I was entertaining my self with Facebook when I saw a post by my friend and fellow Studio 180 Design Certified Instructor, Karen Overton The Quilt Rambler. Here is some of what she wrote: “The idea began with a talented quilter named Jessica of Jessica Quilter also known on Instagram as @Jessicaquilter. Seems the good folks at Just Wanna Quilt picked up on her inspiration and ran with it! More details can be found here on the JWQ website. Jessica had an idea to use a little bit of her favorite fabrics from her “inventory” and the rest they say is history”. Karen was chosen as a Featured Designer, you can read the rest of The Quilt Rambler’s blog Inventory Quilt Project here.
I was inspired to check my “Inventory”

I had this wonderful collection by Tula Pink called Spirit Animal. I have had this fabric in my “Inventor” for over two years.


I decided to make Hallucination by Deb Tucker. This is a great pattern to get yourself acquainted with the Wedge Tool. You will also need a Tucker Trimmer III. To accomplish a scrappy Hallucination I had to put on my Rose colored glasses. I needed light, medium and dark fabrics. Whenever I have trouble sorting fabrics by value I use red lenses to help.


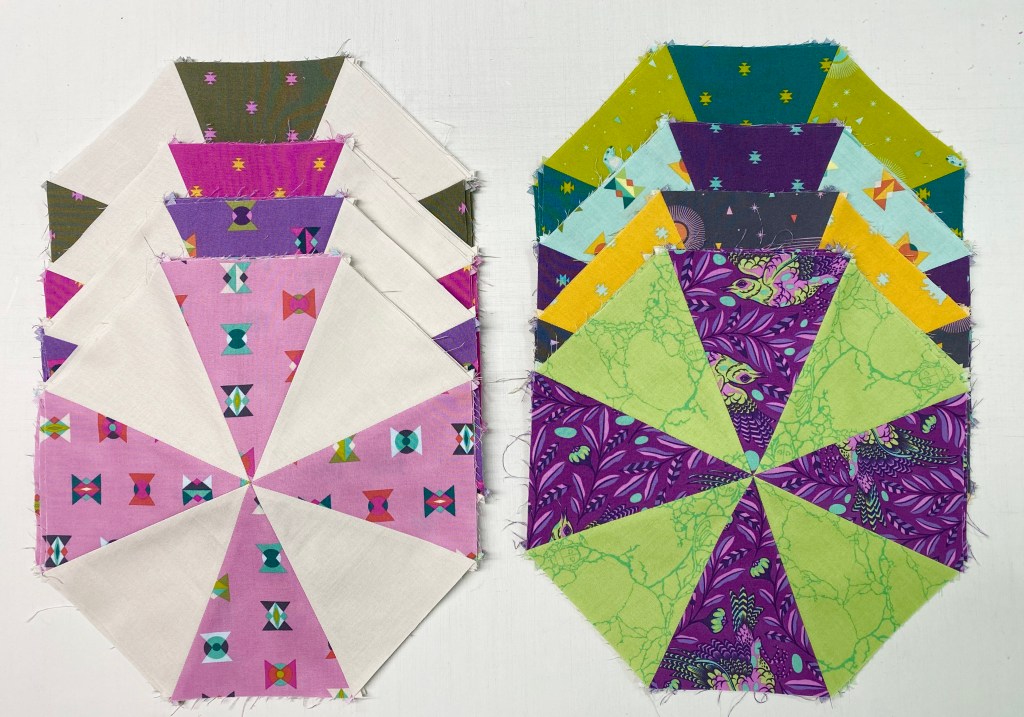
I began cutting my large wedges for Block “A” which consisted of medium and dark wedges.

Once the wedges are cut position a dark wedge with a medium wedge aligning the raw edges, being sure to always put the dark wedge on top. This will assure you will alternate between dark and medium wedges in your block. Stitch into pairs using your best 1/4″ seam allowance.


Remove the “dog ears” and “sliver trim” the wedge pair by aligning the common diagonal line on your Tucker Trimmer with the seam and trim the dog ears, and true up the 90 degree angle. Note there may be just a few whiskers trimmed here.
Continue for all the “A” Blocks and the “B” Blocks.


You need to make a halfway registration mark on all 8 wedges of all “A” & “B” Blocks. You can do this by placing the center line of the wedge tool on the seam and mark on the right side of the fabric with a removable marker. My thin chalk pen broke so I folded the wedges in half matching the seams and then pressed with my iron to give a centerfold line.


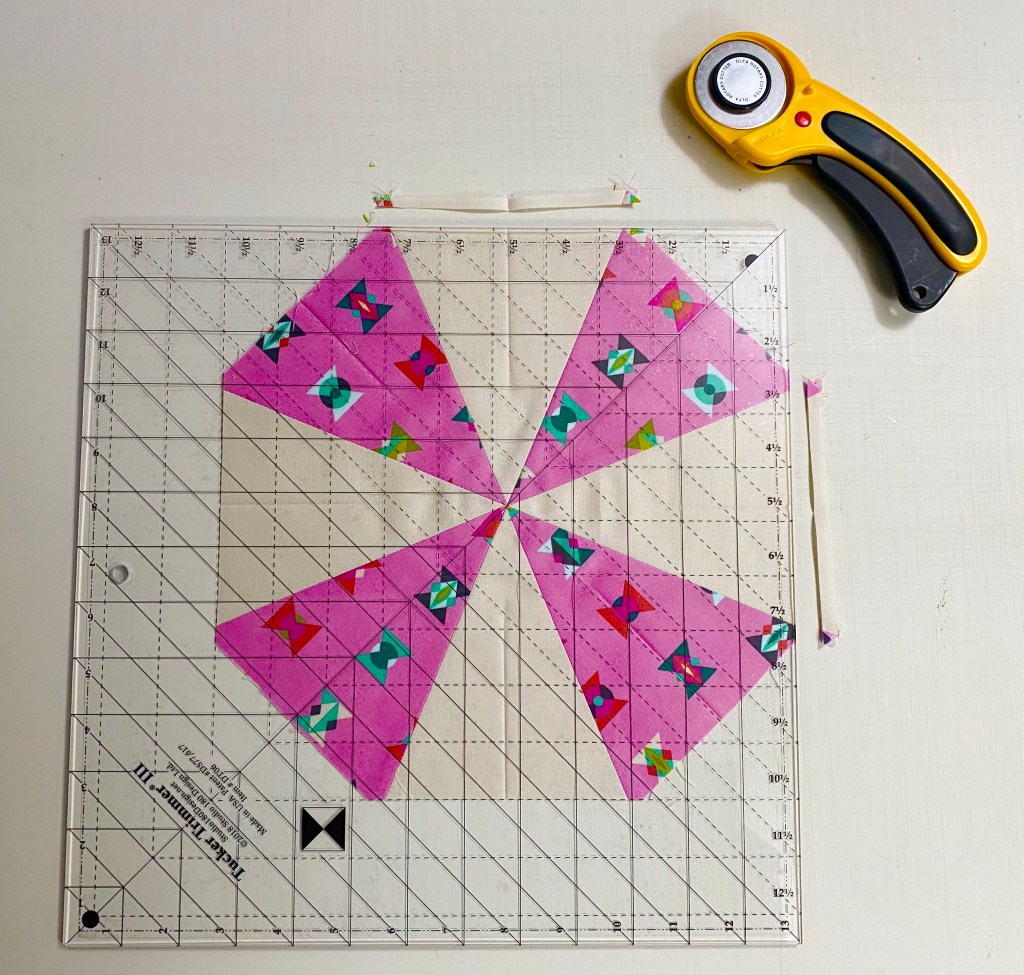
Block A: Position the dark wedges north, south, east and west on your cutting mat. Align the 10 1/2″ sizing line and the common diagonal line with the registration marks and the intersection of the lines with the center of the block. Trim up the side and across the top. Rotate realign and trim again. The dark wedges are trimmed so we can add corners to the block. The medium wedges will be trimmed after the corners are added.

Center the oversized corner triangles over the just trimmed dark wedges and stitch. Press toward the corner triangles.


Using your Tucker Trimmer III, align the common diagonal and the 10 1/2″ sizing line with the registration marks and lines intersecting over the center of the block, trim up the side and across the top. Rotate the block and trim again.

Block B: Position the light wedges north, south, east and west on your cutting mat. Align the 10 1/2″ sizing line and the common diagonal line with the registration marks and the intersection of the lines with the center of the block. Trim up the side and across the top. Rotate realign and trim again. The light wedges are trimmed so we can add corners to the block. The medium wedges will be trimmed after the corners are added.

Center the oversized corner triangles over the just trimmed light wedges and stitch. Press toward the corner triangles.


Using your Tucker Trimmer III, align the common diagonal and the 10 1/2″ sizing line with the registration marks and lines intersecting over the center of the block, trim up the side and across the top. Rotate the block and trim again.
Block C:


Cutting the Diamonds for Block C: Lay your strip horizontally on the cutting mat. Using your wedge tool align the edge of the Wedge Star tool with raw edge of the strip close to end of the strip. Using another ruler with a 45 degree line, bump it up to slanted edge of the Wedge Star tool, this helps to establish the 45 degree angle. Cut, keep cutting till you have the desired number of diamonds.
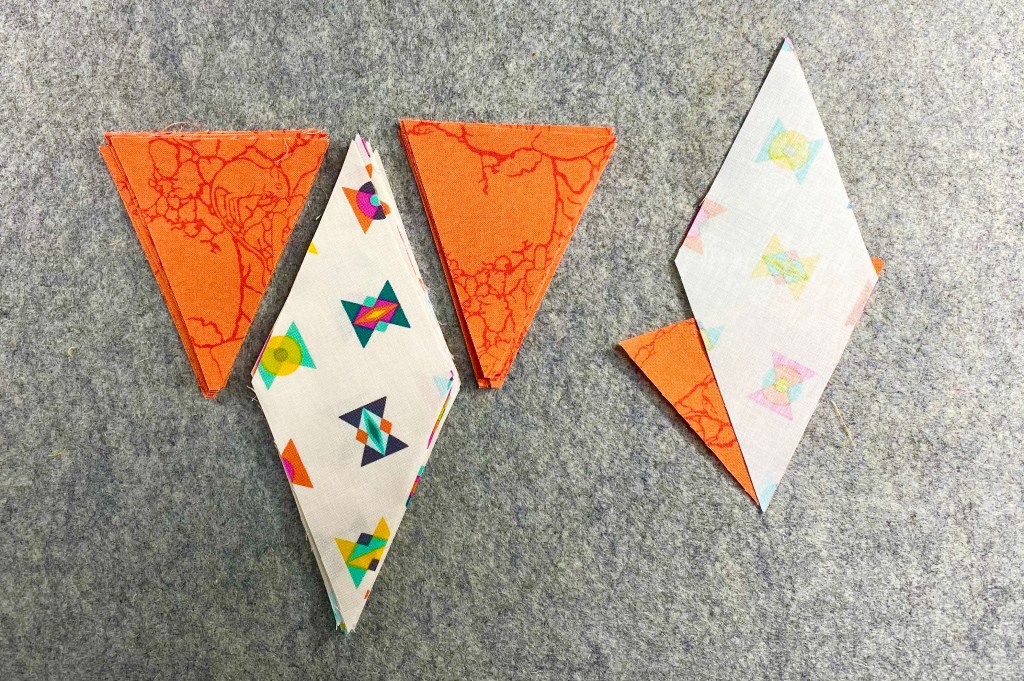
Lay out your small wedges and diamond units as shown. Position a small wedge from the right hand side of the top of the diamond. Match the point of the diamond with the corner of the wedge and align the raw edges.

Stitch with the diamond on top.
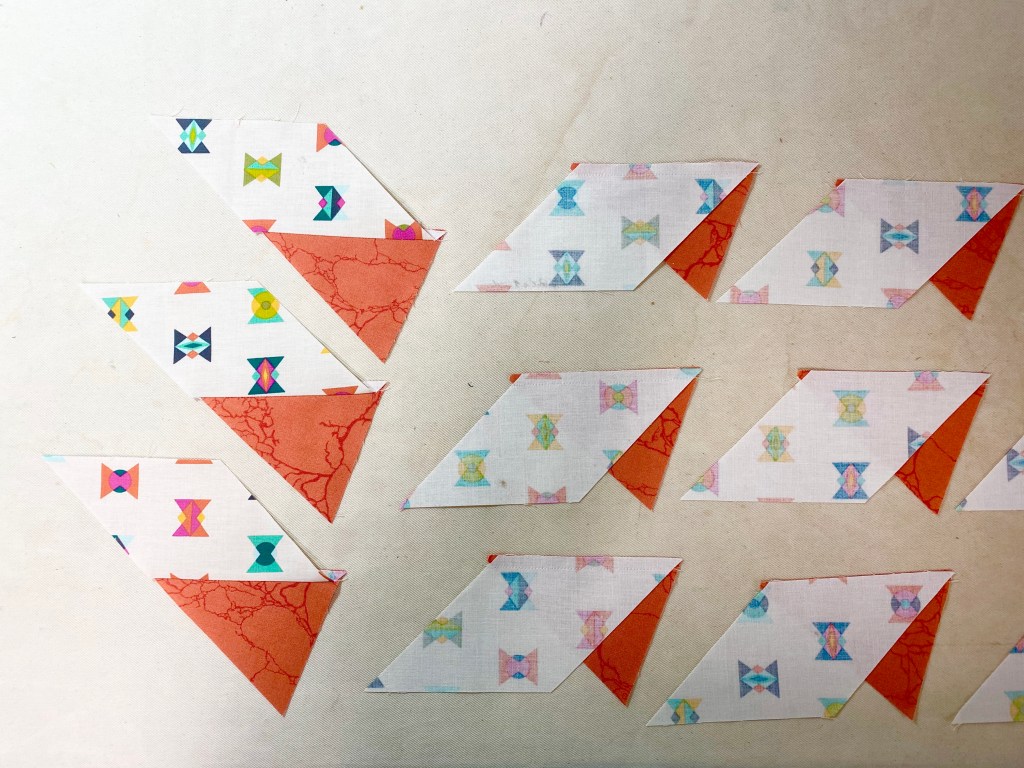
Press toward the diamond. Remember “whatever you are pressing toward, goes on top”!


Trim off the dog ear. Position a remaining small wedge to the other side of the diamond point. Align the raw edges and center the shapes right sides together. Press toward the small wedge. Trim the each diamond wedge using the 10″ line in the Diamond Trim Down Section on the Wedge Star tool.

Lay out the Diamond Wedges and the dark Large Wedges for the C Block.

Consistently place a diamond Wedge on top of a dark Large Wedge right sides together.

Stitch the point end first. Press seams open. Trim the dark wedges as before and add the triangle corners. Trim the block with your Tucker Trimmer III.

In fact be sure you press all seams open during block construction. I find the Strips Stick very helpful!

Lay out your finished A, B & C blocks, stitch into rows. Add your inner and outer Borders.

I’m loving this scrappy version of Hallucination!

This project was Tucker approved with Aurifil Thread, Quilters Dream Batting, my Reliable Iron, and the Strip Stick. Not to mention my wonderful Studio 180 Design Tools.

Thanks for sharing! Your quilt is wonderful.
LikeLike
Thank You!
LikeLike
What a perfect inventory quilt! Love the fabrics – can’t believe how quickly you whipped that out! I can almost see a cartoon version of the quilt ninja at lightening speed sewing and trimming away! You go girl!
LikeLike
Thank you so much Karen for sharing your blog, it was an inspiration!
LikeLiked by 1 person