
It is late March 2020. Most of us are quarantined inside. At least those of us in New York are! I had planned to schedule a class at Stash away Quilt Shoppe in Rome NY, for a Quilt of Valor using the Rapid Fire Lemoyne Star ruler. I decided to just post the lesson here and share it with anyone who would like to make Patriotic Lemoynes.
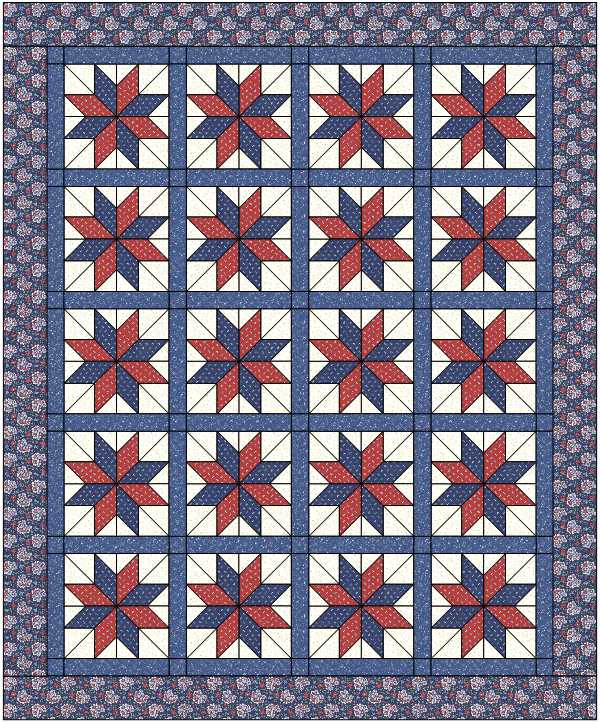
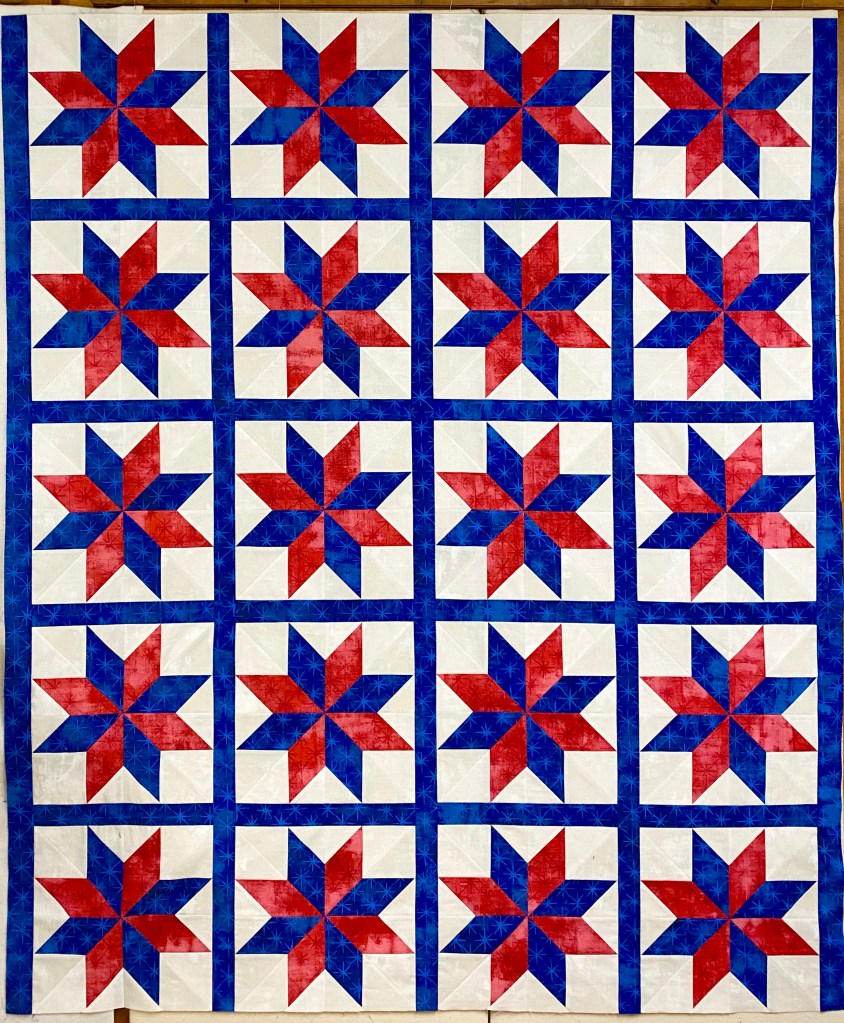
I went to my EQ8 software and designed this quilt for Lynn. This is a great skill builder for those that took the Tucker University Rapid Fire Lemoyne Star class but haven’t made a project yet. This quilt measures 68″ X 82″ with 20 – 12″ finished Lemoyne star blocks. The supply list and instructions are available here for download.
Studio 180 Design Tools required: Rapid Fire Lemoyne Star & Tucker Trimmer III. You will also need a 6″ x 12″ ruler with 45 degree lines.
Understanding the “Cutting Chart”. The chart in the tool instructions gives you valuable information for 10 Finished Size Blocks: Cut Size of Star Strips, Cut size of Background Strips, Minimum Strip Length for One Block & Approx. # of Diagonal Cuts from Full WOF strips. For 12” finished blocks, you need a minimum of 24” star & background strips to be able to make one block.
Block Construction: (Width of Fabric – WOF)
Background Fabric: Cut 20 – 4 3/4″ WOF strips
Red Star Points: Cut 10 – 3 1/4″ WOF strips
Blue Star Points: Cut 10 – 3 1/4″ WOF strips

Step 1 – Make 2 piles of 10 background strips right sides up – side by side. At the top, mark 10 “A” & 10 “B”.
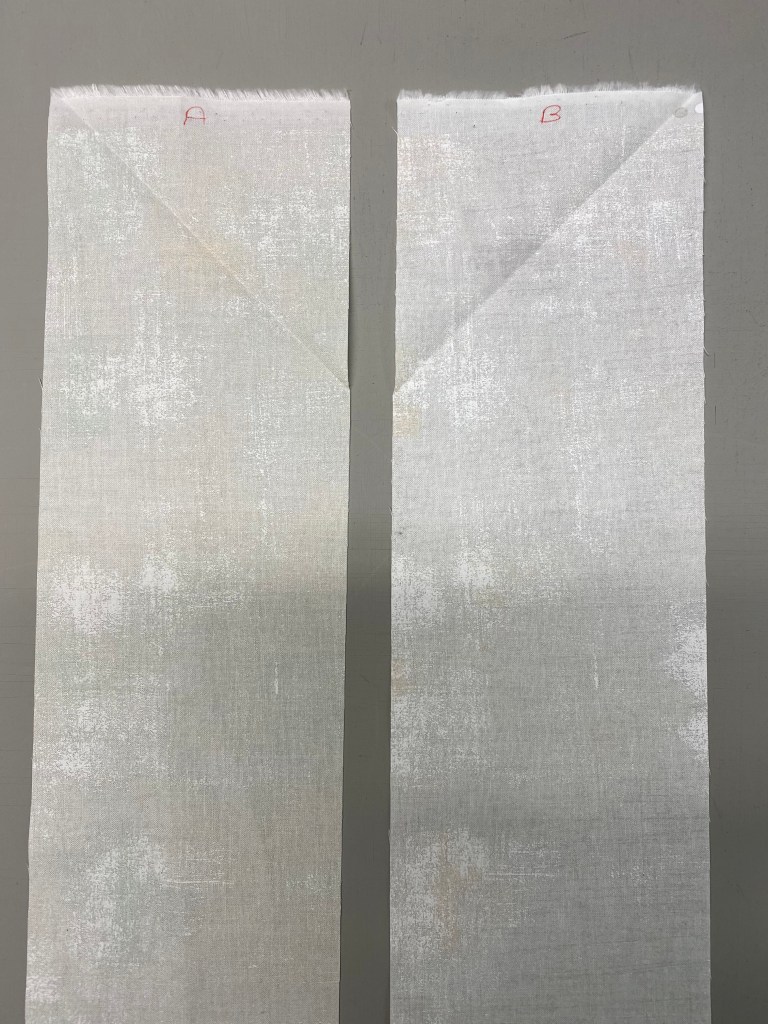


Establish the starting point for placement of our star strips by making two additional marks down from the top of the strip, on the inside edges of each strip, the same width as our strip is wide. Our background strips are 4 ¾” wide. OR simply fold top right corner over to the left edge for “A” matching raw edges and top left corner over to the right edge for “B”.

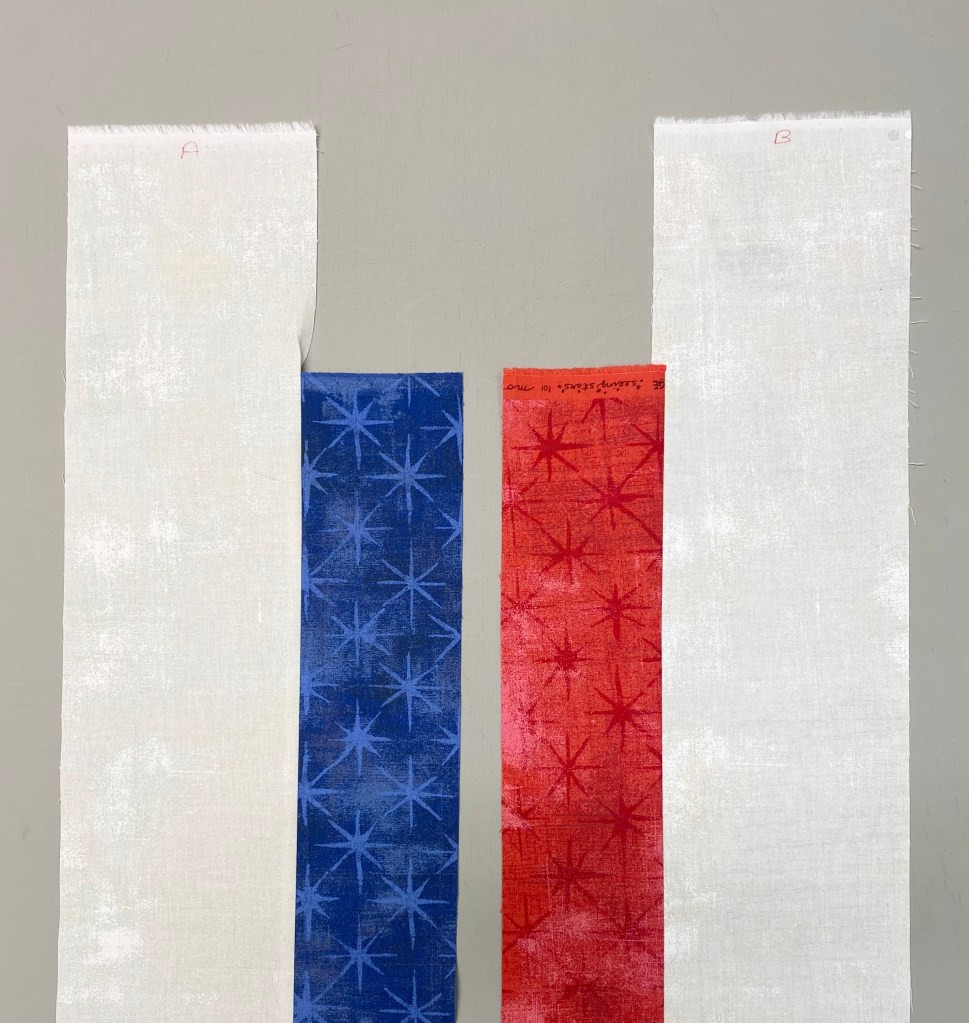
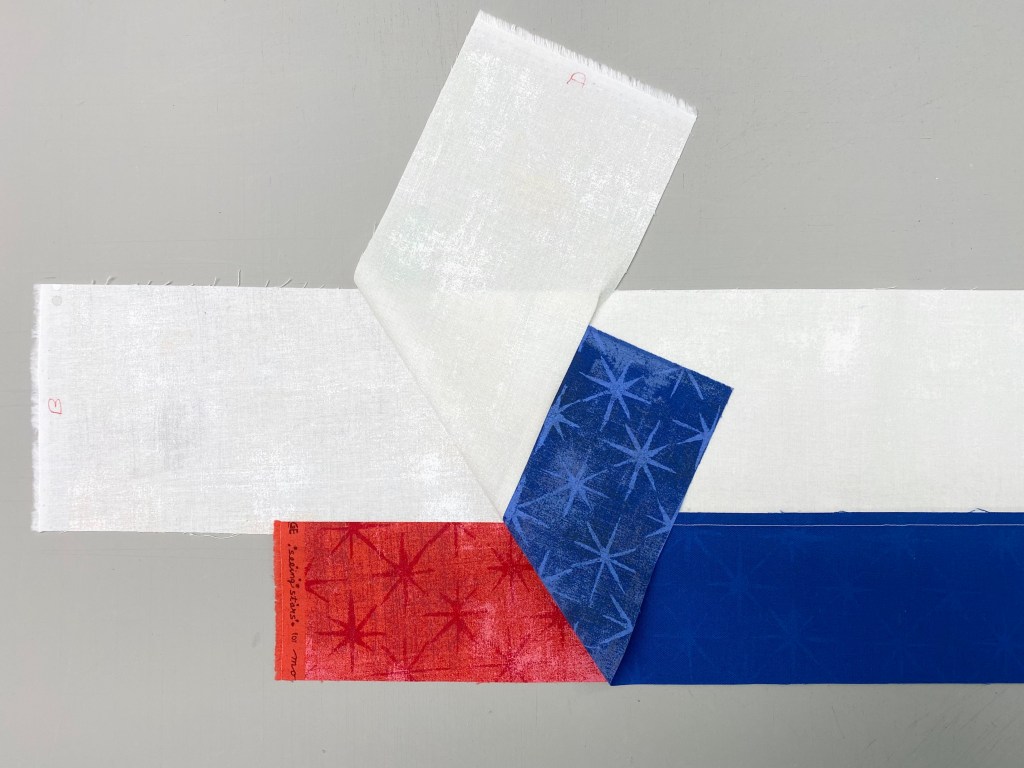
Step 2 – Position a star strip right sides together with each of the background strips starting 4 ¾” down from the top.


Step 3 – Using your Best ¼” Seam, Stitch the “A” strip on the right side & the “B” strip on the left side. (Do not use a scant ¼” seam.)
Step 4 – Press: The “A” strip should be pressed toward the background strip. The “B” strip should be pressed toward the Star Strip. Remember “whatever you are press toward goes on top”!
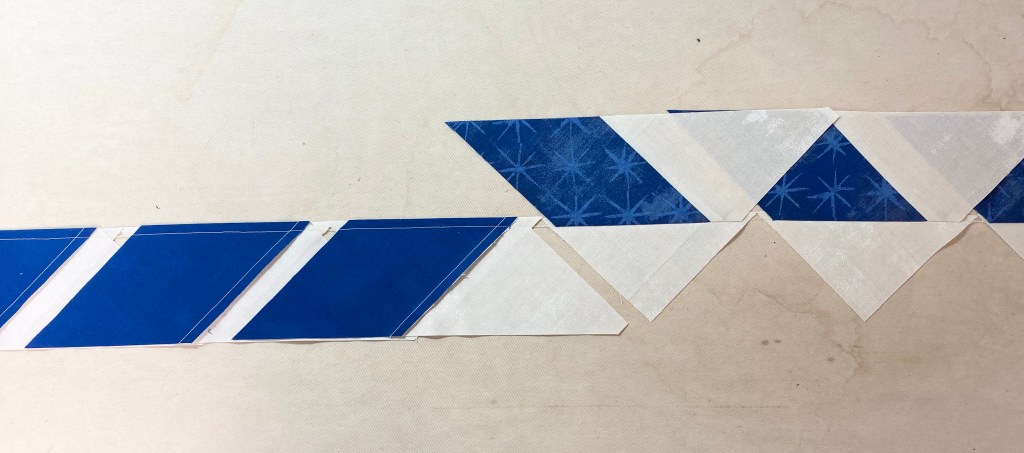
Step 5 – Position: Move the strips to the cutting mat and layer the strip pairs right sides together, background strip to background strip & and star strip to star strip. The long seams should nest.
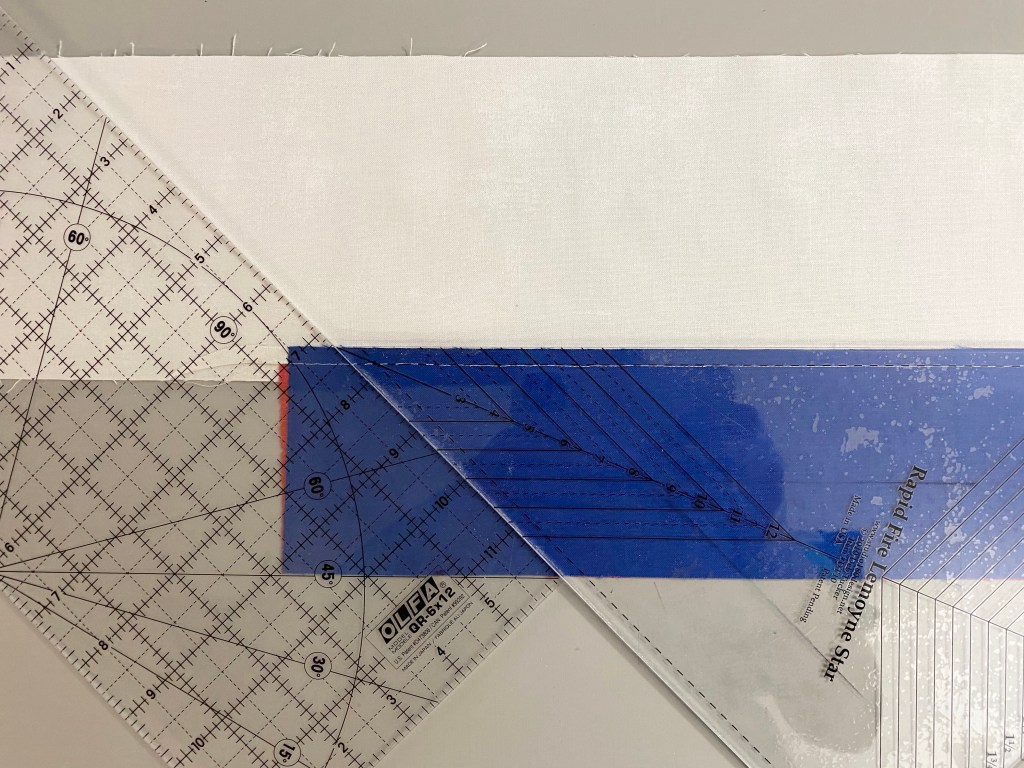

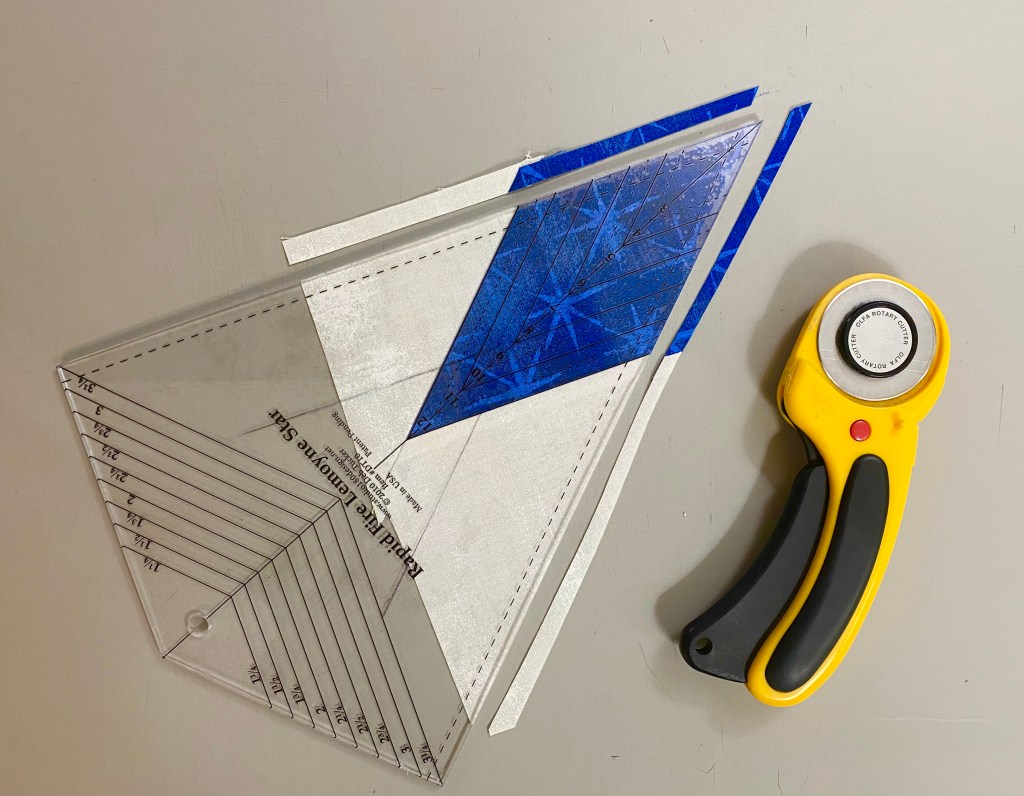
Step 6 – Cut: Make a 45 degree angled cut. Use your Lemoyne Star ruler to help insure you get a good 45 degree angle by lining up the ruler edge with the stitching line and bumping another ruler ap against the angled edge.

Step 7 – Cut the 1st Unit: Each Cut Should be the same measurement as the Star Strip Width (3 ¼” wide).
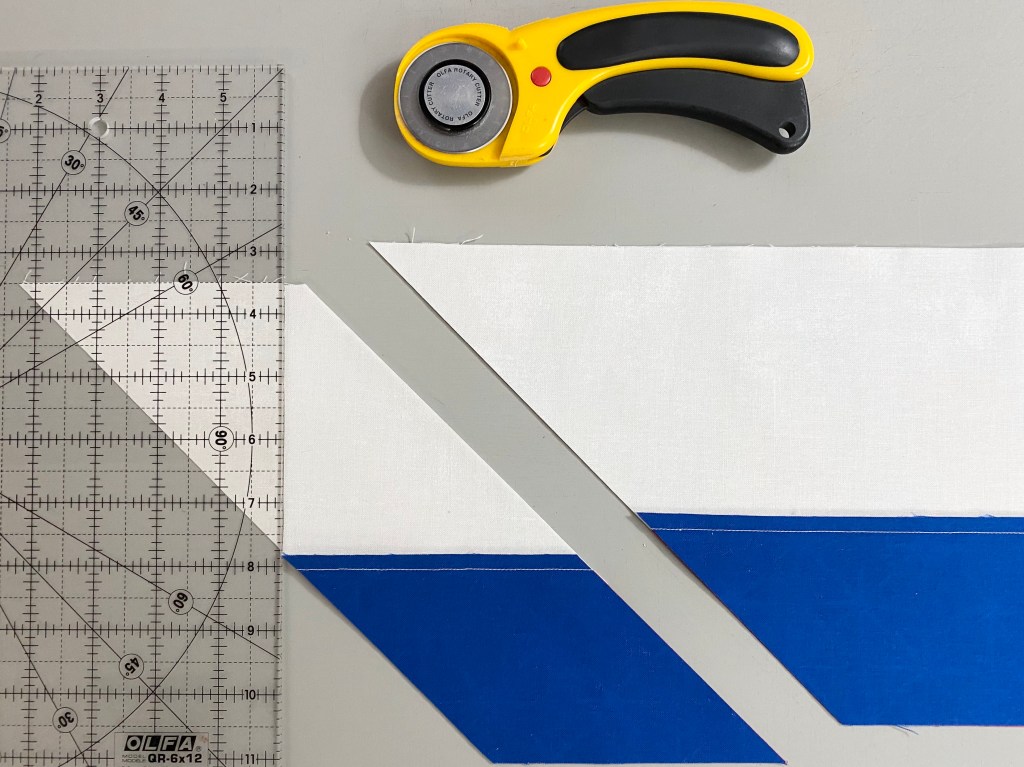
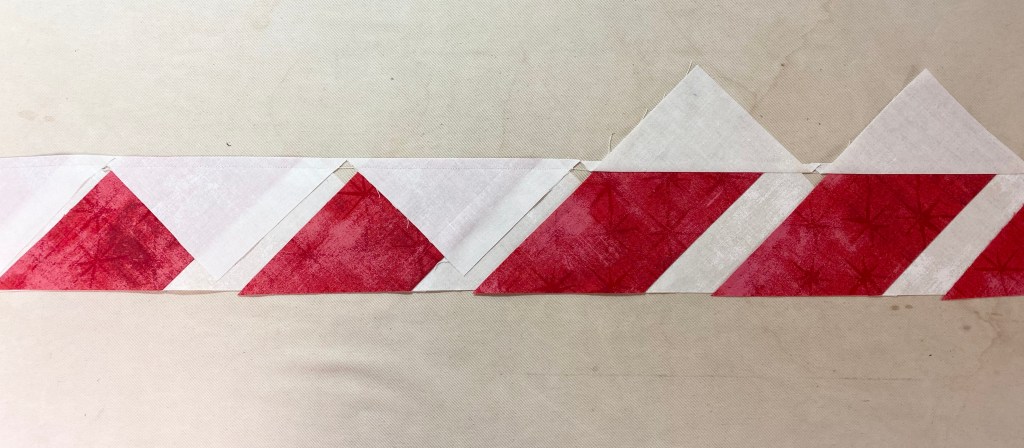
Step 8 – Second Cuts: Cut one set and trim side triangles. Using your 6” x 12” ruler, place a line on the top edge of the just cut unit and slide to the right until the ruler touches point from the star fabric. Trim up the right side of the ruler. See tool instructions for left hand cutting. In the tool instructions you are told cut all the units then trim the side triangles. I find the students are less confused if they cut the unit and immediately cut the side triangle.
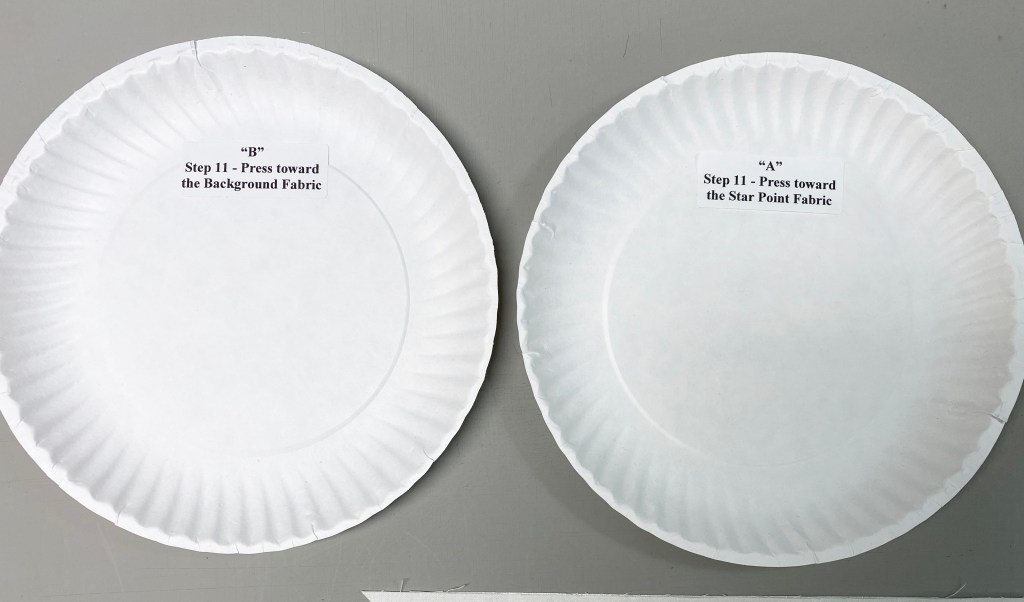
Tip: Label two paper plates One “A” & one “B”. I also add pressing instructions from Step 11: “A” units are pressed toward the star point. “B” units are pressed toward the background fabric.

Righties – “A” strip is on top & “B” strip is on the bottom. Once cut, place “A” unit on plate marked “A” & “B” unit on plate marked “B”.
Lefties – “B” is on top & “A” is on the bottom. Place “A” unit on plate marked “A” & “B” unit on plate marked “B”.
NOTE: IF Left Handed, It will be beneficial to flip each of the pairs over from east to west so that they look like the pairs trimmed by right handed cutters.
Cut side triangles and place one on each plate. Continue cutting sets and side triangles.
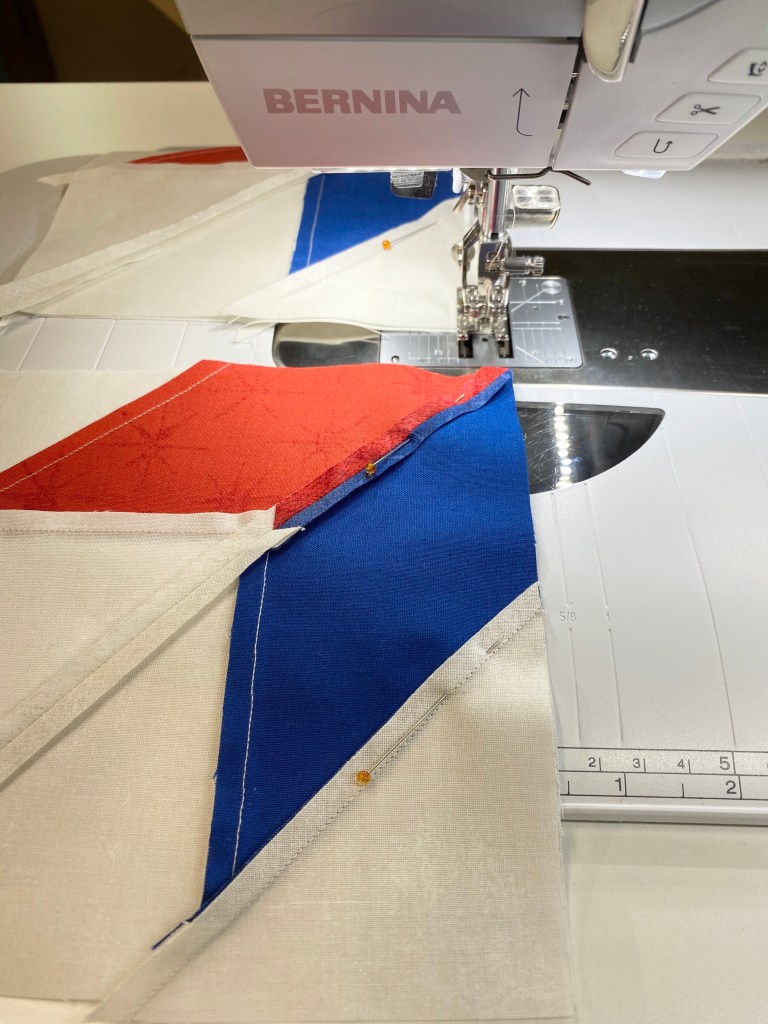
Step 9 – Lay Out: Take your plate of “A” units to the sewing machine.

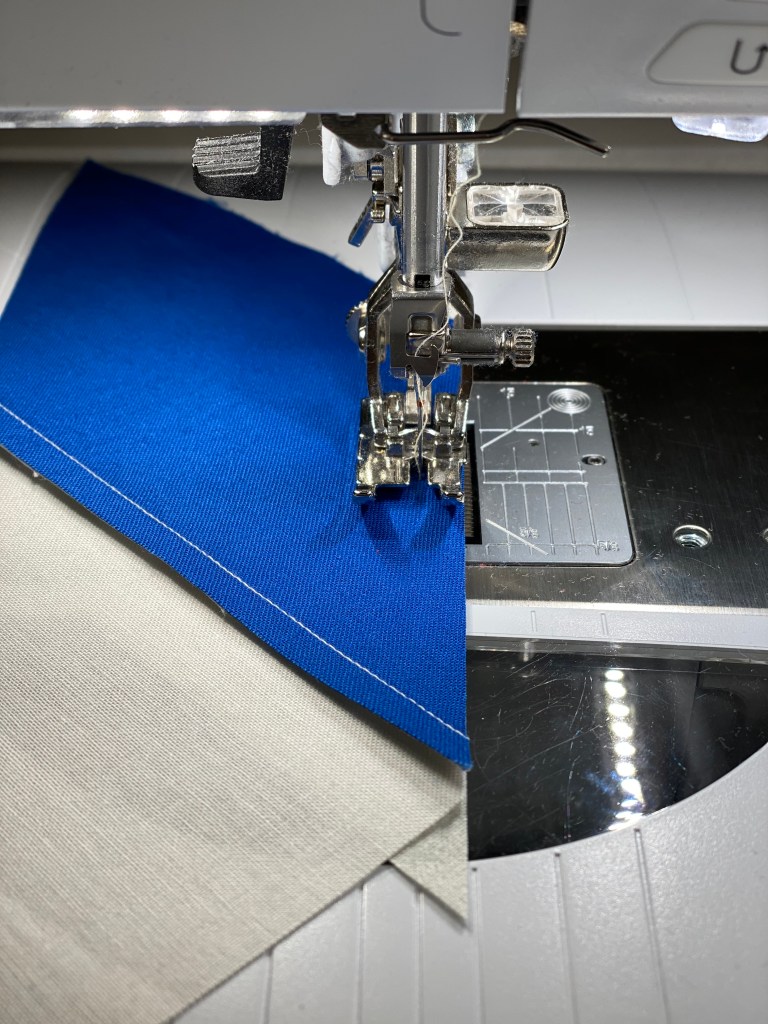
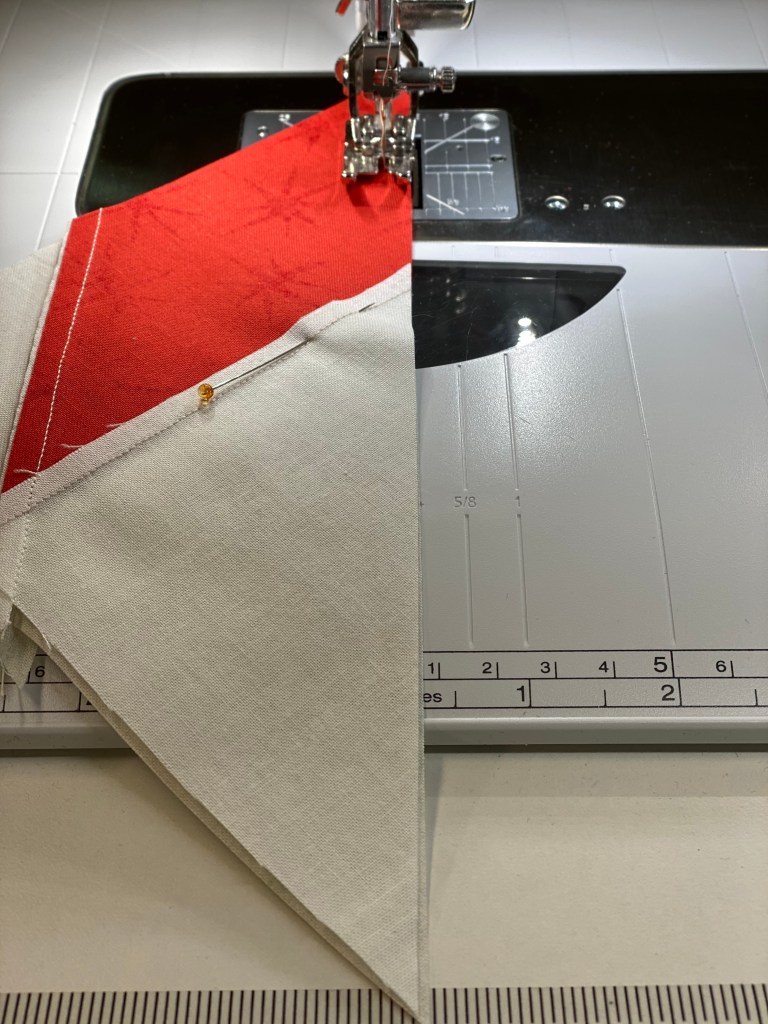
Step 10 – Position & Stitch: Position the side triangle right sides together with the pieced unit. Raw edges even and triangle centered over the pieced unit. Stitch, continue to chain stitch all the “A” units & then all the “B” units.
Step 11 – Press Carefully: Take the “A” units to the ironing board. “A” units are pressed toward the star points, therefore place your chain stitched units with the star points facing up. Trim threads, place back on “A” plate.
“B” units are pressed toward the background fabric, therefore place your chain stitched units with the background fabric facing up. Trim threads, place back on “B” plate.
STOP – BEFORE YOU TAKE ANOTHER STITCH!
Step 12 – Trim: Take all you units to the cutting mat. Place your units at a 2:00 position to be able to comfortable trim the two sides. Trim all your “A” & “B” units to an exact size using the 12” lines.

Step 13 – Examine/Position: You will now have pieced half square triangles that will fit together perfectly. Nest the seams and pin.
Step 14 – Stitch: Stitch the pieced triangle units together, first into pairs, then into half blocks and then into complete blocks. Stitch from the star center outward.

Step 15 – Press: Option #1 press all seams open. Option #2 press seam in the same direction as all the other seams in the unit. I press my seams open. Trim the Dog Ears at the star center.

Lay out four units.
Choose two units. Pin the nested seams and pin star point.

Press seams open.

Join halves pin the nested seams, match & pin the center. Stitch.
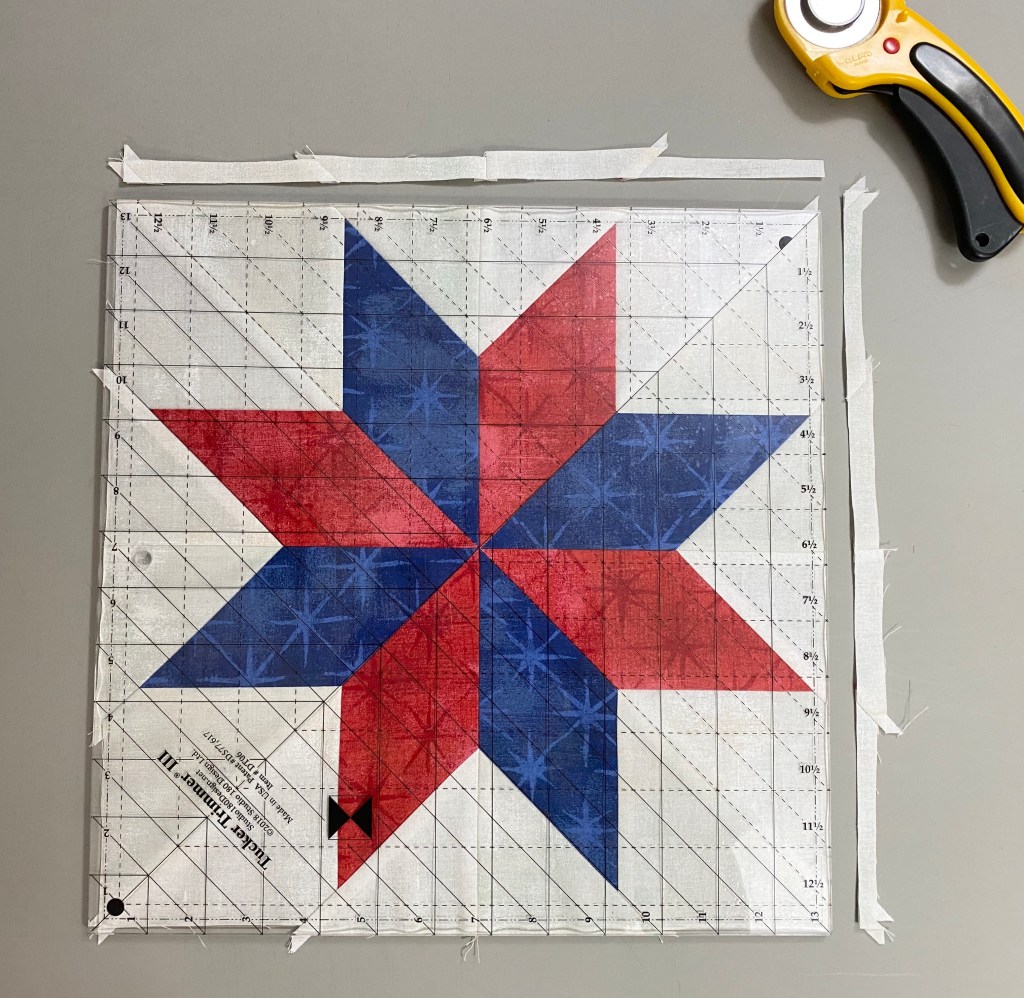

Step 16 – Trim to 12 ½” using your Tucker Trimmer III: If right handed, place the half circle in the upper right hand corner. Center the common diagonal line and the 12 ½”” size diagonal line on the seams of the block. Trim up the right side and across the top. Lift the tool, rotate the block, centering as before but also using the clean up lines on the edges just trimmed. Trim up the right side and across the top. See Tucker Trimmer tool instructors for complete left hand cutting.
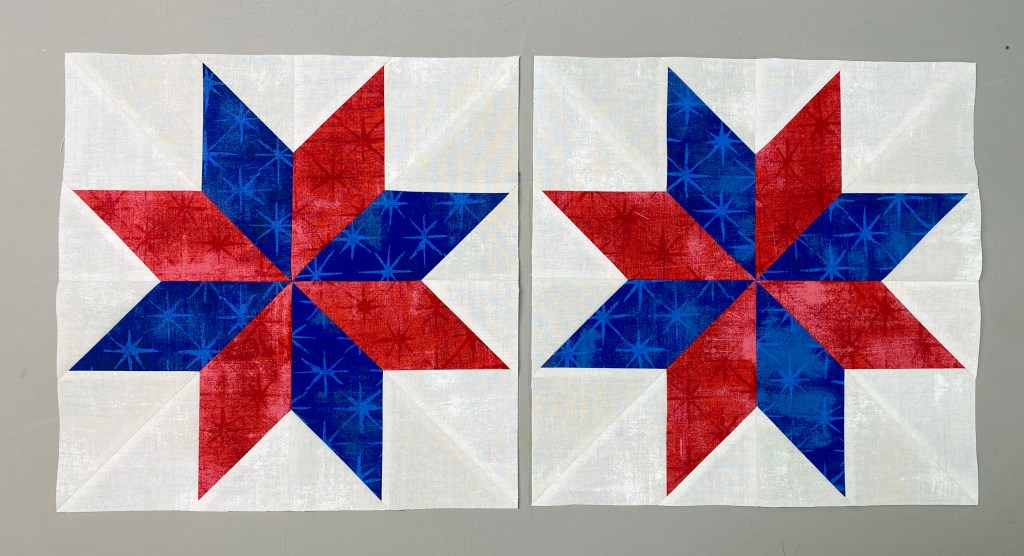
Two WOF background strips & two WOF star strips will yield 2 – 12” finished lemoyne star blocks.

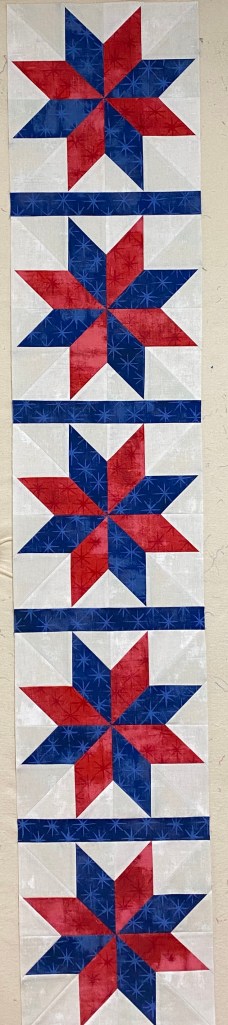
Sashing: Cut 6 – 2 ½” WOF strips. Sub Cut into 16 – 12 ½” strips. I stitch four sashing strips between 5 blocks and measure the row length to determine the size of the vertical sashing strips.
Vertical Sashing: Cut 14 – 2 ½” WOF strips. You may need less if don’t mind piecing several together. I just stitched two 2 ½” WOF strips together and cut to fit. Once the vertical sashing is complete and rows are joined, measure the width through the center and cut the top and bottom sashing and stitch to the quilt top.

Cut 8 – 5 ½” WOF. Strips. Measure the length of the top to determine side border length. Once the side borders are stitched, measure the top width through the center to determine the final borders for the top and bottom.
Binding: You will need approximately 8 strips for the binding.

#Studio180Design #DebTucker #RapidFireLemoyneStar #TuckerTrimmerIII #EQ8 #Bernina #ReliableIrons #Olfa #AurifilThread

Thanks so much, Jackie. I miss your classes sooooo much.
Sent from my iPhone
>
LikeLike
Thanks Marlene. Let know what other lesson I can post
LikeLike
What a perfect project to keep us busy while self isolating. I love the Lemoyne Star. Thanks for sharing your pattern.
LikeLike
You a are welcome Carol!
LikeLike