I love to figure out how a block was made. I saw this quilt online and thought “I bet I can make this quilt without a pattern”.

So I drew the block on graph paper so I could identify each unit. With the tools from Studio 180 Design you can make just about any block in any size, easily. For this block I would use the Studio 180 Design Wing Clipper I & the Tucker trimmer I.

To make a 20” finished block I determined that each square on the graph paper would represent a 2” square. I chose a black print for the center star, white background and red for the surrounding units.
Black Center Star:
The center square would measure 4” finished so I cut one 4 ½” square. I would need 4 flying geese units.
All I had to do was check the chart in the Wing Clipper tool instructions. It lists finished sizes for flying geese units and then tells you what size to cut your fabric to achieve the results you want. I needed a finished size of 2” by 4” so I cut one 5 ½” square and four 3” squares. From this I would get 4 flying geese.
Using my Magic Wand trace a line on either side of all the 3” squares.

Place two 3” squares diagonally on the white 5 ½” square as shown.

Sew on the lines, cut apart and press toward the small triangles. (See Wing Clipper instructions for complete info)

Place another square on the unit, sew on the lines.
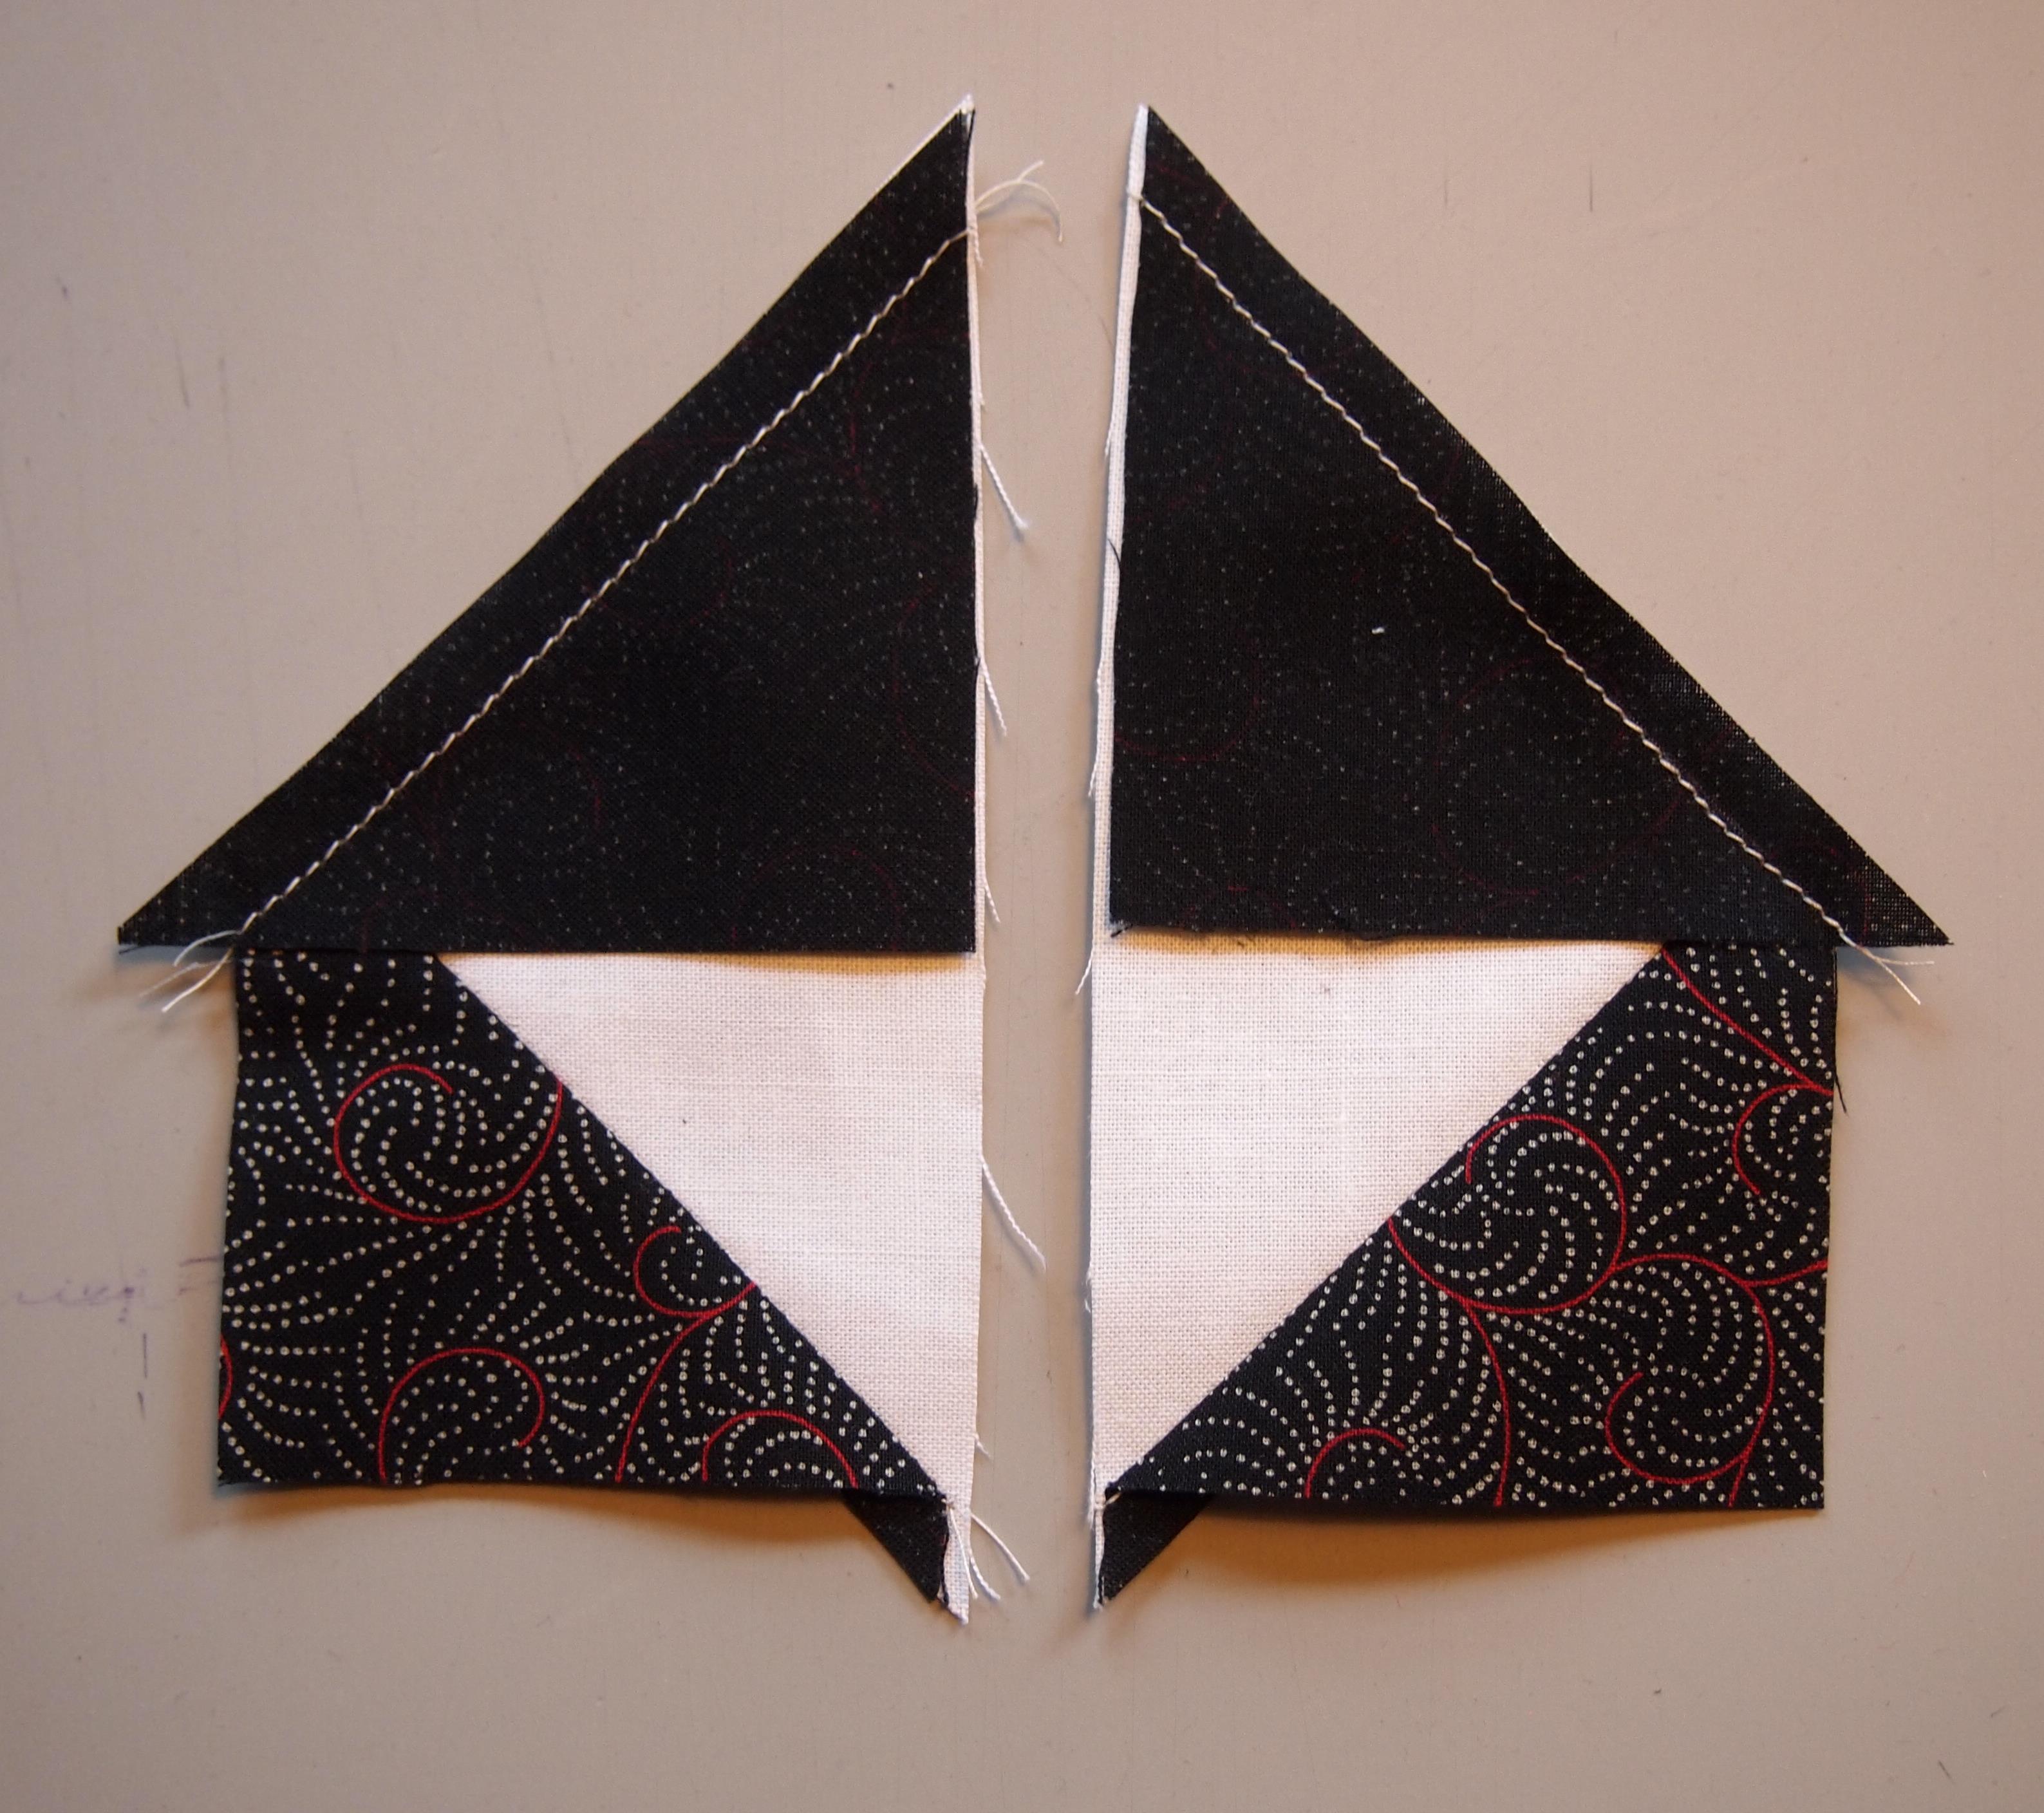
Cut apart. Press toward the small triangle.


Square up using your Wing Clipper.
Red Fabric:
I needed eight 2” by 4” finished flying geese units, so I cut two 5 ½” (white) squares and eight 3” (red) squares to produce 8 flying geese as before.
Cut four 2” by 4” red rectangles.
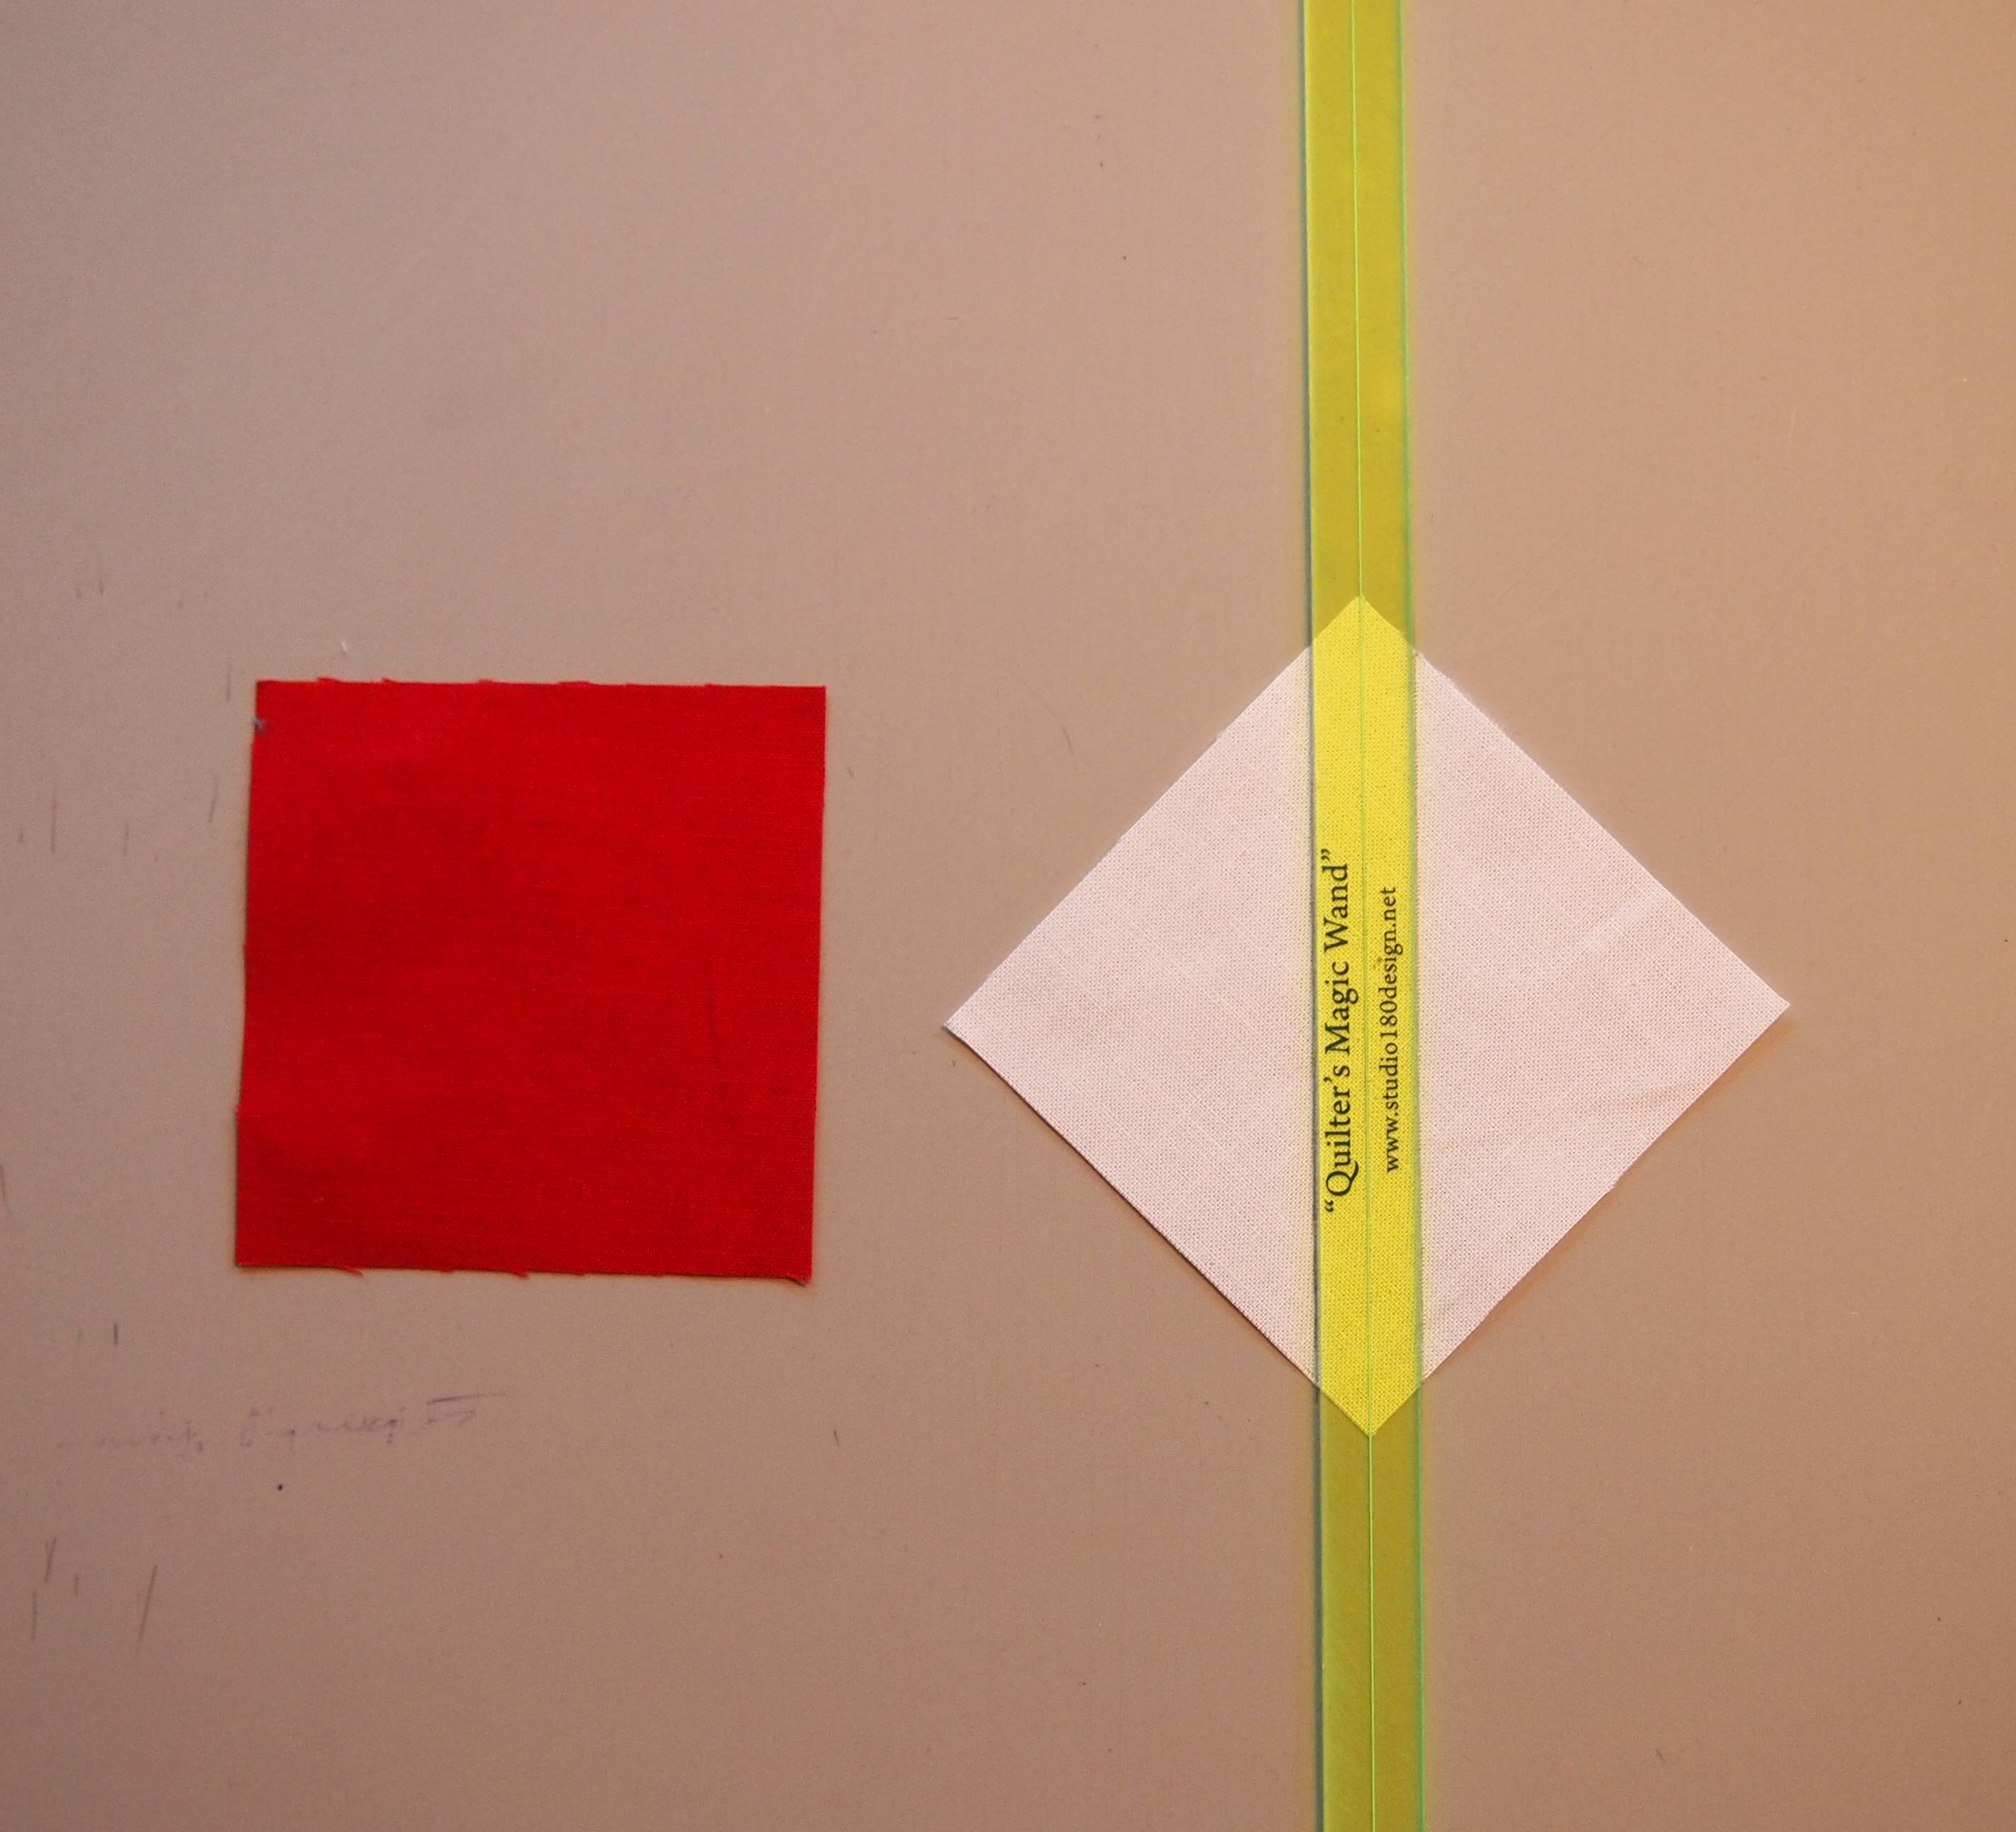
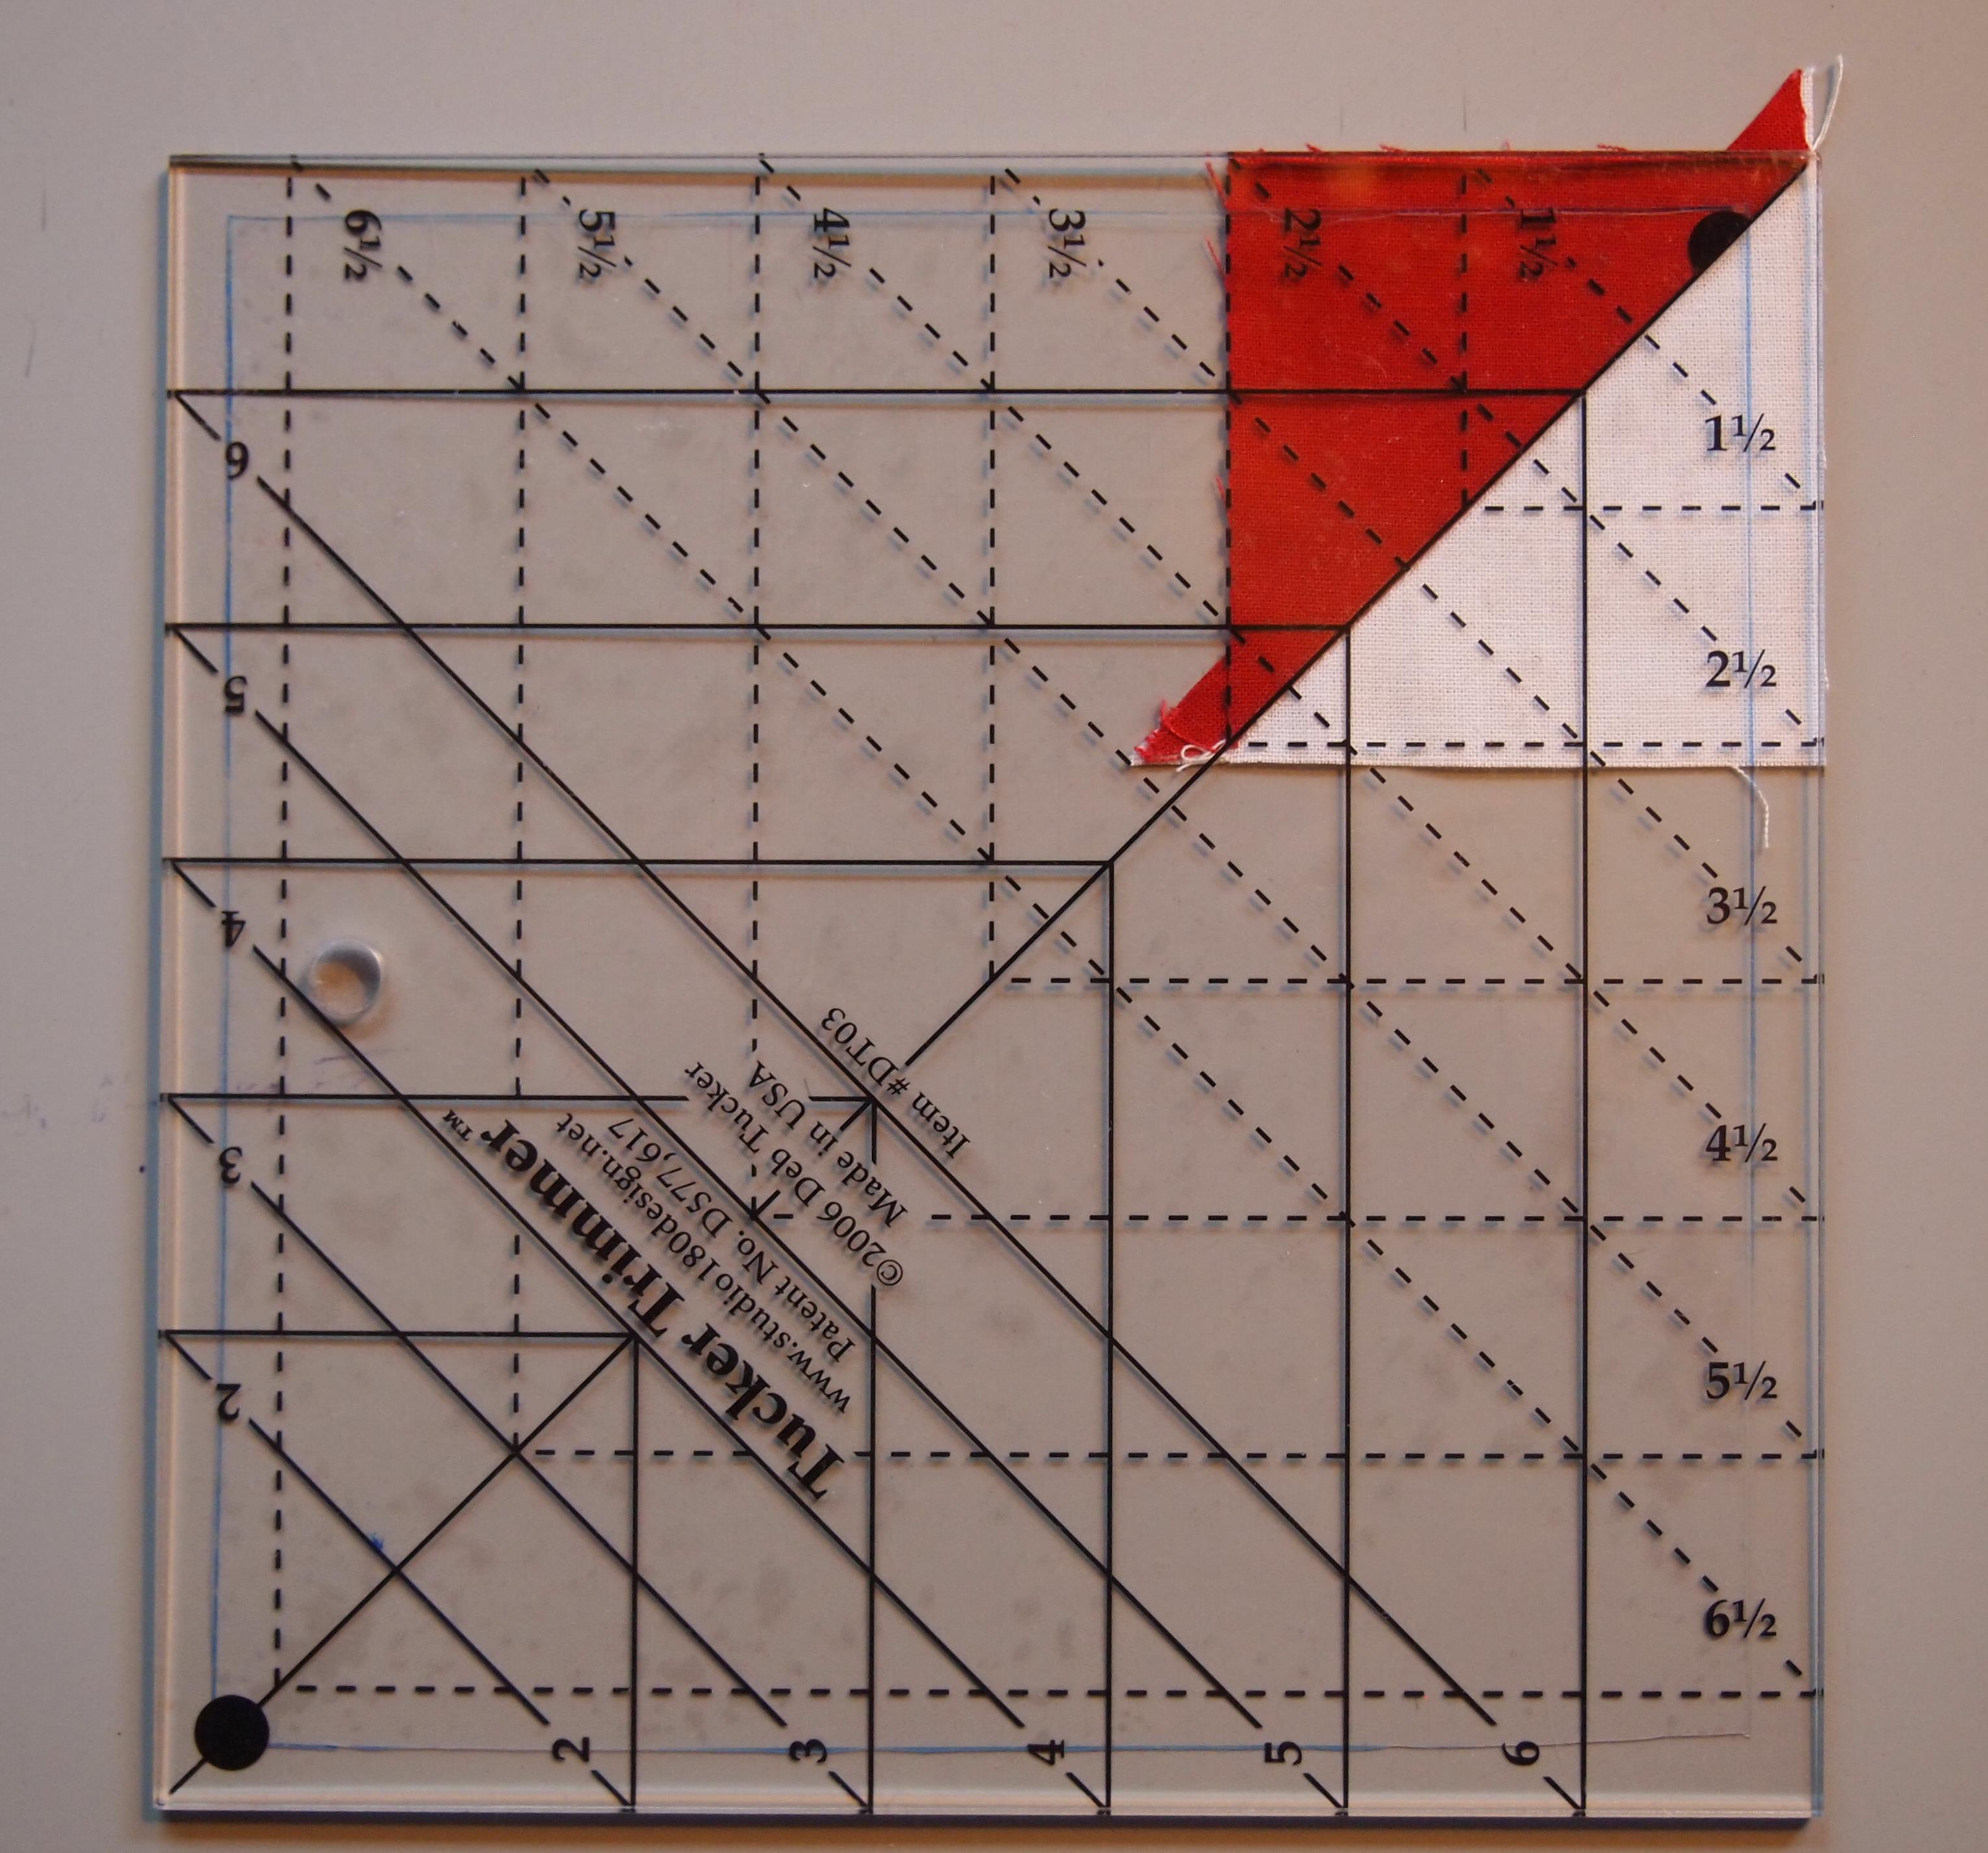
I needed 20 red and white Half Square Triangles (HST). Once again I consulted the chart on my Tucker Trimmer instructions. To end up with twenty 2 ½” unfinished HST, I cut 10 red 3″ squares and 10 white 3” squares.
Using my Magic Wand I traced a line on either side of the white squares.
Place one red and white square together and sew on each line.

Trim in half diagonally press toward the dark.
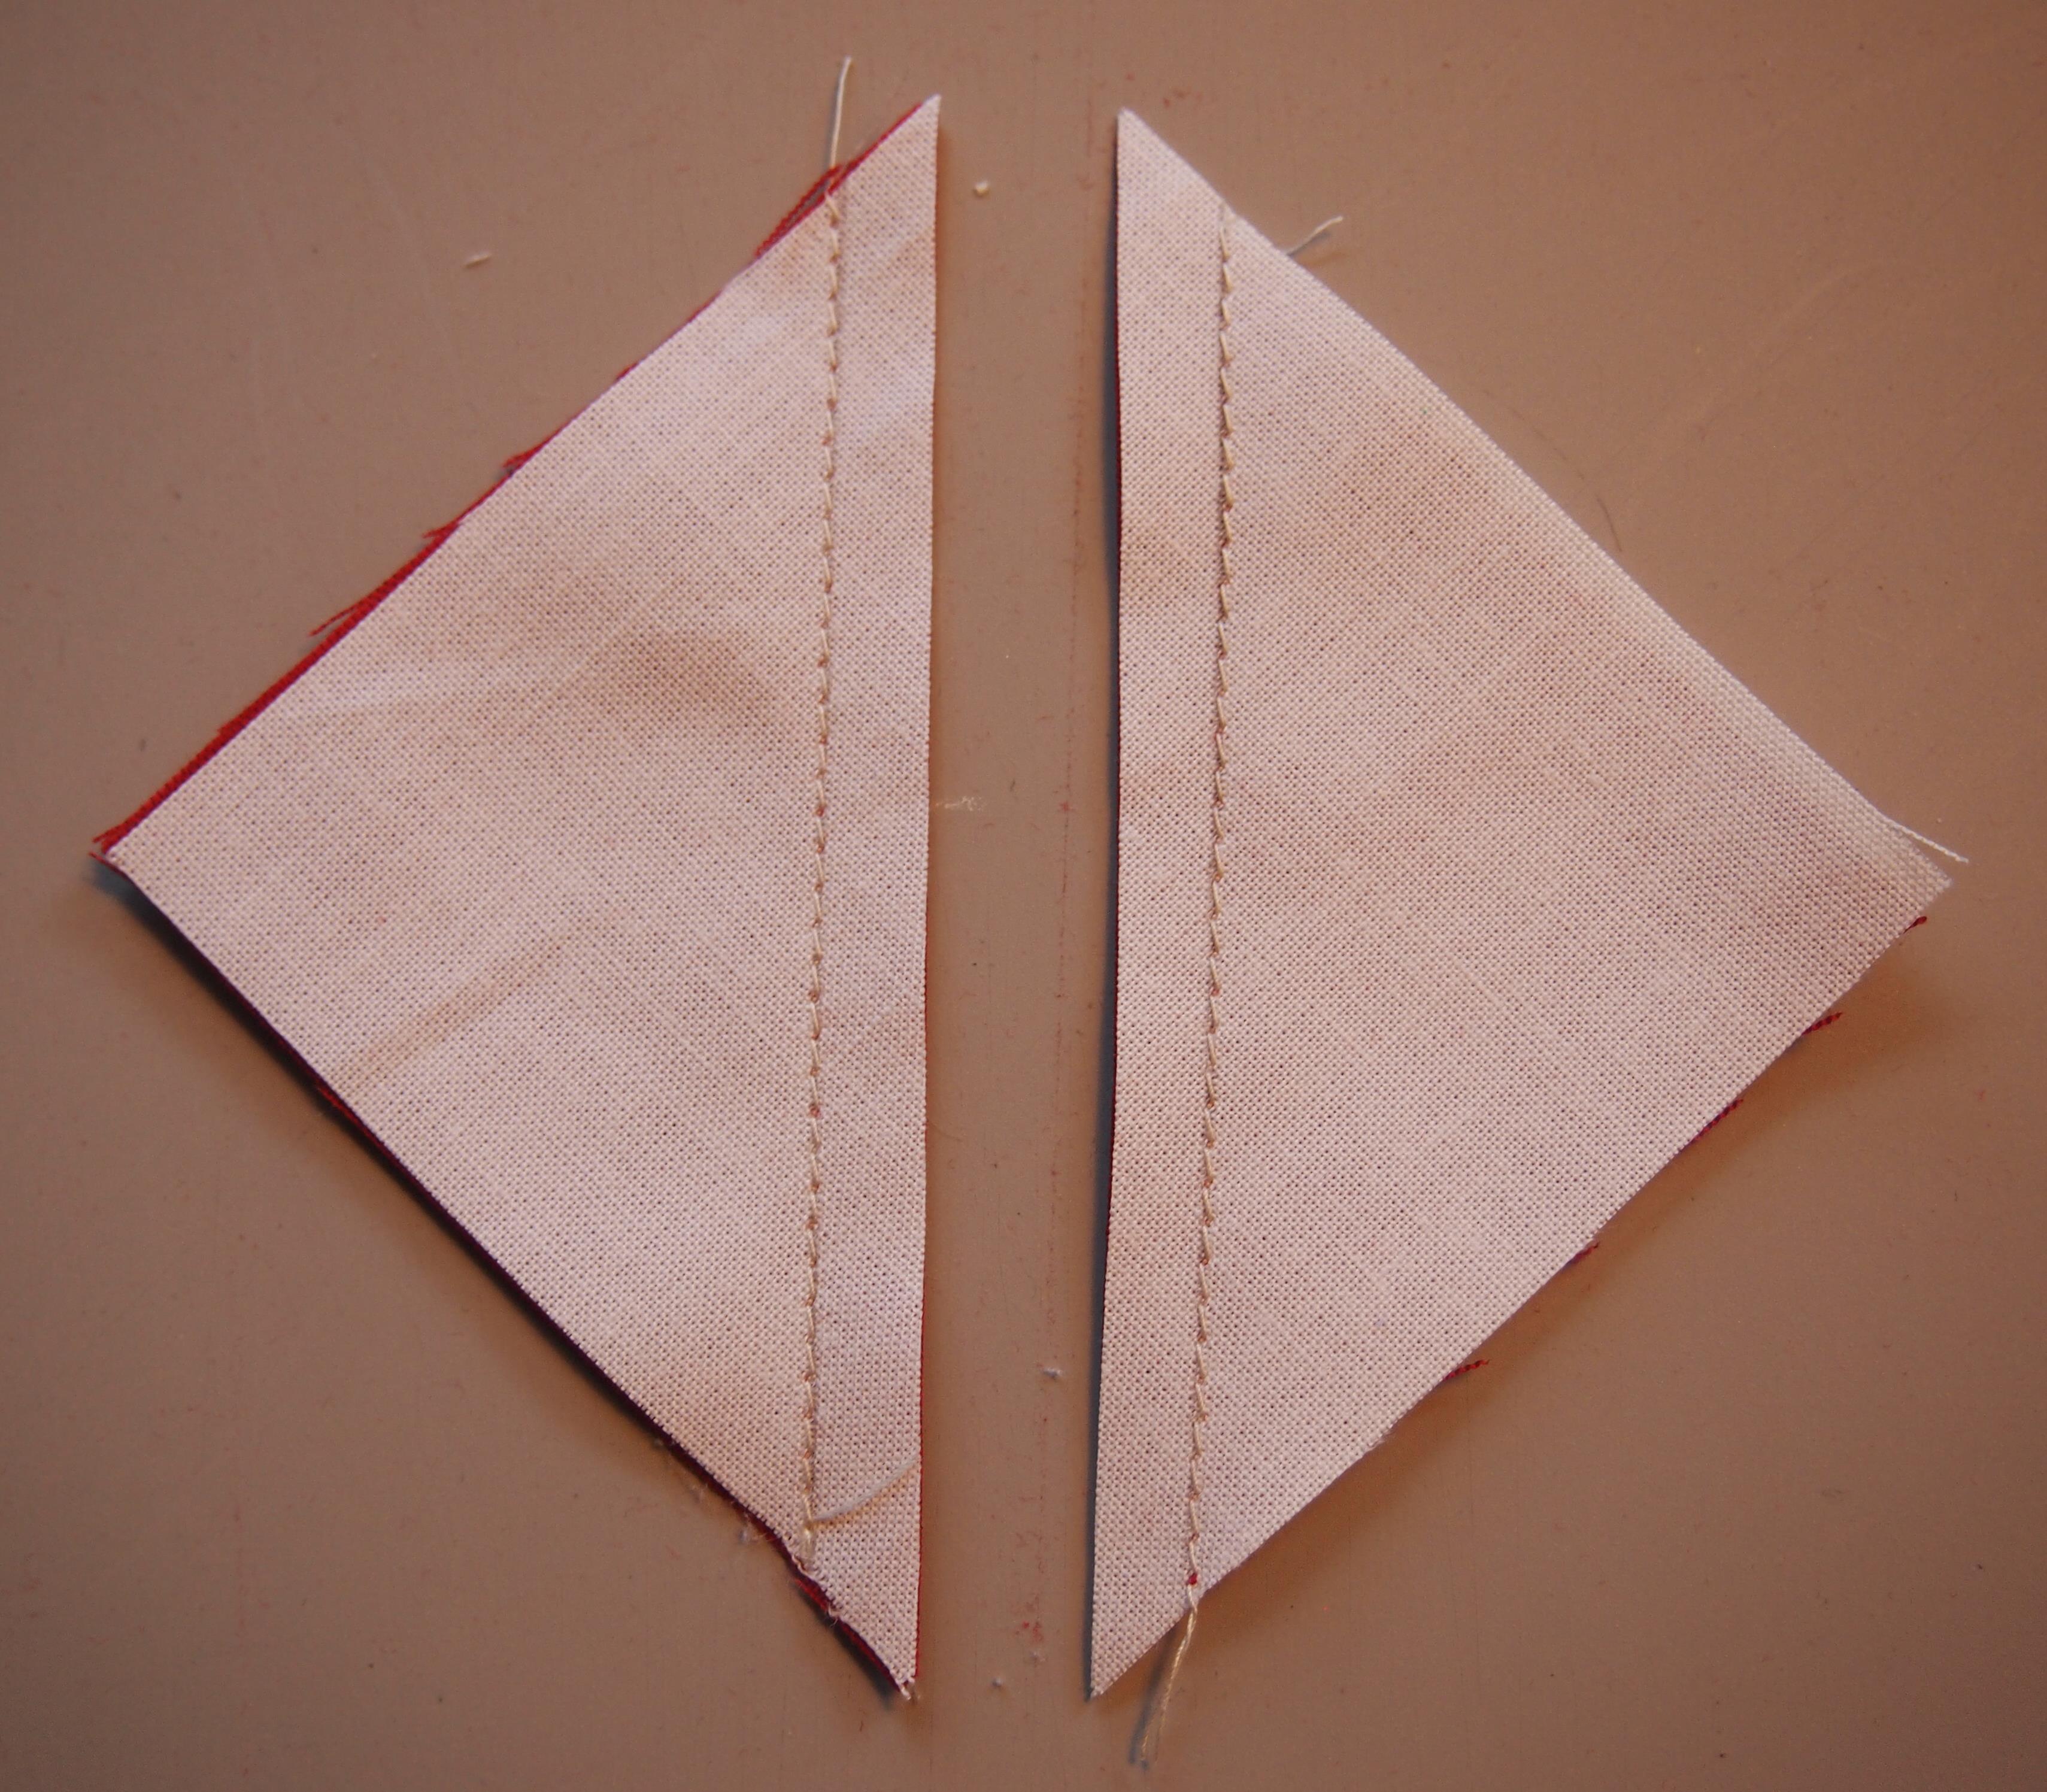
Square up using your Tucker Trimmer.
White Fabric:
Cut four 6 ½” squares for the corners and
Cut eight 2 ½” squares for either side of the red flying geese.

Layout your completed units

I started on the right side and sewed the above units into rows.

Join the rows into a block.
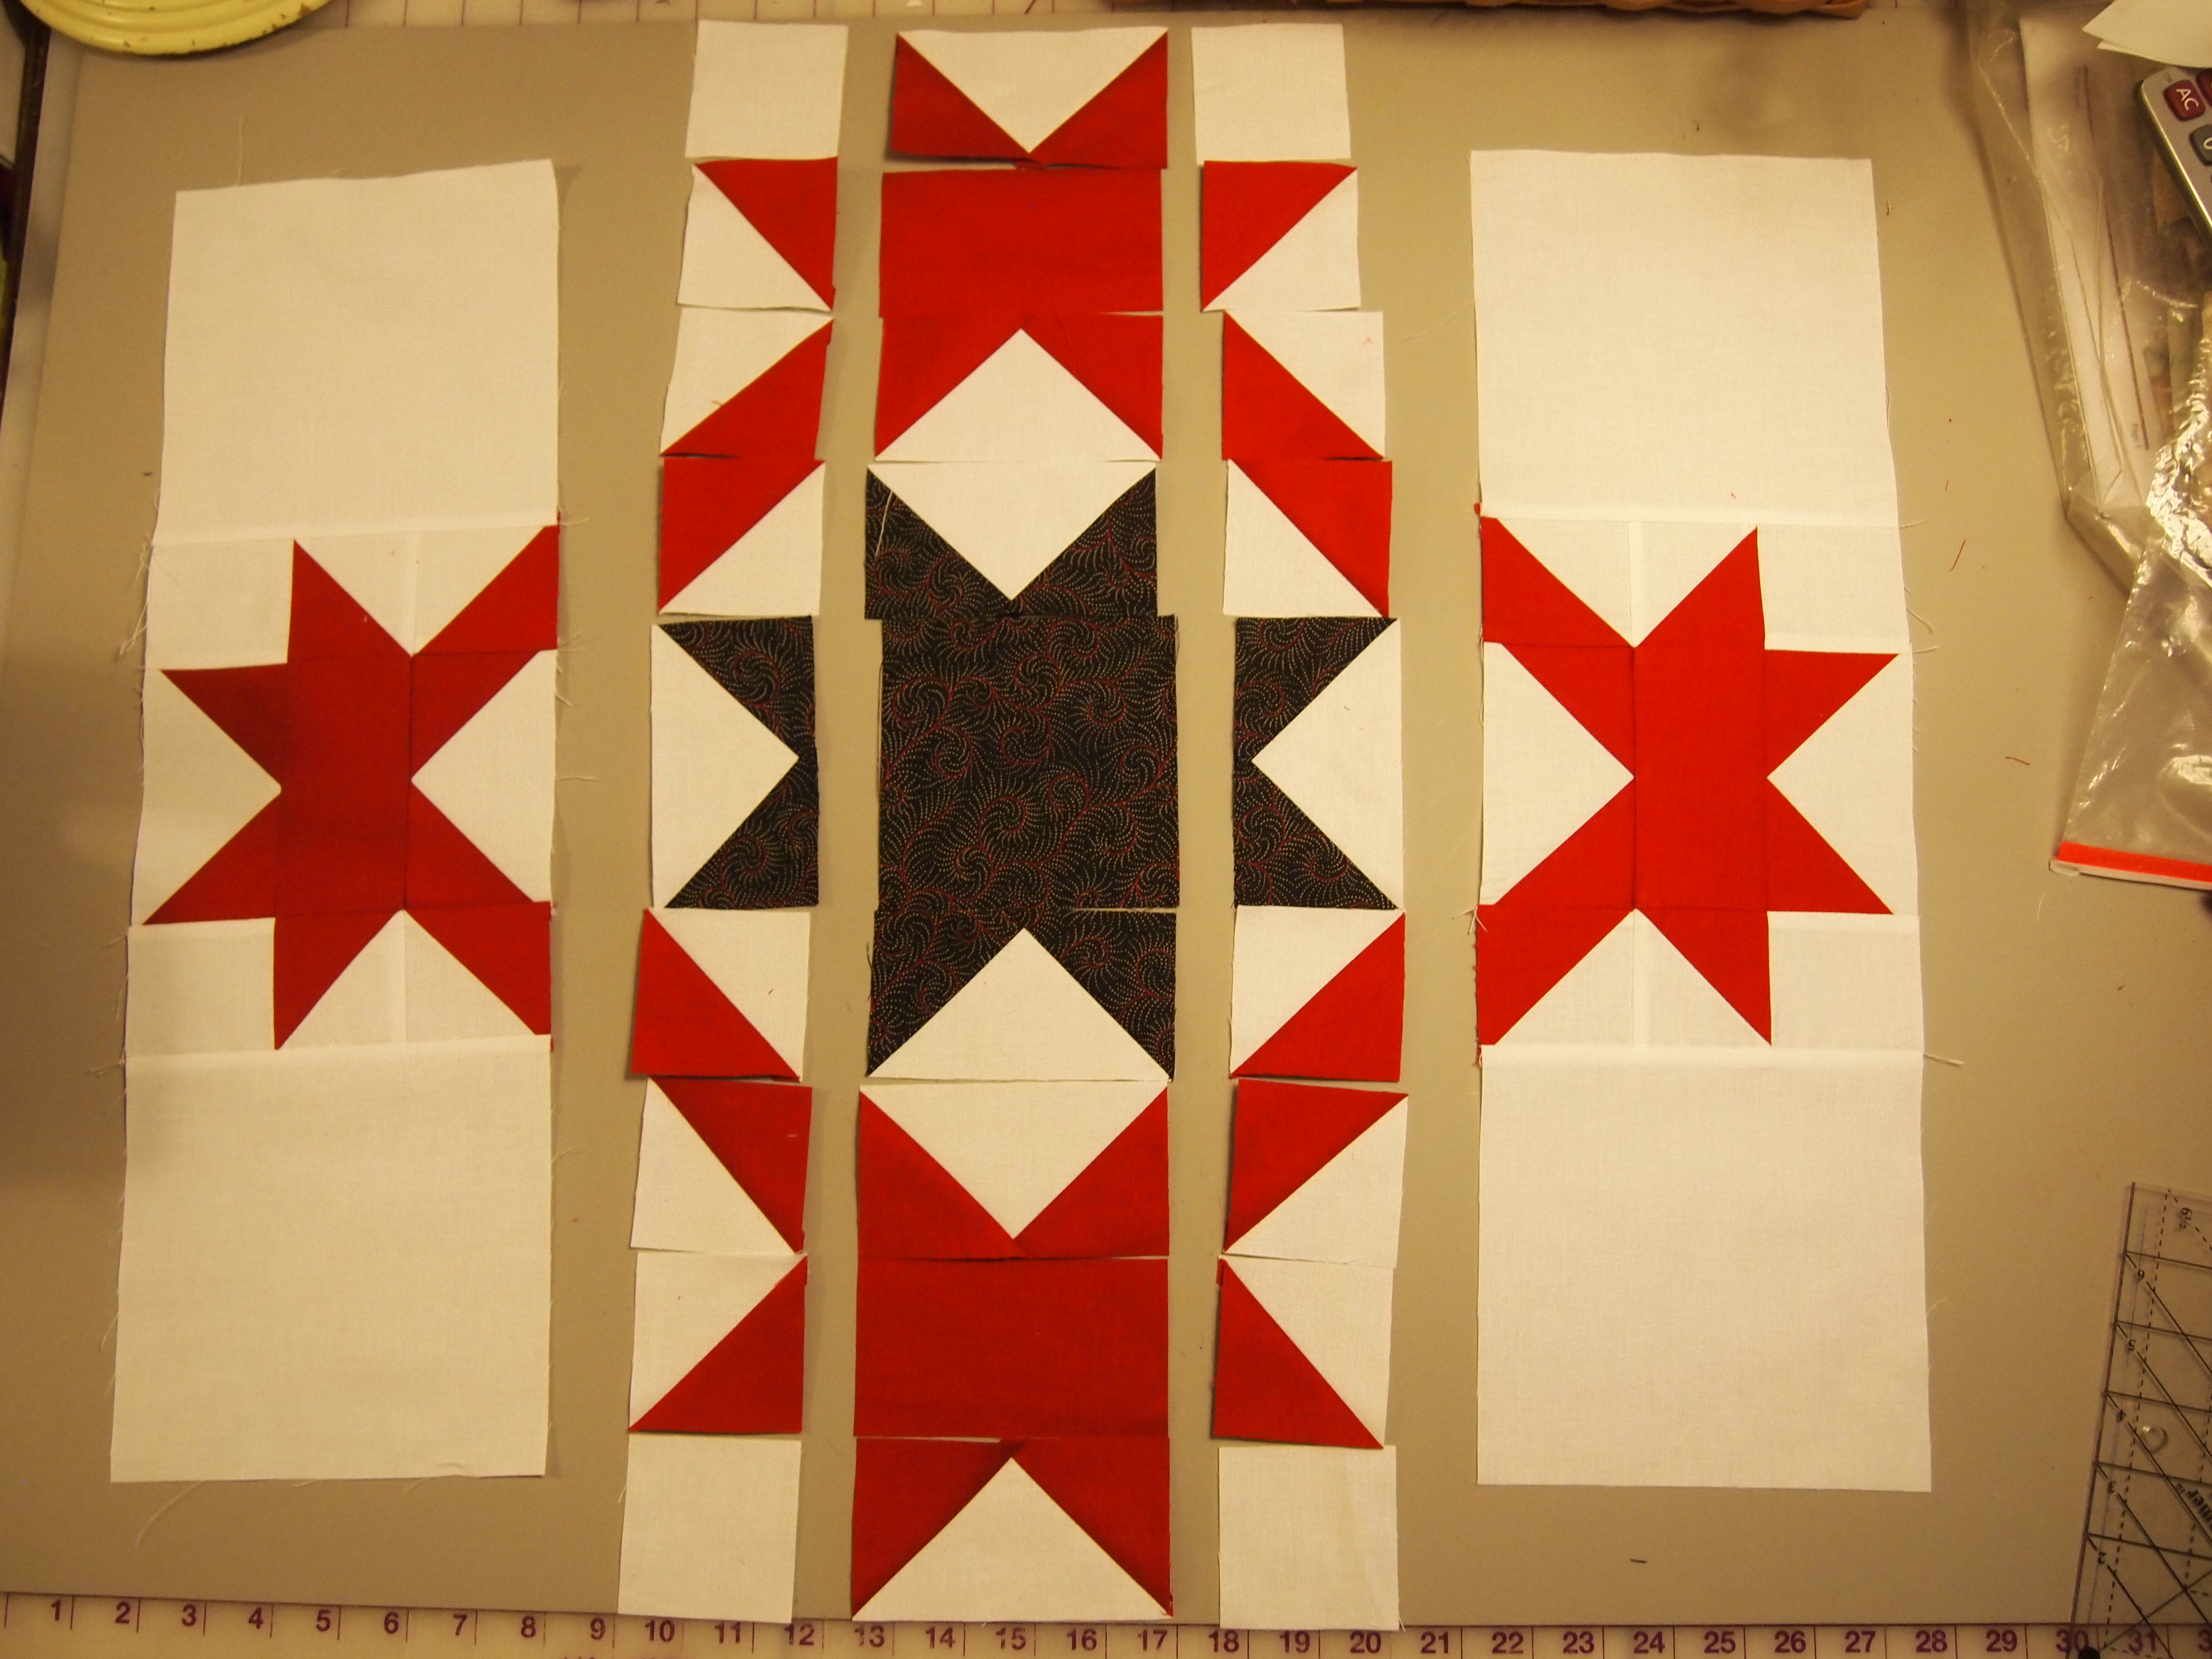
Add the 6 1/2″ corner blocks. Repeat on the left side.

As shown above, I divided the block into 4 sections. Above I sewed the right and then the left sections together. Next I joined the units right of the center and left of the center into rows and then joined the center units together. Finally I joined the four sections together for the finished block. You can decide how big to make your own blocks and how many blocks to make.


I constantly design my quilts that was. I take a picture of something I like and use the picture to draw the pattern on graph paper. Granted, mine are not art quilts with millions of pieces but I can redo just about any I see.
I love doing things that way as I learn more and more about technique in design.
LikeLike
It is great fun. Anytime I see a quilt online I down the photo to see if I can recreate it. Merry Christmas, and Happy Holidays!
LikeLike