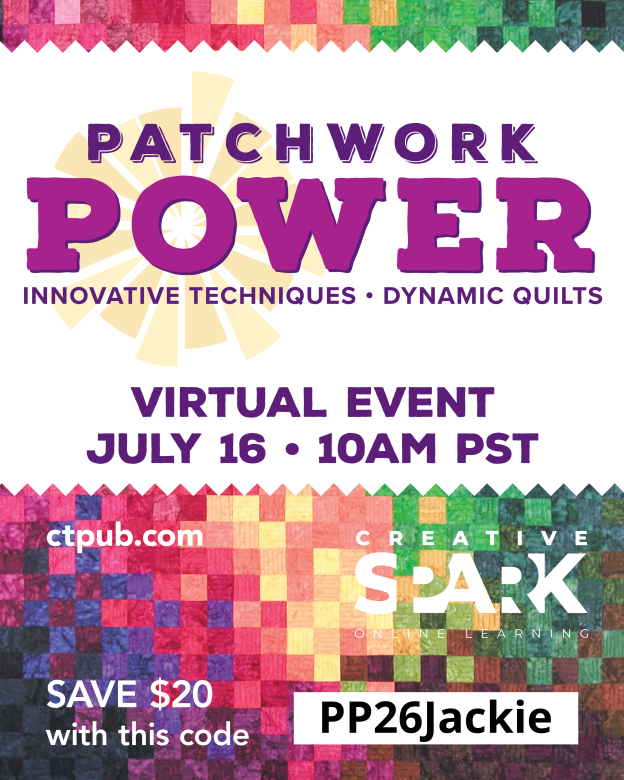
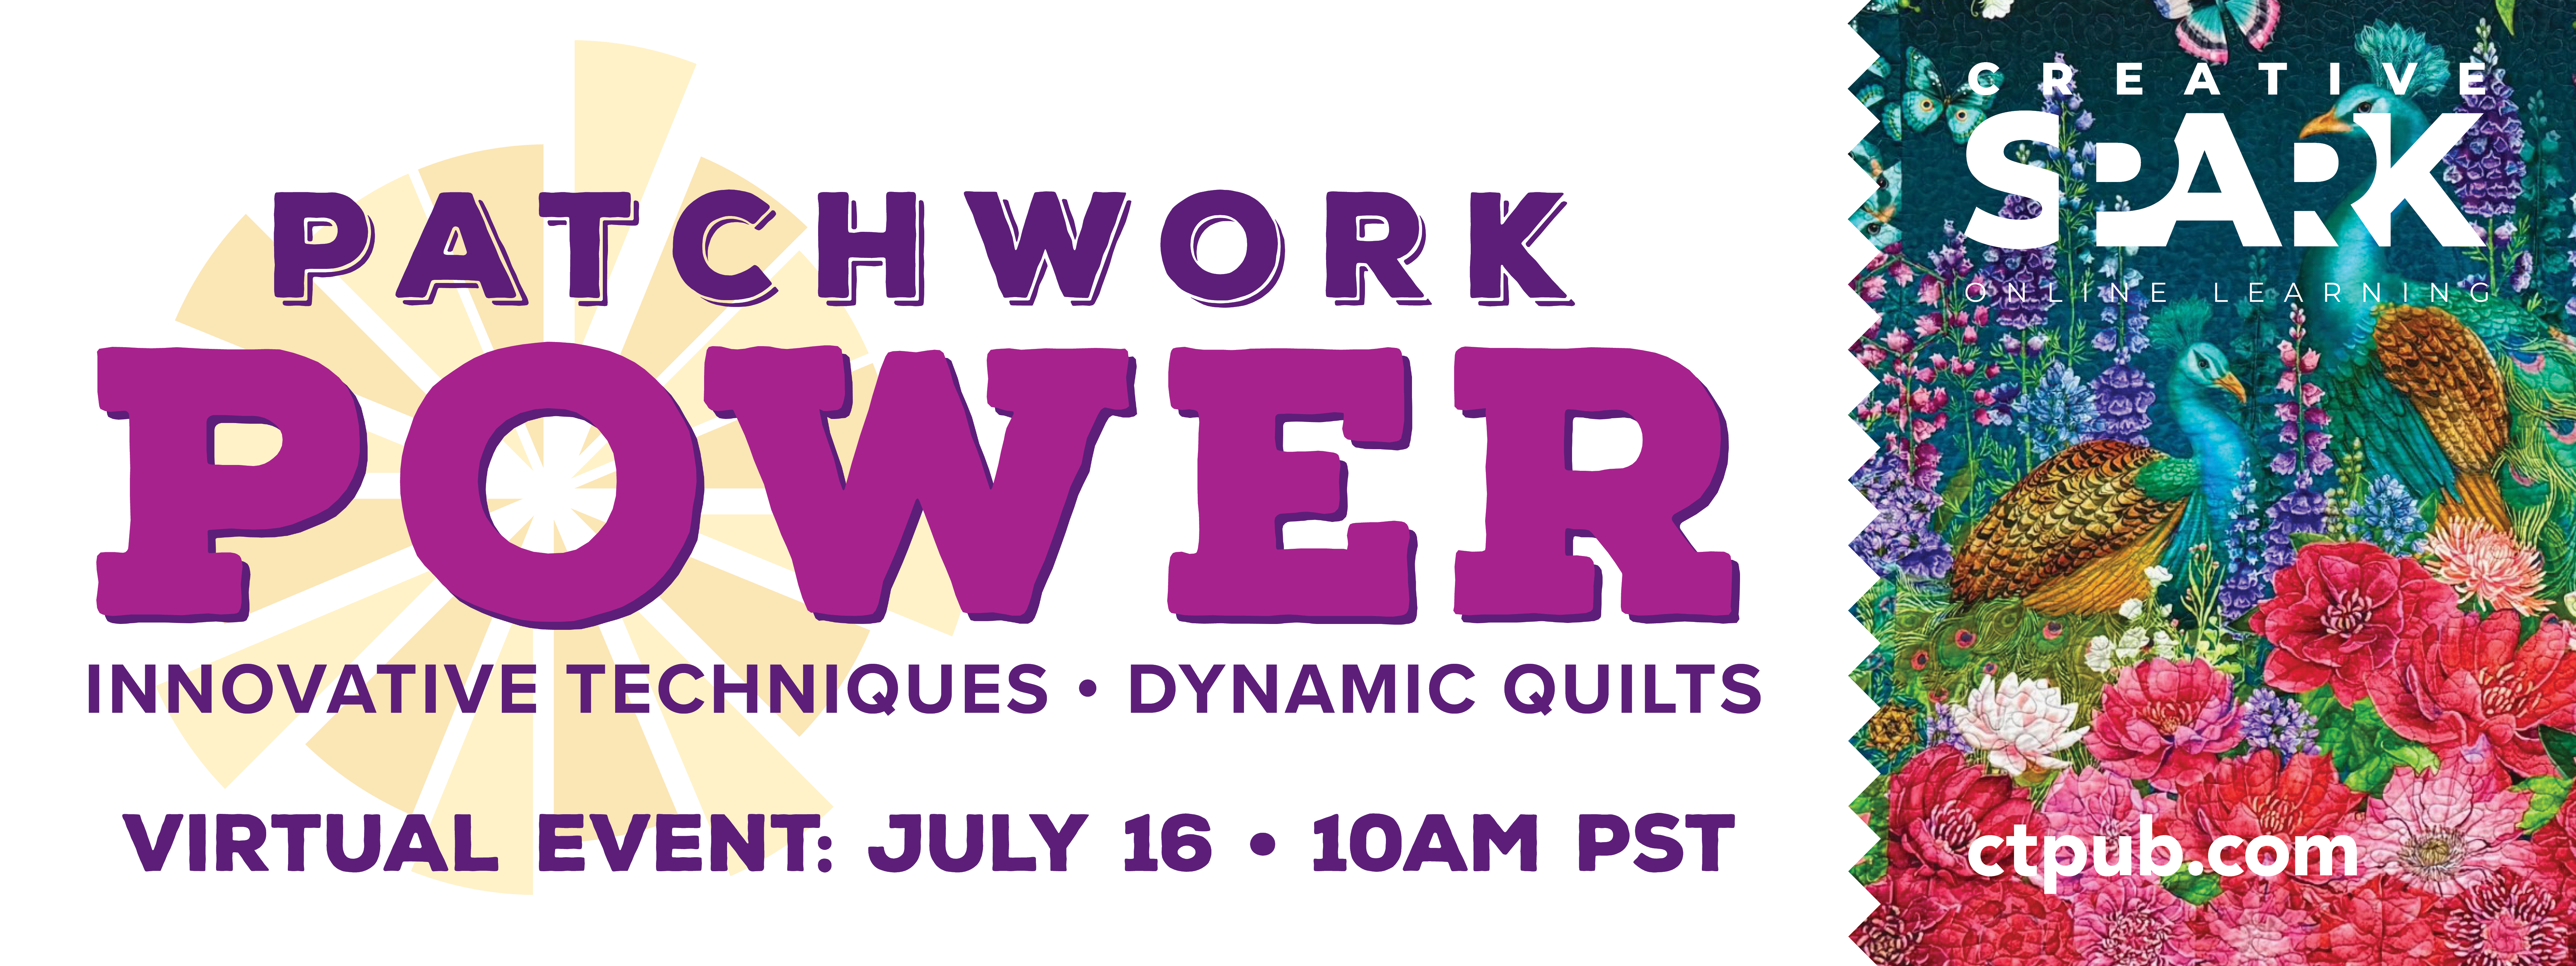
You are invited to participate in Creative Spark’s Online Learning Event – Patchwork Power!
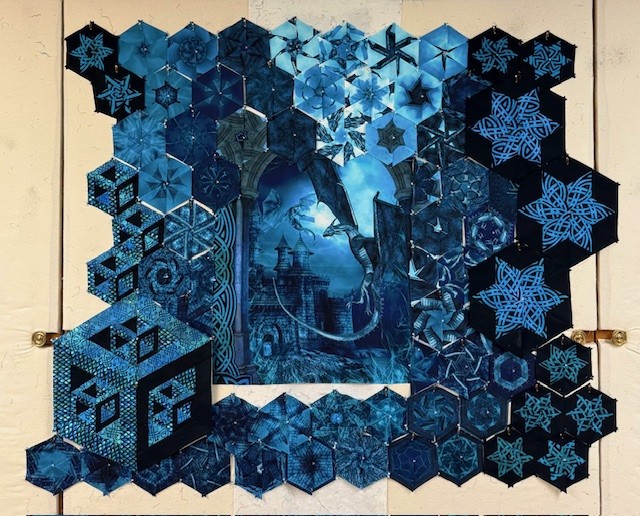
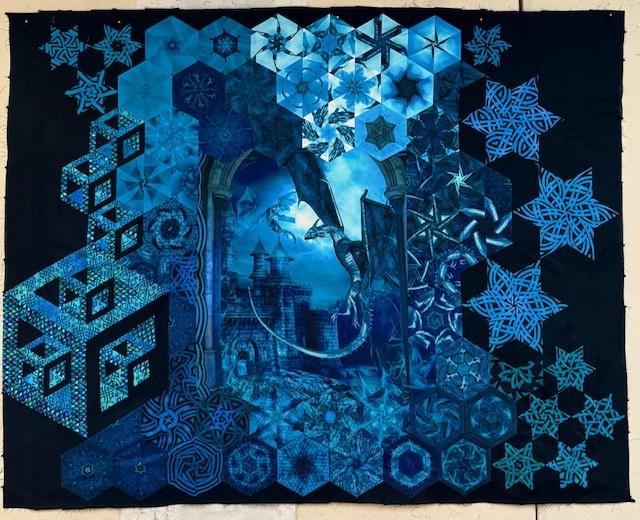
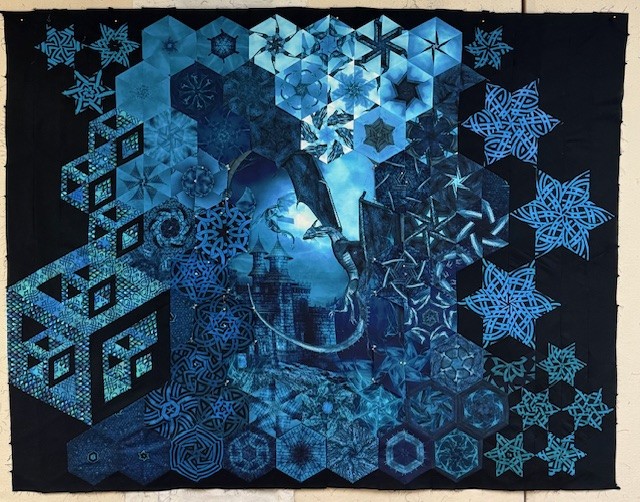
Let’s Explore Making One Block Wonder Panels Together
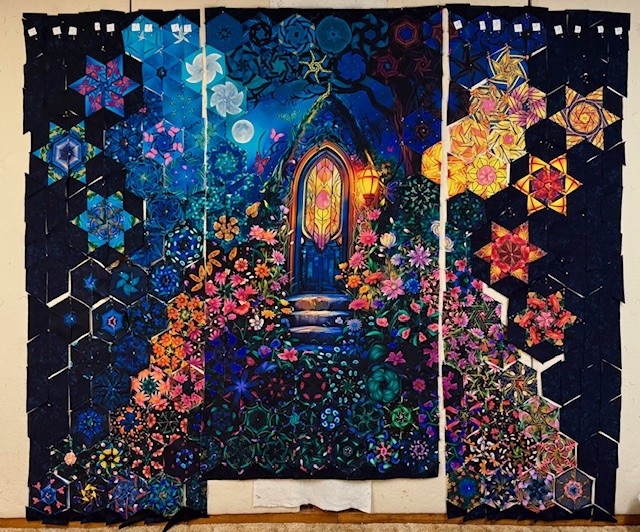
If you love the idea of creating spectacular quilts from panels, I’d love to have you join me at Patchwork Power.
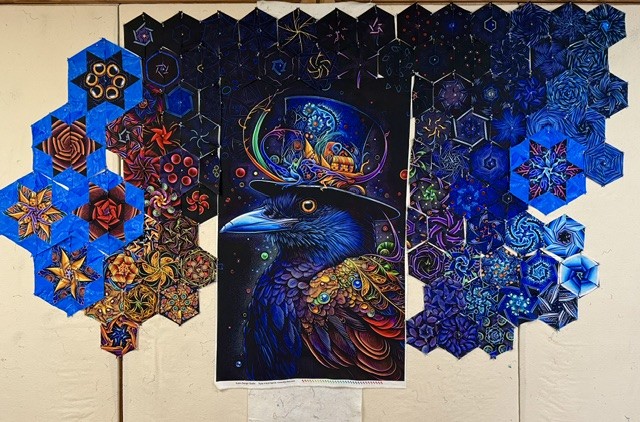
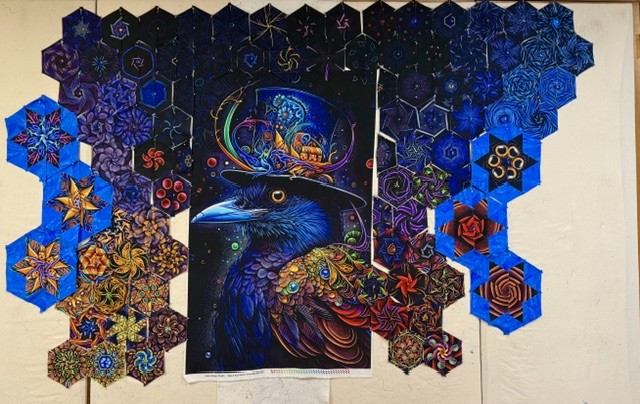
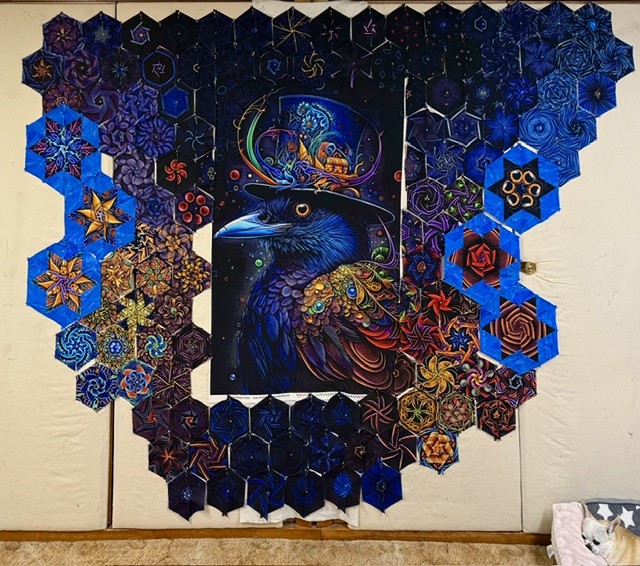
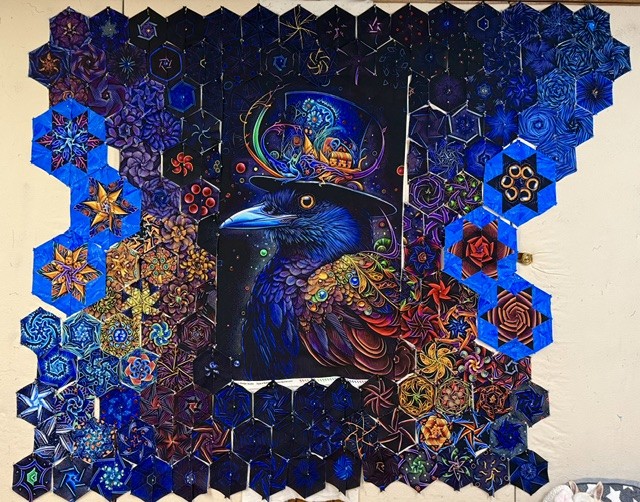
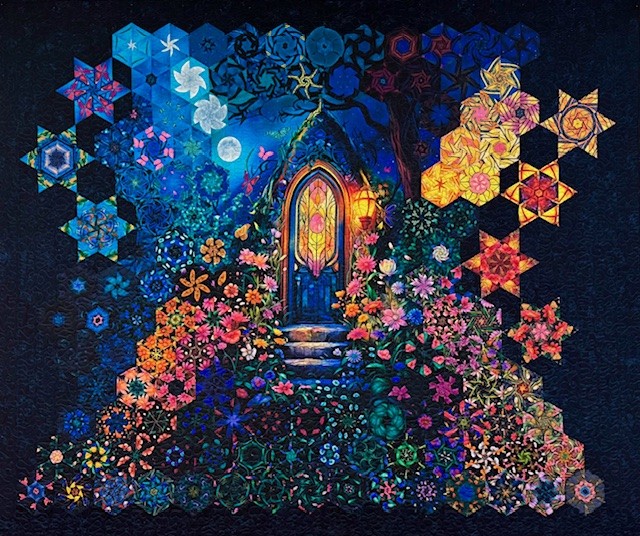
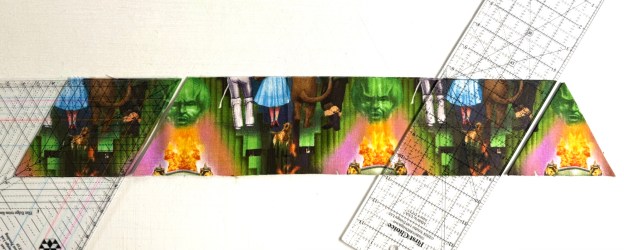
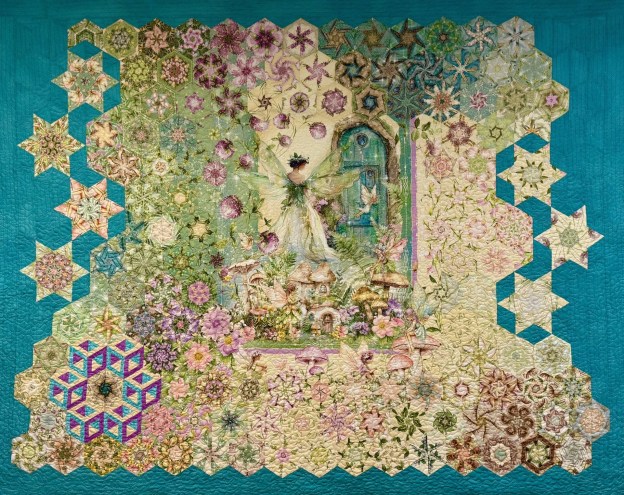
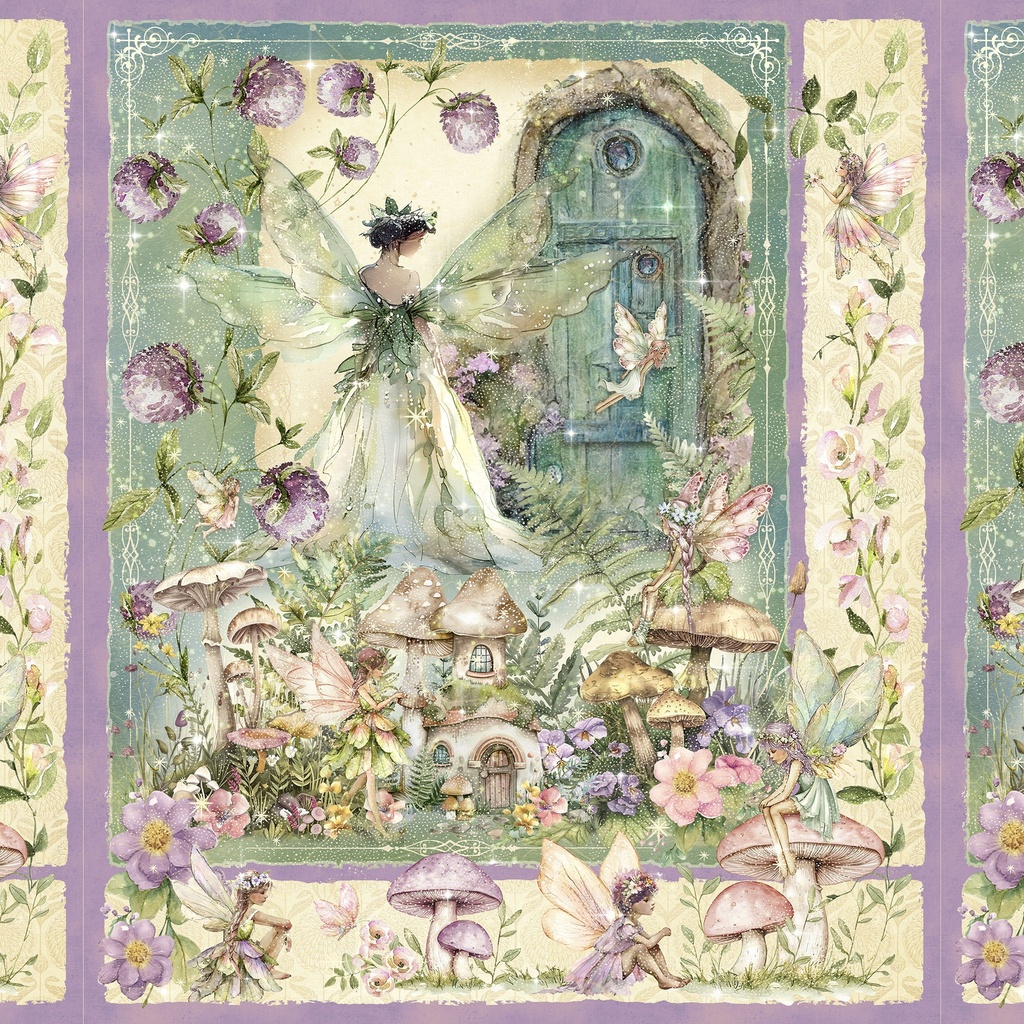
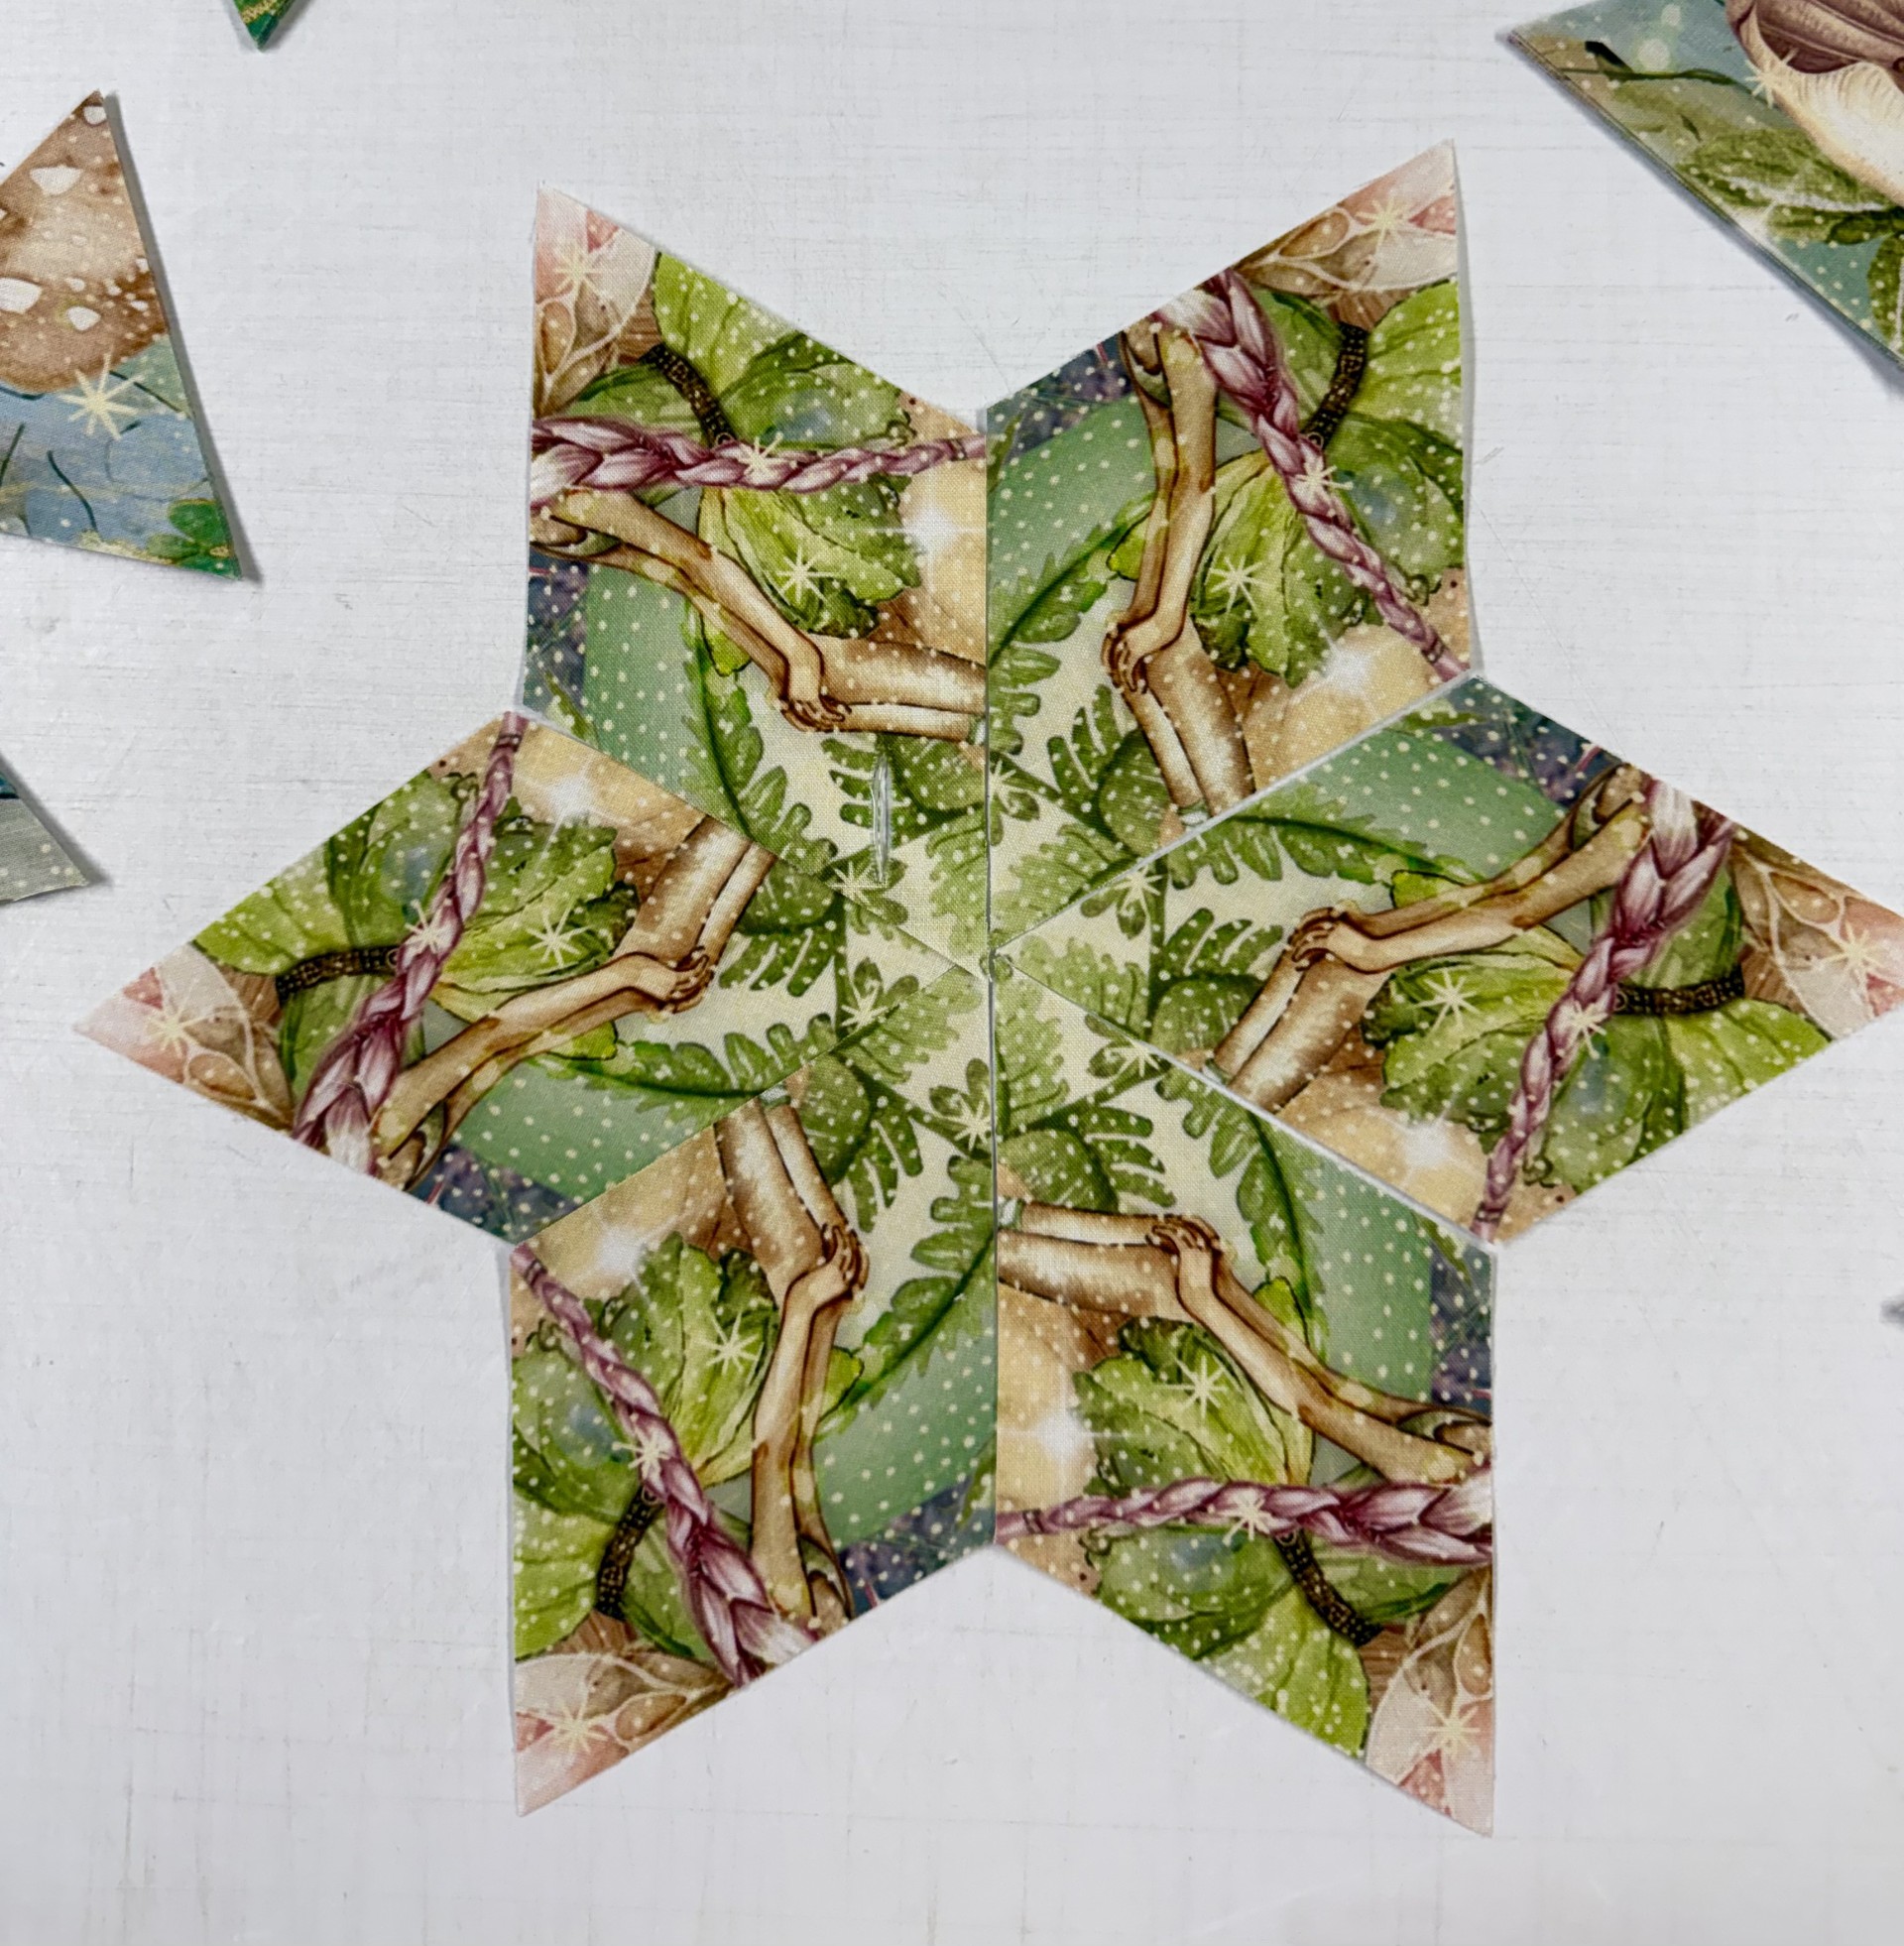
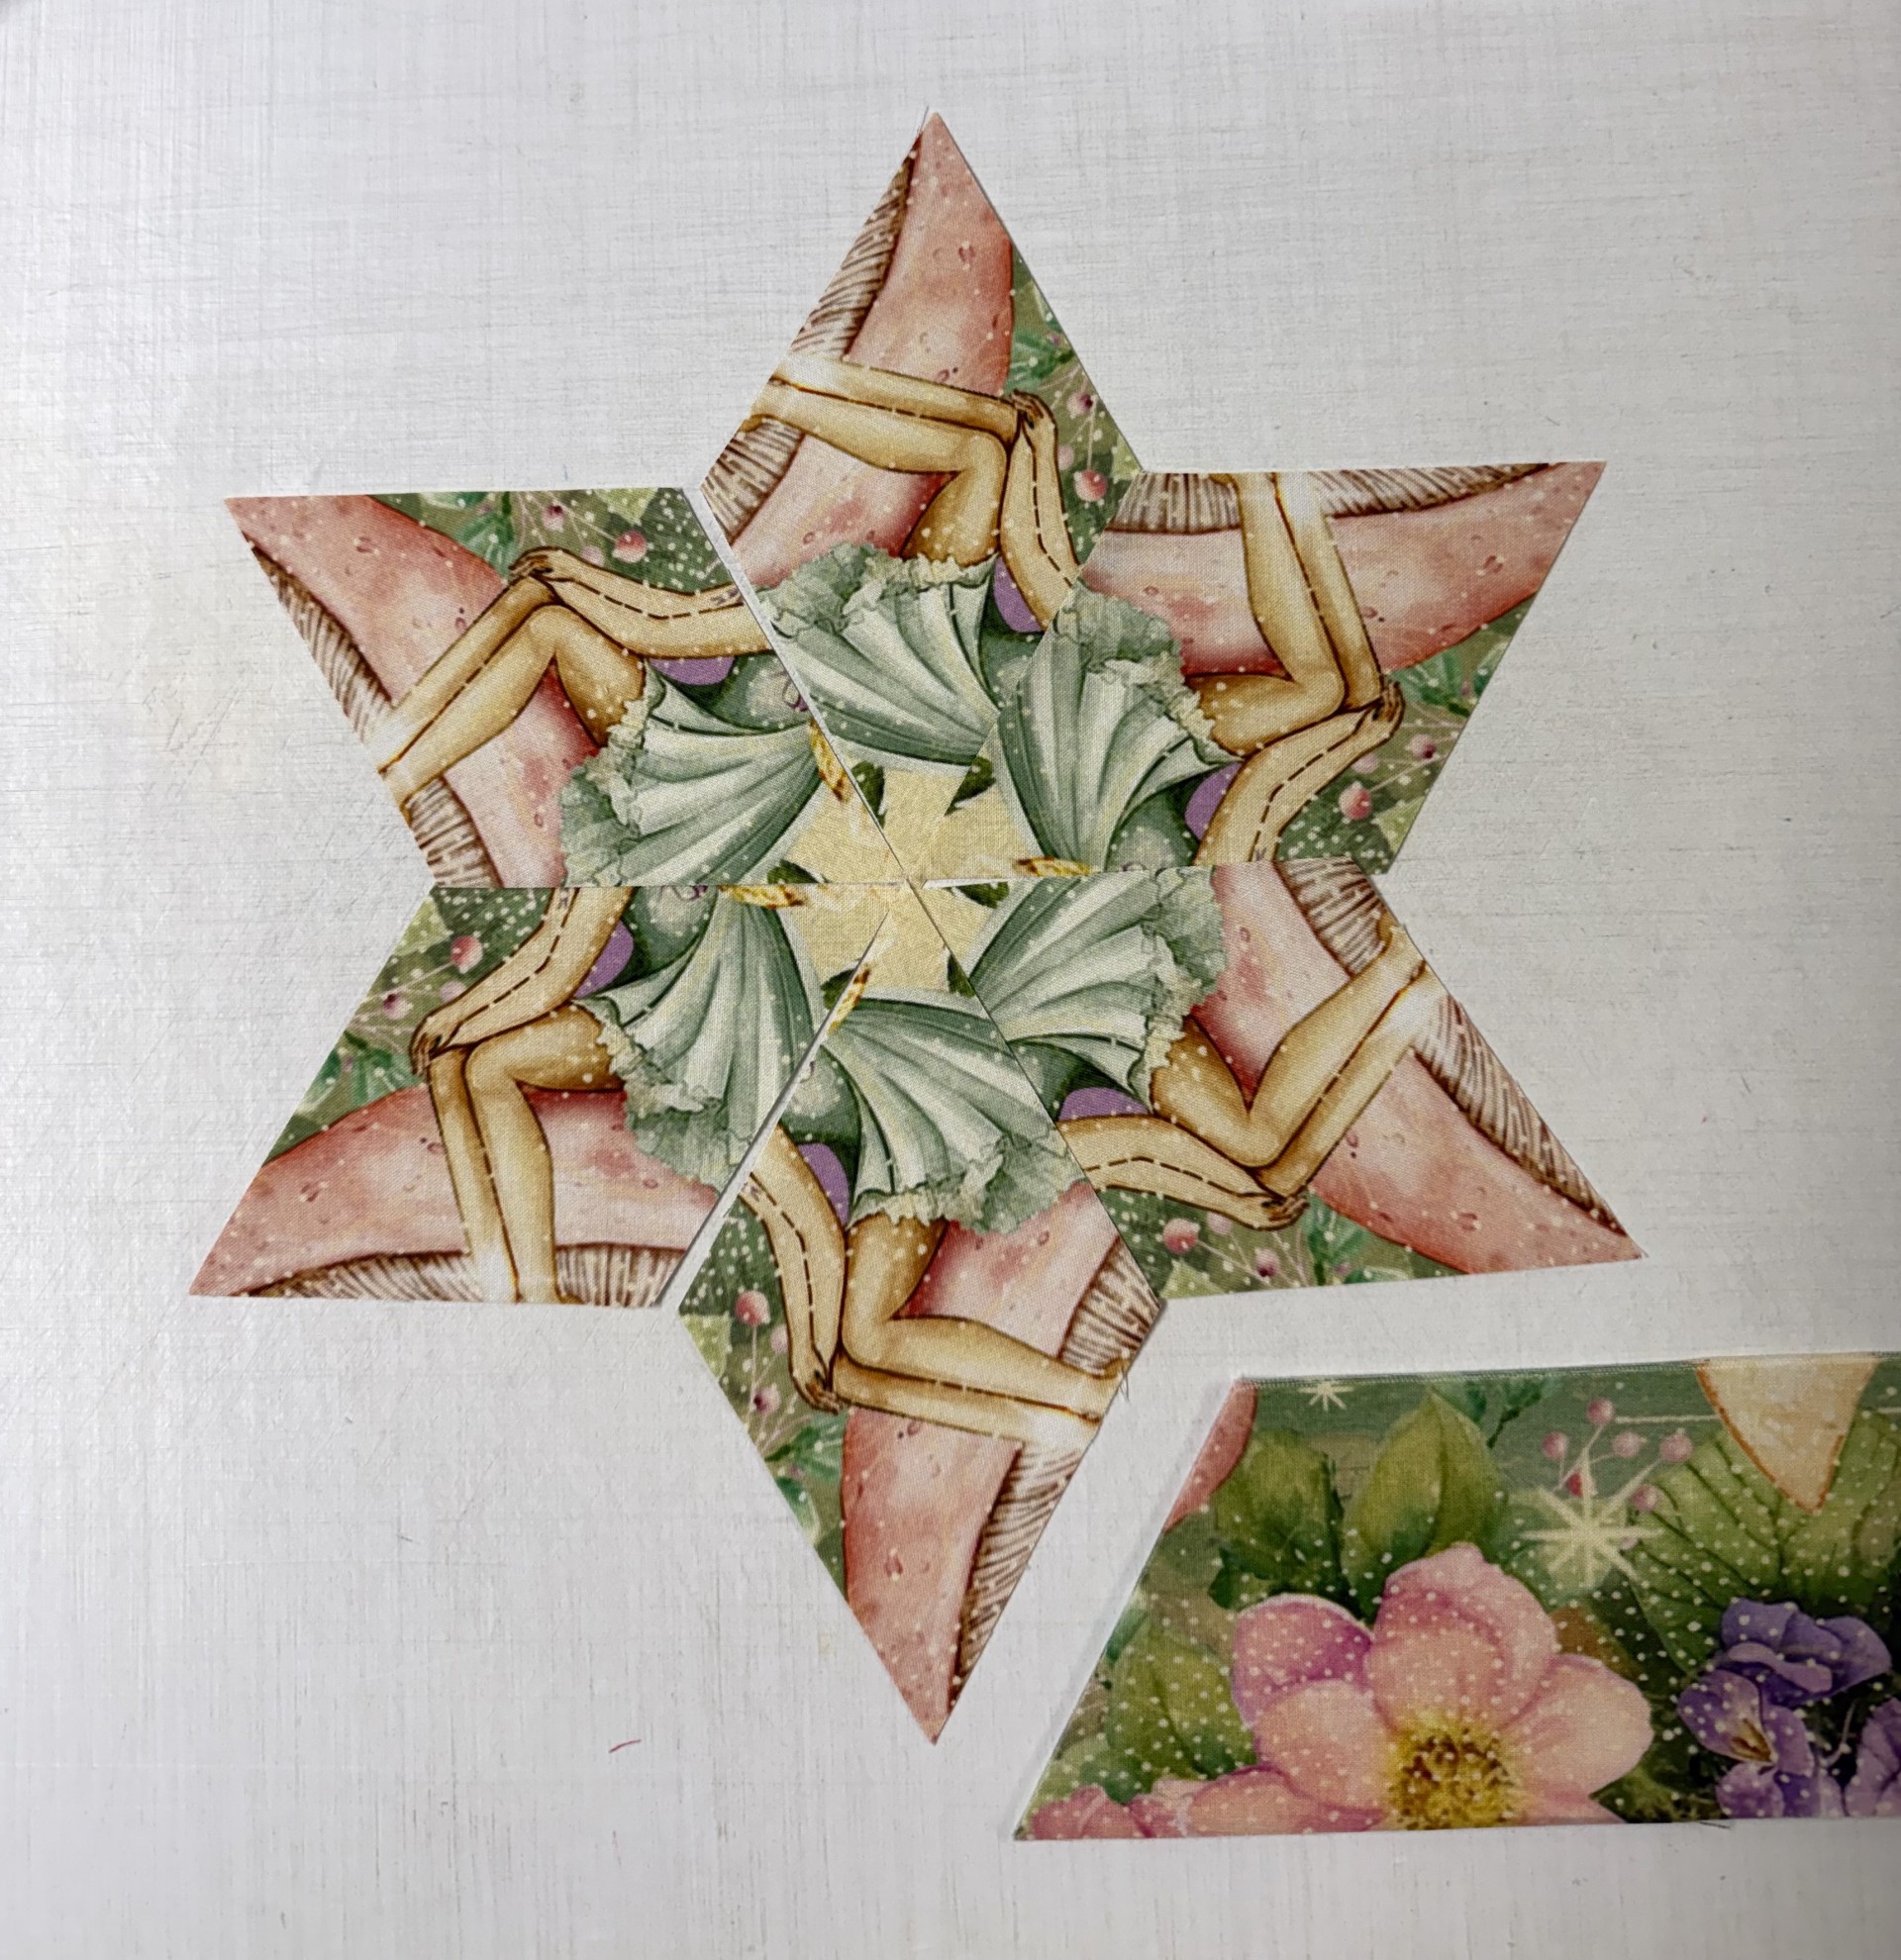
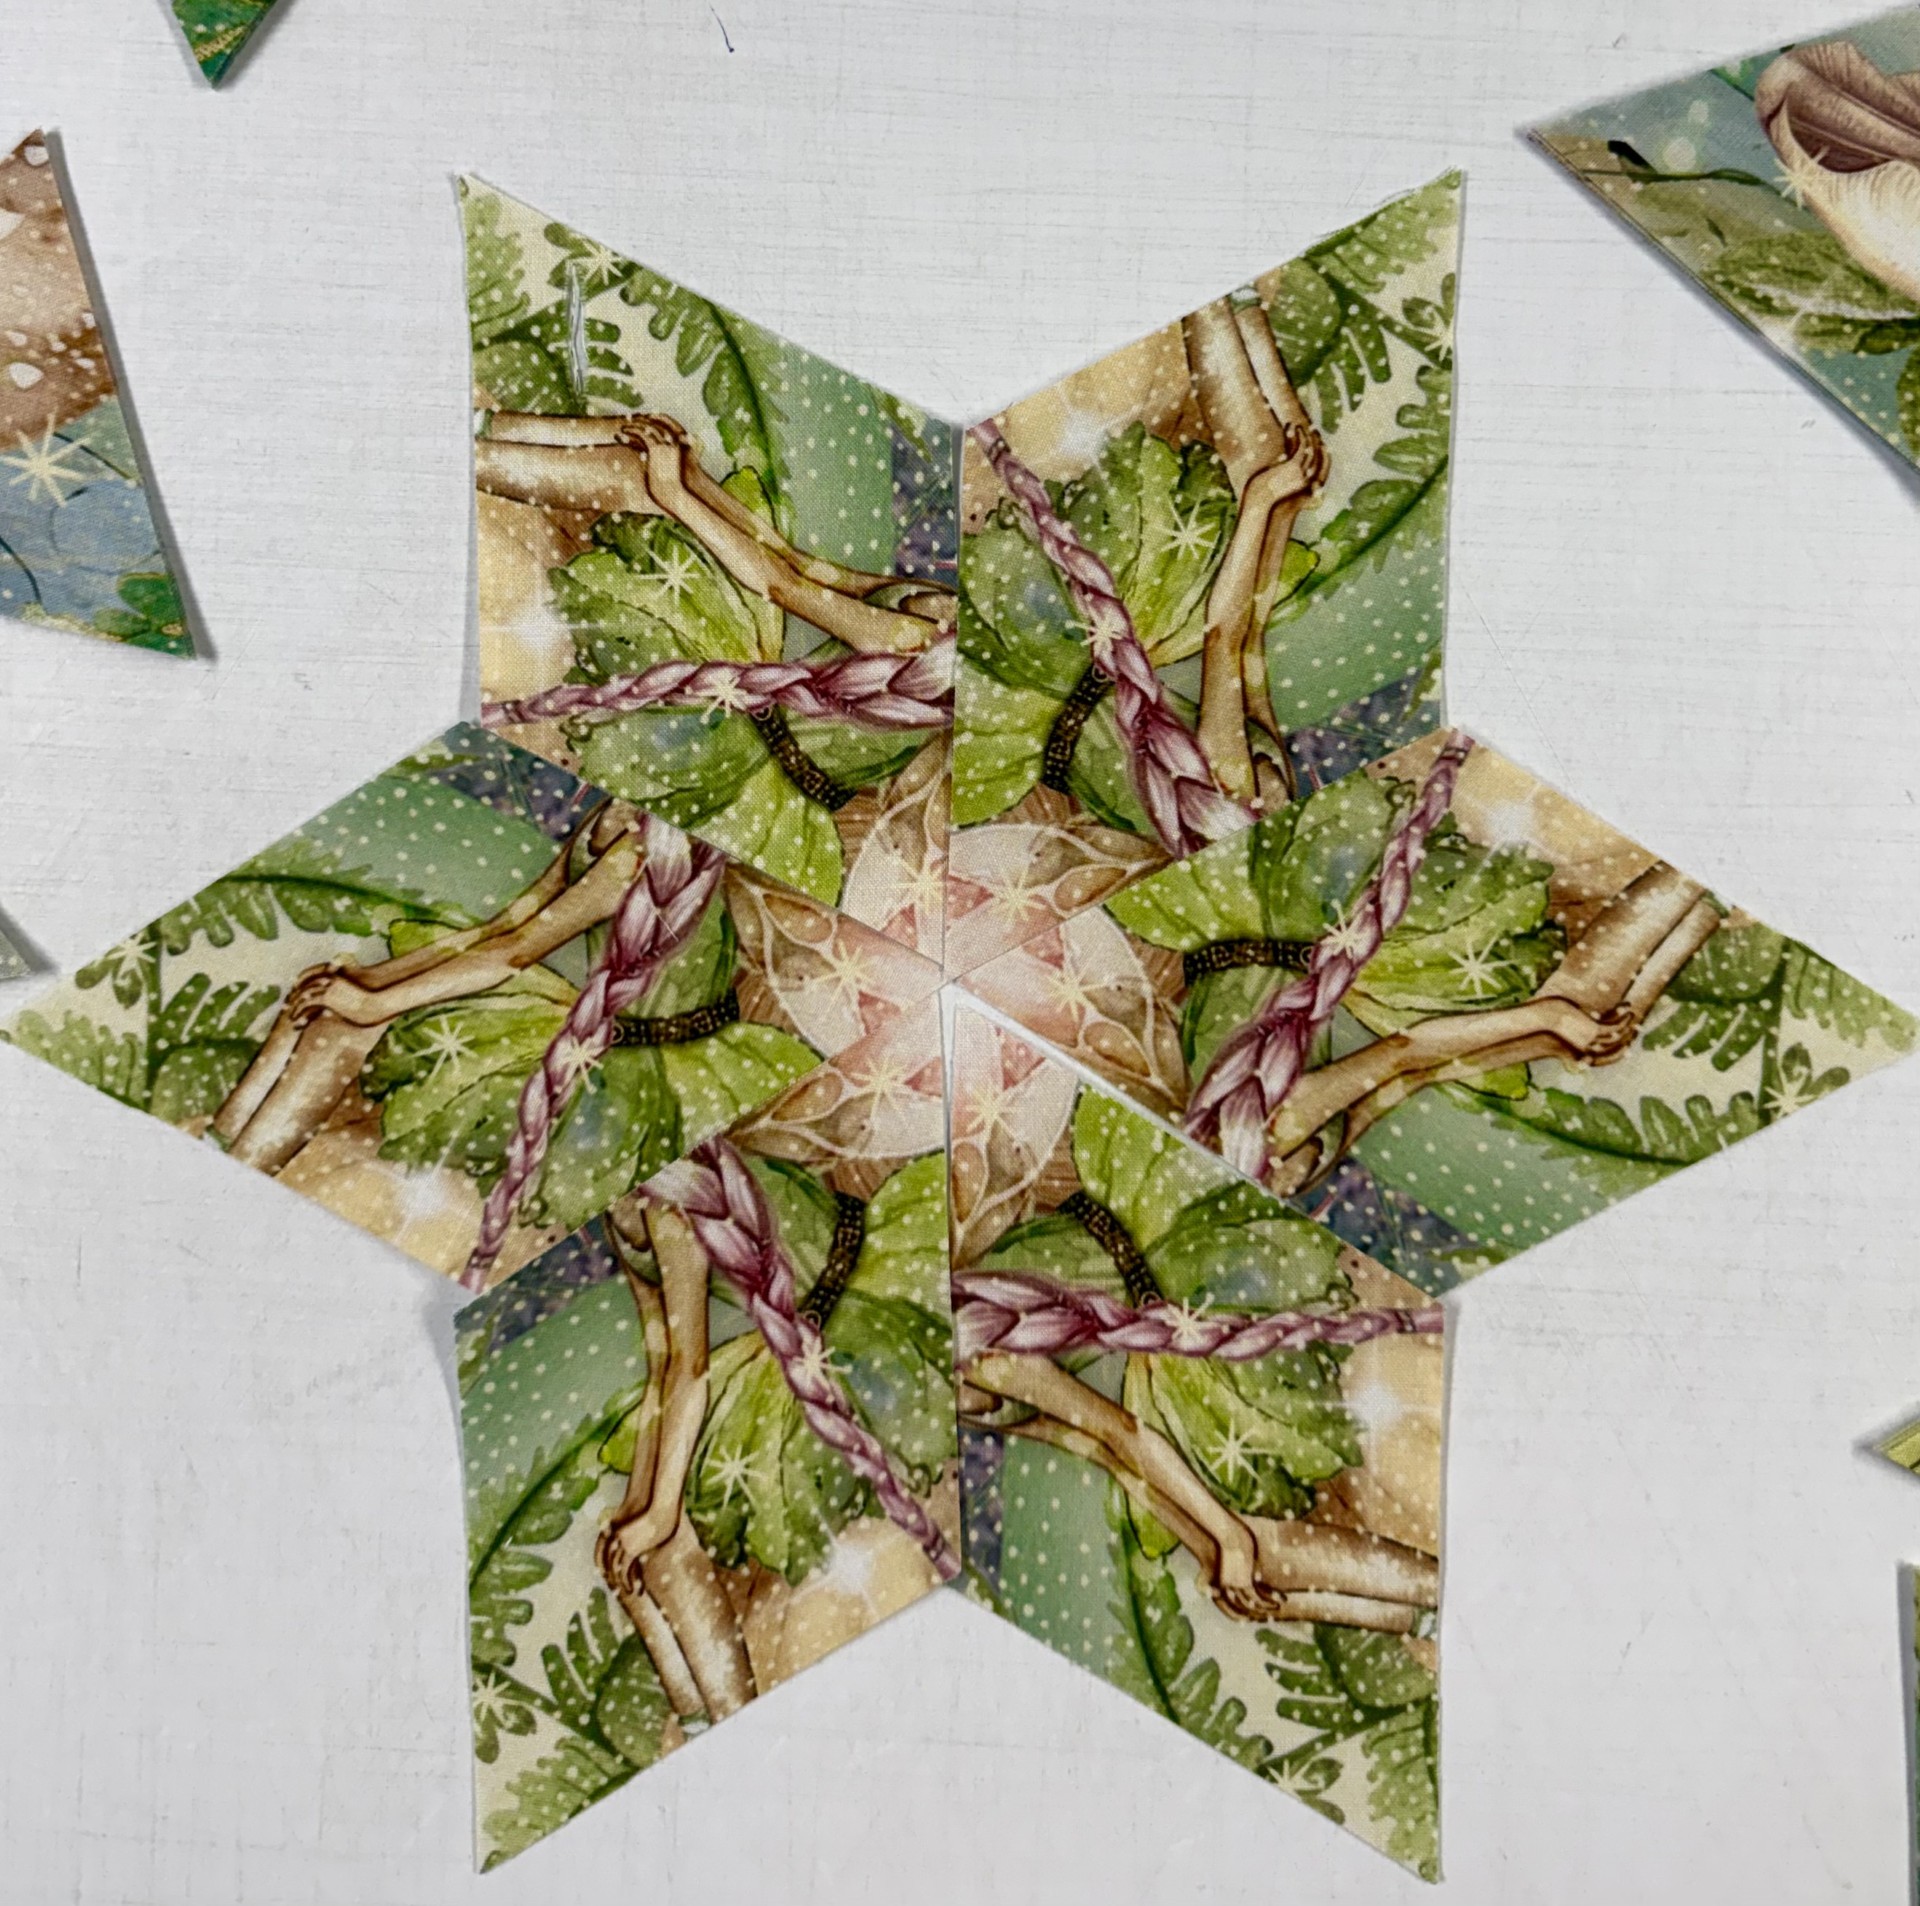
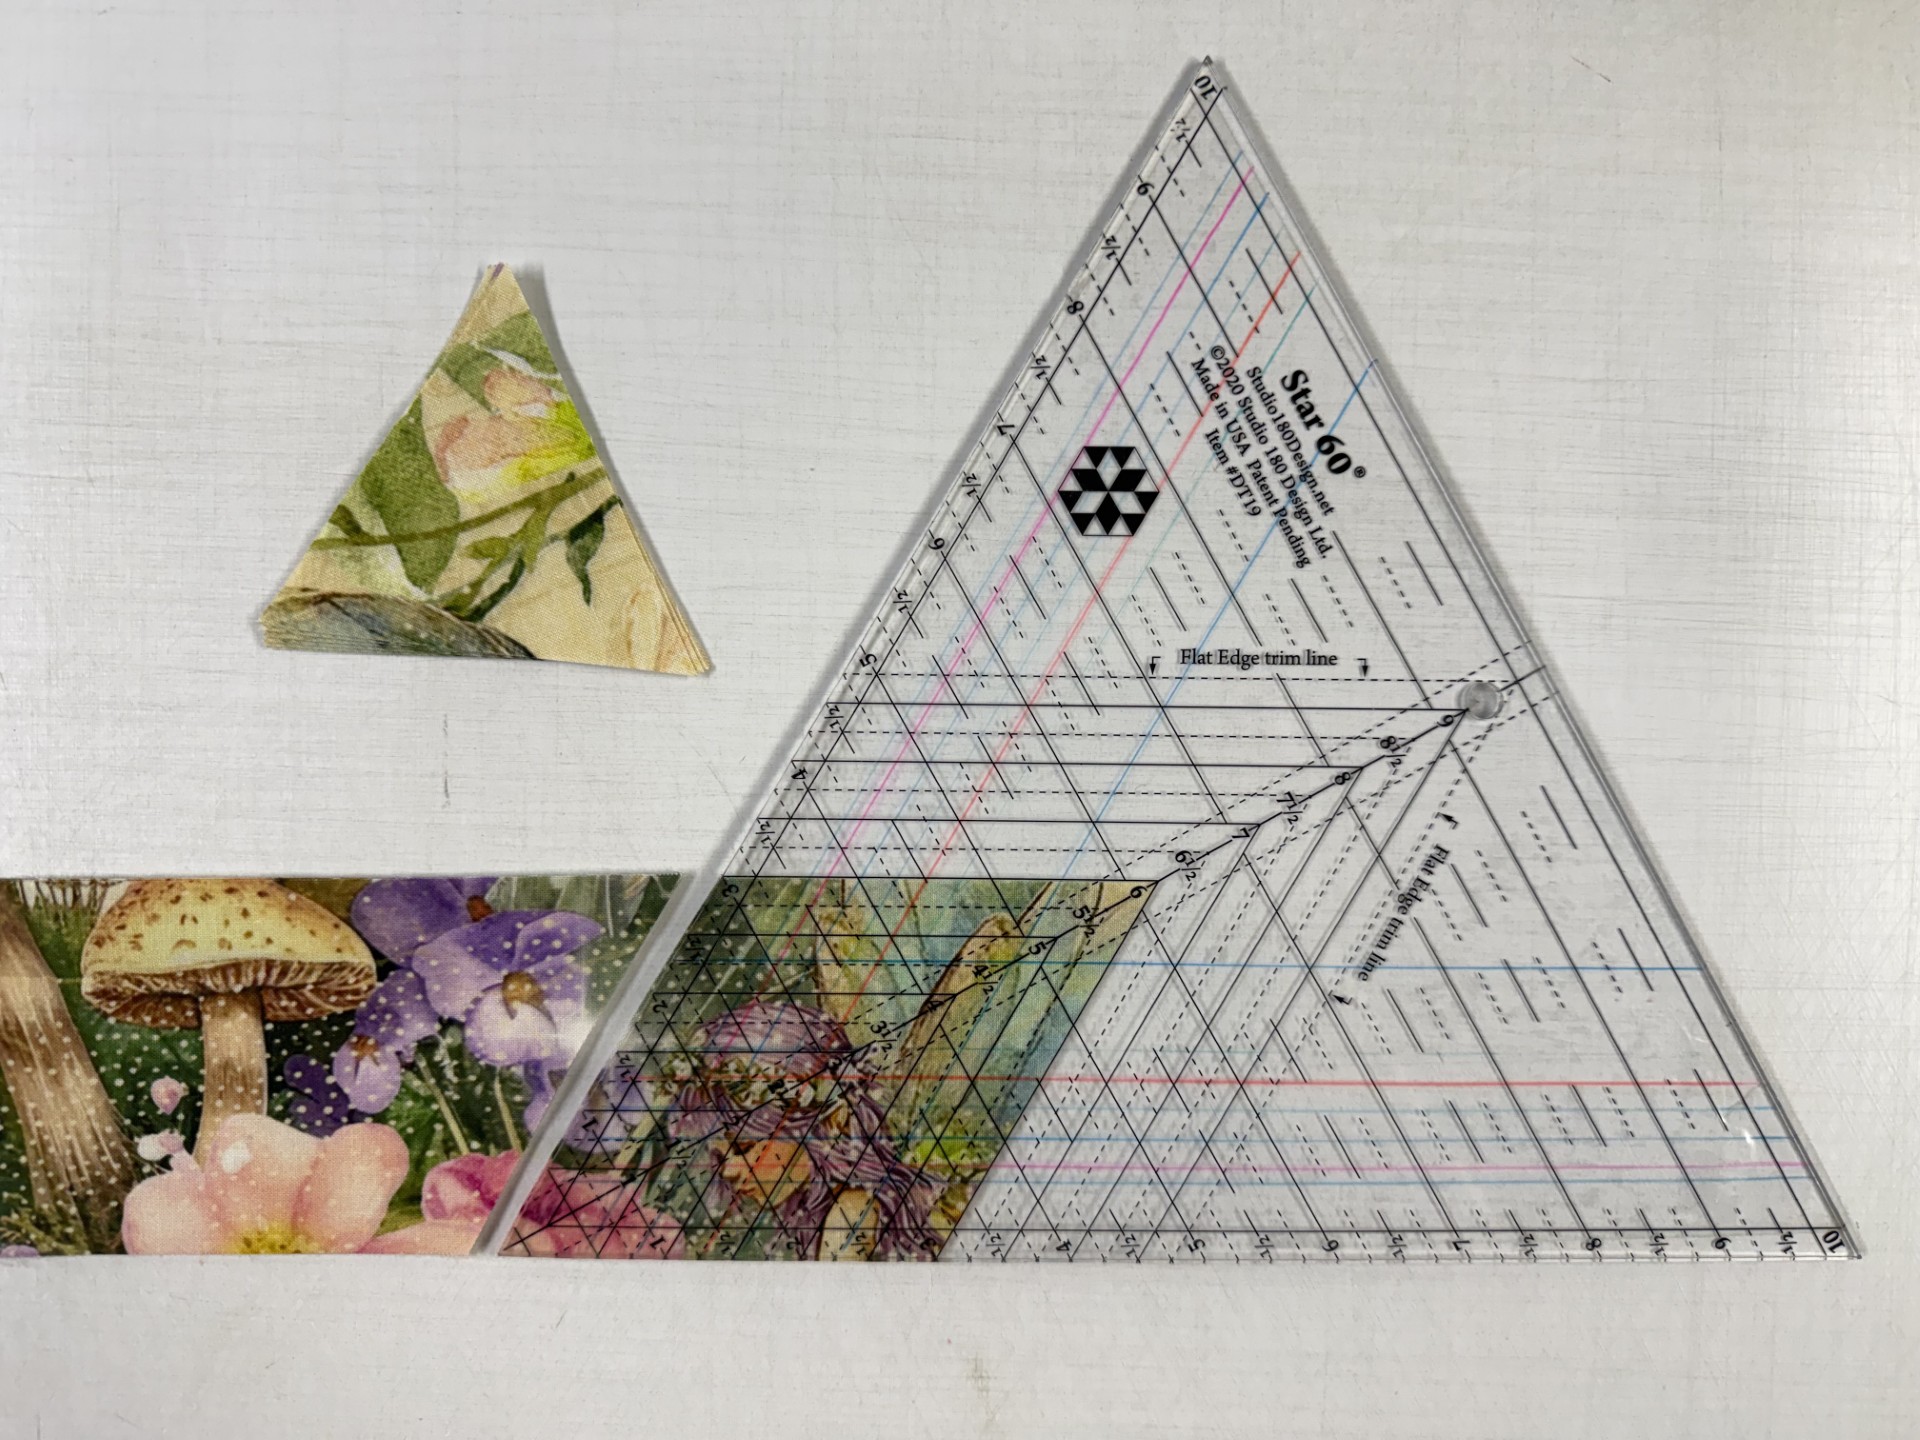
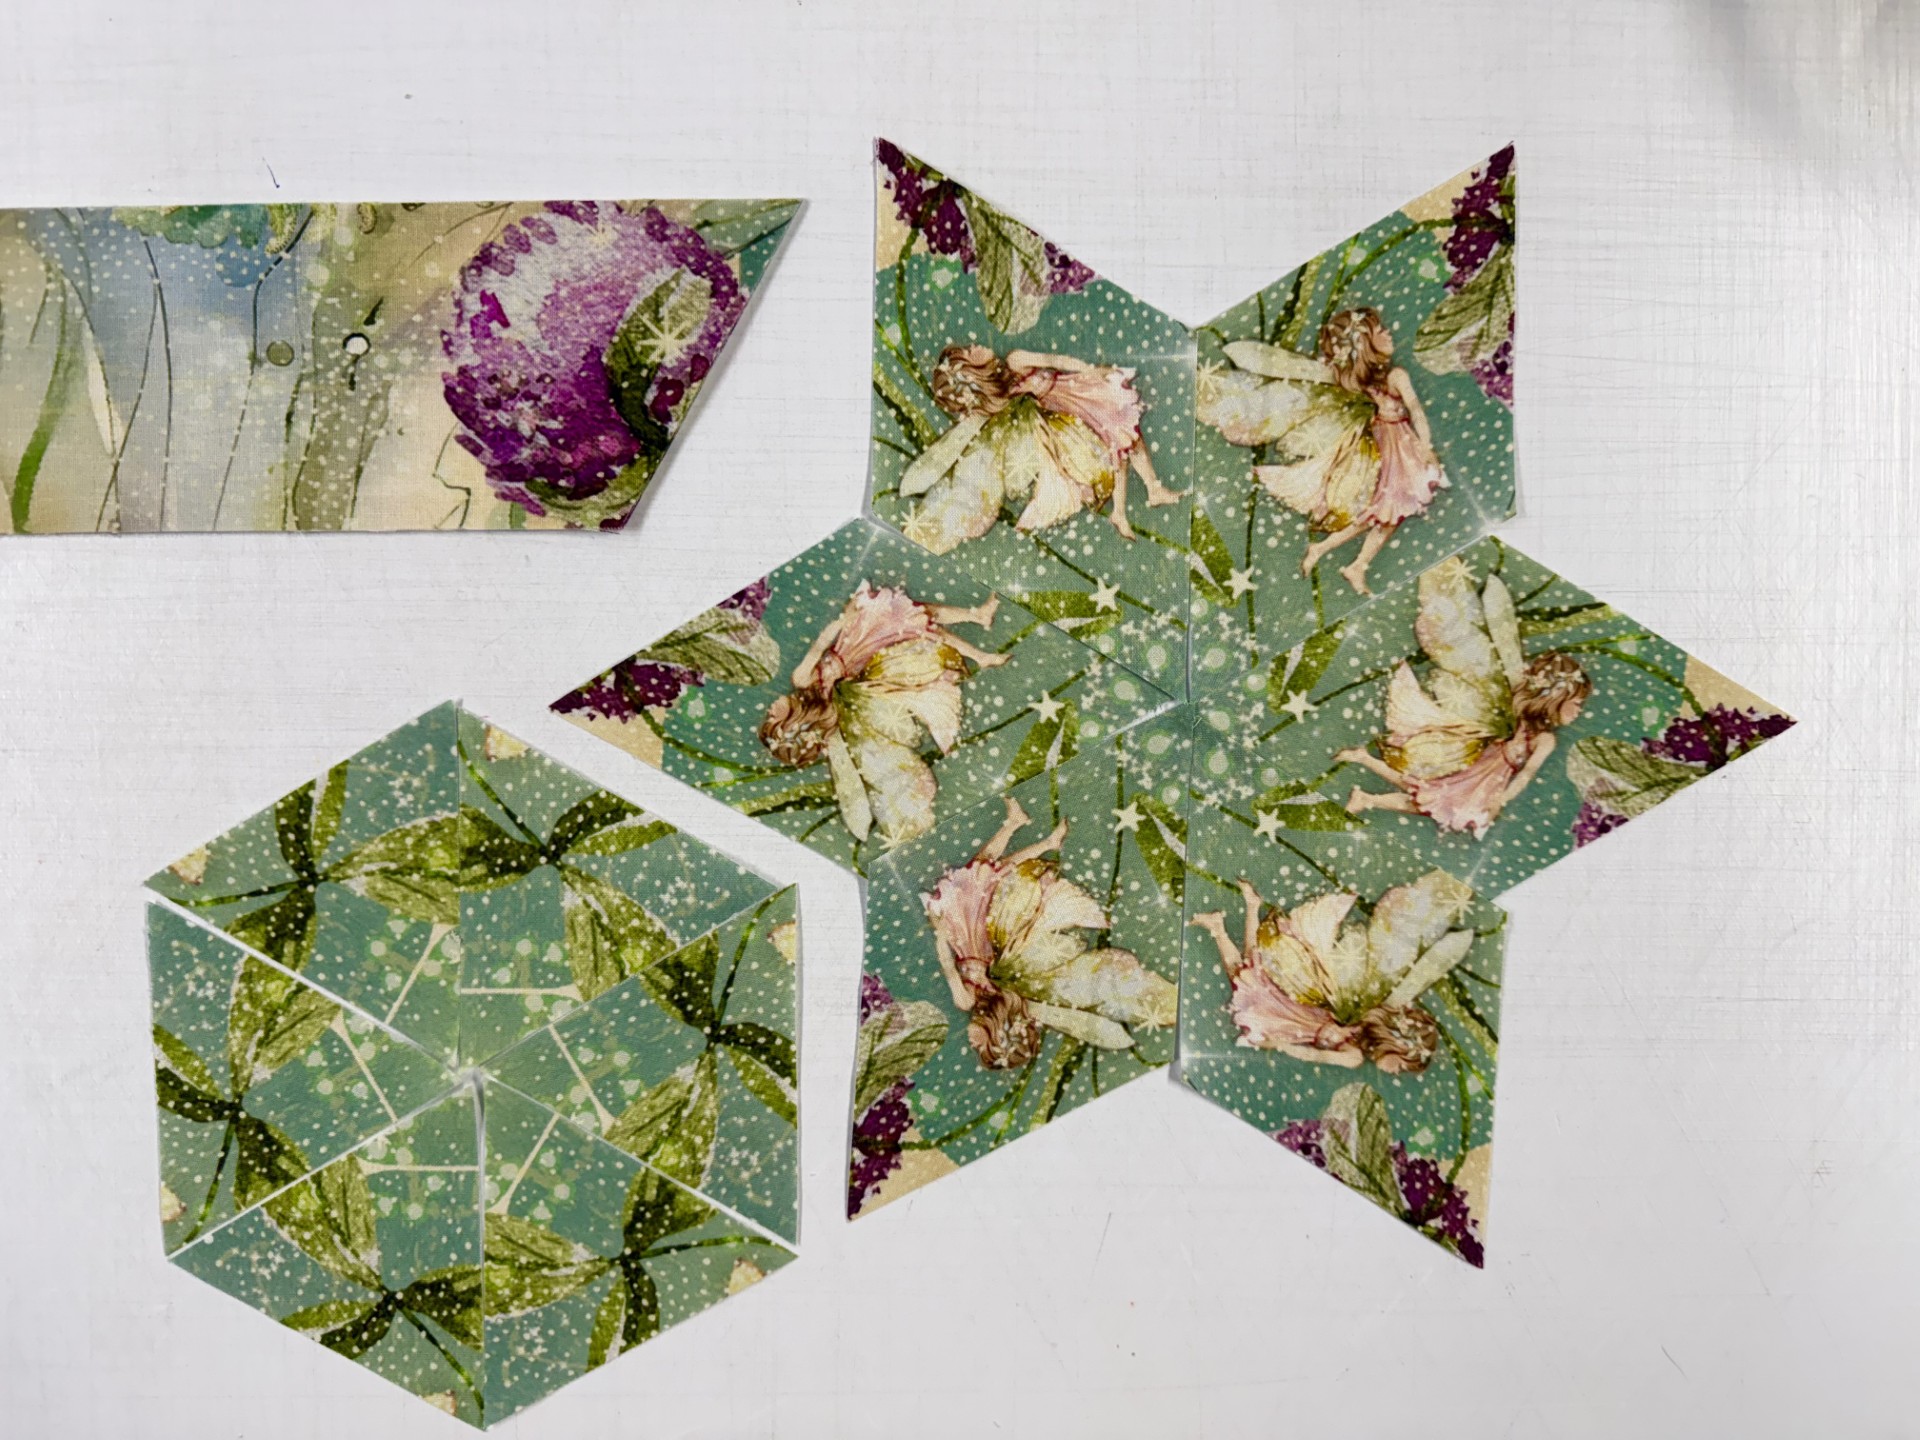
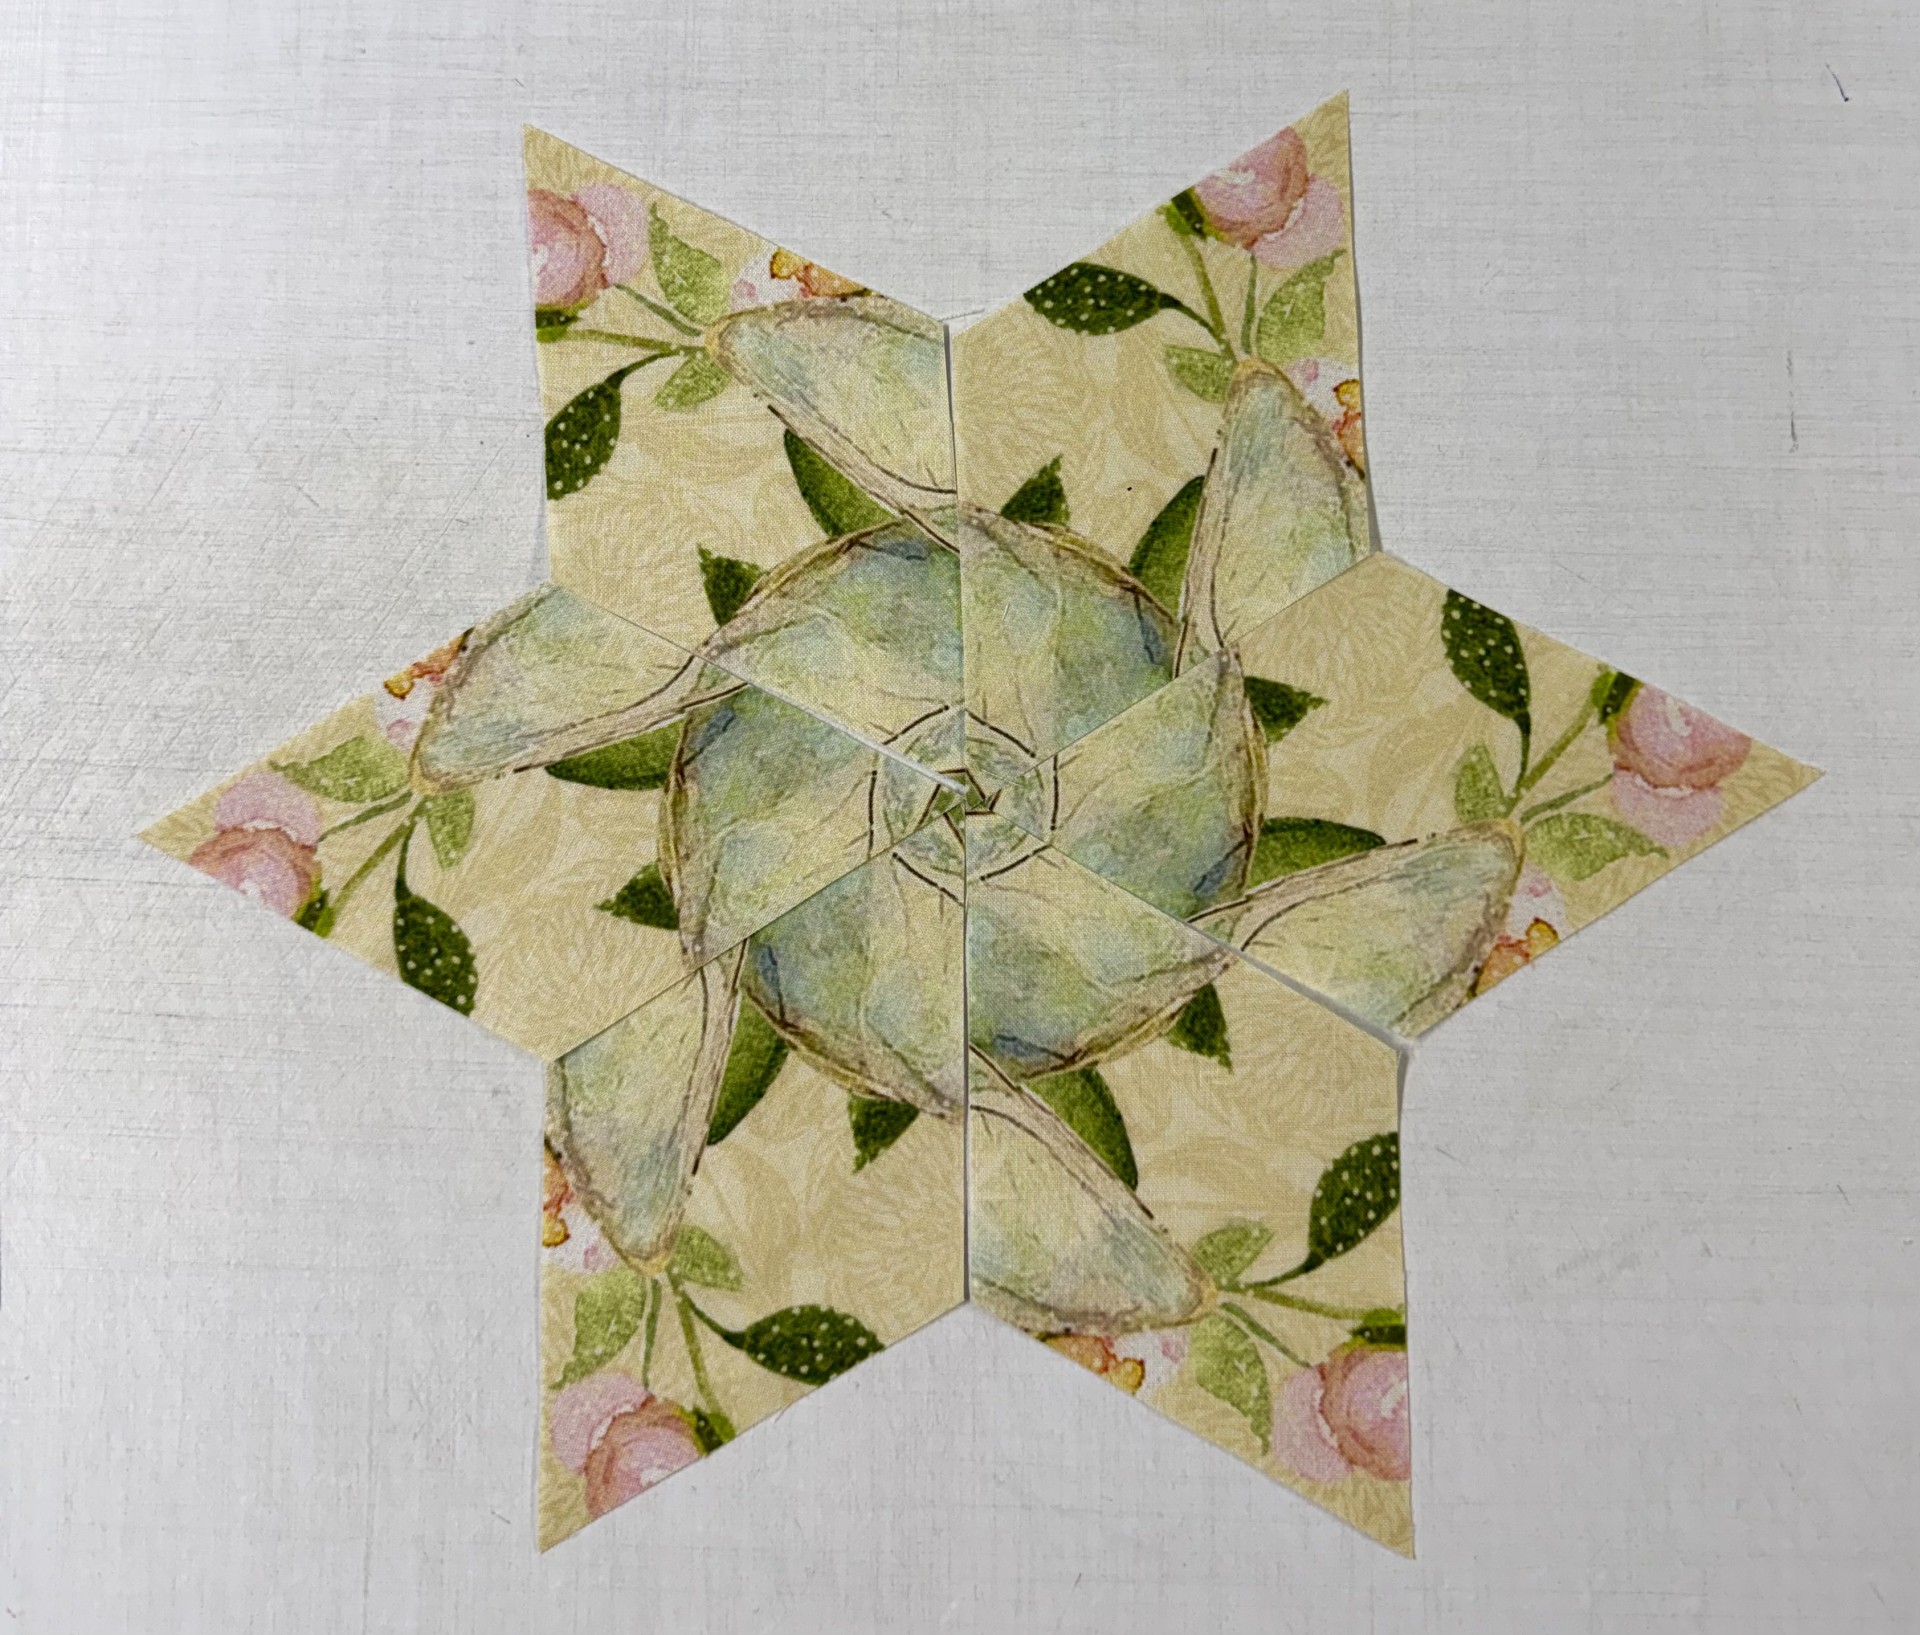
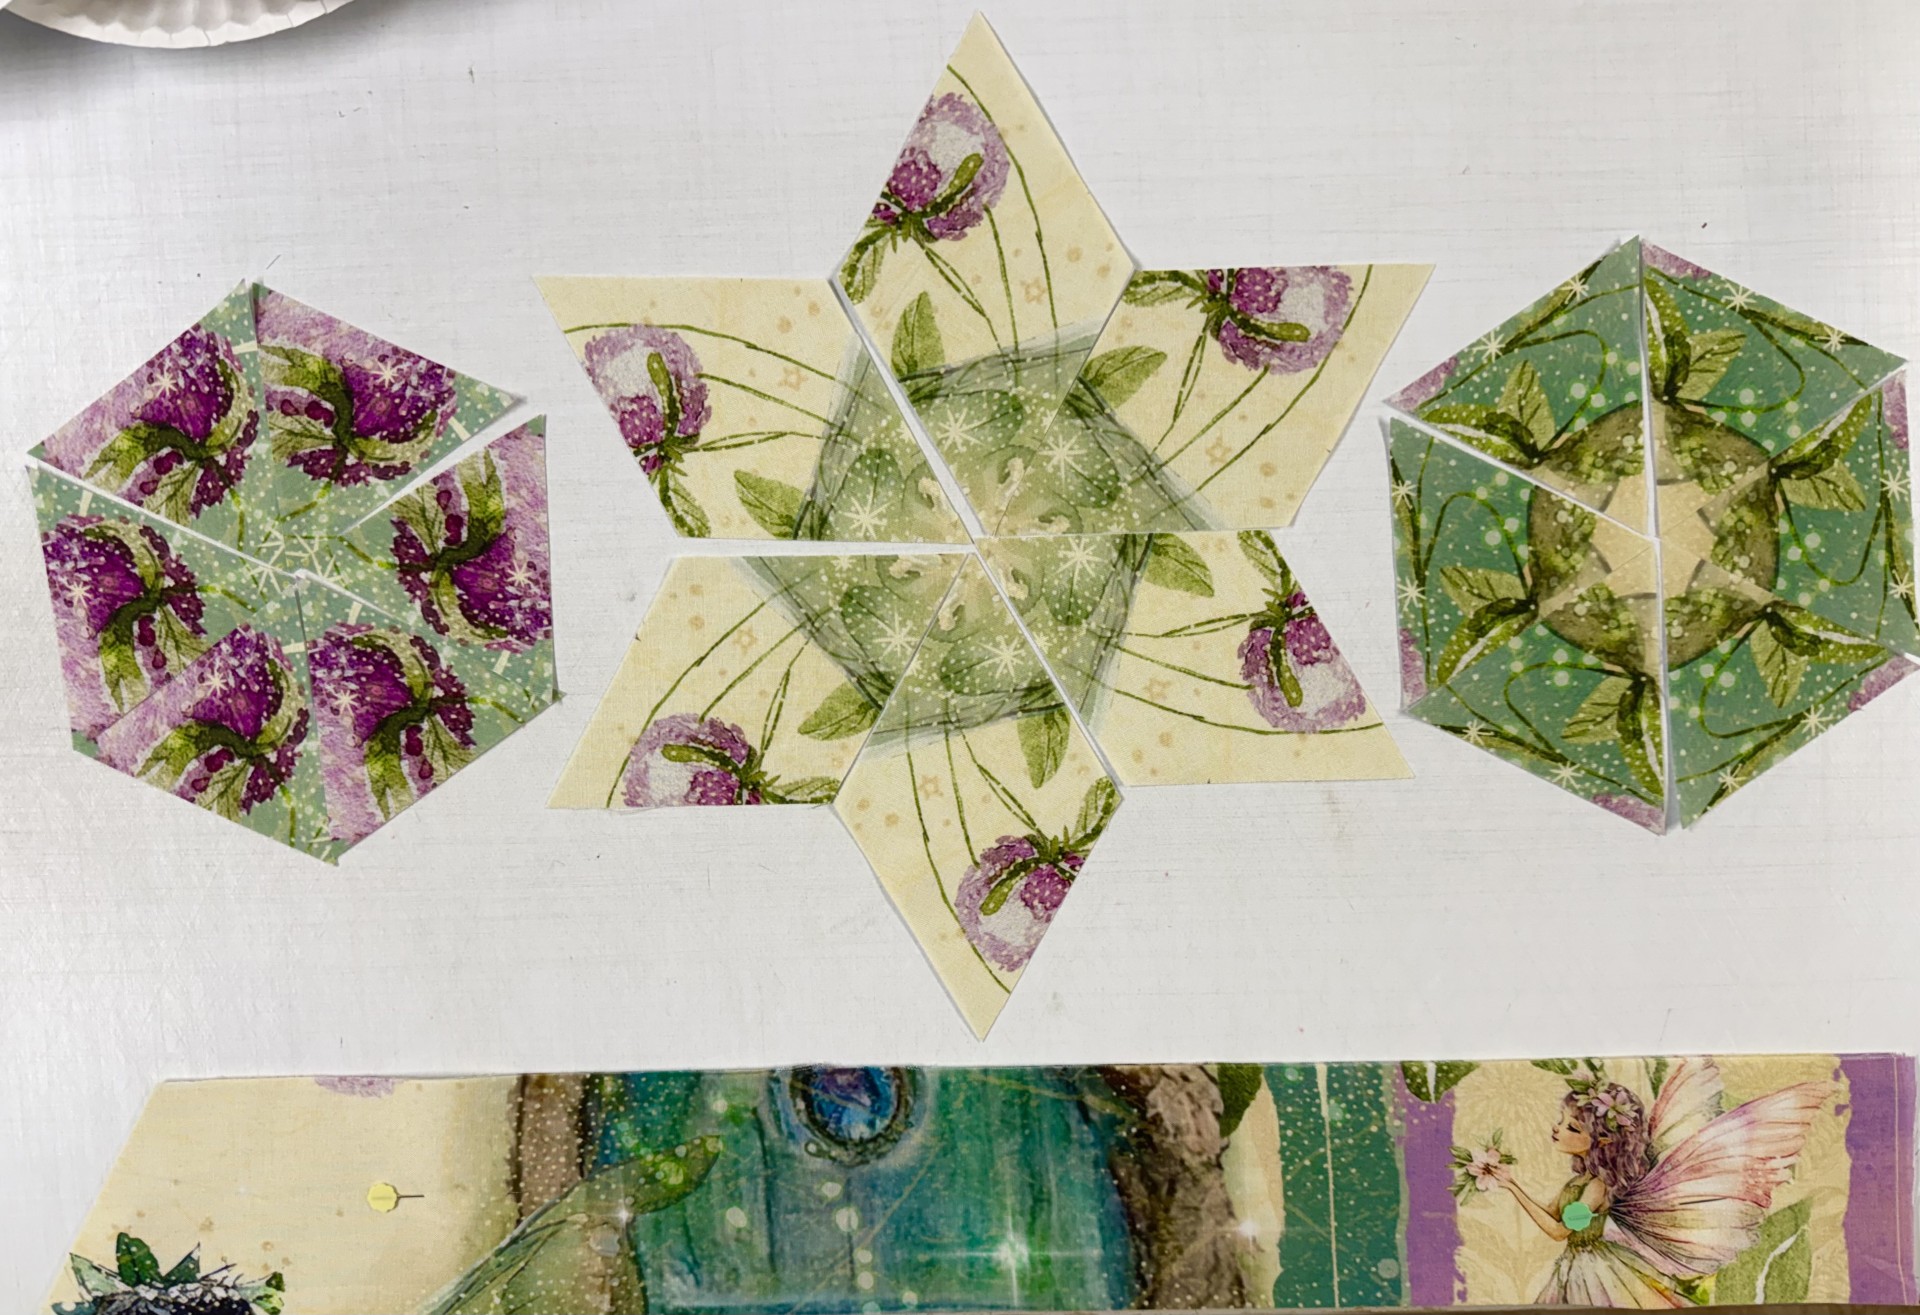
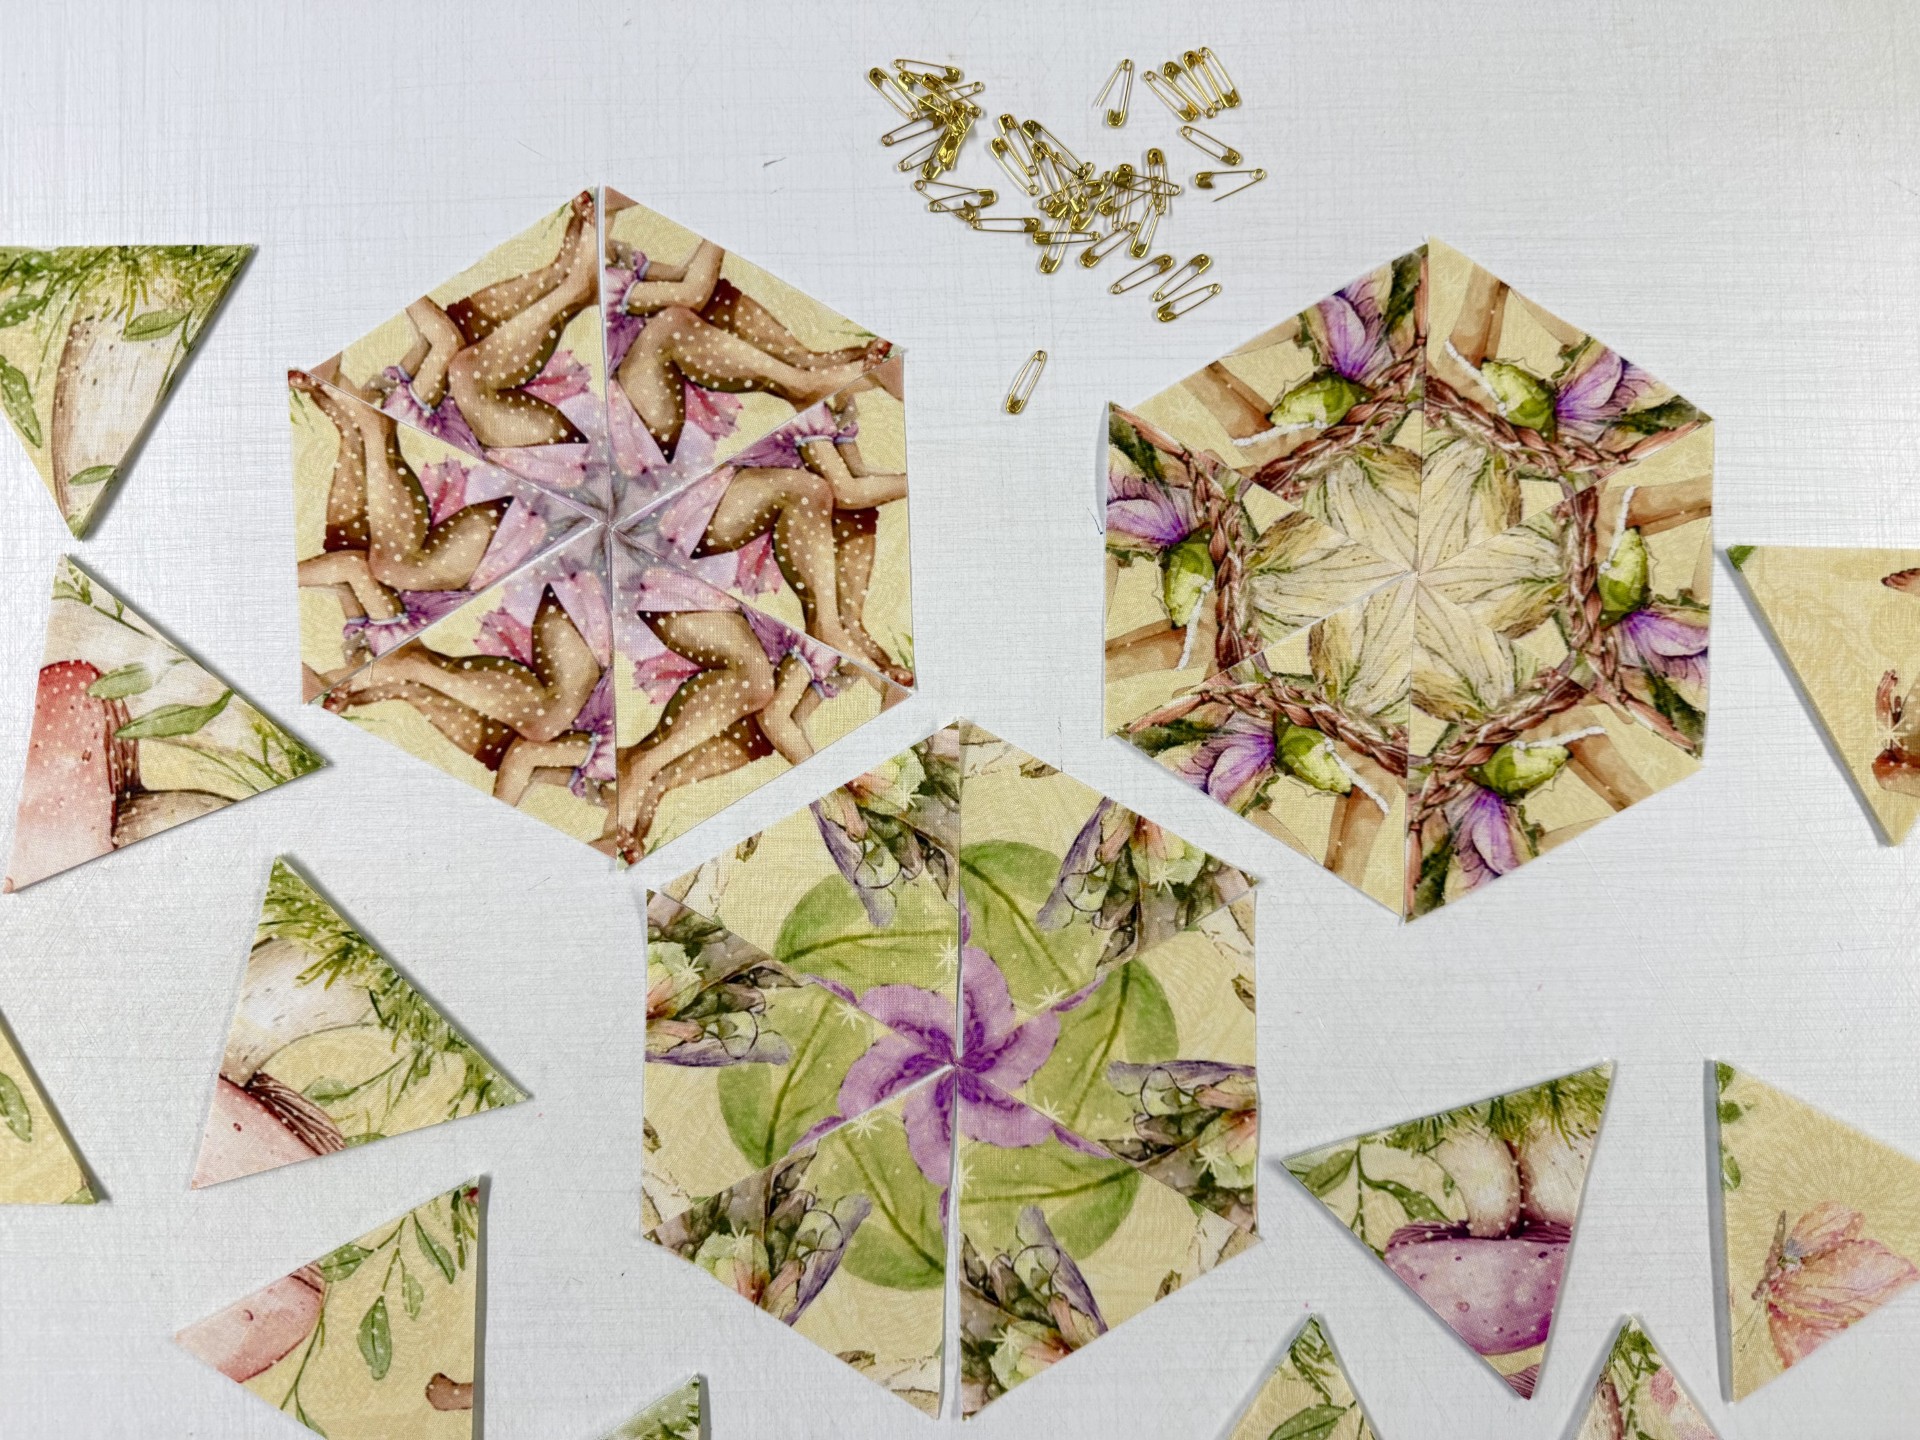
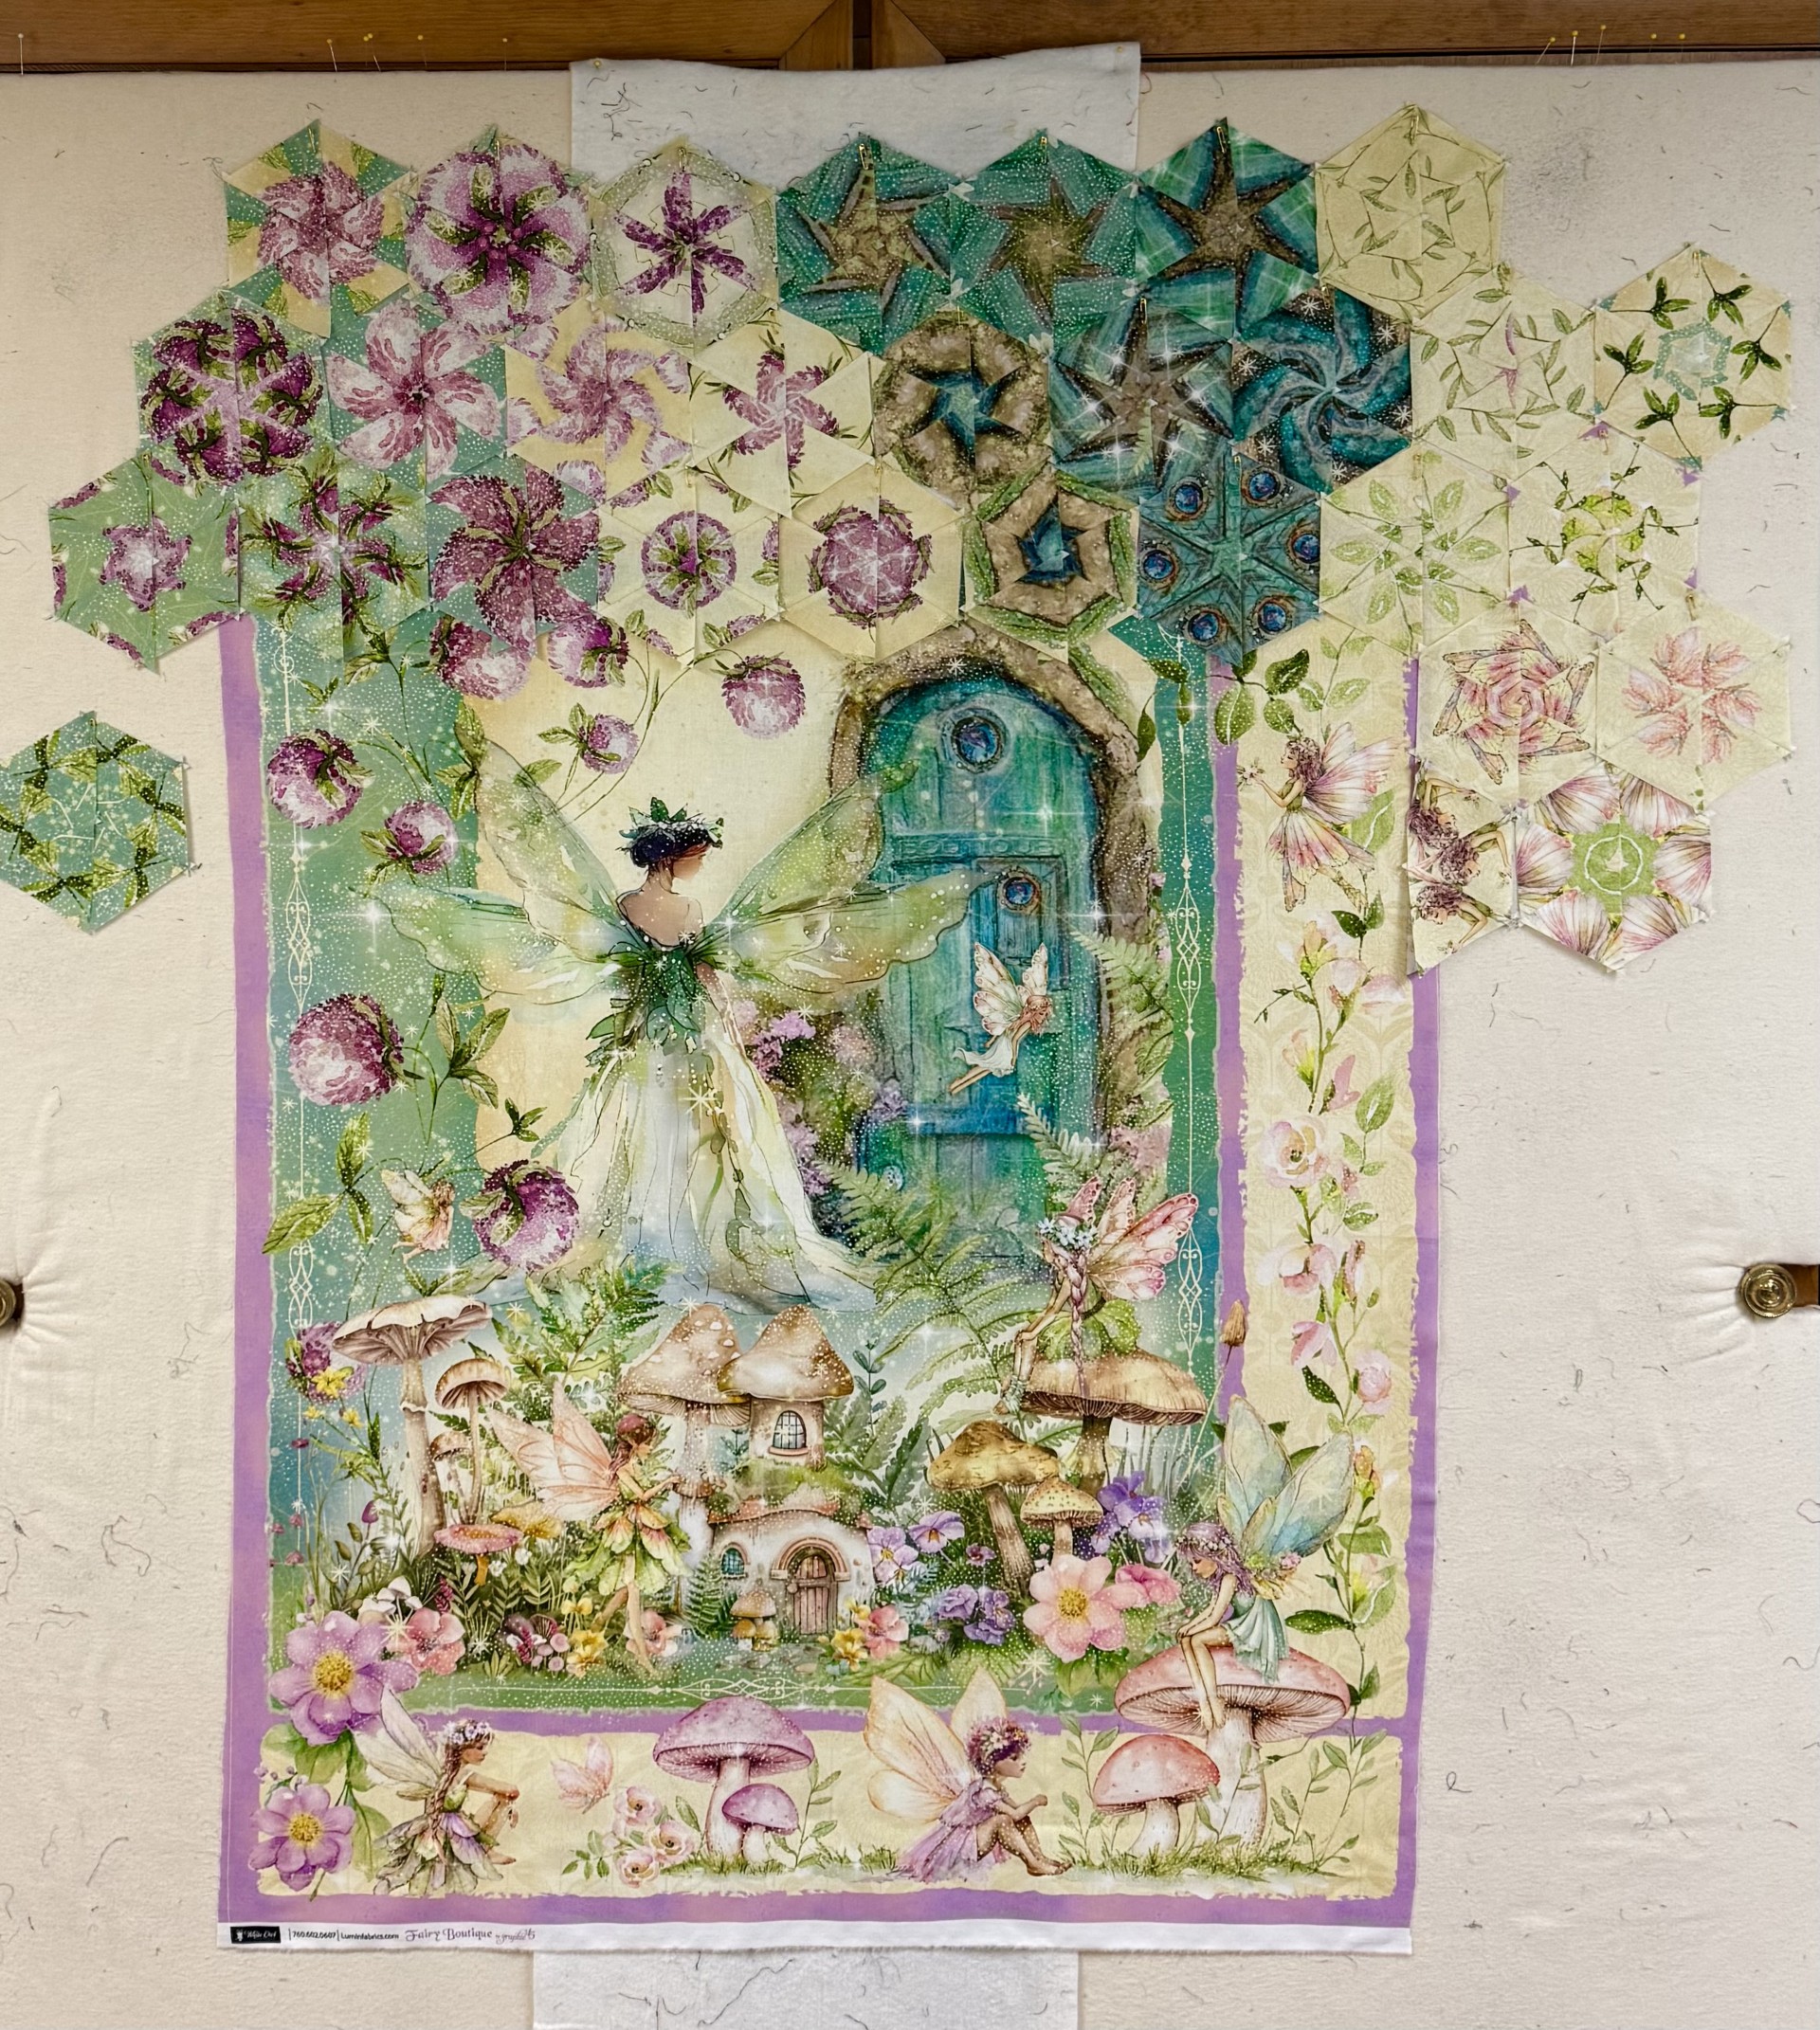
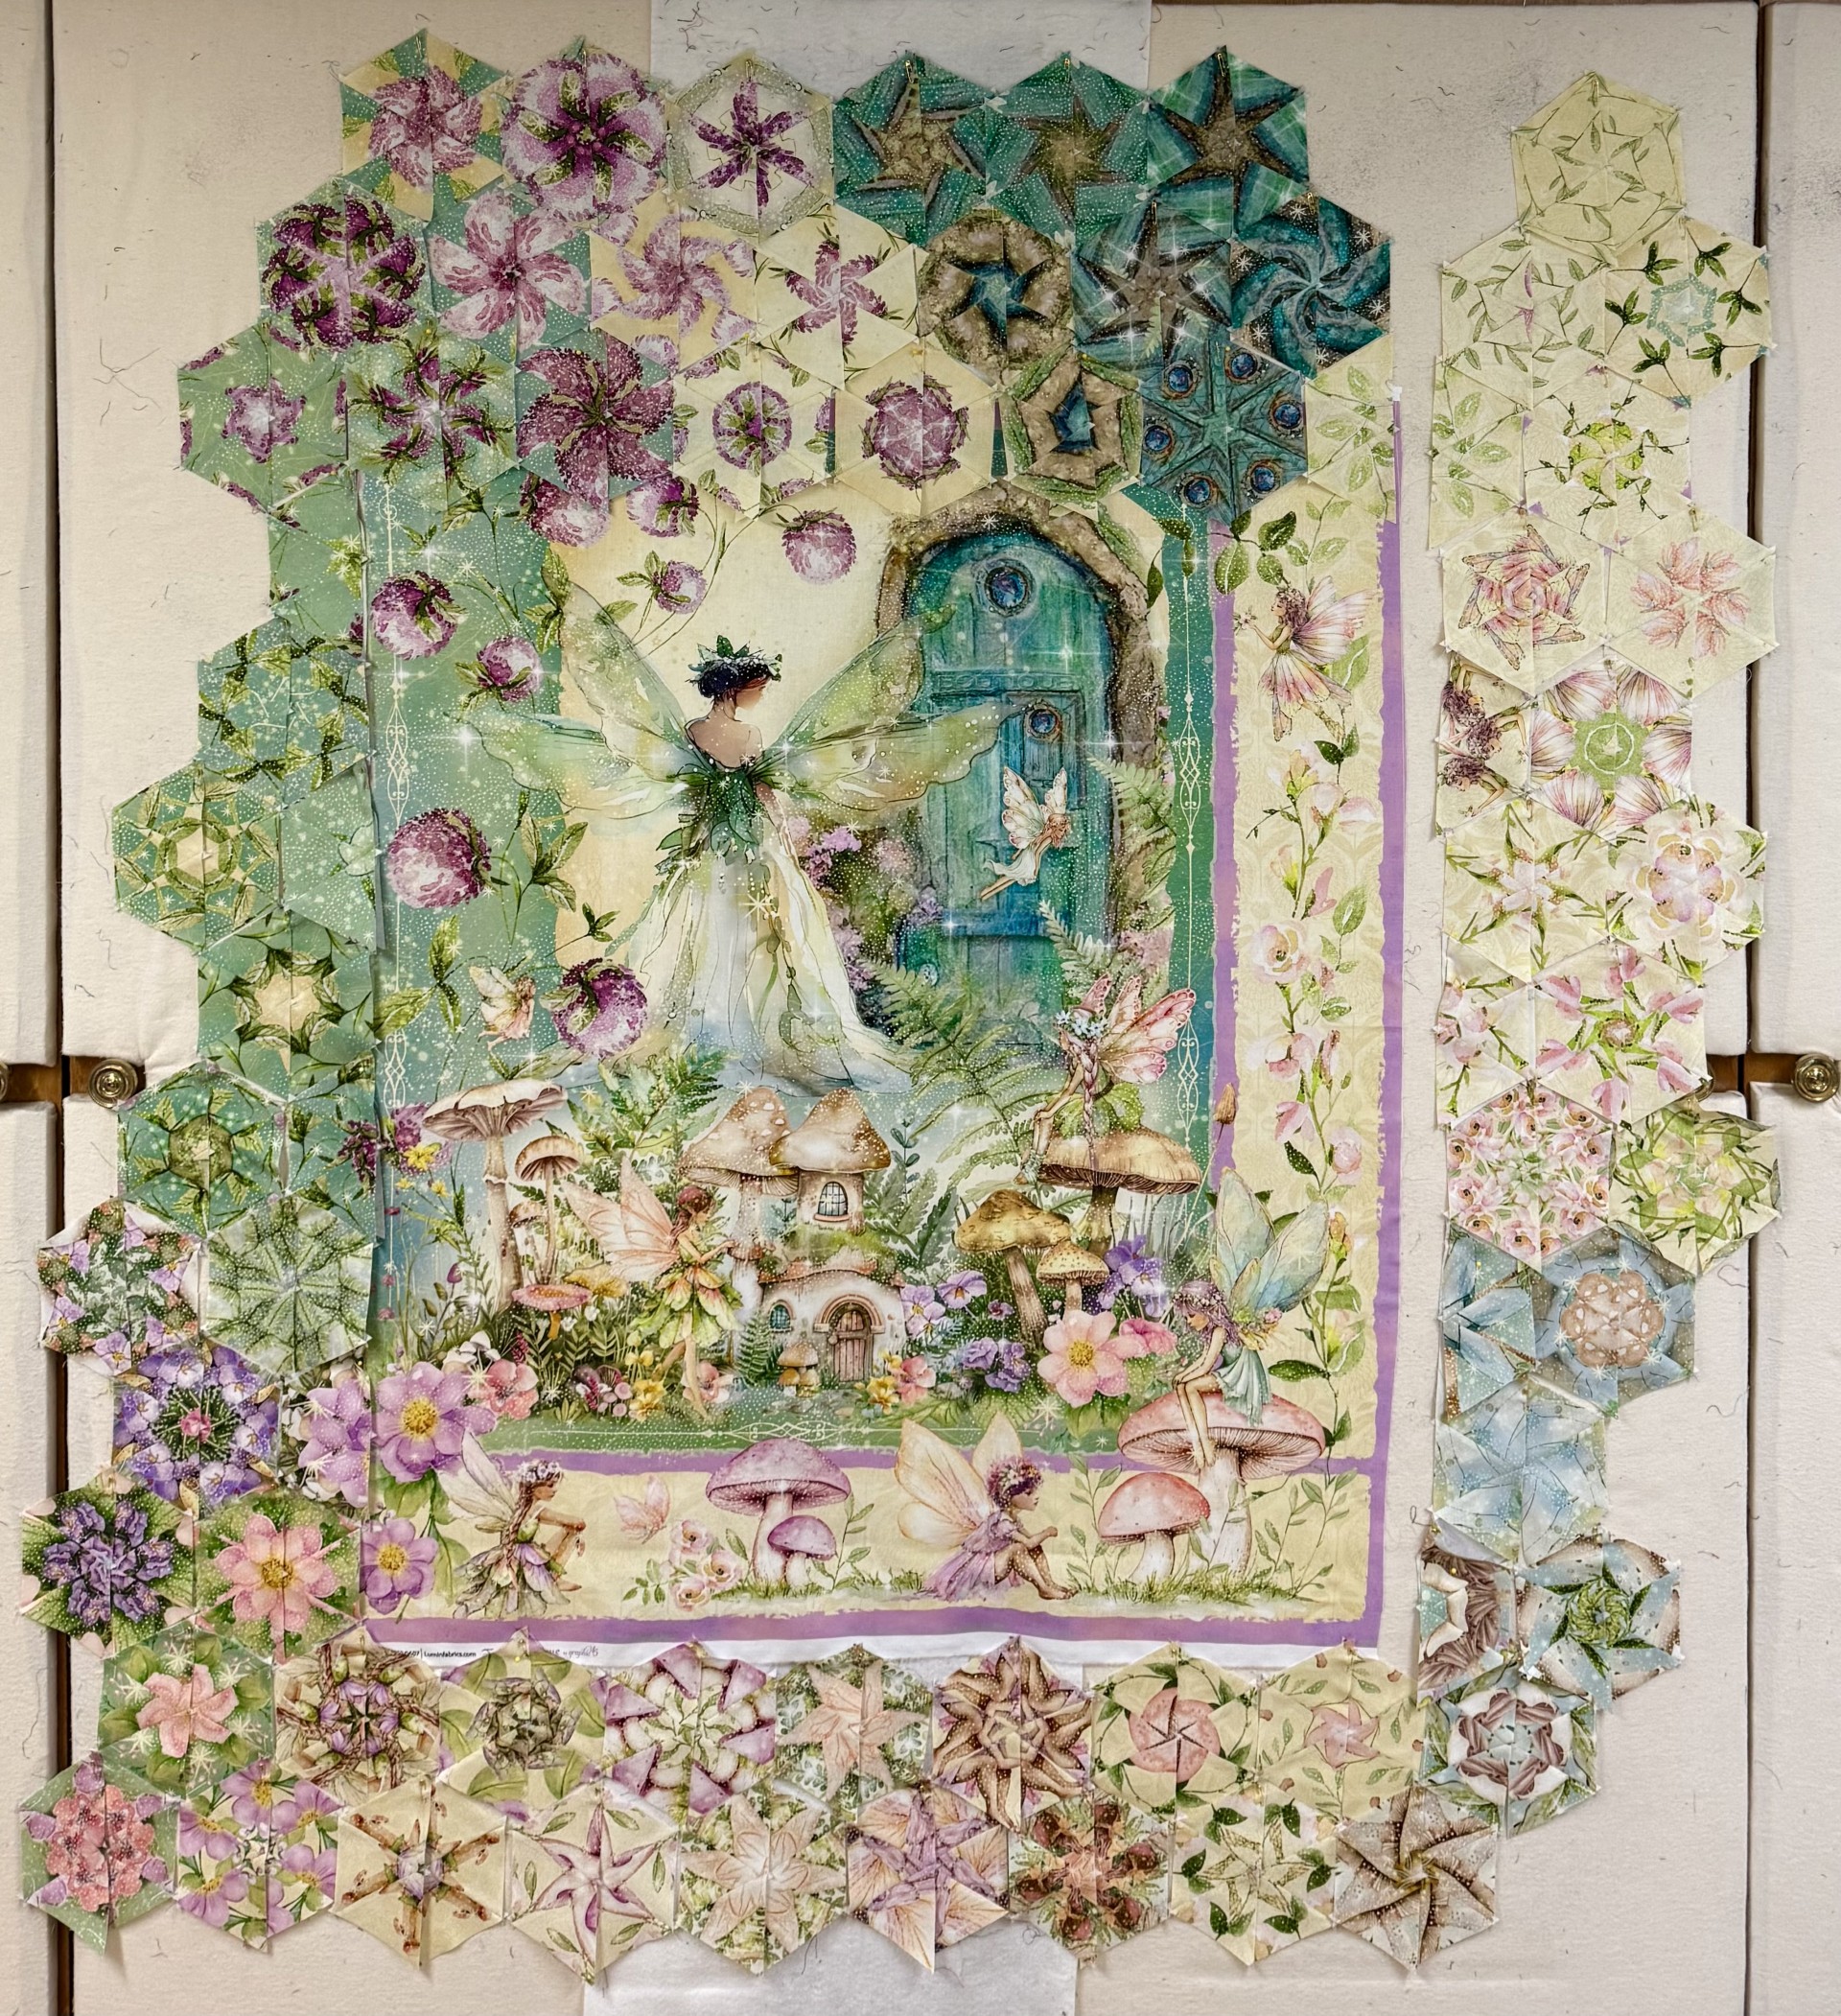
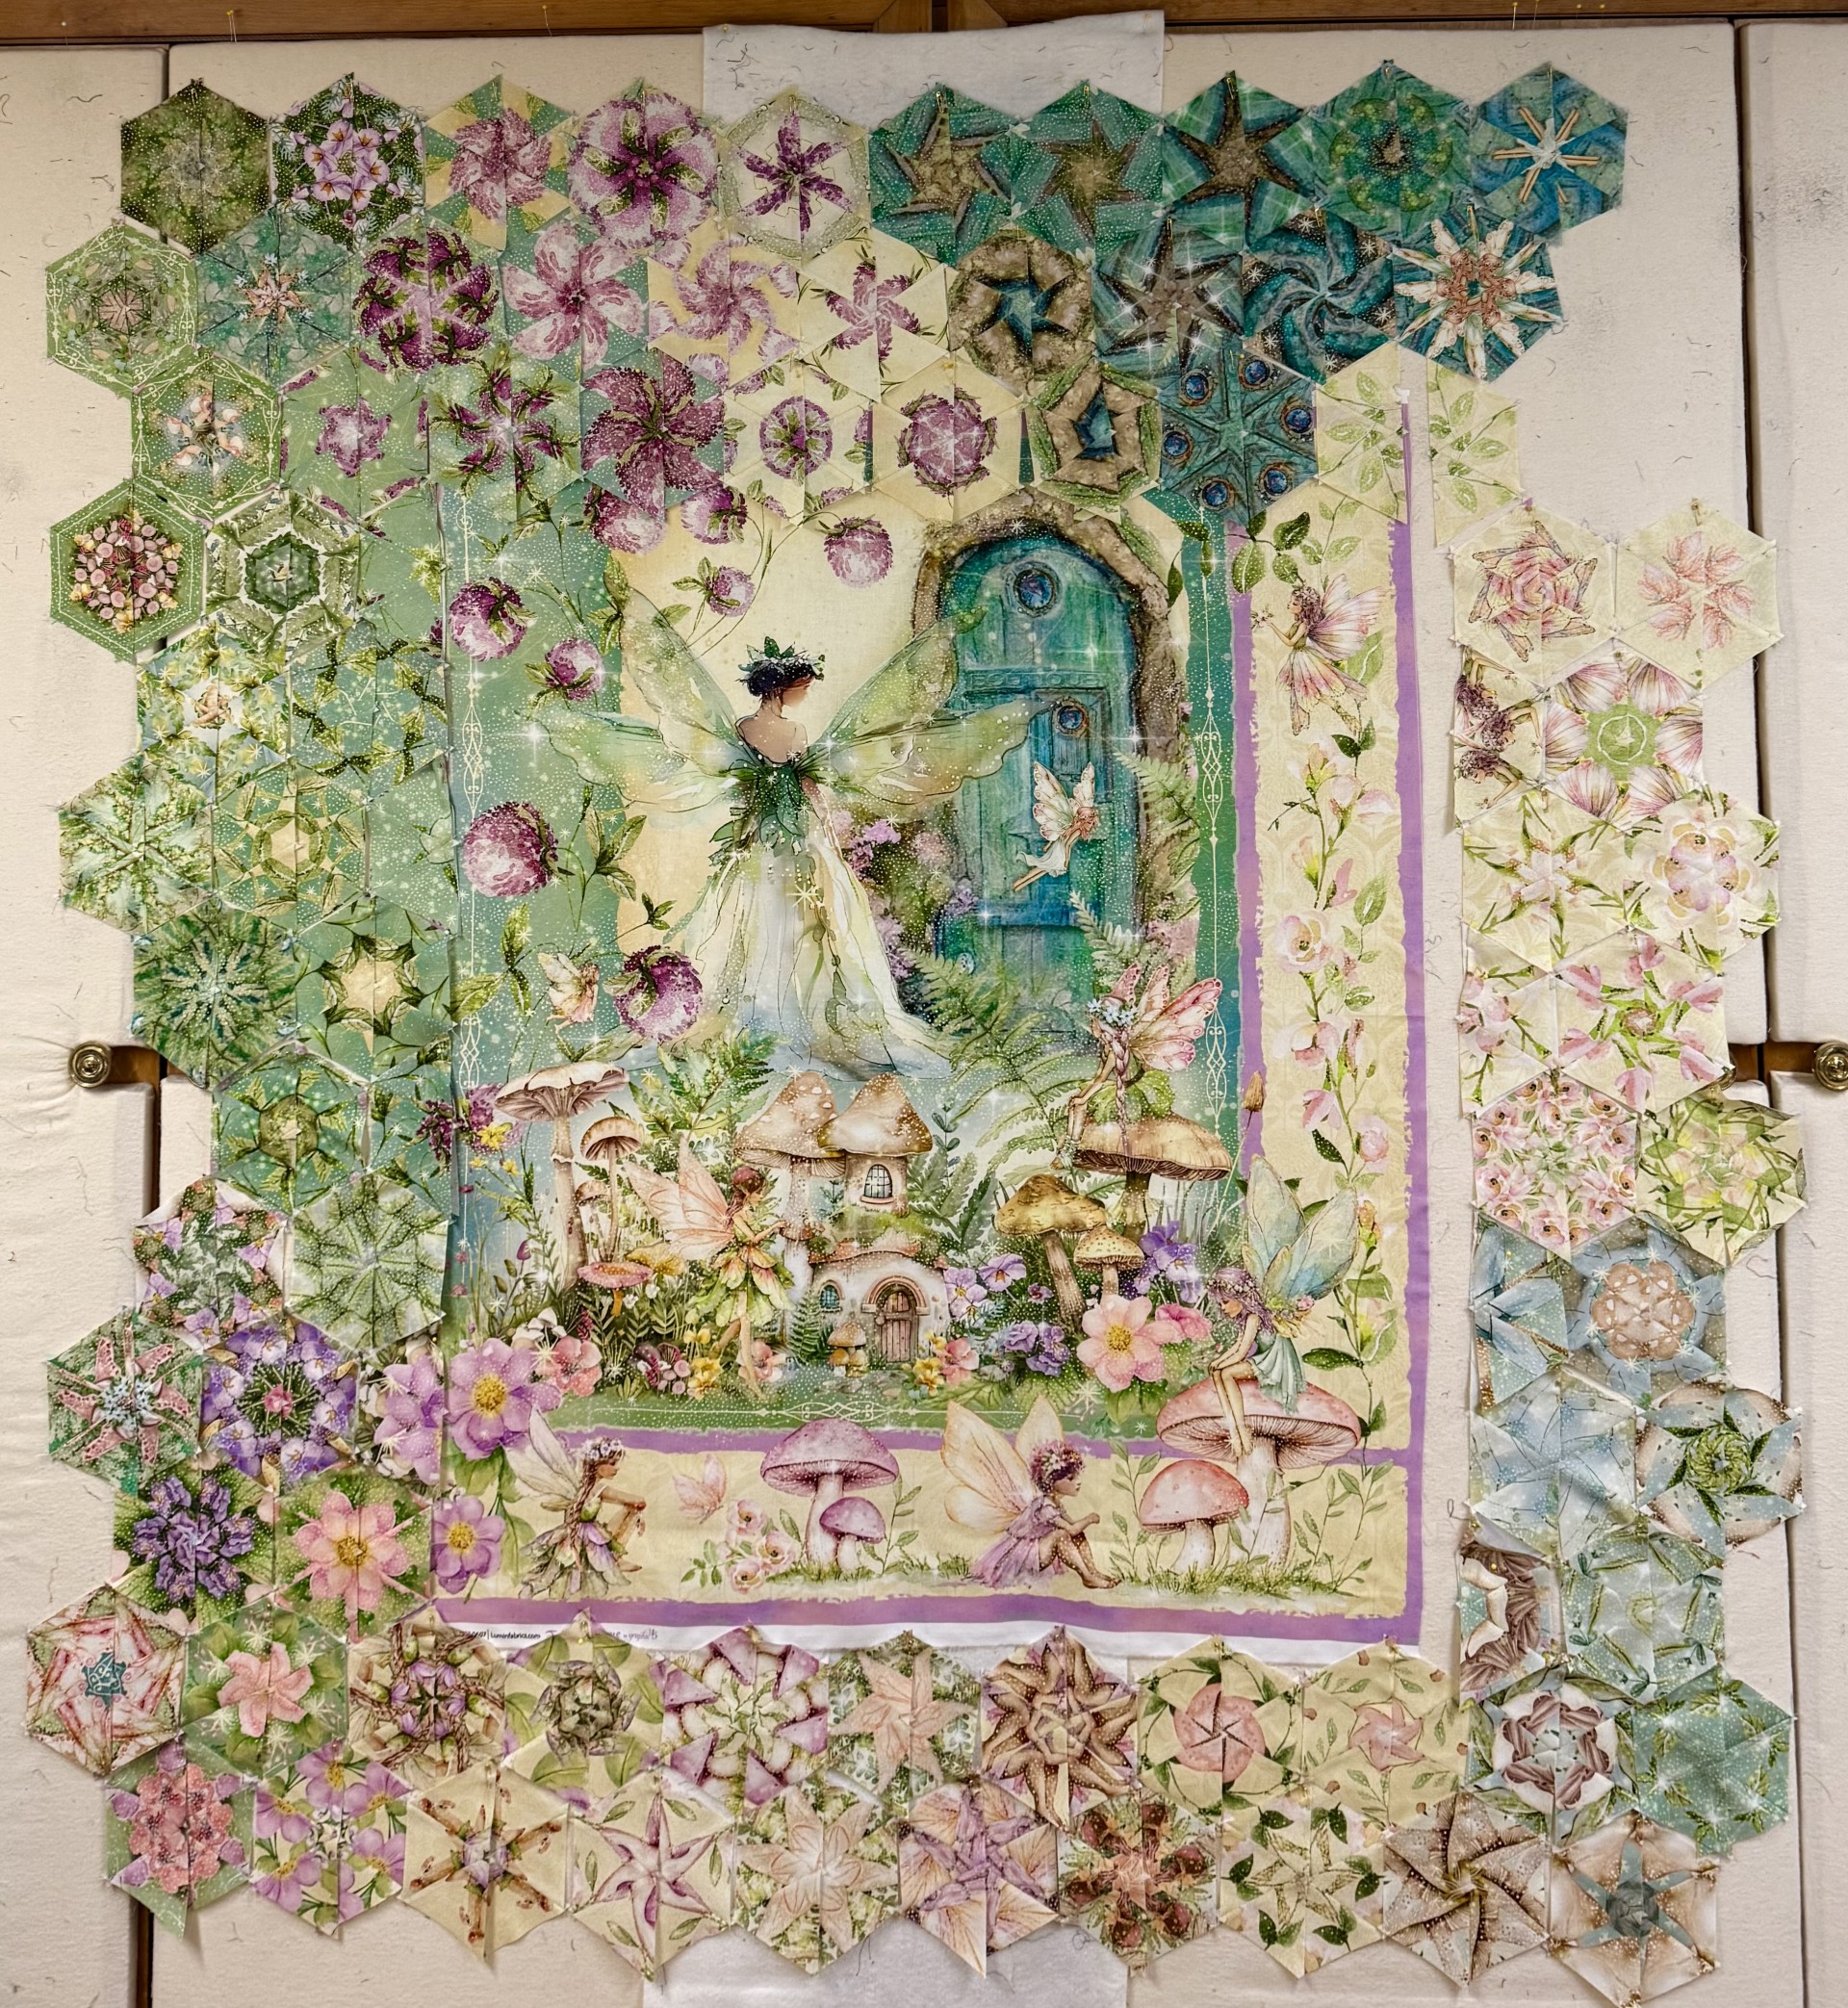
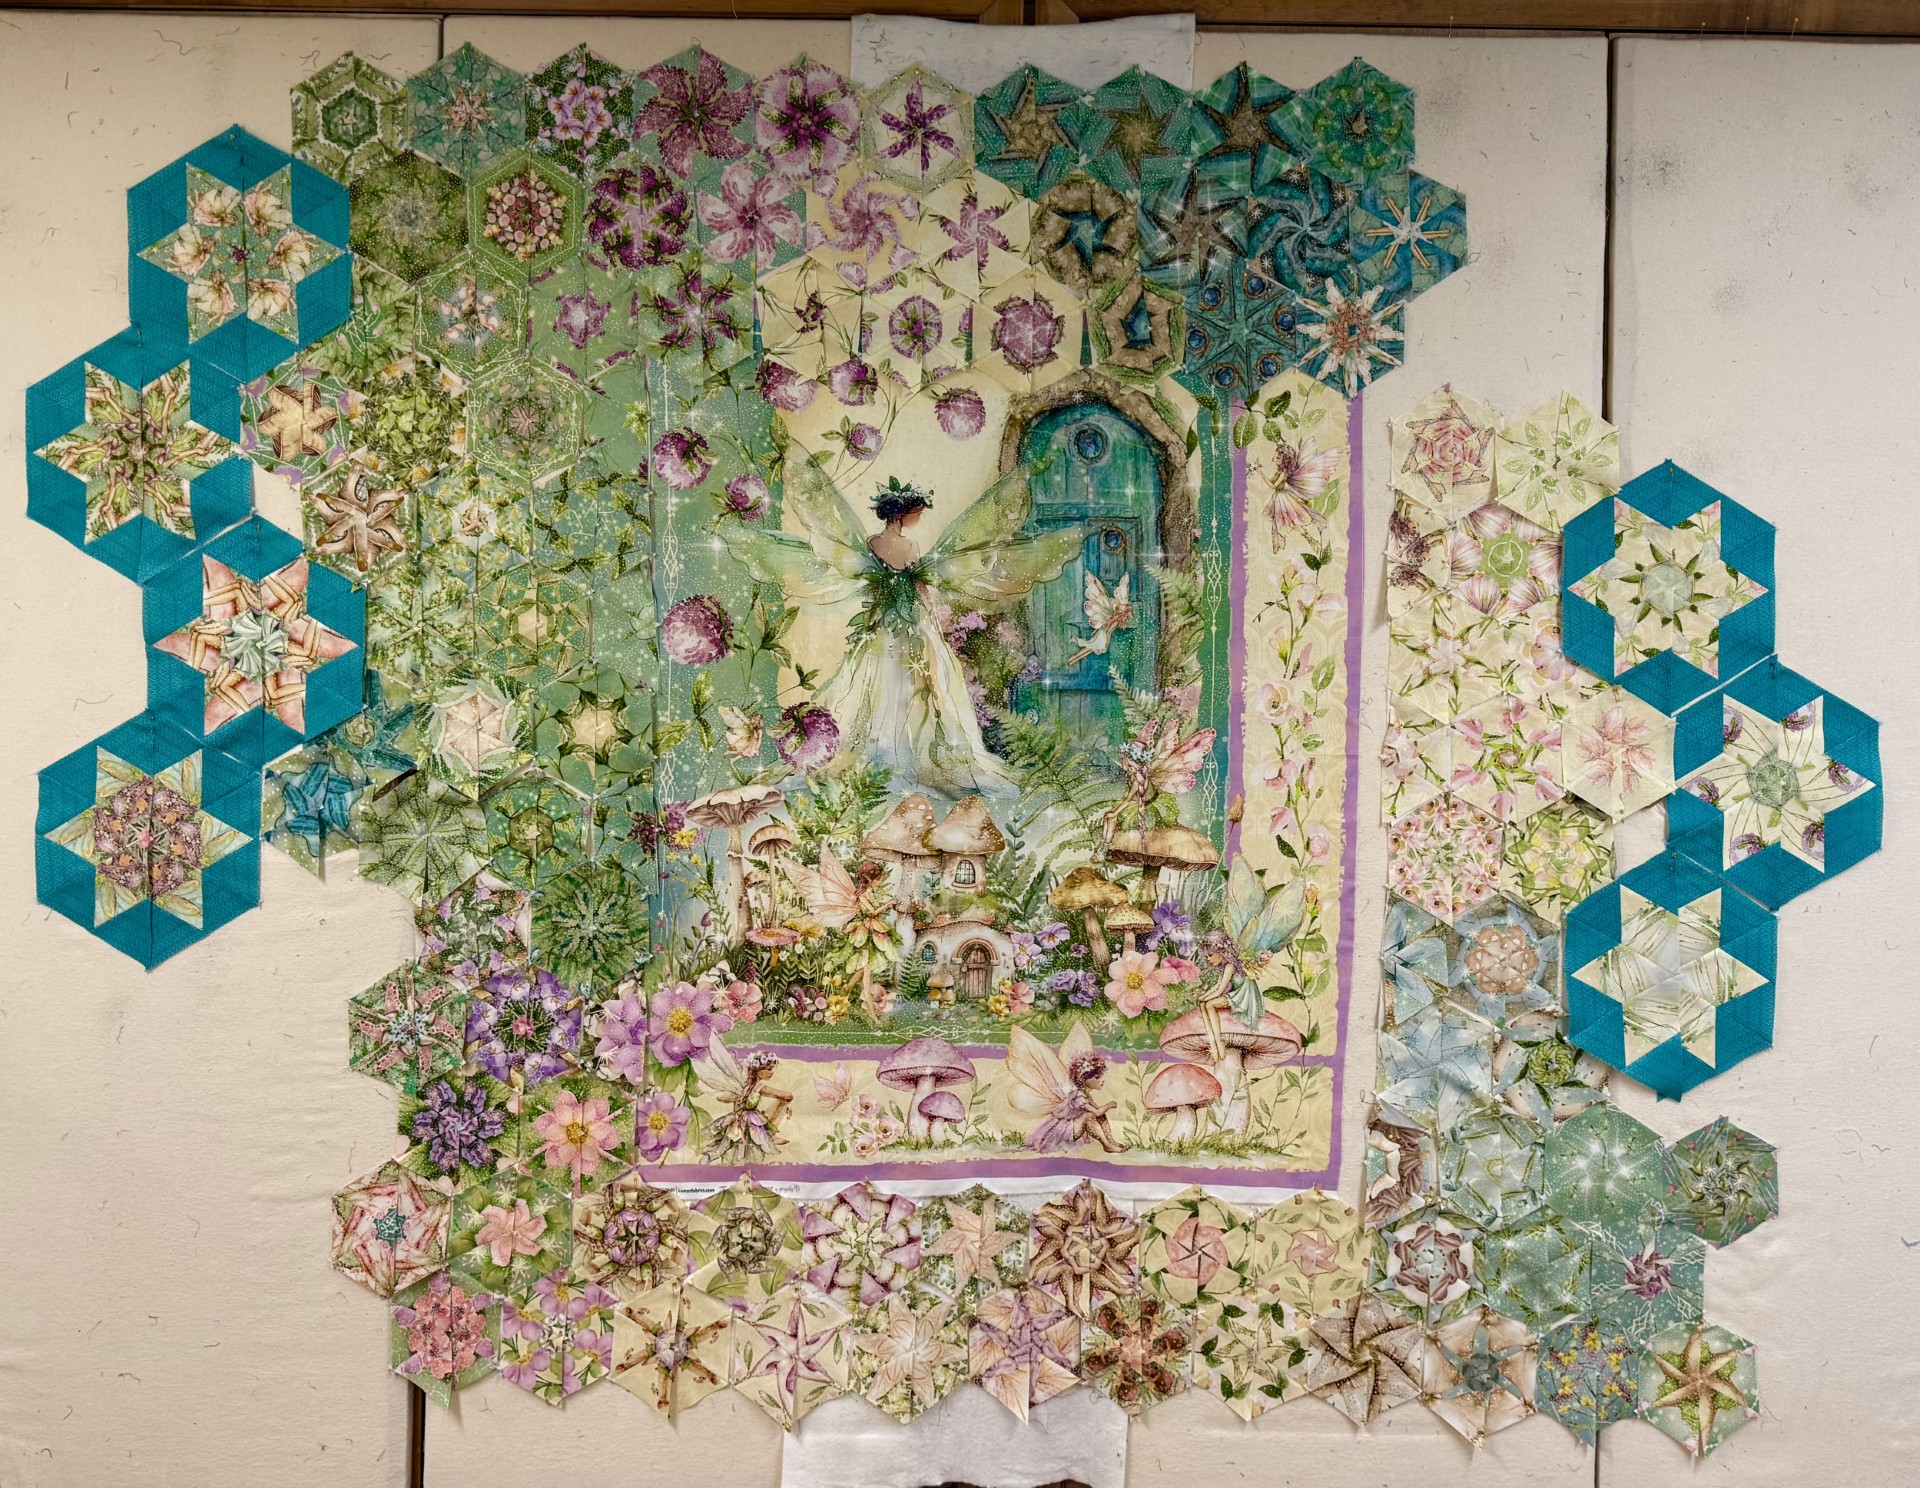
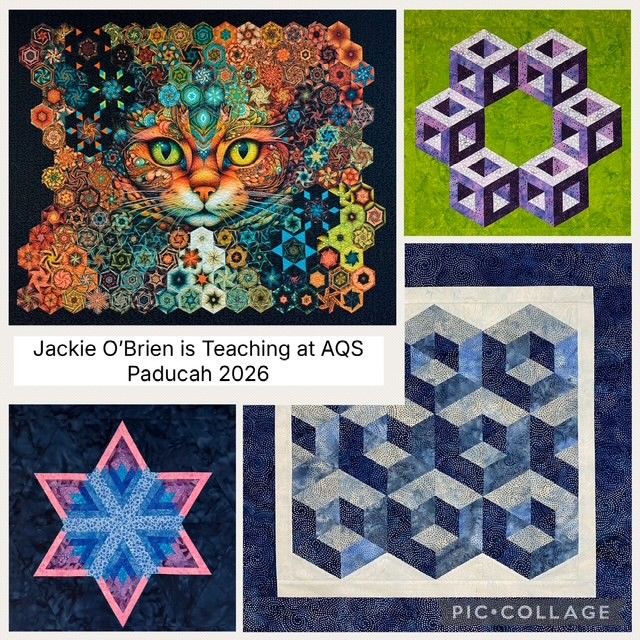
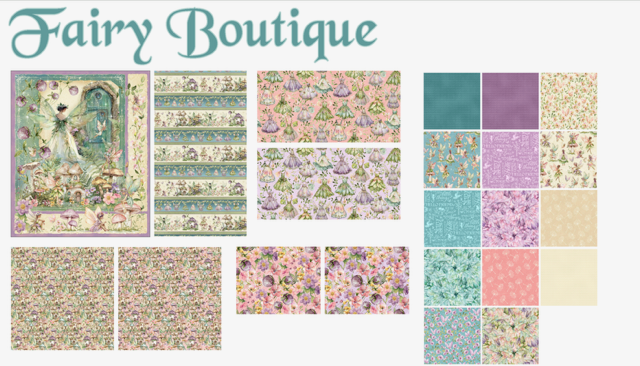
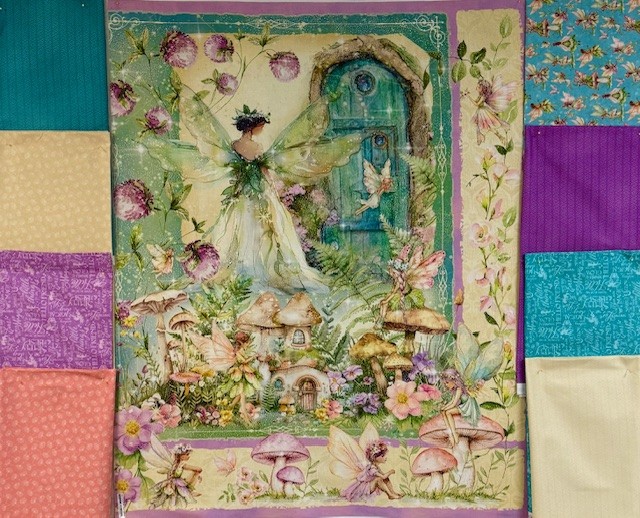
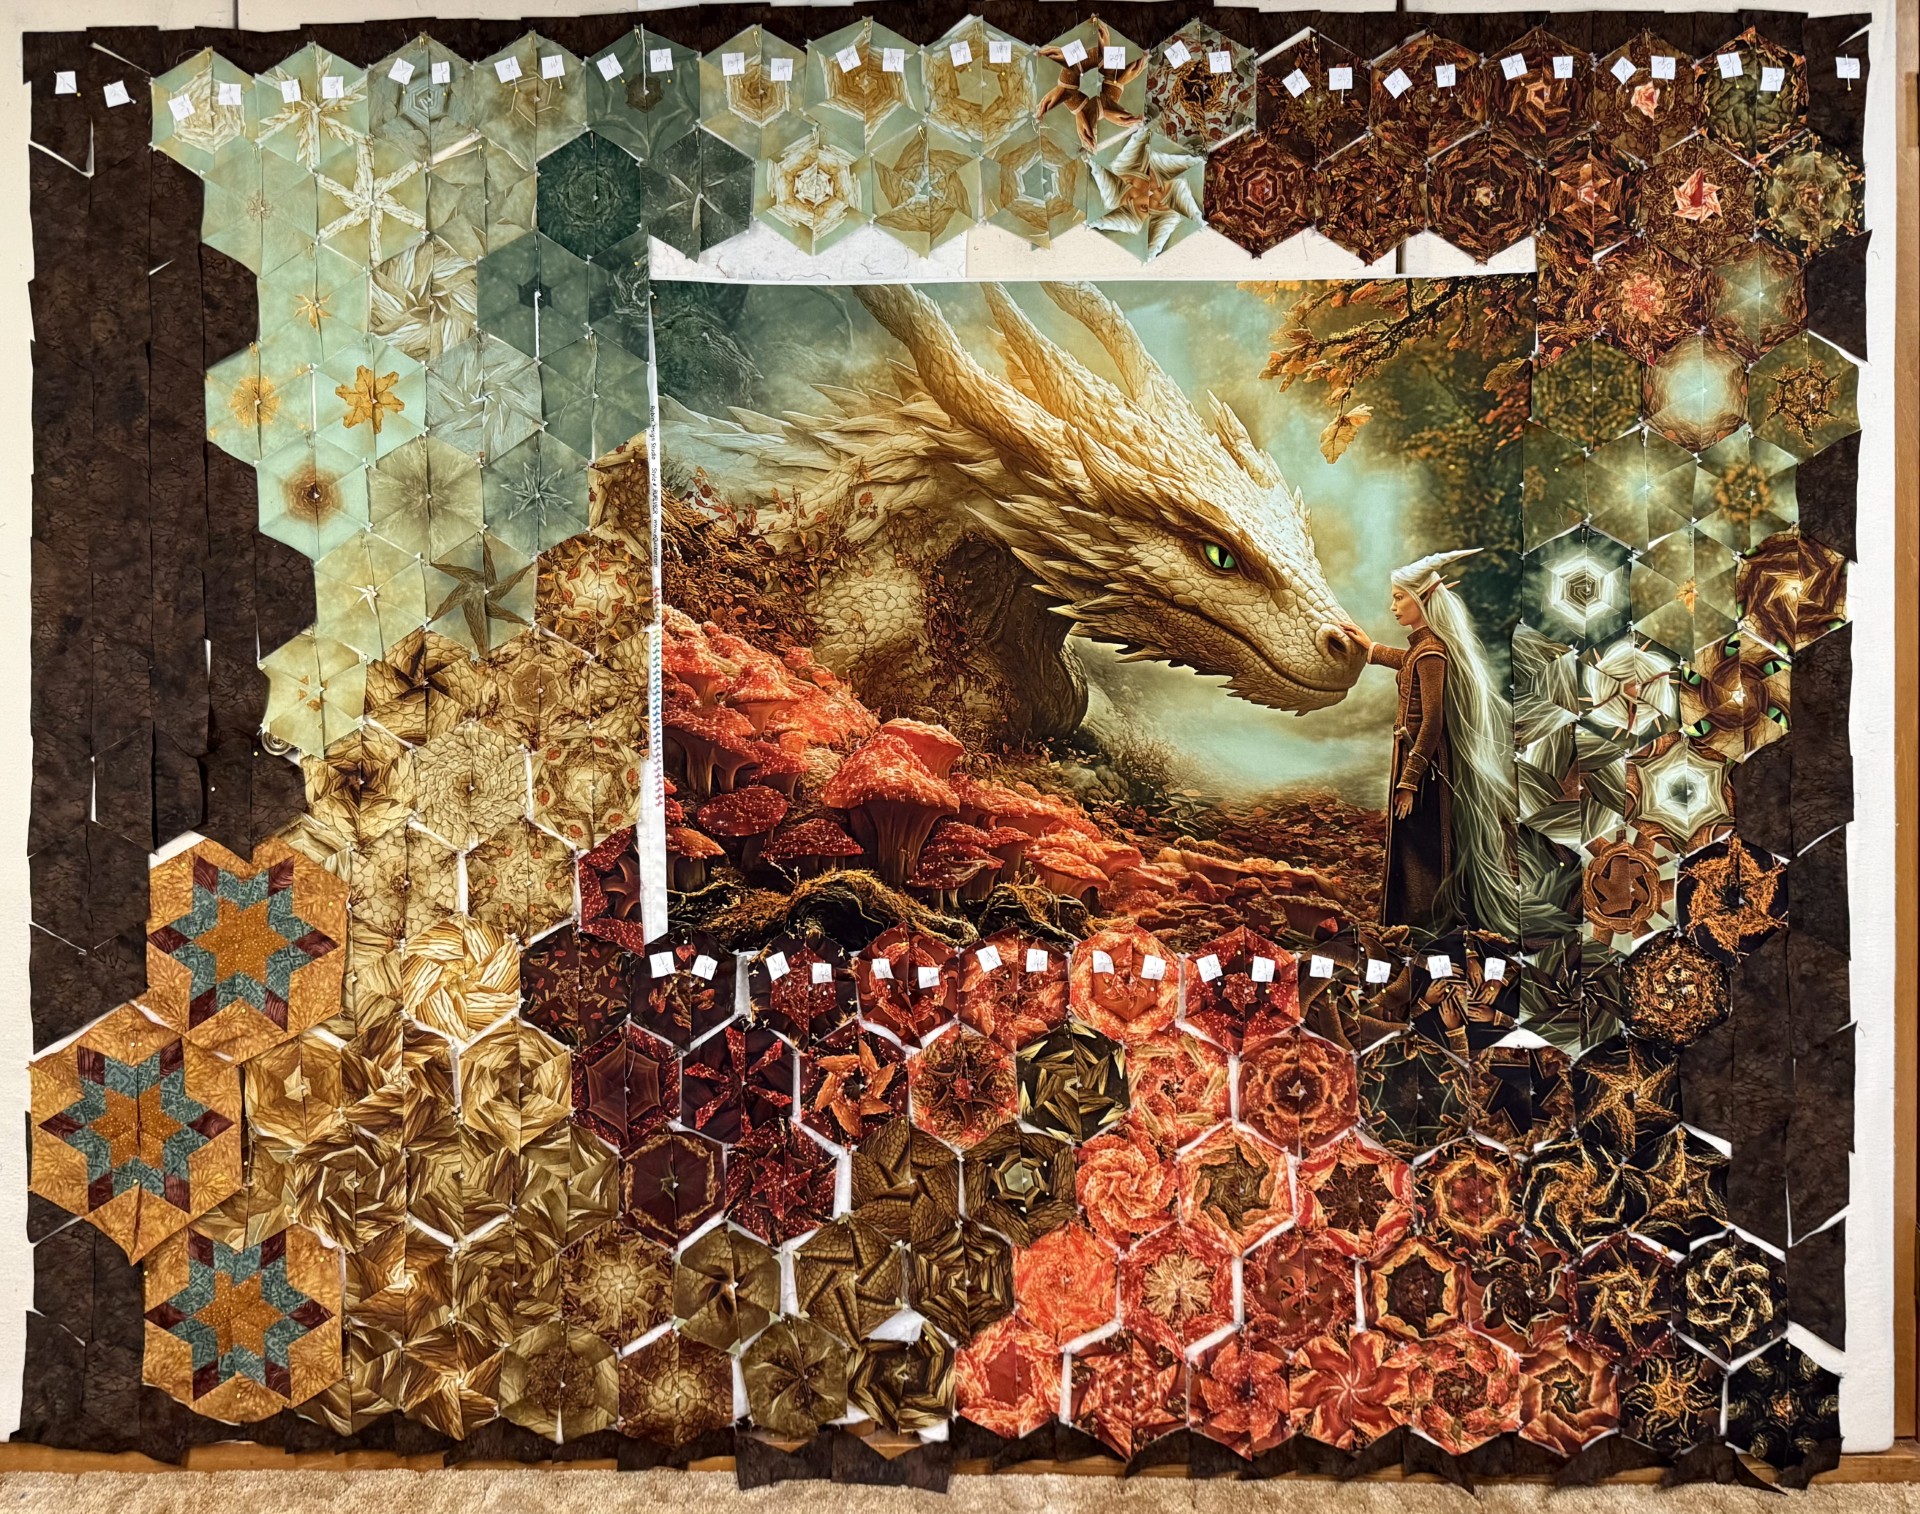
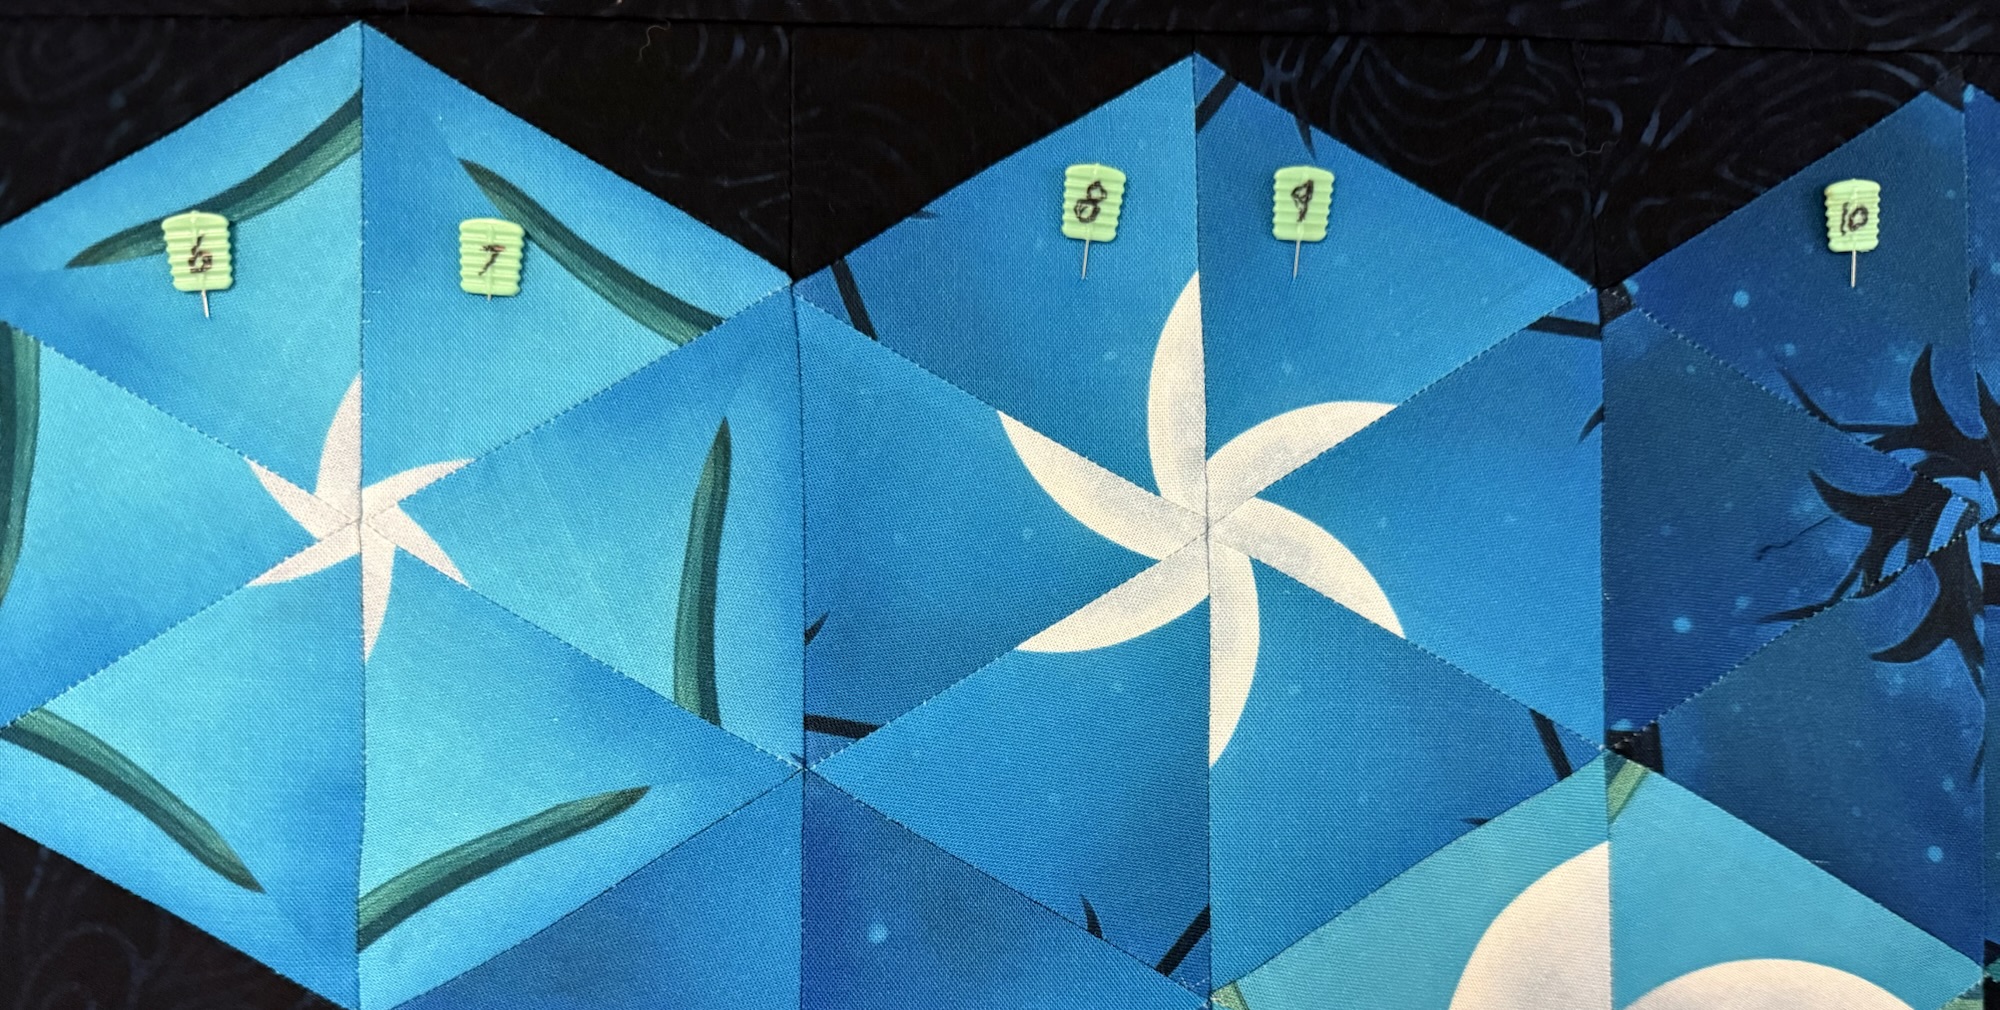
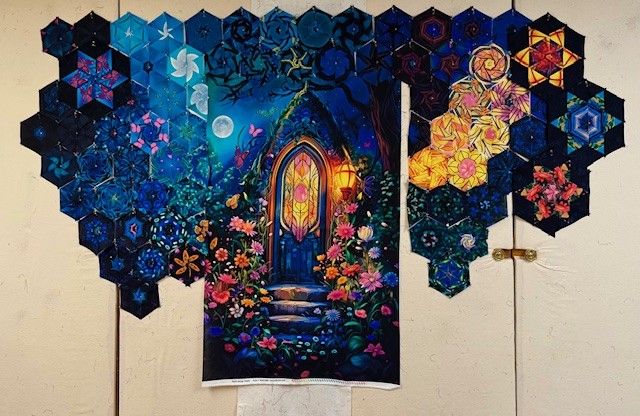
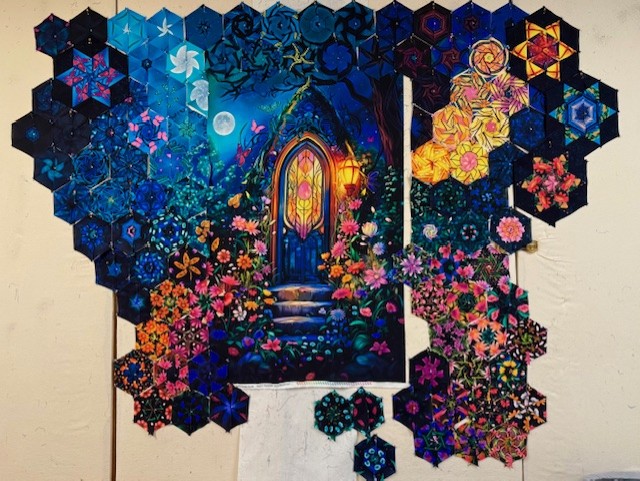
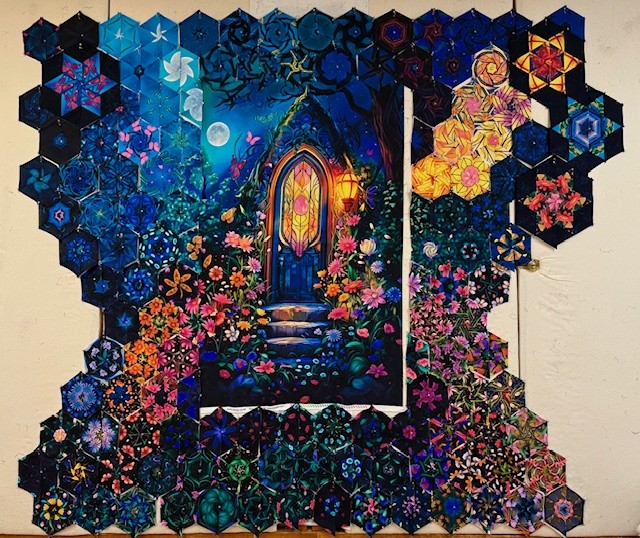
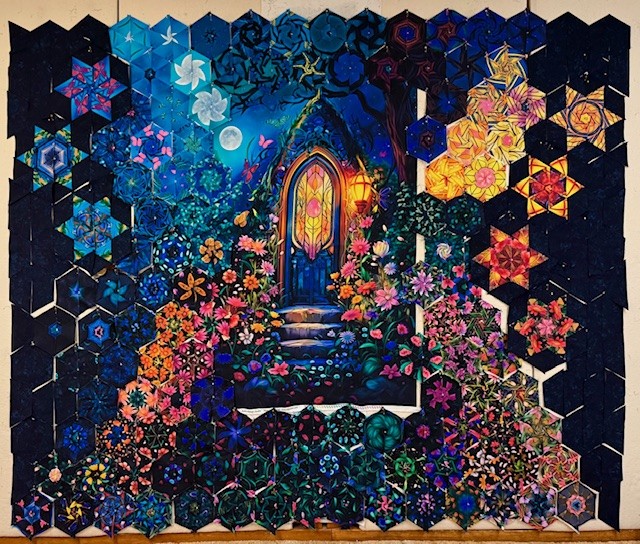
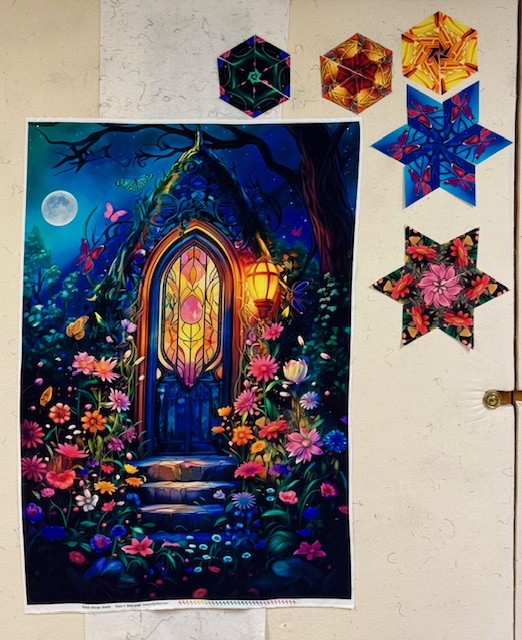
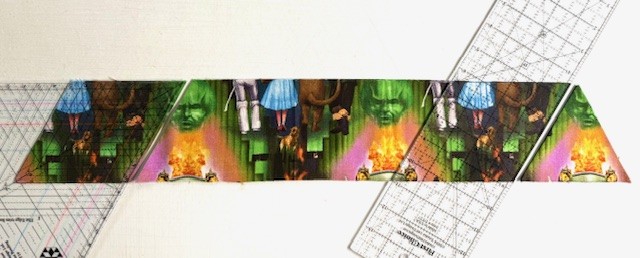
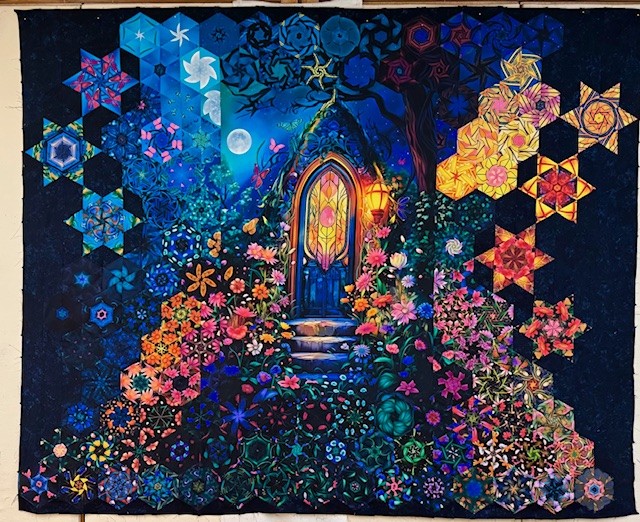
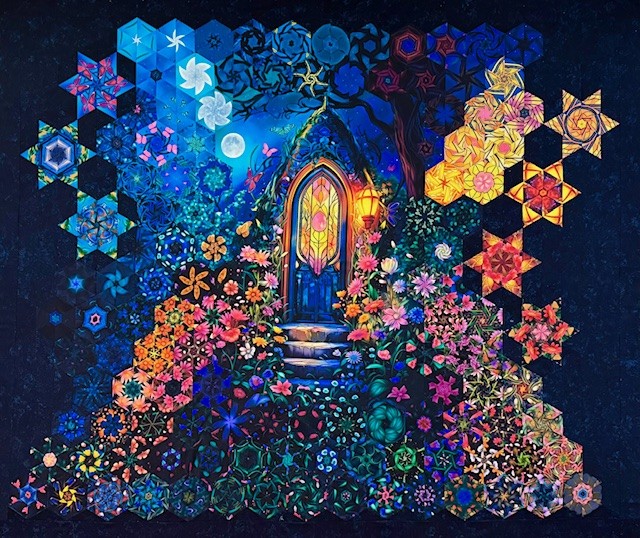
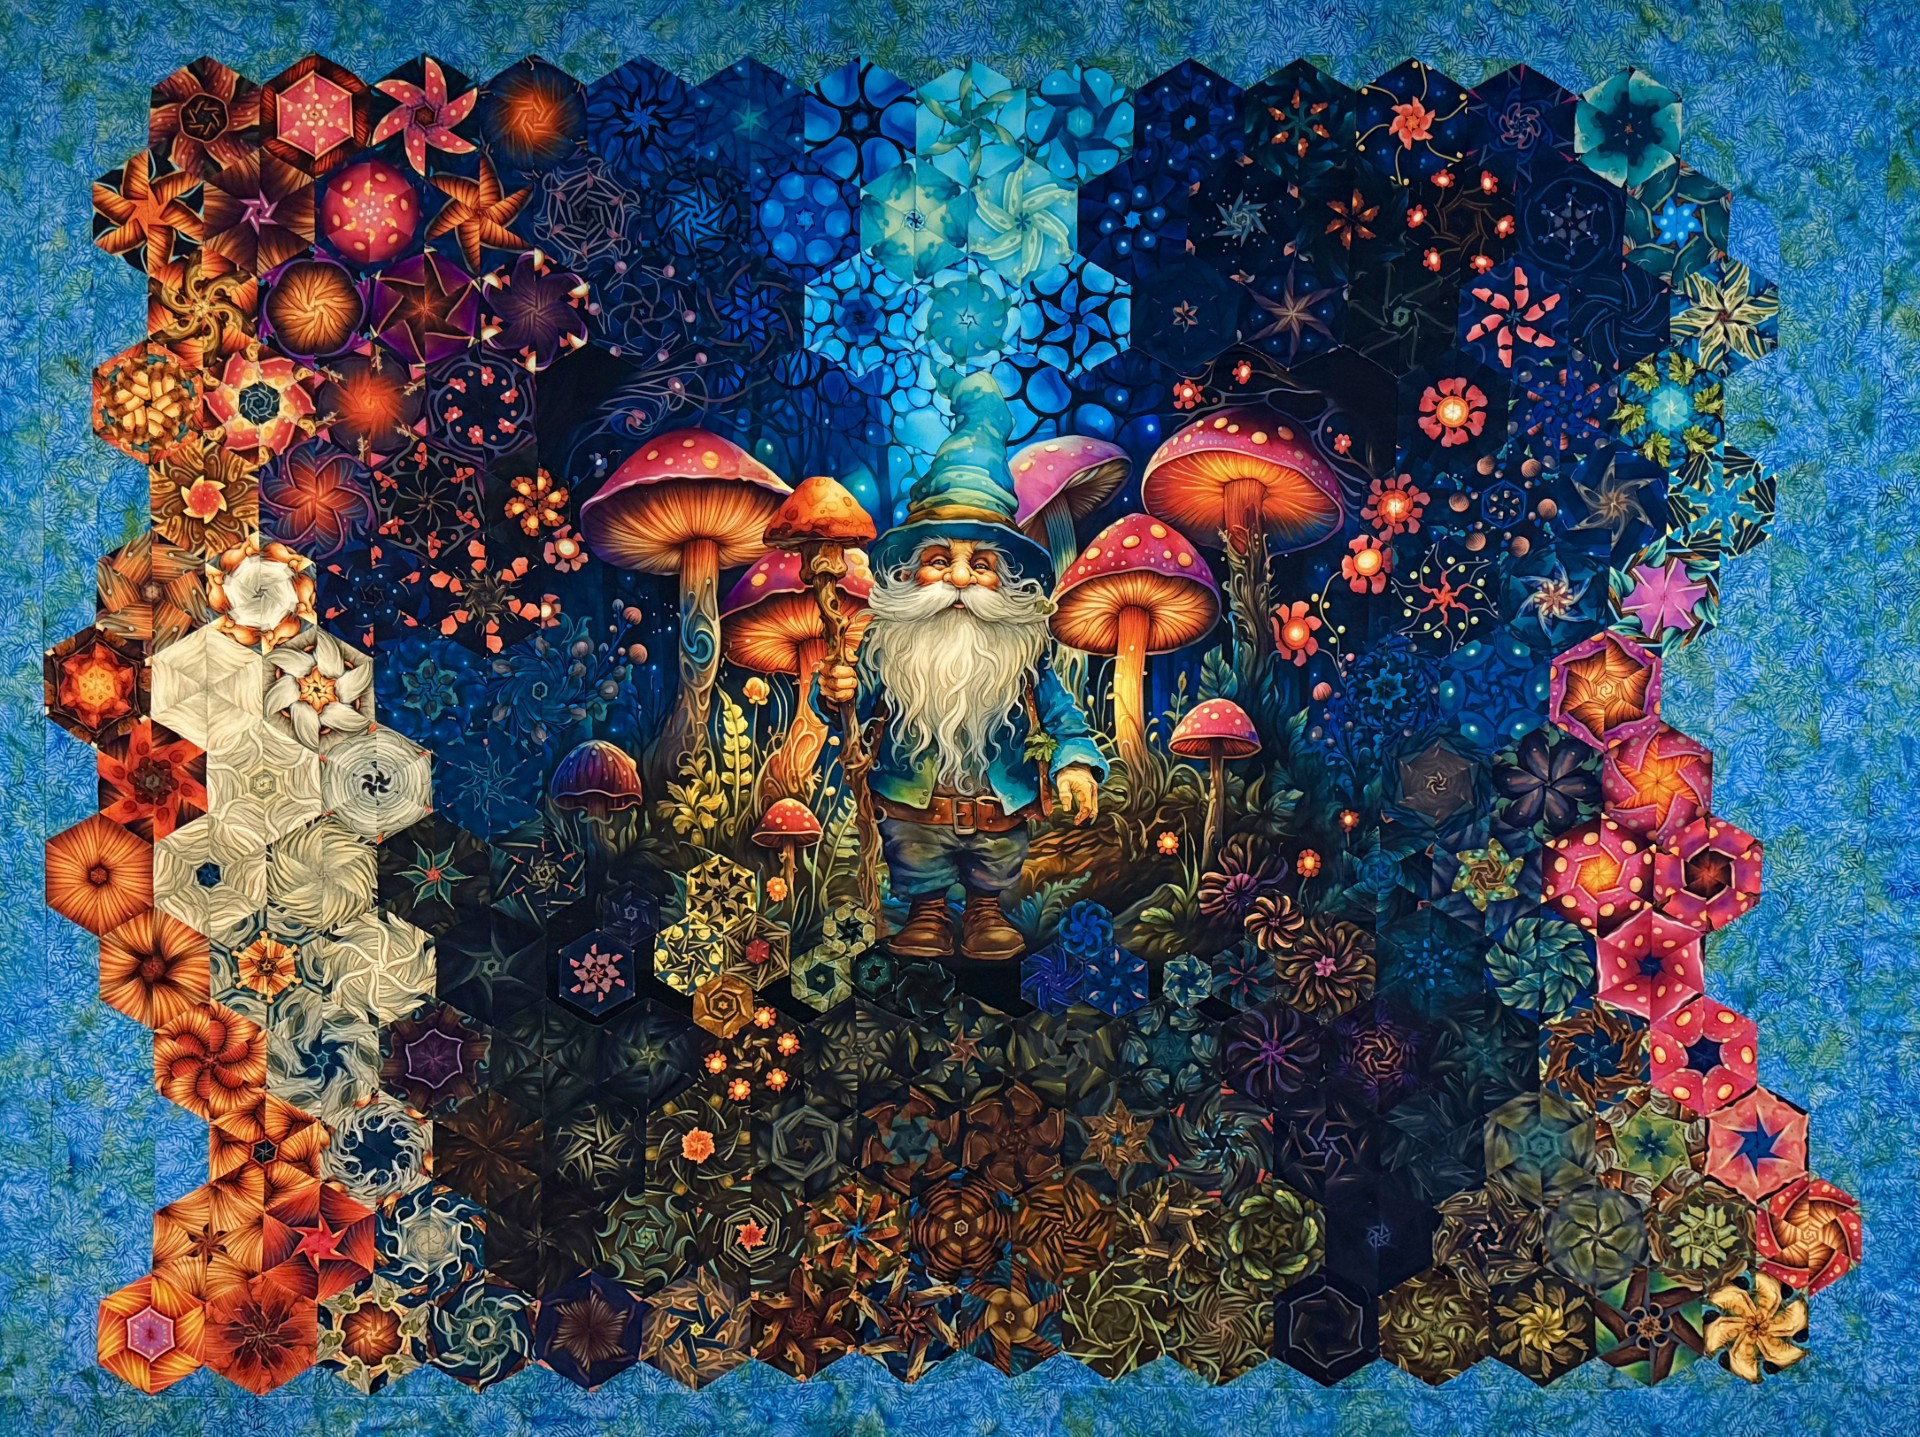
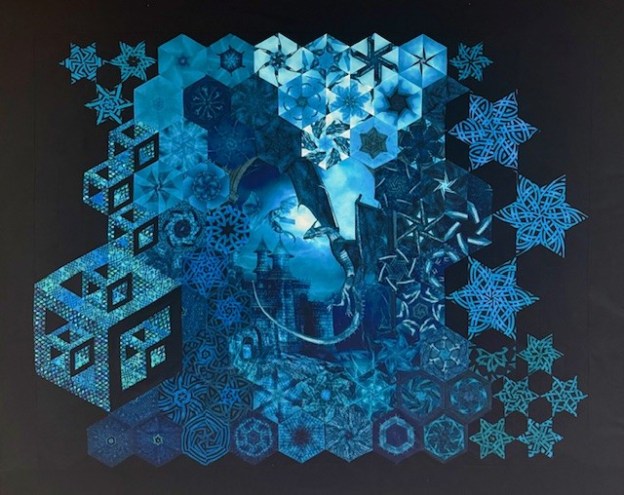
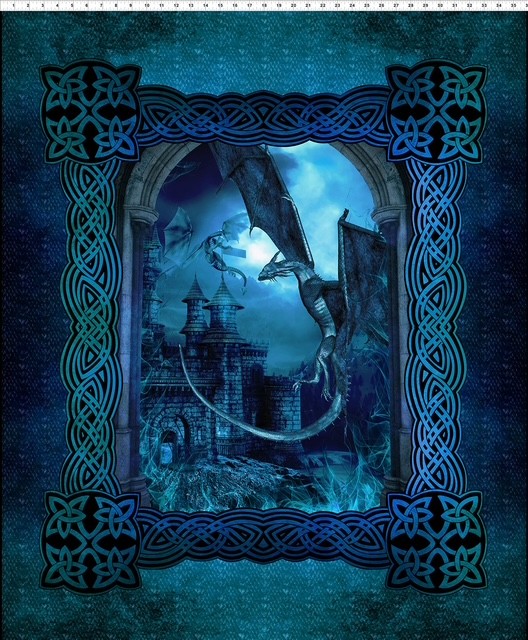
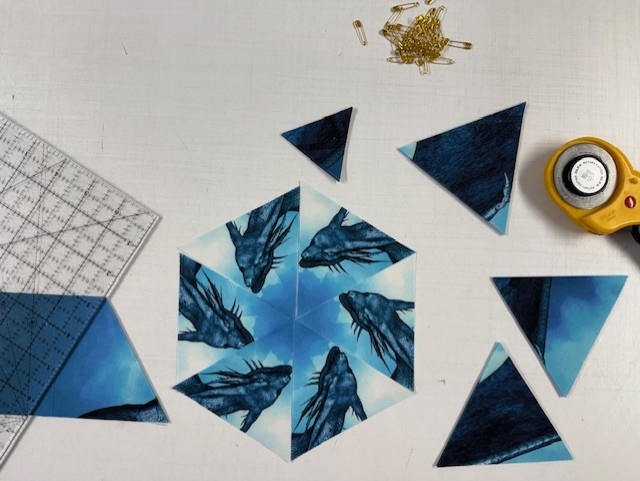
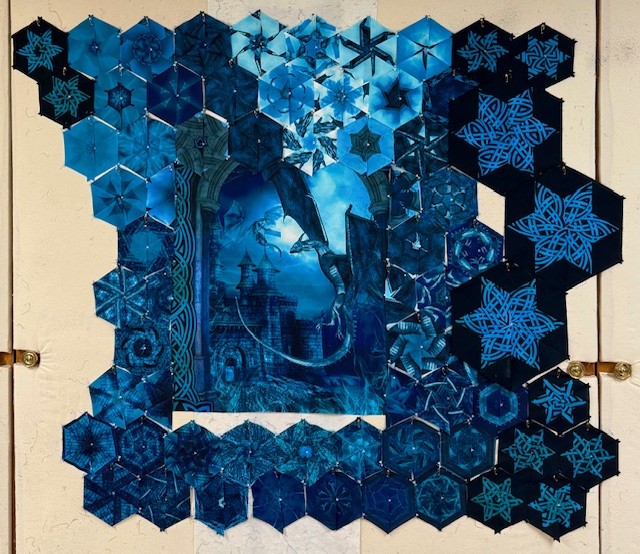
In One Block Wonder Kaleidoscope Panels, we’ll talk about strip sizes, feature-panel layouts, and how strategic cutting choices can create beautiful, swirling effects.
Receive 20% off coupon on Event Price of $59.00 when you Register with code PP26Jackie at:
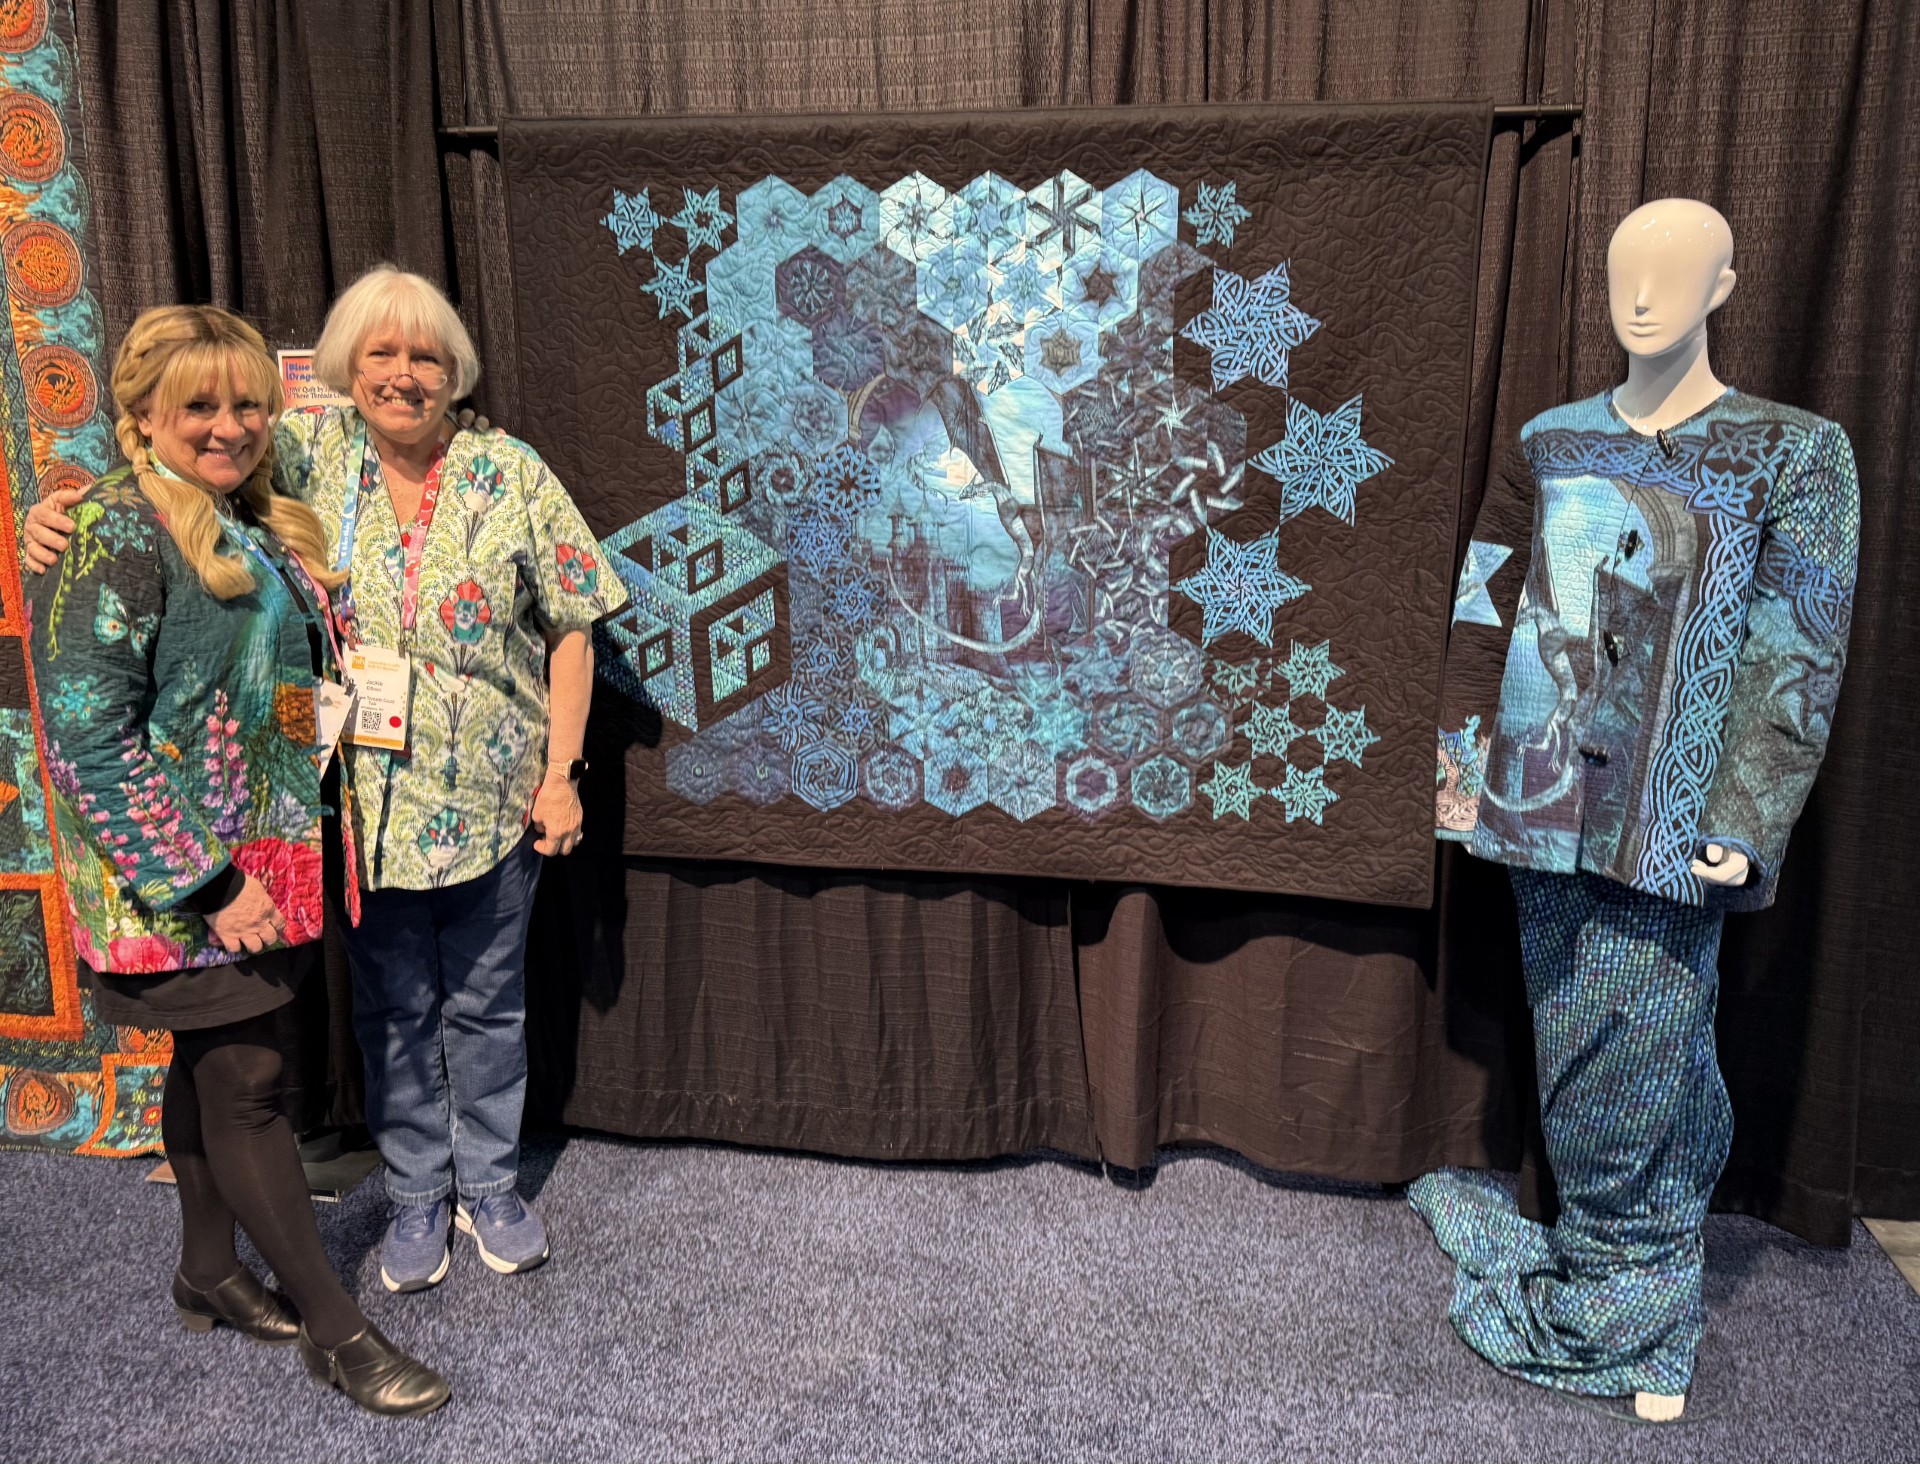
I’ll be teaching One Block Wonder Kaleidoscope Panels, a session all about transforming panels into dazzling quilts with movement, depth, and visual impact. We’ll talk about:
- Choosing strip sizes for strong kaleidoscope results
- Designing around a feature panel
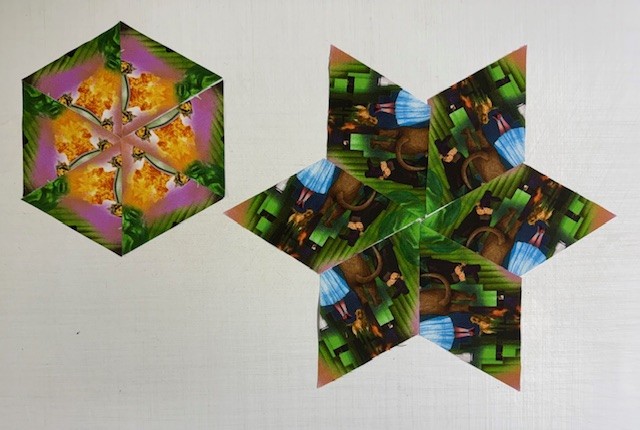
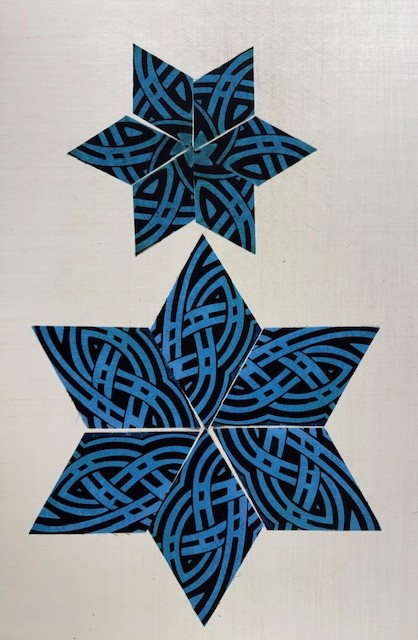
- Incorporating stars and cubes in multiple sizes
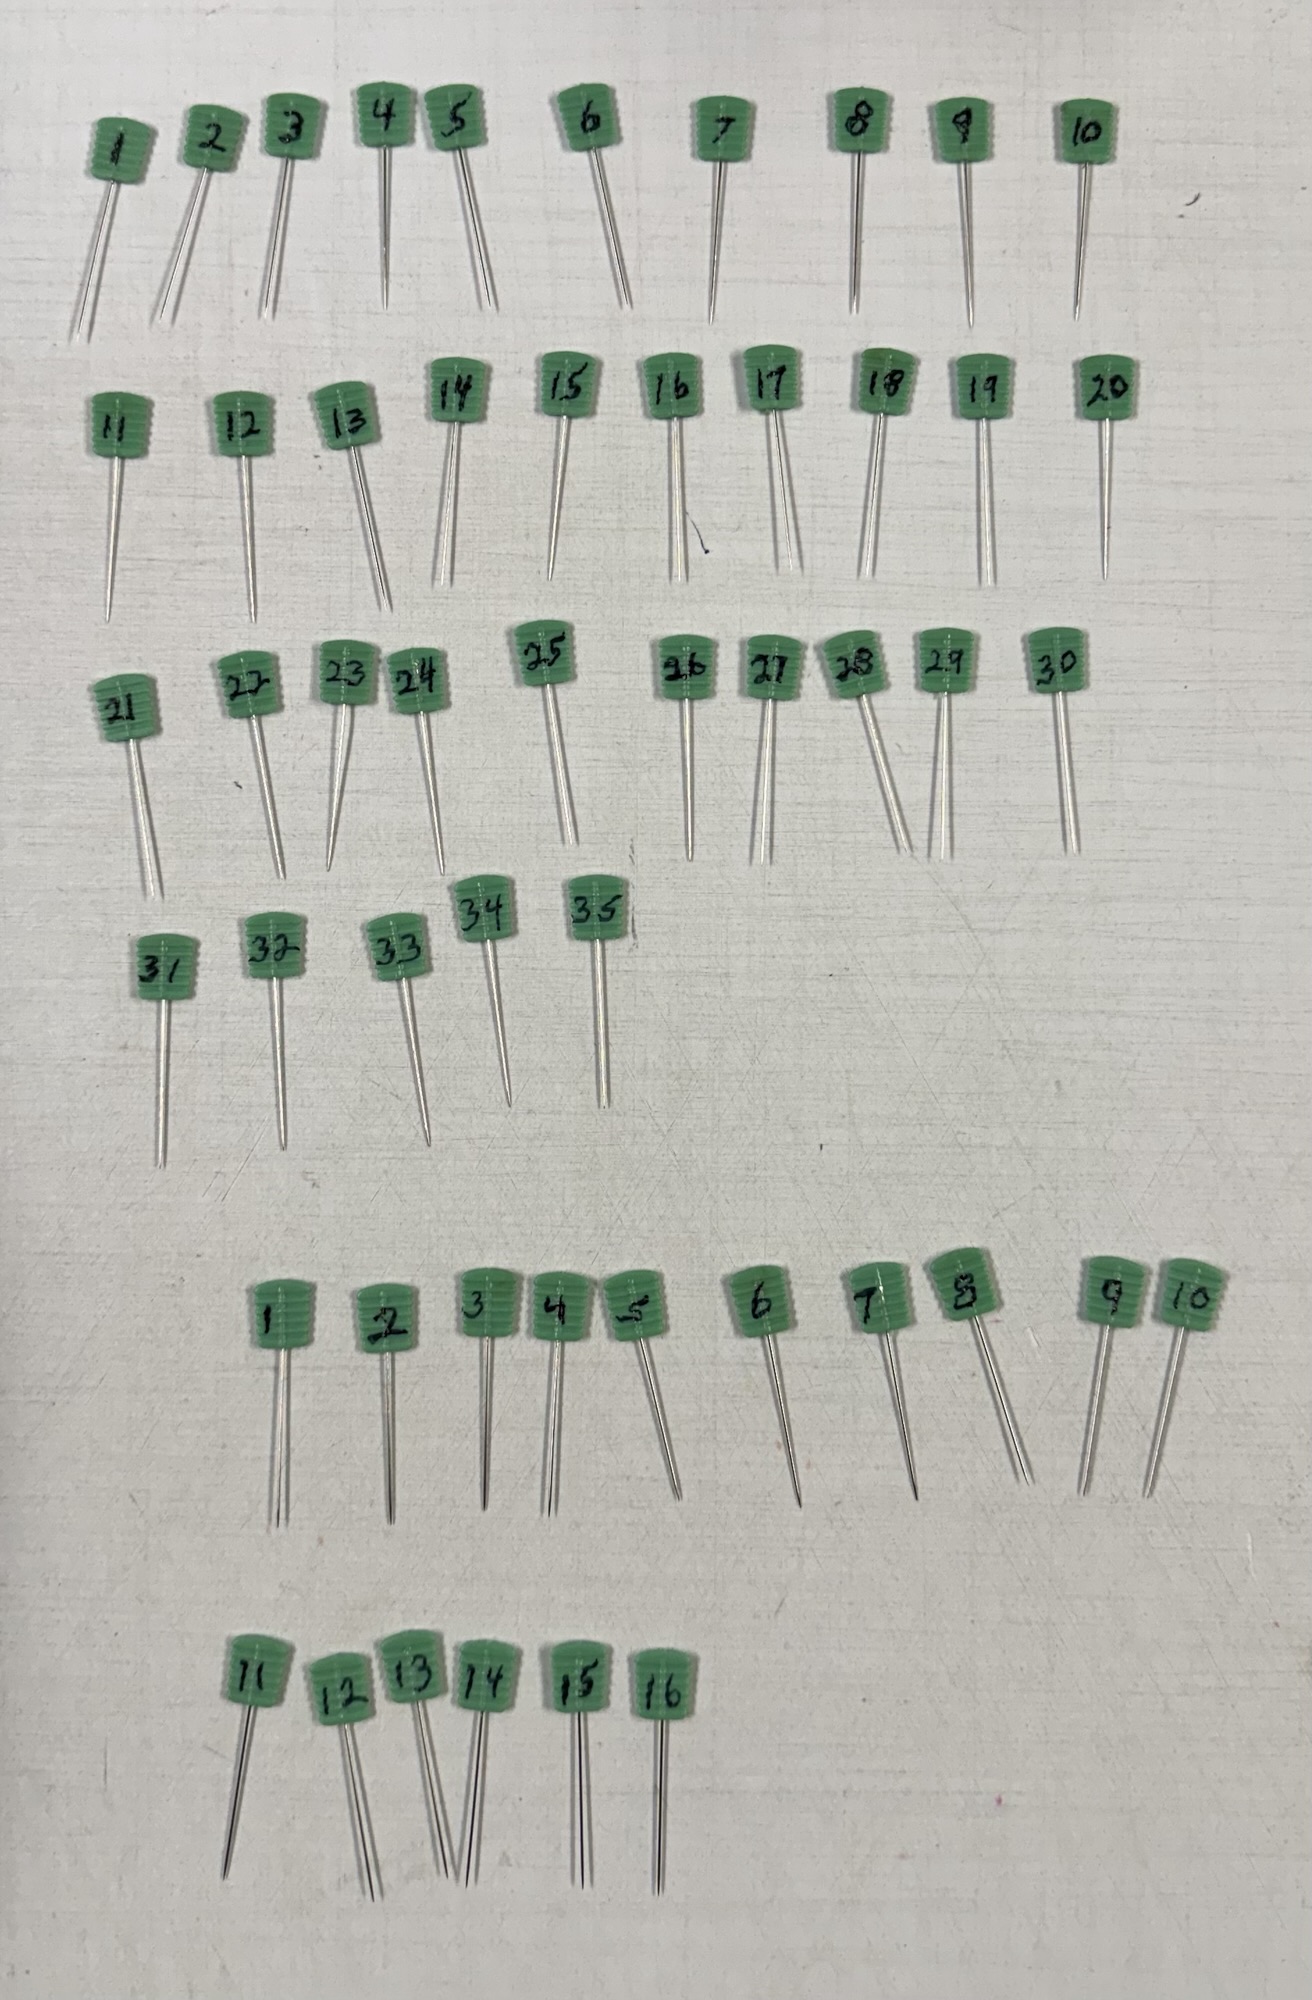
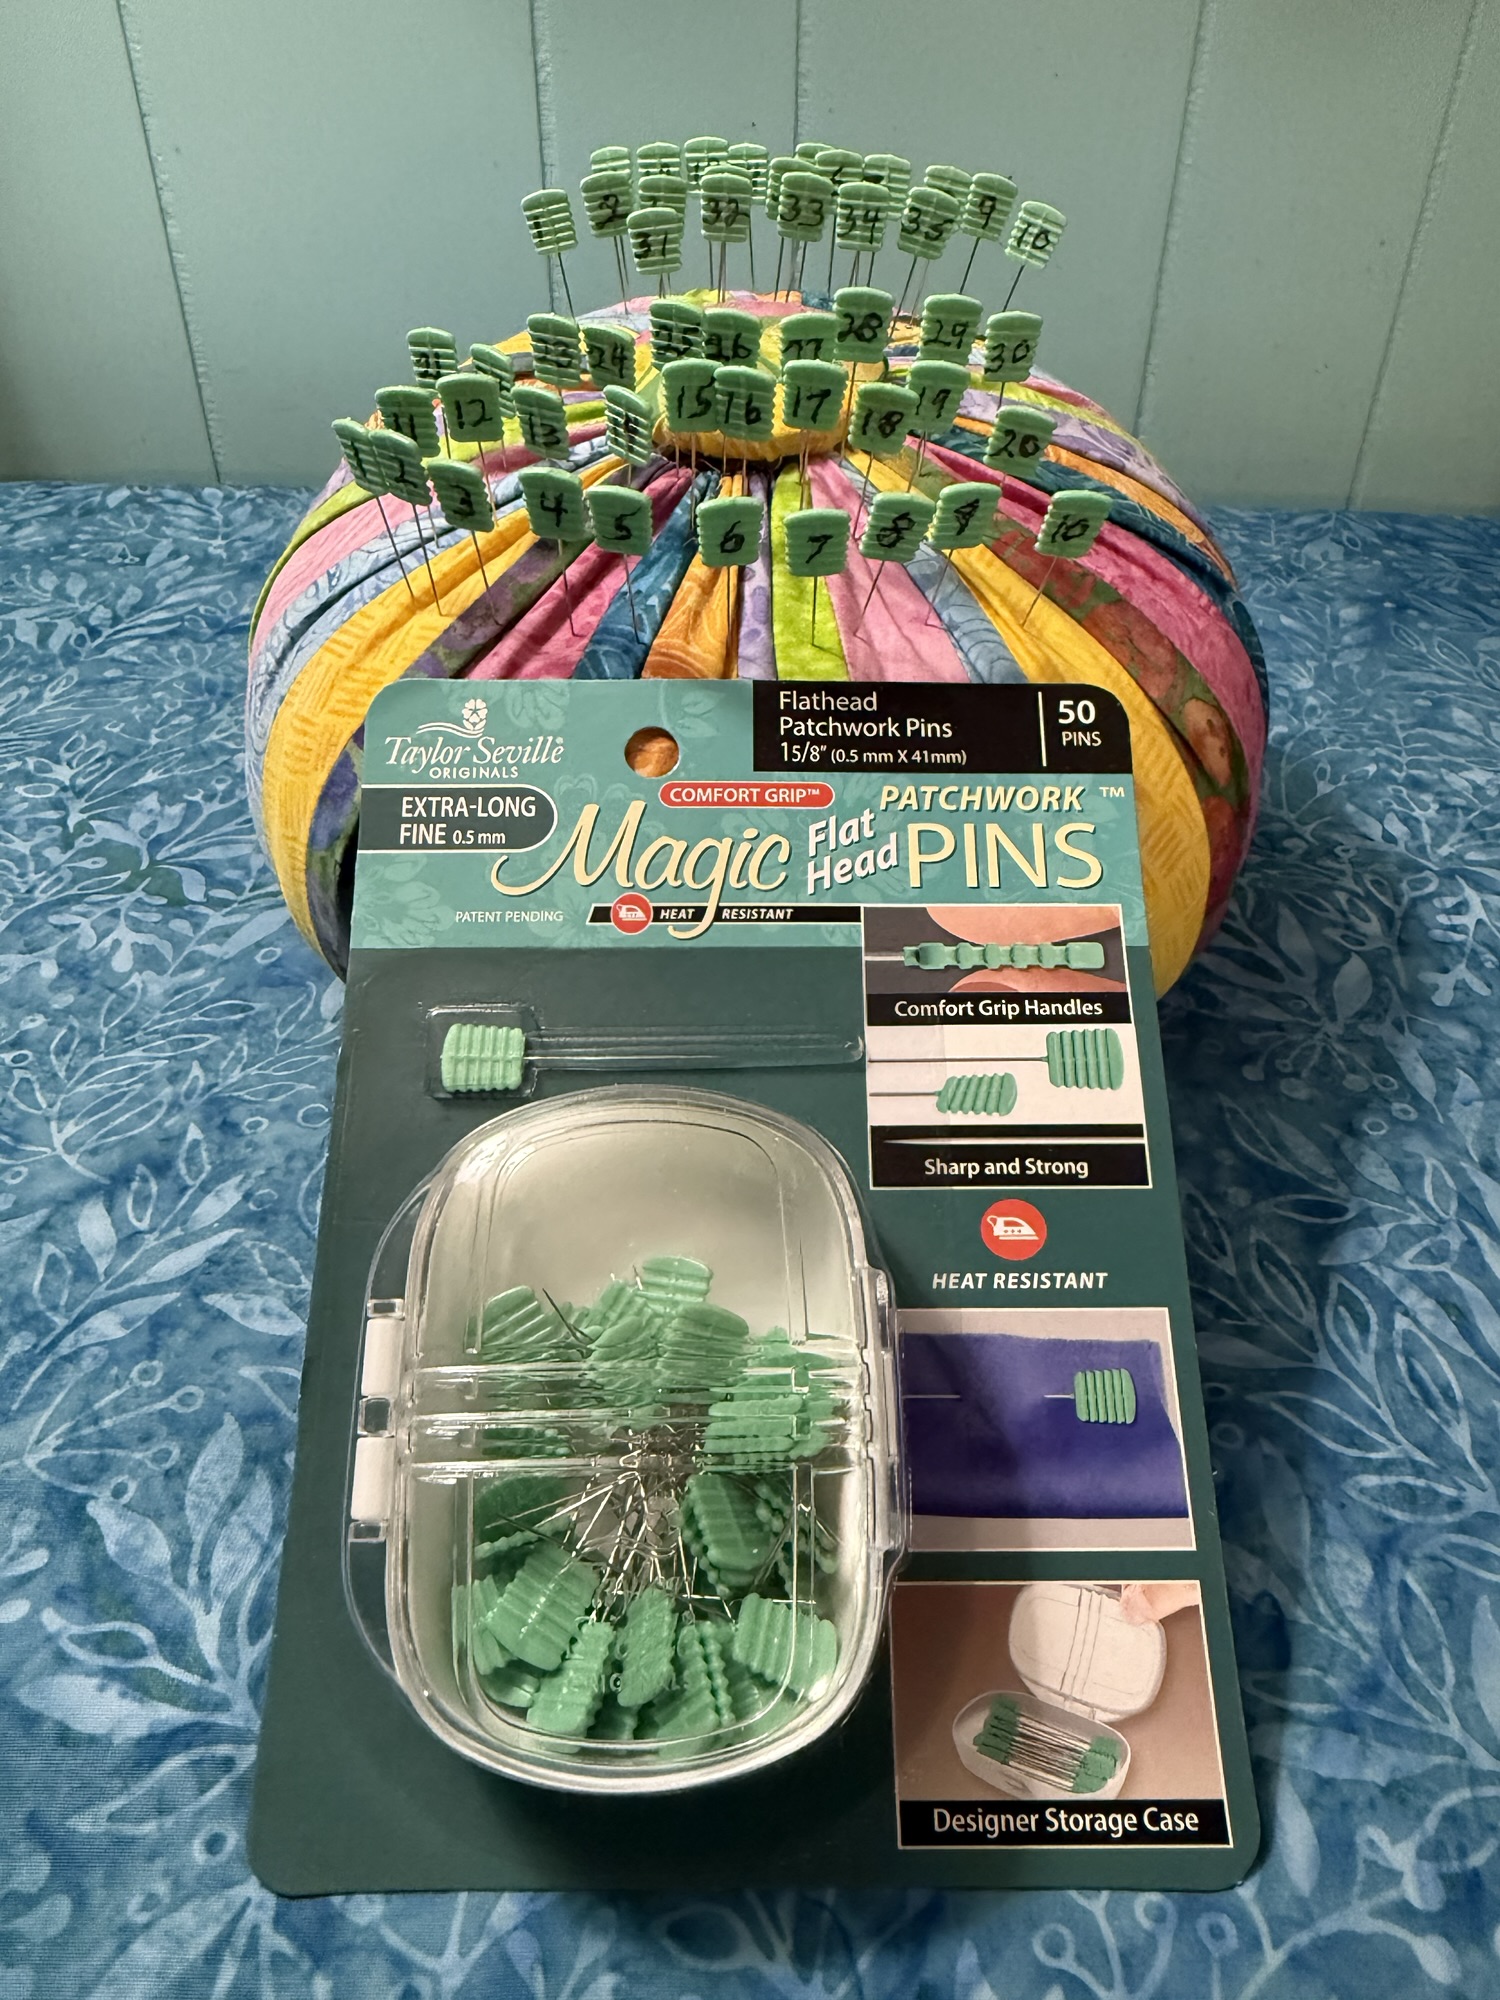
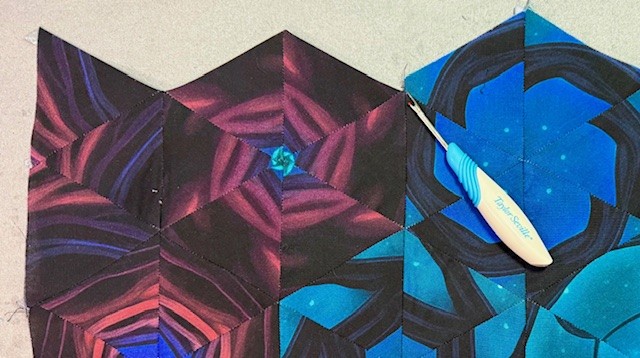
- Using strategic cutting to create dramatic effects
- Making layout choices that help the panel and piecing work beautifully together
This session is all about helping you see new possibilities in panel quilts and One Block Wonder design. I’ll share ways to make thoughtful cutting and layout decisions that create those striking, swirling effects while still feeling cohesive and balanced, so you can continue exploring these techniques with more confidence at home.
Patchwork Power: A One-Day Virtual Quilting Intensive is a live virtual retreat designed to help quilters sharpen their skills, refine their process, and build more confidence at every stage of quilting. The day includes expert-led sessions on precision piecing, ruler work, digital design, jelly rolls, curves, wool applique, One Block Wonder quilts, and more, plus a keynote from Karen Montgomery.
I hope to see you there.
#PatchworkPower #CreativeSparkOnlineLearning