
The tune “Back in the Saddle Again” is playing in my head as I stare into the Shultz & Dooley mirror hanging over my sewing machine.

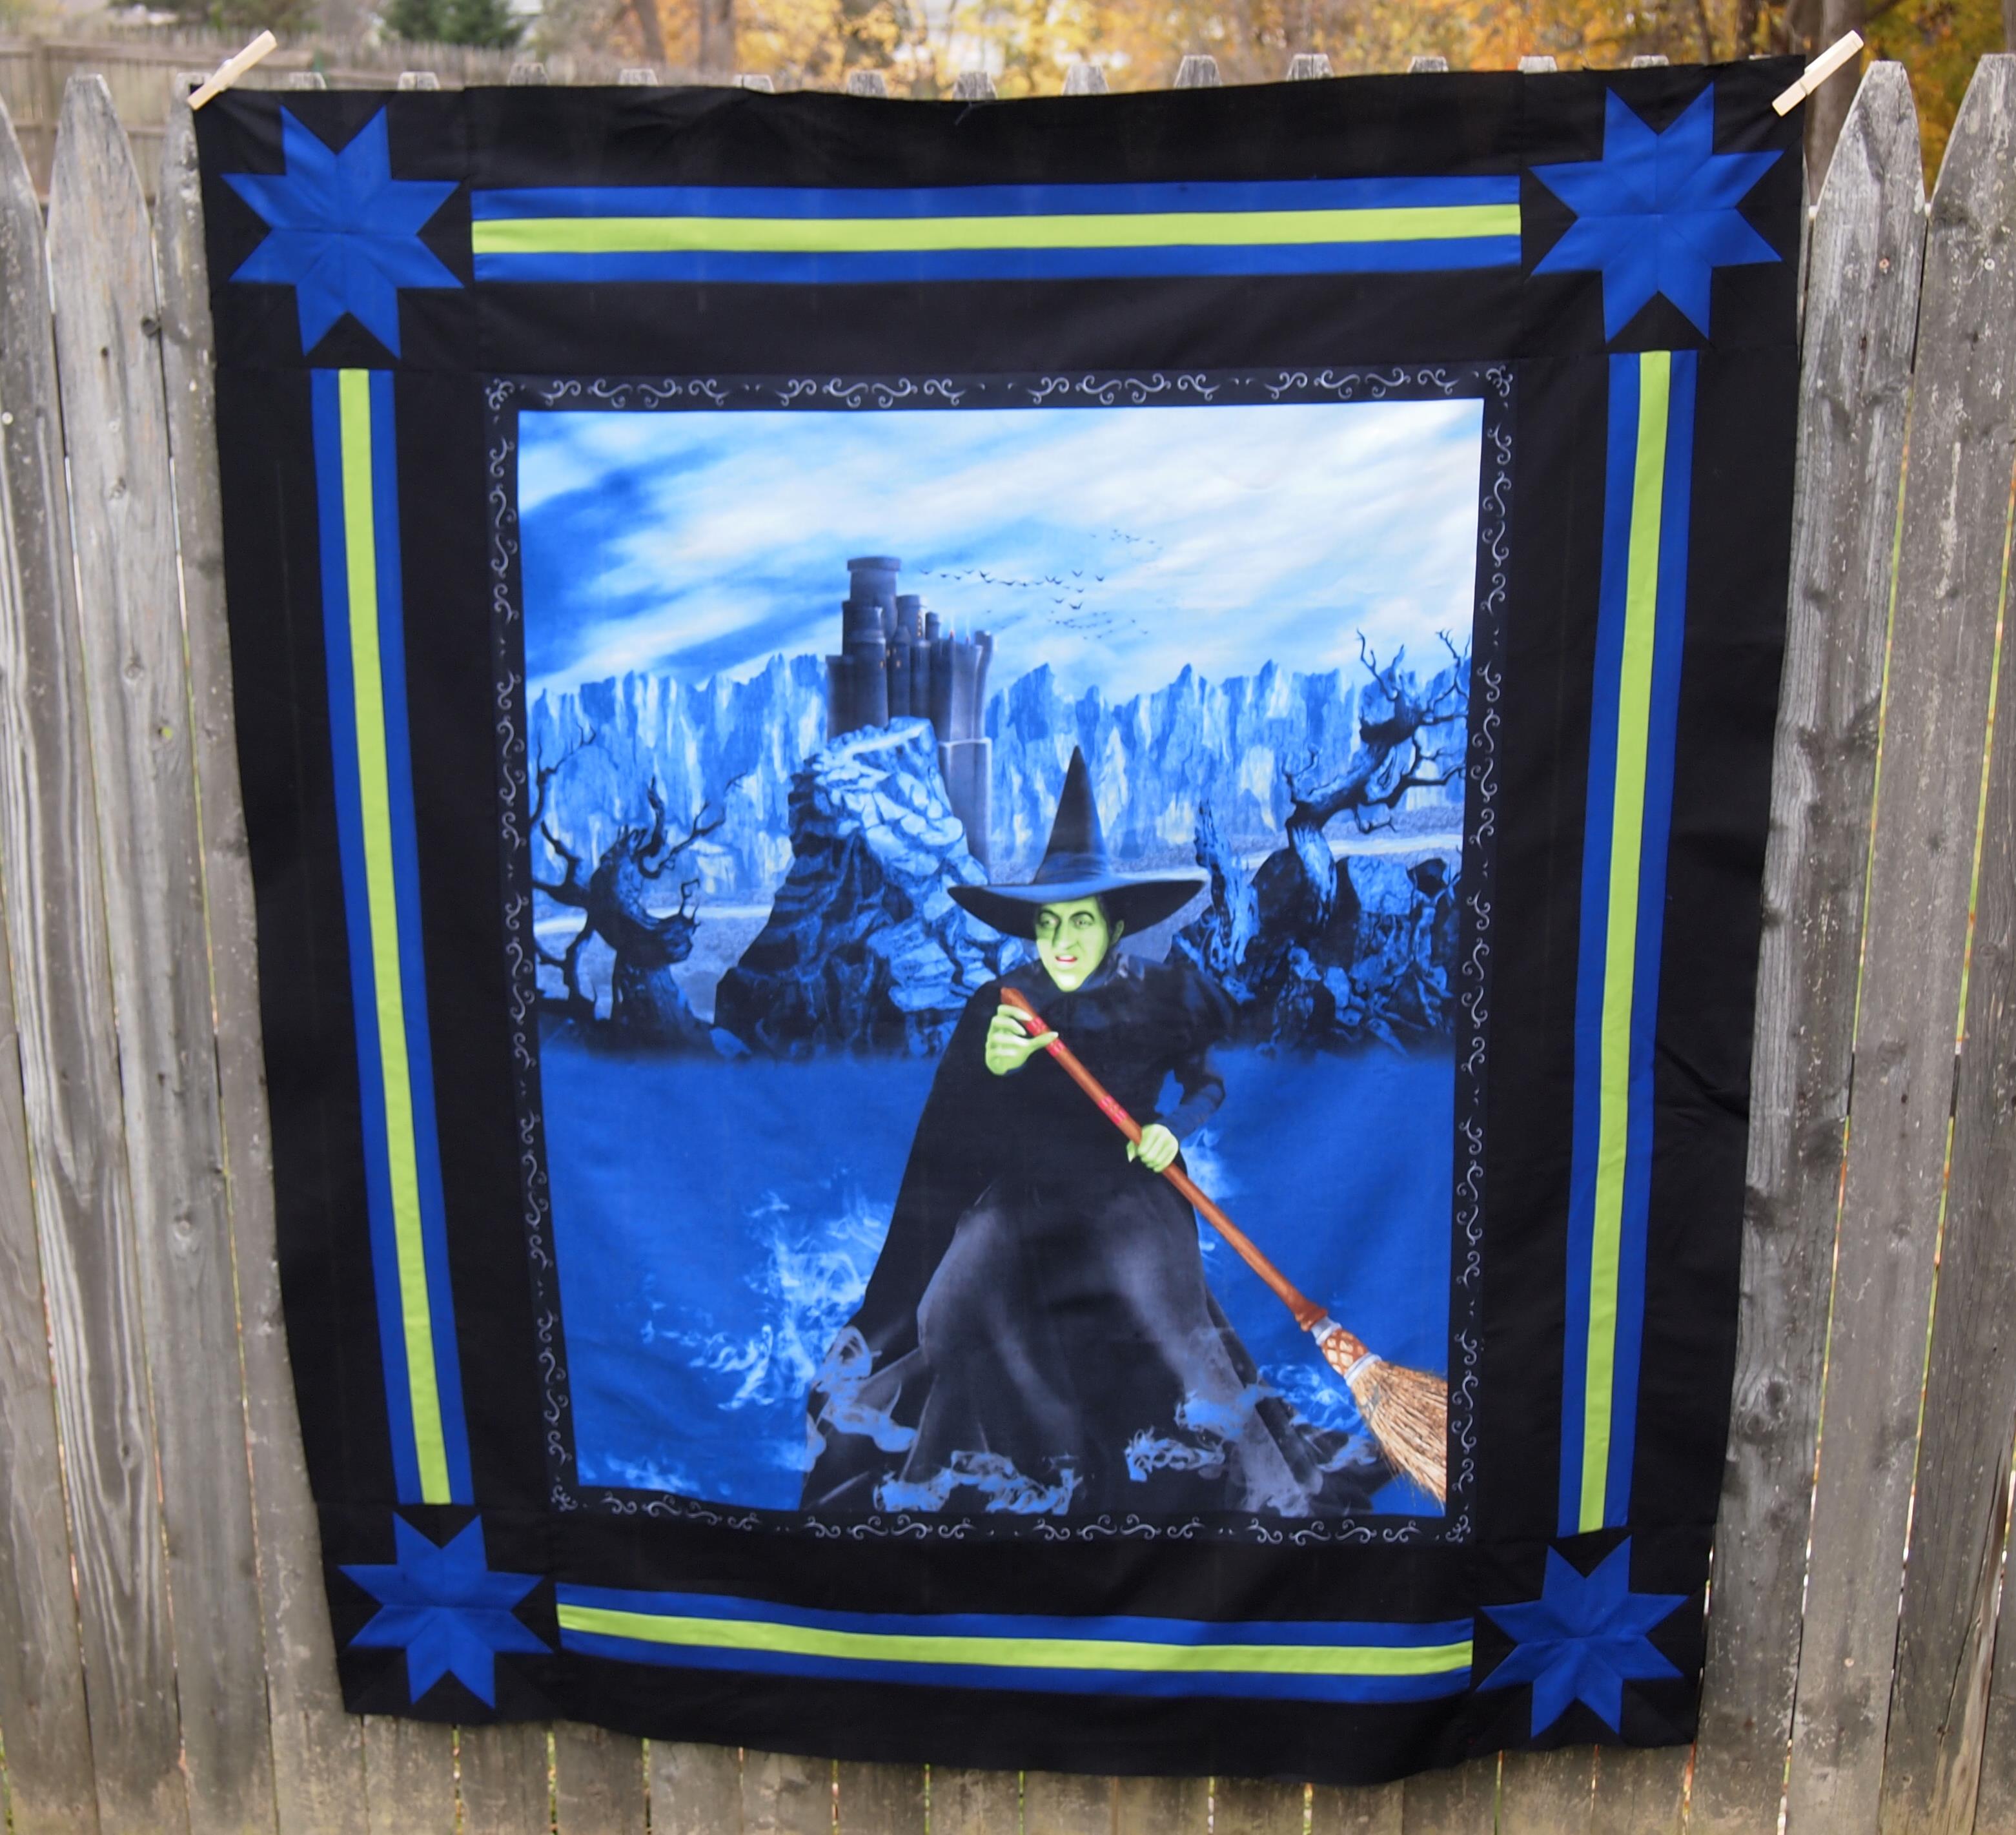
I’m getting ready to work on the Wicked Witch Panel below. I’m a Wizard of Oz fan! This is my first project in the new house. The panel measures 34″x42″. I decided to add Lemoyne Star cornerstones and stripped borders. I pulled the colors from the panel, Kona Black, Midnight Blue and Grass green to match the Witch’s Skin.

I know I have blogged about the Rapid Fire Lemoyne Star Ruler before but thought I would reiterate some tips.
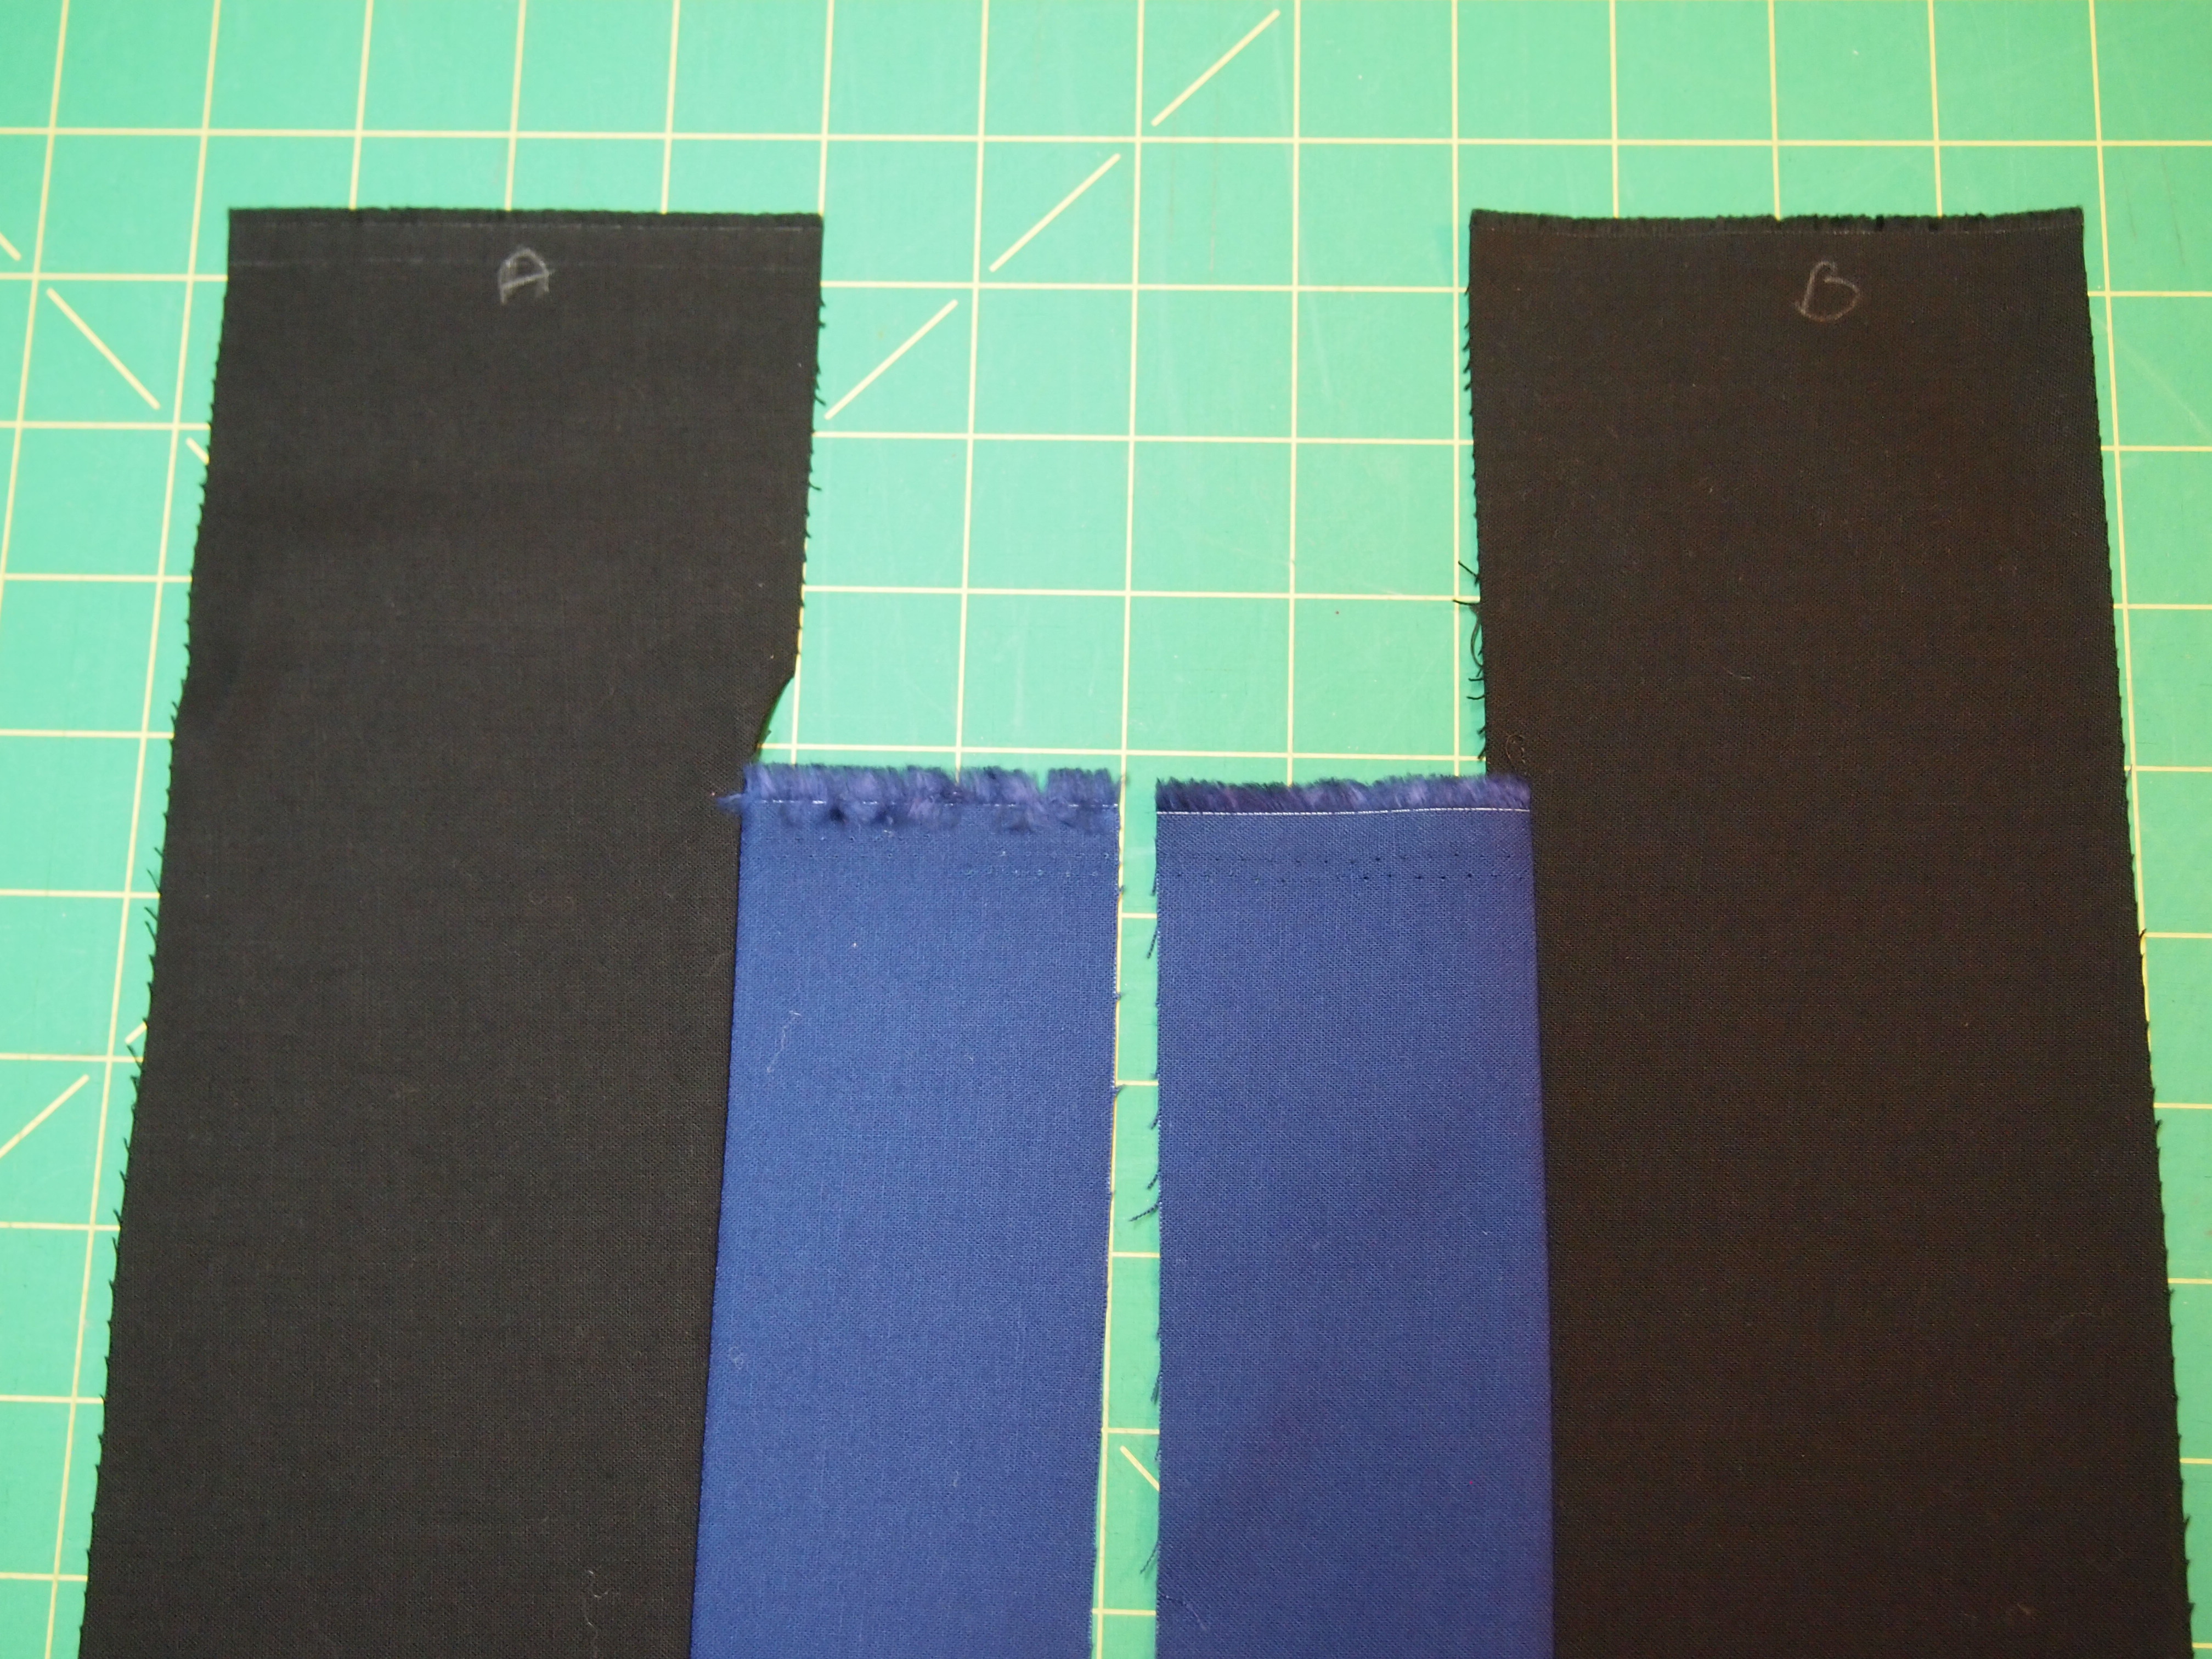
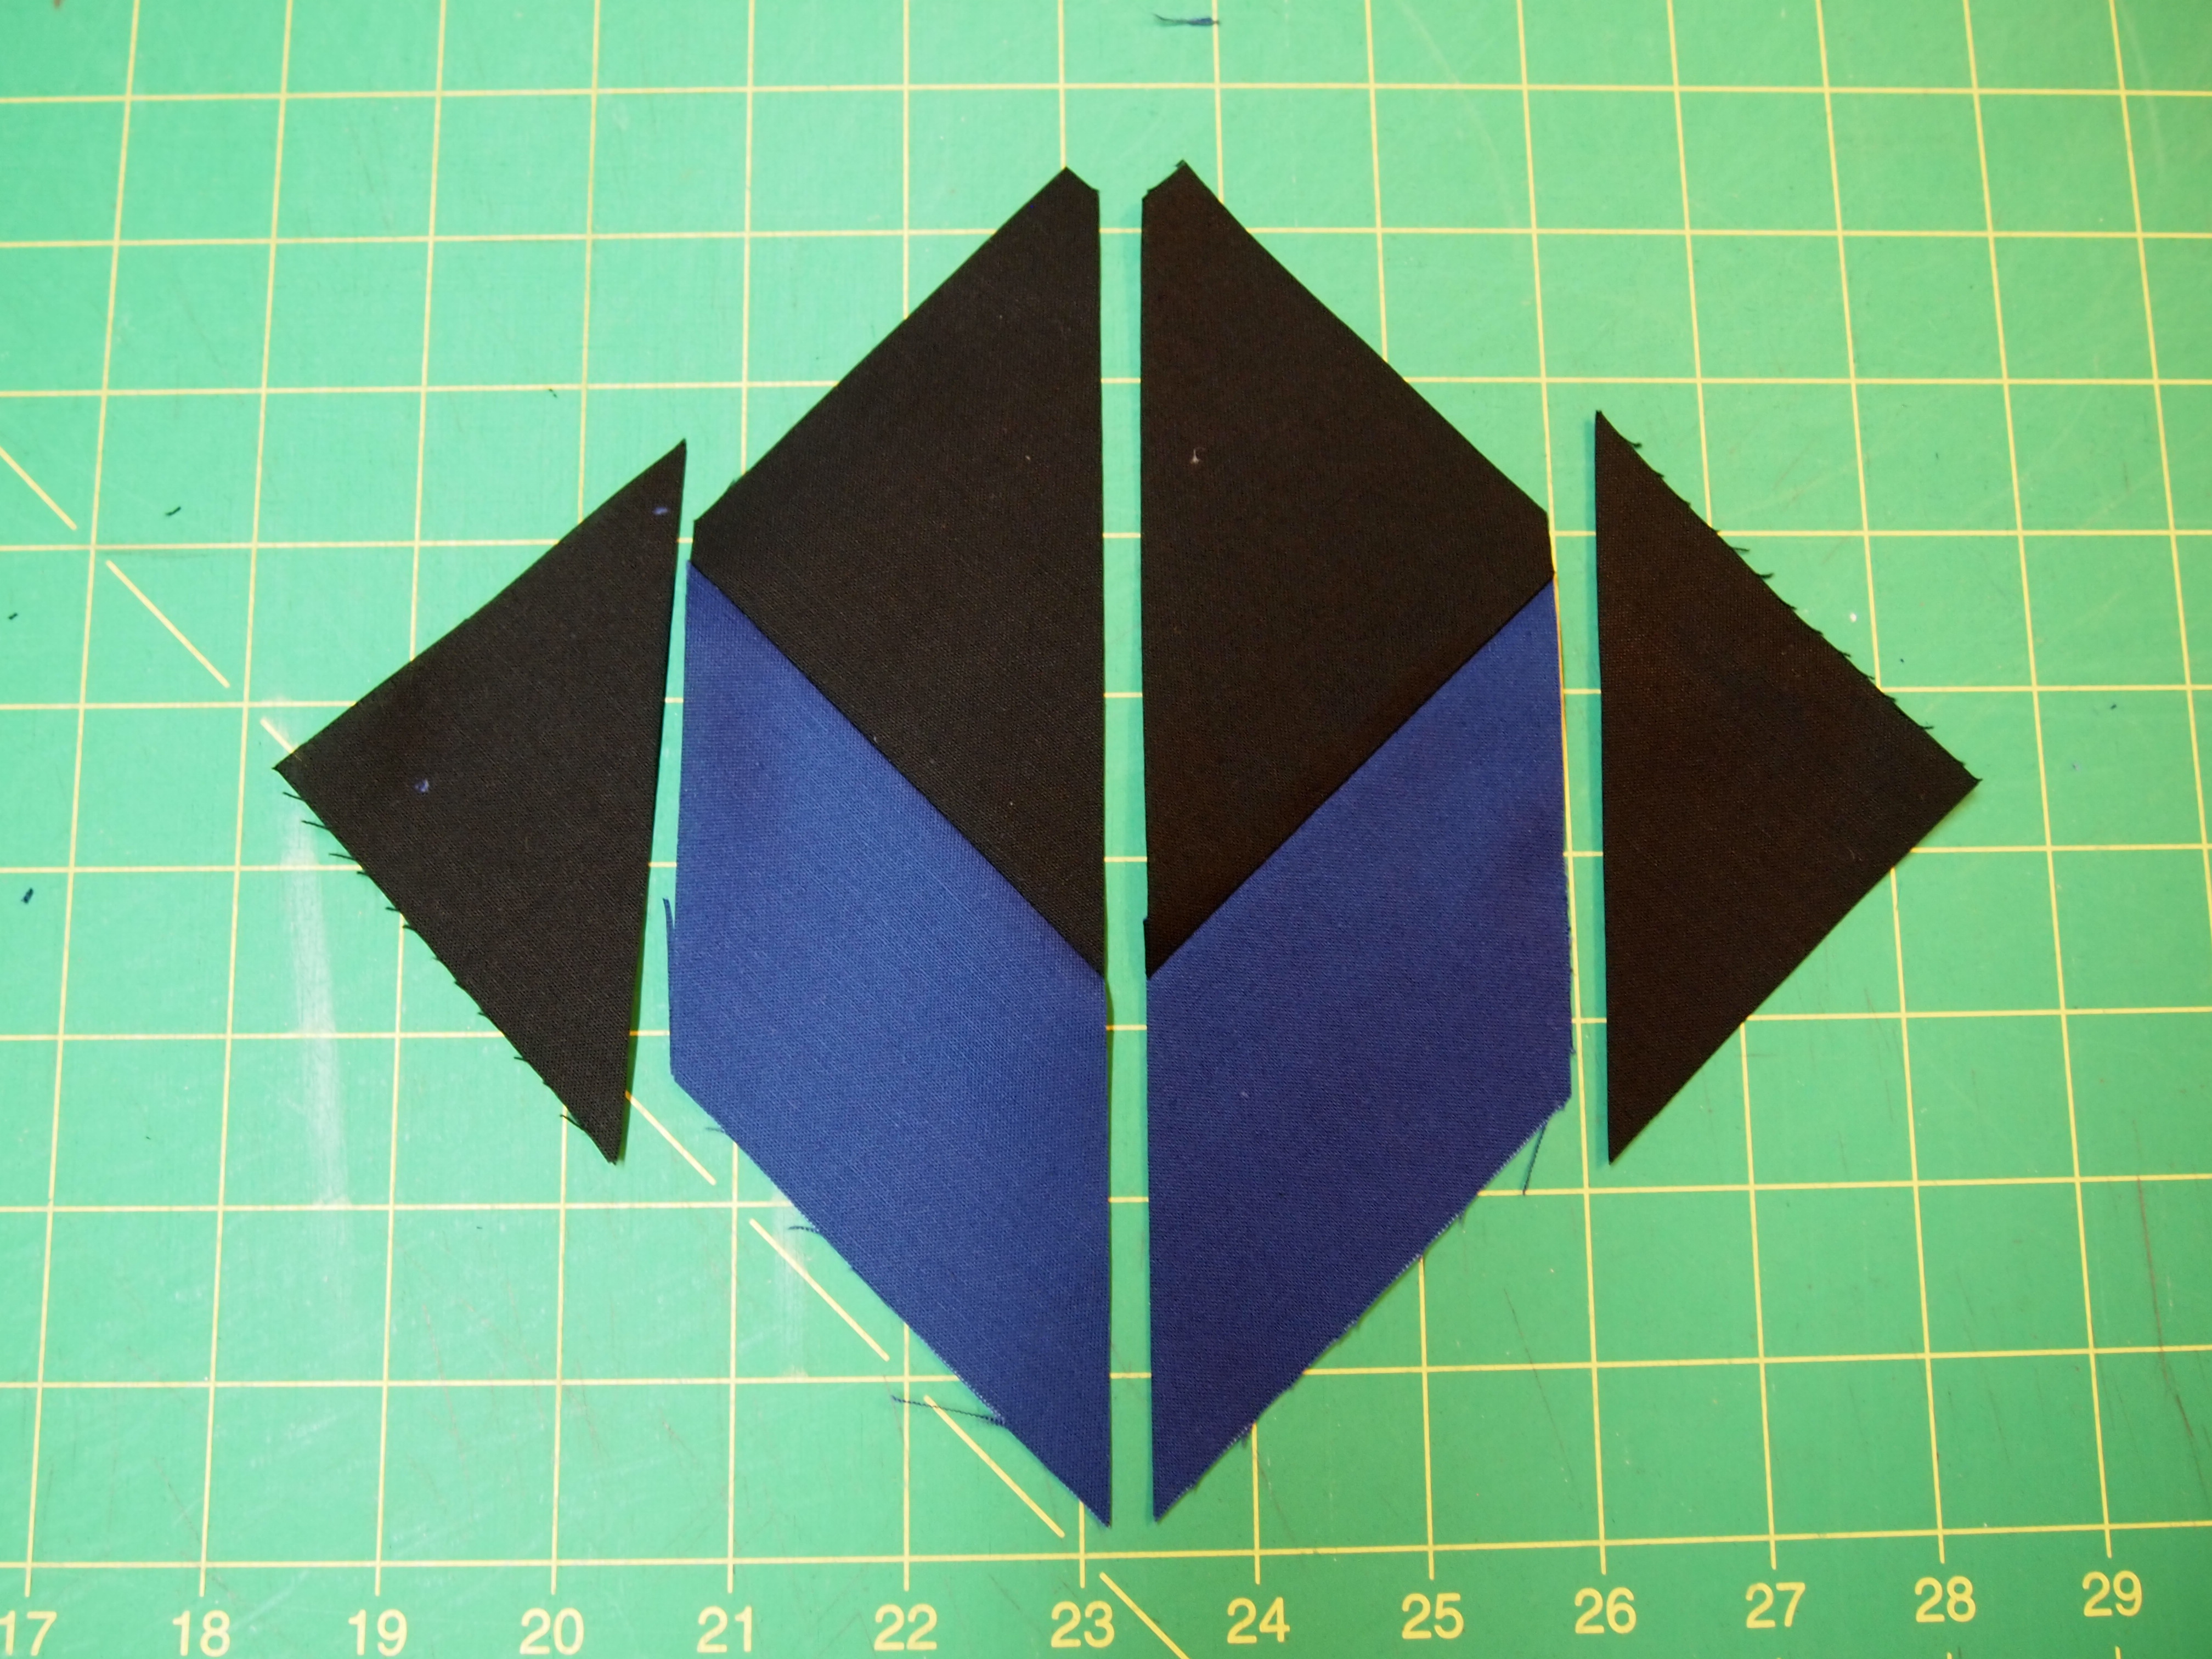
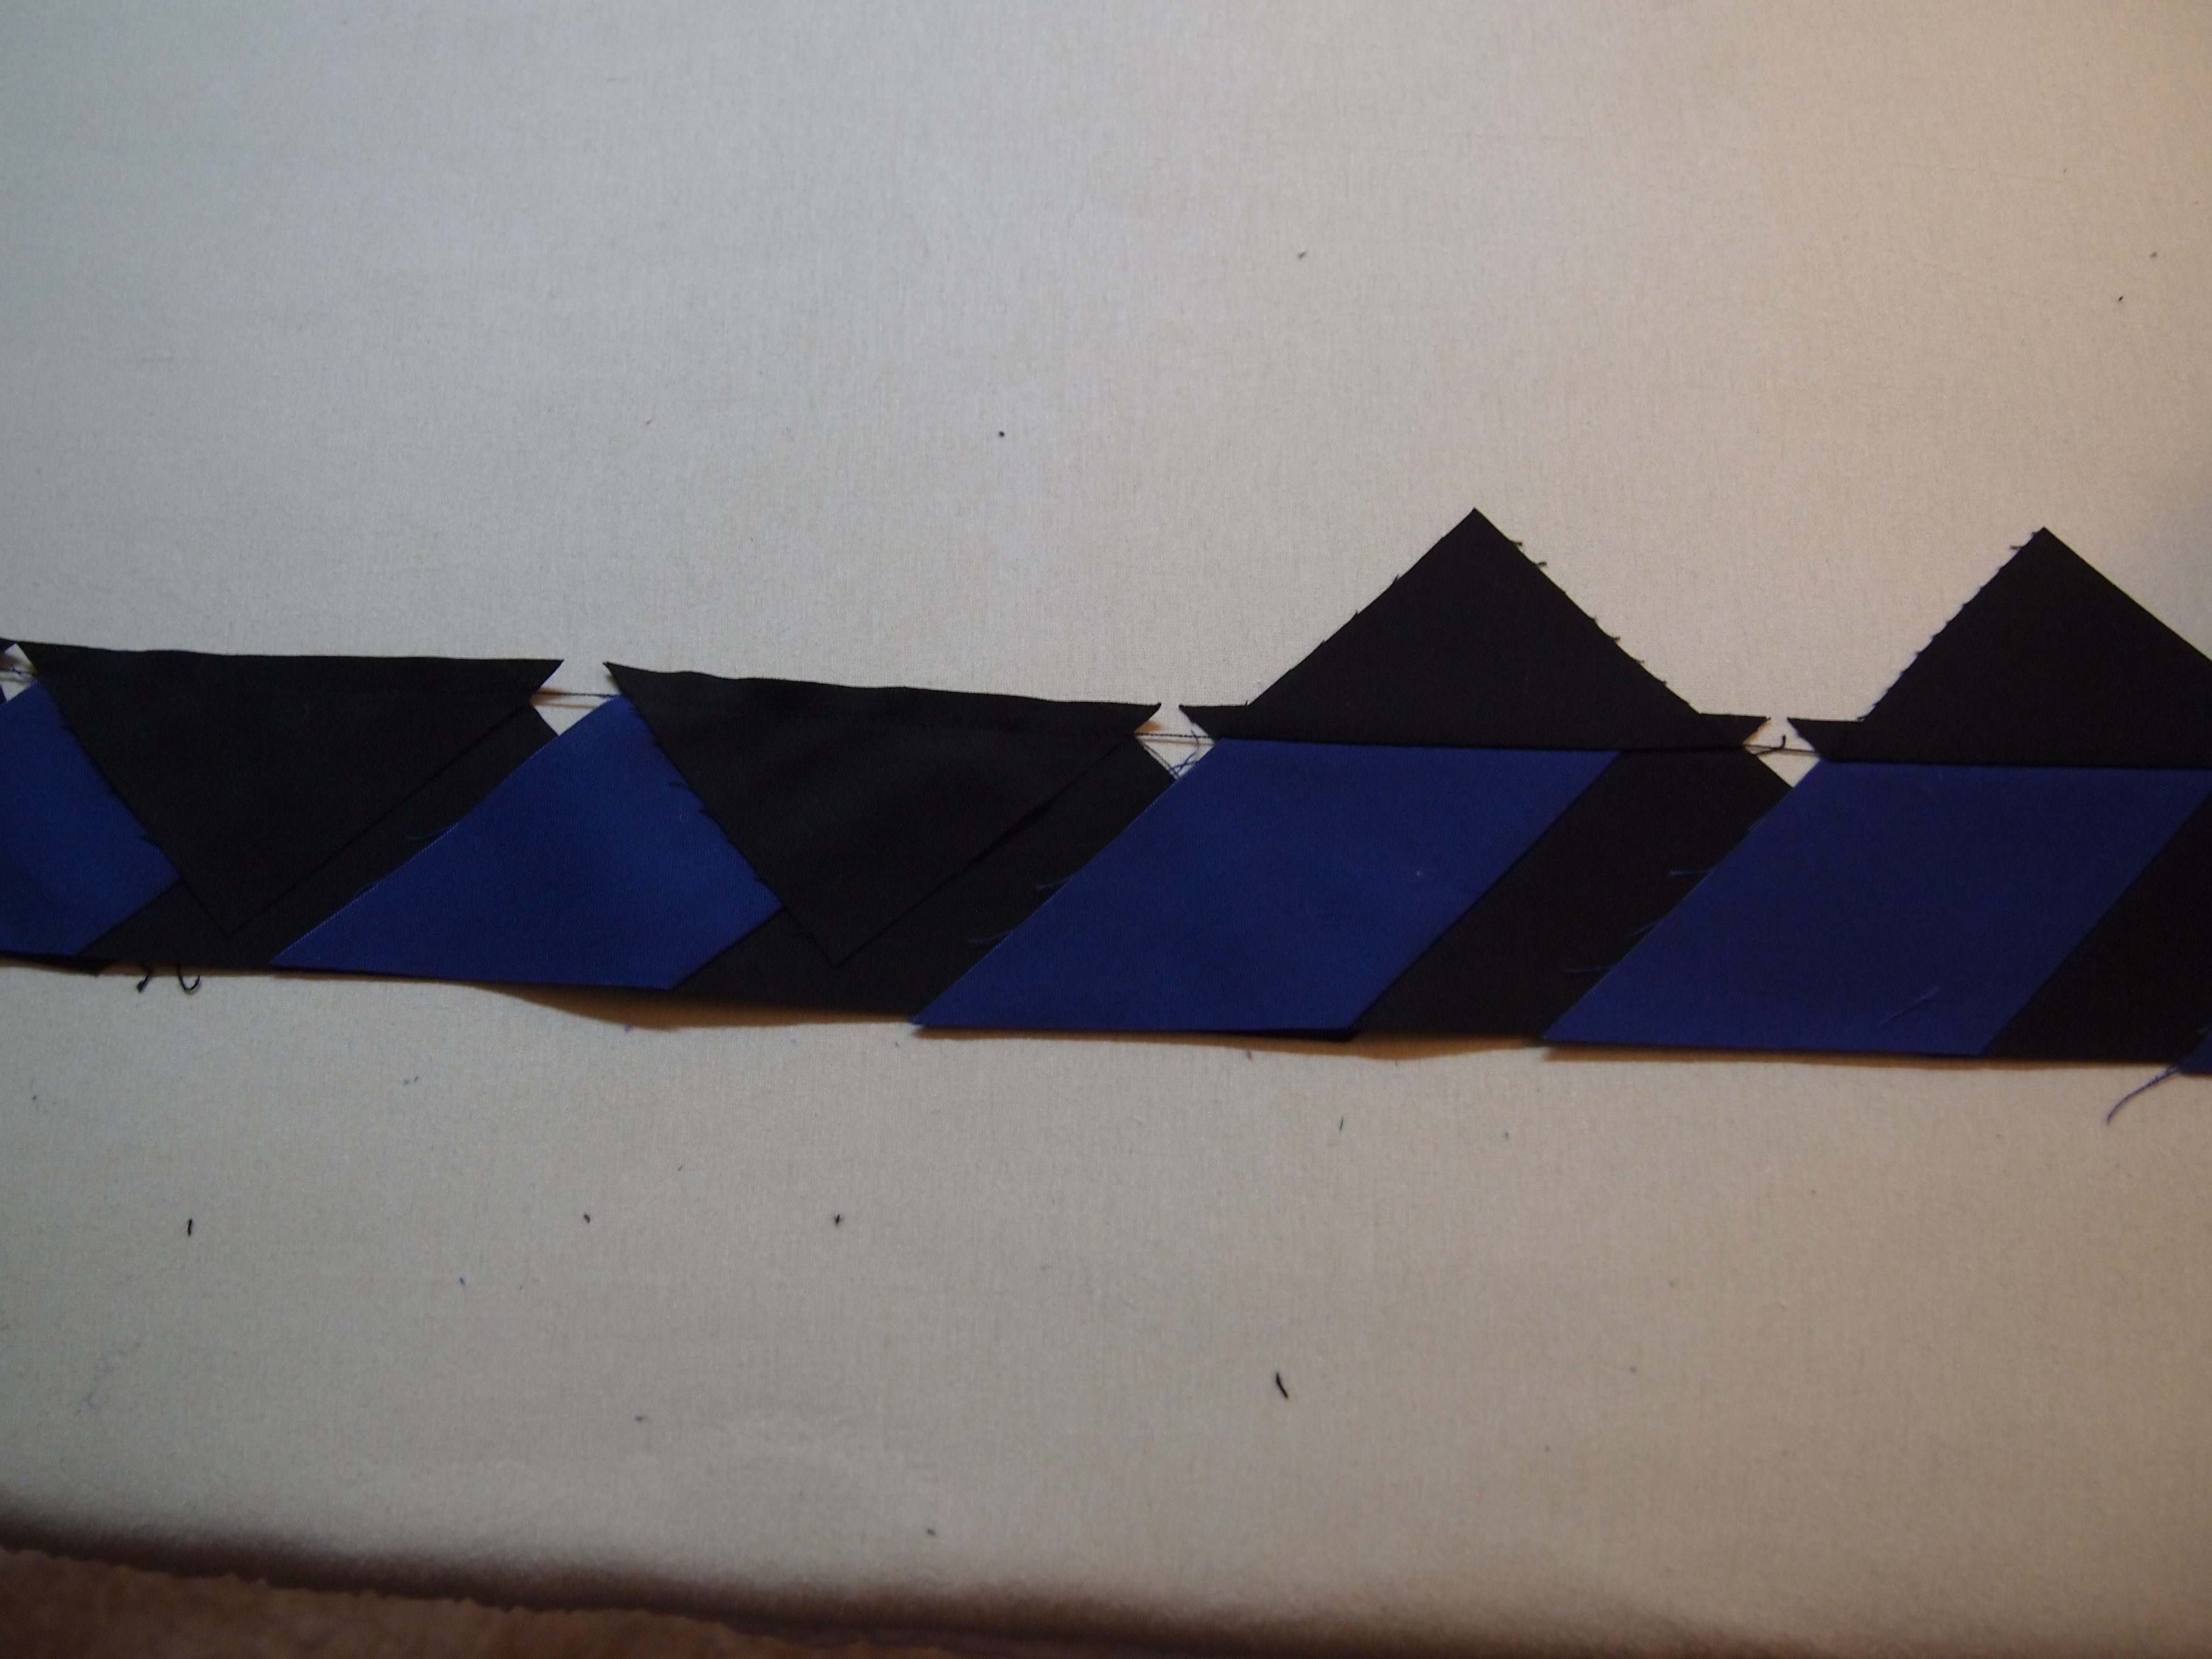
Below I have cut 2 background strips and two star strips. I know these are dark colors but I like the way they work with the panel. I have marked my background strips A and B and 2 additional marks down from the top of the strips on the adjacent, inside edges the same distance as the strip is wide. What that means is; I chose to make an 8″ finished Lemoyne star so I cut my background strip 3 3/4″ wide by width of fabric (WOF). So I marked the inside edges down 3 3/4″. With right sides together I place the star strips on the marks as shown.

Stitch the strips as shown.

Quilting is a Pressing Matter!!! What I love about Studio 180 Design Tools is the care Deb Tucker takes in telling you how to press your seams. I did not know this until I was Studio 180 Design Teacher Certification Training, “Whatever You Are Pressing Toward – Goes On Top”! Genius!
When pressing strip A, the seam gets pressed toward the background strip. I then place the strip on the ironing board with background side on top and press. Strip B seam is pressed toward the star strip, so then the I place the strip with star strip on top. We now have mirror images.
Place Strip B right up on the table, then place strip A on top, right sides together. I start by just matching up the edges. Then using my fingers feel along the seams to determine if the seams are nesting properly. I always gently peel back each end to see if the seams are nesting. If we pressed the seams correctly it will nest nicely.

Now we are going to establish a 45 degree angle by placing the edge of the Rapid Fire Lemoyne Star ruler on the stitched seam line and then bump up another cutting ruler against the angled edge.
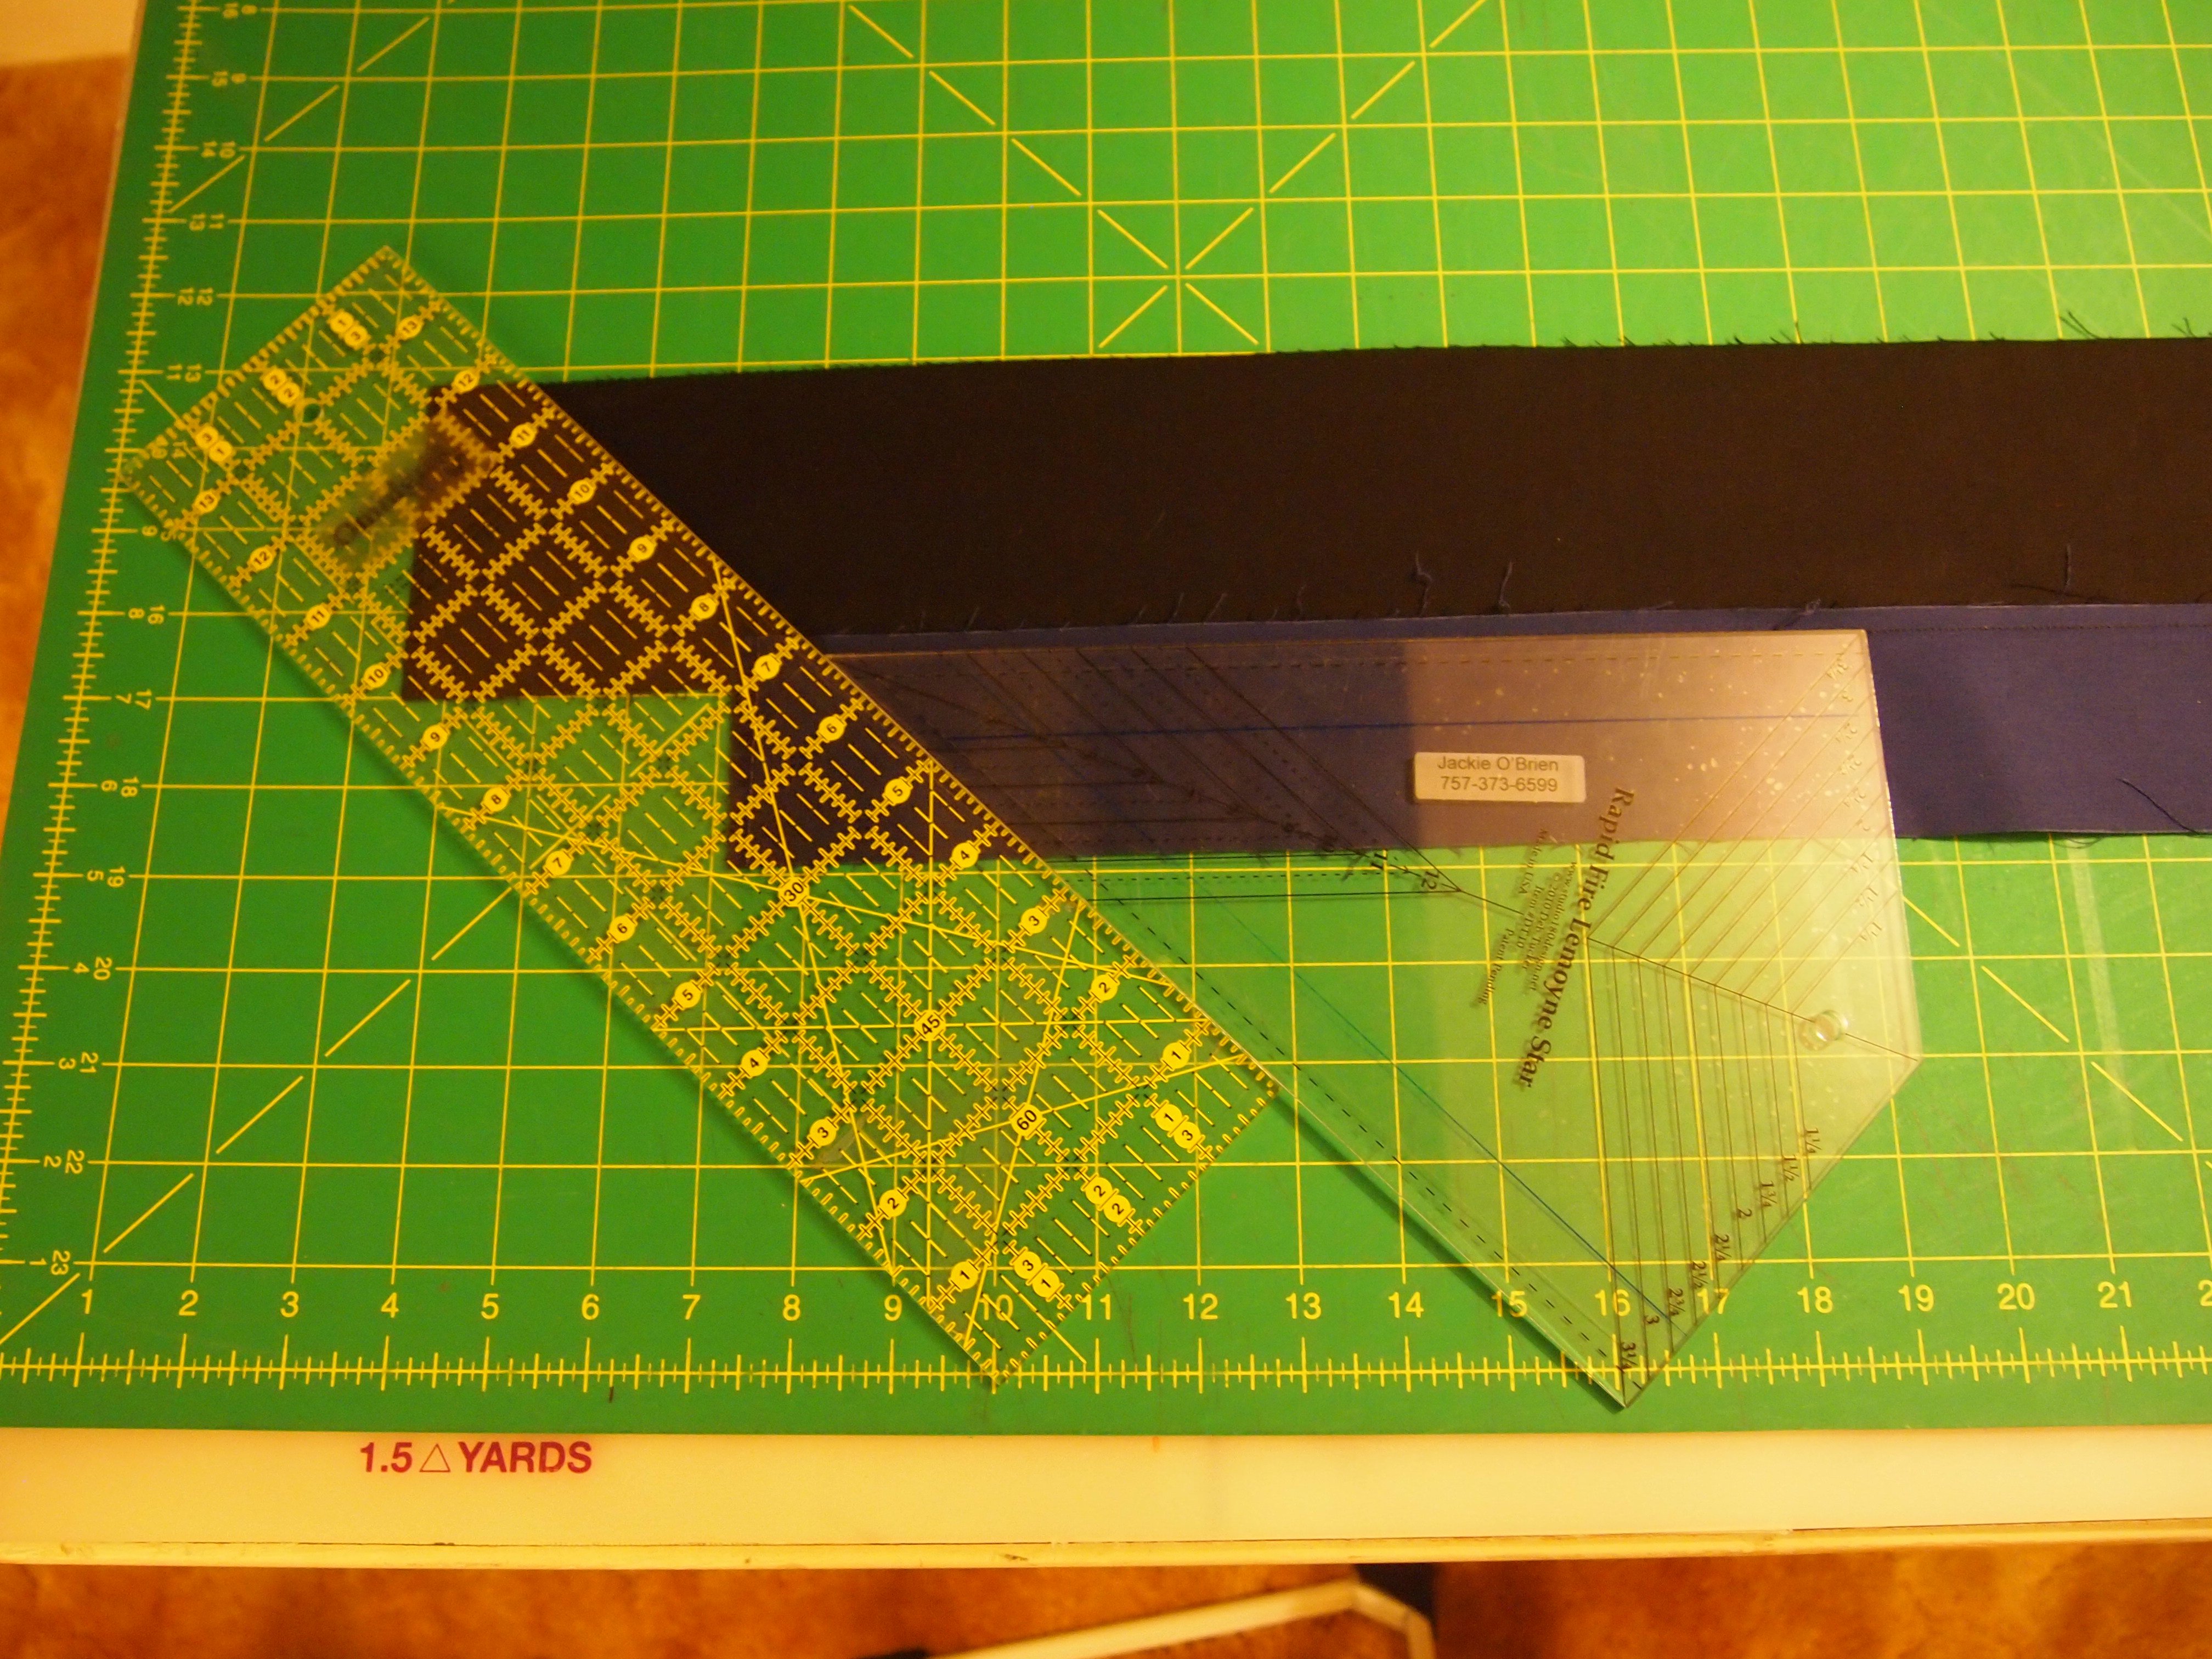
Make the first cut.
Place the cutting ruler on that beautiful 45 degree angle and cut strips the width of your star strip. For an 8″ Lemoyne Star I cut 2 1/5″ strips. So I make a 2 1/2″ cut.

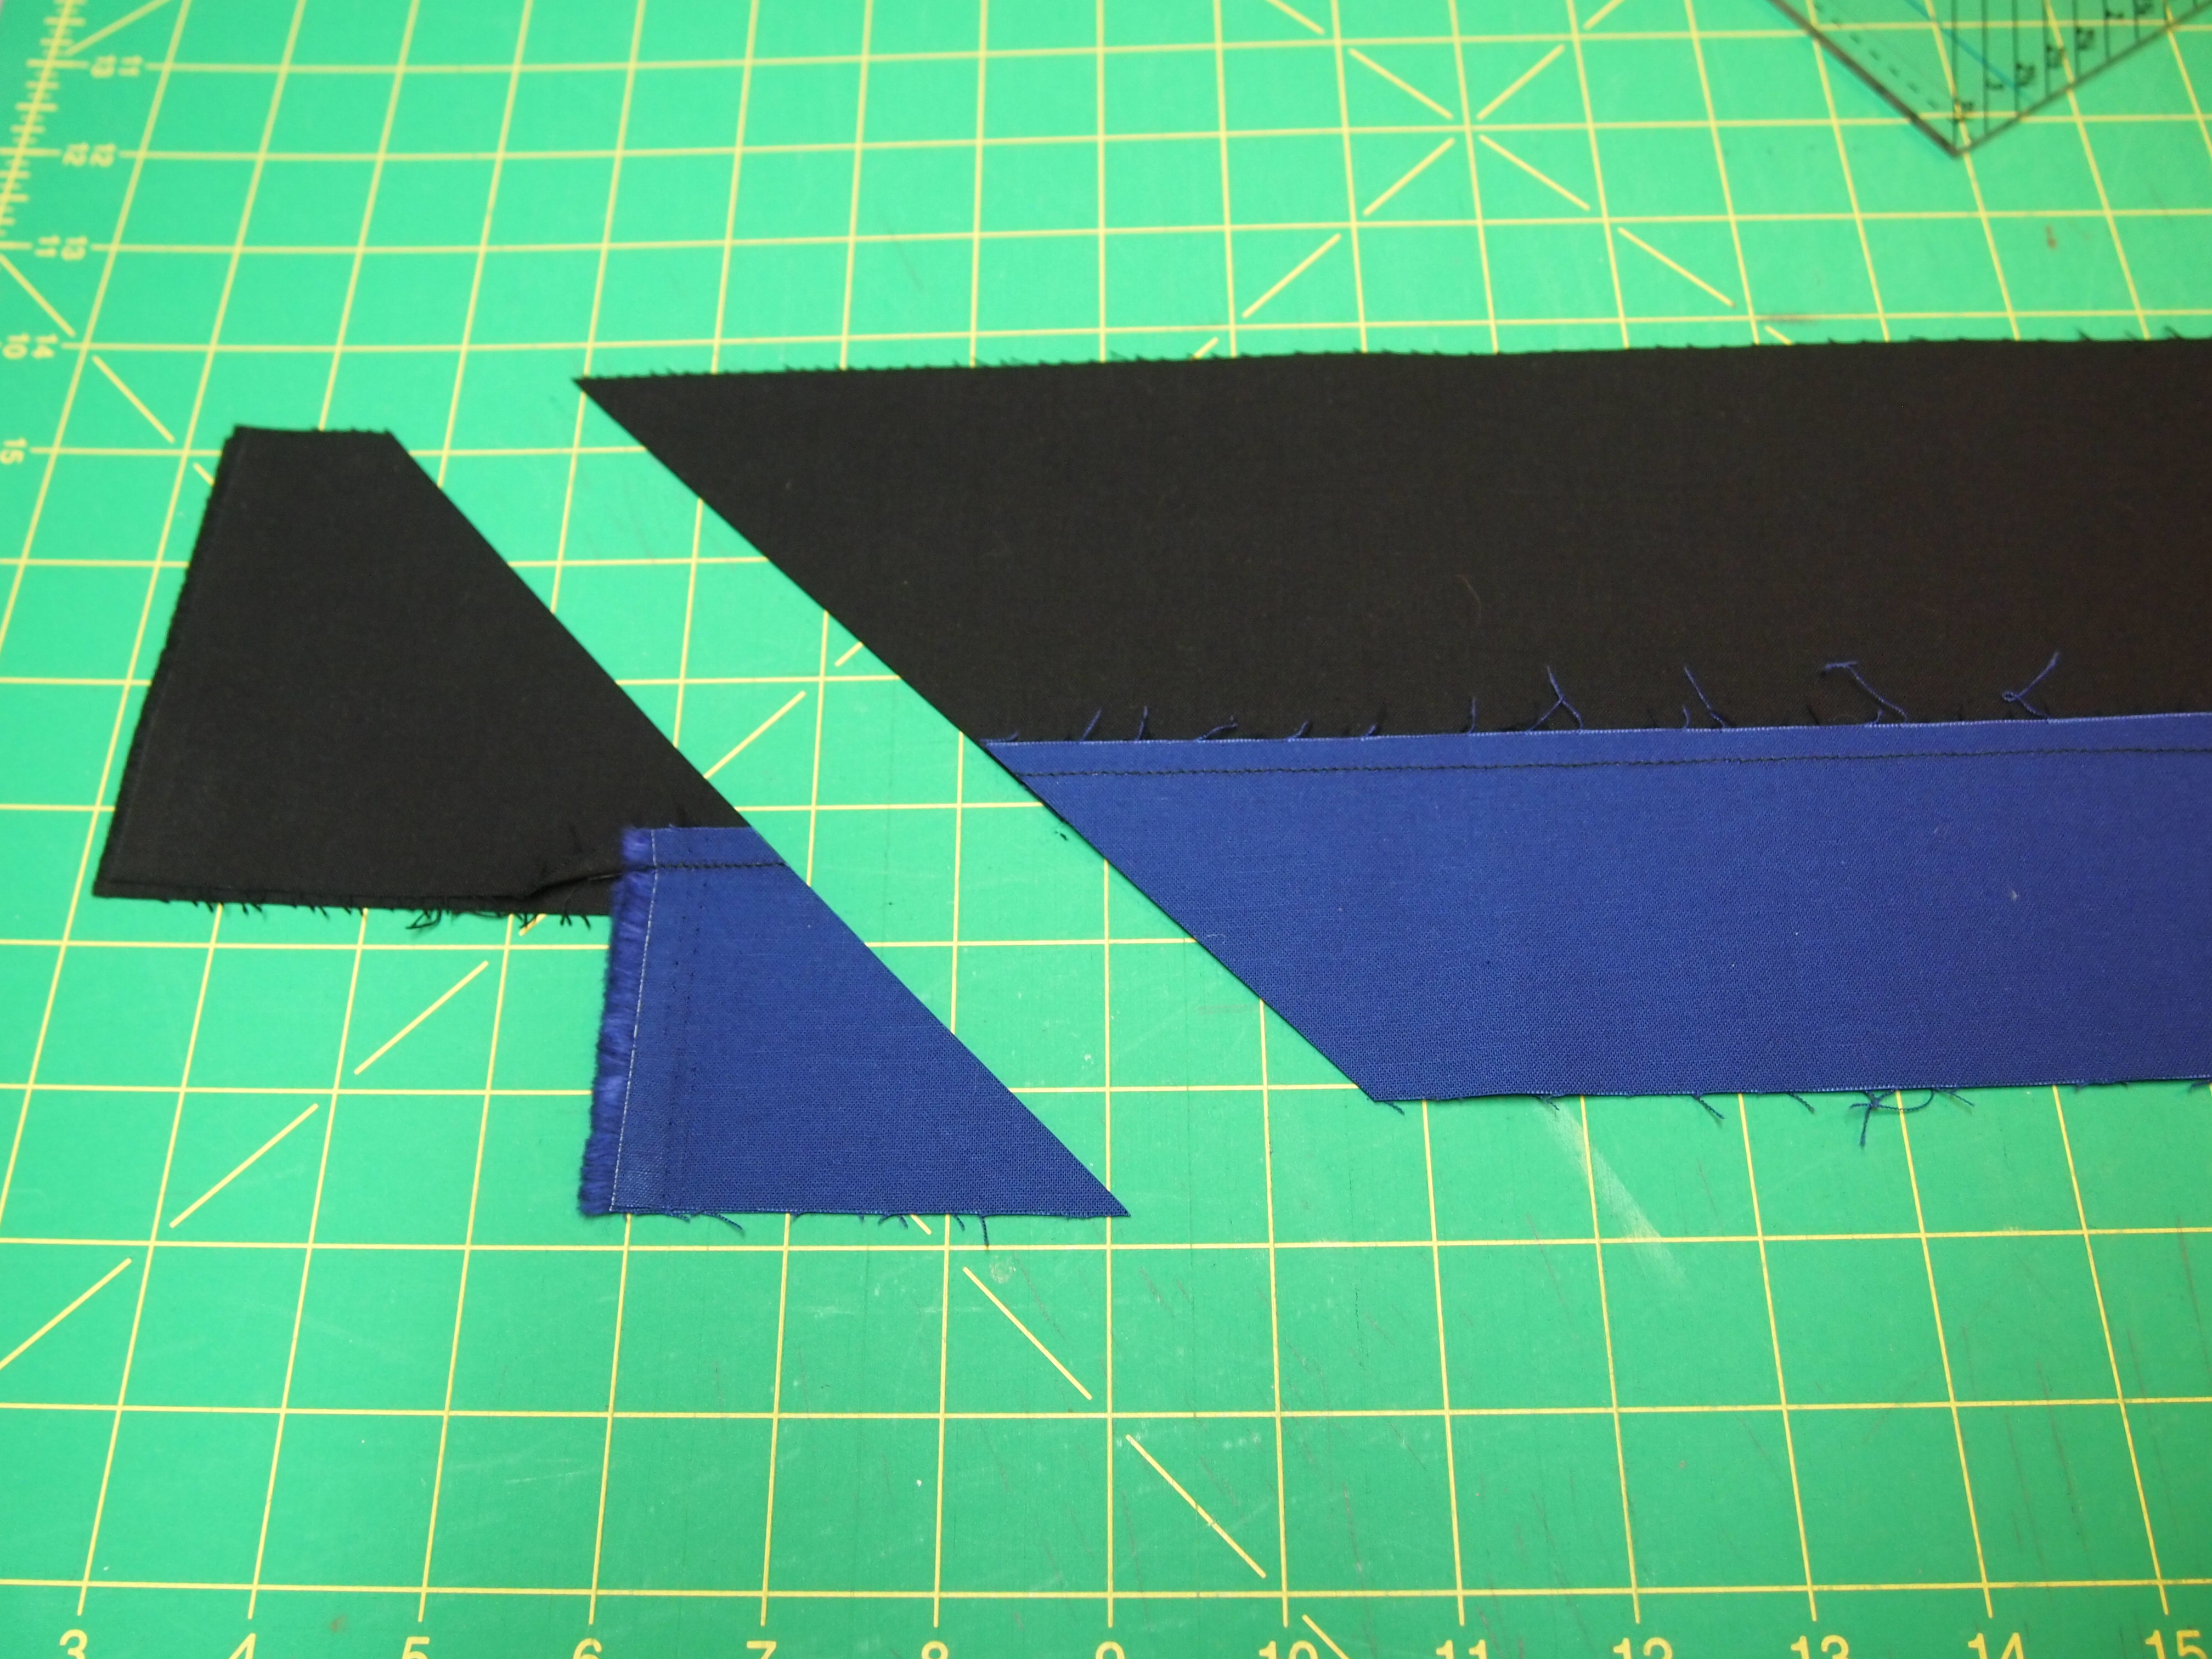
You can go ahead and make all your 2 1/2″ cuts, but I prefer to make the first cut and then make the second cut by going vertically south to north and position the ruler edge at the tip of the star point and trim straight up.

These triangles will be the side pieces for your unit.
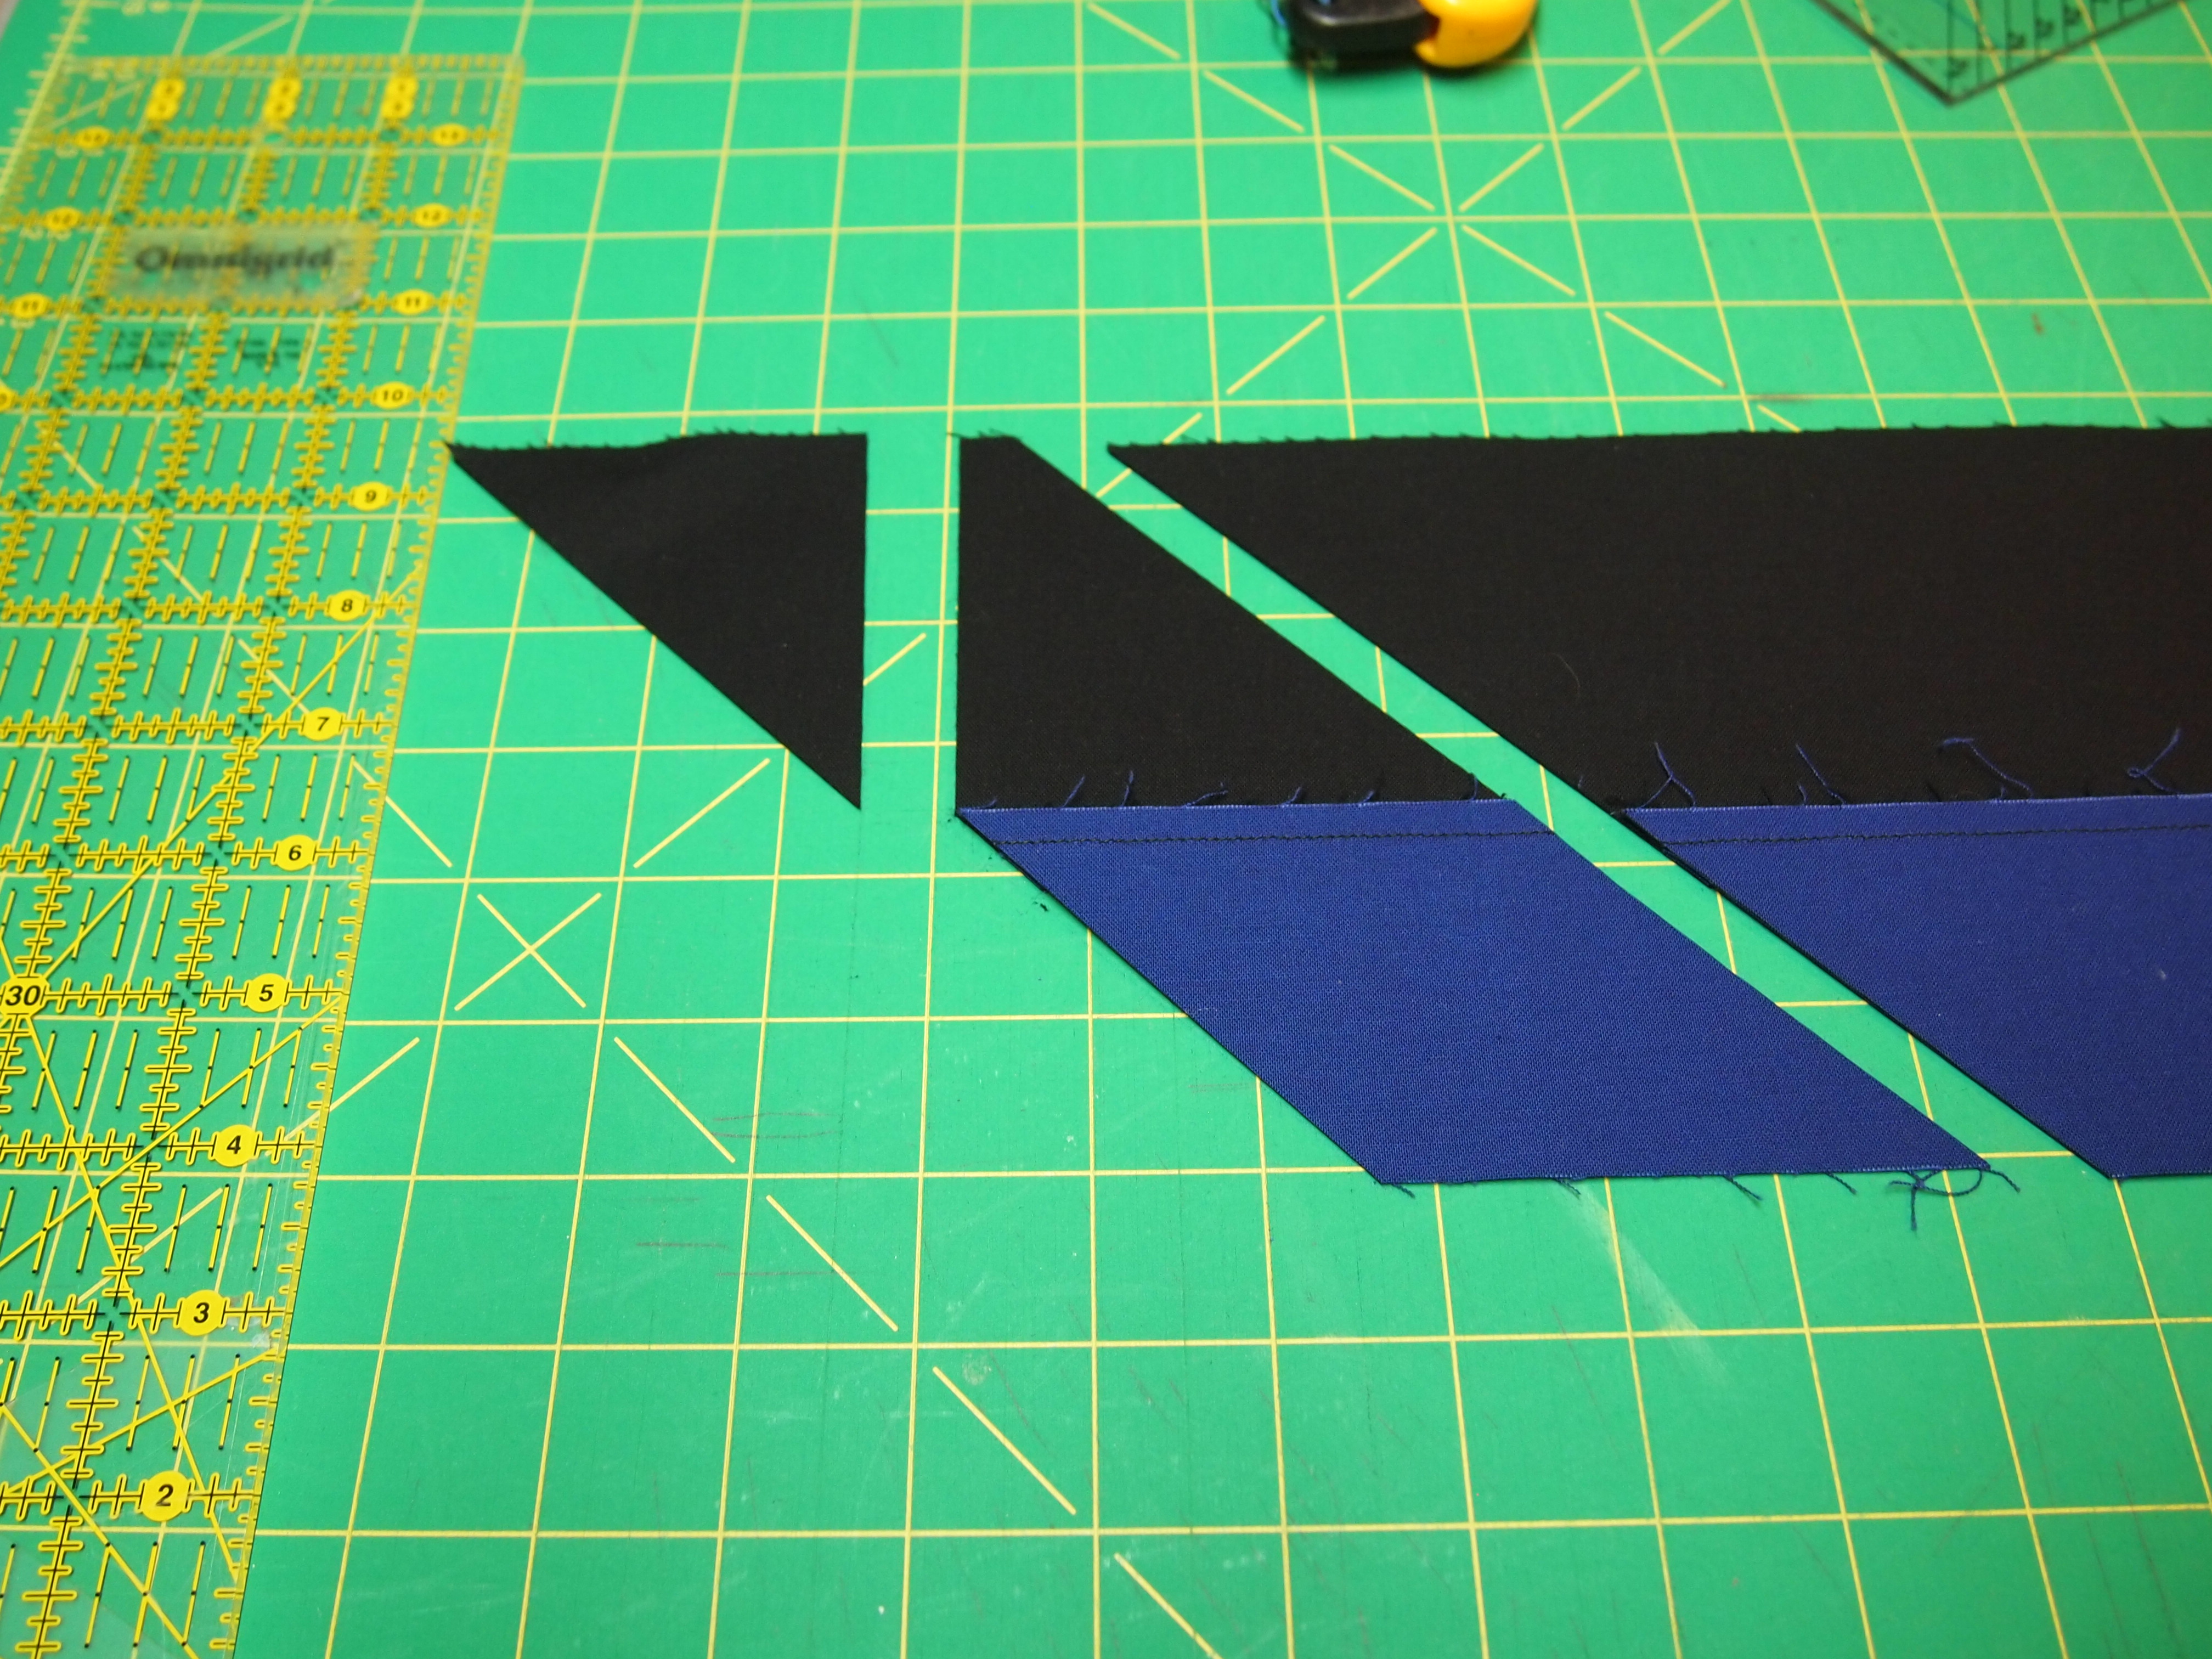
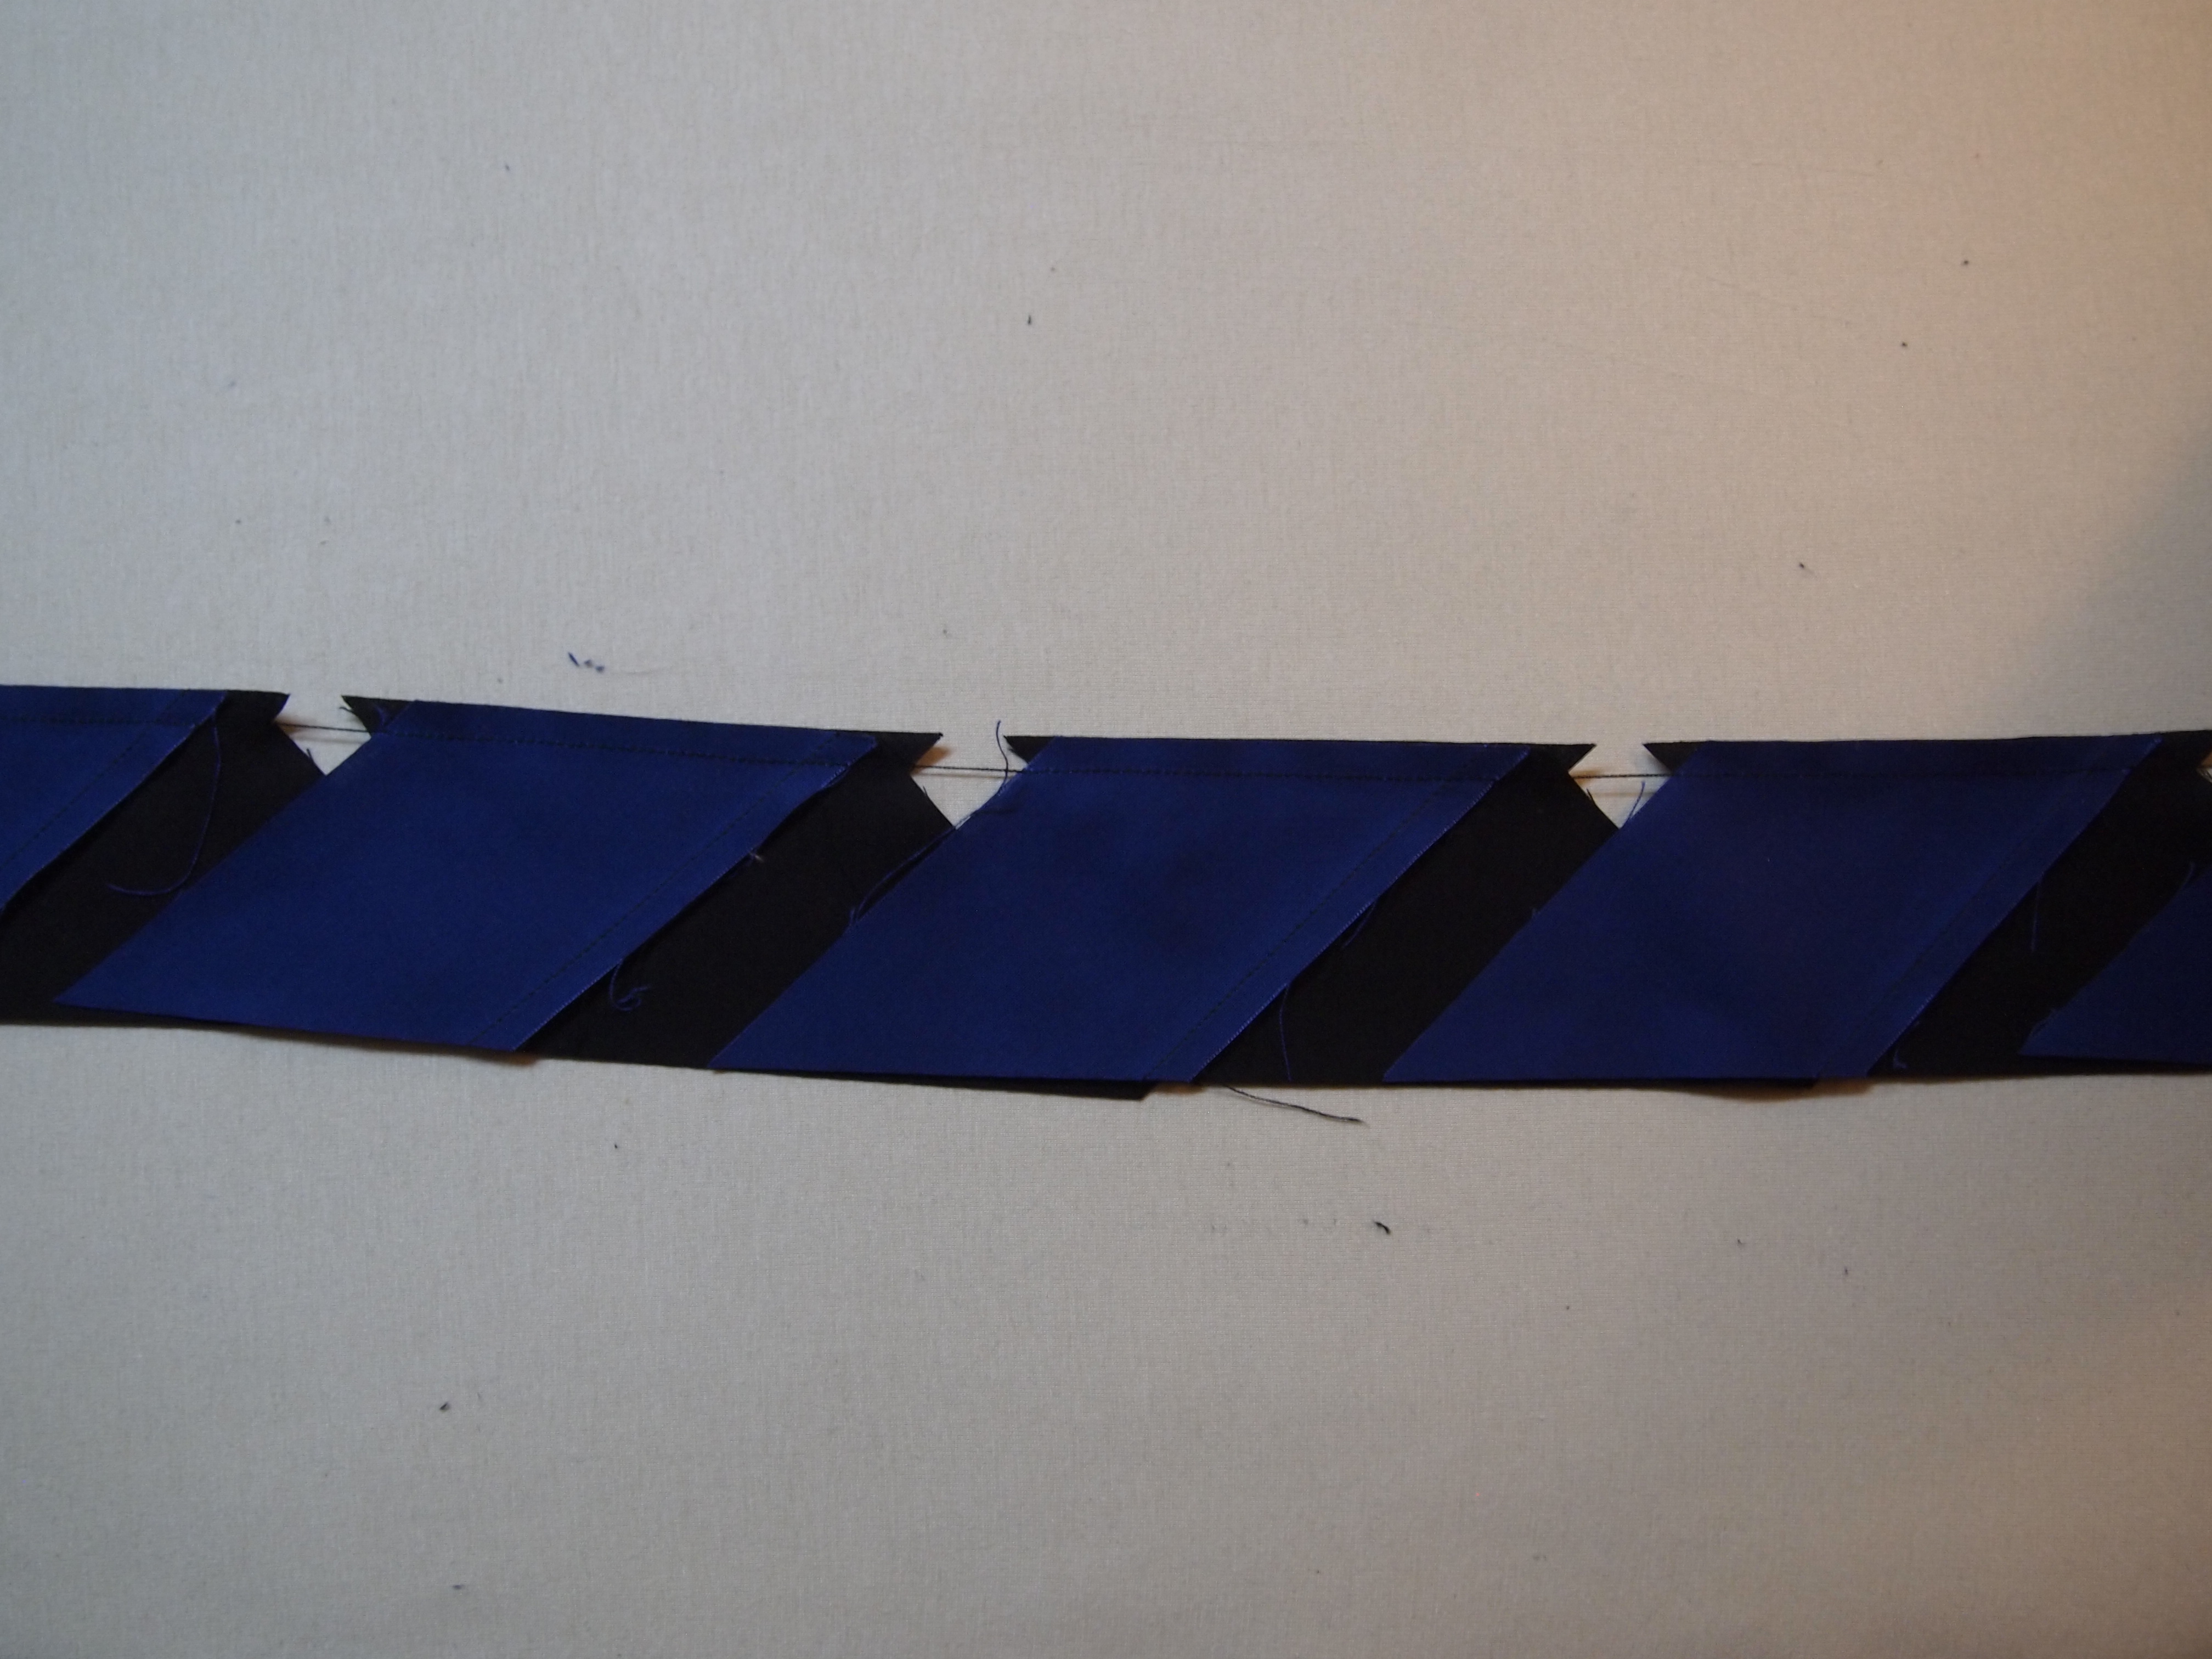
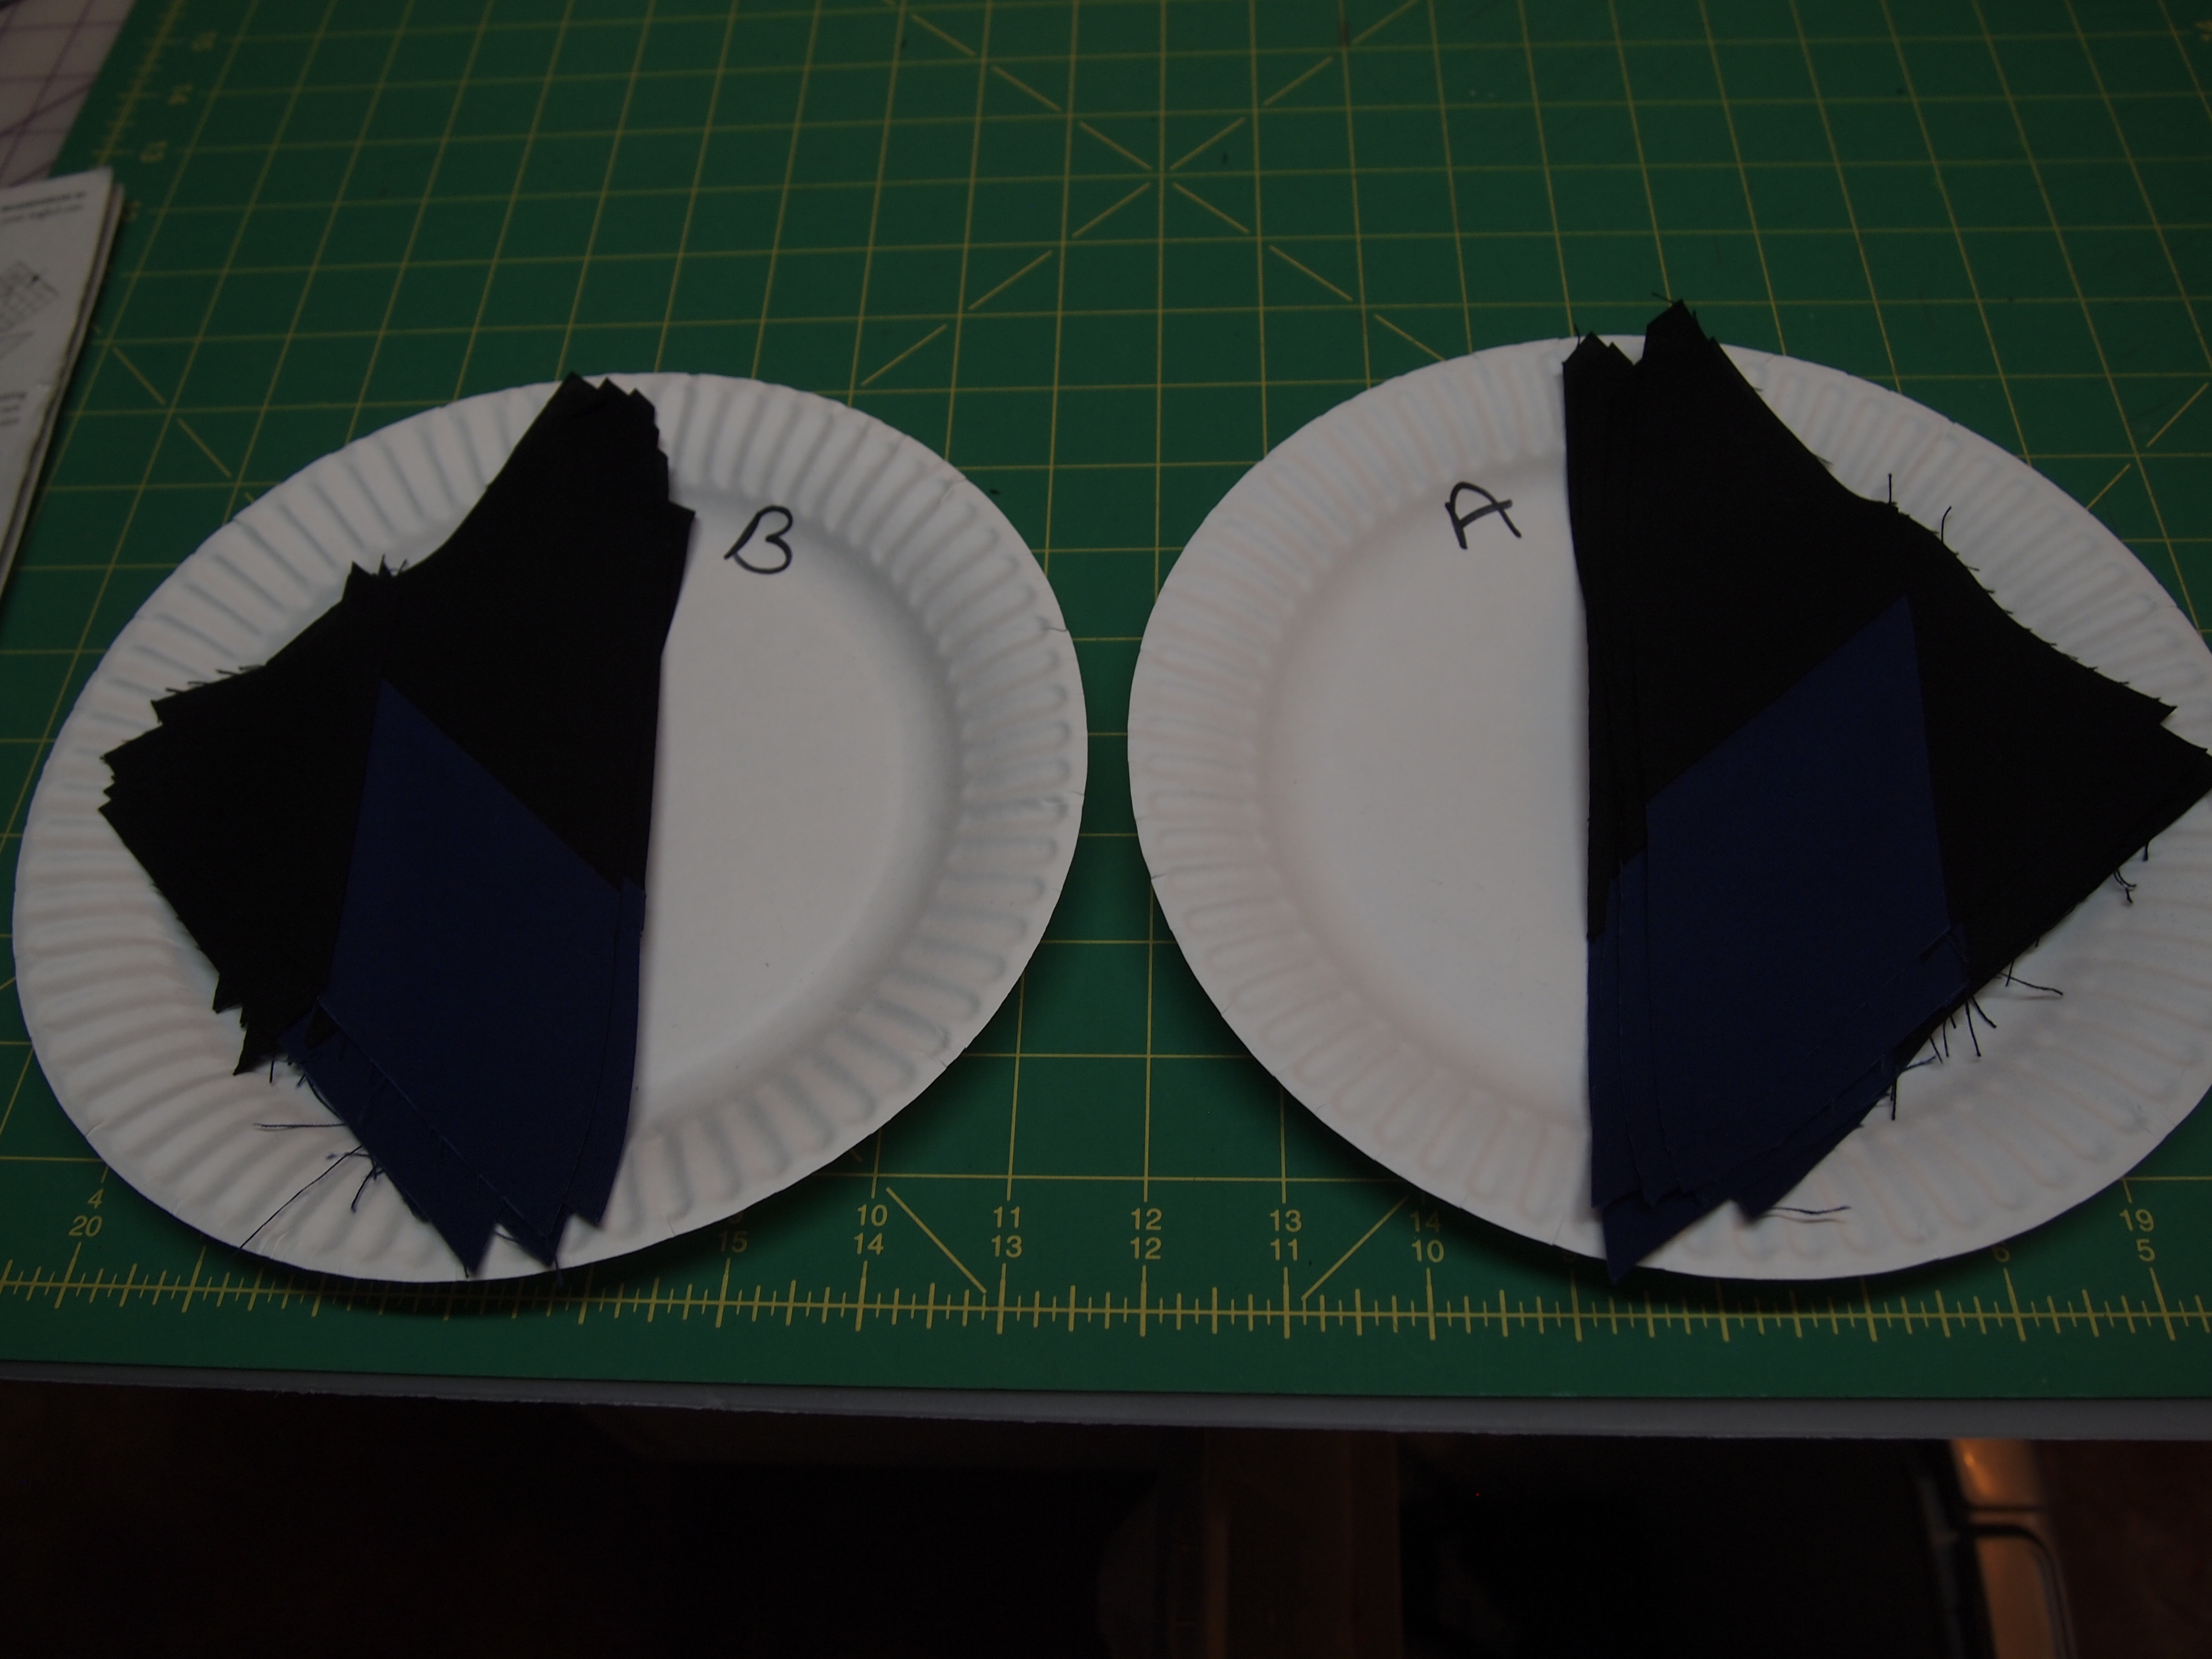
Once all your units are cut, open your units with A on the right and B on the left as shown below.
This is a great tip from fellow teacher Jane Godshall: Take two paper plates, label one A and one B. Open your units as shown above place all the A units on one plate and B units on the other. This will save you from confusing them.

Take plate “A” to the sewing machine, center and stitch one side triangle to each unit.

Chain stitch all the “A” Units.
Take the chain to the ironing board. “A” pieces will be pressed toward the star point fabric so lay the chain with the star point fabric on top.
By chain stitching the “A” units together and pressing, it keeps your brains from falling out trying to keep straight what unit you are working on.
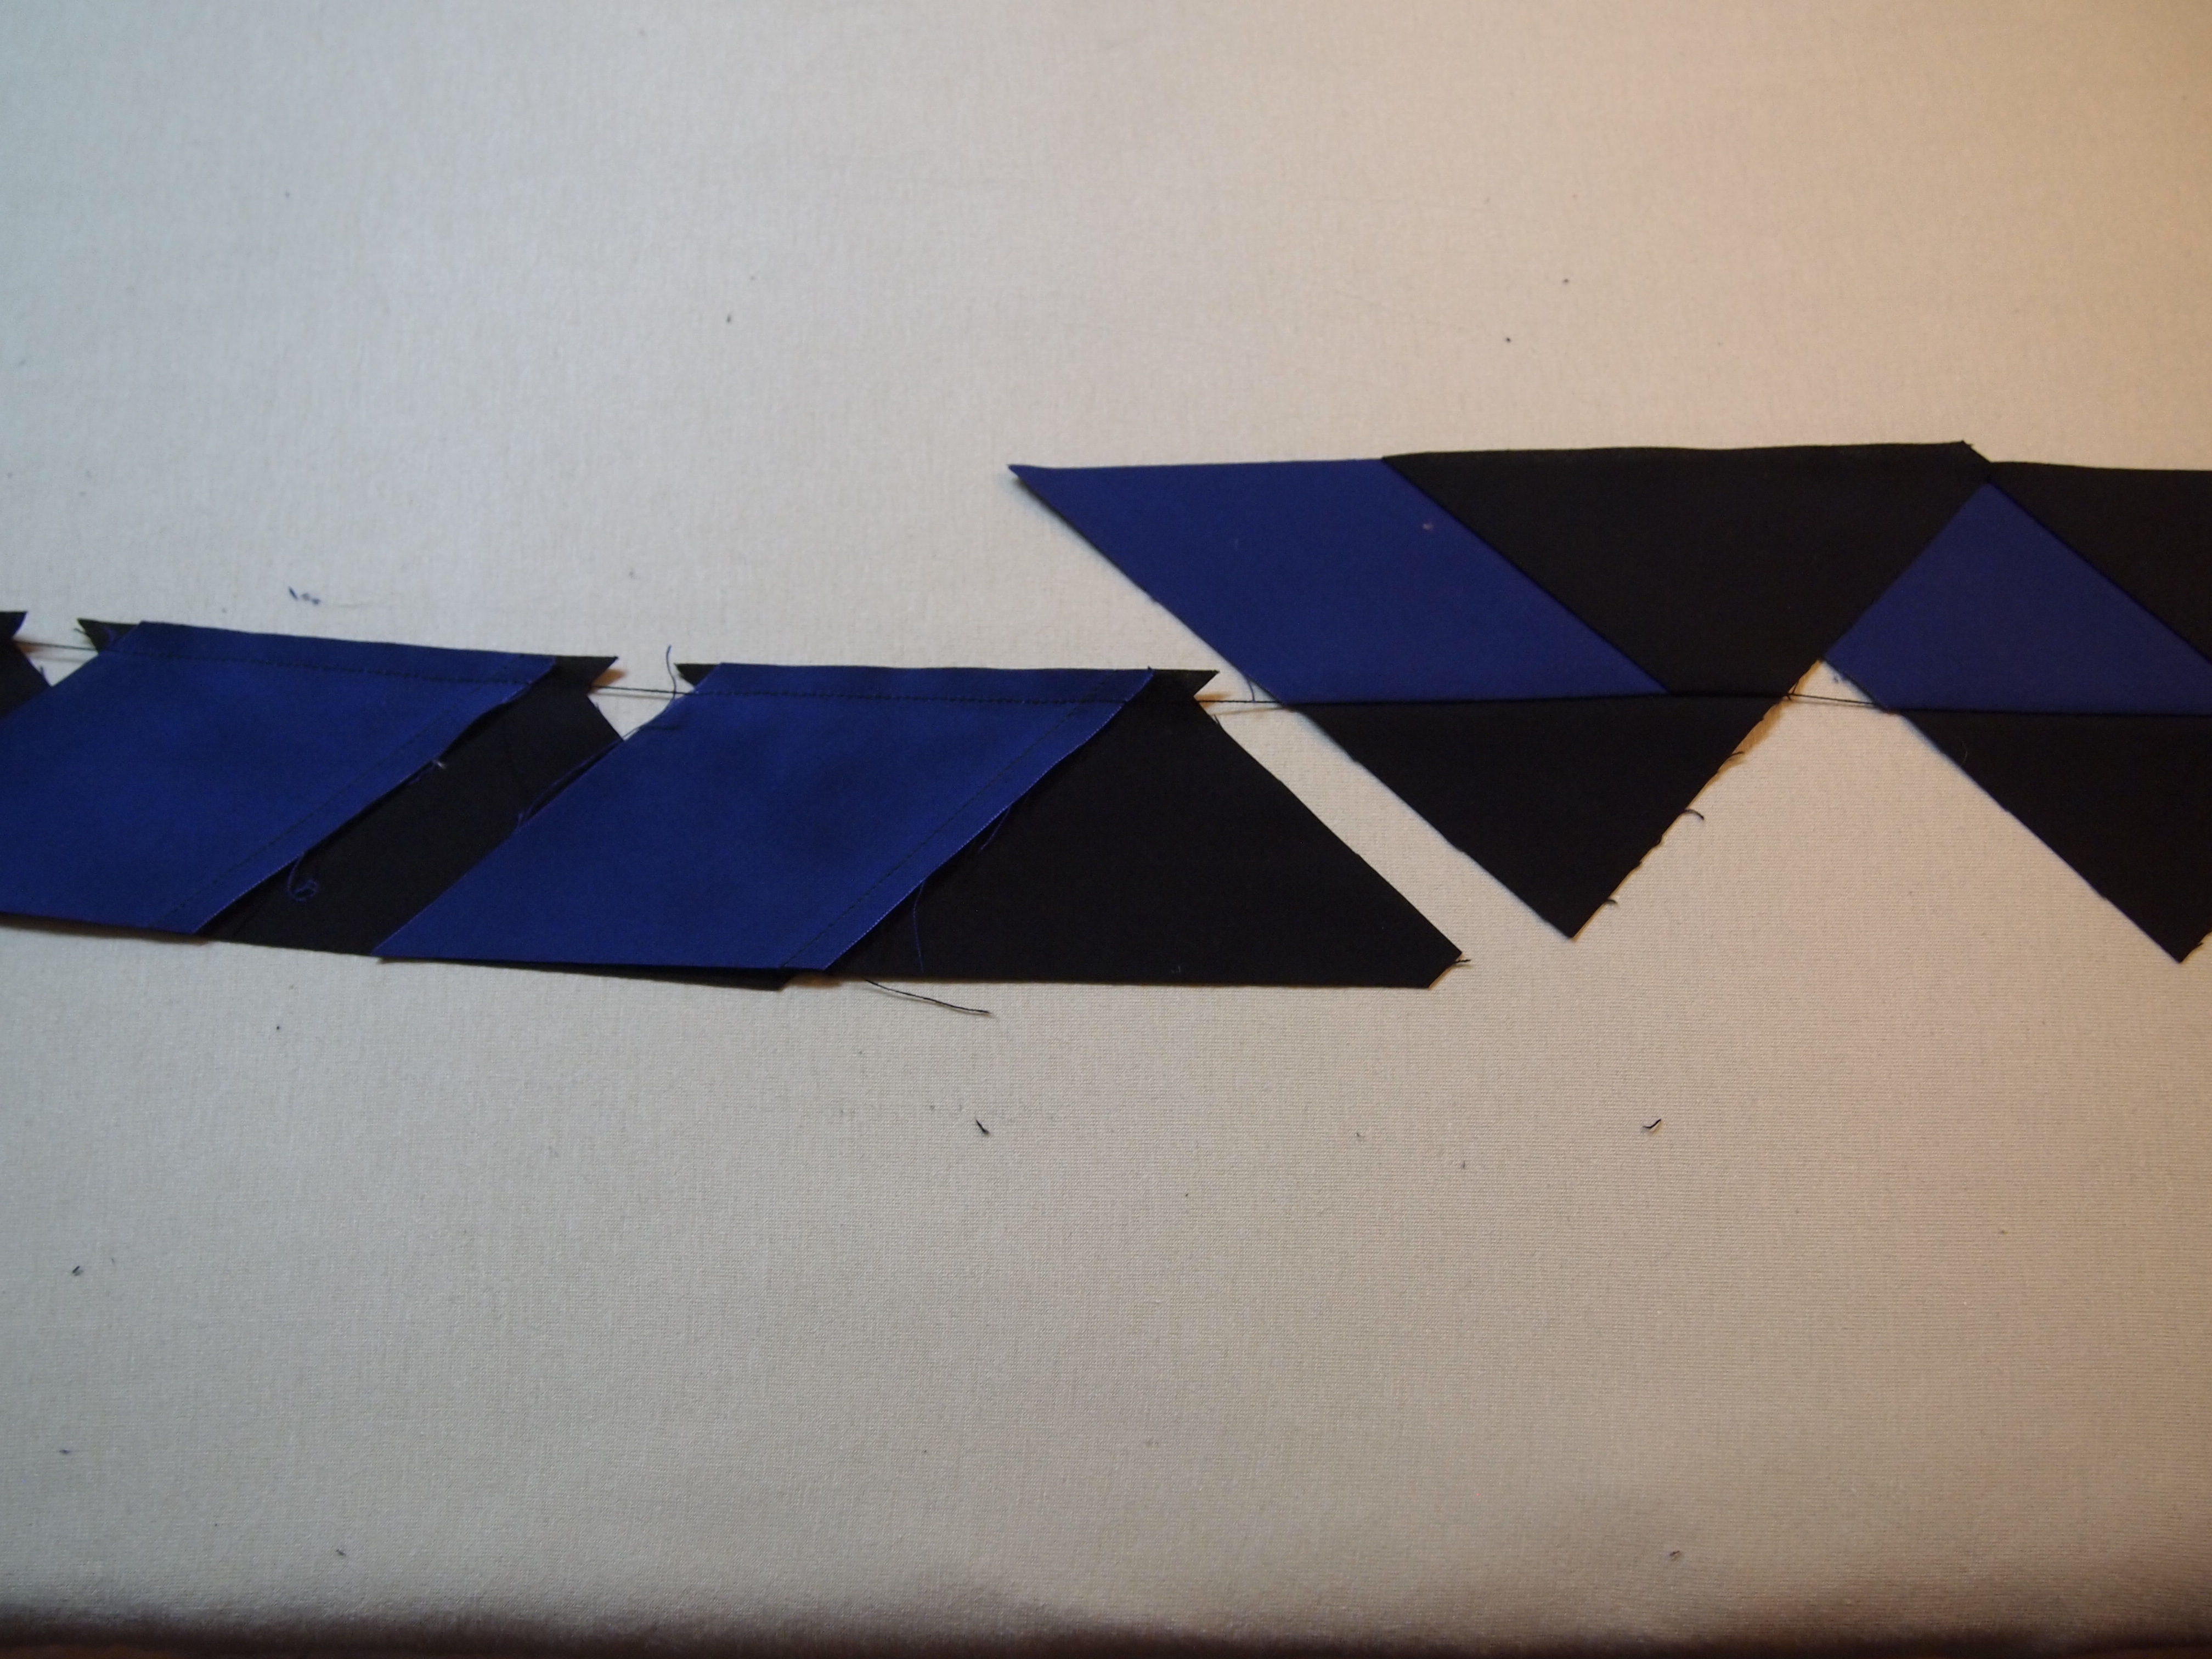
Now chain stitch the side triangles to the “B” units with the side triangles on top.
Press.
Our “A” and “B” units are ready to trim.
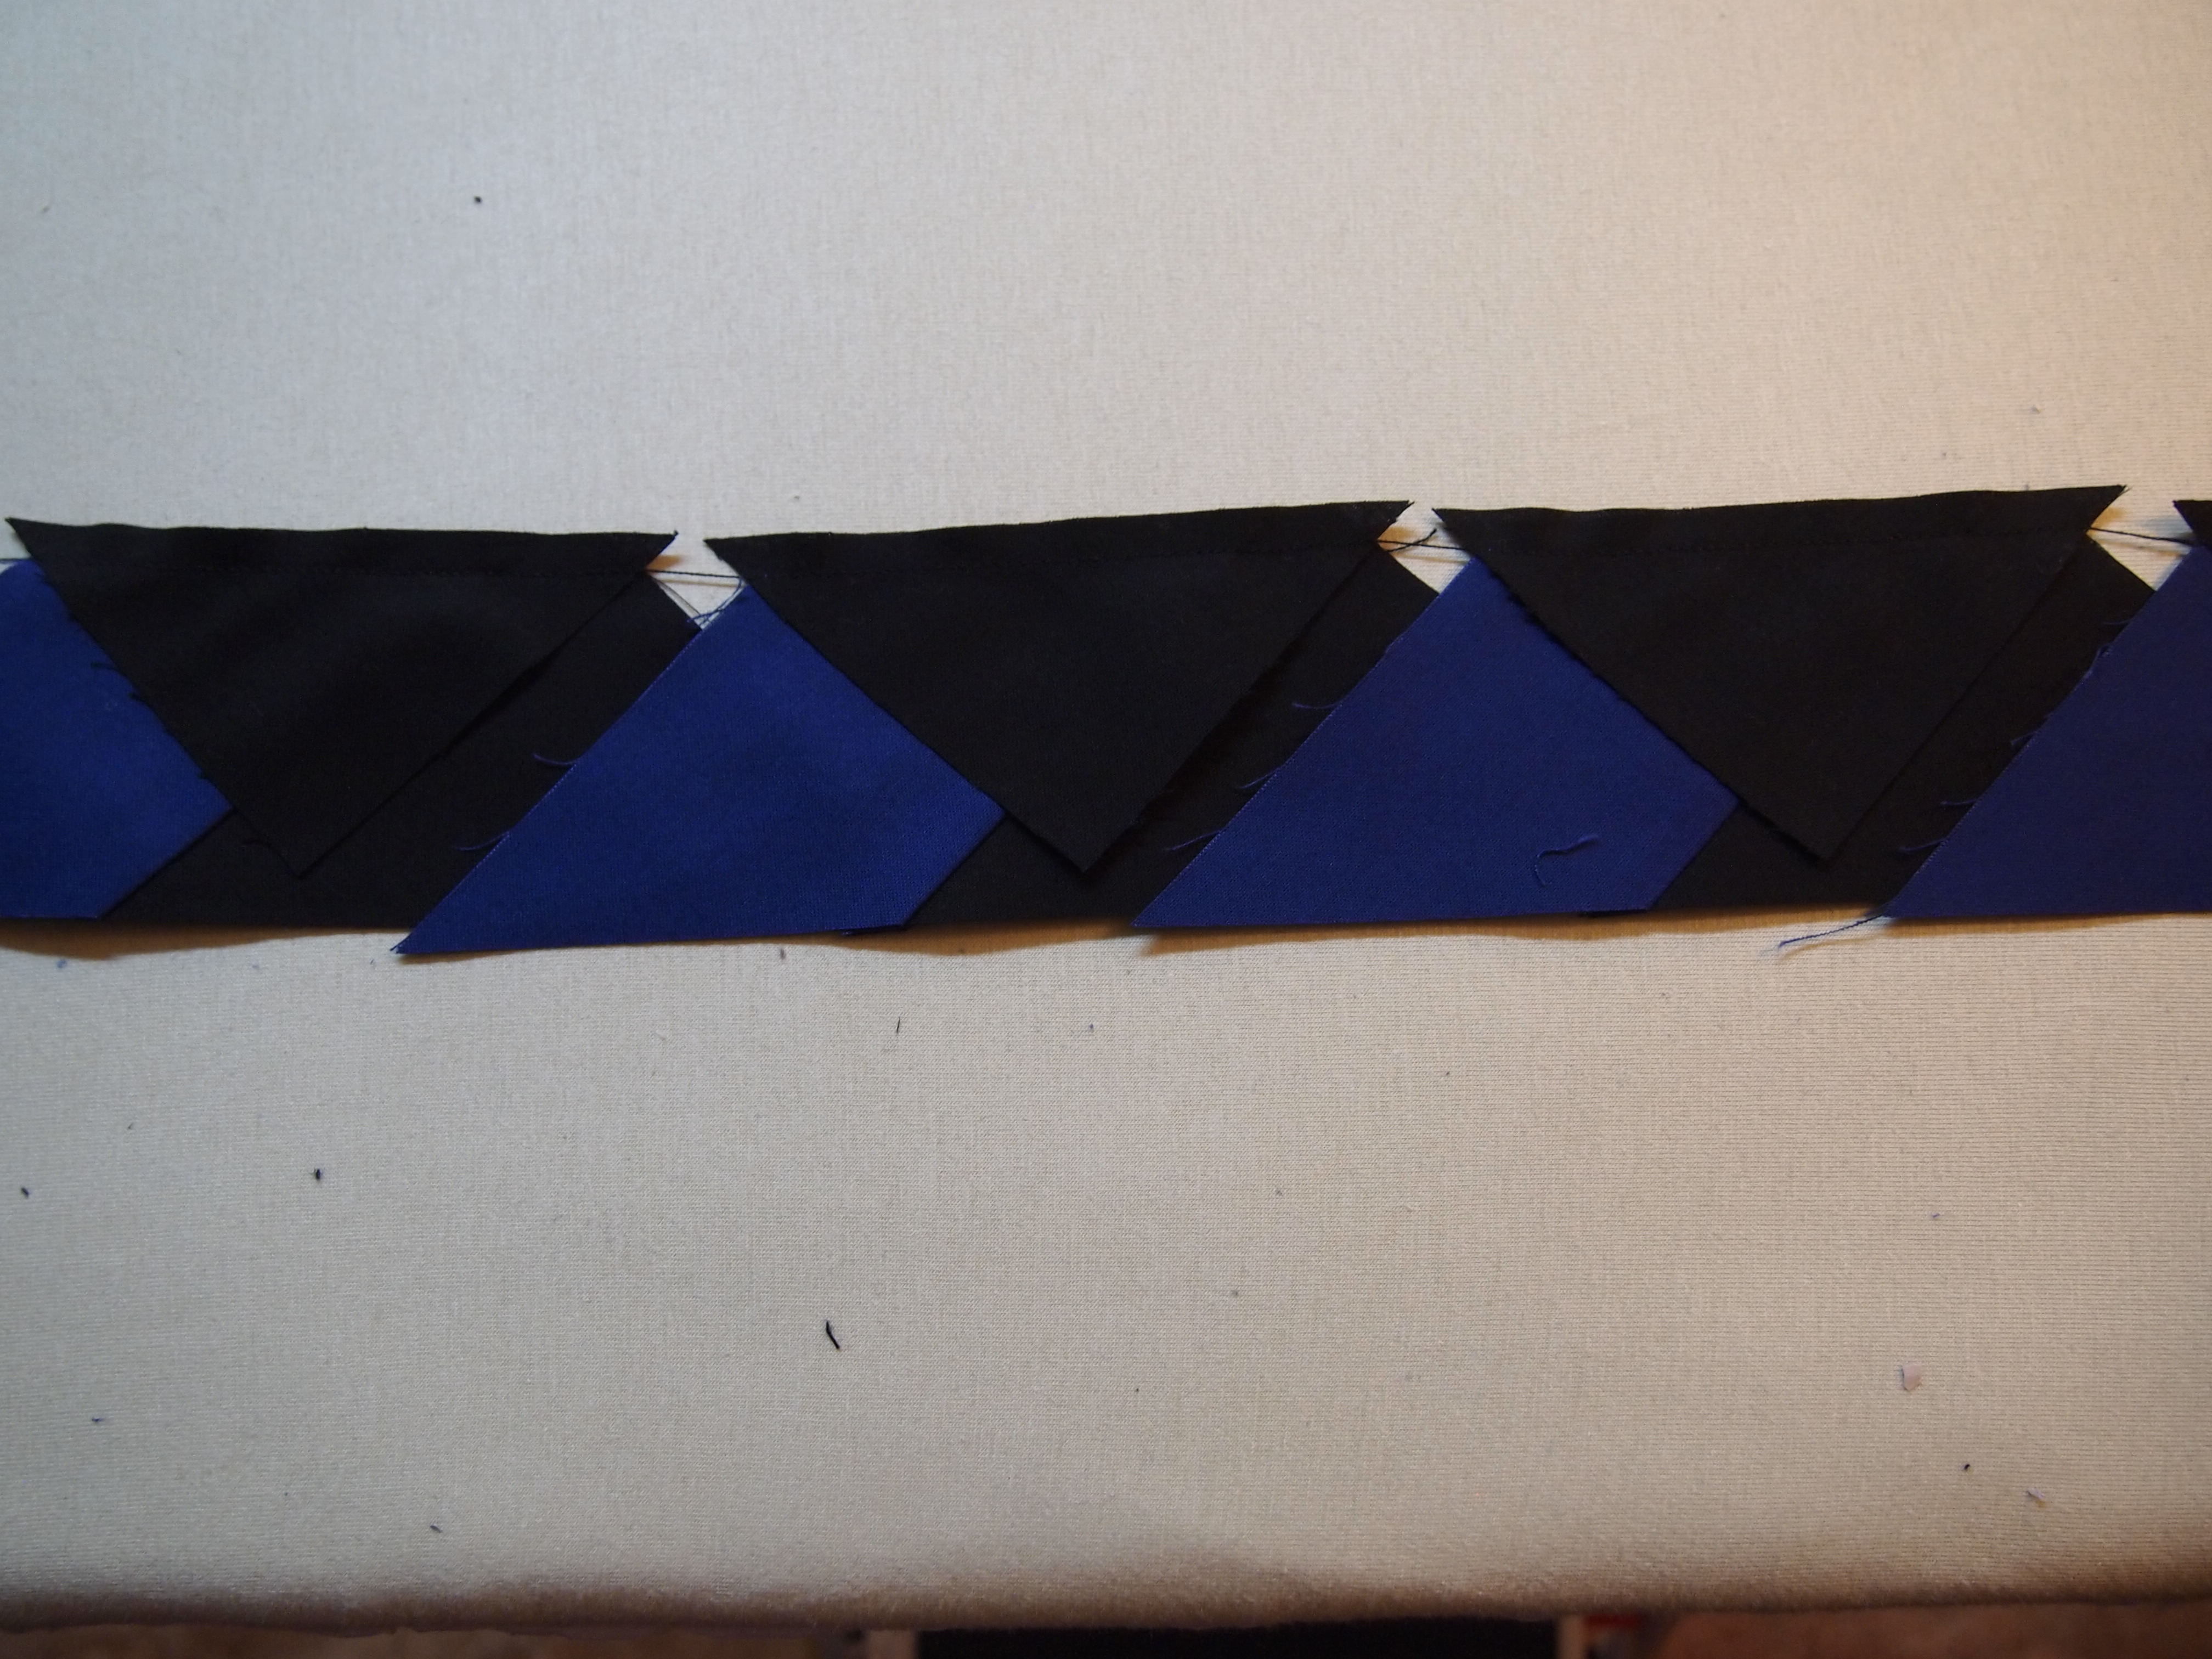
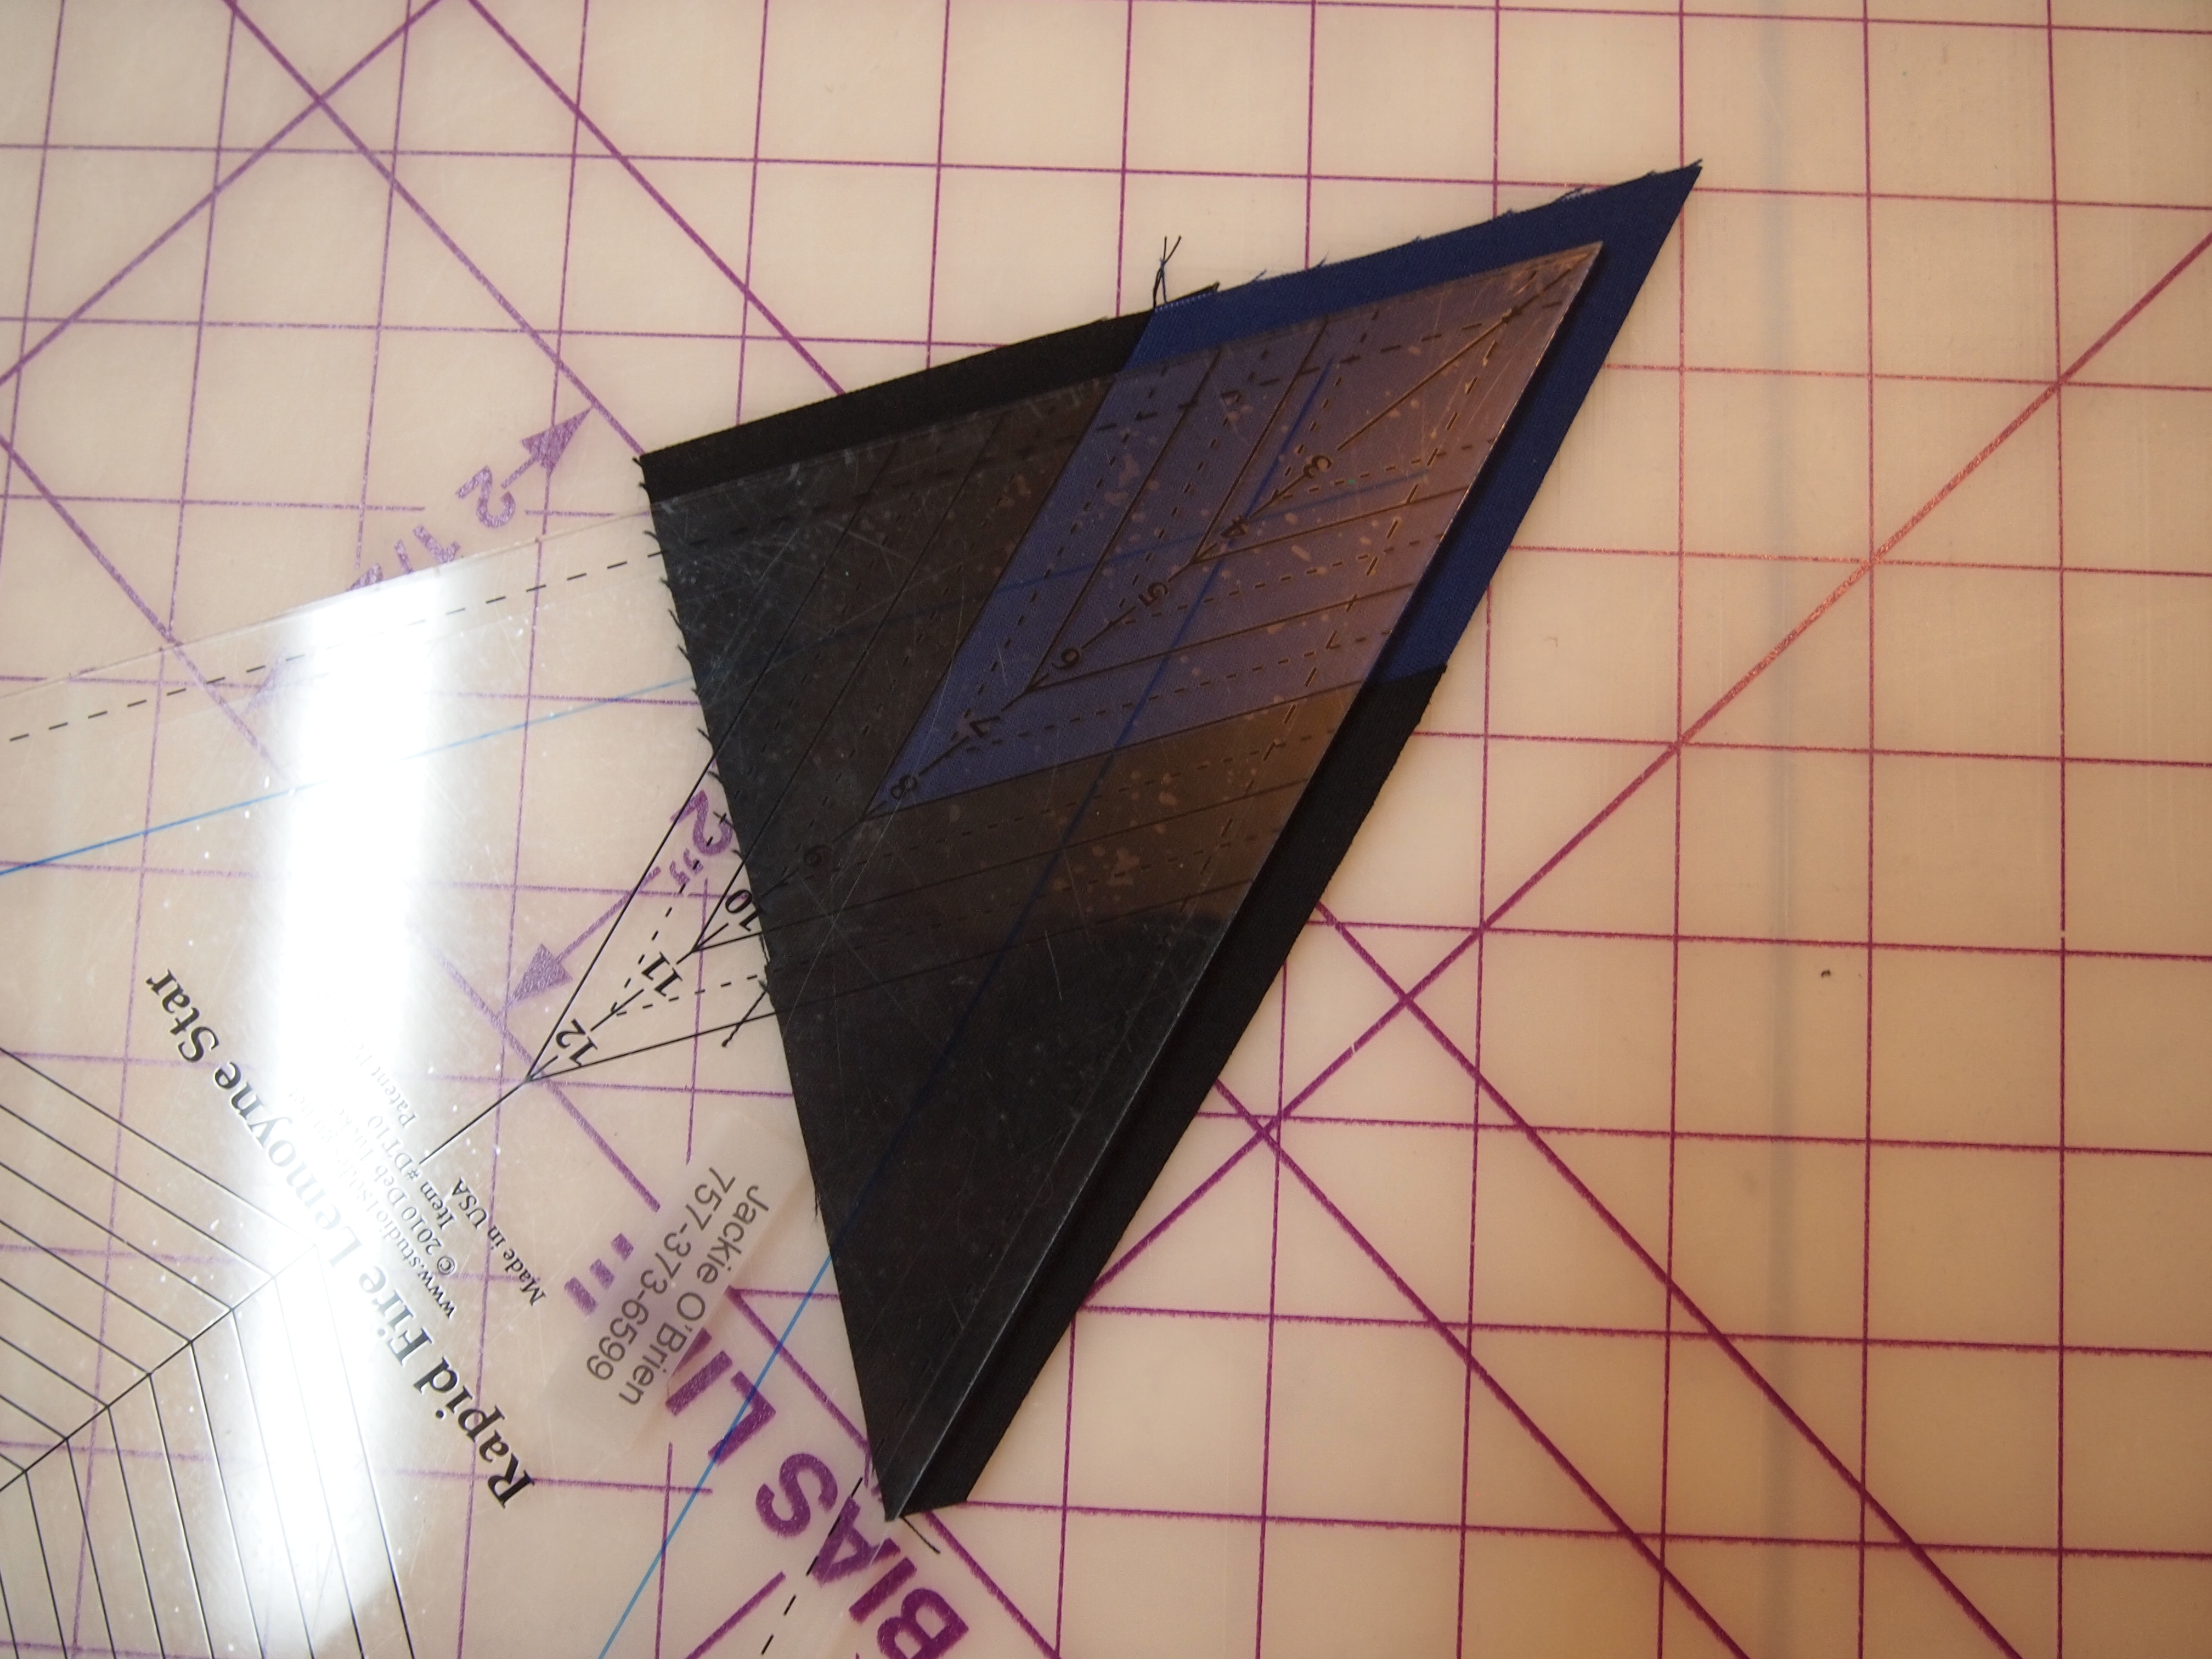
Sorry for the glare, I’m having lighting issues. I don’t care for most ruler gripping products but I love InvisiGrip. This product helps keep your ruler from sliding with bunching up your fabric when you are positioning the ruler. You will definitely want to use some on your Rapid Fire Lemoyne Star Ruler. As you put pressure on the ruler toward the point it will keep it from moving.
Sorry my fabric is so dark. Place your unit with the star point facing towards 2 o’clock, this helps with trimming both sides without repositioning the unit. I am making 8″ Lemoyne stars so I align the desired block size lines with the sewn seam lines. You really want a sharp blade in your rotary cutter for this trim!
Trim all your units before sewing the “A” and “B” together.
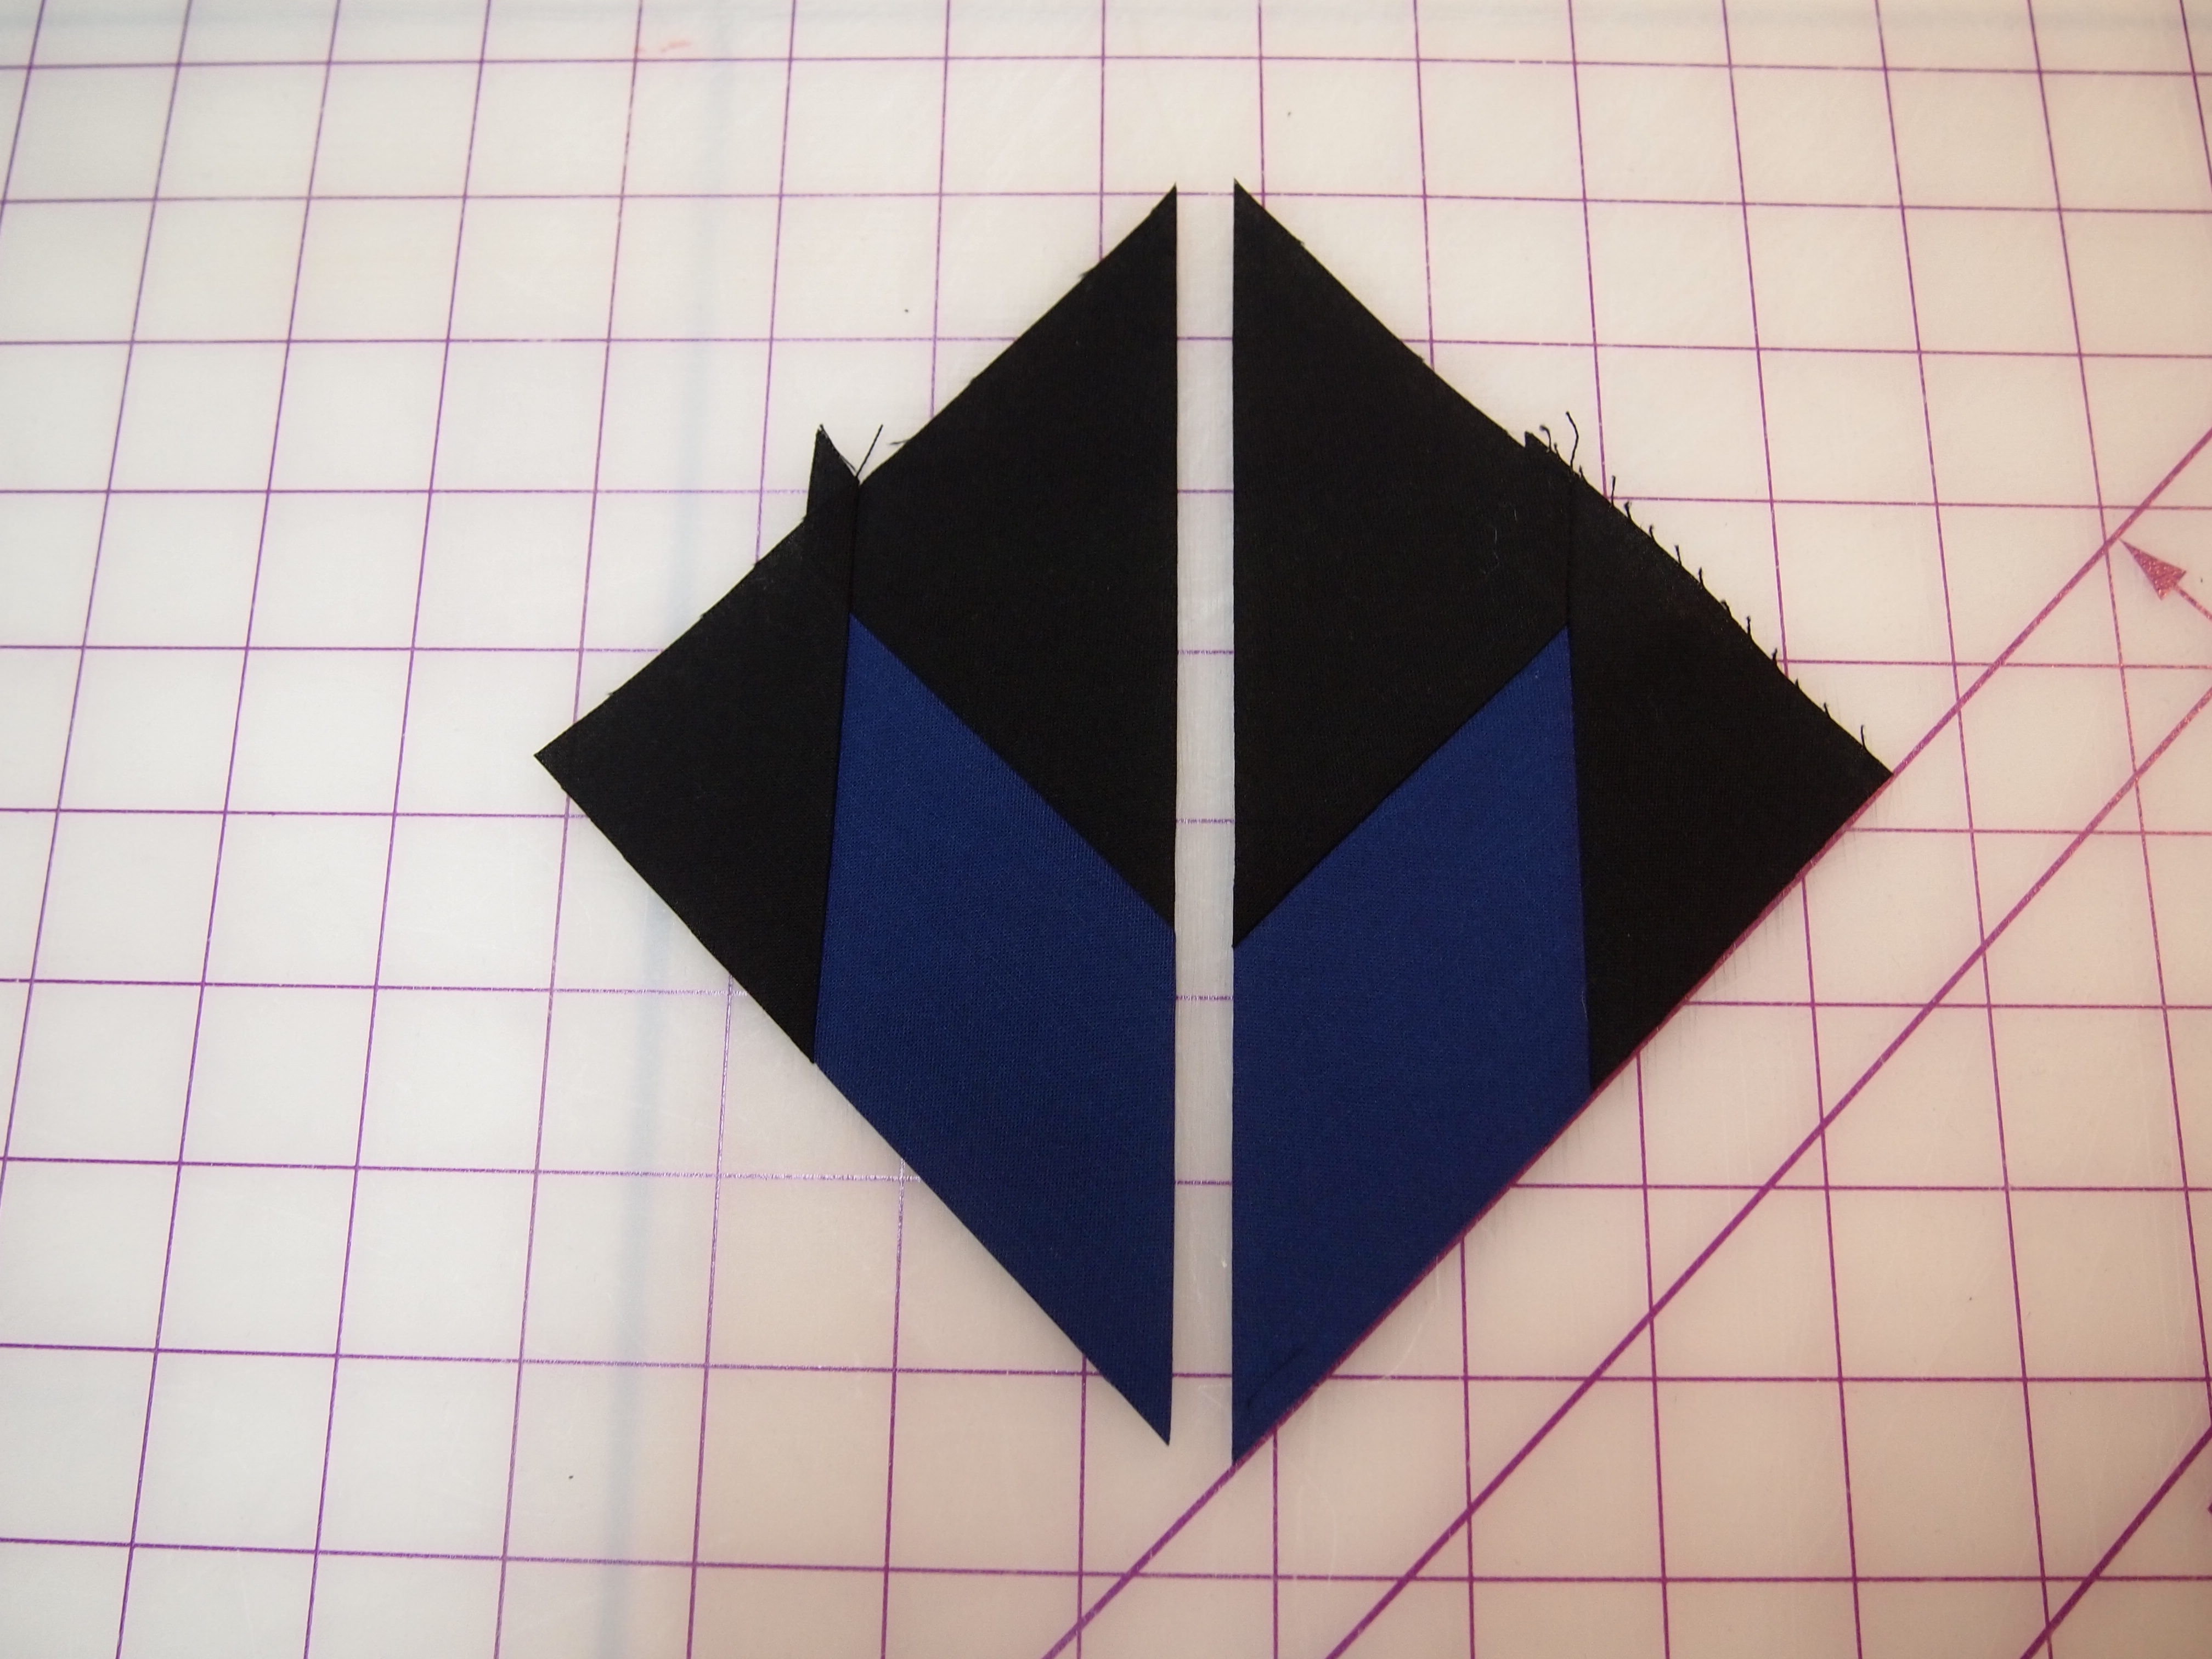

Once the “A” and “B” units are sewn together, trim the dog ears from the star points. Sew 4 units to make a block.
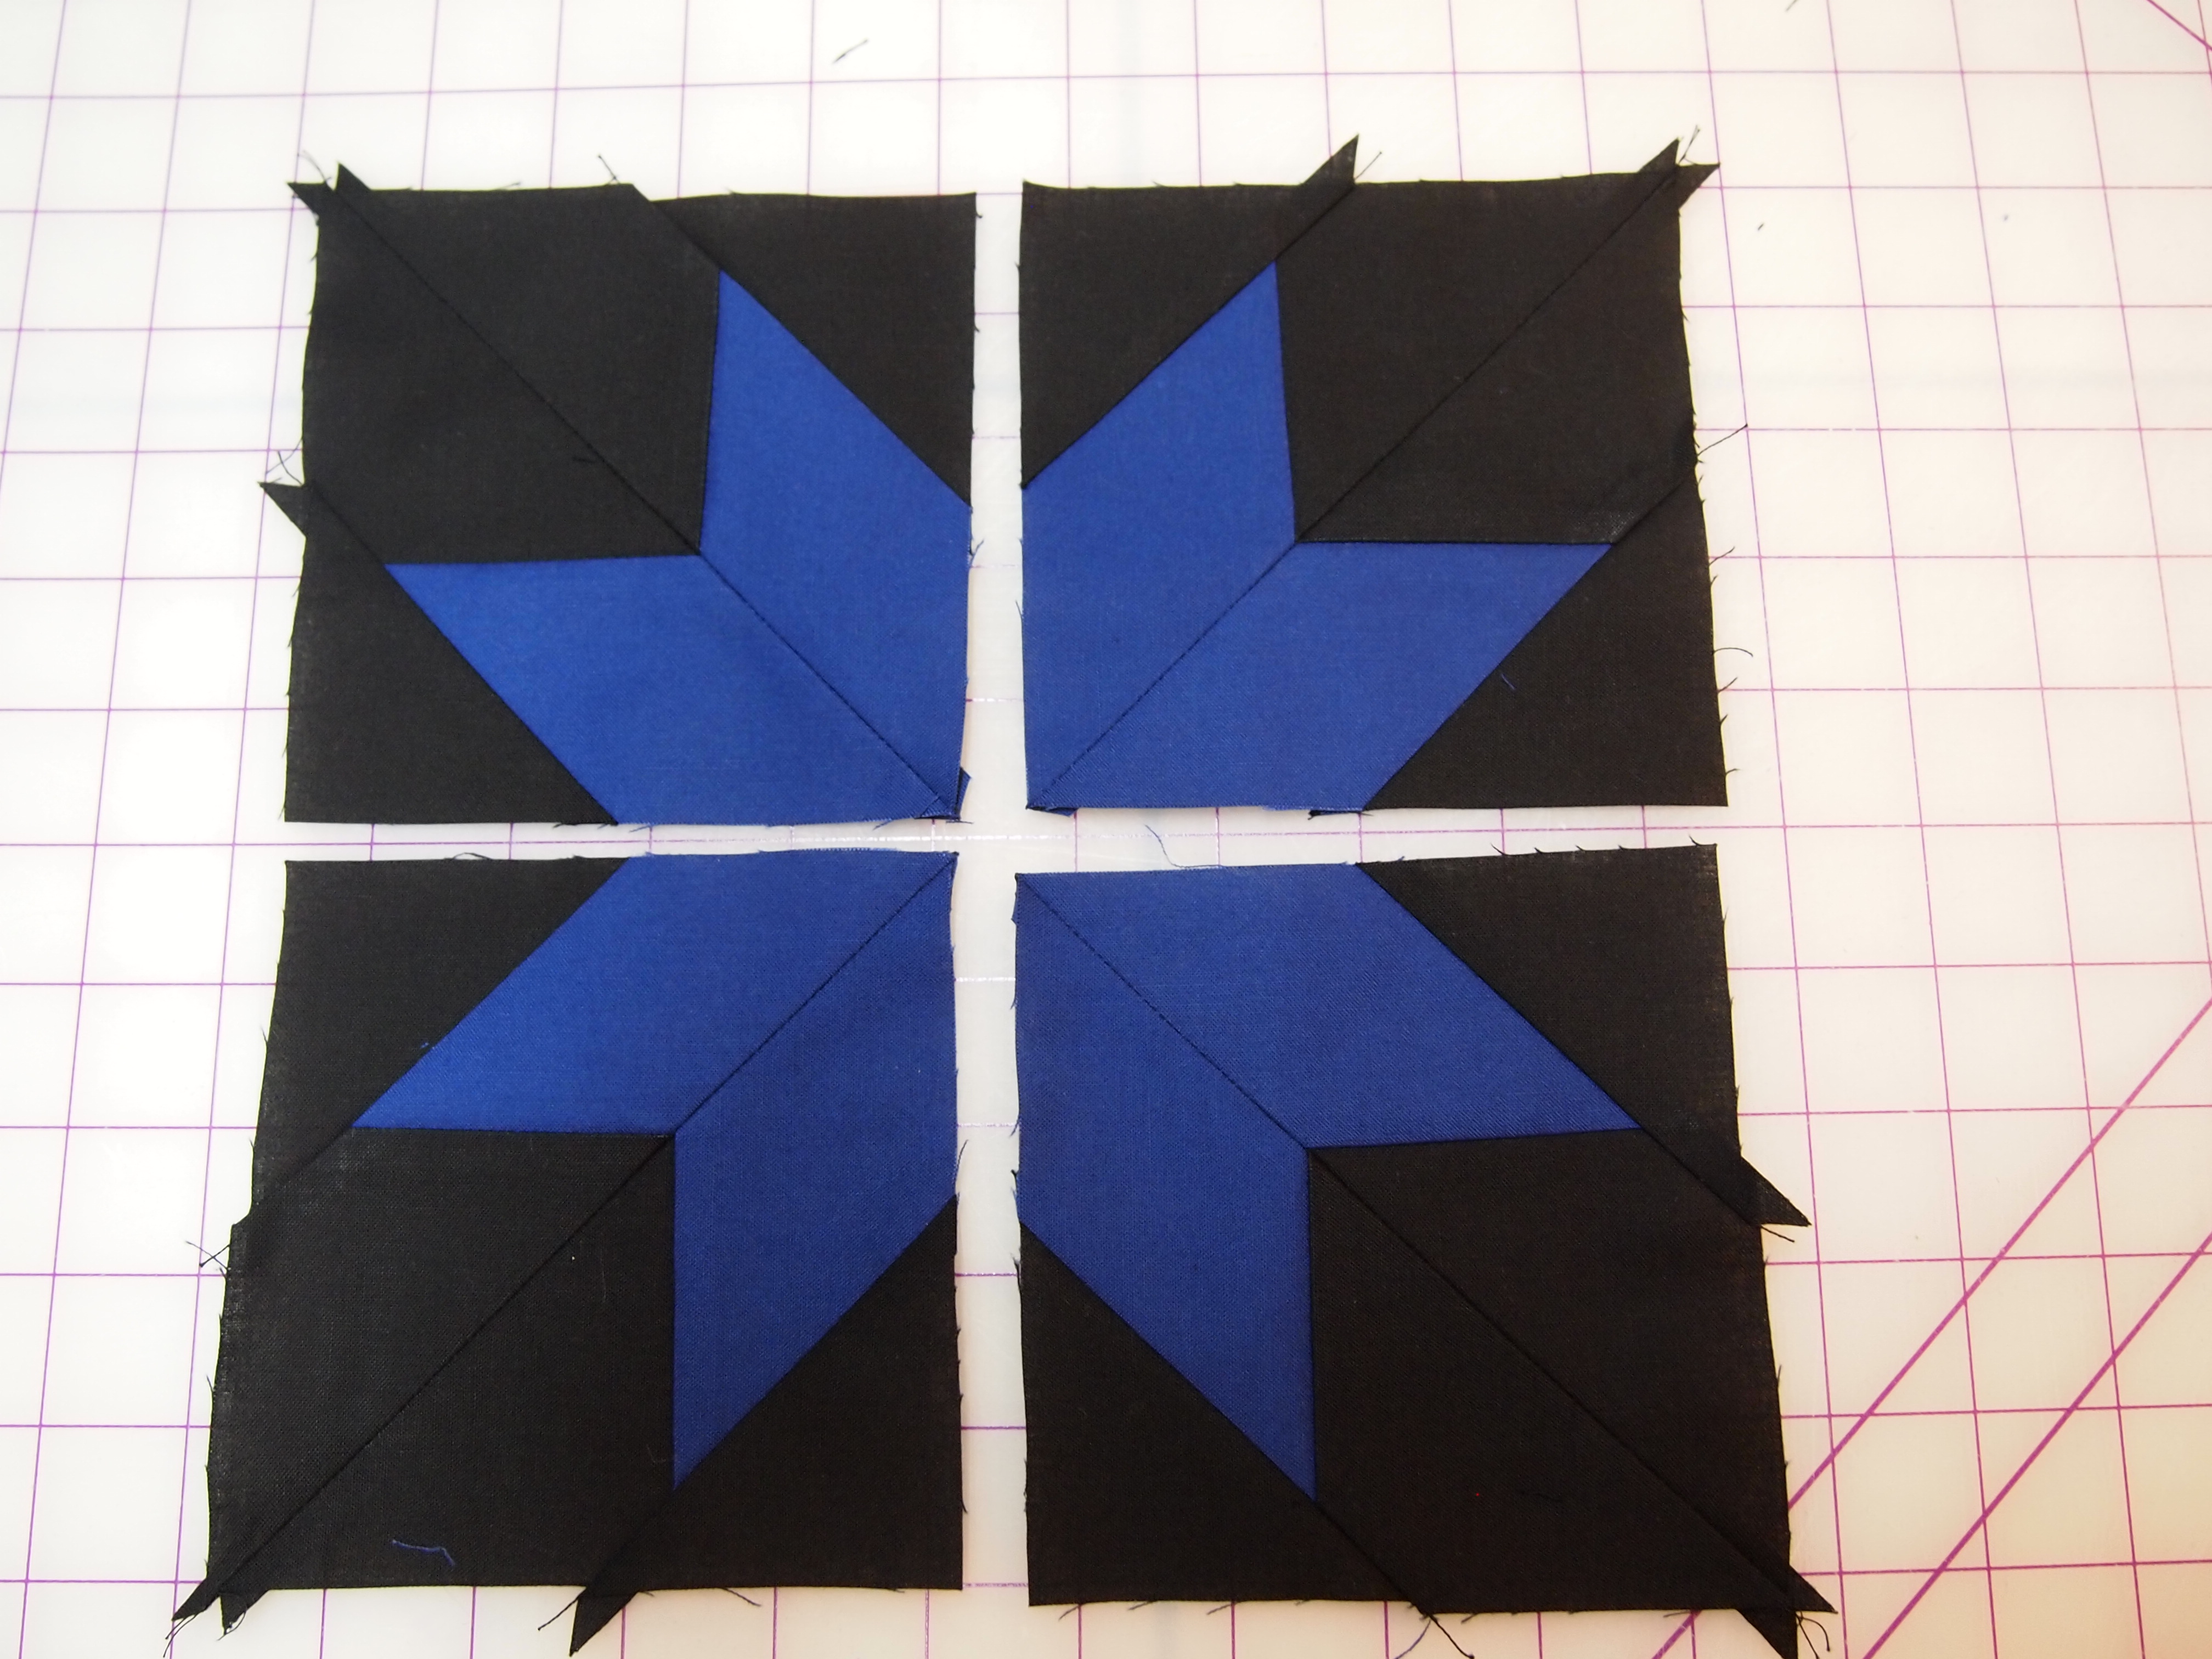
Square up using your Tucker Trimmer 3.

I think it came out pretty good. it measures 52″x60″.

Looks great, Jackie, as does all of your work. Miss you back here in ole Virginny!!!!!
LikeLike
Thanks Janet, hope you are doing well.
LikeLike
Ohhh! I love it. It could be Halloween or Wizard of Oz. We miss you so much down here. Any chance you will be making labels in the near future?
I just got back from taking my grandkids up to the Shenandoah Mountains – leaves were so pretty.
LikeLike