Welcome to Stitchin Heaven’s Journeys Month 5. My helper for Month 5 is Deb Tucker, of Studio 180 Design. This month you are going to learn to make Lemoyne Star Quarters using the Rapid Fire Lemoyne Star and Tucker Trimmer I tools. You will be using Prints 7, 9 & 11. Label your fabrics and use your best cutting skills when cutting your starter squares.
Prints 7, 9 & 11
Piecing Instructions
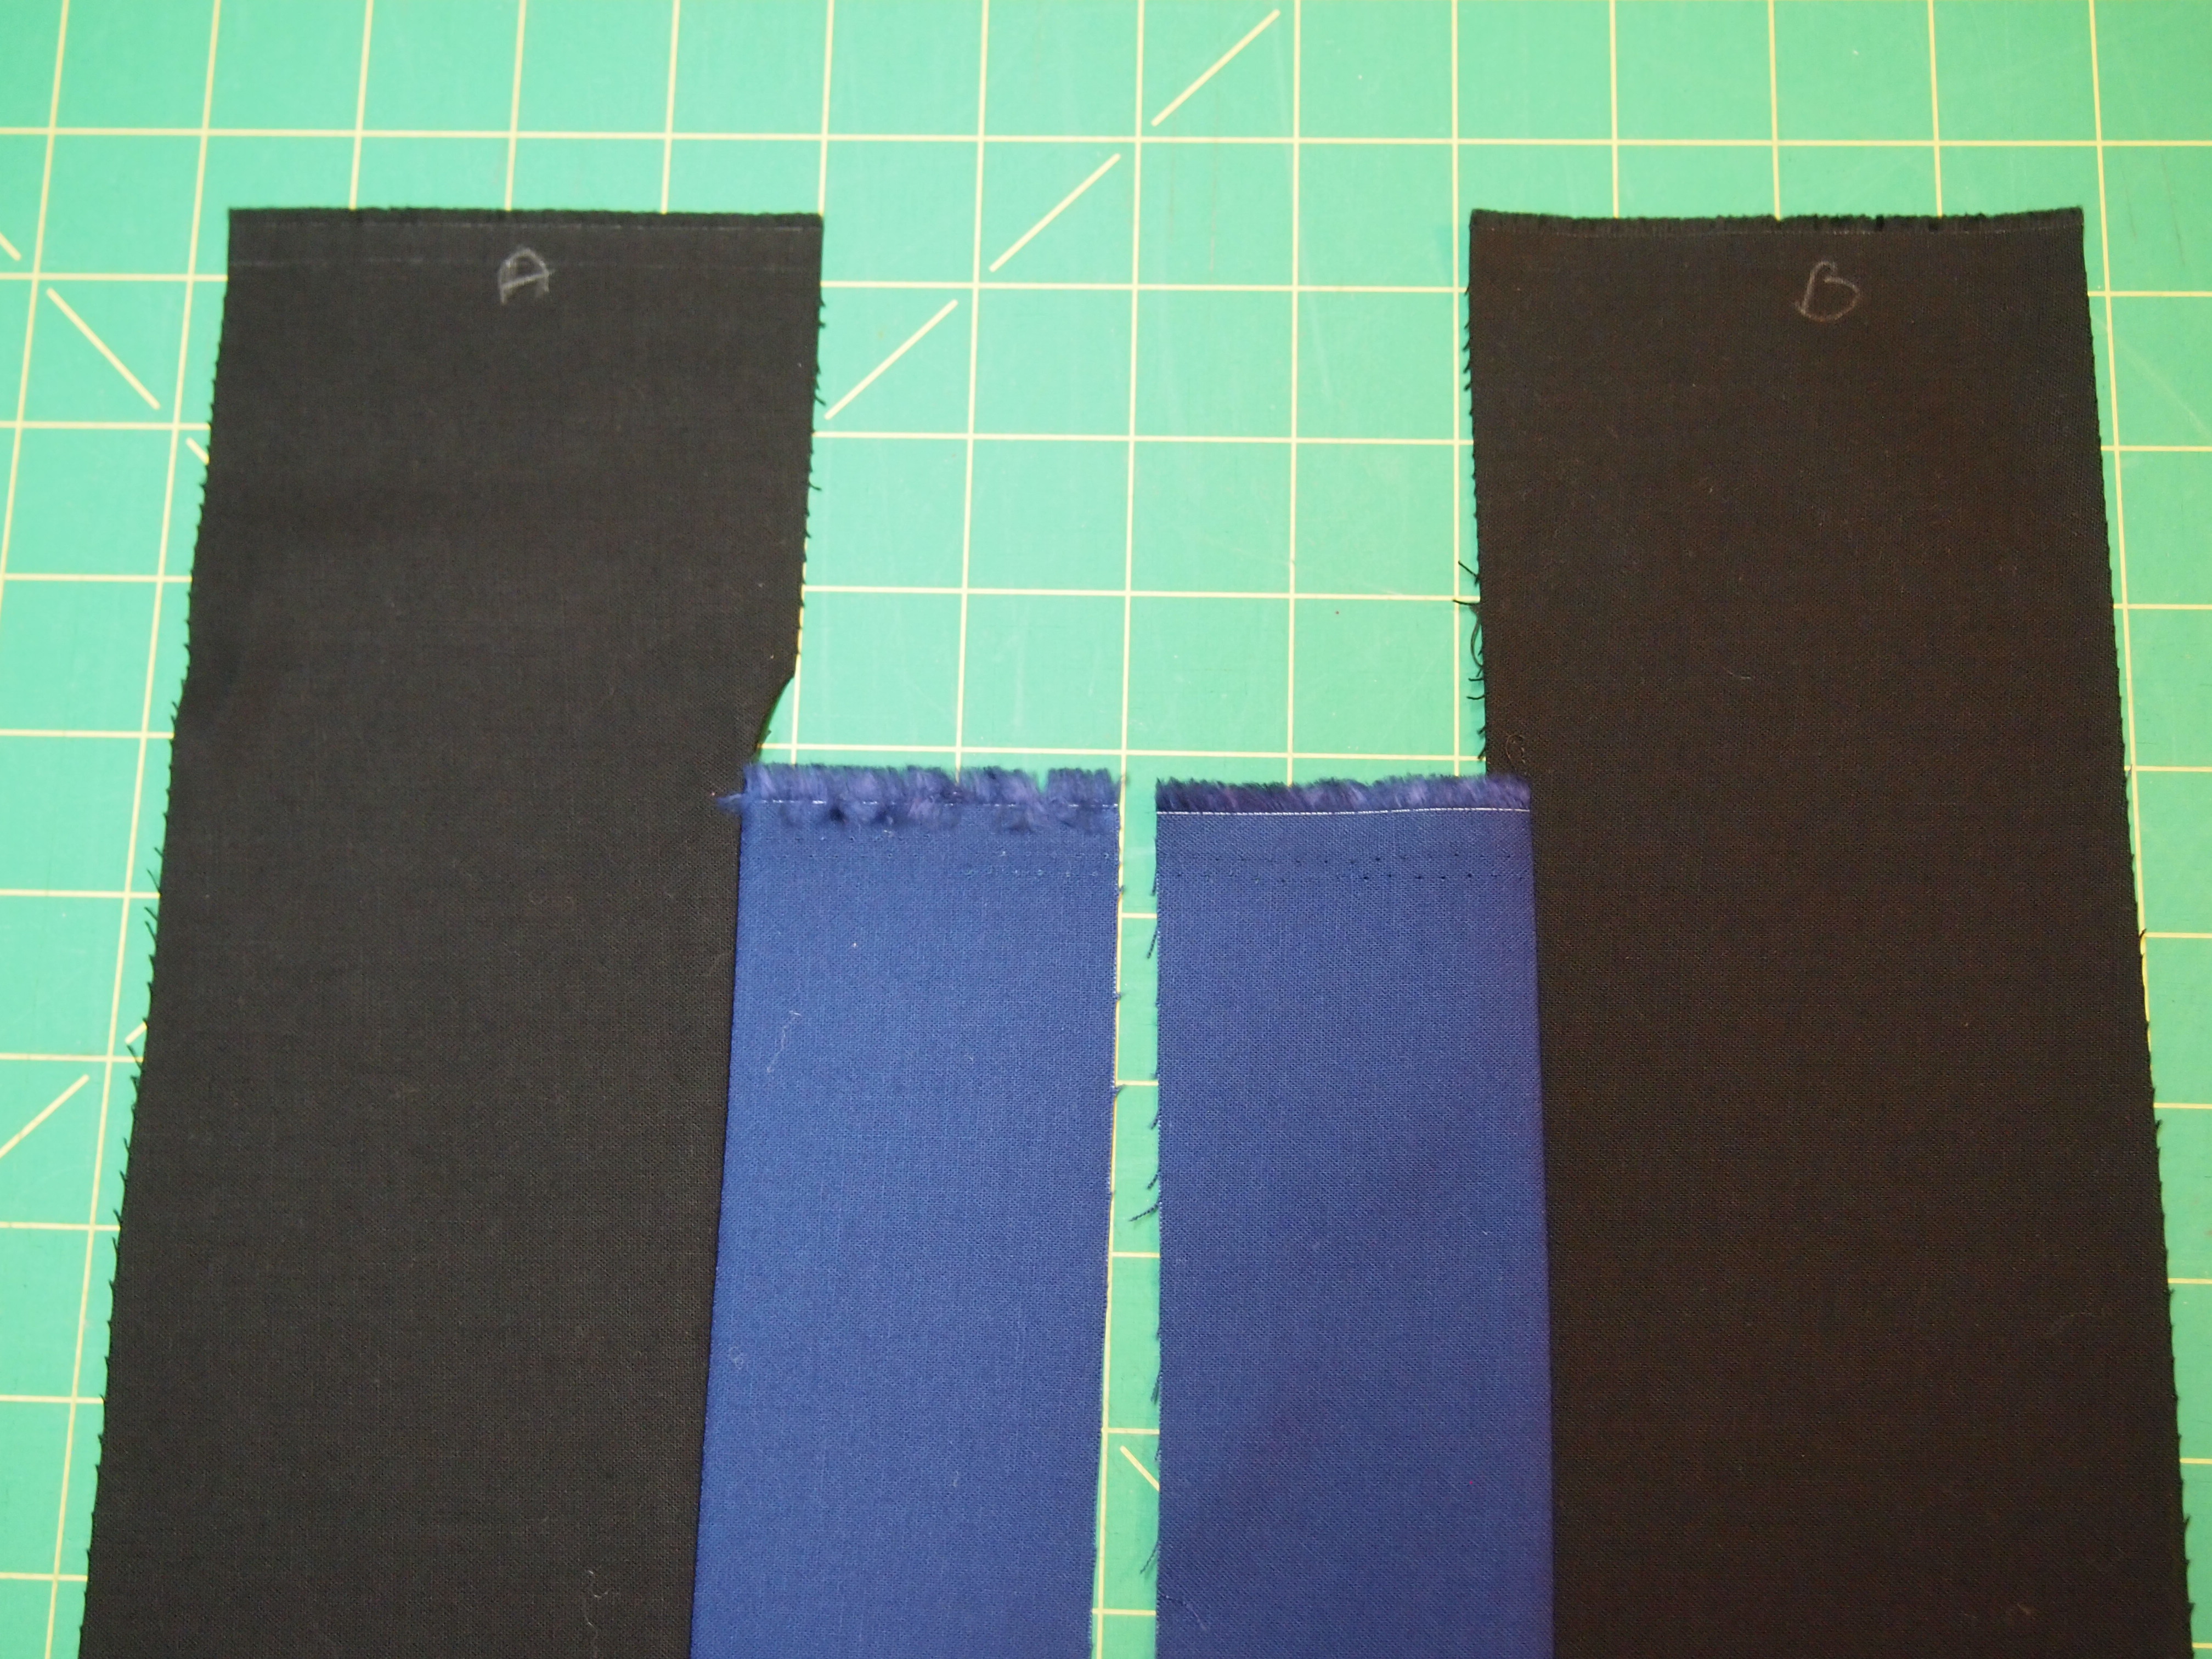
Step 1 – Organize Strips. Place Print 9 and Print 7 into two separate piles. Use Print 7 to make the A Strip Set and Print 9 to make the B Strip Set.
Step 2 – Make Strip Sets A and Strip Sets B in the same manner as described in the Rapid Fire® Lemoyne Star basic instructions. Position each diamond strip 4¾” down from the top of the background strip. Sew the strips lengthwise and press as indicated in the diagram below. Pay close attention to proper strip alignment and pressing to ensure success.
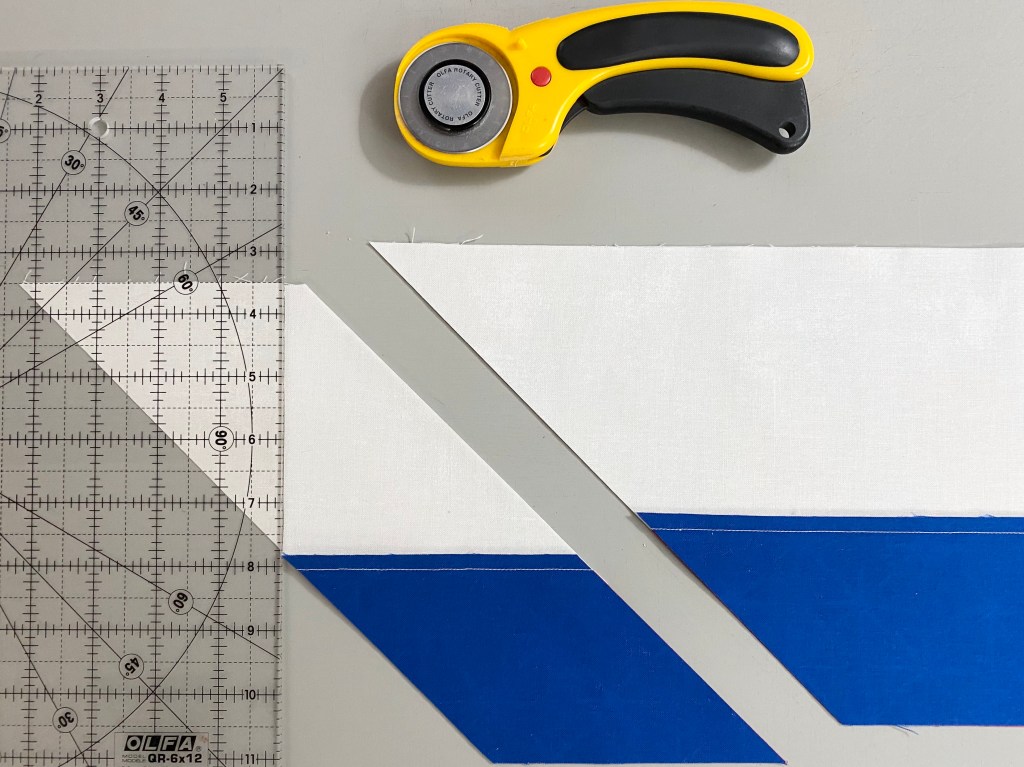
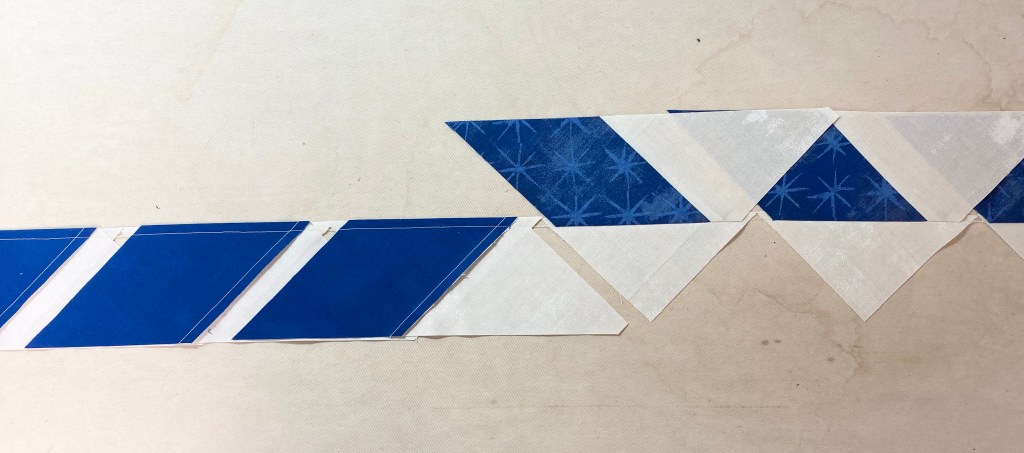
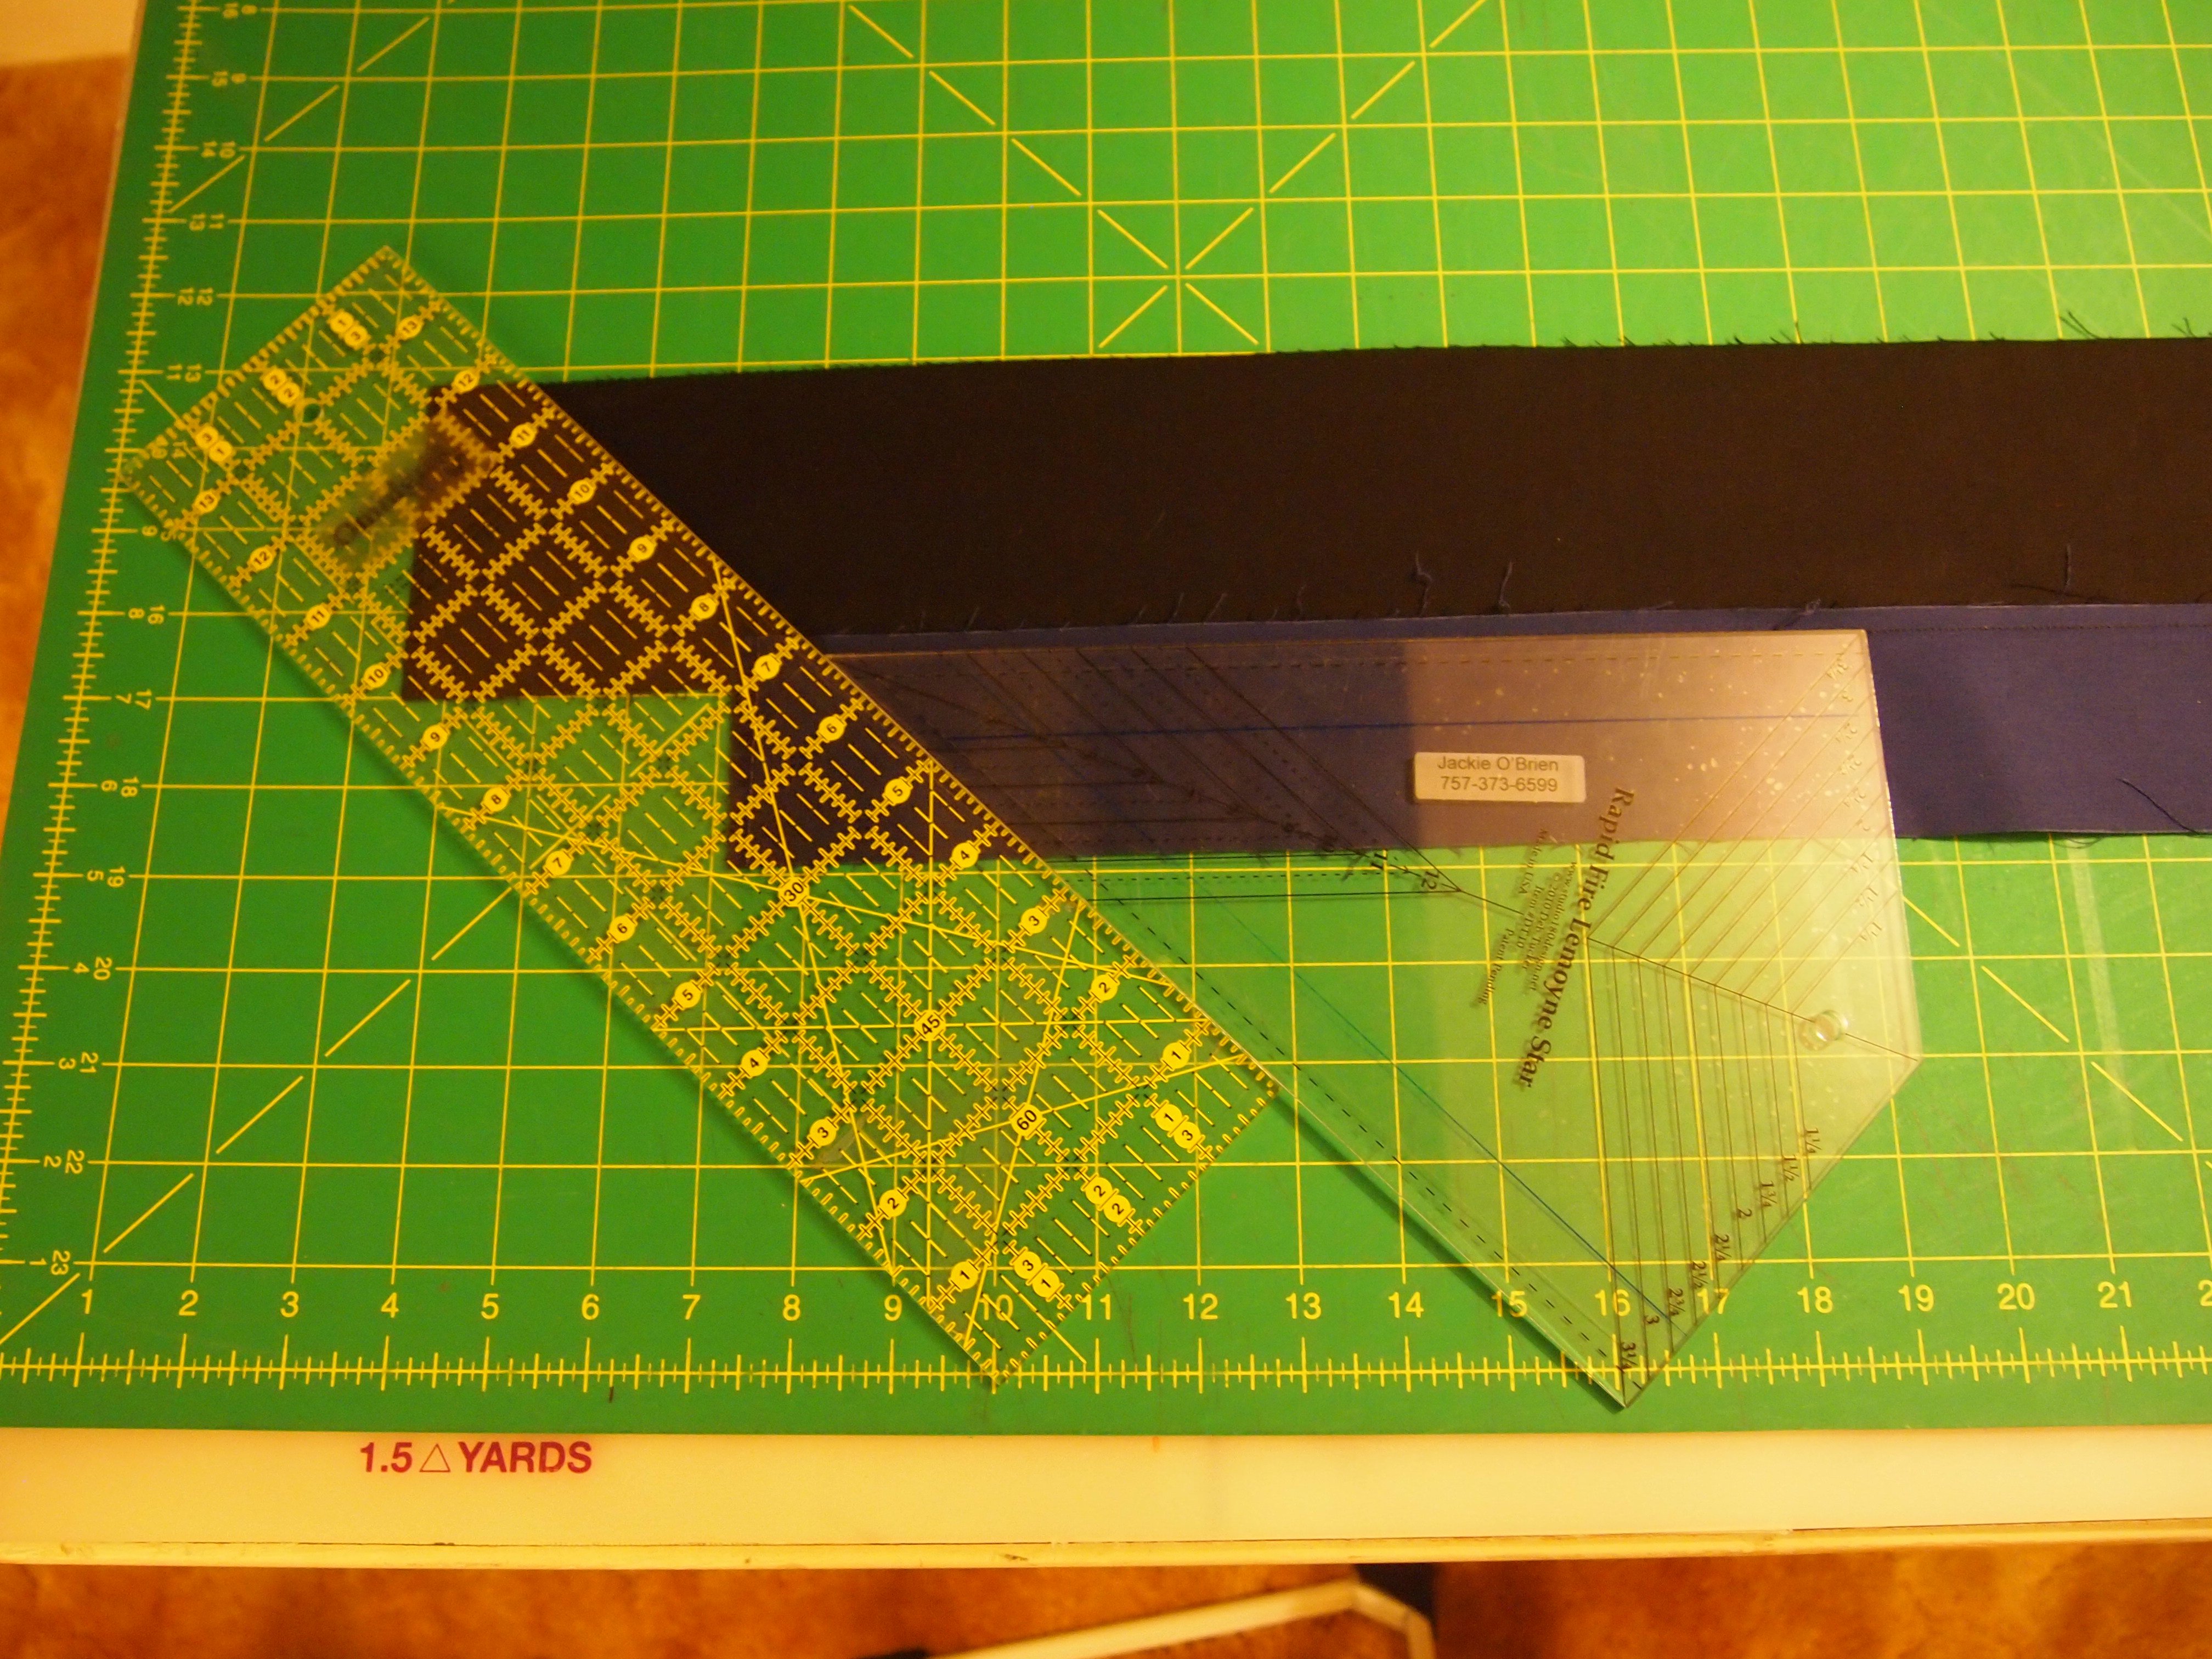
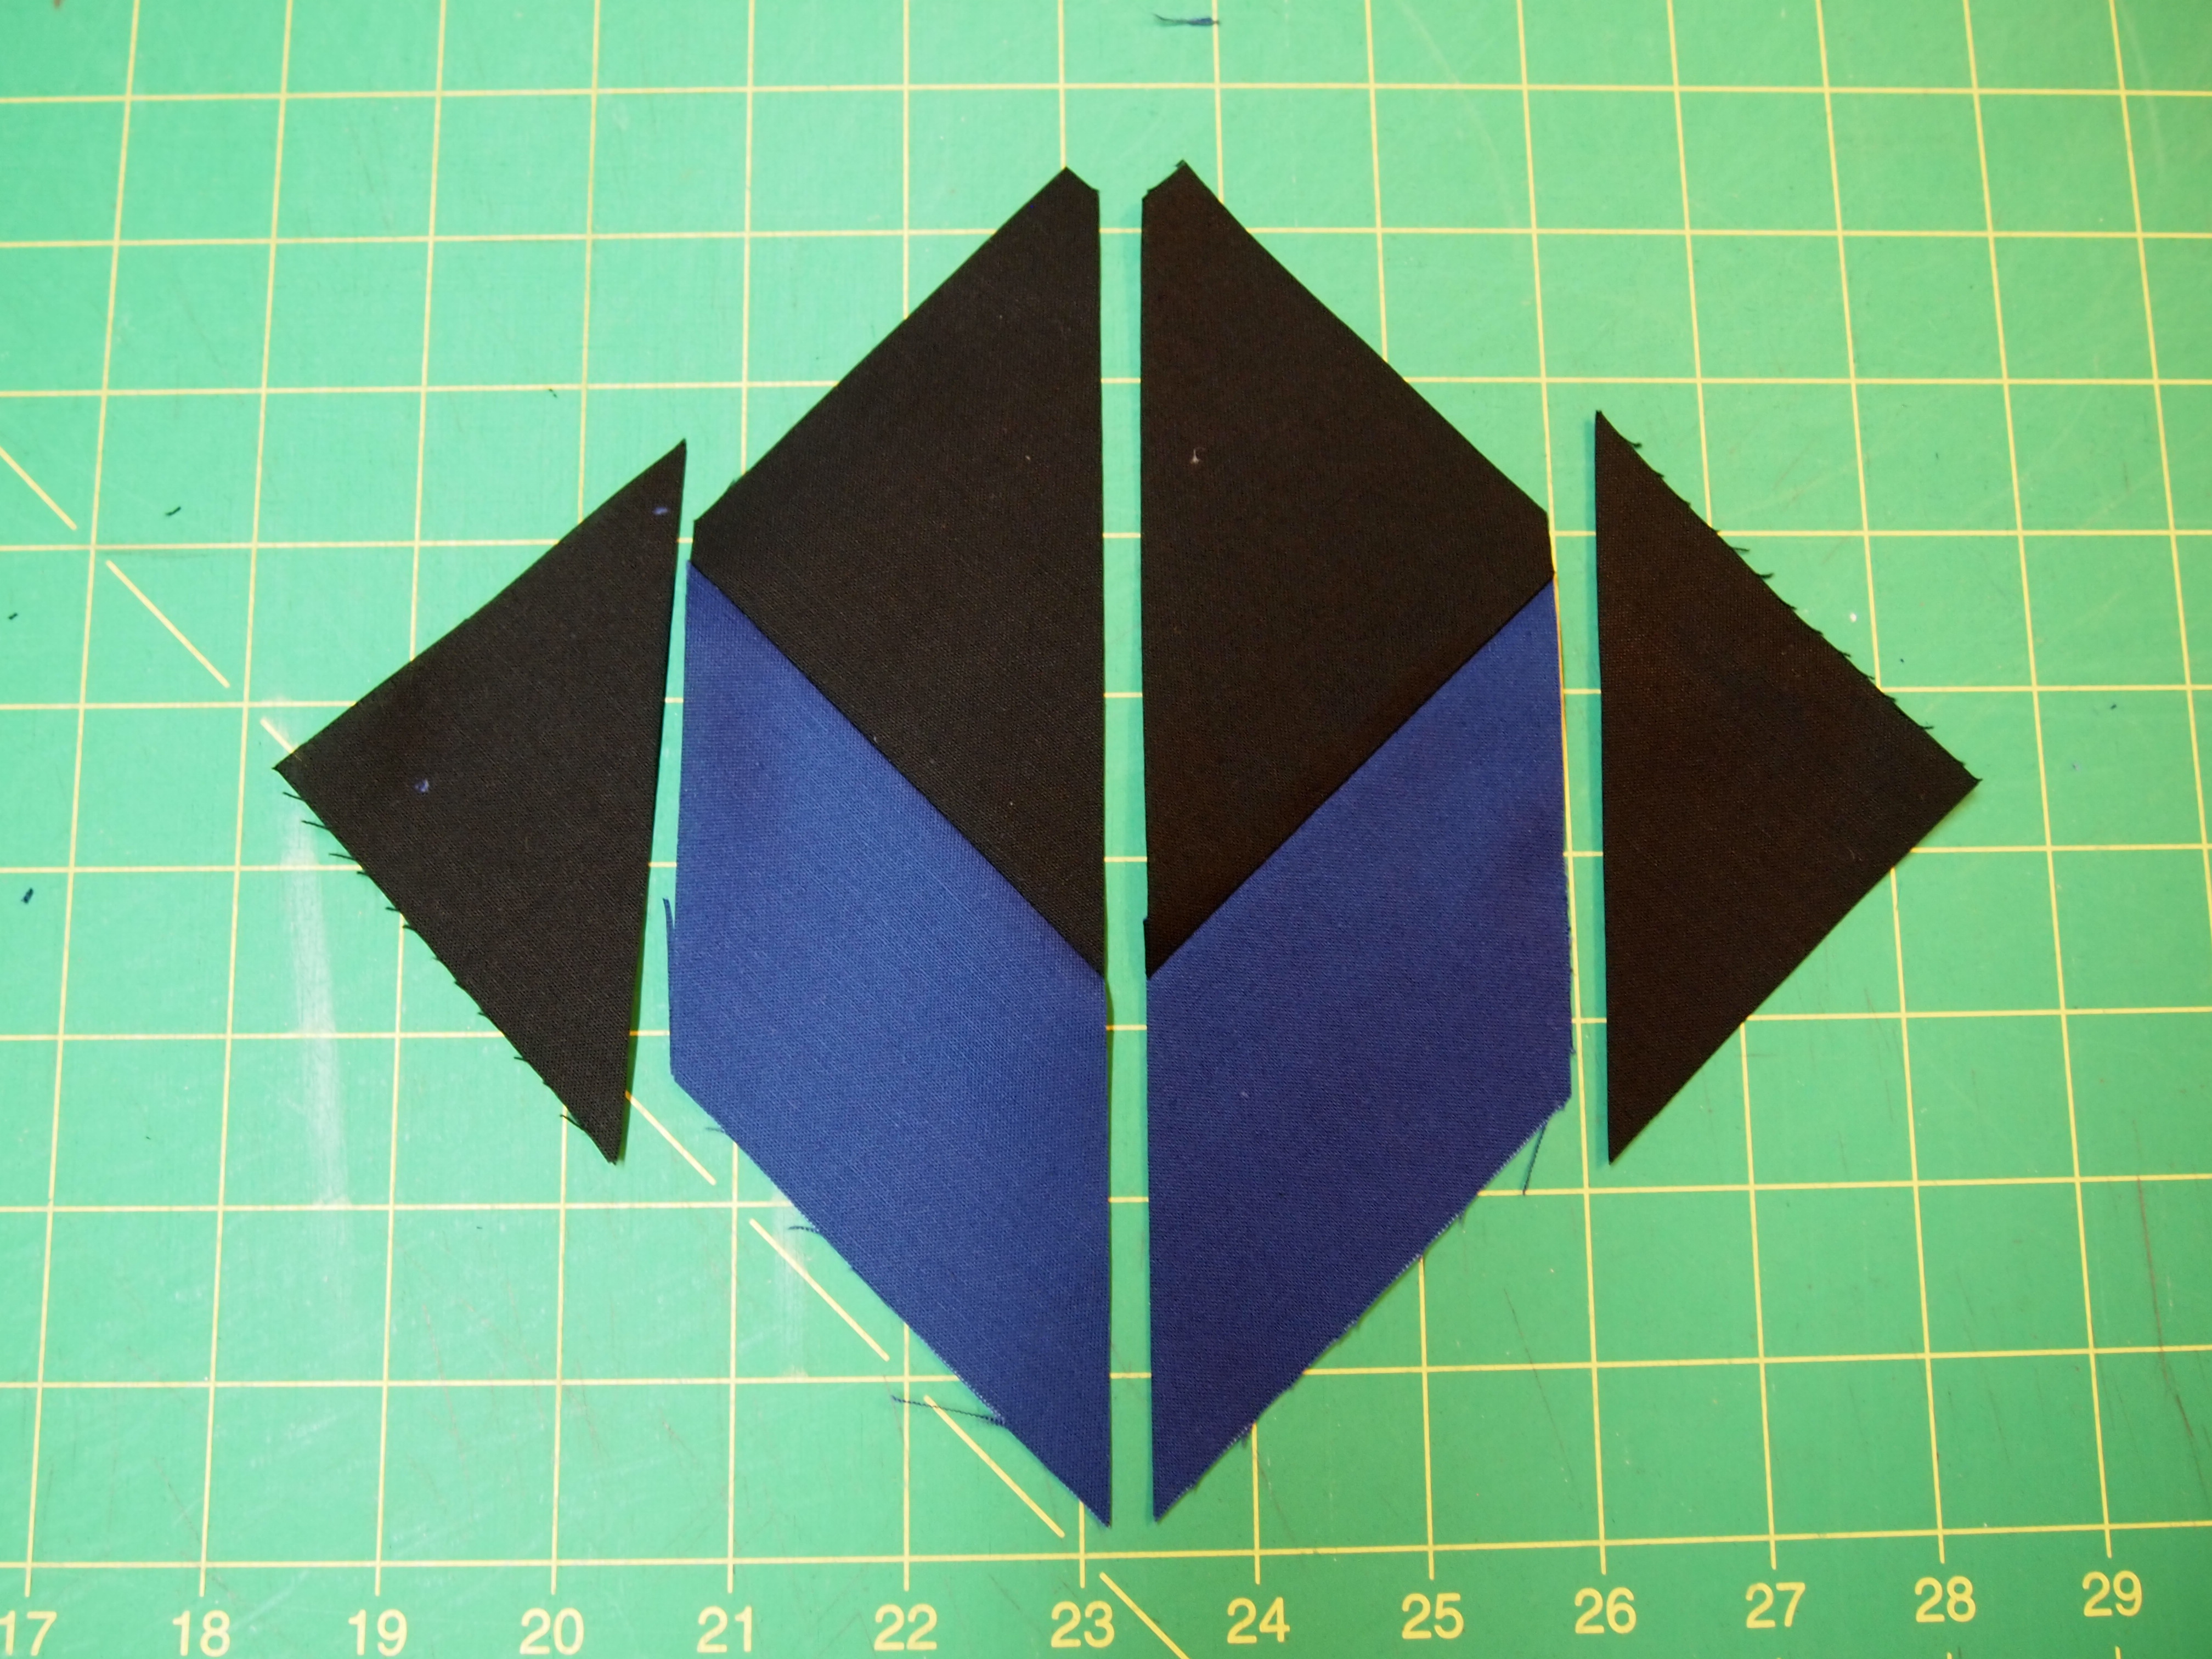
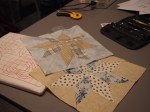
Step 3 – First Cuts. Layer Strip Set A and Strip Set B right sides together as illustrated. Trim the ends of the strips at a 45° angle, then continue making 45° angle cuts every 3¼” across the length of the strips. You will get 8 cuts from a paired strip set. Cut the remaining strip sets in this manner until you have 20 pairs.
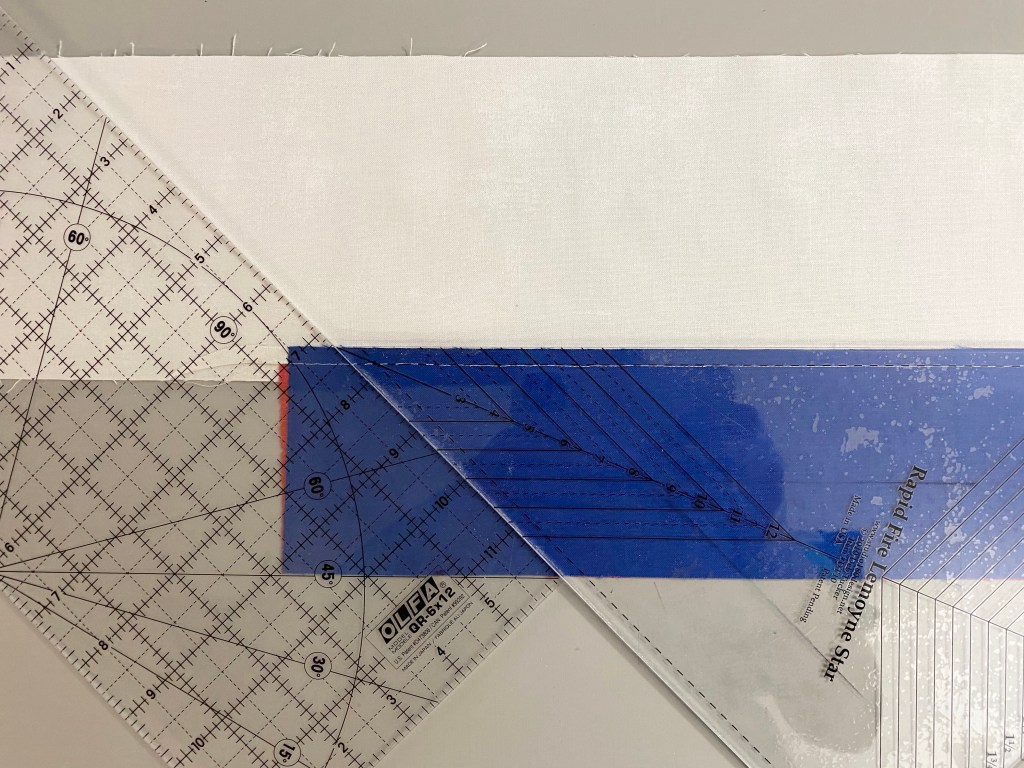
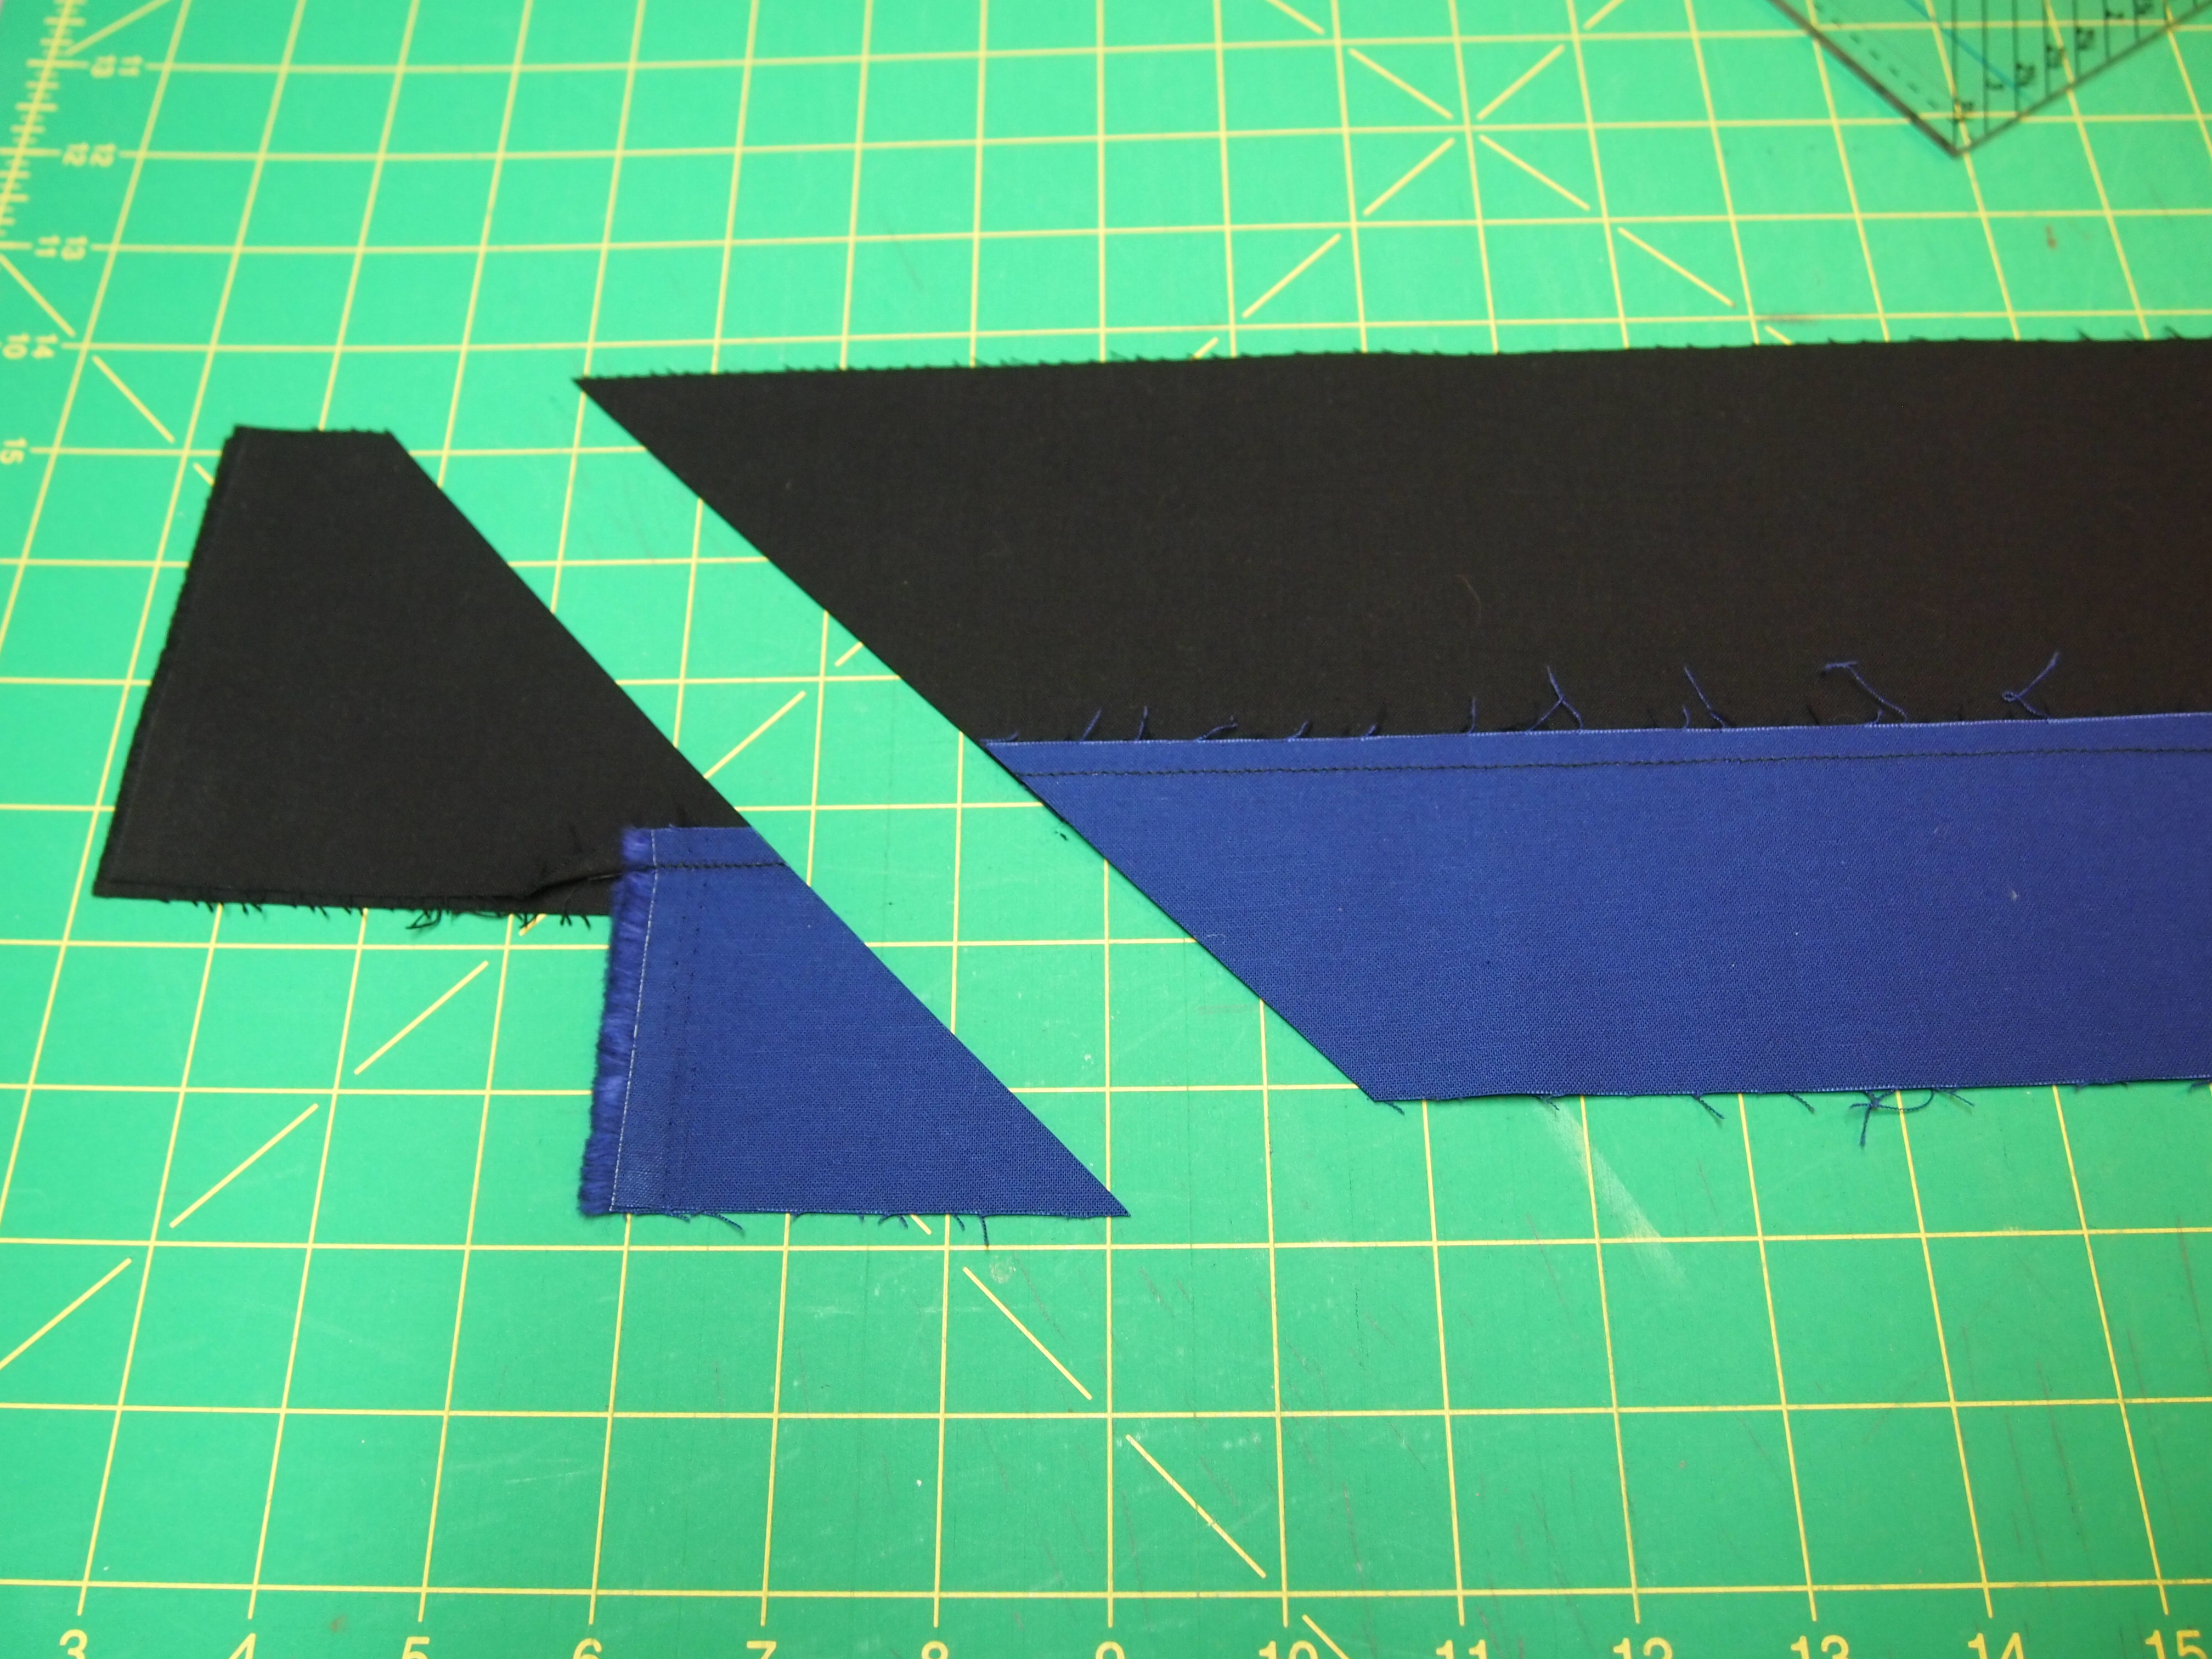
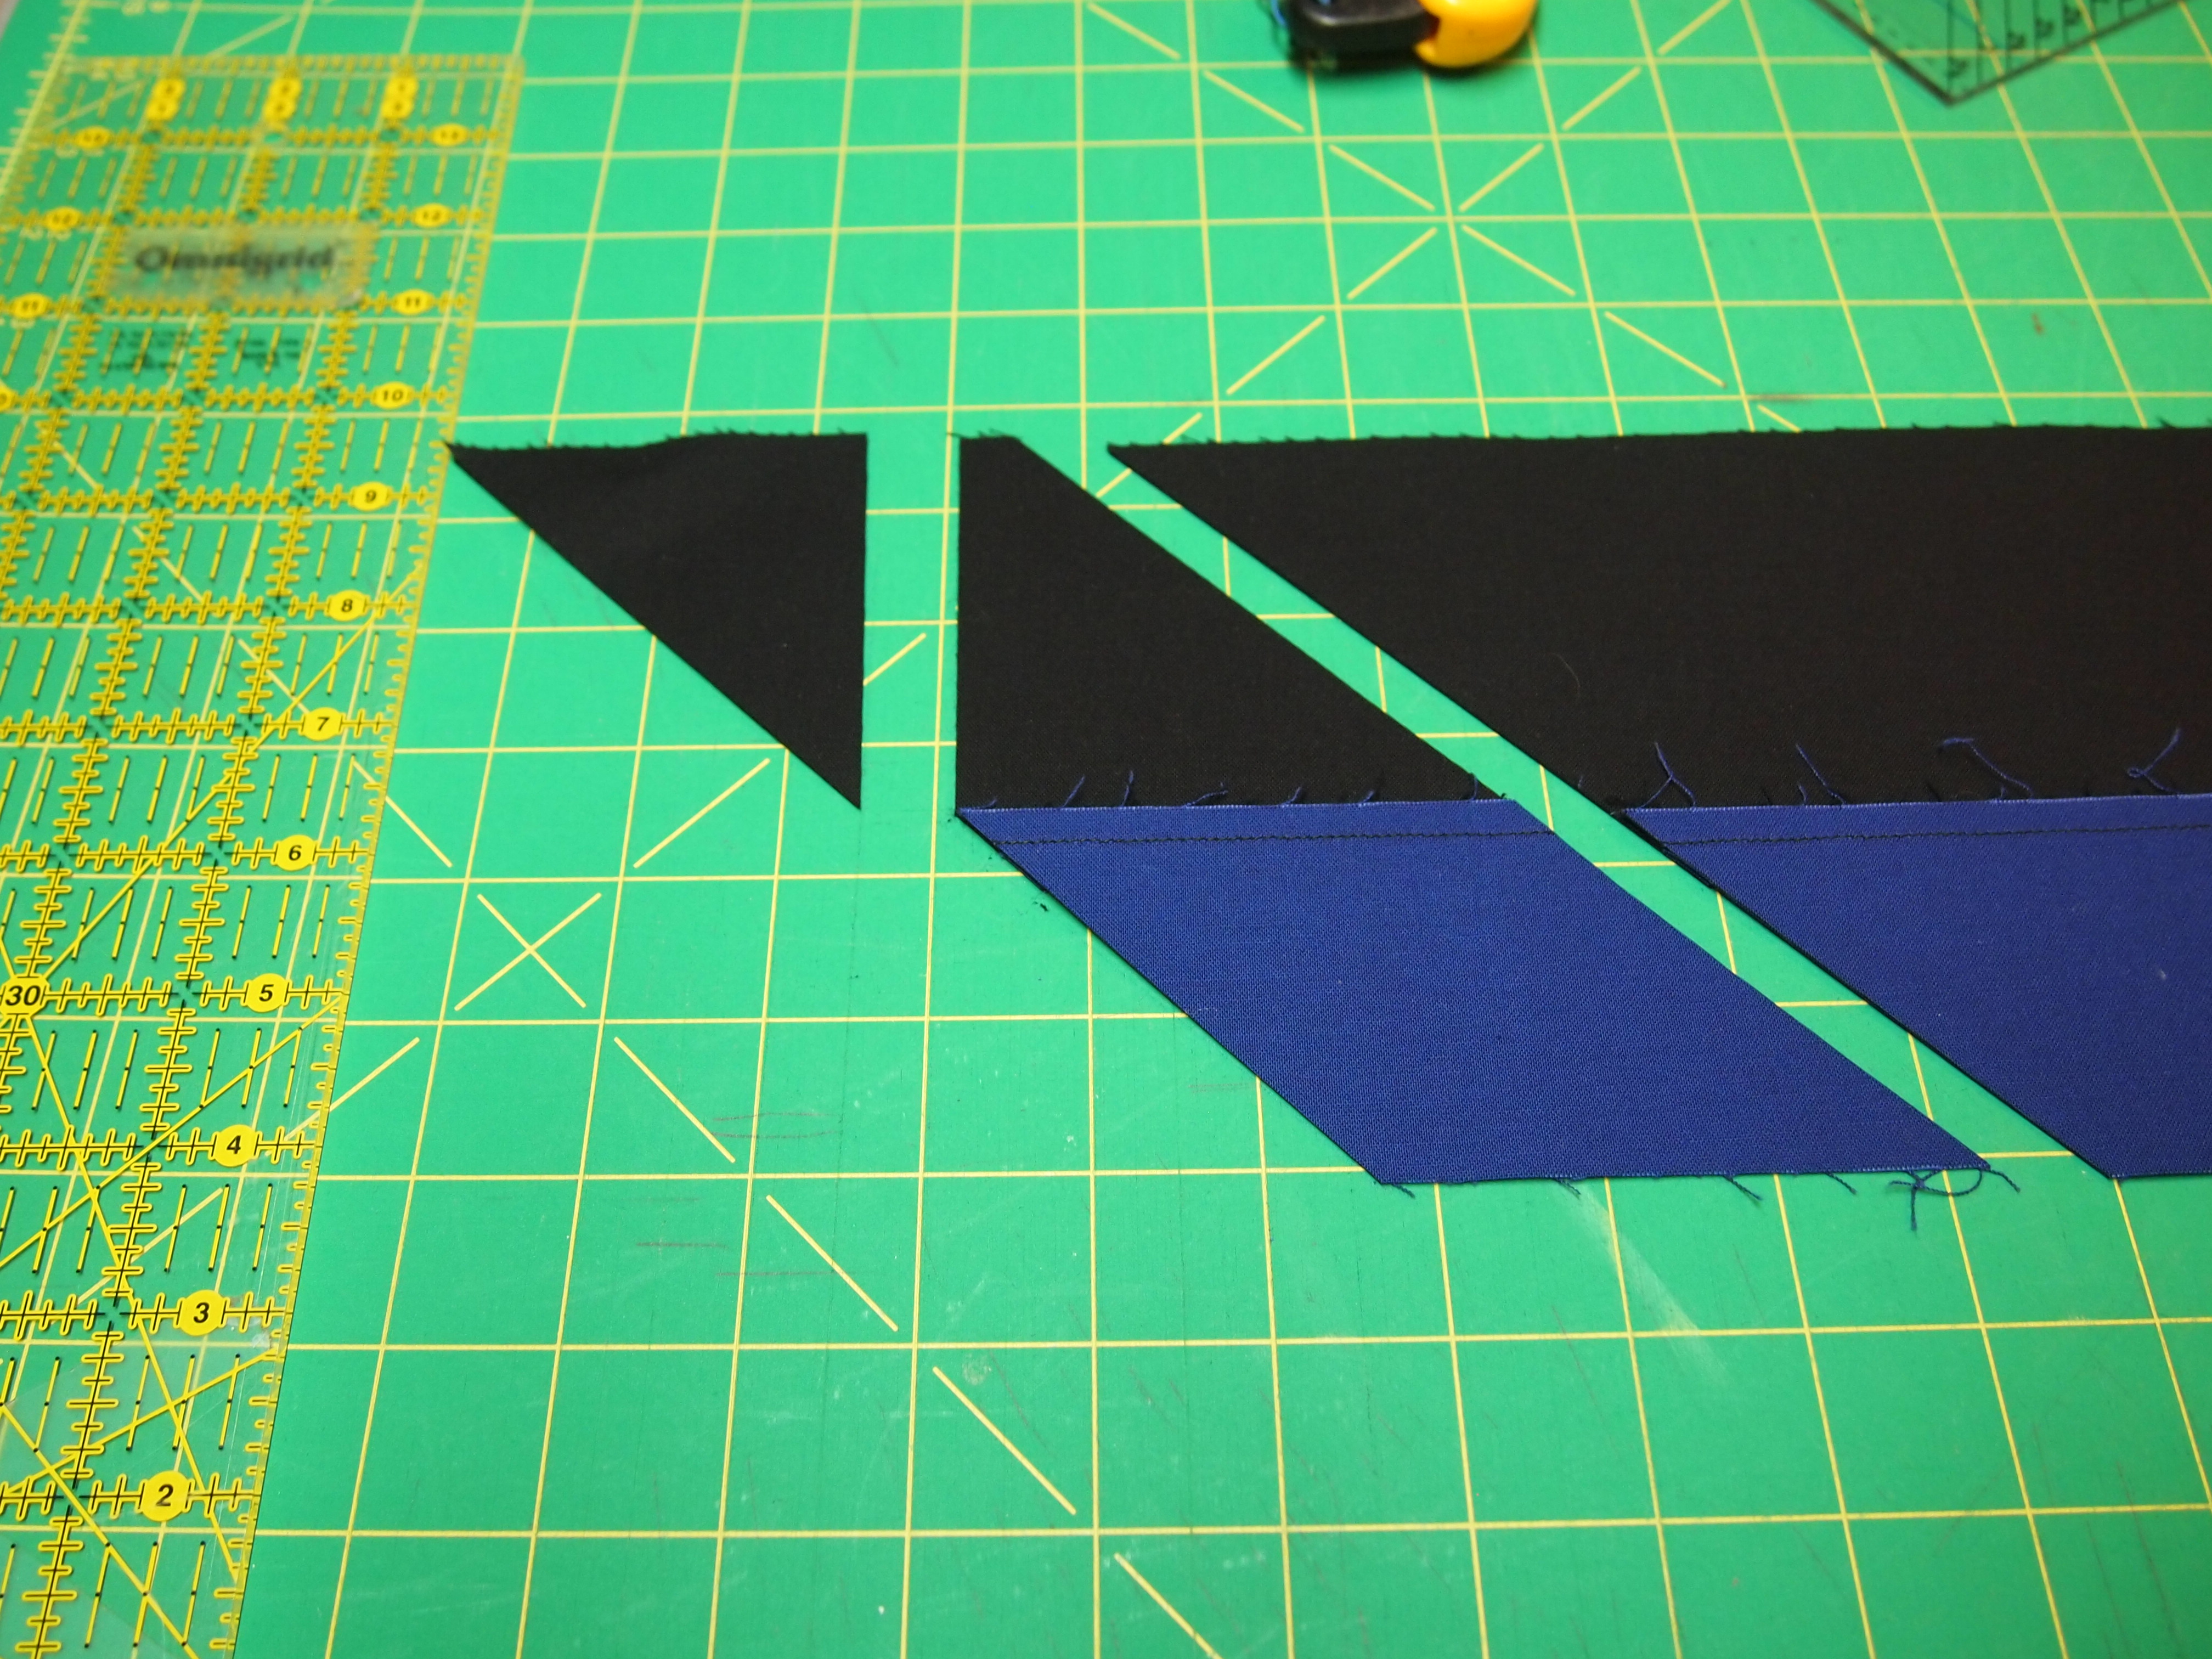
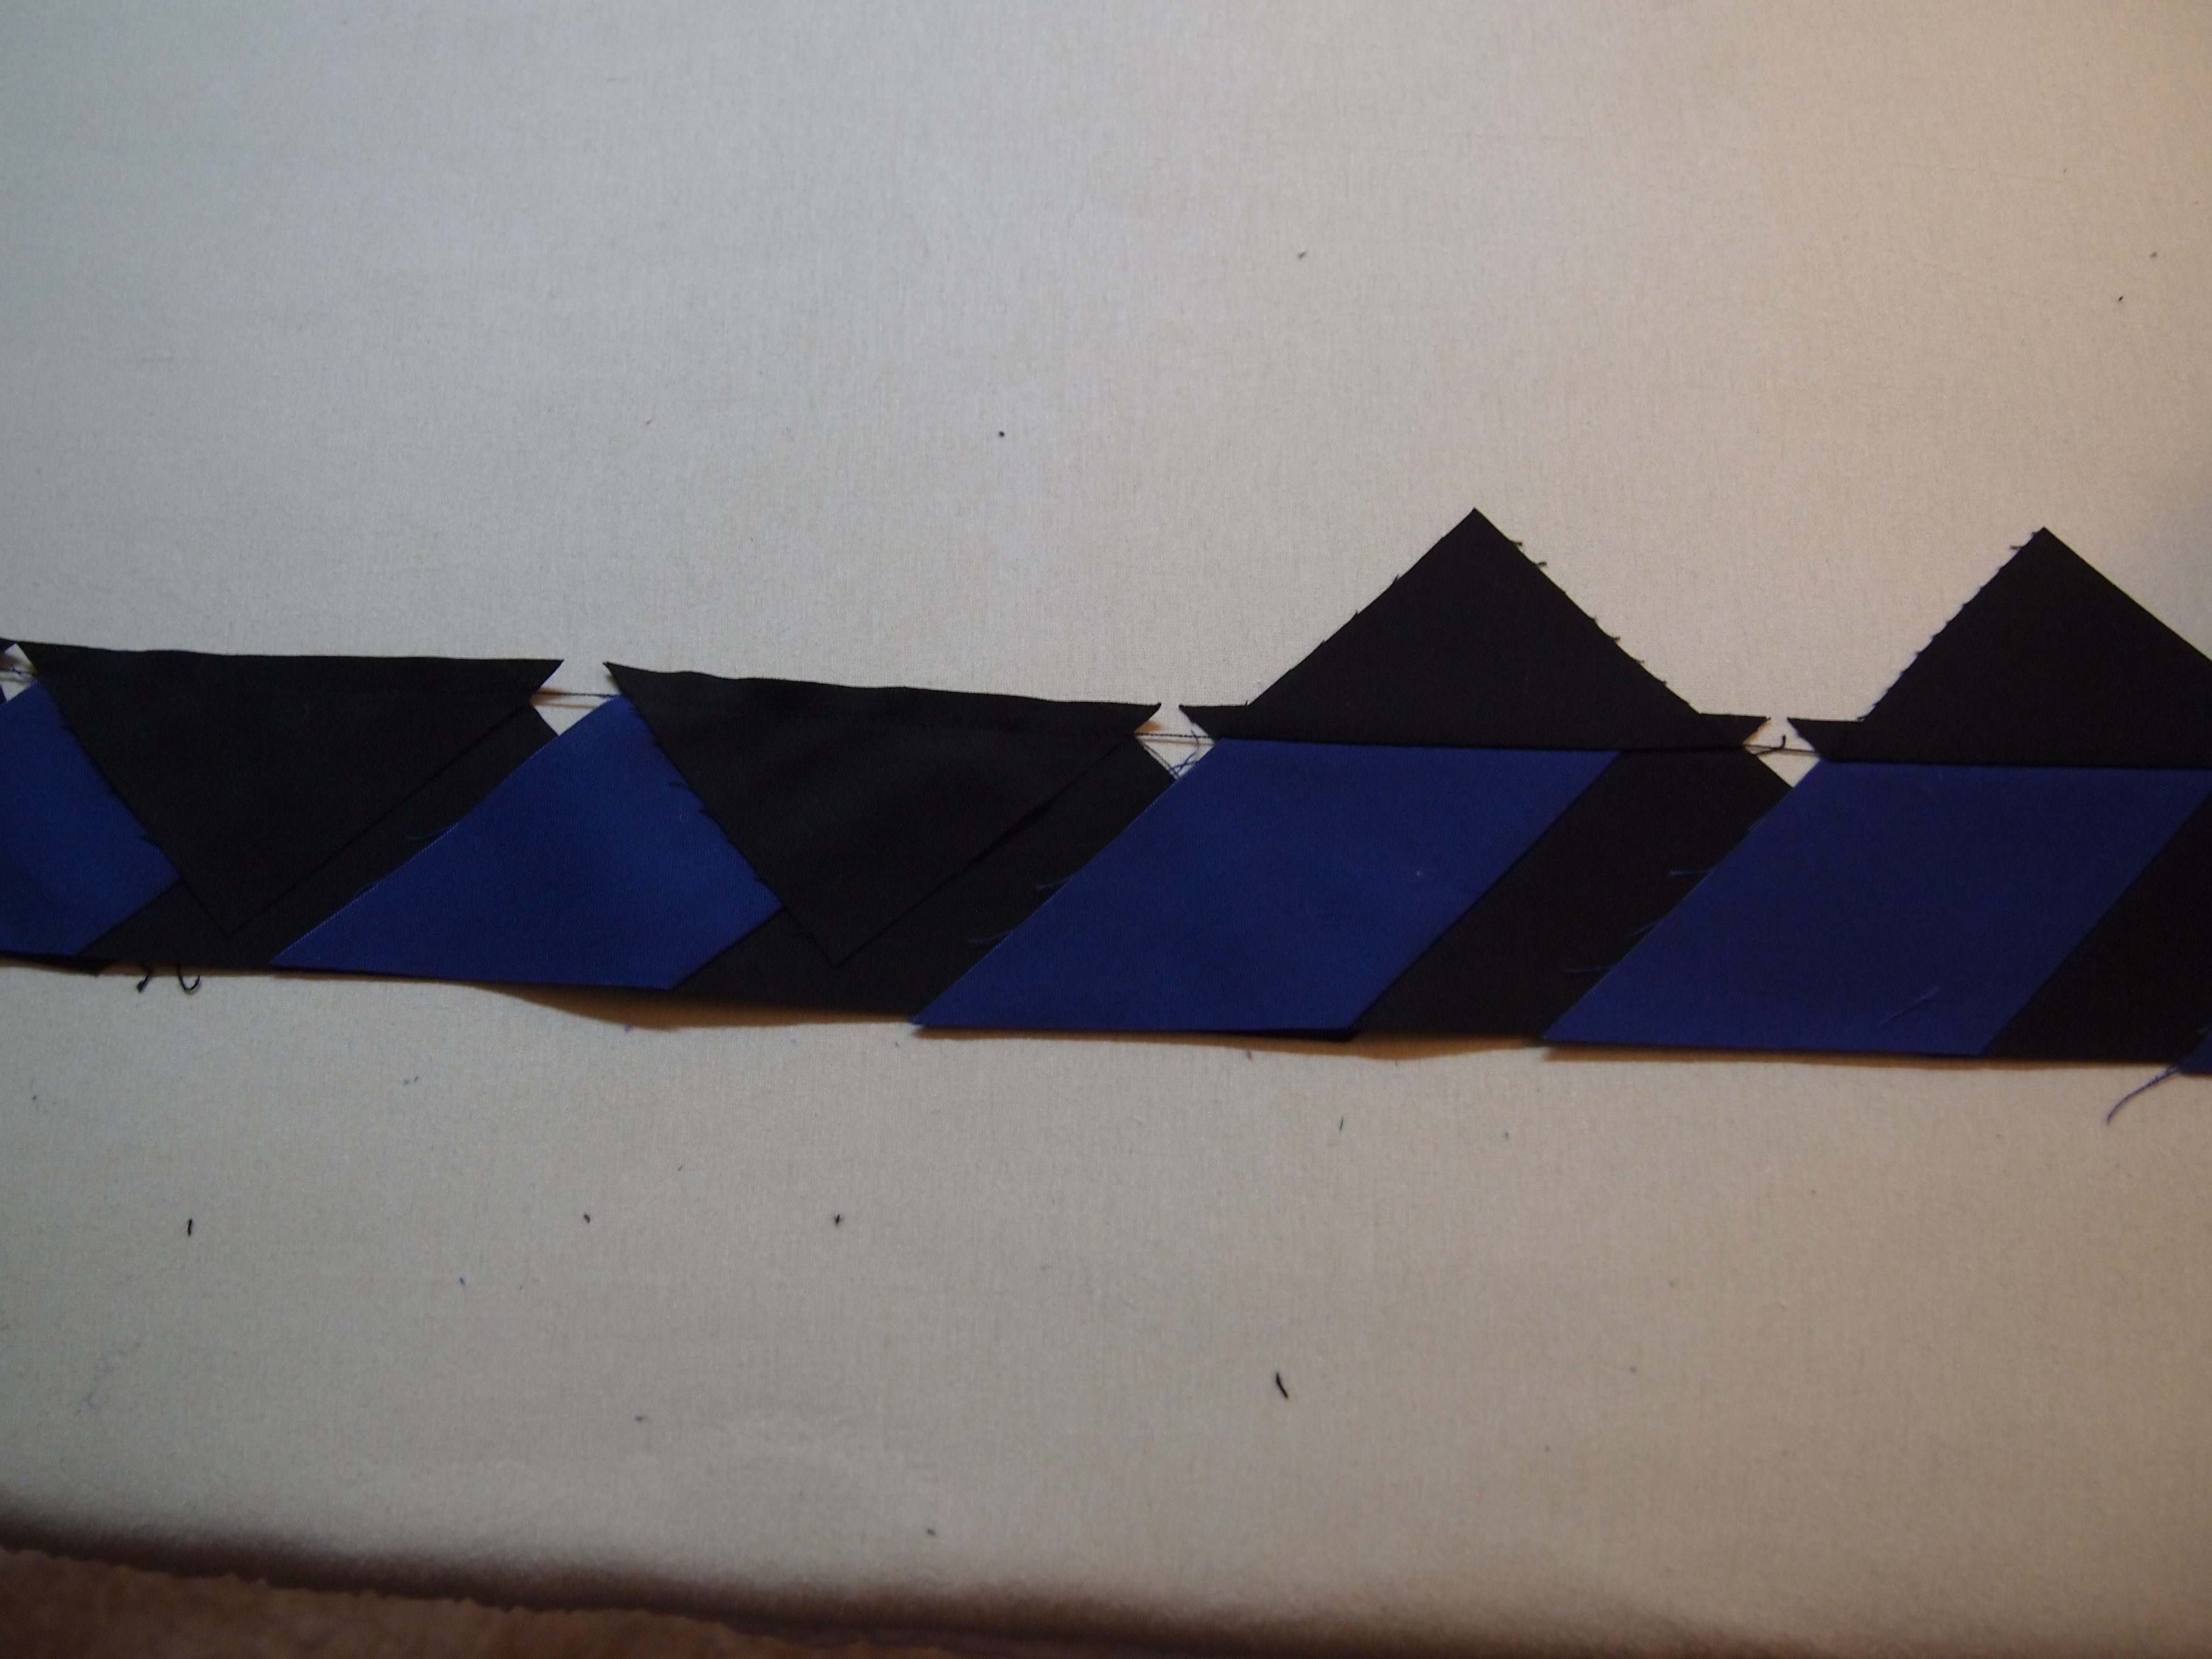
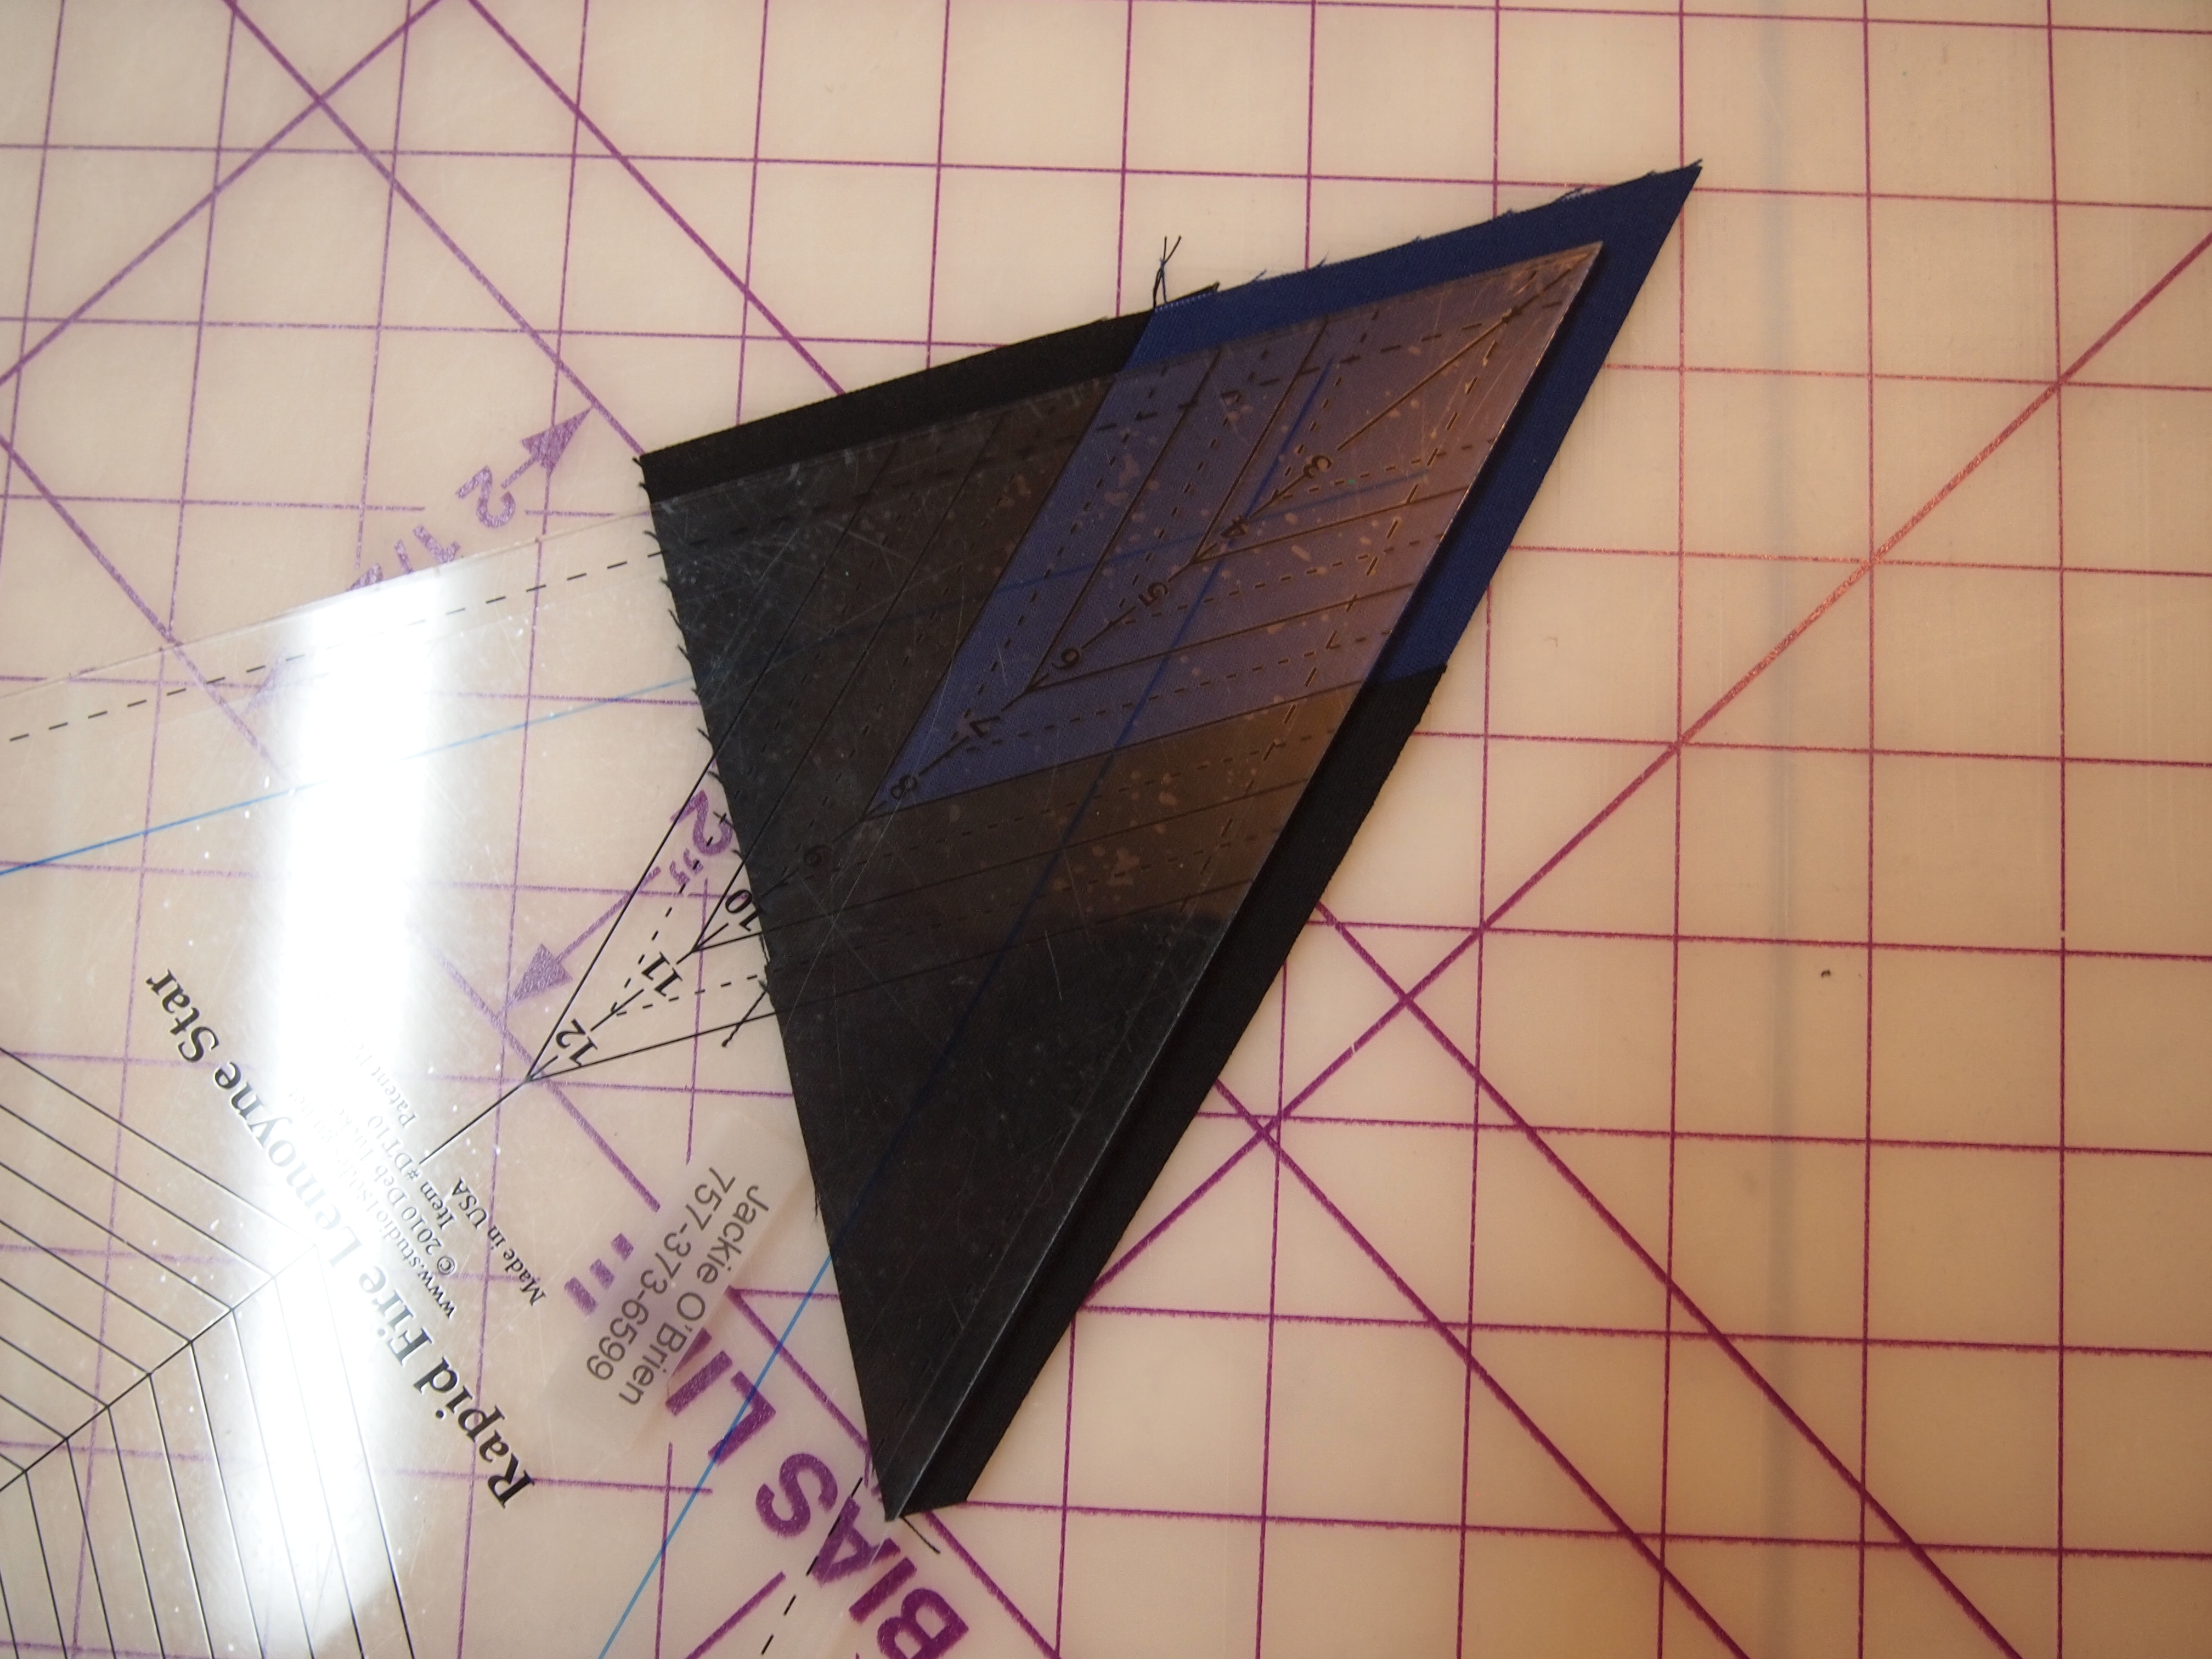
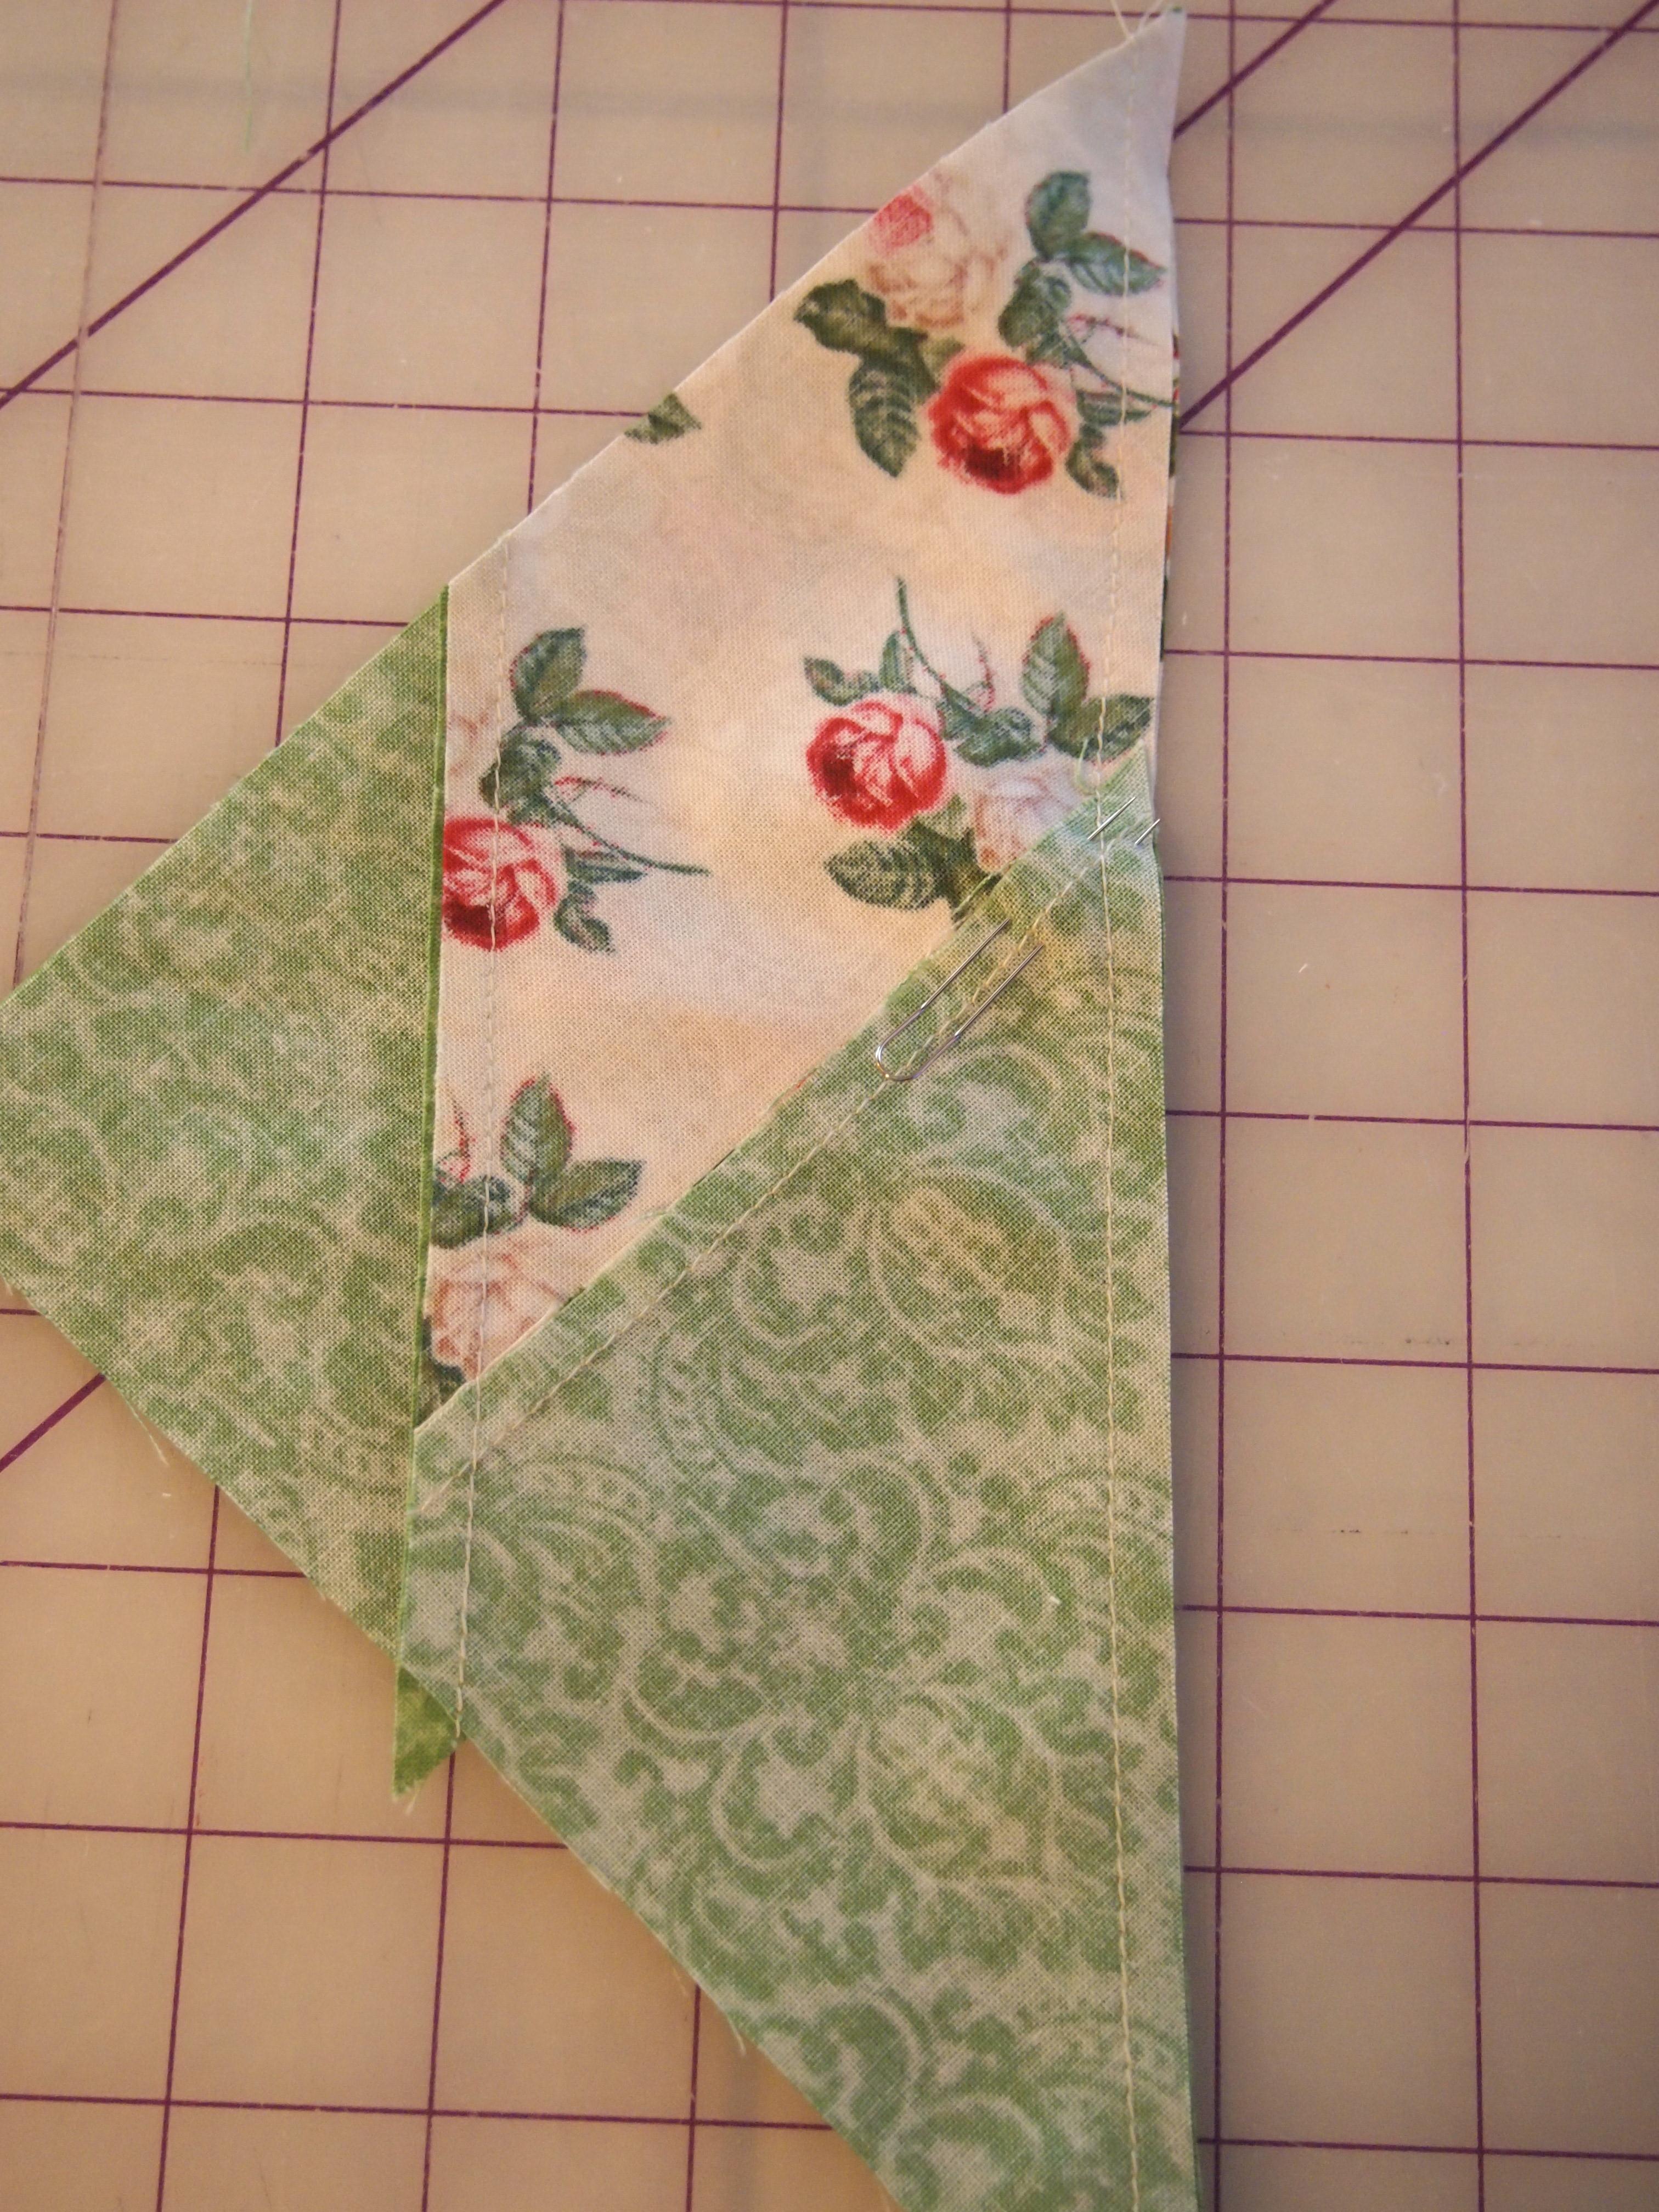
Step 4 – Make Second Cuts going vertically south to north, as shown. Position the ruler edge at the tip of the star strip and trim straight up. These triangles will be added to the pieced unit.
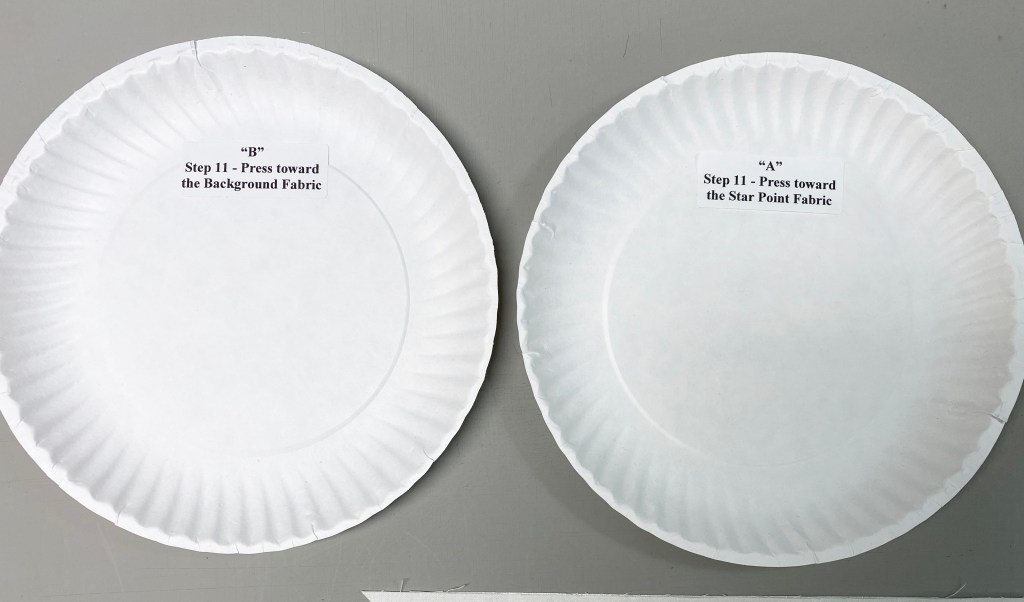
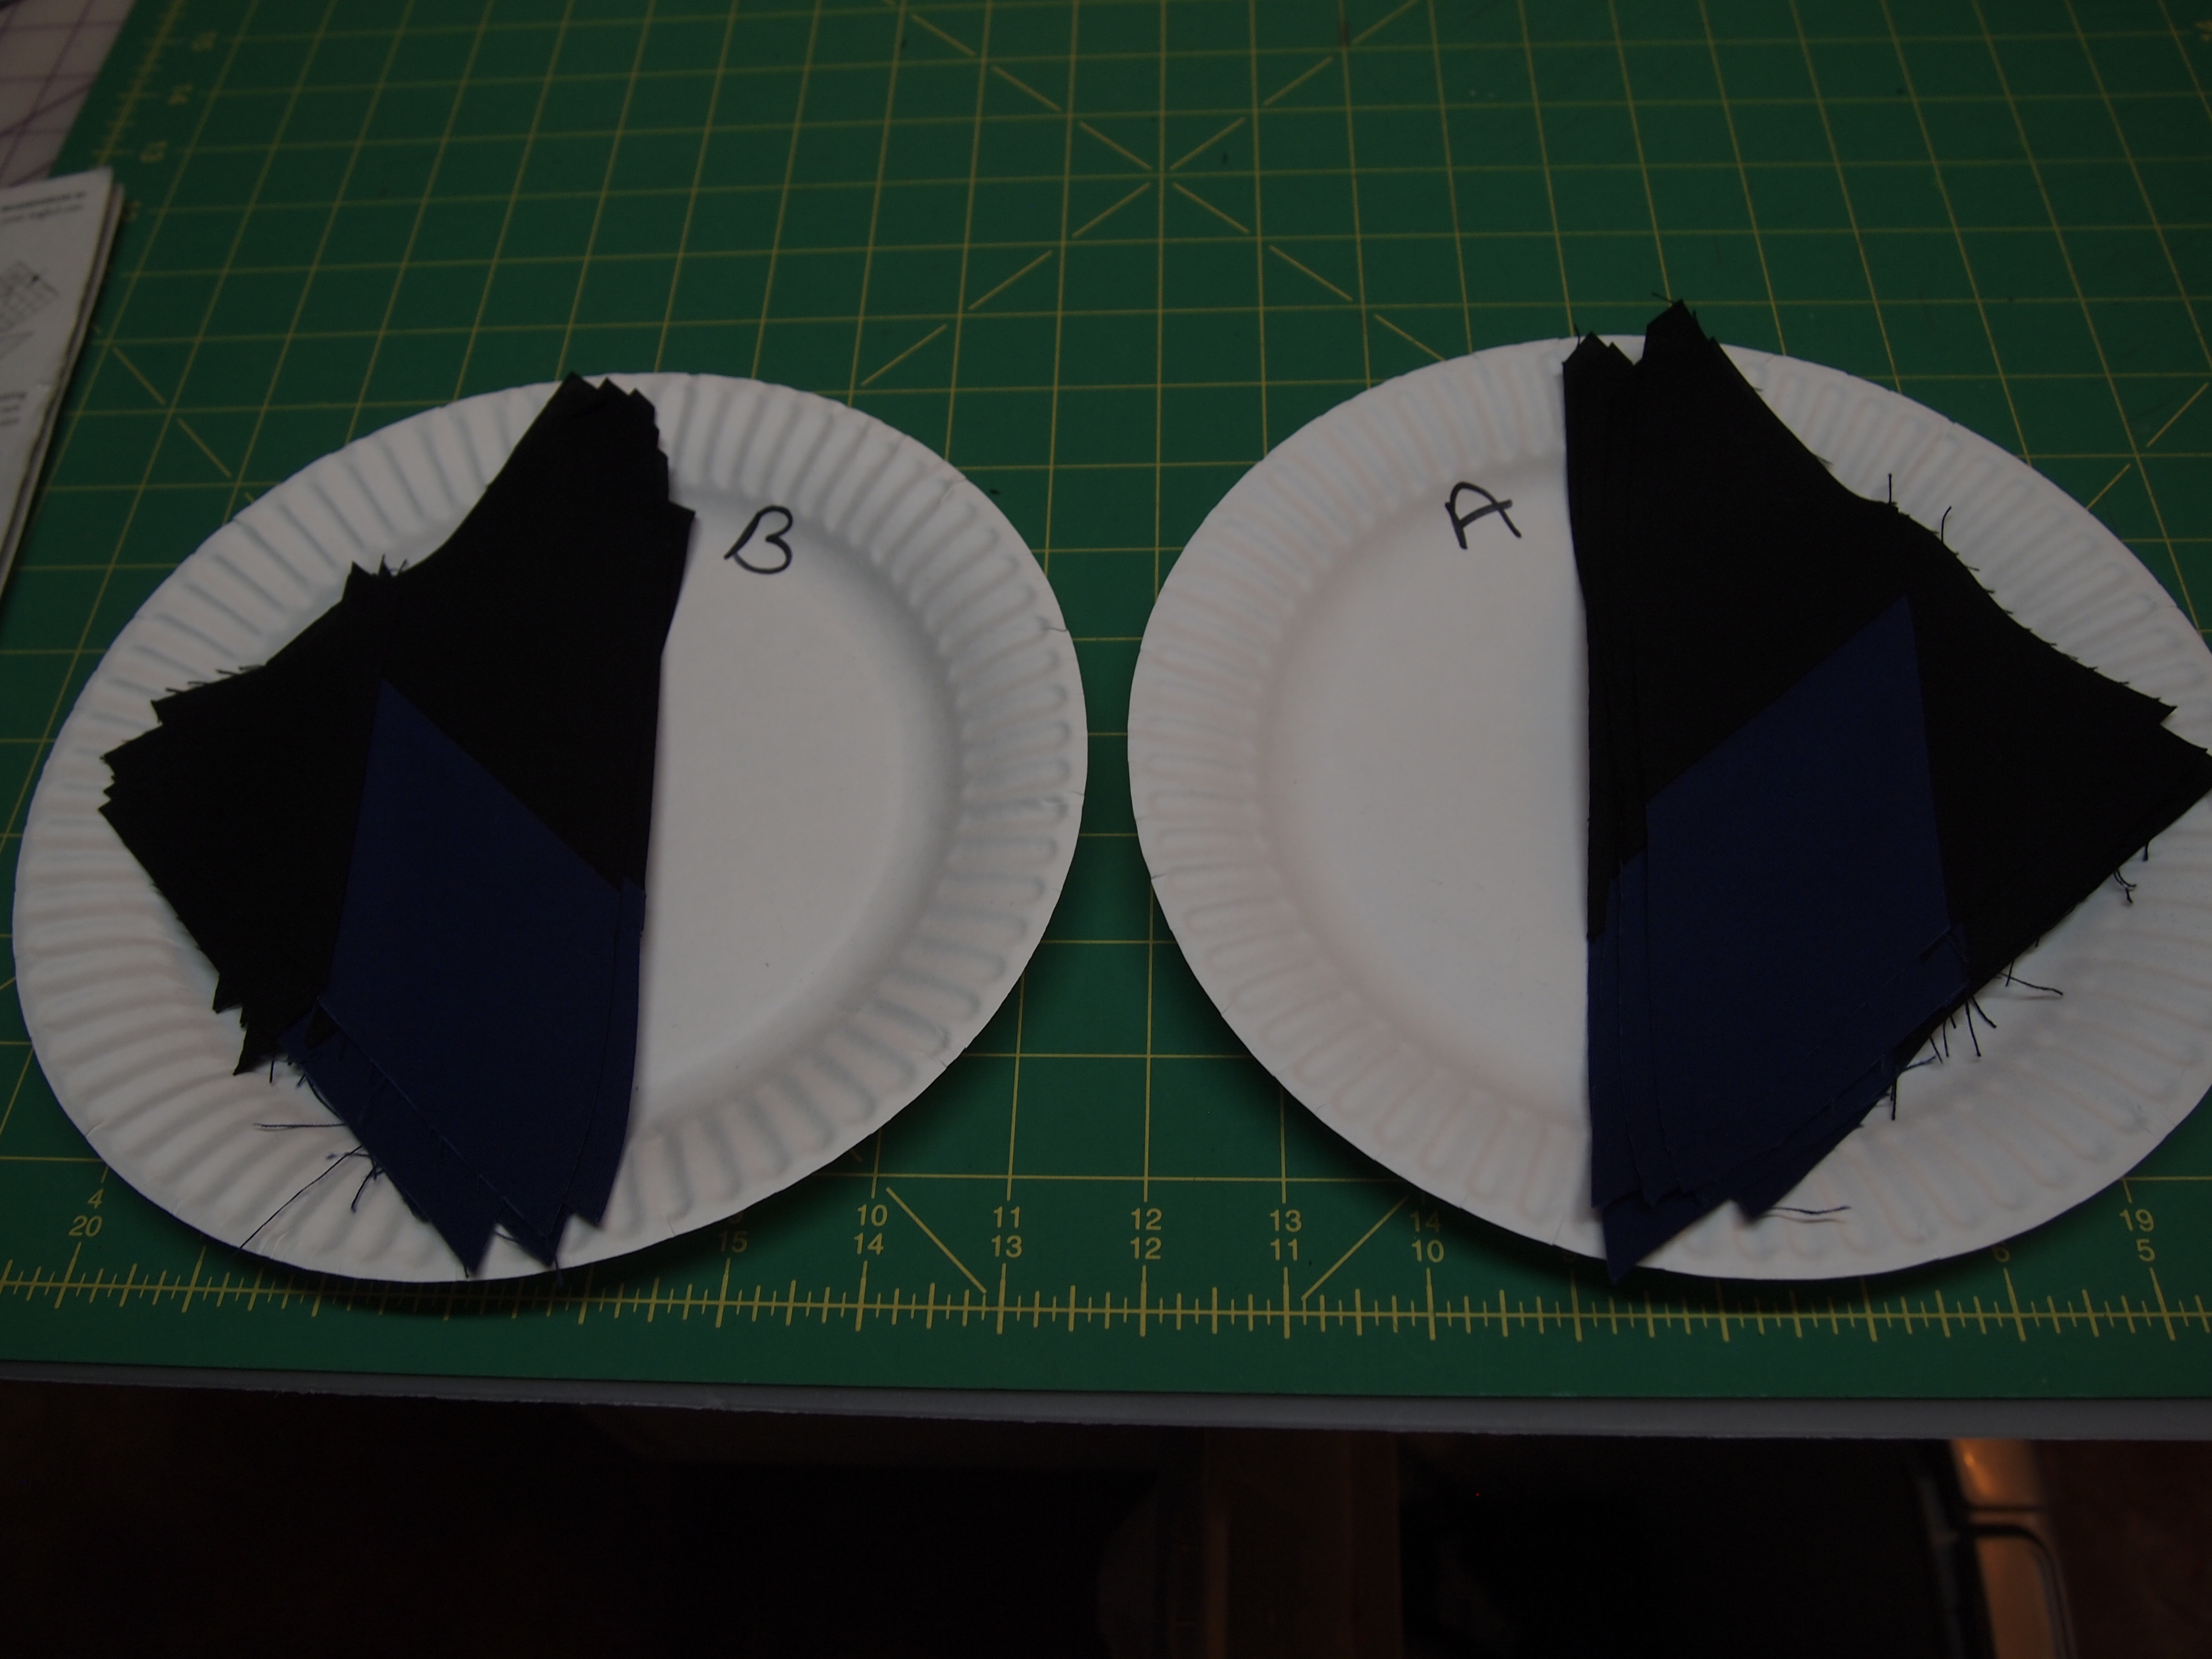
Jackie’s Tip for staying organized is to label two paper plates A & B. For Right handers, Strip “A” is on top & Strip “B” is on the bottom. Cut one unit at a time, place the “A” unit on plate marked “A” & the “B” unit on plate marked “B”. You will always know which units are A & B for pressing.
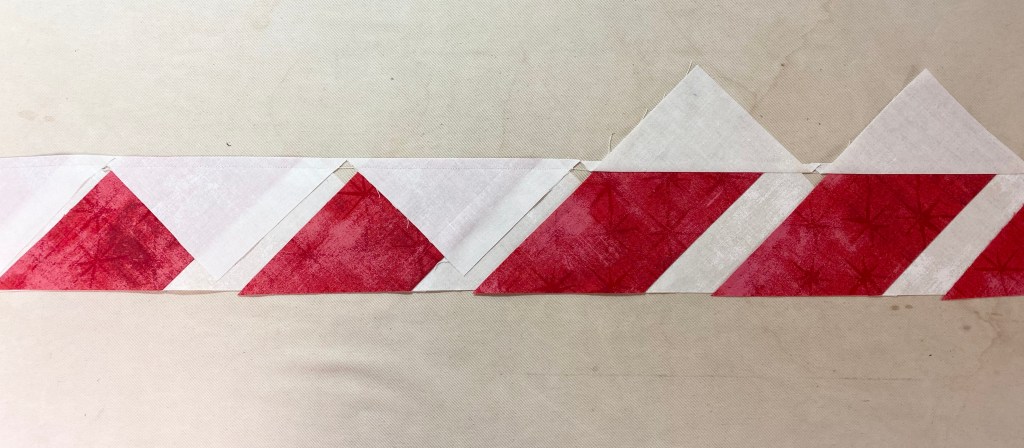
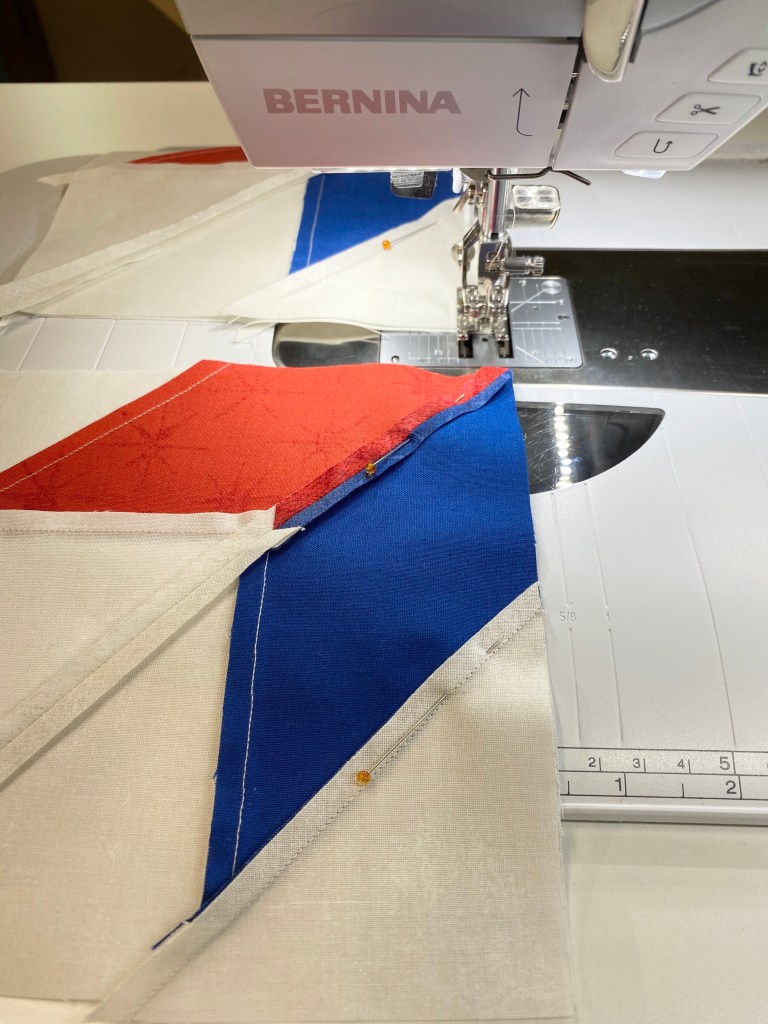
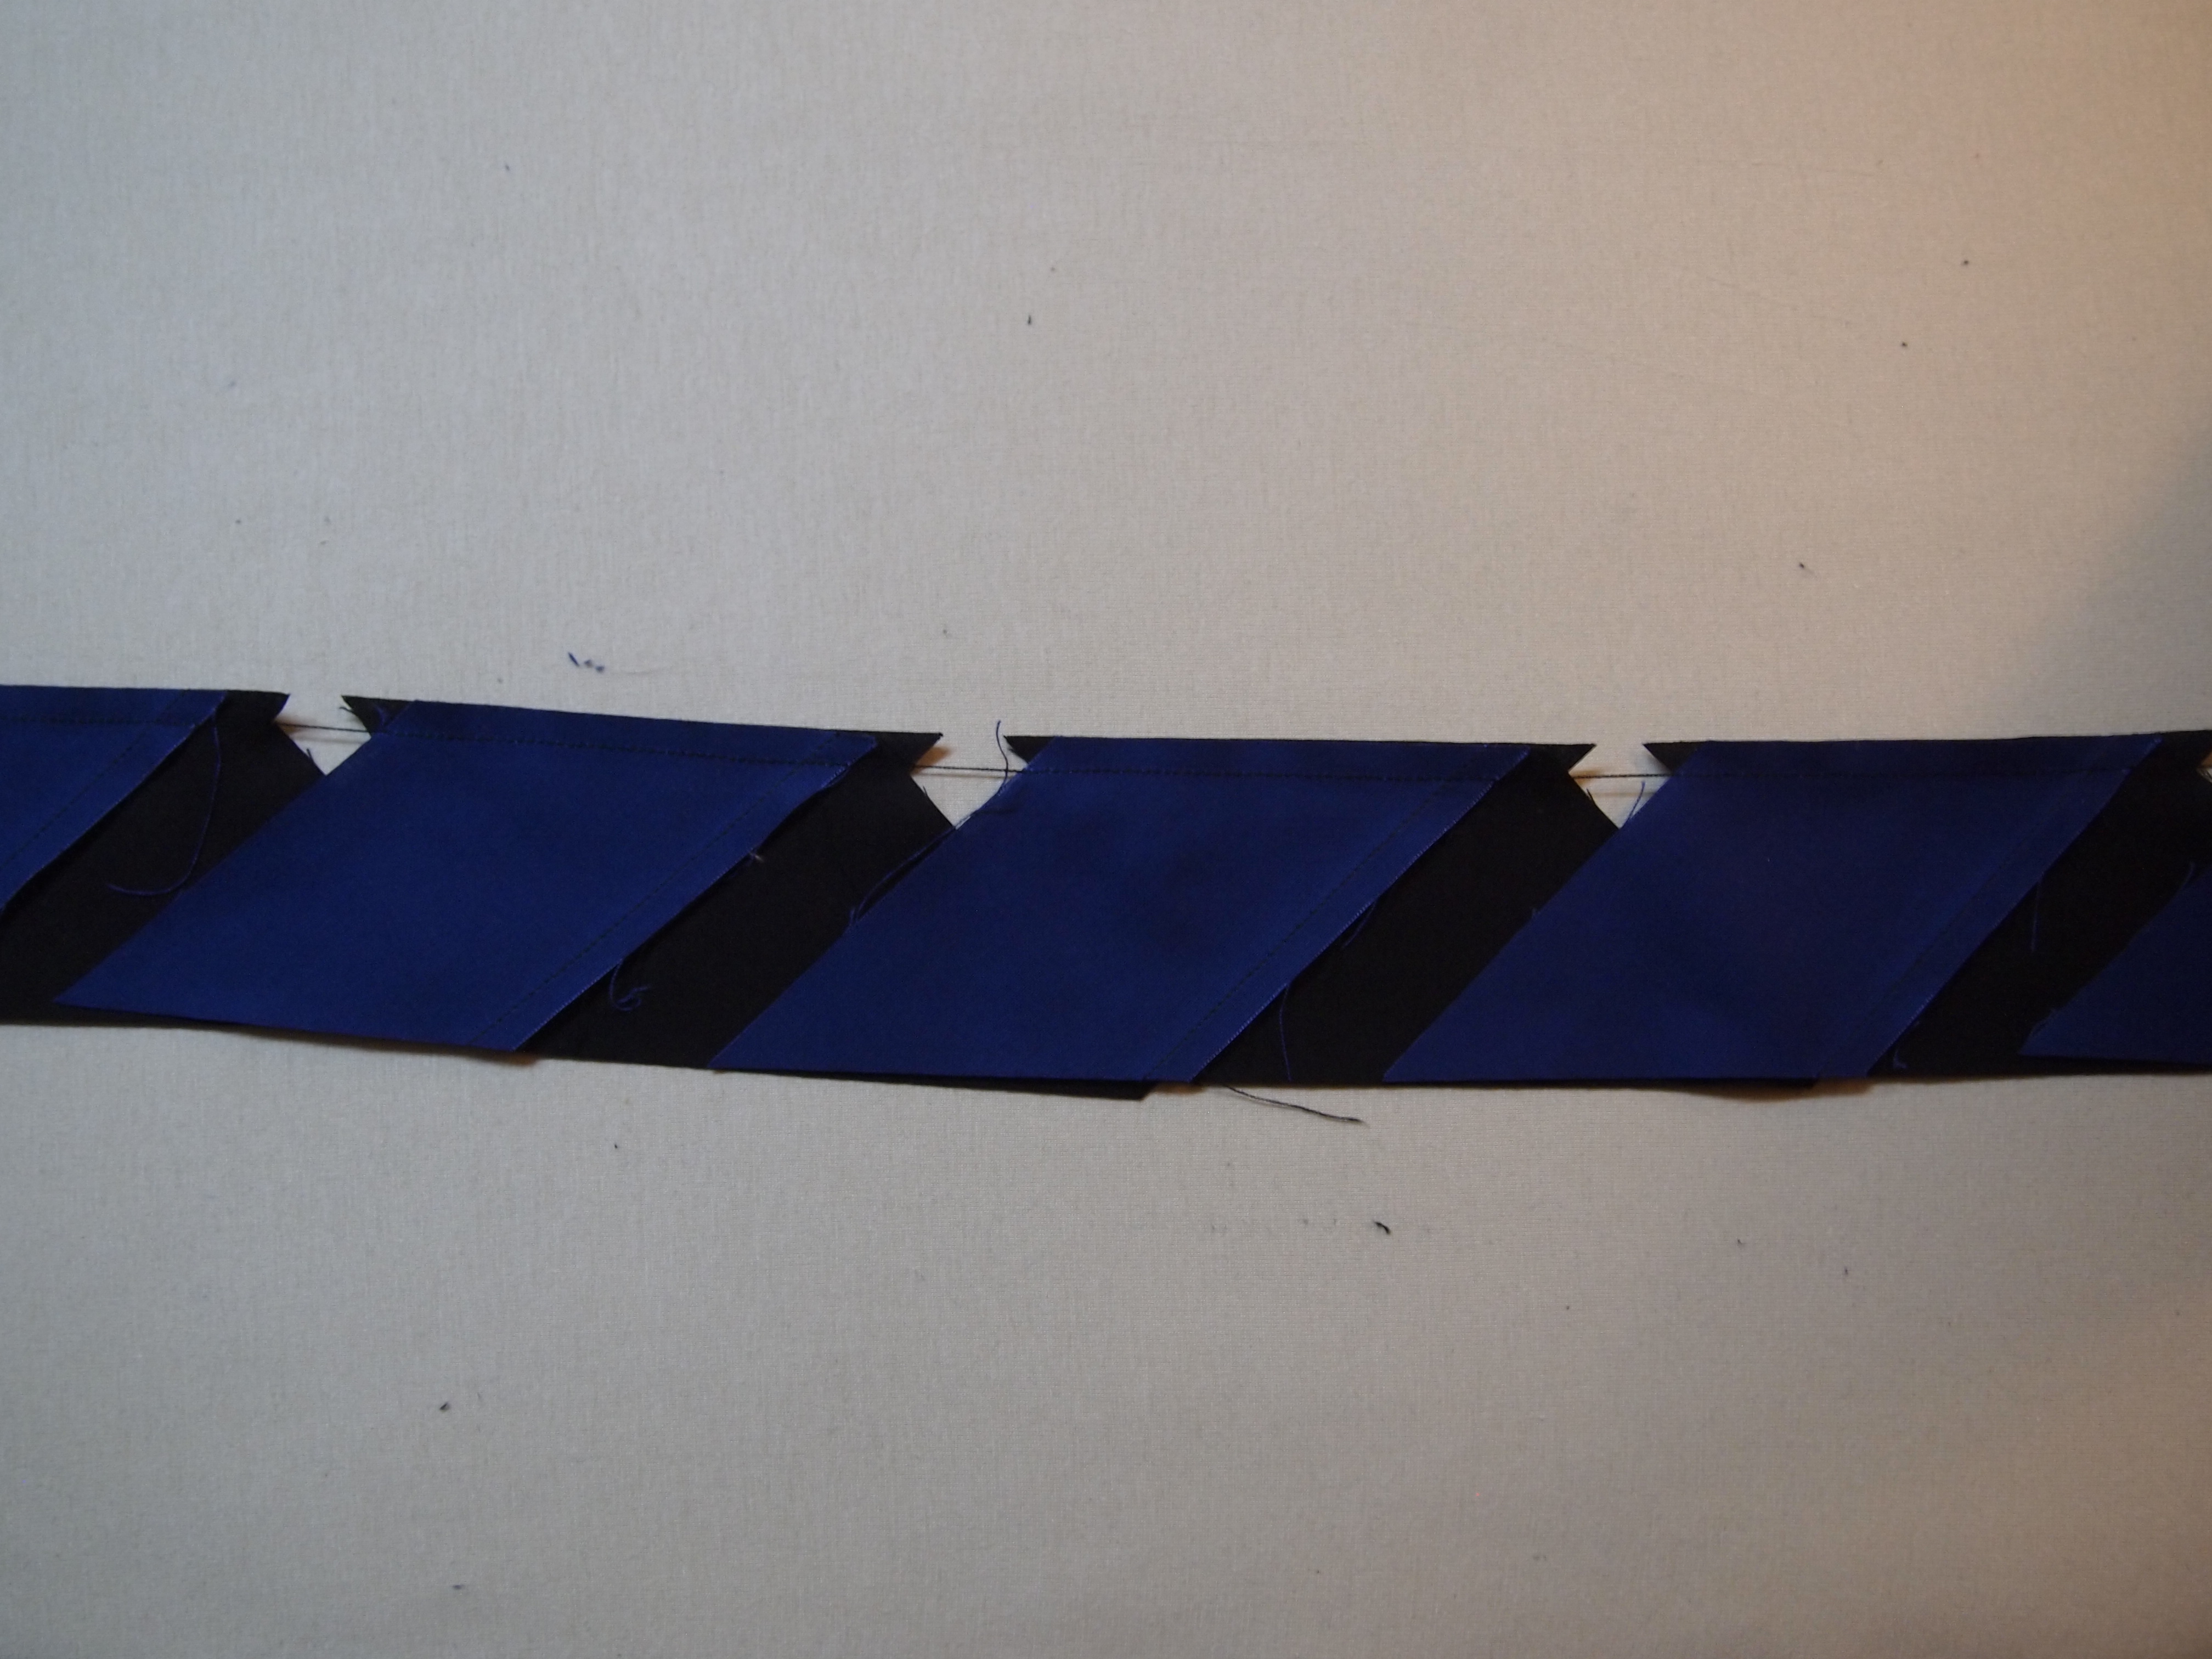
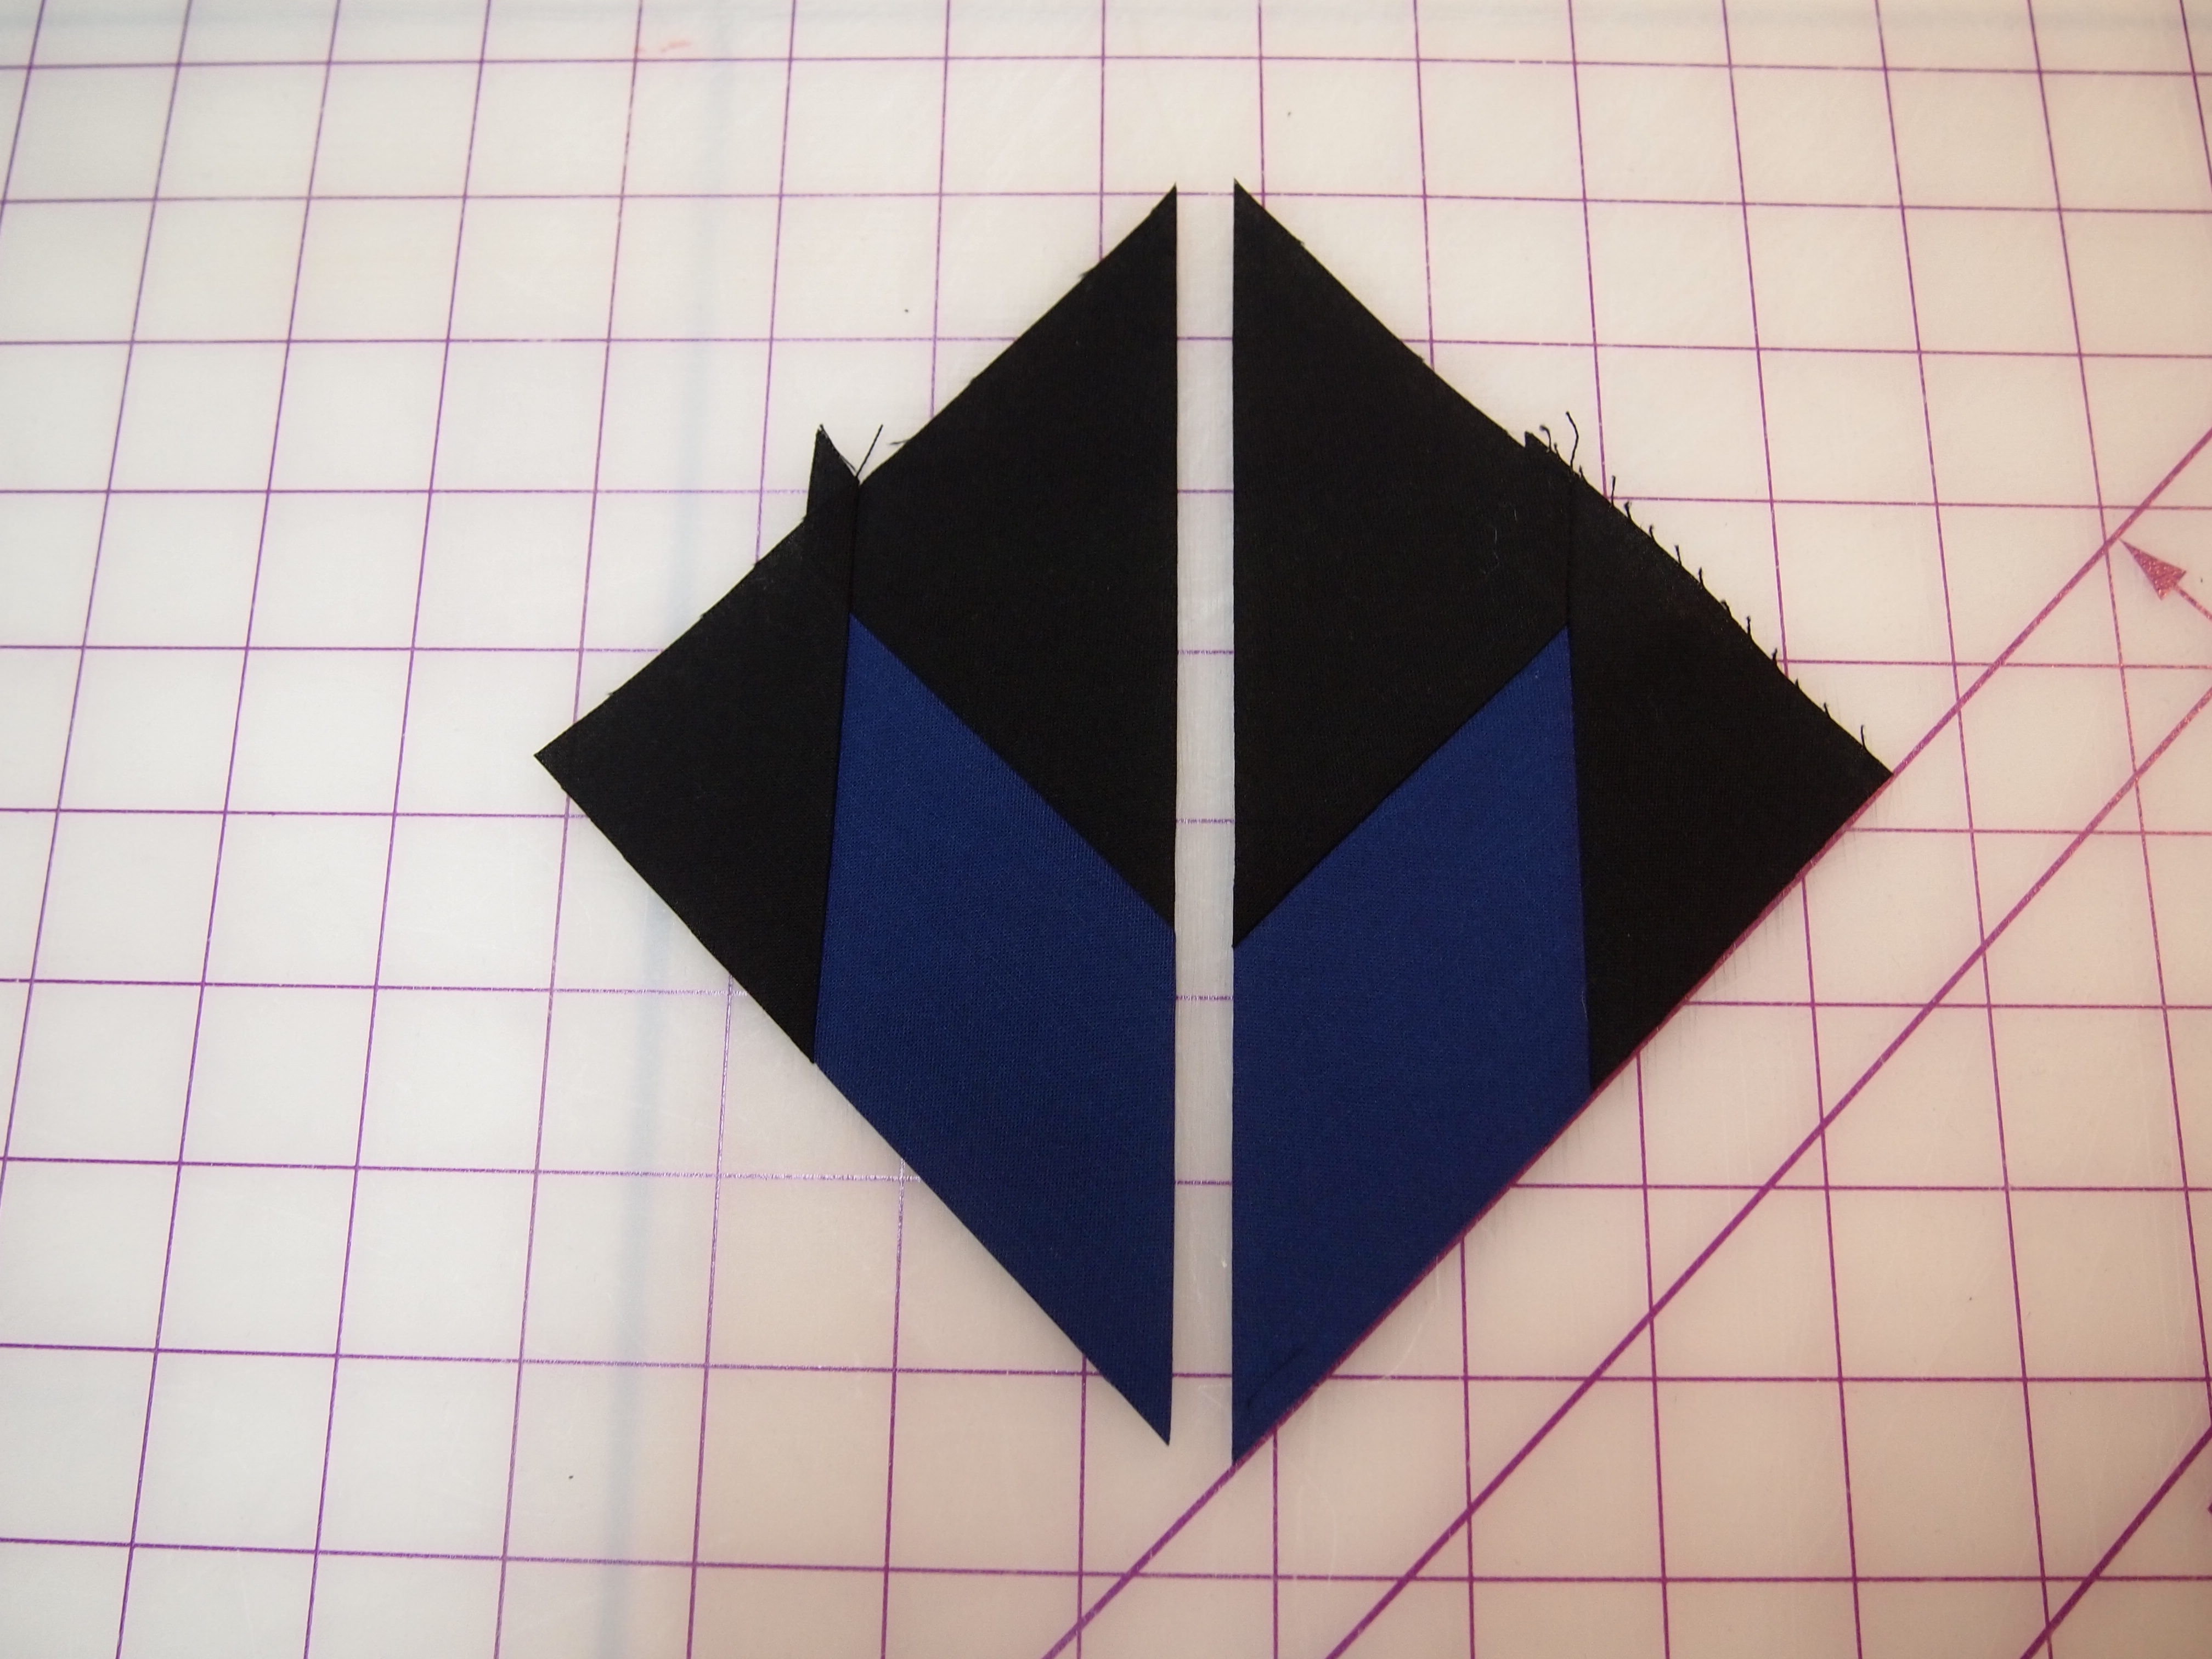
Step 5 – Arrange, position and stitch the cut pieces together into pieced triangle units. Press as shown in the diagram to yield future nesting seams.
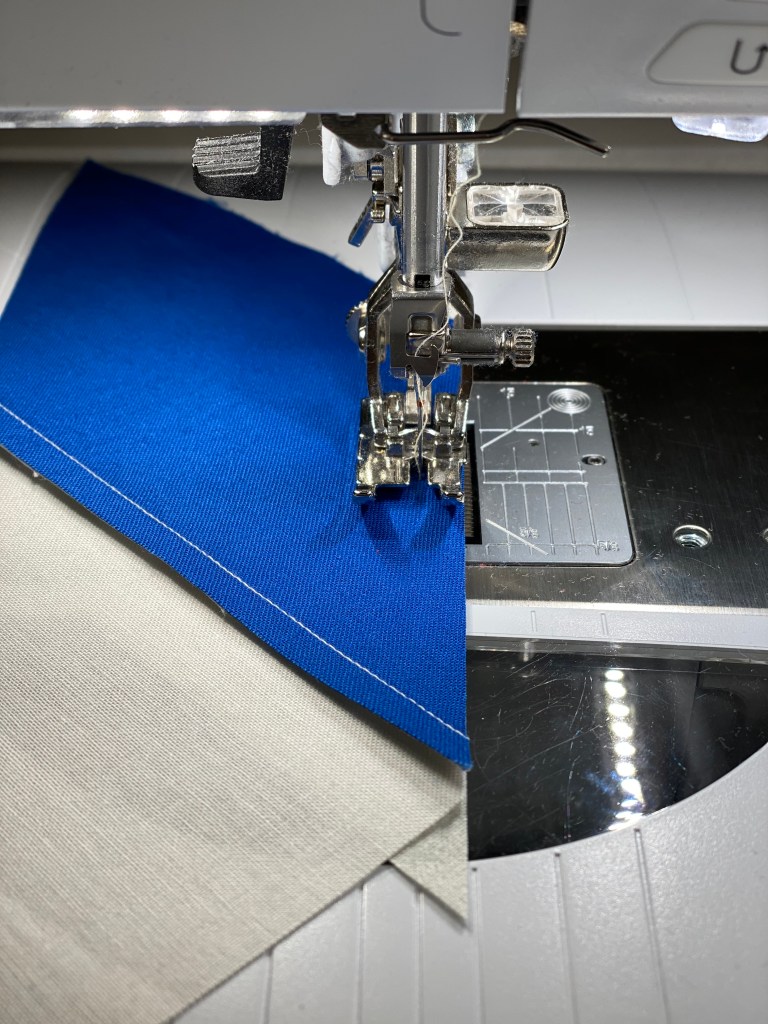
You can chain stitch your “A” and “B” units for easier pressingPress “A” units toward the Star PointPress “B” units toward the side triangle
Tip: Remember “whatever you are pressing toward – goes on top”!
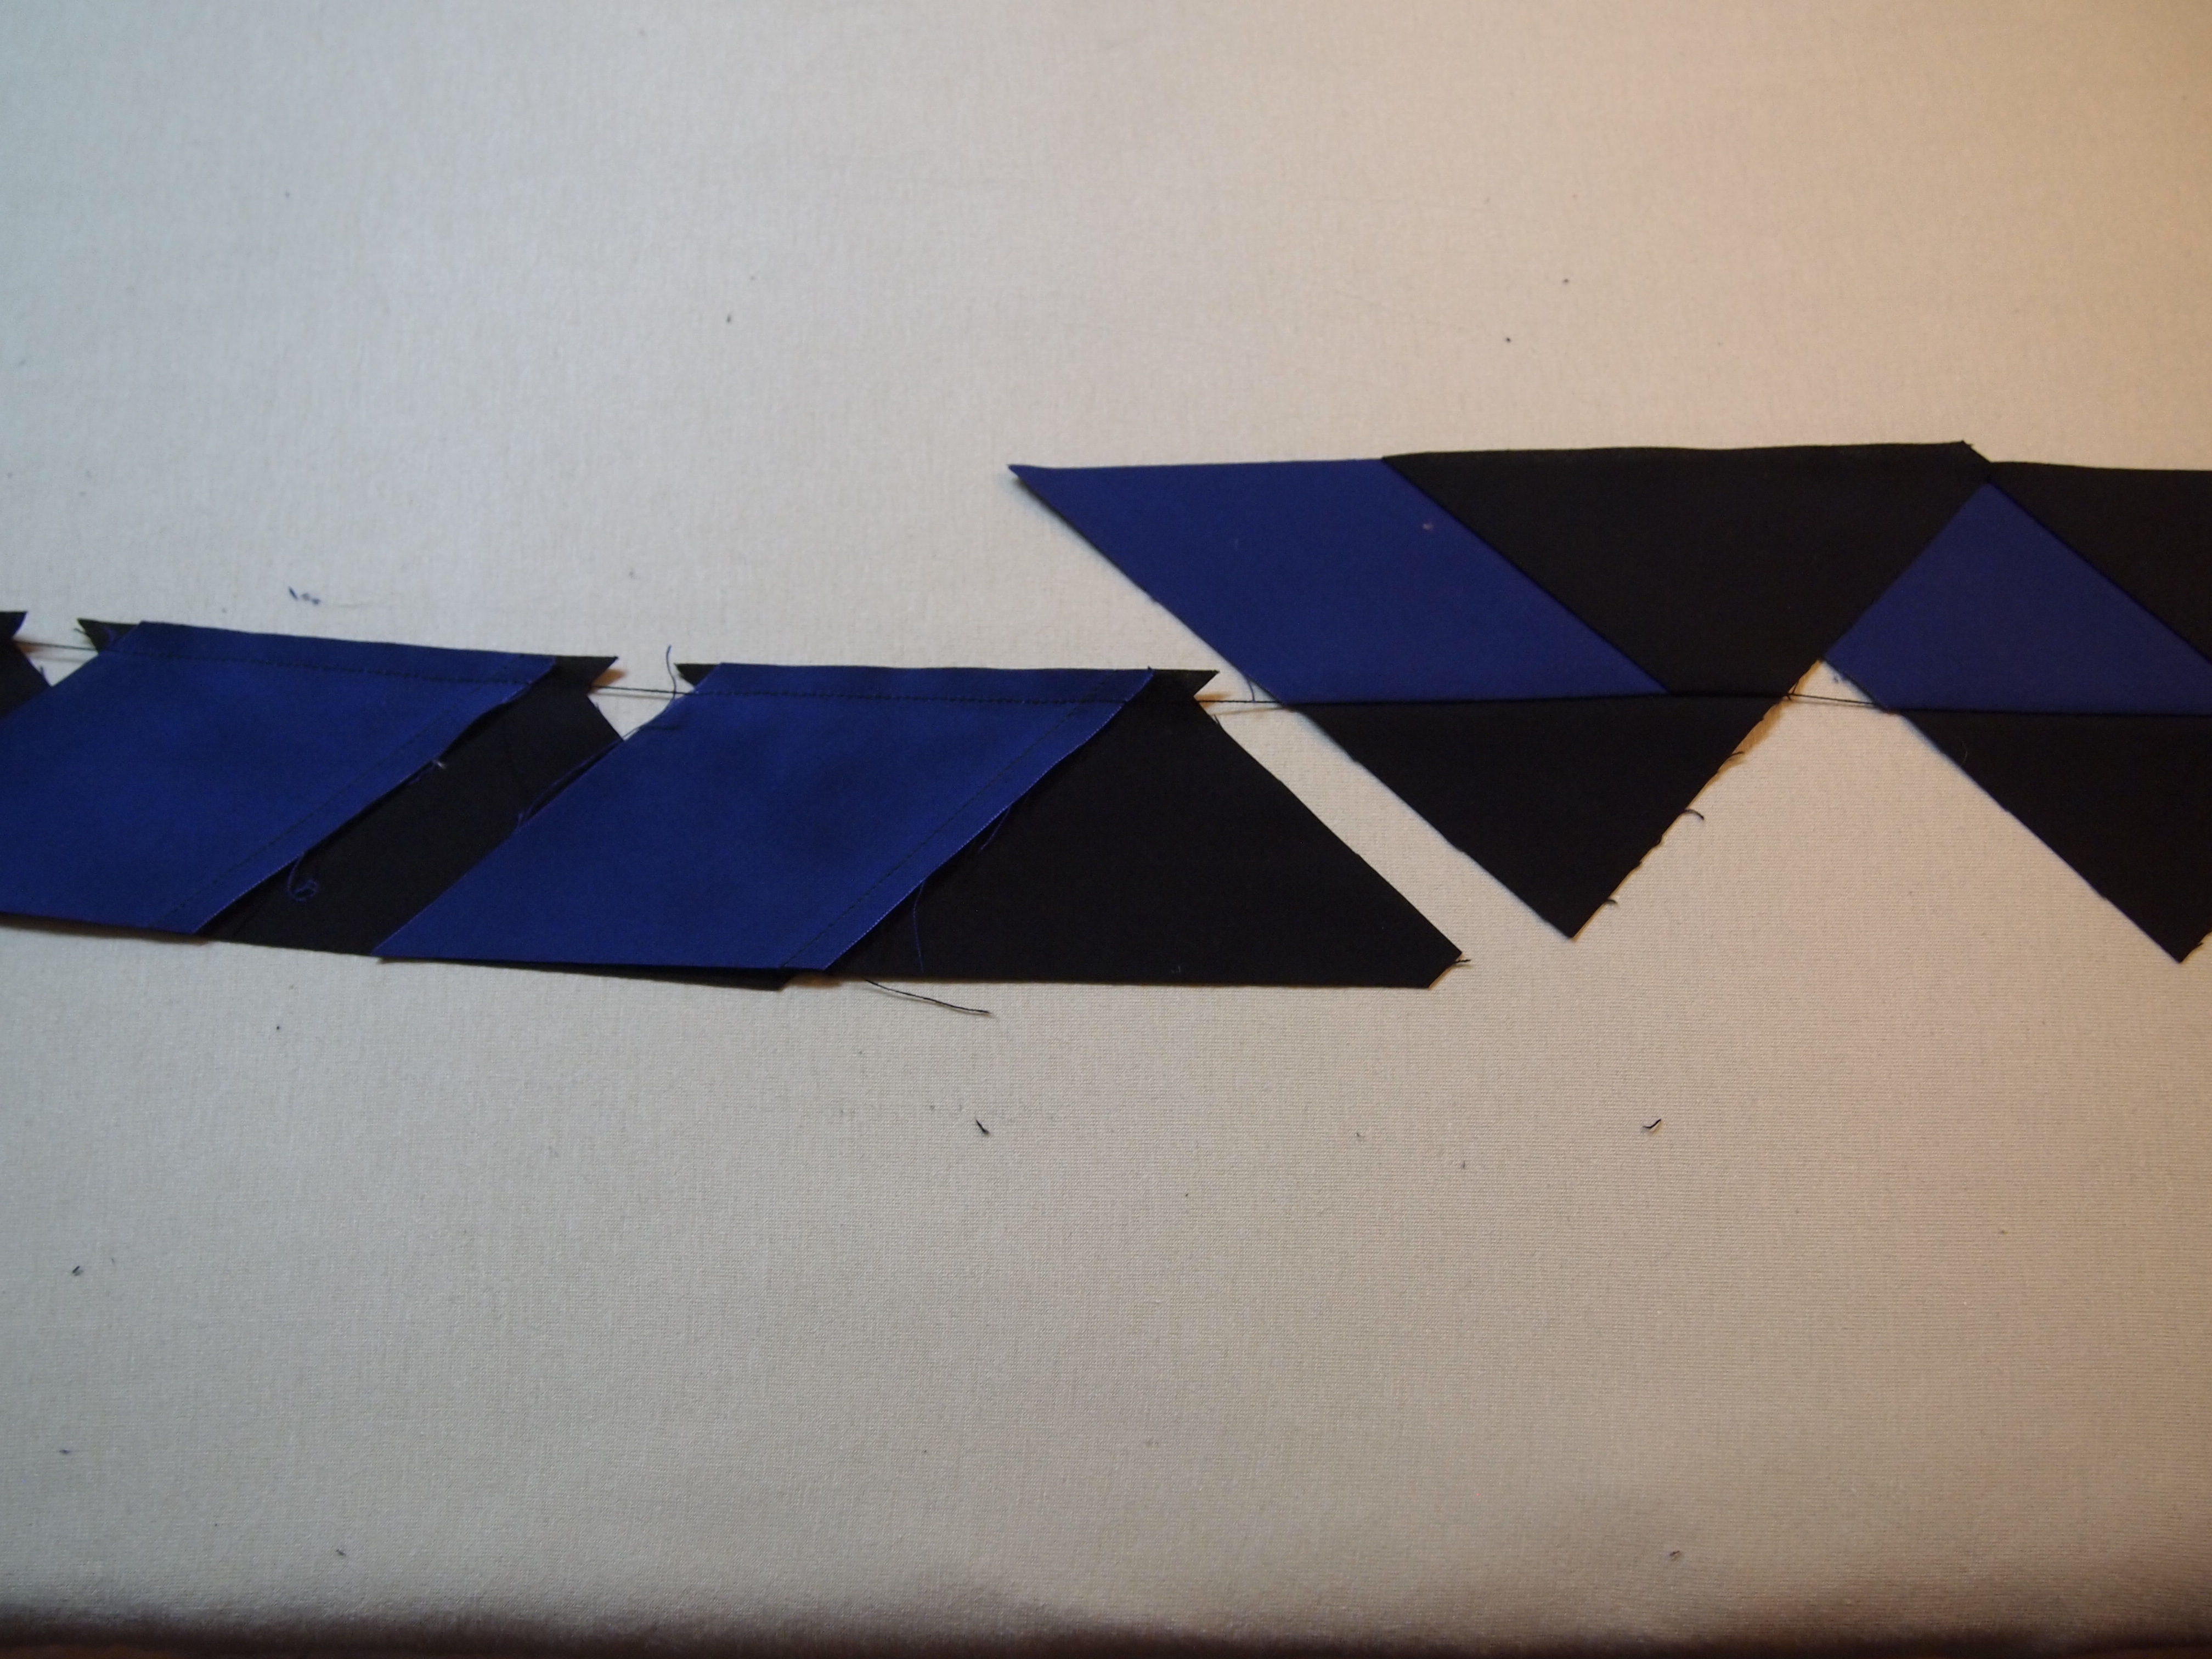
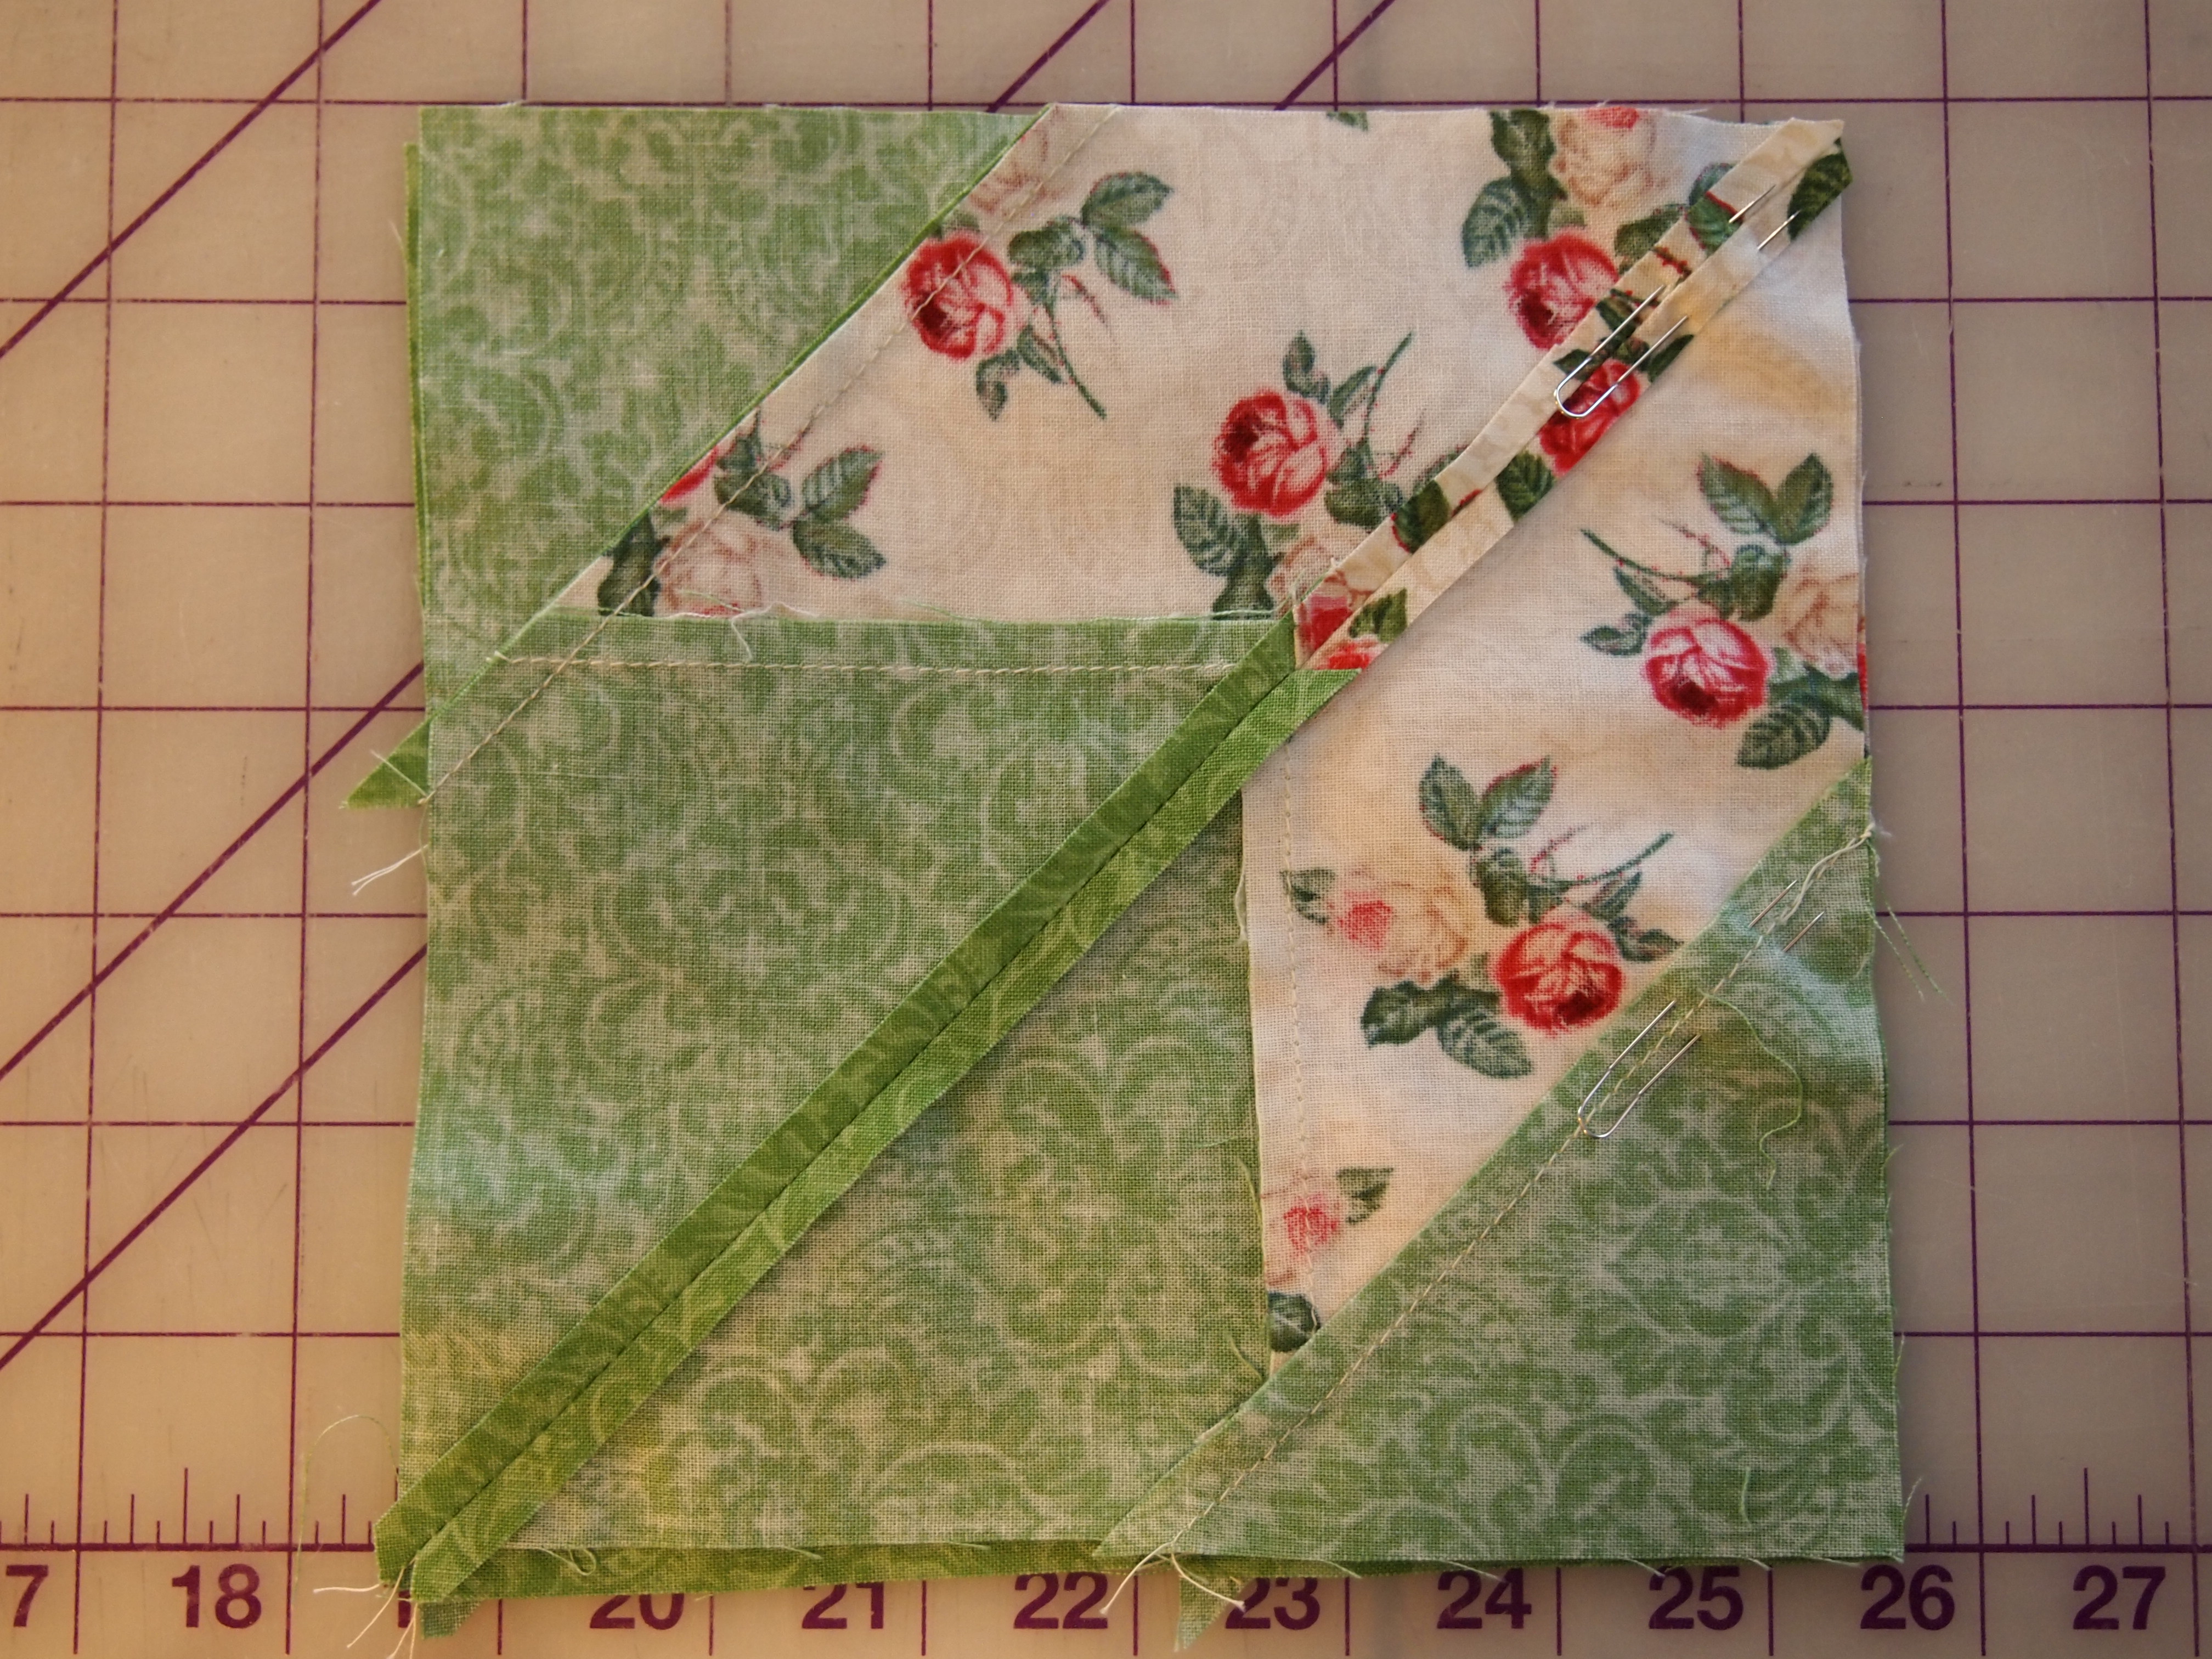
Step 6 – Trim down all pieced triangle units using the 12” line on the Rapid Fire® Lemoyne Star tool as shown in the diagram.
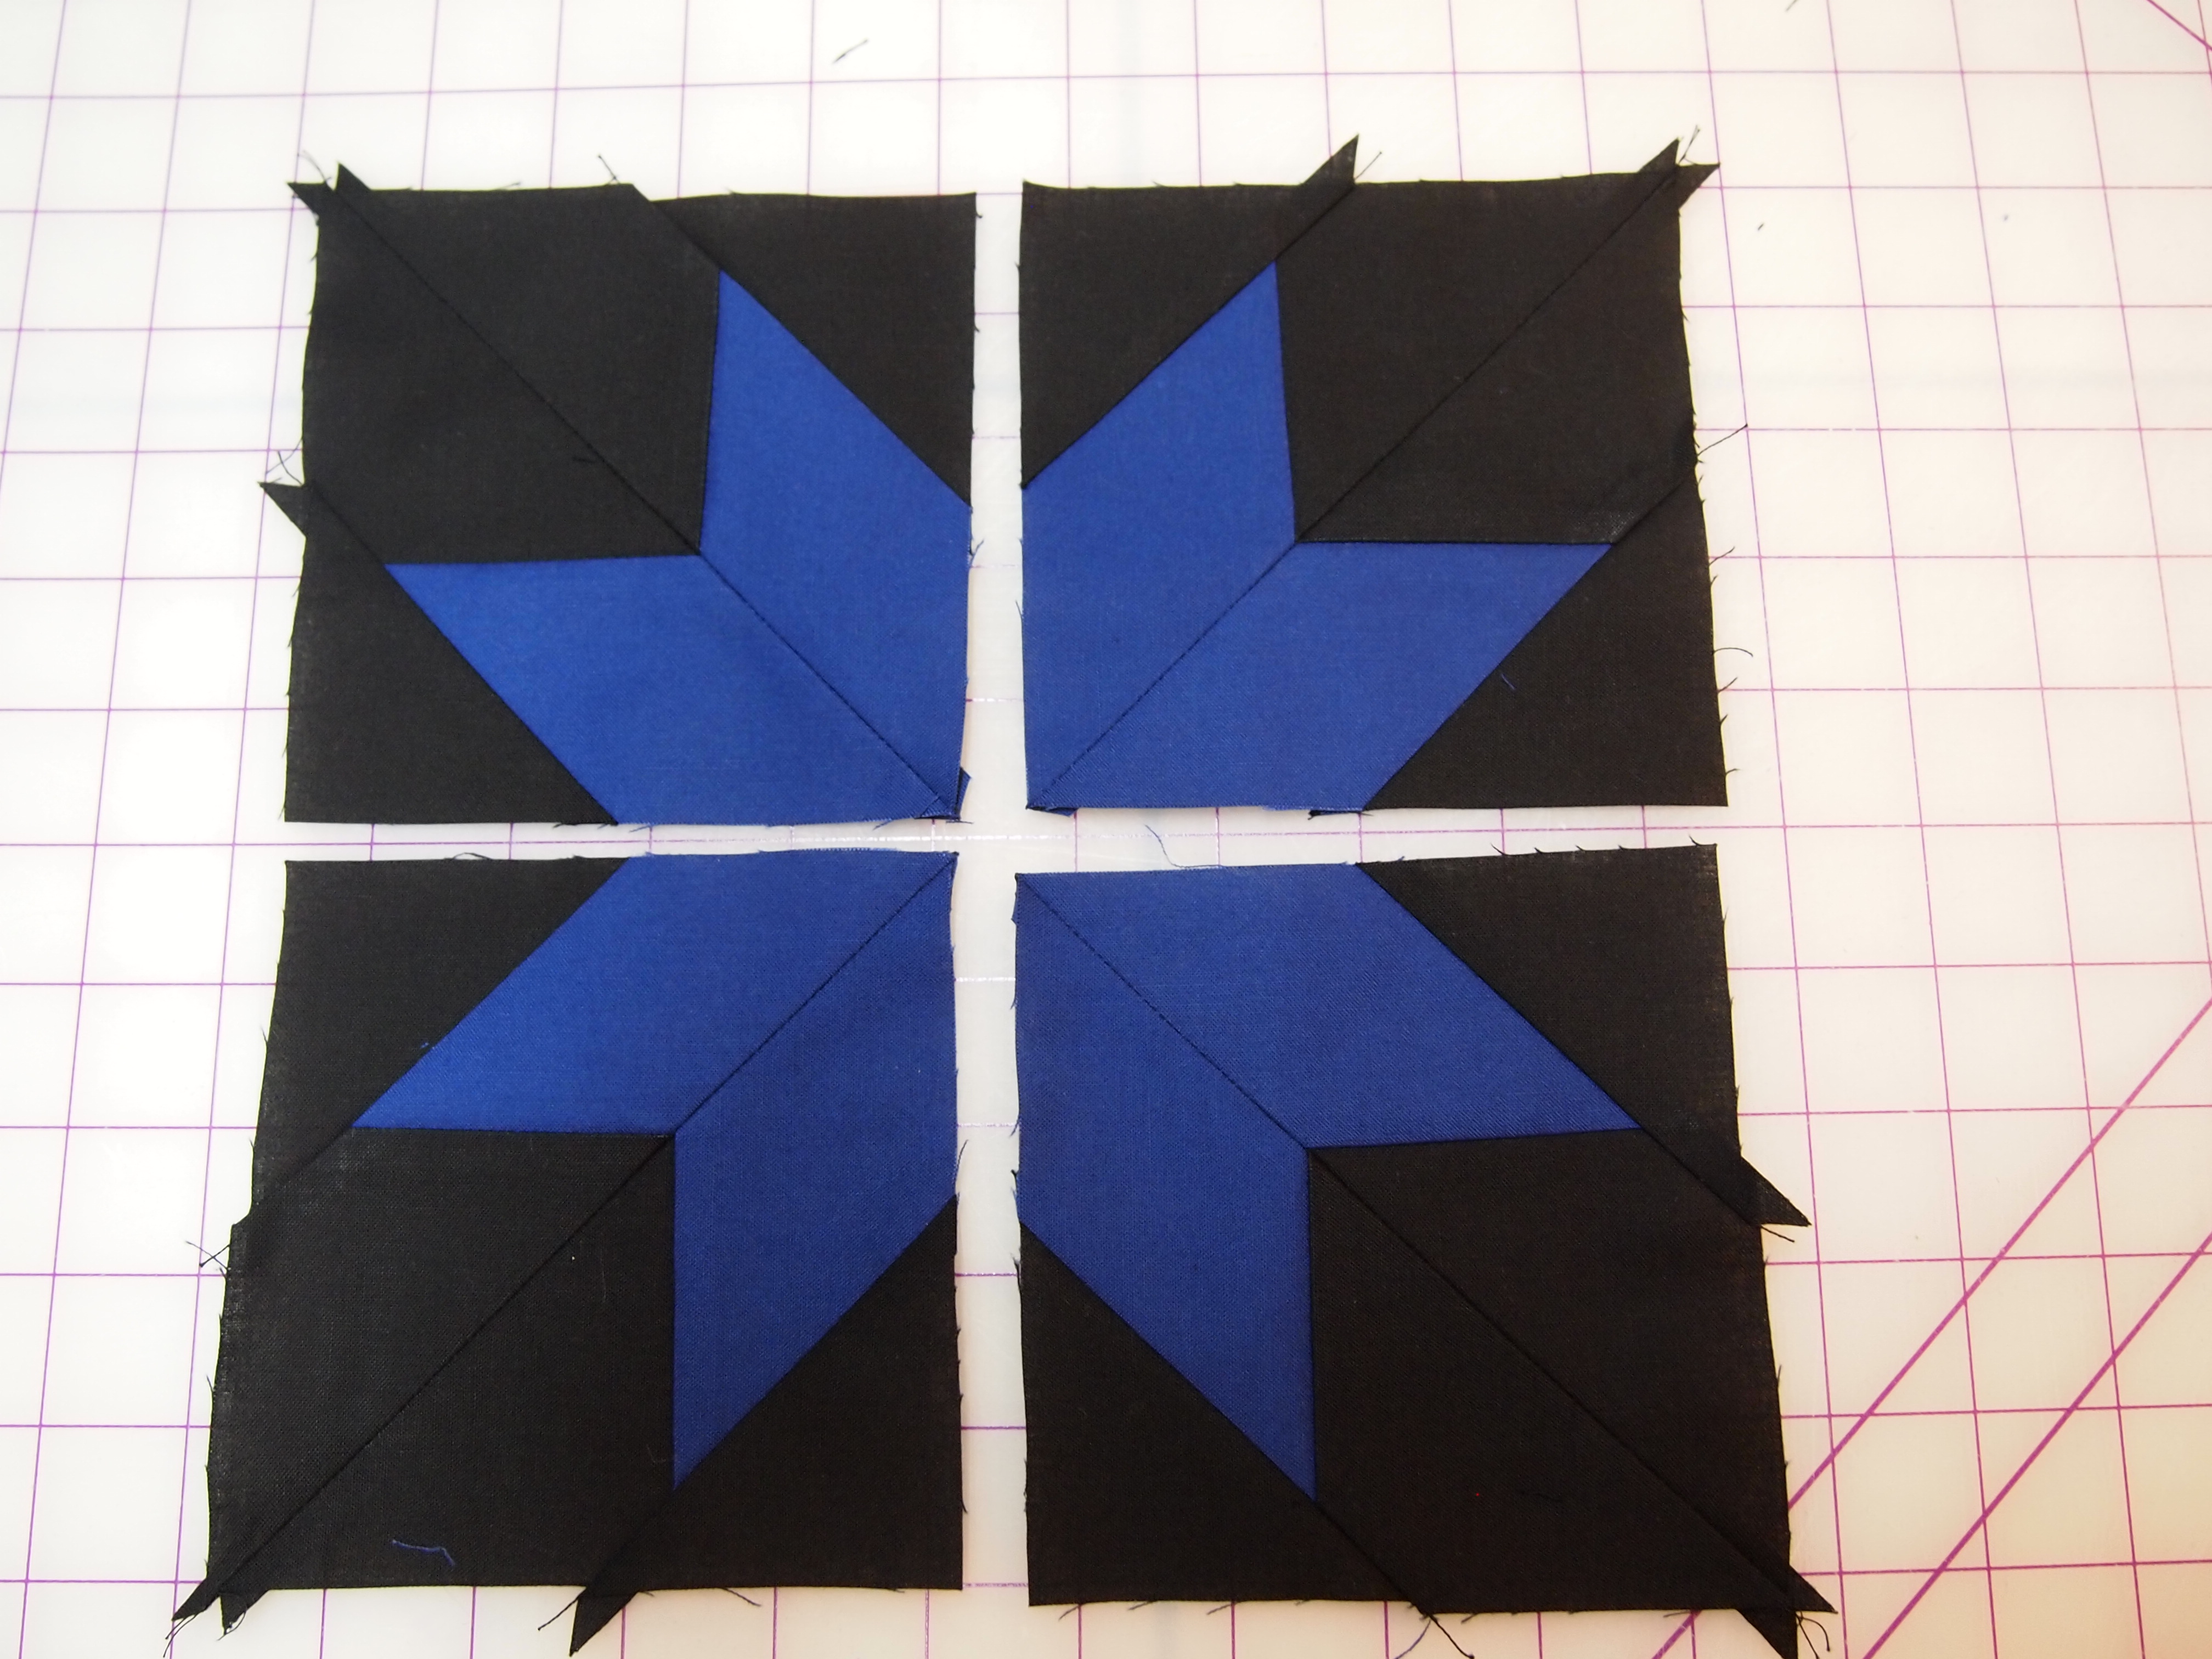
Step 7 – Assemble quarters. Arrange the sewn and trimmed A and B sections into quarter blocks. Stitch the sections together and press the seams open to best distribute bulk. You should have 20 quarter blocks total.
You can choose to press your seams open or…You can choose to press the seams so they are all going in the same direction.
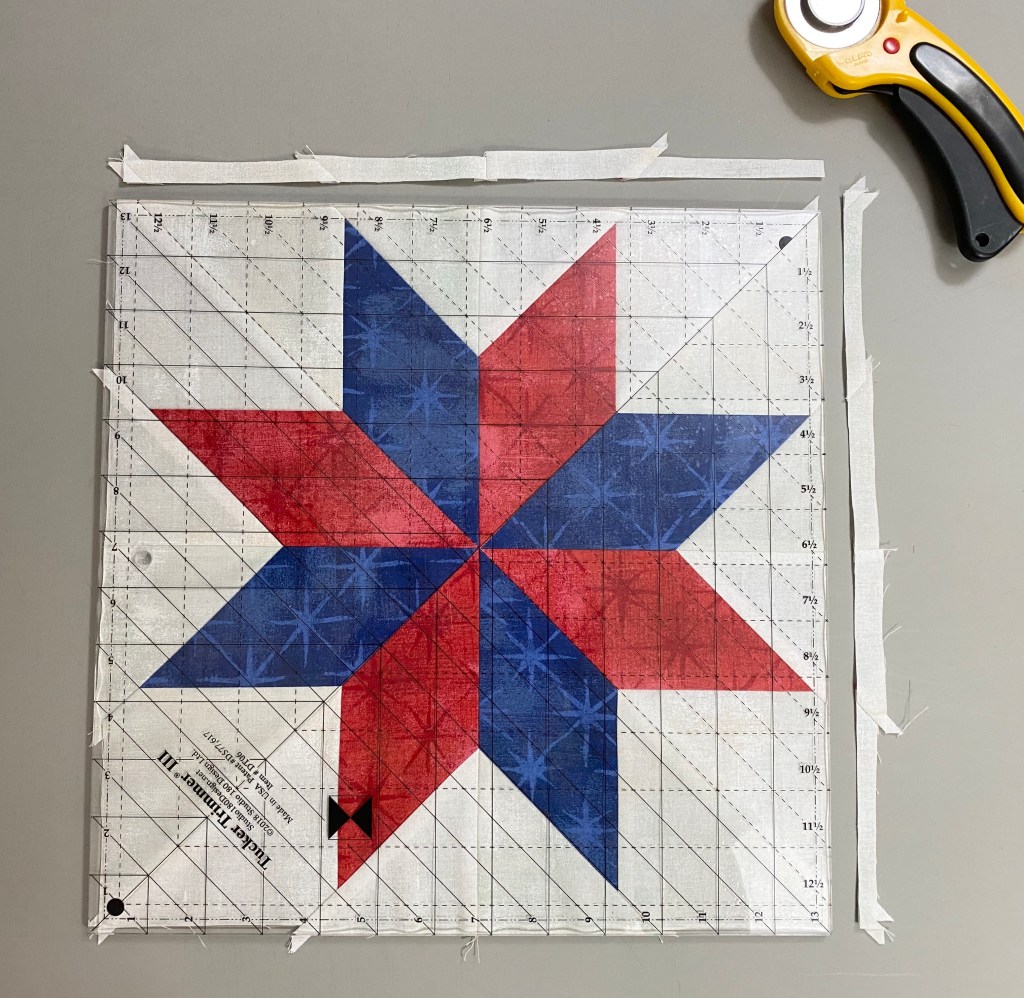
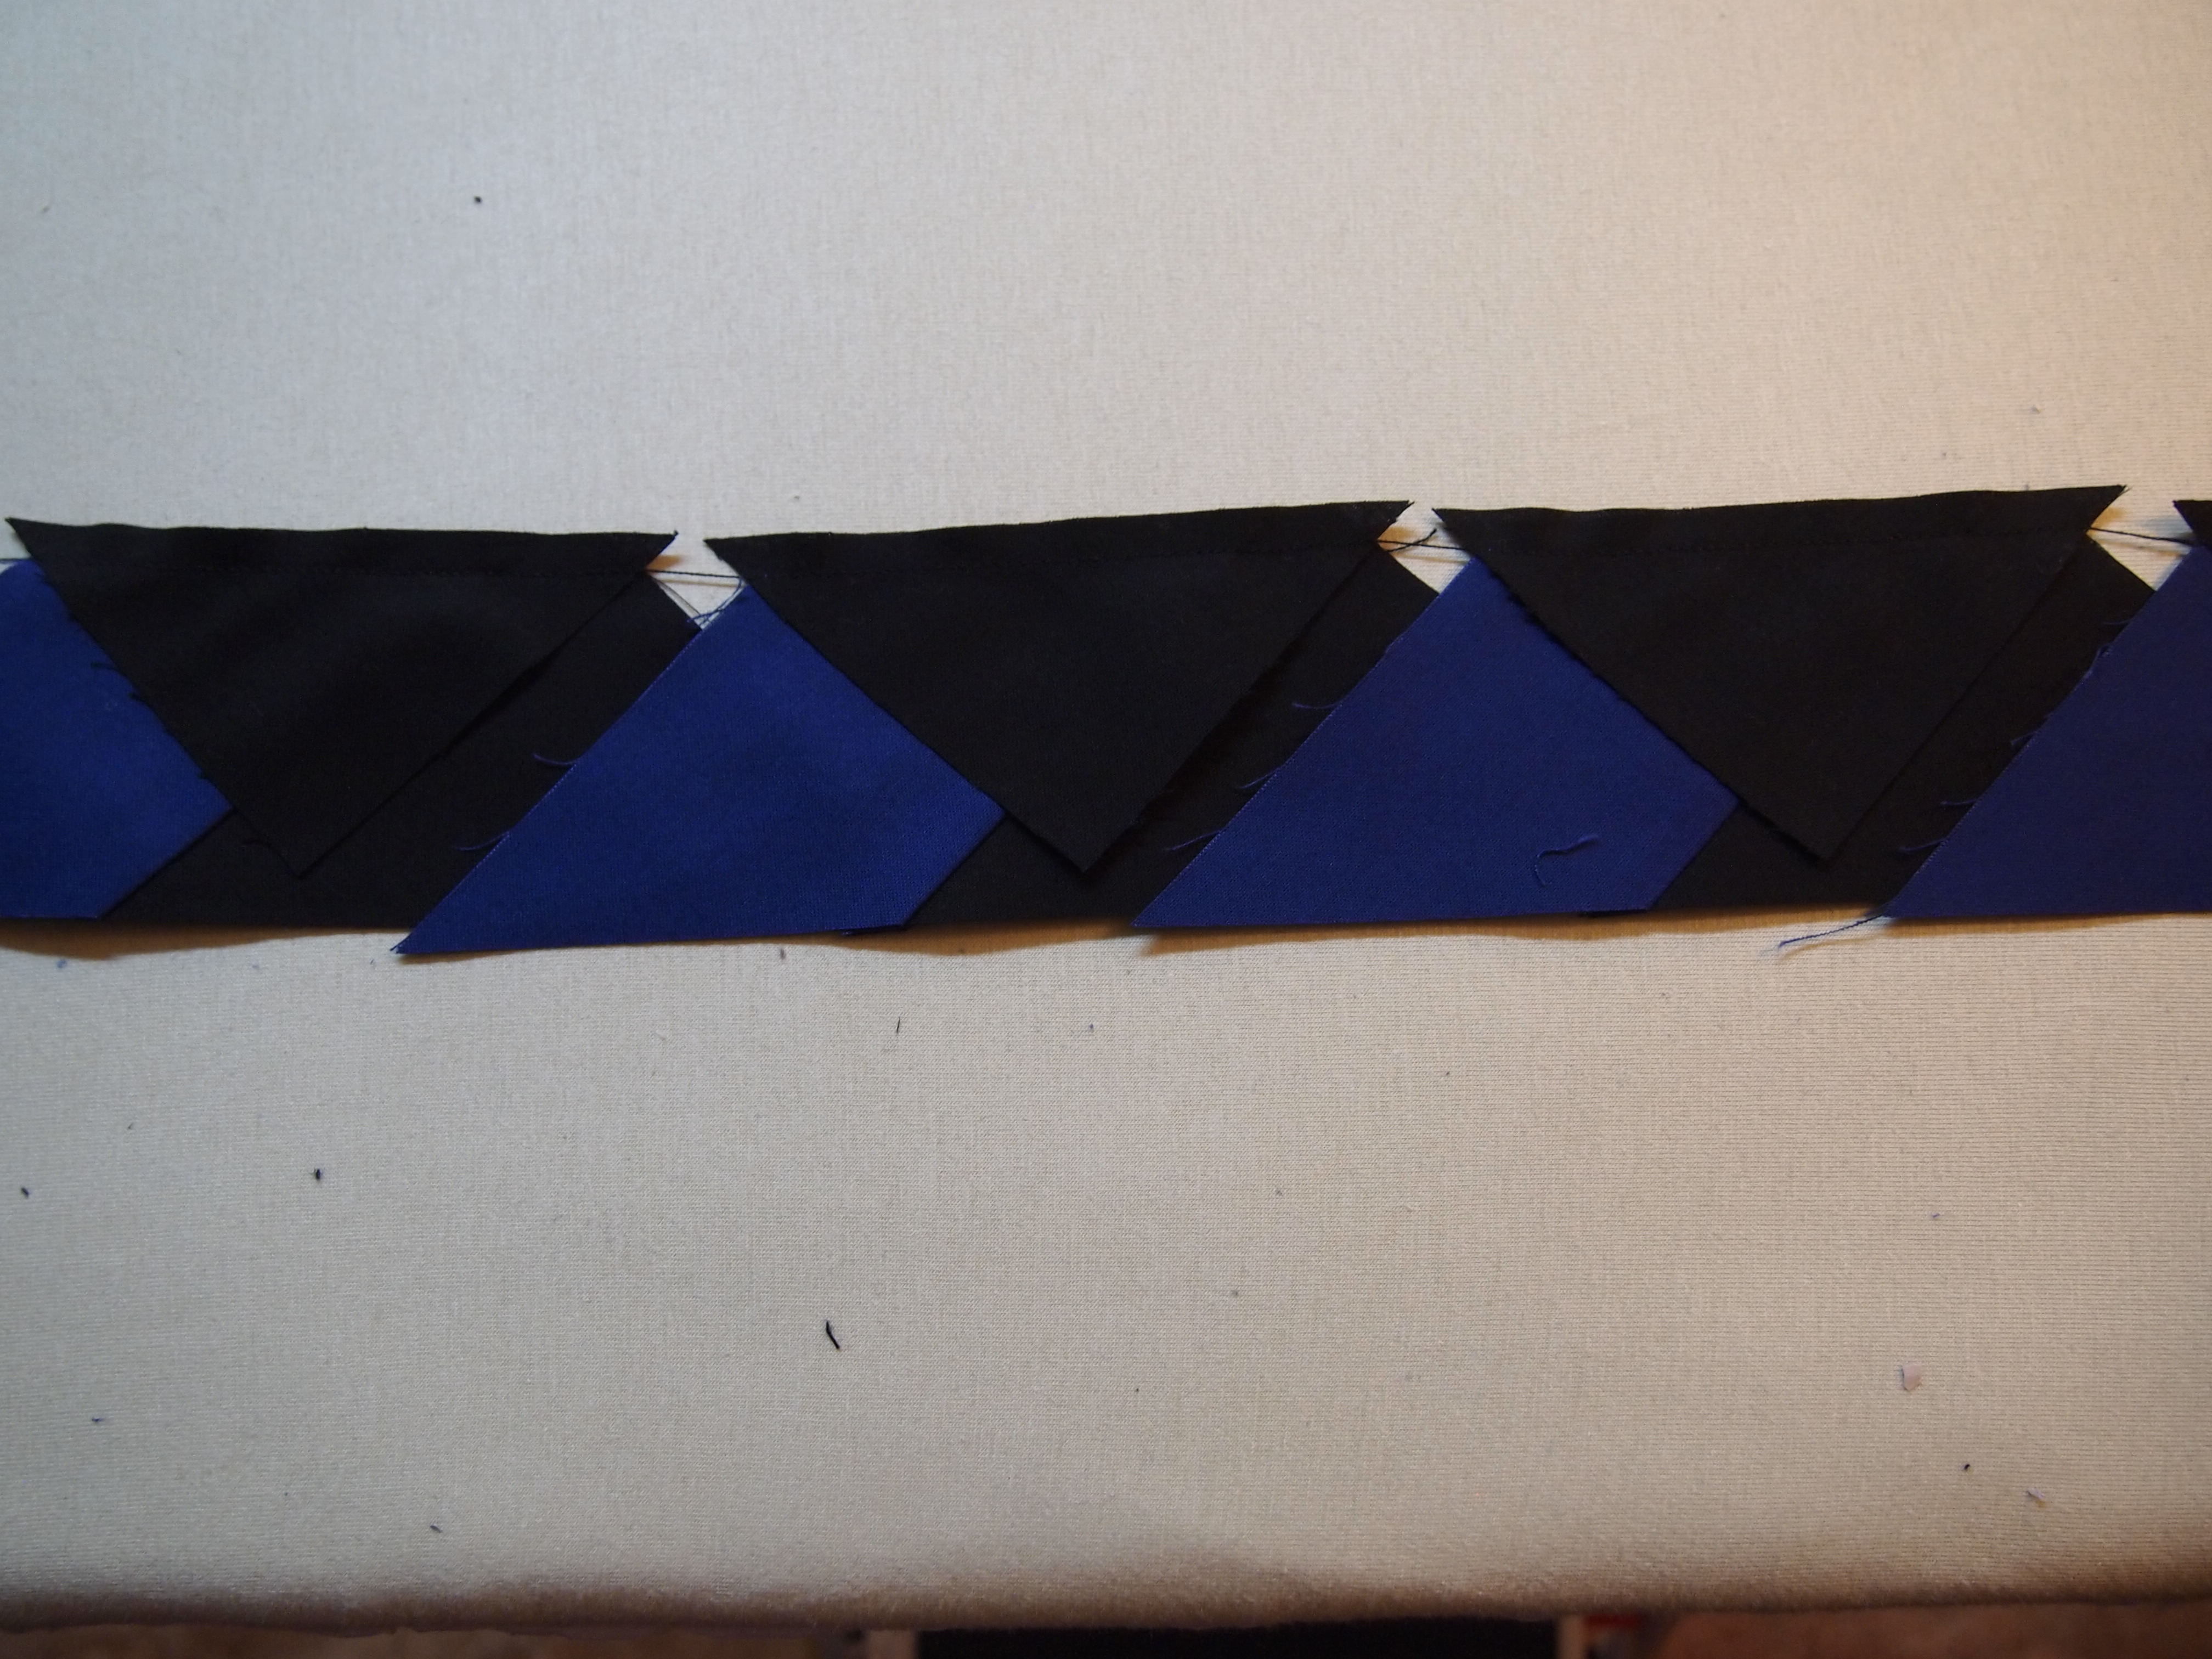
Step 8 – Trim the quarters to 6½” x 6½” with your Tucker Trimmer® I tool. Clean up the dog ears and true up the first corner as shown (this should just be a few threads at most), then rotate the unit 180o to trim the opposite corner. Align the Common Diagonal with the seam and the 6½” clean up lines with the trimmed edges to trim the remaining two sides. Repeat for all 20 quarters. Label the finished quarters Unit H.
First TrimSecond Trim
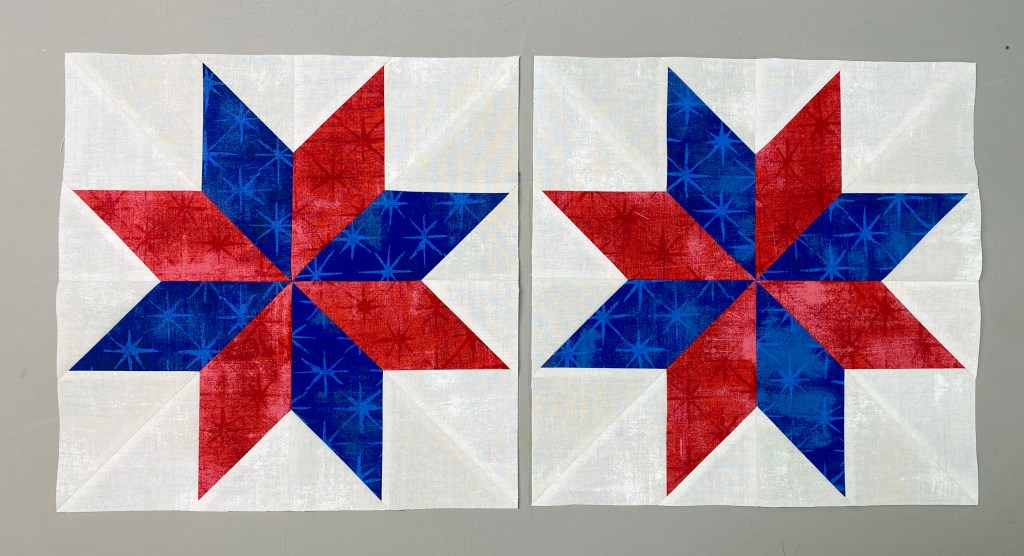
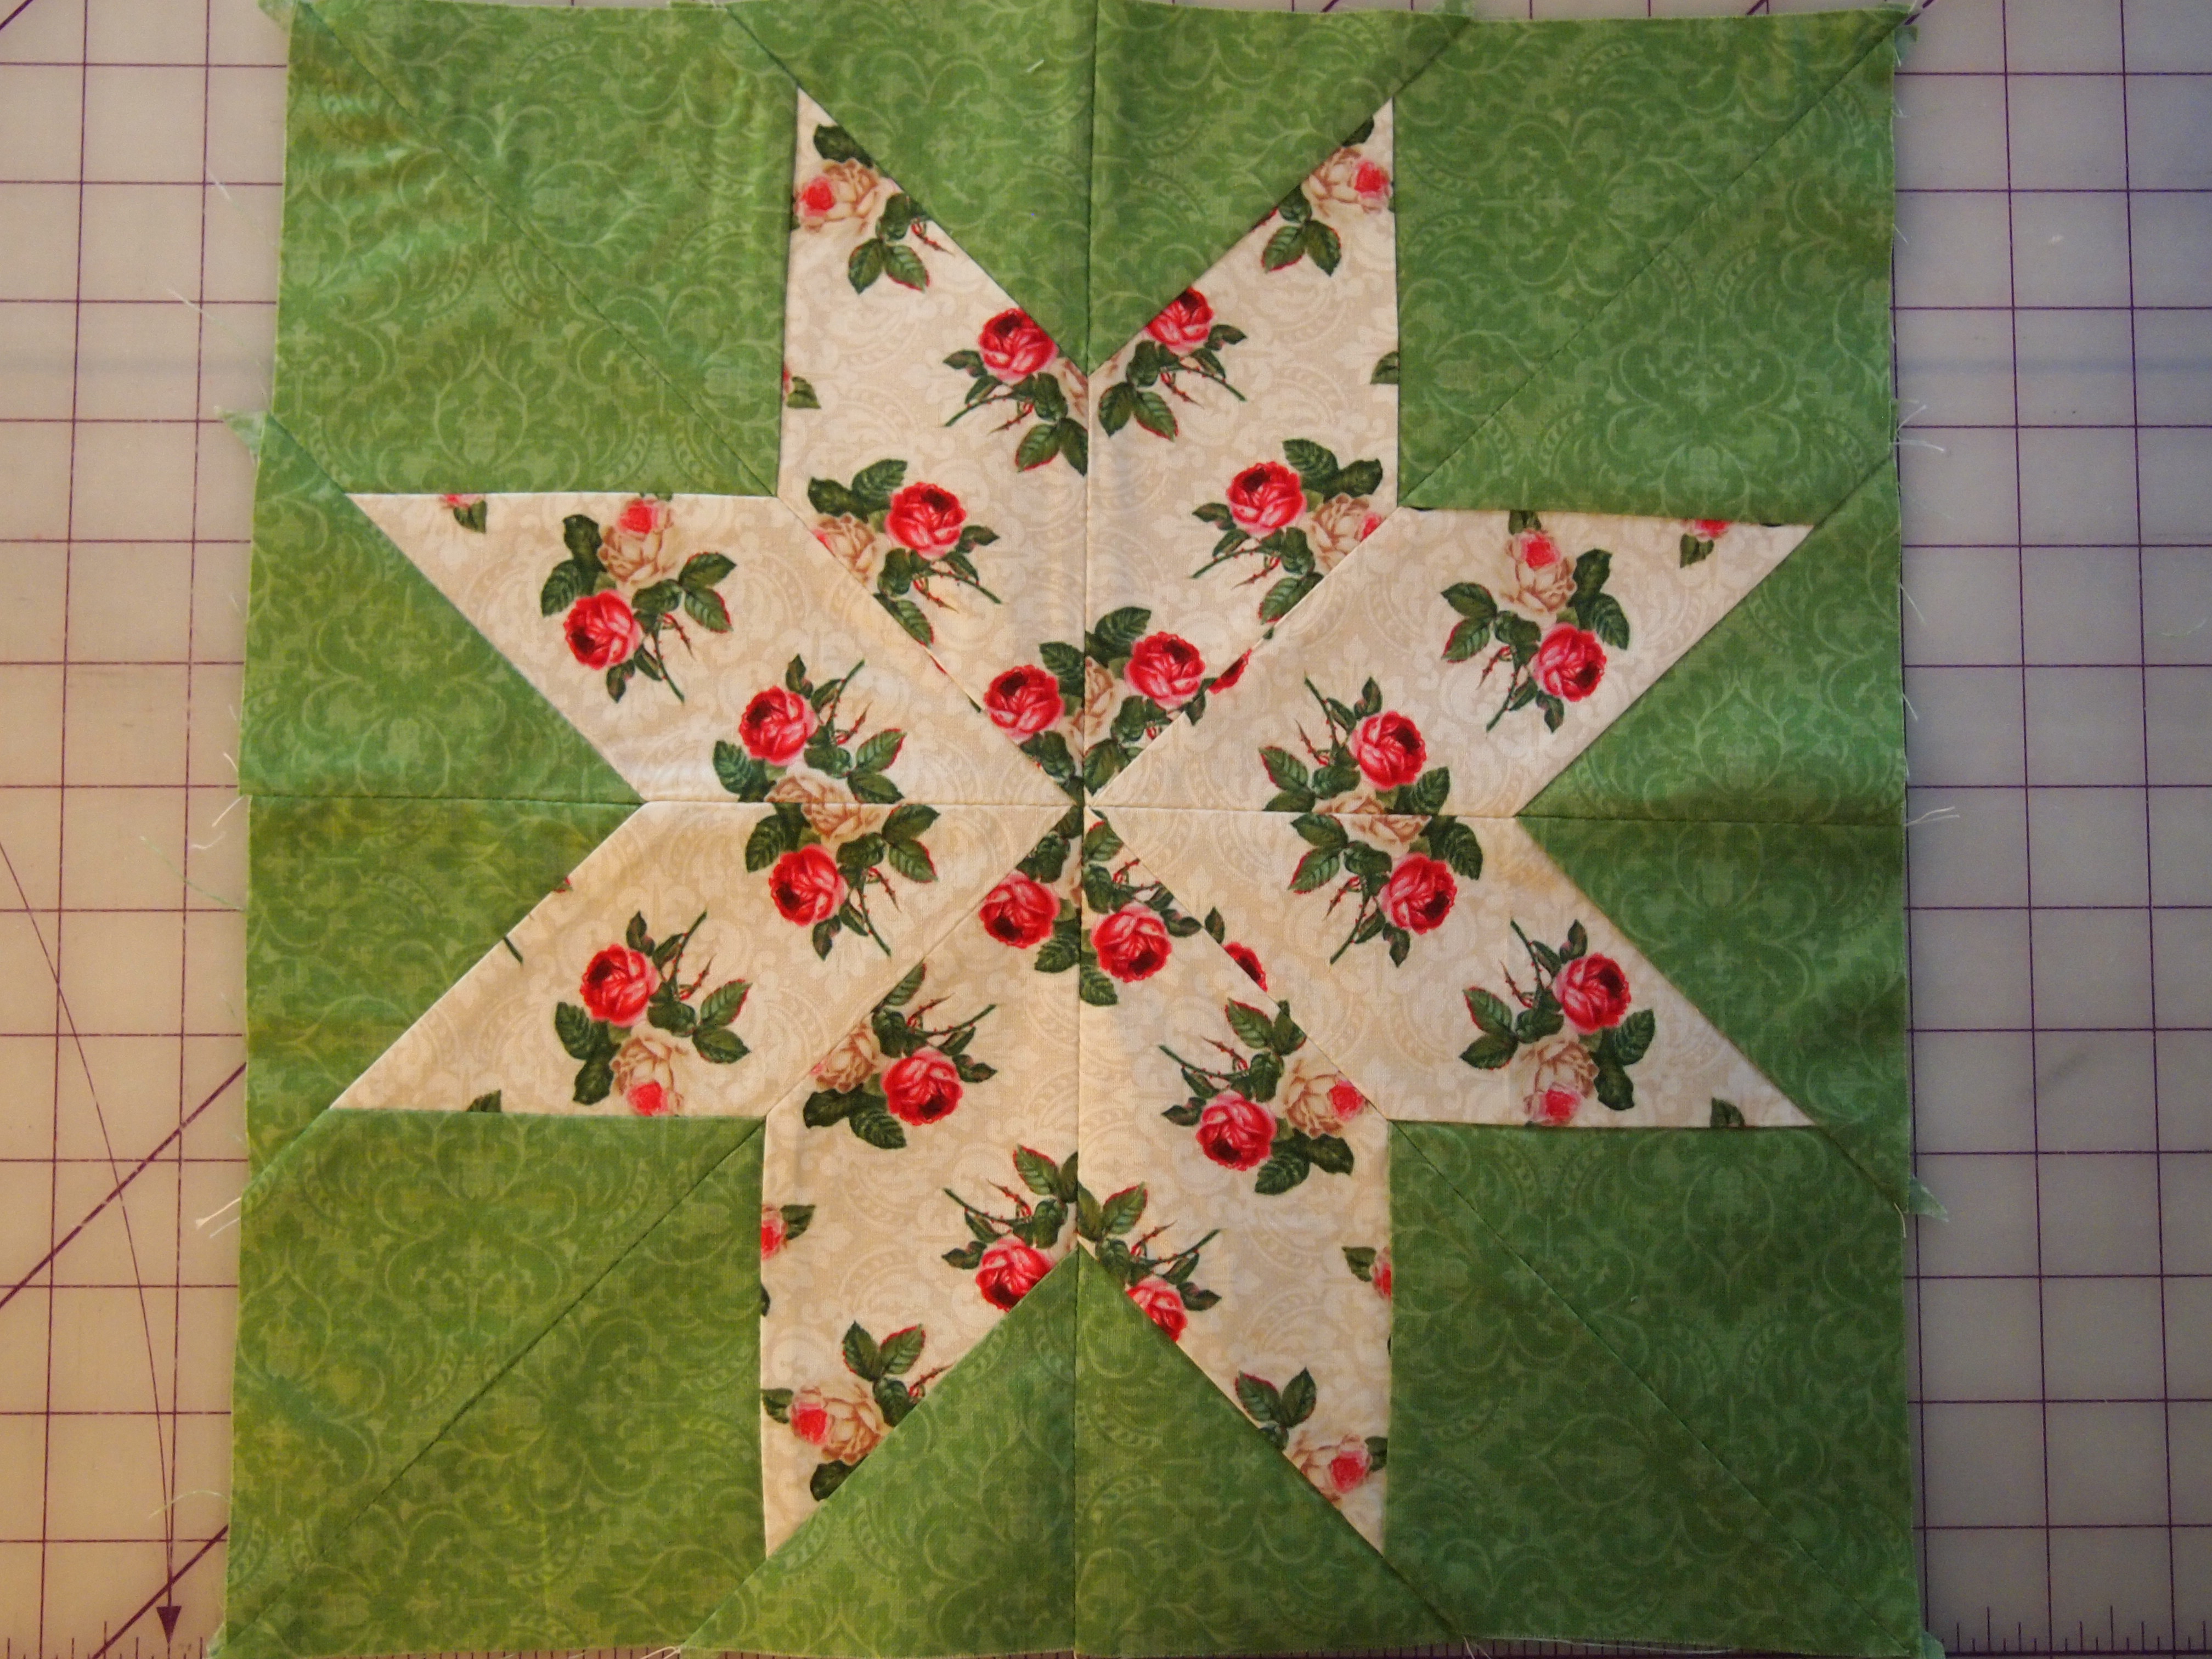
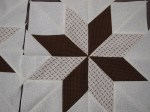
Recap: Make 20 Unit H – Homeward Bound Units.
Homeward Bound, Unit H
Congratulations, you have learned to use your Rapid Fire Lemoyne Star tool!
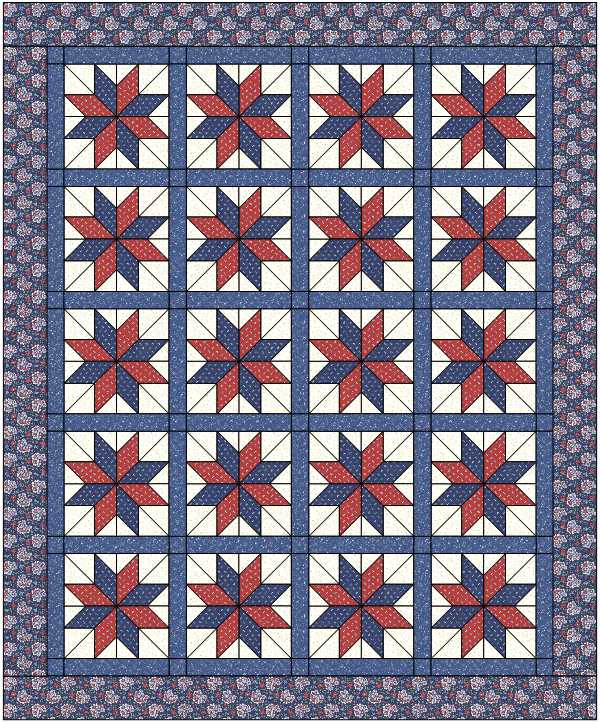
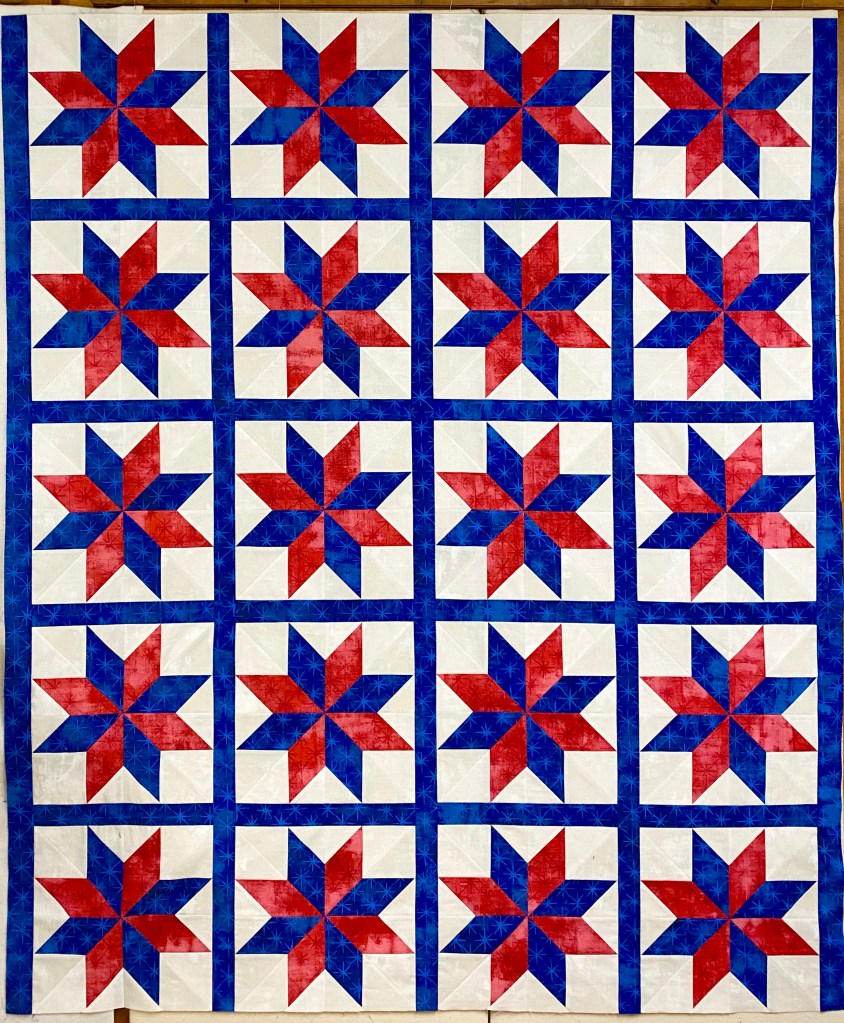
It is late March 2020. Most of us are quarantined inside. At least those of us in New York are! I had planned to schedule a class at Stash away Quilt Shoppe in Rome NY, for a Quilt of Valor using the Rapid Fire Lemoyne Star ruler. I decided to just post the lesson here and share it with anyone who would like to make Patriotic Lemoynes.
I went to my EQ8 software and designed this quilt for Lynn. This is a great skill builder for those that took the Tucker University Rapid Fire Lemoyne Star class but haven’t made a project yet. This quilt measures 68″ X 82″ with 20 – 12″ finished Lemoyne star blocks. The supply list and instructions are available here for download.
Understanding the “Cutting Chart”. The chart in the tool instructions gives you valuable information for 10 Finished Size Blocks: Cut Size of Star Strips, Cut size of Background Strips, Minimum Strip Length for One Block & Approx. # of Diagonal Cuts from Full WOF strips. For 12” finished blocks, you need a minimum of 24” star & background strips to be able to make one block.
Block Construction: (Width of Fabric – WOF)
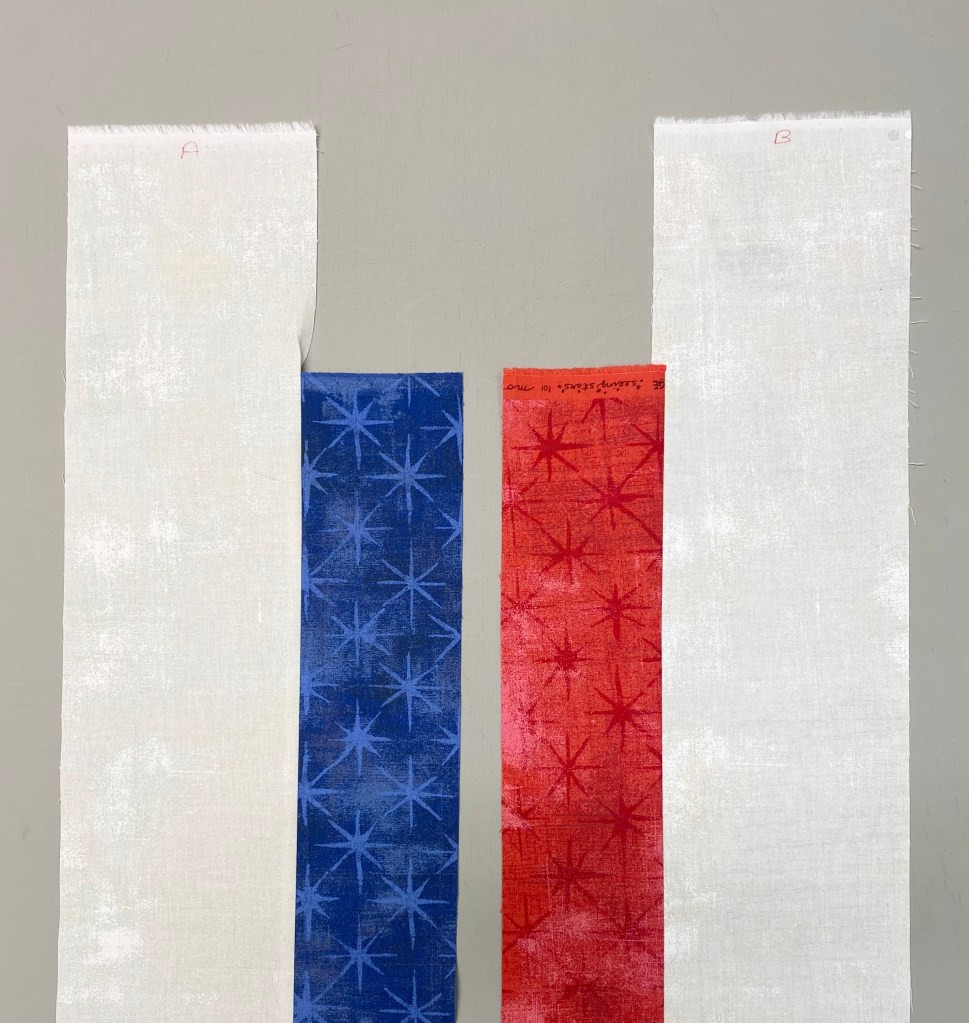
Background Fabric: Cut 20 – 4 3/4″ WOF strips
Red Star Points: Cut 10 – 3 1/4″ WOF strips
Blue Star Points: Cut 10 – 3 1/4″ WOF strips
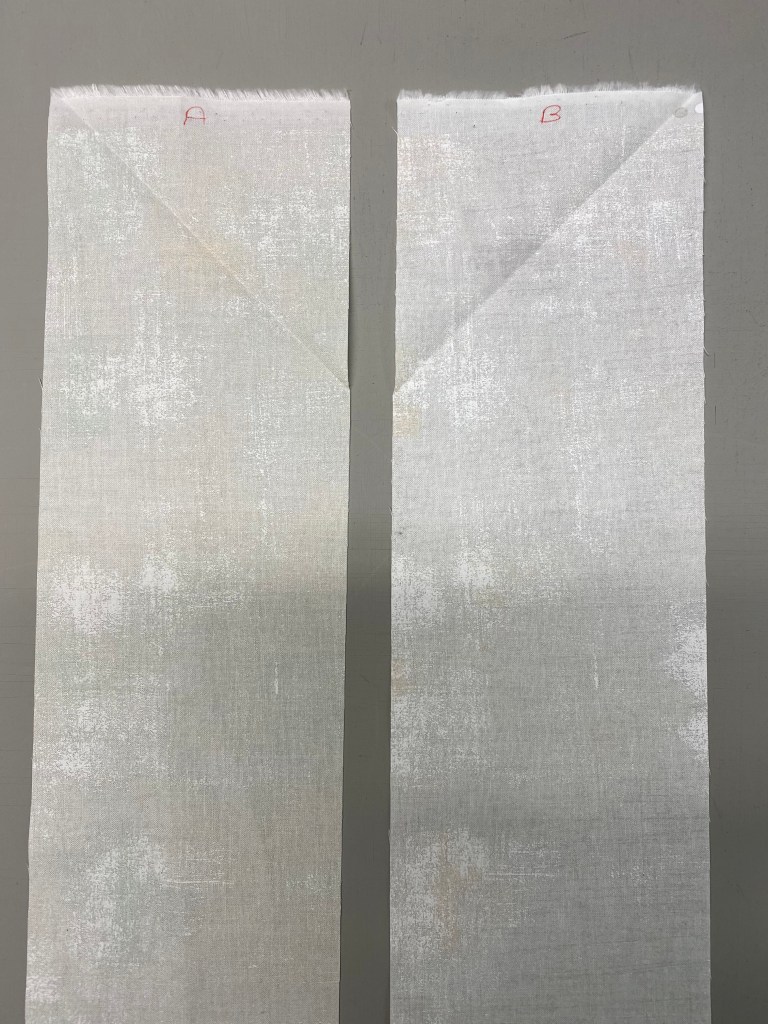
Step 1 – Make 2 piles of 10 background strips right sides up – side by side. At the top, mark 10 “A” & 10 “B”.
Establish the starting point for placement of our star strips by making two additional marks down from the top of the strip, on the inside edges of each strip, the same width as our strip is wide. Our background strips are 4 ¾” wide. OR simply fold top right corner over to the left edge for “A” matching raw edges and top left corner over to the right edge for “B”.
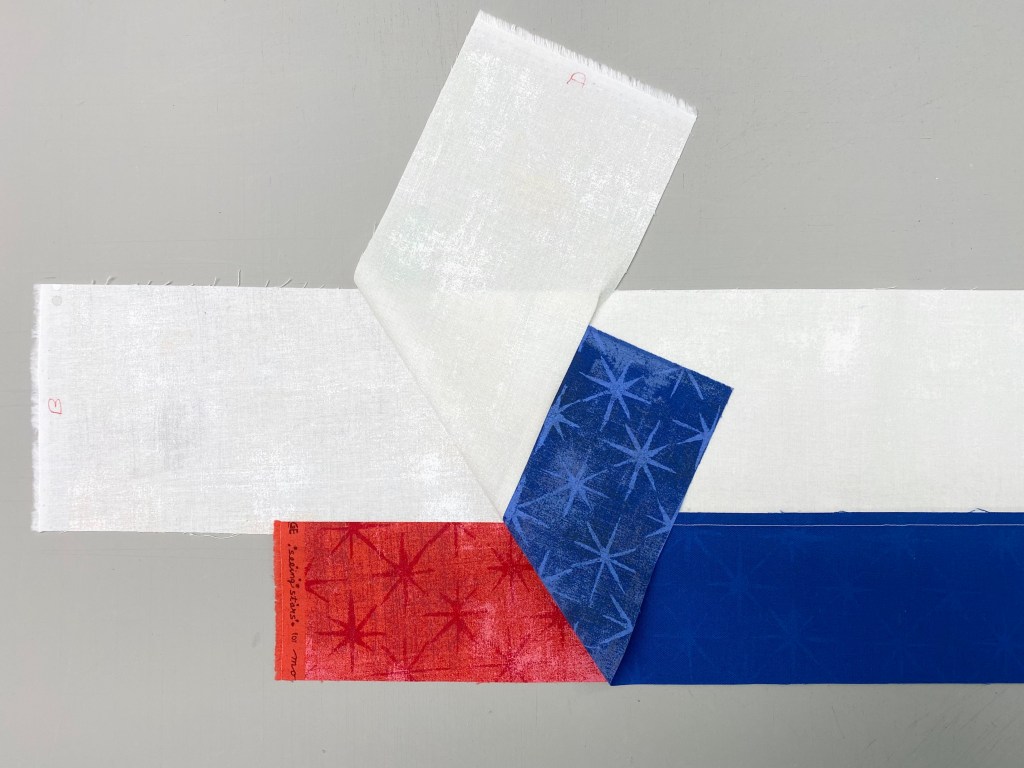
Step 2 – Position a star strip right sides together with each of the background strips starting 4 ¾” down from the top.
Step 3 – Using your Best ¼” Seam, Stitch the “A” strip on the right side & the “B” strip on the left side. (Do not use a scant ¼” seam.)
Step 4 – Press: The “A” strip should be pressed toward the background strip. The “B” strip should be pressed toward the Star Strip. Remember “whatever you are press toward goes on top”!
Step 5 – Position: Move the strips to the cutting mat and layer the strip pairs right sides together, background strip to background strip & and star strip to star strip. The long seams should nest.
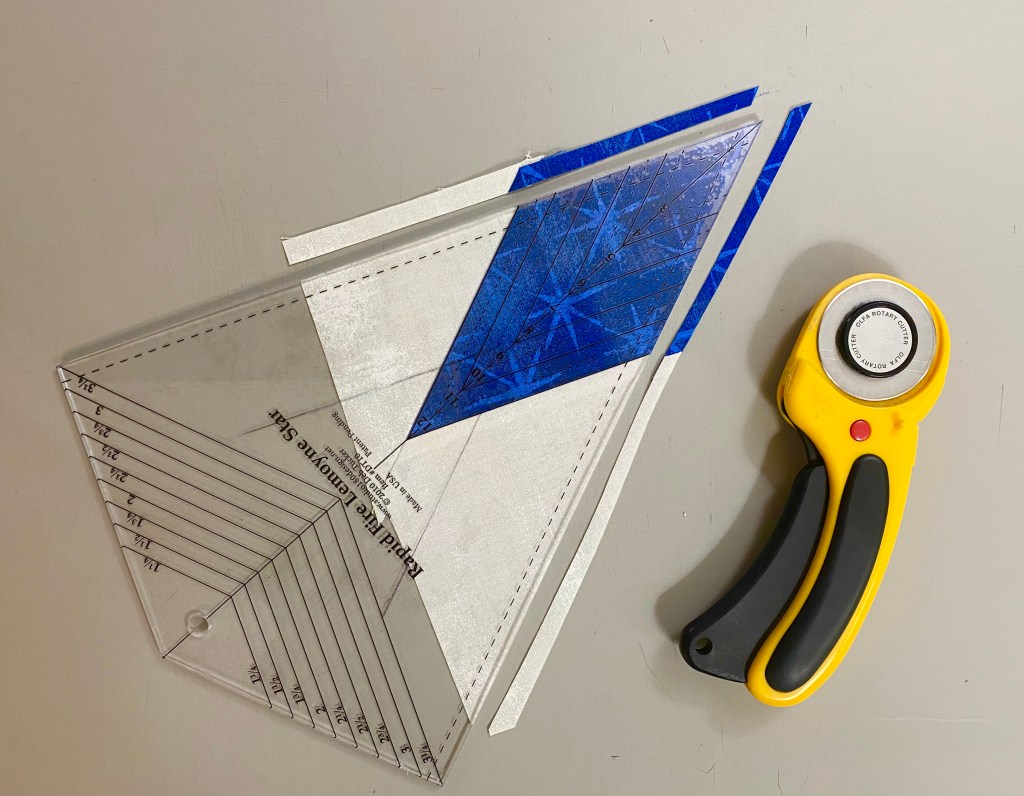
Step 6 – Cut: Make a 45 degree angled cut. Use your Lemoyne Star ruler to help insure you get a good 45 degree angle by lining up the ruler edge with the stitching line and bumping another ruler ap against the angled edge.
Step 7 – Cut the 1st Unit: Each Cut Should be the same measurement as the Star Strip Width (3 ¼” wide).
Step 8 – Second Cuts: Cut one set and trim side triangles. Using your 6” x 12” ruler, place a line on the top edge of the just cut unit and slide to the right until the ruler touches point from the star fabric. Trim up the right side of the ruler. See tool instructions for left hand cutting. In the tool instructions you are told cut all the units then trim the side triangles. I find the students are less confused if they cut the unit and immediately cut the side triangle.
Tip: Label two paper plates One “A” & one “B”. I also add pressing instructions from Step 11: “A” units are pressed toward the star point. “B” units are pressed toward the background fabric.
Righties – “A” strip is on top & “B” strip is on the bottom. Once cut, place “A” unit on plate marked “A” & “B” unit on plate marked “B”.
Lefties – “B” is on top & “A” is on the bottom. Place “A” unit on plate marked “A” & “B” unit on plate marked “B”.
NOTE: IF Left Handed, It will be beneficial to flip each of the pairs over from east to west so that they look like the pairs trimmed by right handed cutters.
Cut side triangles and place one on each plate. Continue cutting sets and side triangles.
Step 9 – Lay Out: Take your plate of “A” units to the sewing machine.
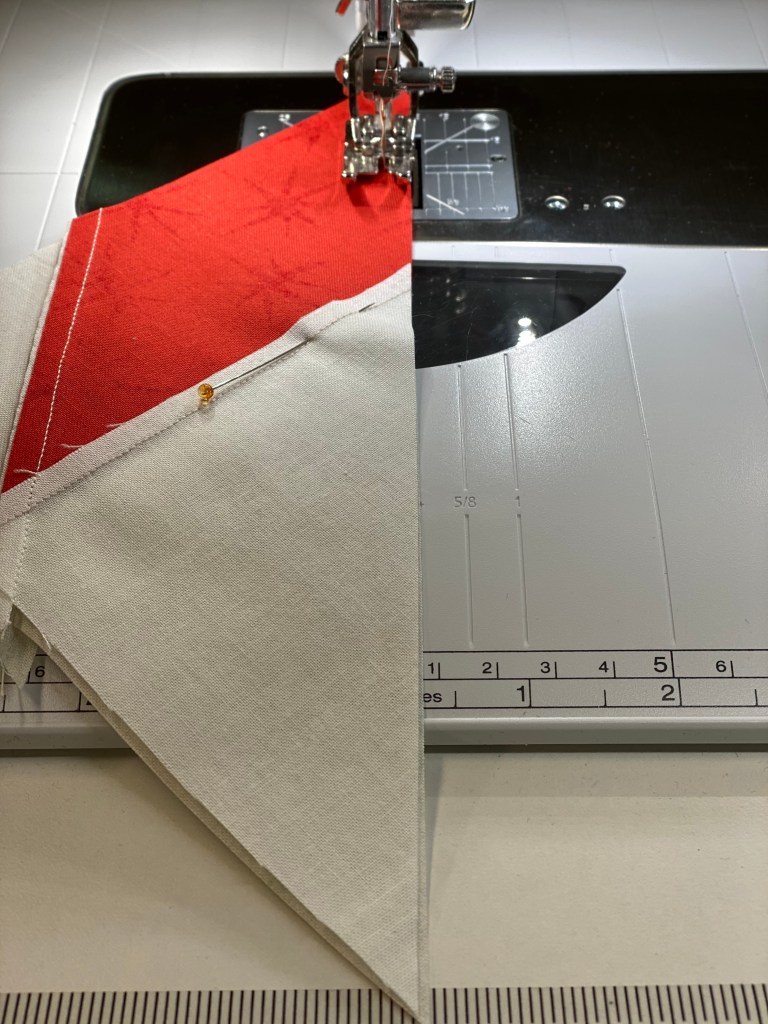
Step 10 – Position & Stitch: Position the side triangle right sides together with the pieced unit. Raw edges even and triangle centered over the pieced unit. Stitch, continue to chain stitch all the “A” units & then all the “B” units.
Step 11 – Press Carefully: Take the “A” units to the ironing board. “A” units are pressed toward the star points, therefore place your chain stitched units with the star points facing up. Trim threads, place back on “A” plate.
“B” units are pressed toward the background fabric, therefore place your chain stitched units with the background fabric facing up. Trim threads, place back on “B” plate.
STOP – BEFORE YOU TAKE ANOTHER STITCH!
Step 12 – Trim: Take all you units to the cutting mat. Place your units at a 2:00 position to be able to comfortable trim the two sides. Trim all your “A” & “B” units to an exact size using the 12” lines.
Step 13 – Examine/Position: You will now have pieced half square triangles that will fit together perfectly. Nest the seams and pin.
Step 14 – Stitch: Stitch the pieced triangle units together, first into pairs, then into half blocks and then into complete blocks. Stitch from the star center outward.
Step 15 – Press: Option #1 press all seams open. Option #2 press seam in the same direction as all the other seams in the unit. I press my seams open. Trim the Dog Ears at the star center.
Lay out four units.
Choose two units. Pin the nested seams and pin star point.
Press seams open.
Join halves pin the nested seams, match & pin the center. Stitch.
Step 16 – Trim to 12 ½” using your Tucker Trimmer III: If right handed, place the half circle in the upper right hand corner. Center the common diagonal line and the 12 ½”” size diagonal line on the seams of the block. Trim up the right side and across the top. Lift the tool, rotate the block, centering as before but also using the clean up lines on the edges just trimmed. Trim up the right side and across the top. See Tucker Trimmer tool instructors for complete left hand cutting.
Two WOF background strips & two WOF star strips will yield 2 – 12” finished lemoyne star blocks.
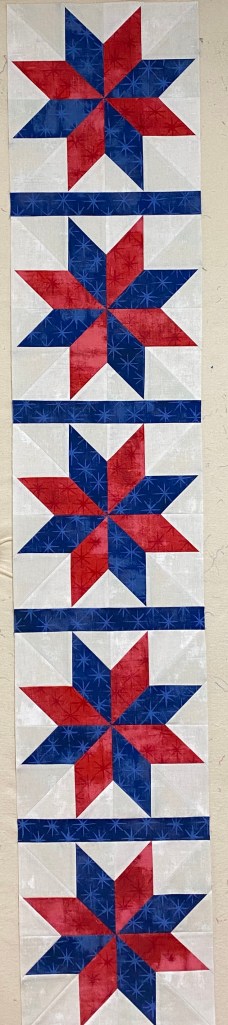
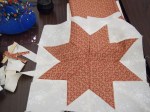
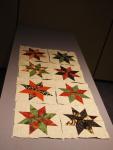
Twenty 12 ½” Lemoyne star blocks done!
Sashing: Cut 6 – 2 ½” WOF strips. Sub Cut into 16 – 12 ½” strips. I stitch four sashing strips between 5 blocks and measure the row length to determine the size of the vertical sashing strips.
Vertical Sashing: Cut 14 – 2 ½” WOF strips. You may need less if don’t mind piecing several together. I just stitched two 2 ½” WOF strips together and cut to fit. Once the vertical sashing is complete and rows are joined, measure the width through the center and cut the top and bottom sashing and stitch to the quilt top.
Cut 8 – 5 ½” WOF. Strips. Measure the length of the top to determine side border length. Once the side borders are stitched, measure the top width through the center to determine the final borders for the top and bottom.
Binding: You will need approximately 8 strips for the binding.
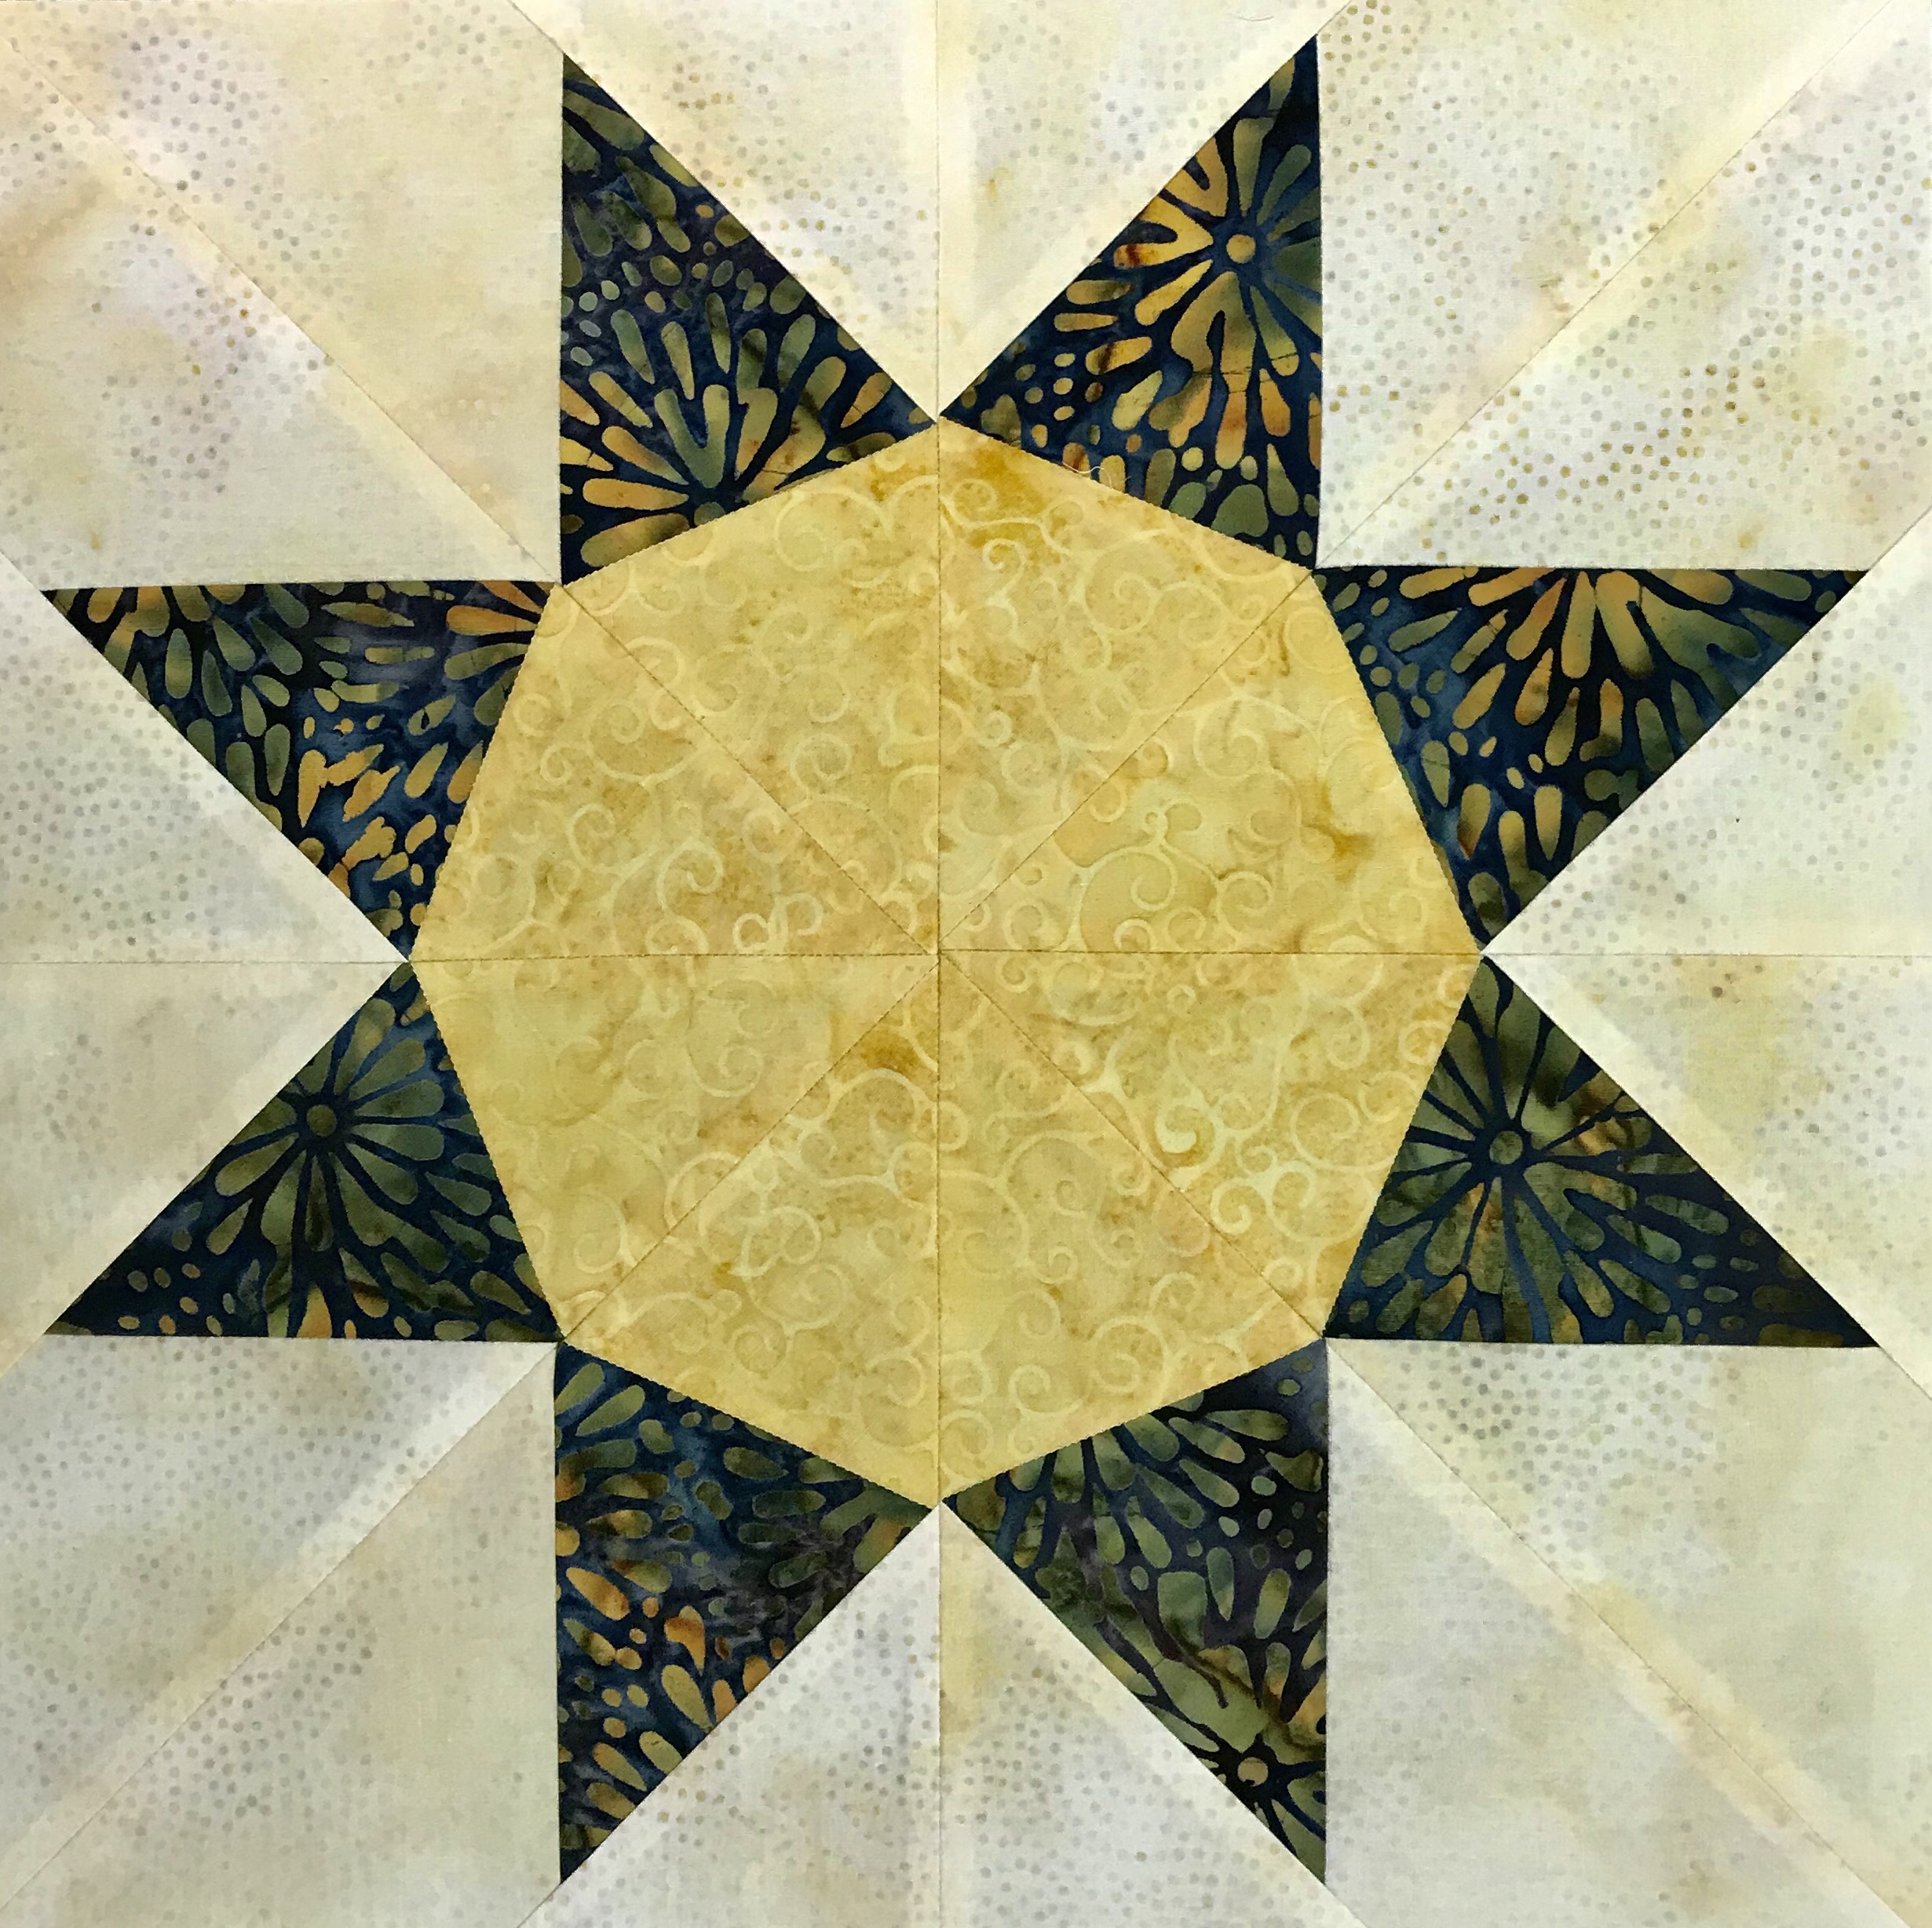
The fabrics shown in this post were given to me by Island Batik.
Next week, January 7th begins Island Batik’s “Get Away Blog Hop” I’m all ready for my reveal. My secret bundle for this blog hop is Deb Tucker’s Twilight Chic by Island Batik which was introduced at this past fall market.
I participated in Studio 180 Design’s blog hop in November in which I made this version of “Evening Elegance” from the Twilight Chic line.
With fabric I had left I wanted to make a quilt to showcase the seven technique sheets created to expand what you can do with the Rapid Fire Lemoyne Star tool.
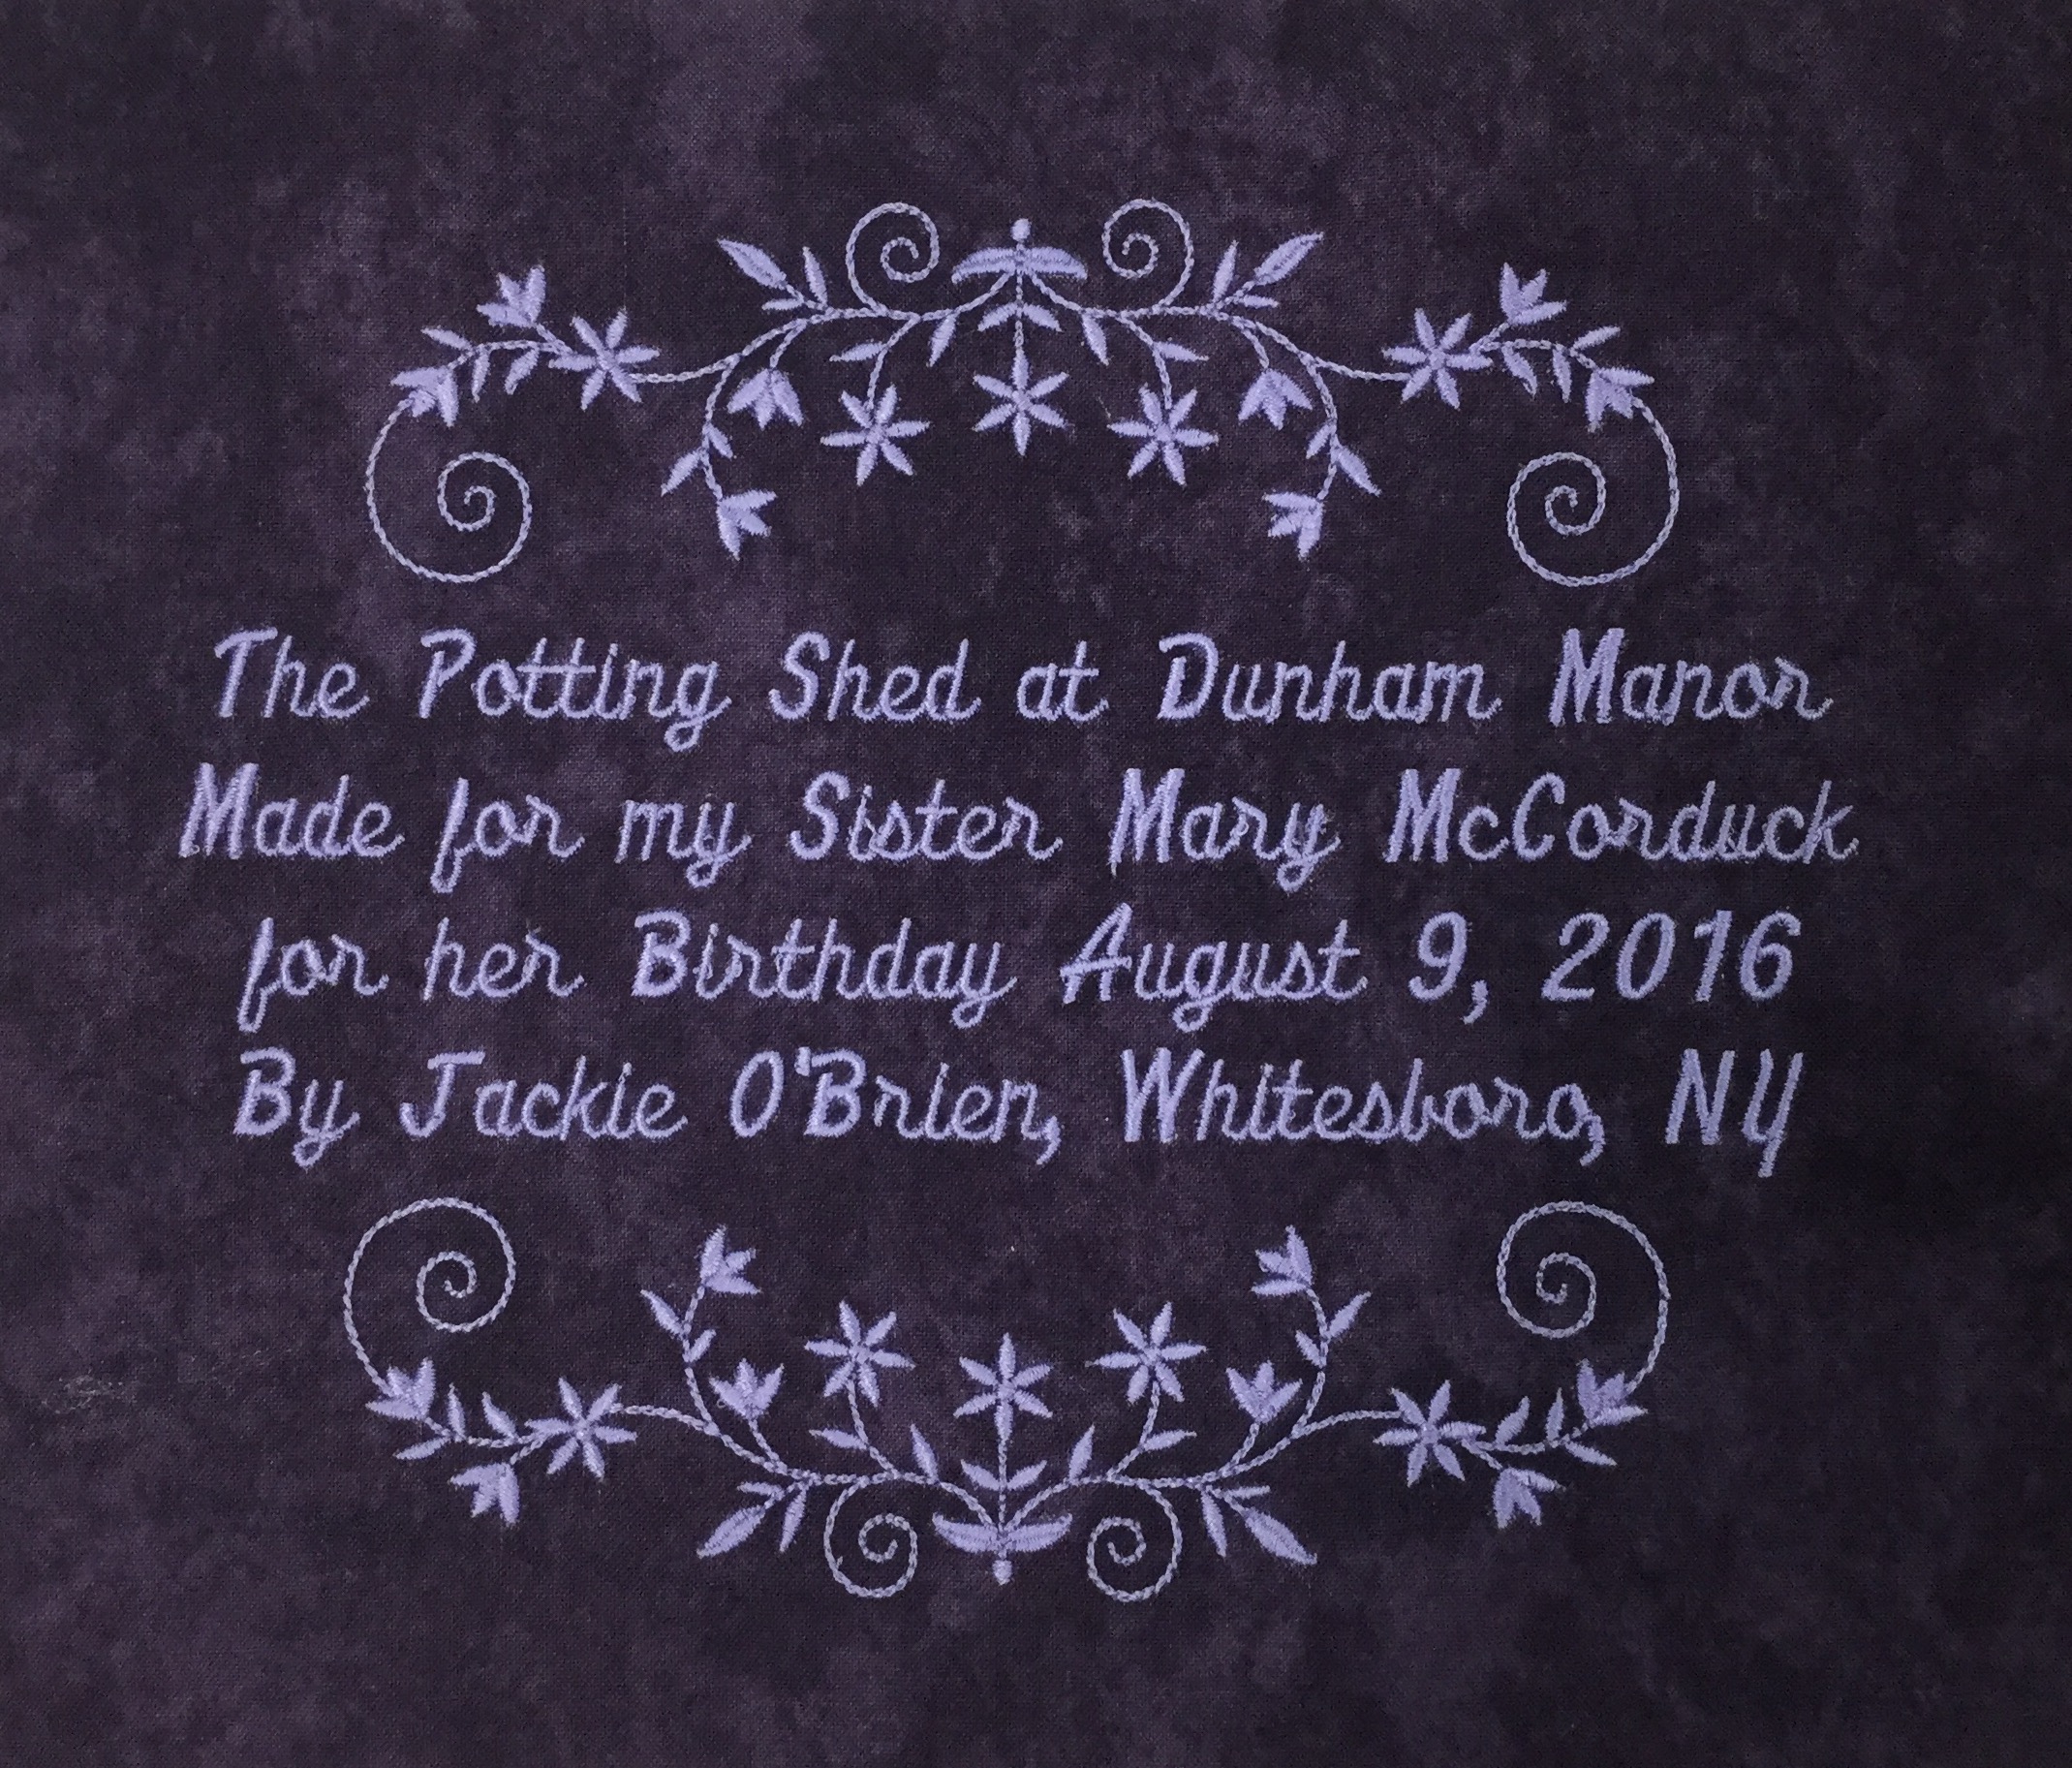
My sister fell in love with a fabric line by Moda called The Potting Shed by Holly Taylor. So I designed a quilt using Deb Tucker’s Rapid Fire Lemoyne Star tool that makes it so easy to construct perfect Lemoyne stars with NO “Y” seams!
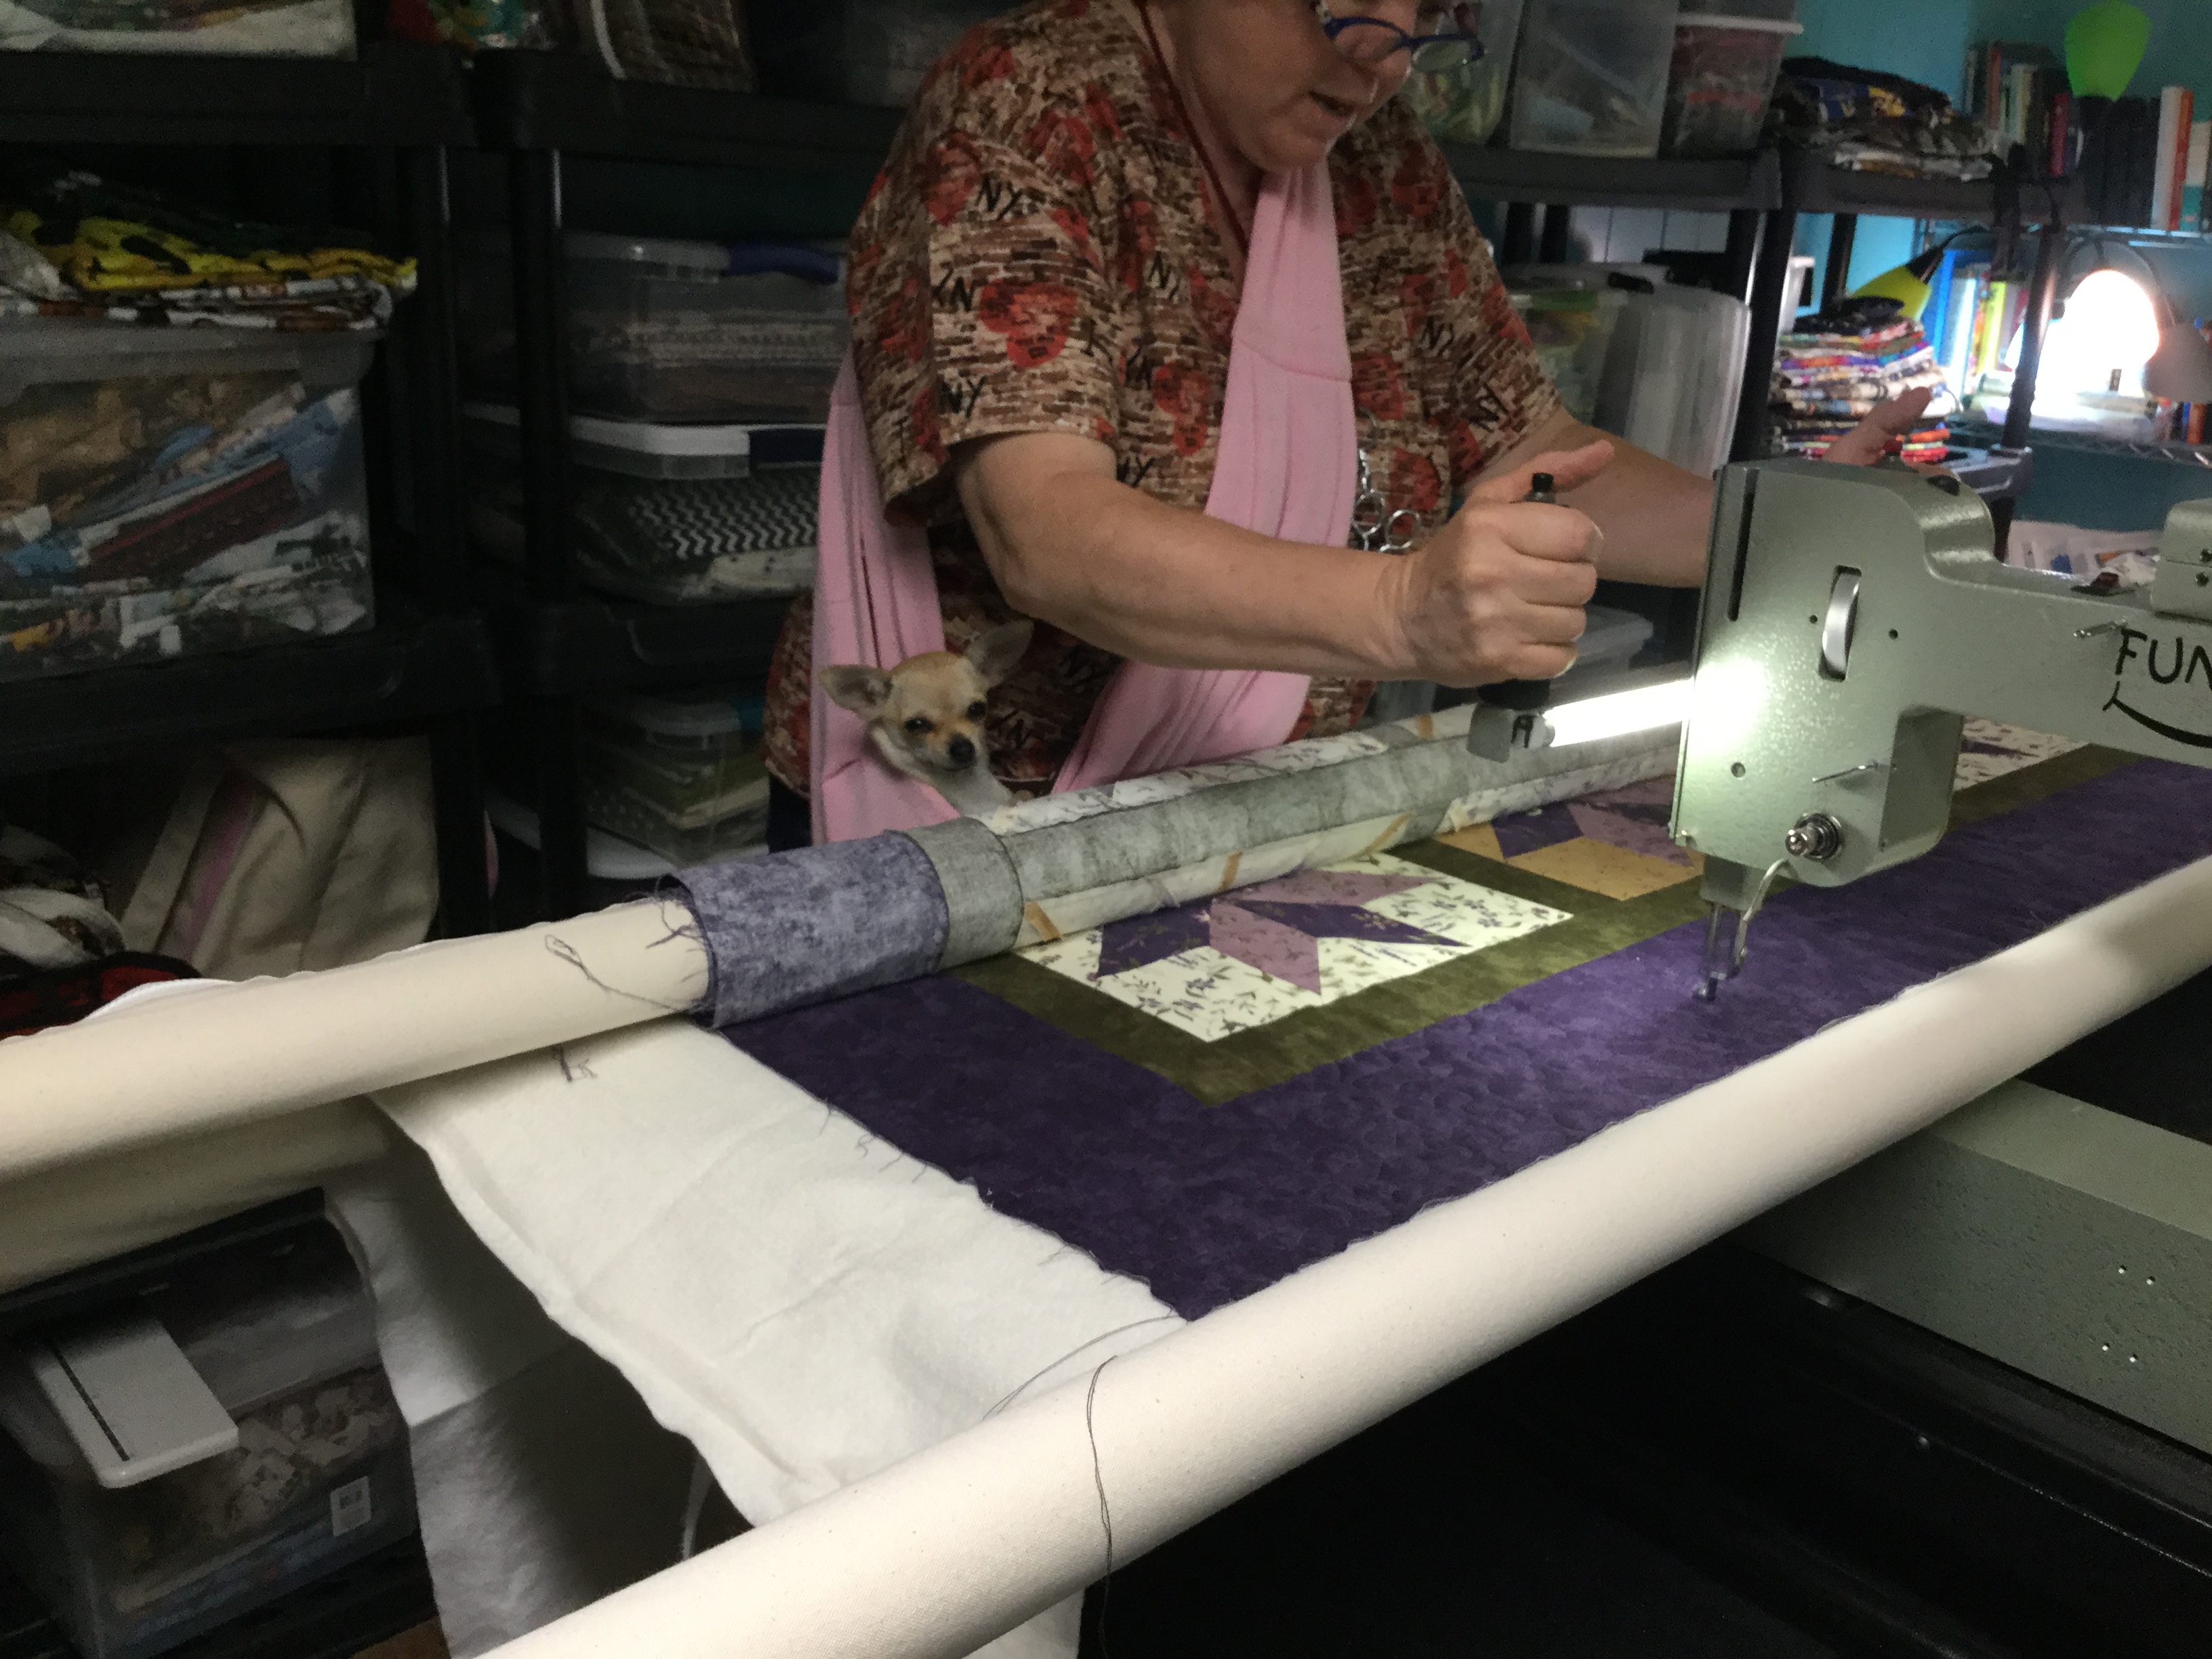
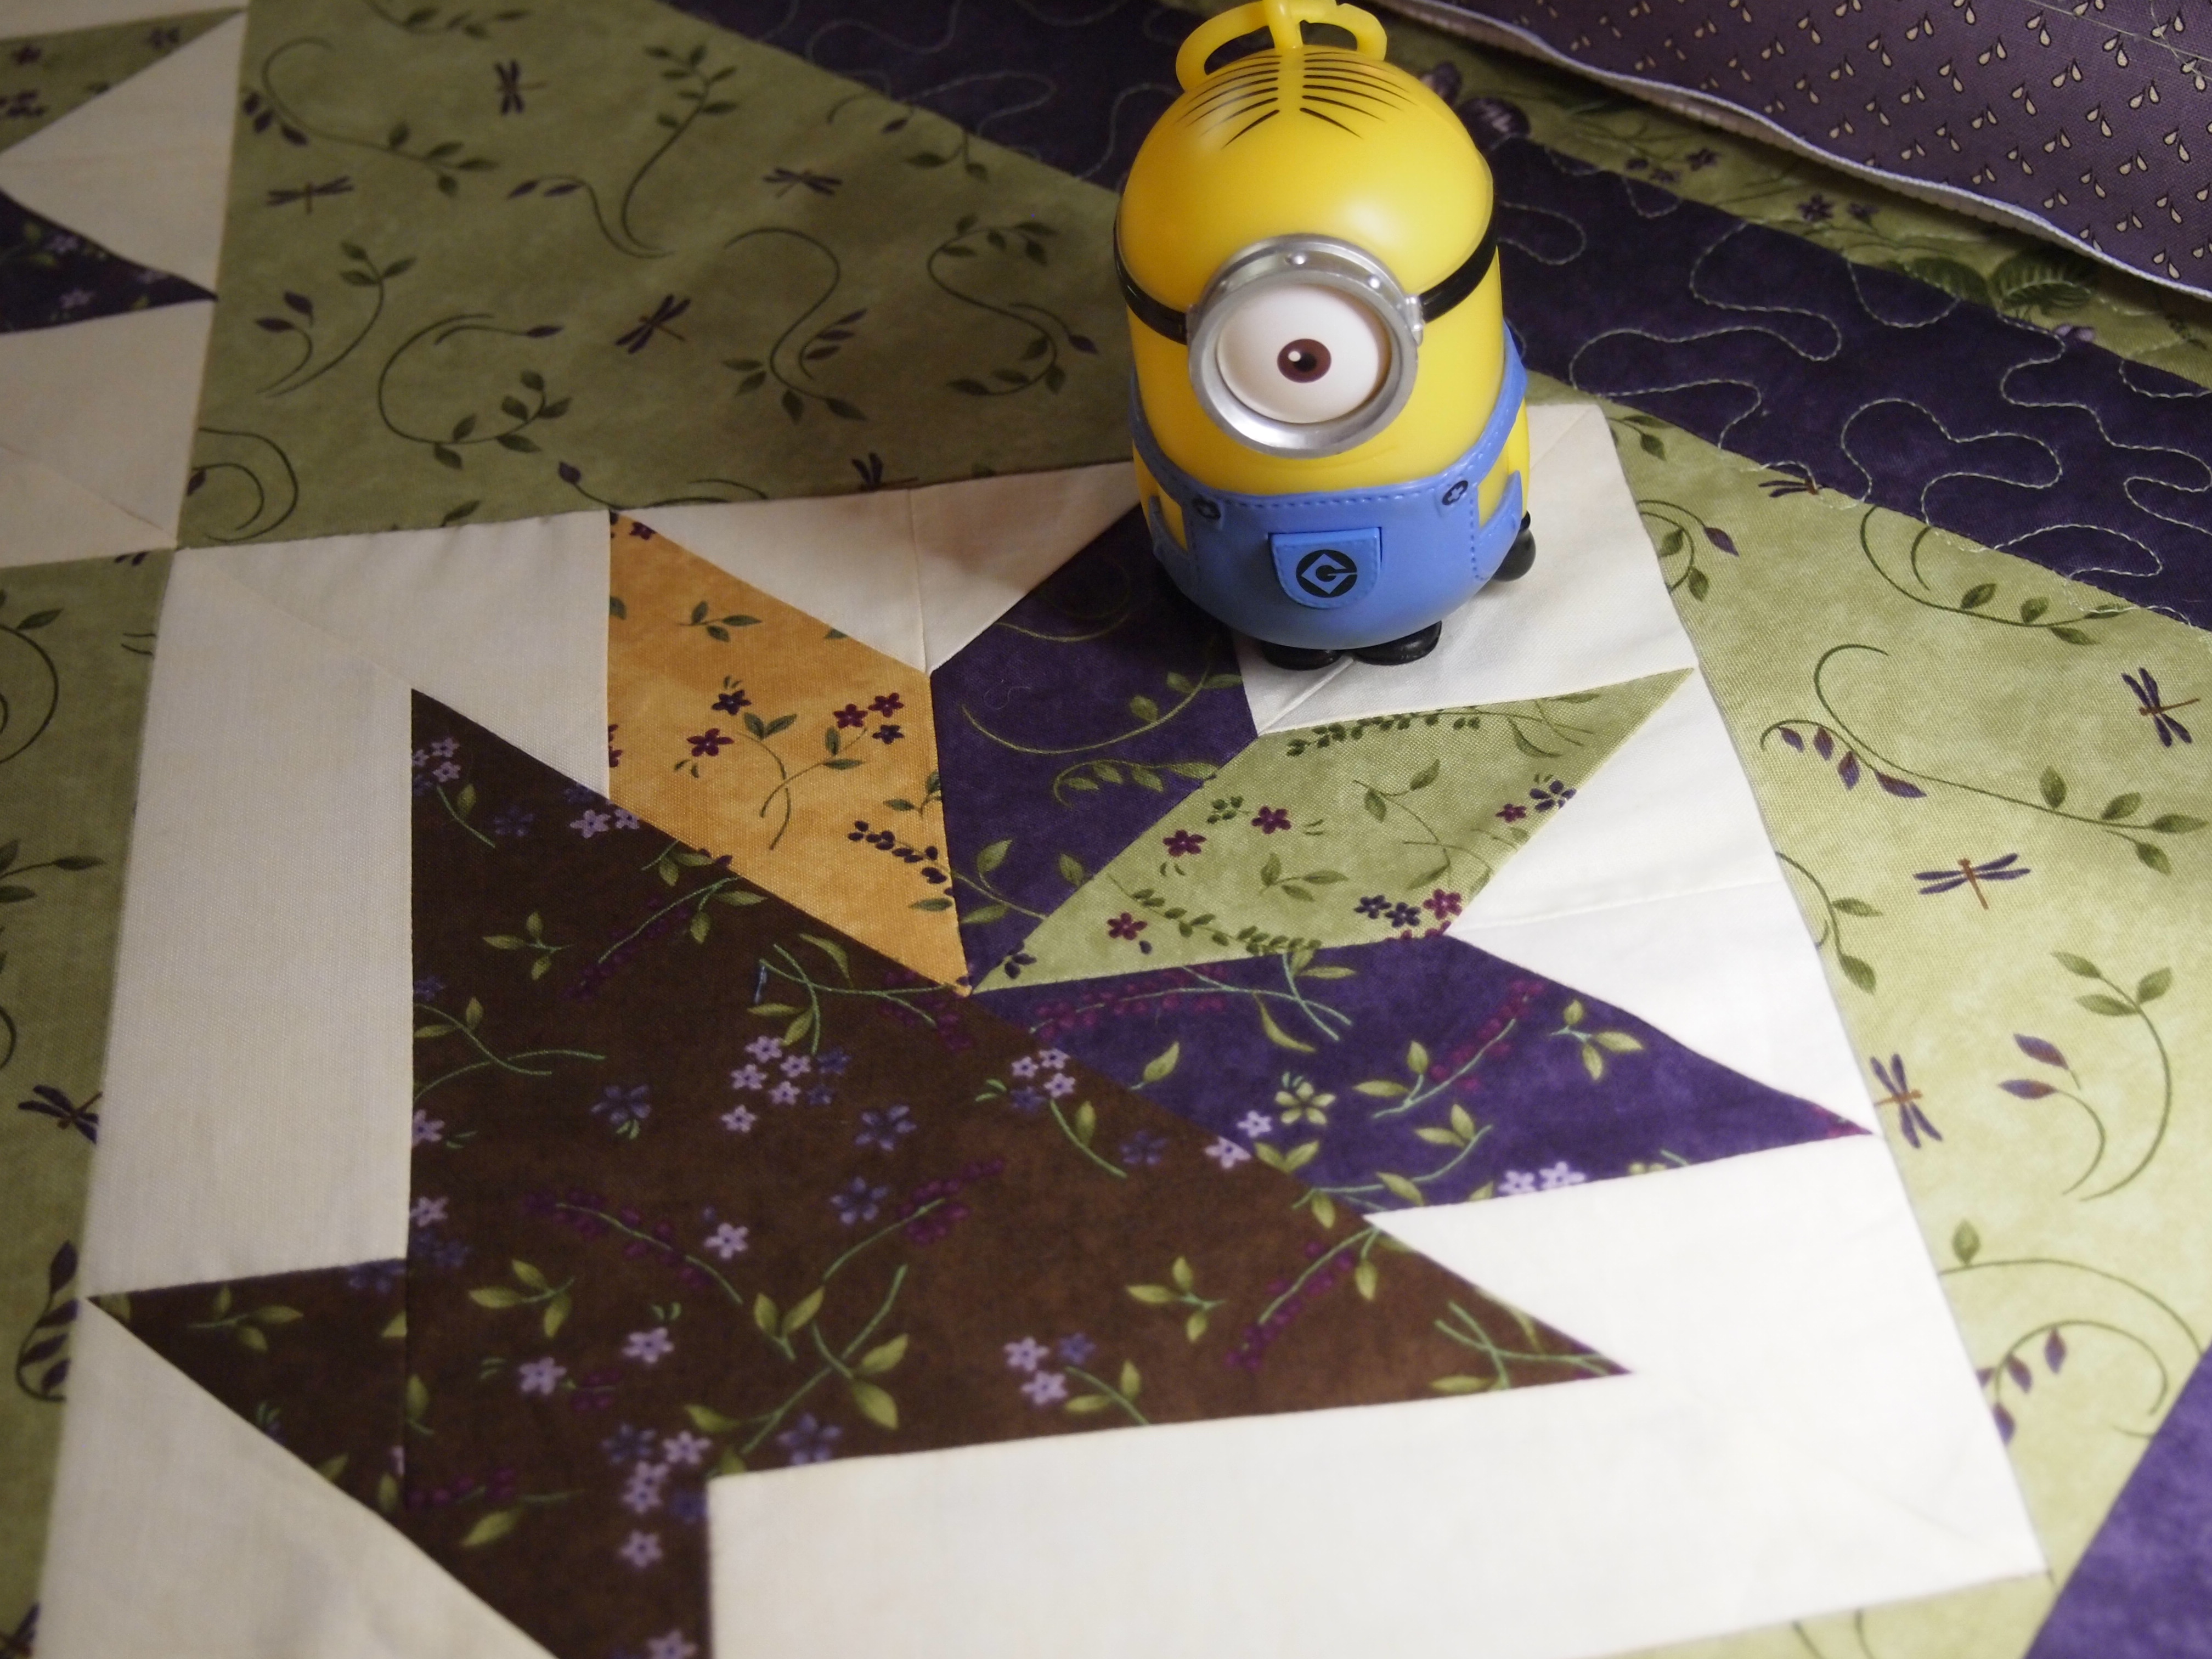
Of course Tucker had to oversee the quilting process, after all she is the Quality Control Officer of Tuckerville.
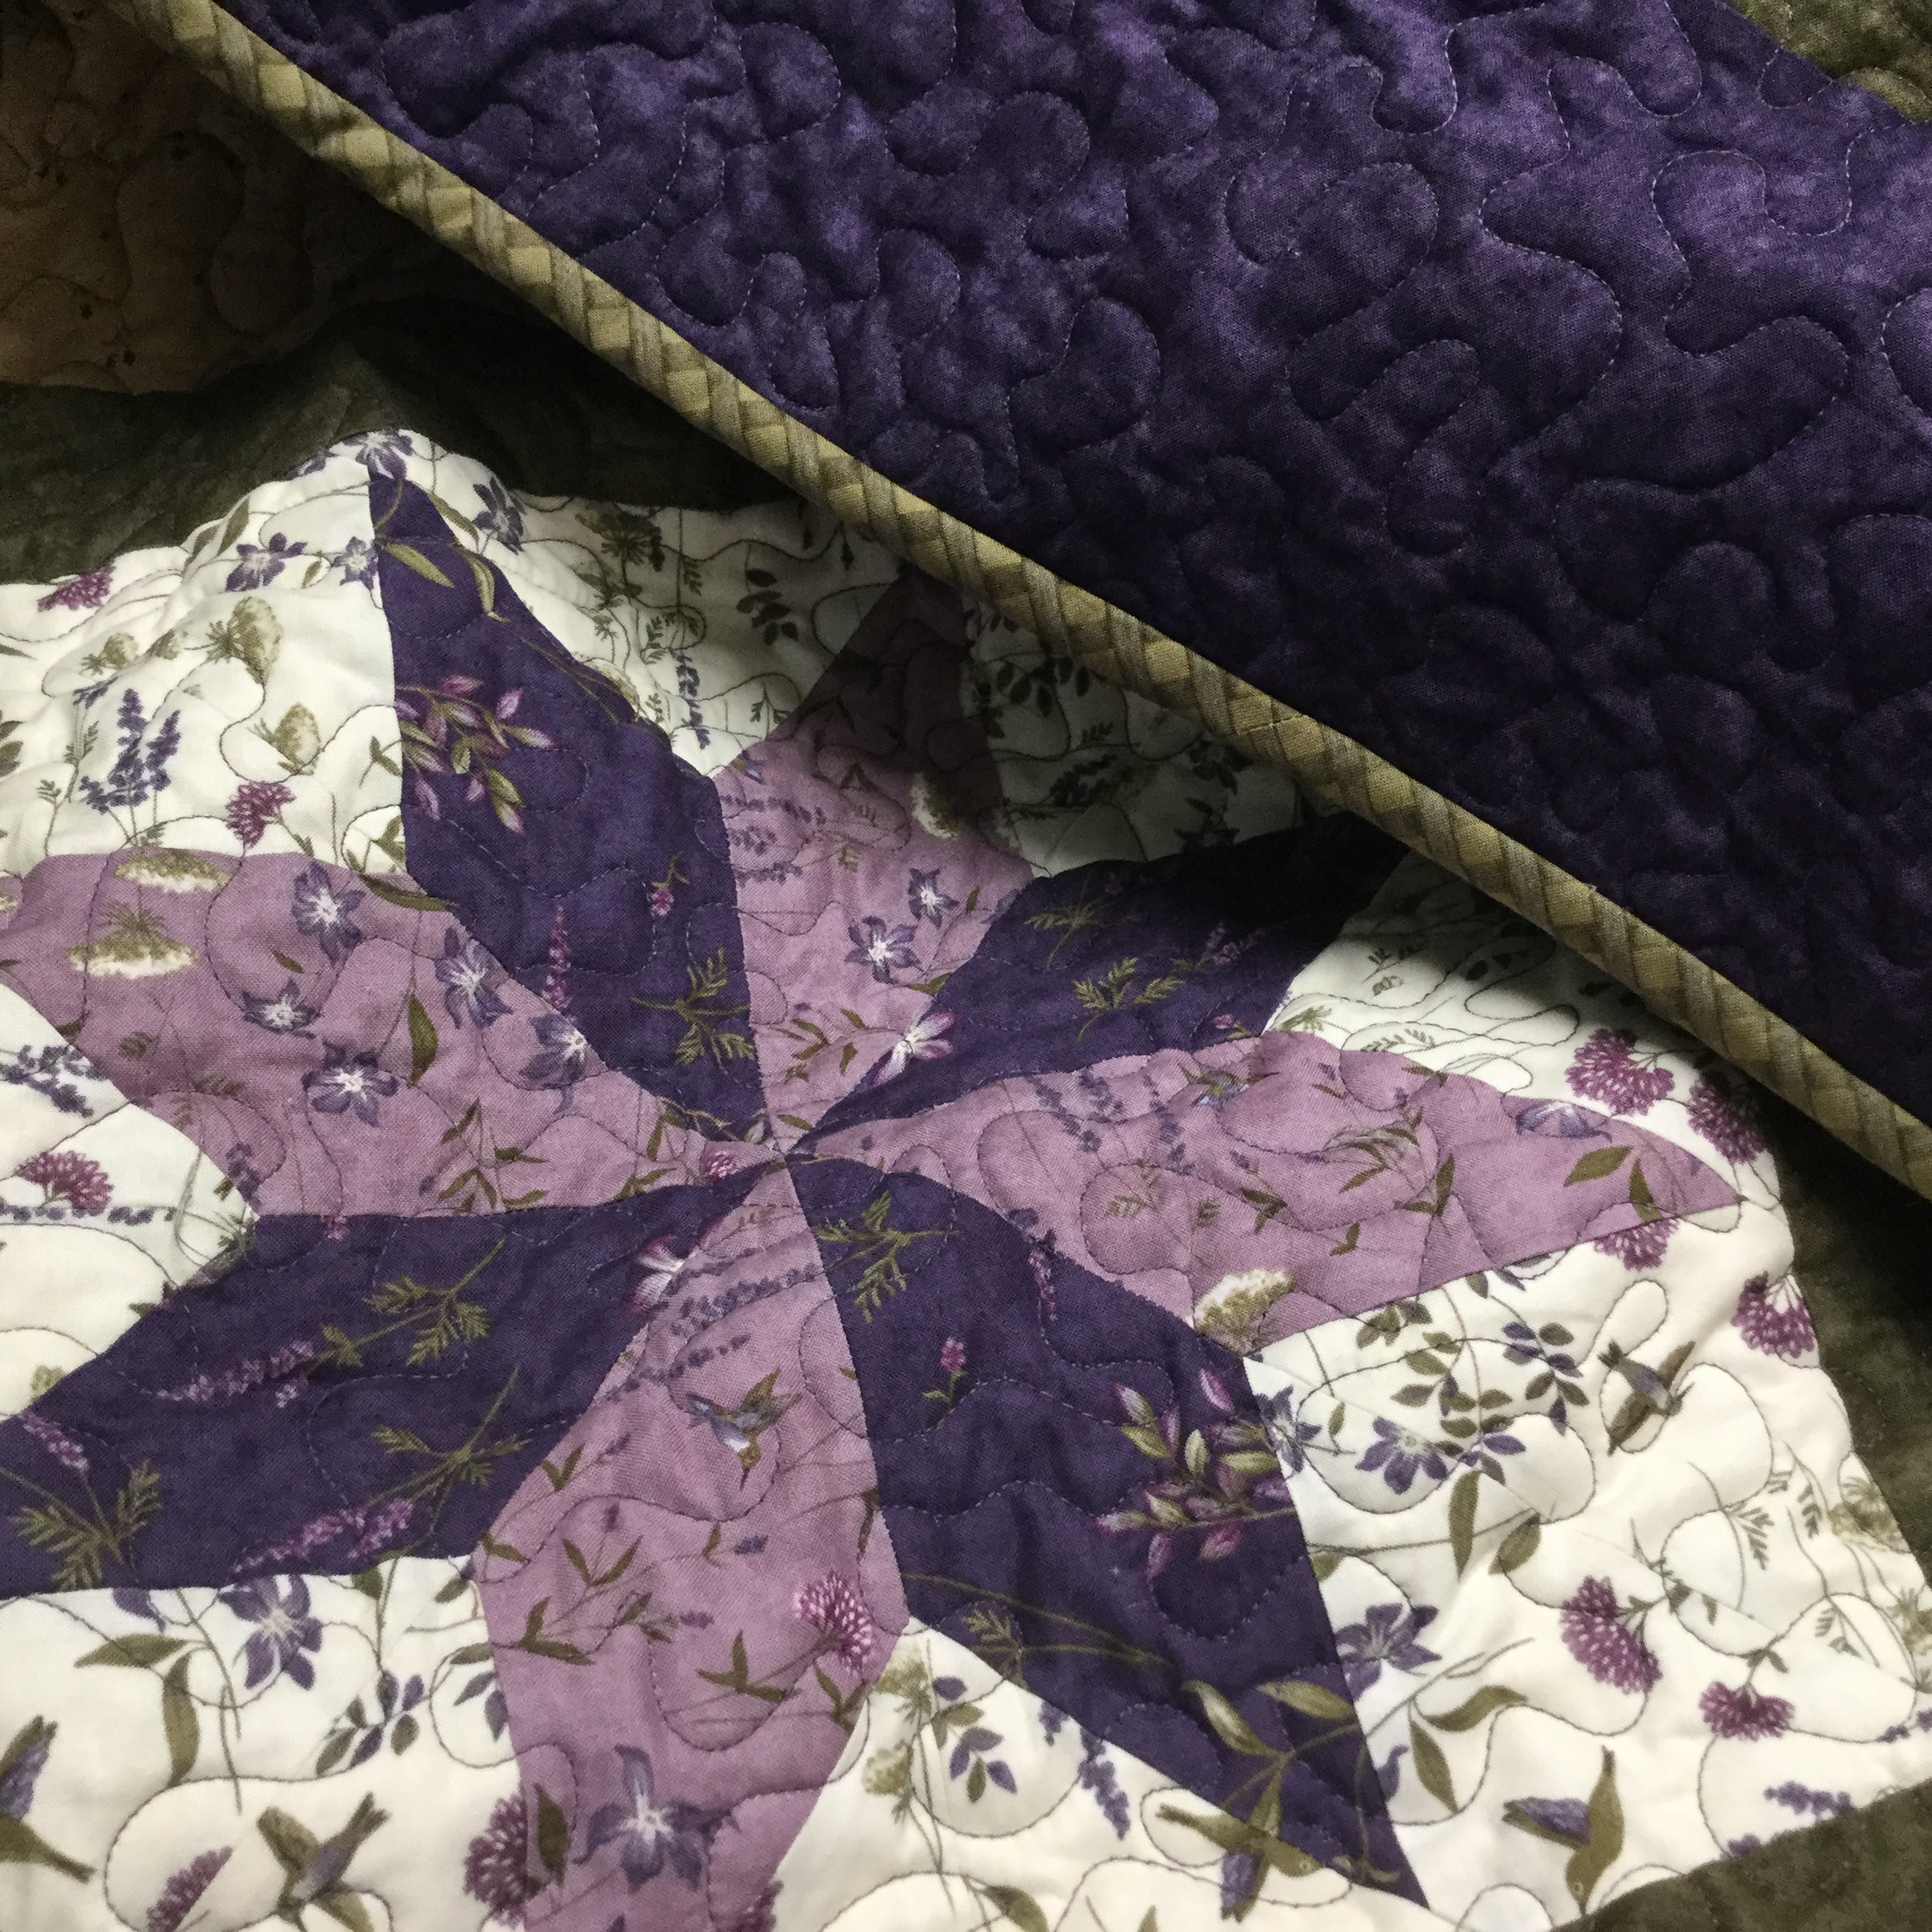
I just finished sewing on the binding in time for her birthday tomorrow, phew!
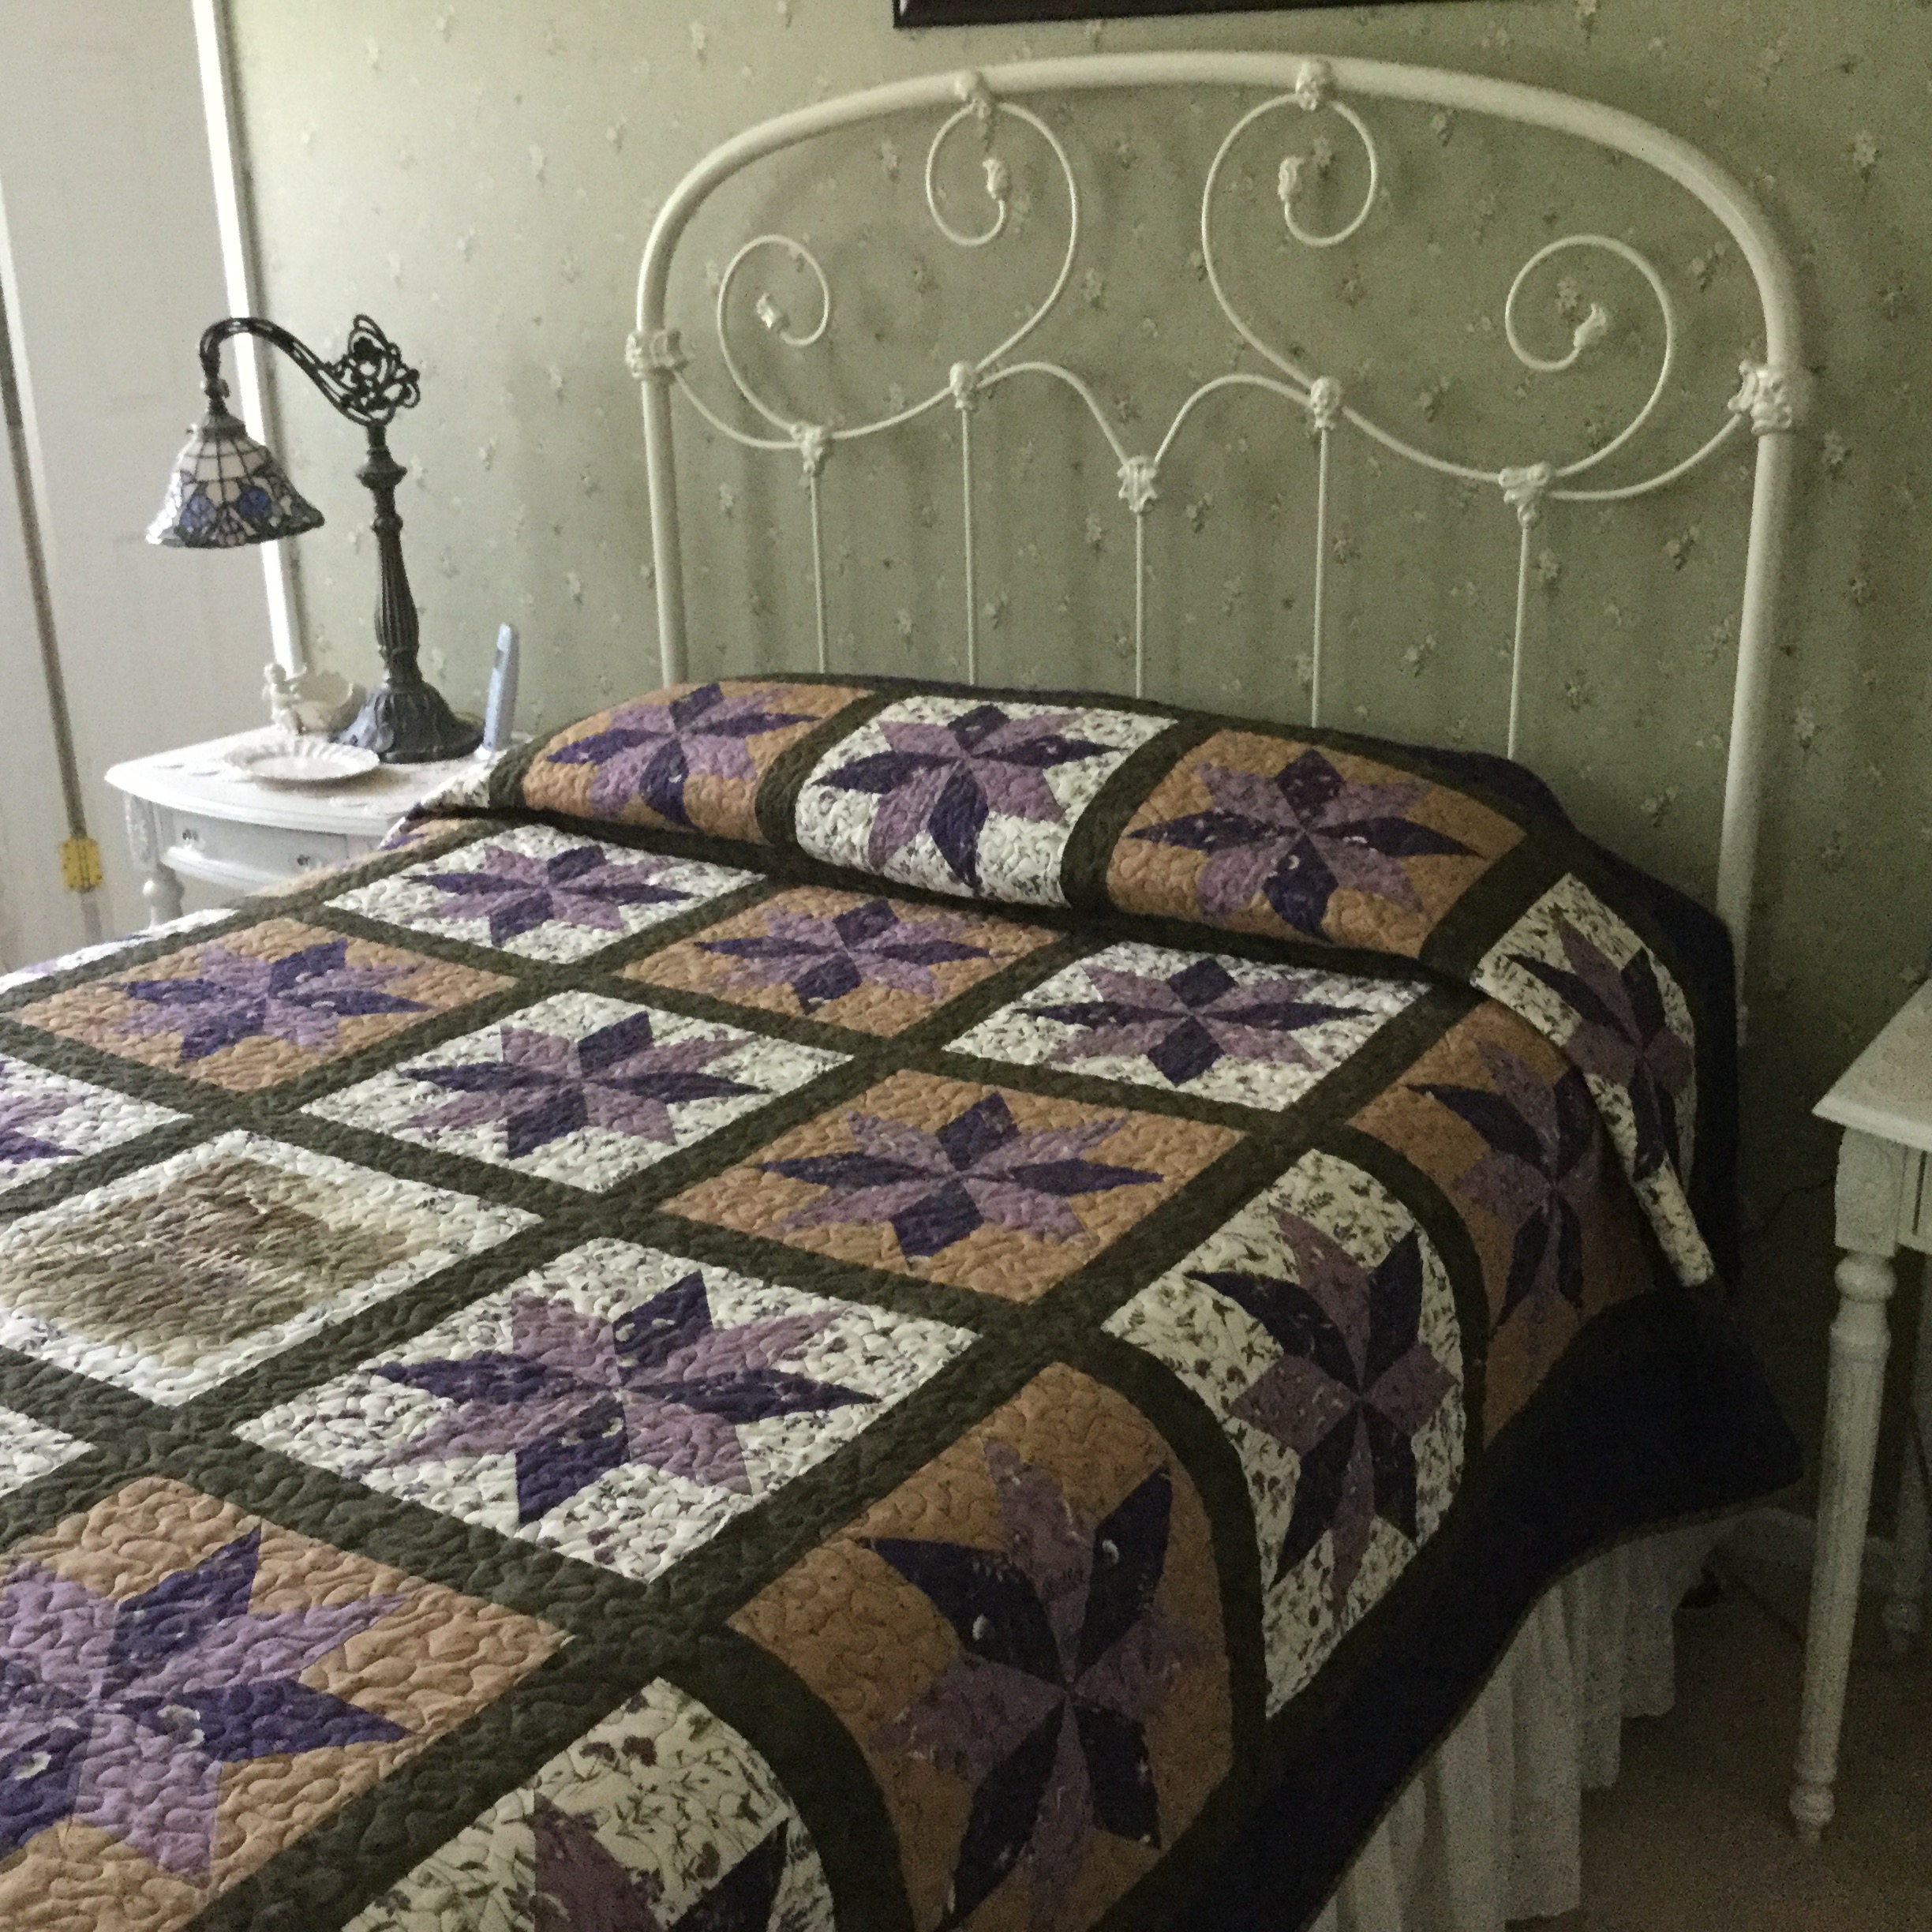
We just put it on her bed and it looks great. 29 twelve inch lemoyne stars and one panel.
Mary loved the panel of the potting shed so I was sure to place it so it would be in the middle of the bed.
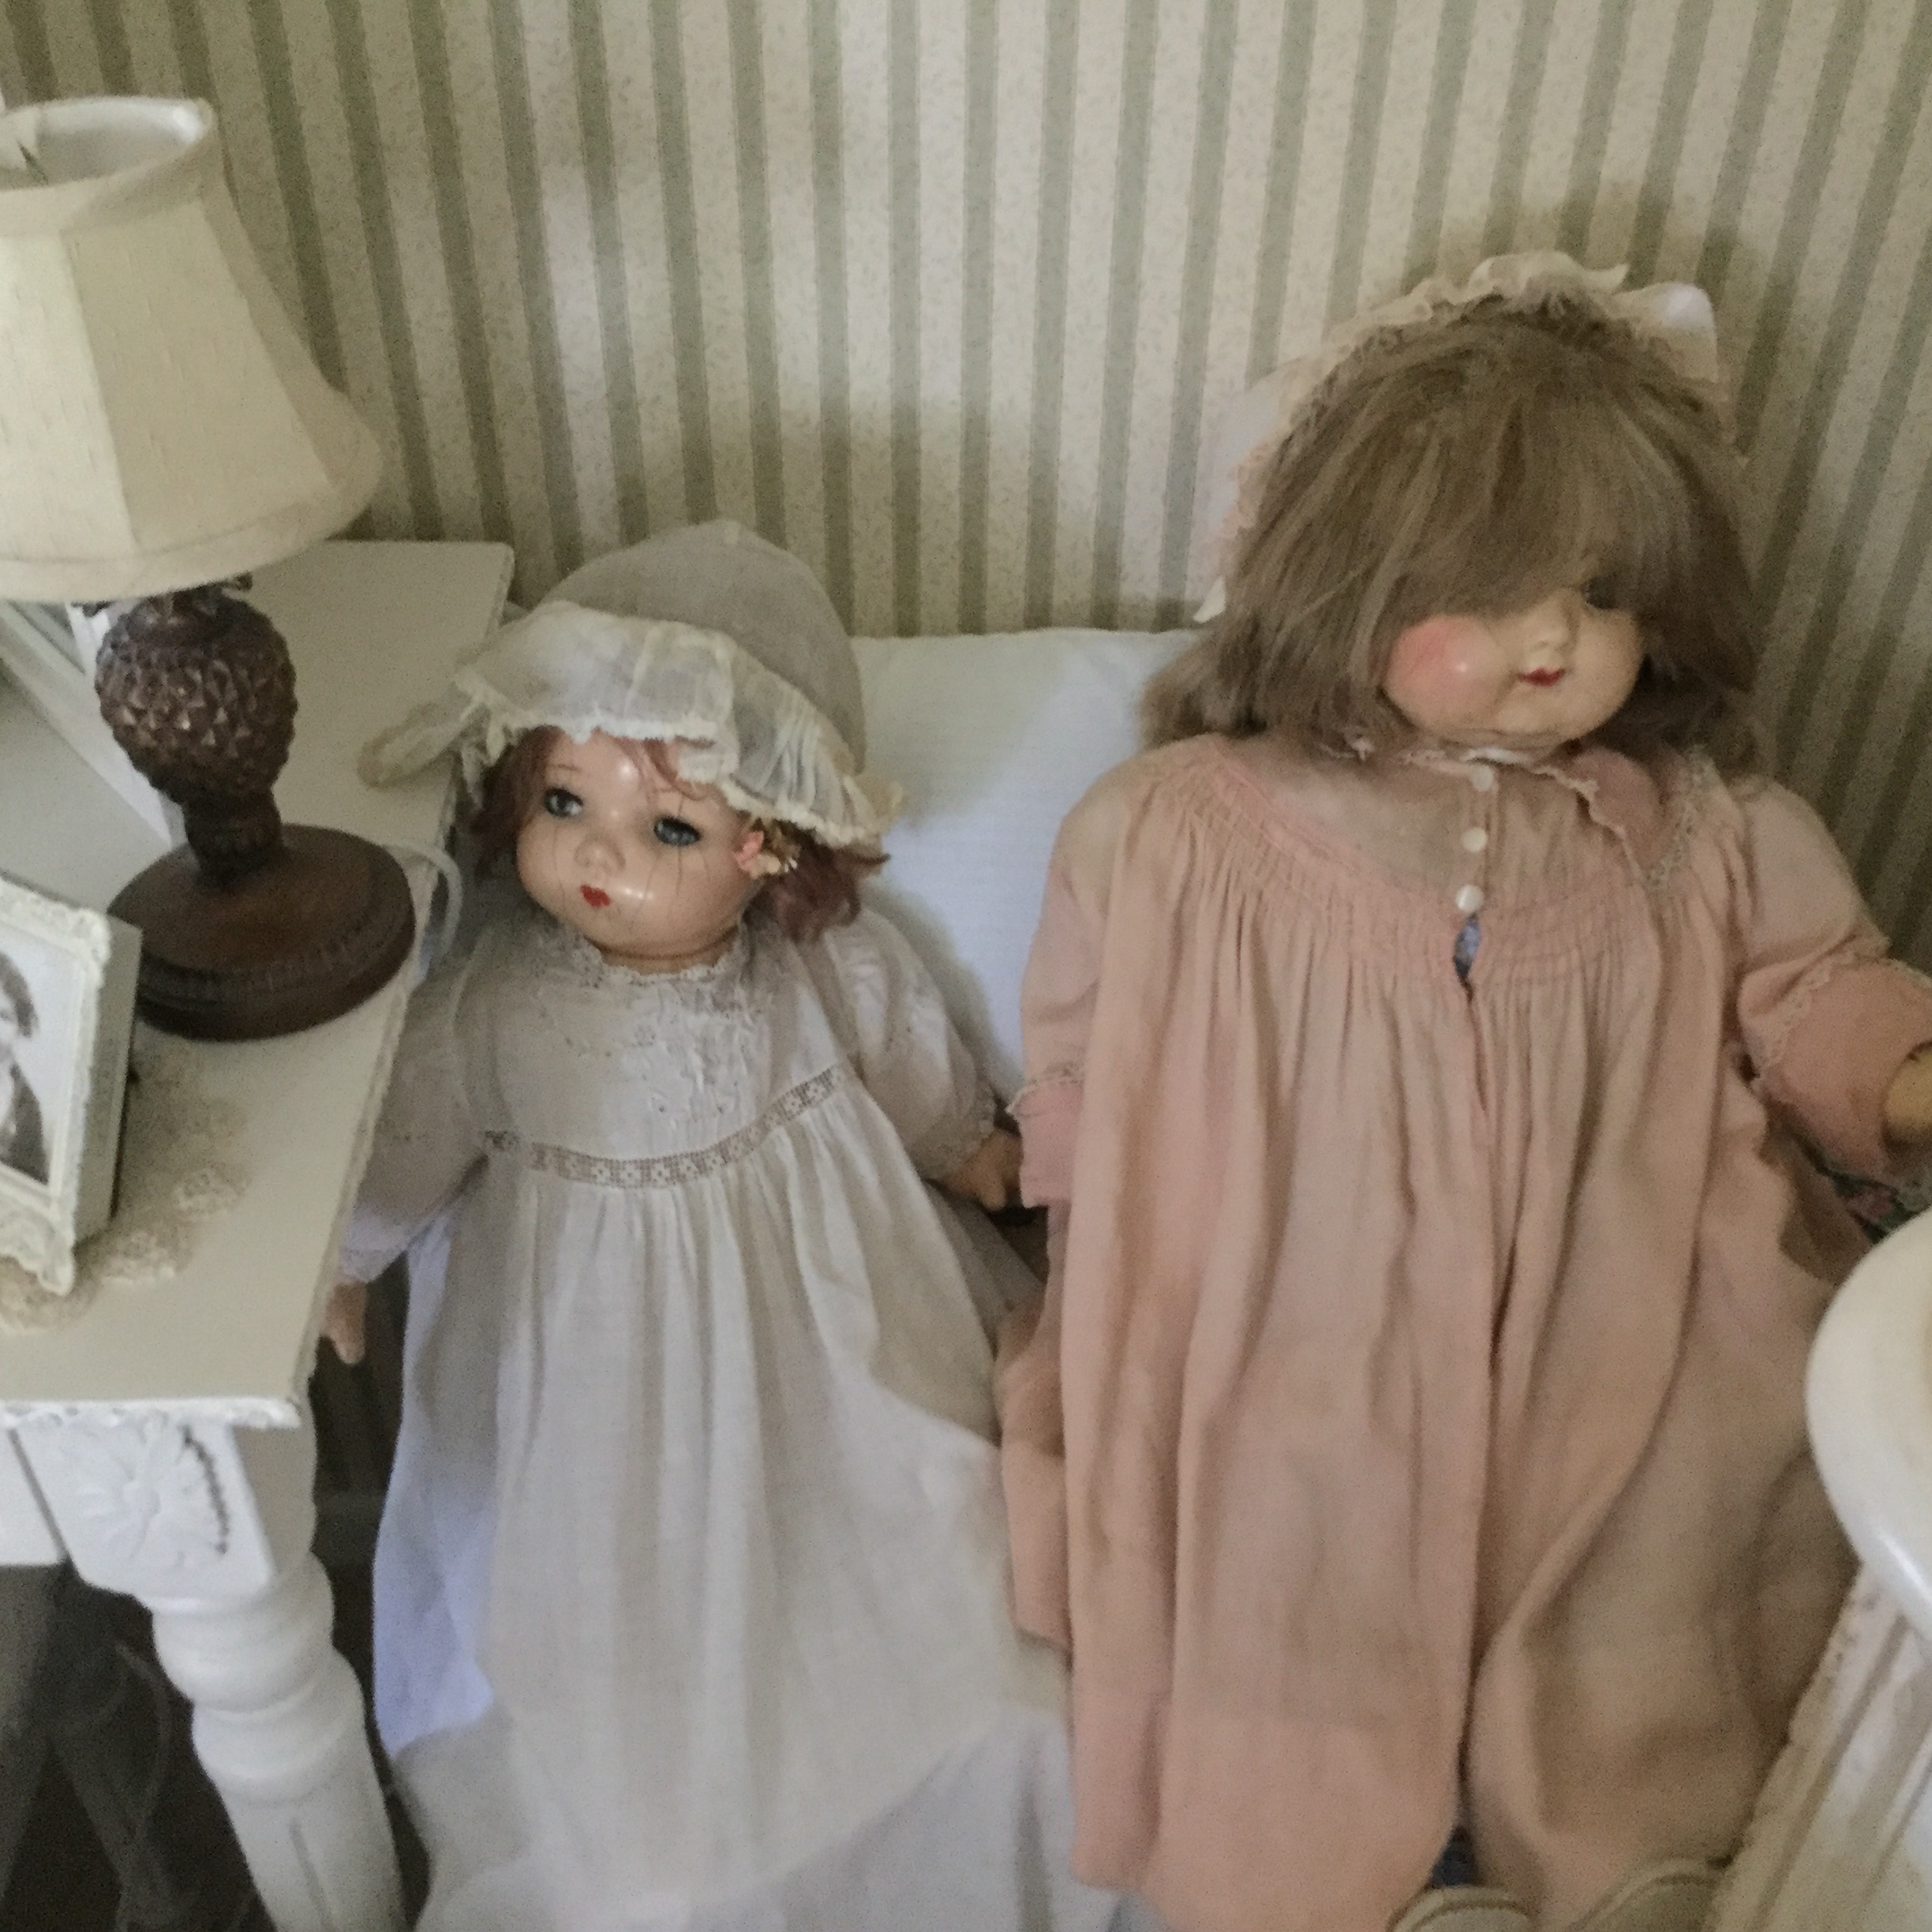
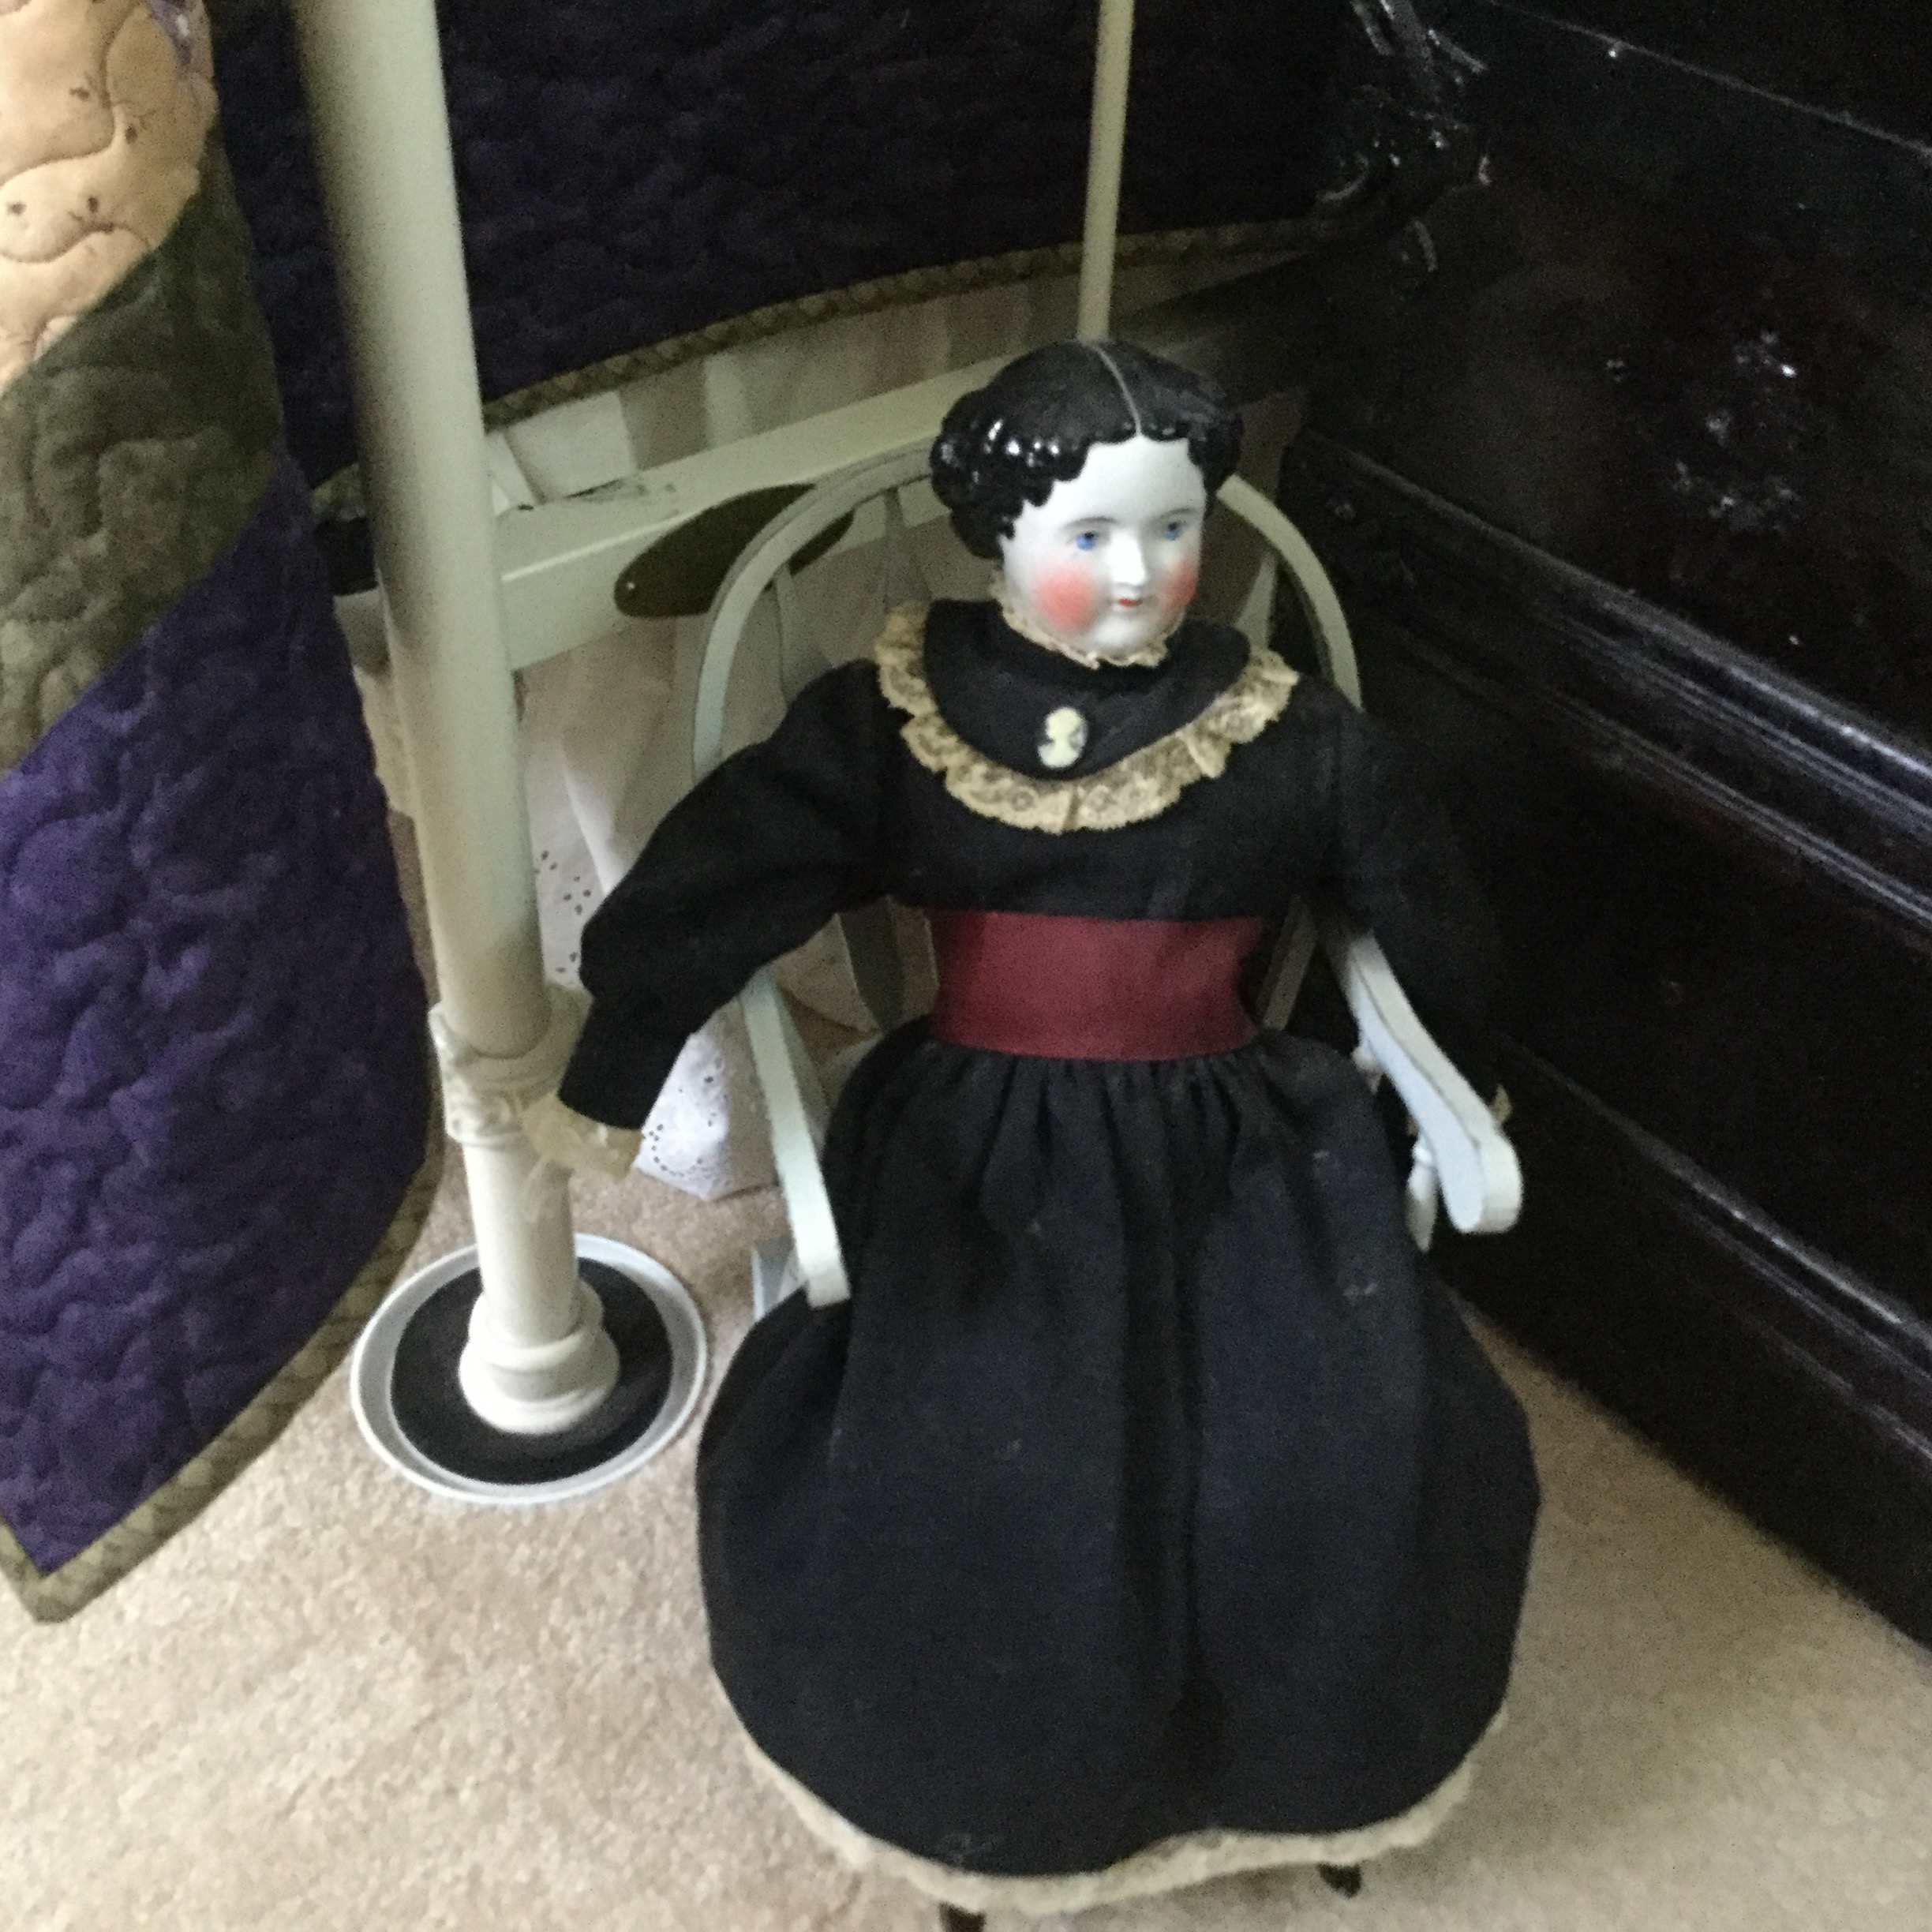
My sister is a collector of vintage dolls. She has a beautiful bedroom that displays only part of her collection.
Happy Birthday Mary, your quilt was made with love!
I wanted to help raise funds to support The New York Mills Historical Society (my hometown), so for me that means “Quilt Raffle”! I chose a pattern by fellow Studio 180 Design Certified Instructor (CI) Katrina Thomas. I met Katrina last March at our CI Reunion. This girl is on fire when it comes to quilt designing. Katrina is one of the features in Fons & Porter’s “Scrap Quilts” magazine for Summer 2015 on news stands now.
I lover her pattern called “Rolling Stars”. Katrina is a very creative designer. Her patterns feature the use Studio 180 Design tools, which I love! Check out Katrina’s website The Hope Chest Quilting to get her wonderful quilt patterns.
I chose Katrina’s pattern Lemoyne Baskets to make my raffle quilt.
I love Lemoyne Stars. This pattern is a twist on this process using the Rapid Fire Lemoyne star Tool by Deb Tucker. It also requires the Studio 180 Design Tech Sheet Lemoyne stars as Triangles.
Tuck, his brother Earl and his other brother Earl are in charge of quality control.
And Dave is keeping a close eye on my stitches.
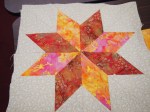
The fabric for this quilt is Lady Slipper Lodge by Moda. I have named this quilt “Lady Slipper Lemoyne
The tune “Back in the Saddle Again” is playing in my head as I stare into the Shultz & Dooley mirror hanging over my sewing machine.
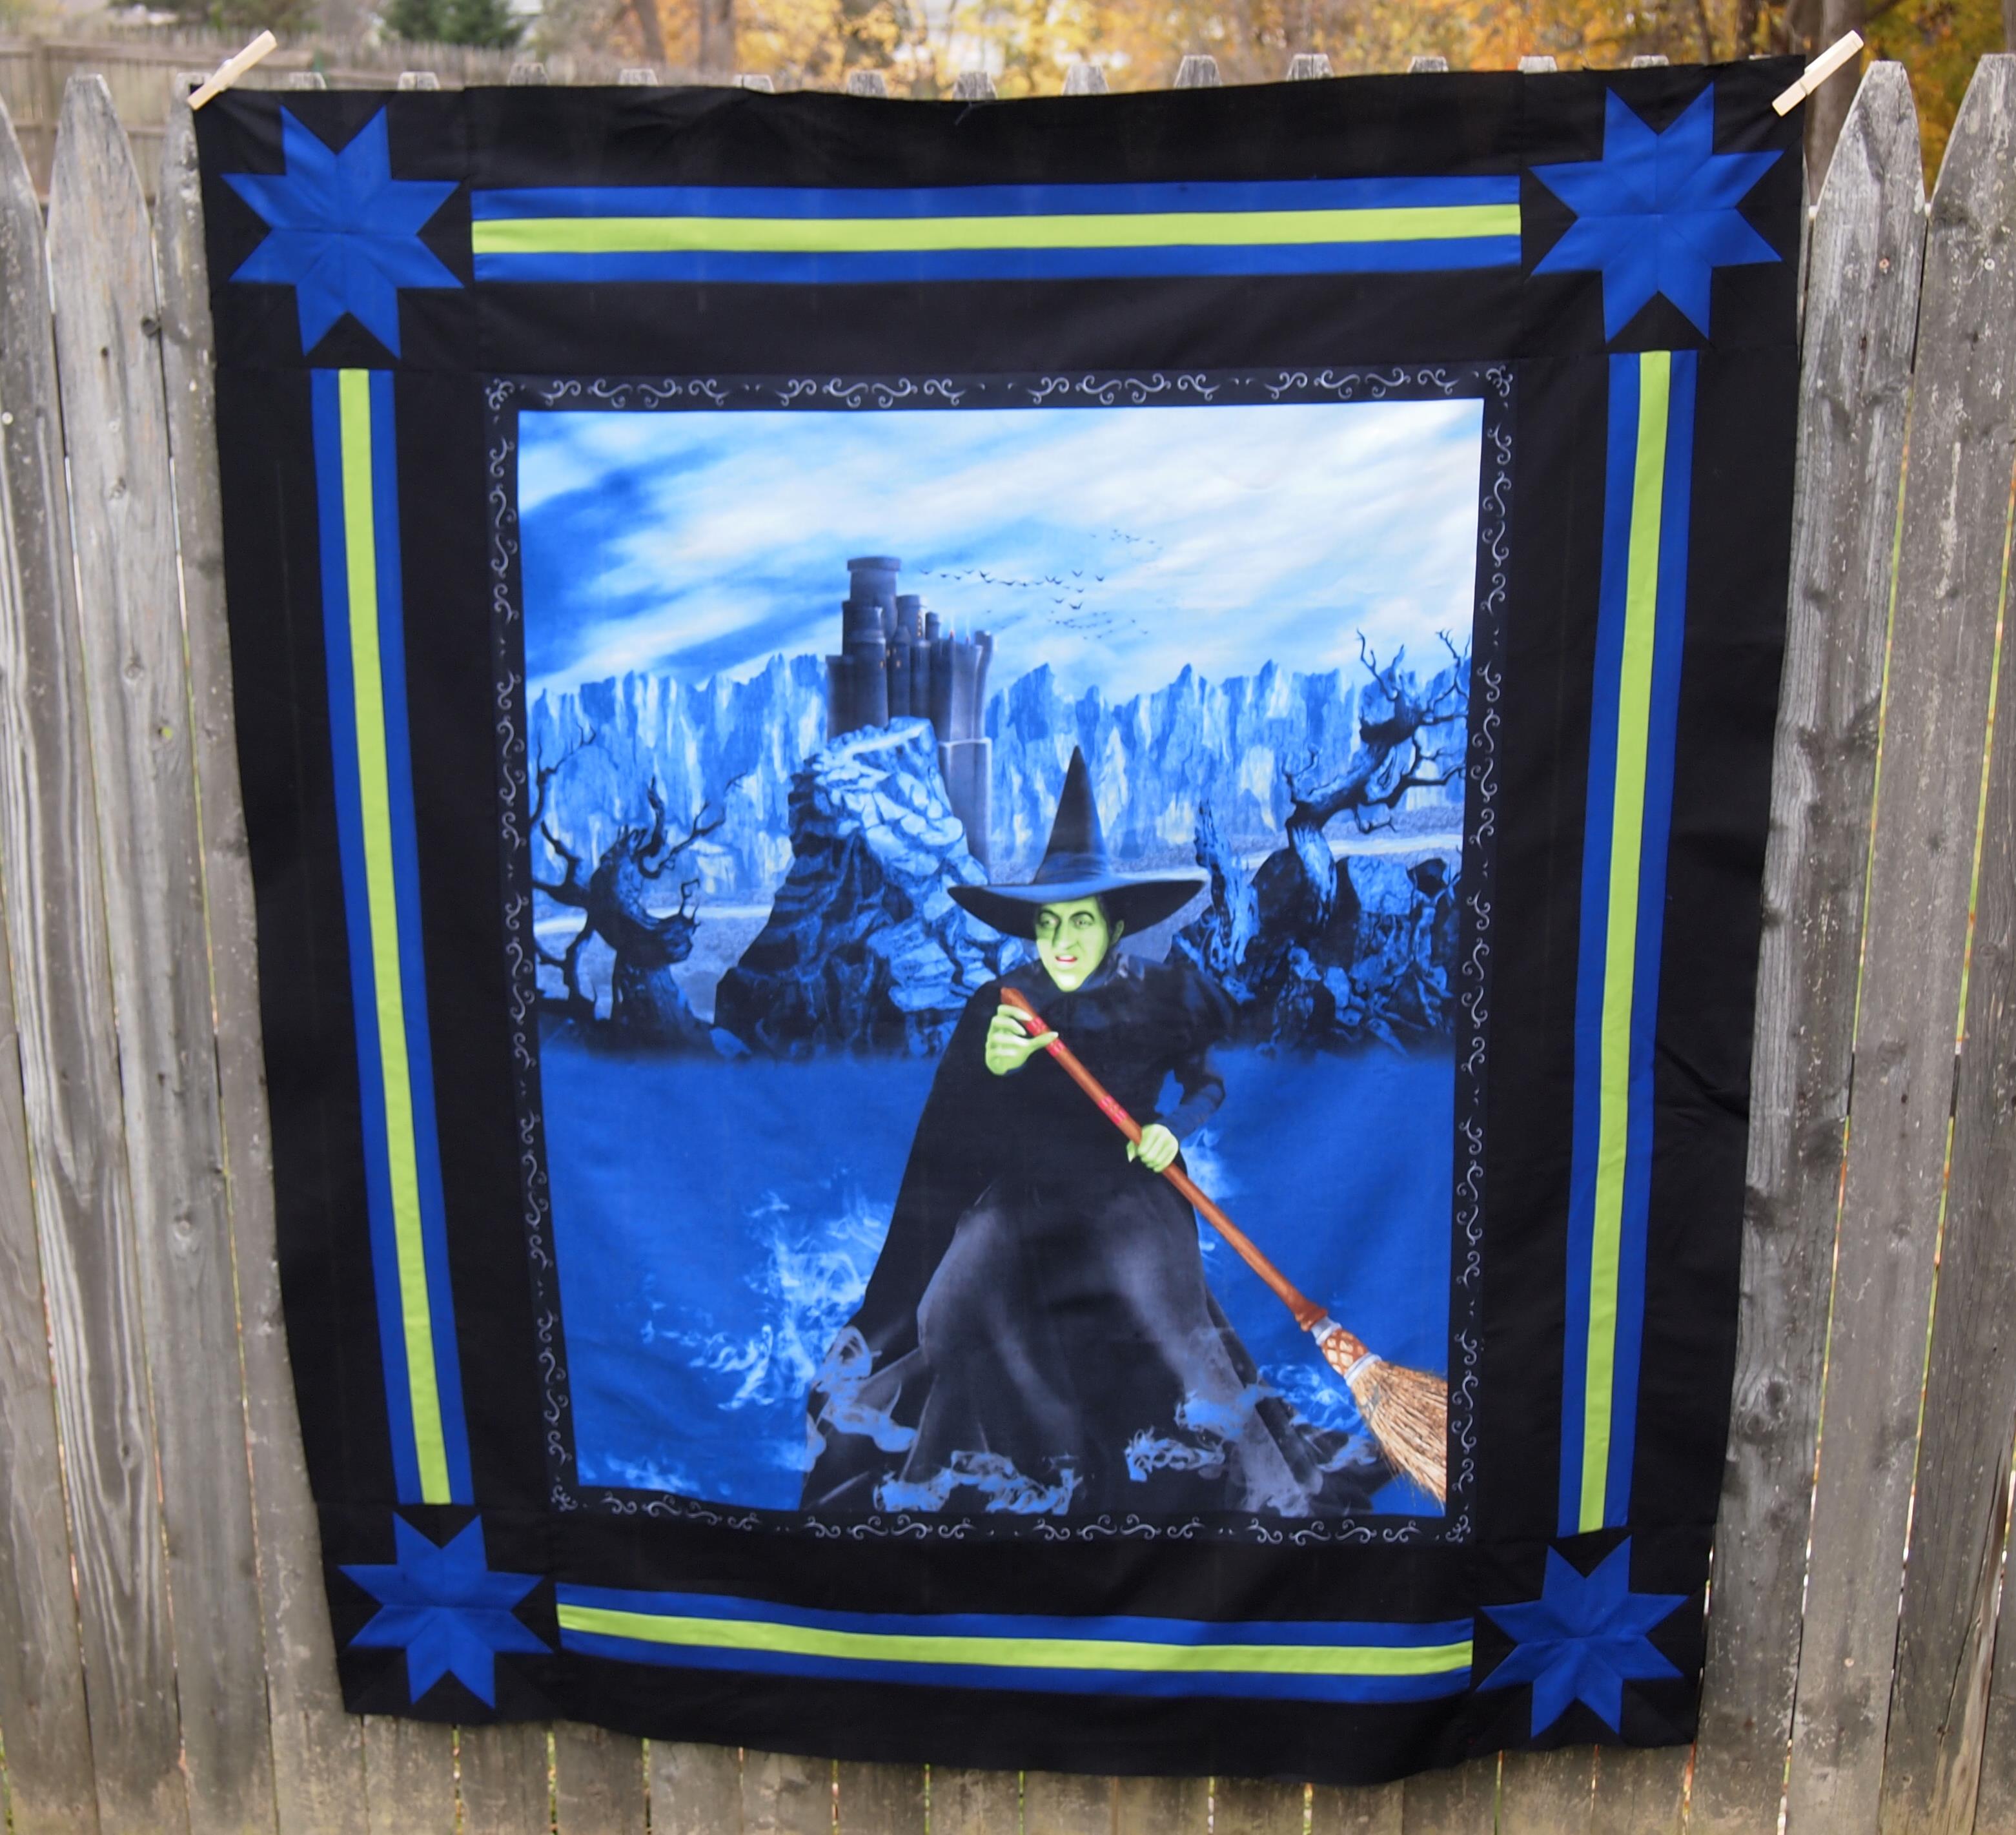
I’m getting ready to work on the Wicked Witch Panel below. I’m a Wizard of Oz fan! This is my first project in the new house. The panel measures 34″x42″. I decided to add Lemoyne Star cornerstones and stripped borders. I pulled the colors from the panel, Kona Black, Midnight Blue and Grass green to match the Witch’s Skin.
I know I have blogged about the Rapid Fire Lemoyne Star Ruler before but thought I would reiterate some tips.
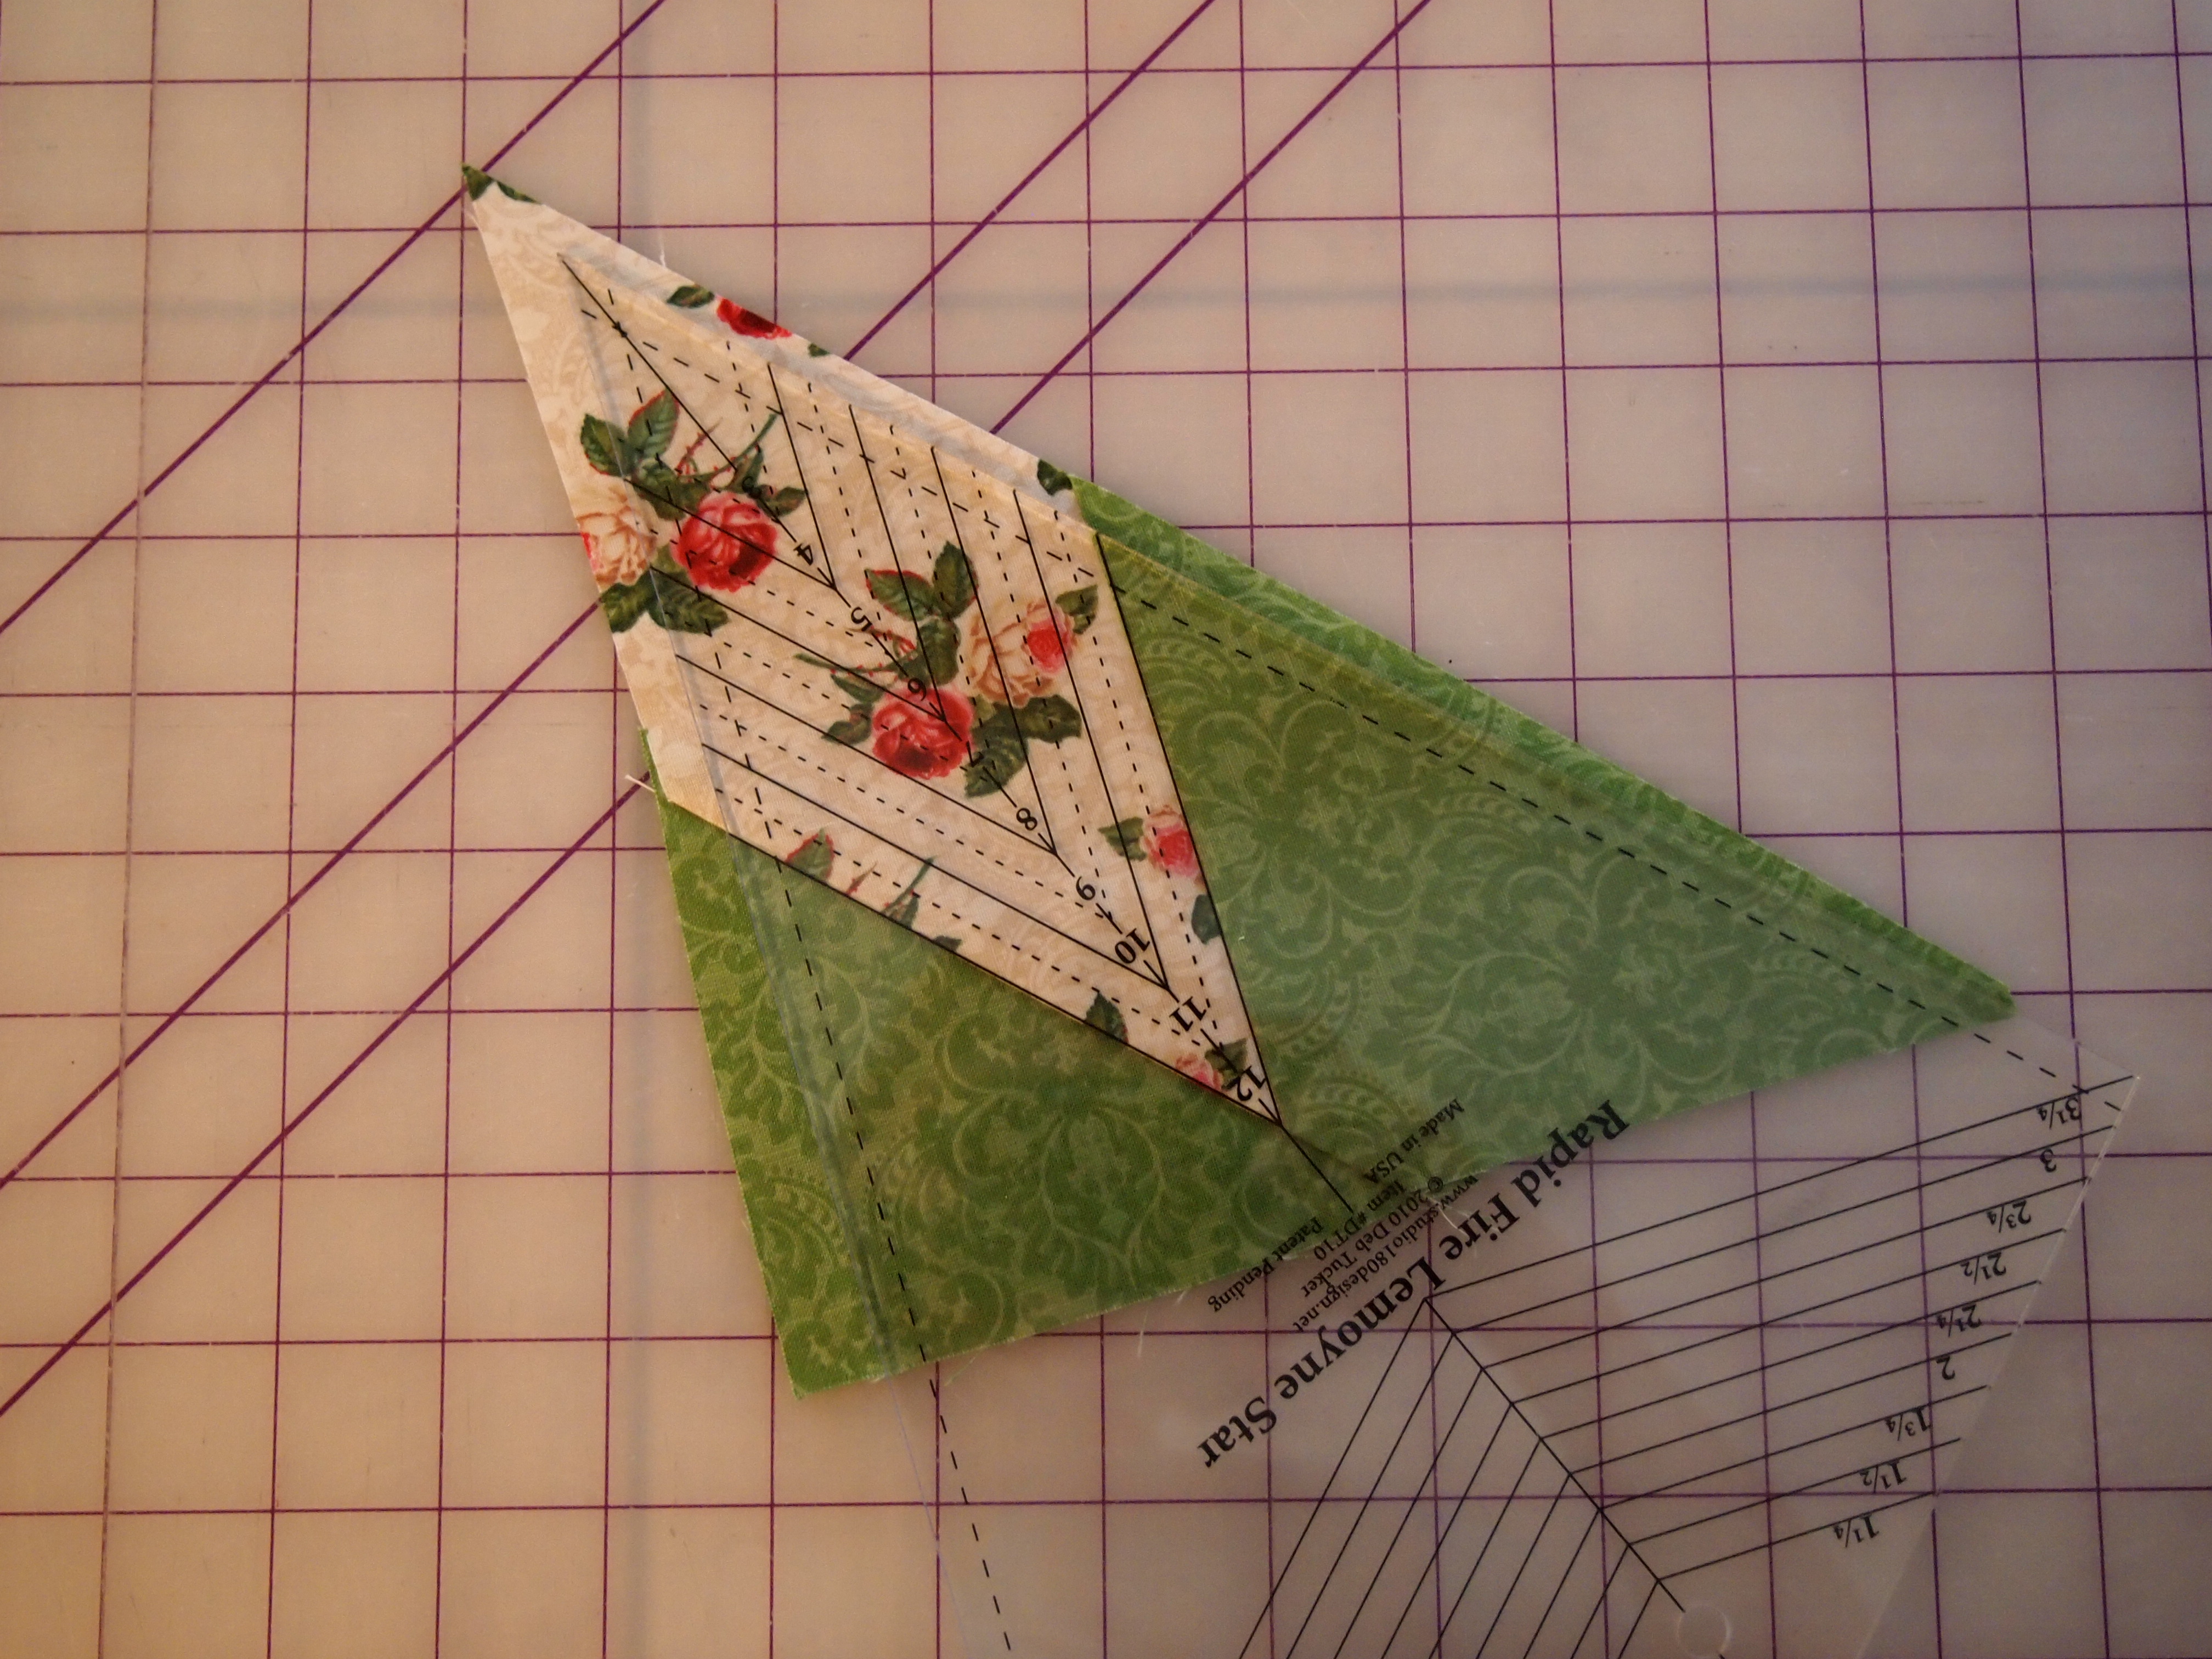
Below I have cut 2 background strips and two star strips. I know these are dark colors but I like the way they work with the panel. I have marked my background strips A and B and 2 additional marks down from the top of the strips on the adjacent, inside edges the same distance as the strip is wide. What that means is; I chose to make an 8″ finished Lemoyne star so I cut my background strip 3 3/4″ wide by width of fabric (WOF). So I marked the inside edges down 3 3/4″. With right sides together I place the star strips on the marks as shown.
Stitch the strips as shown.
Quilting is a Pressing Matter!!! What I love about Studio 180 Design Tools is the care Deb Tucker takes in telling you how to press your seams. I did not know this until I was Studio 180 Design Teacher Certification Training, “Whatever You Are Pressing Toward – Goes On Top”! Genius!
When pressing strip A, the seam gets pressed toward the background strip. I then place the strip on the ironing board with background side on top and press. Strip B seam is pressed toward the star strip, so then the I place the strip with star strip on top. We now have mirror images.
Place Strip B right up on the table, then place strip A on top, right sides together. I start by just matching up the edges. Then using my fingers feel along the seams to determine if the seams are nesting properly. I always gently peel back each end to see if the seams are nesting. If we pressed the seams correctly it will nest nicely.
Now we are going to establish a 45 degree angle by placing the edge of the Rapid Fire Lemoyne Star ruler on the stitched seam line and then bump up another cutting ruler against the angled edge.
Make the first cut.
Place the cutting ruler on that beautiful 45 degree angle and cut strips the width of your star strip. For an 8″ Lemoyne Star I cut 2 1/5″ strips. So I make a 2 1/2″ cut.
You can go ahead and make all your 2 1/2″ cuts, but I prefer to make the first cut and then make the second cut by going vertically south to north and position the ruler edge at the tip of the star point and trim straight up.
These triangles will be the side pieces for your unit.
Once all your units are cut, open your units with A on the right and B on the left as shown below.
This is a great tip from fellow teacher Jane Godshall: Take two paper plates, label one A and one B. Open your units as shown above place all the A units on one plate and B units on the other. This will save you from confusing them.
Take plate “A” to the sewing machine, center and stitch one side triangle to each unit.
Chain stitch all the “A” Units.
Take the chain to the ironing board. “A” pieces will be pressed toward the star point fabric so lay the chain with the star point fabric on top.
By chain stitching the “A” units together and pressing, it keeps your brains from falling out trying to keep straight what unit you are working on.
Now chain stitch the side triangles to the “B” units with the side triangles on top.
Press.
Our “A” and “B” units are ready to trim.
Sorry for the glare, I’m having lighting issues. I don’t care for most ruler gripping products but I love InvisiGrip. This product helps keep your ruler from sliding with bunching up your fabric when you are positioning the ruler. You will definitely want to use some on your Rapid Fire Lemoyne Star Ruler. As you put pressure on the ruler toward the point it will keep it from moving.
Sorry my fabric is so dark. Place your unit with the star point facing towards 2 o’clock, this helps with trimming both sides without repositioning the unit. I am making 8″ Lemoyne stars so I align the desired block size lines with the sewn seam lines. You really want a sharp blade in your rotary cutter for this trim!
Trim all your units before sewing the “A” and “B” together.
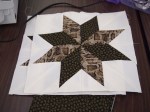
Once the “A” and “B” units are sewn together, trim the dog ears from the star points. Sew 4 units to make a block.
Square up using your Tucker Trimmer 3.
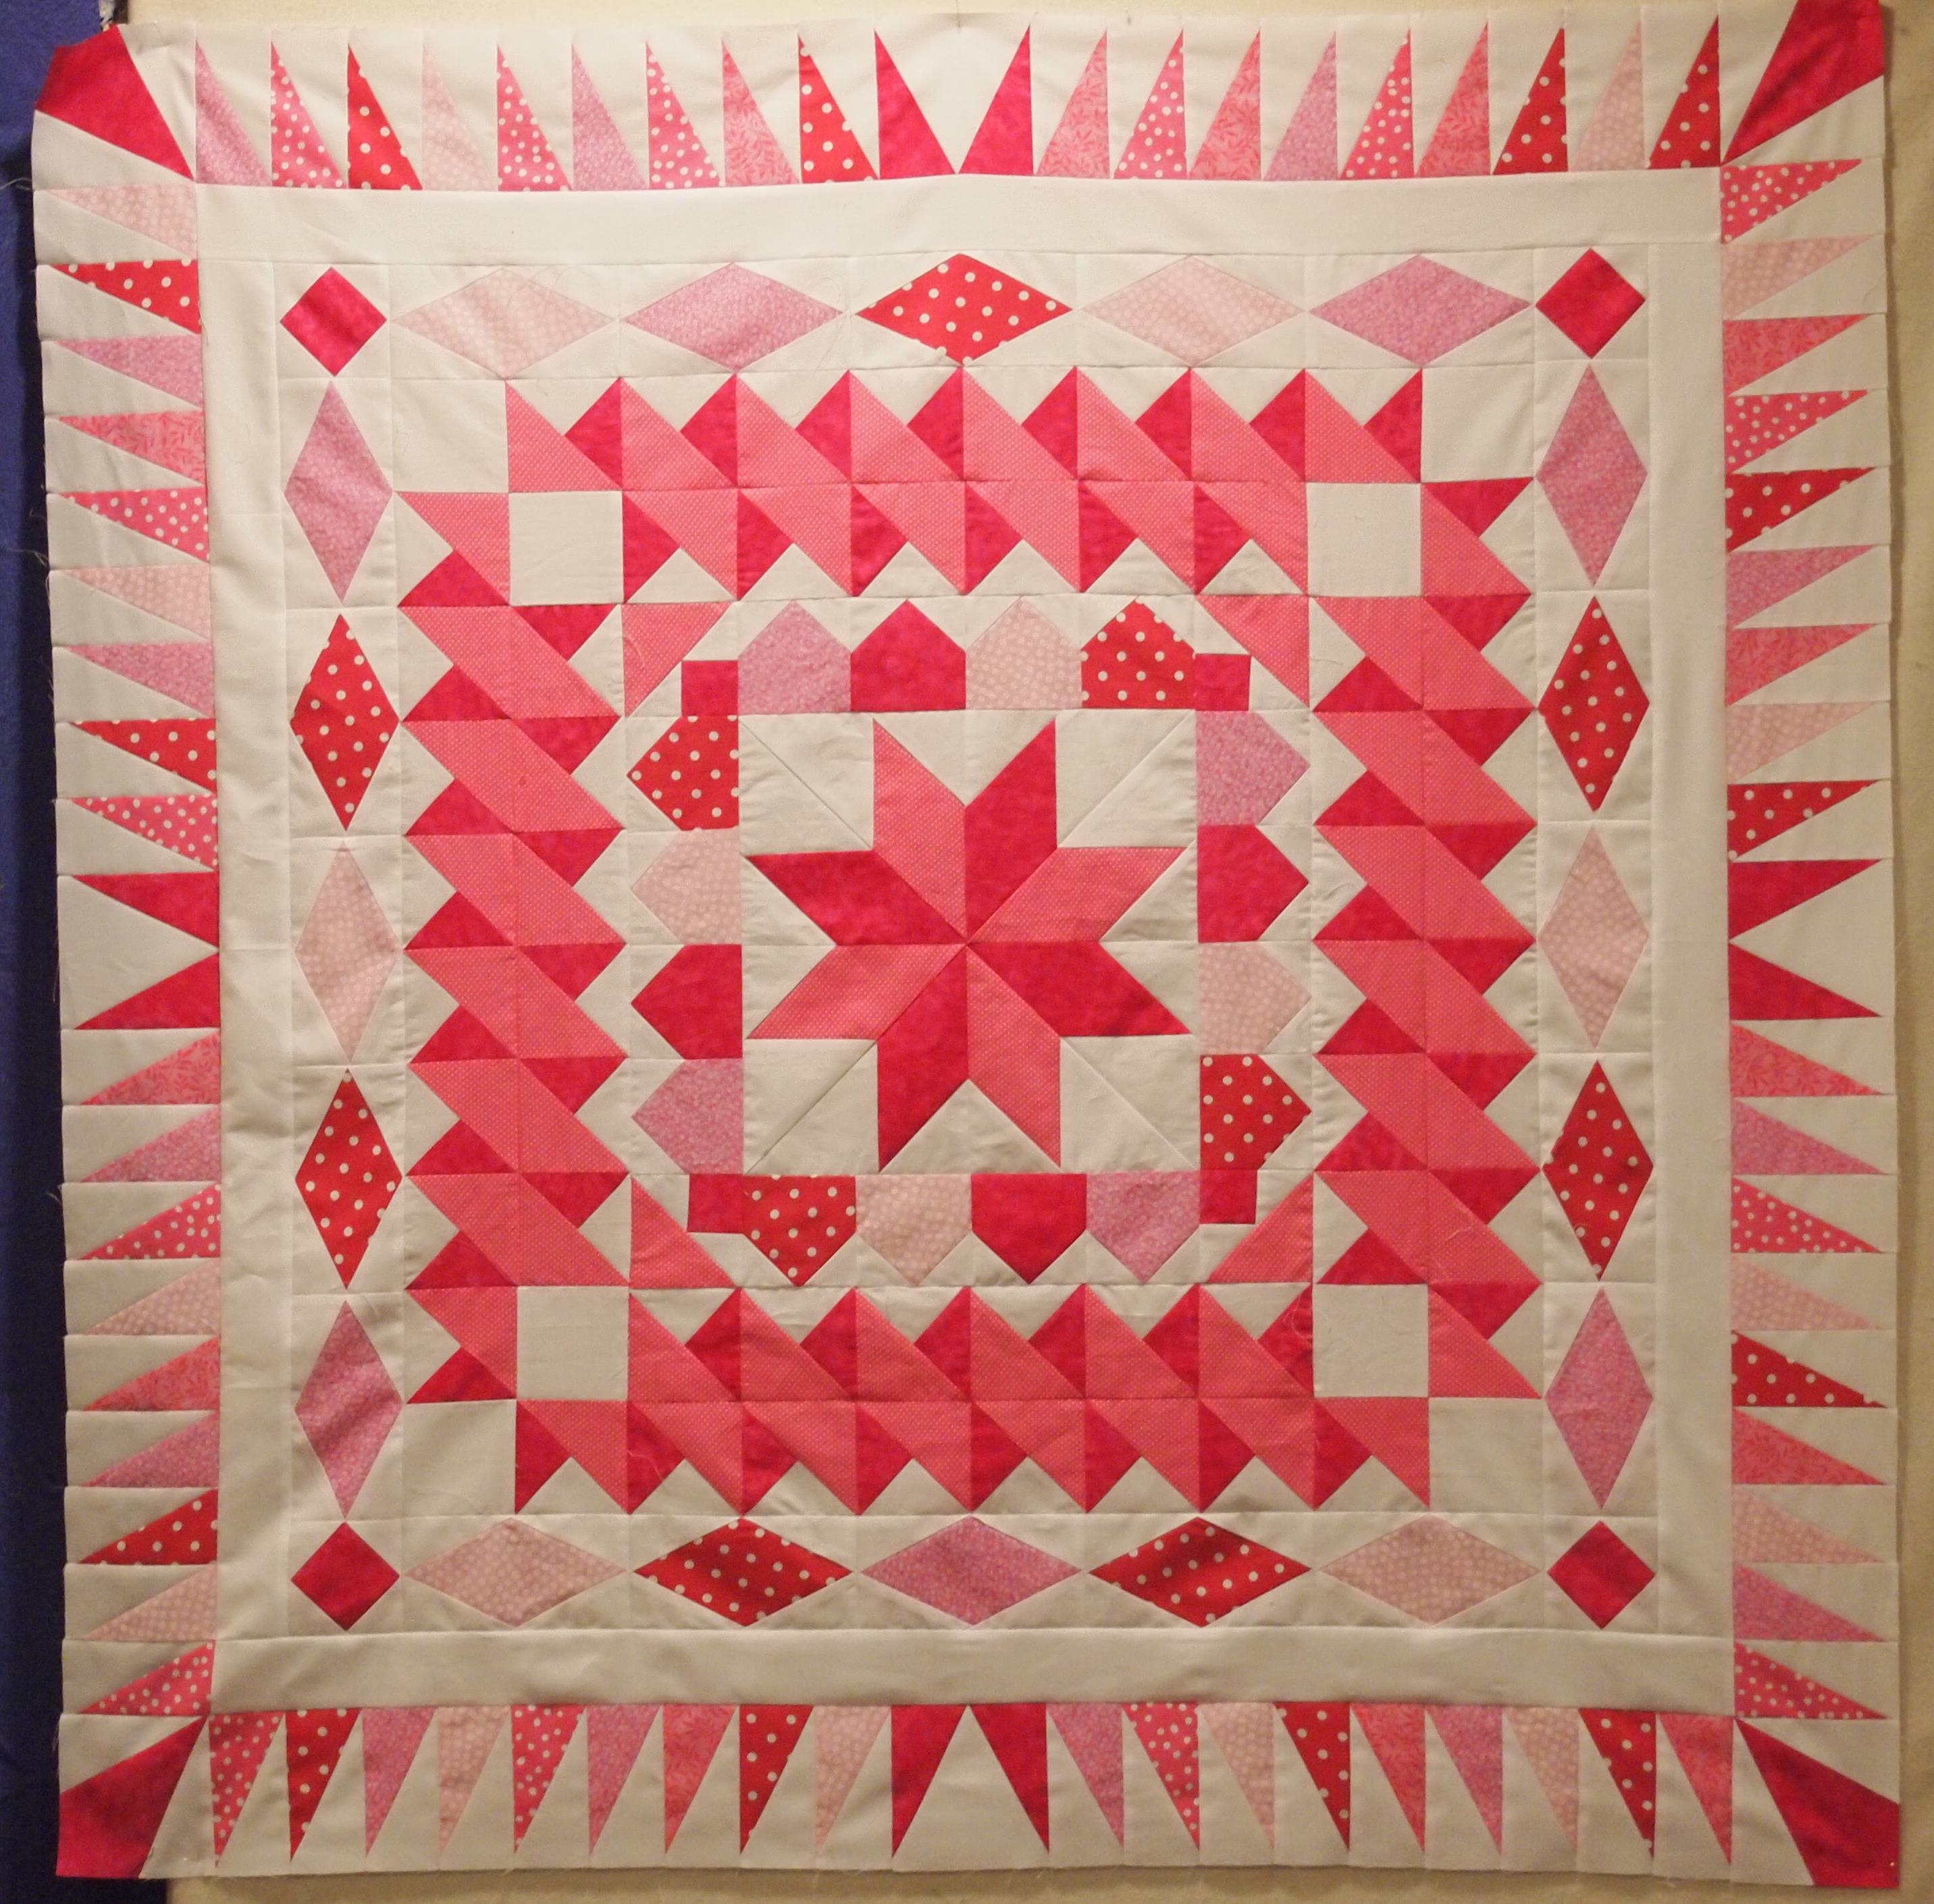
I think it came out pretty good. it measures 52″x60″.
While I was at Studio 180 Design Teacher Certification, as I was just trying to keep up two other students; Phyllis Fay and Sarah Furrer were busy creating. Below is what they whipped up.
What I love about this top other than great technique, is all the different tools they used to create a quilt without using a pattern. When I am giving a presentation on all the Studio 180 Design tools I always show this picture. I am crazy about the outer border. I love the way they used the Split Rects tool. It looks just like they paper pieced it but it was accomplished with a ruler!
You start in the middle of the quilt with the Lemoyne Star and work your way out with each new border. I have also listed the pre-finished sizes or trimmed sizes.
• One 12 ½” Lemoyne Star
• Four 3 ½” shaded 4-patch
• Sixteen 3 ½” little houses
• Eight 3 ½” squares of background fabric
• Fifty-six 3 1/2” combo blocks (which means you have to make 28 Half Square Triangles (HST) blocks first; remembering that they yield a double number of blocks)
• Four 3 ½ “Square/Squared blocks
• Twenty 3 ½ ” X 6″ ½ ” Diamond Rects
• 2 ½ ” border of the background fabric
• Four 4 ½ ” V Blocks
• Four 4 ½ ” Corner Beams
• Eighty 2 ½ ” x 4 ½ ” Split Rects (which means you have to make 40 by using the rights sides together method)
Studio 180 Design Tools Required:
• Rapid Fire Lemoyne Star
• Tucker Trimmer I & III
• Diamond Rects
• V-Block
• Corner Beam
• Split Rects
Studio 180 Design Technique Sheets:
• Shaded 4-Patch
• Little Houses
I am a self-proclaimed Deb Tucker Groupie! I love the Rapid Fire Lemoyne Star Ruler – NO “Y” SEAMS. This post is not meant to replace Deb Tuckers instructions. It is meant to encourage you try her ruler. The instructions that come with the ruler are very detailed and easy to follow, and also include instructions for Left handed people. You can purchase Deb Tucker products from their web page at http://www.studio180design.net
Each block requires two background strips and two star point strips. I cut two background strips the width of fabric and mark one “A” and One “B” at the top.
Cut two star point strips. Place a star strip on Strip “A” right sides together down the same distance as the background strip is wide. Do the same with Strip “B” as shown below. Sew both with 1/4″ seam allowance. Notice you are sewing strip “A” on the right side and strip “B” on the left side of the strip.
Press star strip “A” toward the background strip. Press star strip “B” toward the star strip.
Place strip “A” & “B” right sides together with strip “B” on the bottom, nesting the long seams.
Line the Rapid Fire Lemoyne Star Ruler edge along the stitching line and bumping another ruler against the angled edge. This will give you your 45 degree angle. Cut off the staggered end and discard.
Continue making cuts the same width as your Star Point Strips. In this picture my star point strips are 3 1/4″ wide, so I continue to cut 3 1/4″ wide units.
Continue to cut your units.
Second cuts. Position the ruler edge at the tip of the star strip and trim straight up.
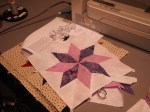
This shows the parts placement to 1/4 quarter of your block. With right side together center the triangle you just cut off on the side of the unit and sew together.
Place the two units in front of you with the star points facing toward you. “A” is on the right and “B” is on the left. Press “A” toward the star point and press “B” toward the background.
Place the unit right side up pointing the diamond toward 2:00 (for ease in cutting both directions). As you can see in this picture I did not position it correctly. Align the desired block size lines with the sewn seam lines. Trim along both sides of the ruler.
Place two units together nesting the seam and starting at the star point and sew together.
Press seam open.
Join the quarters together and sew, then sew the halfs together. Press seams open.
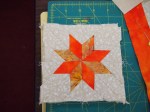
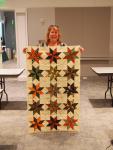
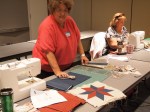
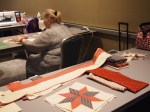
Yesterday at Sew EZ in Portsmouth we had another great class on how to make a Lemoyne star – with out “Y” seams!!! I love this method. It was developed by Deb Tucker www.studio180design.net . It is so much fun. Thanks to Mary & Mary, Nancy & Sandy. It was a good class.
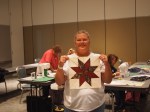
I just got home from teaching a Rapid Fire Lemoyne Star class in Hampton, VA. I have to say the students: Arlene, Susan, Suzanne, Leanne, Mavis, & Lisa – you guys are rock stars. We had a great class. They learned something new and had fun doing it. If you haven’t tried Deb Tucker’s Rapid Fire Lemoyne Star ruler, you don’t know what you are missing.
Going back tomorrow to teach the Oak Ridge Stars Pattern.