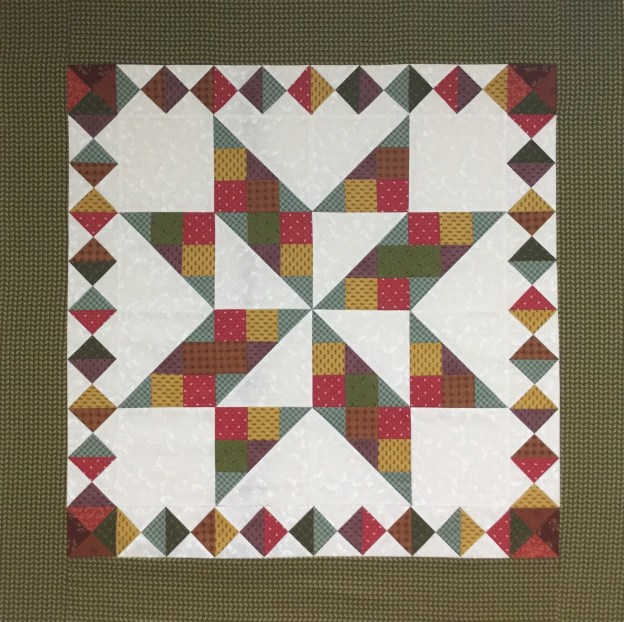
I was scheduled to teach the Shaded Nine Patch Star to the Thread Bears Quilter’s Guild of Sherill, NY in May. But as it doesn’t look like I will be able to, so I am going to teach it here.
This star was designed by Studio 180 Design Certified Instructor Sarah Furrer. I love it as a fun way to learn the Shaded Nine Patch Unit. The Shaded Nine Patch is an amazing unit that has endless possibilities & can be made in 7 sizes. Maybe Sarah will make it a pattern someday. You will need the Tucker Trimmer I, Magic Wand and Shaded Nine Patch Technique Sheet. Down load the lesson & supply list here:
Fabric Requirements:
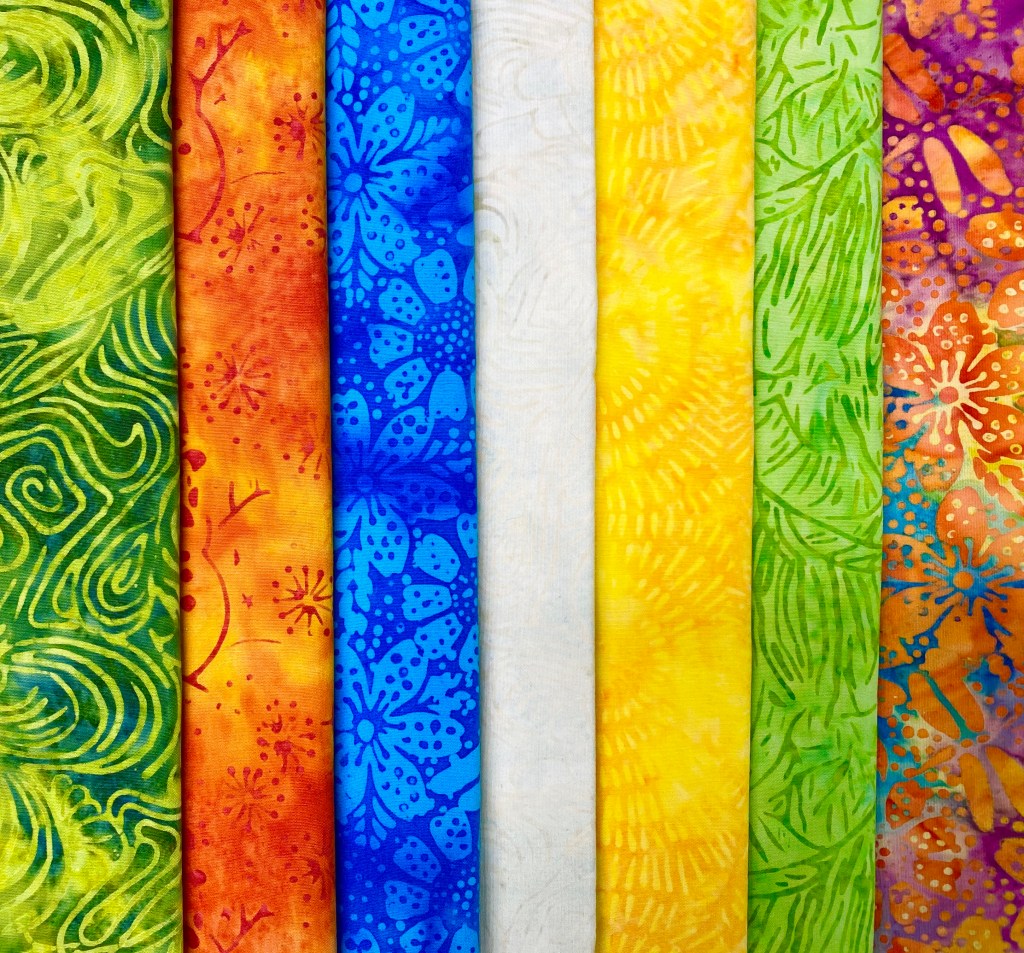
Choose 6 fabrics and a background. You may choose Width of Fabric Strips (WOF) OR Fat Quarters and cut more strips.
Background: 1 Yard
6 different – ¼ yard fabrics or 6 fat quarters
Border & Binding: 1 yard
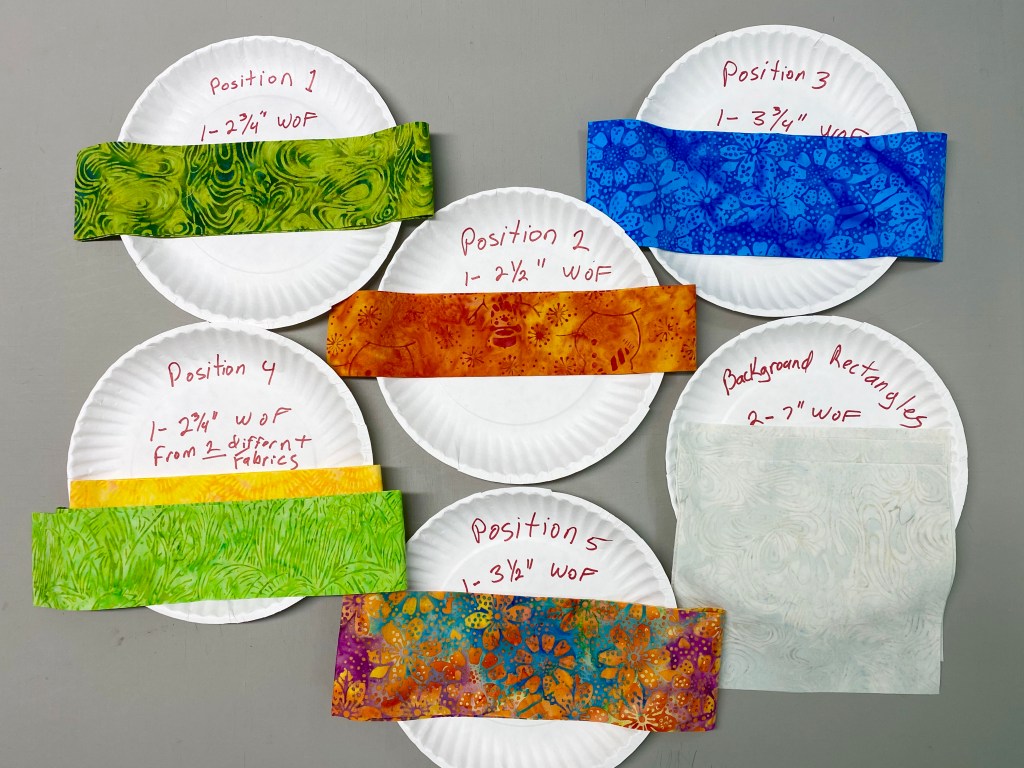
Cutting Strips for the Shaded 9 Patch Block: We will be making 12 – 6″ finished Shaded Nine Patch Units.
- Position 1: Cut 1 – 2 3/4″ WOF strip
- Position 2: Cut 1 – 2 1/2″ WOF strip
- Position 3: Cut 1 – 3 3/4″ WOF strip
- Position 4: Cut 1 – 2 3/4″ WOF strip from 2 different fabrics
- Position 5: Cut 1 – 3 1/2″ WOF strip
- Rectangles (from background fabric): Cut 2 – 7″ WOF strips. Sub-cut into six 7″ x 8″ rectangles
Background Fabric: (Aside from the rectangles above) Cut 4 – 6 ½” squares for the star corners.
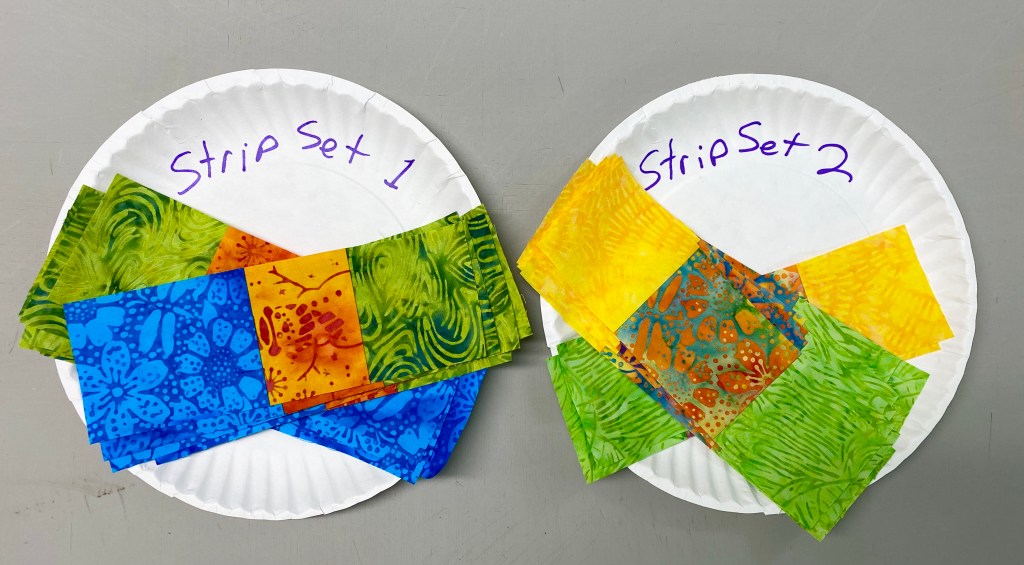
Step 1 – Each block requires two strip sets. You will need to make twice as many of the First Strip Set as you will the Second Strip Set.
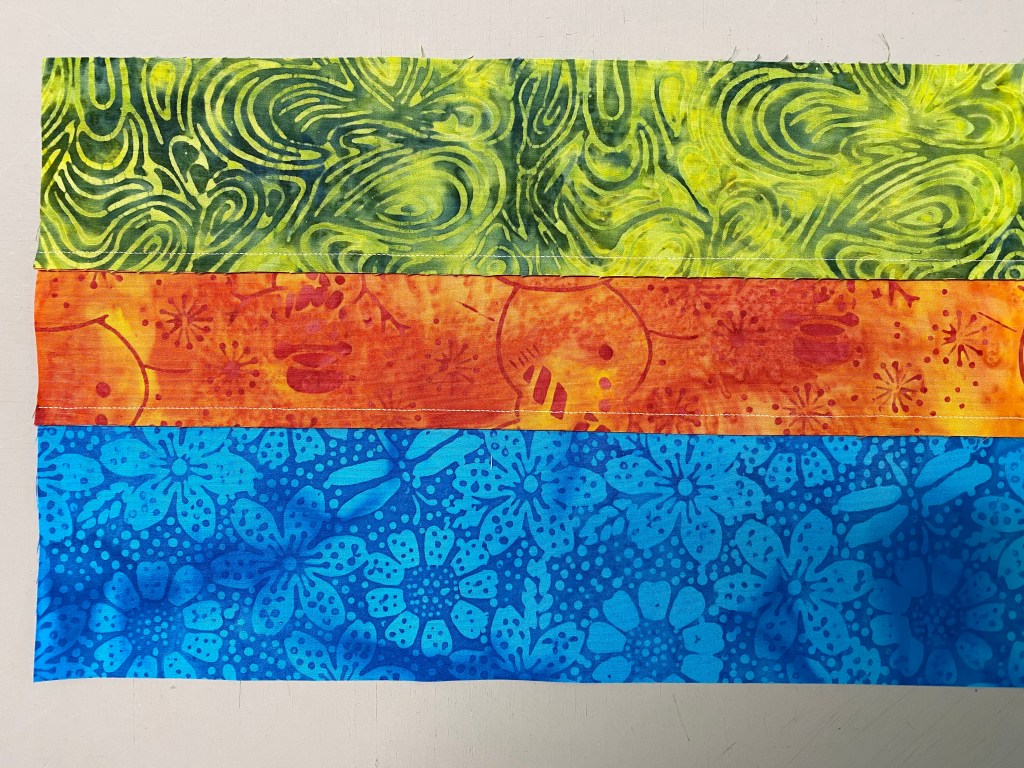
Piecing the First Strip Set – take one strip each of the fabrics for position 1, 2 and 3. Sew them together along the long edge, right sides together in the order shown. Press all seams toward position 3.

Piecing the Second Strip Set – take one strip for position 5 and two strips of fabric for position 4. Sew them together along one long edge, right sides together in the order shown. Press seam towards the position 4 strips.
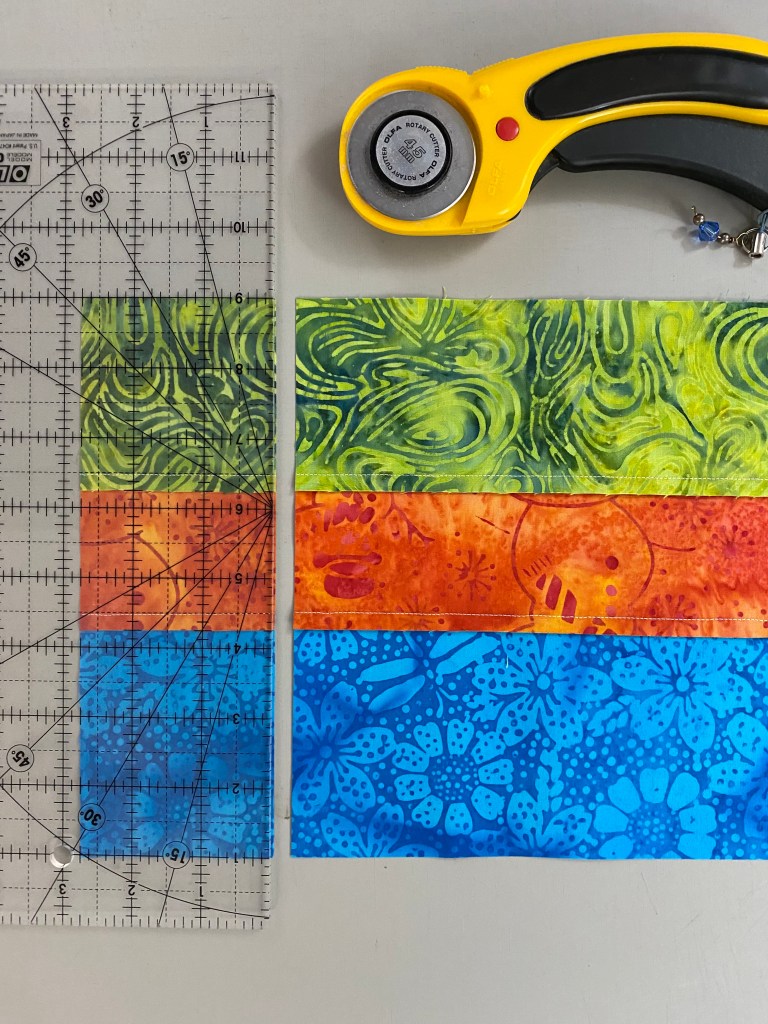
Step 2 – For the First Strip Set only – sub-cut crosswise the width of the strip for Position 1. We are making a 6” finished unit, Position 1 strip is 2 ¾” wide, you will sub cut your sections 2 ¾” wide.
Sub-cut 12 – 2 ¾ wide Strip Set 1” units.

For the Second Strip Set only – sub-cut crosswise the width of the strip for Position 2. We are making a 6” finished unit, Position 2 strip is 2 ½ ” wide, you will sub cut your sections 2 ½ ” wide
Sub-cut 6 – 2 ½” wide Strip Set 2 units.
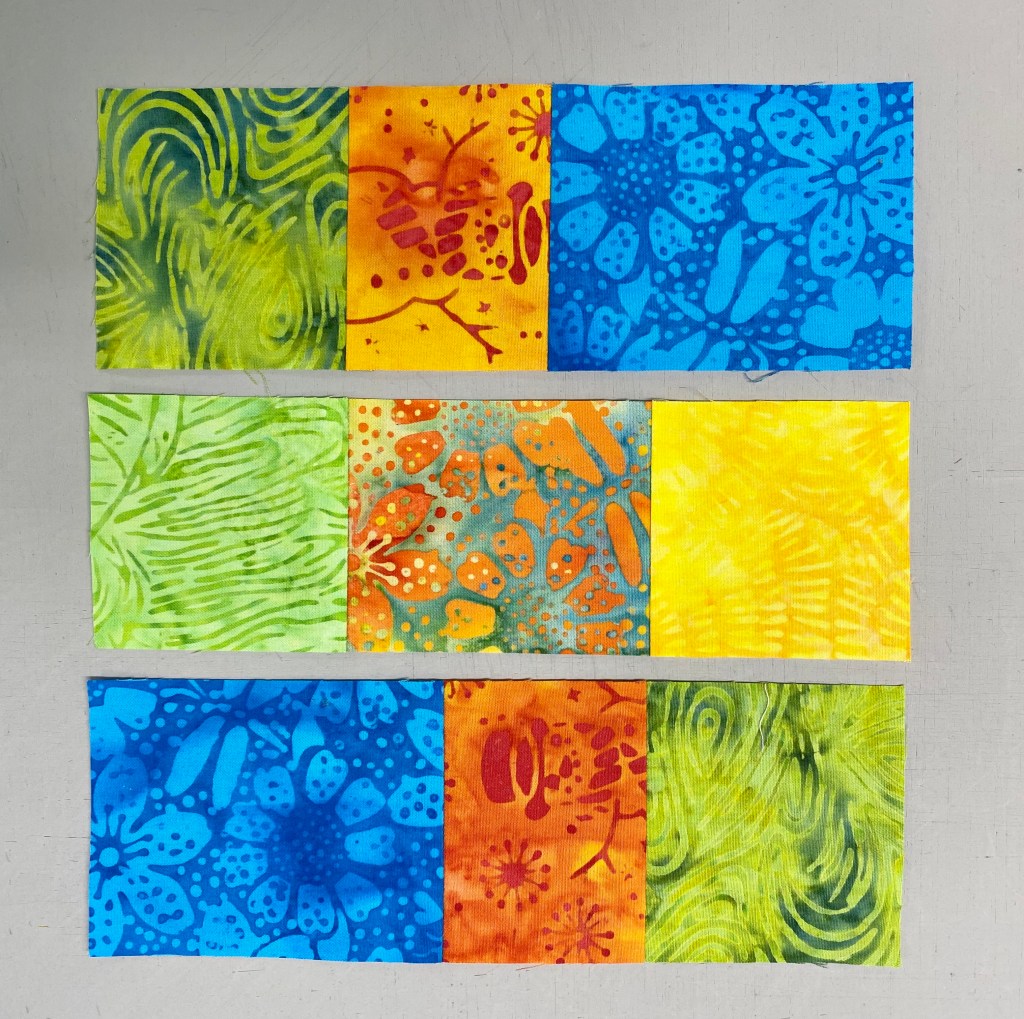
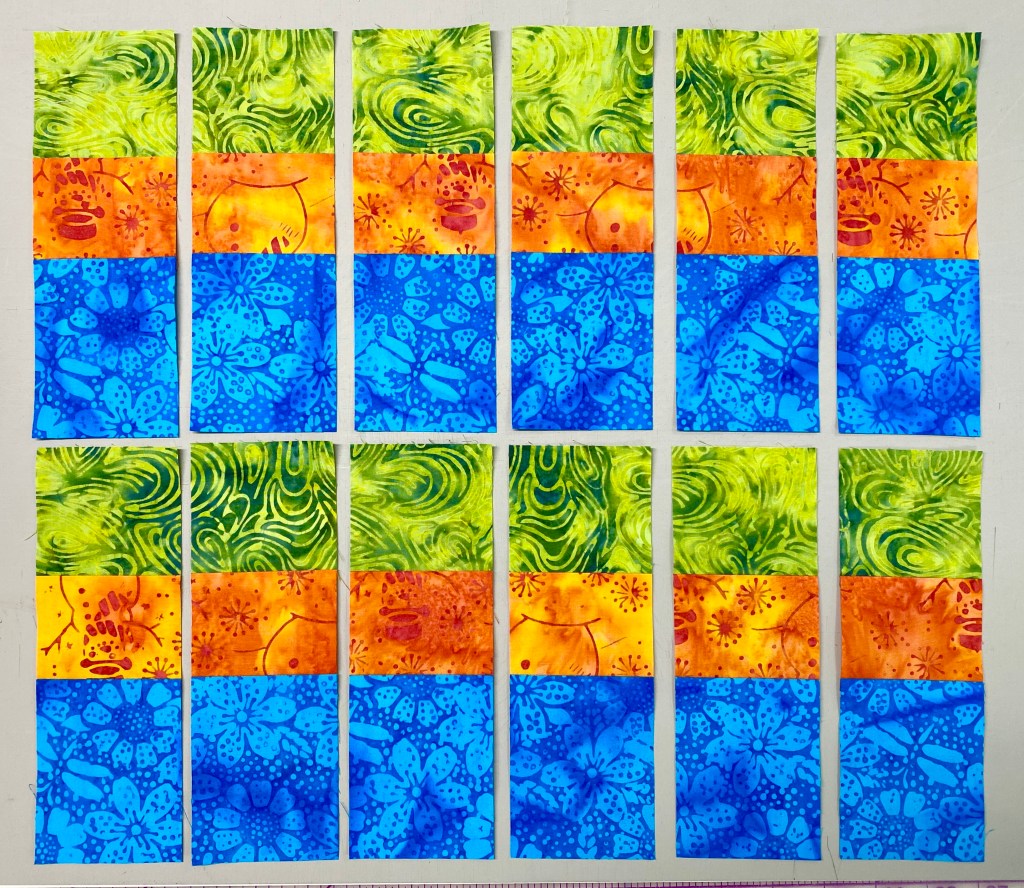
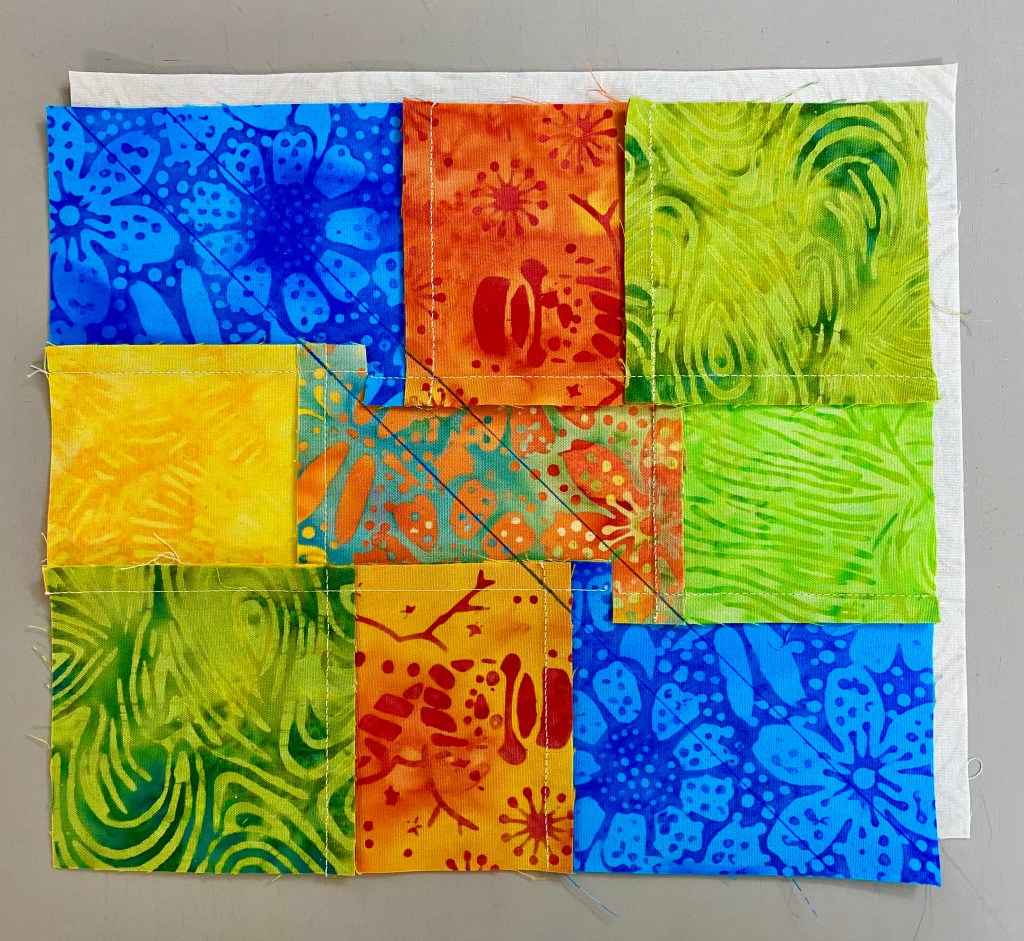
Step 3 – Stitch the strip set units together. Lay them out as shown. Seams will nest between positions 1 & 4. Note: Row 1 is Strip Set 1, Row 2 is Strip Set 2 and Row 3 is Strip Set 1, but reversed.
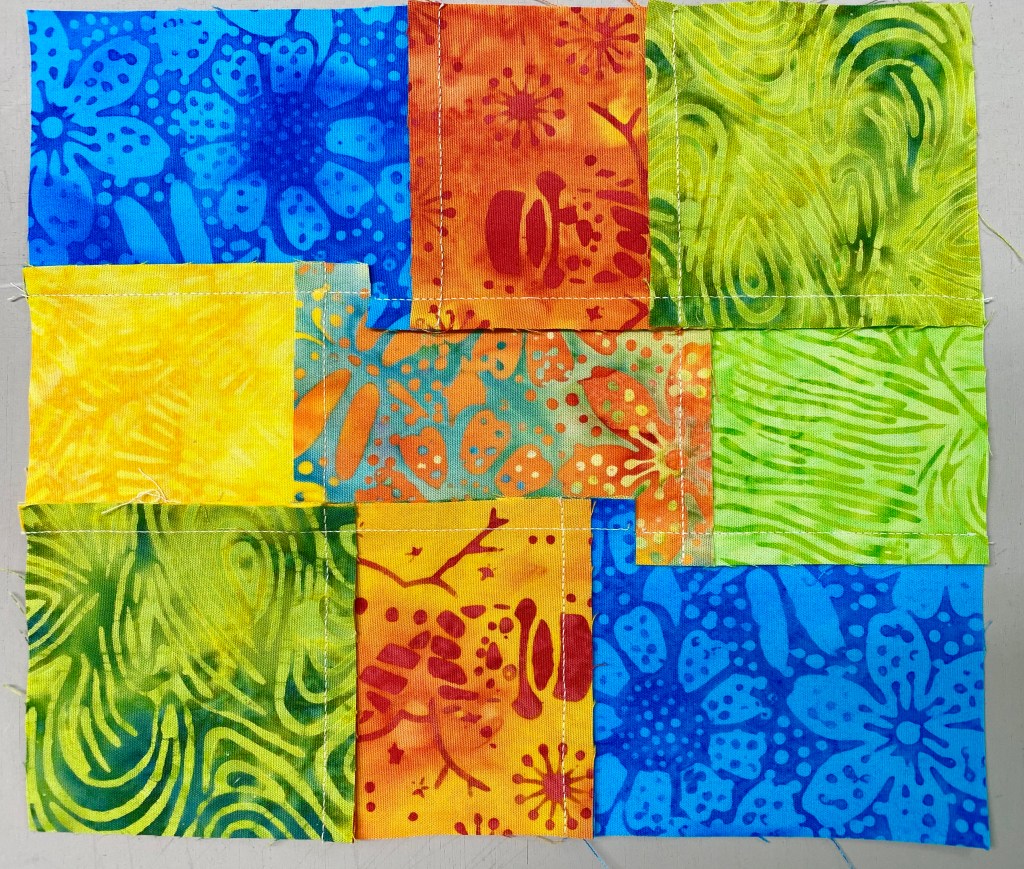
Before you press, you will need to snip the seam allowance in two places as shown. Press each half of the unit as shown. (See down loadable lesson and/or Shaded Nine Patch Technique Sheet for detailed description.)
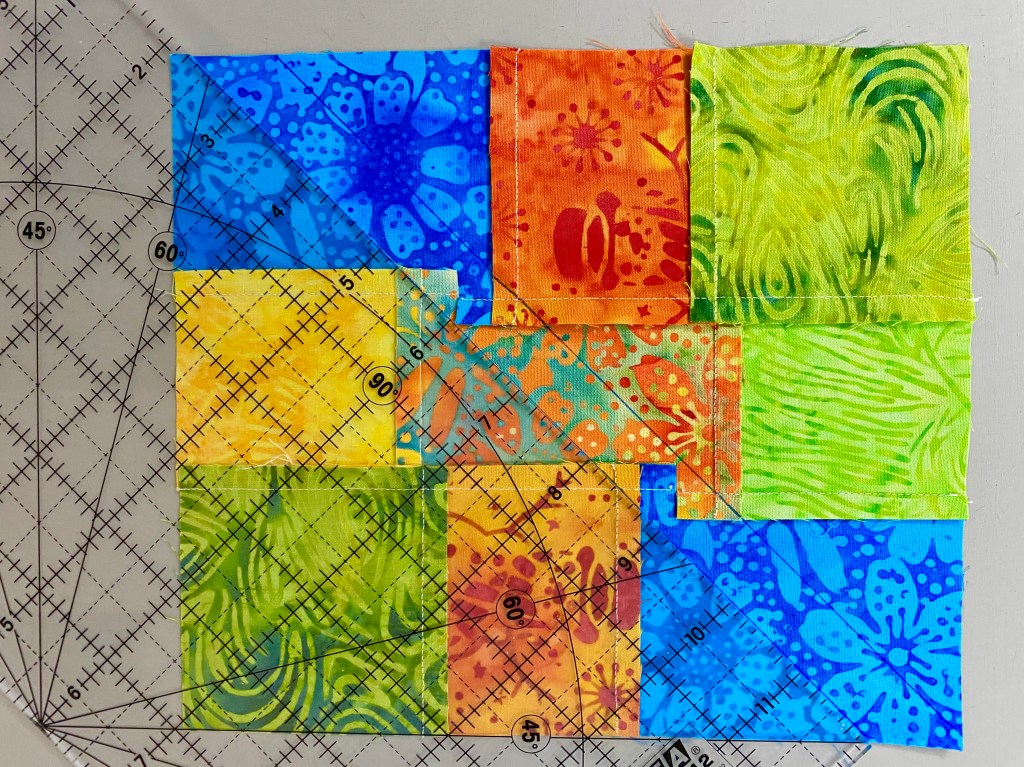
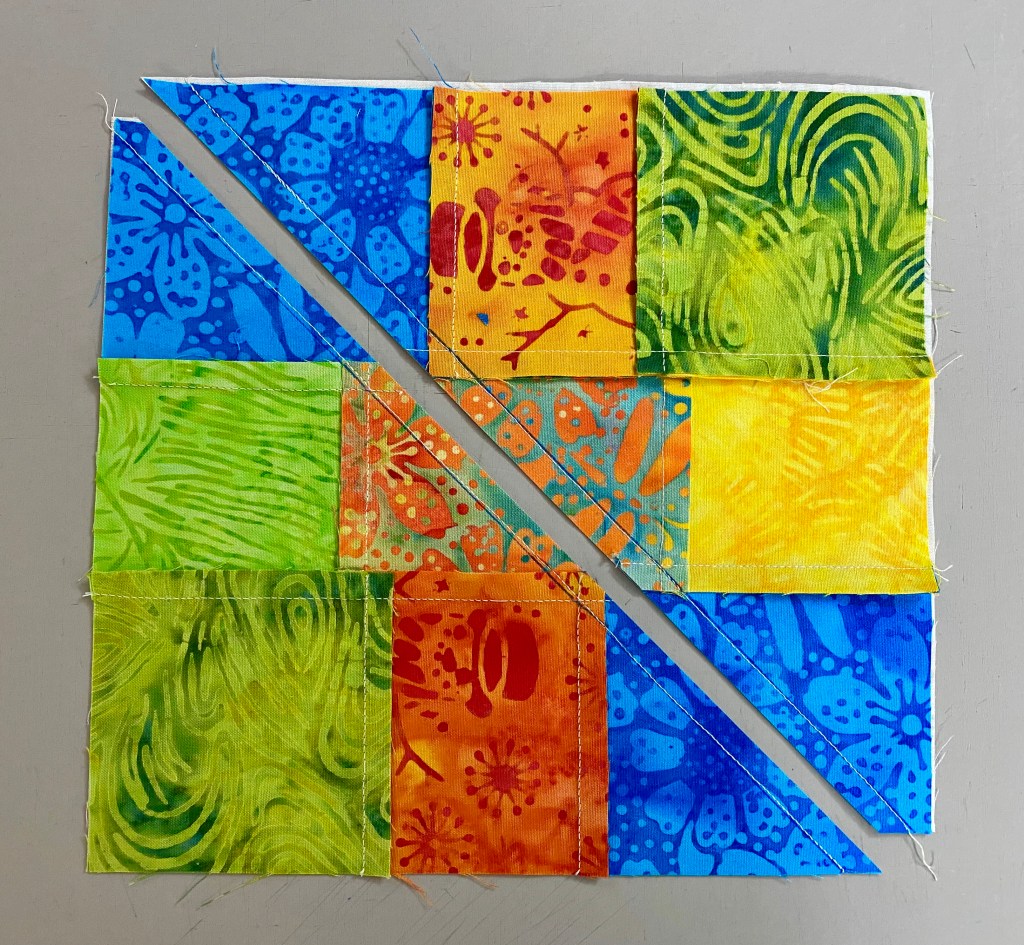
Step 4 – Select a ruler with a long 45 degree angle marked on it. The edge of your ruler needs to be at least as long as the diagonal of the unit. Place you’re your sewn rectangle right side down, horizontally on your work surface and draw a 45 degree line from top to bottom, through the corners of the squares labeled 2 and 4 where the stitching lines meet.

Draw a second 45 degree line through the corner of the other position 2 and 4 squares.
Step 5 – Center each marked unit over a large rectangle, right sides together. They may not be exactly the same size.

Step 6 – Stitch on both of the marked sewing lines. Cut apart.
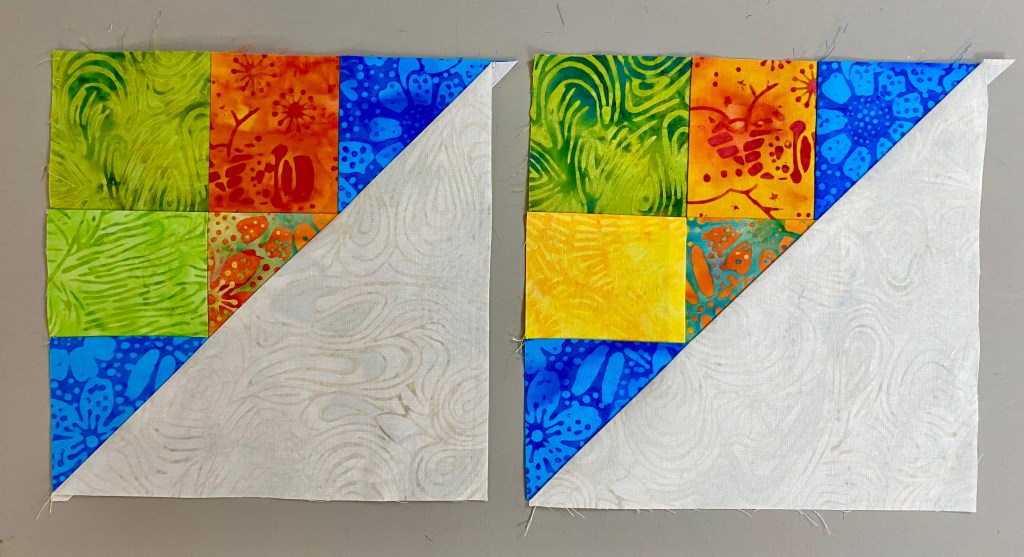
Press toward the large triangle. Remember: “Whatever your are pressing toward, goes on top!”

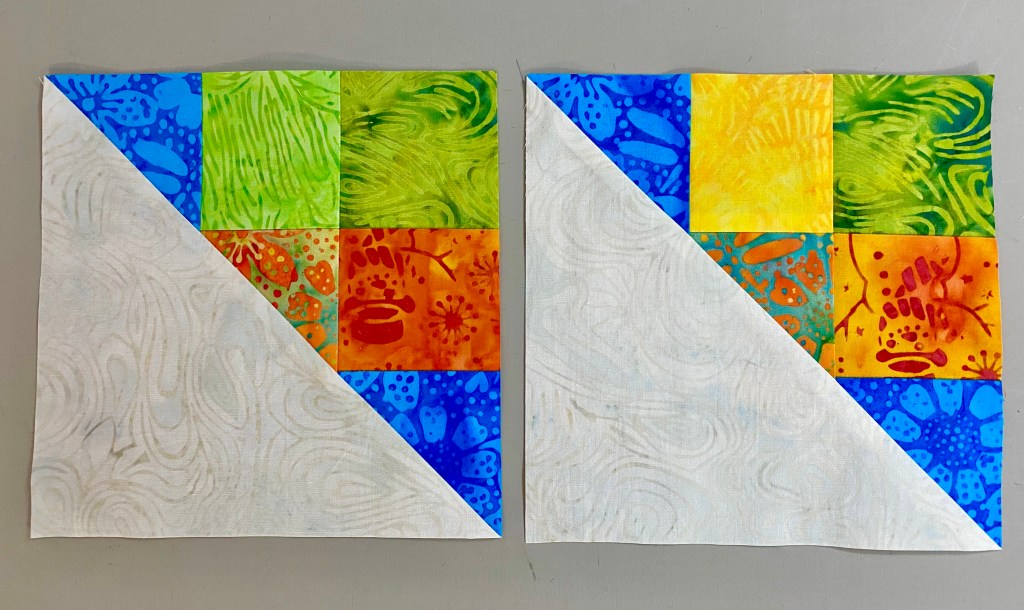
Step 7 – Position the 6 ½” sizing diagonal of your Tucker Trimmer on the unit so that it lines up with the diagonal seam line of the Shaded Nine Patch. Position the common diagonal so it passes through the center of position 1 square. Trim your first two sides.
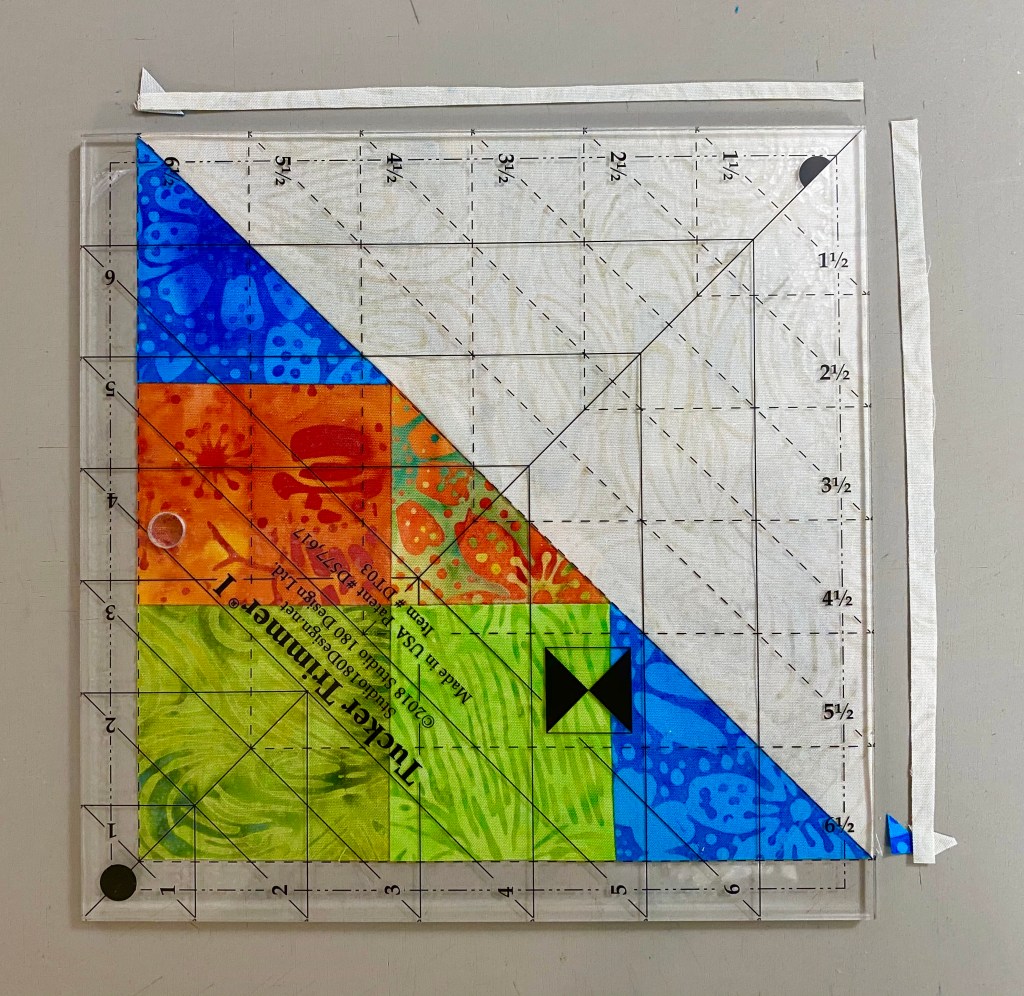
Step 8 – Rotate the unit and line up the 6 ½” size lines on the Tucker Trimmer with the trimmed raw edges. Adjust as needed. Trim both sides.
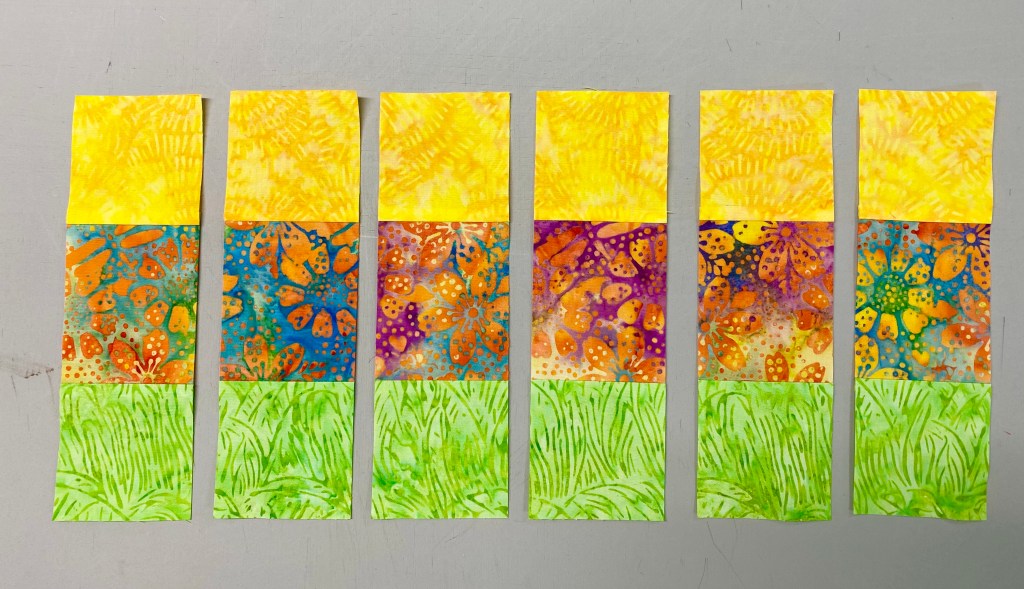
Make five more sets for a total of 12 blocks.

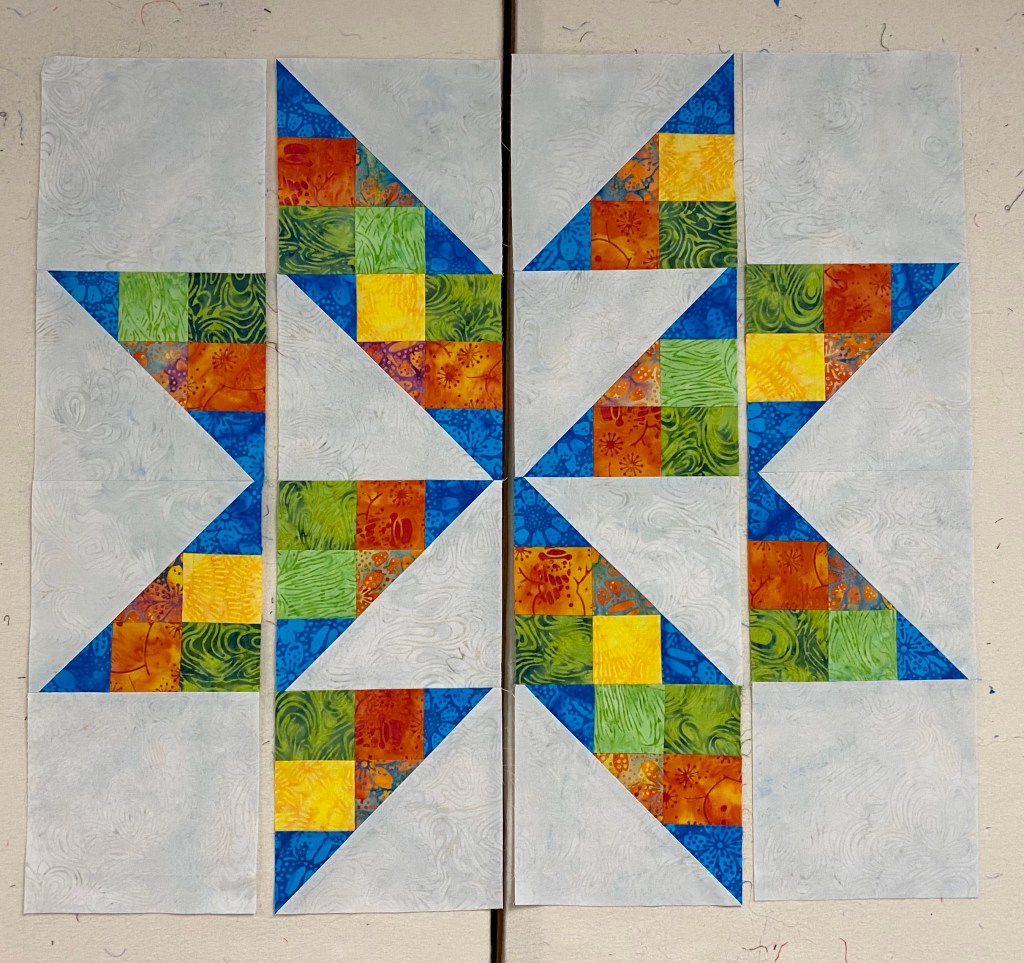
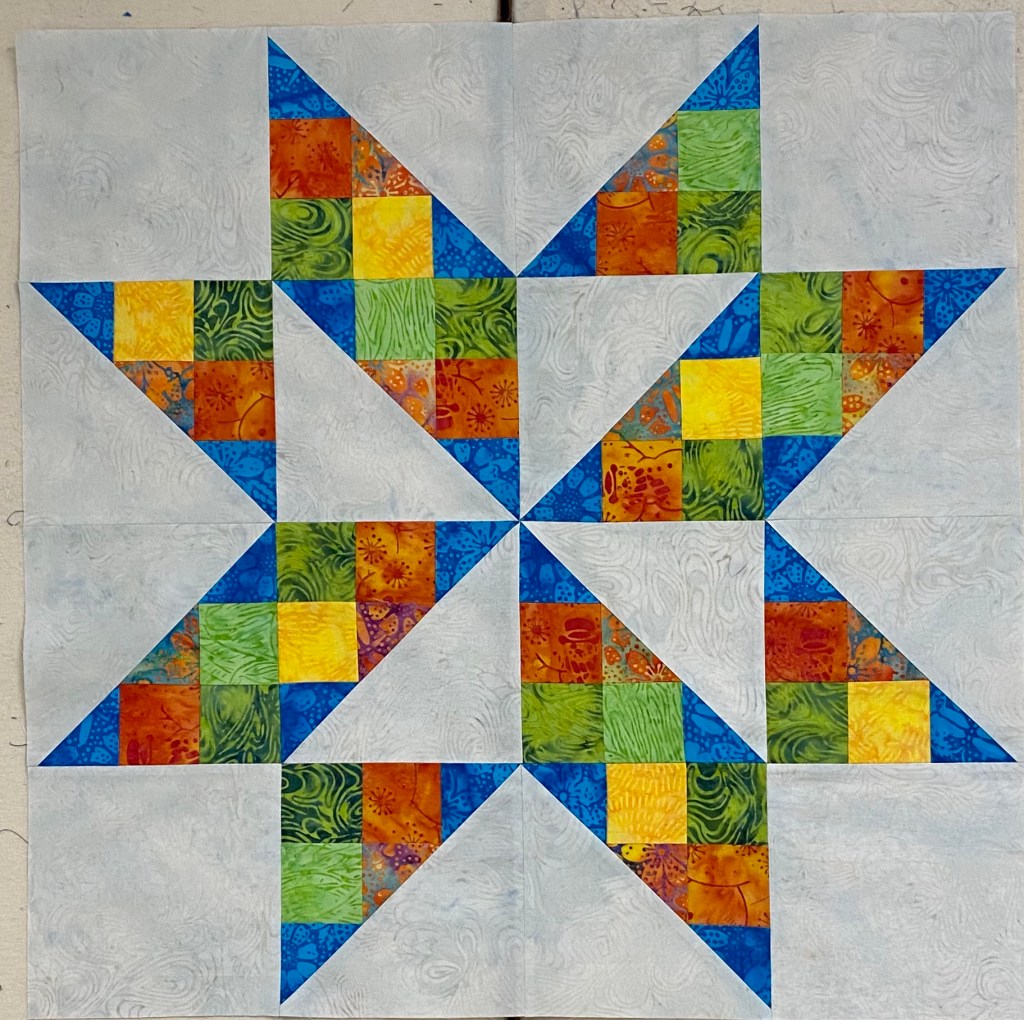
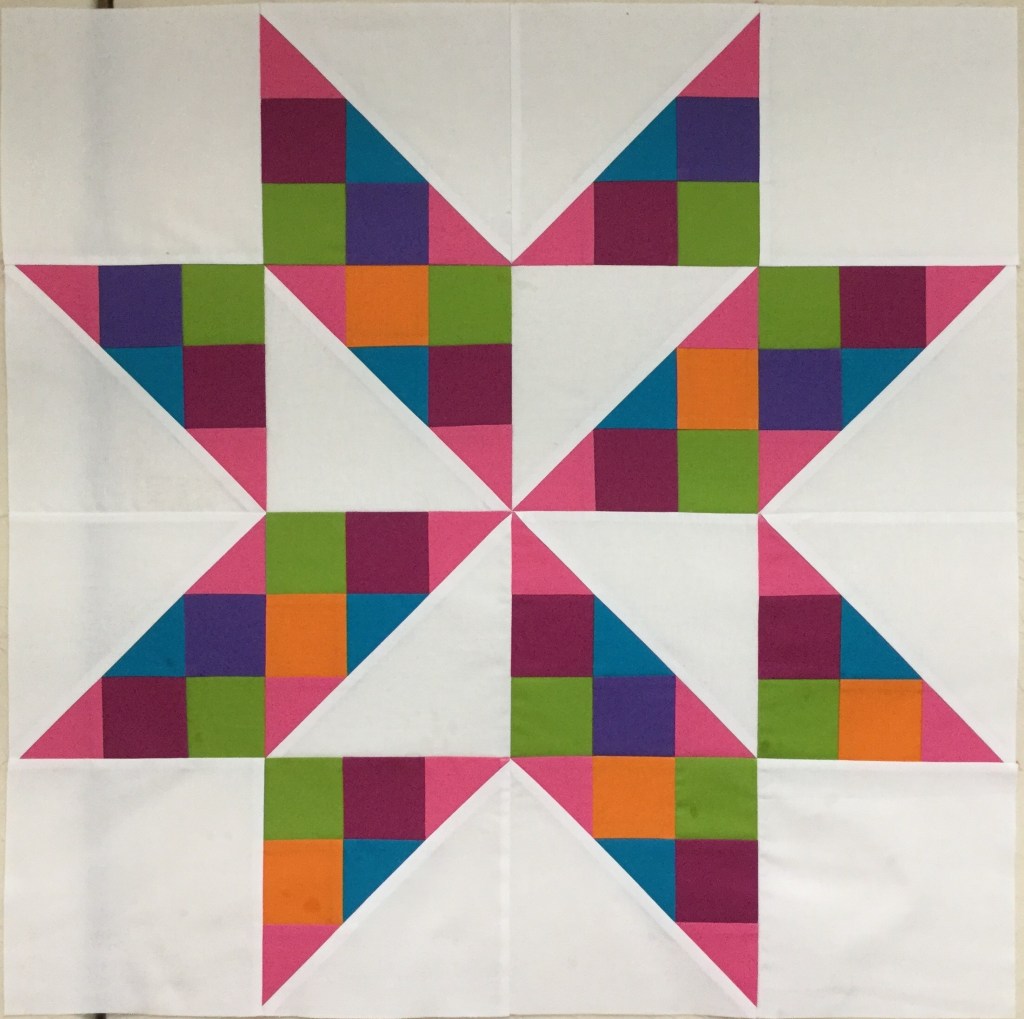
Take your 12 blocks and four 6 ½” background corner squares & layout your star. Stitch into rows, press seam open. Join your rows, press seams open.
Please see the down loadable lesson plan to complete your Shaded Nine Patch Star.

Miss gal! I am making this tonight. Got out all my Tucker rulers😍. I may repeat another set of blocks to make it bigger. TQG misses you.
LikeLike
Thank you Carol 💕
LikeLike
How beautiful this is. 😊🤗
Sent from my iPhone
>
LikeLike
Thank you Marlene 💕
LikeLike
Thank you!
On Thu, Apr 2, 2020, 4:20 PM If These Threads Could Talk wrote:
> ifthesethreadscouldtalk posted: ” I was scheduled to teach the Shaded Nine > Patch Star to the Thread Bears Quilter’s Guild of Sherill, NY in May. But > as it doesn’t look like I will be able to, so I am going to teach it here. > This star was designed by Studio 180 Design Certified In” >
LikeLike
You are welcome!
LikeLike