I love Christmas Tree quilts. I wanted to try making one with the Studio 180 Design V Block Tool. It was pretty easy.
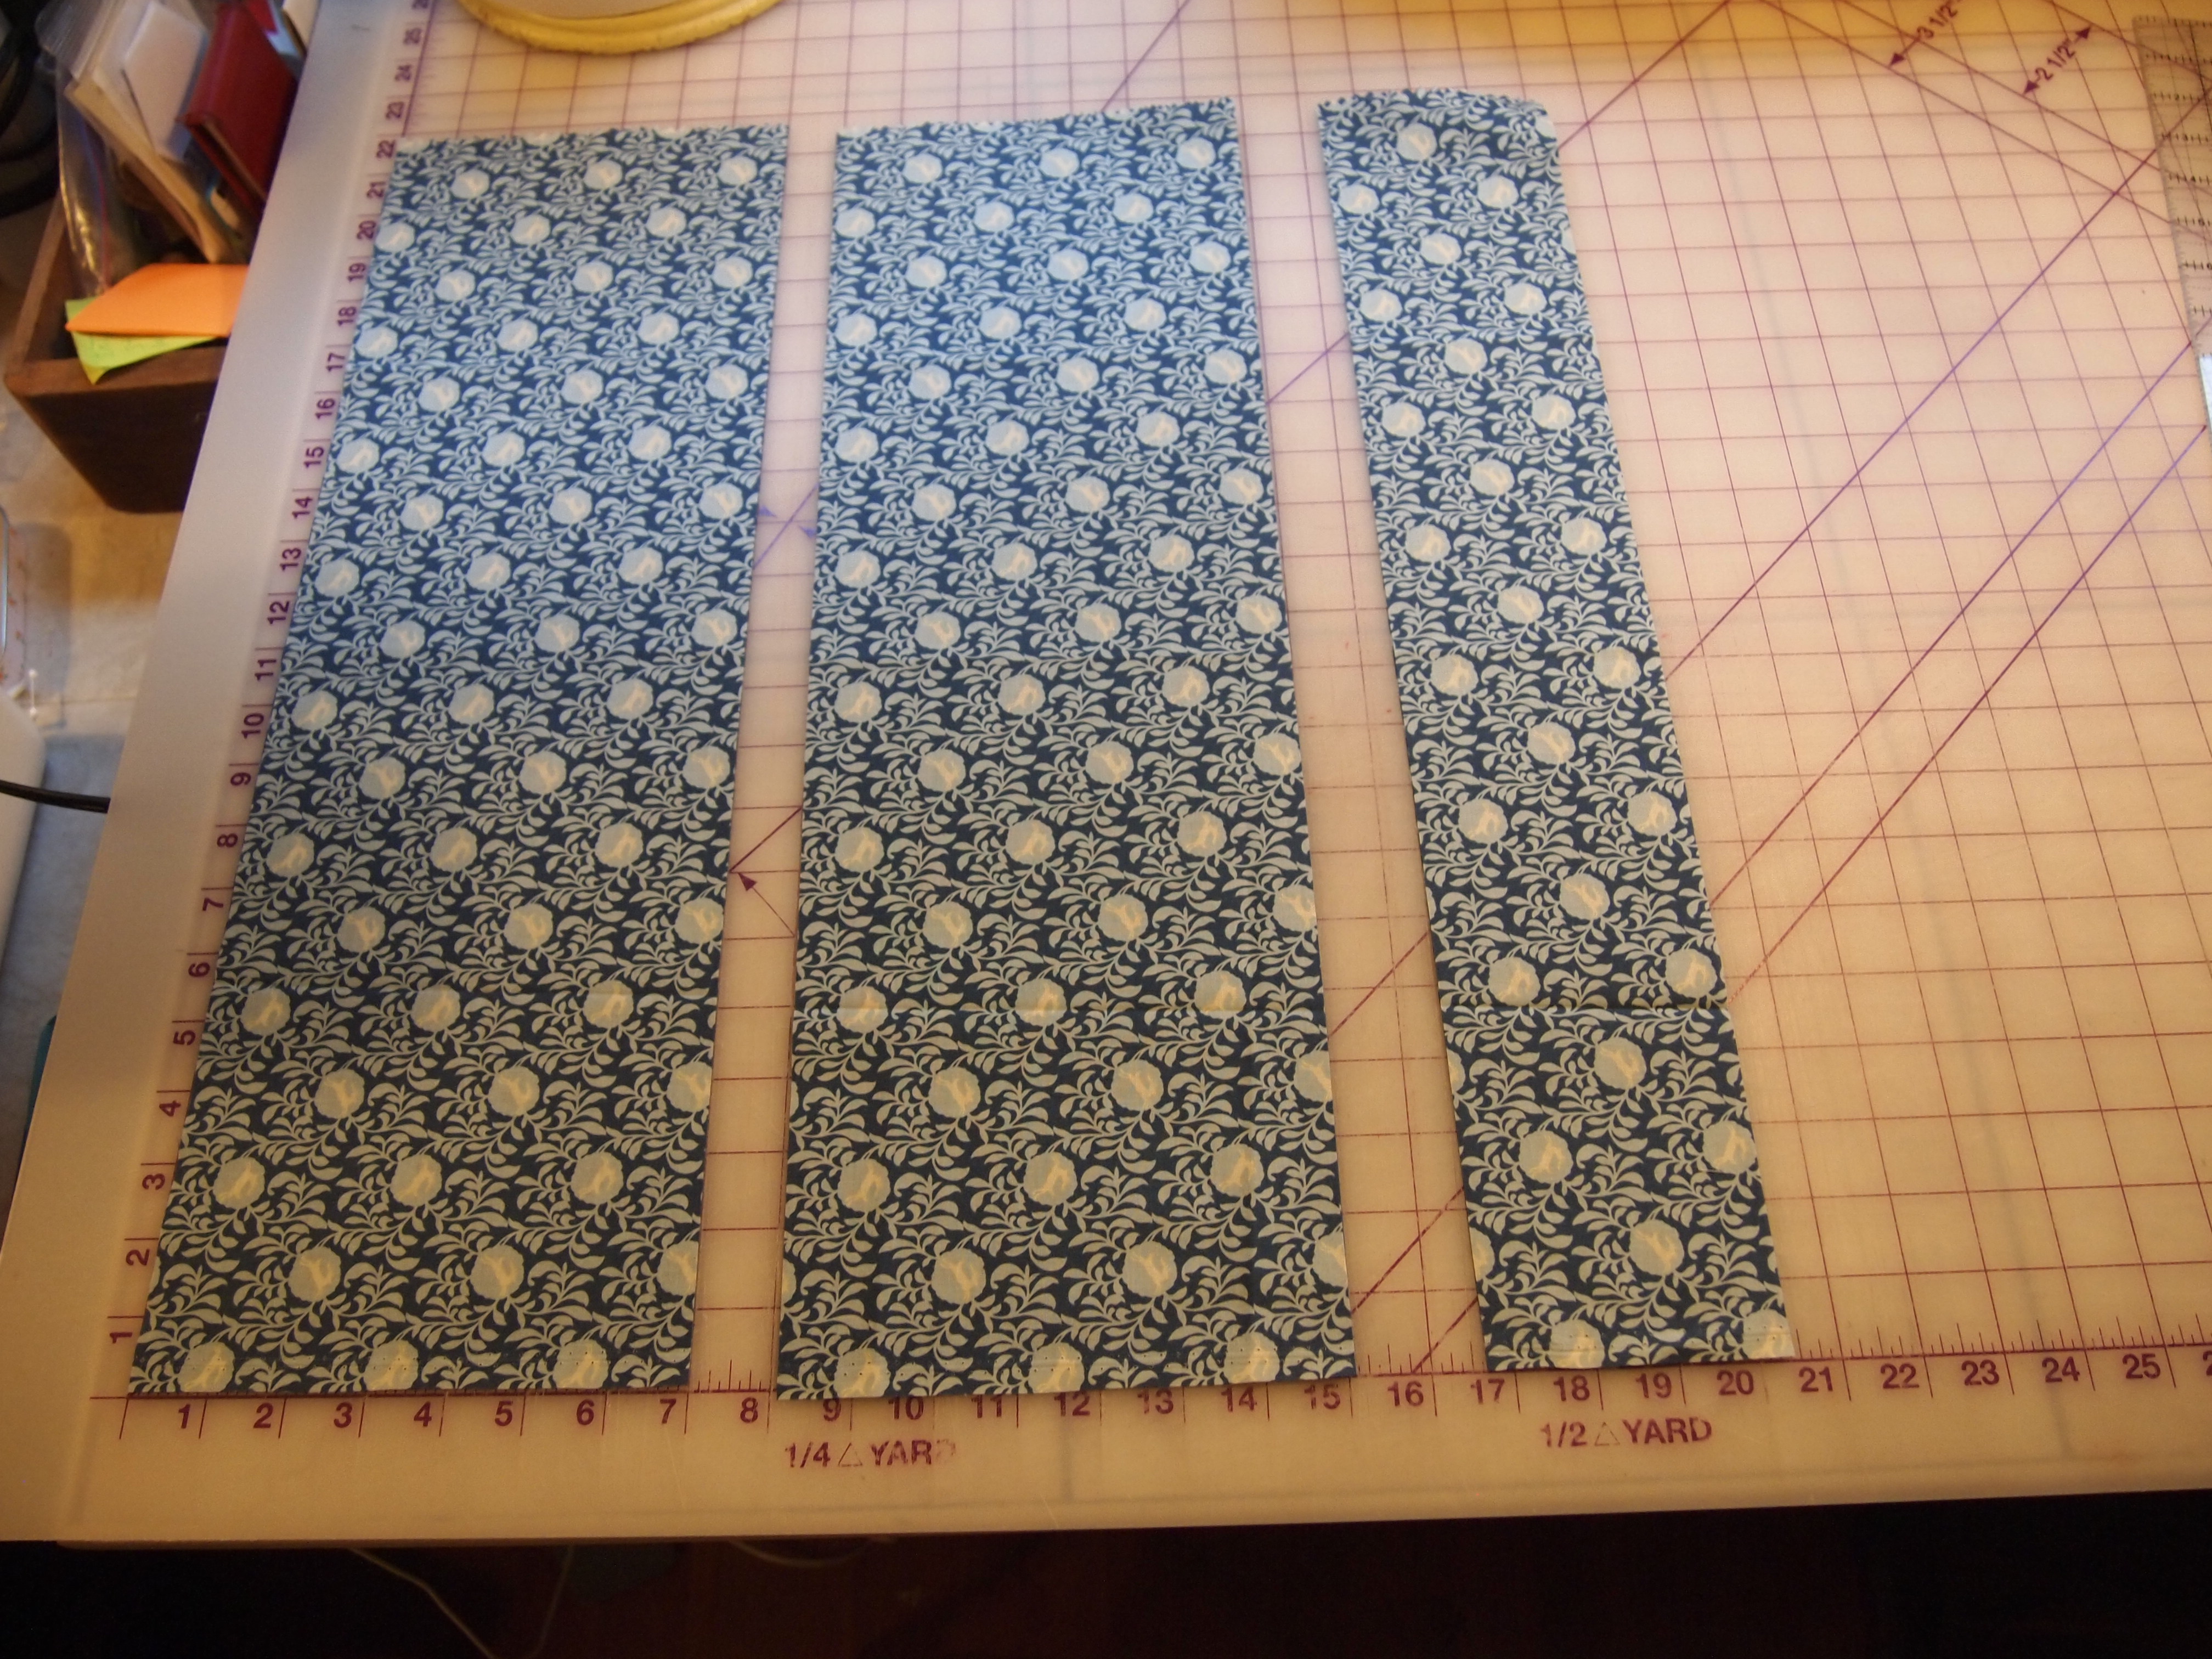
I started with 9 Christmas fat quarters, 3 green, 3 red and 3 blue. I decided to make 6” blocks, so per the directions on the V Block tool I layered 3 fat quarters and cuts 7” strips.
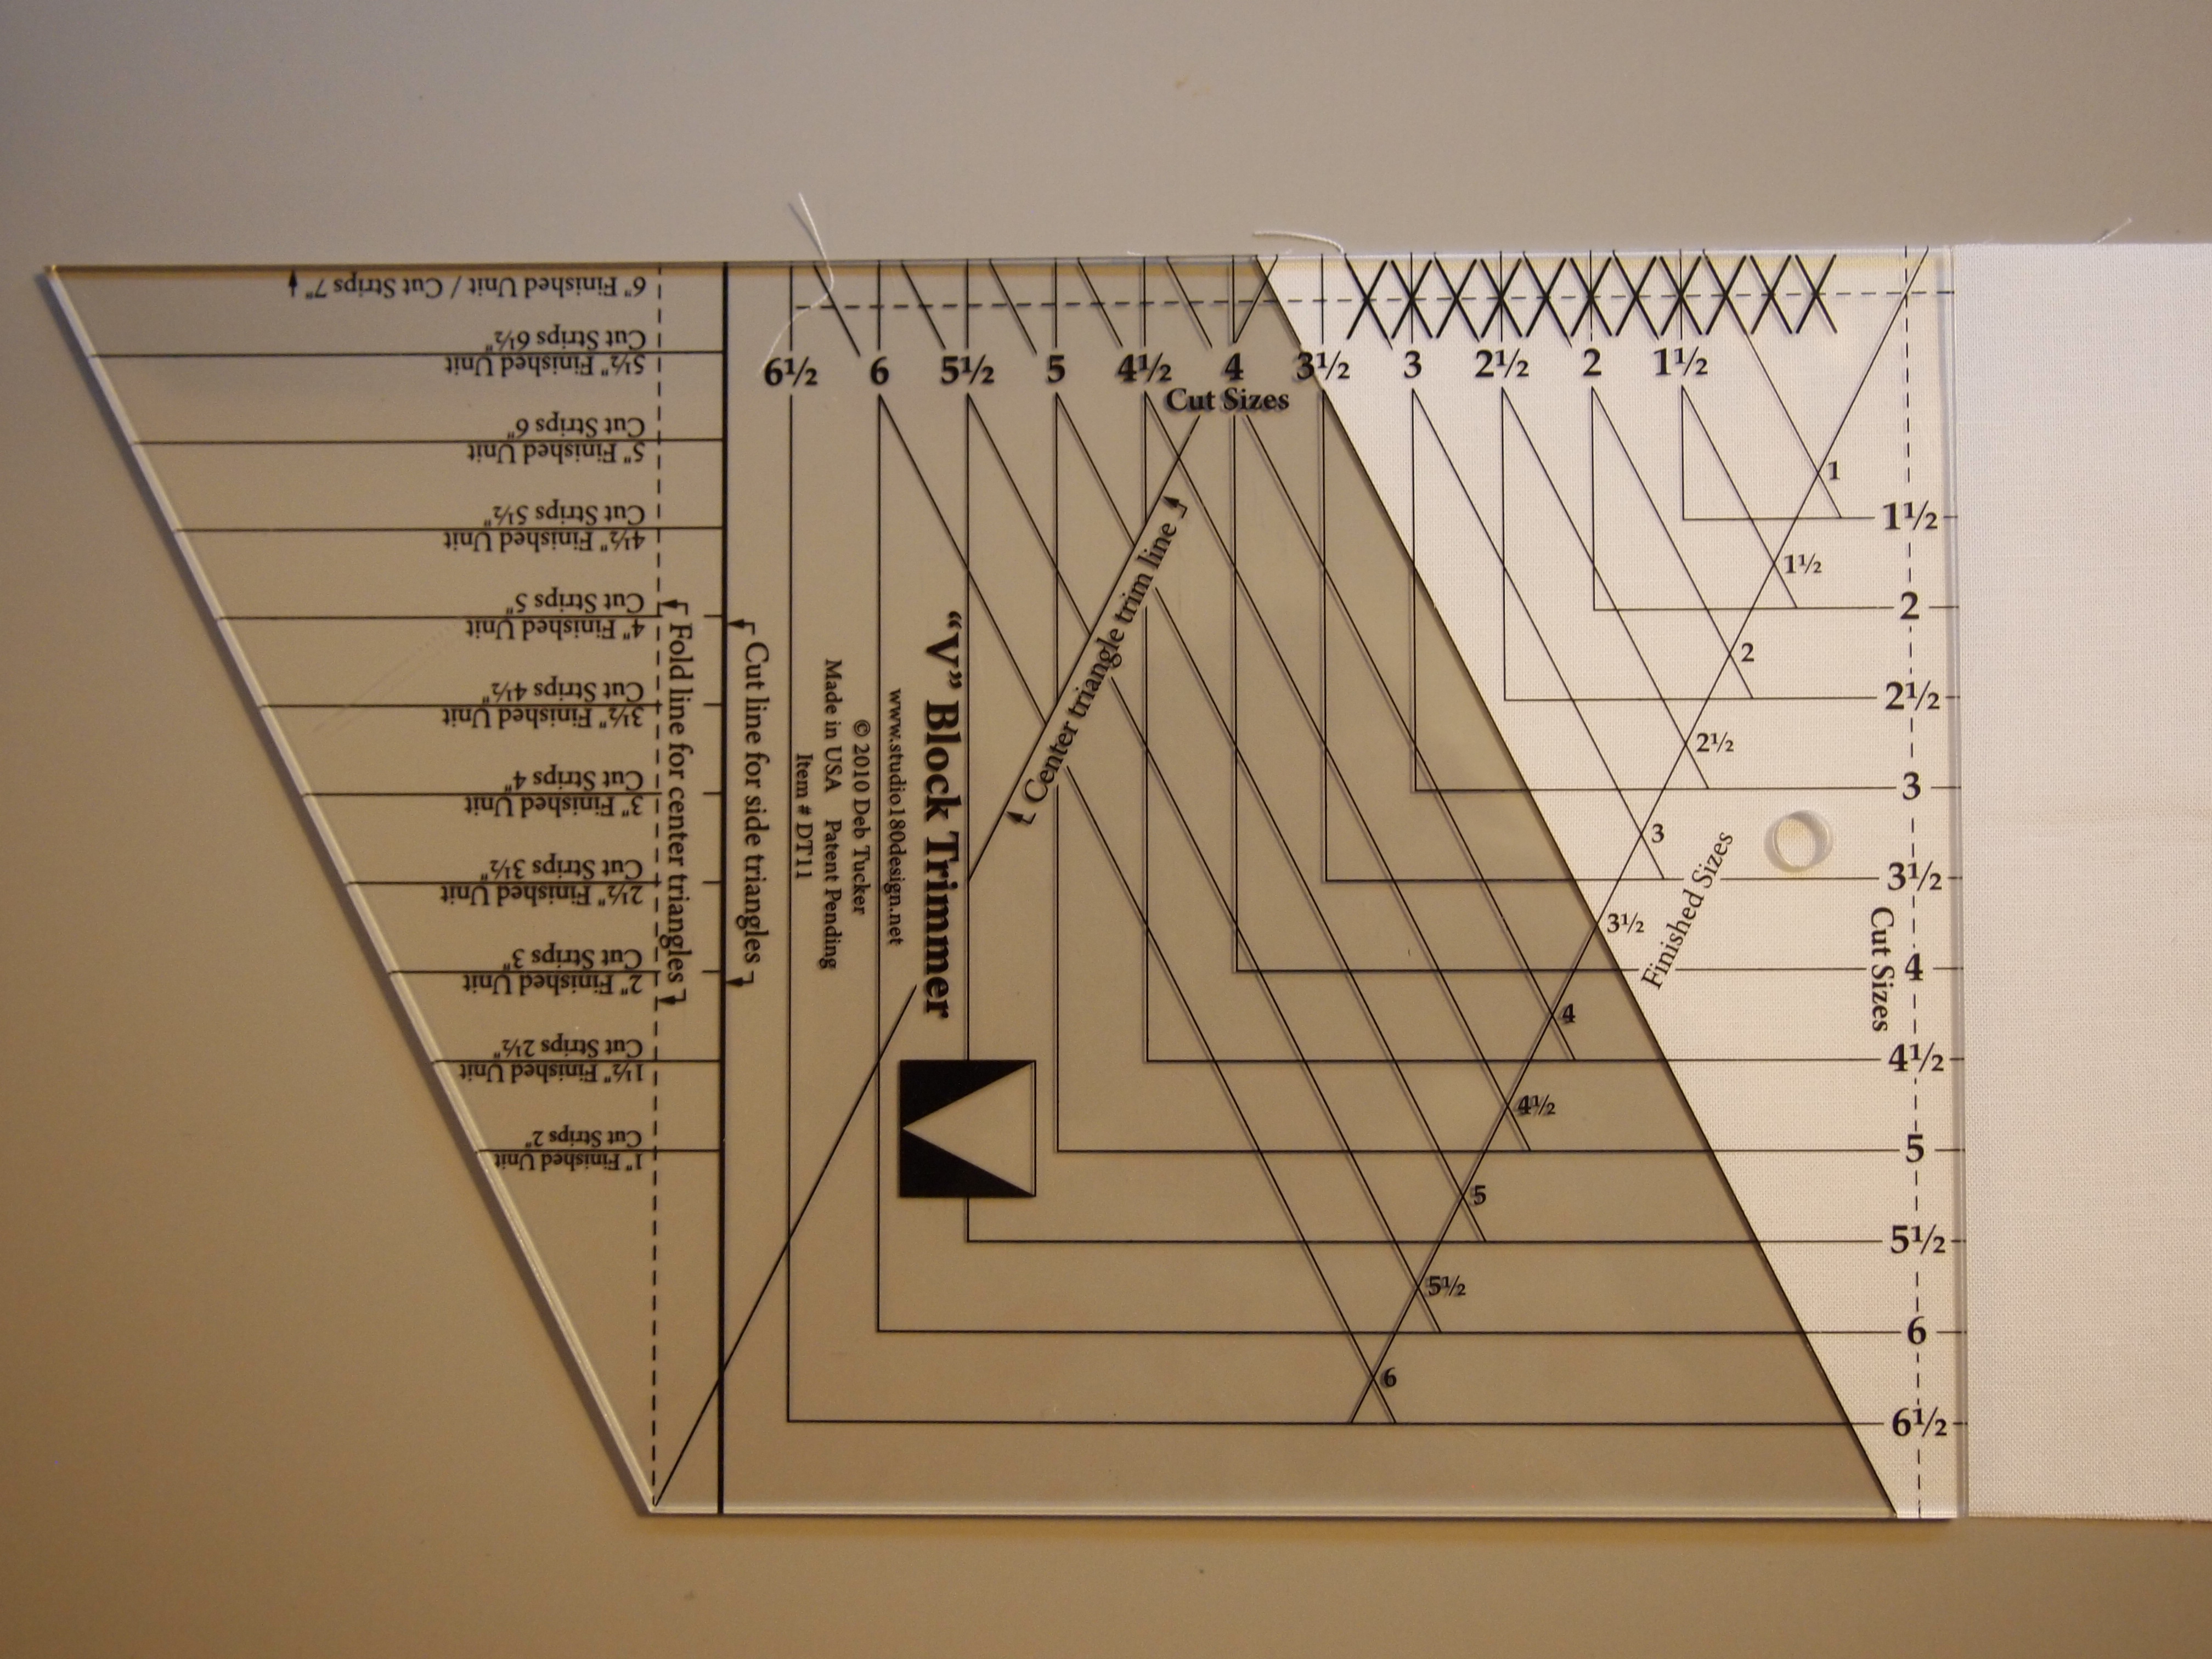
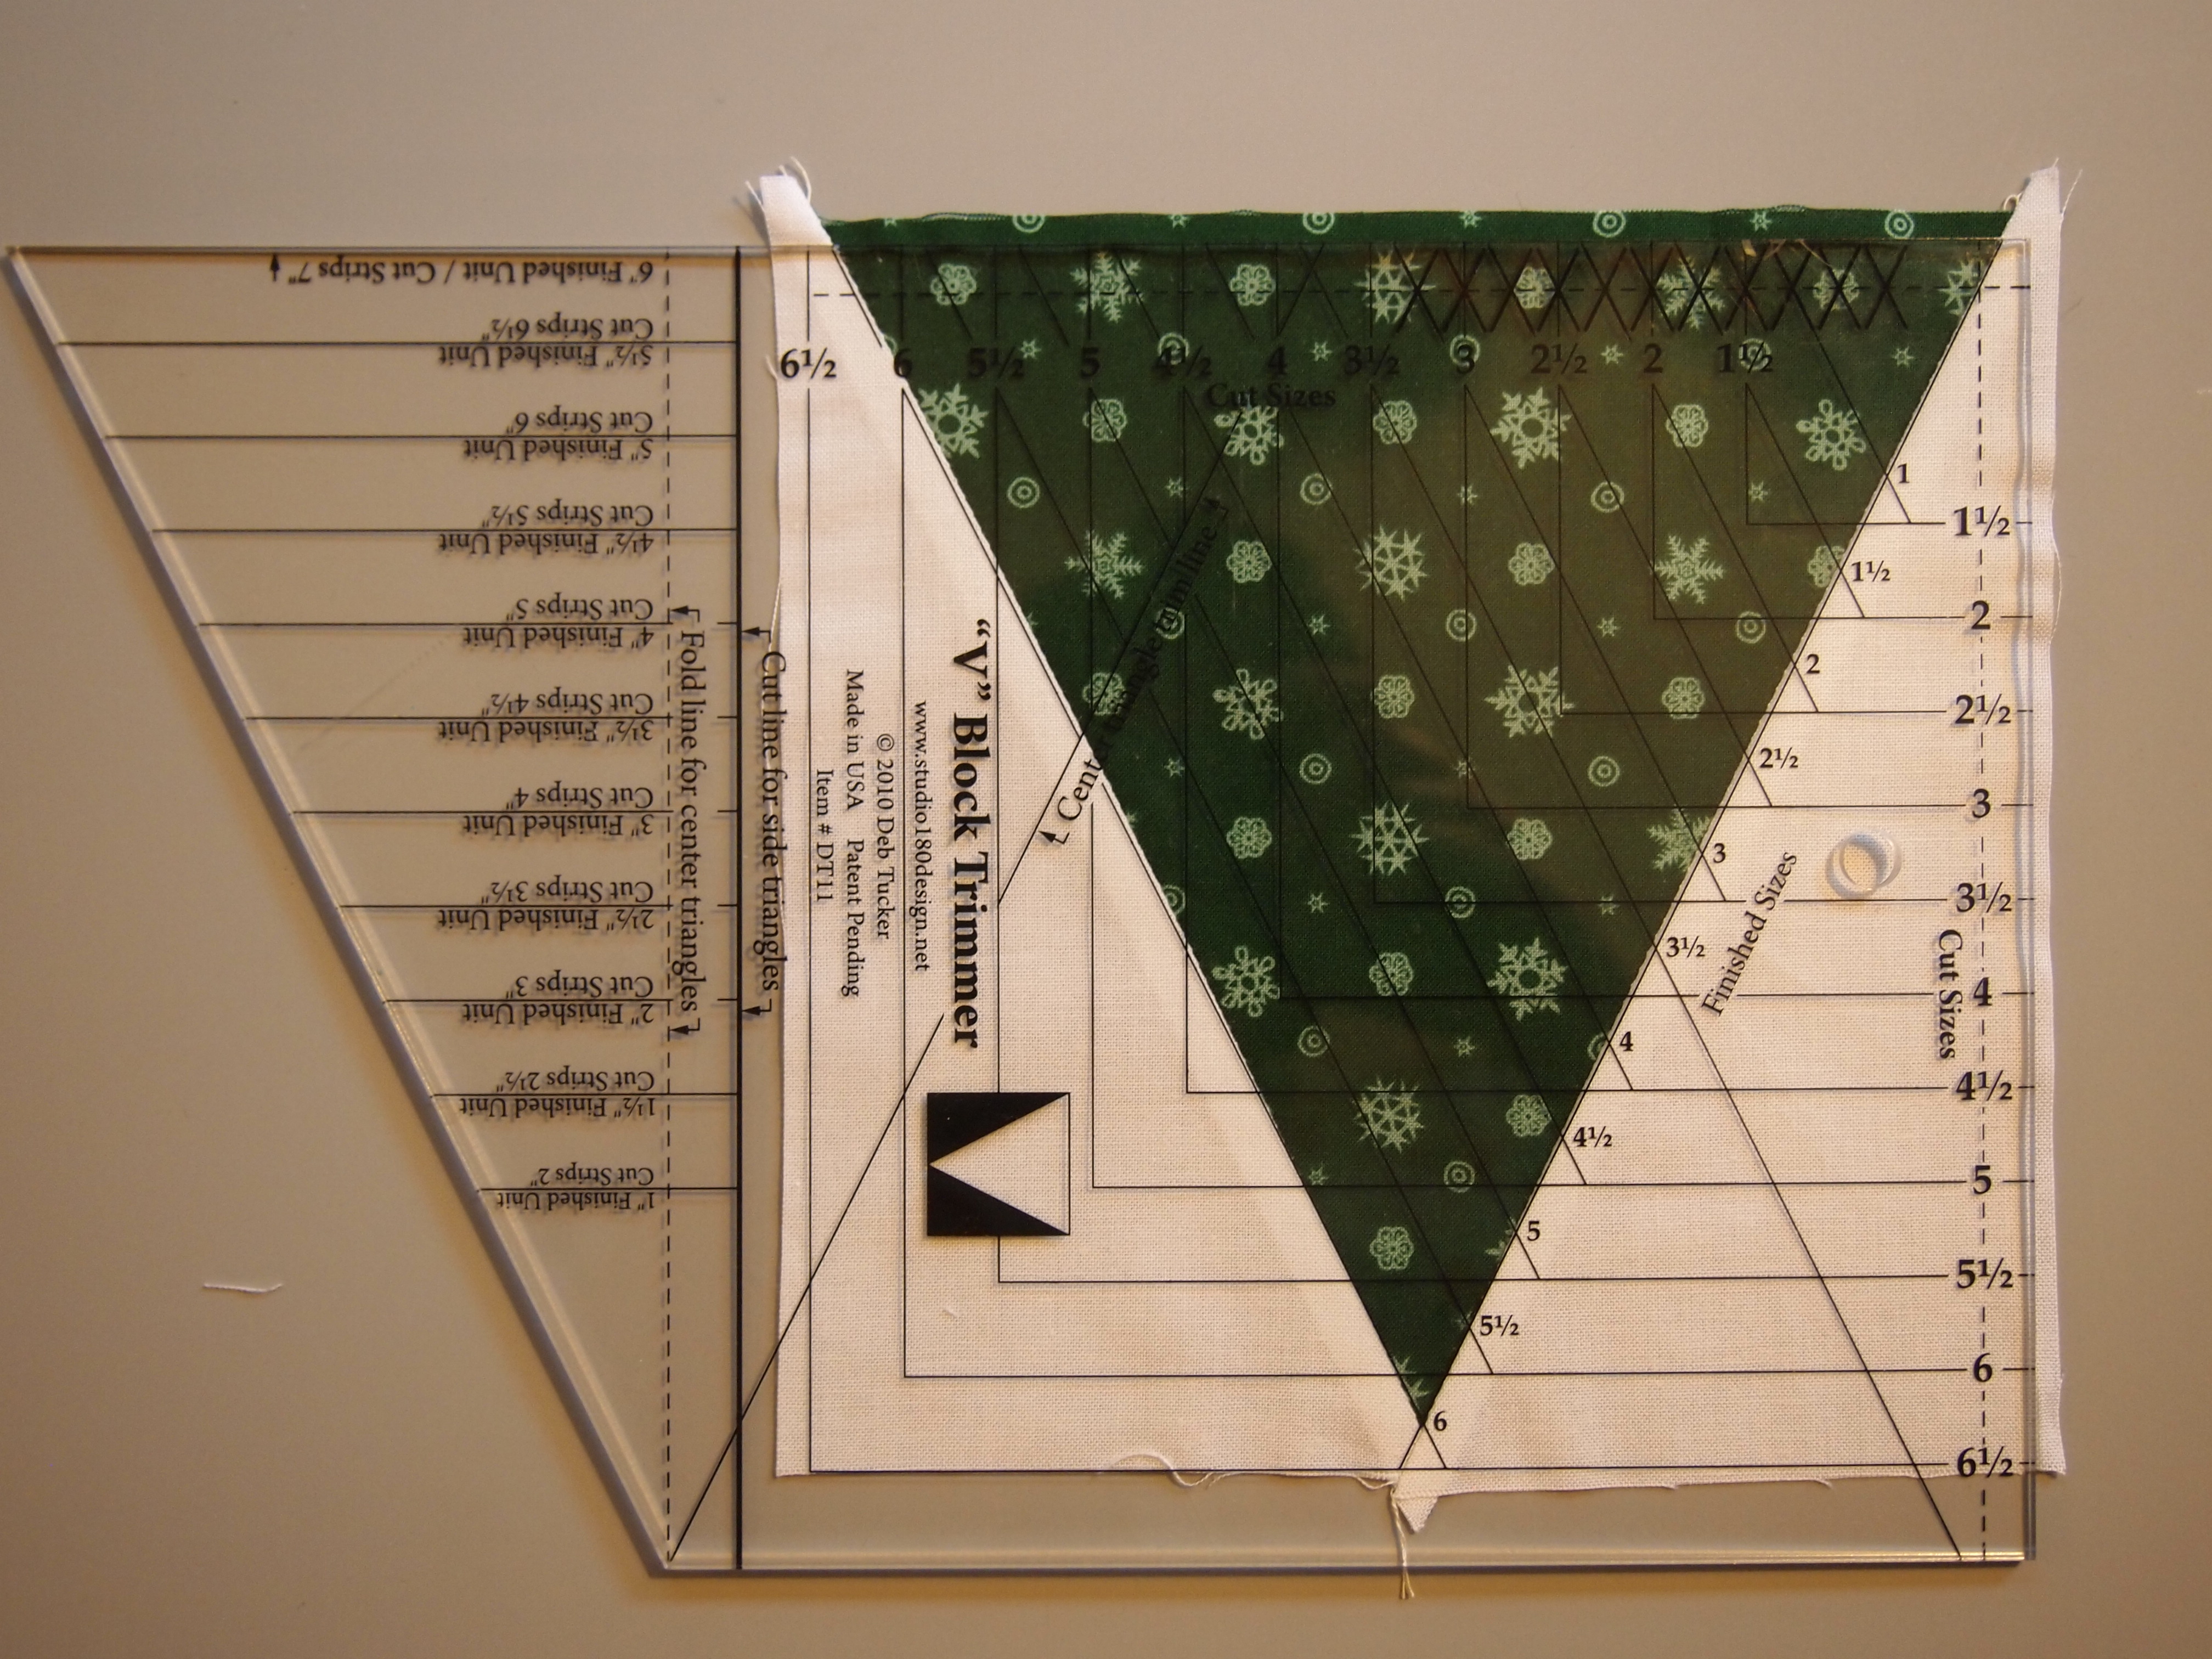
I used the V Block Tool and placed the line for the cutting the center triangles on the folded fabric.

Second cut for center triangles. Keep going until you have used up the strip.

The 9 fat quarters yielded 72 center triangles.

I used white Kona Cotton for the side triangles. It took about 1 ½ yards. Per the directions on the tool I cut 7” strips for the side triangles also. There is a line on the tool for cutting the side triangles

Rotate the tool for the second cut for side triangles, keep going until you have two side triangles for each center triangle.
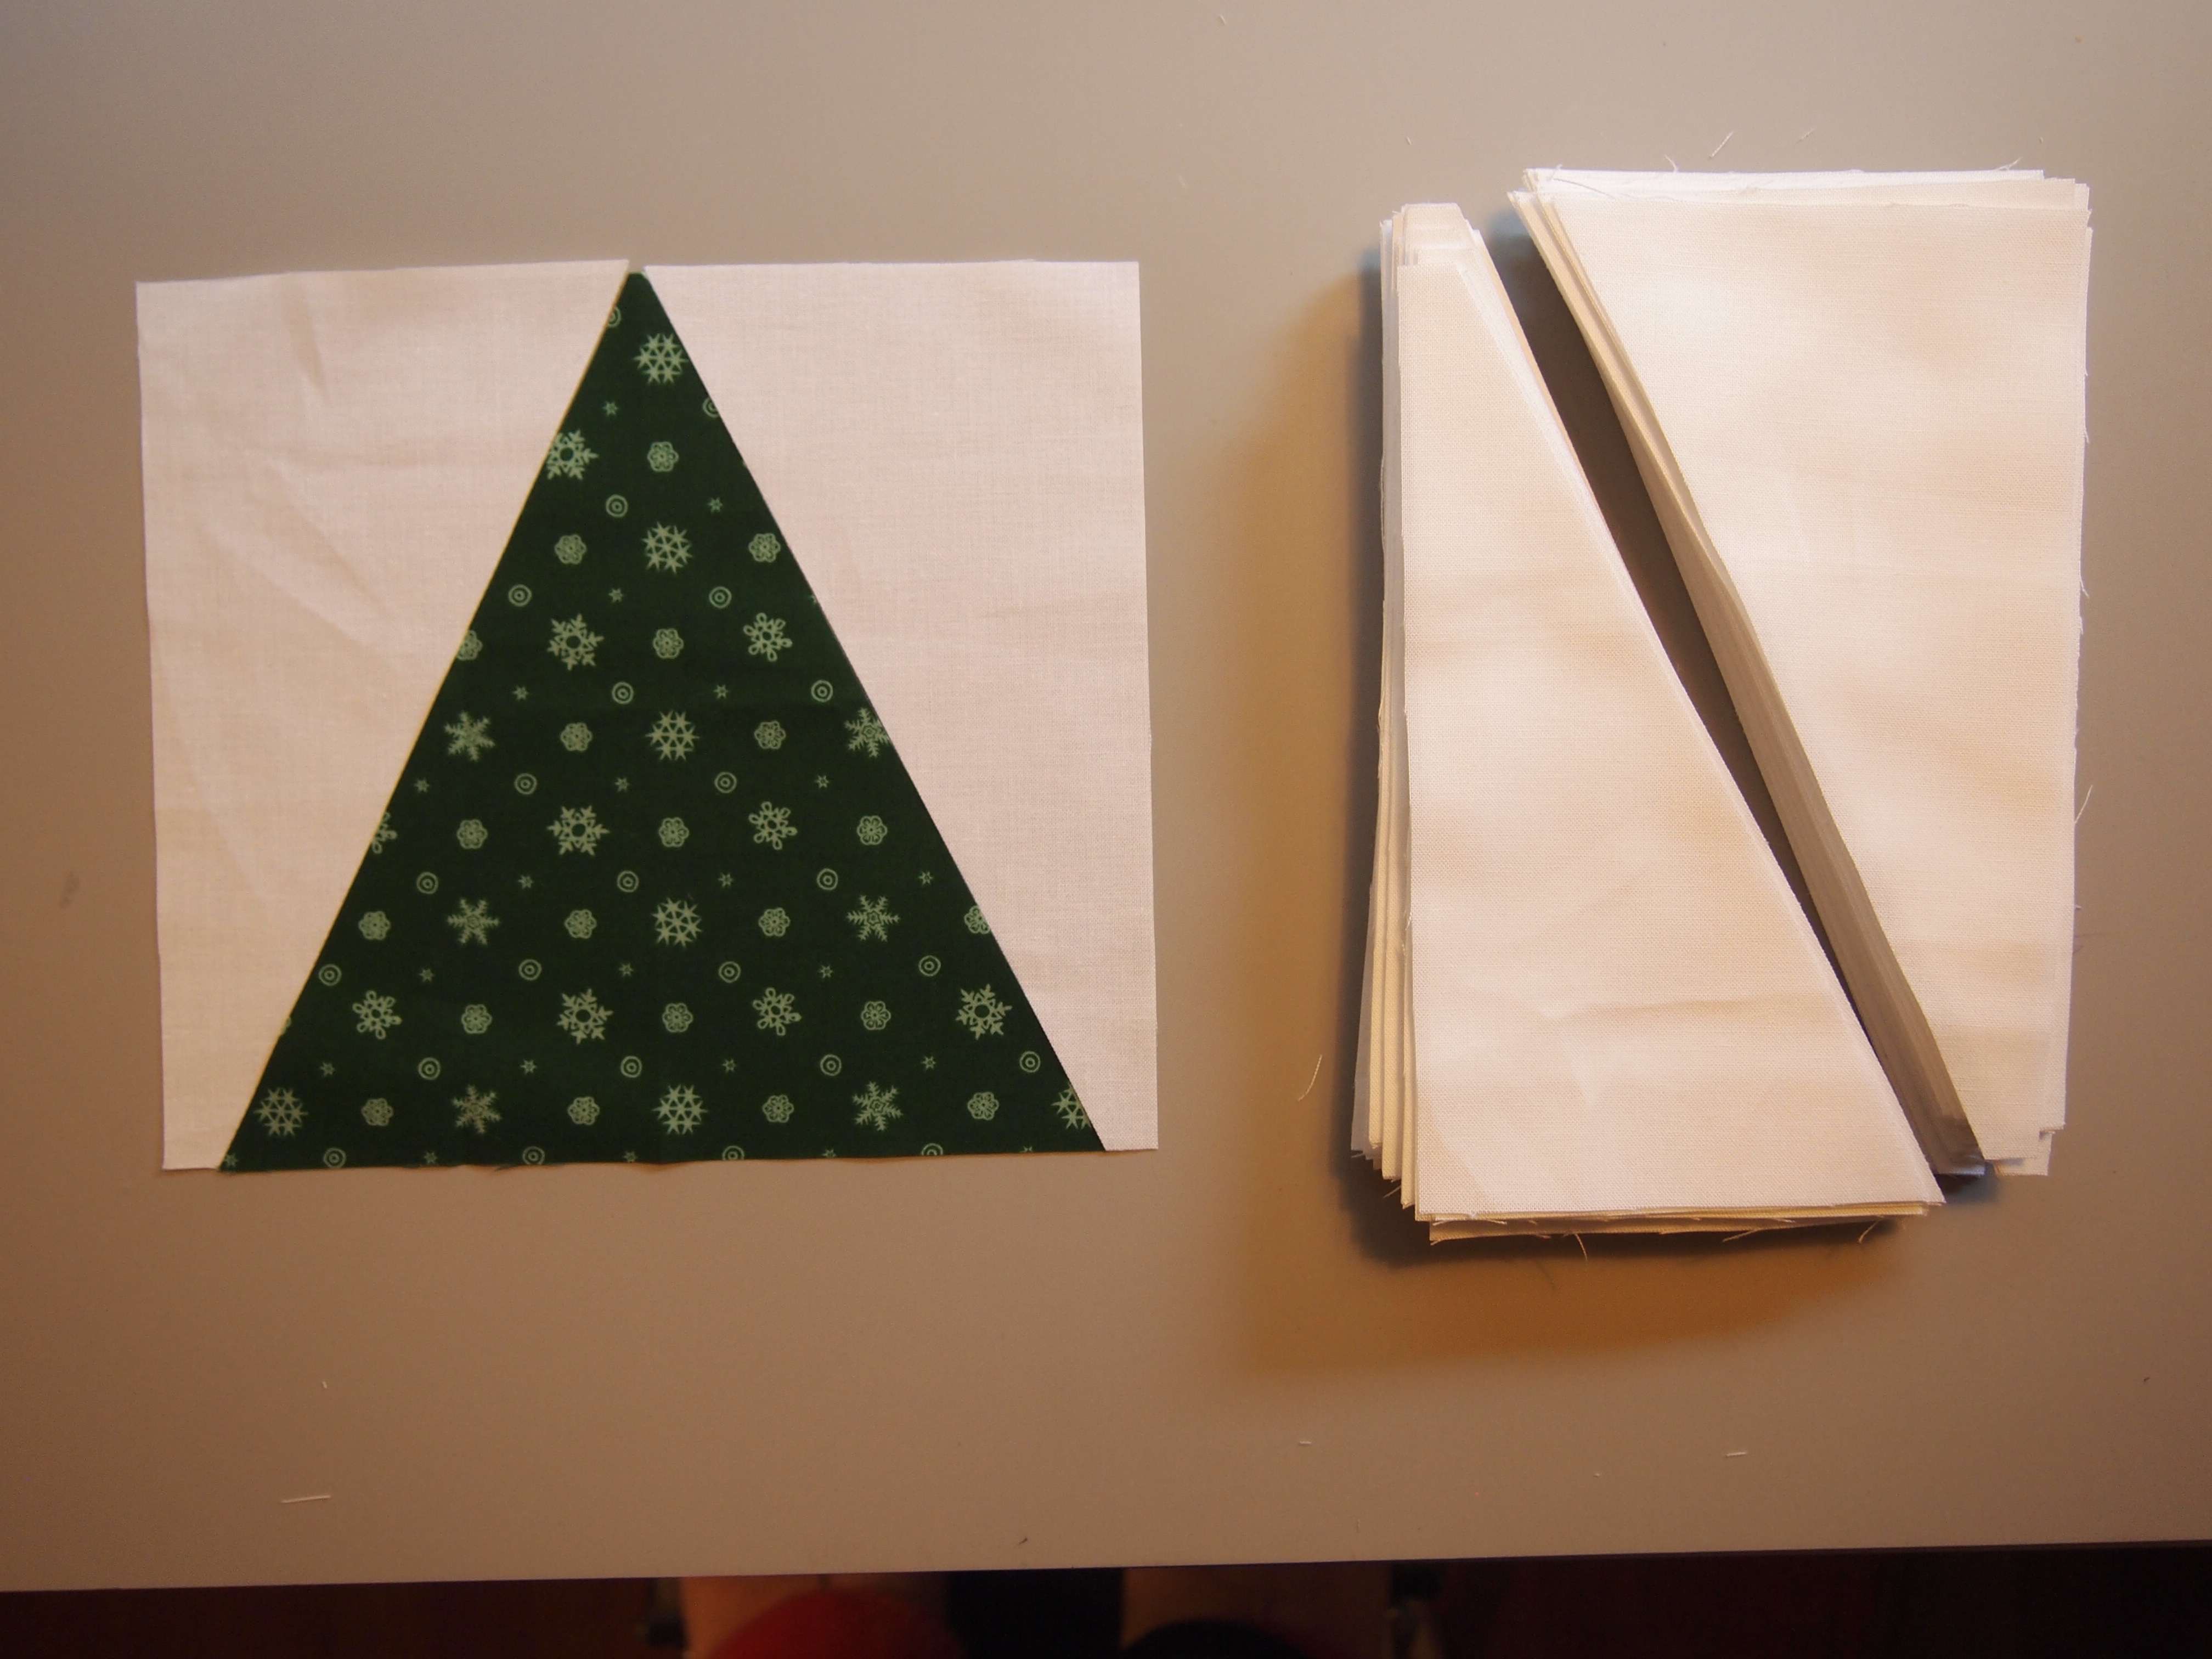
Sew on the first side triangle.

Press toward the side triangle.

Add the second triangle.

Press toward the side triangle.
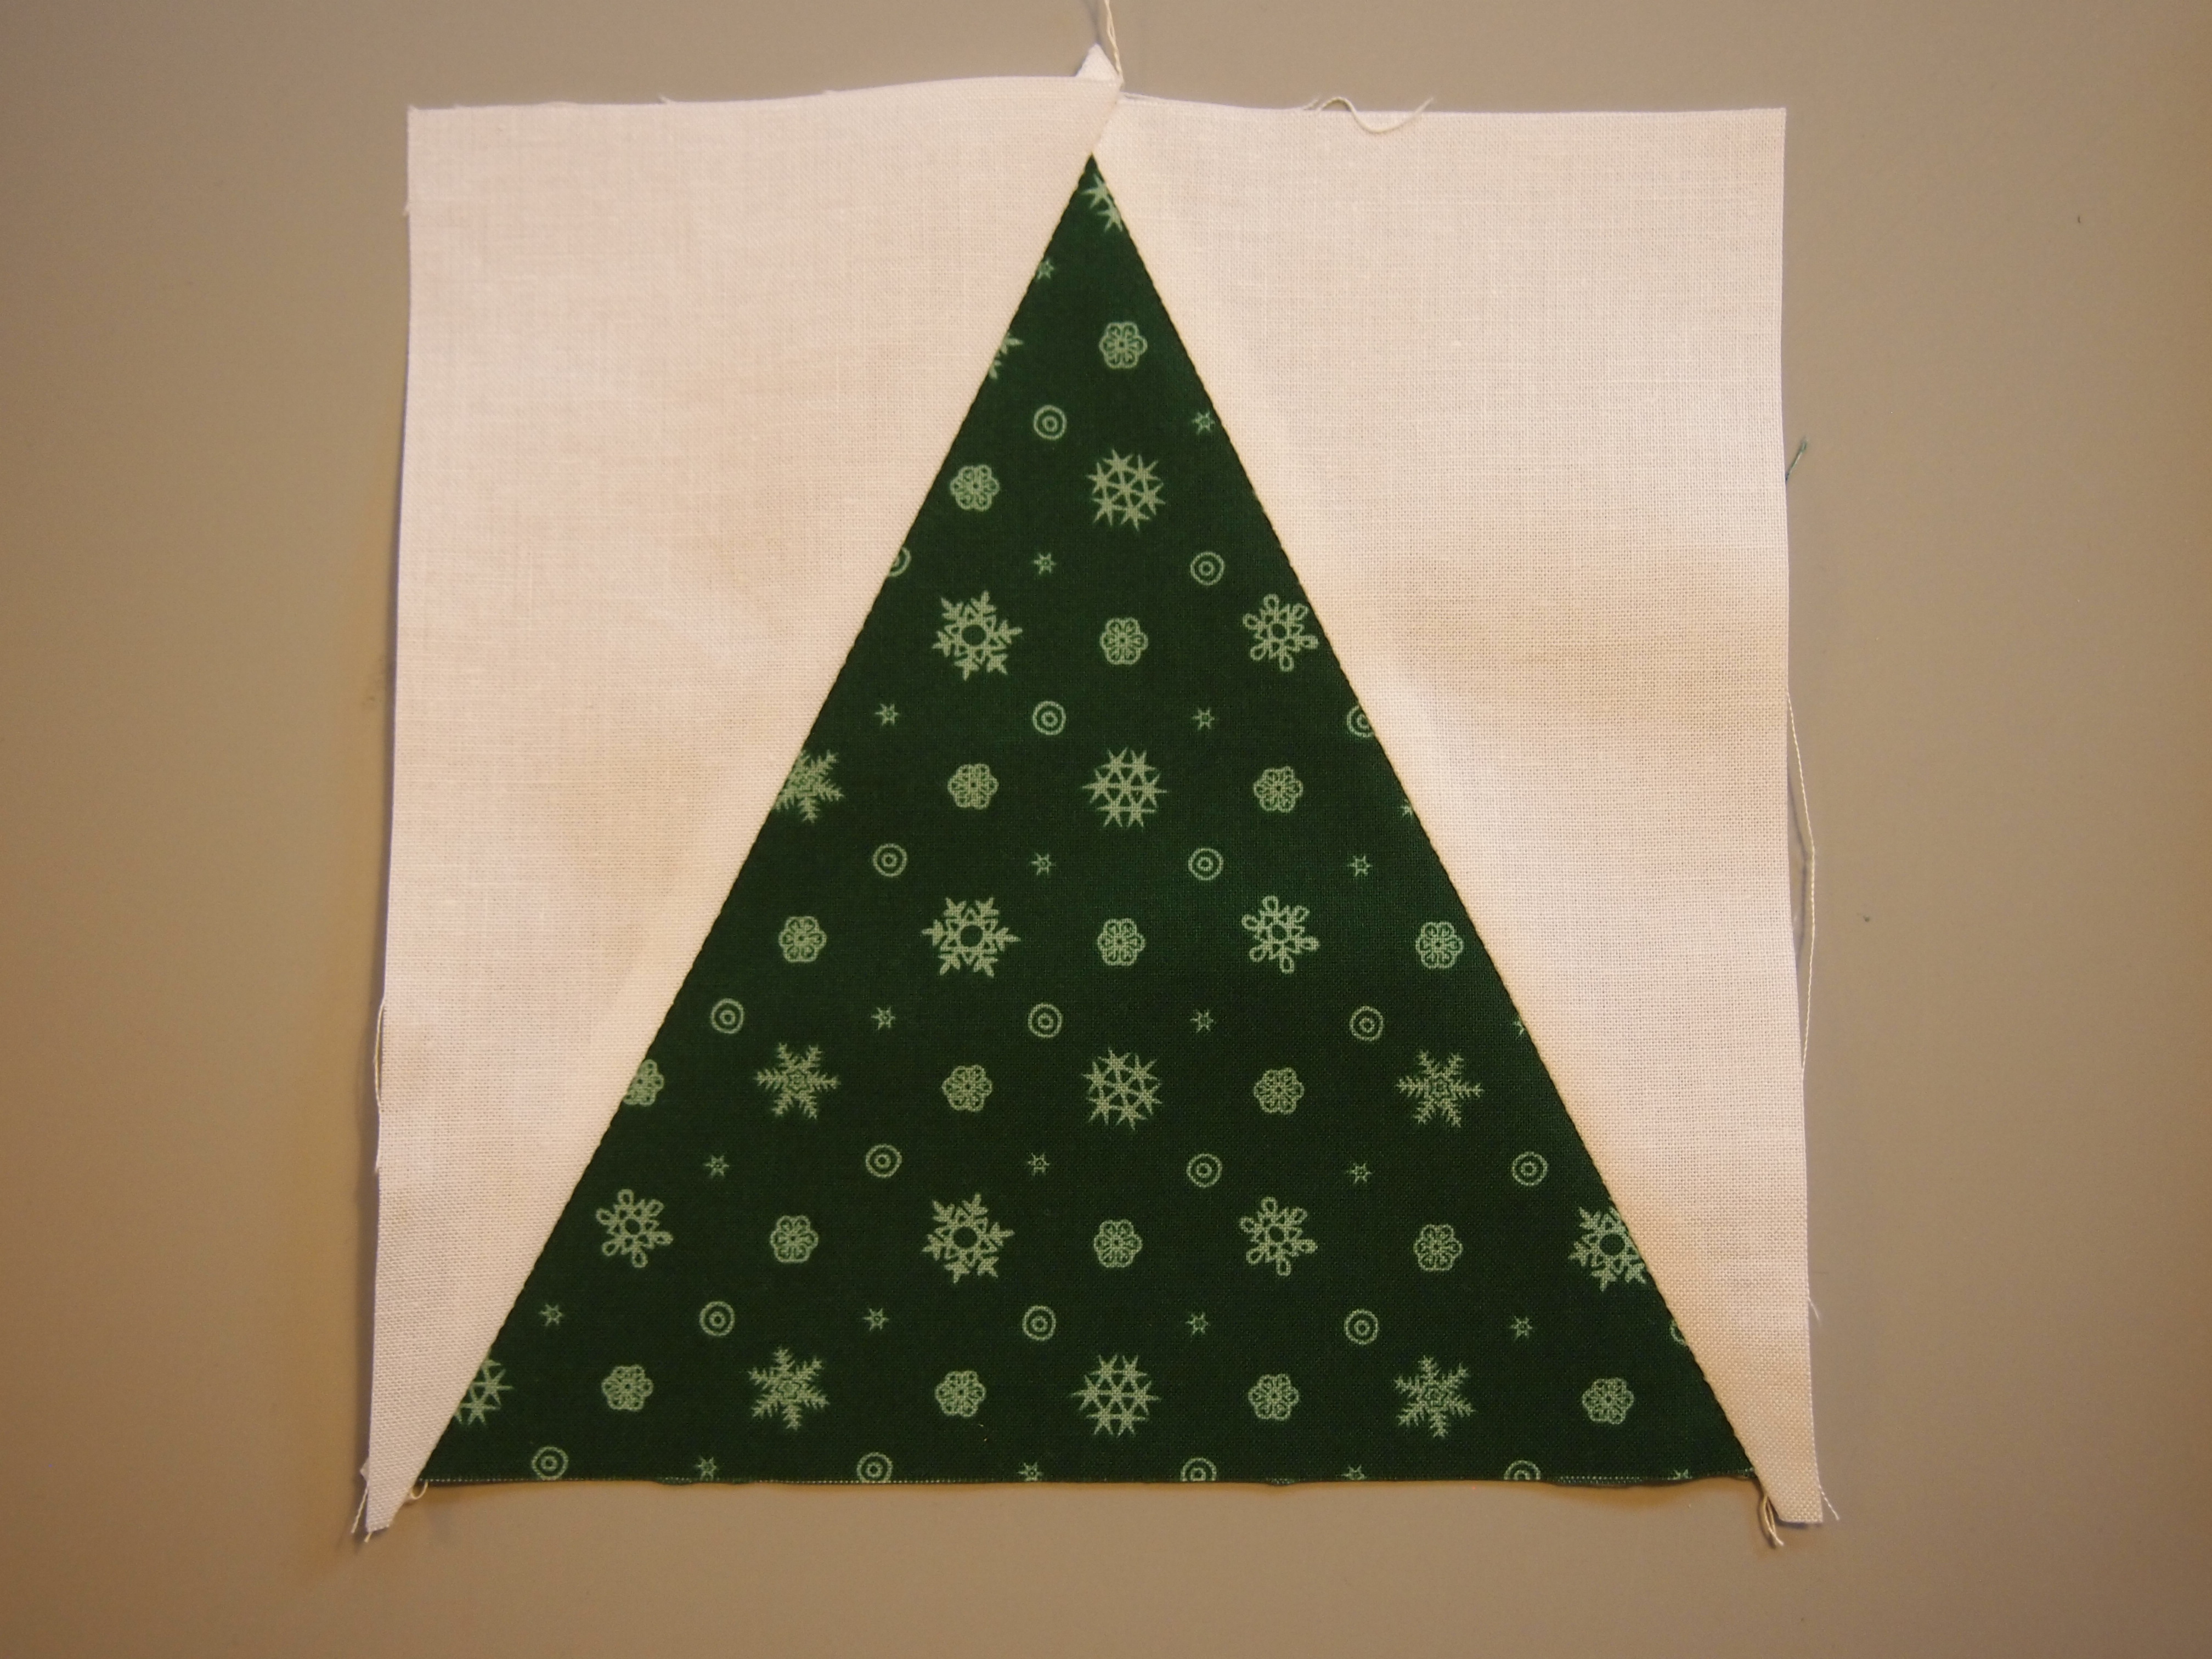
Square up the V Blocks by pointing it toward you, square up two sides.
Rotate the block and square up the. other two sides.

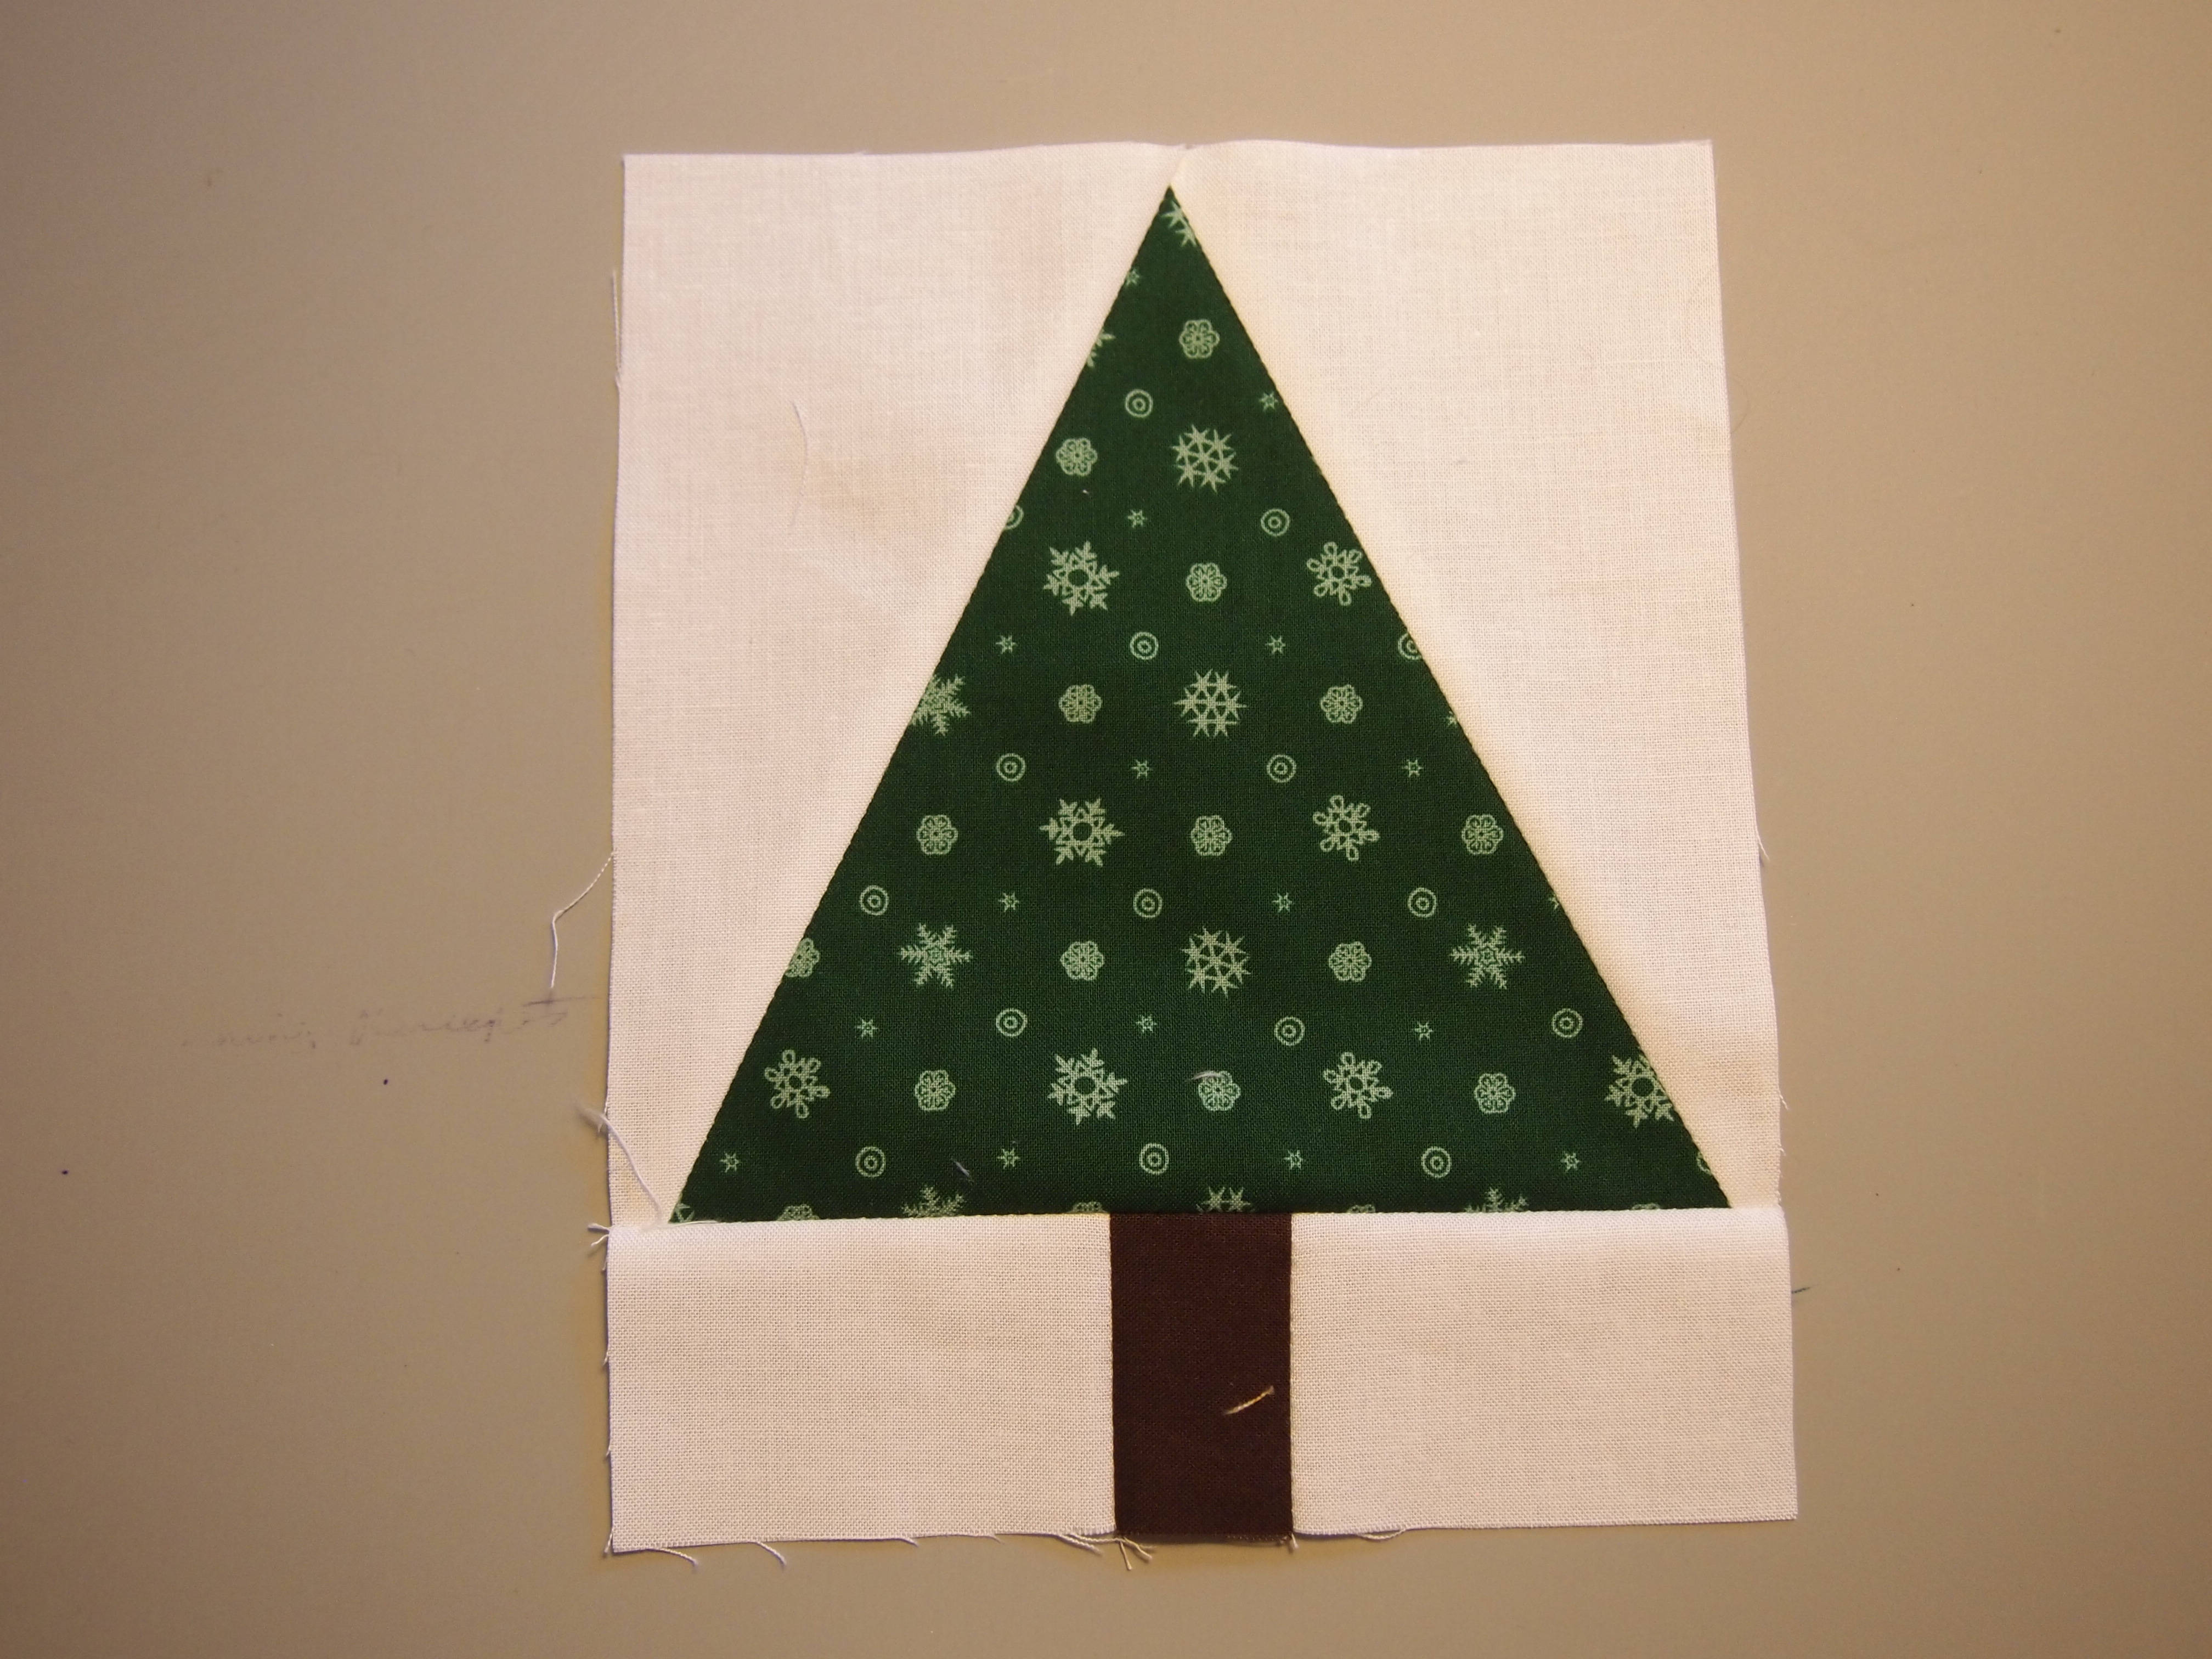
For each tree block I cut two 2″ x 3″ white rectangles and one 1 1/2″ x 2″ brown rectangles for the tree trunk.

Sew these sashings to the bottom of each block.
I cut nine 3 1/2″ x 8″ rectangles to be used to stagger the tree blocks. I sewed one rectangle to row 1,3, 5, 7, and 9. And one rectangle to the end of row 2, 4, 6, and 8.
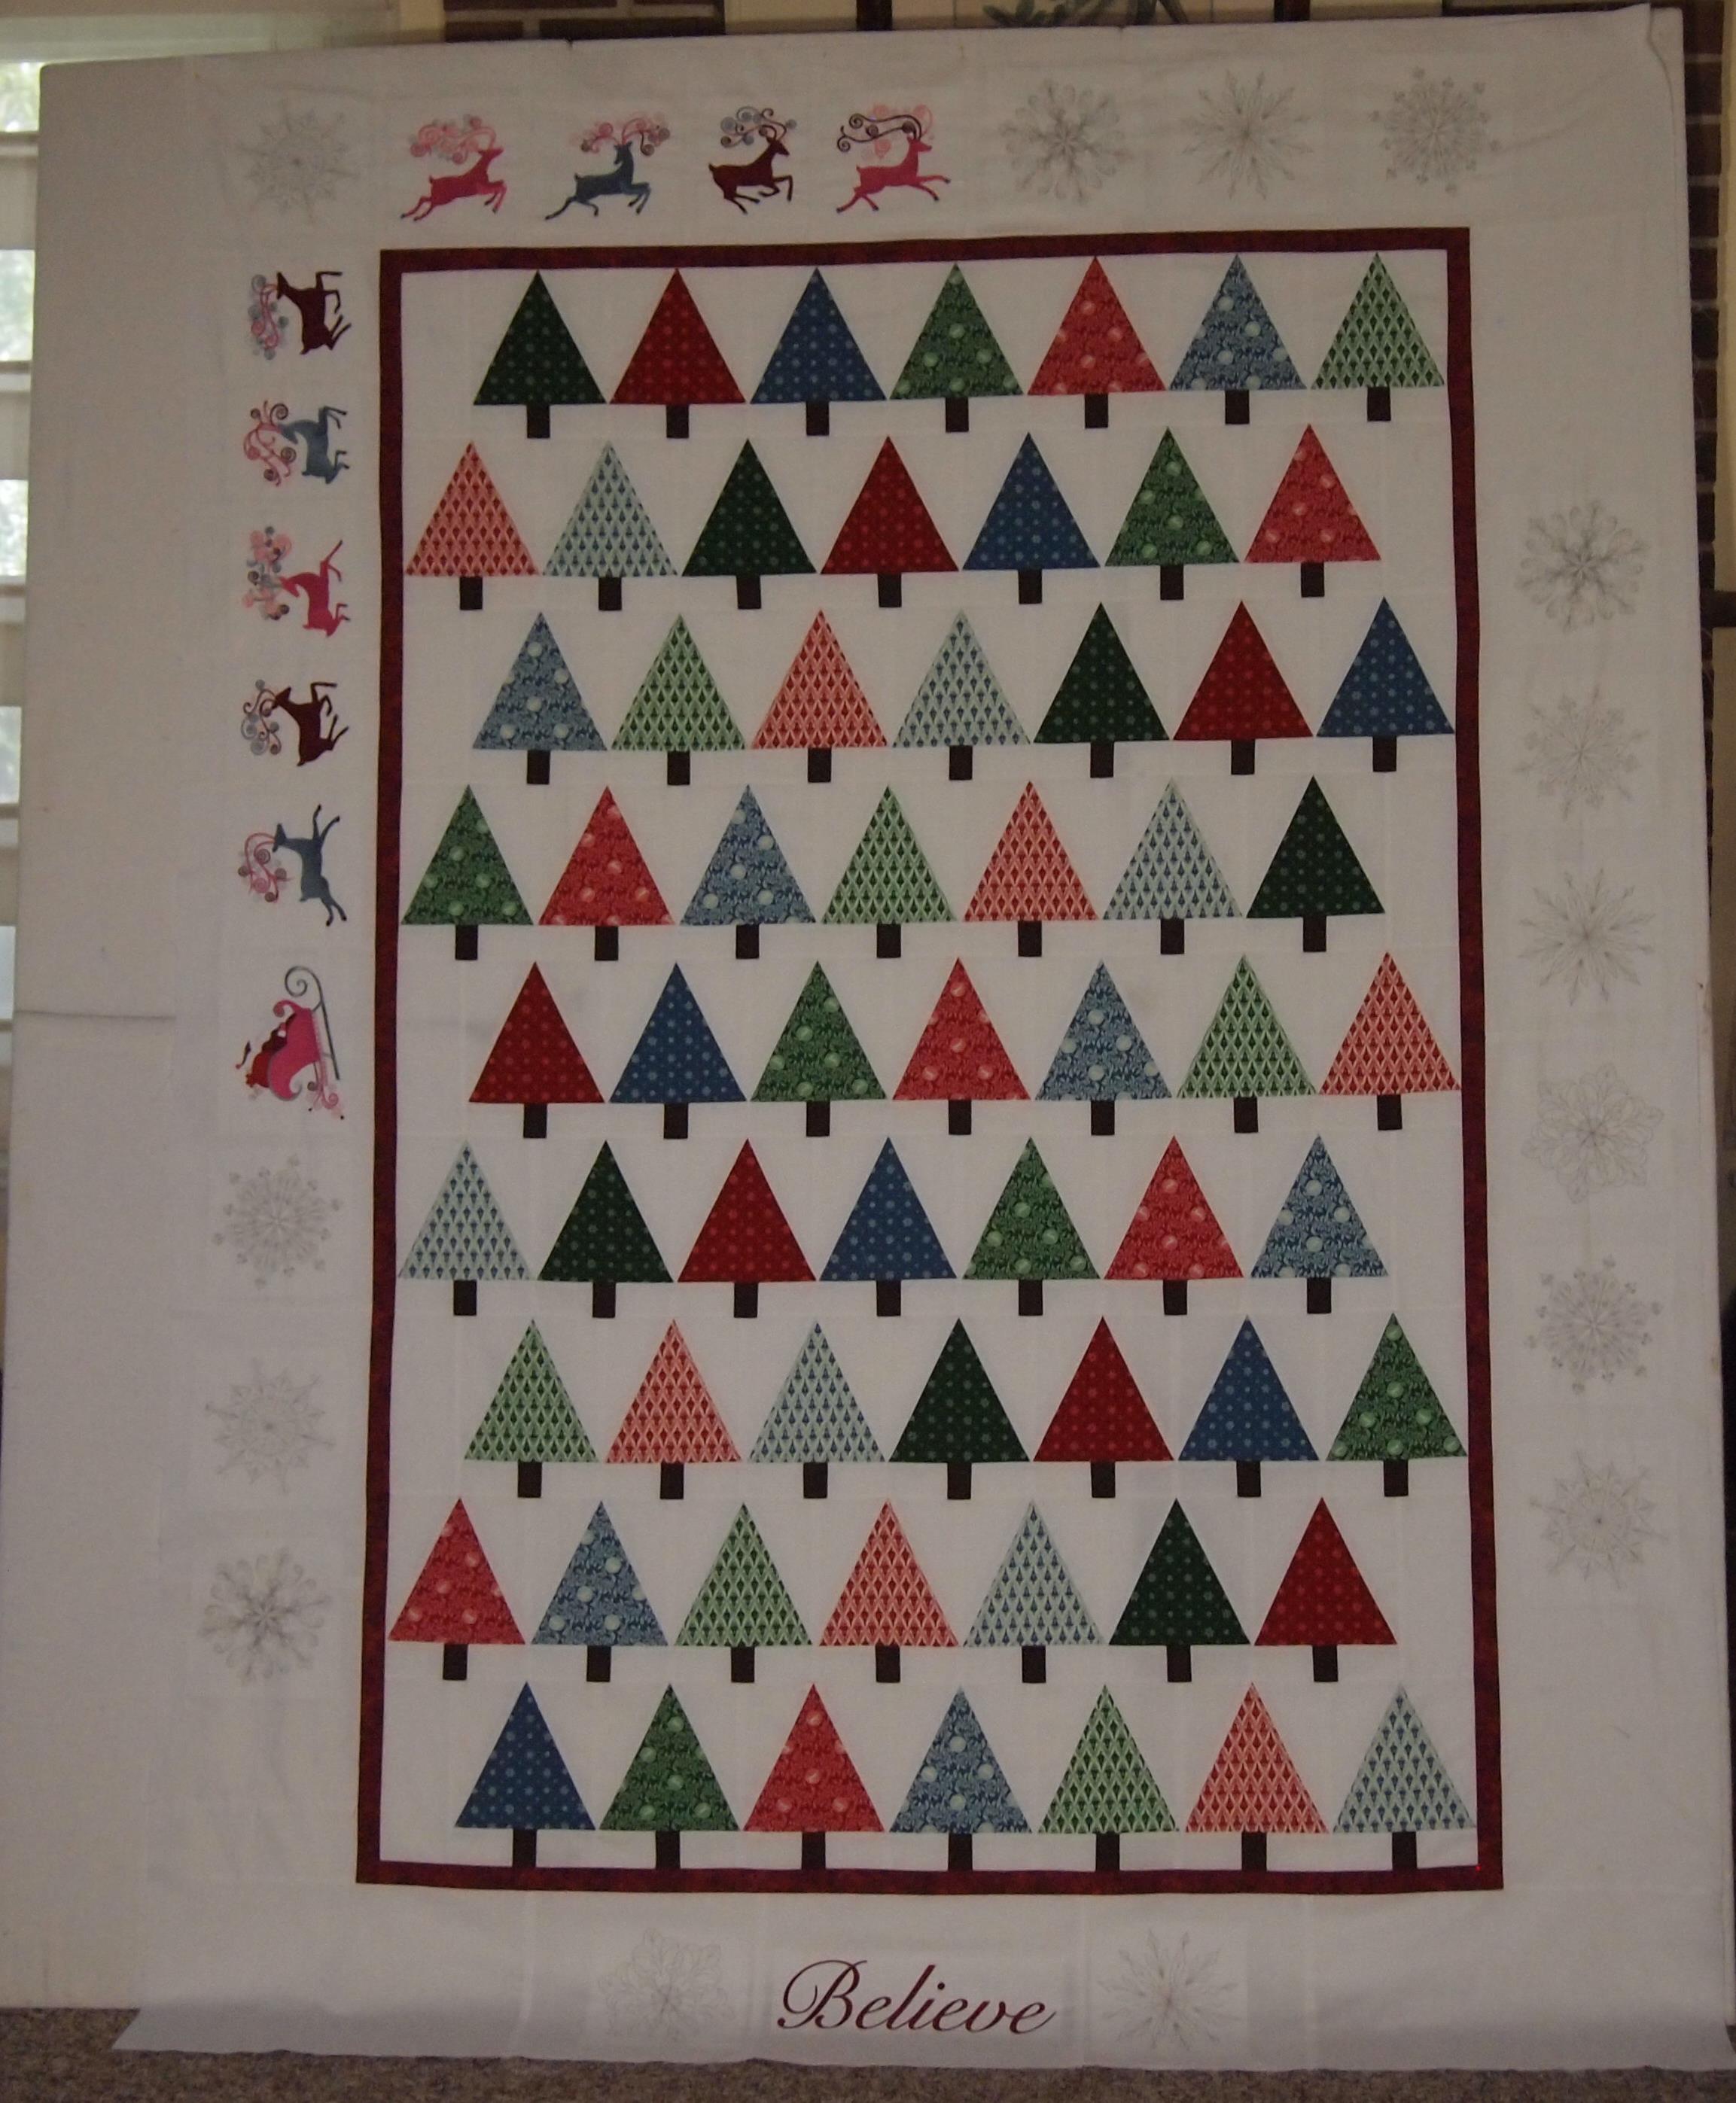
I cut 1 1/2″ red inner borders (1/2 yard). The white outer borders took about 2 yards white Kona cotton. I cut 9″ borders and machine embroidered Santa and his reindeer in reds, blues and pinks. And randomly scattered machine embroidered silver snowflakes around the border. In the center of the bottom of the quilt I embroidered “Believe”. The quilt measures 65″ x 87″ un-quilted. I purchased my embroidery designs from Embroidery Library