I was looking through my quilt books and saw this quilt that just screamed to be Tuckerized. What does that mean you ask? To Tuckerize a block/quilt is to identify the units that make up the block/quilt and apply Studio 180 Design techniques to the construction, to streamline and make the process more efficient without losing the points, and to have the ability to make it in many sizes. For instance, Deb Tucker’s V Block can be made in 11 sizes.
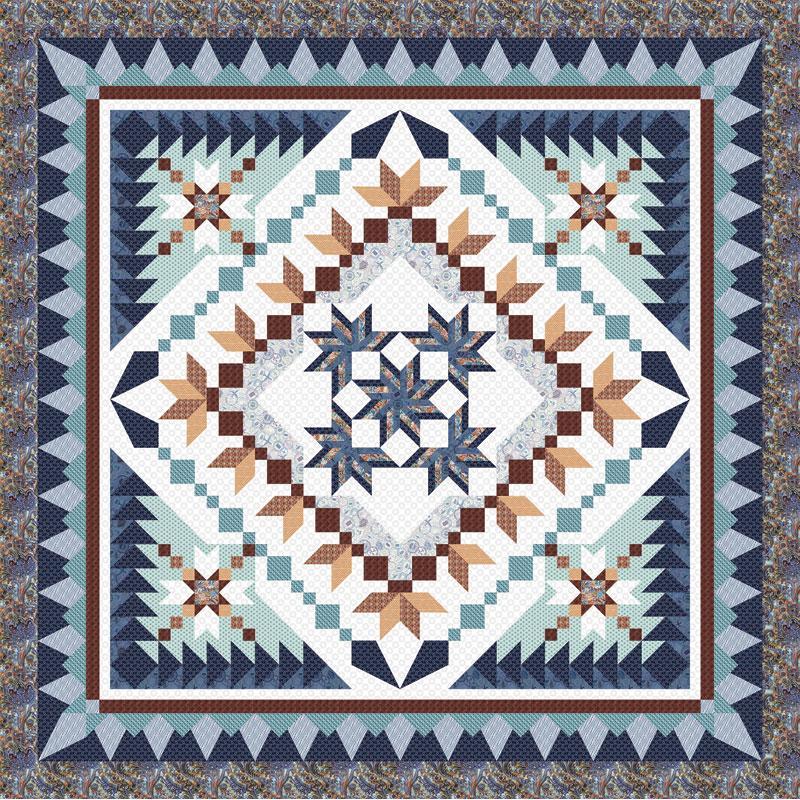
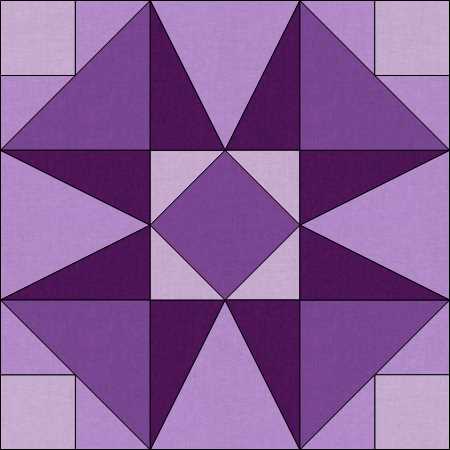
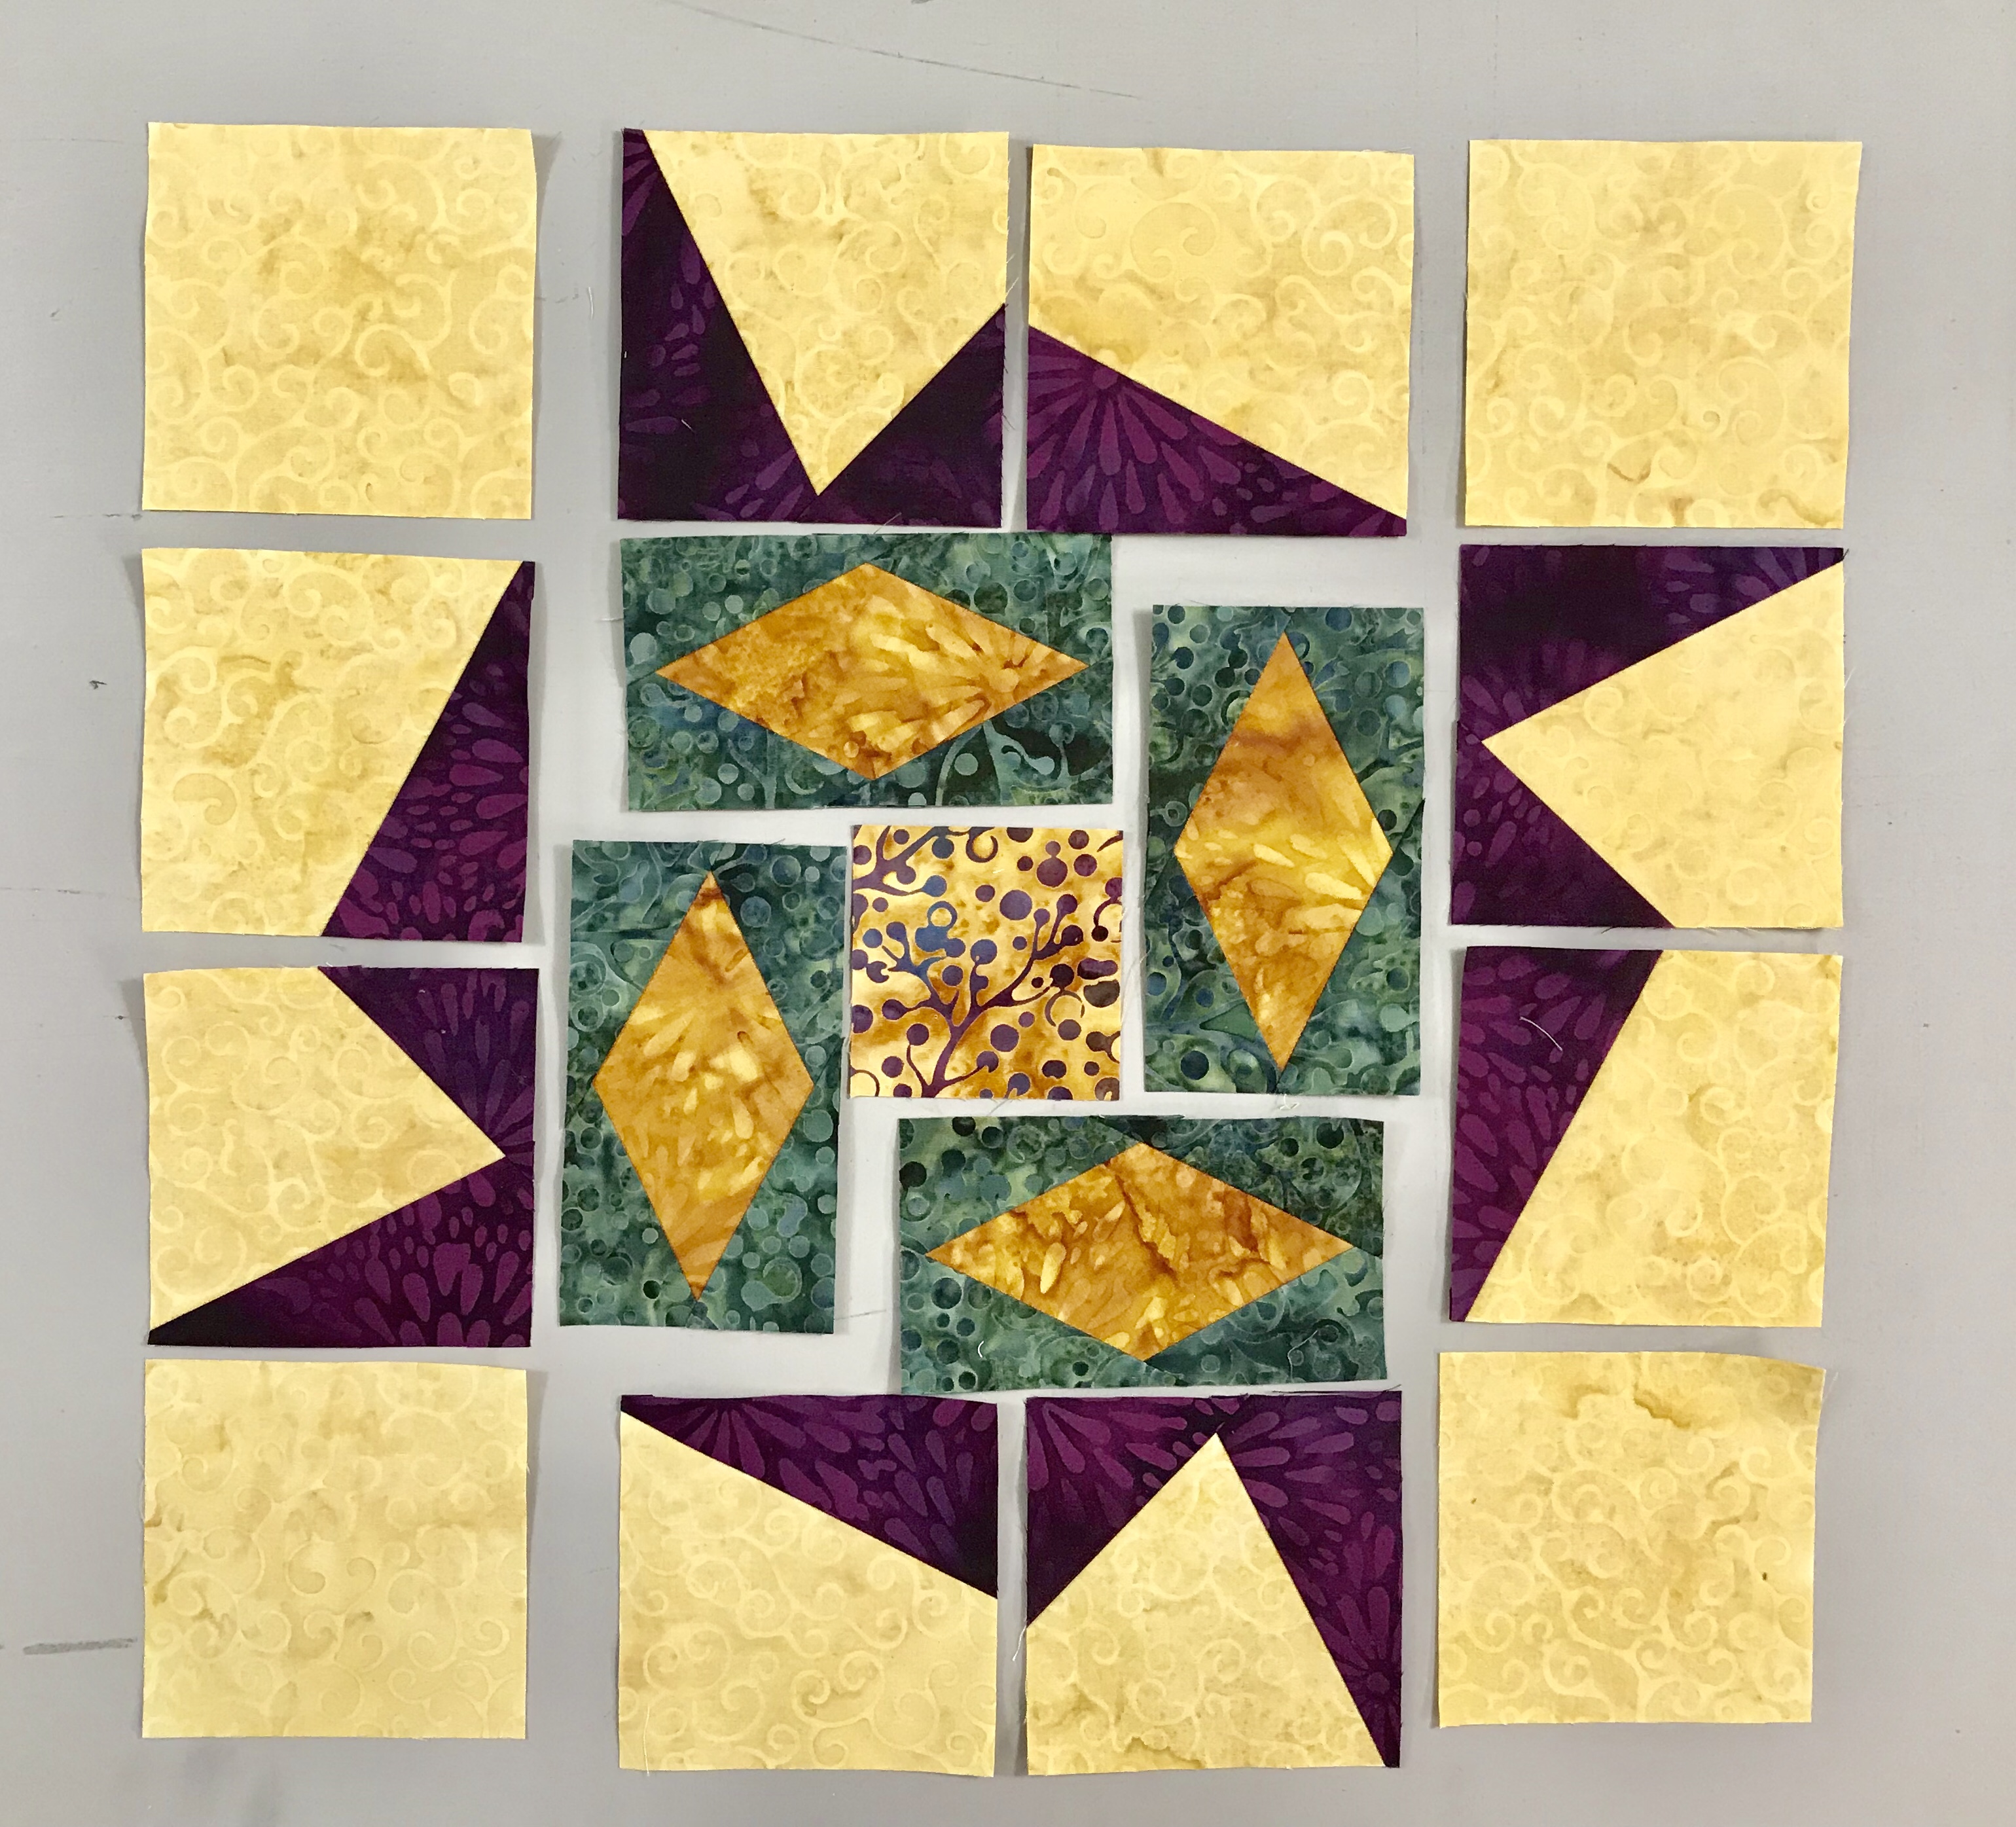
This is the Bethlehem Star. It can be easily Tuckerized using the V Block tool by Deb Tucker.
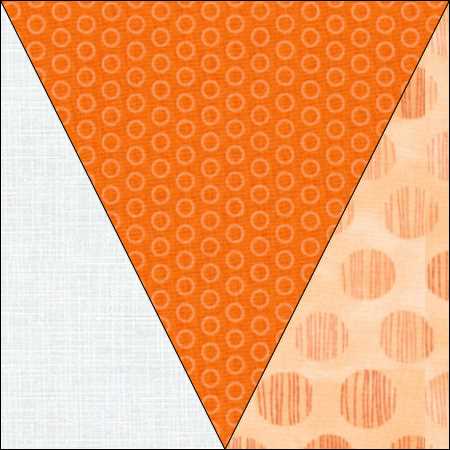
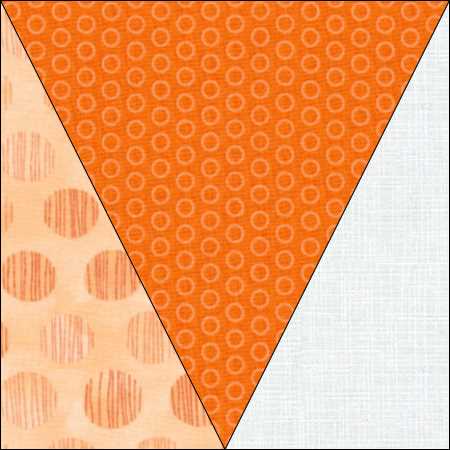
The block consists of 2 of each V Blocks units shown above, plus a center rectangle & 4 corner squares.
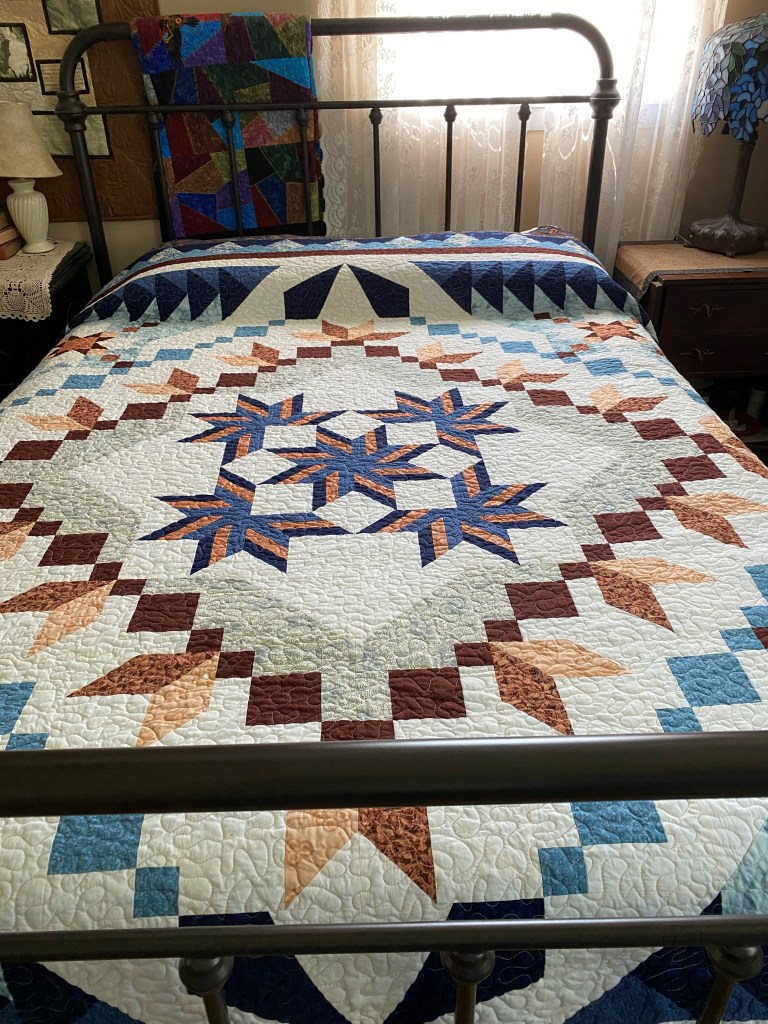
This entire quilt including the sashing stars can be made with Studio 180 Design V Block Tool. Just follow the directions for the V Block tool. BethIehem Star quilt Measures 69″ x 85″. I created a supply list so you can make it too.
Welcome, Welcome, Welcome to Stitchin Heaven’s Journey’s BOM – Month 12! This has been a spectacular year. You all have worked so hard. Thank you to Deb Luttrell, Founder of Stitchin Heaven, Deb Tucker, Creative Kingpin of Studio 180 Design, Marie Bostwick New York Times best selling author and Jason Yenter Fabric Designer & President of In the Beginning Fabrics for making this all possible. Now to assemble your quilts!
Print 4
Print 6
Print 11
Print 12
Note: WOF stands for width of fabric. This month you will assemble your quilt top and add the borders.
Gather the following pieces:
4 Corner Sections from Month 6
Block K from Month 7
4 Middle Edge Sections from Month 9
4 Pieced Border sections from Month 11
Finishing Instructions
Step 1 – Lay out the Corner Sections, Middle Edge Sections, and Block K as shown in the diagram on page 35.
Step 2 – Stitch the sections together into rows, press the seams open. Stitch the rows together to create the quilt center.
Step 3 – Attach the 72½” Print 11 inner border strips. Find the center of the quilt and the center of the 72½” border strip. Match the center points with right sides together, pin. Match both ends of the strip with the ends of the quilt and pin in place. Ease the quilt top to match the border strip and add more pins between the others to hold the border in place as you stitch. Attach the other 72½” border to the opposite side in the same manner and press toward the inner border strip.
Step 4 – Repeat step 3 for the 75½” Print 11 border strips.
Step 5 – Attach the 75½” Print 6 middle border strips. Using two of the border strips, stitch them to the quilt in the same manner as in step 3. Press toward Print 6.
Step 6 – Stitch a Print 4 middle border corner stone to each end of the remining 2”x 75½” Print 6 borders. Press toward the middle border.
Step 7 – Attach the remining two middle border strips to the quilt as described in step 3. Make sure to nest the seams. Press toward the middle border.
Step 8 – Add the pieced borders. Start with the borders that do not have the N Units on the ends. Orient the pieced borders so that the Corner Pops are against the middle border and the points of the V Blocks are pointing away from the quilt center. Refer to the diagram. Find the center of the quilt top and the center of the pieced border. Match the centers and pin. Match each end and pin. Ease the border to match the quilt top and add more pins between the others to hold the border in place as you stitch. Stitch in place. Press toward the middle border.
Step 9 – Repeat step 8 for the other pieced borders with the N Units attached to the ends. After you have matched the centers and the ends, make sure that you nest the Corner Beam seam with the seam attaching the pieced border.
Note: We recommend that you wait to cut your outer borders to length until you can measure your quilt top. To determine your specific border length, measure the longest side of your quilt in three different places. If those measurements are different, add the three measurements together and divide by three. That will be the length that you need to cut your first two borders. Once the first two borders are attached to the quilt repeat the process for the remaining two sides.
Step 10 – Add the outer borders. Find the center of the quilt and the center of the 90½” outer border strip. Match the center points with right sides together, pin, match either end of the strip with the ends of the quilt, and pin in place. Add more pins between the others, about every 4”, to hold the border in place as you stitch. Attach the other 90½” border to the opposite side in the same manner and press toward the outer border strip.
Step 11 – Repeat step 10 for the 102½” outer border strips.
Step 12 – Finish with Batting, Backing, Quilting, and Binding! Layer quilt top with batting and backing. Baste and quilt. Bind and Enjoy!
Journeys
Thank you all so much for joining us on this Journey! Congratulations on a job well done!
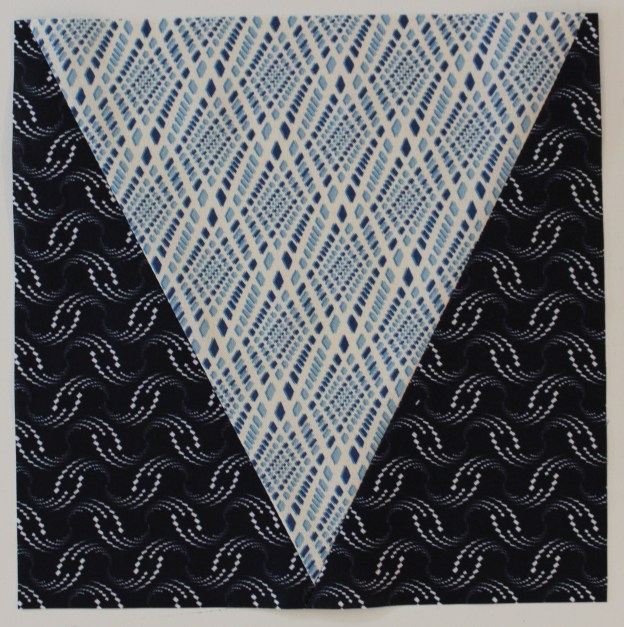
Welcome to Stitchin Heaven’s Journeys BOM – Month 10 Victory Block: Part 1. This month you will be using Studio 180 Design V Block tool. Sarah Furrer is my helper this month.
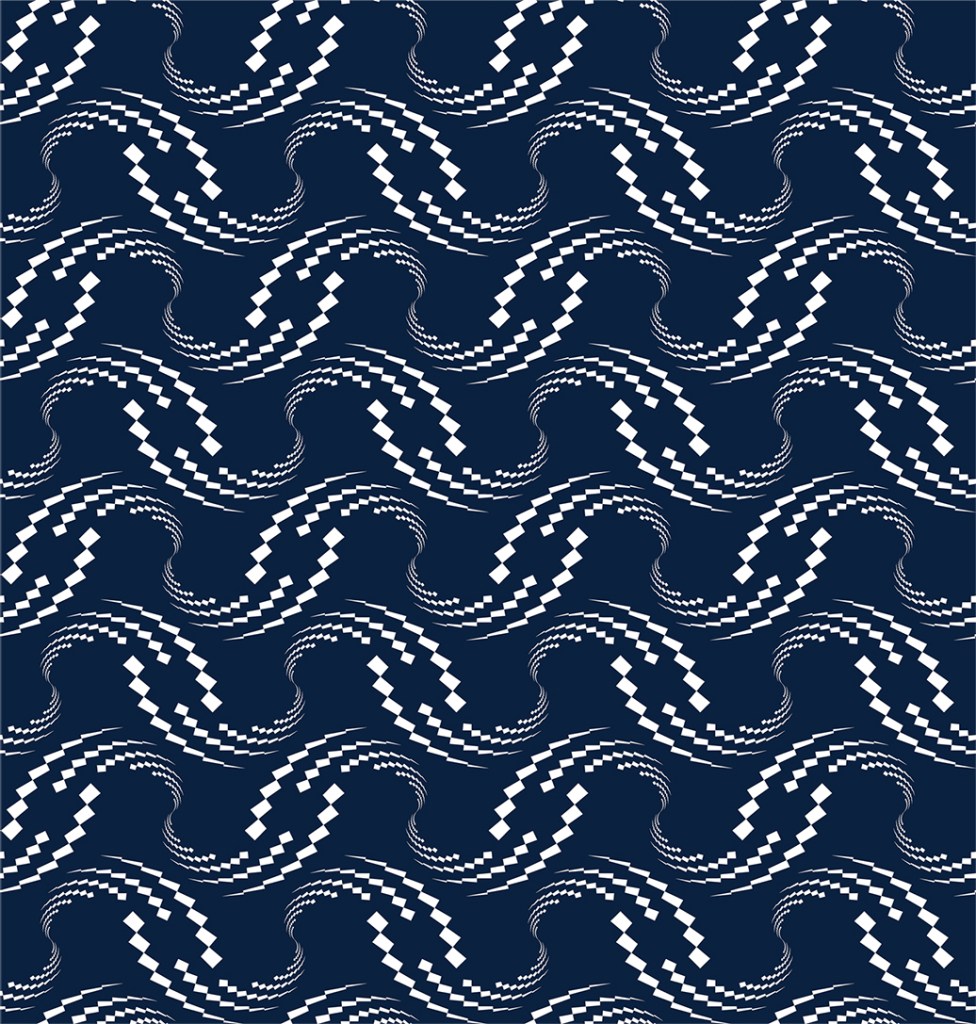
Print 1
Print 4
Unit P, V Blocks will be cut from Print 1 & Print 4.
Piecing Instructions
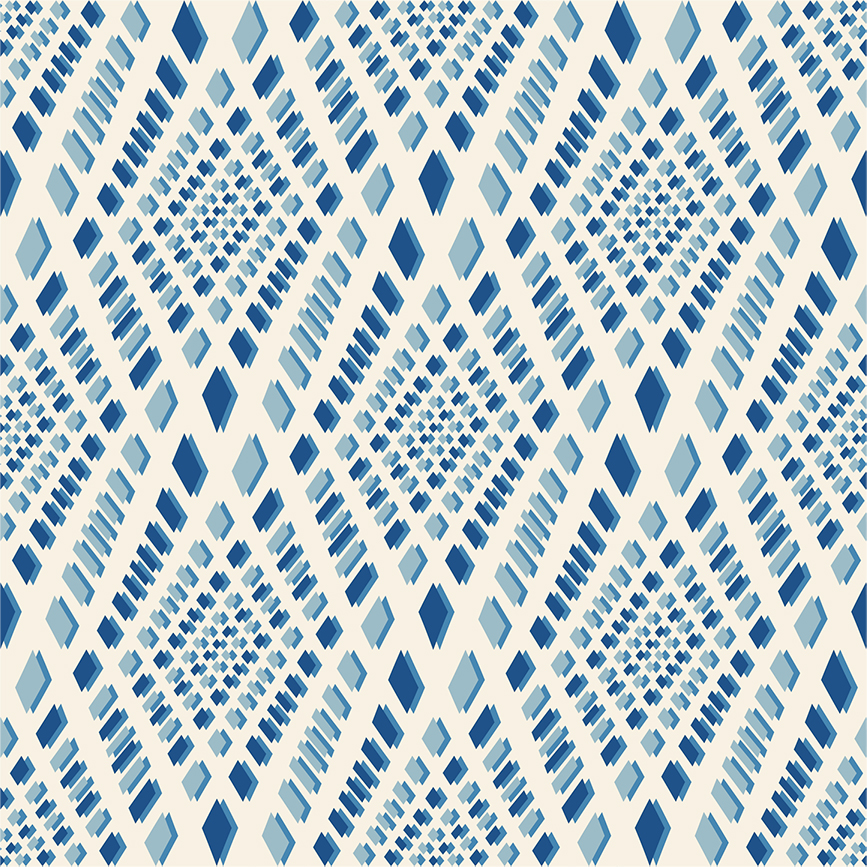
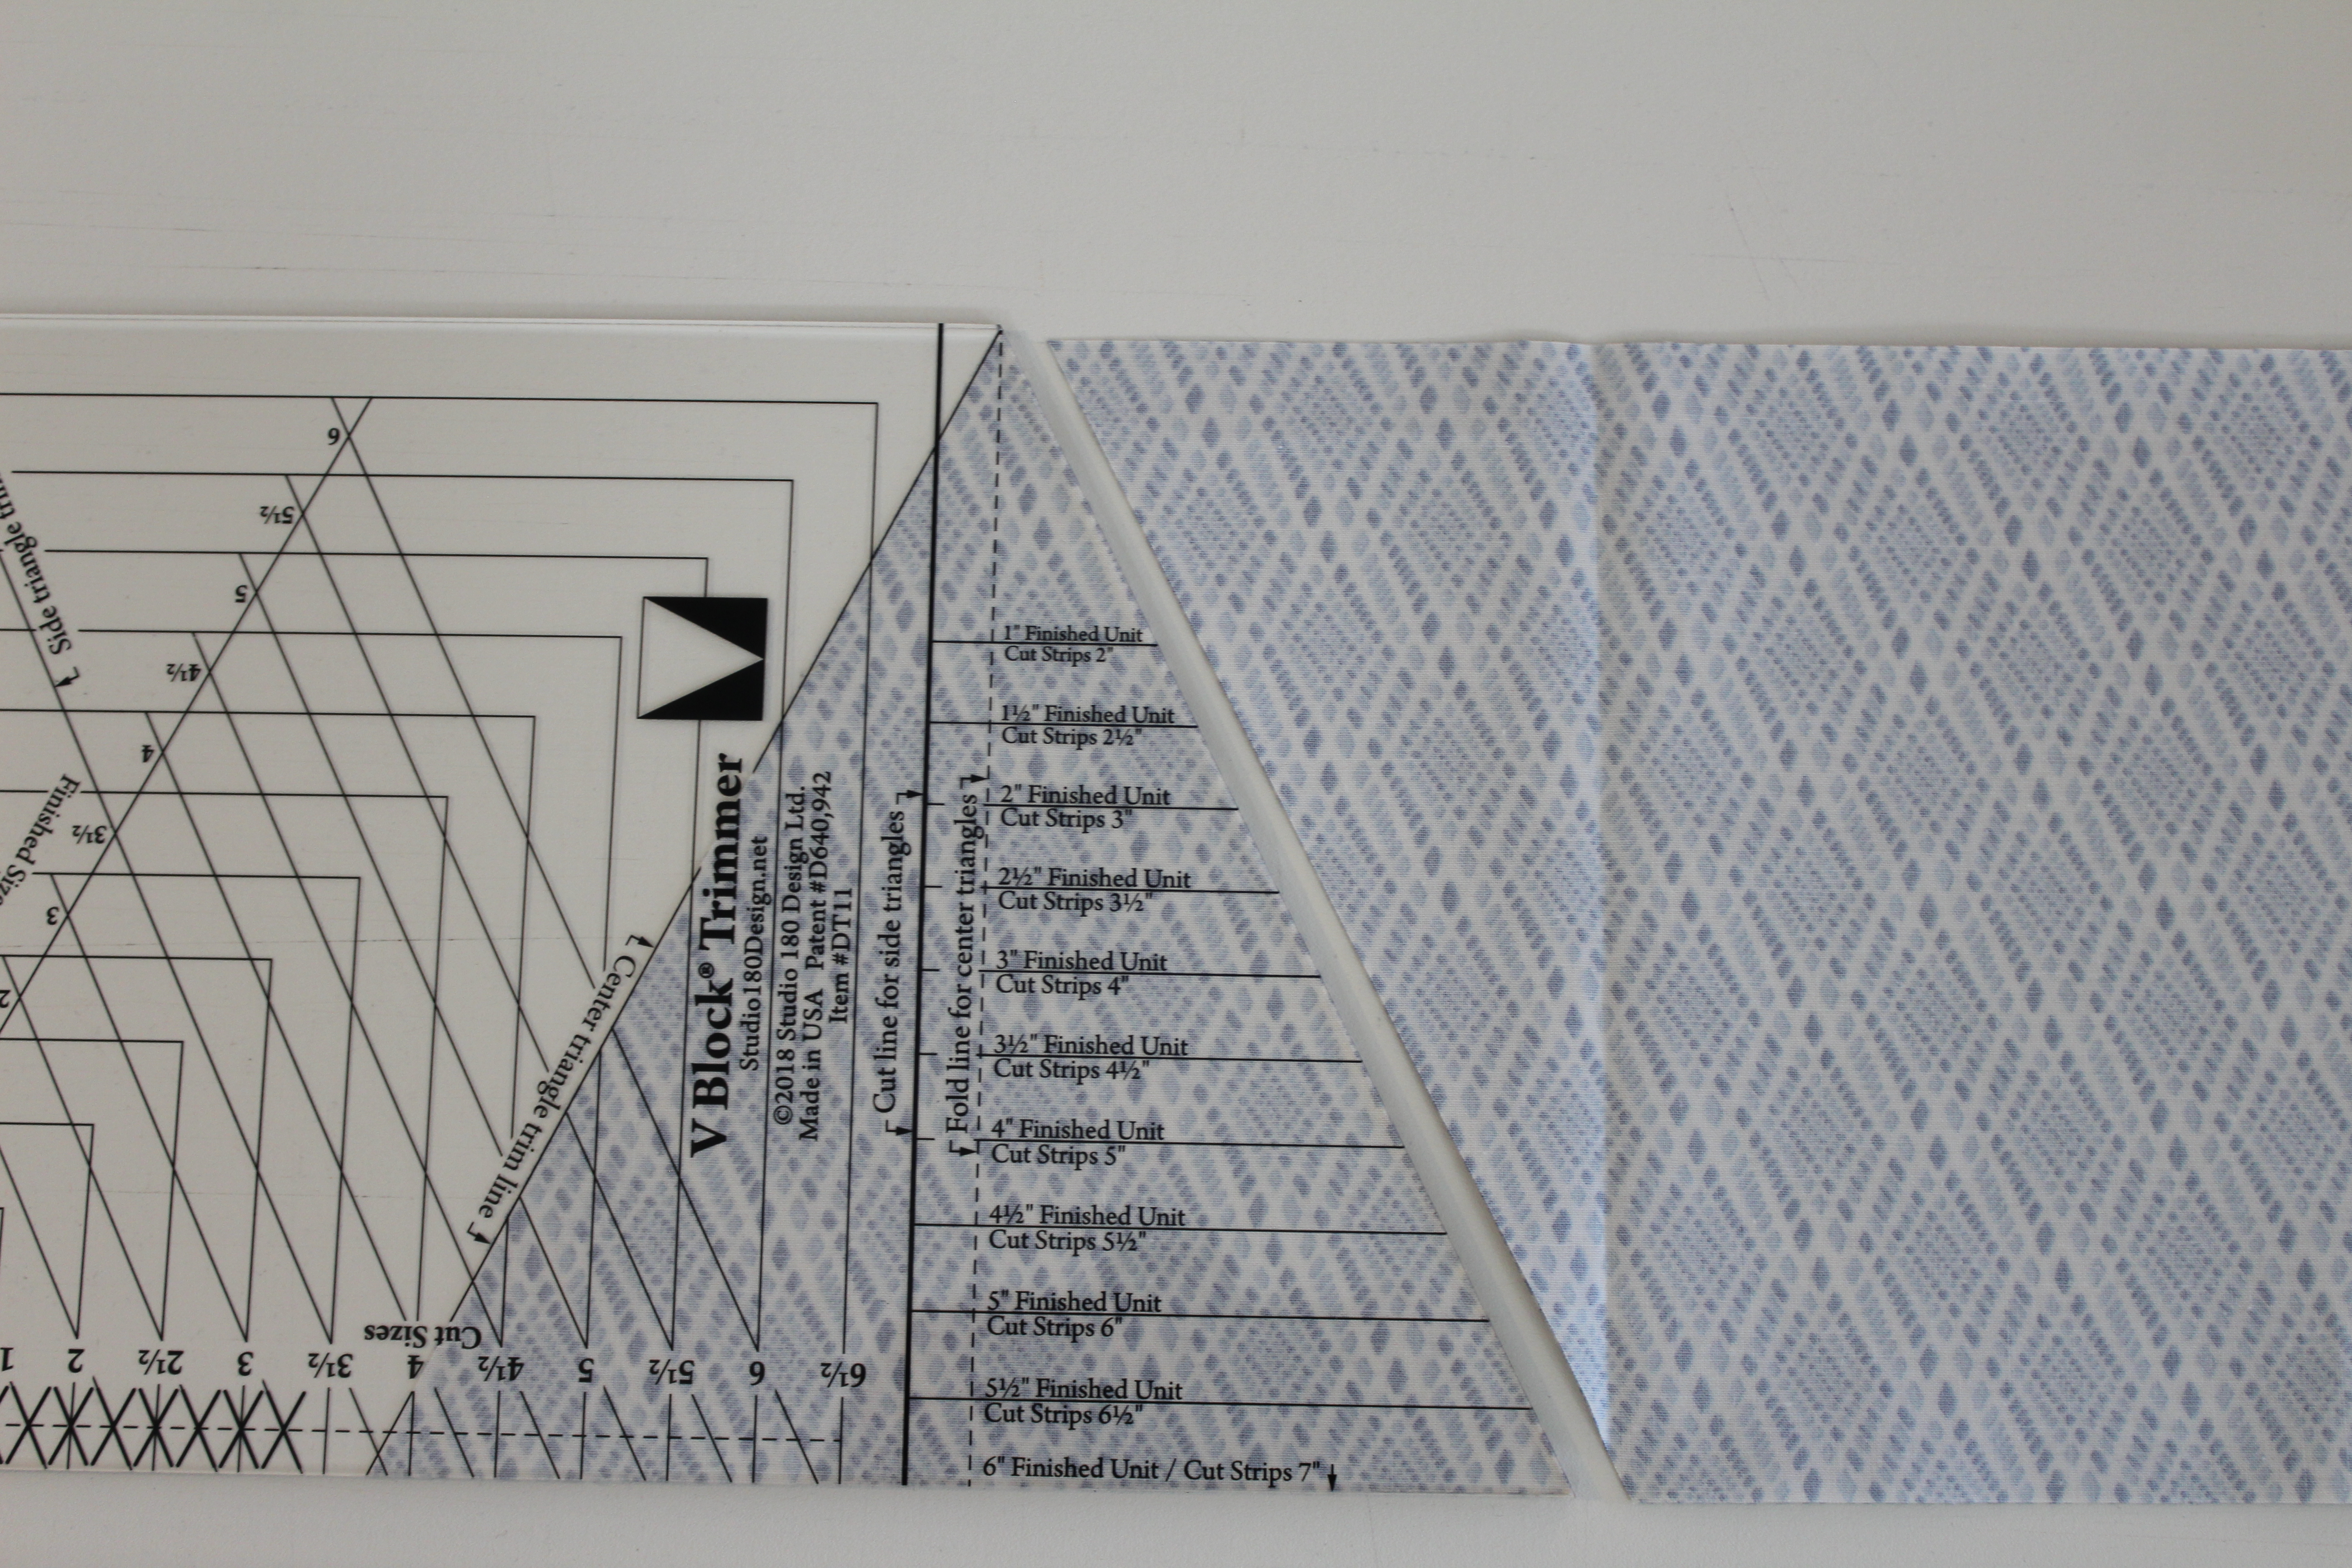
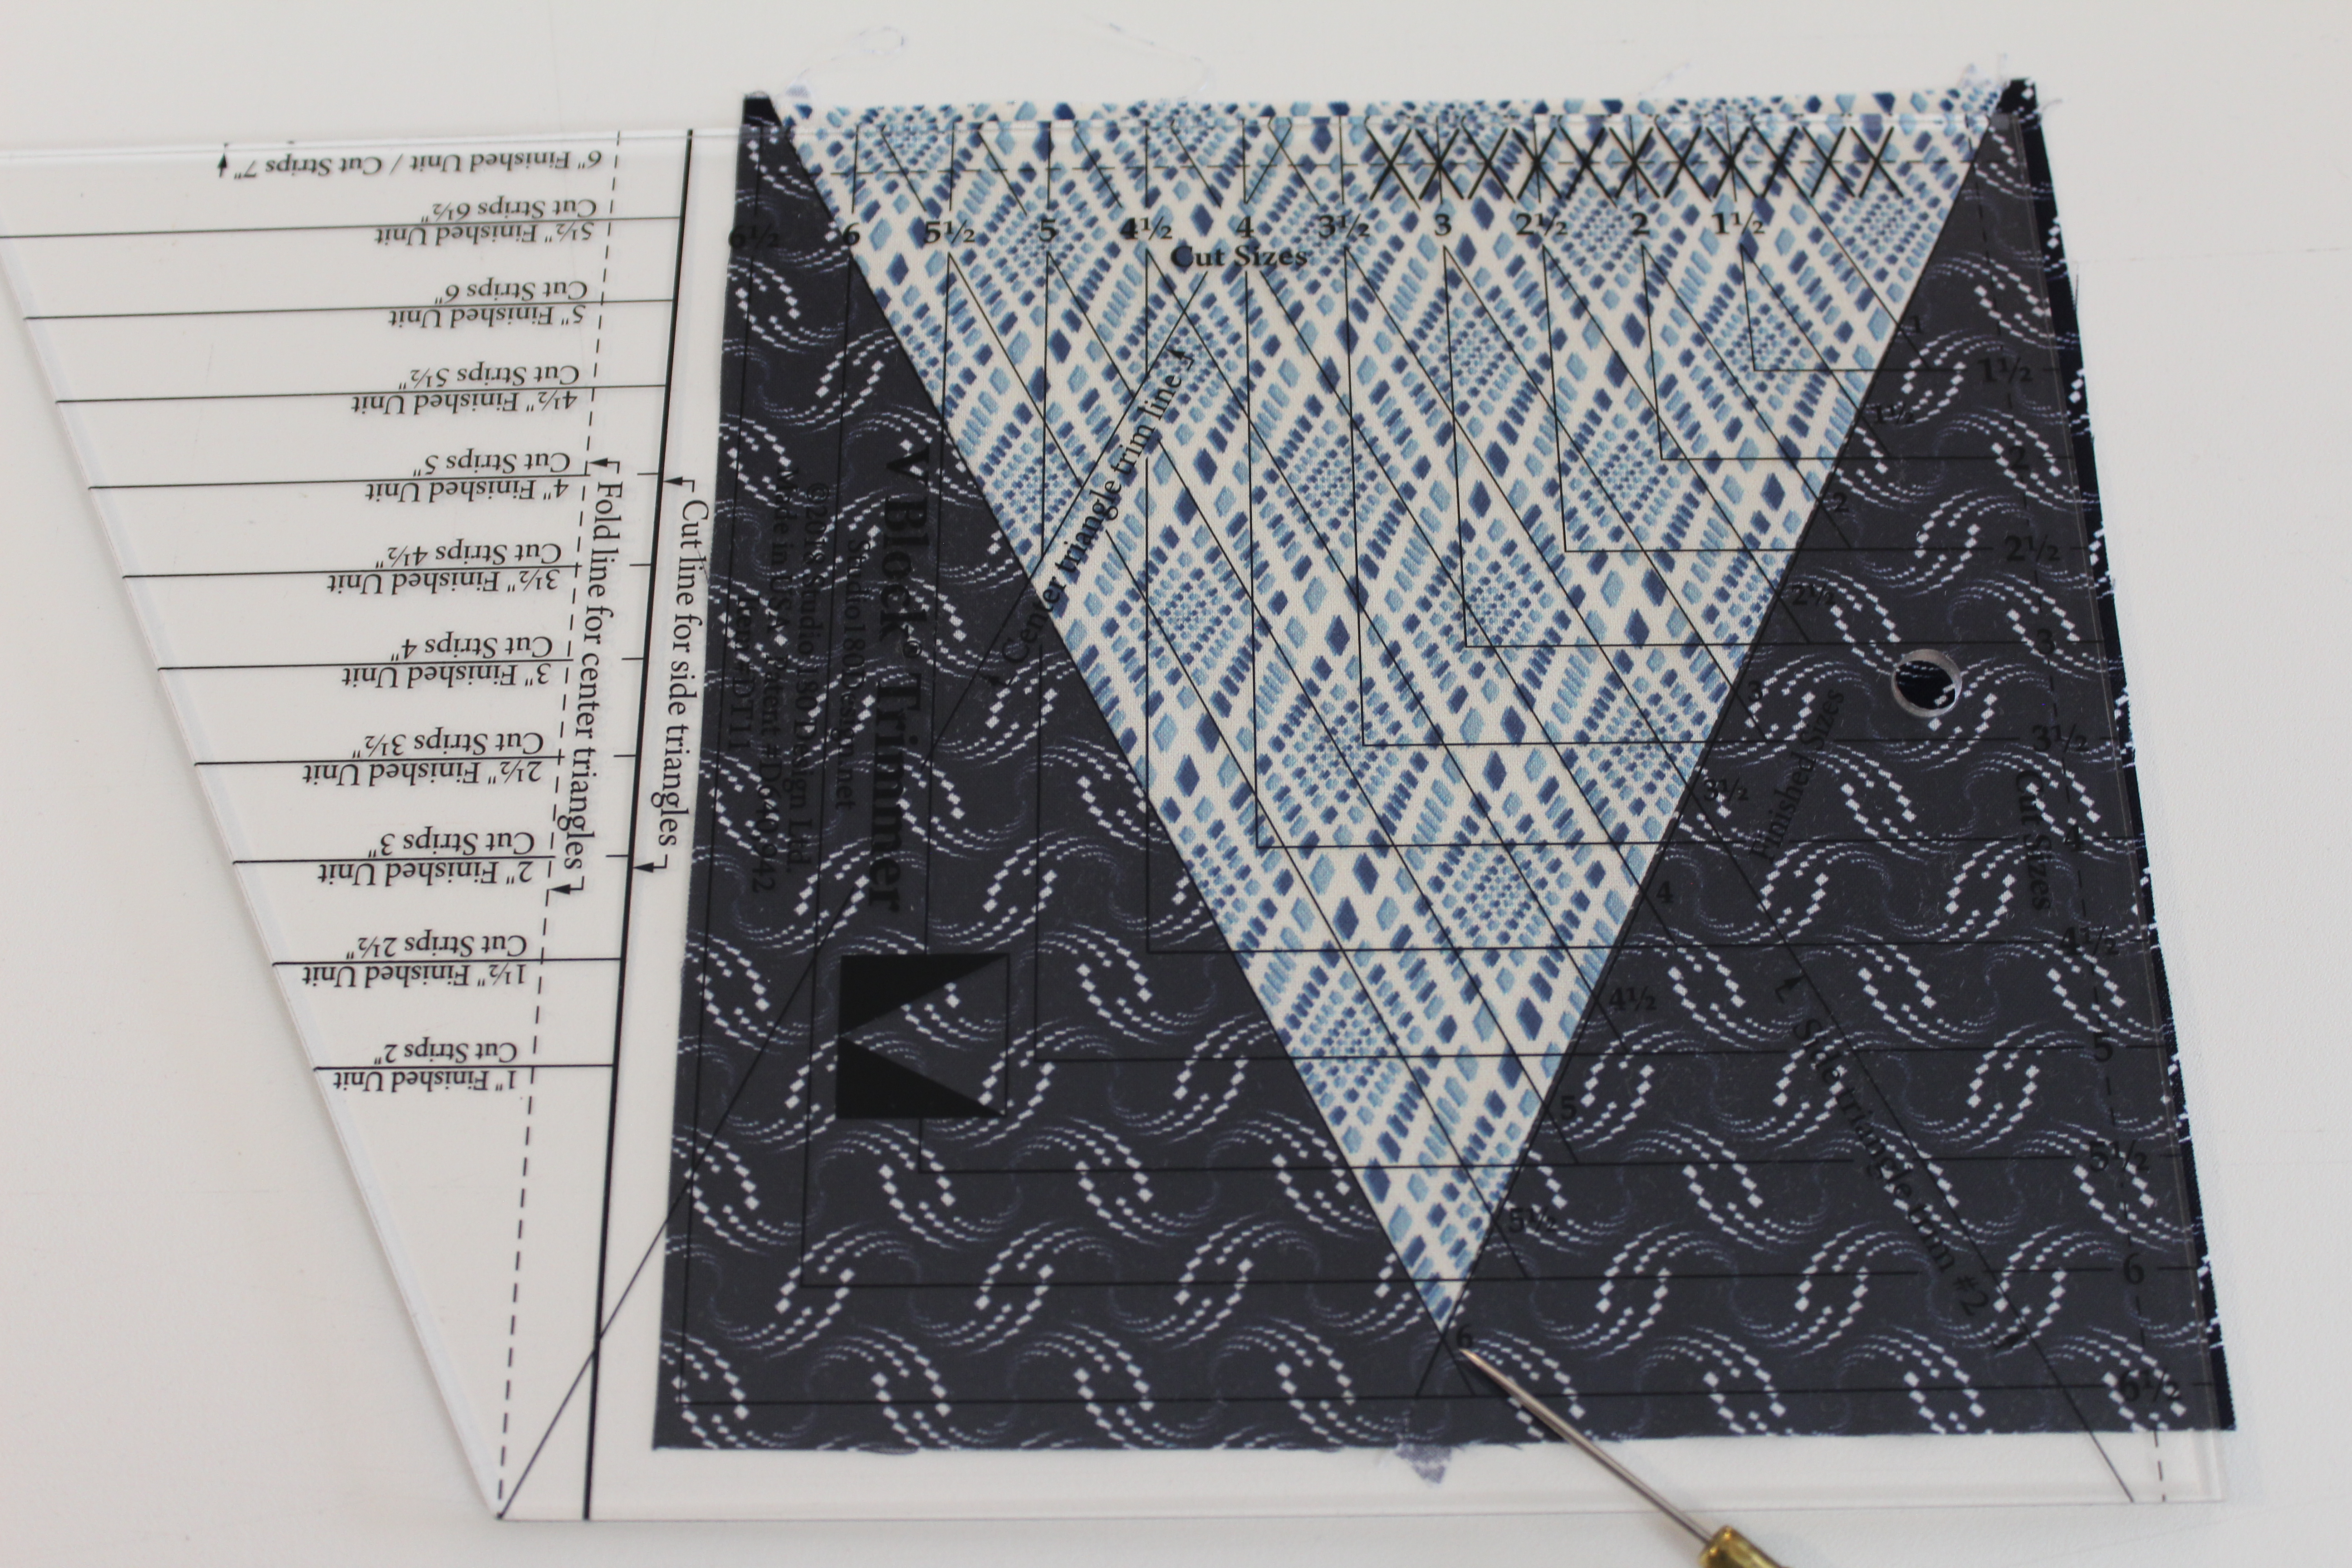
Step 1 – Cut the Center Triangles from Print 4 strips. Lay the strip out and fold over the end of the strip as shown. Position the V Block® tool on the strip so that the Fold Line for Center Triangle is on the fold and the bottom of the strip is lined up with the 6” finished unit line (bottom of the tool).
Step 1
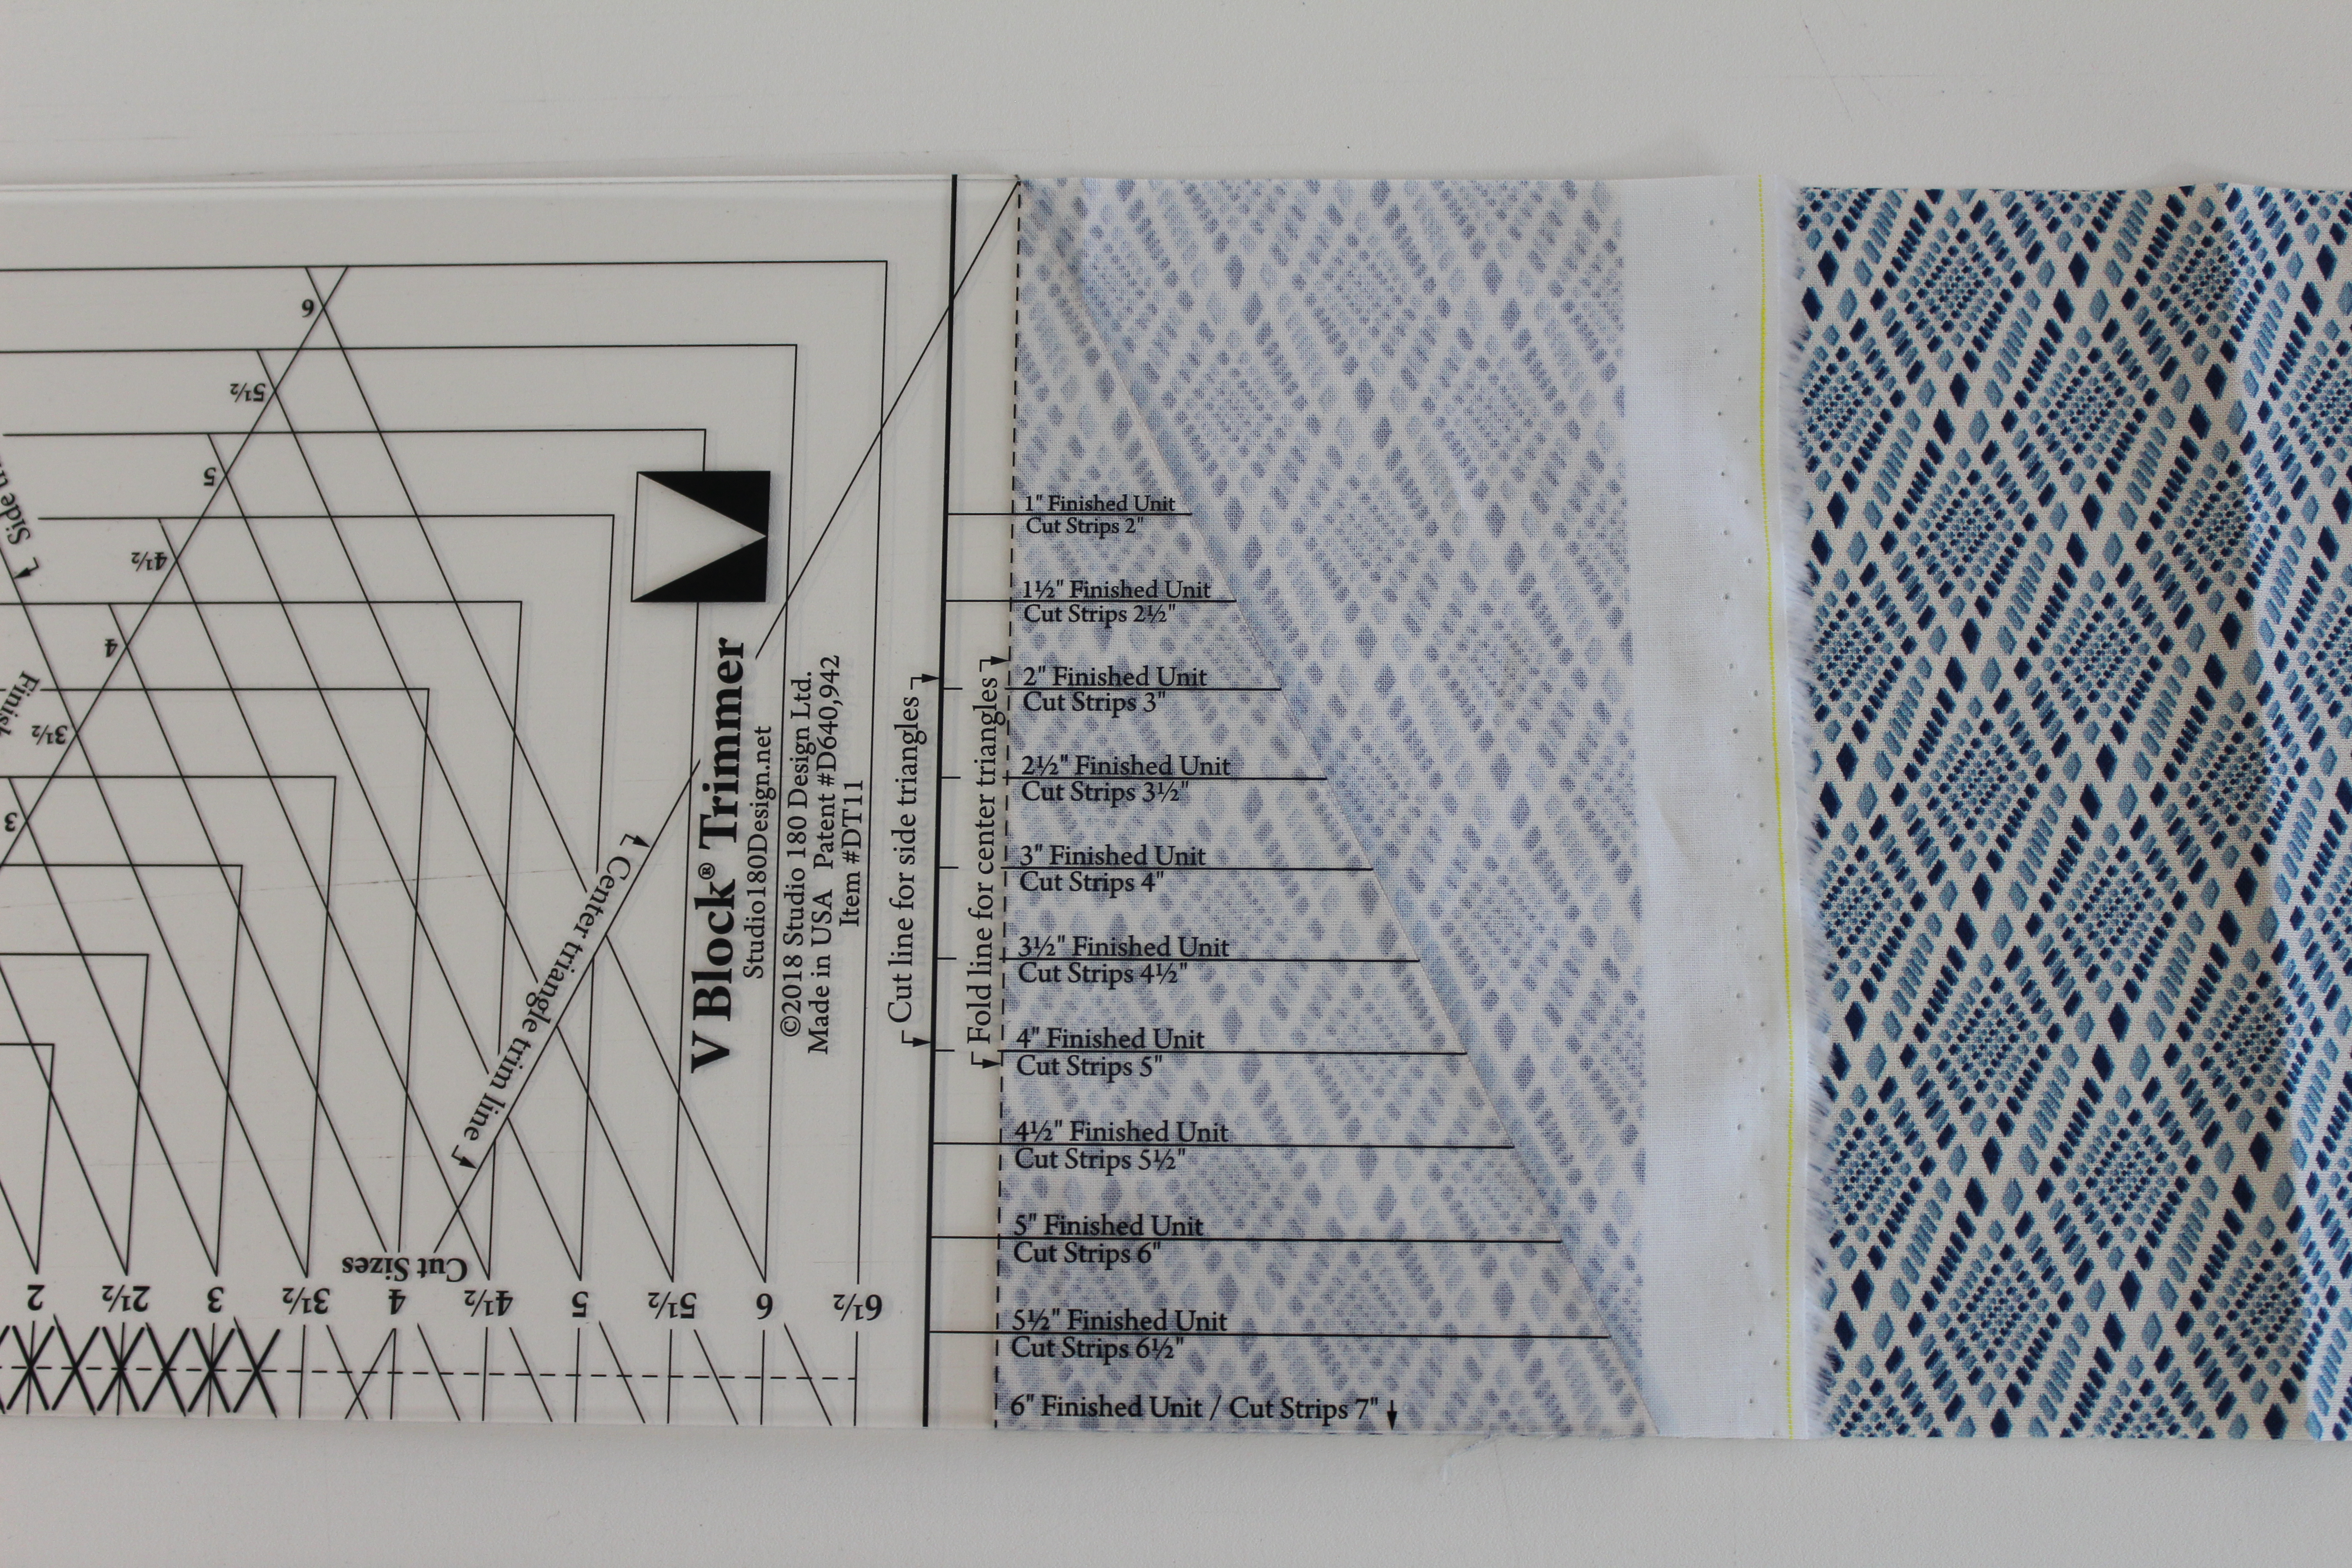
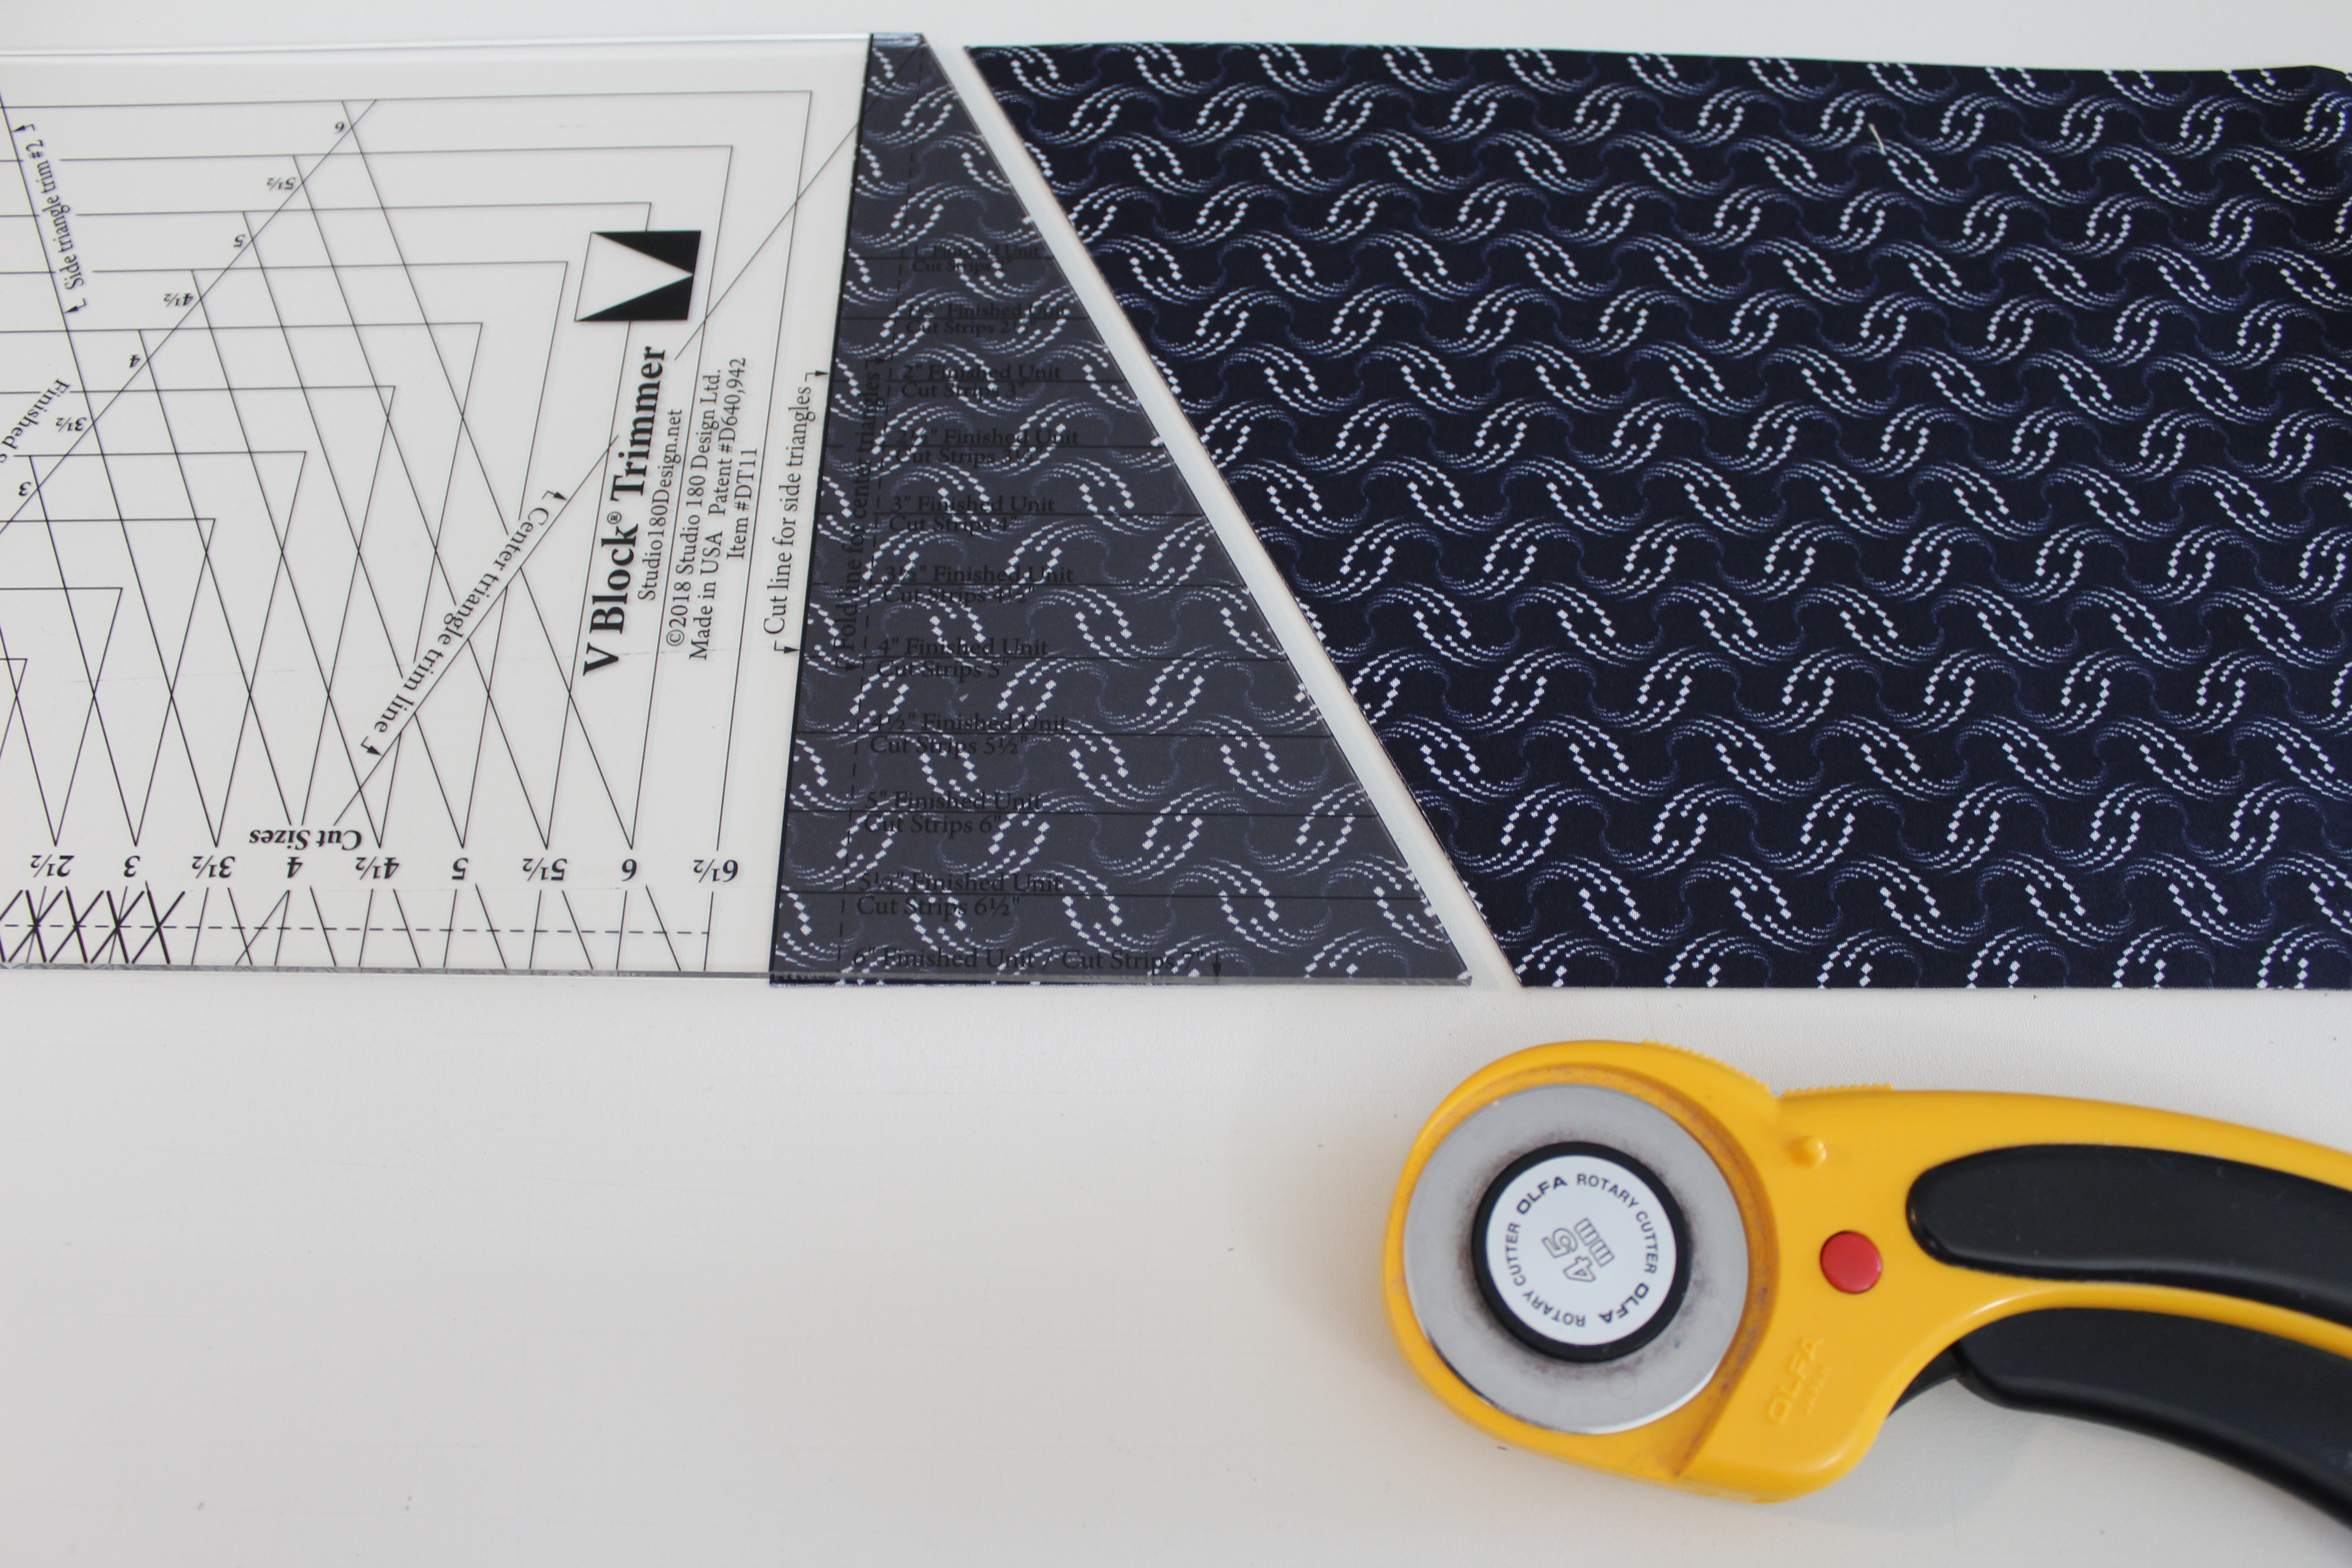
Step 2 – Cut along the slanted edge of the tool. Unfold the piece to reveal a Center Triangle. Flip the strip top to bottom as shown.
Step 2
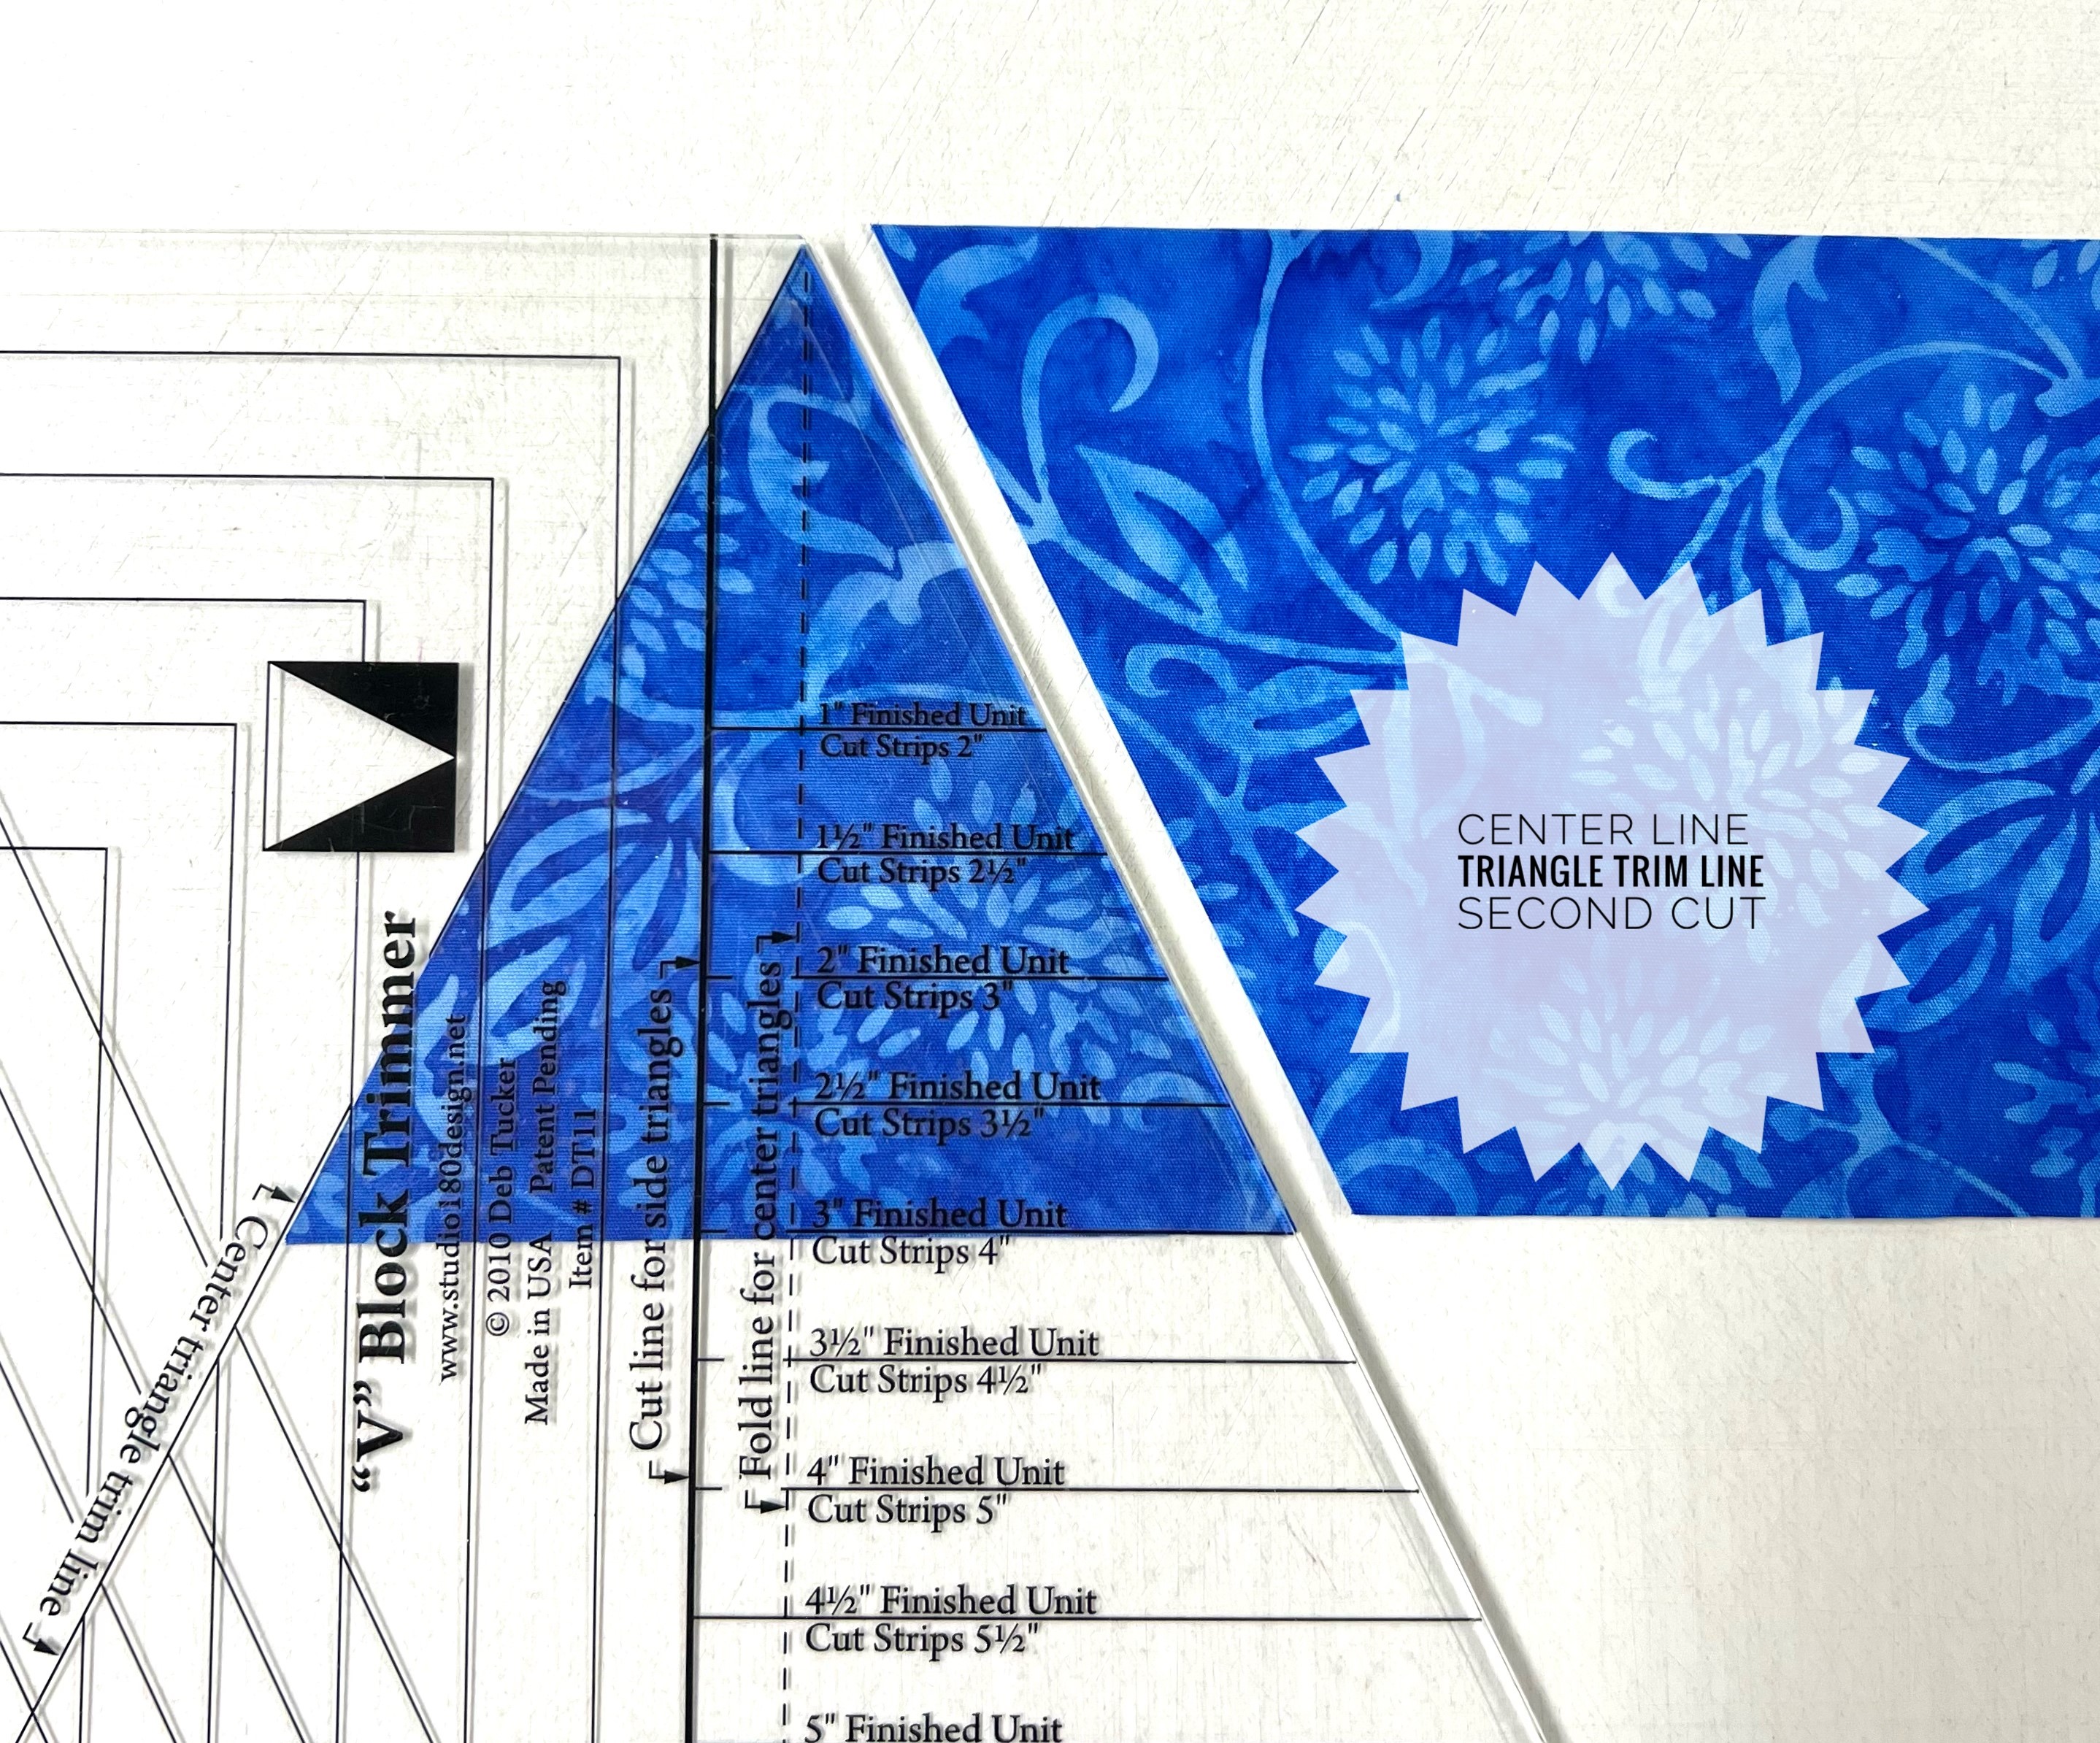
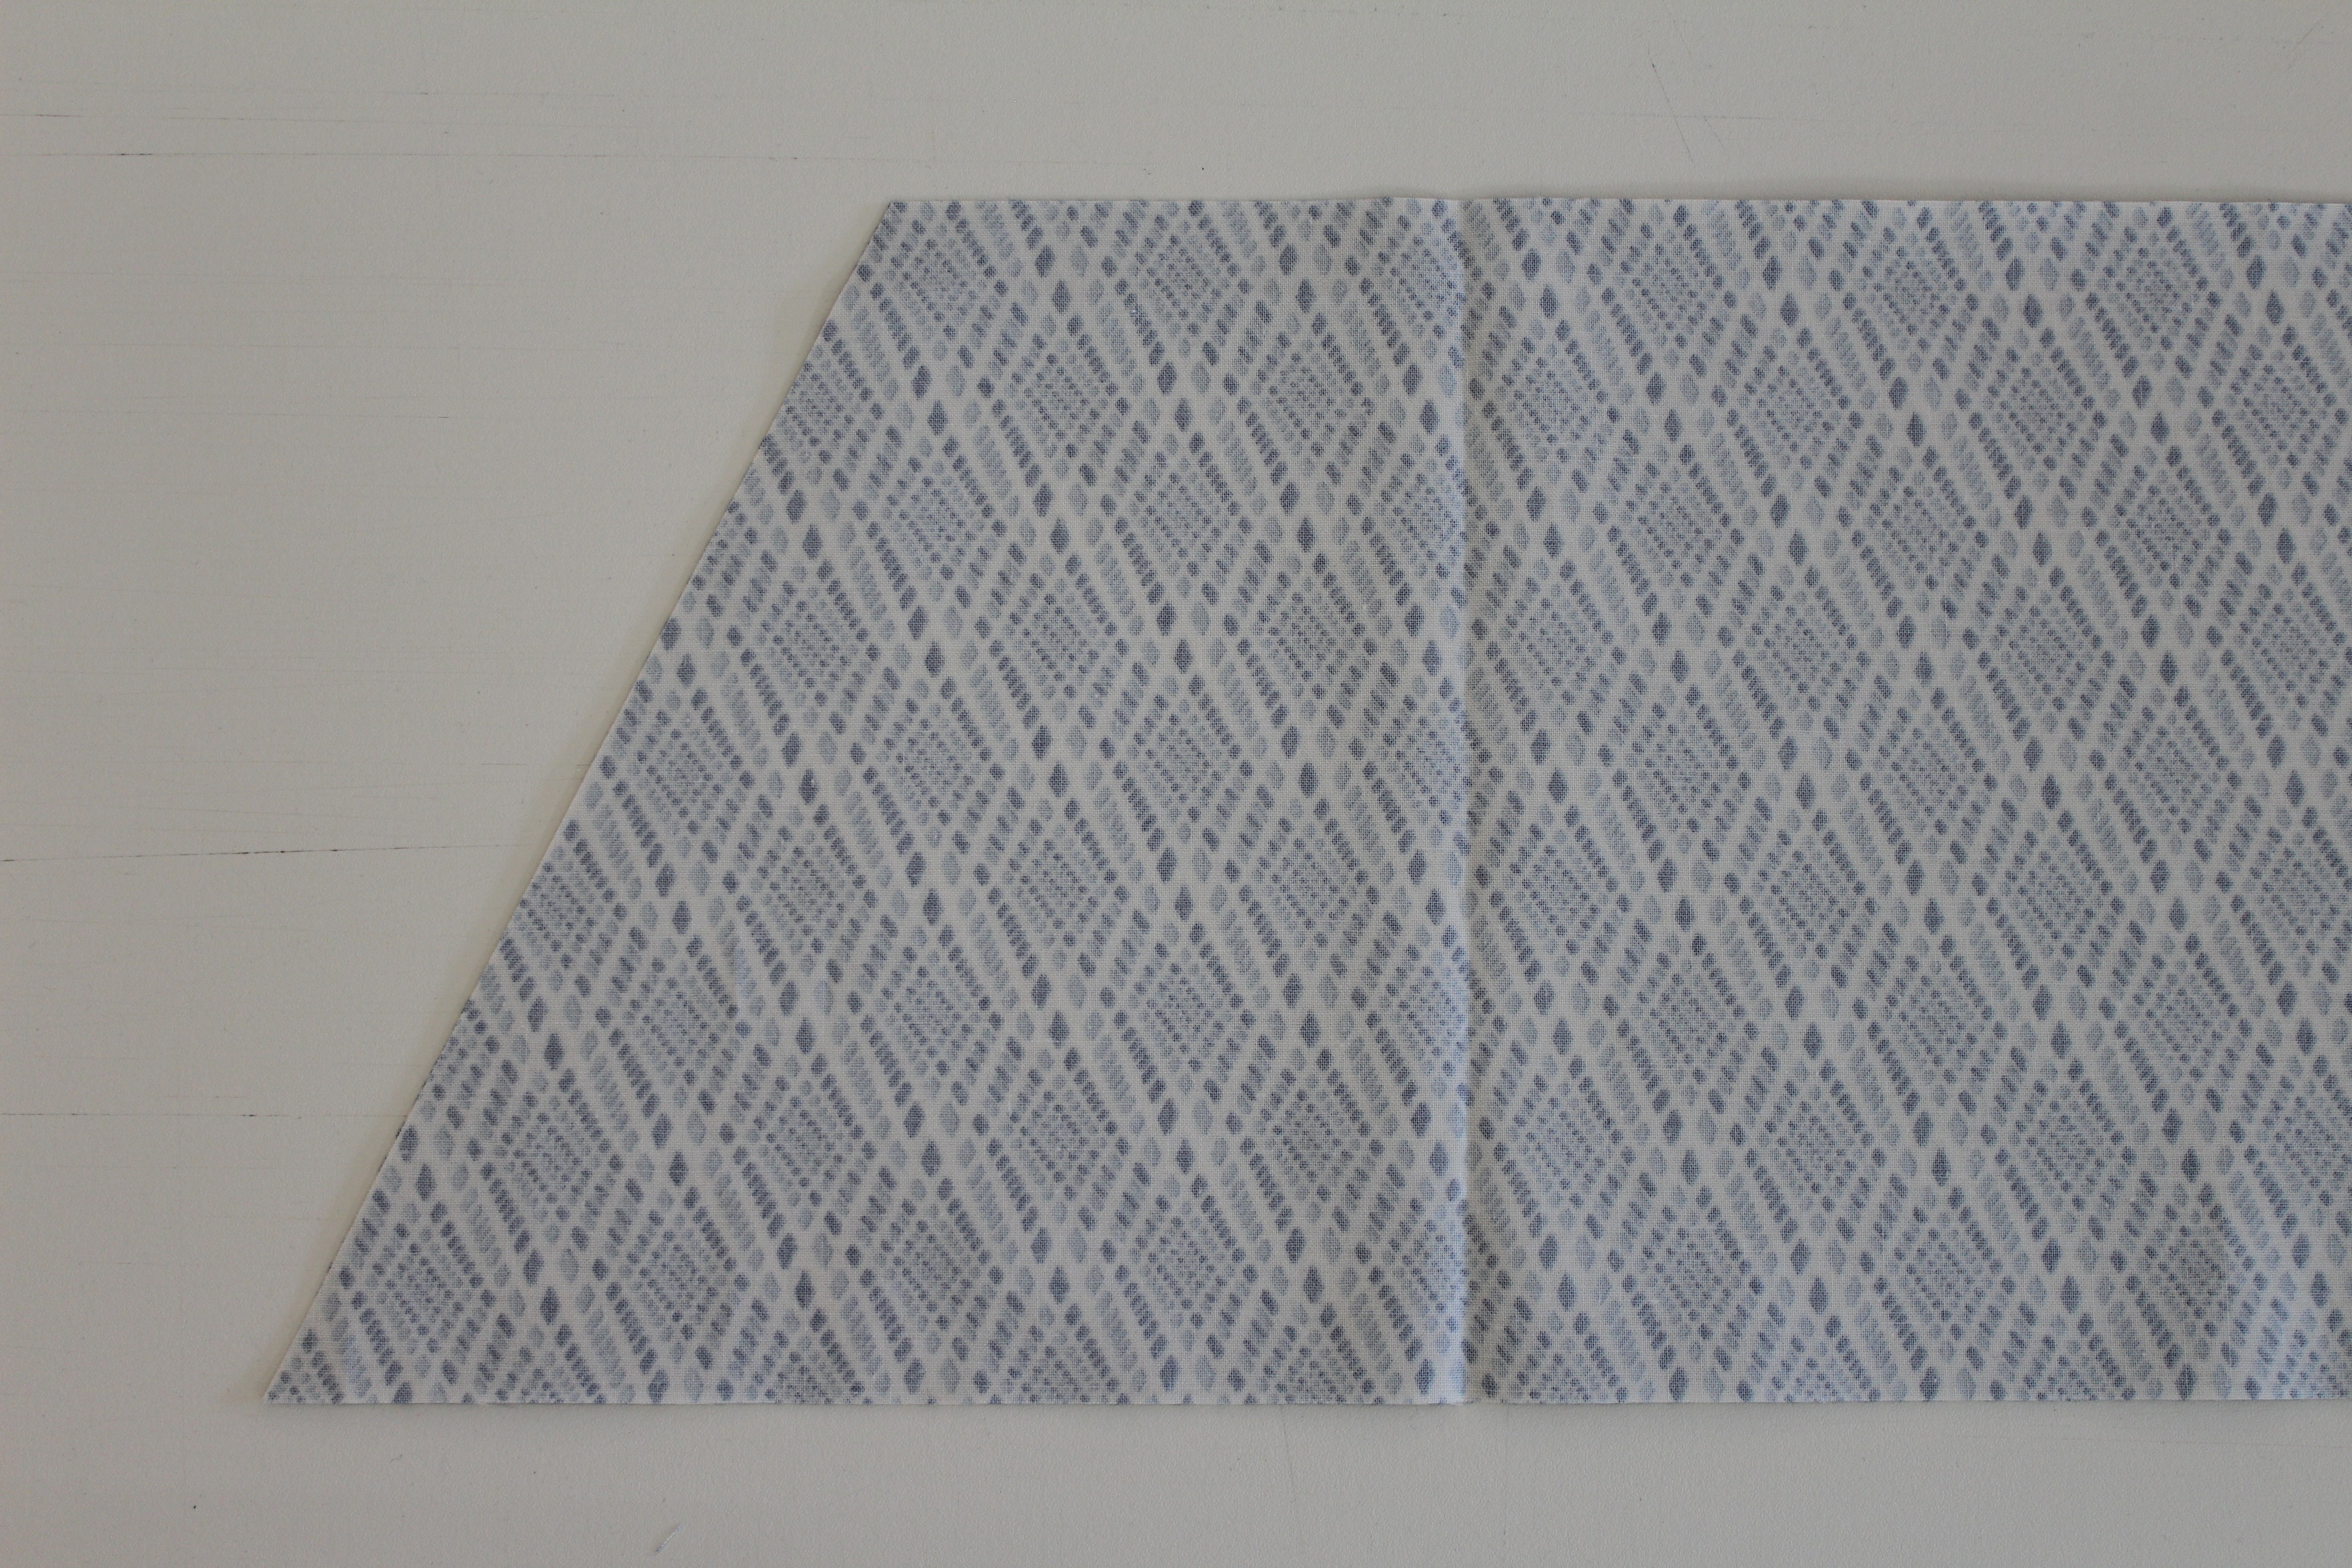
Step 3 – Line up the Center Triangle Trim Line with the edge of the strip, and cut the next triangle.
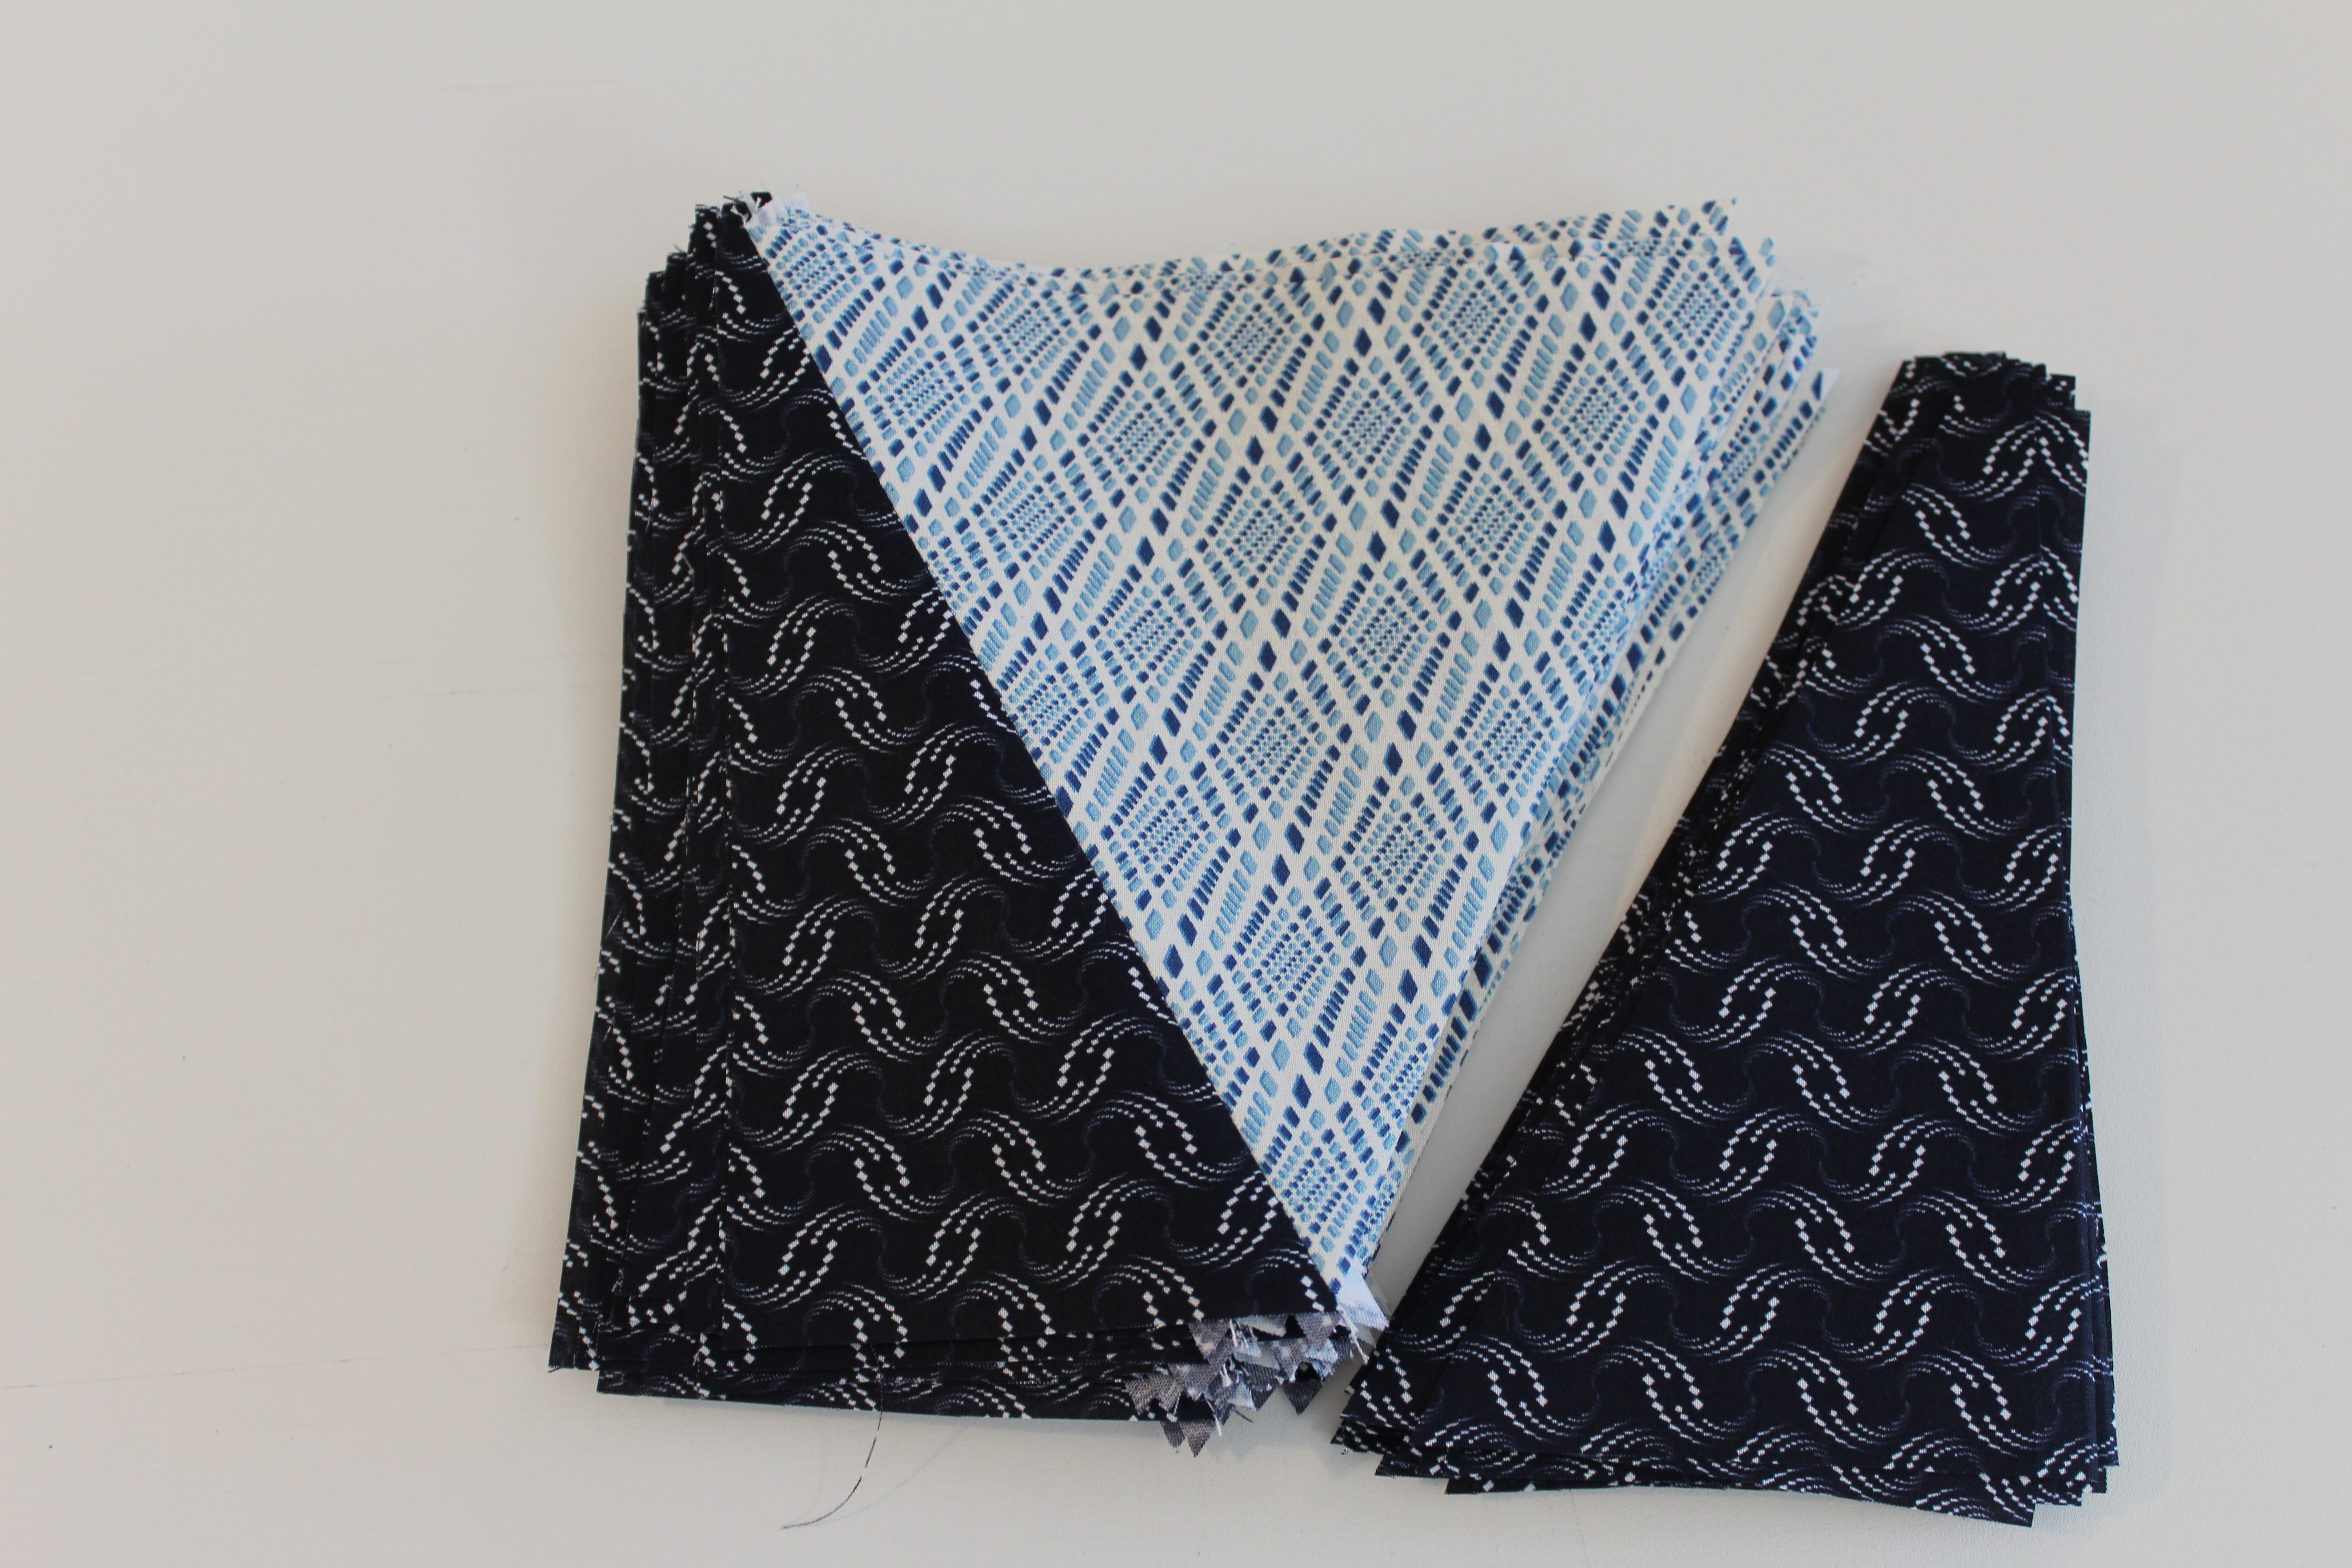
Step 4 – Continue to cut triangles. Flip the strip, cut a center triangle, flip, and cut again. Continue until you have 52 center triangles total.
Flip the strip.Line up the Center Triangle Trim Line with the edge of the strip.Continue to cut triangles.
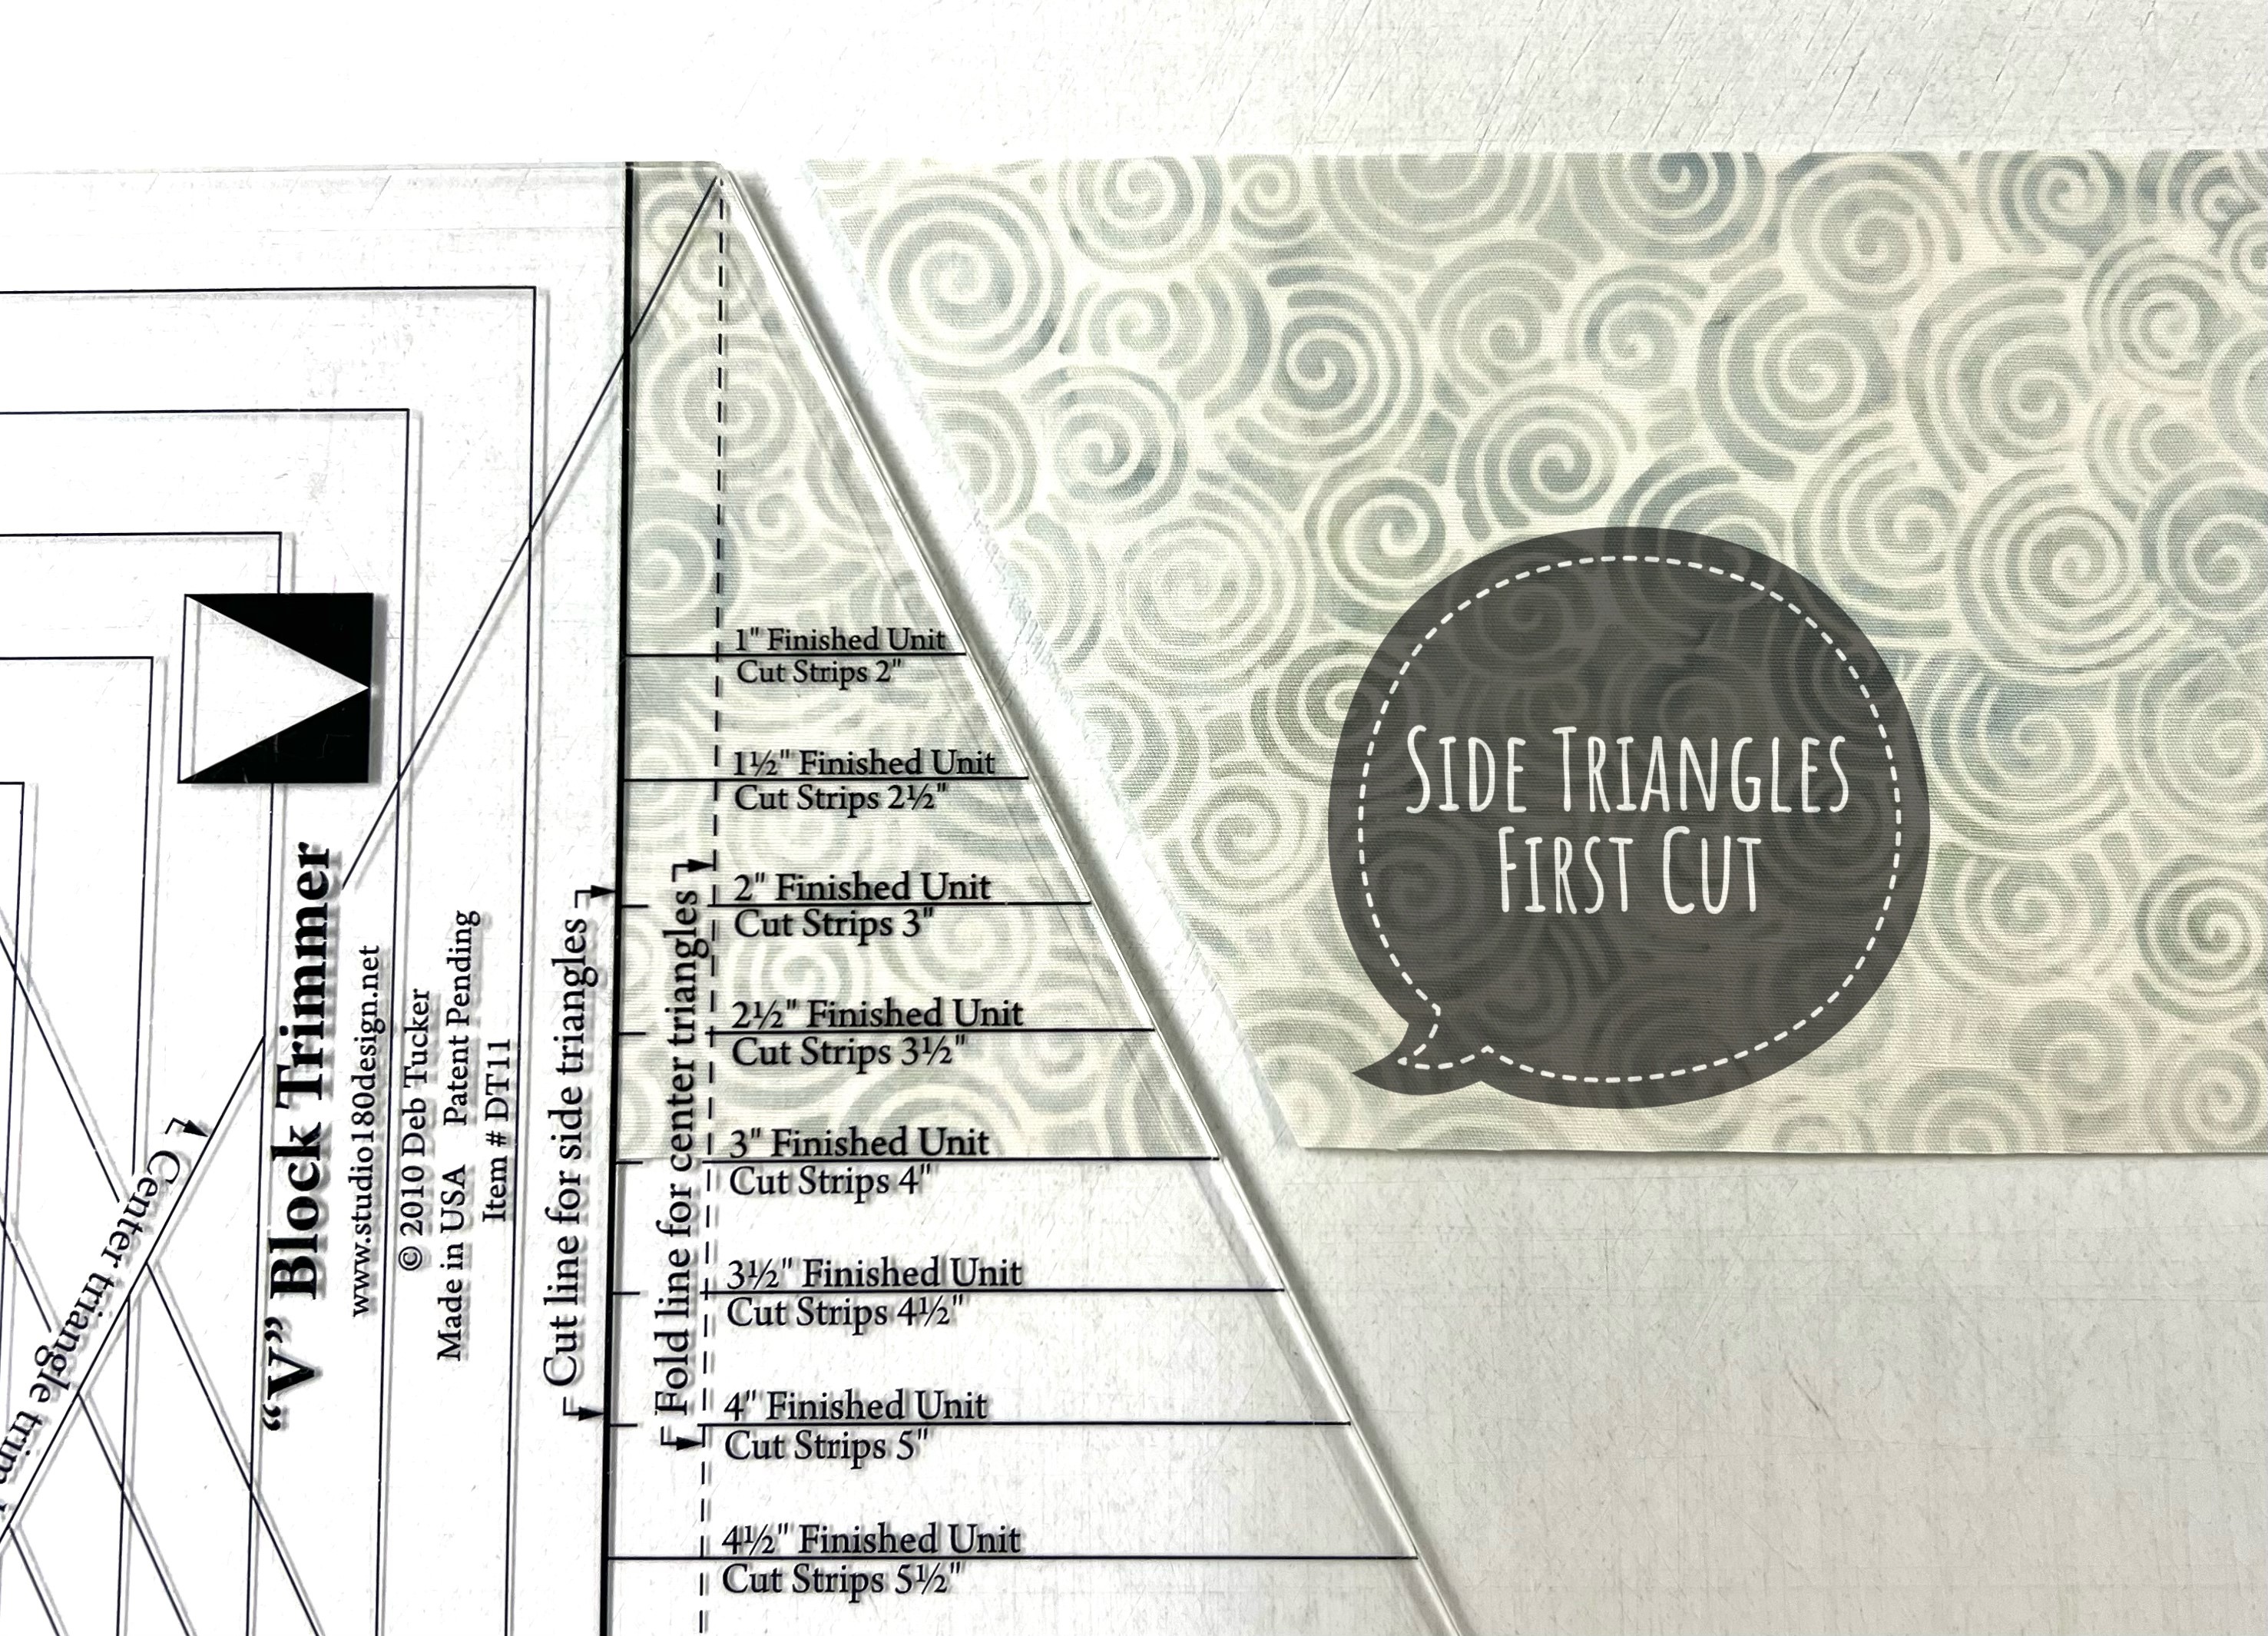
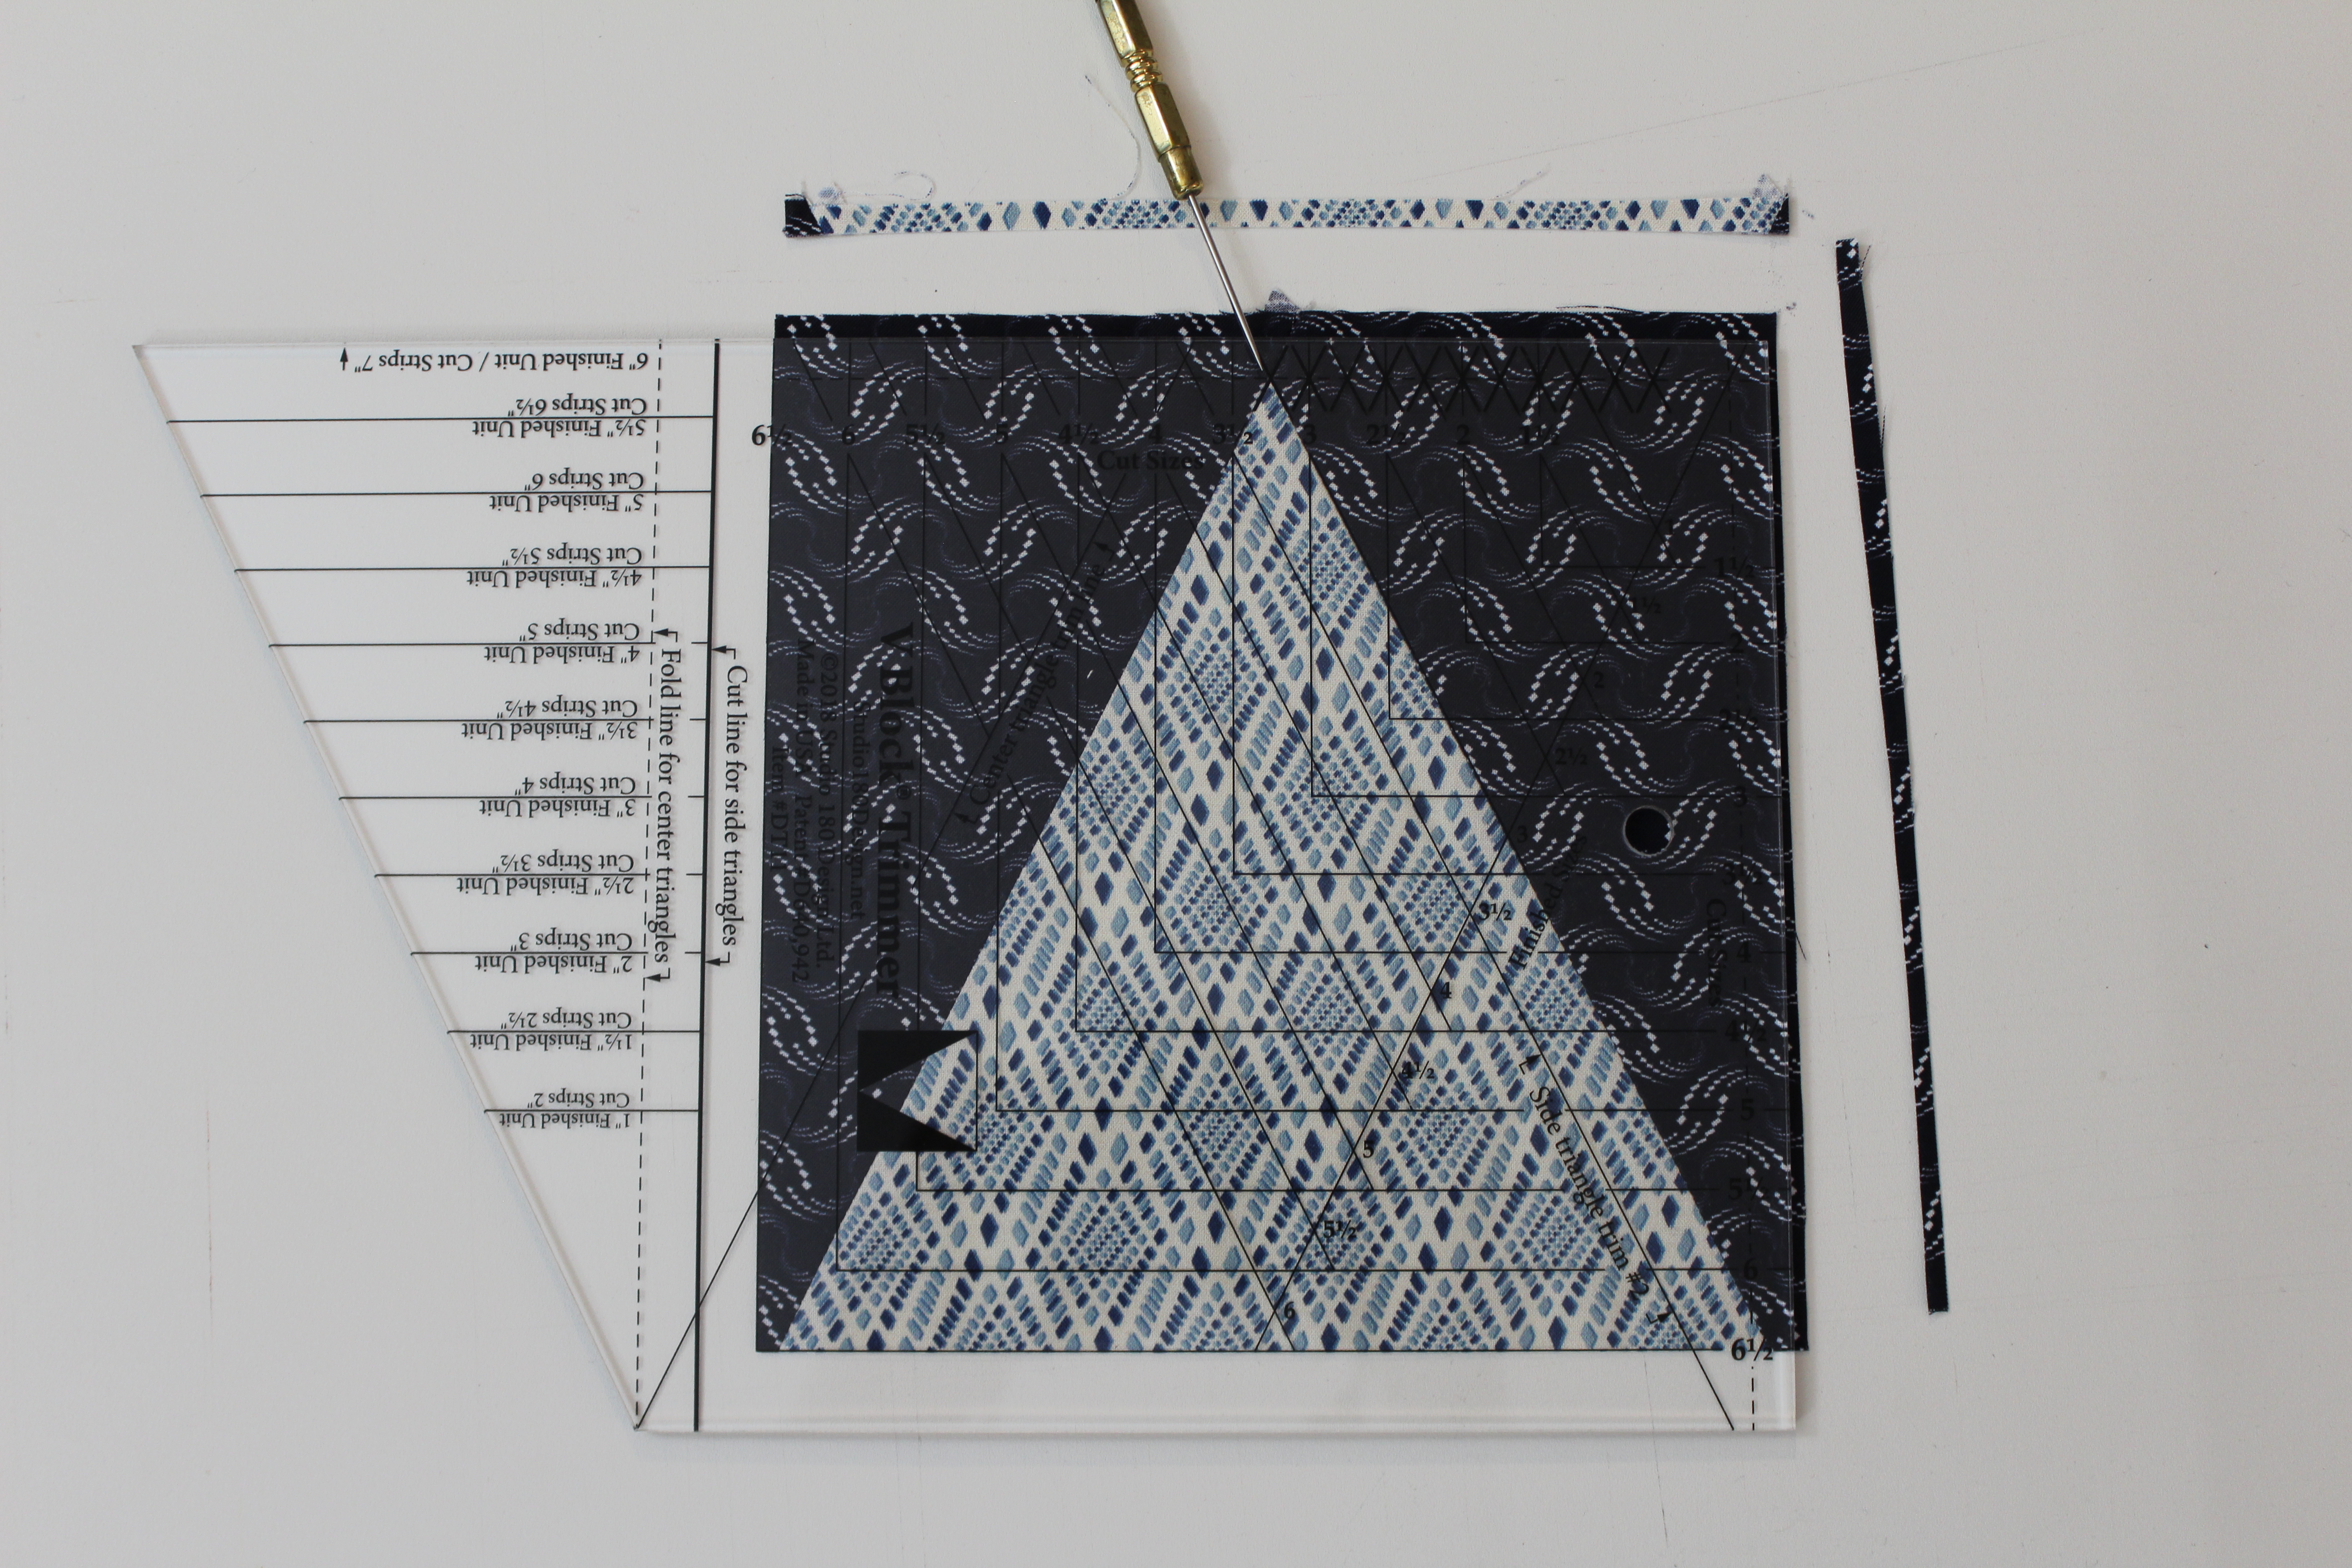
Step 5– Position the Print 1 Side Triangle strips wrong sides or right sides together in order to yield mirror images. Trim the selvages and position the Cut Line for Side Triangles line on your strips, lining up the 6” finished unit line (bottom of the tool) with the bottom raw edge of the strip. Cut along the angled edge.
Step 5
Step 6– Rotate the V Block® tool and position the Side Triangles Trim #2 line on the edge of the strip you just cut, making sure the angled edge of your strip is lined up along the second trim line. Cut along the edge. Continue cutting until you have 52 pairs of Side Triangles from Print 1.
Step 6
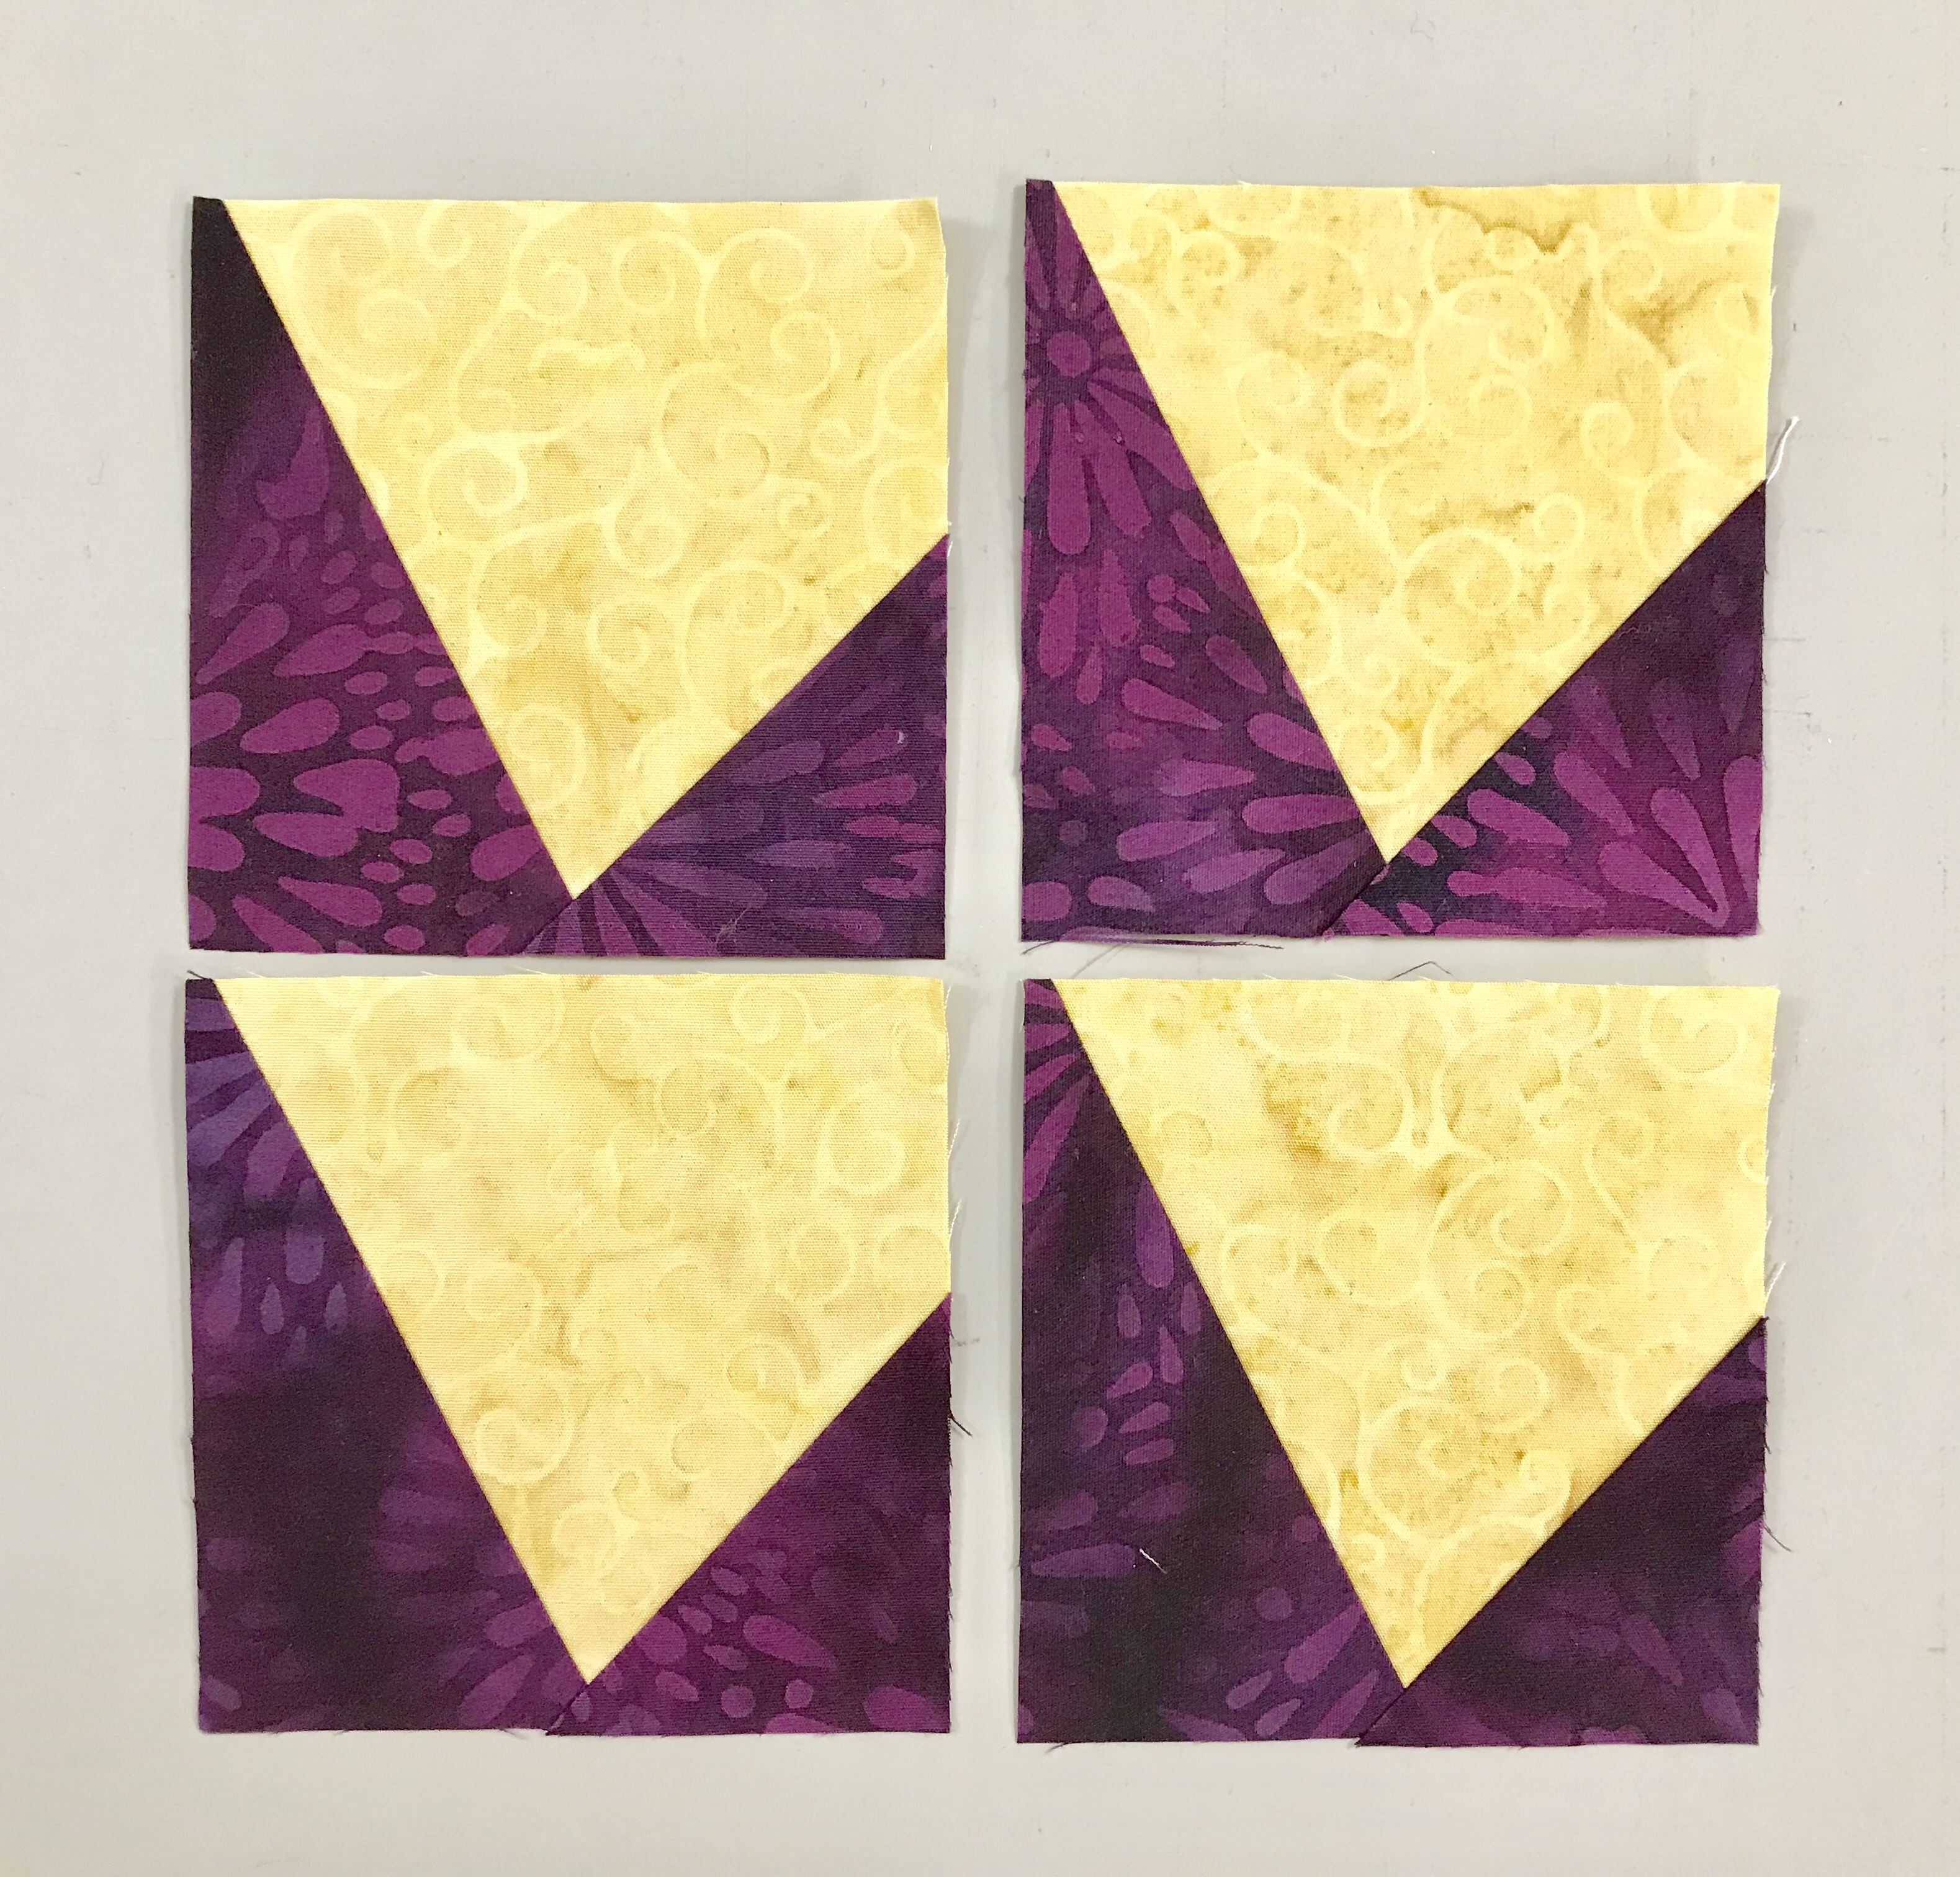
Step 7– Lay out the center triangles and the side triangle pairs.
Step 7
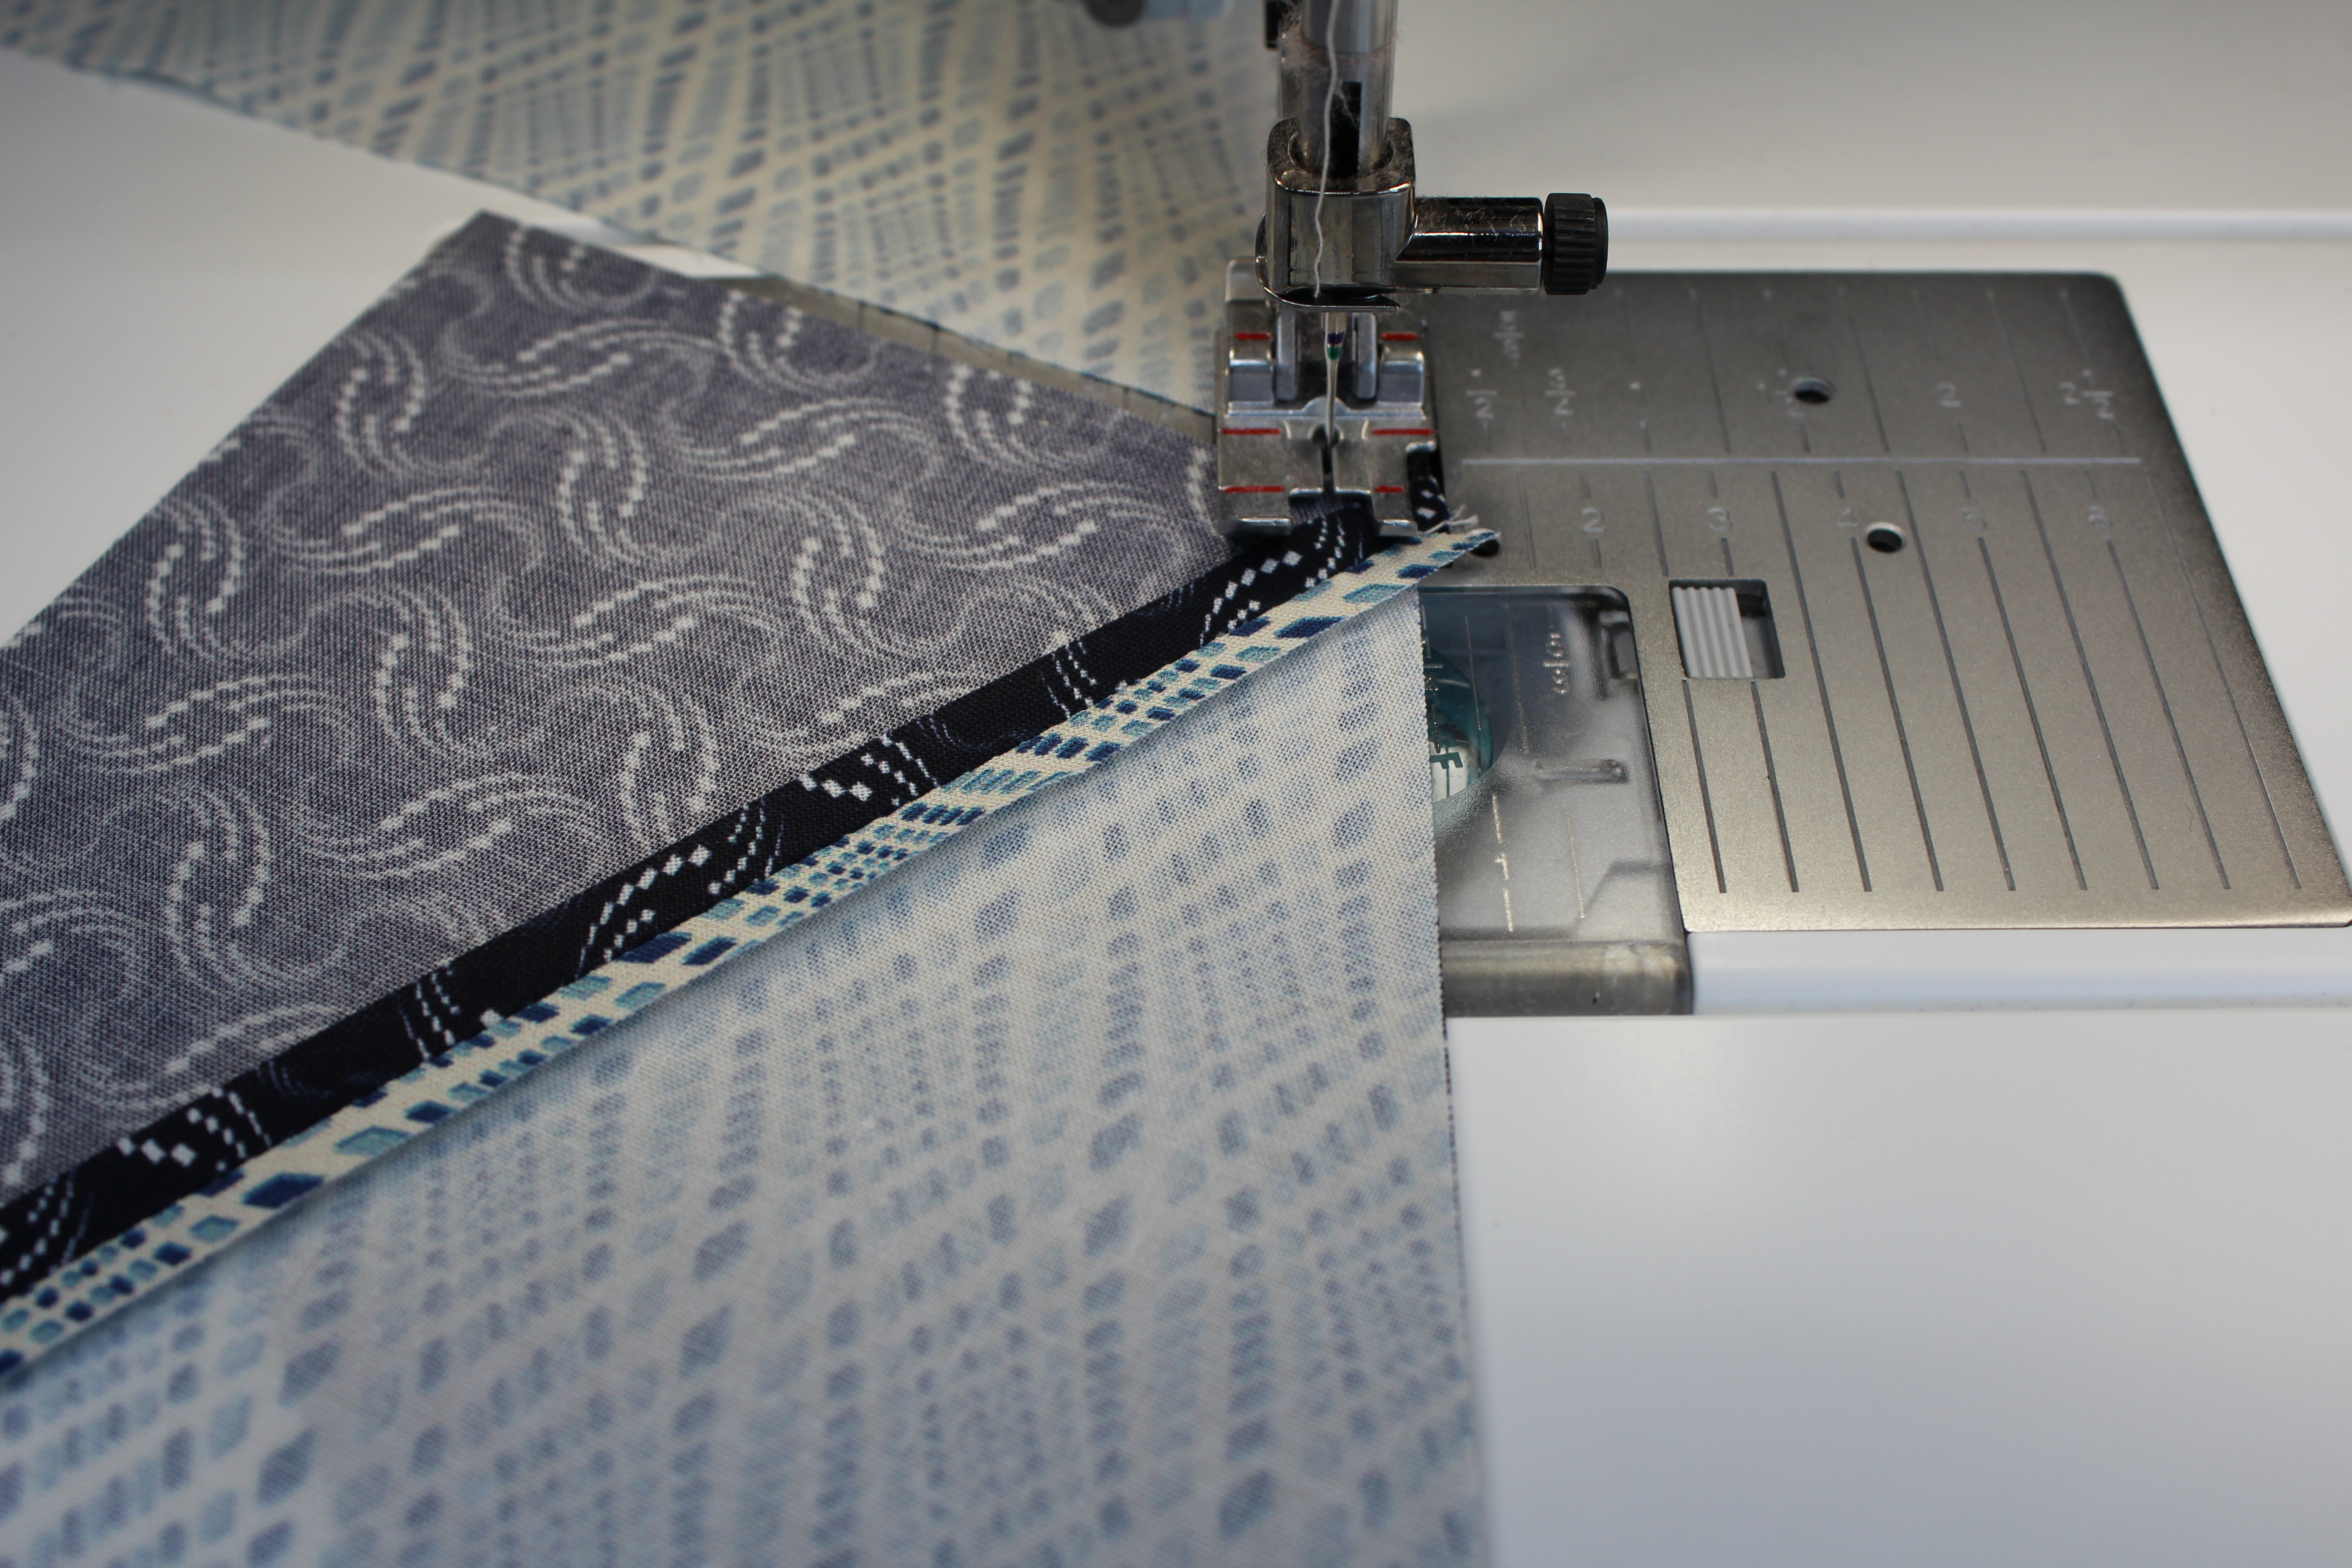
Step 8– Align and stitch one side triangle to the center triangle. Use care to make sure you are lining up the correct edges of both the center and side triangles. Stitch and press the seam open. Do this for all center triangles.
Step 8 – this photo shows layering the V Block unit on top of the side triangleStitch and press seams open.
Step 9– Position the remaining side triangles on the other side of the center triangles. Stitch and press the seam open. Repeat for all units
Position remaining side triangles on the other side.Stitch & press seams open.
Step 10– Trim the units. Place the V Block unit on the cutting mat right side up with the point of the Center Triangle closest to you. Position the V Block® tool on the unit, aligning the 6” Finished Size measurement with the seam lines. Trim the first two sides of the unit.
Trim up the side and across the top
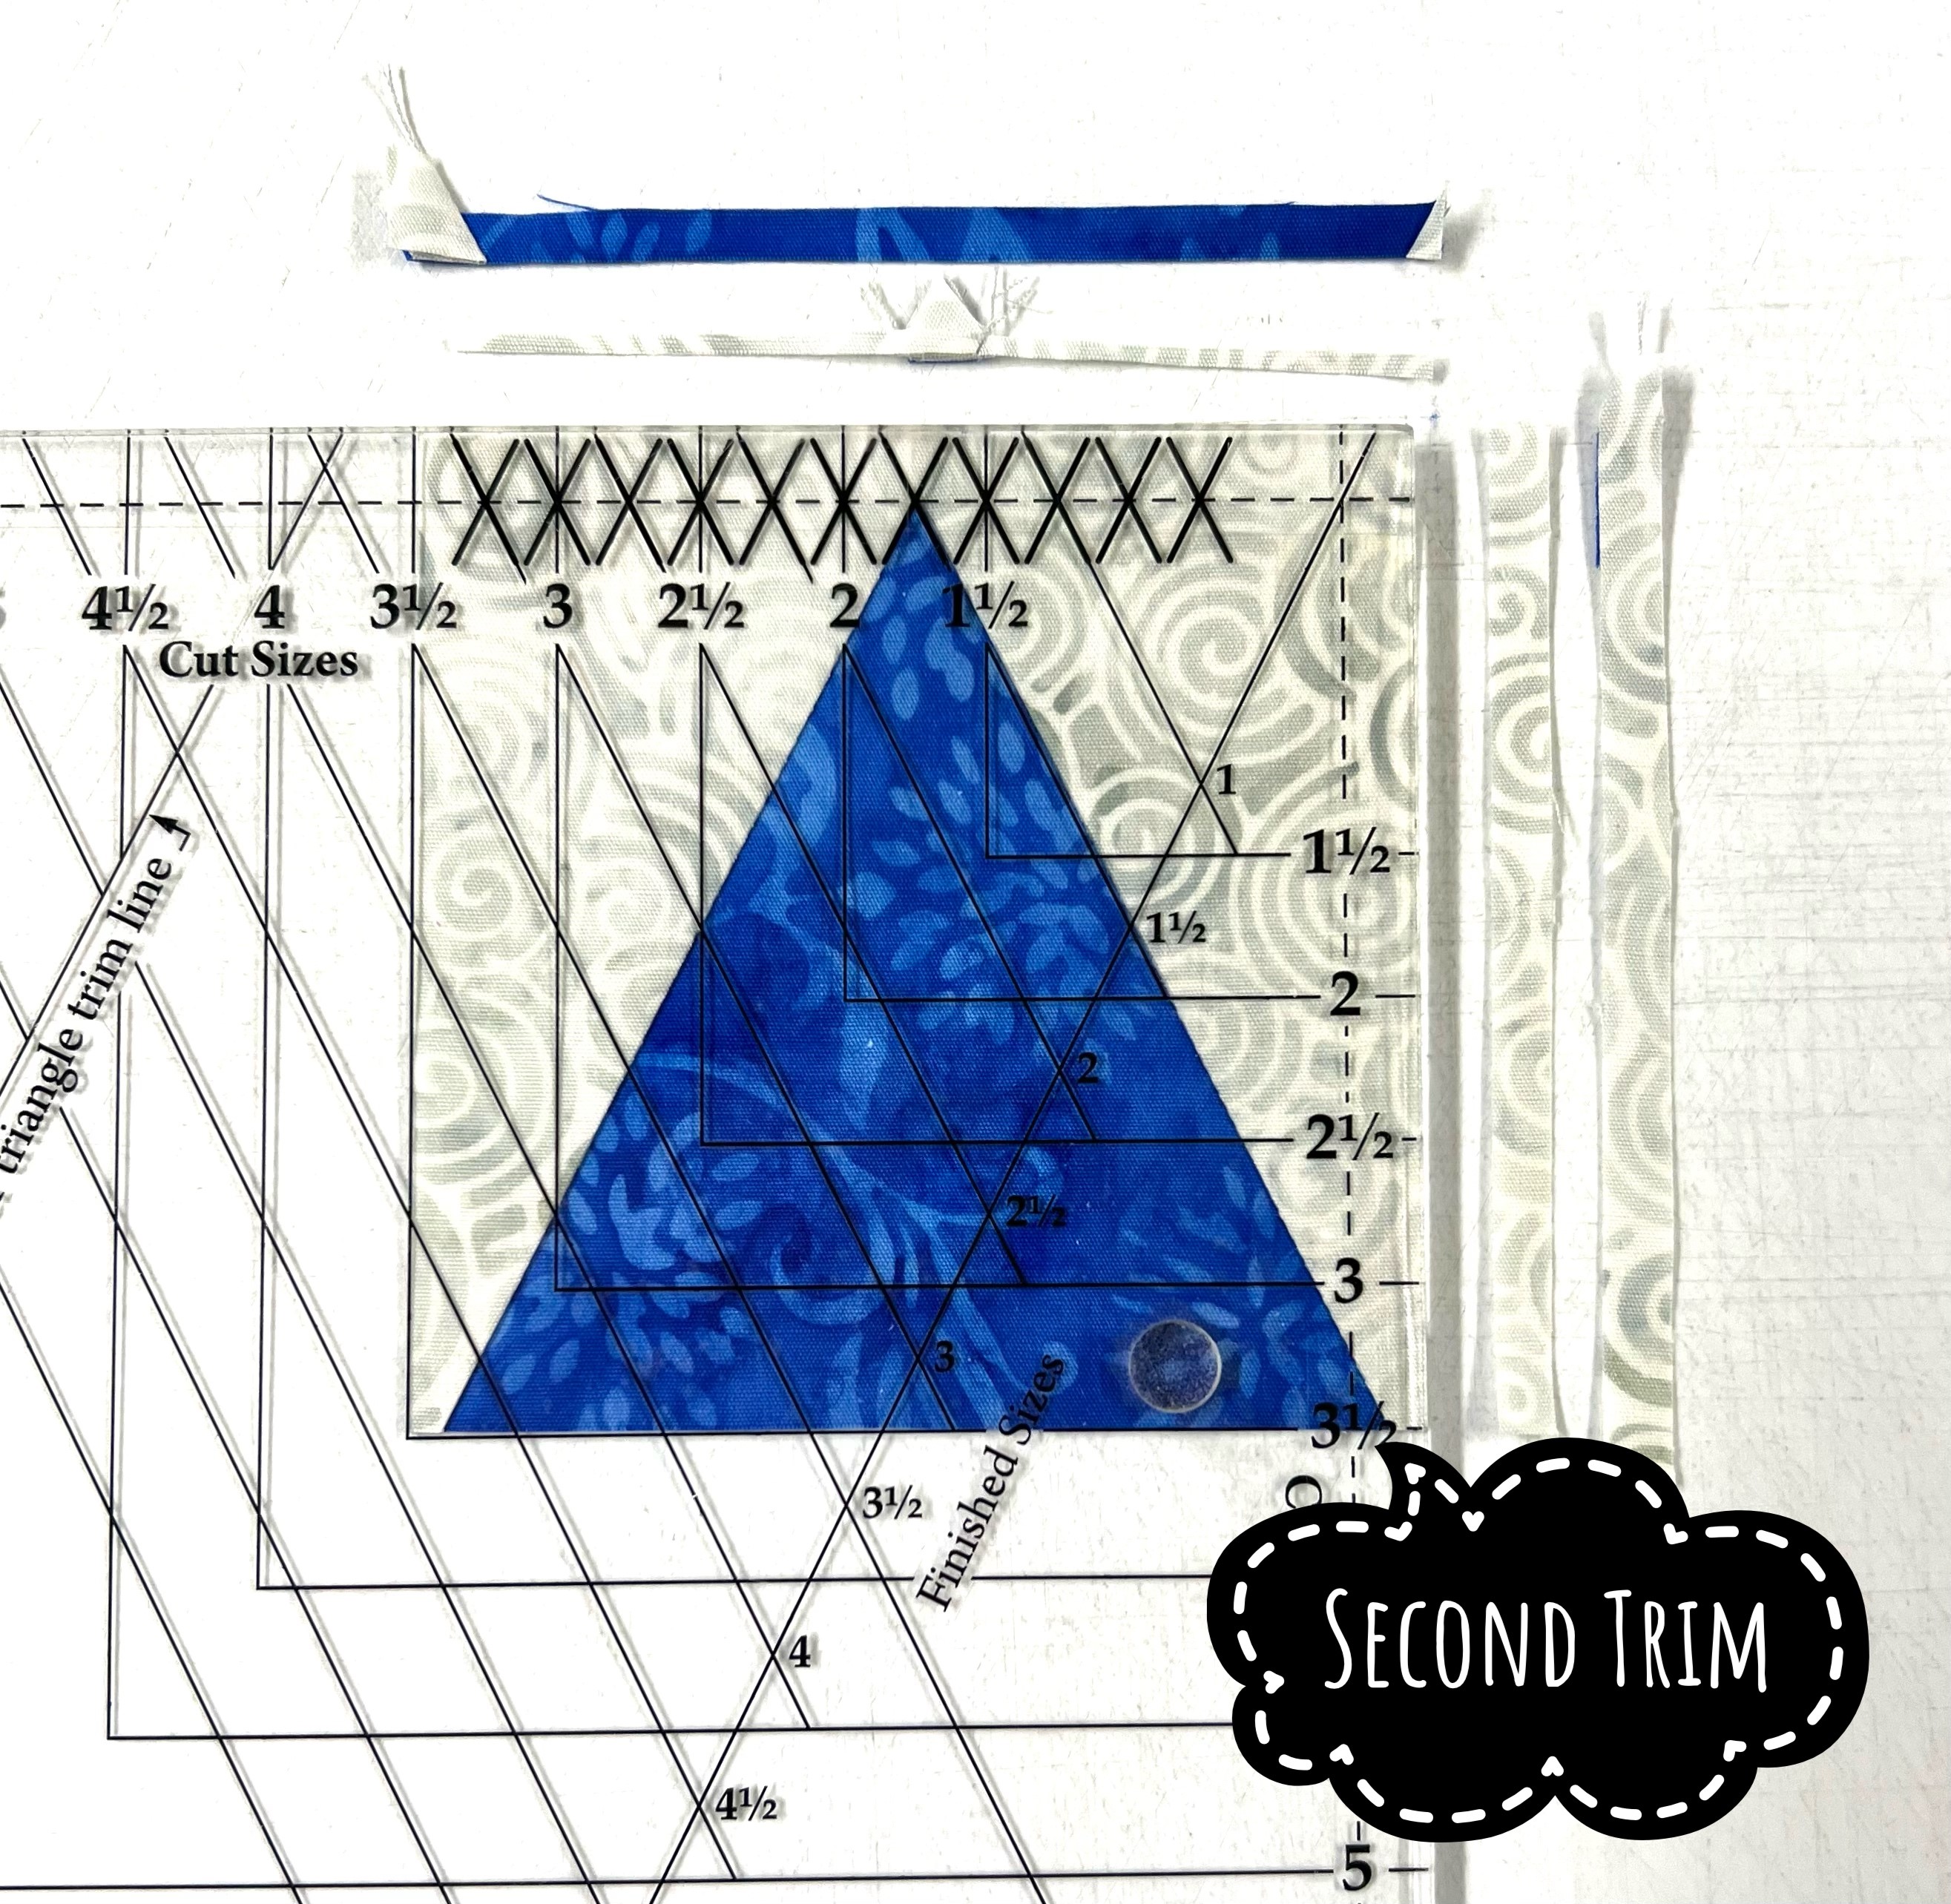
Step 11– Rotate the unit 180o and reposition the tool on top, aligning the trimmed edges of the unit with the Cut Size measurement of 6½” and placing the point of the Center Triangle “V” in the “X” at the top of the tool. Trim the remining two sides. Trim all 52 units.
Trim 2 – trim up the side and across the top.Make 52 Unit P V Blocks
See instructions for left hand cutting. Congratulations, you have learned another new skill and how to use the V Block tool.
I made this quilt for my sister Mary. She came with me to every doctors appointment and every cancer treatment for nine months. Mary had to wait in the car during these (winter) appointments because of COVID restrictions. She loves this pattern and I was so happy to make it for her.
I love Christmas & I love Christmas Tree Quilts! Over the years I have made several and decided to share some with you. Studio 180 Design tools gives you several ways to easily make Christmas Trees.
I Believe
I made this 7 years ago for my Granddaughter Samantha. I Believe uses the V Block tool. Below is the supply list:
Stitchin Heaven Quilt Shop is excited to announce a new collaboration of a unique BOM program from Deb Tucker (Studio 180 Design), NYT and USA Today best-selling author Marie Bostwick (Between Heaven and Texas, Hope on the Inside, and the Cobbled Court Quilt Series, including A Single Thread), Deb Luttrell (Stitchin’ Heaven), and Jason Yenter (In the Beginning Fabrics). In this 12-month program you will take your own Journeys through an exclusive novella written by Marie Bostwick. Each month you will receive a chapter from the book which is exclusive to this program. It is a page-turning tale of love, loss, and new beginnings for PJ Lloyd, an adventurous young woman who defies her family and risks her future to make a difference after the attack that plunged America into the second World War.
I will be your guide on this “Journey”. Every month I will post a tutorial showing you how to use the tools required for this beautiful quilt and answering your questions.
Throughout the Journeys BOM you will be on your own journey to learn how to use 8 of the tools from Studio 180 Design. Tools include: V Block, Corner Pop, Four-patch Square Up, Tucker Trimmer, Rapid Fire Lemoyne Star, Square Squared, Wing Clipper, Corner Beam. The final quilt measures 102″ x 102″. A beautiful collection of fabrics have been designed by Jason Yenter of In The Beginning Fabrics, that will make this project an heirloom favorite.
I tested the pattern with fabrics from Deb Tucker’s stash. It is truly a beautiful quilt I can’t wait for you to make your own! The Journey’s BOM program is due to start in September 2020. We will be sure to keep you up to date and informed on all the details.
A conversation with Deb Luttrell, Deb Tucker & Marie Bostwick
I’m sitting here in Tuckerville, watching TV, looking at my ceiling. I pin orphan blocks on my drop ceiling.
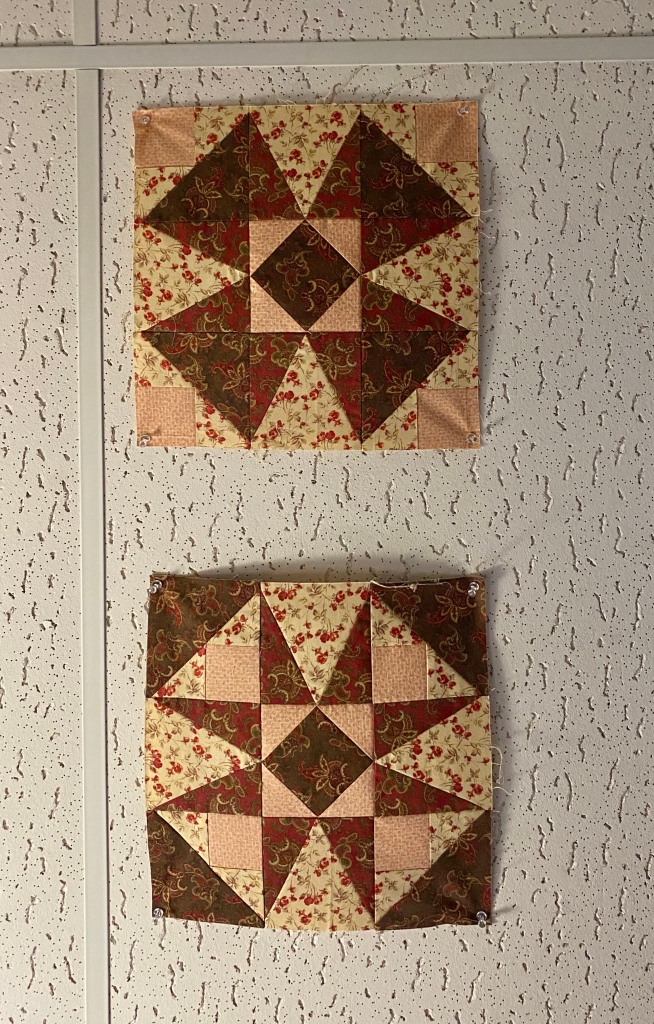
Two of a Kind
These two blocks are made from the same fabric and units. They both have a Square Squared for the block center, 4 V Block units for the star points and 4 Shaded Four Patch Units (with the Tucker Trimmer I) in the block corners. The top block has the Shaded Four Patch unit small square facing out, while the bottom block has the Shaded Four Patch unit small square facing in. Two very different looks from the same block.
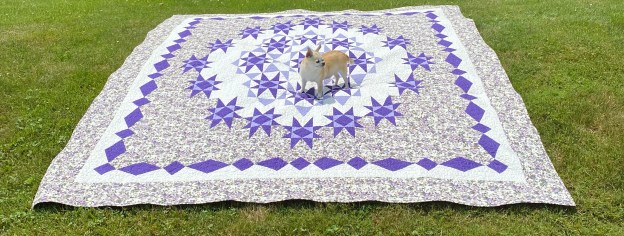
As I stared at these blocks on the ceiling I wondered what the secondary design would be if I put them in a quilt. Time to break out EQ8!
I used shades of purple and lavender because I thought my sister may like it. This is pretty cool. EQ8 is fun to use and brings quilt designs to life. Time to break out my Studio 180 Design tools get busy!
The fabrics featured in this post were given to me by Northcott Fabrics.
A Storm at Sea quilt has been on my “need to make list” for a long time. I especially love the kind that use graduating colors. Lucky for me, fellow Studio 180 Design Certified Instructor Michelle Hiatt created her pattern “Calm Seas“. This fabulous pattern offers you a choice of 3 sizes; Throw, Double or King. I chose to make the Throw size (62″ x 72”). Calm Seas is a companion pattern for Studio 180 Design’s Large Square/Squared, Diamond Rects & V Block Tools.
I chose to use the fabulous fabrics from Northcott’s Canvas line. I needed 12 graduating colors in 2 different values each. Canvas is richly textured and has a depth of color that is gorgeous!
Definitely use your best organizational skills when making this pattern. Michelle has made it much easier for us to conquer a storm at sea.
If you know me…you know I use paper plates to keep myself organized. I snipped a piece of each fabric and pasted it to the paper plate, writing down all pertinent info to keep my brains from falling out.
I was very fortunate to spend a few days at Bridle Creek Bed & Breakfast for an annual mini quilt retreat with friends. I managed to get all my diamond rects, large square/squared and small square/squared units done!
Following the pattern instructions, I laid out my units in the proper color order to achieve this beautiful flow.
I numbered my rows and pinned them together to begin stitching them together,
A little precision pinning goes a long way when it comes to nice crisp points.
After four days of hard work I finished the top. Thanks to Michelle’s pattern Calm Seas & Deb Tucker’s Studio 180 Design tools I have checked another awesome quilt off my bucket list!
This is day 3 of Studio 180 Design’s Evening Elegance Blog Hop. Deb Tucker has launched her own fabulous signature fabric collection, Twilight Chic, with Island Batik and fabric designer Kathy Engle.
Below are the links to everyone participating in the blog hop:
Unit C. Quarter Square Triangle: Make a Quarter Square Triangle with the fabrics that match the V Blocks, remember to swirl the center.
Unit B. Combination Units: Combination units begin by making half squares triangles (HSTs). The fabric for the HSTs must match the side triangles in the v blocks, so I began by laying out the starter squares next to the V Blocks and then making them into the combination units.
When making Combination units, you are making two at a time, a left & a right. Choose the units that will match the side triangles in the V Blocks as shown above.
Sew the units into rows then join the rows into the block.
Unit A. Diamond Rects: Cut your precision diamonds & side triangles per the Diamonds Rects instructions. Stitch opposite side triangles, press toward the side triangles. Stitch the other opposites side triangles.
Make 4 diamond rects units and trim.
Stitch using a partial seam to the center square. Stitch the second diamond rects unit and so on to finish the block center.
Unit B. High Low Left: Following the instruction the in technique sheet cut your squares and trim, add the replacement side triangle. Mark and stitch the square for the low point and trim.
Make four High Low Left Units.
Unit C Sidekick Right: When making a Sidekick Right, position fabrics face down for cutting. Cut and stitch replacement side triangles.
Peaks & Valleys block unit layout.
Stitch units into rows.
Join the rows to complete the block.
I love the Twilight Chic fabrics from Island Batik and I can’t wait to show you one of the finished quilts!