Last January I had the great joy of meeting my half sister Marti for the first time. I also acquired many new family members.
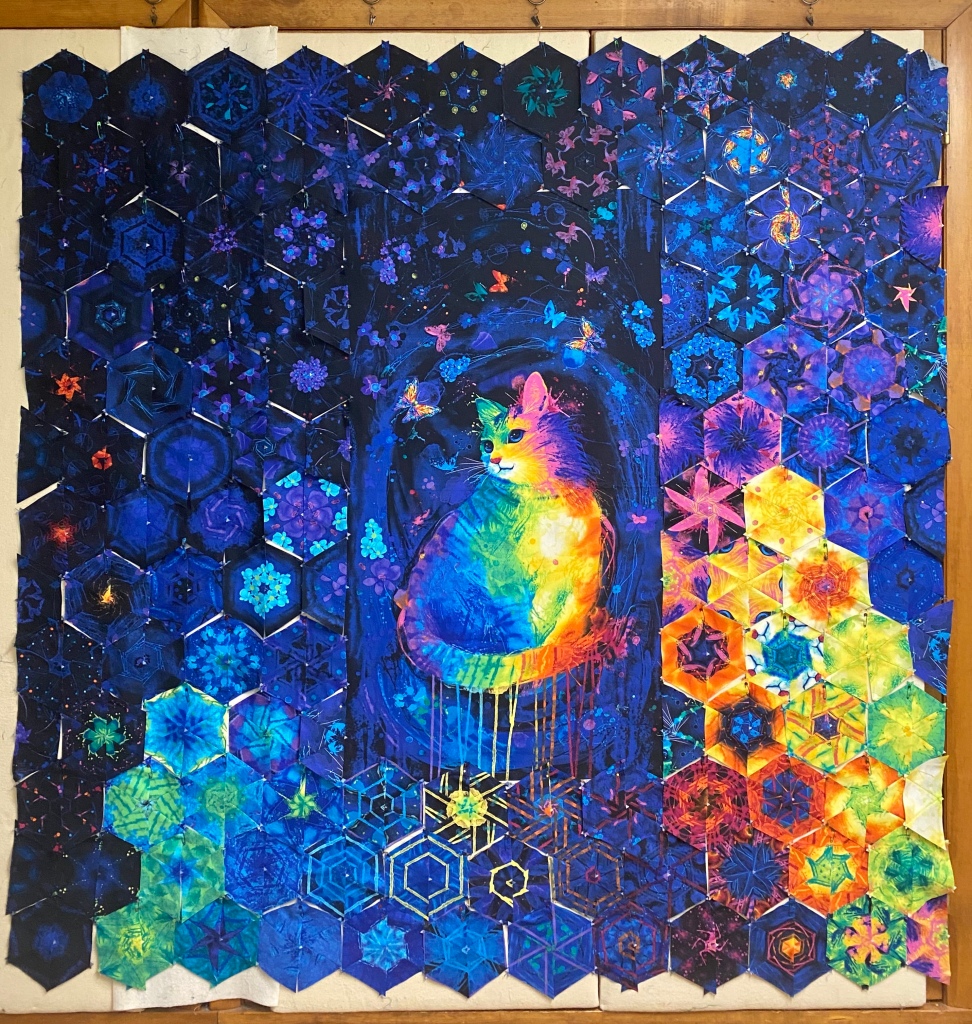
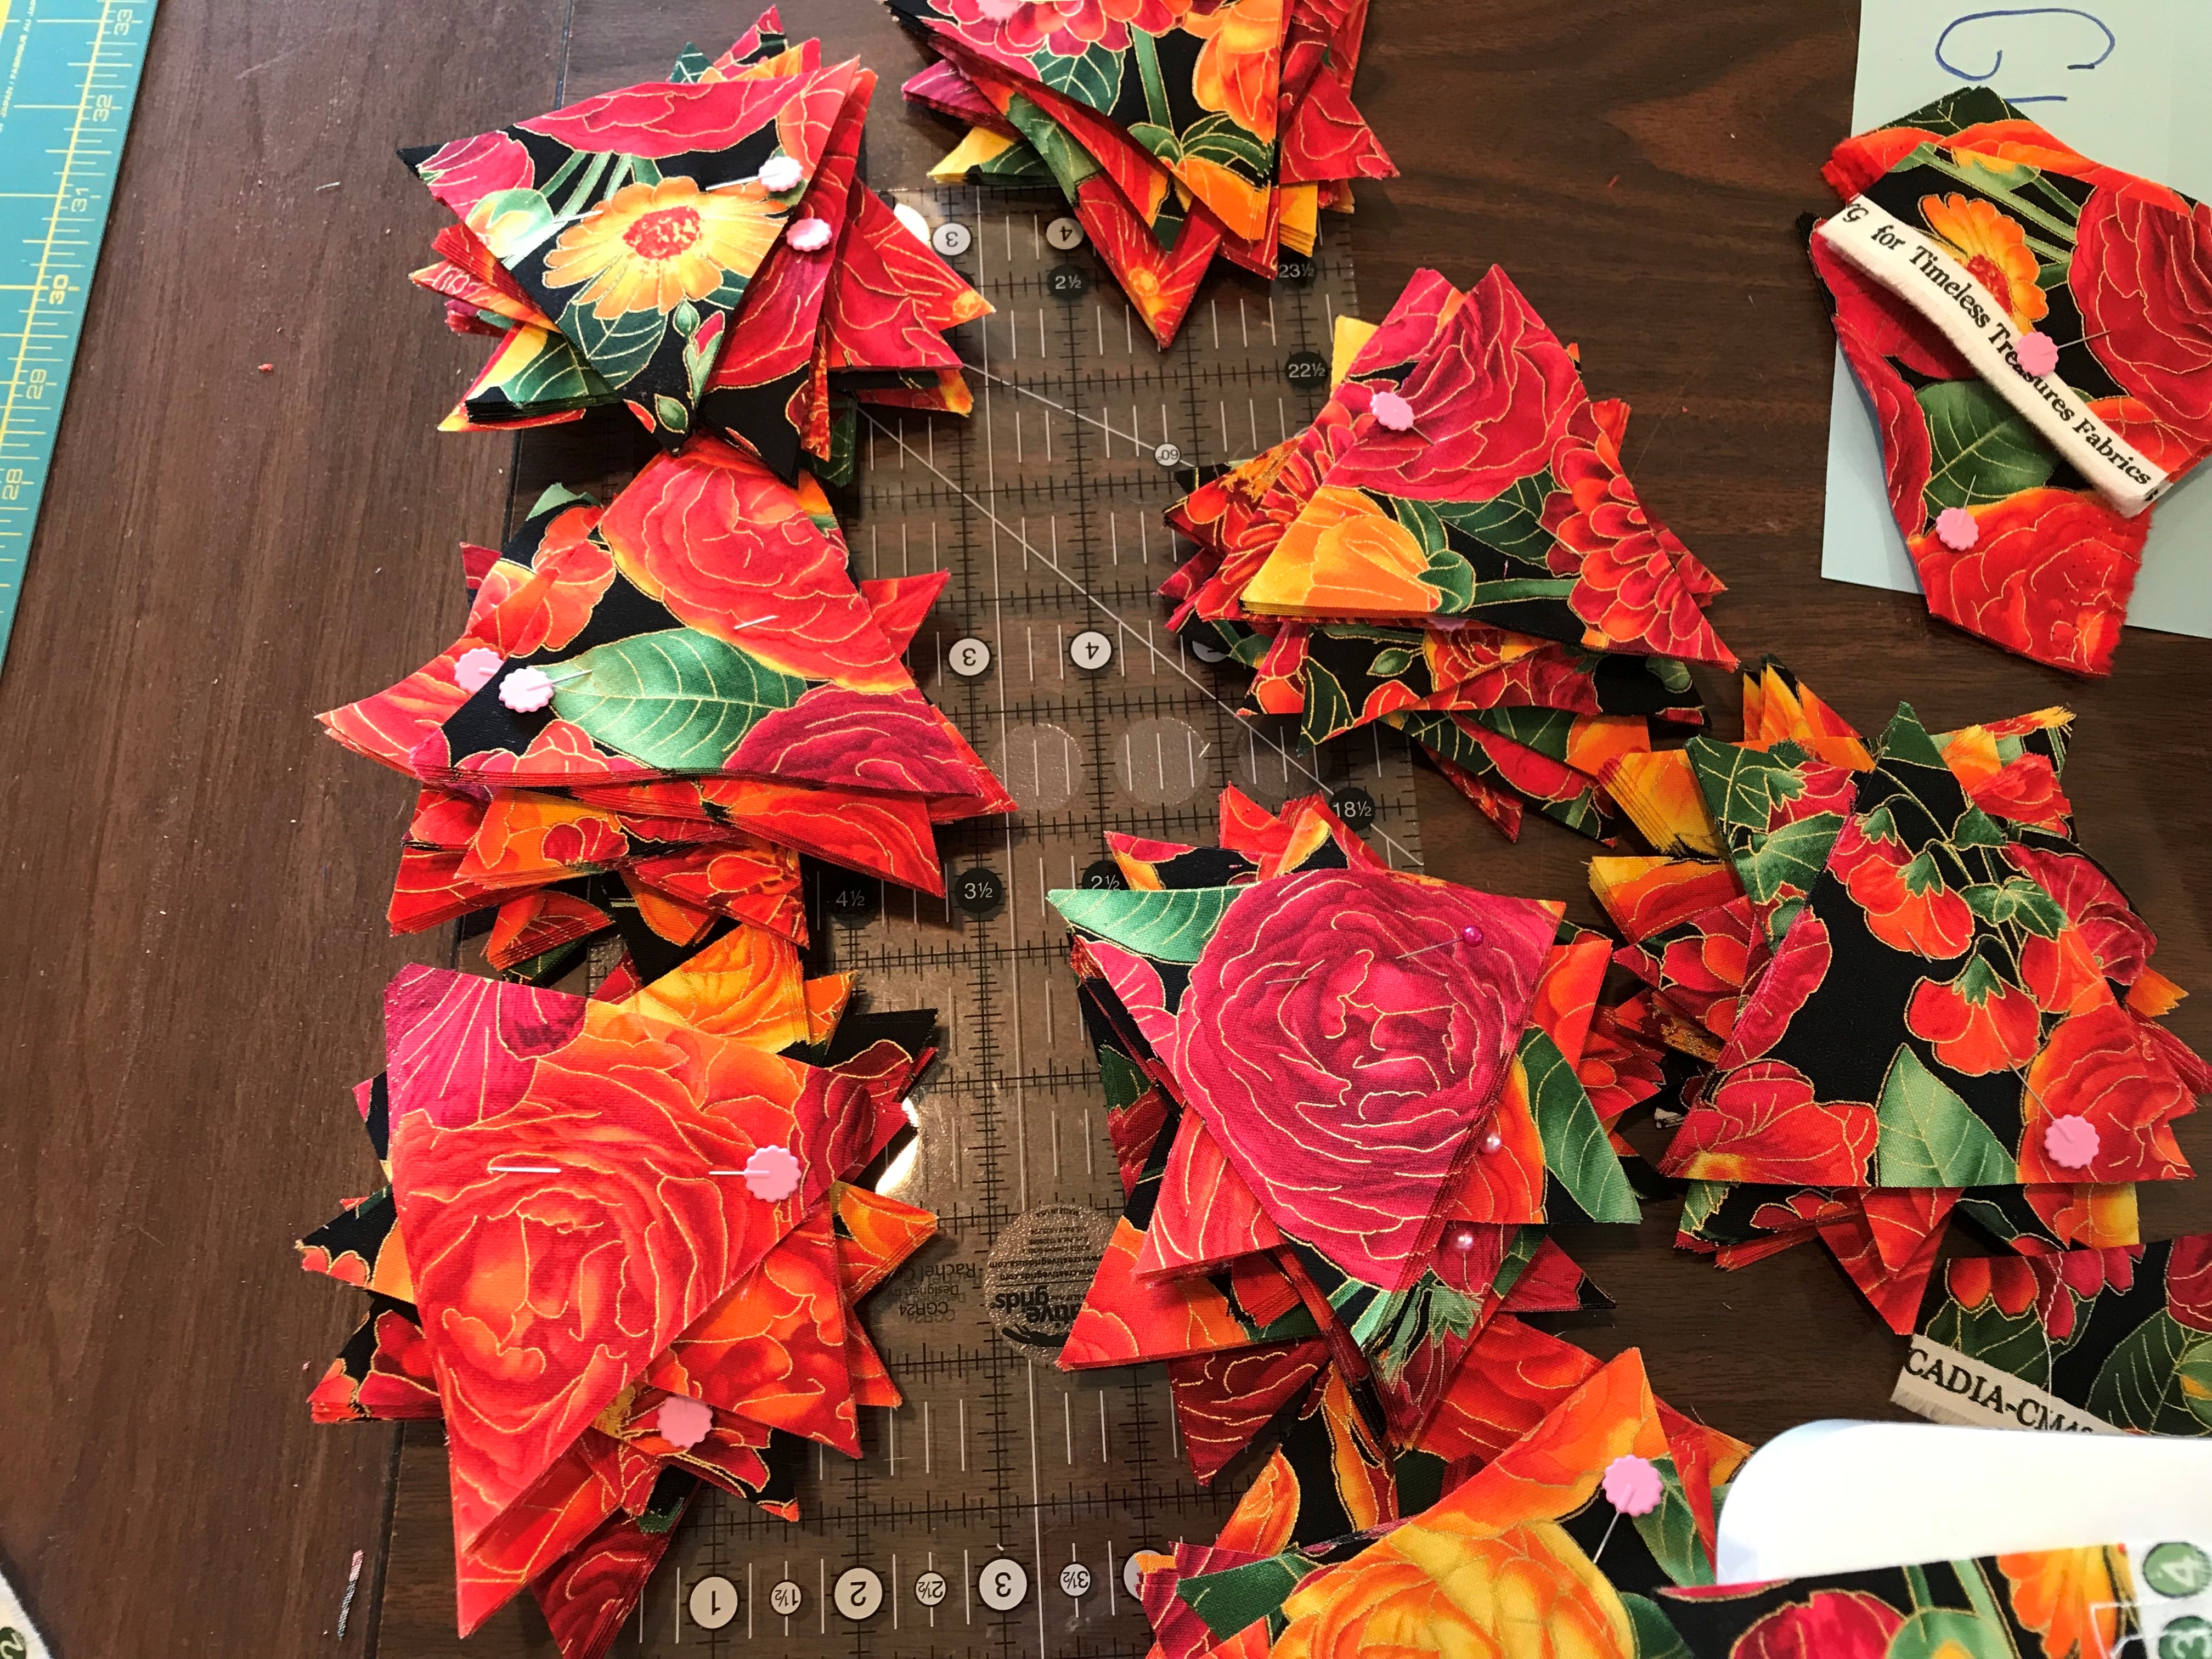
When I saw this panel by Chong-A Hwang for Timeless Treasures, I knew I had to make a One Block Wonder for my Great Niece Alexa. Alexa has a wonderful cat named “Ruca”, whom she has had since she was in college. I met Ruca, a very special cat.
Even though this panel states it measures 24″ by 44″, by the time I cut apart the panels and squared it up, it was more like 23 1/2″ wide. For my finished hexies to fit evenly across the bottom of the panel I would have to make some adjustments. If I cut my strips 3 3/4″ wide, my finished hexies would be 6″ wide, which is not evenly divisible by 23 1/2″. I could just add fabric to the panel to bring it up to 24″ wide and then hide the extra fabric with appliqued hexagons as I have done before.
But I decided to trim the panel to fit the bottom rows of hexagons instead. If I cut my strips 3 1/2″, my finished hexies would be 5 1/2″ wide which would be evenly divisible into 22″. I don’t trim the panel until I’m ready to add the hexies. You can see that four finished hexagons (or 8 half hexies) will fit across the bottom of the panel. Here are my tips for Using Panels for a OBW:
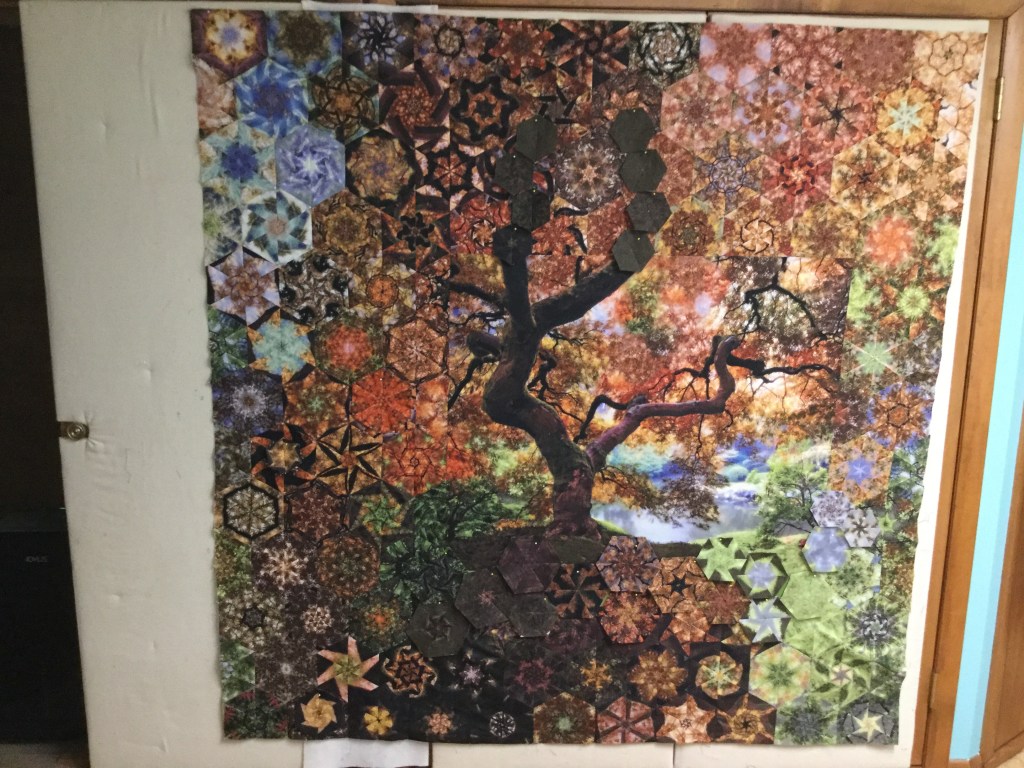
You may have realized I love history and cemeteries. As my sister and I were visiting family in Forest Hills Cemetery (Utica, NY) we were drawn to this tree.
When I saw this panel I couldn’t believe my eyes. I have been taking photo’s of this tree since 2010. It is very near the grave of John Adams Great Granddaughter Mary Louisa Adams. Johnson and not far from our family. I love trees, I think I was a Druid in another life! Needless to say I just had to make a One Block Wonder using this panel from Quilting Treasures.
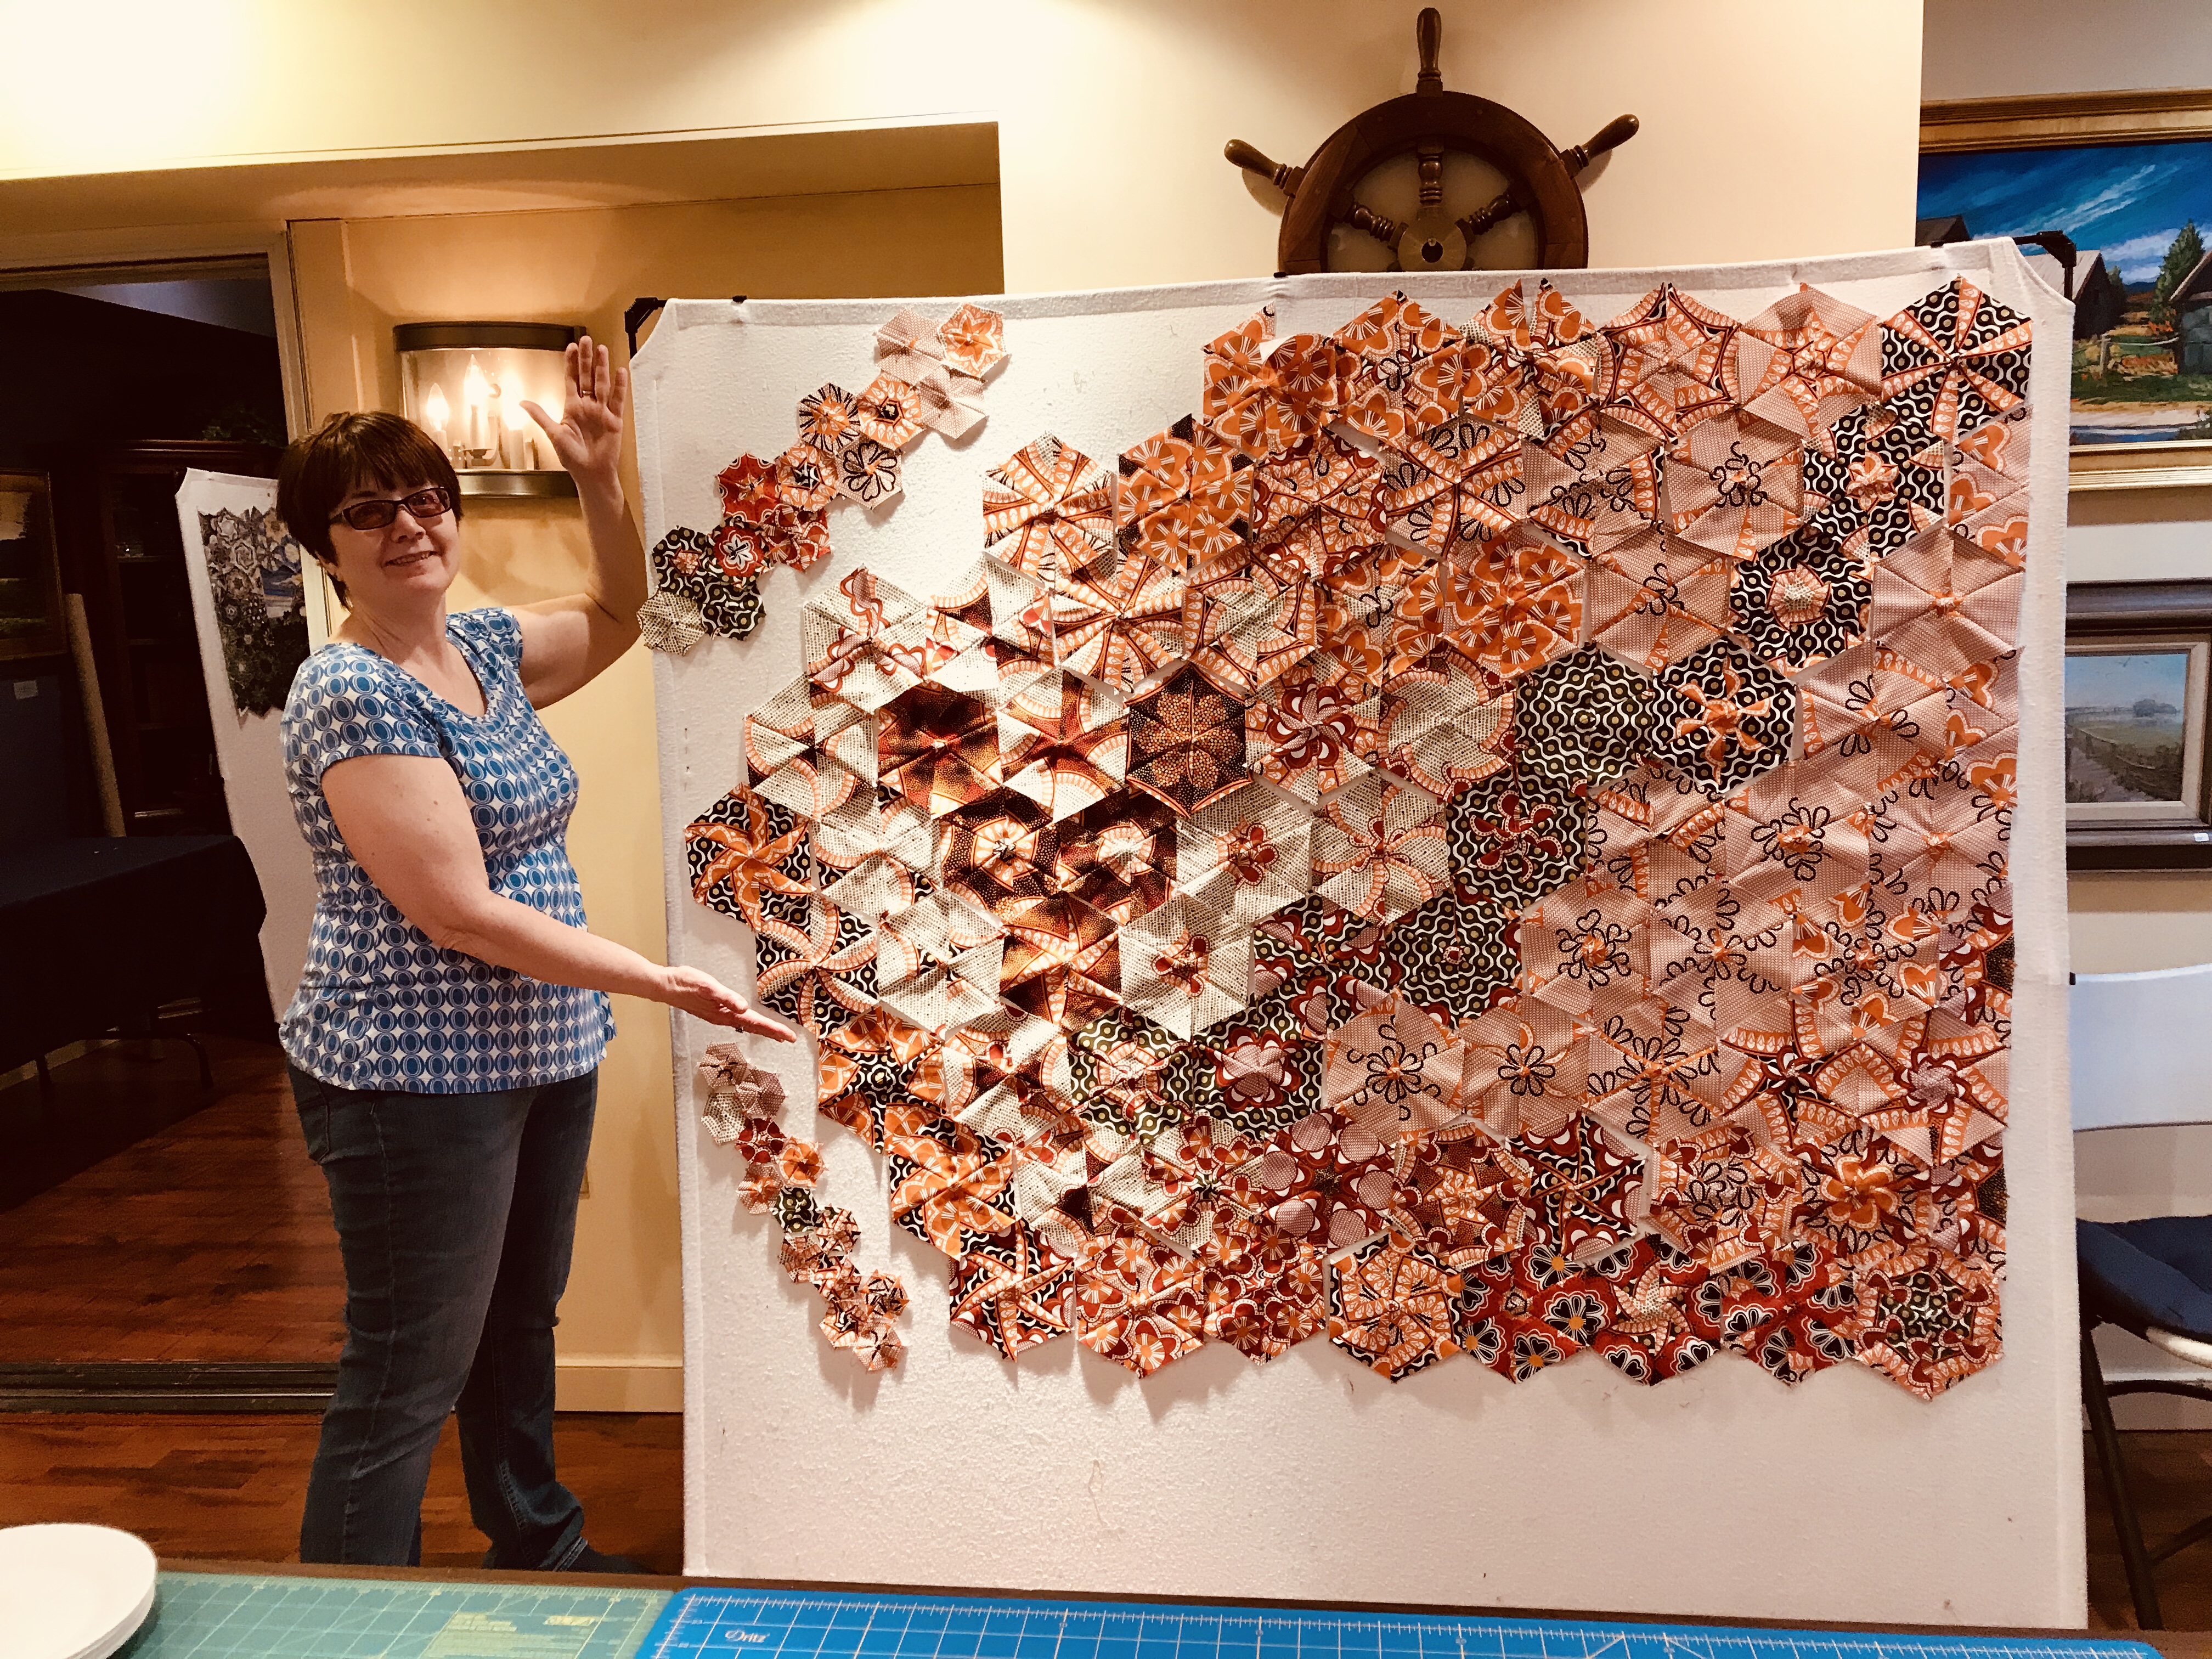
First attempt at designing.
When I stitched the rows together, I discovered I needed to add some fabric so the hexies would line up as I wanted them to. Then I had to disguise the added fabric and soften the edges.
I’m pretty happy with it. Below is a downloadable description of how I design a OBW with panels.
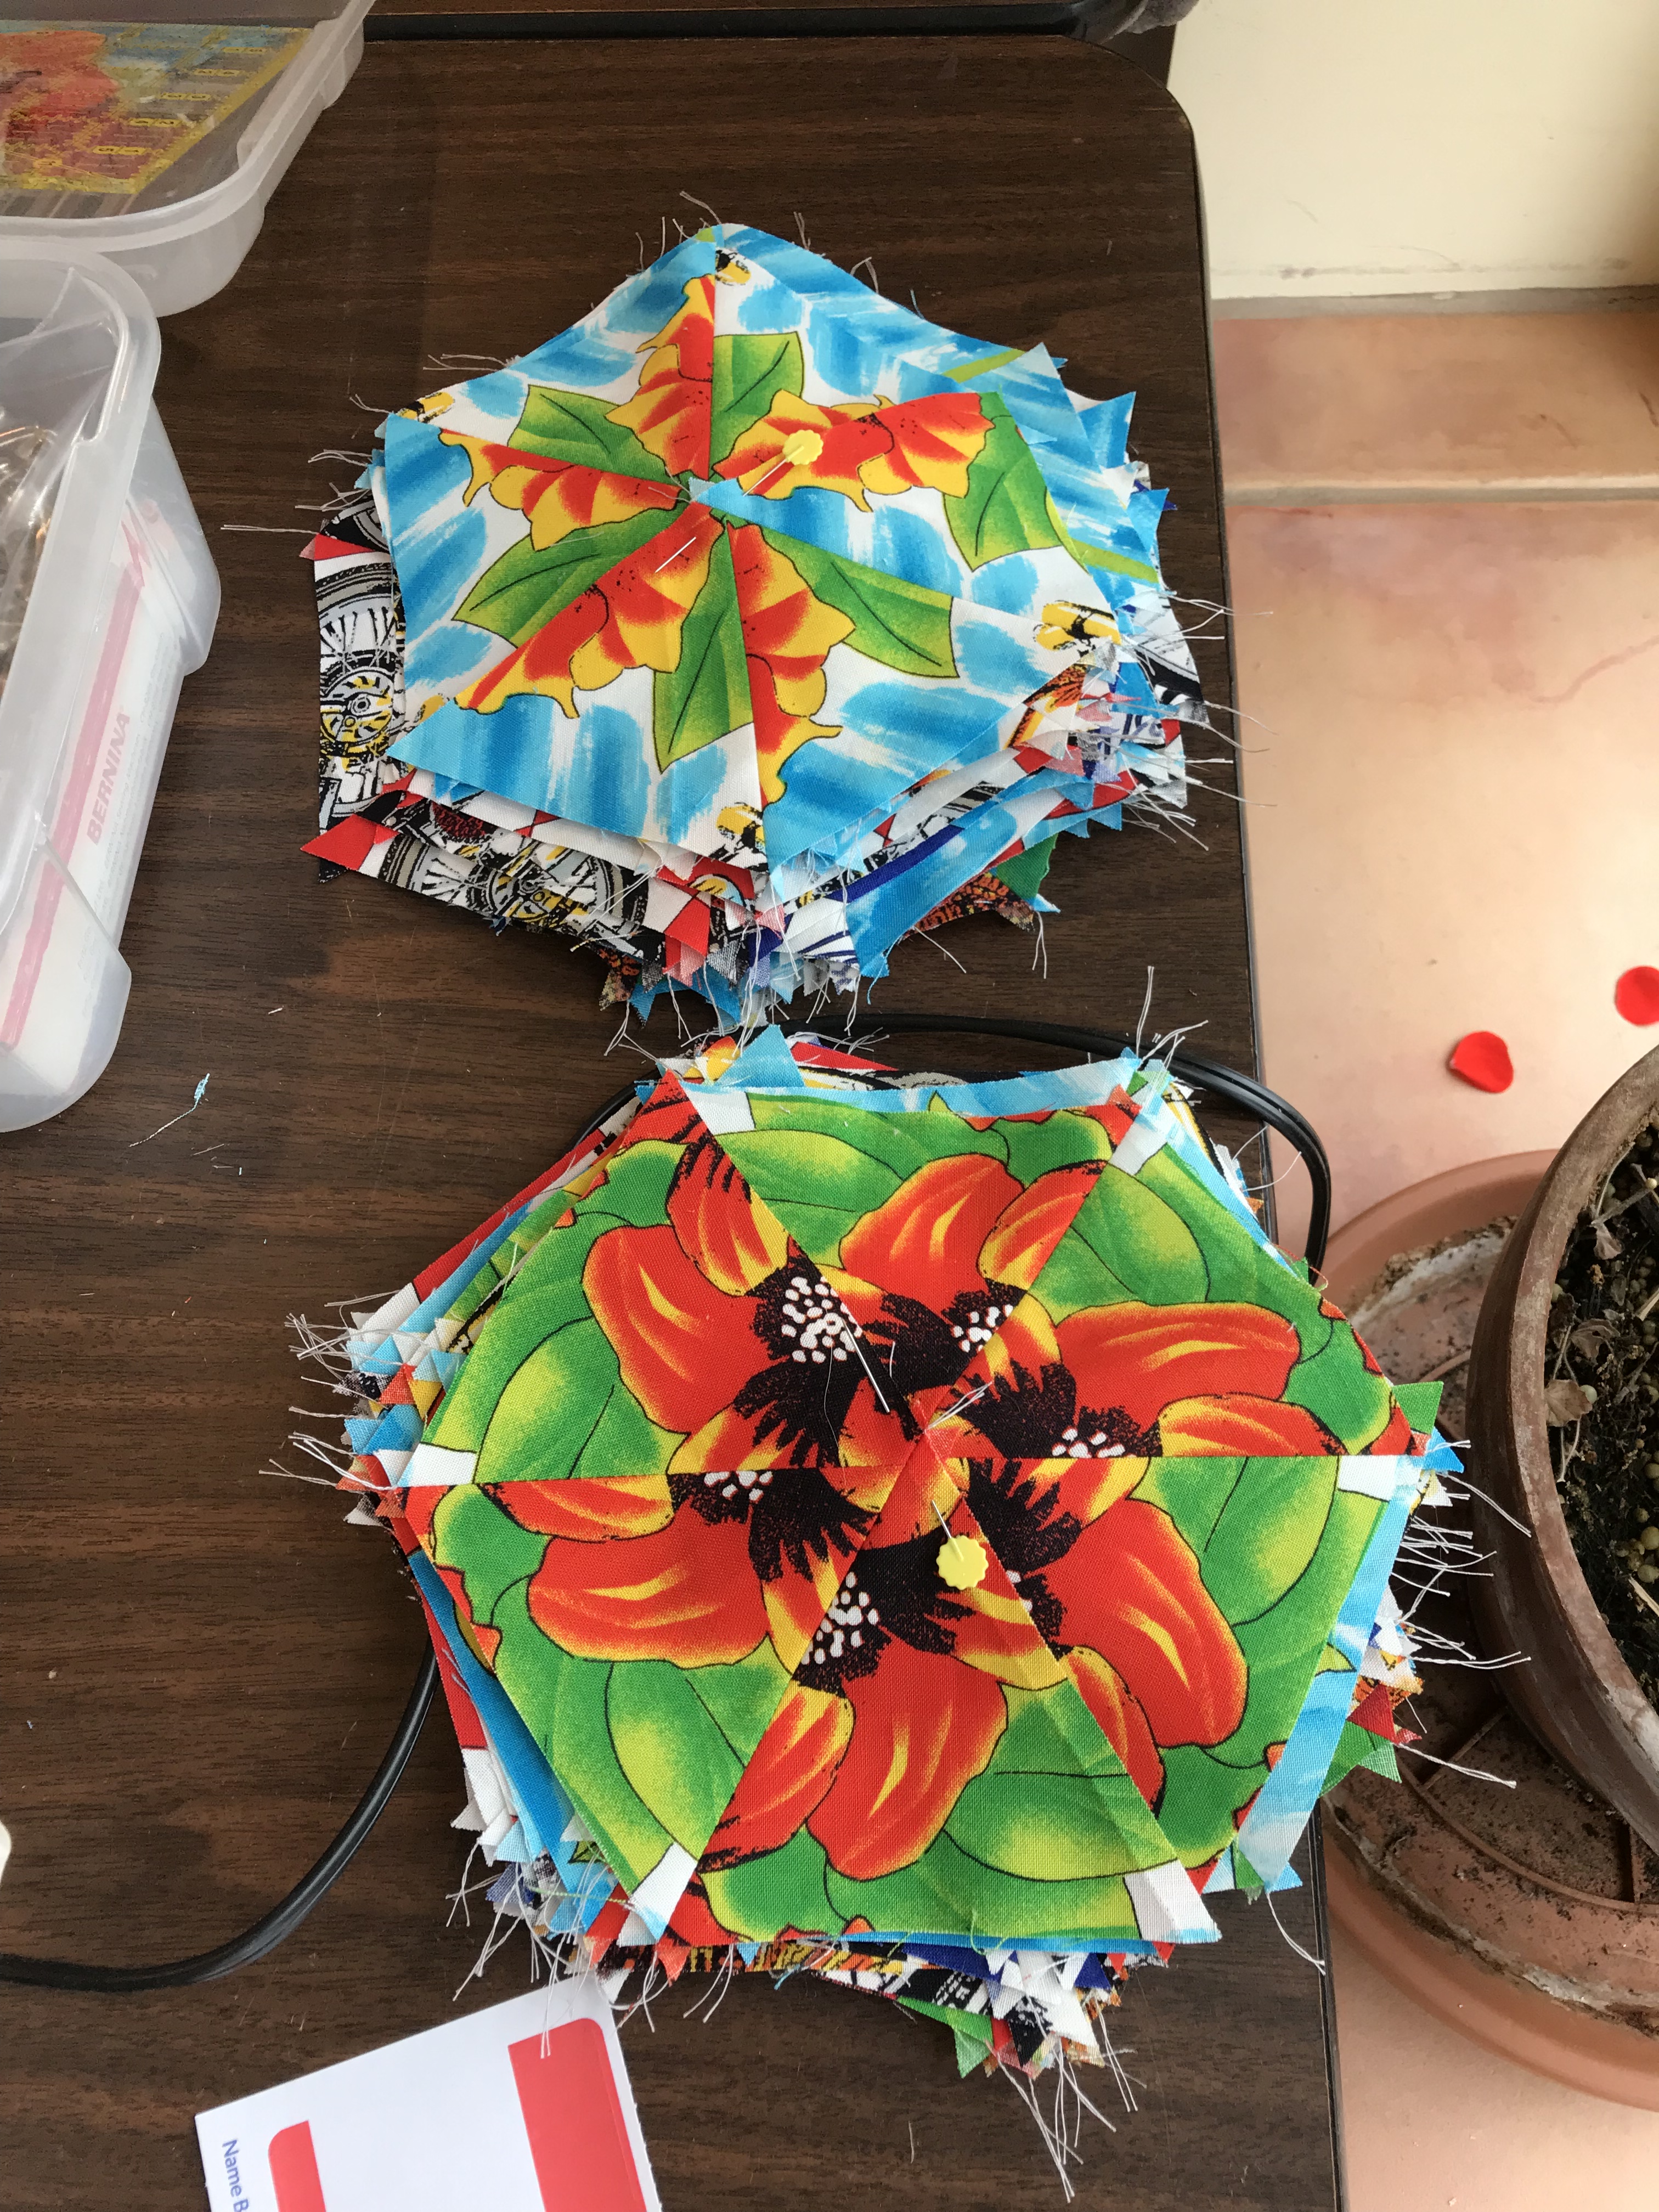
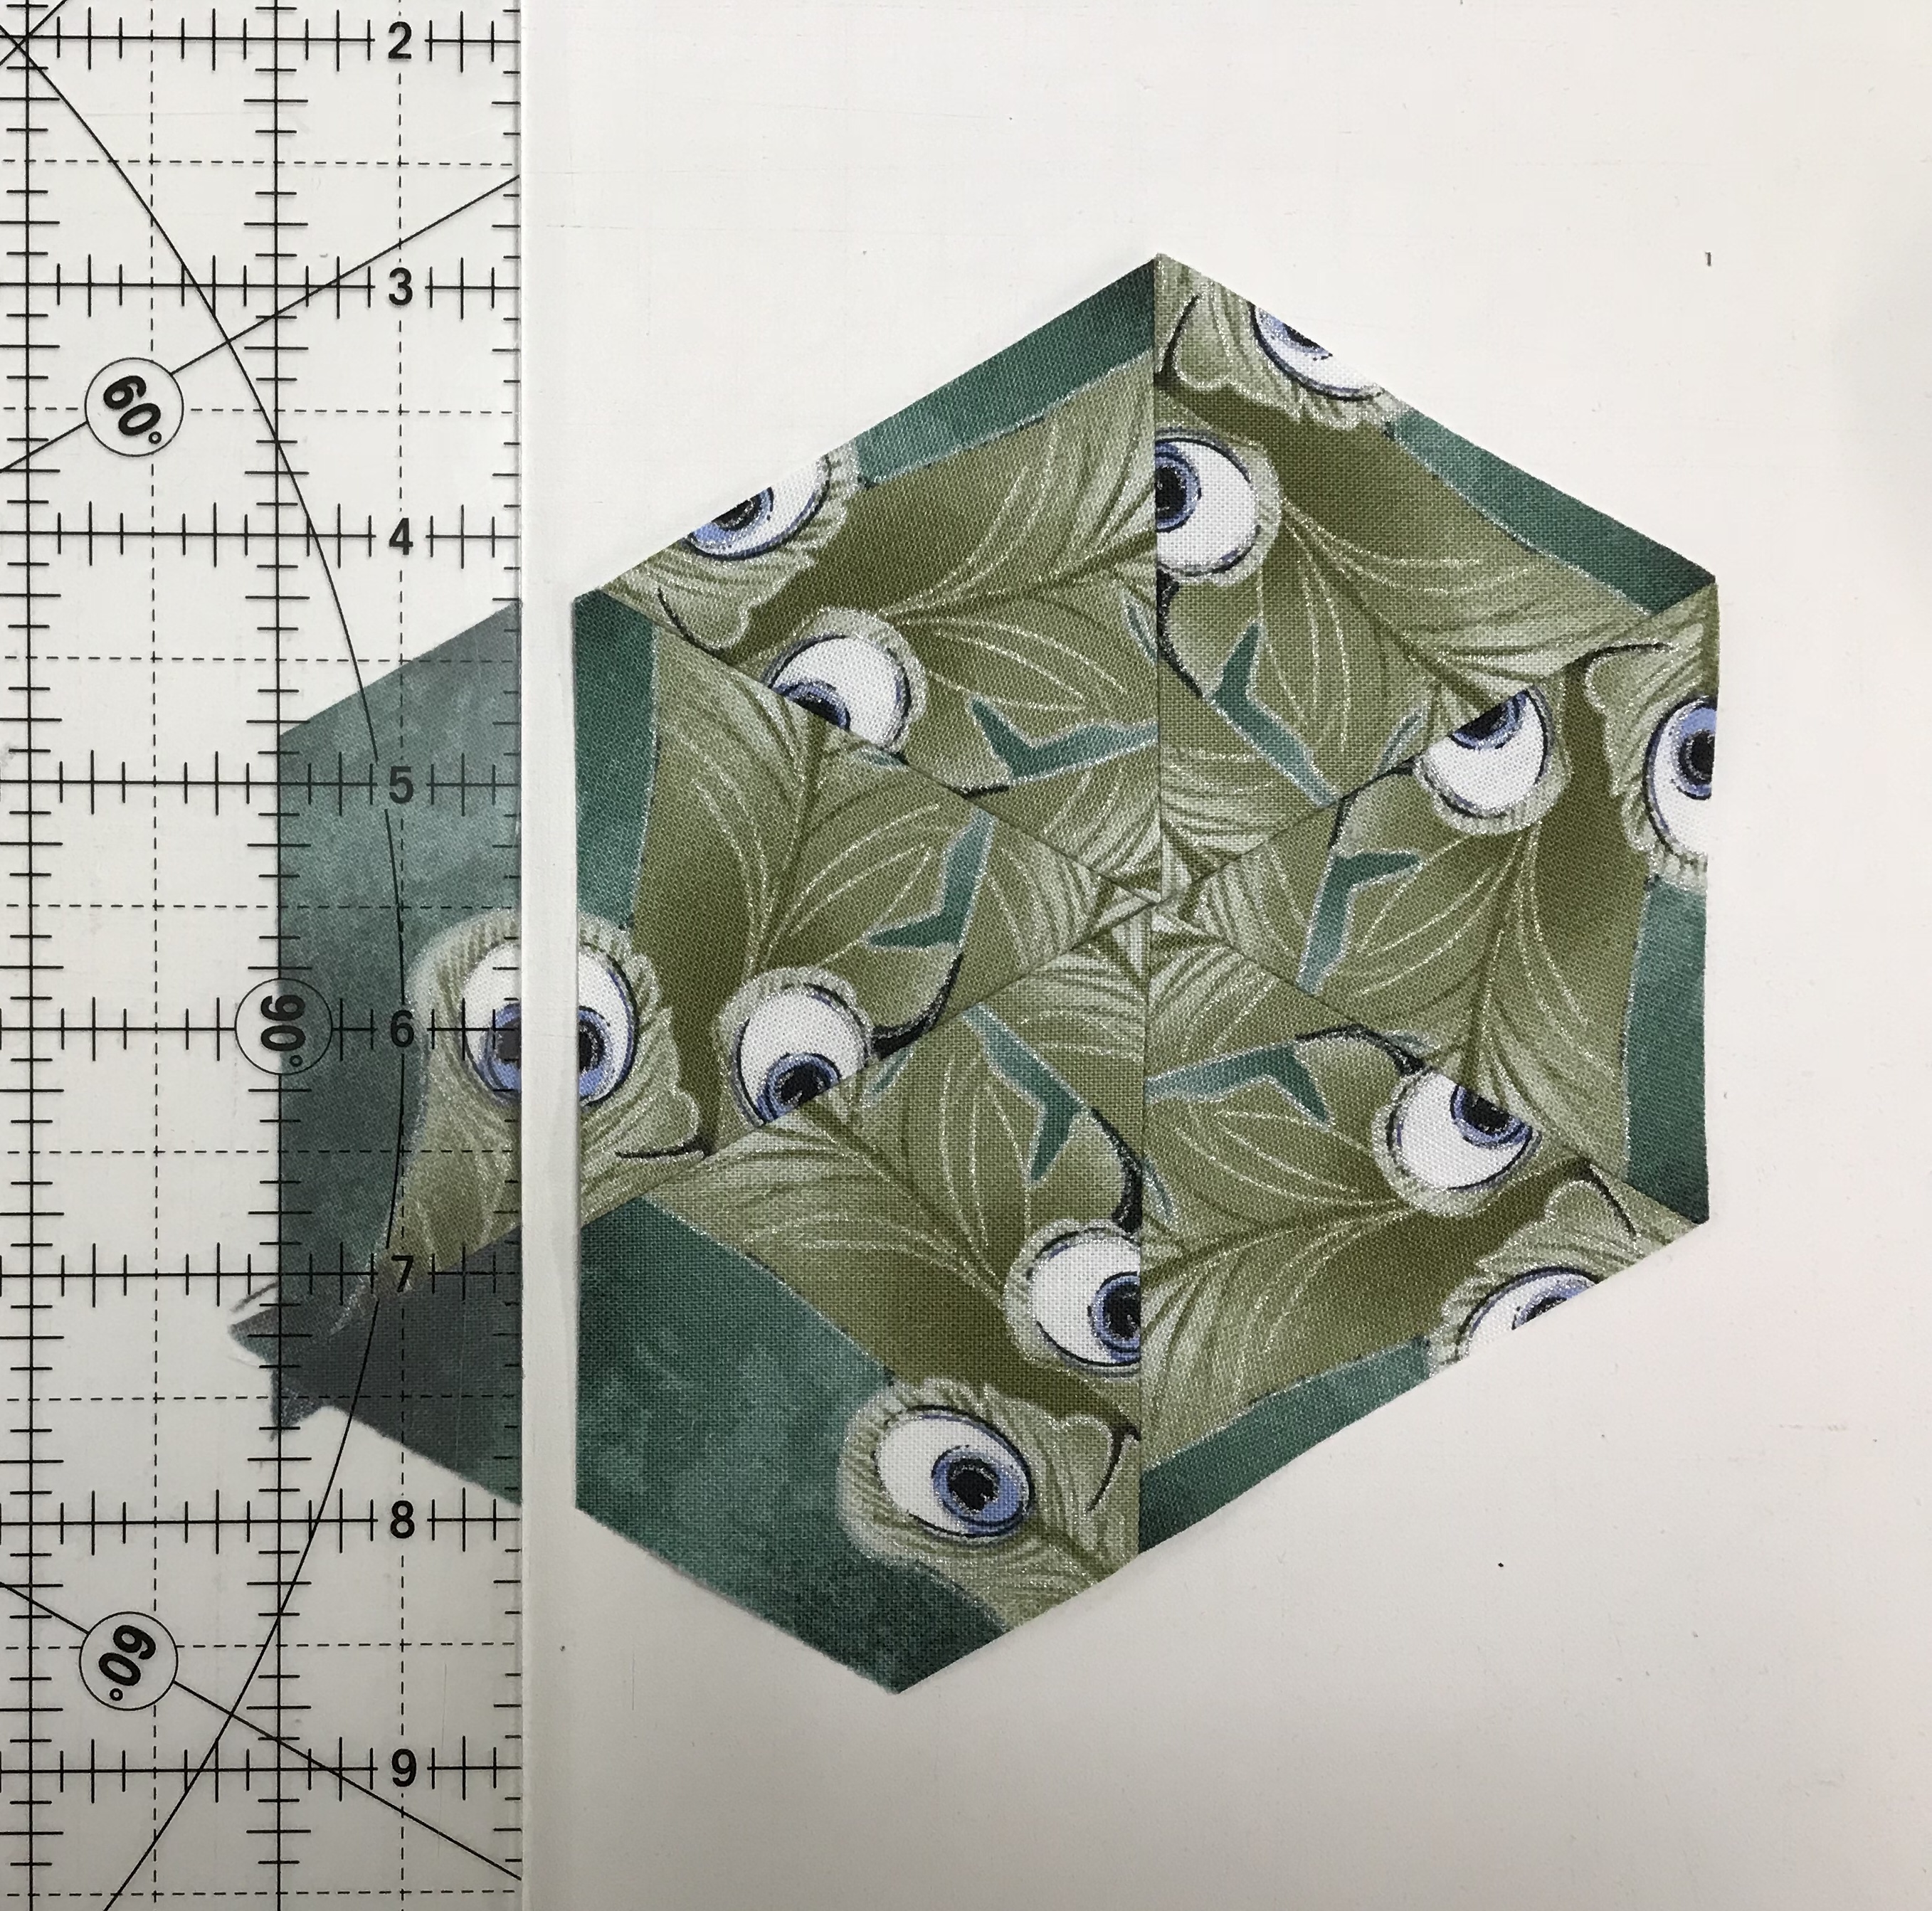
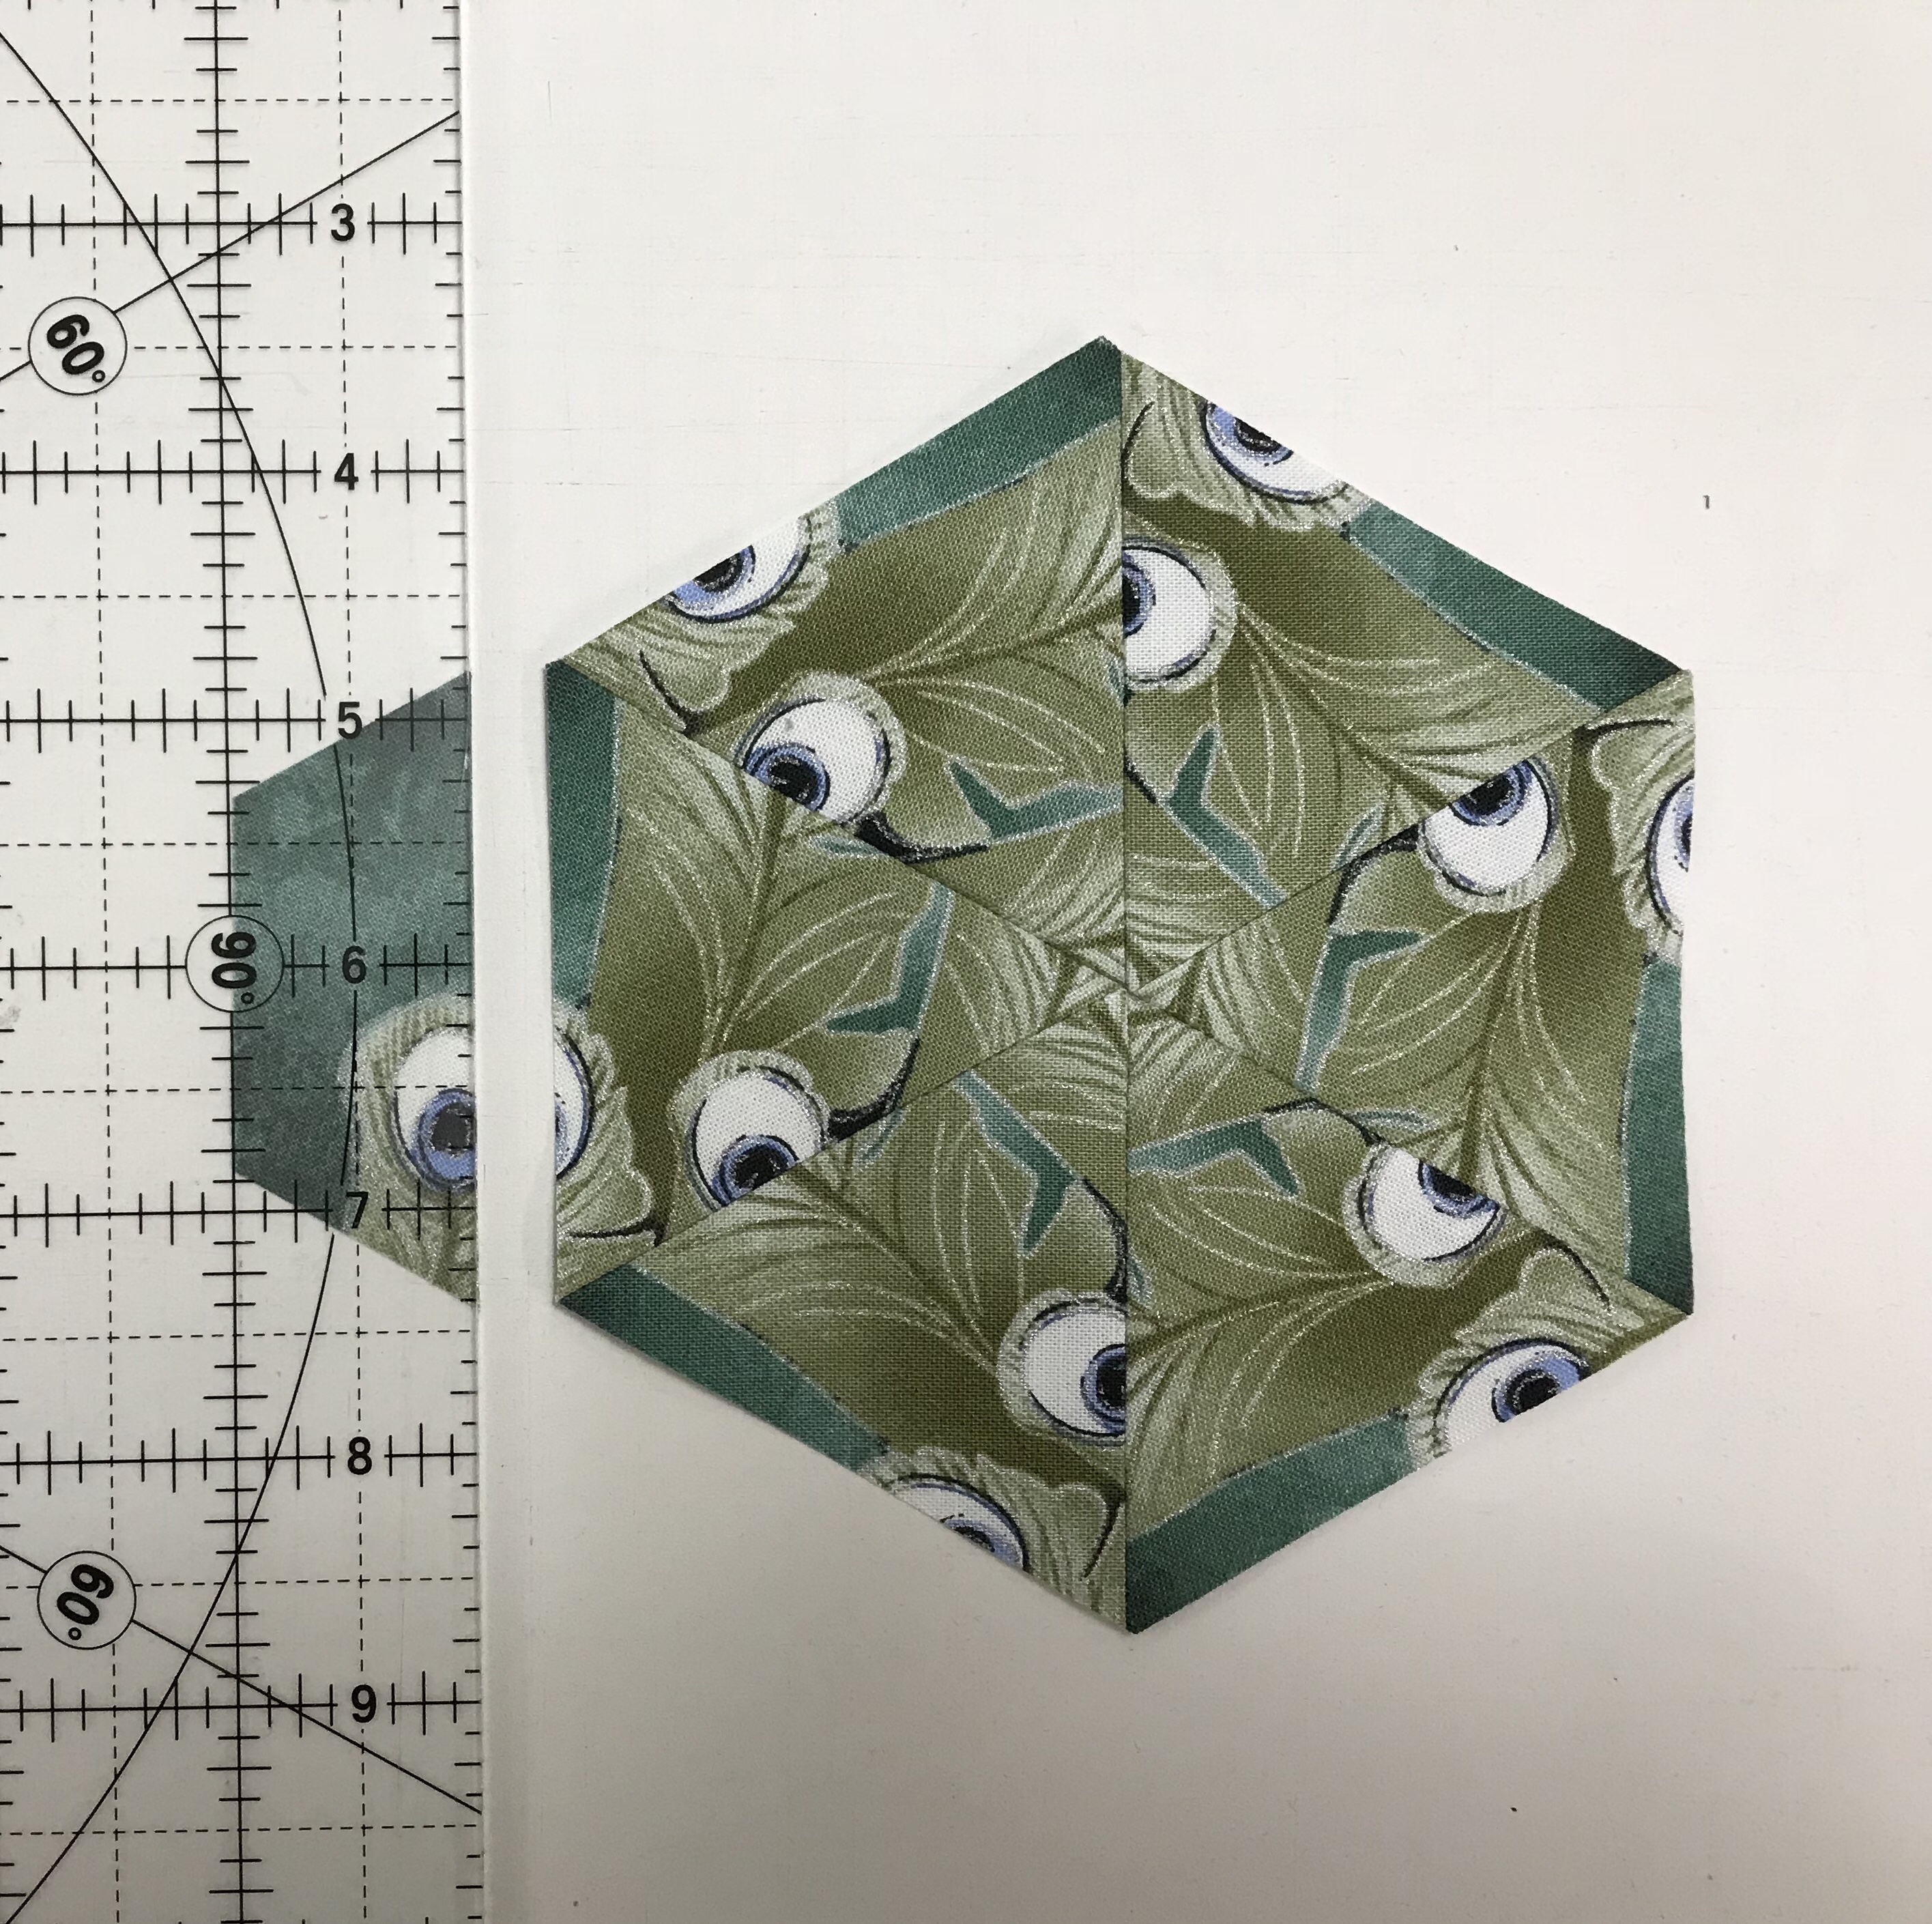
At least when it comes to One Block Wonders (OBW) it does. There are so many “Size” questions when it comes to choosing our fabrics. What size repeat should I choose? What size panel? What size strip width should I cut? What size design elements. The first thing I do when choosing OBW fabric is check the size of the repeat. Then I decide what size to cut the strips based on the size of the design elements. If I want to cut my strips 3 3/4″ wide then I want the design in the fabric to be larger than 4″ or I will not be taking the fabric apart.
I was going through my OBW stash and this found fabric I had started to cut up. I don’t know how long I’ve had it. It was The Saturday Evening Post line by Quilting Treasures. I had 4 yards of this striped pattern and another 4 yards of a different layout. I separated the strips and then found the repeat which was 8″ x 23″. I decided it was large enough to align the repeats and cut into 3 3/4″ strips. I could have cut the strips narrower for small blocks but I decided the design elements were large enough for 3 3/4″ strips which make 6″ finished hexagons. I used the ripping method to separate the strips to be sure they were straight. I have to say I don’t like this method. It made the edges wavy and was rough on the fabric. It may have easier to rip but next time I will use ruler rotary cutter,
It is not quilted yet but I do like the design. I used strips from the original fabric for the inner border. The outer border is from fabric number 2. It was also a striped with these small 5″ squares and larger 10″ squares below:
I have eight 10″ blocks of each, that leaves 6 panels for the blocks and 1 for the top with one leftover. Repeats can be from yardage or 6 panels can be used for our hexagon blocks. If I cut the strips 2 3/4″ I will get 3 strips will a little wiggle room left over. If I cut the strips 2 1/2″ wide I will get 4 strips with very little margin for error.
I made this 12″ block from hexagons cut from 1 1/2″ strips.
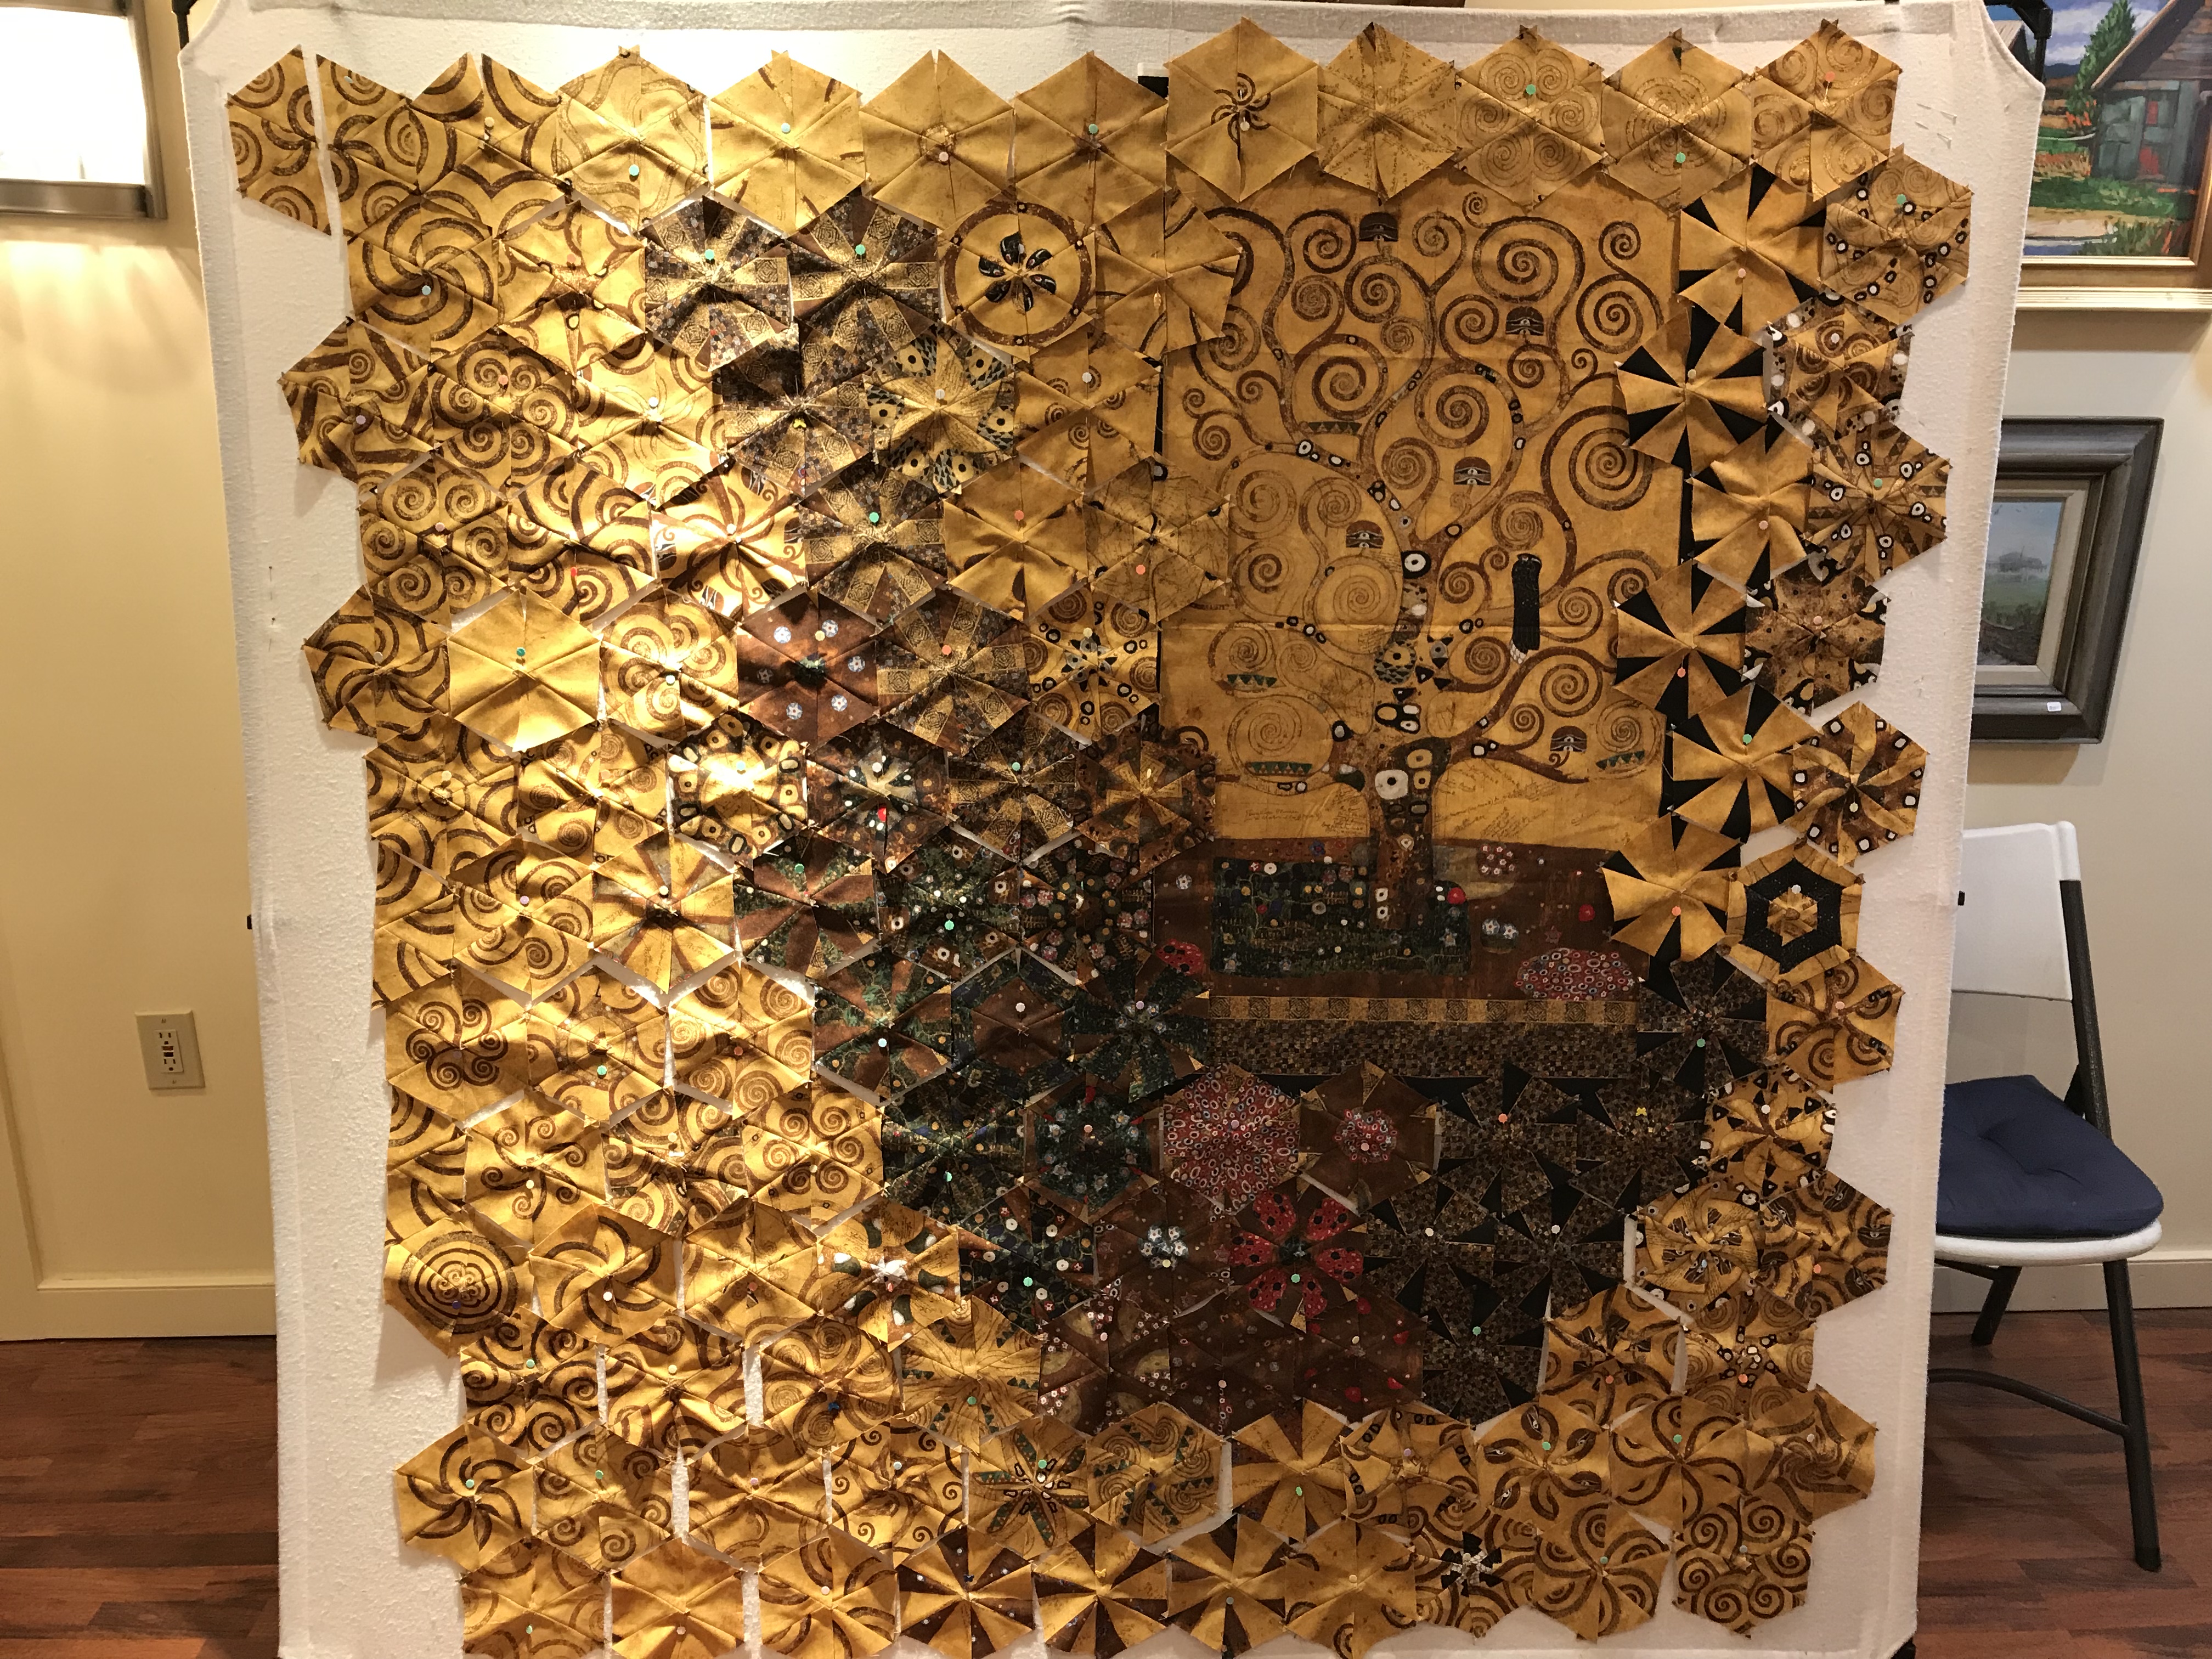
The photo of the tree is from Forest Hills Cemetery in Utica, NY. It is just above the grave of Mary Louisa Johnson, Daughter of John Adams, granddaughter of John Quincy Adams (6th President of the United States) & Great Granddaughter of John Adams 2nd President of the United States. The panel was 36″ 44″. It was so large it took 12 flowers pins to align it instead of the usual 6. I can’t wait to design it.
I spent last weekend cutting these panels into equilateral triangles. Now I’m ready to stitch away to my hearts content.
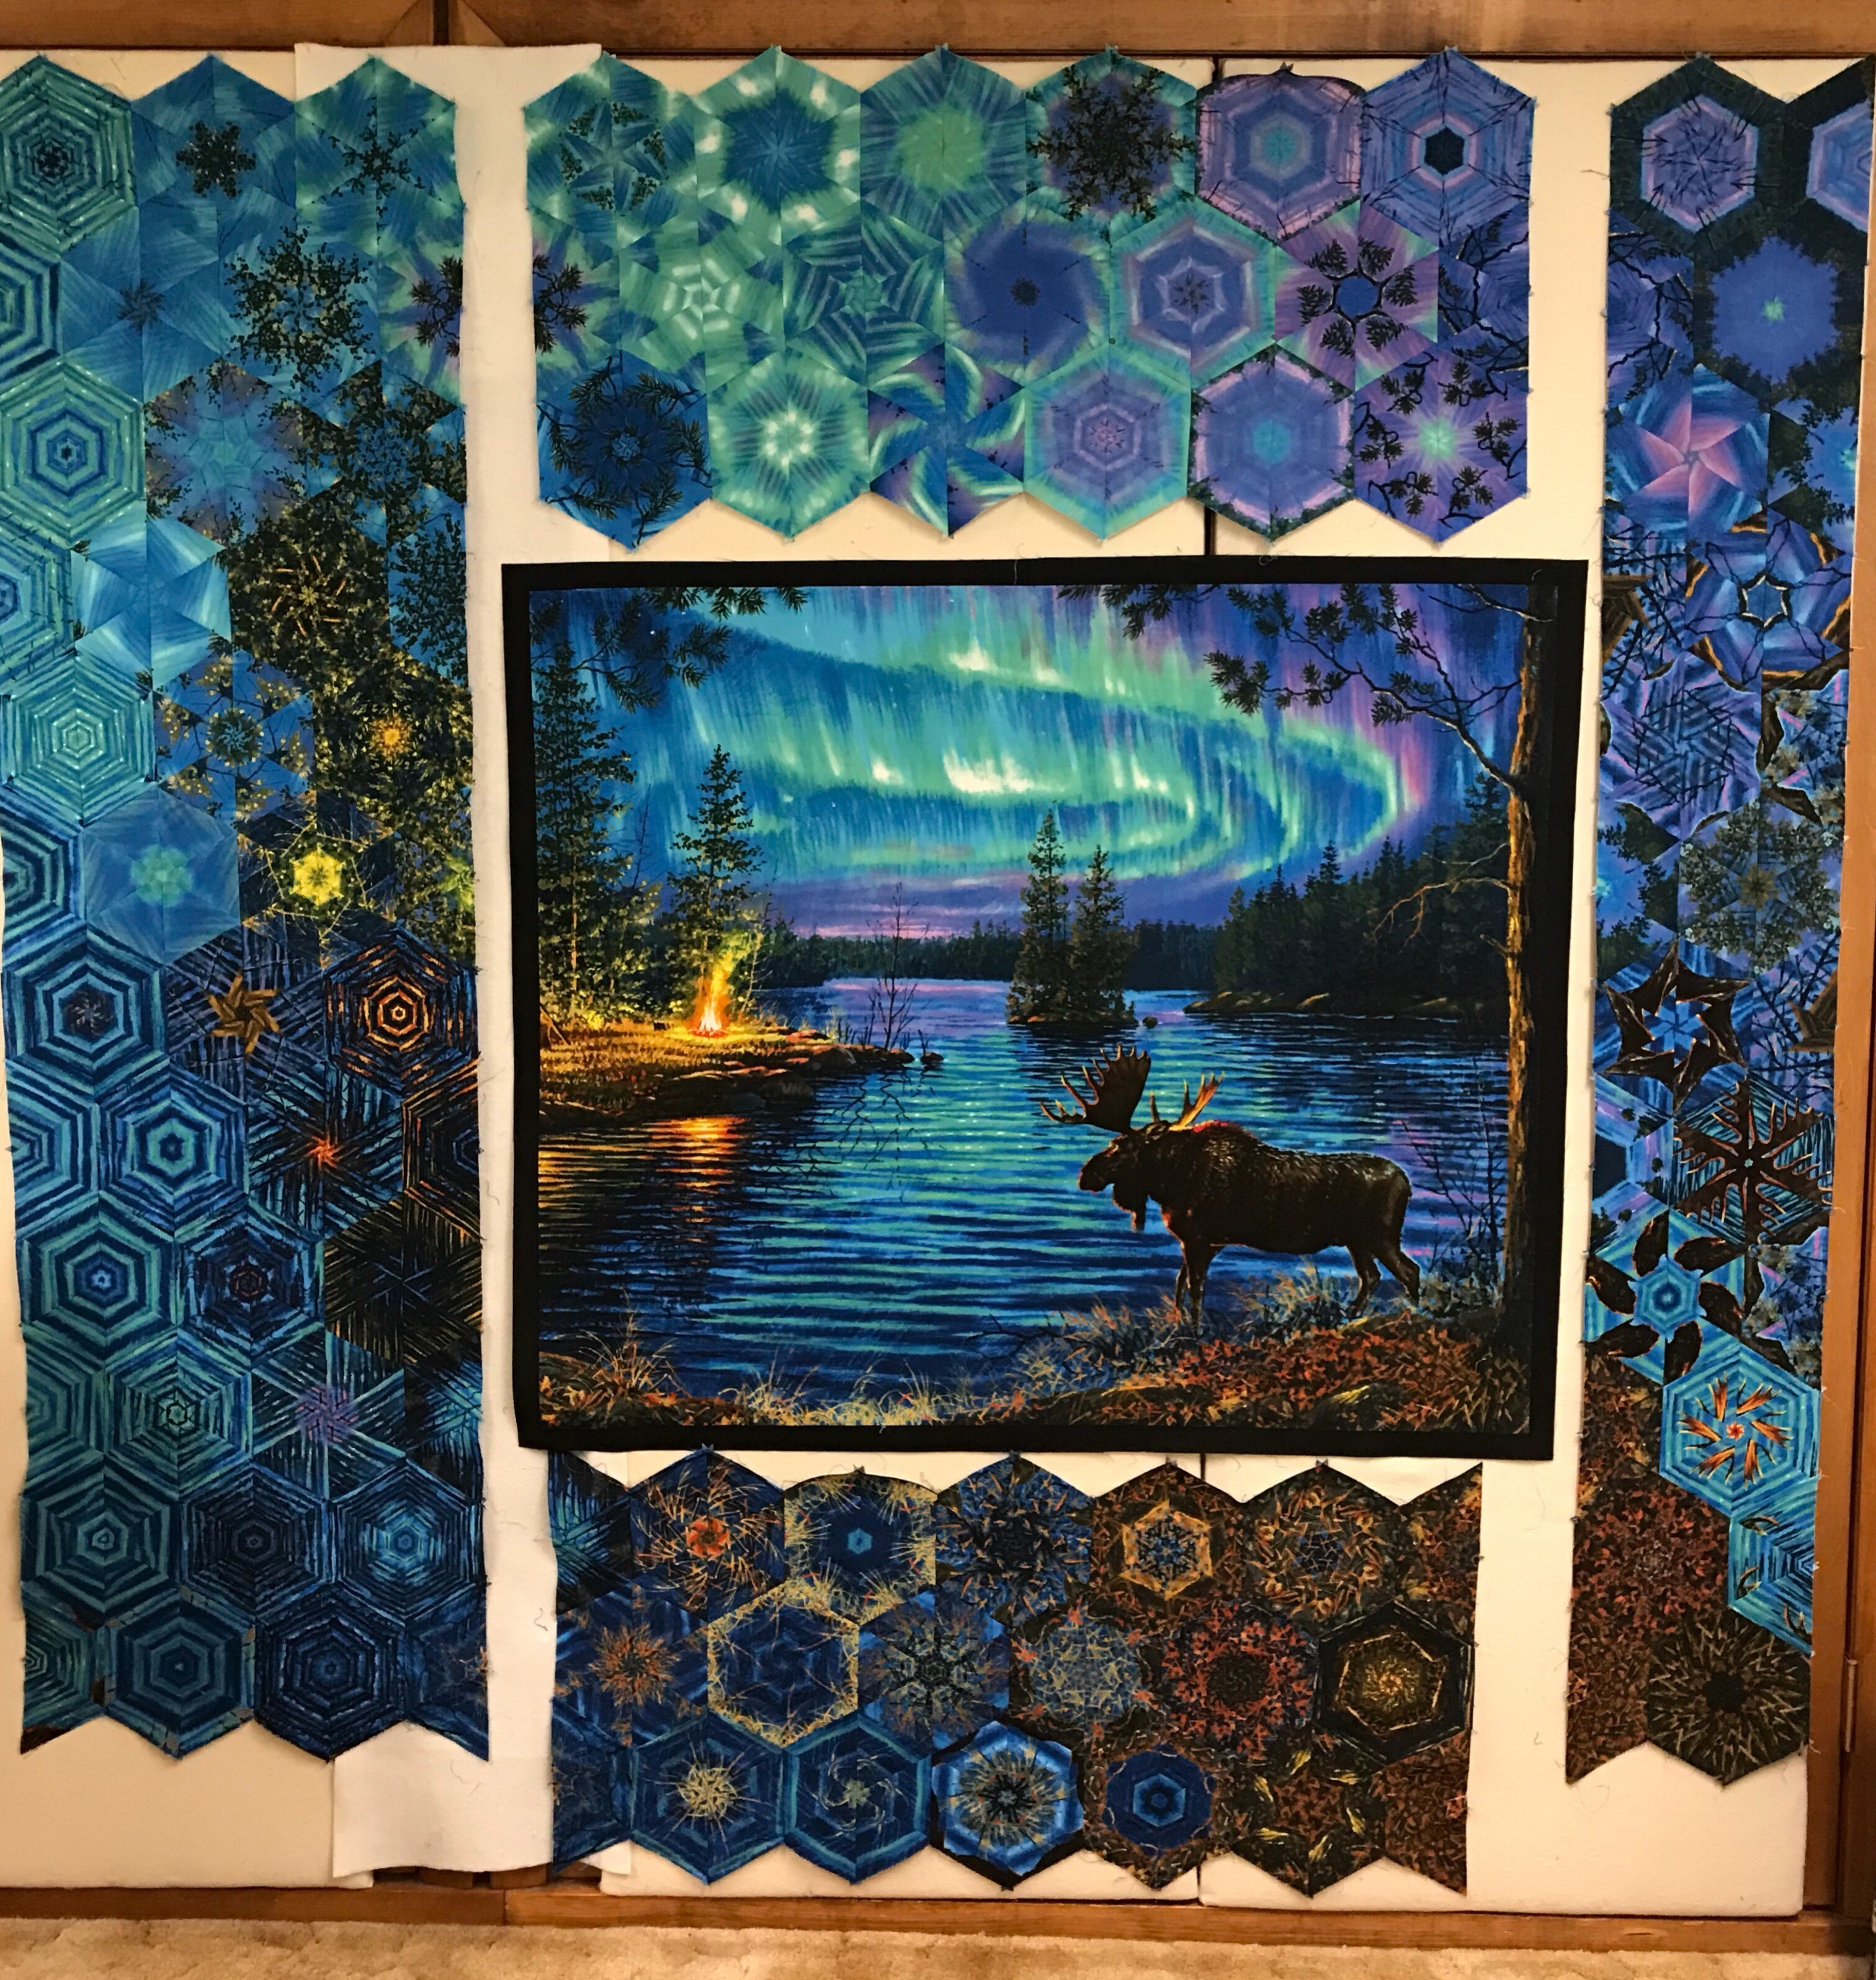
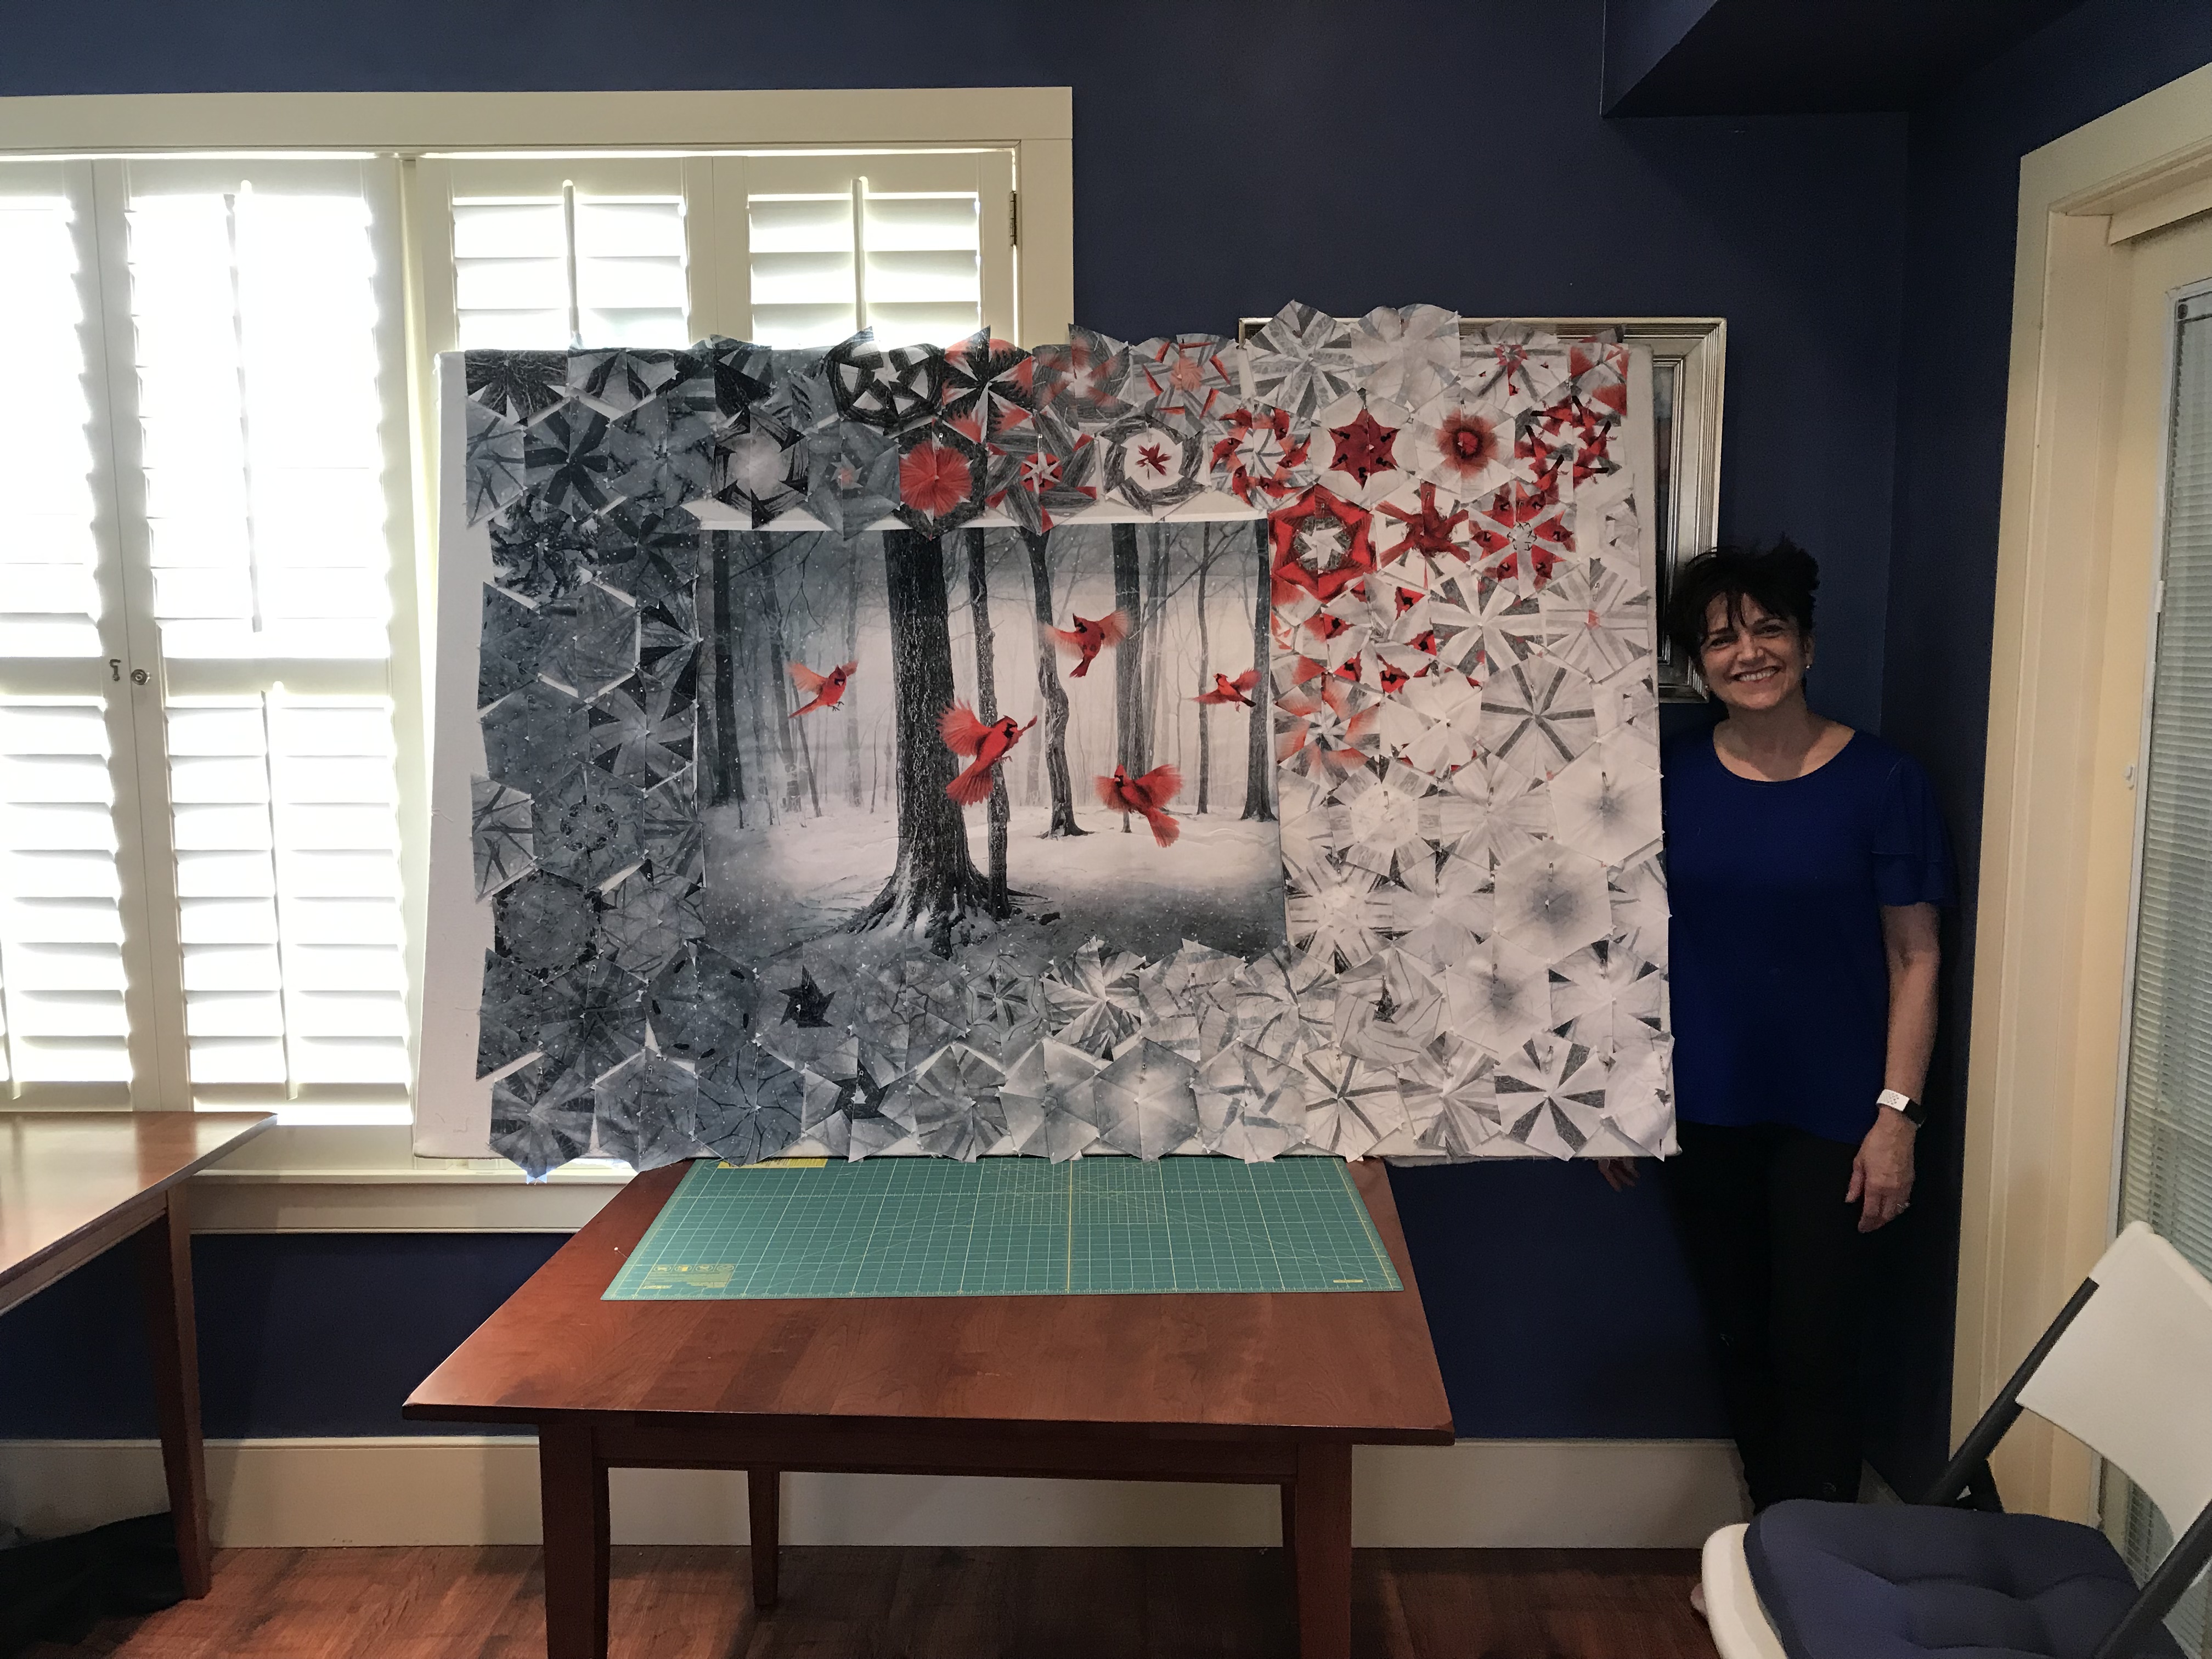
The more you practice the better you get at something. The same is true with quilting. This quilt was supposed to be for my son Josh for Christmas (last Christmas). Oh well, better late than never. This panel is called Northern Lights by Abraham Hunter for Elizabeth’s Studio. It claimed to be 36″ x 44″ but is was closer to 39″ wide.
I aligned my 6 panels, cut my hexagons and began designing around the panel. I do not trim the panels before I align them. Once they are aligned I can decide whether to use any of the borders or not. I decided not to use the border in the blocks so when I guesstimated how much to trim off to even the edges , I included the borders.
I start by trying to get an idea of how many hexies will fit across the top and/or bottom of the panel. It is just like making a pieced border to fit around the center of a quilt. The width of the panel should be divisible by the finished size of my hexagon block.
You have two ways to make sure your hexagons will fit across the top and bottom of your panel. You can trim or add fabric to your panel and/or you can also adjust the size of your finished hexagon so it is divisible by the width of the panel.
Strip Width Yeilds
Finished Hexie Size
3.75”
6.0”
3.50”
5.5
3.25”
5.0
3.00”
4.5
2.75”
4.0
2.50”
3.5
2.25”
3.0
2.0″
2.5
I decided to cut my strips 3.75″ for 6″ finished hexagons and trim my panel to 36″ wide. Six hexagons will fit across the bottom and/or top of the panel.
I kept playing with the design.
Once I was satisfied with the design, I stitched the hexagons into four sections.
I laid the top portion of hexies on the panel to help give me an accurate width to trim off. I felt I would not lose an important part of the panel by cutting off the tree.
I trimmed the panel, Trimmed the portion of the hexies so it could be stitched to the panel.
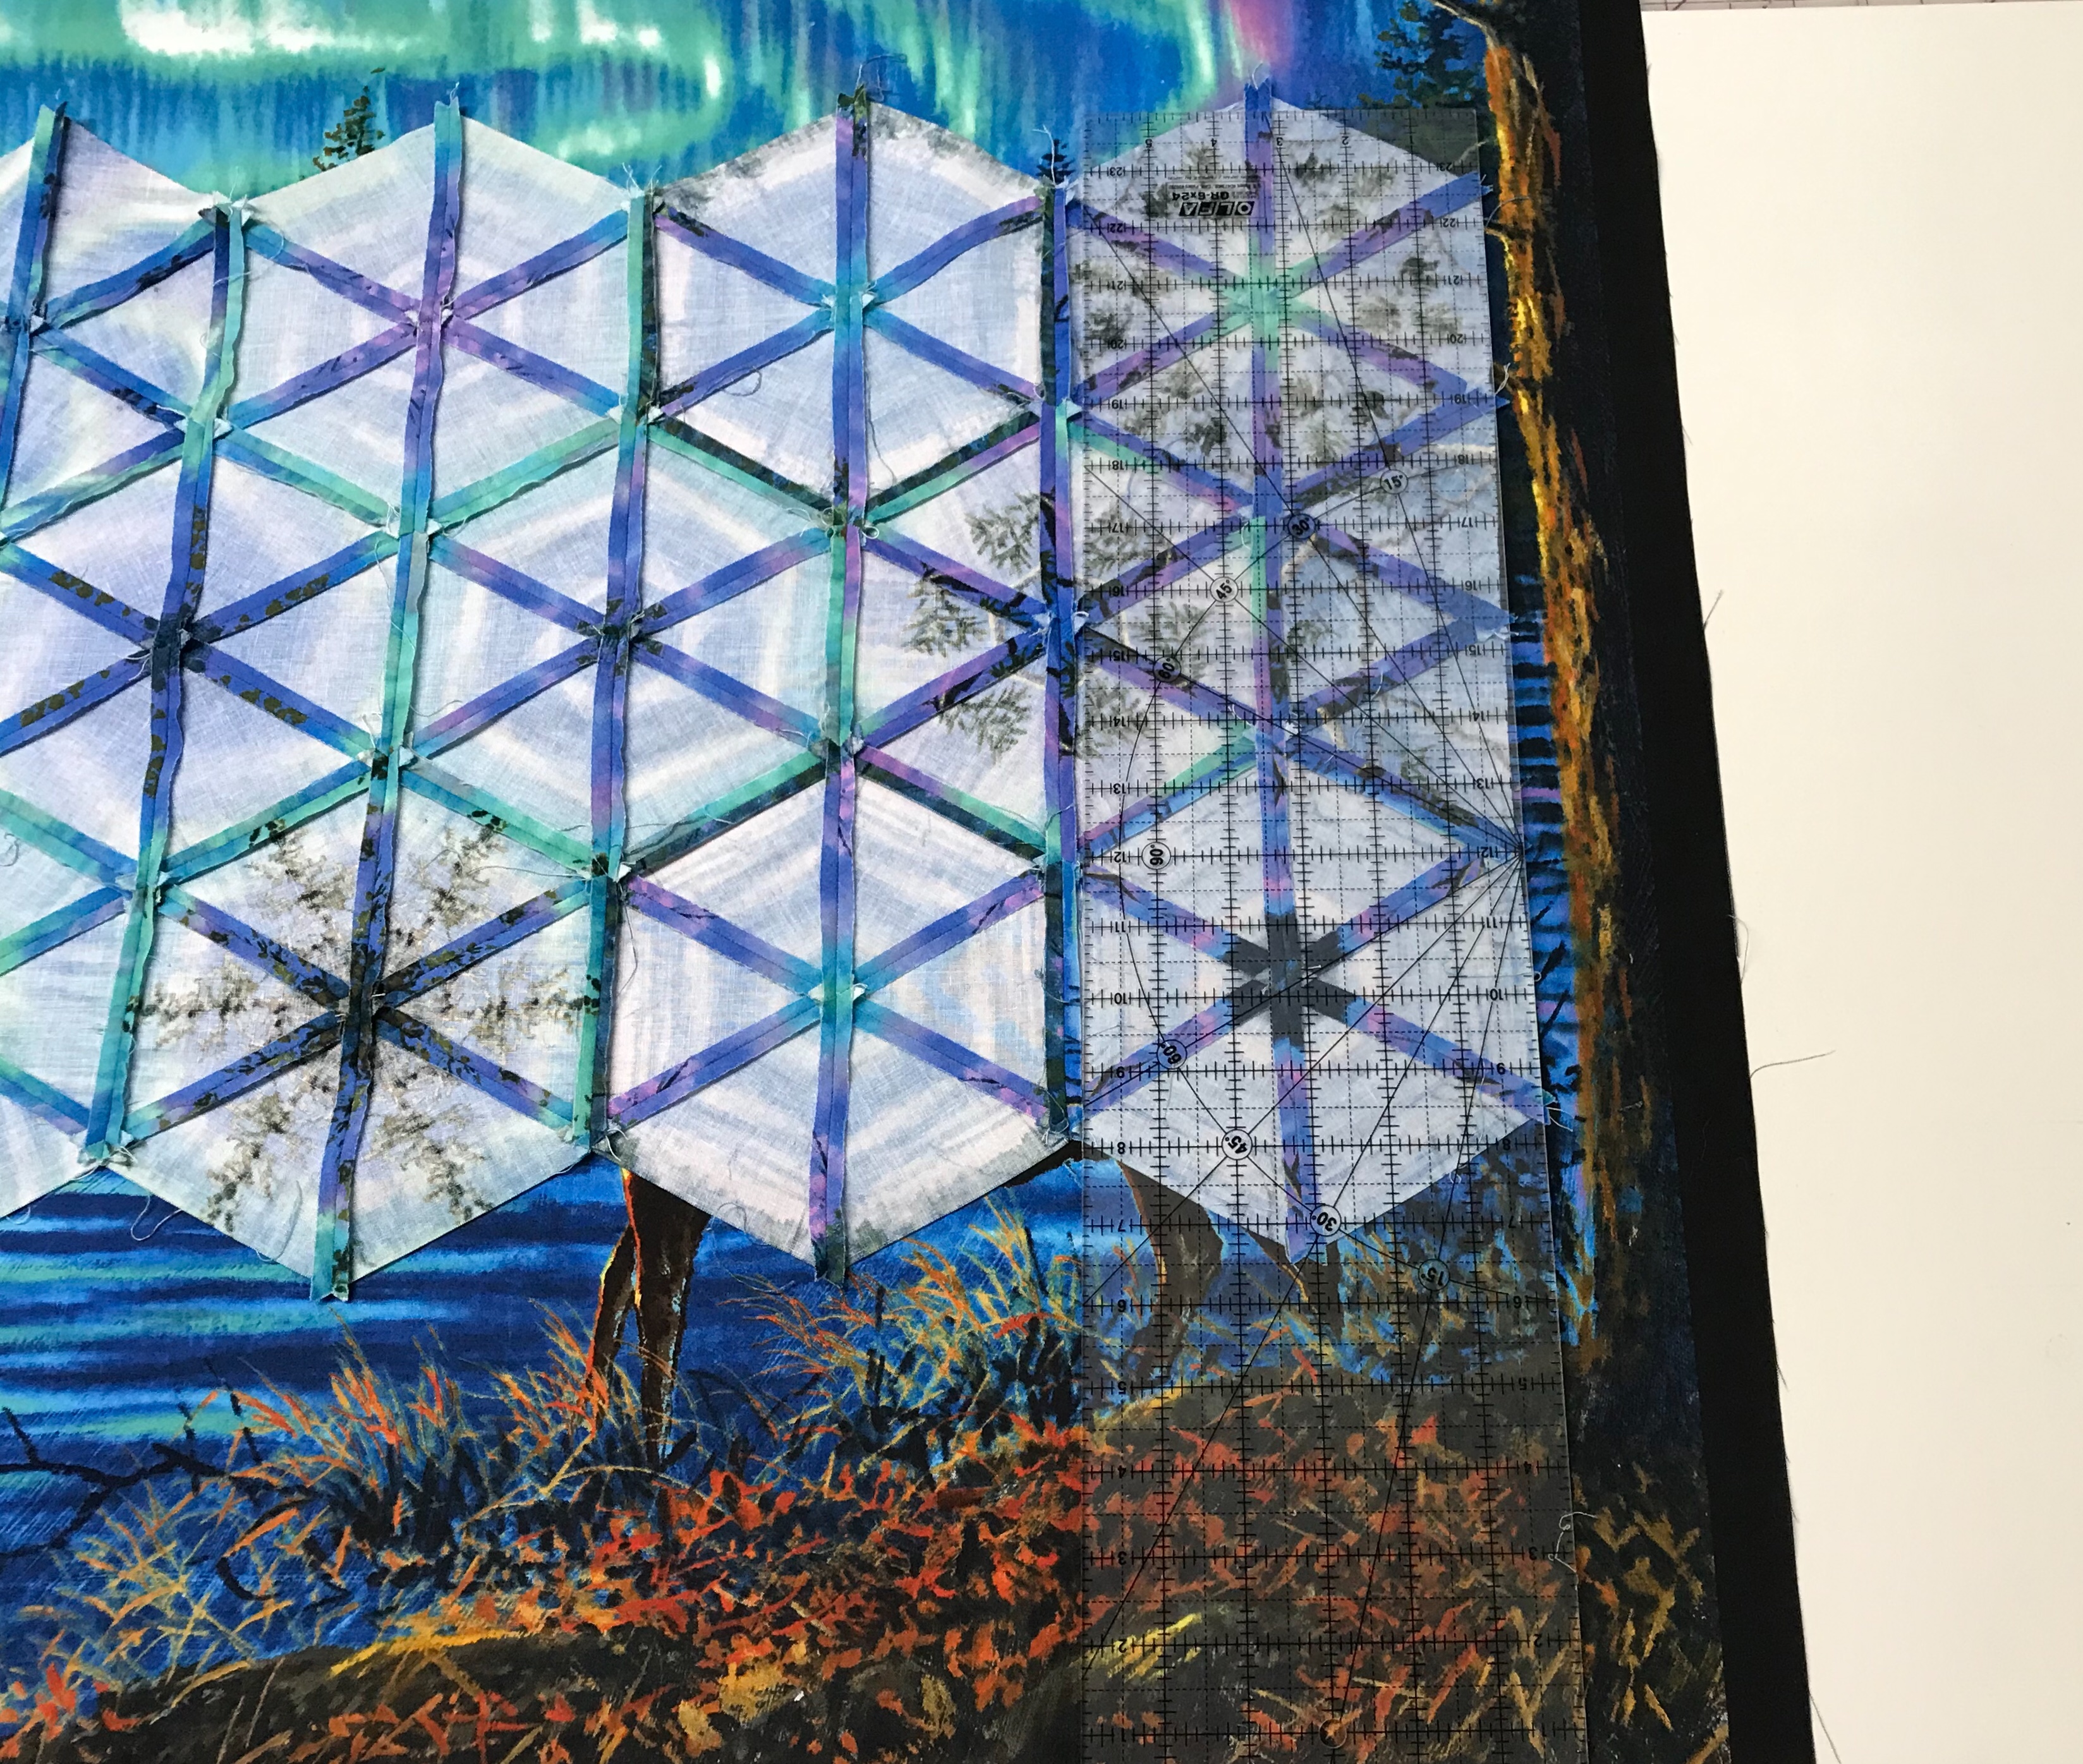
I discovered when the bottom set hexies were aligned with side hexies – I needed to add about 1 1/2″ of fabric.
Now it all fit together wonderfully. I just needed to hide the fabric I added and trim the top and bottom points.
You can’t even tell where I added the fabric or hid it with smaller hexagons. Next I will get quilted!
No moose were hurt in the making of this quilt as Tucker was on duty supervising me the entire time.
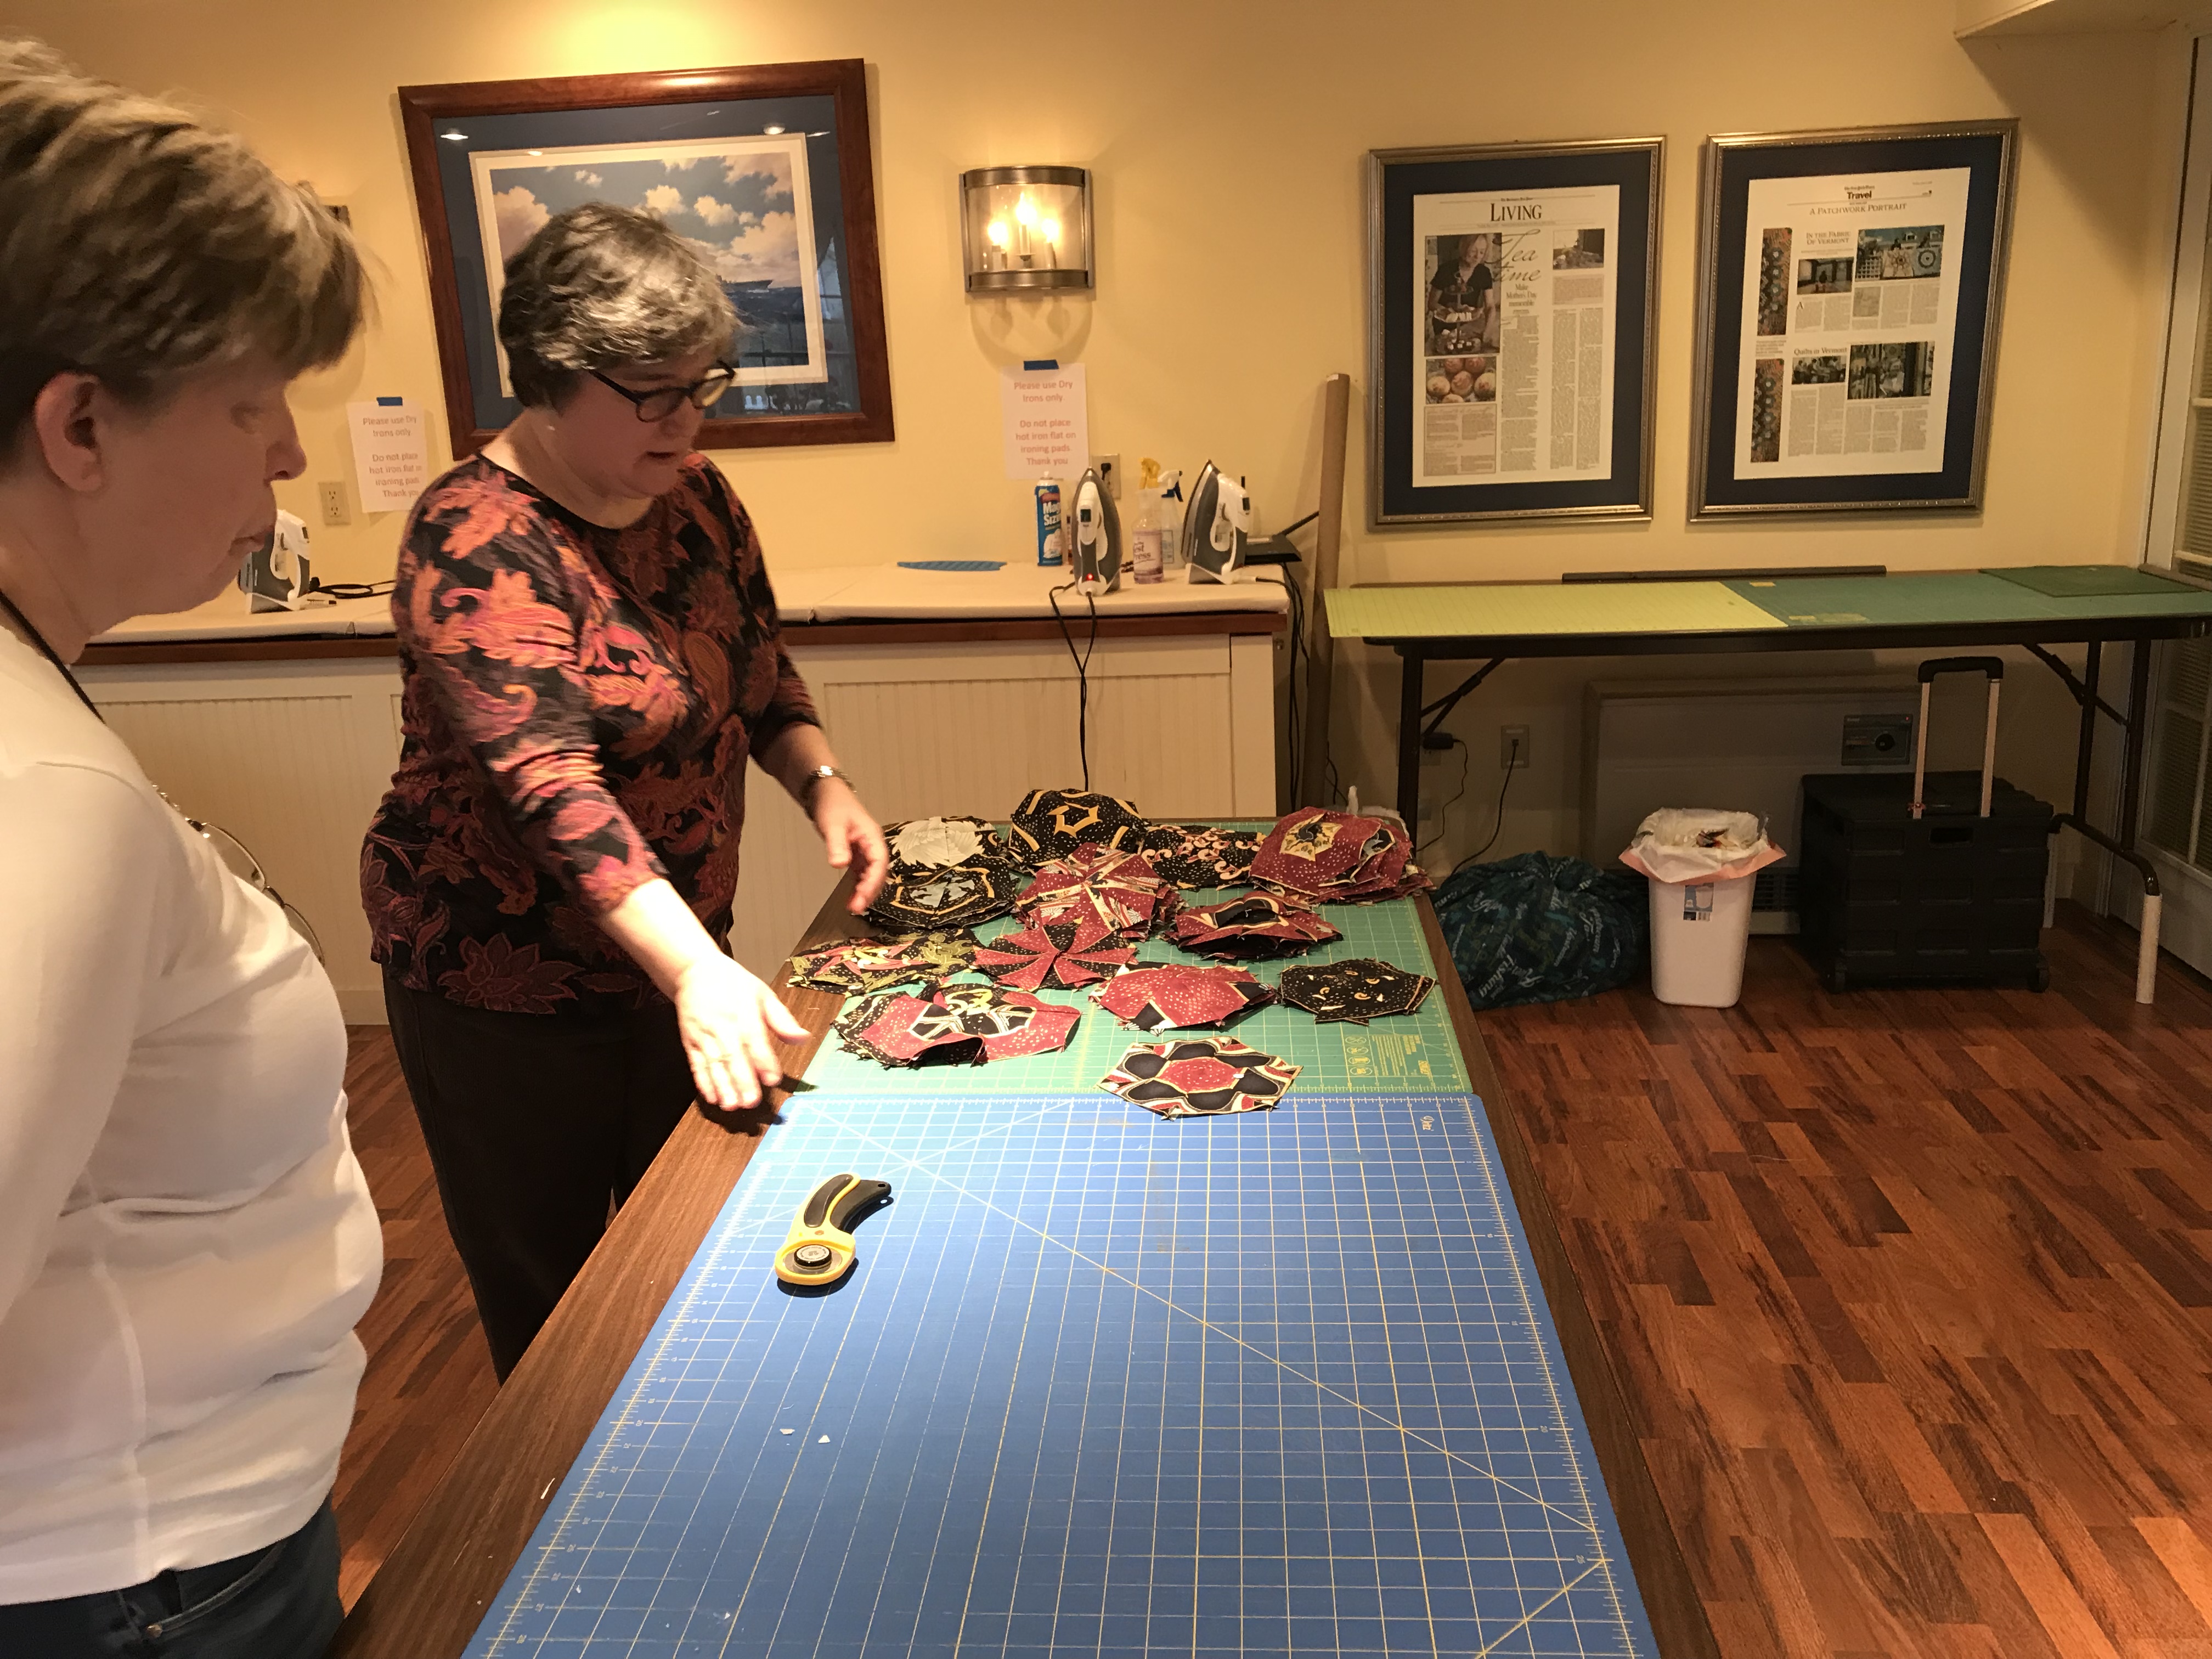
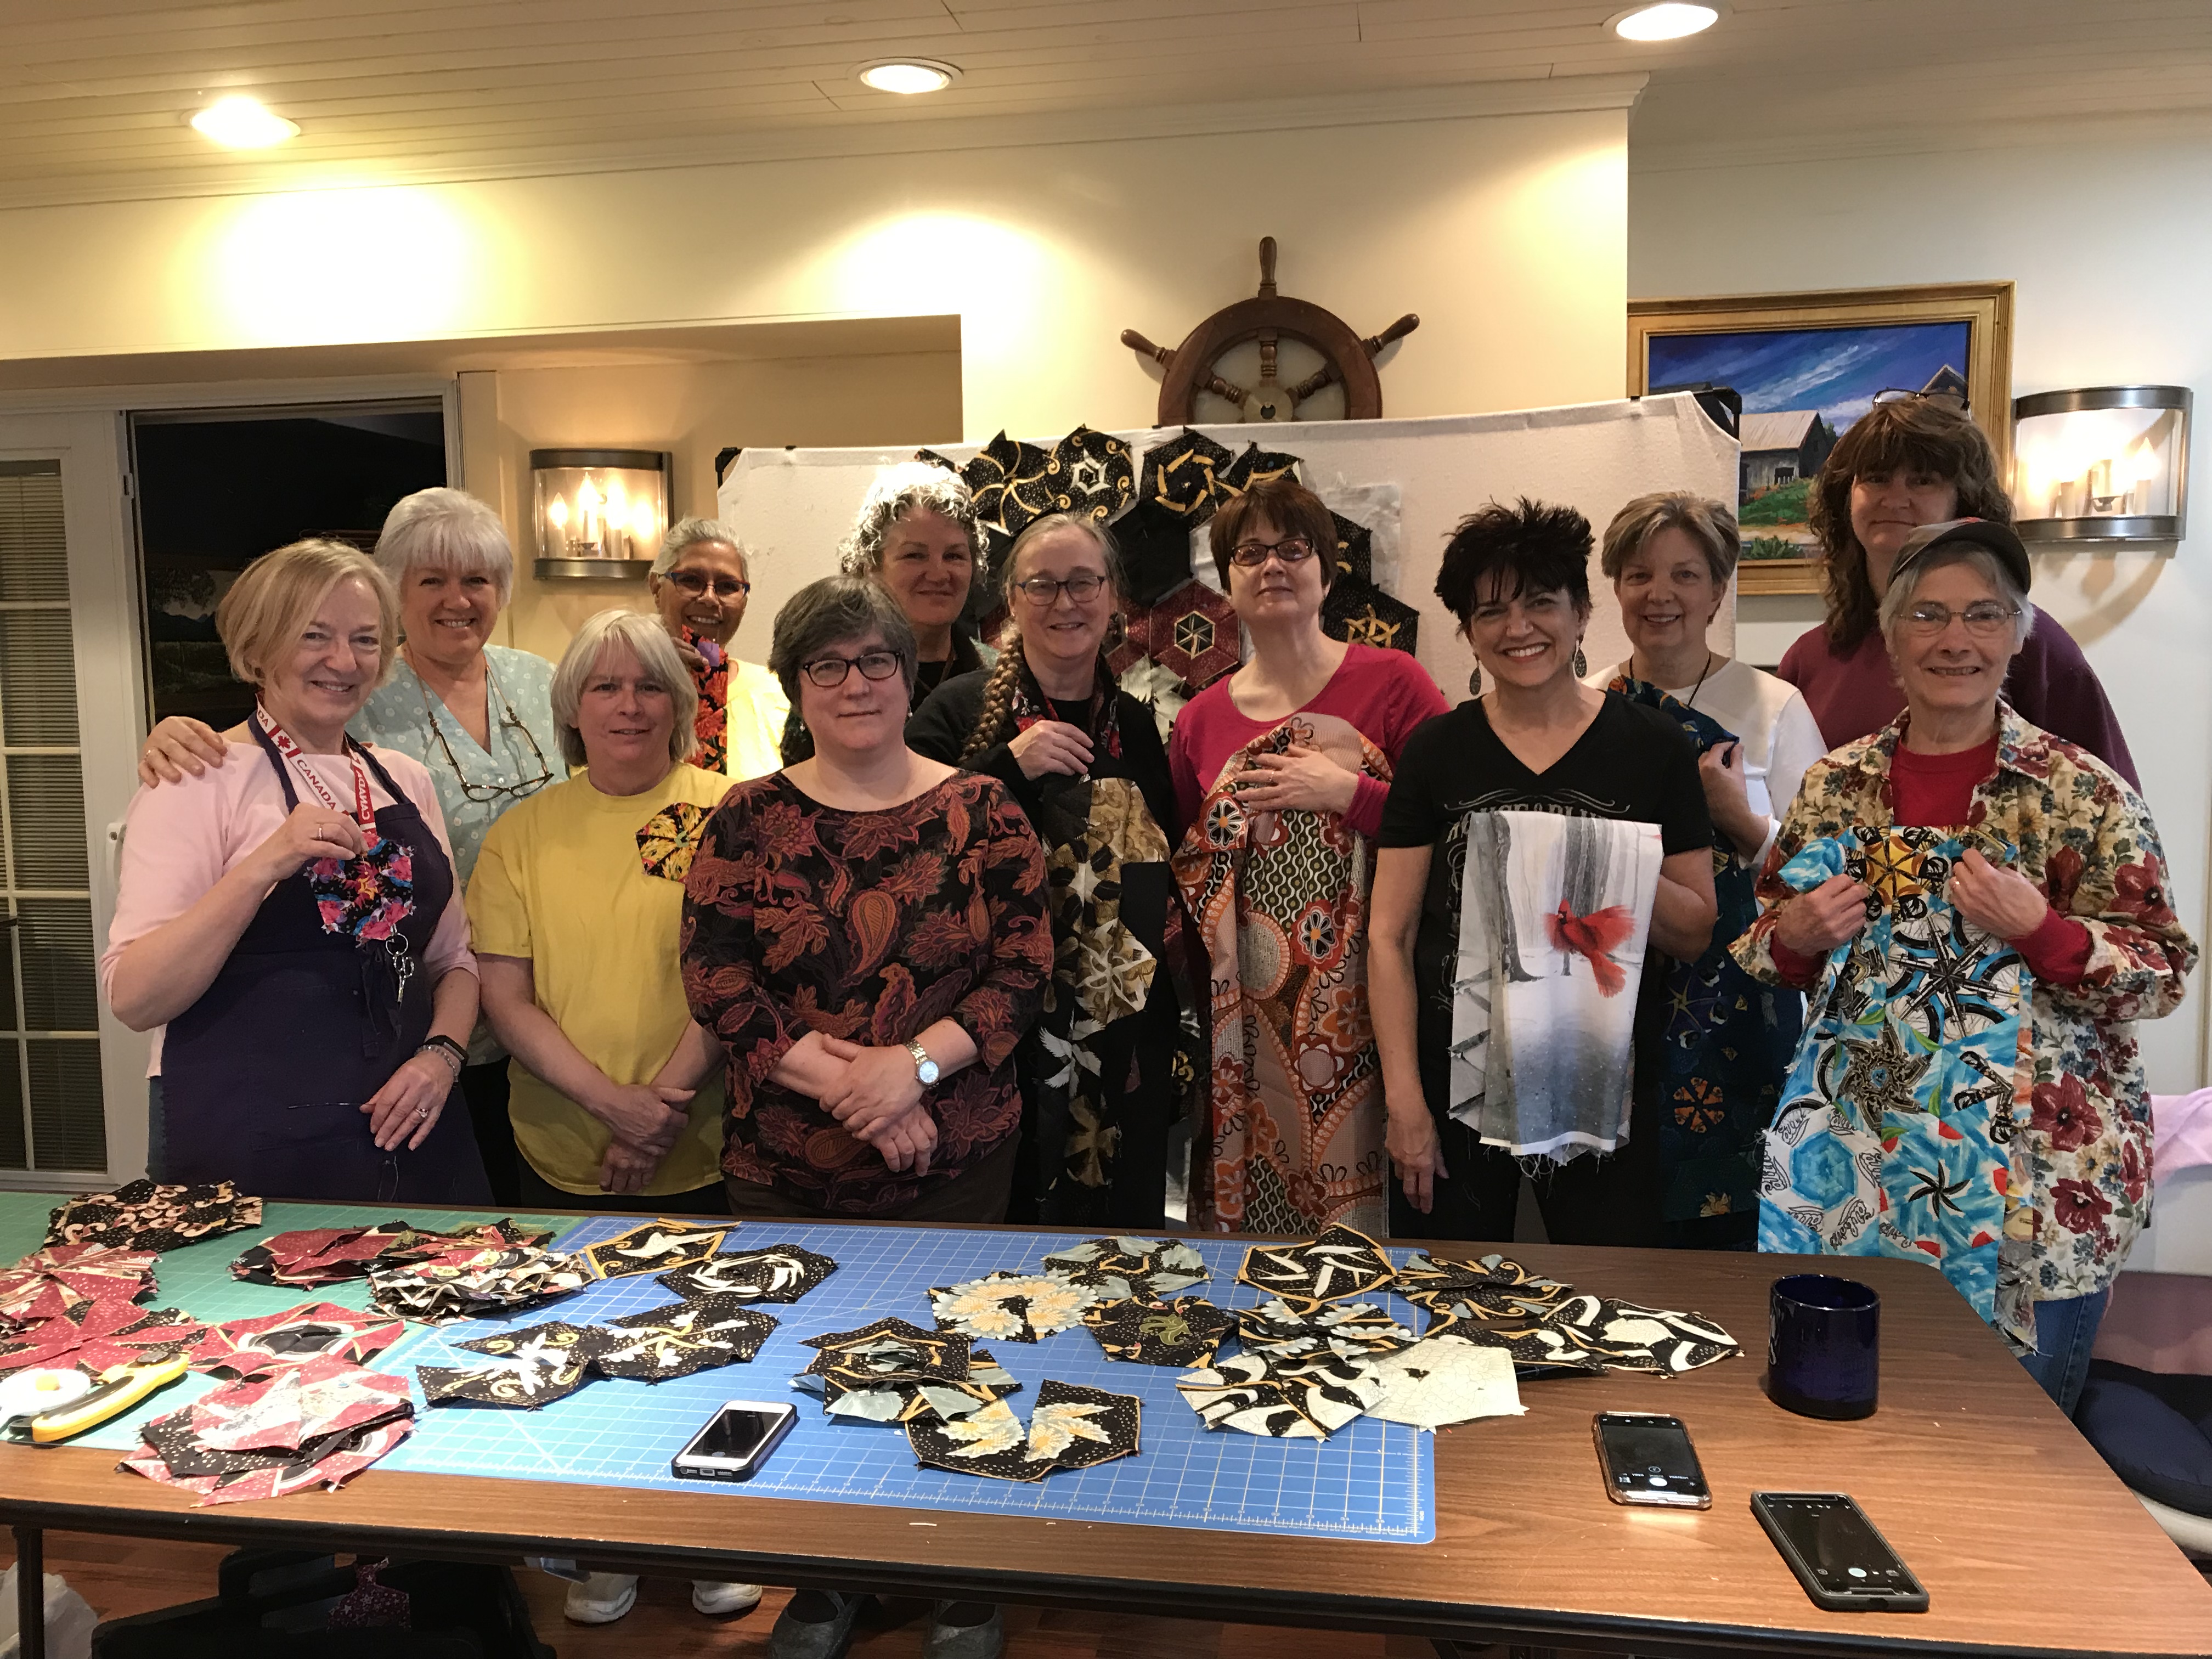
Wowza, I just got home from teaching a One Block Wonder workshop to a great group of quilters whom I think of as friends! We gathered at the Strong House Inn in Vergennes, Vermont, where Innkeepers Mary, Hugh & Betsy spoil us with care.
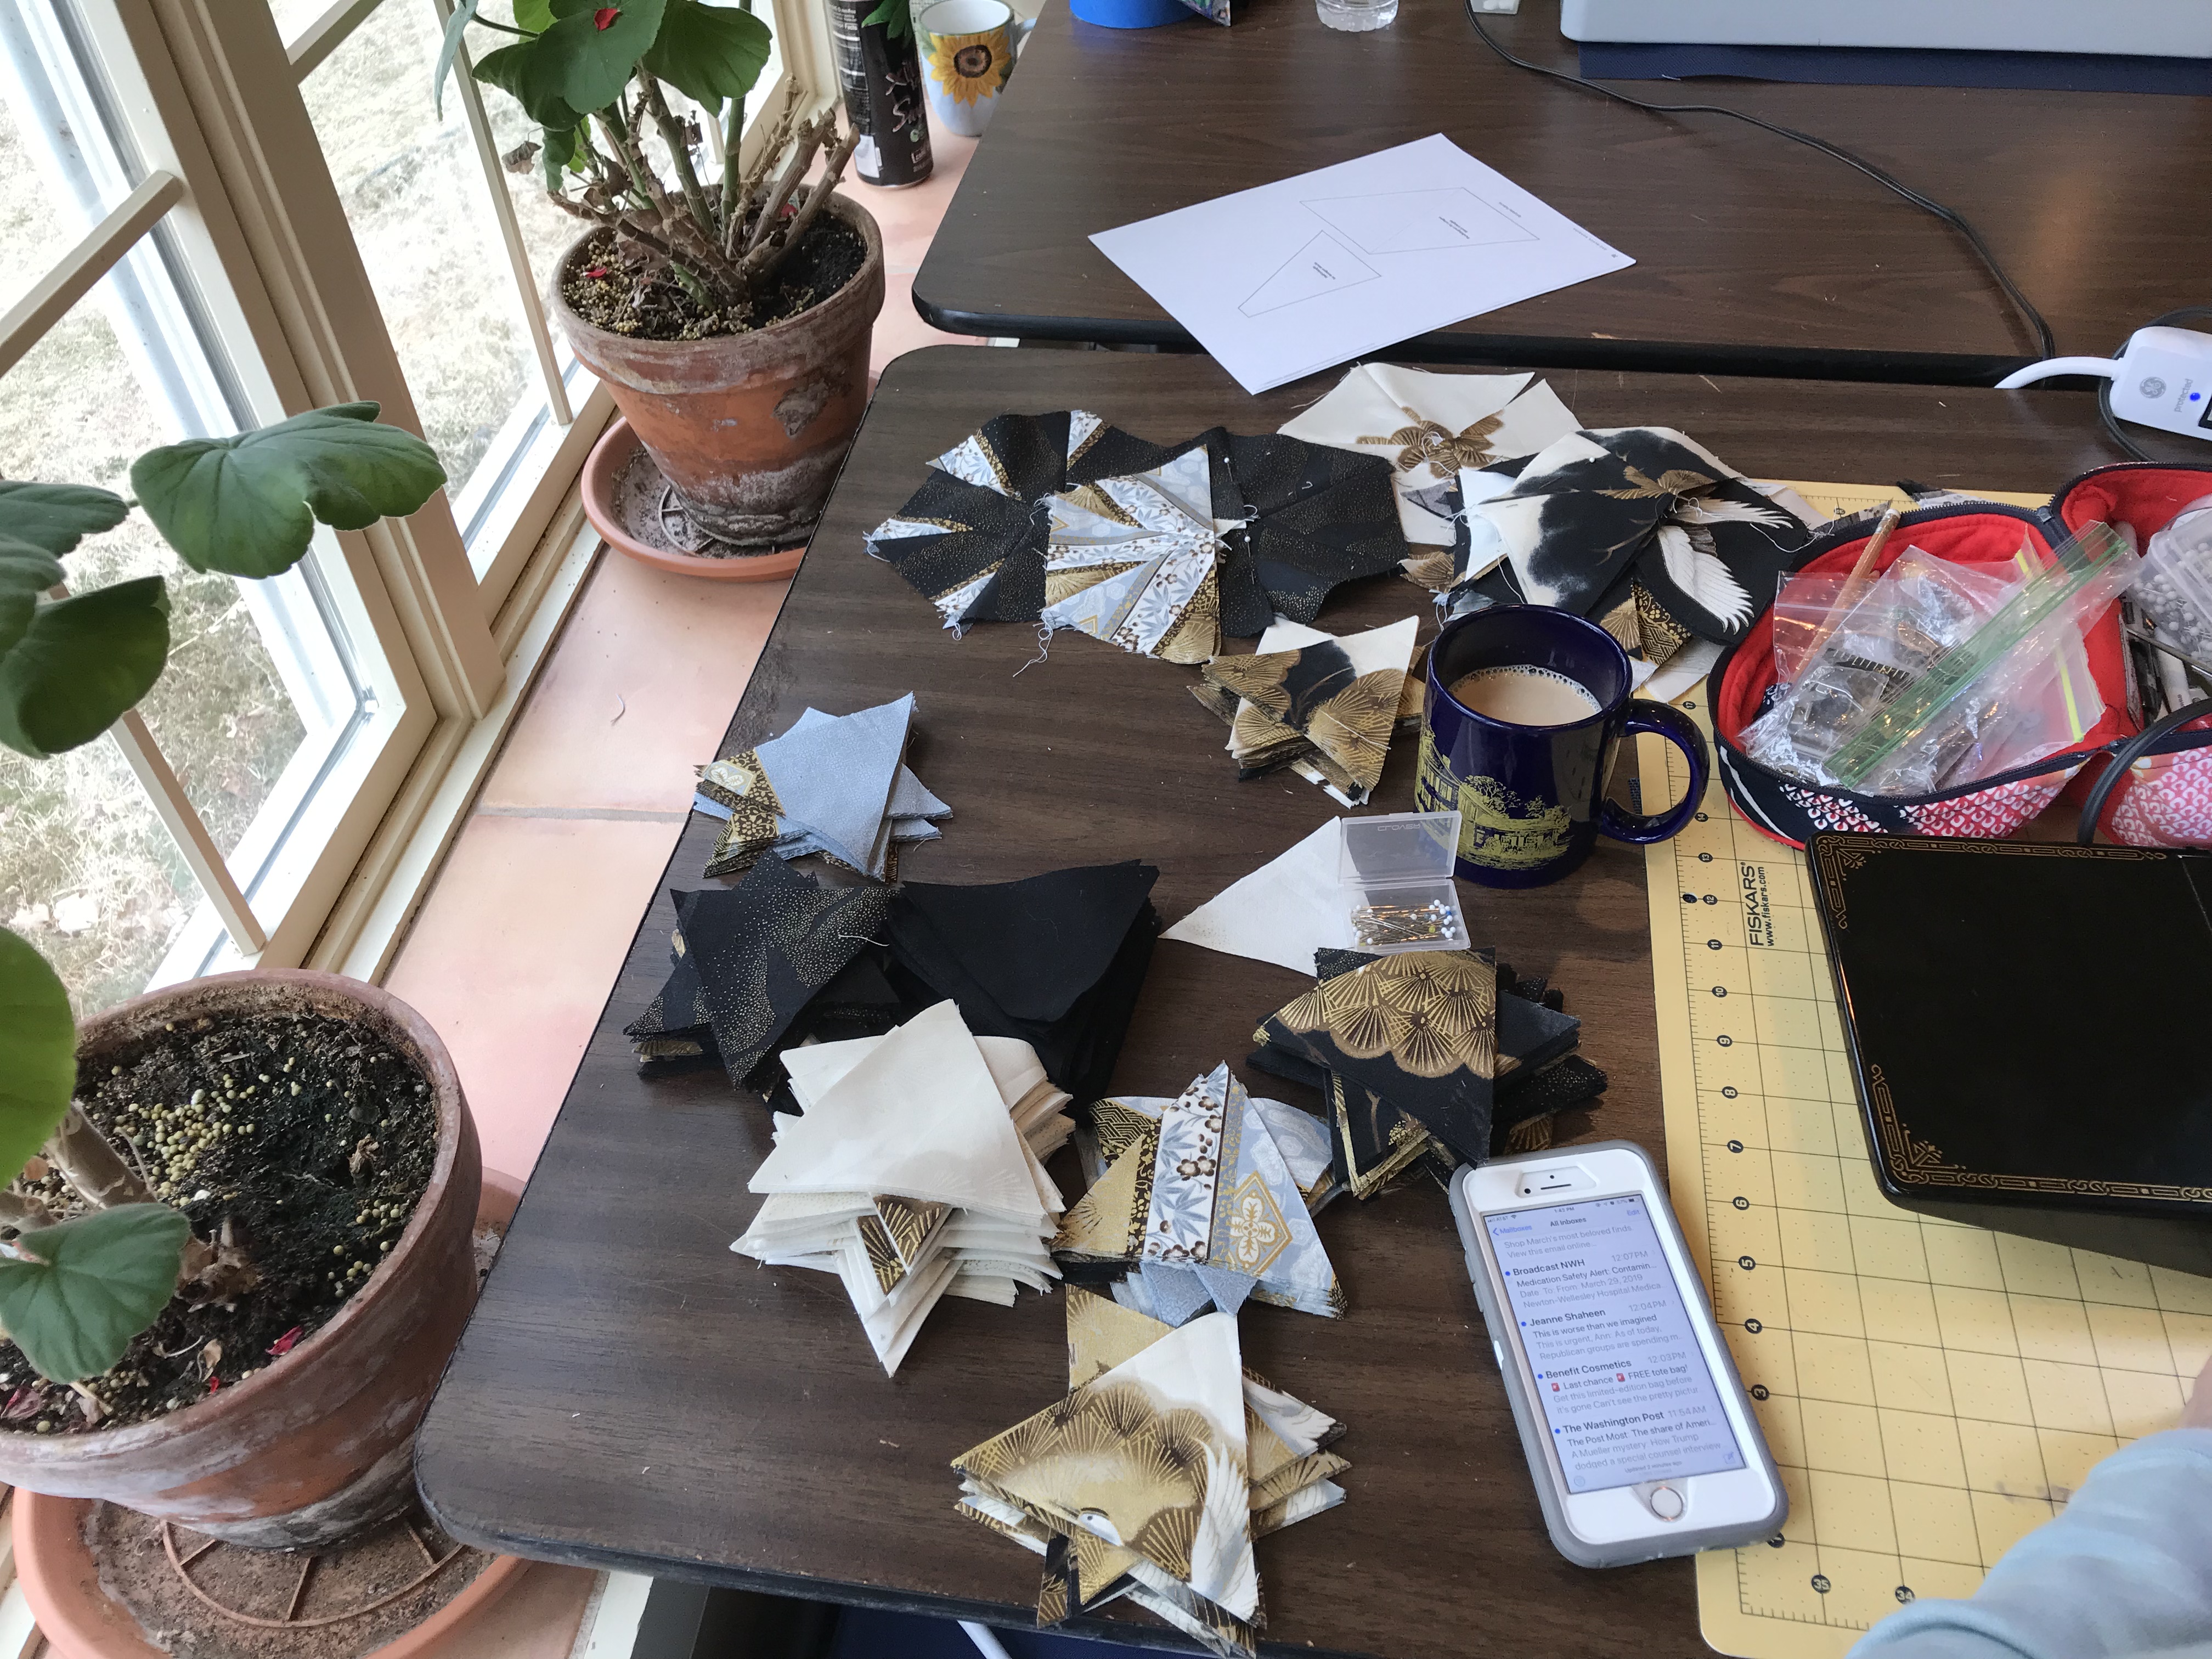
We hit the road running on Thursday afternoon, almost as soon as I got in the room the cutting of the repeats began.
Carol had started hers hexies at home so she designed first, and what an awesome job she did!
I did not get a picture of Sally’s original fabric. It was motorcycles, racing flags and flowers on a bright clear blue fabric. Her design is so very cool. Ride Sally Ride!
Joan’s panel is in deep golds and rich colors. It seems one of her favorite blocks was very plain that she called “the Tortilla”! Can you find it?
Joan’s sister Sharon had a small aboriginal print from an 8″ repeat that she cut 2 1/2″ strips for a smaller hexie. Somehow I missed getting a picture of her final design which was totally awesome.
Deb’s panel is awesome and her hexie design is totally awesomeness!
Gladys’ fabric is so bright and cheerful. Her design is a true celebration of color!
Our very own Kathy Gannon had a fabulous large aboriginal fabric. The light in this photo does not shown how wonderful this design is. Kathy took the darker greens and fashioned a caterpillar crawling across the design. She also made great use of her left over fabric by making several size hexies to add a unique creative flair to her quilt. I can’t wait to see it finished.
Wonderful Jane found her fabric strips needed to be cut smaller to make best use of the design. She thought she would never get to the end of sewing her Mardi Gras hexies together.
Martha started with a great panel and came up with a very creative design. She loving calls some of her blocks “desert plates” that surround the center of light hexies.
Anne was not too sure about a One Block Wonder Retreat, but she went along with her sister Martha’s choice. What a completely awesome job she did. She is calling this quilt “Moon over Kyoto”!
Me at the end of the day laying in my bed exhausted!
What a great group of quilting friends. I miss you guys already!
I’ll be back at the Strong House Inn October 24, 25, 26 & 27, 2019 for “Everything You Wanted to Know about the Tucker Trimmer, But were afraid to Ask” workshop. We will make at least 4 blocks showcasing what units you can make, a table runner and a wall hanging, so make your reservations soon! Happy Quilting everyone.
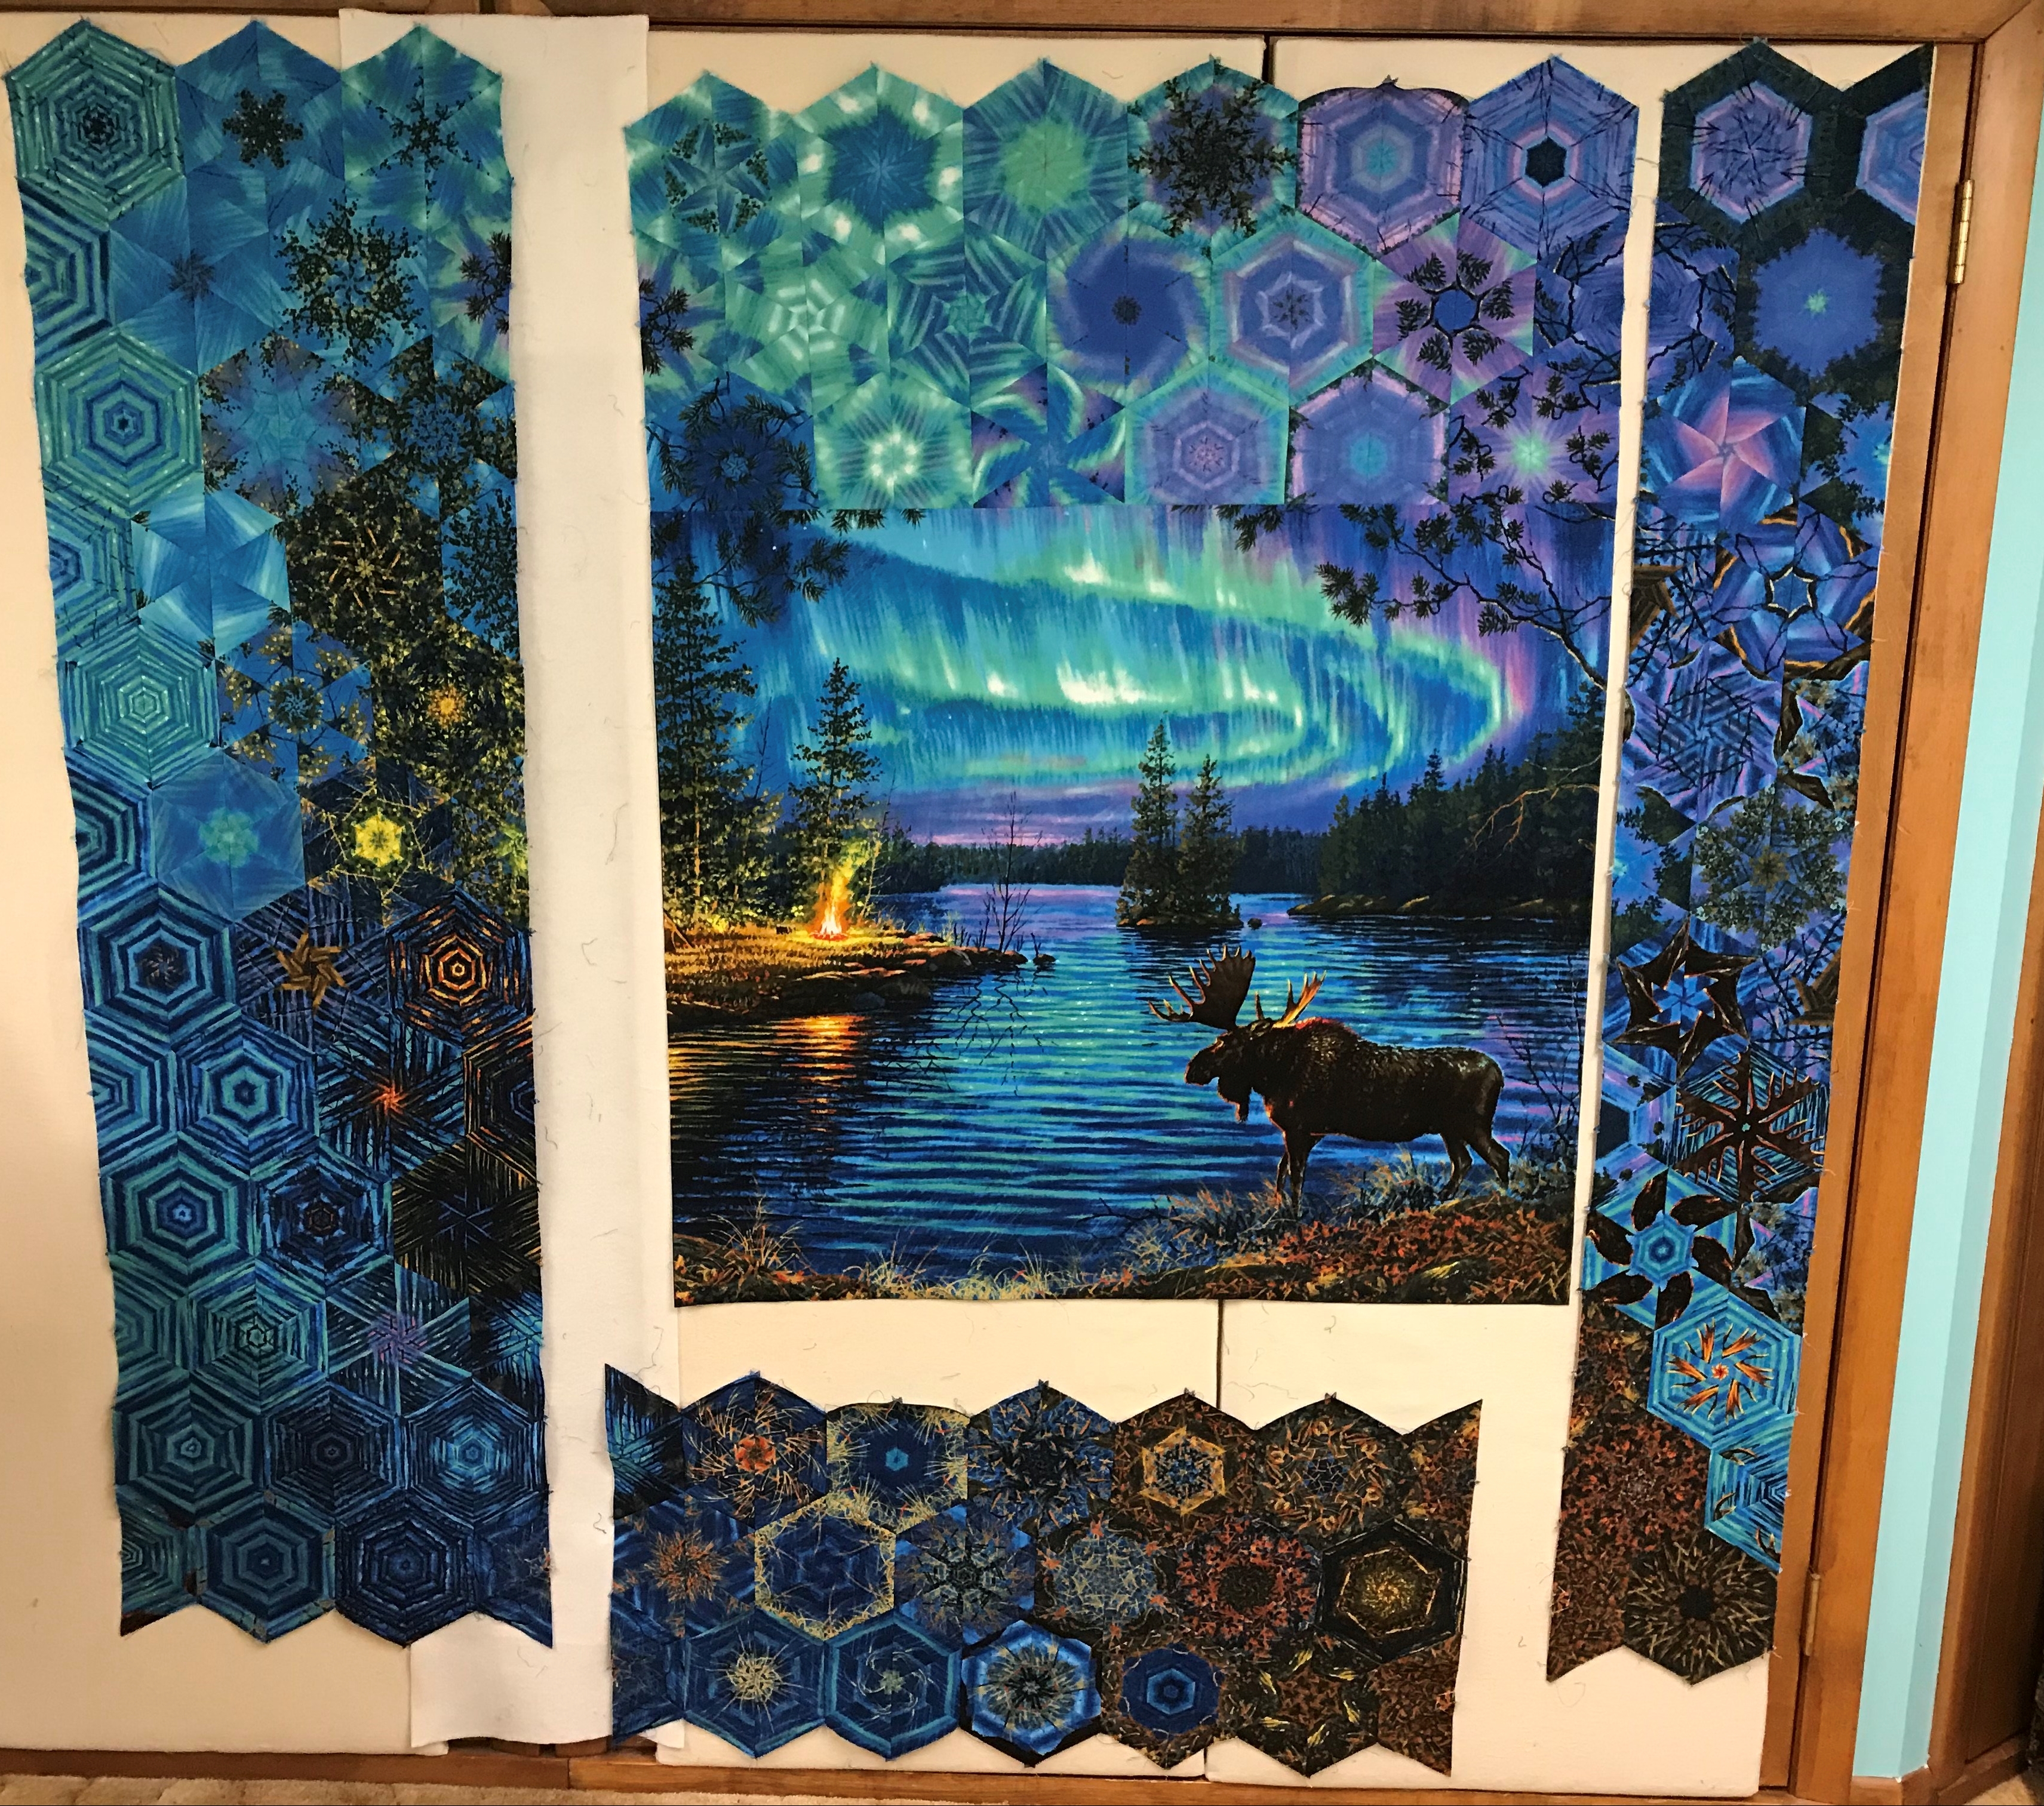
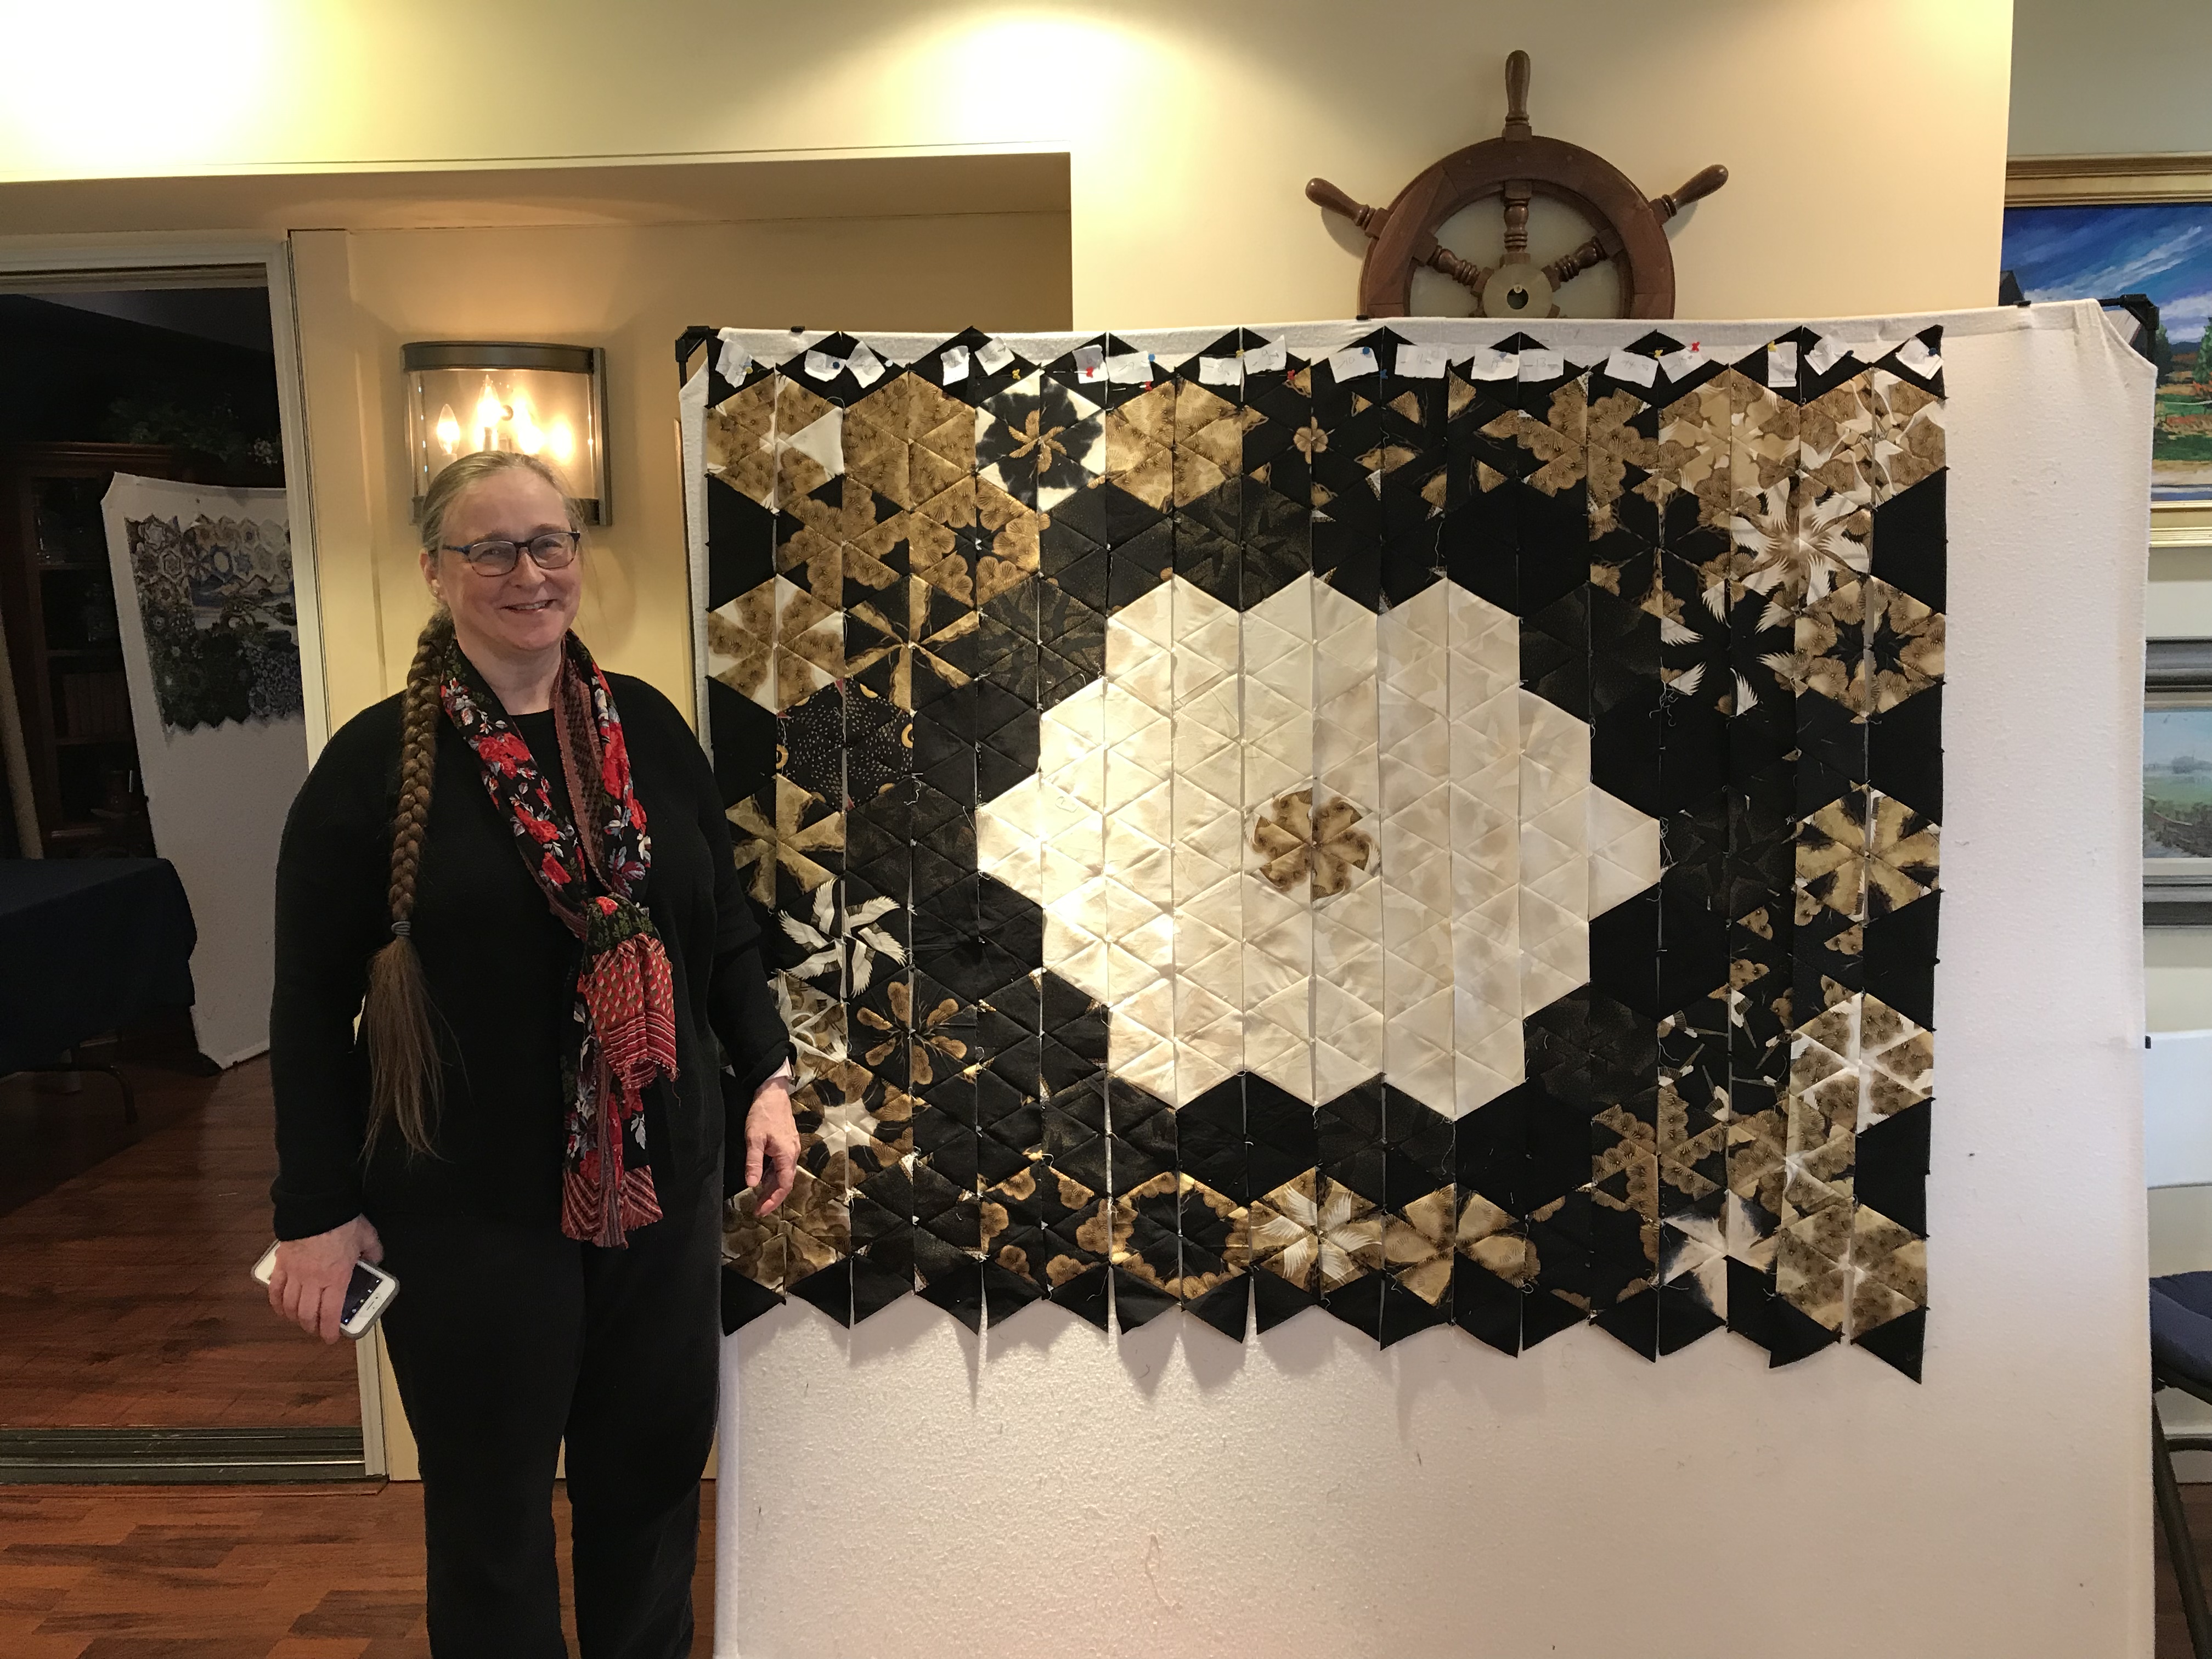
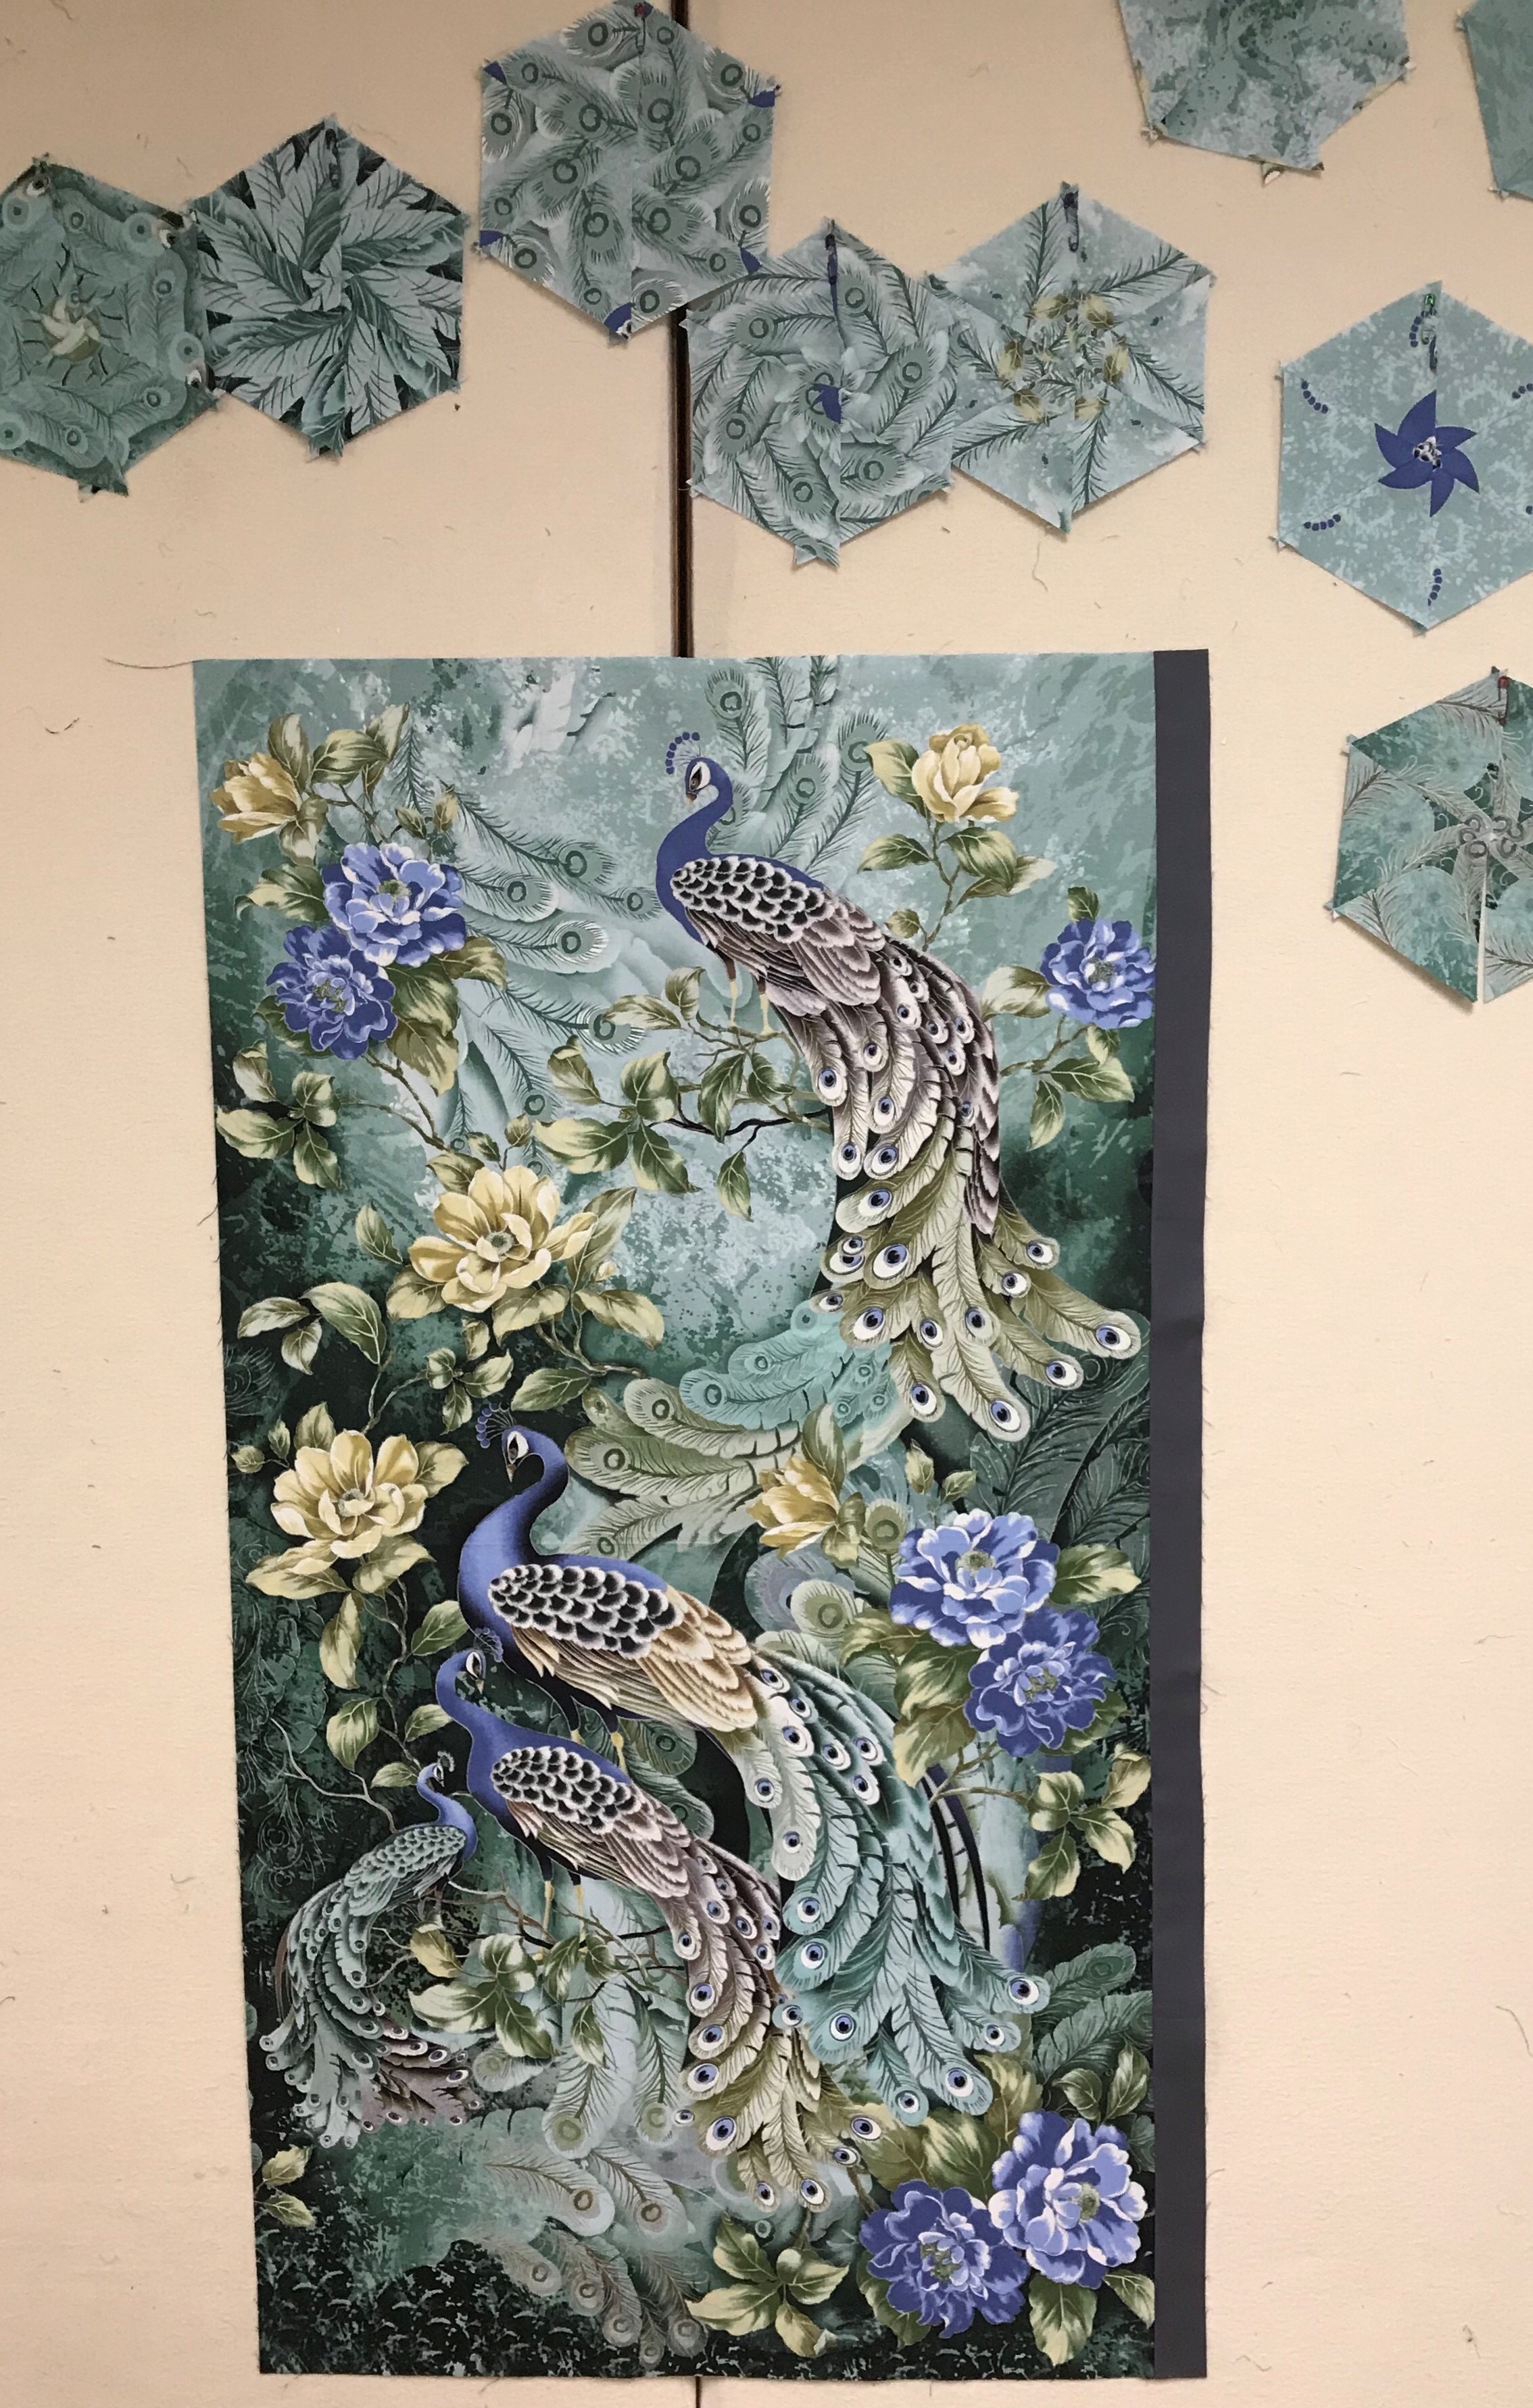
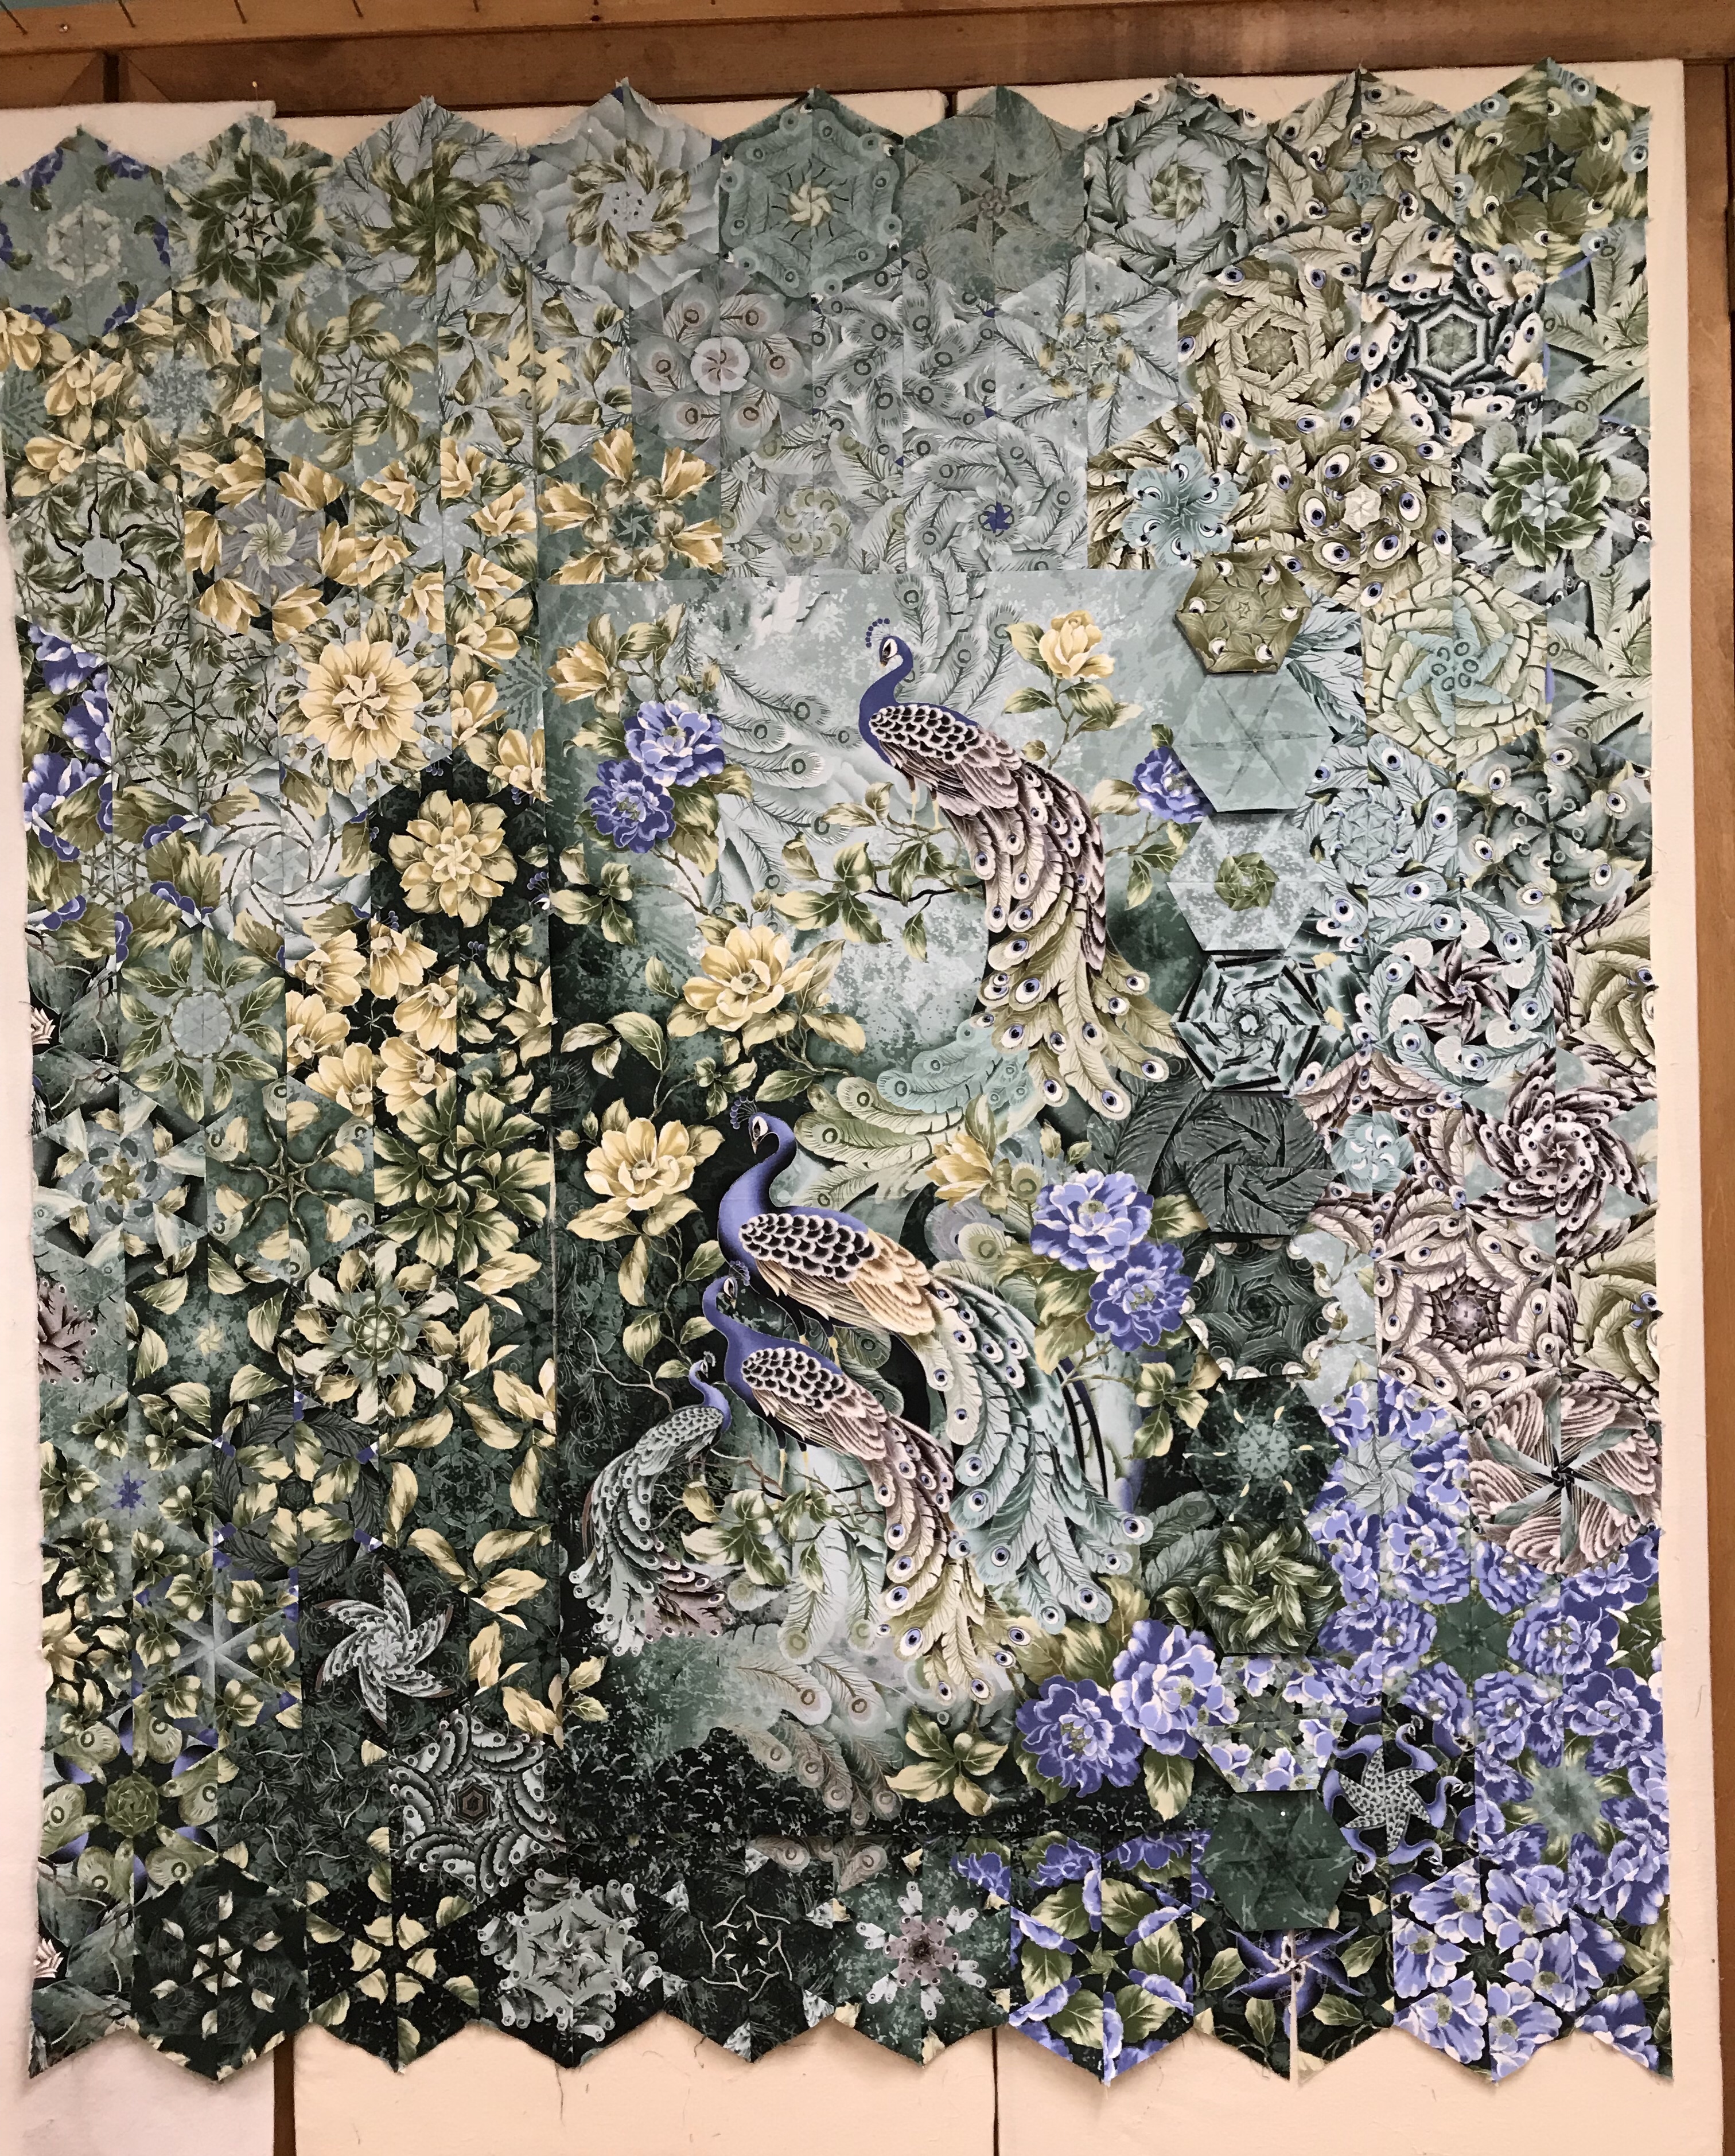
Have you seen some of the wonderfully creative One Block Wonders (OBW) made using precut panels? If you haven’t you should join the Facebook group “One Block Wonder Quilt Forum”! This is my third OBW using panels and I wanted to share how I put them together.
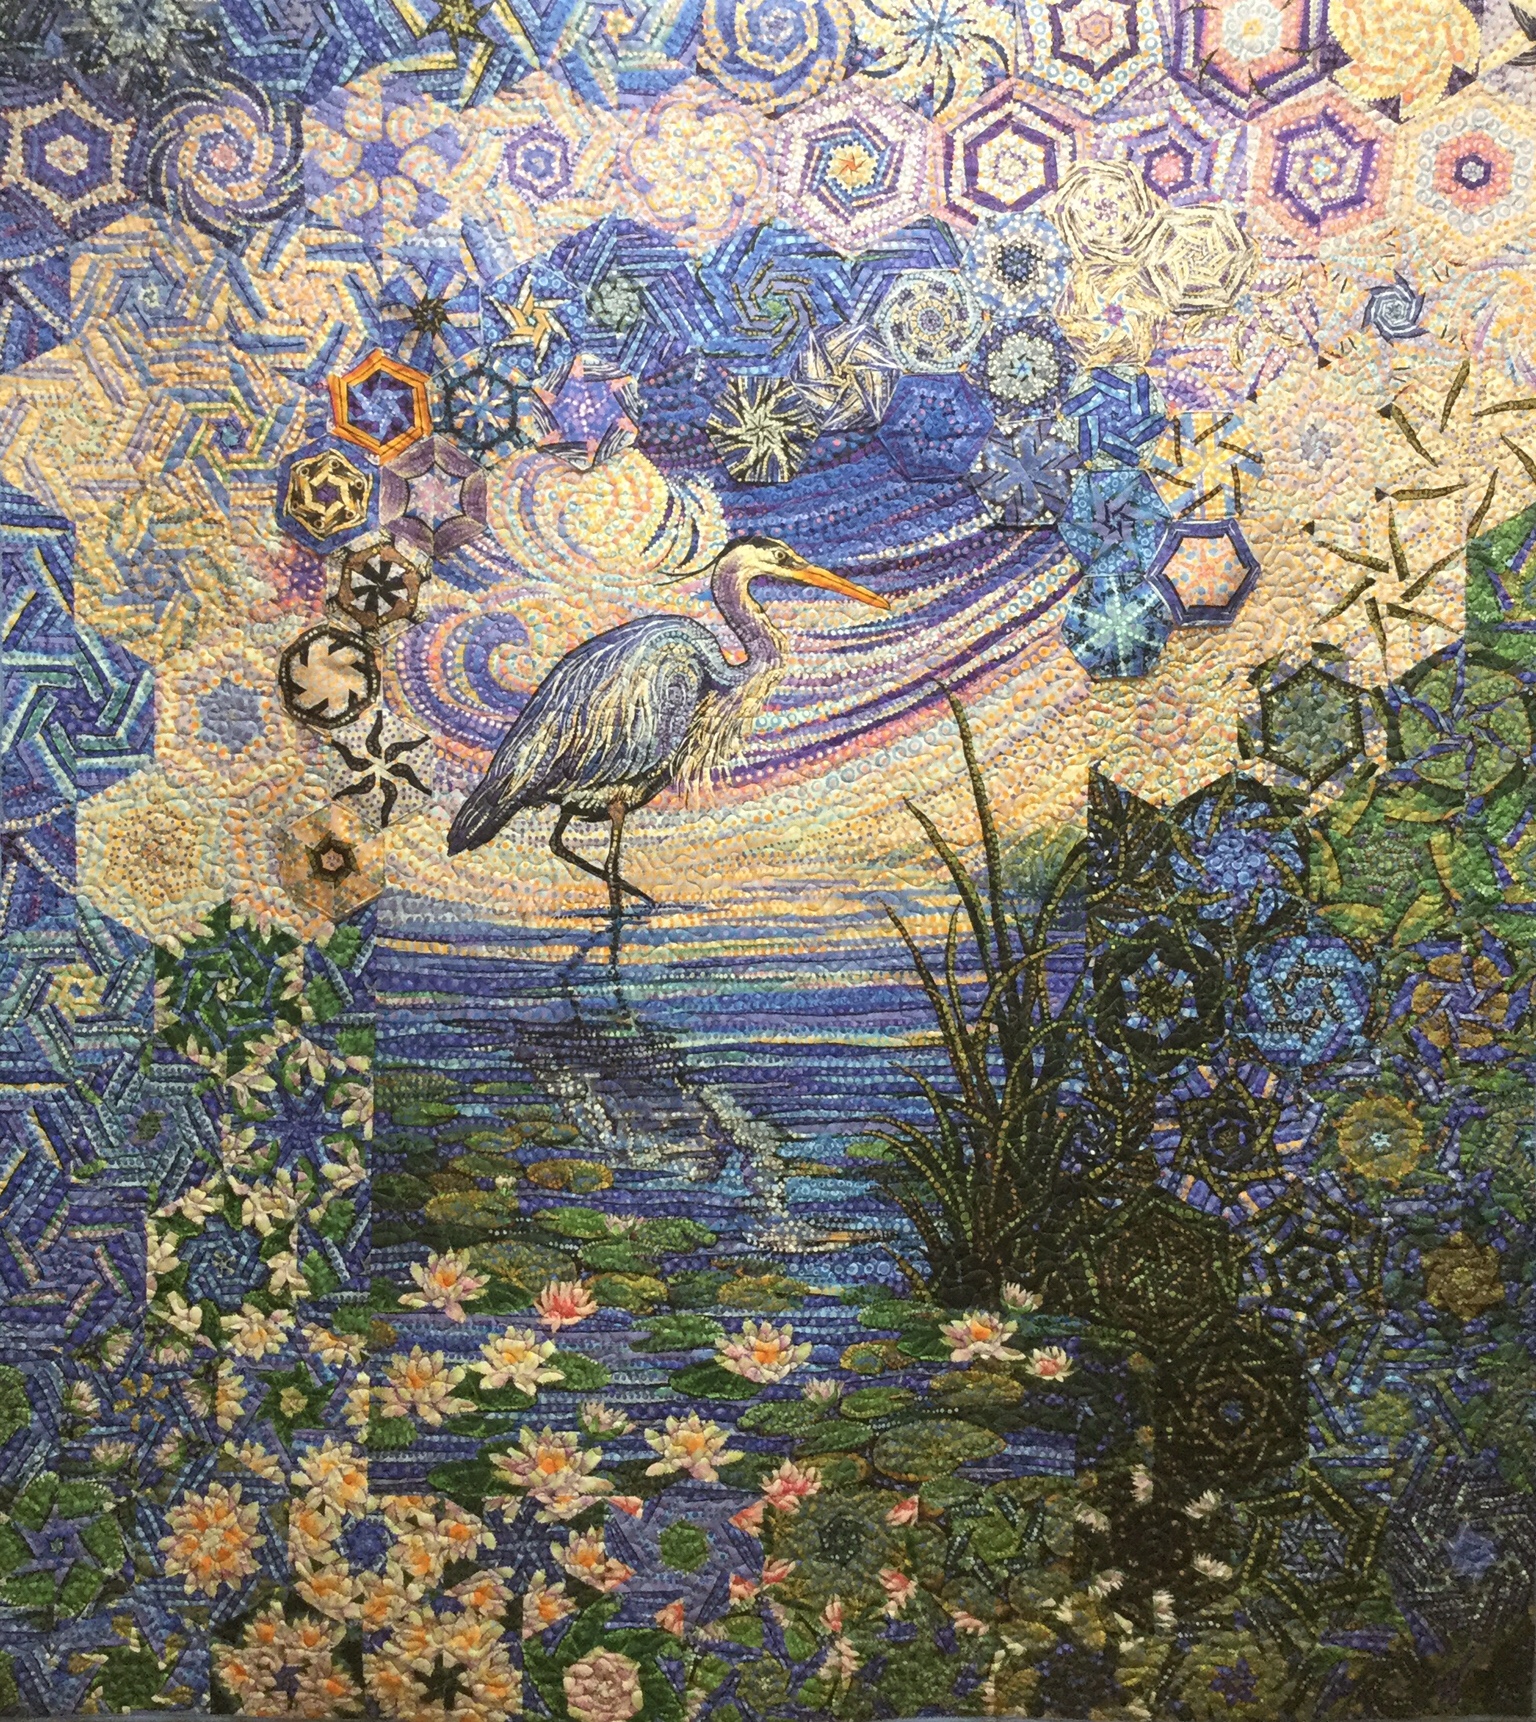
My last OBW using panels “The Heron”, was so much fun I couldn’t wait to make the next one. Start by purchasing 7 Panels. One to be incorporated into the top and 6 to be aligned for making the hexagon blocks.
The process is same whether you are using yardage or panels. The only difference is the repeats are already cut for you. I don’t trim the panels, I just press them and layer them assuring they are all going in the direction. Align them as directed in Maxine Rosenthal’s book One Block Wonders or One Block Wonder Encore.
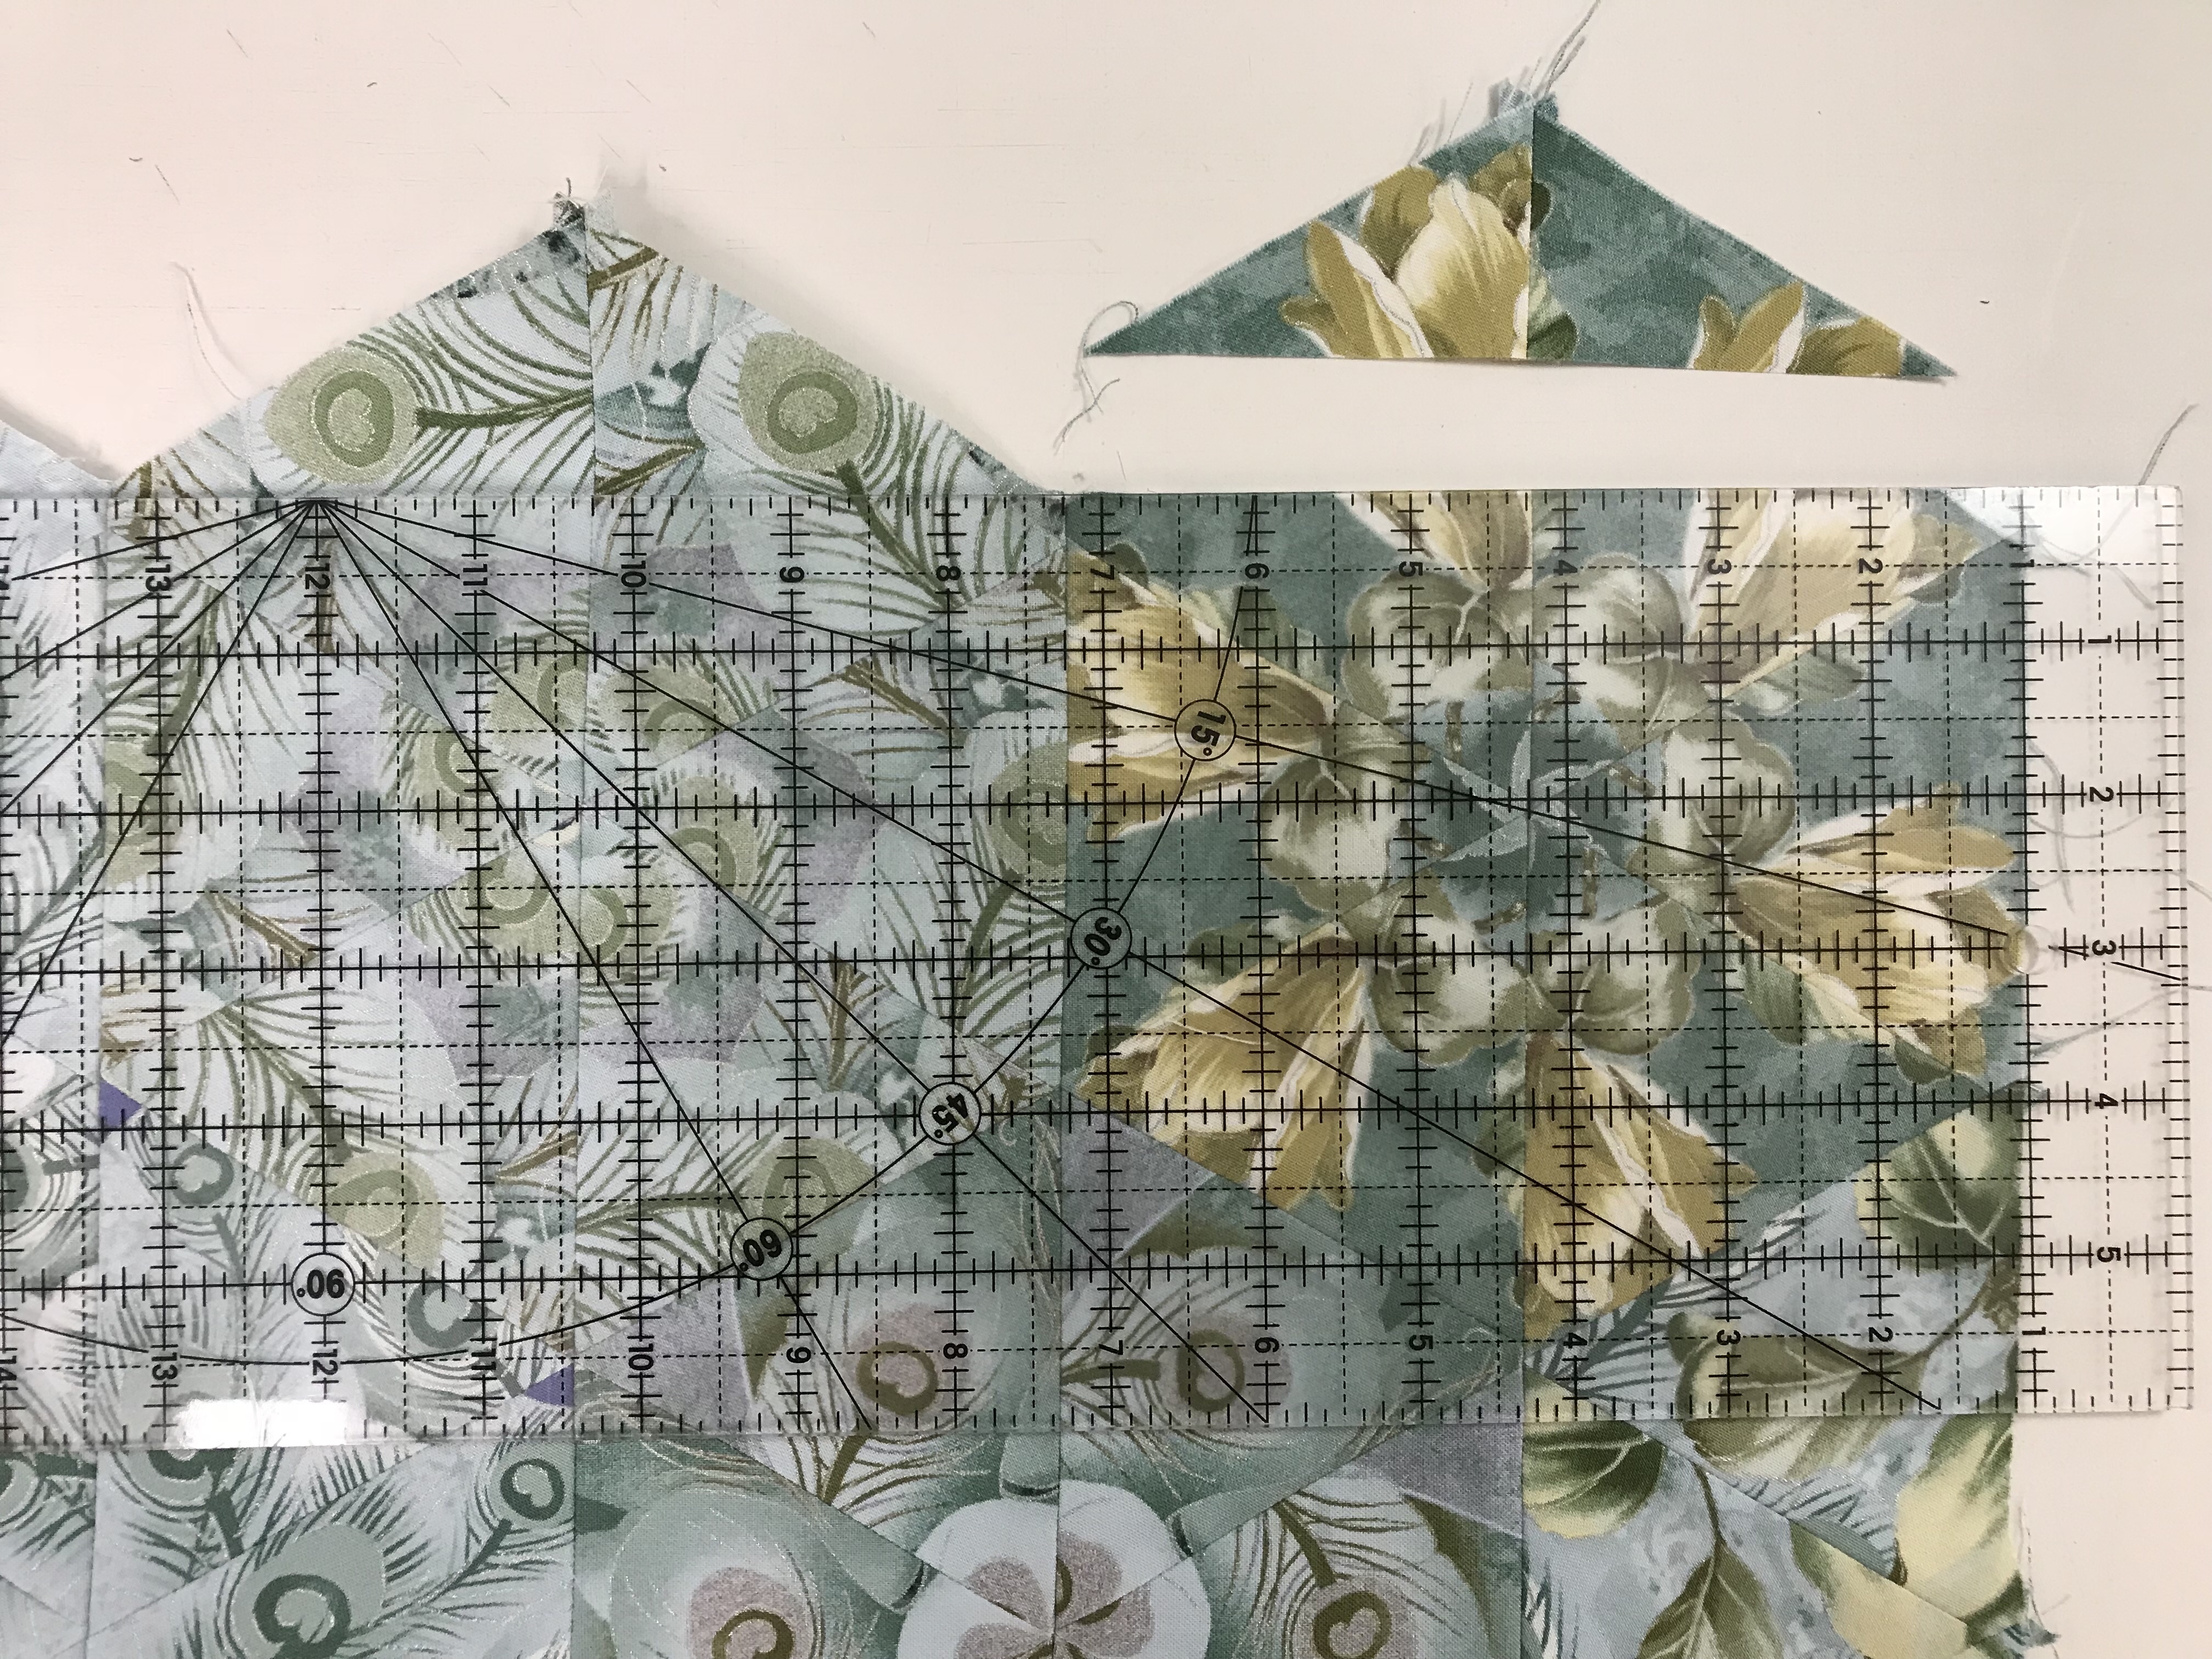
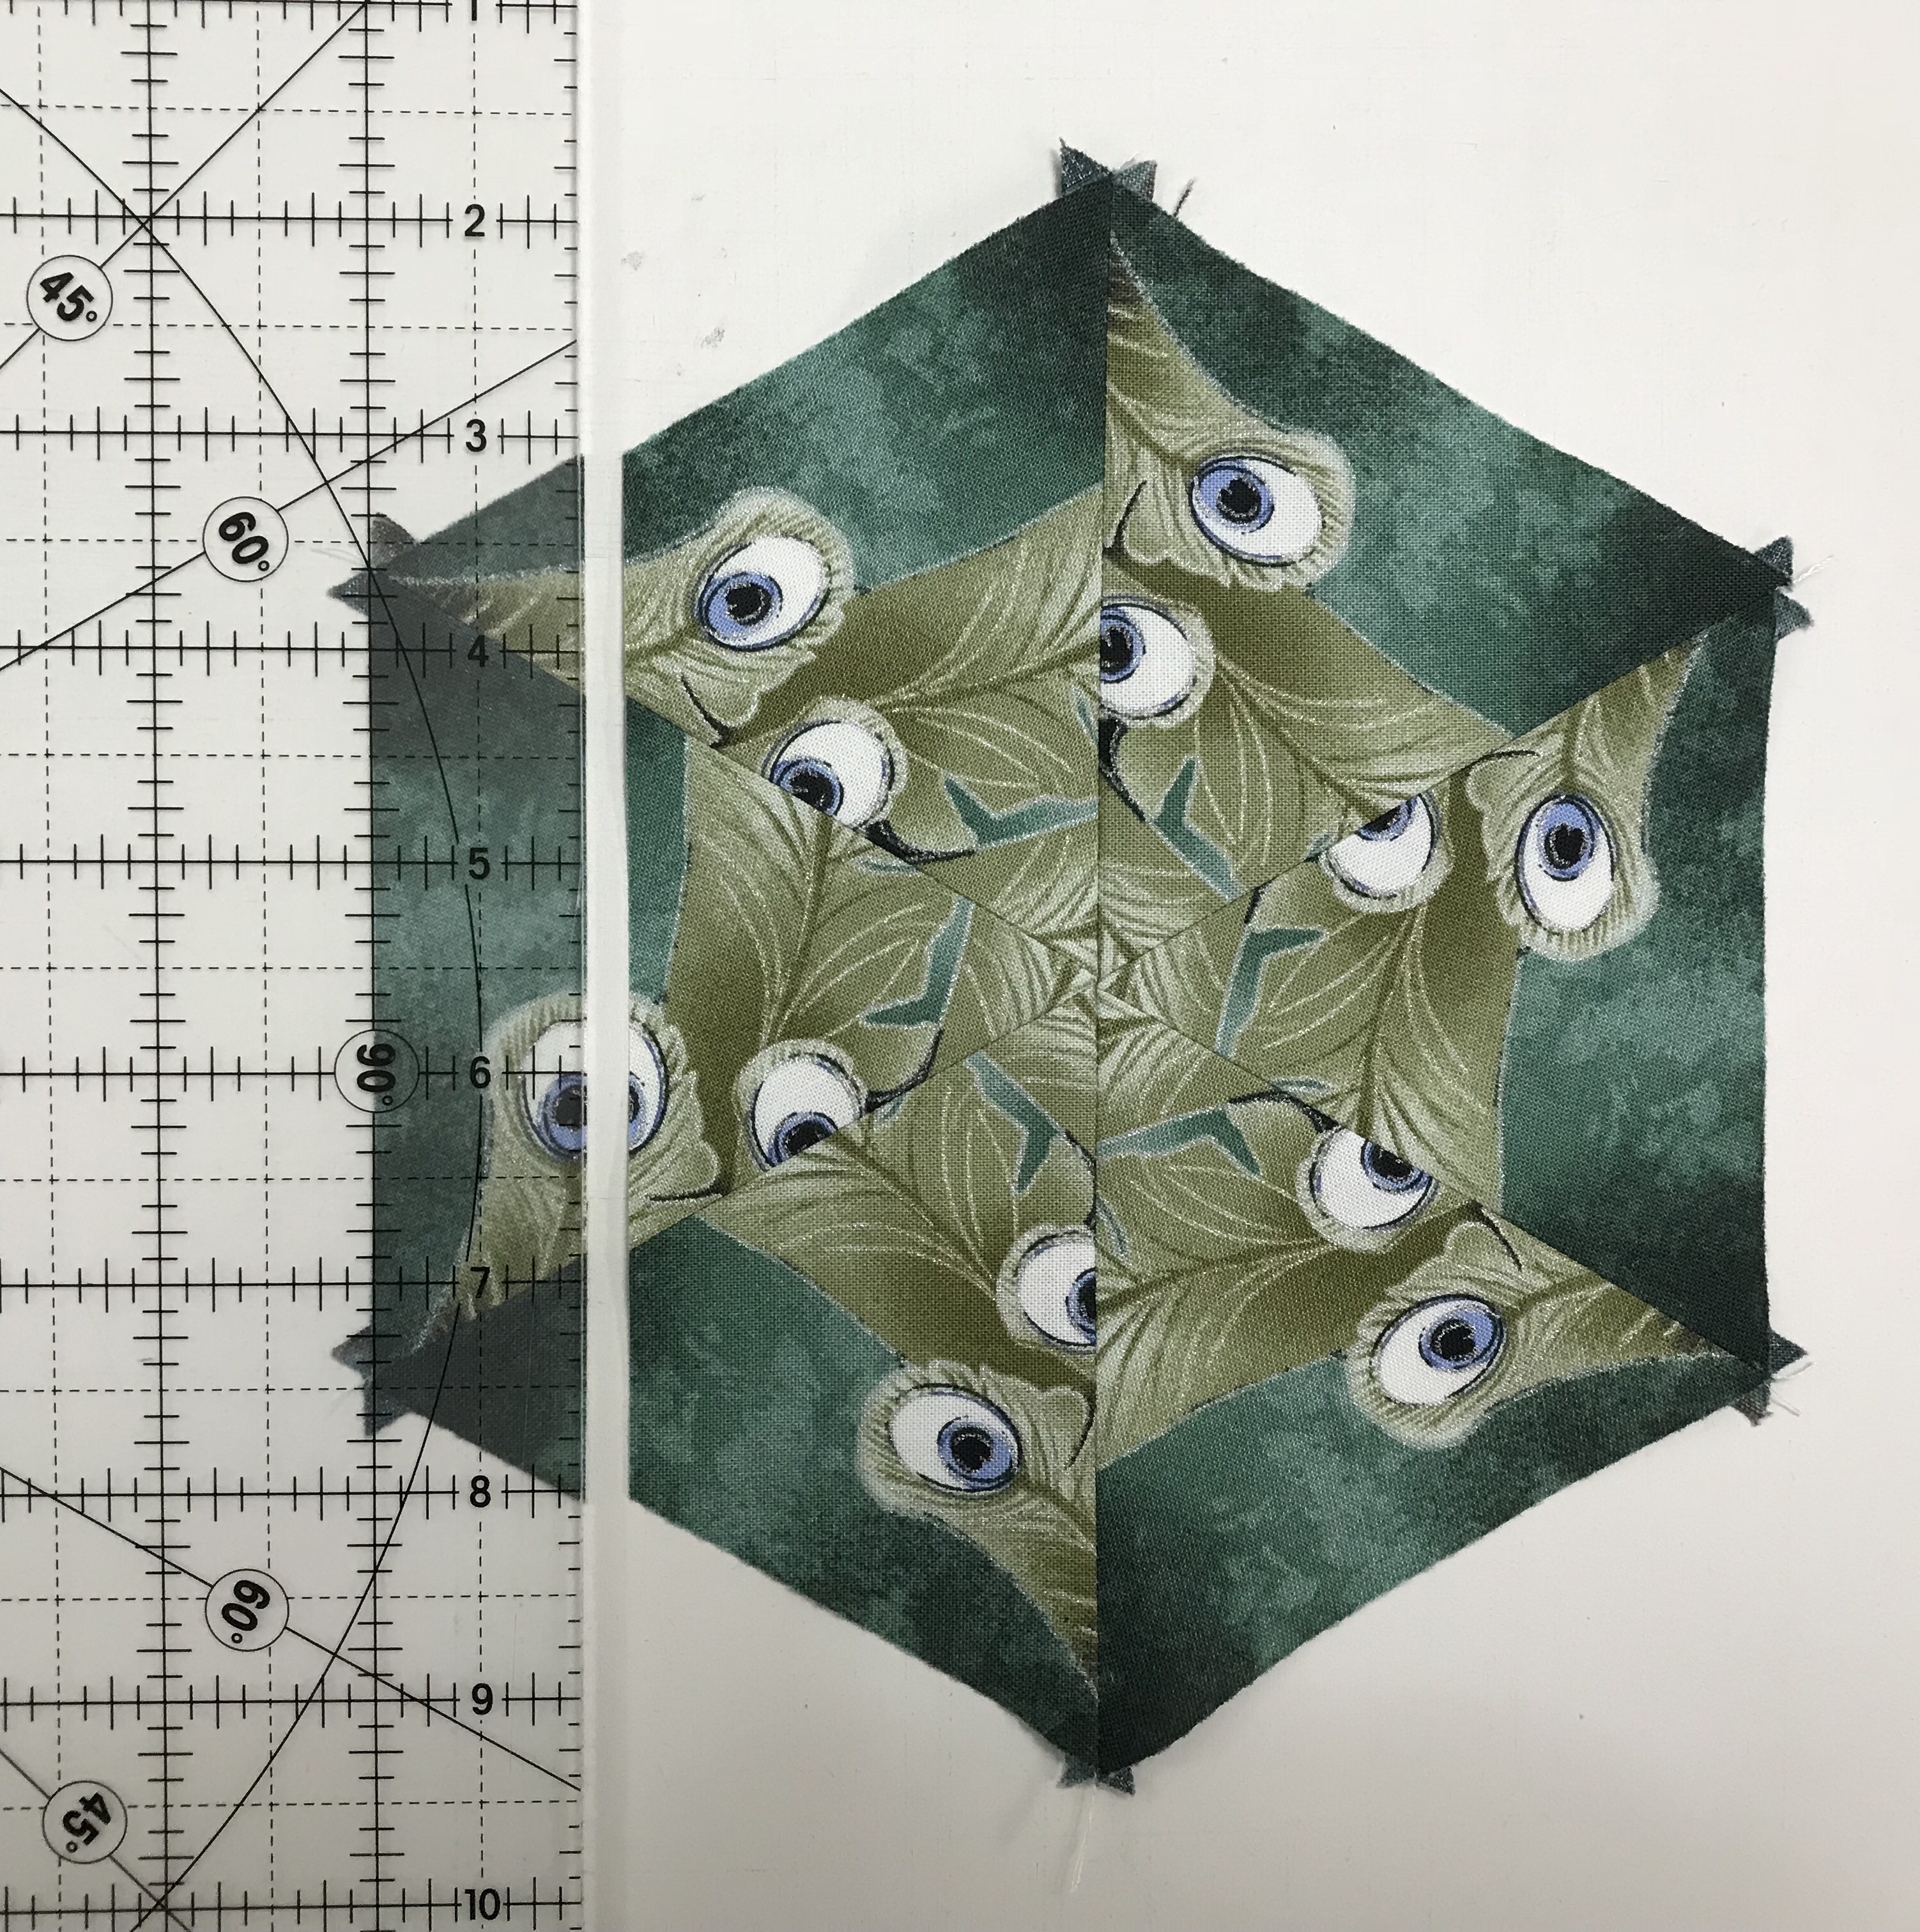
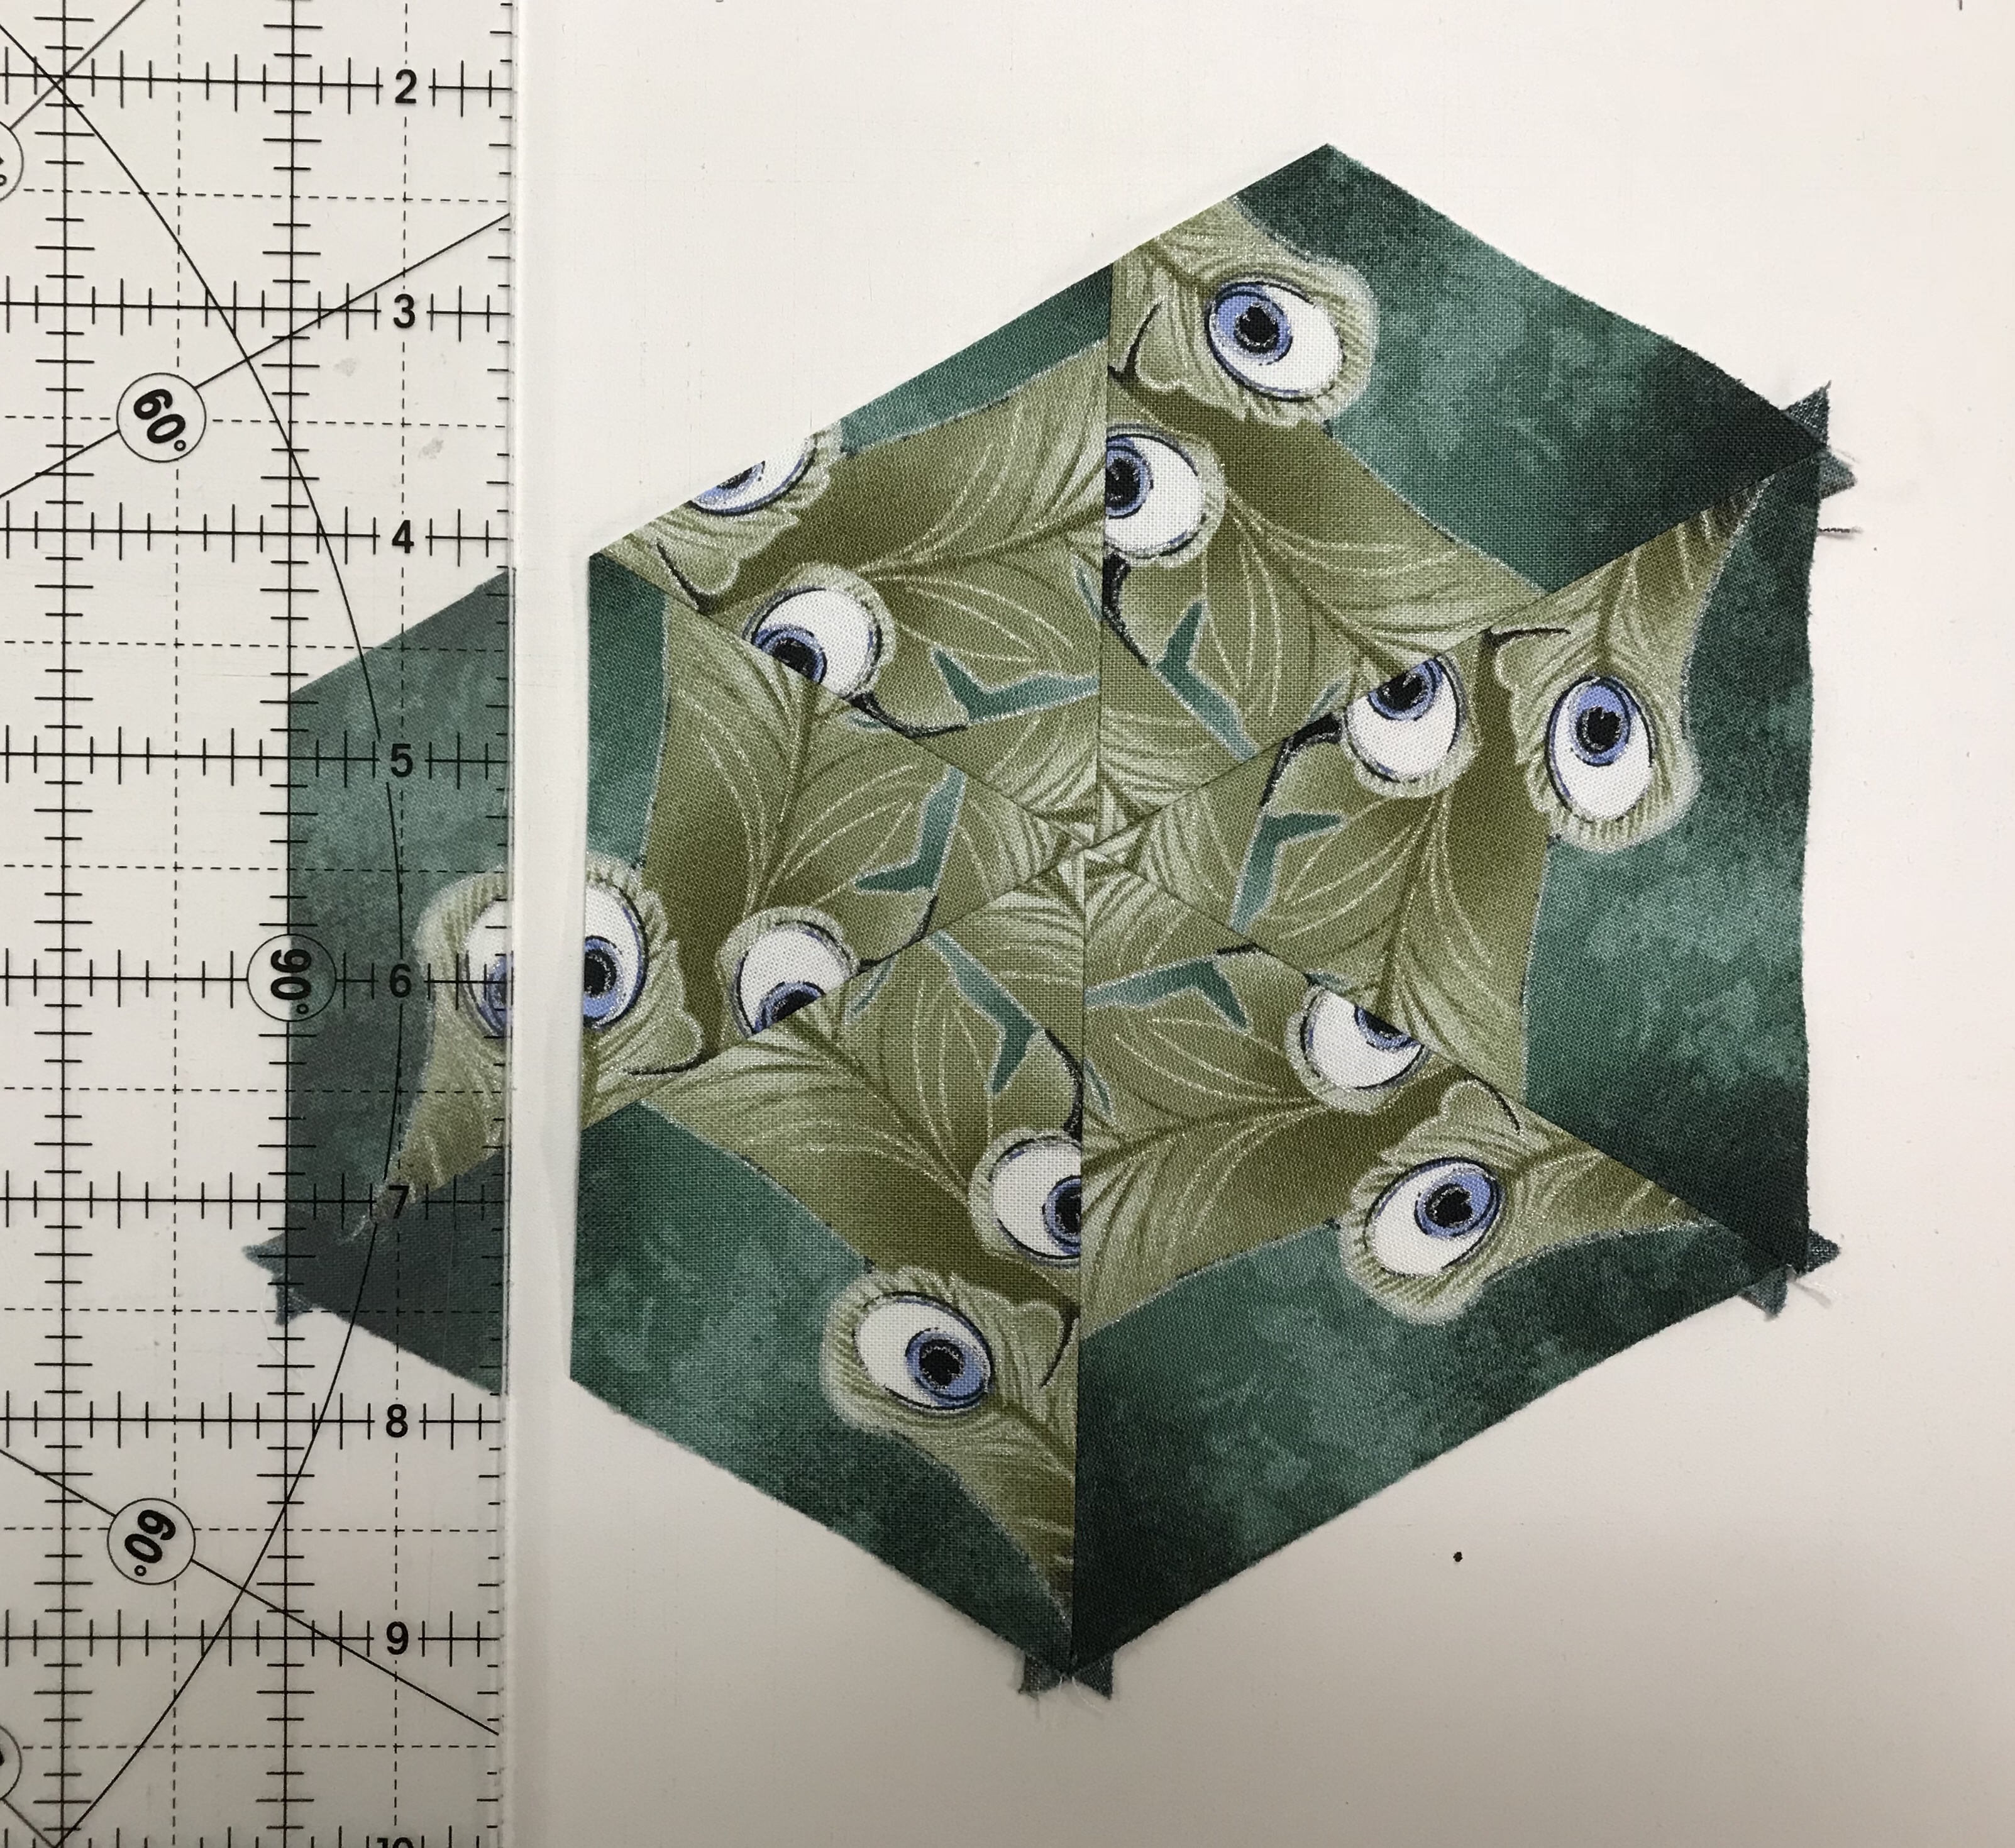
Once the repeats/panels are aligned, trim one long edge so all the layers are ending in the same place. This panel has a good size design, so I cut my strips 3 3/4″ wide by Width of Fabric (WOF). Then using my ruler with a 60 degree line I cut my equilateral triangles and made my blocks. Once the blocks are sorted by predominate color it is time to design.
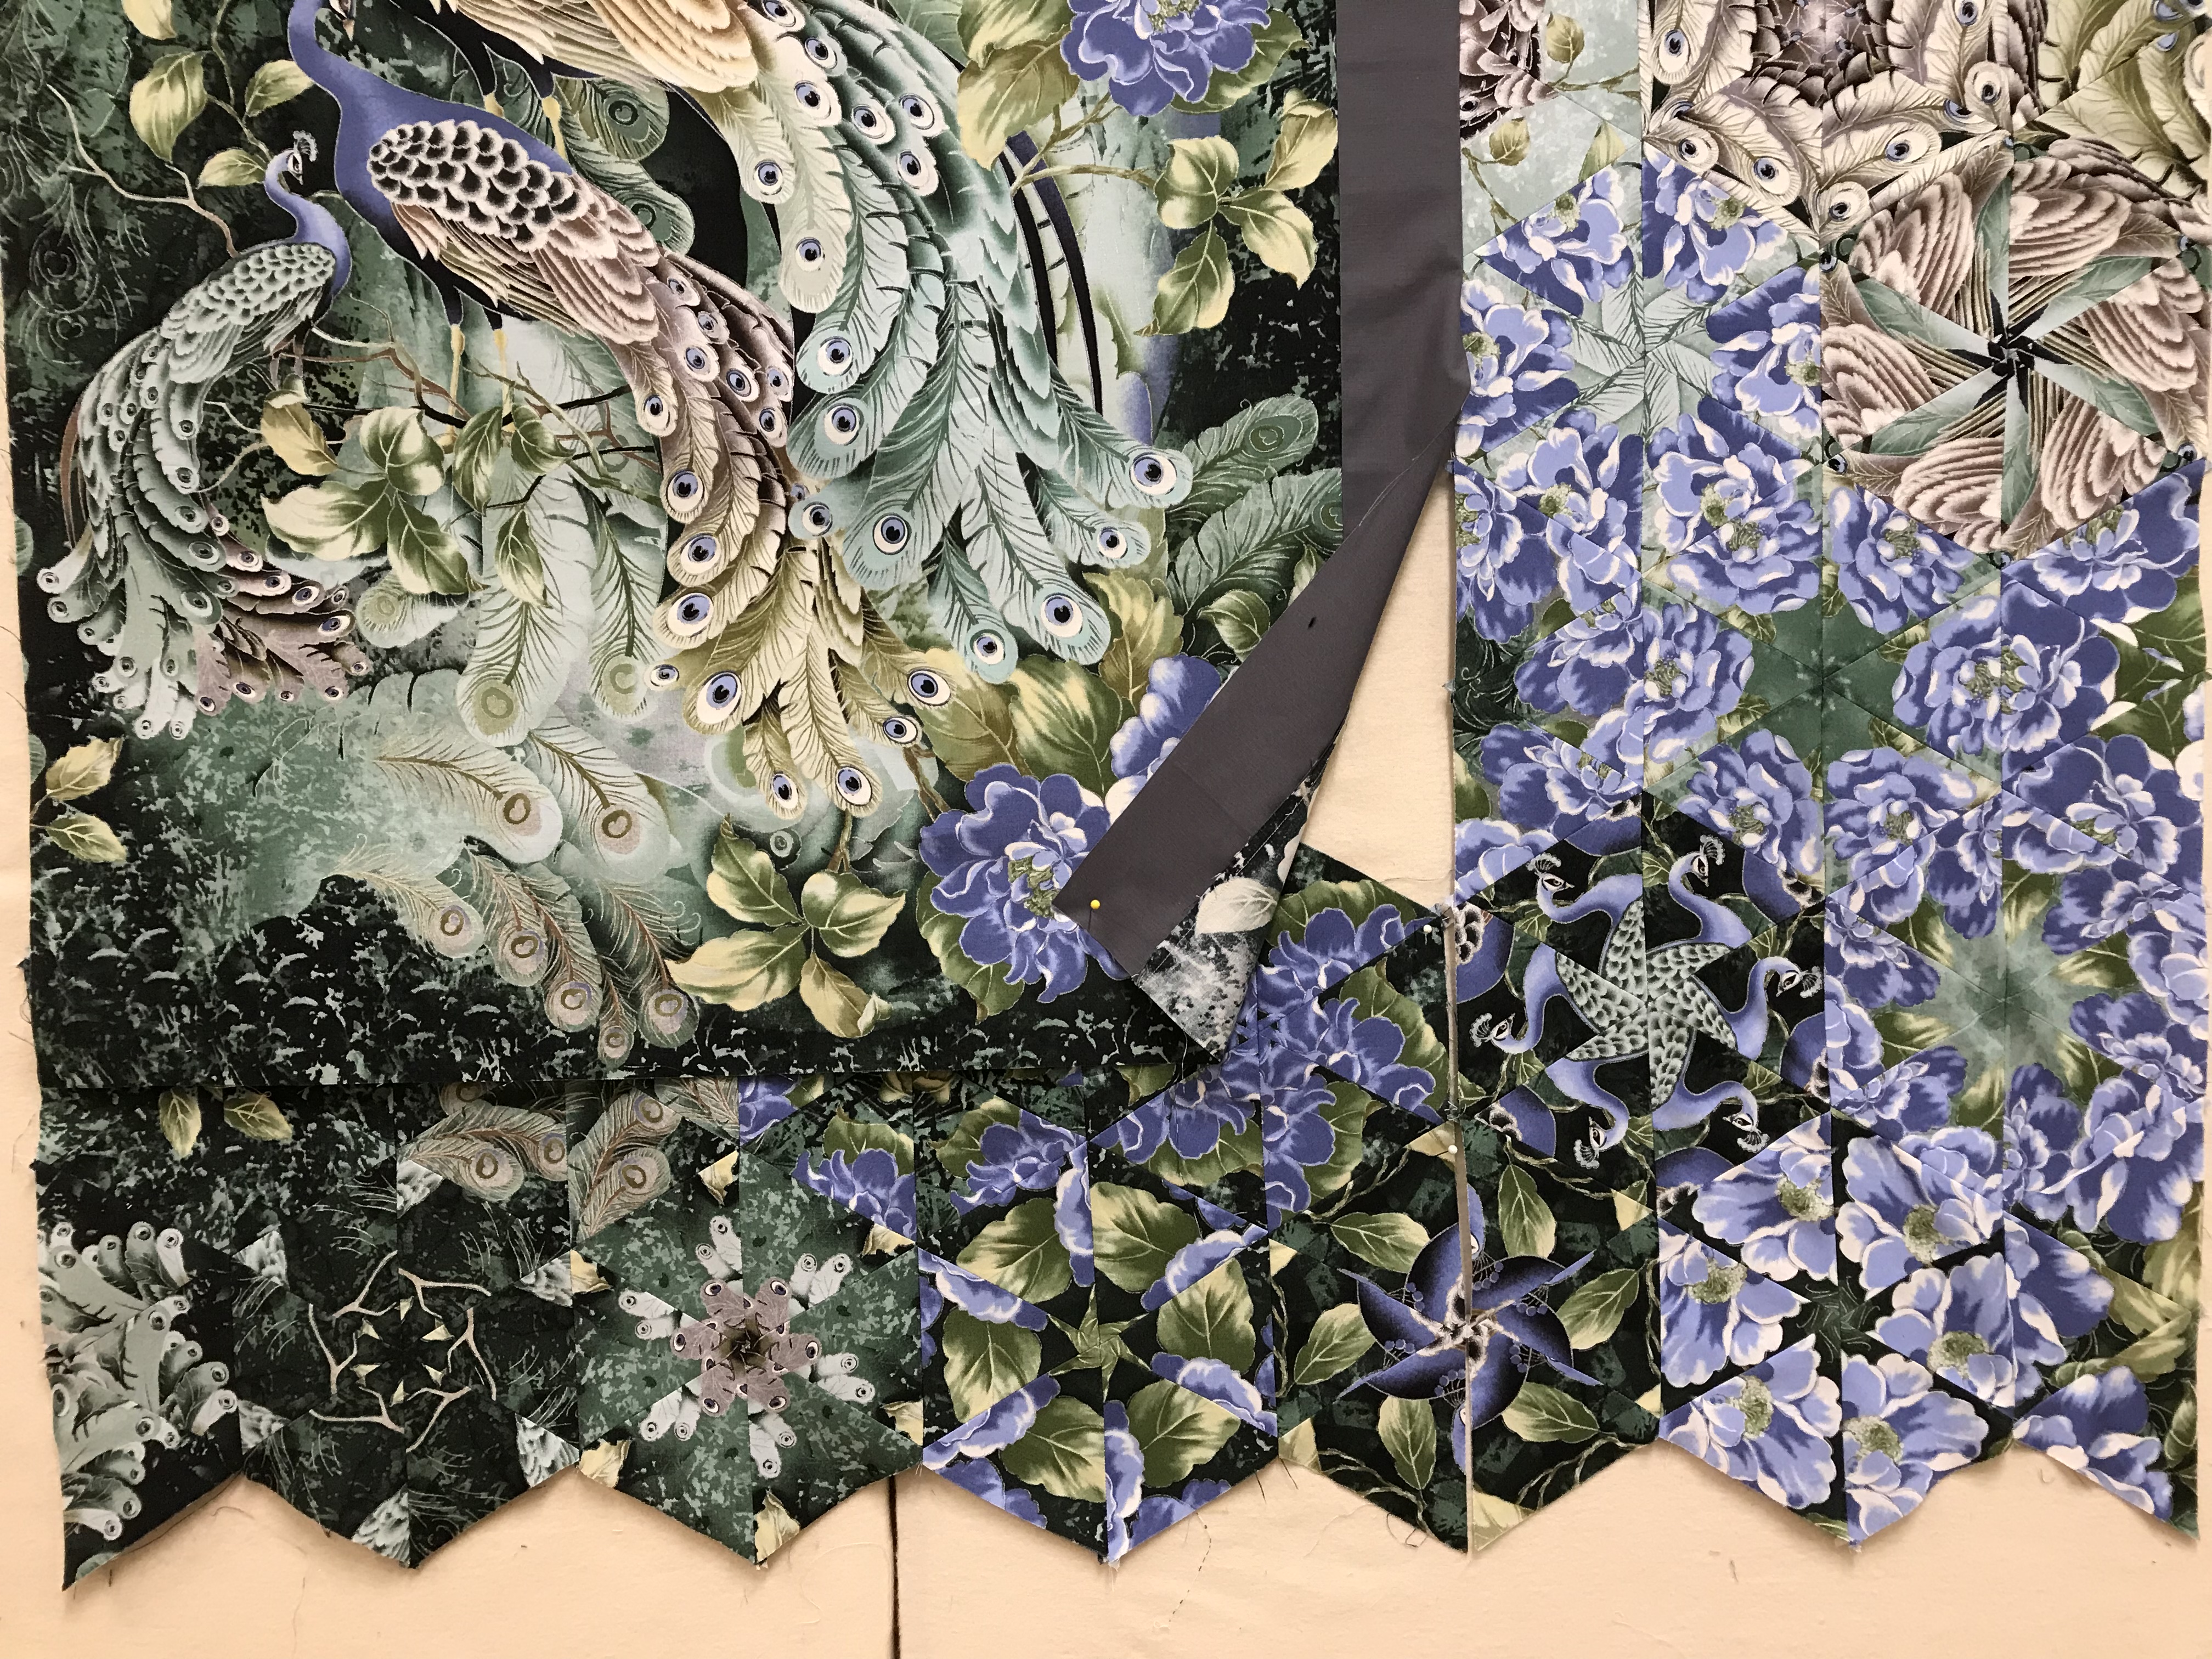
I know that when I cut my strips 3 3/4″ wide, my finished hexagon block will measure 6″ wide. I squared up the panel and measured the width. This panel after squaring up was 23″ wide. This means 3 finished hexagon blocks would measure 18″ and 4 finished hexagon blocks would measure 24″ wide. At this point I had two choices, trim the panel to 18″ wide or add fabric to make the panel 24″ wide. I decided to add fabric that I will hide later. You can decide to center your panel or offset it in any way.
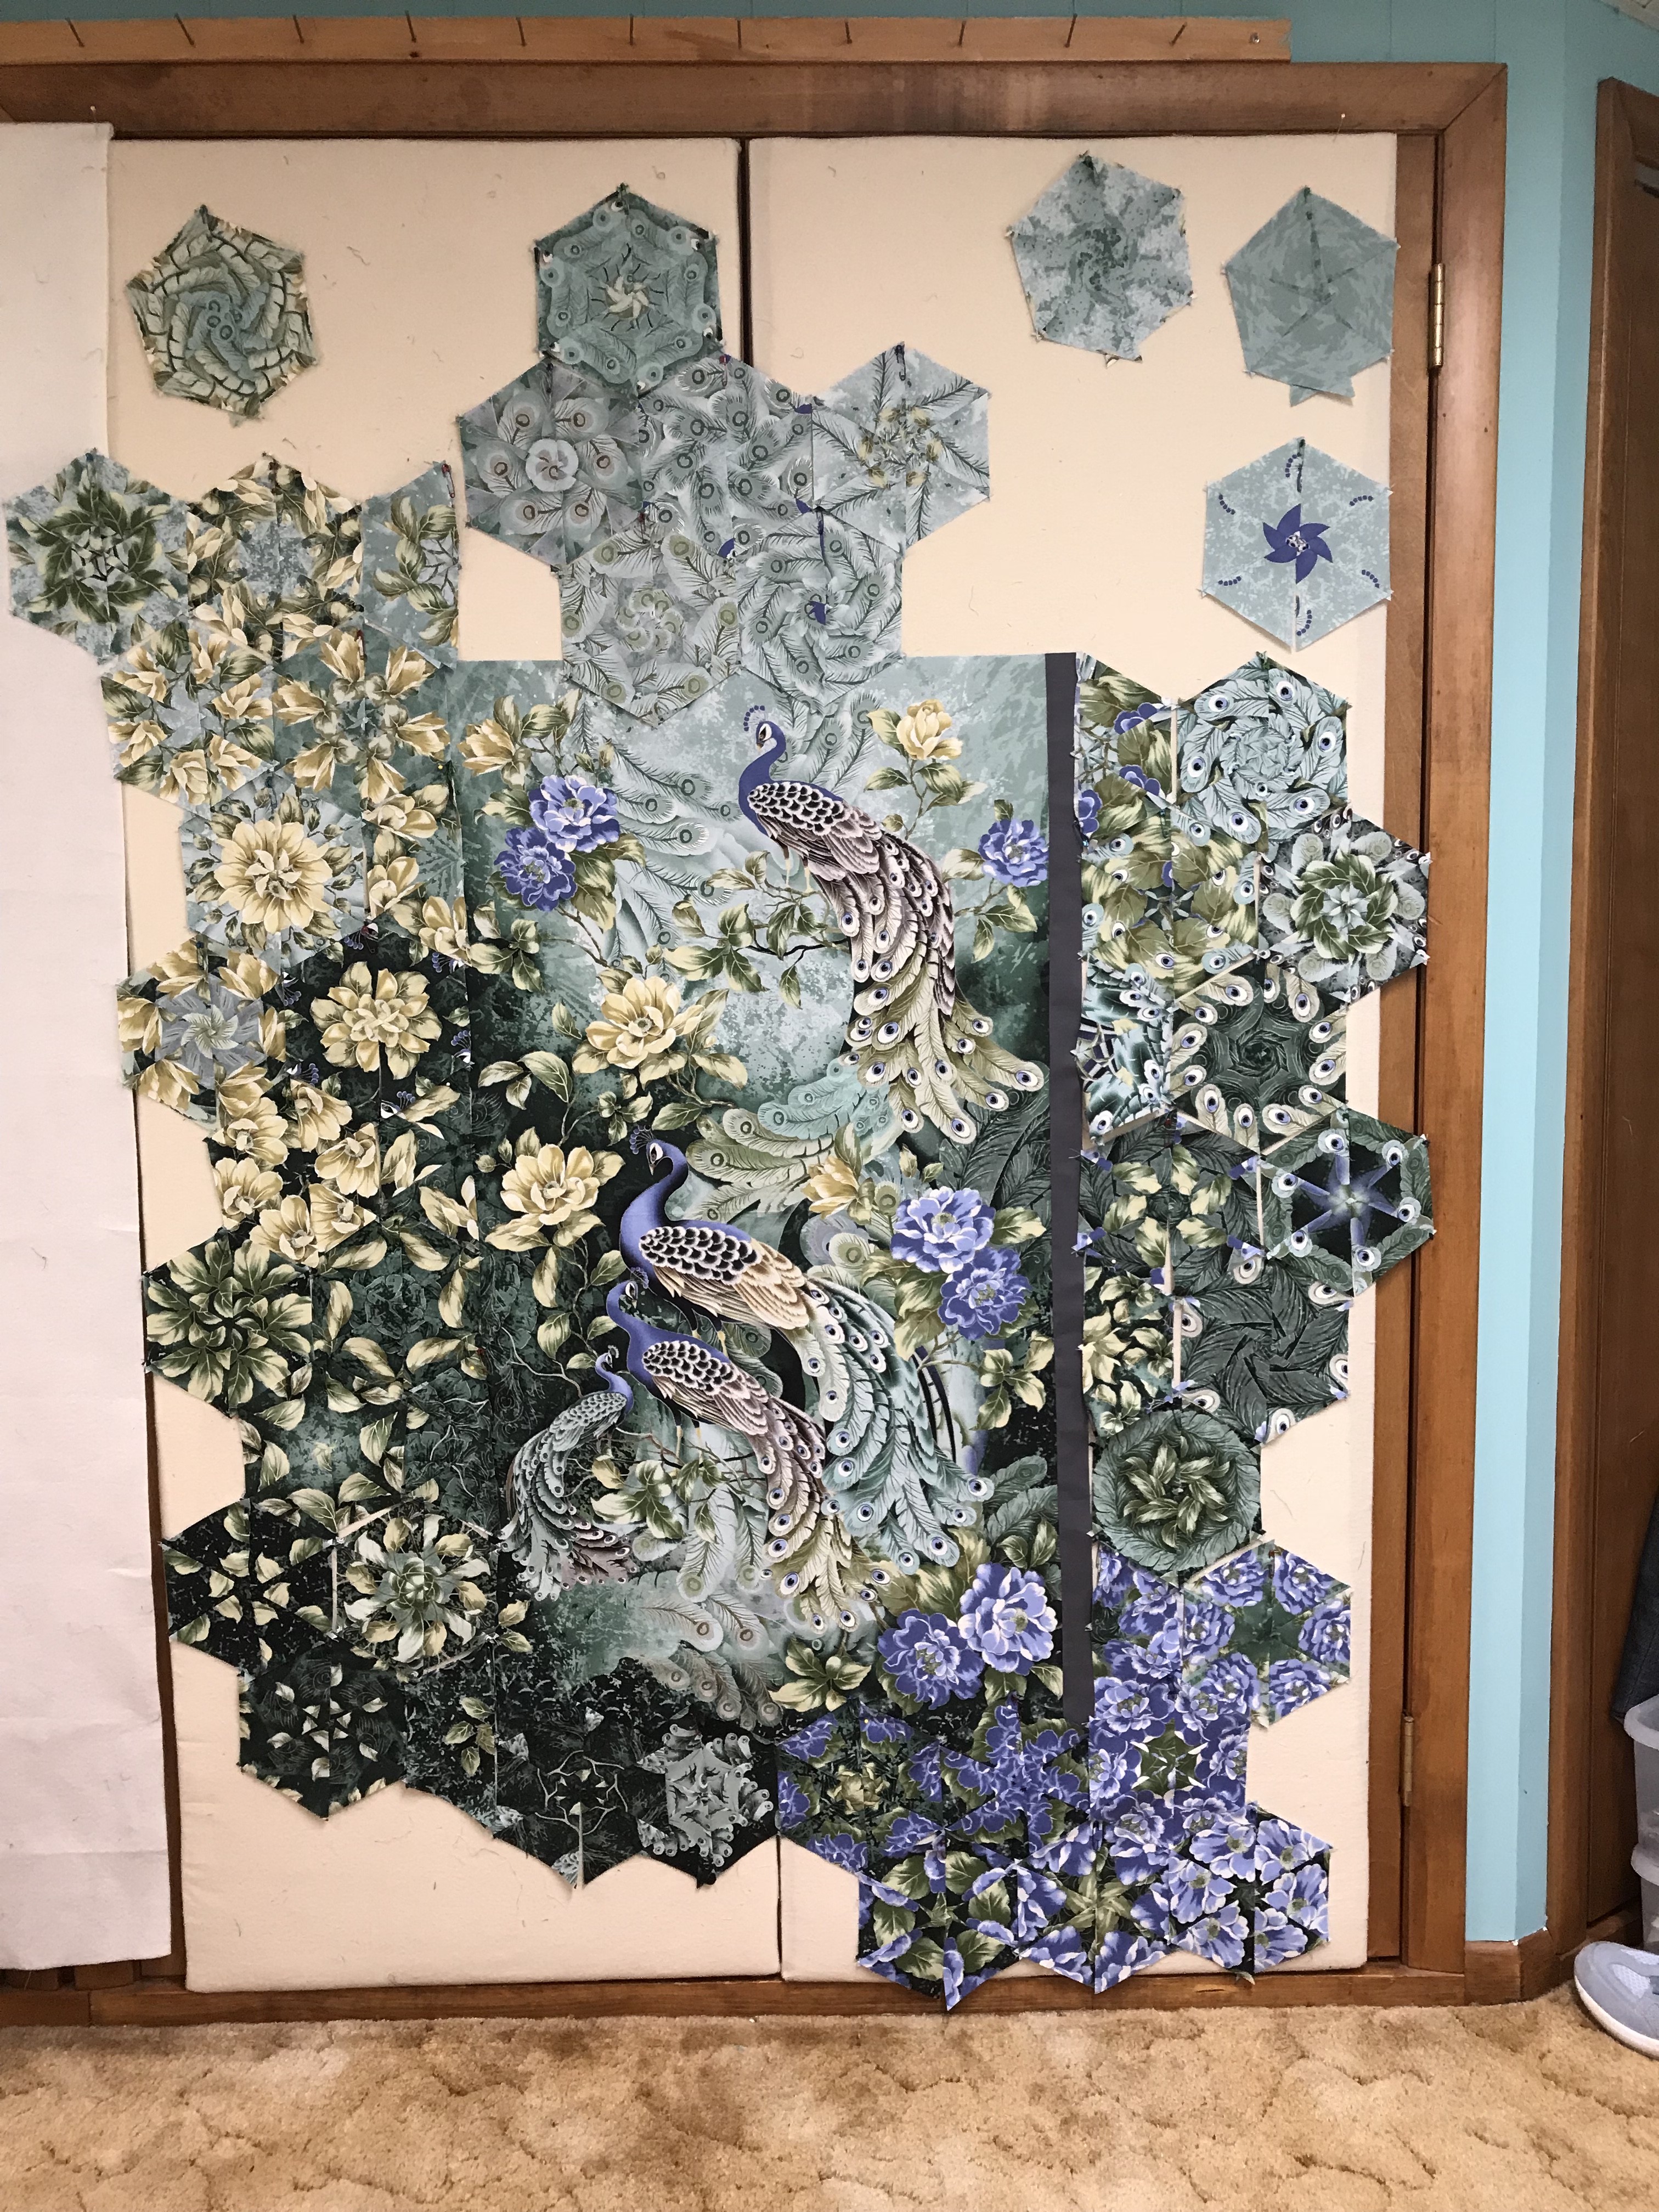
I place the panel on my design wall and start the designing process. I always place my blocks on the design wall so the opening is north and south.
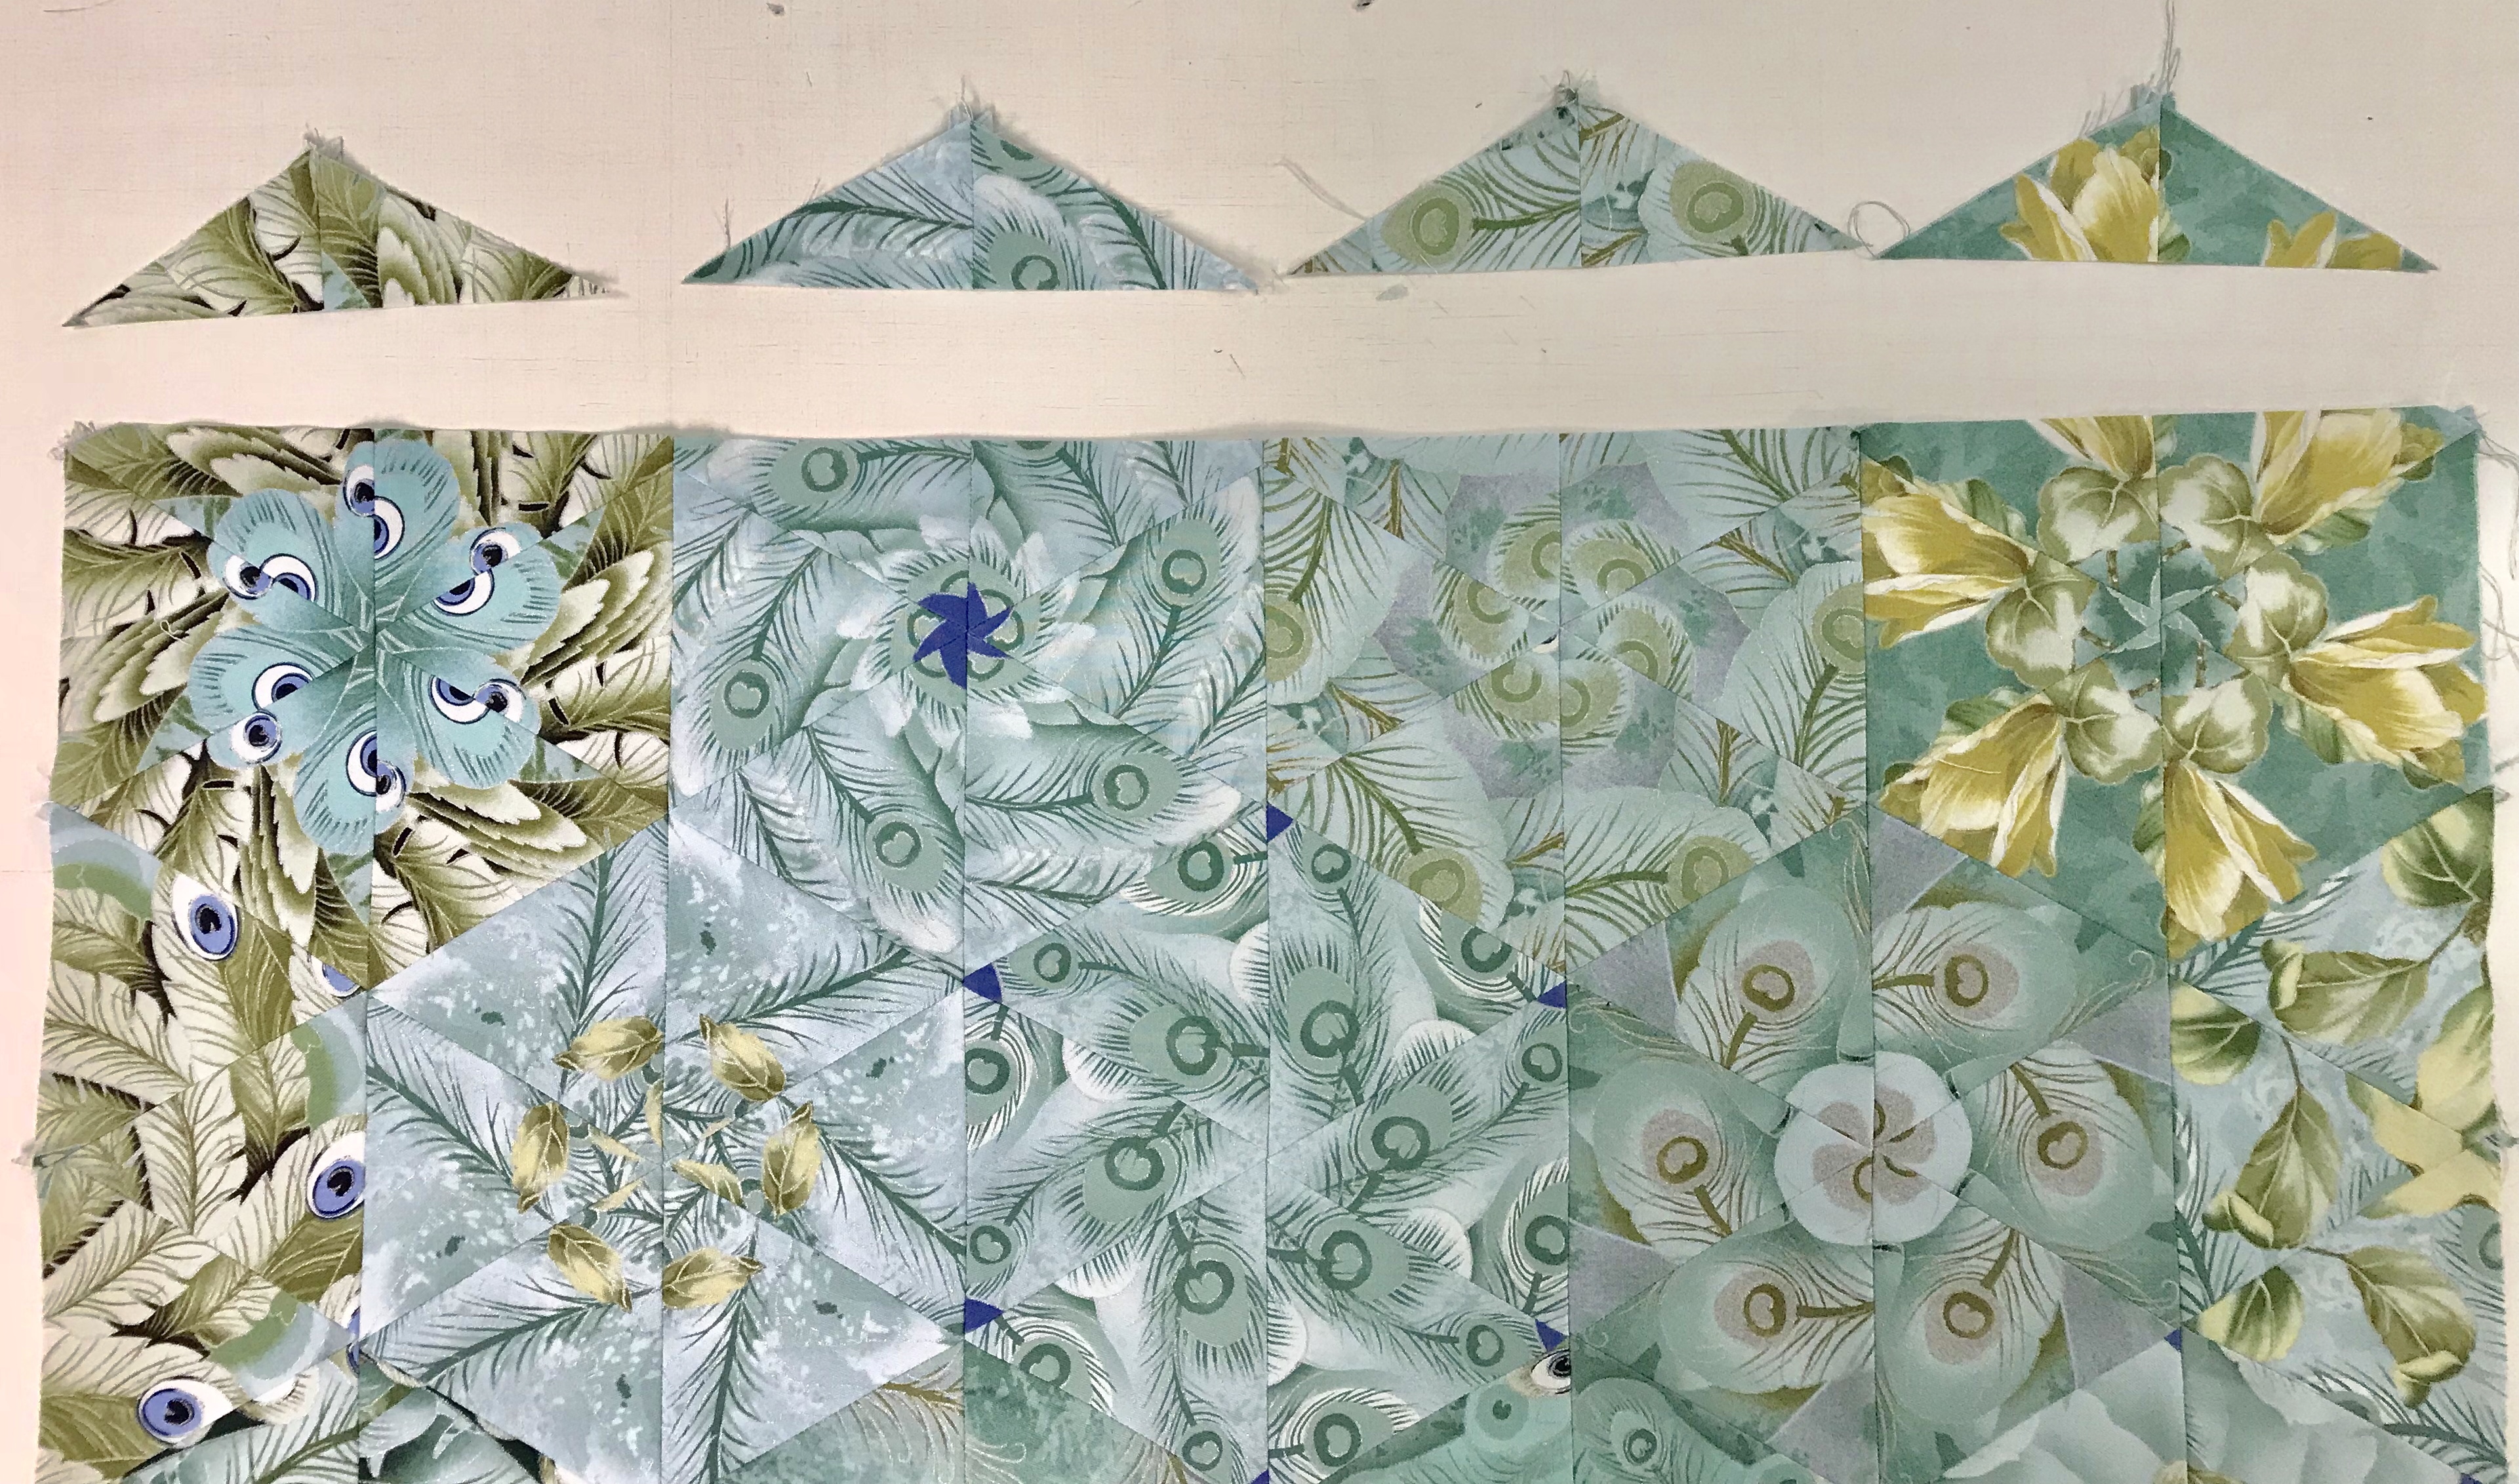
I have established that I will need four blocks wide across the top and the bottom. How deep it goes depends on me. I chose 4 blocks wide and 3 blocks deep on the top, and 4 blocks wide and 2 blocks deep on the bottom.
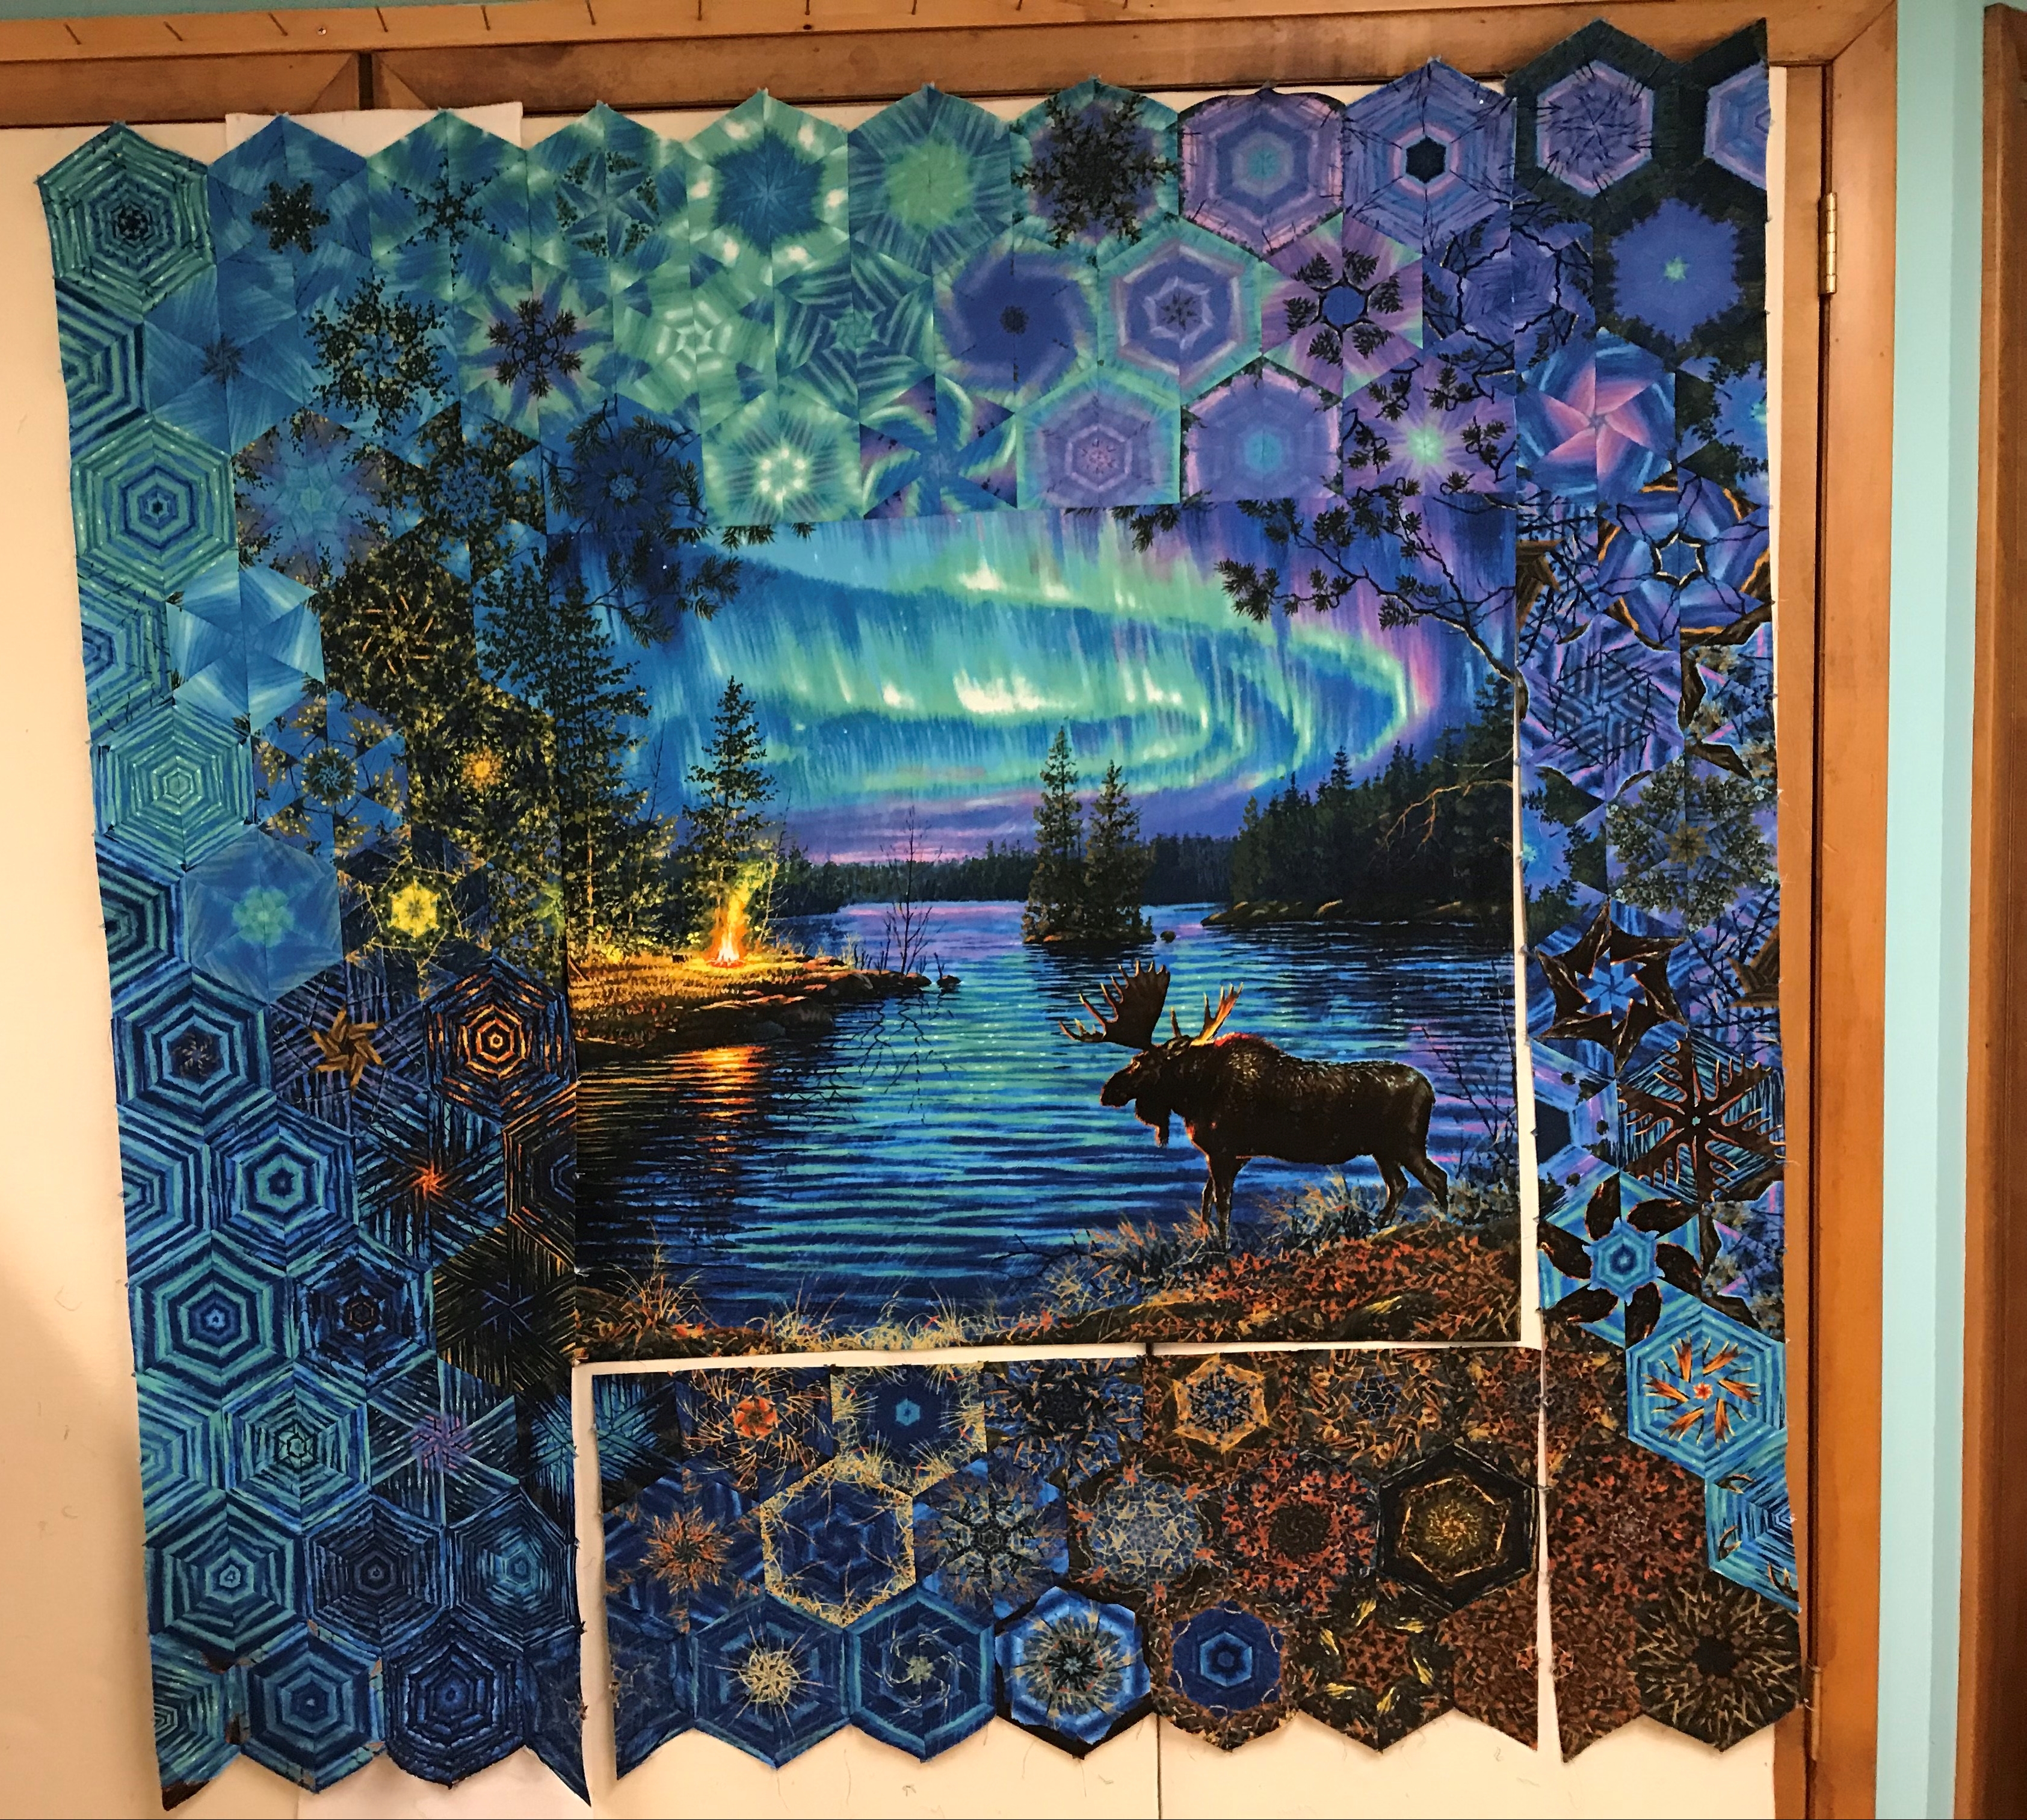
When placing the blocks on the side of the panel, every other block remains whole, while everything other is a half of a block. I don’t remove the half until I’m sure the block will remain there, I just fold it in half.
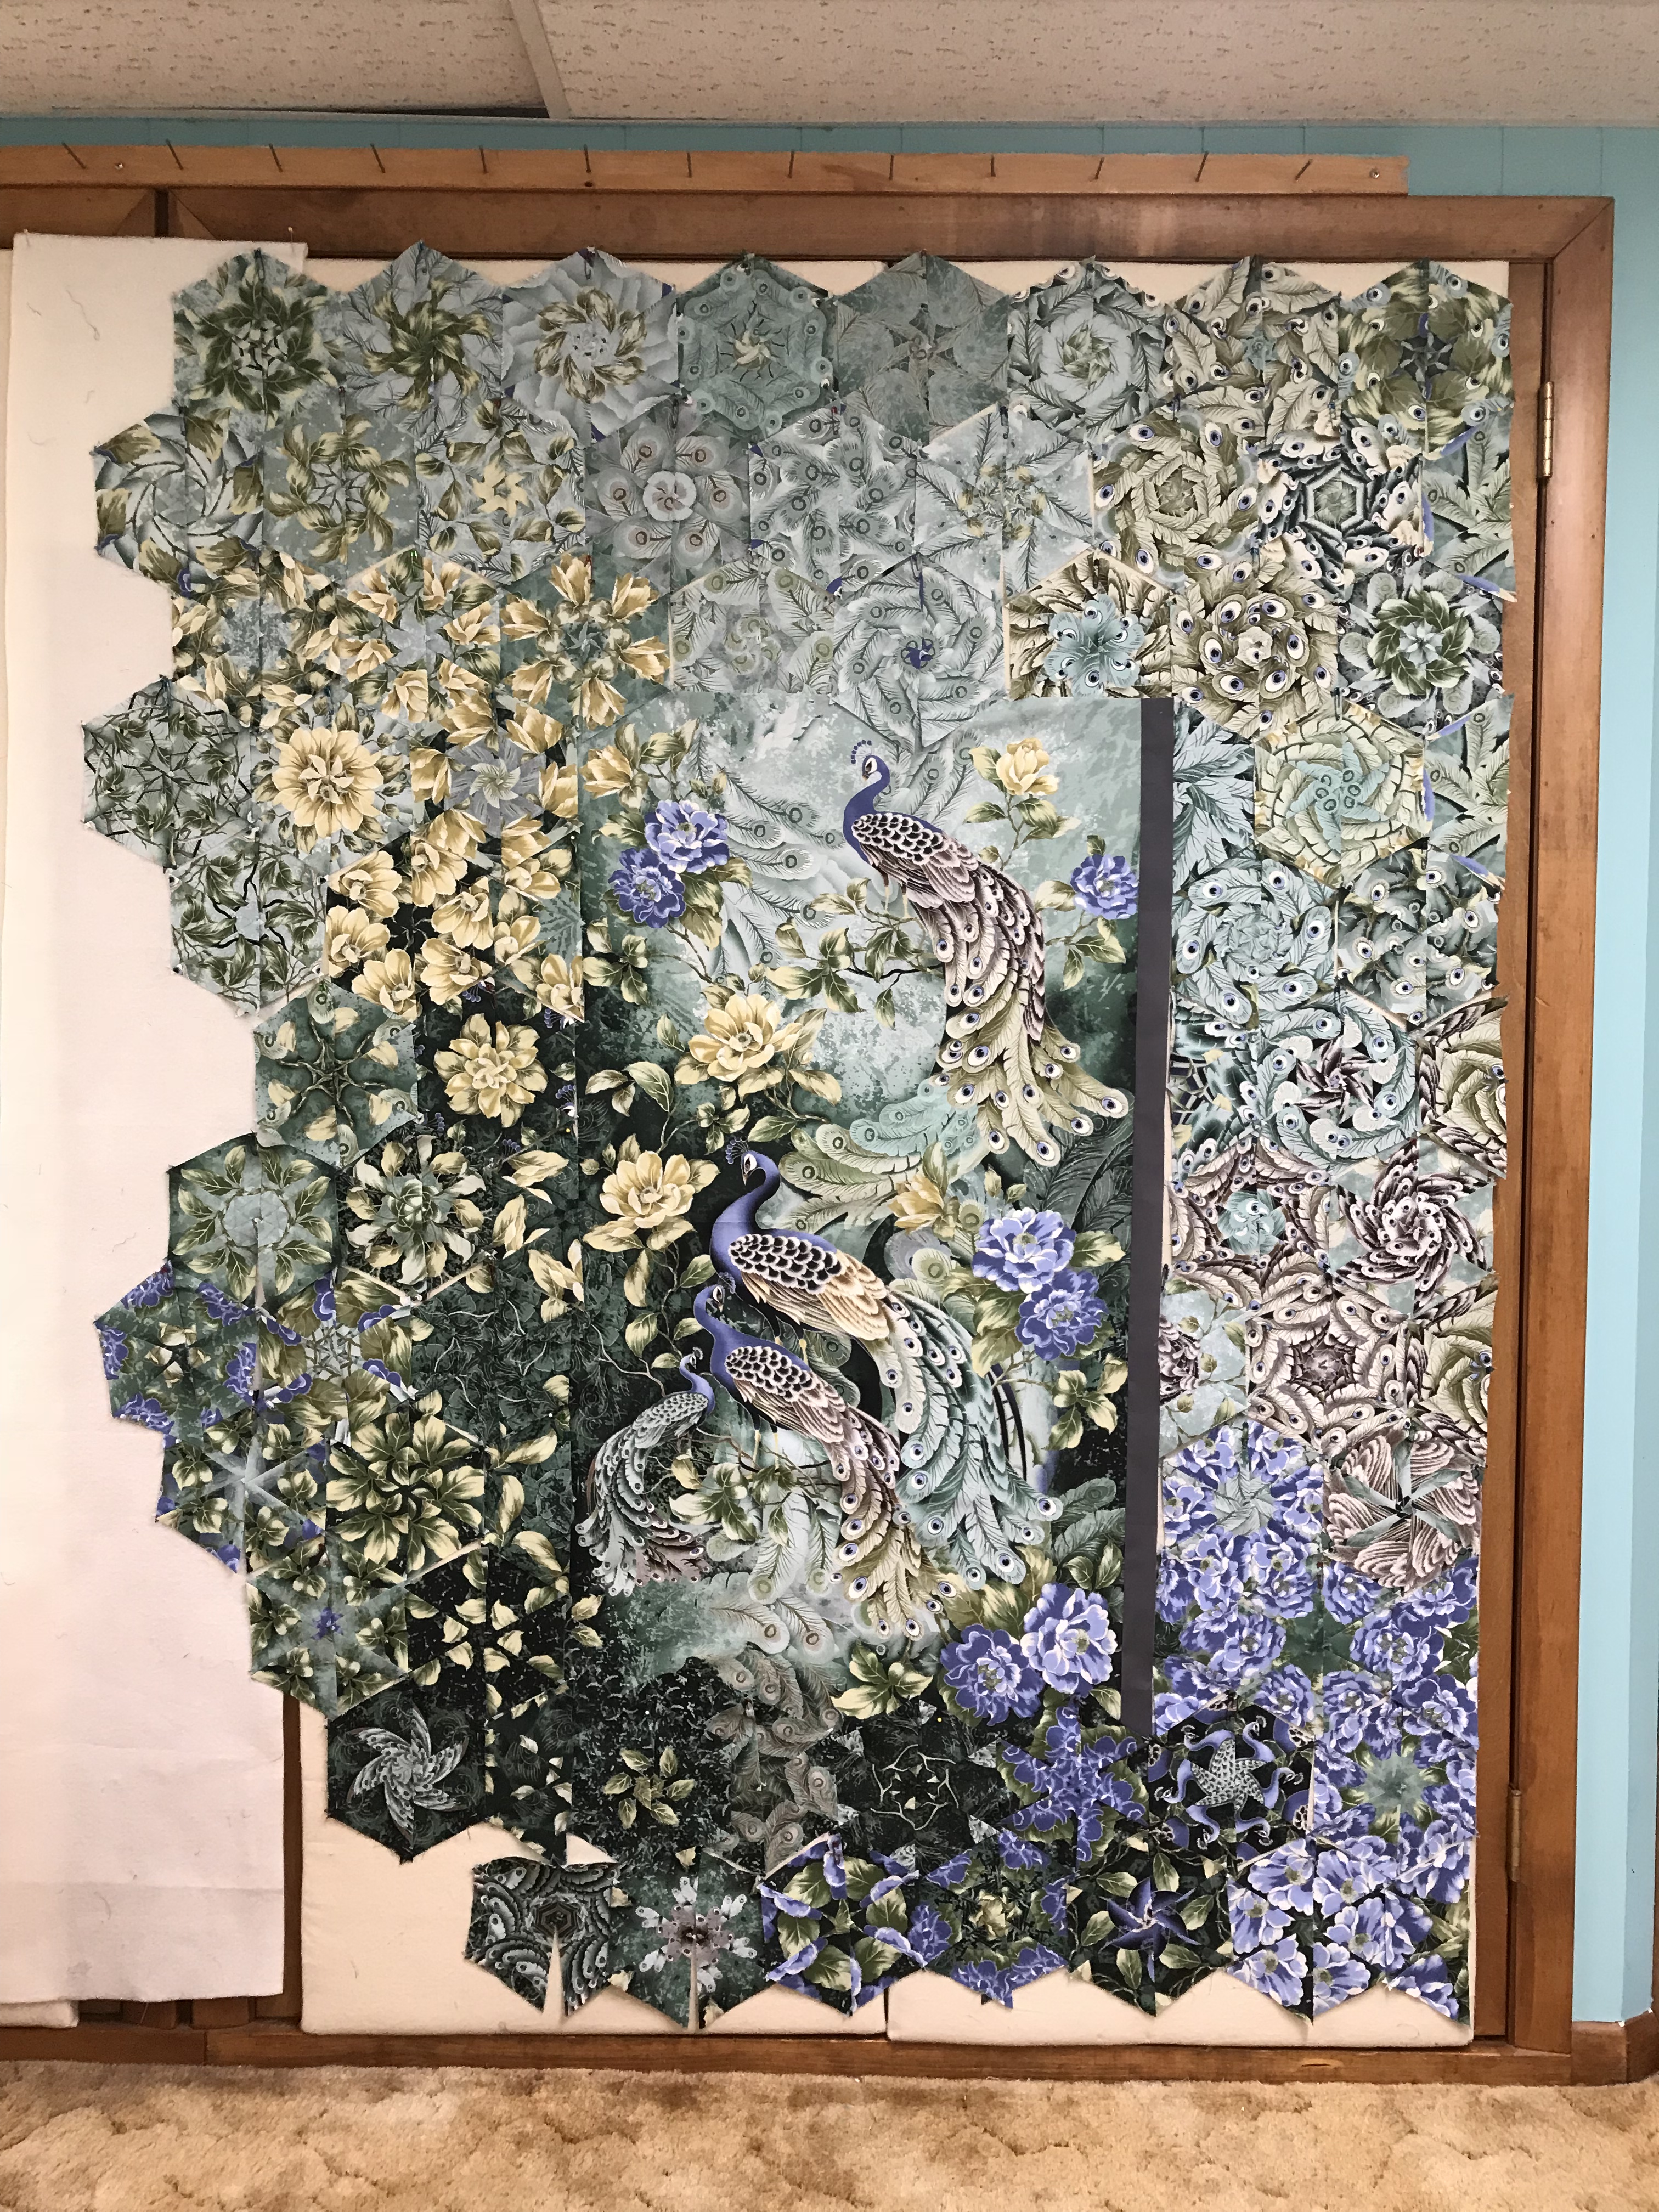
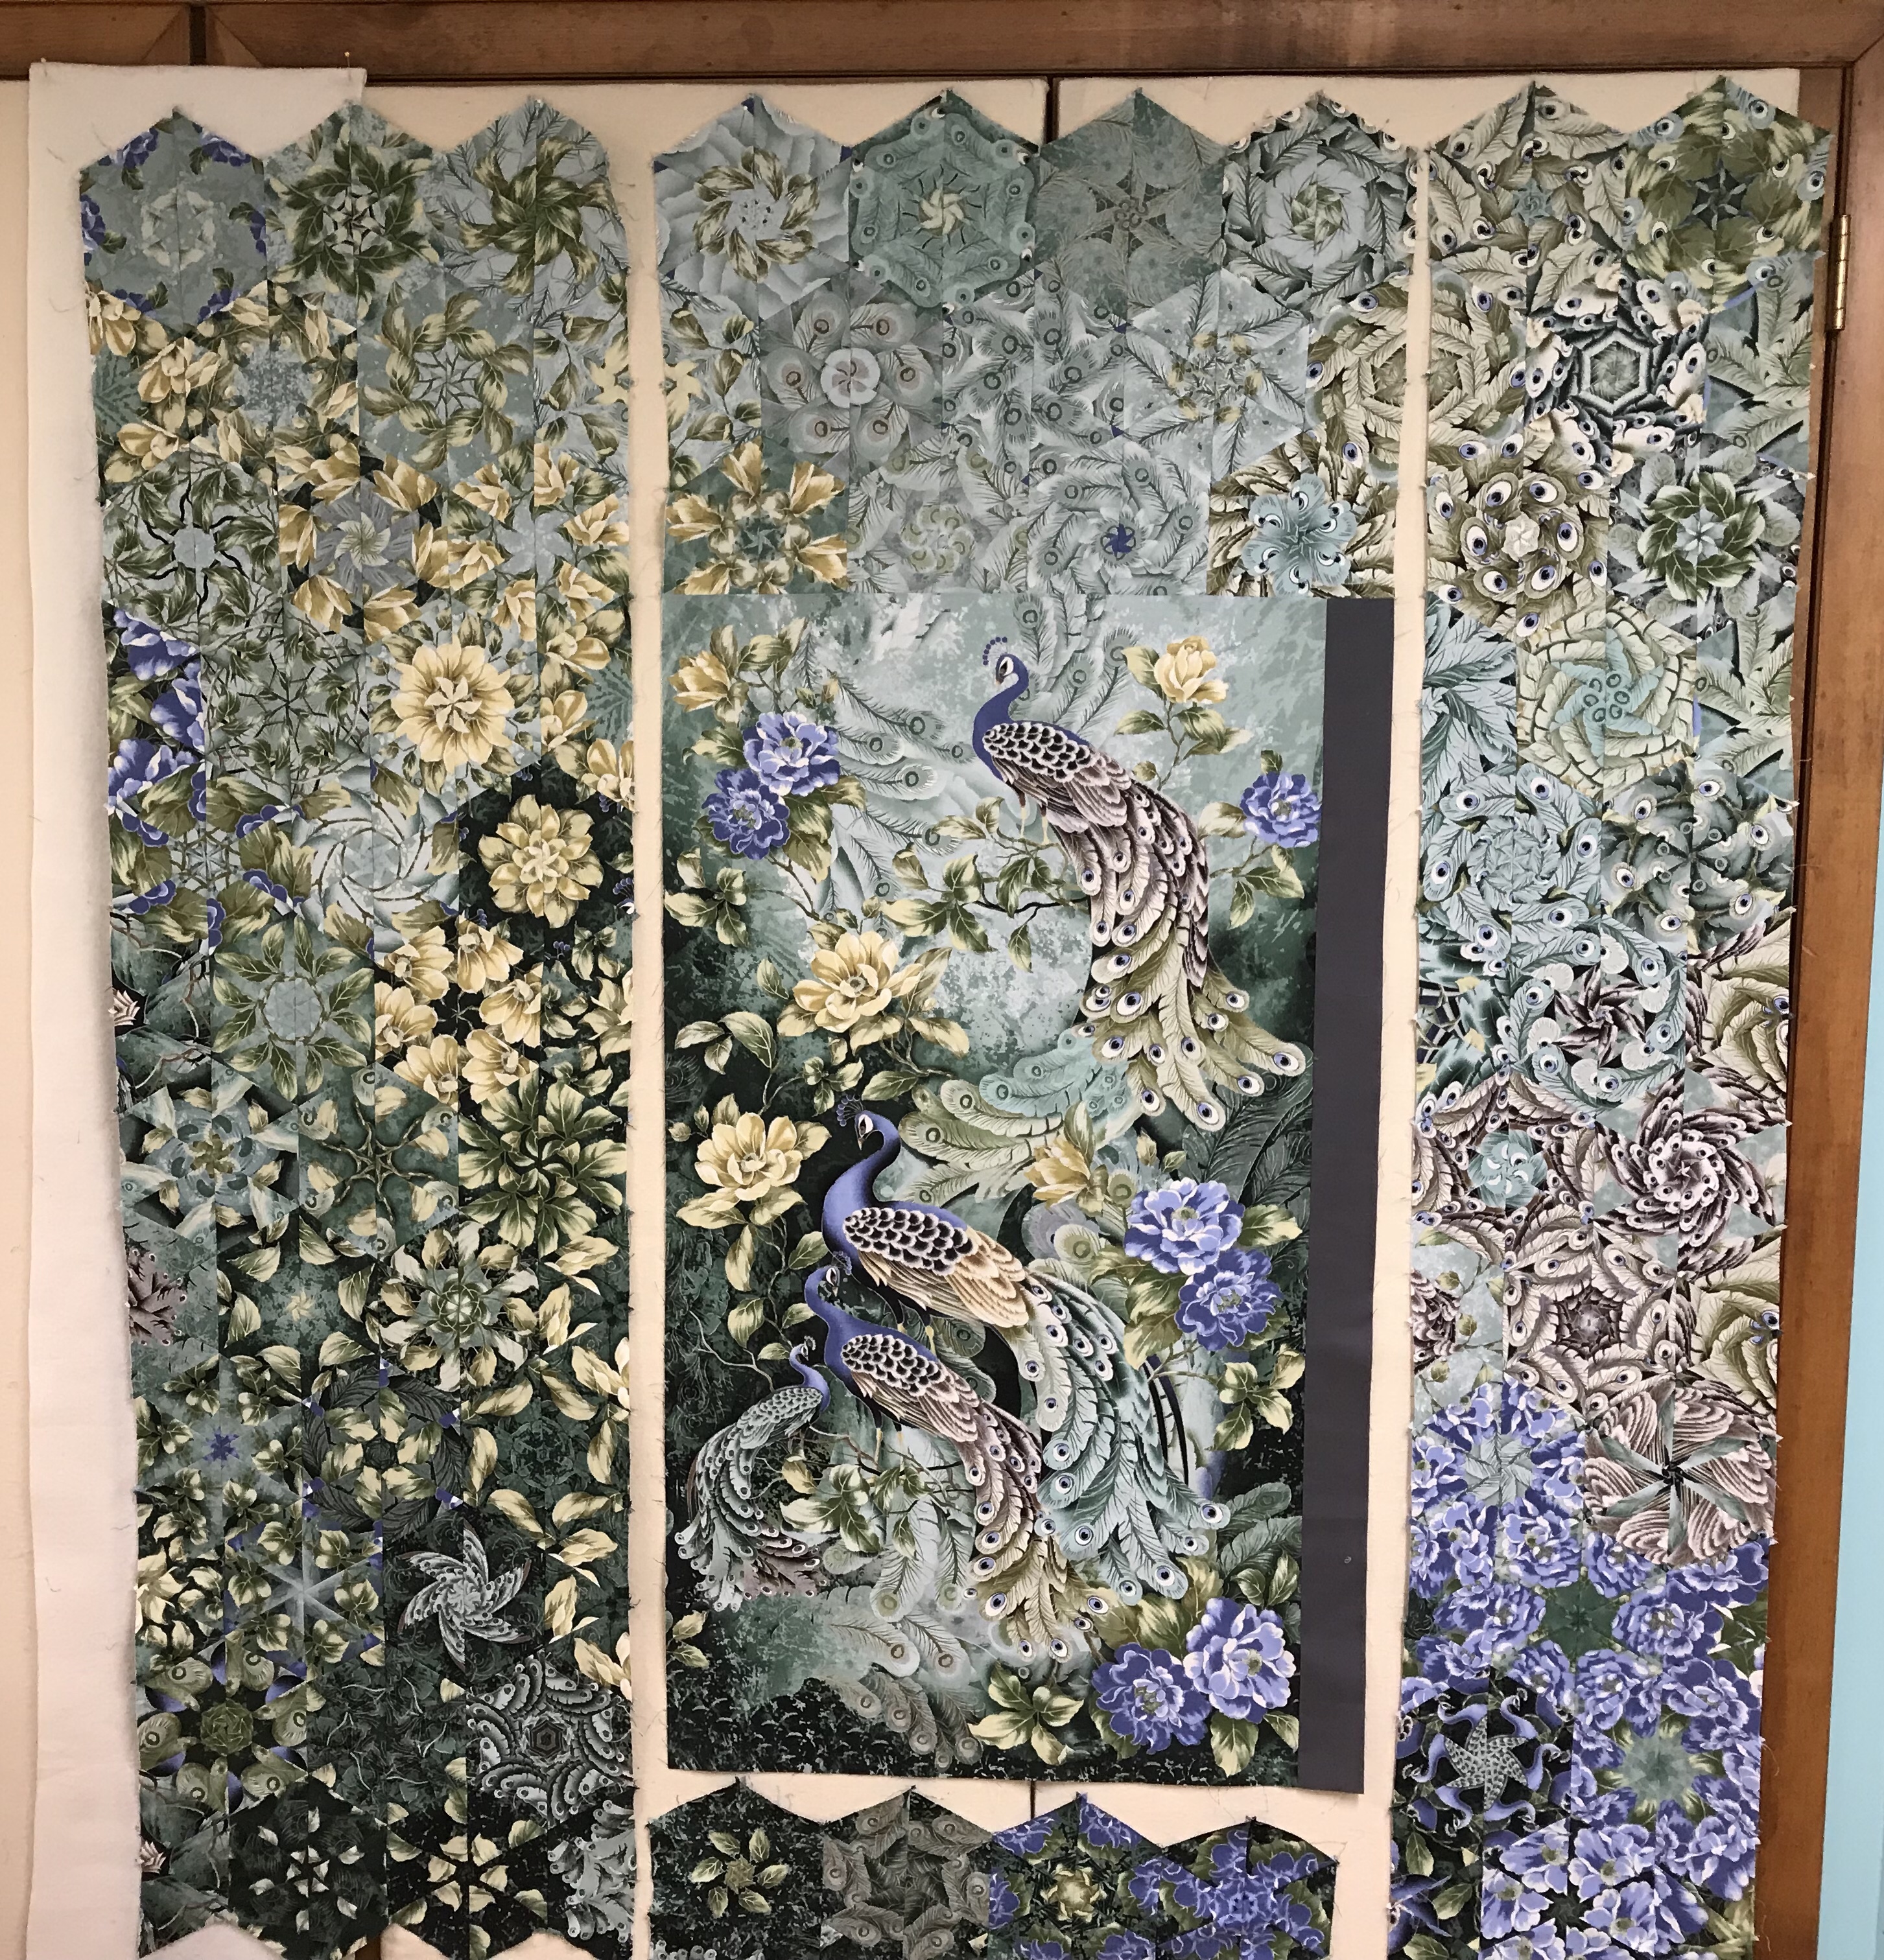
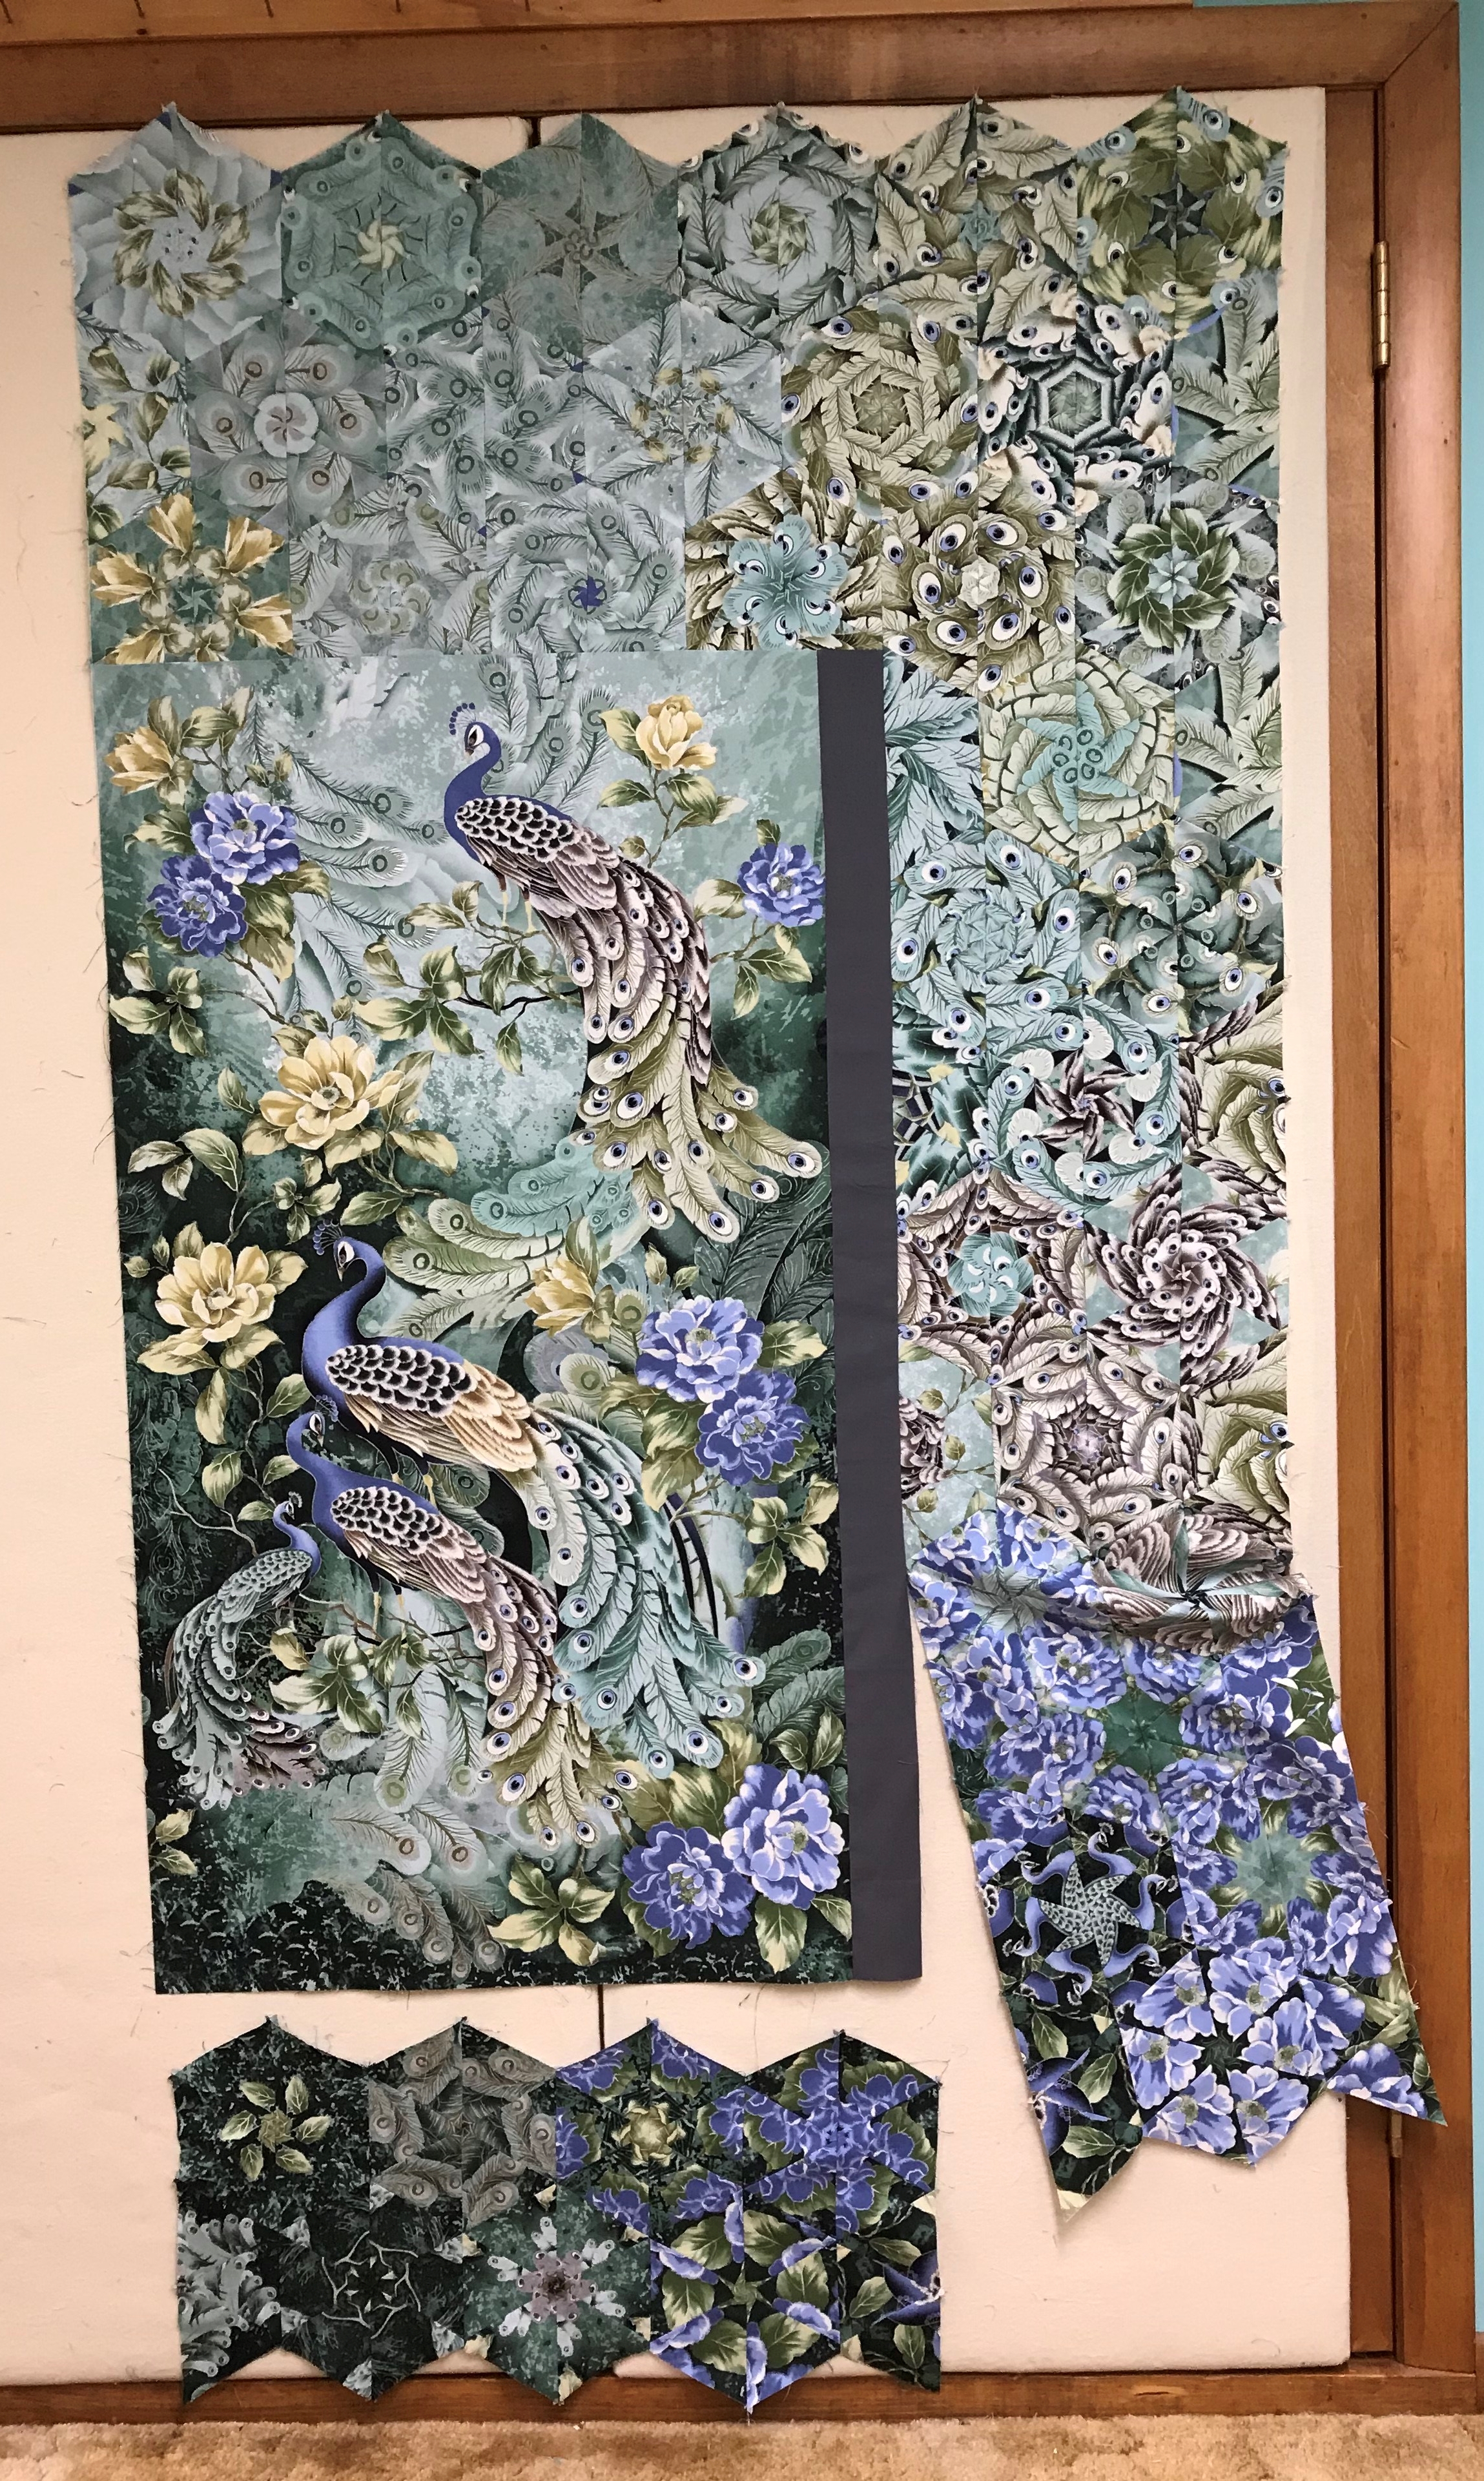
When I am satisfied with the design I number the rows as always and stitch the rows together in four groups: the top, bottom, right side & left side. I think of this as a giant block that has a rectangle in the center and will be constructed using a partial seam.
Decide whether to attach the top or bottom first. I am going to attach the top rows first by trimming the points that will be stitched to the panel, leaving a 1/4″ seam allowance.
Once I have stitched the top rows to the panel I need to choose which side to attach next, matching up dog ears as you would when joining the rows and stitch three quarters of the way down (partial seam).
By using a partial seam, it allows you to match up the dog ears of the bottom of the side rows. I will them mark where the panel hits the bottom rows, add a 1/4″ seam allowance and stitch to the bottom and then finish the partial seam.
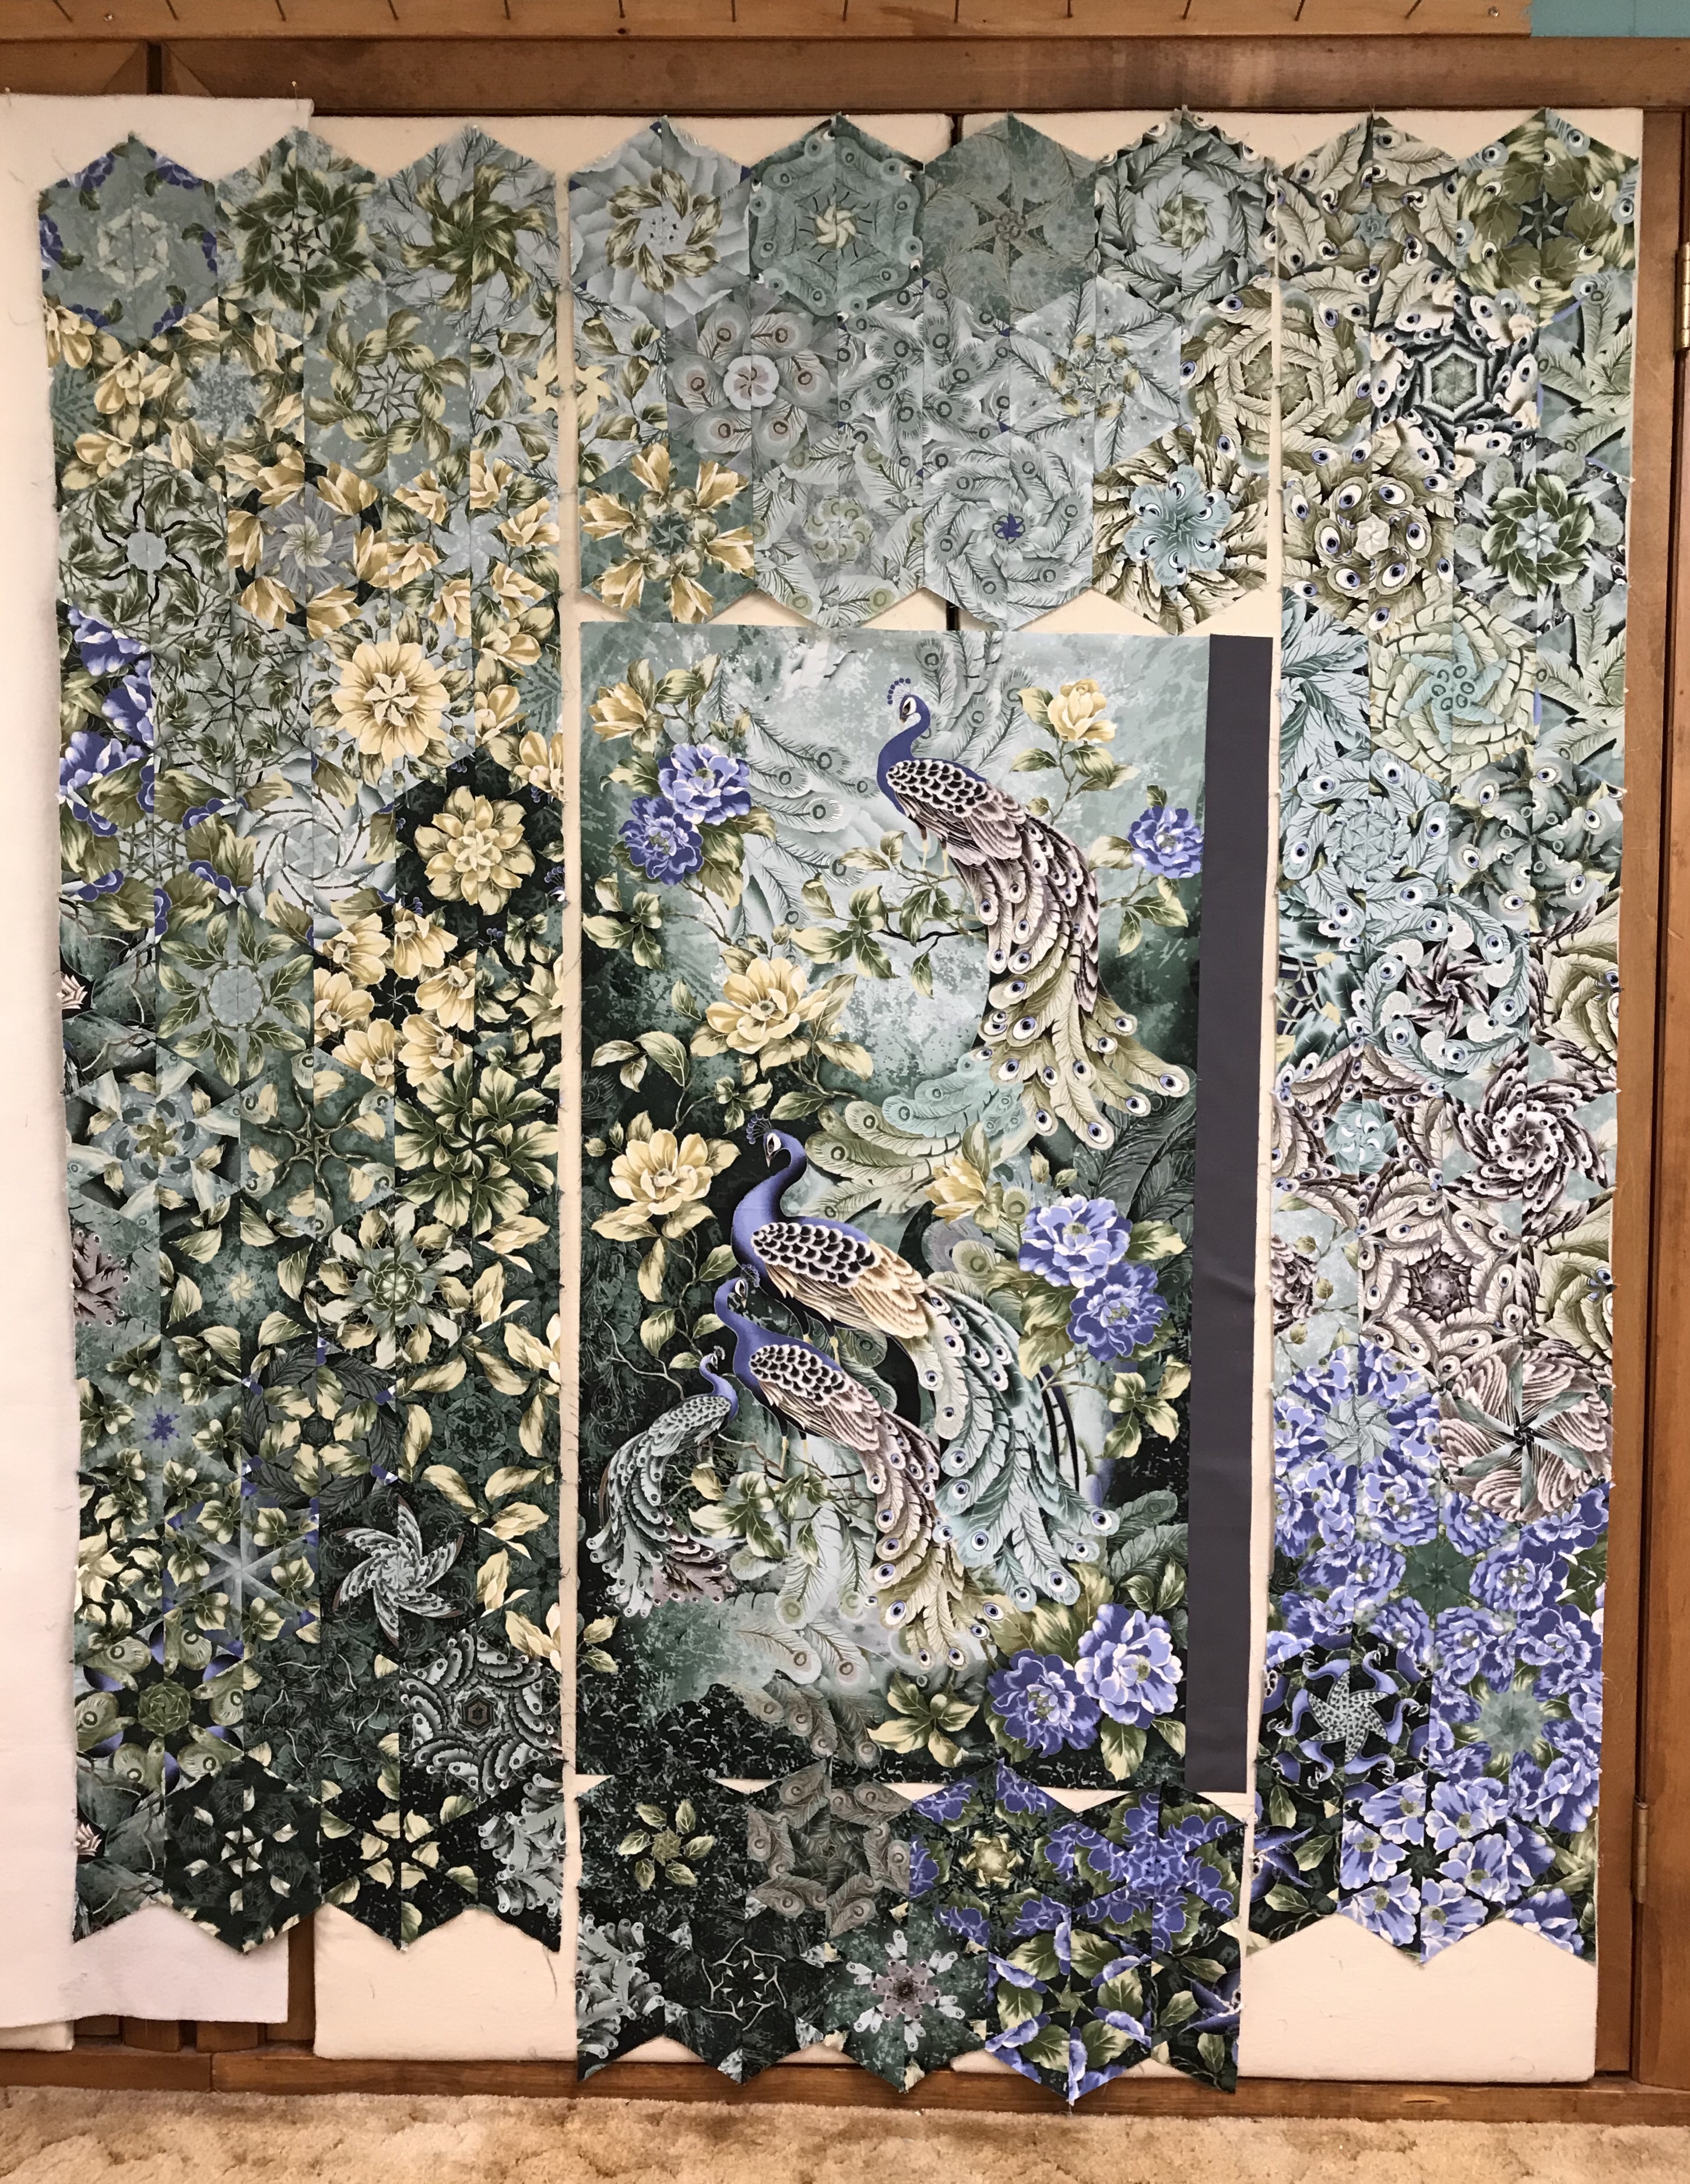
It is now easy to stitch the remaining side rows to the panel matching the dog ears at the top and bottom. I have not finished this top yet as I’m teaching several classes soon and wanted to have a good visual example to show the class.
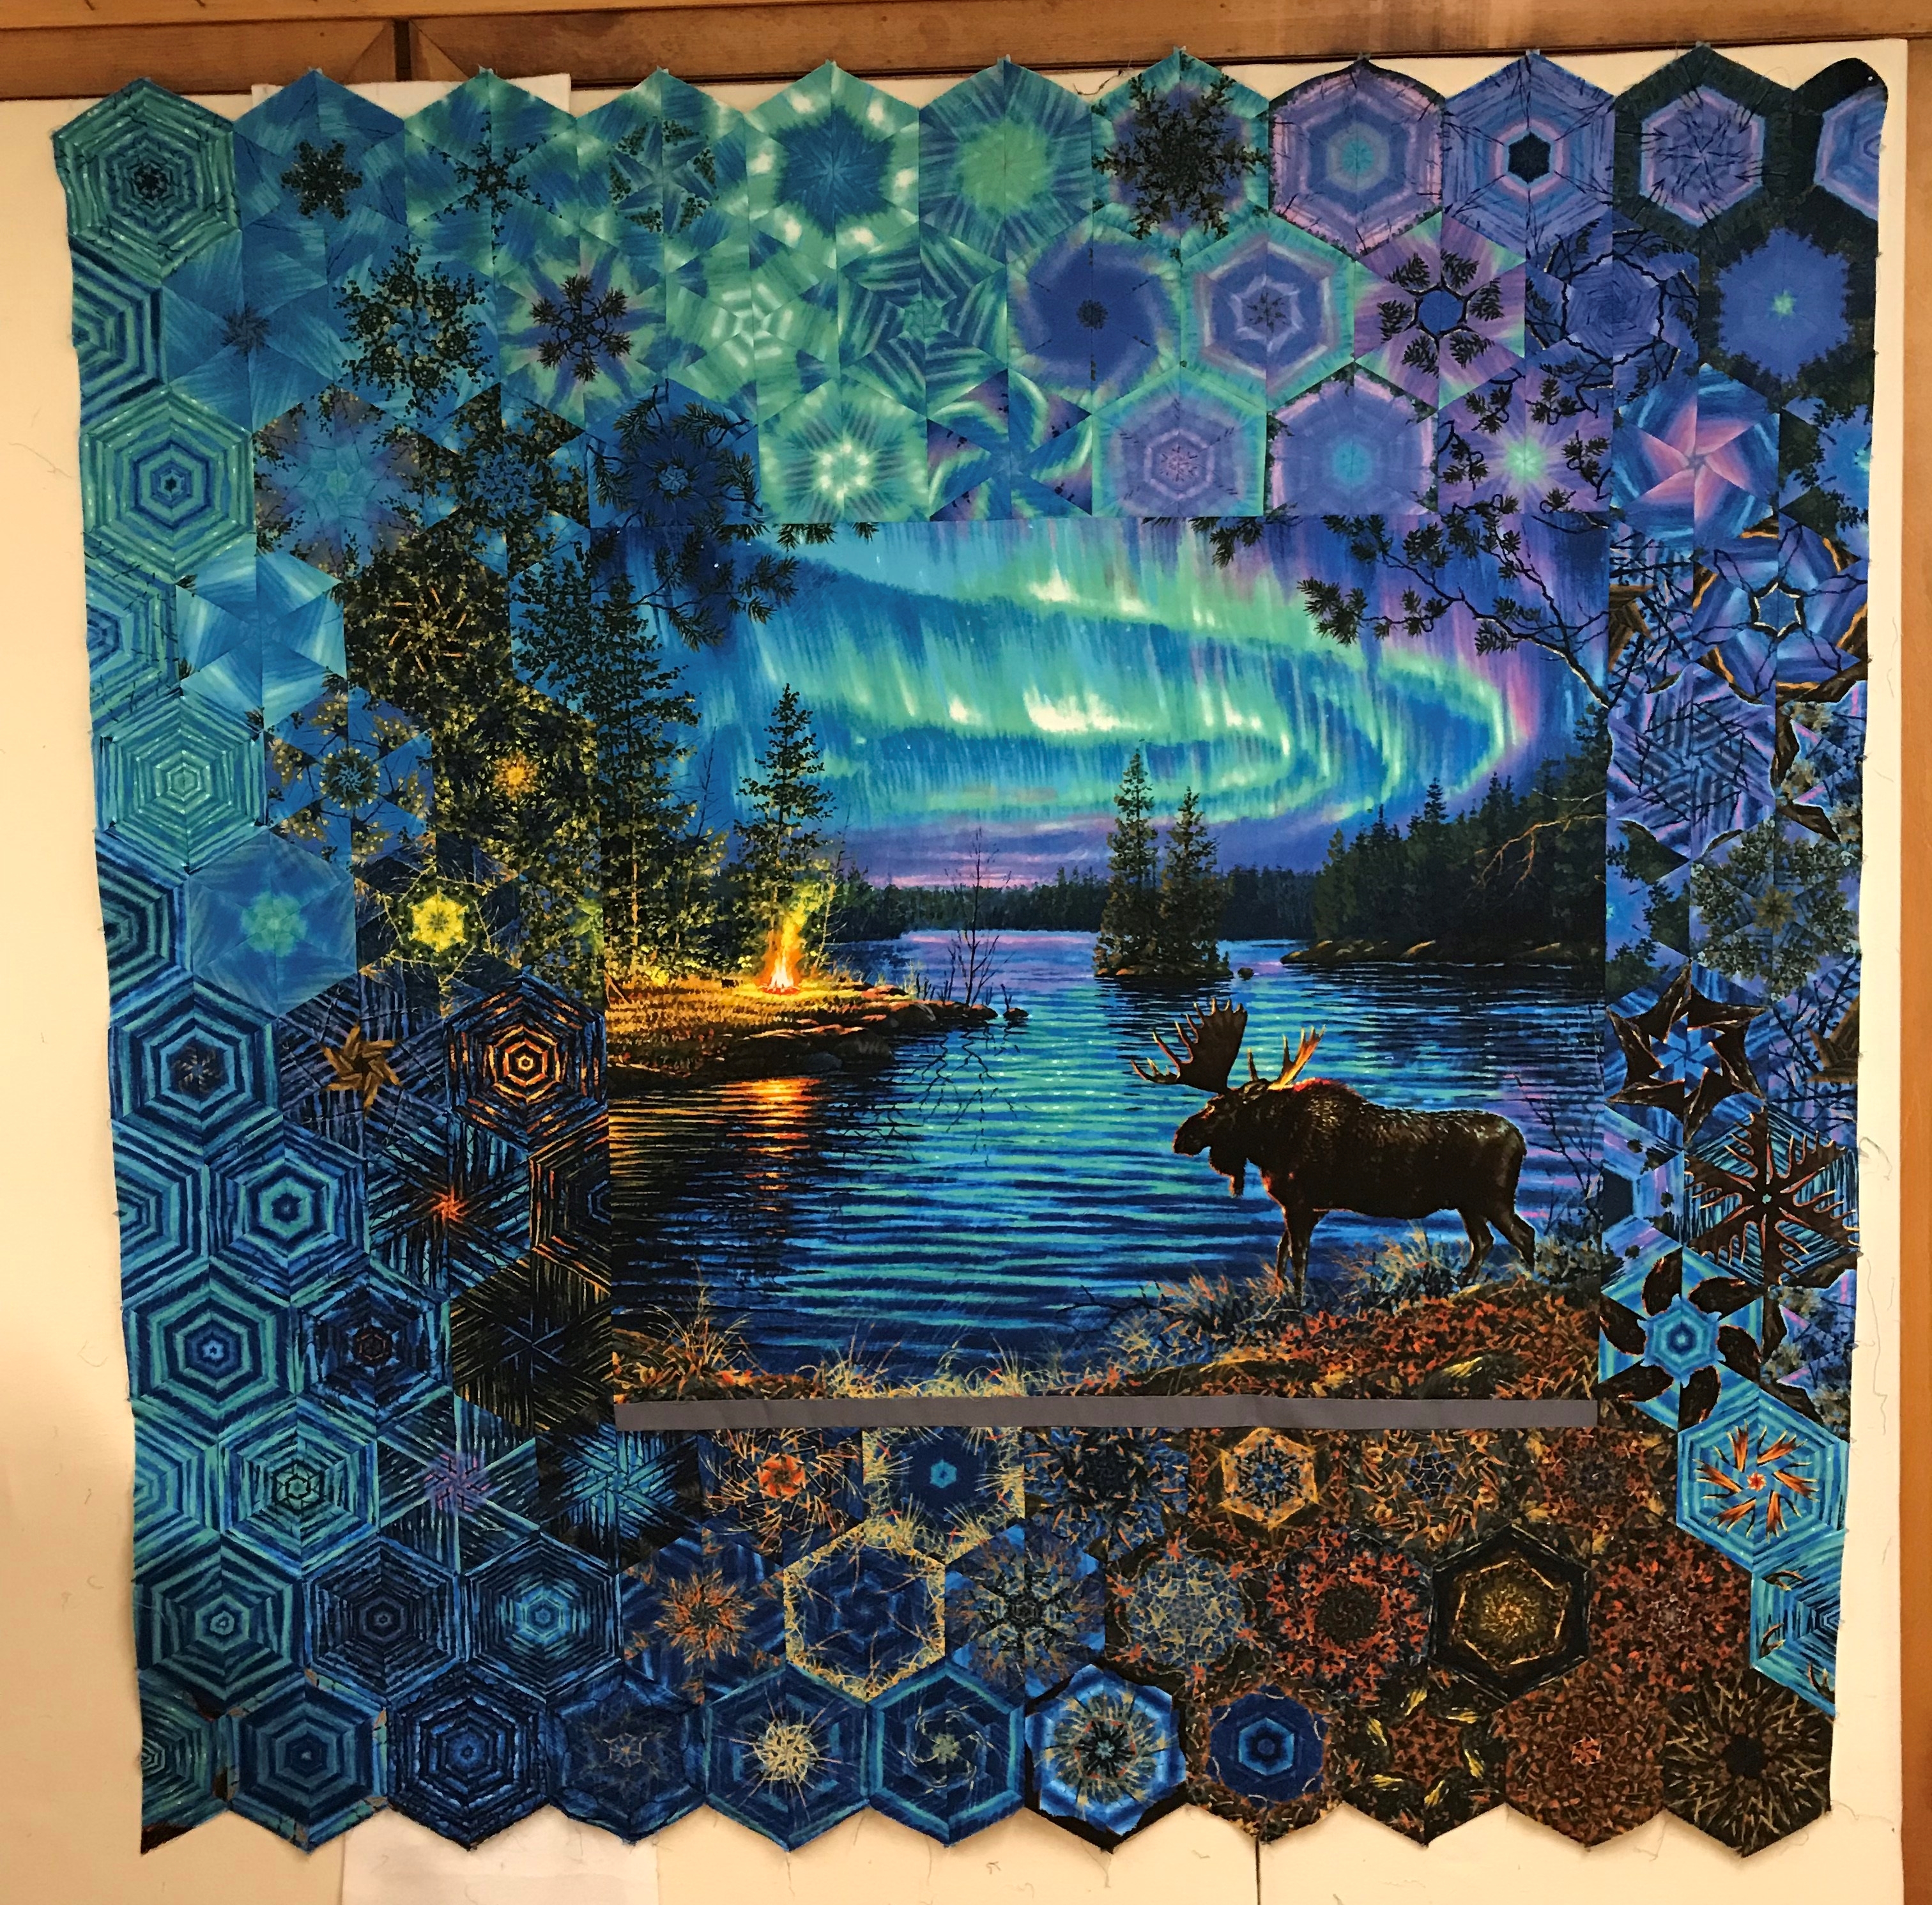
Now to hide my added fabric.
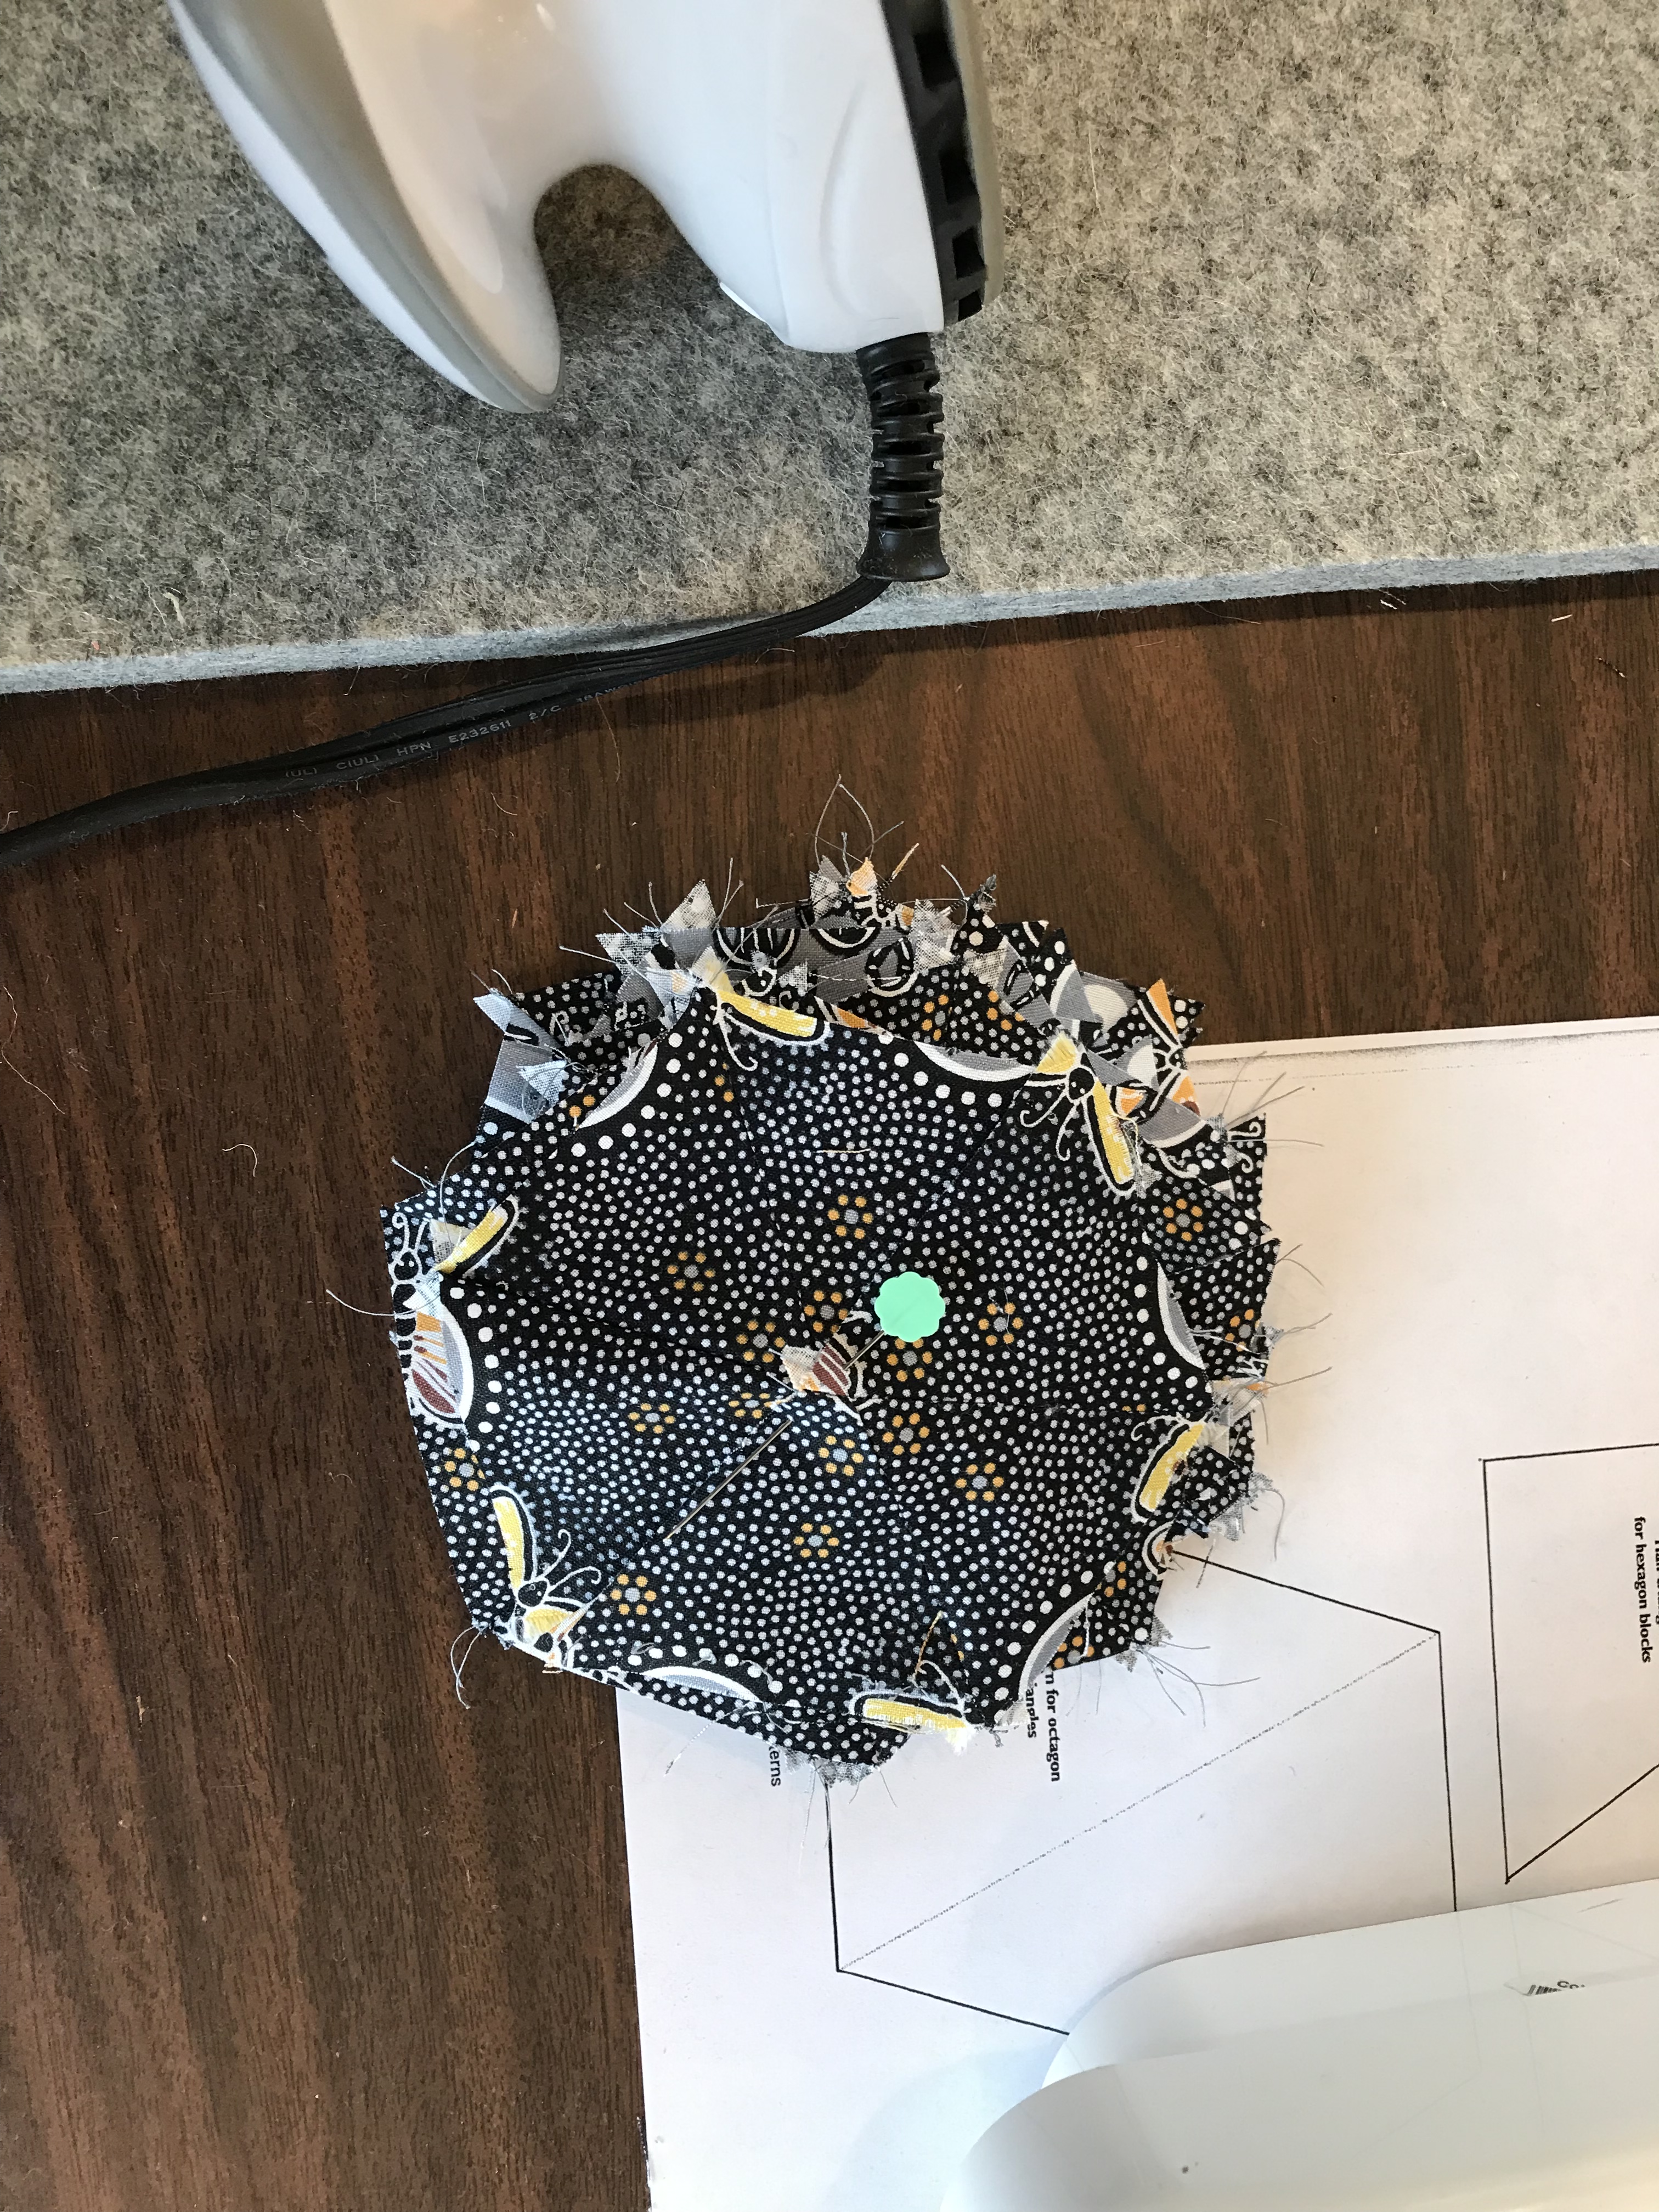
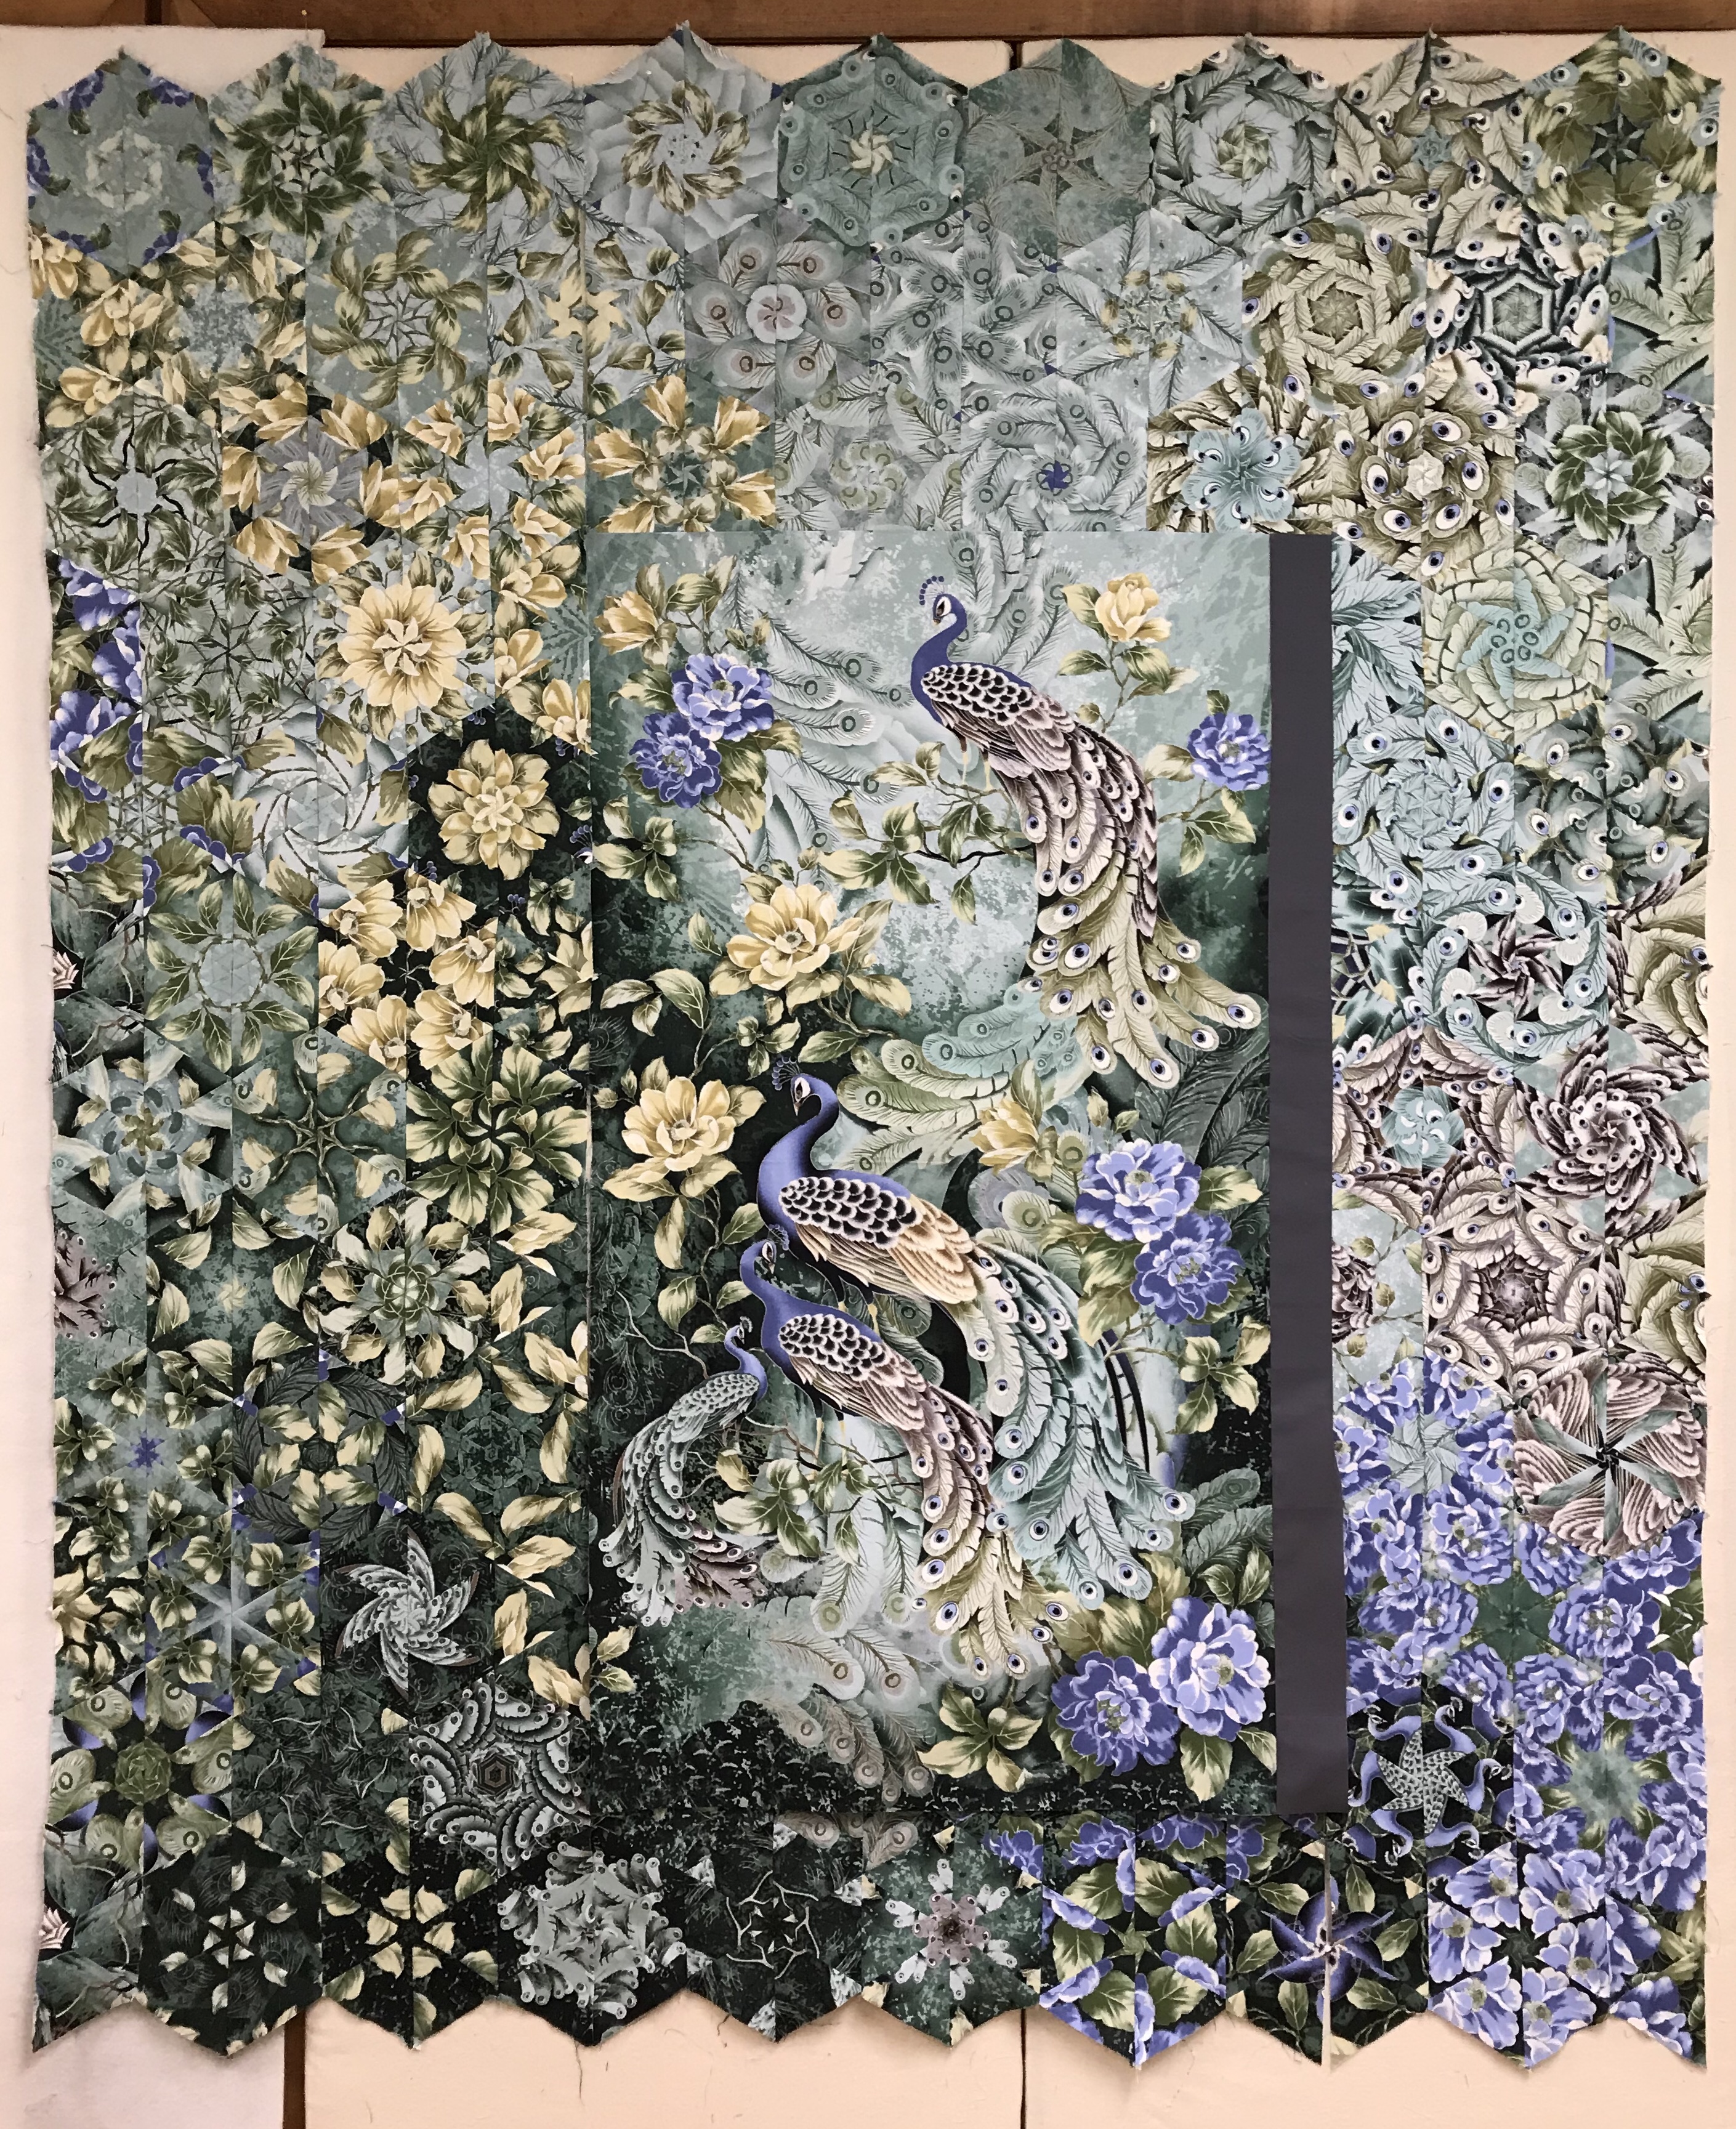
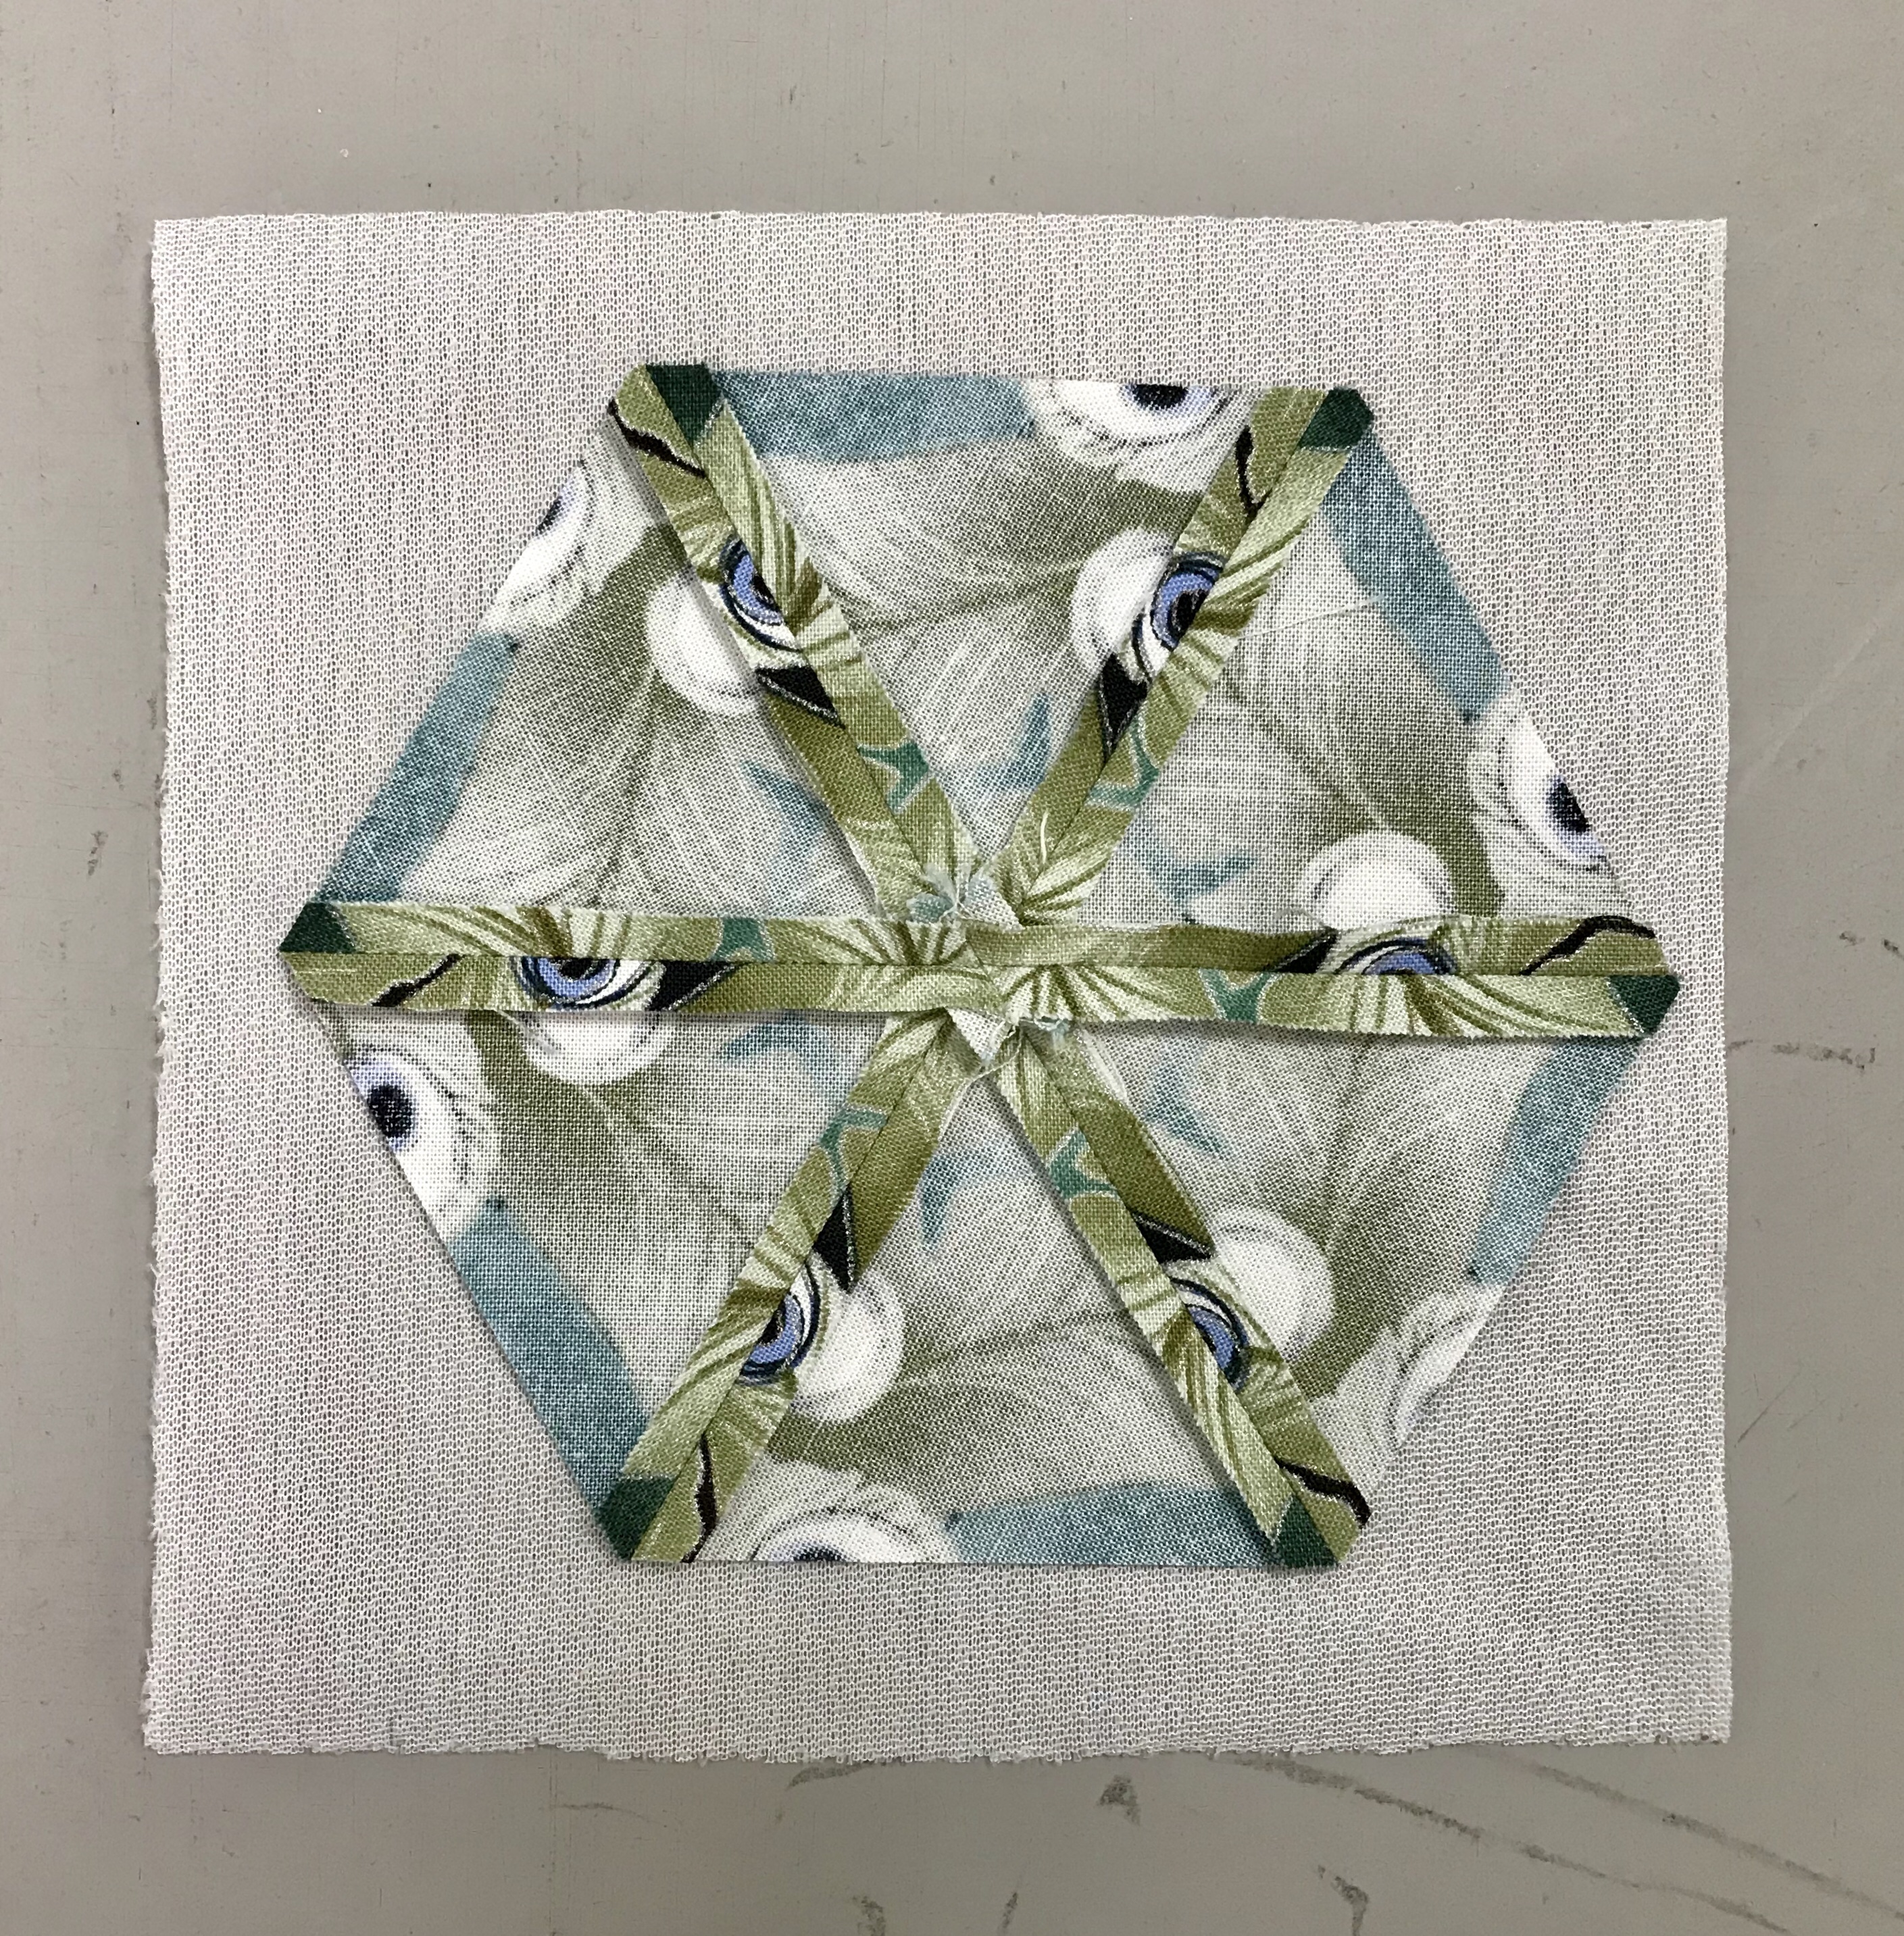
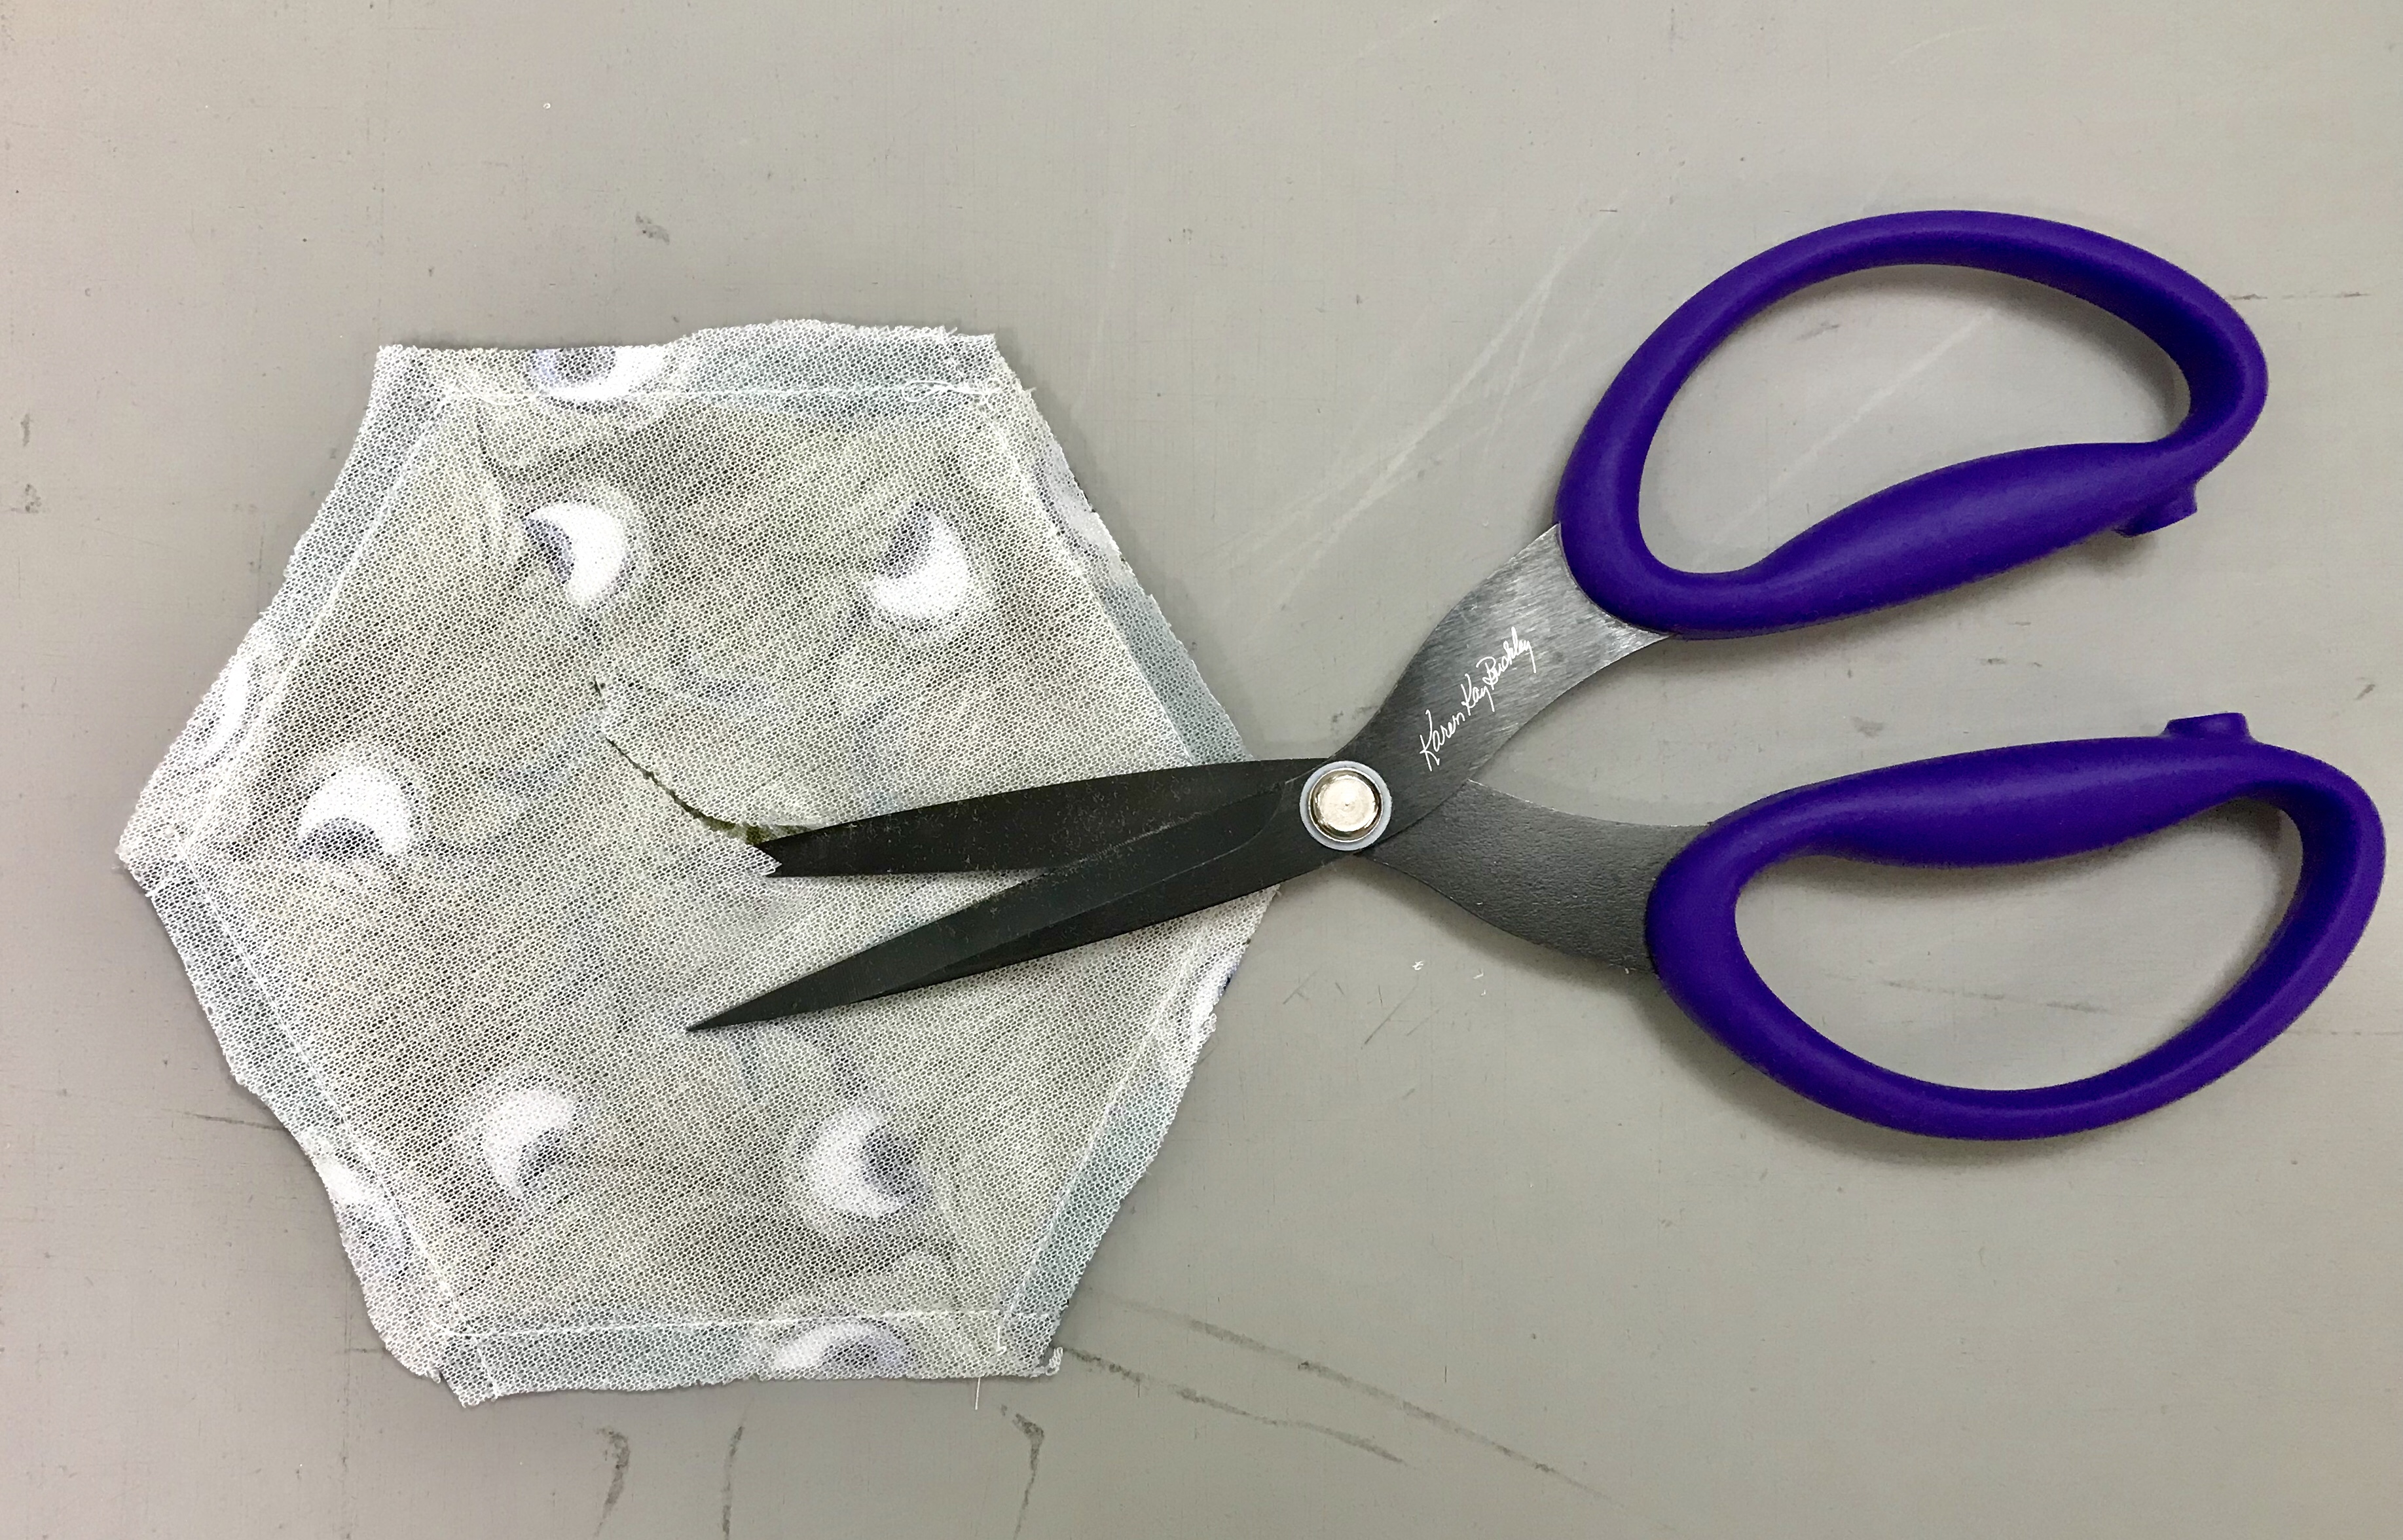
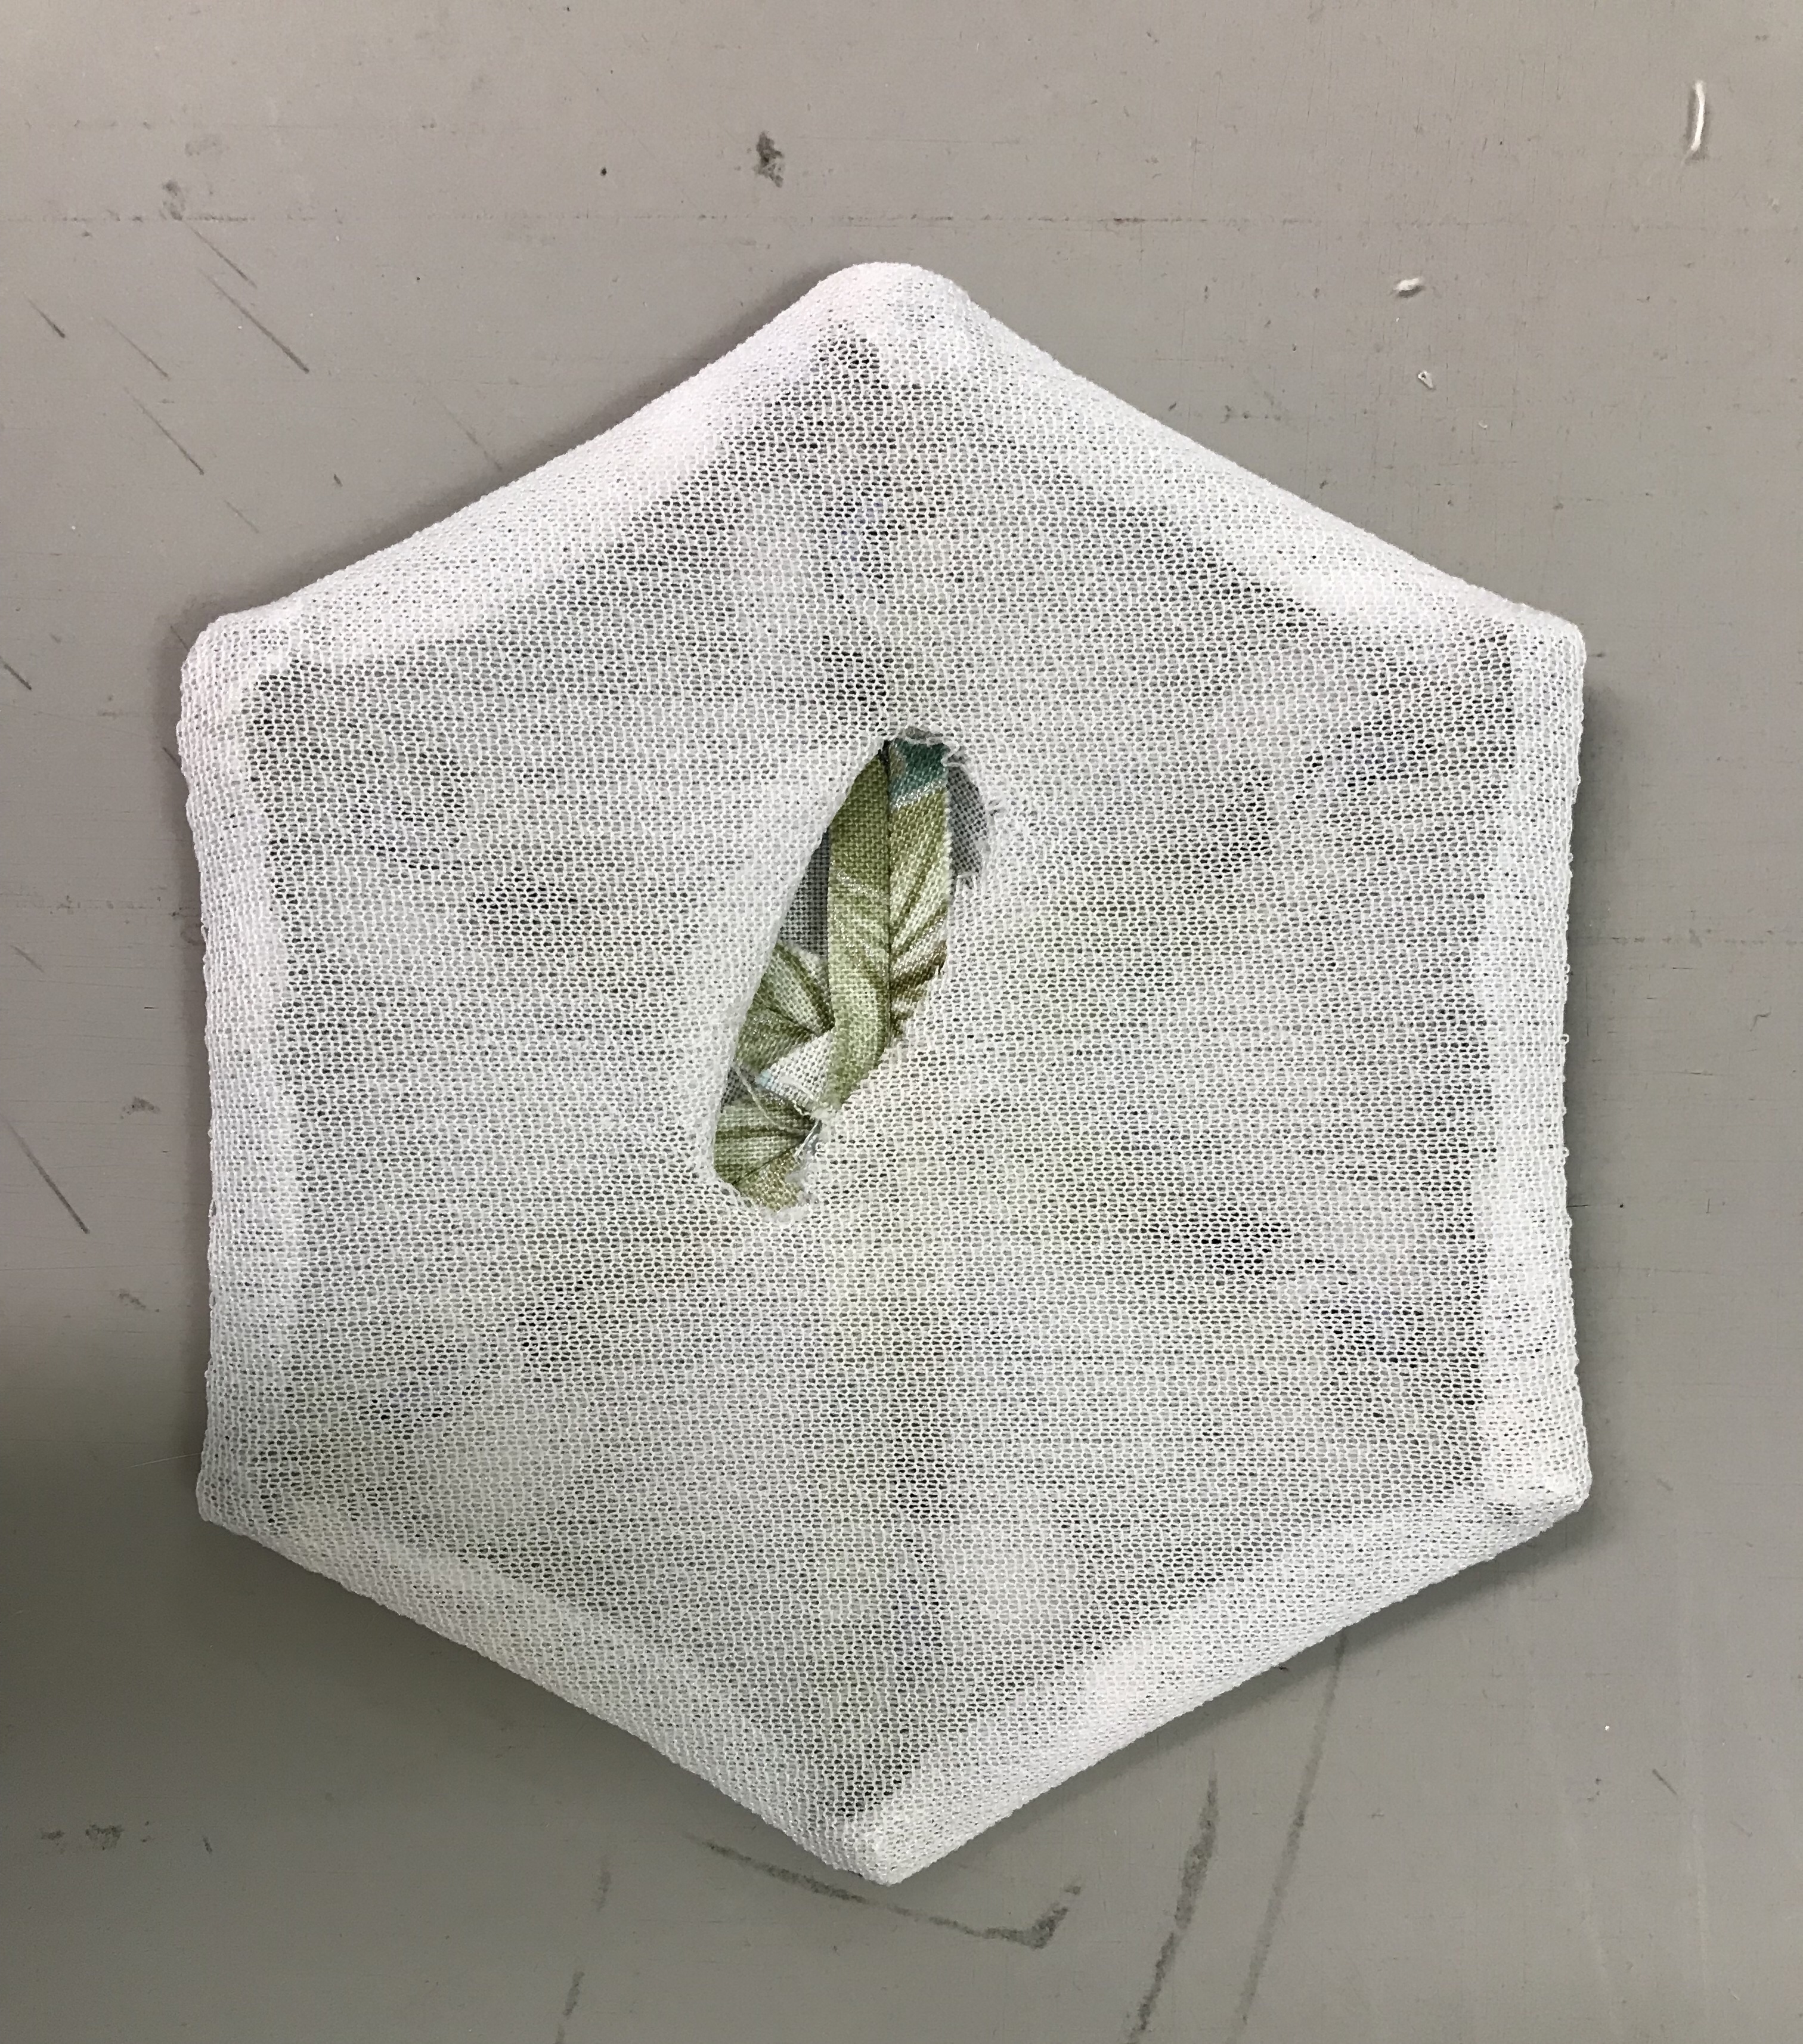
I made sure I had several left over blocks. I stitched the two halves together, pressed the seam open and using my ruler, trimmed 1″ off every side. This reduces my hexagon to about 4″ wide.
I use a Fusible Knit Interfacing, cut a square slightly larger than the hexagon. Place the bumpy side of the interfacing with the right side of the hexagon. Stitch around the hexagon using a 1/4″ seam allowance. Trim off the excess interfacing and snip a hole about 1″ wide.
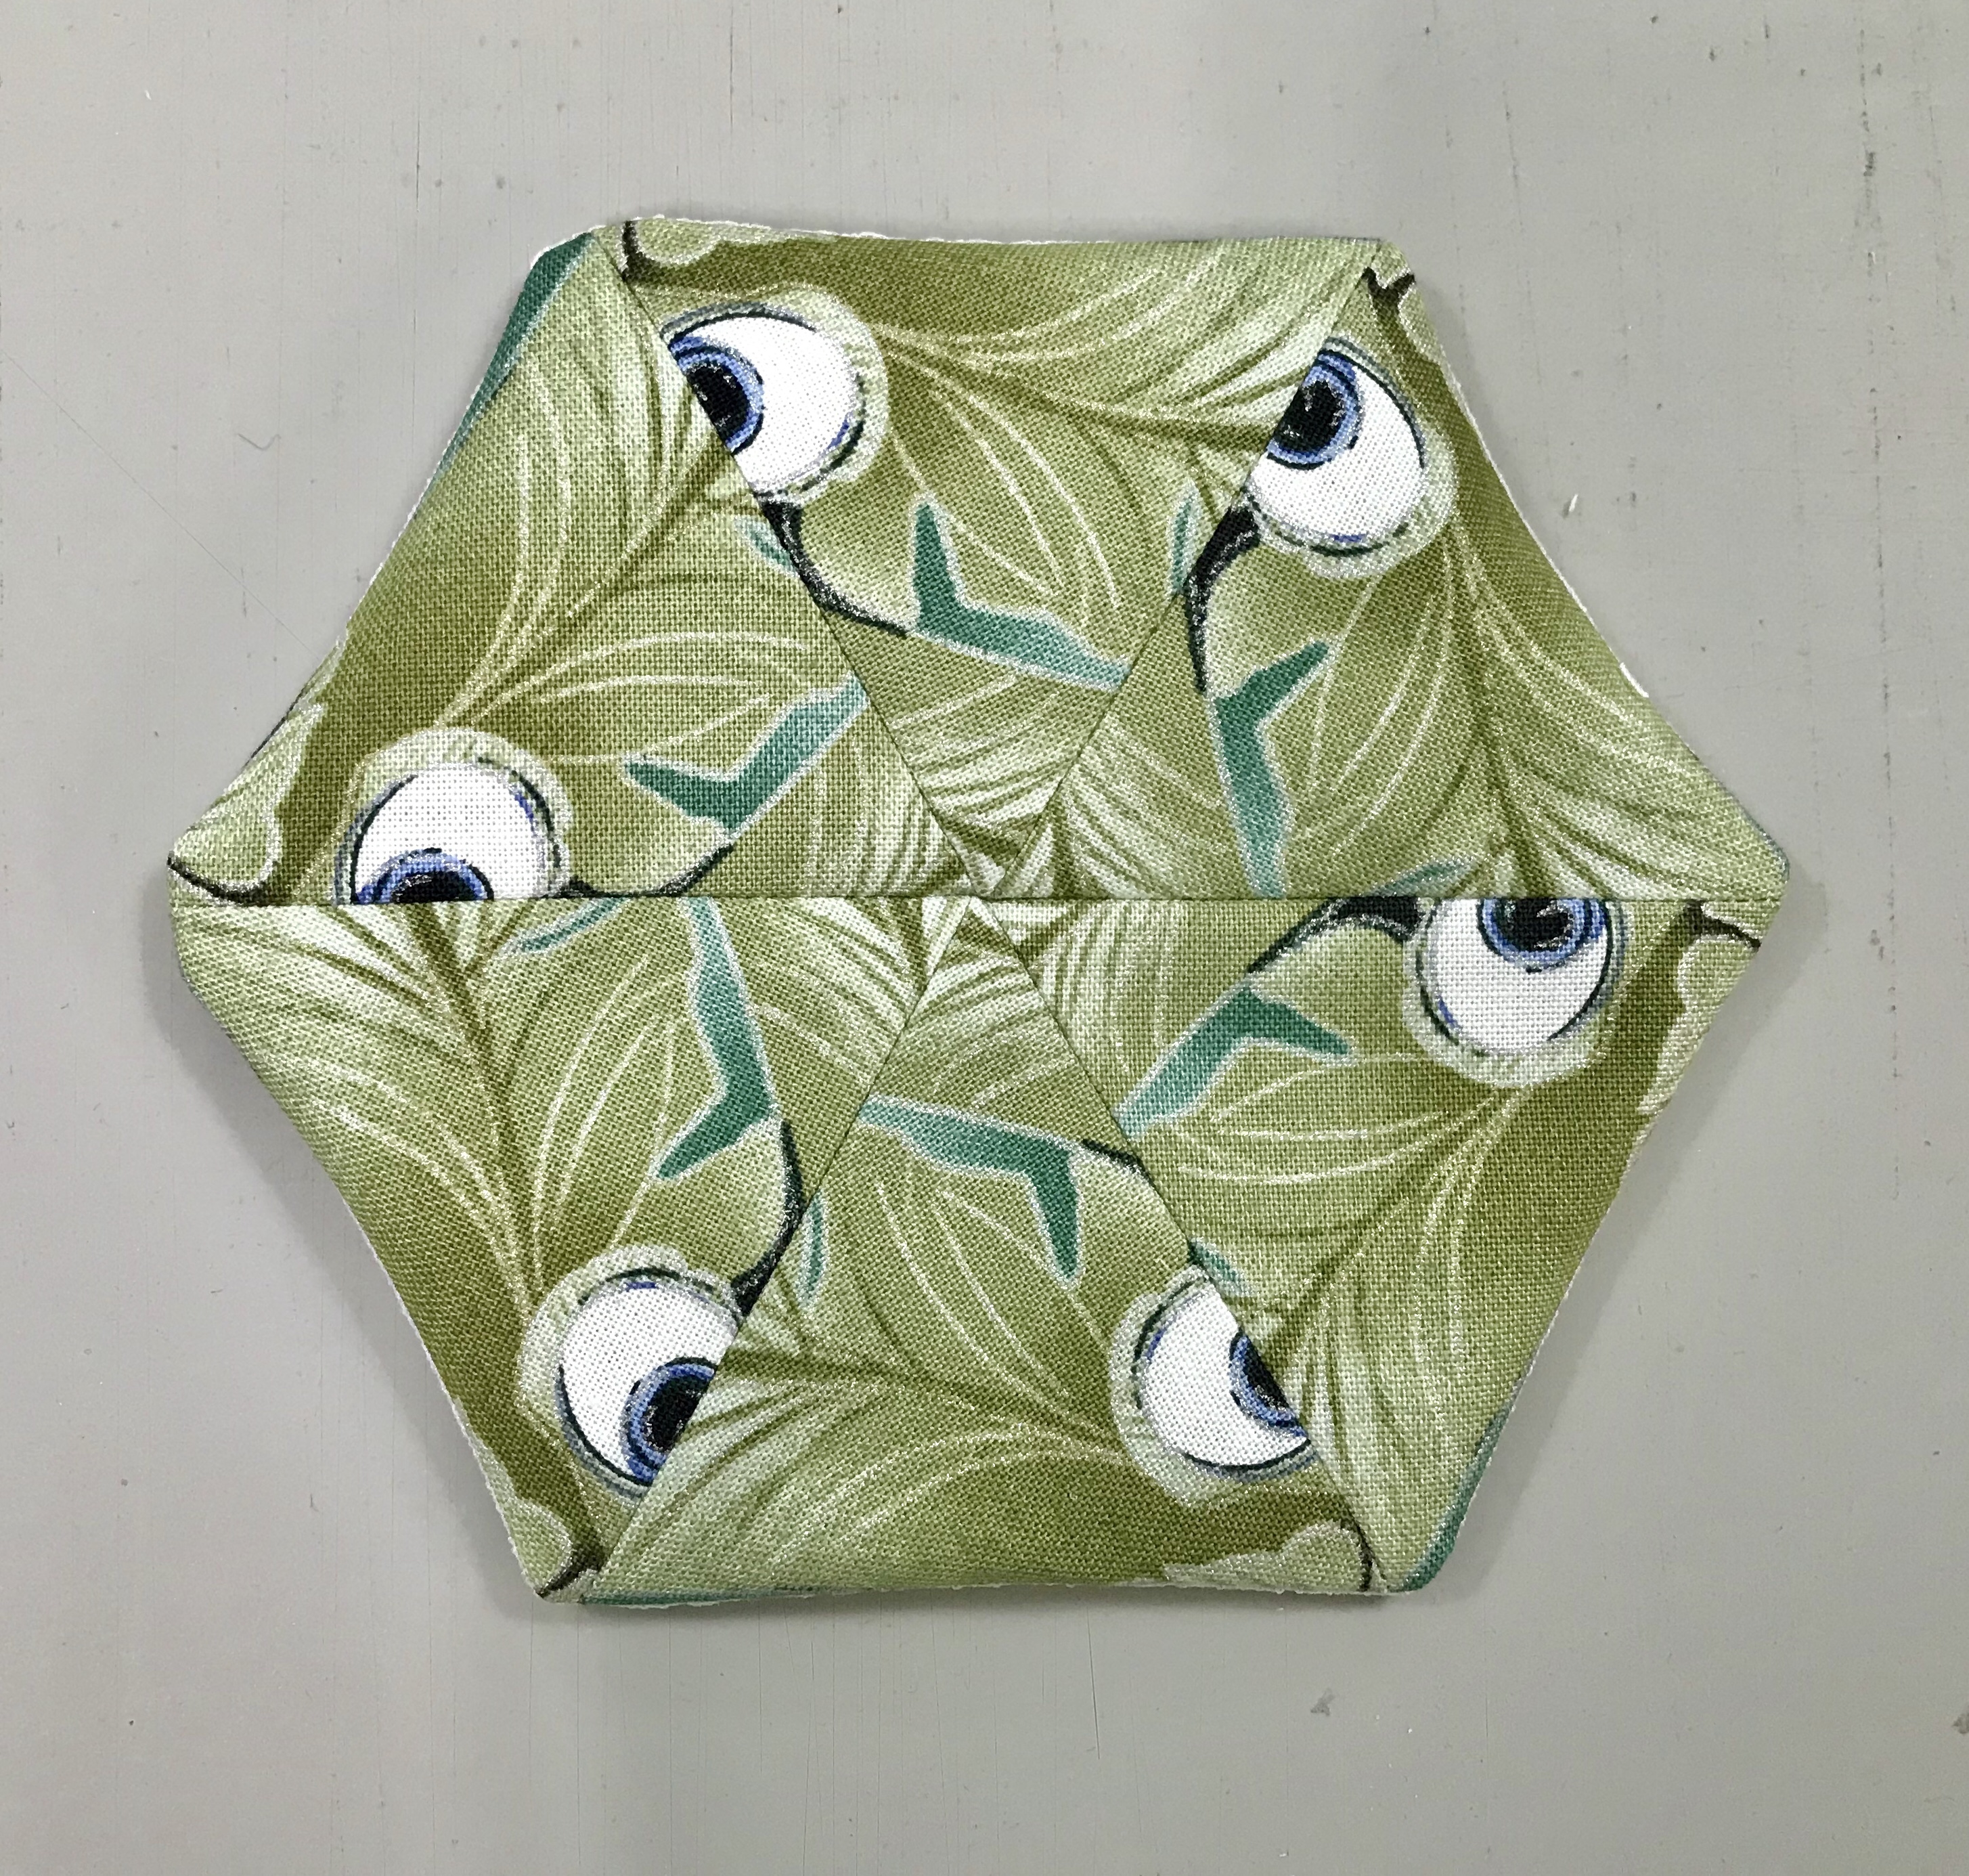
Turn the hexagon right side out. Now the fusible ‘bumpy side is on the outside. Finger press the edges to flatten it out. This is a great way to get a perfect finished edge. Once I have decided where to place my smaller hexagons, I can use my iron and press them in place and finish them by stitching them down.
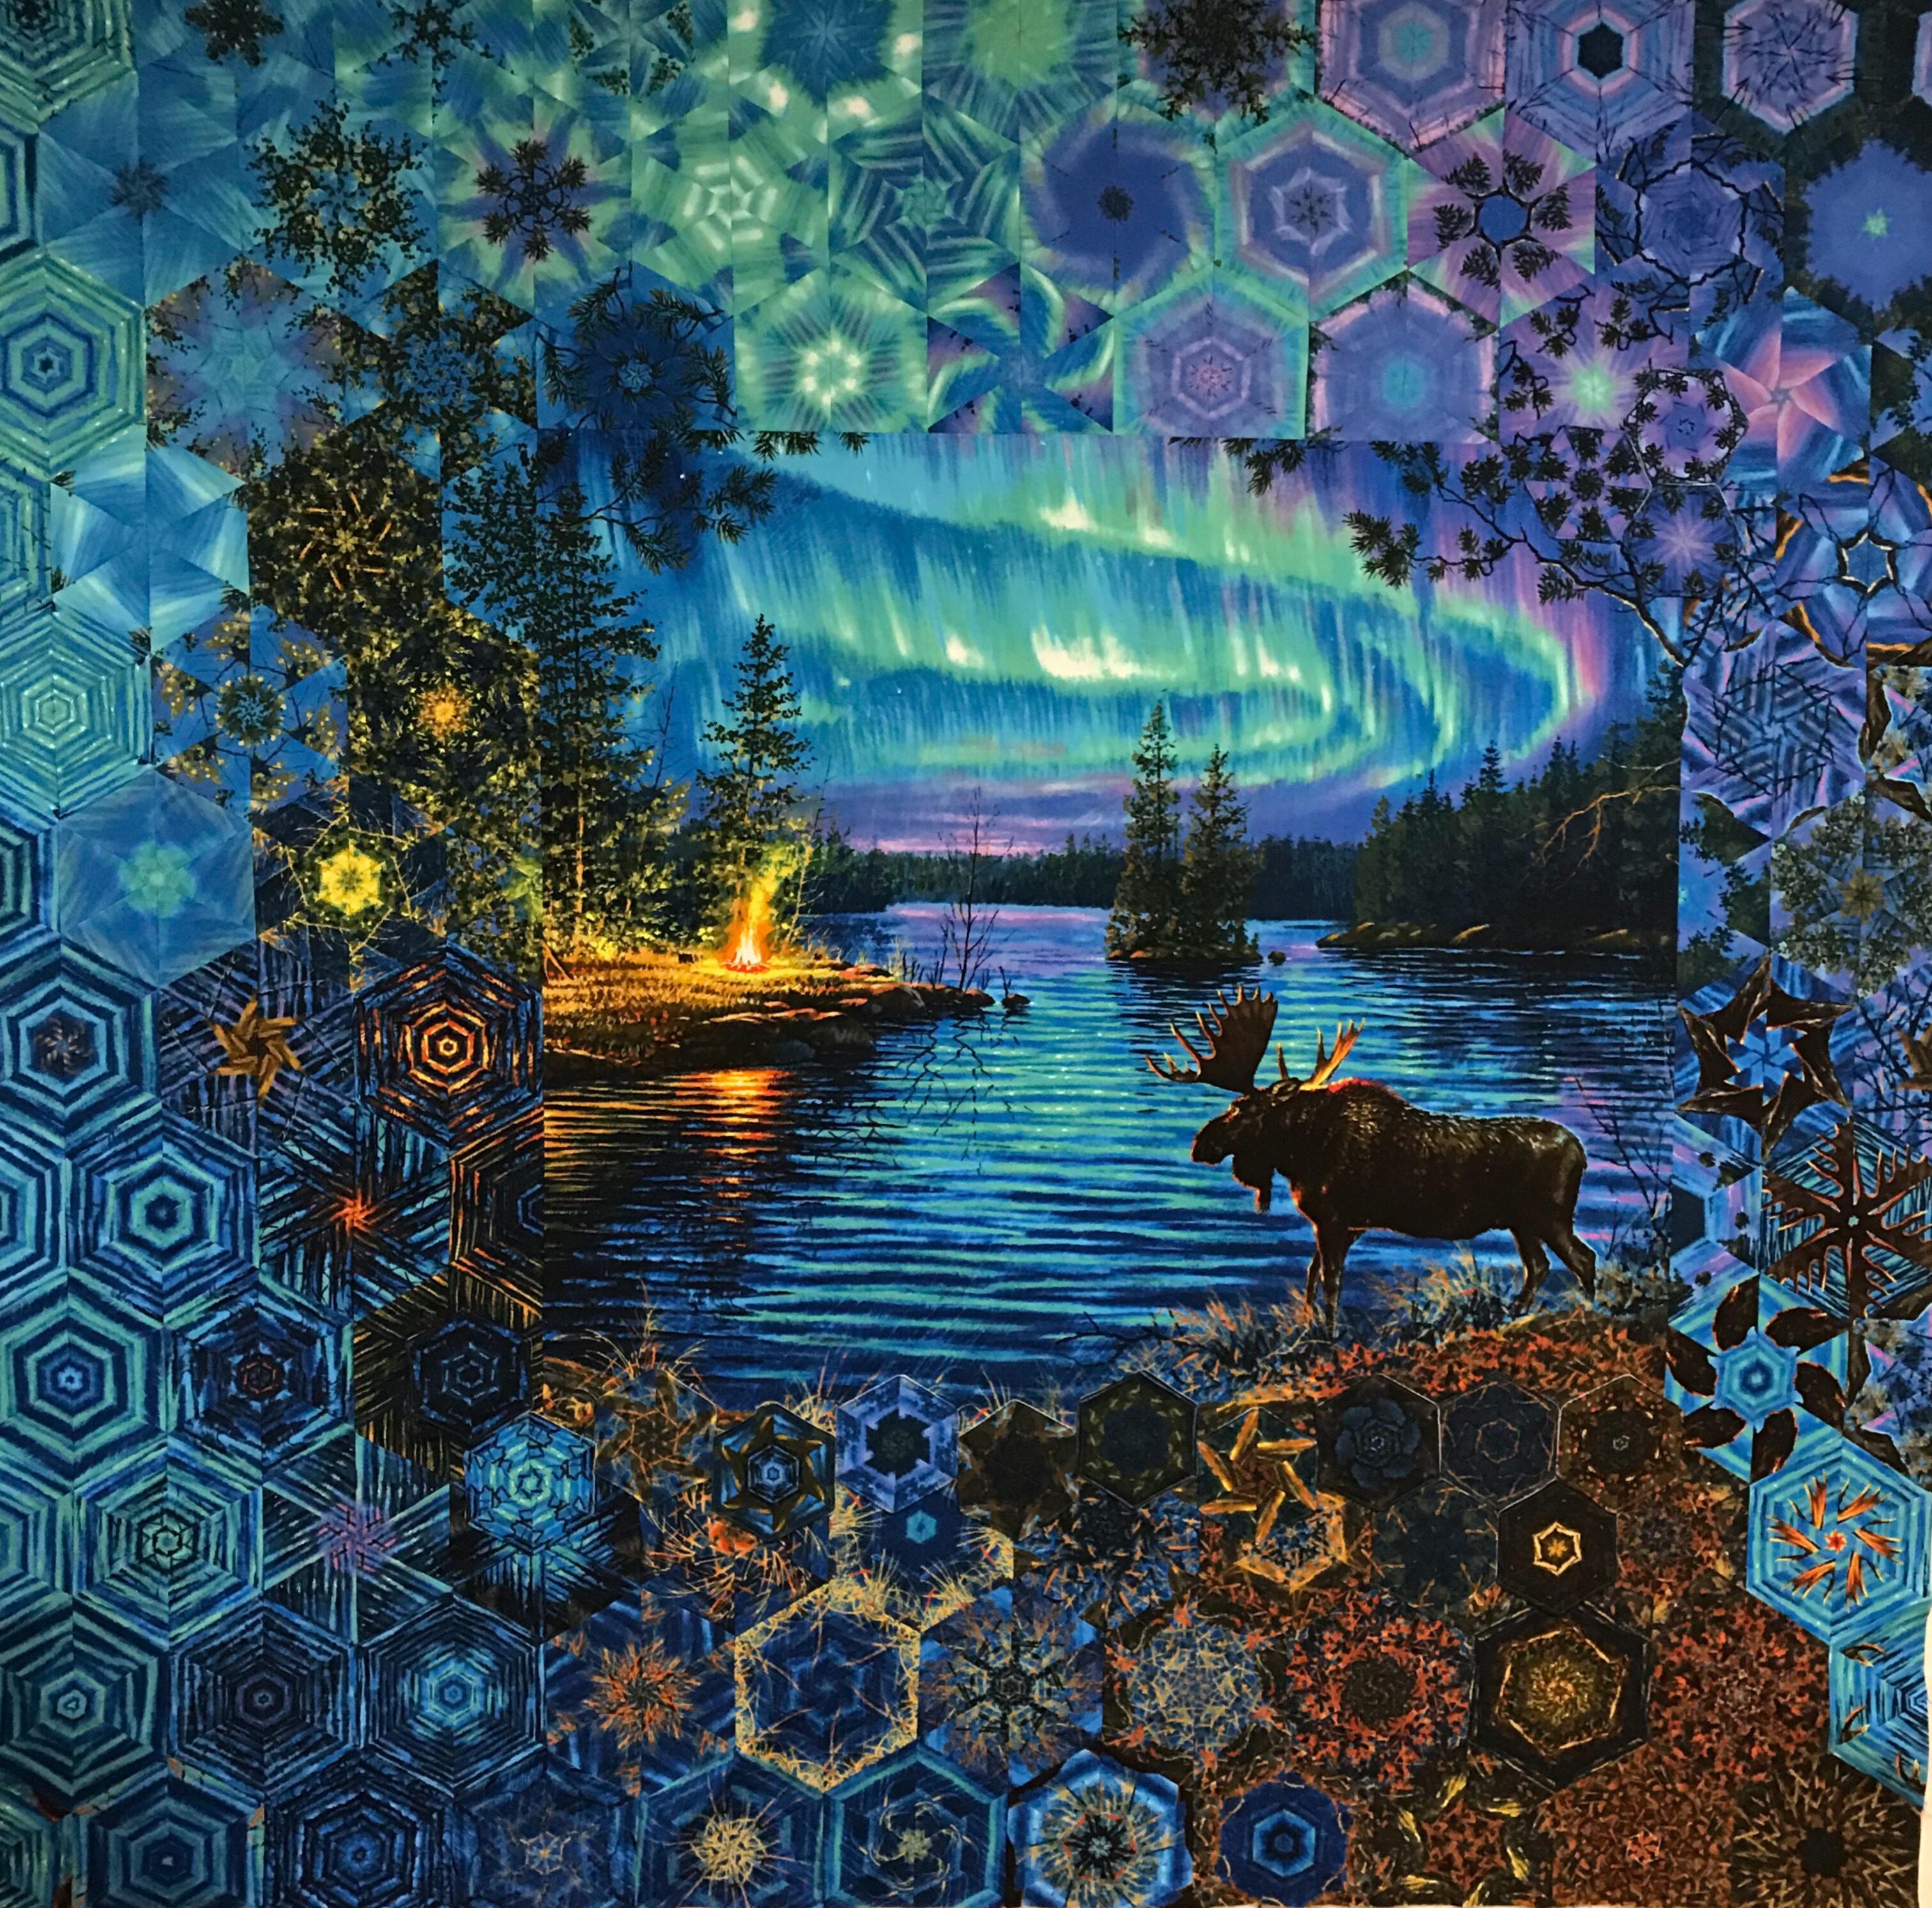
See how well the small hexagons hide my added fabric? I will post this OBW once I finished it.
I was closely supervised while making this OBW by my quilting buddy Tucker!