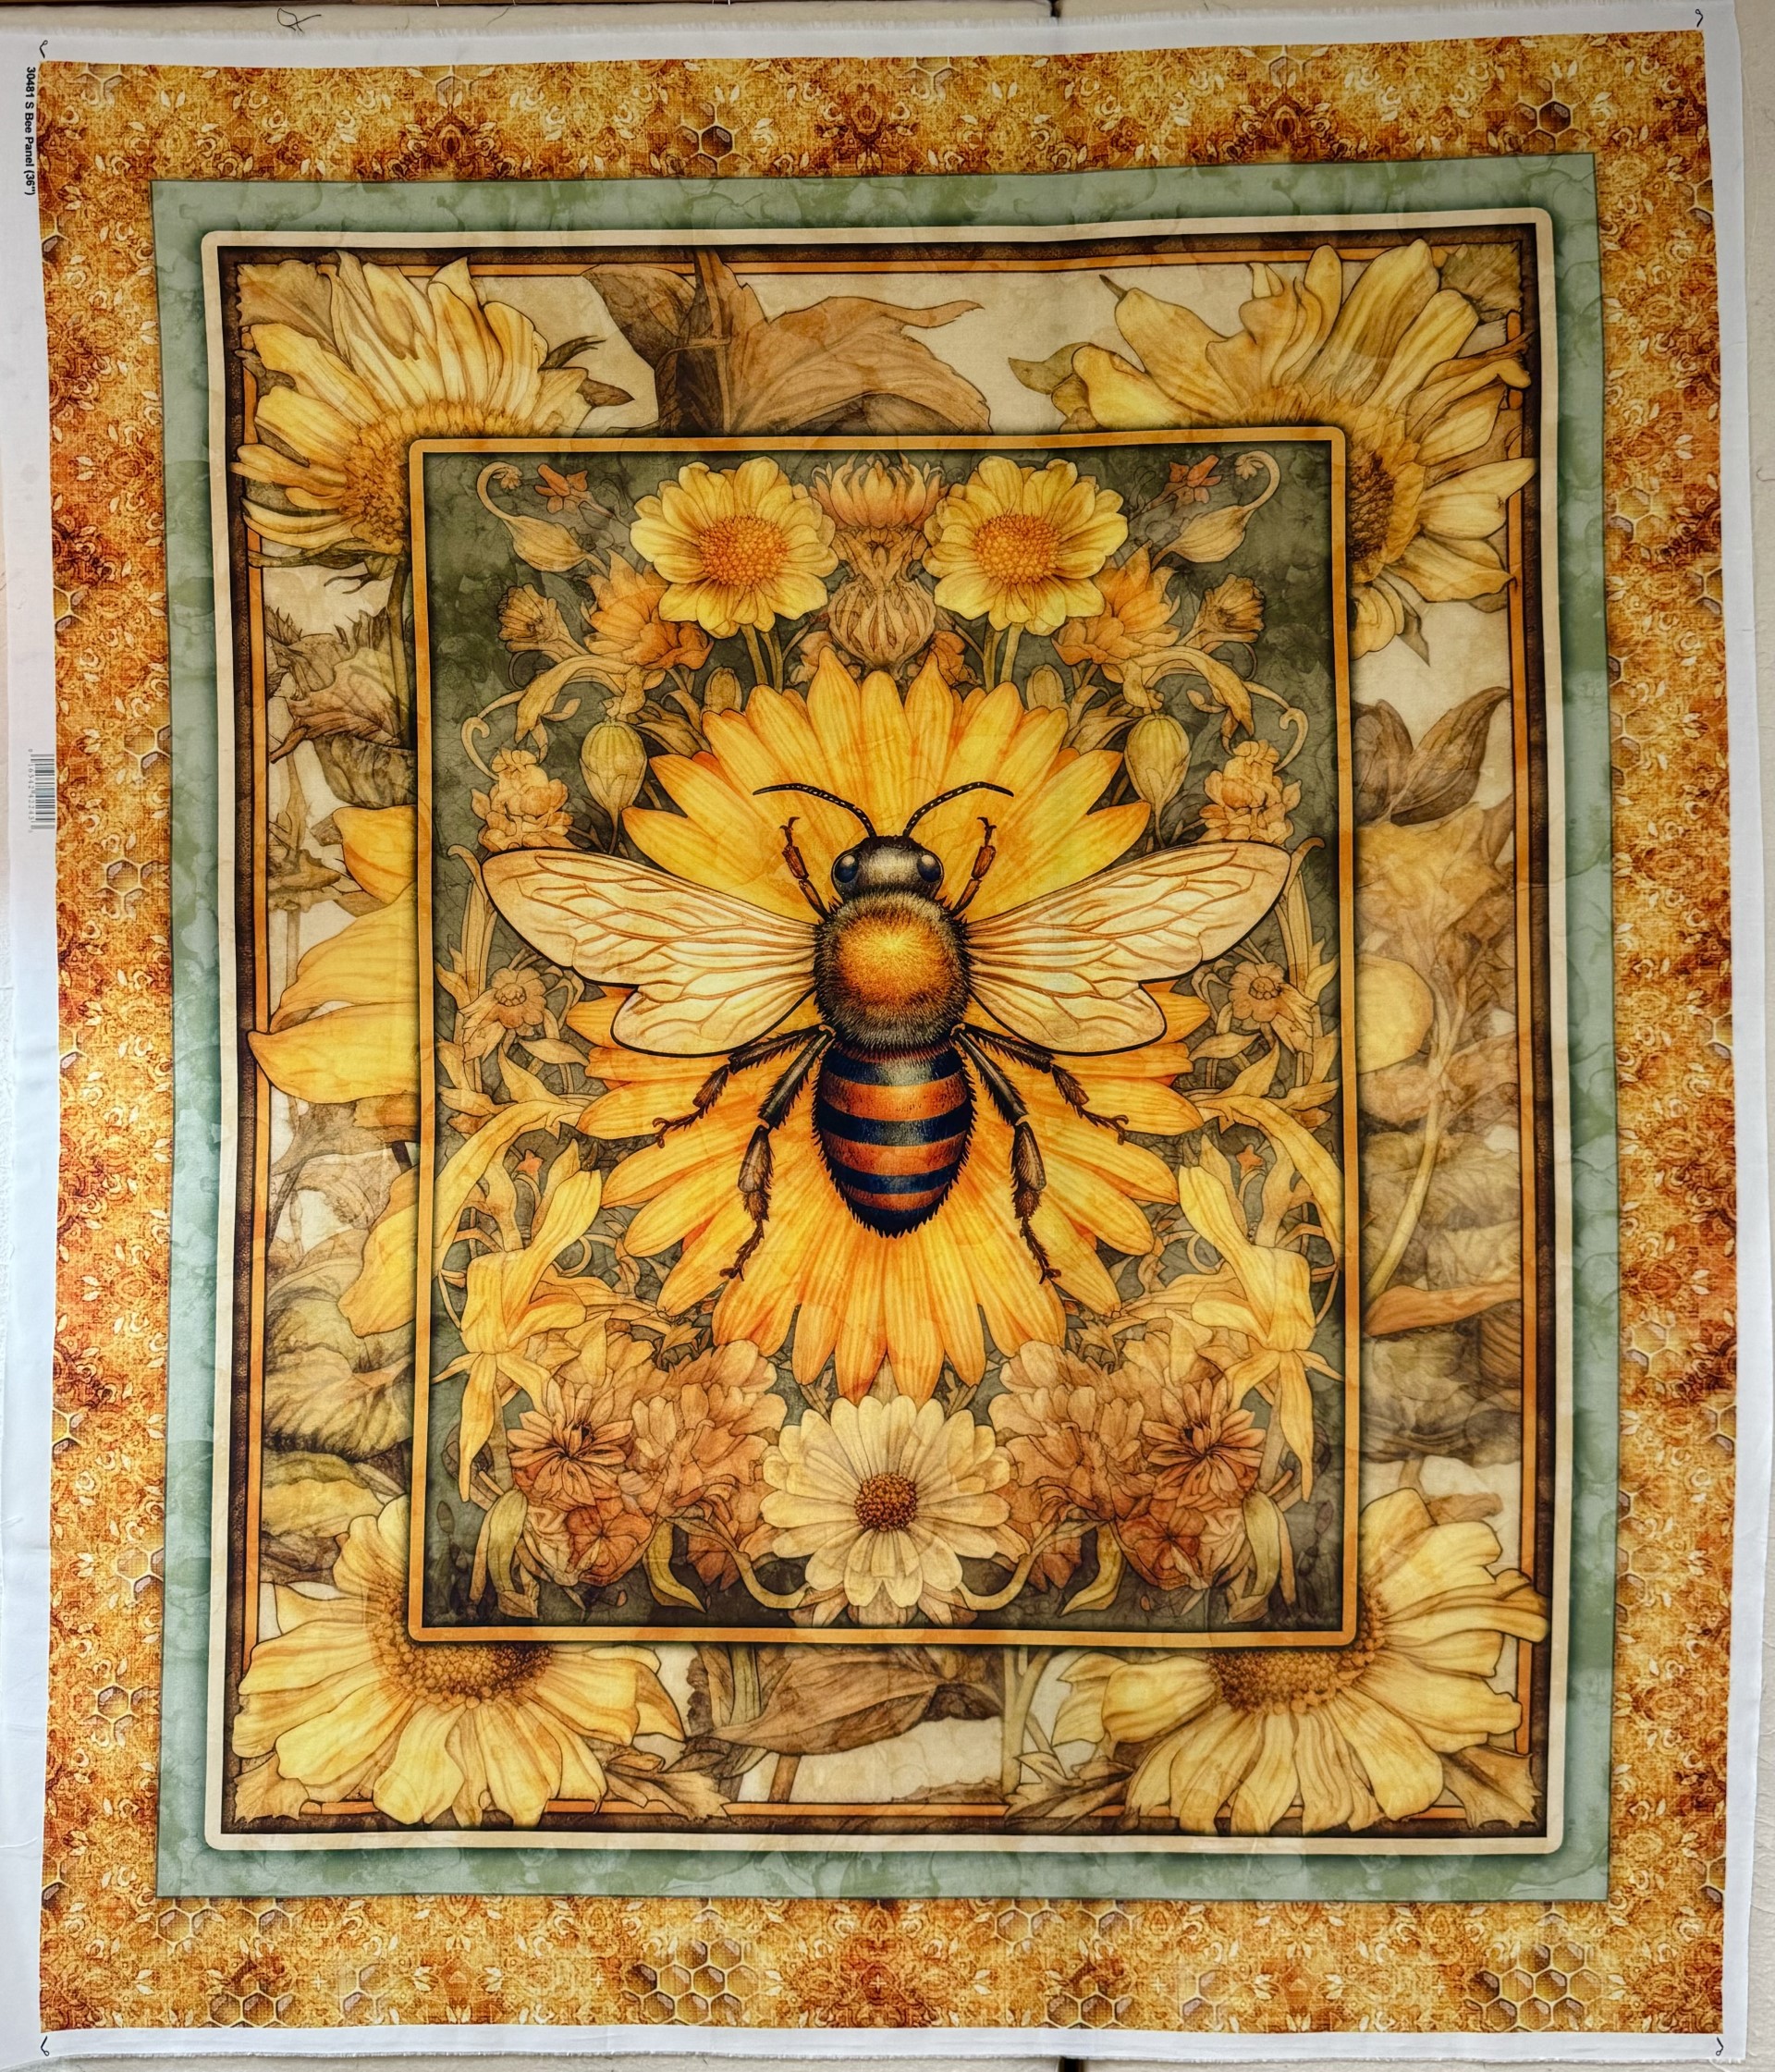
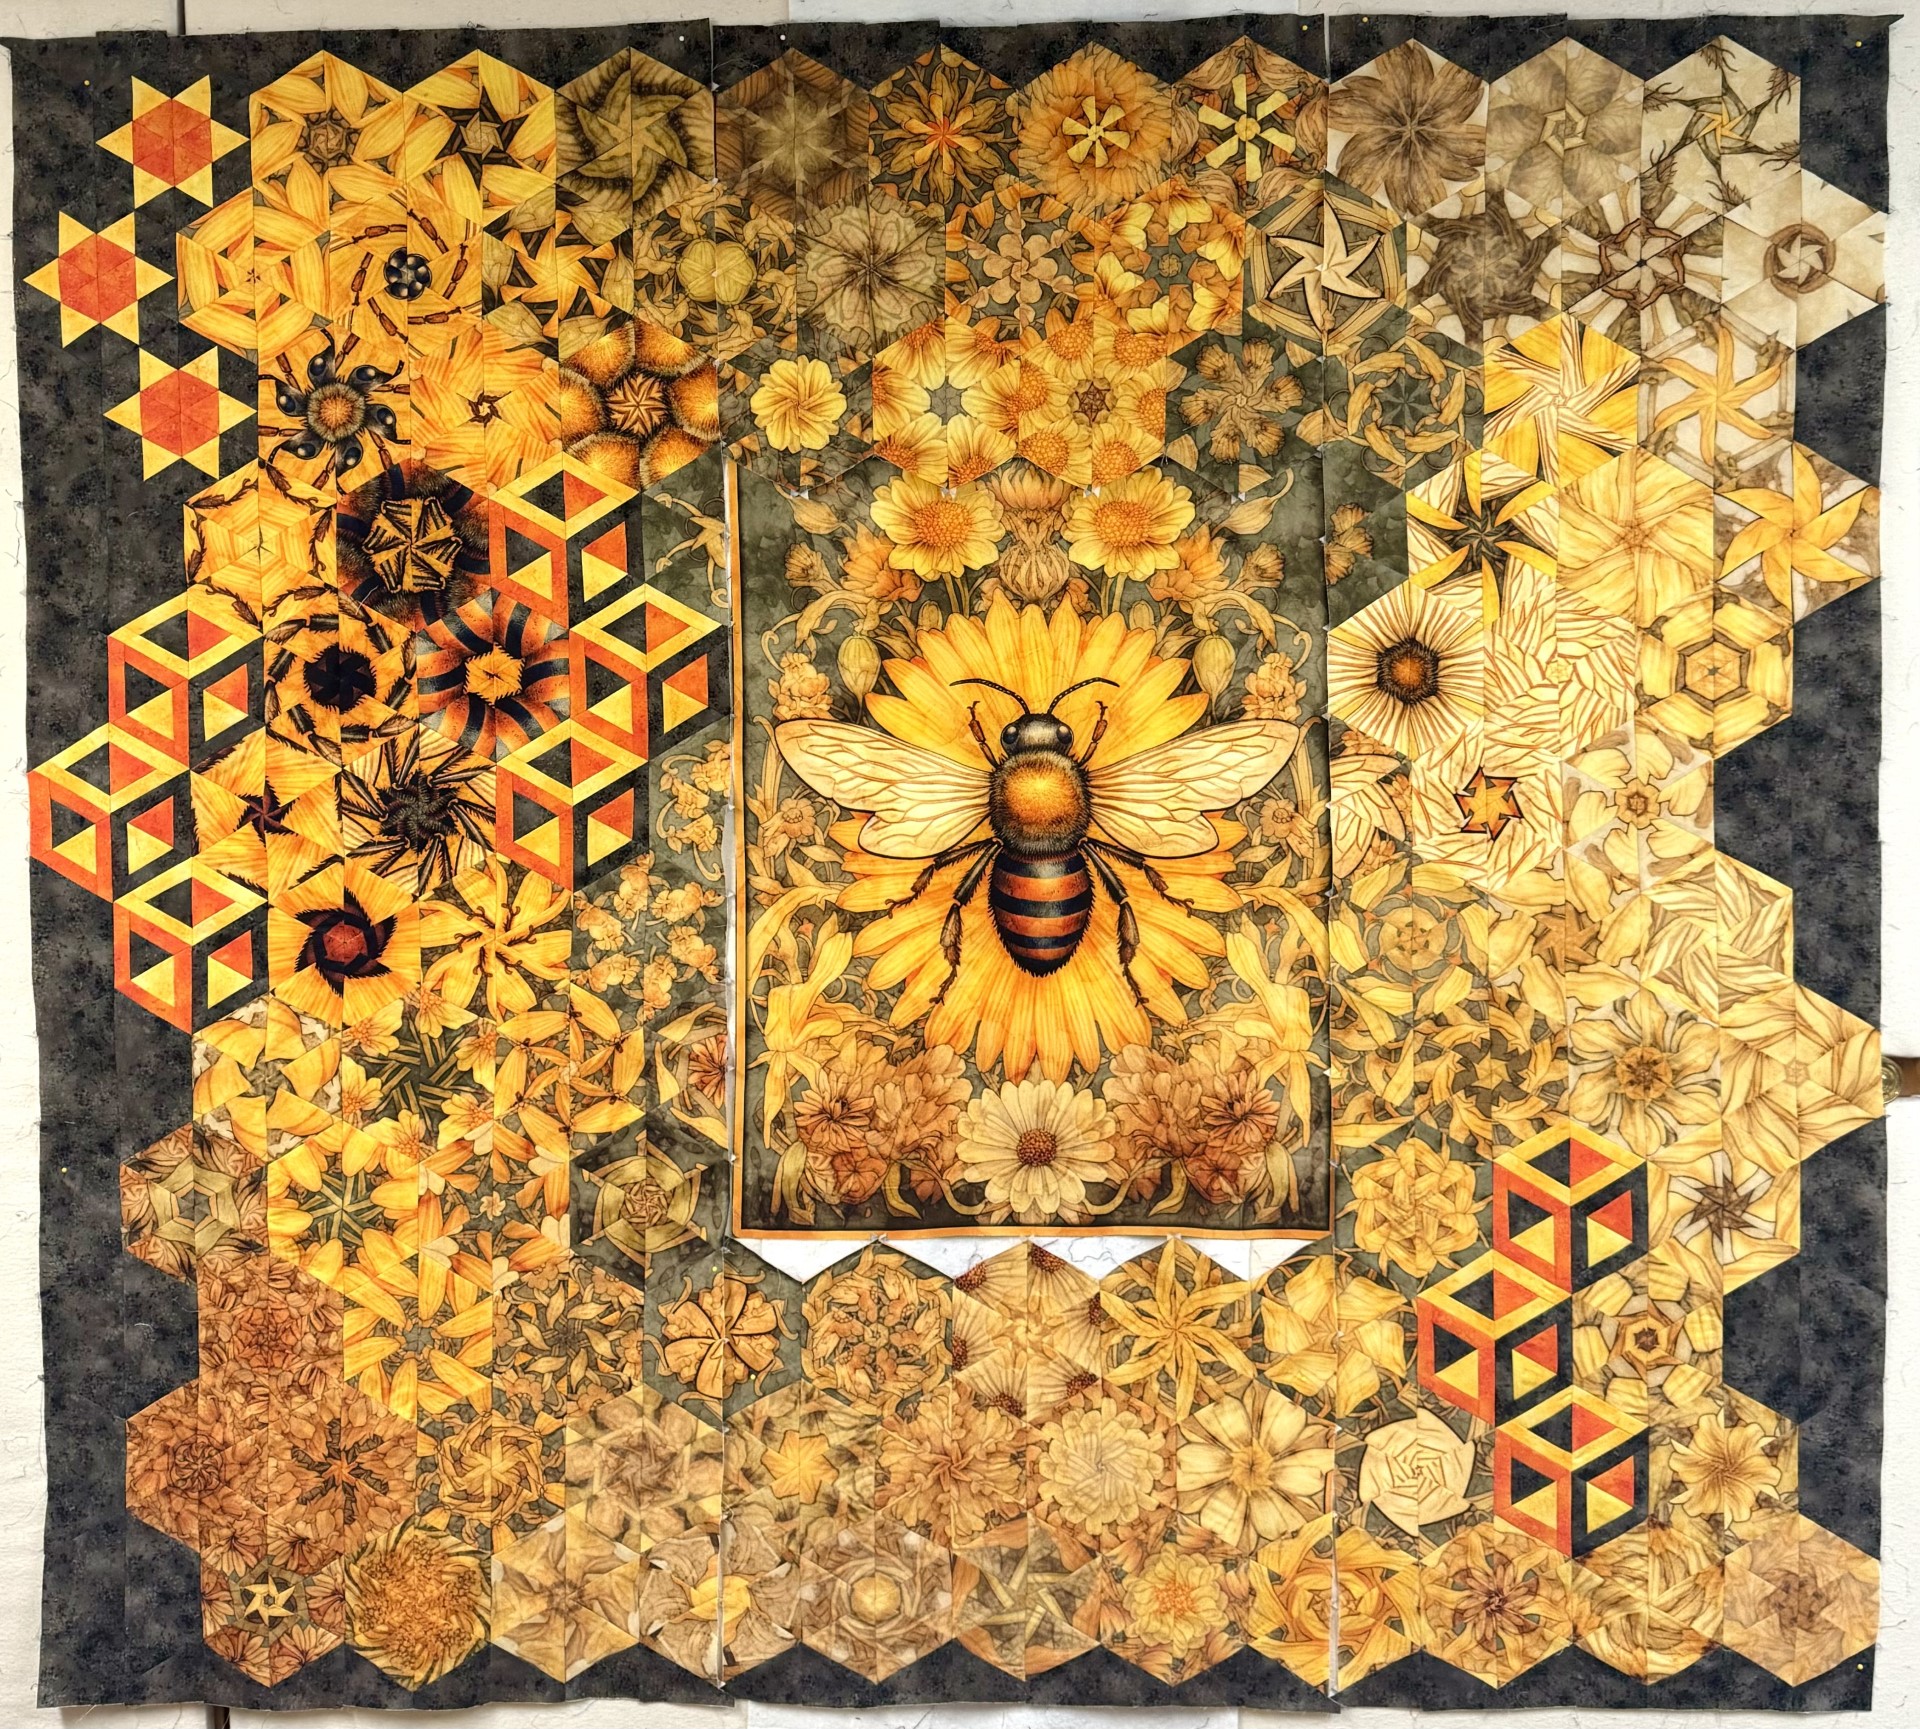
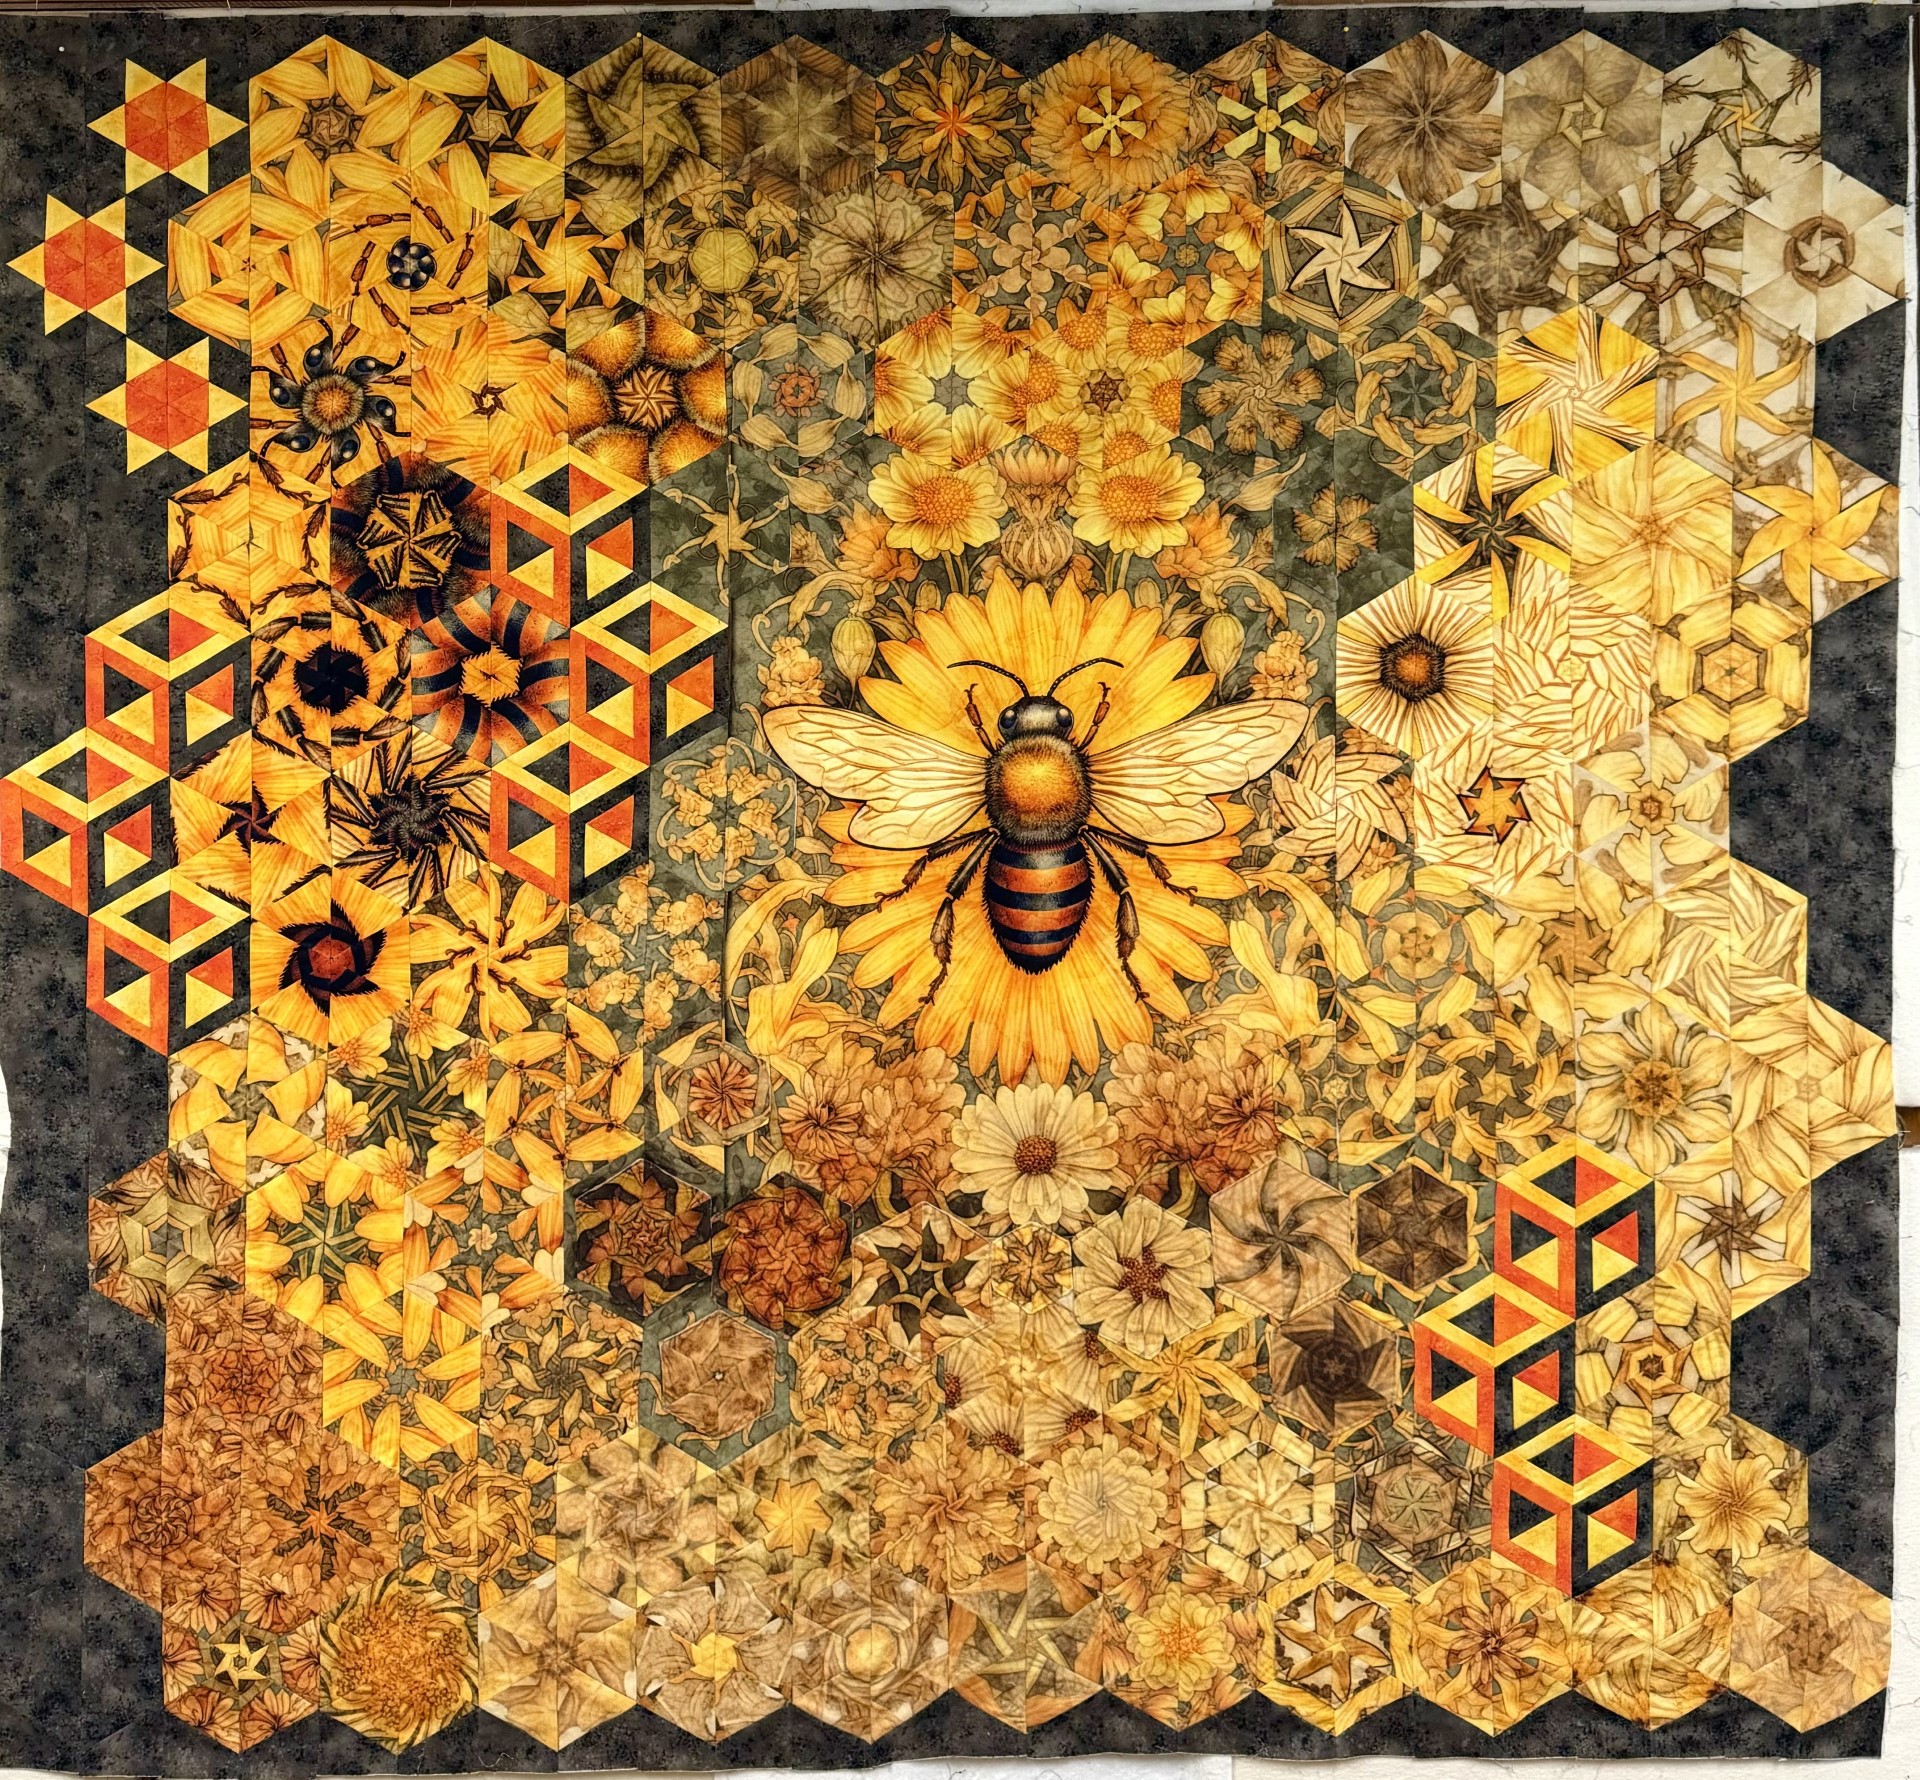
When I started cutting the hexies from Queen Bee strips, I knew it was going to be a beautiful OBW! The Queen Bee panel is by by QT Fabrics. It measures 36″ x 44″. The Queen Bee line will be in stores June 2024.
I cut my strips for the hexies 3.25″ for 5″ finished hexies. I cut off the borders. The inner border containing flowers measured 3.25″ so I was able to use them for more hexies. I had a total of 106 hexies to design with.
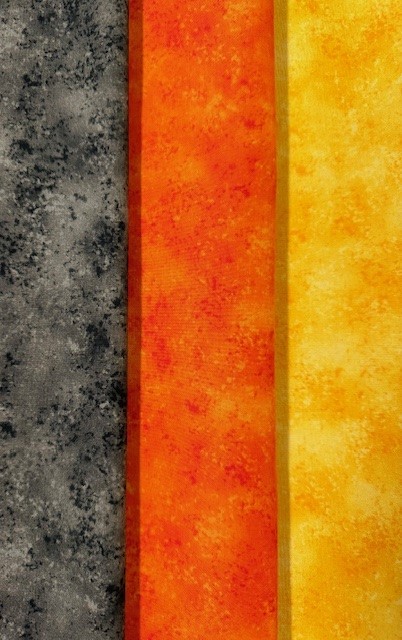
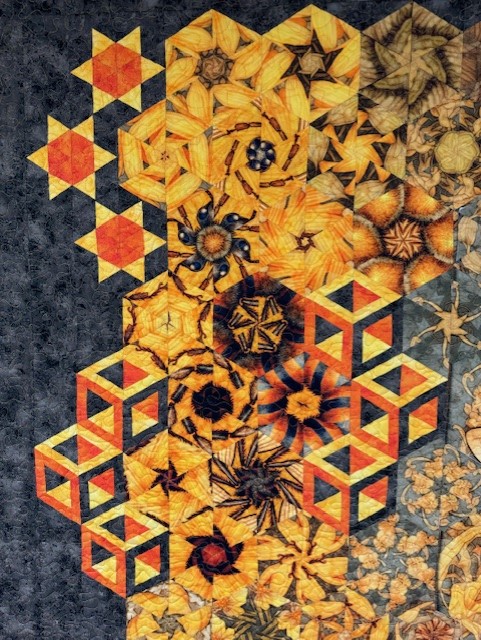
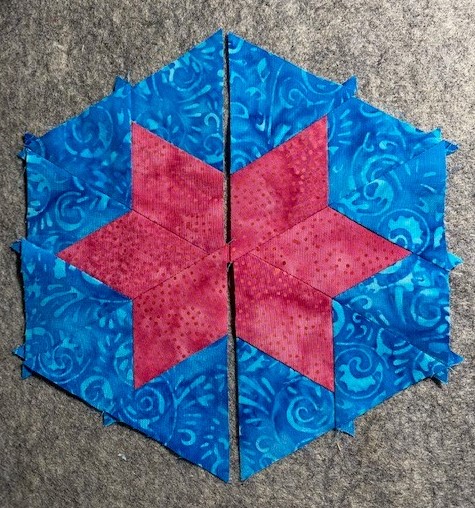
I used QT Fabrics blender line Rapture to create Hollow Cube 60‘s, using the Studio 180 Design Star 60 tool. I chose Charcoal, Orange and Marigold to make the cubes and half hexies surrounding the quilt. The Rapture fabrics were perfect.
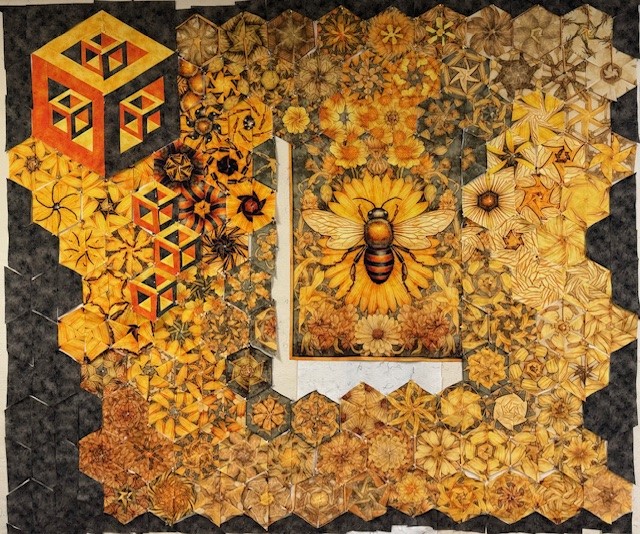
I started out by making a 15″ Hollow Cube 60 containing 5″ Hollow Cube 60’s, but I felt that it over powered the bee.
I decided to make 5″ finished Hollow Cube 60’s and Quad 60 stars.
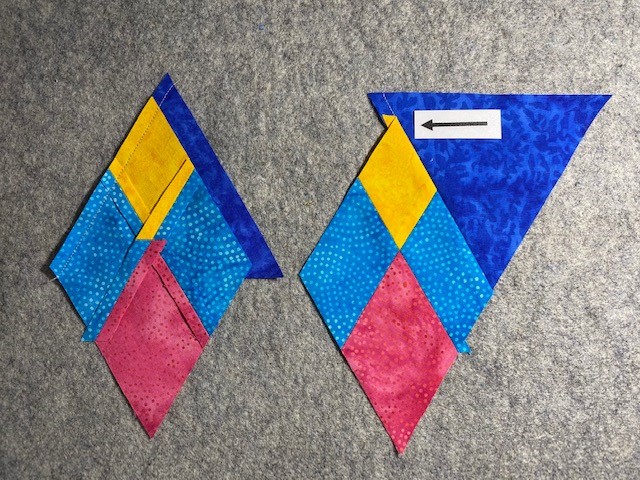
After I completed my four sections and laid them out around the panel, I realized I needed to add a strip to the bottom of the panel to be able to join the bottom section to the panel. That meant I would have to hide the strip by appliqueing hexies. The photo on the right above shows that you can no longer see where I added the strip of fabric.
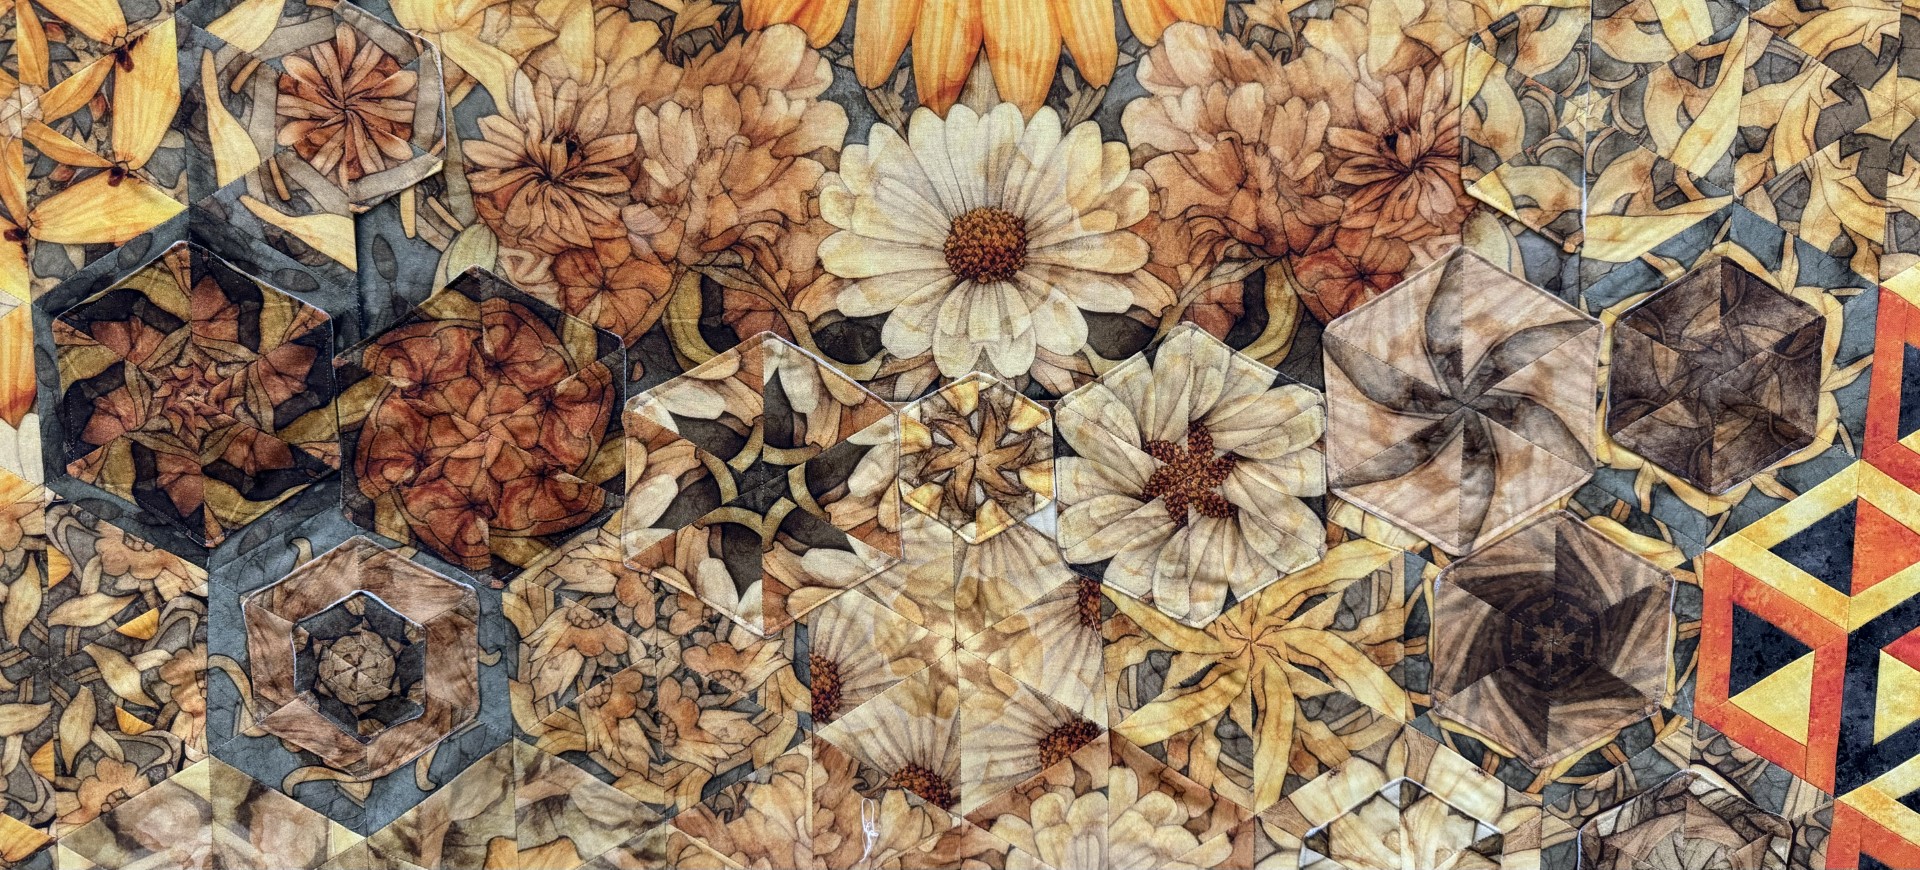
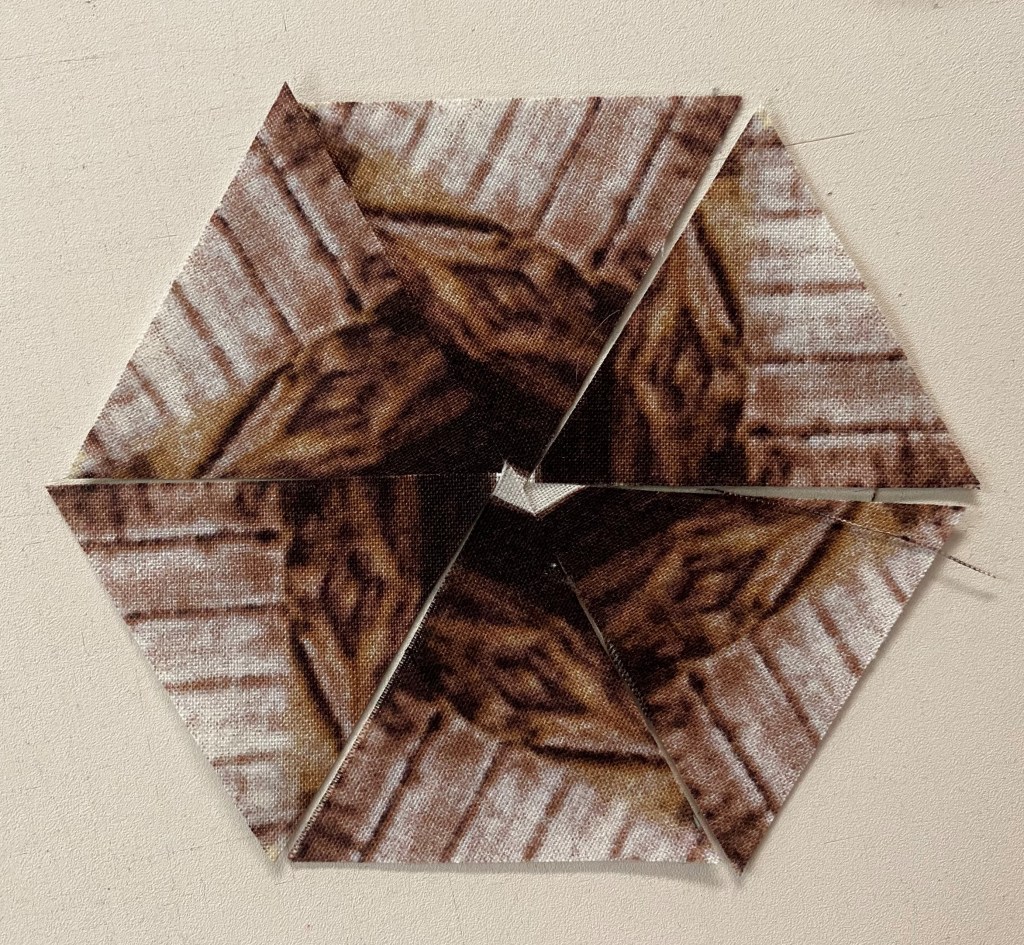
Above shows a closeup of the hidden strip. I applique hexies of various sizes to tweak my design.
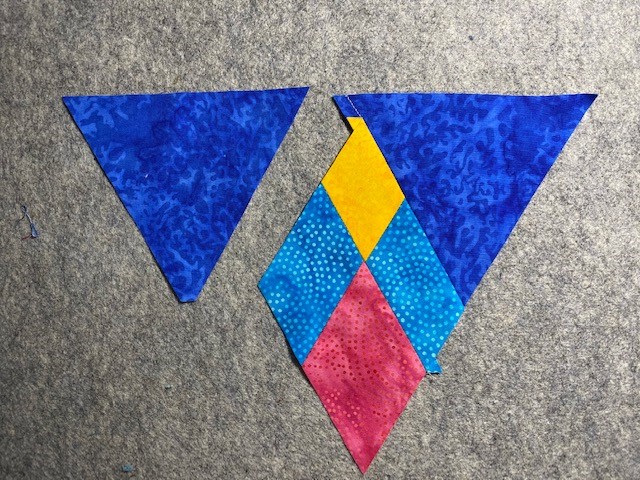
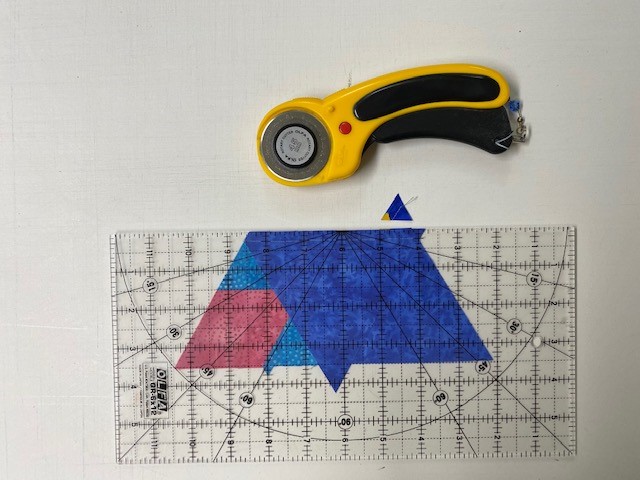
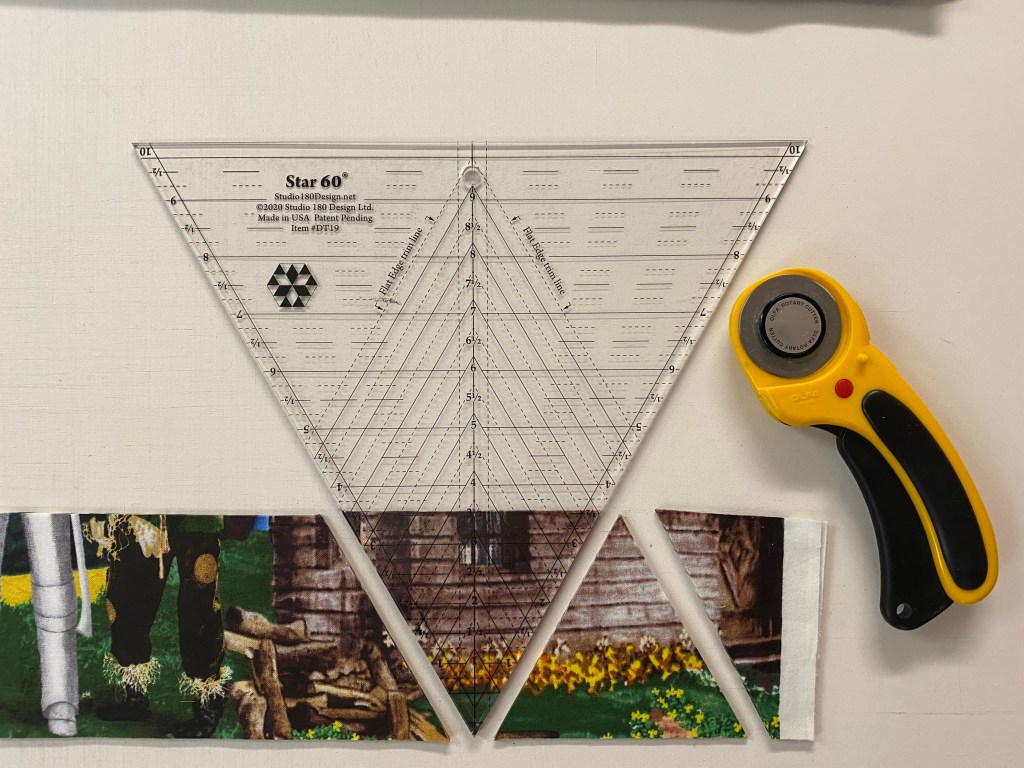
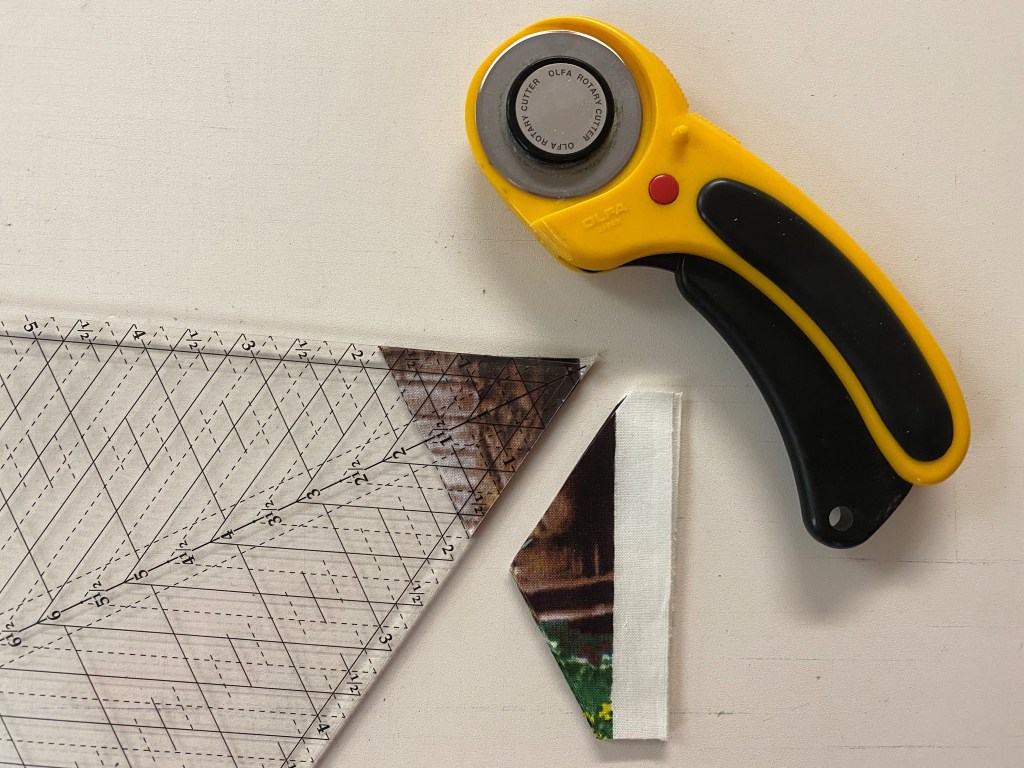
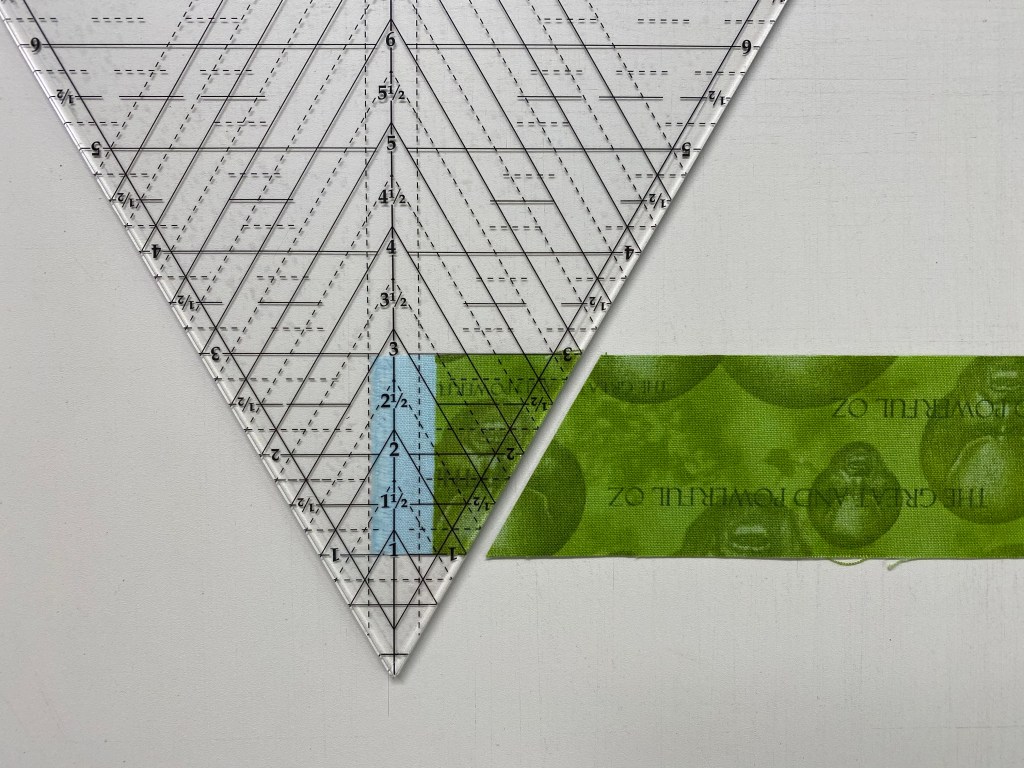
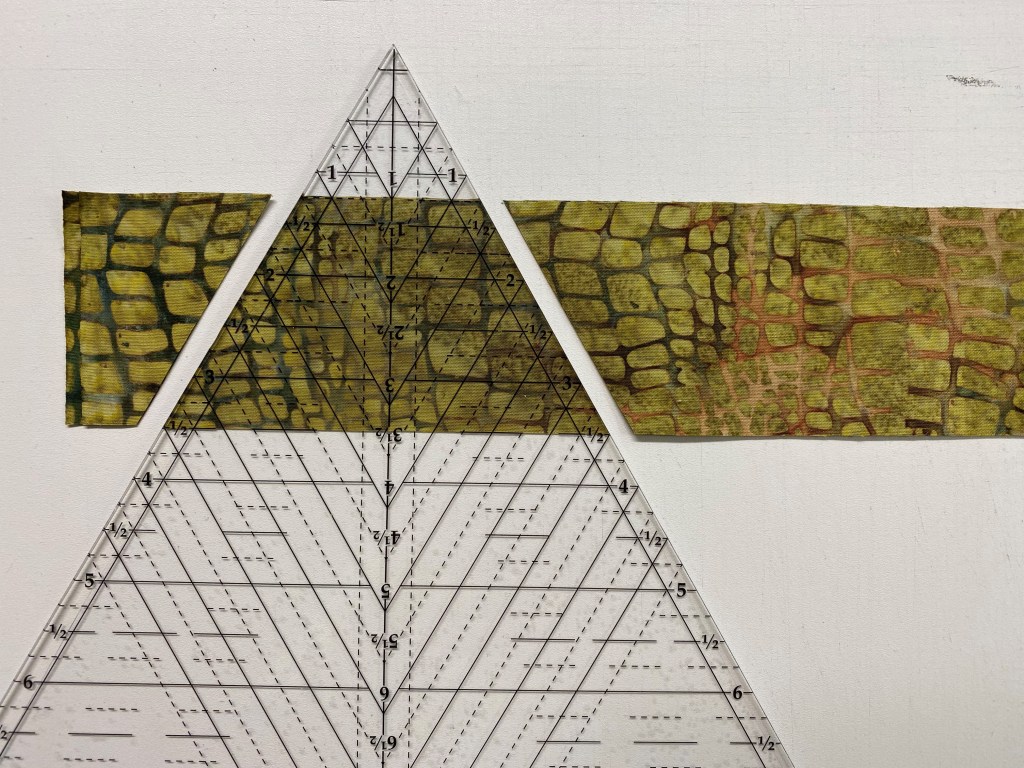
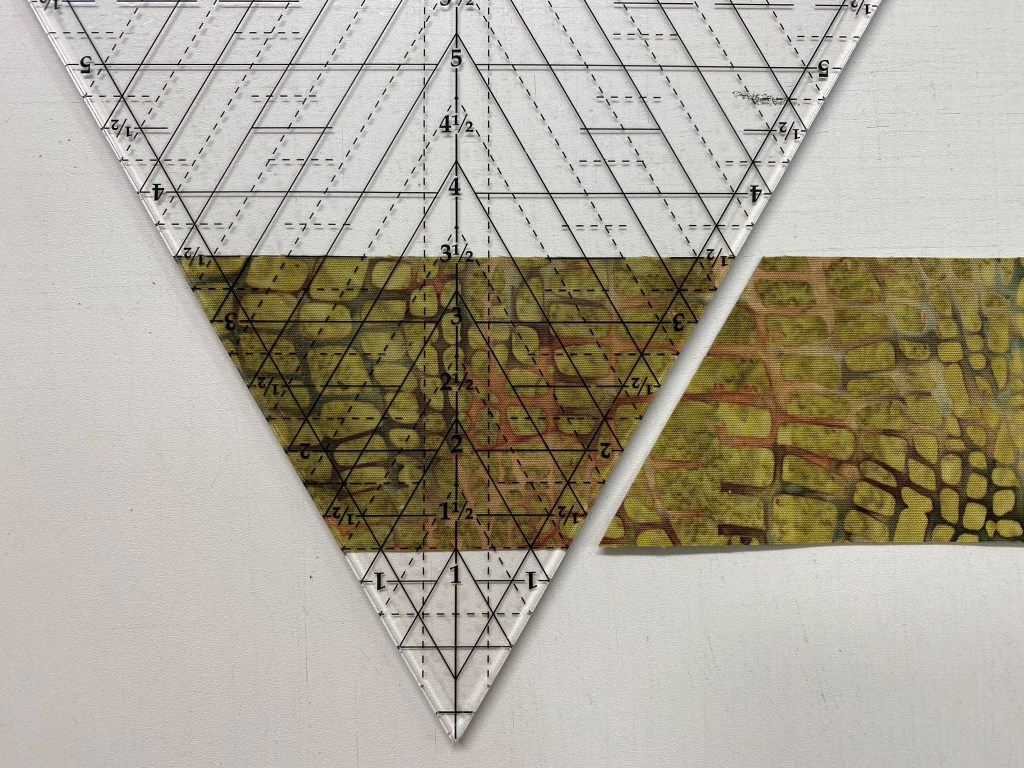
TIP: When you cut your hexies from the strips, you have a leftover piece on both ends. One side of the leftover already has a 60 degree angle. If you put the 60 degree line of your ruler on the straight edge of the leftover piece as shown above and cut , you will have a small hexie that can be appliqued on your OBW. Below I have created a lesson on how I create appliqued hexies.
I just completed my 95th One Block Wonder! I guess I need to shoot for making at least 100 OBW’s!
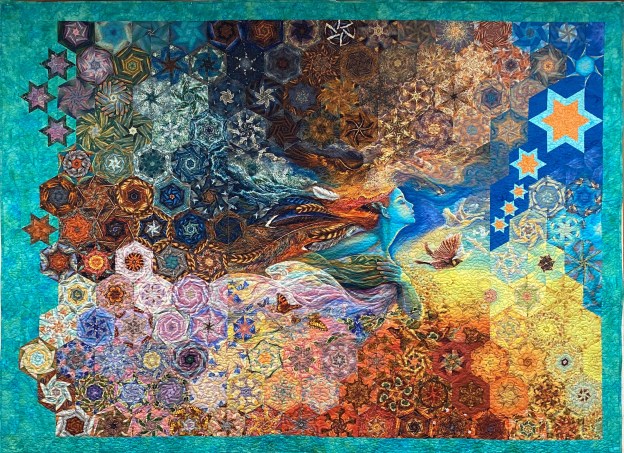
A World of Wonders
“A World of Wonders” is made from a panel by Josephine Wall and measures 72″ x 97″. I integrated Star 60 and Quad 60 Stars and Island Batik fabrics to enhance my quilt’s story.
Join me in January, I have scheduled OBW Class 1 twice. Go to the OBW Zoom Classes Tab for more information & to download the supply list. You must pay the class fee one week before the class so I will have your email address to send you the Zoom class link.
OBW Class 1: learn to identify, cut & align the repeats. How to choose the best strip width based on the fabric design. Learn to cut the strips & the equilateral triangles, plus working with panels.
My latest One Block Wonder “Ray of Hope” a panel by Josephine Wall measures 79″ x 62″. I incorporated 6″ finished Framed 60 stars made with the Star 60 Tool.
Ray of Hope
Reserve your spot in my next OBW Zoom Class January 8, 2022, 1:00 PM (Eastern Standard Time). For class details click on the OBW Zoom Classes tab.
I love Josephine Wall’s art, her fabric panels are glorious. They make spectacular One Block Wonders.
Celestial Journey panel measures 35″ x 43″
These panels must have been either the beginning of the run or the last. The outer edges were off be about 1/2″. I focused on aligning the panels around the unicorn. The outer edges were mostly space so it was not crucial they be perfectly aligned. I cut my strips 3.75″ by WOF.
I have had this panel by Artisan Spirit Dreamscapes by Ira Kennedy for Northcott for several years. The Dreamscapes panel measures 13″ x 20″. It came two in a panel, so I ended up with 14.
I partially completed the first set of 7 panels to show how to add the sections to the panel. I save this OBW classes.
I finally decided to complete the 2nd set of panels. I cut the strips 2 3/4″ for 4″ finished hexies. In hind site I wish I would have made them smaller. To add more hexies and enhance the hexies I had, I added stars made with the Quad 60 Technique Sheet and my Star 60 Tool. My Dreamscapes wall hanging measures 35″ x 41″
One day, several months ago I received a text from my sister Marti in Arizona. She frantically wanted to know how panels were needed for a One Block Wonder (OBW). I quickly answered “7” panels were needed. I thought she must have a found a fabulous panel to work with. Then about a week later I a received a package from Marti.
Spirit of Flight by Josephine Wall
Marti had sent me 7 panels by Josephine Wall & 3 Wishes. I was obsessed and couldn’t wait to make this panel into a OBW. Marti said this would be me when I emerged from breast cancer treatment. She was right!
Spirit of Flight measures 97″ x 71″
As I was working on this OBW I realized that most of the hexagons would be toward the back. I made these great stars using Studio 180 Design Star 60 Tool and the Framed 60 Technique Sheet to enhance my design. Now she is shooting for the stars and leaving cancer behind!
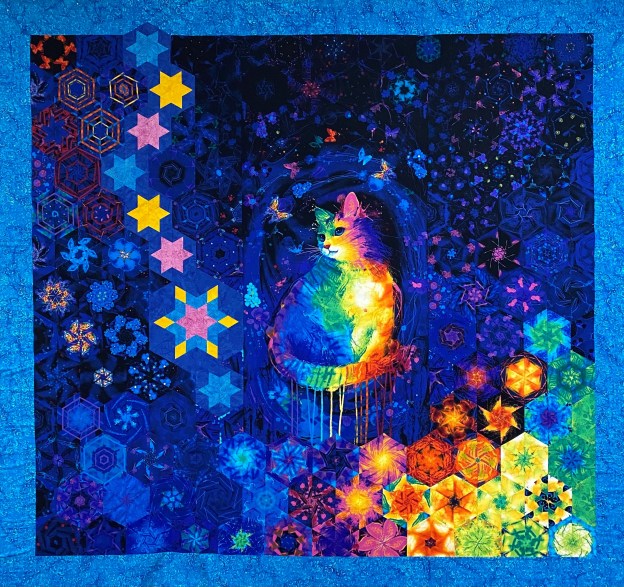
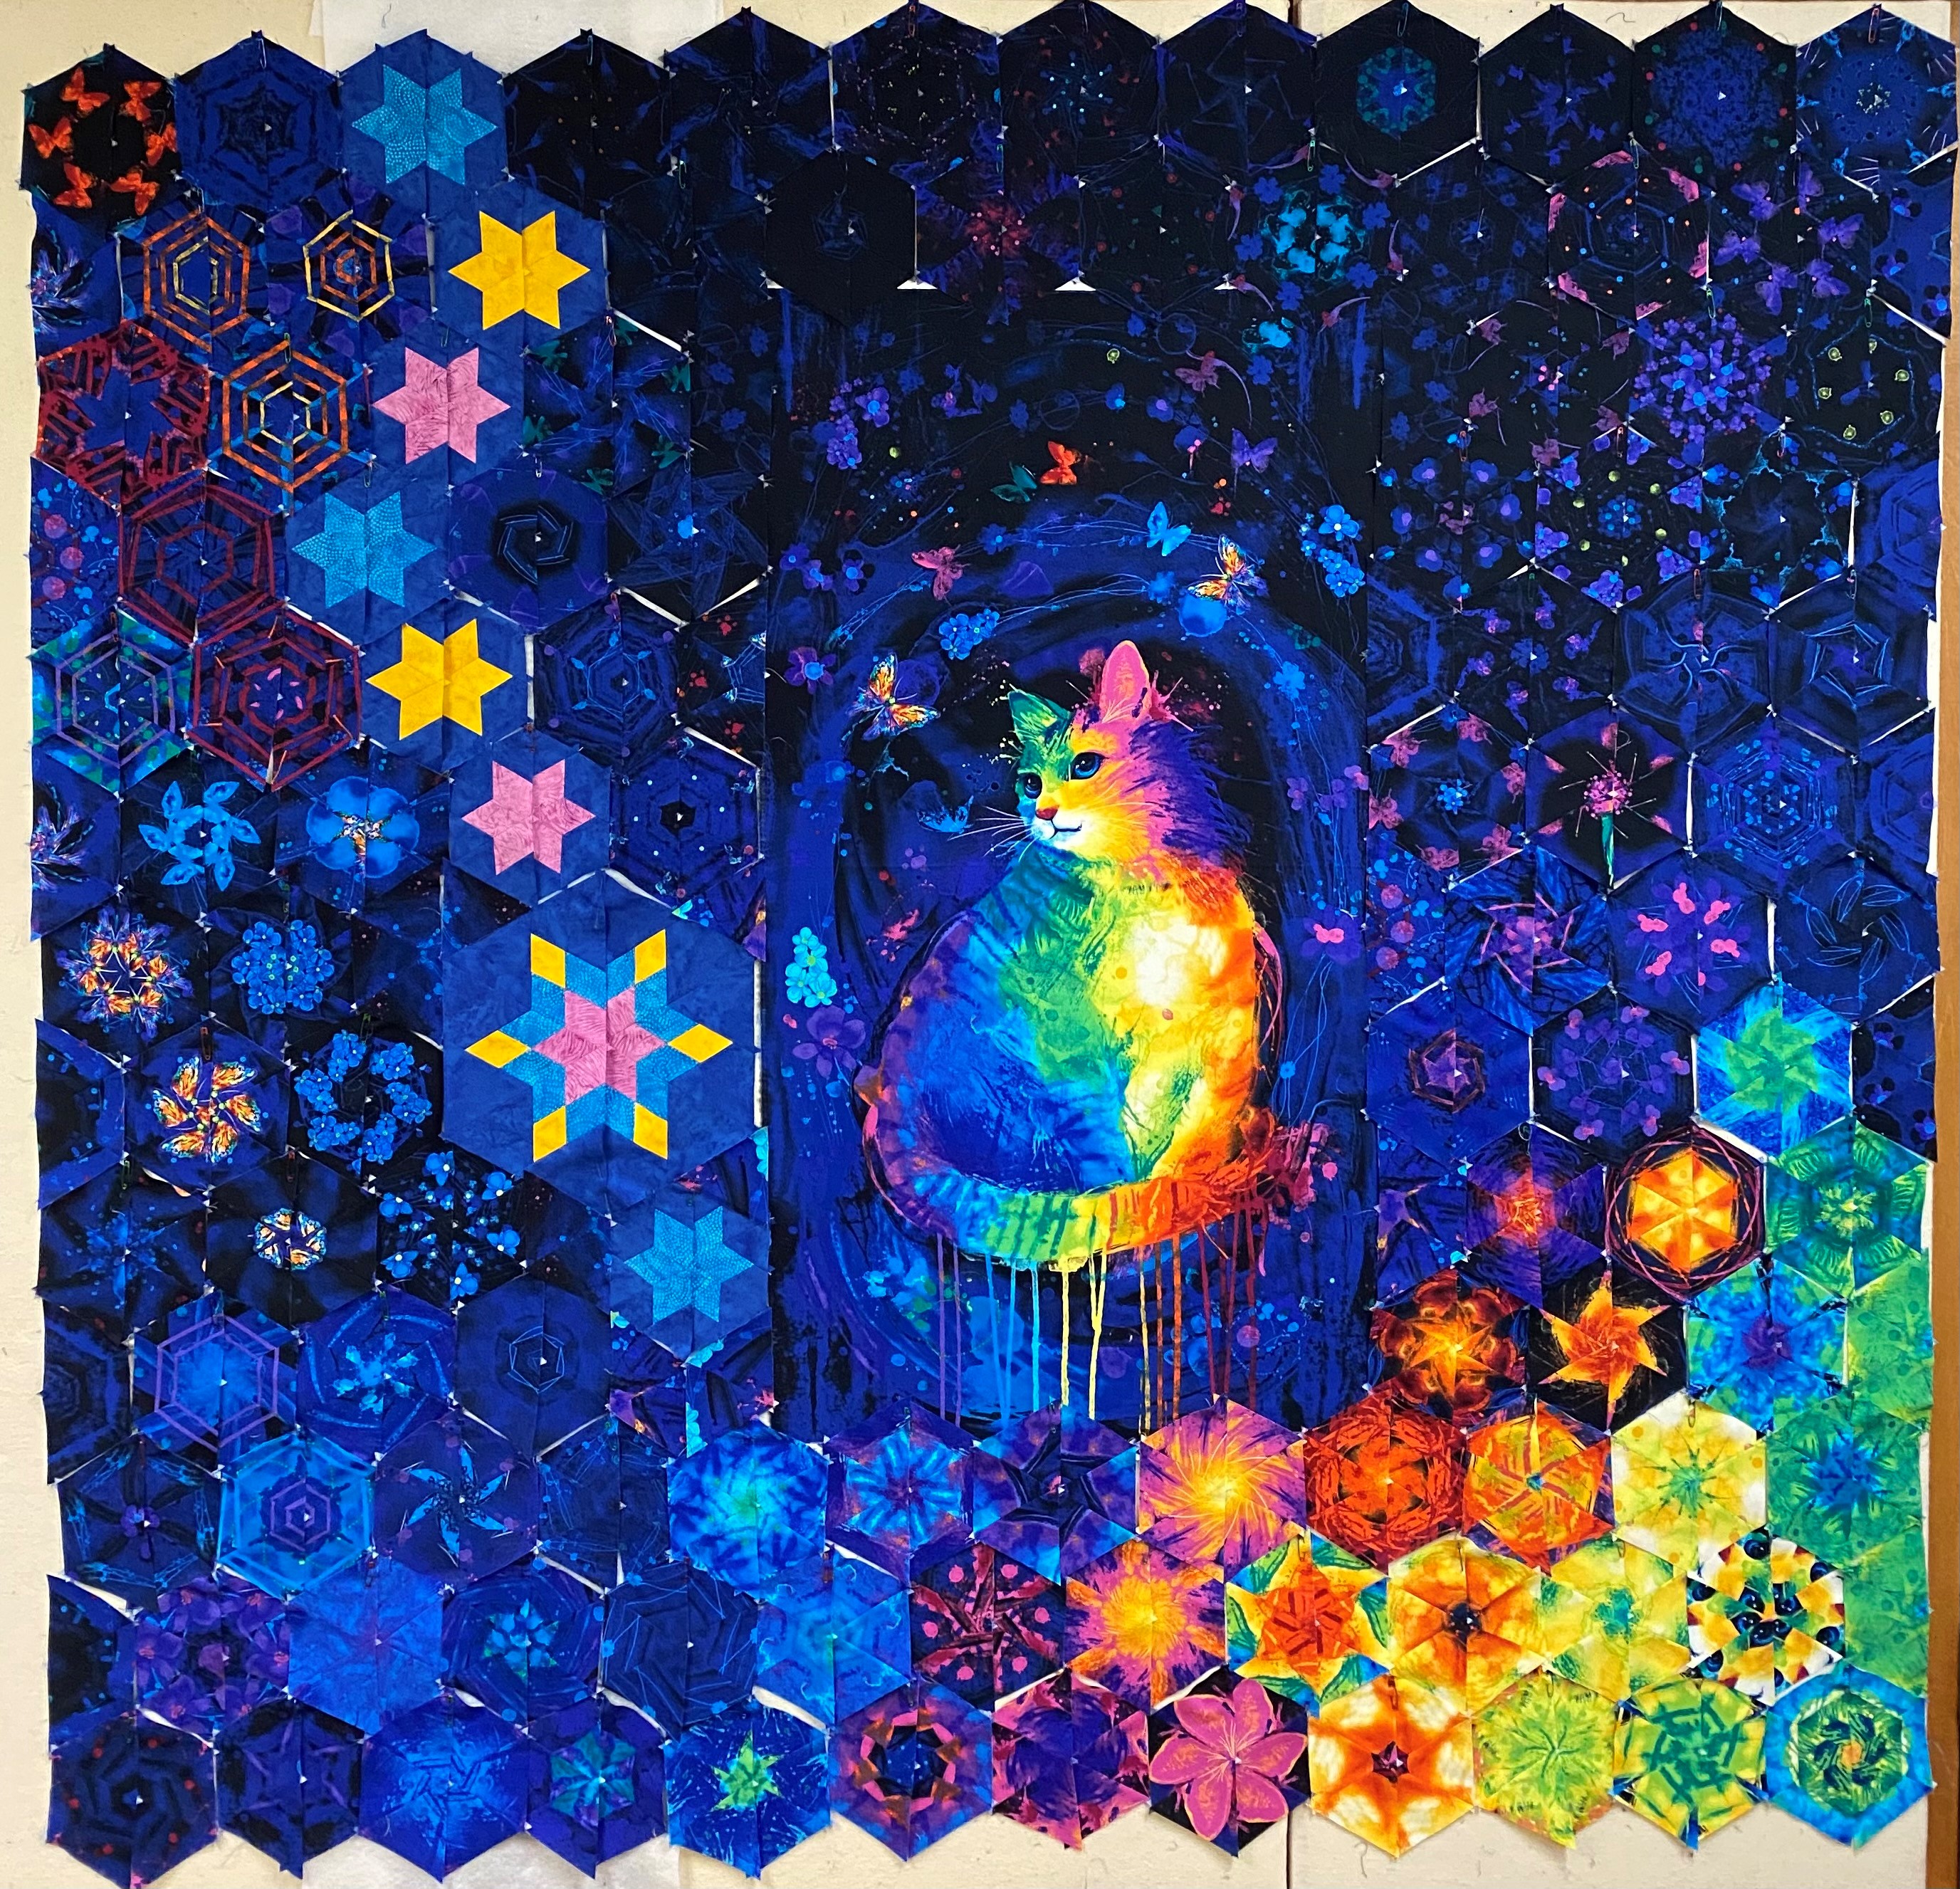
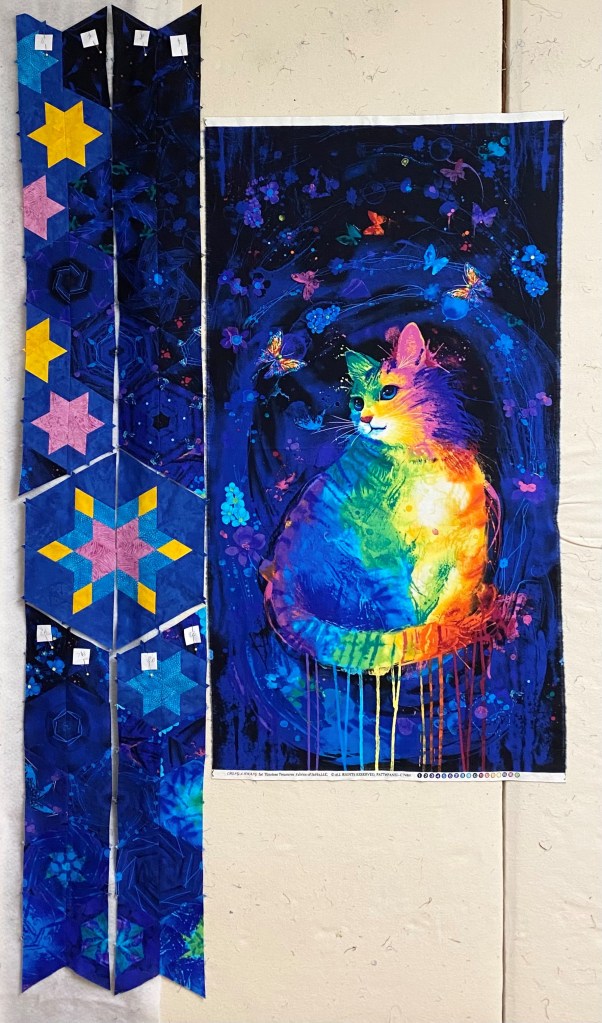
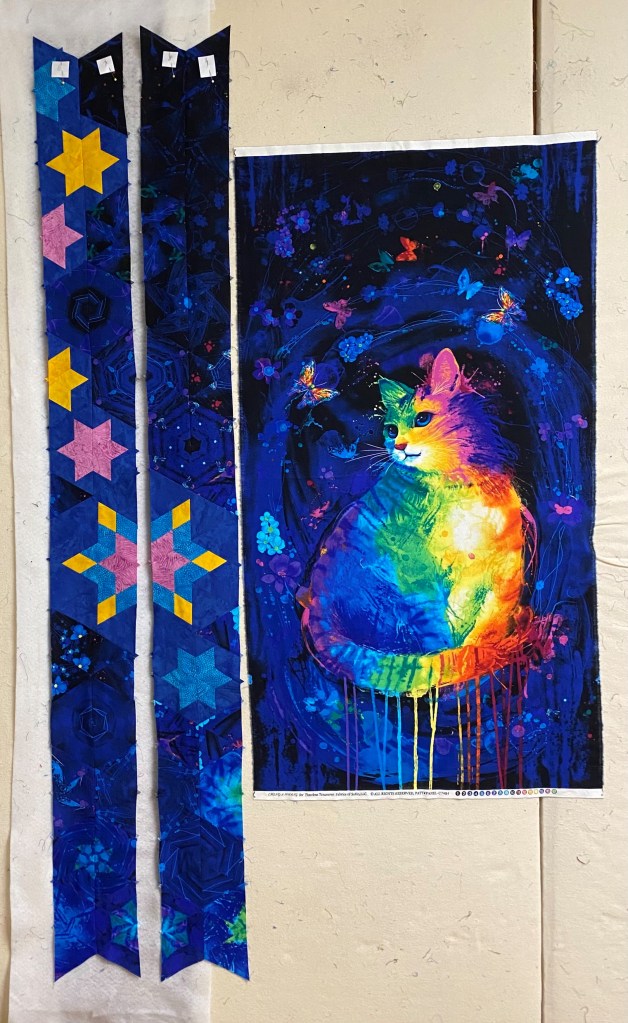
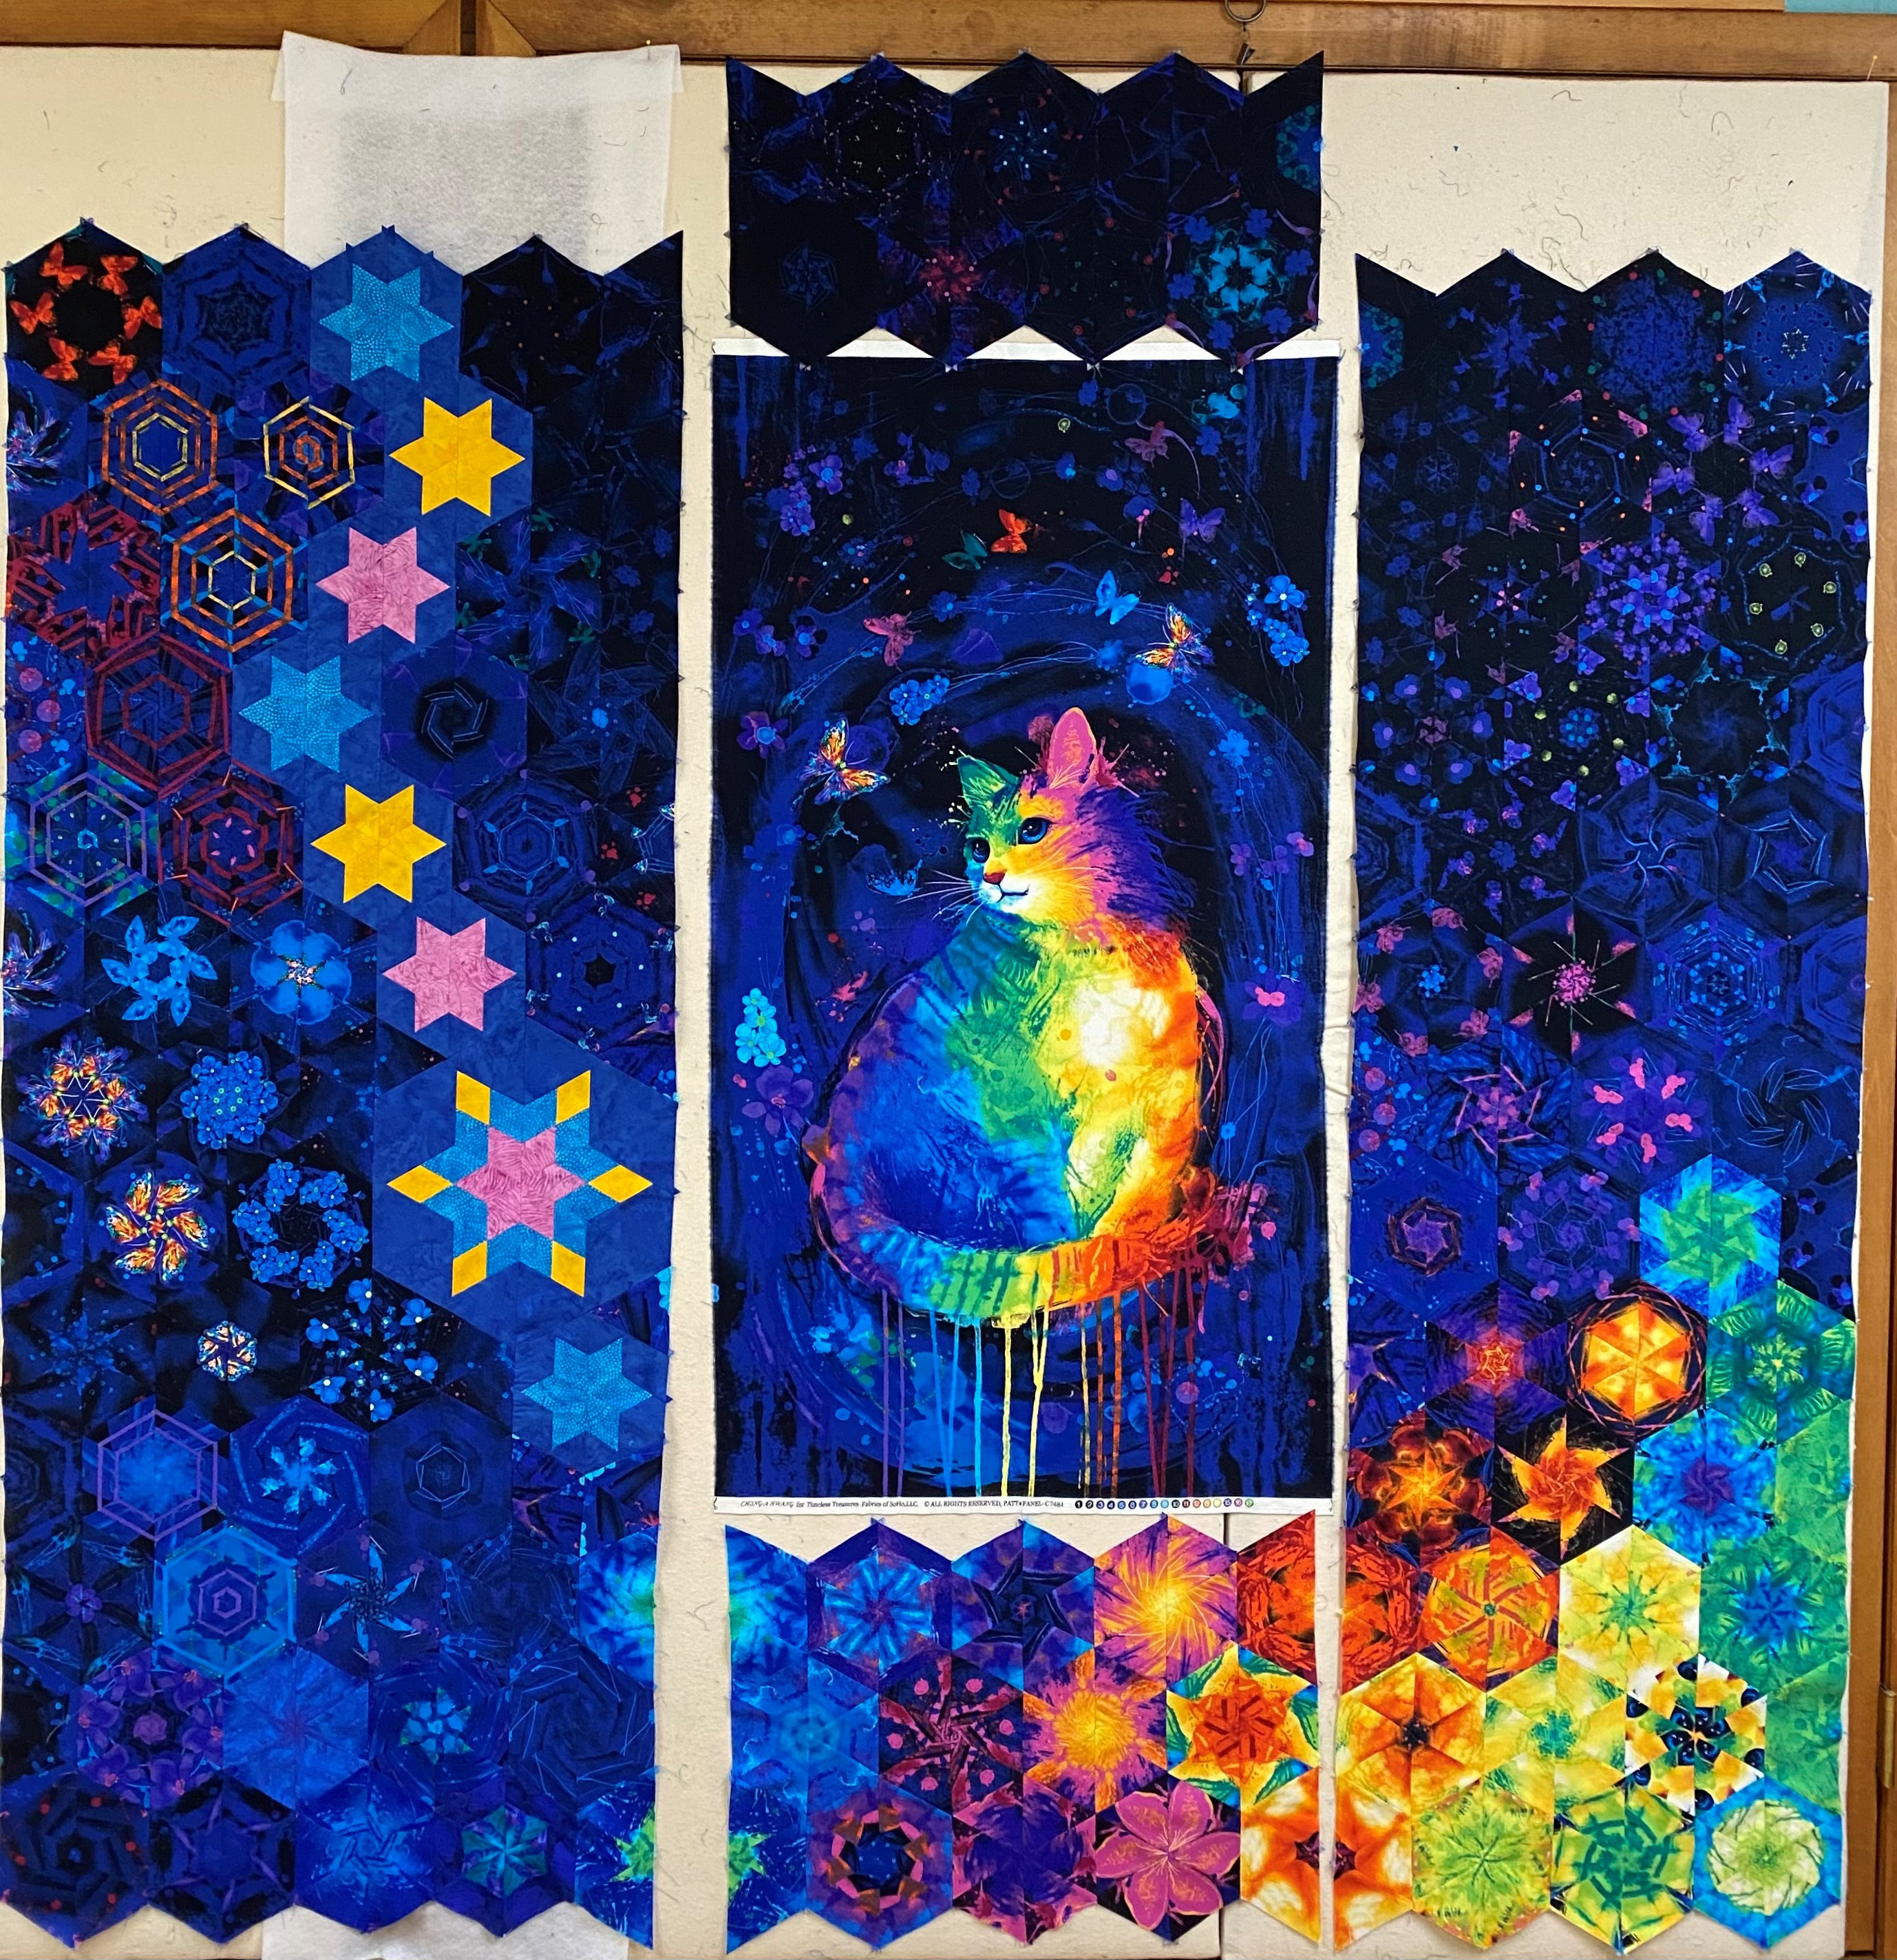
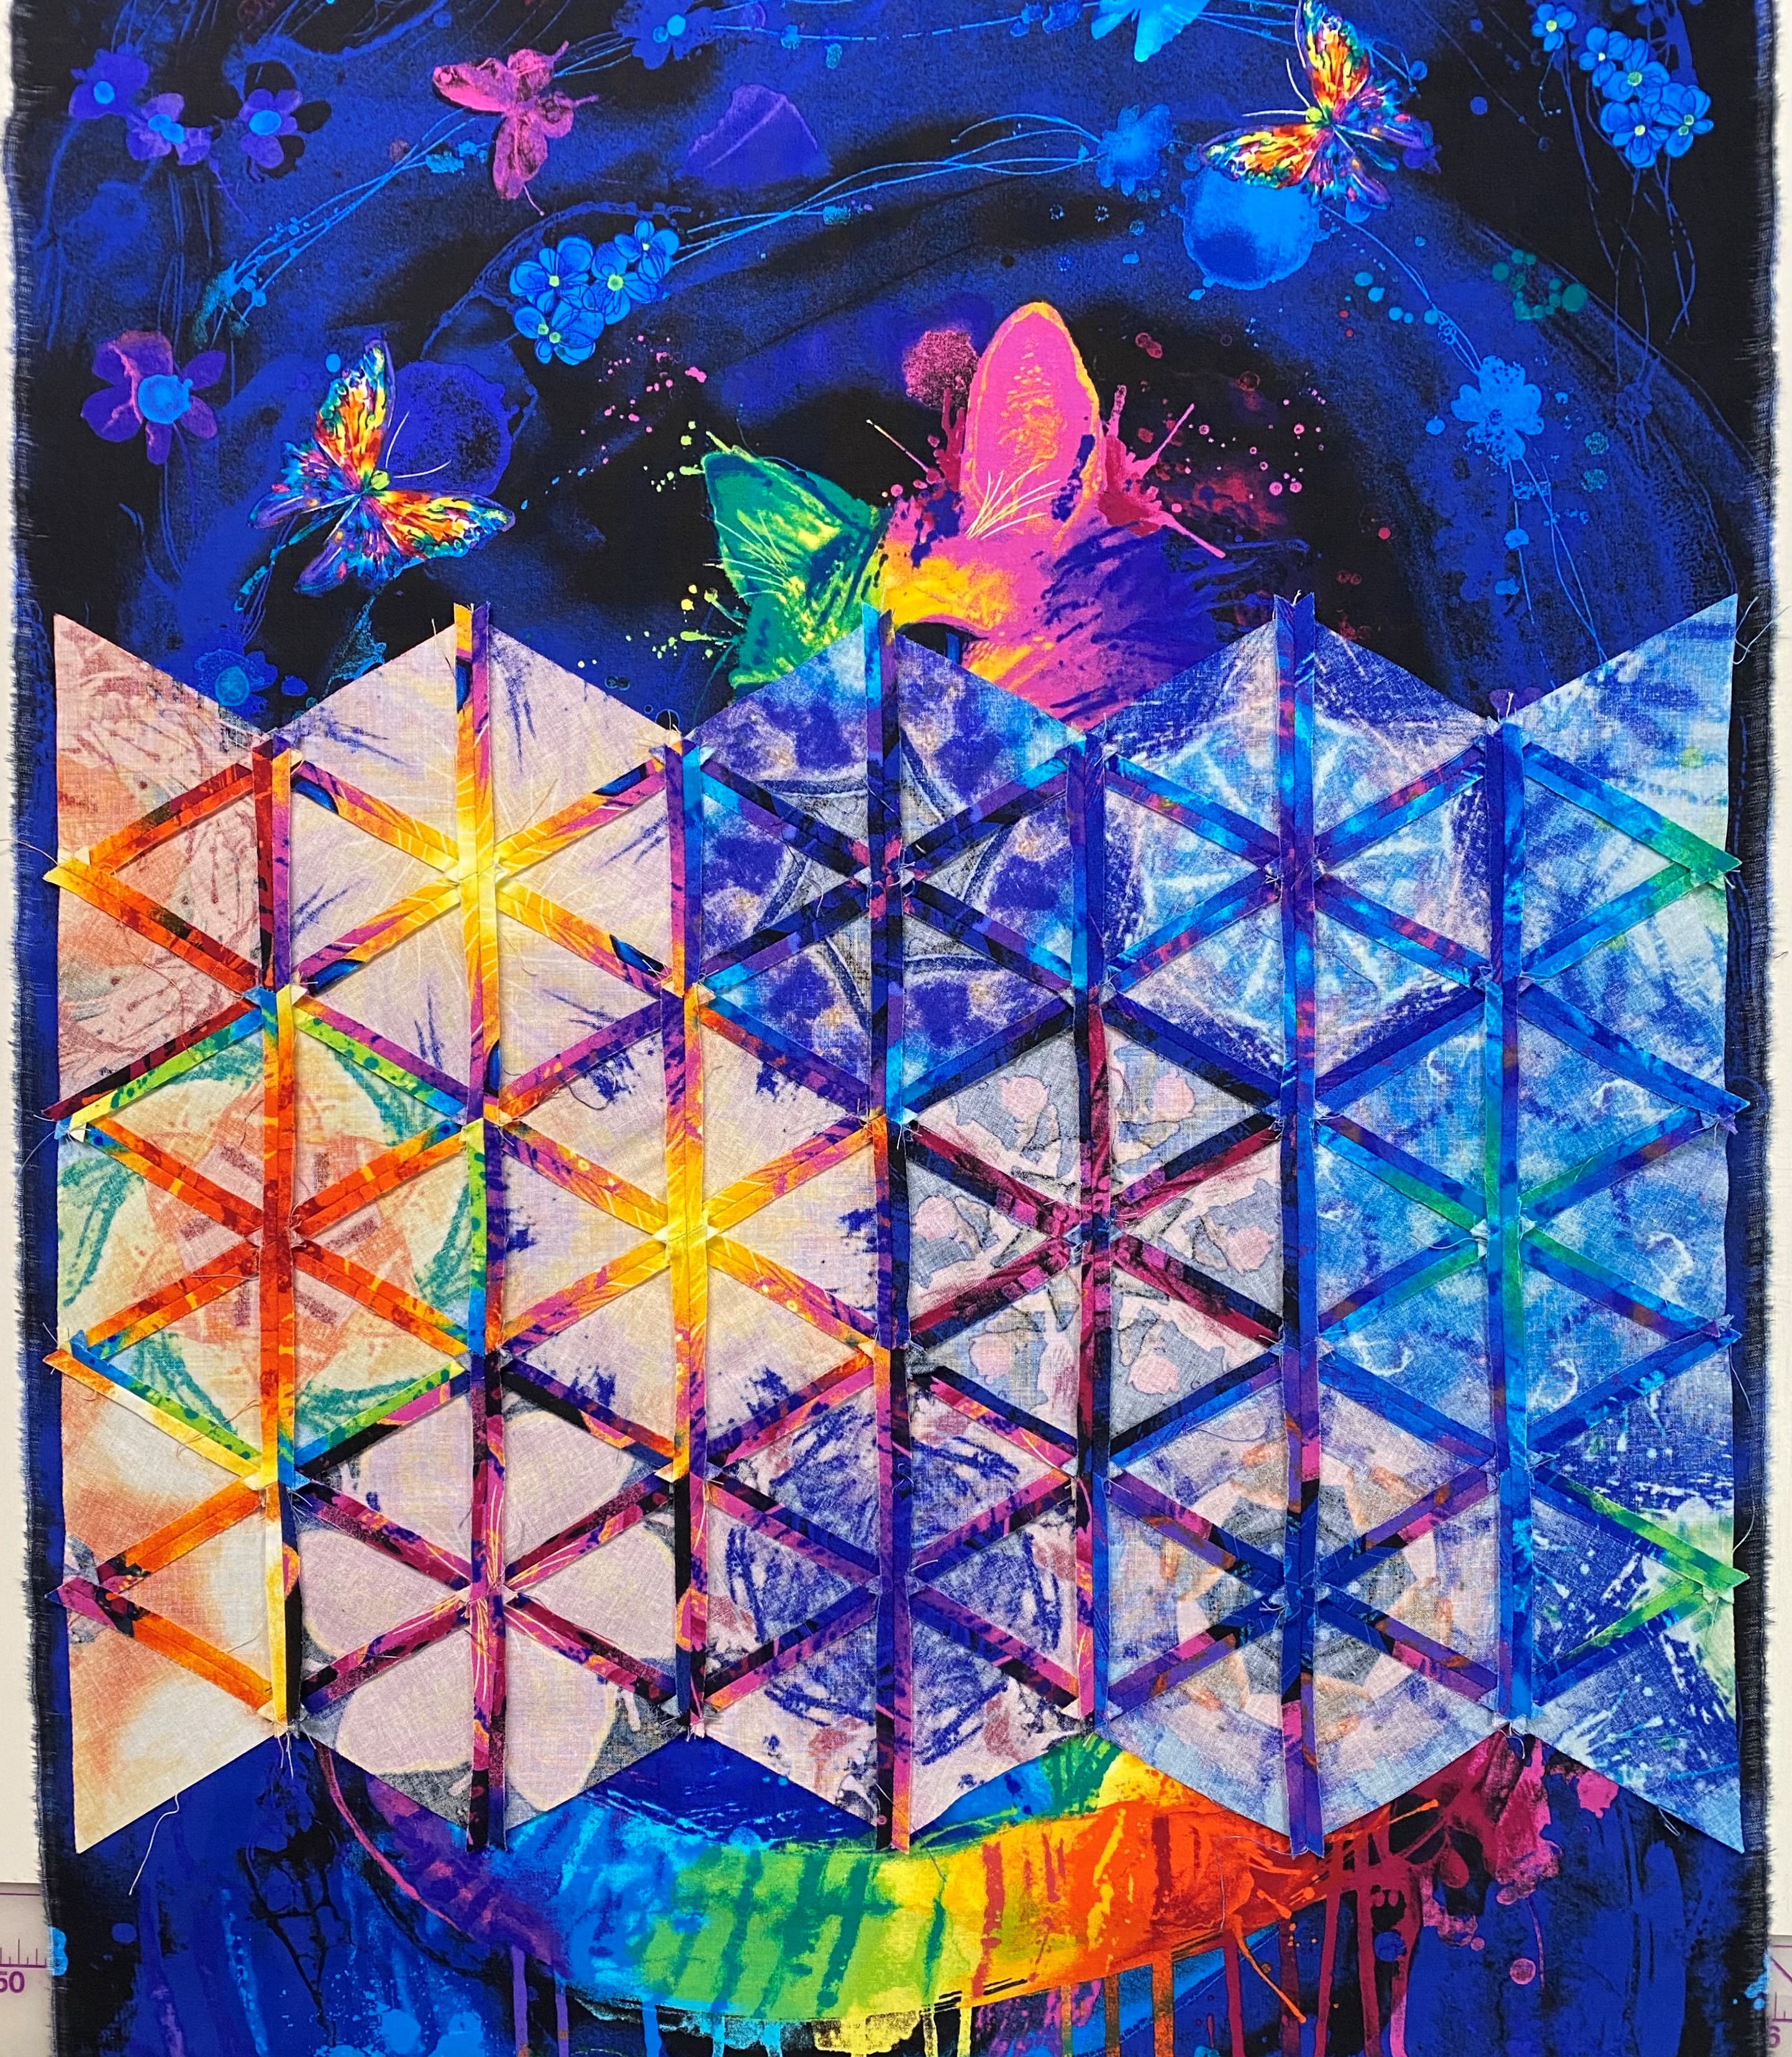
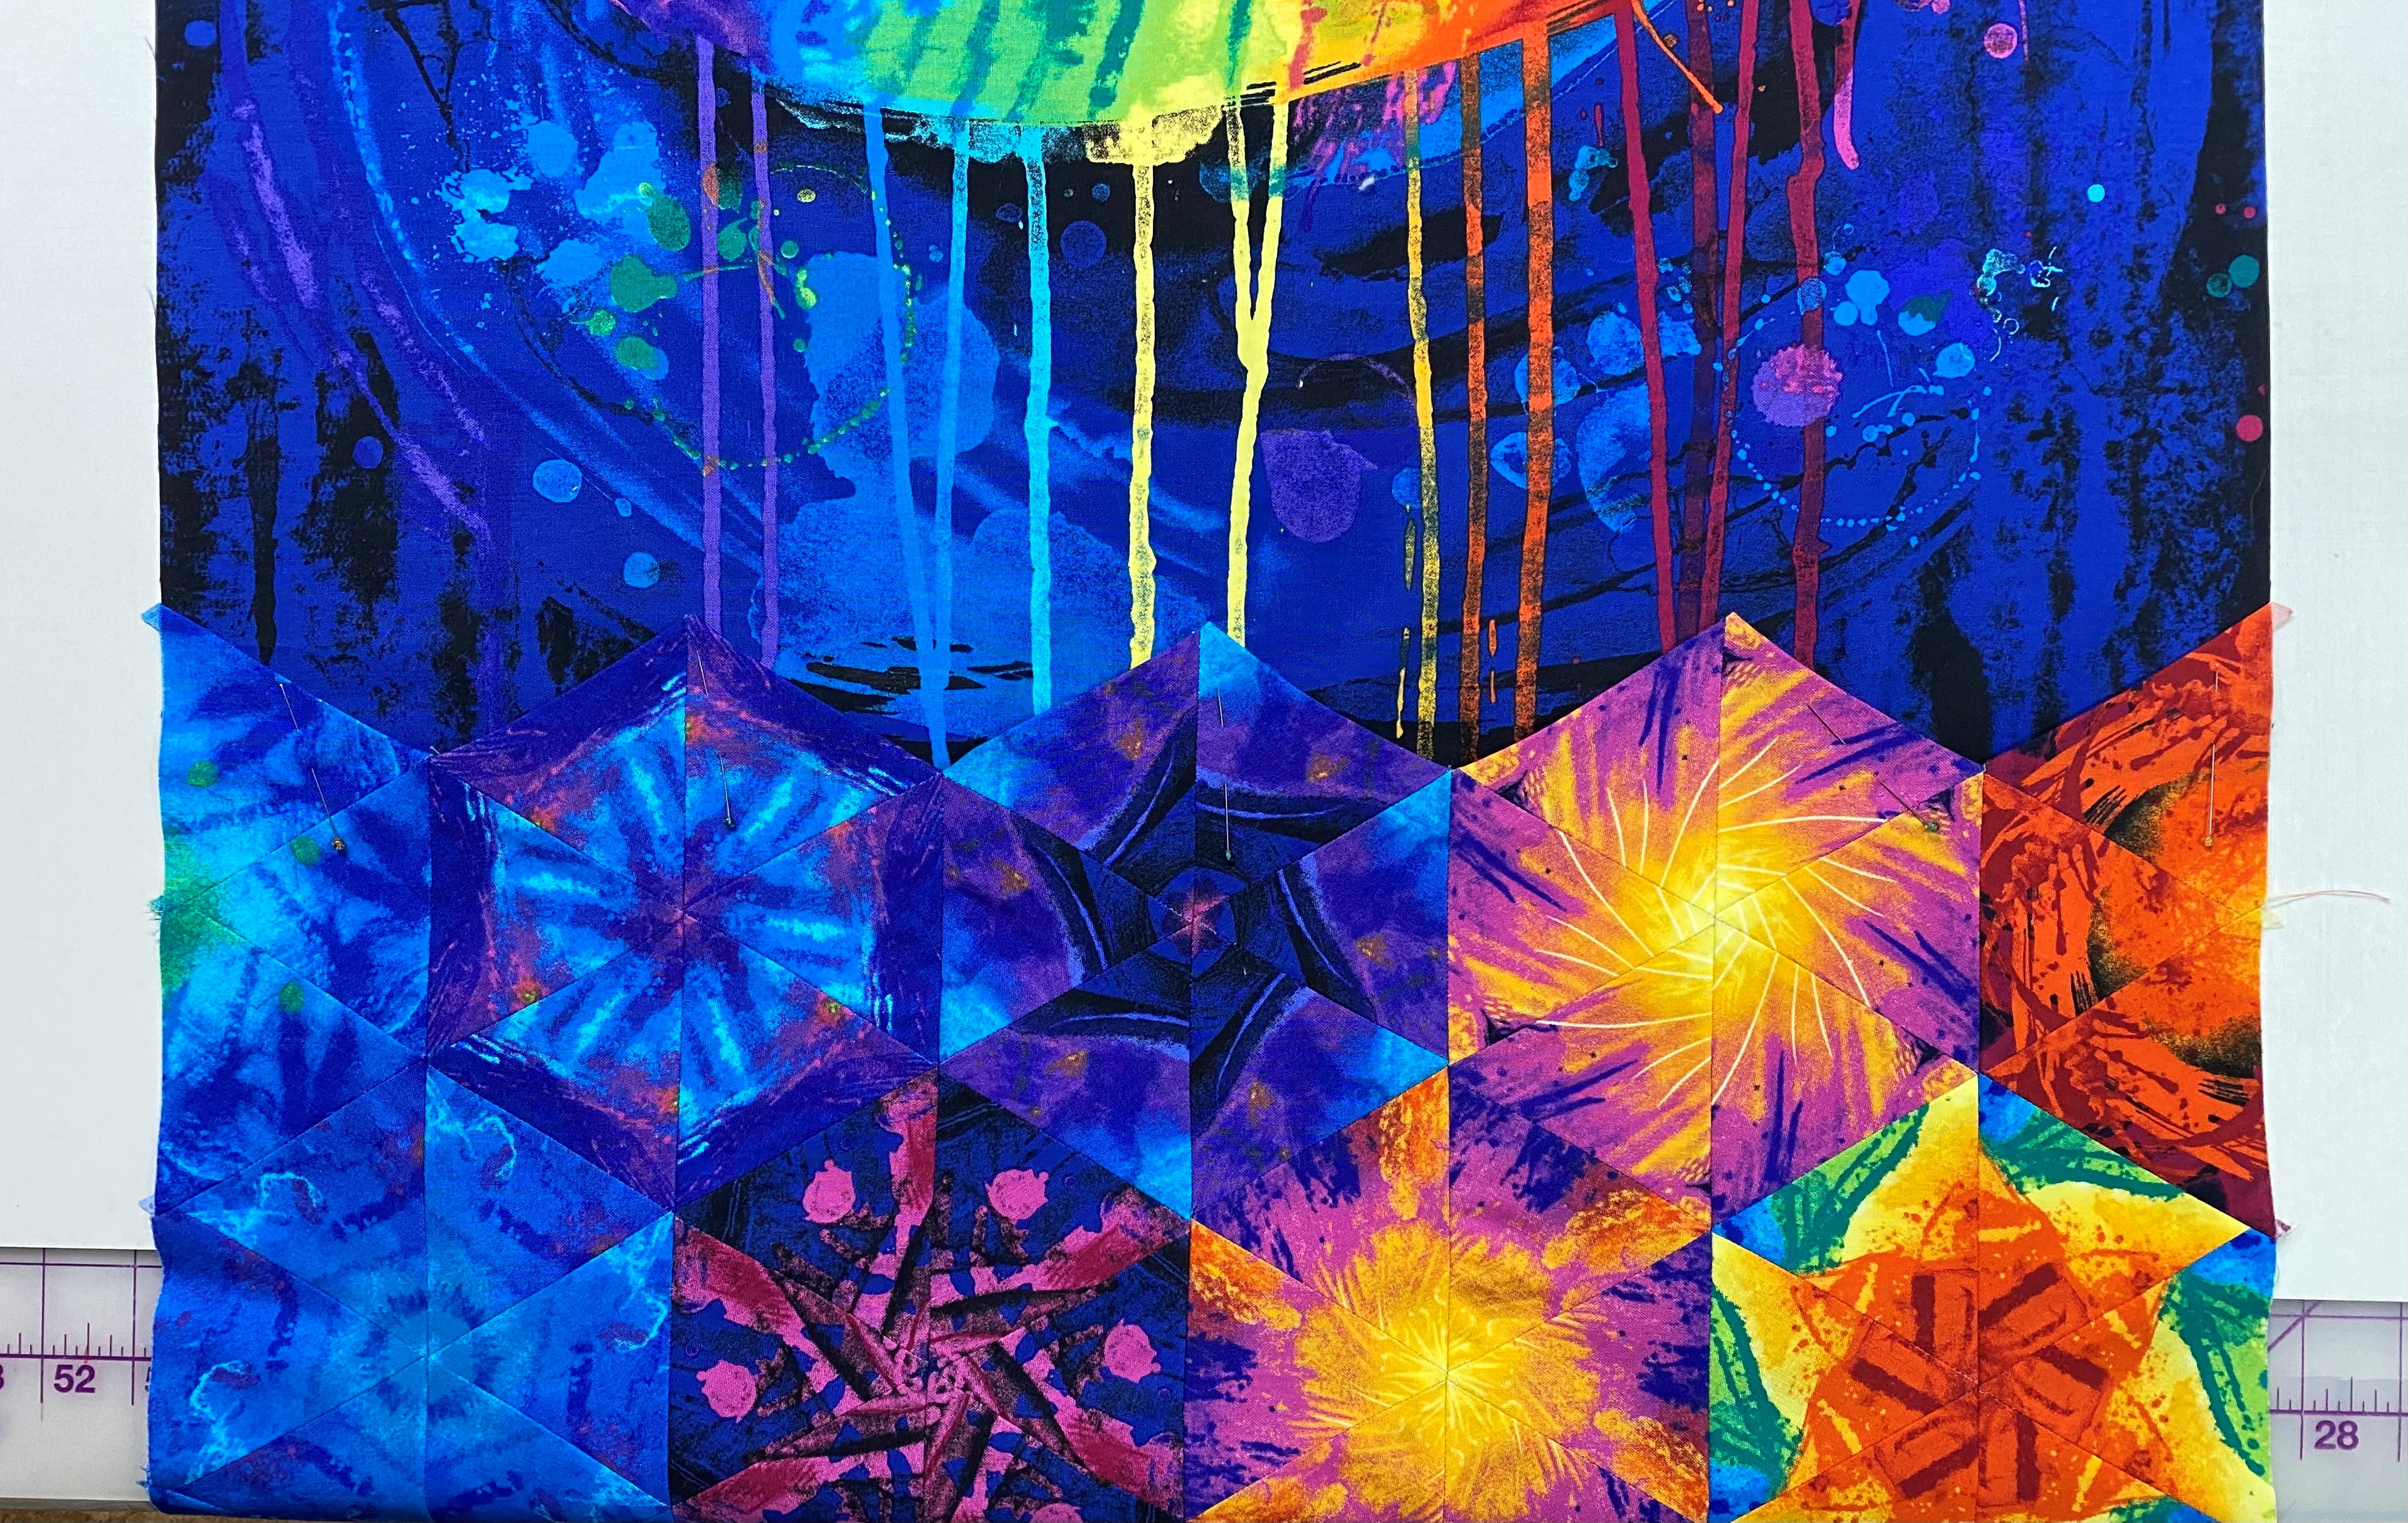
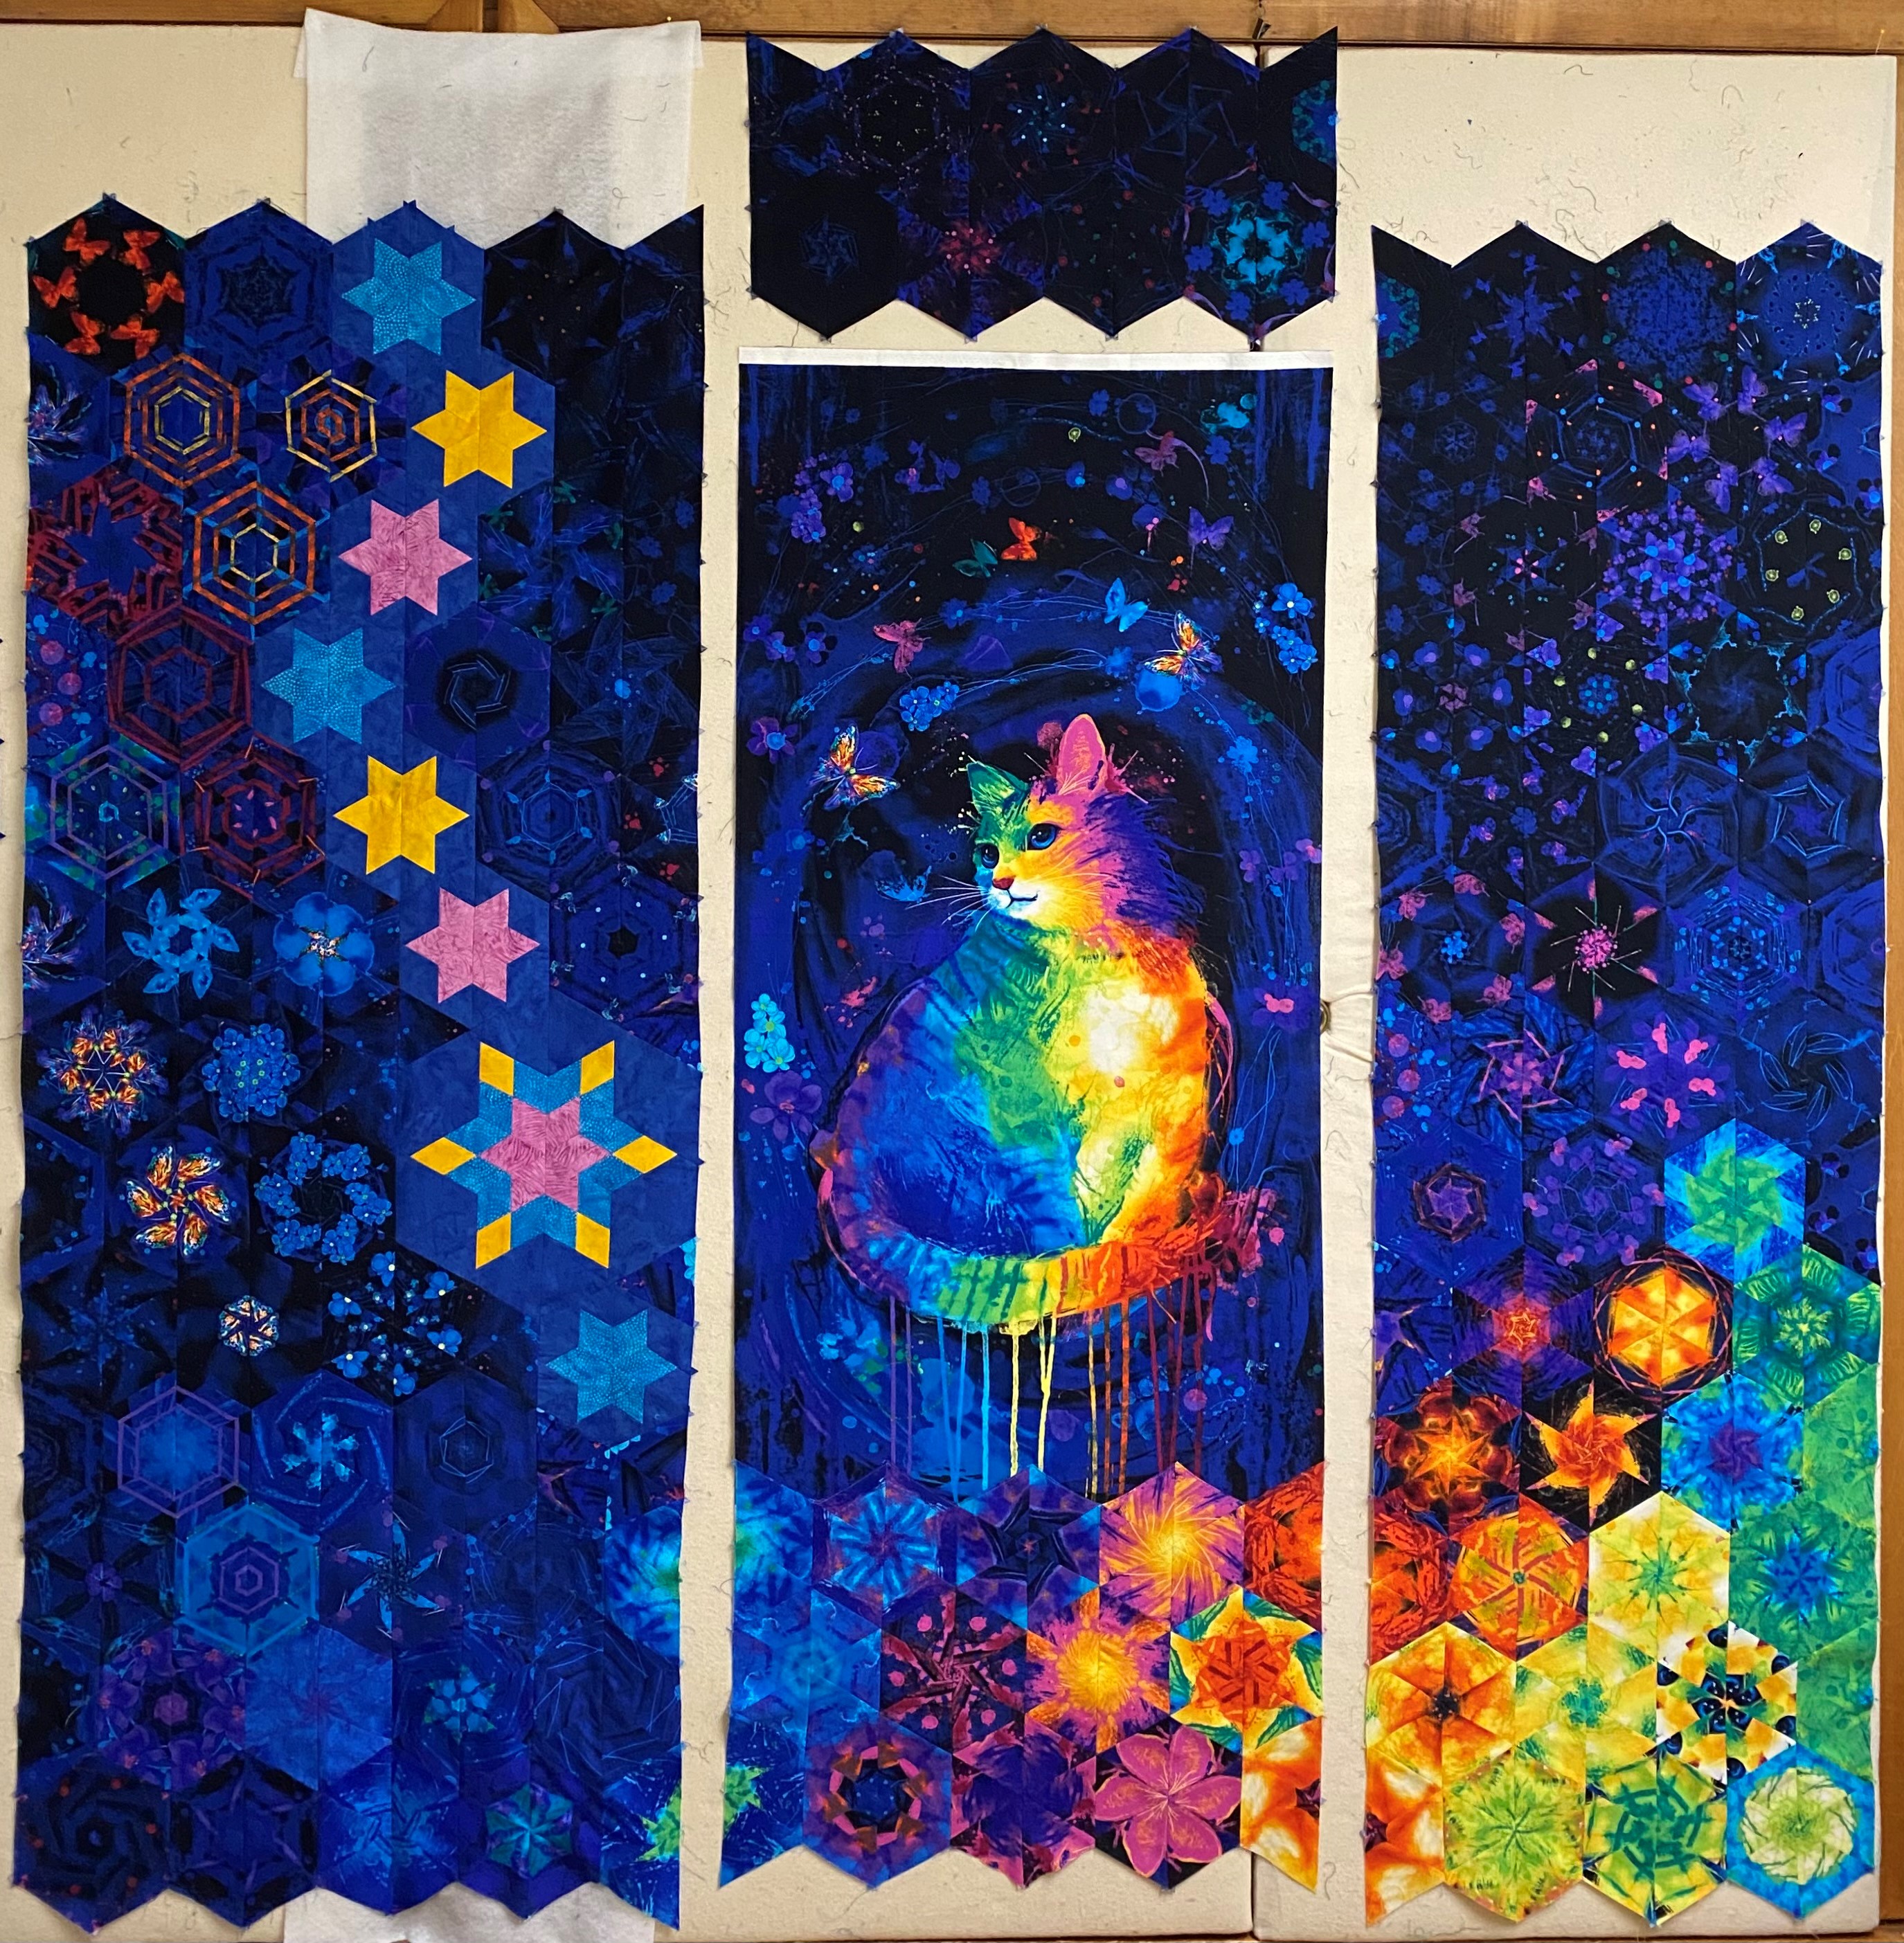
The official name for this quilt is Samantha’s Rainbow Kitty. This quilt was made with love for my Granddaughter Sam. It was supposed to be finished for Christmas but it is in time for my special Valentine.
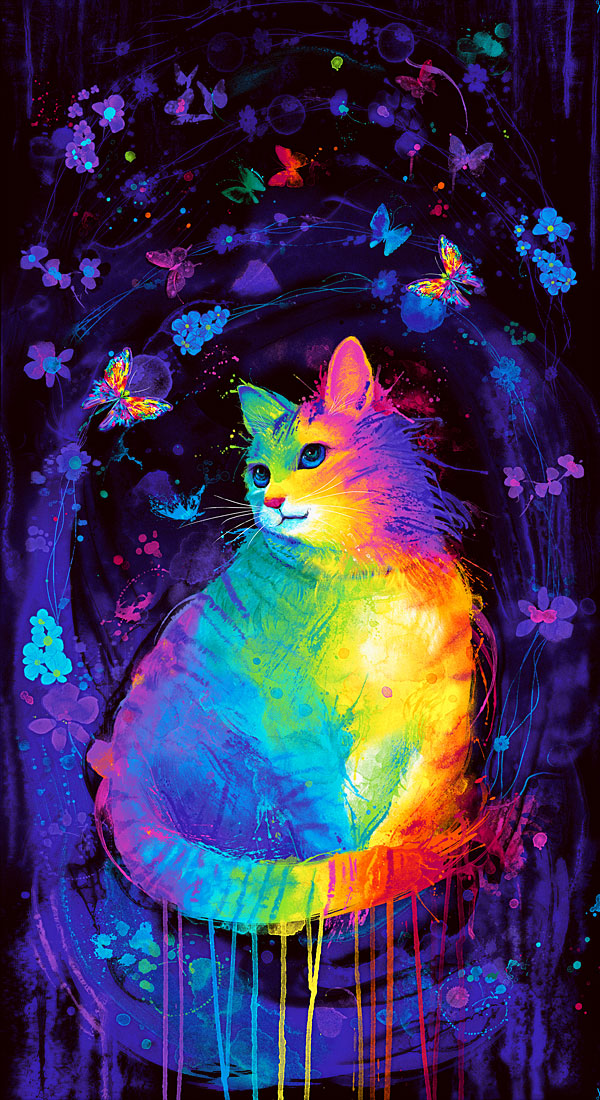
Panel by Chong-A-Hwang for Timeless Treasures
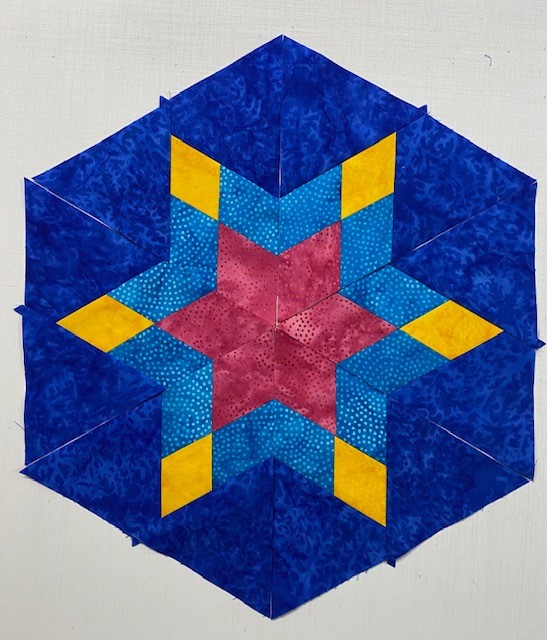
Why did I choose 5.5″ Finished Hexagons?
This panel measured 23 inches wide. I chose 5.5″ (Cut my strips 3.5″) finished hexies because 4 X 5.5 = 22″. Now I only have trim 1/2″ from both sides and my hexies will fit along the bottom and the top of the panel.
I began by deciding on what size to make my star. I wanted it twice as big as my 5.5″ finished hexies, hmmm, that means an 11″ finished star. The Checkerboard Technique sheet makes beautiful stars in 17 sizes from 2″ up to 18″ in 1″ increments. I needed to make 5.5″ Finished units. I followed technique sheet instructions for a 6″ Finished Units and will trim them so they would finish at 5.5″ units.
Step 1 – Make two strip sets.
Step 2 – Layer the strips sets one on top of the other right sides down. Using the Star 60 tool and a regular ruler establish the 60 degree angle.
From the first cut, cut additional angled sections the same width as the as the cut size of the diamond strips.
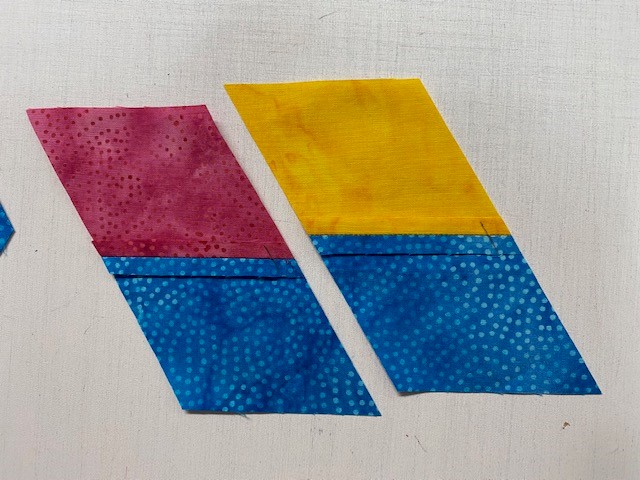
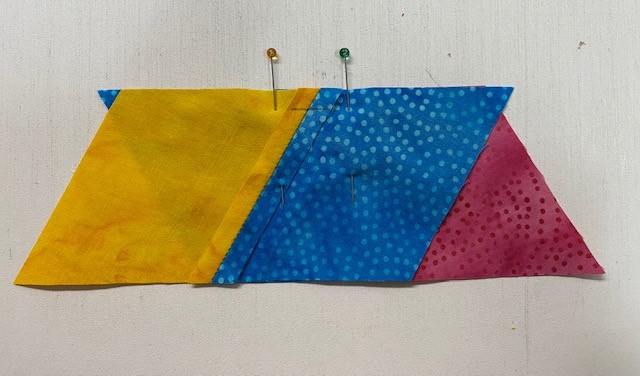
Step 3 – Pair each “A” section with a “B” section. Make sure the inner and outer diamonds are oriented correctly. The pink diamonds will be the inner part of my star. The outer diamonds are yellow.
Mark 1/4″ seam allowance using the Magic Wand.
On the edges you will be stitching together, mark the 1/4″ seam allowance across the seams on the wrong side.
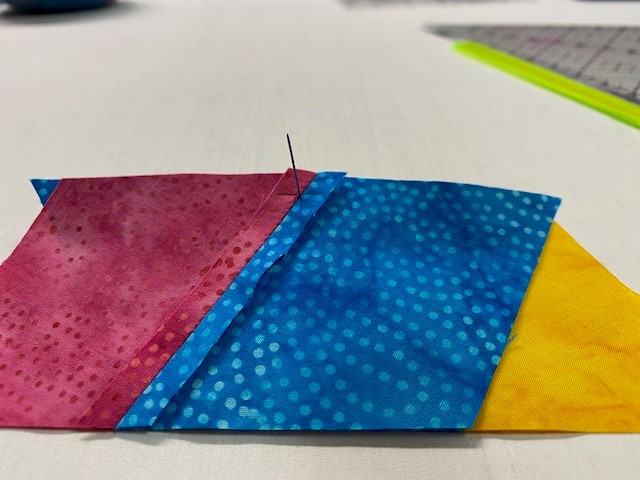
Pin section A & B
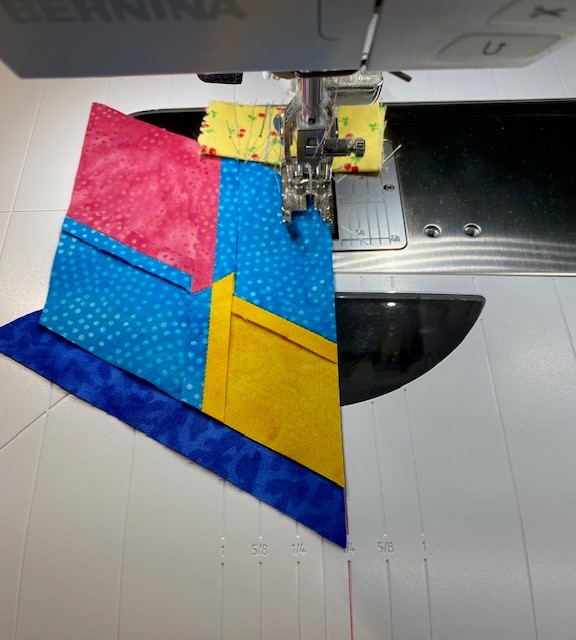
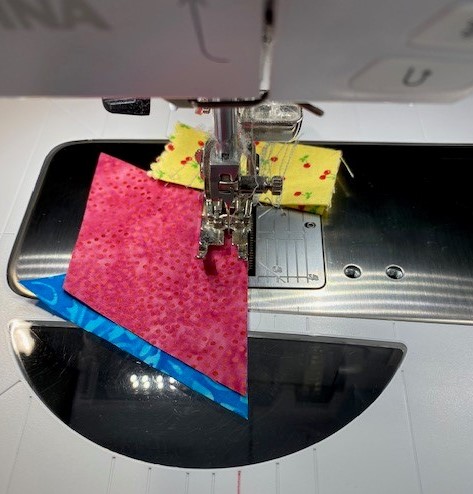
Stitch your section “A” with Section “B” units.
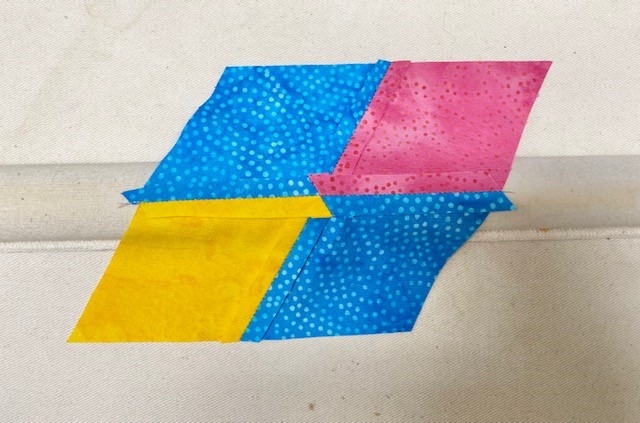
Press the seams open.
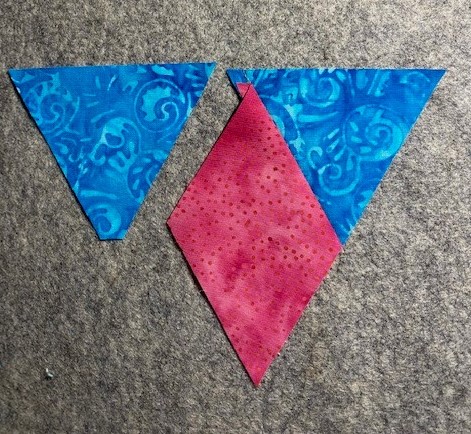
Step 4 – Trim the outer diamond using the Star 60 tool. I trimmed using the Outer Diamond Trim Guidelines for a 5″ finished unit.
First cut.
Continue cutting side triangles.
Step 5 – Add the side triangles.
Layout the right side triangles.
Position the side triangle on top of the diamond, matching the flat corner to the edge of the diamond.
Stitch with the diamond on top.
Press toward the diamond. (Whatever you are pressing toward, goes on top.)
Layout the left side triangle.
Position the the remaining side triangle on the other side of the diamond point. Align the flat corner of the triangle with the edge of the diamond, aligning the raw edges as before.
After it is stitched, but before you press, trim the unit as shown above to remove bulk.
Press toward the side triangle.
Step 6 – Trim the pieced Star 60 unit suing the Star 60 tool. I trimmed using the 5″ finished unit guidelines.
Step 7 – Describes the trimming the final edge. I did not complete this trim. Remember, I need an 11″ finished star, which means I need 5.5″ finished units. I accomplished this by trimming the diamonds per the 5″ guidelines. I created an 11″ finished star by NOT trimming the outer edges of the star.
Layout your diamond units.
Stitch your diamond units together creating two halves.
Making Star 60’s – To make 5.5″ finished Stars, I am following the cutting instructions for 3″ Finished Units. Remember, the chart refers to UNITS not to Finished Stars! To use the chart, first determine the desired finished size of your unit, then follow the row across for the strip size for the shape you want to cut.
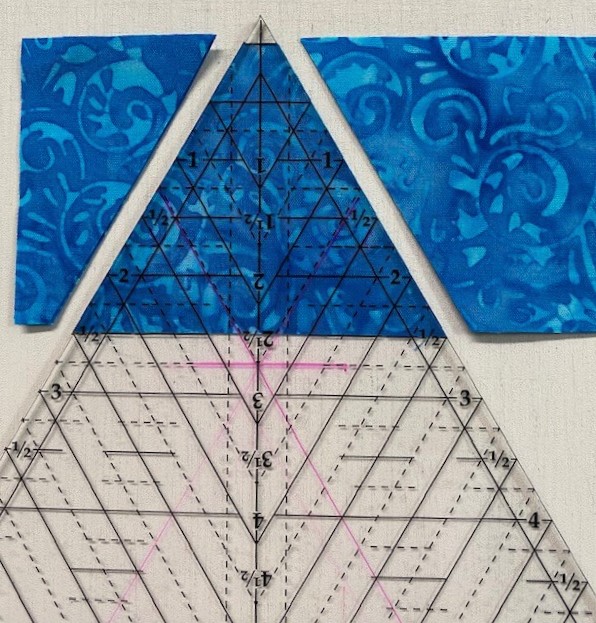
Cutting the Diamonds – I followed the cutting instructions for 3″ finished units. Trim one short edge at a 60 degree angle as shown above. Locate the Diamond Sub-Cut Guideline in the chart which for 3″ finished units is 4″. Align those guidelines with the raw edges of the strip and the angled cut just made as shown in the diagram. Cut along the leading edge of the tool to create oversized diamond shapes.
Cut your side triangles. For 3″ finished units the side triangle strips are 2 1/2″.
Layout the right side triangle.
Position the side triangle on top of the diamond, matching the flat corner to the edge of the diamond.
Stitch with the diamond on top.
Press toward the Diamond. Layout the remaining side triangle.
Position the the remaining side triangle on the other side of the diamond point. Align the flat corner of the triangle with the edge of the diamond, aligning the raw edges as before.
Trim the bulk as shown above.
Press toward the side triangle.
I followed the cutting instructions for 3″ finished units, BUT I’m making 5.5″ finished stars, so I’m trimming the Diamond Point using the 2 1/2″ guidelines. I do not trim the outer edges of the unit to obtain a 5.5″ finished star.
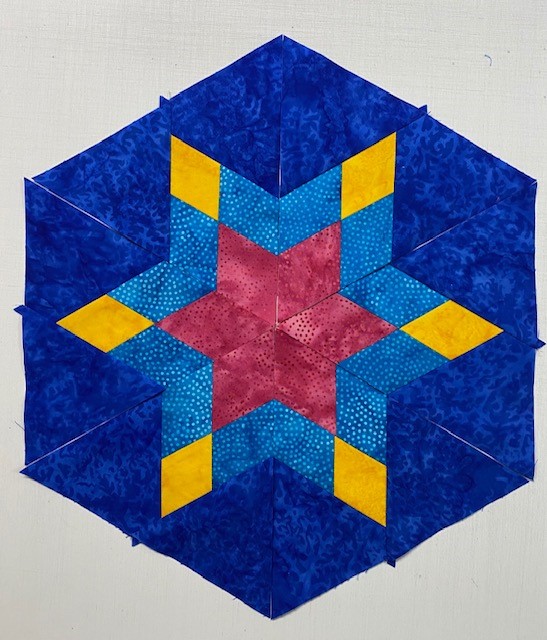
Star 60 Units
Stitch units into two halves.
Designing With the Hexagons
The final layout
After I numbered my rows, I stitched the four rows above the checkerboard star into two rows, and the same with the four rows under the checkerboard star as shown in photo 1. Photo 2 shows stitching the top and bottom row to the checkerboard star halves. Photo 3 shows the two rows joined together.
Continue to stitch rows into 4 sections, Left, Right, Top & Bottom.
I placed the bottom section right sides together to verify how much I need to trim off the sides of the panel so it will be the same width as the top and bottom hexies. In this case I trimmed 1/2″ off both sides.
You can choose to attach either the top or bottom hexies first. I chose the bottom because I wanted to control where the hexies attached to the bottom of the panel. After the hexies are laid out and stitched together we loose 1/4″ between them. I felt I could safely loose a couple of inches off the top of the panel without affecting the design. But I did not want to loose inches off the panel bottom.
I pressed the bottom hexies under 1/4″ and top stitched them to the panel.
Match up the hexies/dog ears of the left side with hexies/dog ears on the bottom. Stitch leaving about 12″ from the top of the panel.
Place the panel and partially stitched left side on a table and place the top hexies on top of the panel matching up the dog ears to establish where the top hexies will be stitched to the panel.
Pin top to the panel being sure the dog ears match up to the left side hexies.
Top Stitch the top hexies to the panel. Finish stitching the left side to the panel and top hexies.
Match up the dog ears of the right side and stitch.
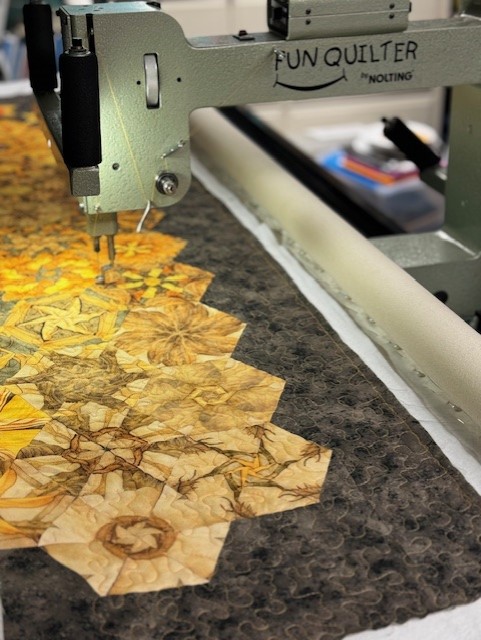
Samantha’s Rainbow Kitty, measures 75″ X 70″. I will quilt it as soon as the backing arrives.
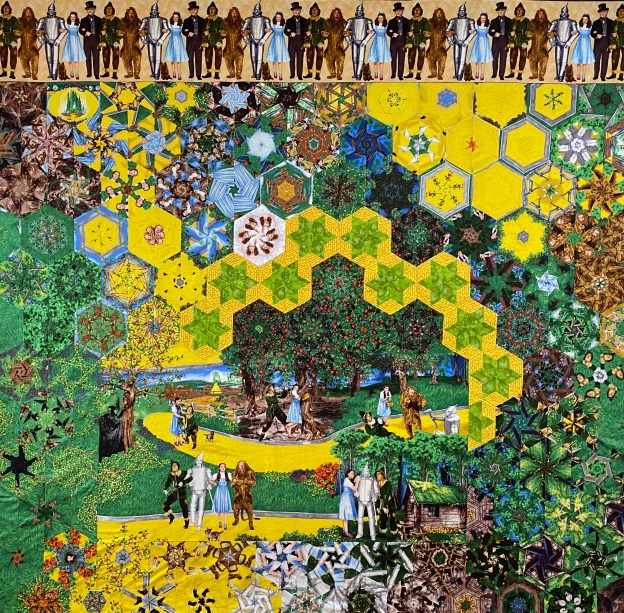
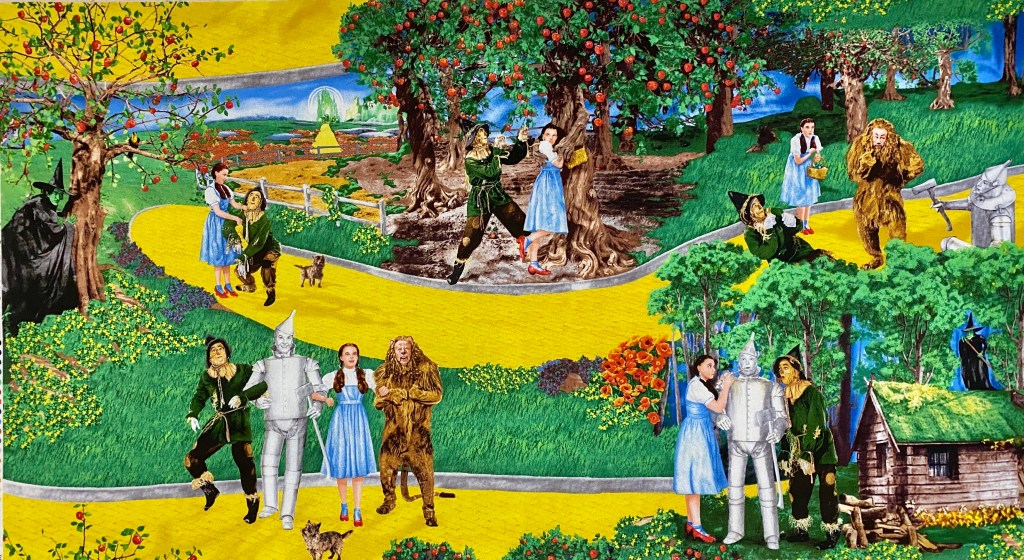
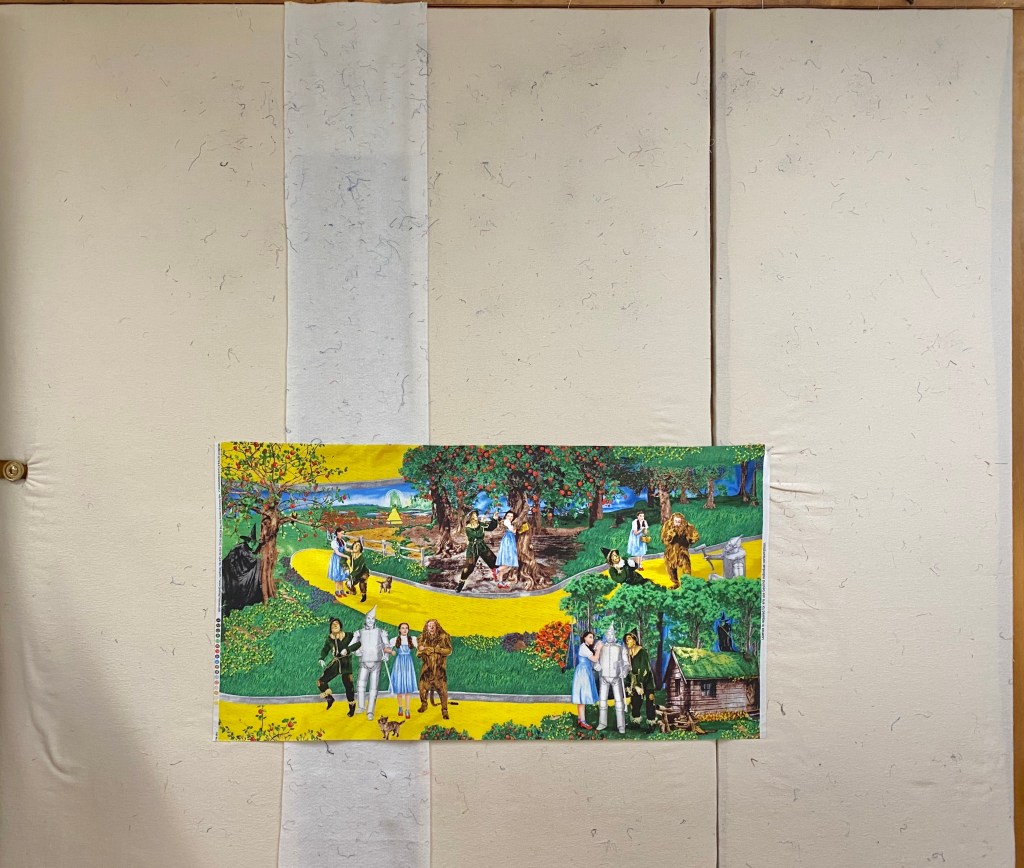
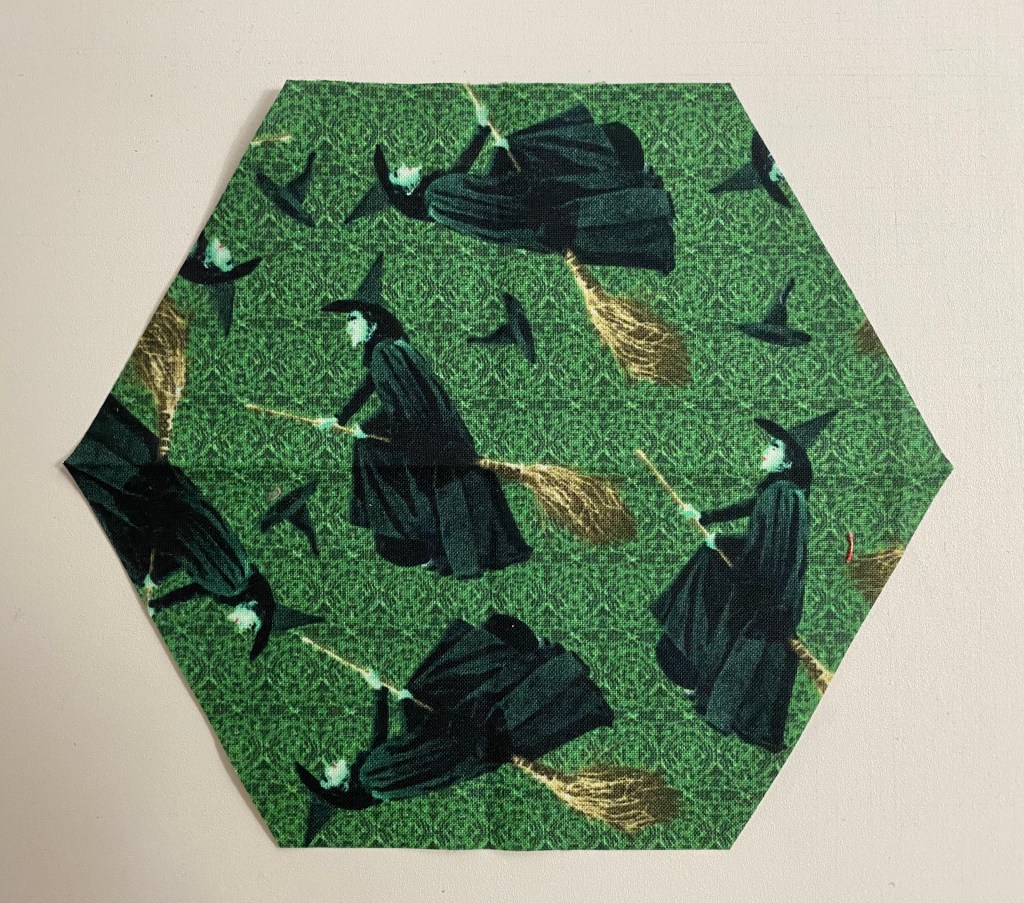
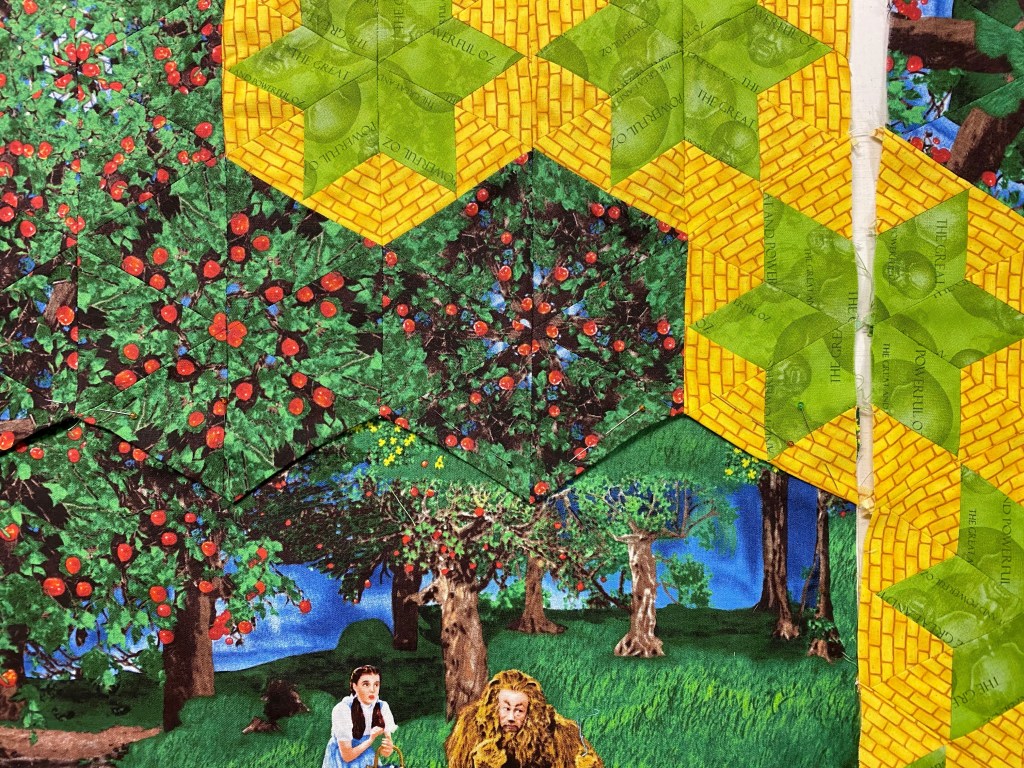
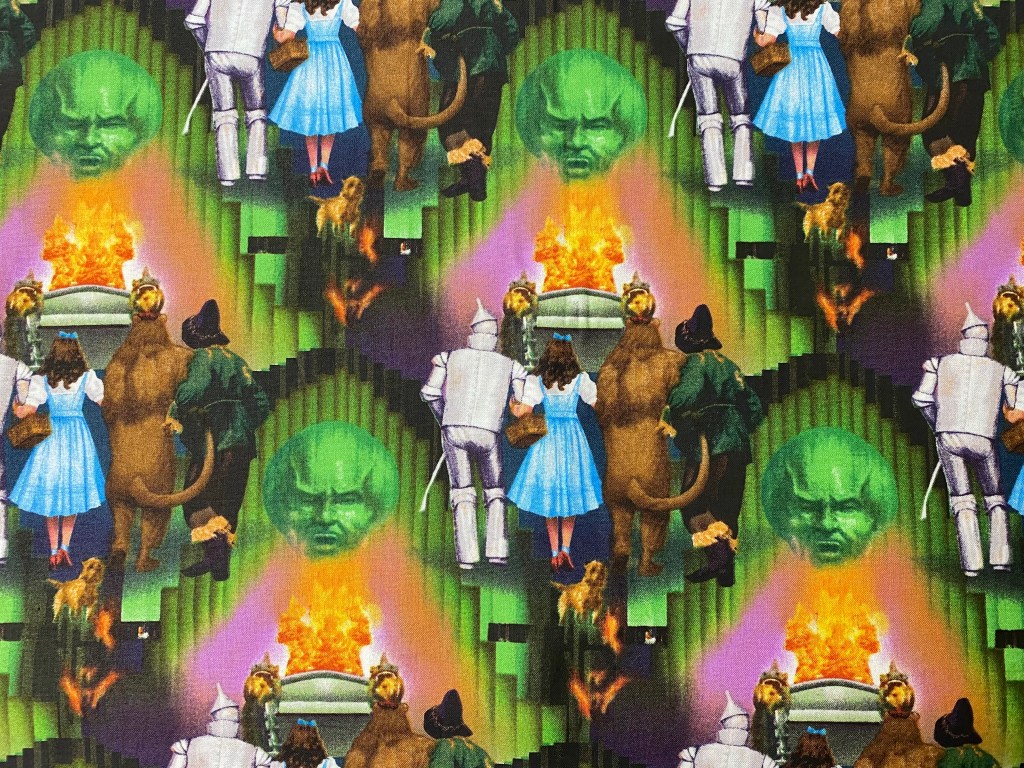
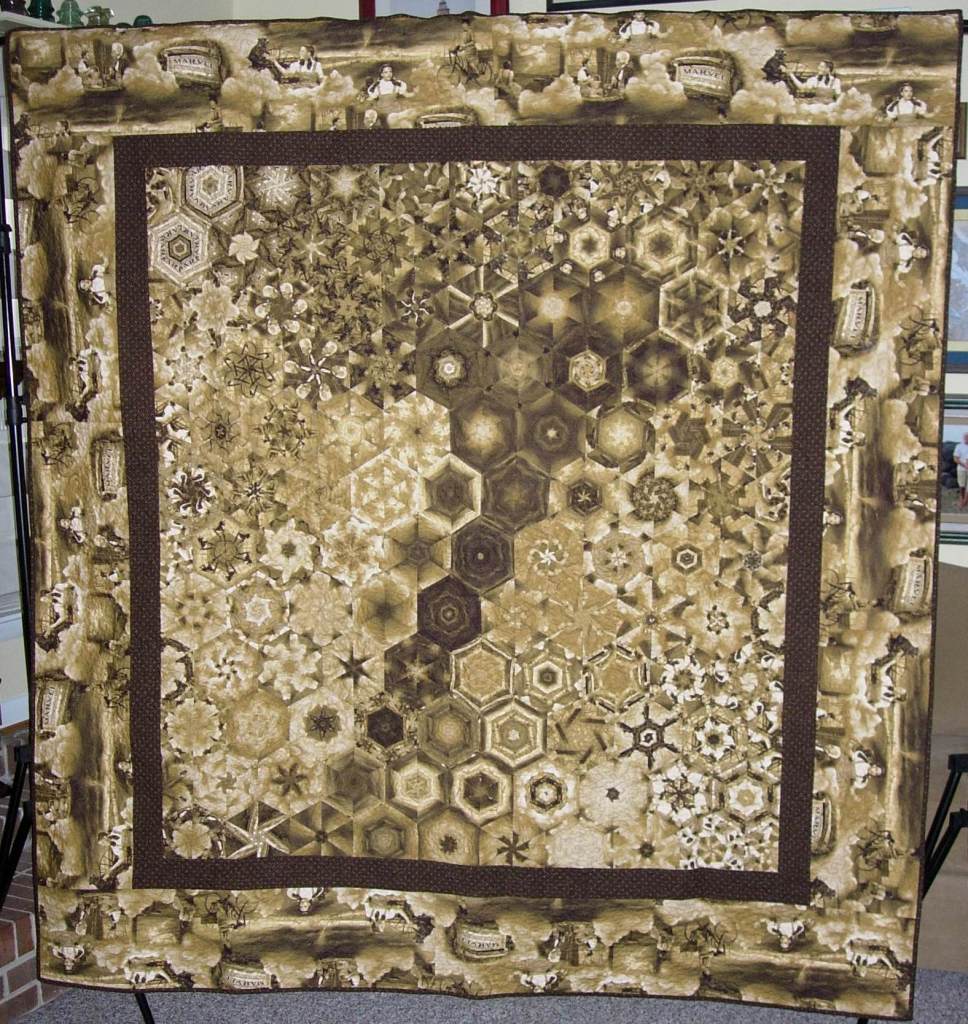
I love the Wizard of Oz! I know it is a very controversial movie, either you love it or hate it! In 2008 Quilting Treasures came out with the Wizard of Oz fabric line. The first fabrics were in sepia tones. I have made many, many Wizard of Oz quilts from my extensive Wizard of Oz fabric stash. This Road to Oz is for me!
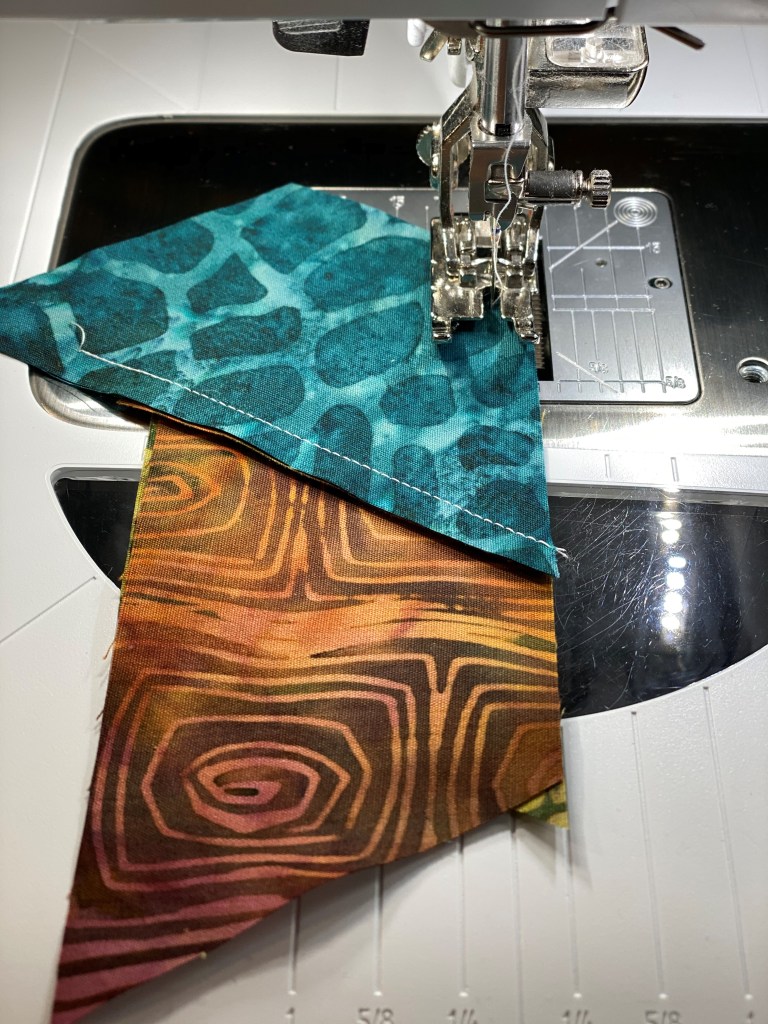
I used Studio 180 Design’s Star 60 Tool to enhance my One Block Wonder. Aside from cutting the equilateral triangles I will share how to cut Whole Hexagons, Half Hexagons and make a Half Hexie Braid for borders with the Star 60 tool.
This fabric by Quilting Treasures came out in 2009 and has a 23″ repeat. I’ve decided to use it as a panel on the quilt top. The width is a little over 43″. I need to determine what size finished hexie will fit evenly across the bottom & top of the panel. If I cut my strips 3 3/4″ wide they will produce 6″ finished hexies. If I trim my panel to 42″, I can fit 7 – 6″ finished hexies across the bottom and top of the panel. Note: I NEVER trim the panel until I have my hexies designed and verify they fit the way I want them to.
Strips are cut.
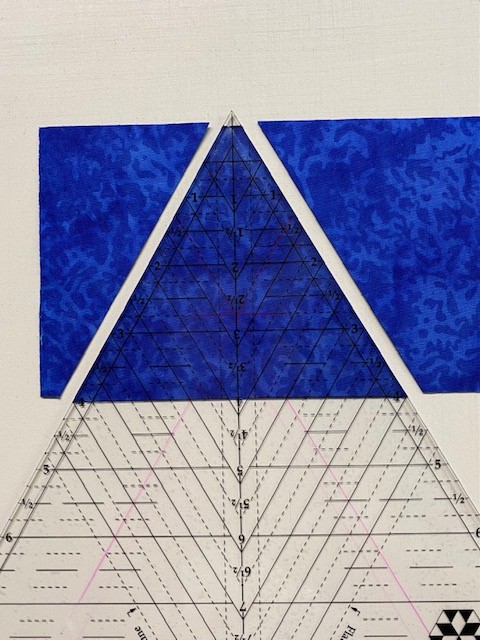
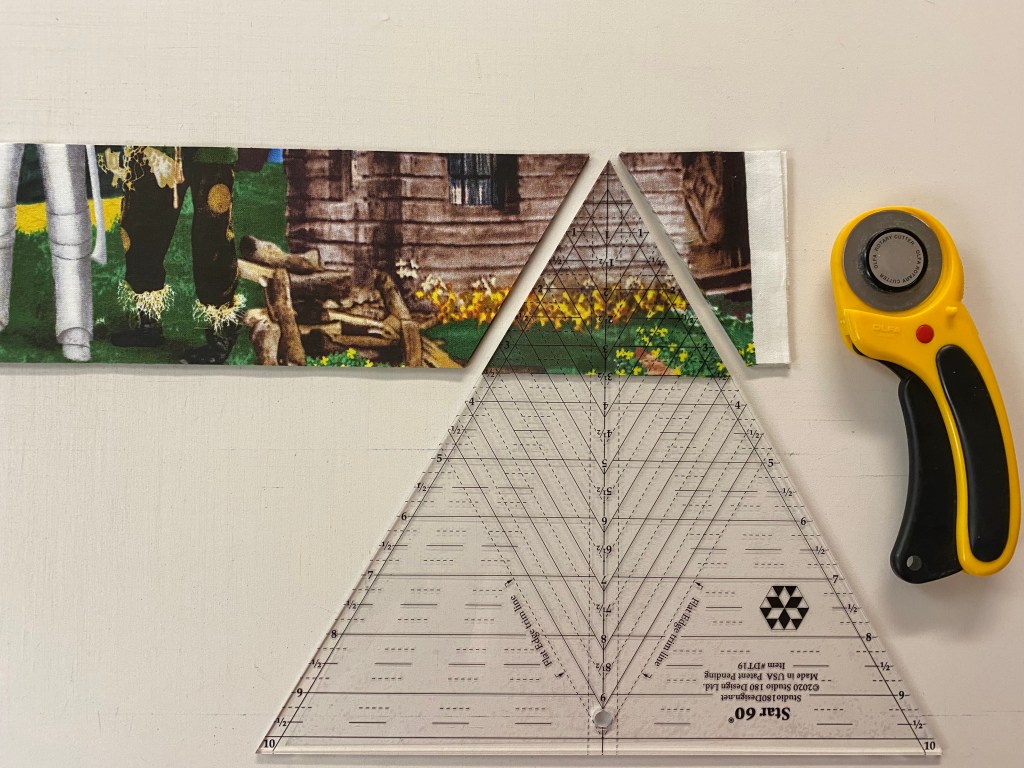
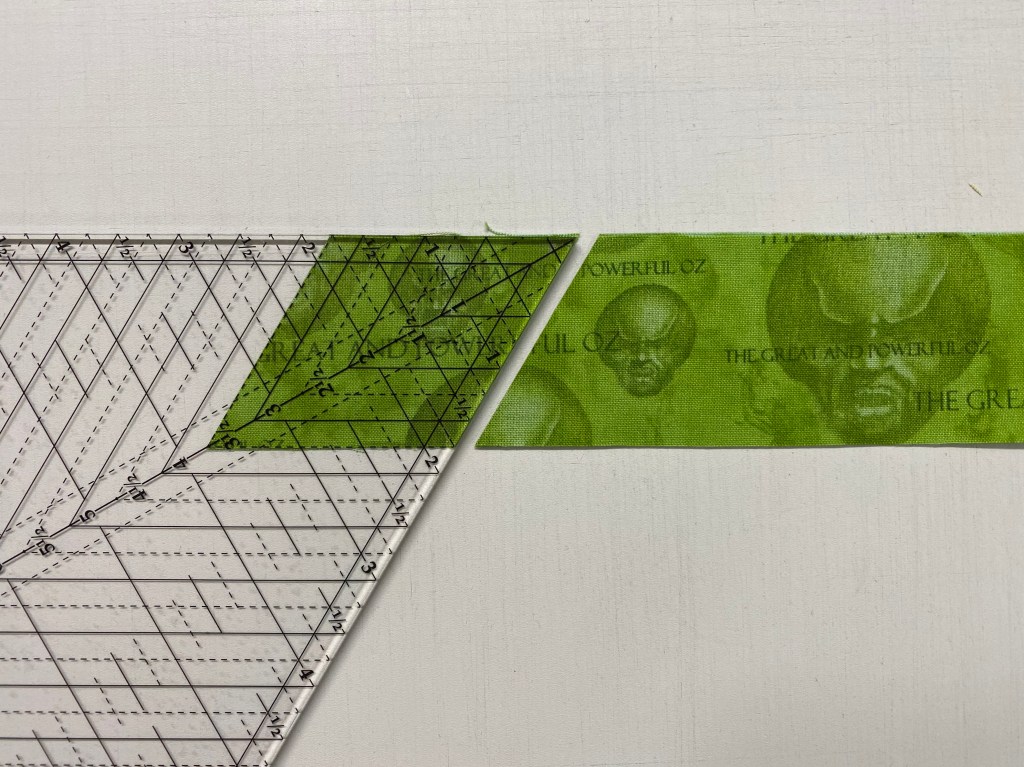
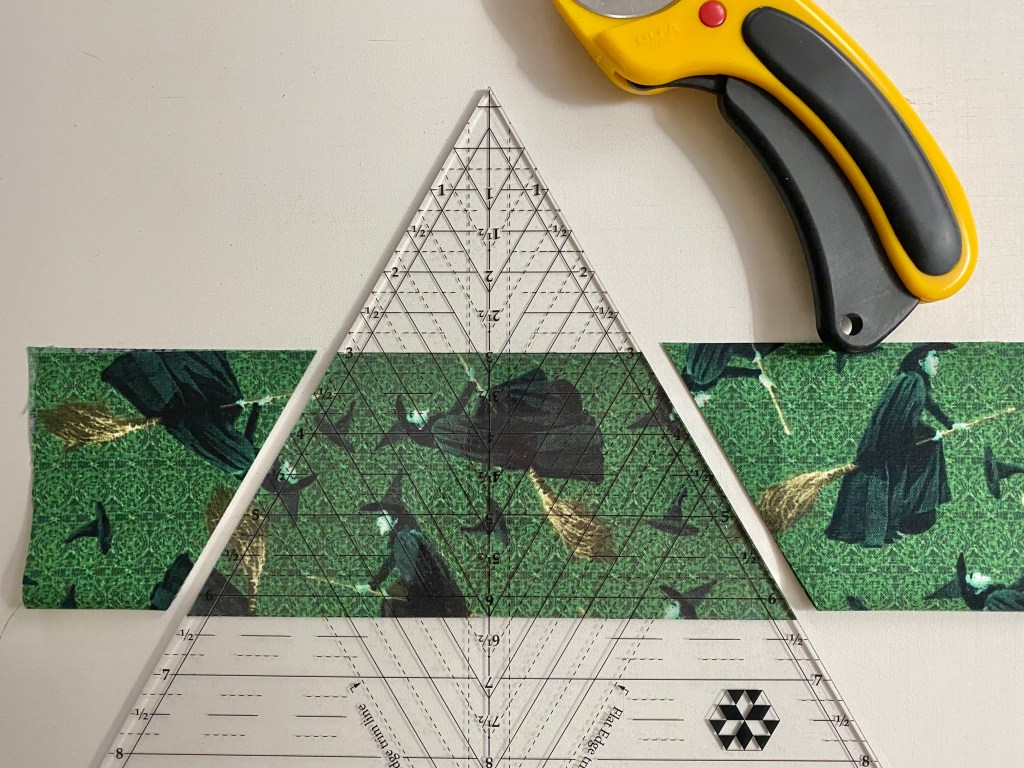
I used my Star 60 Tool from Studio Design to cut my equilateral triangles. Be sure the tool point just touches the cut edge of the strips. we want dogears to help lining up blocks and rows.
TIP: You know those pieces you have left at the of the strips that are too small for a full size hexie? One side is already cut at a 60 degree angle, if you place the tool edge on the straight side of the pieces, adjusting the edge of the tool to not include the selvedge and cut, you will have small hexie that can be appliqued onto your top.
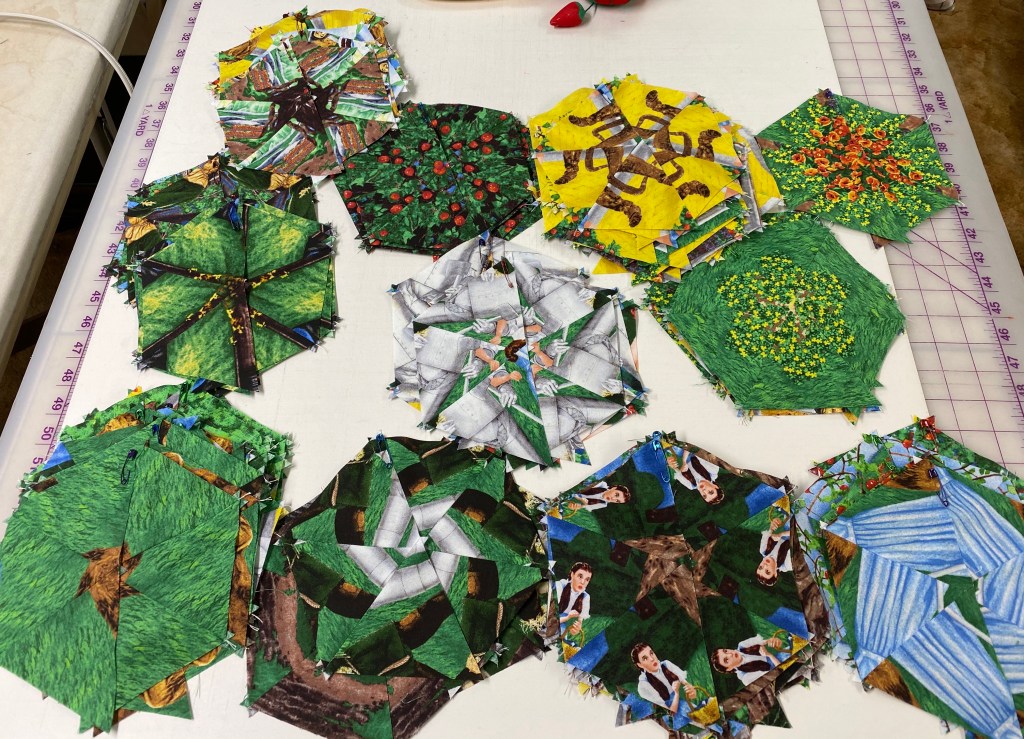
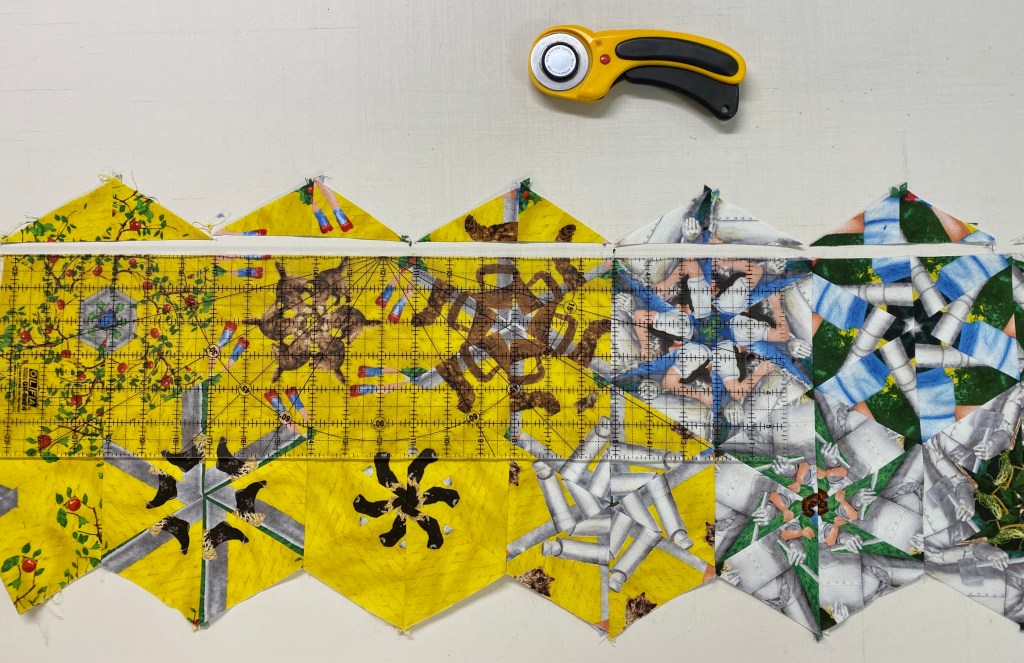
My triangles are cut, stitched and sorted by predominate color.
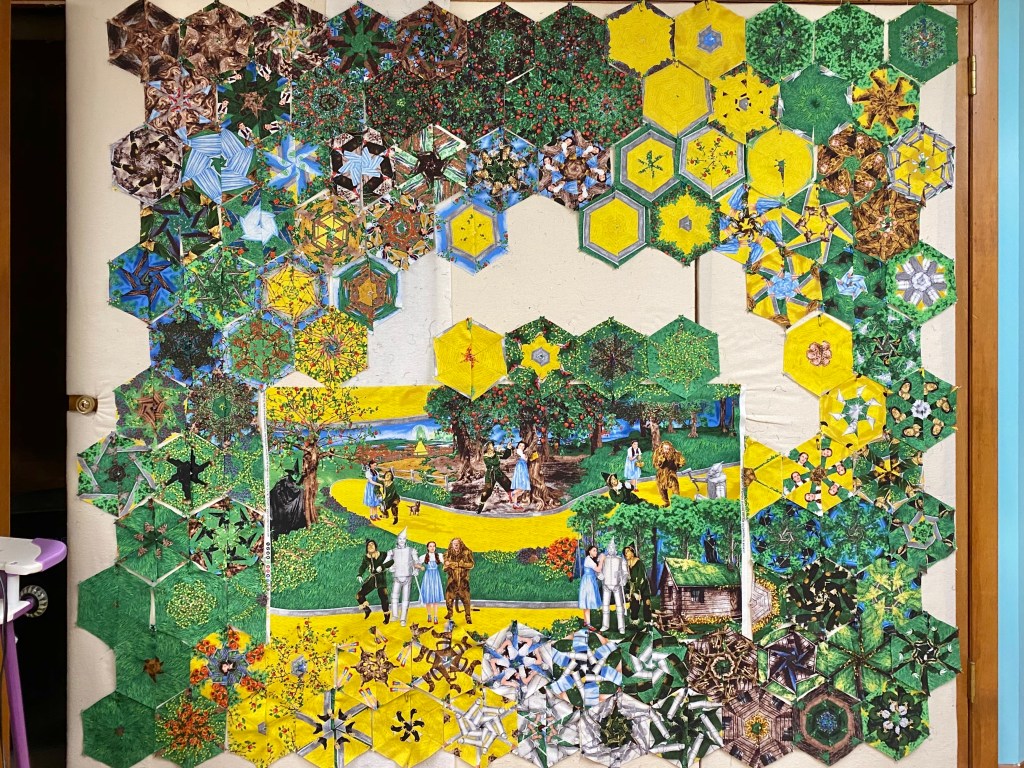
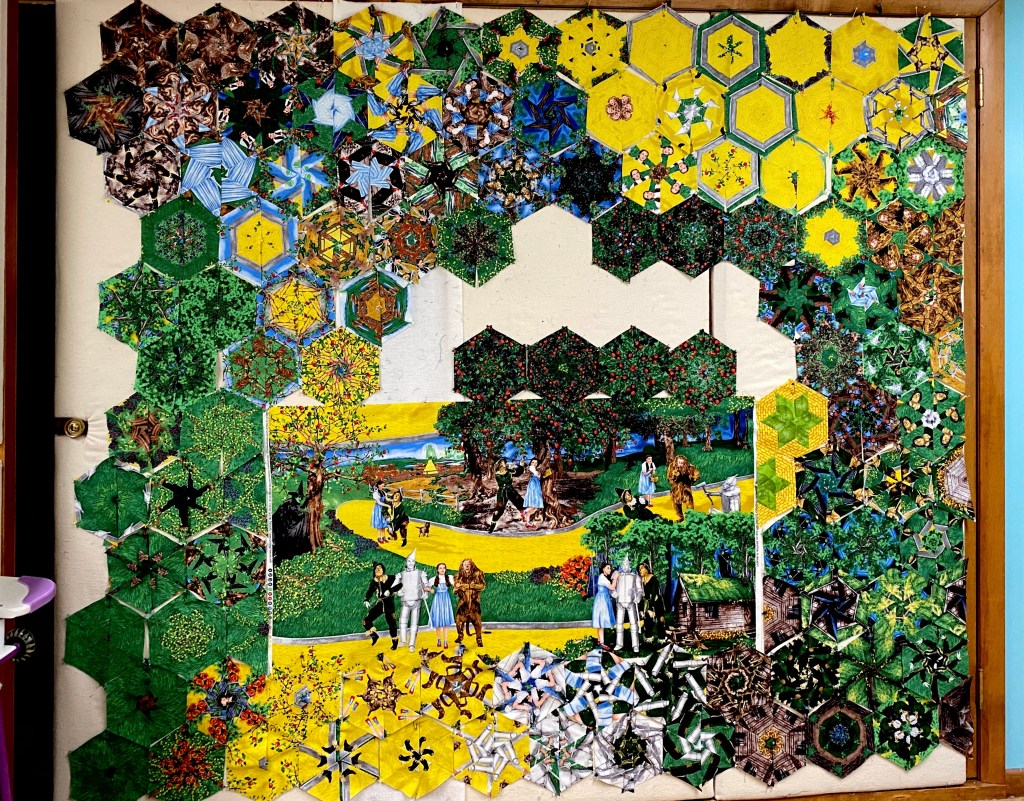
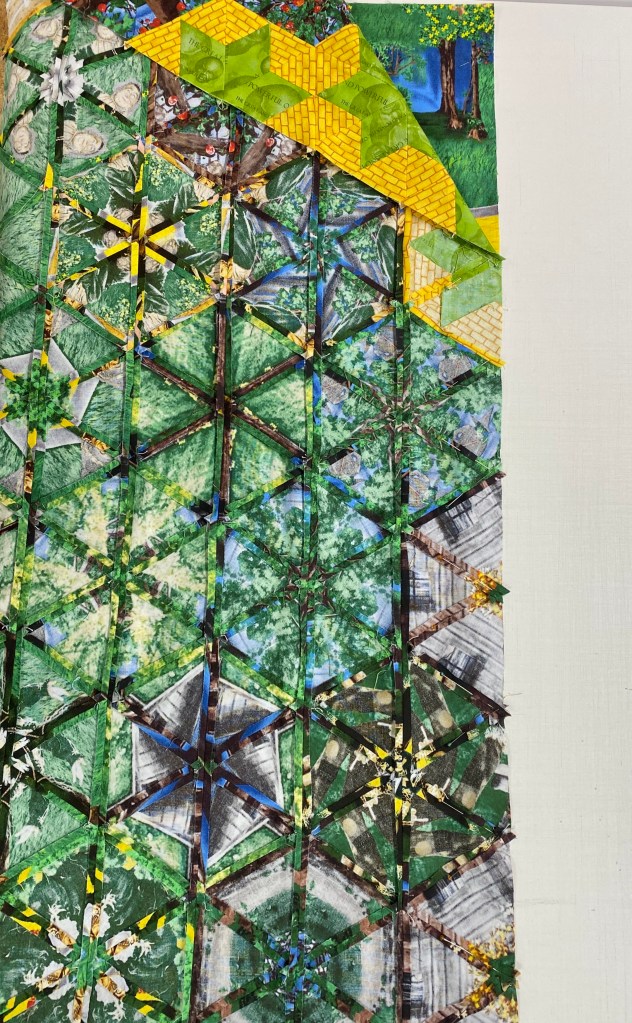
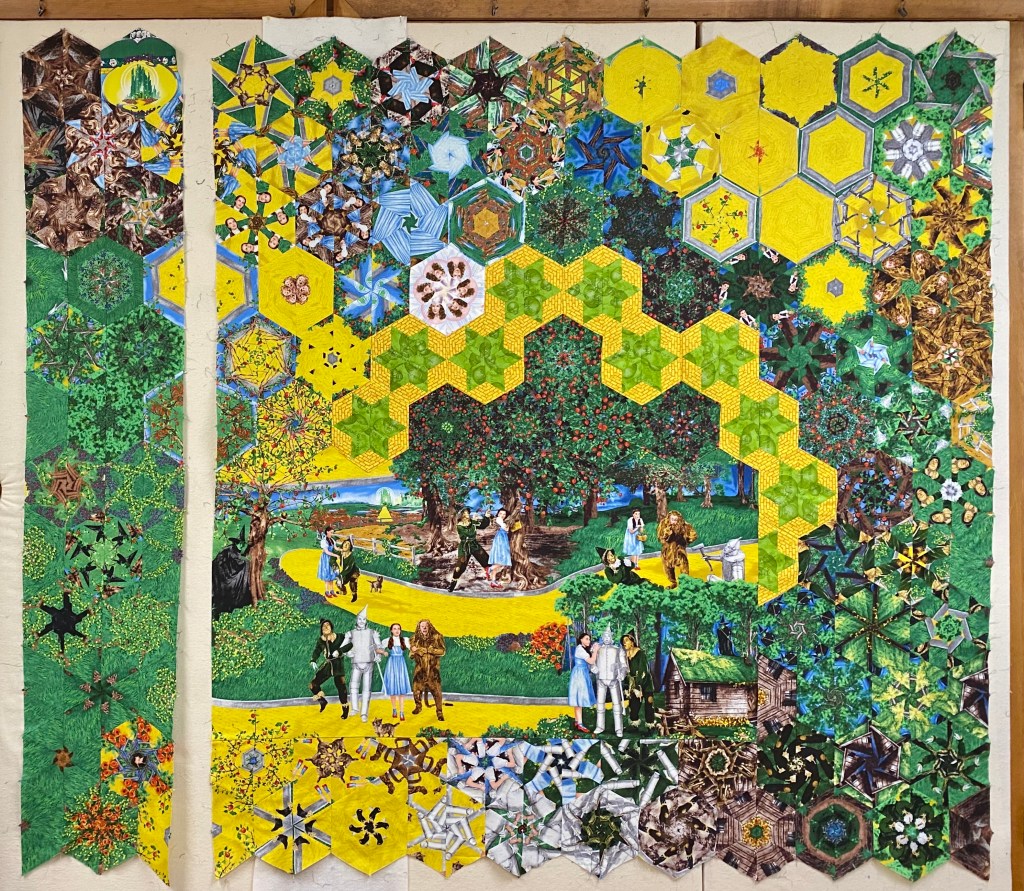
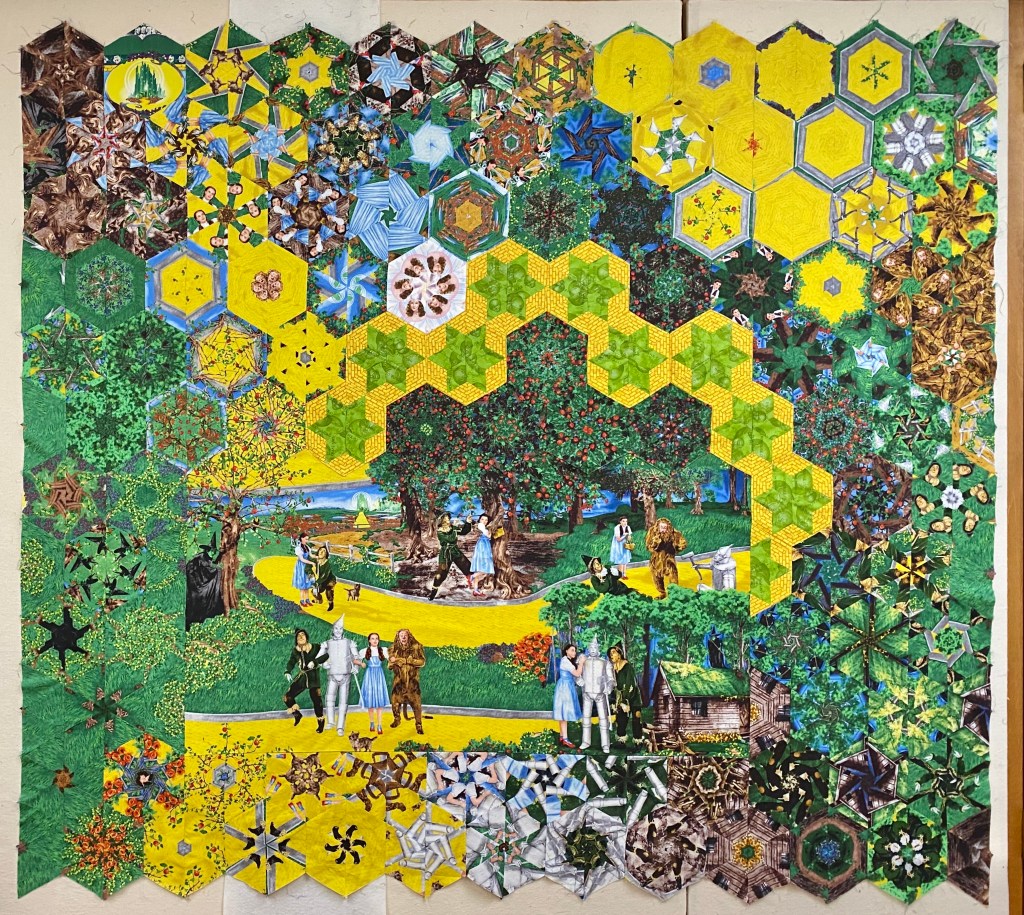
Placing the panel on the design wall takes some thought and planning. My design wall consists of 4 closet doors 24″ wide, that are covered with flannel over insulation, so I have plenty of room. My goal was to create a path that would connect the yellow brick road on the right side with the yellow brick road on the top of the panel. I placed the panel so there would be more room on the right side and the top of the panel.
Remember, I can fit 7 – 6″ finished hexies across the bottom of the panel. The hexies are not finished yet, so they don’t fit well. They extend further than the panel. Keep this in mind to keep track of where your rows are so you don’t get confused. If 7 finished hexies will fit across the bottom, that means 14 half hexies will establish the width of the bottom section and the top section. I started at the bottom of the panel and then worked my way up the sides. You may start at either the top or the Bottom, it doesn’t matter.
First attempt at my design was close, but I didn’t feel the yellow hexies I had were creating a vibrant connecting path. I tried again surrounding my path with darker hexies & decided to create some Star 60 Units instead.
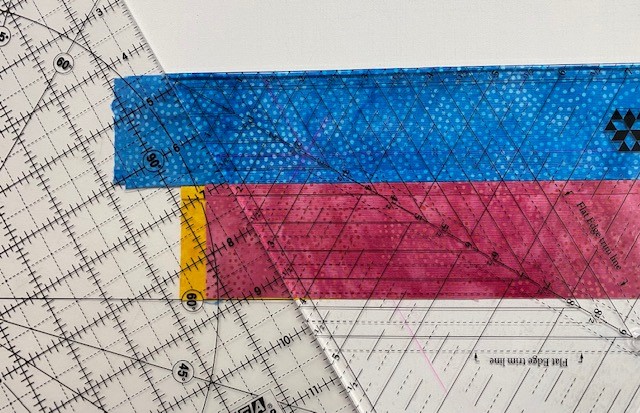
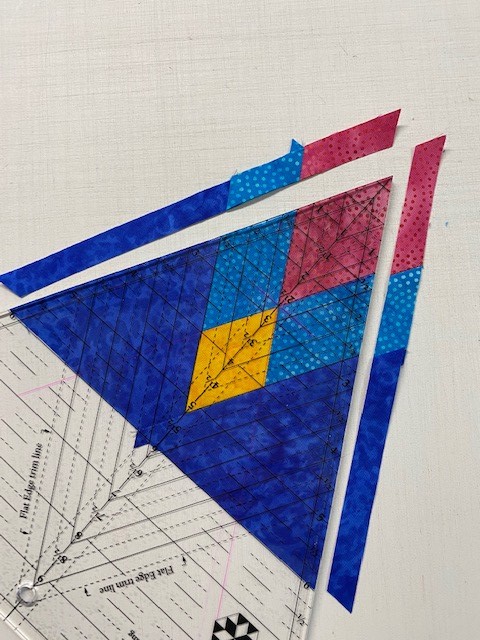
Cutting the Diamonds: To create a Star 60 Unit that contains a diamond with side triangles that would create a 6″ finished hexie I went to the Basic Shape Cutting Chart in the Star 60 instructions. I followed the cutting instructions for 2 1/2″ finished units. For my diamonds, I cut a 2″ WOF strip. Trim the first edge at a 60 degree angle as shown above. Locate the Diamond Sub-cut Guideline in the next column for 2 1/2″ finished unit which is 3 1/2″. Align those guidelines with the raw edges of the strip and the angled cut just made as shown above. Each hexie will need 6 diamonds.
Cutting the Side Triangles.: Checking the chart for Side Triangle Strip size, I cut my 2 1/4″ WOF strips. Align the mark near the top of the tool with the top of the strip and the horizontal line on the tool that corresponds to the width if the strip (2 1/4″). Cut the side triangles then rotate the tool and cut again. Each diamond will need two side triangles. Follow the Star 60 tool instructions for Piecing the side triangles to the diamond.
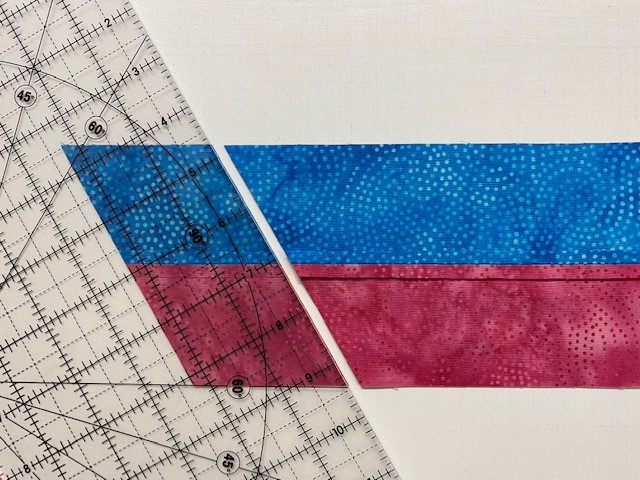
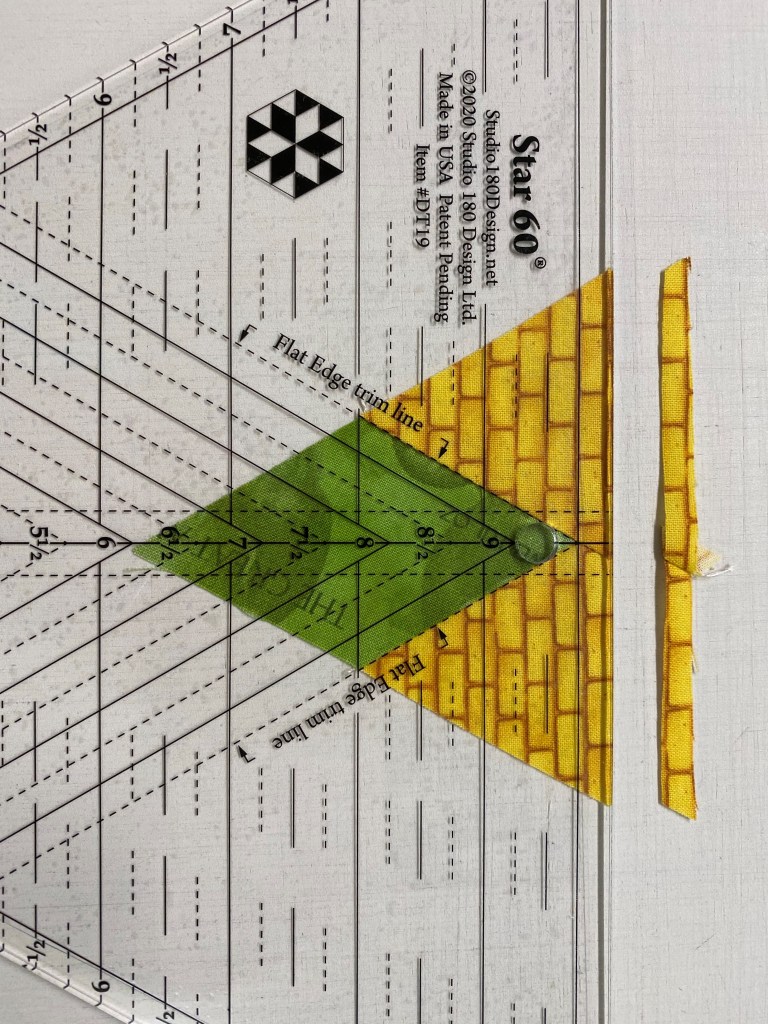
Trimming Star 60 Units: We will be trimming the flat end of the unit only! Align the Flat Edge trim lines with the seams of the diamond. For lefty’s, rotate the unit so the flat side is on left side. Six of these trimmed Star 60 units are the same size as a stack of 6 equilateral triangles cut from a 3 3/4″ strip. These Star 60 units can be made in 17 sizes.
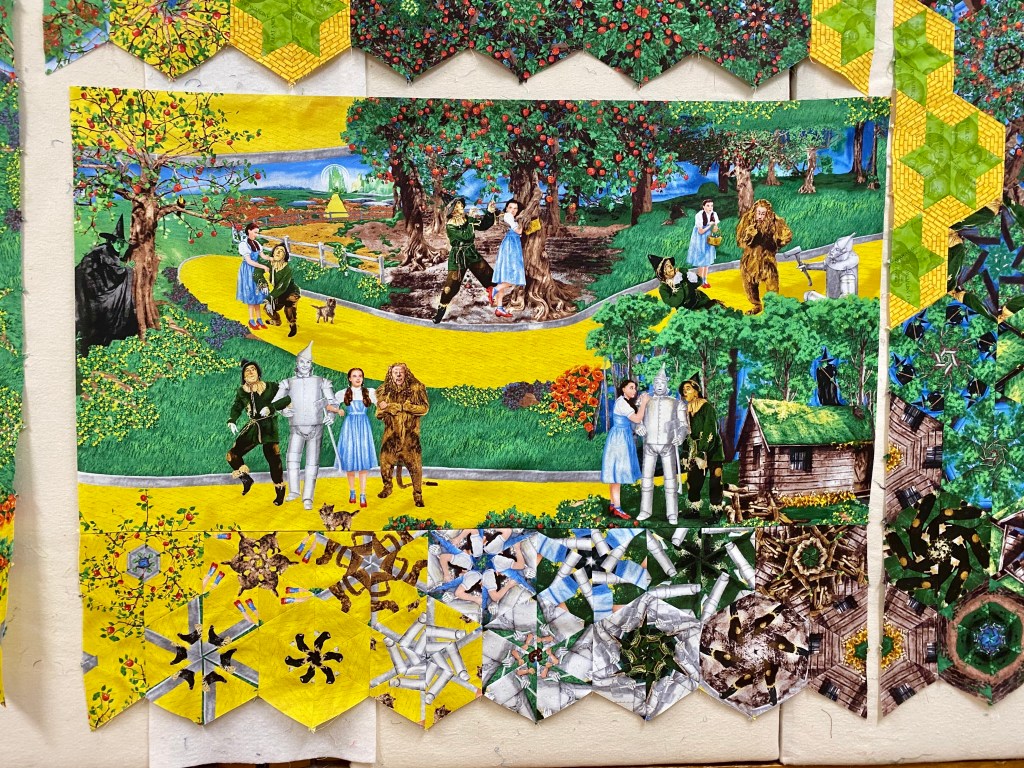
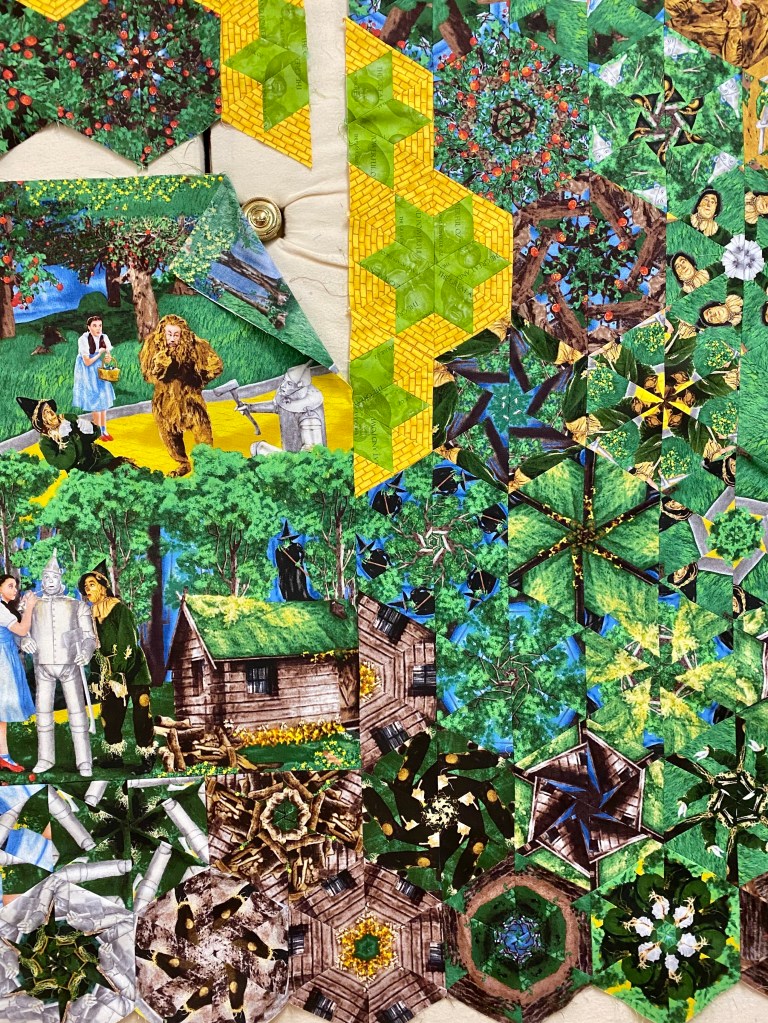
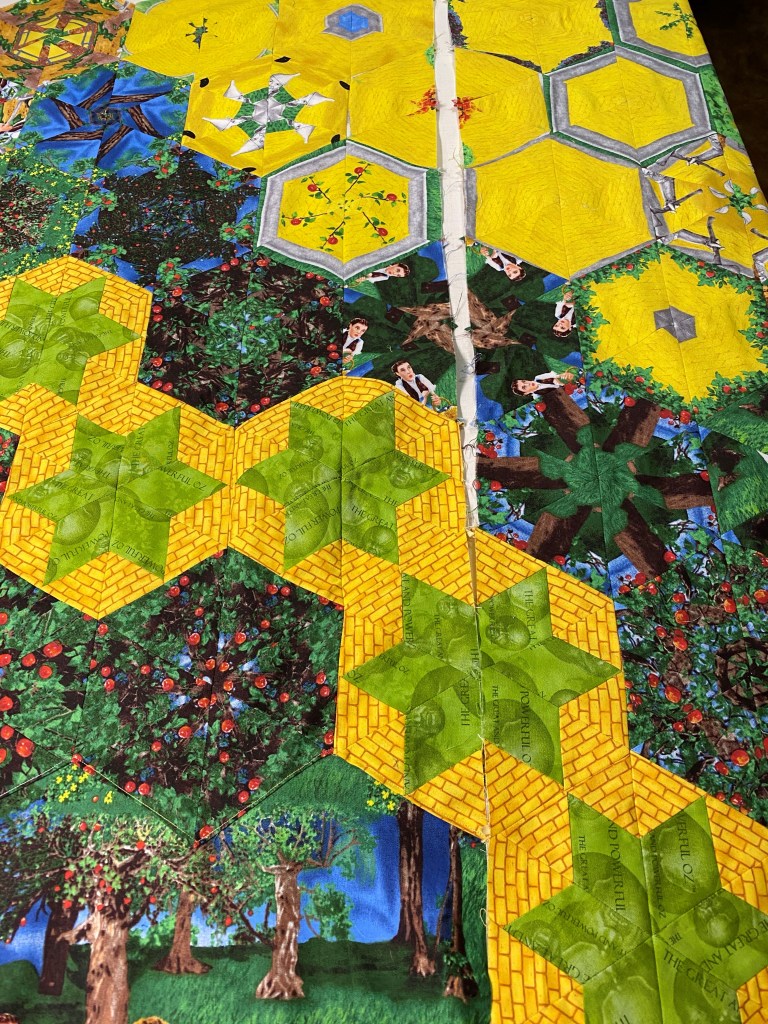
I loved the way the Star 60 units created a vibrant path to connect to the Yellow Brick Road. You notice a very light block near center of the top. That is Glinda the Good Witch. She wasn’t on the panel but I had to add her!
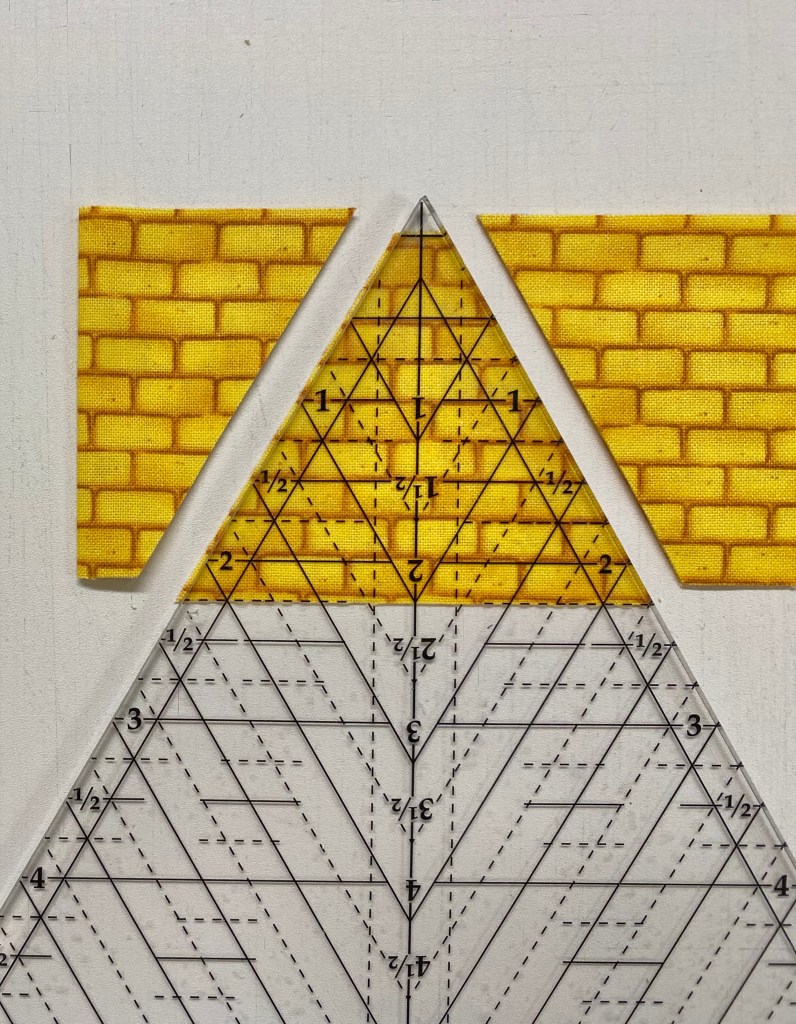
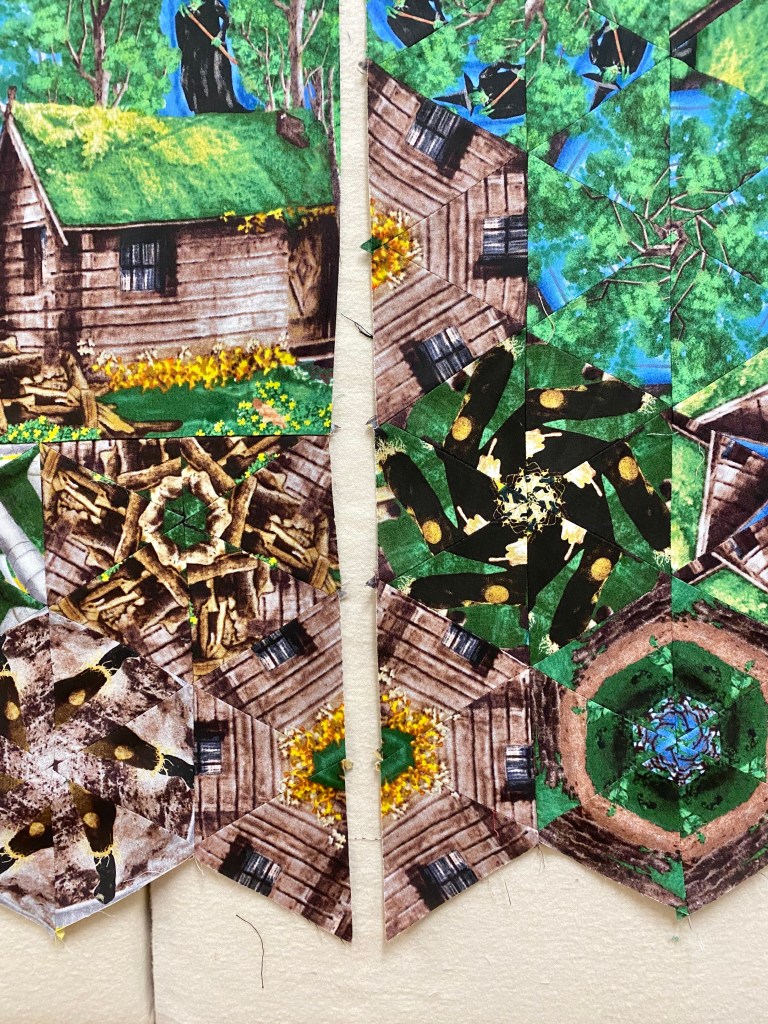
Cutting Whole Hexagons: I wanted a block that contained the Emerald City. I forgot to take a picture while I cut it, so the instructions below use a different fabric.
The Hexagon Cutting Chart allows you to cut whole hexagons in 15 sizes. For a 6″ finished (6 1/2″ Unfinished) hexie, cut a strip 6 1/2″ wide. Fold the strip in half. Our Horizontal Guideline Placement is 6 1/4″. Place the 6 1/4″ line on the fold and cut both sides. You now have a 6 1/2″ unfinished whole hexagon.
Once I was happy with the block placement, I number my rows across the top and under the bottom section. I stitched the rows into four sections, left, right, top & bottom..
I decided to add the bottom section to panel first. I didn’t want to leave the points because they would cover up Toto, and I couldn’t have that, so I trimmed the top points only. I don’t trim the outside edges until the top is all stitched together.
Adding the bottom section allows me to line up and match the dogears of the rows on the right side.
Lining up the dogears
Pin and stitch the right side rows to the center section using a partial seam. I left a good 8 inches open to leave room for adjusting placement of the top section.
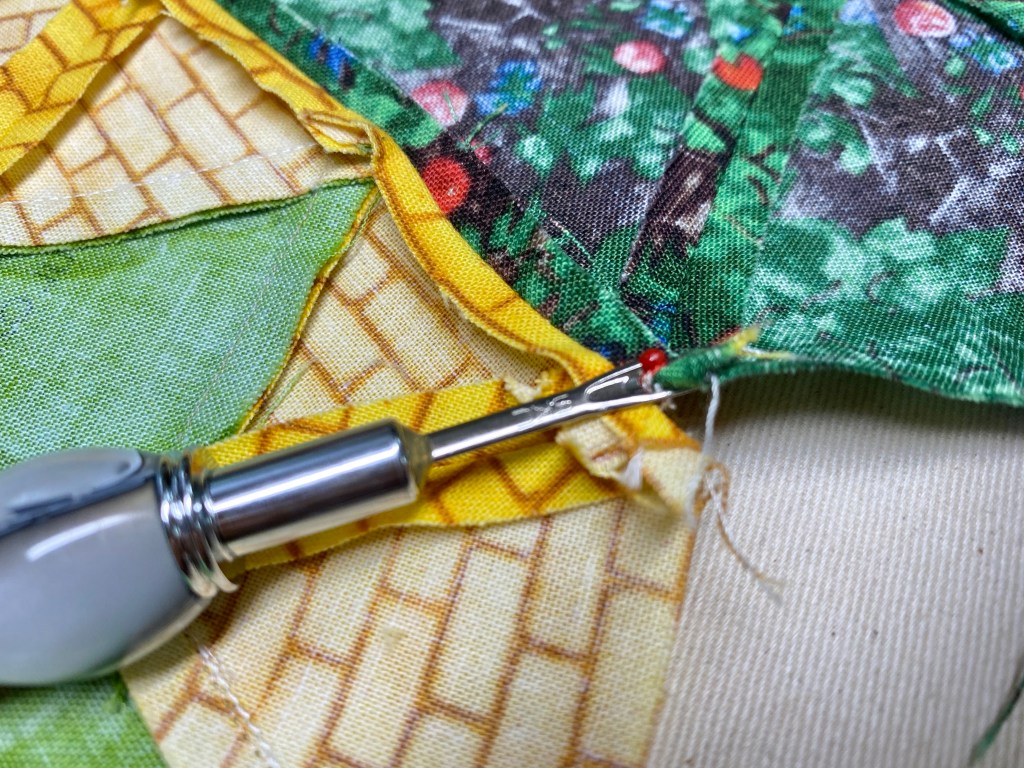
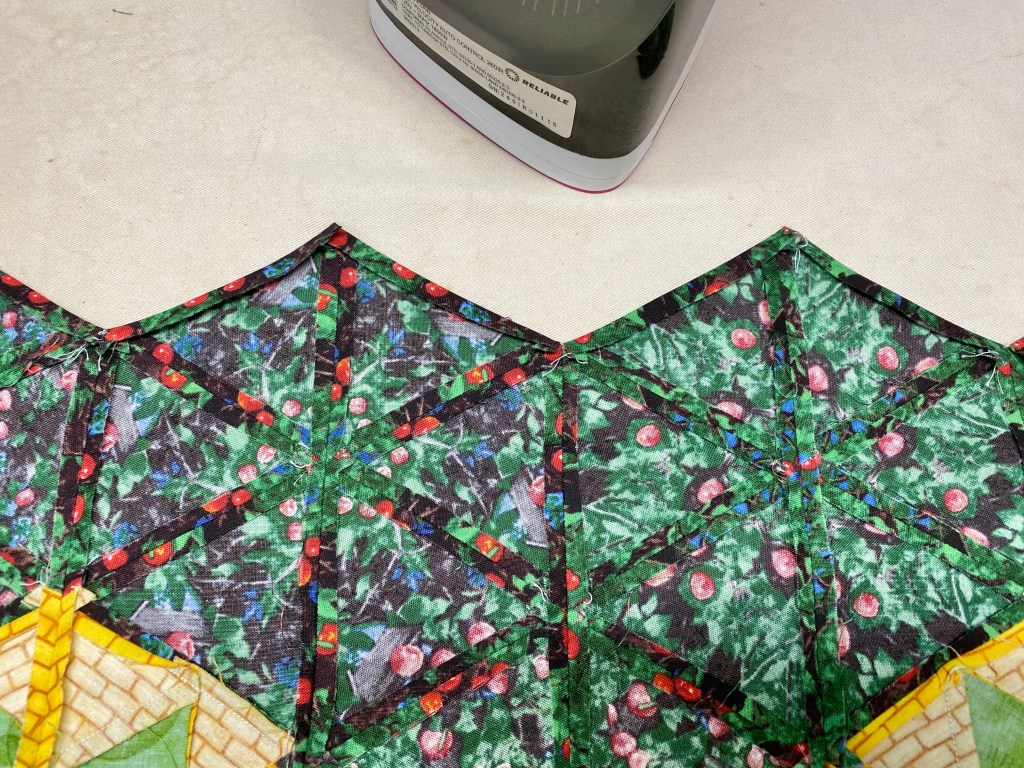
I decided to applique the top section to the panel by leaving the points on the bottom of the top section. I took stitches out about 1/4″ down between the valley of the blocks and pressed the edges under 1/4″.
Lay out the center and the partially stitched right side rows. Lay the top section next to right side rows, matching up the dogears. This will show you how far down the top section will overlap onto the panel.
Pin it well, assuring it is straight and top stitch the center to the panel. Now I’m able to finish the partial seam for the right side.
Adding the left is very easy now. Just match up the dogears and stitch together.
Once the rows are all joined, I trim the points off the top and the bottom of the quilt top. I added a border to the top. I’m thinking about adding a small black border.
Above is a closeup of the showing Glinda & the Emerald City whole Hexie. One more technique I wanted to share is making Half Hexagons. The Star 60 tool instructions have a chart for cutting Half Hexagons in 8 sizes. I thought about making a Half Hexie Braid for a border but my top was too busy.
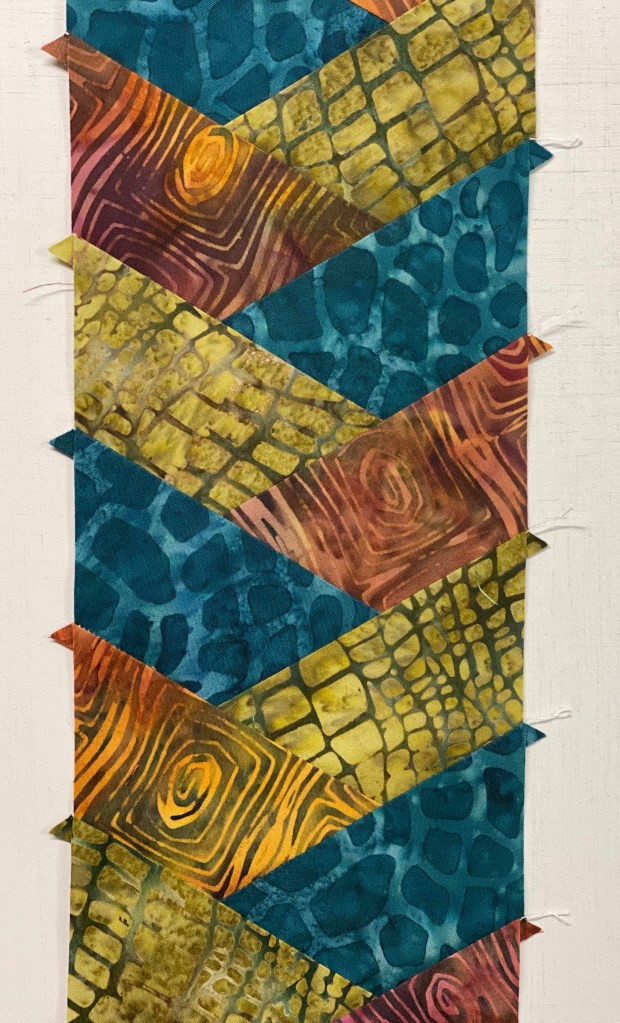
Half Hexies Braid: I followed the cutting instructions for 1 1/2″ finished half hexies. I cut 3 different 2 1/4″ strips. In the chart locate the “Bottom Horizontal Line” for 1 1/2″ finished half hexie, which is the 4″ line. Place it on the bottom of the strip and cut both sides. Rotate the tool placing the 4″ line on the top and aligning the edge just cut.
Above, I laid out my half hexies alternating the 3 colors.
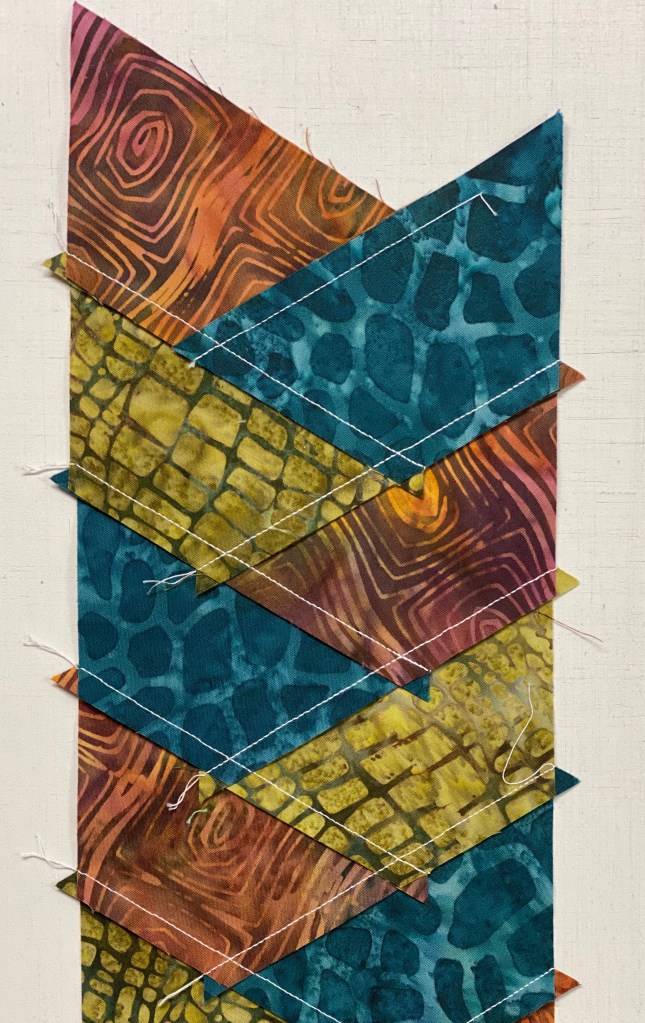
Pick up the first two right sides together, nudging the top half hexie 1/4″ from the point and stitch together. Press toward the first half hexie.
Add a third half hexie by centering it over the two stitched hexies.
Keep adding half hexies until you have the length you want. After the first two half hexies are stitched and pressed, the remaining half hexies are pressed toward the unit just added. I think this a cool inner or outer border that I will be using on another quilt.
Above are “Inside the Twister” and “Yellow Brick Road with a Twist”.