Tag Archives: Charm Squares

Doubly Charmed

Doubly Charmed
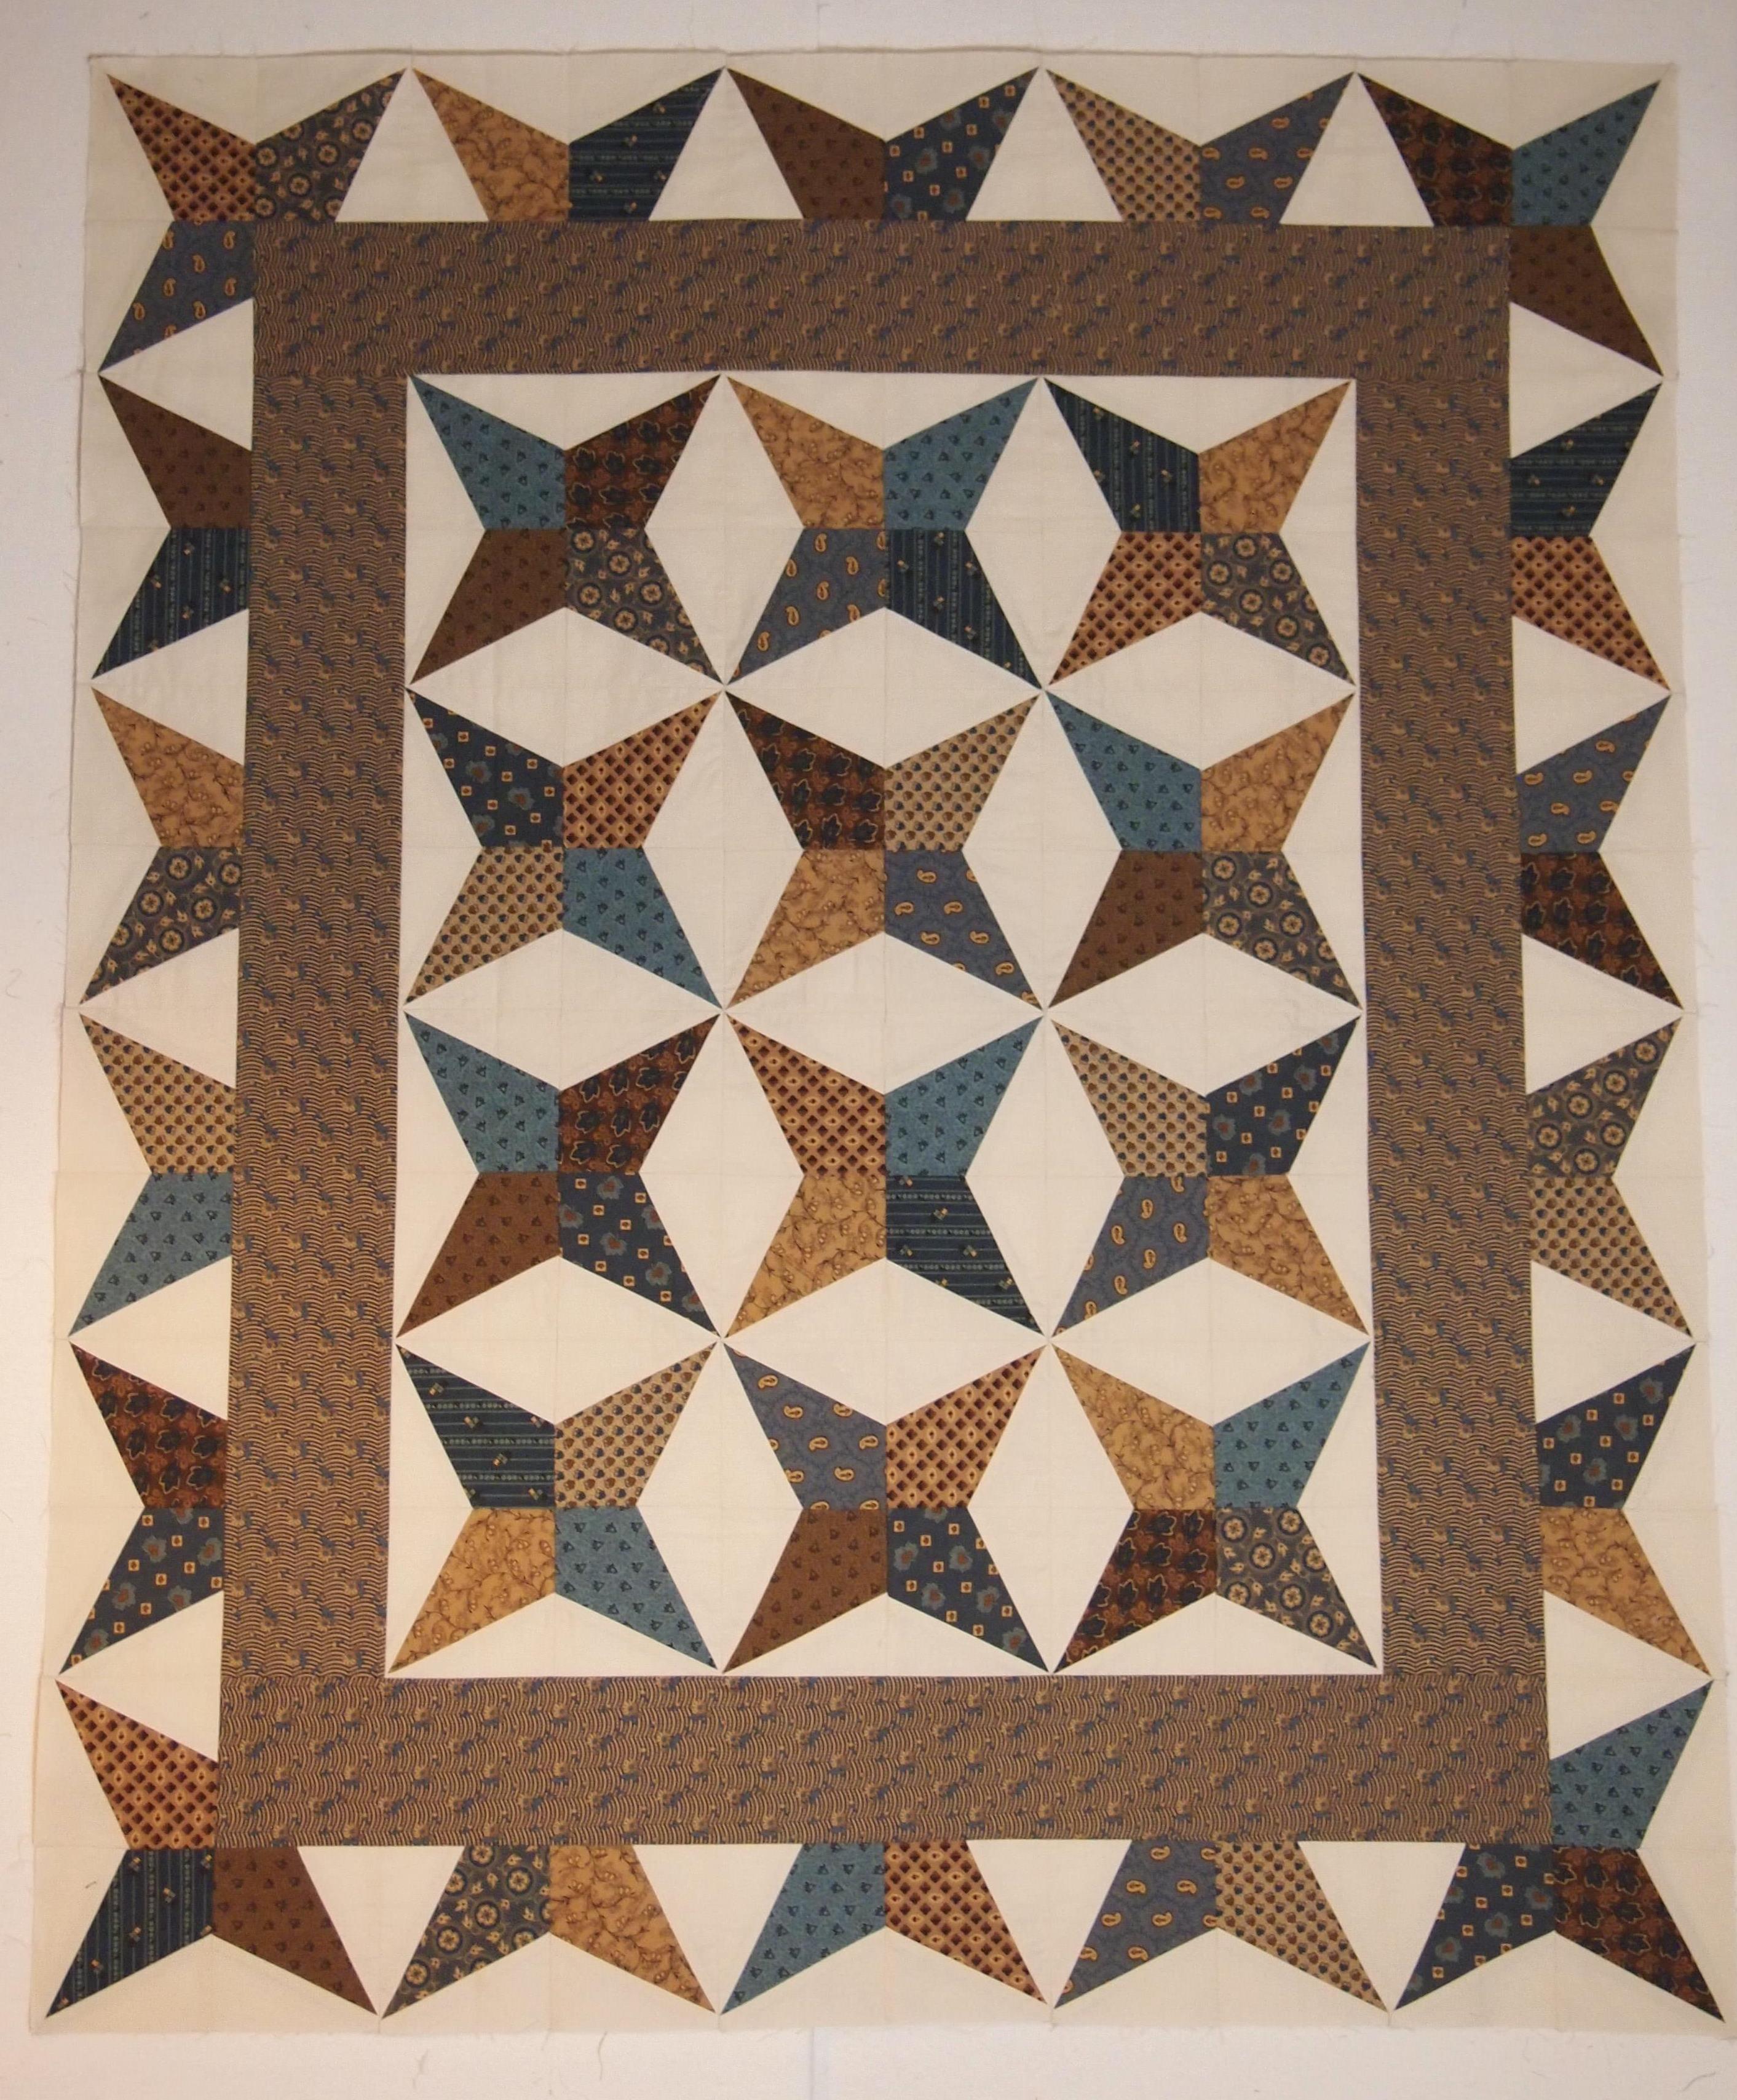
Above is Charmed Corner Beam (40″ x 48″).  I Love this pattern. It’s from Studio 180 Design and is called “Doubly Charmed”! You use the same set of 5″ squares for two quilts. You cut the center beams from the squares for the first quilt and then use the cutaway triangles for the side triangles in the second quilt. Two beautiful quilts from one set of squares. Below is Charmed V Block (47″ x 59″).
OLYMPUS DIGITAL CAMERA

OLYMPUS DIGITAL CAMERA

Above shows the first cut using the Corner Beam ruler.  Position the dashed line against the raw edge of your stacked squares, trim.
OLYMPUS DIGITAL CAMERA

Lift and position the ruler and locate the line labeled “Center Beam Trim #2”, trim.
OLYMPUS DIGITAL CAMERA

Save the side triangles for the Charmed V Block Quilt.
OLYMPUS DIGITAL CAMERA

V Block Center triangle first cut.  Fold the fabric strip deep enough to accommodate the slanted cut for the chosen size unit, trim.
OLYMPUS DIGITAL CAMERA

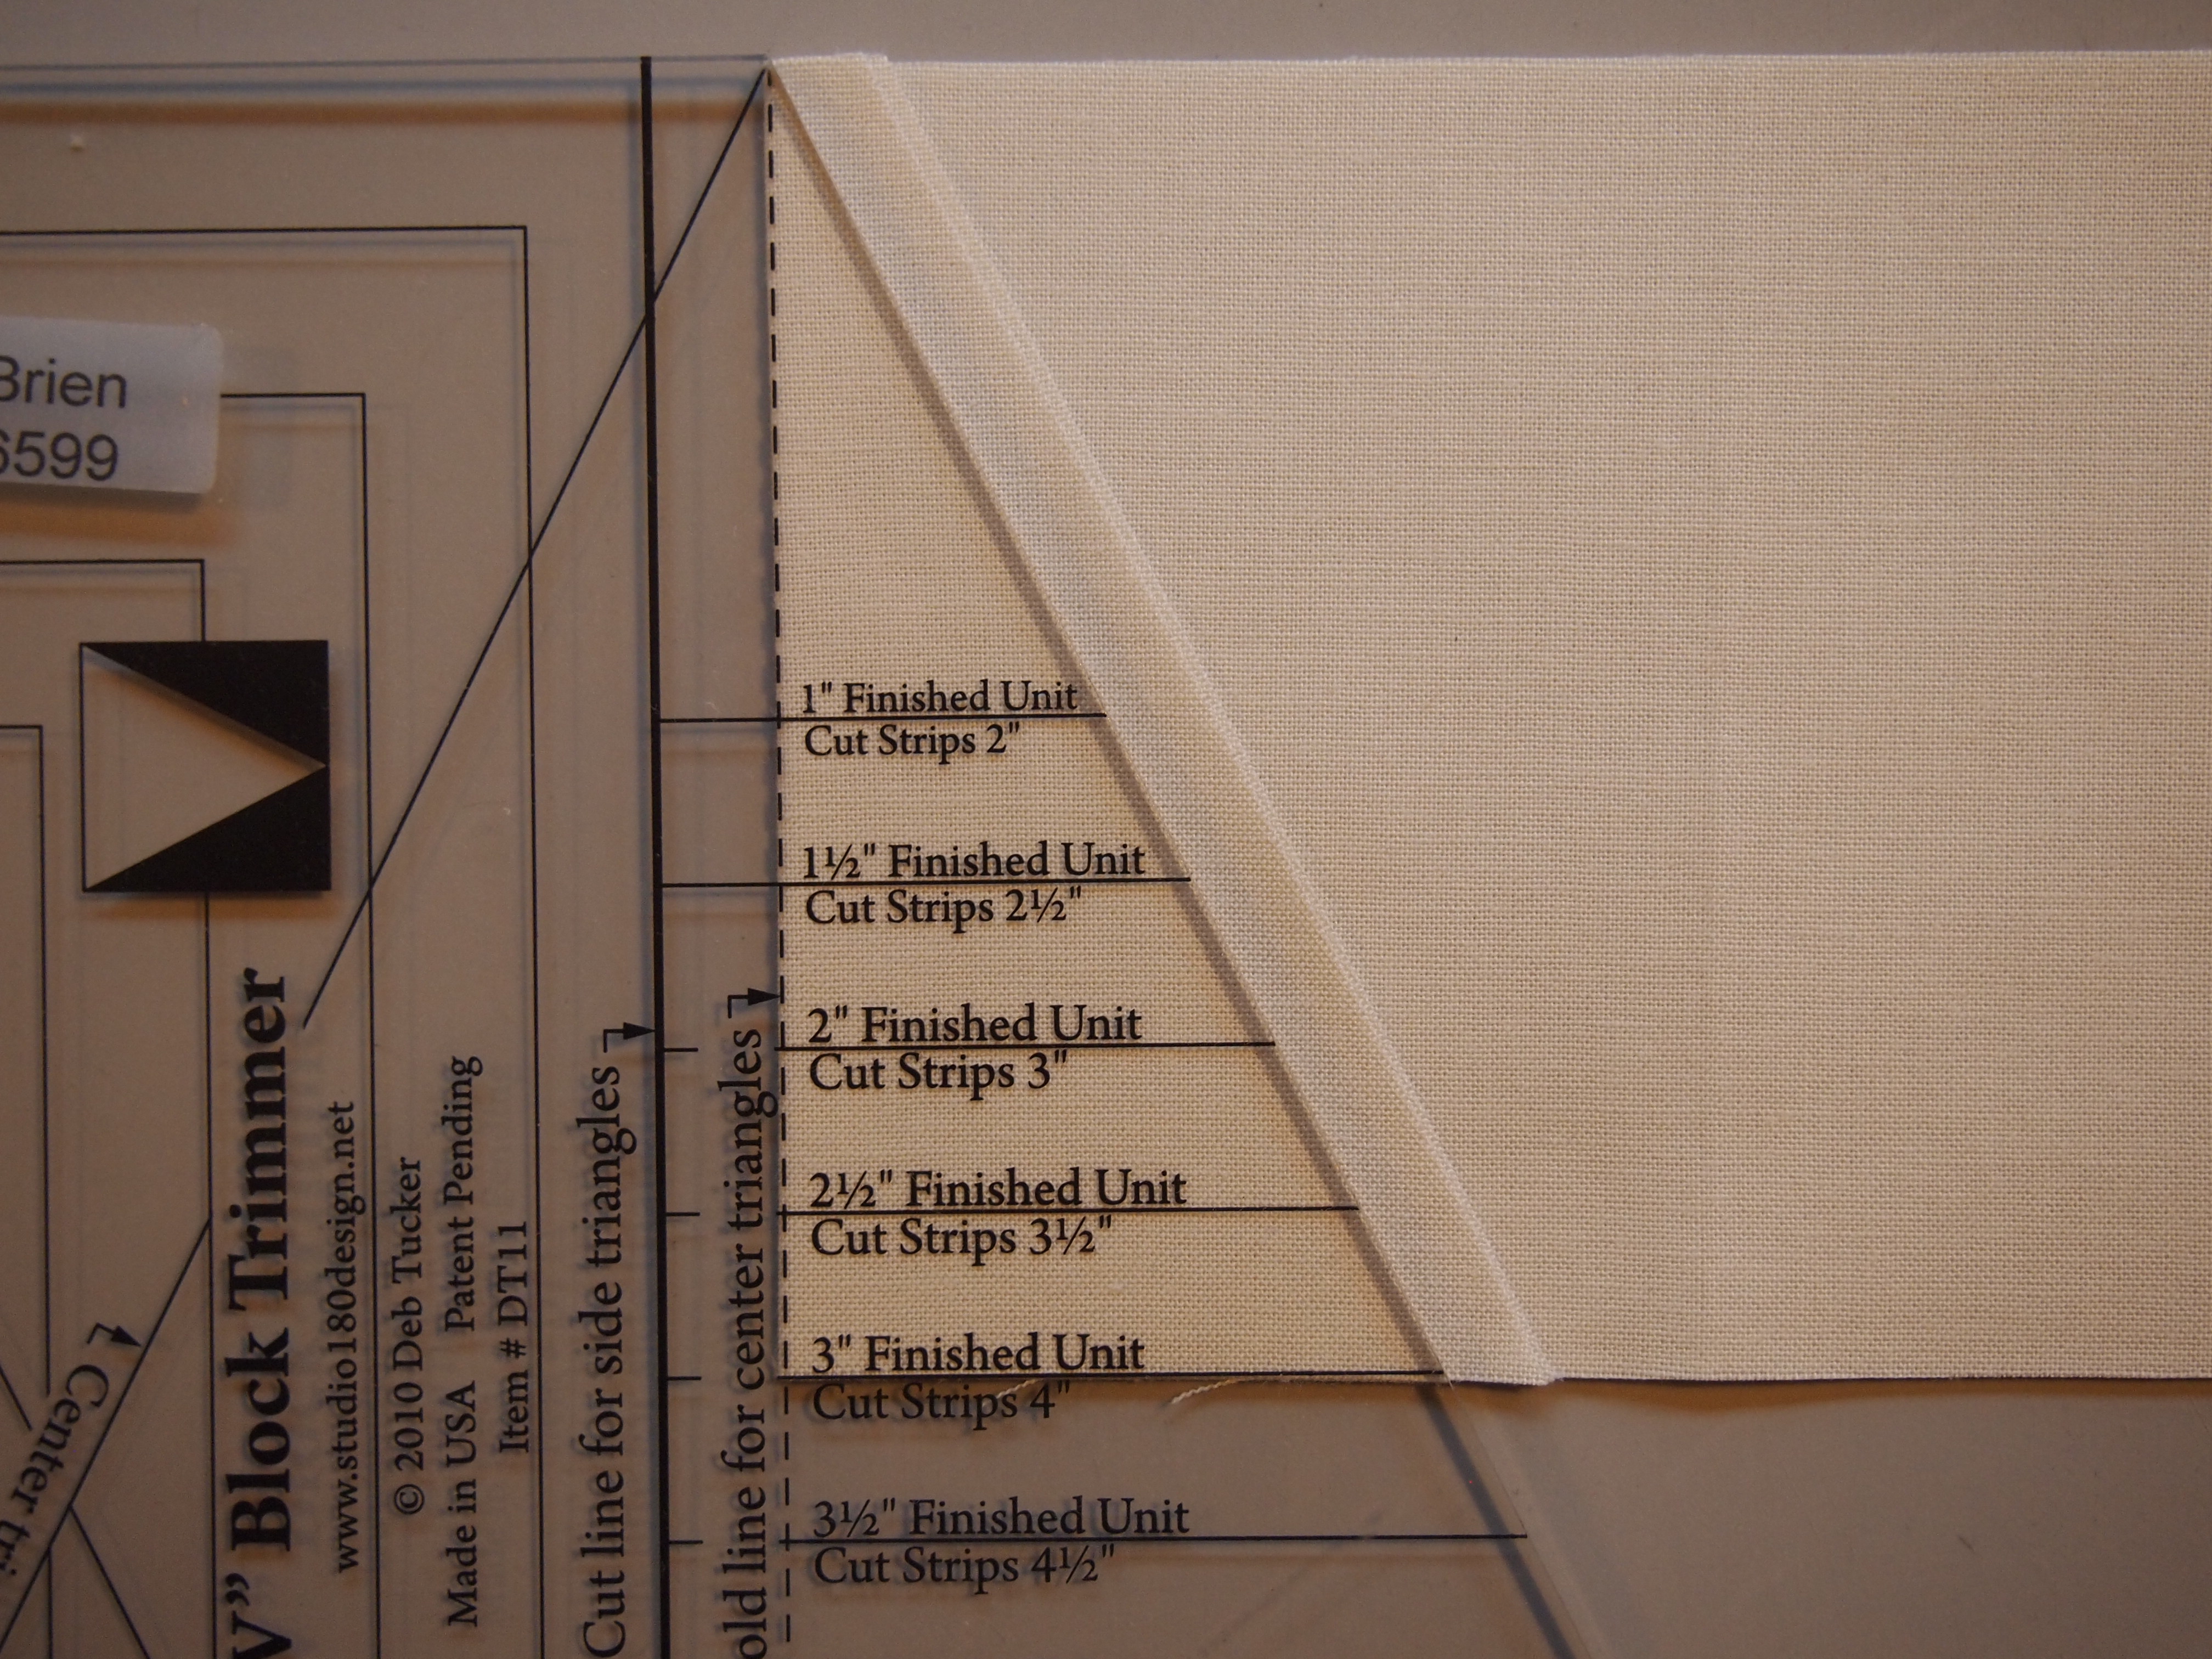
2nd cut.  Move the cut triangles off to the side and flip the strip over and fold the fabric strip deep enough to accommodate the slanted cut, trim.
OLYMPUS DIGITAL CAMERA

Per the instructions in the pattern, trim down the side triangles saved from the corner beam quilt and construct your units.  This is a companion pattern for the V Block, Corner Beam, and Squared2 Tools from Studio 180 Design.
OLYMPUS DIGITAL CAMERA

Chevron Quilt – More fun with Half Square Triangles

After having fun making the Big Square Quilt with Layer Cakes I wanted to make a Chevron quilt with Layer Cakes or 10″ squares. It looks even better with all blues and whites or reds and whites, but I was working with what I had in my stash. My goal was to provide a decent lesson plan for a beginner quilter. As with the Big Star Quilt, the Chevron quilt can also be made with charm squares.

Chevron Quilt
Everytime I look at this quilt it reminds me of the poem about the “Crooked Little Man” (see the label at the end).

OLYMPUS DIGITAL CAMERA
I cut 30 solid color 10” squares to pair with my 30 printed layer cakes.

OLYMPUS DIGITAL CAMERA
With right sides together sew ¼” seam around all 4 sides of your layer cakes.

OLYMPUS DIGITAL CAMERA
First Cut diagonally

OLYMPUS DIGITAL CAMERA
Second Cut diagonally

OLYMPUS DIGITAL CAMERA
You now have 4 half square triangles. Press open toward the dark fabric

OLYMPUS DIGITAL CAMERA
Square up your blocks to 6.5” I love my Tucker Trimmer I for squaring up. Note: I found that my layer cakes were not always square nor a consistent 10” square. So, I felt it was well worth the time it took to square up these blocks. It made the top go together nicely.

OLYMPUS DIGITAL CAMERA
Time to go to the design wall. When laying out your blocks remember to match solid to solid and print to print. I initially had 42 Layer cakes and 42 solid 10” squares. Which meant I had 168 – 6.5” half square triangles (HST) for a 12 by 14 layout. I could not fit them all on my design wall, so I decided to make mine 10 across and 12 down. When the HST were sewn together it measured 62” by 74” before the borders were added.

OLYMPUS DIGITAL CAMERA
Once you get it all laid out, number your rows with row 1 on the left side, so when you join your rows the top gets bigger moving out from the inside of your sewing machine.

OLYMPUS DIGITAL CAMERA

OLYMPUS DIGITAL CAMERA

OLYMPUS DIGITAL CAMERA
Sew your blocks into rows using a ¼” seam allowance. I alternate direction when pressing the seam of the sewn blocks. Row 1 I pressed going down. Row 2 I pressed going up so that when I joined the rows the seams nest nicely. I chose 2.5 strips for my inner border. I like to rip one piece outer borders. So I added 10” wide outer borders. You can always change it up for your quilt, making your borders larger or smaller.

OLYMPUS DIGITAL CAMERA