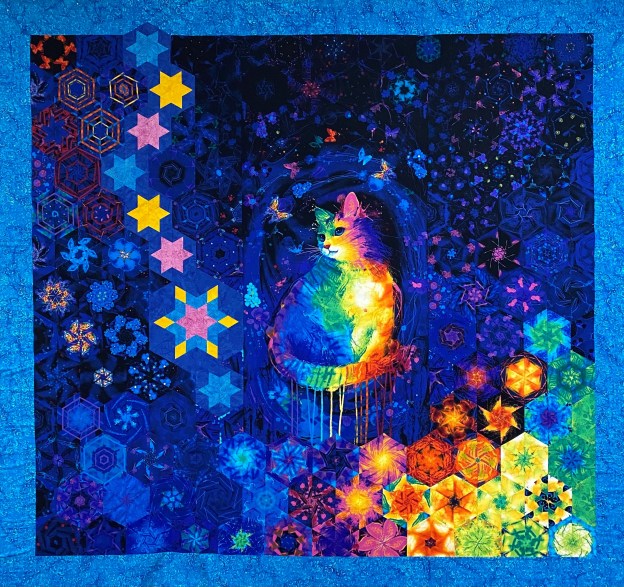
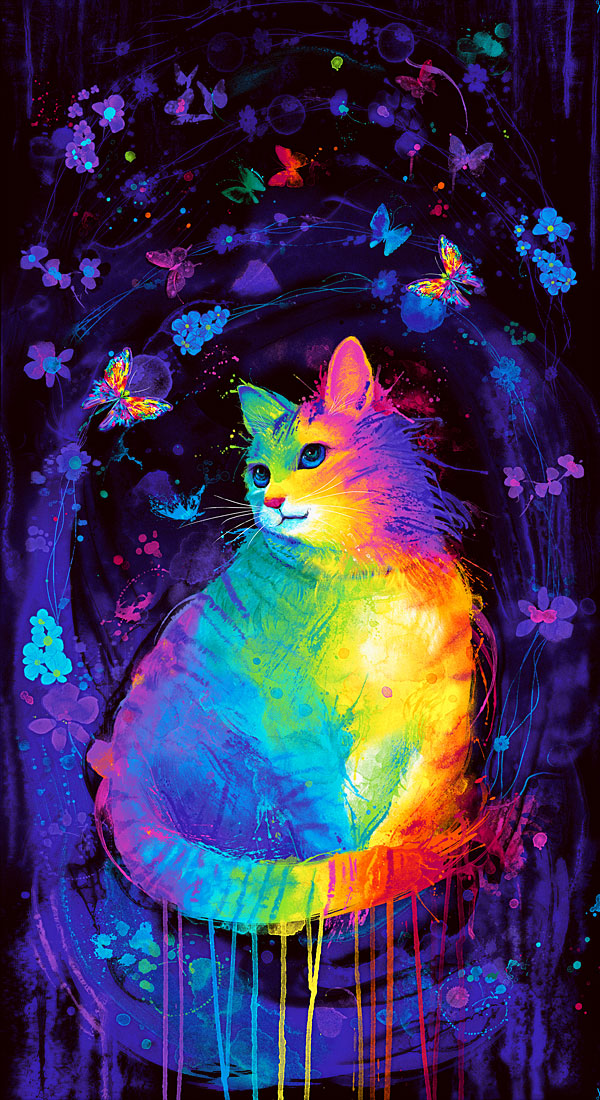
The official name for this quilt is Samantha’s Rainbow Kitty. This quilt was made with love for my Granddaughter Sam. It was supposed to be finished for Christmas but it is in time for my special Valentine.
Why did I choose 5.5″ Finished Hexagons?
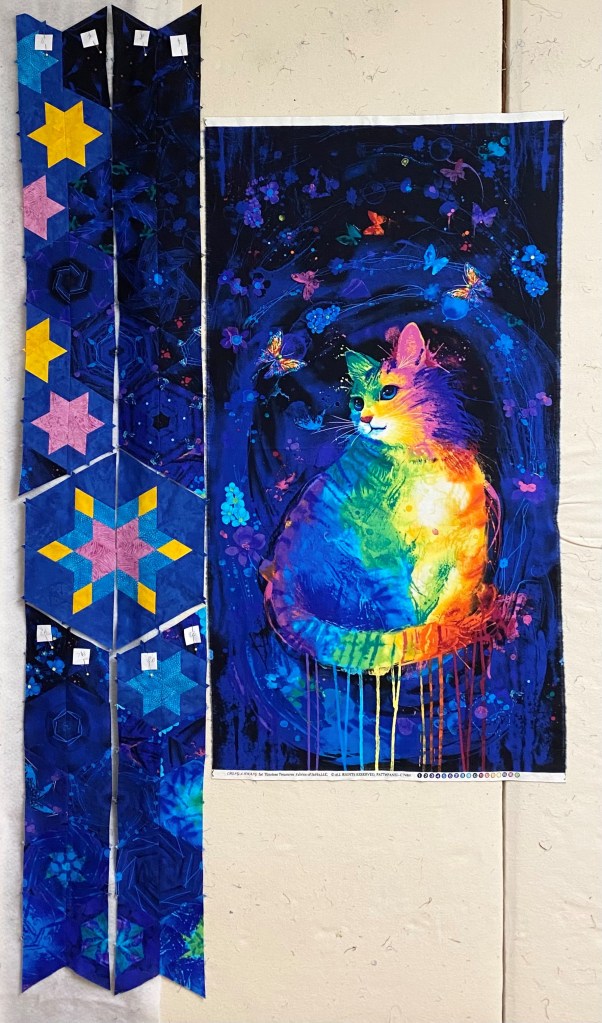
This panel measured 23 inches wide. I chose 5.5″ (Cut my strips 3.5″) finished hexies because 4 X 5.5 = 22″. Now I only have trim 1/2″ from both sides and my hexies will fit along the bottom and the top of the panel.
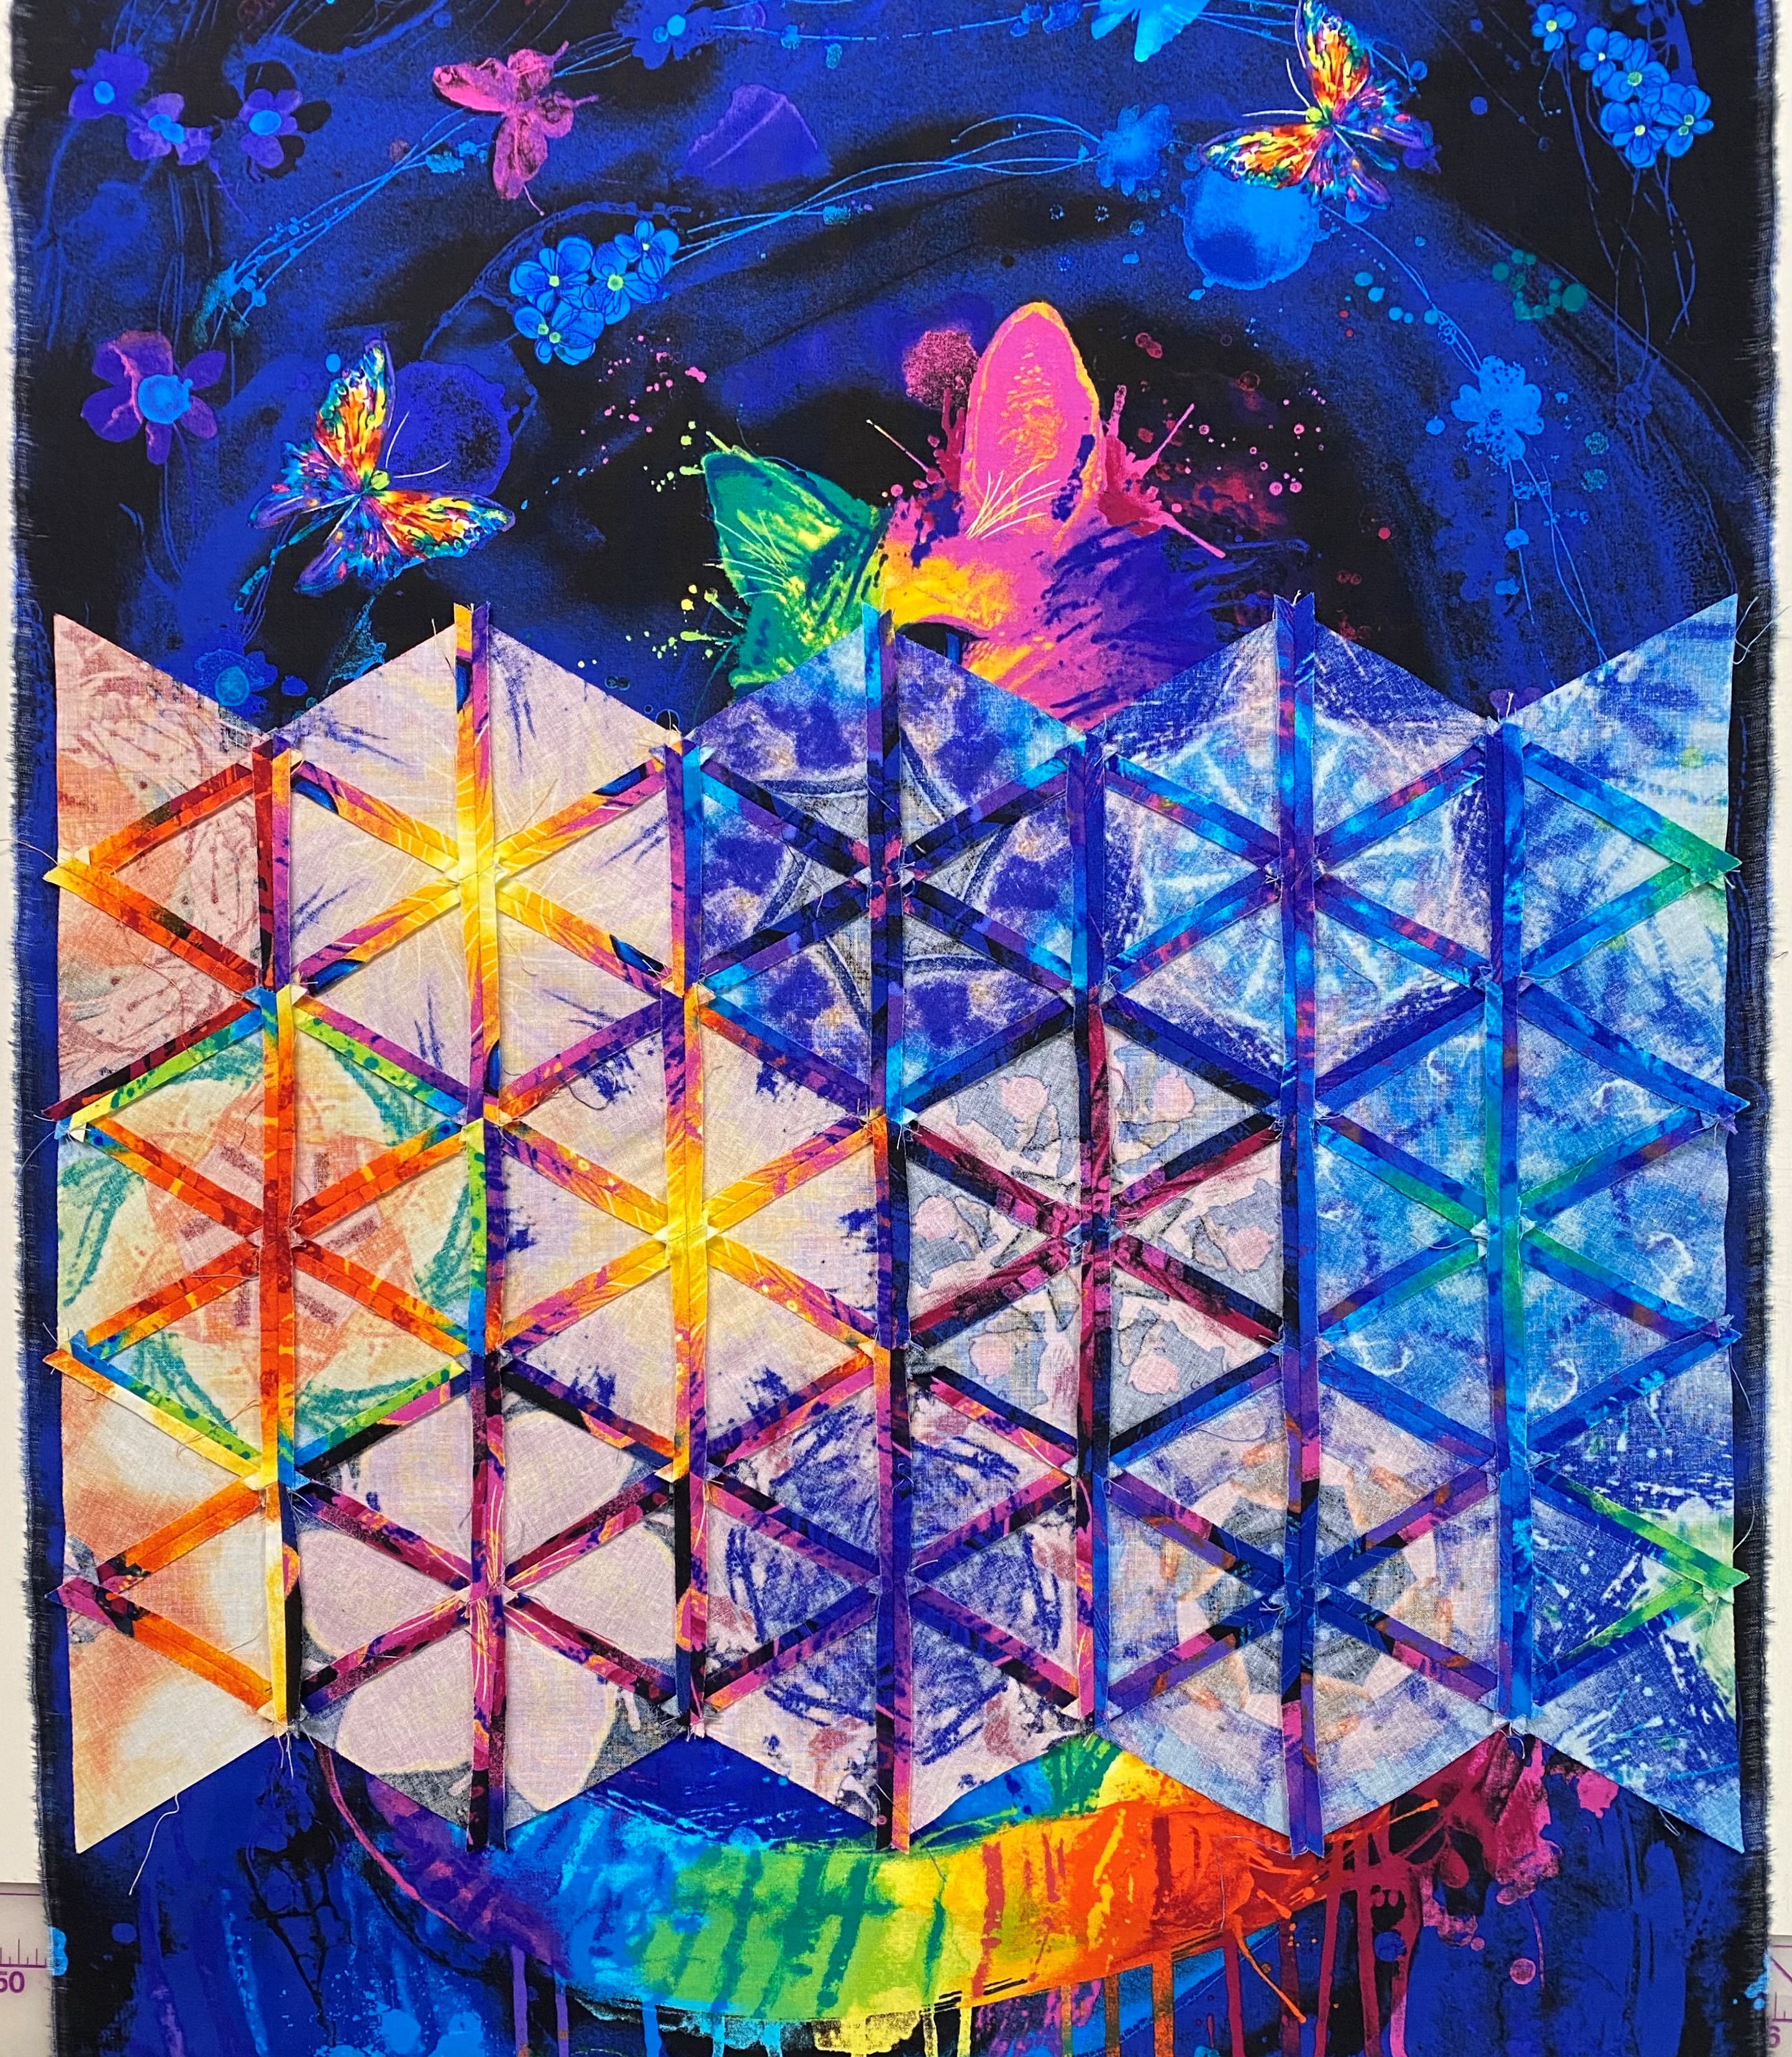
Checkerboard 60
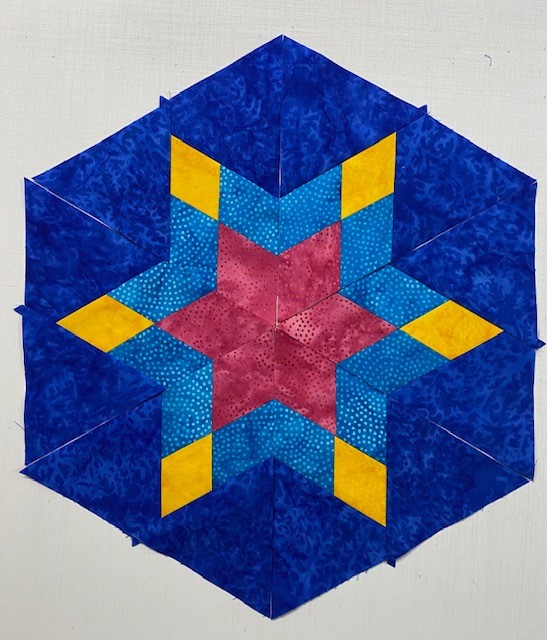
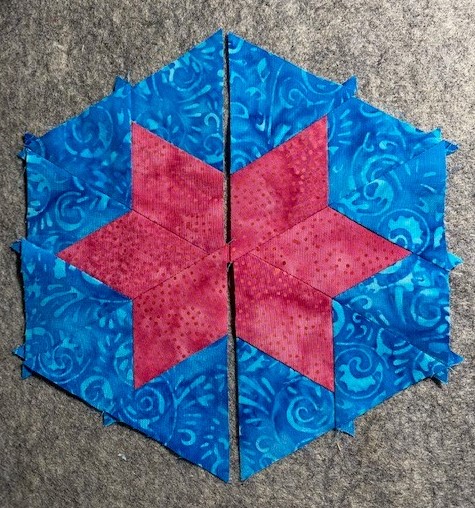
I wanted to add a large star to my design. Using my Star 60 Tool and Checkerboard 60 Technique Sheet I was able to make a great star.
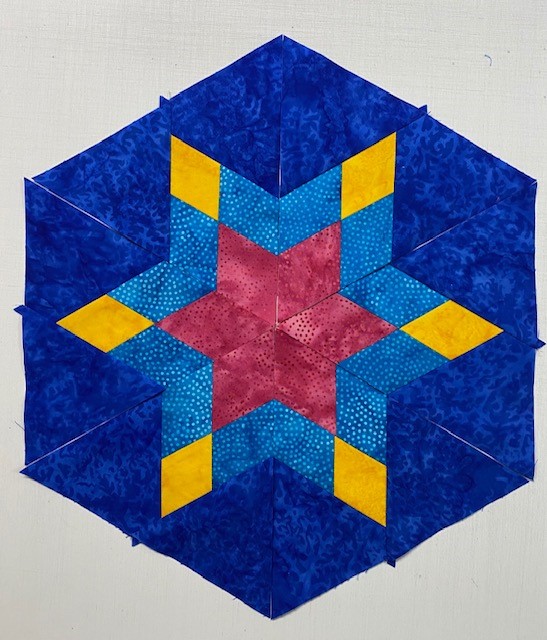
I began by deciding on what size to make my star. I wanted it twice as big as my 5.5″ finished hexies, hmmm, that means an 11″ finished star. The Checkerboard Technique sheet makes beautiful stars in 17 sizes from 2″ up to 18″ in 1″ increments. I needed to make 5.5″ Finished units. I followed technique sheet instructions for a 6″ Finished Units and will trim them so they would finish at 5.5″ units.

Step 1 – Make two strip sets.
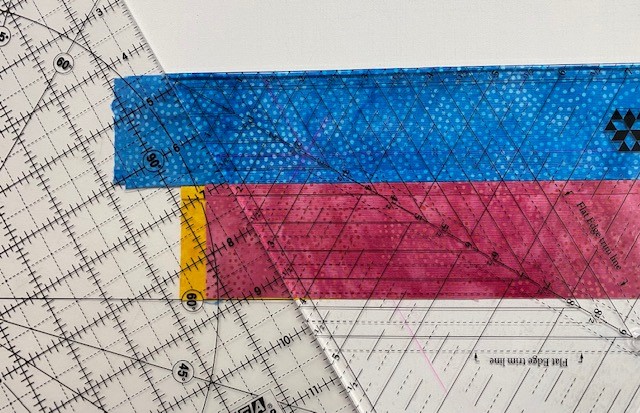
Step 2 – Layer the strips sets one on top of the other right sides down. Using the Star 60 tool and a regular ruler establish the 60 degree angle.

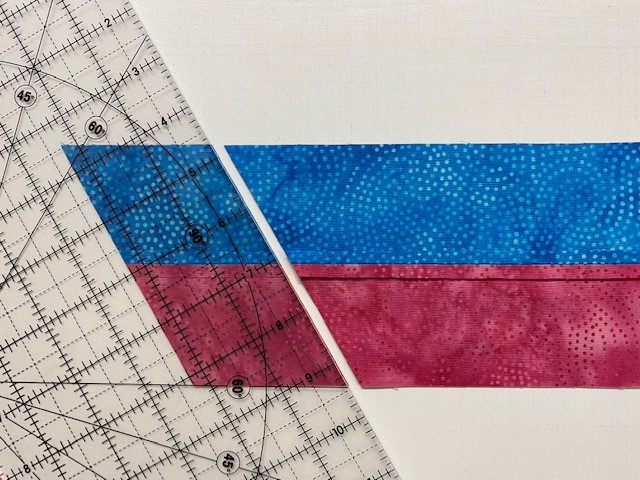
From the first cut, cut additional angled sections the same width as the as the cut size of the diamond strips.

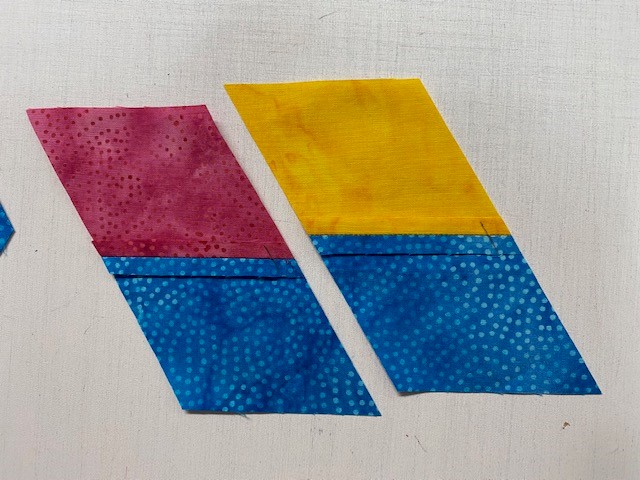
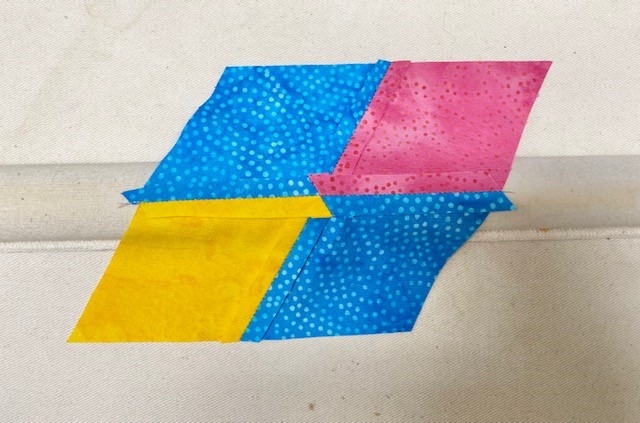
Step 3 – Pair each “A” section with a “B” section. Make sure the inner and outer diamonds are oriented correctly. The pink diamonds will be the inner part of my star. The outer diamonds are yellow.

On the edges you will be stitching together, mark the 1/4″ seam allowance across the seams on the wrong side.

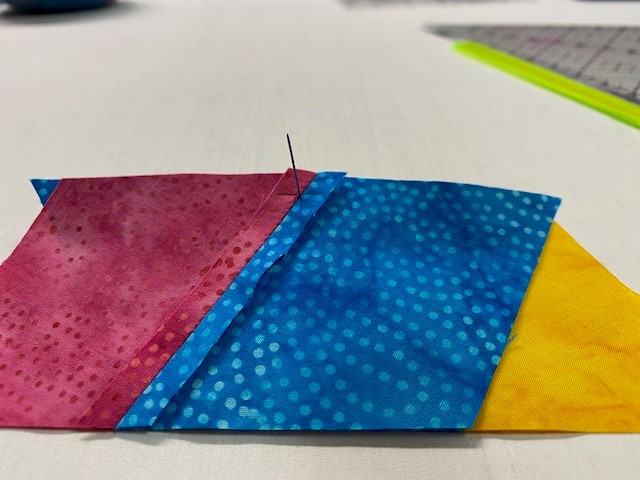

Stitch your section “A” with Section “B” units.
Press the seams open.

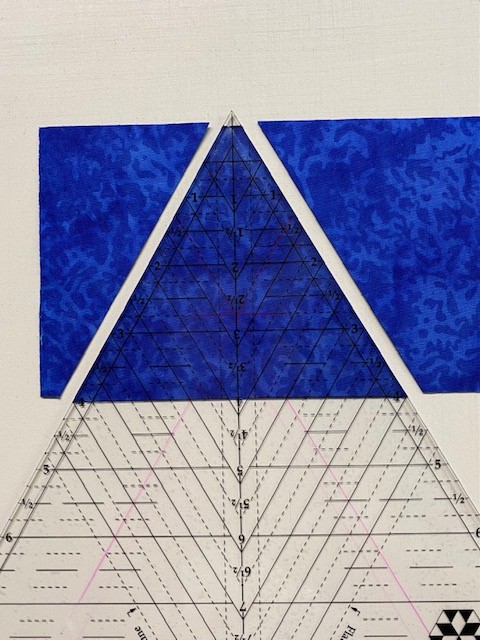
Step 4 – Trim the outer diamond using the Star 60 tool. I trimmed using the Outer Diamond Trim Guidelines for a 5″ finished unit.
First cut.

Continue cutting side triangles.
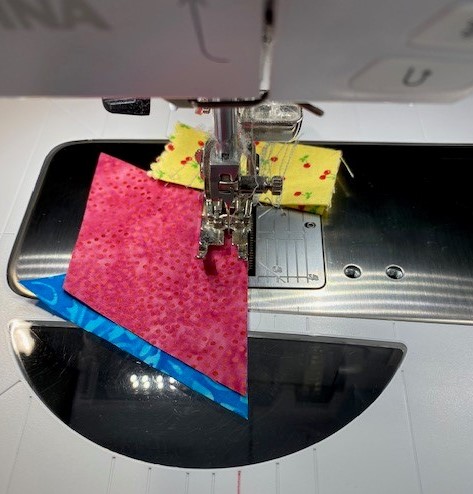
Step 5 – Add the side triangles.

Layout the right side triangles.

Position the side triangle on top of the diamond, matching the flat corner to the edge of the diamond.
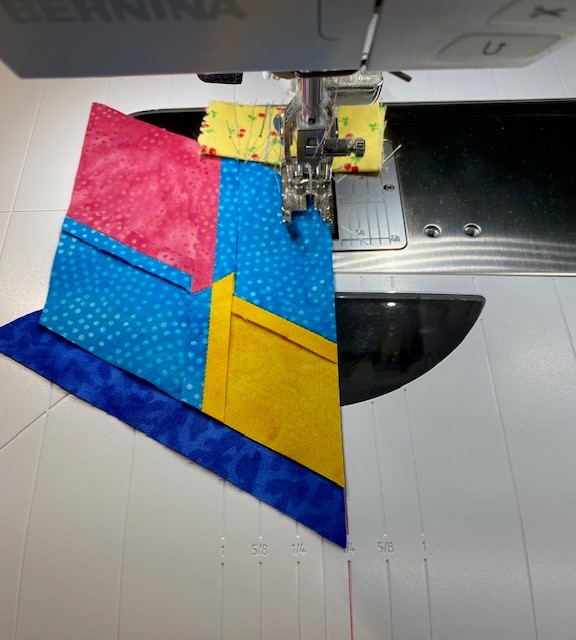
Stitch with the diamond on top.
Press toward the diamond. (Whatever you are pressing toward, goes on top.)
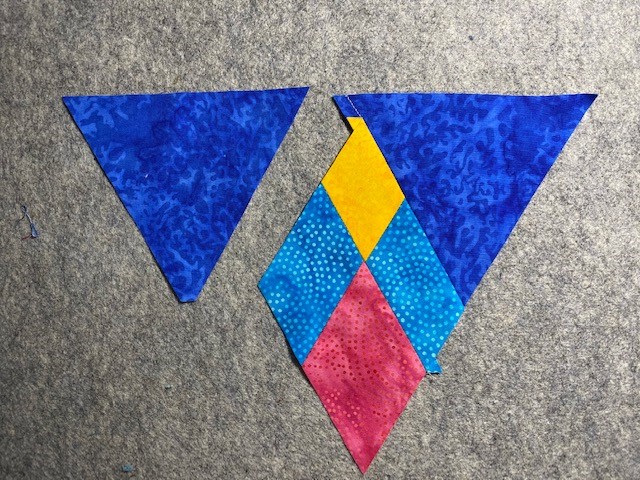
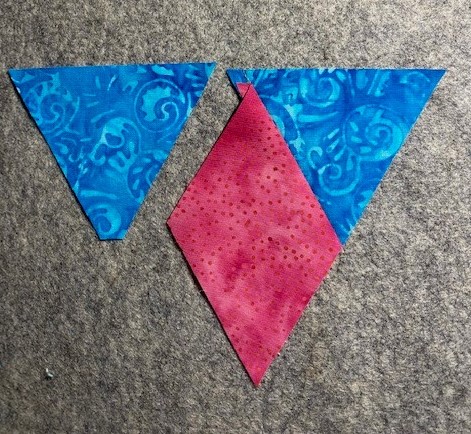
Layout the left side triangle.

Position the the remaining side triangle on the other side of the diamond point. Align the flat corner of the triangle with the edge of the diamond, aligning the raw edges as before.

After it is stitched, but before you press, trim the unit as shown above to remove bulk.
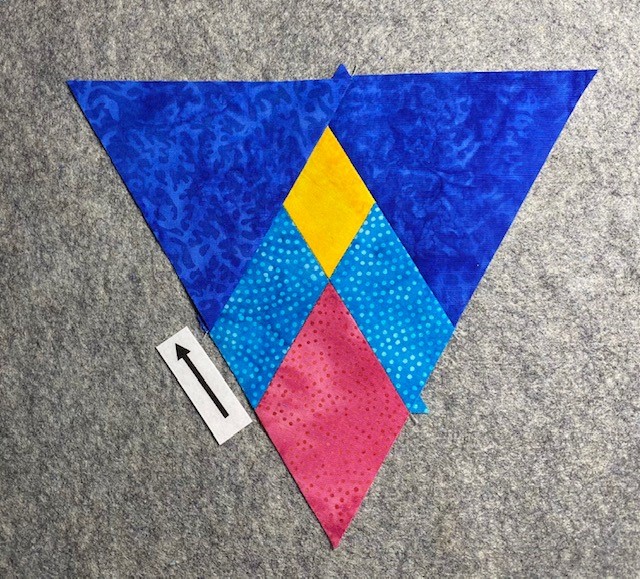
Press toward the side triangle.
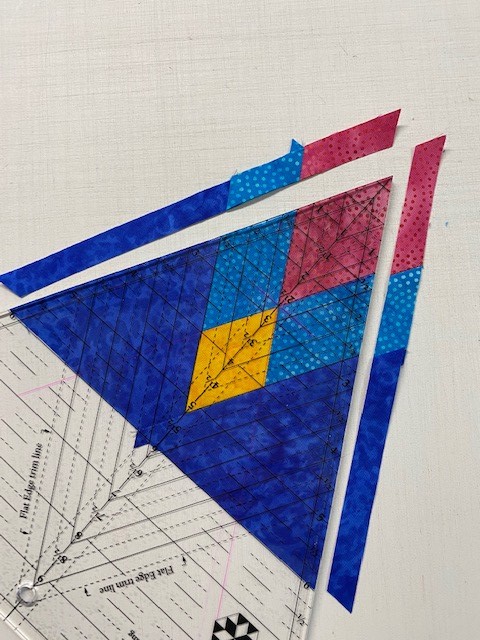
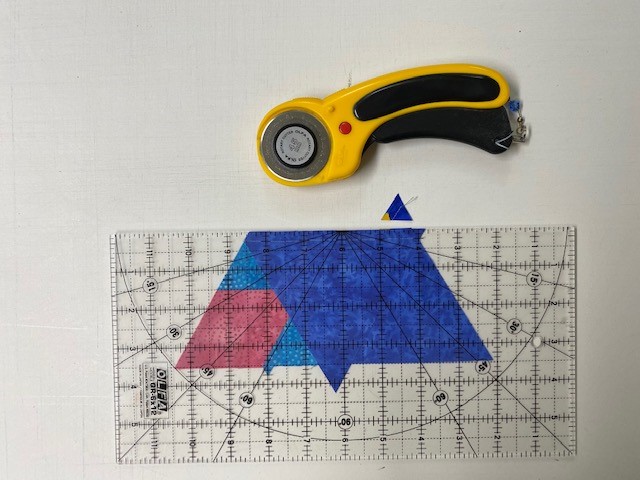
Step 6 – Trim the pieced Star 60 unit suing the Star 60 tool. I trimmed using the 5″ finished unit guidelines.
Step 7 – Describes the trimming the final edge. I did not complete this trim. Remember, I need an 11″ finished star, which means I need 5.5″ finished units. I accomplished this by trimming the diamonds per the 5″ guidelines. I created an 11″ finished star by NOT trimming the outer edges of the star.
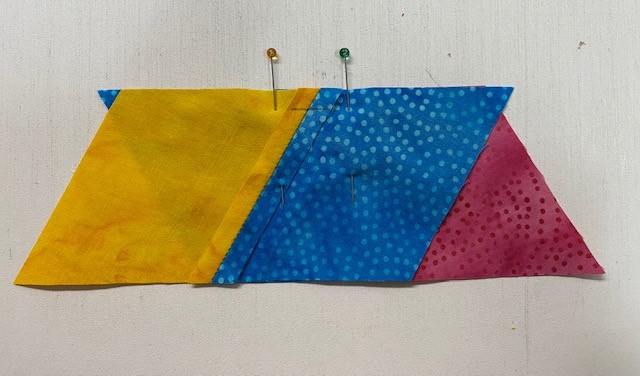
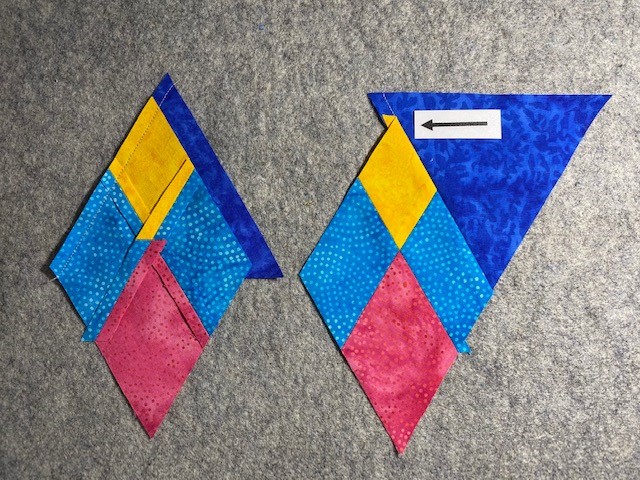
Layout your diamond units.

Stitch your diamond units together creating two halves.
Making Star 60’s – To make 5.5″ finished Stars, I am following the cutting instructions for 3″ Finished Units. Remember, the chart refers to UNITS not to Finished Stars! To use the chart, first determine the desired finished size of your unit, then follow the row across for the strip size for the shape you want to cut.


Cutting the Diamonds – I followed the cutting instructions for 3″ finished units. Trim one short edge at a 60 degree angle as shown above. Locate the Diamond Sub-Cut Guideline in the chart which for 3″ finished units is 4″. Align those guidelines with the raw edges of the strip and the angled cut just made as shown in the diagram. Cut along the leading edge of the tool to create oversized diamond shapes.
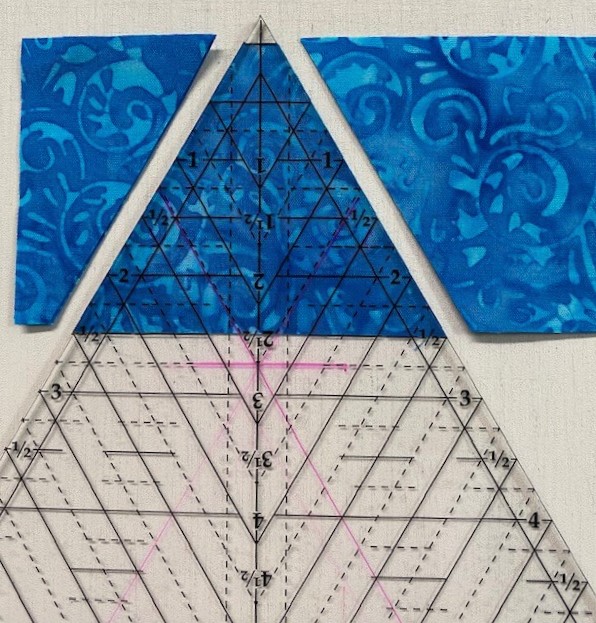

Cut your side triangles. For 3″ finished units the side triangle strips are 2 1/2″.

Layout the right side triangle.

Position the side triangle on top of the diamond, matching the flat corner to the edge of the diamond.
Stitch with the diamond on top.
Press toward the Diamond. Layout the remaining side triangle.

Position the the remaining side triangle on the other side of the diamond point. Align the flat corner of the triangle with the edge of the diamond, aligning the raw edges as before.
Trim the bulk as shown above.

Press toward the side triangle.

I followed the cutting instructions for 3″ finished units, BUT I’m making 5.5″ finished stars, so I’m trimming the Diamond Point using the 2 1/2″ guidelines. I do not trim the outer edges of the unit to obtain a 5.5″ finished star.

Stitch units into two halves.
Designing With the Hexagons
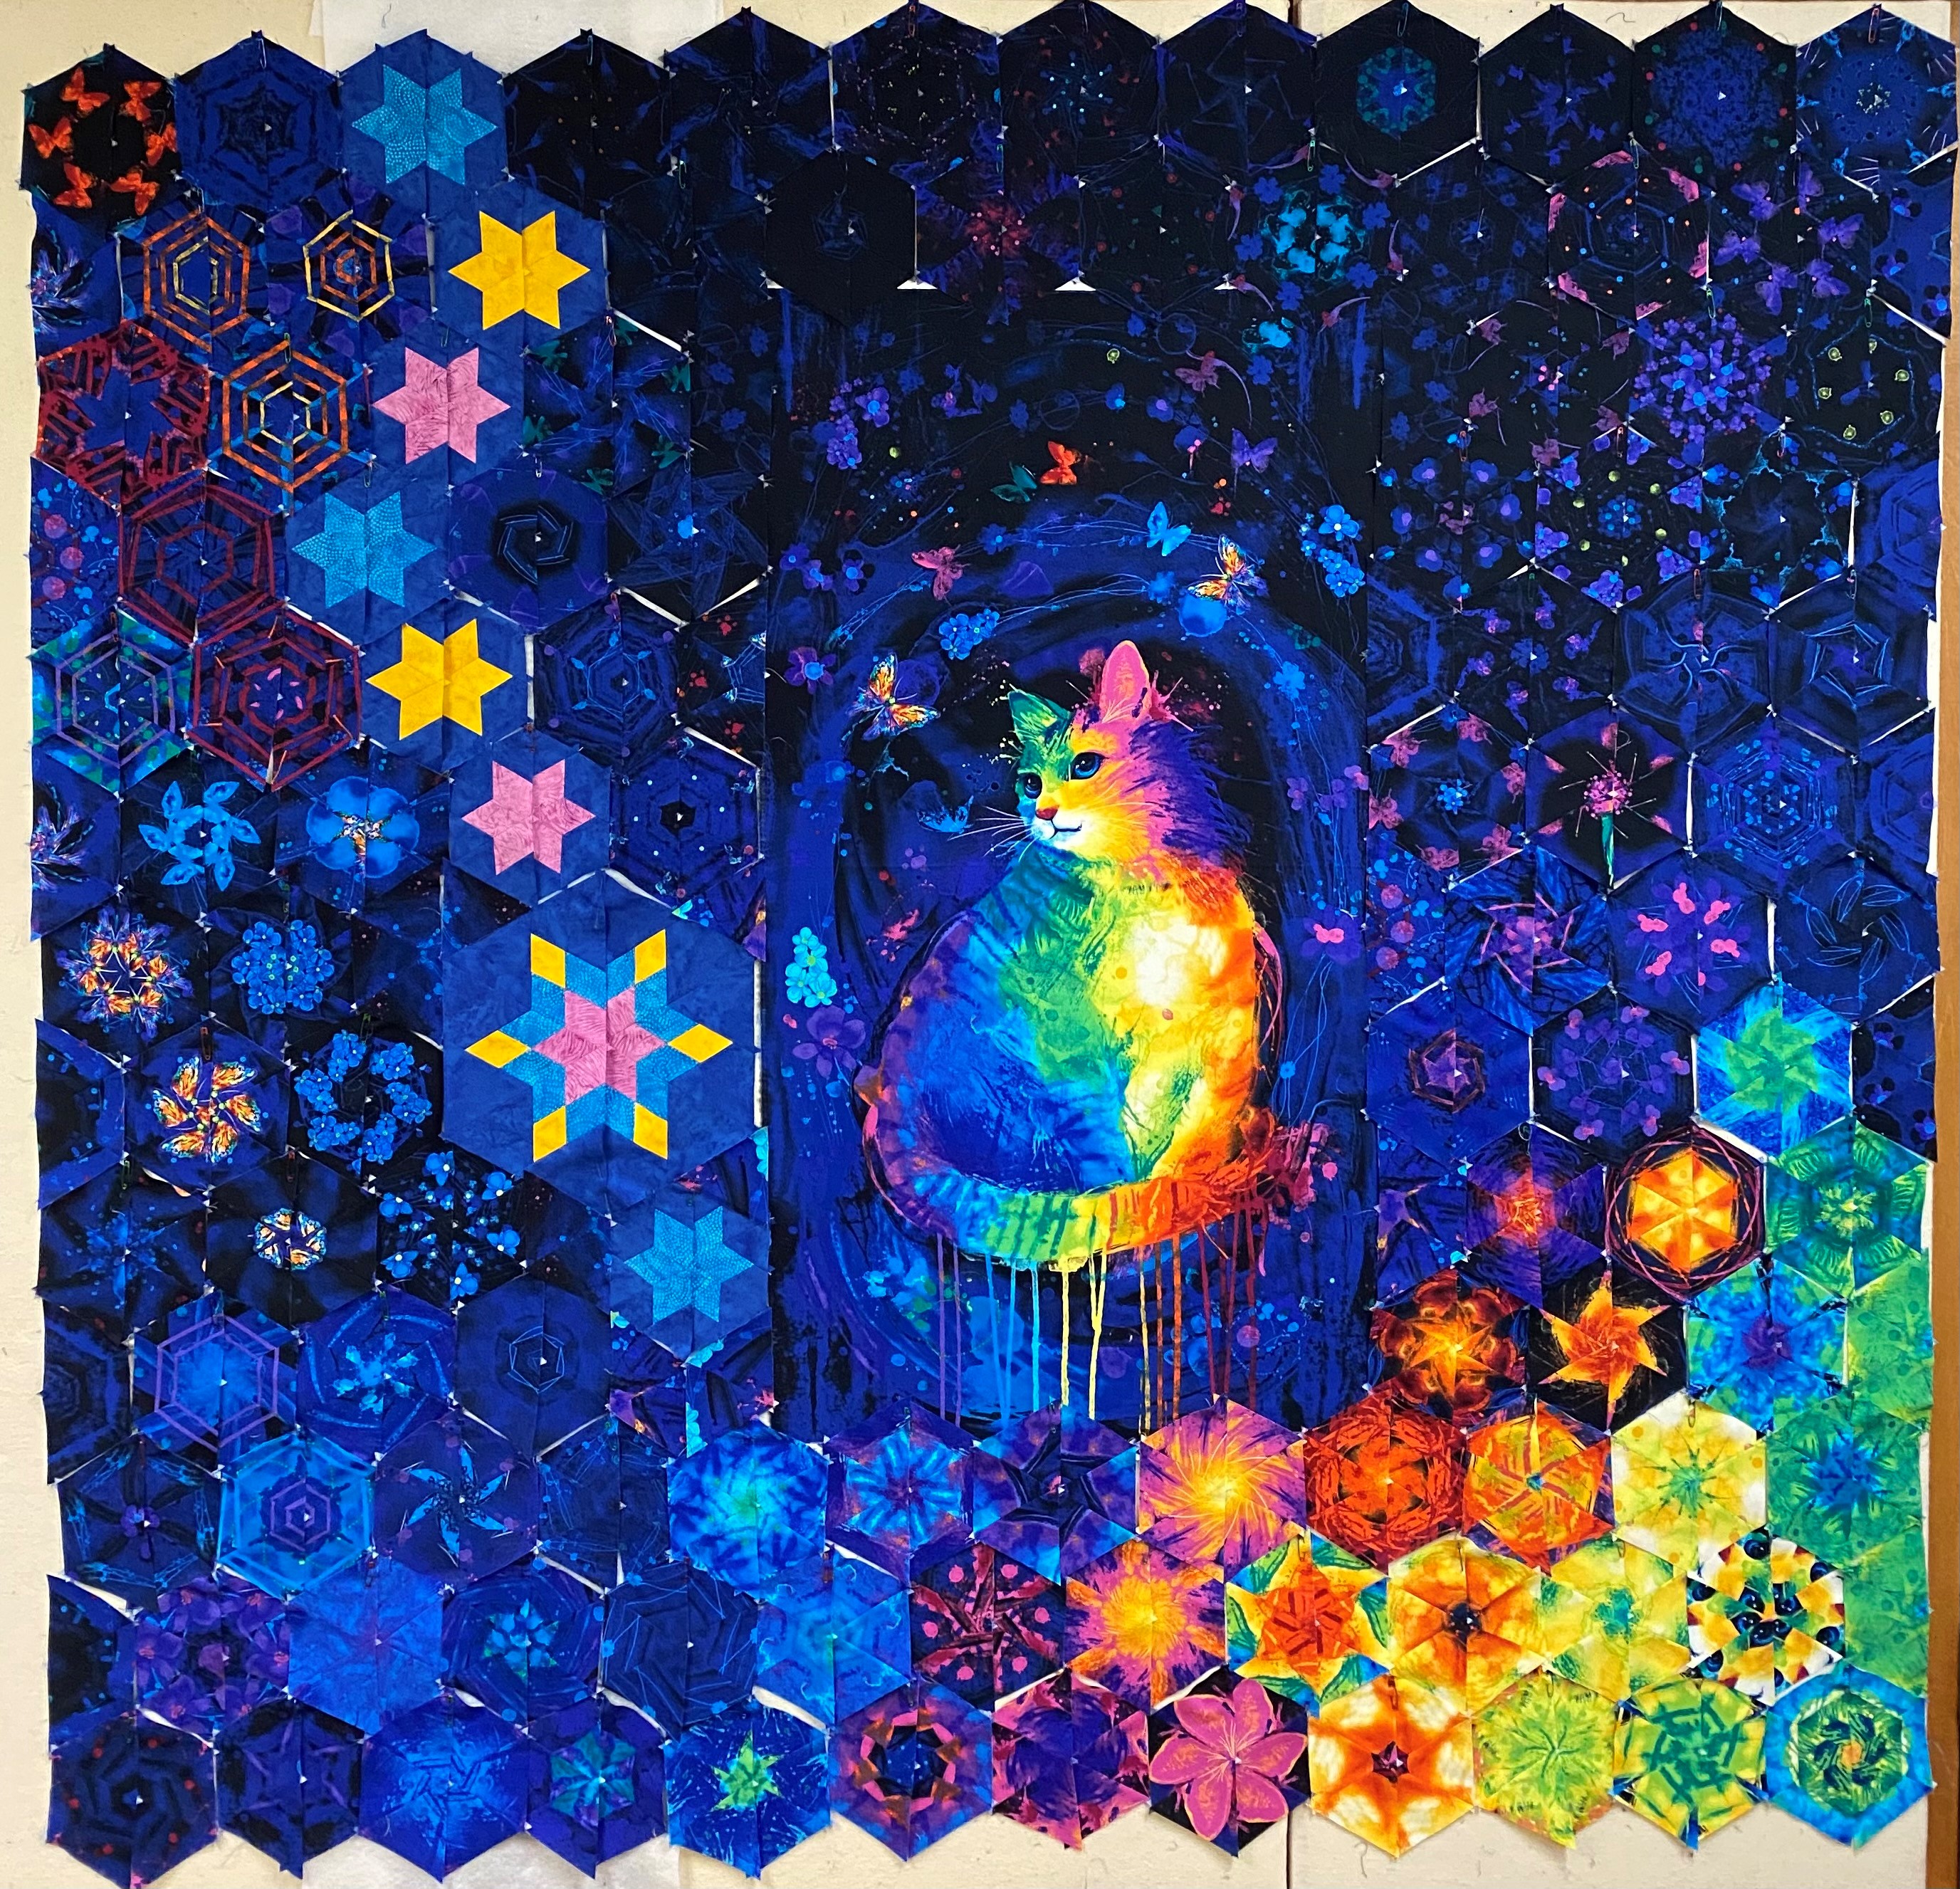

After I numbered my rows, I stitched the four rows above the checkerboard star into two rows, and the same with the four rows under the checkerboard star as shown in photo 1. Photo 2 shows stitching the top and bottom row to the checkerboard star halves. Photo 3 shows the two rows joined together.
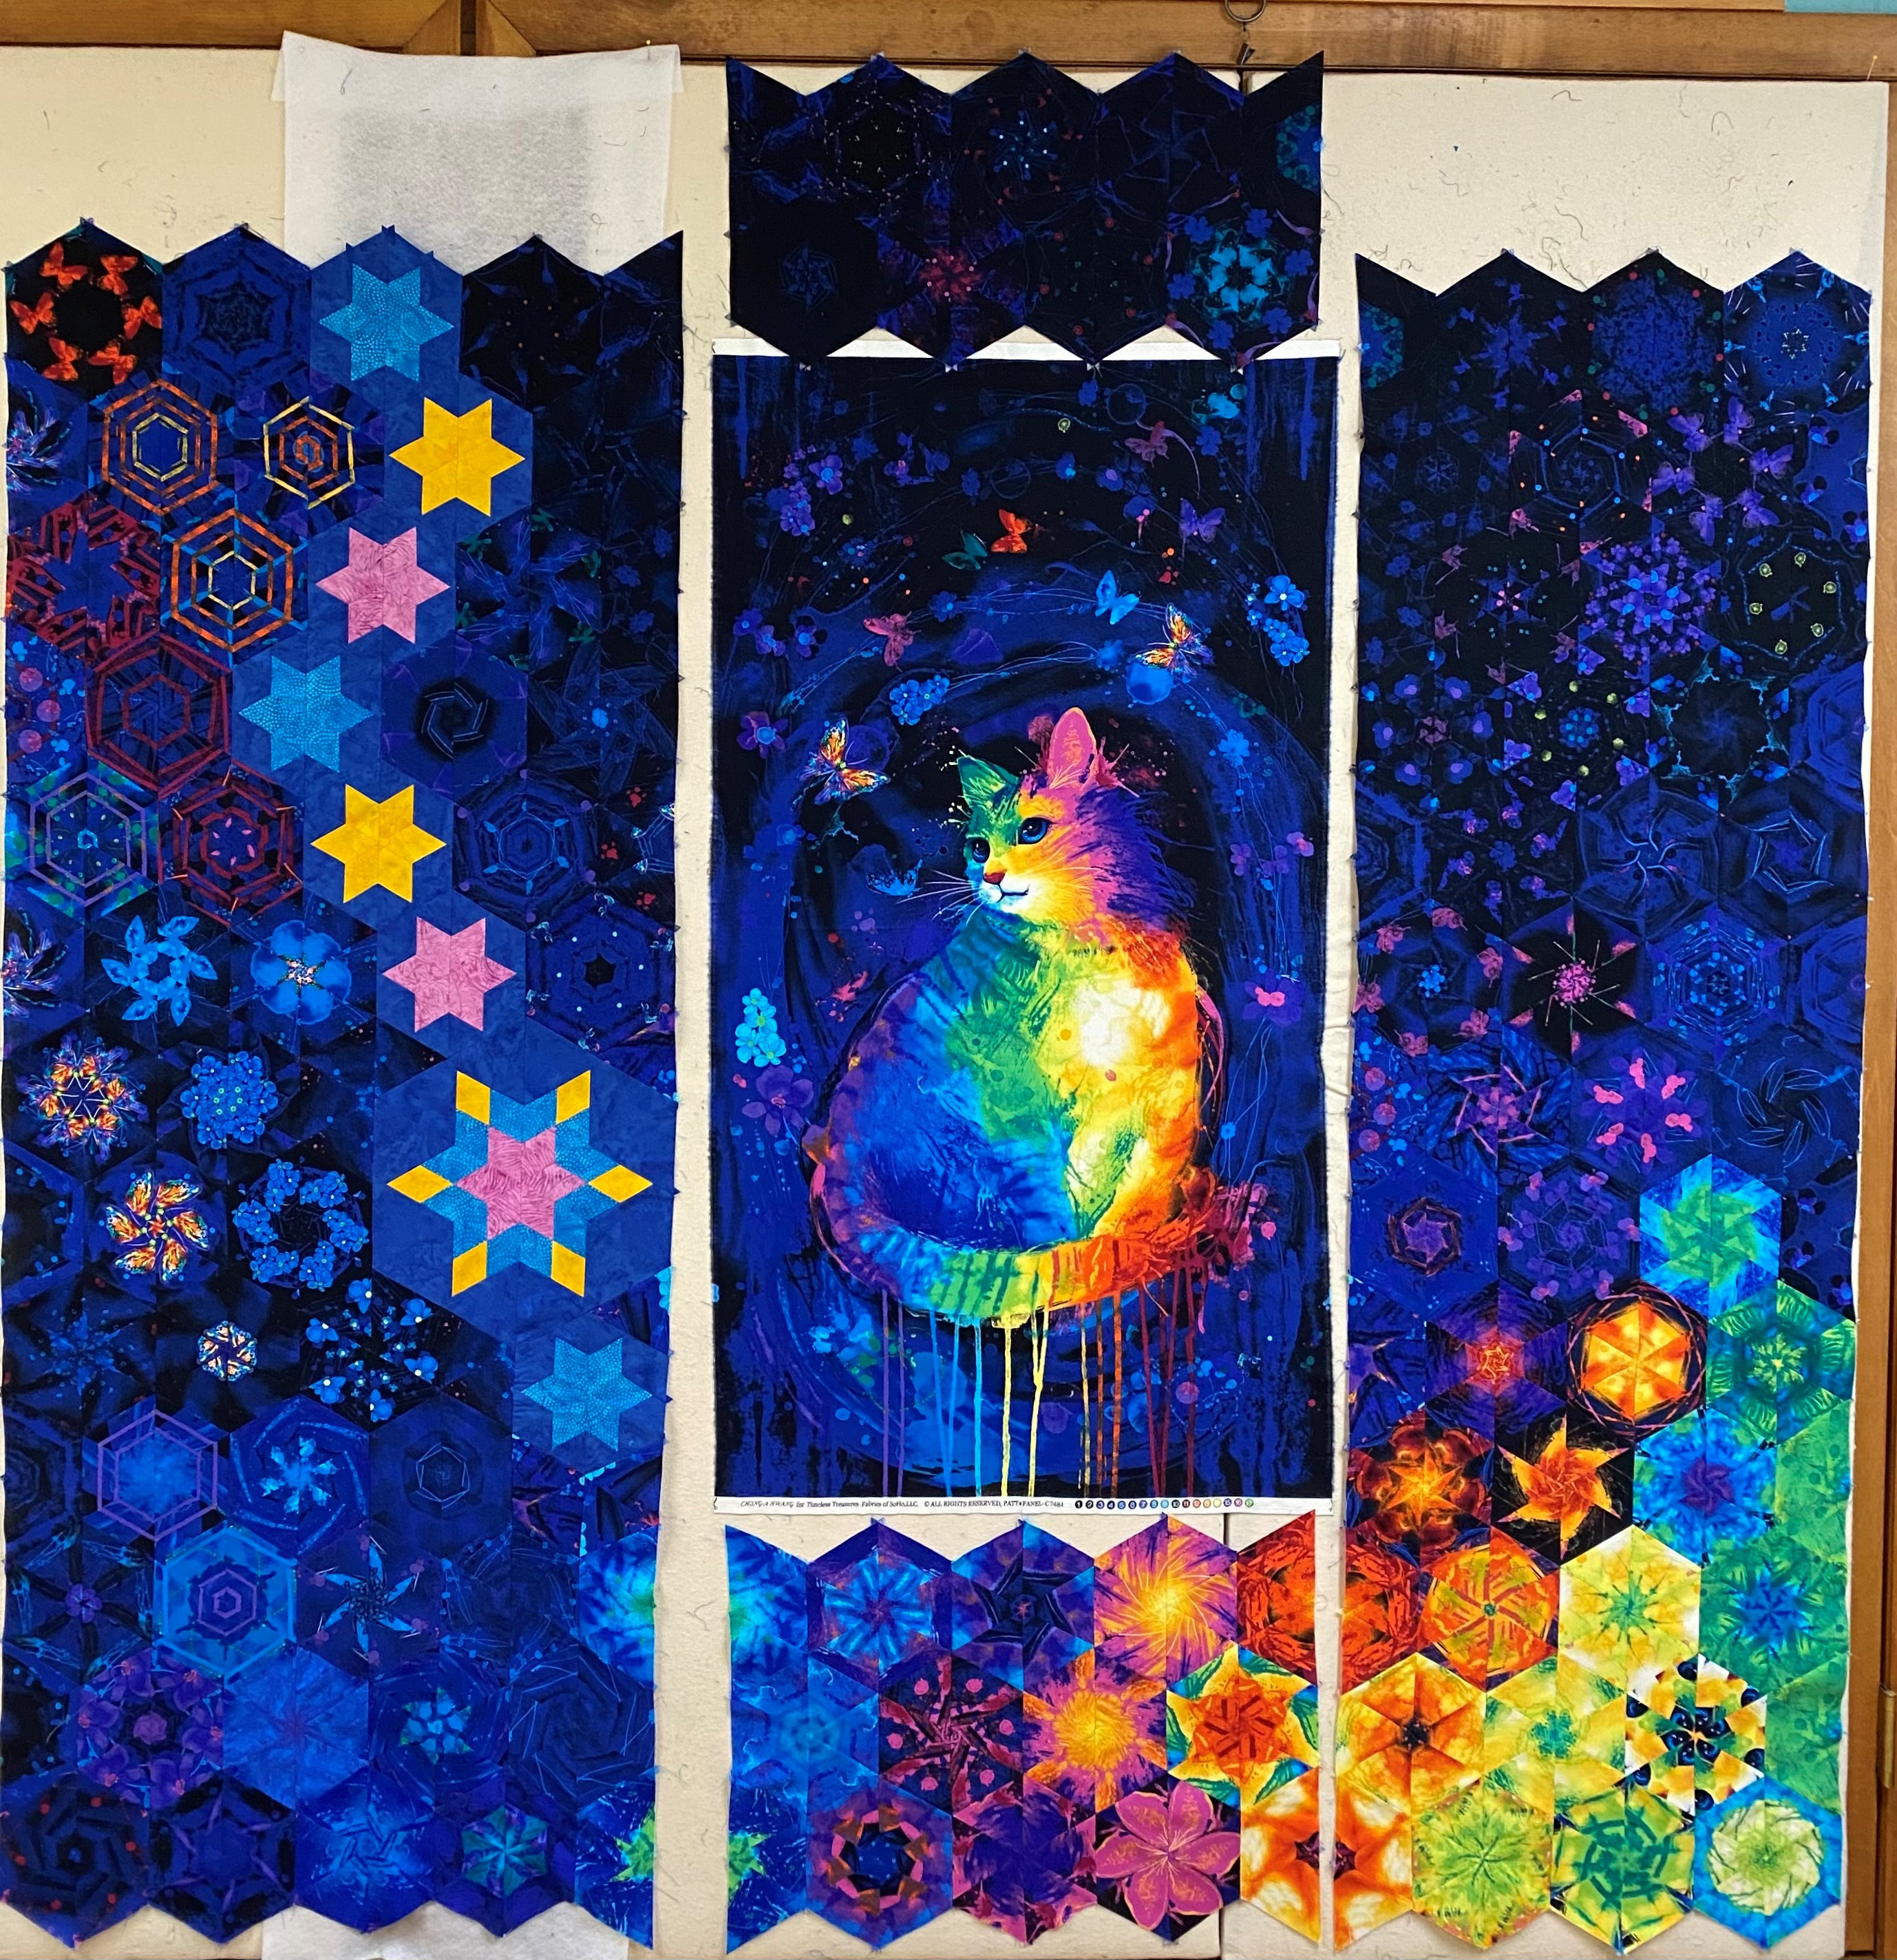
Continue to stitch rows into 4 sections, Left, Right, Top & Bottom.
I placed the bottom section right sides together to verify how much I need to trim off the sides of the panel so it will be the same width as the top and bottom hexies. In this case I trimmed 1/2″ off both sides.
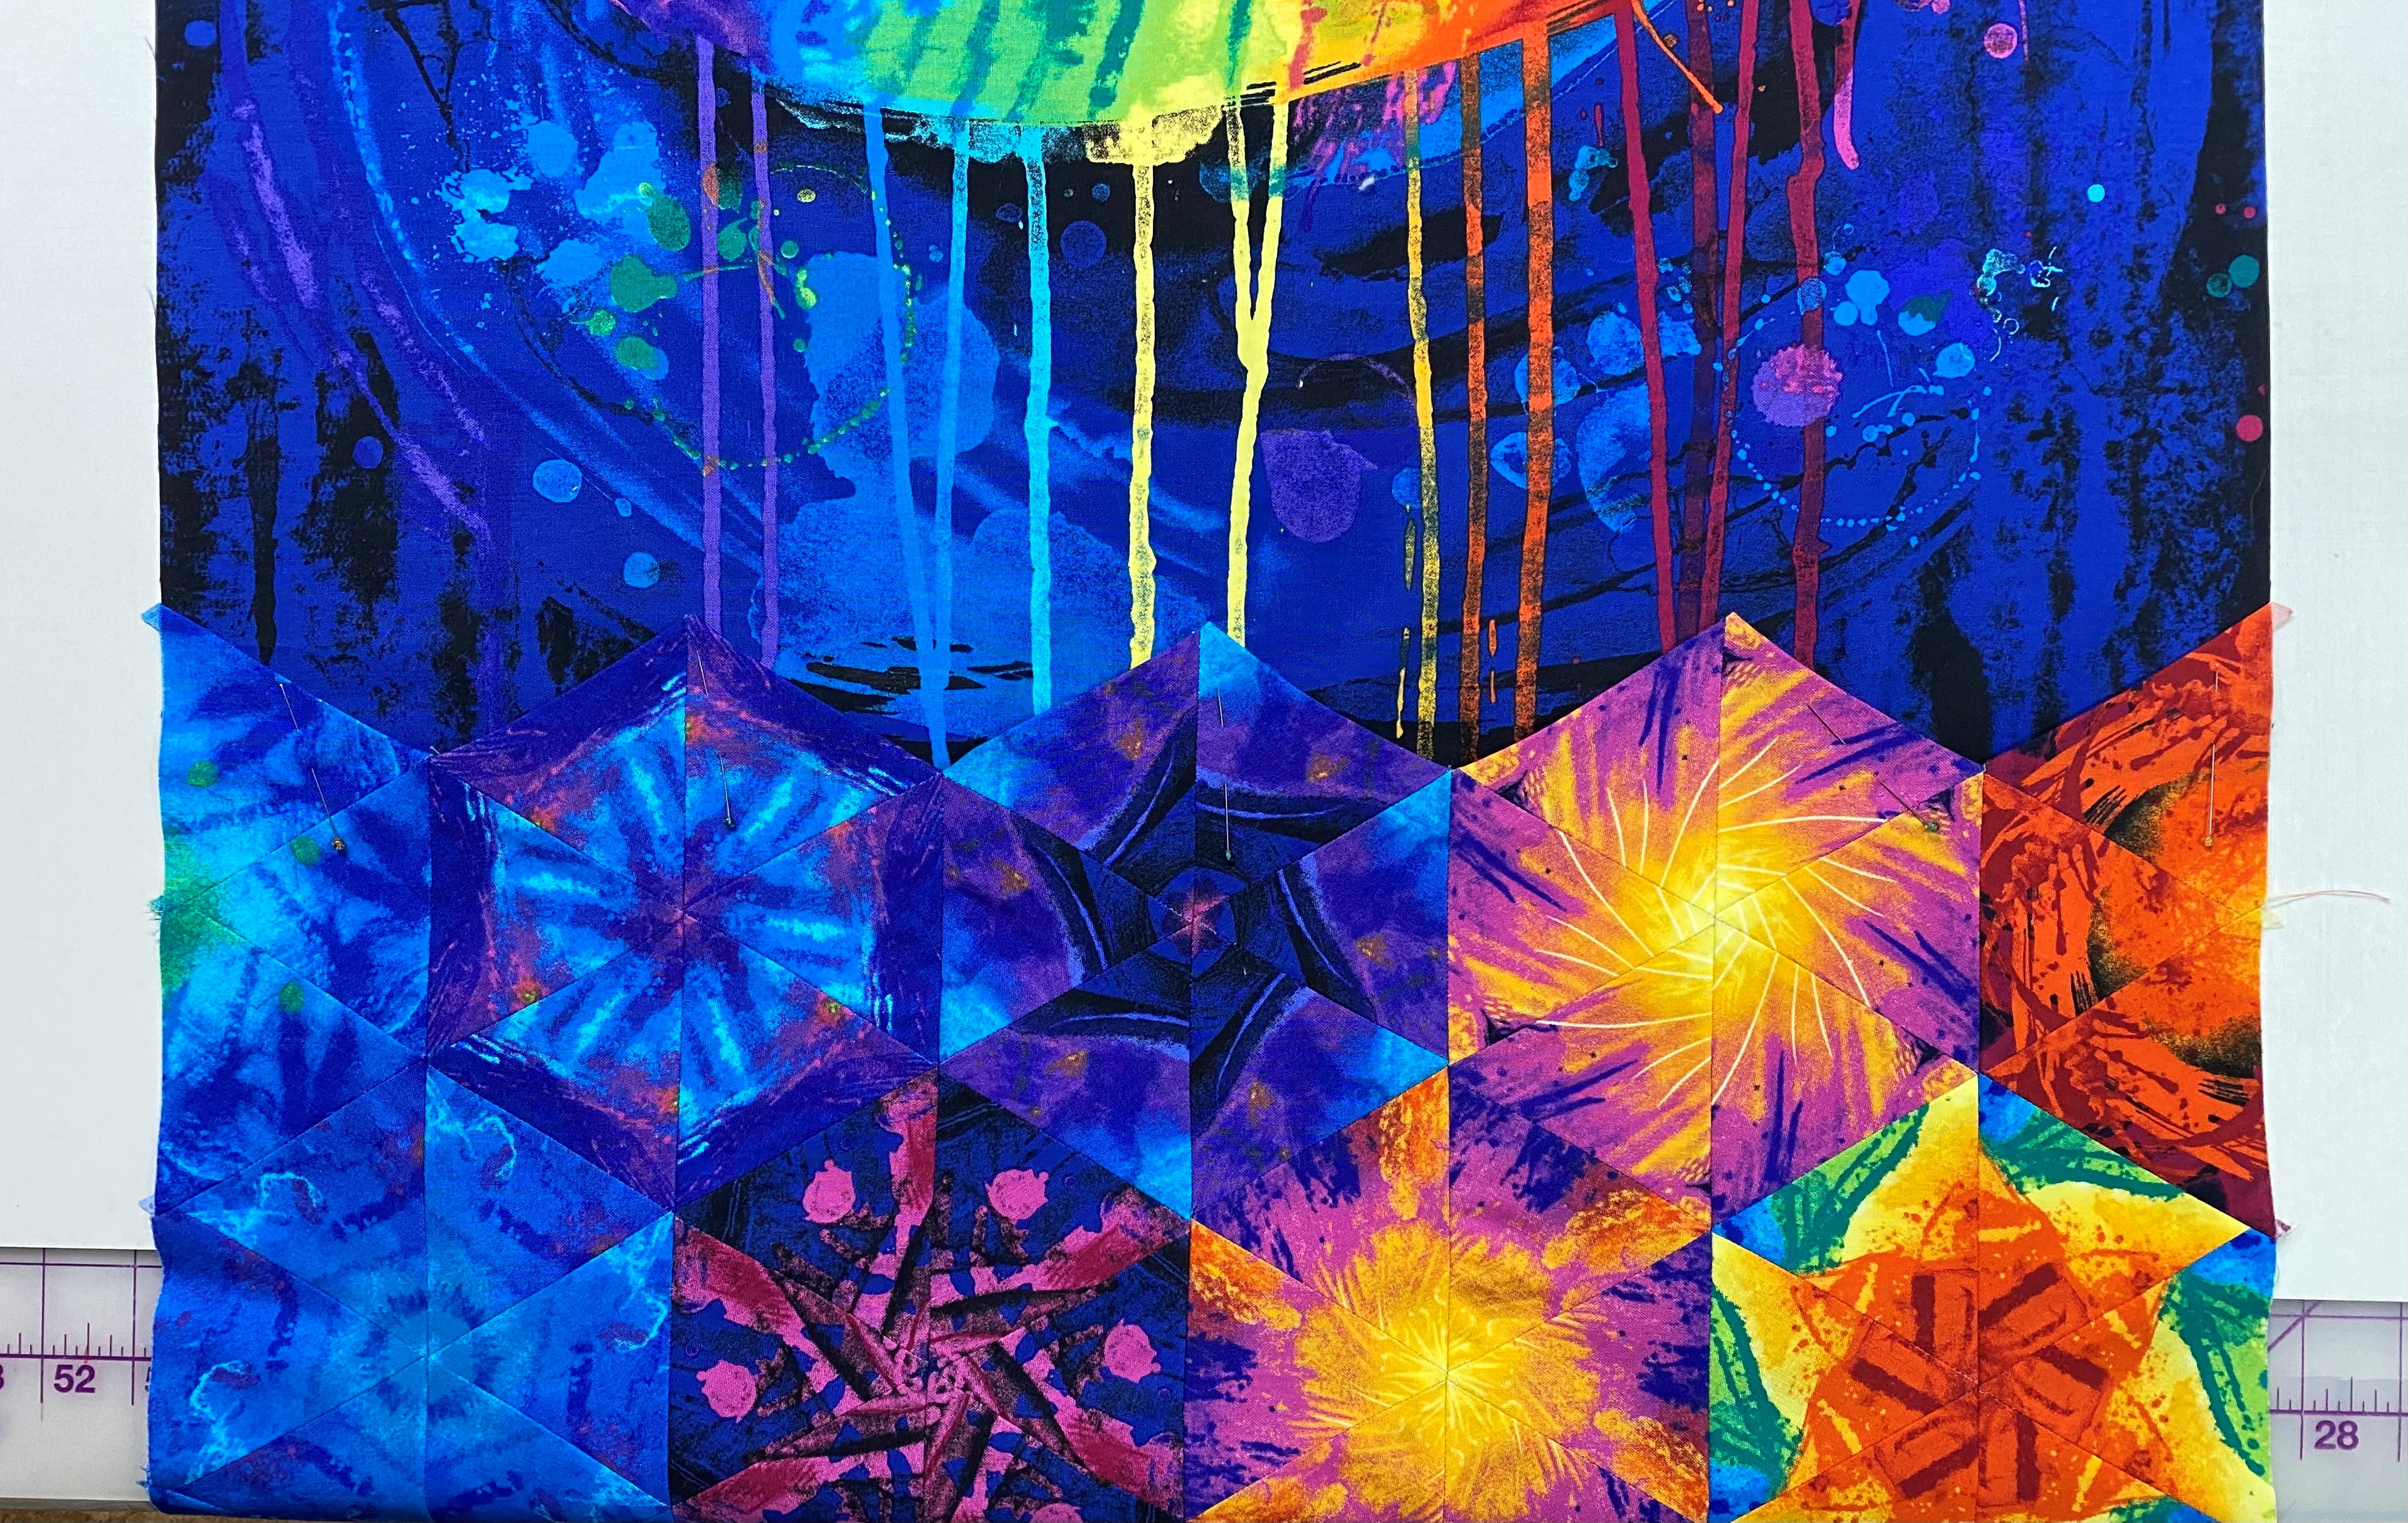
You can choose to attach either the top or bottom hexies first. I chose the bottom because I wanted to control where the hexies attached to the bottom of the panel. After the hexies are laid out and stitched together we loose 1/4″ between them. I felt I could safely loose a couple of inches off the top of the panel without affecting the design. But I did not want to loose inches off the panel bottom.
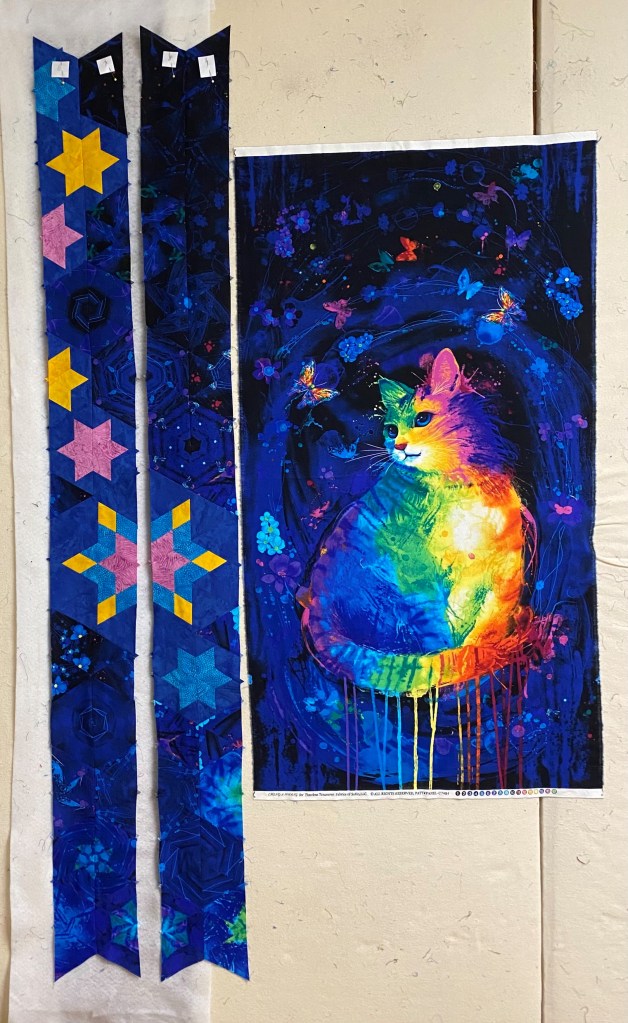
I pressed the bottom hexies under 1/4″ and top stitched them to the panel.

Match up the hexies/dog ears of the left side with hexies/dog ears on the bottom. Stitch leaving about 12″ from the top of the panel.

Place the panel and partially stitched left side on a table and place the top hexies on top of the panel matching up the dog ears to establish where the top hexies will be stitched to the panel.

Pin top to the panel being sure the dog ears match up to the left side hexies.

Top Stitch the top hexies to the panel. Finish stitching the left side to the panel and top hexies.

Match up the dog ears of the right side and stitch.

Samantha’s Rainbow Kitty, measures 75″ X 70″. I will quilt it as soon as the backing arrives.


Such a beautiful quilt! When attaching the hexies to the top and bottom of the panel where they overlap, do you fold the raw edges of the hexies over and essentially applique them to the panel?
LikeLike
Yes, you are right Dawn.
LikeLike
Wow! that’s amazing. I don’t understand all of it but I’ll read it again and hopefully I’ll begin to understand.
LikeLike
Thank you Judy. Did you see I post the correct photo’s on the Journey BOM Facebook page?
LikeLike