Welcome to Stitchin Heaven’s Journeys BOM – Month 10 Victory Block: Part 1. This month you will be using Studio 180 Design V Block tool. Sarah Furrer is my helper this month.

Print 1 
Print 4
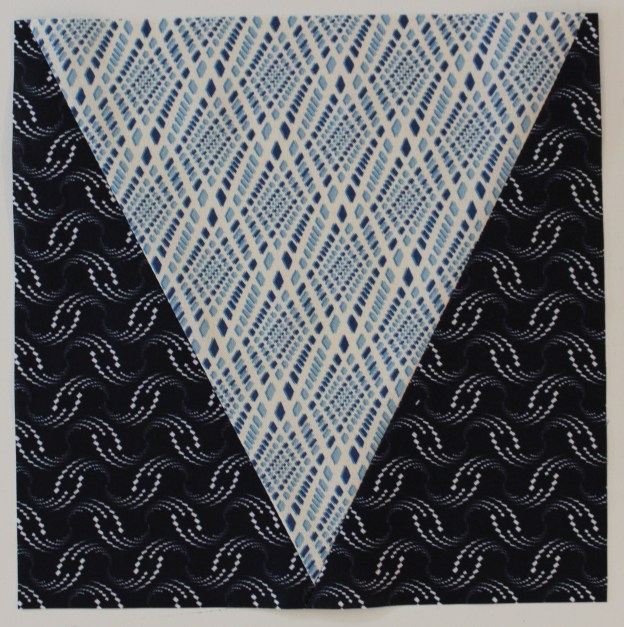
Unit P, V Blocks will be cut from Print 1 & Print 4.
Piecing Instructions
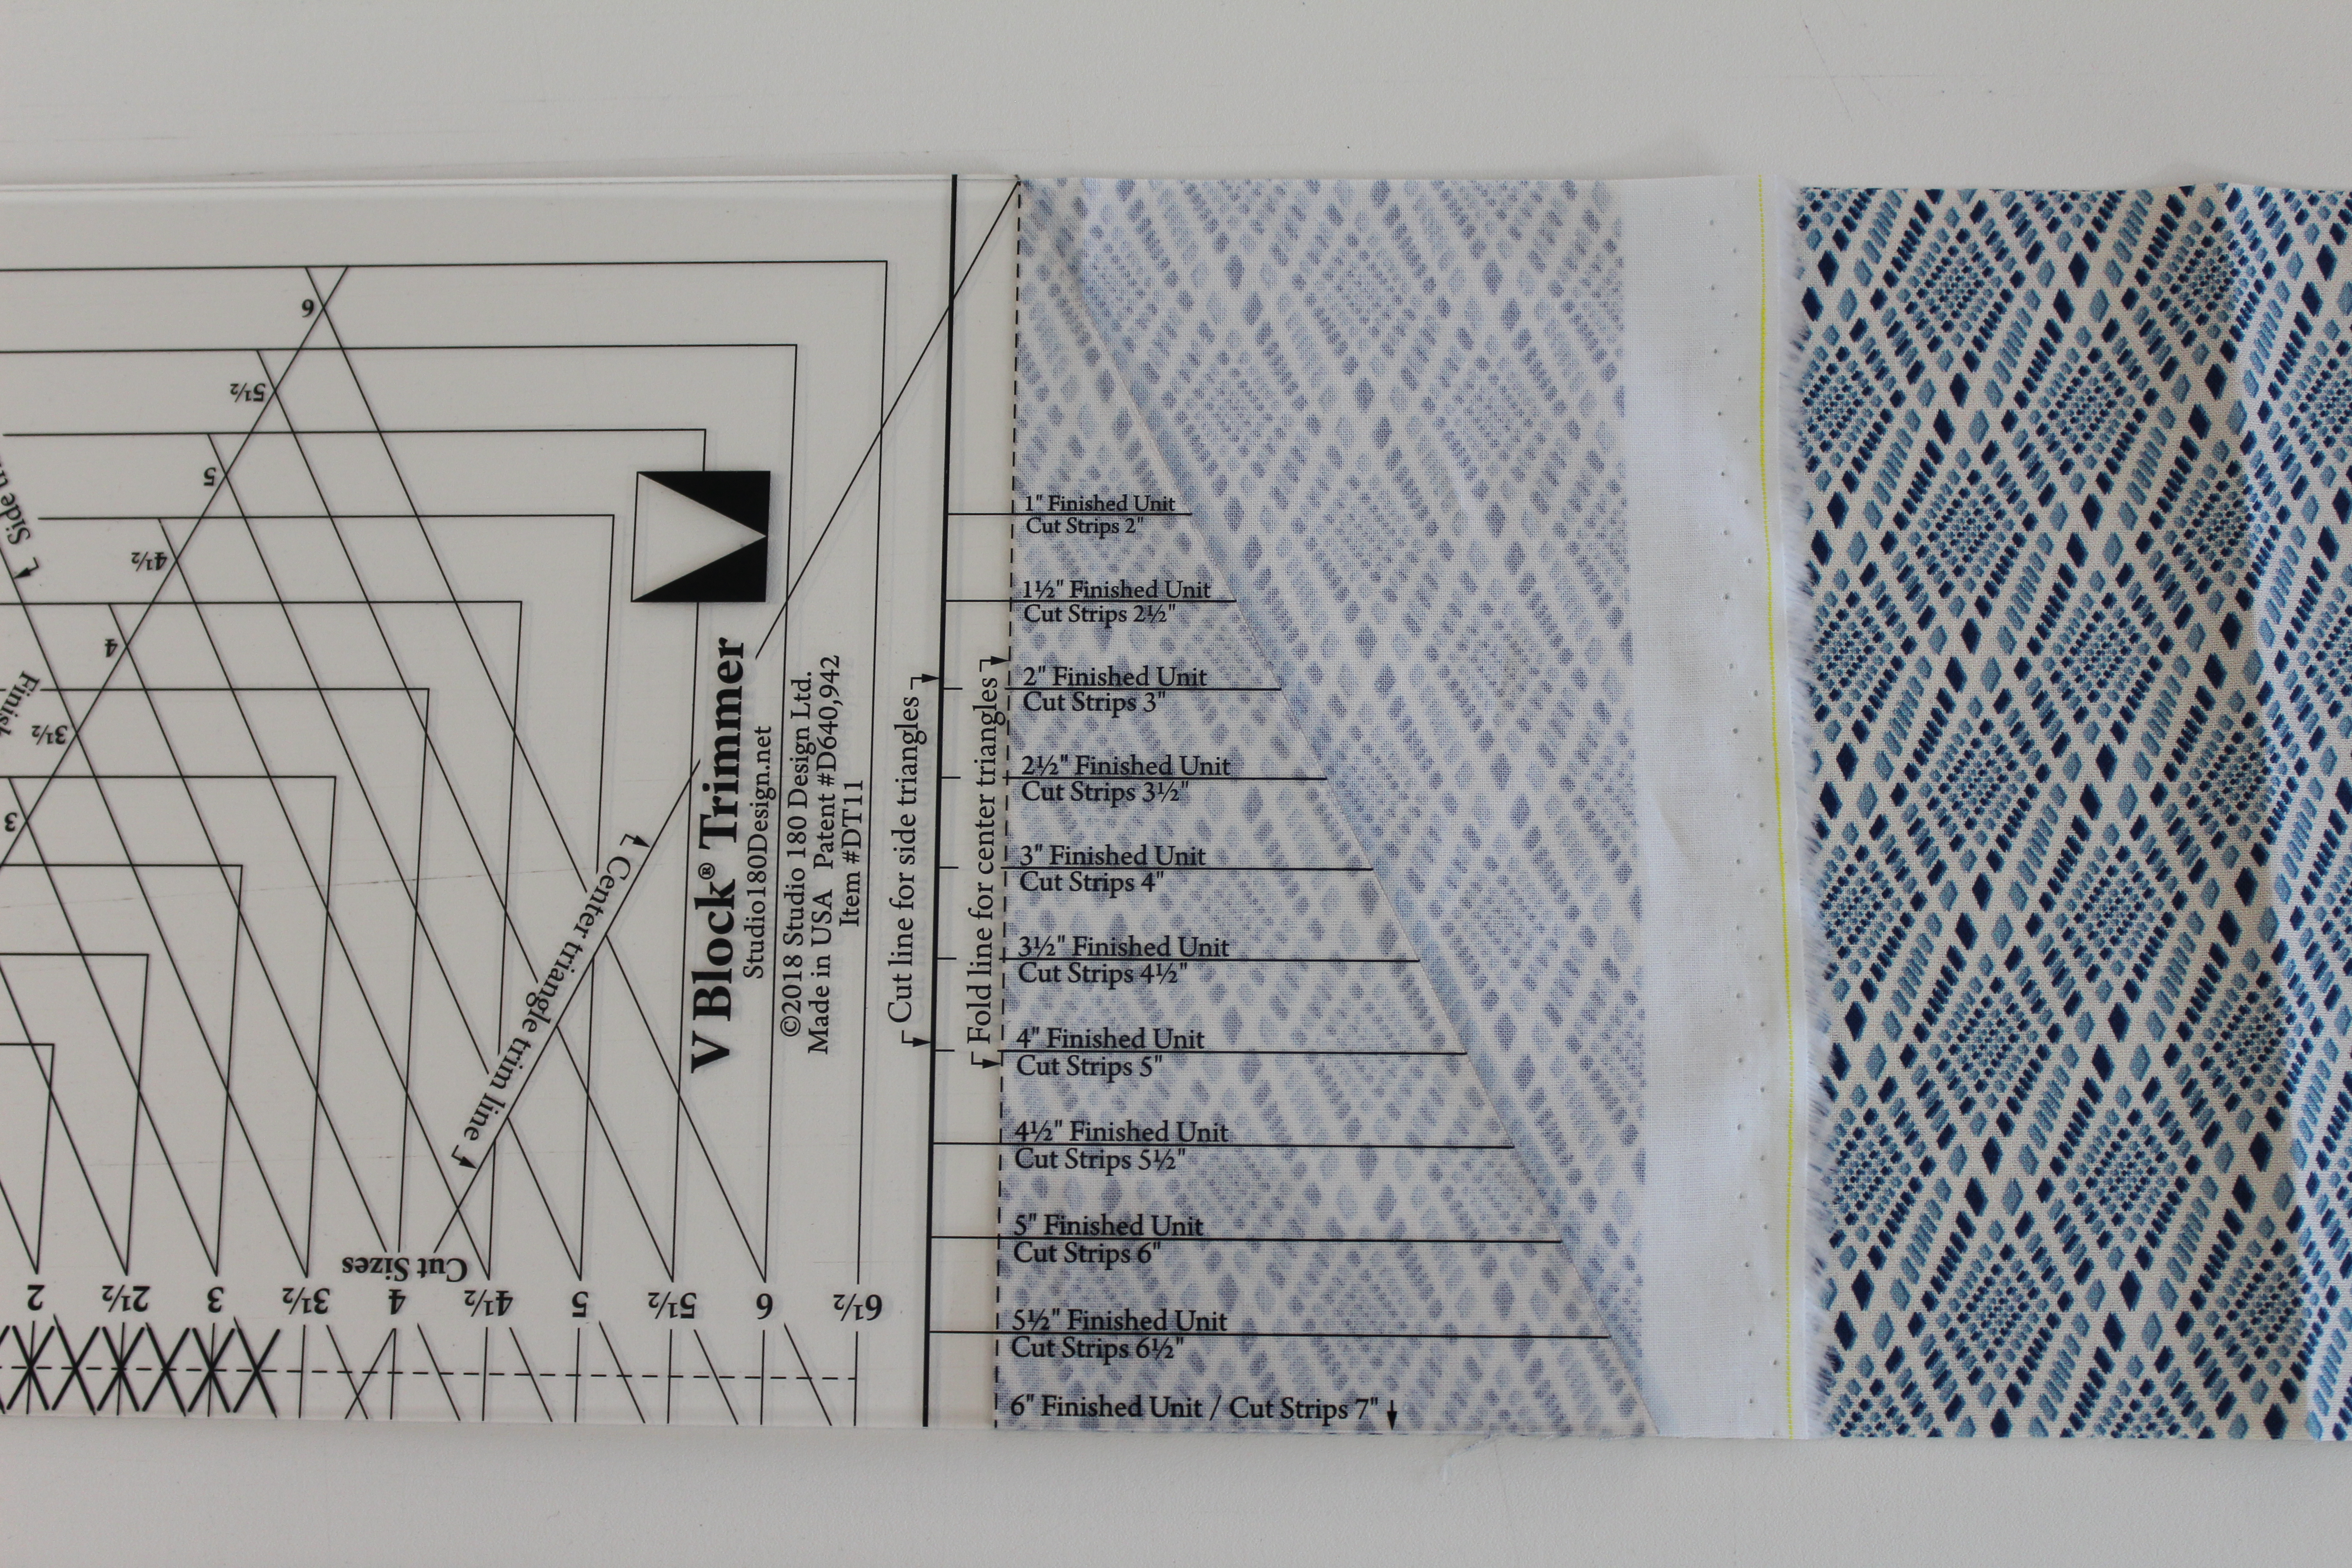
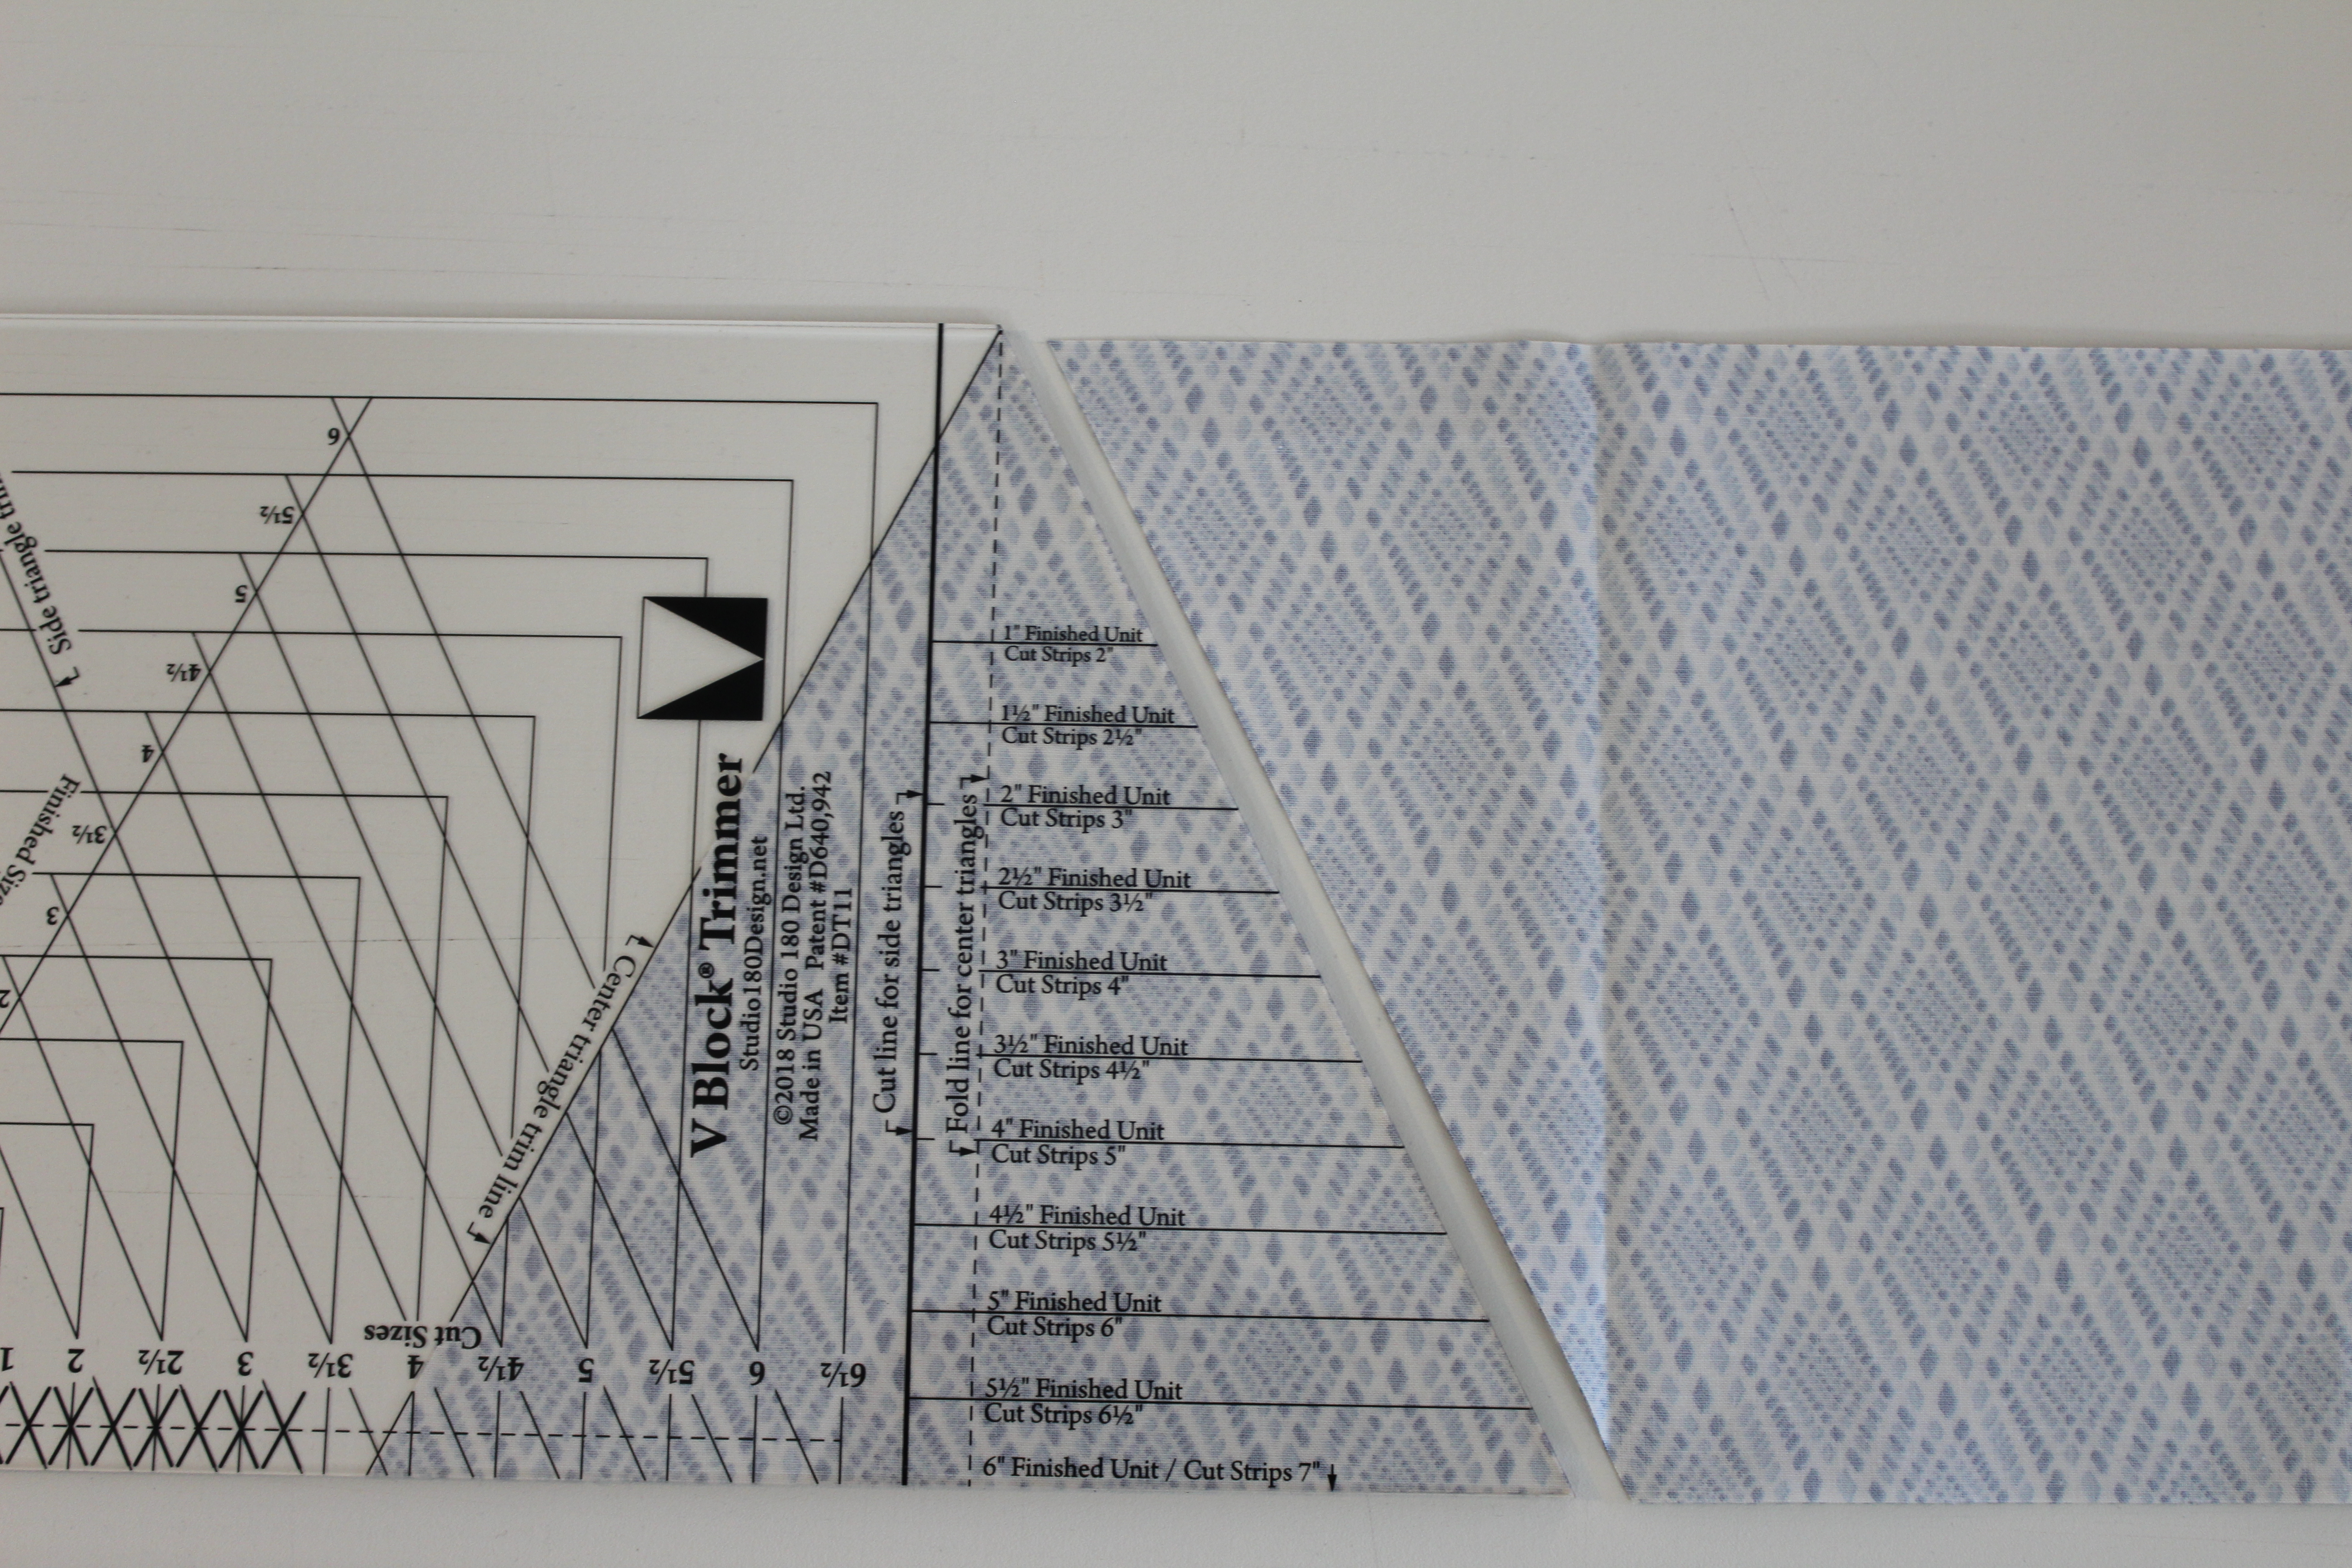
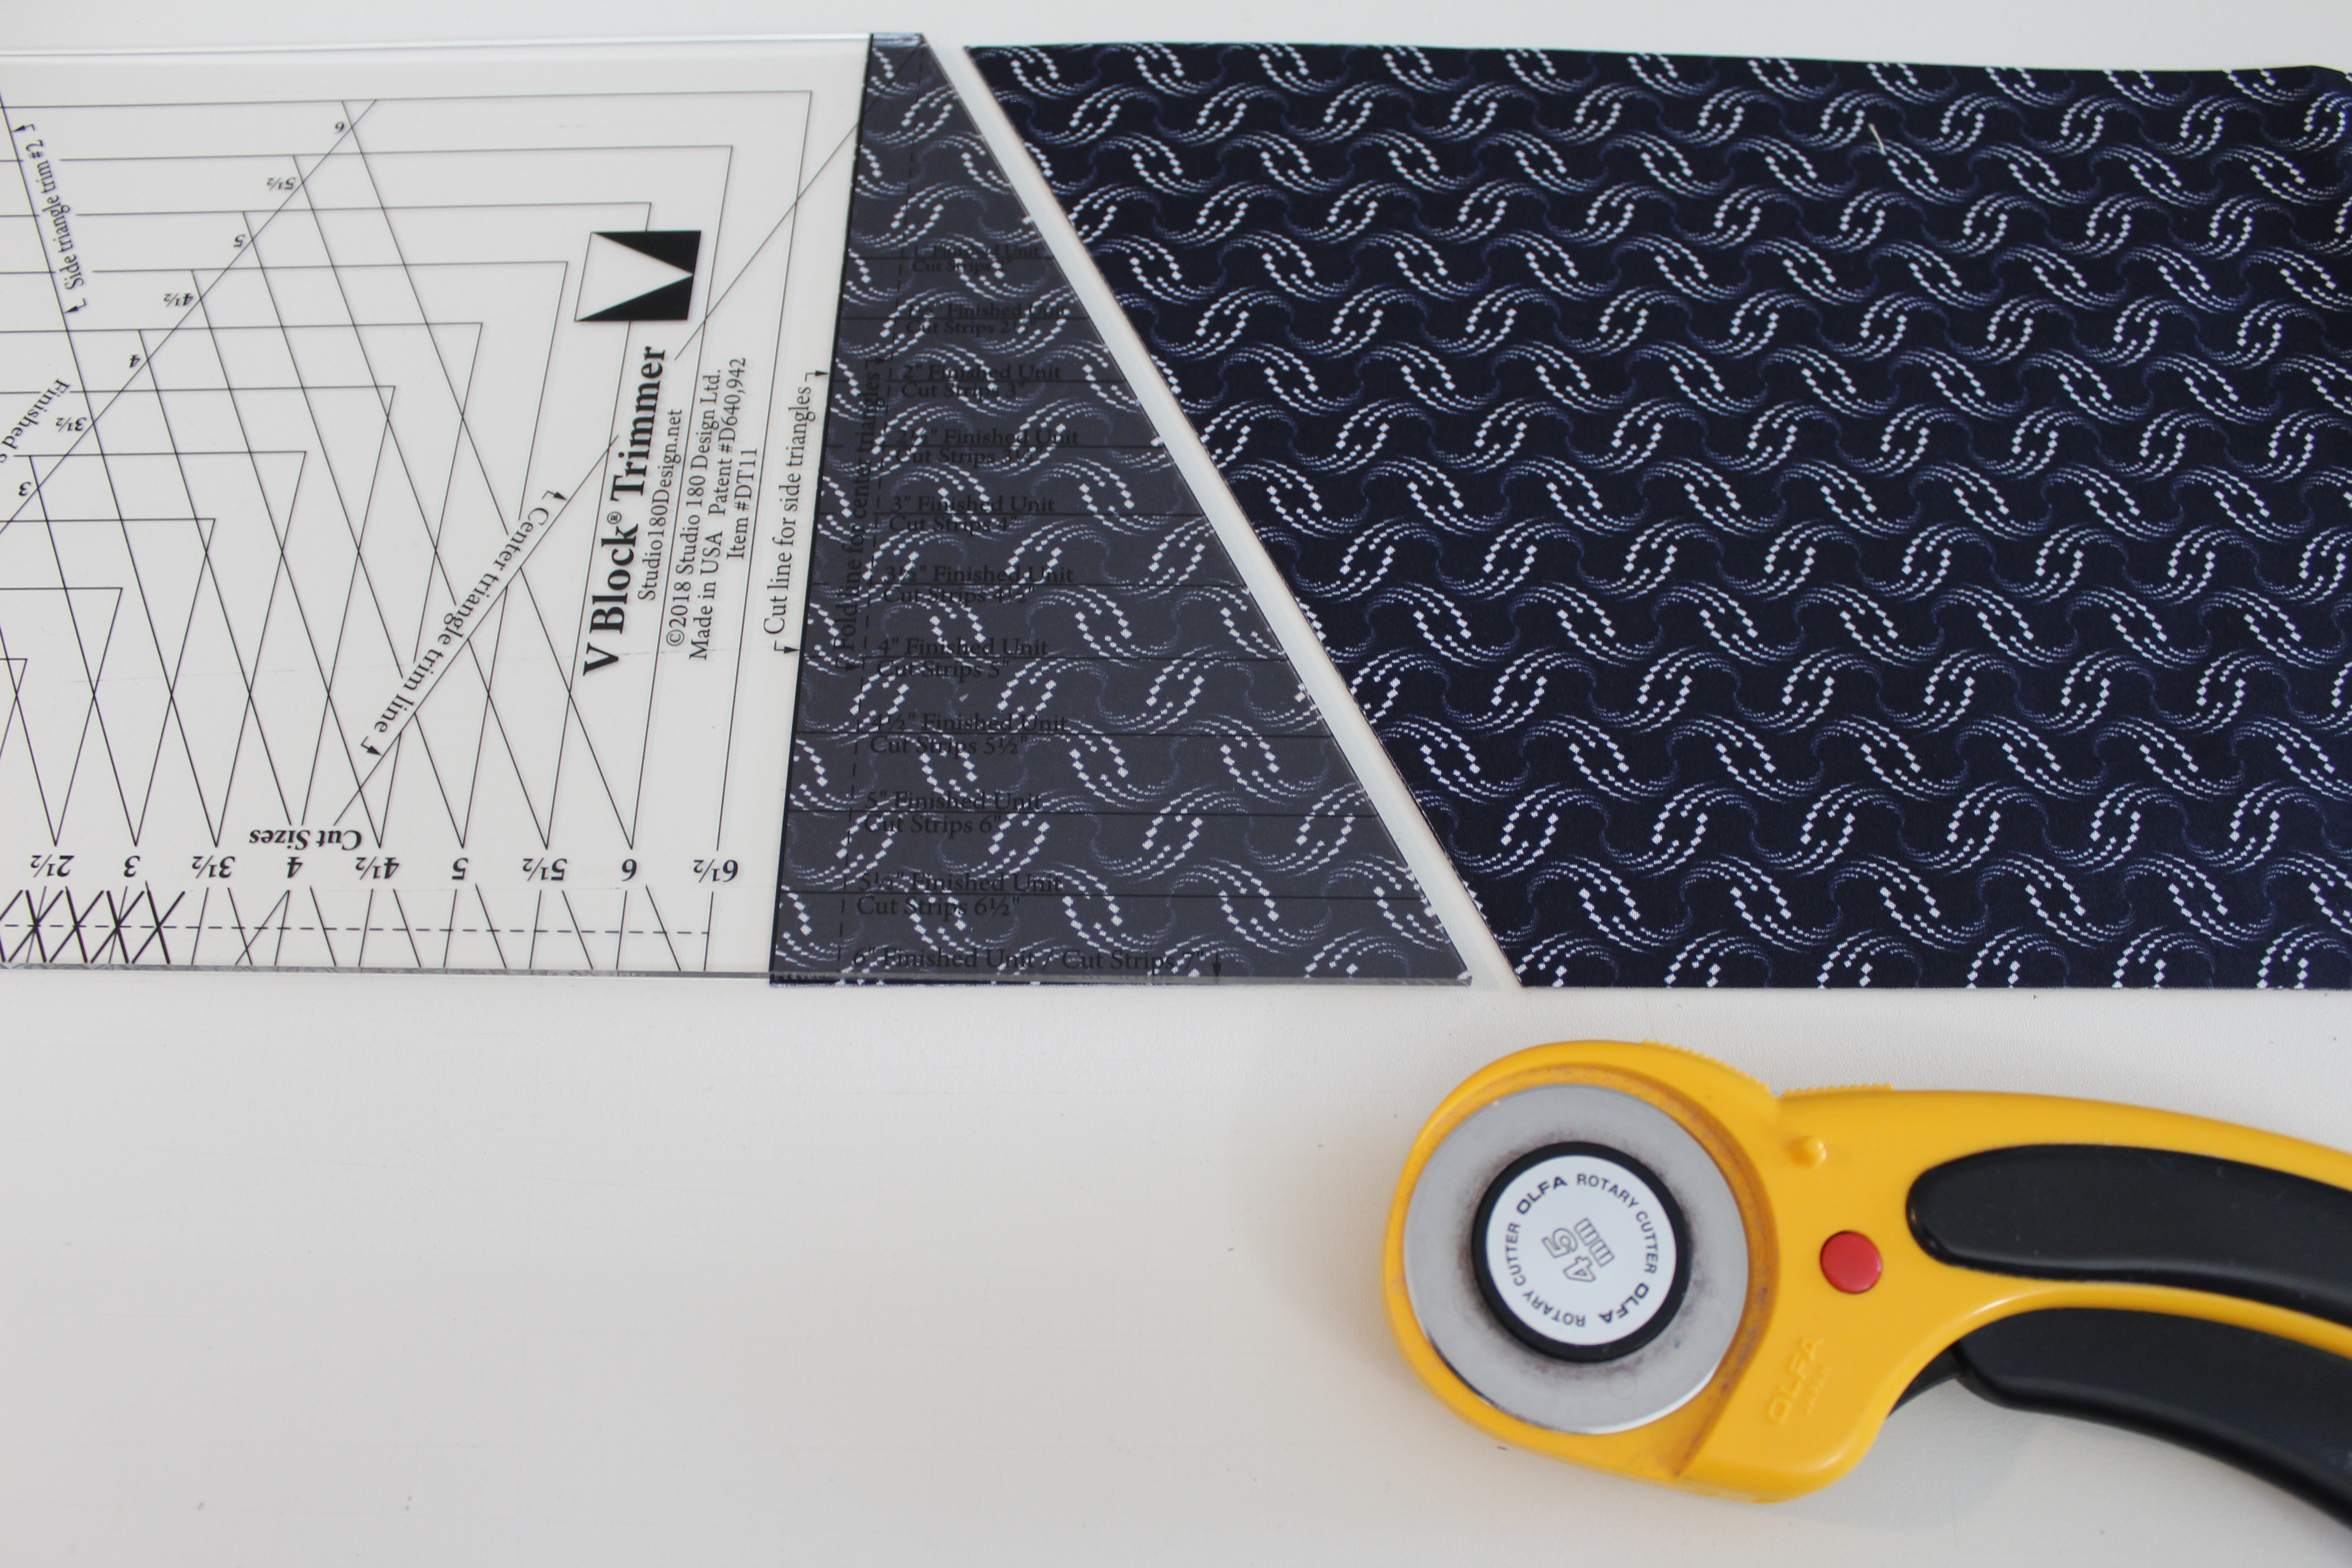
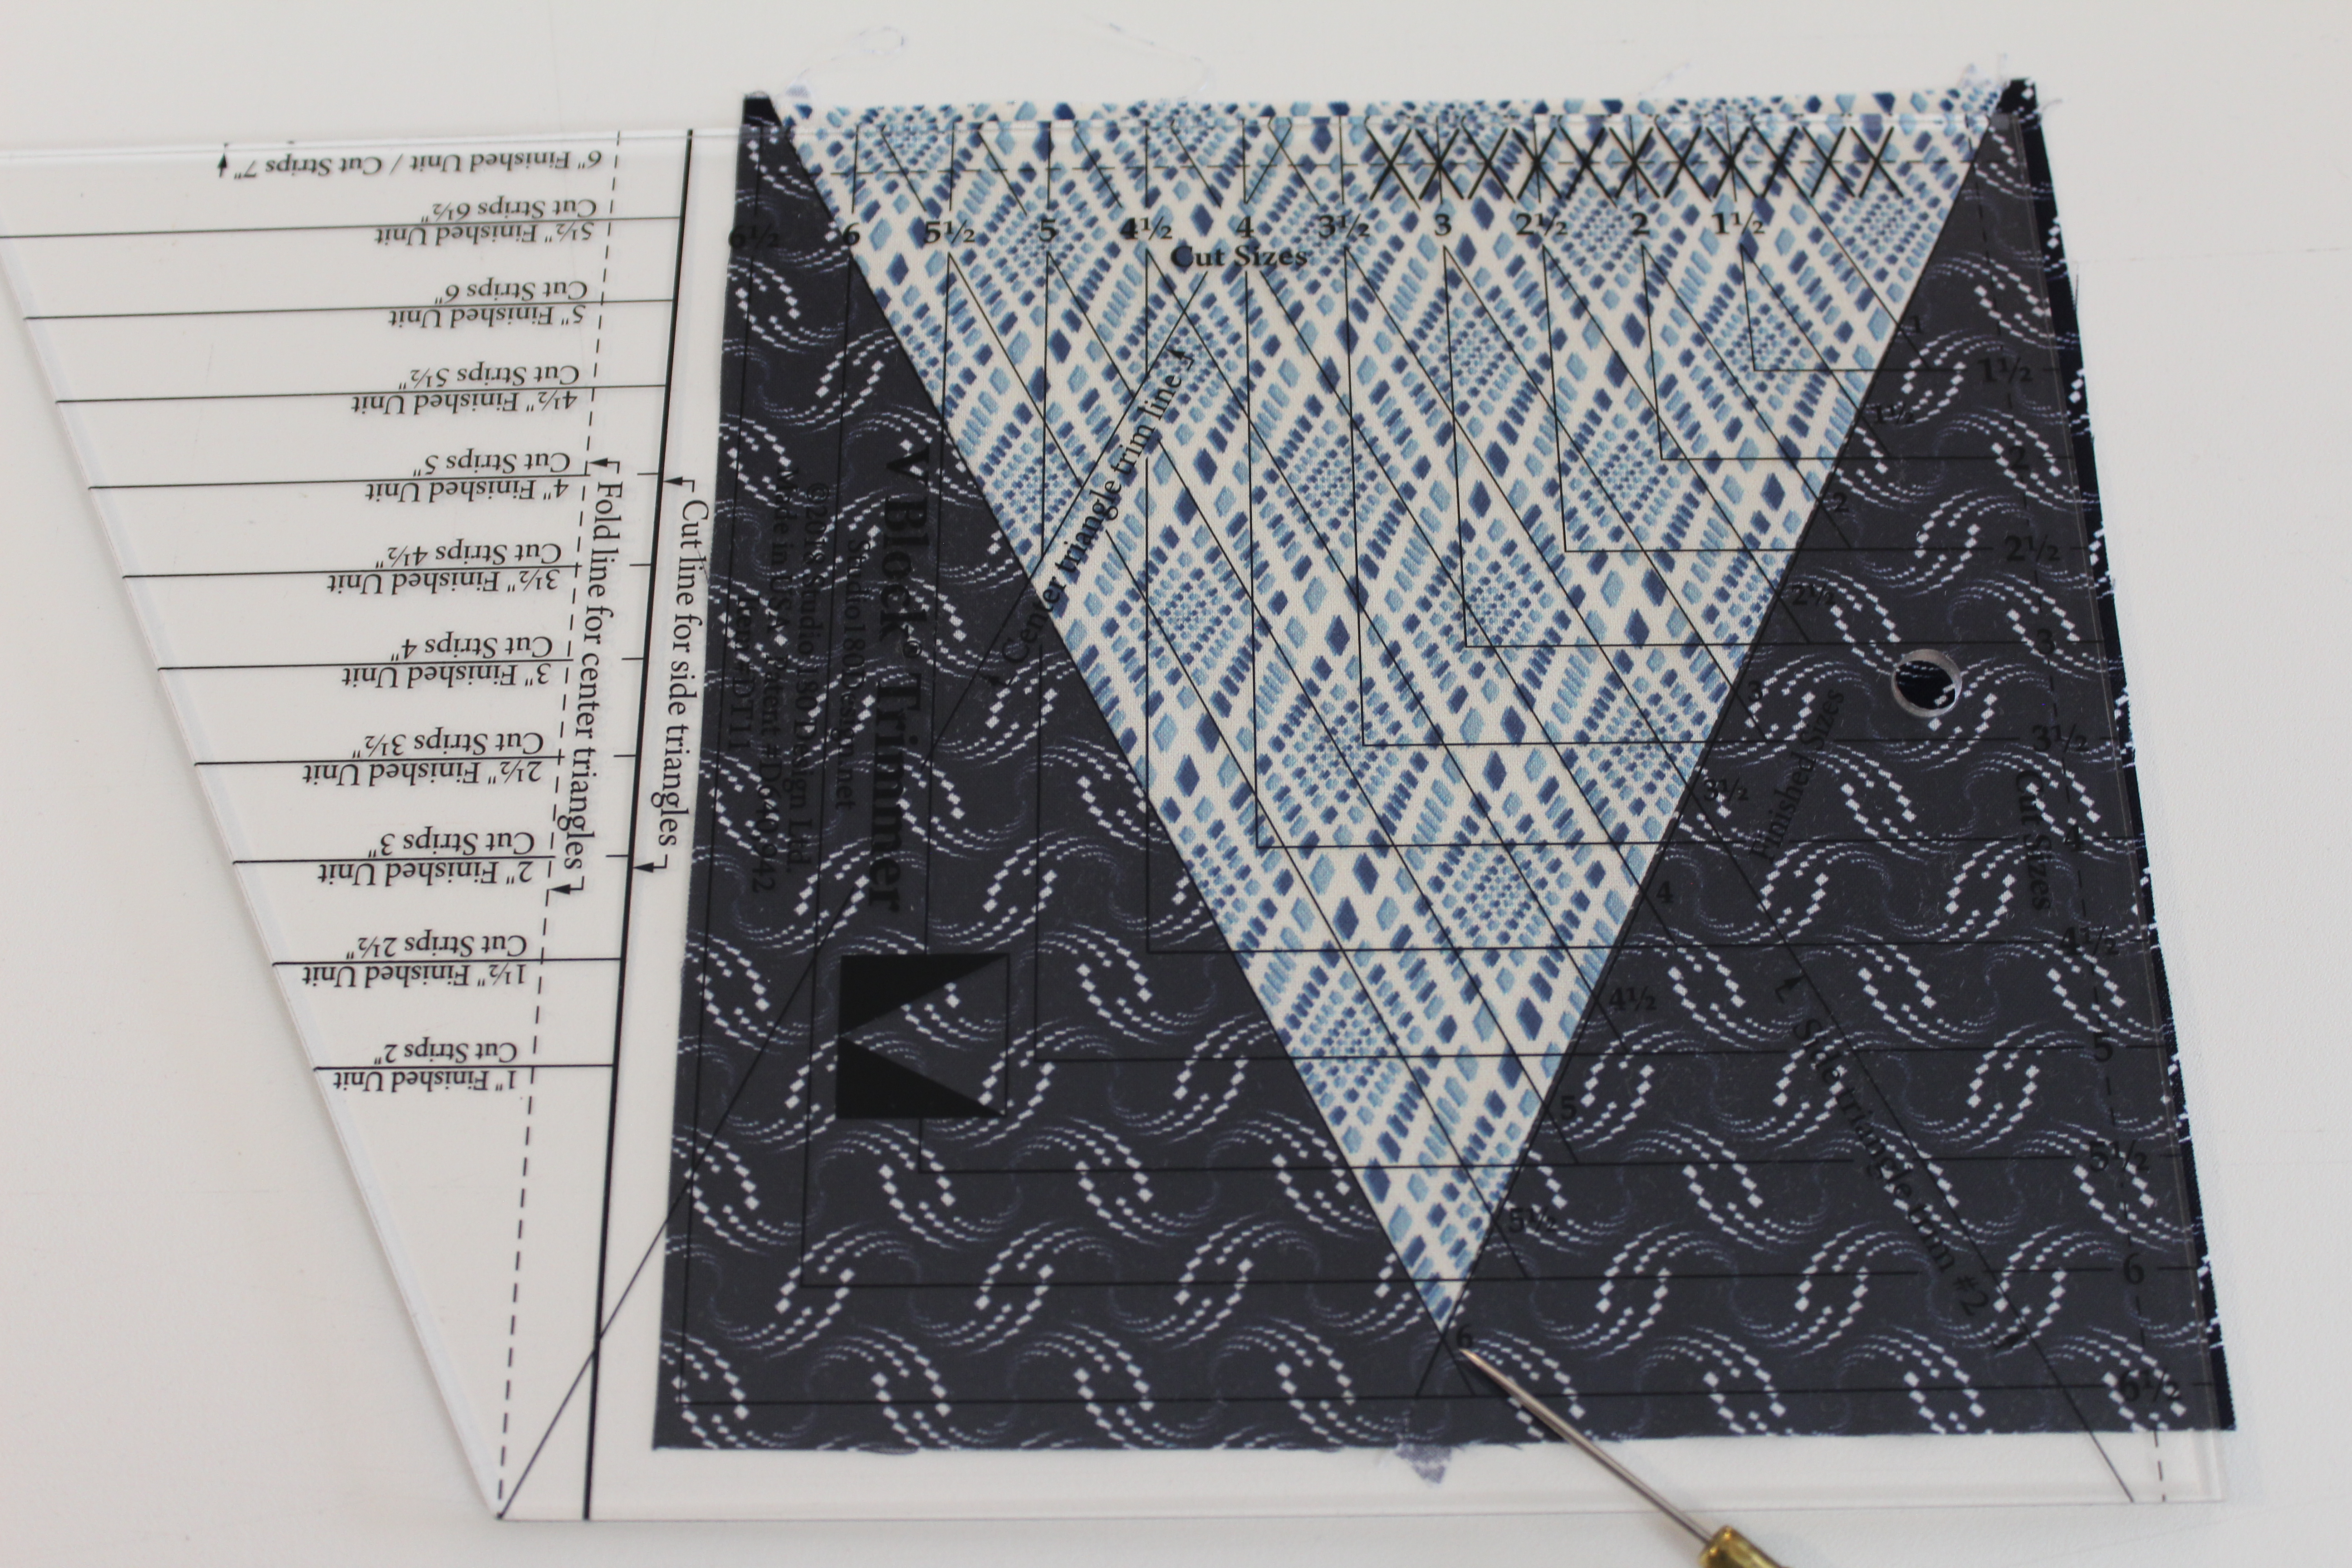
Step 1 – Cut the Center Triangles from Print 4 strips. Lay the strip out and fold over the end of the strip as shown. Position the V Block® tool on the strip so that the Fold Line for Center Triangle is on the fold and the bottom of the strip is lined up with the 6” finished unit line (bottom of the tool).
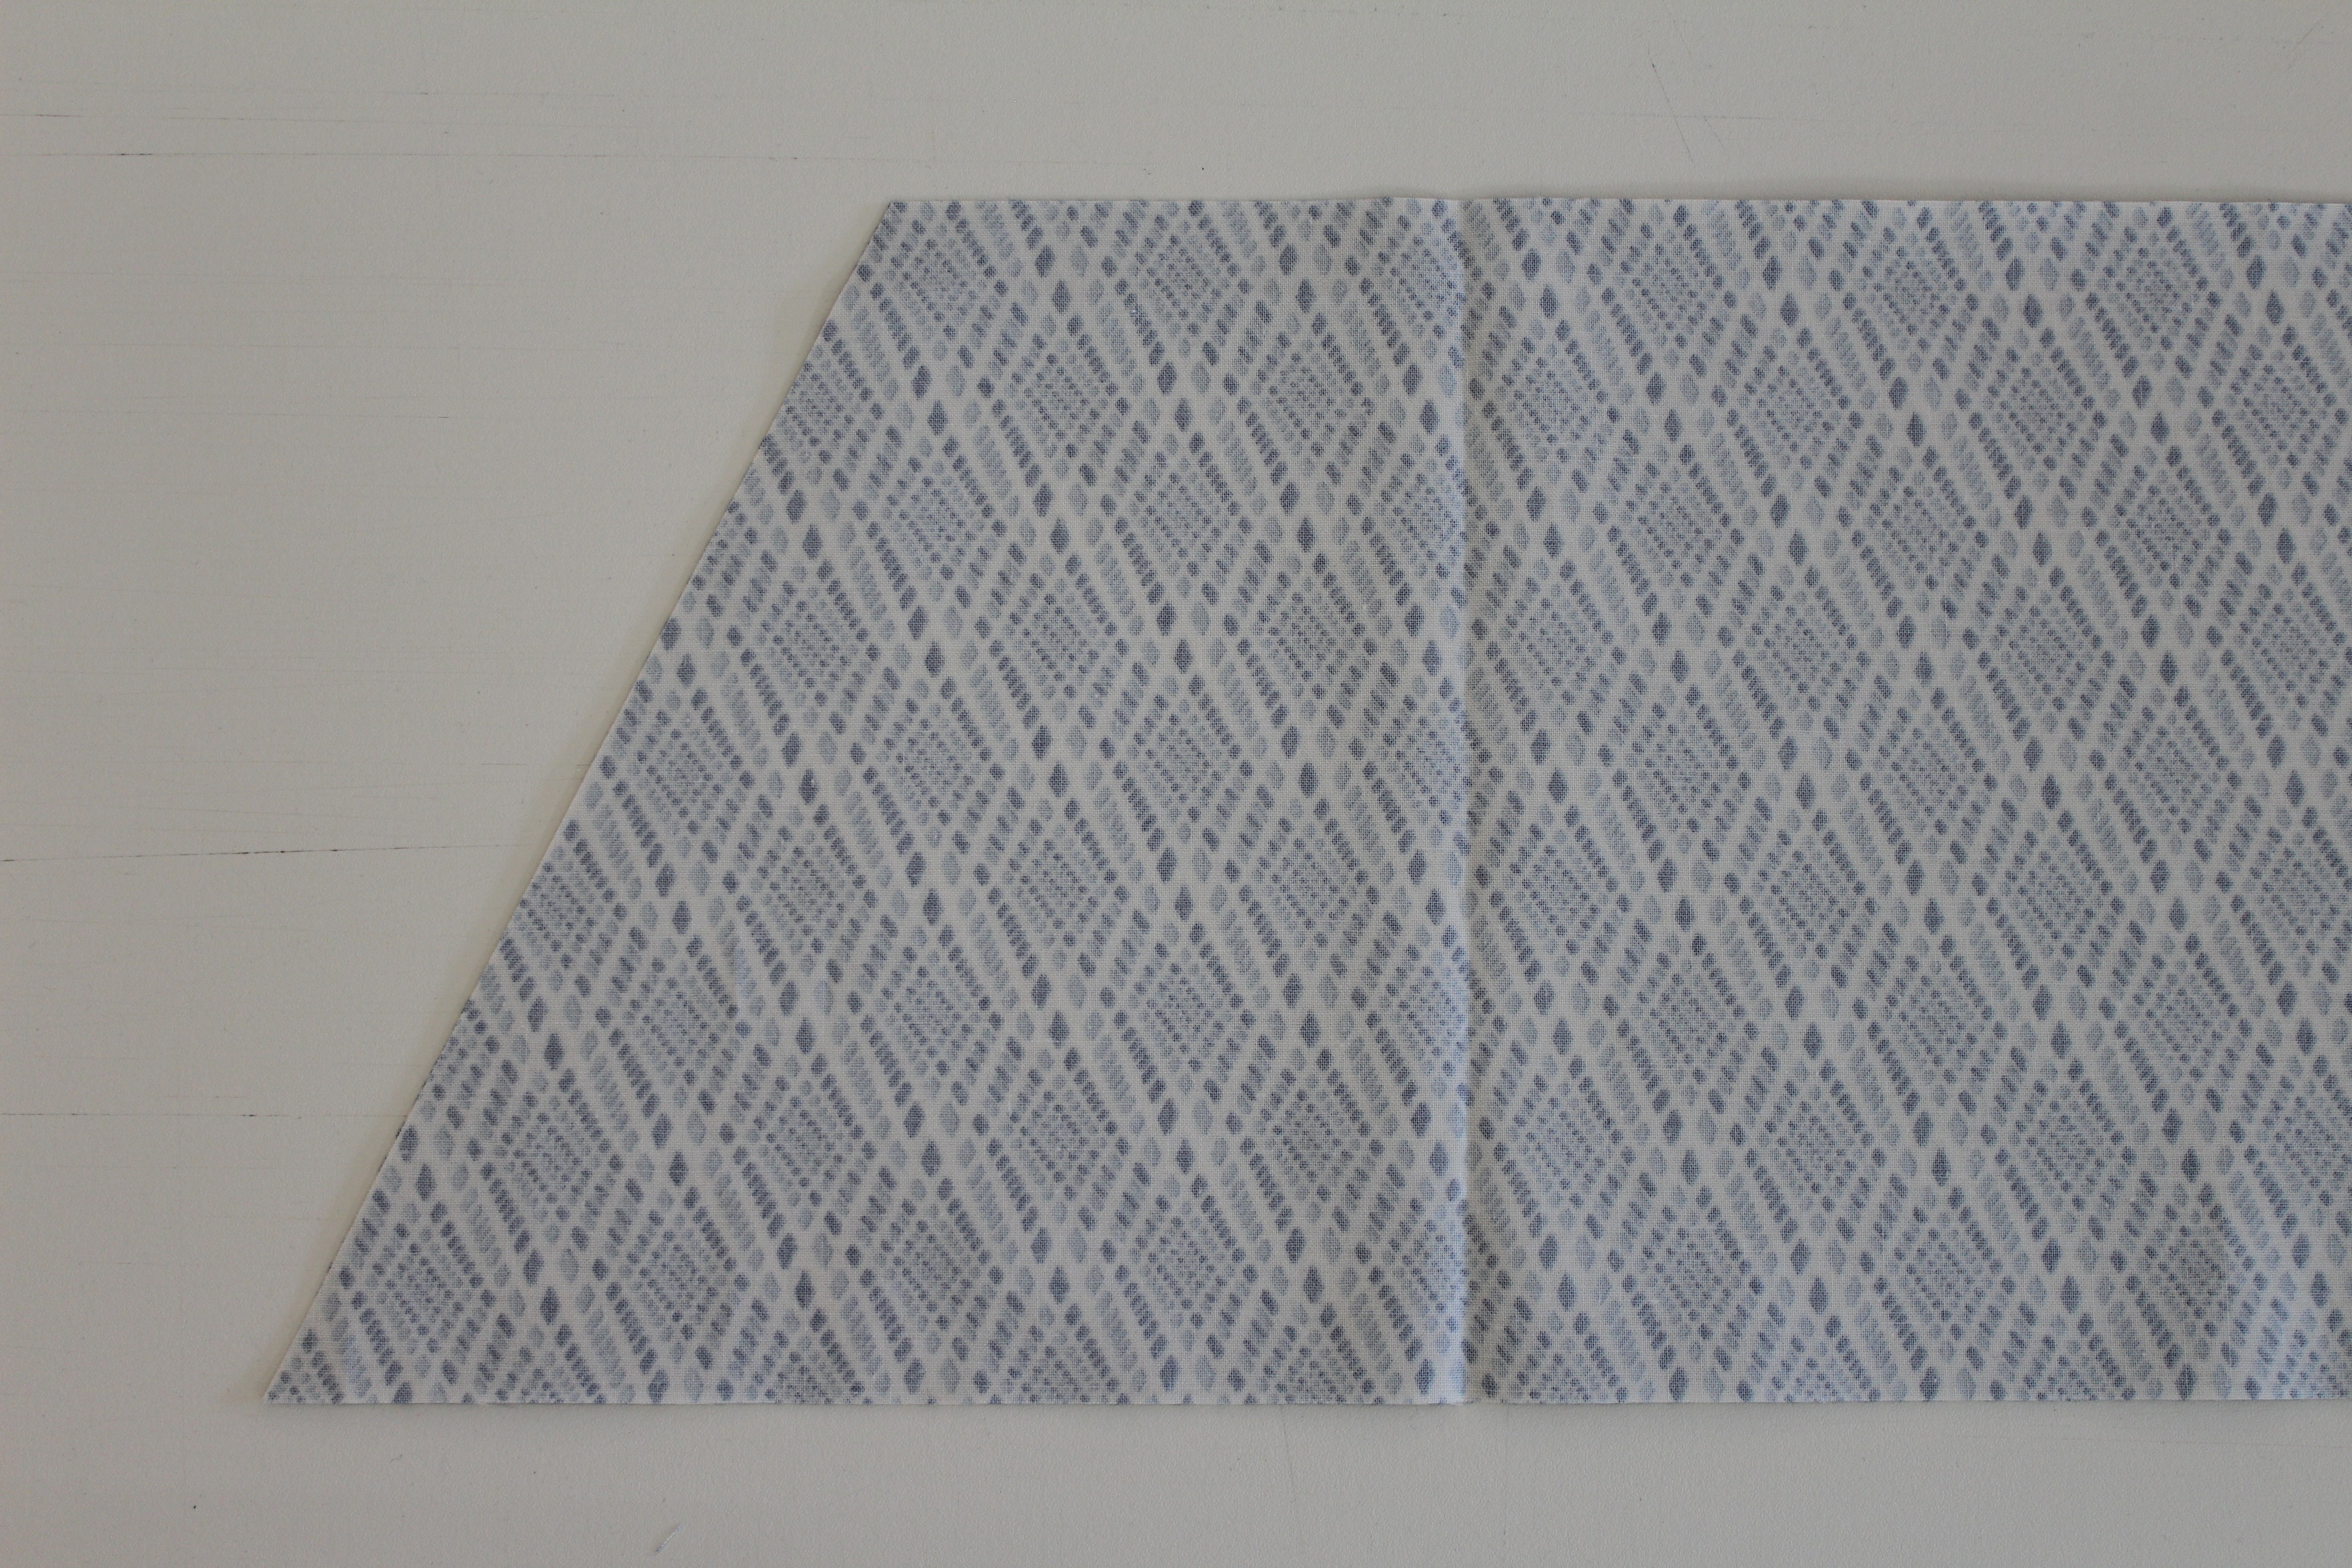
Step 2 – Cut along the slanted edge of the tool. Unfold the piece to reveal a Center Triangle. Flip the strip top to bottom as shown.

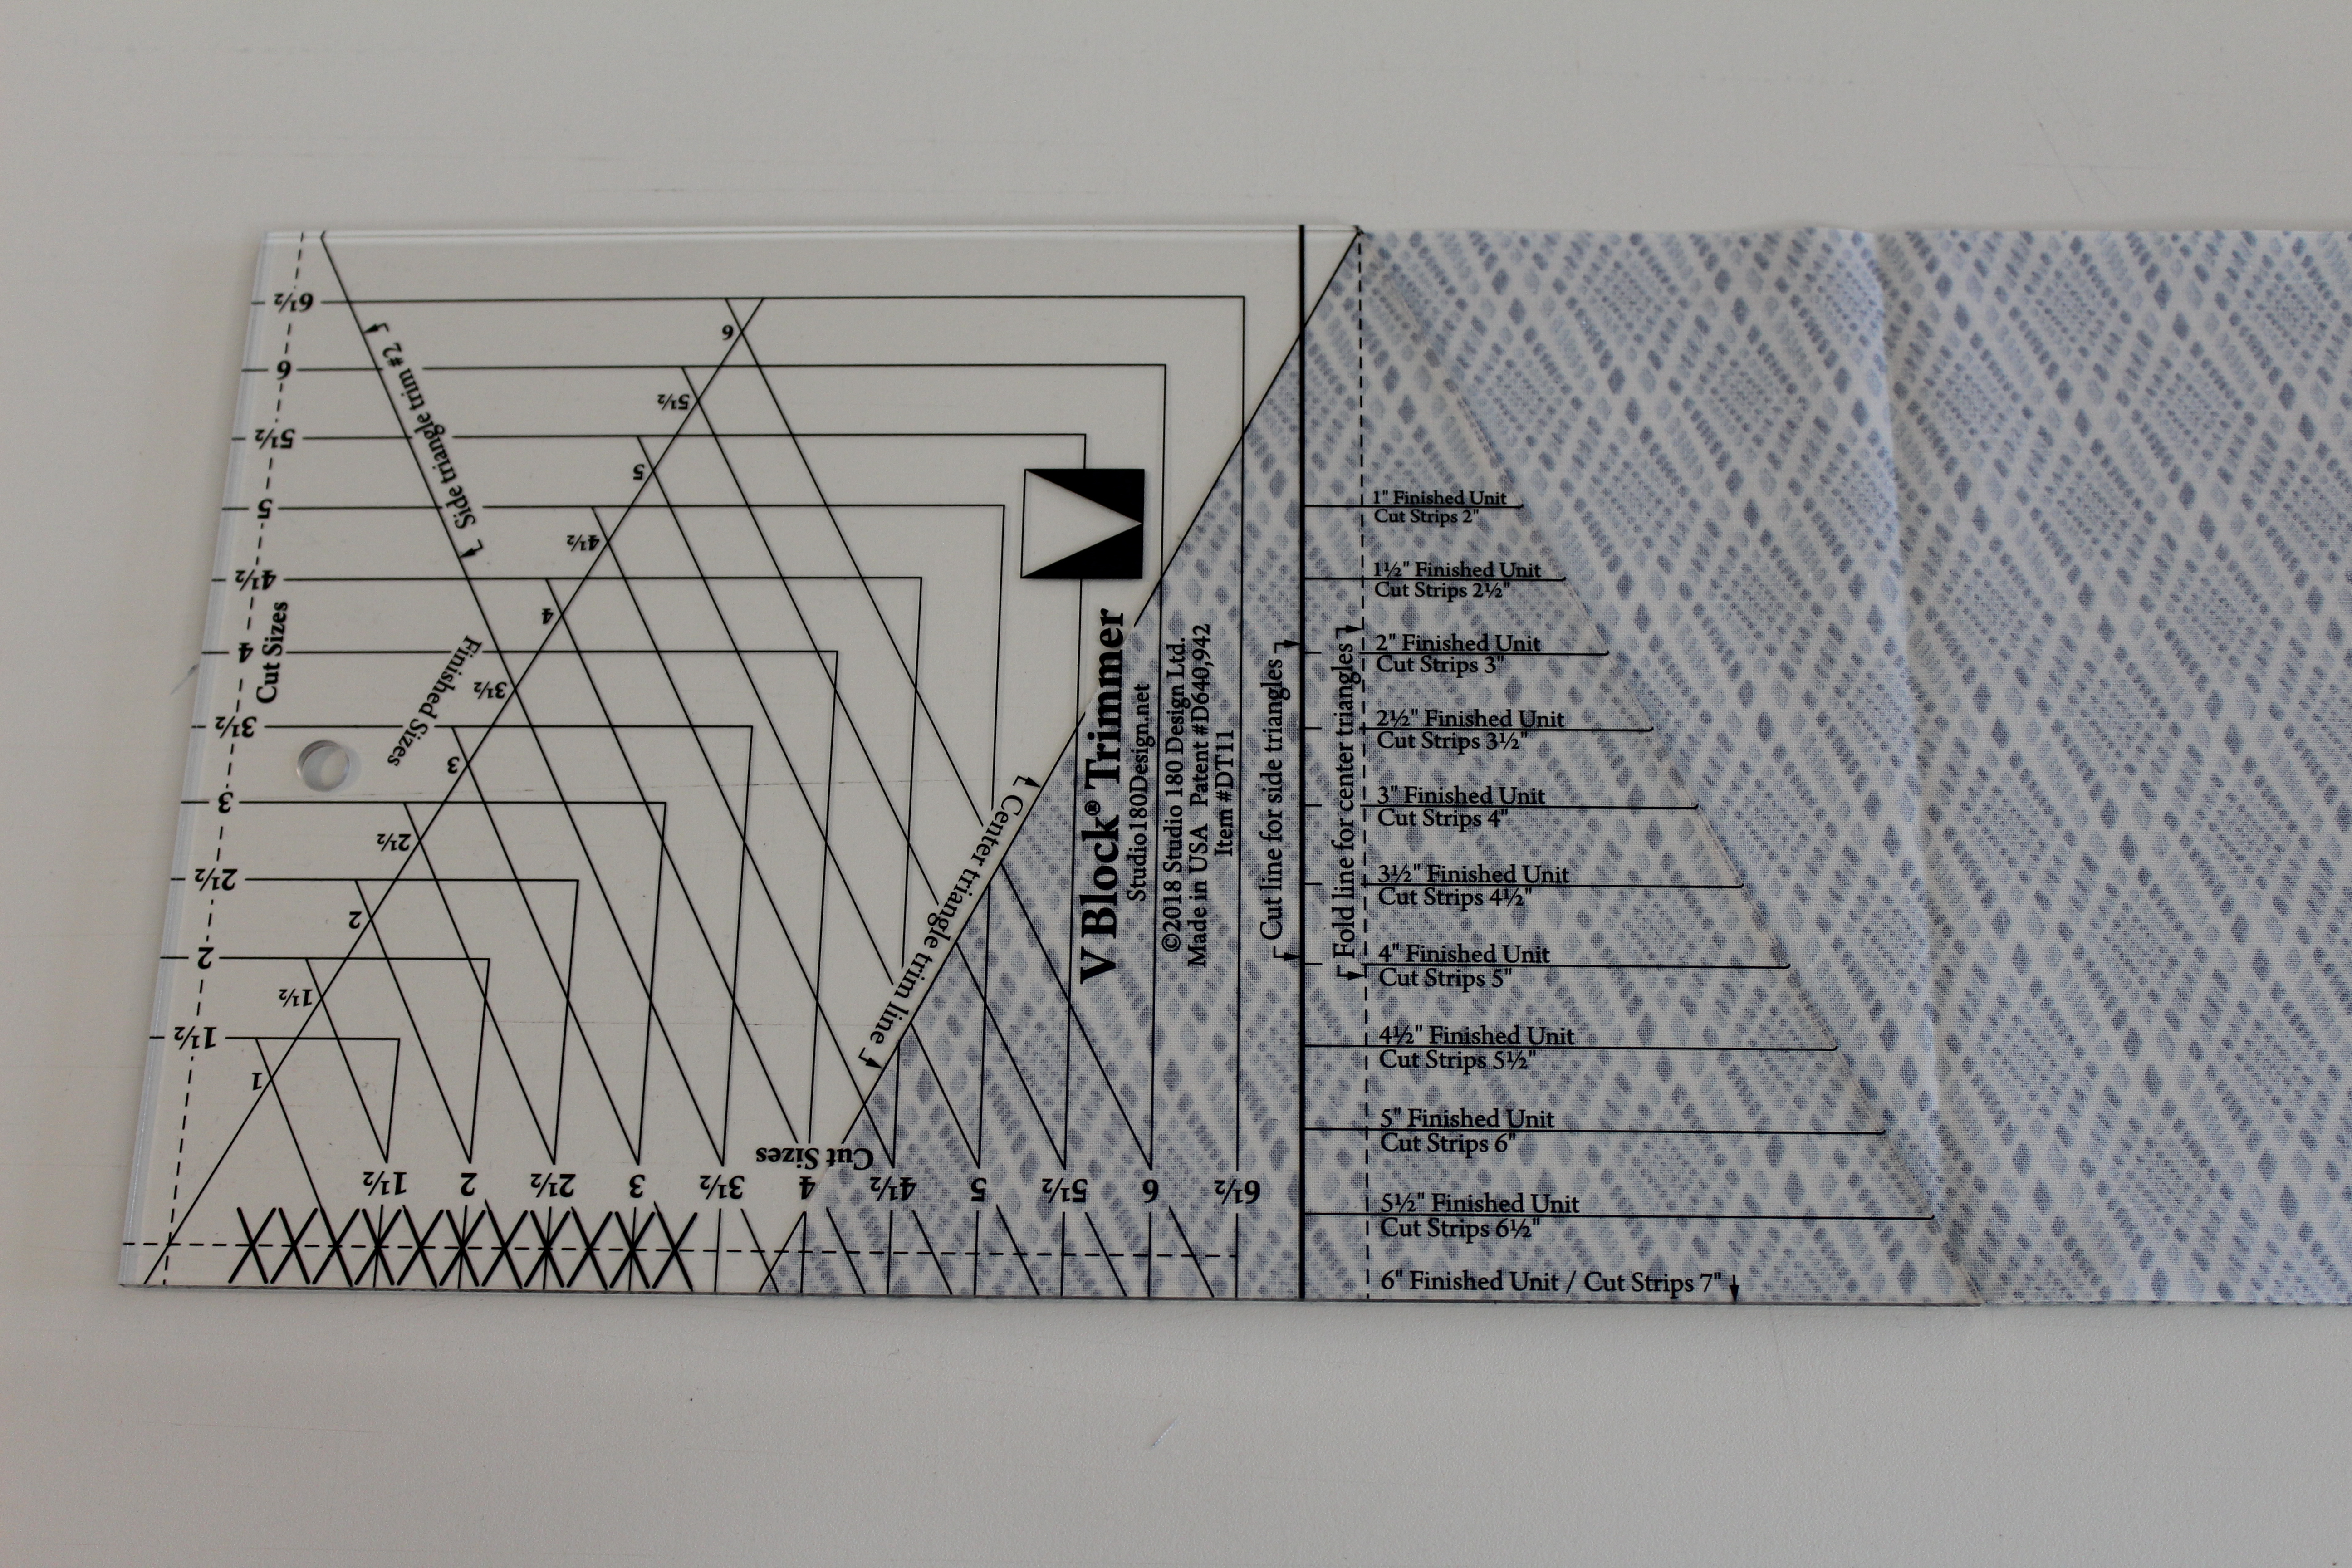
Step 3 – Line up the Center Triangle Trim Line with the edge of the strip, and cut the next triangle.
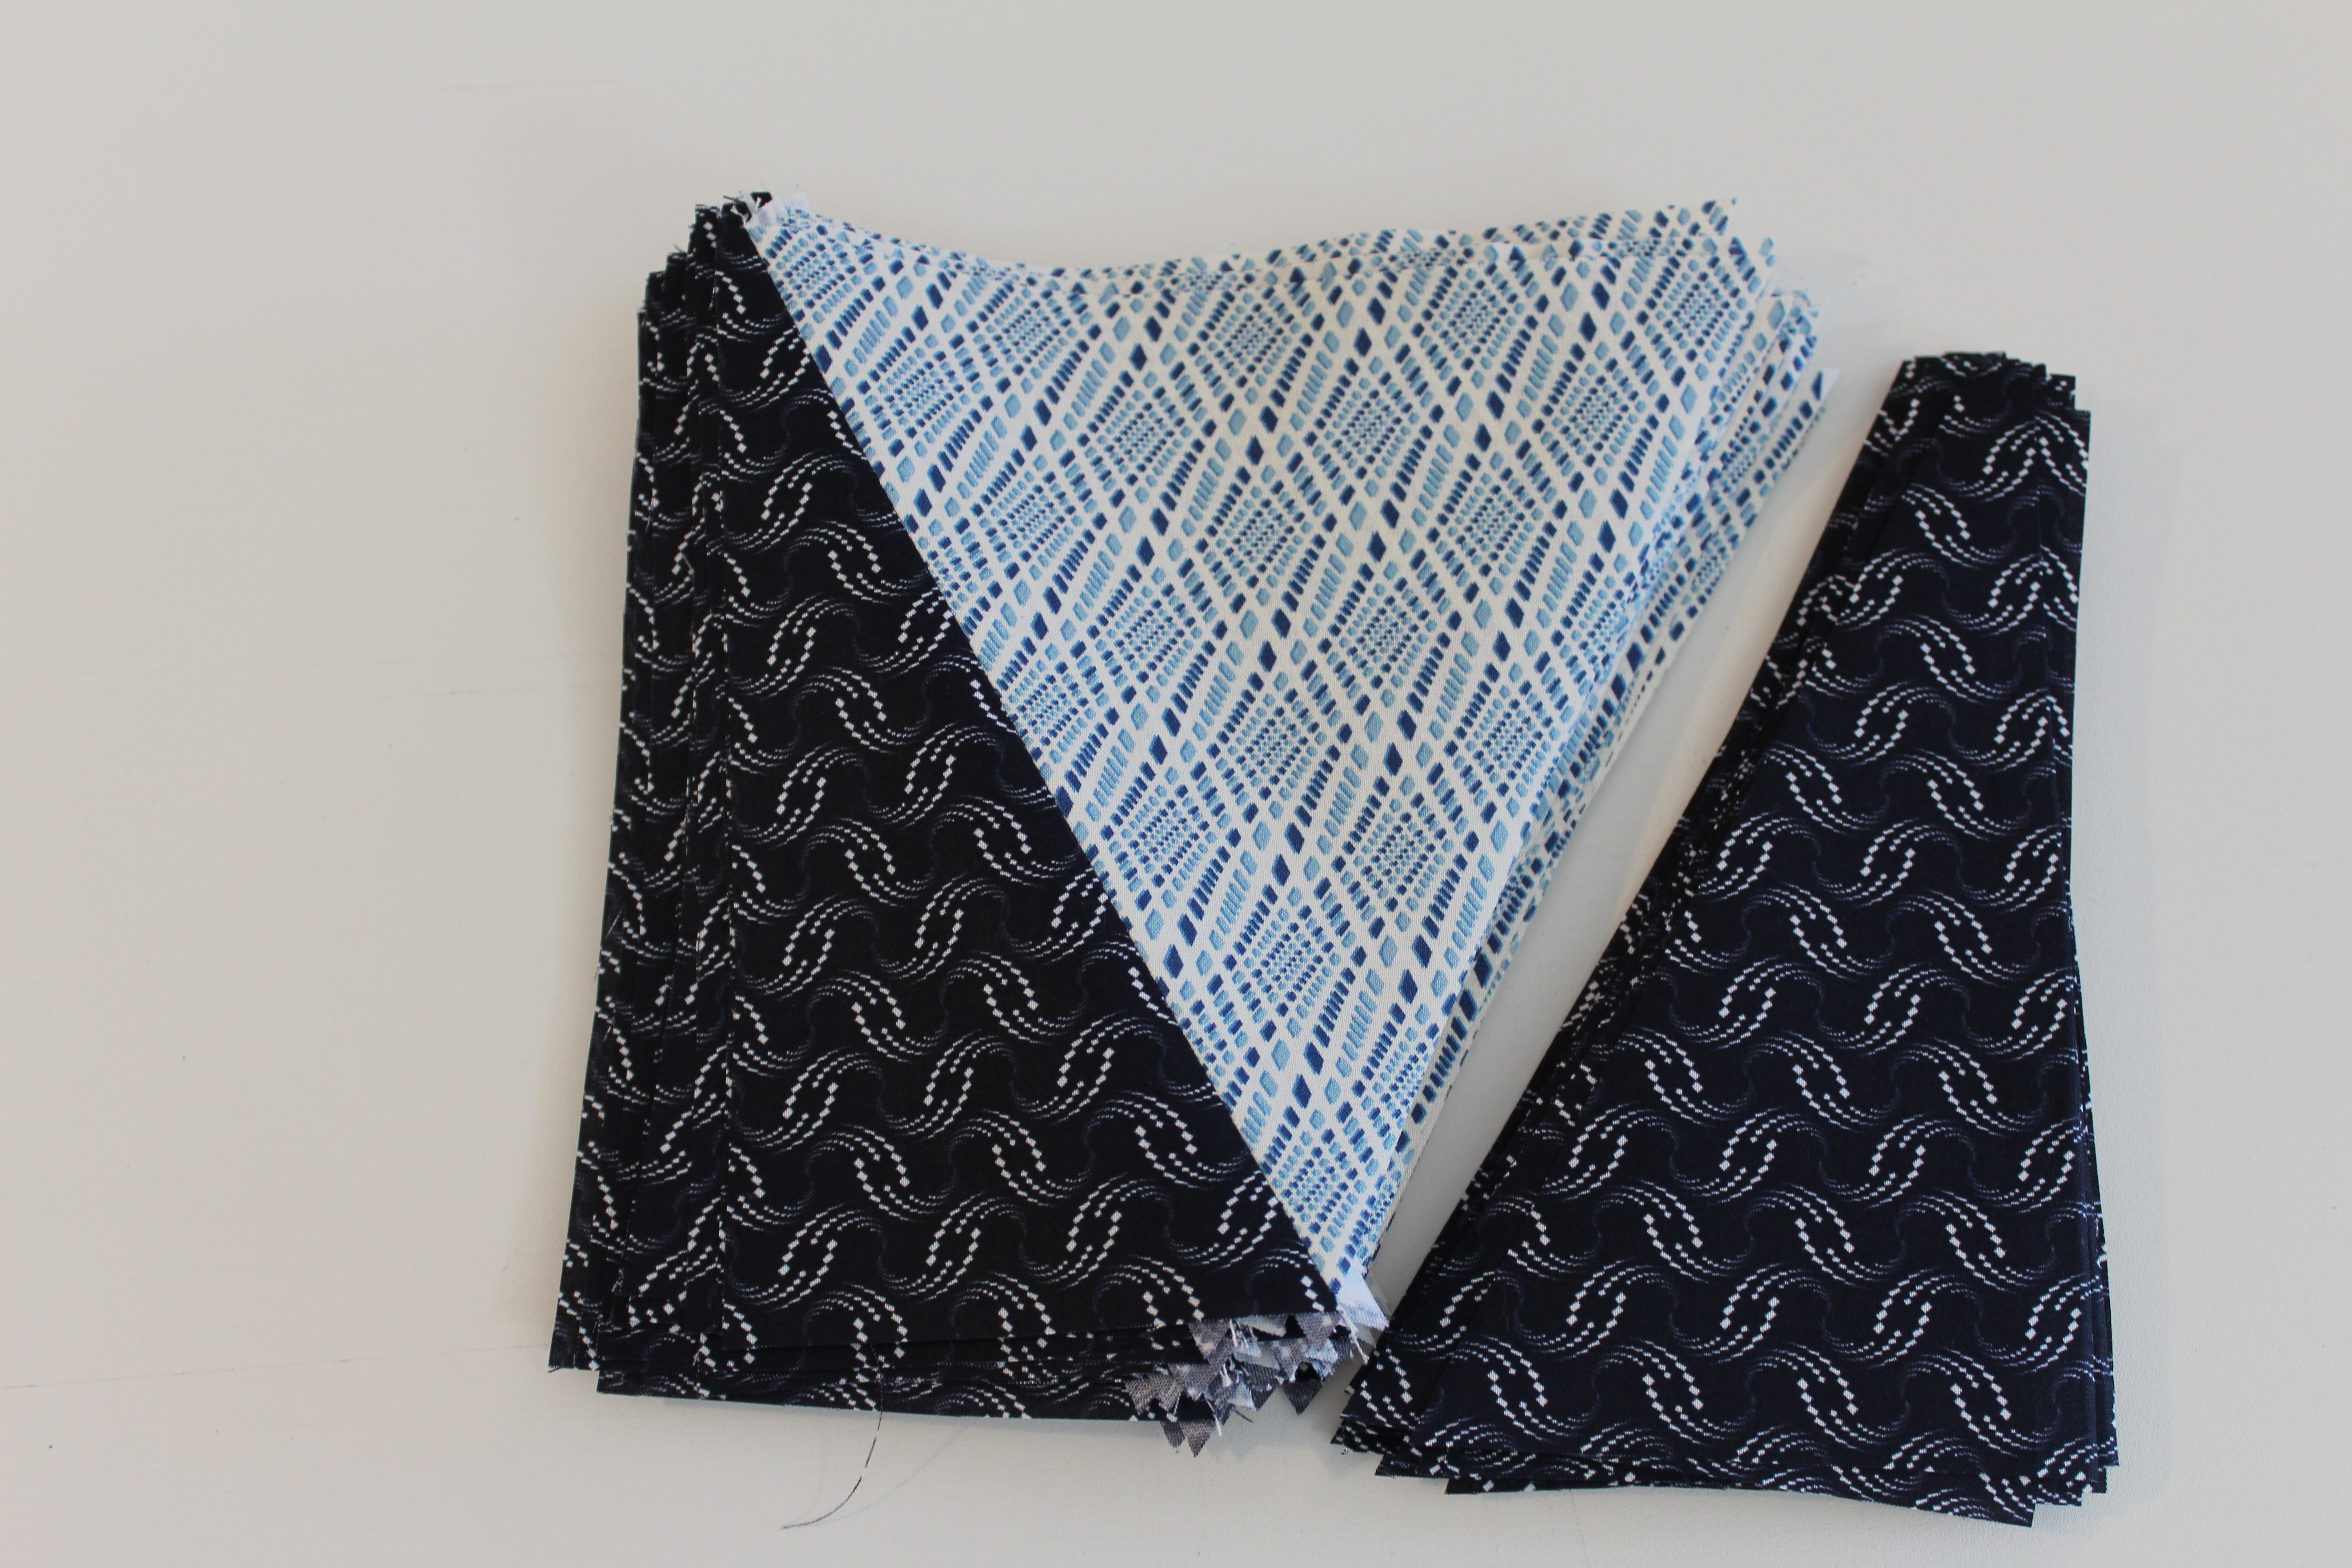
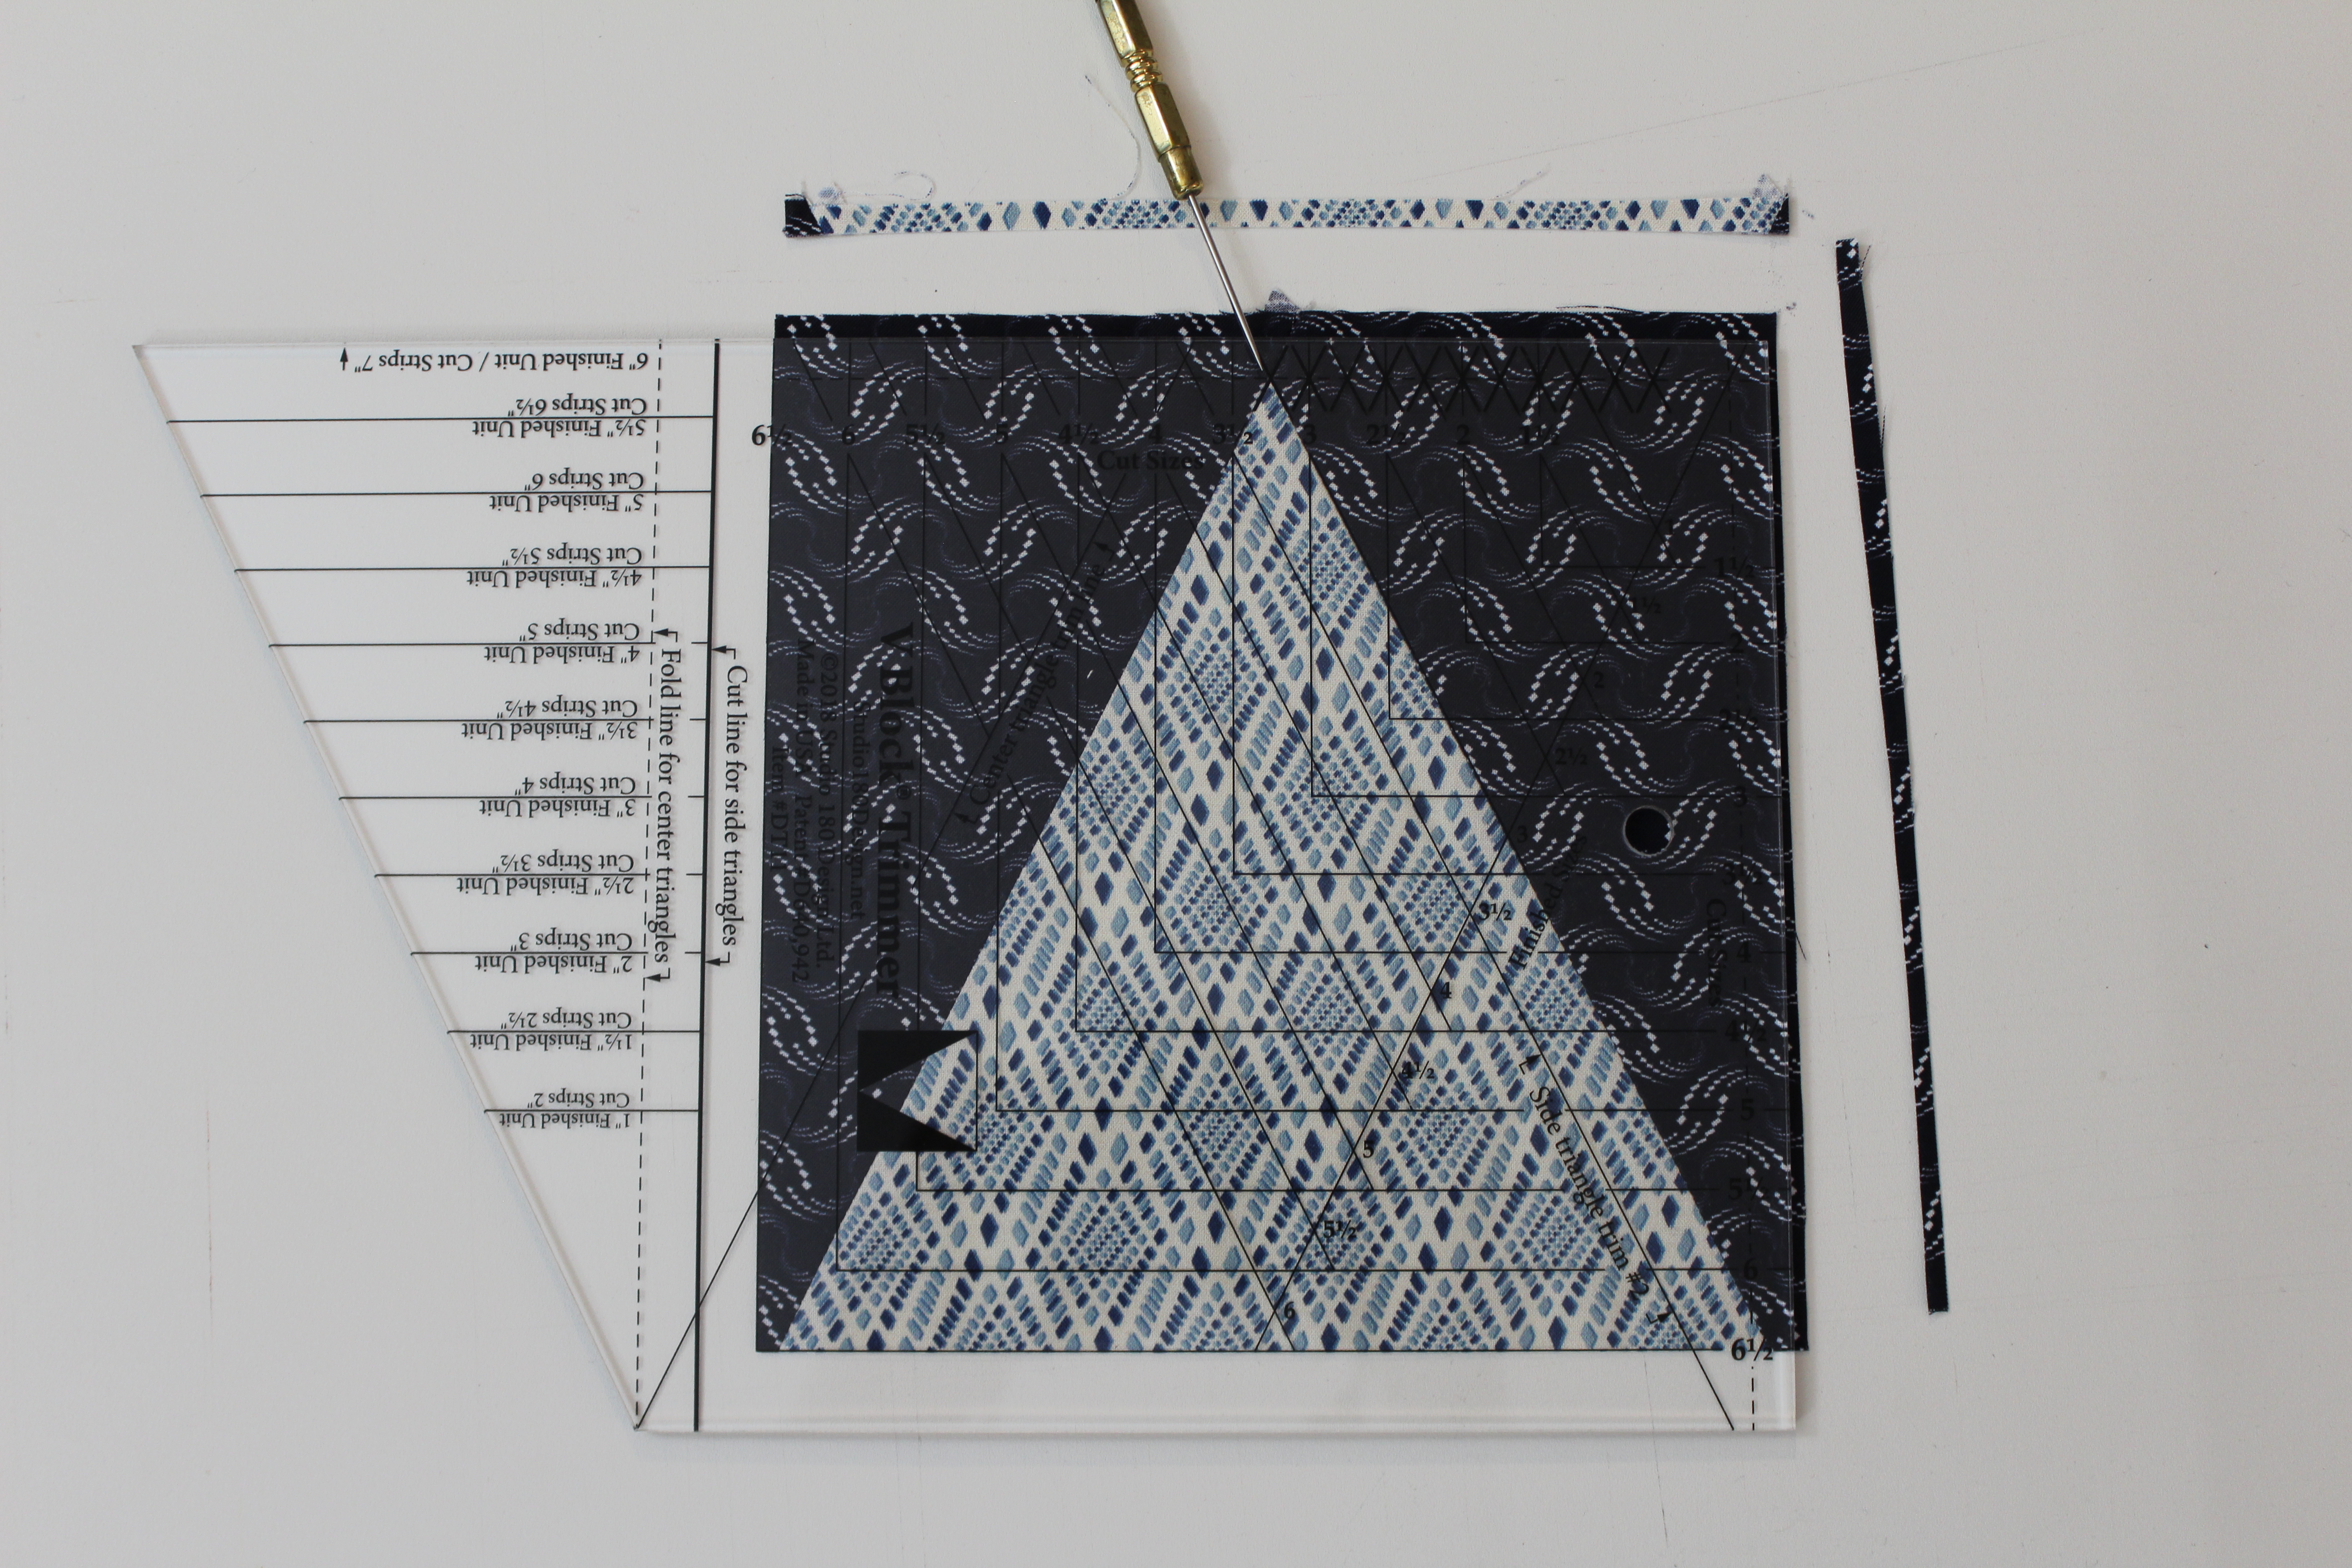
Step 4 – Continue to cut triangles. Flip the strip, cut a center triangle, flip, and cut again. Continue until you have 52 center triangles total.
Step 5 – Position the Print 1 Side Triangle strips wrong sides or right sides together in order to yield mirror images. Trim the selvages and position the Cut Line for Side Triangles line on your strips, lining up the 6” finished unit line (bottom of the tool) with the bottom raw edge of the strip. Cut along the angled edge.
Step 6 – Rotate the V Block® tool and position the Side Triangles Trim #2 line on the edge of the strip you just cut, making sure the angled edge of your strip is lined up along the second trim line. Cut along the edge. Continue cutting until you have 52 pairs of Side Triangles from Print 1.

Step 7 – Lay out the center triangles and the side triangle pairs.

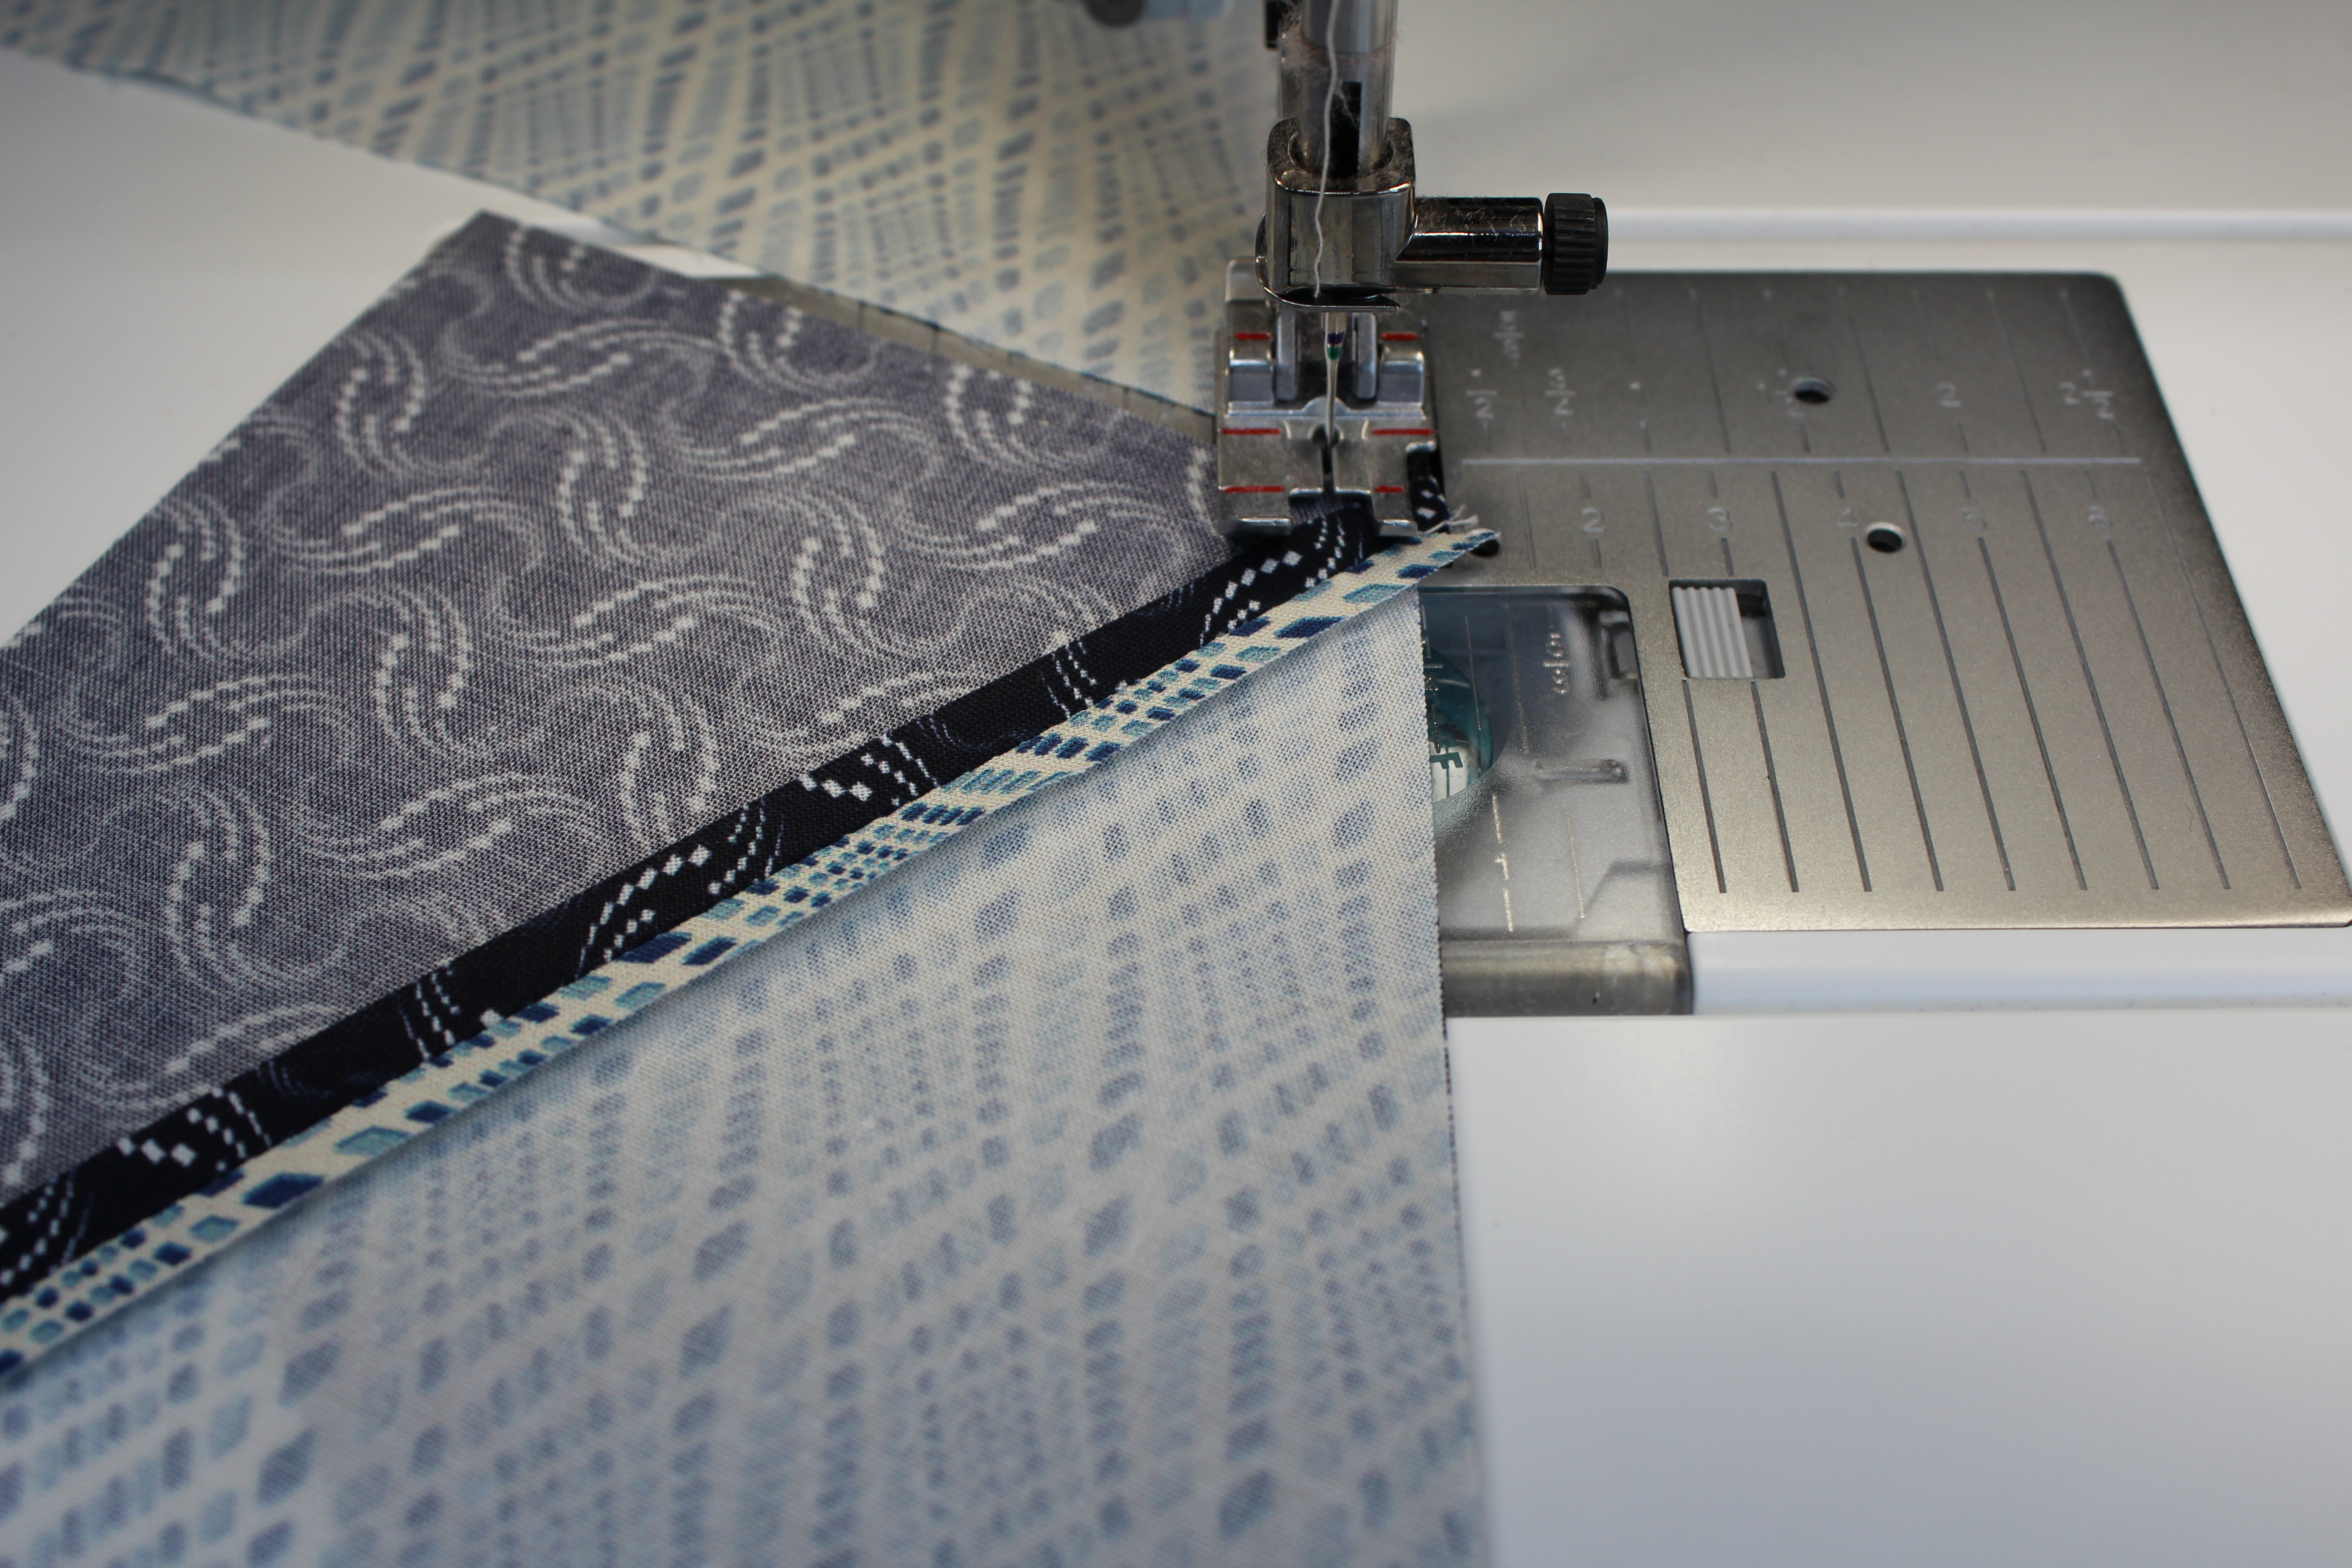
Step 8 – Align and stitch one side triangle to the center triangle. Use care to make sure you are lining up the correct edges of both the center and side triangles. Stitch and press the seam open. Do this for all center triangles.


Step 9 – Position the remaining side triangles on the other side of the center triangles. Stitch and press the seam open. Repeat for all units
Step 10 – Trim the units. Place the V Block unit on the cutting mat right side up with the point of the Center Triangle closest to you. Position the V Block® tool on the unit, aligning the 6” Finished Size measurement with the seam lines. Trim the first two sides of the unit.
Step 11 – Rotate the unit 180o and reposition the tool on top, aligning the trimmed edges of the unit with the Cut Size measurement of 6½” and placing the point of the Center Triangle “V” in the “X” at the top of the tool. Trim the remining two sides. Trim all 52 units.

See instructions for left hand cutting. Congratulations, you have learned another new skill and how to use the V Block tool.

Love the fabrics. Thanks, Jackie.
>
LikeLike
Hi Marlene.
LikeLike