It is a beautiful Autumn Day and I’m inside wrangling peacocks.
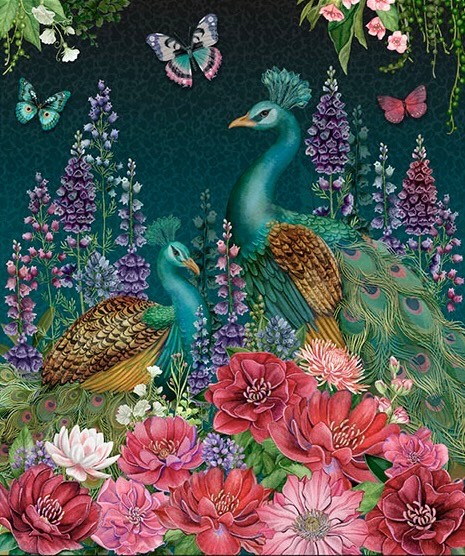
This beautiful panel Wild Garden by White Owl for Lumin Fabrics is just stunning. Wild Garden panel measures 36″ x 42″. Wild Garden is in quilt shops now!
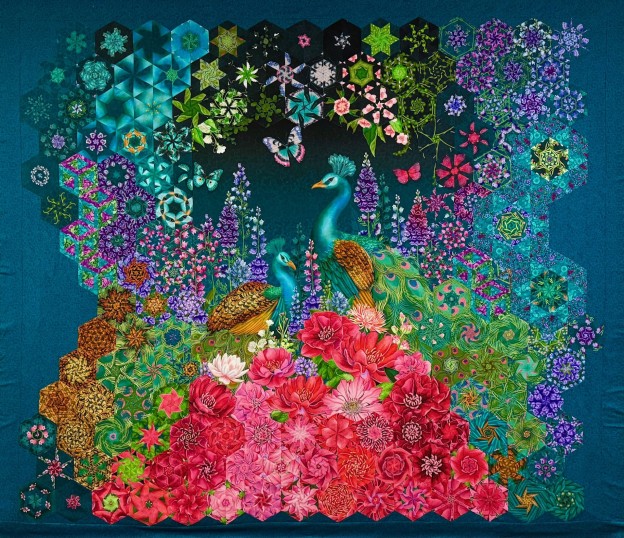
I cut 3.25″ strips for 5″ finished hexies, yielding 210 hexies.
There were some great hexies from this panel. I used Studio 180 Design’s First Choice Ruler to cut mt hexies.
I had a 2″ strip left from cutting up my panels. This allowed to use my Star 60 Tool to make 5″ kaleidoscope Star 60 units to add to my design.
First layout.
This photo shows the top, bottom and right sections have been stitched to the panel.
All stitched together, tweaked and borders added. Wild Garden measures 85″ x 74″.
Terri Butler wore her Wild Garden Jacket out last night. I think she looks Fabulous.
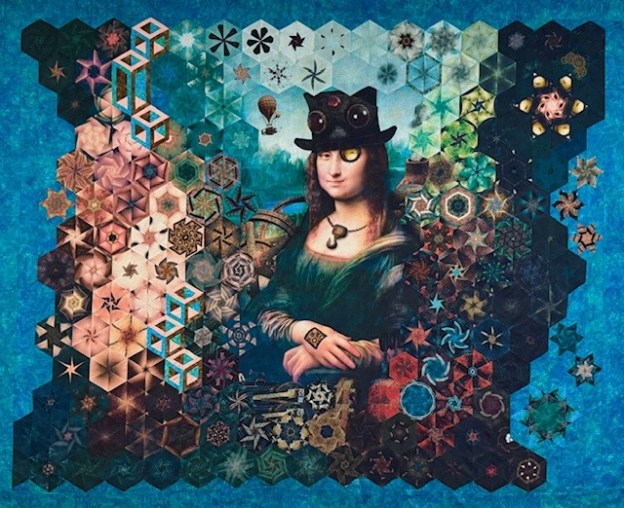
Wind me up & watch me go! Has anyone seen Leonardo? Steampunk Mona is Leonardo da Vinci’s version of AI. Someone greased Mona’s gears and now she is looking for Leo!
Steampunk Mona Lisa is from Rubin Design Studio and eQuilter. She measures 29″ x 44″.
There was much more color in this panel than I expected. I cut my strips 3.25″ to yield 5″ finished hexies. I got 176 hexies to play with.
I played with the hat for a while but decided to leave it alone.
The Hollow Cube 60‘s in the section represent the platform Leonardo launched his flying machine from.
The clock over Mona’s eye didn’t blend with anything. I stitched the clock hexie and Mona’s eye hexies together to create a diamond. Then added side triangles to create a 10″ Star 60.
Steampunk Mona before borders and tweaking.
Steampunk Mona measures 86″ x 69″. She was great fun to make. But wait! There’s more! Terri Butler of Mama Said Sew is working on a Steampunk Mona OBW coat. Follow Terri and me on our adventures at www.facebook.com/MamaSaidTheseThreadsCouldTalk
I’m beyond excited! I felt honored to be chosen for Quiltfolk’s Cat issue. It’s amusing because I am a Chihuahua mom! But I think cats are cool!
The cat issue is full of beautiful cat quilts and cats!
The panel called Intricately illustrated Kitty is by Rubin Design Studio of eQuilter.com. I named my One Block Wonder quilt “Bedazzled”. The large hexagons are made with Studio 180 Design’s Star 60 tool. I call them Star 60 Spinners. My quilt measures 88″ x 71″. I am on page 106. Thank you Quiltfolk!
Elf & Dragon panel by Rubin Design Studio on eQuilter.com Panel measures 33″ x 44″.
I cut my strips 3.25″ to yield 5″ finished hexies. I created 10″ finished Checkerboard 60 units with my Star 60 Tool to be part of the dragon’s body.
The photo above is the quilt top stitched together, but no borders yet. Next I hide what needs hiding.
“The Elf’s song was heard through out the forest. The mossy earth began to shift. The dragon rose from beneath the leaves and mushrooms. The dragon would always come when the Elf called!
Can you find all my appliques’? The Elf and Dragon measures 90″ x 70″.
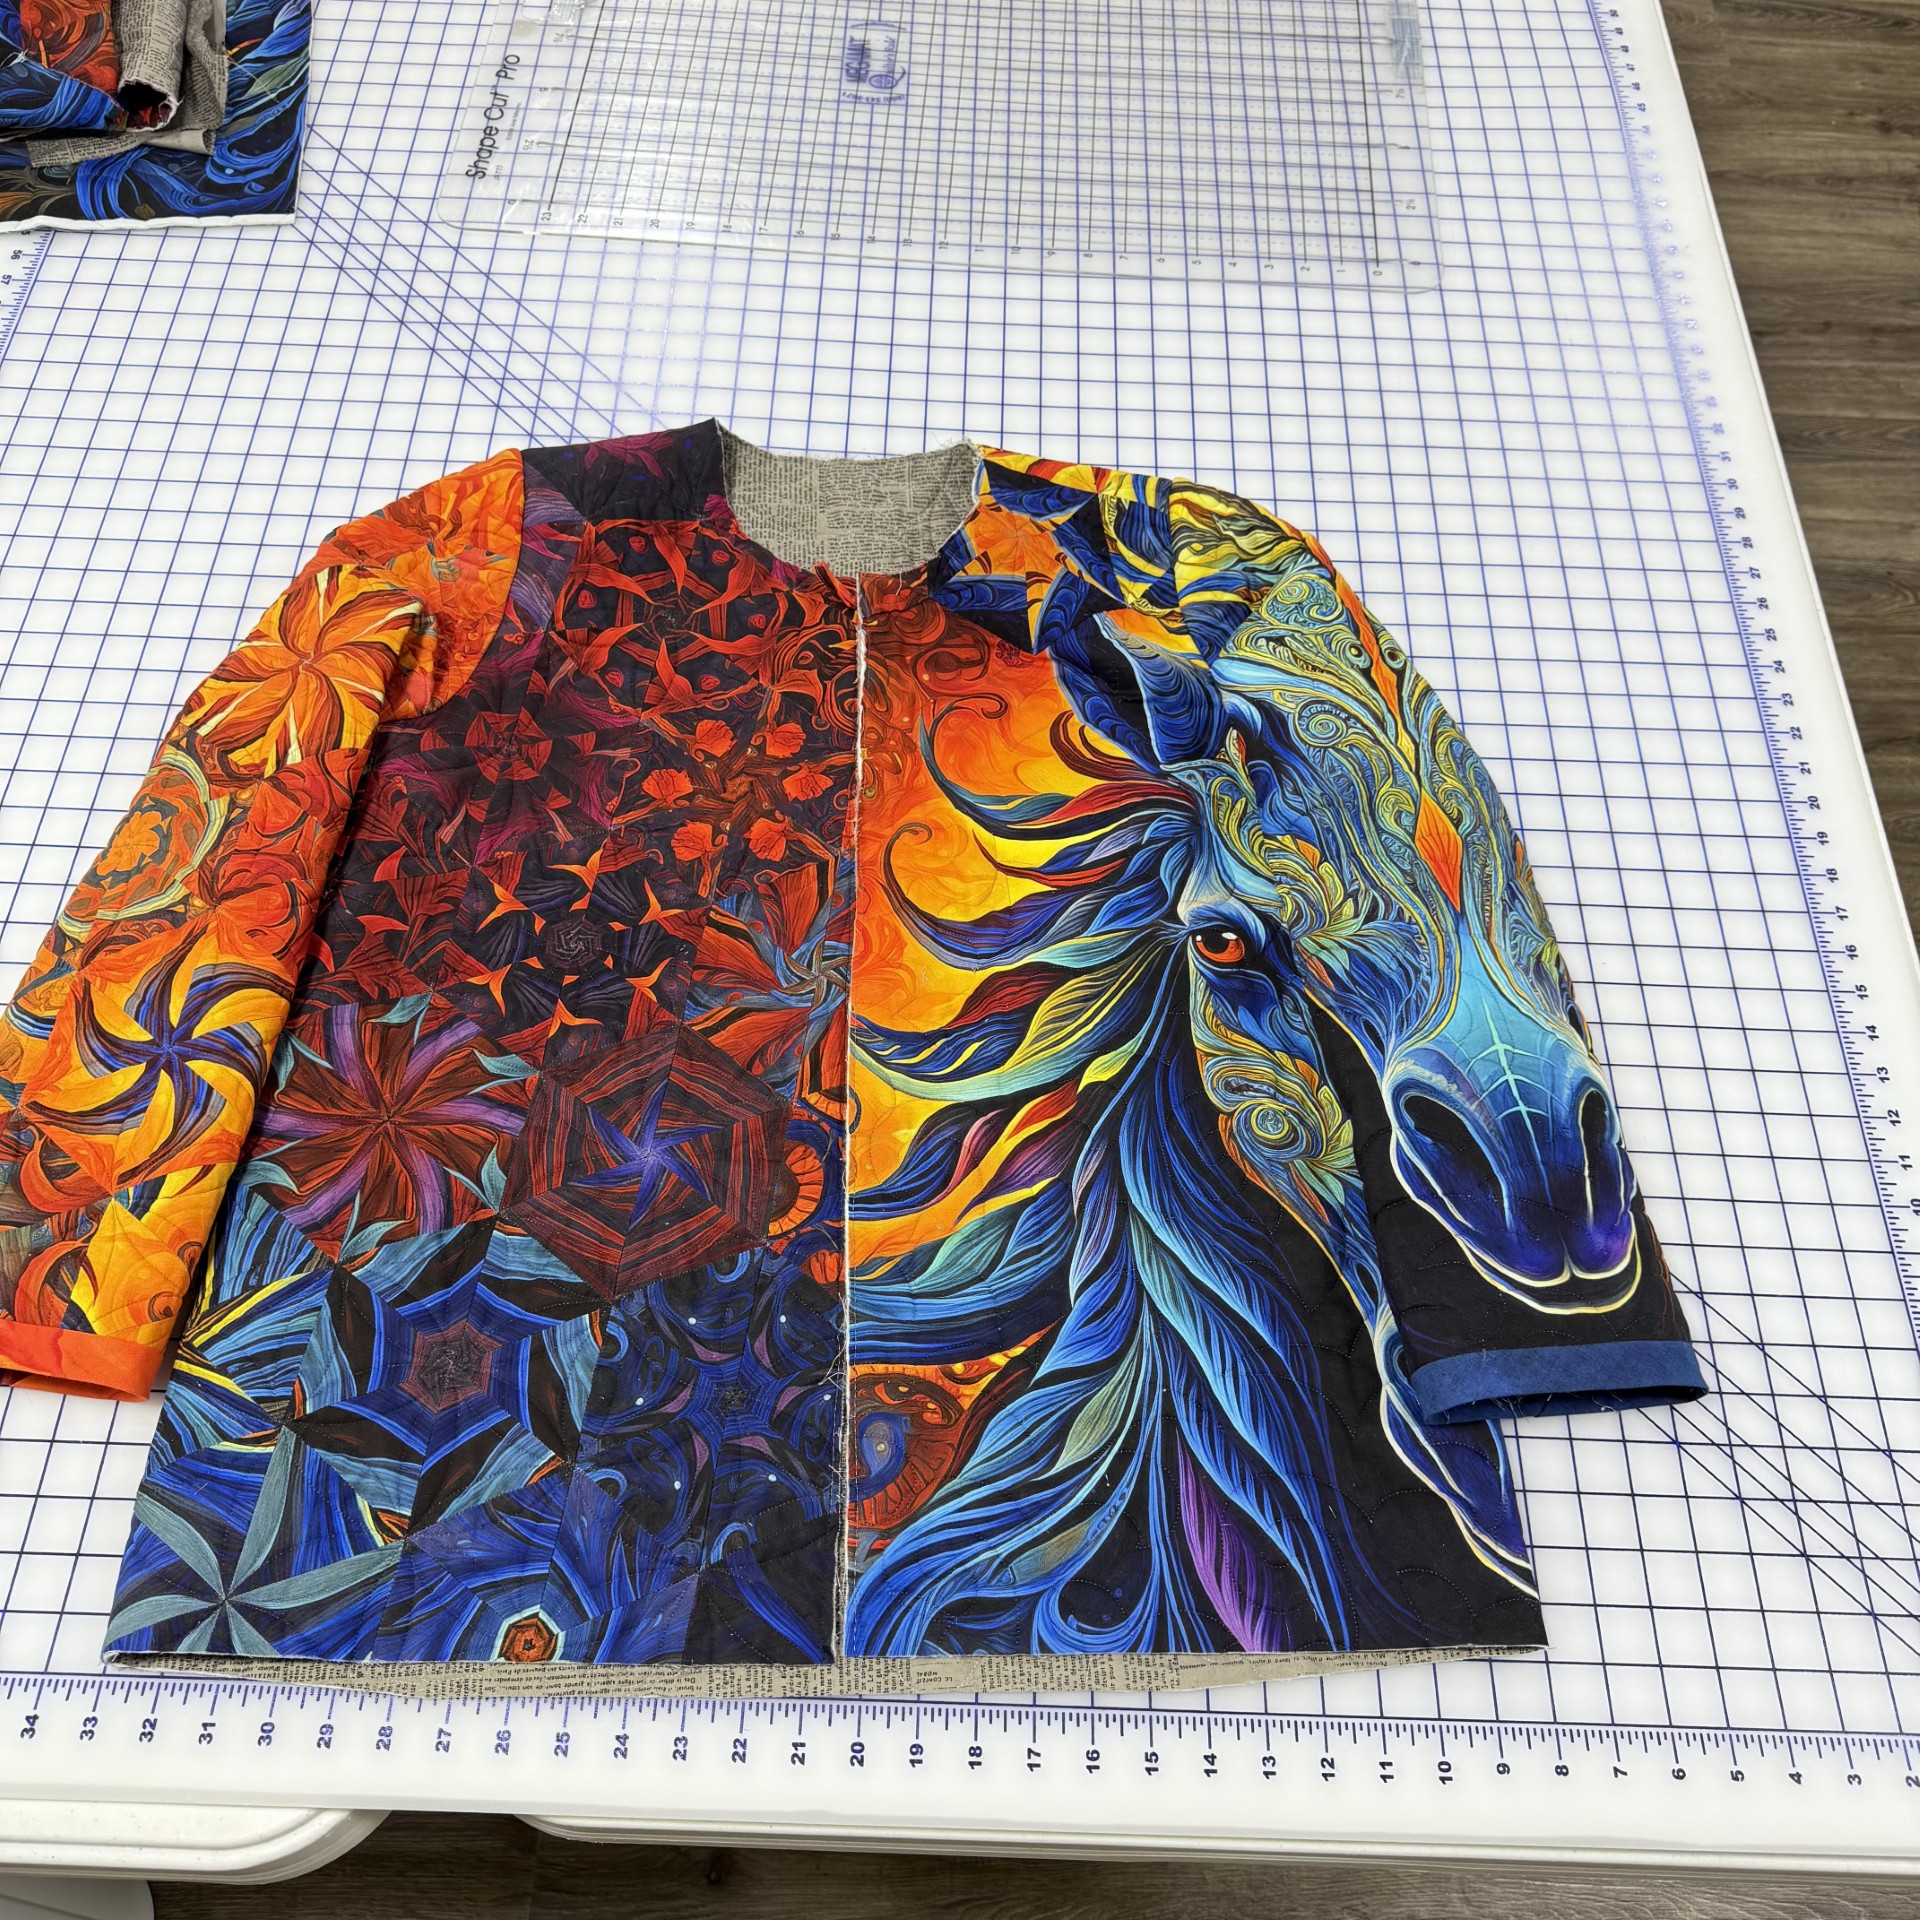
This is me on Buck, our first horse. In 1966 I was living in Las Vegas. I was in the 4H Club. Every year we participated in a parade down the Las Vagas Strip. I was such a tomboy. I once caught a wild mustang and brought it home. He was tearing up the corral so bad I had to set him free the next day. At least he had water and a meal.
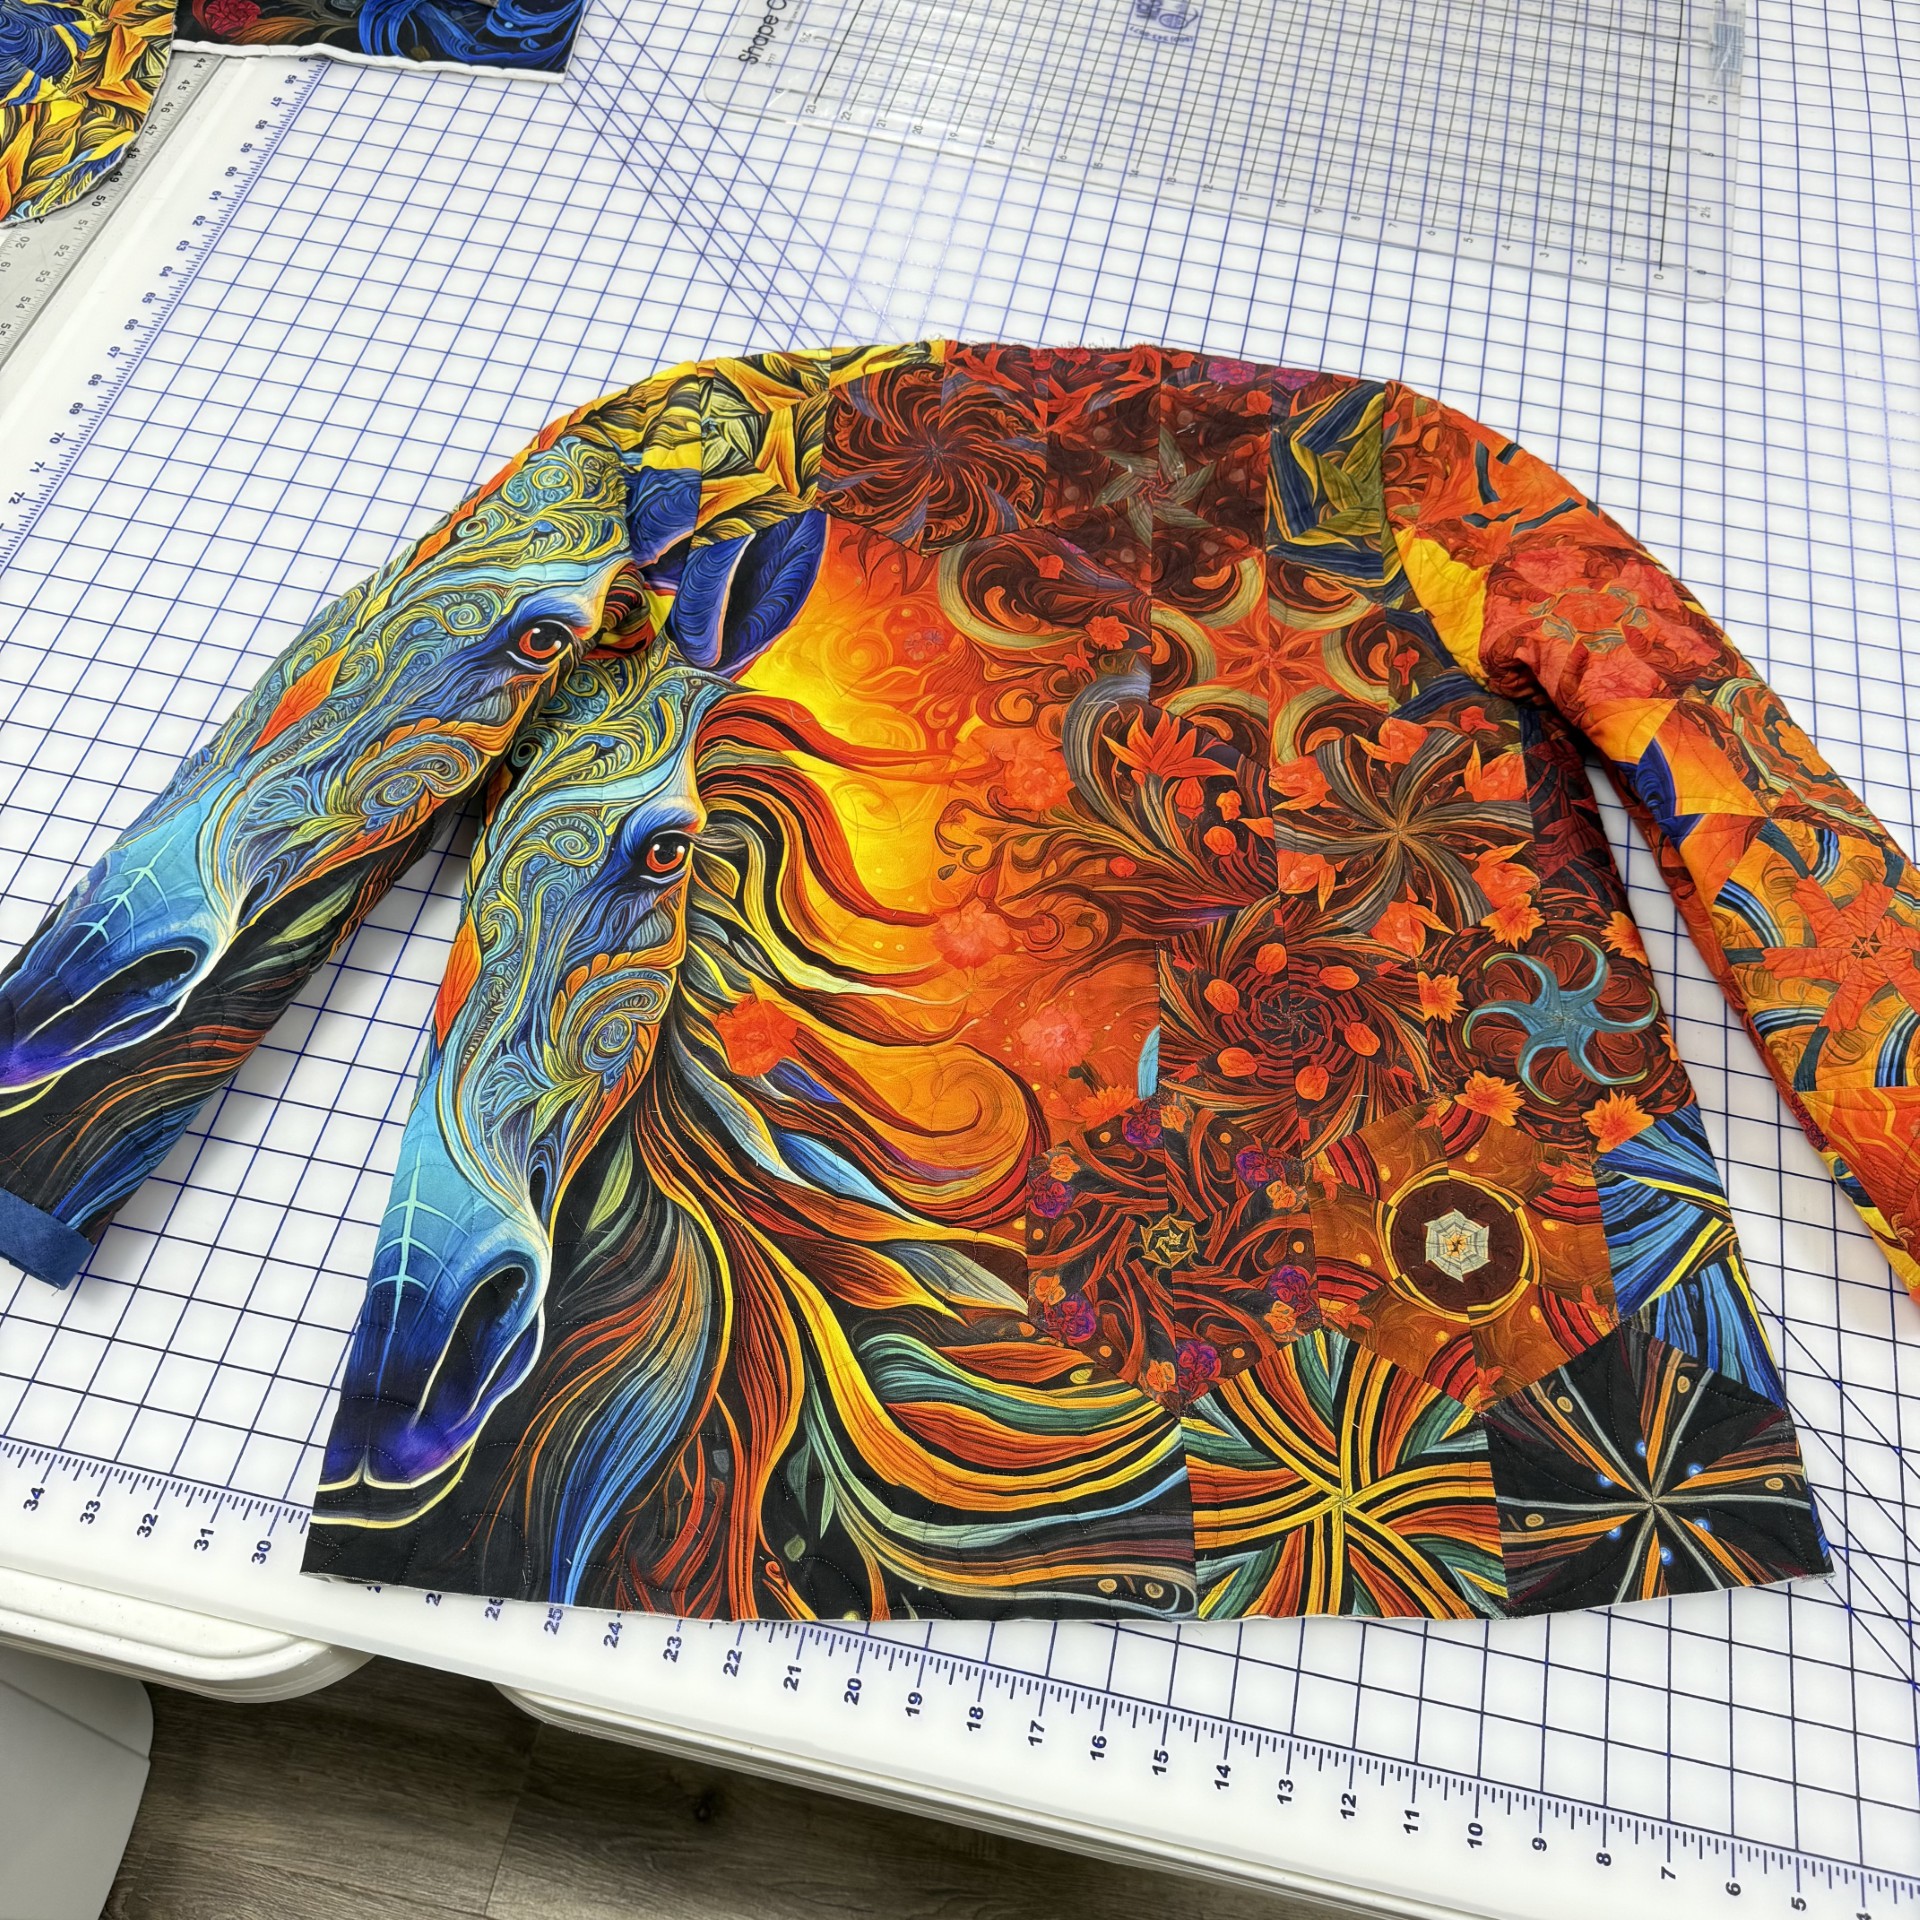
Mystical Horse OBW measures 94″ x 71″. I cut my strips 3.25″ which yielded 5″ finished hexies, cut with the First Choice ruler. I included 10″ finished Framed 60 Units made with the Star 60 Tool and Island Batik fabrics.
My friend and fellow Studio 180 Design Certified Instructor Terri Butler has challenged herself to make a OBW coat for every OBW that I make. She got hers done before me.
Terri and I did a thing! Terri Butler is my friend and fellow Studio 180 Design Certified Instructor. While we were at H&H Americas in Chicago we had an idea.
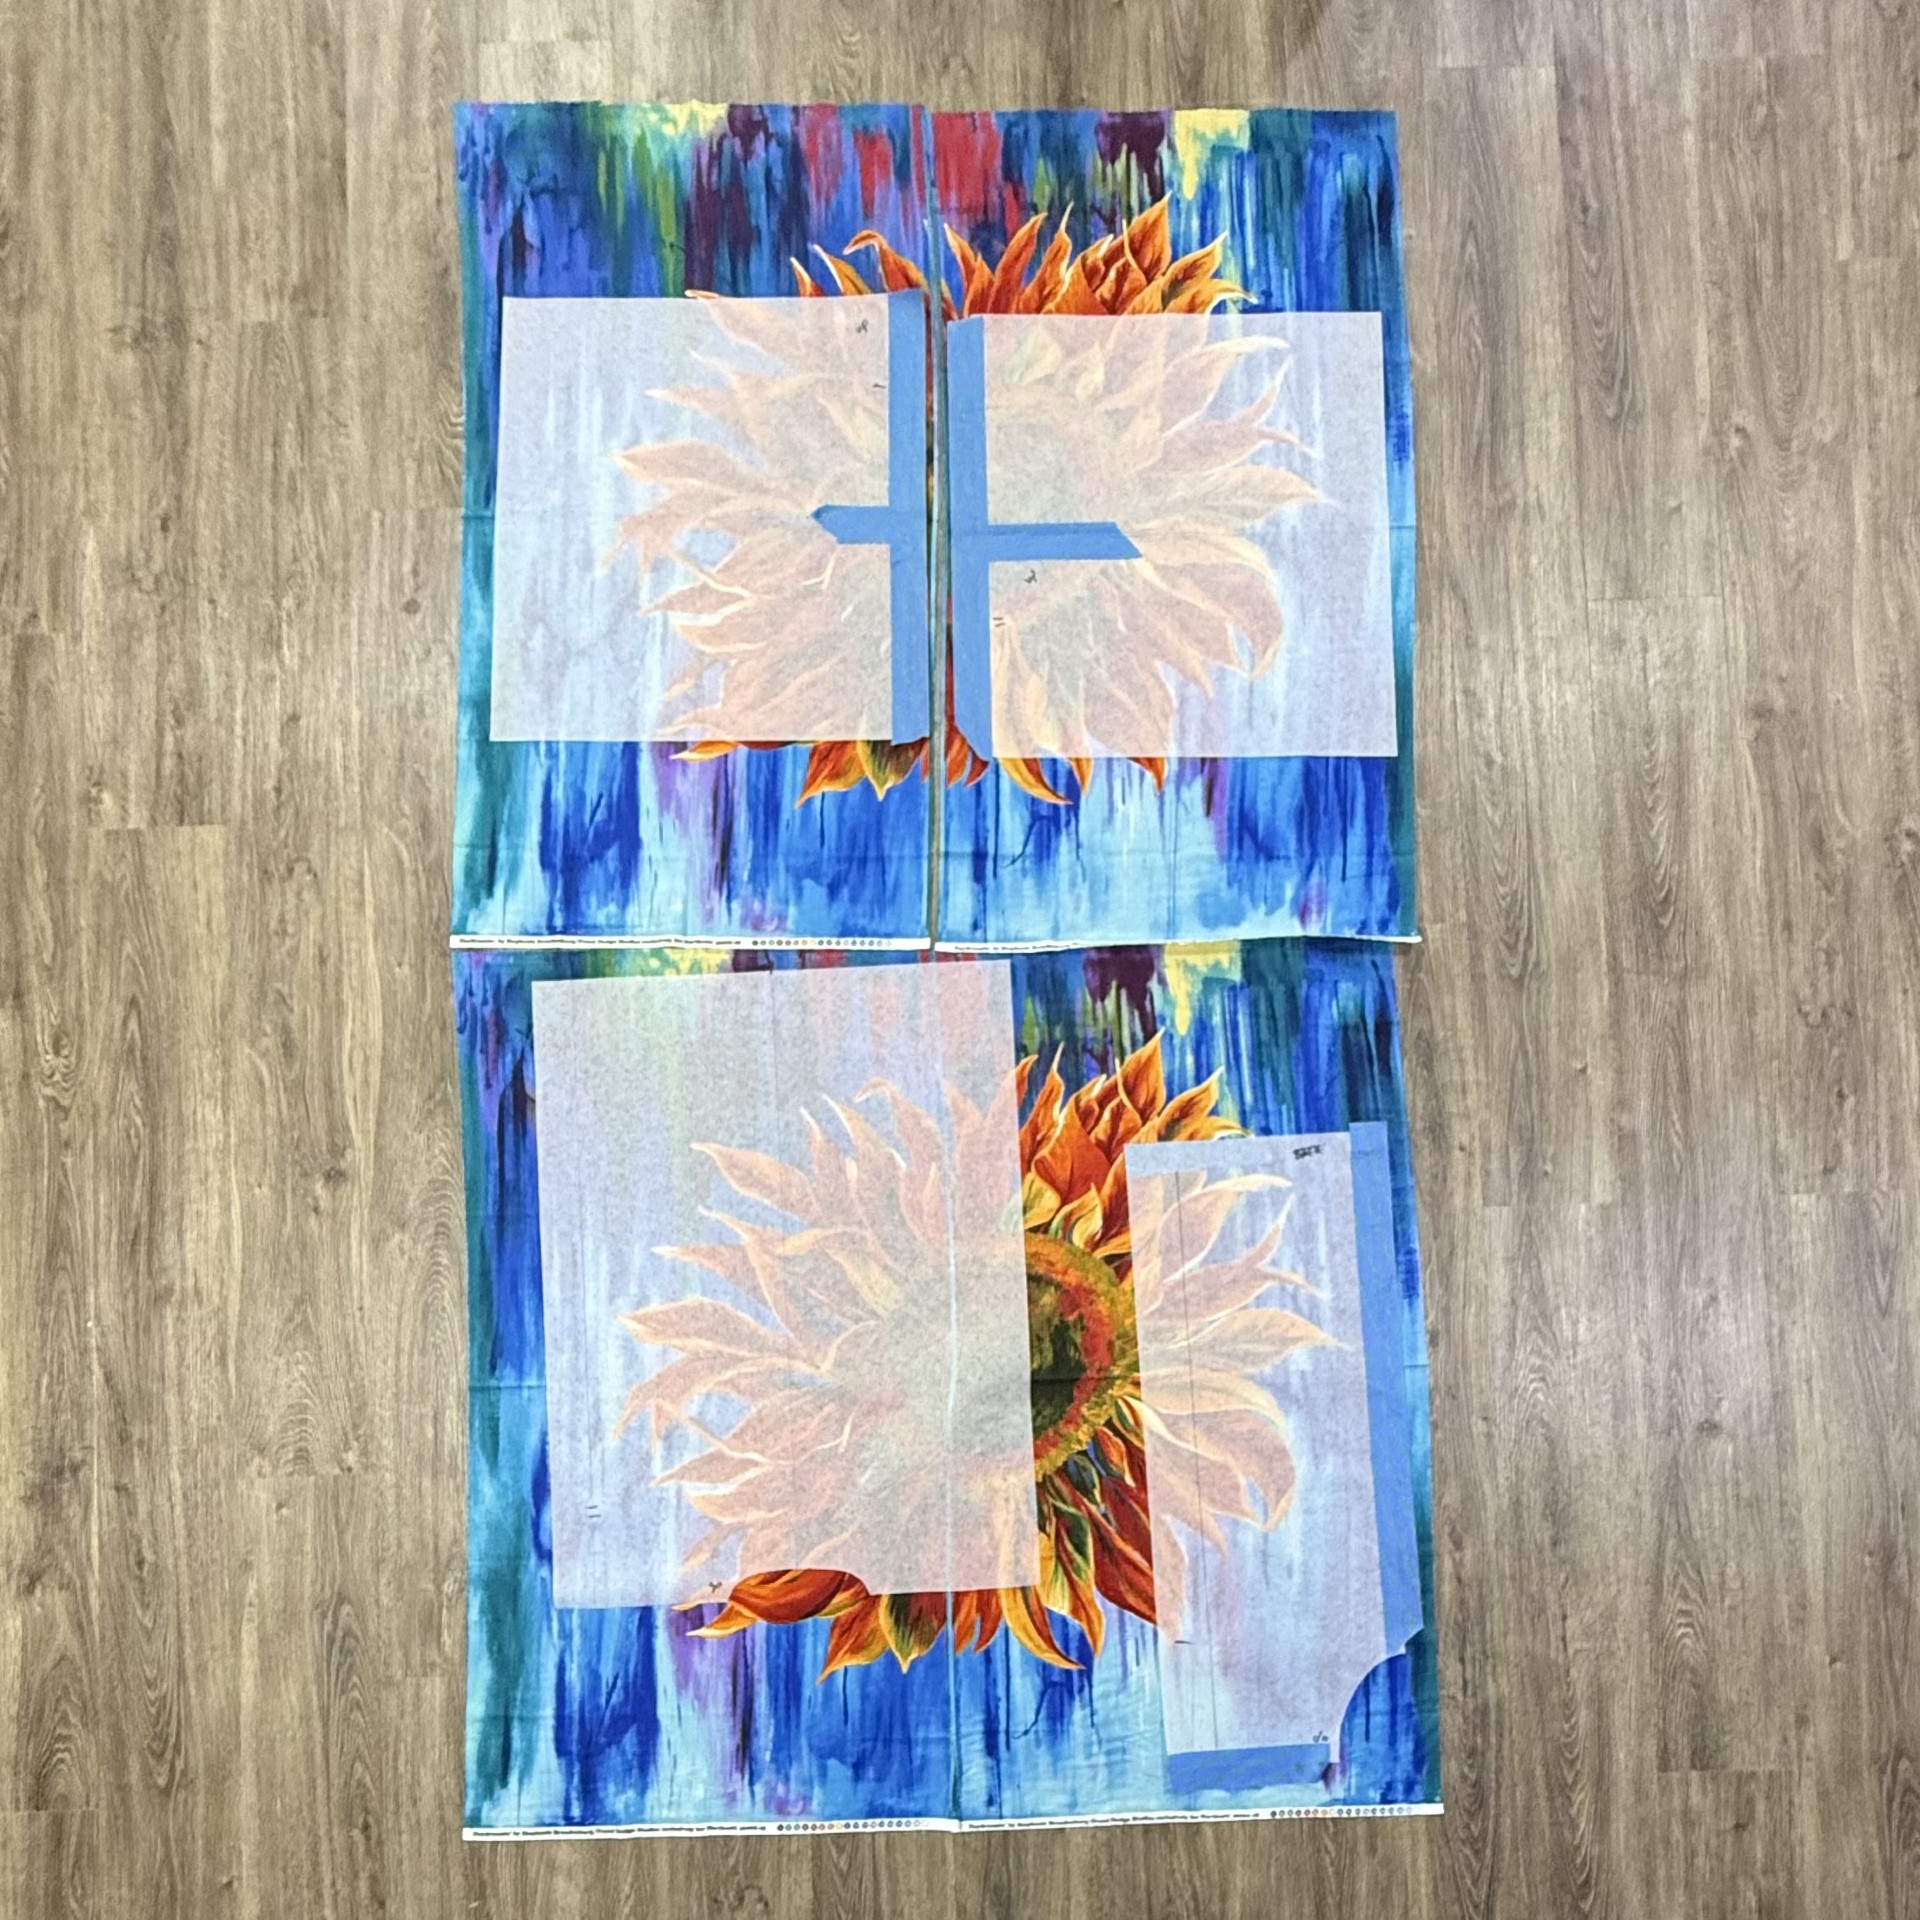
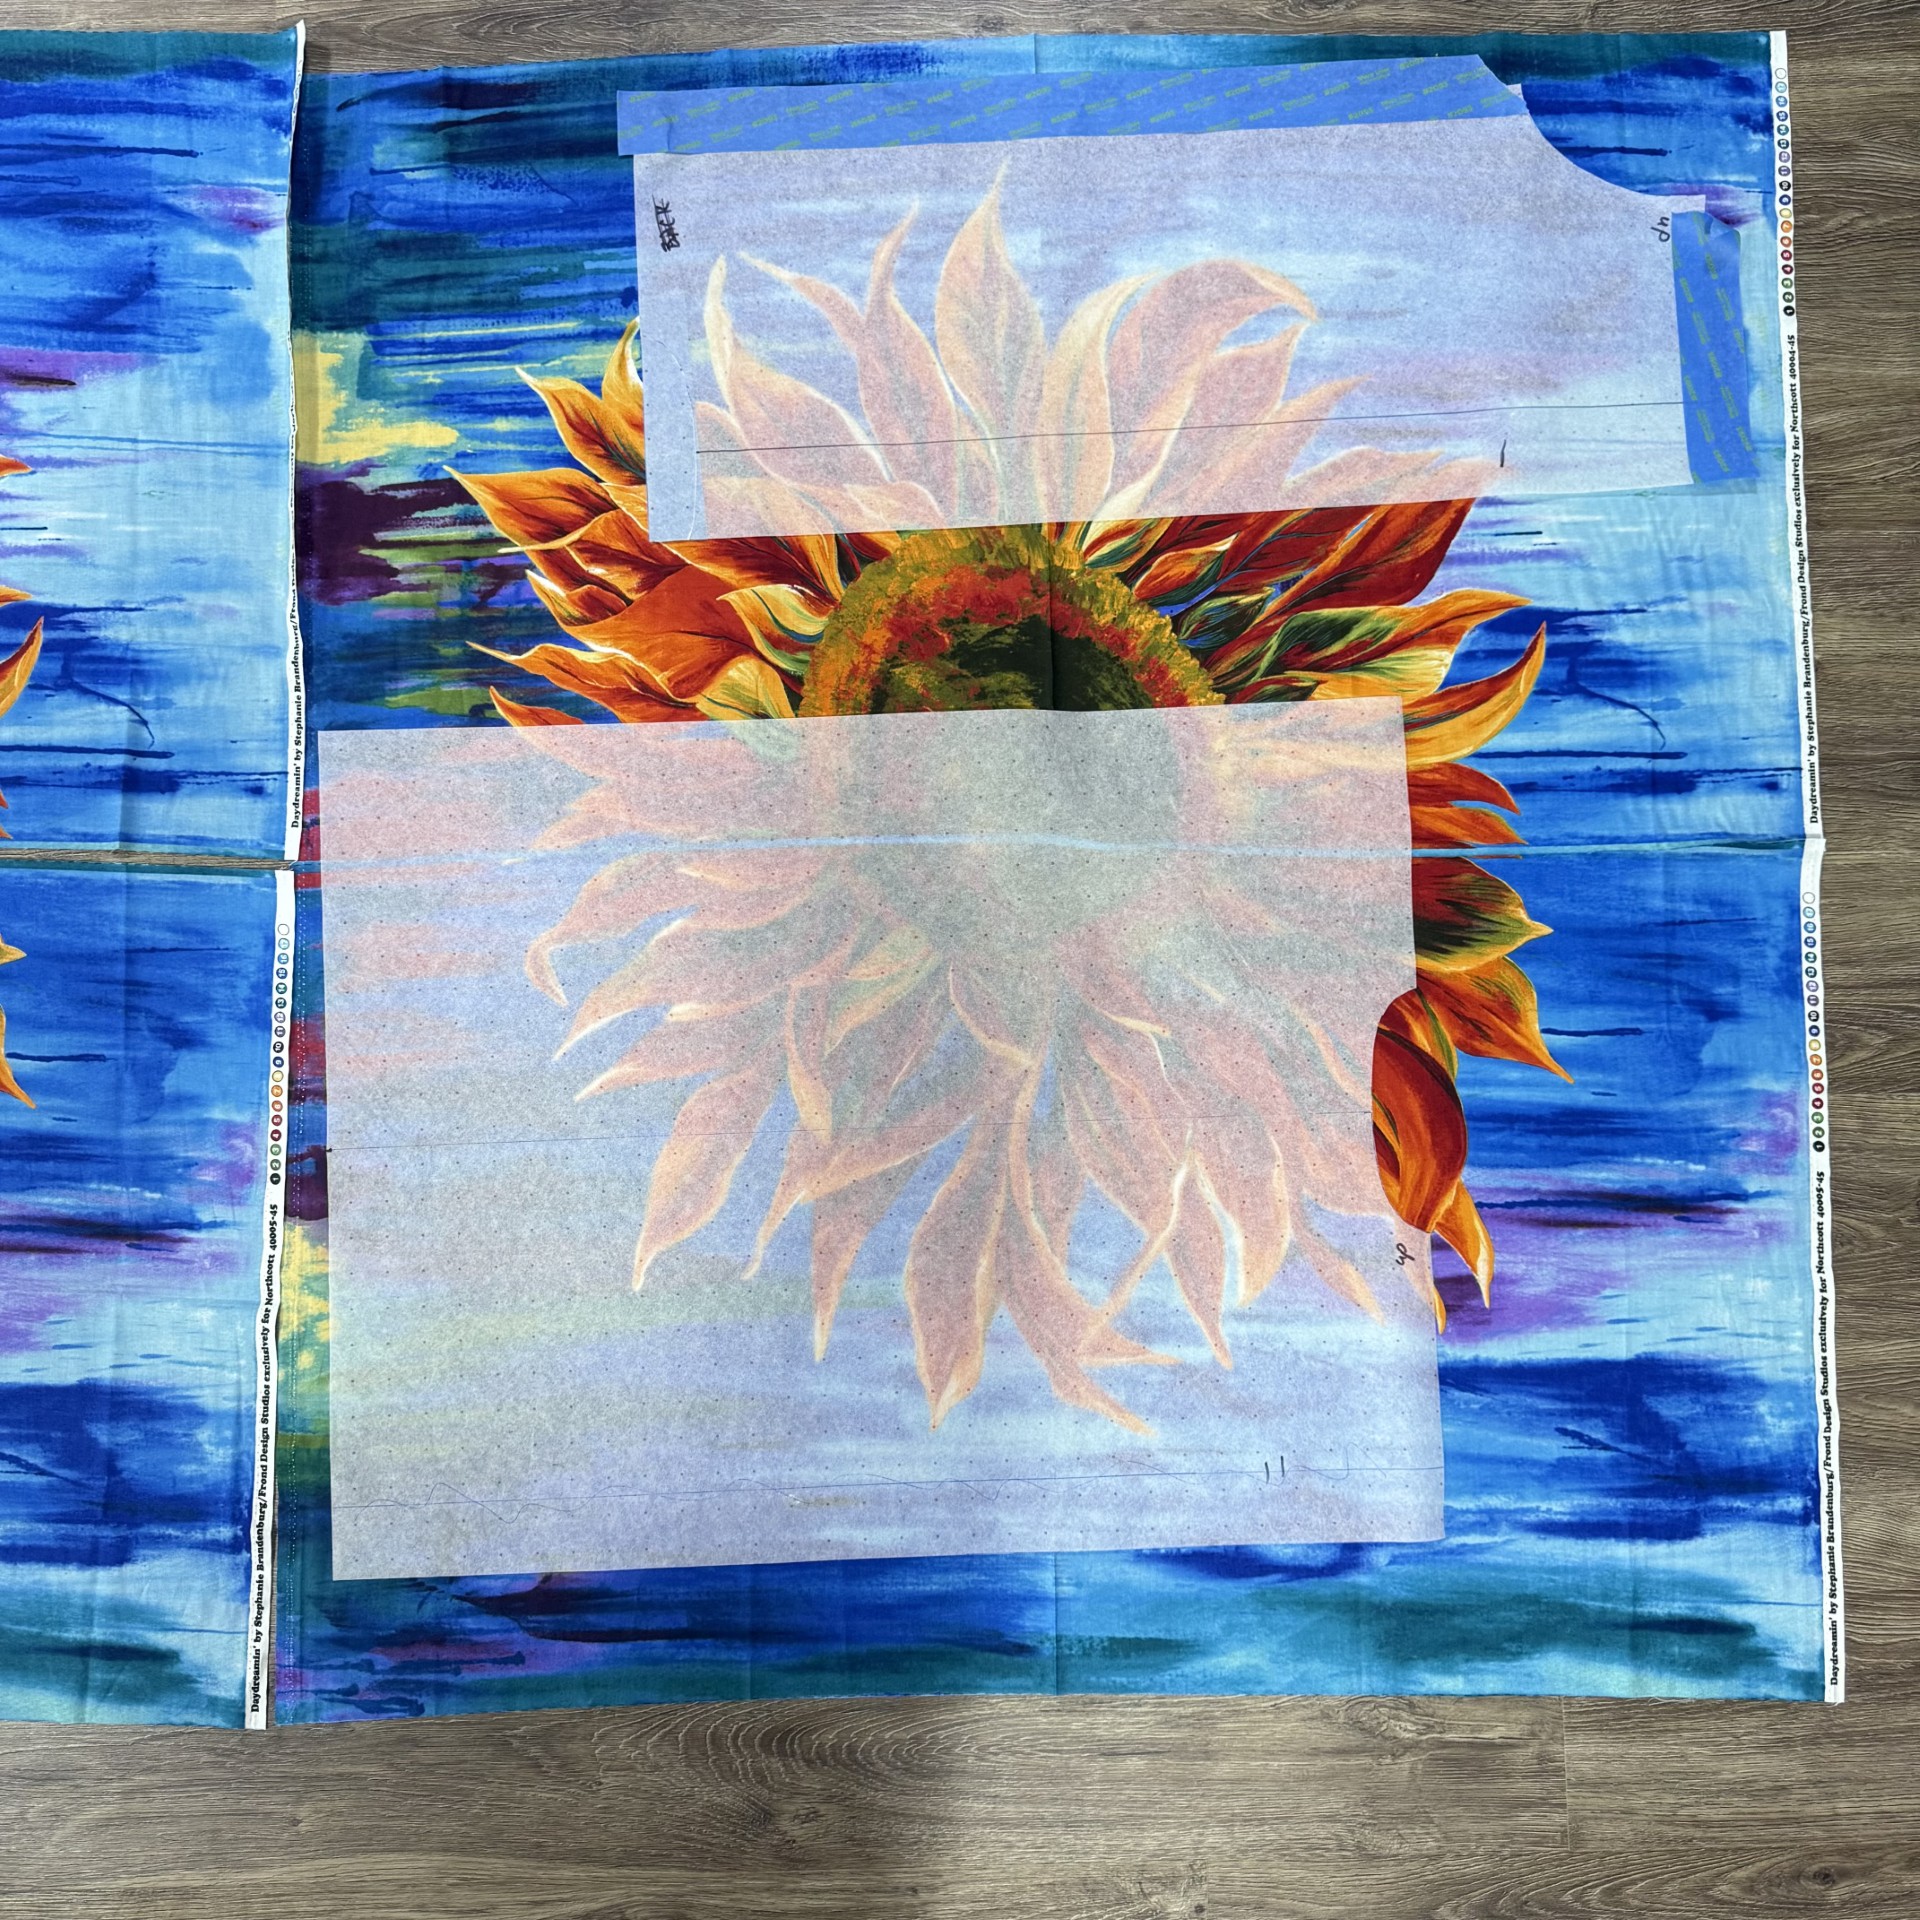
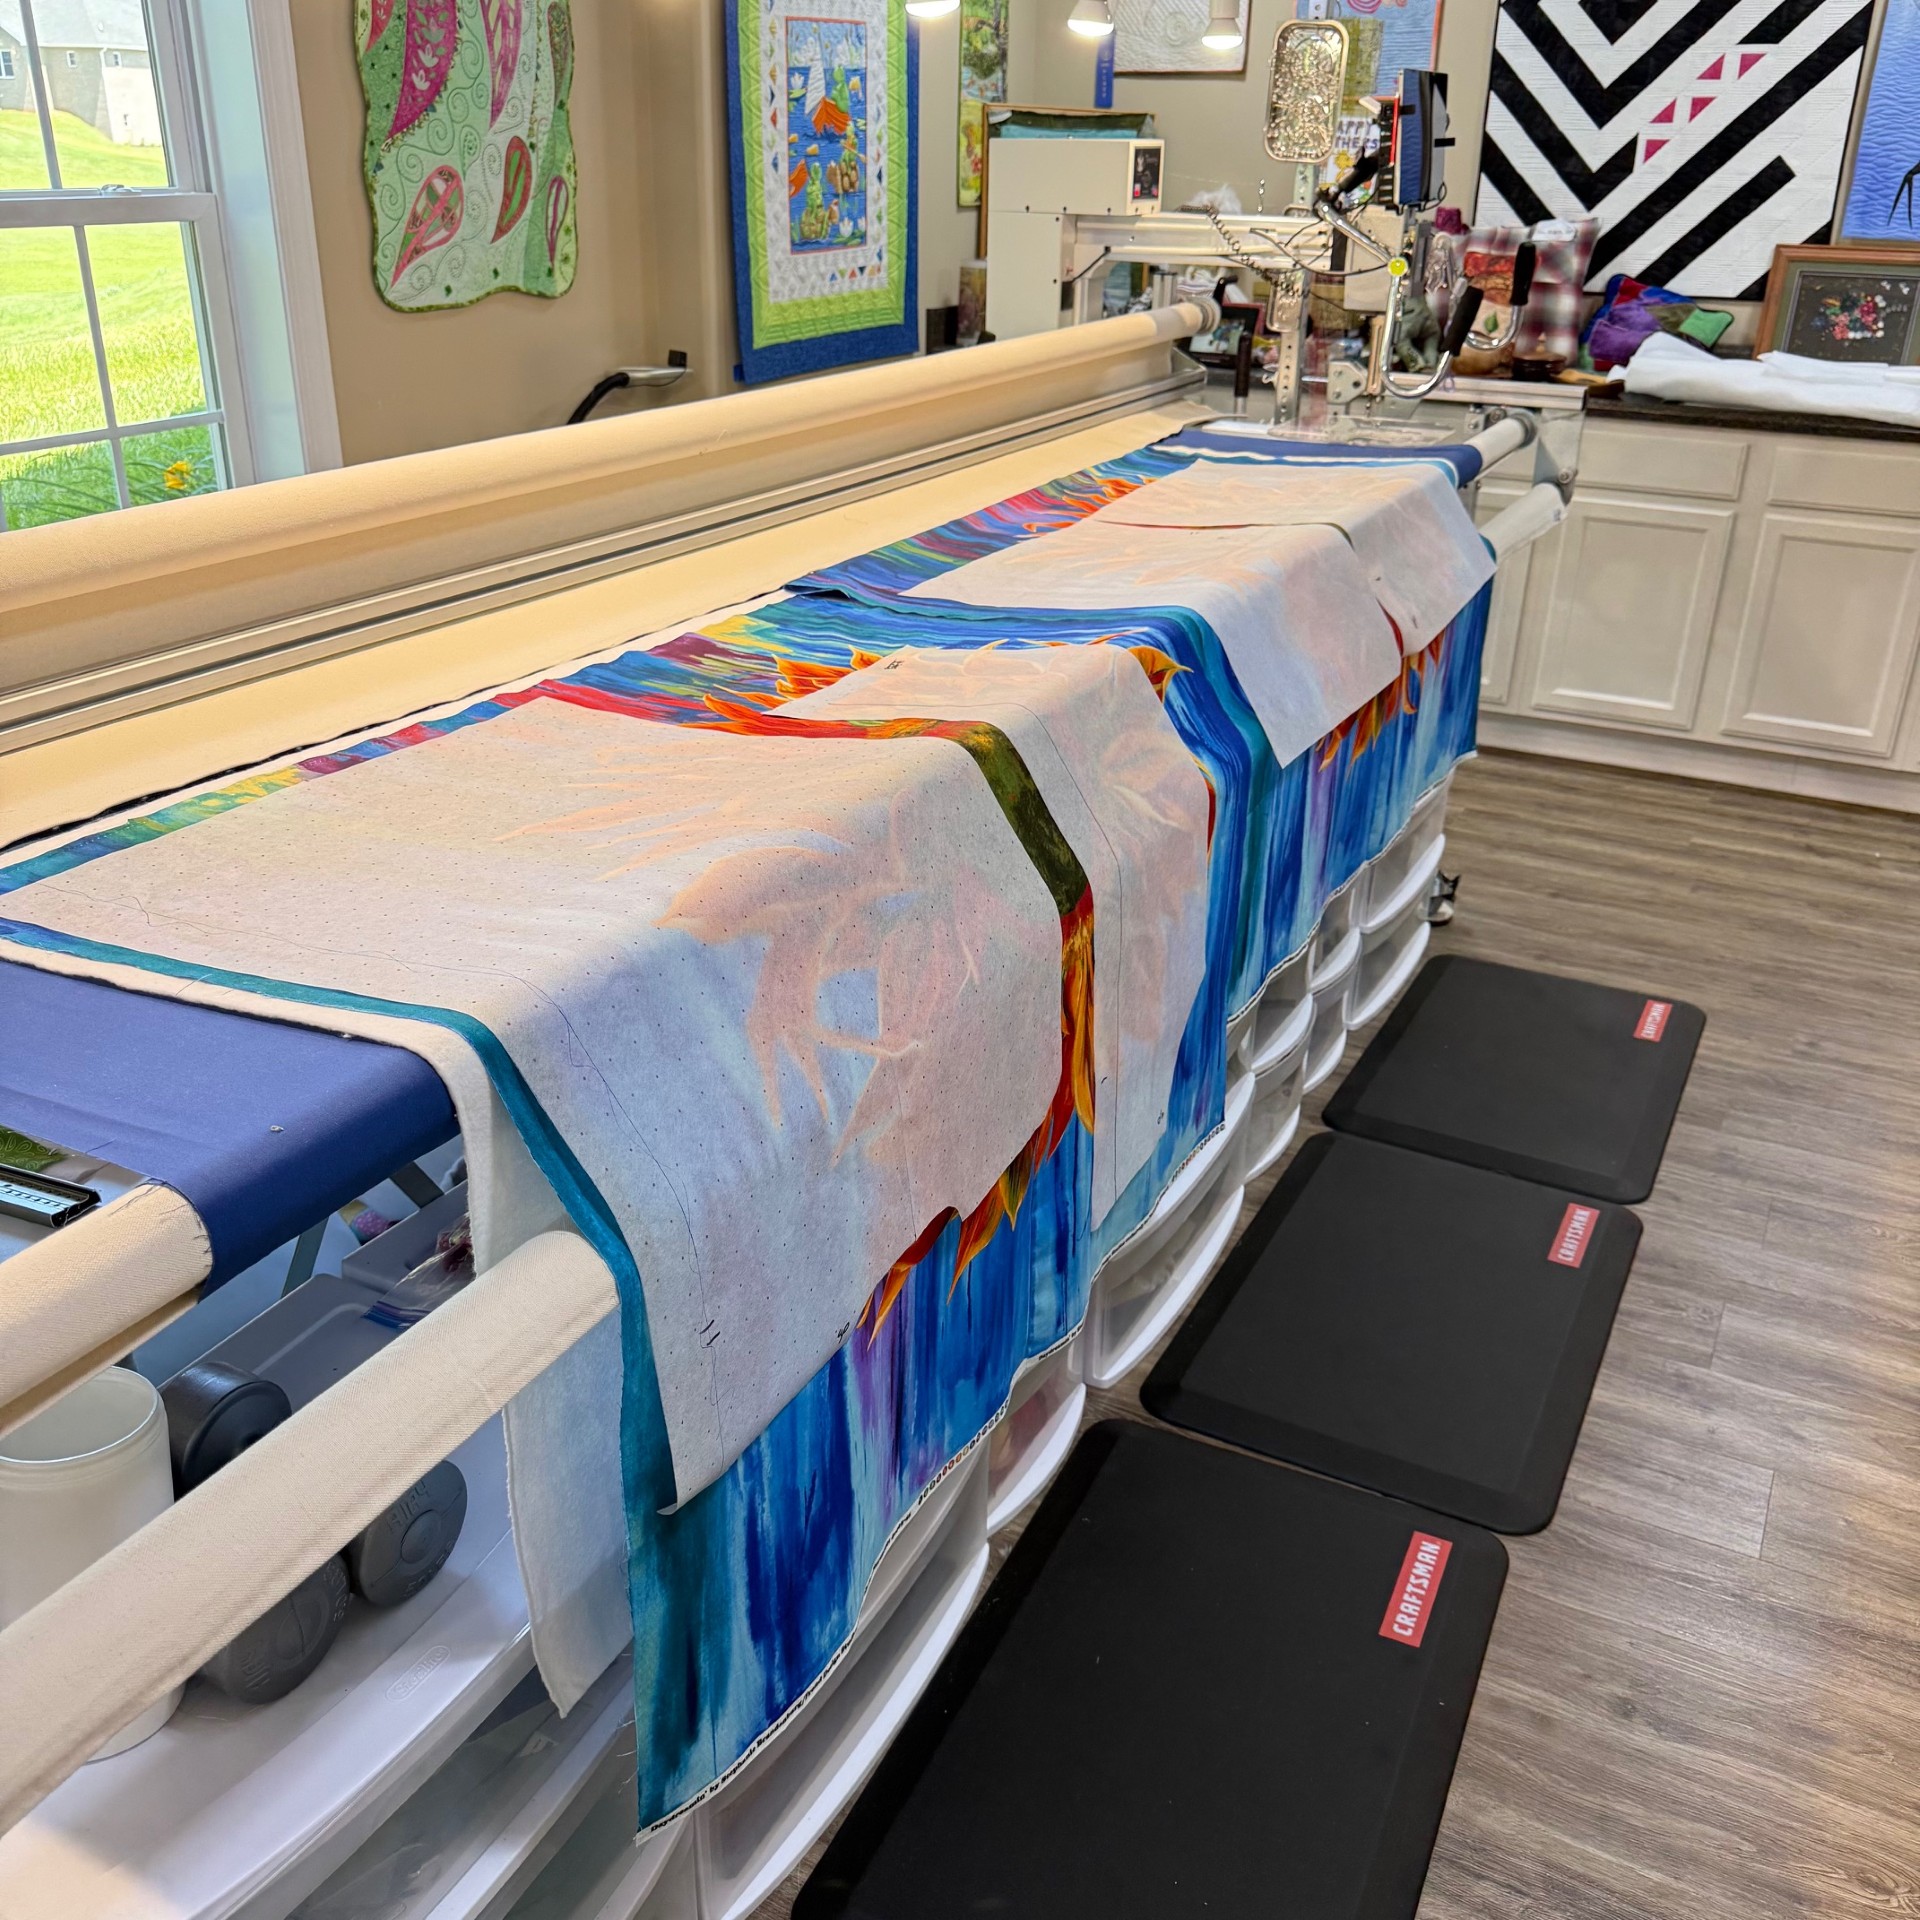
These two panels were created by Frond Design for Northcott Fabrics. Terri had it on her design wall and I have had them in my OBW stash for a couple of years. The normal thing would be to stitch the halves together and design around them. Why be normal? We decided to do what we do best. A One Block Wonder coat and quilt out of the same panels!
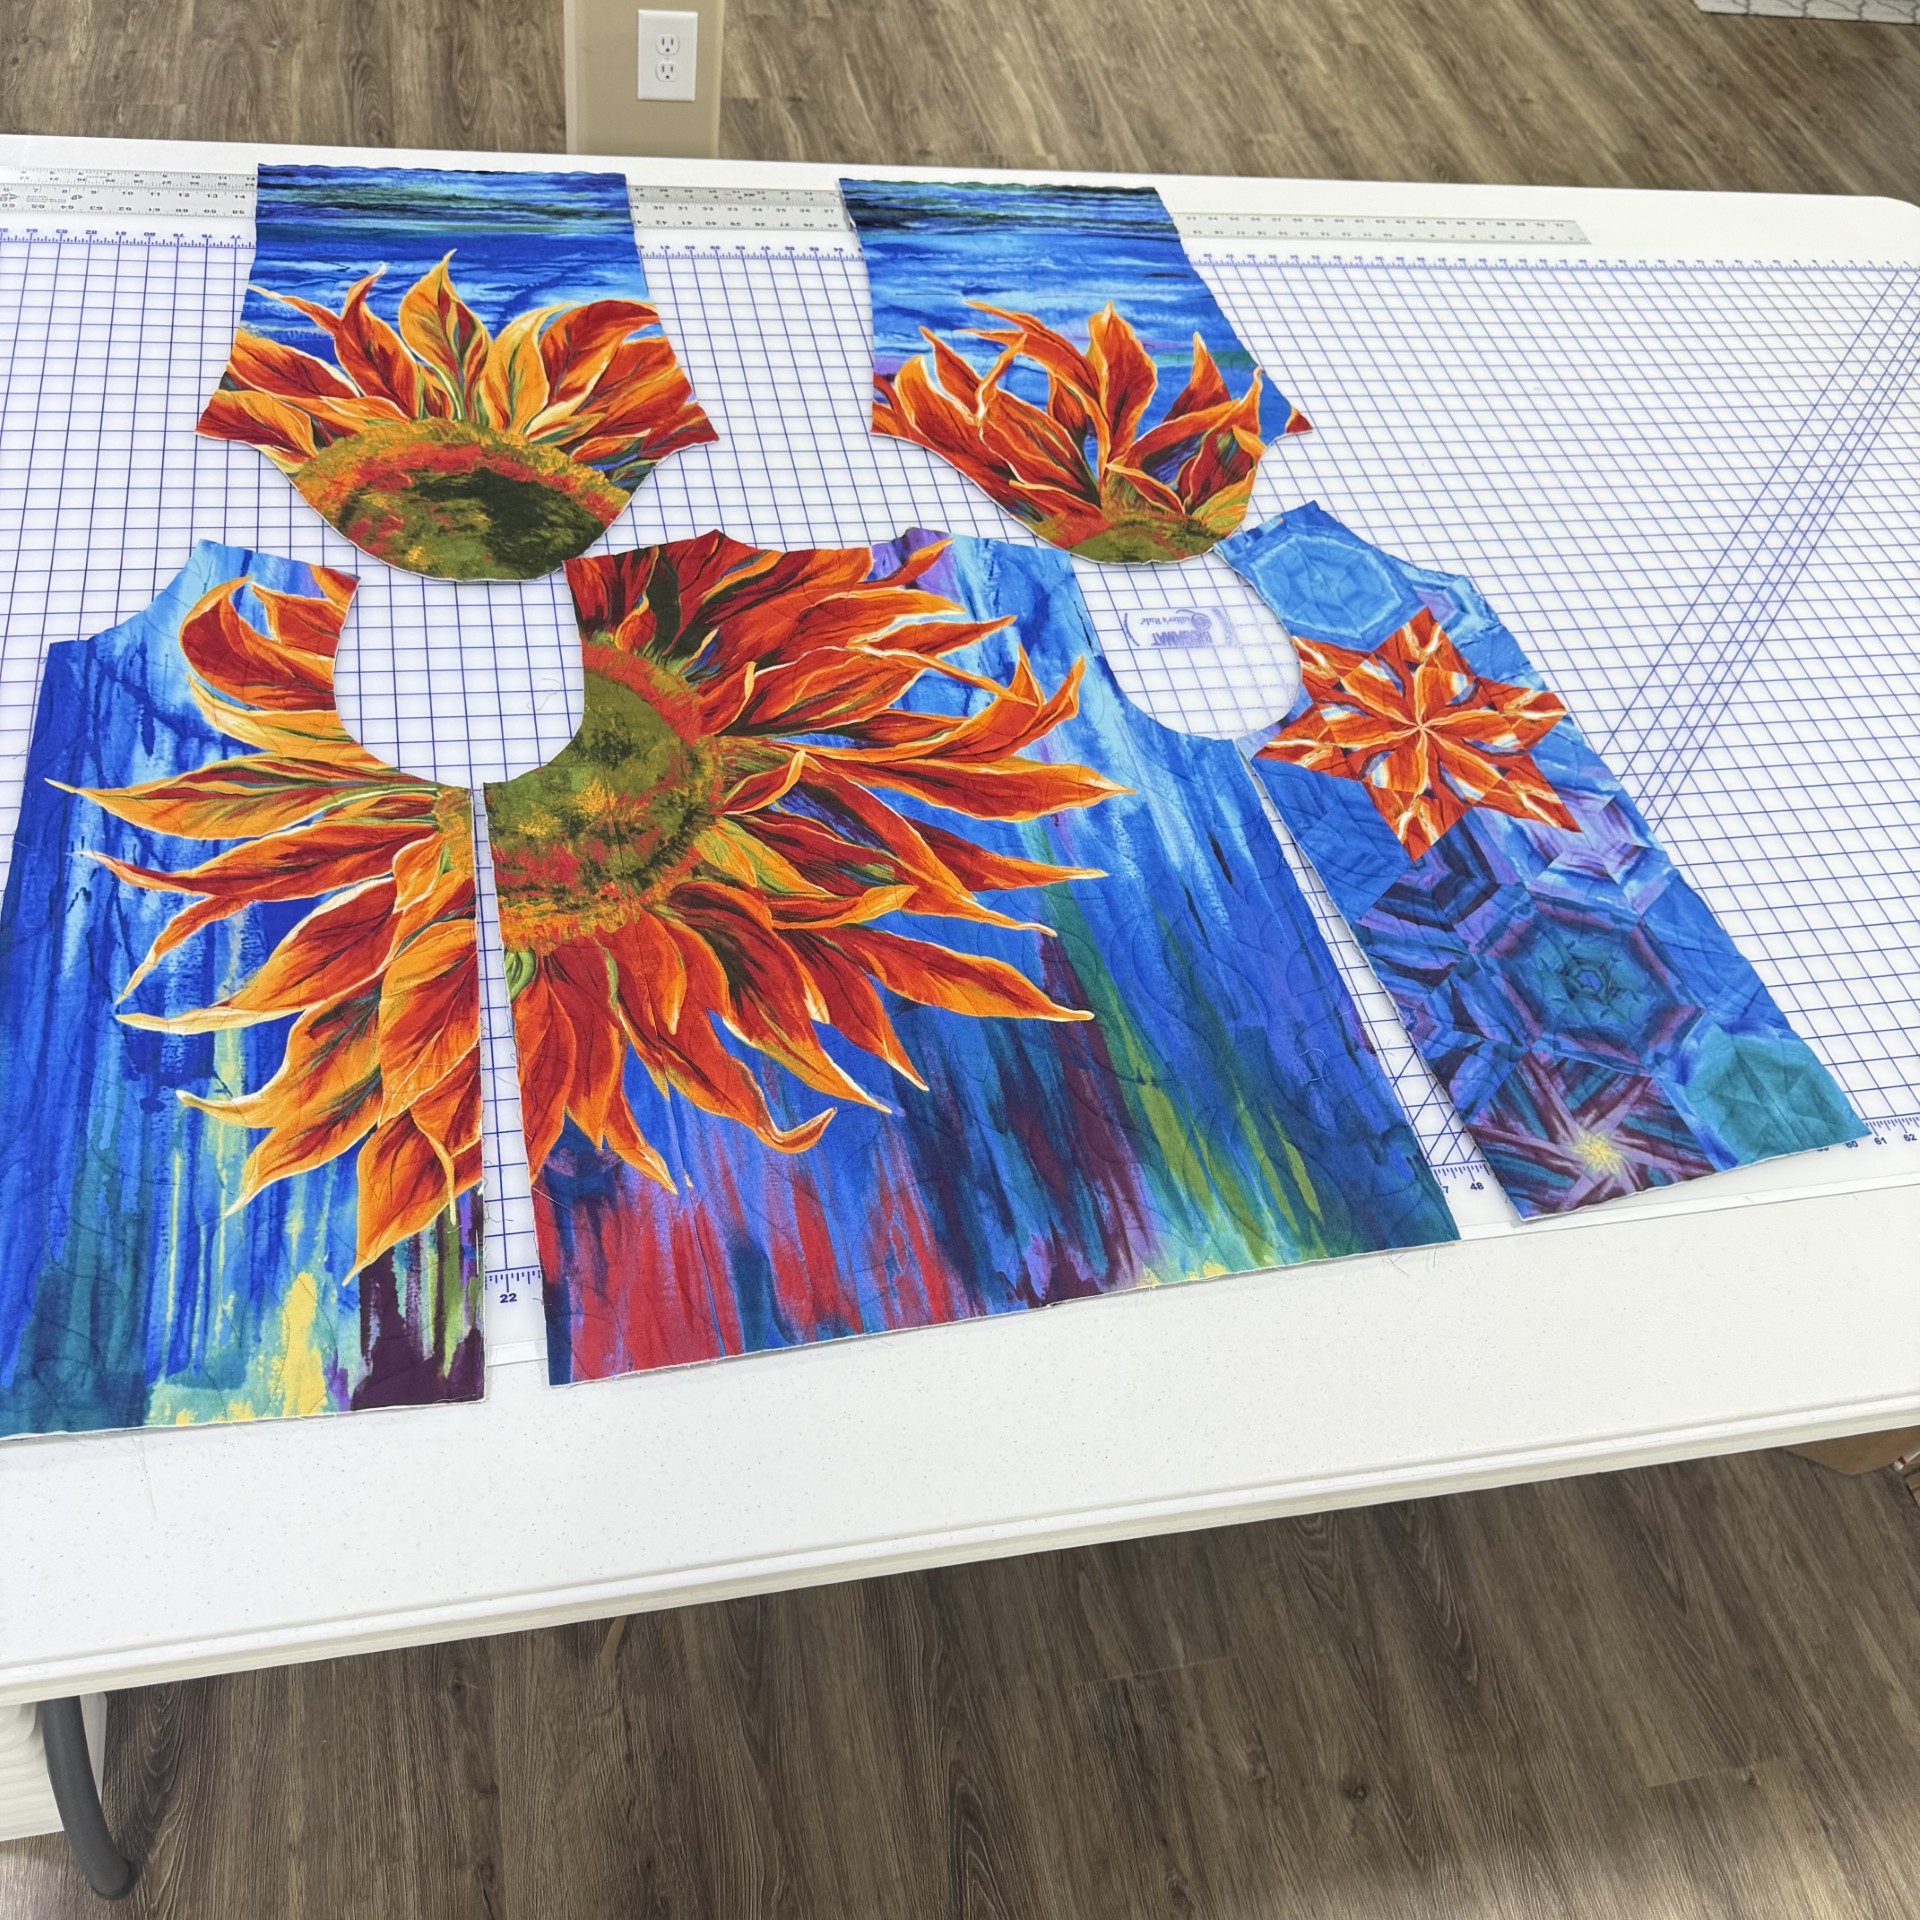
Terri chose the layout, quilted the individual sections and cut out the coat pieces.
Terri did such a great job with her interpretation of Daydreamin, I just love it. You can follow Terri at Mama Said Sew. Terri is a great pattern designer.
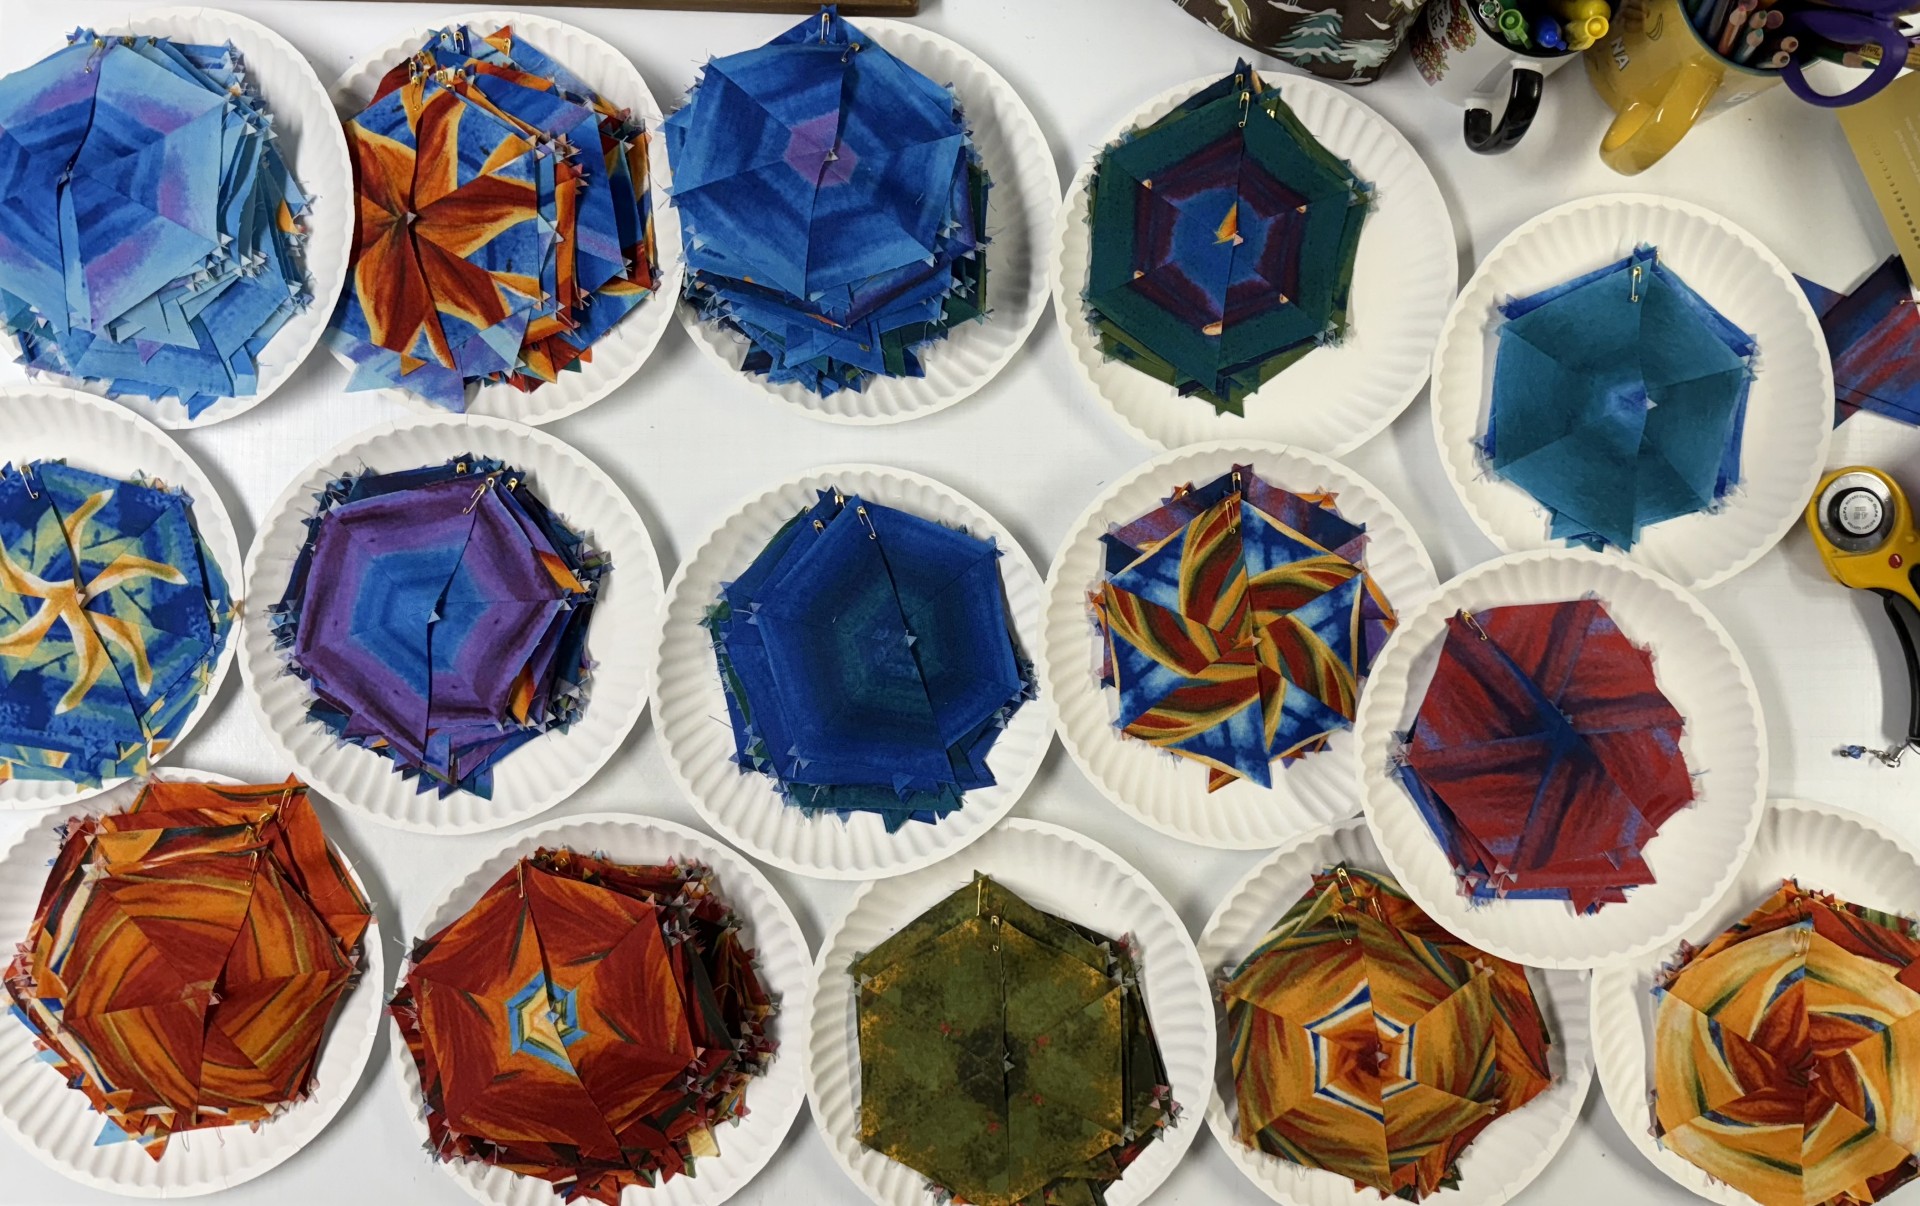
After aligning the 2 sets of panels, I cut 3.25″ strips that yielded 294 – 5″ finished hexies.
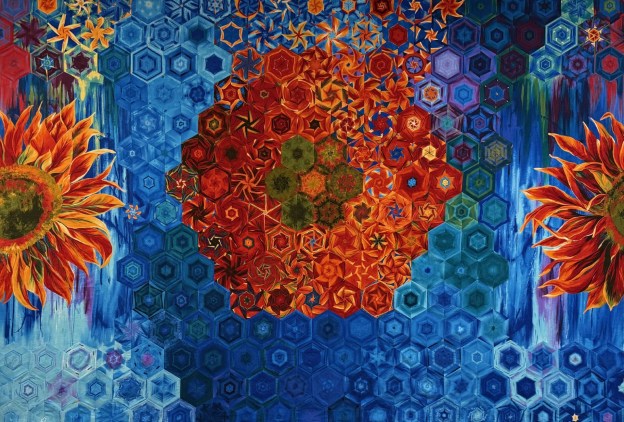
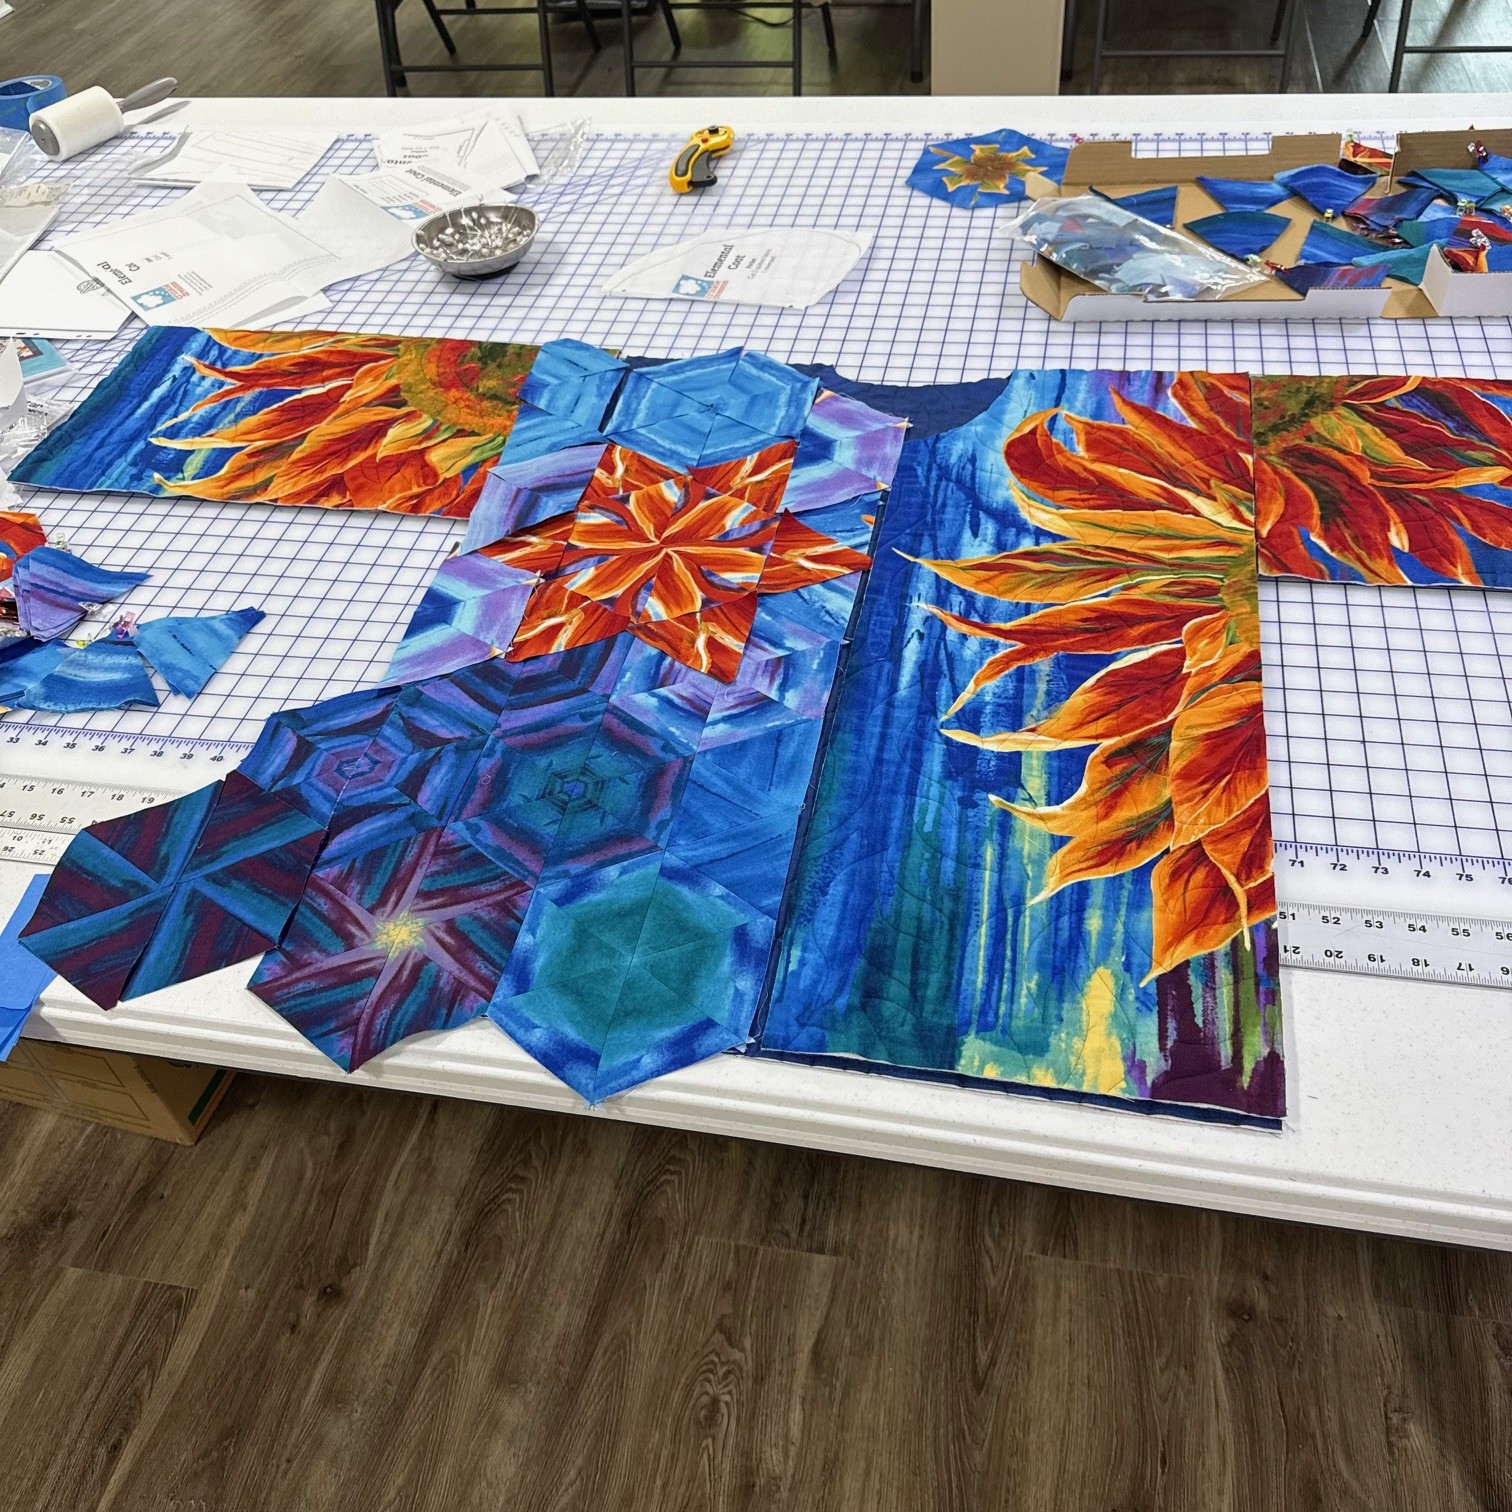
I didn’t want to just design what was expected. The words that kept creeping into my mind were mutual attraction, cross pollination. I decided to create a flower in the center that came from a seed dropped by a bird. My design wall is 106″ wide by 72″ tall. That’s why my OBW’s look like murals. I filled my design wall and still had 63 hexies left over.
Daydreamin measures 97″x 65″. The colors are just mesmerizing. We will share photo’s of the quilt and coat together soon.
No hexies were harmed during the construction of this One Block Wonder. The Supervisor was on the job.
1776 panel designed by the Morris Group for QT Fabrics measures 38″ x 32″. This beautiful Eagle panel will be in shops Fall 2025.
The 1776 fabric line offers everything needed to create your own 1776 quilt. You can finish it in time to celebrate our nation’s 250th birthday in 2026.
I chose 5 coordinating fabrics to add to my story. I choose fabrics before I know what my design approach will be. The flags with the light blue background ended up on the back of the quilt.
I used Deb Tucker’s First Choice Rulers to cut my strips 3.25″ wide, yielding 5″ finished hexies. The stars were created using the Star 60 Tool by Deb Tucker. I started placing my hexies on the top section first.
Numbering the rows keeps everything organized. Once I attached the top and bottom sections, I stitched the hexies on the left into rows. It shows how much the rows shrink when stitched together.
The photo on the left shows the quilt top together without borders. On the right the borders have been added, but not yet tweaked.
1776 measures 75″ x 66″. I wanted to make the eagle’s wings look larger than they were. As if their strength created air currents that actually moved the stars.
I wanted to share my next OBW project using the 1776 line from QT Fabrics. (Correction, the video states 1776 will be in shops Summer 2025. 1776 will be shops Fall 2025)