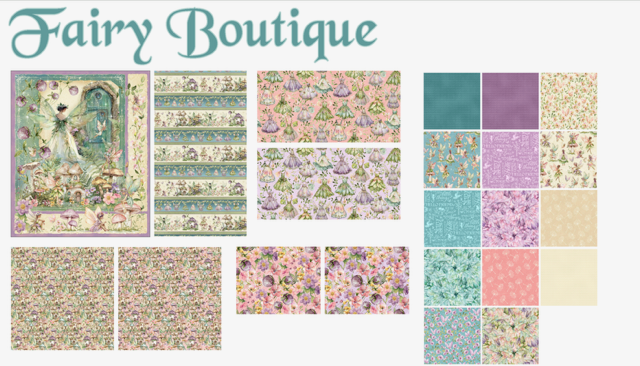
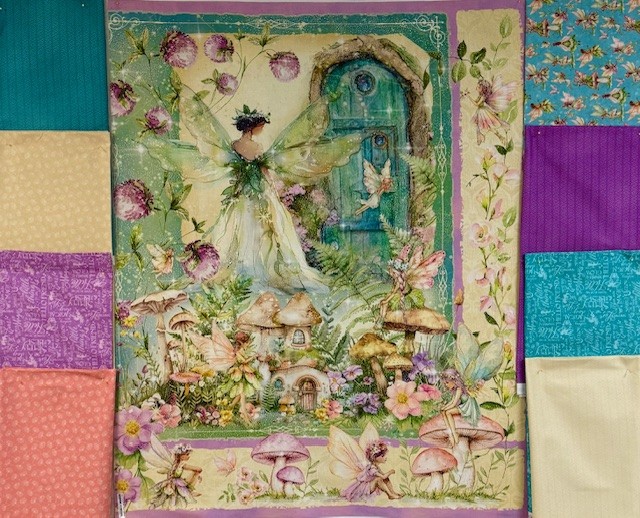
These are the fabrics I requested to make a magical One Block Wonder (OBW). I will be using my Star 60 Tool to create some Hollow Cube 60’s and Star 60’s with these coordinating fabrics. Terri Butler of Mama Said Sew, LLC will be creating one of her gorgeous OBW Jackets.
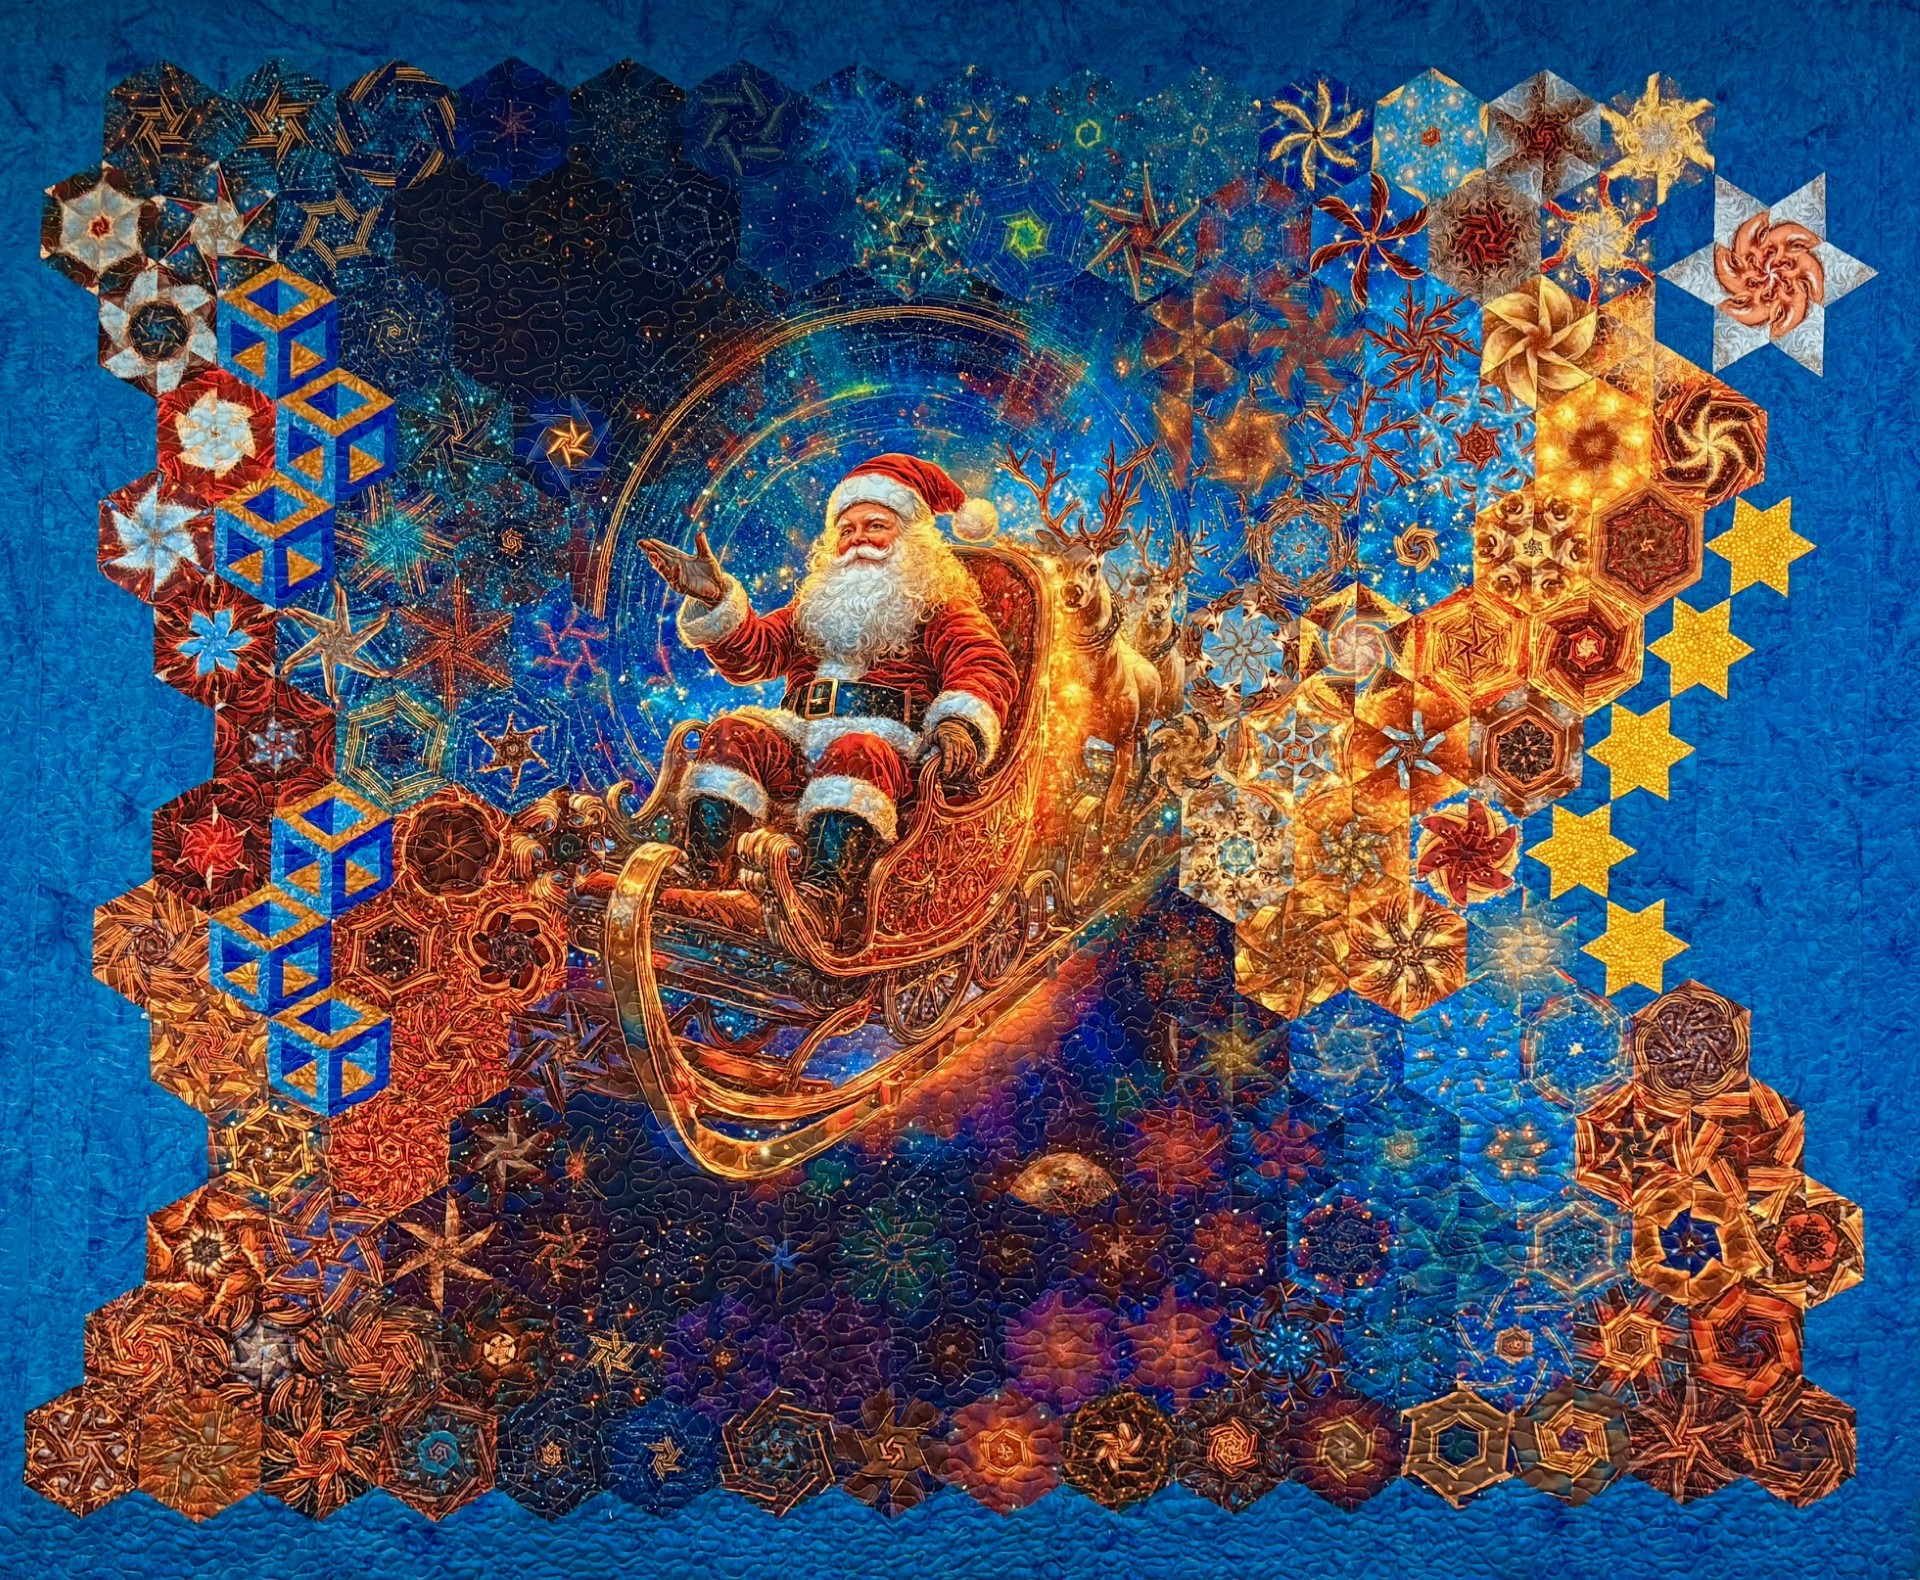
As soon as I saw this panel I wanted it! I love the colors and the Santa! Santa’s Sleigh is by Rubin Design Studio’s exclusively for eQuilter. BUT, then I noticed the reindeer! Why were they behind the Santa’s sleigh??? I decided it must be a shift change. After all we know male reindeer lose their antlers in winter. So, this must be the female reindeer showing up to have Santa’s Back!
I cut my strips 3.25″ using my First Choice rulers for 5″ finished hexies. This panel yielded 176 hexies.
The 5″ finished star 60 units were made with my Star 60 tool.
I made the Santa’s face hexies by stitching together two triangles to create a diamond. Then adding side triangles to create 5″ triangles, making it a 10″ finished Star 60 hexie.
I love this Santa’s Sleigh OBW Quilt. You can never have too many Santa quilts. Santa’s Sleigh measures 88″ x 70″. I Finish all my quilts with Quilters Dream Batting and Superior Omni thread.
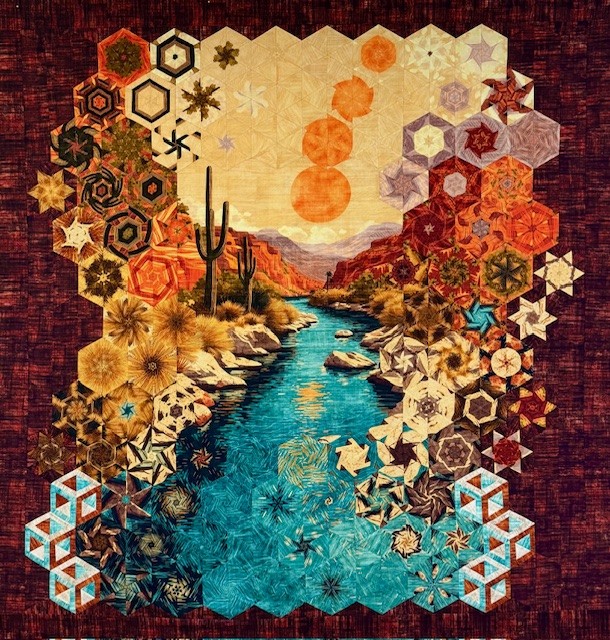
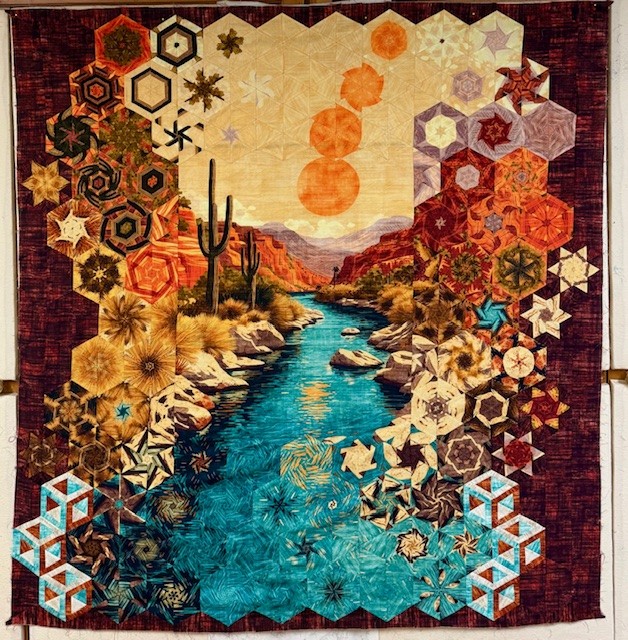
I absolutely love the colors in Canyonlands and couldn’t wait to get my hands on it. Canyonlands panel by the Morris Creative Group for QT Fabrics measures 36″ x 42″. QT Fabrics has given me and Terri Butler Canyonlands to make a One Block Wonder (OBW) quilt and jacket.
Into the Woods coordinating fabrics were used to enhance my OBW.
First the top and bottom sections are attached then the sides. Ready for borders.
Canyonlands top is together and ready for quilting. Canyonlands measures 63″ x 66″. I call it “Bad Moon Rising” after the Creedence Clearwater Revival song from 1969. Geez, I was in high school then. I just love the way river winds it way through the canyon and pools between the Hollow cubes.
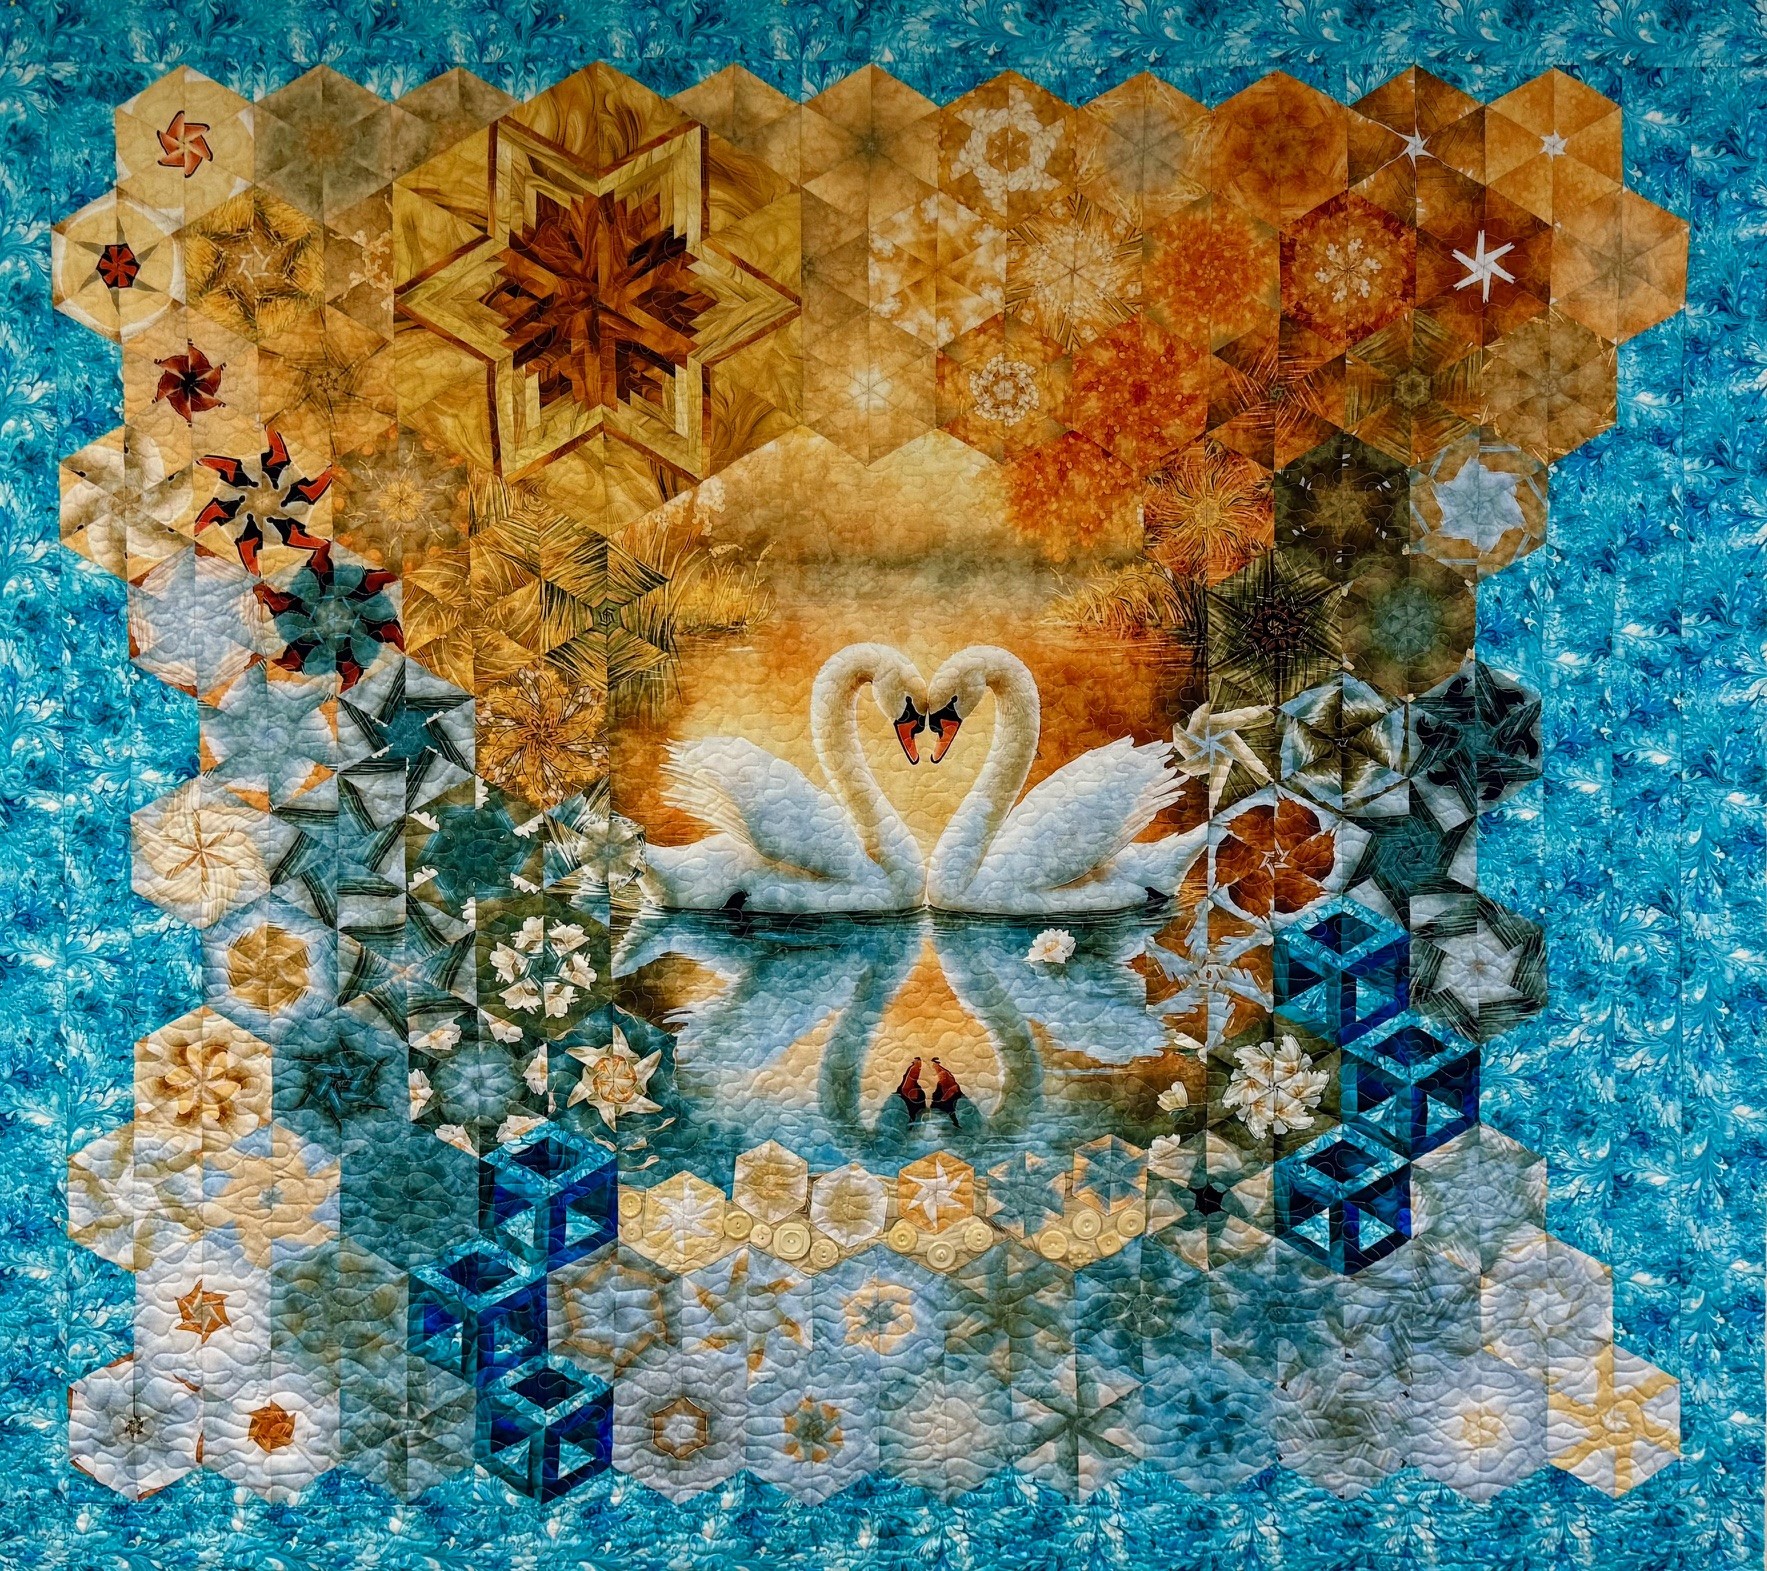
Swan Song by The Morris Creative Group for QT Fabrics. Panel measures 36″ x 42″ with the outer border. I cut off the border to use as an outer border on the quilt. I cut my strips 3.25″ to yield 5″ finished hexies.
The ivory vintage buttons symbolize the swan eggs. The Swans are lovingly watching over their nest.
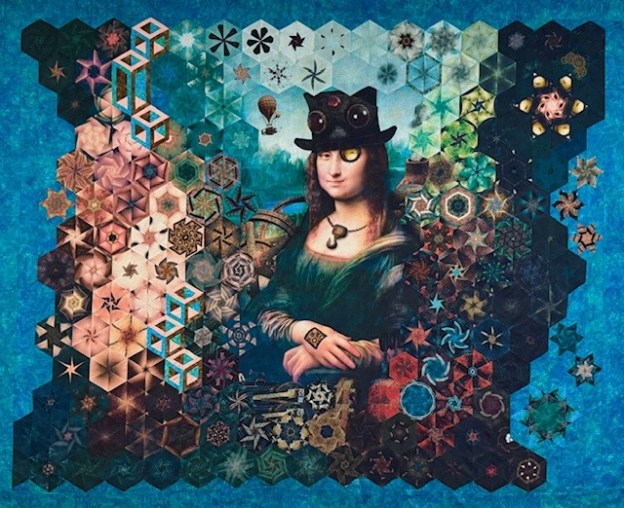
Wind me up & watch me go! Has anyone seen Leonardo? Steampunk Mona is Leonardo da Vinci’s version of AI. Someone greased Mona’s gears and now she is looking for Leo!
Steampunk Mona Lisa is from Rubin Design Studio and eQuilter. She measures 29″ x 44″.
There was much more color in this panel than I expected. I cut my strips 3.25″ to yield 5″ finished hexies. I got 176 hexies to play with.
I played with the hat for a while but decided to leave it alone.
The Hollow Cube 60‘s in the section represent the platform Leonardo launched his flying machine from.
The clock over Mona’s eye didn’t blend with anything. I stitched the clock hexie and Mona’s eye hexies together to create a diamond. Then added side triangles to create a 10″ Star 60.
Steampunk Mona before borders and tweaking.
Steampunk Mona measures 86″ x 69″. She was great fun to make. But wait! There’s more! Terri Butler of Mama Said Sew is working on a Steampunk Mona OBW coat. Follow Terri and me on our adventures at www.facebook.com/MamaSaidTheseThreadsCouldTalk
The Spirited panel was designed by Elise Genest for Northcott Fabrics. The panel measures 24″ x 44″.
I cut my strips 2.75” which yields 4” finished hexies. There were 210 hexies. I let the design tell me what it needs to tell a good story. After cutting my strips I had about 2.25” strip left. This allowed me to cut diamonds and make 11 kaleidoscope Star 60 units. I added 4” finished Hollow Cube 60’s and a 12” hollow Cube with 4” cubes inside it to represent the stables.
Spirit was left in the corral far too long. It began to rain and she jumped over the fence and headed for the stables, where it was dinnertime. Spirited measures 71” x 68”.
Spirited was made for The Quilt Crossing quilt shop in Boise, ID. They have invited me there to teach a 4 day Sleep in your Own Bed One Block Wonder Workshop, June 18 – 21, 2025. Maybe I will get to meet you there.
Does anyone remember an old song from the 40’s called “I got the Sun in the Morning “? It was written by Irving Berlin in 1946 for a musical called “Annie Get Your Gun”.
I’ve been humming that tune while working on this great panel designed by the Morris Group for QT Fabrics. The panel measures 36″ x 43″. Bohemian Sunrise will be available in early 2025.
I was at a quilt retreat last weekend with my friends the Turtle Crew. I took off the borders which left me with a width of 28″ for the panel. I cut 2.75″ strips that yielded 190 – 4″ finished hexies.
I picked coordinating fabrics from QT Fabrics Color Essence line and Morris Group Bohemian Sunrise line for making adding stars and cubes to my design.
Using a set of equilateral triangles for the center and light orange from the Color Essence line and stars fabric from the Bohemian Sunrise line, I made 2″ finished Star 60 units that were stitched to the equilateral triangles to make diamonds. I then made 2″ finished Capped 60 units that I used as side triangles for pieced diamonds. This made a 8″ finished star.
Using a light, medium and dark fabrics from the Color Essence line I made 4″ Hollow Cube 60 units.
I began designing in the upper right corner. I placed hexies 7 across and started going down the left side until I passed the bottom of the panel. Then another 7 hexies across the bottom and up the right side of the panel.
Once I have the four sides established, I can then add hexies until I am please with the design.
I added half hexies on the sides and half rectangle triangles to the top and bottom of each row and numbered my rows.
I used 4″ and 8″ finished hexies in my design. I stitched the 2.5″ rows together above and below the 4.5″ half hexies so they could be stitched to the 4.5″ half hexies. Then joined all the rows on the left side.
The photo above shows the top, bottom and left section attached to the panel, and how much shrinkage there was when the hexies are joined into rows.
Bohemian Sunrise measures 78″ x 63″. OBW # 113, not yet quilted.
“Got no diamond, got no pearl. Still think I’m a lucky girl. I’ve the Sun in morning and Moon at Night”!
A BIG Thank You to Amy of Amy’s Quilt Room in Uniontown, PA. I’m just now home from teaching a One Block Wonder (OBW) workshop or as Amy would call “Quiltpalooza”! It was fabulous! I had so much fun. The Hilton Garden Inn at Uniontown PA was the perfect venue. We had a great space and were very well cared by the staff.
This group of ladies did such a great job. They learned all about OBW’s and how to make Hollow Cube 60’s & Star 60 units. We delve into how to design and enhance our OBW’s.
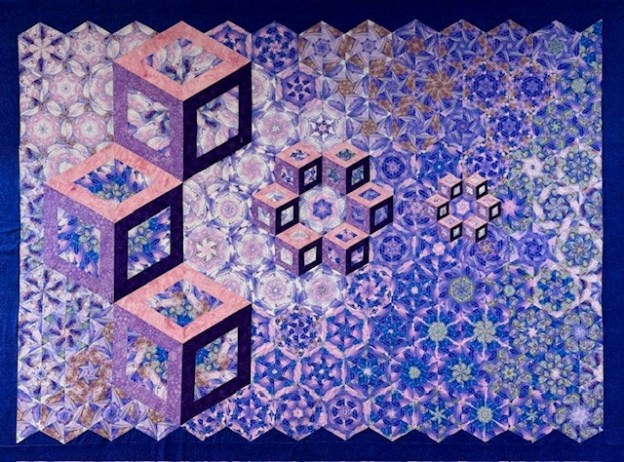
While I was teaching a OBW workshop at the Strong House Inn in April, I figured out how to put a hexie inside of a hollow cube. I couldn’t wait to get home and start playing.
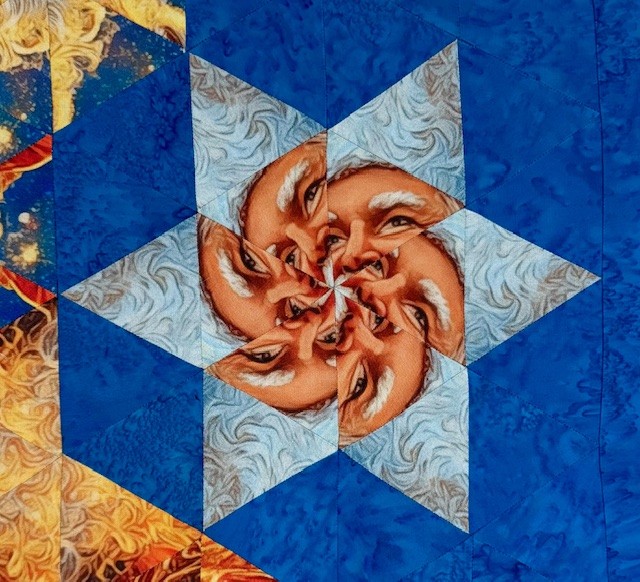
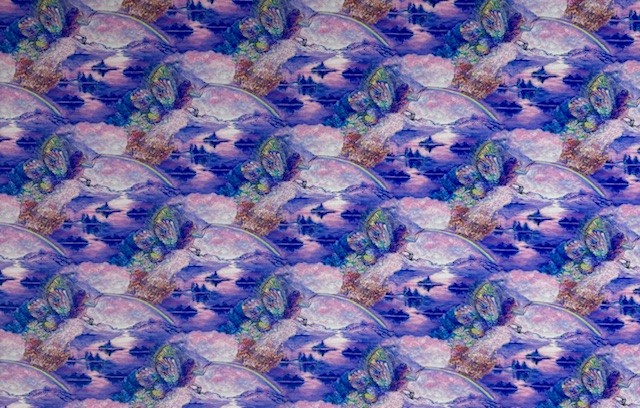
I had 6 yards of this fabric from the Astral Voyage line by Josephine Wall and 3 Wishes Fabrics. It only had an 8″ repeat, but the design elements were large. I cut my strips 3 3/4″ for 6″ finished hexies. I make my hollow cubes using Deb Tucker’s Hollow Cube 60 Technique Sheet and the Star 60 Tool. I can make hollow cubes in 16 sizes from 3″ to 18″ finished cubes.
I wanted to start with 18″ finished cubes. I cut 2 short and 2 long frames from a light, medium and dark fabrics. I layered and aligned 6 repeats of my fabric and cut the size strips I needed. Then I cut my triangles using my Star 60 tool and following the technique sheet instructions. I layed out the triangles choosing what point I wanted in the middle.
For the first short frame, I layed out the triangle center pointing away from the short frame and the second short frame, the triangle gets turned one time to the left.
With right sides together stitch the triangles to the short frames. Press toward the triangles. Repeat for the medium and dark short frames. Add the long frames according to the Hollow Cube 60 instructions.
I layed out the framed triangles with the light ones on top.
I made three 18″, six 6″ and six 3″ finished hexies. I started by playing with the 18″ hexies and trying to decide where to place the circle of 6″ cubes in relation the 18″ hexies. Then I started to place the hexies on the right side of the 18″ hexies. BIG mistake. I know better. When designing around a panel you should always work your way around all four sides to establish the top, bottom , right & left sides. It is the same when working with hexies of different sizes. I should have designed on all sides of the 18″ hexies. Because I didn’t I was off by one triangle, you can see it on the left side just under the middle 18″ hexie. To fix that, I needed to remove a diagonal row under the middle hexie. As it was, I had 10 hexies down the left side andd 11 hexies down the right side.
Once I fixed the left side I had to totally redesign the right side. I wanted to share this so if you ever find yourself off by one triangle, you will know you have to remove a diagonal row to correct it.
My Cubed Hexies measures 83″ x 62″. I was pleased that with only an 8″ repeat I was able to get a pleasing design.
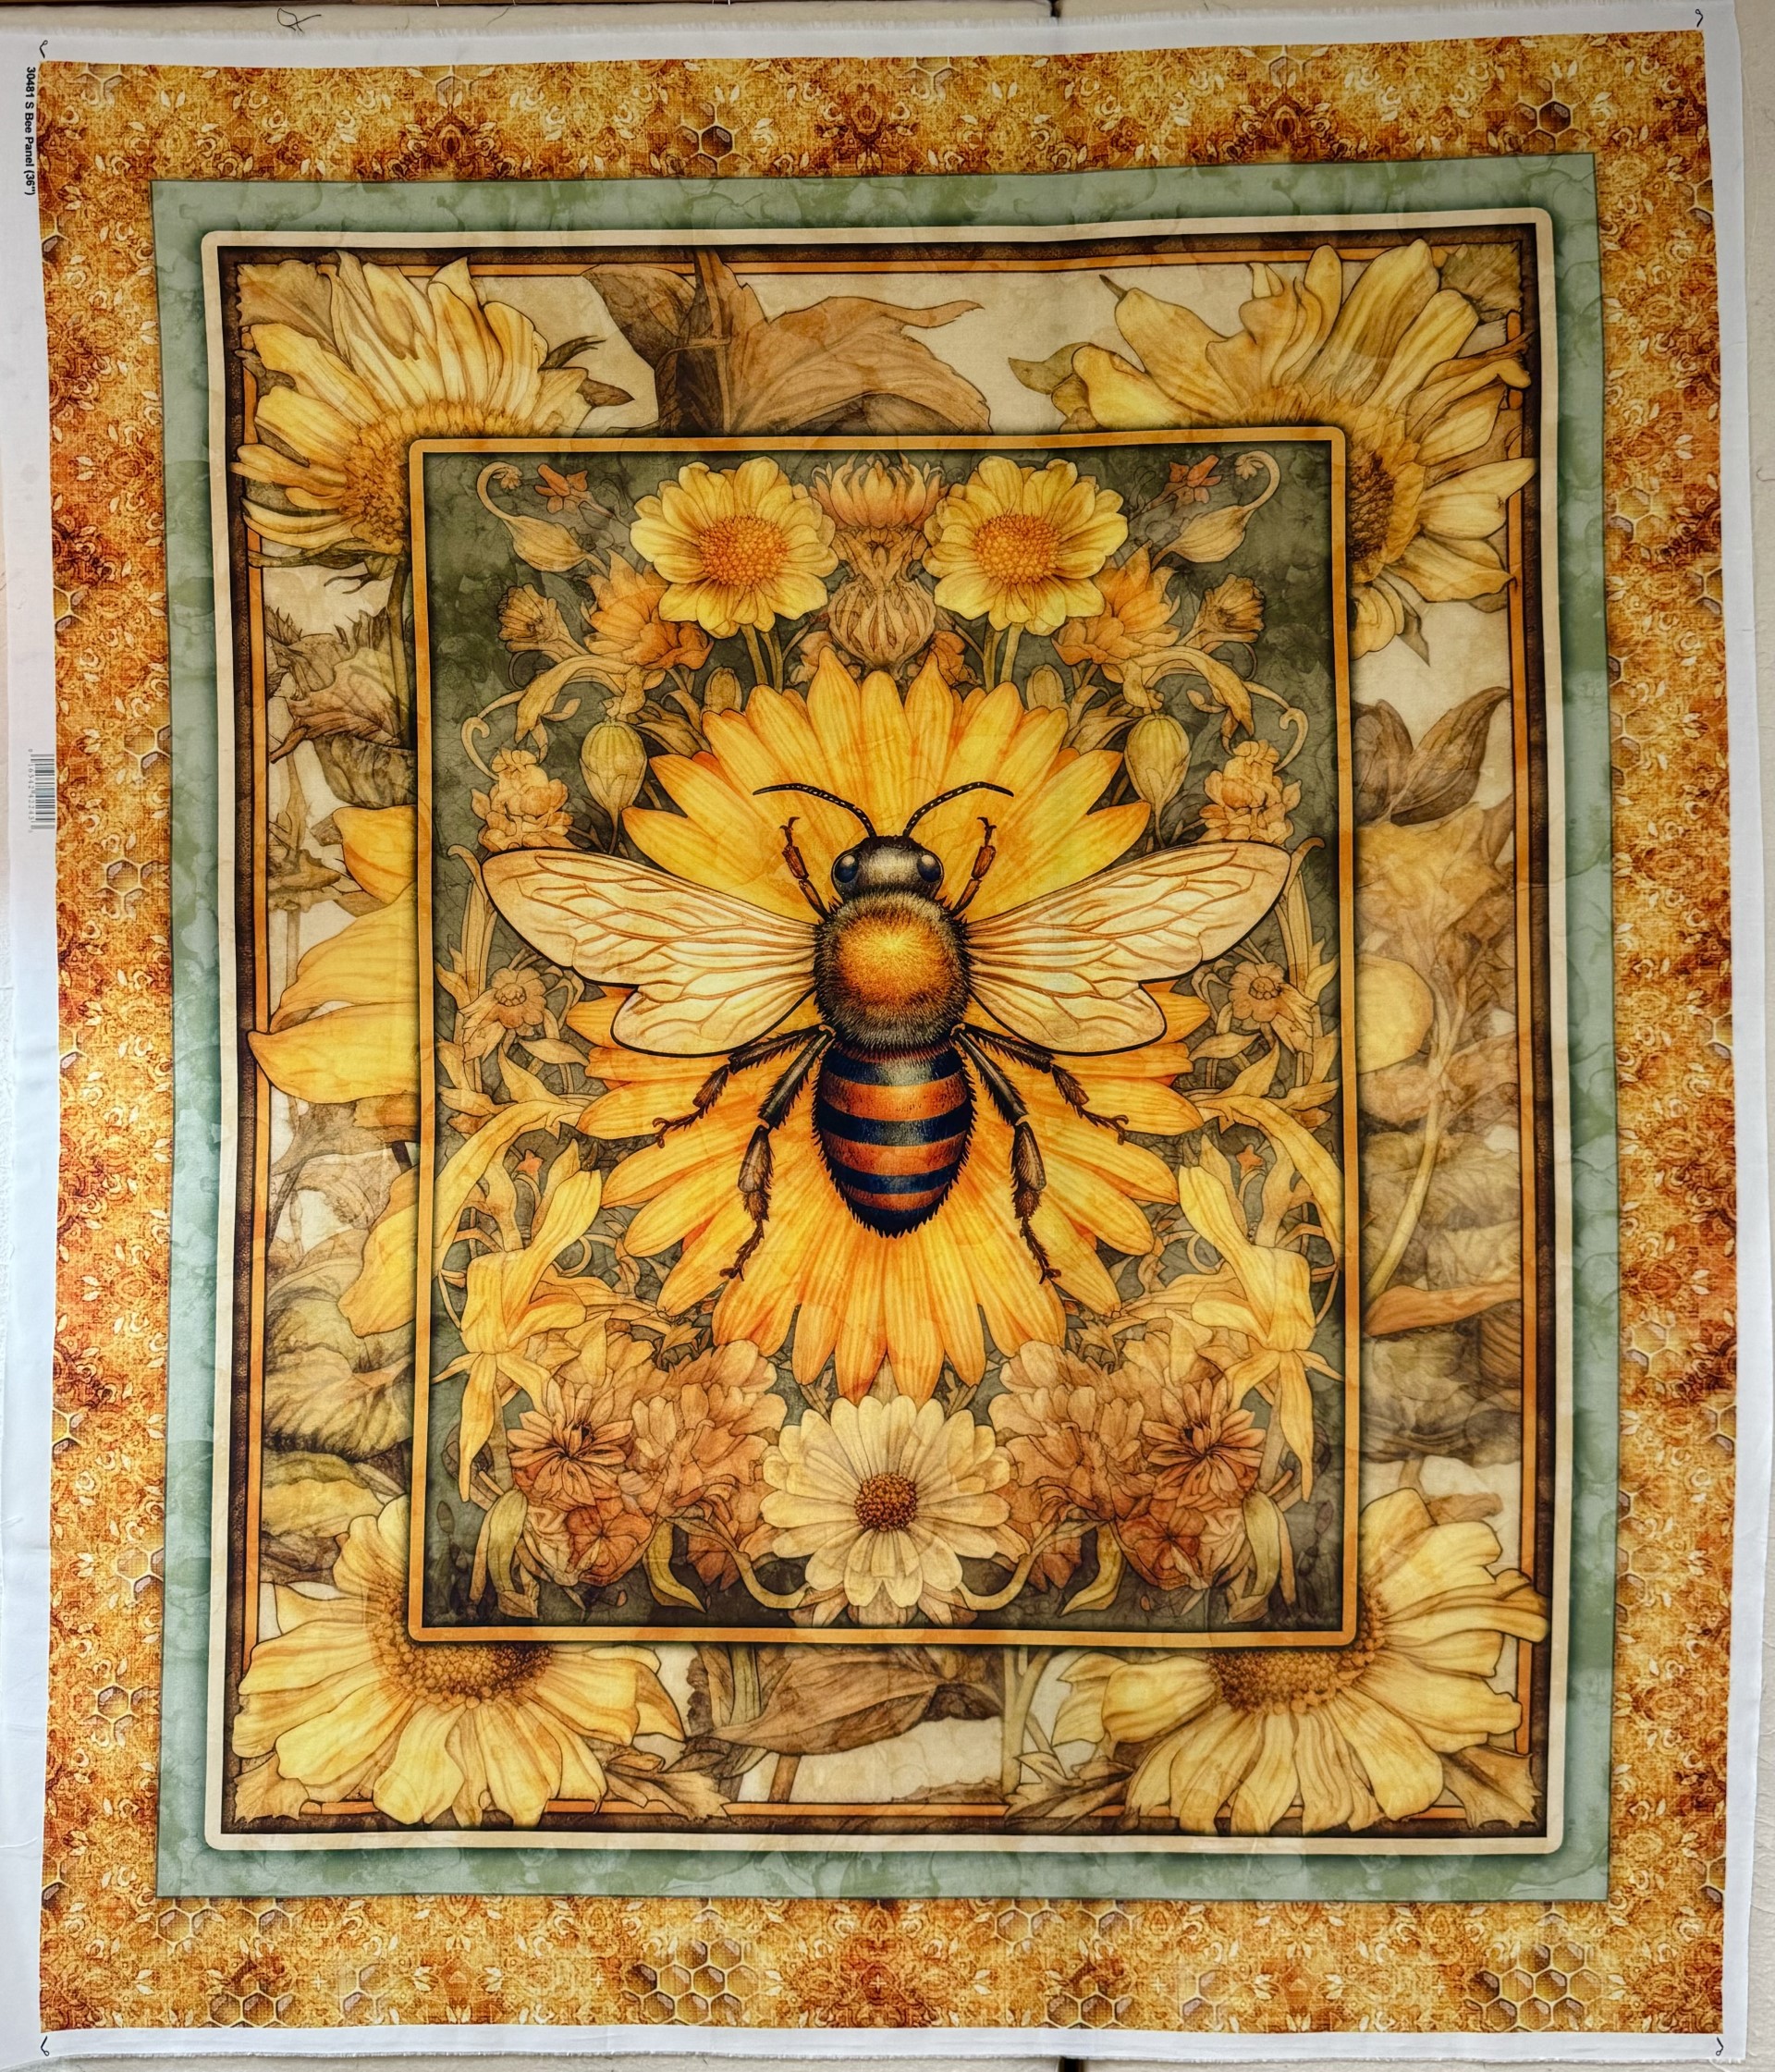
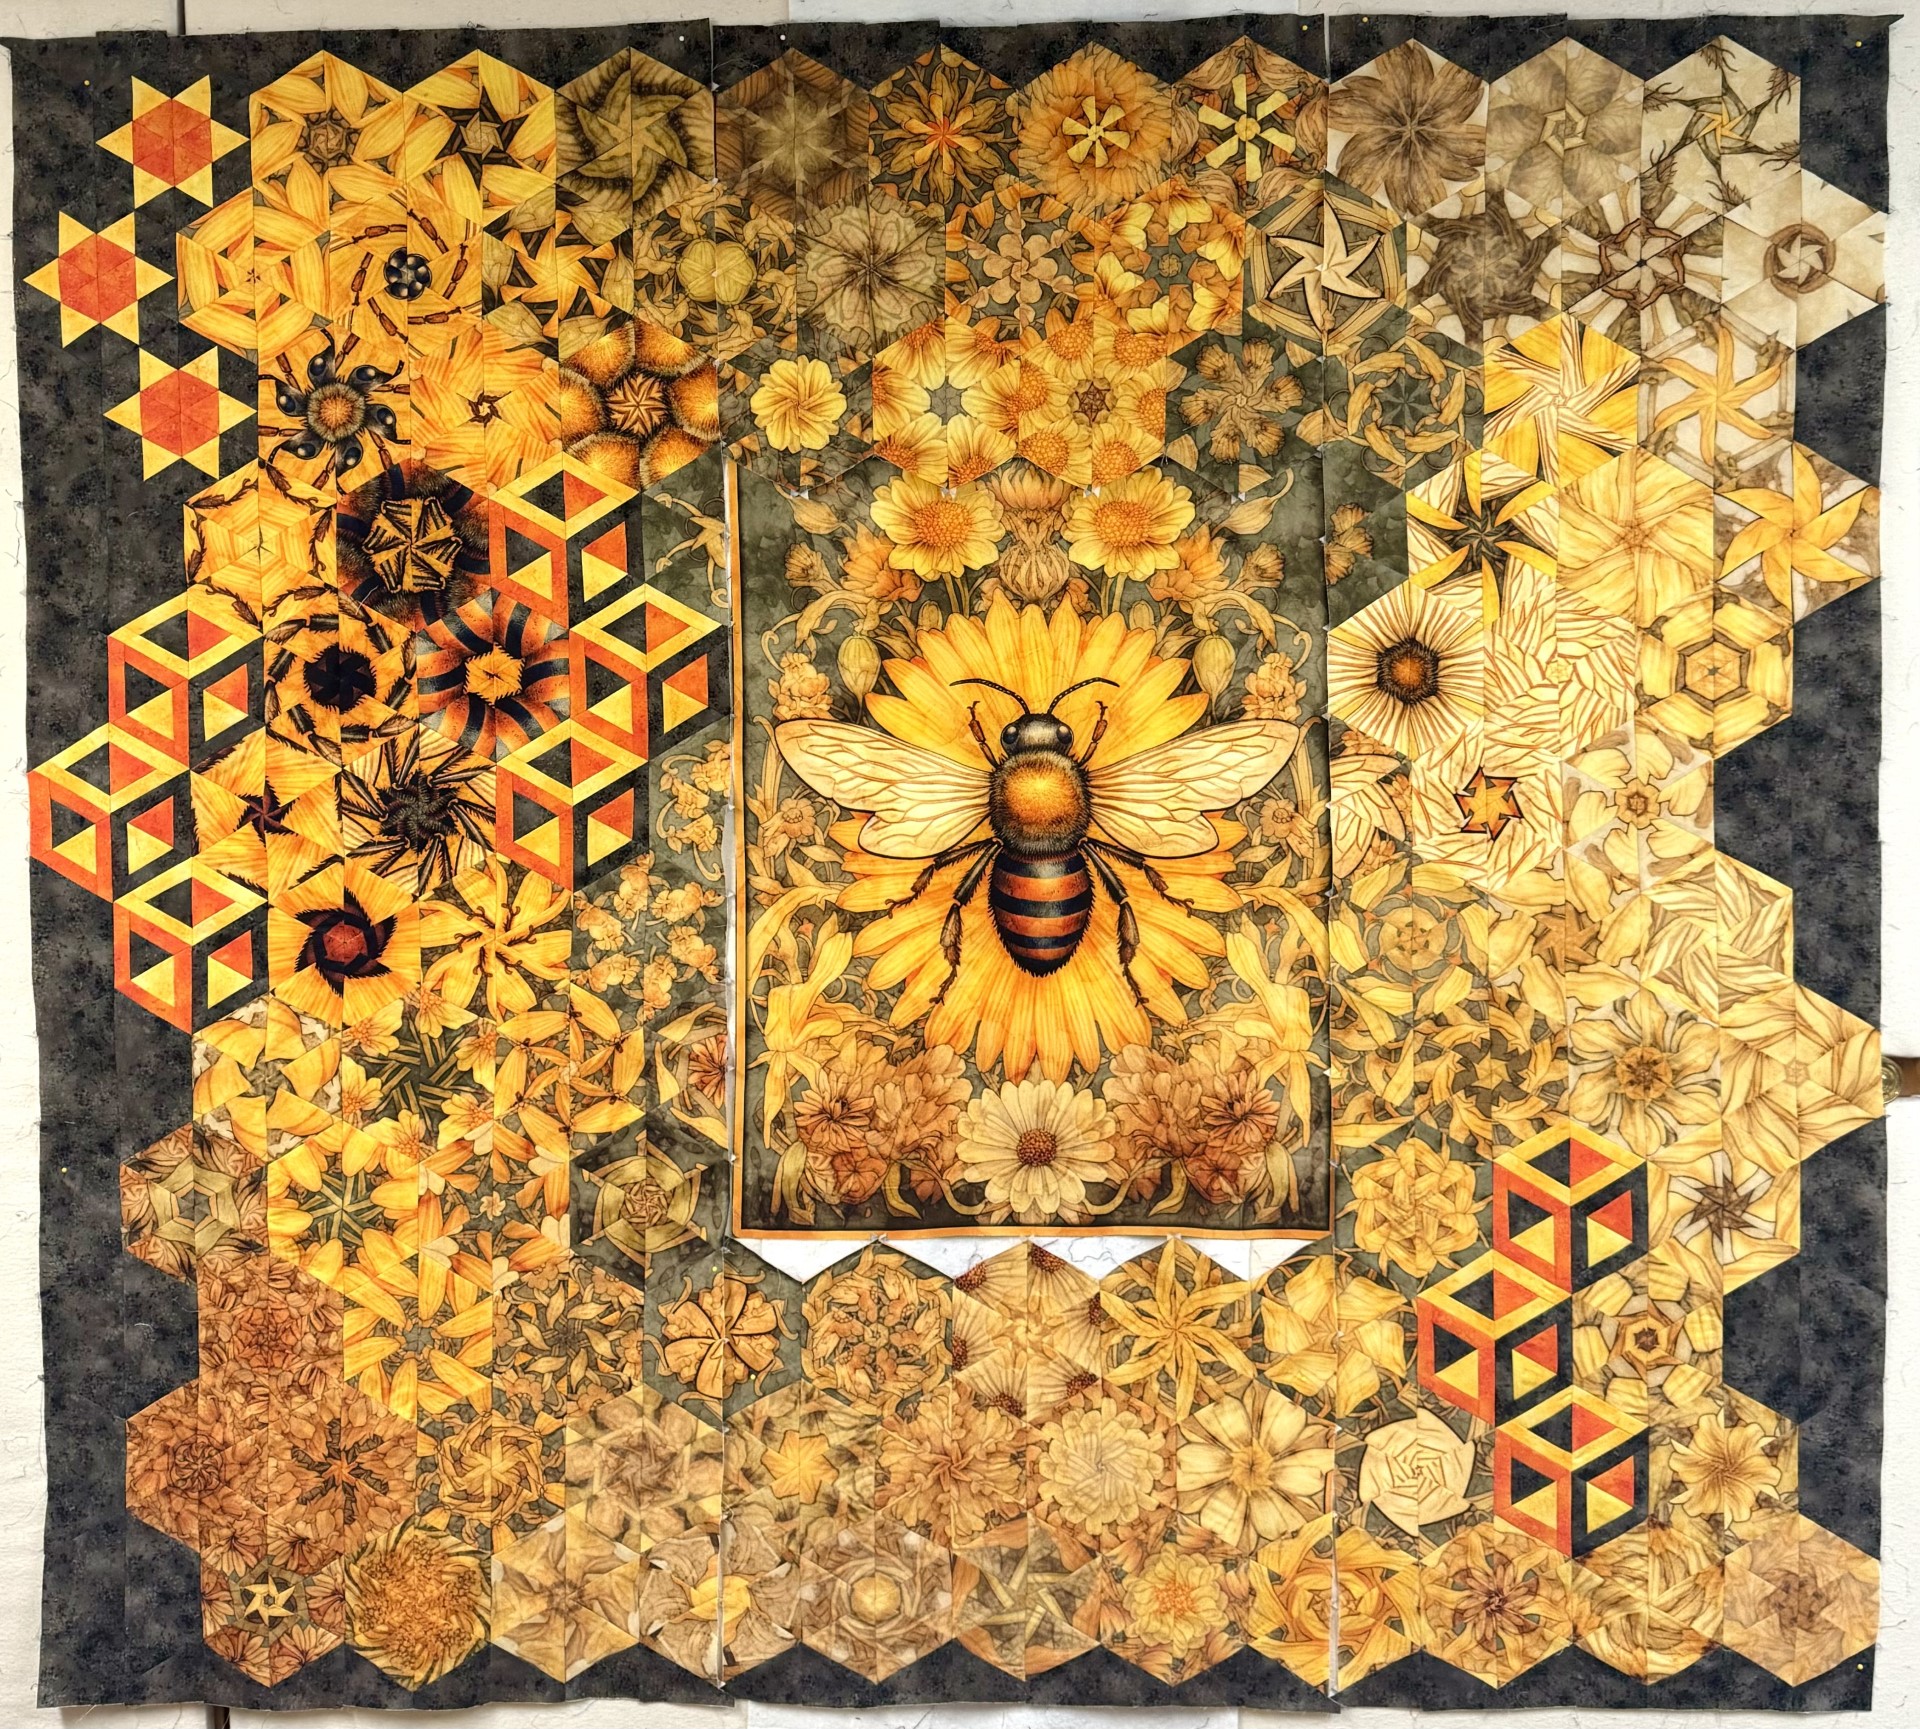
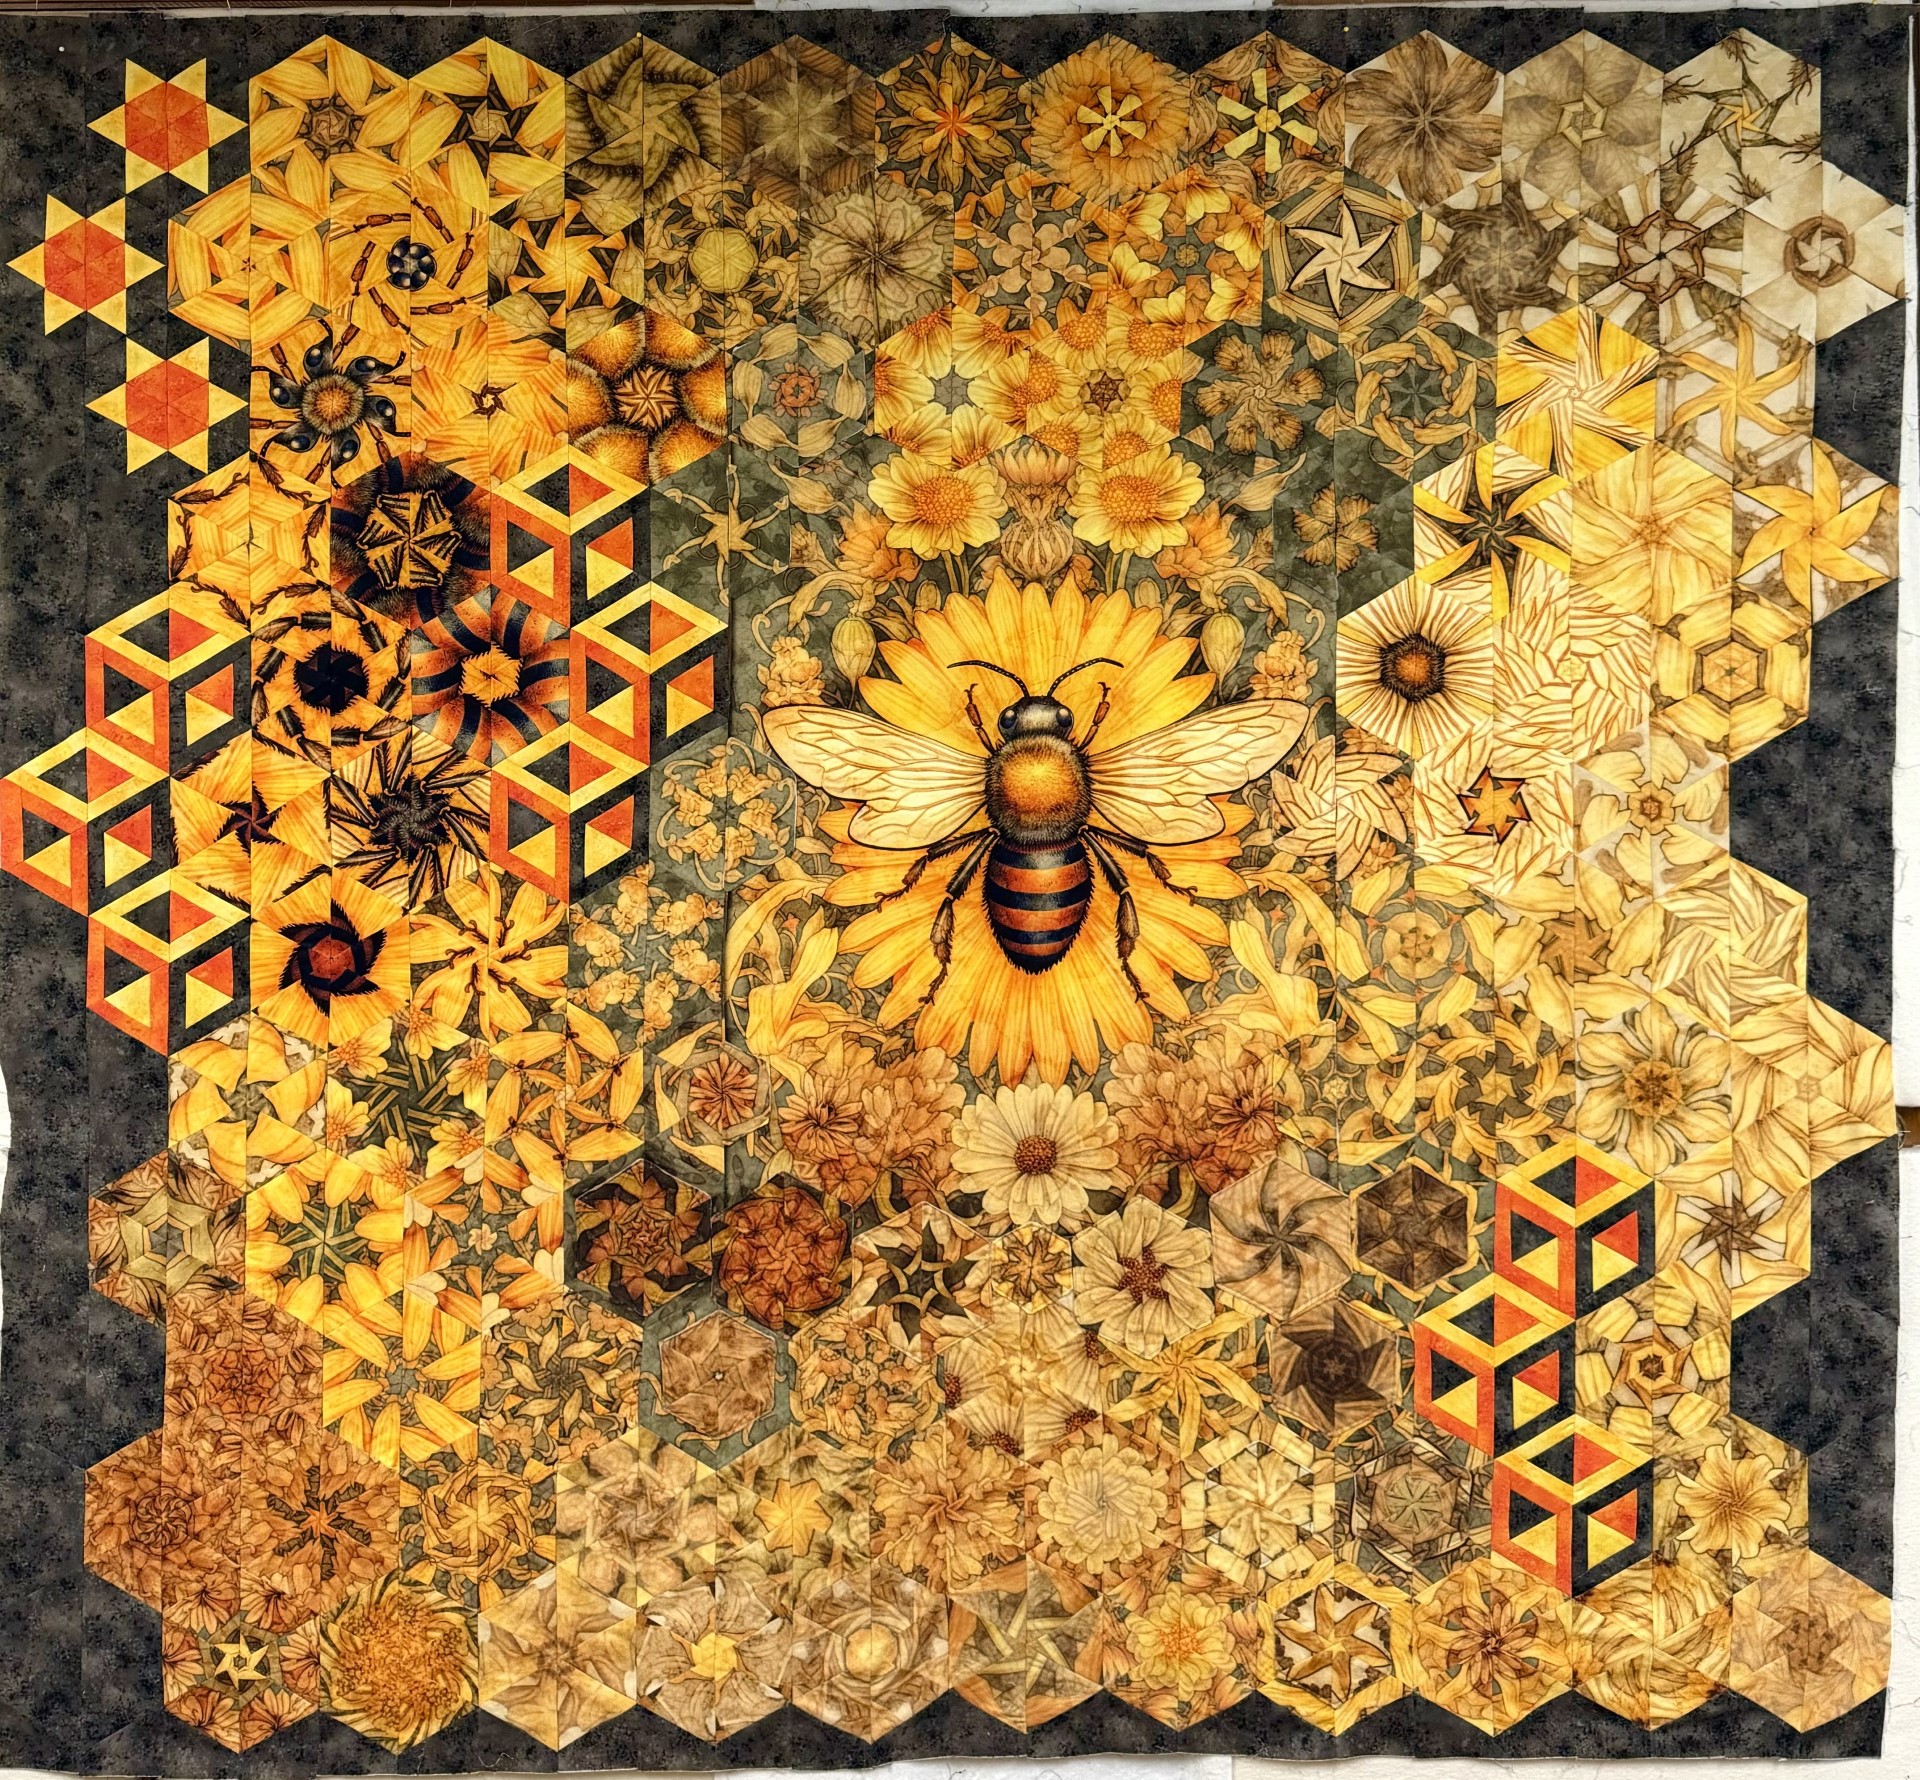
When I started cutting the hexies from Queen Bee strips, I knew it was going to be a beautiful OBW! The Queen Bee panel is by by QT Fabrics. It measures 36″ x 44″. The Queen Bee line will be in stores June 2024.
I cut my strips for the hexies 3.25″ for 5″ finished hexies. I cut off the borders. The inner border containing flowers measured 3.25″ so I was able to use them for more hexies. I had a total of 106 hexies to design with.
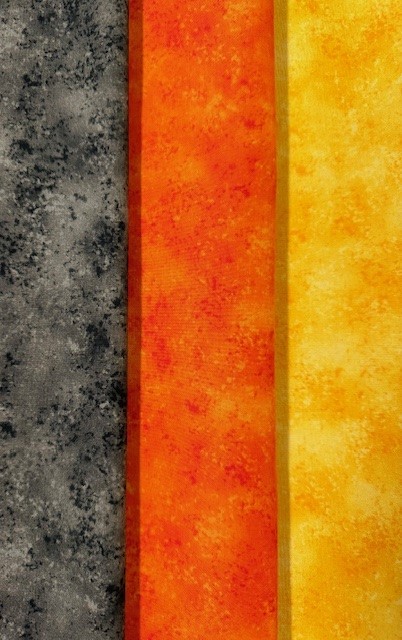
I used QT Fabrics blender line Rapture to create Hollow Cube 60‘s, using the Studio 180 Design Star 60 tool. I chose Charcoal, Orange and Marigold to make the cubes and half hexies surrounding the quilt. The Rapture fabrics were perfect.
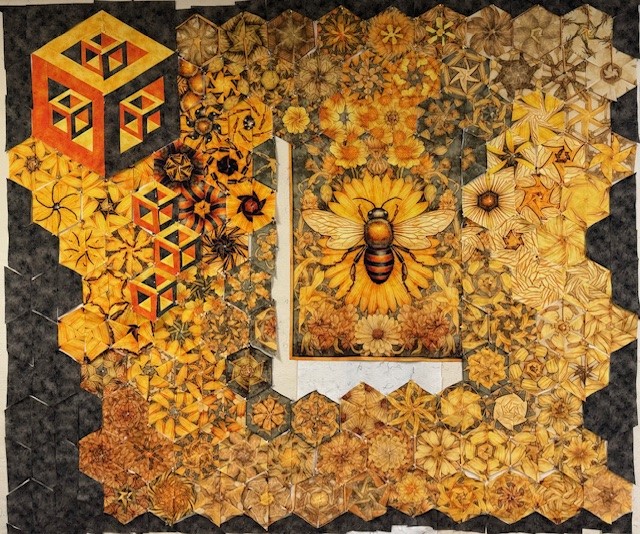
I started out by making a 15″ Hollow Cube 60 containing 5″ Hollow Cube 60’s, but I felt that it over powered the bee.
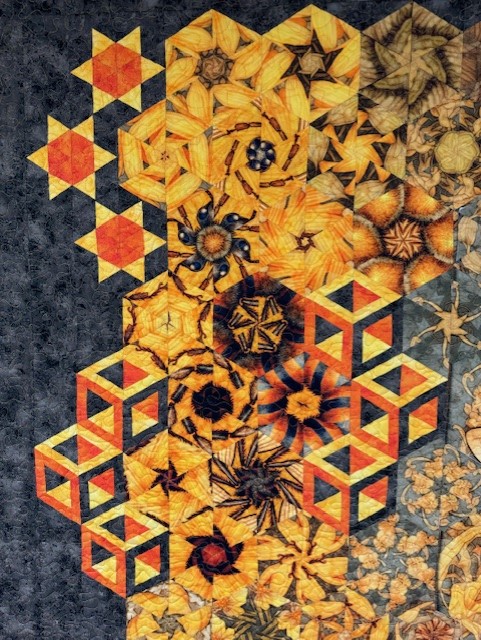
I decided to make 5″ finished Hollow Cube 60’s and Quad 60 stars.
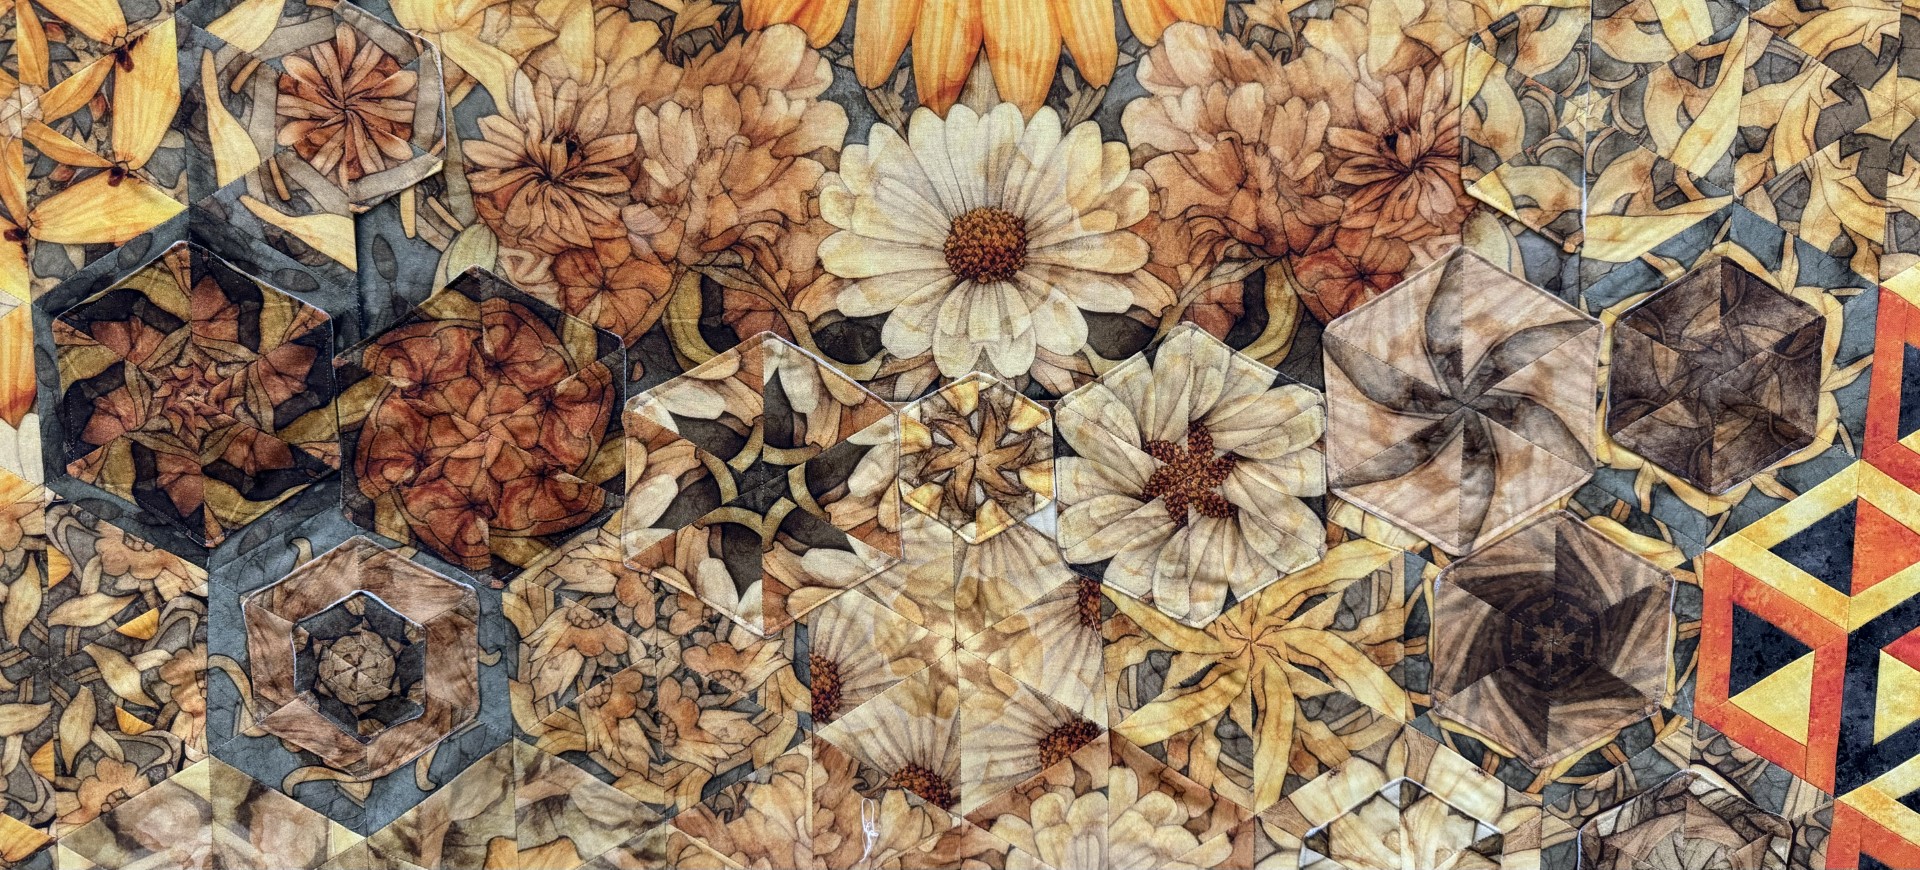
After I completed my four sections and laid them out around the panel, I realized I needed to add a strip to the bottom of the panel to be able to join the bottom section to the panel. That meant I would have to hide the strip by appliqueing hexies. The photo on the right above shows that you can no longer see where I added the strip of fabric.
Above shows a closeup of the hidden strip. I applique hexies of various sizes to tweak my design.
TIP: When you cut your hexies from the strips, you have a leftover piece on both ends. One side of the leftover already has a 60 degree angle. If you put the 60 degree line of your ruler on the straight edge of the leftover piece as shown above and cut , you will have a small hexie that can be appliqued on your OBW. Below I have created a lesson on how I create appliqued hexies.