
Flying Geese are fun to make when you know how! When you learn to use Deb Tucker’s Wing Clipper, you will make 4 flying geese at once. With the Wing Clipper you can make finished size flying geese in 10 sizes from 1/2″ X 1″ to 5″ X 10″. This block is called the 03 Flying Dutchman and consists of 8 flying geese. All the instructions you need to make the flying geese units required for this block came with your Wing Clipper’s instructions. There is a chart with step by step graphics and directions.
I chose the third option in the supply list. Remember the large square becomes the large triangle or body in your flying geese, and the small squares become the side triangles or wings in your units.
I am making my BlockBuster blocks 12″ finished size. That way when I’m done I can make a quilt. When using the Wing Clipper you start with one large square and 4 small squares. 
For a 12″ block, my units need to be 3″ x 6″ finished size. According to the chart in my instructions my large square should be cut 7 1/2″ and my small squares should be cut 4″. Because I need 8 flying geese units I cut 2 large squares and 8 small squares.
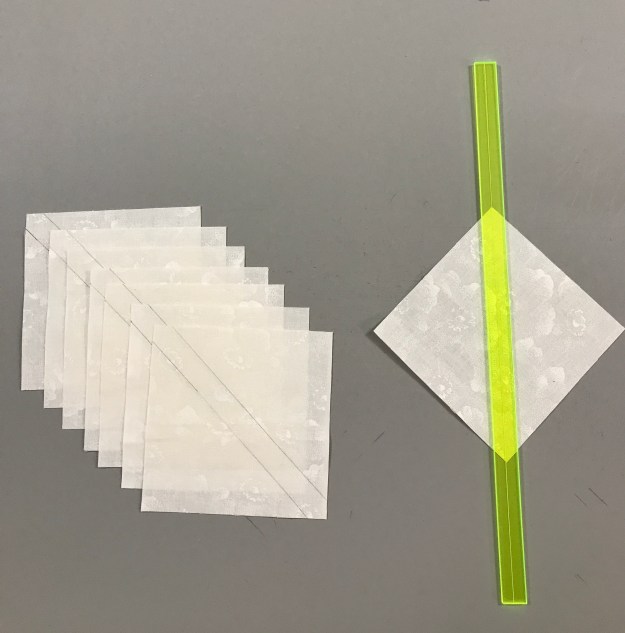
Take your Magic Wand and on the back of your small squares draw lines diagonally corner to corner as shown above.

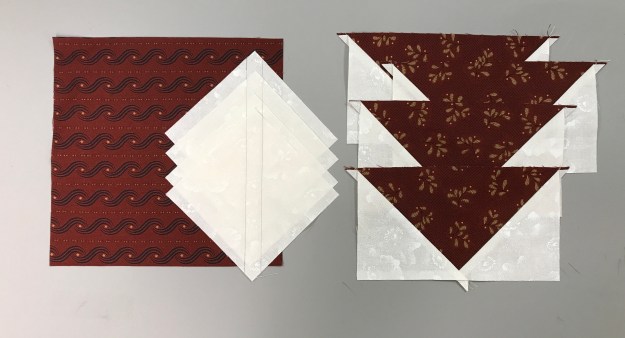
Position two small squares on one large square as shown. When positioning, nudge the small squares toward the center a thread or two. This gives you a little more to trim off.

Sew on lines and cut apart as shown above.

Press toward the small triangles. Position another small square as shown above, again nudging the small square away from the edge about 1/16th of inch.
Sew on the lines and cut apart, and press.
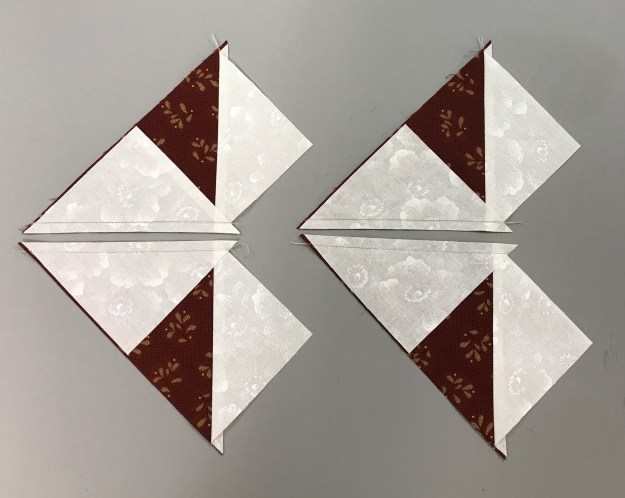
You now have 4 oversized flying geese units. Repeat the same process with the second large square and 4 small squares.
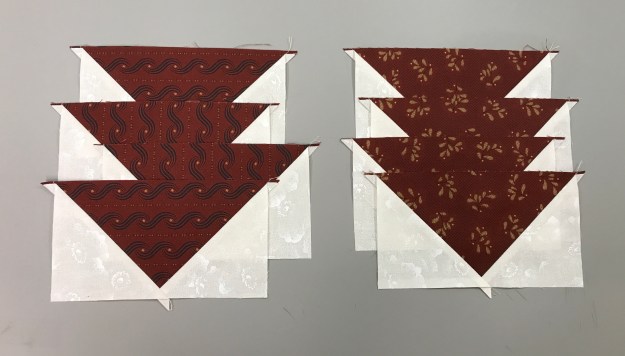
You now have 8 oversized flying geese units.

Position your oversized flying geese unit horizontally on your cutting mat, with unit pointed toward you as shown above. Align the diagonal guide lines of the Wing Clipper with the sewn seams of the flying geese unit. Trim the two sides.
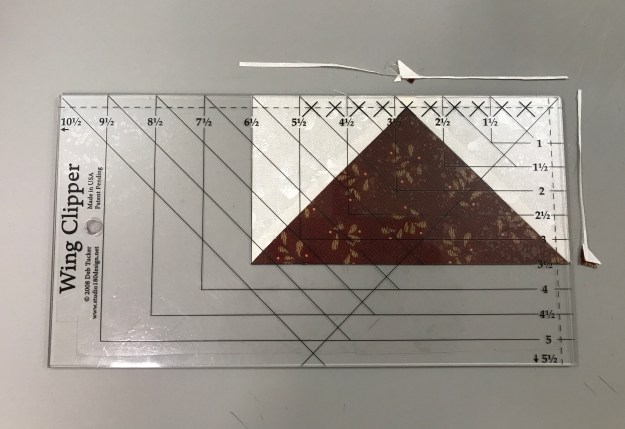
Rotate your unit and reposition your Wing Clipper to align clean-up guidelines with the previously trimmed raw edges and trim. Check your instruction for Left-handed trimming.


Lay out your units and sew 2 together to make 4 quarters, pressing your seams in the directions the geese are flying.

Sew your 4 quarters together.
