Tag Archives: BlockBuster’s

Whimsical and Wonky

Whimsical and Wonky

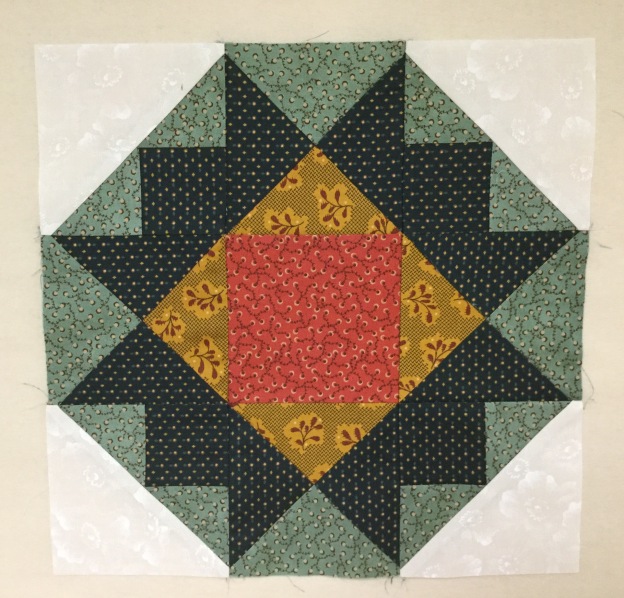
The Island Batik Ambassador’s December challenge was to create a project that is Whimsical & Wonky”.   Well, I settled on Tipsy!  My Holiday Tipsy Tree is based on BlockBuster pattern # 27 Roll the Dice .  This year I have made many quilt projects using Split Rects Units so it is only fitting I end the year with Split Rects.

img_2060

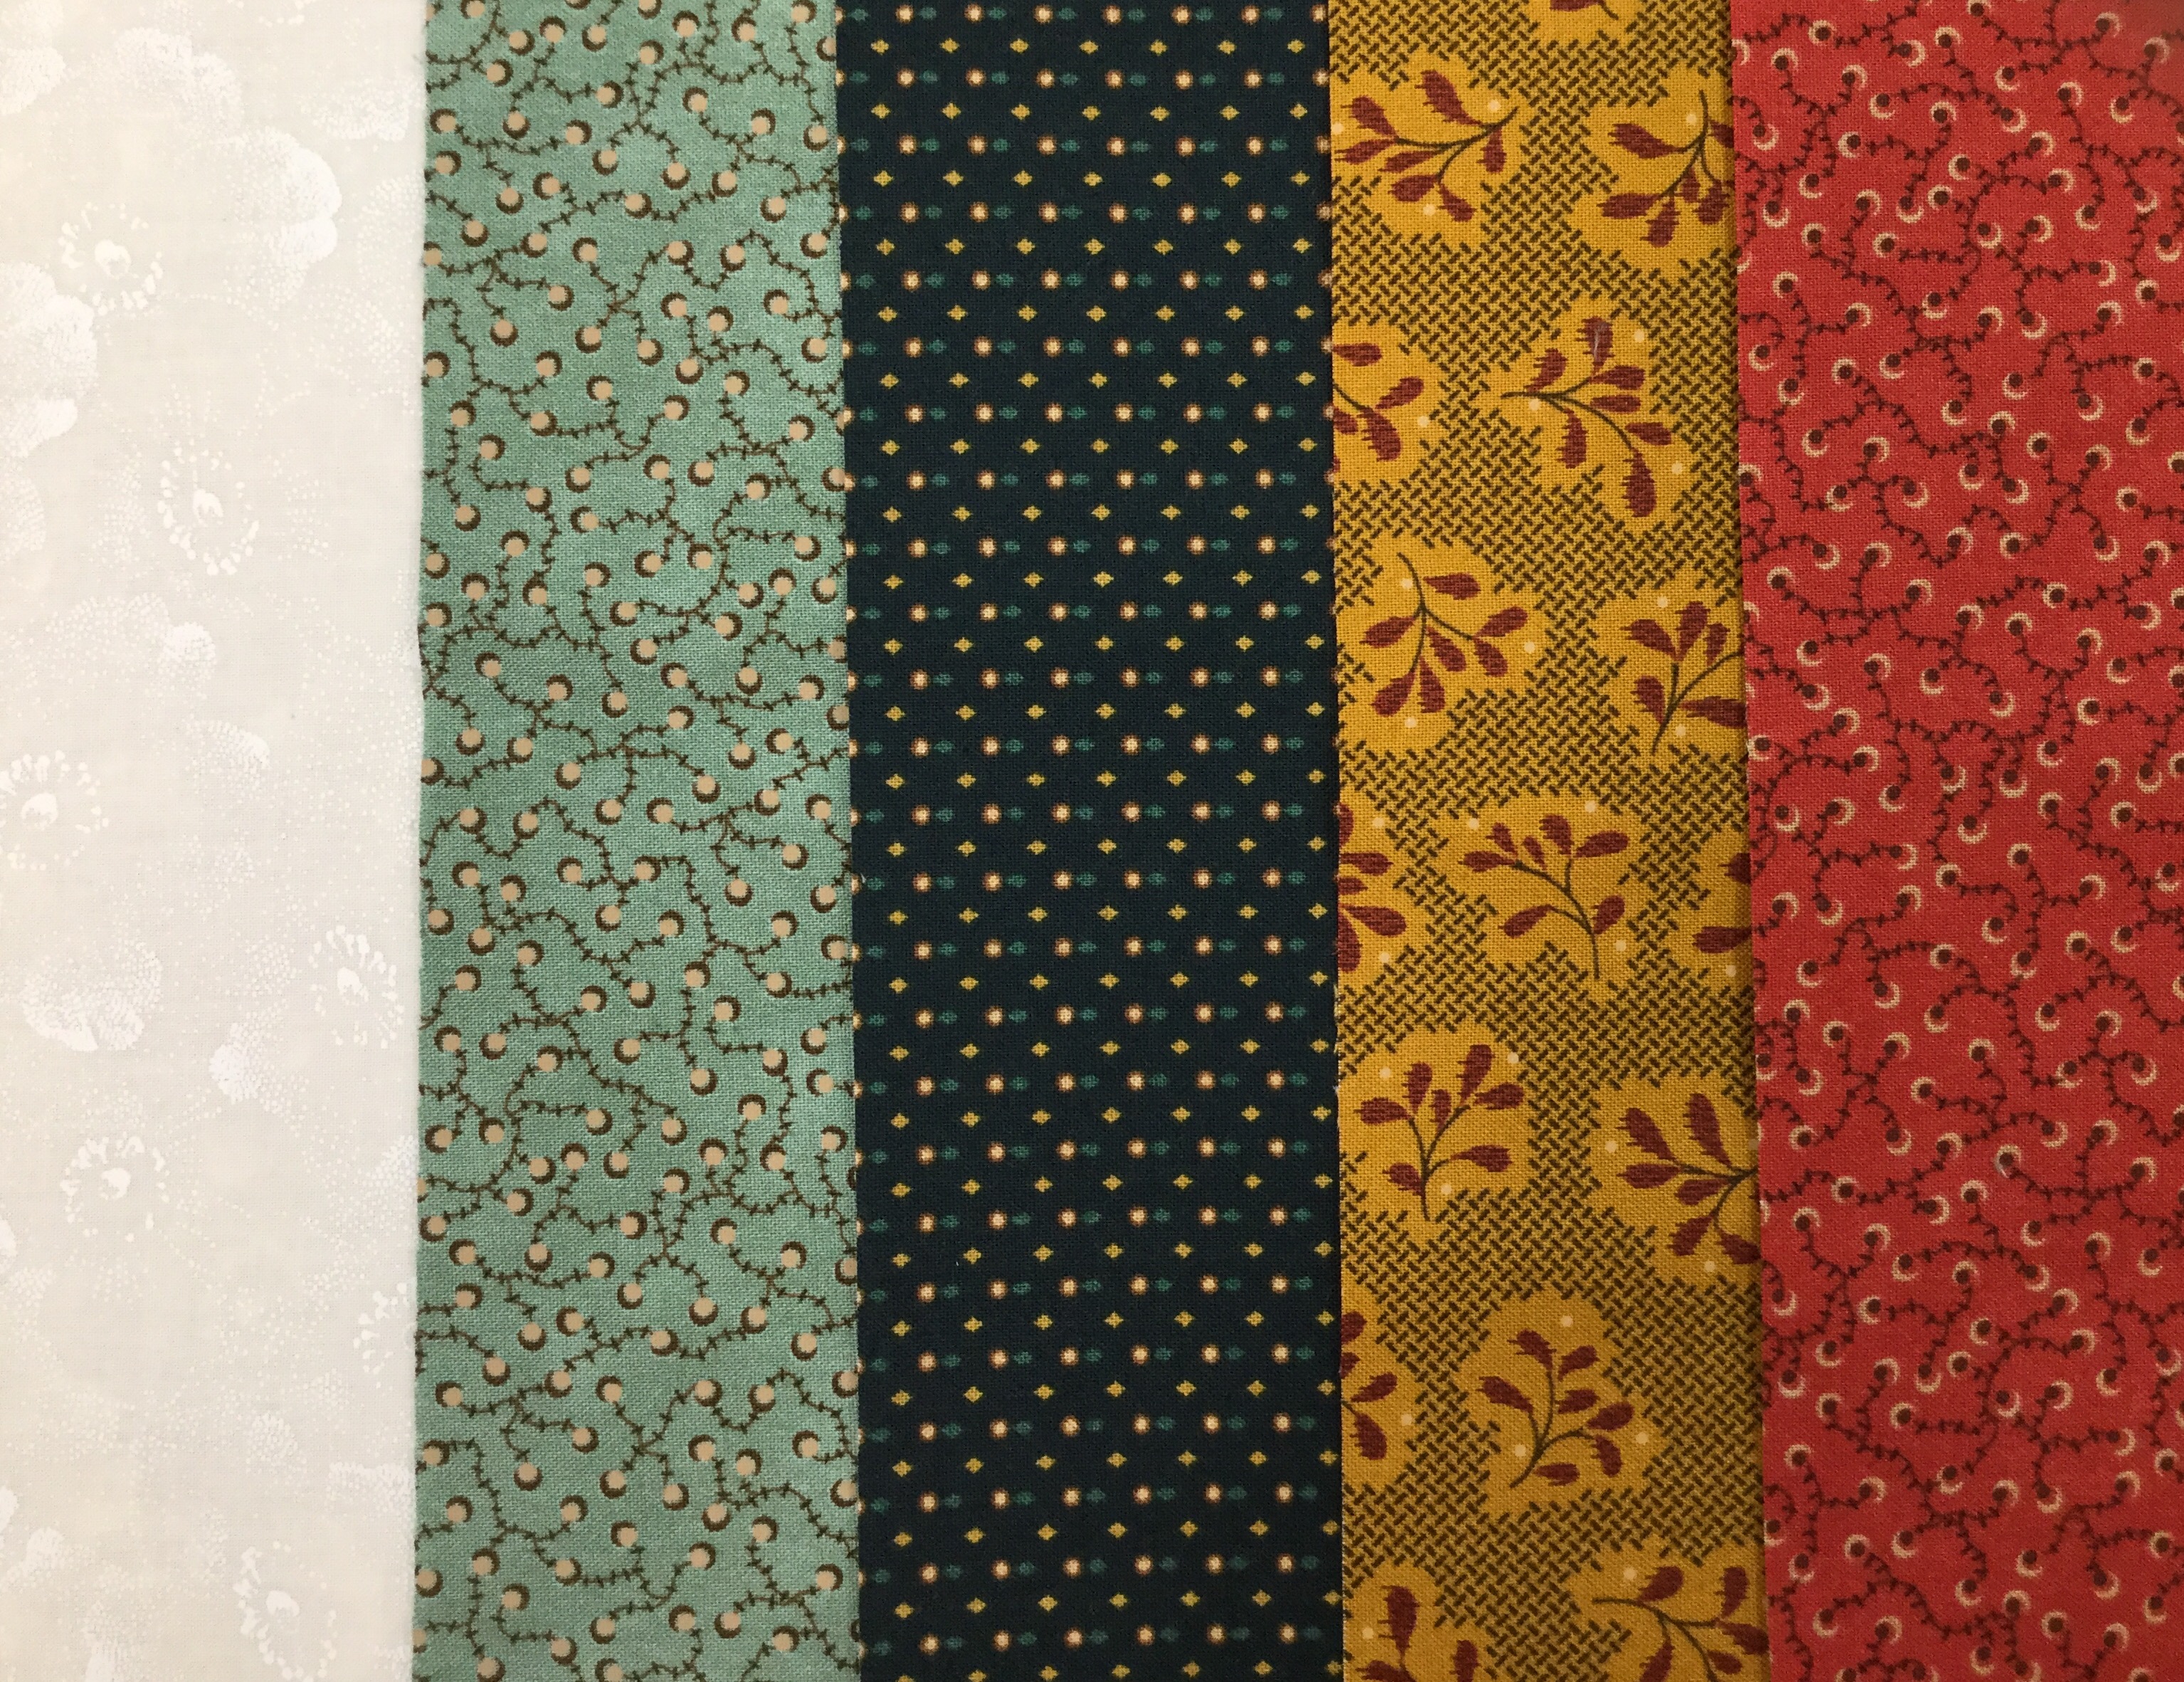
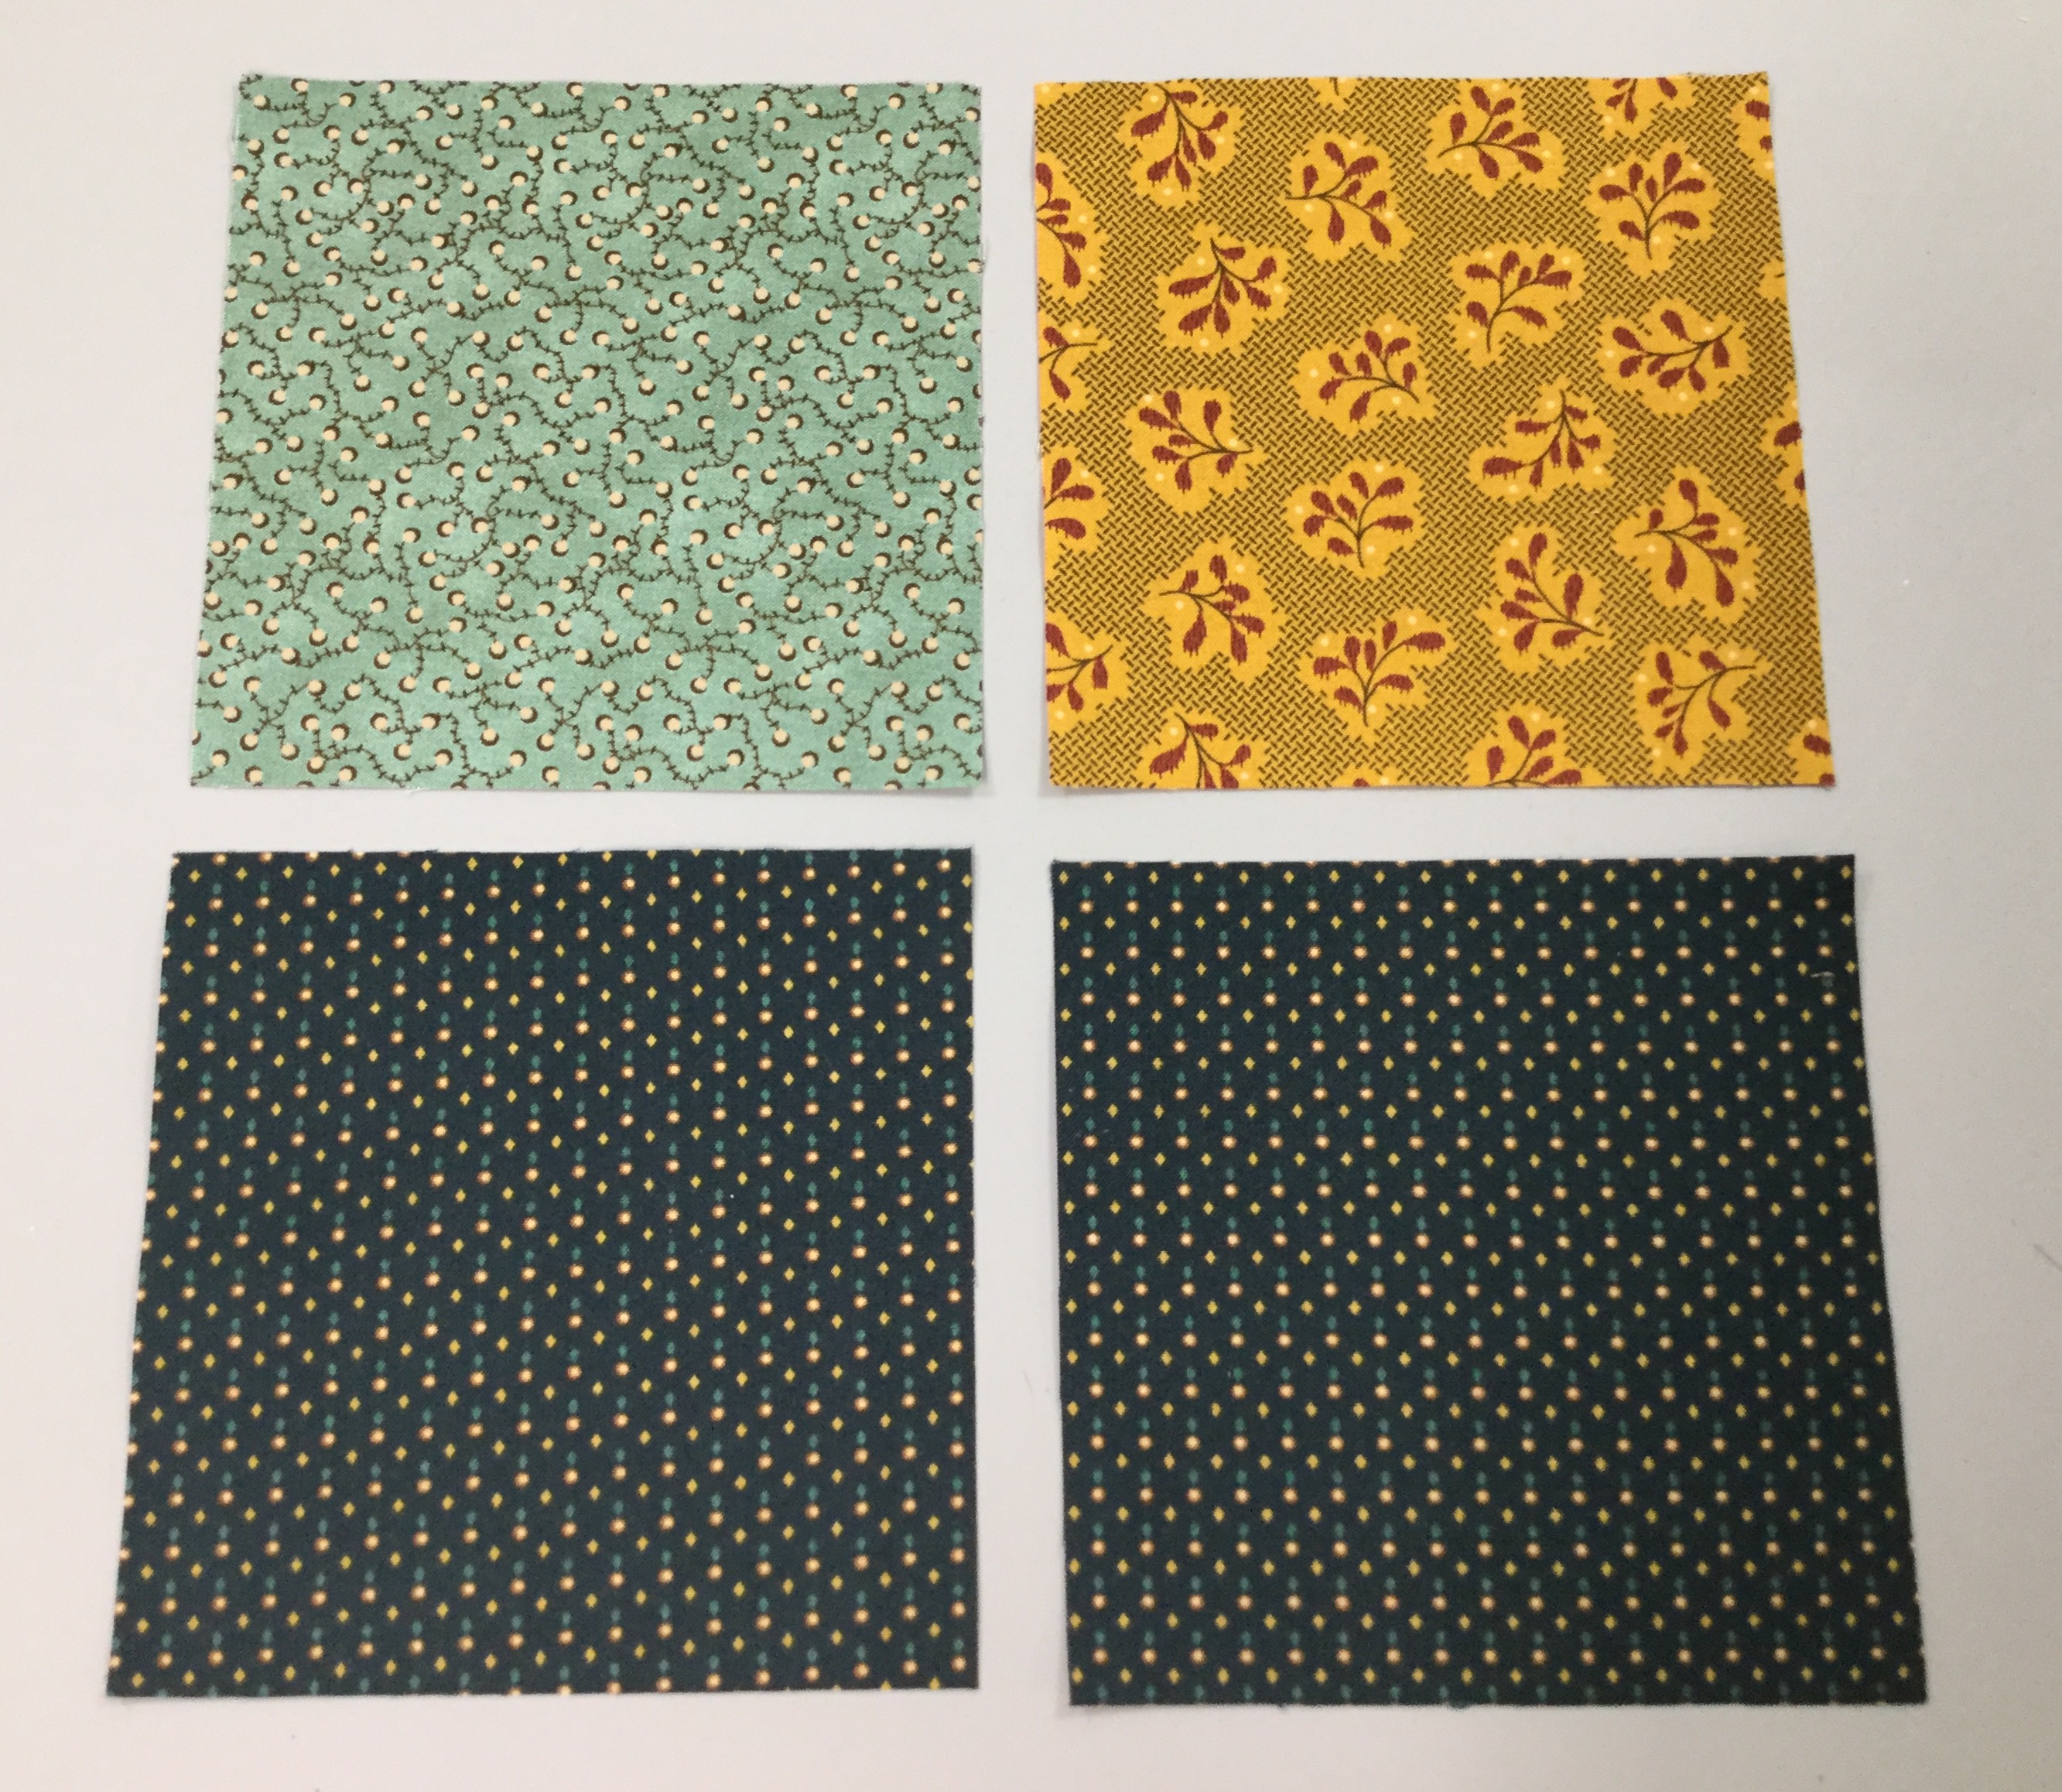
For this quilt I used Island Batik’s “Alpine Jungle” line of beautiful batiks.  I also used Studio 180 Design Split Rects, Square/Squared, Wing Clipper I & Lemoyne Star tools.  I chose four different green fabrics, 9 for block centers.

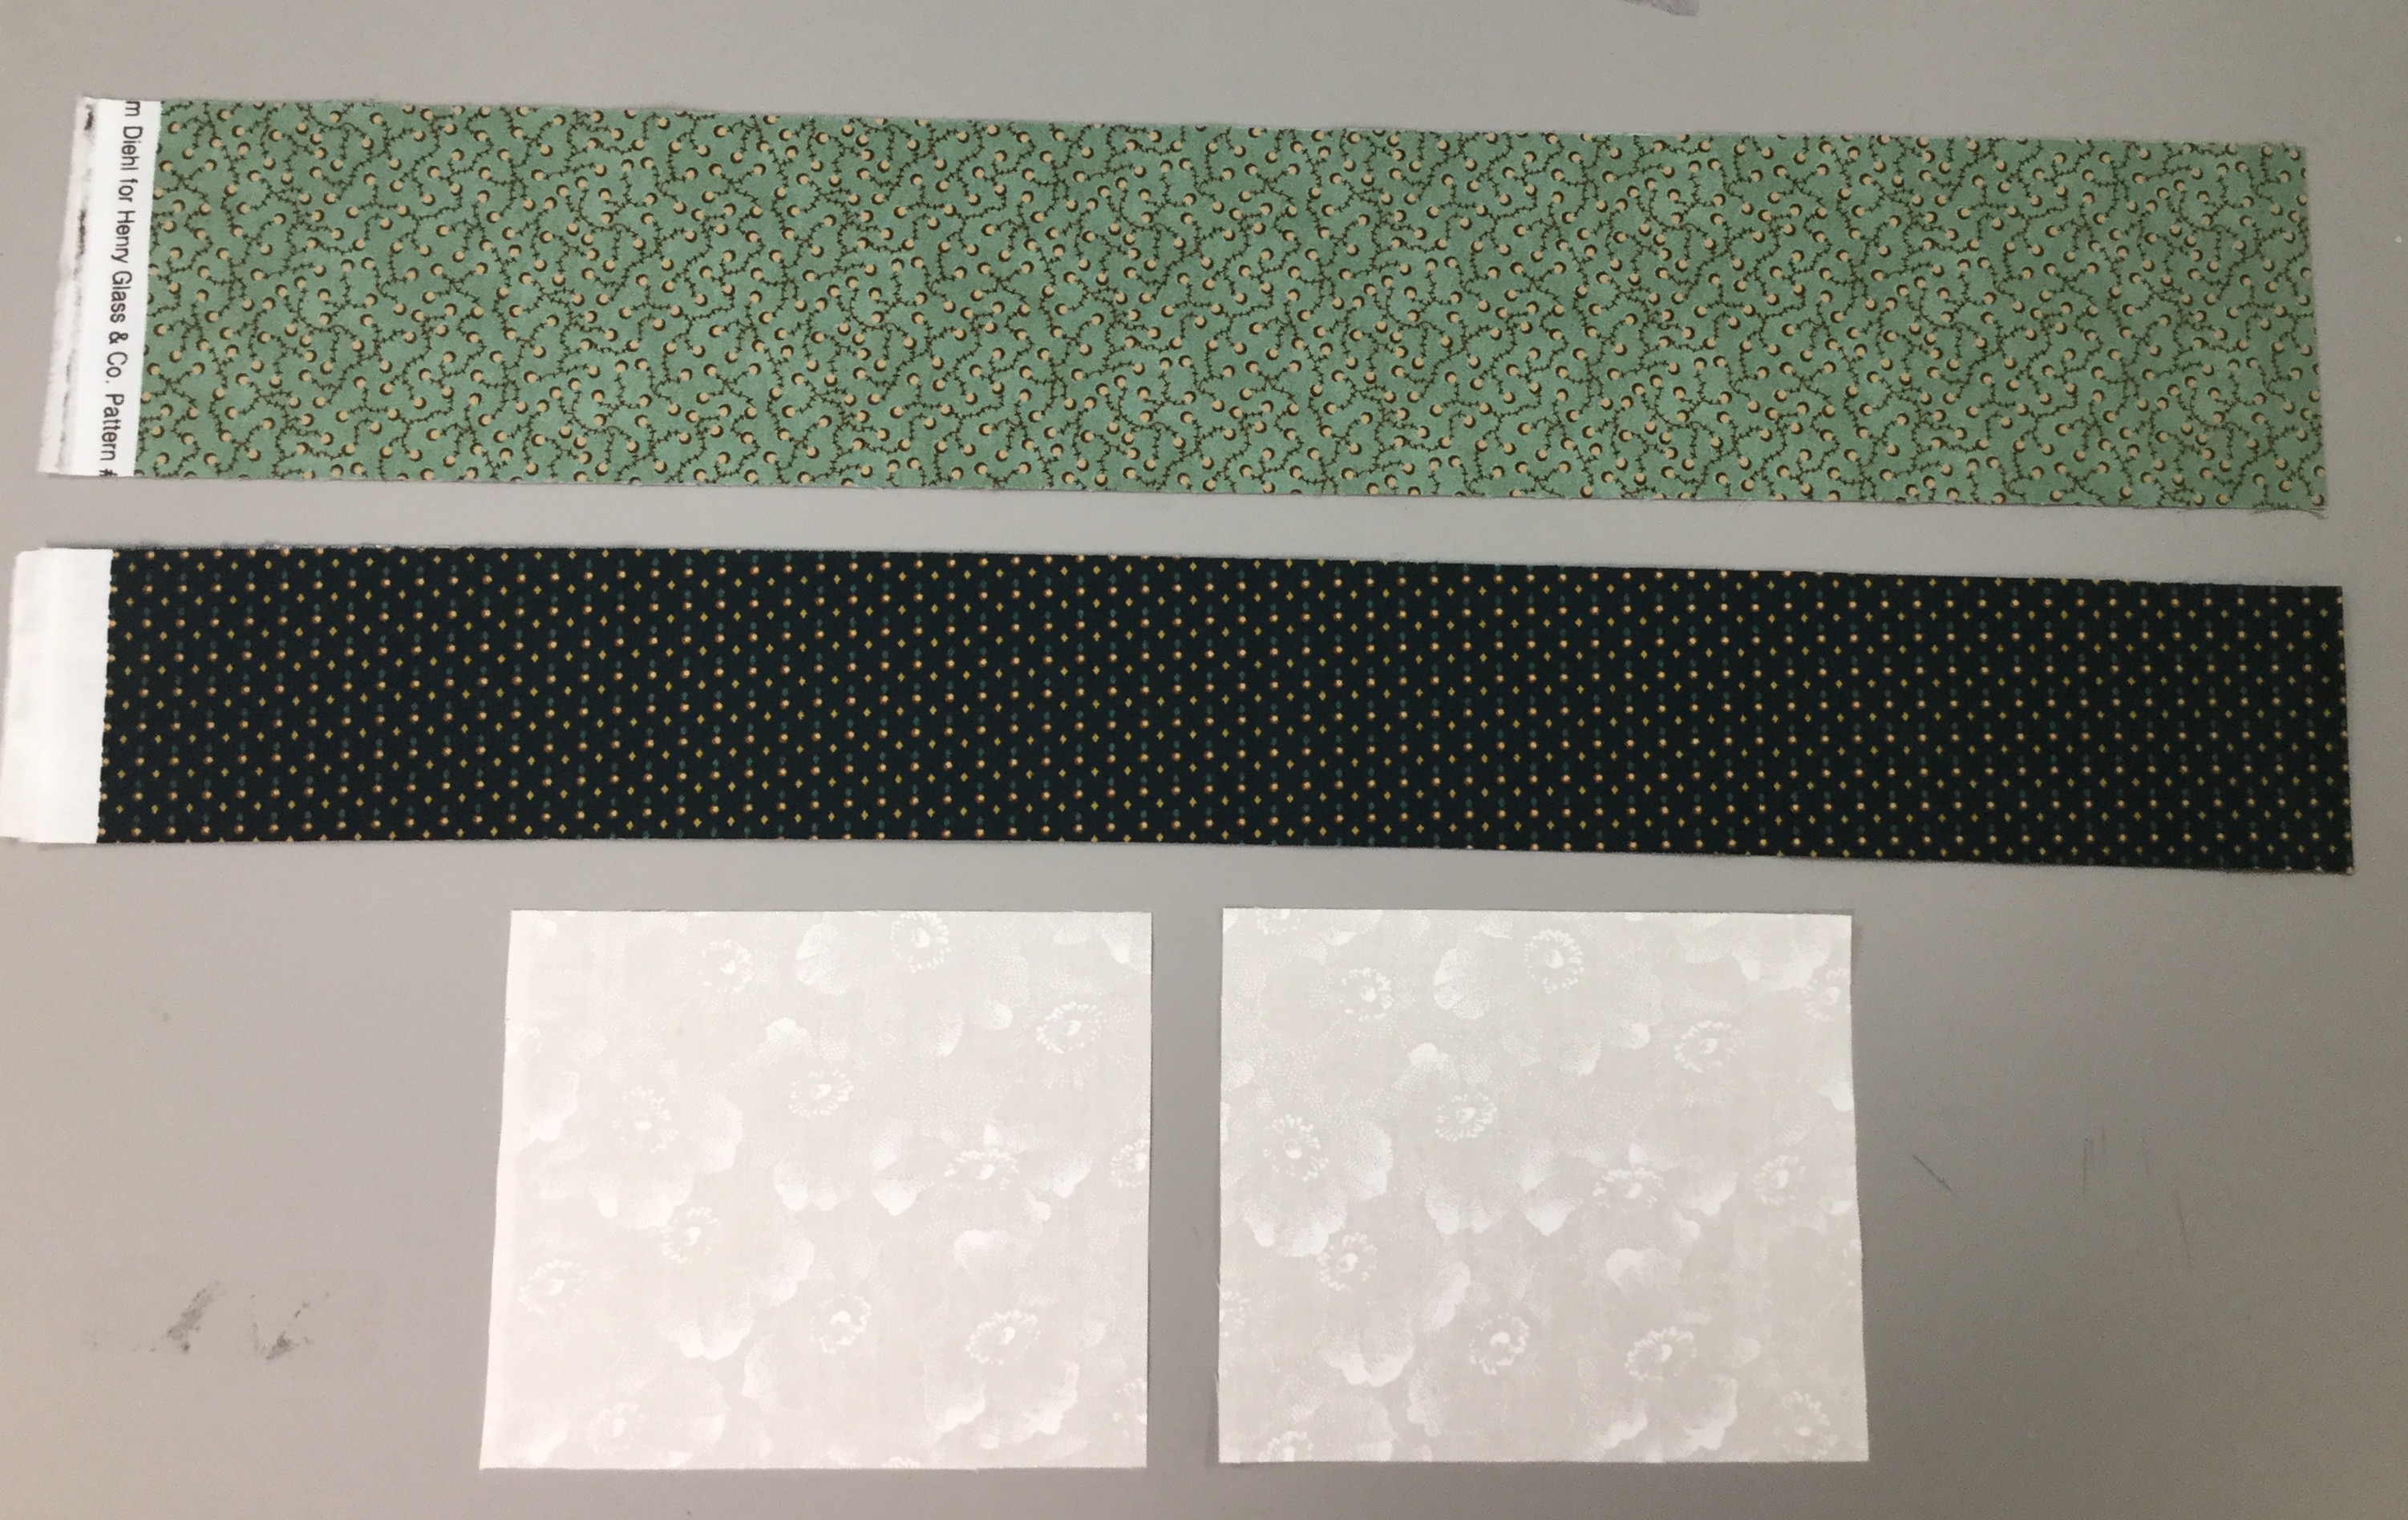
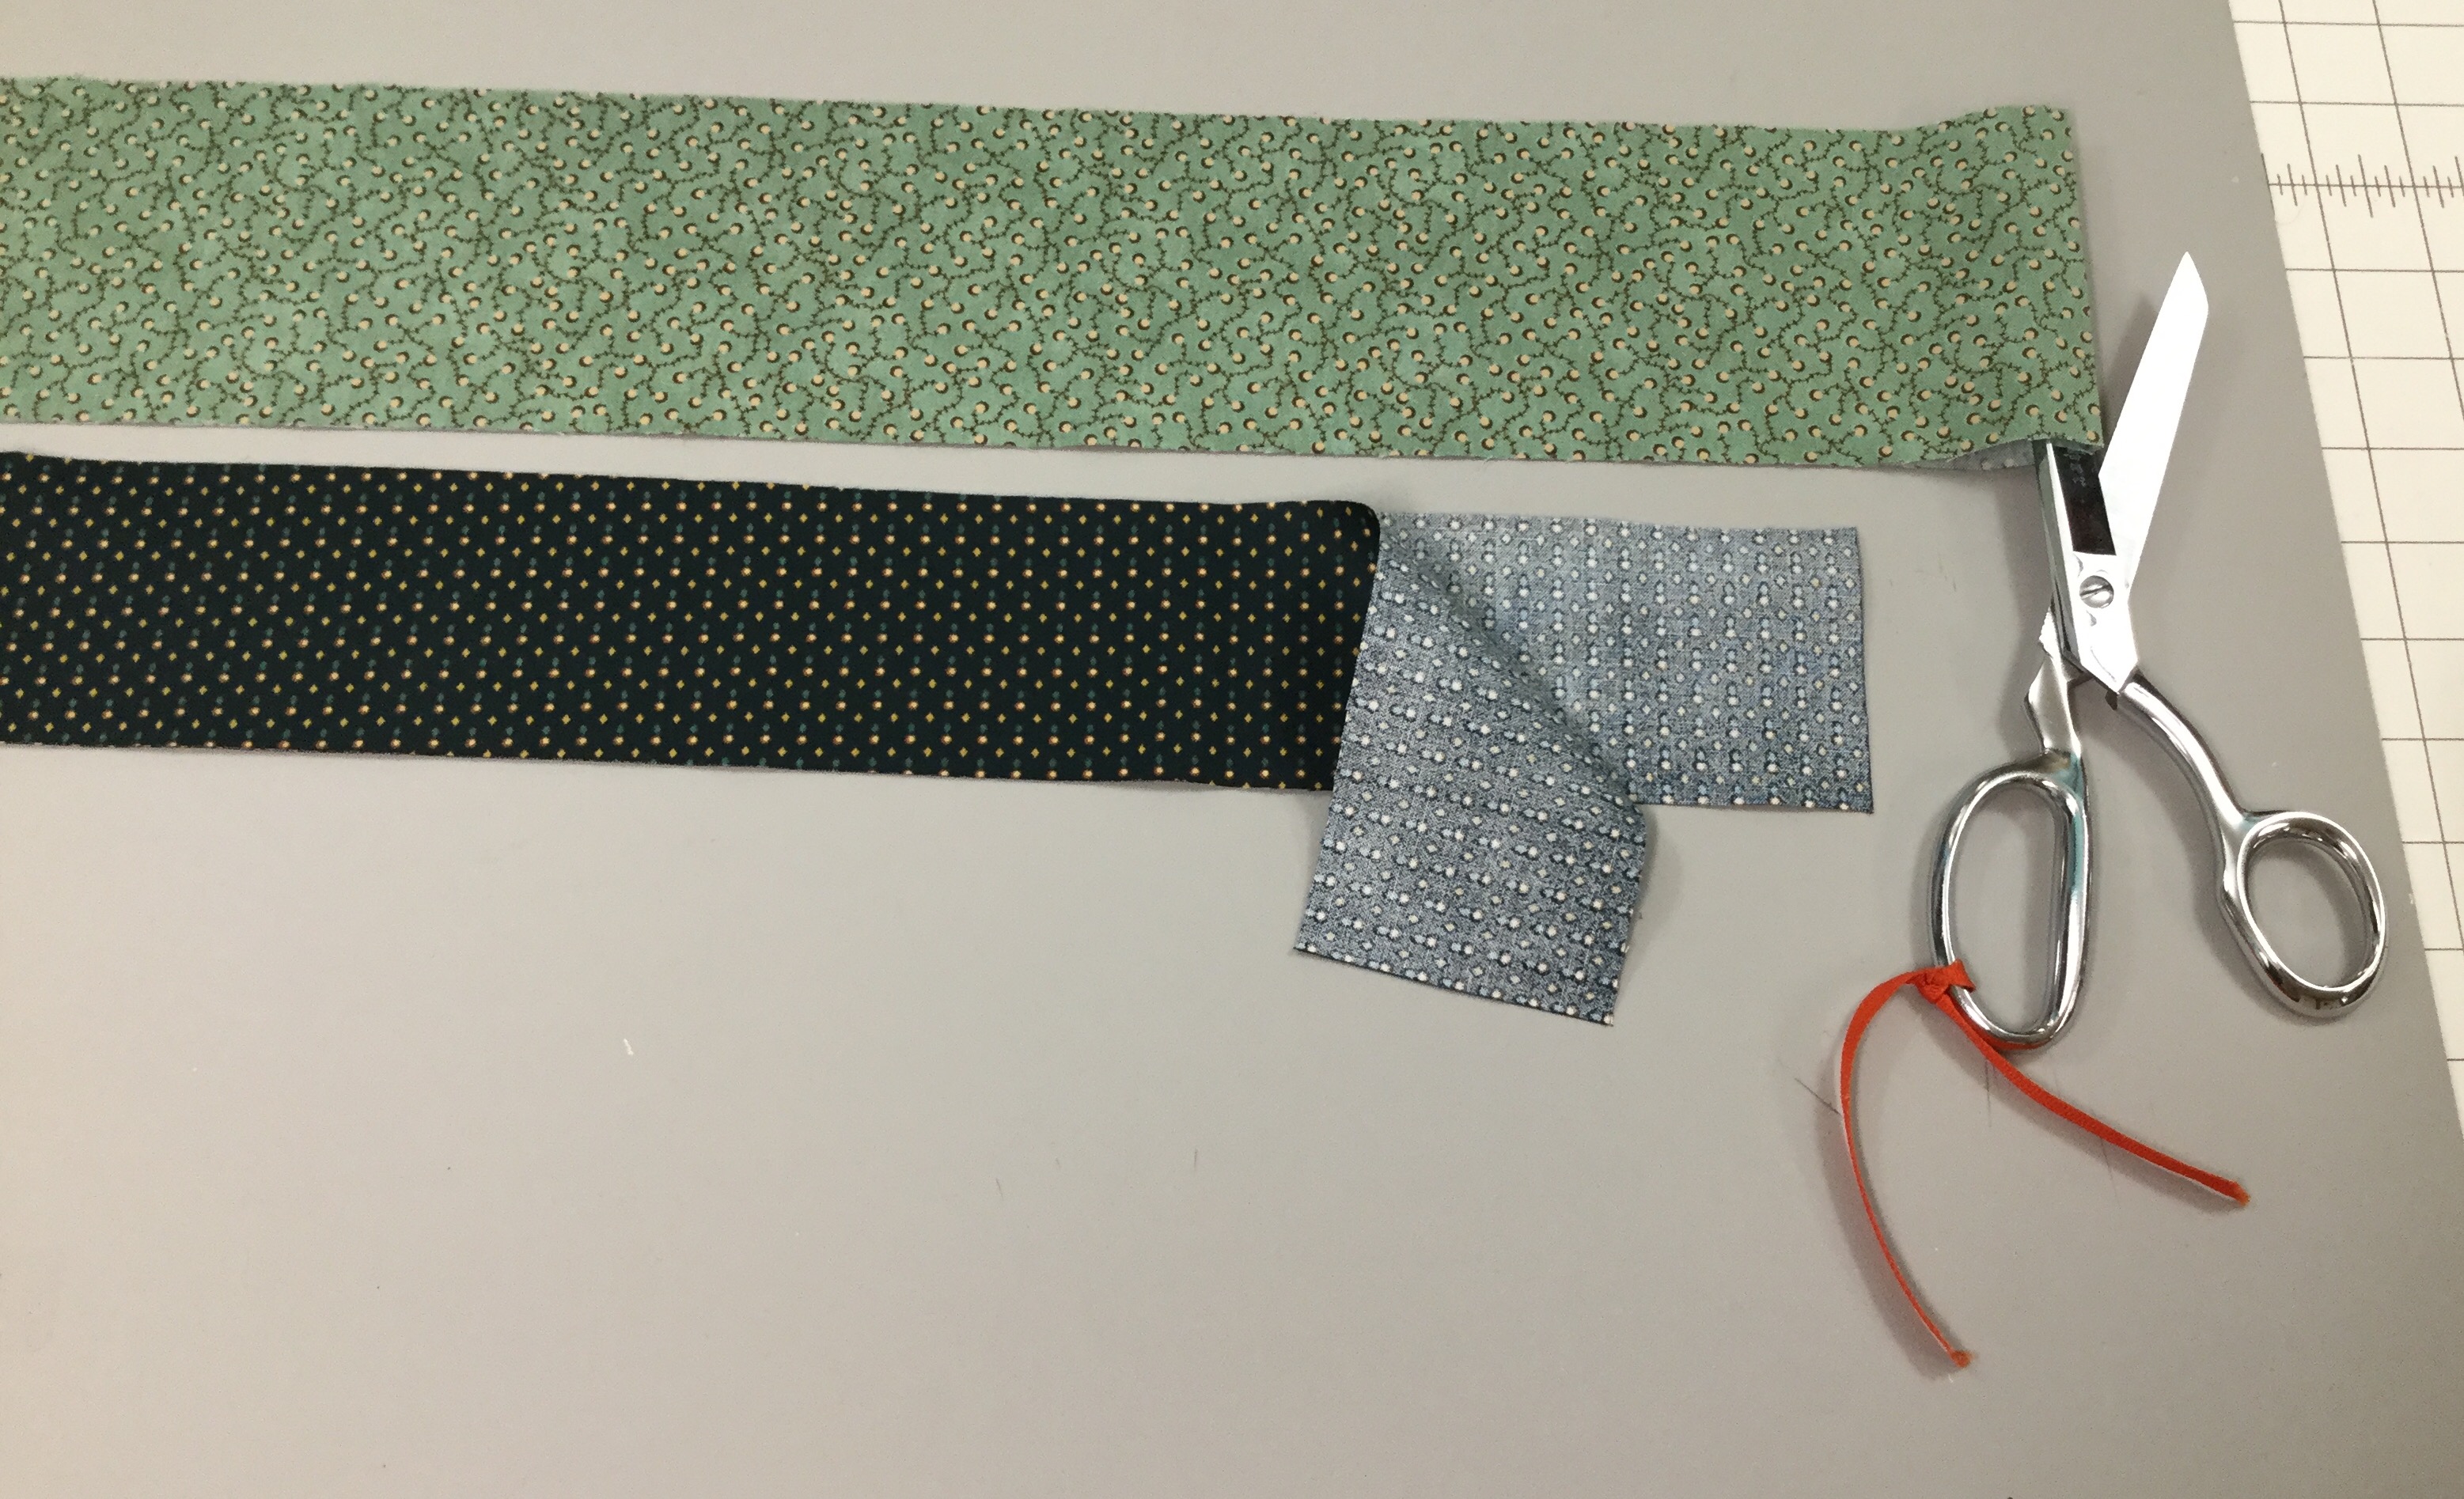
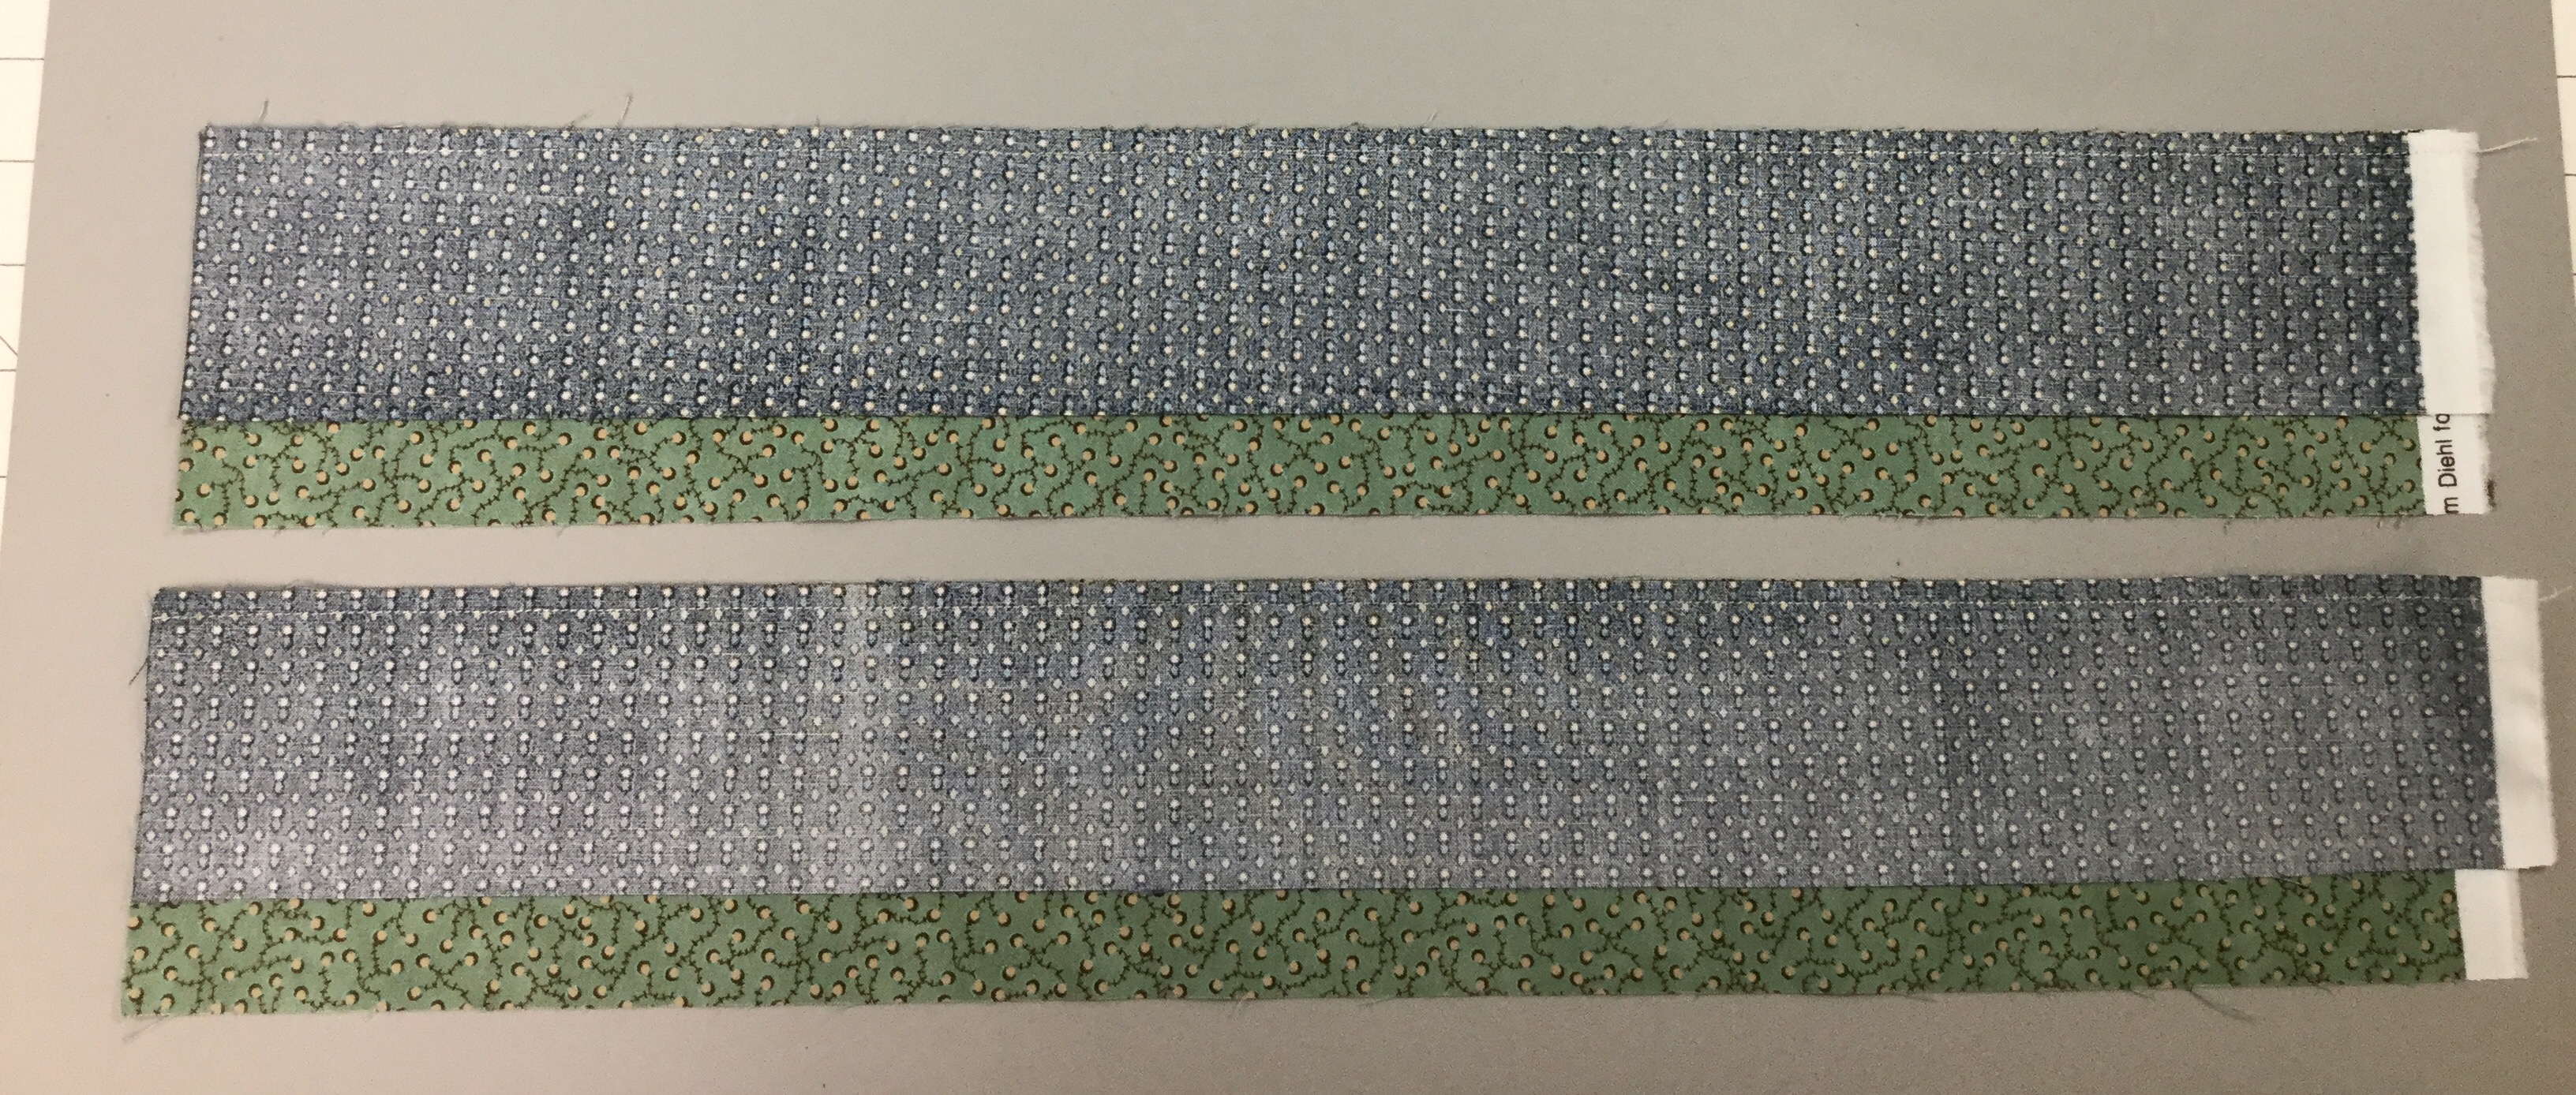
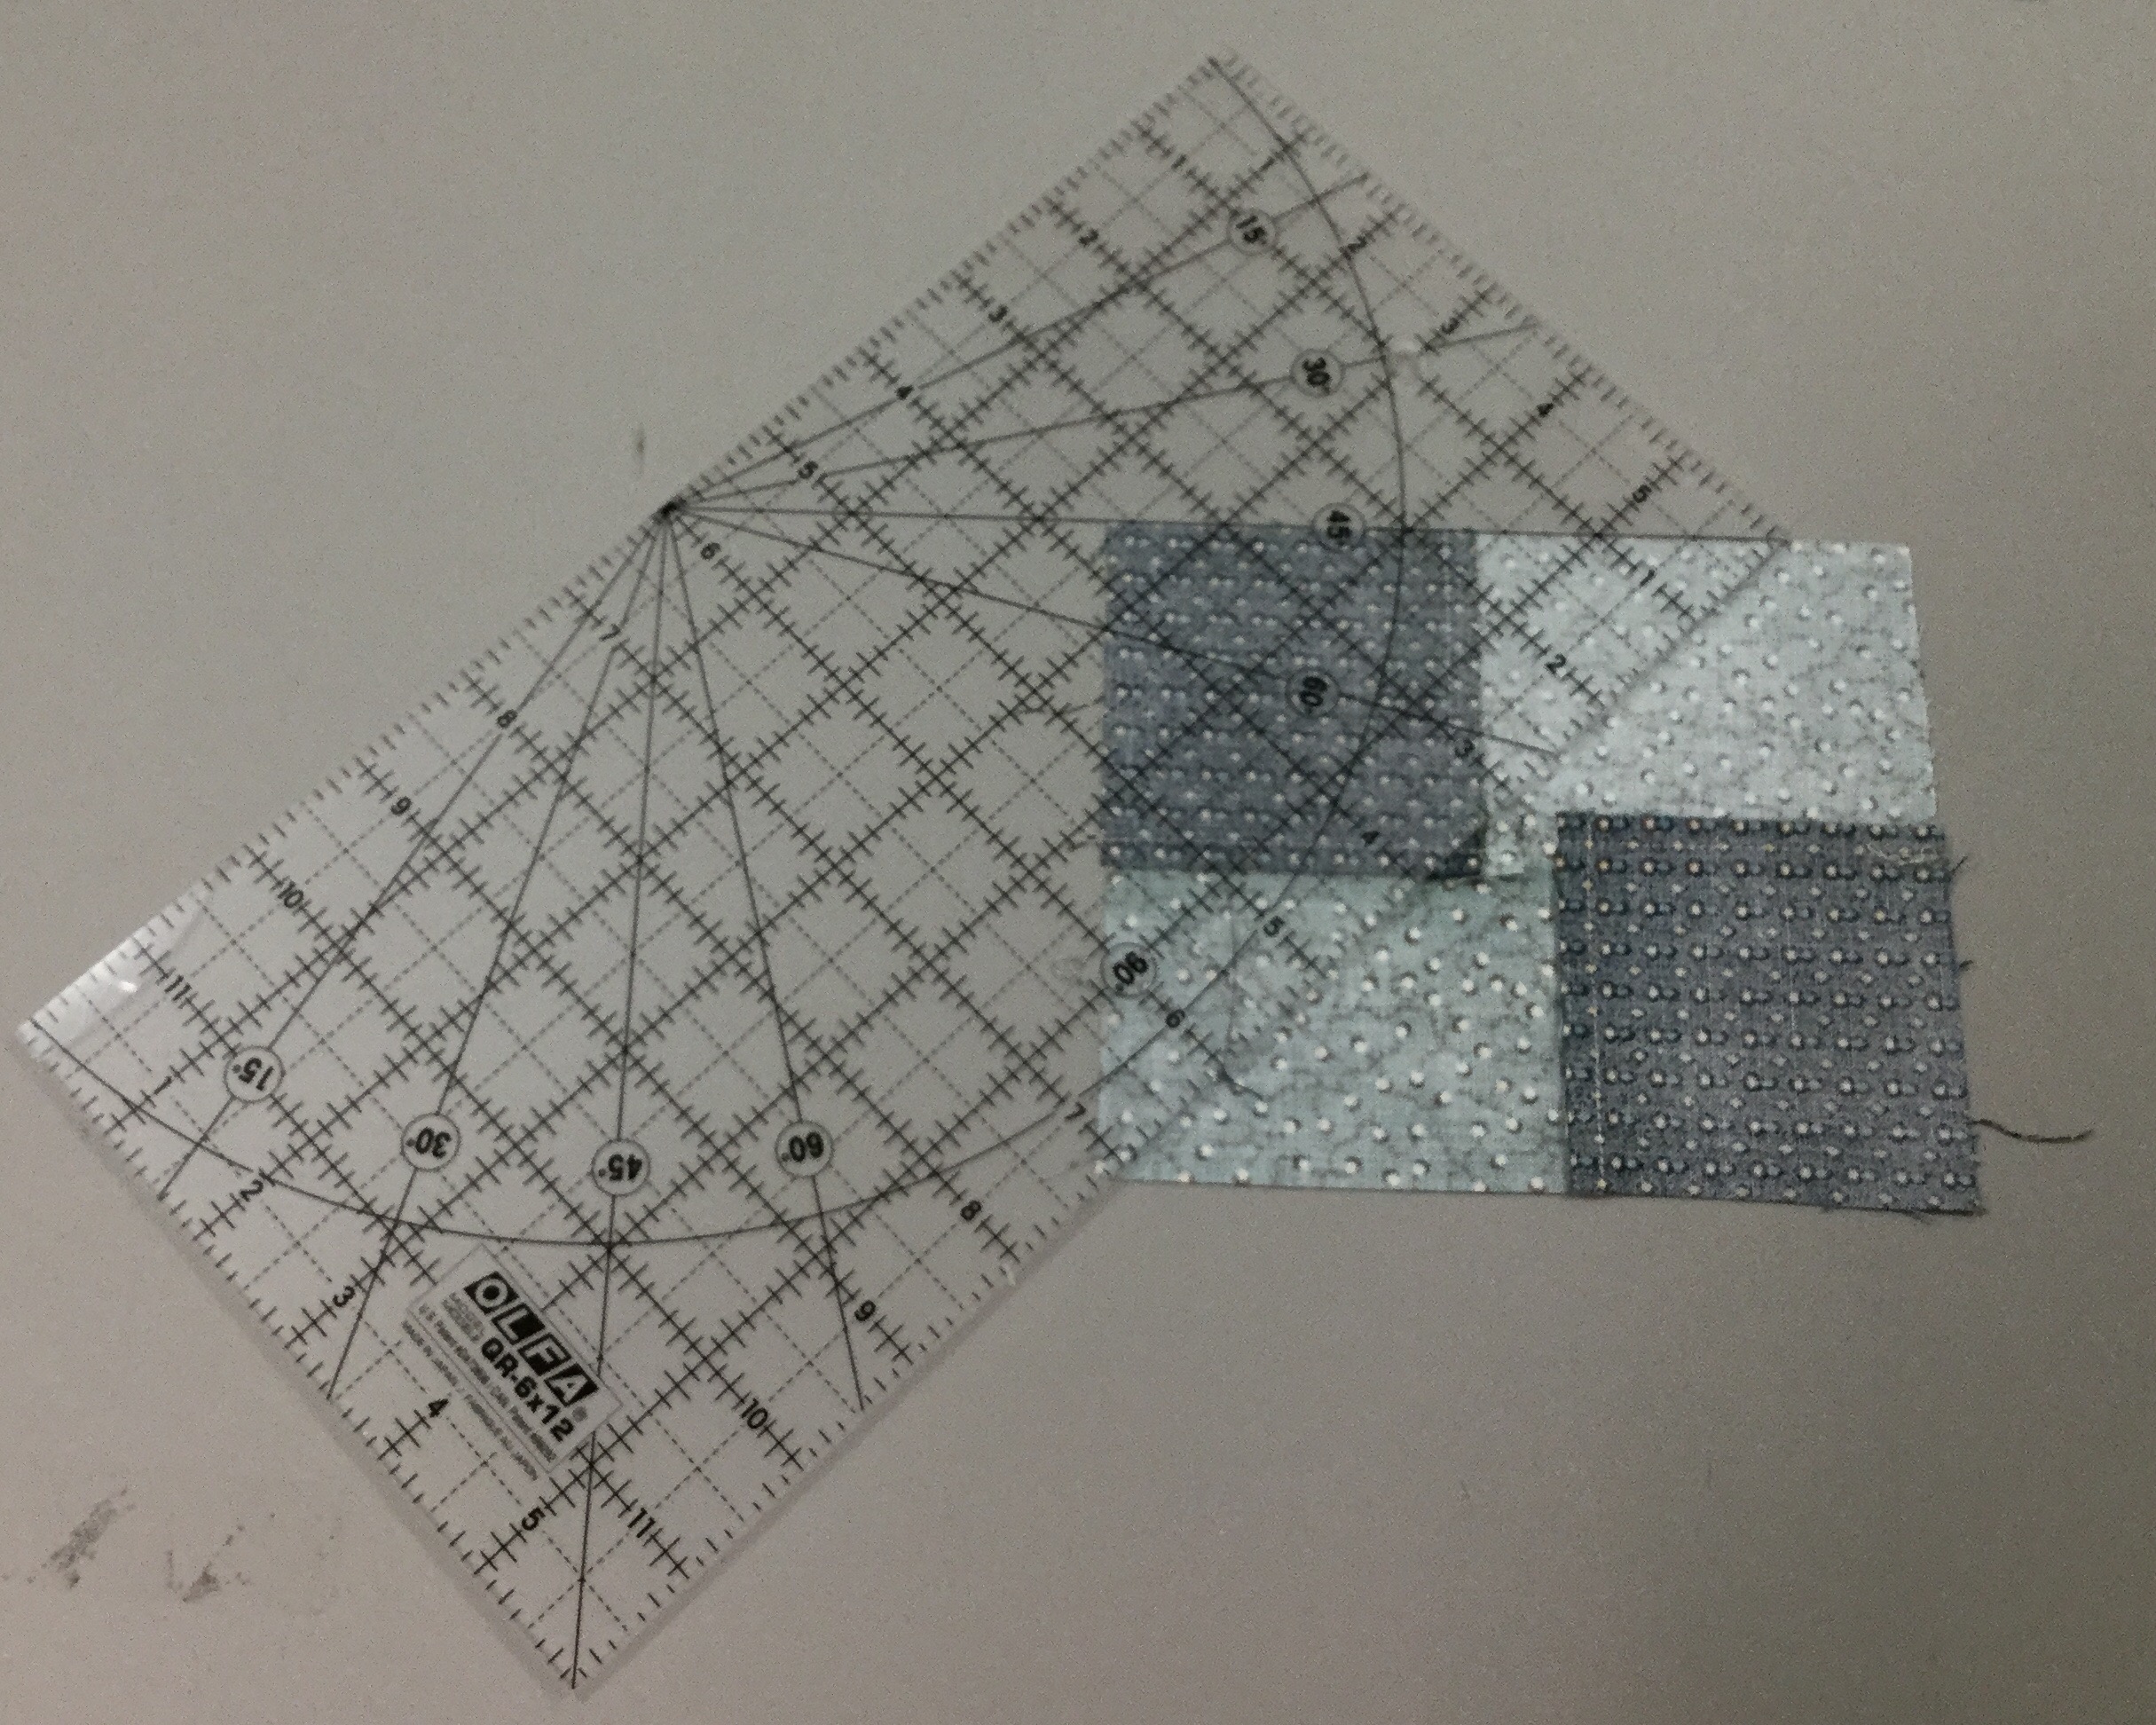
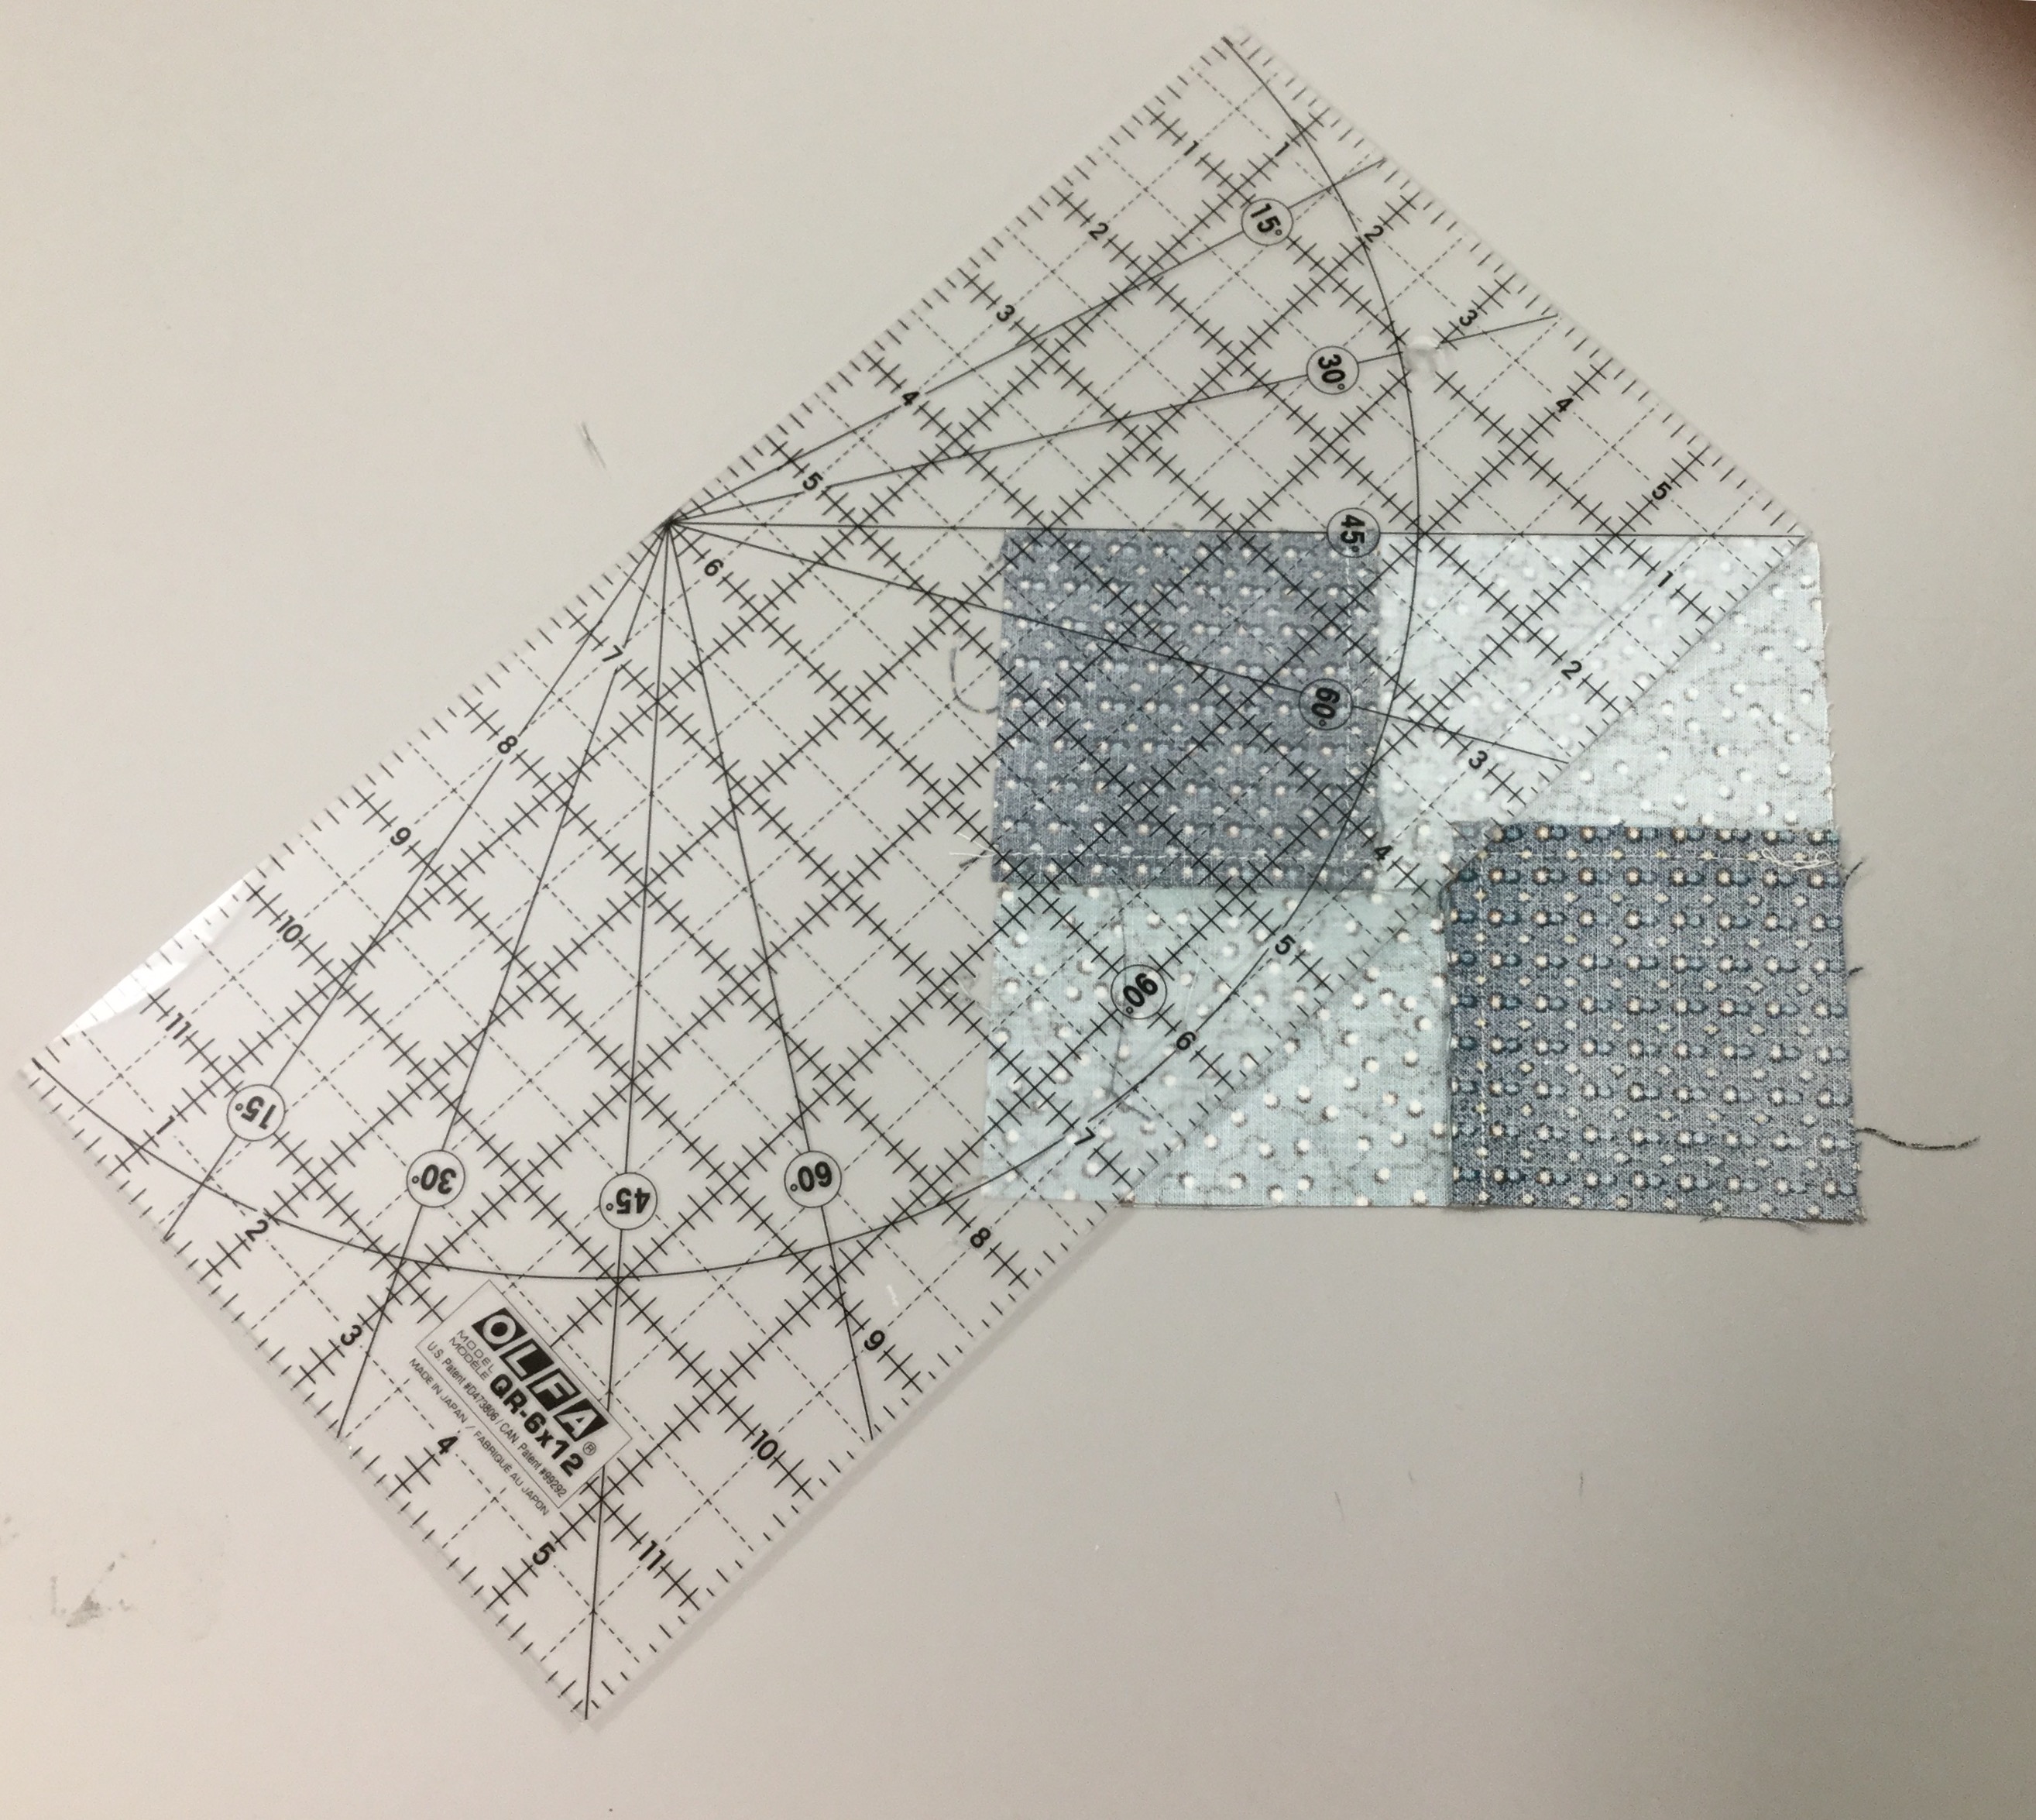
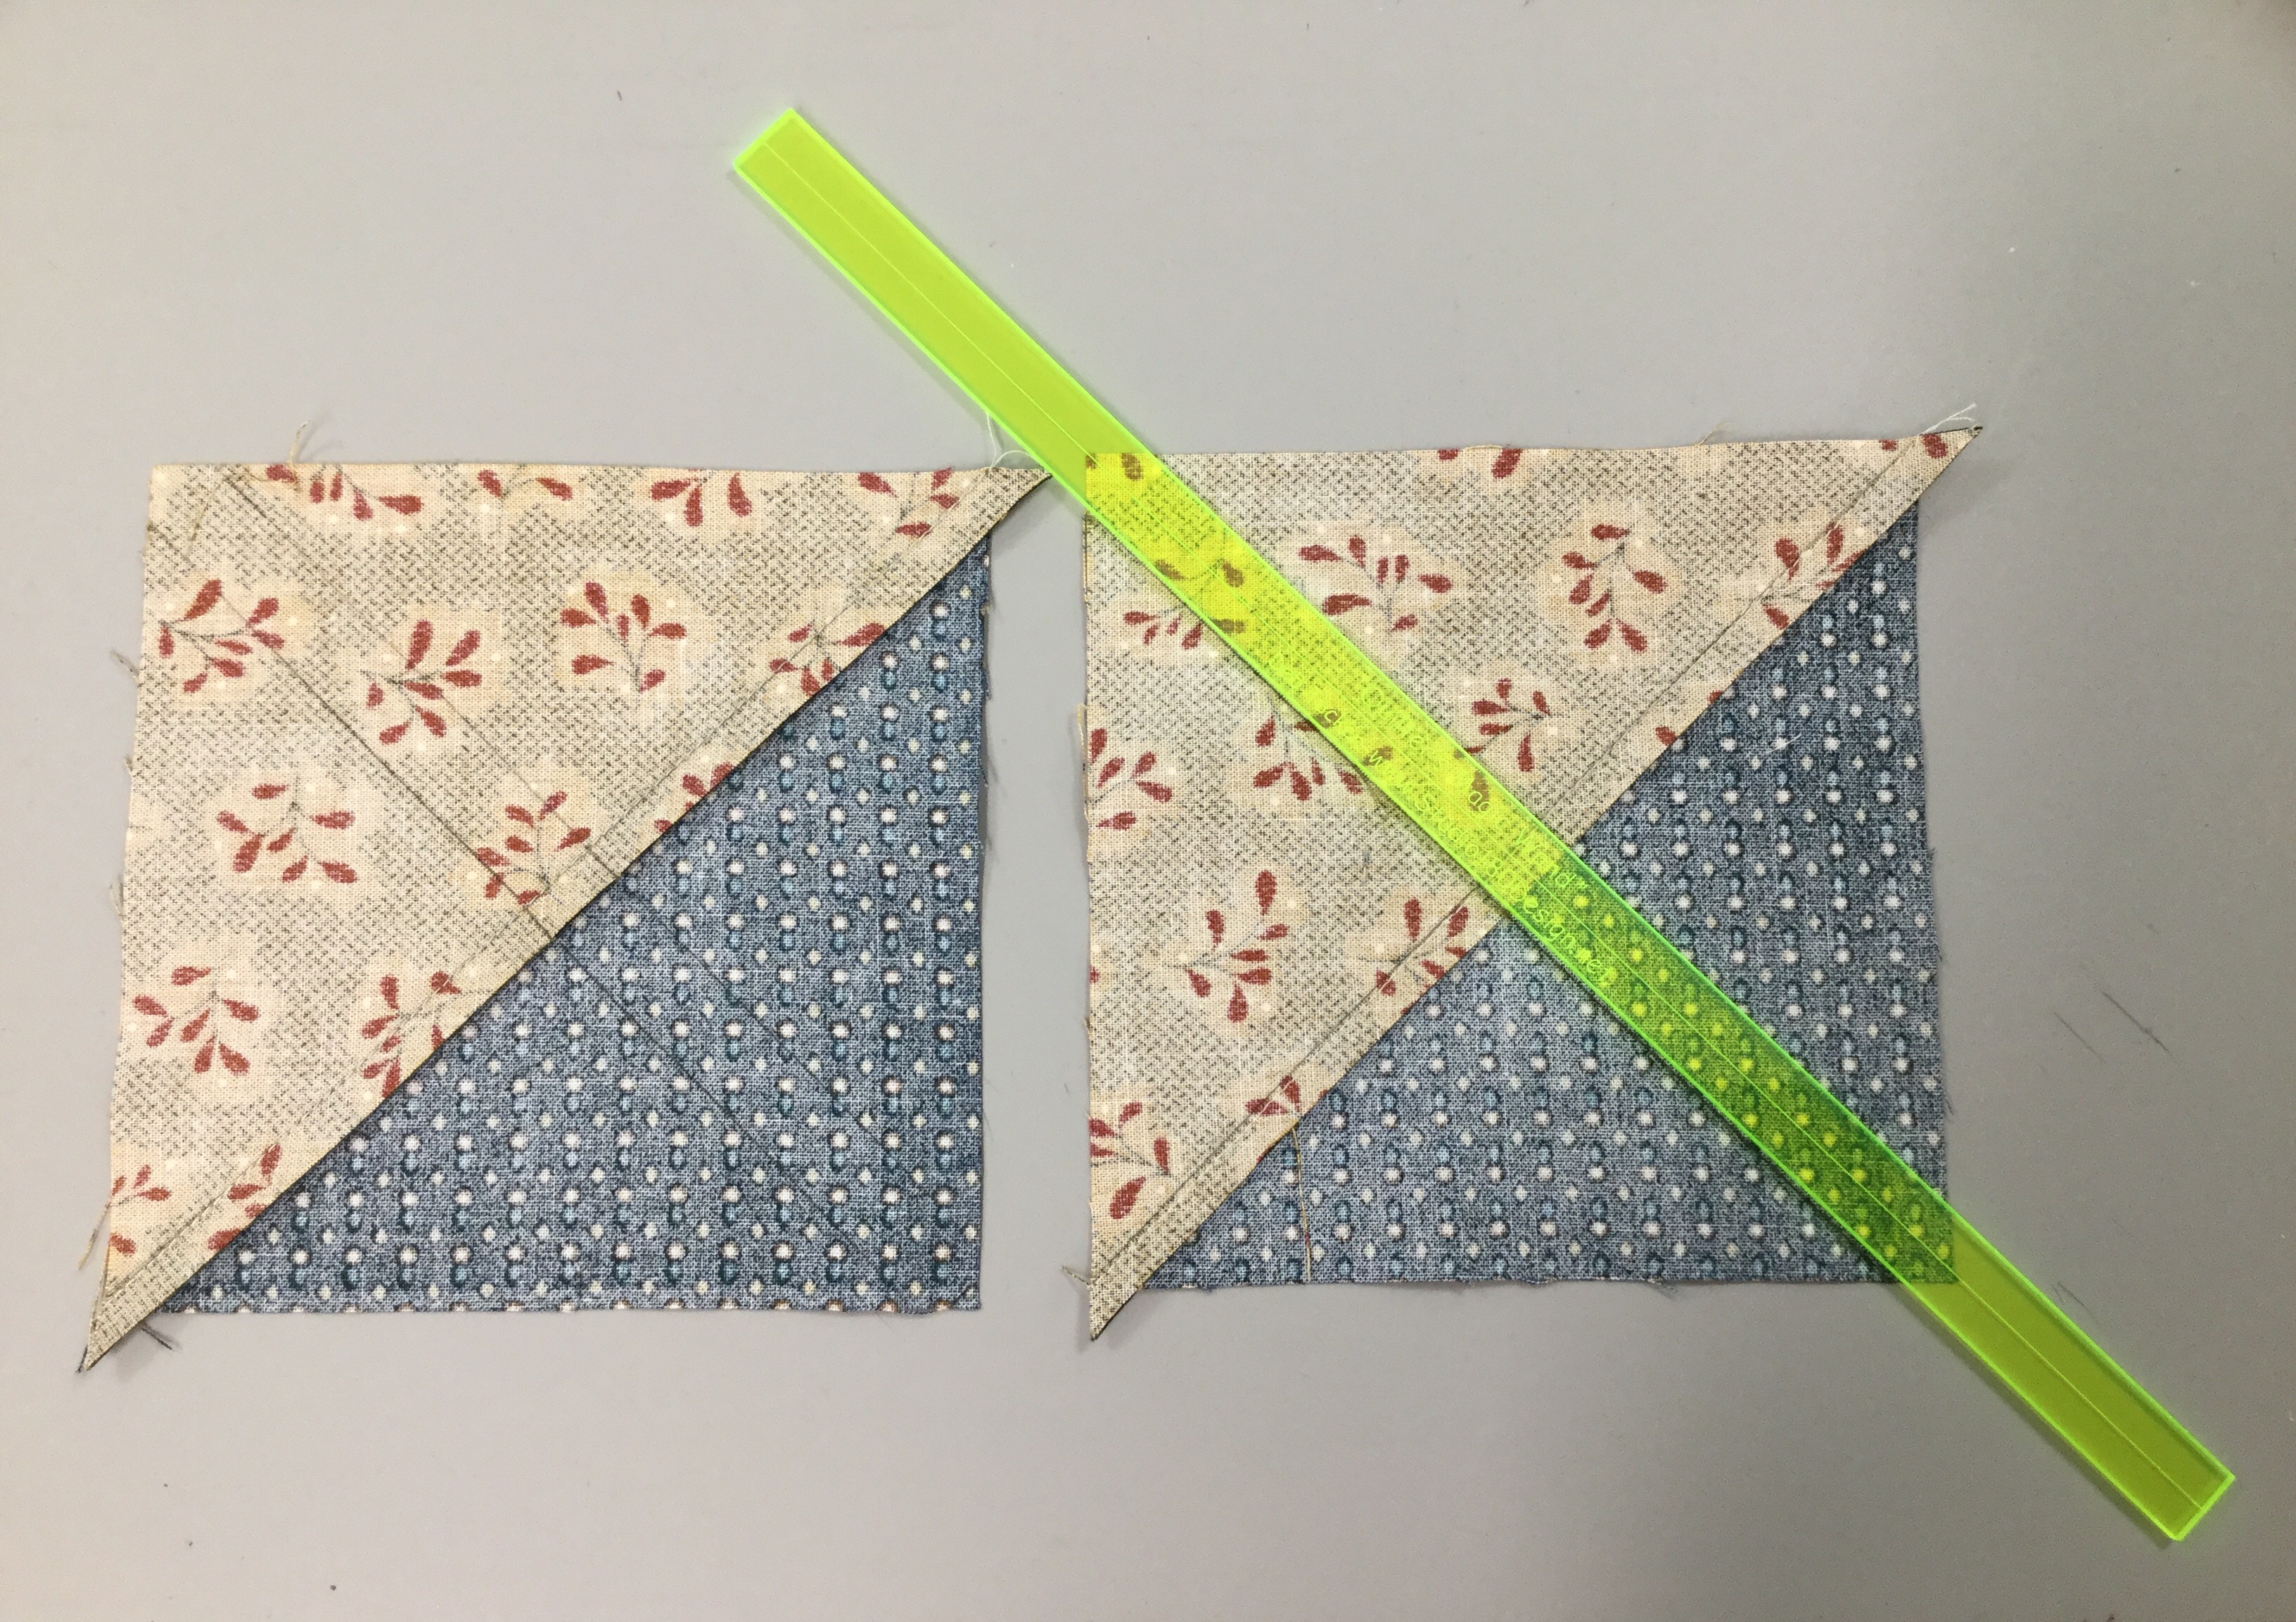
Cut your elongated triangles according to the Split Rects tool instructions.

Cut your background side triangles the same way.

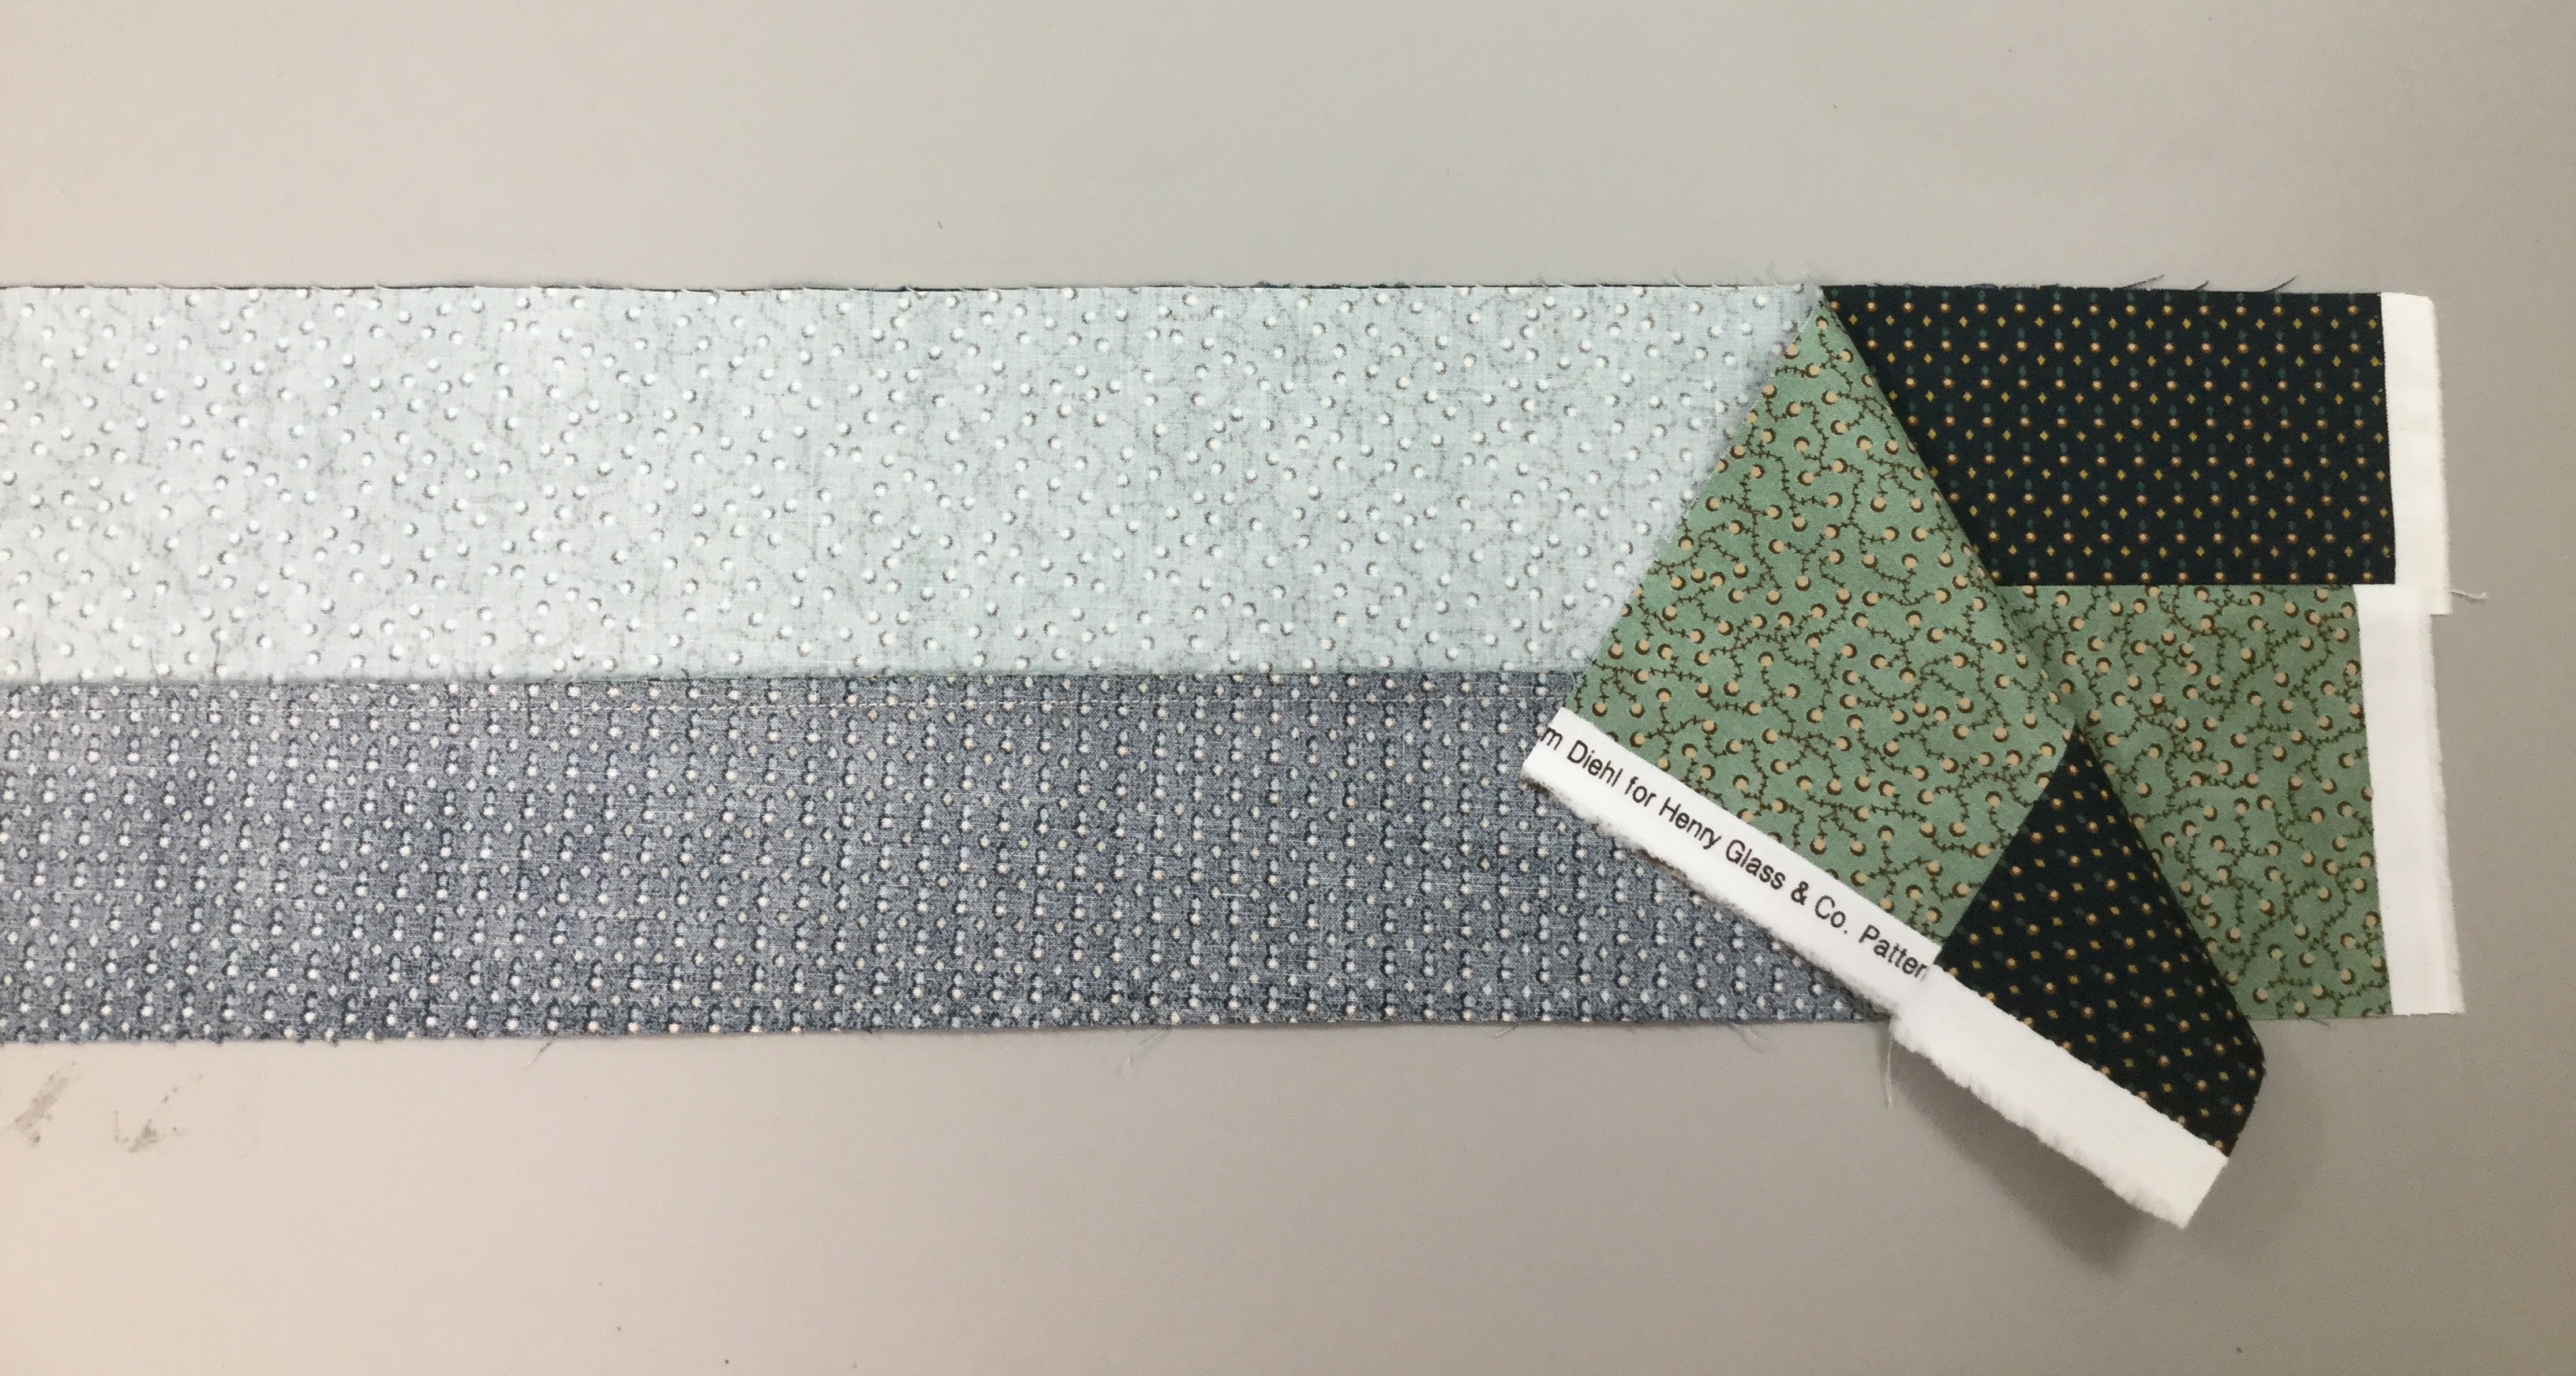
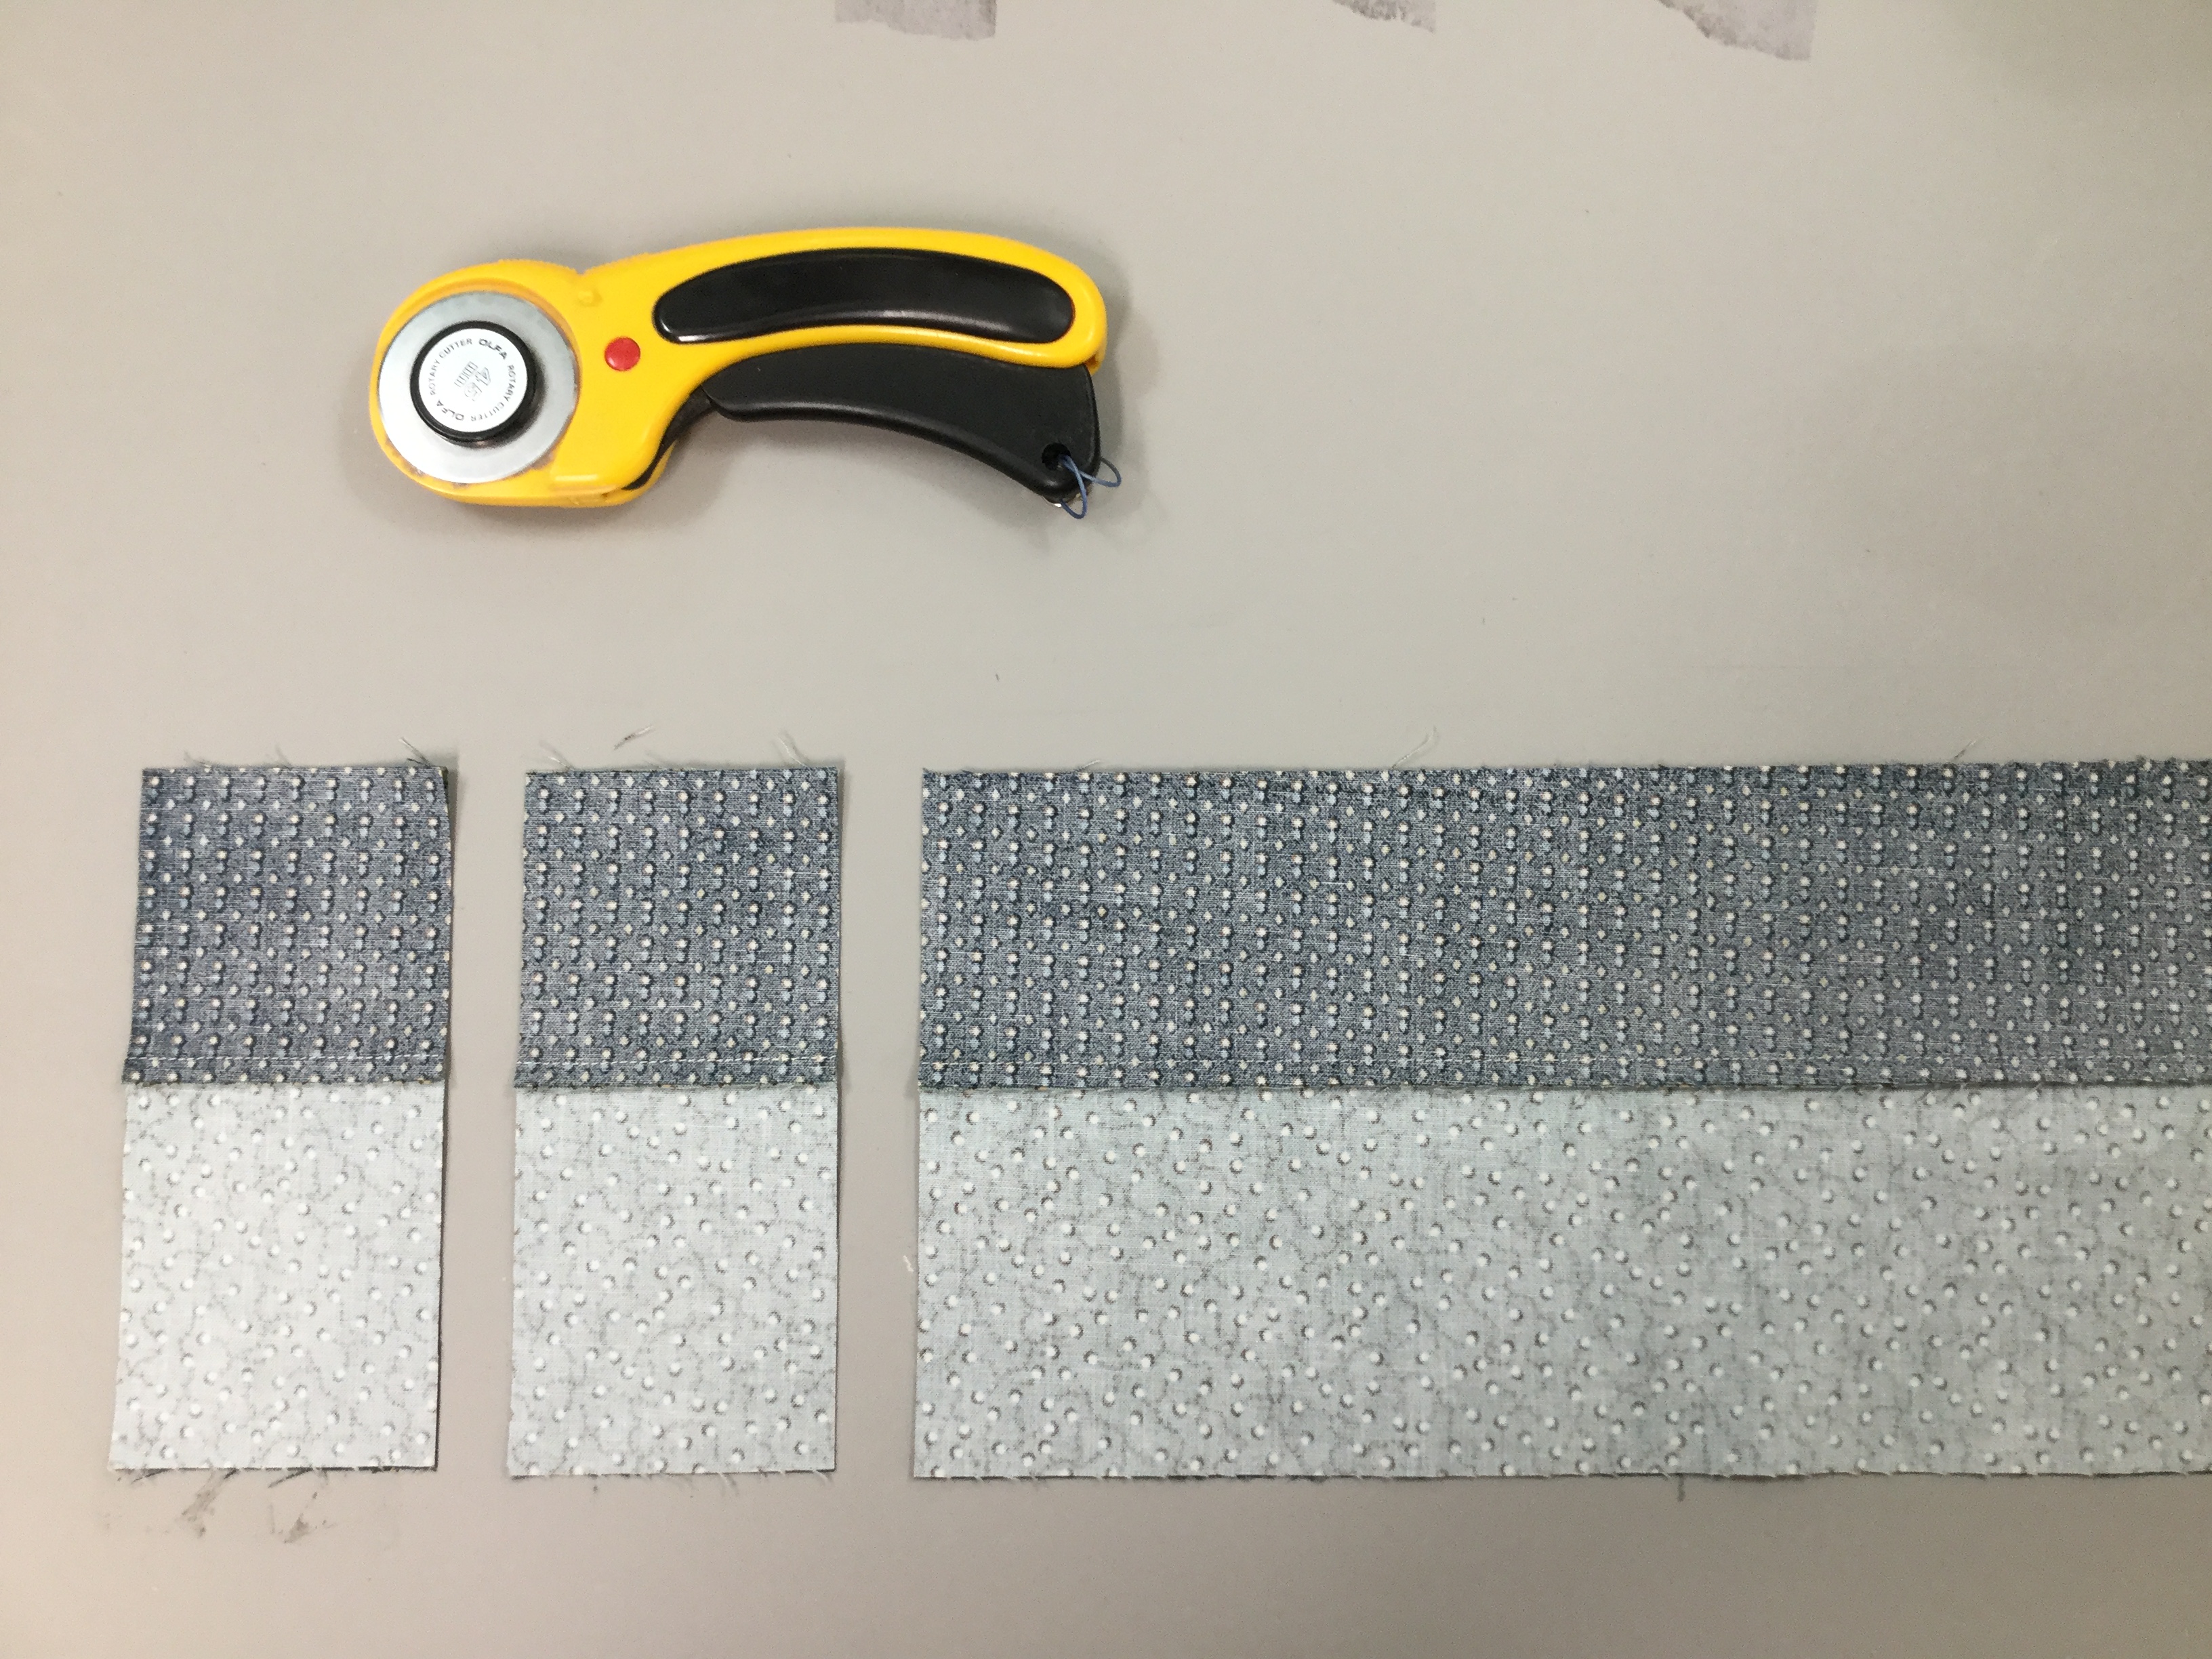
Lay out your split rects, align and center the two pieces with just a bit of overlap at the ends. Stitch and press seams open.  I love using my “Stick Strip” for pressing seams open.

Following the tool instructions trim, rotate & trim again.

img_2047

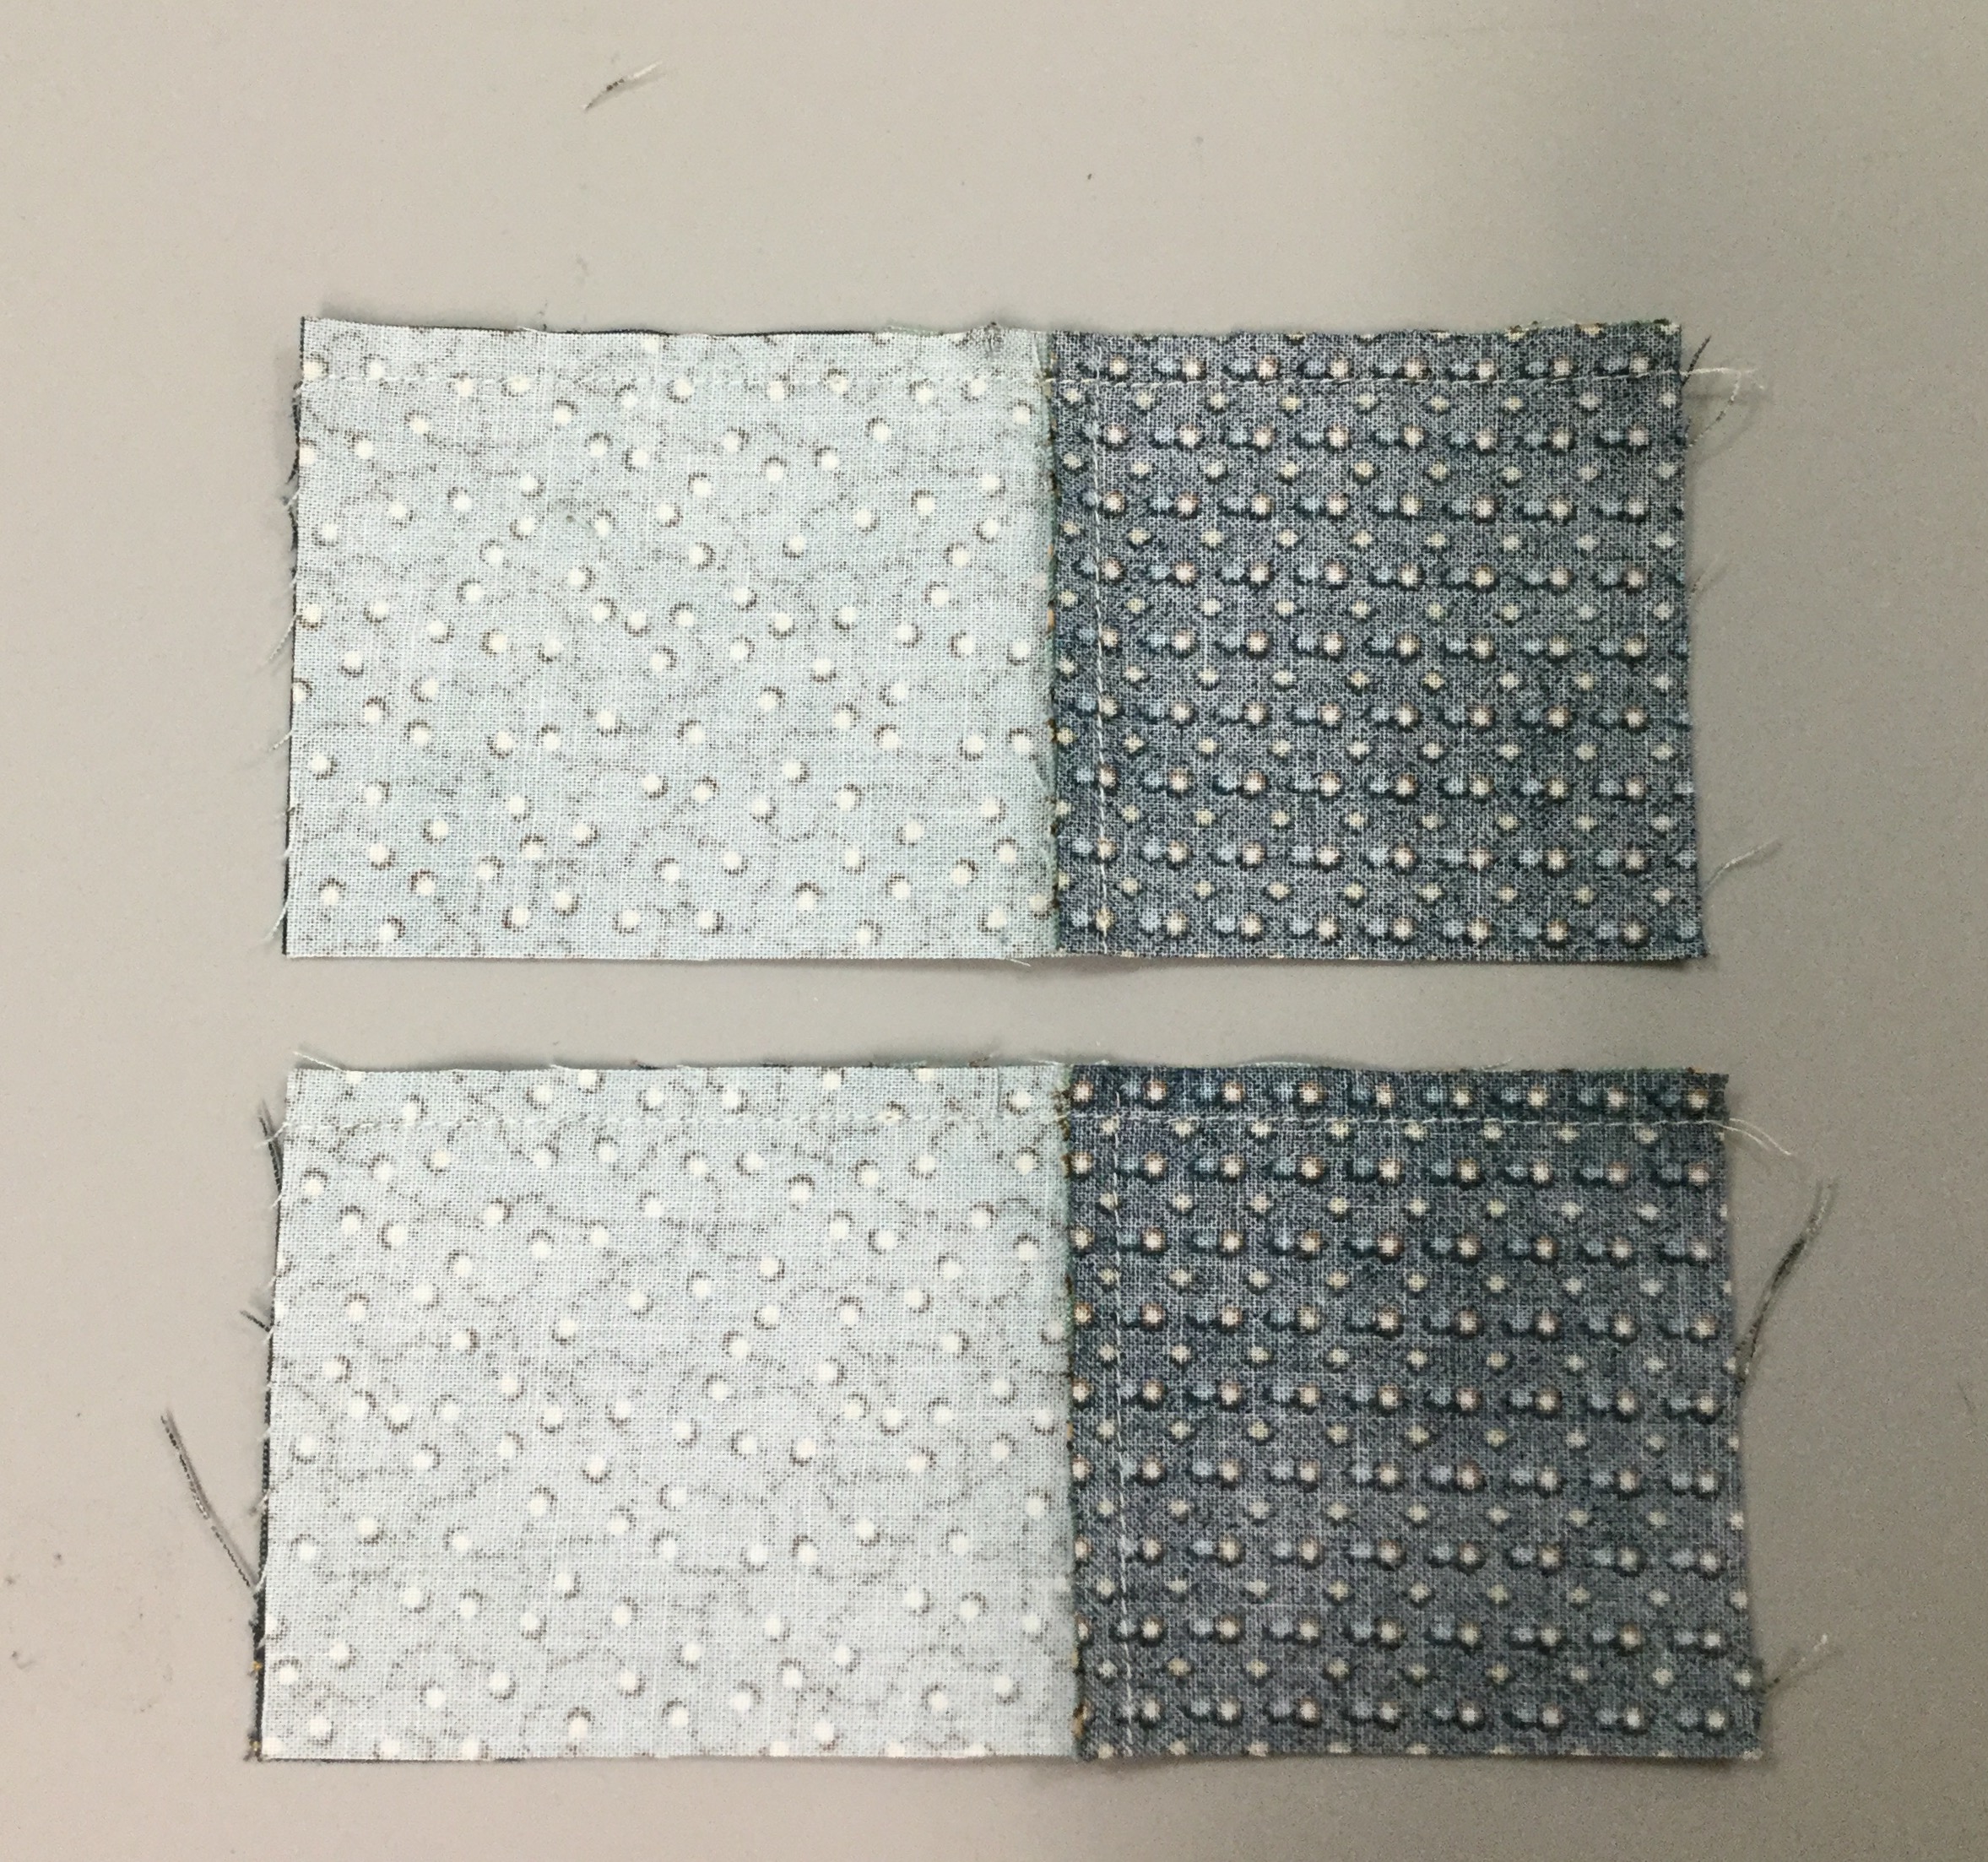
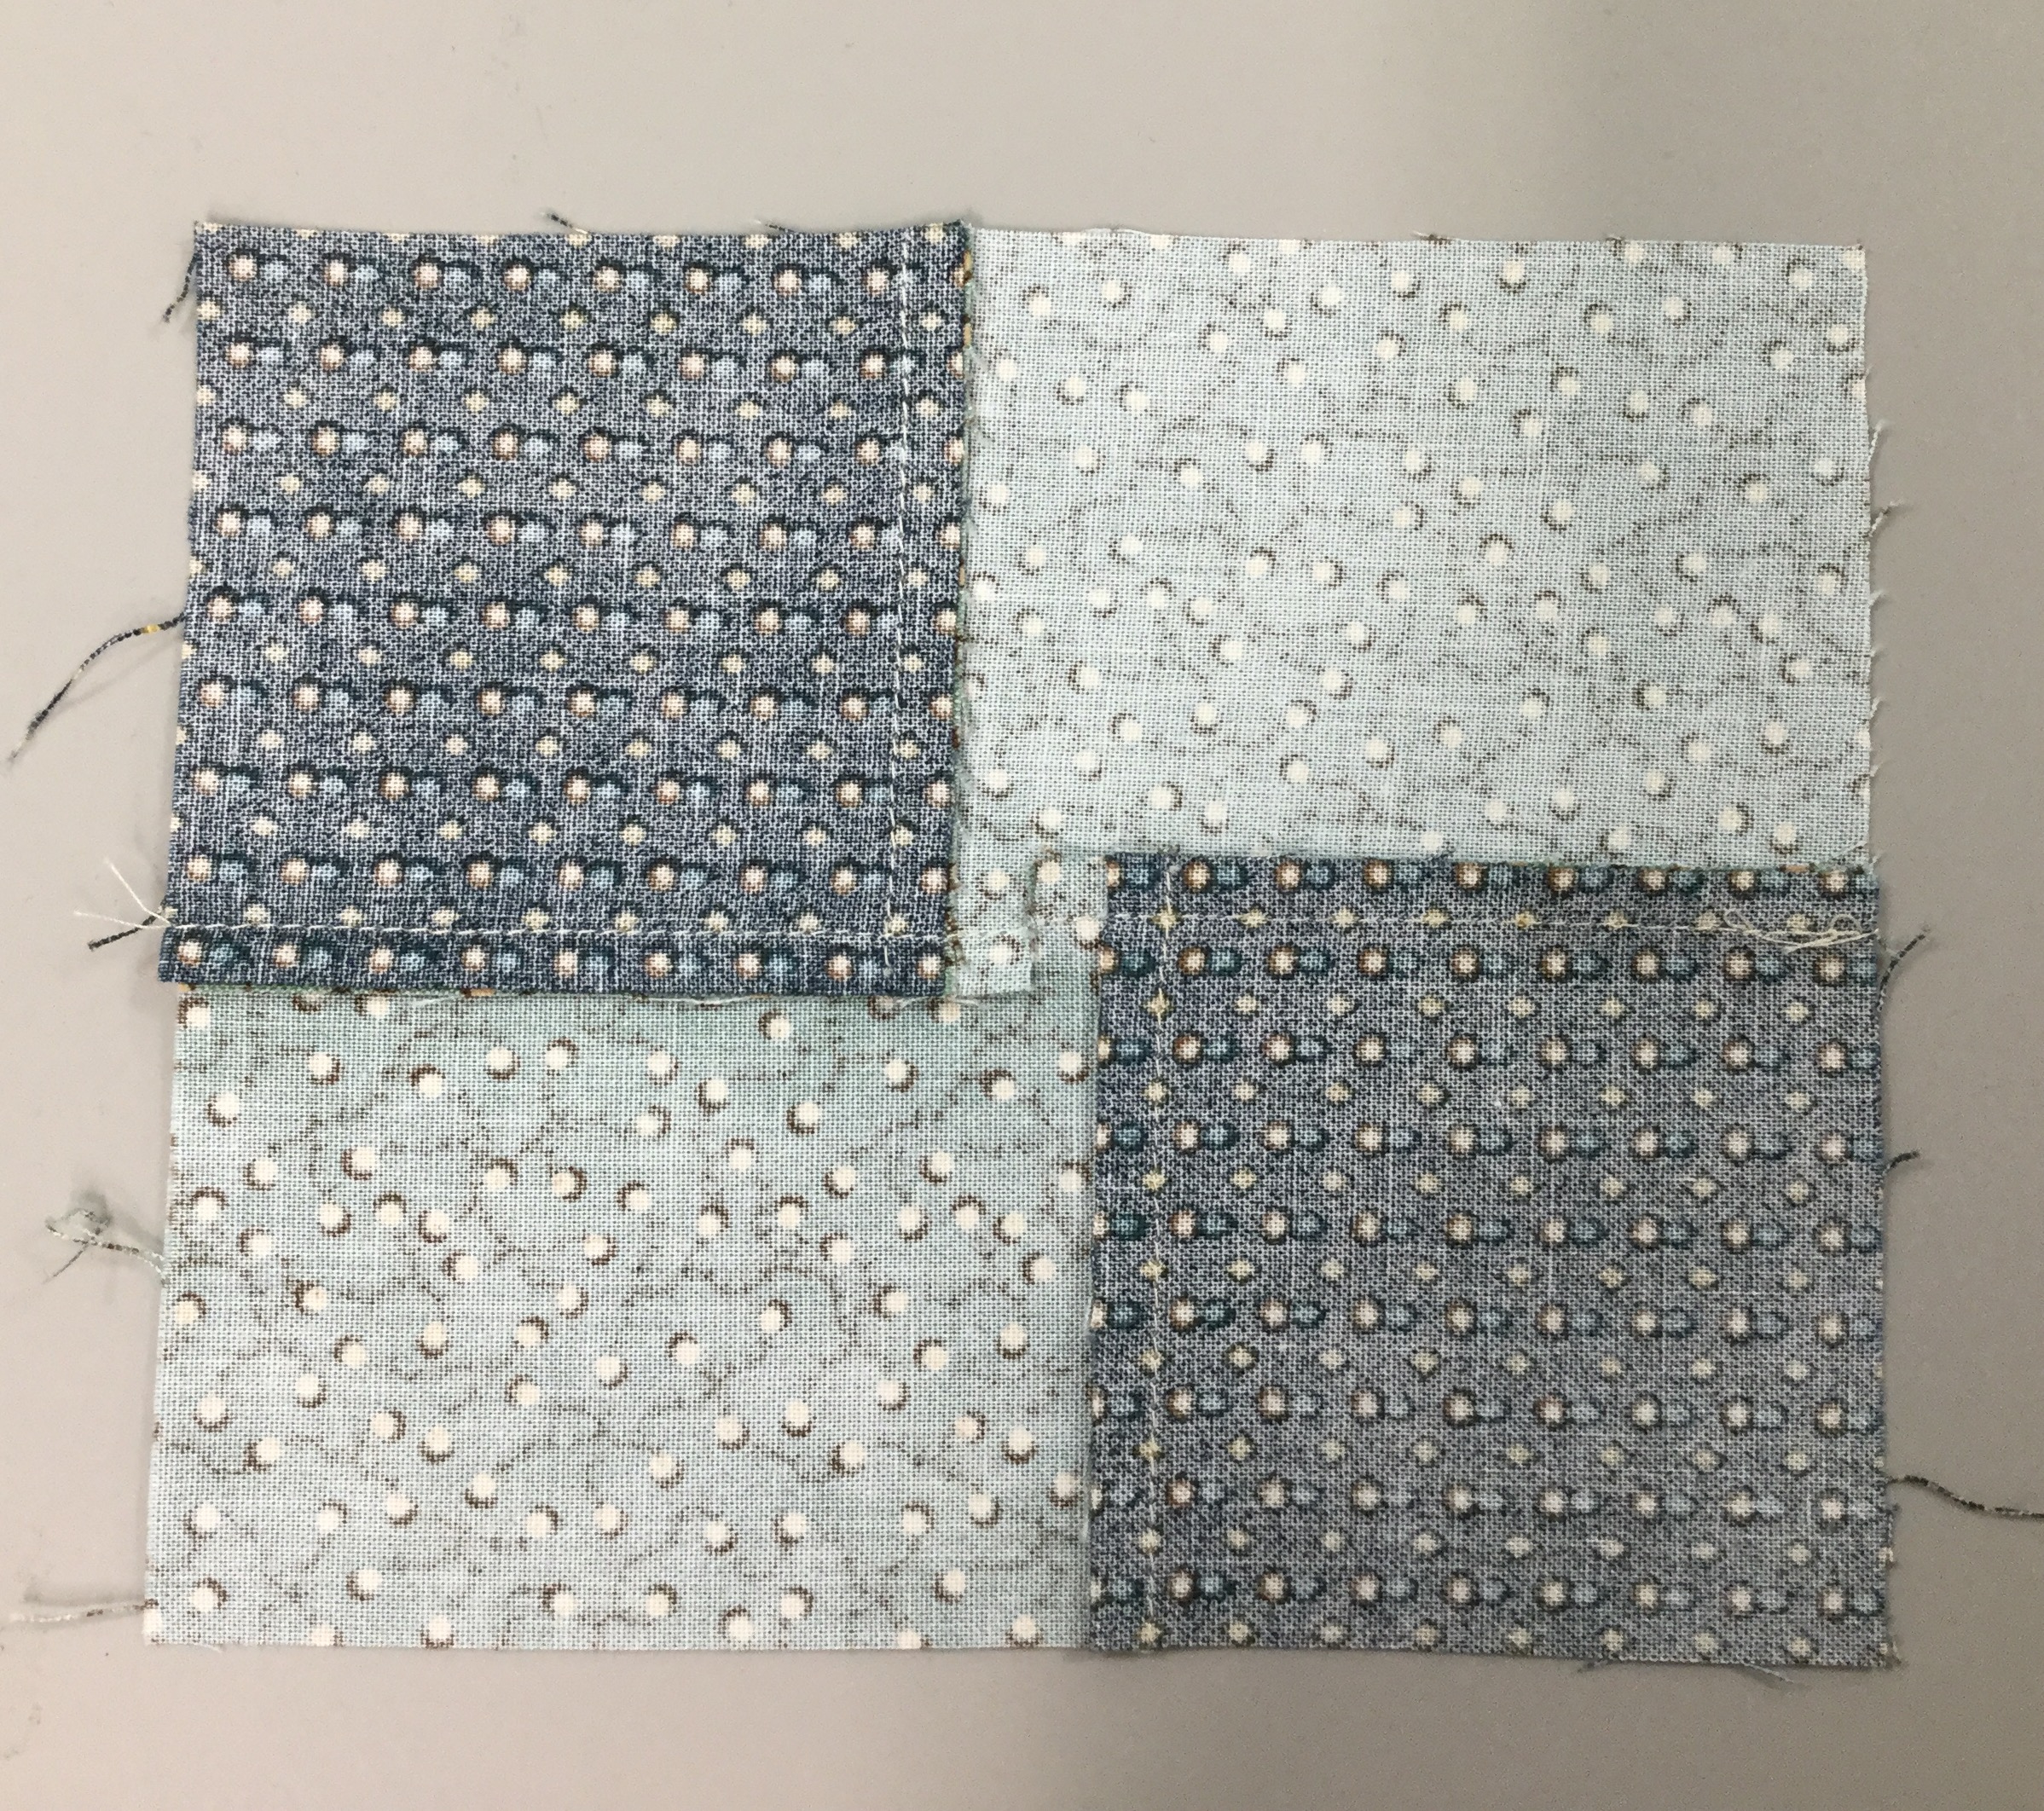
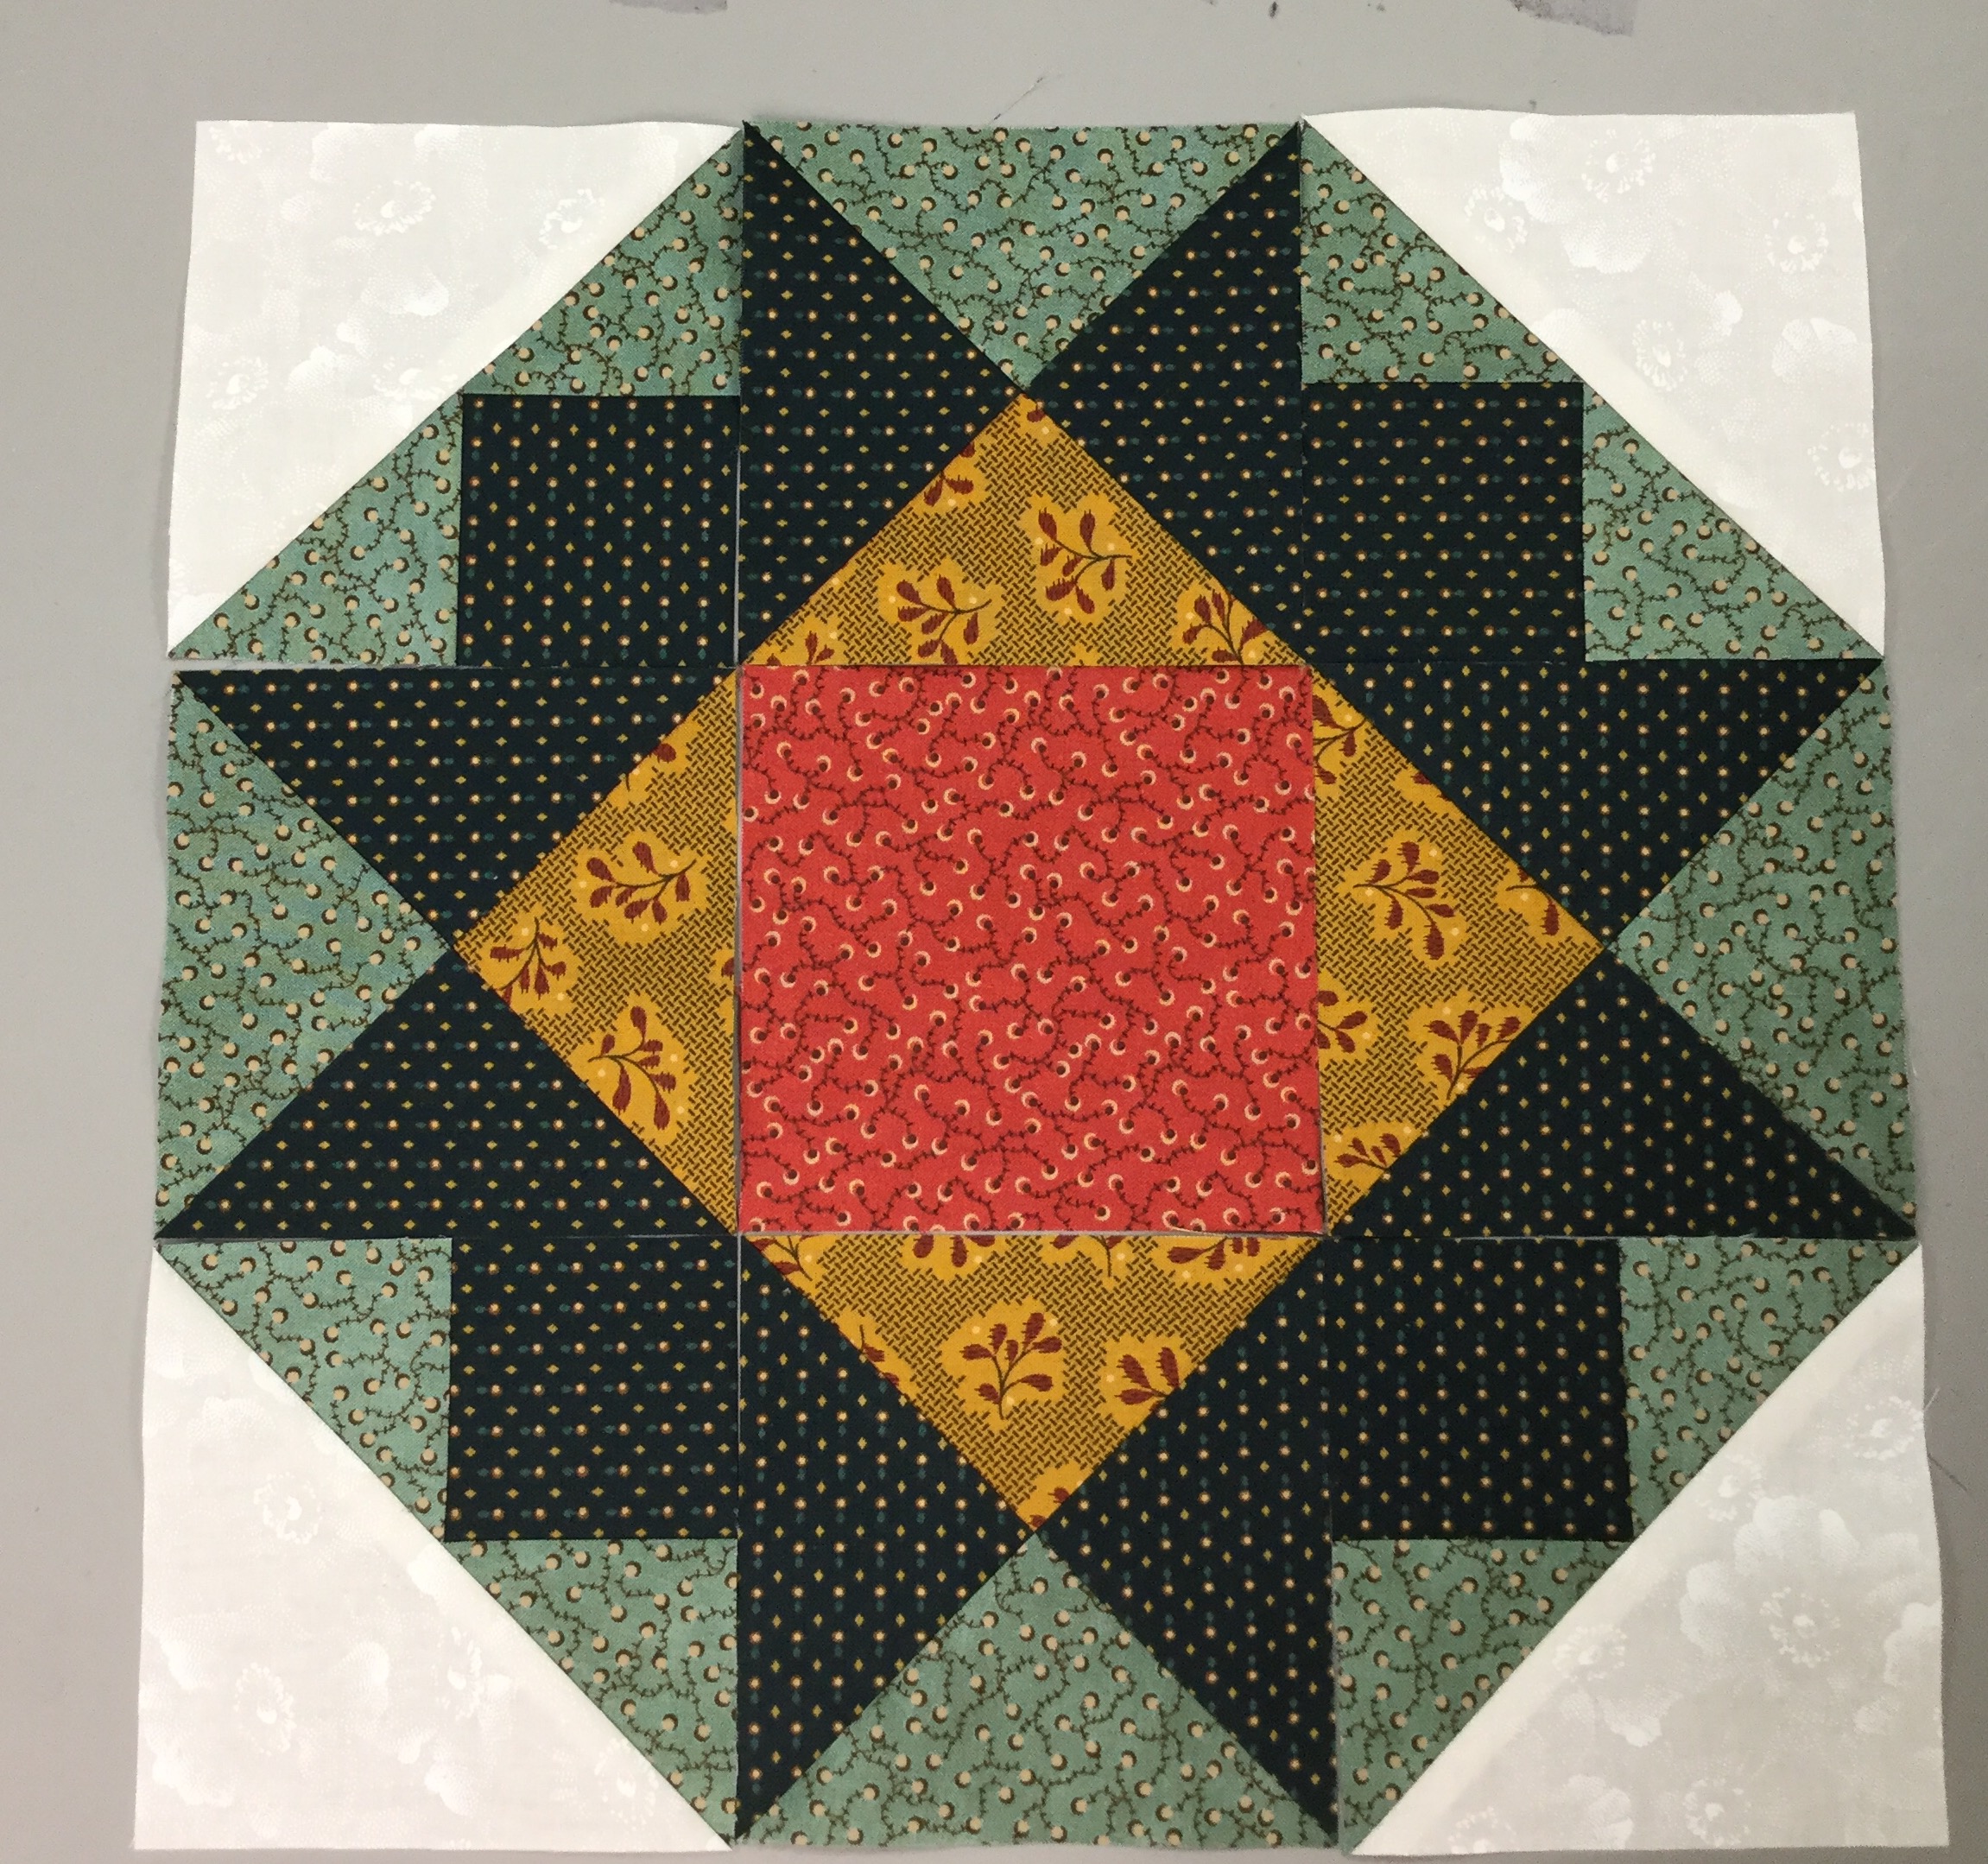
Make the 9 Square/Squared units following the Square Squared tool instructions.  I chose 9 different unit centers but you could make them all one color if you like.  Each side of the square/squared unit will be different to match the fabric used for the split rects units.

Lay out your units as they will be stitched.  Choose a square/squared unit for the center, rotating the square/squared unit so the side triangle matches the same fabric used in the split rects unit.

img_2053

This block is constructed using a partial seam.  Place the square/squared unit right sides together with one of the split rects units being sure to match the fabrics and stitch half way down the square/squared unit.

This gives you the next complete edge to stitch another split rects to, again matching the square/squared unit fabric with the split rects fabric.

img_2063

When stitching the split rects to the square/squared unit, always place the precision cut square/squared unit on top be careful to stitch using the unit center as a guide.

Continue stitching the split rects units and complete the partial seam, pressing toward the split rects units.  Make the other 8 blocks the same way.

img_2048

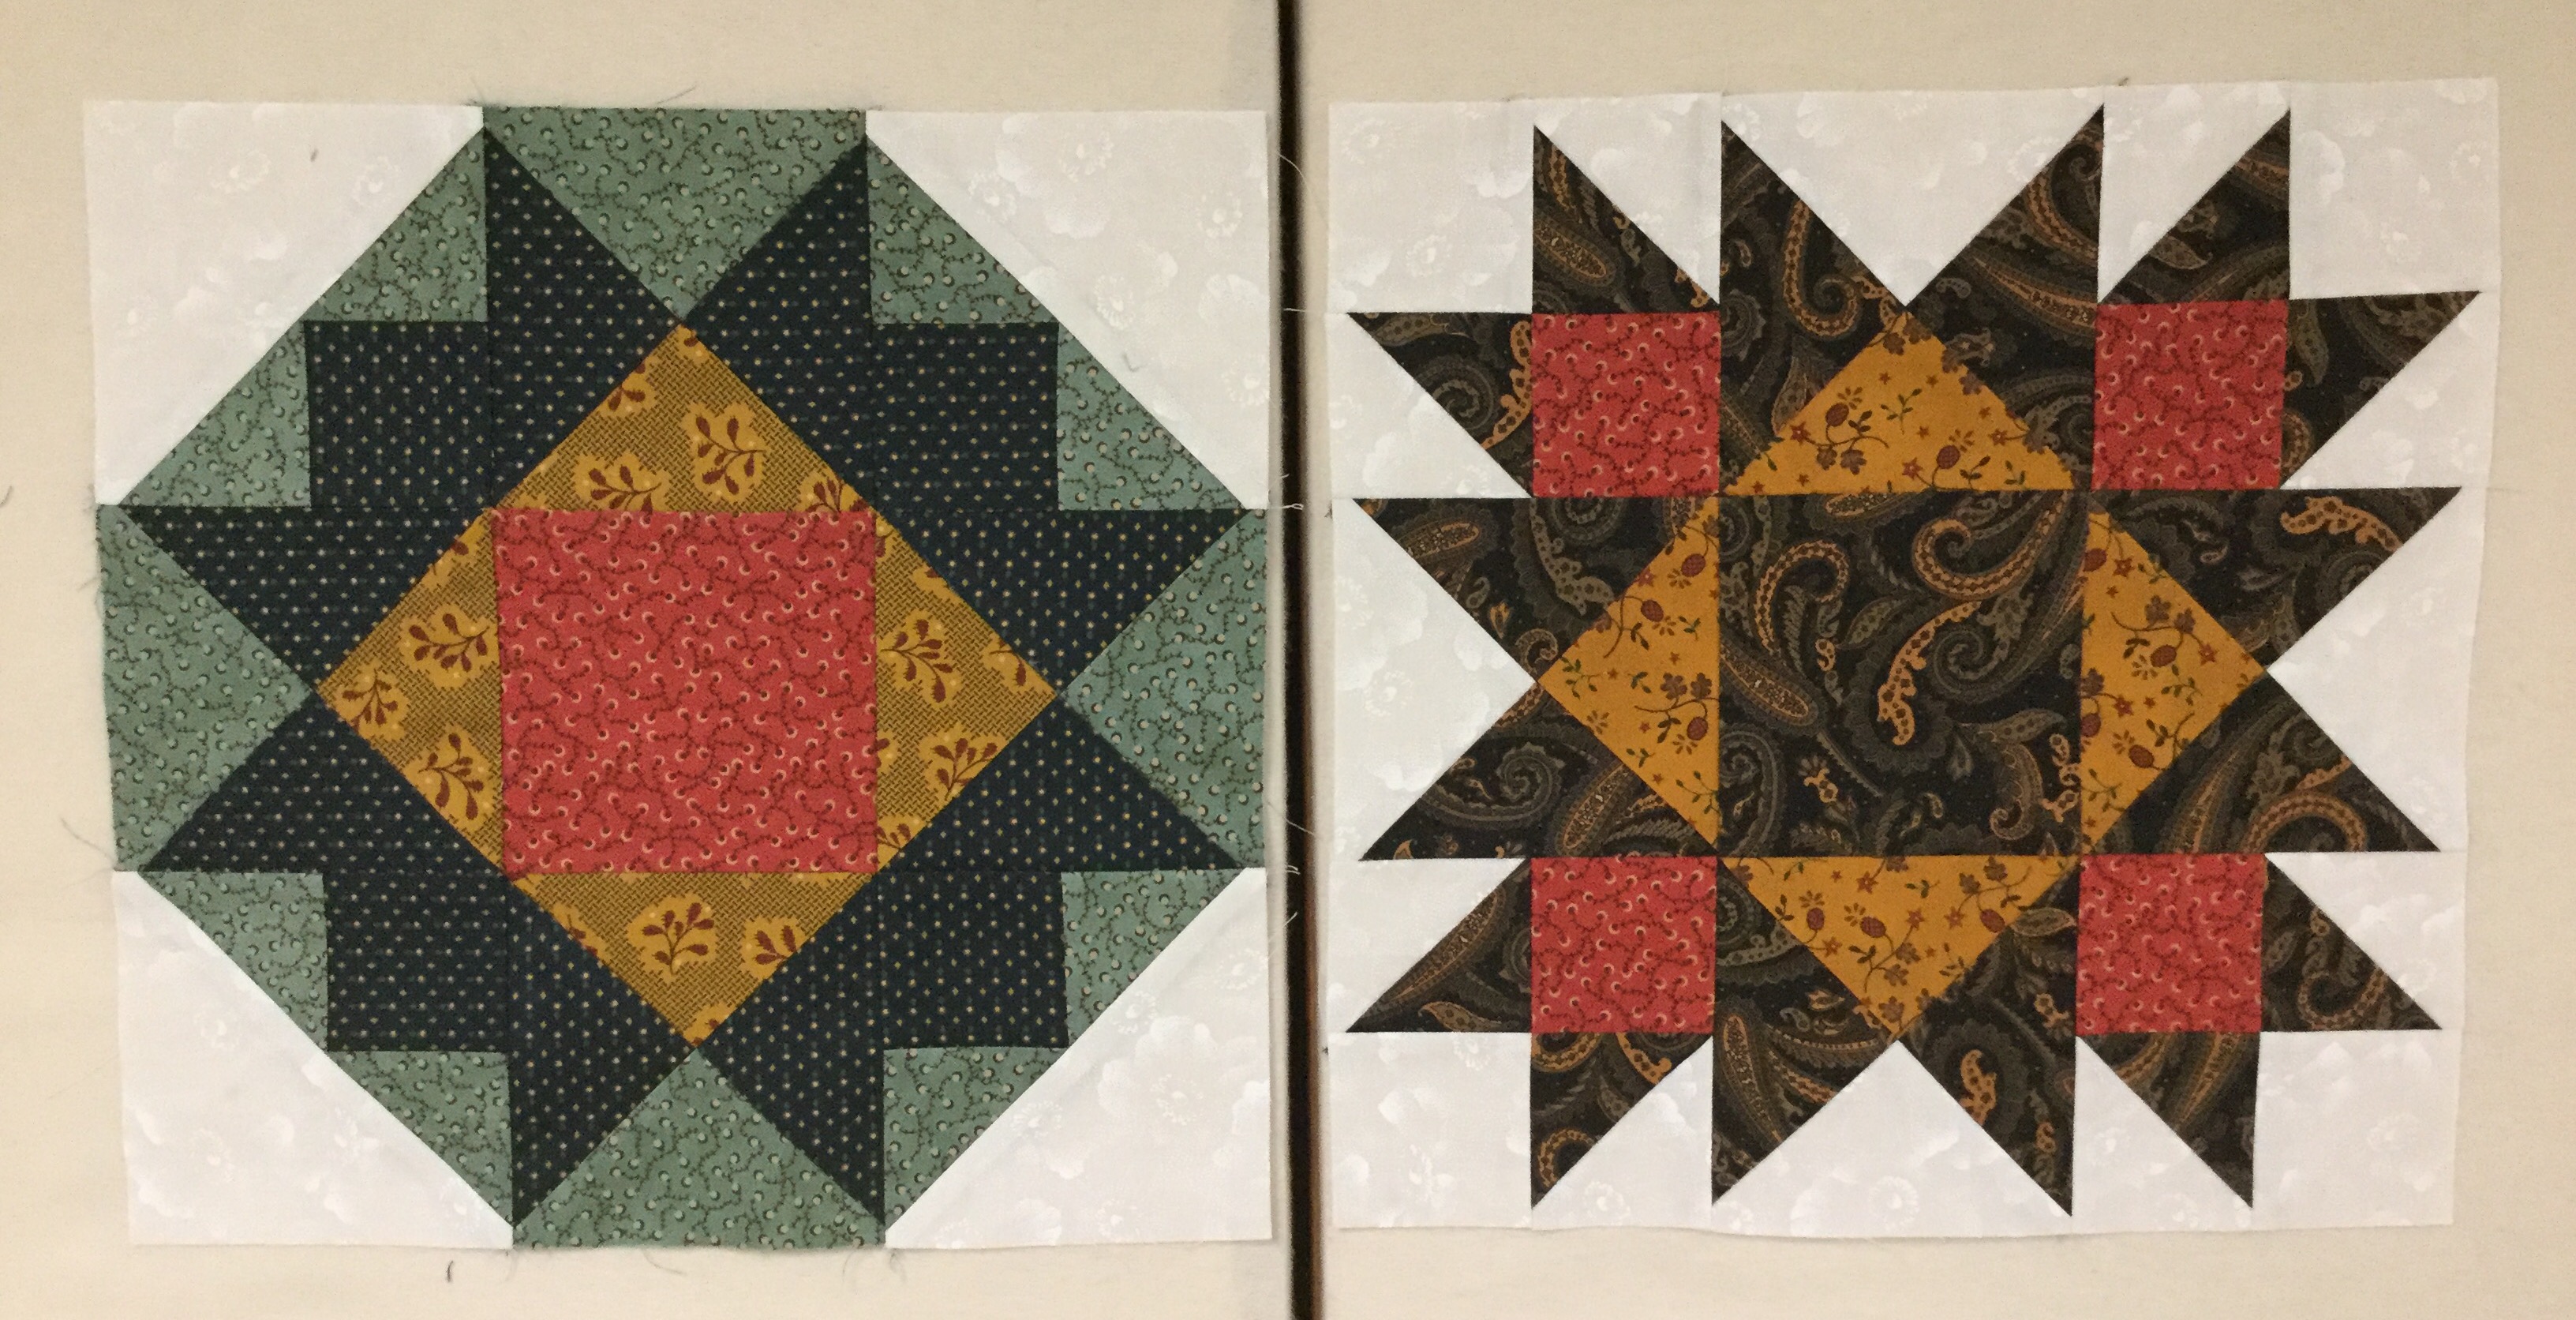
Tree Trunk:  Make one set of 2″ x 4″ finished flying geese using the Wing Clipper I tool instructions.  Only 3 flying geese units will be needed.

img_2049


Tree Star:  Make the 6″ finished lemoyne star using the Lemoyne Star tool instructions.

Lay out your quilt blocks and construct the quilt center.  Once the borders are added the finished quilt measures 38″ x 38″.

Happy Holidays!

#islandbatik #thebestofbali #islandbatikambassador #alpinejungle #iloveislandbatik #debtucker #studio180design #whimsicalandwonky

My Evening Elegance Revealed

img_1957

Evening Elegance measures 60″ x 60″.  The blocks are finished at 12″.

This is one version of Deb Tucker’s Evening Elegance quilt.  Go to Deb Tucker’s blog  to see version 1 and to download both quilt settings.  It was designed using BlockBuster Patterns:   1 Ohio Star, 7 Whimsy Turndash, 9 Three in One, 16 Peaks & Valleys, 20 Stellar Collision, 21 Around the Block, 22 Square Dance, 26 Cactus Blossom and  34 Evening Shadow.

I really had fun making this quilt.  I love the “Circle of Nine” layout.

These beautiful fabrics from Island Batik are gorgeous.

#islandbatik #thebestfrombali  #debtucker #studio180design #twilightchic #Blockbusters

Scrapodopolis – BlockBuster’s #1 – #9

I just finished my quilt containing Deb Tucker’s BlockBuster patterns #1 through #9!  Scrapodopolis seems like a pretty good name.

img_6002

I used the Tucker trimmer 1, Wing Clipper 1, Square/Squared, V Block & Four Patch Square up tools from Studio 180 Design.  I was encouraged by fellow Certified Instructor Sarah Furrer to try a block layout a little outside the box, and I totally did!

01 Layout

This is the layout I chose.  I did change it up a little.

02 Square Squared

My blocks are 12″ when finished.  that indicated that my Square/Squared units would finish at 6″.  I Needed 16 square/squared units and decided the center squares would be cut from 16 different fabric pulled from the blocks & the side triangles would be the same background fabric used in the blocks.  The 3″ rectangles on either side of the square/squared units would match the border fabric.  The outer borders would finish at 6″ also.  I added a 3″ border outer border to enhance the four square/squared units in the border.

03 dont do this

Don’t do what I did.  I started in the center and stitched the outer square/squared units to the center blocks, (they had to be un-sewed and sewn to the borders pieces). In each of the corners, I stitched a 12″ block to a square/squared unit & stitched a square/squared unit to a 6.5″ square and then stitched it to the block.  The two blocks on either side of the center were stitched to a square/squared unit

04

This is much better. Now there are 3 rows of blocks in the center ready to be stitched together & the border square/squared units are pieced to the border strips.

Once all the pieces were stitched together I decided I needed to add a 3″ outer border so all the units appear to be floating.

09 quilted

I am so pleased with how it came out!  My finished quilt measures 67″ x 67″.

10 a different view

I can’t wait to start the next quilt with BlockBuster  #10!

BlockBuster #6 Rolling Stone

The Rolling Stone block is fun and easy.  You will need the 06 Rolling Stone Supply List and your Studio 180 Design Square/Squared tool.  All the instructions you need to make Square/Squared Units required for this block came with your Square/Squared tool.

img_5521

The Rolling Stone supply list gives you 3 different color layouts, a black line master & 3 block size choices, I decided to make a 12″ block.  Above are the 3 colors and a background fabric I chose.

Square┬▓ Ruler

Your Square/Squared tool has three different sections:  1. Size Chart for Triangles, 2.  Center Square Trim Down Section & 3. Unit Trim Down Section.

img_5524

Unit A:  I am making 4″ finished units, so I checked my tool (The newer Square/Squared tools has Center Square strip width requirements based on the finished size of your chosen unit). I cut one strip 3 1/2″ wide ( this is slightly wider than needed).  I’m right handed so I laid my strip horizontally on the cutting mat with the selvages to the left.  Find the correct size square in the Center Square Section.  Lay the tool on the fabric so the bottom line for a 4″ finished unit is even with the bottom edge of the strip.

img_5525

Make two cuts, once up the right side, them across the top.

img_5526

Rotate your square so it is aligned with the 4″ finished clean up lines on the tool and make one more cut up the right side as shown above. Cut four precision center squares.

img_5523

Find the Size Chart for Triangles on your tool.  For a 4″ finished unit I cut a strip 3 1/4″ wide. Cut 2 – 3 1/3″ squares for each Square/Squared unit, then cut them each once diagonally as shown above.


Position two triangles on opposite sides of the center square.  No need to fuss with matching the middles as the triangles are larger than they need to be.  Just lay the triangle down right side up and then center the center square over it eyeballing it to see if it is even on both sides.

img_5535

Stitch & press toward the triangles.

Position the two remaining triangles on the two remaining sides of the center square as shown above.  Press triangles away from the center square.

Position the Trim Down Section of your tool over the pieced unit.  Focus on aligning the “X’s” for your particular size unit over the sewn seams.  Trim two sides, then lift the tool and rotate the unit on the cutting mat.  For the second cut, position the tool on top of the unit lining up the “X’s” and also lining up the cleanup lines on the tool with the edges previously trimmed.  Repeat the steps to make 3 more Square Squared units.

Unit B:  These are basically 2 1/2″ squares sewn together.  I cut two 2 1/2″ strips of fabric and sewed them together along the length of the strips.  For this block we need four 2 patch units and one 4 patch unit. Trim the selvage off and cut 2 1/2″ wide units.  We need 6 units.

Take two units, and with right sides together, nest the seams and stitch. Swirls the center seams and press to make your 4 patch unit.

img_5522

Unit C:  For a 12″ clock cut a 2 1/2″ strip of fabric.  Then sub-cut into four 2 1/2″ x 4 1/2″ rectangles.

img_5544

Lay out your block units.

img_5545

Sew the Unit B – 2 Patches together with the Unit C – rectangles, press toward the rectangle.  Now all your units are 4 1/2″.

img_5546

Sew your Square/Squared units to your 2 Patch/Rectangle units and your 2 Patch/Rectangle units to your center 4 patch unit as shown above.

img_5549

The back of the block shows I pressed the square/squared units toward the 2 patch units, and when I joined the rows i pressed the center out towards the sides of the block.

img_5548

BlockBuster #6 – Rolling Stone.  Nice block!

Follow my blog with Bloglovin

BlockBuster 3 – Flying Dutchman

Flying Geese are fun to make when you know how!  When you learn to use Deb Tucker’s Wing Clipper, you will make 4 flying geese at once.  With the Wing Clipper you can make finished size flying geese in 10 sizes from 1/2″ X 1″ to 5″ X 10″.  This block is called the 03 Flying Dutchman and consists of 8 flying geese.  All the instructions you need to make the flying geese units required for this block came with your Wing Clipper’s instructions.  There is a chart with step by step graphics and directions.

I chose the third option in the supply list.  Remember the large square becomes the large triangle or body in your flying geese, and the small squares become the side triangles or wings in your units.

I am making my BlockBuster blocks 12″ finished size.  That way when I’m done I can make a quilt.  When using the Wing Clipper you start with one large square and 4 small squares.  IMG_0575

For a 12″ block, my units need to be 3″ x 6″ finished size.  According to the chart in my instructions my large square should be cut 7 1/2″ and my small squares should be cut 4″.  Because I need 8 flying geese units I cut 2 large squares and 8 small squares.

IMG_0576

Take your Magic Wand and on the back of your small squares draw lines diagonally corner to corner as shown above.

IMG_0577

Position two small squares on one large square as shown.  When positioning, nudge the small squares toward the center a thread or two.  This gives you a little more to trim off.

IMG_0578

Sew on lines and cut apart as shown above.

IMG_0580

Press toward the small triangles.  Position another small square as shown above, again nudging the small square away from the edge about 1/16th of inch.

IMG_0581

Sew on the lines and cut apart, and press.

IMG_0582

You now have 4 oversized flying geese units.  Repeat the same process with the second large square and 4 small squares.

IMG_0583

You now have 8 oversized flying geese units.

IMG_0585

Position your oversized flying geese unit horizontally on your cutting mat, with unit pointed toward you as shown above.  Align the diagonal guide lines of the Wing Clipper with the sewn seams of the flying geese unit. Trim the two sides.

IMG_0587

Rotate your unit and reposition your Wing Clipper to align clean-up guidelines with the previously trimmed raw edges and trim.  Check your instruction for Left-handed trimming.

Lay out your units and sew 2 together to make 4 quarters, pressing your seams in the directions the geese are flying.

IMG_0591

Sew your 4 quarters together.

BlockBuster 2 – Crowning Glory

The BlockBuster 2 – Crowning Glory block is very much like the Ohio Star Variation.  Both use the Tucker Trimmer I, but the corner units are swapped out for the Shaded Four Patch units.  All the instructions you need for this block can be found in the instructions that came with your Tucker Trimmer I tool and on the Shaded Four Patch Technique Sheet.

Click here for the 02 Crowning Glory supply list.  When making your shaded four patches, remember that the narrow strip is your small square and the wide strip becomes your little triangles, and the rectangle is the large triangle.  I chose to make the middle block layout using 5 fabrics for a 12″ finished block.

IMG_4746

Color 1 – Background, cut 2 – 5″ x 6″ rectangles.

Color 2 – Light Teal, wide strip, cut 1 – 3 3/4″ strip WOF ( if using a fat quarter, cut 2 strips). Cut 1 – 5 1/2″ square.

Color 3 – Dark Teal, narrow strip, cut 1 – 2 3/4″ strip WOF ( if using a fat quarter, cut 2 strips). Cut 2 – 5 1/2″ squares.

Color 4 – Gold, cut 1 – 5 1/2″ square.

Color 5 – Red center square, cut 1 – 4 1/2″ square.

Beginning with the shaded four patch units, cut 2 – 5″ x 6″ rectangles from Color 1 – Background.  Cut 1 – 3 3/4″ strip from Color 2 – Light Teal.   Cut 1 – 2 3/4″ strip from Color 3 – Dark Teal.

IMG_4715

Cut the wide & the narrow strips in half if you cut from WOF.

IMG_4716

Take one narrow strip and one wide strip and with right sides together, sew along one long side. Repeat with the other 2 strips.  Press towards the wide strip.

IMG_4717

Pair two of the pieced strips, right sides together with the narrow strips on opposite sides as show below:

IMG_4718

Trim the end and sub-cut into units the same width as the narrow strip, which is 2 3/4″.  Because we only need 4 shaded four patch units, we only need to cut 2 pairs.

IMG_4719

Stitch each pair of cut pieces along one long side. Fold in half to find the center and snip to the seam line to aid in pressing.

IMG_4720

Press each unit as shown below:

IMG_4721

Position a ruler with a 45 degree angle on your unit as shown below. Draw a 45 degree sewing line from the top to bottom, through the corner of the square where the stitching lines meet.

IMG_4722

Draw a second 45 degree sewing line through the other corner as shown below:

IMG_4723

Center each marked unit over the rectangle. Sew on the lines, Cut apart and press toward the large triangle.

Using your Tucker Trimmer I, trim to the cut size of 4 1/2″.  Rotate the unit and trim again.  You now have 4 shaded four patch units.

As with the Ohio Star Variation we will be making 3 color quarter square triangles.  I chose the dark teal as my star points.  Following the instructions for my Tucker Trimmer  for 4″ finished units, I cut 2 – 5 1/2″ starter squares of my color 3 dark teal, 1 – 5 1/2″ starter square of color 2 light teal. And 1 – 5 1/2″ starter square of color 4 gold.

IMG_4729

We start by making half square triangles.  Using your Magic Wand, draw diagonal lines on the back of 2 of the starter squares.  Position a color 2 light teal square over a color 3 dark teal square, and a color 4 gold square over the other color 3 dark teal square.

Sew on the lines and cut apart.  Press toward the dark triangle.

Again, Using your Magic Wand draw diagonal sewing lines on the back of two half square triangles.

IMG_4734

Position one gold and dark teal half square triangle over one light teal and dark teal half square triangle making sure the dark teal is on opposite sides. Nest the seams carefully.  Sew on the lines, cut apart, swirl the centers and press well.  Repeat with the other two half square triangles.

Trim to the cut size of 4 1/2″ using your Tucker Trimmer I. Rotate and trim Again.  You now have 4 – 3 color quarter square triangles.

Cut 1 – 4 1/2″ square from color 5 for the block center.  Layout your units as shown below:

IMG_4741

Sew the 3 units on the right and press toward the shaded four patch units.  Sew the center 3 units and press toward the center square.  sew the 3 units on the left and press toward the shaded four patch units.  Join the 3 sections, carefully nesting the seams and press.

The finished block:

IMG_4745

Below are Crowning Glory and the Ohio Star Variation side by side .  They look so different for being so similar.

IMG_4747

BlockBuster 1 – Ohio Star Variation

If you have been following Deb Tucker’s Studio 180 Design’s Facebook page then you know that Deb premiered their BlockBuster program series last January, which means they have a full year of exciting blocks to add to your quilting repertoire.

The Ohio Star is one of the most classic quilting blocks, and one that can be easily transformed by playing with the four cornerstone units.  Instead of the traditionally seen solid squares for the corners, they pieced two half square triangle units with two squares to make a more interesting variation.  Click here 01 Ohio Star Variation for the Supply list.  I all have the supply sheets for the BlockBusters on my page or you can go to Studio 180 Design

The supply sheet has a Cutting Chart giving you the option of making 6″, 12″ or 15″ finished blocks, and shows 3 different color ways.  I decided to make 12″ finished blocks.  I chose 4 colors for my block.  Color 1 is a light background.  Color 2 is my dark fabric for my star points.  Color 3 is my gold fabric and Color 4 is my red fabric.  it really helps to assign numbers to your fabric choices.

IMG_4680

We will make four 3 color quarter square triangles using the instructions from your Tucker Trimmer I.  You will need 4 – 4.5″ unfinished quarter Square triangles for your block.  Check your Tucker Trimmer instructions, there is a chart that based on your finished or unfinished size unit tells you what size your starter squares should be.  You will need 1 – 5.5″ (color 1) background square,  2 – 5.5″ (Color 2) black squares & 1 – 5.5″ (color 3) Gold square .

IMG_4681

We  start by making half square triangles.  Position: I placed my background square and my gold square on my 2 dark squares.  Placing my “Magic Wand” diagonally on the squares I drew a line on both sides of the wand.  I sewed on the lines and then cut them apart as shown below.

I then pressed them towards the dark triangle.  When ever you are pressing, remember “whatever you are pressing toward, goes on top”!

IMG_4685

Using your Magic Wand, draw diagonal lines on the back of 2 half square triangles.

IMG_4686

Position your half square triangles right sides together making sure the dark triangles are opposite each other and that the seams are nicely nested.

IMG_4687

Sew on the drawn lines and cut apart.

Swirl the centers and press making sure all the seams completely open.

Trim using your Tucker Trimmer. The cut size of the unit is 4.5″, find the half circle on you Tucker Trimmer and the diagonal 4.5″ line. Using the 4.5″ line and the common diagonal line center it on your unit and trim 2 sides.  Then rotate your unit centering as before but also using the 2 trimmed sides and trim again.  You now have 4 – 3 color quarter square triangles that will be the star points for your Ohio Star.

Make the corner units that are made up of 8 – 2.5″ unfinished half square triangles and 8 – 2.5″ squares (4 from our background fabric and 4 from your color 4 fabric).  We start by checking our chart to find for 2.5″ unfinished half square triangles we cut 4 – 3″ starter squares of both our dark and background fabric. Again using our Magic Wand draw diagonal lines on the back of the background fabric, position and sew on the lines.

Cut apart and press toward the dark triangles. As before trim to 2.5″ using your Tucker Trimmer.

Layout 2 half square triangles, 1 – 2.5″ background square and 1 – 2.5″ square from Color 4 as shown below.  Sew 1 half square triangle to a background square and 1 half square triangle to a color 4 square.  Press toward the square fabric. Place right sides together and nesting the seams and sew together.  You can press the seam to one side or, I chose to press it open to lessen bulk.

Cut 1 – 4.5″ center square  and lay out your block units as shown below:

IMG_4703

Sew units together in 3 sections.  Press the side sections toward the corner units and the center section toward the center square so the seams nest nicely.

Join the 3 sections to make your Ohio Star Variation.

IMG_4708