Category Archives: Wing Clipper 1

Converging Geese Zoom Class

Join me for a Converging Geese Zoom class September 15th at 11:00 AM. Sign up and download the supply list here (pattern is included with the class fee):

Register for Converging Geese Zoom Class

Converging Geese Block

I created this pattern November 2018 for an Island Batik Log Cabin Challenge. It has been a popular pattern in my Etsy Shop ever since. This is a variation on the Log Cabin block and is a fun way to use your Square/Squared, Tucker Trimmer I & Wing Clipper I tools.

I named my original design “Converging Geese” because each block has Flying Geese & Geese on the Edge units, along with Square/Squared units.

Each 16″ block contains 12 – 2″ x 4″ finished flying geese, 4 – 6″ finished geese on the edge & 1 square/squared unit. 

Converging Geese – Measures 60″ x 60″

Starget

I just finished Studio 180 Design pattern “Starget” by Deb Tucker. This quilt finishes at 88″ x 104″. It requires V Block, Square/Squared, Wing Clipper I & Split Rects tools.

I made this quilt for my sister Mary. She came with me to every doctors appointment and every cancer treatment for nine months. Mary had to wait in the car during these (winter) appointments because of COVID restrictions. She loves this pattern and I was so happy to make it for her.

Journeys Month 3 – Flying Geese

Welcome to Stitchin Heaven’s Journeys BOM Month 3. This month you will be learning to make flying geese the Deb Tucker way, using your Wing Clipper I. My helper this month is Deb Tucker herself! As always use your best cutting, stitching and pressing skills. We will be using prints 1, 2 & 5. Carefully cut your starter squares and let’s go!

Prints 1, 2 & 5

Piecing Instructions Flying Geese Construction

Step 1 – Mark Squares. Begin with one large Print 1 square and two Print 2 and two Print 5 small squares. On the wrong side of each small square, mark two stitching lines ¼” on either side of the center diagonal. I like to use my Quilter’s Magic Wand™ for this task.

Step 1

Step 2 – Position the two Print 2 small squares in opposite diagonal corners of the large square, right sides together. Nudge the small squares in toward the center a few threads from the edge of the large square and align the drawn lines.

Nudge the small squares toward the center of the large square.
Step 2

Step 3 – Stitch on the two marked lines, then cut between the stitching lines along the center diagonal of the squares. Press your seams toward the small triangles.

Tip: Stitch just inside of the drawn lines. This will give you more to trim later.
Step 3
Step 3 Cont.

Step 4 – Position two Print 5 small squares, one in each corner of your heart shaped units. Nudge these squares a few threads in from the edge of the large triangle.

Step 4

Step 5 – Stitch along the two marked lines.

Step 5

Step 6 – Cut between the stitched lines along the center diagonal of the small squares and press toward the small triangle.

Step 6
Step 6

Step 7 – Position your Wing Clipper® I tool over your unit, aligning the correct diagonal guidelines of the ruler with the seams of your unit and trim two sides. Rotate the unit 180° and align the 3½”x 6½” horizontal and vertical guide lines with the edges of the unit. Align the “X” on the Wing Clipper® I with the seam intersection of your unit and trim again. Repeat for the remaining units. You will end up with 24 geese that have print 2 on the left, label these as Unit E, and 24 geese that have print 2 on the right, label these as Unit F.

First Trim
Second Trim
4 Flying Geese

Congratulations! You have now learned to make flying geese using the Wing Clipper I.

It’s December! Time for Christmas Tree Quilts

I love Christmas & I love Christmas Tree Quilts! Over the years I have made several and decided to share some with you. Studio 180 Design tools gives you several ways to easily make Christmas Trees.

I Believe

I made this 7 years ago for my Granddaughter Samantha. I Believe uses the V Block tool. Below is the supply list:

Deck the Halls

I made Deck the Halls for Northcott Fabrics in 2019. It is made with Tucker Trimmer I & Wing Clipper I. Below is the supply list:

Split Rects Christmas Tree

The Split Rects Christmas Tree wall hanging is made with the Split Rects tool. The supply list is below:

Wing Clipper Wall Hanging

The Wing Clipper wall hanging is made with 4 Flying Geese using the Wing Clipper I. The supply list is below:

Kermits Christmas Tree

This Skinny Christmas Tree was made using all 10 sizes the Wing Clipper I makes. Supply List is below:

Happy Holidays everyone!

I Will Be Your Guide On This Journey

Stitchin Heaven Quilt Shop is excited to announce a new collaboration of a unique BOM program from Deb Tucker (Studio 180 Design), NYT and USA Today best-selling author Marie Bostwick (Between Heaven and Texas, Hope on the Inside, and the Cobbled Court Quilt Series, including A Single Thread), Deb Luttrell (Stitchin’ Heaven), and Jason Yenter (In the Beginning Fabrics). In this 12-month program you will take your own Journeys through an exclusive novella written by Marie Bostwick. Each month you will receive a chapter from the book which is exclusive to this program. It is a page-turning tale of love, loss, and new beginnings for PJ Lloyd, an adventurous young woman who defies her family and risks her future to make a difference after the attack that plunged America into the second World War.

I will be your guide on this “Journey”. Every month I will post a tutorial showing you how to use the tools required for this beautiful quilt and answering your questions.

Throughout the Journeys BOM you will be on your own journey to learn how to use 8 of the tools from Studio 180 Design. Tools include: V Block, Corner Pop, Four-patch Square Up, Tucker Trimmer, Rapid Fire Lemoyne Star, Square Squared, Wing Clipper, Corner Beam. The final quilt measures 102″ x 102″. A beautiful collection of fabrics have been designed by Jason Yenter of In The Beginning Fabrics, that will make this project an heirloom favorite.

I tested the pattern with fabrics from Deb Tucker’s stash. It is truly a beautiful quilt I can’t wait for you to make your own! The Journey’s BOM program is due to start in September 2020. We will be sure to keep you up to date and informed on all the details.

A conversation with Deb Luttrell, Deb Tucker & Marie Bostwick

Half Way Between Galentines & Valentines Day

Last Valentines day I posted my Hearts Abound Wall Hanging for Island Batik. Today I taught this class and posted the photo of the wall hanging again. Everyone wants the supply list, So I am posting it here. Remember I’m a Dyed in Wool, Drank the Kool Aid Studio 180 Design Certified Instructor and this Supply List is based on Studio 180 Design Tools: Square Squared, Wing Clipper I, Tucker Trimmer I & Magic Wand. Enjoy

Deck the Halls

I love Christmas Tree Quilts. I’m always looking for quilt blocks that look like Christmas Trees.

With this block and the Deck the Halls fabric that Northcott gave me to make this quilt, I have a winner.

What can be easier than Half Square Triangles made with Studio 180 Design’s Tucker Trimmer I & Flying Geese made with the Wing Clipper I!

I love designing with EQ8. Having the option of auditioning the actual fabric I will be using is awesome!

Perfect for cuddling up under in front of a warm fire. You can make this quilt using your Studio 180 Design Tucker Trimmer I & Wing Clipper I tool instructions and these fabric requirements:

#northcottfabrics #studio180designtools #Aurifilthread #quiltersdreambatting

Stars Over Tucson, Shining on Lake Havasu

Life is good!  Here I am in Central, NY making a very special cactus quilt for a newly discovered sister.  I have a half sister (Mary) whom I have known my entire life.  Two years ago Mary wanted to submit our DNA to Ancestry.com to see if we really did have Native American ancestor’s as our mother said.  Turns out we don’t.

My mother used to tell me in a hushed voice “you have sisters in Canada”!  I always wondered if that story was true.  Turns out it is true!  I have two sisters on my Father’s side.  My sister Marti contacted me and we have been emailing, Facebooking and messaging each other for the last 2 years!  And get this, Marti is also a quilter.  You can’t make this stuff up!  We have not met each other yet.  Marti lives in Arizona and as I said, I’m in Central NY.  Marti is one determined quilting sister.  She has been trying to get a local Arizona quilt guild to schedule a class with me so we can finally meet.  She did it!  The Havasu Stitcher’s Quilt Guild is bringing me to Lake Havasu, AZ in January 2020 to teach a One Block Wonder Workshop at their event “Quilting at the Lake”!  I am beyond excited.

Sars Over Tucson

I was looking through my quilt book library and saw this quilt by Jean Biddick from her book “Blended Quilt Backgrounds”, and just had to make it for Marti.  I know that this type of cactus only grows near and around Tucson but it is such an iconic cactus that always makes me think of Arizona.

Stars Over Havasu

So, of course I opened up my EQ8 to redesign & Tuckerize it.  I made a few changes.  I decided on 12″ finished blocks,

img_2748.jpg

and of course varying shades of purple from Island Batik!

The star points are made using Studio 180 Design’s Wing Clipper I.  Tuckerizing a pattern is one of my favorite things to do, and the Wing Clipper is the best way to make flying geese!

Start by making the small stars that form the center of the large stars.  There is a link to a complete supply list at the end of this blog post.  Make 21 of these double star blocks.


Once the star blocks were made I started to work on the cactus.

These blocks make up the cactus.  (See link below for a complete supply list.)

img_2812img_2820

Marti this quilt is just a simple hug from me to you.  Can’t wait to meet you!

img_2760

This quilt is also Tucker approved!  Click here for the Stars Over Tucson Shinning on Lake Havasu  Supply List.


Magnificent Mini’s

The products shown in this post were given to me by Island Batik.

Magnificent Minis

Our assignment for February was to create a “Magnificent Mini” using any technique we chose.  The only criteria was the size: 24″ x 24″ or smaller.  It seems I’m always collecting quilt blocks for hearts and Christmas Trees. The first thing I do is fire up my EQ8 and start drawing.

Last year I made a heart mug rug.  The drawing above consists of mirror image split rects and two squares that have had the corners popped using Studio 180 Design Split Rects & Corner Pop tools.

Magnificent Mini 2

These hearts are made from a large flying geese and two smaller flying geese.  I used Studio 180 Design’s Wing Clipper I, Tucker Trimmer I & Square/Squared tools.  Click here for the fabric requirements for Hearts Abound Mini.

The center block contains:

1 – 6″ finished Square/Squared

4 – 3″ x 6″ finished flying Geese

8 – 1 1/2″ x 3″ flying geese

4 – 3″ finished Half Square Triangles

4 – 2″ x 6 1/2″ red rectangles

4 – 3 1/2″ x 6 1/2″ background rectangles

4 – 3 1/2″ background squares

acs_0004

I added 2″ finished borders with 2″ finished Square/Squared units for the cornerstones.  Hearts Abound measures 22″ x 22″.

img_2393

My Hearts Abound Mini was made from Island Batik fabric, with Hobbs 80/20 cotton batting. Pieced and quilted with Aurifil thread.

#islandbatik #hobbsbatting #aurifilthread #studio180design

Starstruck, in a SueNami Kind of Way!

Starstruck

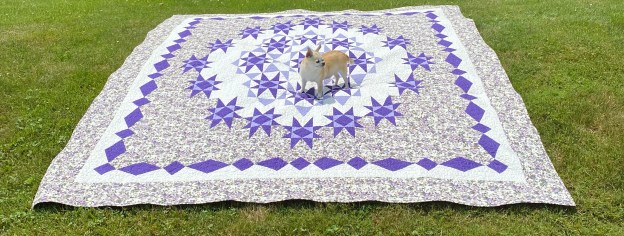
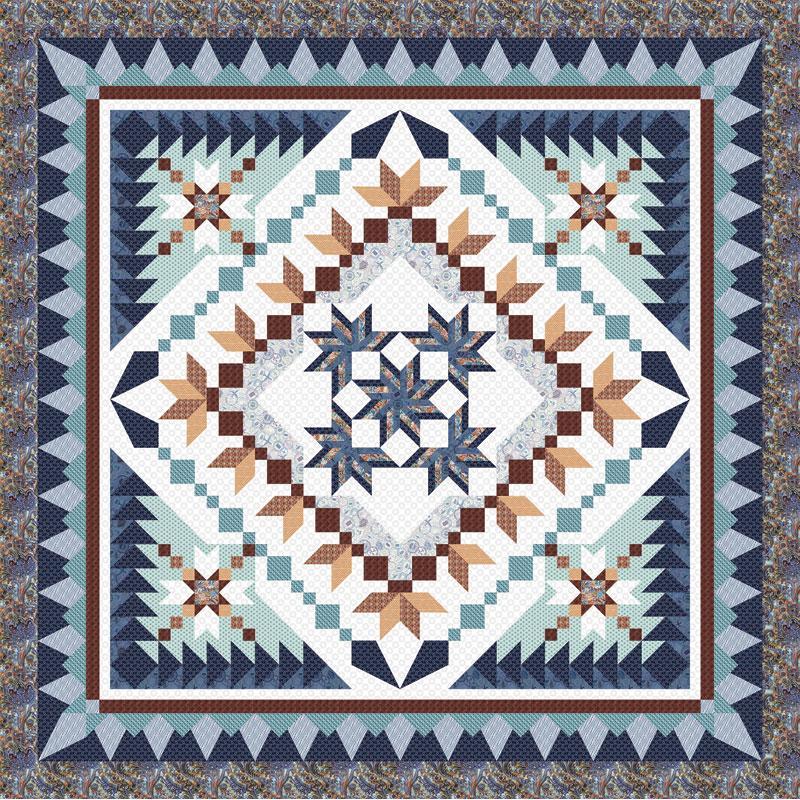
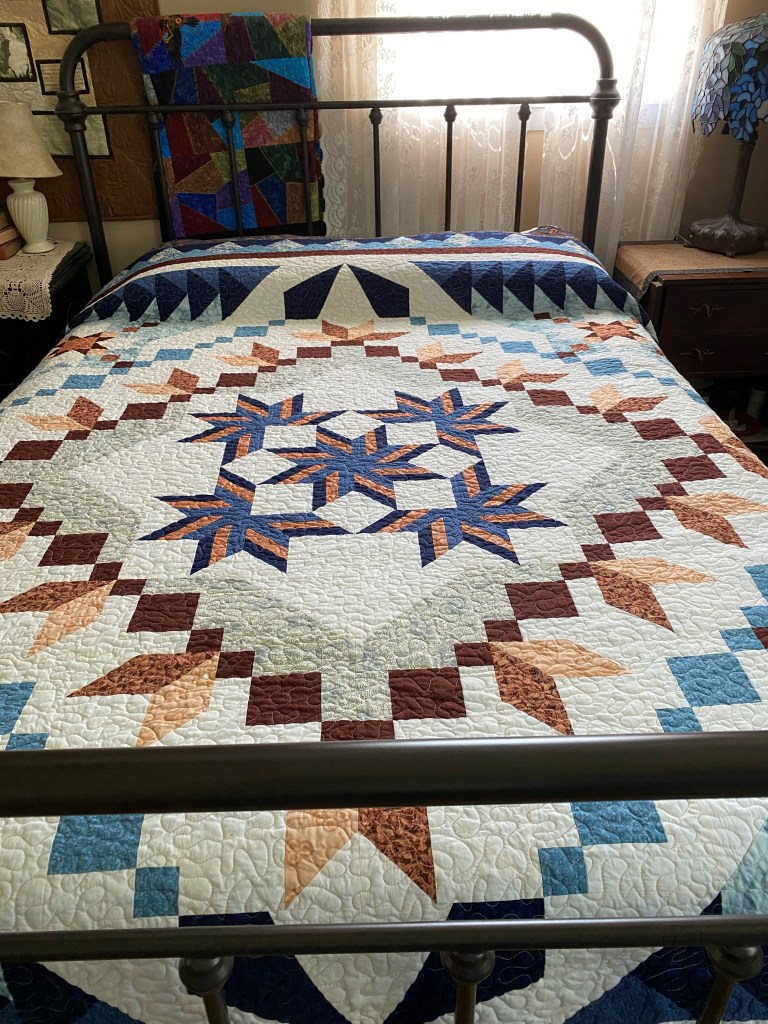
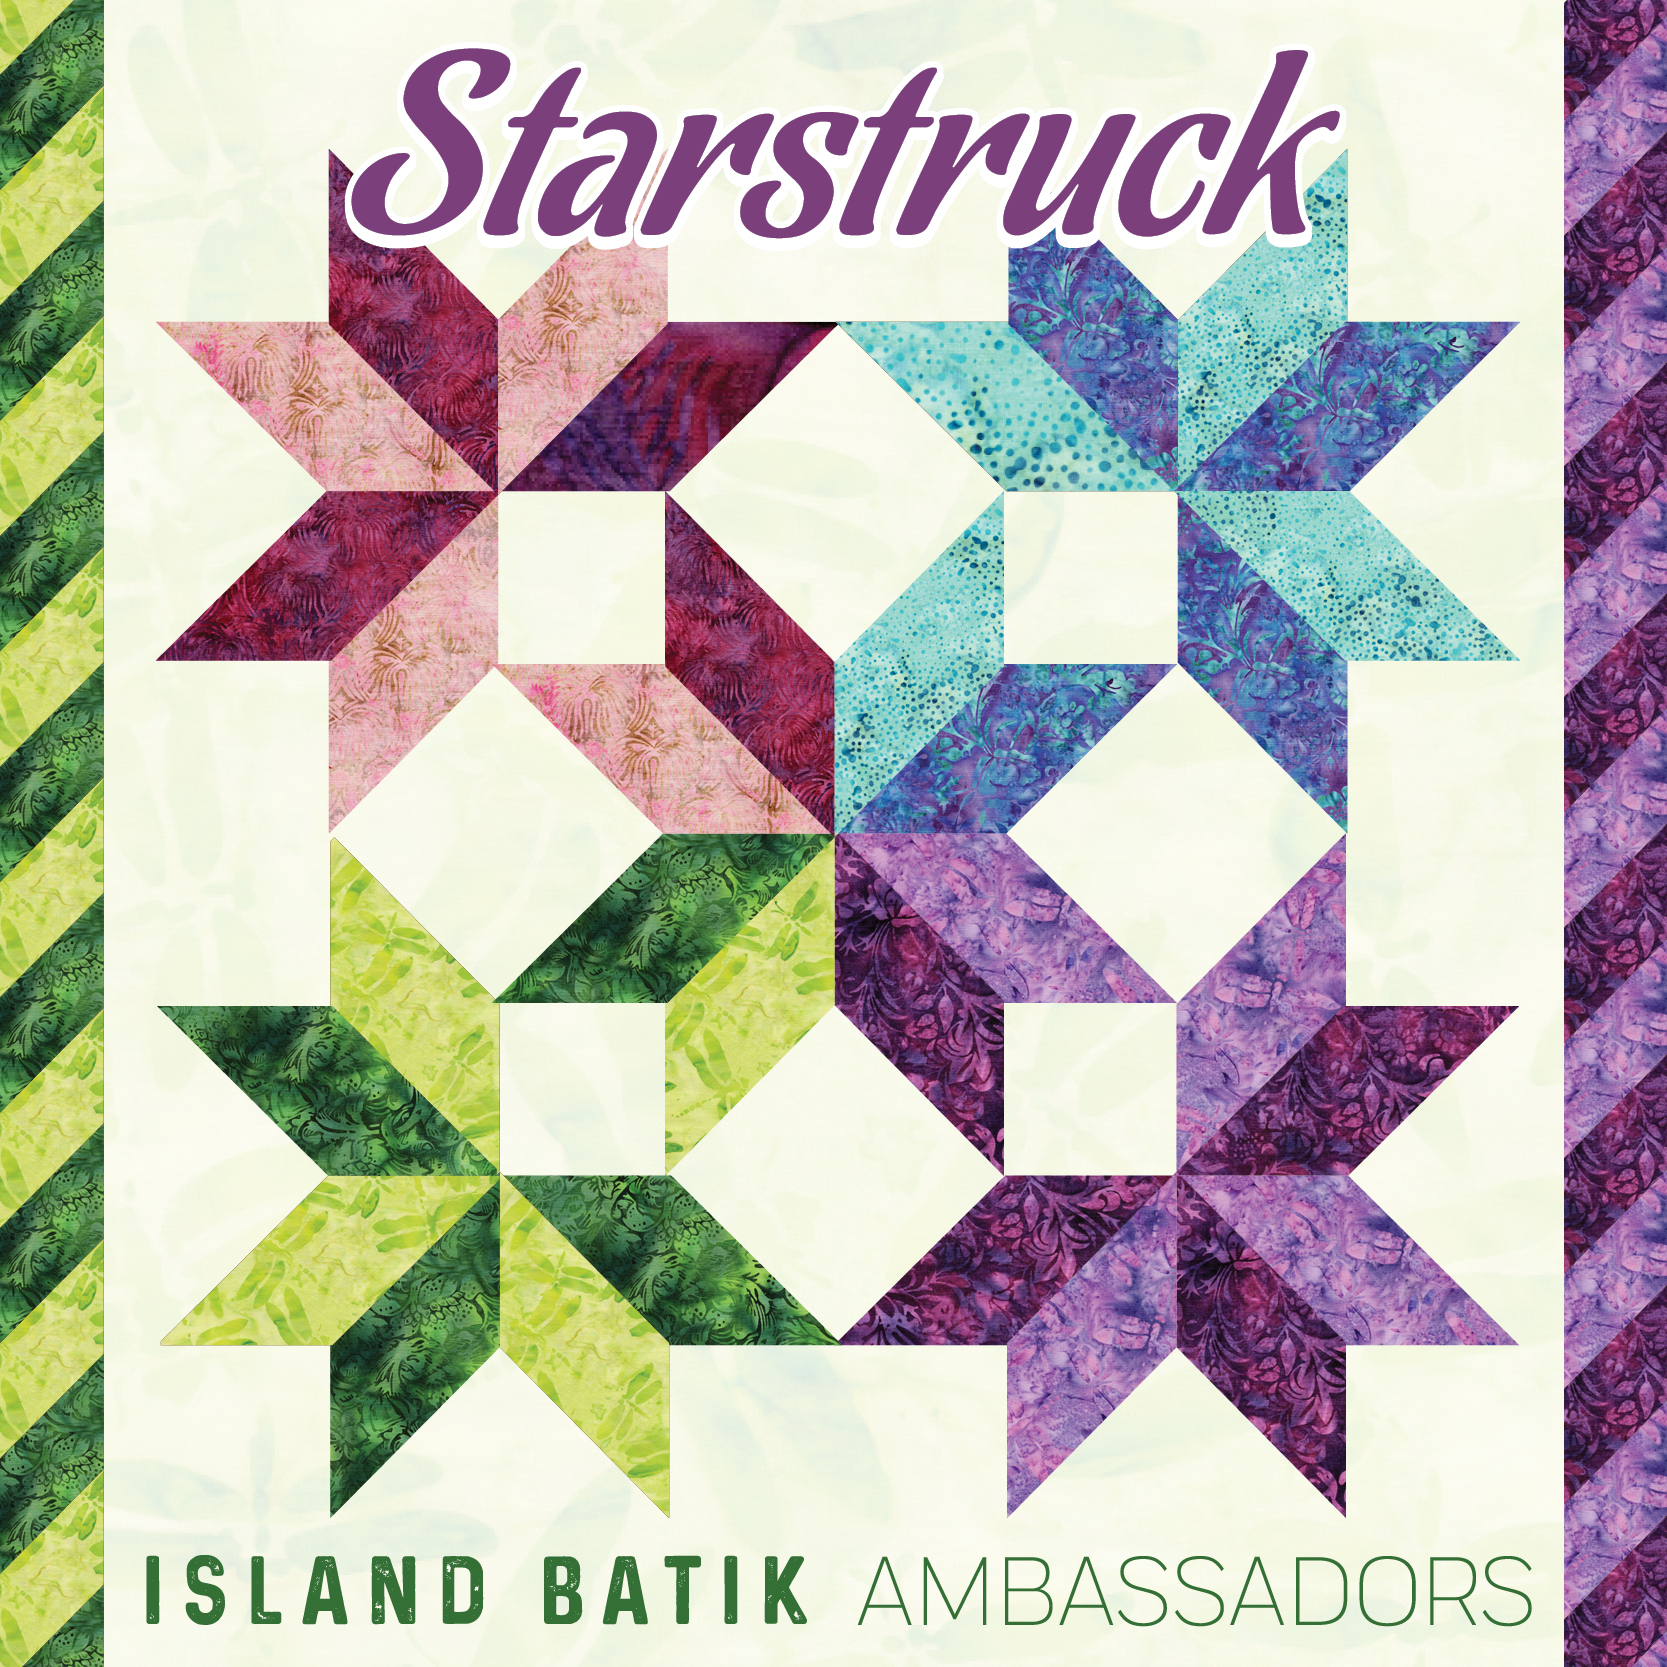
The Island Batik Ambassador’s challenge for September is “Starstruck”.  We must incorporate “stars” into our project.  I chose the Hunter Star block and Sue Tuckers award winning quilt pattern “SueNami“.  This really fun quilt was made with 5” blocks using Deb Tucker’s Rapid Fire Hunter Star Petite tool and measures 68″ x 68″.

img_1480

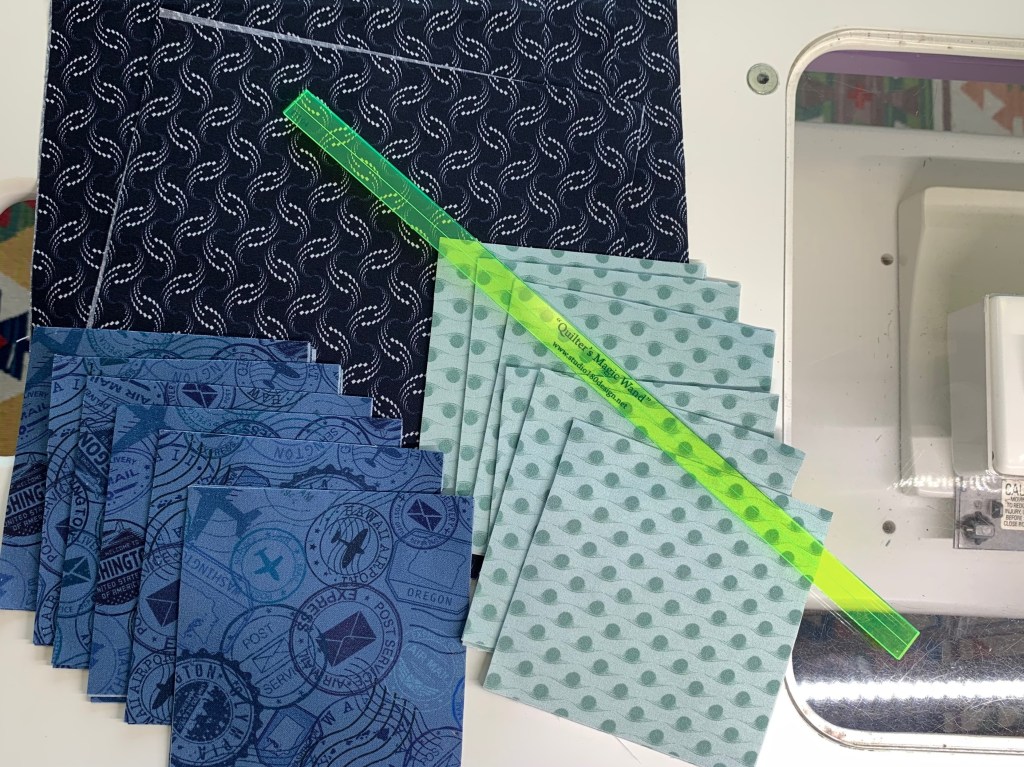
This fat quarter friendly quilt requires 8 dark & 8 light fat quarters.  I used yardage for light background instead of fat quarters.  Of course, all my fabrics are from Island Batik.

img_1396

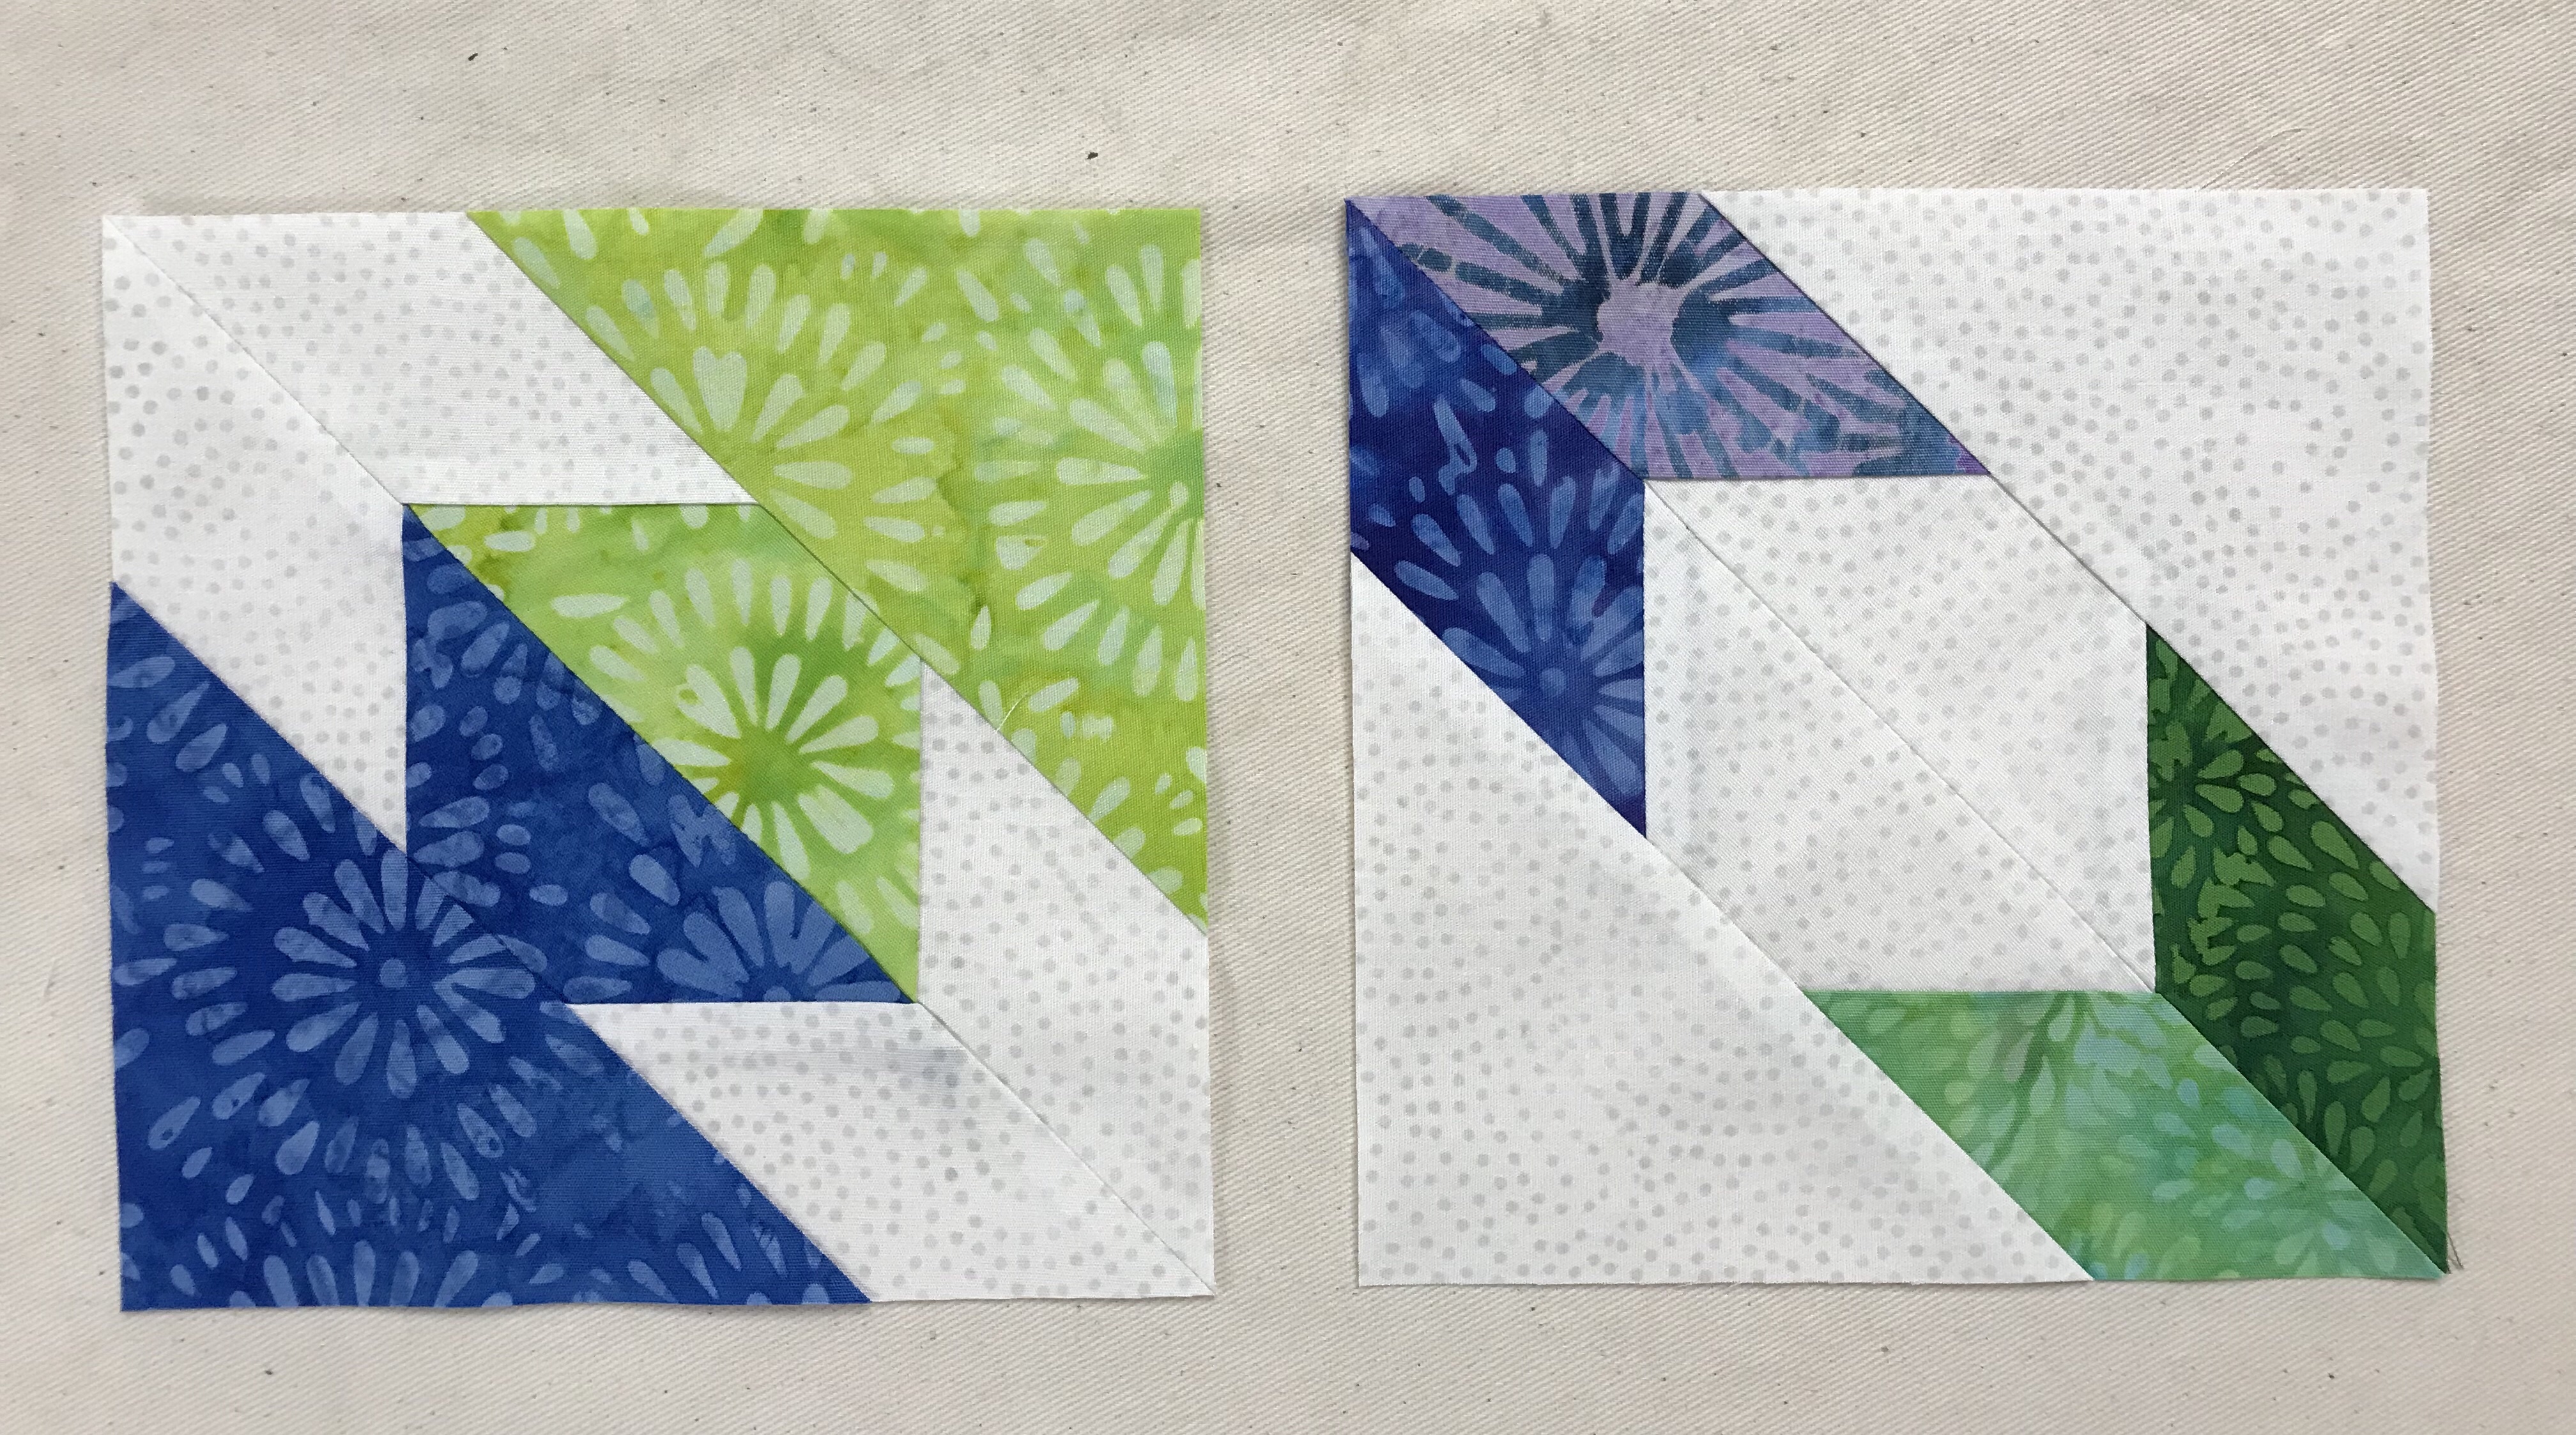
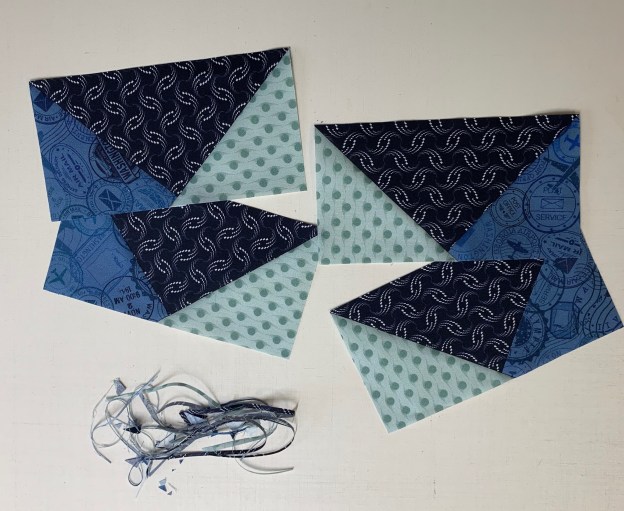
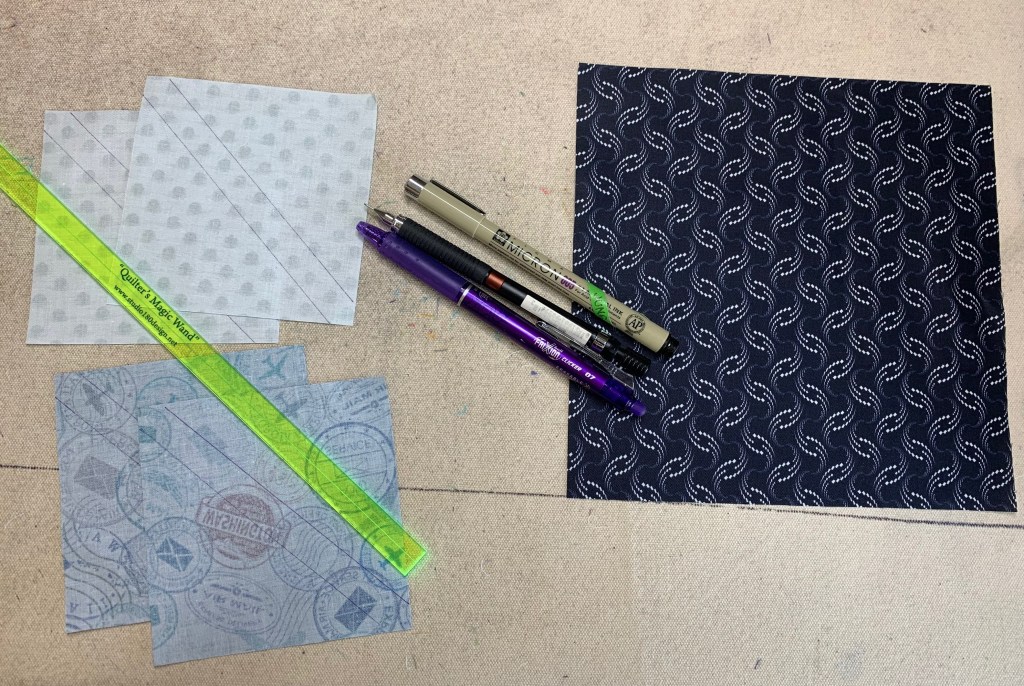
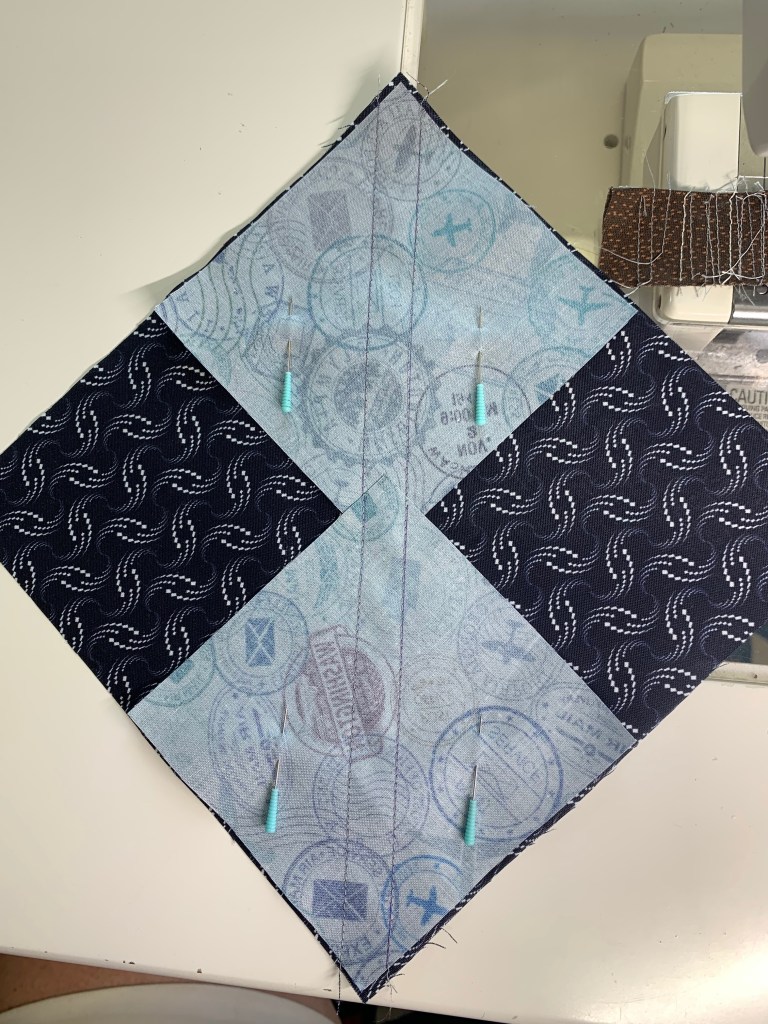
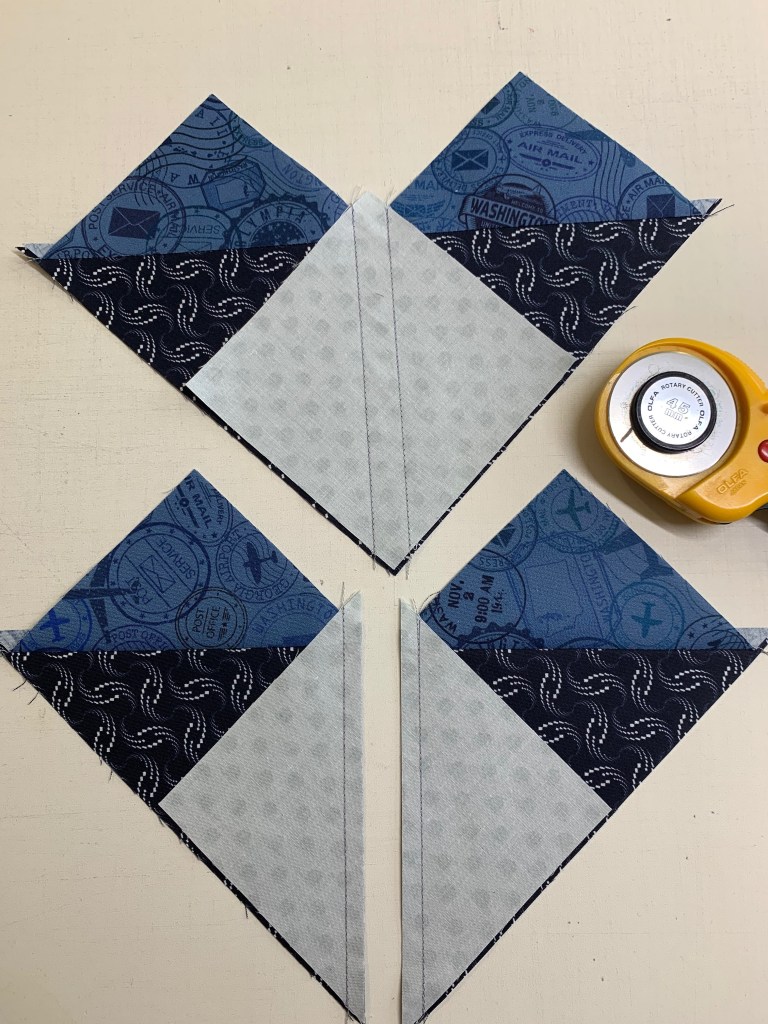
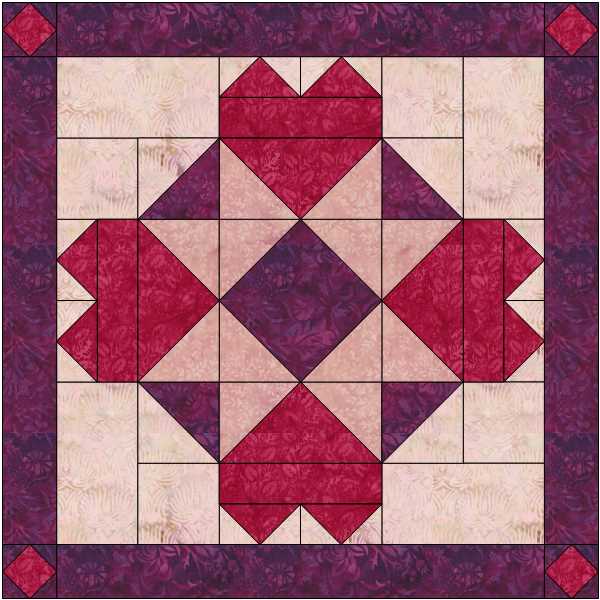
Every hunter star block consists of 2 trapezoids, 2 triangles, 4 star points.  I made 64 blocks – 32 blocks with dark trapezoids and triangles & 32 blocks with light trapezoids and triangles.

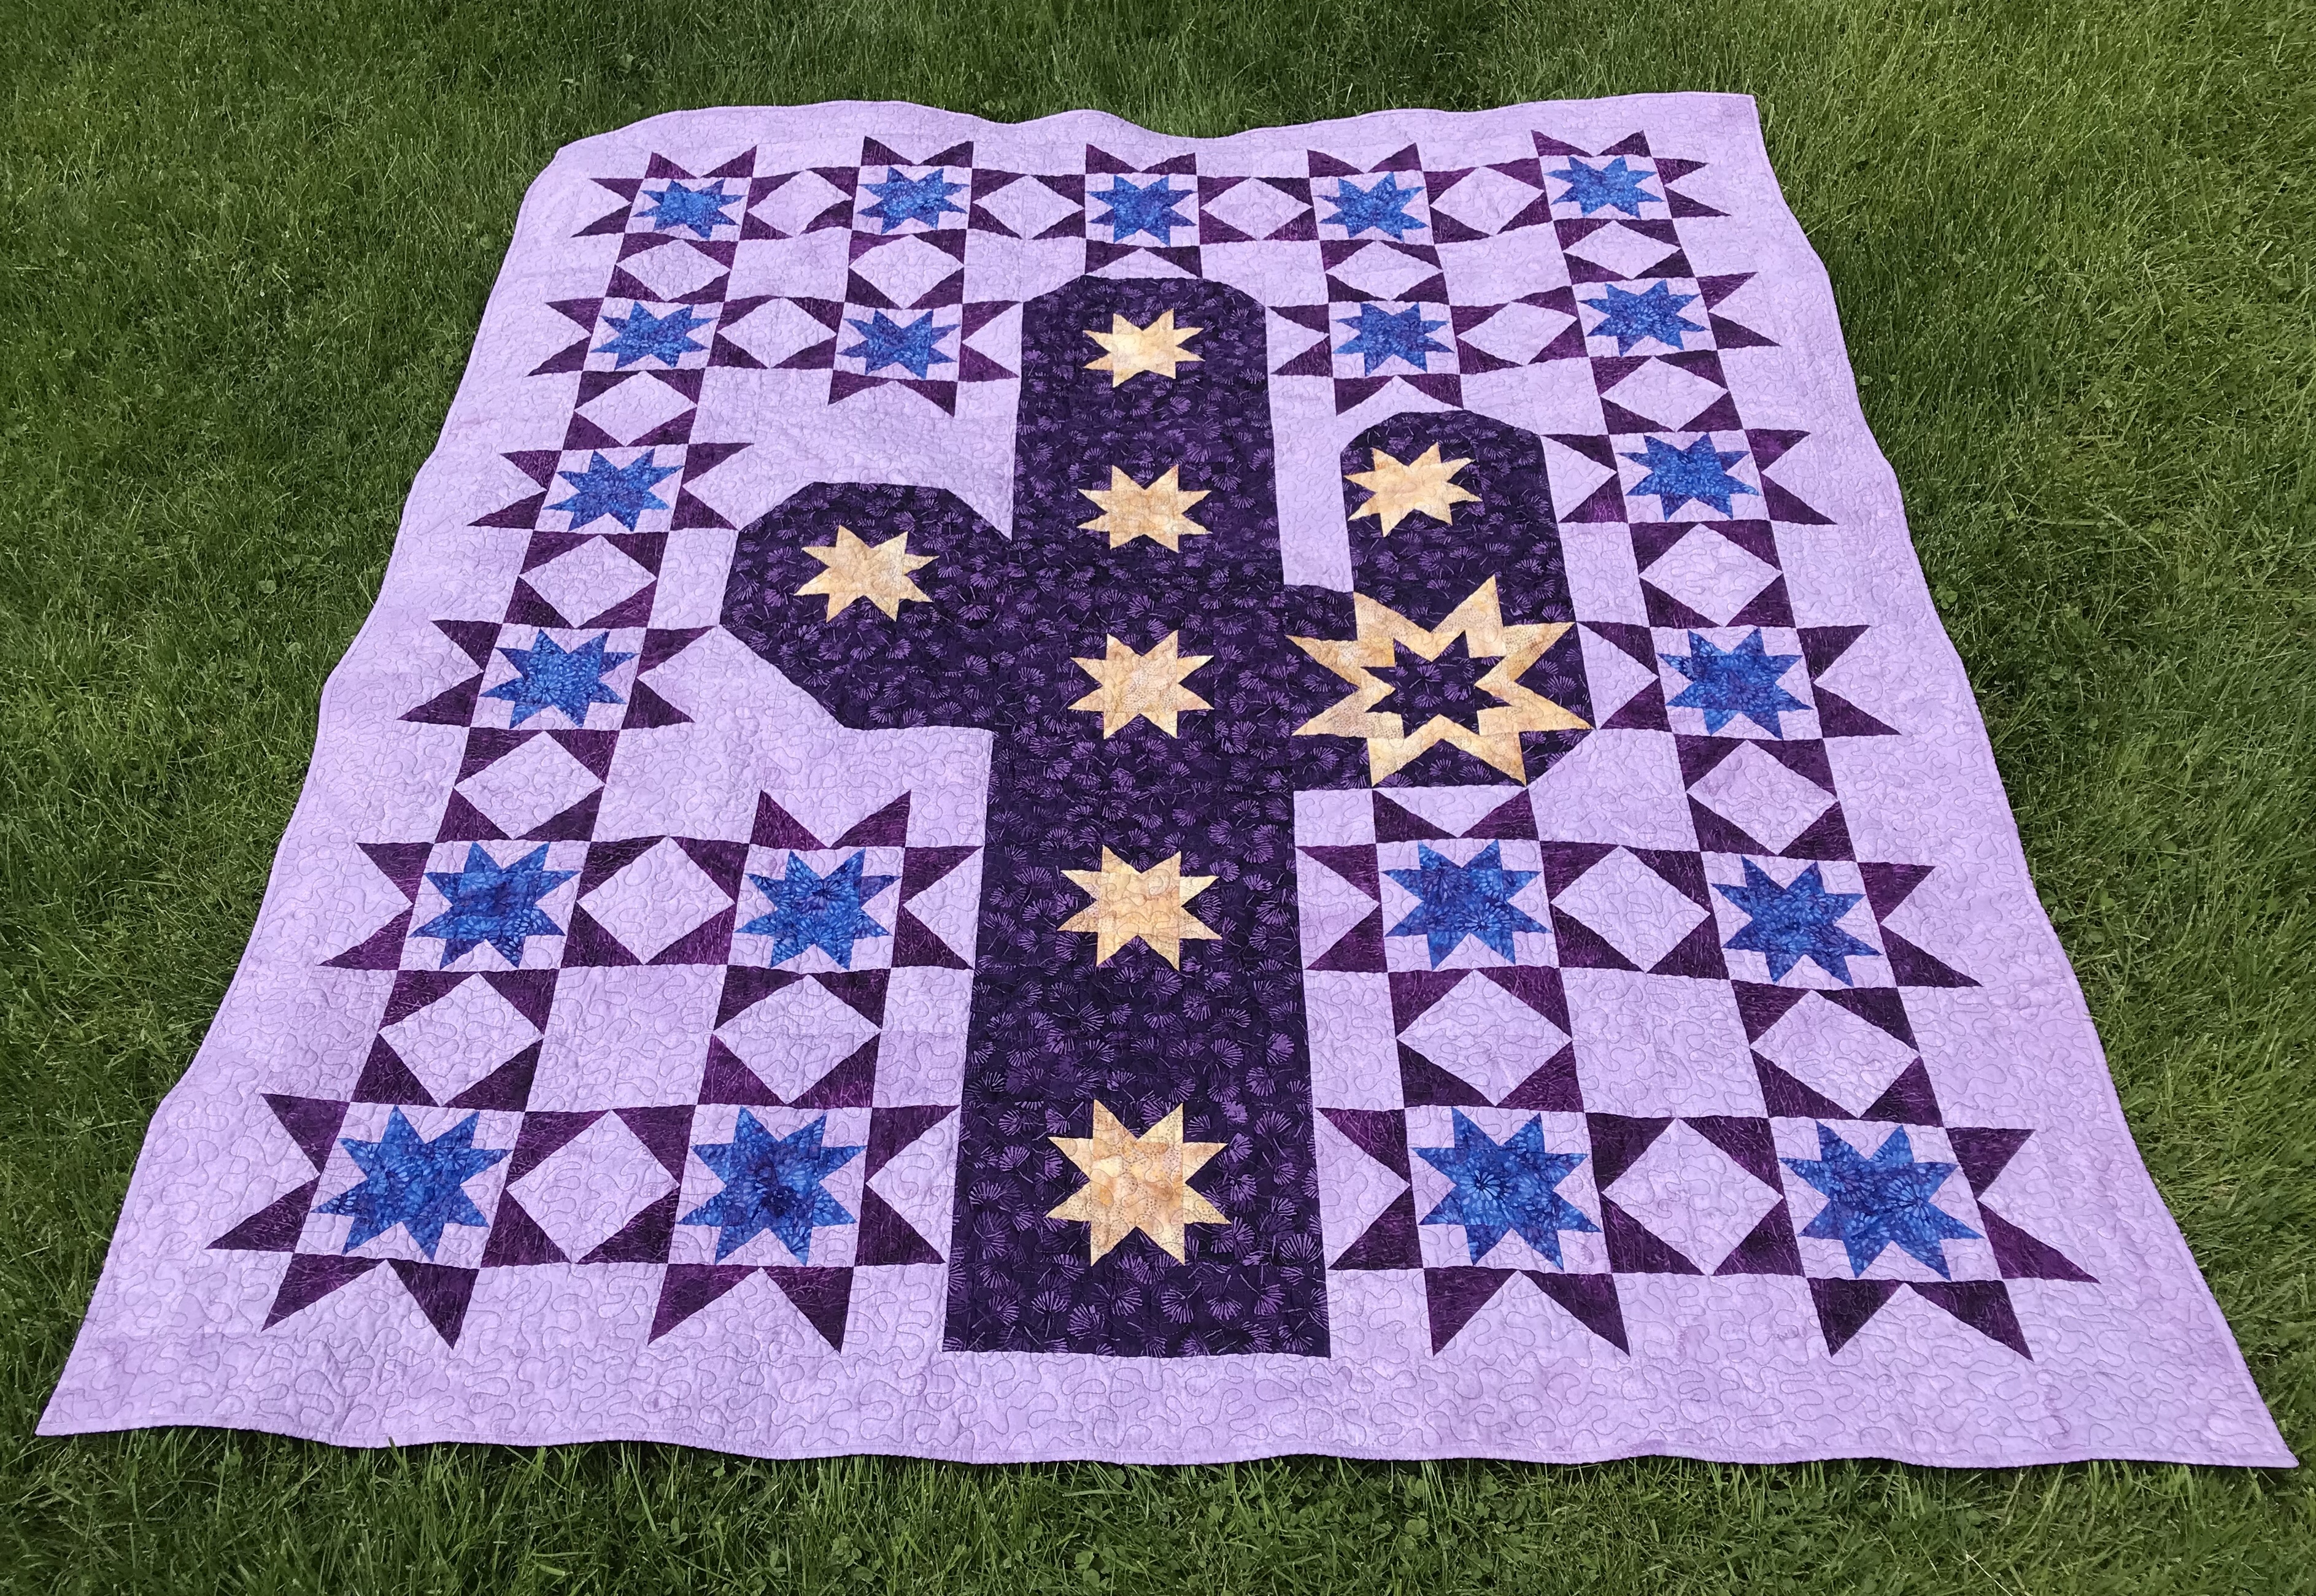
The first layout is with un-trimmed triangles. Take care when laying out the triangles that when ever dark star points come together that none are the same so when the stars are formed, every star point is a different color.

img_1390

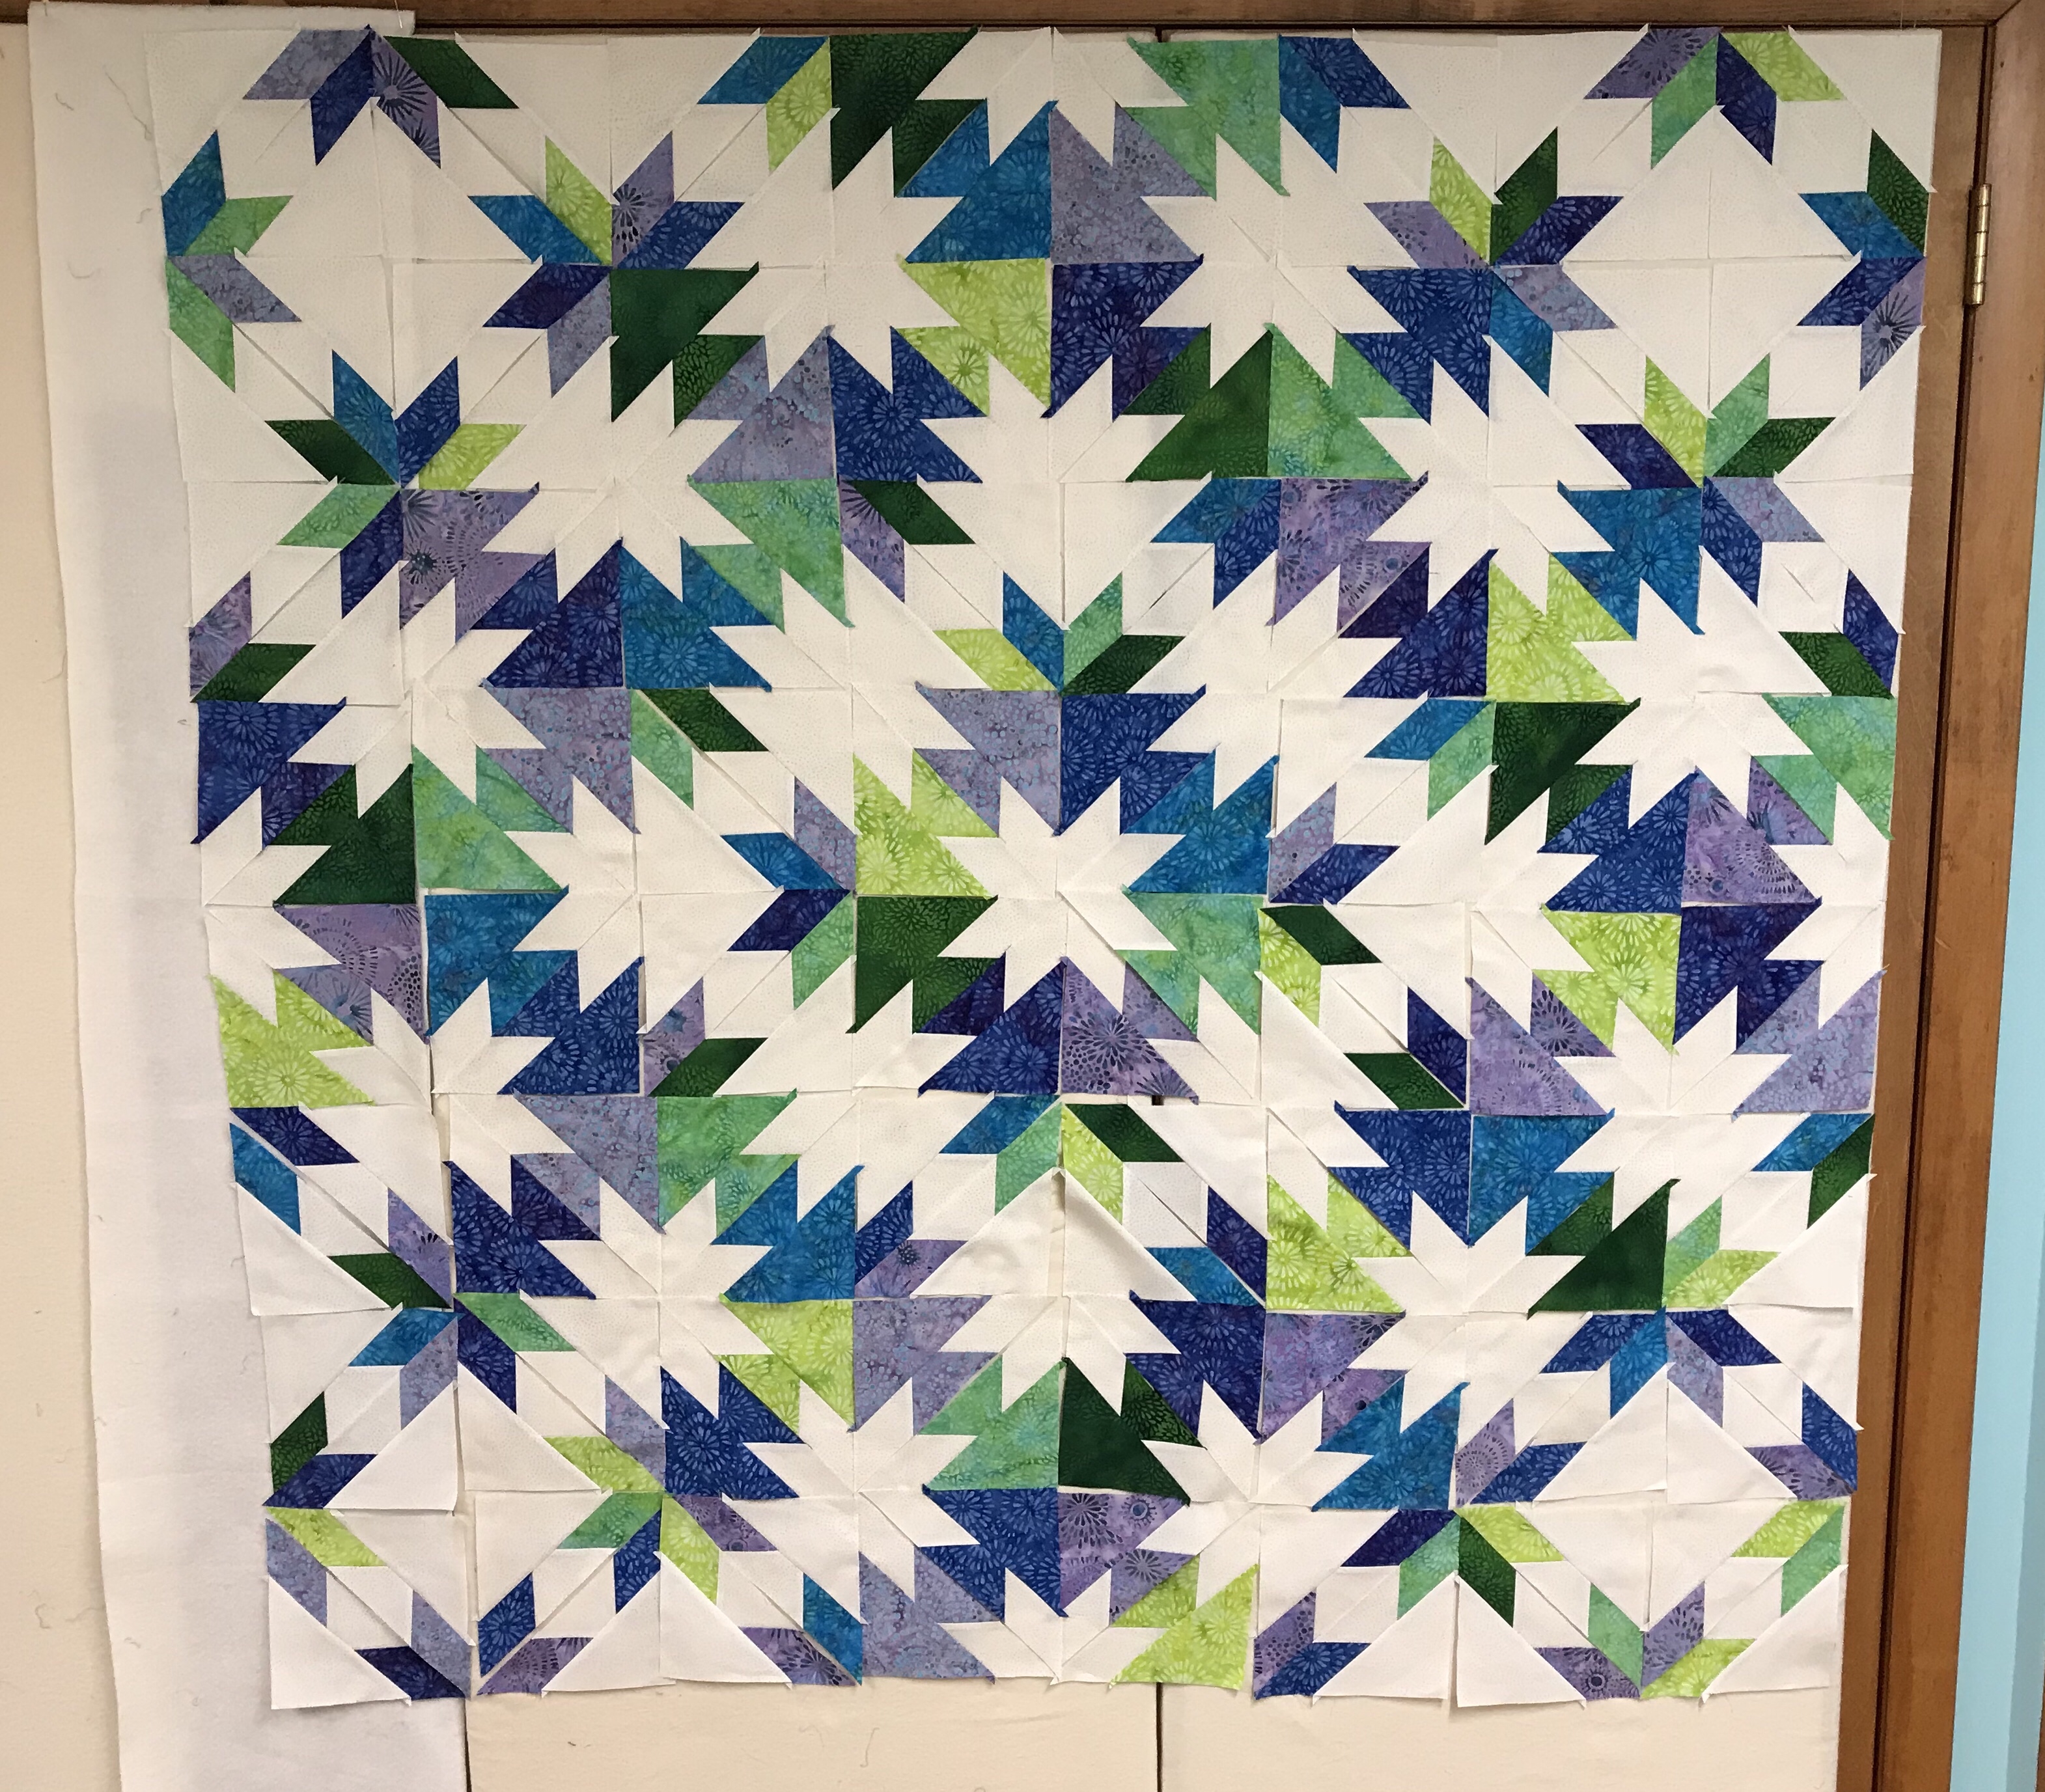
Having a design wall is very helpful.

img_1392

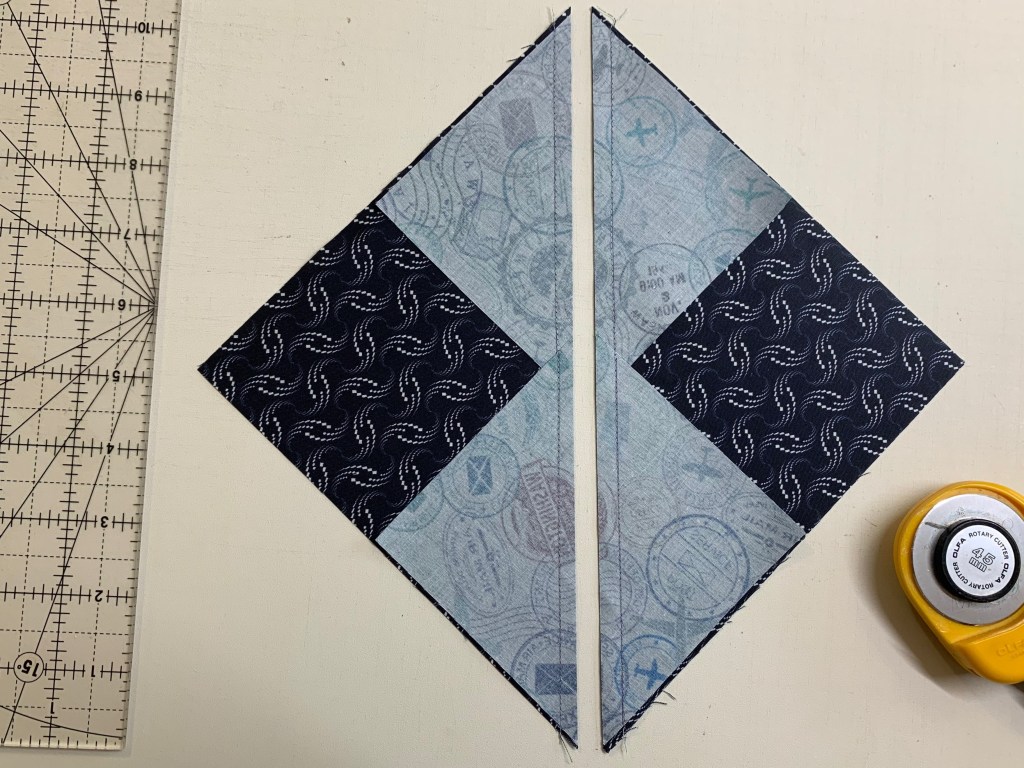
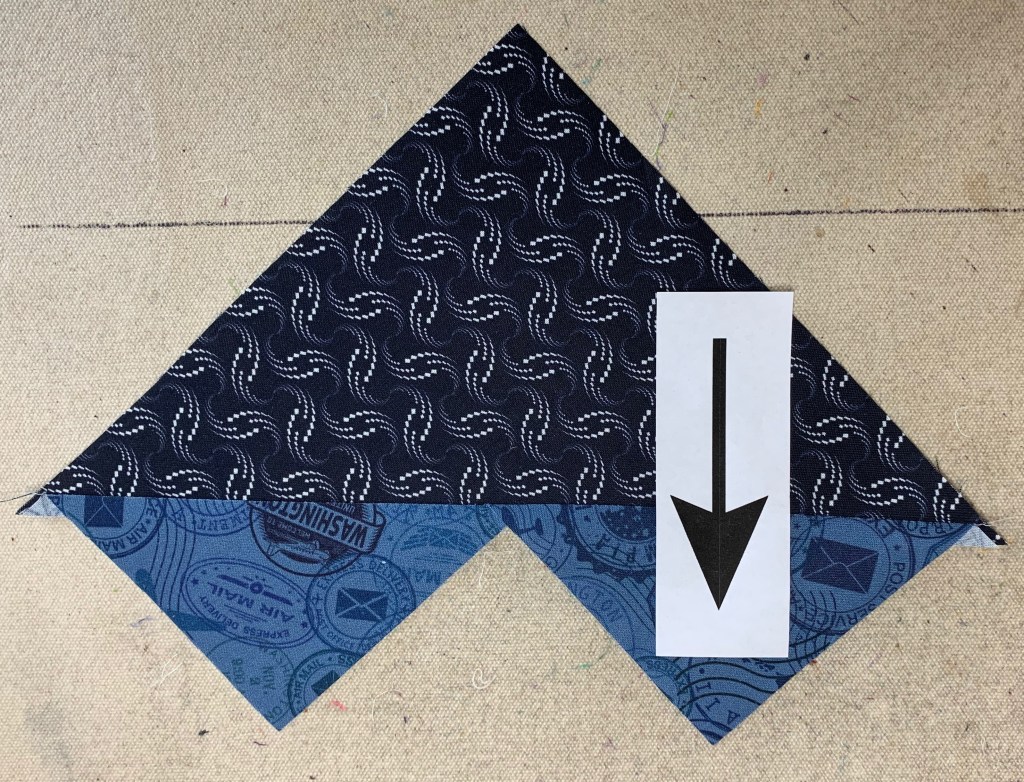
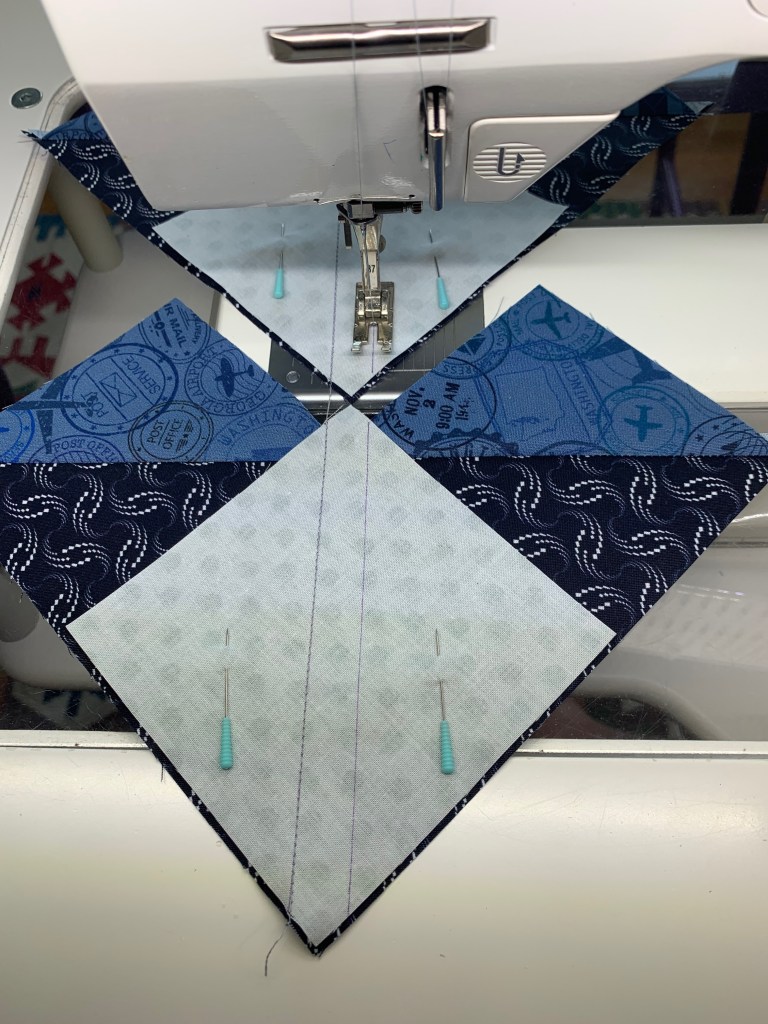
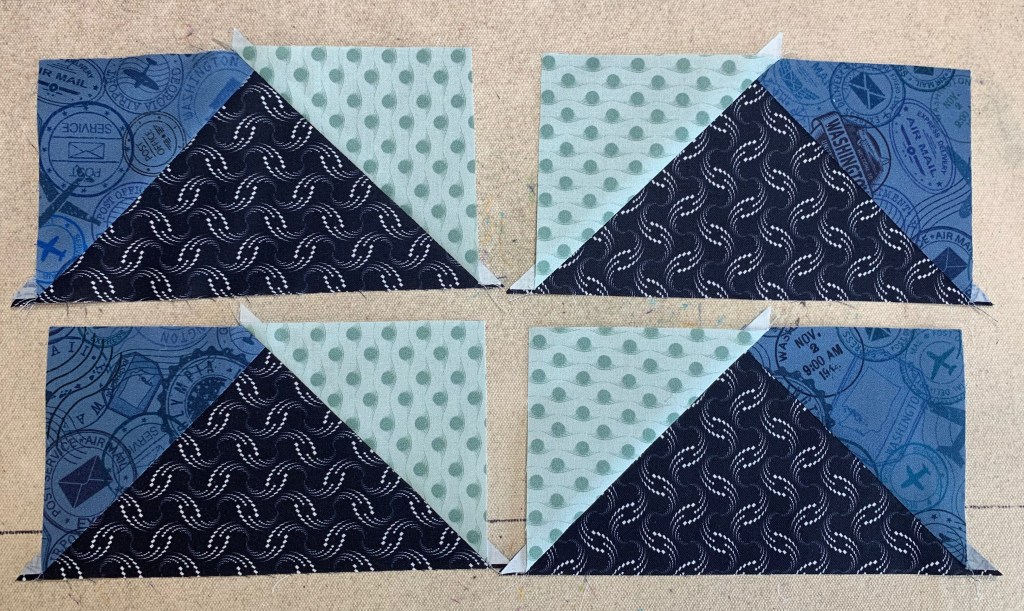
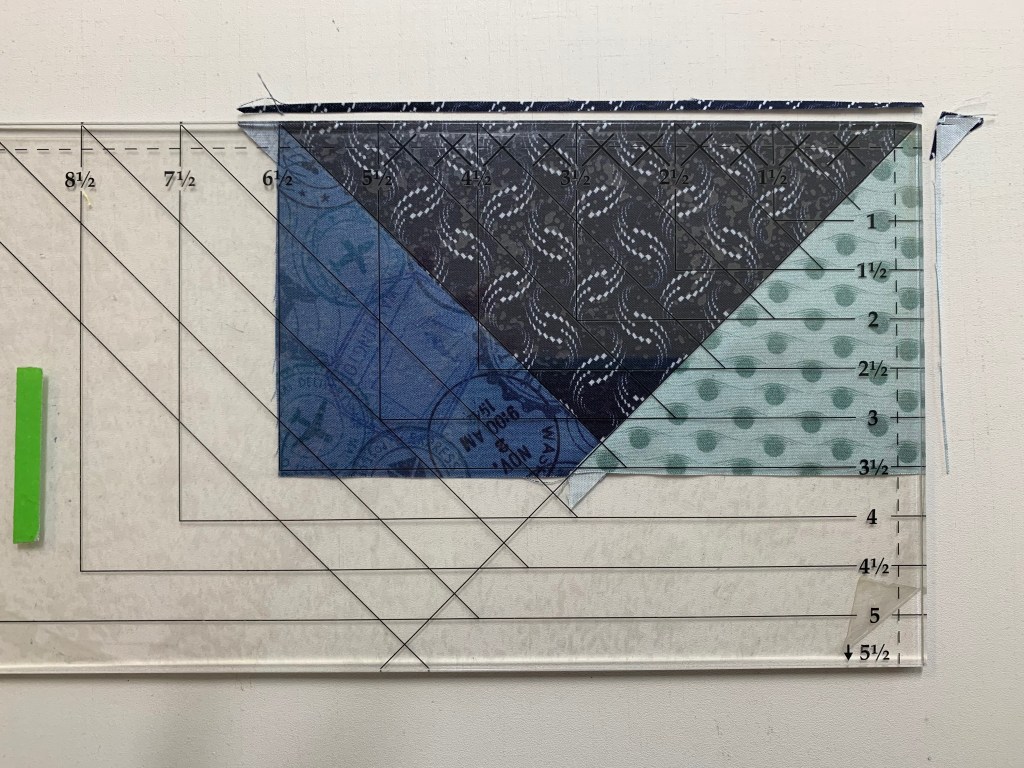
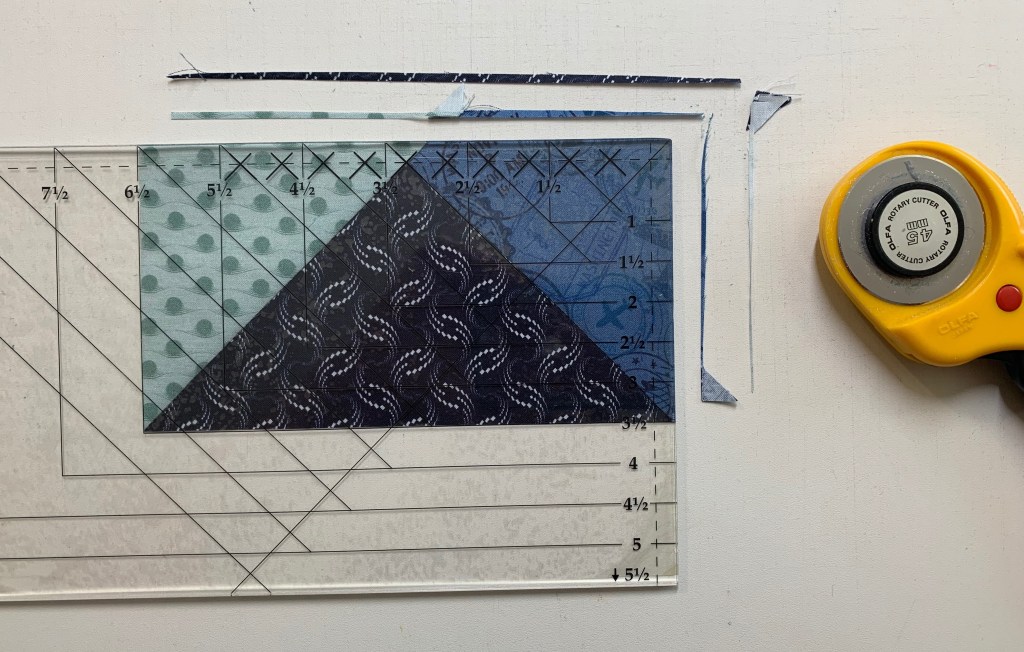
Once you are satisfied with the balance of color, stitch blocks together, press seam open and trim using your Hunter Star tool.  Full instructions are included with the pattern & hunter star tool.

img_1395

Once your blocks are trimmed, stitch them together into rows.

Join the rows together to complete the quilt center.

img_1439

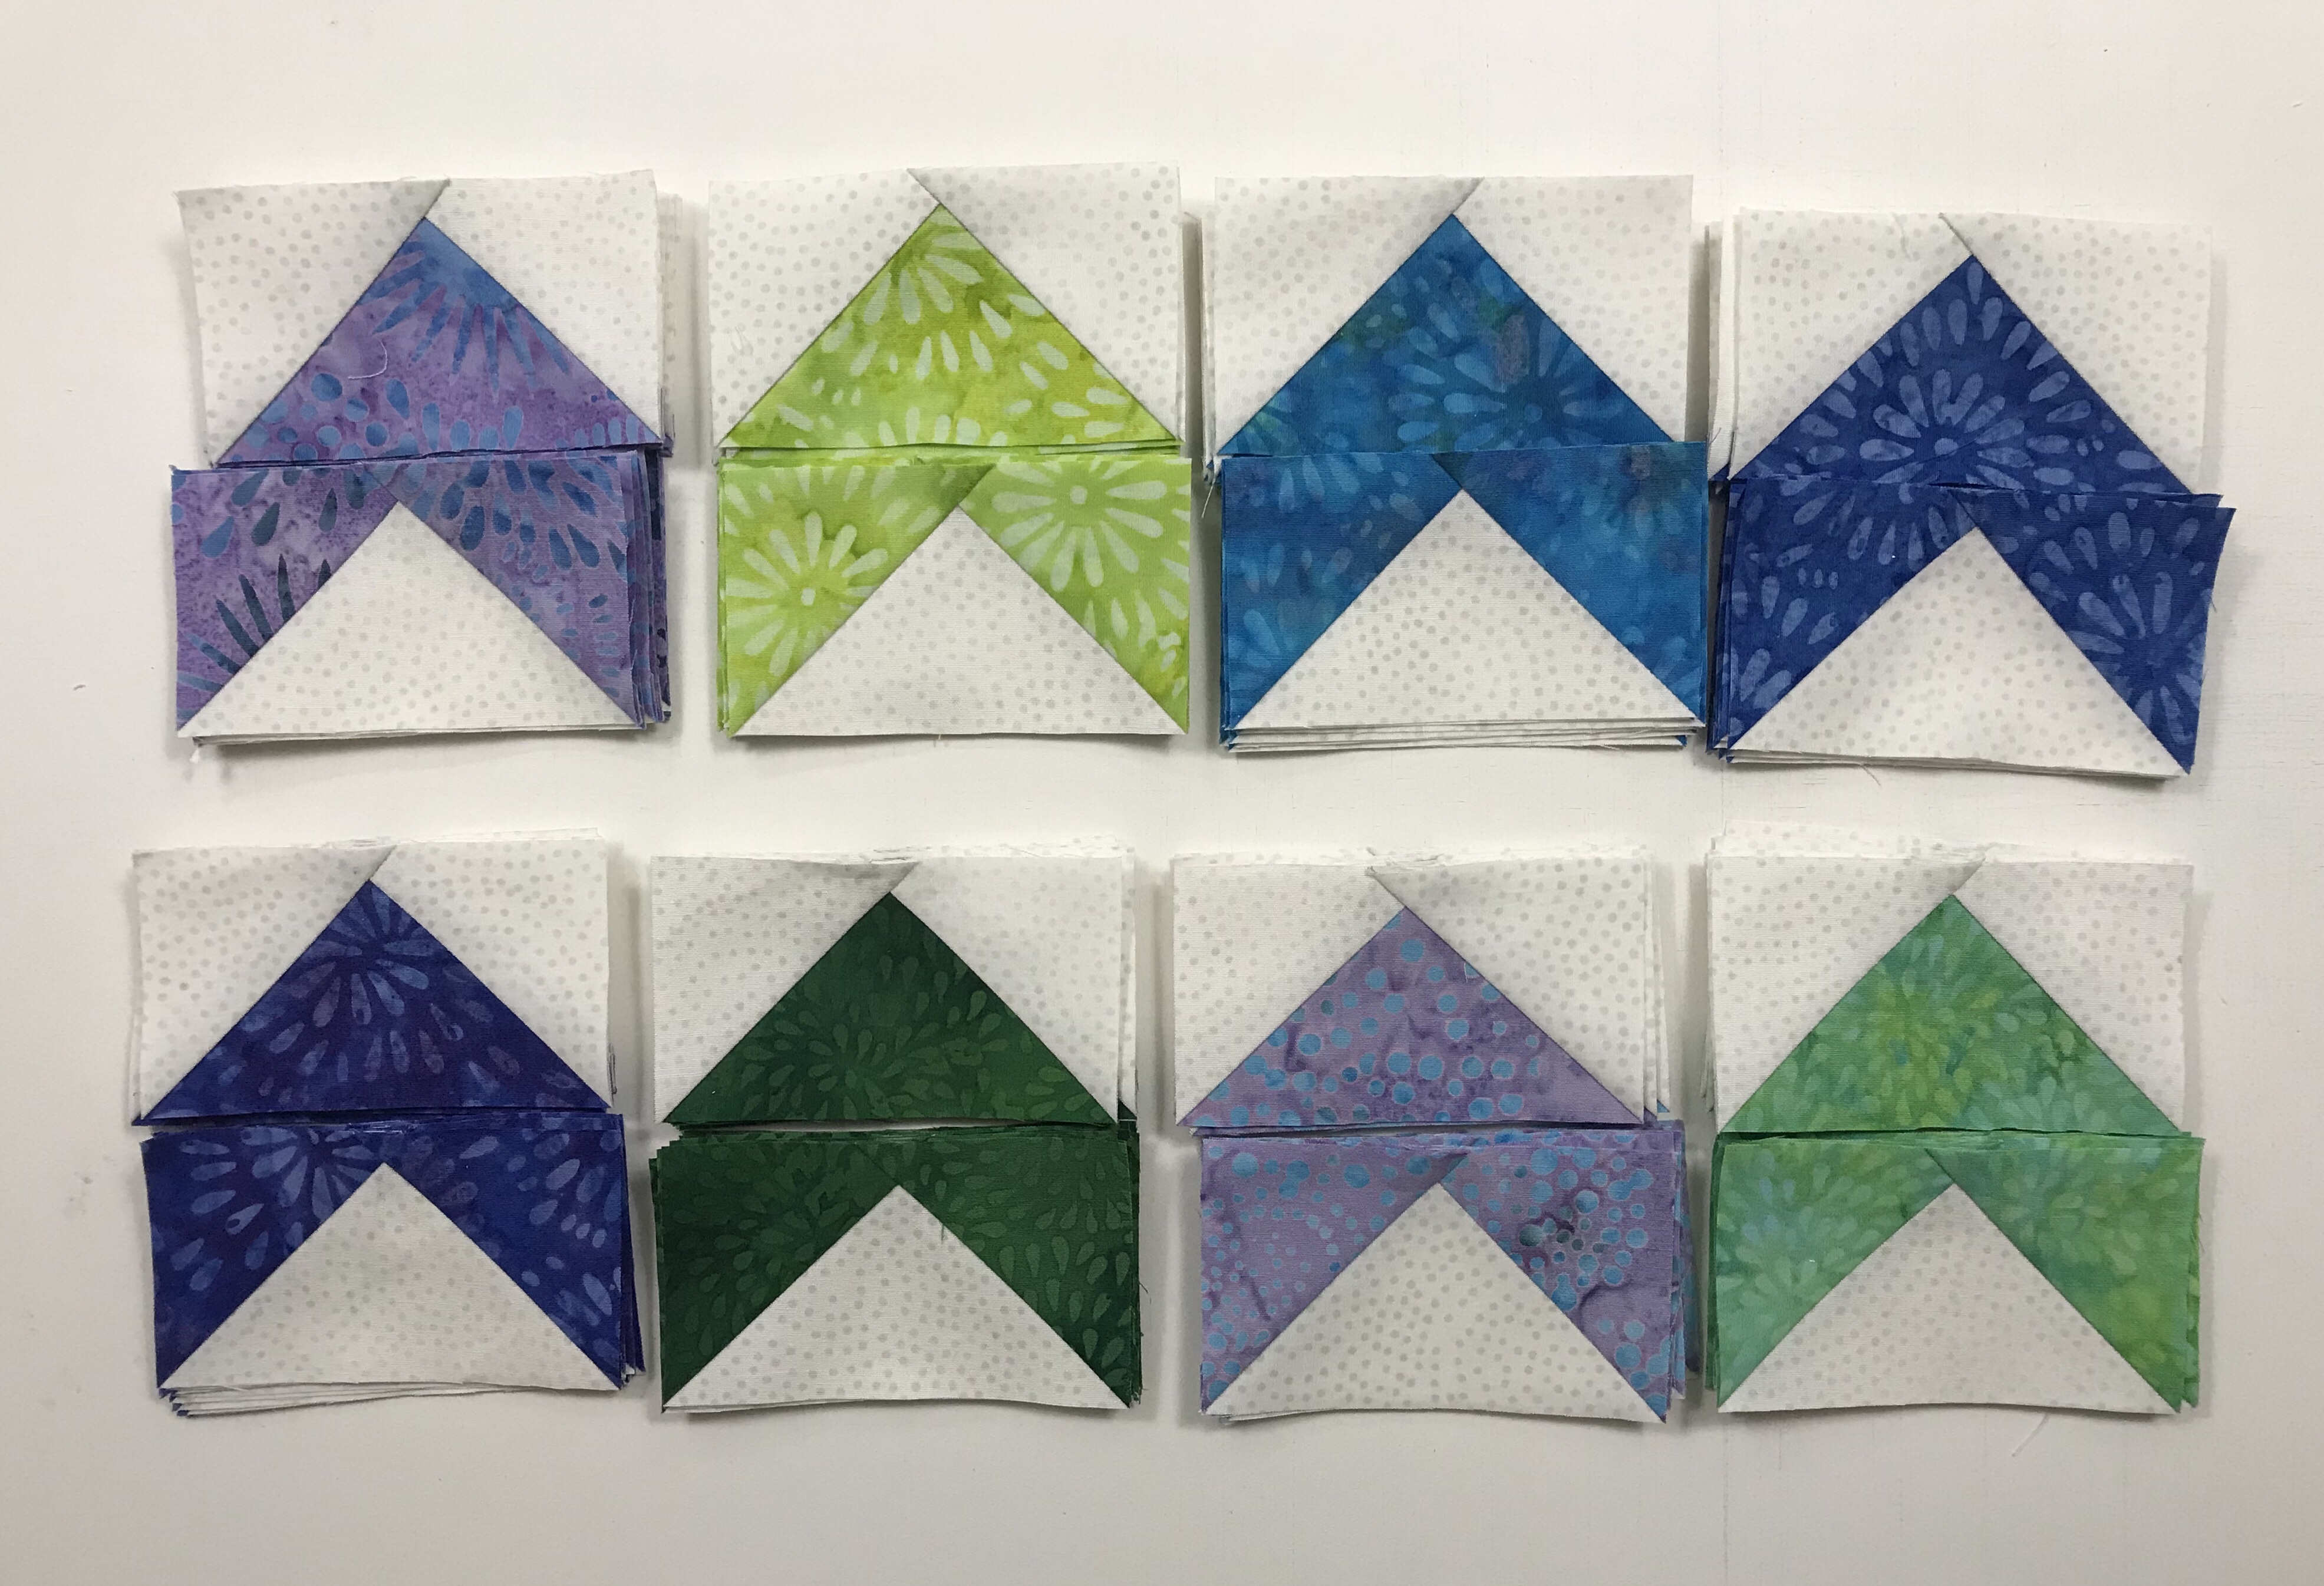
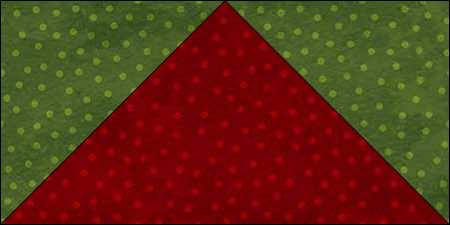
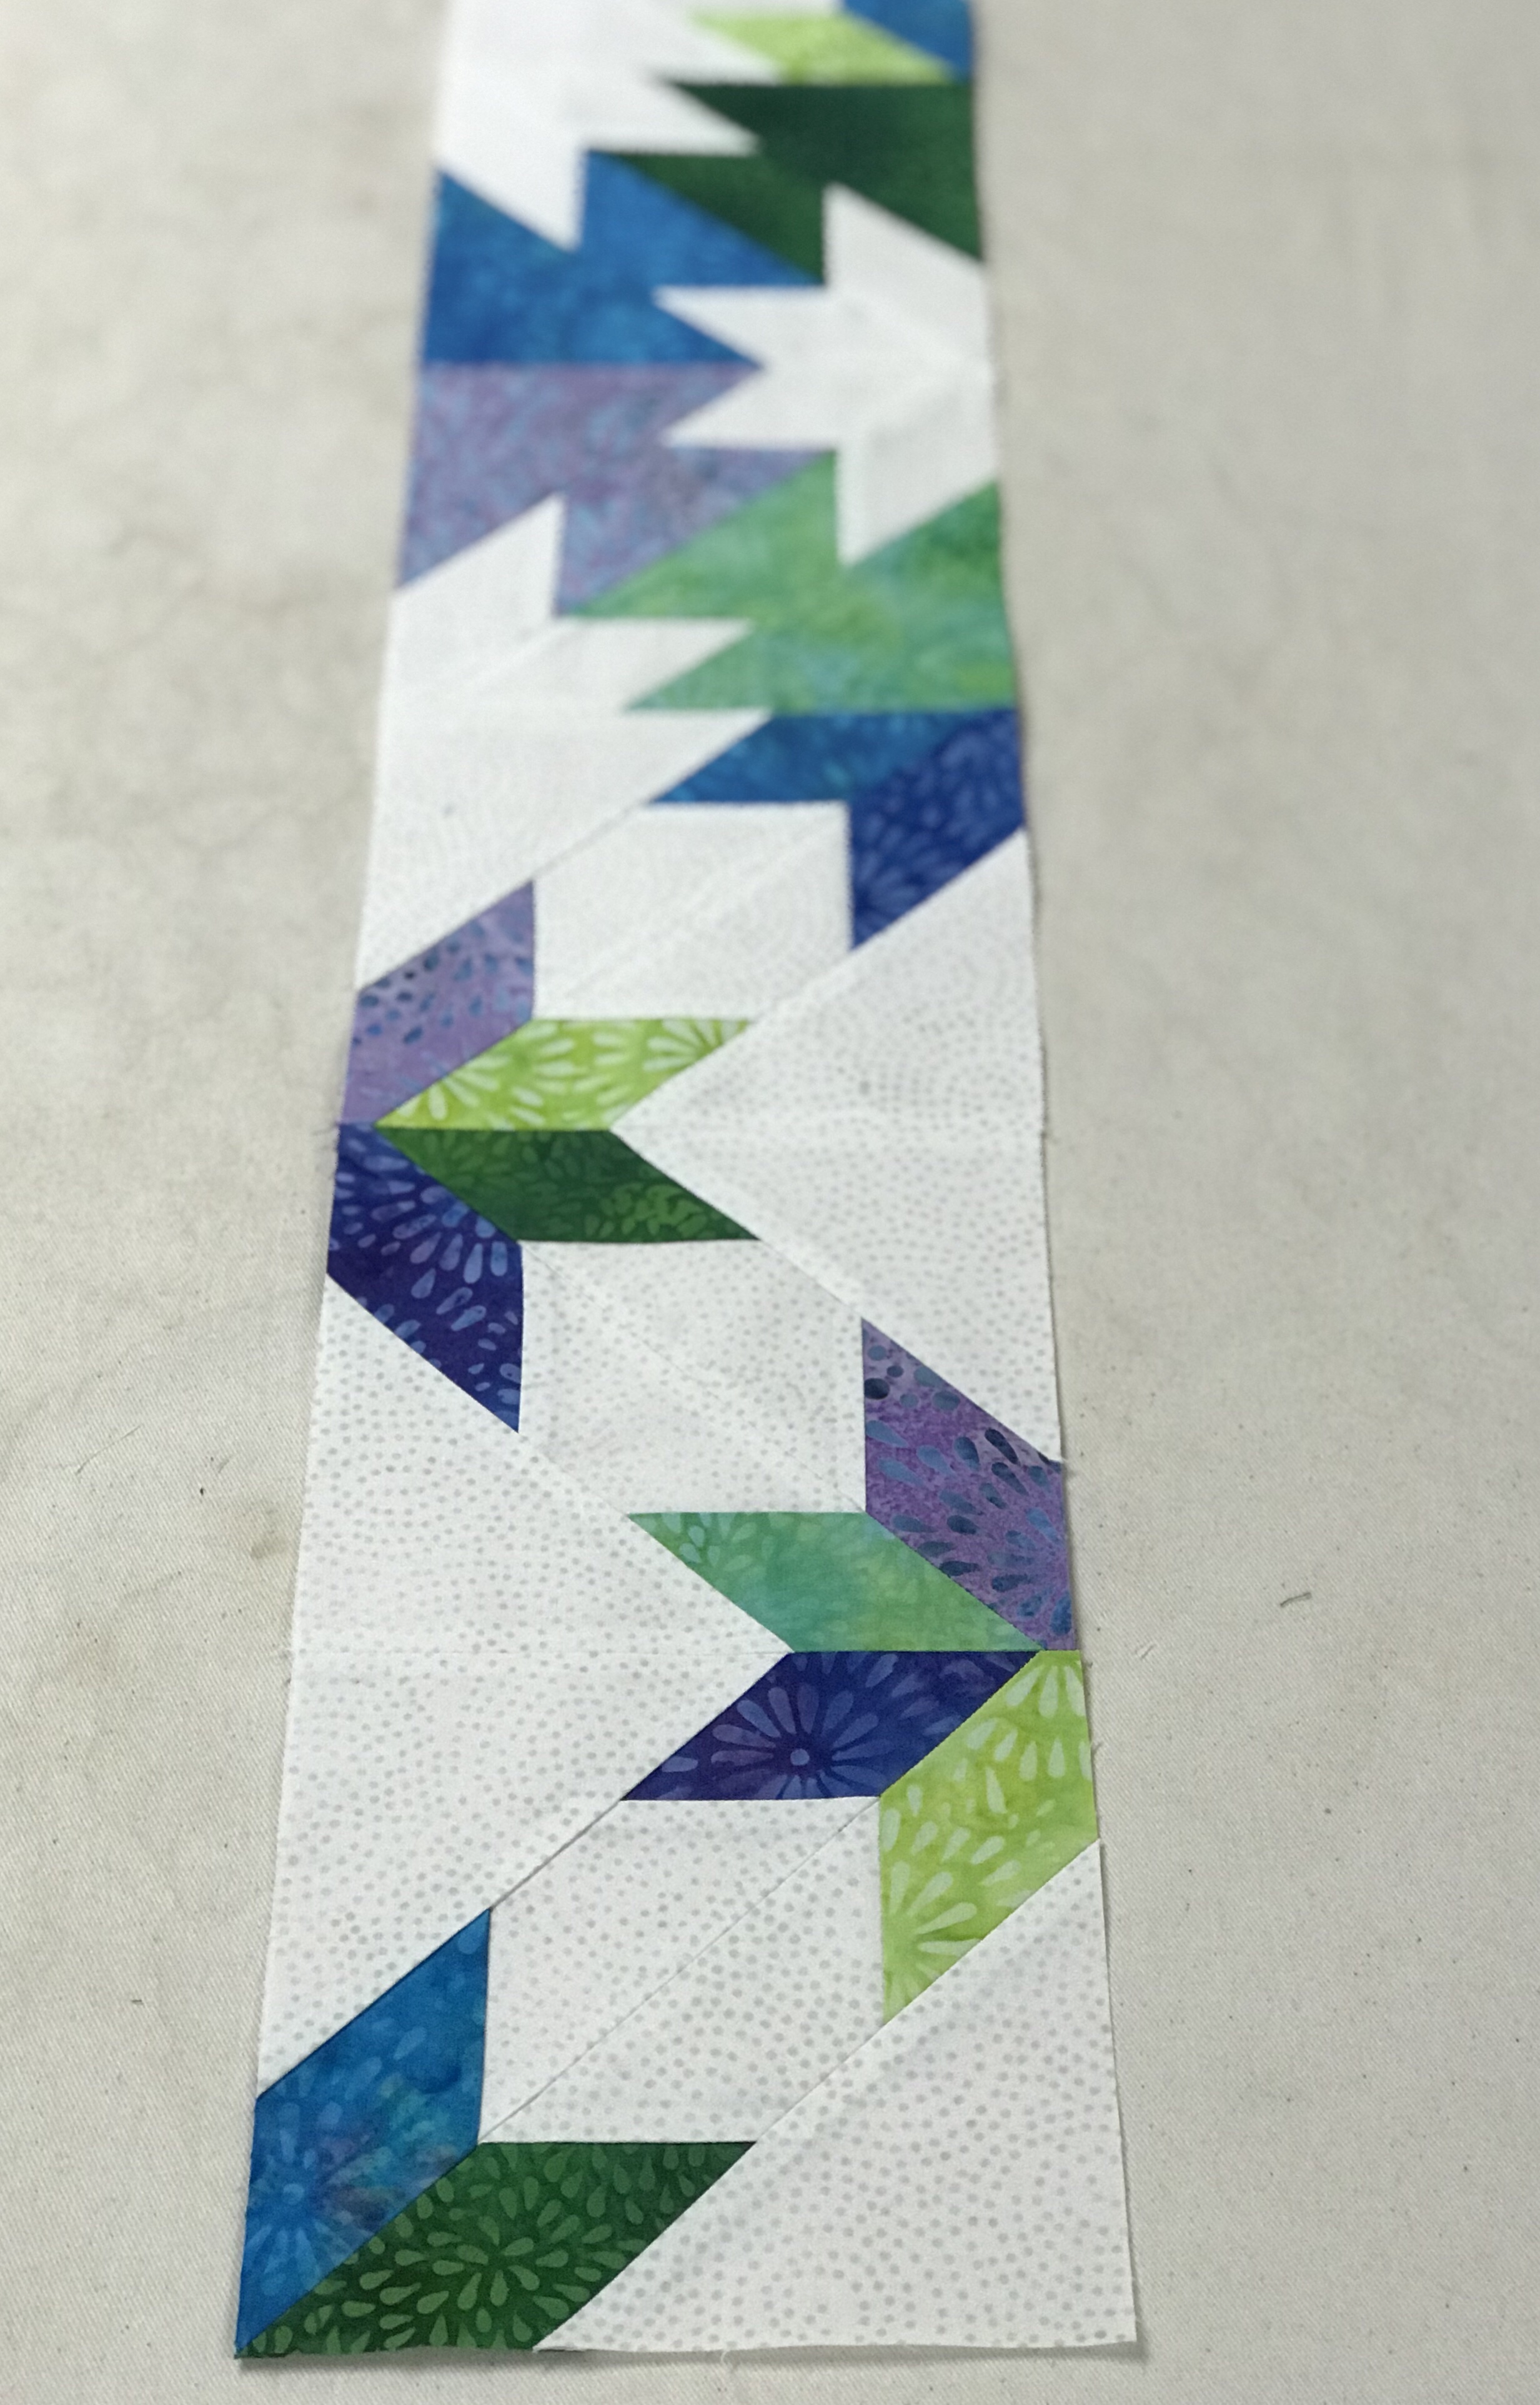
The inner border was made with flying geese using Deb Tucker’s Wing Clipper I tool.  A flying goose with a large light triangle always follows a flying goose with a large dark triangle. This fools the eye into seeing chevrons.

img_1440

Stitch the geese into pairs, you will then have 8 chevrons from each color fabric. Divide the chevrons into four piles containing 2 chevrons from each color. Decide how you want the colors of your geese to flow, and organize each pile of 16 chevrons, we will use 15 per side. Each strip of stitched chevrons will end up in the same order, with 4 chevrons left over.

Cropped corner


The pattern calls for quarter Square triangles as the cornerstones.  I decided to use four patches, (there’s a story there).  Using Deb Tucker’s Four Patch Square Up tool for the four patches is so quick and easy.

This quilt comes alive with color because of the Island Batik fabrics I used.

#islandbatikambassador  #islandbatik #iheartislandbatik