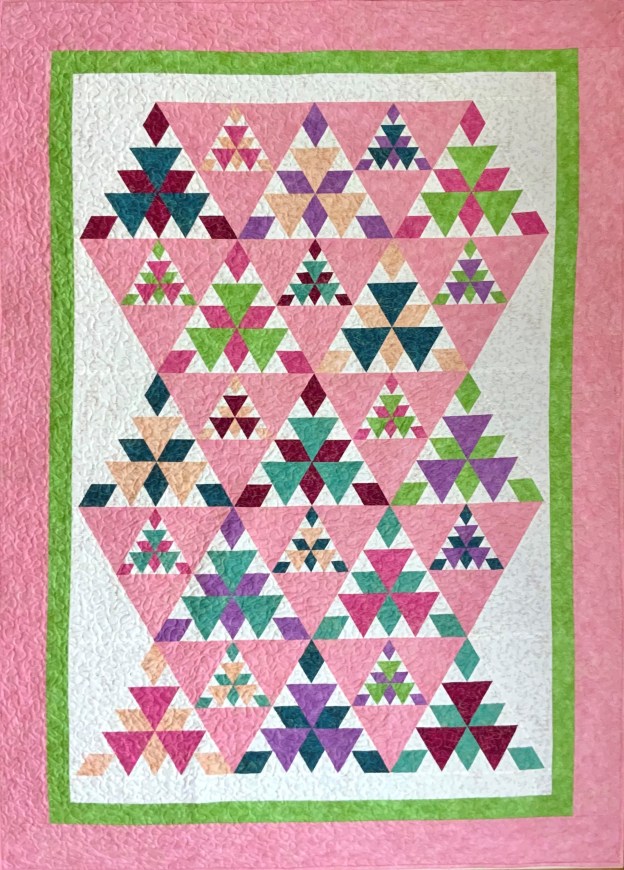
I obviously can’t get enough of 60 degree triangles. I decided to take a break from One Block Wonders to play with my Star 60 Tool and make Radioactive by Deb Tucker.

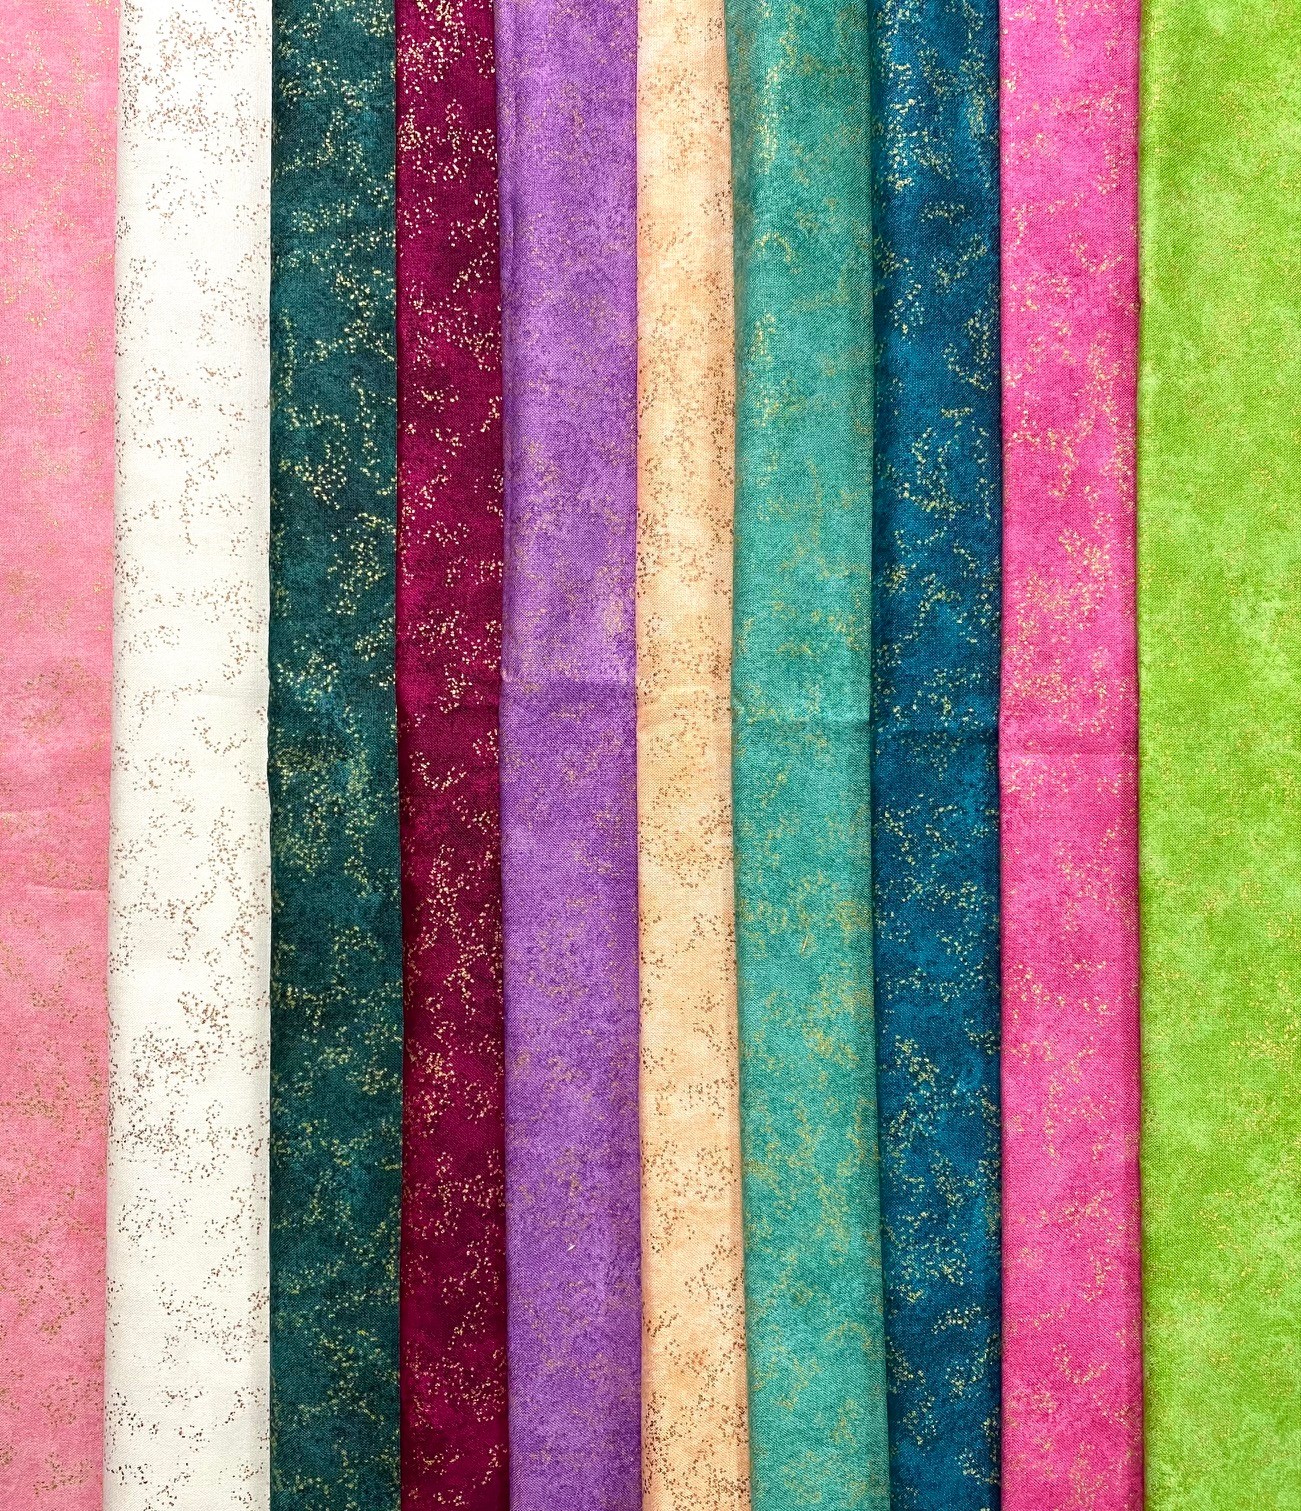
Northcott Fabrics provided me with Shimmer Radiance by Deborah Edwards. These fabrics are so beautiful with a soft luscious hand and saturated colors.


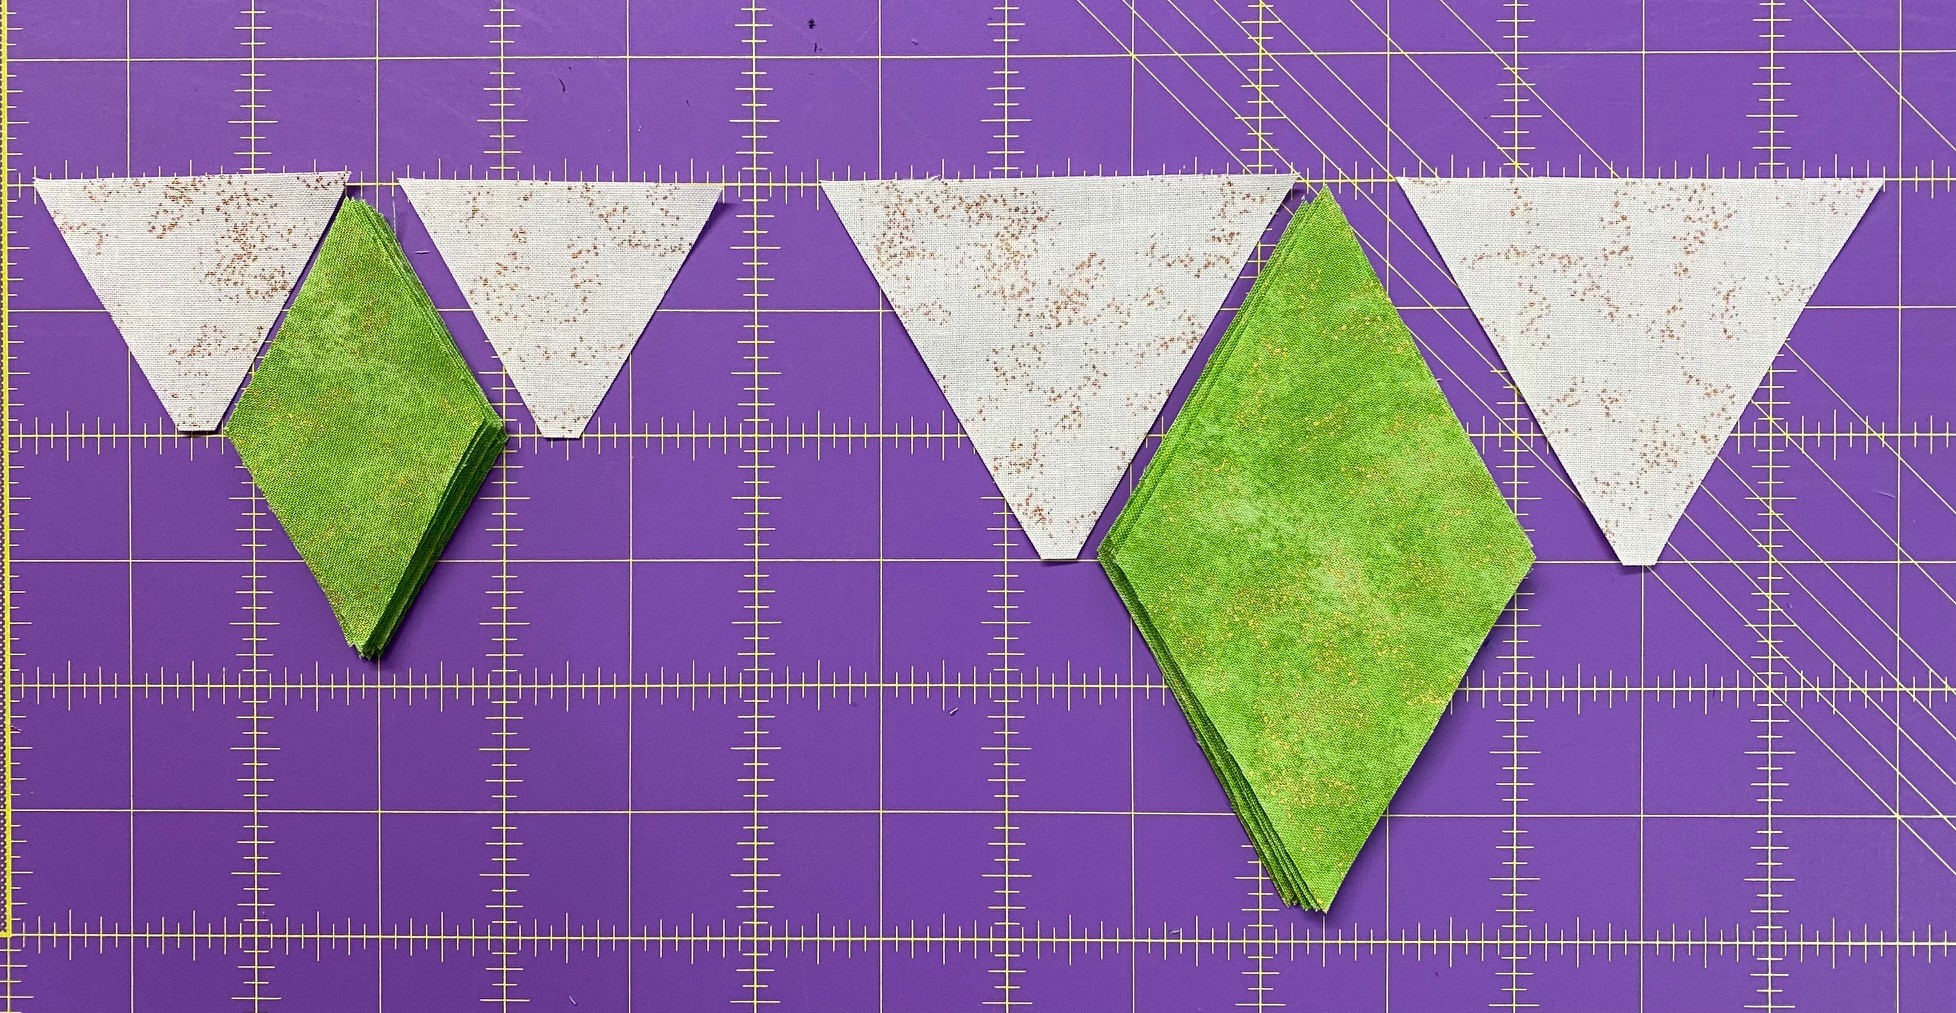
Radioactive uses Star 60 units for 12″ and 6″ triangle blocks. First I cut my side triangles for my 12″ Star 60 units, then the 6″ units.

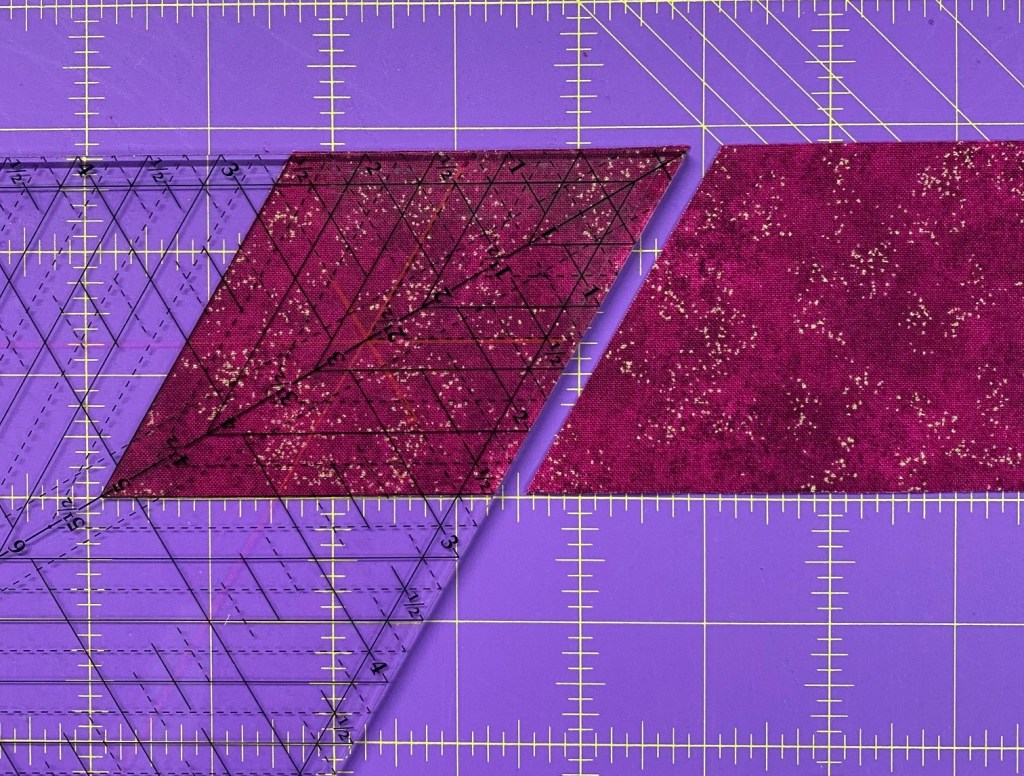
Then I cut my Diamonds using my Star 60 tool.
Once I have cut my units for both my star 60 units it is time to construct my units.
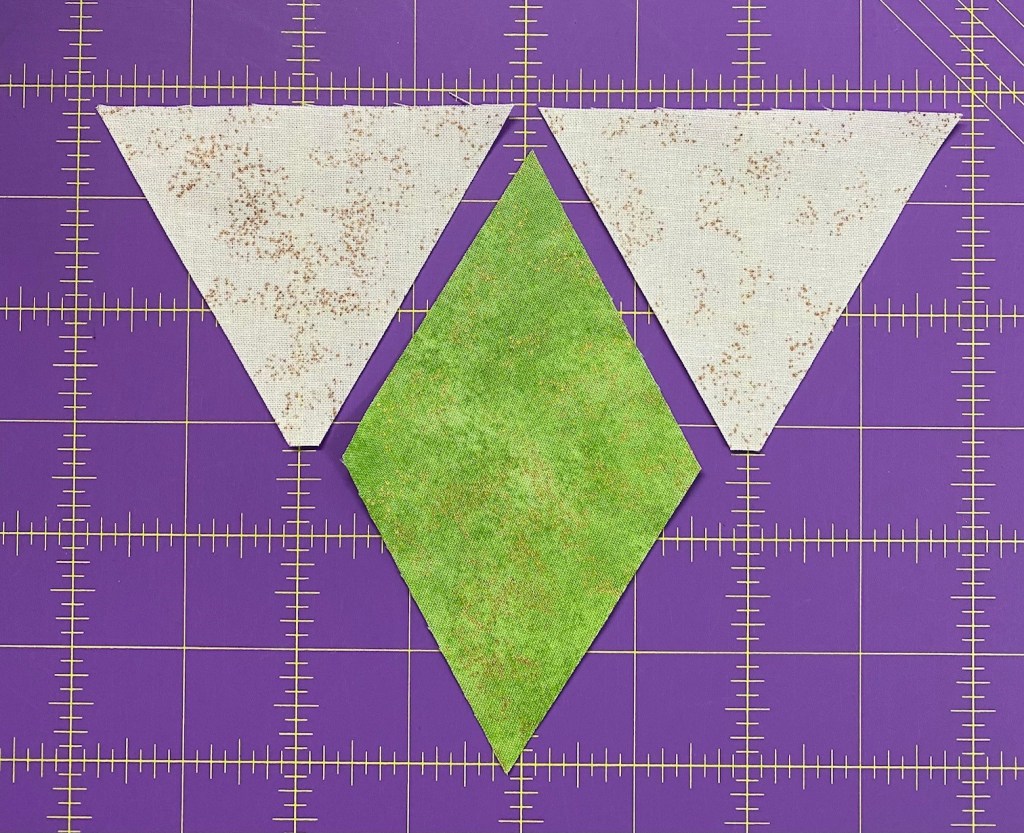

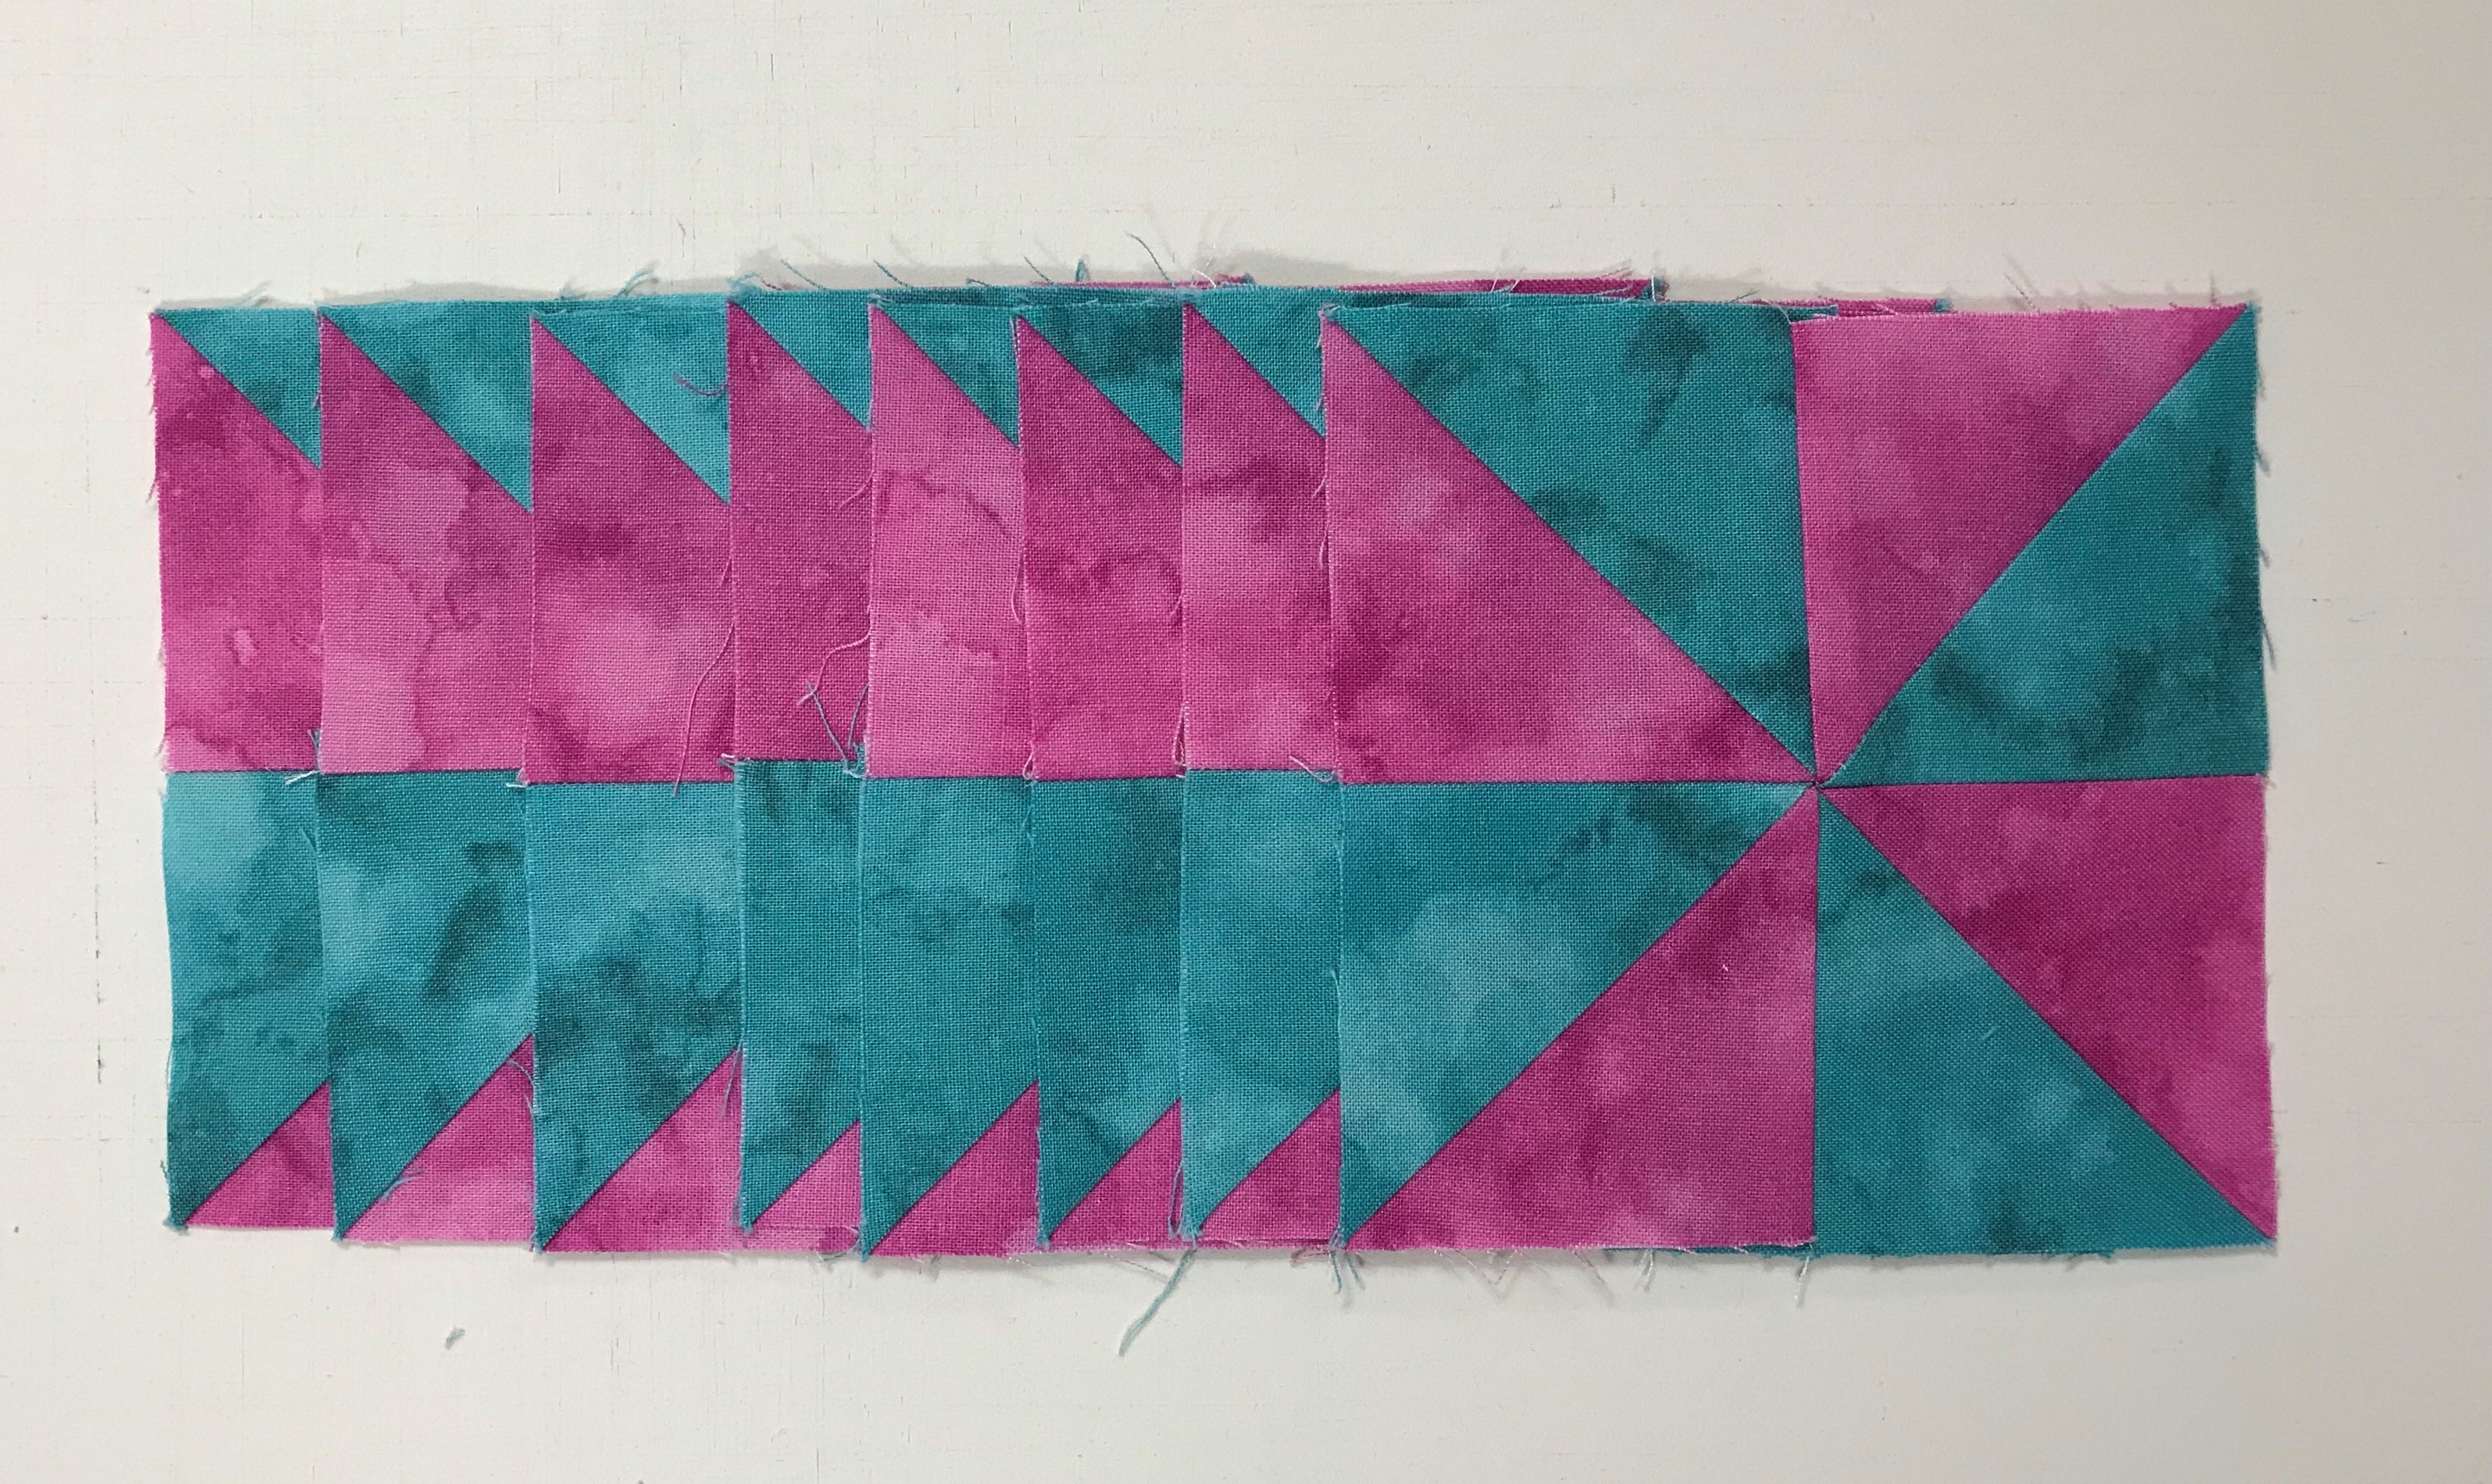
Lay out the bright Diamonds and the background side triangles as shown above. Take a triangle from the right hand side and position it on top of the diamond. Match the flat corner of the triangle with the edge of the diamond as shown; align the raw edges.

With the diamond on top, stitch along the matched edges. Press seams open.


Position a remaining triangle on the other side of the diamond point. Align the flat corner of the triangle with the edge of the diamond. Align the raw edges. With the diamond on top; stitch.


Press seams open. Both the 6″ and the 12″ Star 60 units are constructed the same way.

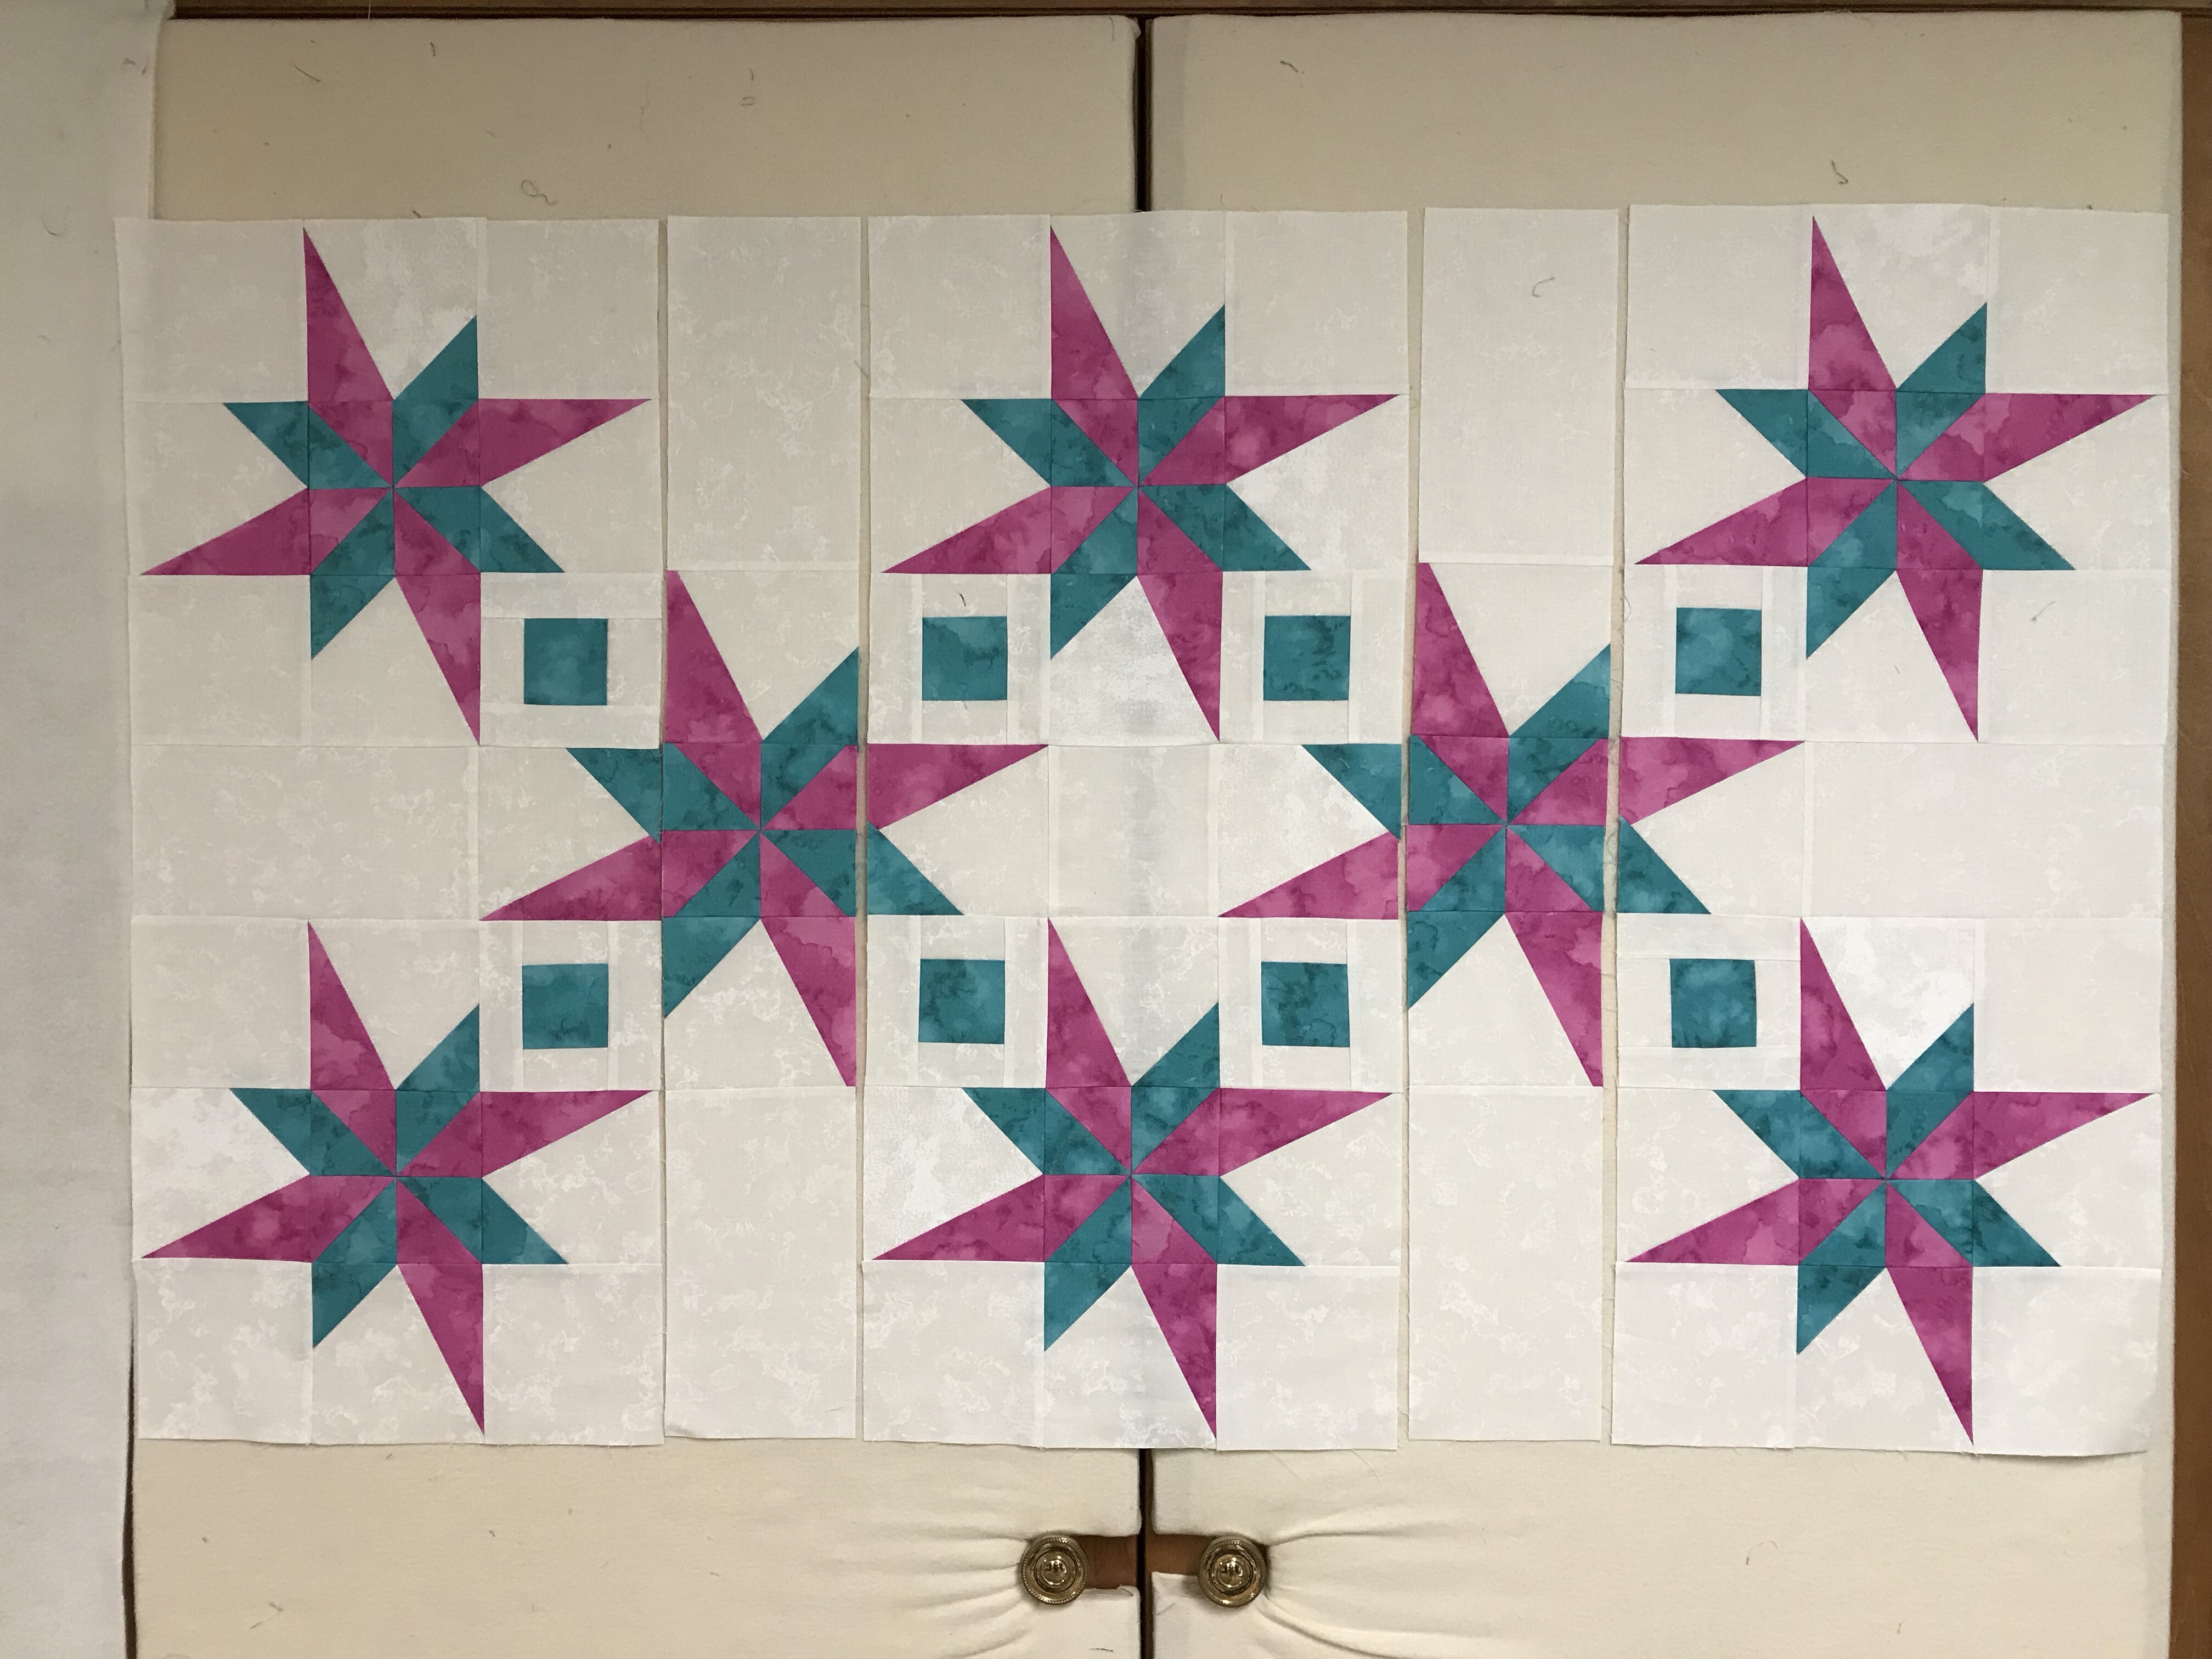
Choose 6 Star 60 units and 3 companion triangles and layout as shown above.
Note: 3 Star 60 units have the diamonds pointing inward and 3 are pointing outward.
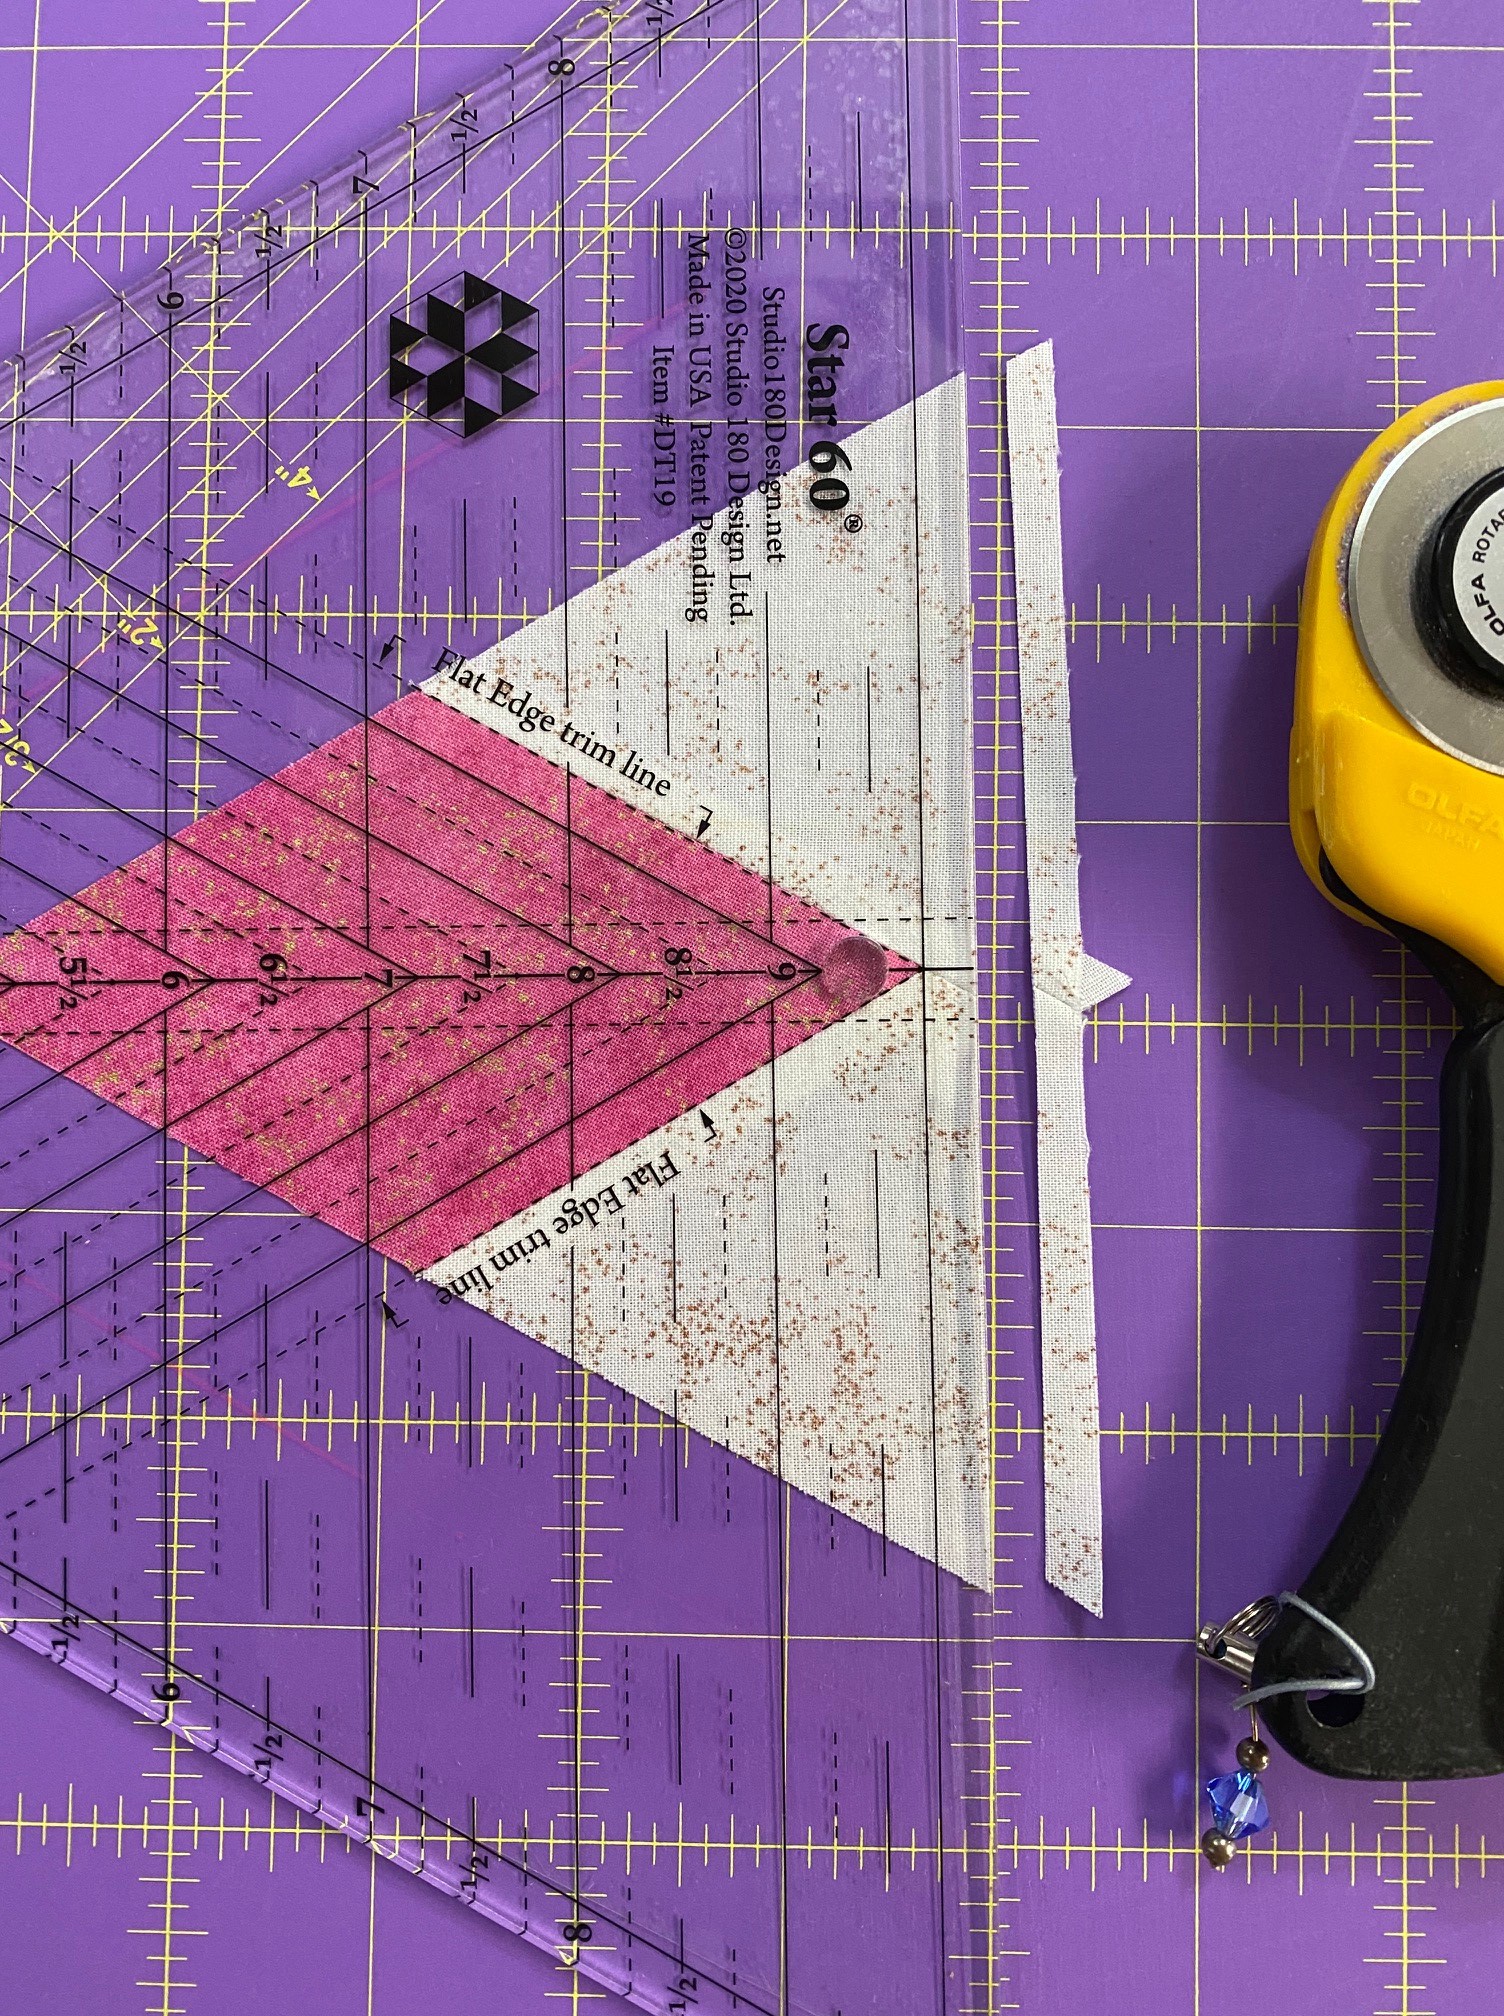
Take the 3 Star 60 units that are pointing outward and position them so the raw edge with both side triangles is either by your right hand if you are right handed or left hand if you are left handed. Locate and align the Flat Edge trim lines on the tool with the seams of the diamond and trim.

Position and stitch each of the 3 trimmed Star 60 units with a Companion Triangle. Stitch with the Star 60 unit on top.
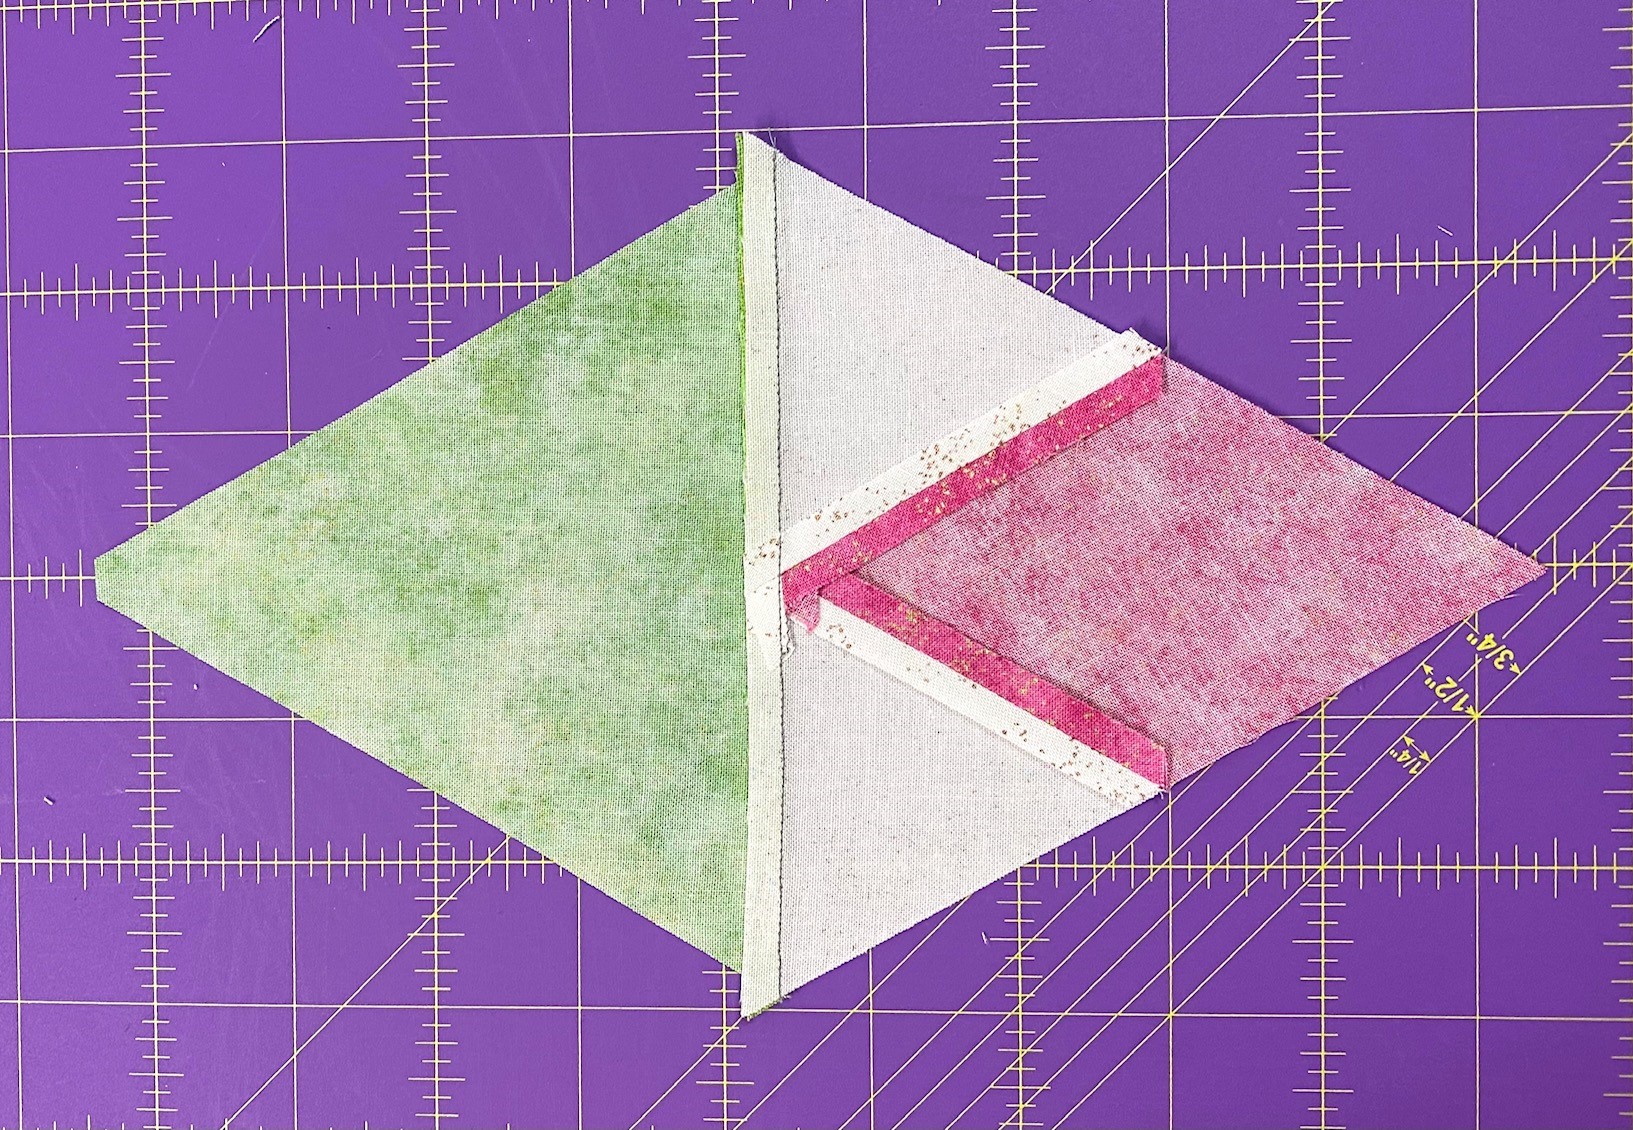
Press the seam toward the Companion Triangle or open.

Trim the Companion Triangle. Position the unit on the cutting mat so that for right handers the Companion Triangle is in the 2 o’clock position or 10 o’clock for left handers. Align the point of point of the 4″ Diamond Point Guidelines with the point of the diamond in the Star 60 unit and the 4 1/4″ horizontal guideline on the seam. Trim the triangle.

Trim the 3 remaining Star 60 units (they are pointing inward in the layout). Position the pieced unit right side up on the cutting mat. Align the 4″ Diamond Point Guidelines with the sewn seams. Trim along both sides of the tool.
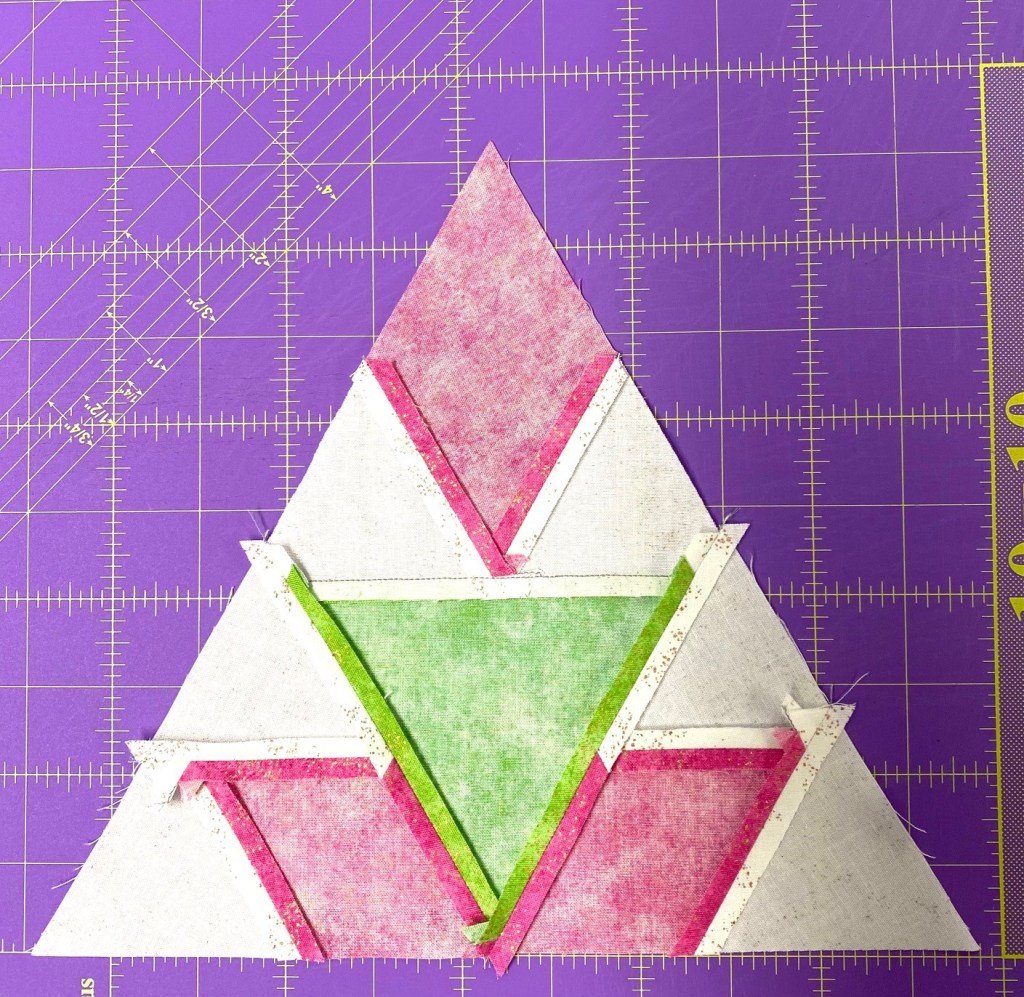
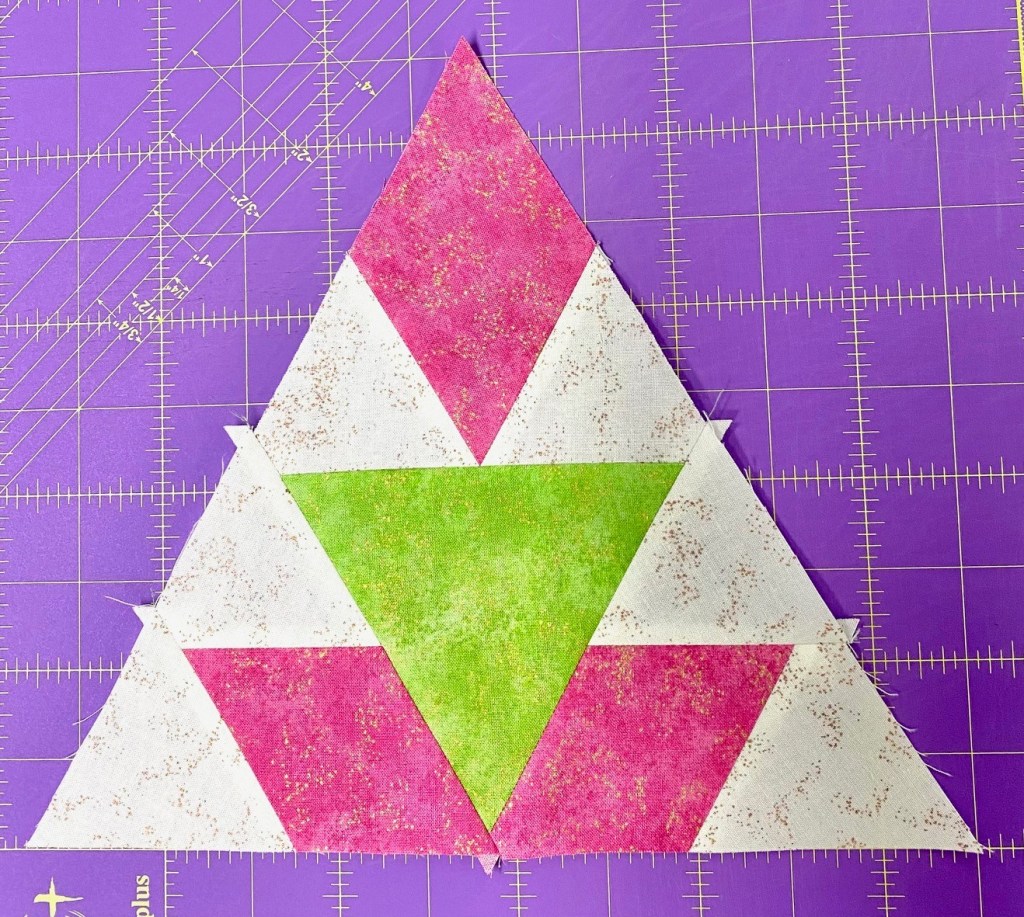
Sew the top 3 units as shown. Press all seams open.


Stitch the remaining 3 units as shown above.

Sew the top and bottom sections together. Match the center intersection and the raw edges. Press seams open.

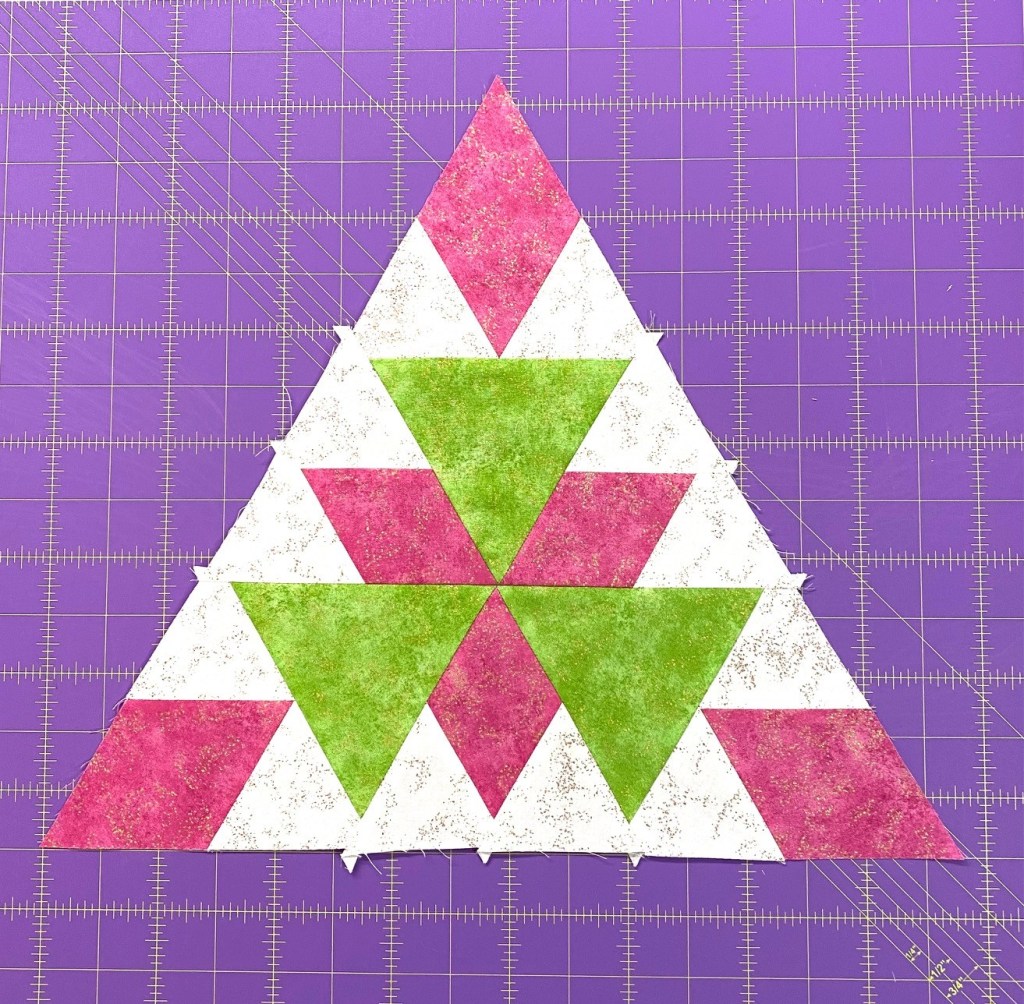
Trim the 12” blocks. Position the block on the cutting mat so that one point is away from you and a flat side near you. Align the 4” Diamond Point Guidelines with the seams of the Star 60 unit at the top of the block and the 8” Diamond Point Guidelines with the seam of the Companion Triangle. The 4¼”, 6¼”, and 8¼” horizontal guidelines will align with seams as well. Trim on both sides of the tool. Because the tool is smaller than the block, trim to about the halfway point on each side of the tool.


Rotate the block so that the next untrimmed point is pointing up, realign the same guidelines and trim again. Then rotate the block to trim the final point. Realign the guidelines and clean up the last point.
Follow the pattern instructions for trimming the 6″ blocks.
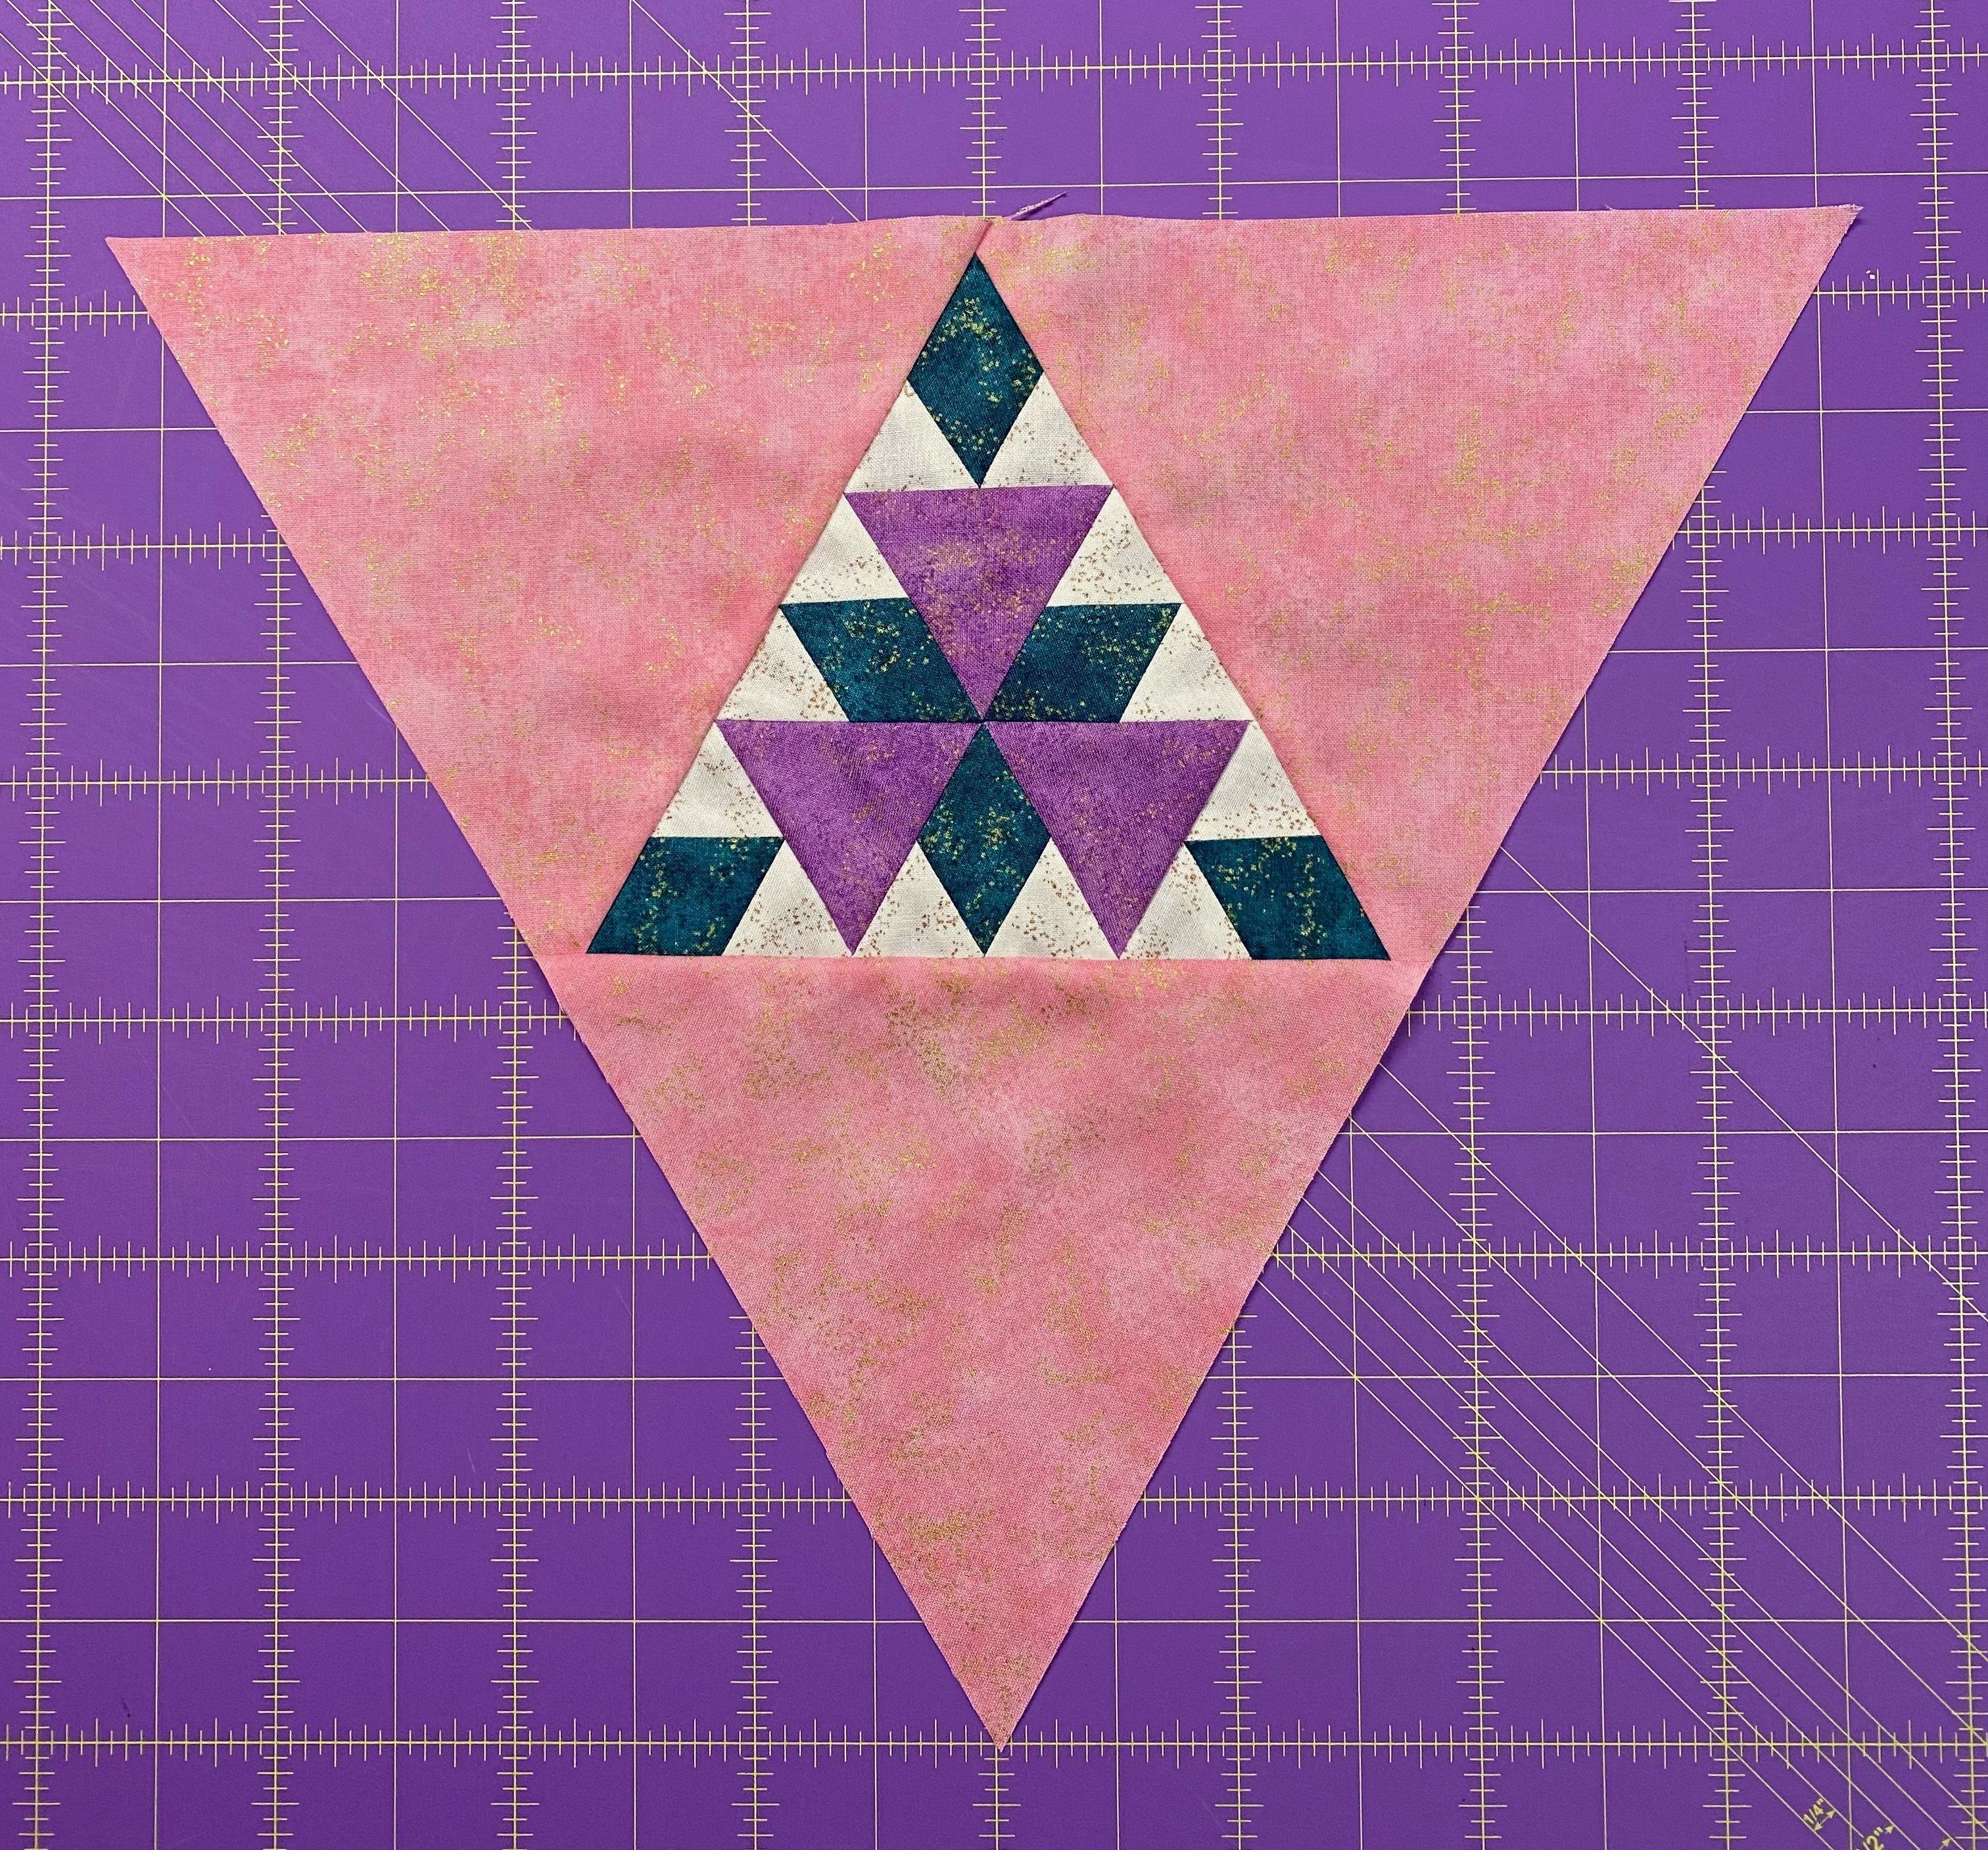
Align and center each accent Companion Triangle with the 6” pieced block. Stitch with an accurate ¼” seam. Press all seams toward the Companion Triangles.
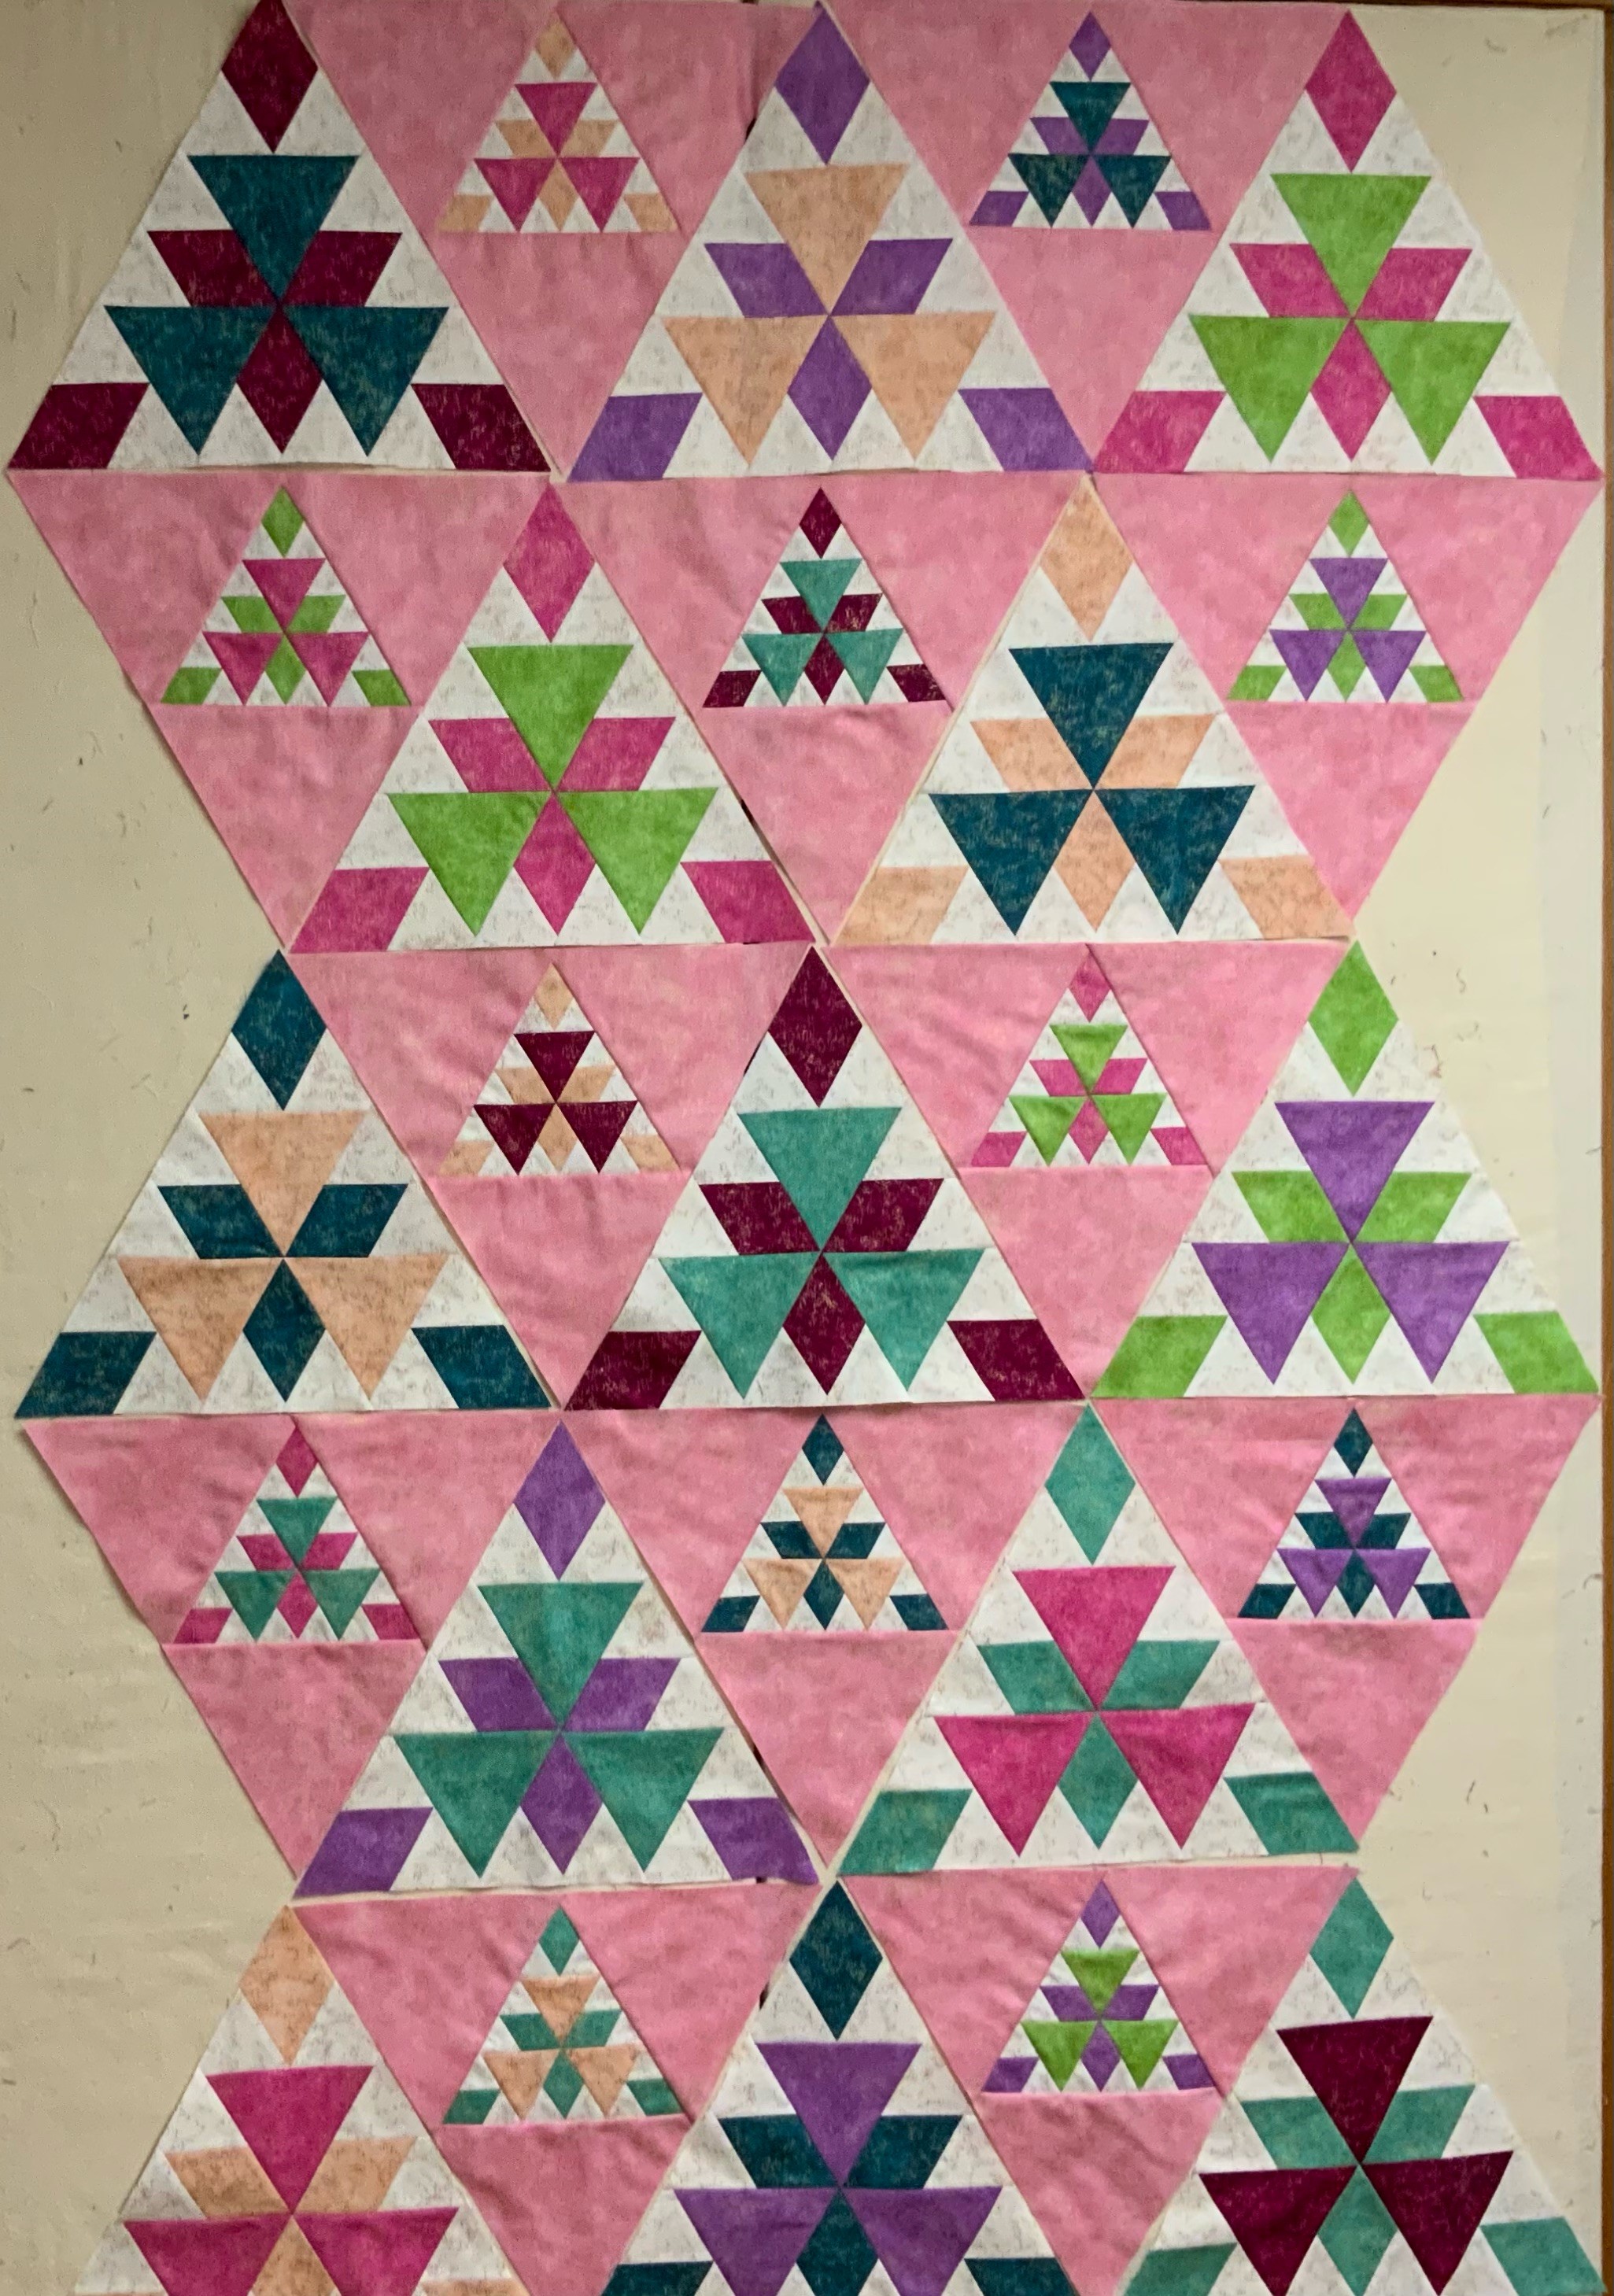
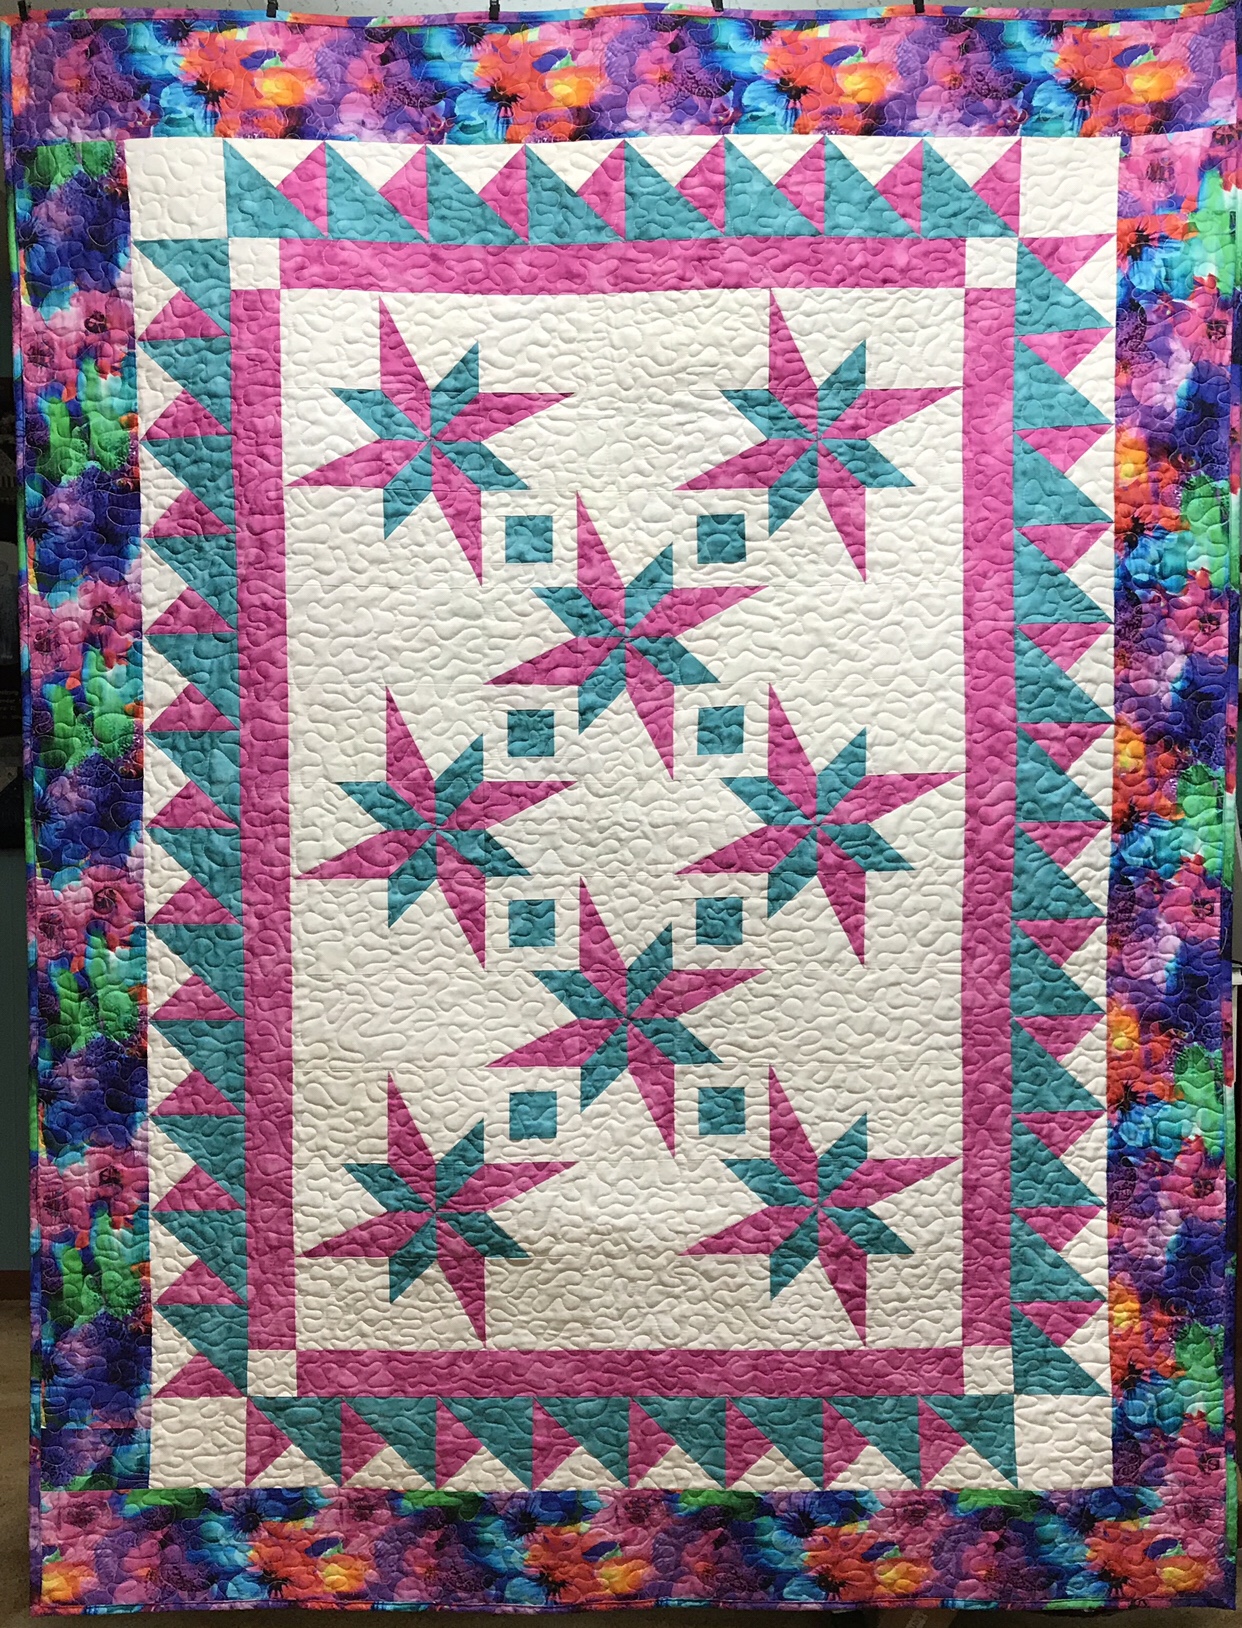
Layout your triangle blocks.

Stitch triangles into rows, then add the setting triangles on both ends.

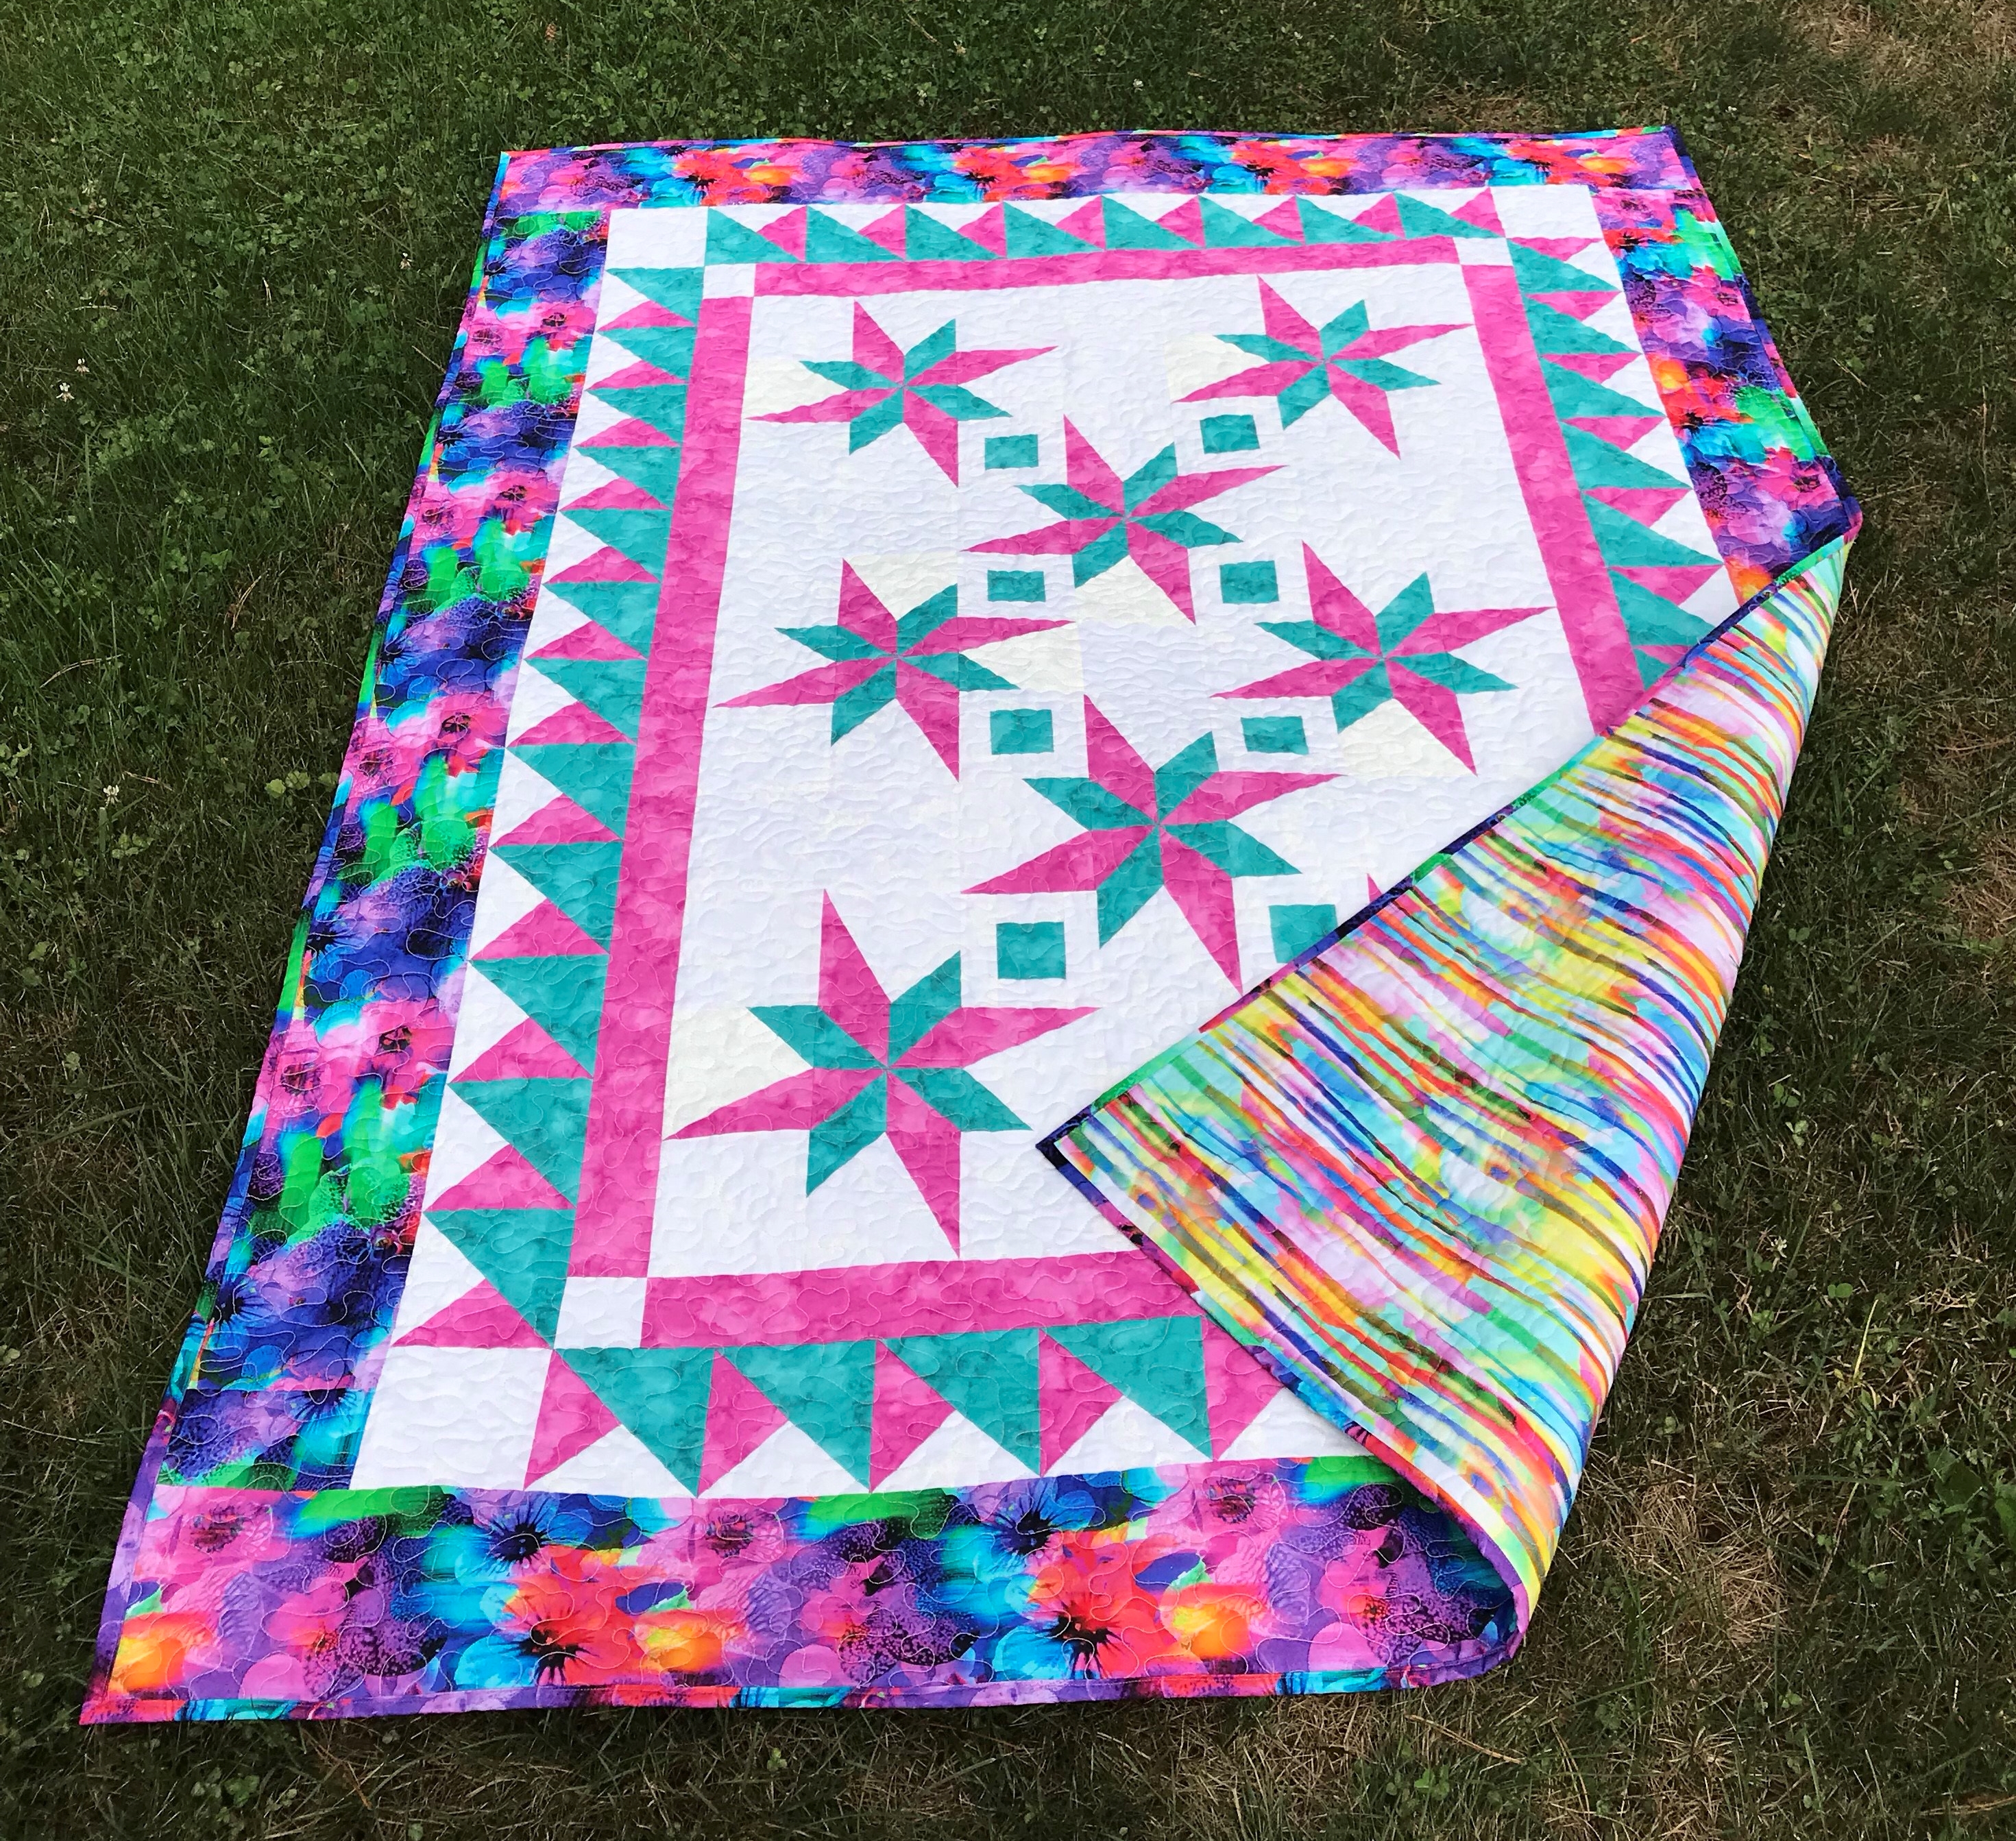
I made the lap size Radioactive, measuring 55″ X 75″. Thank you Northcott Fabrics for these beautiful fabrics. Finished with Quilter’s Dream Batting.