I made a short video to share with you about Deb Tucker’s new First Choice rulers.
@Studio180Design @DebTucker #FirstChoice
Get your First Choice rulers at Studio180design.net

I made a short video to share with you about Deb Tucker’s new First Choice rulers.
@Studio180Design @DebTucker #FirstChoice
Get your First Choice rulers at Studio180design.net

I unlocked the door and stepped into the room. The full moonlight shone through the window, illuminating a small table with a beautiful blooming bouquet of flowers. I saw the vase reflected on the French doors. I stepped onto the balcony and looked to my right and saw the Eiffel Tower lit up above the rooftops.

I always try to find the story the fabric is telling me. The Blooming Bouquet panel designed by Suzanne Allard and QT Fabrics transported me to Paris.


The colors were so vibrant I didn’t want to distract from them. I added Star 60 units in pink (31244P), blue (3144B) and gold (31244O). I used coordinating fabrics of purple (31244V) on the left and green (31244H) on the right.

I used the rest of the fabric for the quilt backing. Blooming Bouquet measures 82″ x 65″. Blooming Bouquet will be in quilt shops September 2025.
@QTFabrics @Studio180Design #BloomingBouquet #OmniThread #QuiltersDreamBatting

I can’t wait for Spring. This video is the unboxing of the Blooming Bouquet line designed by Suzanne Allard for QT Fabrics. The Blooming Bouquet line will be in your local quilt shops Spring 2025.
@QTFabrics @Studio180Design #QTFabrics #BloomingBouquet #Star60Tool

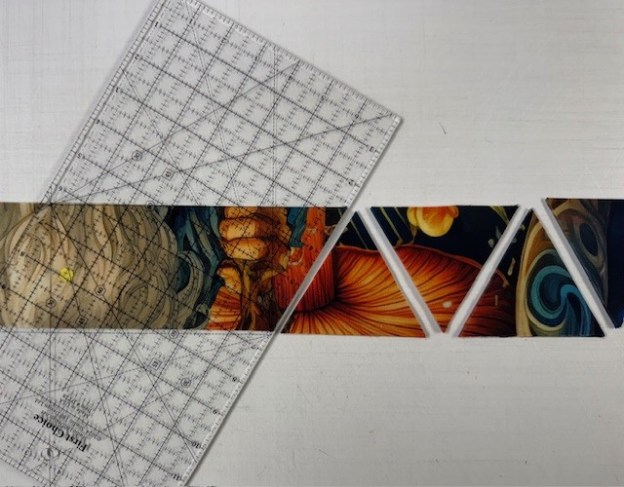
The Spirited panel was designed by Elise Genest for Northcott Fabrics. The panel measures 24″ x 44″.


I cut my strips 2.75” which yields 4” finished hexies. There were 210 hexies. I let the design tell me what it needs to tell a good story. After cutting my strips I had about 2.25” strip left. This allowed me to cut diamonds and make 11 kaleidoscope Star 60 units. I added 4” finished Hollow Cube 60’s and a 12” hollow Cube with 4” cubes inside it to represent the stables.

Spirit was left in the corral far too long. It began to rain and she jumped over the fence and headed for the stables, where it was dinnertime. Spirited measures 71” x 68”.
Spirited was made for The Quilt Crossing quilt shop in Boise, ID. They have invited me there to teach a 4 day Sleep in your Own Bed One Block Wonder Workshop, June 18 – 21, 2025. Maybe I will get to meet you there.
@northcottfabric @studio180design #Star60 #HollowCube60 #DebTucker #Spirited

I have been traveling and teaching. I picked up my friend and fellow Studio 180 Design Certified Instructor Barb Wiseman, we left Pennsylvania and went west to Lexington, KY and met up with another fellow Studio 180 Design Certified Instructor Toni Raynolds. Barb and Toni assisted me while teaching One Block Wonder and a Hollow Cube 60 classes at Thomas Sewing Center. What a fabulous time we had! Thank you Toni for taking such good care of Barb & I.

Thank you to Thomas Sewing Center owner Alysson Rife and everyone who attended. I had a great time.
After Thomas Sewing Center Barb and I traveled south to Fairfield Glade, TN and met up with another fellow Studio 180 Design Certified Instructor Pauline Lang and the Fan-Tastic Quilt Guild for a One Block Wonder Trunk Show and workshop. I had a blast with you all. Thank you Pauline for all your help and wonderful hospitality!

I was on the road for 8 days, driving through 8 states by the time we got home. I am so grateful to be home safe!
Thank you sew very much for a great time! I hope you will all share photo’s of your completed OBW’s.

Bread and Butter is a fun table runner from Deb Tucker and even better when made from Qt Fabrics Autumn Smiles fabric line by Anne Lehman Stolpe. Autumn Smiles will be in quilt shops in early 2025.


This is a great beginner project to learn to use your Tucker Trimmer 1. Bread and Butter measures 18″ x 49″. The three 9.5″ blocks are made Using 3 color hour glass units. I will show you have to make the hour glass units.

Tip: I use plain plain plates to organize the fabrics required for my units.
Making 3 Color Hour Glass Units
Bread and Butter pattern Steps 1 -7 show you how to make your hour glass units.

Pair 3 “A” squares with 3 “B” squares and pair 3 “A” squares with 3 “D” squares.

Mark one of every pair with 2 diagonal lines using the Magic Wand.


Stitch on the drawn lines and then cut them apart.

Press toward the “A” fabric. You will end up with 6 A/B units and 6 A/D units. Remember: whatever you are pressing toward, goes on top.

Mark the back of the A/D units on with 2 diagonal lines using the Magic Wand.


Position each of the A/B units with right sides together with A/D units. Be sure the A’s are not layered on top of each other. Carefully align the center seams. Stitch on the lines and cut apart.

Swirl the centers and carefully press, ensuring the sections are completely pressed to the seams.


This is a 3.5″ unfinished hour glass unit. Place the half circle in the upper right hand corner of the unit. Carefully align both the common diagonal and 3.5″ size diagonal lines over the center seam lines of the unit. Trim up the right side and across the top. Rotate the unit. Line up the 3.5″ lines with the just trimmed raw edges and the 3.5″ size diagonal line as before and again trim up the right side and across the top. (Lefties place the half circle on the Tucker Trimmer in the upper left corner so they can trim up the left side and across the top.)


Make 12 – 3 color Hour Glass units. Follow Steps 8 – 10 to make the pieced units that will be the corners of the block. Note: Deb Tucker has a new Timeout Technique Sheet for these corner units.


Lay out the hour glass units, corner units and the center “G” square as shown above. Stitch into rows.

Join the rows to make the 9.5″ unfinished block. Finish your Bread and Butter table runner by following pattern Steps 12 – 18.


Back of the table runner.
@QTFabrics @Studio180Design @DebTucker #BreadandButter #TuckerTrimmer1 #AutumnSmiles
Click here for a supply list using Autumn Smiles fabrics:

Does anyone remember an old song from the 40’s called “I got the Sun in the Morning “? It was written by Irving Berlin in 1946 for a musical called “Annie Get Your Gun”.

I’ve been humming that tune while working on this great panel designed by the Morris Group for QT Fabrics. The panel measures 36″ x 43″. Bohemian Sunrise will be available in early 2025.


I was at a quilt retreat last weekend with my friends the Turtle Crew. I took off the borders which left me with a width of 28″ for the panel. I cut 2.75″ strips that yielded 190 – 4″ finished hexies.

I picked coordinating fabrics from QT Fabrics Color Essence line and Morris Group Bohemian Sunrise line for making adding stars and cubes to my design.

Using a set of equilateral triangles for the center and light orange from the Color Essence line and stars fabric from the Bohemian Sunrise line, I made 2″ finished Star 60 units that were stitched to the equilateral triangles to make diamonds. I then made 2″ finished Capped 60 units that I used as side triangles for pieced diamonds. This made a 8″ finished star.

Using a light, medium and dark fabrics from the Color Essence line I made 4″ Hollow Cube 60 units.

I began designing in the upper right corner. I placed hexies 7 across and started going down the left side until I passed the bottom of the panel. Then another 7 hexies across the bottom and up the right side of the panel.

Once I have the four sides established, I can then add hexies until I am please with the design.

I added half hexies on the sides and half rectangle triangles to the top and bottom of each row and numbered my rows.


I used 4″ and 8″ finished hexies in my design. I stitched the 2.5″ rows together above and below the 4.5″ half hexies so they could be stitched to the 4.5″ half hexies. Then joined all the rows on the left side.

The photo above shows the top, bottom and left section attached to the panel, and how much shrinkage there was when the hexies are joined into rows.

Bohemian Sunrise measures 78″ x 63″. OBW # 113, not yet quilted.
“Got no diamond, got no pearl. Still think I’m a lucky girl. I’ve the Sun in morning and Moon at Night”!
@QTFabrics @TheMorrisGroup @Studio180design #BohemianSunrise #Star60

Check out my unboxing video of new QT Fabrics coming out early 2025.
@QTFabric #Bohemian Sunrise #Autumn Smiles #TuckerTrimmer1 #Star60

If you follow me you know I love my Chihuahua Tucker.

But, These cat panels by Rubin Design Studio, exclusively from eQuilter are just fabulous!

Mysterious Kitty panel measures 43.5″ x 29.5″. I decided to cut my strips 3.25″ yielding 168 – 5″ finished hexies.

I decided to start my design at the top of the panel, choosing the upper right corner to start, and placing 8 hexies across the top before going down to start the left side.

Above is the design I settled on. The edges of the panel range from black to dark blue. I didn’t think the green from the eyes would show up much, so I added Framed 60 stars to the upper right corner. They make the Kitty’s eyes sparkle more. I added Star 60 units to the left side in orange and blue made using the Star 60 Tool.

Above shows the top and bottom sections attached to the panel. Notice how much it shrinks when stitched together. We know we lose 1/2″ between straight seams. But, when stitching the hexies into rows we lose 9/16″ between seams. Depending on how many hexies are in your row, you lose about 3″ or more.


There are always two opportunities to tweak the design. The first is while designing with the hexies. The second is after you finished designing and the rows stitched are together. The photo on the right shows the top stitched together un-tweaked. I needed to soften the dark corners on the bottom of the panel. The photo on the right shows the top tweaked. I added appliqued Star 60 units on the lower right and left corners of the panel in different sizes and colors to created more of a curve I was looking for.

In my OBW Supply List, I show you a method to create appliqued hexies using fusible knit interfacing. This time I tried something different. I used Steam-A-Seam. I traced the fabric unit on the Steam-A-Seam paper, and then cut it out at least 1/4″ smaller. Following the Steam-a-Seam directions, I attached it to the back of the fabric unit. I removed the paper and finger pressed the raw edges under 1/4″. It was now ready to be attached to the quilt top. Once I have all my appliqued units attached to the top, I top stitch them down using Superior Monopoly clear thread.

Mysterious Kitty measures 90″ x 71″. I love her!
@rubindesignstudio @eQuilter @studio180design #MysteriousKitty #star60tool

A BIG Thank You to Amy of Amy’s Quilt Room in Uniontown, PA. I’m just now home from teaching a One Block Wonder (OBW) workshop or as Amy would call “Quiltpalooza”! It was fabulous! I had so much fun. The Hilton Garden Inn at Uniontown PA was the perfect venue. We had a great space and were very well cared by the staff.

This group of ladies did such a great job. They learned all about OBW’s and how to make Hollow Cube 60’s & Star 60 units. We delve into how to design and enhance our OBW’s.


Thank you Amy’s Quilt Room and the Hilton Garden Inn, Uniontown PA.
Amy has scheduled another OBW Quiltapalooza March 2- -23, 2025
Reserve your space now as they fill up fast!
@amysquiltroom @studio180design #quiltapalooza
