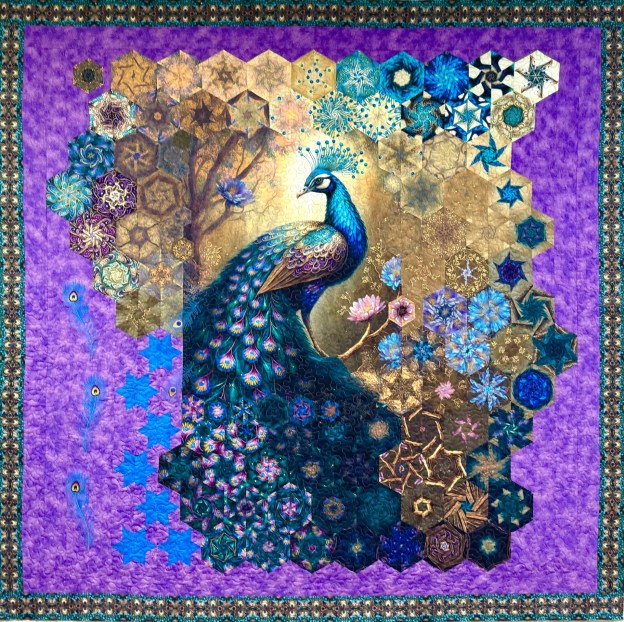
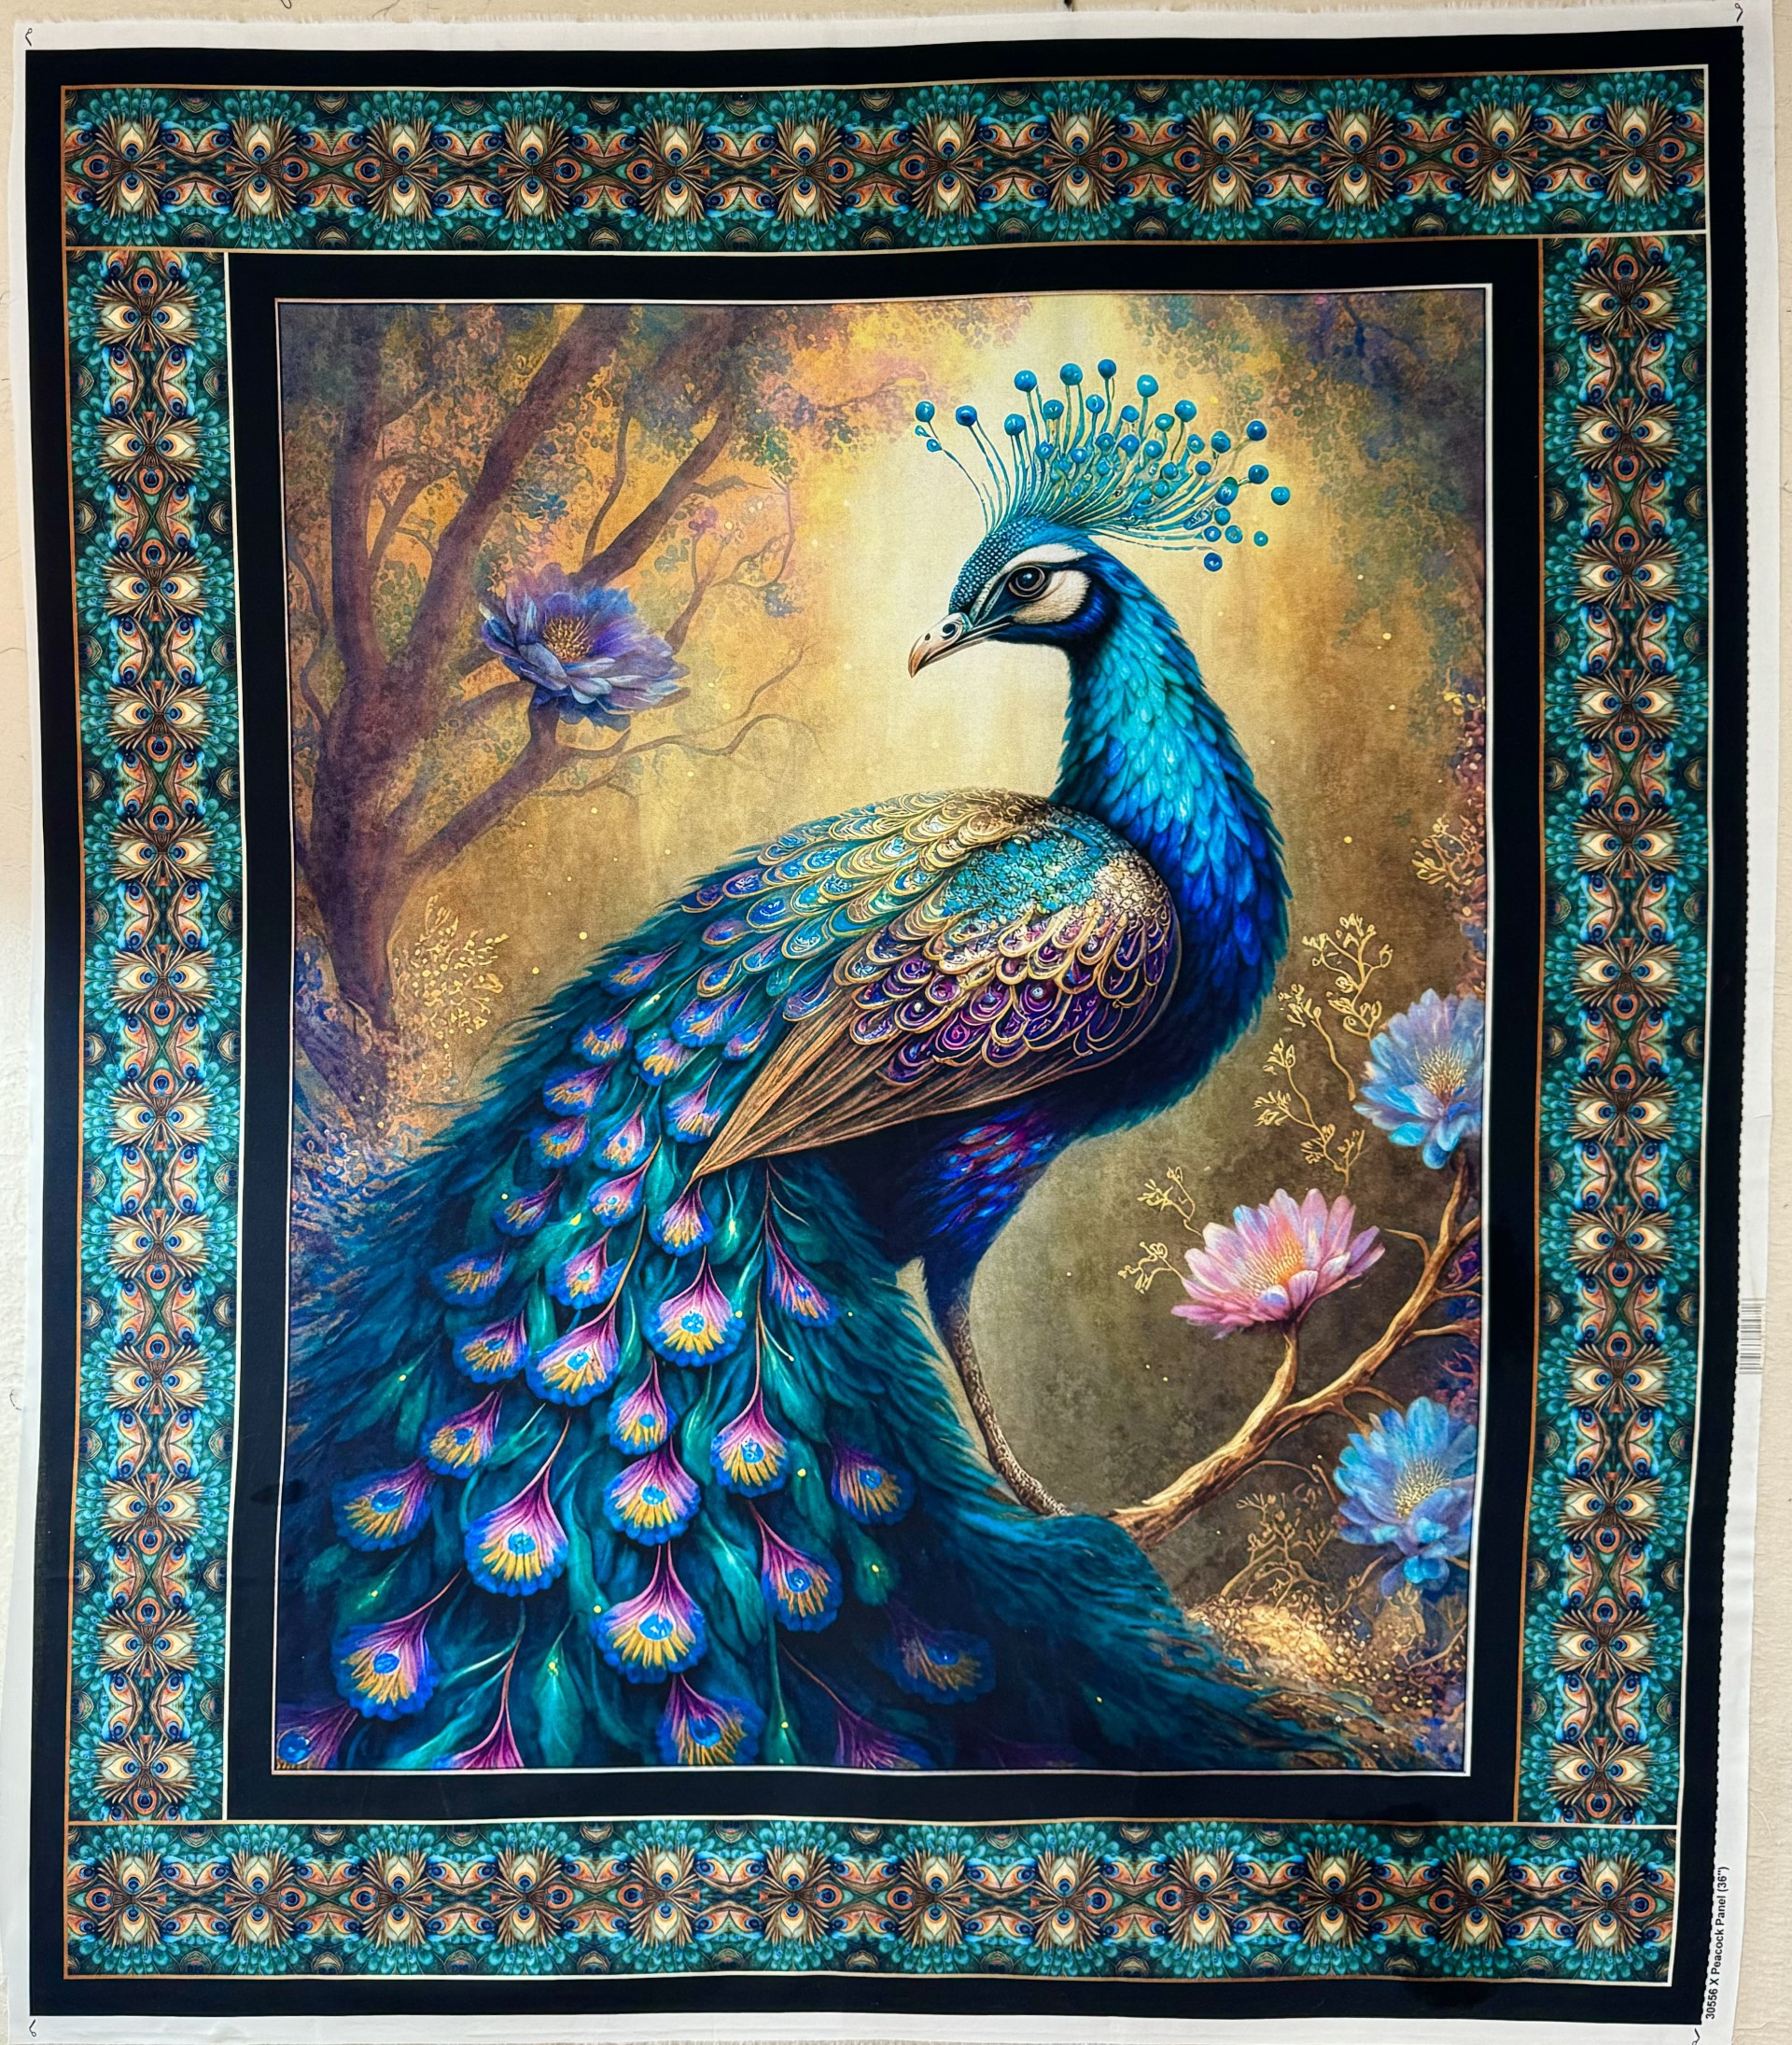
I fell in love with this panel the first time I saw it. The colors are just fabulous. Resplendent is by QT Fabrics. The panel measured 36″ x 44″. Resplendent will be in stores June 2024.
I removed the borders and saved them to use as a outer border and binding for the finished quilt. I cut my strips 3.25″ for 5″ finished hexies. I had a total of 105 hexies to design with.
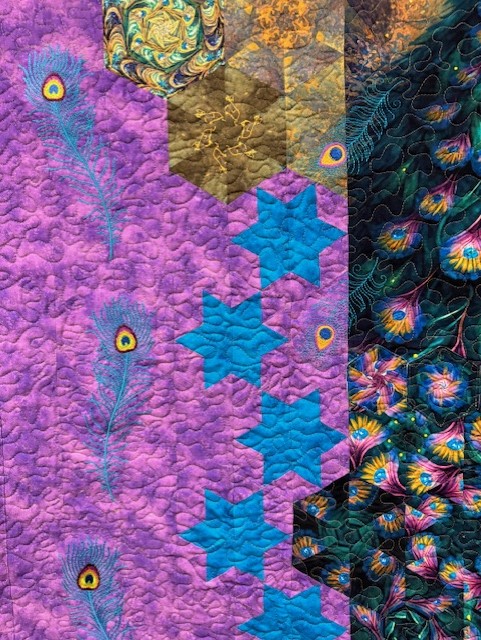
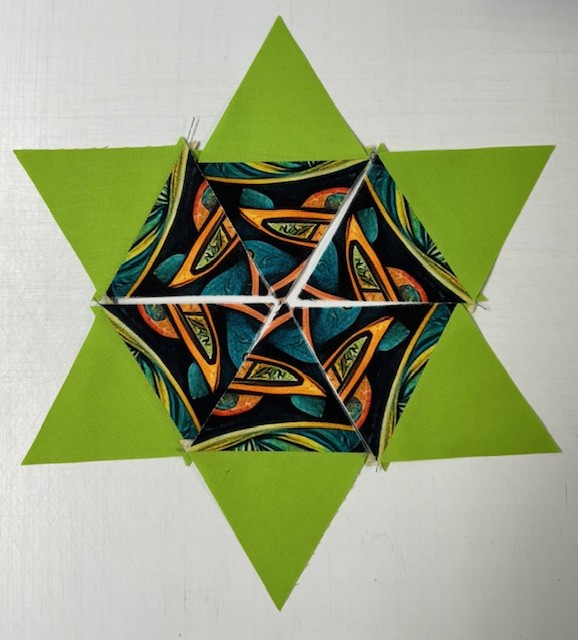
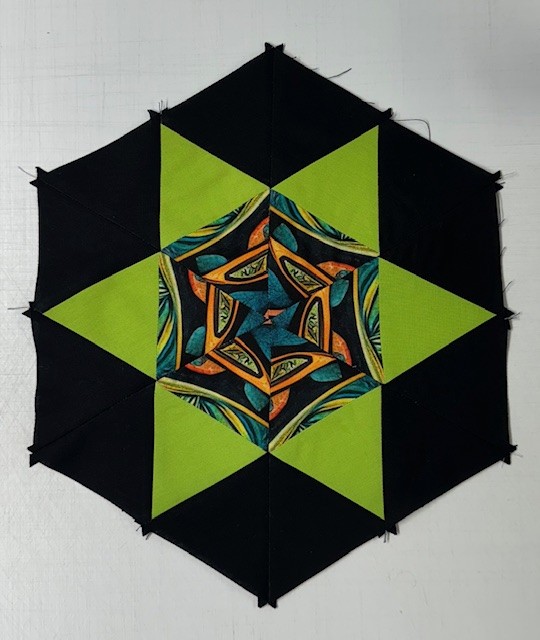
I created Star 60 stars and surrounded the peacock with half hexies using QT Fabrics blender line Rapture. The colors Ocean and Amethyst blended beautifully.
I embroidered peacock feathers to add to the design. I’ve had the large feathers for many years. I downloaded them from The Stitchery Mall by Dancing Thread. The small peacock feahers were purchased from OESD.
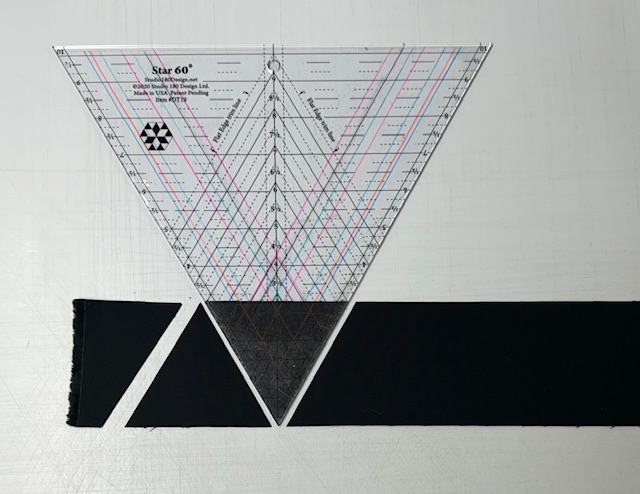
I made the stars using Studio 180 Design’s Star 60 Tool. I’ve created a lesson plan to share with you to show you how easy it is to make a Star 60 star.
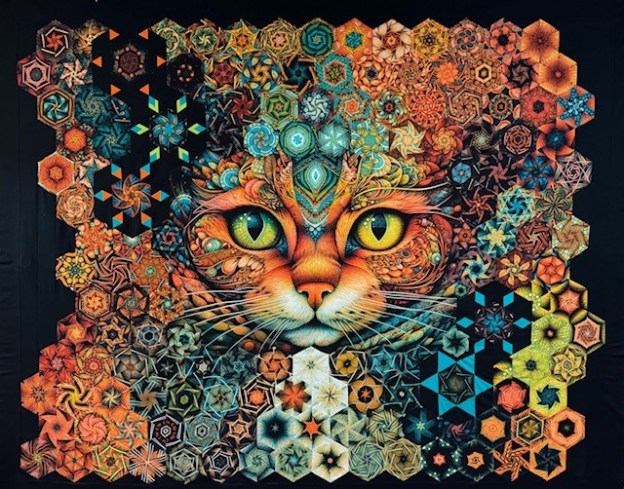
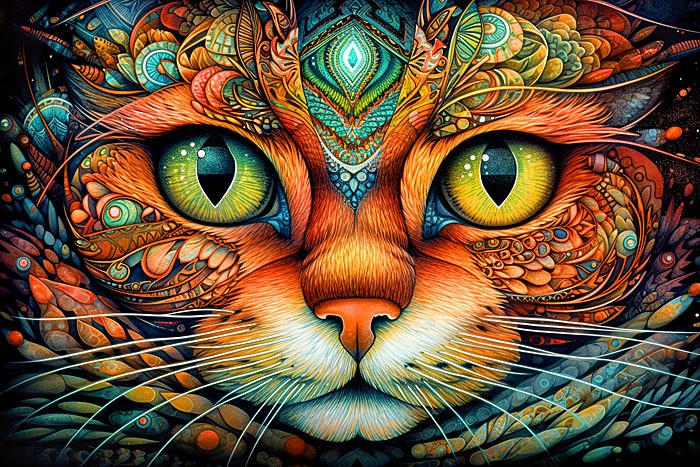
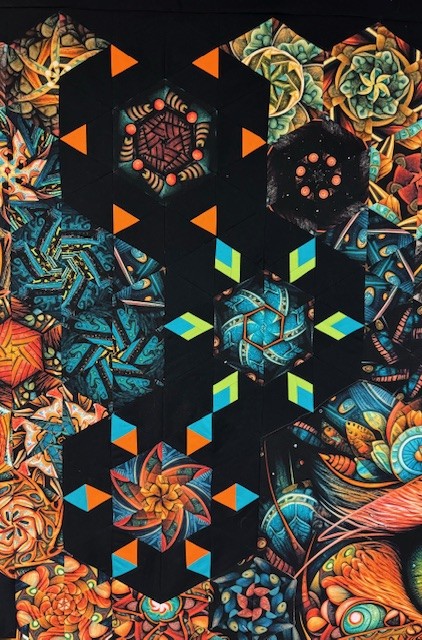
When I saw this panel by Rubin Design Studio “Intricate Illustrated Kitty” of EQuilter, my heart skipped a beat. I just love the colors, the curves and the movement in this panel.
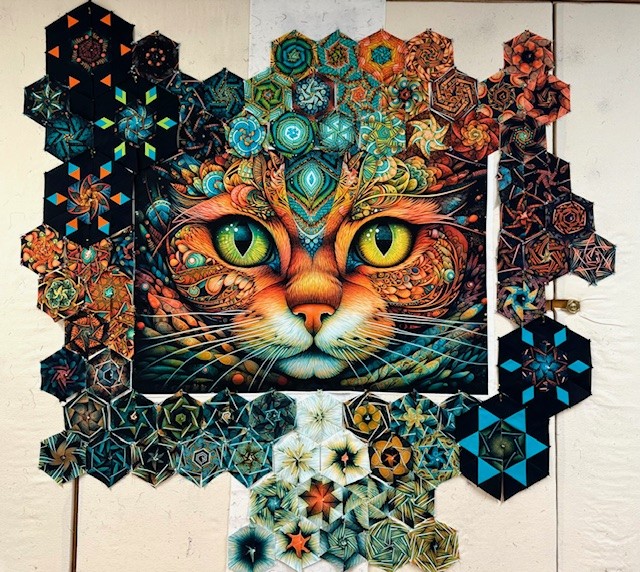
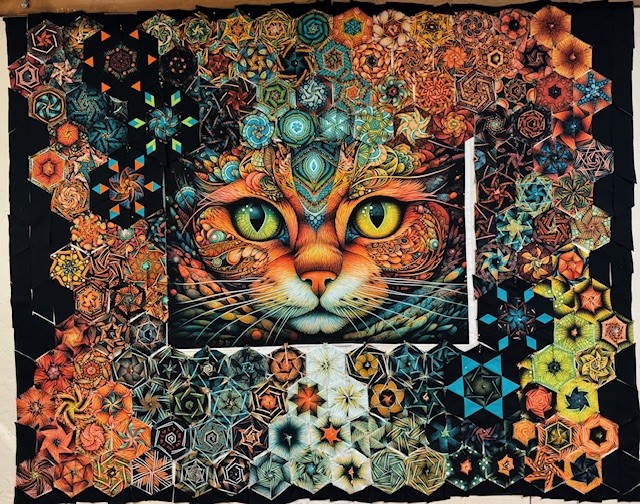
The panel measured 29″ x 43.5″. I could have cut 3.75″ strips for 6″ finished hexies and trimmed the panel to 42″. But, I decided to cut 3.25″ strips for 5″ finished hexies using my Star 60 Ruler. I would need to trim more of the panel, but I felt a smaller strip would make more interesting hexies. There is some stretching with bias edges, but in the end, I only needed to trim 1″ from bothe sides of the panel. I placed the panel in the middle of my design wall and began designing.
It is always a guessing game when trying to ddecide how far to go past the end of the panel when establishing the bottom row. We know that when we stitch together our hexies, we lose 1/2″ between the seams. But the vertical seams are much harder to calcutlate. The photo above shows the shrinkage, it was abut 3″.
I was playing around trying to find interesting ways for the Star 60 ruler to interact with the hexies. I came up with what I call Star 60 Spinners.
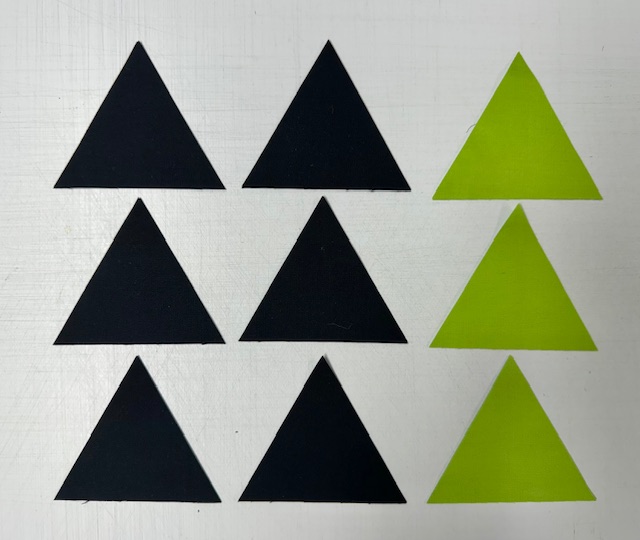
Basic Spinner: You need one hexie (taken apart), and two strips cut the same size as you cut you hexies from. Bedazzled had 5″ finished hexies, cut from 3.25″ strips. I cut one 3.25″ strip for the inner companion triangle and one 3.25″ strip for the side triangles.
With the strip folded, cut 6 sets of 2 side triangles and 3 sets of 2 companion triangles.
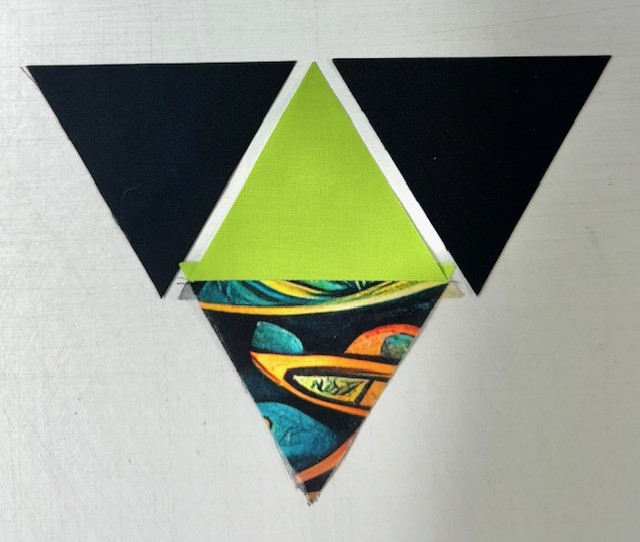
Decide what point is going in the center of your hexies, stitch the companion triangle to the opposite edge. Press seams open.
Lay out you side trinagles as shown above on either side of the companion triangle. Stitch the right sides first, then stitch the left sides. Press all seams open.
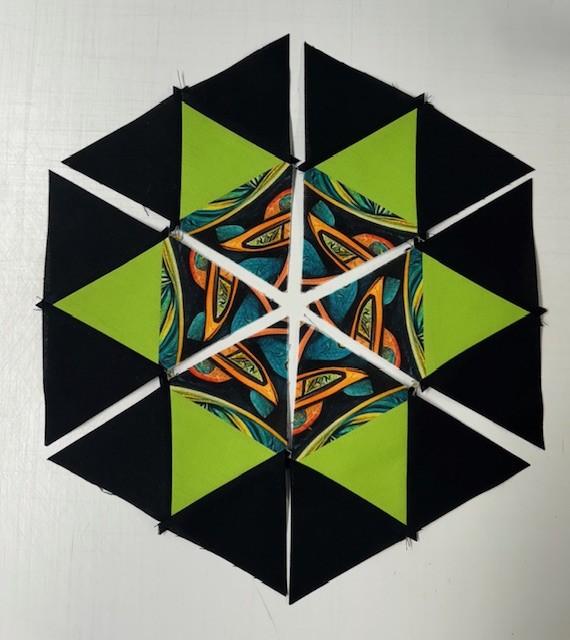
Construct as you would a hexagon, stitch 2 together, press the seams open then add the third. This made a 10″ finished hexie.
Once I made the Basic Spinner, I knew I could replace the companion triangle with other Star 60 units. I made the units half the size of my 5″ finished hexies. I made 6 – 2.5″ Capped 60, Framed 60, Quad 60 and Star 60 units. I really love these Star 60 Spinners.
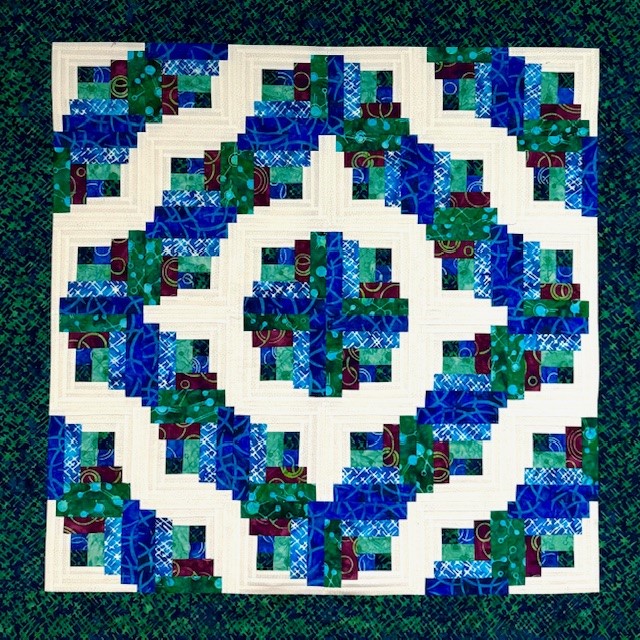
Bedazzled measures 88″ x 71″. To get my uneven curvy sides on my OBW, I use half hexies following the Star 60 instrutions on page 10. Bedazzled is not quilted yet.
I was at a quilt retreat this weekend with my quilting buddies. I brought plenty of projects to work on, but a local quilt shop had a sale going on so I bought some beautiful fabric.
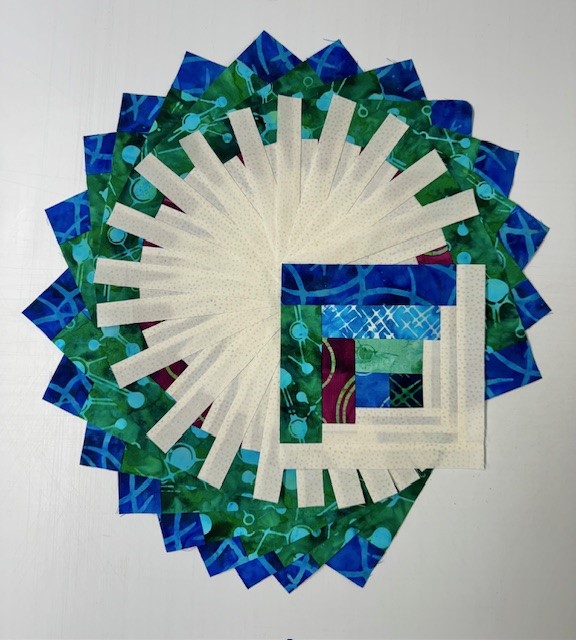
Shadow Play by Maywood fabrics had a nice light, medium, dark and a great green for a backgound, everyting I needed for Hollow Cube 60’s. I had an idea and wanted to see if it would work.
I love my Star 60 tool by Deb Tucker and I love Hollow Cubes using the Hollow Cube 60 Technique Sheet. I wanted to see if I could fit a circle of 6 – 6″ hollow cubes inside a cirlcle of 6 – 18″ hollow cubes and it worked. I love the look! I bought the fabric on Thursday and made the quilt on Friday! The quilt measures 60″ x 60″.
Next up was a challenge to make a 36″ finished quilt with the main focus using 7 fat quarters of 30’s reproduction fabric.
I decided to use Deb Tucker’s Star 60 Log Cabin Technique Sheet and of course my Star 60 Tool. I chose to add 6 rounds of 1/2″ finished logs for a 27″ finished log cabin star. I added Half Rectangle Triangles using the Star 60 tool instructions to make the hexagon into a rectangle. I added 2″ strips to make it square and added a 2″ border to make it 36″. I love my Star 60 Tool! All together a very productive weekend.
Deb Tucker is introducing her newest fabric collection from Island Batik – Squiggles and Dots. I decided to make a small quilt using Deb Tucker’s “Curved Log Cabin Technique Sheet“.
A Curved Log Cabin Block is really an optical illusion. The block is made up of one center square with a series of narrow and wide logs sewn around the center square. It sounds easy, but if you’ve ever tried to make them, you know that it is tough to get them to come out the way you want them – nice and square. Studio 180 Design’s technique has you strip piece each round of logs, then trim with the Tucker Trimmer® III, which allows you to straighten up those edges before you sew the next round. You will make every block quickly, easily, and accurately.
I had 6 – 1/2 yard pieces of Squiggles, Dots and Lines, plus background fanric. I chose to make 36 – 5.5″ finished blocks with 3 rounds of logs.
What is so interesting about the log cabin block is you have many design options.
I fell in love with this version of a Curved Log Cabin quilt. It measures 40″ by 40″. Below are other options I came with.
Check out what my fellow Certified Instructors created:
I decided to take Myrtle May out for a run. Myrtle May is my Singer 301A, hey that rhymes! She had been cleaned and tuned up and she now purred like a kitten. Not bad for a gal that is 60 years old. You see, Myrtle May & I are both turning 60, we were both born in 1953.
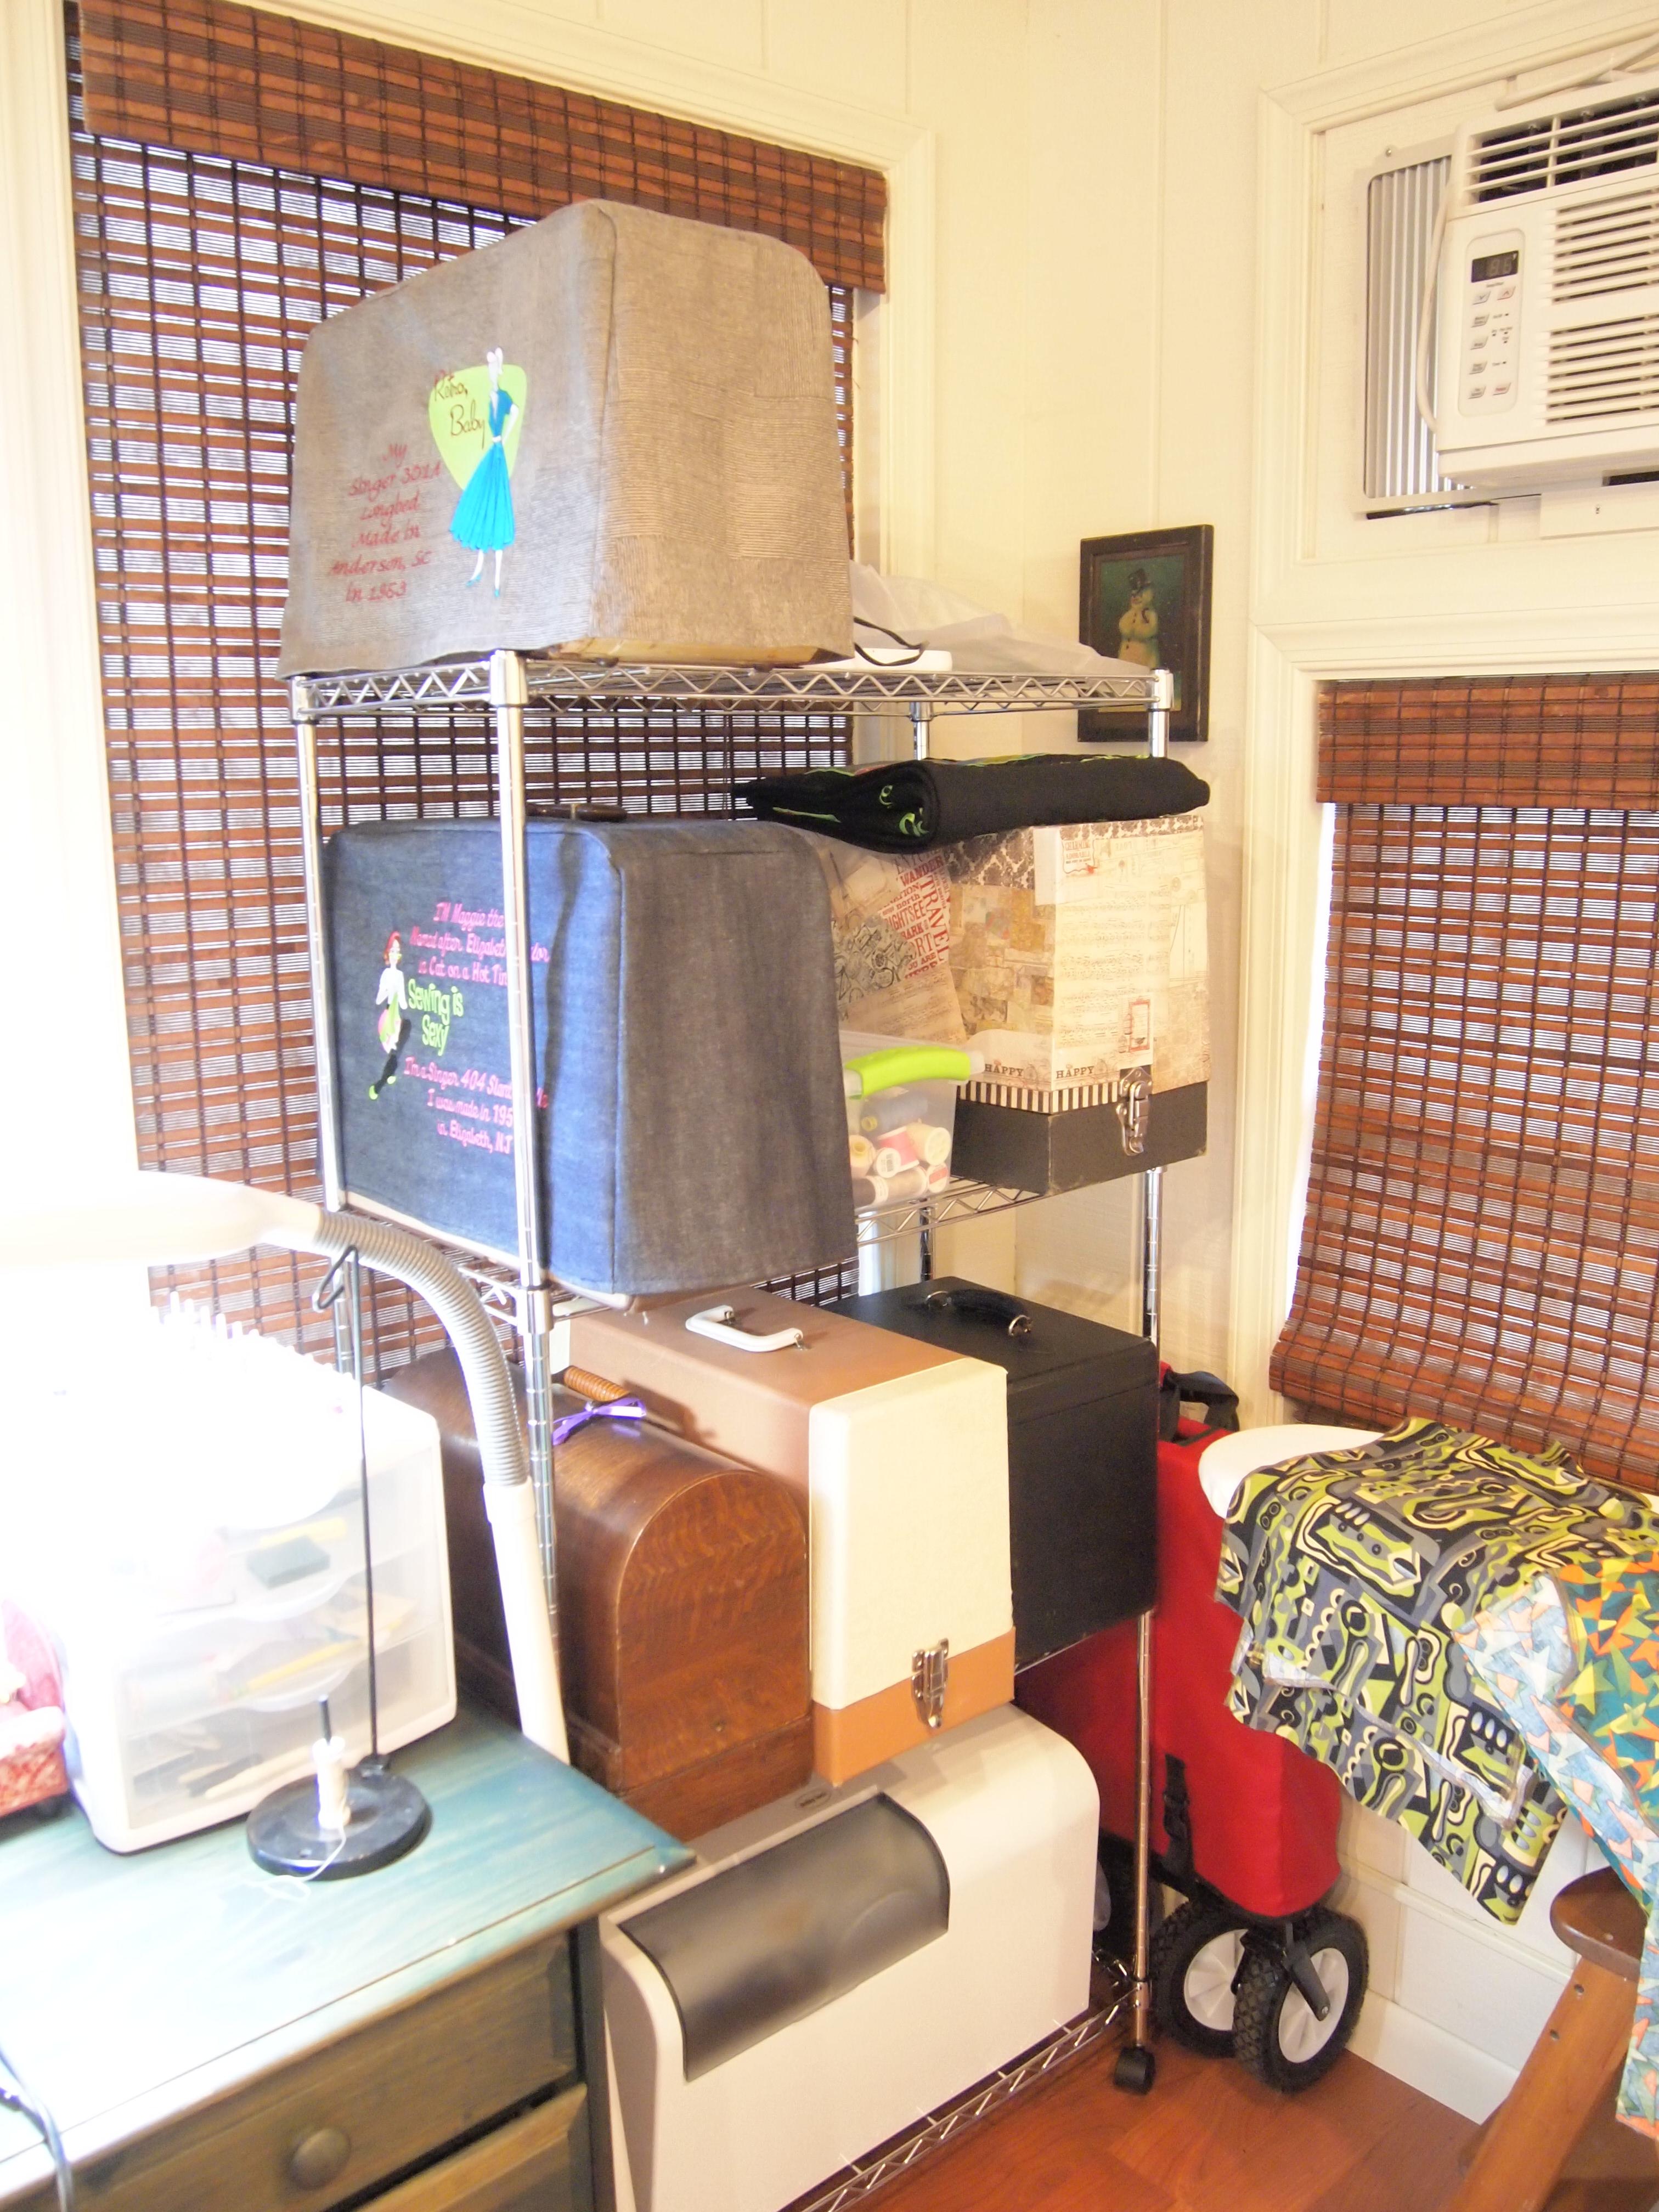
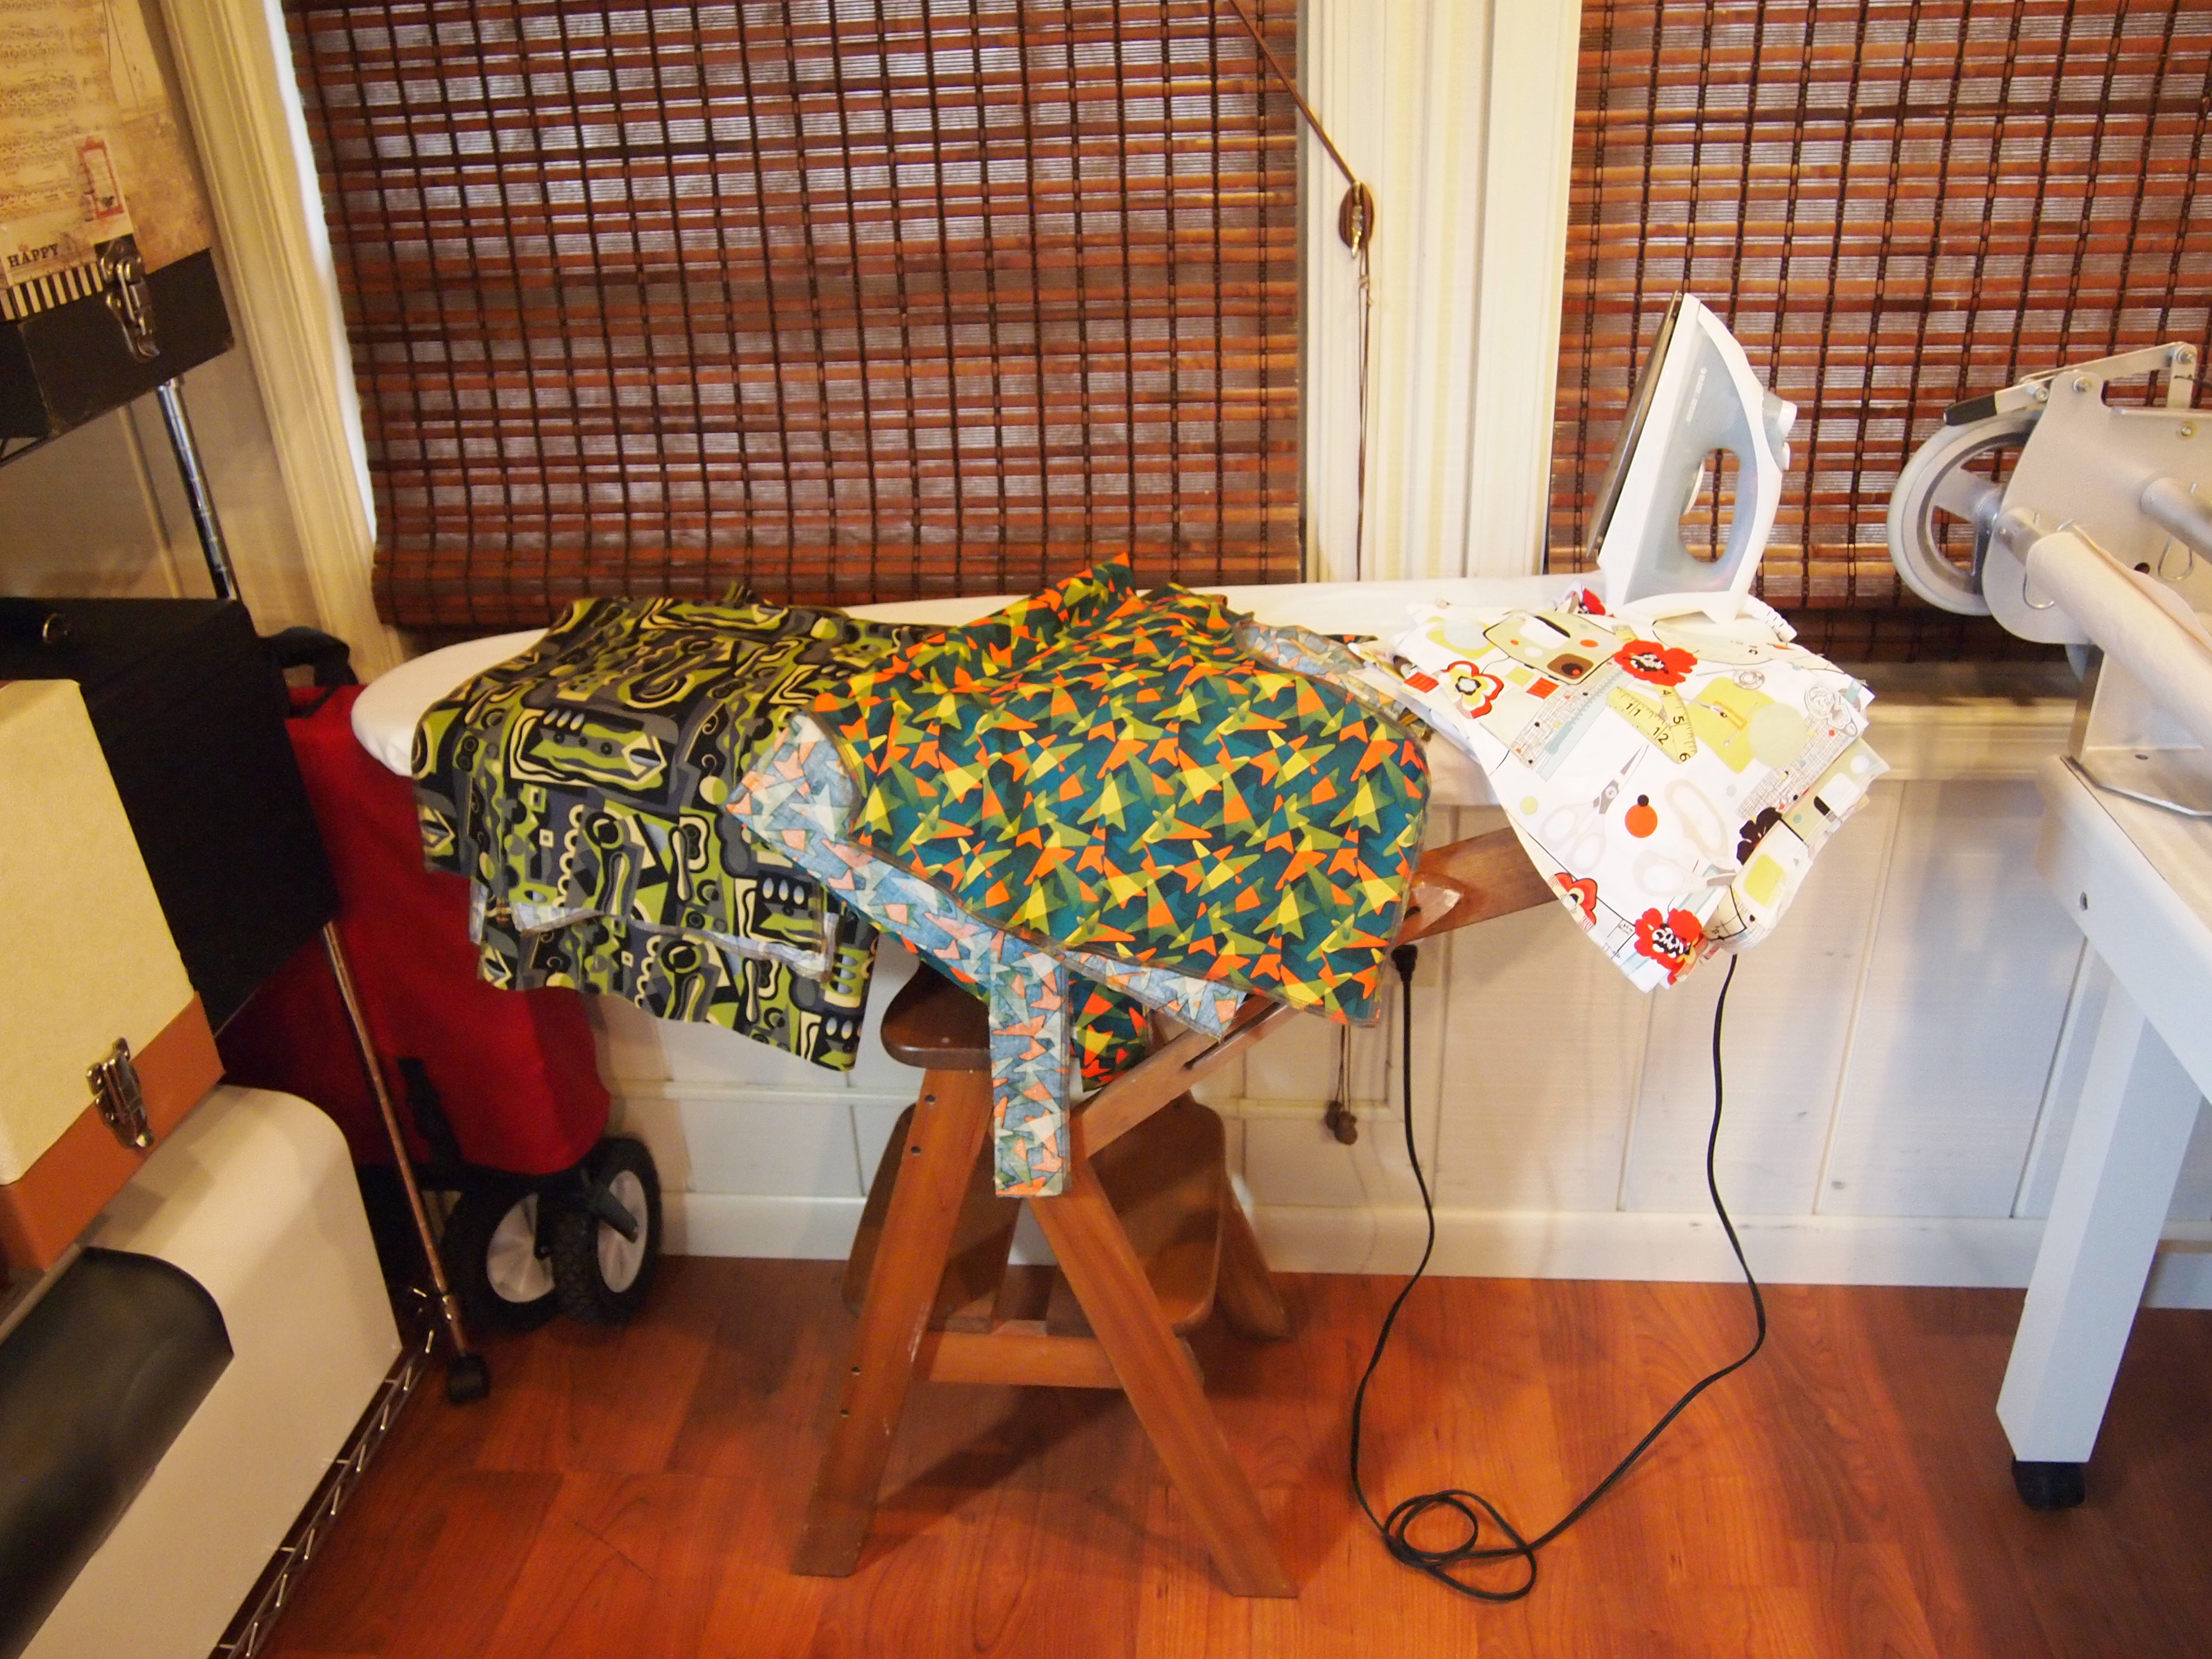
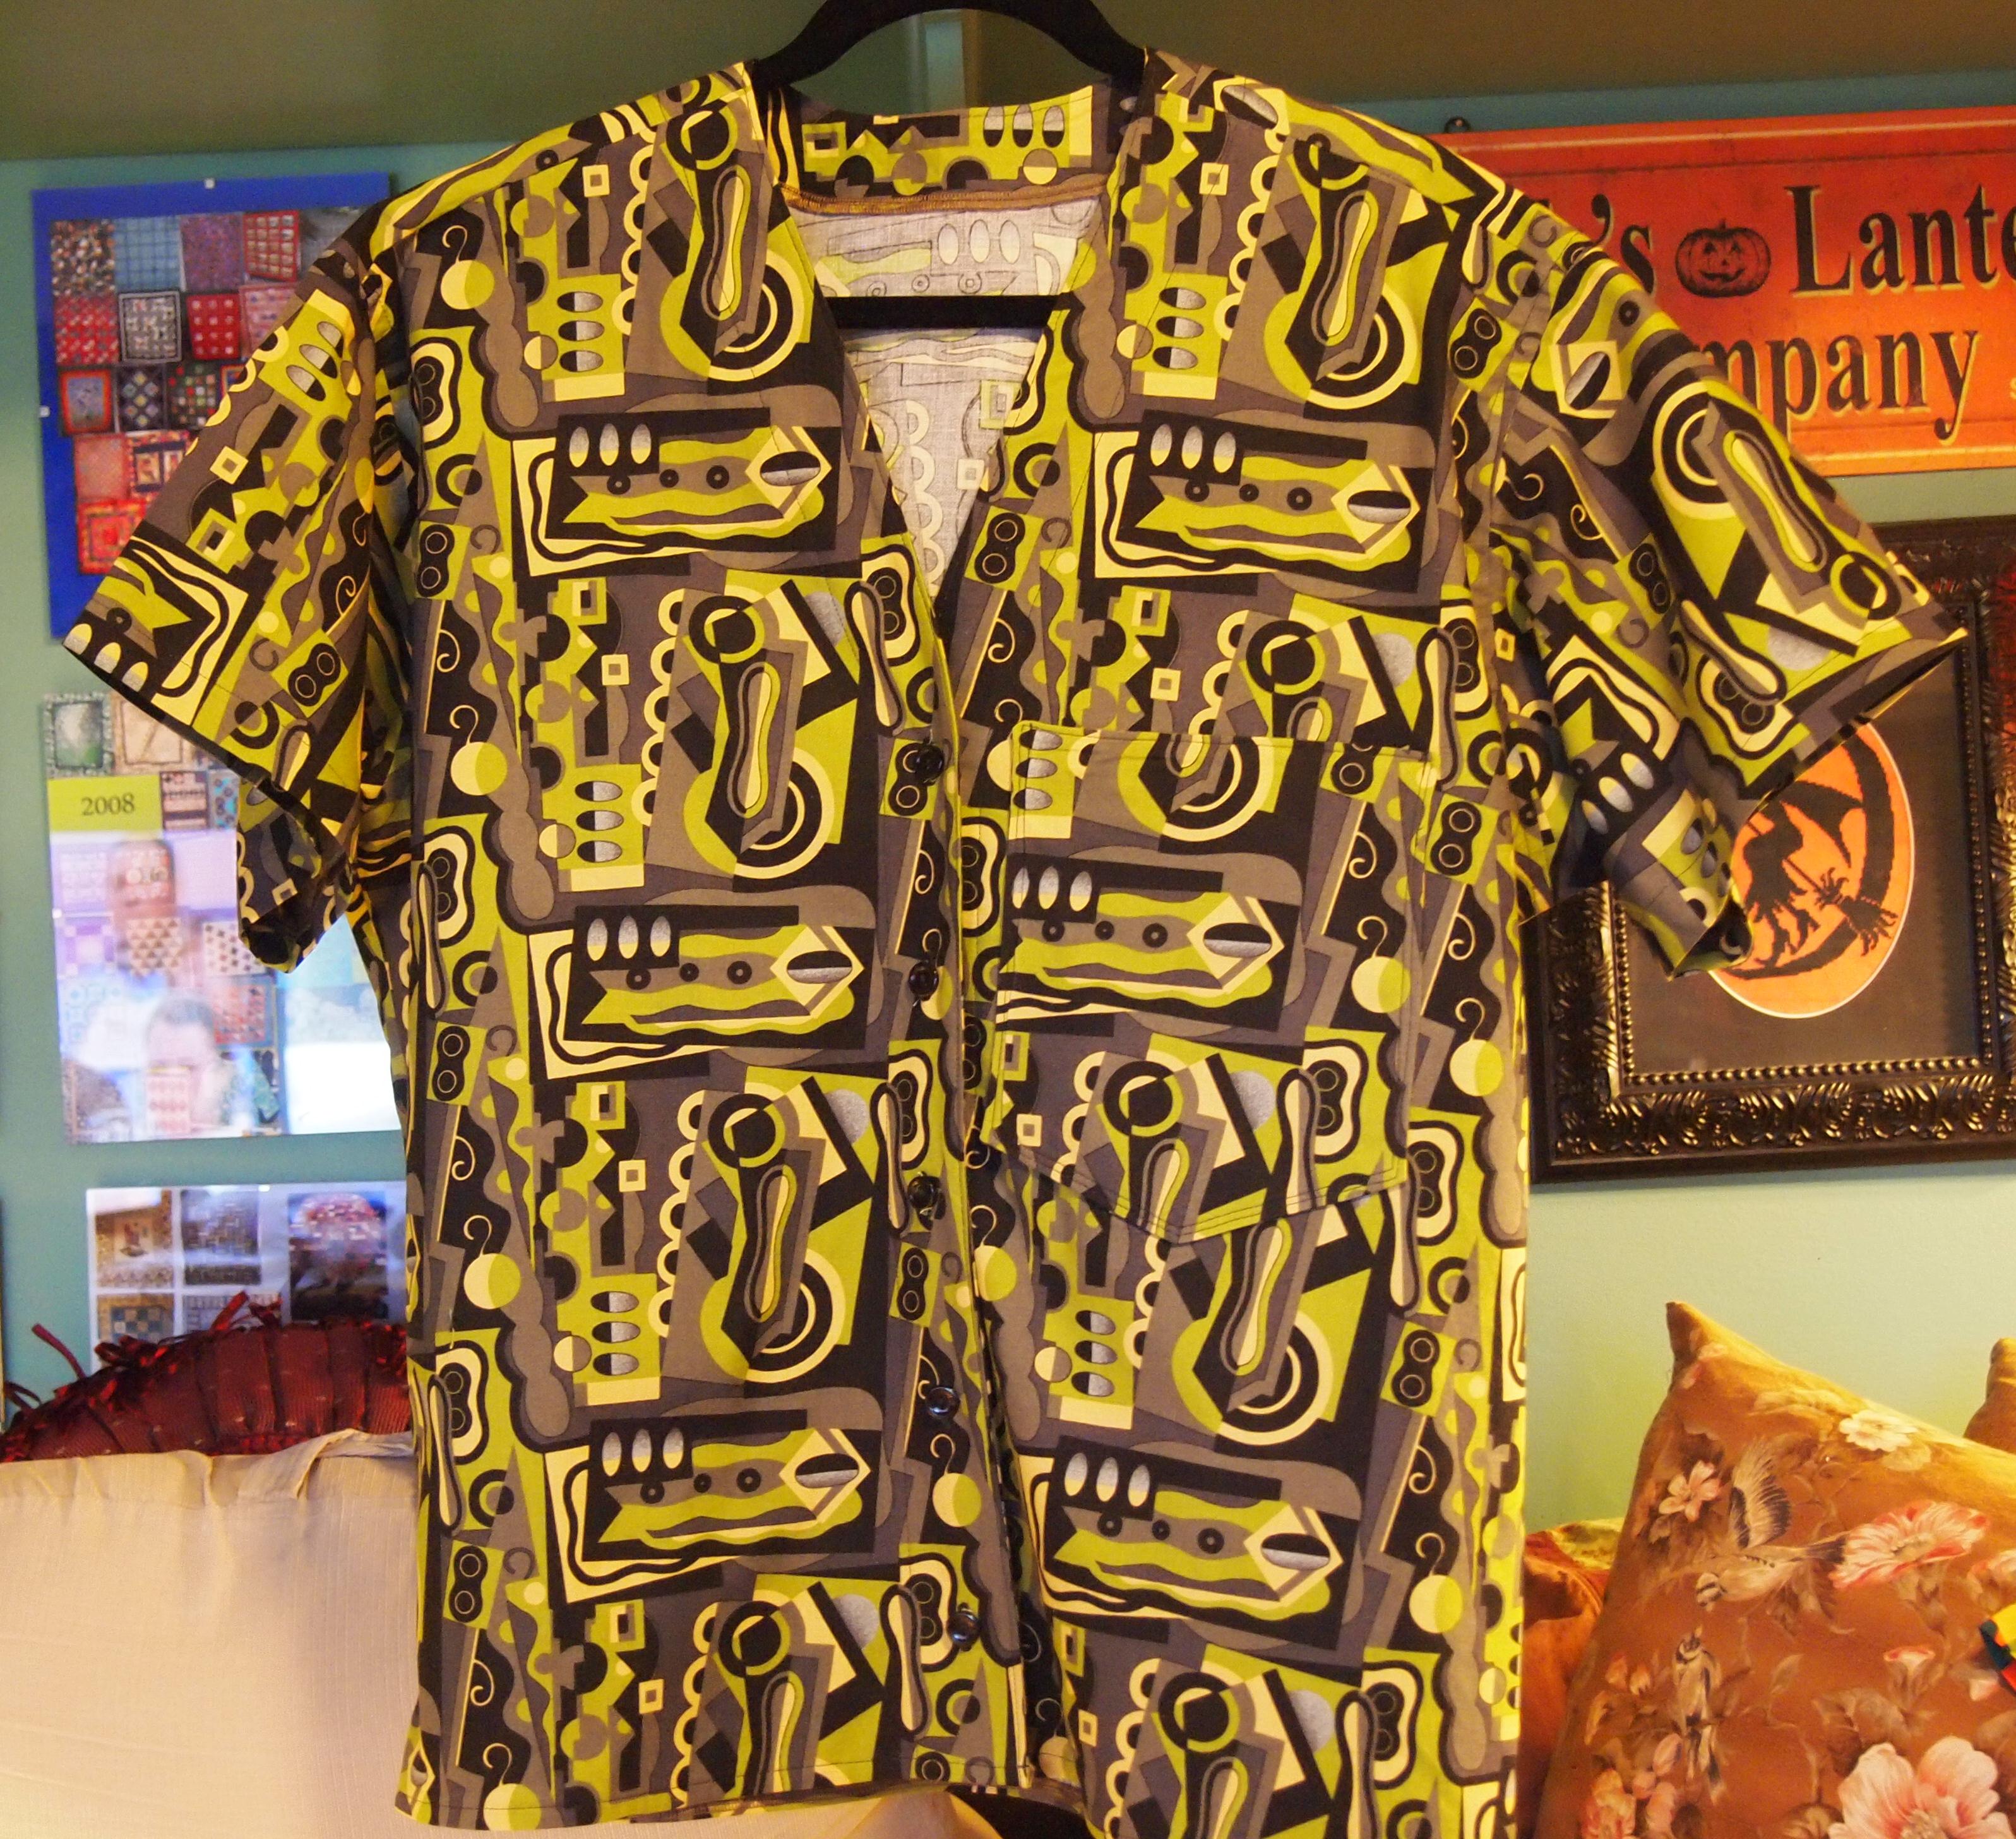
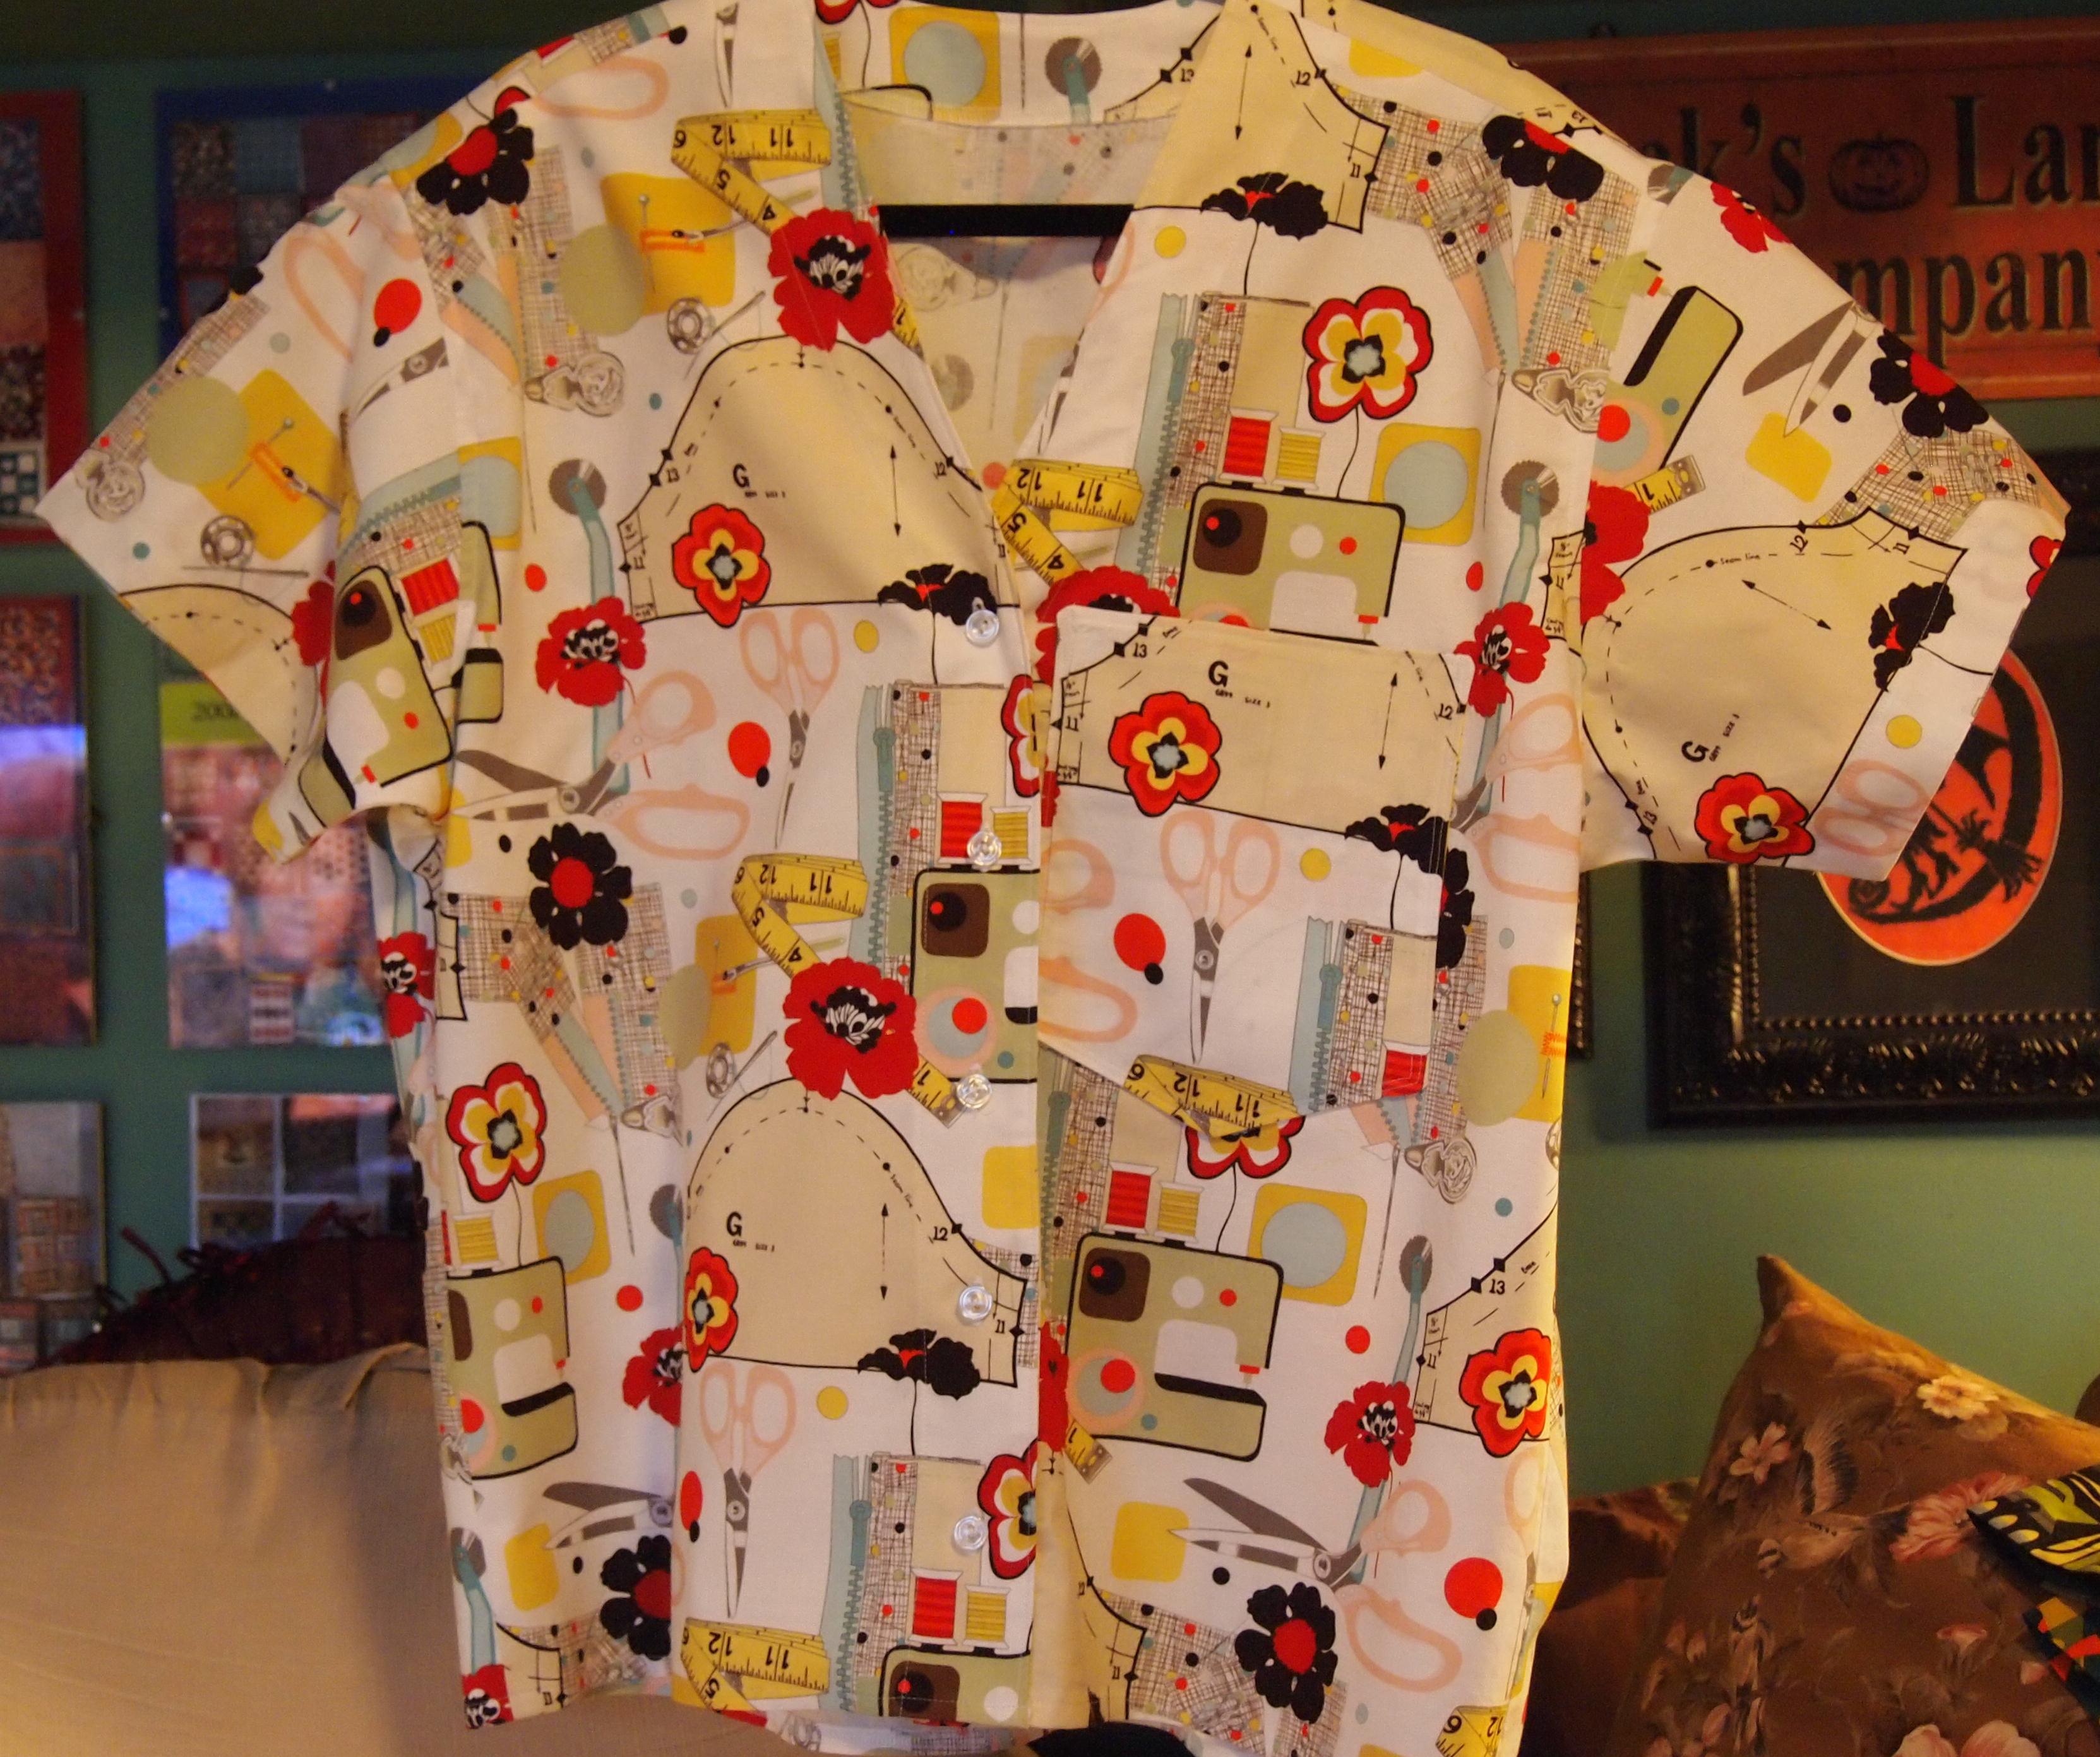
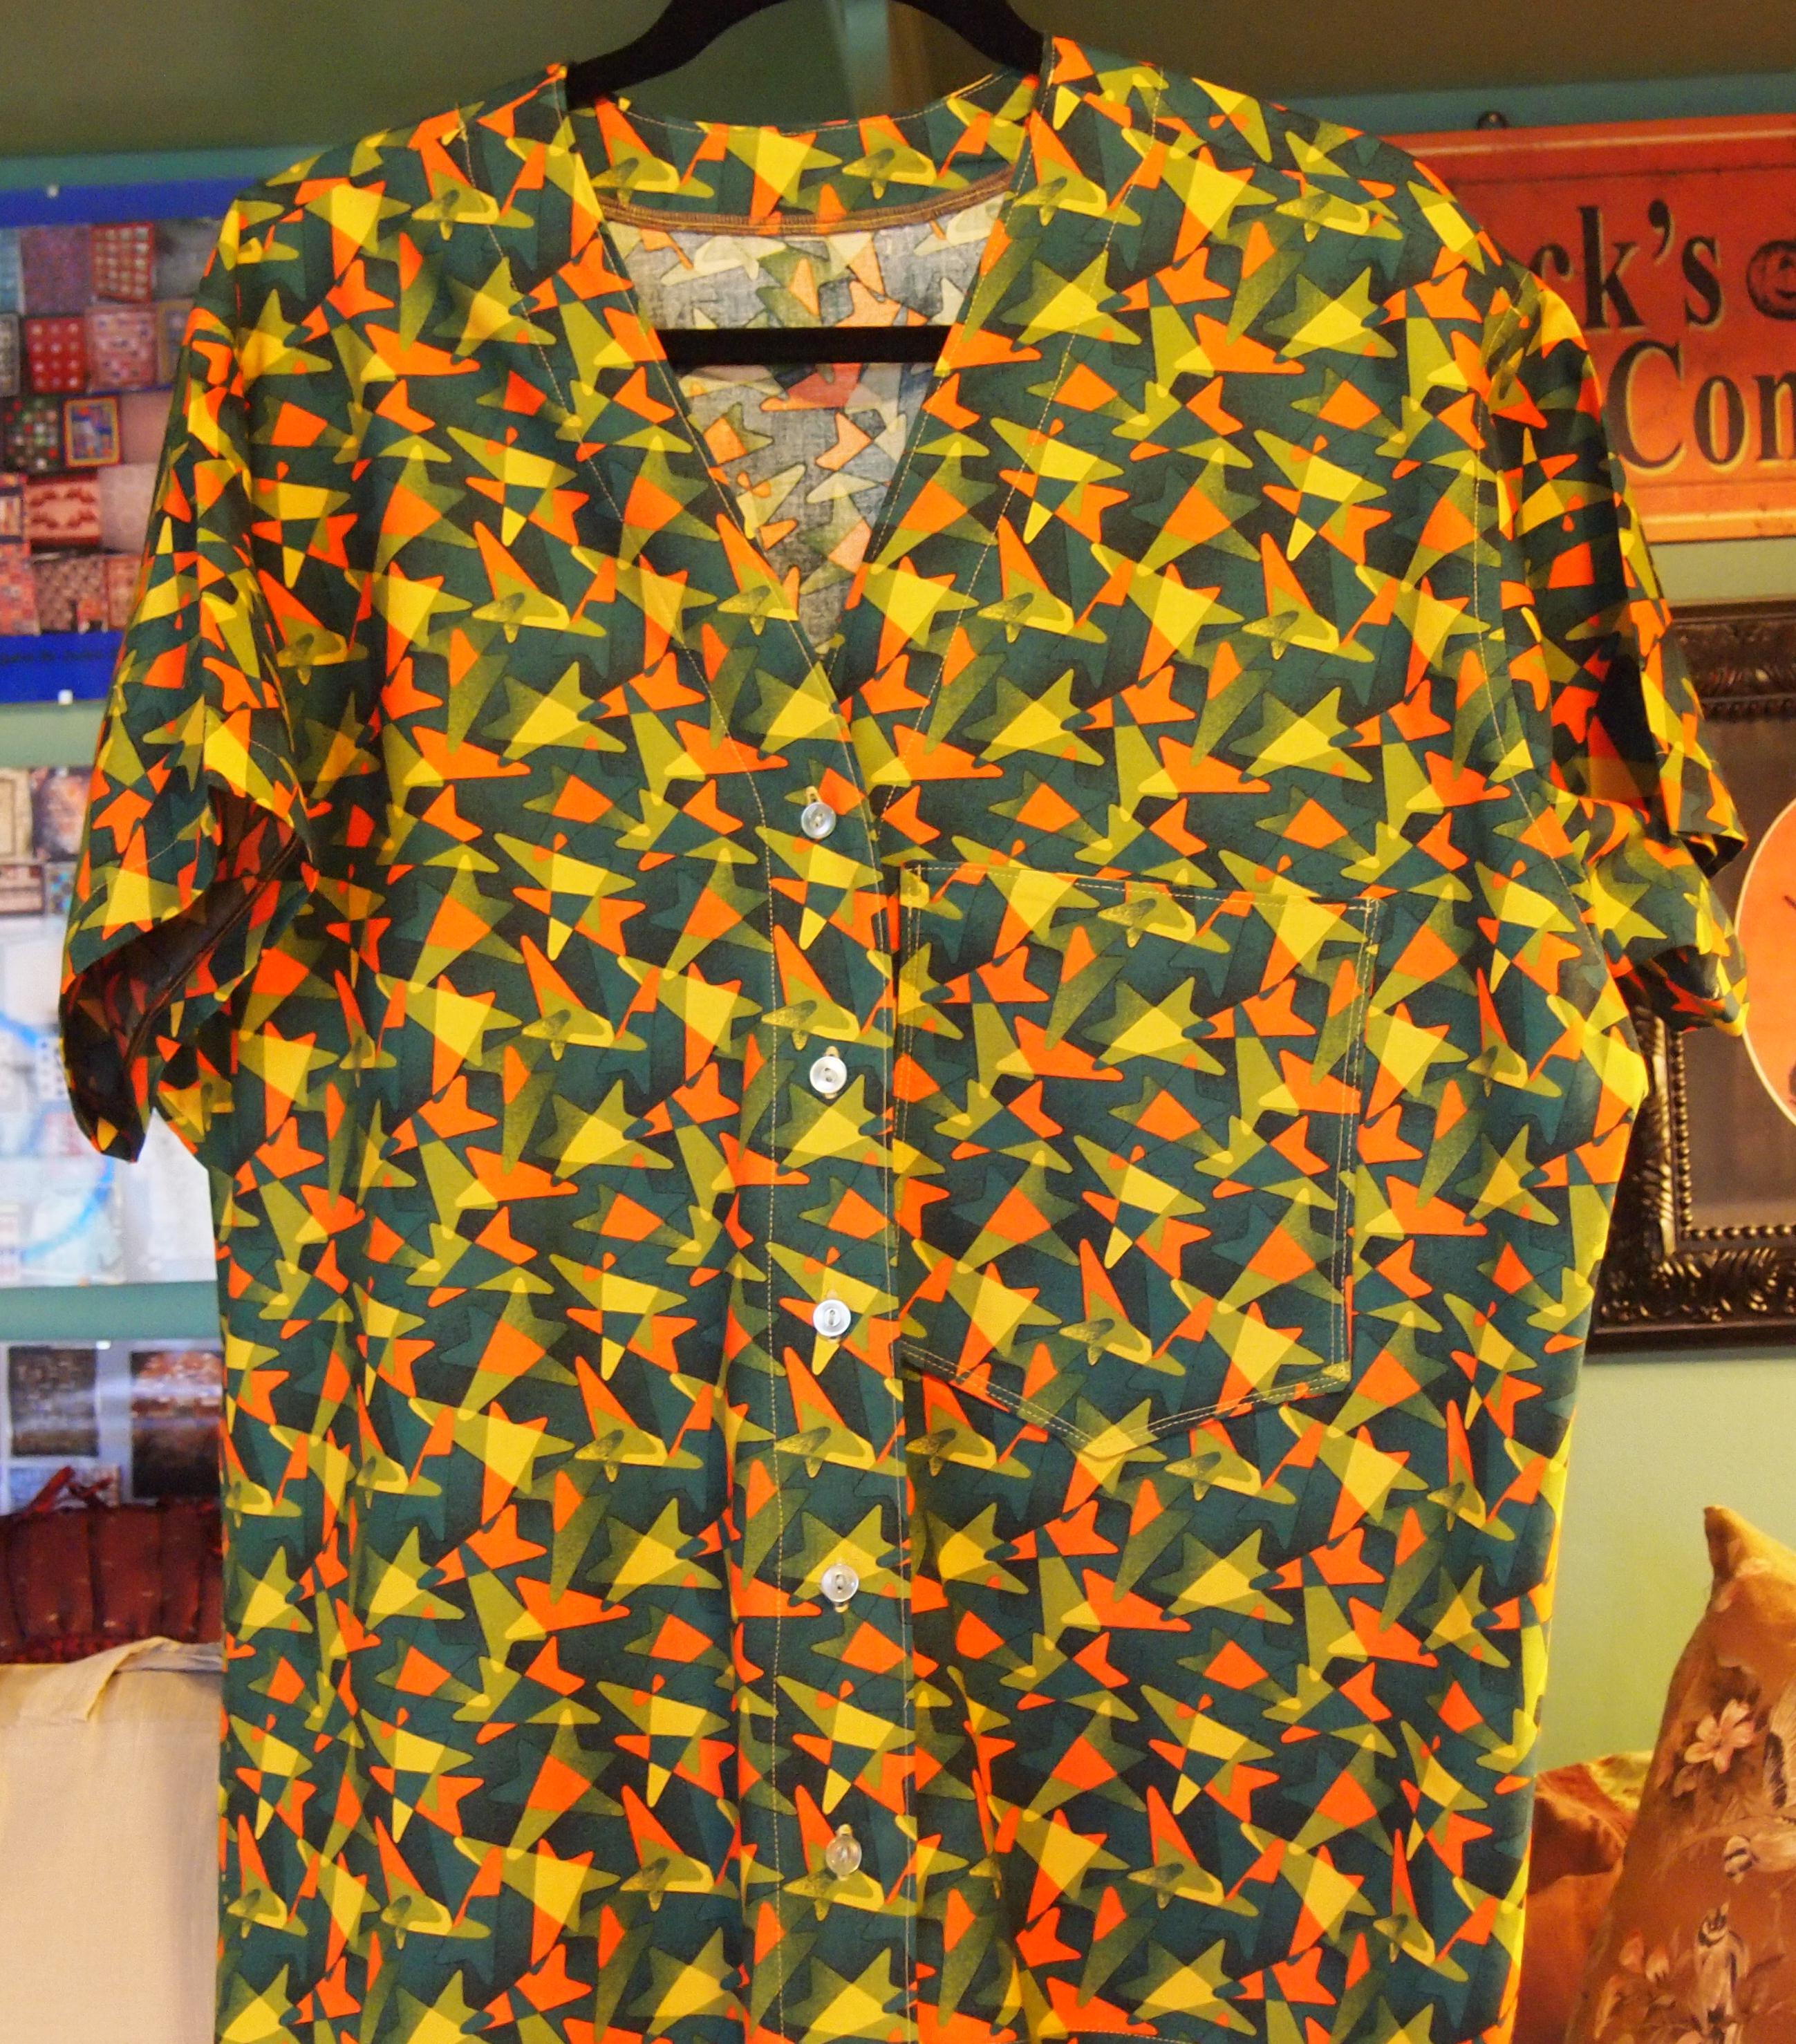
I ventured into sewing room number 2 where I park some of my sewing machines and set up Myrtle May and my Babylock Serger. I had 3 shirts that had been cut out since last summer and this was a good day to give Myrtle May a workout and git em done!
I have been wearing the same shirt for 10 years. It started out with long sleeves and a collar. First the long sleeves went, then the collar. You see, I am a Flasher – Hot Flasher that is is. I love cotton shirts.
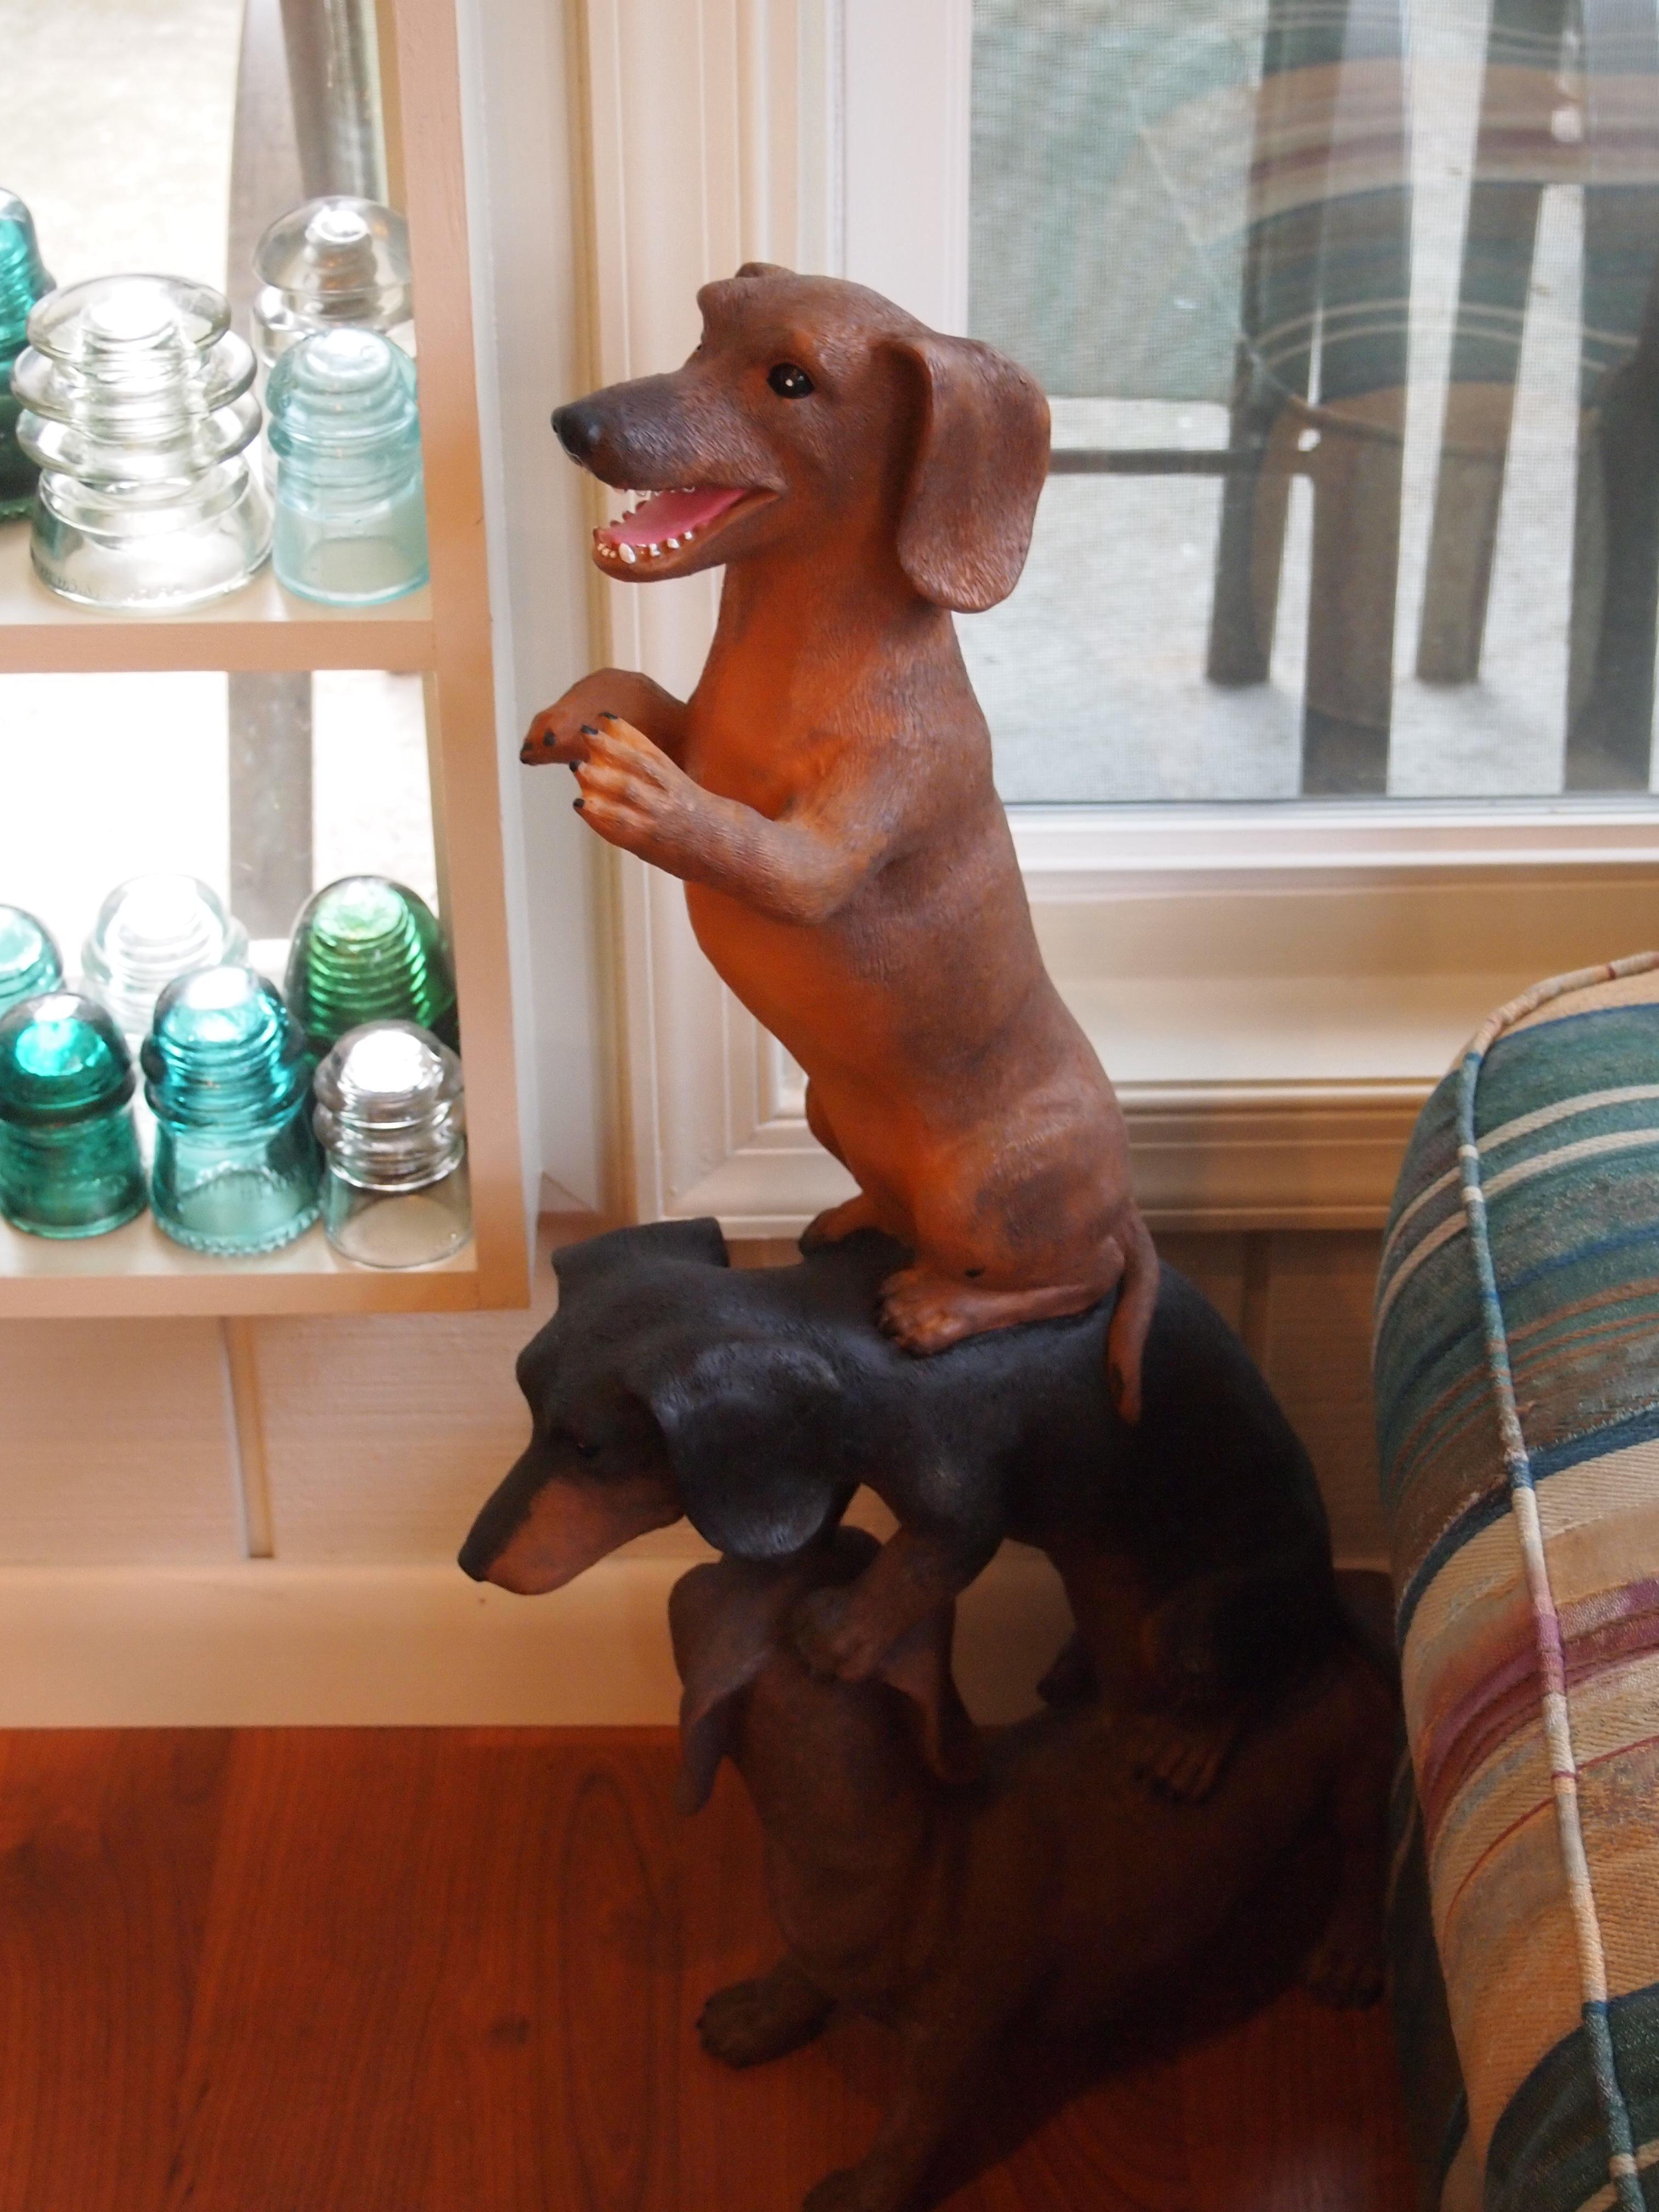
This is a gift from my Aunt Judy for my birthday. My two dachshunds don’t know what to think about them!