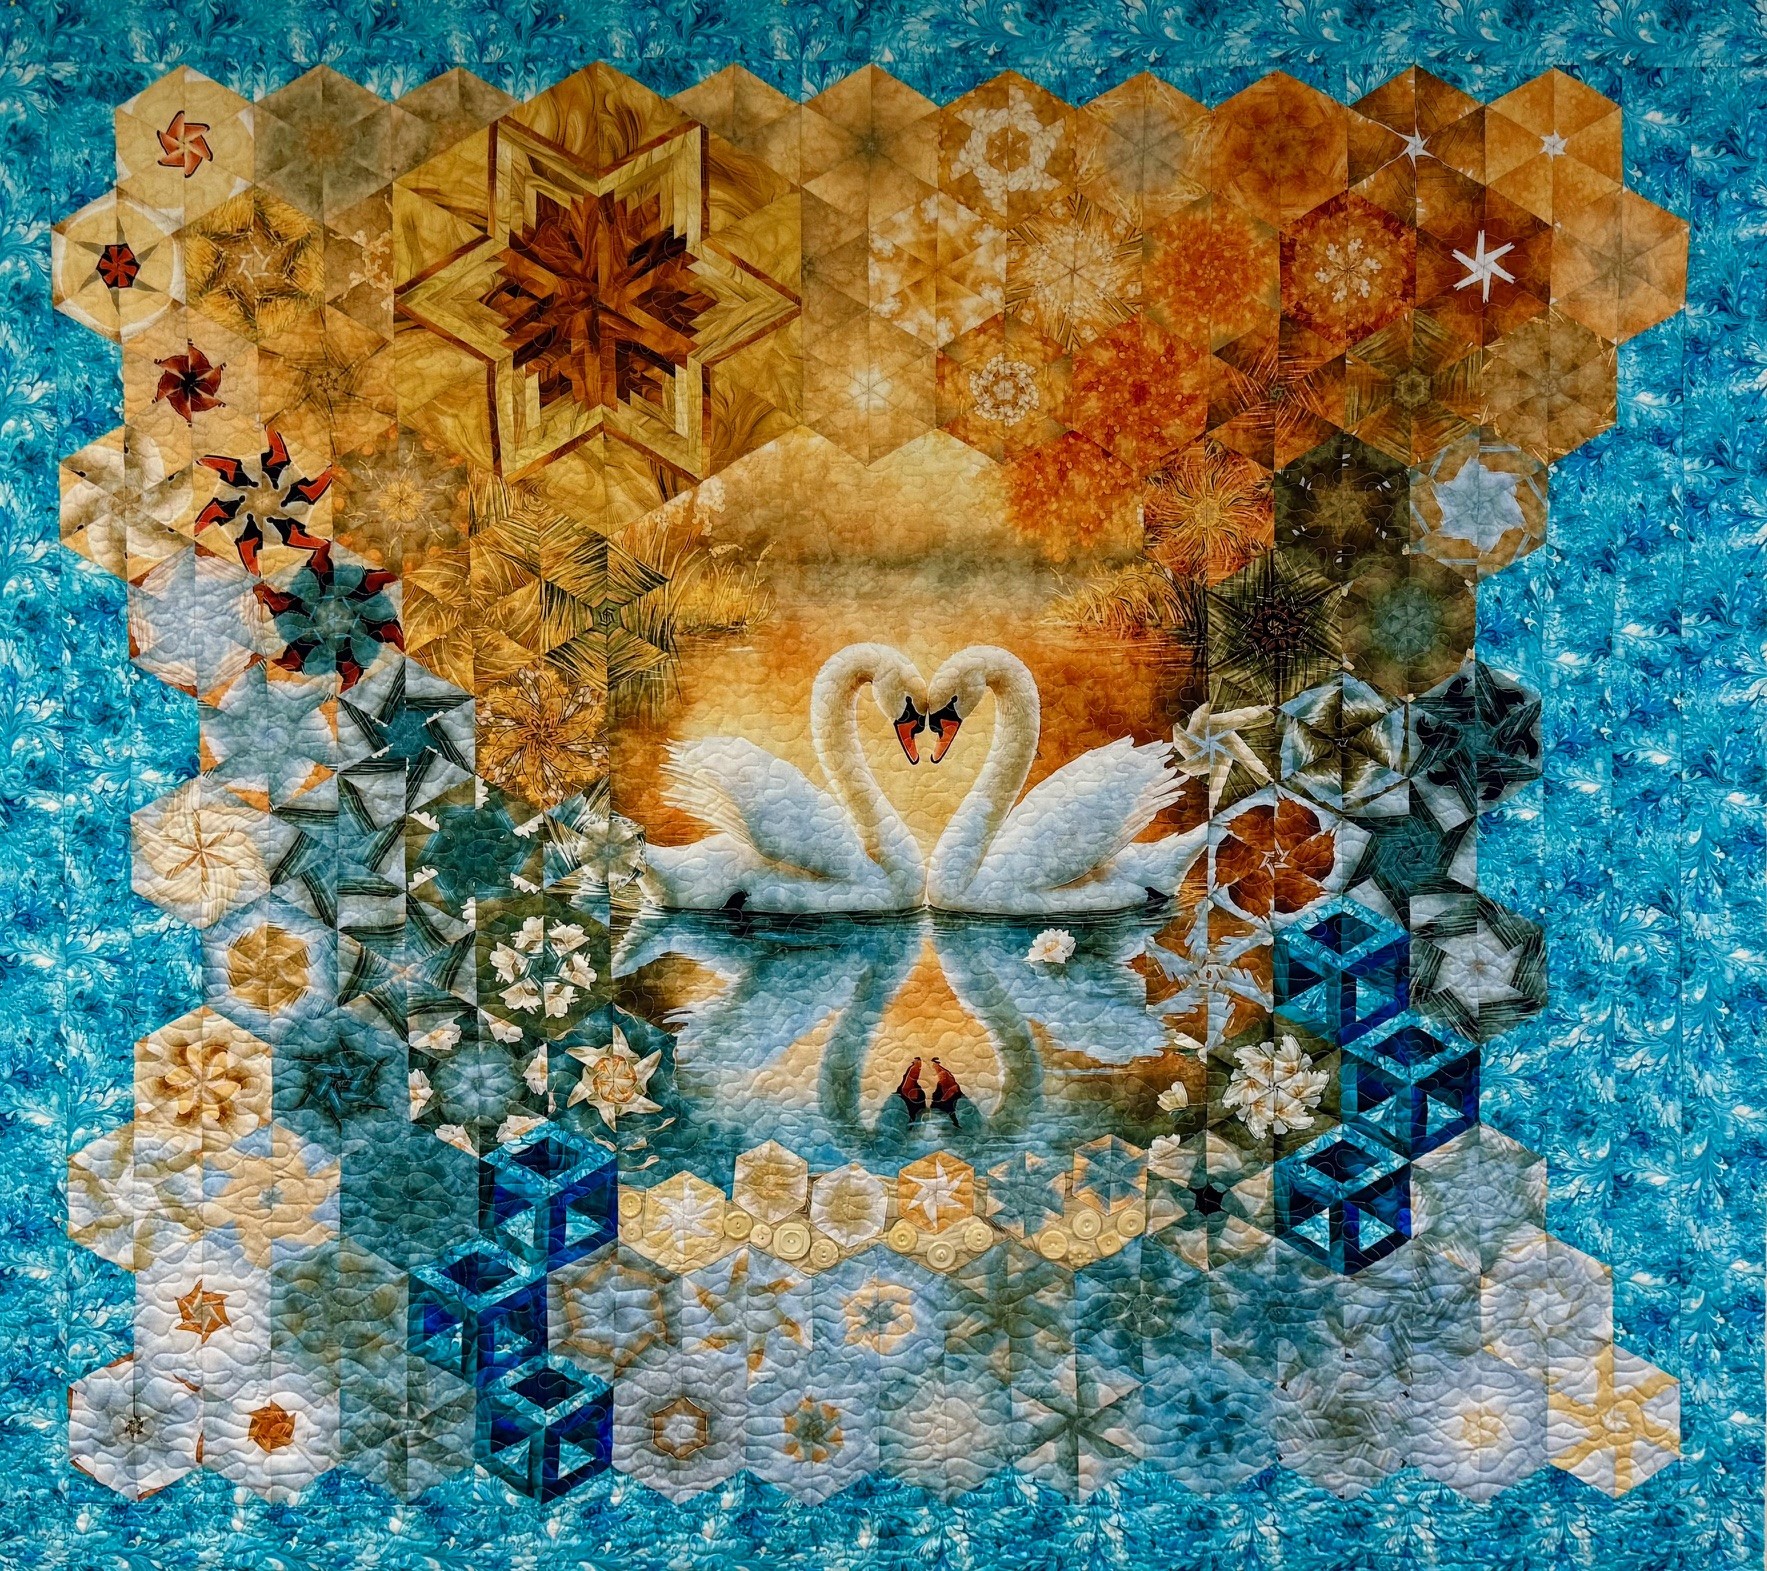
Swan Song by The Morris Creative Group for QT Fabrics. Panel measures 36″ x 42″ with the outer border. I cut off the border to use as an outer border on the quilt. I cut my strips 3.25″ to yield 5″ finished hexies.
The ivory vintage buttons symbolize the swan eggs. The Swans are lovingly watching over their nest.
Just for fun I thought I would share how the Quilt Ninja came about.
It all started in 2008. I went to the Virginia Consortium of Quilters Celabration at Smith Mountian Lake and participated in an Apron contest and won 1st place.
I covered the apron vest in pockets. I placed a pocket on my back to hold a ruler and placed a rotary cutter in a front pocket.
I would whip out the ruler and rotary cutter at the same time, stating loudly “Quilt Ninja”! It was pretty funny. Needless to say, the Quilt Ninja became my alter ego, and over the years has gained a name; “Myrtle May the Quilt Ninja”!
Myrtle May wanted some new duds, so this version was made in 2012.
This version was made in 2015. I embroidered a list of the Studio 180 tools on the back at that time. I changed from a ruler to a Magic Wand on the back.
This version was made 2019. It is covered in Studio 180 Design tool merit badges. It has a Magic Wand on the back.
2024: I needed a vest representing the Star 60 Tool. I made a pocket for each of the star/cubes you can make with the Star 60 tool; Capped 60, Hollow Cube 60, Framed 60, Striped 60, Quad 60, Checkerboard 60, Star 60 & Star 60 Log Cabin. I added a small One Block Wonder I made with a panel. I added embroidered words the distressed women is saying: “Someone has been cutting paper with my fabric sisscors”!
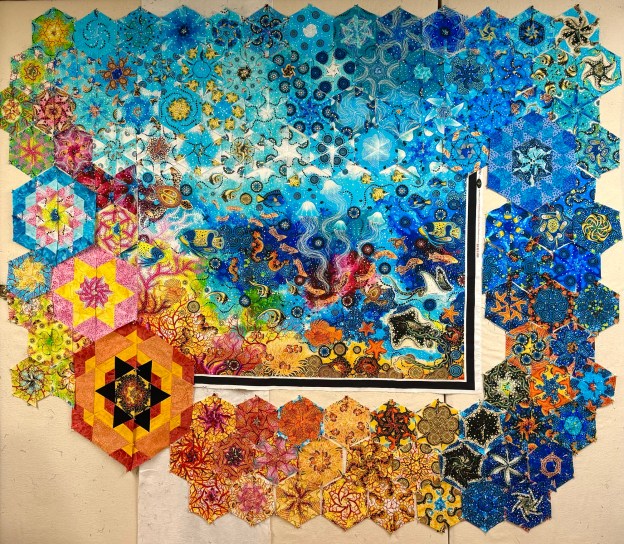
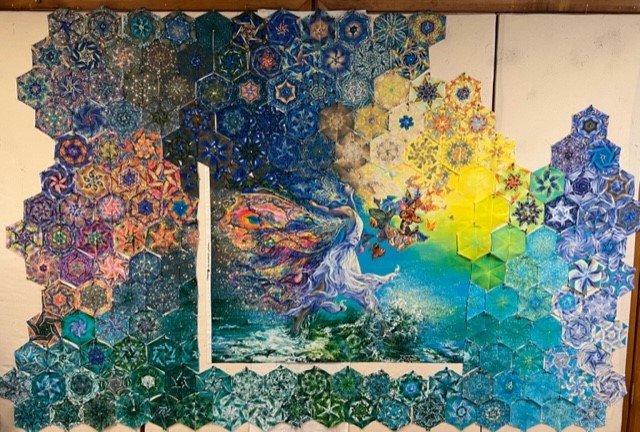
I’ve been playing among the stars, literally! In August I will be going to Amy’s Quilt Room in Union Town, PA to teach a One Block Wonder (OBW) Workshop. I want to show them how to design aound a panel and how to add hexies/stars of different sizes.
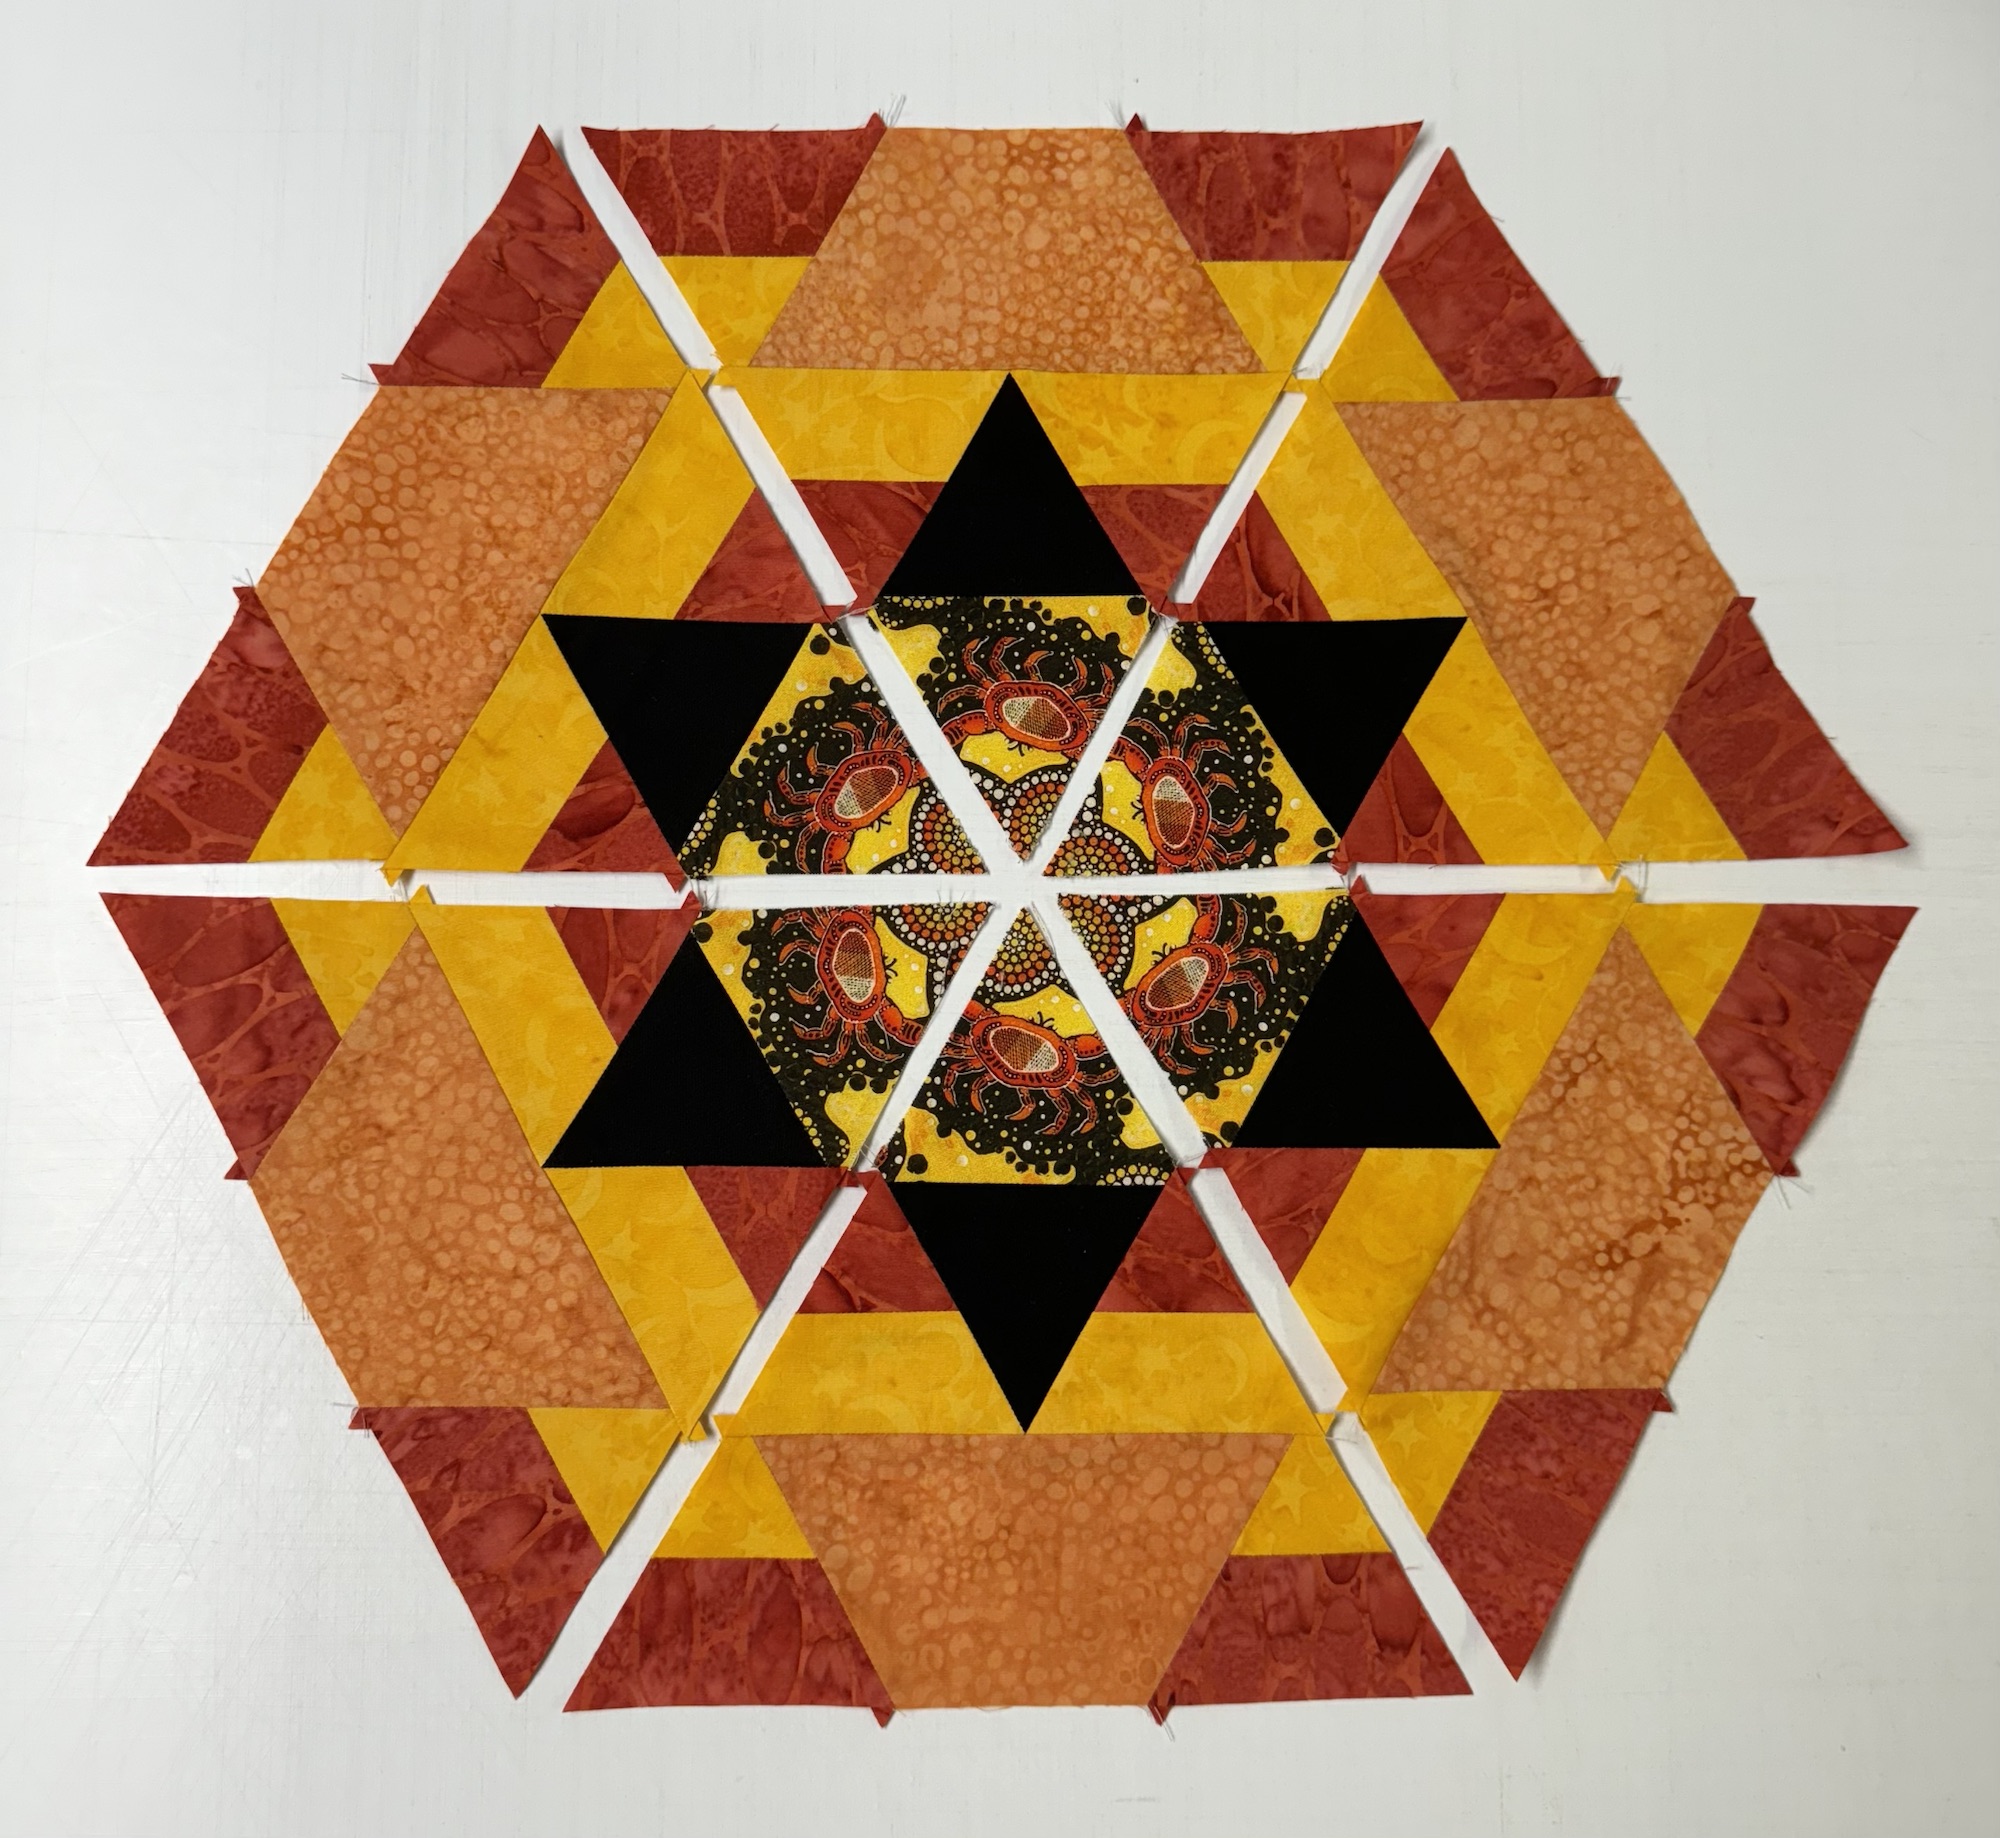
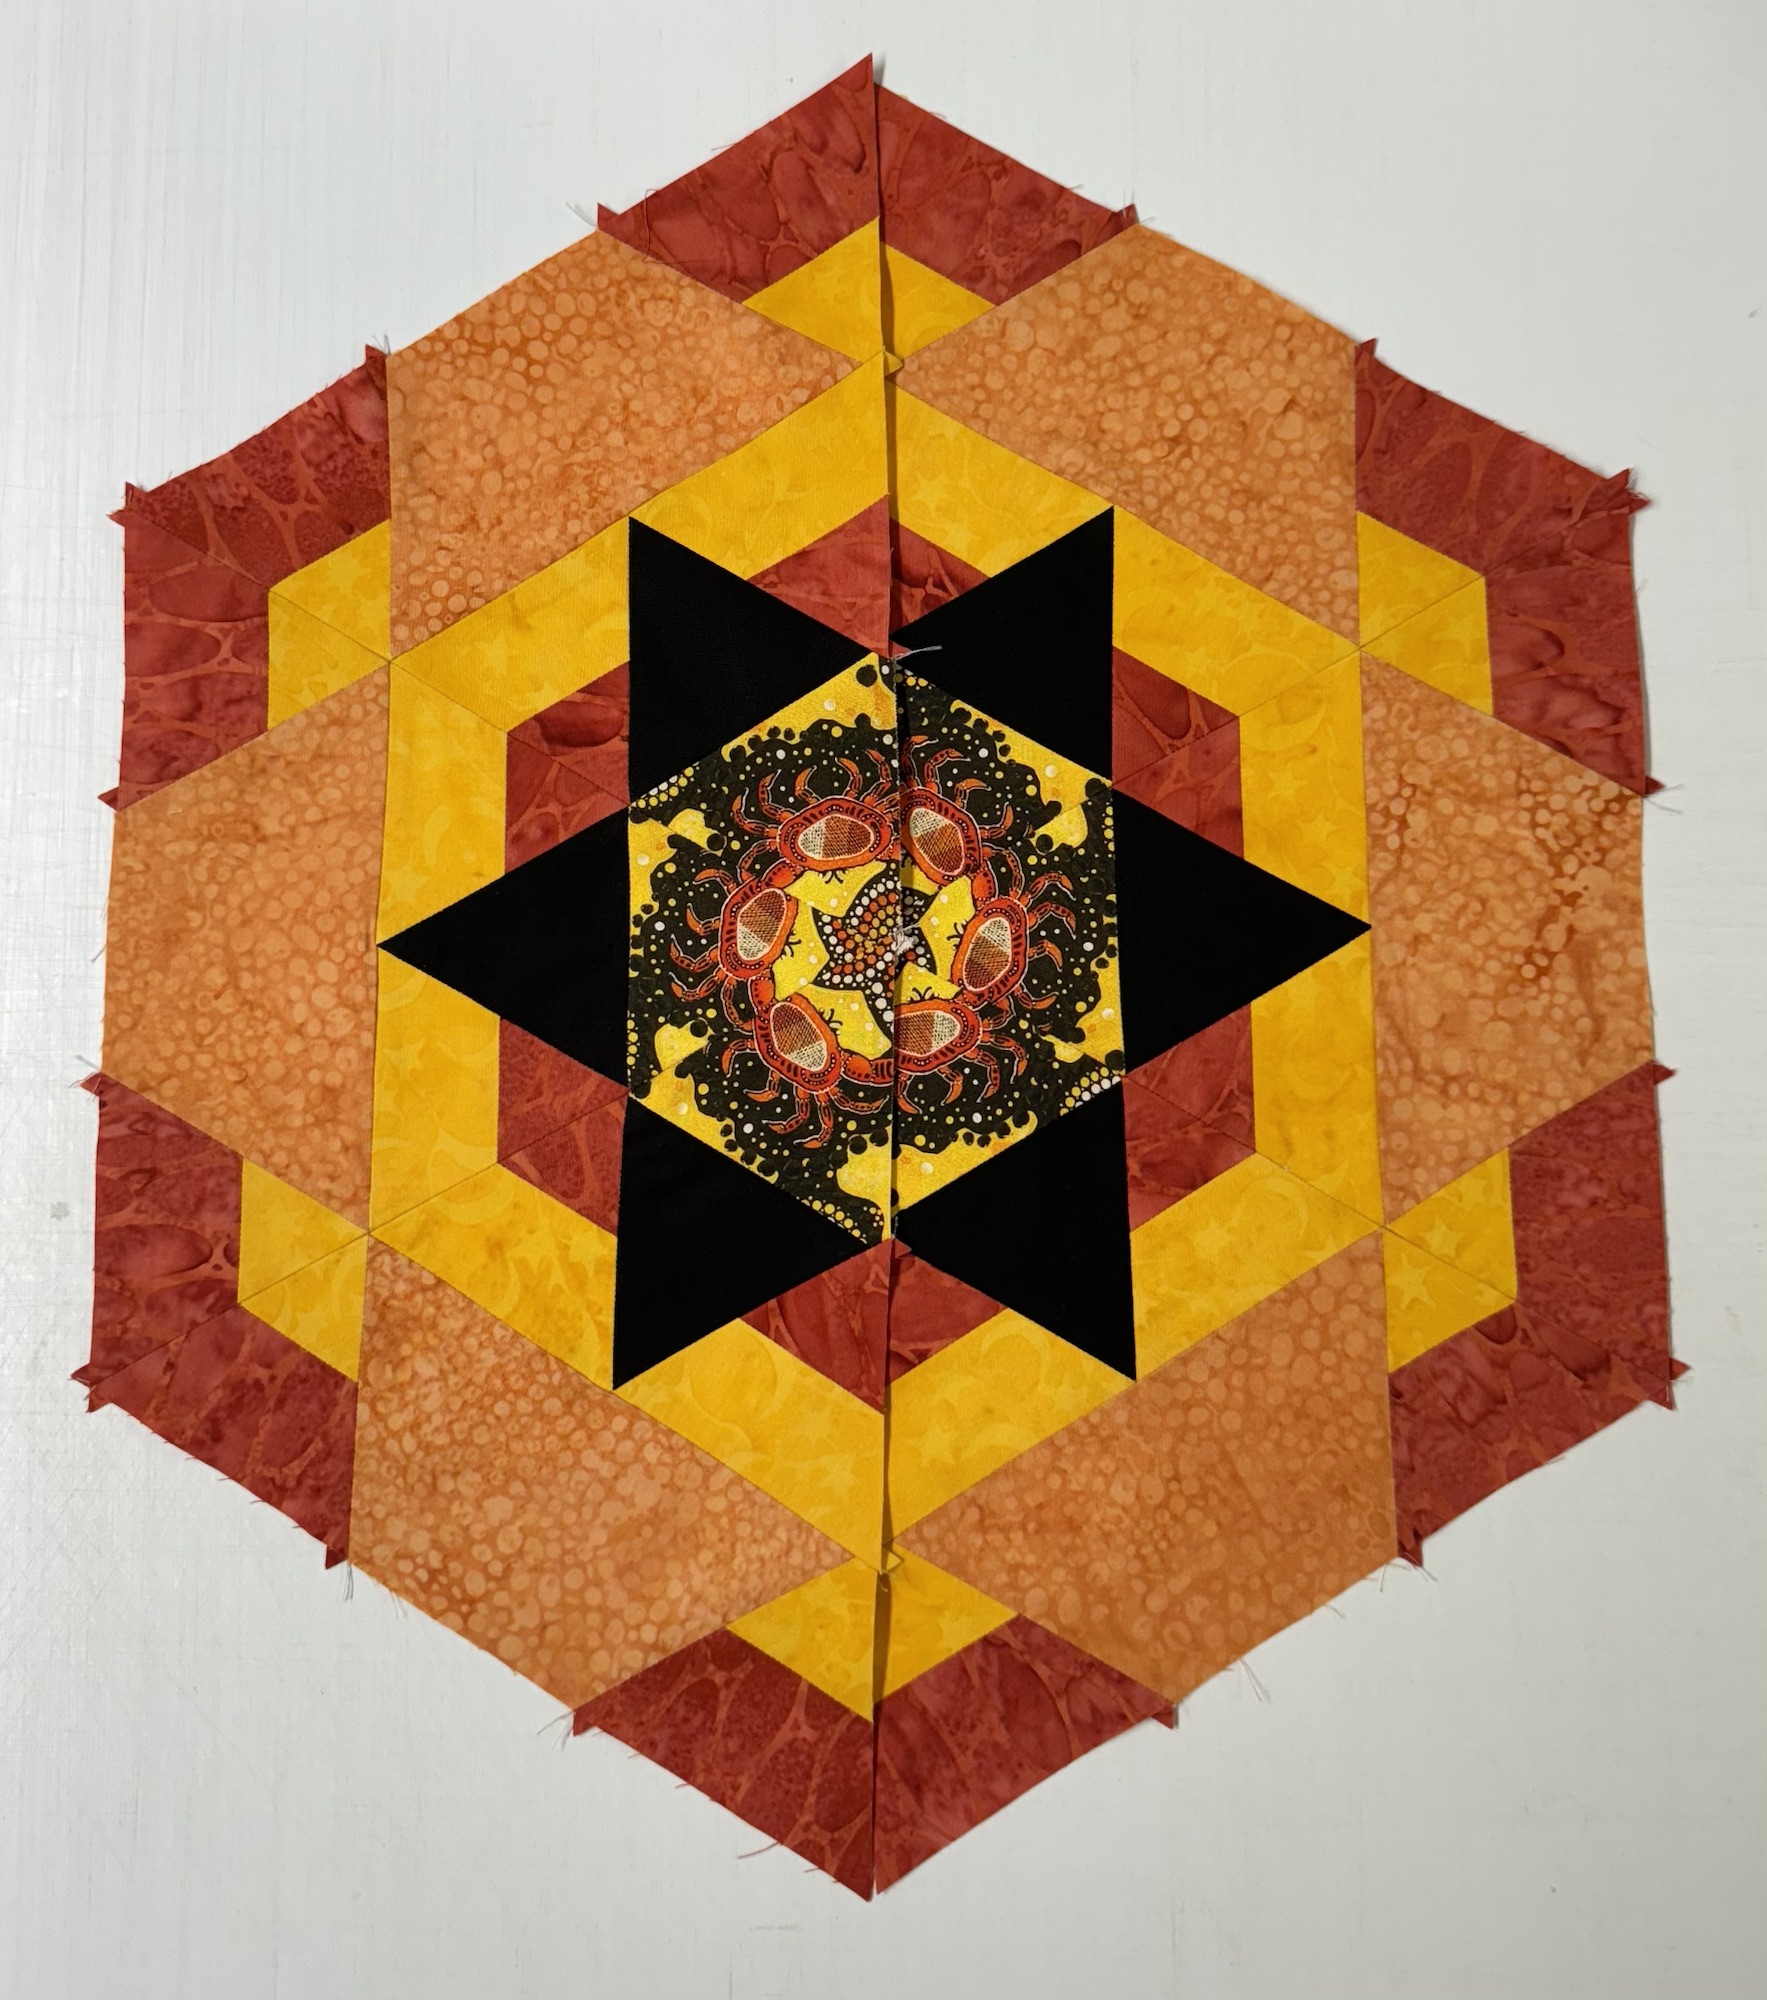
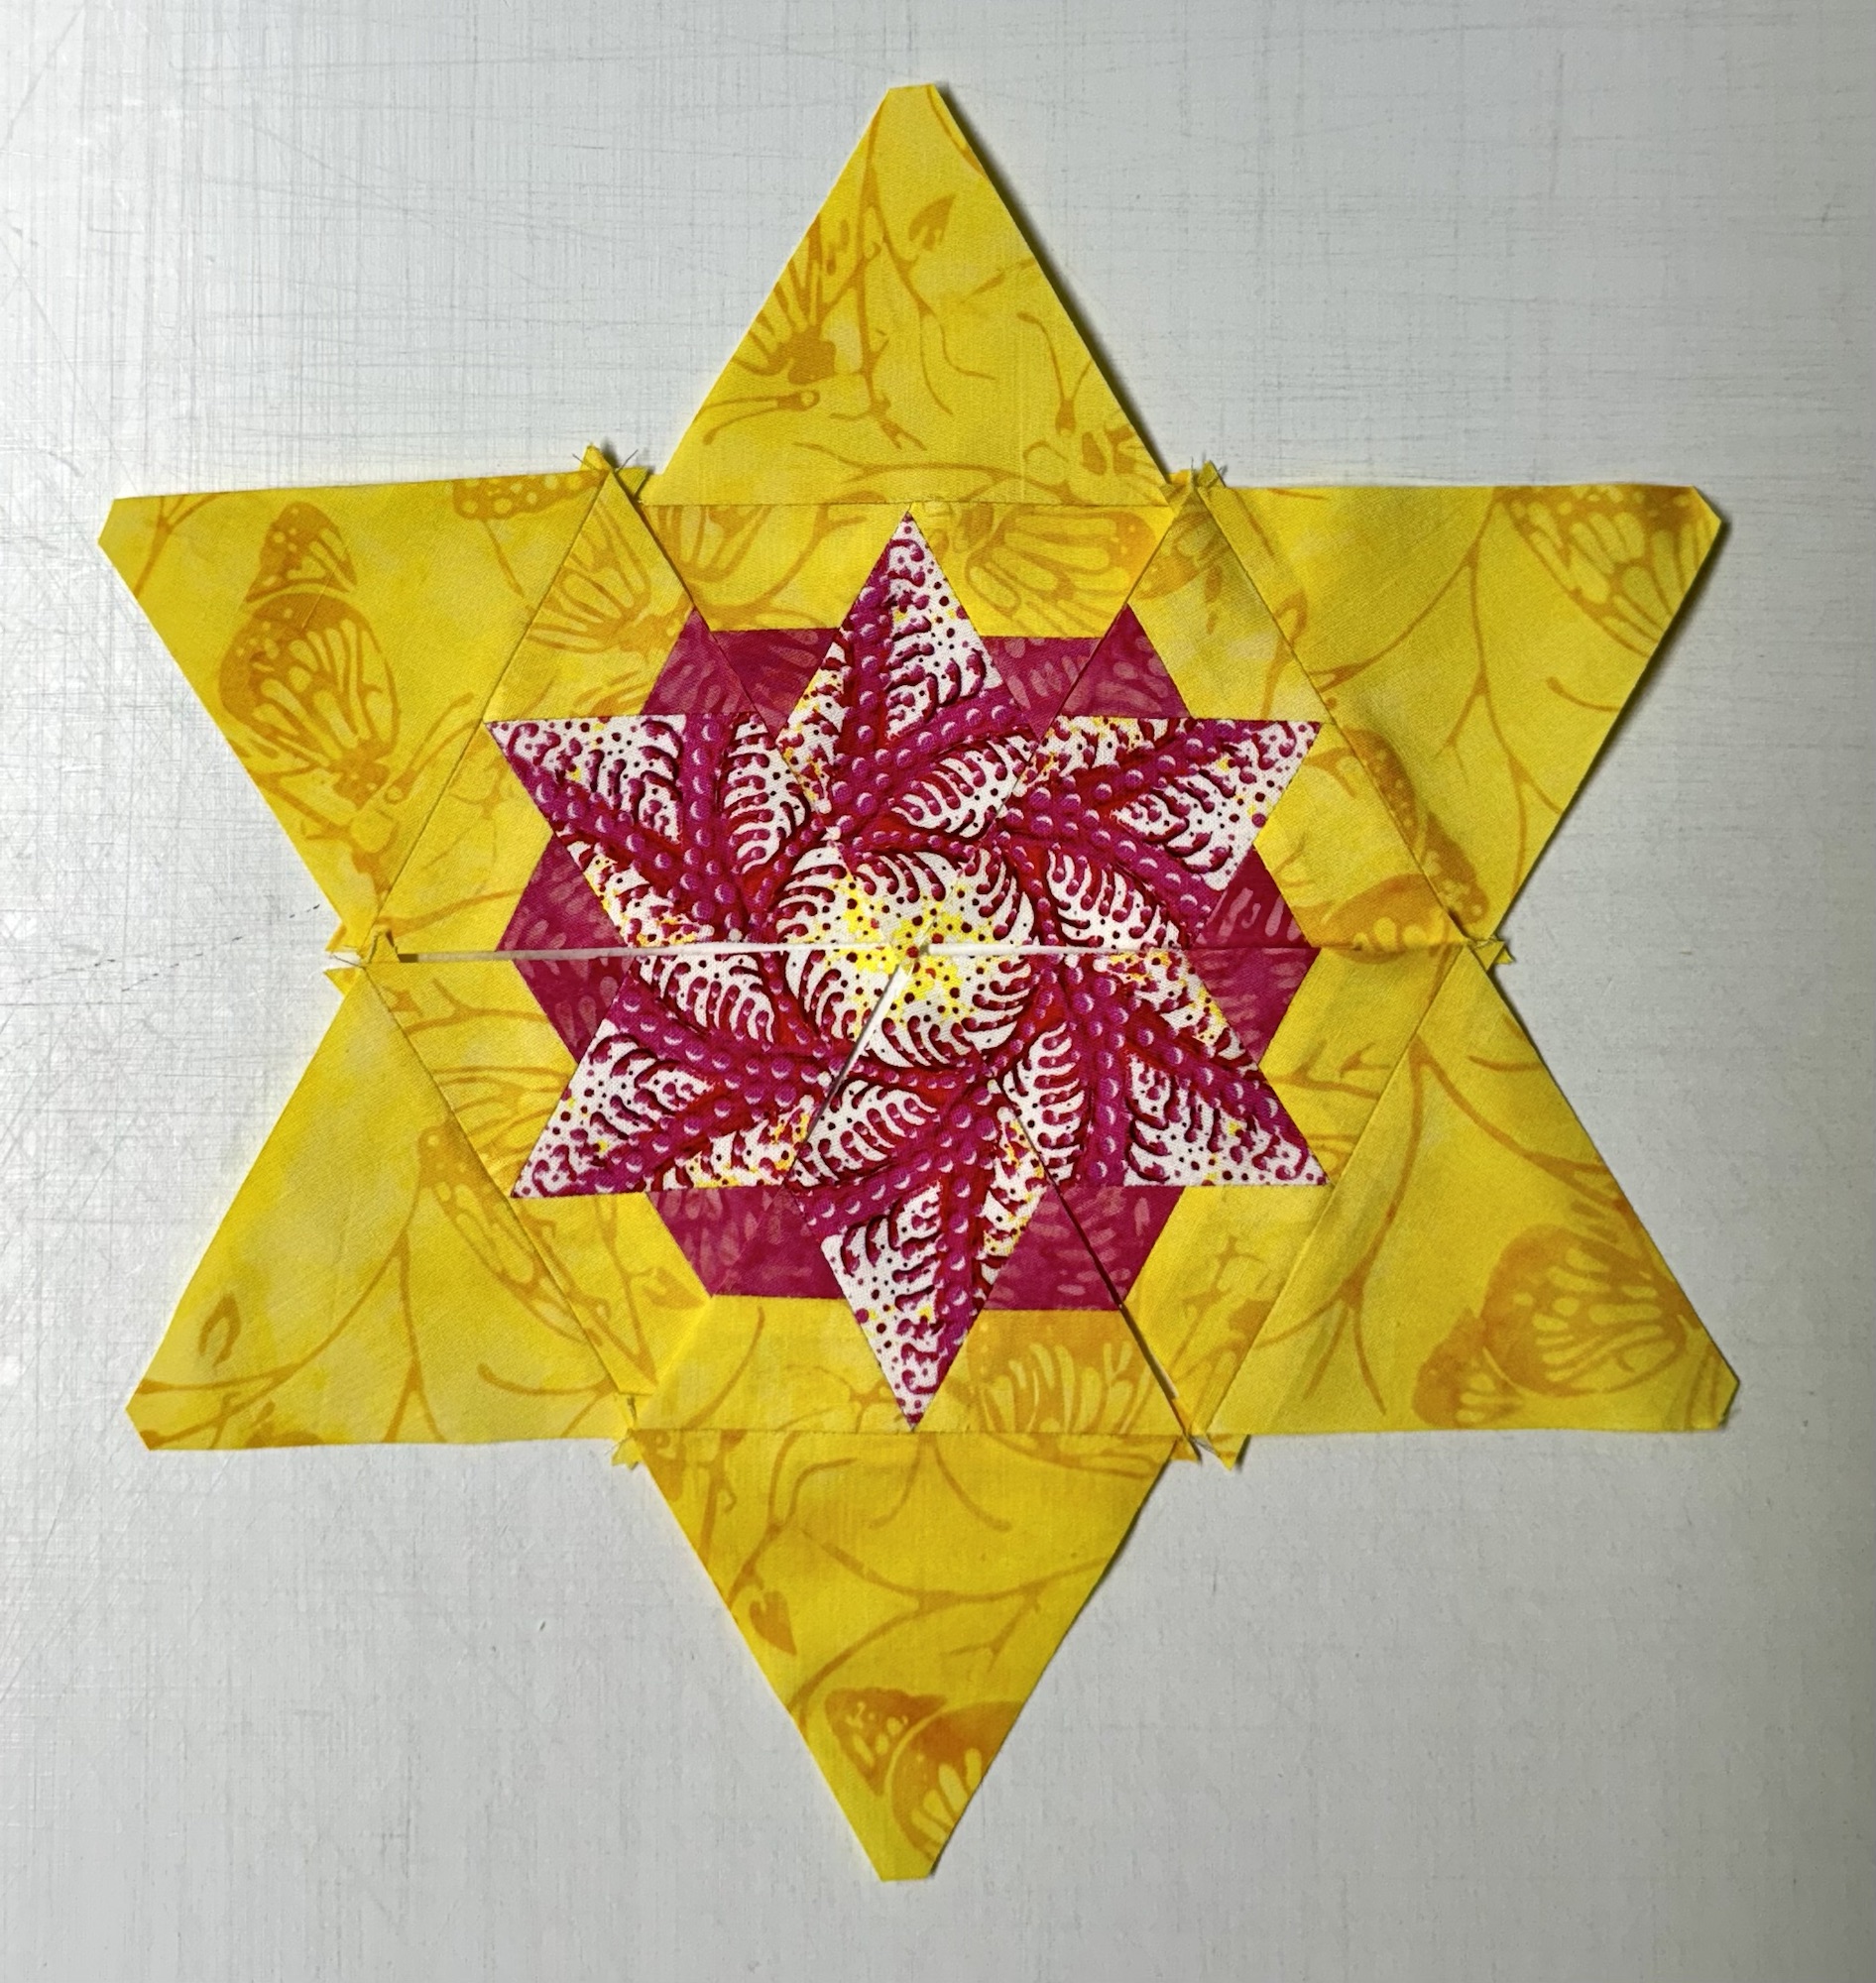
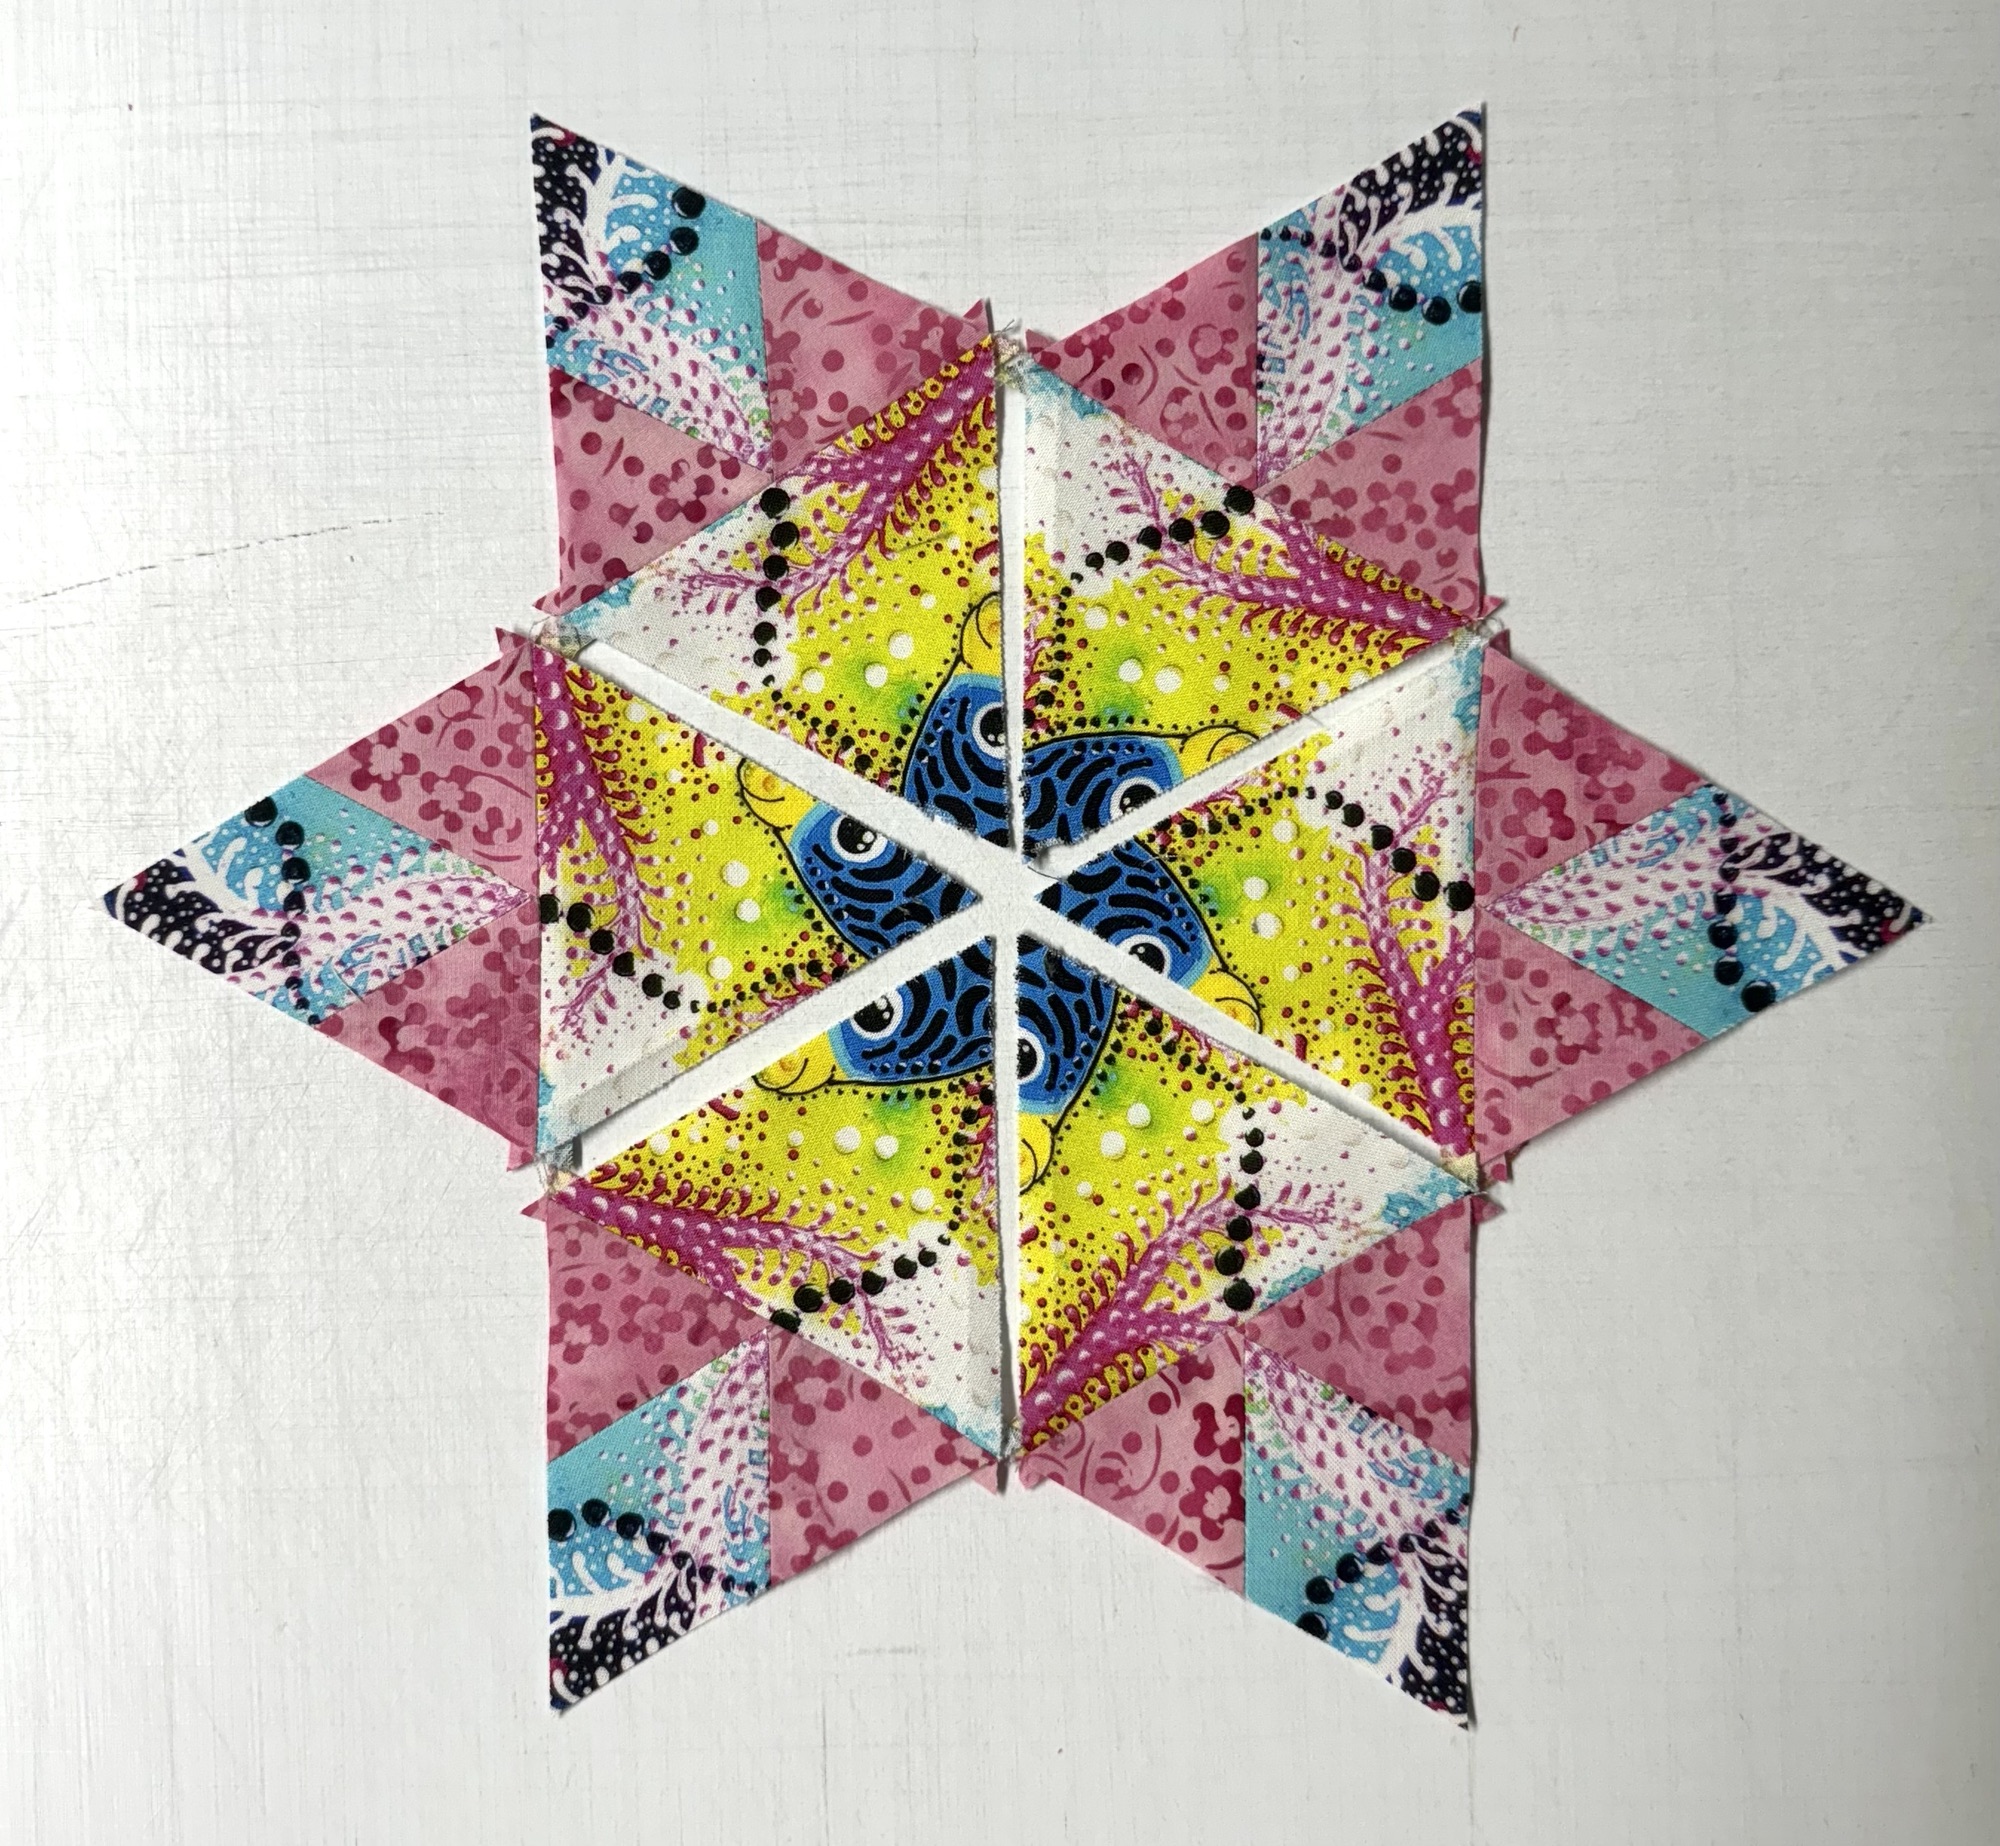
The panel is Salt Water Dreaming by Spirit of the Bush, it measures 41.5″ x 27″. I decided to cut my strips 3.25″ to yield 5″ finished hexies. When you want to add hexies/stars/cubes of different sizes, they must be divisible by the original size of the hexies. Deb Tucker’s Star 60 tool makes it easy to do this.
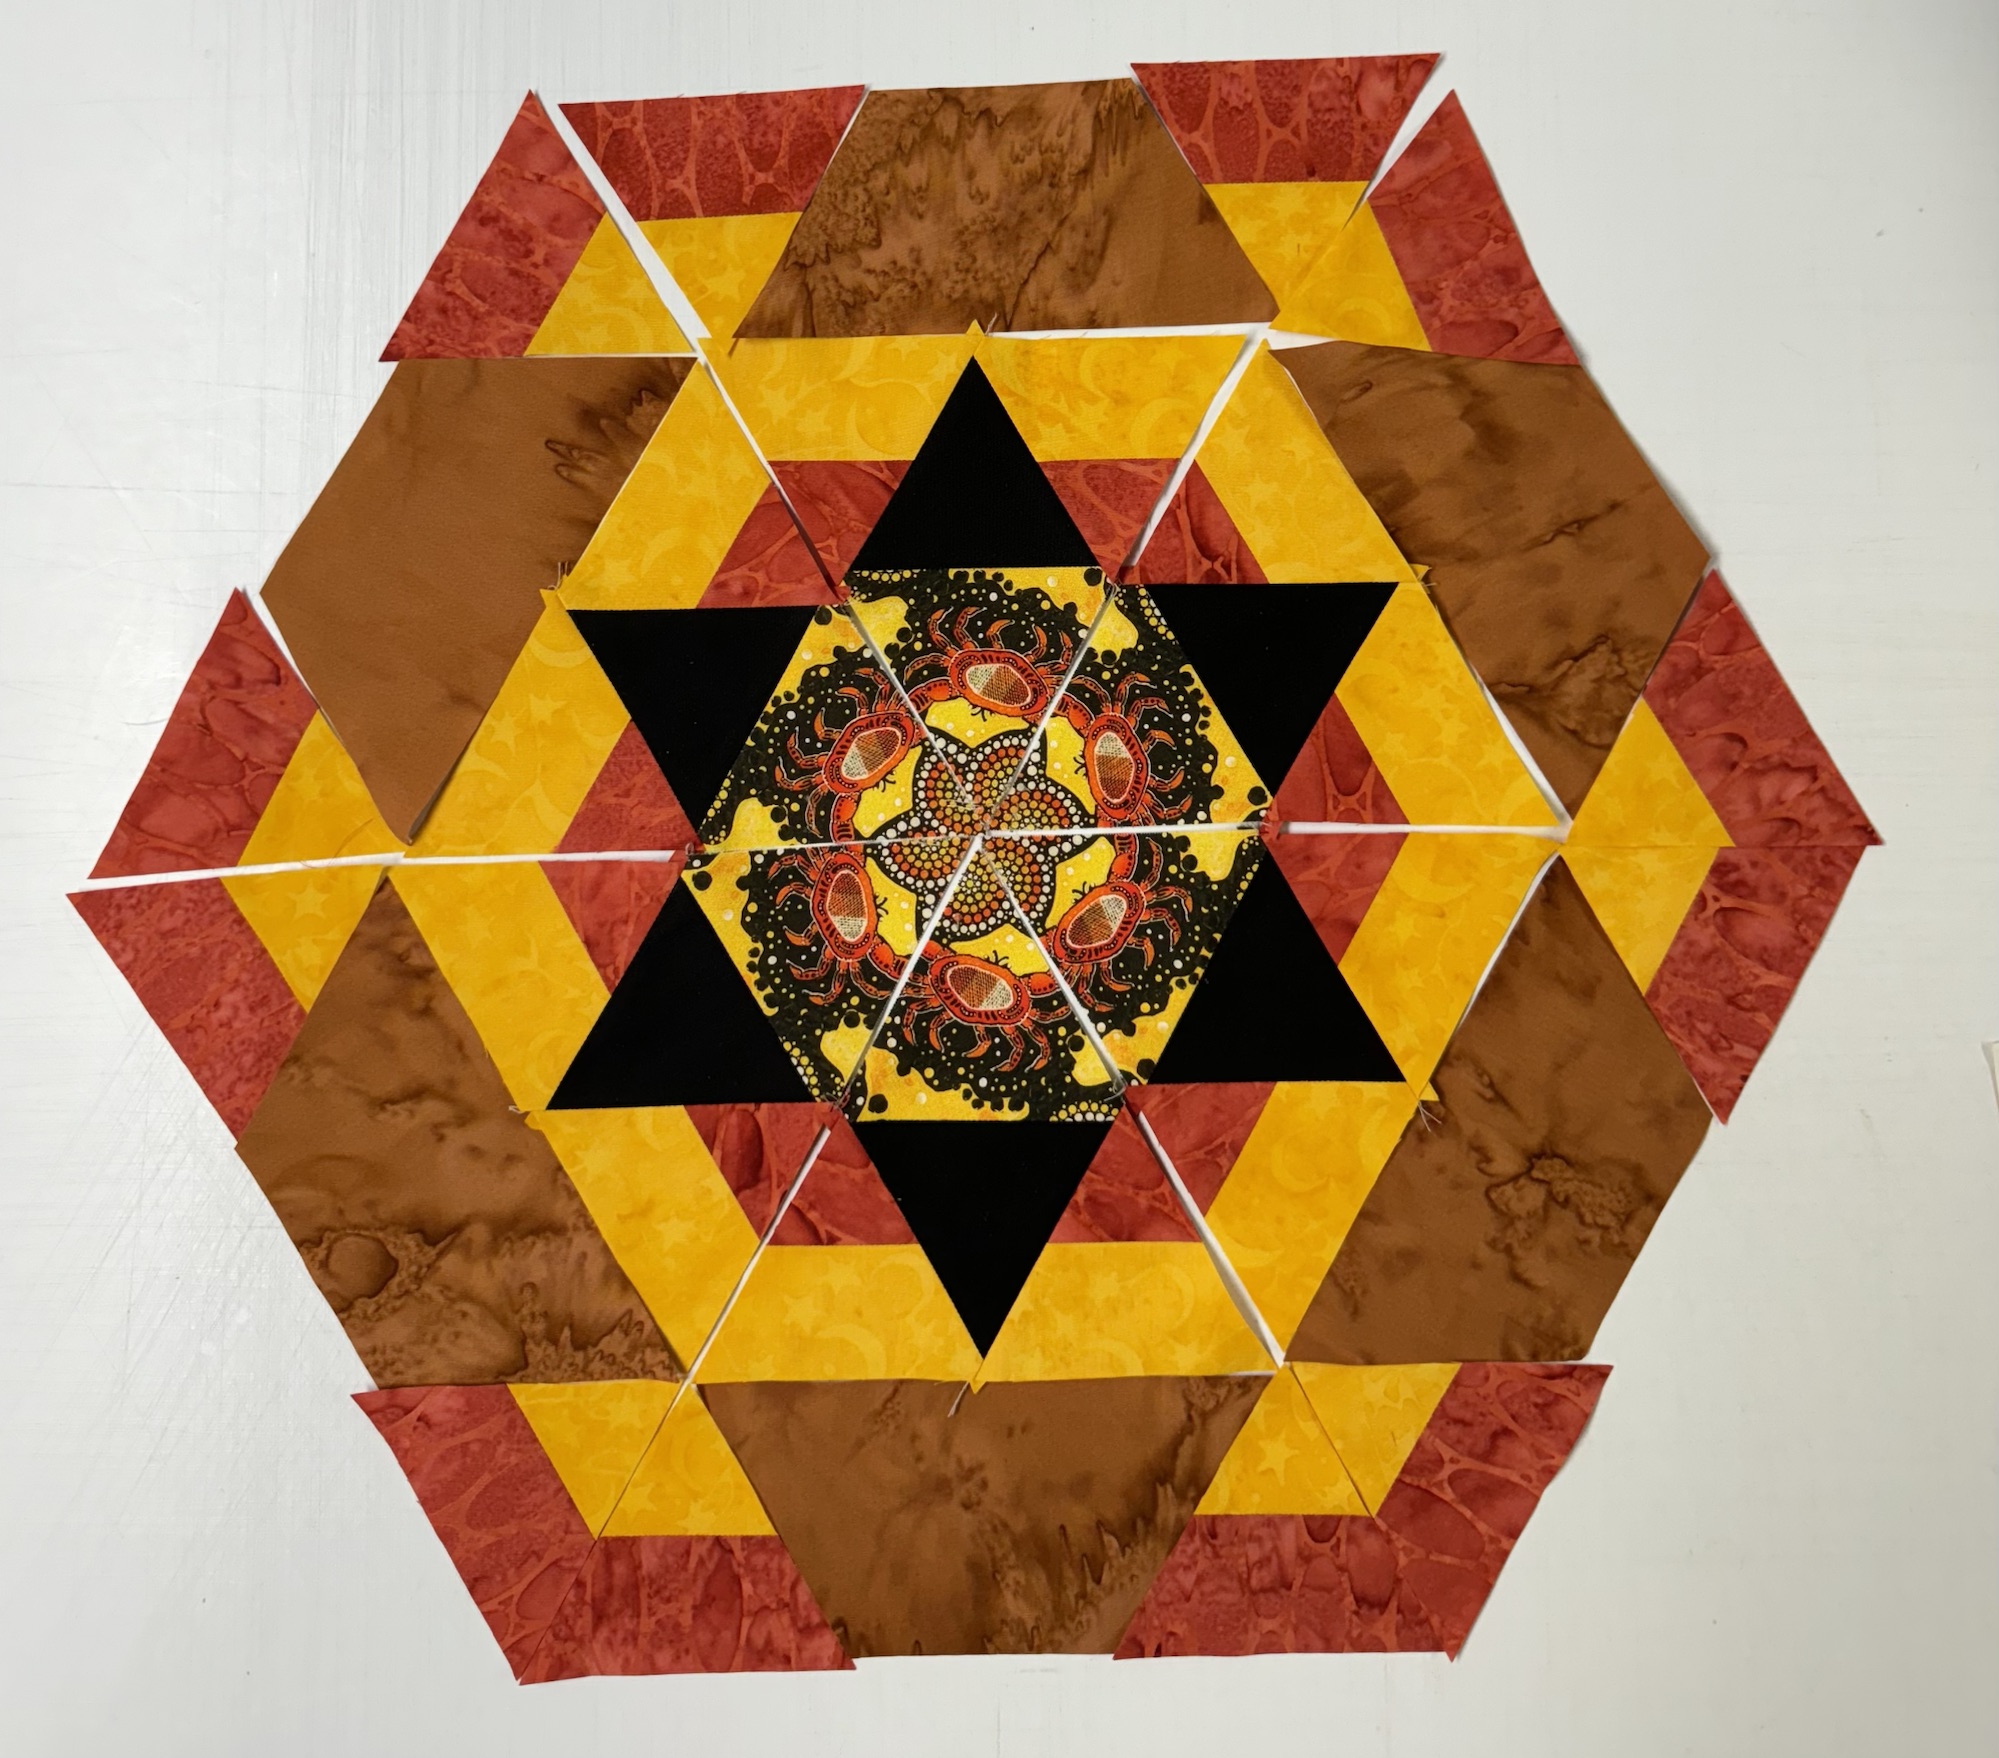
15″ Star Block – This 15″ star is divisible by 5″. This star includes 2 rings of 2.5″ finished Capped 60 units. Your units are always half the size of the finished hexie.
Center: 6 repeats cut into 3.25” strips = a 5” finished hexie.
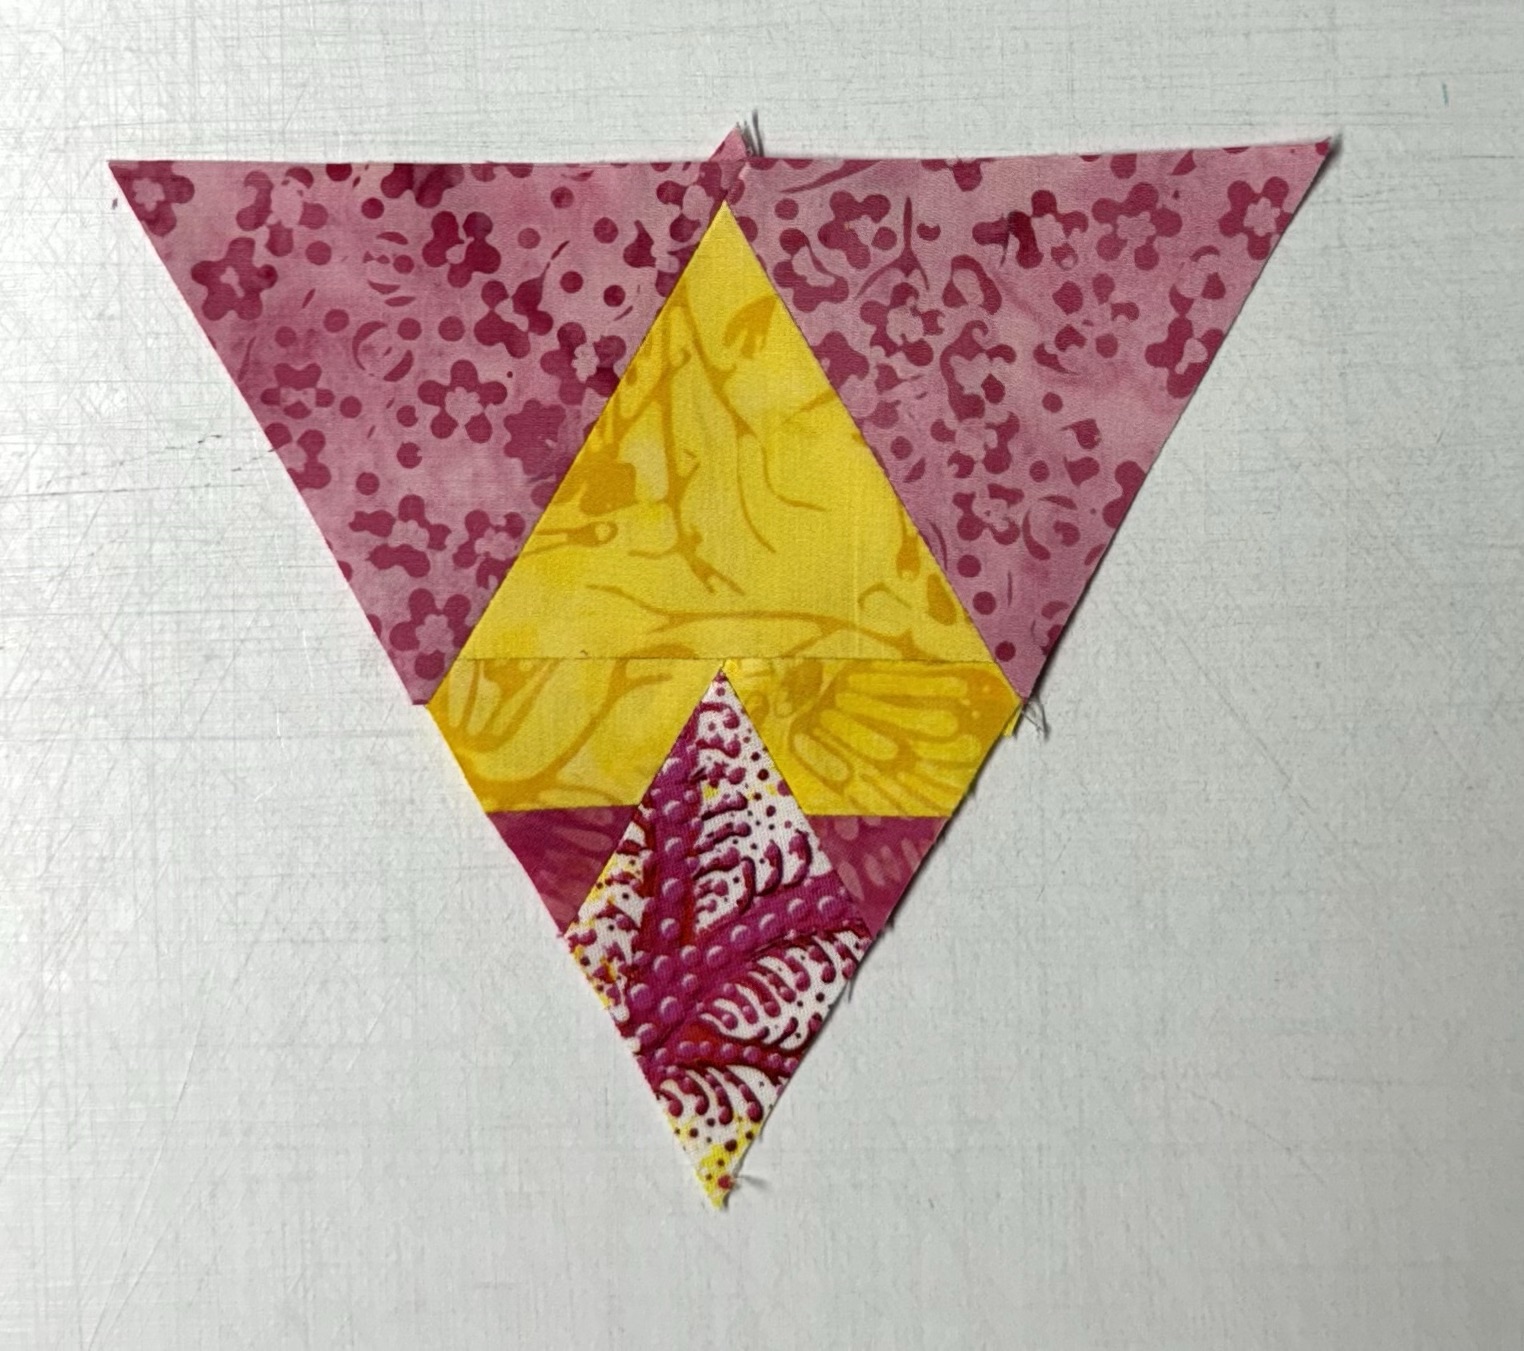
Companion Triangle: (Black Fabric) Cut 1 – 3.25” WOF strip, cut 6 triangles using the 60 degree line .
Inner Capped 60: ( Orange point, yellow Trapezoid) Make 12 – 2.5” Capped 60 units. Cut two 2” WOF strips from a medium and light fabric.
Half Hexagons: (Bronze fabric) Cut one 3” WOF strip. Using the Star 60 ruler, place the 5.5” line on the bottom of the strip and cut 6 half hexies from a medium fabric.
Outer Capped 60: (Gold points, orange trapezoids) Make 12 Capped 60 units. Cut two 2” WOF strips from a medium and light fabric.
Stitch the center hexie triangle to the black companion triangle. Press seams open.
I used Capped 60 units as side triangles to the diamond shape created by stitching the hexie center to the black triangle. I stitched the second ring of Capped 60 units on either side of the half hexie and then stitched that pieced unit to the pieced center triangle.
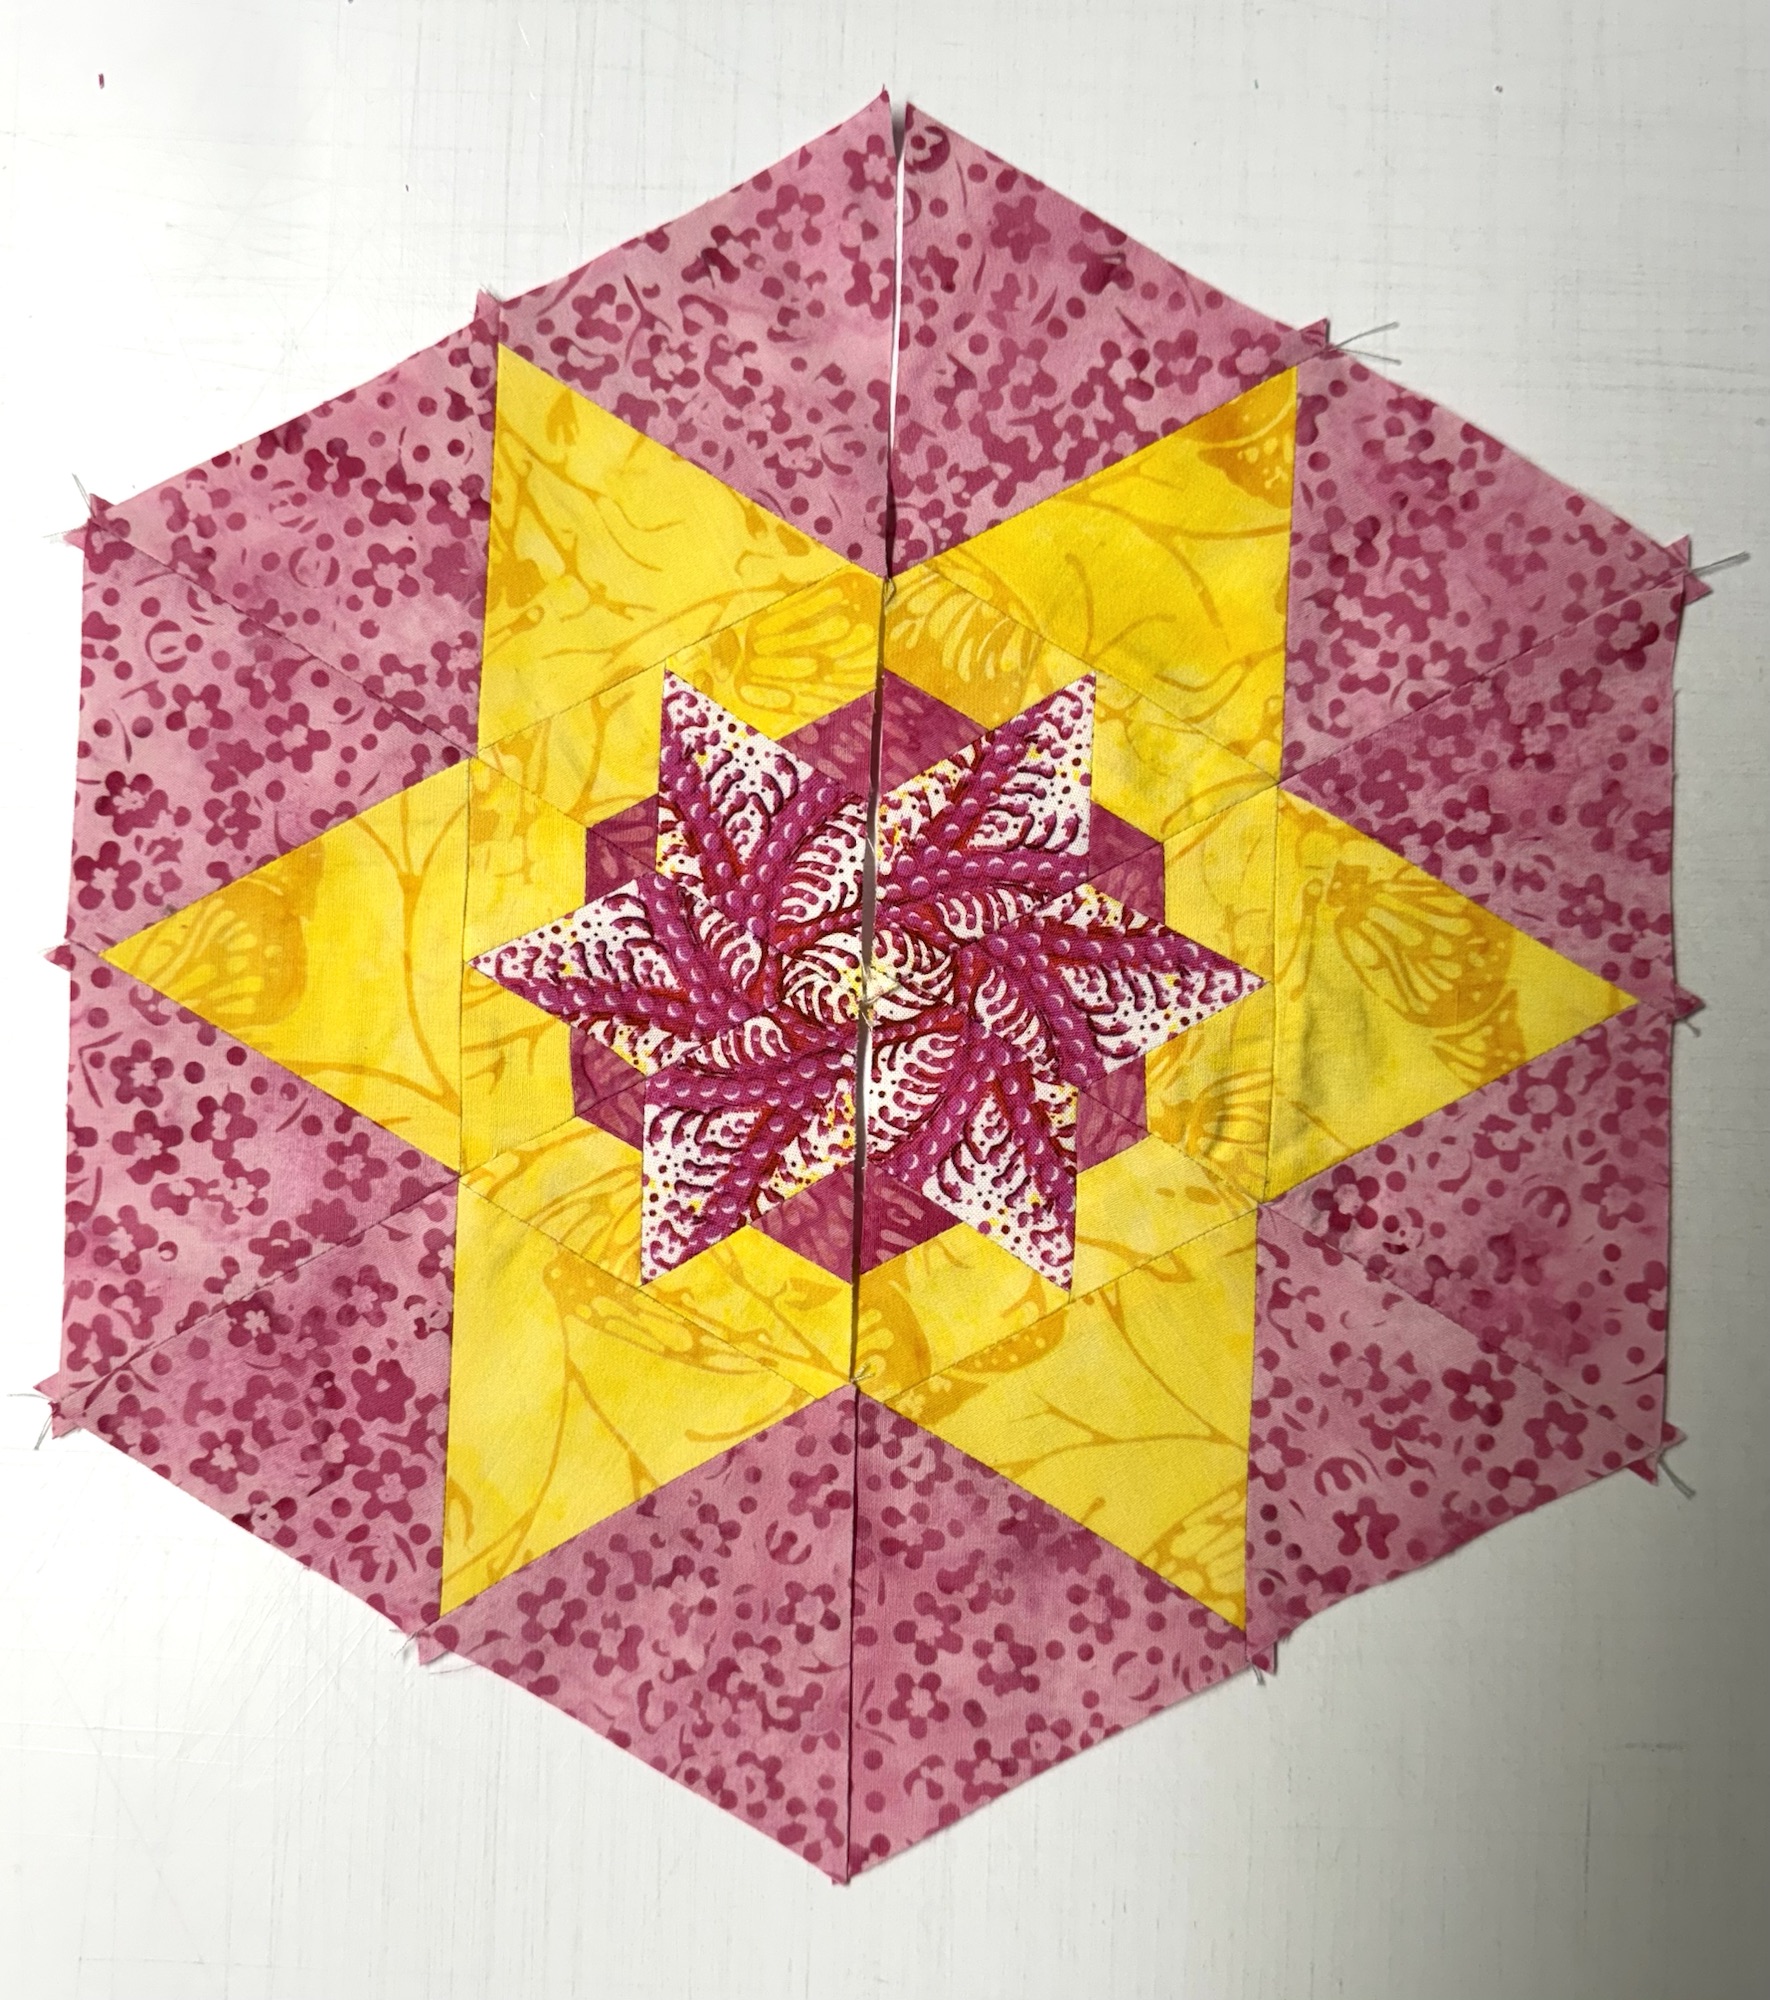
Stitch 3 triangles together, pressing the seams open, repeat with the other 3 triangles.
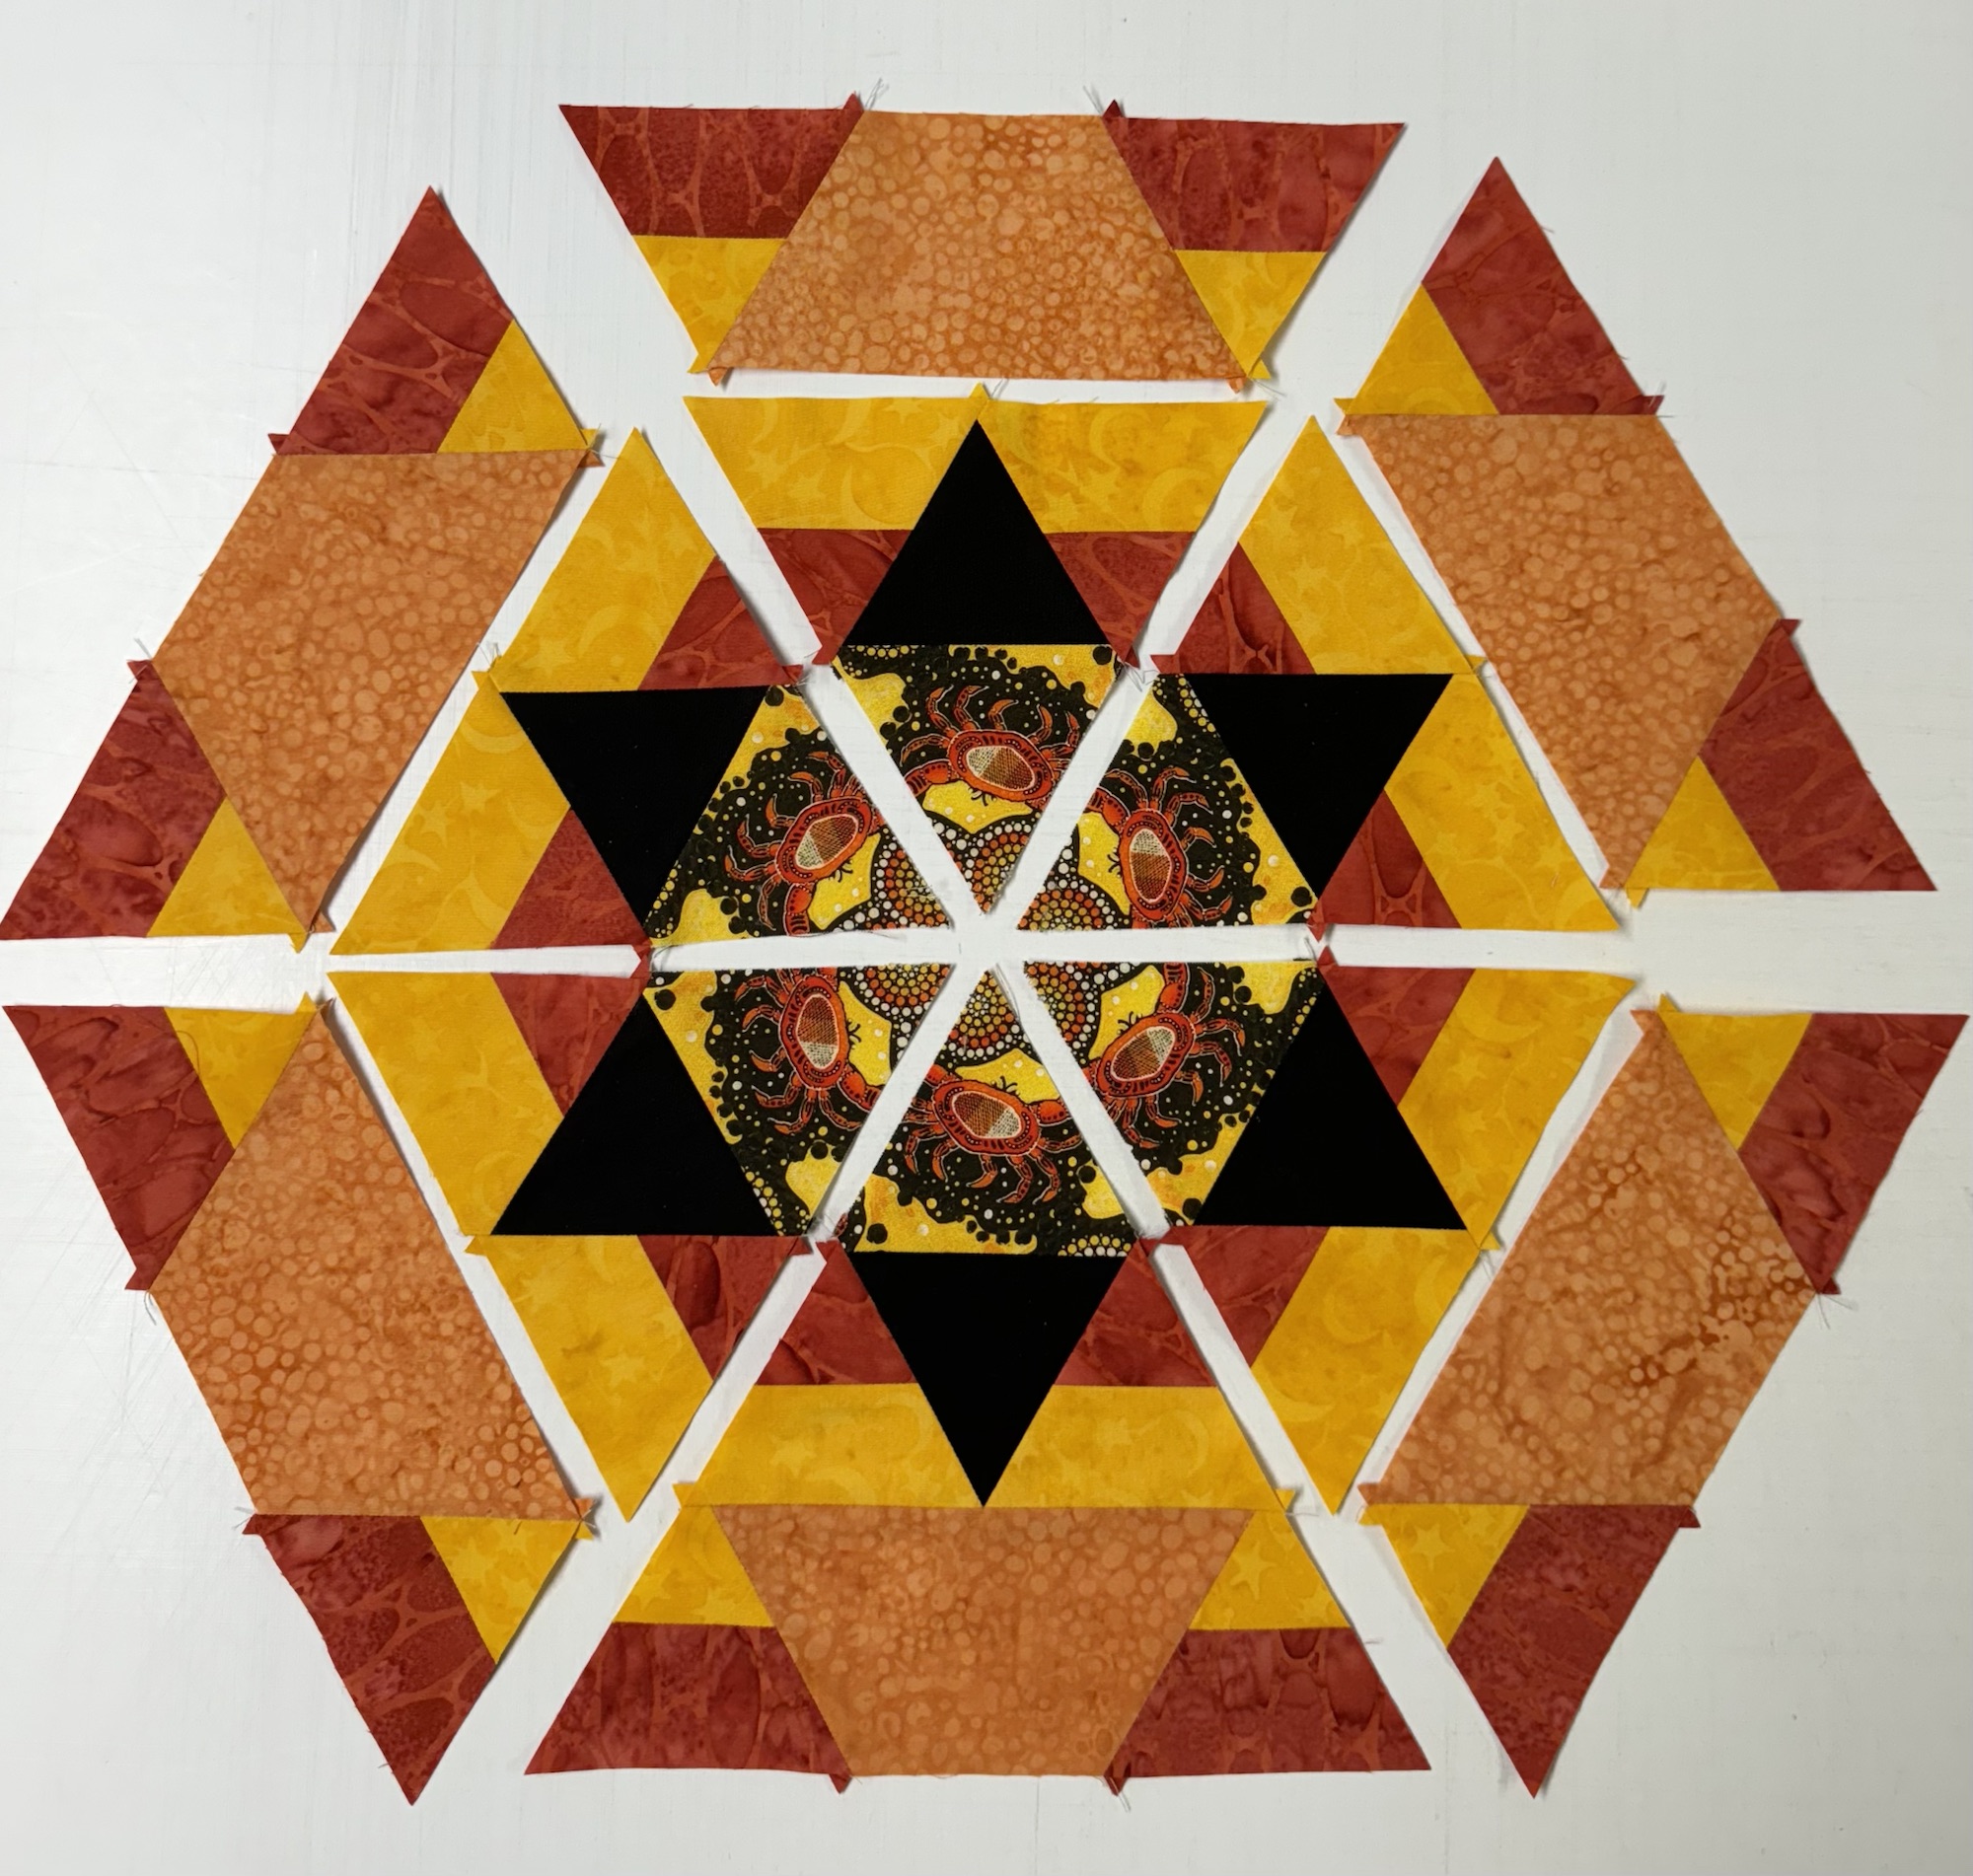
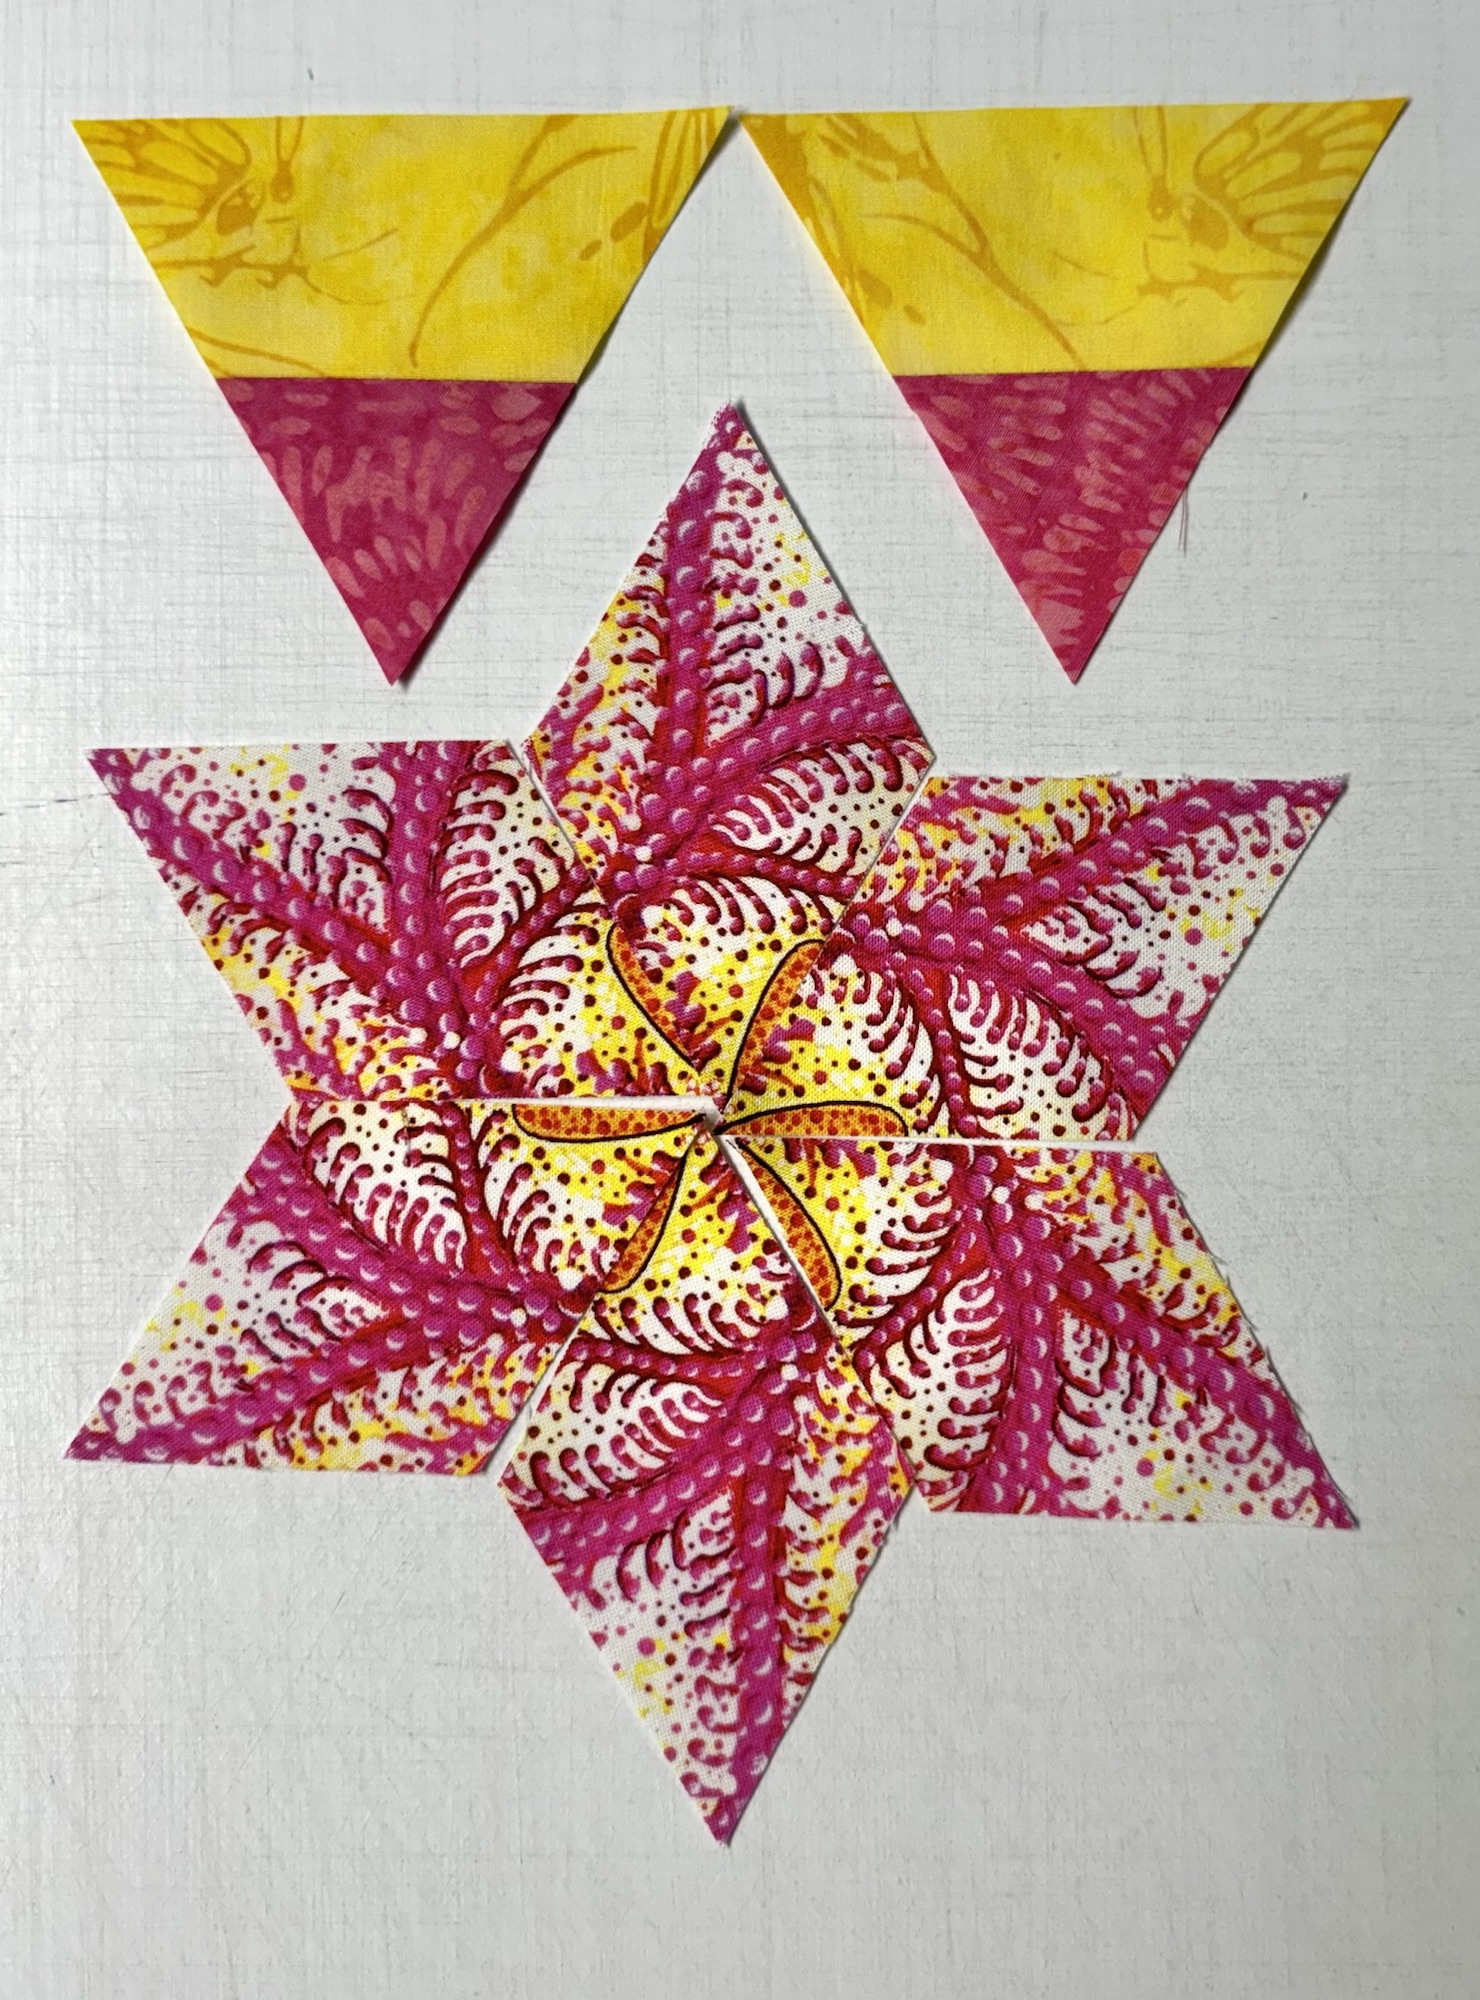
Creating with a Star Center
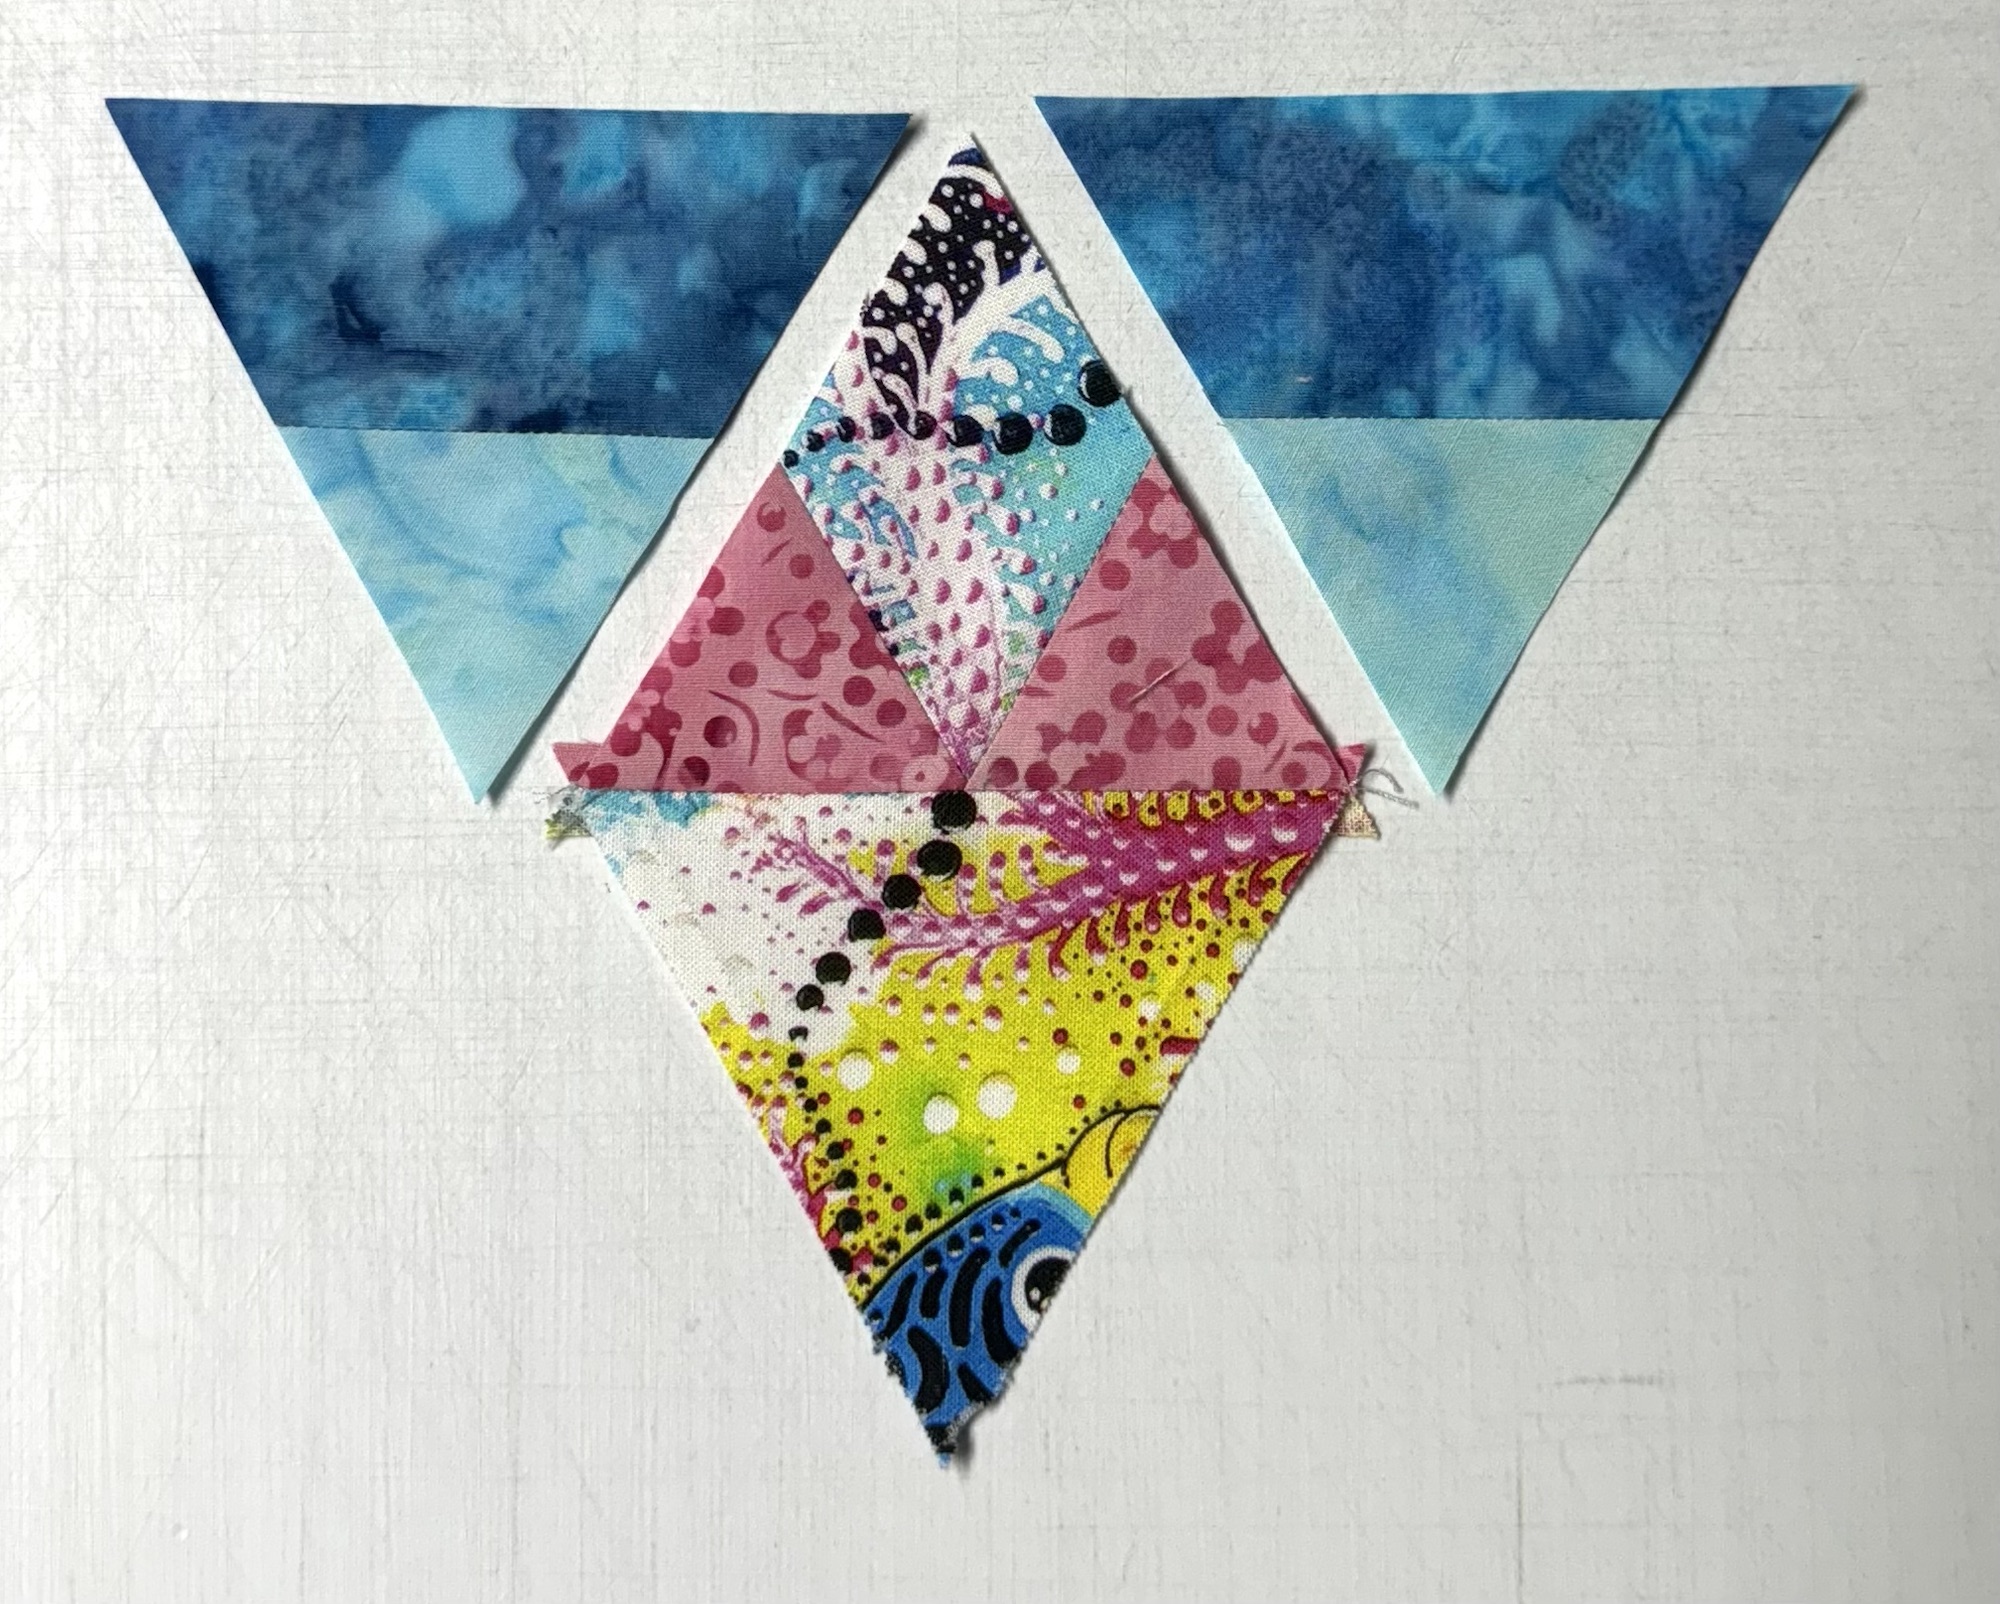
When I was cutting out my hexies from the aligned panels, I had a strip left that was less than 3.25″. I usually save these for cutting out smaller hexies to applique on the quilt top. This time I trimmed the strip to 2″, the size that would make diamonds for a 2.5″ finished Star 60 unit.
I cut the diamonds following the Star 60 instructions on pages 2 – 3. I made 12 – 2.5” finished Capped 60 units. They were trimmed down to 2.25”. Stitch a Capped 60 unit on each side of the diamonds.
Cut a 3” WOF strip. Cut 6 companion triangles. Stitch to the Star 60 Units creating a pieced diamond. Cut another 3” WOF strip. Cut 12 companion triangles. Stitch to each side of the pieced diamond.
Stitch 3 together, press seam open. Stitch the remaining 3 together and press seams open.
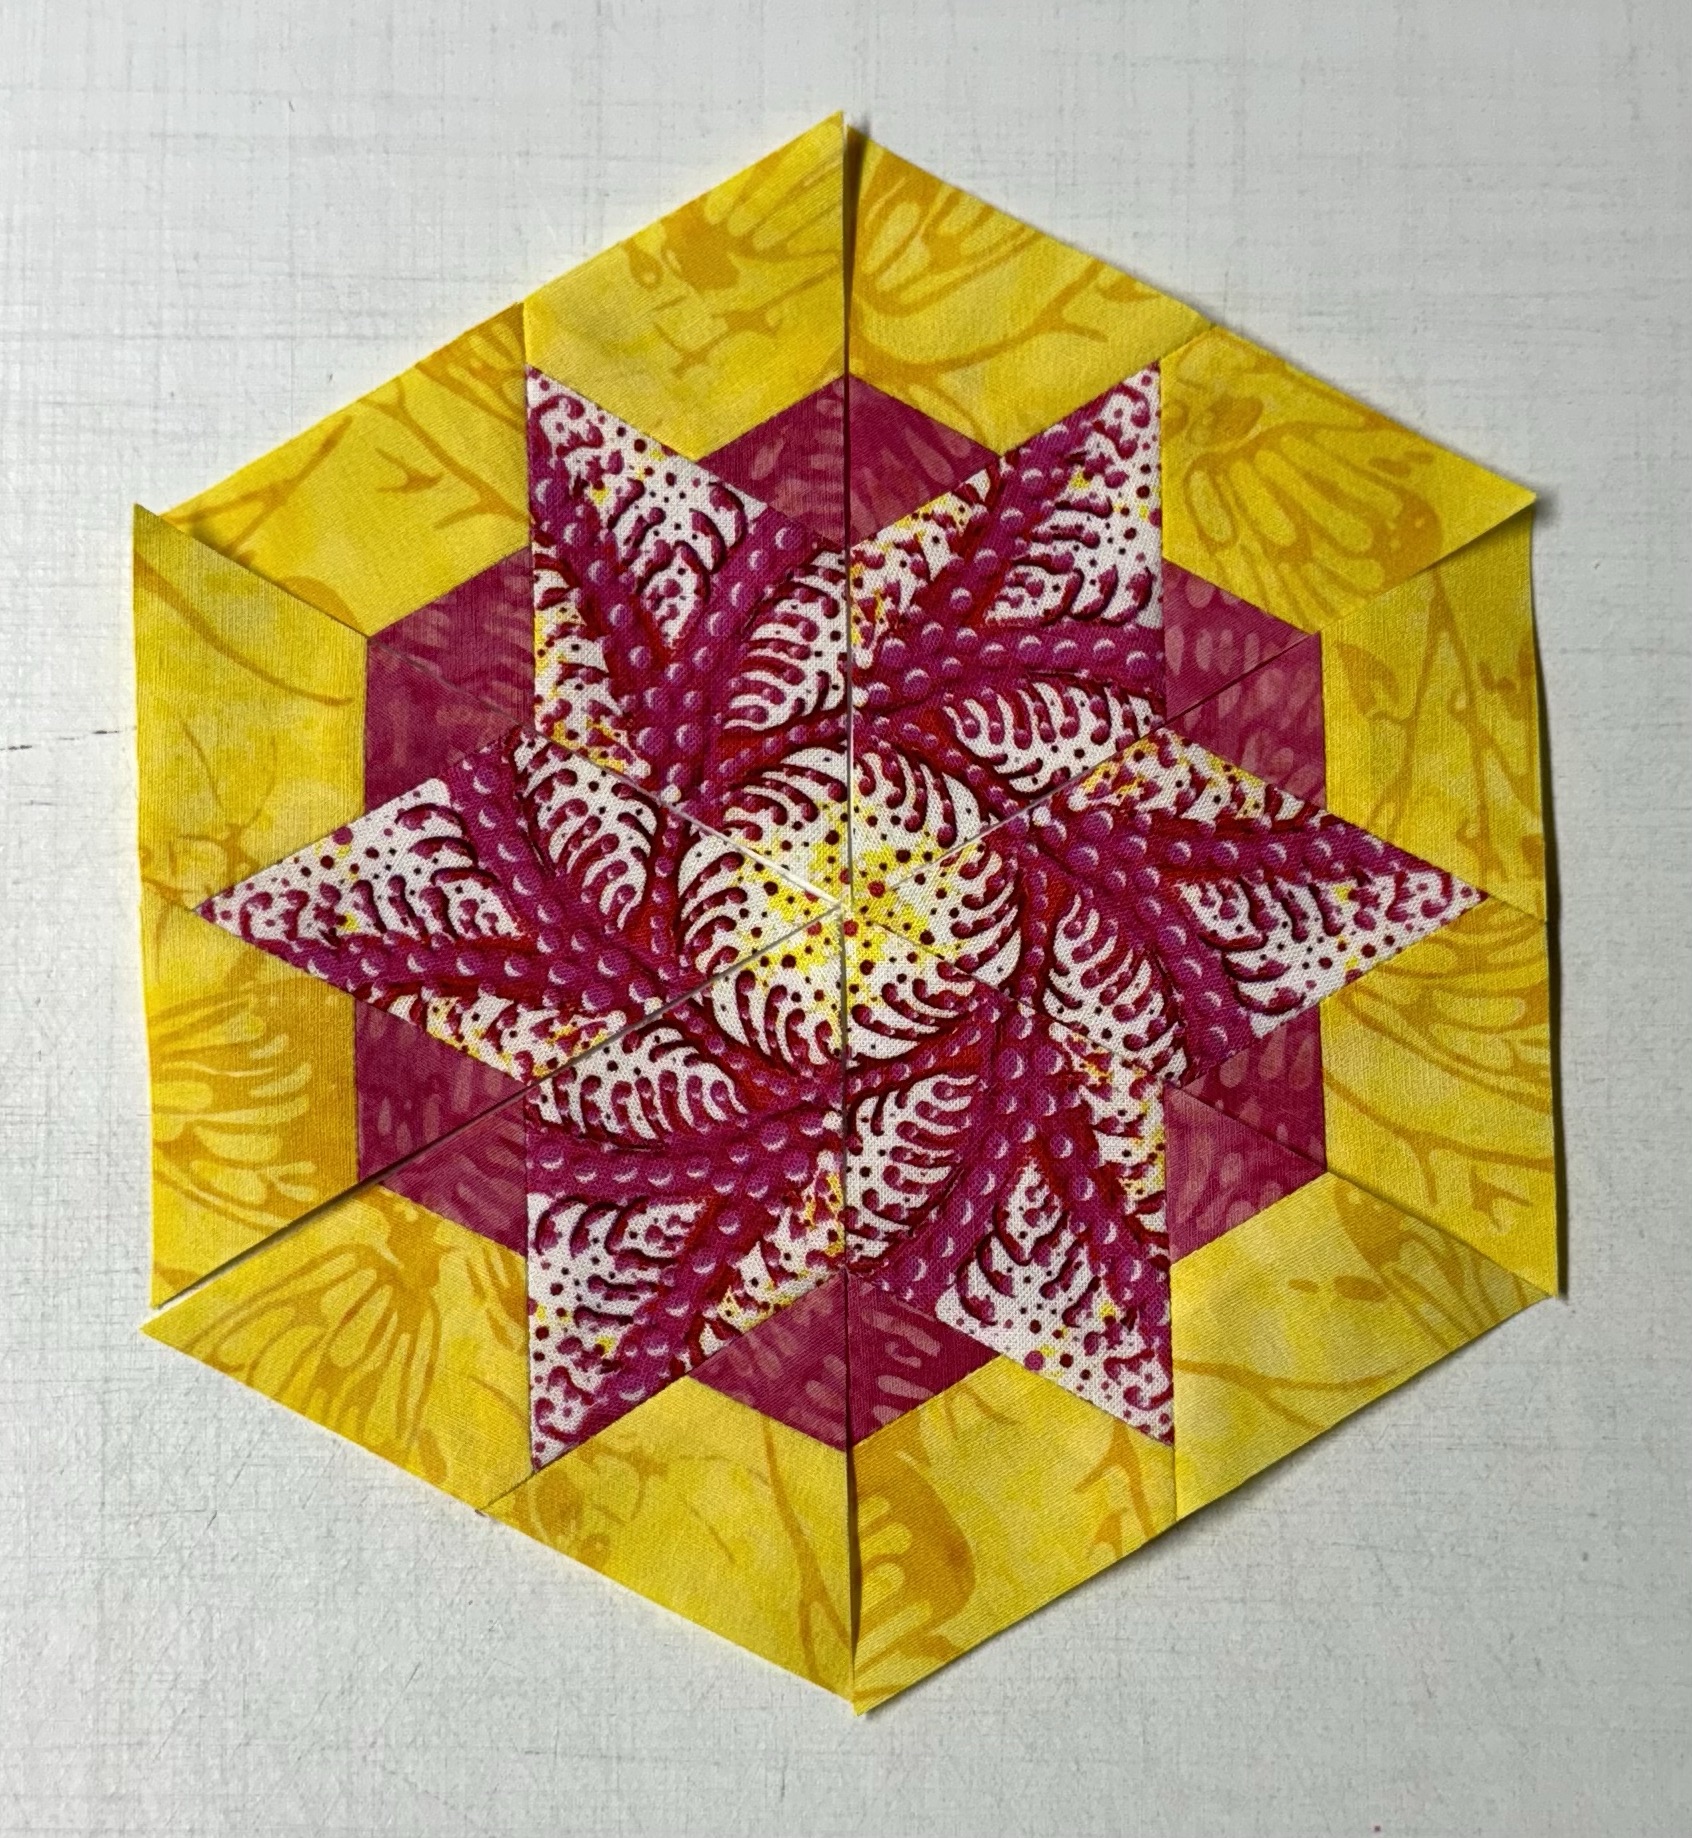
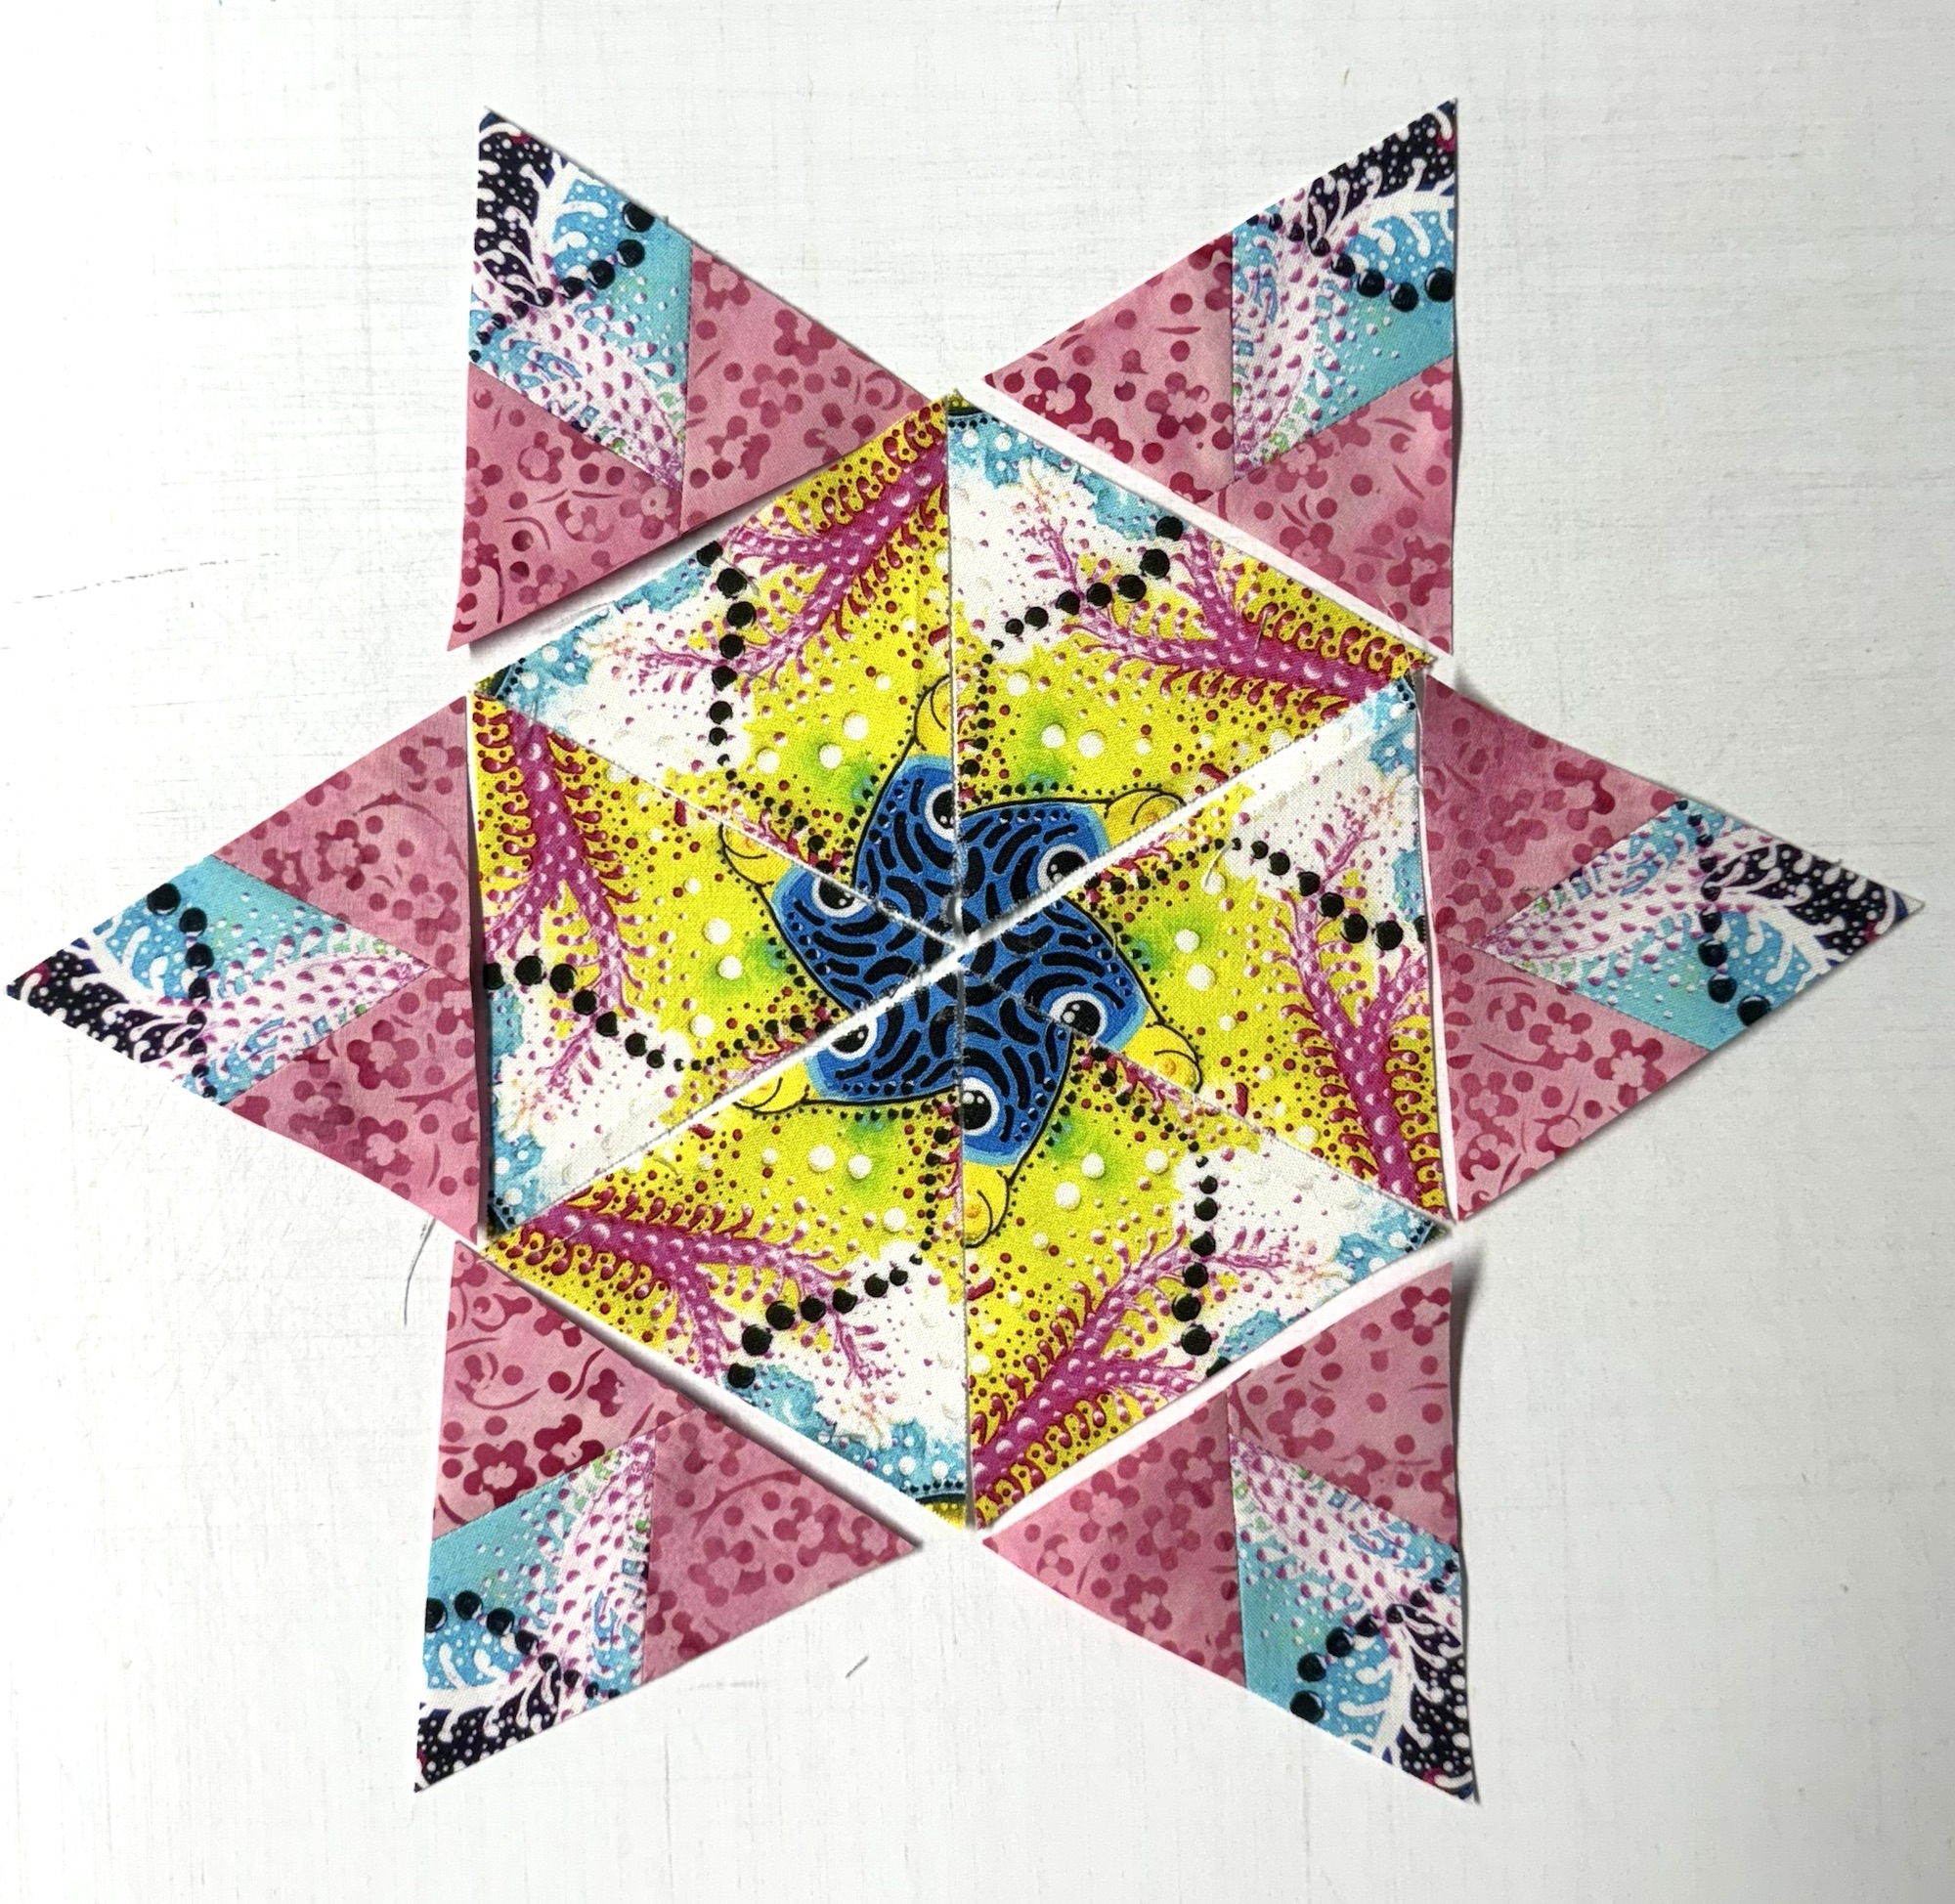
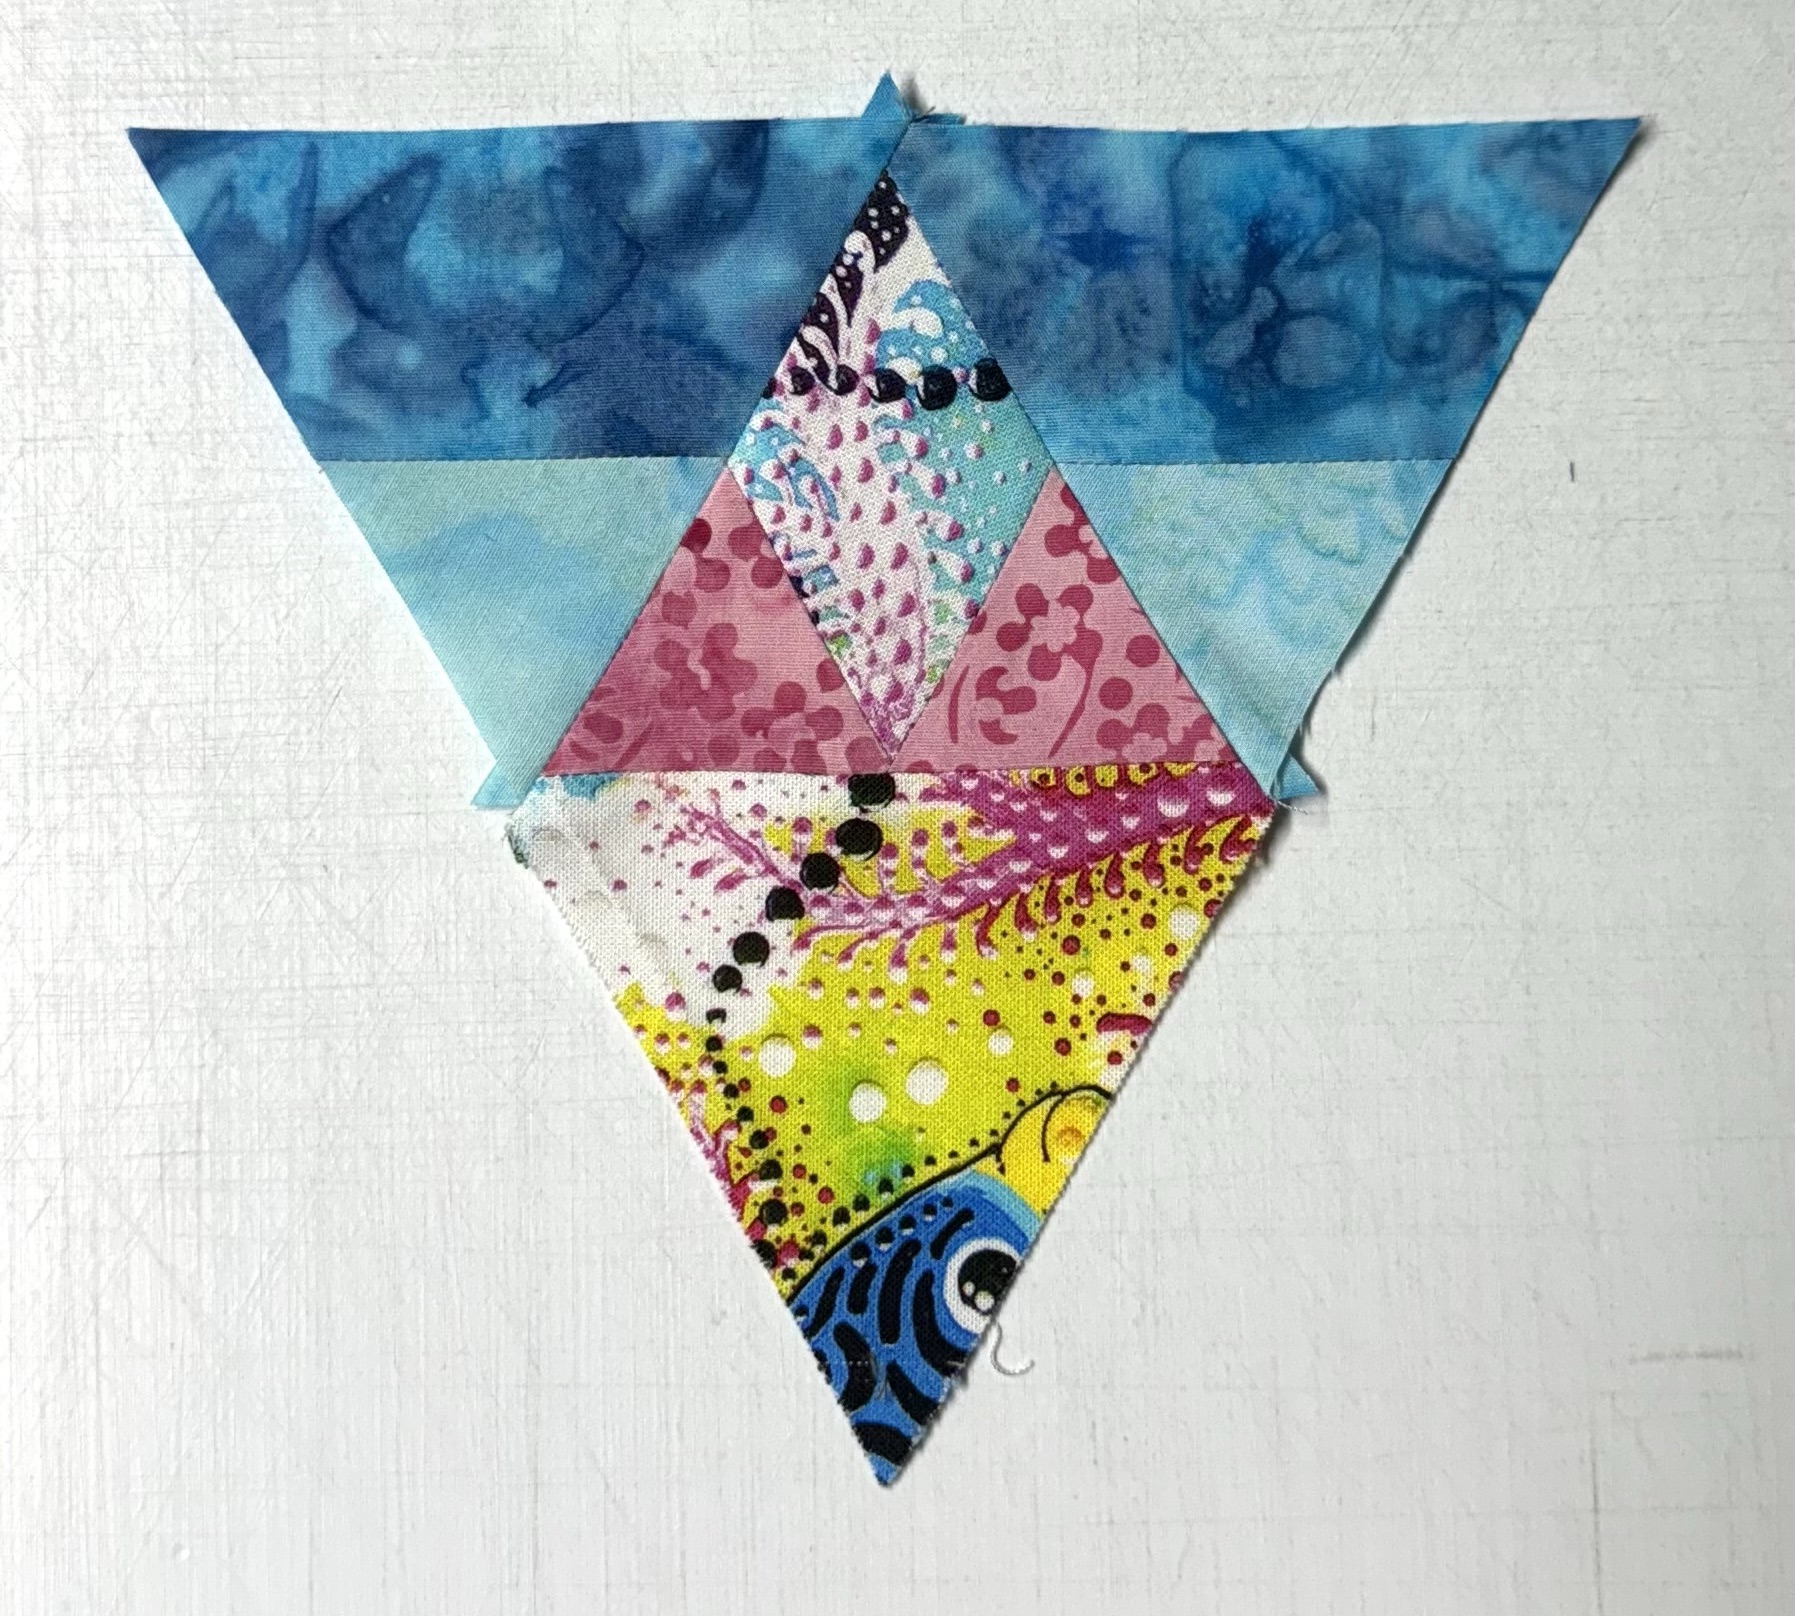
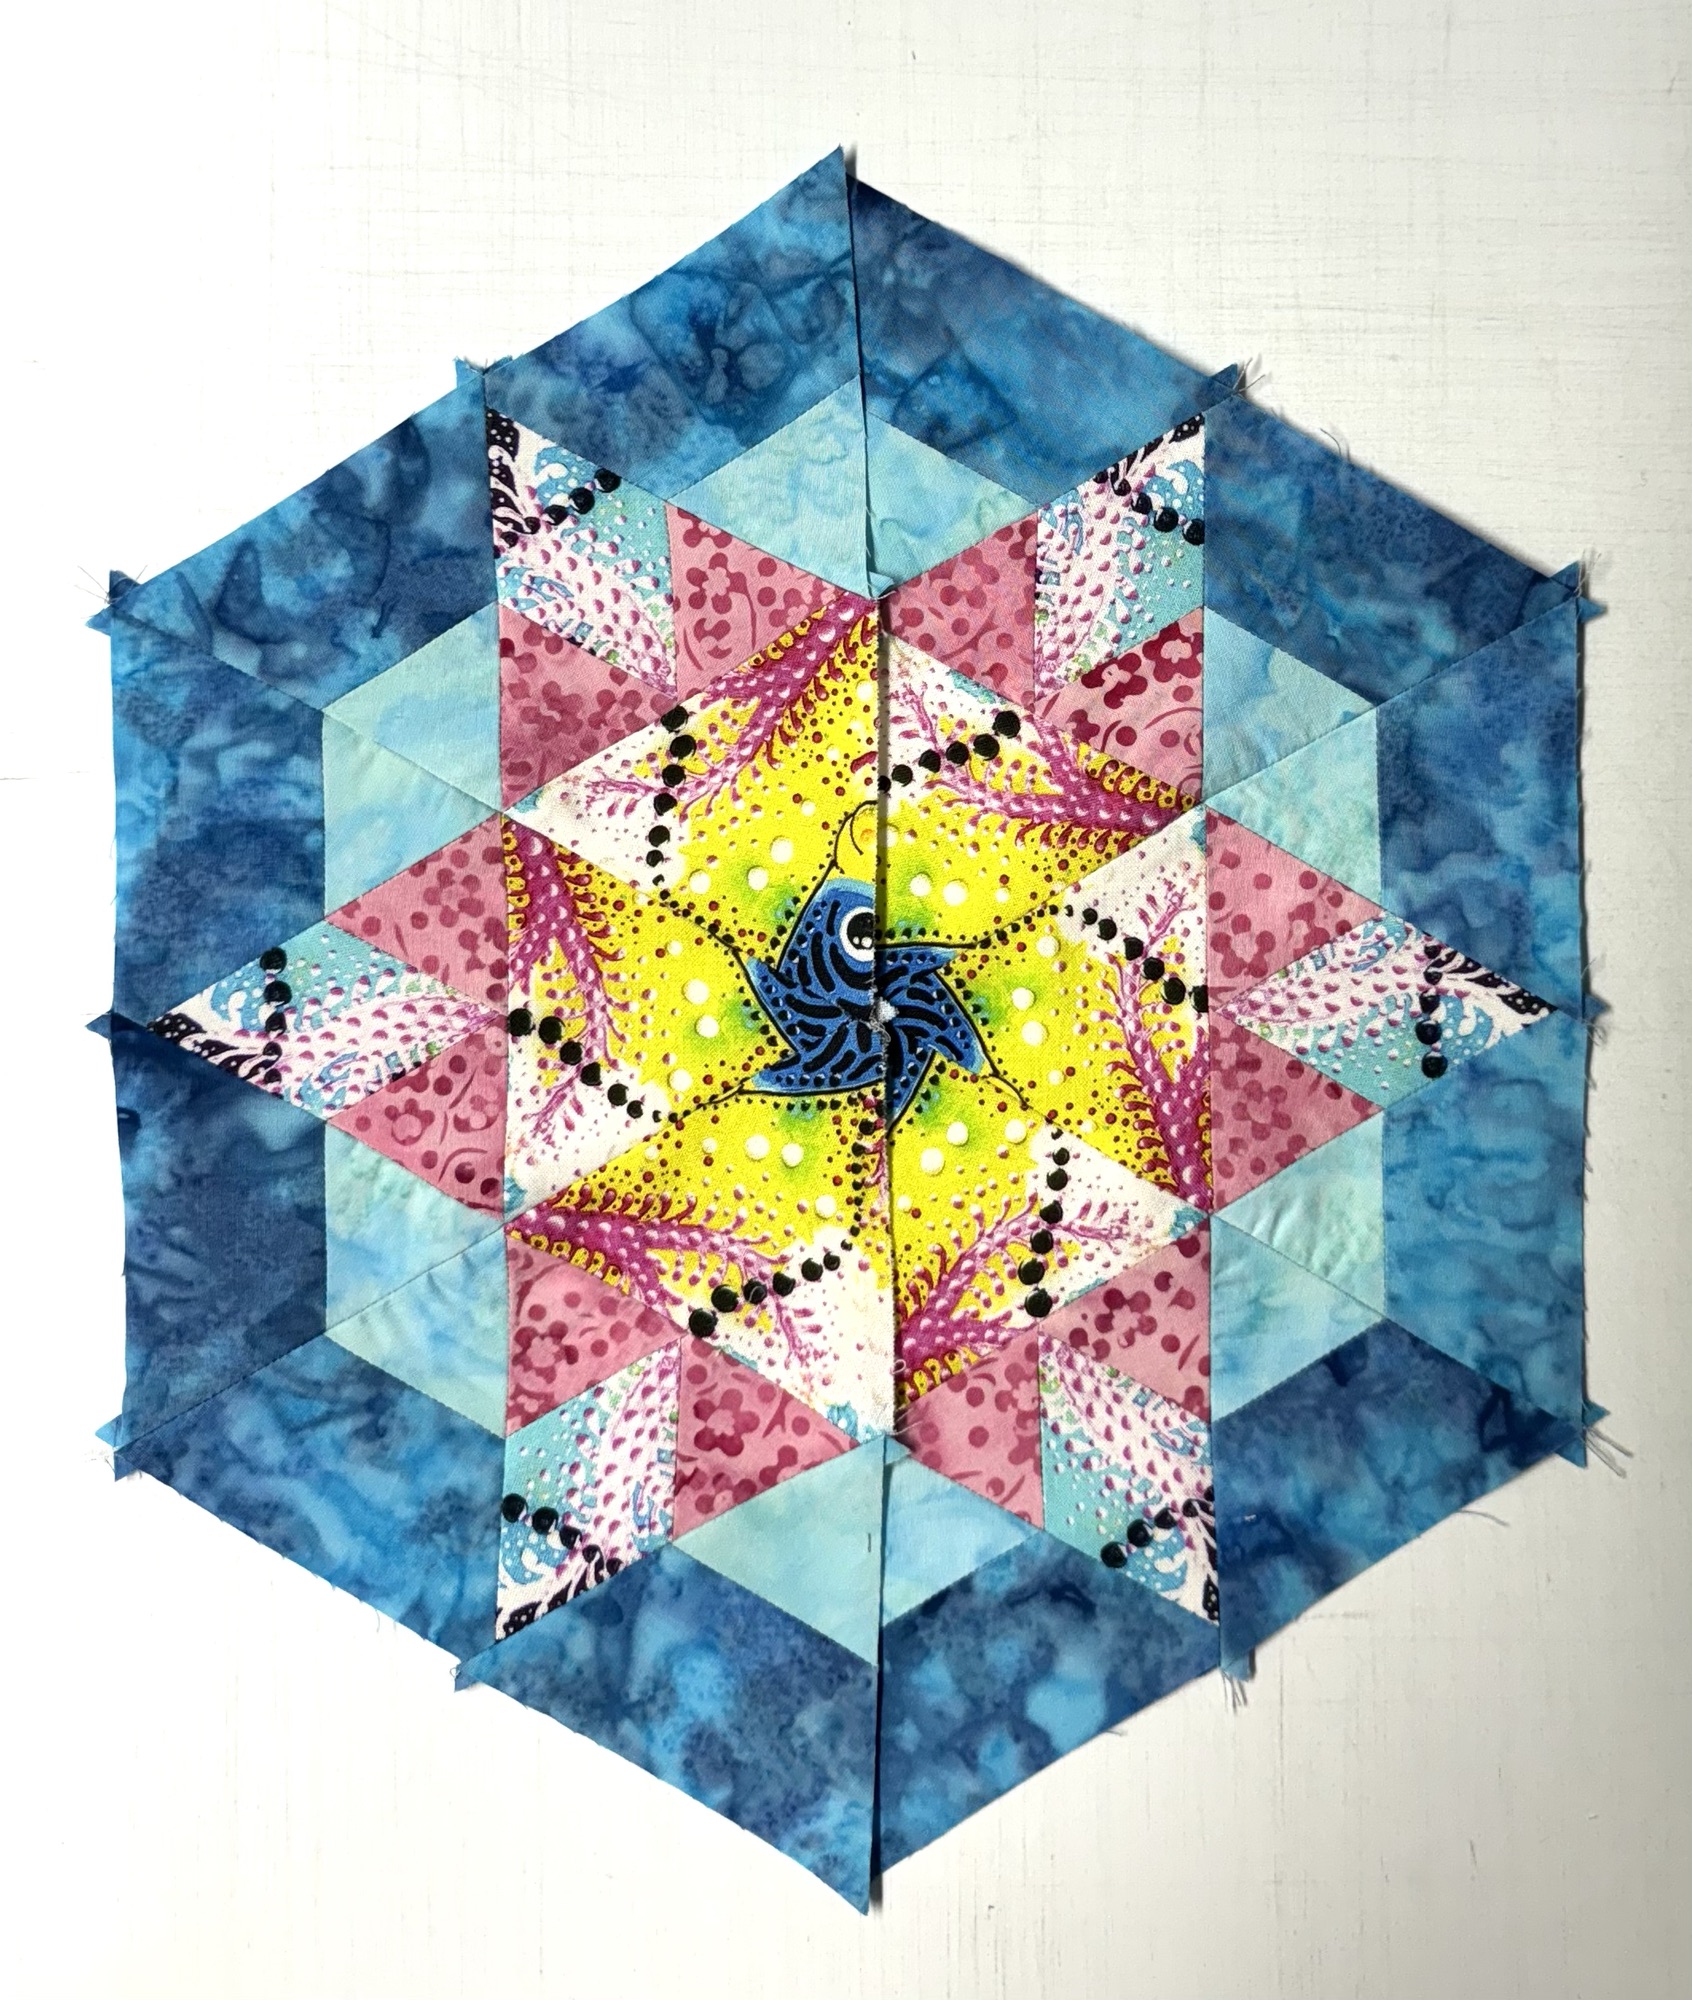
Another Star Variation
Center: 6 identical equilateral triangles cut from 3.25” strips. Make 6 – 2.5” Star 60 Units. I used diamonds cut from a 2” strip of 6 repeats. Follow Star 60 instructions pages 2 – 6. Stitch the triangles to the Star 60 Units.
Make 12 – 2.5” finished Capped 60 units. Follow Capped 60 Technique Sheet Instructions. Stitch the Capped 60 units on both side of the pieced diamond.
Carefully pin and stitch 3 pieced triangles together, press seams open. Stitch the remaining 3 triangles together. Press the seams open.
I encourage you to “Play Among the Stars” with the Star 60 tool and the 8 technique sheets that create:
I was at a quilt retreat this weekend with my quilting buddies. I brought plenty of projects to work on, but a local quilt shop had a sale going on so I bought some beautiful fabric.
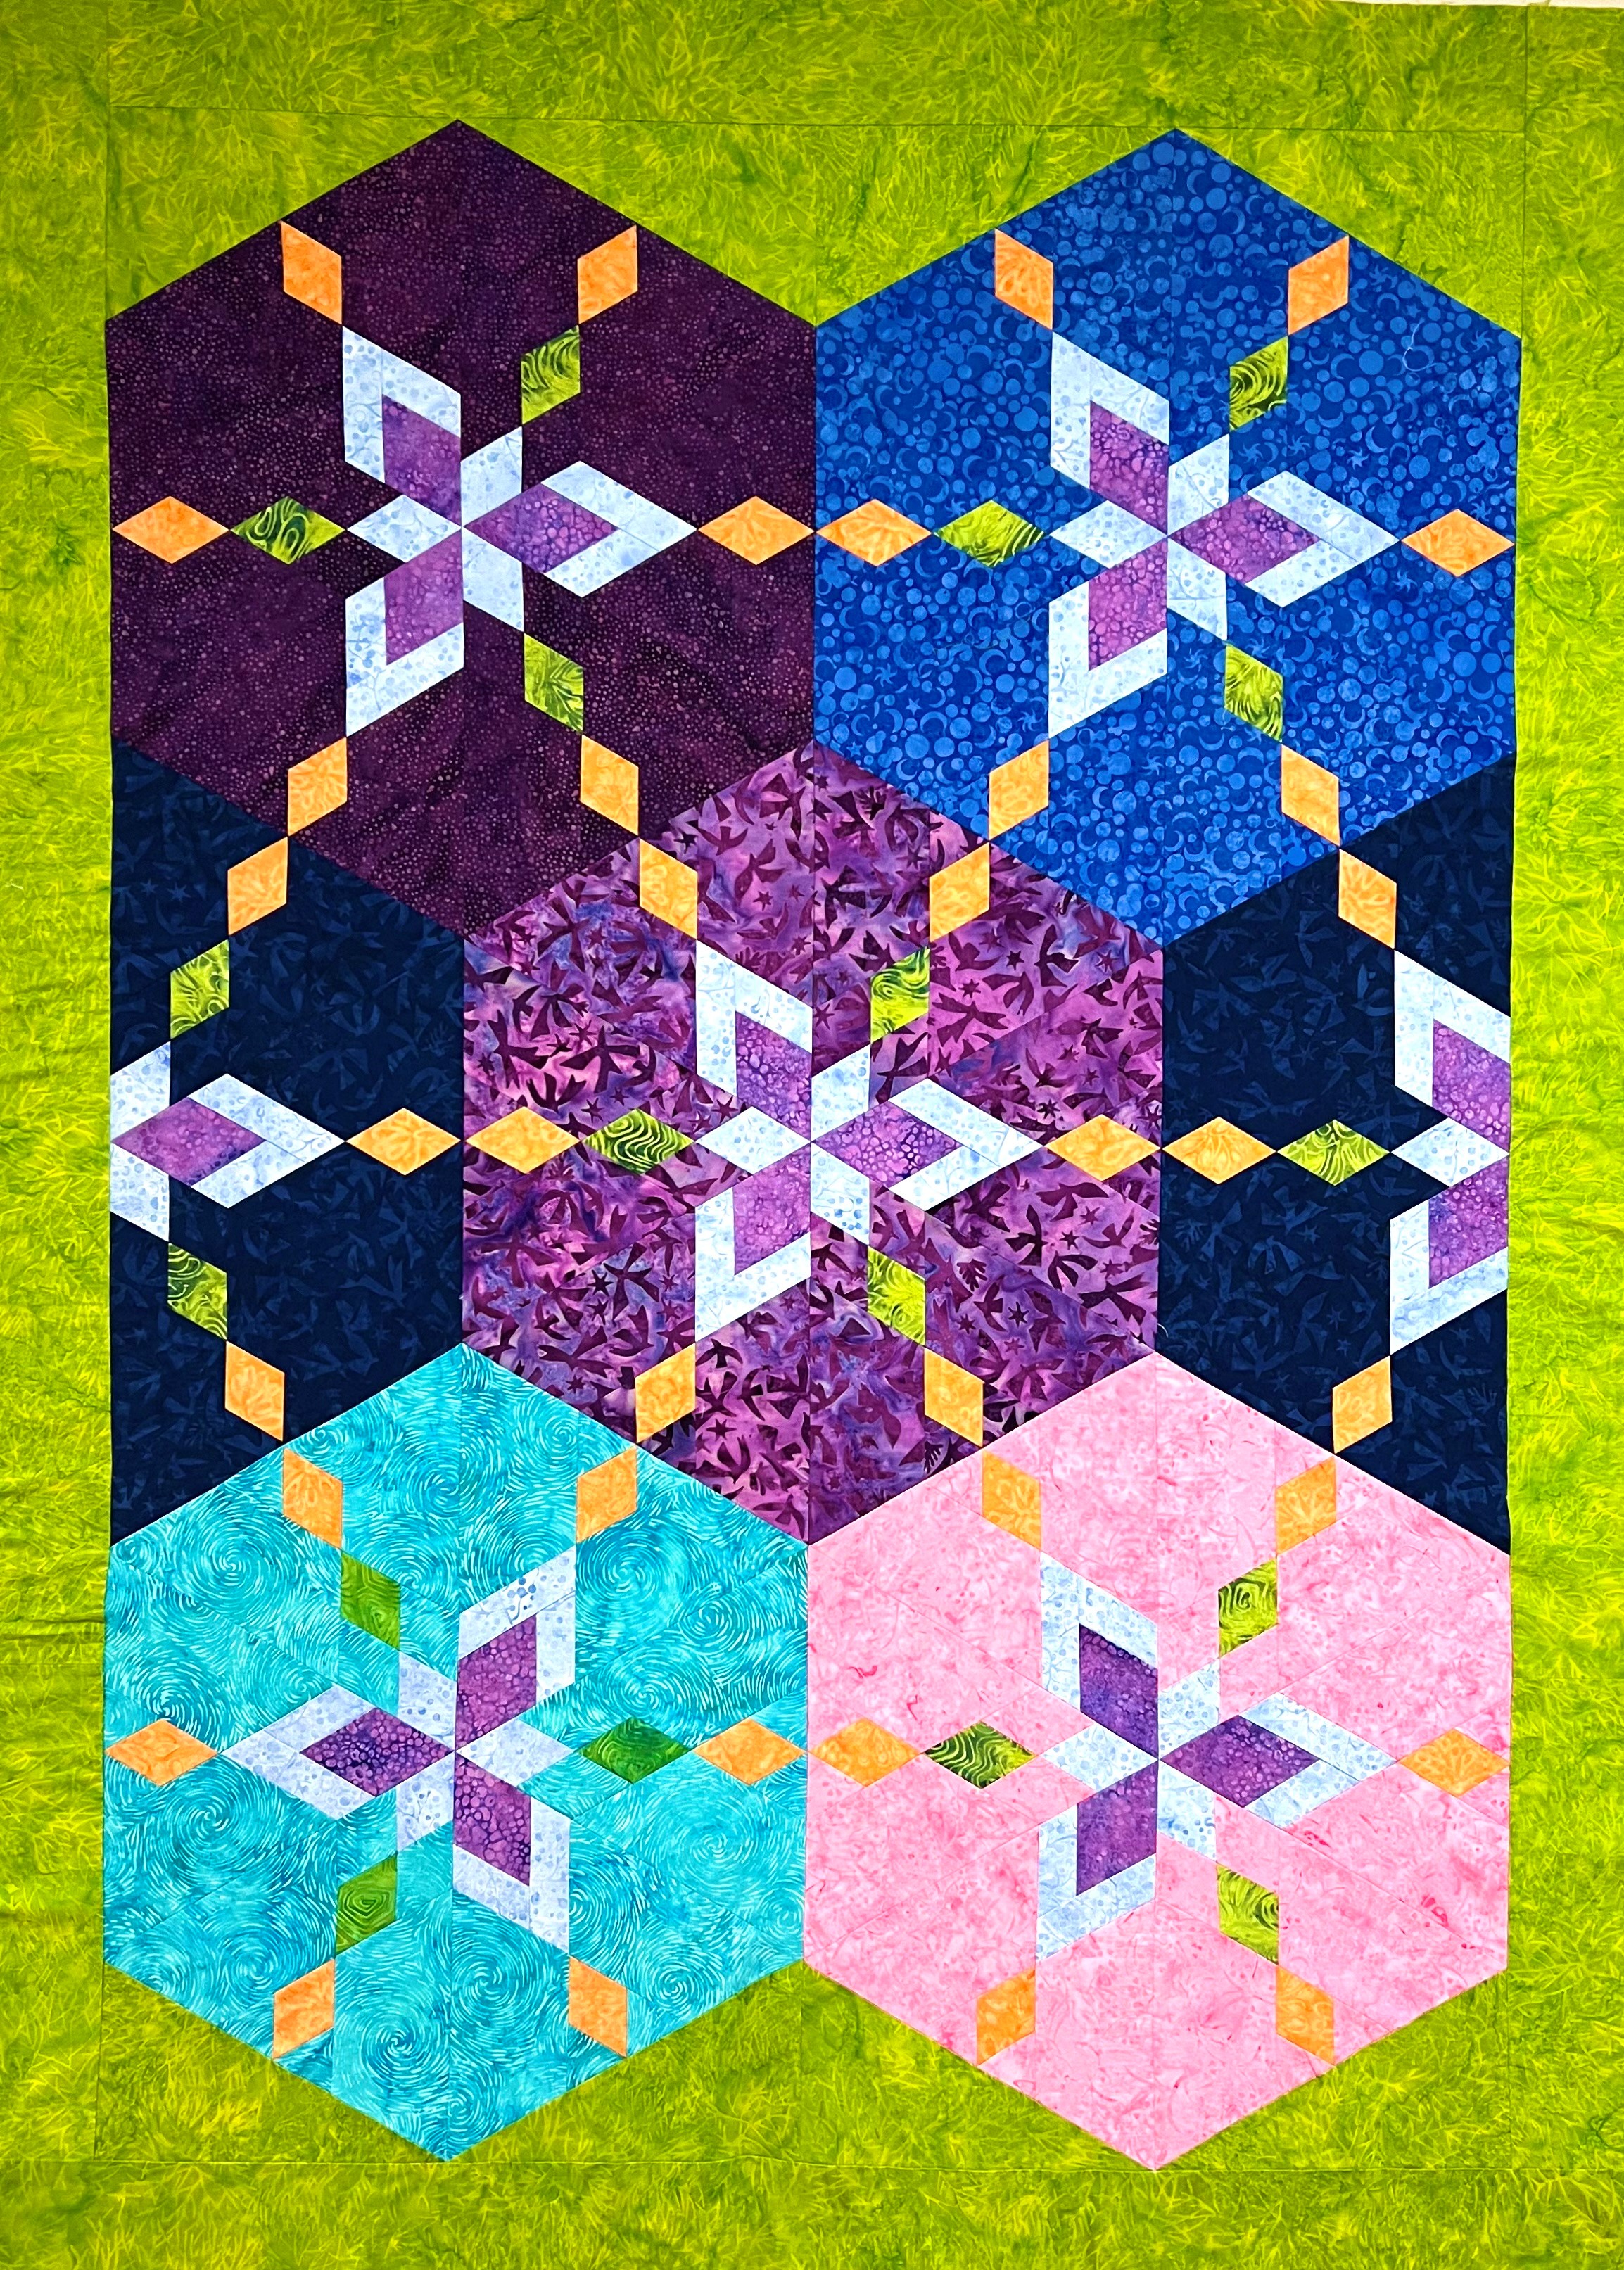
Shadow Play by Maywood fabrics had a nice light, medium, dark and a great green for a backgound, everyting I needed for Hollow Cube 60’s. I had an idea and wanted to see if it would work.
I love my Star 60 tool by Deb Tucker and I love Hollow Cubes using the Hollow Cube 60 Technique Sheet. I wanted to see if I could fit a circle of 6 – 6″ hollow cubes inside a cirlcle of 6 – 18″ hollow cubes and it worked. I love the look! I bought the fabric on Thursday and made the quilt on Friday! The quilt measures 60″ x 60″.
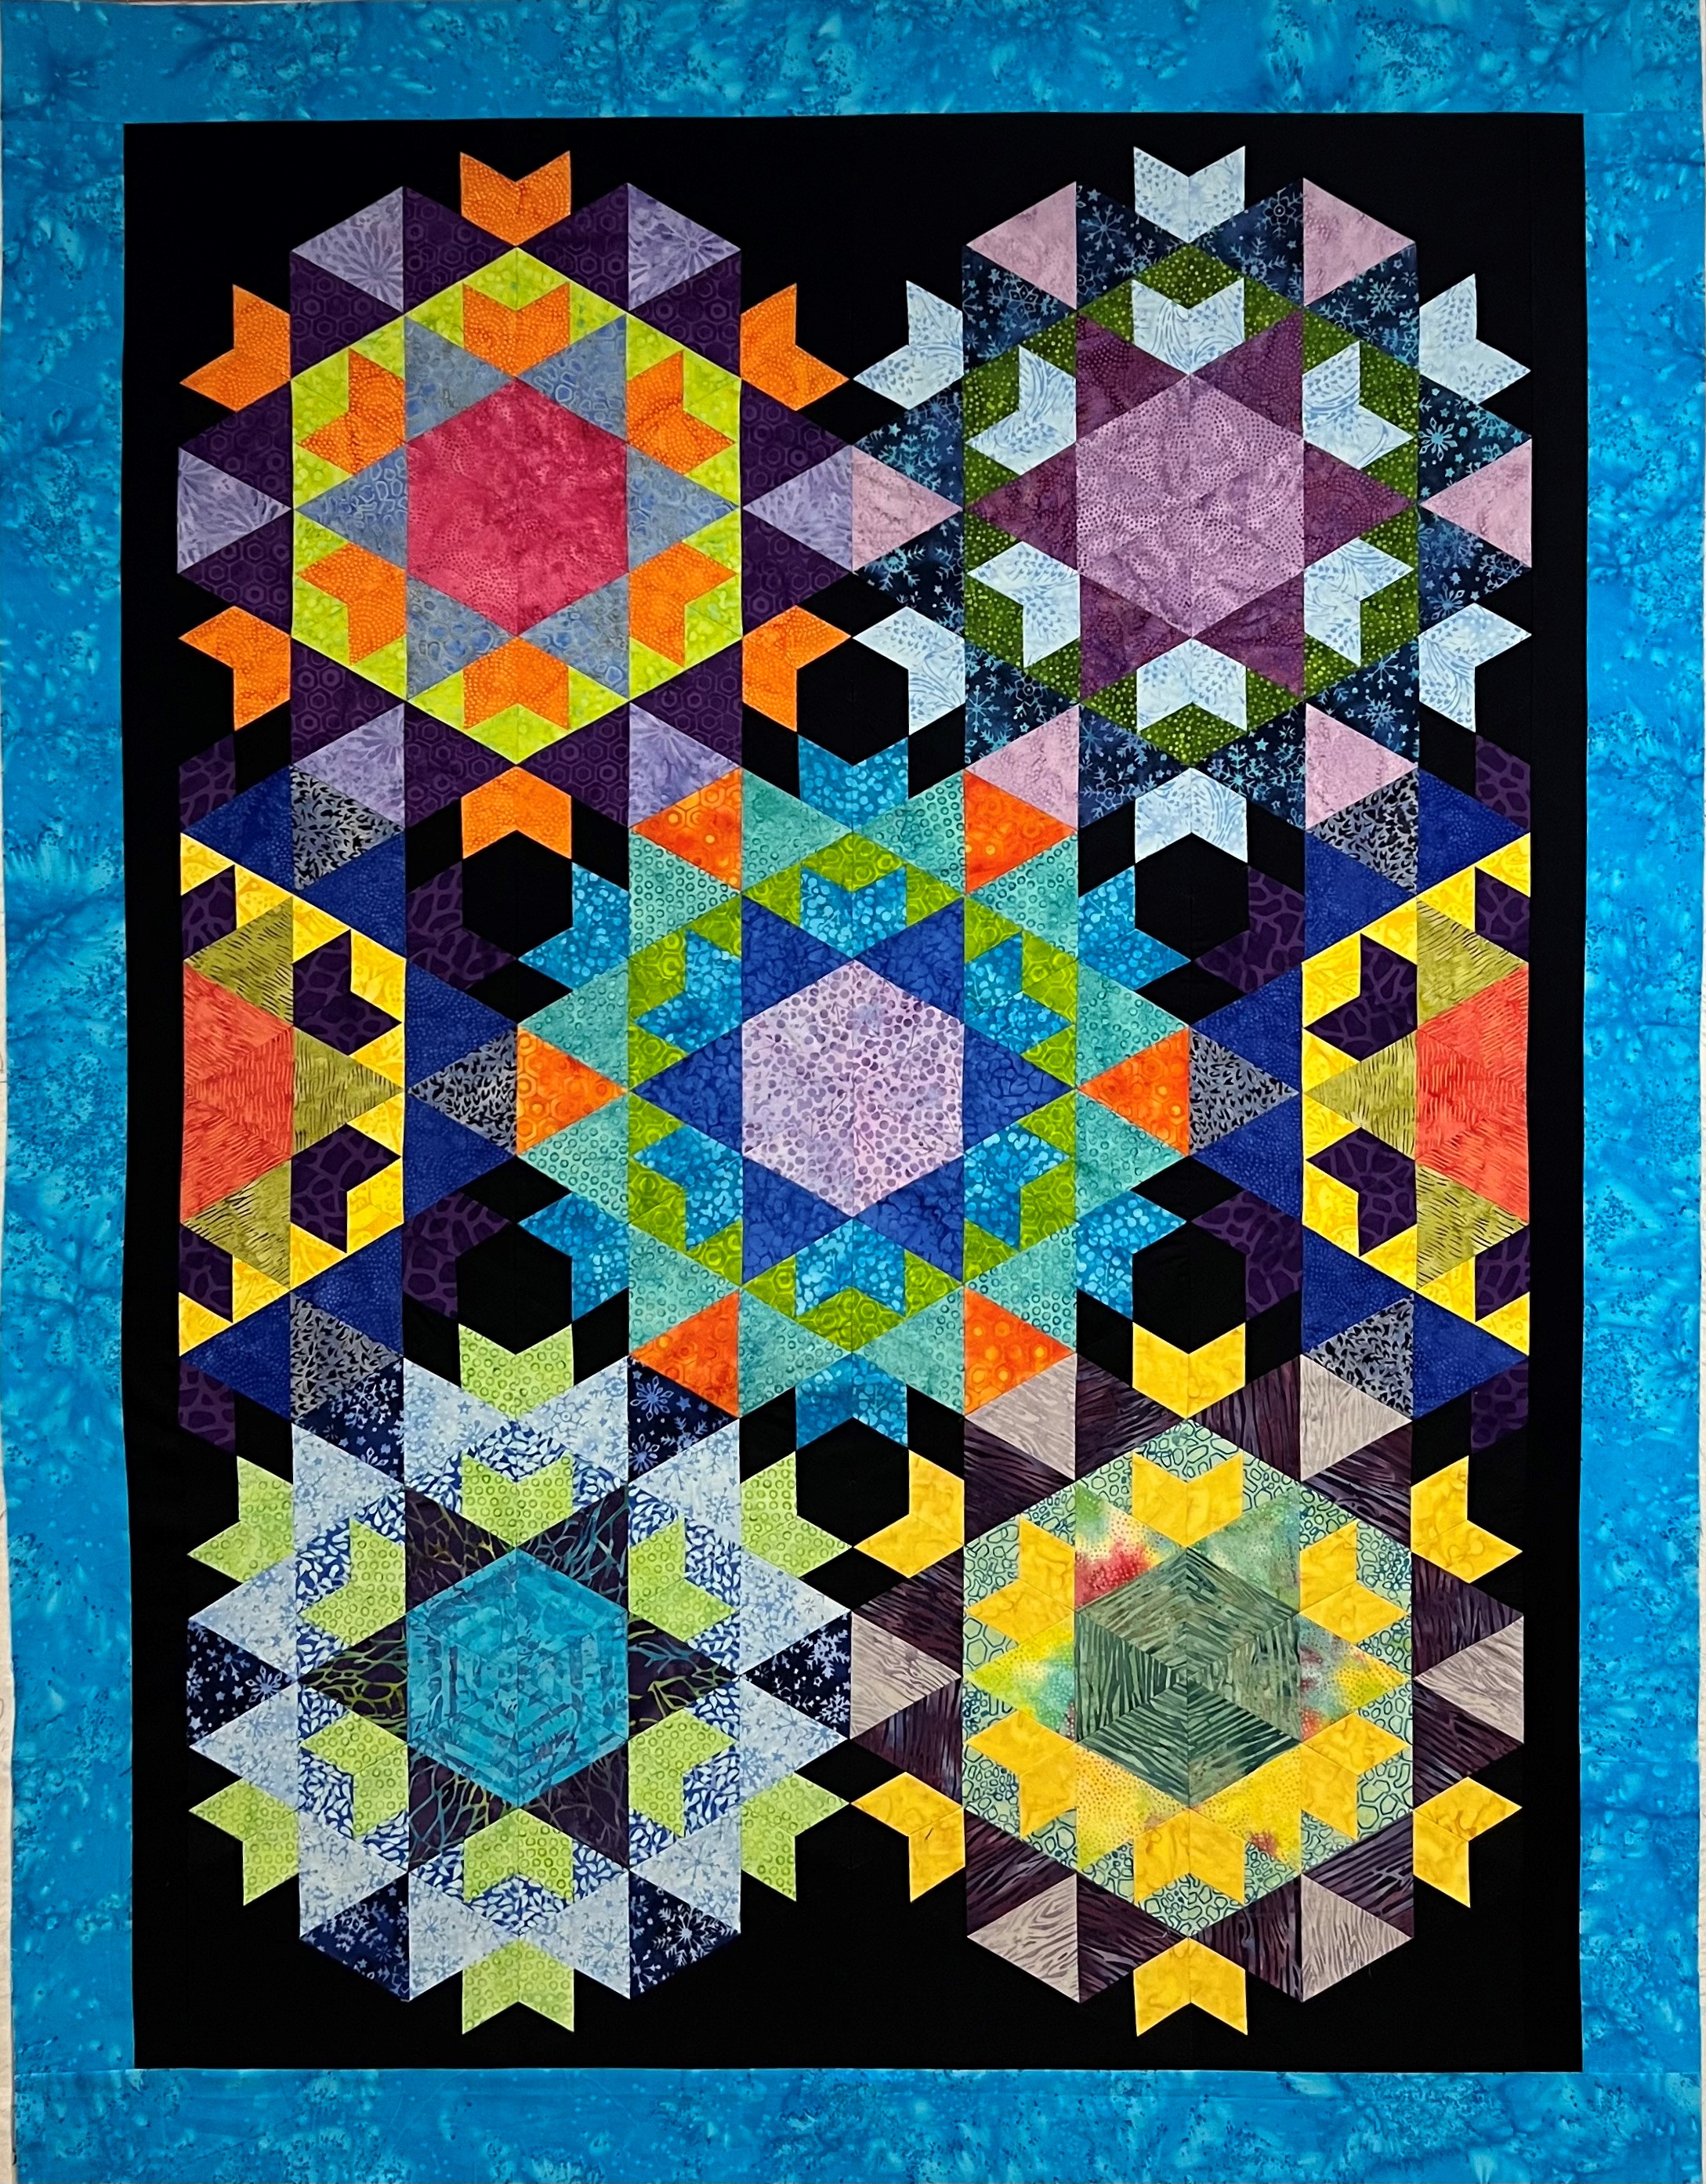
Next up was a challenge to make a 36″ finished quilt with the main focus using 7 fat quarters of 30’s reproduction fabric.
I decided to use Deb Tucker’s Star 60 Log Cabin Technique Sheet and of course my Star 60 Tool. I chose to add 6 rounds of 1/2″ finished logs for a 27″ finished log cabin star. I added Half Rectangle Triangles using the Star 60 tool instructions to make the hexagon into a rectangle. I added 2″ strips to make it square and added a 2″ border to make it 36″. I love my Star 60 Tool! All together a very productive weekend.
I love my Star 60 tool from Studio 180 Design. I’m teaching a Hollow Cube workshop at the end of September at Tiger Lily Quilt Company and in October for the Thread Bears Guild in Oneida, NY. I wanted to create a quilt that would showcase all that the Star 60 tool can create.
I had this quilt, but it didn’t include the Star 60 Log Cabin or Power Strip.
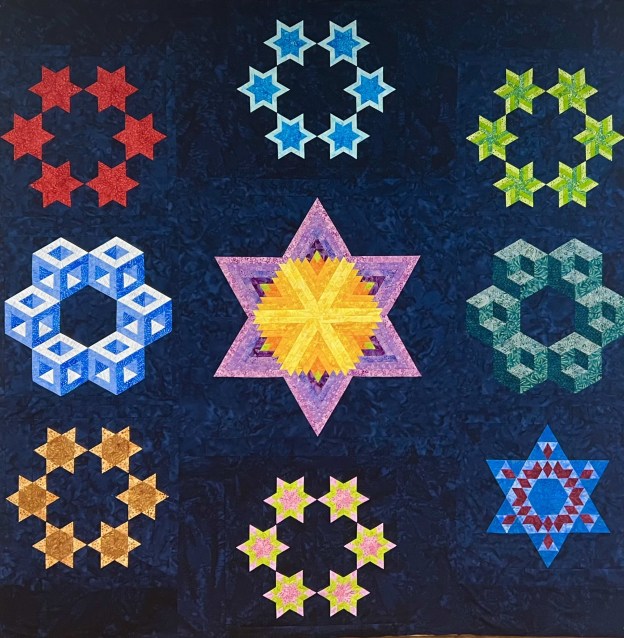
I call this the Star 60 Solar System, it measures 76″ x 76″. In the center is the Star 60 Log Cabin. Starting at the top left and going clockwise is the Star 60, Framed 60, Striped 60, Capped 60, Power Strip, Checkerboard 60, Quad 60 & Hollow Cube 60.
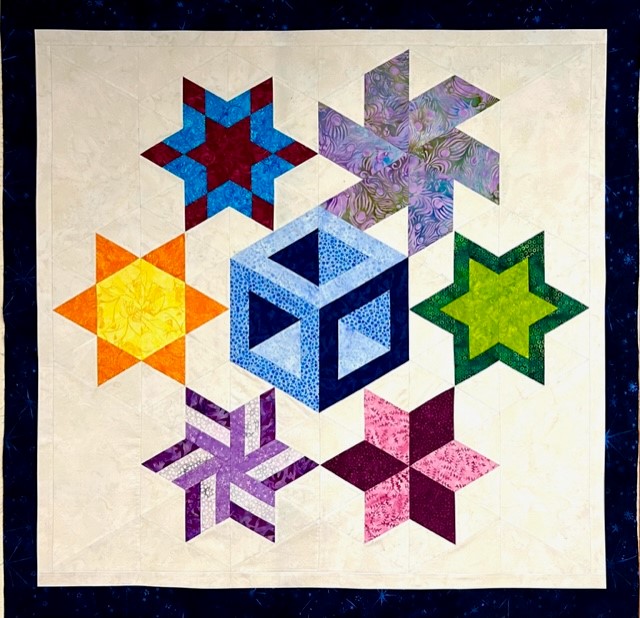
Aside from adding Star 60’s to One Block Wonders, they can be turned into a square to added to traditional quilts.
Chrysanthemum made with just the Star 60 tool and Tucker Twinkle is made with the Framed 60, and Checkerboard 60 technique sheets. The Star 60 tool can definitely bump up your creativity no matter what you are working on.
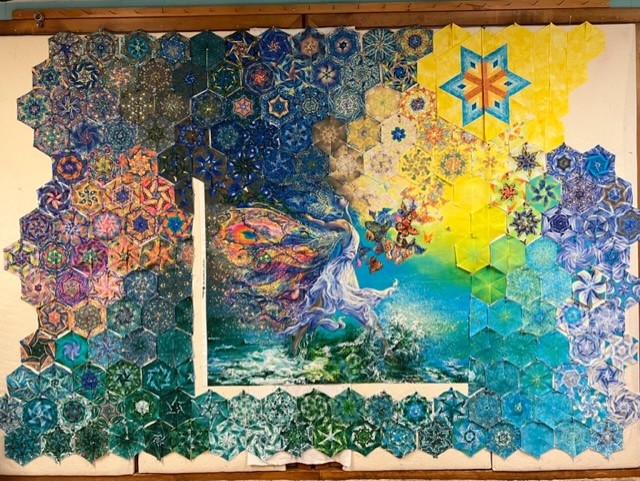
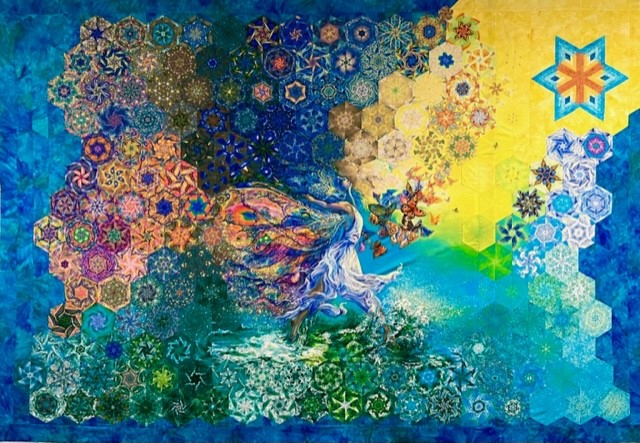
You can probably tell, I’m a huge fan of Josephine Wall panels. I feel so lucky to have found this one.
The name of the panel is Wings of Joy. I added “Emerging from the Cocoon” because I think the design suggests she is emerging with great joy. The panel measures 35″ by 43″.
I cut my strips 3.25″ to yield 5″ finished hexies. With 5″ finished hexies I would fit 8 across the top and bottom of the panel. I will to trim the panel to fit the top and bottom sections. I had to give her a destination, so I using my Star 60 Ruler and my Star 60 Log Cabin Technique Sheet, I added a 15″ log cabin star.
My Star 60 Log Cabin finishes as 15″. I stitched three rows of hexies together above and below each half of the log cabin star, which made it possible to seamless add the 15″ star.
Now, I have the top, right and bottom sections ready.
Above, all four sections have been added to the panel.
After a little tweaking “Wings of Joy, Emerging from the Cocoon” is ready to quilt. She measures 100″ wide by 70″ tall. As always, I use Island Batik fabrics to enhance my OBW’s.
February 11, 2023 – 1:00 PM (EST) Star 60: 3 hour class. Difficulty 2 Stars. This class is an introduction into making the Star 60, which can be made in 17 sizes. As with all the Star 60 Stars they can be incorporated into your OBW’s.
February 18, 2013, 1:00 PM (EST) –Hollow Cube 60: 4 hour class. Difficulty 3 Stars. Add the illusion that light is shining on your quilt from the direction you choose by adding Hollow Cube 60’s. These cubes can be made in 16 sizes. You must stay organized, but they are simple to construct.