Star Chamber is my design created with the Star 60 tool & Striped 60, Framed 60, Checkerboard 60 Quad 60 & Caped 60 Technique Sheets. The next Star 60 Basic Zoom Class is scheduled for January 22, 2022, sign up on this site under the OBW & Star 60 Zoom Classes tab.
Studio 180 Design is running an exclusive special through the end of January of 20% off the purchase price of the Star 60 and/or Wedge Star tools. You can purchase the tools at the links below: Use the code OBWwithStudio180 at checkout to get the discount.
Below is a special offer from Studio 180 Design for tools to add stars to One Block Wonders both hexagons and octagons. If you have not heard of the One Block Wonder Quilt Forum (OBWQF) you should visit and see all the fabulous One Block Wonders for created by the nearly 30,000 members. The OBWQF is a one stop destination for all your OBW questions. A special thanks to Kathy Gannon who works tirelessly to keep the group running smoothly.
Quilt by Sue Tucker
“Exclusive 20% off Special!” You may have seen that my good friend and also a great friend of the One Block Wonder Quilt Forum, Jackie OBrien, is running a series of OBW classes, including some for putting stars into your designs. In the basic classes, Jackie will be presenting a variety of tools to cut your triangles, and one will be our Star 60 tool. In addition, it will be featured in her classes on stars. We have long felt our Star 60 (for hexagon’s) and Wedge Star (for octagons) are the perfect tools to help you make your OBW blocks and stars easily and beautifully. These are the first public classes we know of that will present our tools for use in OBWs, and it’s a very exciting moment for us. In honor of that, we are running an exclusive special for you from now through the end of January of 20% off the purchase price of the Star 60 and/or Wedge Star tools. You can purchase the tools on our webstore, here:
Join me in January, I have scheduled OBW Class 1 twice. Go to the OBW Zoom Classes Tab for more information & to download the supply list. You must pay the class fee one week before the class so I will have your email address to send you the Zoom class link.
OBW Class 1: learn to identify, cut & align the repeats. How to choose the best strip width based on the fabric design. Learn to cut the strips & the equilateral triangles, plus working with panels.
My latest One Block Wonder “Ray of Hope” a panel by Josephine Wall measures 79″ x 62″. I incorporated 6″ finished Framed 60 stars made with the Star 60 Tool.
Ray of Hope
Reserve your spot in my next OBW Zoom Class January 8, 2022, 1:00 PM (Eastern Standard Time). For class details click on the OBW Zoom Classes tab.
I made my first One Block Wonder (OBW) in 2006! I was completely captivated by the process and the one of a kind quilts that are possible. So much so, that I have made 90 OBW’s so far and I have been teaching this class for 15 years..
I am offering a two part Zoom class. Each class is approximately 3 hours. The first class you will Identify, cut & align your repeats. You will then cut your equilateral triangles. The 2nd class is scheduled at least two weeks later to give you time to stitch your hexagons and sort them by predominate color. The 2nd class is all about designing your OBW with or without panels.
Last January started my journey of adding stars to my OBW’s. Deb Tucker’s Star 60 Tool gives me the possibility of creating 6 different size stars in a multitude of sizes. I will be adding classes for the Star 60 Tool and the Checkerboard 60, Capped 60, Striped 60, Quad 60, and Framed 60 Technique Sheets.
From the Home page click on the tab “OBW Zoom Classes” for more information and to download the supply list.
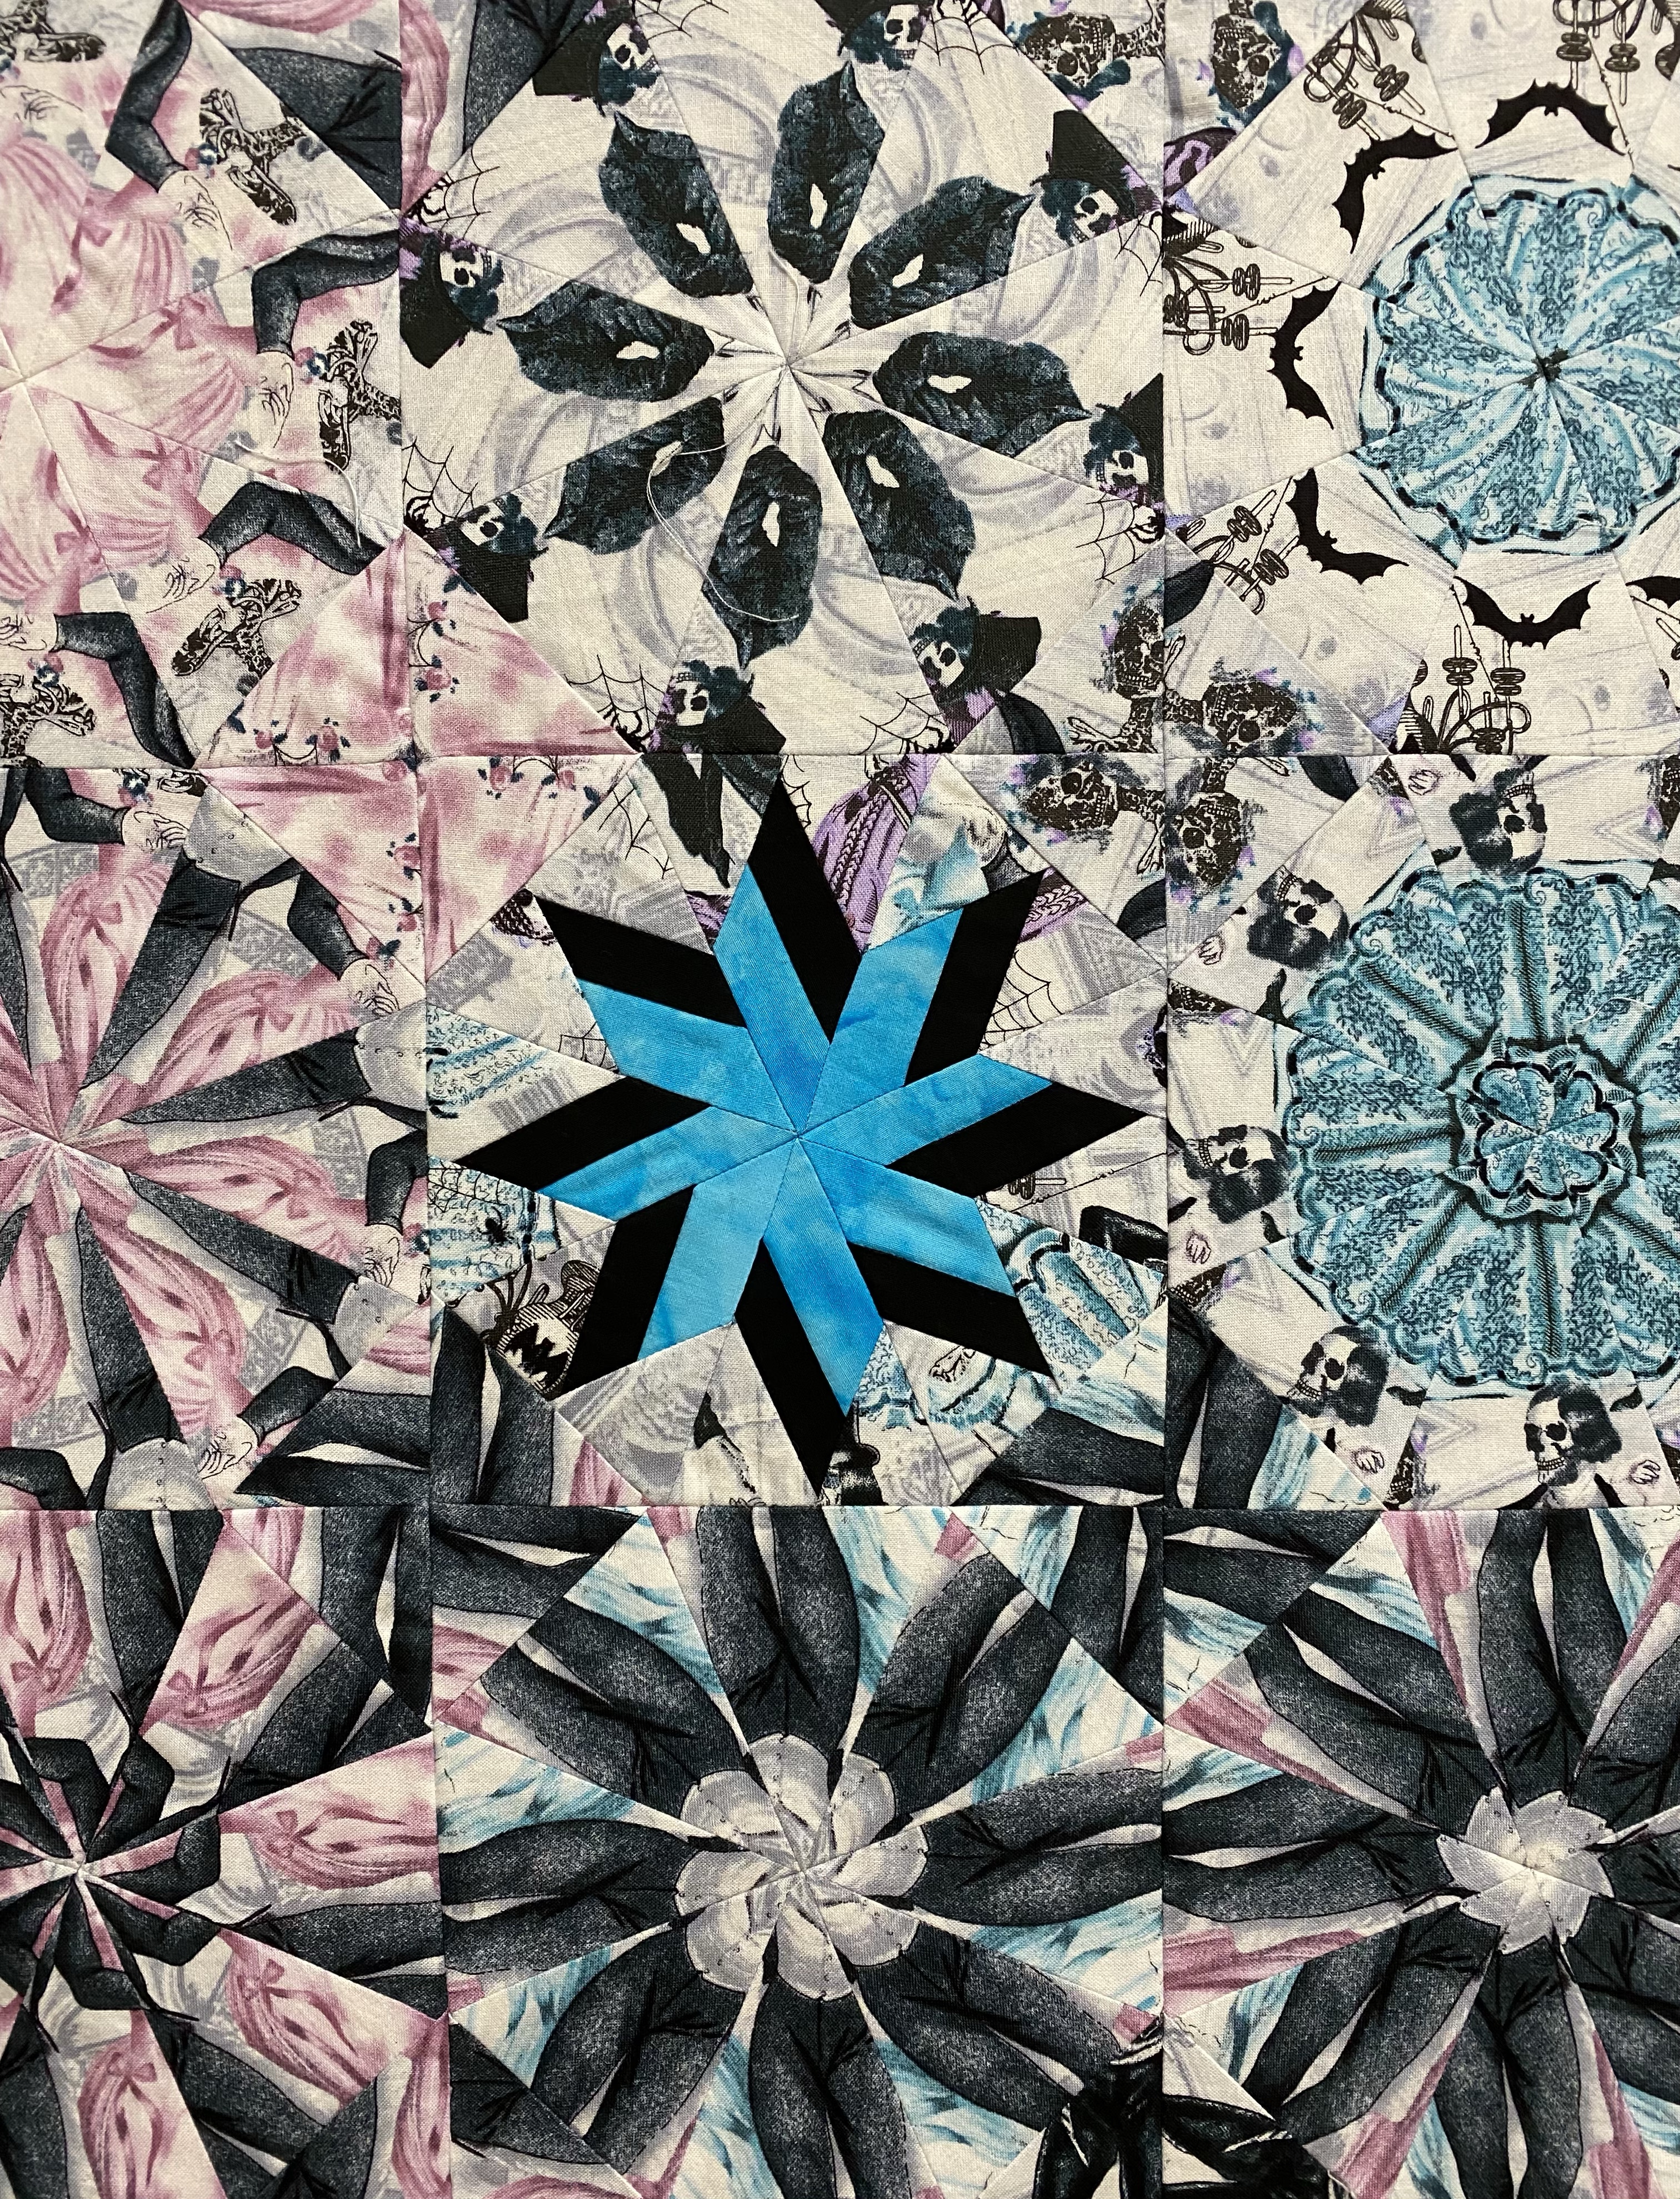
I saw this fabric by Alexander Henry and just had to have it. It is a large print with a 24″ repeat and is full of vibrant colors. I knew I want to add a large star constructed from Star 60 & Quad 60 units.
I made 3″ finished Quad 60 and Star 60 units.
I thought I would incorporate this 12″ hexagon into my design as is.
But, I decided to add points turning it into a 24″ star by adding 6″ finished Quad 60’s for the points.
The photo’s above show how I made the 6″ hexagons and the 24″ star fit together.
Rainbow Forest, measure 64″ x 68″
Rainbow Forest is not yet quilted, but it will be soon.
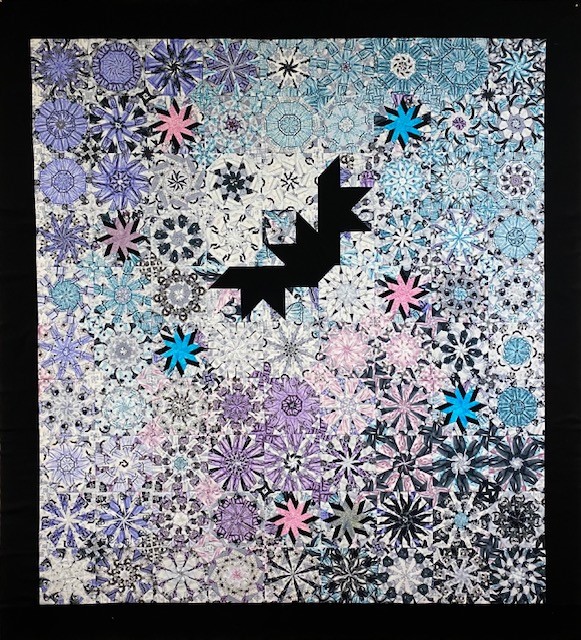
I have been on a journey this year to see how many stars and shapes I can place in a One Block Wonder.
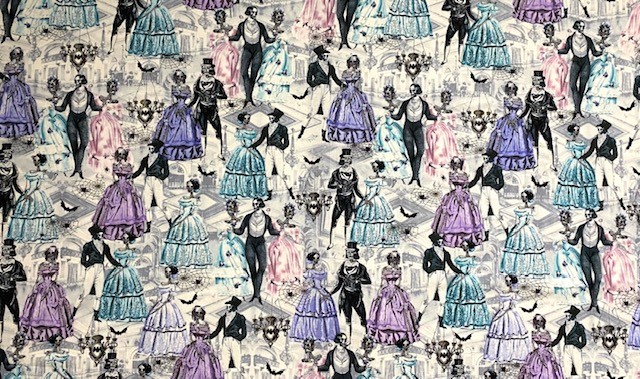
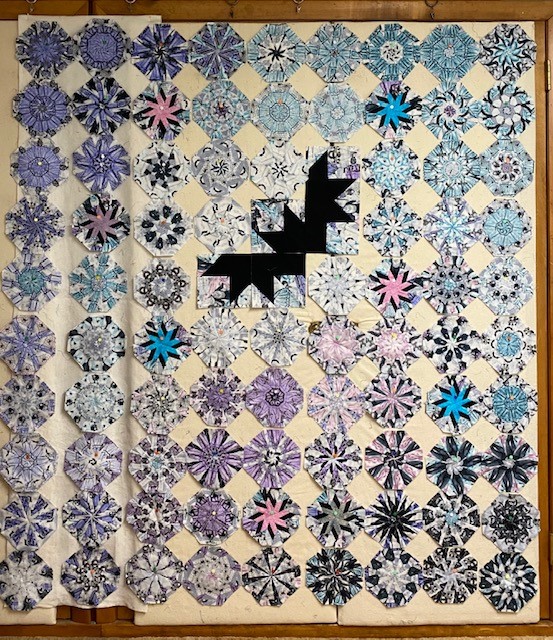
Timeless Treasures Last Dance
I found this great fabric from Timeless Treasures called “Last Dance”. The Skeletons are about 6 1/2″ tall.
Octagons
Last Dance made some great octagons. I wanted to add a bat in my design also.
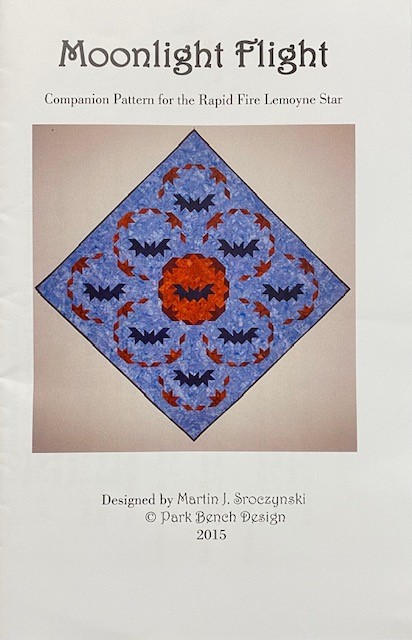
Moonlight Flight
My friend and fellow Studio 180 Design Certified Instructor Beth Sidley designs great patterns. I love Moonlight Flight and decided to use her bat for my quilt. You can purchase Moonlight Flight from her Etsy shop Park Bench Designs.
I love Josephine Wall’s art, her fabric panels are glorious. They make spectacular One Block Wonders.
Celestial Journey panel measures 35″ x 43″
These panels must have been either the beginning of the run or the last. The outer edges were off be about 1/2″. I focused on aligning the panels around the unicorn. The outer edges were mostly space so it was not crucial they be perfectly aligned. I cut my strips 3.75″ by WOF.
I have had this panel by Artisan Spirit Dreamscapes by Ira Kennedy for Northcott for several years. The Dreamscapes panel measures 13″ x 20″. It came two in a panel, so I ended up with 14.
I partially completed the first set of 7 panels to show how to add the sections to the panel. I save this OBW classes.
I finally decided to complete the 2nd set of panels. I cut the strips 2 3/4″ for 4″ finished hexies. In hind site I wish I would have made them smaller. To add more hexies and enhance the hexies I had, I added stars made with the Quad 60 Technique Sheet and my Star 60 Tool. My Dreamscapes wall hanging measures 35″ x 41″
One day, several months ago I received a text from my sister Marti in Arizona. She frantically wanted to know how panels were needed for a One Block Wonder (OBW). I quickly answered “7” panels were needed. I thought she must have a found a fabulous panel to work with. Then about a week later I a received a package from Marti.
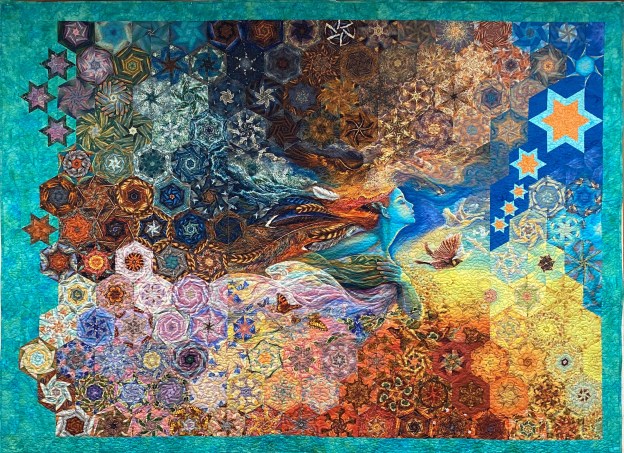
Spirit of Flight by Josephine Wall
Marti had sent me 7 panels by Josephine Wall & 3 Wishes. I was obsessed and couldn’t wait to make this panel into a OBW. Marti said this would be me when I emerged from breast cancer treatment. She was right!
Spirit of Flight measures 97″ x 71″
As I was working on this OBW I realized that most of the hexagons would be toward the back. I made these great stars using Studio 180 Design Star 60 Tool and the Framed 60 Technique Sheet to enhance my design. Now she is shooting for the stars and leaving cancer behind!