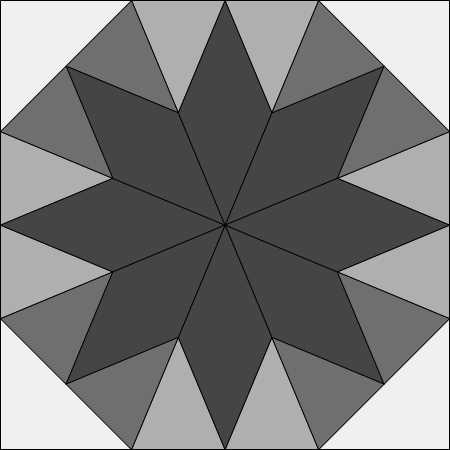
I have just finished a birthday quilt for my sister Mary. I made her Alaska by Edyta Sitar. This pattern uses templates to make the blocks. I “Tuckerized” the pattern by using Studio 180 Design’s Wedge Star tool instead.
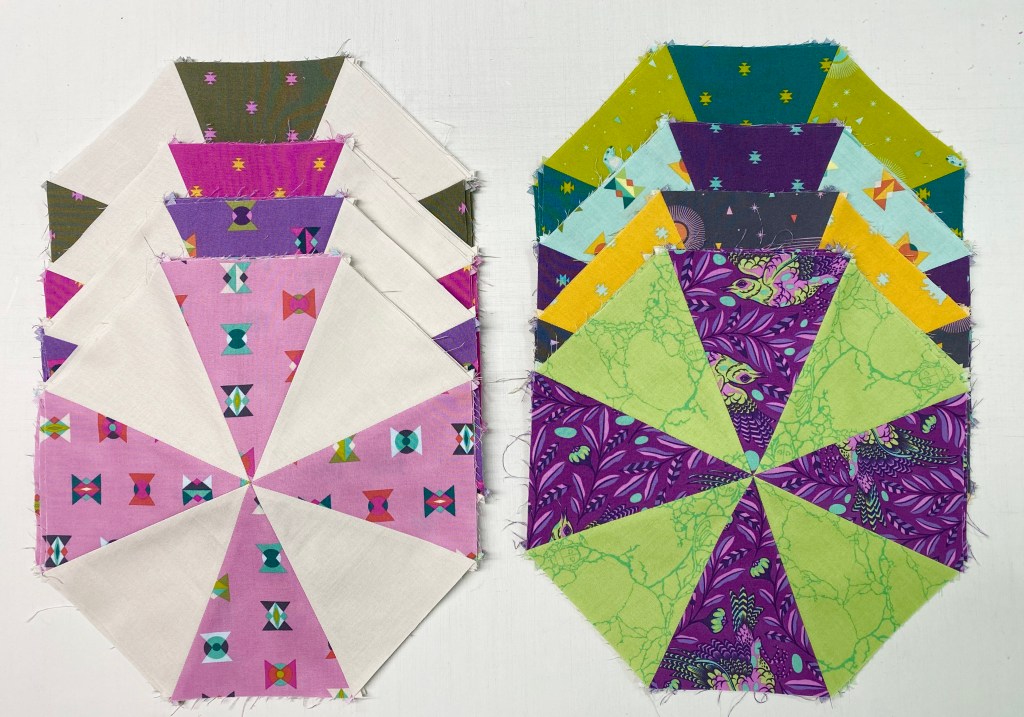
Alaska is made using 5 Wedge block variations, 5 Mixed block variations & 3 Wedge Star Variations.
A total of 13 different blocks all cut out with Deb Tucker’s Wedge Star Tool.
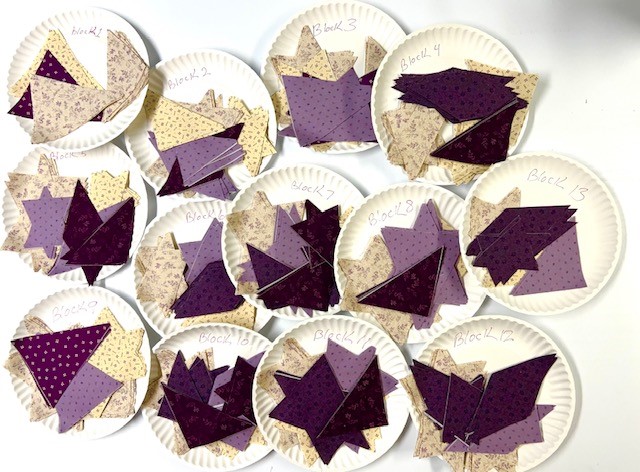
Tuckerized Alaska measures 71″ x 71″. Fabrics used were Marcus Fabrics by Pam Buda, Plumberry II. Made with love for my sister Mary.
Below is a special offer from Studio 180 Design for tools to add stars to One Block Wonders both hexagons and octagons. If you have not heard of the One Block Wonder Quilt Forum (OBWQF) you should visit and see all the fabulous One Block Wonders for created by the nearly 30,000 members. The OBWQF is a one stop destination for all your OBW questions. A special thanks to Kathy Gannon who works tirelessly to keep the group running smoothly.
Quilt by Sue Tucker
“Exclusive 20% off Special!” You may have seen that my good friend and also a great friend of the One Block Wonder Quilt Forum, Jackie OBrien, is running a series of OBW classes, including some for putting stars into your designs. In the basic classes, Jackie will be presenting a variety of tools to cut your triangles, and one will be our Star 60 tool. In addition, it will be featured in her classes on stars. We have long felt our Star 60 (for hexagon’s) and Wedge Star (for octagons) are the perfect tools to help you make your OBW blocks and stars easily and beautifully. These are the first public classes we know of that will present our tools for use in OBWs, and it’s a very exciting moment for us. In honor of that, we are running an exclusive special for you from now through the end of January of 20% off the purchase price of the Star 60 and/or Wedge Star tools. You can purchase the tools on our webstore, here:
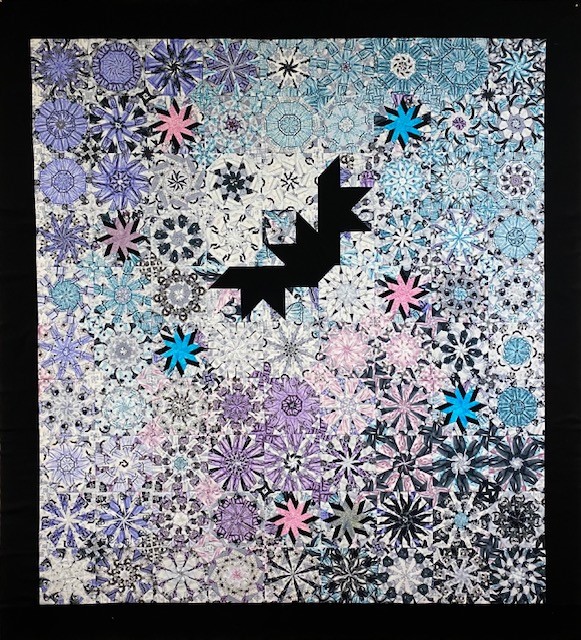
I have been on a journey this year to see how many stars and shapes I can place in a One Block Wonder.
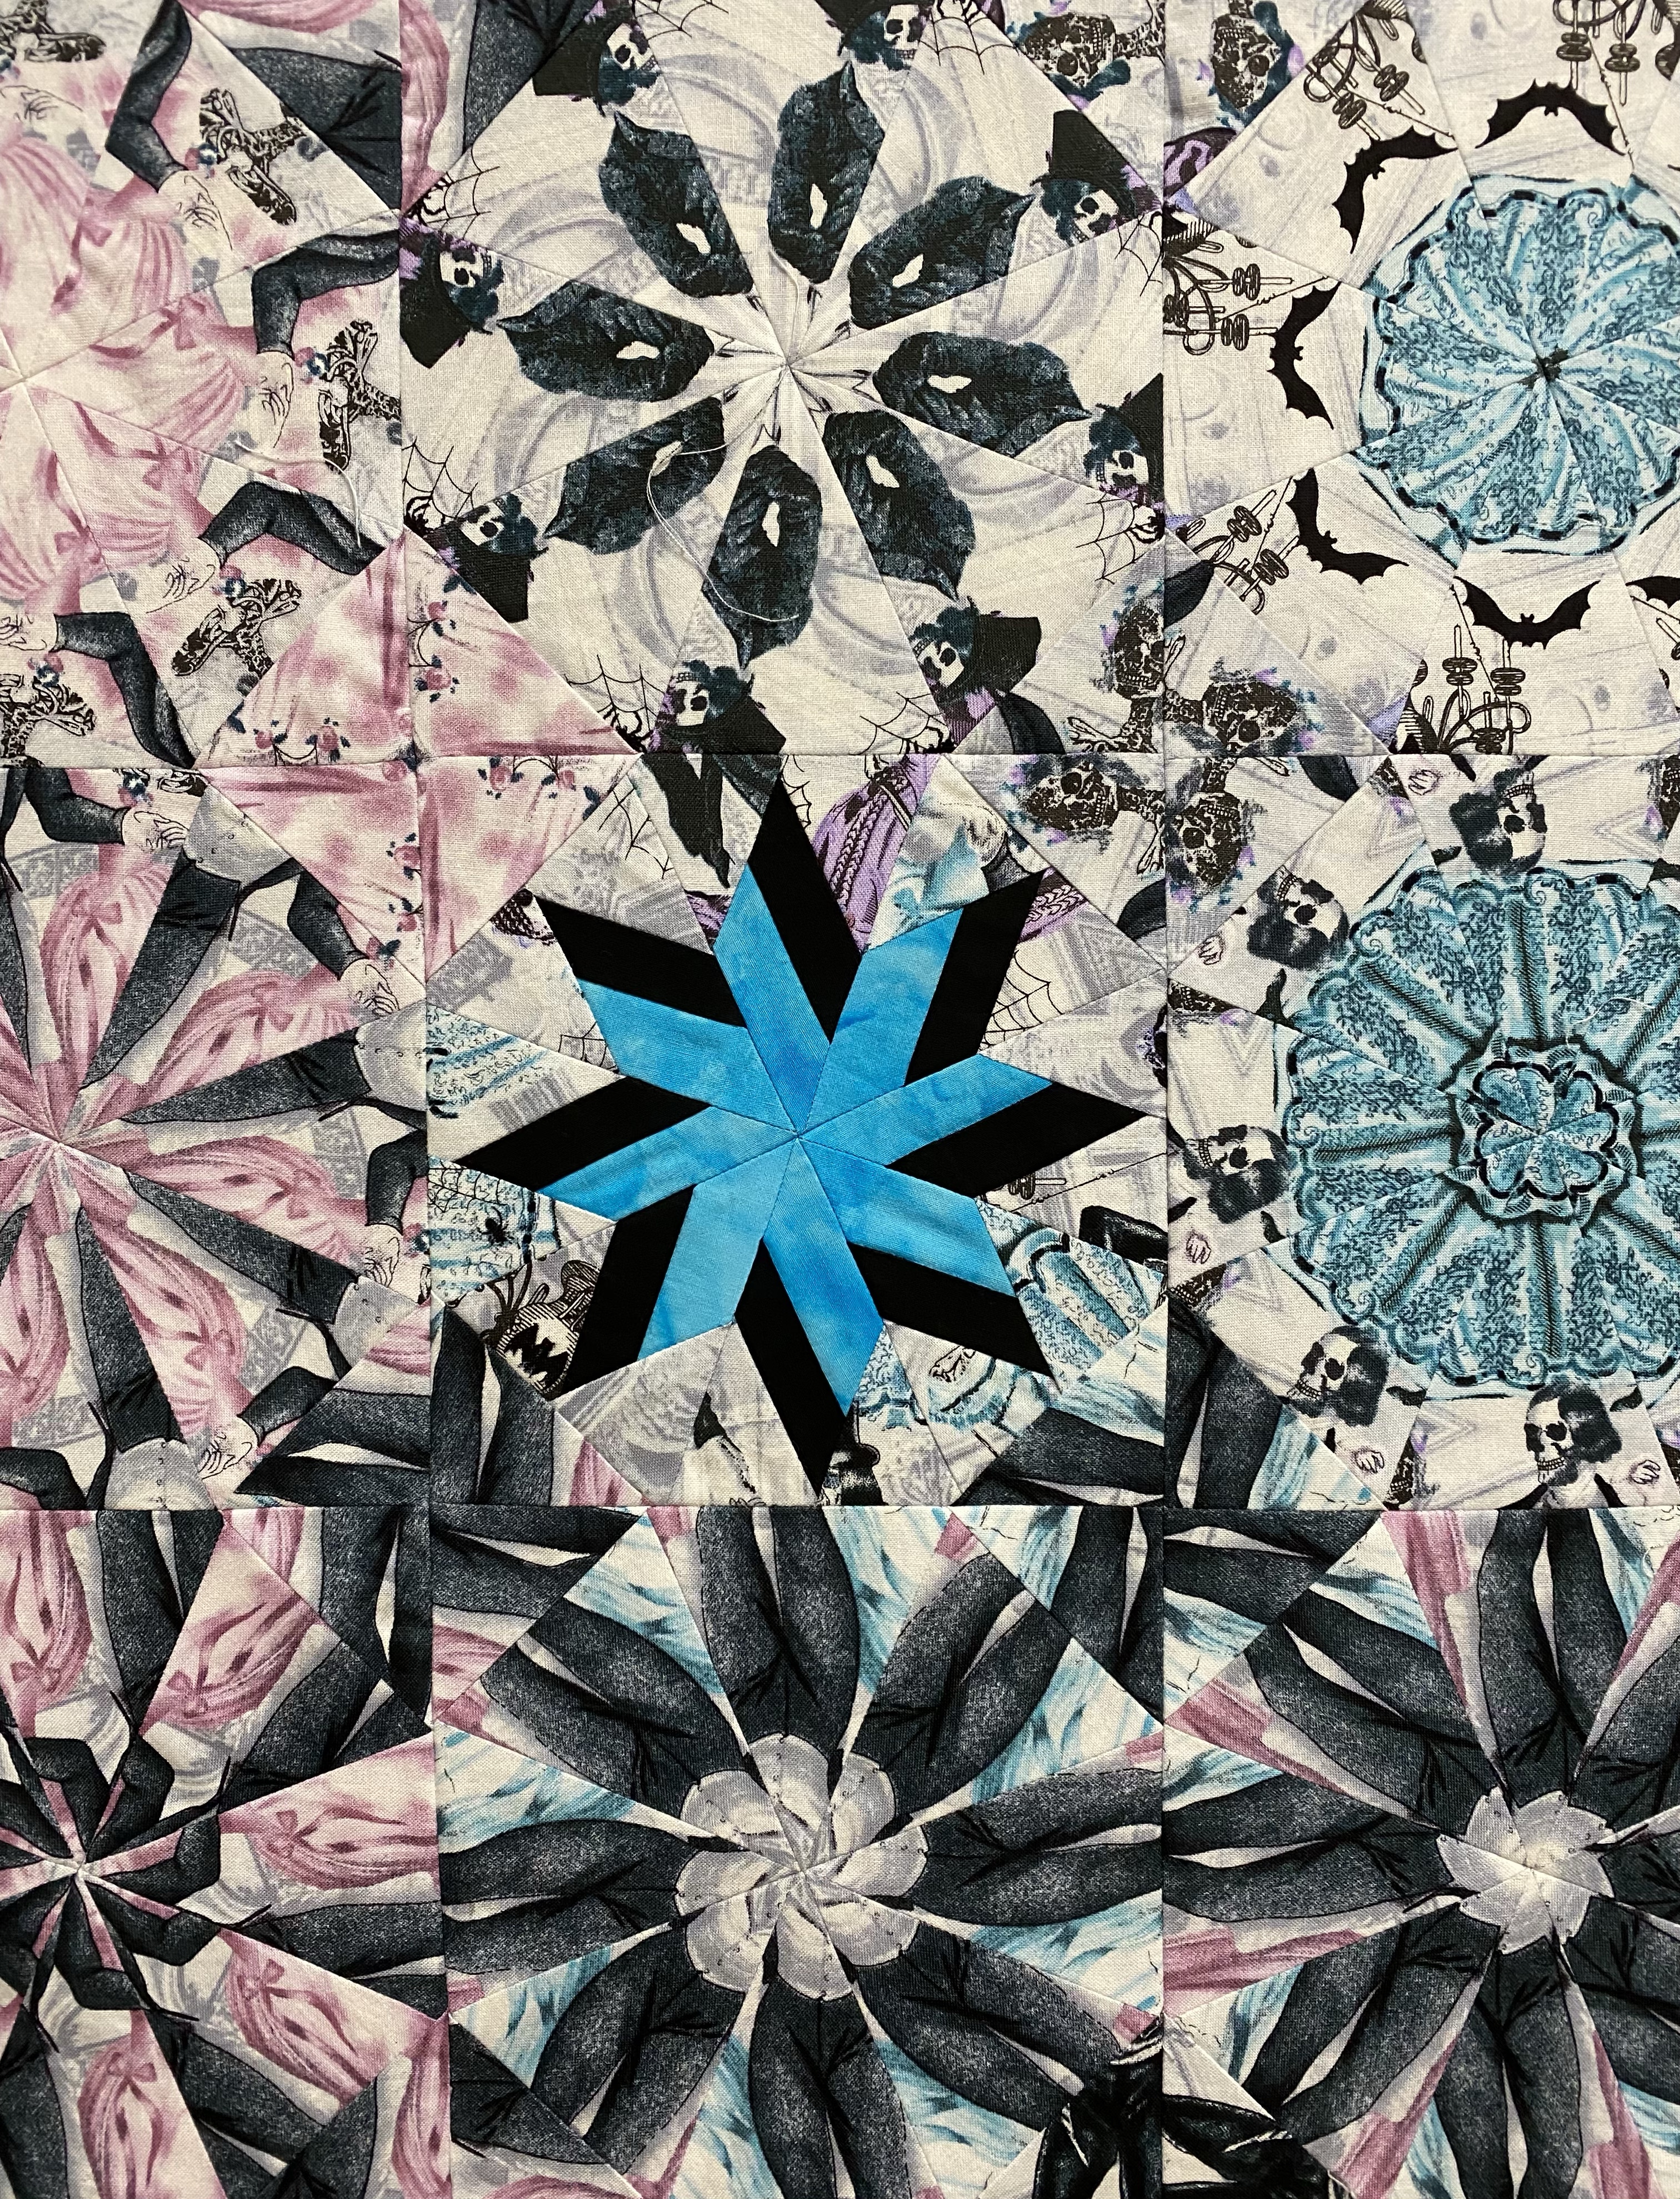
Timeless Treasures Last Dance
I found this great fabric from Timeless Treasures called “Last Dance”. The Skeletons are about 6 1/2″ tall.
Octagons
Last Dance made some great octagons. I wanted to add a bat in my design also.
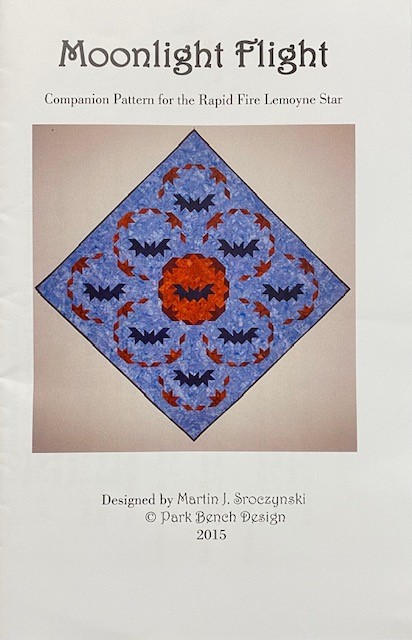
Moonlight Flight
My friend and fellow Studio 180 Design Certified Instructor Beth Sidley designs great patterns. I love Moonlight Flight and decided to use her bat for my quilt. You can purchase Moonlight Flight from her Etsy shop Park Bench Designs.
Continuing my journey to create interesting embellishments for my hexagon and octagon One Block Wonders (OBW’s). I created fabulous stars using Studio 180 Design’s Diamond Four Patch Wedge Technique Sheet and the Wedge Star Tool.
Flowers of the Sun by South Sea Imports
Once again I went to my OBW stash, I’ve had this beautiful large large print for at least 10 years. When I showed it to my friend Sue Tucker she immediately suggested Aqua stars be added.
Groovy Seam Rippers are my favorite
I went to my Joen Wolfrom Color Wheel. To find a complimentary color look directly opposite. For Orange/Red it is Aqua/Blue. Groovy Seam Rippers are my favorite.
I could have chosen several values of aqua, but I decided to use two.
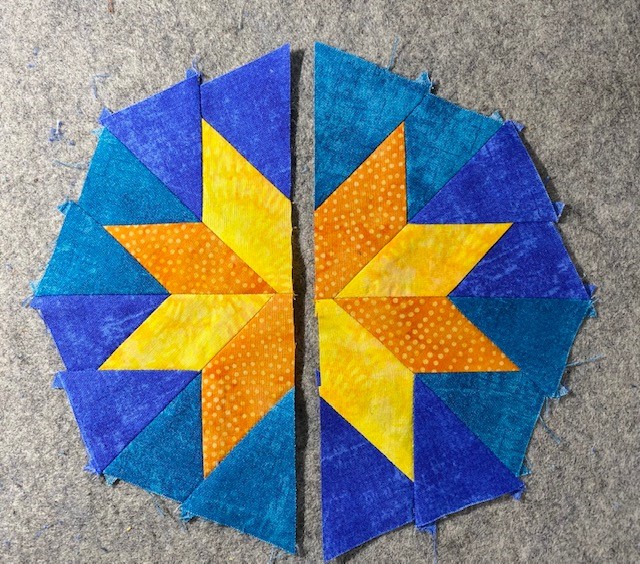
I was lucky to find Kona Cotton Paprika for my star side triangles. The Diamond Four Patch Wedge Technique Sheet gives you instructions for making this block in 22 sizes from 6″ to 48″ finished blocks. I decided that I wanted several size stars in my OBW. My octagons are 6″ finished blocks. Therefore, I would choose size variations in multiples of 6″. I made a 24″, 18″ 12″ and three 6″ finished blocks.
Step 1 – Make strip sets. I chose to make my Inner Diamond & Outer Diamonds the same color. See the Diamond Four Patch Technique Sheet for making strip sets A & B.
Step 2 – Layer the strips sets one on top of the other. Make sure both sets are right sides down. Use the Wedge Star tool to get the 45 degree angle.
Make the first cut.
From the first cut, cut angled sections the same width as the cut size of the diamond strip.
You’ll need 8 angles “A” & 8 angles “B” sections for each star.
Pair a section “A” with a section “B”Mark seam intersection
Step 3 – Pair each “A” section with a “B” section. Make sure that the inner and outer points are oriented correctly. On the edges you will be stitching together, mark the 1/4″ seam allowance across the seams.
Position the pieces so that the intersections of the marked lines and the seams match. Pin and stitch.
StitchPress your seams open.
Step 4 – Trim the outer points using the Wedge Star tool. Consult the chart for the line needed, and position the line on the seam of the outer point only, trim each side.
Step 5 – Add the small wedges to the out points that you just trimmed. See the Wedge Star tool instructions, page 3 for “Cutting the Small Wedges”.
Layout the small wedges and the Diamond Four Patches.
Stitch the right wedges first. For complete instruction on “Piecing the Diamond Wedges” see the Wedge Star tool instructions, page 4.
Diamond Four Patch Wedge18″ Diamond Star Wedge
Step 6 – Trim the pieced wedges using the Wedge Star tool. For finished stars up to 24″, align the desired finished block size line with the outer point.
Step 7 – Assemble and trim the block according to steps 1.12 through 1.18 in the Wedge Star tool Instructions.
As before, I marked the 1/4″ seam allowance across the seams and pinned before stitching. Stitch 2 Diamond Four Patch Wedge together. Remove the dog ears and sliver trim the Wedge pair by placing on the mat Righties orient the pair so the 90 degree corner is in the upper right, lefties position it so the 90 degree corner is in the upper left. Align the common diagonal on your Tucker Trimmer with the seam to trim the dog ears and true up the 90 degree angle.
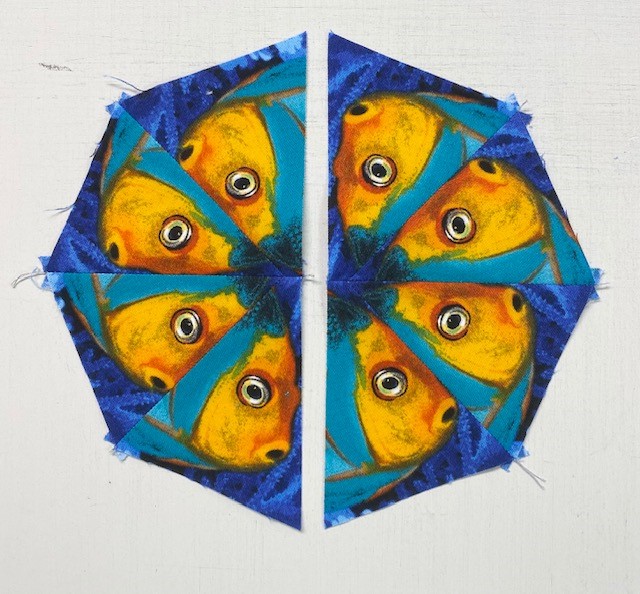
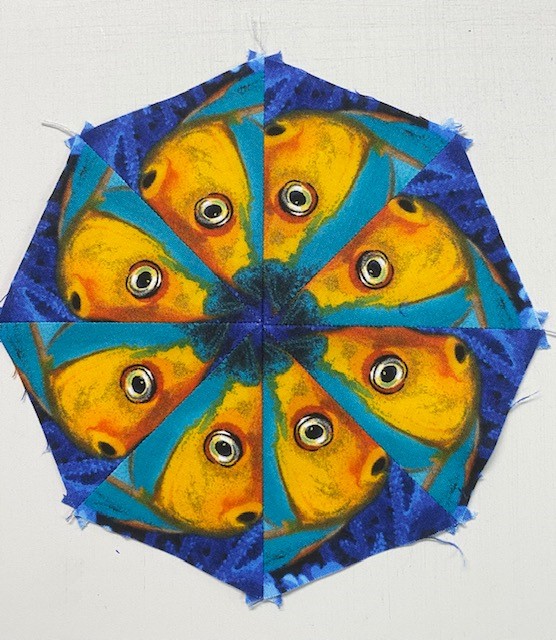
Something Fishy was made with fabric called Atlantis by Sentimental Studios for Moda. I have had this 6 yard piece in my One Block Wonder (OBW) stash for 12 o 13 years. Evidently I like to age my fabric before I cut it up.
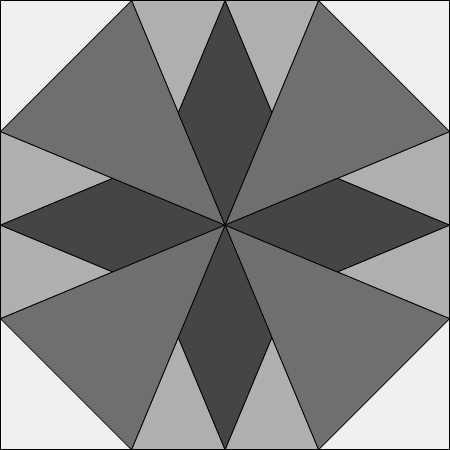
This is my second octagon OBW. Like hexagon OBW’s, octagon OBW’s can be made in many sizes. I will show you how to use the Wedge Star Tool Instructions to choose different size octagons and add different octagon blocks to your quilt. The numbered steps in this post refer to steps outlined in the Wedge Star Tool Instructions. The basic octagon OBW is made with 45 degree wedges as sown below. The Wedge Star tool instructions refer to this as the Wedge Block. We use the Wedge Block instructions to make the basic octagon OBW.
The Wedge Block instructions begin on page 7
The Wedge Star Block instructions begin on page 3
The Mixed Block can be made up of any combination of Diamond Wedges and Large Wedges, plus four corner triangles.
Use the chart on page 2 of the Wedge Star instructions, find your desired finished block size (first column), then follow the row across to determine the strip and square sizes you need to cut.
I chose 6″ finished blocks. From the first column follow to right to the “Large Wedge Strip” and see to cut the wedge strips 4″ Width of Fabric (WOF) and “Corner Square” strips 3″ by WOF.
After I have aligned my 8 repeats and trimmed one long edge so all the repeats end in the same place, I re-measure my repeat to verify how many strips I can cut.
Note: For every 2 Large Wedge strips you will need to cut 1 Corner Square strip.
I ended up with 22″ trimmed repeats, so I was able to cut four 4″ Large Wedge WOF Strips and two 3″ WOF Corner Square strips for 6″ finished octagons.
Wedge Block
Cutting the Large Wedges (Page 7, Step 2.01)
When making an octagonal OBW, we are cutting 8 layers of fabric at once. Our Large Wedge and Corner Square strips are from one fabric. Putting a new blade in your rotary cutter is important!
The cutting instructions on page 2 show you how to cut your wedges with the strip placed horizontally on the mat. I prefer to cut the wedges by placing my strips vertically on the mat. Try both and see what works best for you.
Wedges cut from one strip
Cutting the Corner Triangles (Step 2.02)
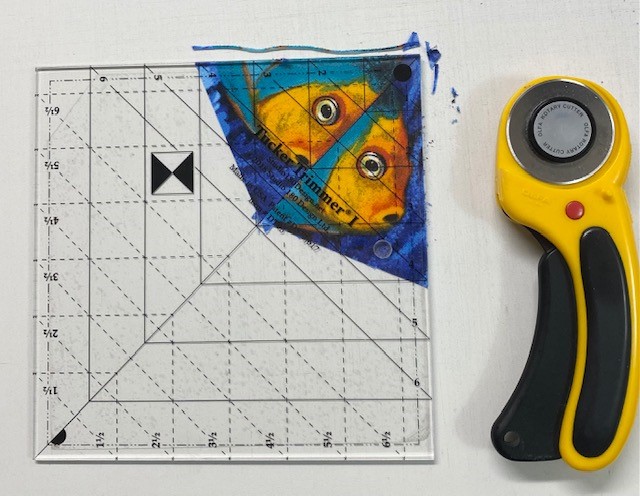
I use my Tucker Trimmer I to cut my Corner Squares from my 3″ WOF strips.
Once your Corner Squares are cut, cut them once diagonally. Each set of corner triangles contains 8 identical corner triangles. When cutting the squares diagonally, consider what design elements will be in both halves.
Constructing the Wedge Block (Step 2.03)
From each stack of 8 wedges, stitch 2 together making 4 pair, press seams open.
Remove the Dog Ears(Step 2.06)
Step 2.06
Remove the dog ears and sliver trim the wedge pair. Position the Wedge Pair on the cutting mat. Righties as shown above position it so the 90 degree corner is in the upper right (see tool instructions for left handed cutting). Align the common diagonal line on your Tucker Trimmer with the seam and slide it forward just until it meets with either edge or the point of the wedge, trim up the side and across the top. There may only be a few whiskers trimmed here. Trim all the wedge pairs.
Match up the points, stitch into halves, press seams open (Step 2.08).
Tip: Find the center of one wedge half by placing a pin where seams meet and go through the second wedge half in the same place. Align the two halves, pin on both sides of the center pin.
Remove the center pin and stitch the halves together. Press seams open.
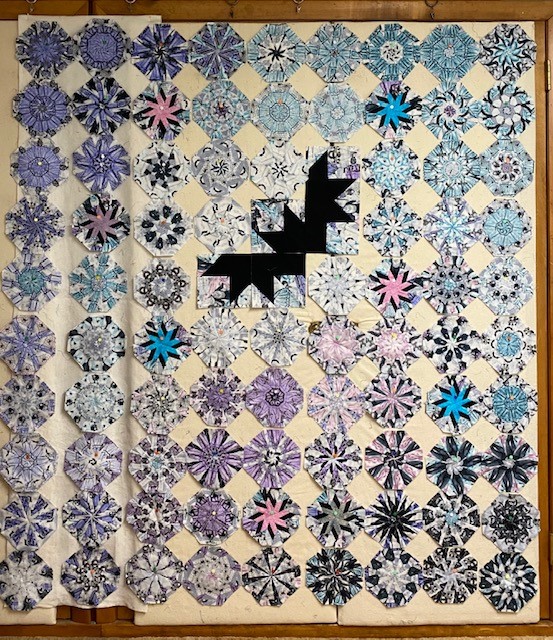
It helps to place your octagon blocks on a design wall as you finish them.
The next step (Step 2.09), is to trim the octagon wedges that will have a corner triangle stitched to them. But before that I want to make some Wedge Star & Mixed Blocks to enhance my octagons and strengthen certain colors .
Wedge Star Block (Page 3)
Cutting the Diamonds (Step 1.01)
All my octagons will be 6″ finished blocks. Go to the chart on page 2, find the first column “Finished Block Size” move down to 6″, move across the row to “Diamond Strip”. Cut the Diamonds strips 1 3/4″ by WOF. Trim one short edge at 45 degree angle by placing the 1/4″ line of your Wedge Star tool on the top edge of the strip. Using a regular 6″by 12″ ruler, bump it up to the Wedge Star tool placing the 45 degree line of the ruler on the bottom edge of the strip.
Remove the Wedge Star tool and cut using the regular ruler.
The rule here is to cut your diamonds the same width as the diamond strip. Continue cutting Diamonds every 1 3/4″ using the ruler. See tool instructions for left handed cutting.
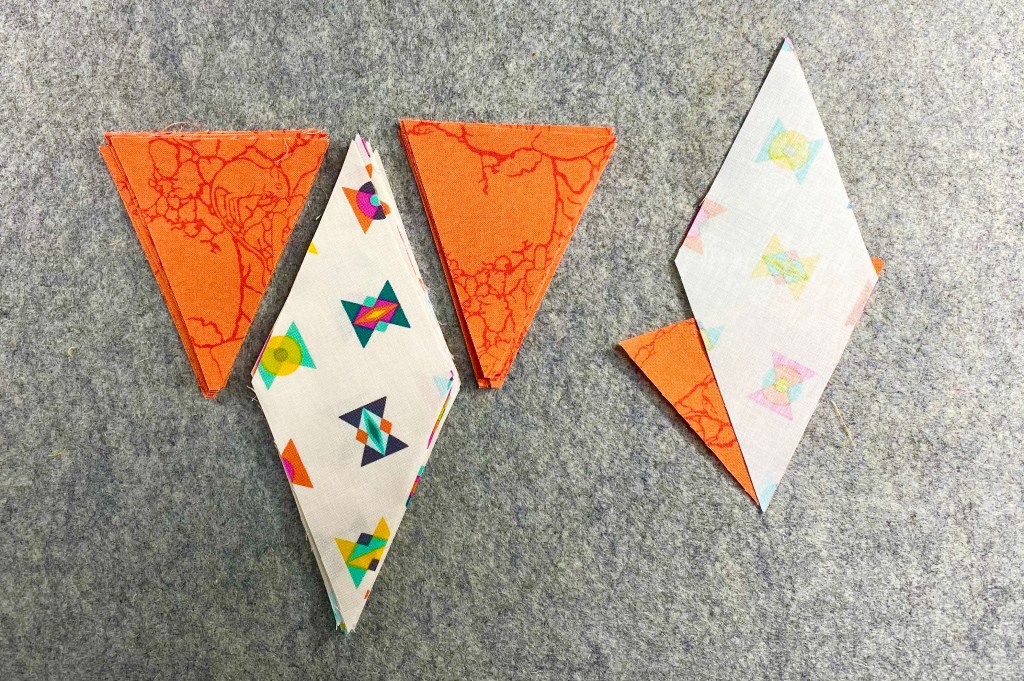
I wanted two color Diamonds so I chose two fabrics.
Cutting the Small Wedges (Step 1.02)
Following the chart for 6″ finished blocks, move across to the “Small Wedge Strip”. Cut the Small Wedge strips 2 3/4″ wide, WOF.
Align the small mark near the top of the tool with the top of the strip, and the line on the tool that corresponds with the width of the strip (2 3/4″).
Step 1.04 – Rotate the Wedge Star tool 180 degrees so the sharp point is closest to you. Align the same guidelines as before and continue cutting the wedges. (I prefer to place my strips vertically when cutting the wedges. Find what works best for you.)
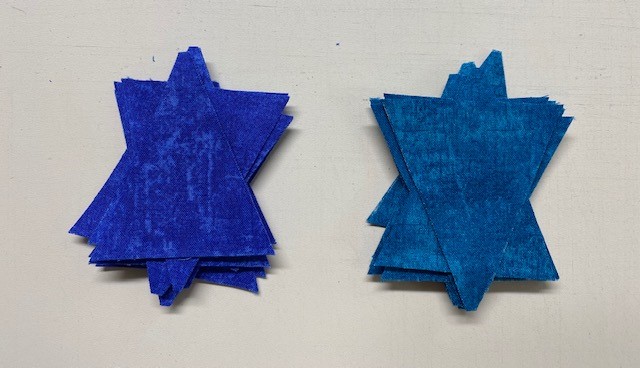
Two fabric color Small Wedges, blue & teal.
Note: We are skipping from Step 1.04 to Step 1.06 because we are making a OBW and will address the corners later.
Piecing the Diamond Wedges
Step 1.06 – Lay out the Diamonds and Small Wedges as shown. I am making two color diamonds first I laid out the Yellow diamonds with the blue small wedges.
Step 1.07 – Take a small wedge from the right hand side and position it it on top.
Note: My interpretation is to place a diamond right sides together with a small wedge as show above.
Stitch small wedges to the diamonds right sides together as show above. Press toward the Diamonds.
Note: Remember that “whatever you are pressing toward goes on top”! So, you would place all your units with the diamond on top.
Step 1.08 – With the Diamond on top, stitch along the matched edges with a ¼” seam. Press the seam toward the Diamond and trim off the “dog ear”. Repeat with the rest of the diamonds.
Trim the Dog Ears
Step 1.09 & 1.10
Step 1.09 – Using the other pile of Small Wedges, take one and position it on the other side of the Diamond point. Align the raw edges and center the shapes right sides together as shown above.
Step 1.10 – With the Diamond on top, stitch with a ¼” seam. Press the seam toward the Small Wedge. Repeat with the rest of the Diamonds.
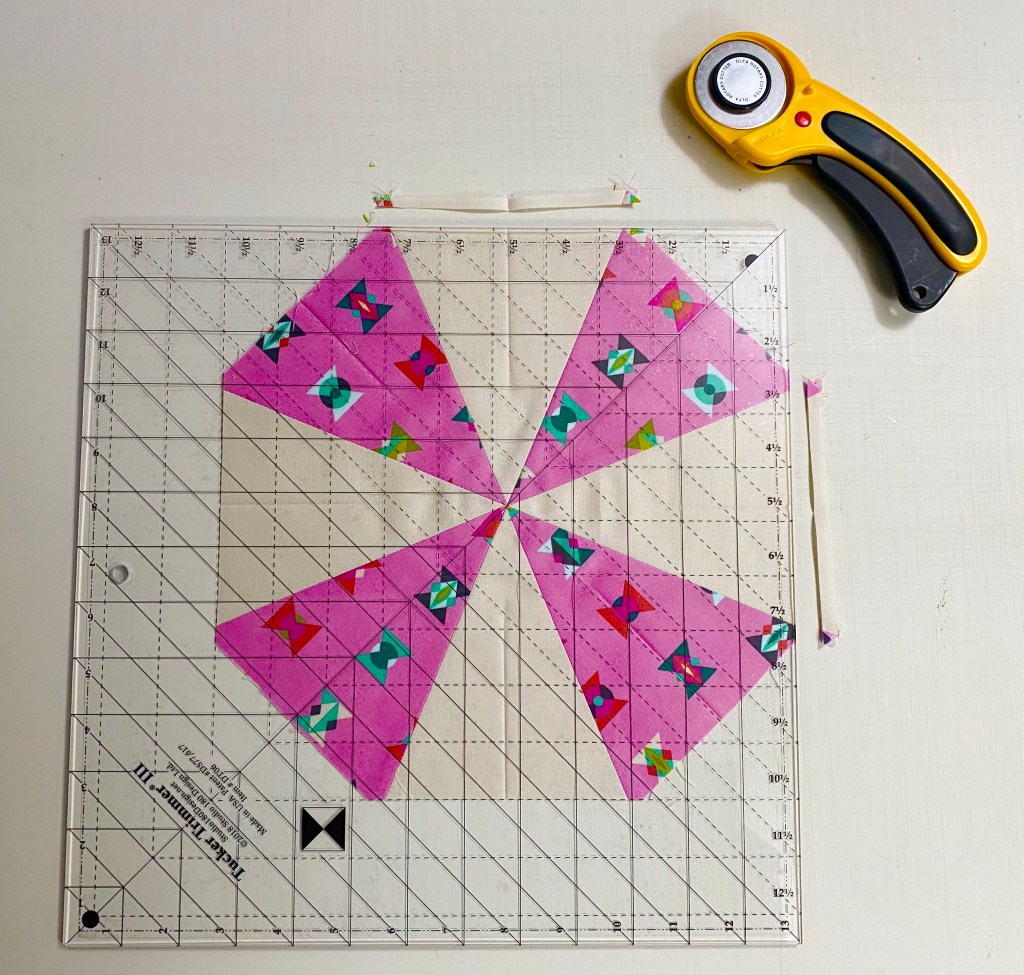
Step 1.11 – Use the Wedge Star™ tool to trim each Diamond Wedge unit to an exact size.
Step 1.12 – Position the unit right side up on the cutting mat. Righties point the Diamond toward the 2 o’clock position, lefties point the Diamond toward the 10 o’clock position. Align the desired finished block size lines with the sewn seams. Trim along both sides of the ruler. See tool instructions for left handed cutting.
Layout wedges. Stitch wedges together into pairs.
Press seams open.
Step 1.13 – Remove the “dog ears”.
Remove the dog ears and sliver trim the wedge pair. Position the Wedge Pair on the cutting mat. Righties as shown above position it so the 90 degree corner is in the upper right (see tool instructions for left handed cutting). Align the common diagonal line on your Tucker Trimmer with the seam and slide it forward just until it meets with eight the edge or the point of the wedge, trim up the side and across the top. There may only be just a few whiskers trimmed her. Trim all the wedge pairs.
Step 1.15 – Stitch quarters in halves, then stitch halves together, pressing seams open.
Step 1.16 – To turn your octagon into a square you will need to add triangles to the corners. Determine which wedge sections will be located in the corners of your finished block. Align the Outside Edge Trim Line on the Wedge Star™ tool with the seams of the Diamond on one corner wedge. Trim along the edge of the tool. Repeat this for the other three corners, making sure you are only trimming every other edge. The remaining edges will be trimmed after the corners are added.
Trim Mixed blocks the same as the Wedge Star Block
Final layout.
Mixed Blocks – See page 10
Mixed block variations combining wedge star and large wedge units.
Mixed blocks are made by simply combining Wedge Stars with Large Wedges as shown above. Once I made several Wedge Star Blocks and Mixed Blocks I added them to my other octagons. The fabric choices for my Wedge Stars and Mixed blocks was to strengthen my orange/golds and turquoises.
Prepping Wedge Blocks for adding the Corners: If there is a way to square up a difficult unit/block Deb Tucker will find it!
Step 2.09 (Pg. 8) – Determine which Large Wedges are going to have Corner Triangles attached. Step 2.10 – Make a halfway registration mark on these four wedges. Wedges can be folded in half matching the seams and then lightly pressed to give a centerfold line. Or the centerline of the tool can be placed on the sewn seam with the point of the tool at the center. Mark with a removable marking tool.
Note: Add a flower pin to the top wedge unit for each block to aid in orientation. This will help you throughout the trimming process.
Step 2.11 – Place your Wedge Star® tool upside down, with the Invisigrip™ facing up. Find the Block Center dimension for your project on the chart.
Step 2.12 – Measure down that distance from the flat edge of the tool and make a mark on the back of the tool, across the centerline as illustrated. Use a fine point Sharpie® marker. For our example, make a mark 3¼” from the tool edge.
Step 2.13 – Working on your cutting mat, place the intersection of the centerline of the tool and the Sharpie® marked line on the center of the sewn block. At the same time, align the centerline of the tool with the halfway registration mark on the fabric block.
Step 2.14 – Cut along the flat edge of the tool. You should only be trimming off a small amount of fabric. If you are trimming more than ¼”, recheck your tool mark!
Step 2.15 – Repeat for the other three Corner Wedges.
For prepping Wedge Star & Mixed Blocks for adding corners see tool instructions page 5, Step 1.16.
Add Corners:
Block corners are trimmed and ready for Corners
Choose corner triangles that will help blend the octagons and create flow.
When four octagons are put together, there is a diamond spaced shape between them. You fill this space with 4 identical triangles cut from the 3″ Corner Strip.
Keep adding corners to the octagons and place back on the design wall.
Corners have been added to all the inner octagons.
I add corners to all the inner octagons first, then continue adding them to the outer edges.
Now all the octagons have 4 corner
Squaring up the Octagon Blocks
Step 2.18 – For blocks that finish to 12” or less, we prefer to use our Tucker Trimmer®. Consult the Block Cut Size in the chart and align the common diagonal and sizing diagonal with the marks made for the previous trimming. Make sure that the intersection of the tool lines is over the center. Trim two sides. Rotate the block 180° and line up the diagonal lines as well as the clean up lines with the trimmed edges. Trim the final two sides.
My octagon blocks will be 6″ finished. Therefore, I can use my Tucker Trimmer I and square up my blocks to 6 1/2″. Make sure the intersecting lines for 6 1/2″ are over the center of the block and trim as shown above.
All my octagons are now trimmed to 6 1/2″ and are ready to be sewn into rows.
Tip: To line up your blocks, pin where the seams intersect on both blocks. Pin on both sides, then pull out the pin in the seams and stitch.
See how nicely the points line up when the blocks are trimmed and squared.
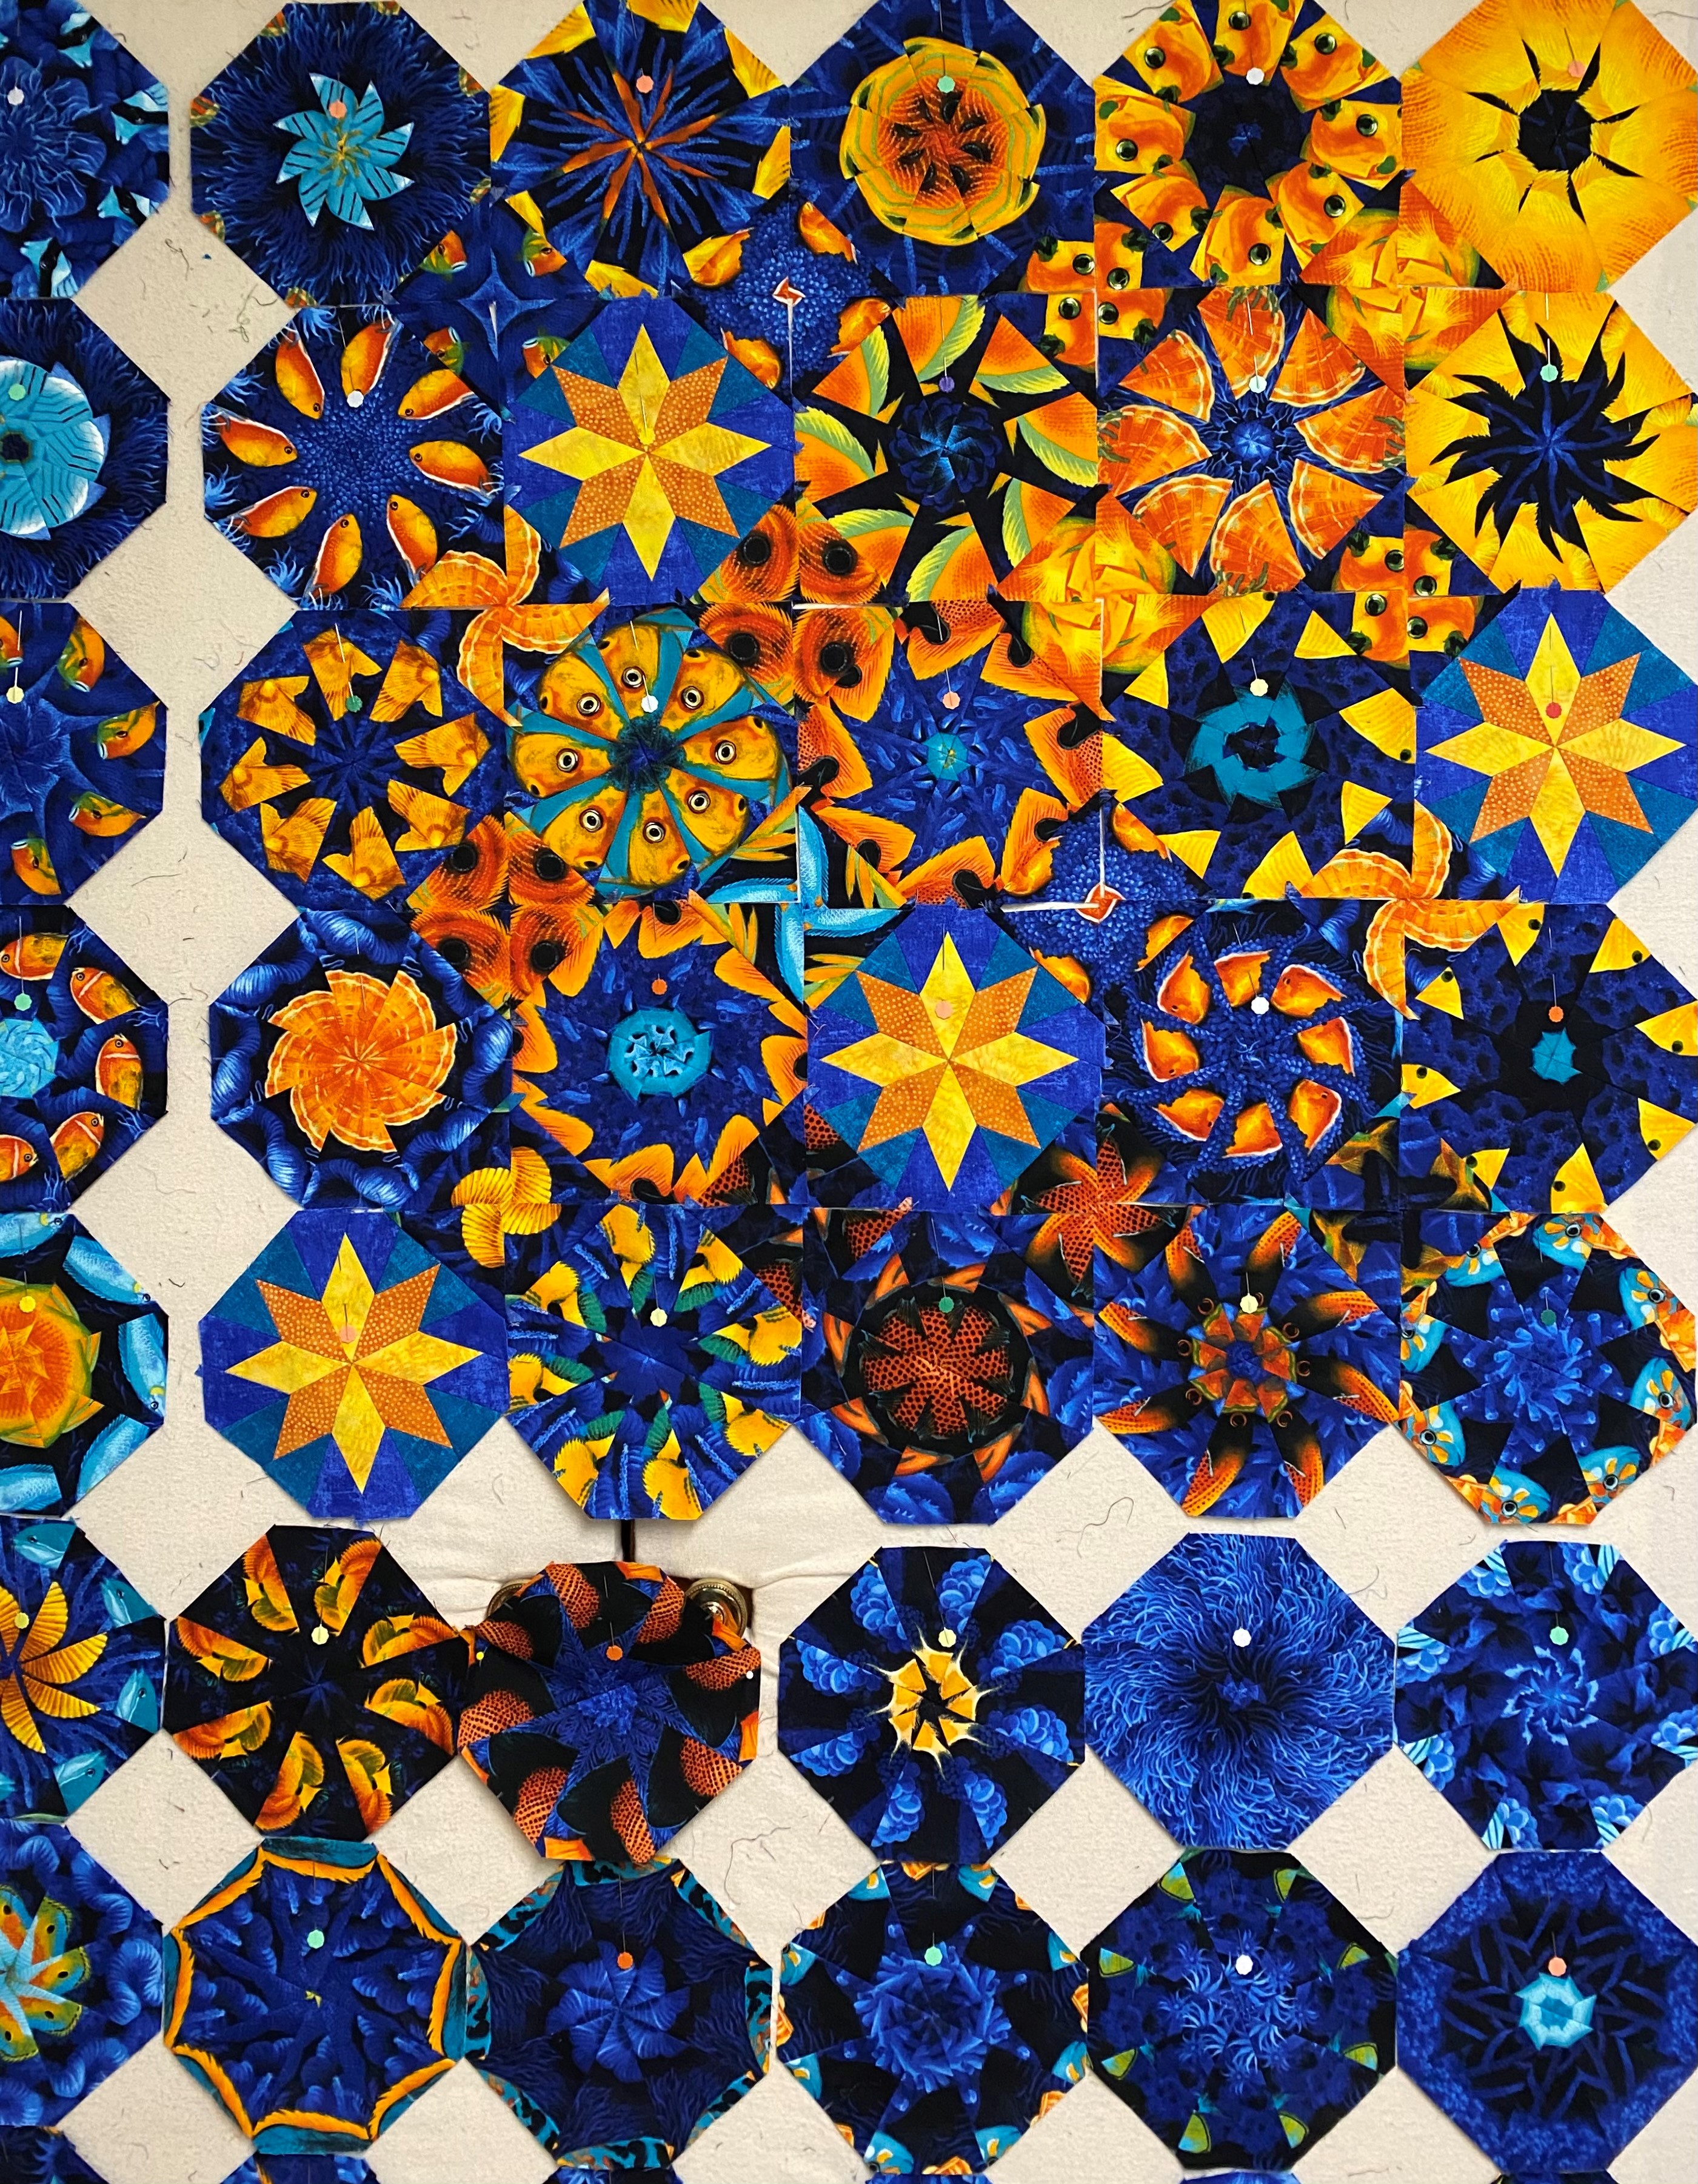
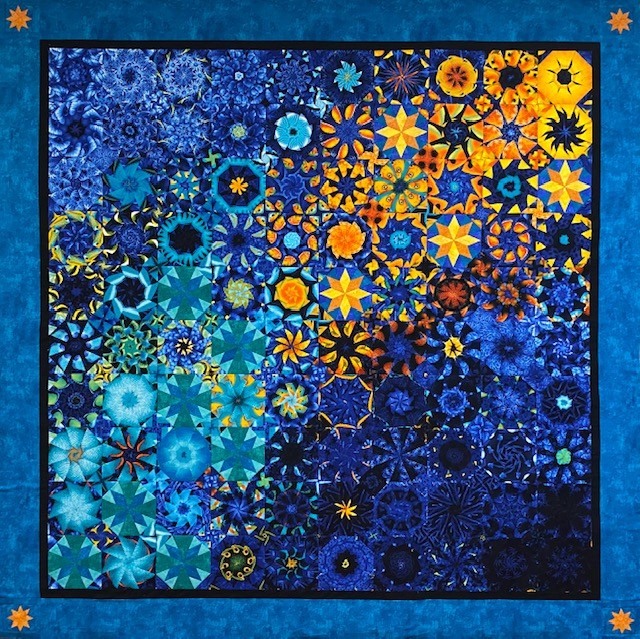
Something Fishy
Something Fishy, 72″ x 72″
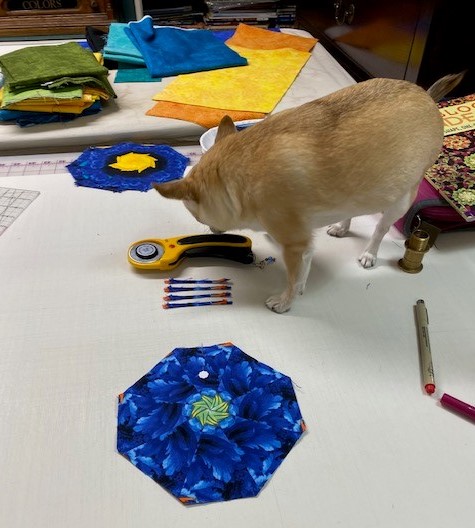
As you can see, this project was closely supervised by Tucker!
Included in your Wedge Star Tool Instructions is a free project “Freelancer”.
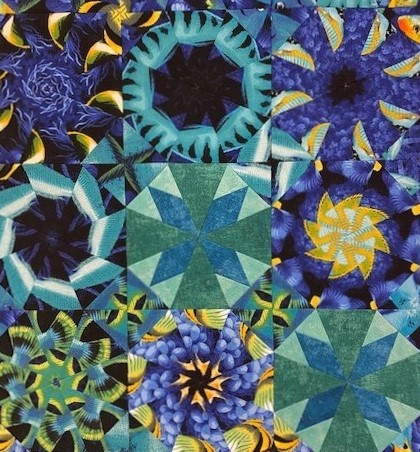
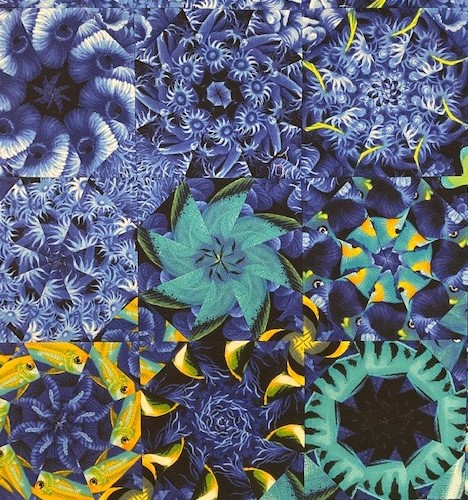
What is a One Block Wonder (OBW)? I bought Maxine Rosenthal’s book “One Block Wonders” in 2006 and was totally awestruck! So much so, that I have made 79 hexagon OBW’s since. Whether you are making hexagons or octagons your are creating kaleidoscope blocks – each one unique by using one fabric, one shape for one of kind quilts! With hexagon OBW’s you cut 6 identical repeats and with octagon OBW’s you cut 8 identical repeats.
Octagons are used in the cover photo.
In 2007 I bought Alexander Henry’s fabulous fabric “Lion Eyes”. I always buy at least 6 yards. This time I had 12 yards in my stash.
I made my 27th hexagon OBW and named it “Just Lion Around” It was included in Maxine Rosenthal’s 4th book One Block Wonders of World.
Just Lion Around 2007, OBW #27
I made my first OBW in 2006. That year I made 16 OBW’s. It only took me 14 years to finally make my first octagon One Block Wonder!
Cutting the Repeats: I cut my 8 identical repeats and aligned them just as I would for a hexagon OBW. Now it is time to cut octagon and corner triangle strips. You can make octagon OBW’s in any size. Following Maxine’s suggestion I cut my octagon strips 4″ wide. Maxine said to cut the strips for the corner triangles 2 3/4″ wide. I am a Studio 180 Design Certified Instructor. You may be able to take the girl out of the studio…but you will never take the studio (180) out of the girl!
Instead of 2 3/4″ strips, I cut my corner triangle strips 3″ wide, that would give me a little more to trim off the completed octagon blocks. After I aligned and trimmed one long edge of the repeats, I re-measure the width of my repeat to verify how may strips I can cut. My trimmed, aligned repeat measured 23″. For every two strips used to make octagons, cut one strip for the “Sensational Squares” (corner triangles). If I cut four 4″ strips and two 3″ strips it equals 22″. Now I know I have enough fabric in my repeat without cutting myself short.
First cut
As I said earlier: You may be able to take the girl out of the studio…but you will never take the studio (180) out of the girl! I am using Studio 180 Design’s Wedge Star Tool to cut my wedges for the octagon blocks.
The beauty of the Wedge Star tool is you can make octagons in sizes 3″ to 24″.
I found it easier to cut both left and right wedges by placing the octagon strip vertically on my cutting table and pull the strip toward me as I cut. The Wedge Star tool instructions show how to cut the units horizontally also:
Continue cutting your wedge units. I got 23 wedges per strip.
From the 3″ strips cut your 3″ squares using your Tucker Trimmer I.
Cut you squares diagonally once and set aside.
Because hexagons are made with equilateral triangles you have 3 choices as how to design your block. With Octagons you only have one choice, the narrow end of the wedge is always the center.
Align two wedges and chain stitch the four pair.
As with hexagons, press all seams open. I love my Strip Sticks for that.
Remove “dog ear” and sliver trim the wedge pair. Righties orient the wedge pair so the 90 degree corner is in the upper right (lefties orient the wedge pair so the 90 degree corner is in the upper left). Align the common diagonal line on the Tucker Trimmer with the seam and slide it toward the corner just until the sides of the tool touch the very edge of the wedge pair and trim. Note there may be just a few whiskers trimmed here. This is called Trueing up your 90 degree angles and will create a much more square unit.
Match up two wedge pairs, stitch them together and press seams open.
Find the center of the two wedge halves by placing a pin where the two seams meet in both units and align the halves. Pin close to both sides of the first pin, then remove the pin in the center. This will help to center you octagon wedge halves.
Stitch your wedge halves together.
Press your seams open.
I placed my octagons on the design wall as I made them. This helped me to see what I had.
Here I am looking at life through rose colored glasses. again Time to sort the octagons. Looking at the octagons through red plastic helps me to sort the octagons by value. If you didn’t know, I have been battling breast cancer. I am responding well to treatment, but as my hair grows back, I’m noting a resemblance to the Old Man Dancing for the Six Flags commercials.
Sorting the octagons by predominate color or value was more difficult than I thought it would be. I think because the octagons don’t nest with each other as the hexagons do, you don’t get the same flow and movement. I’m saying this because after I added the corner triangles i wasn’t as happy with the design. Take your designing!
Tip: This is most important tip! Place a flower pin in the top wedge of each octagon! By doing this you will be able to easily orient the octagons as you remove and place them back on the design wall. It will keep your brains from falling out!
Adding the “Sensational Squares” (corner triangles).
One set of corner triangles is laid out as shown above making a kaleidoscope square.
Those squares will fit into the space between 4 octagons.
When you step back from the design wall, the square will appear to be gone as the 4 octagons blend together.
I worked with one row at time, deciding which set of corners to add. Remove one octagon at a time and stitch the triangle to the appropriate octagon wedge. In affect, you will be adding corners that effect two rows at a time. In the end, each octagon will have a different triangle on each corner.
Center the octagon wedge over the corner triangle and stitch. Press toward the corner triangle. Remember Deb Tucker’s tip when pressing: “whatever you are pressing toward, always goes on top”!
Above shows the corner triangles added to the inner octagons.
Once the inner octagons have the corners added, continue adding the final corner triangles to the outside edges of the octagons.
Trimming the Octagon Blocks: The octagon units need to be squared up to 6 1/2″.
If you don’t know the beauty of using the Tucker Trimmer you will love this. The Tucker Trimmer is marked with a “Common Diagonal line and Size Lines to help you perfectly center each unit or block for trimming. For righties the Common diagonal line is placed on the center seam going from the bottom left to the upper right. The 6 1/2″ size line is positioned from the upper left to the lower right going through the center of the block. The size line and common diagonal line should intersect in the center of the block centering it perfectly for squaring up. Trim up the right side and across the top. Rotate the block place the 6” clean up lines of the Tucker Trimmer on just trimmed lines of the block. Trim up the right side and across the top.
When all the octagons are trimmed it’s time to stitch your blocks into rows and then join your rows to complete your quilt. My layout was 9 X 10 = 90 – 6″ finished blocks measuring 57″ X 63″ unquilted. I learned a lot in this process. I think my layout would have been more satisfying if I had left it more random. I was trying to create an oval shape with the lighter blocks in the center. But there wasn’t enough contrast between the medium and light blocks. I’ve always been a little contrast challenged.
I was entertaining my self with Facebook when I saw a post by my friend and fellow Studio 180 Design Certified Instructor, Karen Overton The Quilt Rambler. Here is some of what she wrote: “The idea began with a talented quilter named Jessica of Jessica Quilter also known on Instagram as @Jessicaquilter. Seems the good folks at Just Wanna Quilt picked up on her inspiration and ran with it! More details can be found here on the JWQ website. Jessica had an idea to use a little bit of her favorite fabrics from her “inventory” and the rest they say is history”. Karen was chosen as a Featured Designer, you can read the rest of The Quilt Rambler’s blog Inventory Quilt Project here.
I was inspired to check my “Inventory”
I had this wonderful collection by Tula Pink called Spirit Animal. I have had this fabric in my “Inventor” for over two years.
I decided to make Hallucination by Deb Tucker. This is a great pattern to get yourself acquainted with the Wedge Tool. You will also need a Tucker Trimmer III. To accomplish a scrappy Hallucination I had to put on my Rose colored glasses. I needed light, medium and dark fabrics. Whenever I have trouble sorting fabrics by value I use red lenses to help.
I began cutting my large wedges for Block “A” which consisted of medium and dark wedges.
Once the wedges are cut position a dark wedge with a medium wedge aligning the raw edges, being sure to always put the dark wedge on top. This will assure you will alternate between dark and medium wedges in your block. Stitch into pairs using your best 1/4″ seam allowance.
Remove the “dog ears” and “sliver trim” the wedge pair by aligning the common diagonal line on your Tucker Trimmer with the seam and trim the dog ears, and true up the 90 degree angle. Note there may be just a few whiskers trimmed here.
Continue for all the “A” Blocks and the “B” Blocks.
You need to make a halfway registration mark on all 8 wedges of all “A” & “B” Blocks. You can do this by placing the center line of the wedge tool on the seam and mark on the right side of the fabric with a removable marker. My thin chalk pen broke so I folded the wedges in half matching the seams and then pressed with my iron to give a centerfold line.
Block A: Position the dark wedges north, south, east and west on your cutting mat. Align the 10 1/2″ sizing line and the common diagonal line with the registration marks and the intersection of the lines with the center of the block. Trim up the side and across the top. Rotate realign and trim again. The dark wedges are trimmed so we can add corners to the block. The medium wedges will be trimmed after the corners are added.
Center the oversized corner triangles over the just trimmed dark wedges and stitch. Press toward the corner triangles.
Using your Tucker Trimmer III, align the common diagonal and the 10 1/2″ sizing line with the registration marks and lines intersecting over the center of the block, trim up the side and across the top. Rotate the block and trim again.
Block B: Position the light wedges north, south, east and west on your cutting mat. Align the 10 1/2″ sizing line and the common diagonal line with the registration marks and the intersection of the lines with the center of the block. Trim up the side and across the top. Rotate realign and trim again. The light wedges are trimmed so we can add corners to the block. The medium wedges will be trimmed after the corners are added.
Center the oversized corner triangles over the just trimmed light wedges and stitch. Press toward the corner triangles.
Using your Tucker Trimmer III, align the common diagonal and the 10 1/2″ sizing line with the registration marks and lines intersecting over the center of the block, trim up the side and across the top. Rotate the block and trim again.
Block C:
Cutting the Diamonds for Block C: Lay your strip horizontally on the cutting mat. Using your wedge tool align the edge of the Wedge Star tool with raw edge of the strip close to end of the strip. Using another ruler with a 45 degree line, bump it up to slanted edge of the Wedge Star tool, this helps to establish the 45 degree angle. Cut, keep cutting till you have the desired number of diamonds.
Lay out your small wedges and diamond units as shown. Position a small wedge from the right hand side of the top of the diamond. Match the point of the diamond with the corner of the wedge and align the raw edges.
Stitch with the diamond on top.
Press toward the diamond. Remember “whatever you are pressing toward, goes on top”!
Trim off the dog ear. Position a remaining small wedge to the other side of the diamond point. Align the raw edges and center the shapes right sides together. Press toward the small wedge. Trim the each diamond wedge using the 10″ line in the Diamond Trim Down Section on the Wedge Star tool.
Lay out the Diamond Wedges and the dark Large Wedges for the C Block.
Consistently place a diamond Wedge on top of a dark Large Wedge right sides together.
Stitch the point end first. Press seams open. Trim the dark wedges as before and add the triangle corners. Trim the block with your Tucker Trimmer III.
In fact be sure you press all seams open during block construction. I find the Strips Stick very helpful!
Lay out your finished A, B & C blocks, stitch into rows. Add your inner and outer Borders.
I’m loving this scrappy version of Hallucination!
This project was Tucker approved with Aurifil Thread, Quilters Dream Batting, my Reliable Iron, and the Strip Stick. Not to mention my wonderful Studio 180 Design Tools.
The Island Batik Ambassador’s June Challenge is “Try a New Technique”! Have you tried Studio 180 Design’s new Wedge Star Tool?
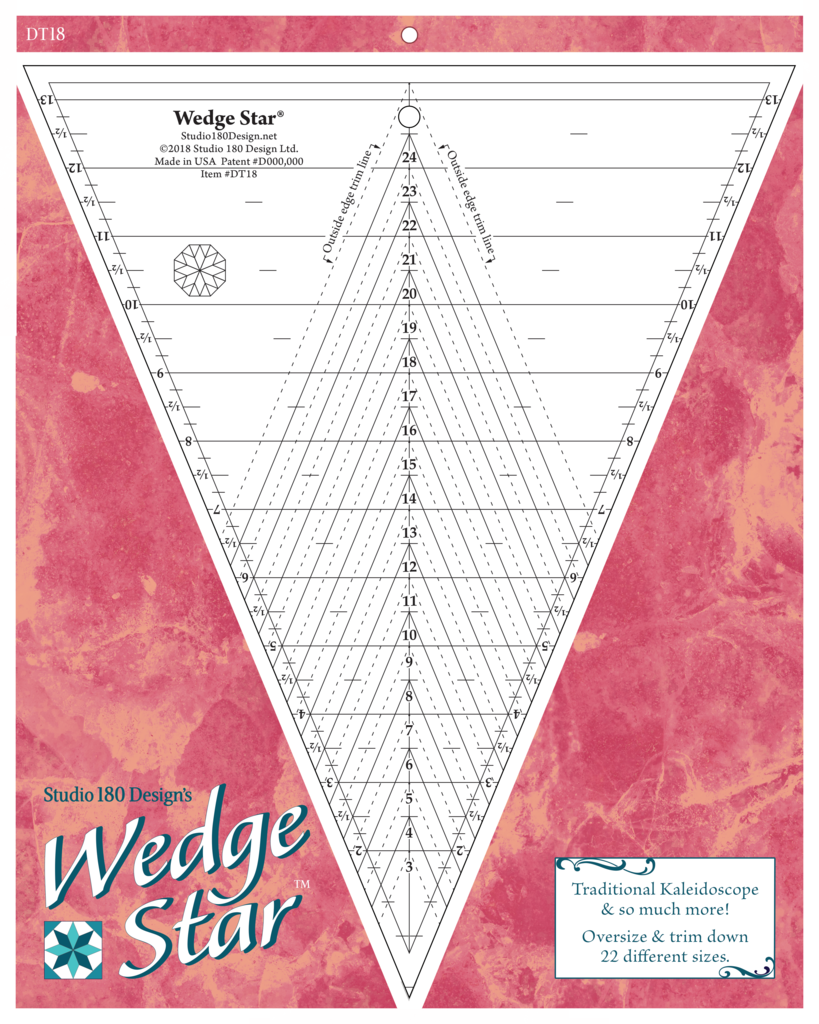
The Wedge Star tool is designed to make a variety of different blocks based on 45 degree sub-units.
They range from Wedge Star Blocks, Wedge Blocks & Mixed Blocks. There are 22 different size options ranging from 3″ to 24″ finished blocks!
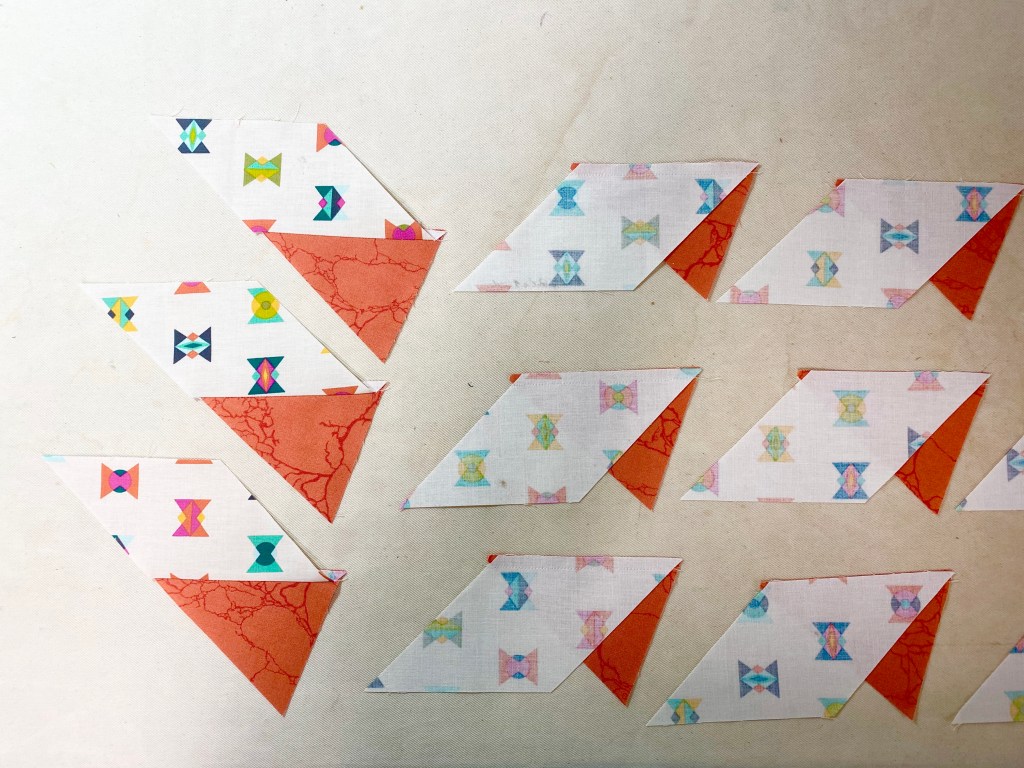
Diamond units are constructed and trimmed down.
Units are stitched together in quarters and half’s, then joined into blocks with corners added to complete it.
The new Wedge Star tool is for “Intermediate Skilled” quilters. You must use your best 1/4″ seam allowance, NO scant seams here! As always use your best measuring, cutting, stitching & pressing skills.
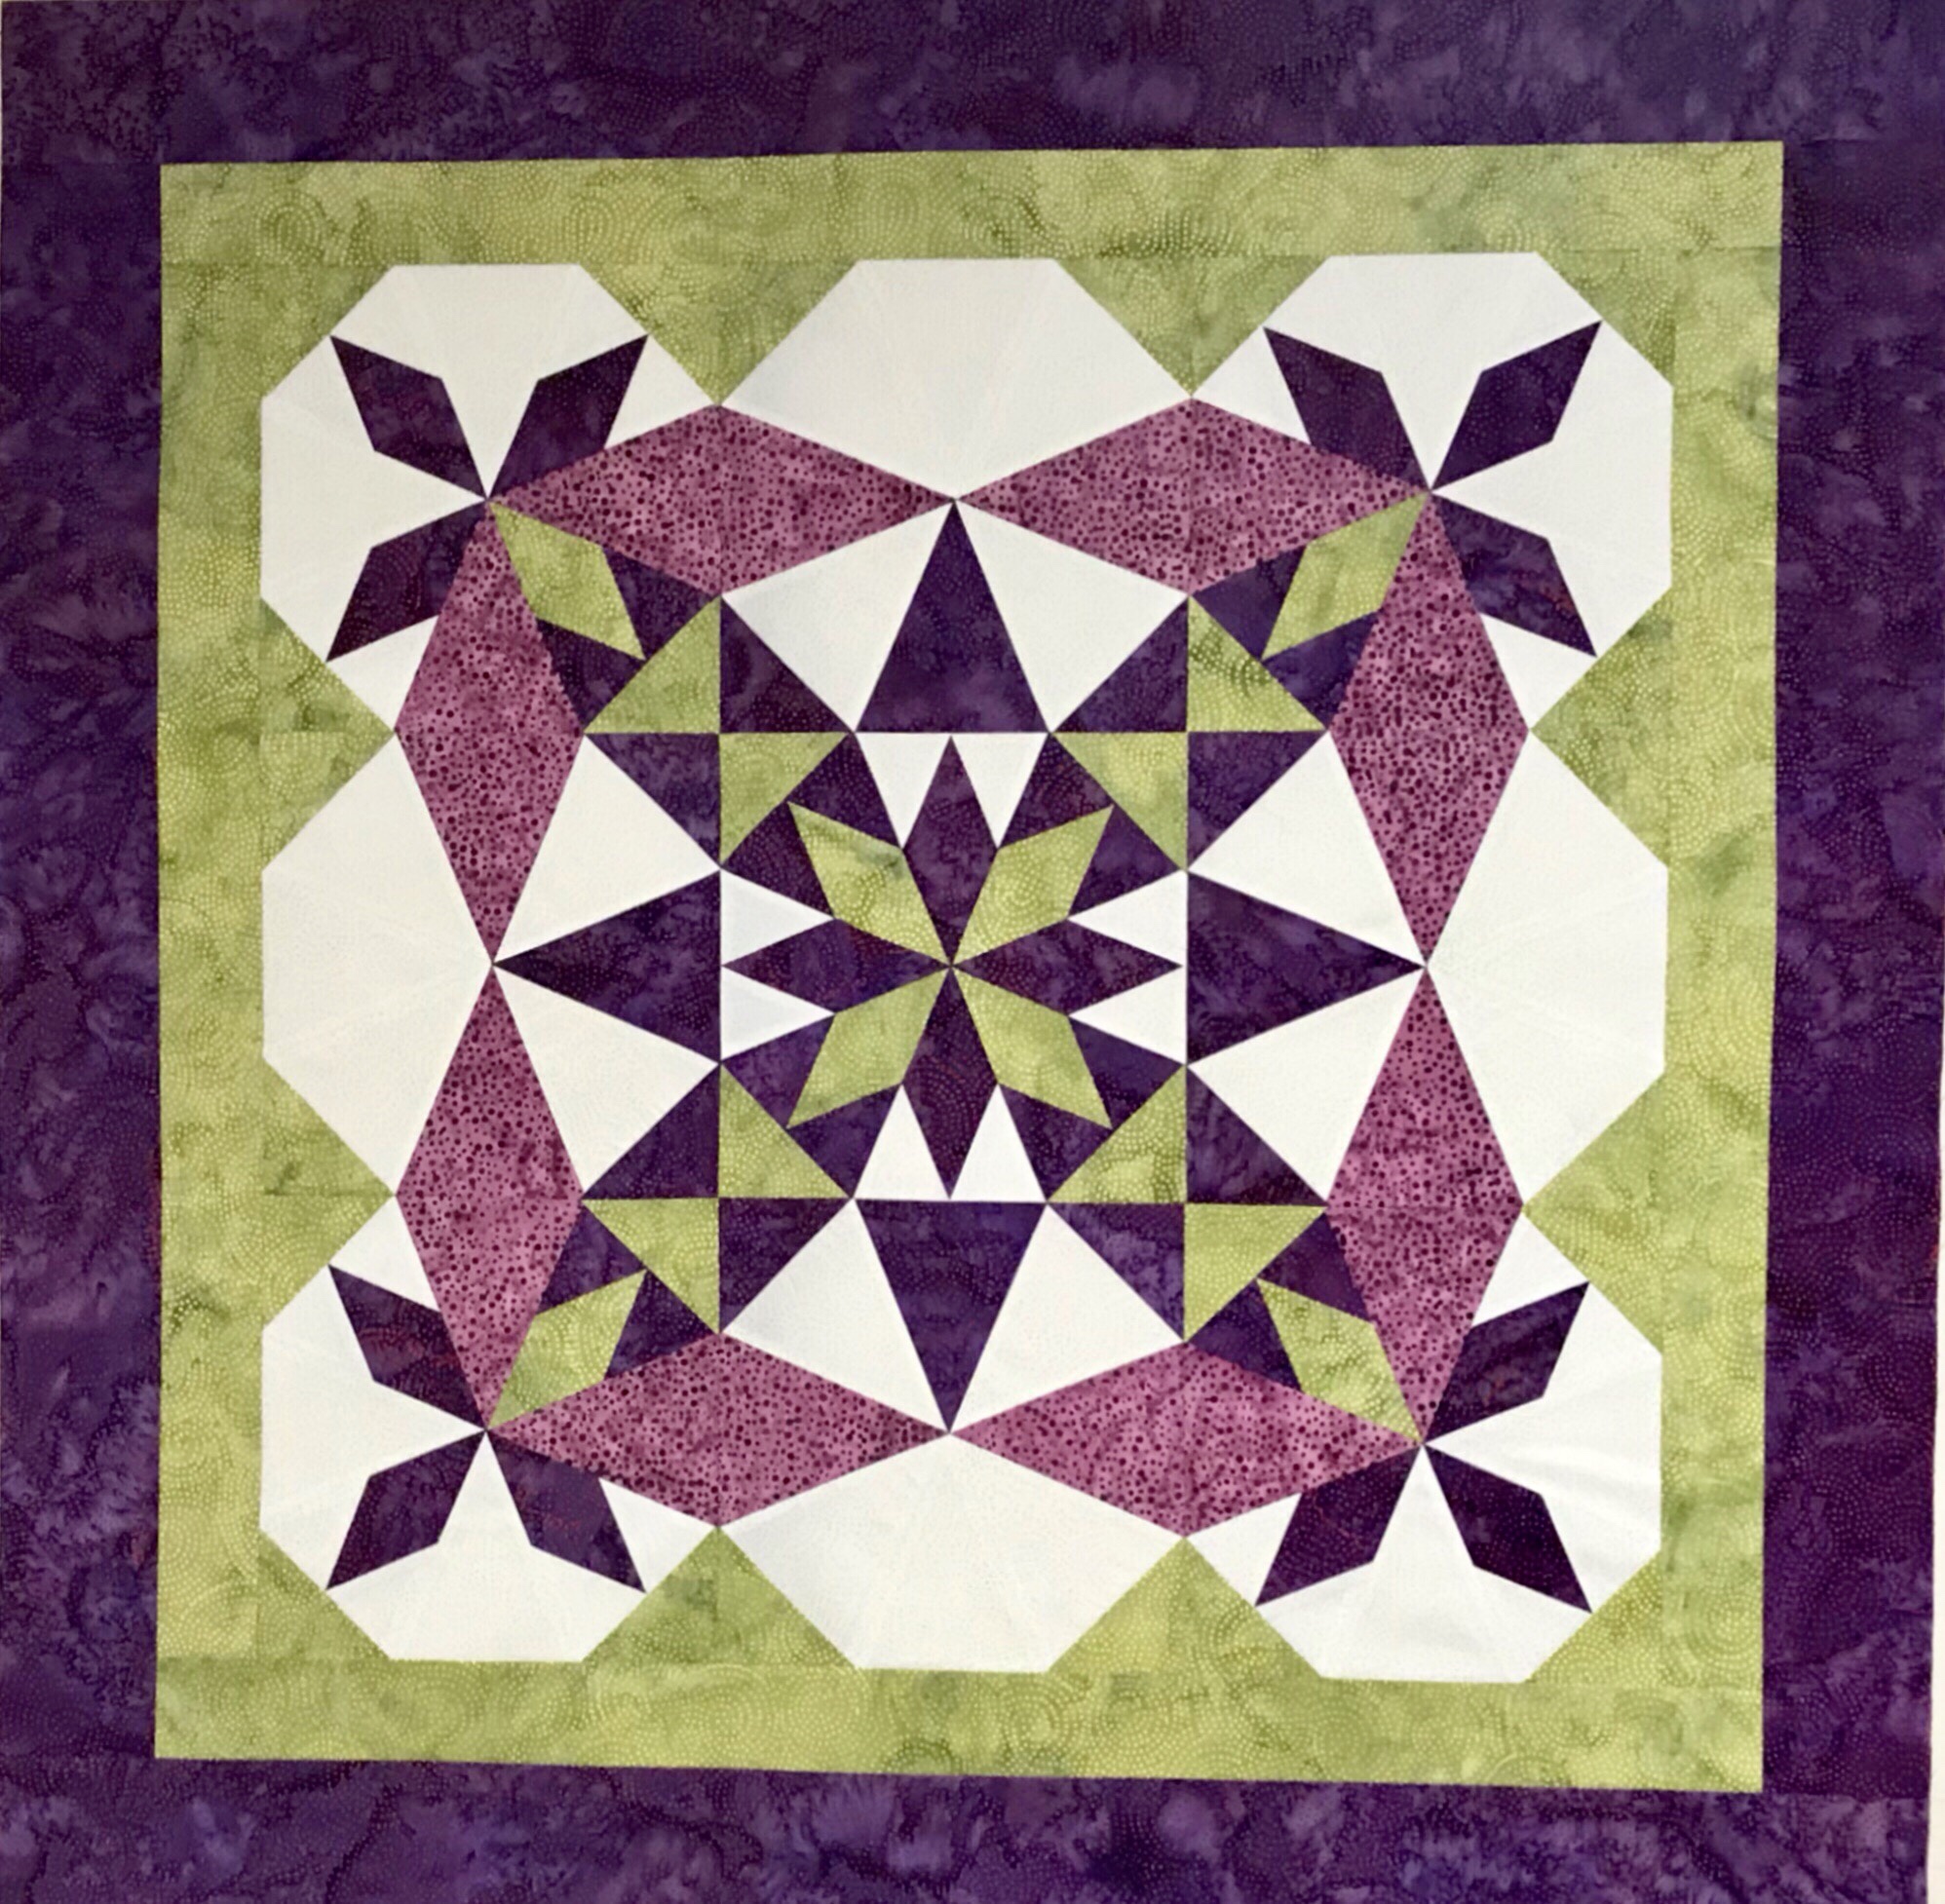
Included in the Wedge Star tool instructions is a bonus Wedge Star Pattern – Freelancer.
My beautiful Freelancer quilt was made using Island Batik’s Paisley Dot Swirl fabric and Aurifil thread.
I just got home from Studio 180 Design Certified Instructor Reunion 2019. We all worked on learning the new Wedge Star Tool. Here are some gorgeous Freelancer Quilts.
Wowza!
Here are some of the CI’s from Class of 2013. There were 5 classes represented this year. It was wonderful to see everyone and make new friends.