Just for fun I thought I would share how the Quilt Ninja came about.
It all started in 2008. I went to the Virginia Consortium of Quilters Celabration at Smith Mountian Lake and participated in an Apron contest and won 1st place.
I covered the apron vest in pockets. I placed a pocket on my back to hold a ruler and placed a rotary cutter in a front pocket.
I would whip out the ruler and rotary cutter at the same time, stating loudly “Quilt Ninja”! It was pretty funny. Needless to say, the Quilt Ninja became my alter ego, and over the years has gained a name; “Myrtle May the Quilt Ninja”!
Myrtle May wanted some new duds, so this version was made in 2012.
This version was made in 2015. I embroidered a list of the Studio 180 tools on the back at that time. I changed from a ruler to a Magic Wand on the back.
This version was made 2019. It is covered in Studio 180 Design tool merit badges. It has a Magic Wand on the back.
2024: I needed a vest representing the Star 60 Tool. I made a pocket for each of the star/cubes you can make with the Star 60 tool; Capped 60, Hollow Cube 60, Framed 60, Striped 60, Quad 60, Checkerboard 60, Star 60 & Star 60 Log Cabin. I added a small One Block Wonder I made with a panel. I added embroidered words the distressed women is saying: “Someone has been cutting paper with my fabric sisscors”!
I wanted to share two OBW workshops/retreats coming up. The first one is in Reliance TN at Quilters Getaway, 898 Childers Creek Road Reliance, TN 37369 – November 11 – 13, 2024. Hosted by Toni Raynolds of Pieced Perfection. Join me for a creative journey in the world of 60 degree kaleidoscopes.
Identifying and cutting your repeats.
Aligning repeats including difficult fabrics.
Choosing a ruler and understanding the difference between pointed & blunt tip rulers.
Deciding what strip widths to cut
And of course, cutting all your equilateral triangles.
Designing with the hexagons,
Integrating stars & cubes
Designing around a panel
Make your reservation now by clicking on the link below:
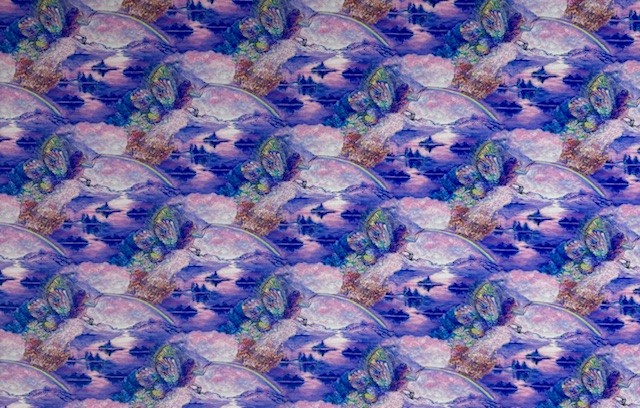
I’ve been playing among the stars, literally! In August I will be going to Amy’s Quilt Room in Union Town, PA to teach a One Block Wonder (OBW) Workshop. I want to show them how to design aound a panel and how to add hexies/stars of different sizes.
The panel is Salt Water Dreaming by Spirit of the Bush, it measures 41.5″ x 27″. I decided to cut my strips 3.25″ to yield 5″ finished hexies. When you want to add hexies/stars/cubes of different sizes, they must be divisible by the original size of the hexies. Deb Tucker’s Star 60 tool makes it easy to do this.
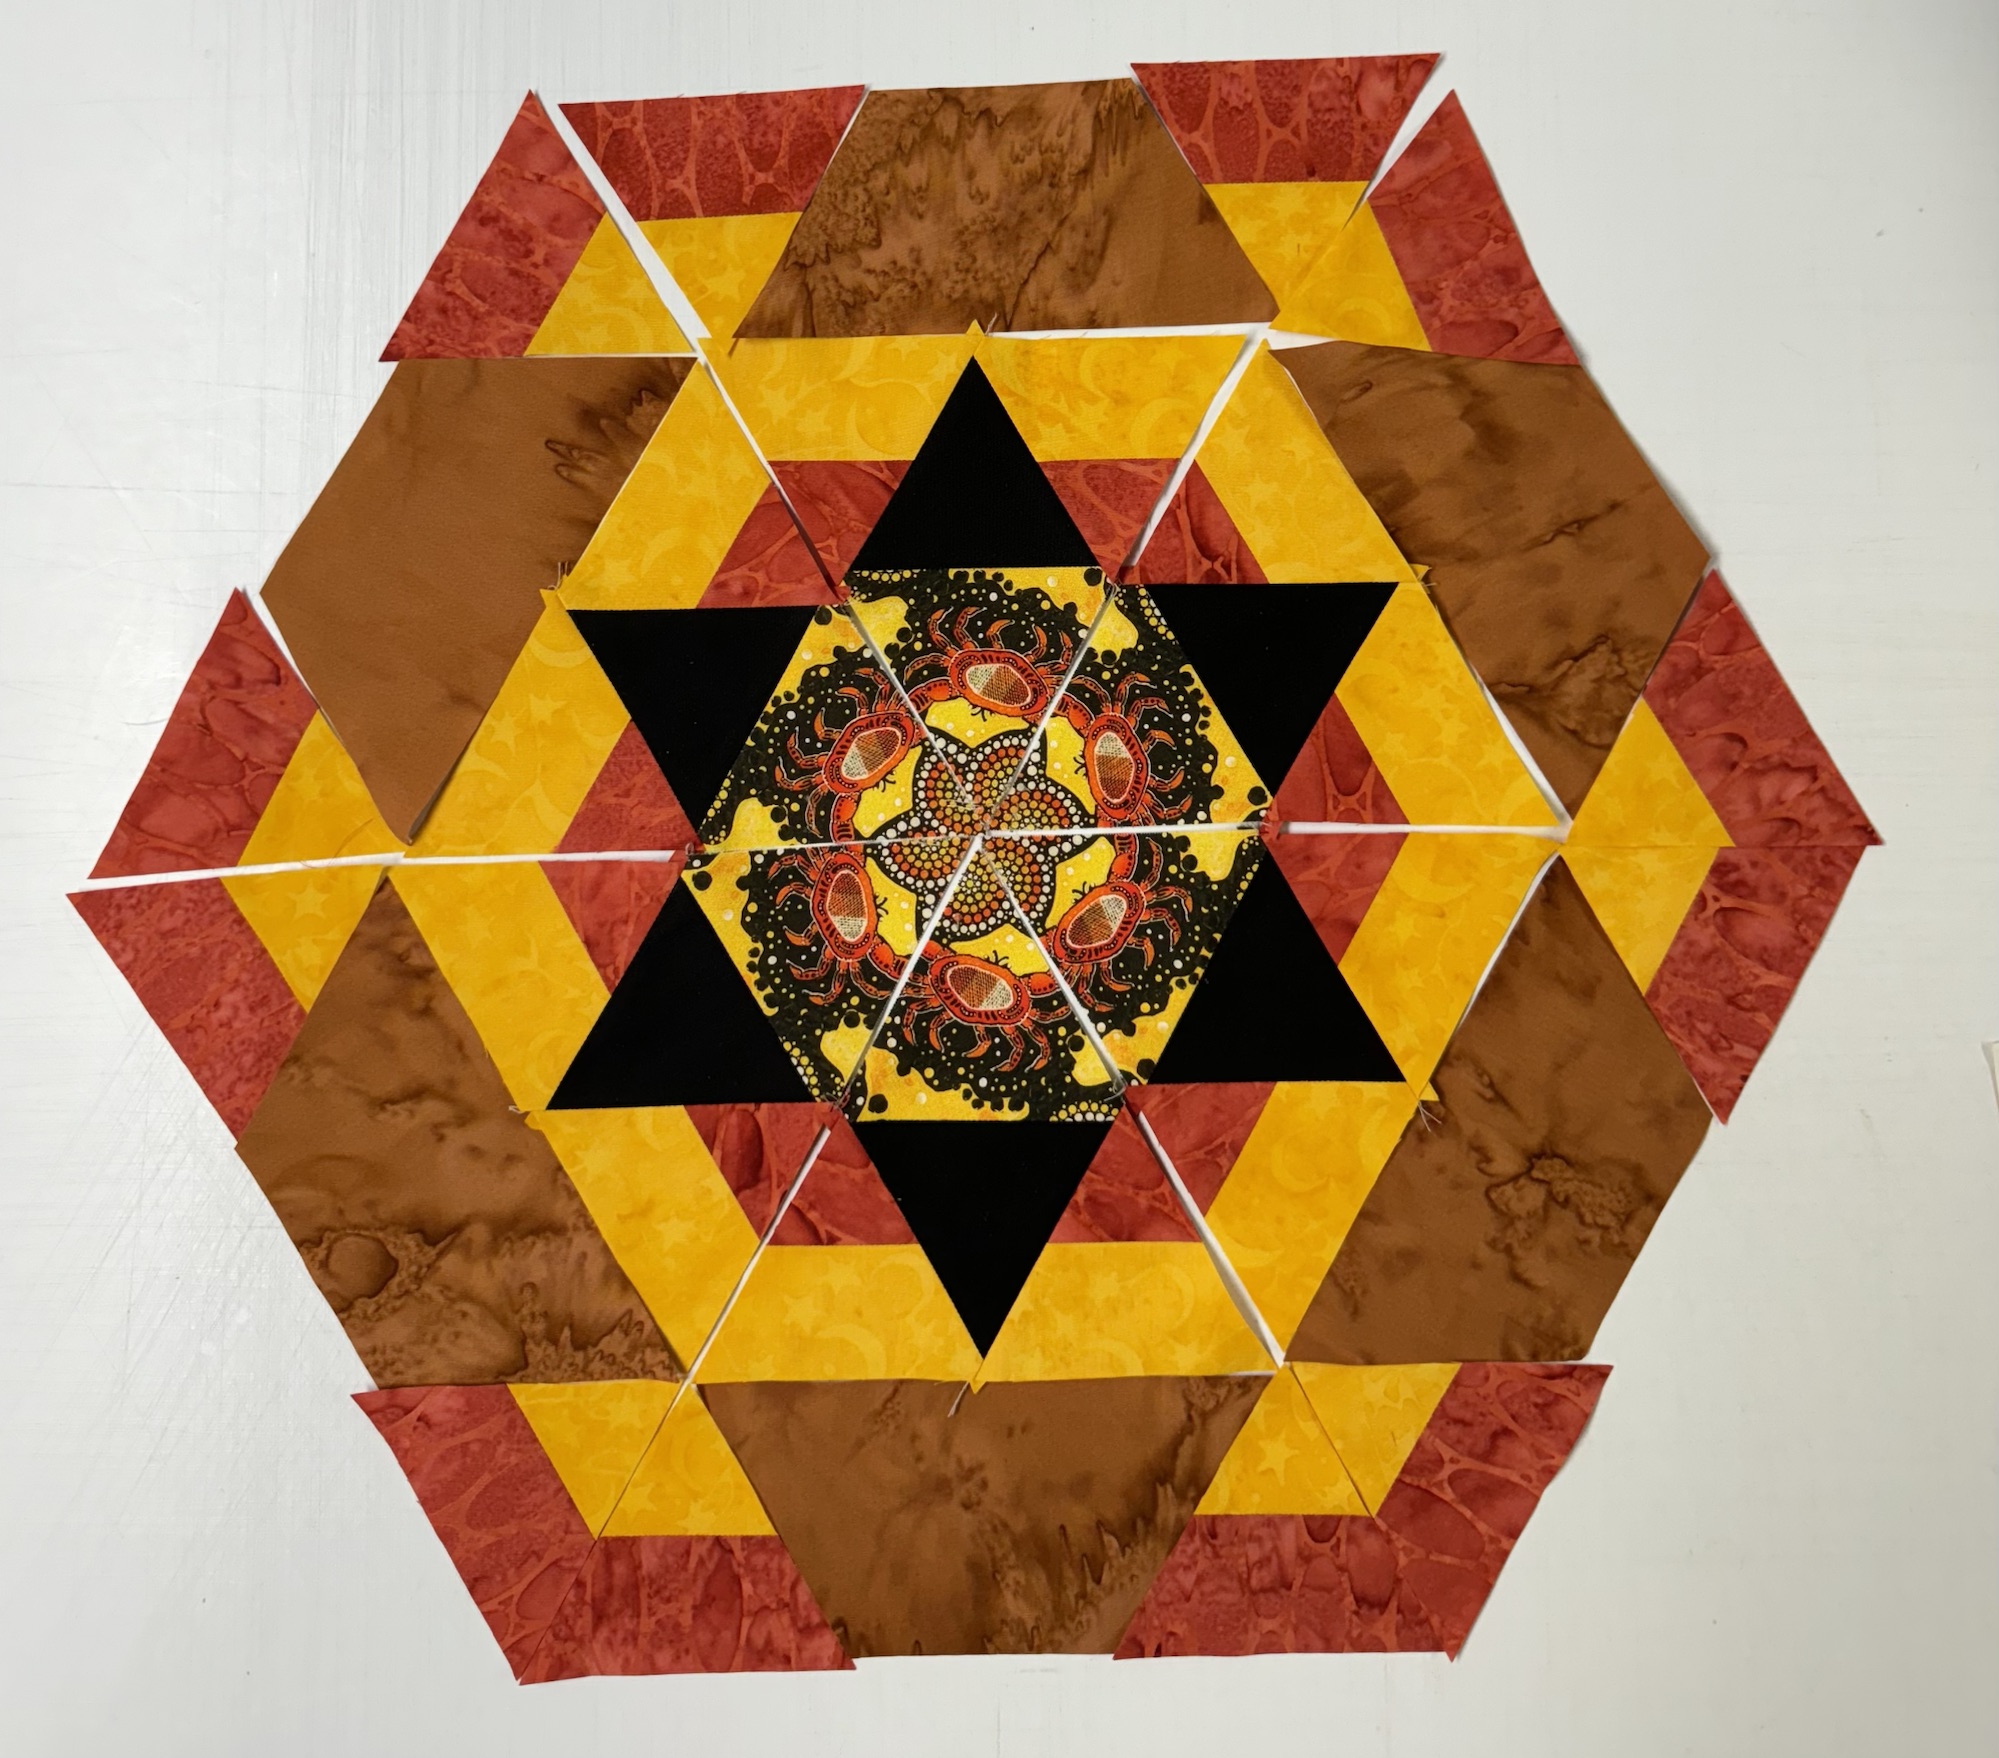
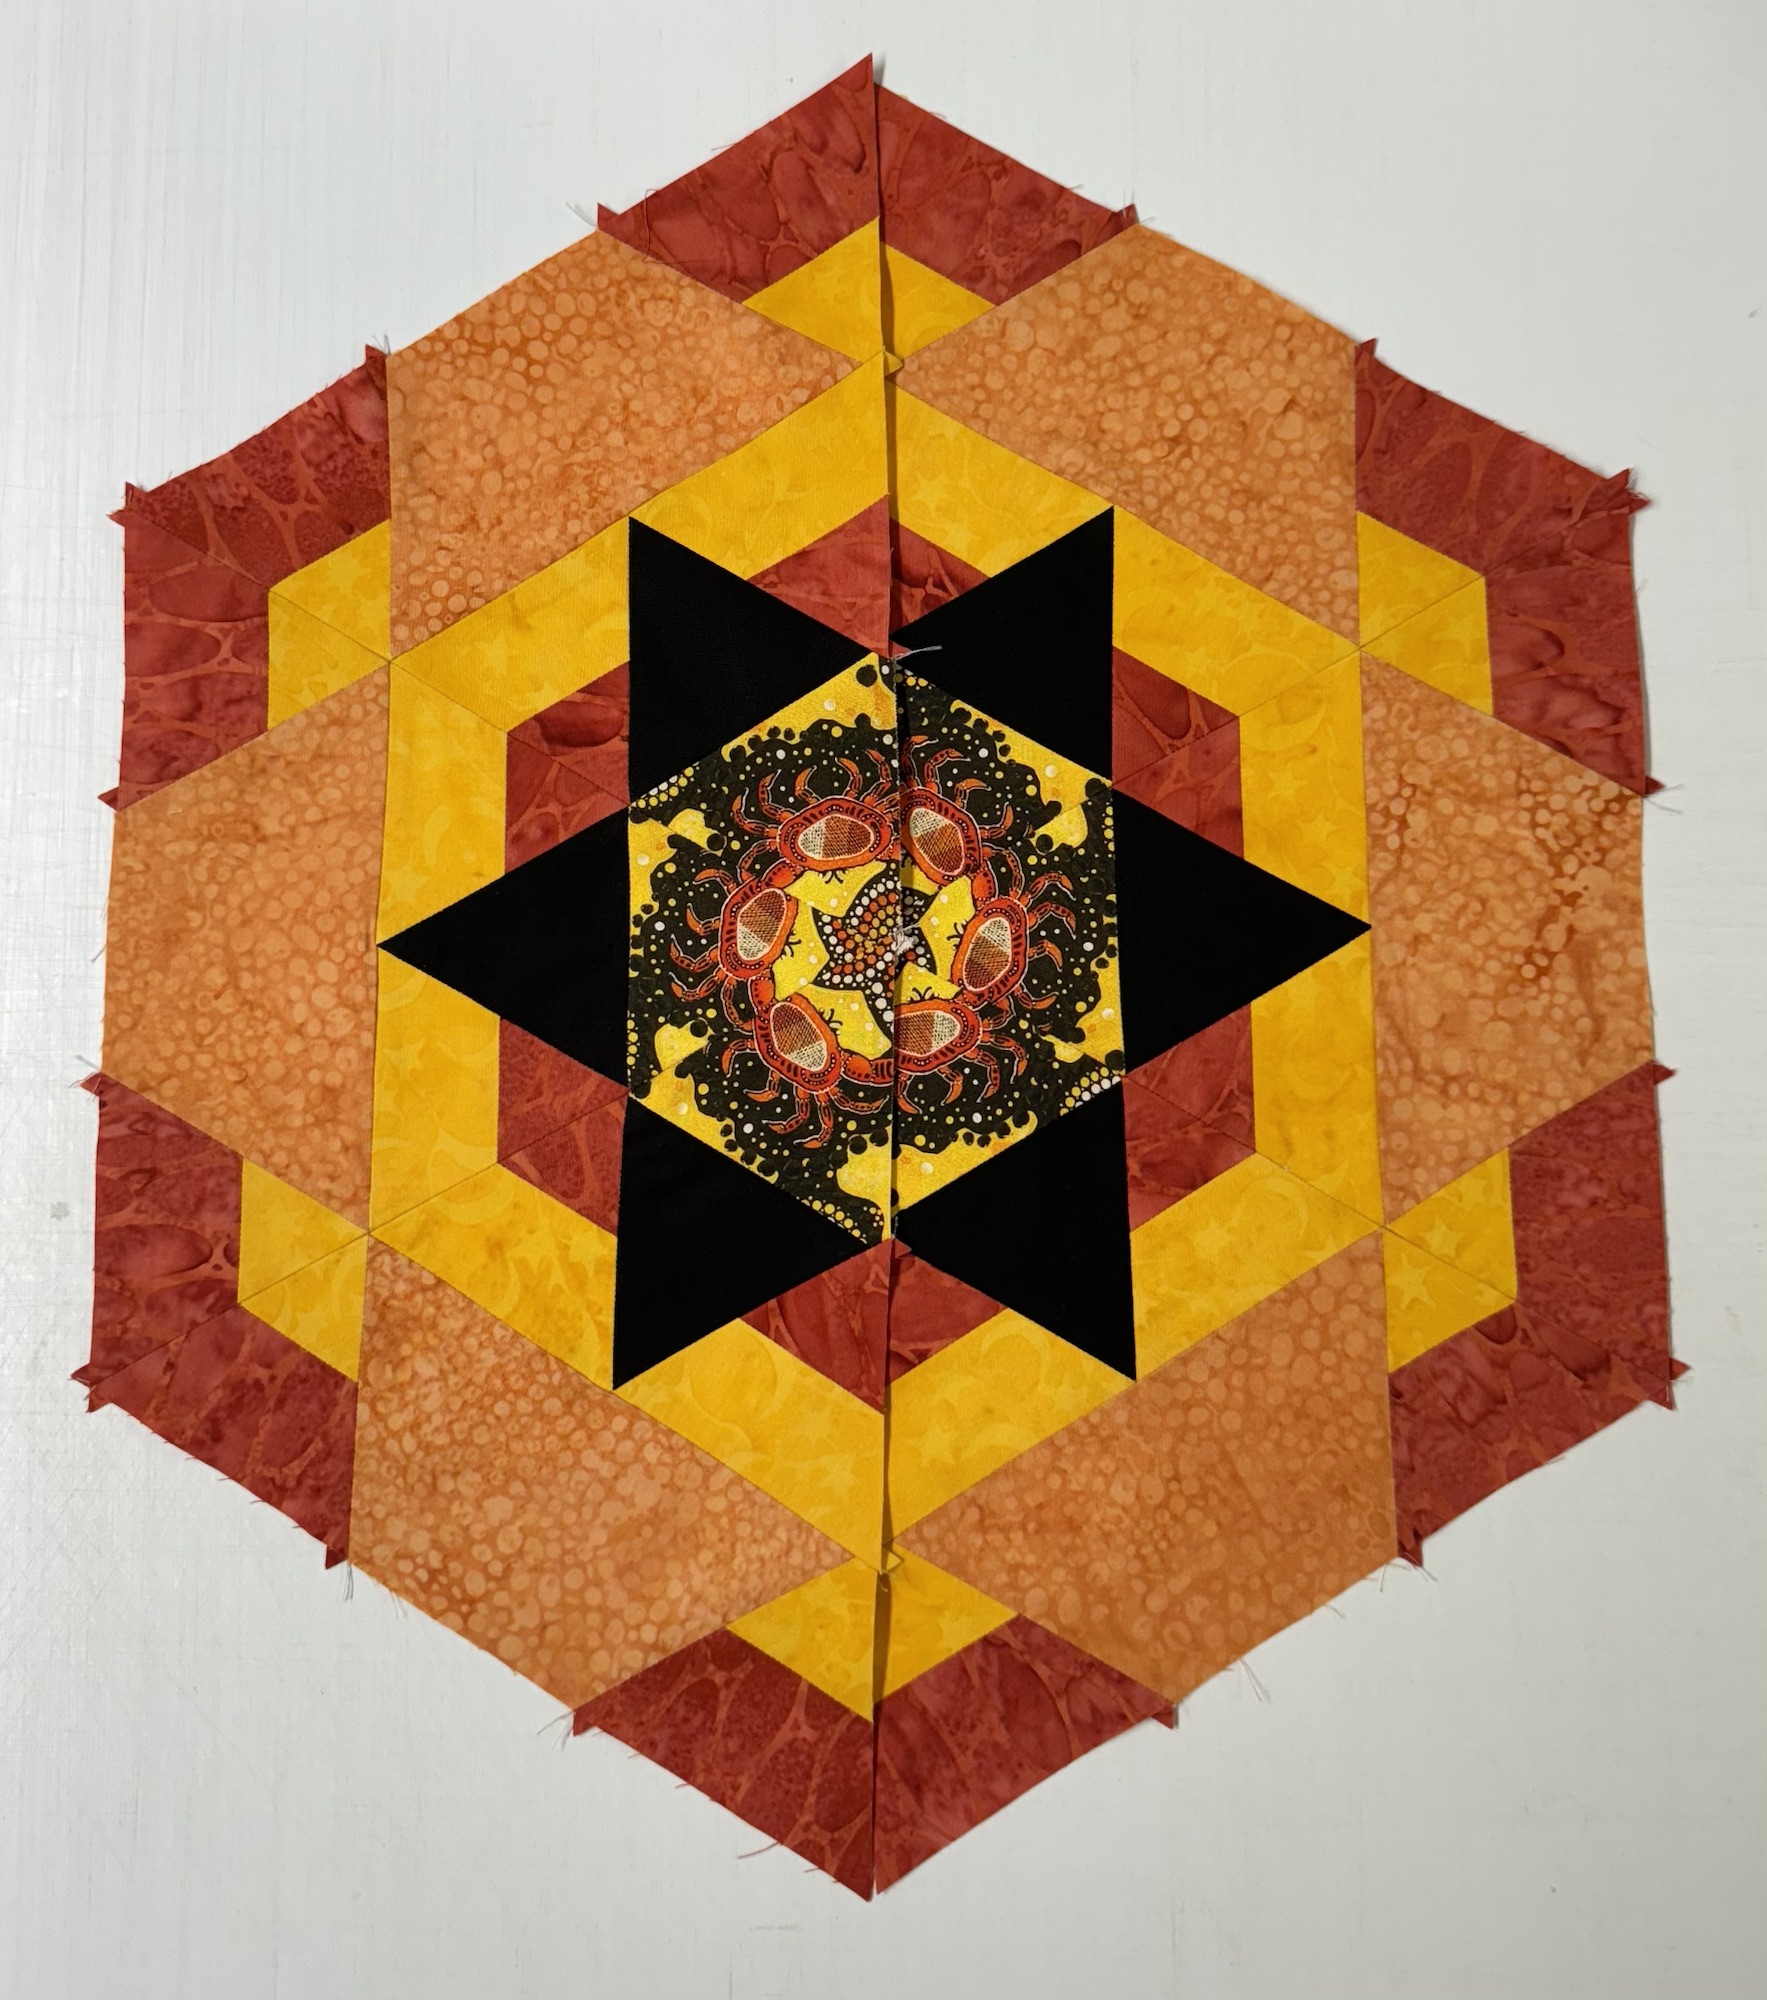
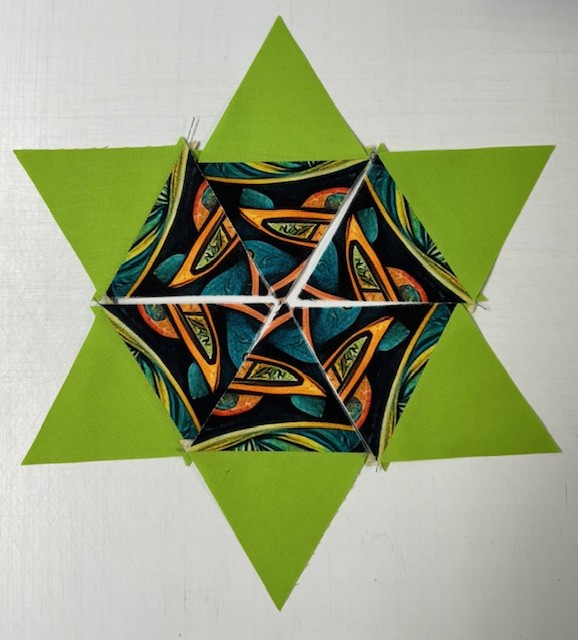
15″ Star Block – This 15″ star is divisible by 5″. This star includes 2 rings of 2.5″ finished Capped 60 units. Your units are always half the size of the finished hexie.
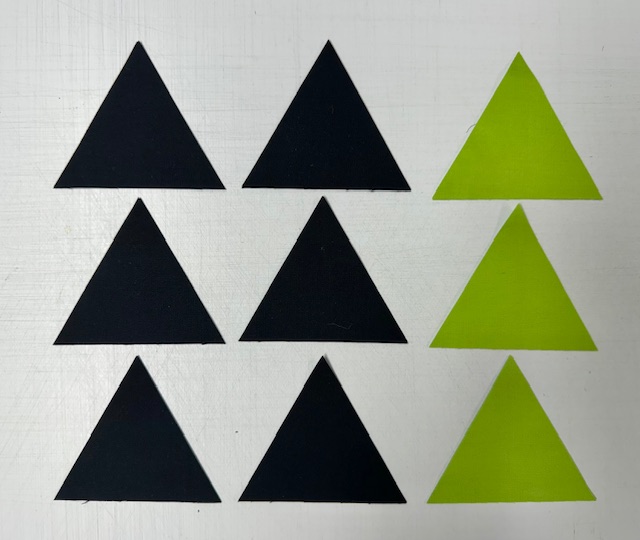
Center: 6 repeats cut into 3.25” strips = a 5” finished hexie.
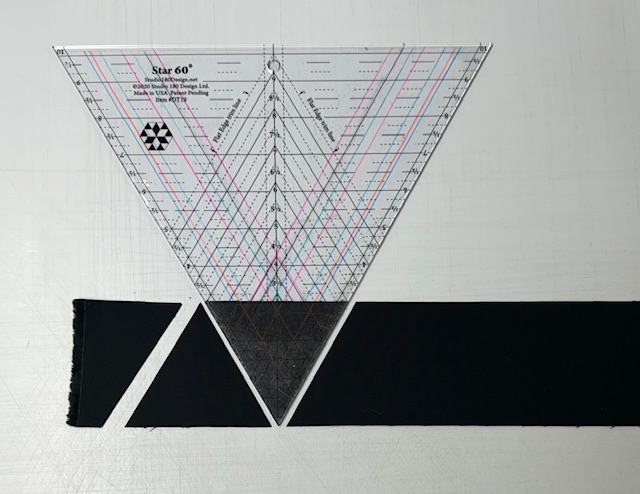
Companion Triangle: (Black Fabric) Cut 1 – 3.25” WOF strip, cut 6 triangles using the 60 degree line .
Inner Capped 60: ( Orange point, yellow Trapezoid) Make 12 – 2.5” Capped 60 units. Cut two 2” WOF strips from a medium and light fabric.
Half Hexagons: (Bronze fabric) Cut one 3” WOF strip. Using the Star 60 ruler, place the 5.5” line on the bottom of the strip and cut 6 half hexies from a medium fabric.
Outer Capped 60: (Gold points, orange trapezoids) Make 12 Capped 60 units. Cut two 2” WOF strips from a medium and light fabric.
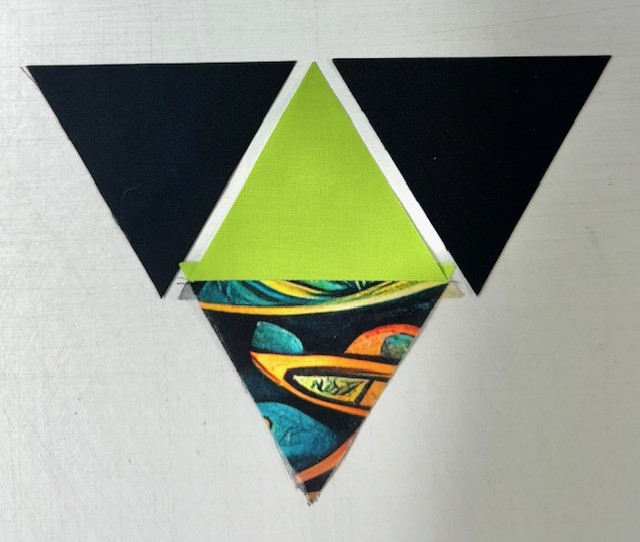
Stitch the center hexie triangle to the black companion triangle. Press seams open.
I used Capped 60 units as side triangles to the diamond shape created by stitching the hexie center to the black triangle. I stitched the second ring of Capped 60 units on either side of the half hexie and then stitched that pieced unit to the pieced center triangle.
Stitch 3 triangles together, pressing the seams open, repeat with the other 3 triangles.
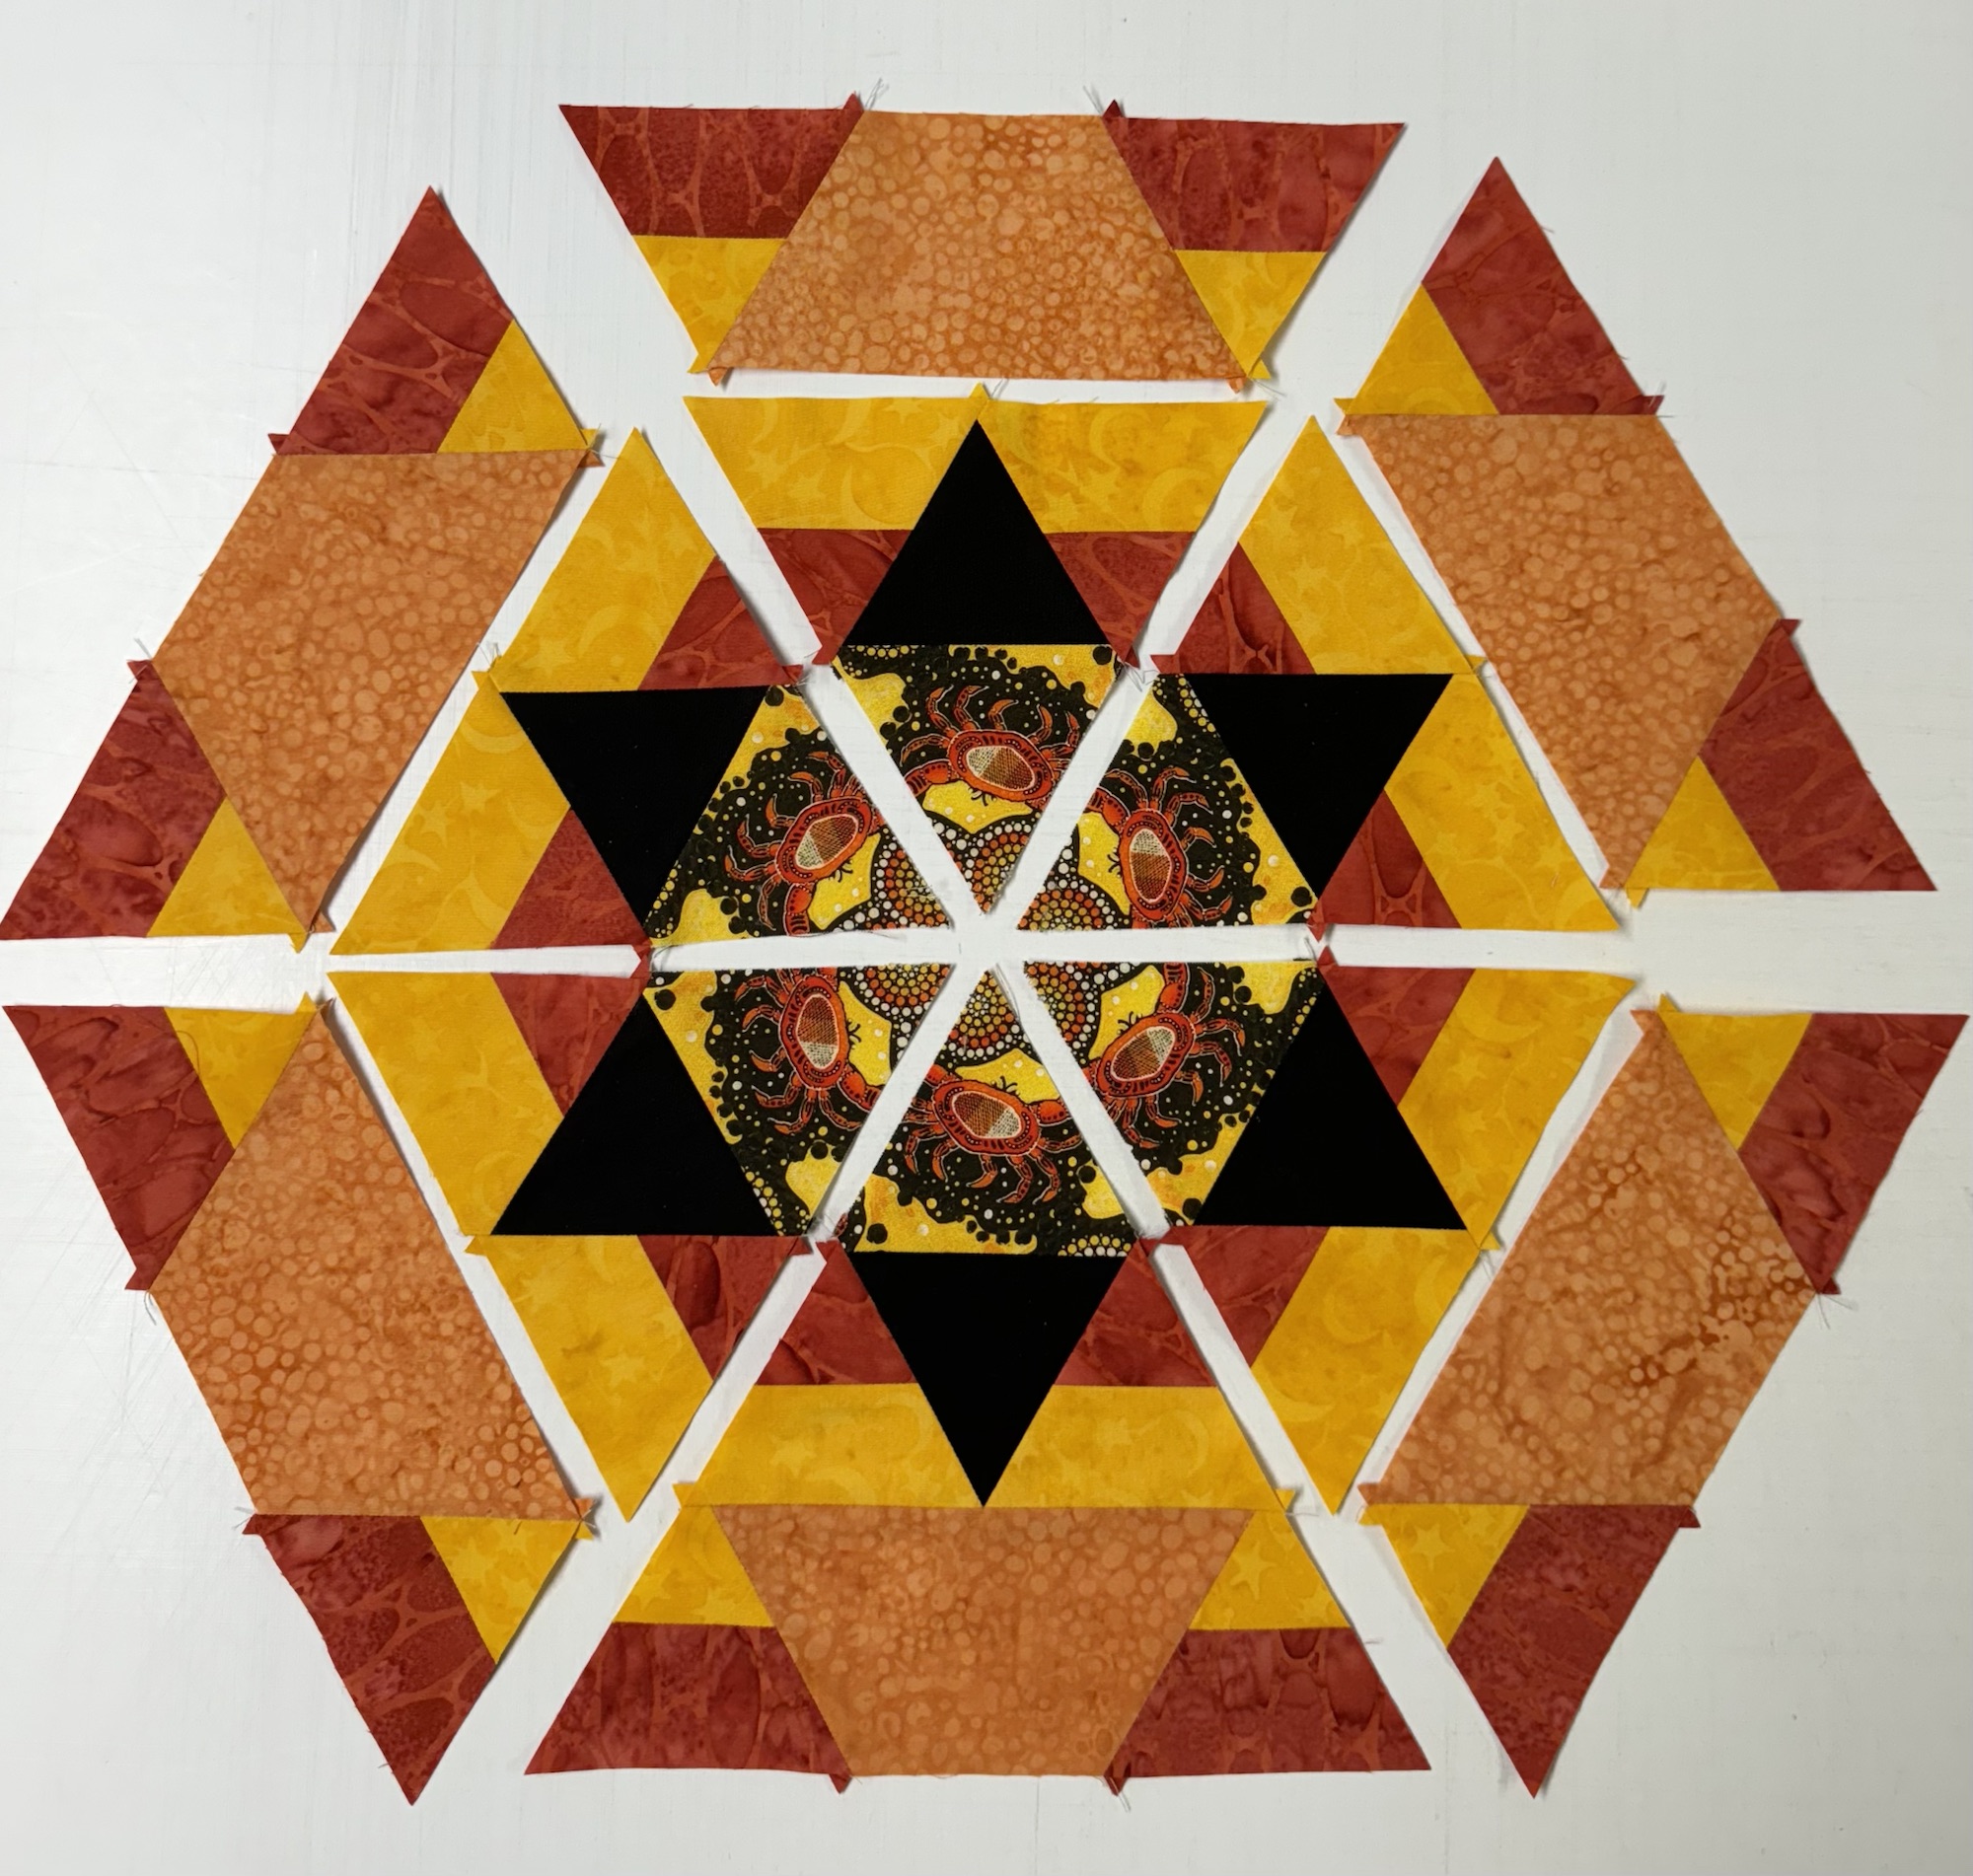
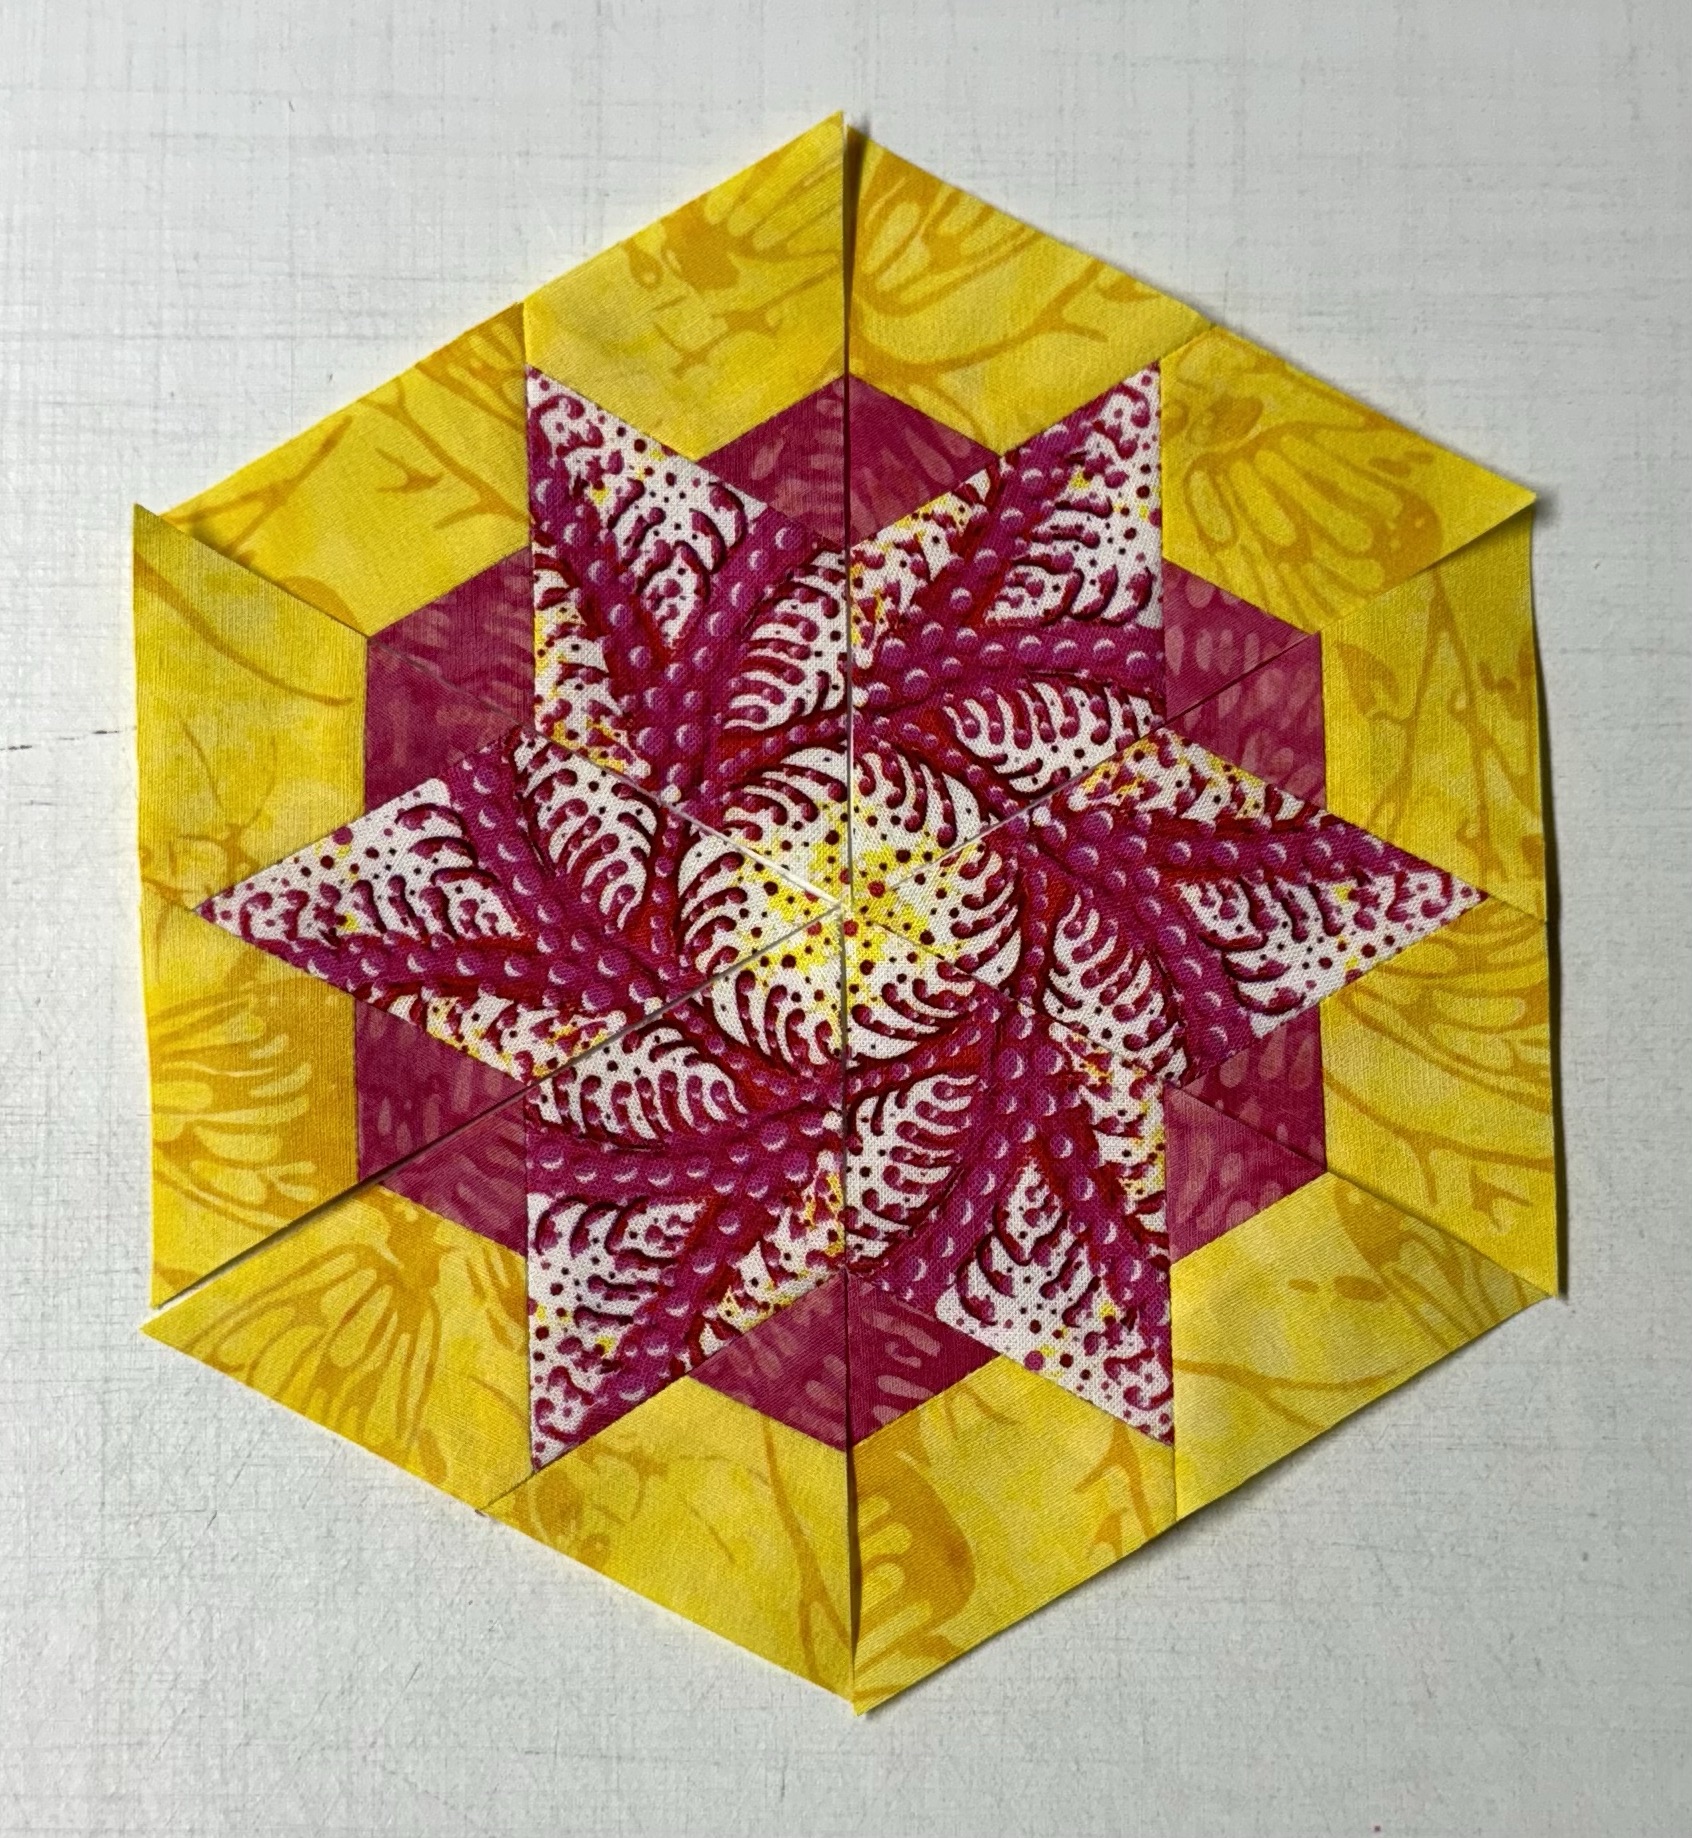
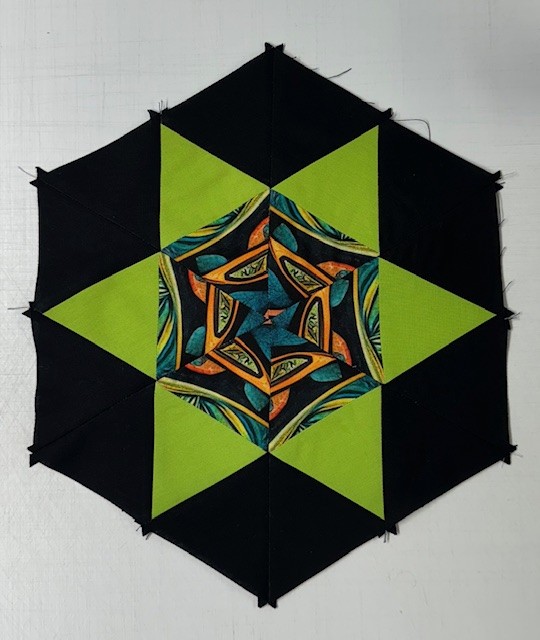
Creating with a Star Center
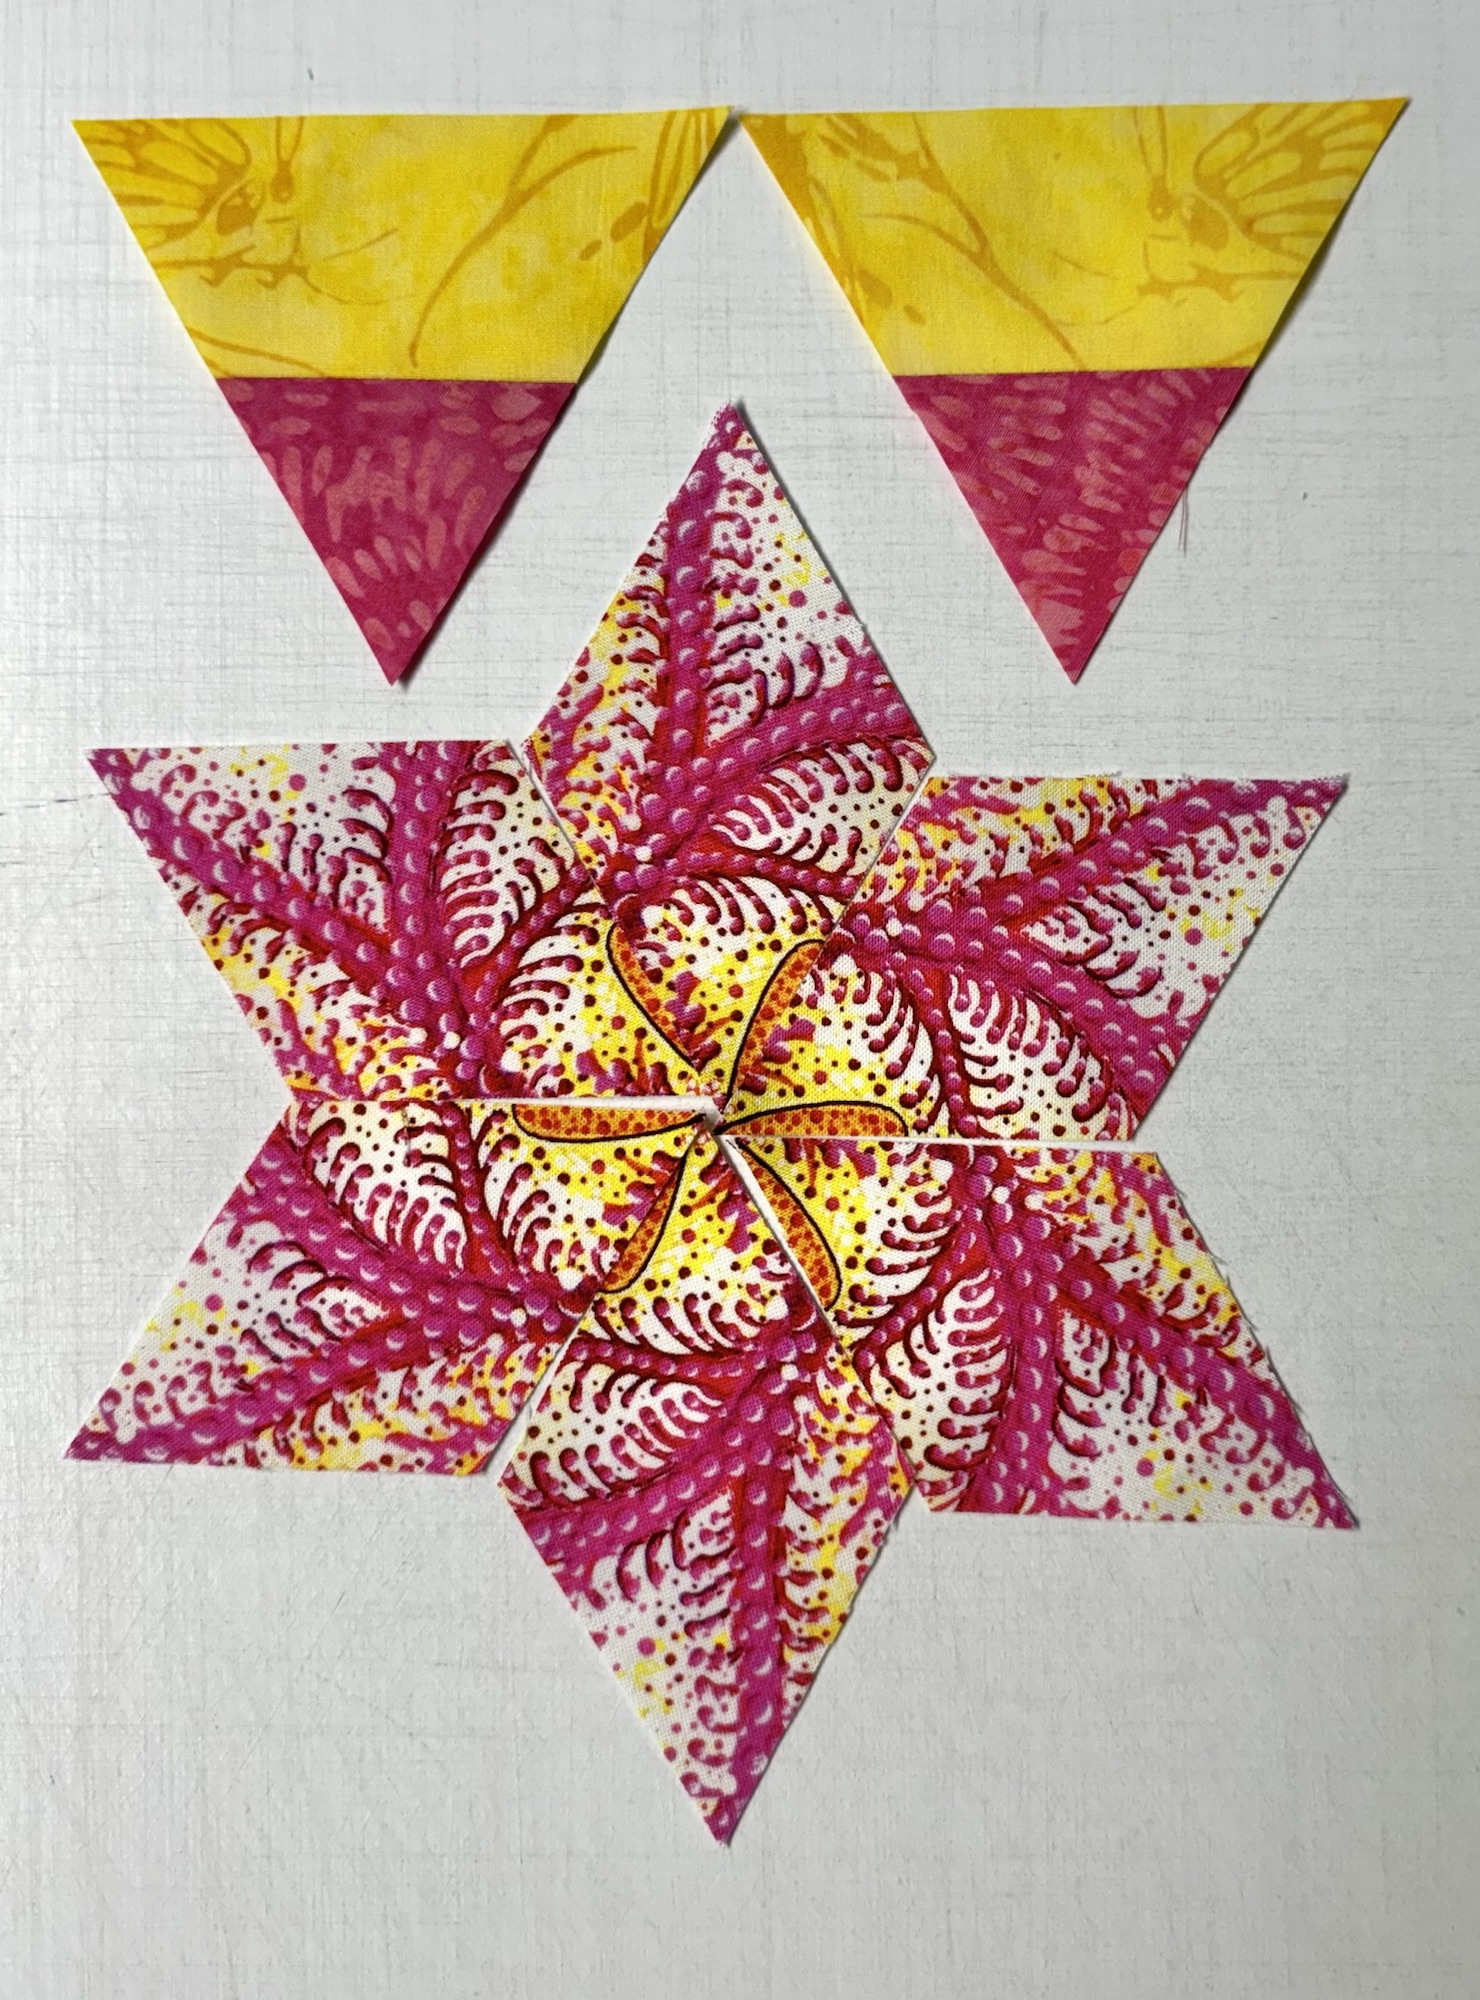
When I was cutting out my hexies from the aligned panels, I had a strip left that was less than 3.25″. I usually save these for cutting out smaller hexies to applique on the quilt top. This time I trimmed the strip to 2″, the size that would make diamonds for a 2.5″ finished Star 60 unit.
I cut the diamonds following the Star 60 instructions on pages 2 – 3. I made 12 – 2.5” finished Capped 60 units. They were trimmed down to 2.25”. Stitch a Capped 60 unit on each side of the diamonds.
Cut a 3” WOF strip. Cut 6 companion triangles. Stitch to the Star 60 Units creating a pieced diamond. Cut another 3” WOF strip. Cut 12 companion triangles. Stitch to each side of the pieced diamond.
Stitch 3 together, press seam open. Stitch the remaining 3 together and press seams open.
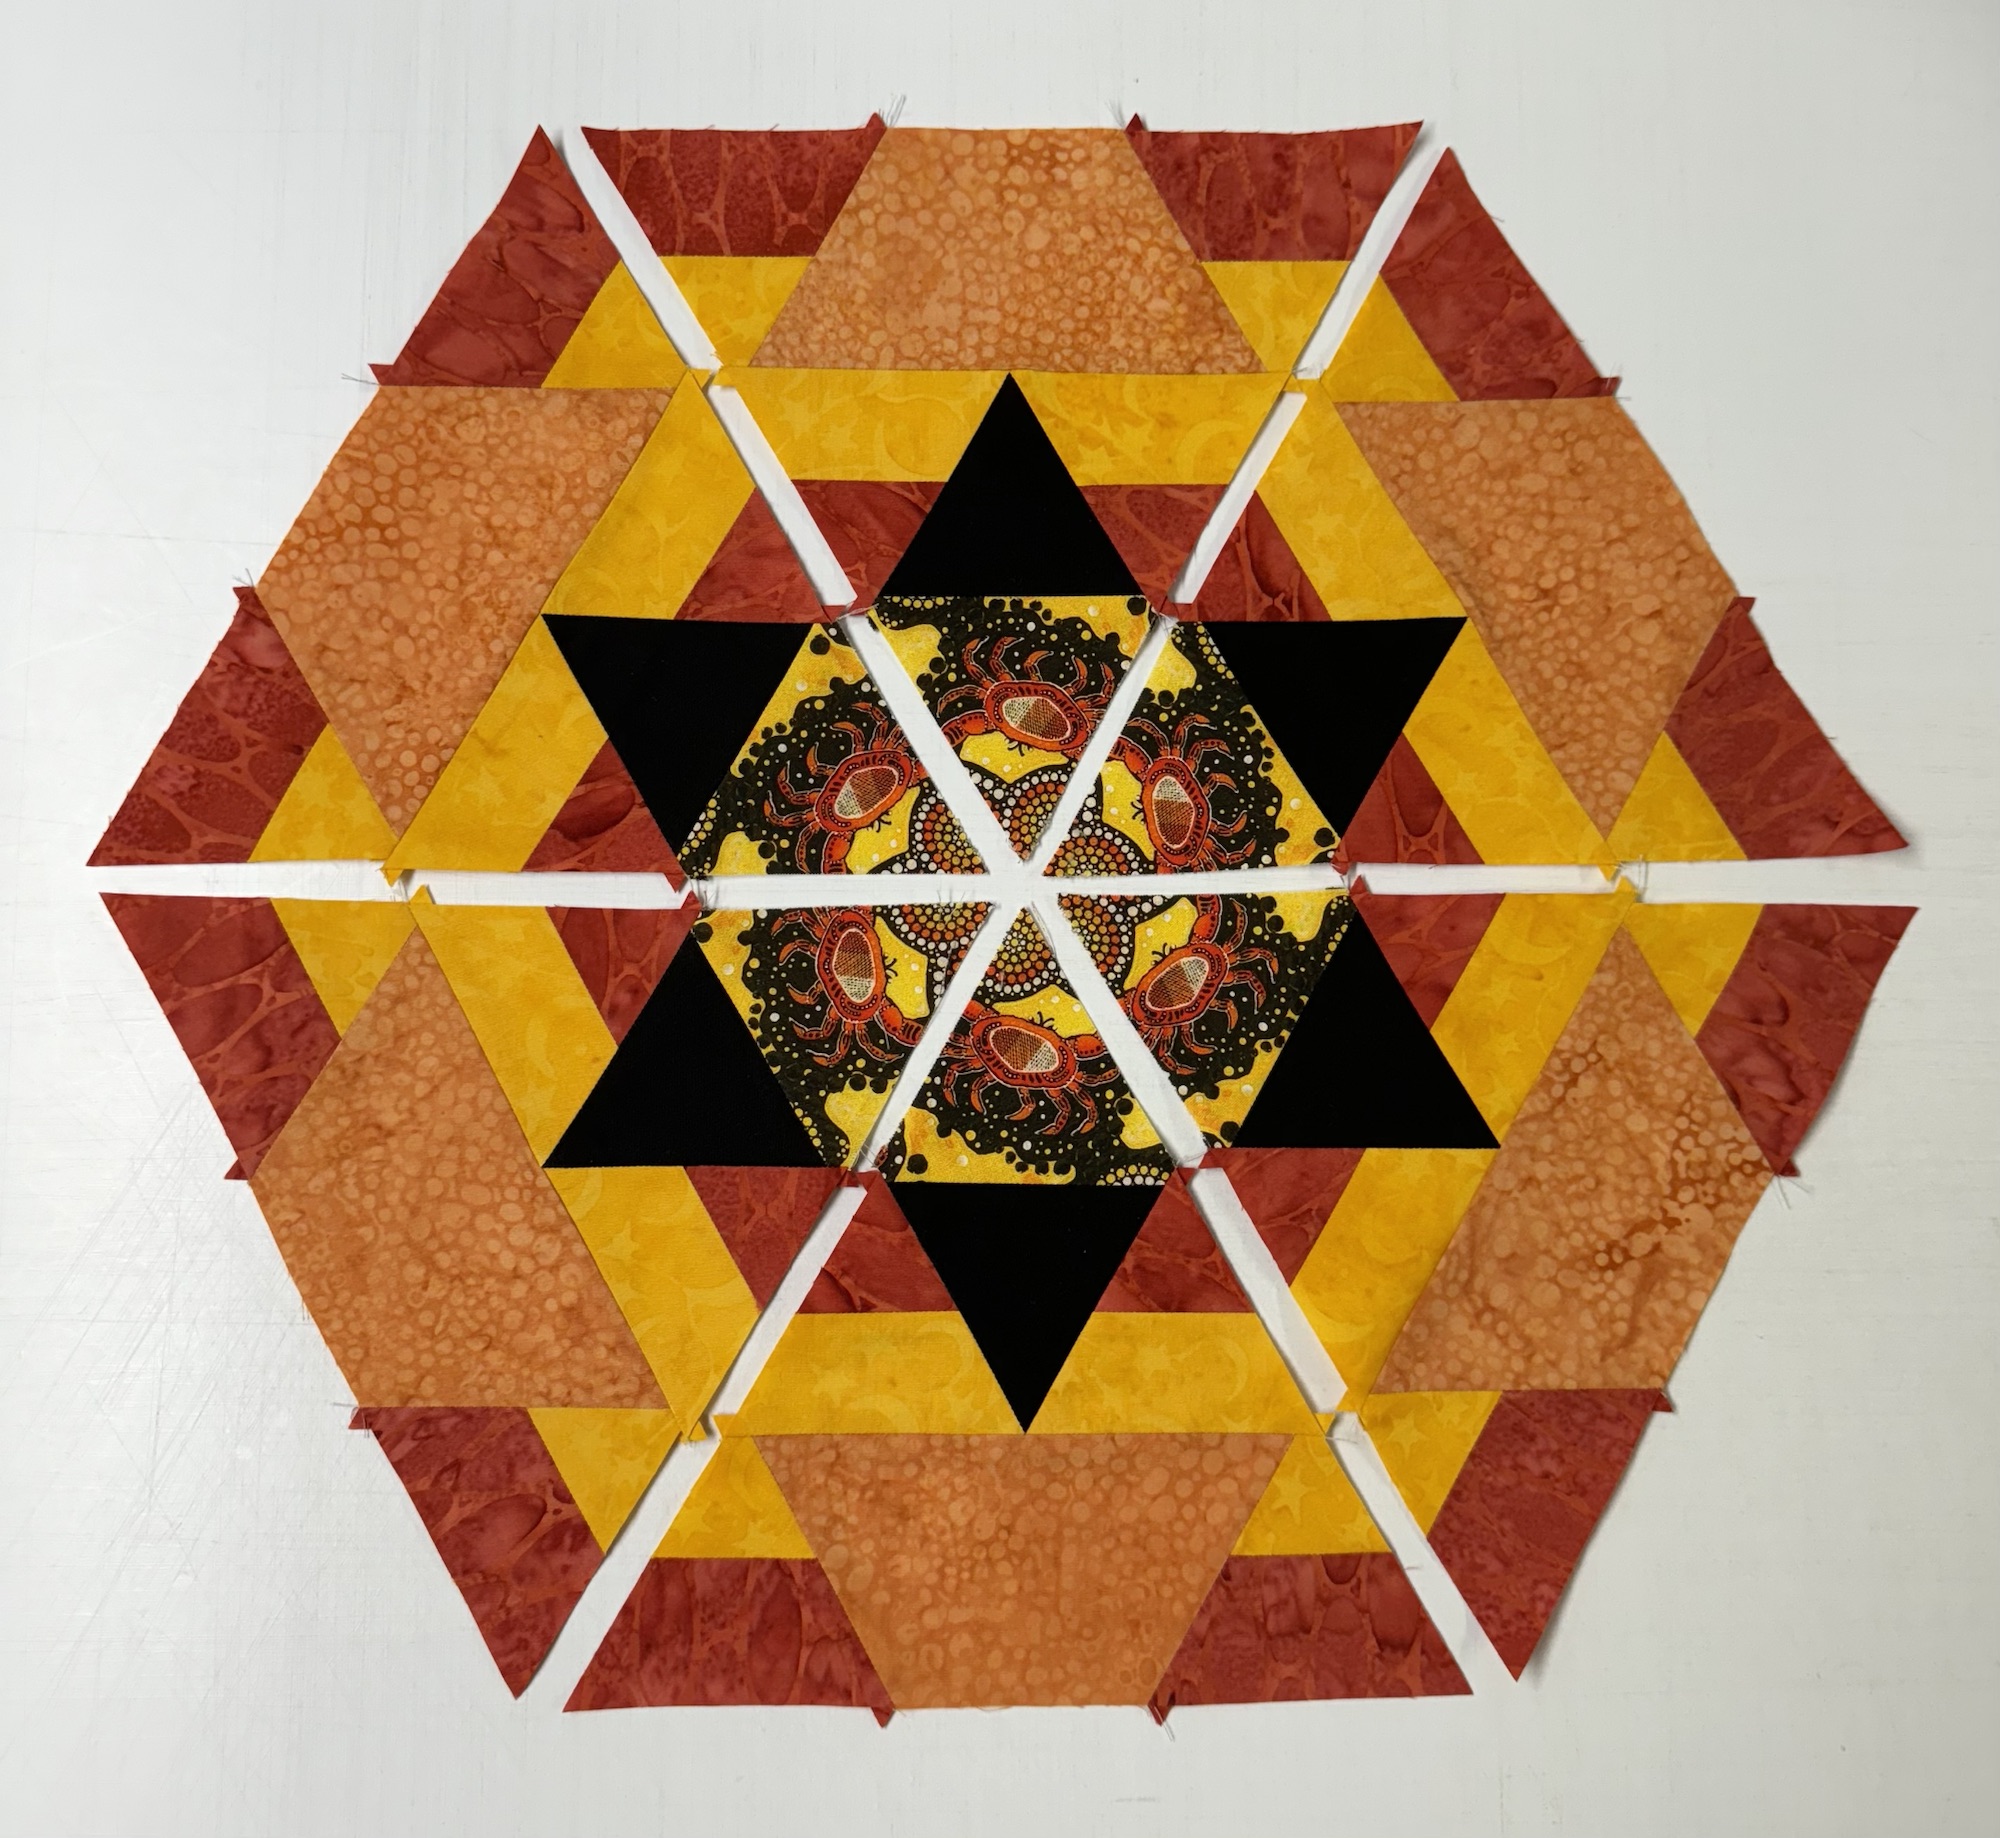
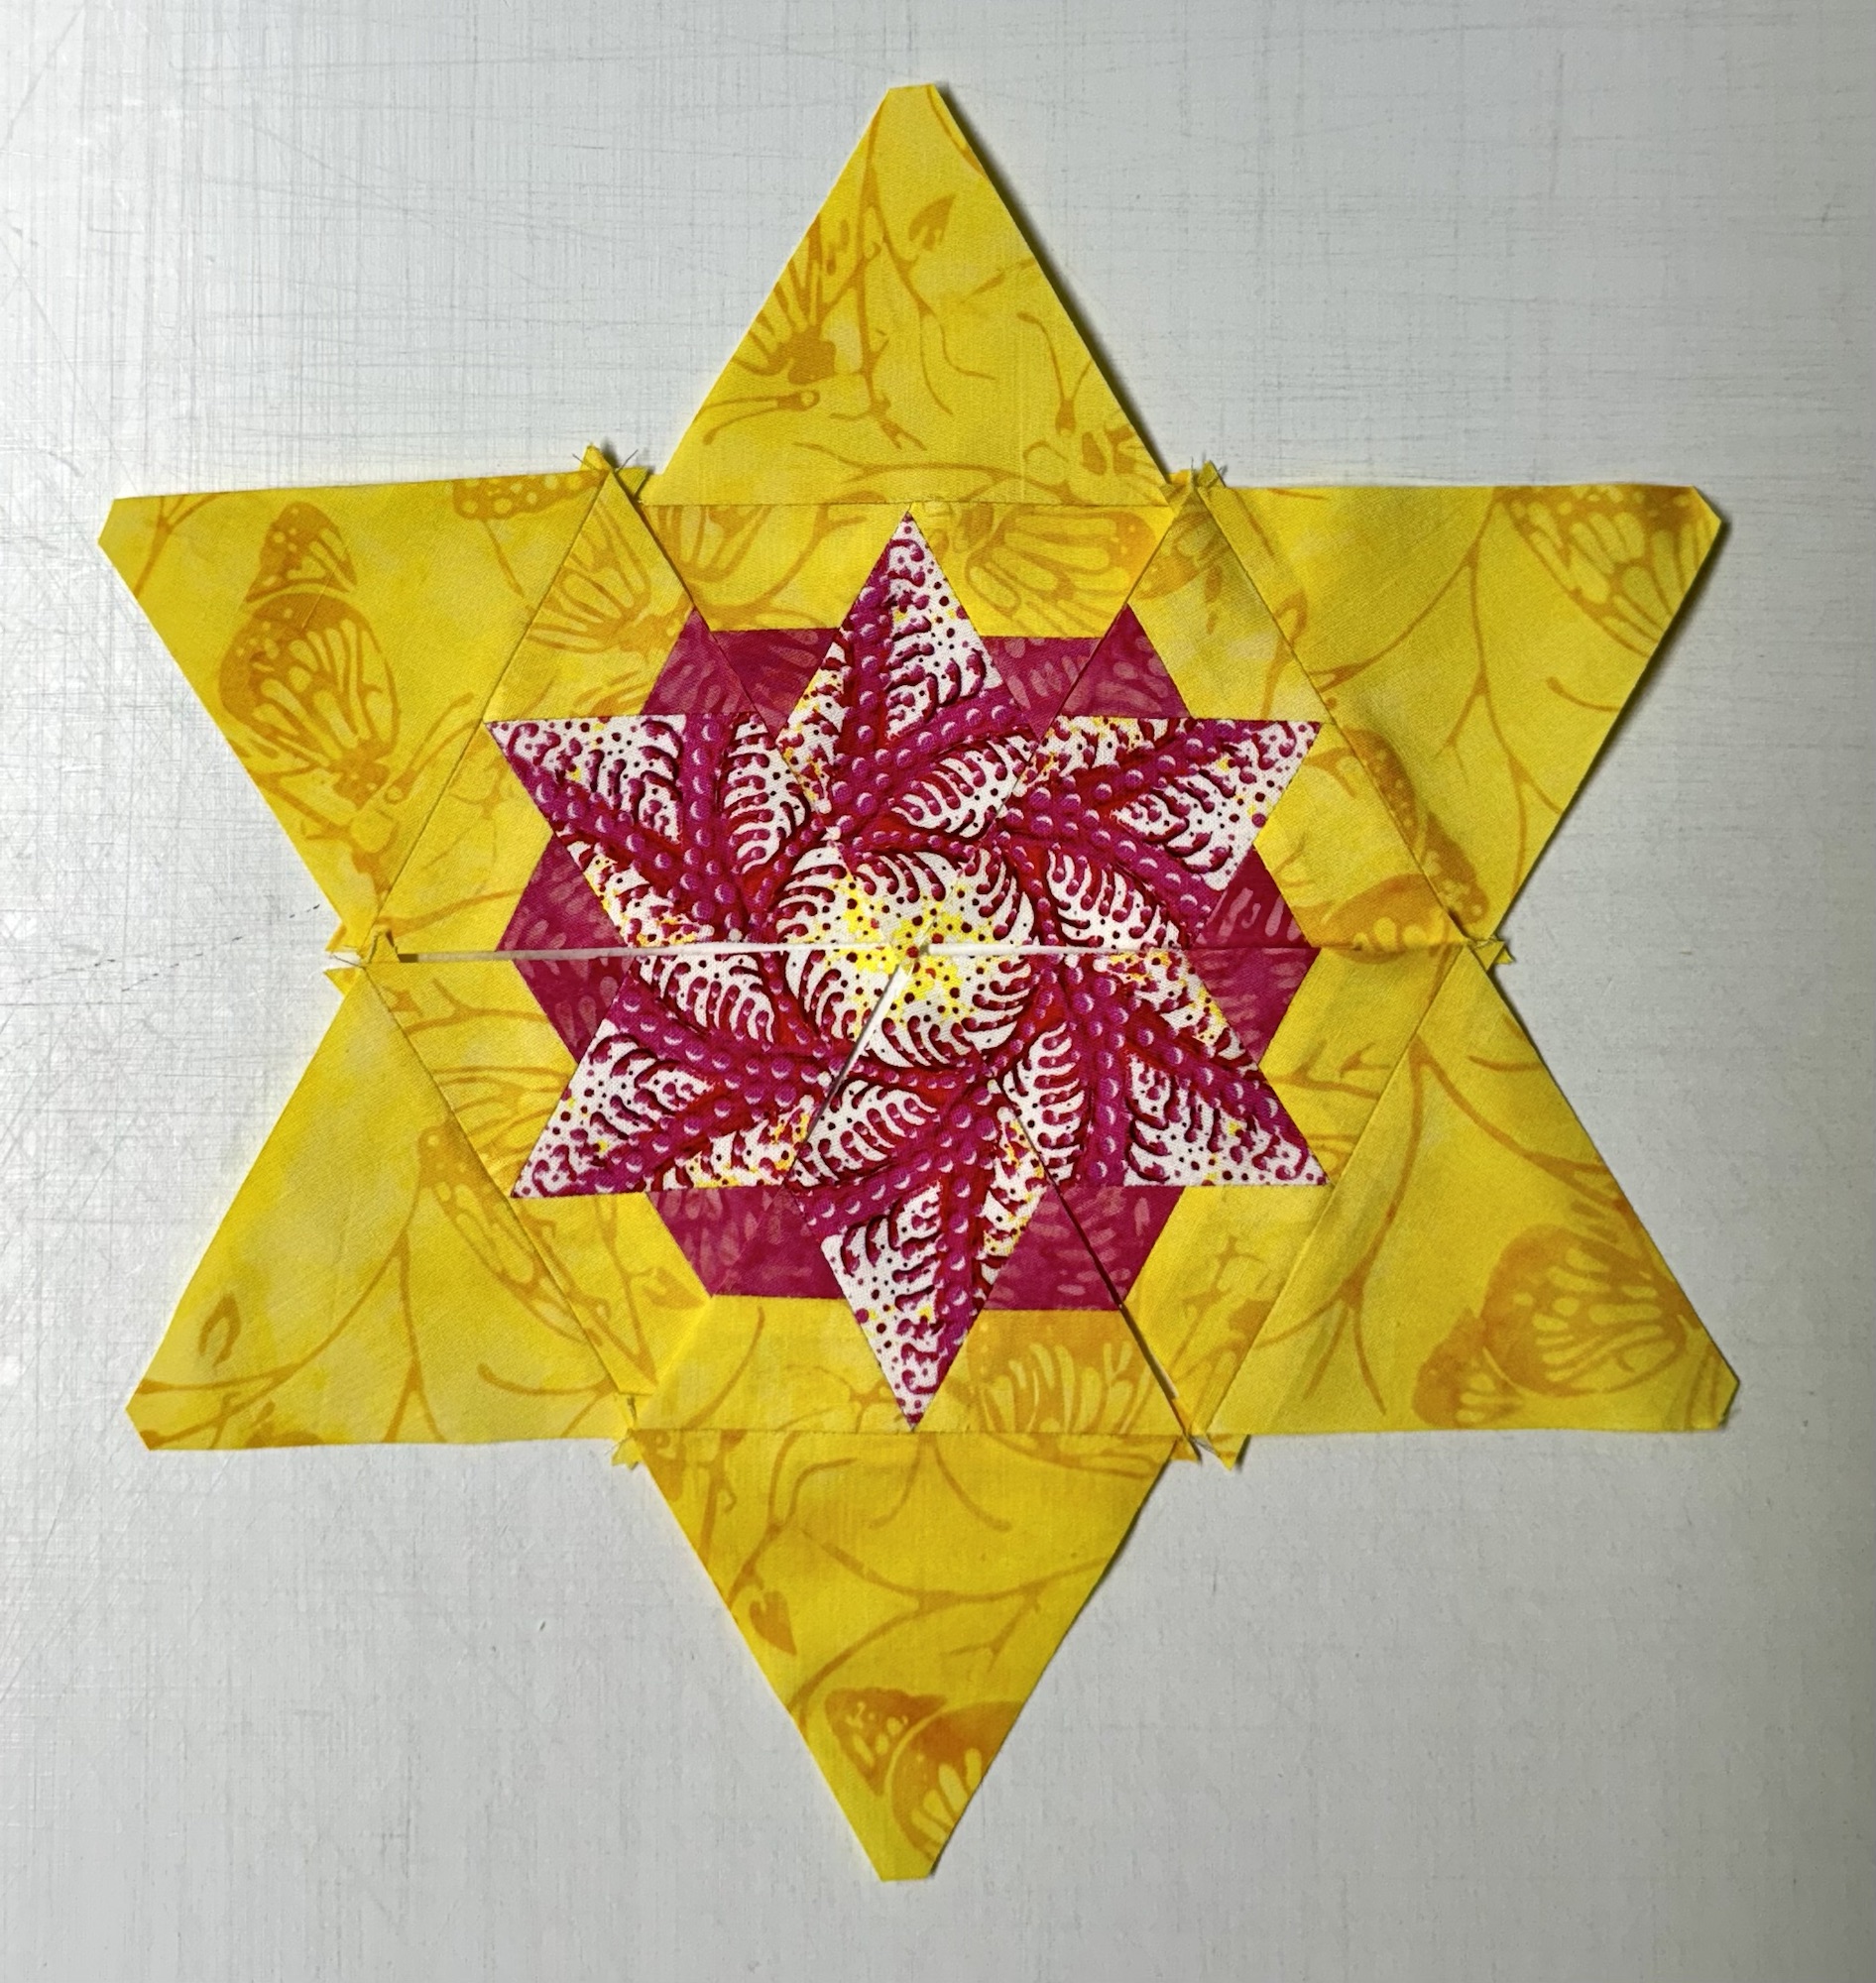
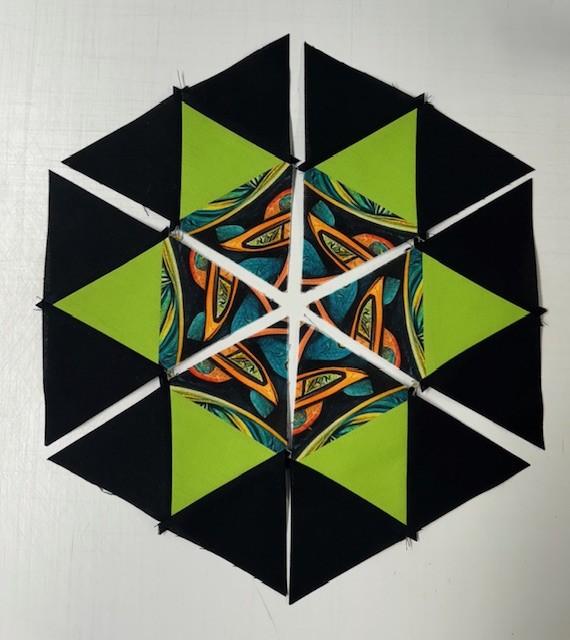
Another Star Variation
Center: 6 identical equilateral triangles cut from 3.25” strips. Make 6 – 2.5” Star 60 Units. I used diamonds cut from a 2” strip of 6 repeats. Follow Star 60 instructions pages 2 – 6. Stitch the triangles to the Star 60 Units.
Make 12 – 2.5” finished Capped 60 units. Follow Capped 60 Technique Sheet Instructions. Stitch the Capped 60 units on both side of the pieced diamond.
Carefully pin and stitch 3 pieced triangles together, press seams open. Stitch the remaining 3 triangles together. Press the seams open.
I encourage you to “Play Among the Stars” with the Star 60 tool and the 8 technique sheets that create:
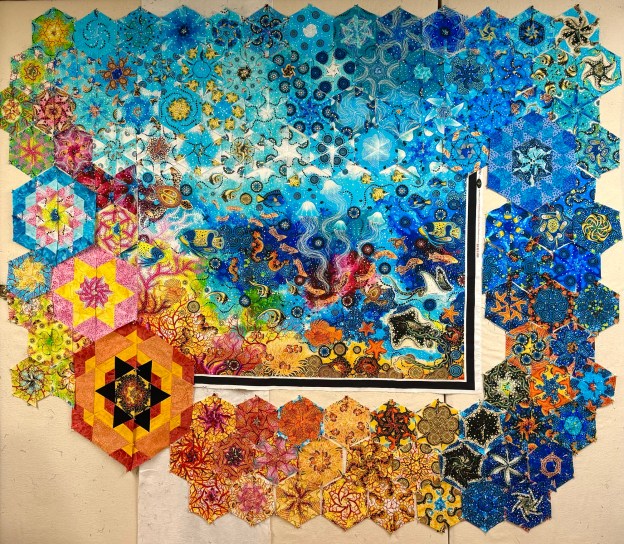
I’m playing around with a panel by Spirit of the Bush, Saltwater Dreaming. I want to see how many intricate hexagons I can make. They seem like they would represent tidal pools to me. The large hexagon on the bottom of the panel is 15″ finished. Can you tell what Deb Tucker techniques I used to make it?
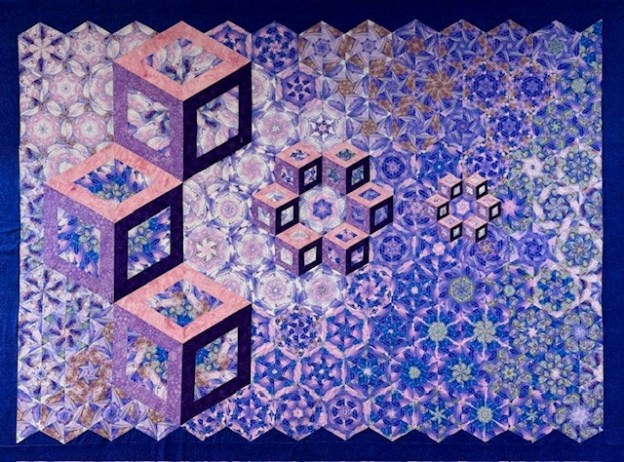
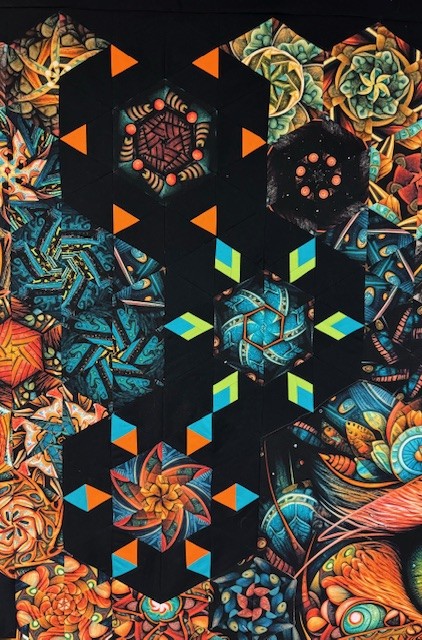
While I was teaching a OBW workshop at the Strong House Inn in April, I figured out how to put a hexie inside of a hollow cube. I couldn’t wait to get home and start playing.
I had 6 yards of this fabric from the Astral Voyage line by Josephine Wall and 3 Wishes Fabrics. It only had an 8″ repeat, but the design elements were large. I cut my strips 3 3/4″ for 6″ finished hexies. I make my hollow cubes using Deb Tucker’s Hollow Cube 60 Technique Sheet and the Star 60 Tool. I can make hollow cubes in 16 sizes from 3″ to 18″ finished cubes.
I wanted to start with 18″ finished cubes. I cut 2 short and 2 long frames from a light, medium and dark fabrics. I layered and aligned 6 repeats of my fabric and cut the size strips I needed. Then I cut my triangles using my Star 60 tool and following the technique sheet instructions. I layed out the triangles choosing what point I wanted in the middle.
For the first short frame, I layed out the triangle center pointing away from the short frame and the second short frame, the triangle gets turned one time to the left.
With right sides together stitch the triangles to the short frames. Press toward the triangles. Repeat for the medium and dark short frames. Add the long frames according to the Hollow Cube 60 instructions.
I layed out the framed triangles with the light ones on top.
I made three 18″, six 6″ and six 3″ finished hexies. I started by playing with the 18″ hexies and trying to decide where to place the circle of 6″ cubes in relation the 18″ hexies. Then I started to place the hexies on the right side of the 18″ hexies. BIG mistake. I know better. When designing around a panel you should always work your way around all four sides to establish the top, bottom , right & left sides. It is the same when working with hexies of different sizes. I should have designed on all sides of the 18″ hexies. Because I didn’t I was off by one triangle, you can see it on the left side just under the middle 18″ hexie. To fix that, I needed to remove a diagonal row under the middle hexie. As it was, I had 10 hexies down the left side andd 11 hexies down the right side.
Once I fixed the left side I had to totally redesign the right side. I wanted to share this so if you ever find yourself off by one triangle, you will know you have to remove a diagonal row to correct it.
My Cubed Hexies measures 83″ x 62″. I was pleased that with only an 8″ repeat I was able to get a pleasing design.
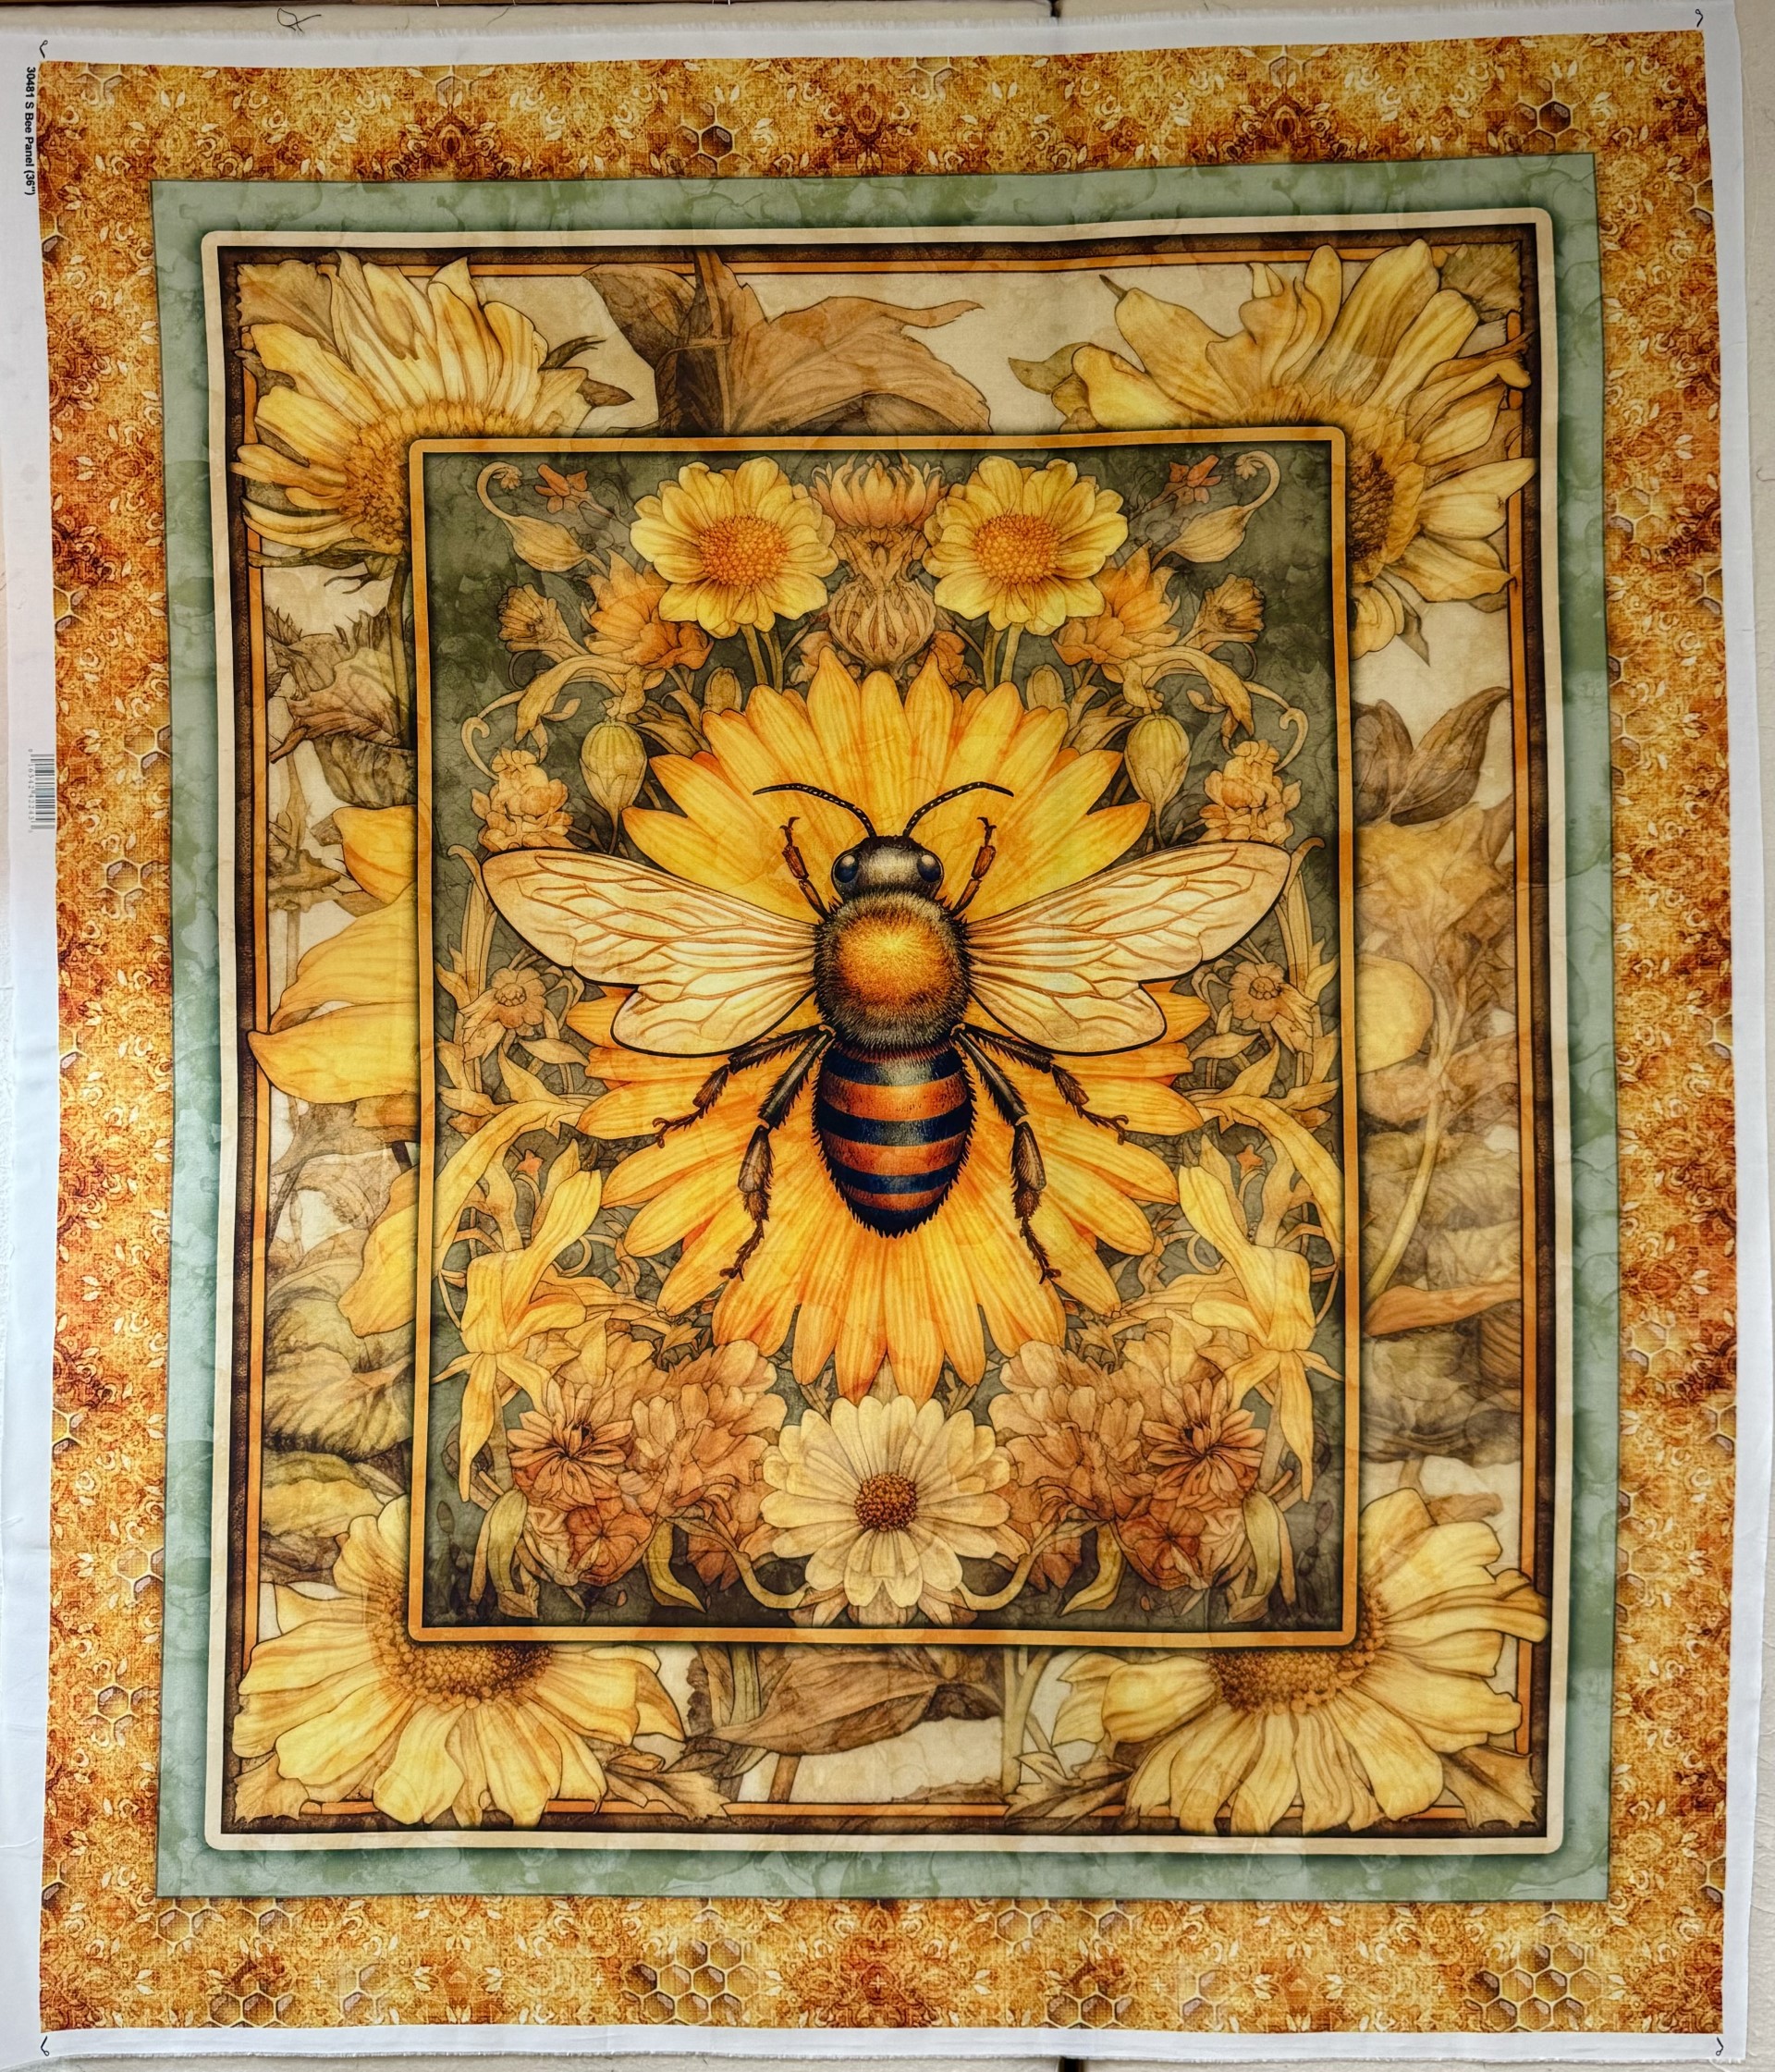
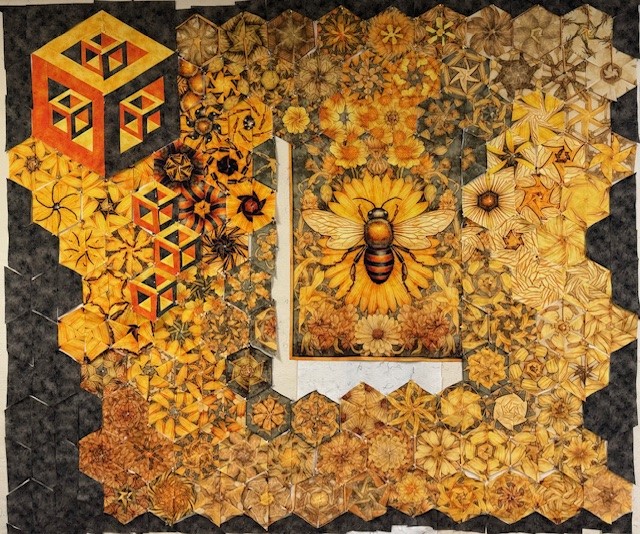
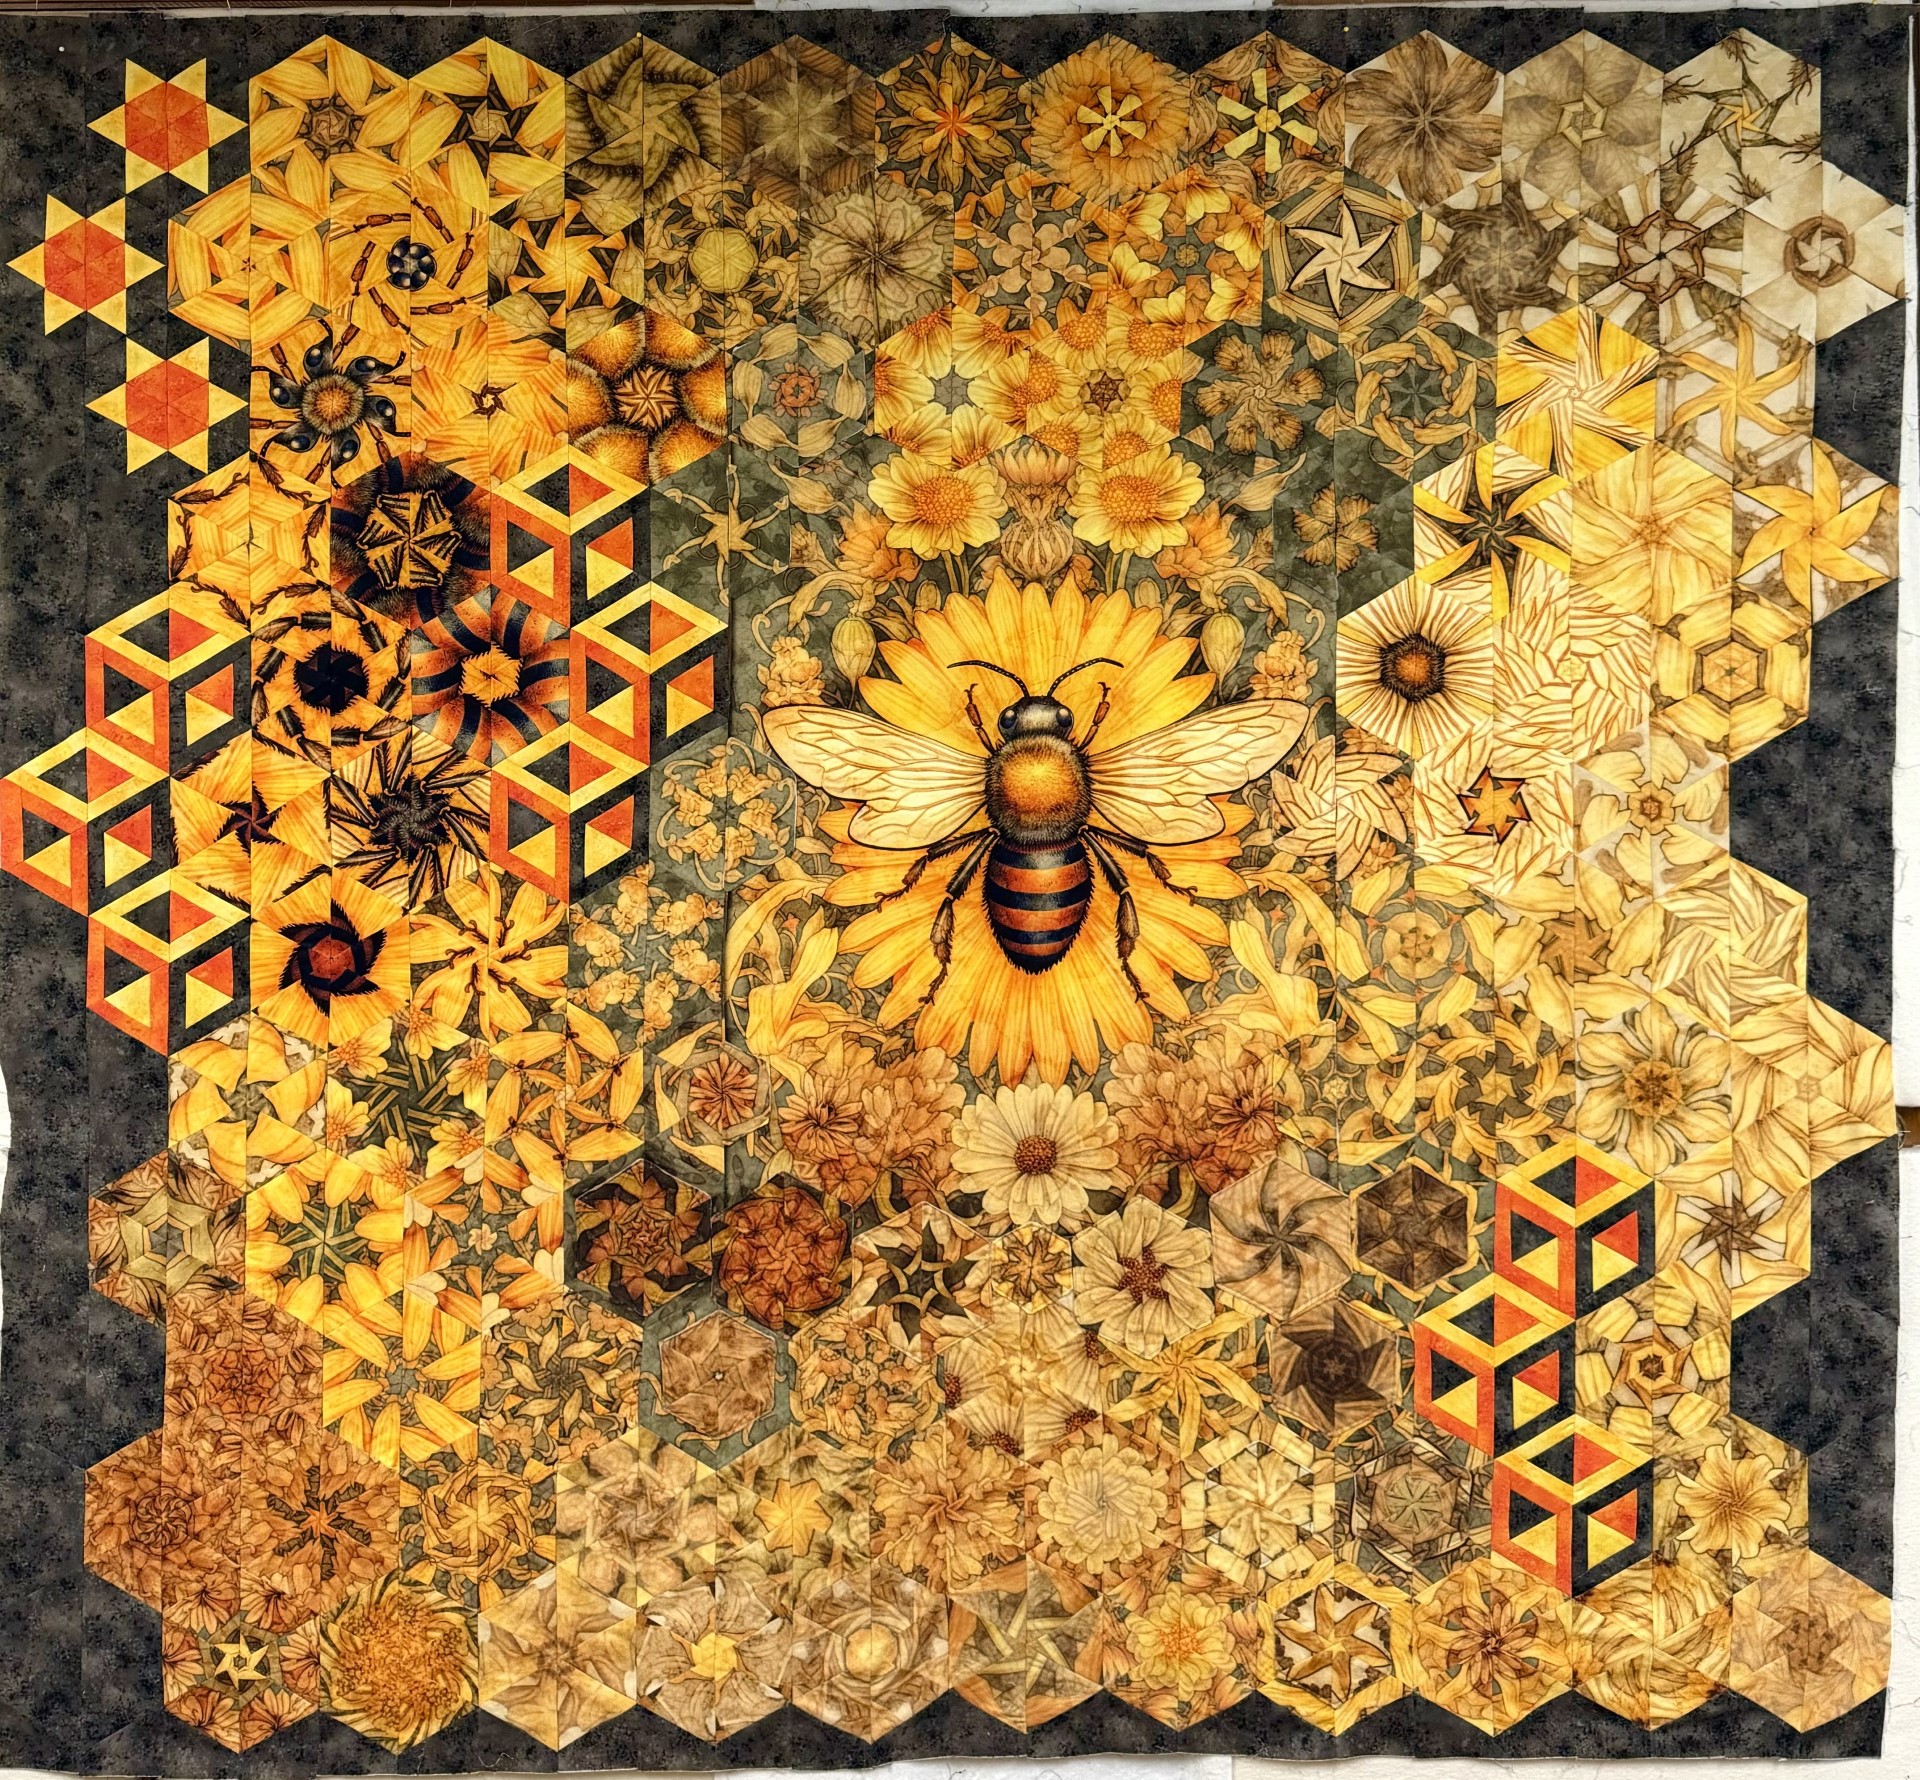
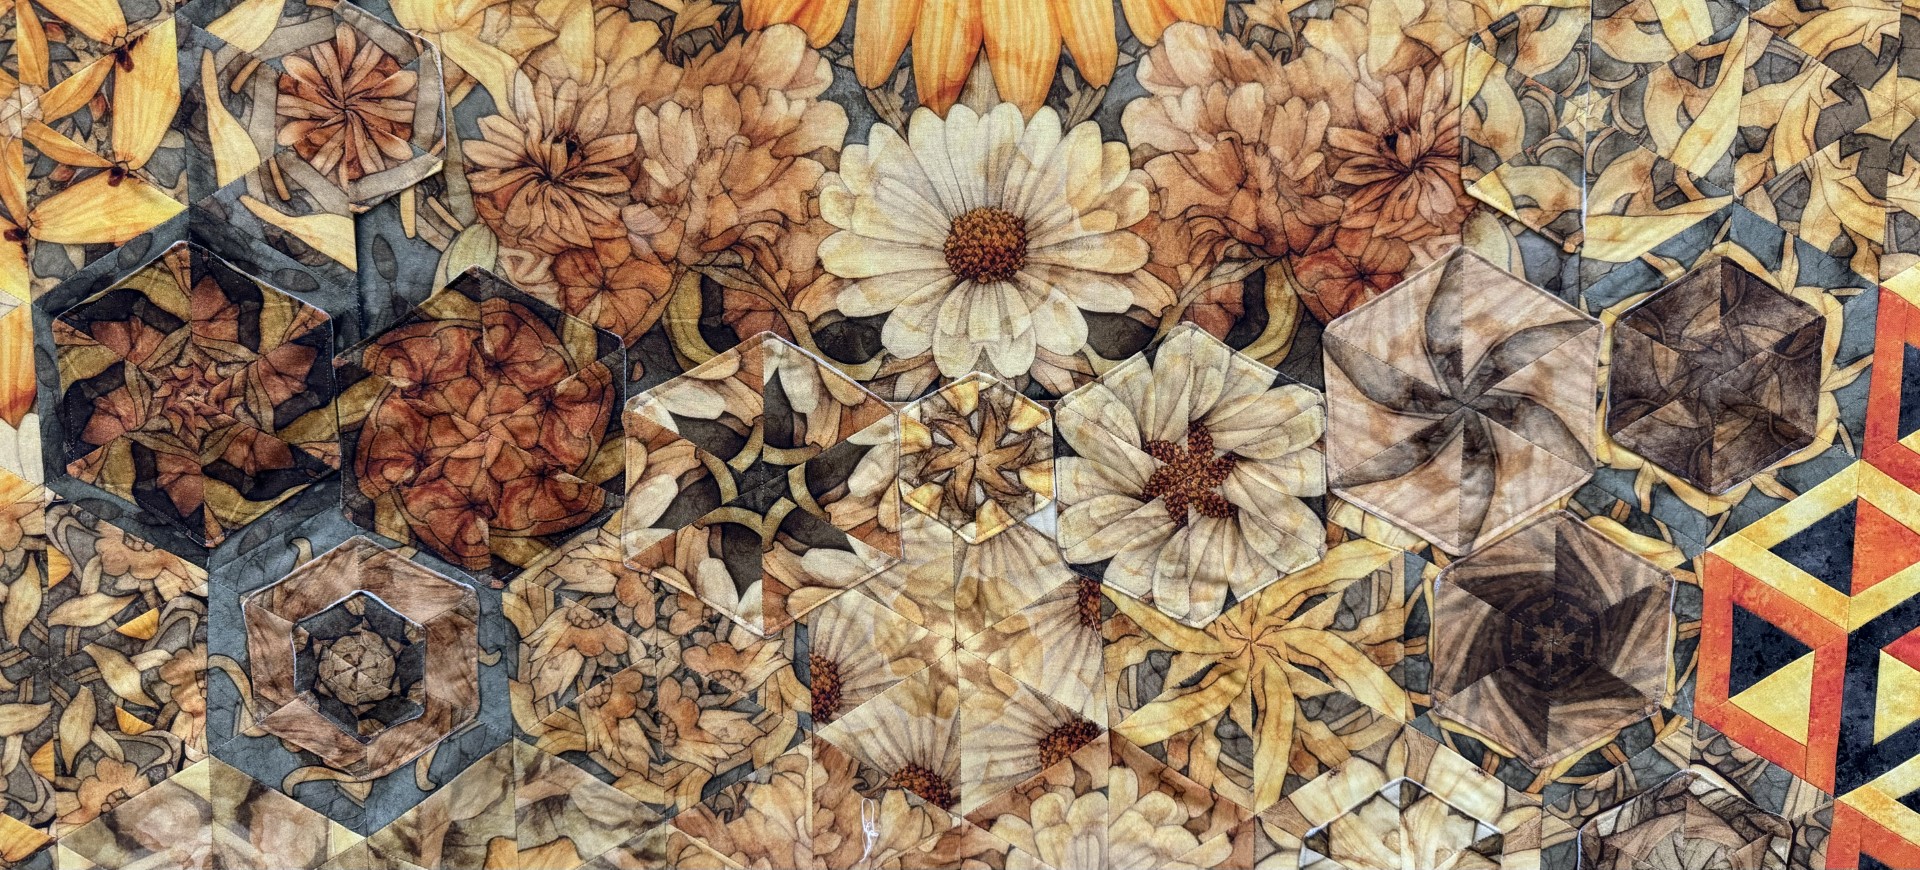
When I started cutting the hexies from Queen Bee strips, I knew it was going to be a beautiful OBW! The Queen Bee panel is by by QT Fabrics. It measures 36″ x 44″. The Queen Bee line will be in stores June 2024.
I cut my strips for the hexies 3.25″ for 5″ finished hexies. I cut off the borders. The inner border containing flowers measured 3.25″ so I was able to use them for more hexies. I had a total of 106 hexies to design with.
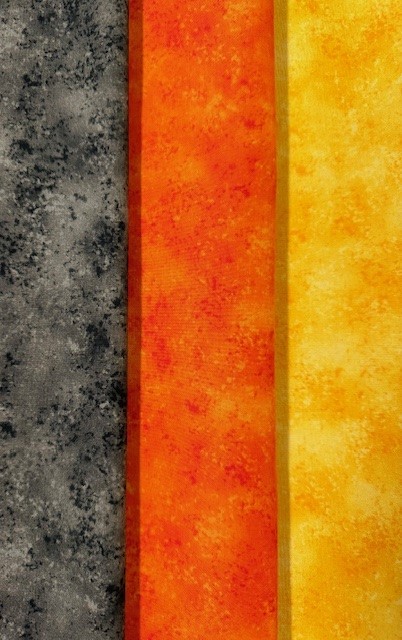
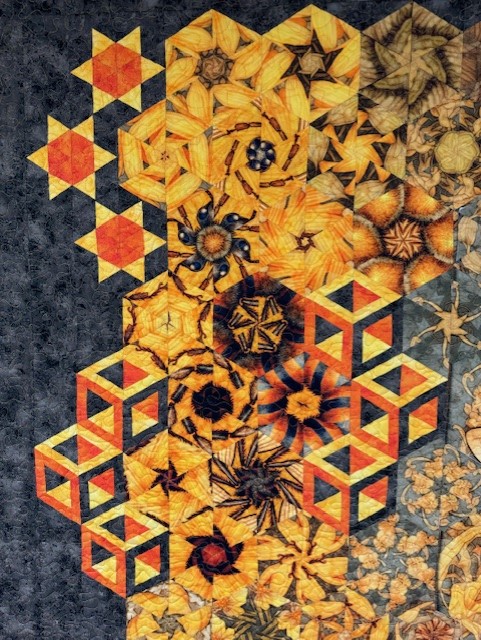
I used QT Fabrics blender line Rapture to create Hollow Cube 60‘s, using the Studio 180 Design Star 60 tool. I chose Charcoal, Orange and Marigold to make the cubes and half hexies surrounding the quilt. The Rapture fabrics were perfect.
I started out by making a 15″ Hollow Cube 60 containing 5″ Hollow Cube 60’s, but I felt that it over powered the bee.
I decided to make 5″ finished Hollow Cube 60’s and Quad 60 stars.
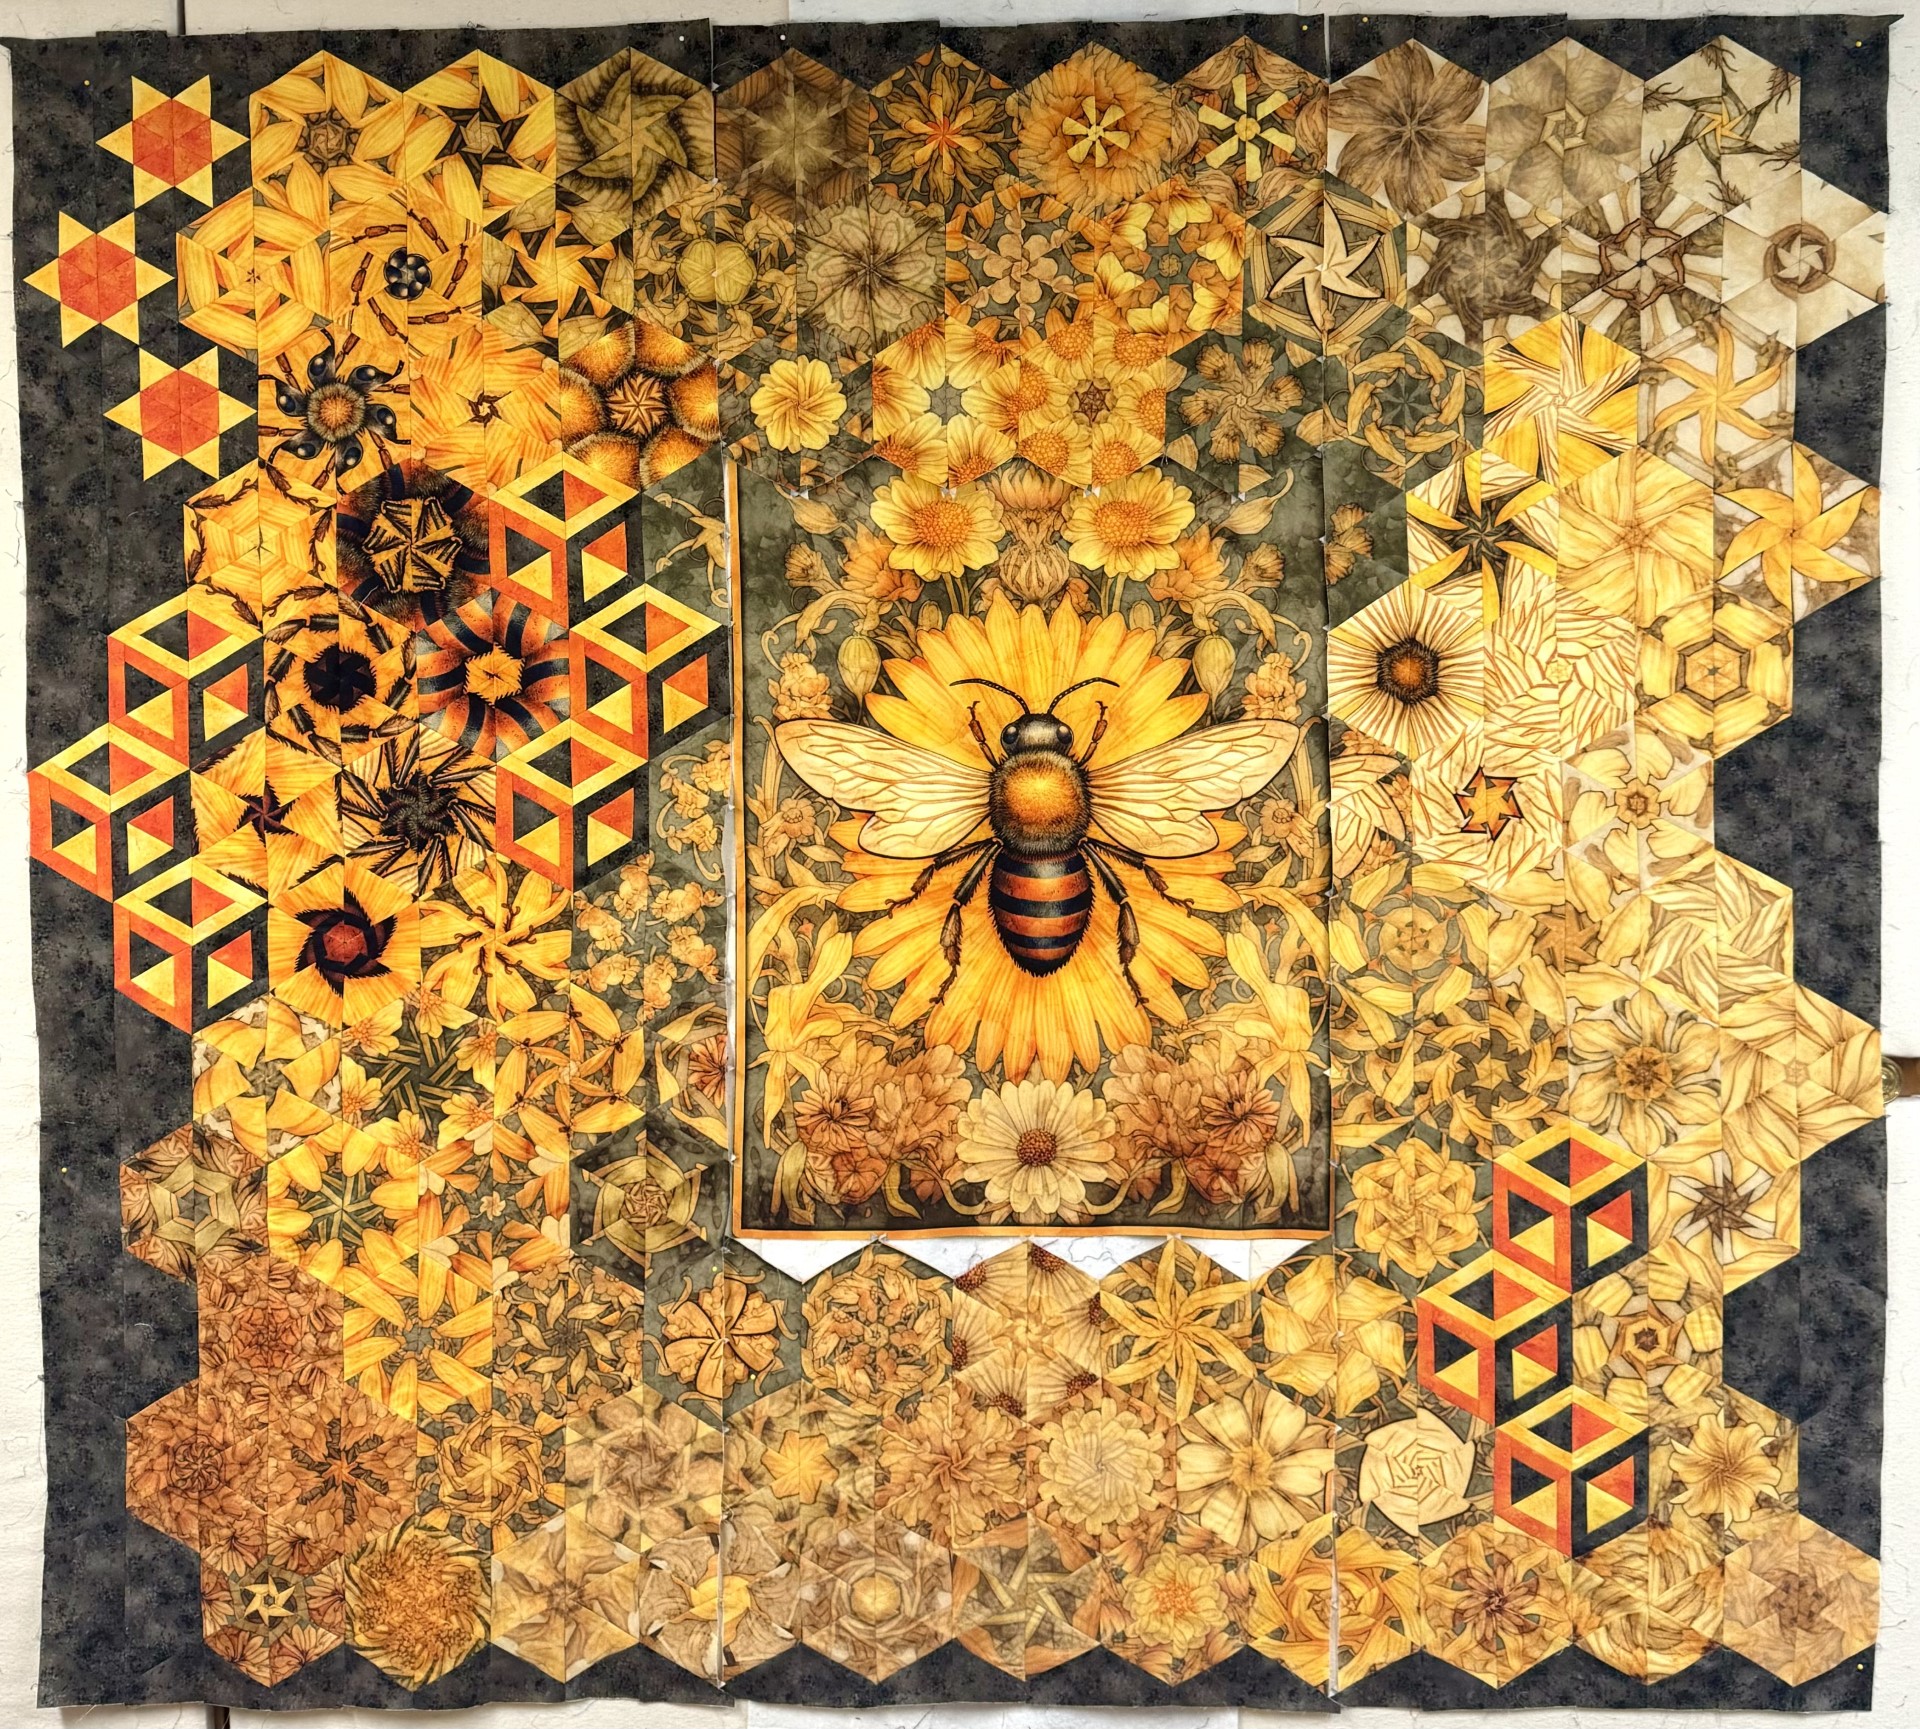
After I completed my four sections and laid them out around the panel, I realized I needed to add a strip to the bottom of the panel to be able to join the bottom section to the panel. That meant I would have to hide the strip by appliqueing hexies. The photo on the right above shows that you can no longer see where I added the strip of fabric.
Above shows a closeup of the hidden strip. I applique hexies of various sizes to tweak my design.
TIP: When you cut your hexies from the strips, you have a leftover piece on both ends. One side of the leftover already has a 60 degree angle. If you put the 60 degree line of your ruler on the straight edge of the leftover piece as shown above and cut , you will have a small hexie that can be appliqued on your OBW. Below I have created a lesson on how I create appliqued hexies.
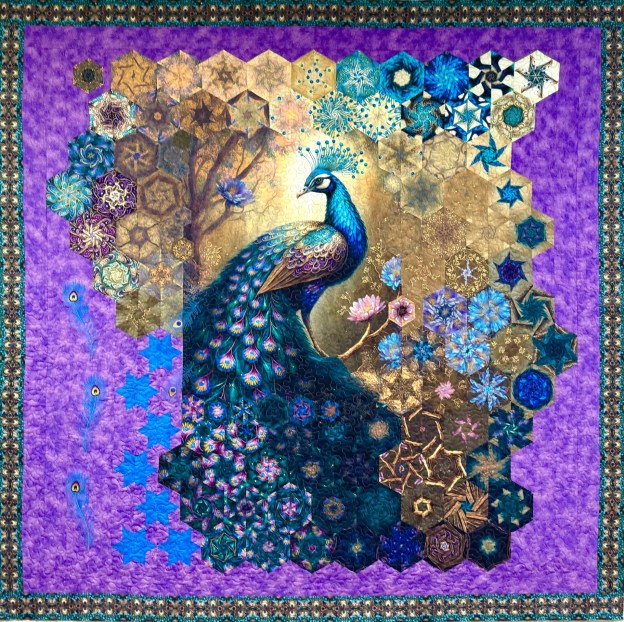
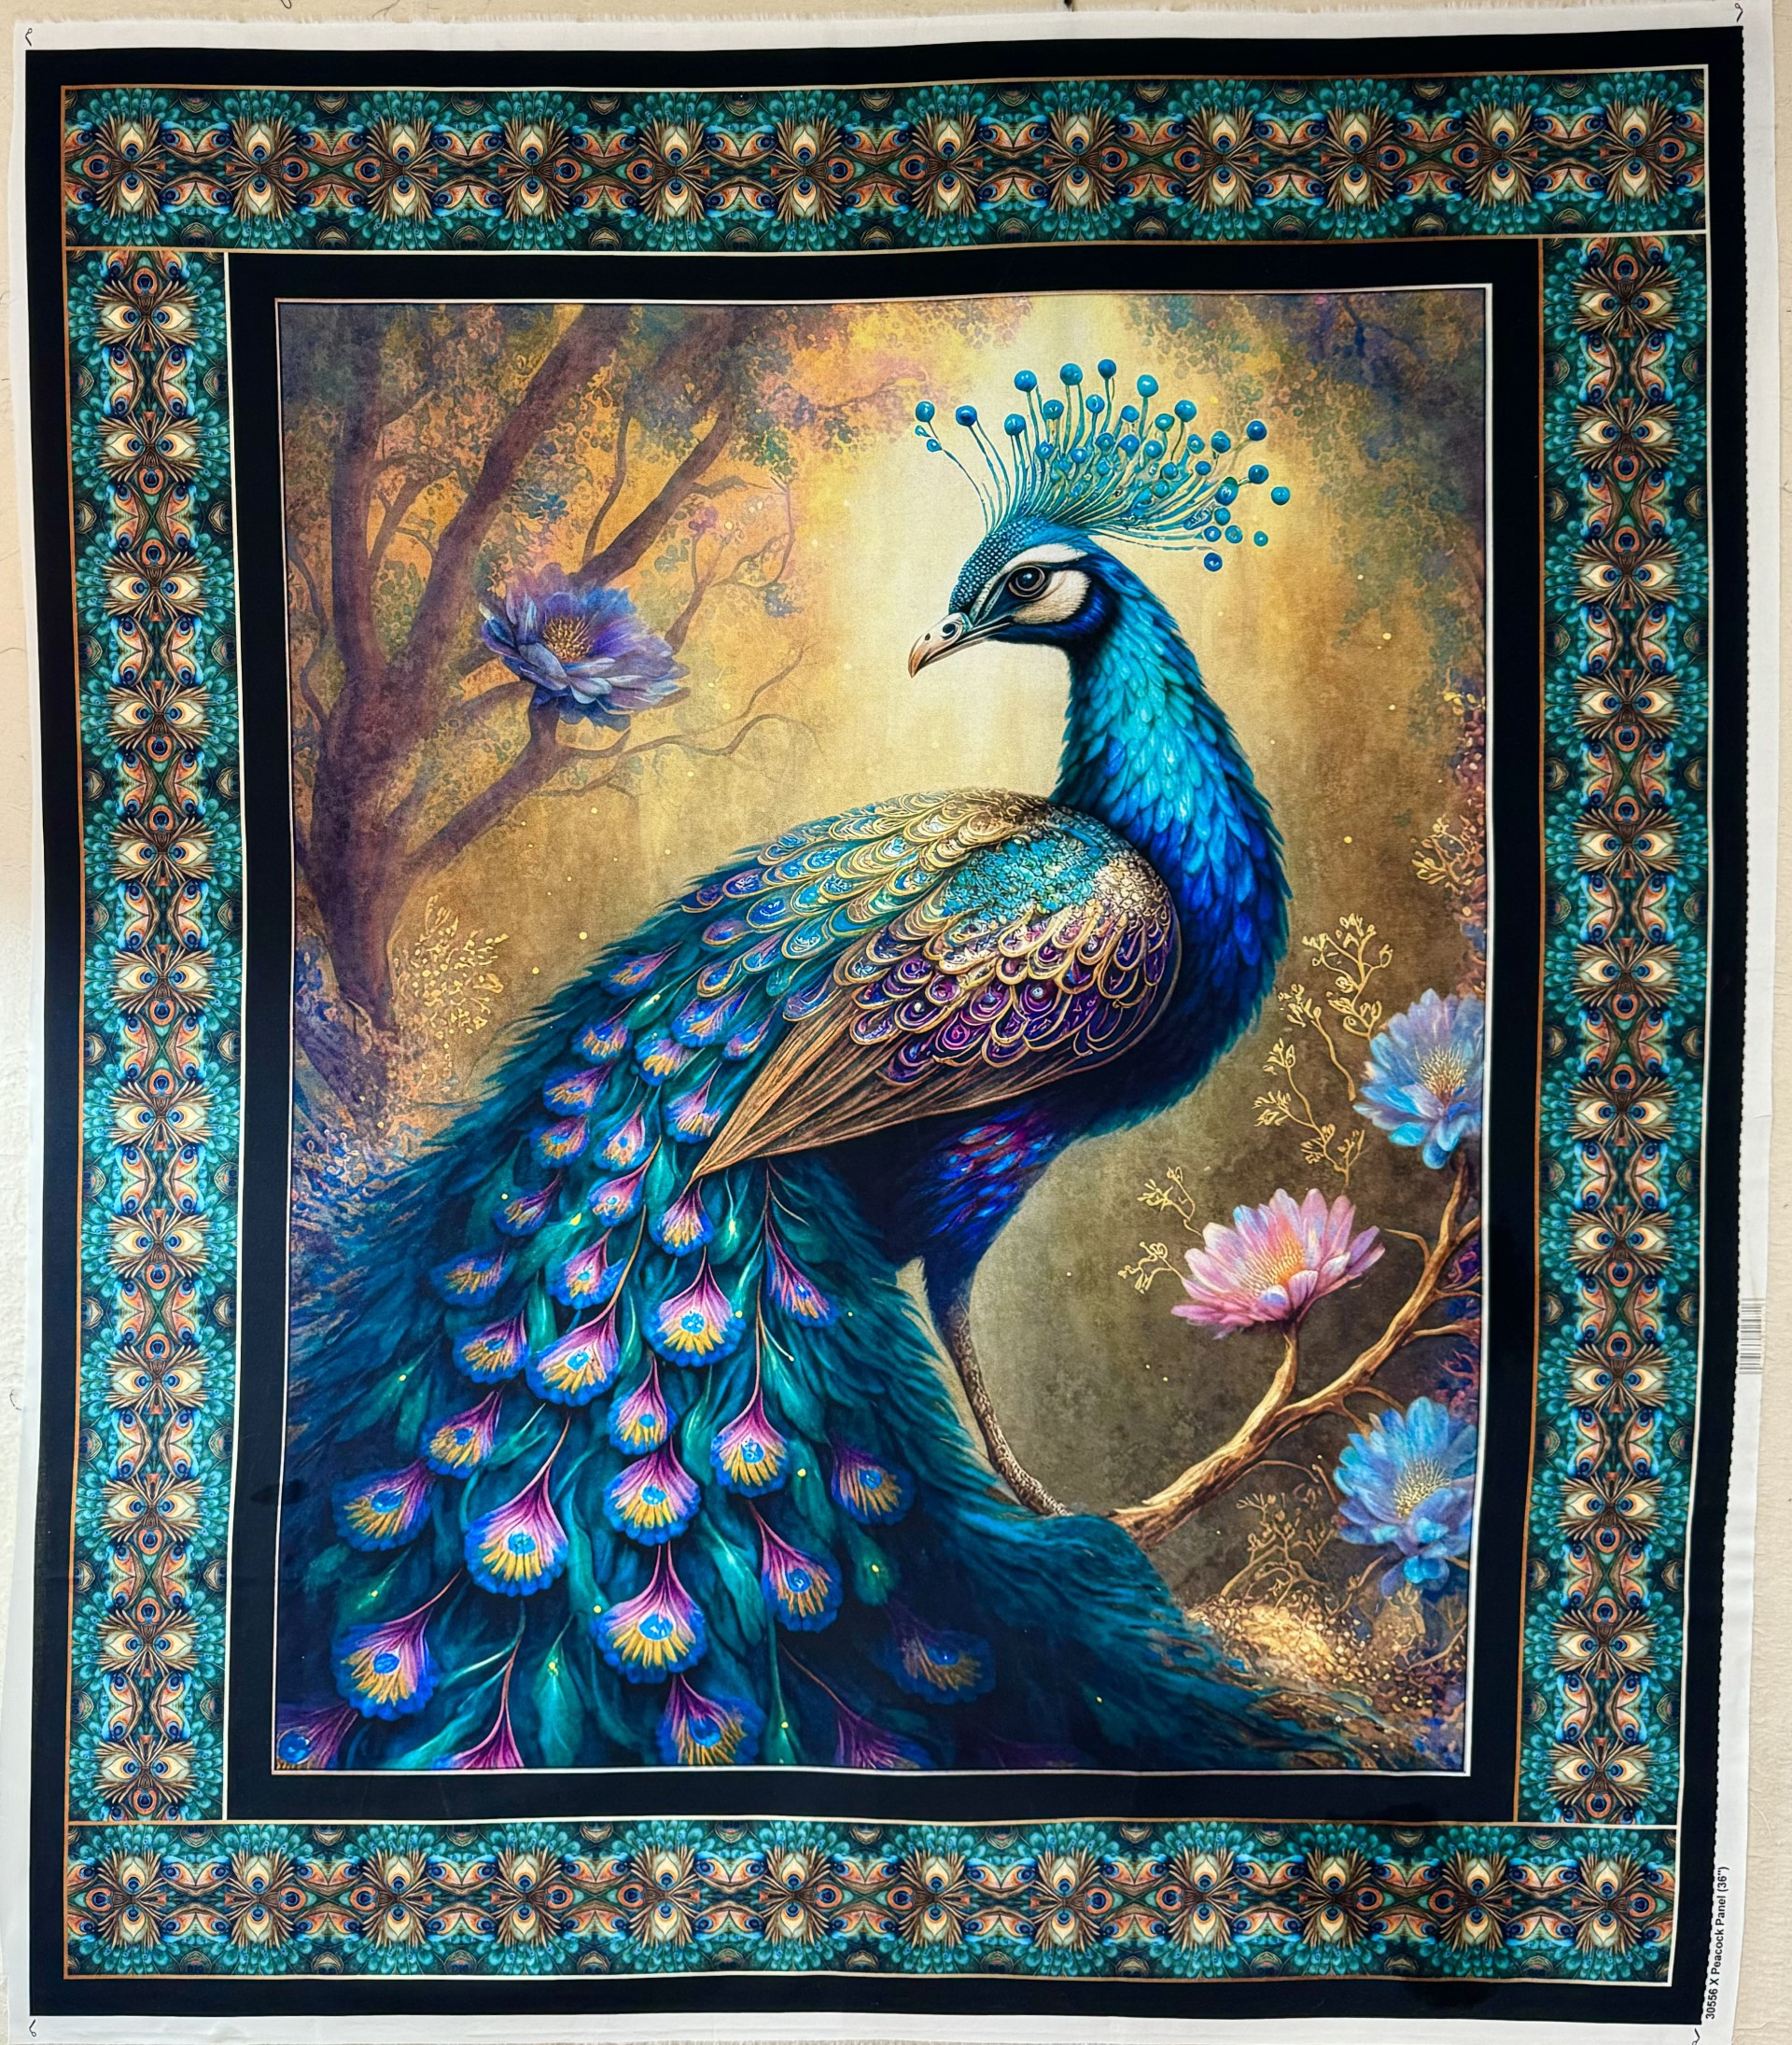
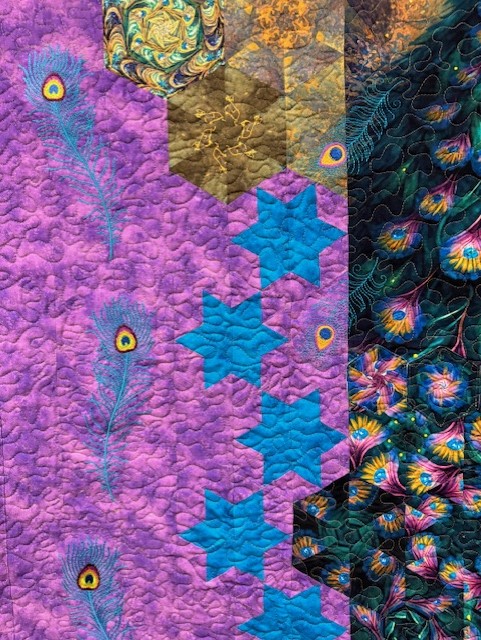
I fell in love with this panel the first time I saw it. The colors are just fabulous. Resplendent is by QT Fabrics. The panel measured 36″ x 44″. Resplendent will be in stores June 2024.
I removed the borders and saved them to use as a outer border and binding for the finished quilt. I cut my strips 3.25″ for 5″ finished hexies. I had a total of 105 hexies to design with.
I created Star 60 stars and surrounded the peacock with half hexies using QT Fabrics blender line Rapture. The colors Ocean and Amethyst blended beautifully.
I embroidered peacock feathers to add to the design. I’ve had the large feathers for many years. I downloaded them from The Stitchery Mall by Dancing Thread. The small peacock feahers were purchased from OESD.
I made the stars using Studio 180 Design’s Star 60 Tool. I’ve created a lesson plan to share with you to show you how easy it is to make a Star 60 star.
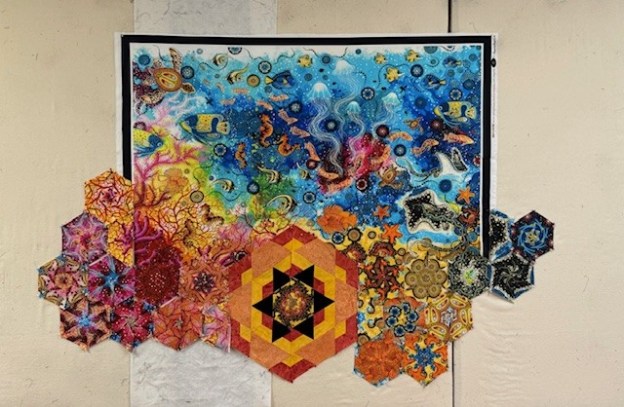
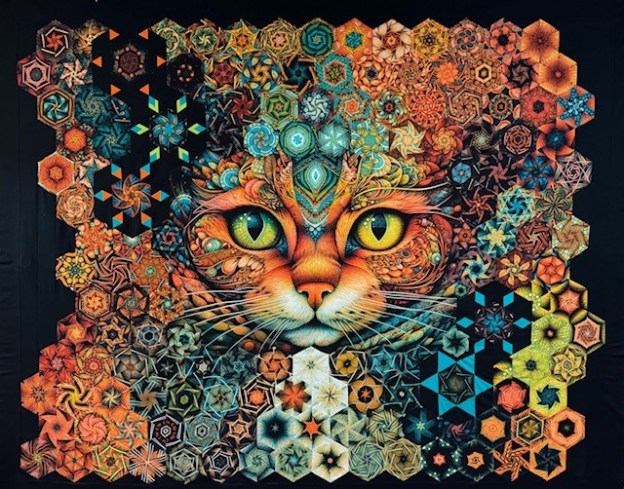
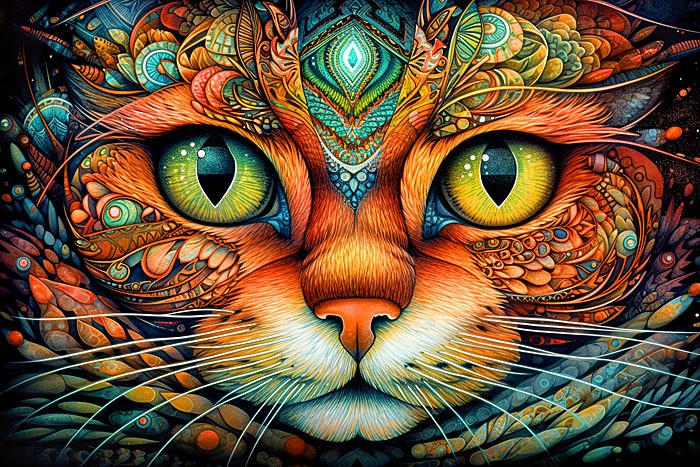
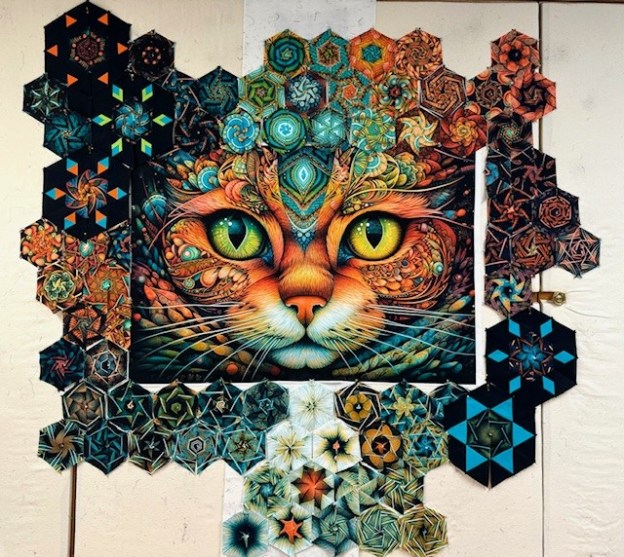
When I saw this panel by Rubin Design Studio “Intricate Illustrated Kitty” of EQuilter, my heart skipped a beat. I just love the colors, the curves and the movement in this panel.
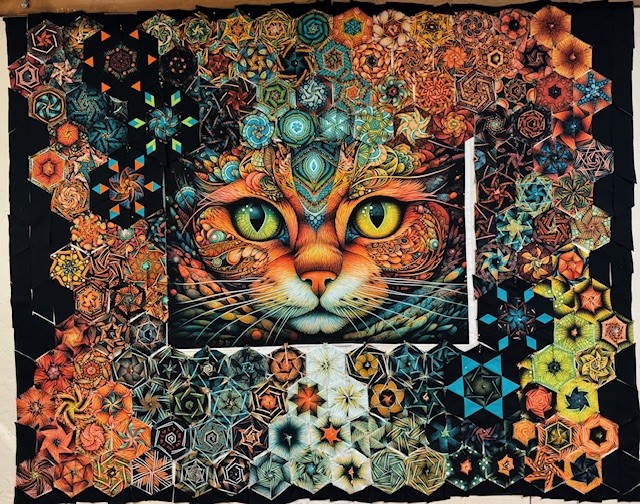
The panel measured 29″ x 43.5″. I could have cut 3.75″ strips for 6″ finished hexies and trimmed the panel to 42″. But, I decided to cut 3.25″ strips for 5″ finished hexies using my Star 60 Ruler. I would need to trim more of the panel, but I felt a smaller strip would make more interesting hexies. There is some stretching with bias edges, but in the end, I only needed to trim 1″ from bothe sides of the panel. I placed the panel in the middle of my design wall and began designing.
It is always a guessing game when trying to ddecide how far to go past the end of the panel when establishing the bottom row. We know that when we stitch together our hexies, we lose 1/2″ between the seams. But the vertical seams are much harder to calcutlate. The photo above shows the shrinkage, it was abut 3″.
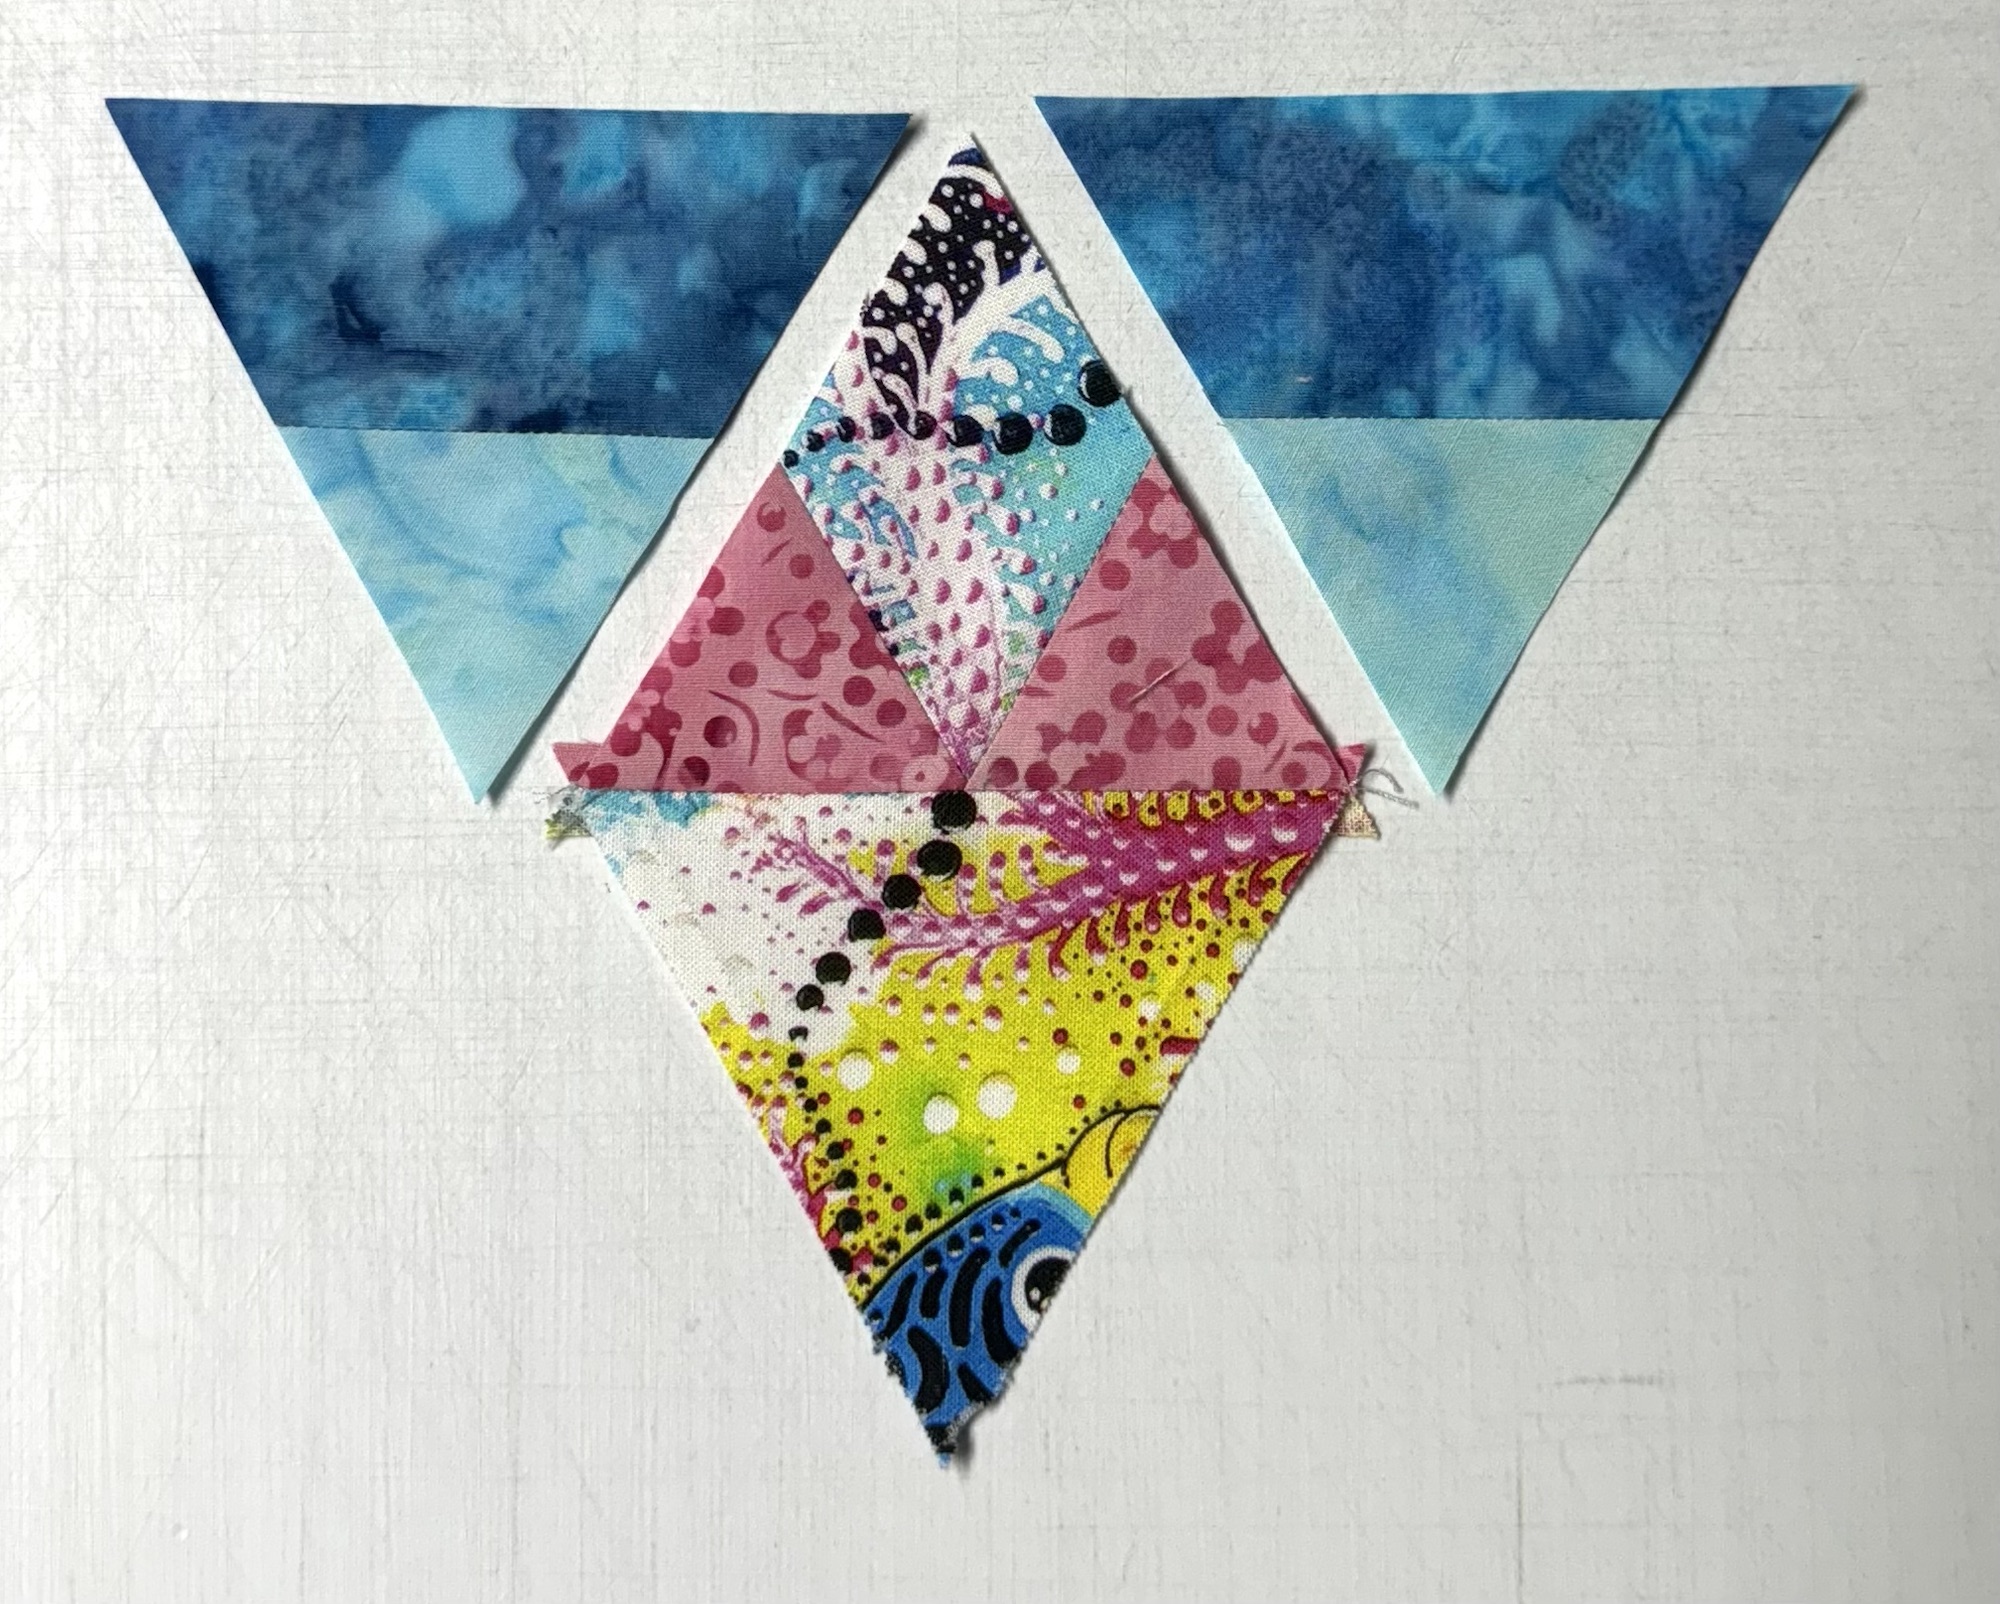
I was playing around trying to find interesting ways for the Star 60 ruler to interact with the hexies. I came up with what I call Star 60 Spinners.
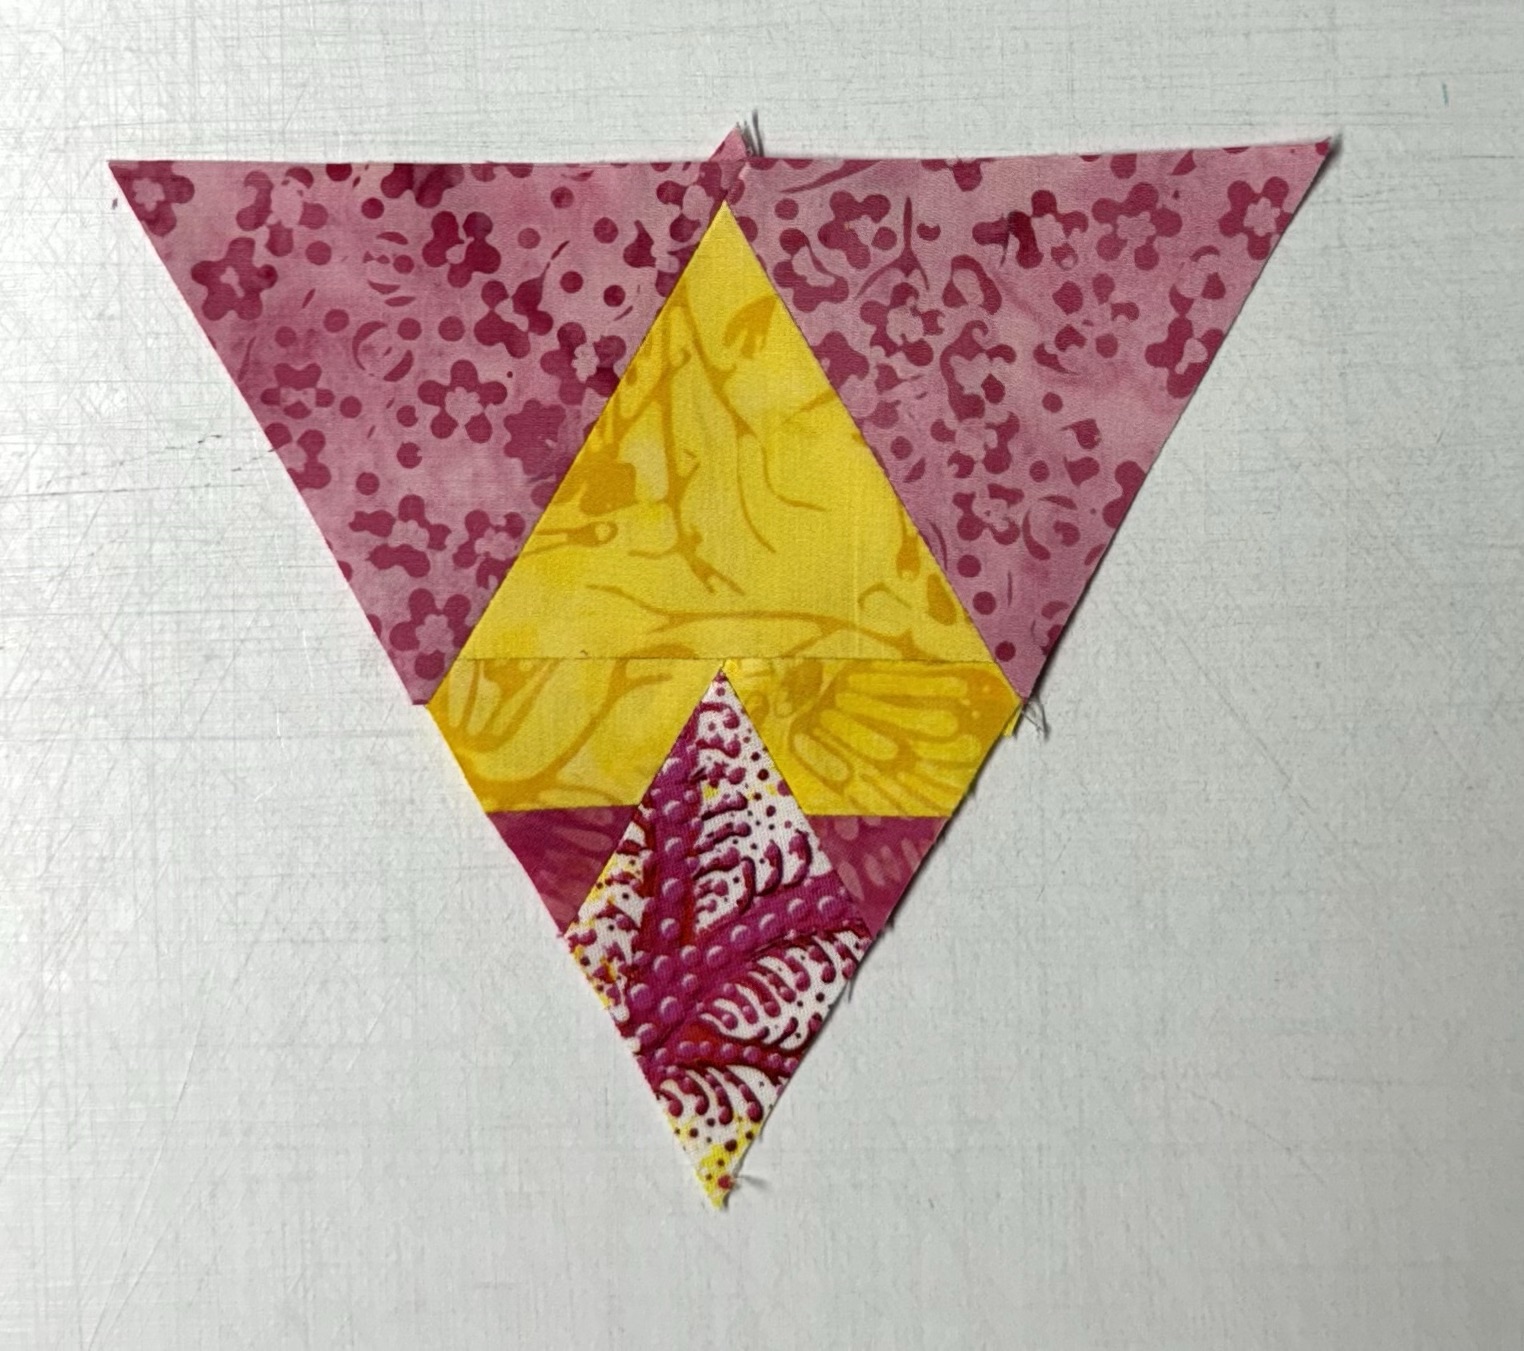
Basic Spinner: You need one hexie (taken apart), and two strips cut the same size as you cut you hexies from. Bedazzled had 5″ finished hexies, cut from 3.25″ strips. I cut one 3.25″ strip for the inner companion triangle and one 3.25″ strip for the side triangles.
With the strip folded, cut 6 sets of 2 side triangles and 3 sets of 2 companion triangles.
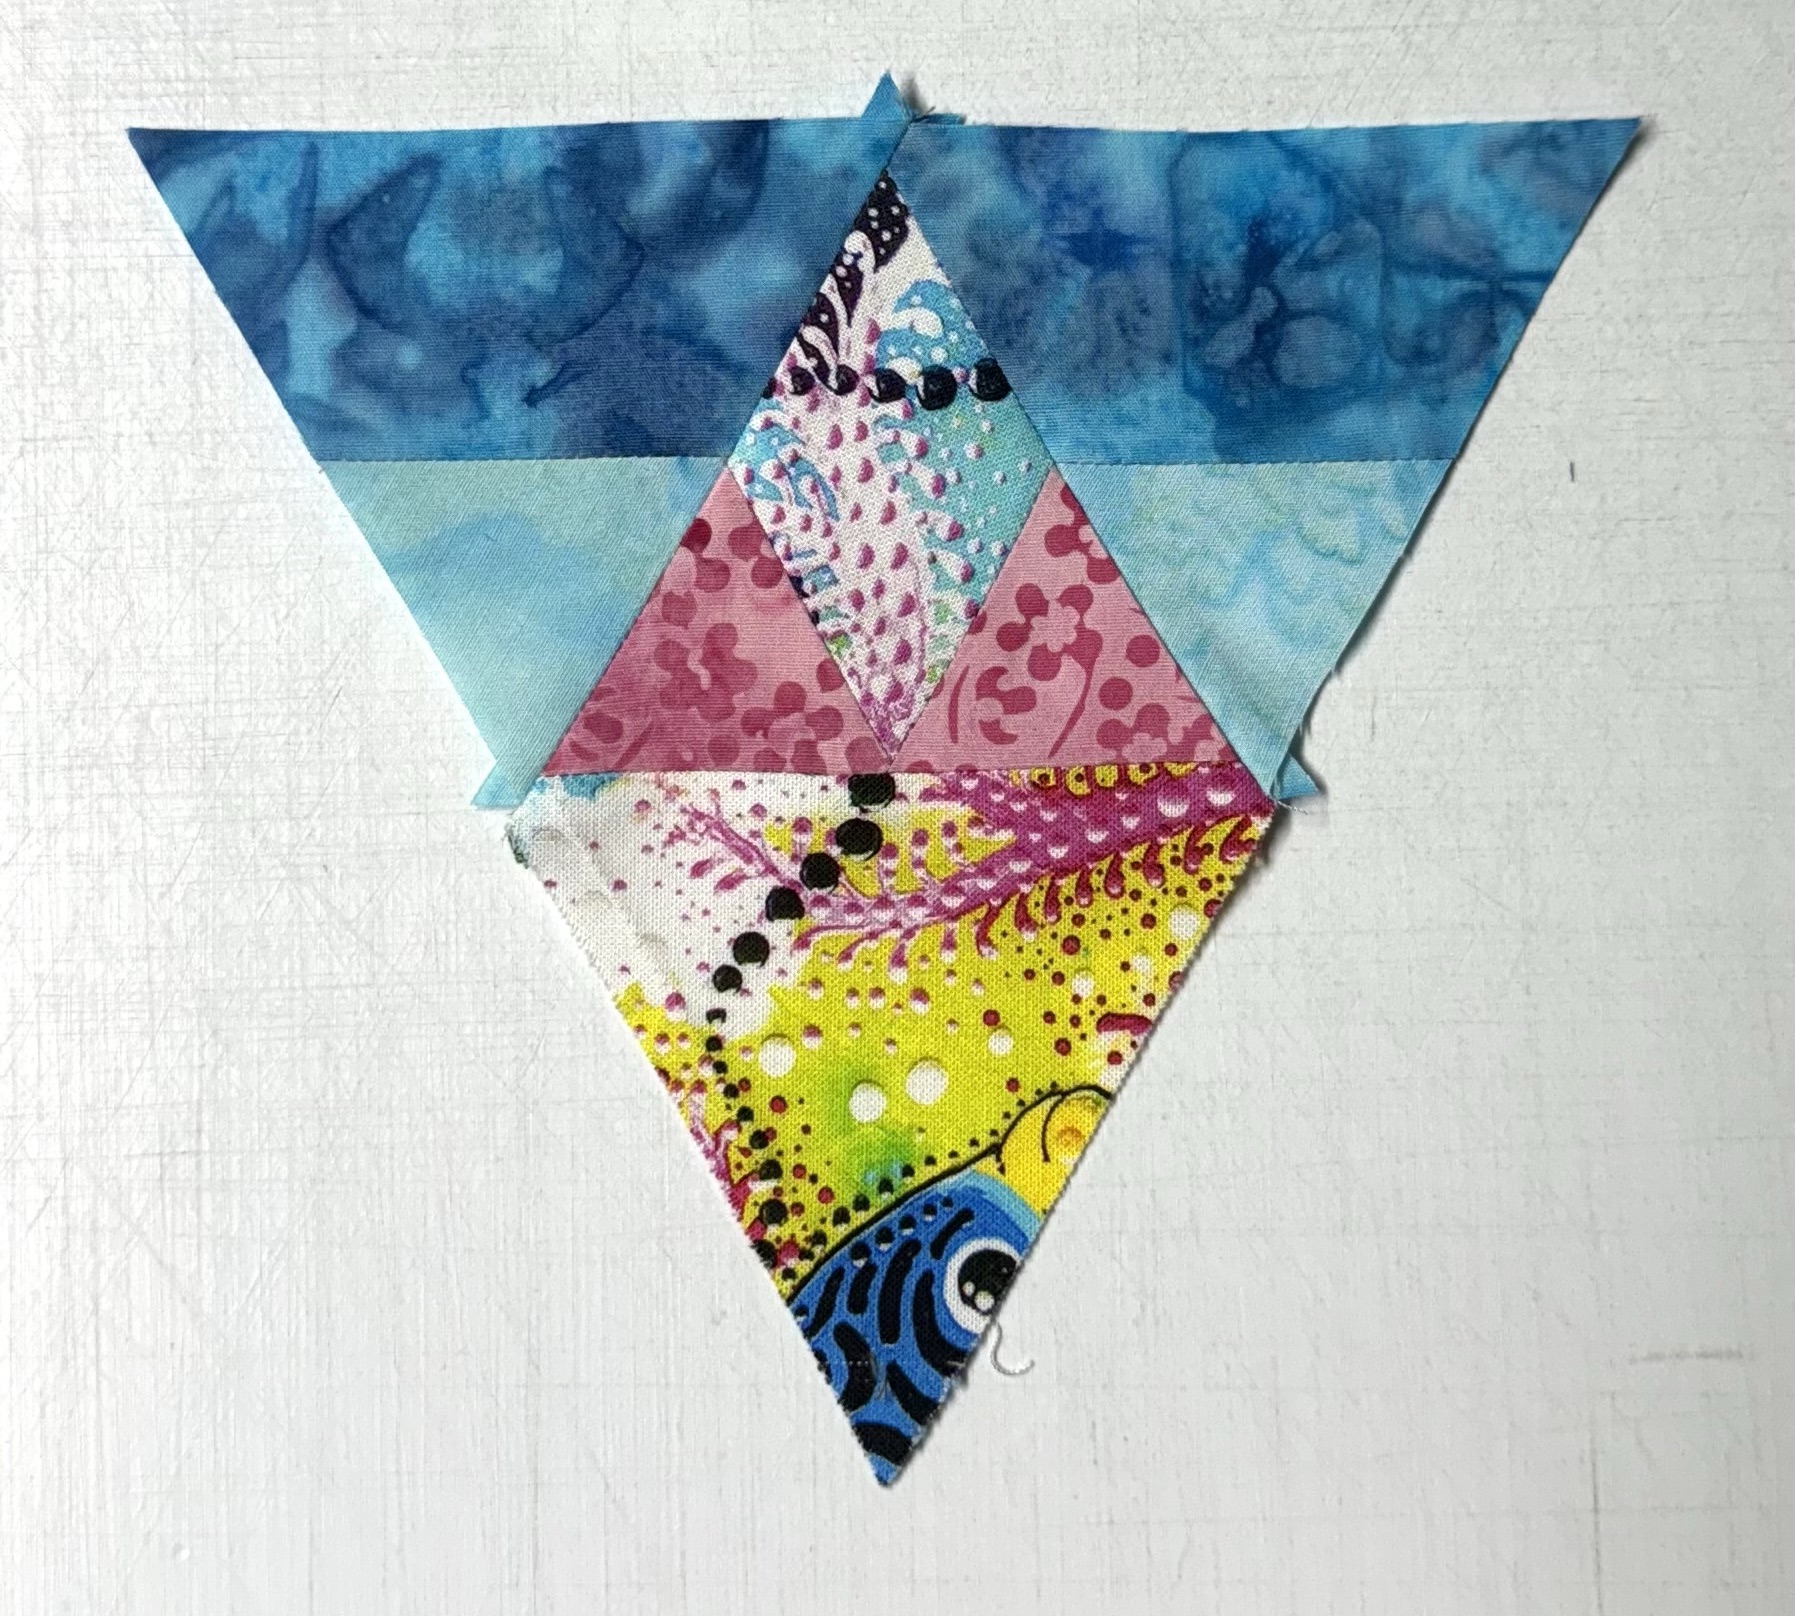
Decide what point is going in the center of your hexies, stitch the companion triangle to the opposite edge. Press seams open.
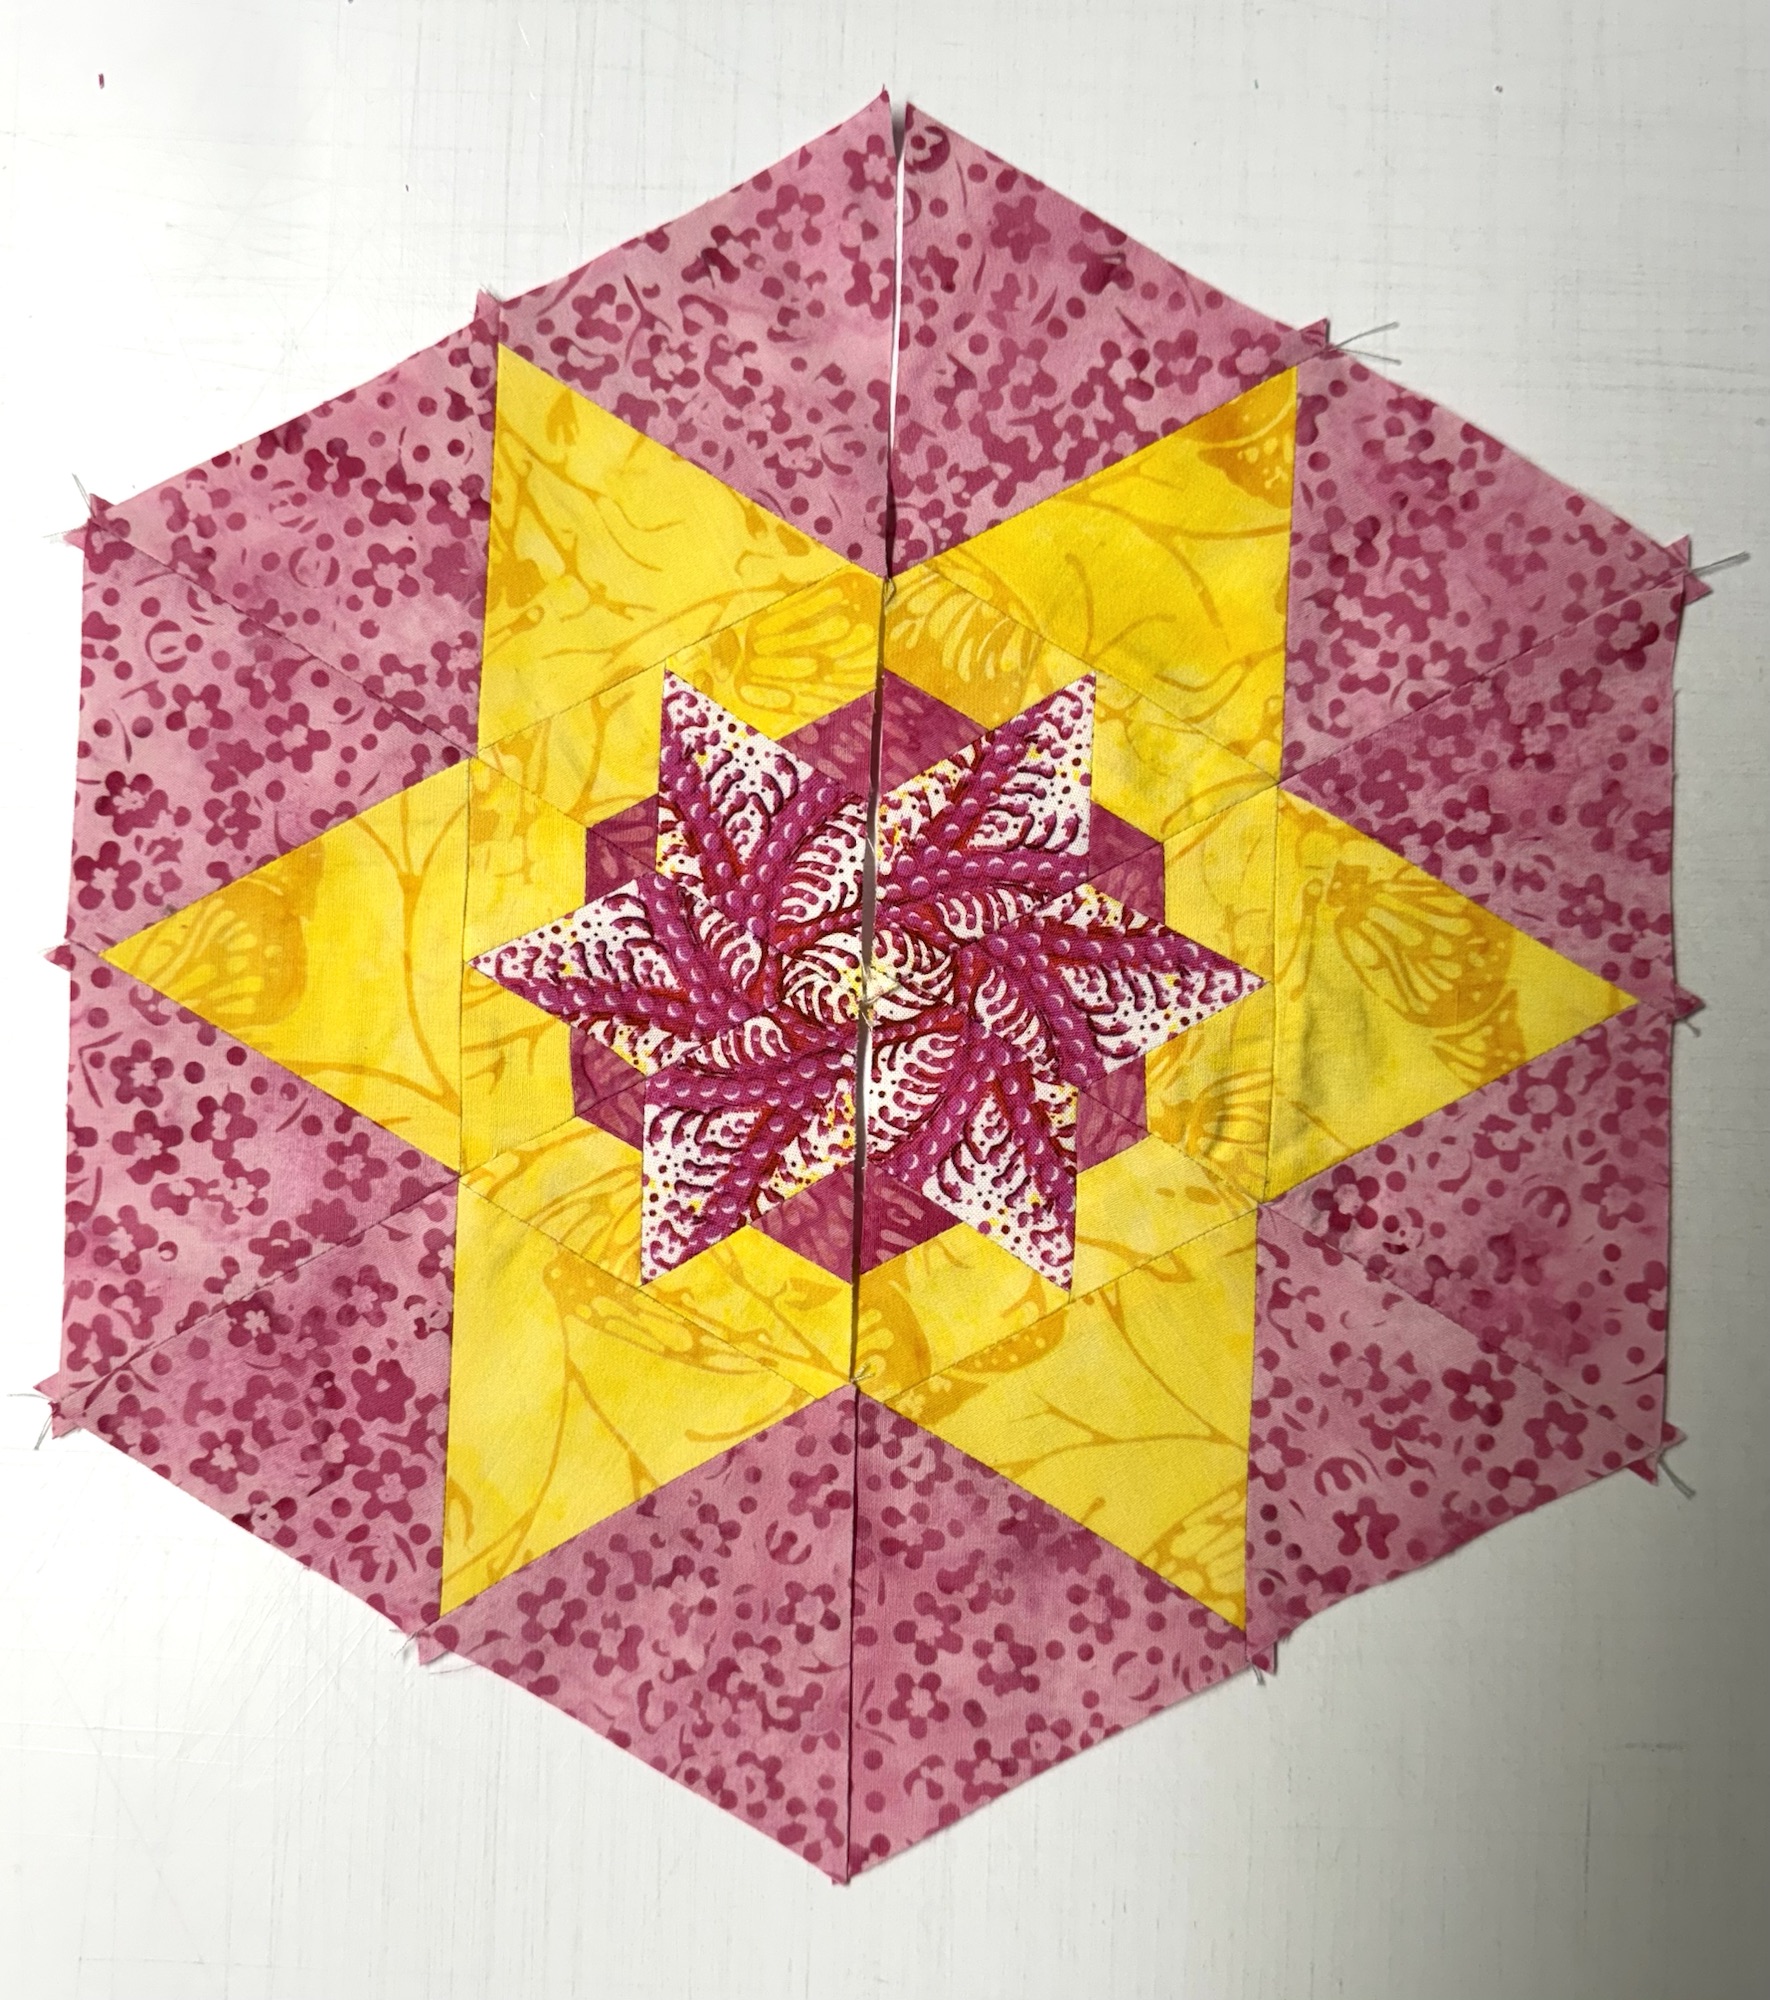
Lay out you side trinagles as shown above on either side of the companion triangle. Stitch the right sides first, then stitch the left sides. Press all seams open.
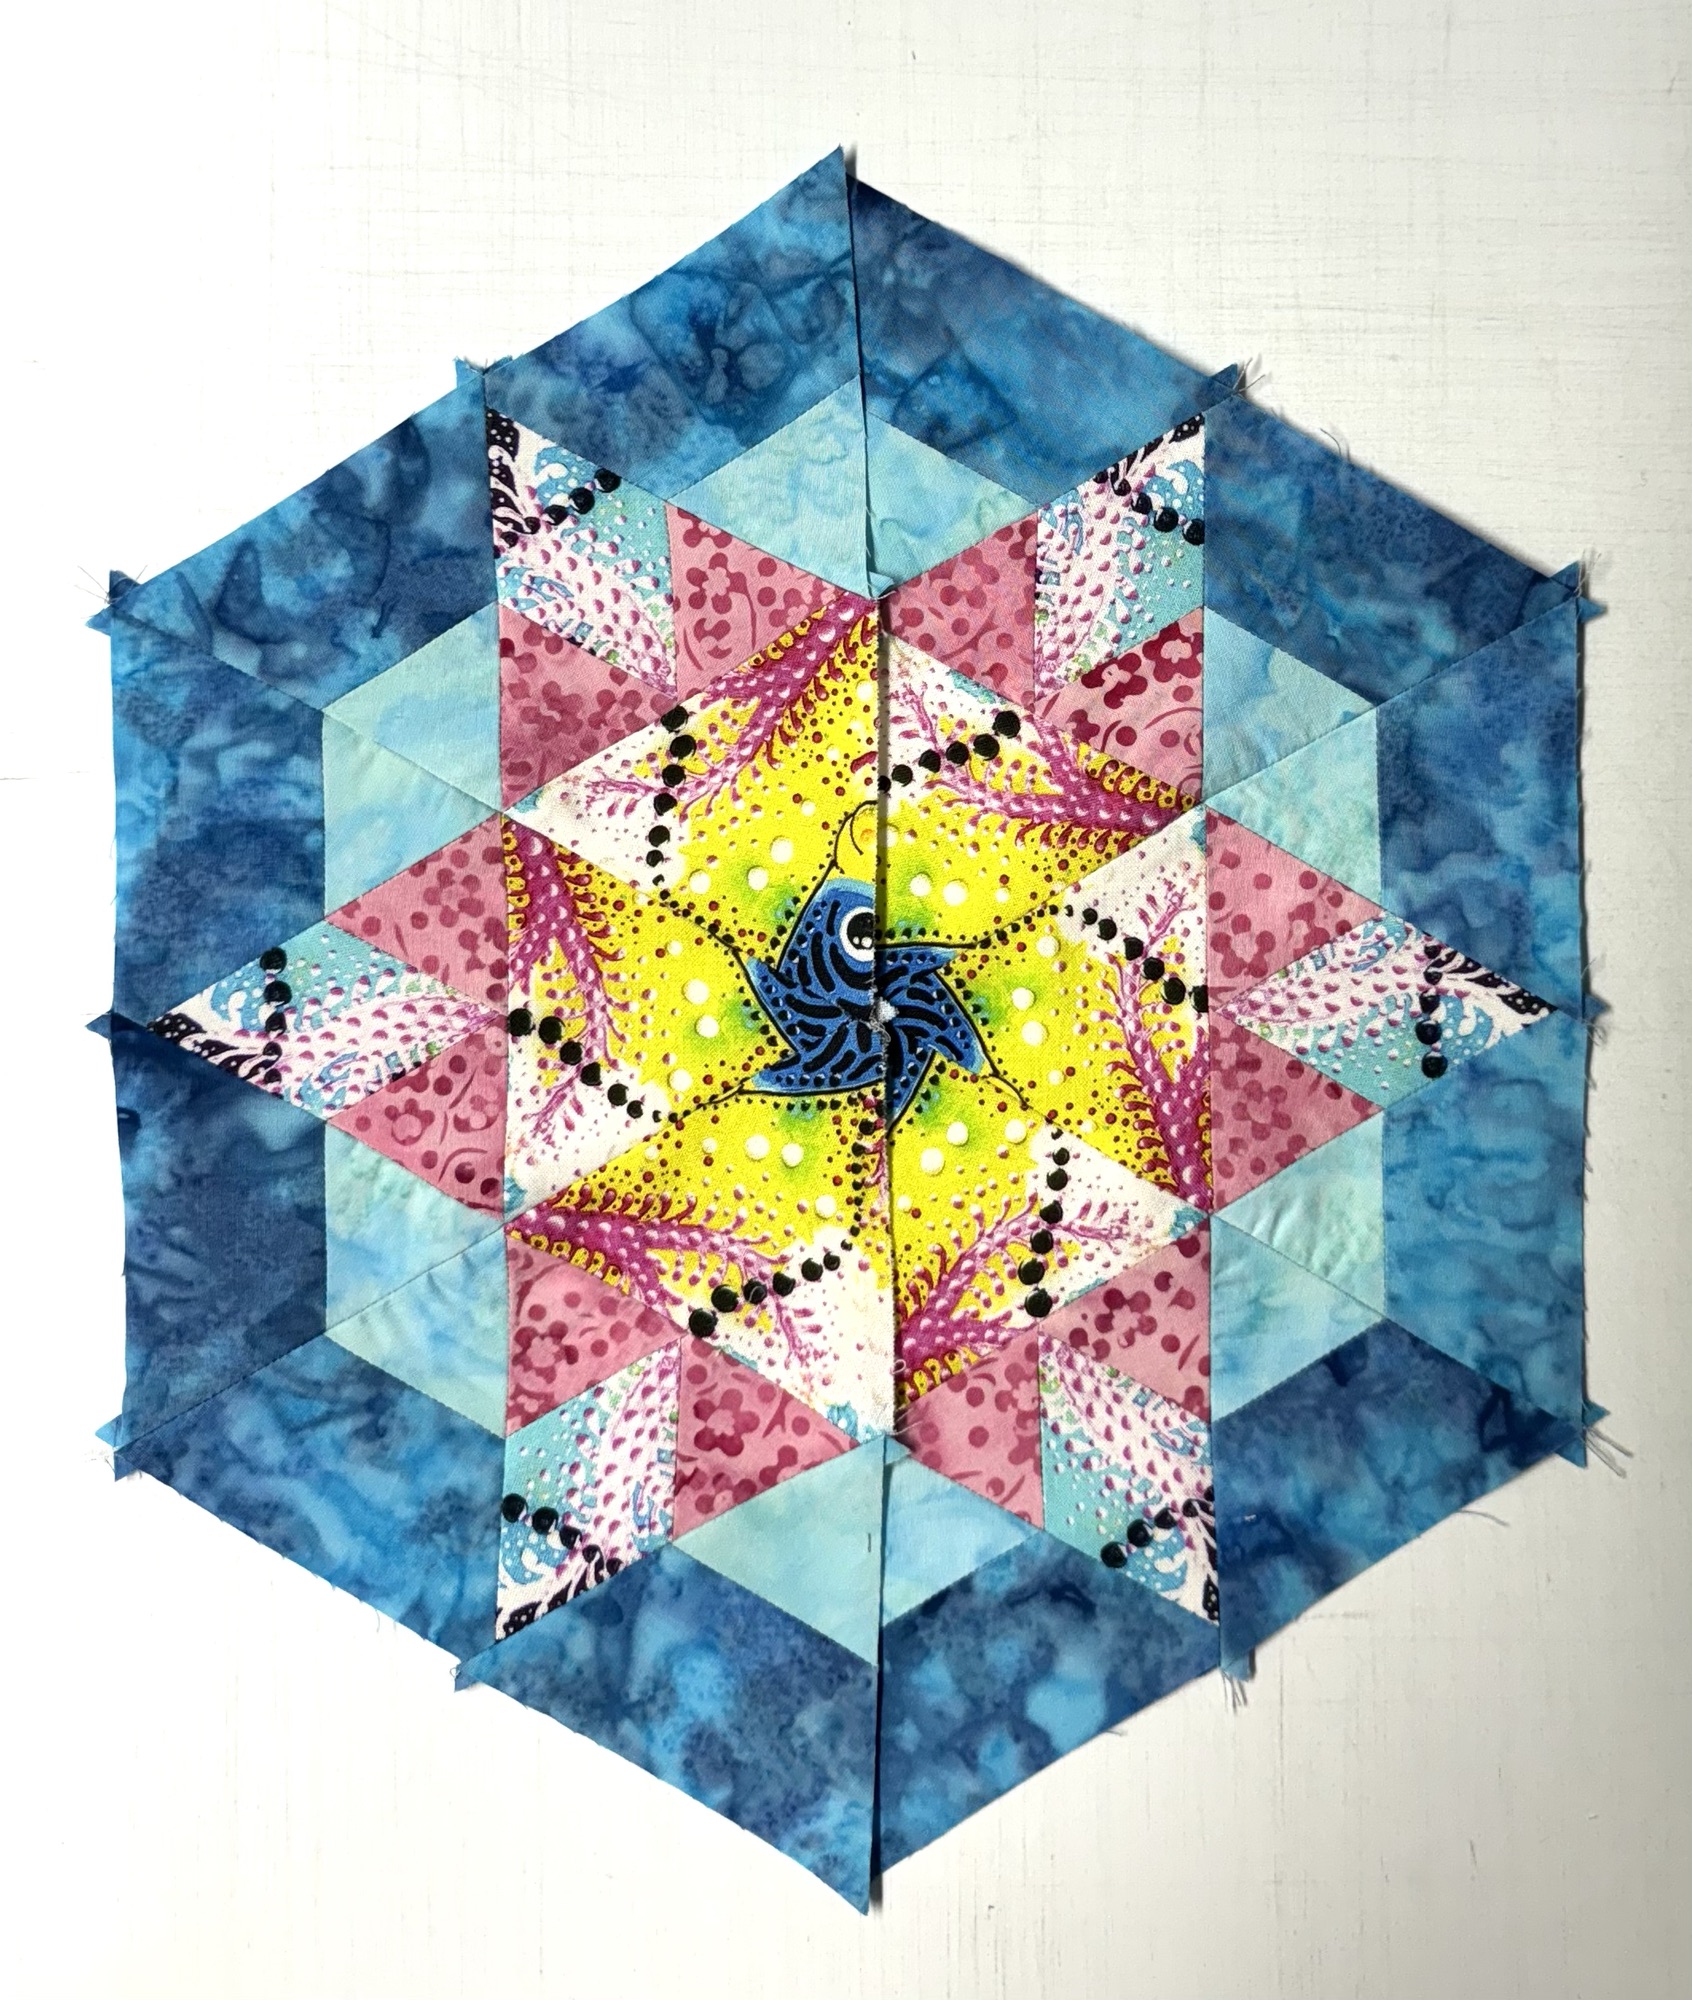
Construct as you would a hexagon, stitch 2 together, press the seams open then add the third. This made a 10″ finished hexie.
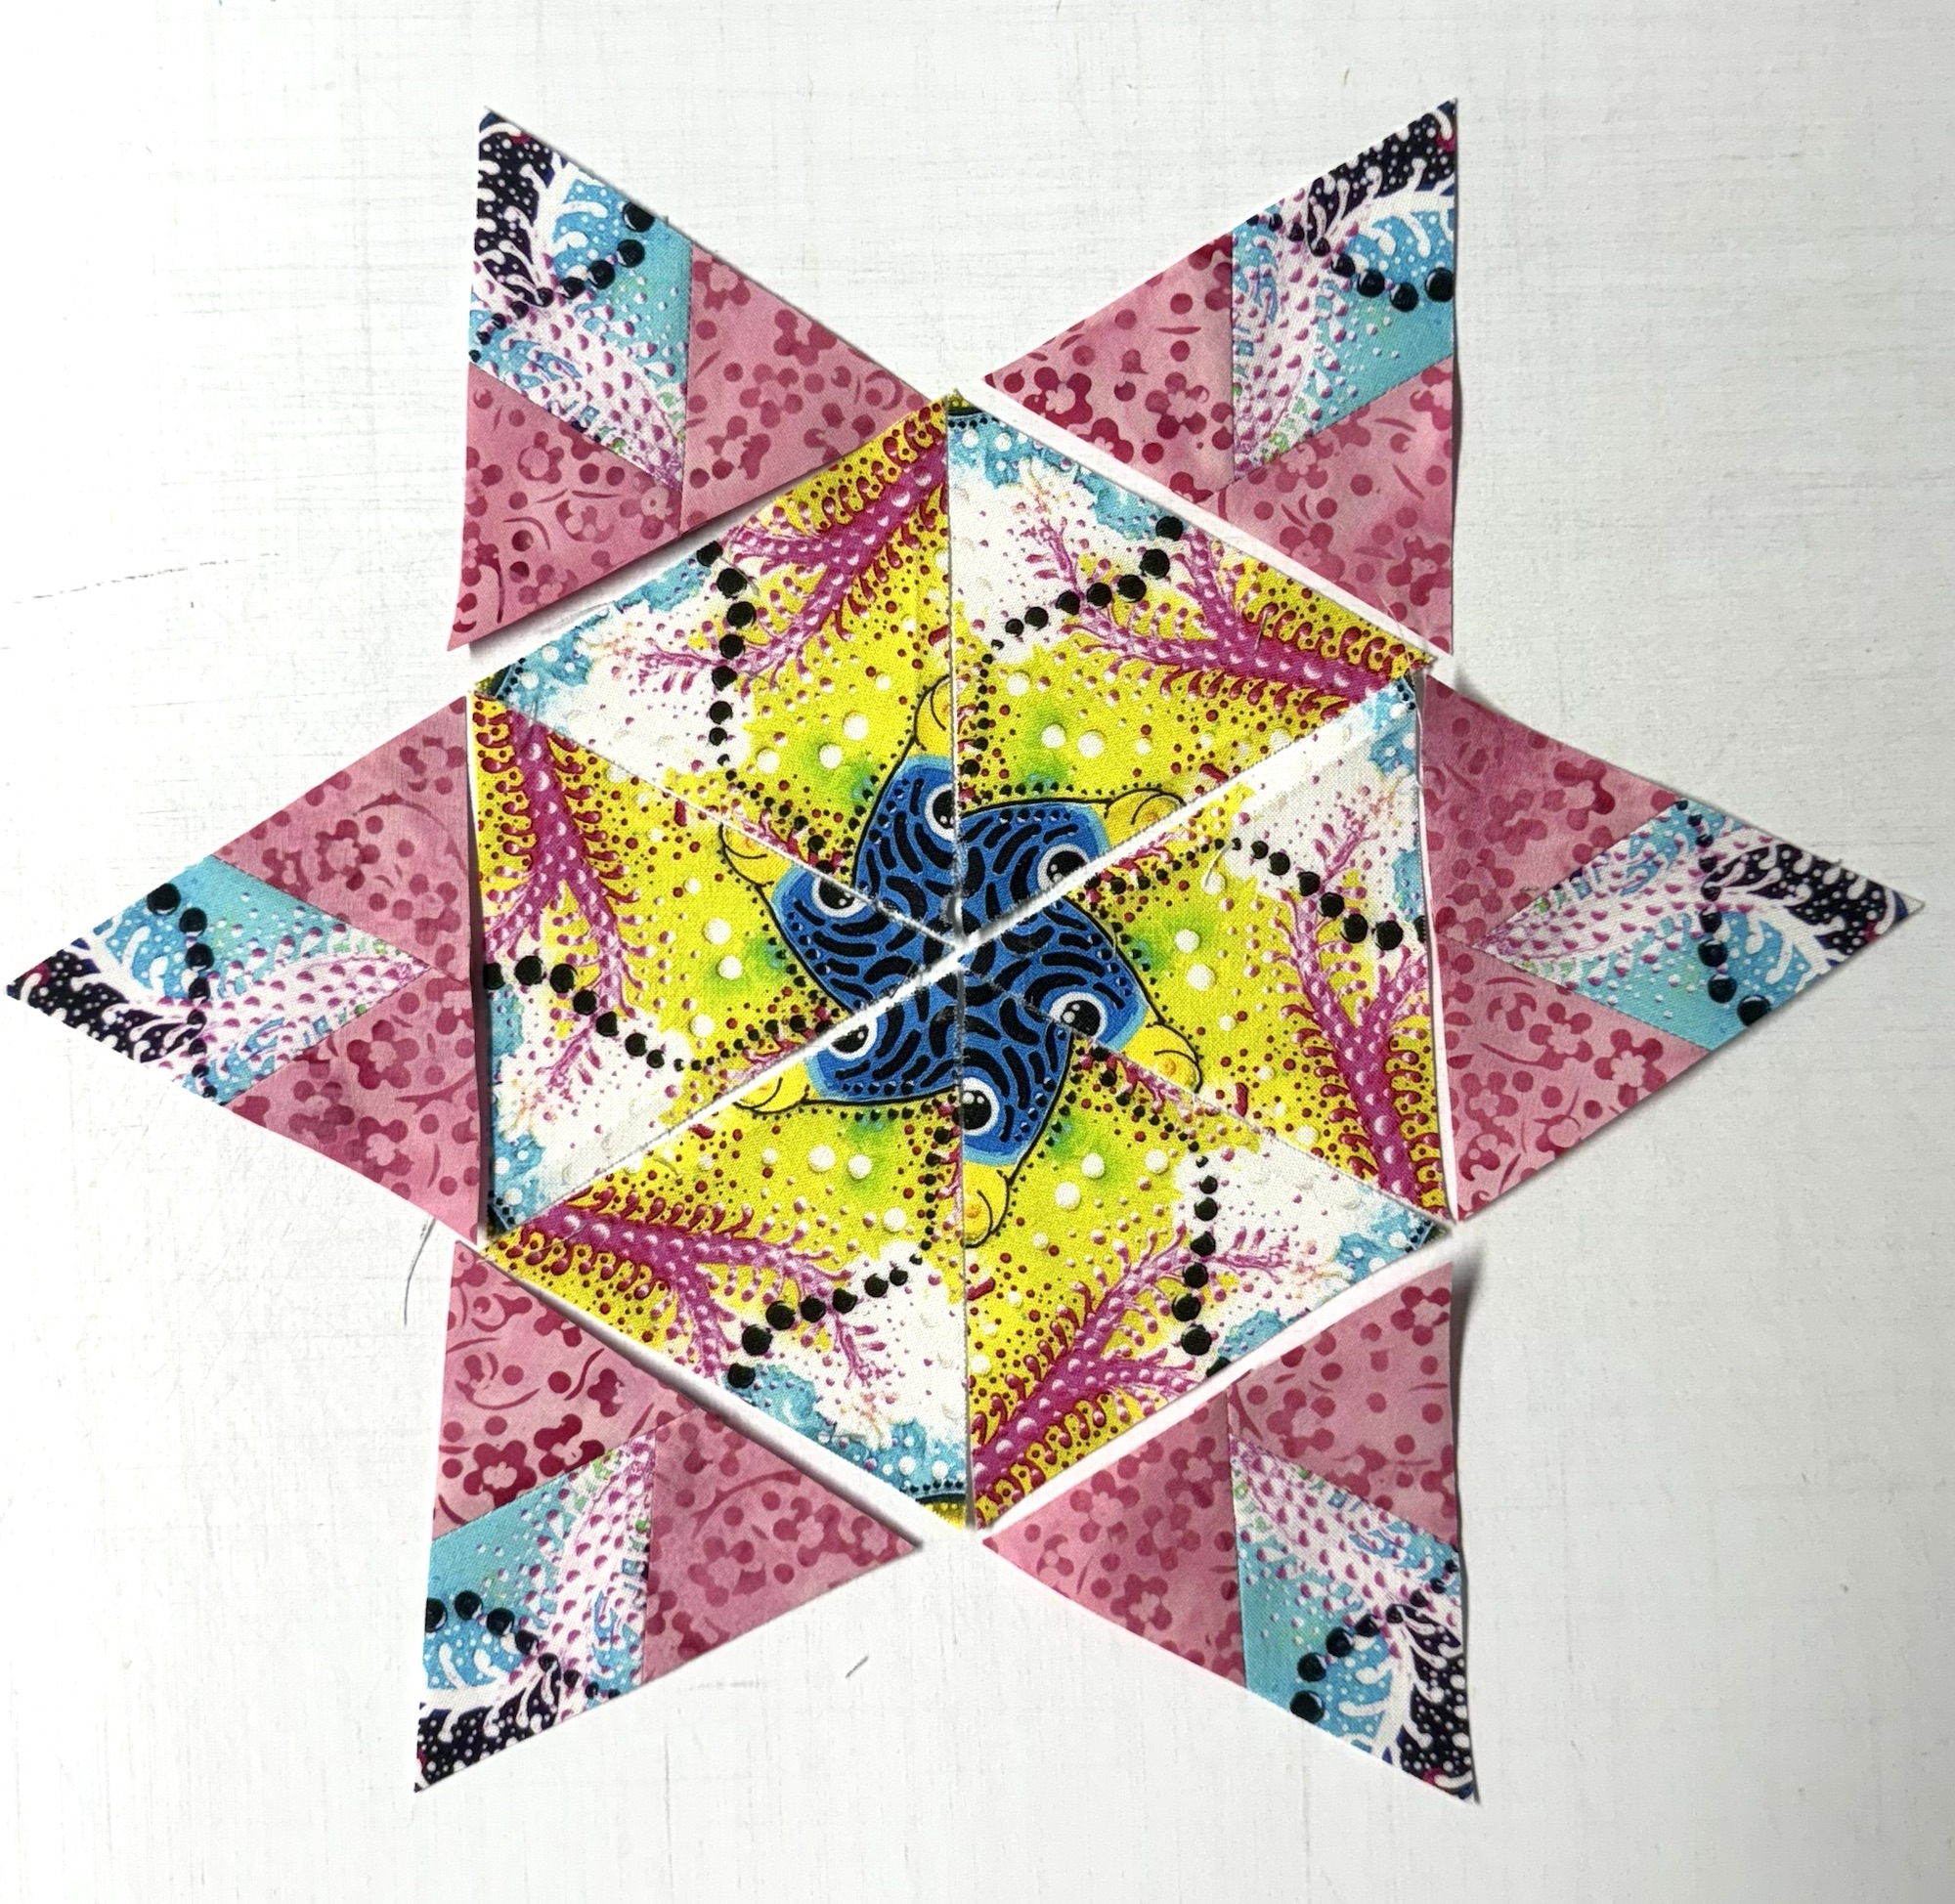
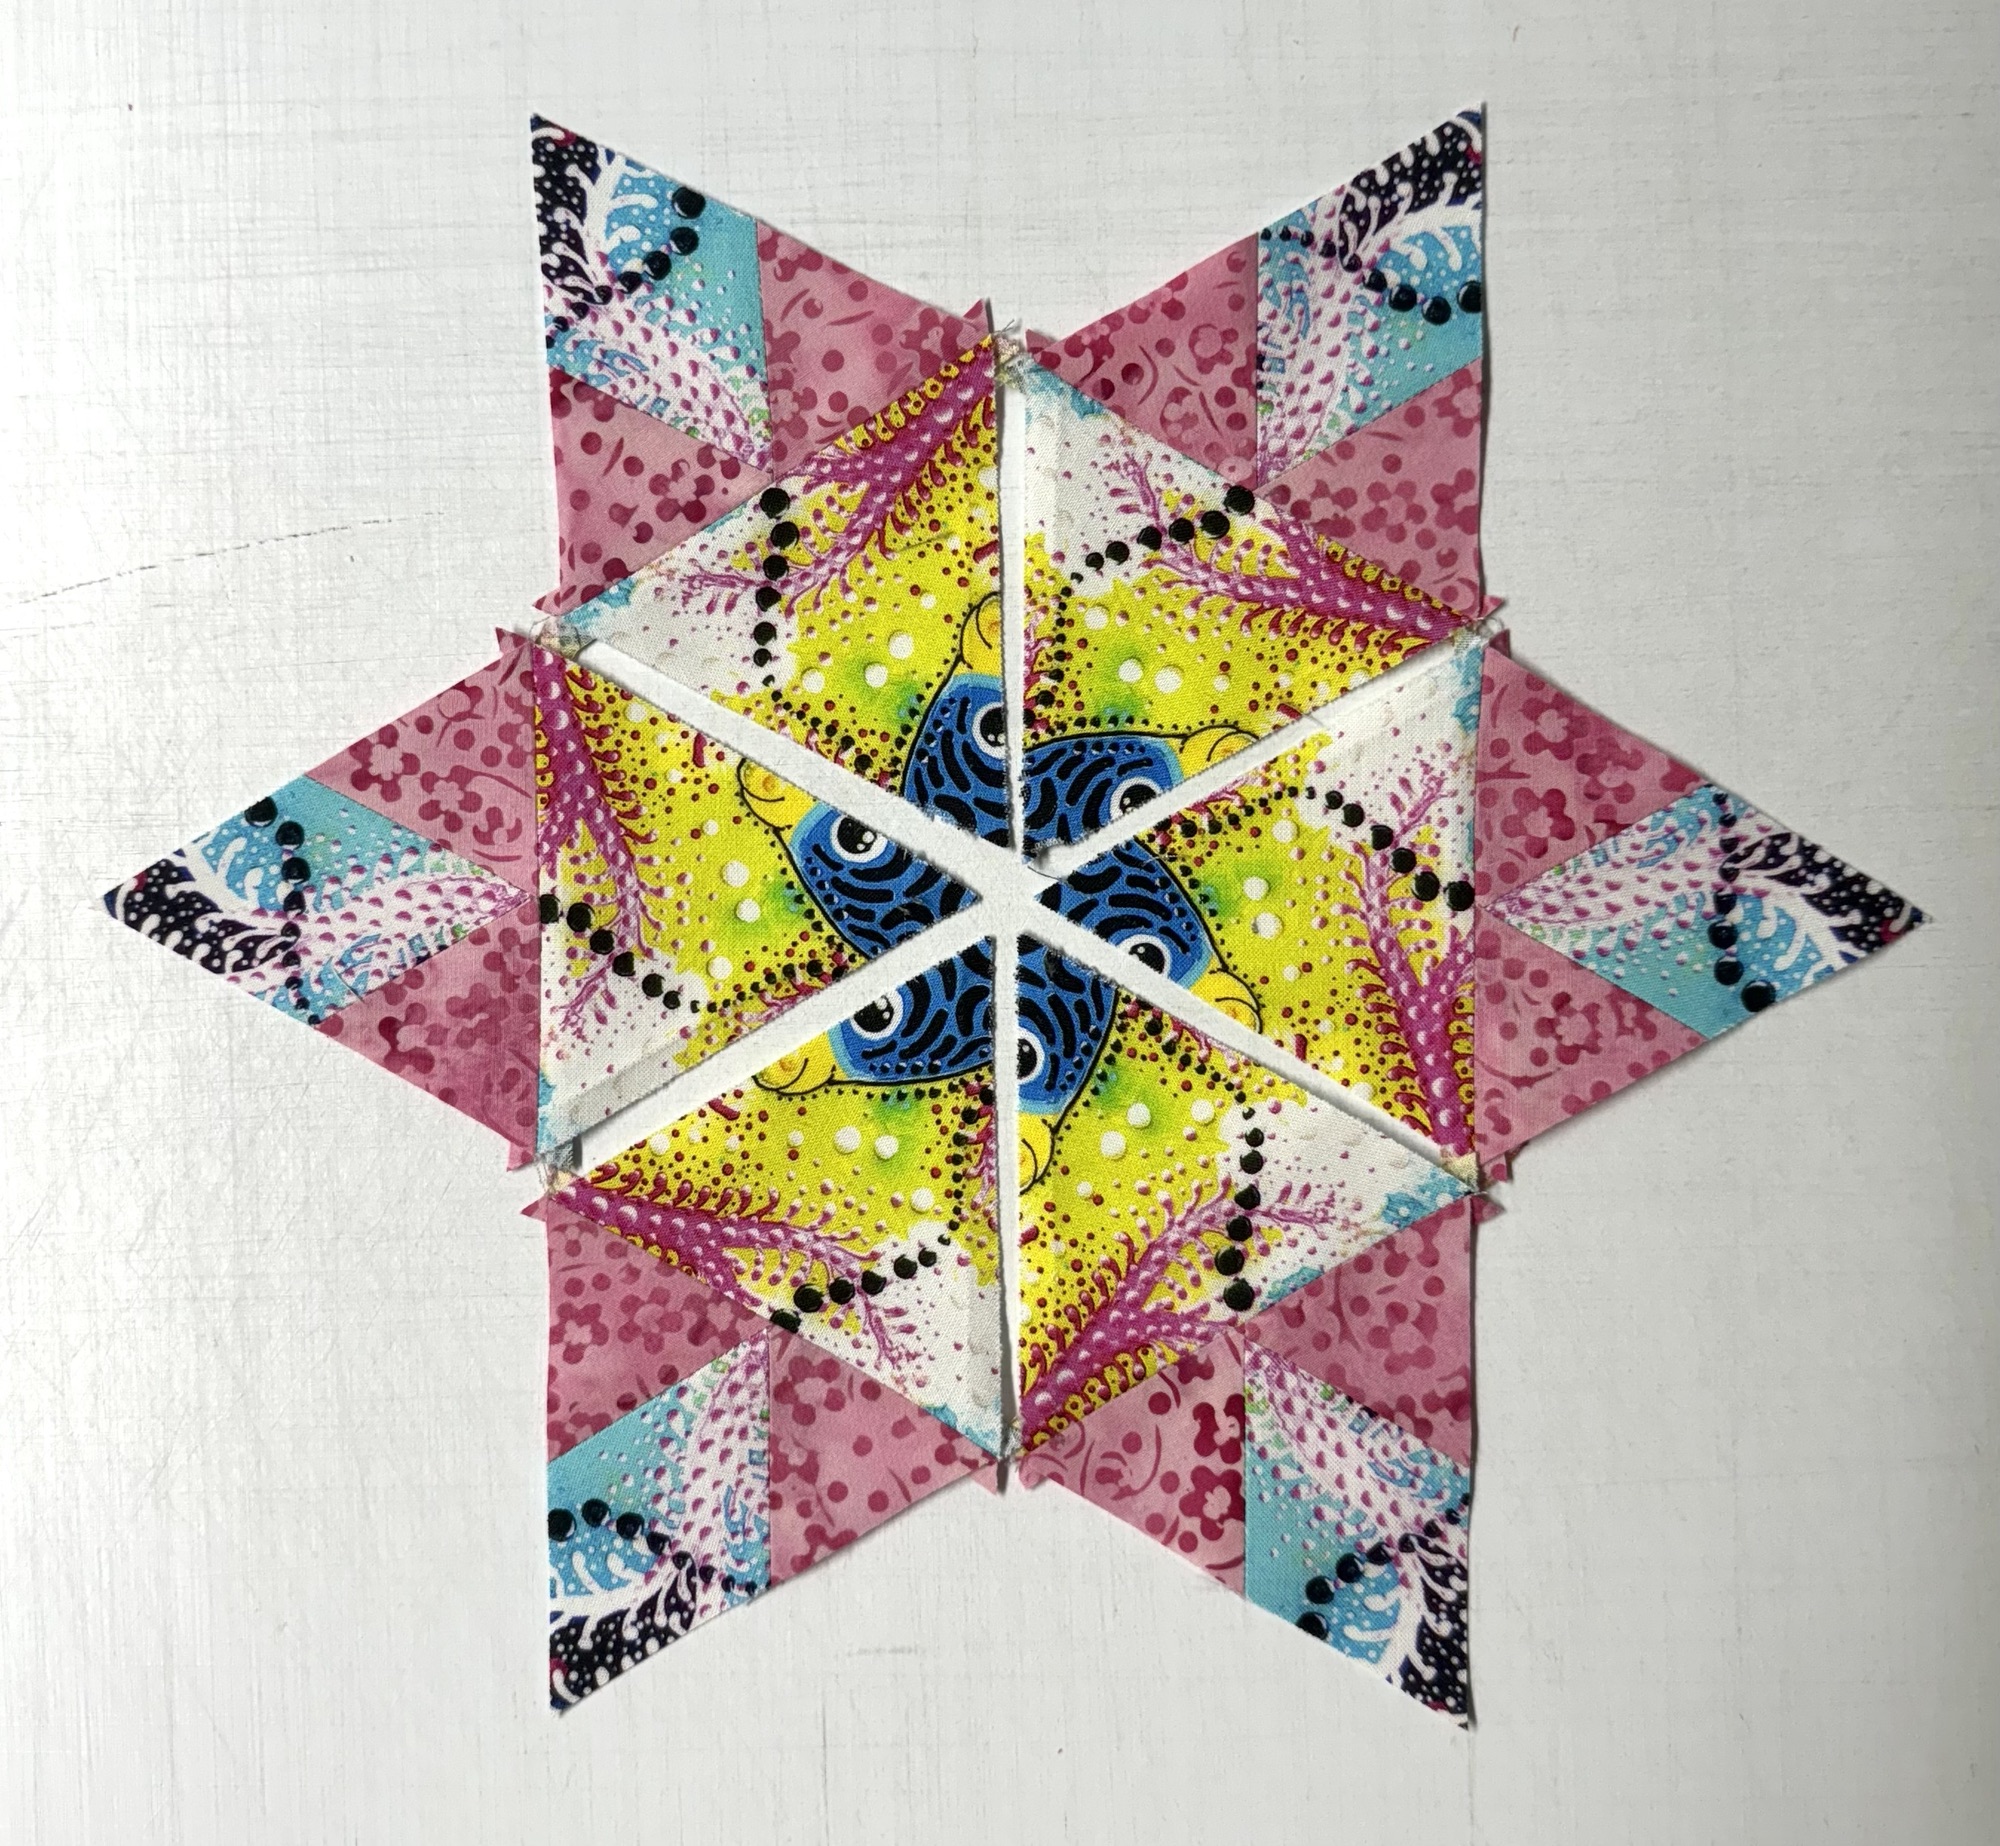
Once I made the Basic Spinner, I knew I could replace the companion triangle with other Star 60 units. I made the units half the size of my 5″ finished hexies. I made 6 – 2.5″ Capped 60, Framed 60, Quad 60 and Star 60 units. I really love these Star 60 Spinners.
Bedazzled measures 88″ x 71″. To get my uneven curvy sides on my OBW, I use half hexies following the Star 60 instrutions on page 10. Bedazzled is not quilted yet.
I was at a quilt retreat this weekend with my quilting buddies. I brought plenty of projects to work on, but a local quilt shop had a sale going on so I bought some beautiful fabric.
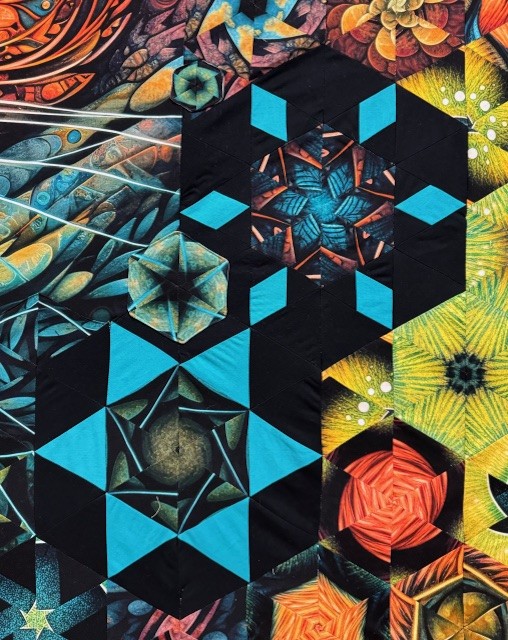
Shadow Play by Maywood fabrics had a nice light, medium, dark and a great green for a backgound, everyting I needed for Hollow Cube 60’s. I had an idea and wanted to see if it would work.
I love my Star 60 tool by Deb Tucker and I love Hollow Cubes using the Hollow Cube 60 Technique Sheet. I wanted to see if I could fit a circle of 6 – 6″ hollow cubes inside a cirlcle of 6 – 18″ hollow cubes and it worked. I love the look! I bought the fabric on Thursday and made the quilt on Friday! The quilt measures 60″ x 60″.
Next up was a challenge to make a 36″ finished quilt with the main focus using 7 fat quarters of 30’s reproduction fabric.
I decided to use Deb Tucker’s Star 60 Log Cabin Technique Sheet and of course my Star 60 Tool. I chose to add 6 rounds of 1/2″ finished logs for a 27″ finished log cabin star. I added Half Rectangle Triangles using the Star 60 tool instructions to make the hexagon into a rectangle. I added 2″ strips to make it square and added a 2″ border to make it 36″. I love my Star 60 Tool! All together a very productive weekend.