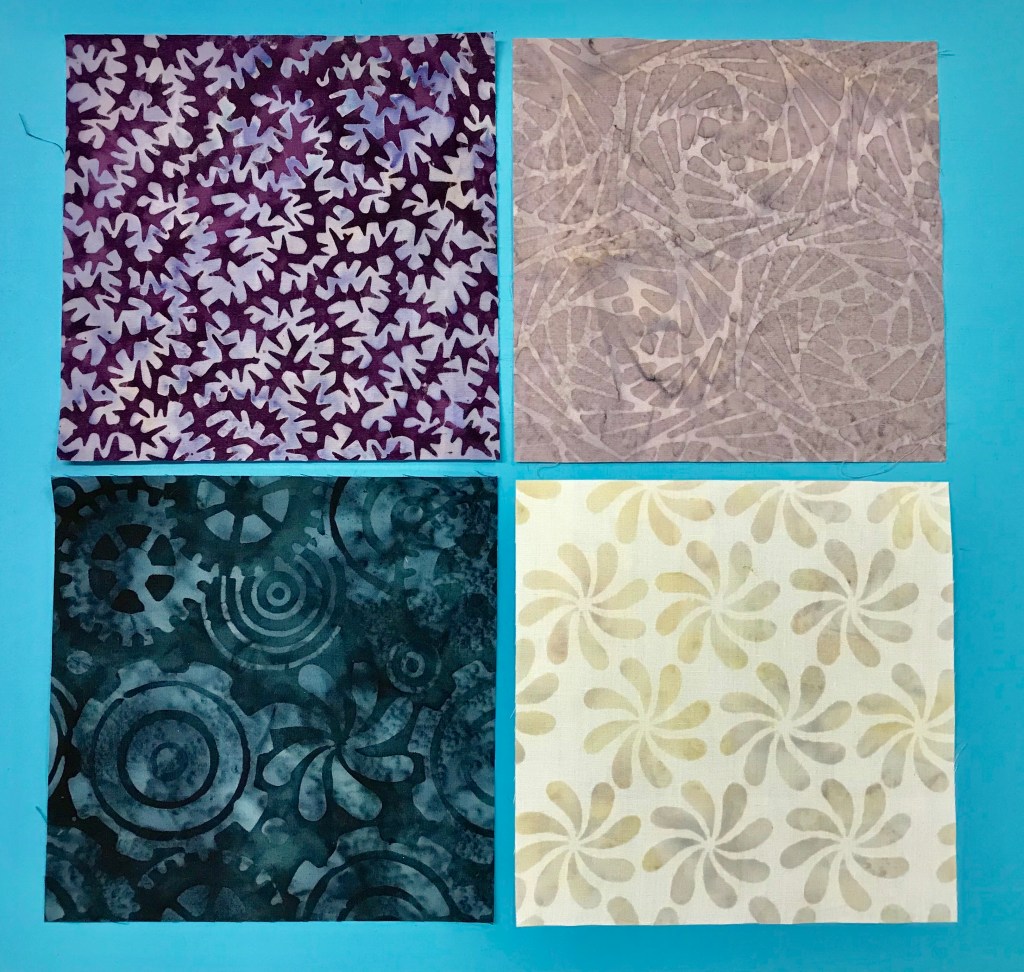
Deb Tucker’s “Steam Engine” fabric line from Island Batik is simply Gorgeous.
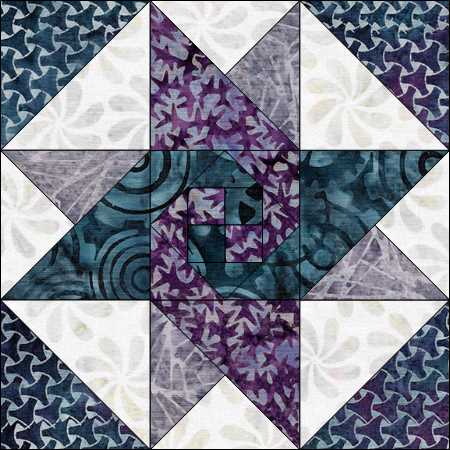
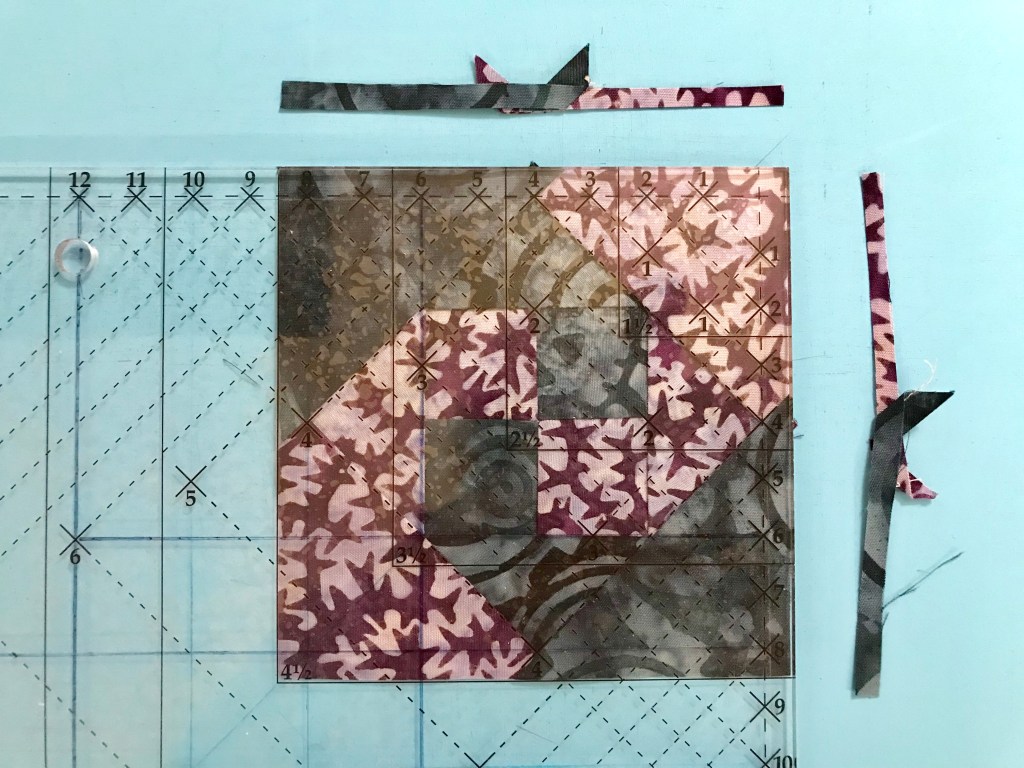
Card Shark: what a great block, made with Half Square Triangles, Non Mirror Combo units & a Stacked Square. Constructed using Studio 180 Design Tucker Trimmer I & Square Squared tools with Stacked Squares & Non Mirror Combo Units Technique Sheets.


Download your Cutting instructions here:
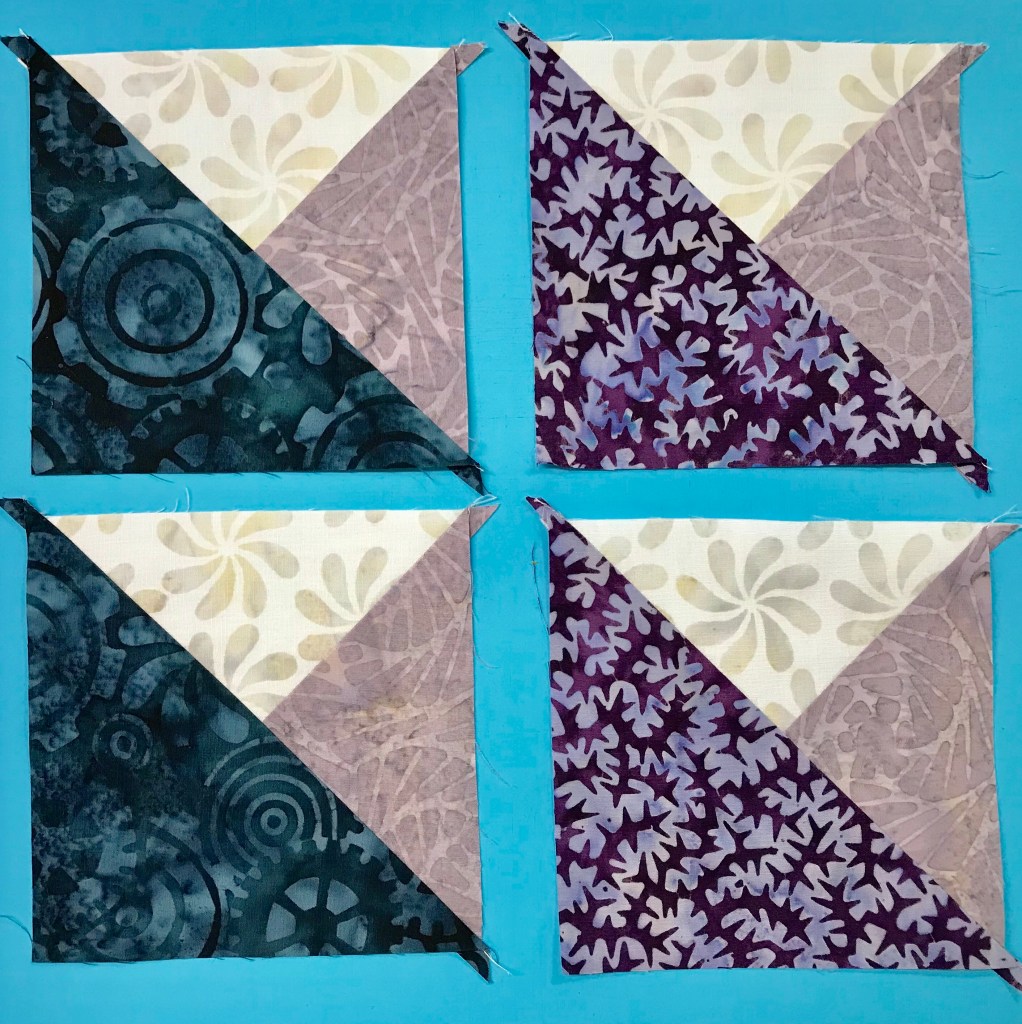
Half Square Triangles:
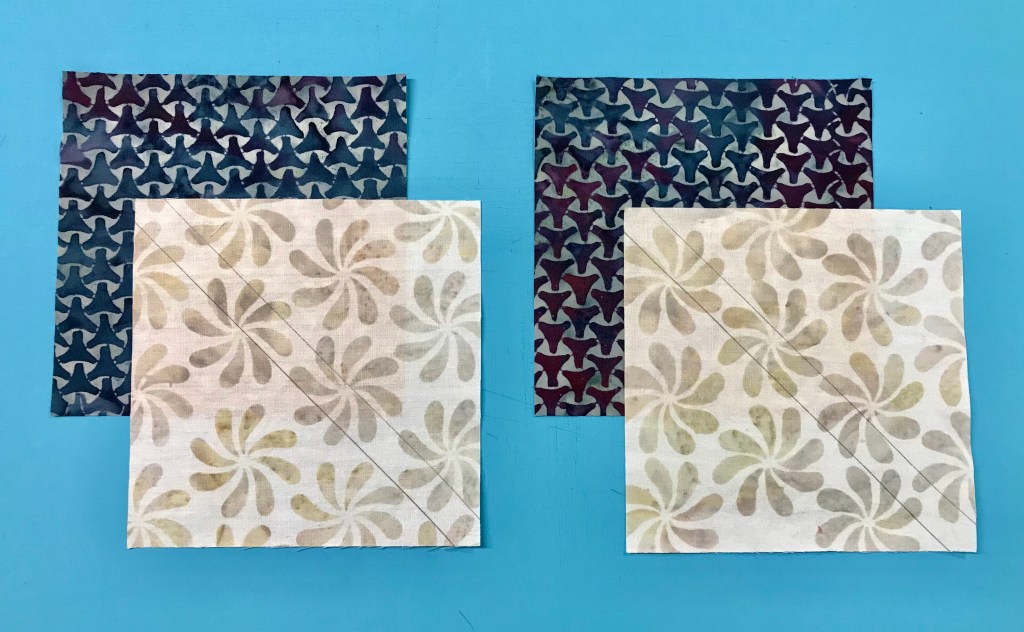
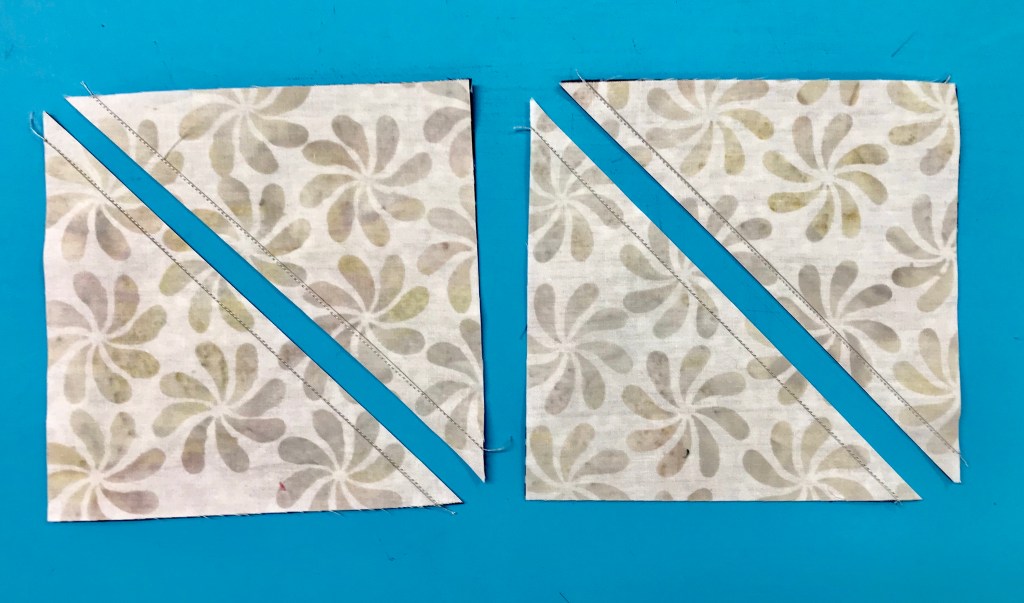
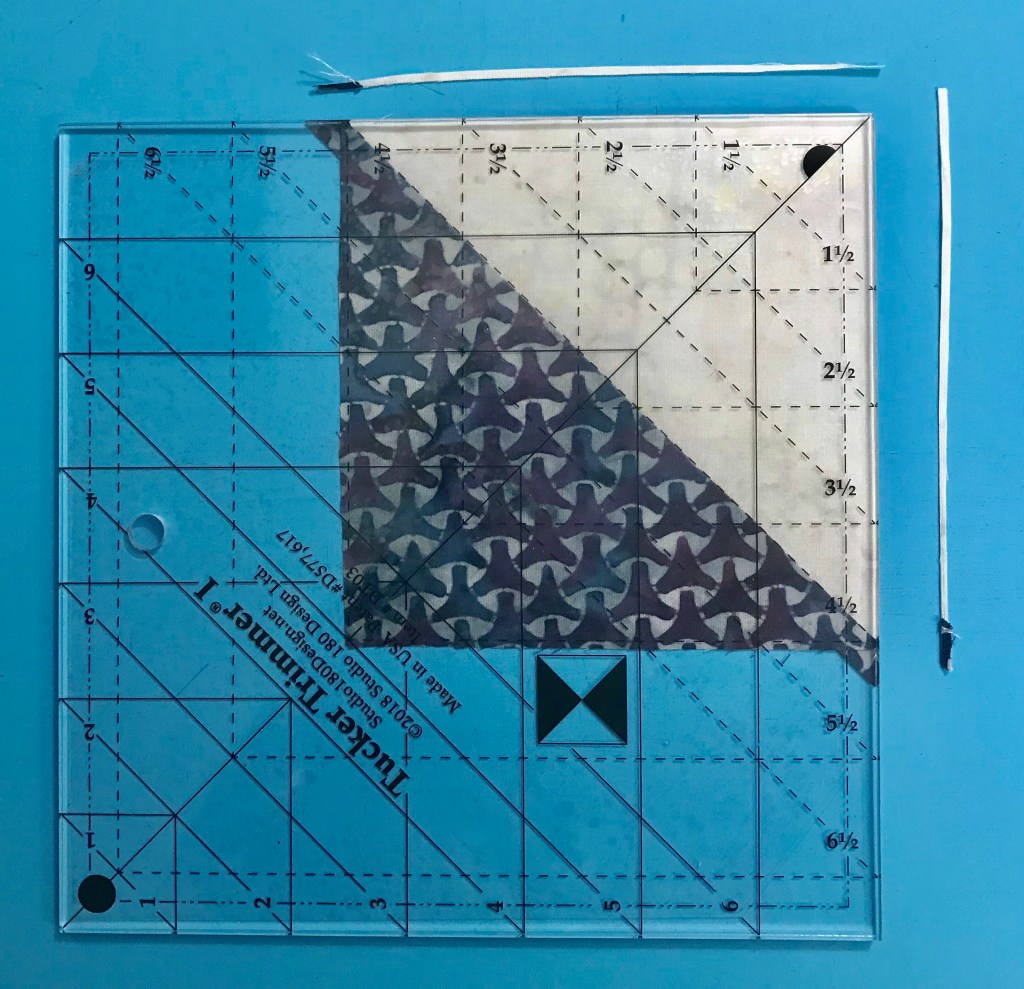
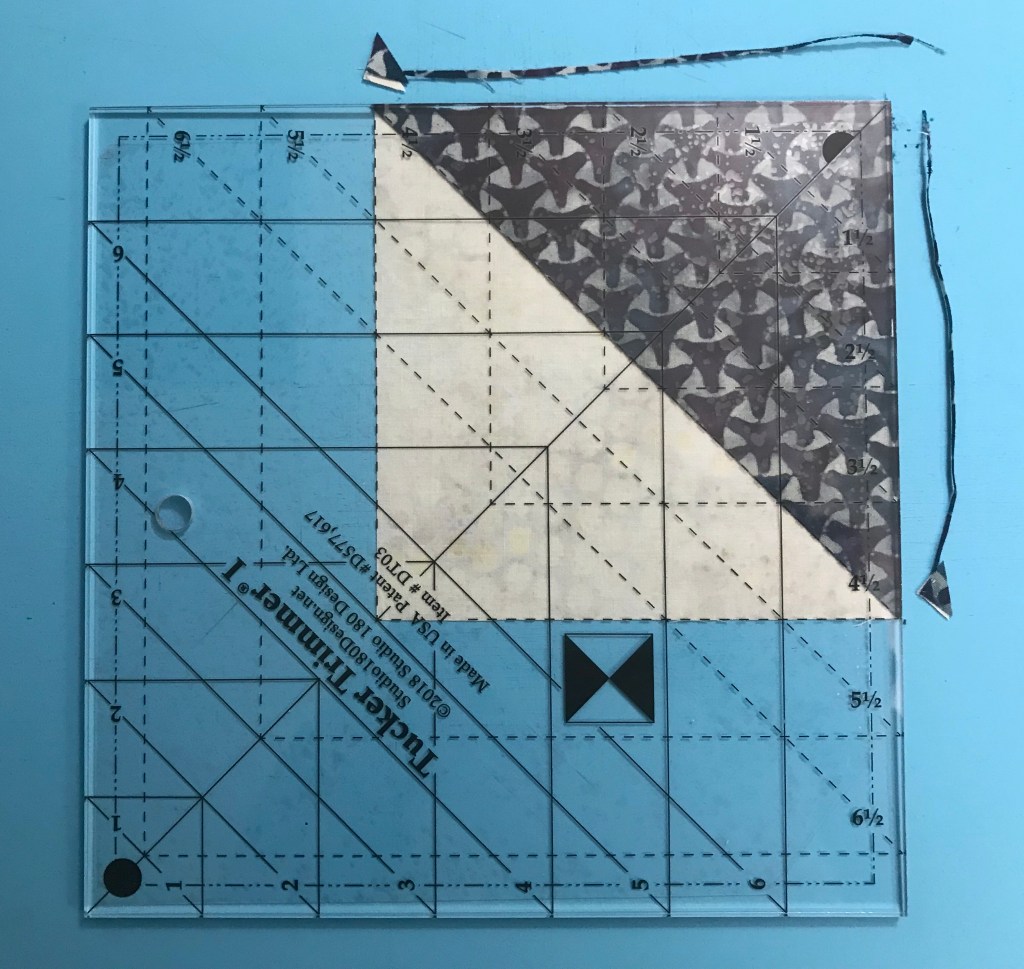

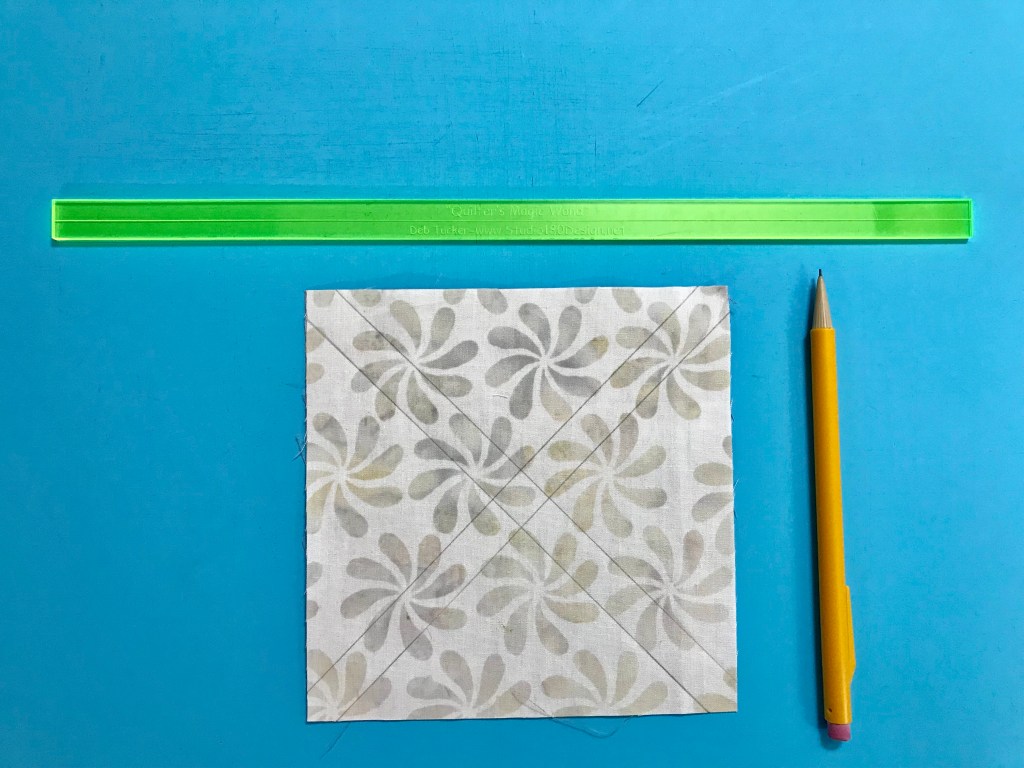
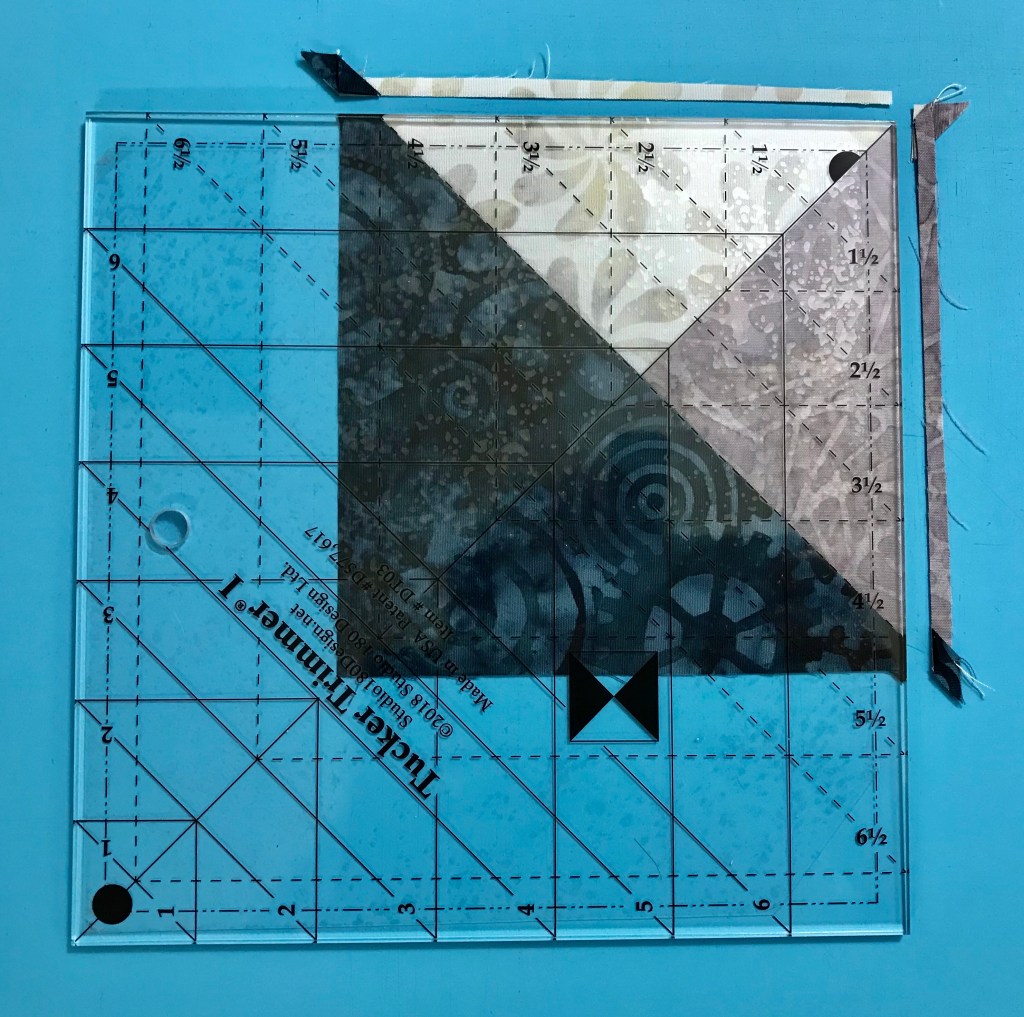
Your Tucker Trimmer Tool Instructions give you the information you need to complete your Half Square Triangles. Cut your squares and using your Magic Wand draw two diagonal lines. Match up your dark and light fabric squares aligning the raw edges. Stitch on the lines, cut apart and press to the dark fabric. Remember: whatever you are pressing toward, goes on top. Trim your Half Square Triangle units to 4 1/2″.
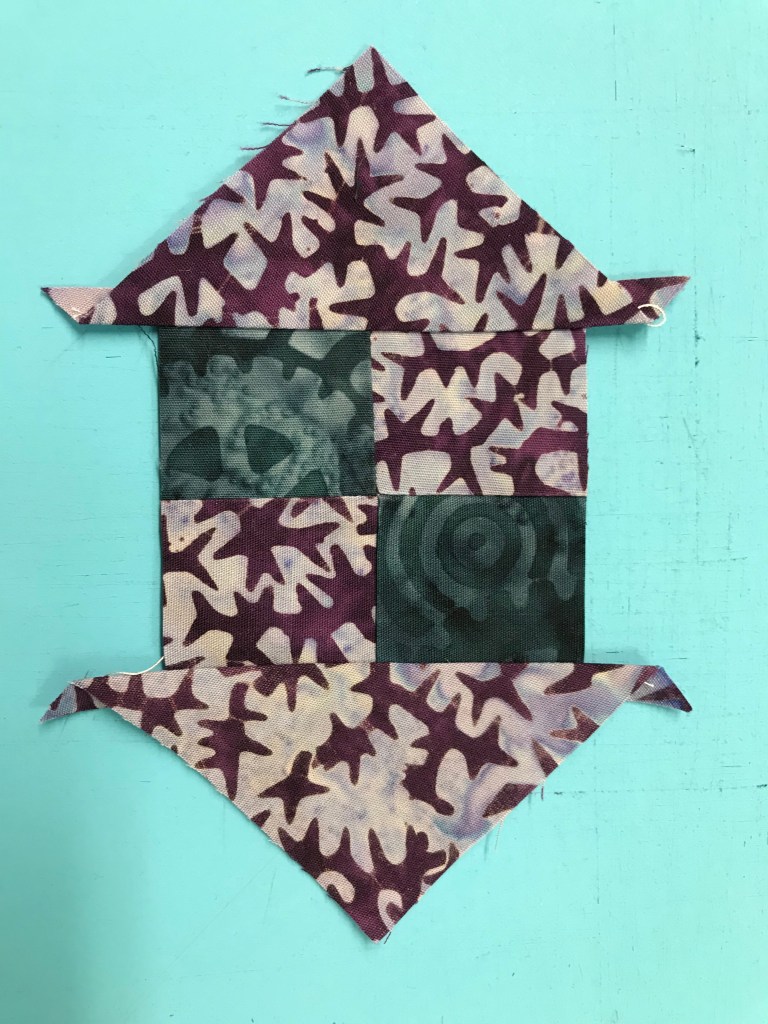
Non Mirror Combo Units: Past construction methods would result in mirror image units. Sometimes we need combination units that are the same as in Card Shark which requires two of each units below:
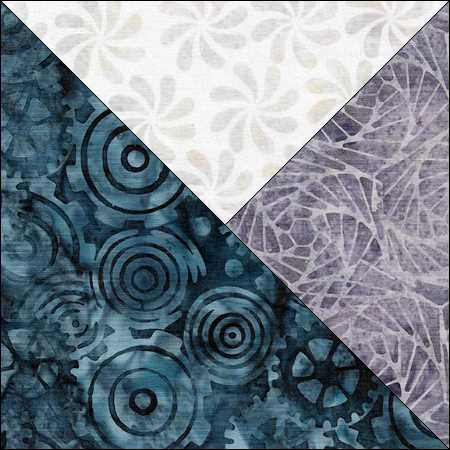
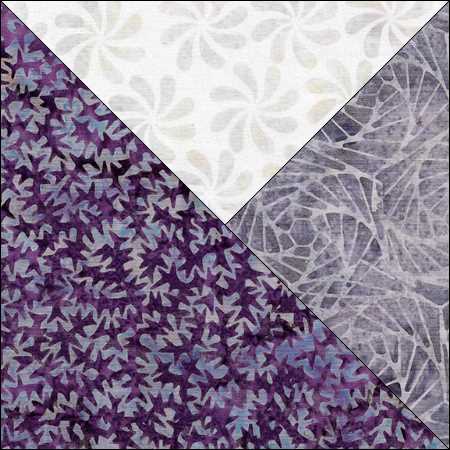
Determine your color placement. Follow the instructions in the Non Mirror Combo Units Technique Sheet.

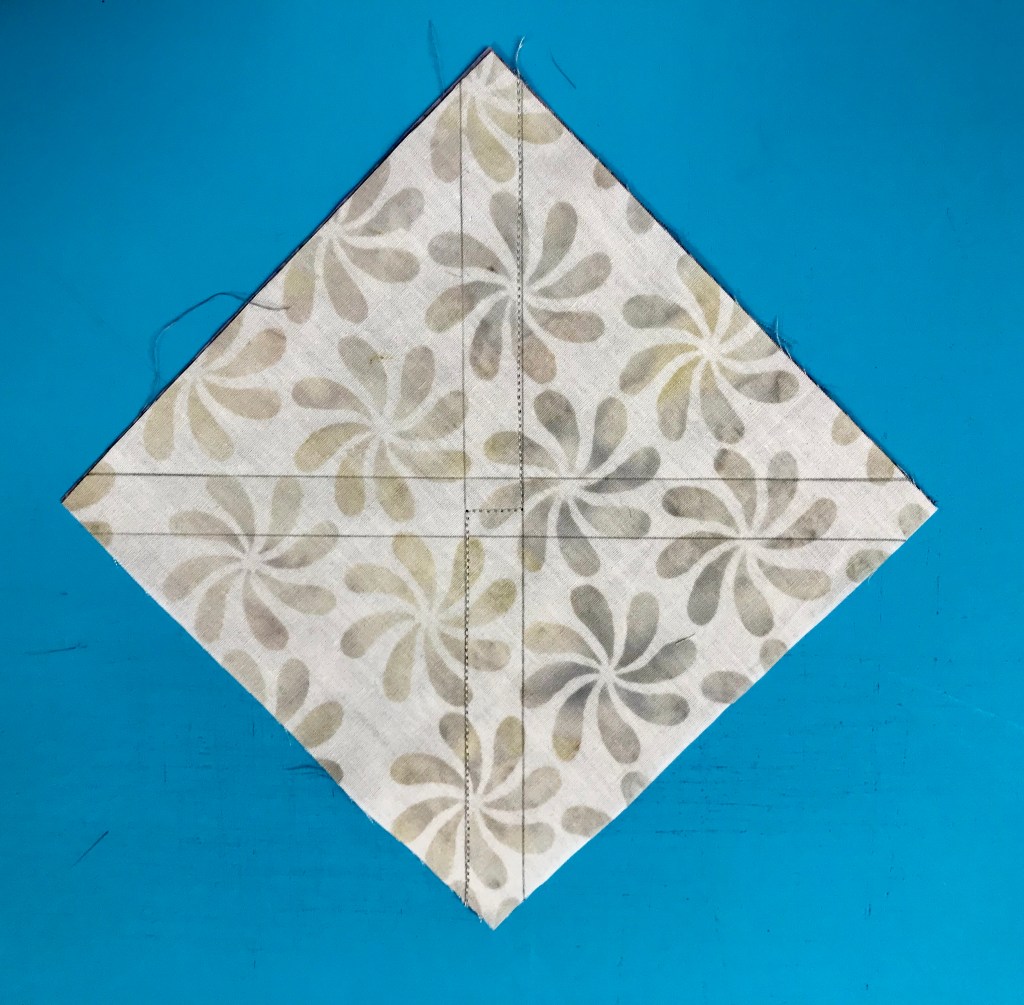
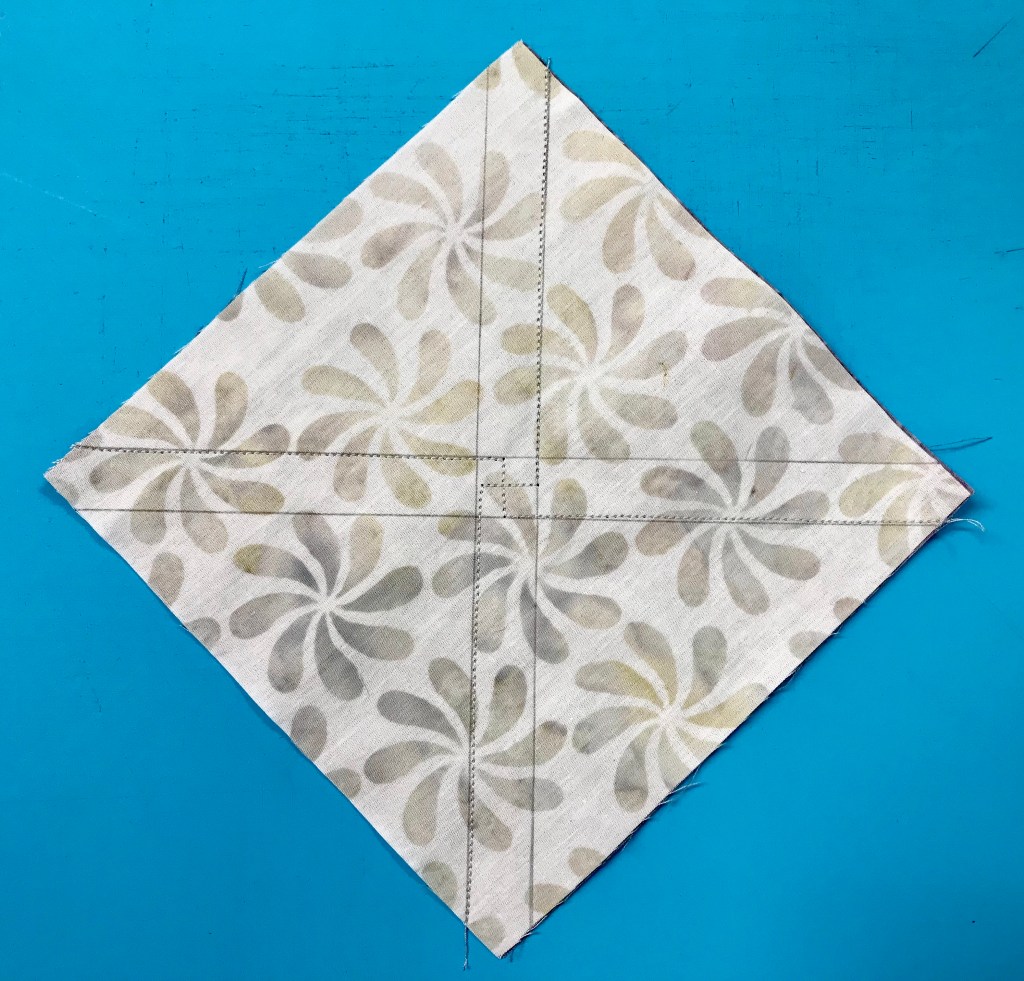
Make the half square triangles first by using the Magic Wand and mark 4 diagonal lines from corner to corner. Follow the stitching instructions in the technique sheet. Cut apart.


Press toward the dark triangle.

Cut squares for large triangles once diagonally.
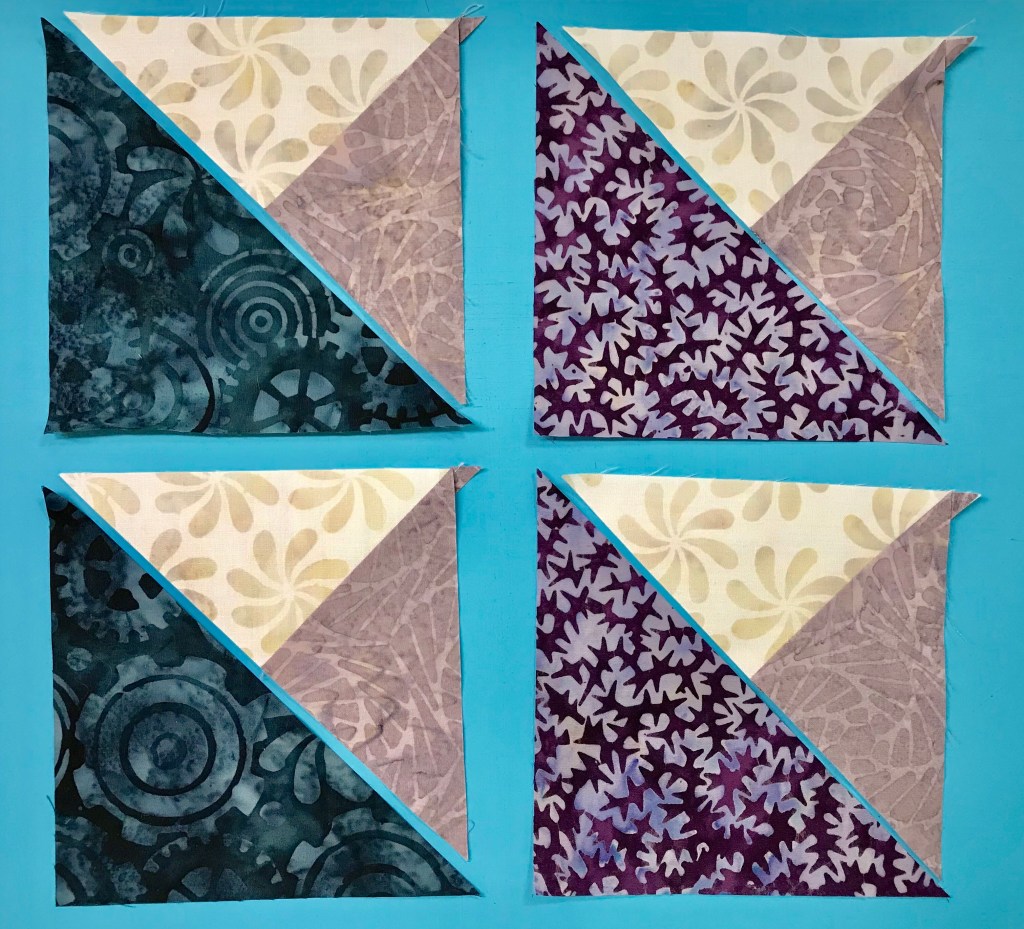
Pair small triangles with the large triangles, center and stitch. Press toward the large triangle.

Trim units to 4 1/2″.
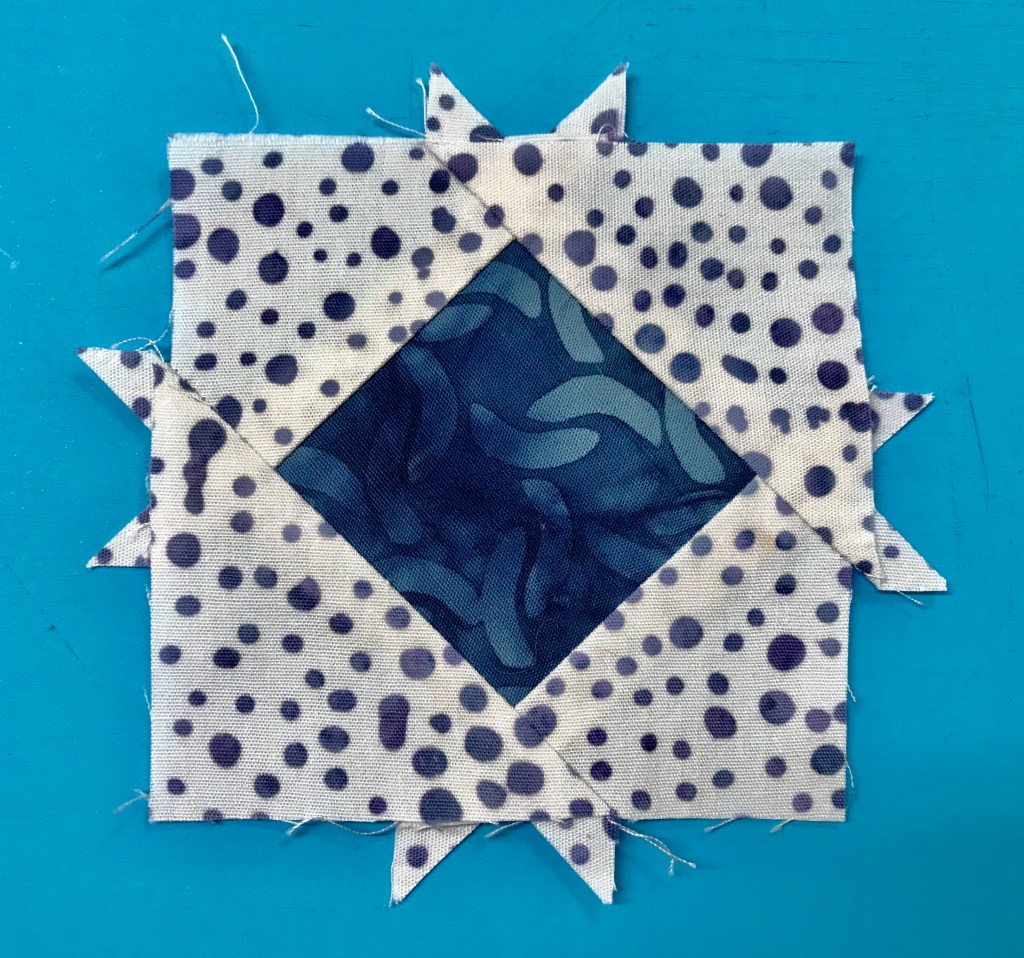
Stacked Square:
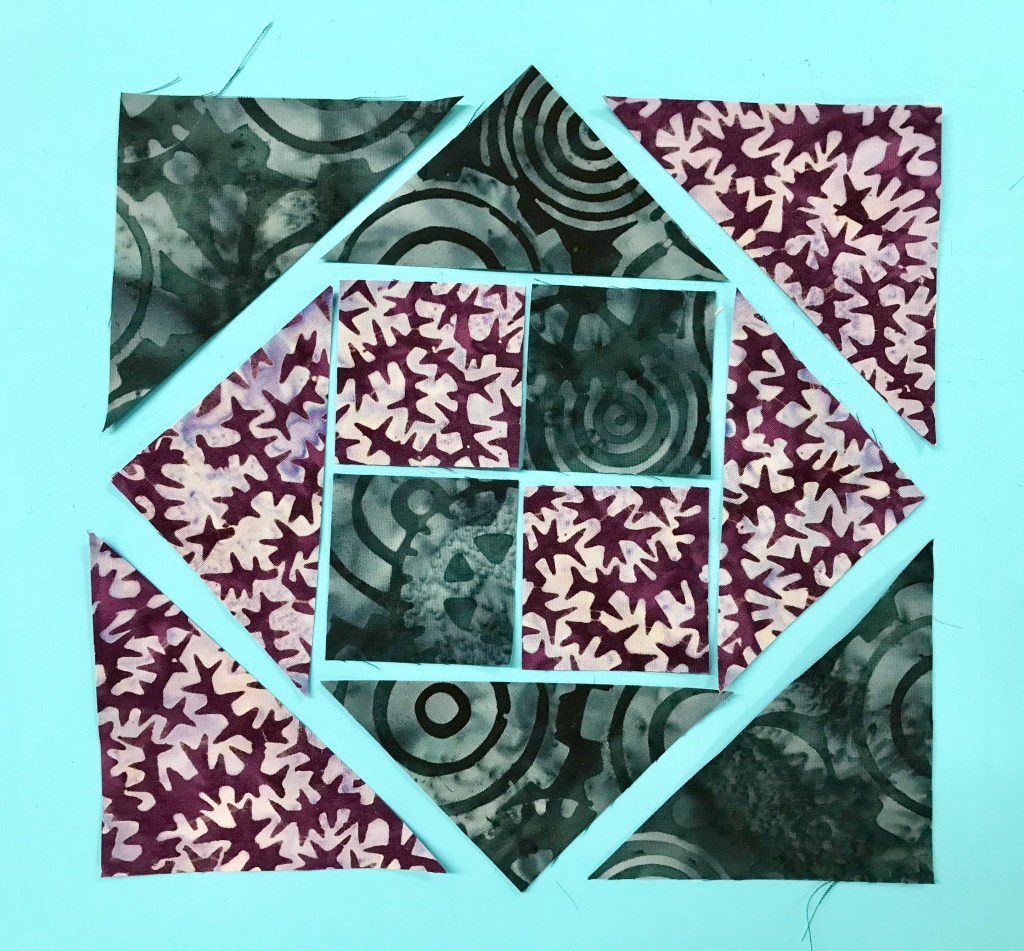
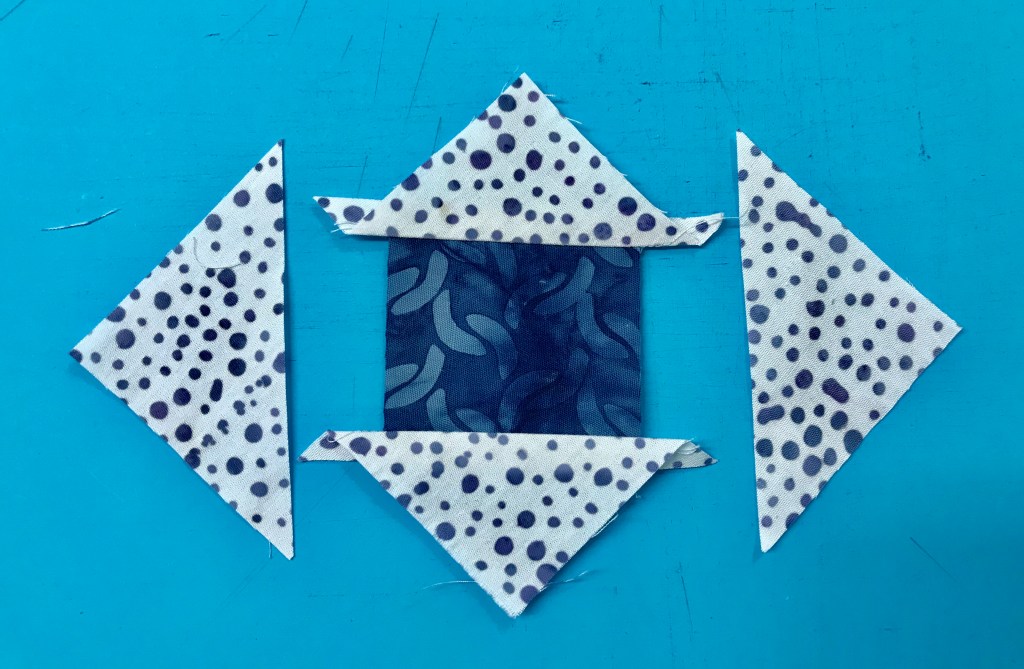
Layout your Stacked Square unit pieces.


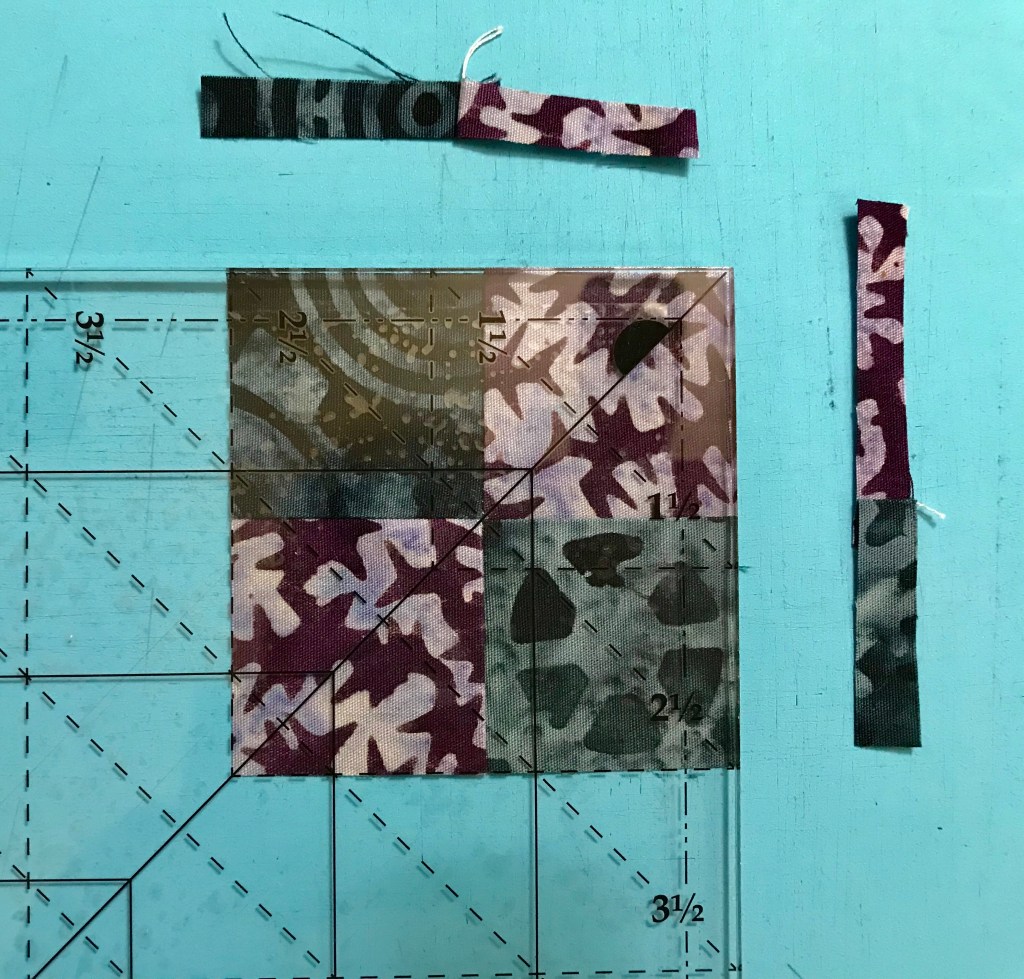
Start by making a four patch and swirl the center. Our Stacked Square is a 4″ finished unit. Check the chart on the Stacked Square Technique sheet to find the Cut size for the center square, which is 2 1/2″. Using my my Tucker Trimmer I trimmed the four patch to 2 1/2″.

Check your color placement and stitch two triangles. Press toward the triangle and add the two more triangles pressing toward the triangles as before.

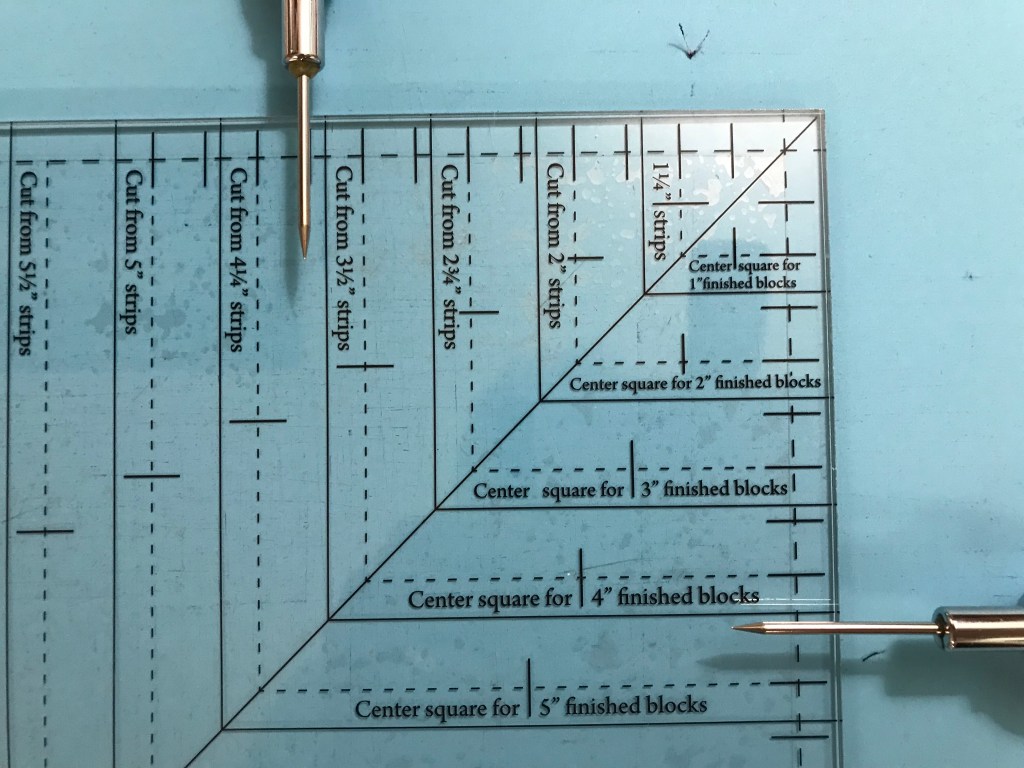


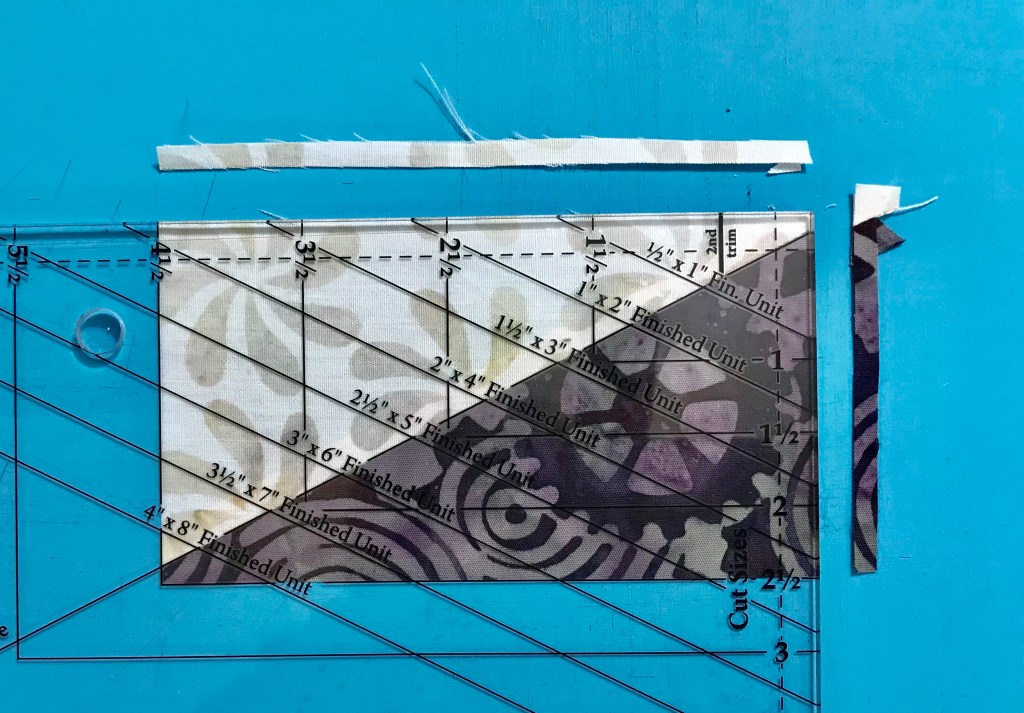
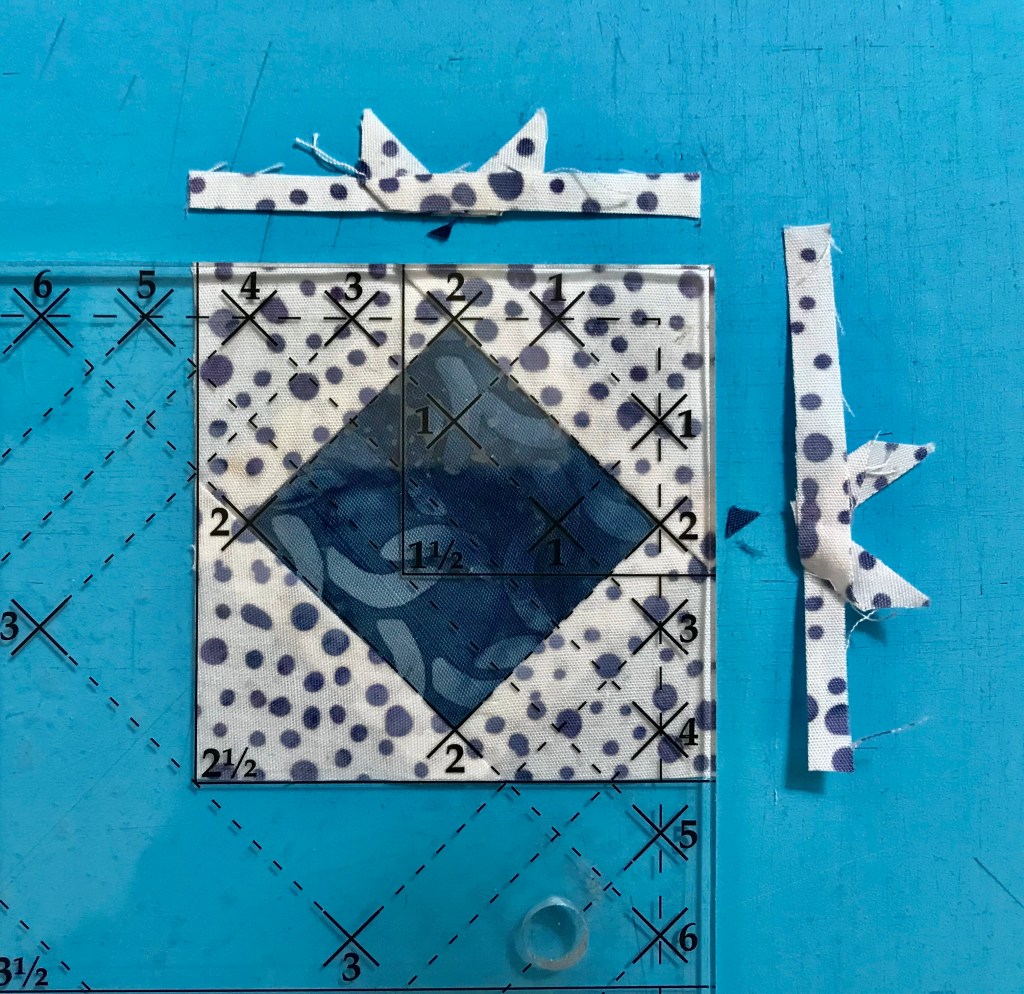
The Large Square Squared Tool is broken up into two different parts. Part “A” & Part “B” to include guidelines for making 12 different sizes. The chart in the Stacked Squares Tech sheet tells us what size to cut our side triangles and how line up for trimming. The first trim uses Part “A” to trim before adding the second round of triangles.

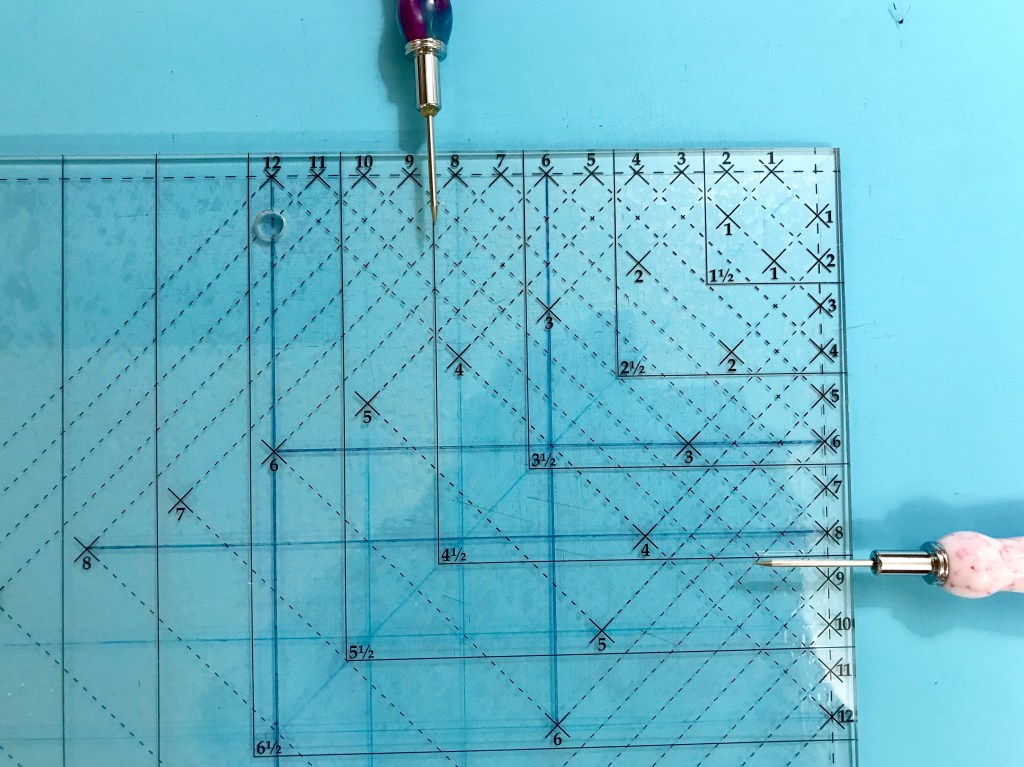
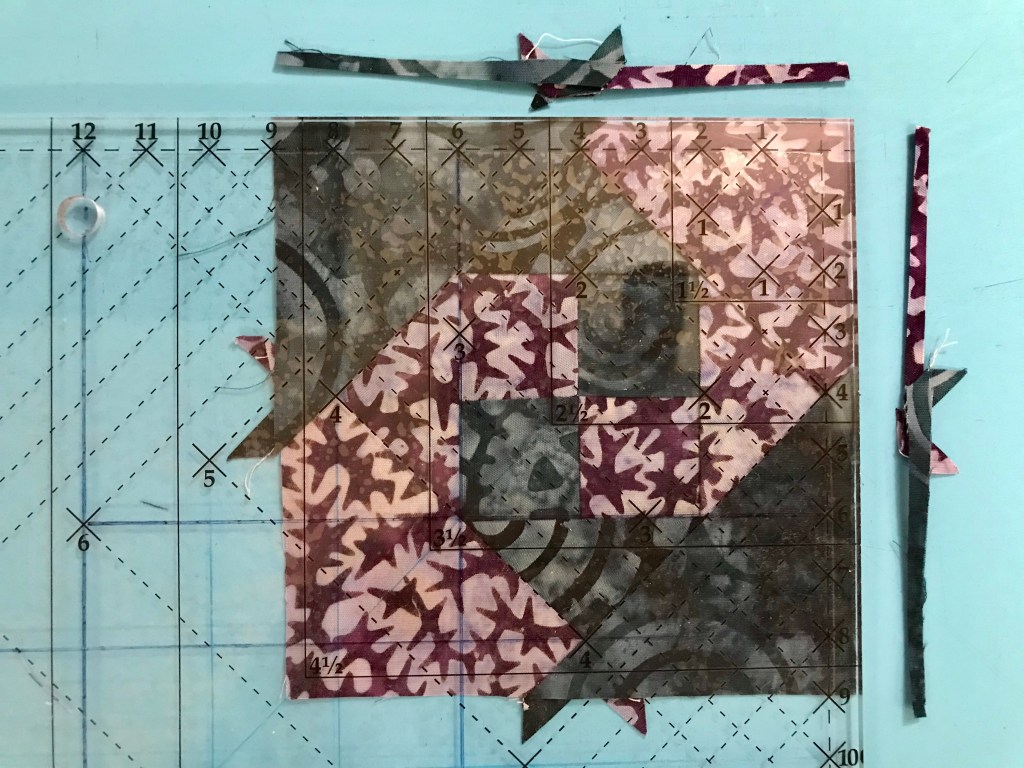

After adding the second round of triangles, use Part “B” to trim the stack square to a cut size of 4 1/2″.


Lay out your units, stitch together in to rows.

Card Shark is now ready to add the quilt!
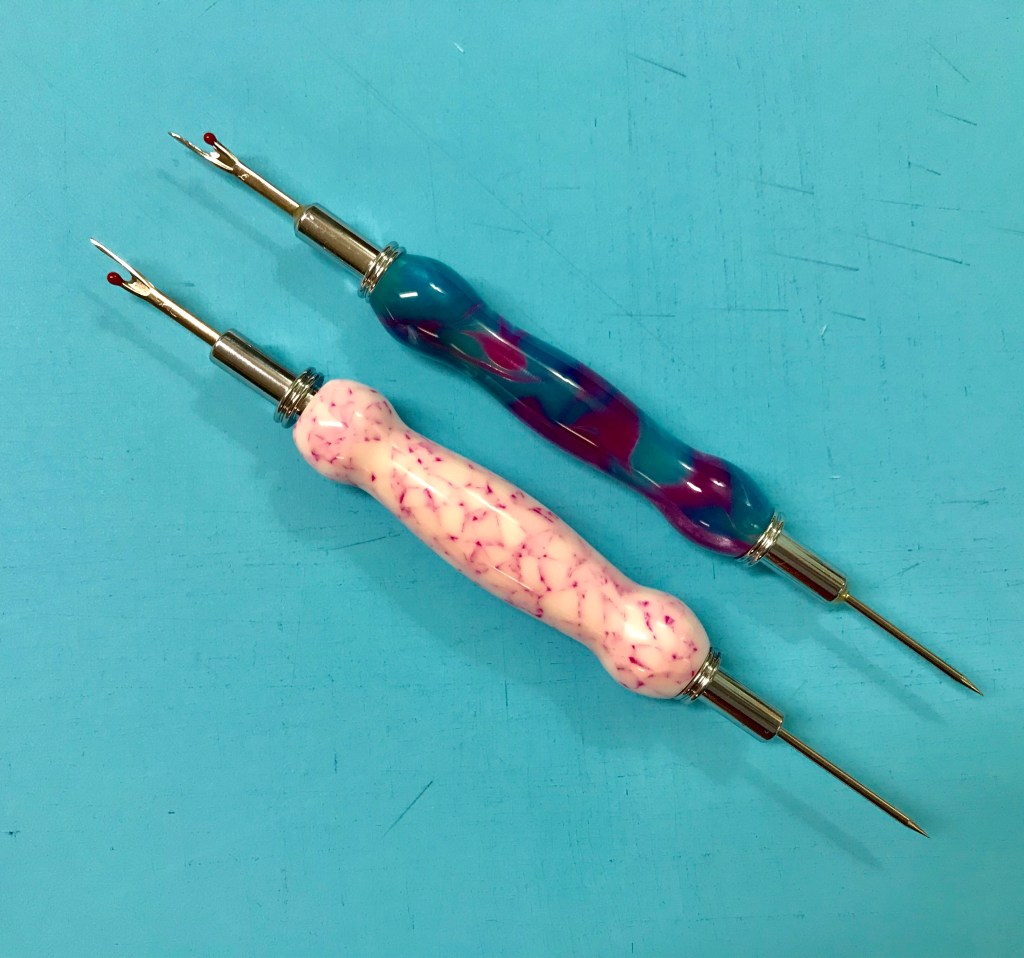
I use my Groovy Seam Rippers made by fellow quilter Nancy Townsend as my little helpers while quilting.
The Whistle Stop Quilt is made up of 12″ blocks and 6″ finished blocks.

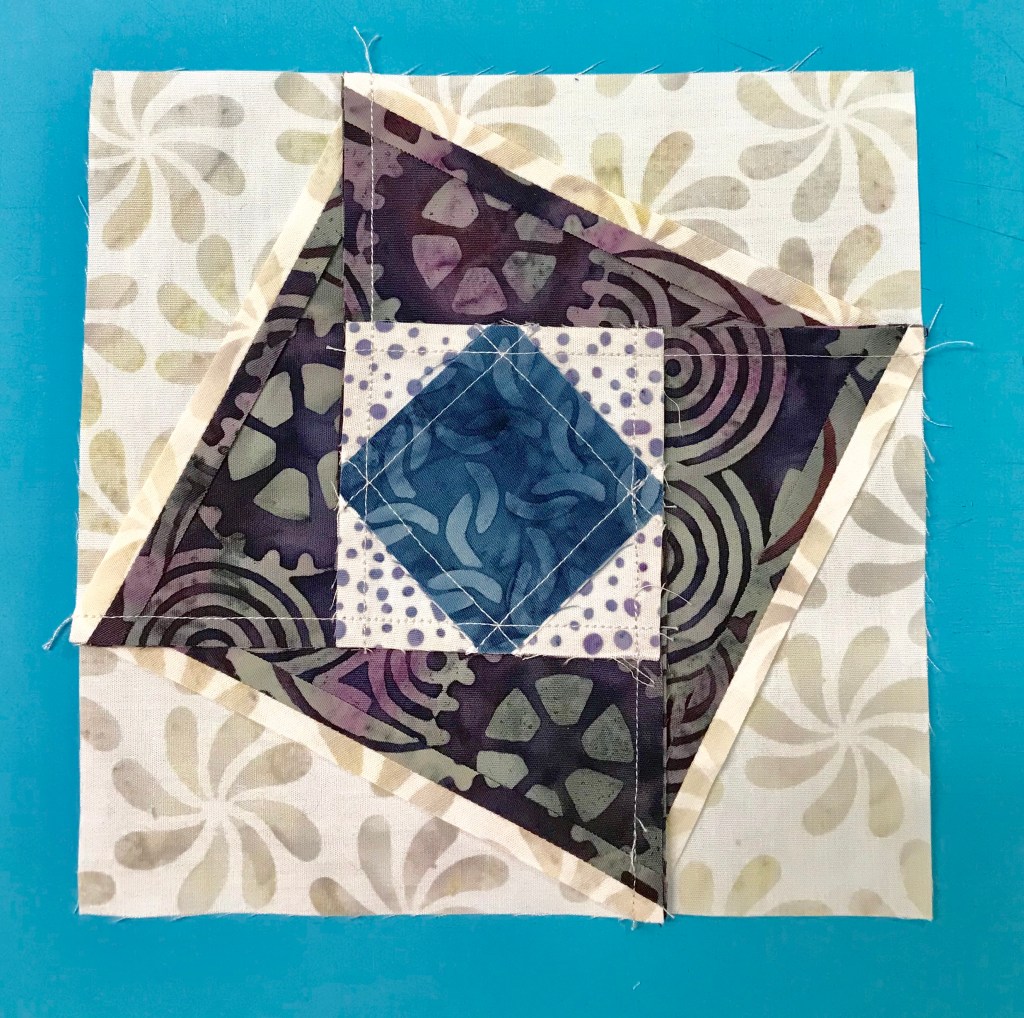
This is “Roll the Dice”. It is made with Studio 180 Design Square Squared and Split Rects tools. Click below to download the cutting instructions.


Using your Split Rects tool, cut 4 side triangles for Type 1 units, per your tool instructions from your two fabrics making sure your fabrics are right side up. Stitch triangles together and press seams open.

Trim your Split Rects to 2 1/2″ x 4 1/2″, rotate and trim again.
Square Squared

Cut your center square using Part “A” for a 2″ finished unit.

Trim to the cut size of 2 1/2″ using Part “B” of your Square Squared tool. Rotate and trim again.

Layout your block units.

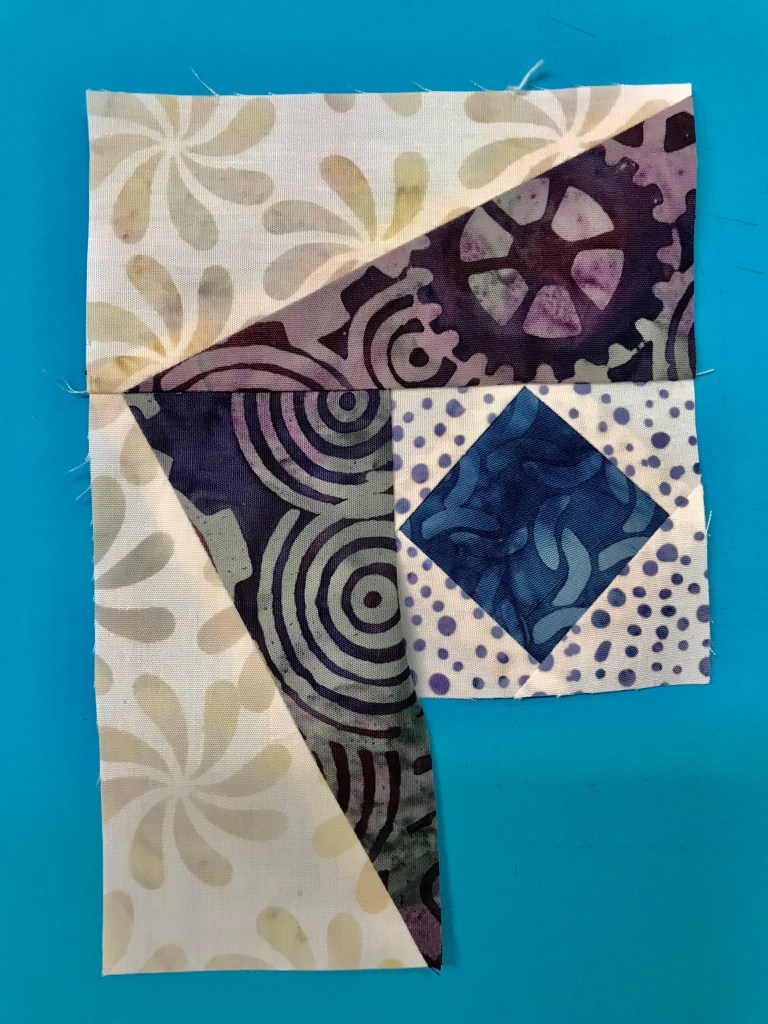
Place the center square/squared unit right sides together with a Split Rects unit aligning the raw edges of the top and sides. Stitch a partial seam along the dark fabric of the Split rects stopping just past the center of the Square/Squared unit.
Now add a Split Rects unit across the top. Be sure the dark fabric of the Split Rects Units are against the center square/squared unit. Press toward the split rects unit.
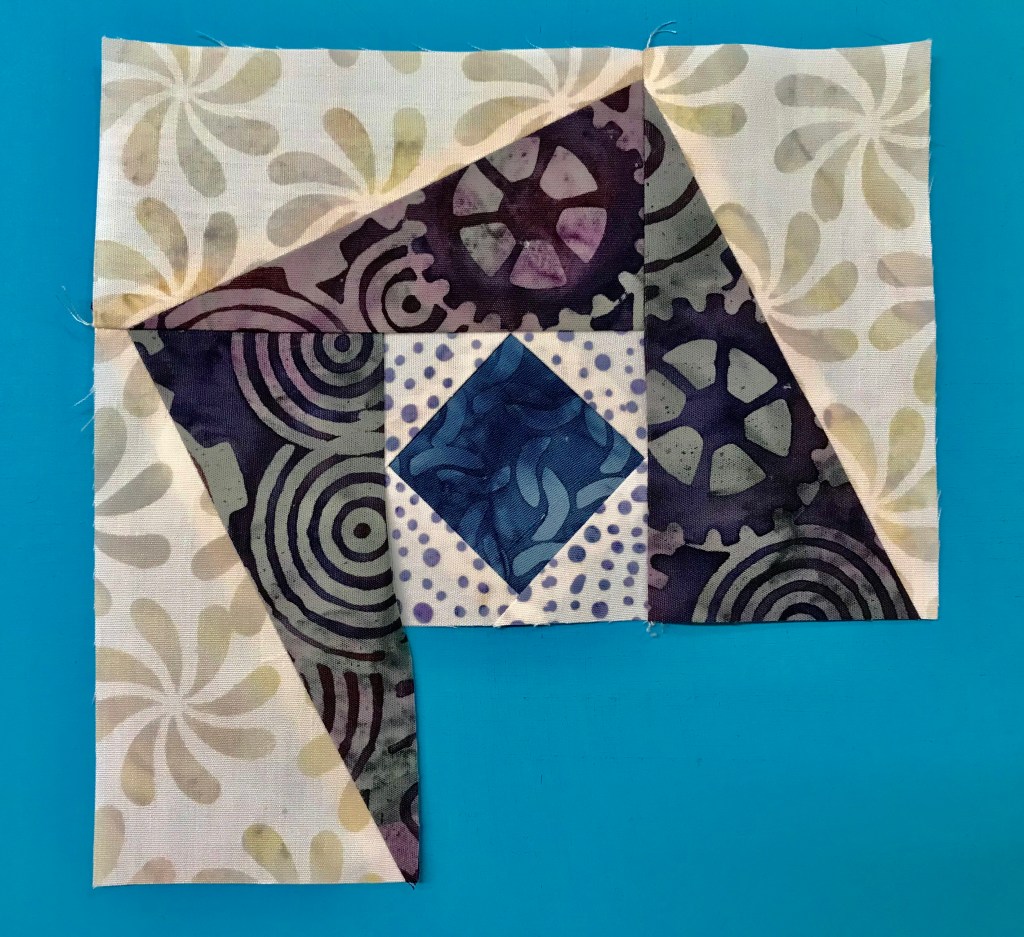
Add a third split rects unit and press as before.

Add the fourth Split Rects units.
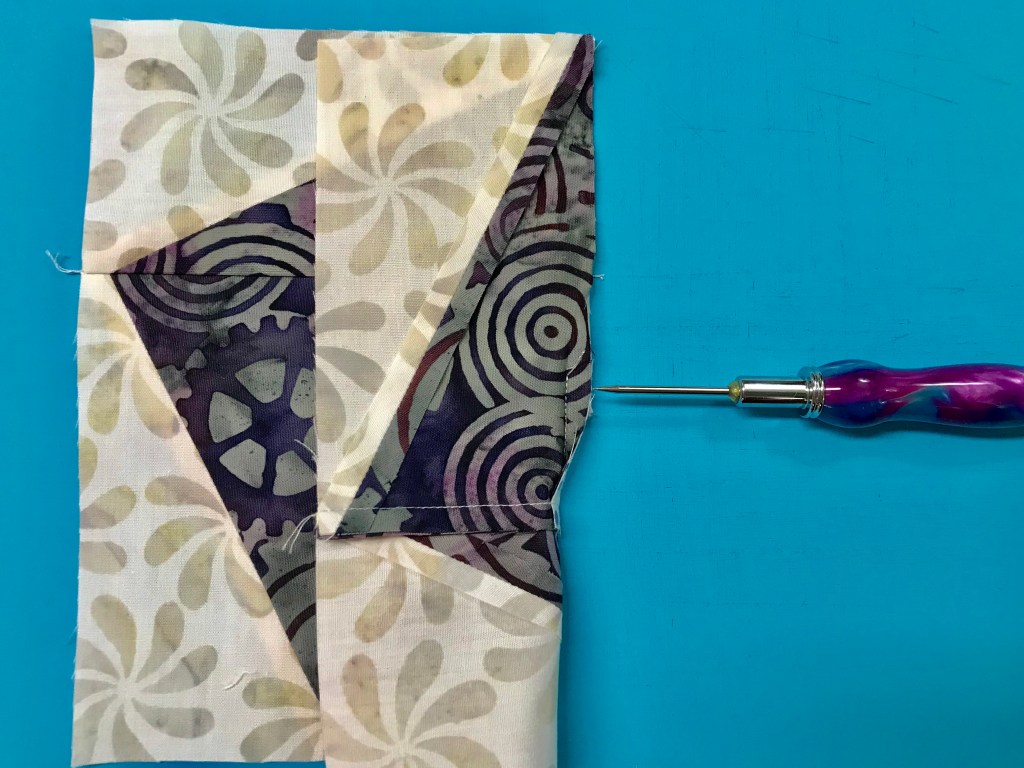
Fold over the split rects unit with the partial seam and align the raw edges. Stitch meeting up with the partial seam.
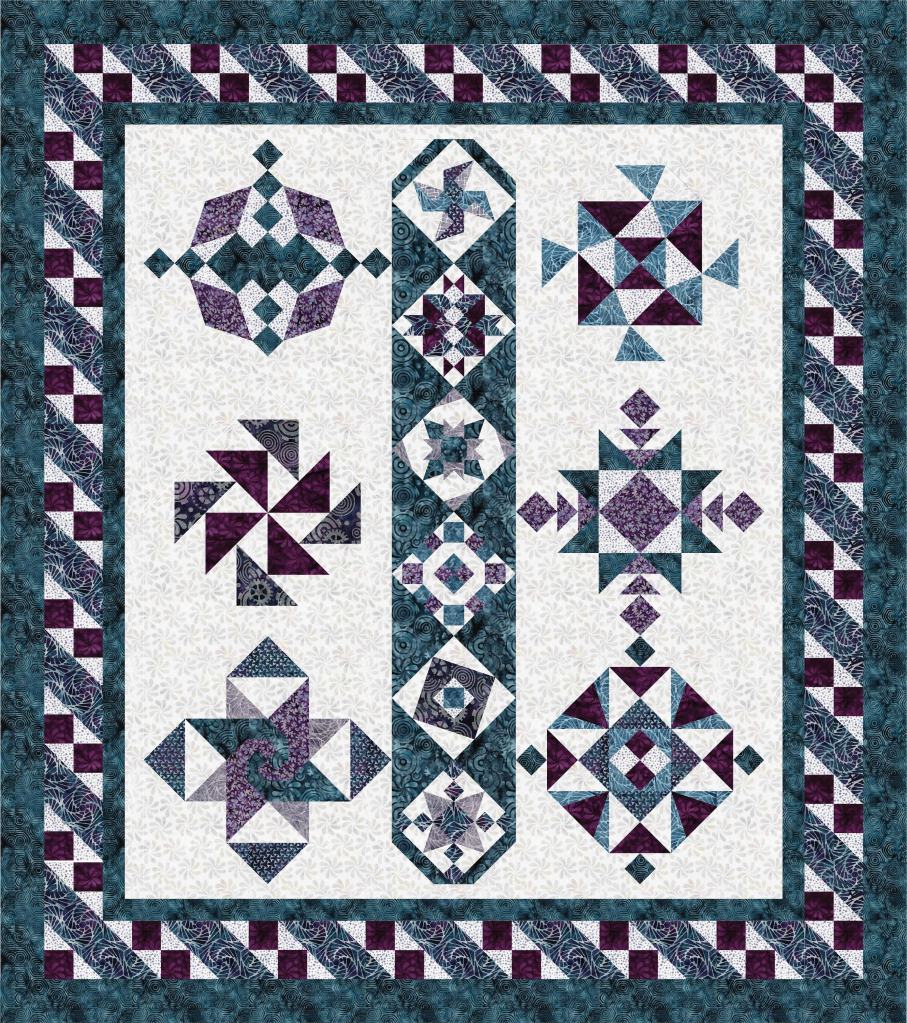
Below is the complete schedule for the Whistle Stop Tour:
Monday September 9th
- Karen Overton – The Quilt Rambler
Tuesday September 10th
- Michelle Renee Hiatt – Sew on the Go
- Marie McKay – Ribbon Star Studio
Wednesday September 11th
- Sarah Furrer – Studio 180 Design
Thursday, September 12th
- Gail Renna – Quilt Haven Threads
- Kathie Beltz- Kathie Beltz Designs
Friday, September 13th
- Jackie O’Brien – If these Threads Could Talk
Saturday, September 14th
- Tammy Silvers – Tamarinis
- Carolyn Ratola – CaTs Quilting
Sunday, September 15th
- Tina Dillard – Quilting Affection Design
- Bonny Peters – Cat Den Mountain Quilts
Monday, September 16th
- Sarah Furrer – Studio 180 Design
#studio180design #SteamEngine #Islandbatik #WhistleStopTour


