Tag Archives: Square Squared

Converging Geese Zoom Class

Join me for a Converging Geese Zoom class September 15th at 11:00 AM. Sign up and download the supply list here (pattern is included with the class fee):

Register for Converging Geese Zoom Class

Converging Geese Block

I created this pattern November 2018 for an Island Batik Log Cabin Challenge. It has been a popular pattern in my Etsy Shop ever since. This is a variation on the Log Cabin block and is a fun way to use your Square/Squared, Tucker Trimmer I & Wing Clipper I tools.

I named my original design “Converging Geese” because each block has Flying Geese & Geese on the Edge units, along with Square/Squared units.

Each 16″ block contains 12 – 2″ x 4″ finished flying geese, 4 – 6″ finished geese on the edge & 1 square/squared unit. 

Converging Geese – Measures 60″ x 60″

Journeys Month 12 – Quilt Assembly

Welcome, Welcome, Welcome to Stitchin Heaven’s Journey’s BOM – Month 12! This has been a spectacular year. You all have worked so hard. Thank you to Deb Luttrell, Founder of Stitchin Heaven, Deb Tucker, Creative Kingpin of Studio 180 Design, Marie Bostwick New York Times best selling author and Jason Yenter Fabric Designer & President of In the Beginning Fabrics for making this all possible. Now to assemble your quilts!

Note: WOF stands for width of fabric. This month you will assemble your quilt top and add the borders.

Gather the following pieces:

4 Corner Sections from Month 6

Block K from Month 7

4 Middle Edge Sections from Month 9

4 Pieced Border sections from Month 11

Finishing Instructions

Step 1 – Lay out the Corner Sections, Middle Edge Sections, and Block K as shown in the diagram on page 35.

Step 2 – Stitch the sections together into rows, press the seams open. Stitch the rows together to create the quilt center.

Step 3 – Attach the 72½” Print 11 inner border strips. Find the center of the quilt and the center of the 72½” border strip. Match the center points with right sides together, pin. Match both ends of the strip with the ends of the quilt and pin in place. Ease the quilt top to match the border strip and add more pins between the others to hold the border in place as you stitch. Attach the other 72½” border to the opposite side in the same manner and press toward the inner border strip.

Step 4 – Repeat step 3 for the 75½” Print 11 border strips.

Step 5 – Attach the 75½” Print 6 middle border strips. Using two of the border strips, stitch them to the quilt in the same manner as in step 3. Press toward Print 6.

Step 6 – Stitch a Print 4 middle border corner stone to each end of the remining 2”x 75½” Print 6 borders. Press toward the middle border.

Step 7 – Attach the remining two middle border strips to the quilt as described in step 3. Make sure to nest the seams. Press toward the middle border.

Step 8 – Add the pieced borders. Start with the borders that do not have the N Units on the ends. Orient the pieced borders so that the Corner Pops are against the middle border and the points of the V Blocks are pointing away from the quilt center. Refer to the diagram. Find the center of the quilt top and the center of the pieced border. Match the centers and pin. Match each end and pin. Ease the border to match the quilt top and add more pins between the others to hold the border in place as you stitch. Stitch in place. Press toward the middle border.

Step 9 – Repeat step 8 for the other pieced borders with the N Units attached to the ends. After you have matched the centers and the ends, make sure that you nest the Corner Beam seam with the seam attaching the pieced border.

Note: We recommend that you wait to cut your outer borders to length until you can measure your quilt top. To determine your specific border length, measure the longest side of your quilt in three different places. If those measurements are different, add the three measurements together and divide by three. That will be the length that you need to cut your first two borders. Once the first two borders are attached to the quilt repeat the process for the remaining two sides.

Step 10 – Add the outer borders. Find the center of the quilt and the center of the 90½” outer border strip. Match the center points with right sides together, pin, match either end of the strip with the ends of the quilt, and pin in place. Add more pins between the others, about every 4”, to hold the border in place as you stitch. Attach the other 90½” border to the opposite side in the same manner and press toward the outer border strip.

Step 11 – Repeat step 10 for the 102½” outer border strips.

Step 12 – Finish with Batting, Backing, Quilting, and Binding! Layer quilt top with batting and backing. Baste and quilt. Bind and Enjoy!

Journeys

Thank you all so much for joining us on this Journey! Congratulations on a job well done!

Journeys Month 6 – Corner Section

Welcome to Stitchin Heaven’s Journeys Month 6 – Corner Section. My helper for Month 6 is Sue Tucker, of Studio 180 Design. This month you are going to learn to make the Square/Squared unit using the Square/Squared tool. You will be using Prints 1, 2 & 5. Label your fabrics and use your best cutting skills when cutting your starter squares.

Piecing Instructions

Diamond Squares

Step 1 – Lay your Print 1 strip on the mat and clean up the short edge. Locate the Center Square window template for a 6” finished unit. Place the solid lines of the window template on the raw edges of the strip end. Cut up the side and across the top to trim each square to a precision size. Cut 4 center squares.

Step 2 – Stitch two Print 2 side triangles to opposite sides of the center square. Stitch with the center square on top. Press the seams toward the side triangles.

Step 3 – Stitch one Print 2 side triangle to one remaining side of the center square and a Print 5 triangle to the other side. Press the seams toward the side triangles.

Step 4 – Trim to 6½” with your Square Squared® tool. Align the X’s labeled 6 with the seam intersections and the dashed lines with the seams. Trim. Rotate the unit 180o and align the seam intersections with the X’s labeled 6. Also align the cut edges with the 6½” clean up lines. Trim again. Repeat steps 1-4 to make a total of 4 Diamond Square units. Label the finished Units J.

Below is a correction. The original photo for the second trim showed the Left Hand Trim for Trim 2. I do not have the original fabric so I remade the Square/Squared unit from stash fabric.

Trim 1
Trim 2
Make 4 Unit J

Assemble Four Corner Sections

It is time to assemble the four corner sections of your quilt. To do this you will need the following:

8 Unit A’s from Month 1. 8 Unit C’s from Month 2. 24 Unit E’s and 24 Unit F’s from Month 3. 4 – G Blocks from Month 4. 4 Unit H’s from Month 5. 4 Unit J’s from Month 6.

Step 5 – Lay out the gathered units as shown to create one corner section.

Step 6 – Stitch the Unit F Flying Geese together to create the rows of geese. Press the seam away from the point of the goose. Attach Unit J to the end of the Unit E Geese as shown in the diagram.

Step 7 – Sew together Unit C, Unit A, and unit H as shown to create two sections and press as indicated.

Step 8 – Sew Block G, together with the two sections you just created as shown and press as indicated.

Step 9 – Sew the Flying Geese rows to the block and press as shown.

Step 10 – Repeat steps 5-9 to make a total of 4 Corner Sections.

Congratulations! You have learned to use the Square/Squared tool, not mention you are half way through your Journeys Quilt.

Whistle Stop Tour – Steam Engine

Deb Tucker’s “Steam Engine” fabric line from Island Batik is simply Gorgeous.

Card Shark: what a great block, made with Half Square Triangles, Non Mirror Combo units & a Stacked Square. Constructed using Studio 180 Design Tucker Trimmer I & Square Squared tools with Stacked Squares & Non Mirror Combo Units Technique Sheets.

Download your Cutting instructions here:

Half Square Triangles:

Your Tucker Trimmer Tool Instructions give you the information you need to complete your Half Square Triangles. Cut your squares and using your Magic Wand draw two diagonal lines. Match up your dark and light fabric squares aligning the raw edges. Stitch on the lines, cut apart and press to the dark fabric. Remember: whatever you are pressing toward, goes on top. Trim your Half Square Triangle units to 4 1/2″.

Non Mirror Combo Units: Past construction methods would result in mirror image units. Sometimes we need combination units that are the same as in Card Shark which requires two of each units below:

Determine your color placement. Follow the instructions in the Non Mirror Combo Units Technique Sheet.

Make the half square triangles first by using the Magic Wand and mark 4 diagonal lines from corner to corner. Follow the stitching instructions in the technique sheet. Cut apart.

Press toward the dark triangle.

Cut squares for large triangles once diagonally.

Pair small triangles with the large triangles, center and stitch. Press toward the large triangle.

Trim units to 4 1/2″.

Stacked Square:

Layout your Stacked Square unit pieces.

Start by making a four patch and swirl the center. Our Stacked Square is a 4″ finished unit. Check the chart on the Stacked Square Technique sheet to find the Cut size for the center square, which is 2 1/2″. Using my my Tucker Trimmer I trimmed the four patch to 2 1/2″.

Check your color placement and stitch two triangles. Press toward the triangle and add the two more triangles pressing toward the triangles as before.

The Large Square Squared Tool is broken up into two different parts. Part “A” & Part “B” to include guidelines for making 12 different sizes. The chart in the Stacked Squares Tech sheet tells us what size to cut our side triangles and how line up for trimming. The first trim uses Part “A” to trim before adding the second round of triangles.

After adding the second round of triangles, use Part “B” to trim the stack square to a cut size of 4 1/2″.

Lay out your units, stitch together in to rows.

Card Shark is now ready to add the quilt!

I use my Groovy Seam Rippers made by fellow quilter Nancy Townsend as my little helpers while quilting.

The Whistle Stop Quilt is made up of 12″ blocks and 6″ finished blocks.

This is “Roll the Dice”. It is made with Studio 180 Design Square Squared and Split Rects tools. Click below to download the cutting instructions.

Using your Split Rects tool, cut 4 side triangles for Type 1 units, per your tool instructions from your two fabrics making sure your fabrics are right side up. Stitch triangles together and press seams open.

Trim your Split Rects to 2 1/2″ x 4 1/2″, rotate and trim again.

Square Squared

Cut your center square using Part “A” for a 2″ finished unit.

Trim to the cut size of 2 1/2″ using Part “B” of your Square Squared tool. Rotate and trim again.

Layout your block units.

Place the center square/squared unit right sides together with a Split Rects unit aligning the raw edges of the top and sides. Stitch a partial seam along the dark fabric of the Split rects stopping just past the center of the Square/Squared unit.

Now add a Split Rects unit across the top. Be sure the dark fabric of the Split Rects Units are against the center square/squared unit. Press toward the split rects unit.

Add a third split rects unit and press as before.

Add the fourth Split Rects units.

Fold over the split rects unit with the partial seam and align the raw edges. Stitch meeting up with the partial seam.

Below is the complete schedule for the Whistle Stop Tour:

Monday September 9th

Tuesday September 10th

Wednesday September 11th

Thursday, September 12th

Friday, September 13th

Saturday, September 14th

Sunday, September 15th

Monday, September 16th

#studio180design #SteamEngine #Islandbatik #WhistleStopTour

Log Cabin Challenge

2a8528e9-15bc-499d-9f48-f0125510a612

The Island Batik challenge for November is to incorporate a log cabin block or variation into my project.  I decided to use Studio 180 Design’s Geese on the Edge Technique Sheet.  This is a variation on the Log Cabin block and is a fun way to use your Square/Squared tool, Tucker Trimmer I & Wing Clipper I.

img_1664

My beautiful Island Batik fabrics from left to right:  Mr. T Blocks: Arc Pine Needle, Dash-Grasshopper, Seed Circle Custard, Arc Waves Grasshopper, & Sprinkles Playful Pachyderm, & Paisley Dot: Apricot, Candy Corn, Nasturtium, & Item number 121412189.

I have named my original design “Converging Geese” because each block has Flying Geese & Geese on the Edge units, along with Square/Squared units.

img_1725

Each 16″ block contains 12 – 2″ x 4″ finished flying geese, 4 – 6″ finished geese on the edge & 1 square/squared unit.  These Geese on the Edge units are soooo much fun to make!  The technique sheet gives instruction for making geese on the edge in 10 sizes from 3″ to 12″!

You begin with starter squares, add logs by chain stitching, square up two sides with your Tucker Trimmer.

Trim apart.

Using your Wing Clipper trim the corner leaving a 1/4″ seam allowance.

Add a replacement triangle and press toward the triangle.

Trim after every addition of a replacement triangle.  Add more logs.

The final trim down is performed when I have four rounds of logs for a  6″ finished geese on the edge unit.

img_1667

Stitch the flying geese units into sets containing 3 each.

img_1708

Block layout.

img_1815

I have created a down loadable pattern for Converging Geese (measures 60″ x 60″) that can be purchased on my If Threads Could Talk Etsy Shop.

#islandbatik #bestofbali #studio180design #debtucker #geeseontheedge

Scrapodopolis – BlockBuster’s #1 – #9

I just finished my quilt containing Deb Tucker’s BlockBuster patterns #1 through #9!  Scrapodopolis seems like a pretty good name.

img_6002

I used the Tucker trimmer 1, Wing Clipper 1, Square/Squared, V Block & Four Patch Square up tools from Studio 180 Design.  I was encouraged by fellow Certified Instructor Sarah Furrer to try a block layout a little outside the box, and I totally did!

01 Layout

This is the layout I chose.  I did change it up a little.

02 Square Squared

My blocks are 12″ when finished.  that indicated that my Square/Squared units would finish at 6″.  I Needed 16 square/squared units and decided the center squares would be cut from 16 different fabric pulled from the blocks & the side triangles would be the same background fabric used in the blocks.  The 3″ rectangles on either side of the square/squared units would match the border fabric.  The outer borders would finish at 6″ also.  I added a 3″ border outer border to enhance the four square/squared units in the border.

03 dont do this

Don’t do what I did.  I started in the center and stitched the outer square/squared units to the center blocks, (they had to be un-sewed and sewn to the borders pieces). In each of the corners, I stitched a 12″ block to a square/squared unit & stitched a square/squared unit to a 6.5″ square and then stitched it to the block.  The two blocks on either side of the center were stitched to a square/squared unit

04

This is much better. Now there are 3 rows of blocks in the center ready to be stitched together & the border square/squared units are pieced to the border strips.

Once all the pieces were stitched together I decided I needed to add a 3″ outer border so all the units appear to be floating.

09 quilted

I am so pleased with how it came out!  My finished quilt measures 67″ x 67″.

10 a different view

I can’t wait to start the next quilt with BlockBuster  #10!

BlockBuster #7 – Whimsy Turndash

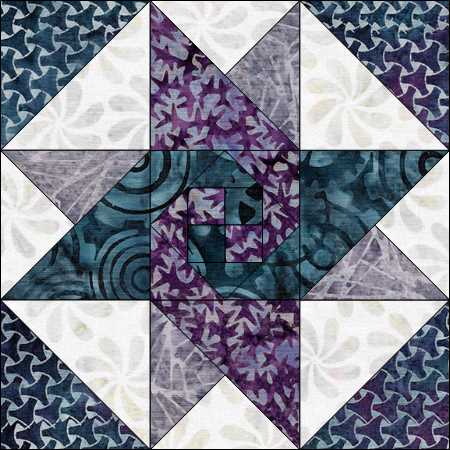
I love this block So sweet & easy.   All the instructions you will need for BlockBuster # 07 Whimsy Turndash  came with your Square/Squared & Tucker Trimmer I tools which are required to make this block.  You will also need to reference your Little Houses Technique Sheet.

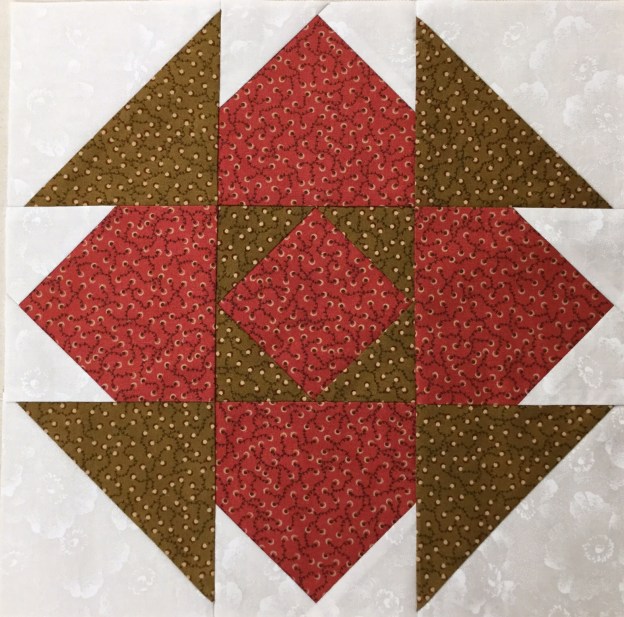
Whimsy Turndash is made up of 3 different units.  Unit A is Square/Squared, one for the block center.  Unit B is Little Houses, 4 are needed.  Unit C is Half Square Triangles (HST), 4 are needed for the block corners.  I made a 12″ finished block containing 4″ finished units.

img_5592-1

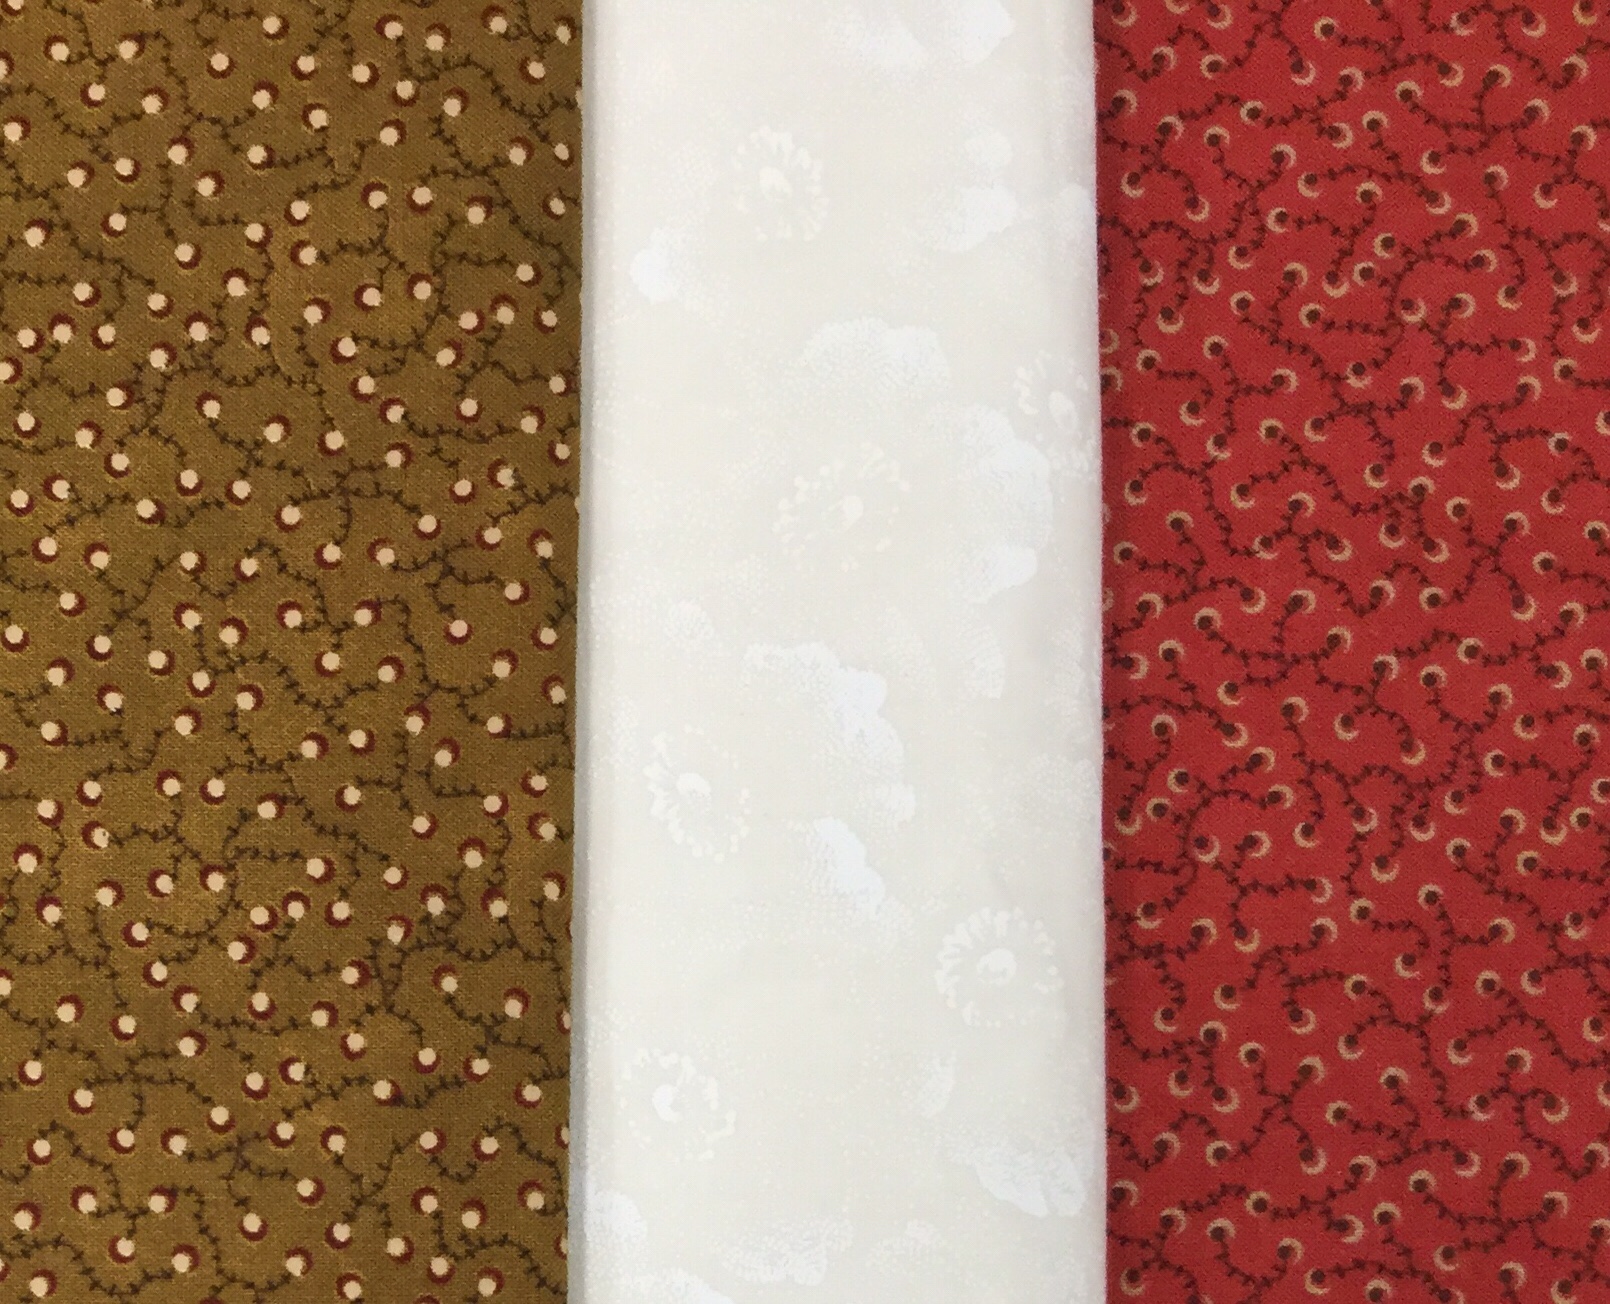
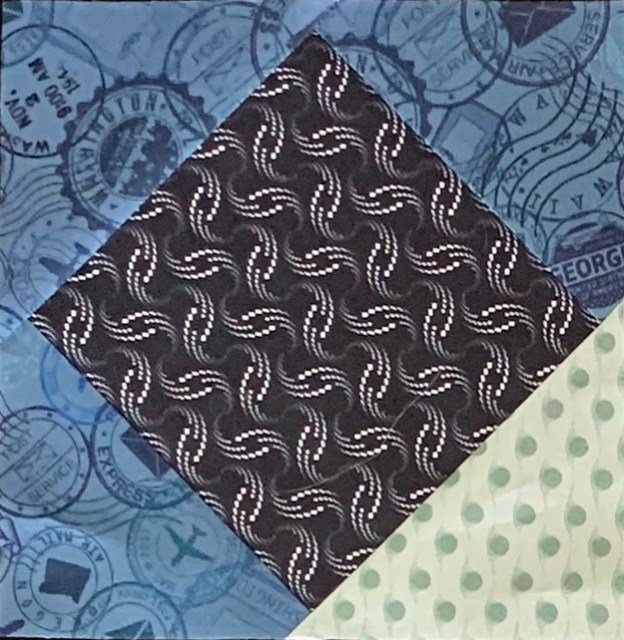
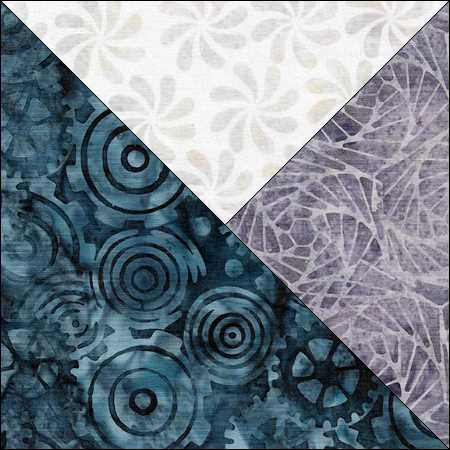
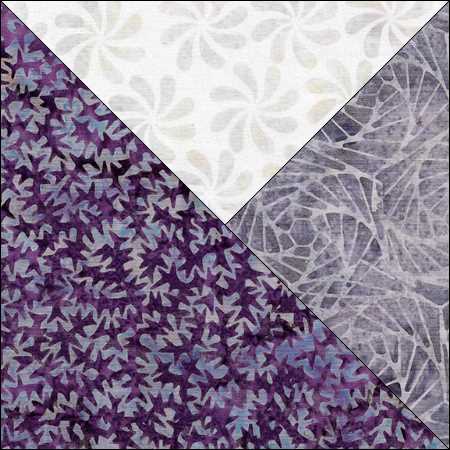
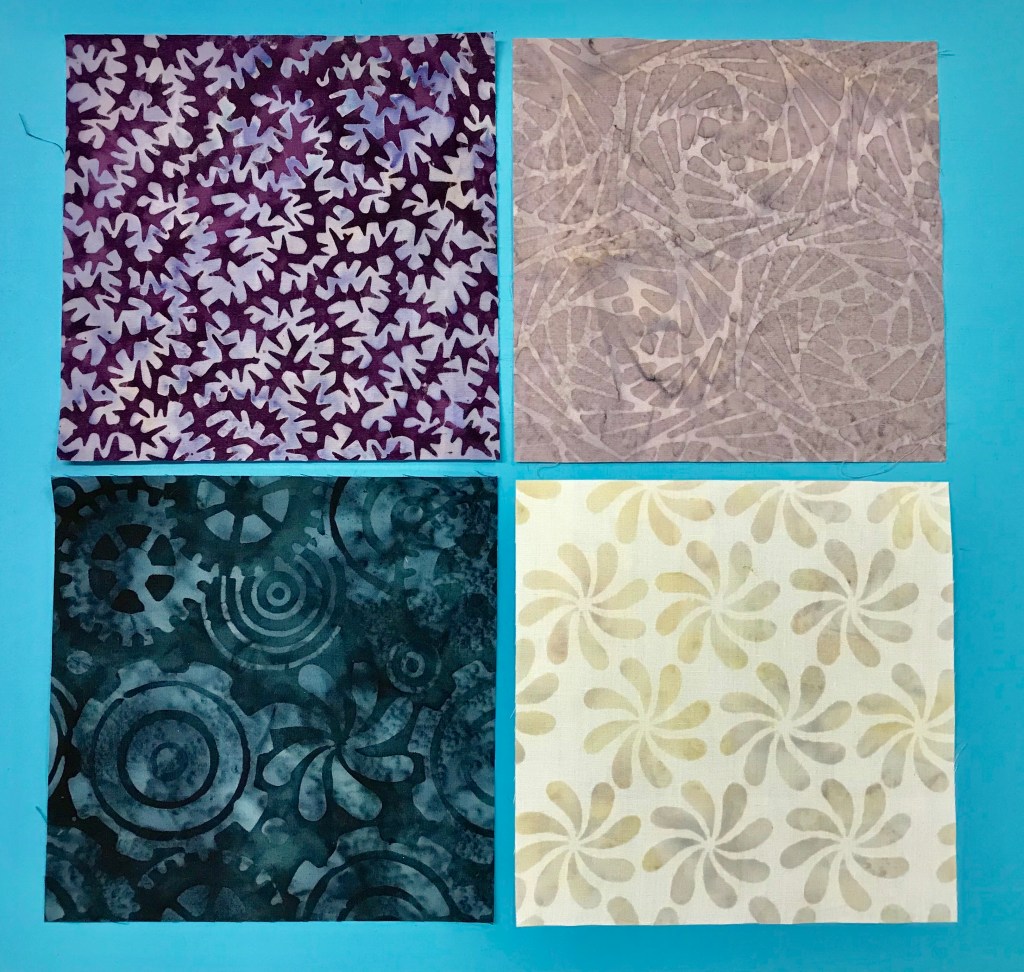
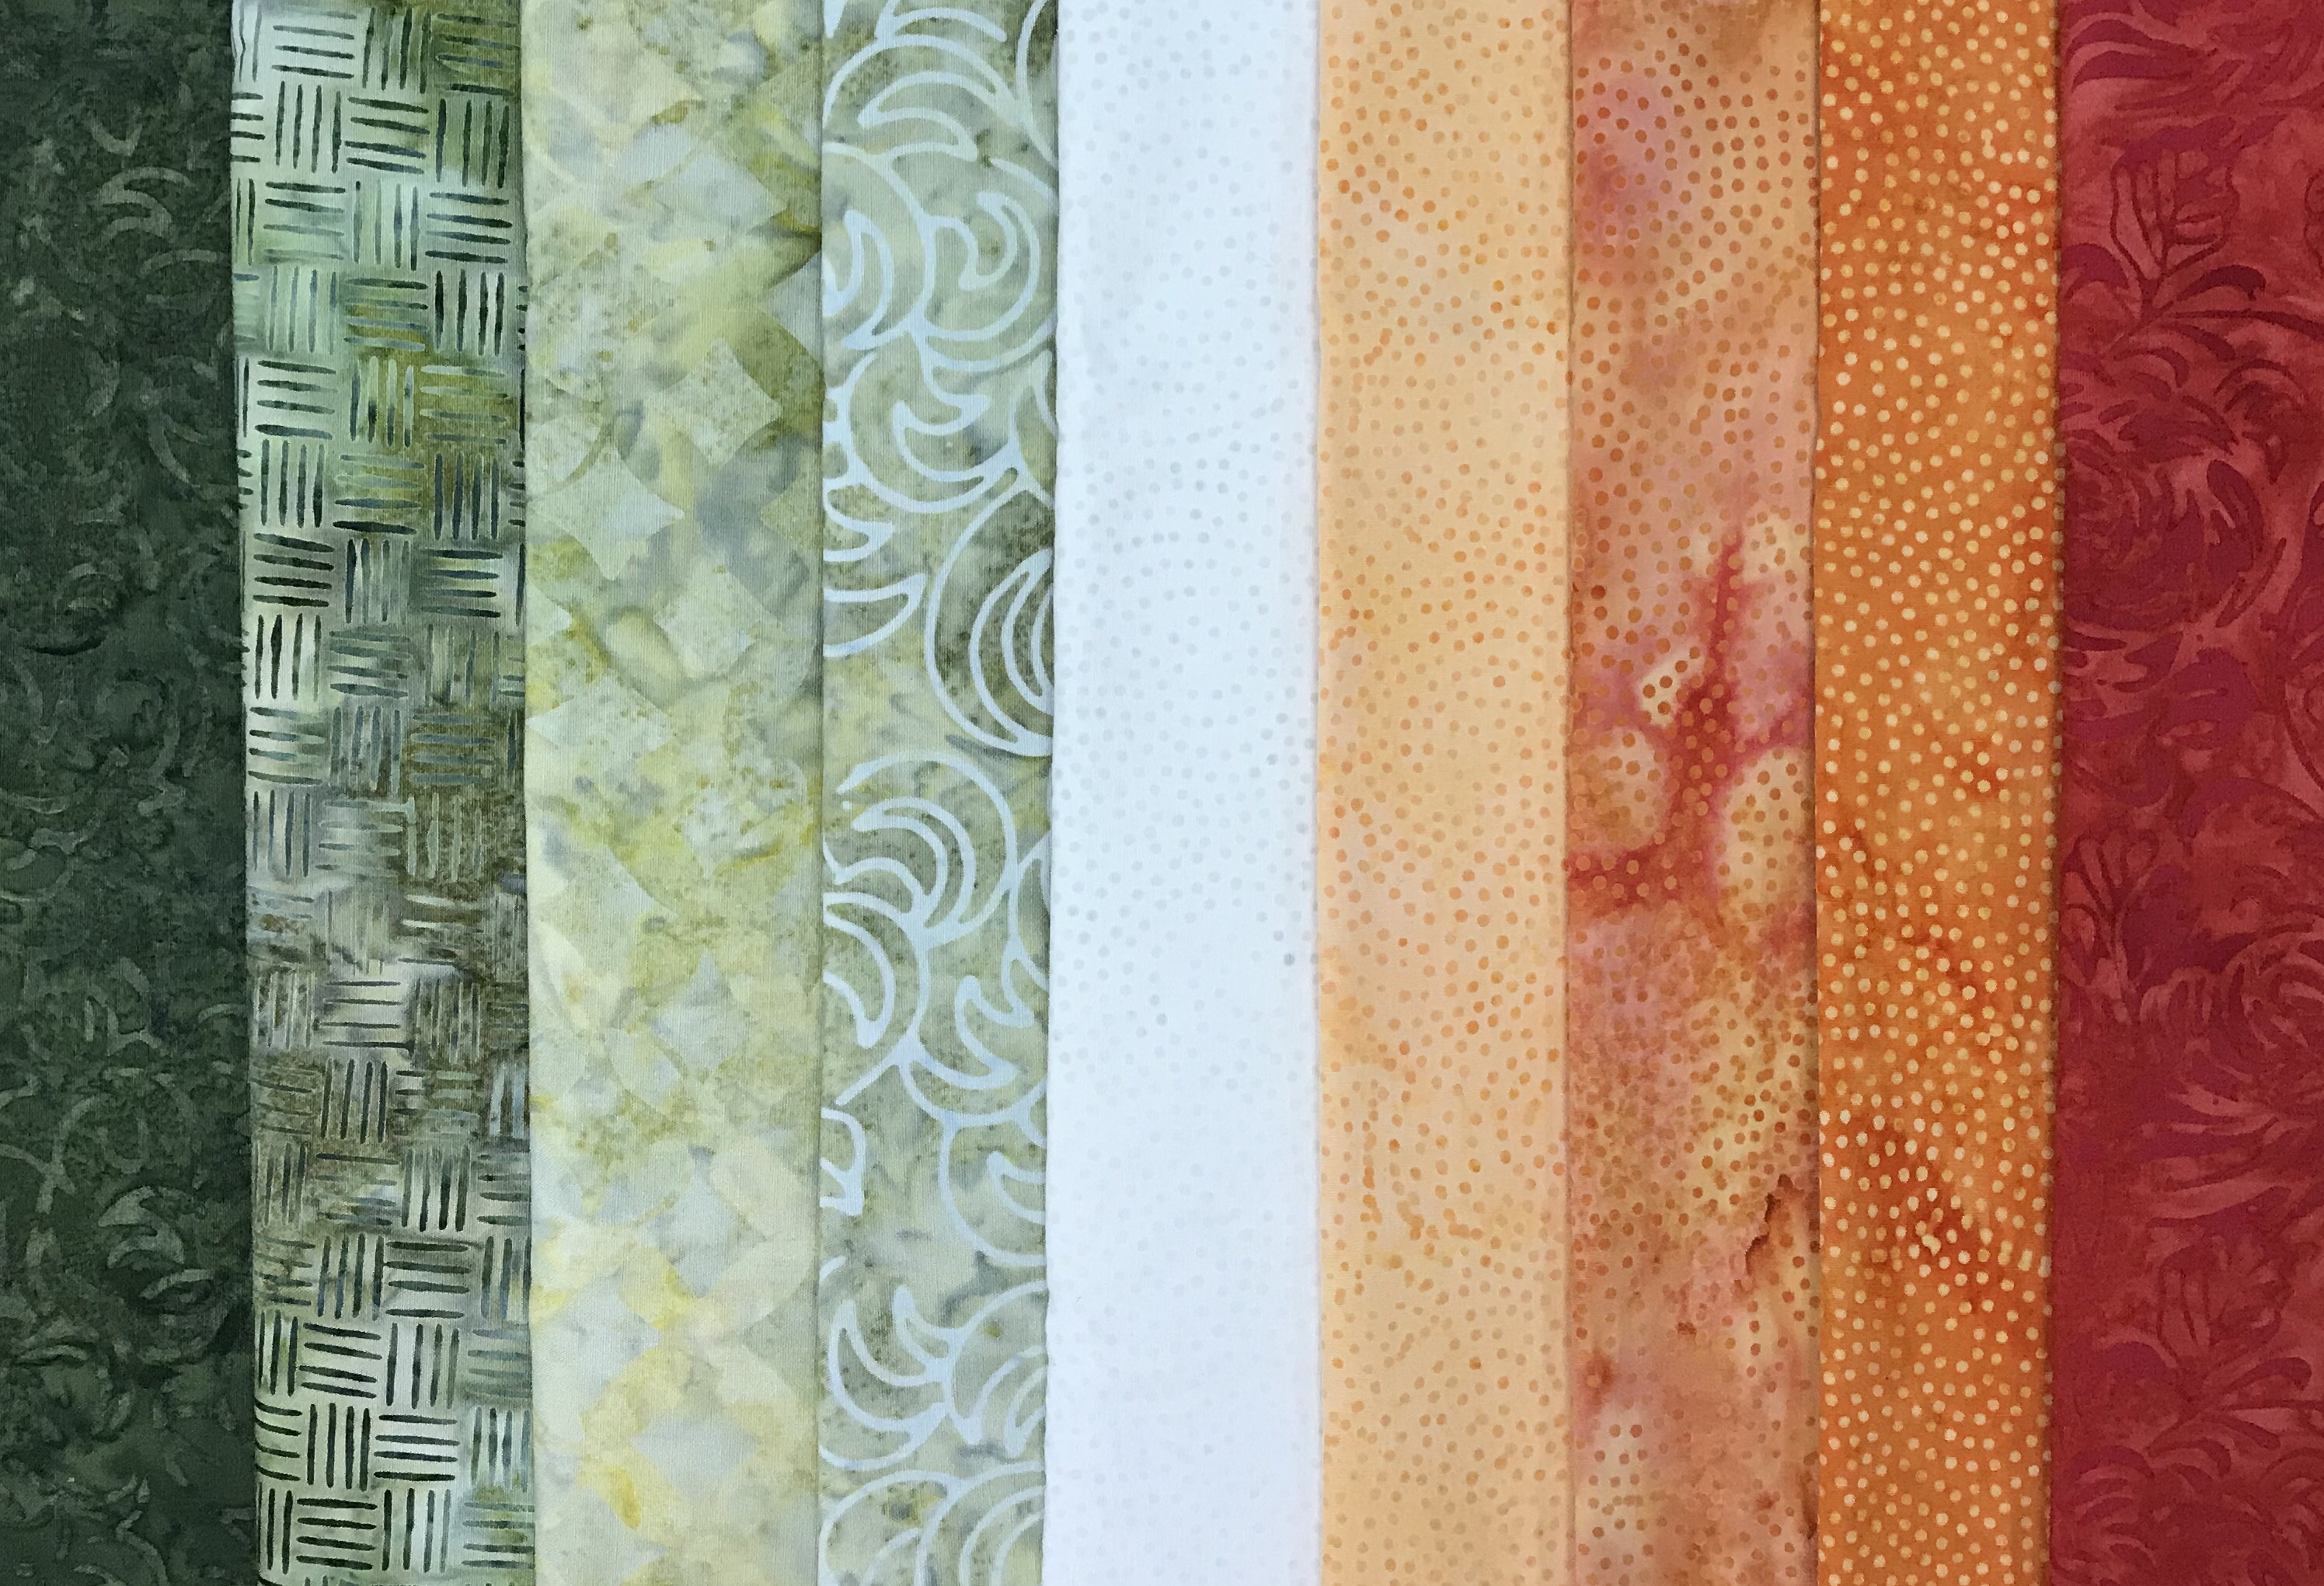
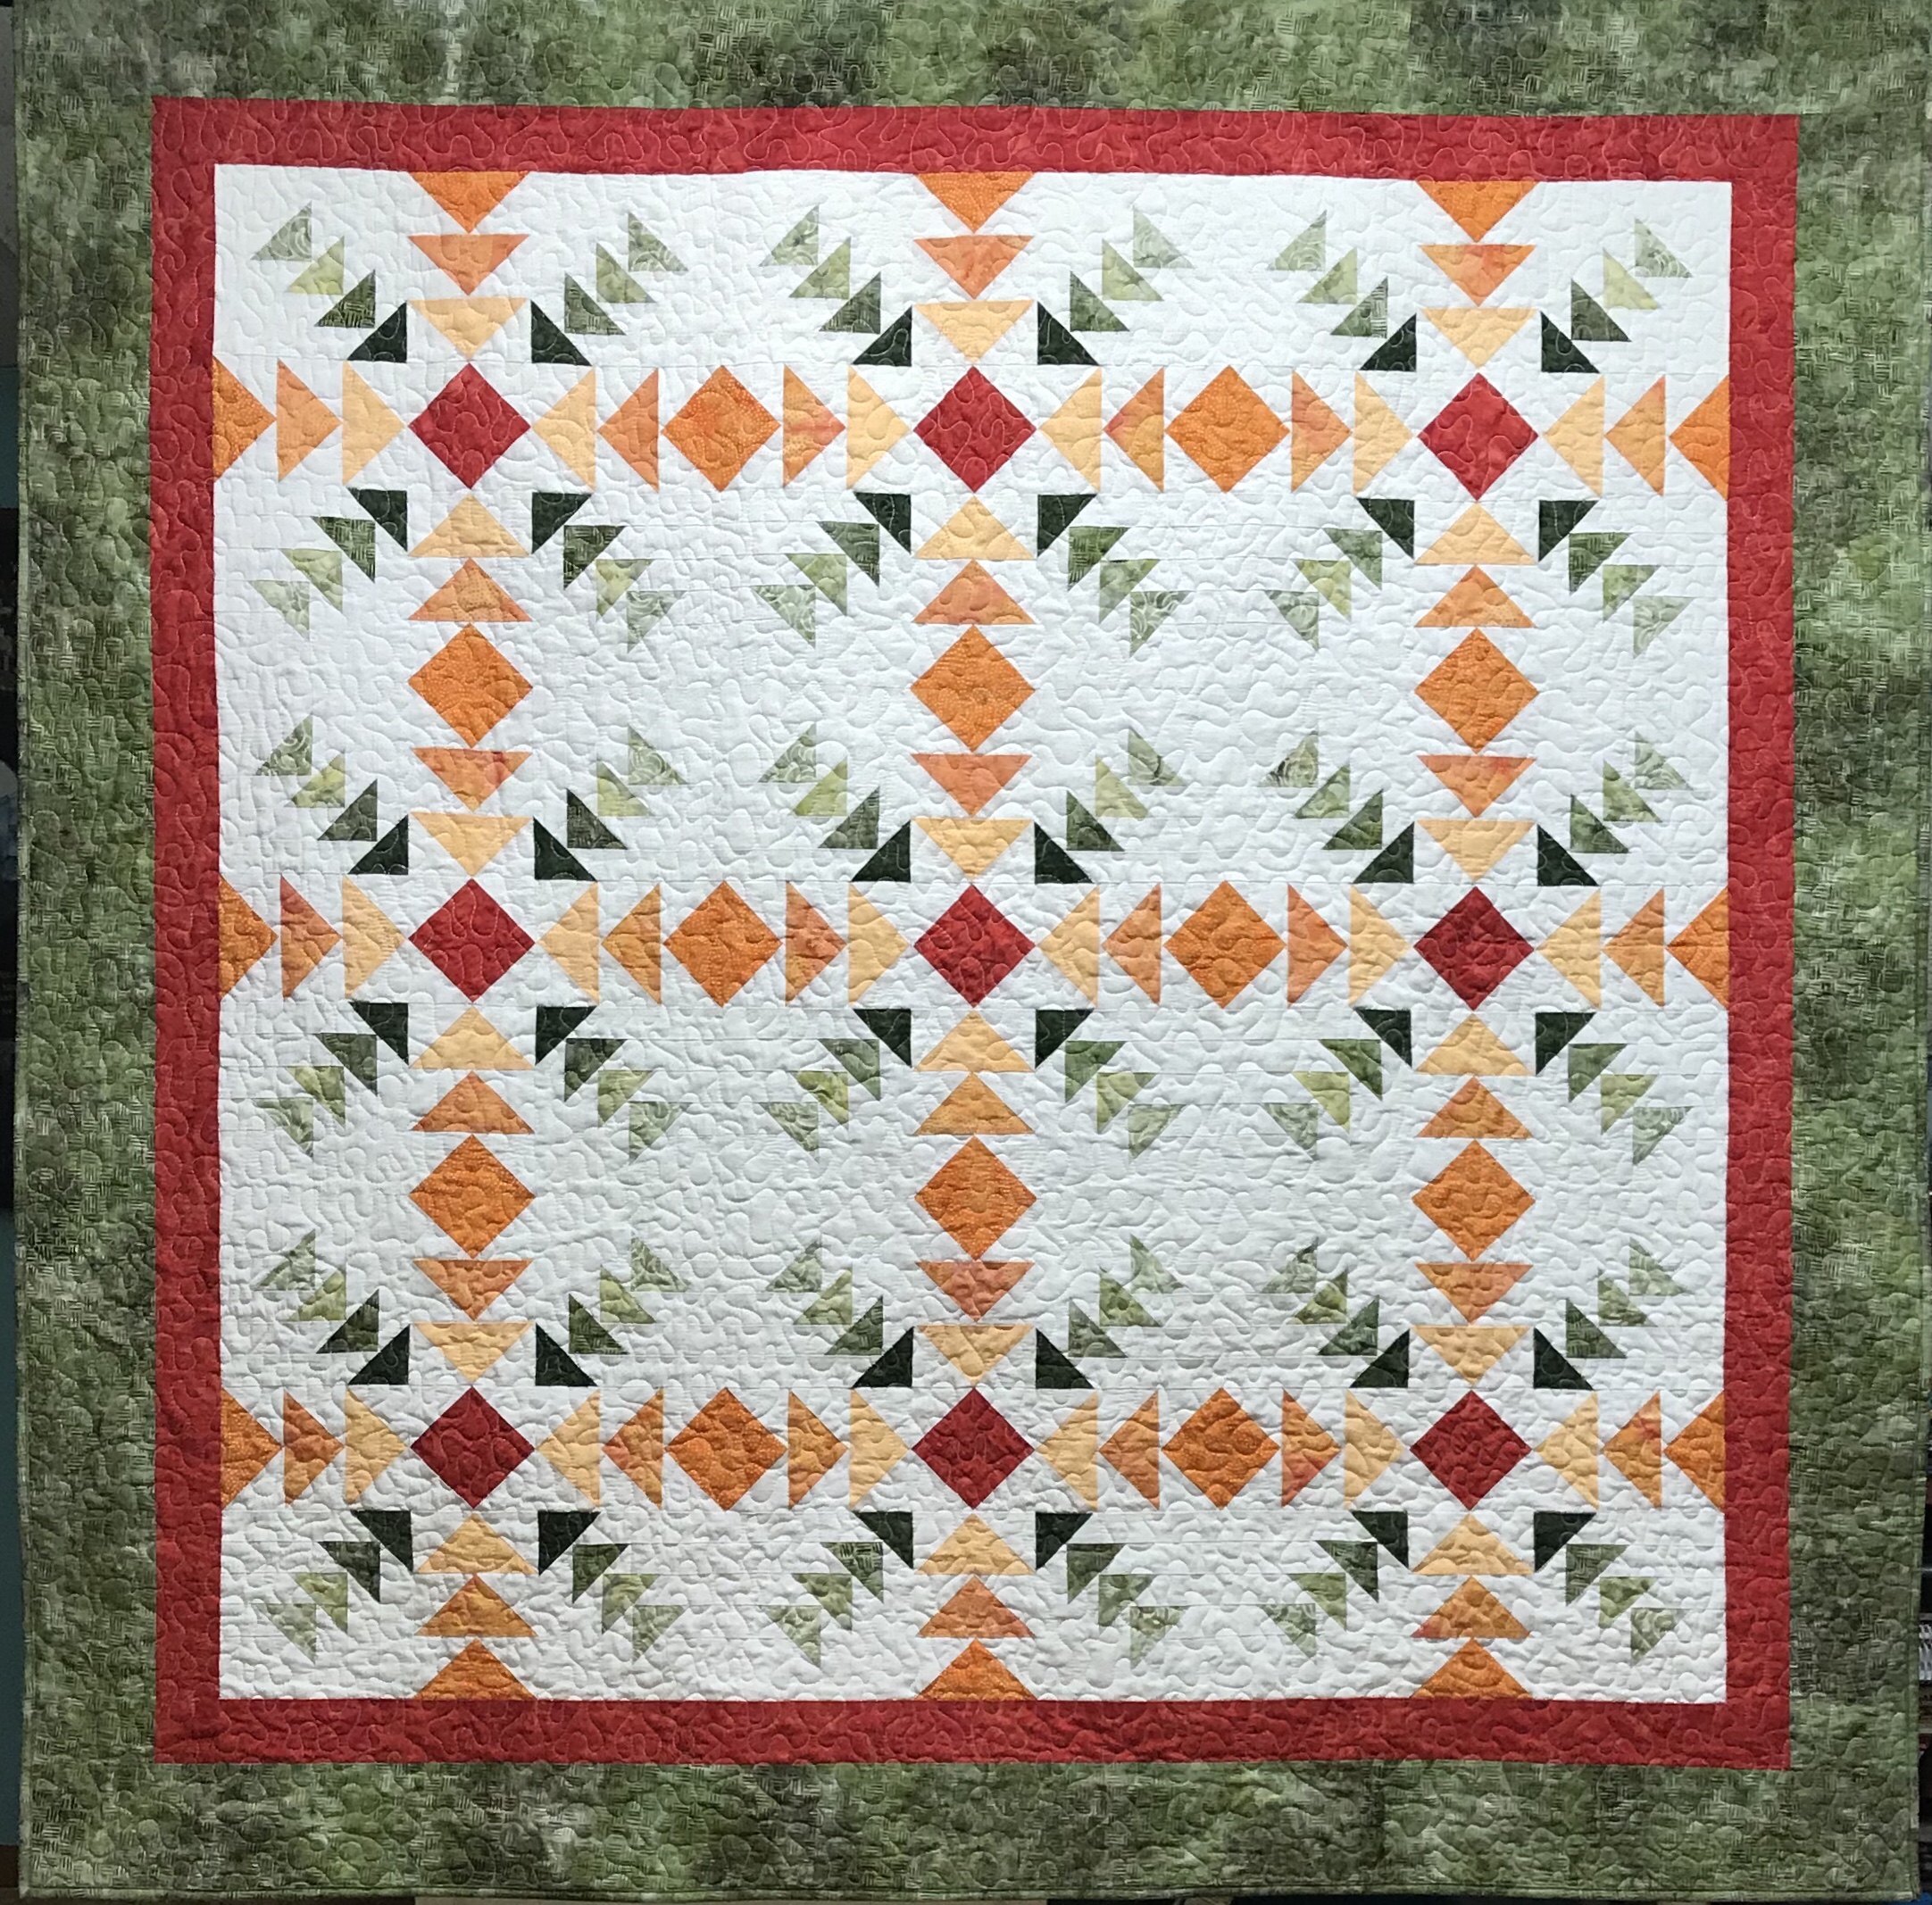
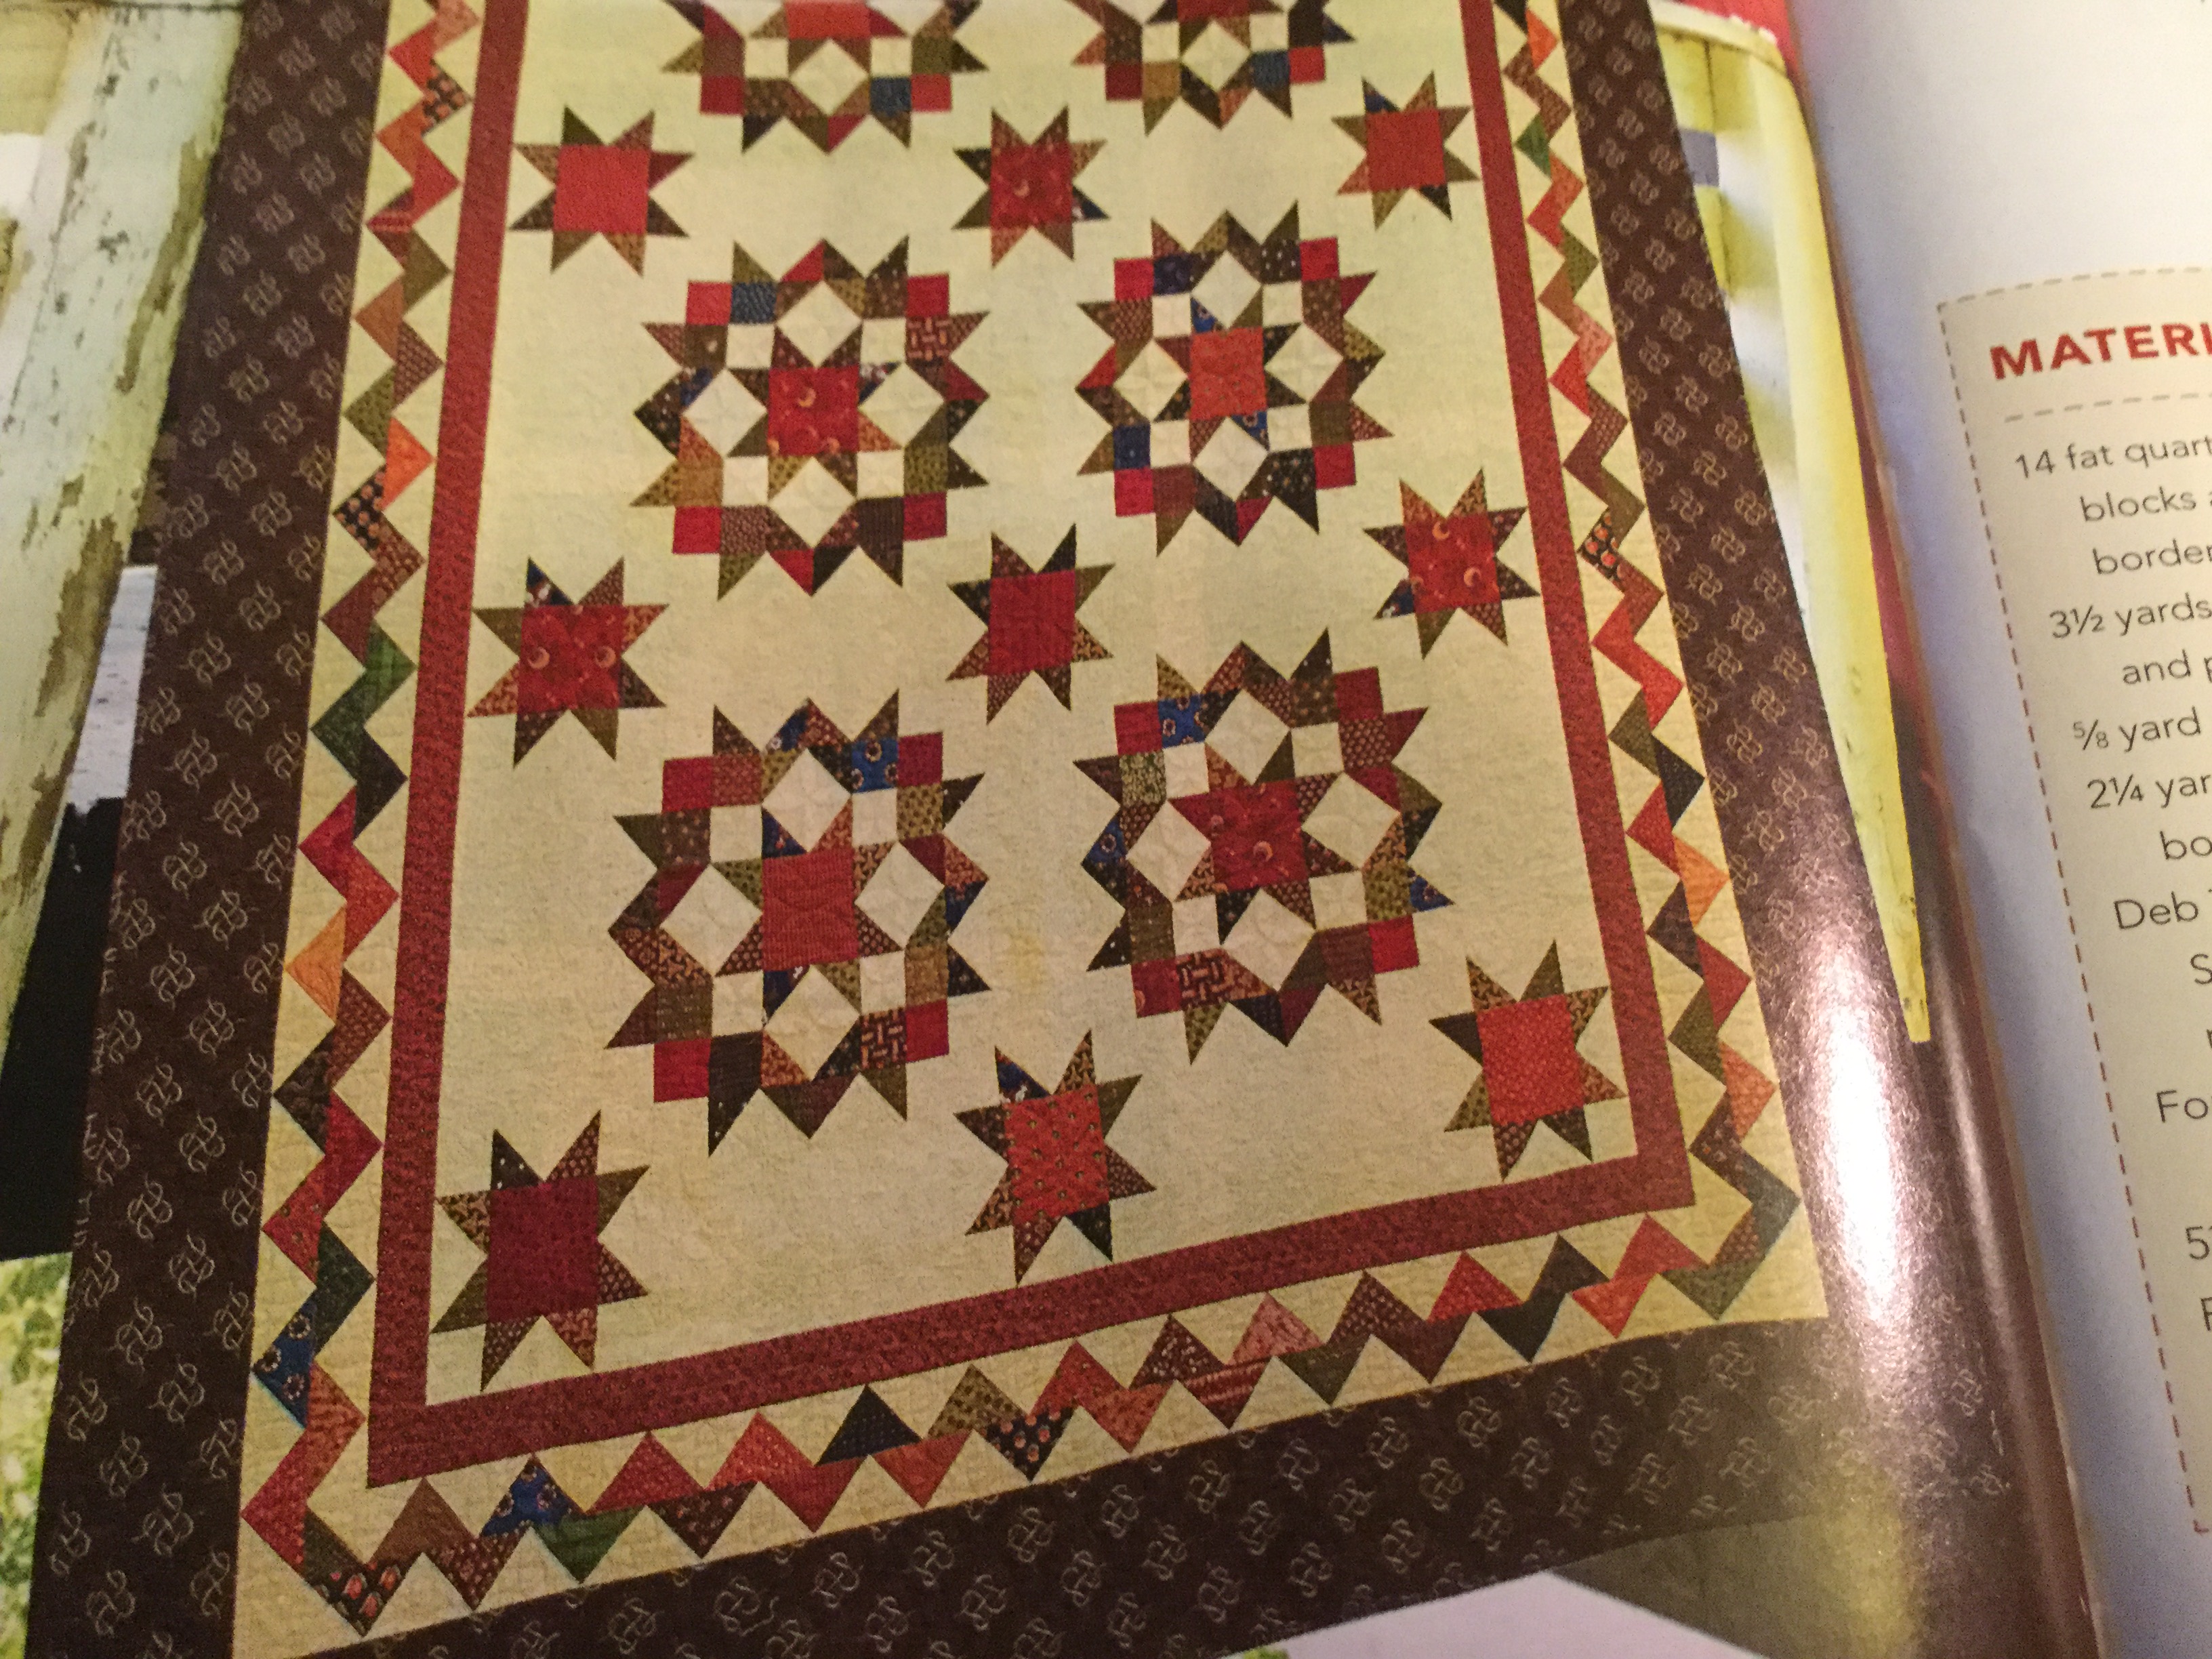
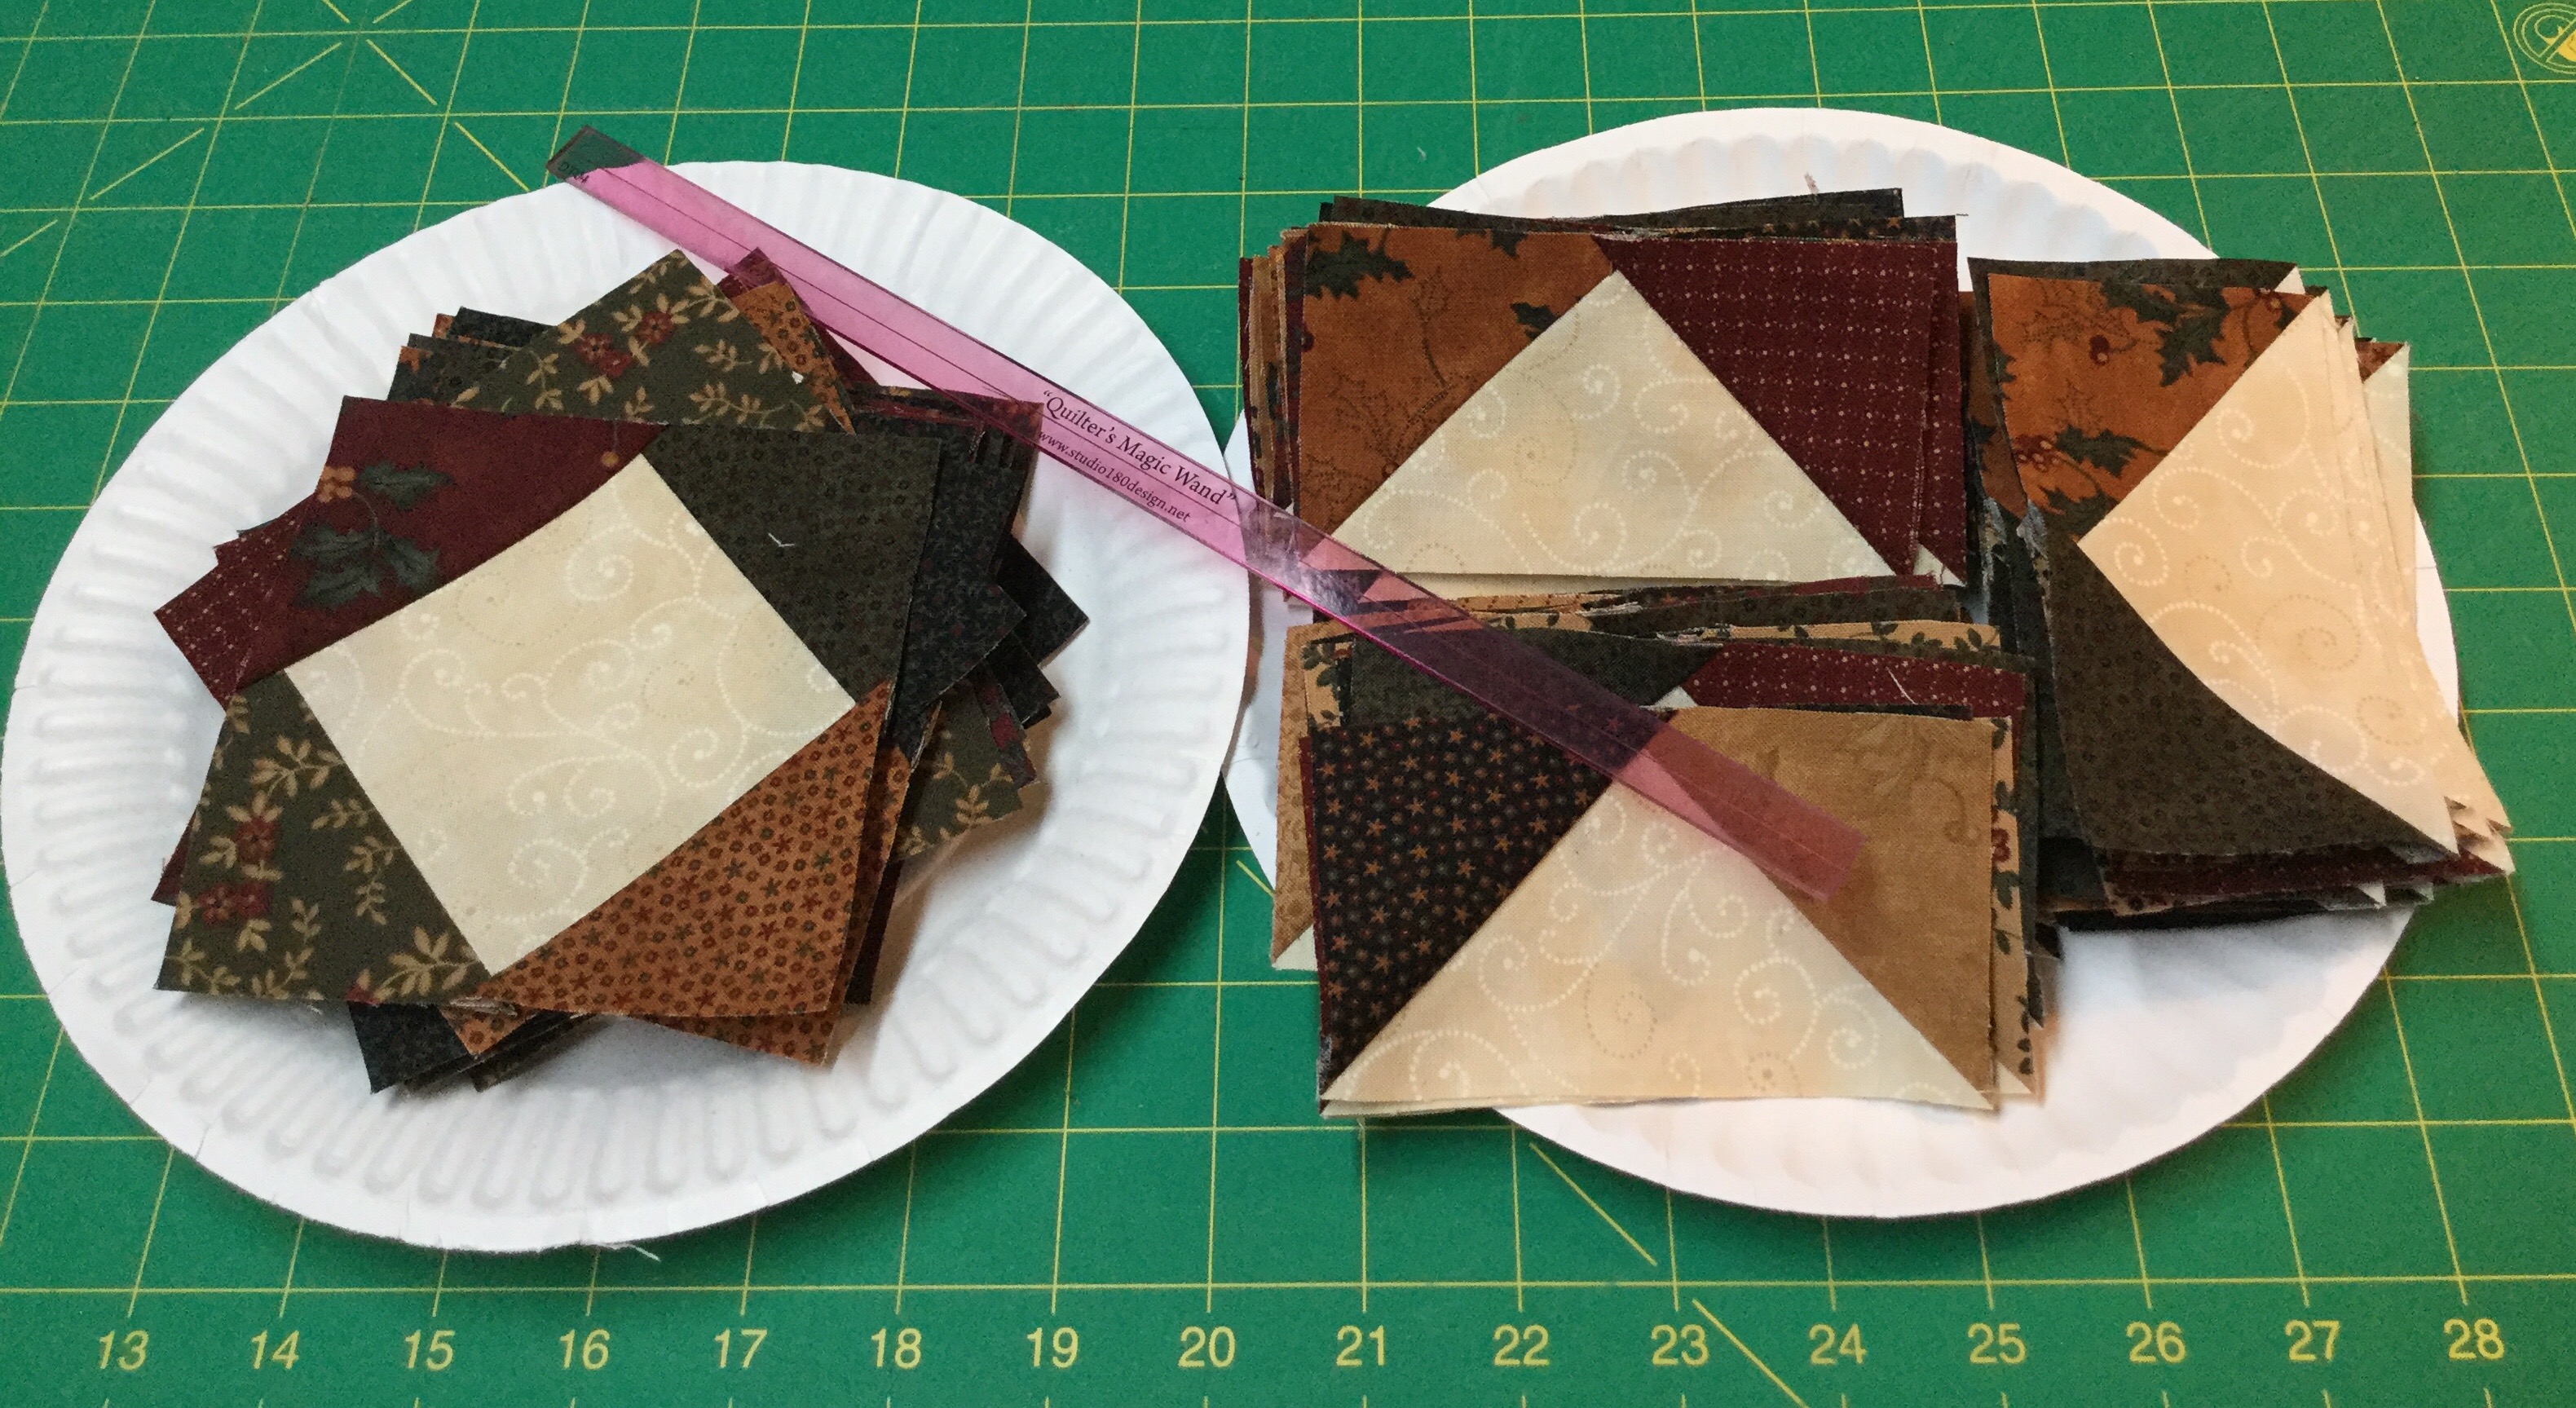
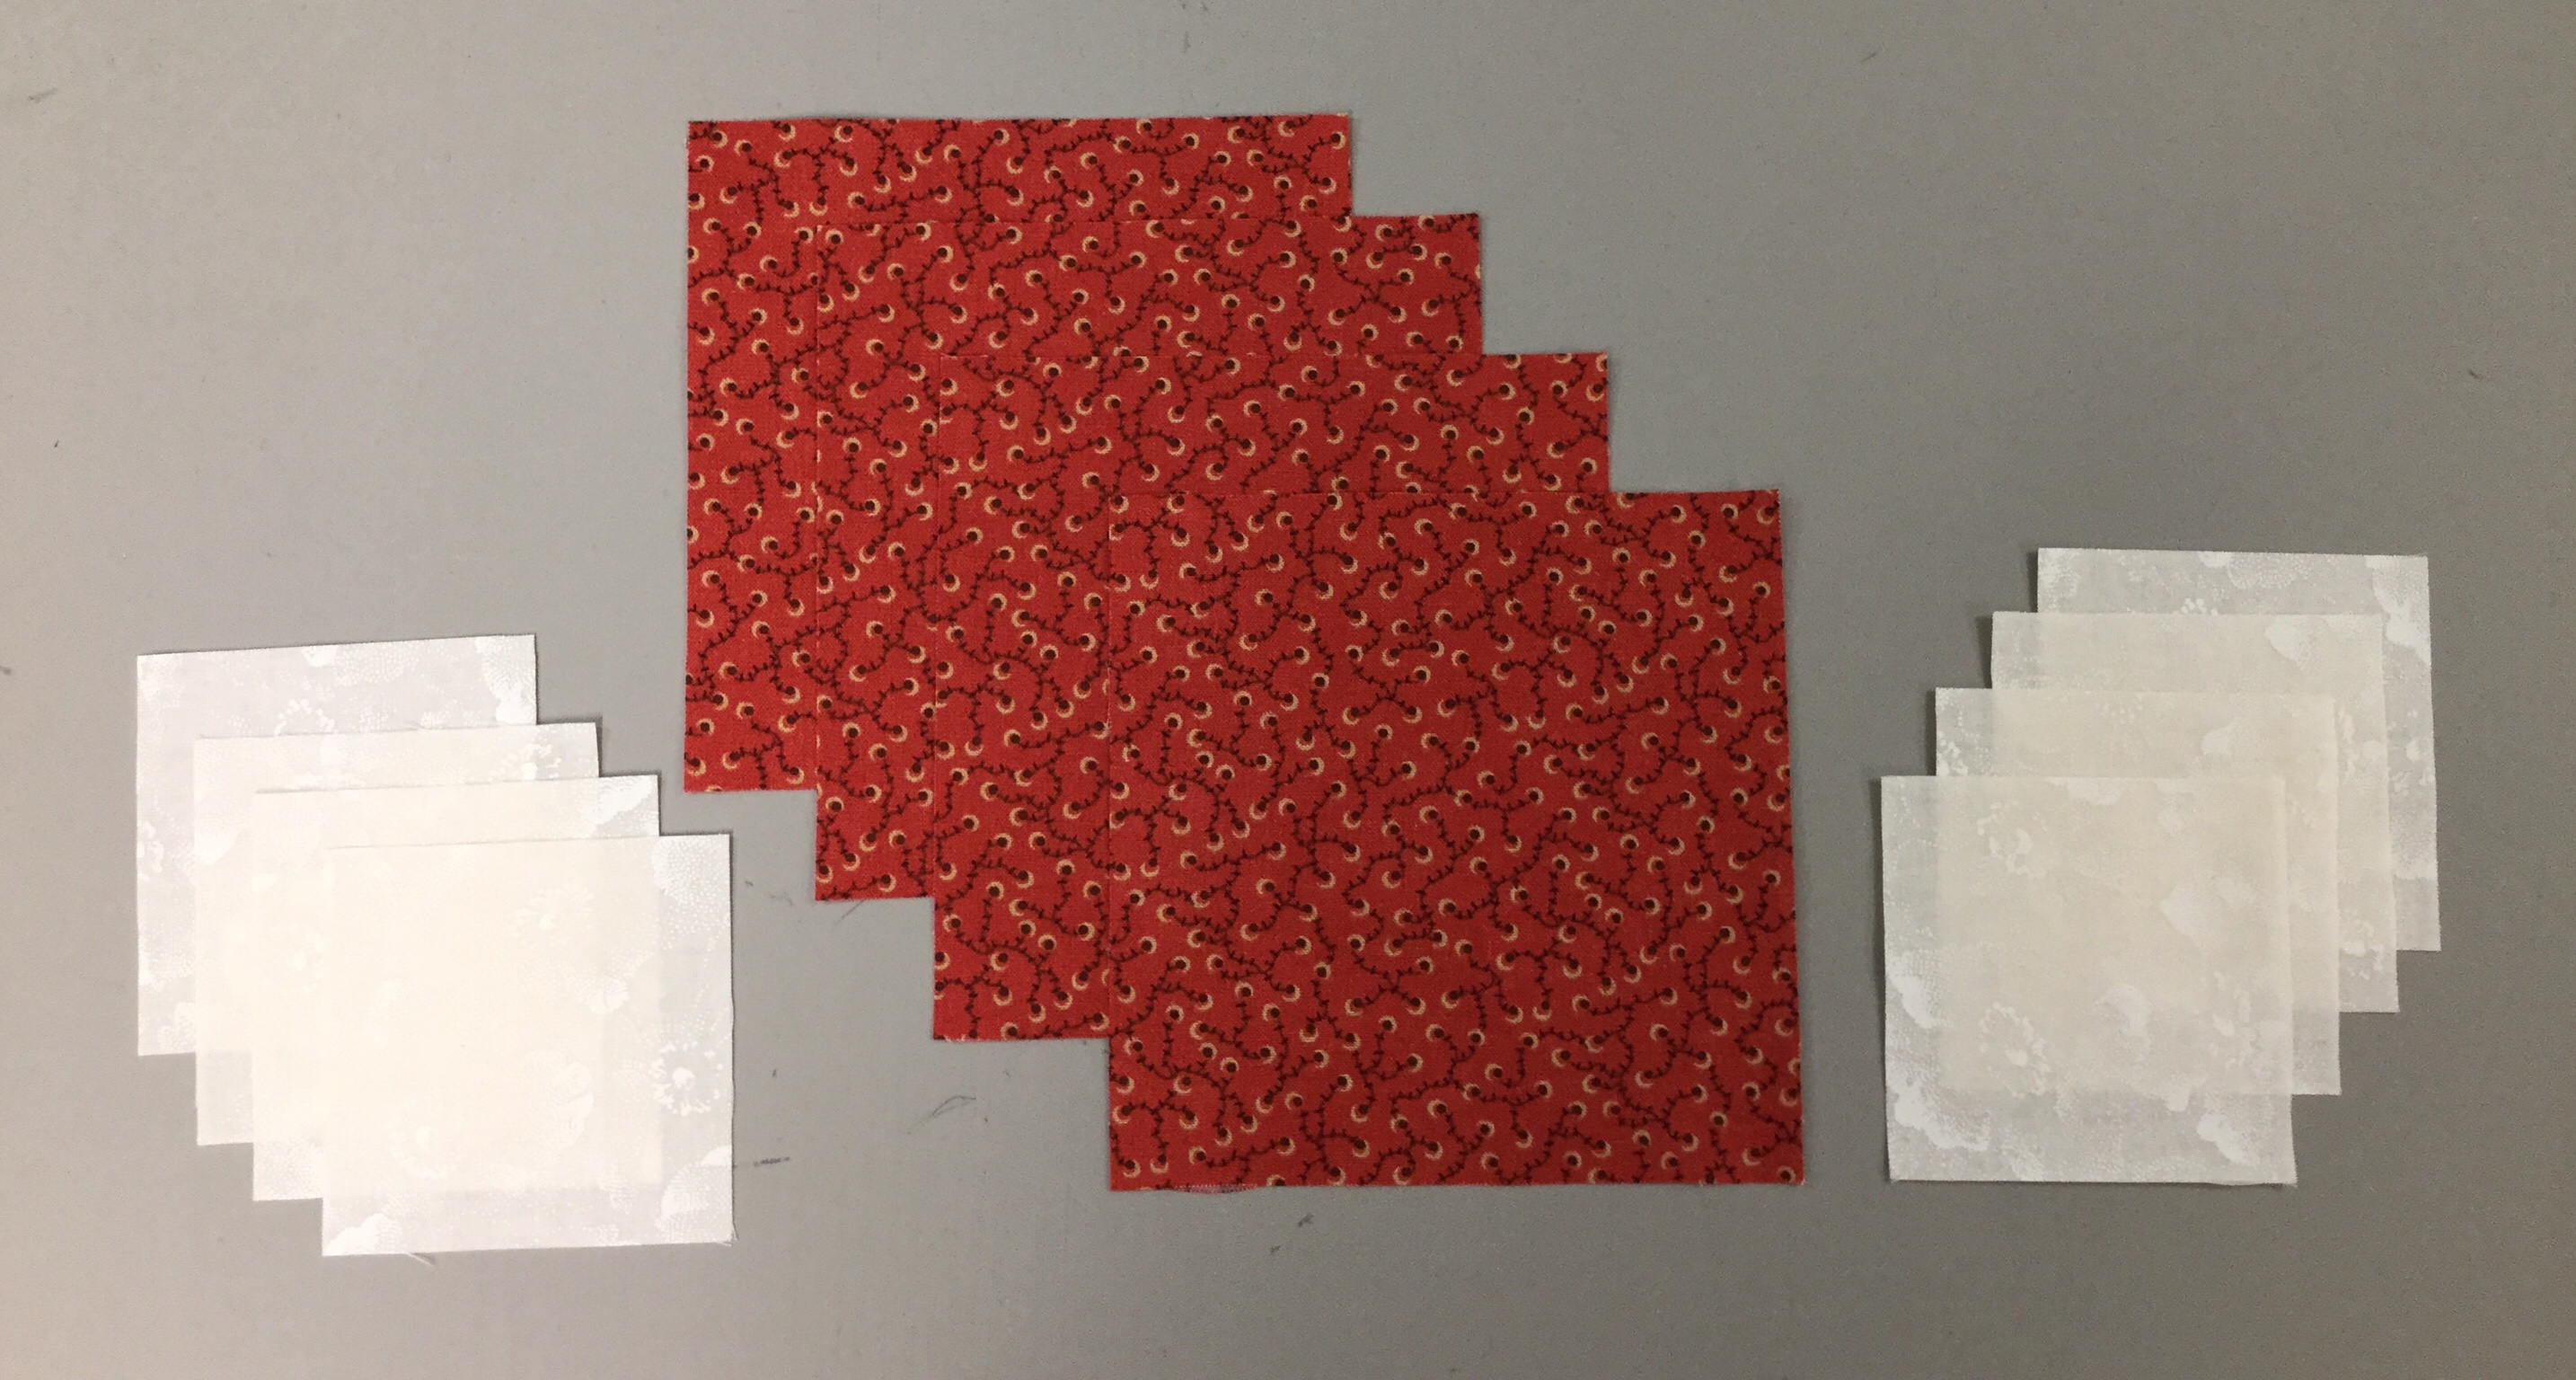
The Whimsy Turndash supply list (link in the first paragraph above) offers you 3 different layouts and a black line master to play with.  I chose 2 colors and a background fabric shown above.

img_5595

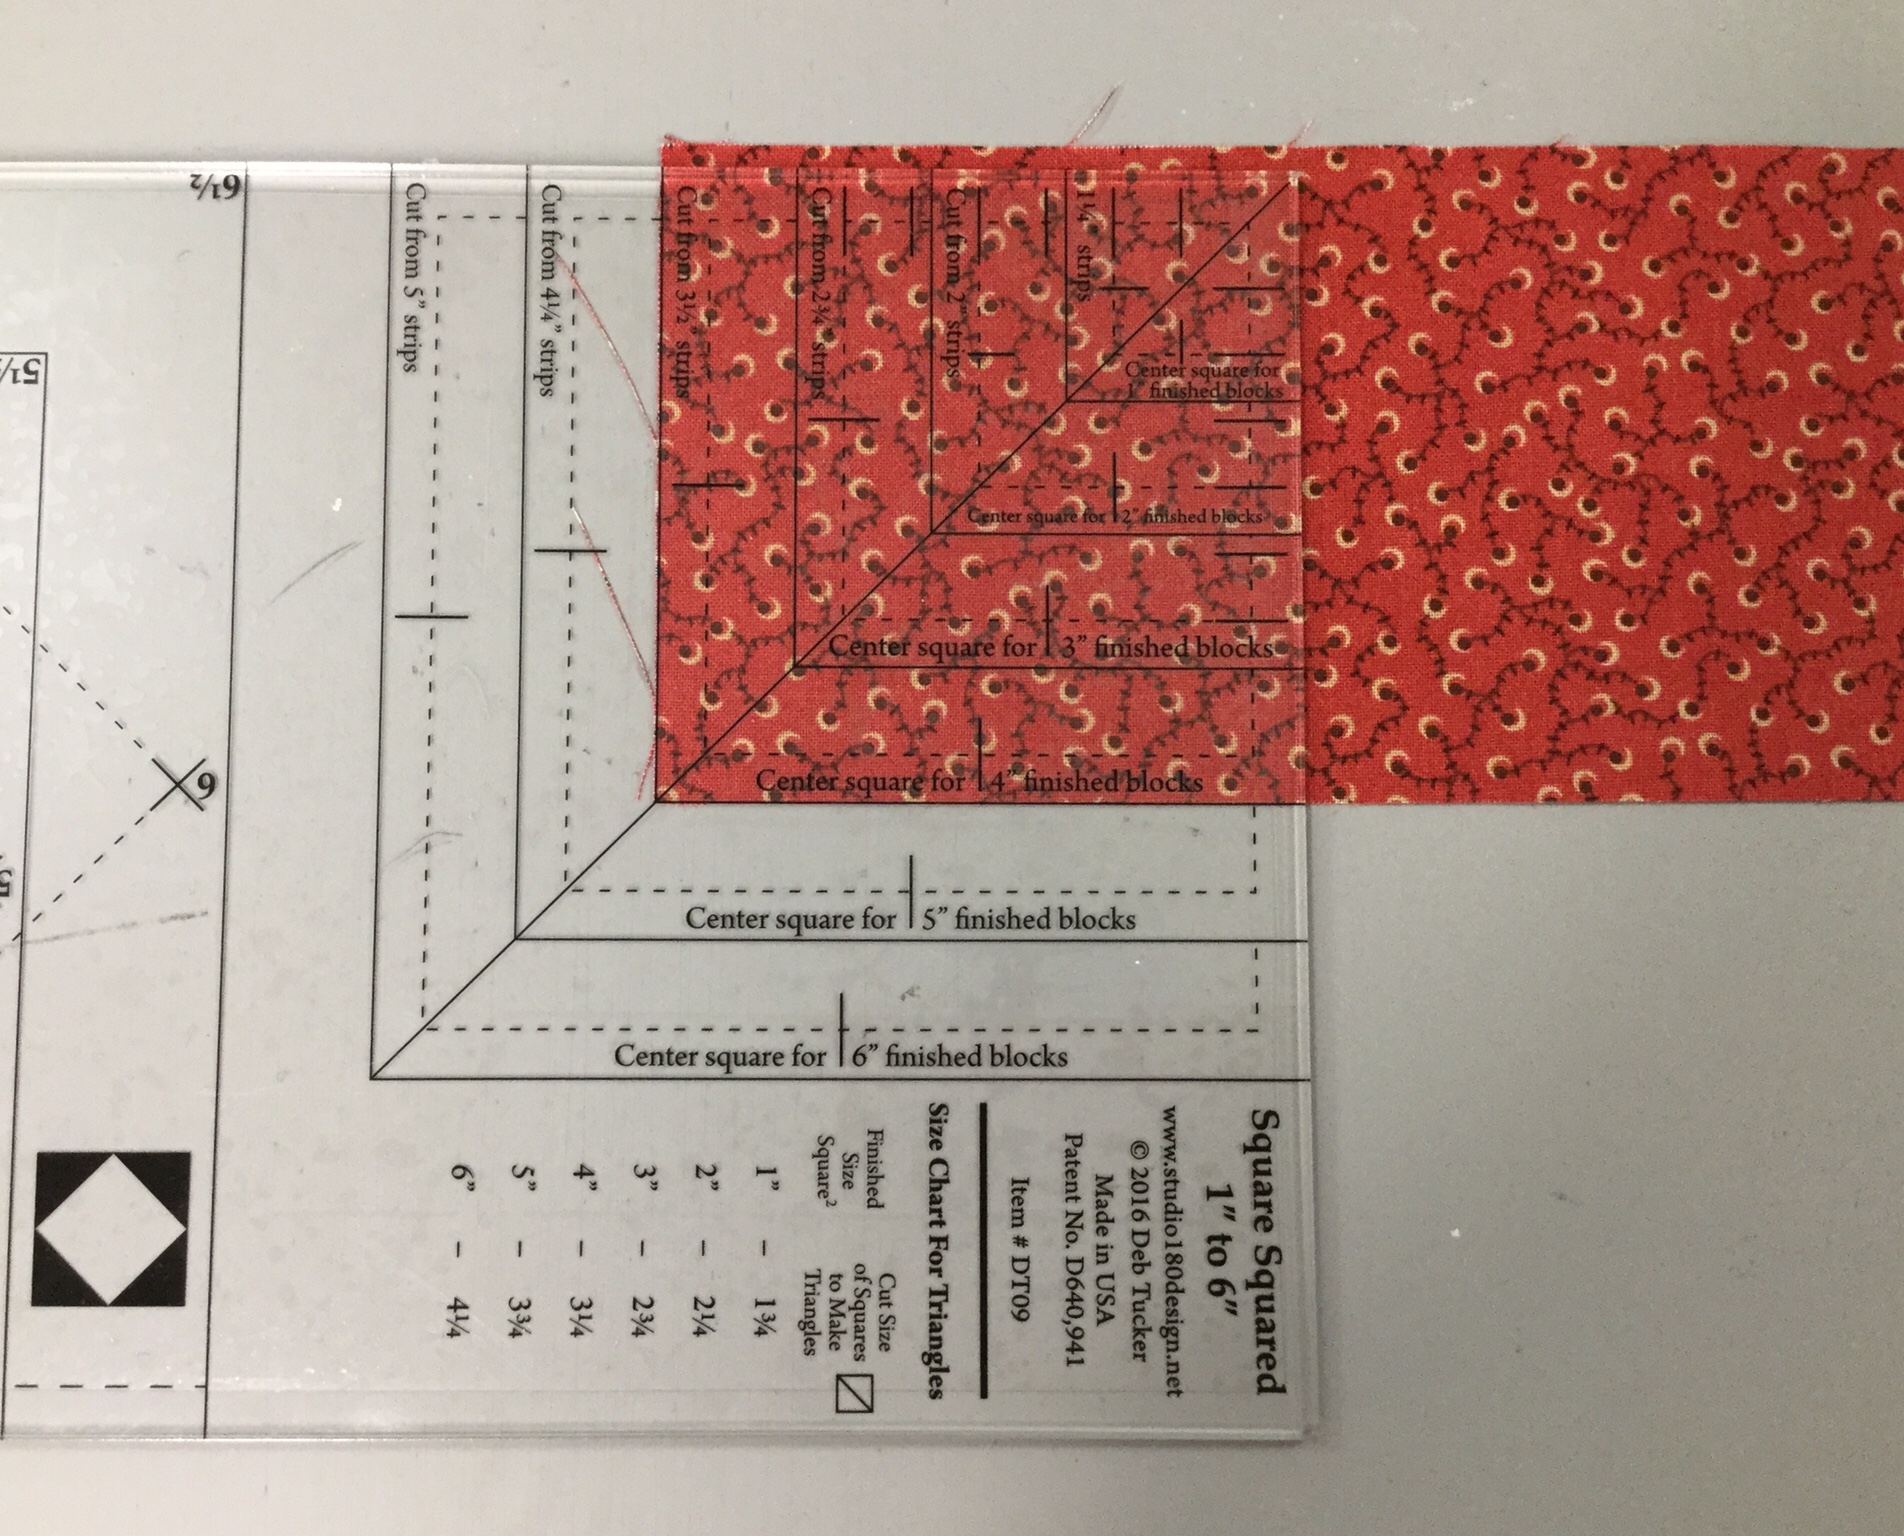
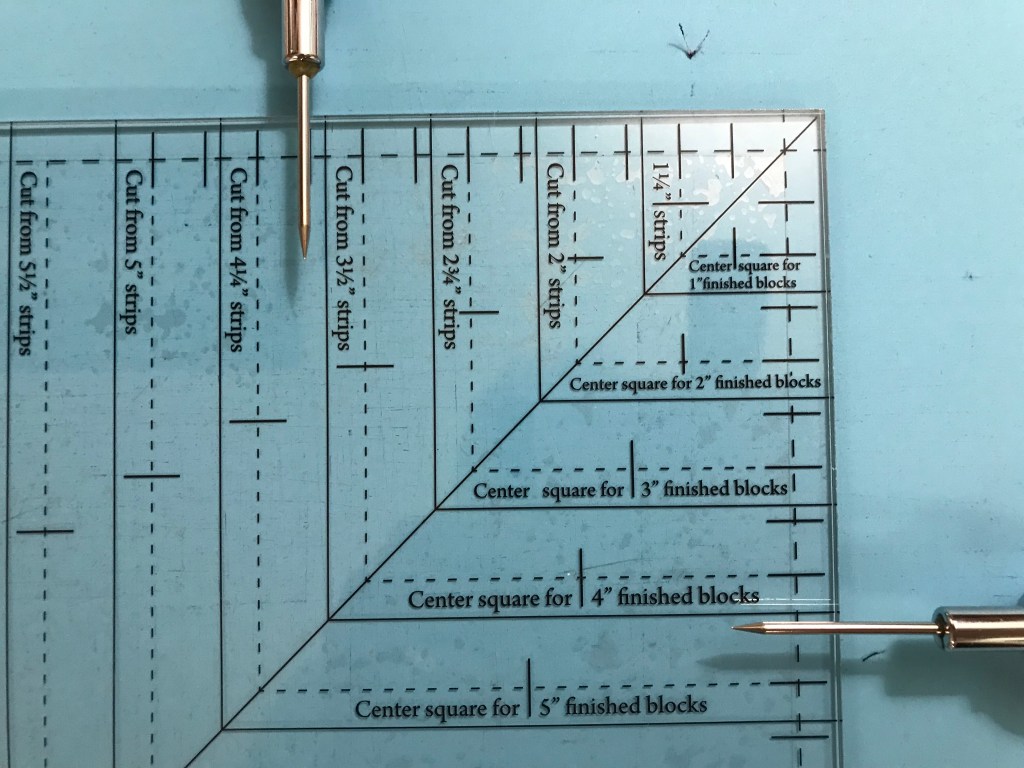
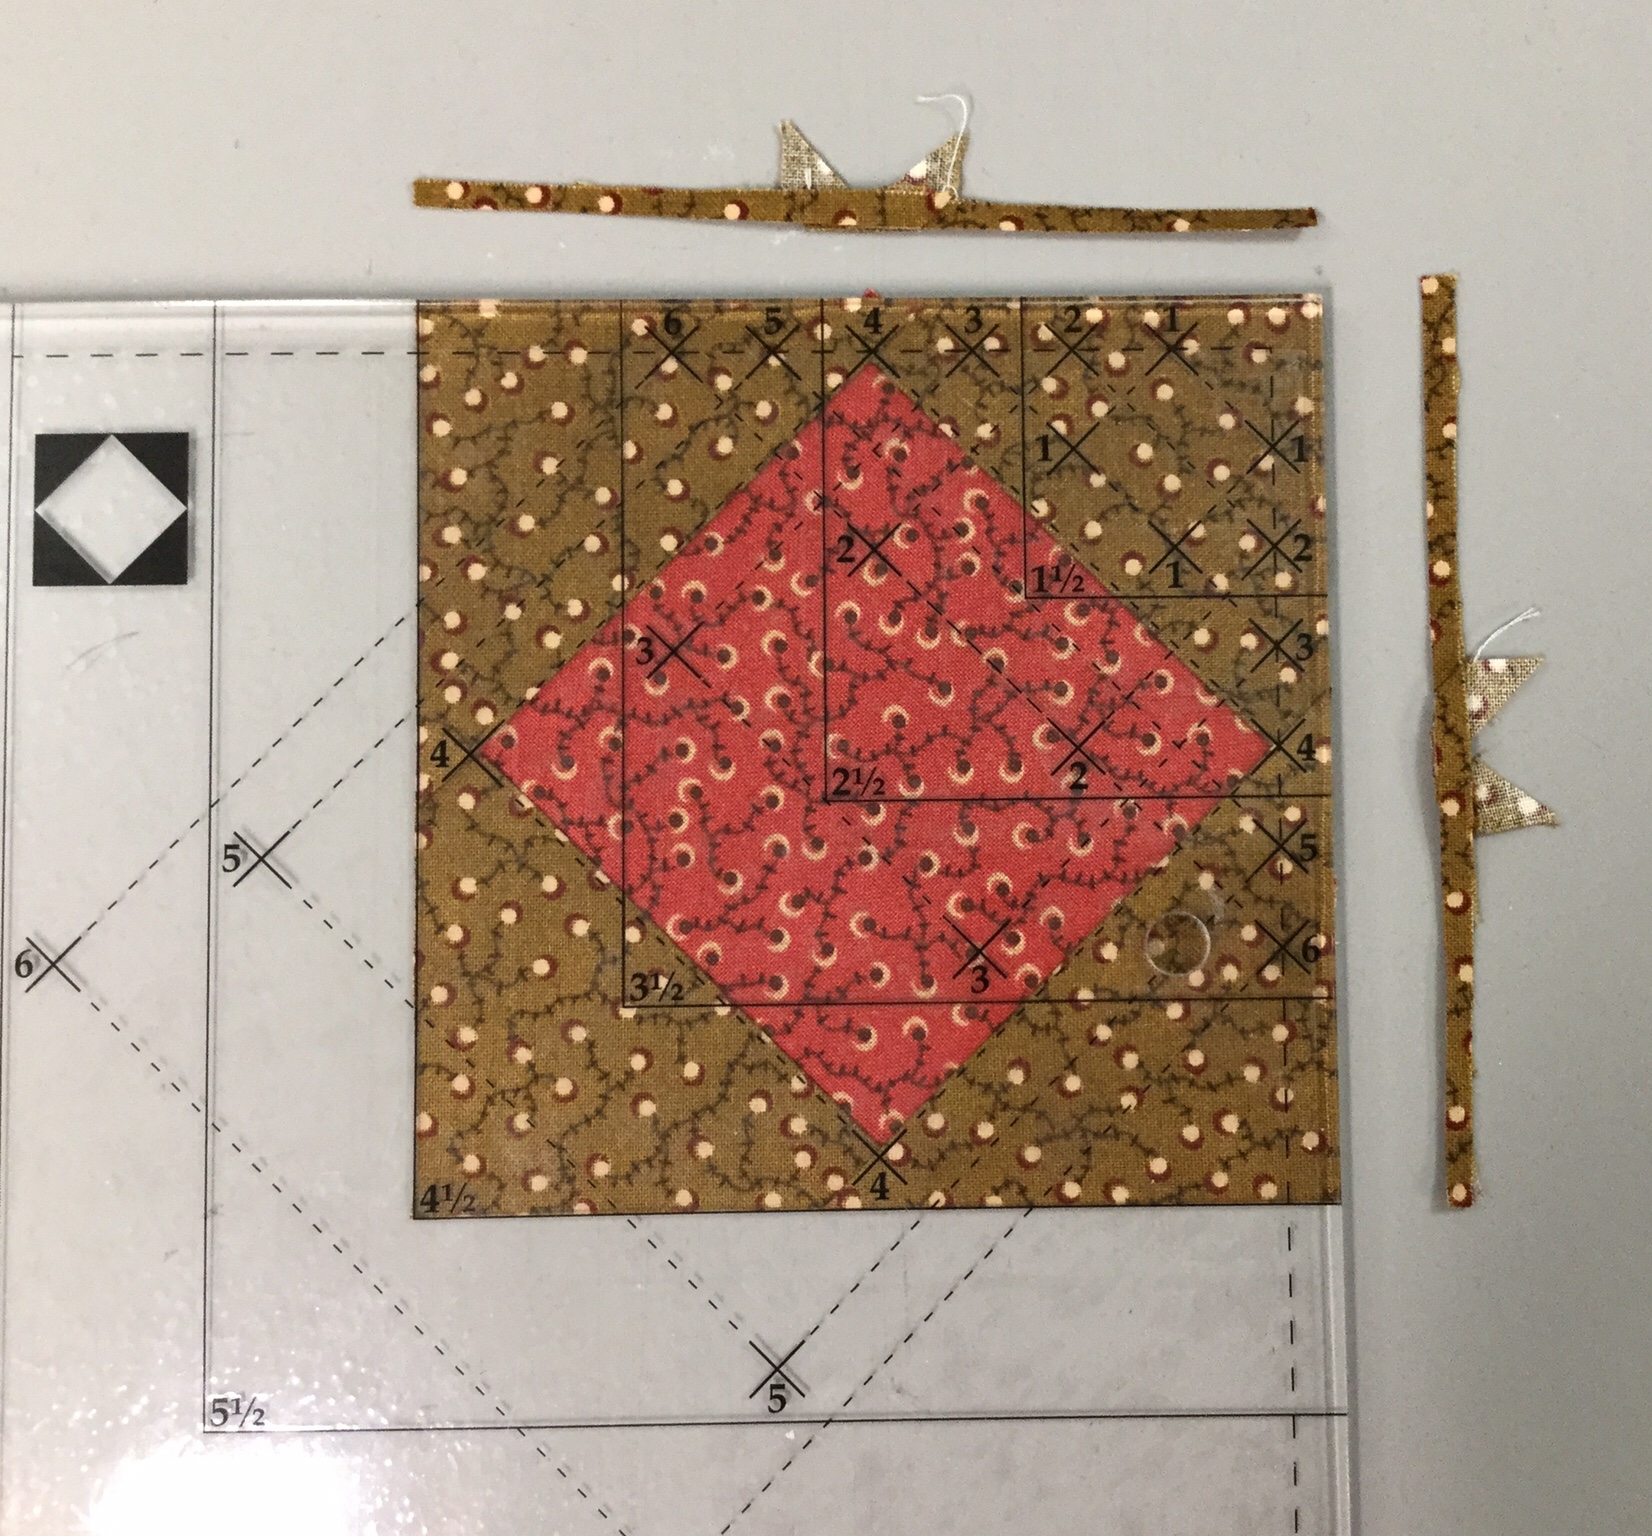
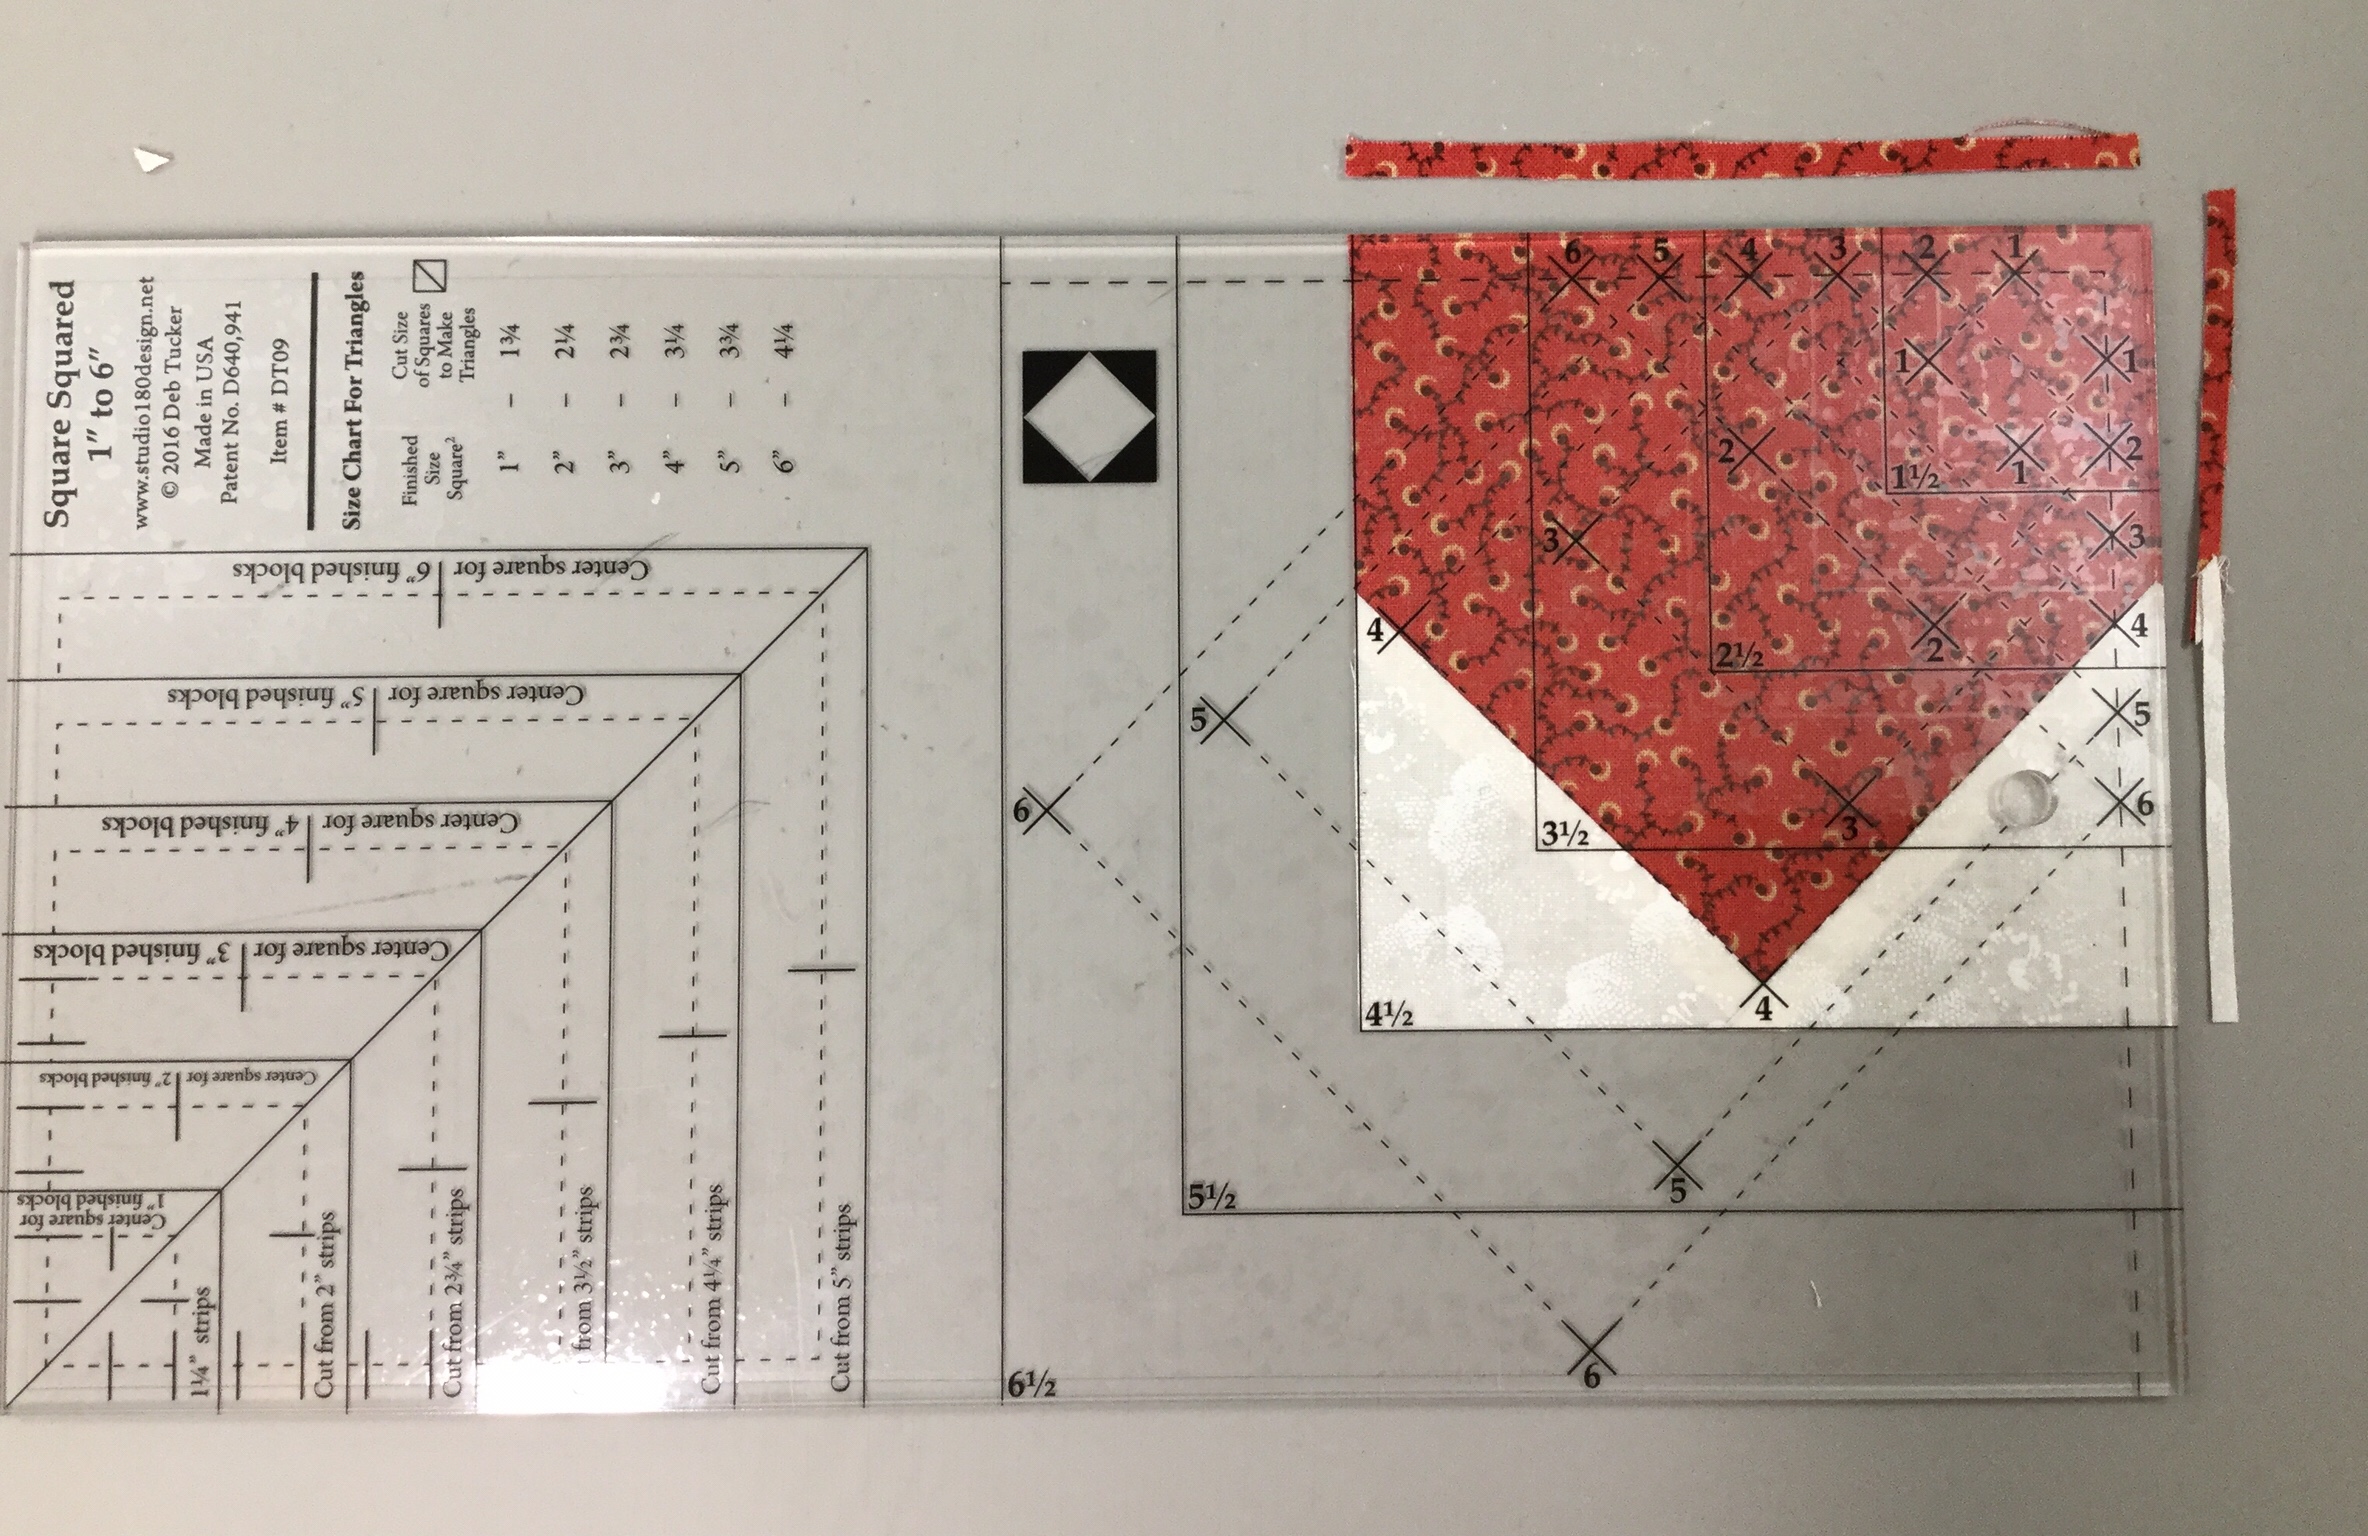
Unit A – Square/Squared:  Determine the desired finished size of your unit.  Go to the Center Square Section on your Square/Squared Tool.  Mine finished size is 4″, The Center Square Sections tells me to cut a strip 3 1/2″ wide.

img_5596

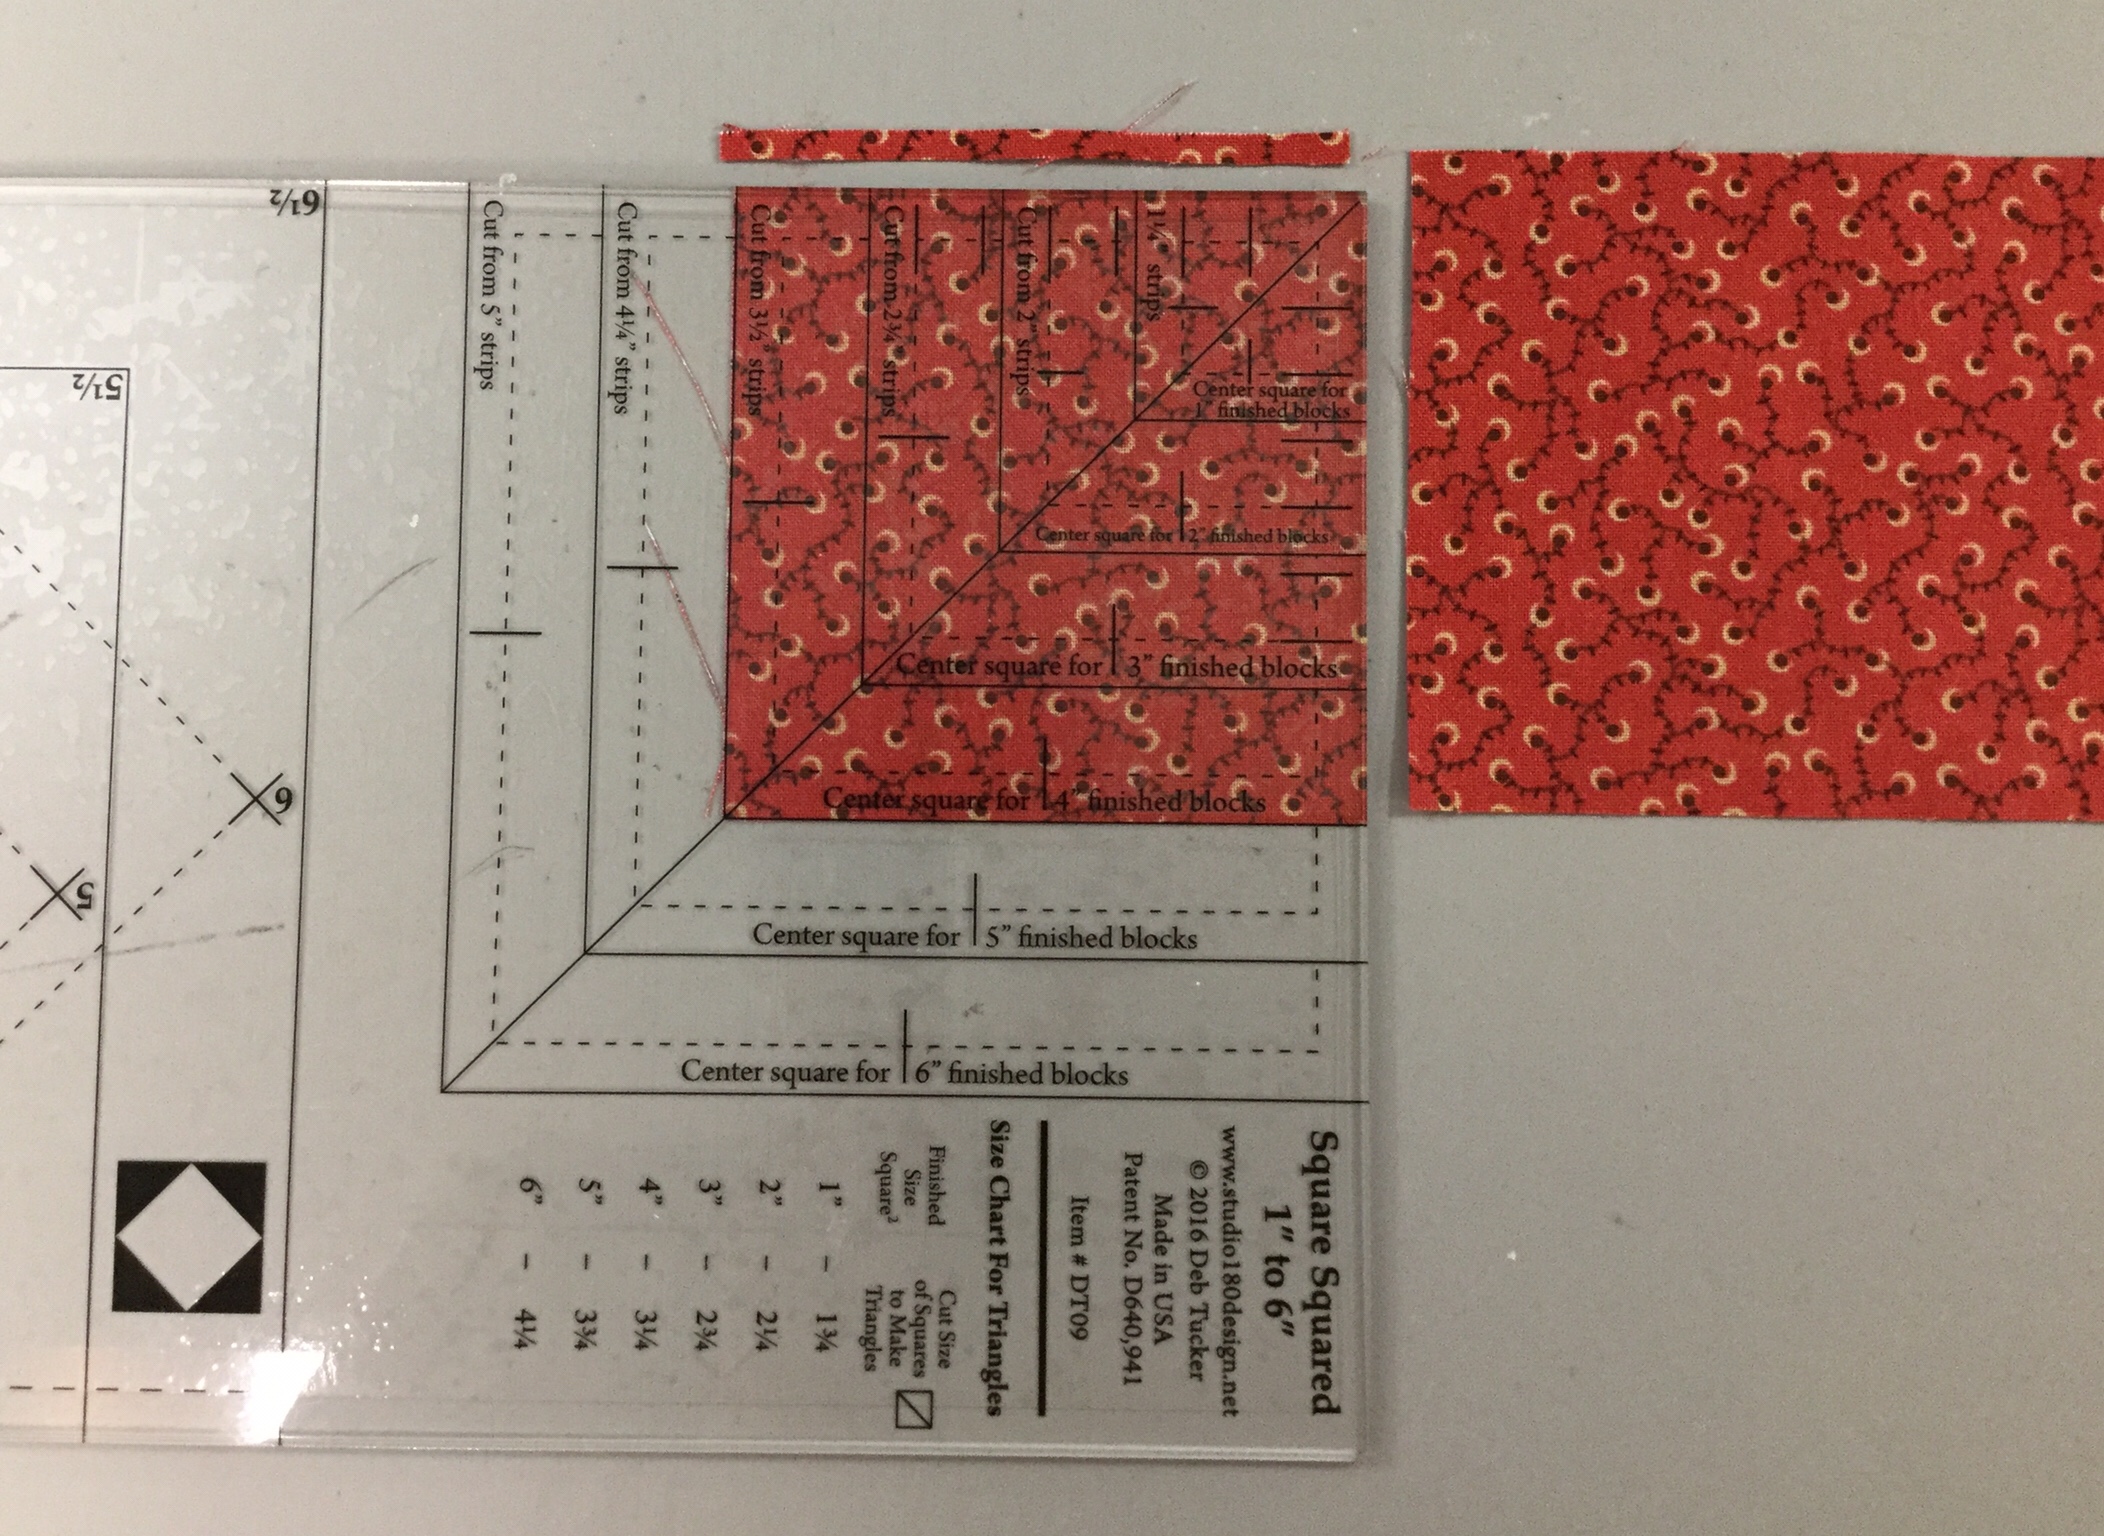
I already trimmed off the selvage of my 3 1/2″ strip.  Place the line for 4″ finished units on the bottom of the strip up against the trimmed end.  Trim up the left side and across the top.  You now have a perfect precision cut center square for your unit.

img_5597

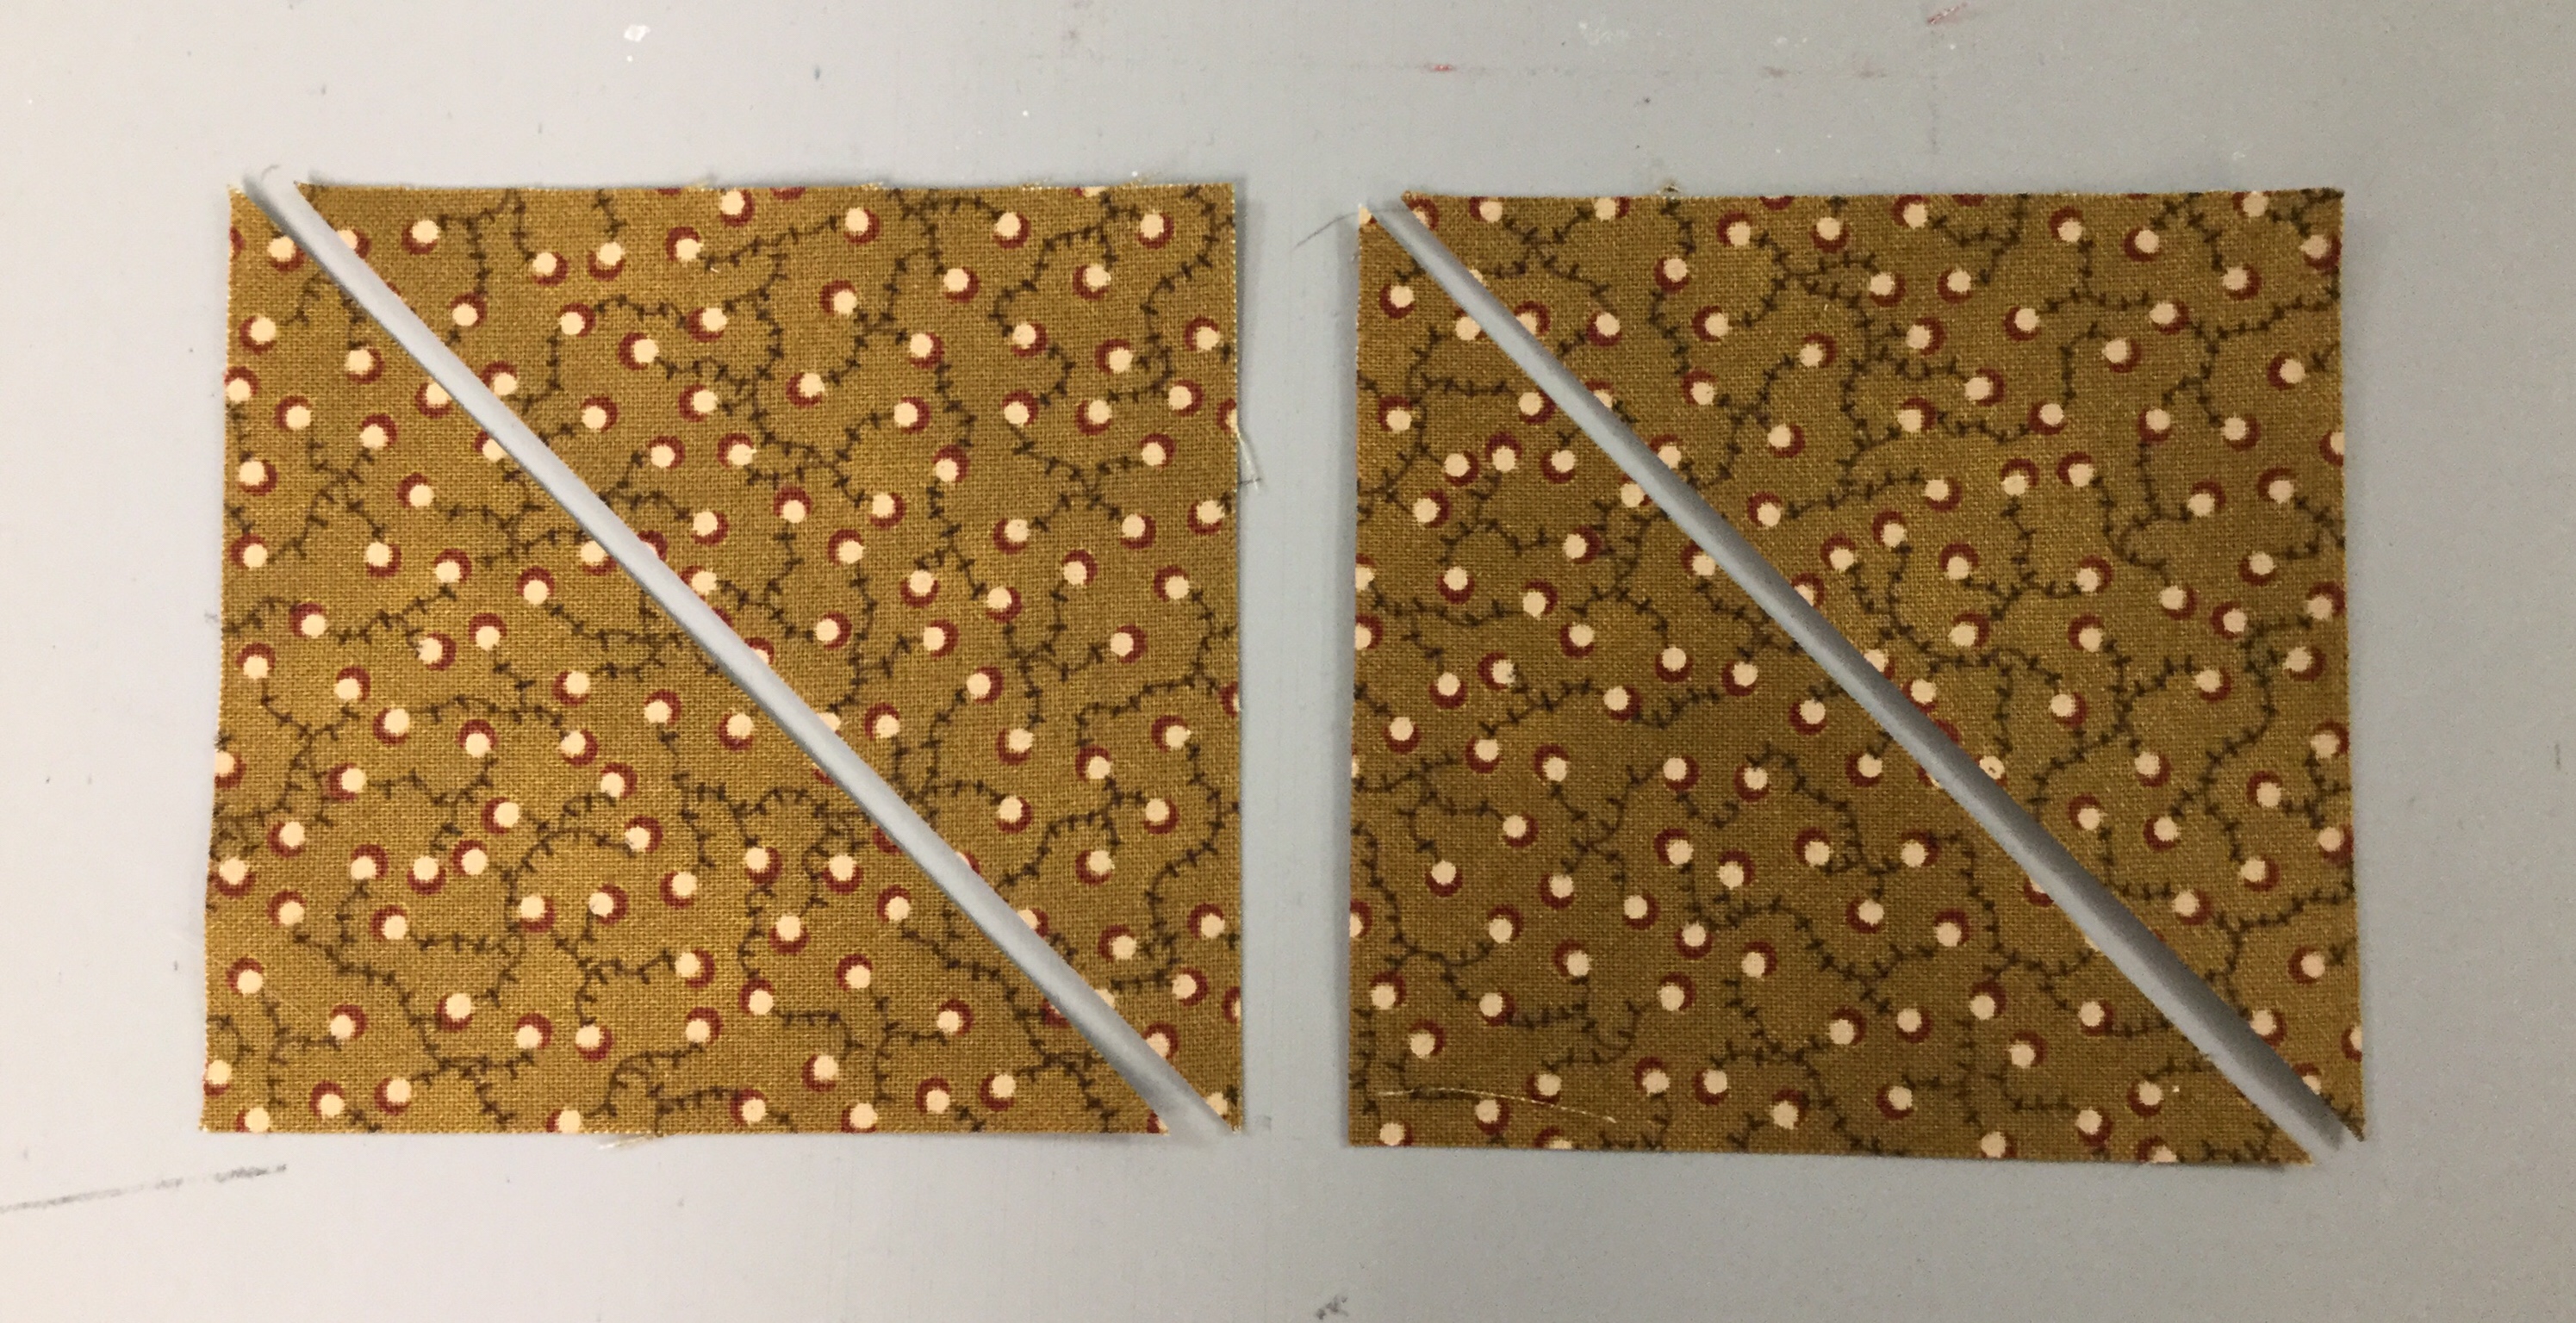
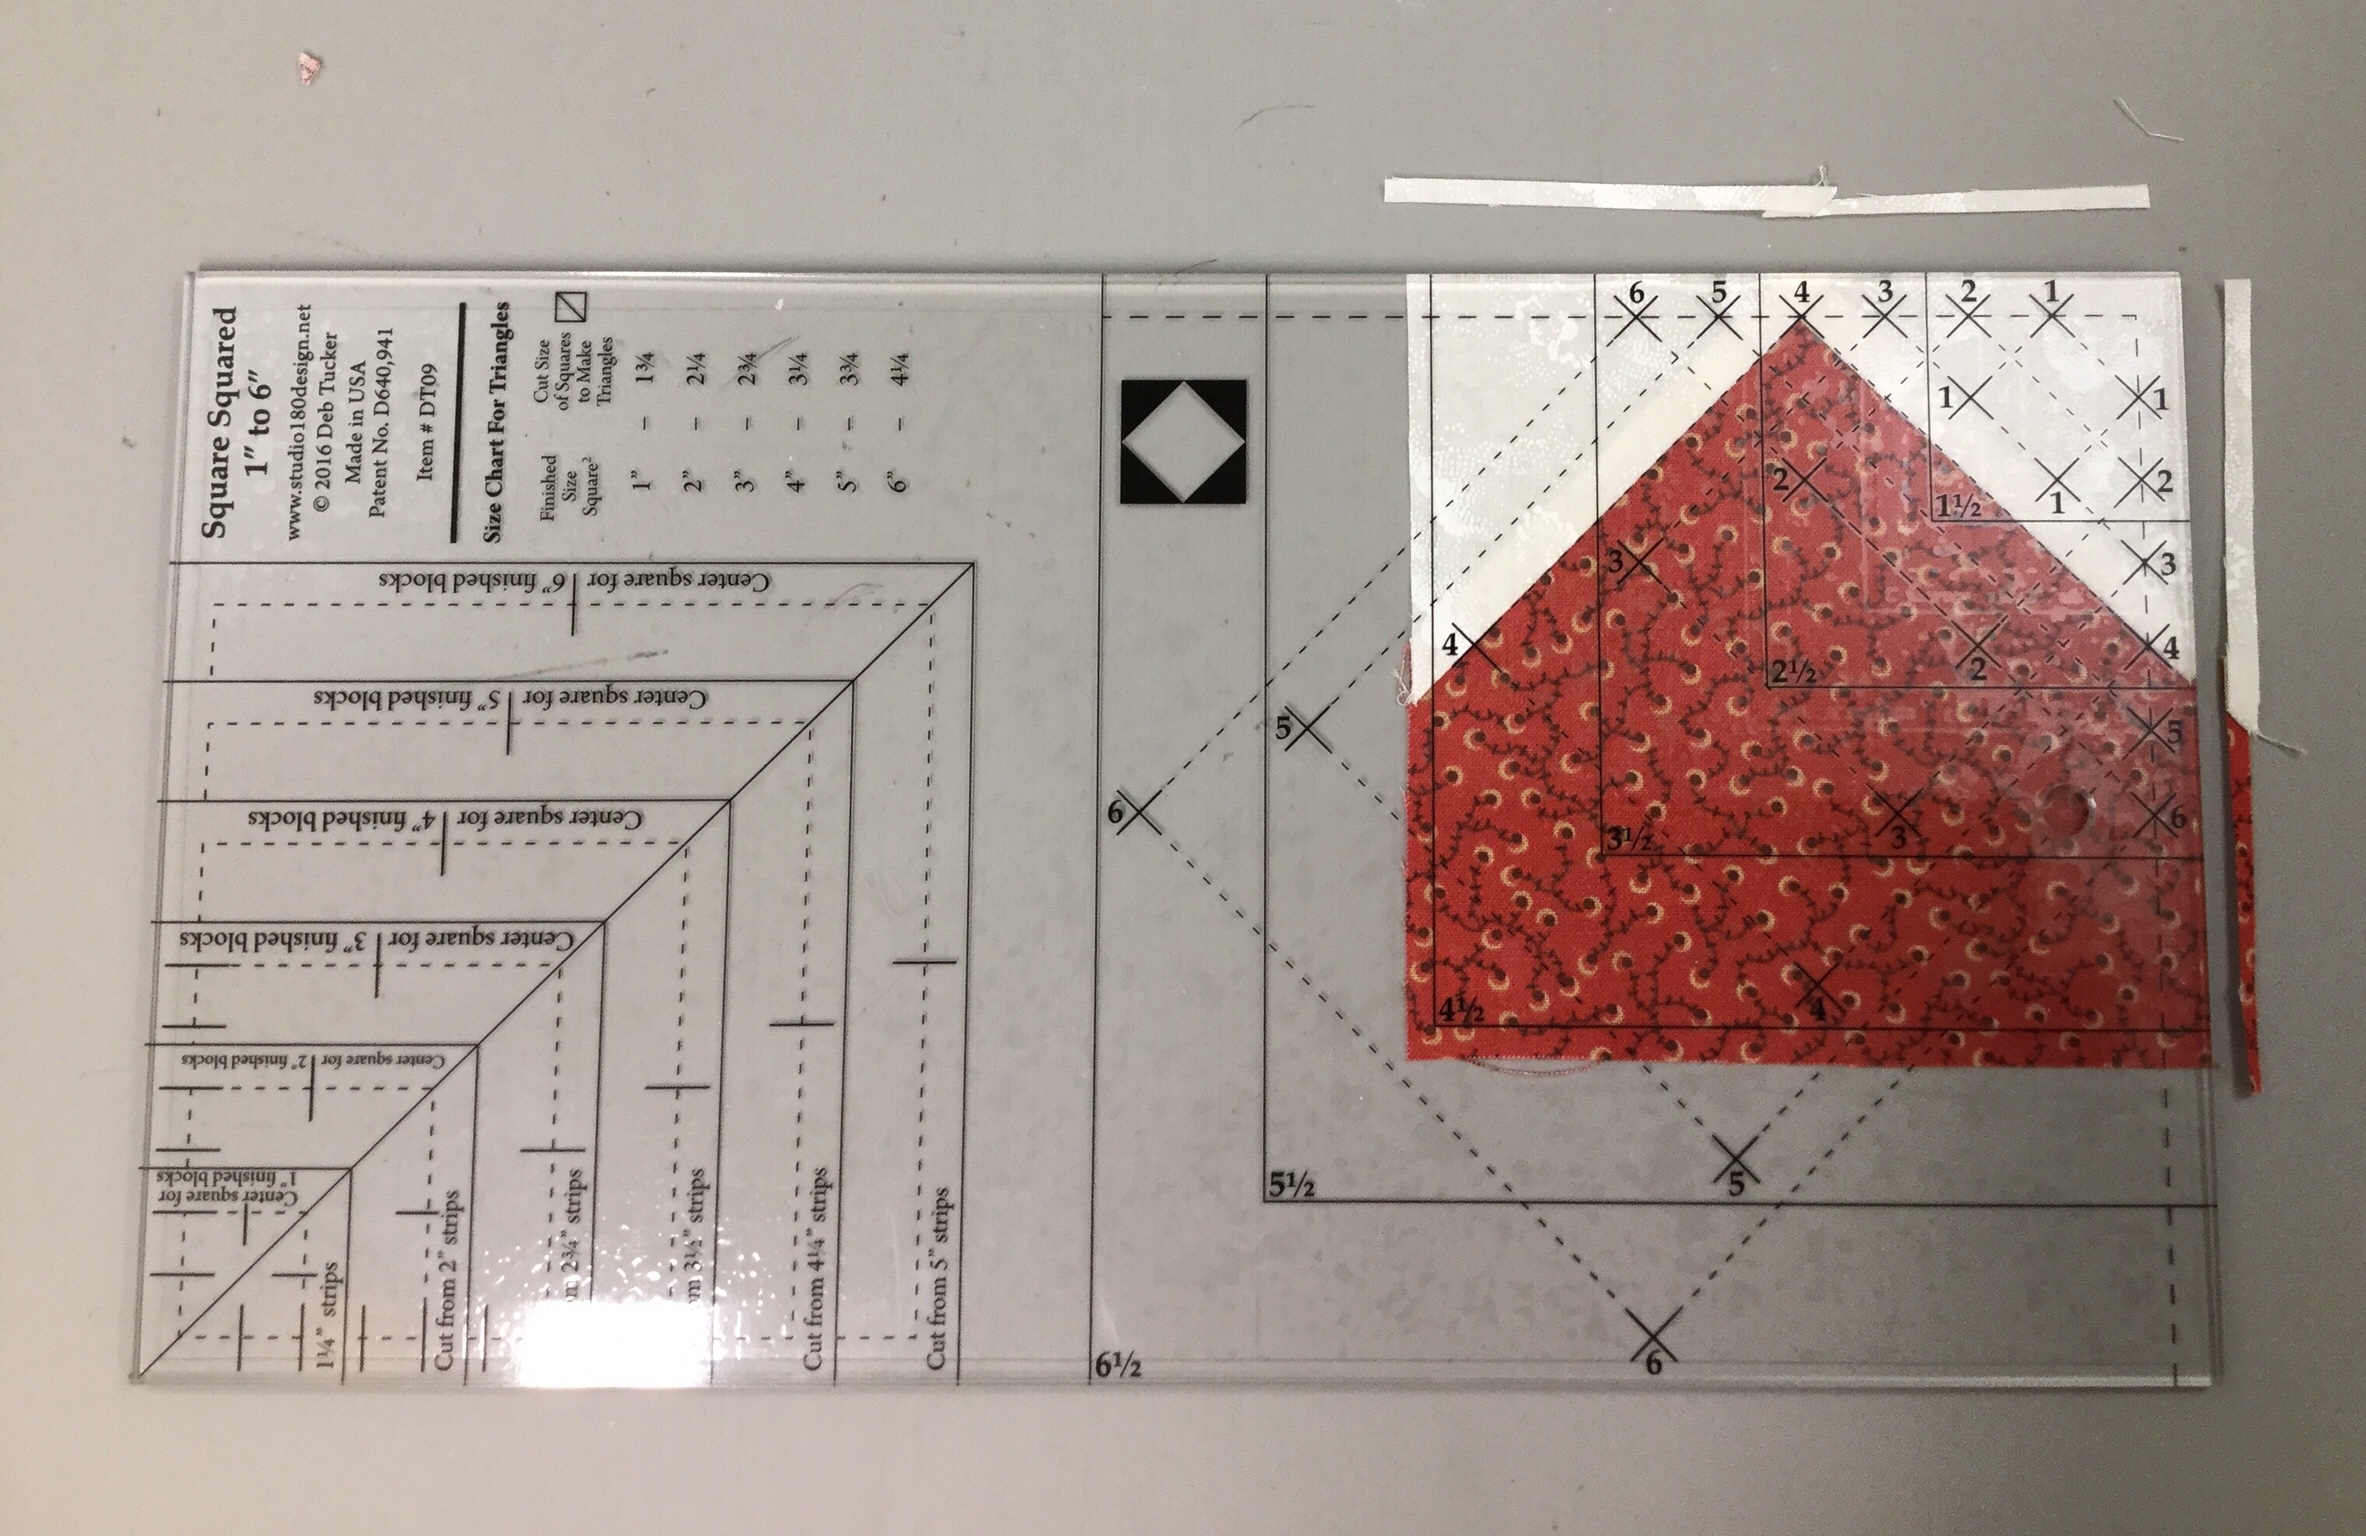
On your Square/Squared tool find the Size Chart for Triangles.  For 4″ finished units I cut two 3 1/4″ squares and cut them once diagonally.

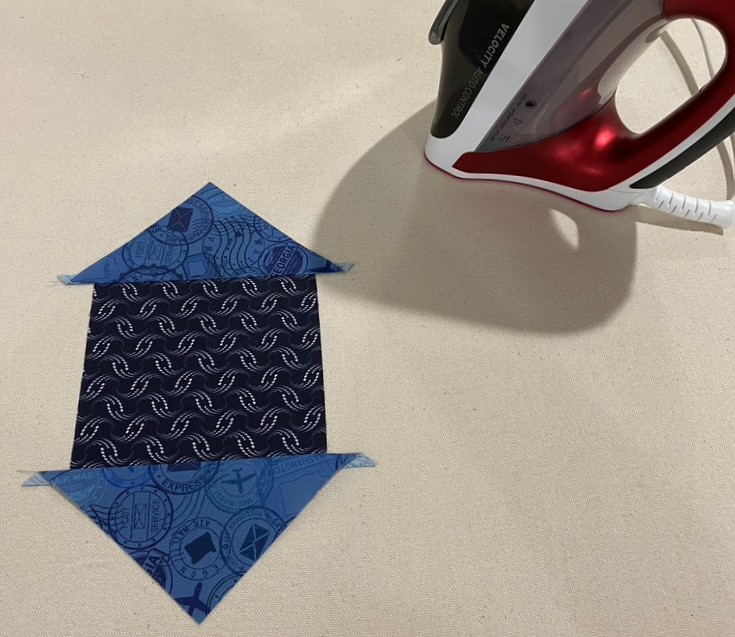
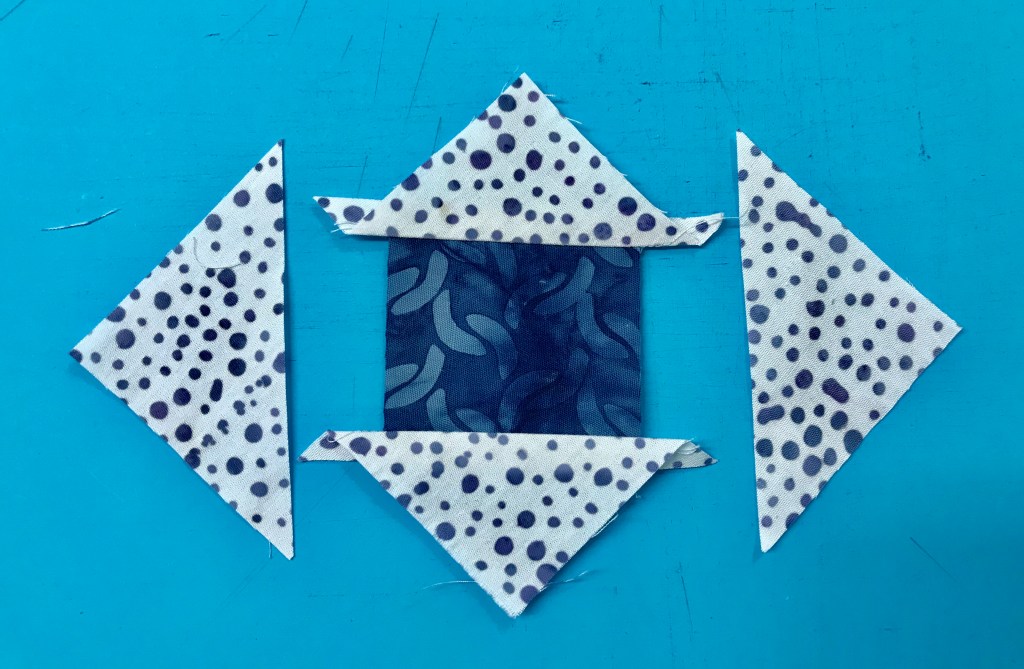
Center a side triangle over the center square and stitch. Center another side triangle to the opposite side of the center square and stitch.  Press toward the side triangle.

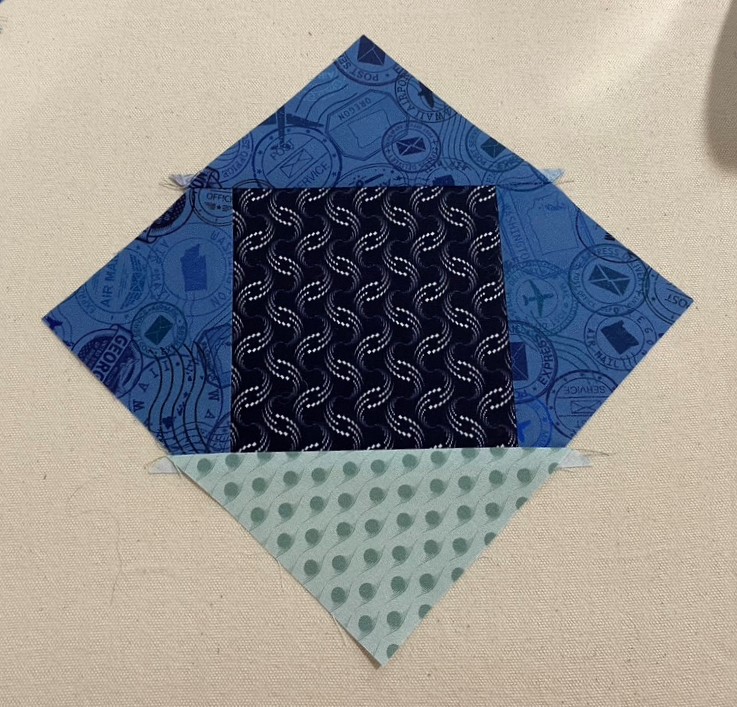
Center another side triangle as before and stitch, repeat on the opposite side so all sides of the center square have a side triangle stitched to it, press toward the side triangle.

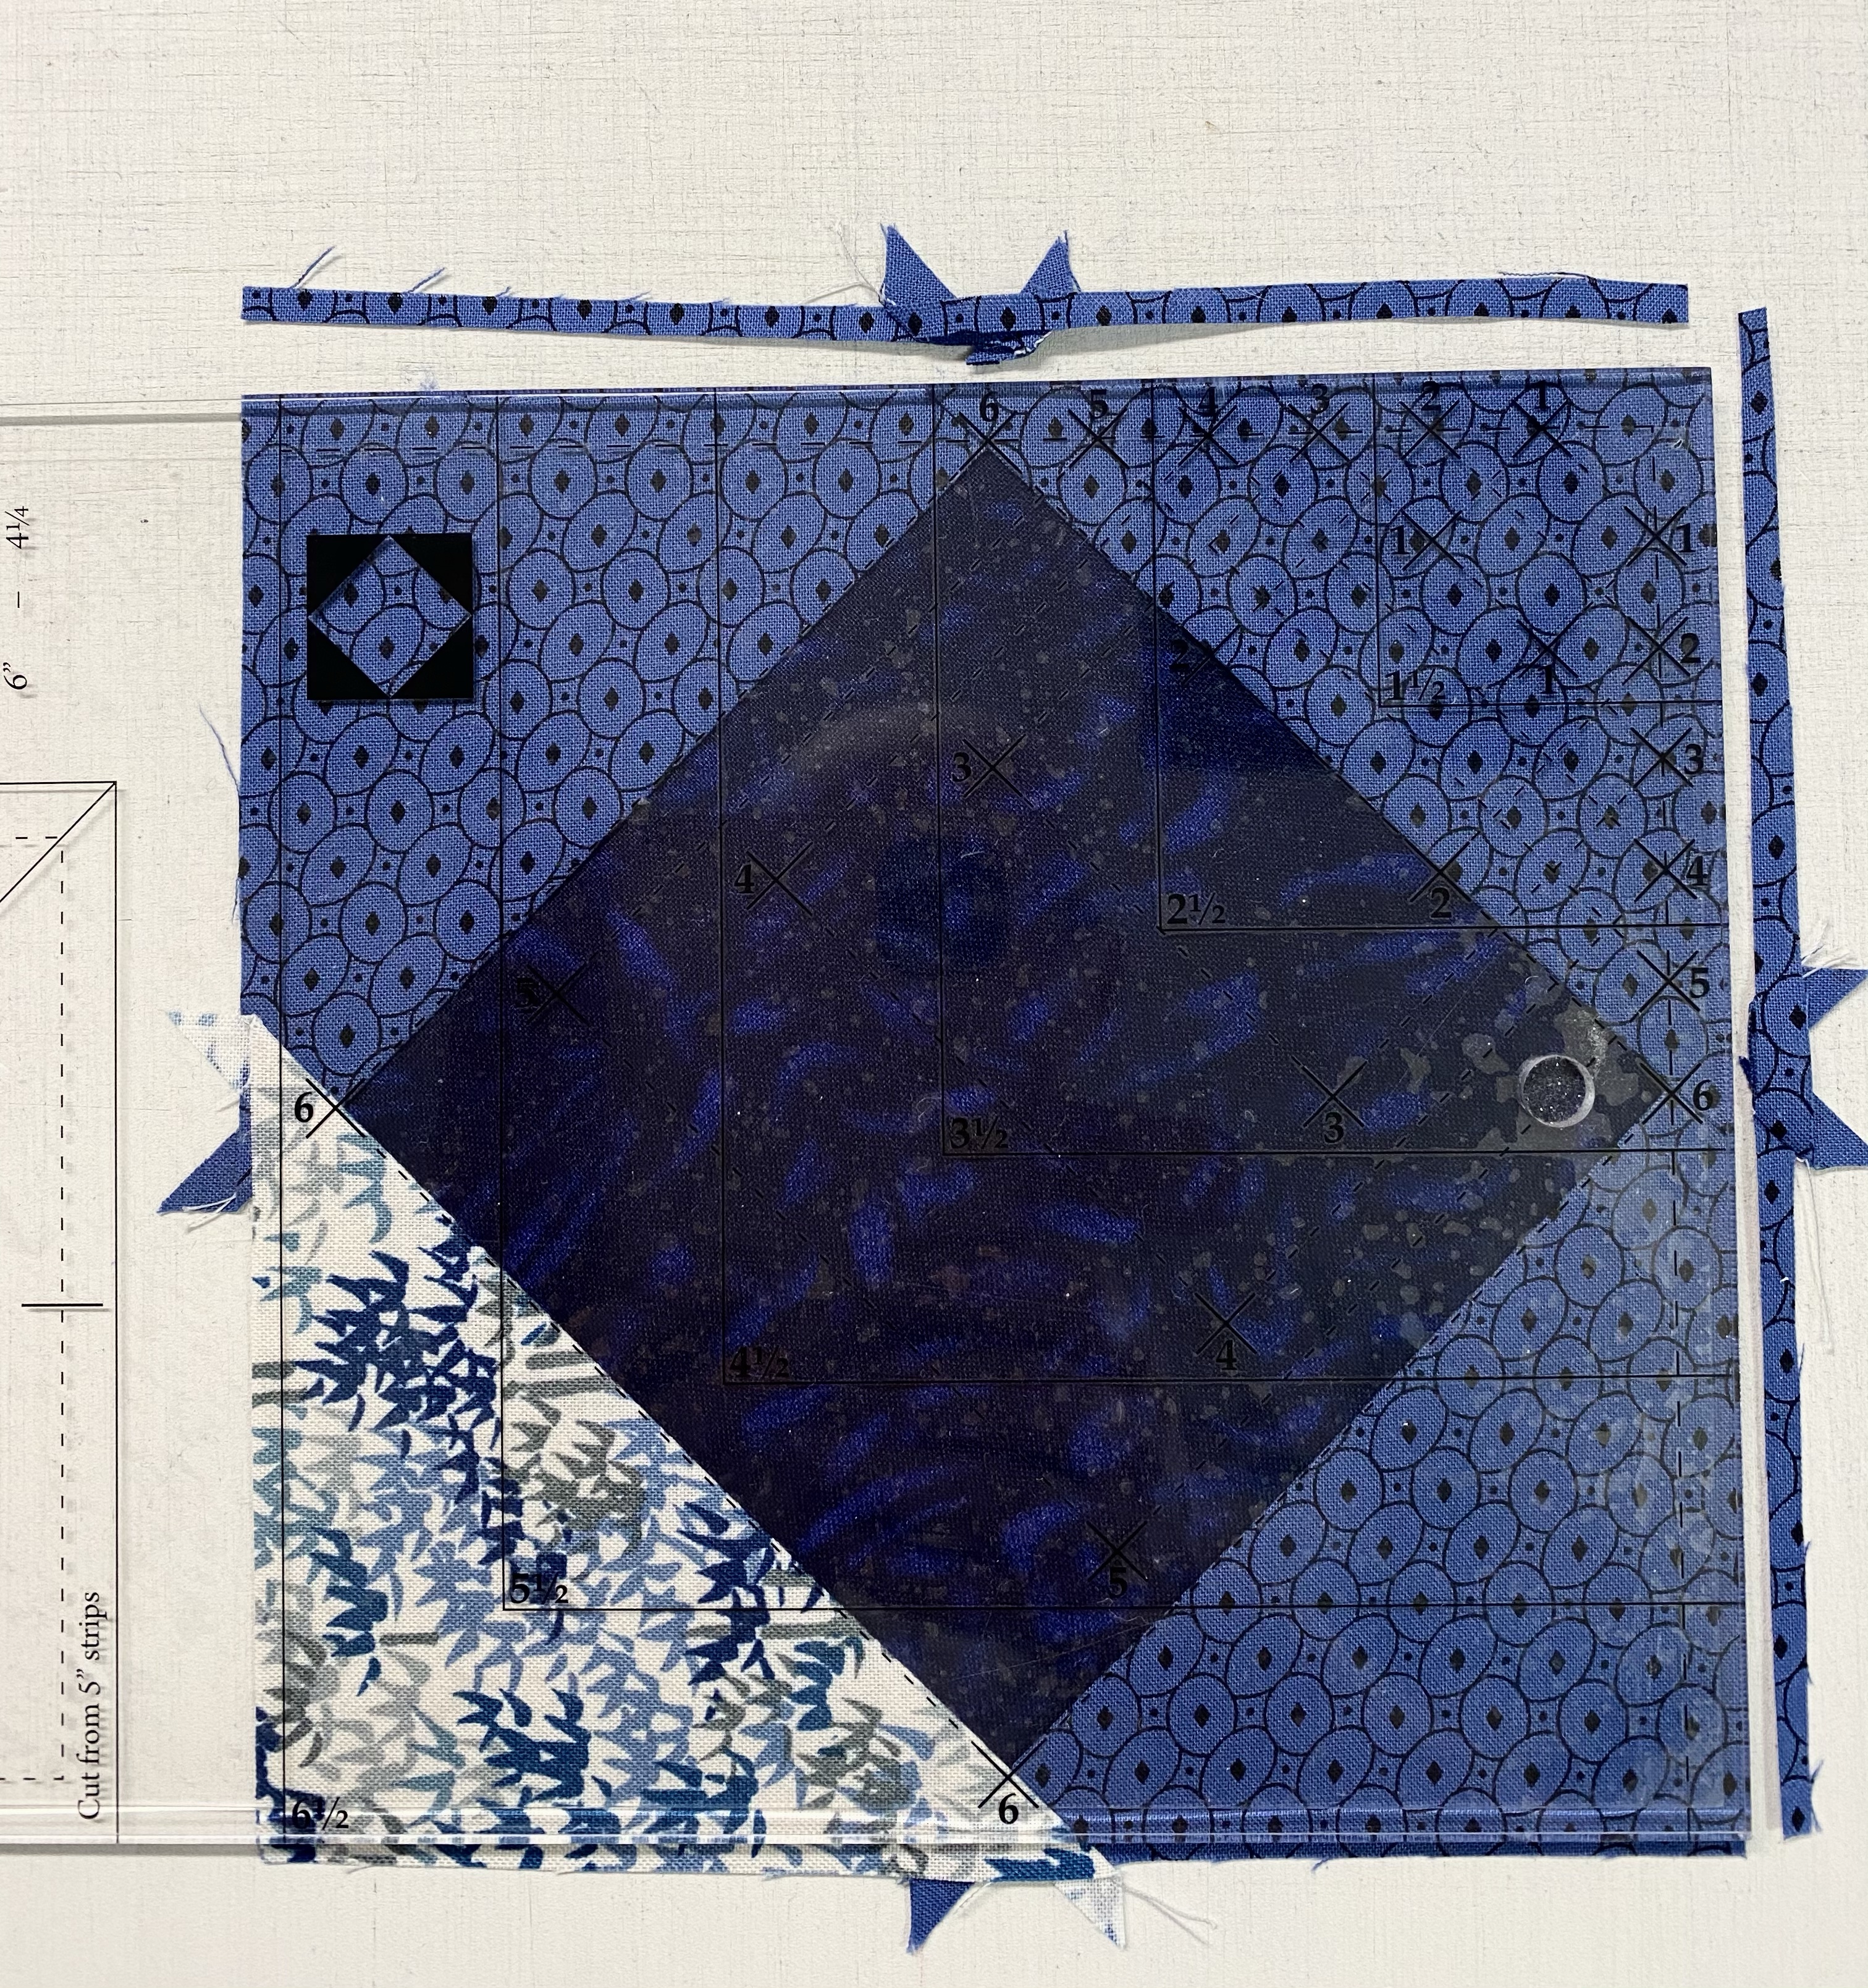
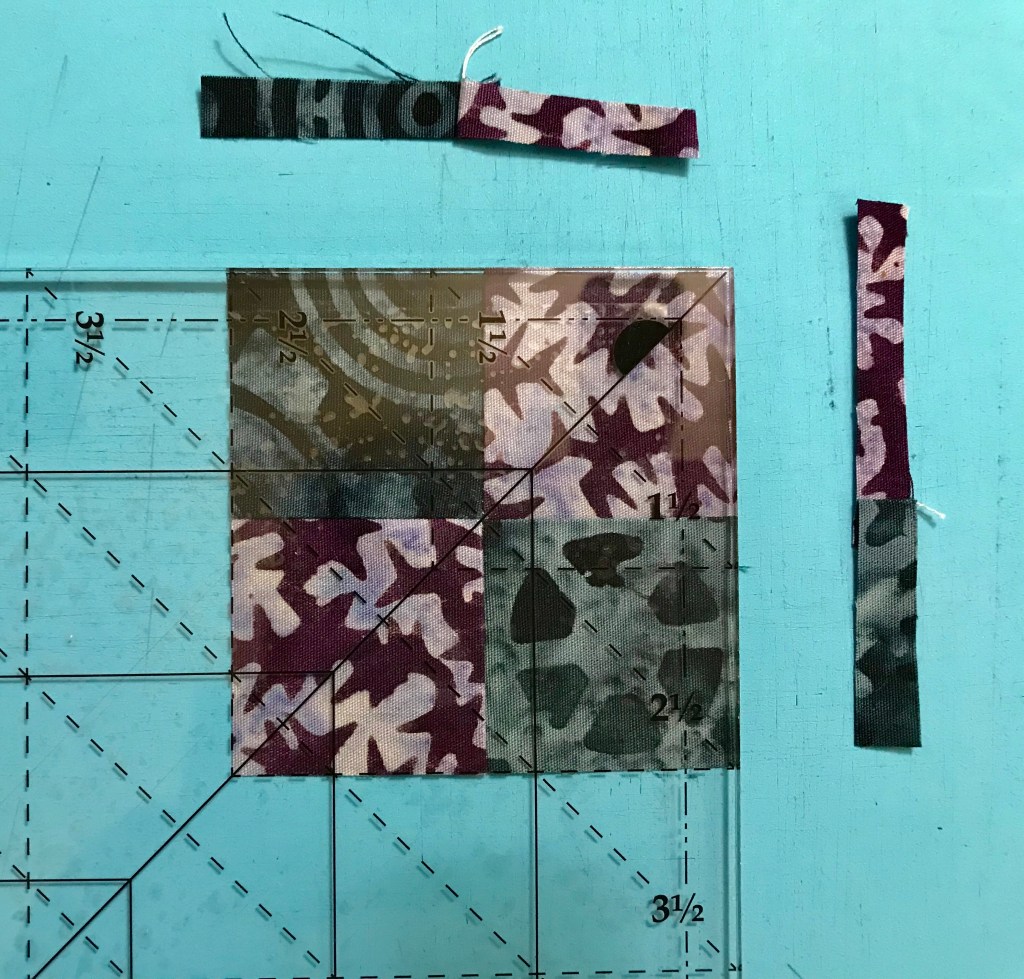
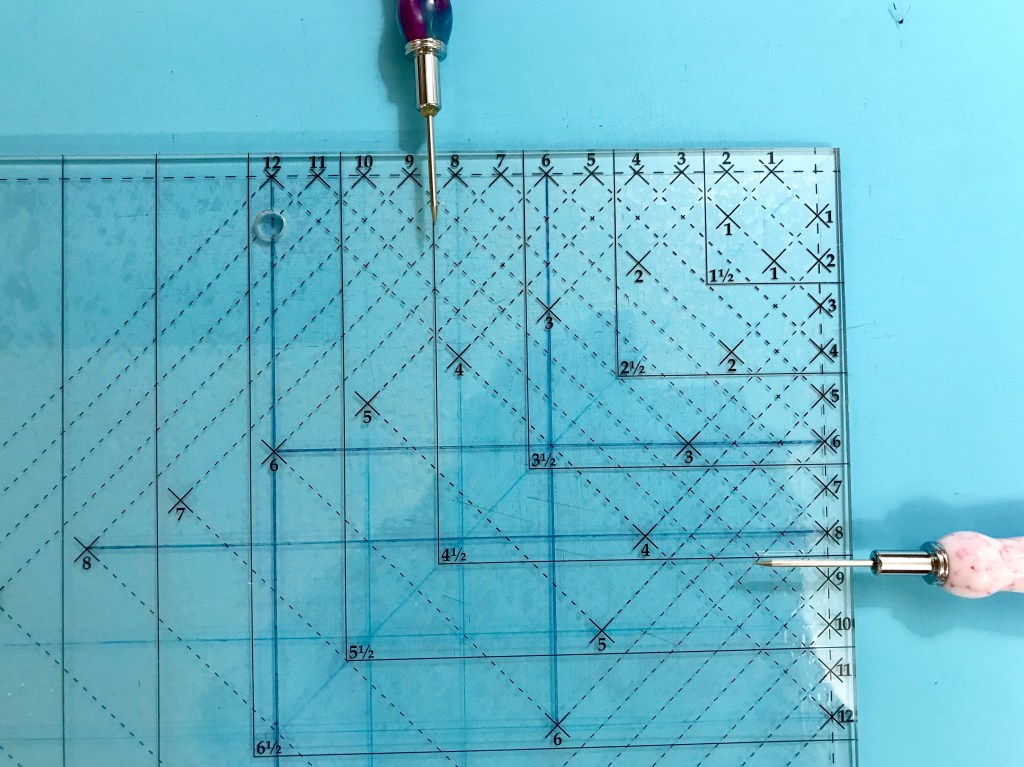
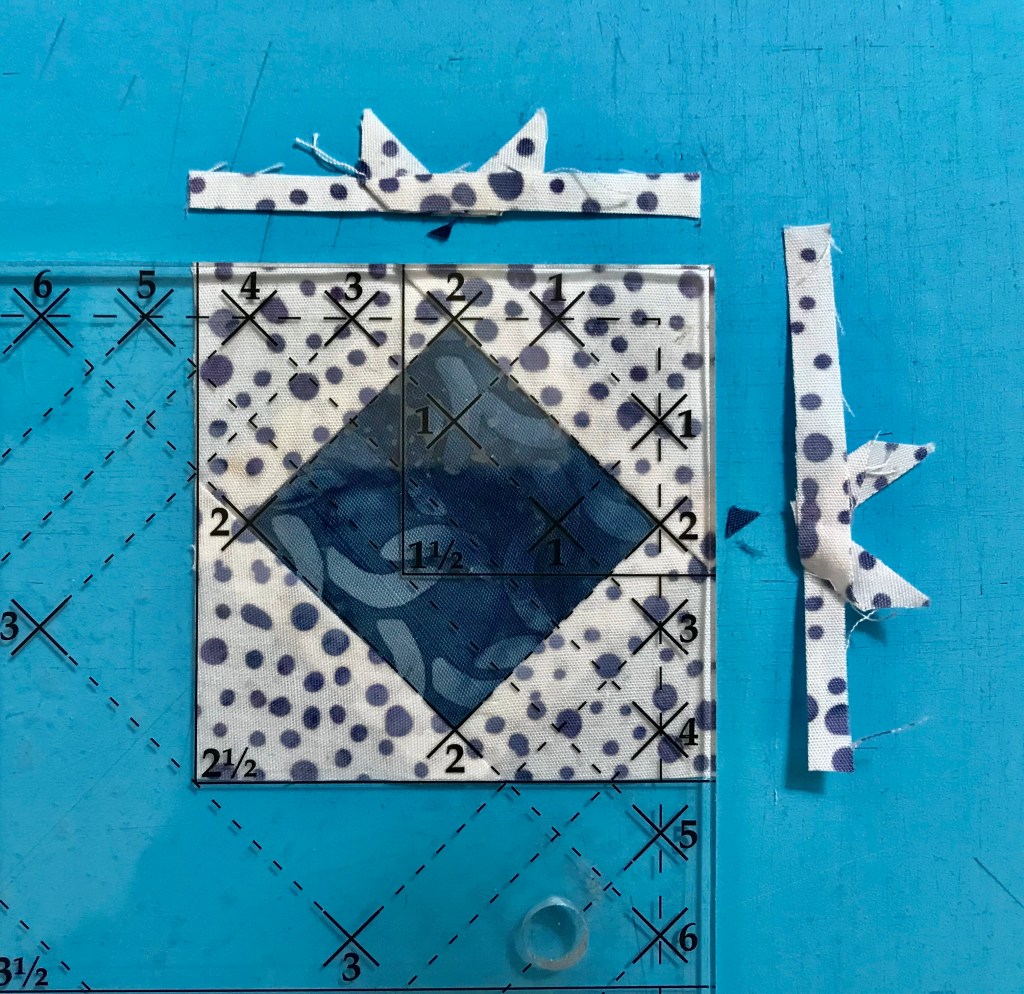
Position the Trim Down Section of your Square/Squared tool over the pieced unit.  Focus on aligning the “X’s” for your particular finished size unit.  Mine is 4″ finished, so there is a 4 at each corner of the center square.  Trim up the right side and across the top.  Check your tool instructions for Left handed cutting tool position.

img_5604

For the second cut Lift your tool & rotate your unit.  Position the tool lining up the “X’s” again and lining up the cleanup lines on the tool with edges previously trimmed.  Trim up the right side and across the top.

img_5605

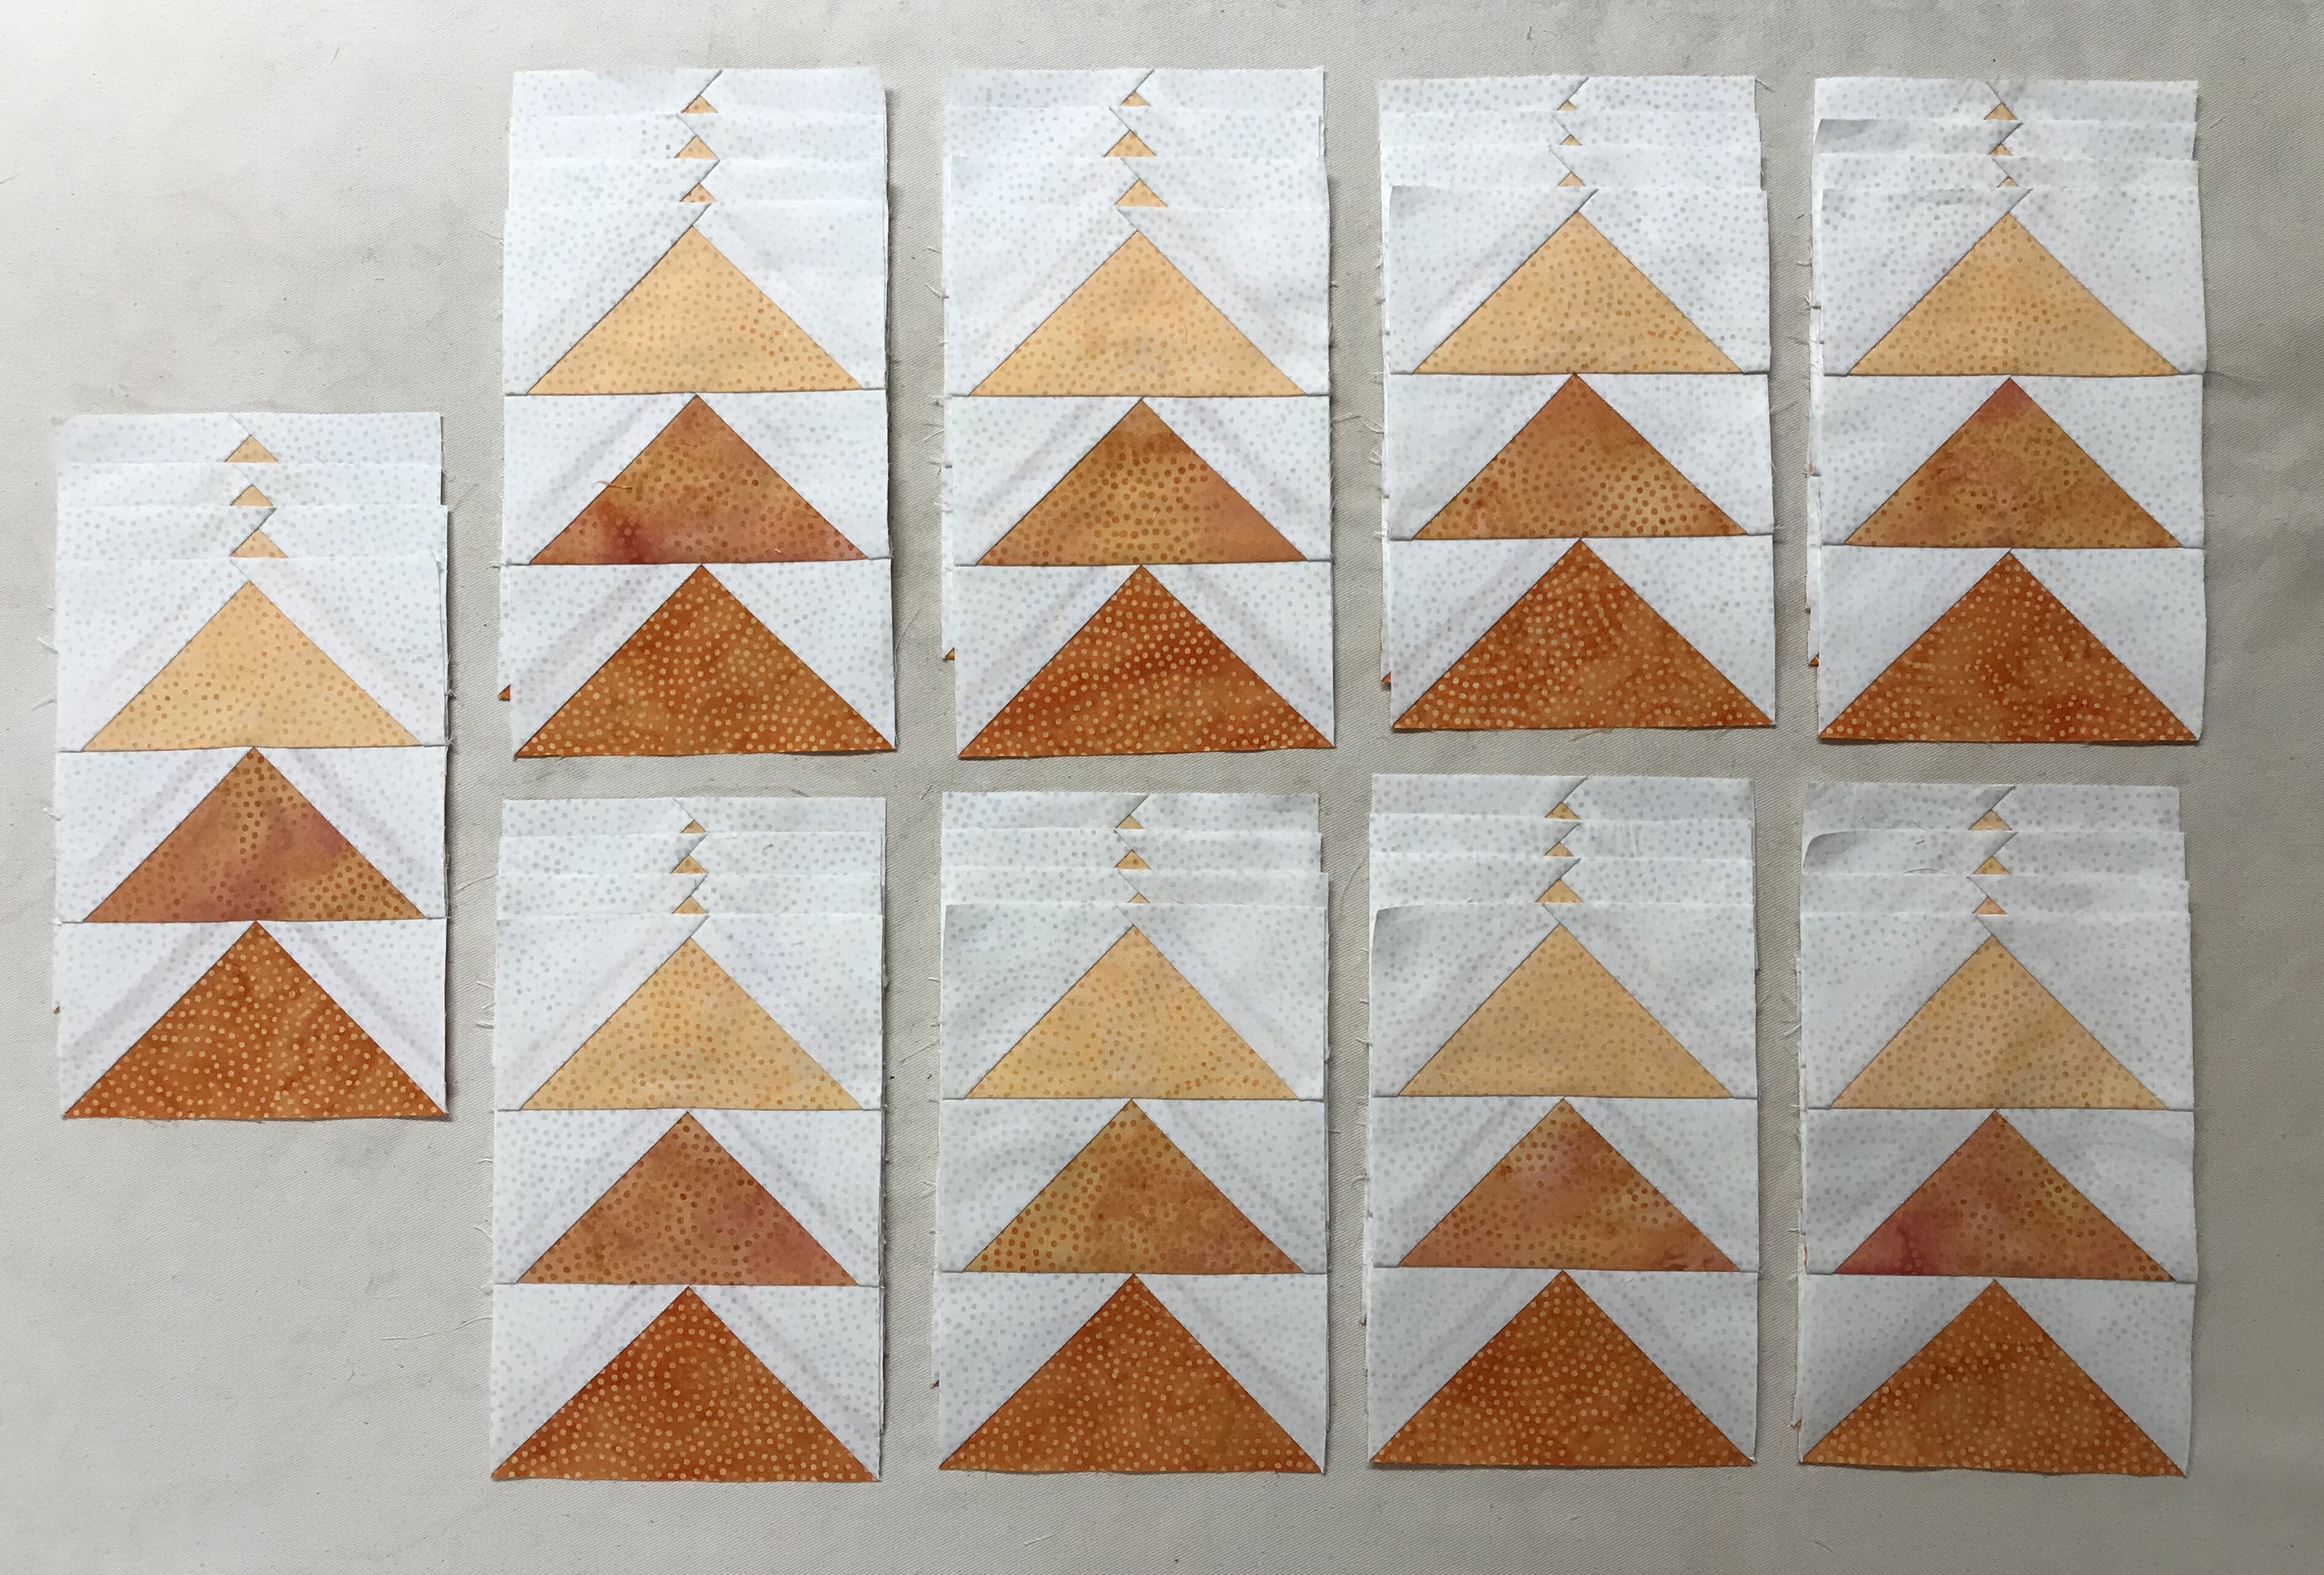
Unit B – Little House:  You will need to make 4 Little Houses.  Each little house is made up of 3 squares, one large and two small.  For a 4″ finished unit cut four 4 3/4″ squares and eight 2 3/4″ squares.

img_5606

Begin by marking a diagonal line on the back of your small squares, this will be a stitching line.

Note:  you may want to mark an additional line 1/2″ from the center diagonal line to use as a secondary stitching line for creating half square triangles out of the left over fabric.

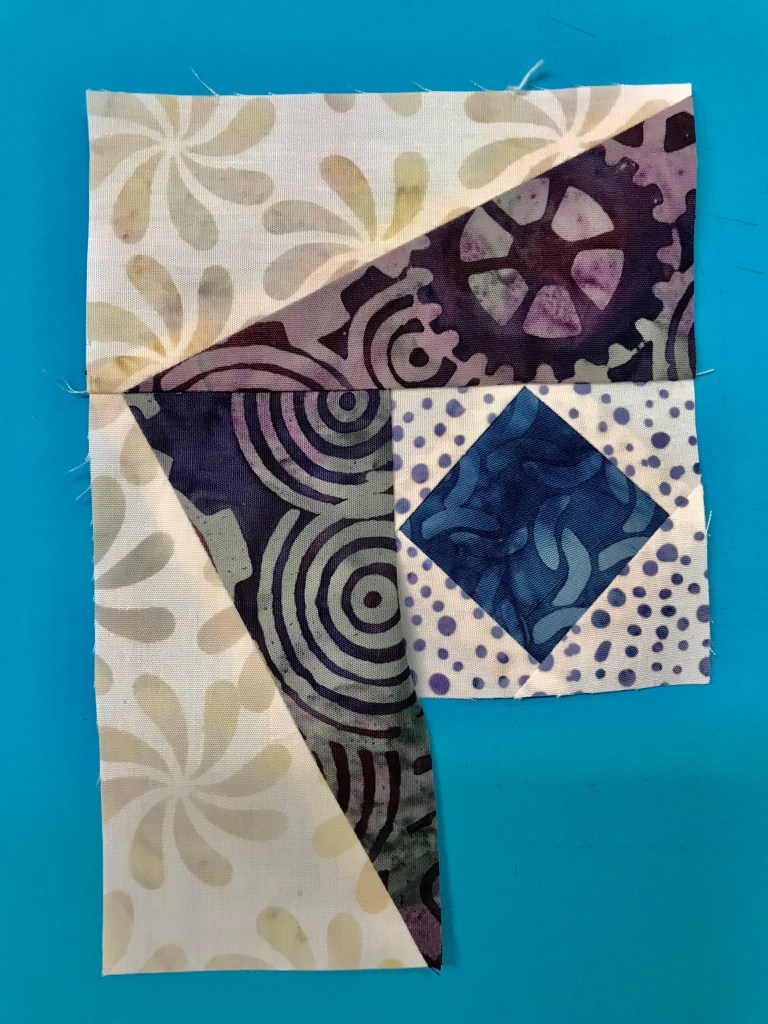
Position one small square in one of the corners of a large square, right sides together, with the marked diagonal line going across the corner of the large square as shown above.  Stitch on both lines and trim apart.

Press toward the triangle.  Position a second small square in the corner next to corner you just stitched.  Stitch on both lines, cut apart press toward the triangle.  Press your half square triangles to the dark.  The small half square triangles are not used in this unit.  If you don’t want to make them for another project just draw the one diagonal line and once it is stitched discard the corner fabric.

img_5611

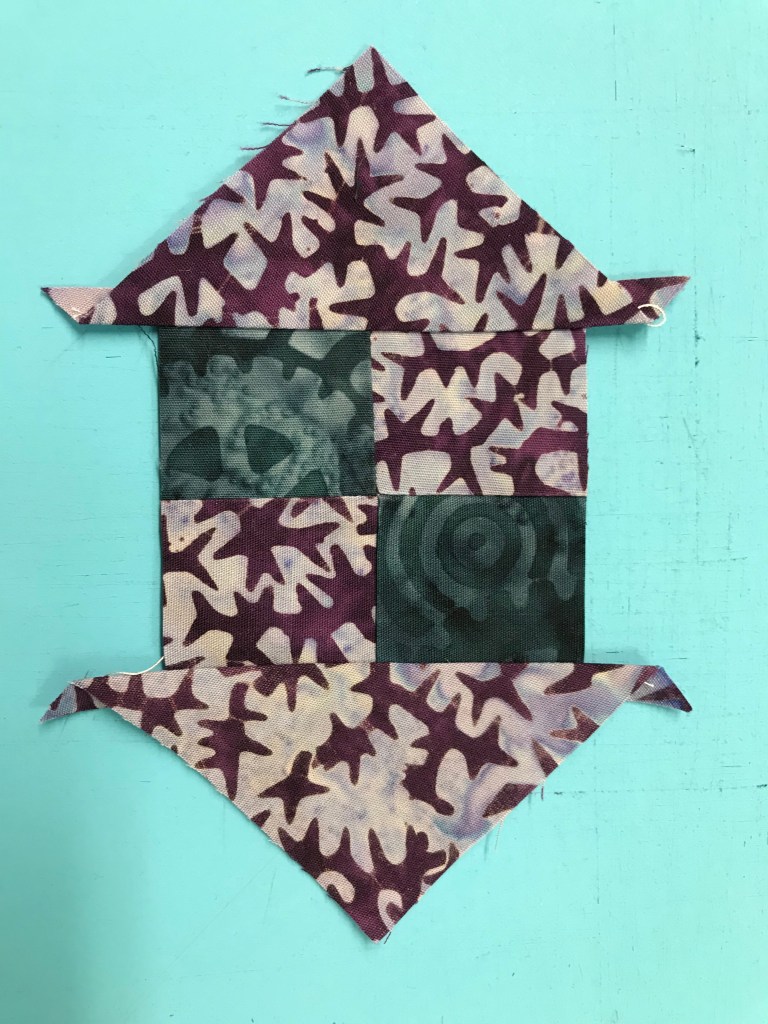
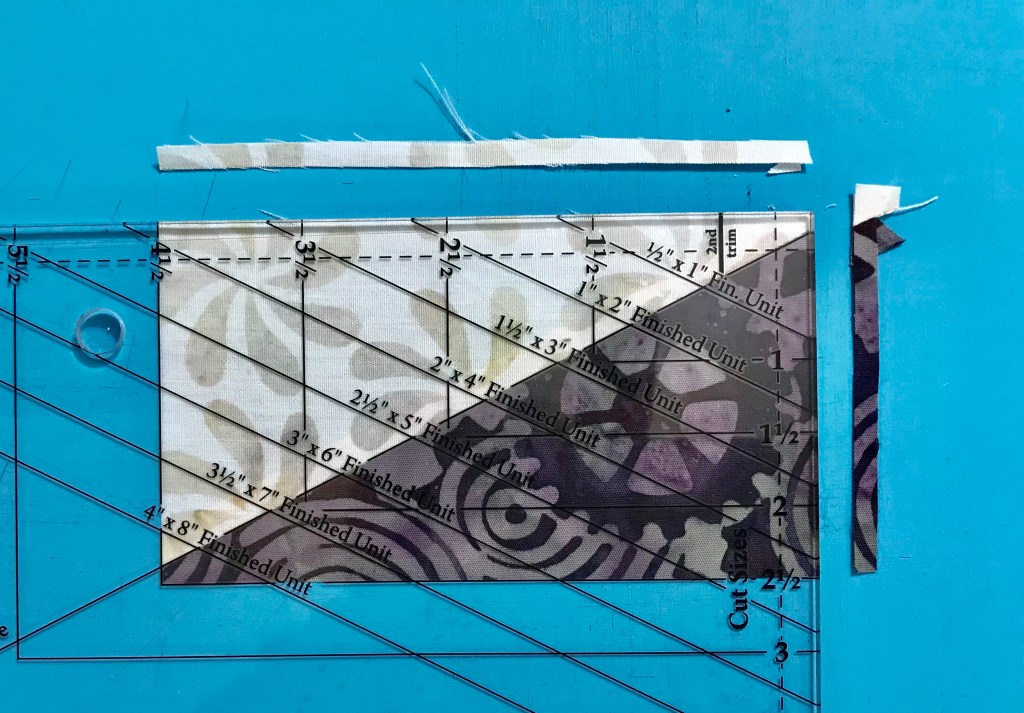
Using the Trim Down Section of your Square/Squared tool line up the peak of the House with the “X” corresponding with your finished unit size.  Align the seams with the dotted lines extending down from the “X”.  Trim up the right side and across the top.

img_5612

Rotate your Little House around, and line up the two trimmed edges with the cleanup line corresponding to your unit cut size.  This time aligning the peak with the “X” at the bottom.  Trim up the right side and across the top.

img_5614

Repeat with the other 3 large squares.

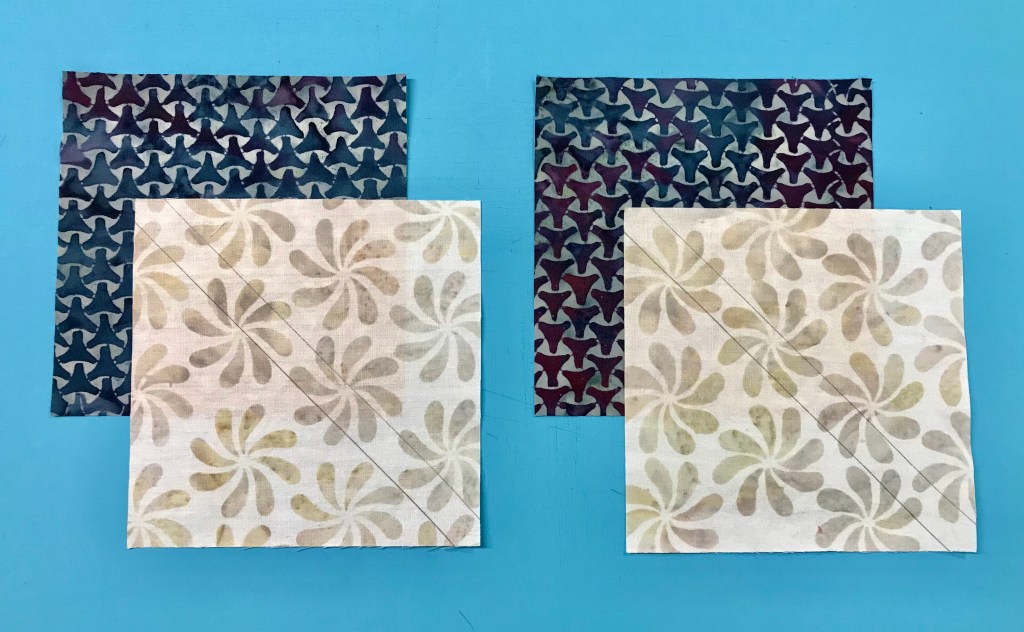
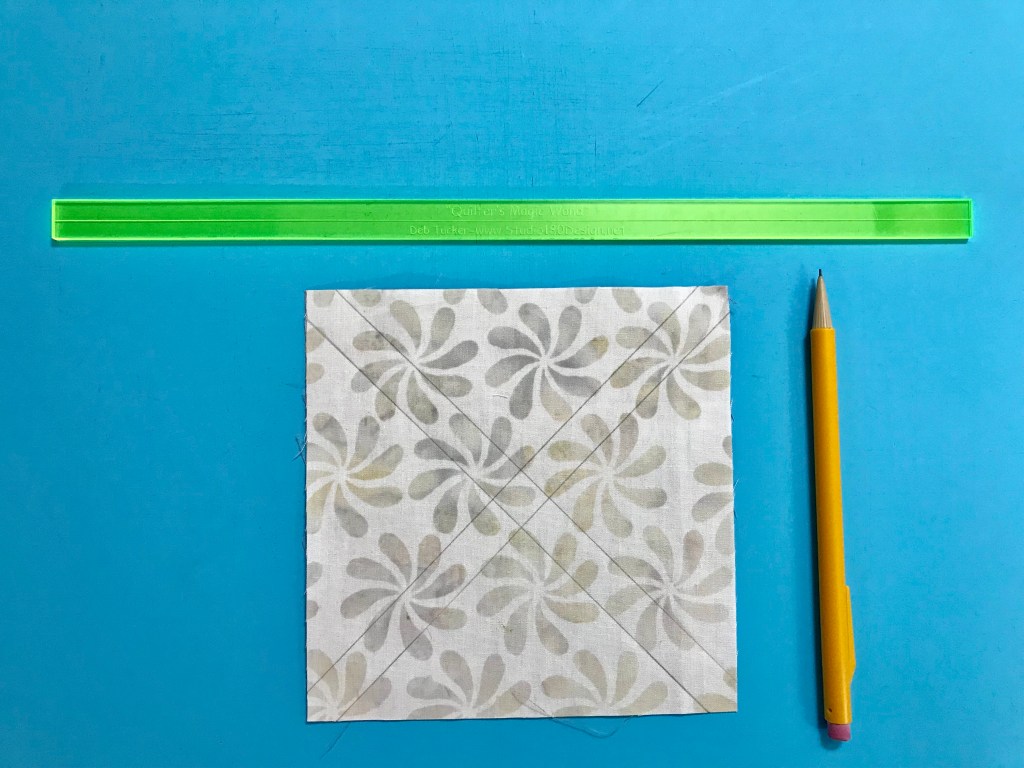
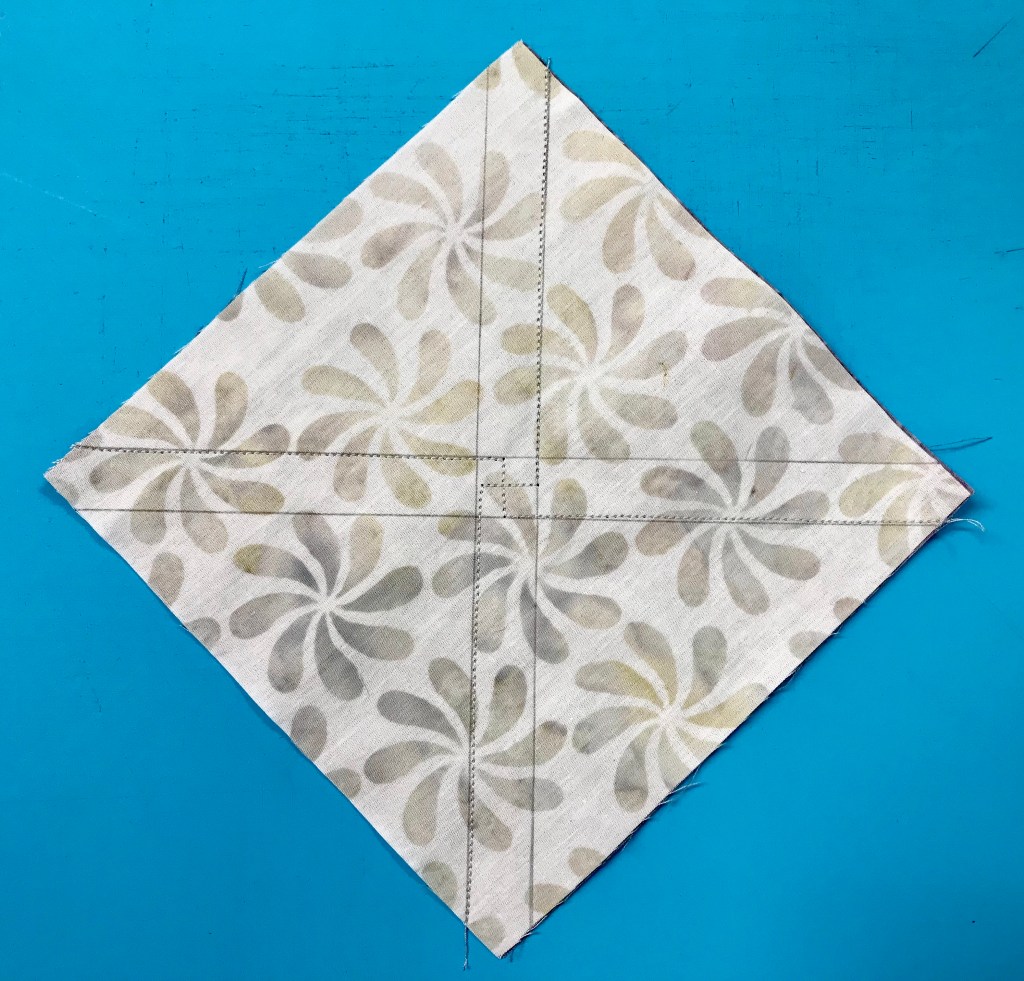
Unit C – Half Square Triangles:  We need four Half Square Triangles.  Go to the “Starting Square Size Chart” in your Tucker Trimmer instructions.  I am making 4″ finished units, so I need to cut two 5″ background squares and two 5″ squares your color of choice.

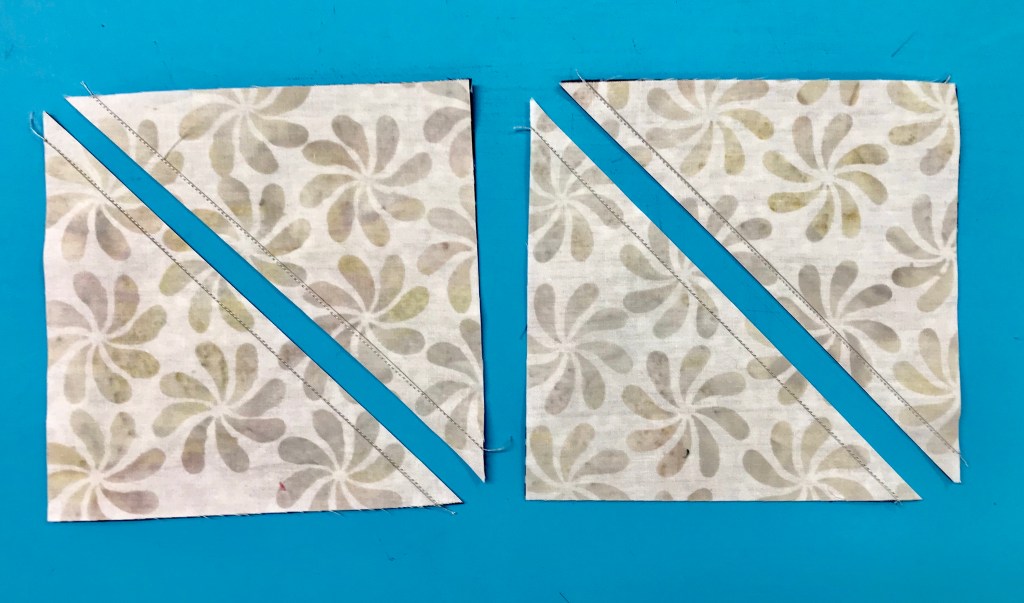
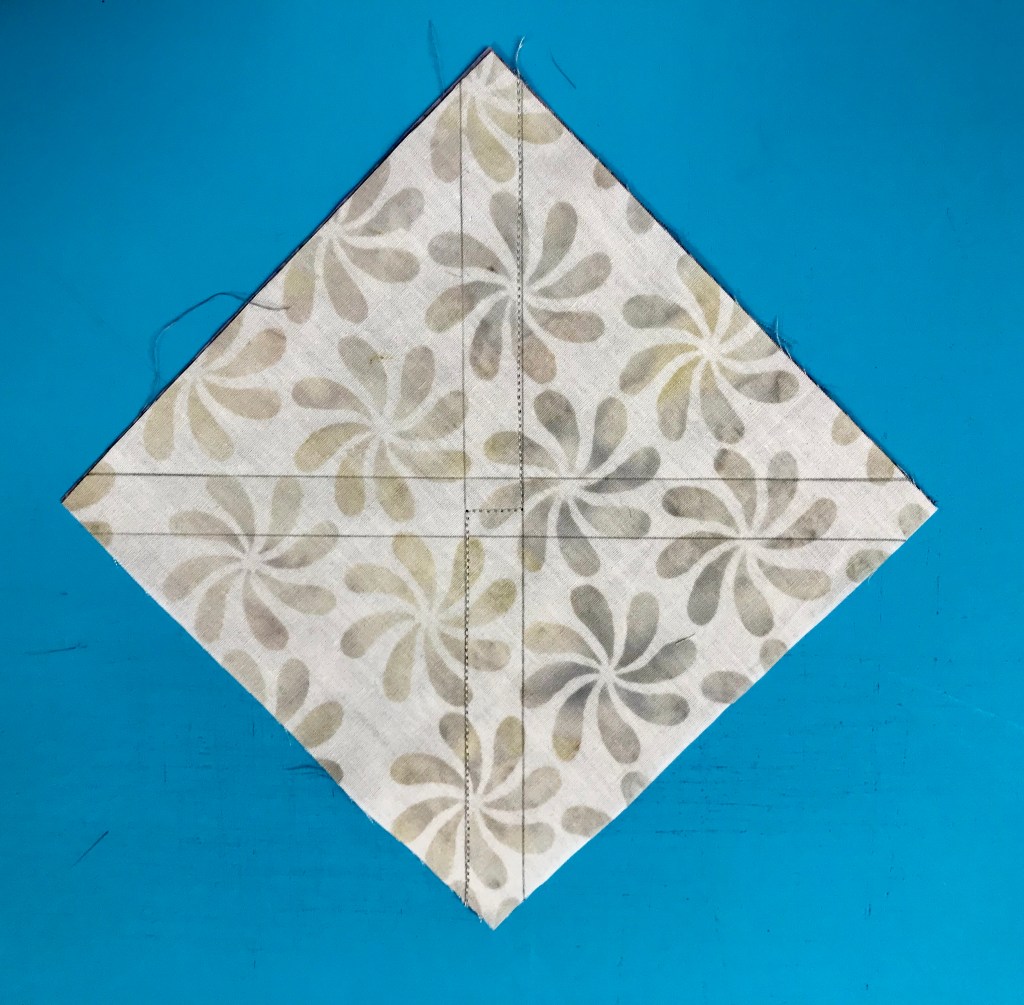
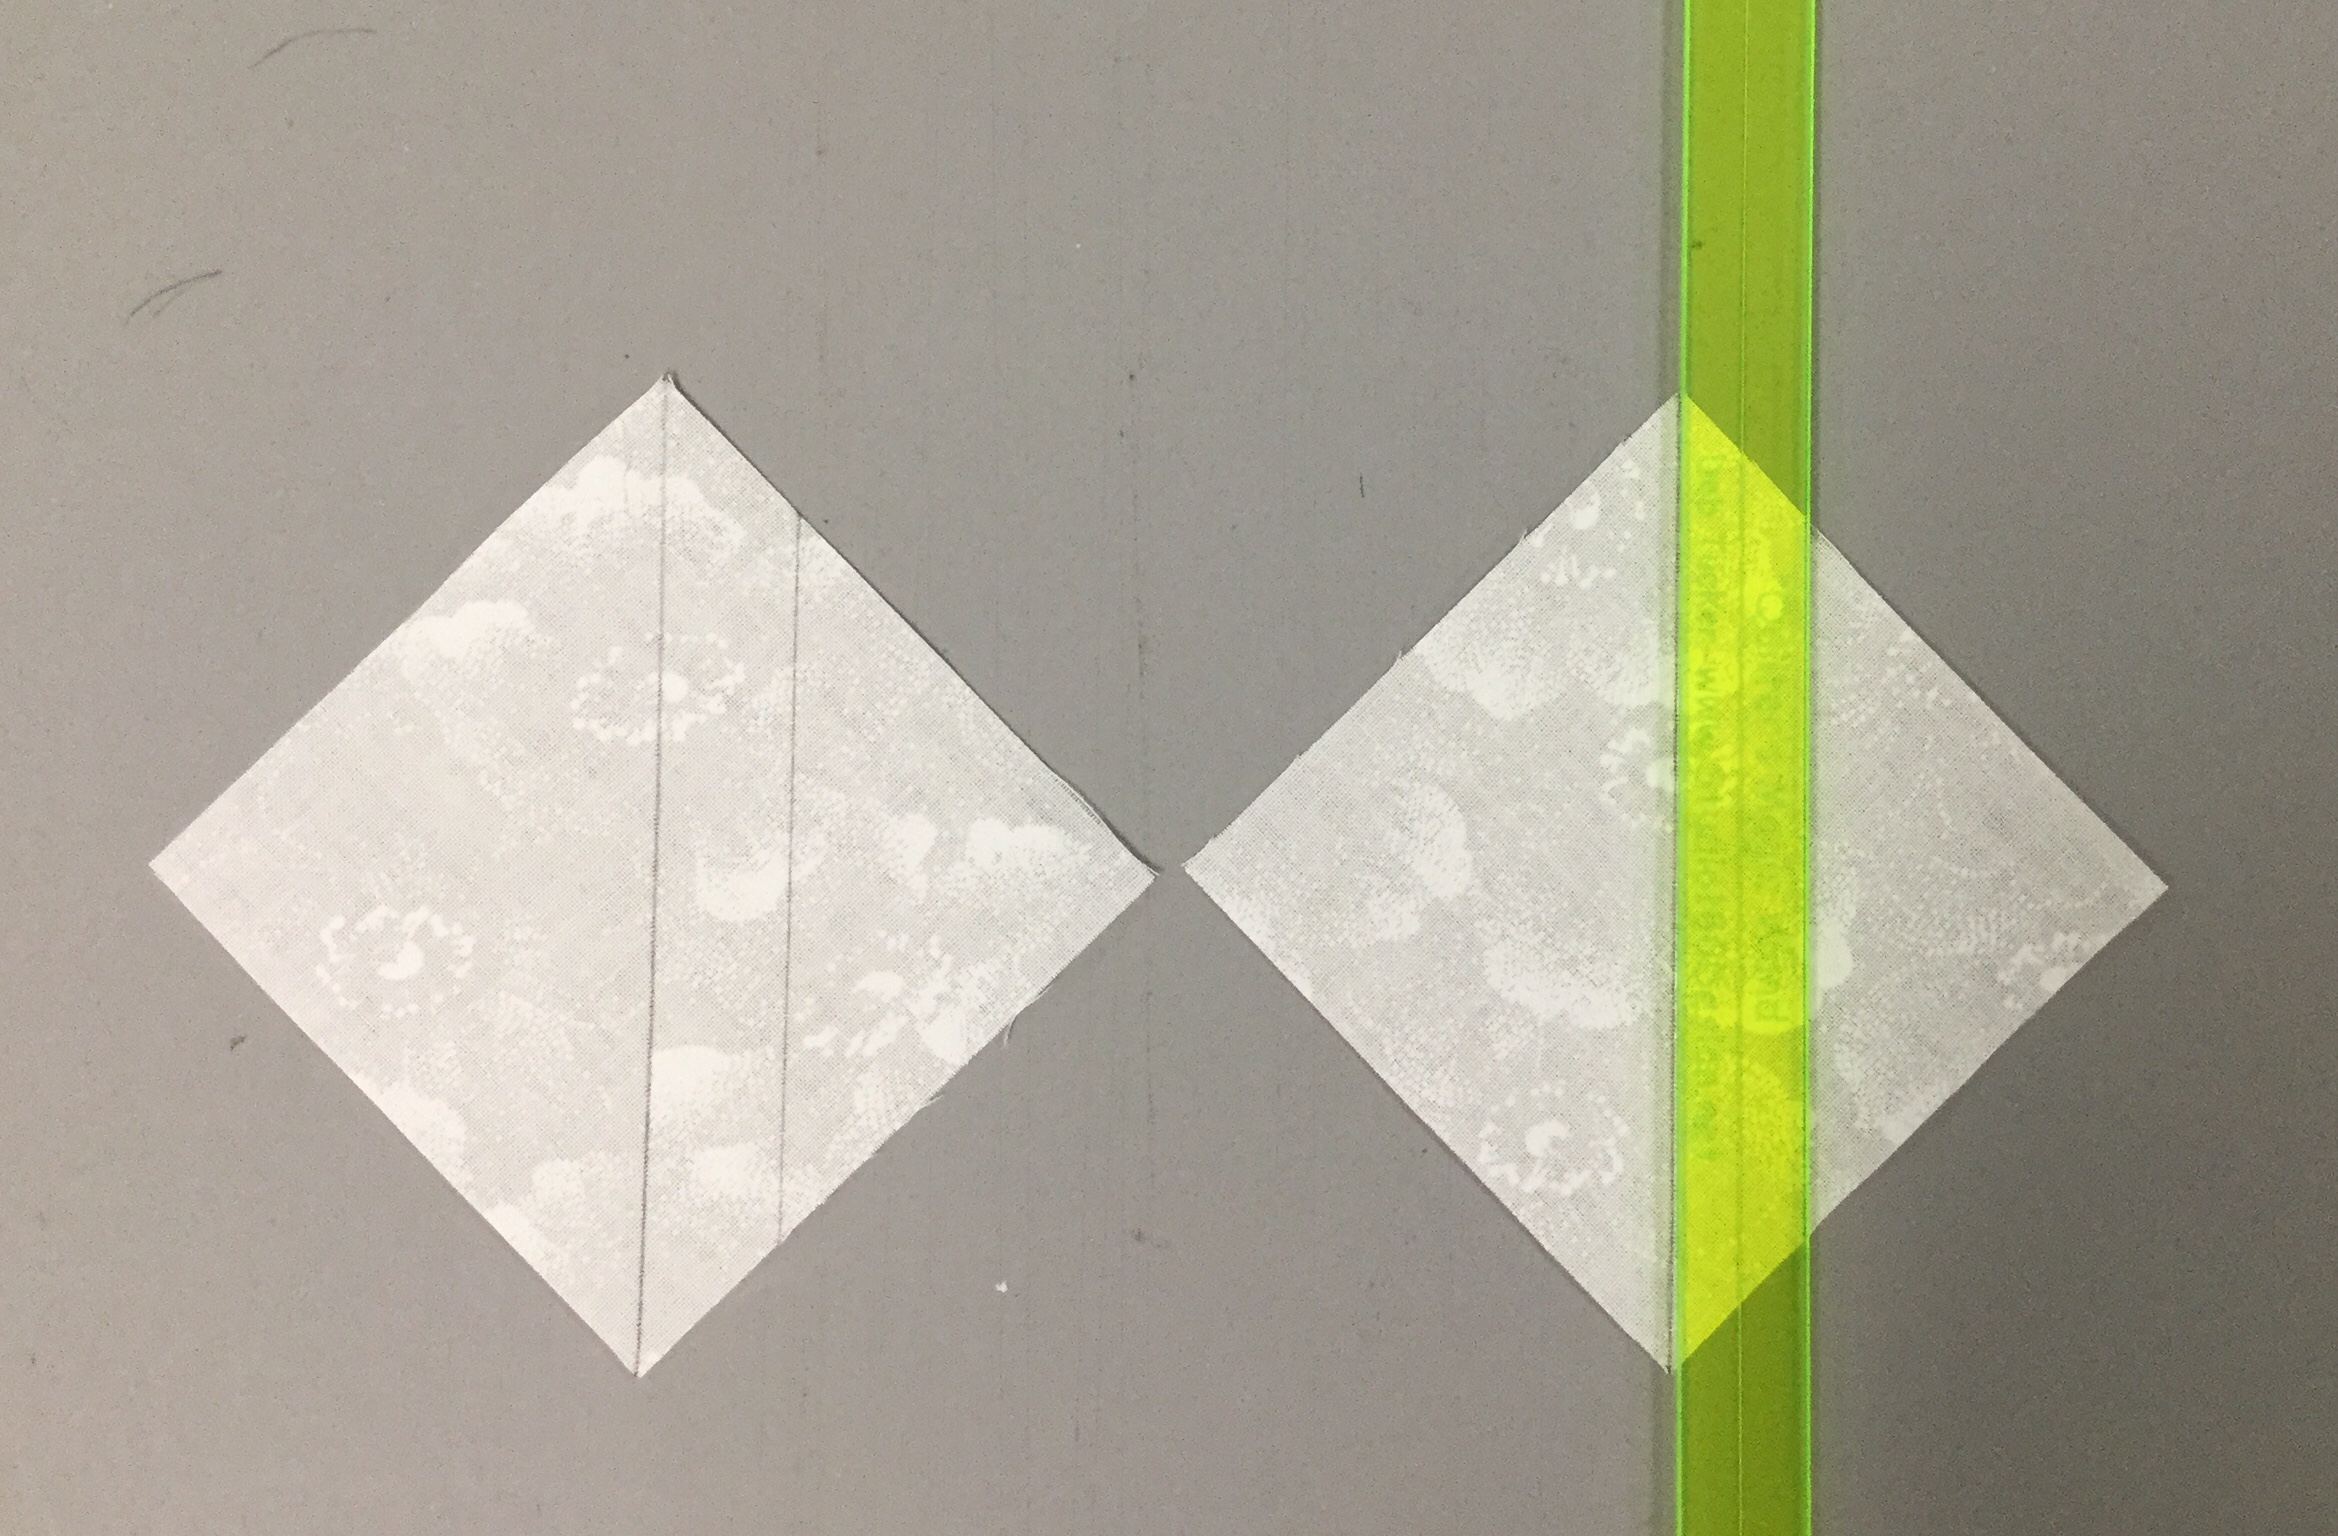
Use your Magic Wand and draw to diagonal lines on the back of your background squares as shown above.

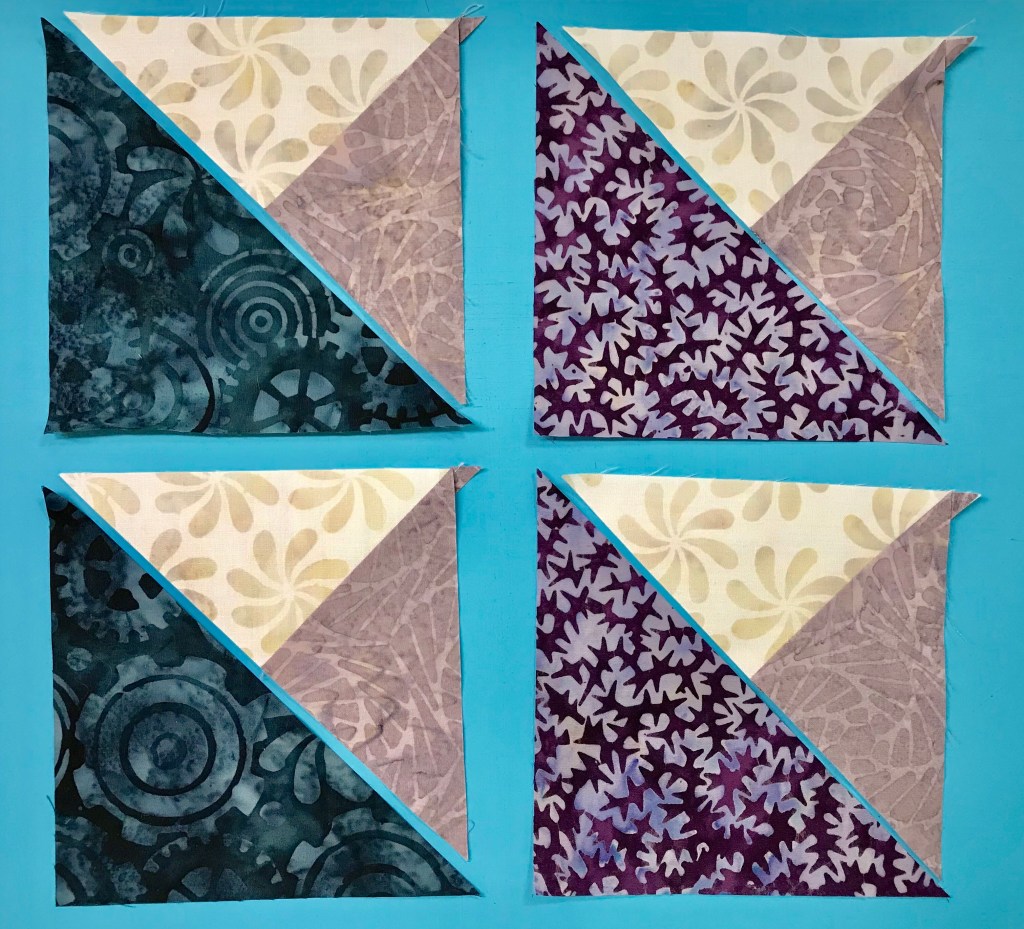
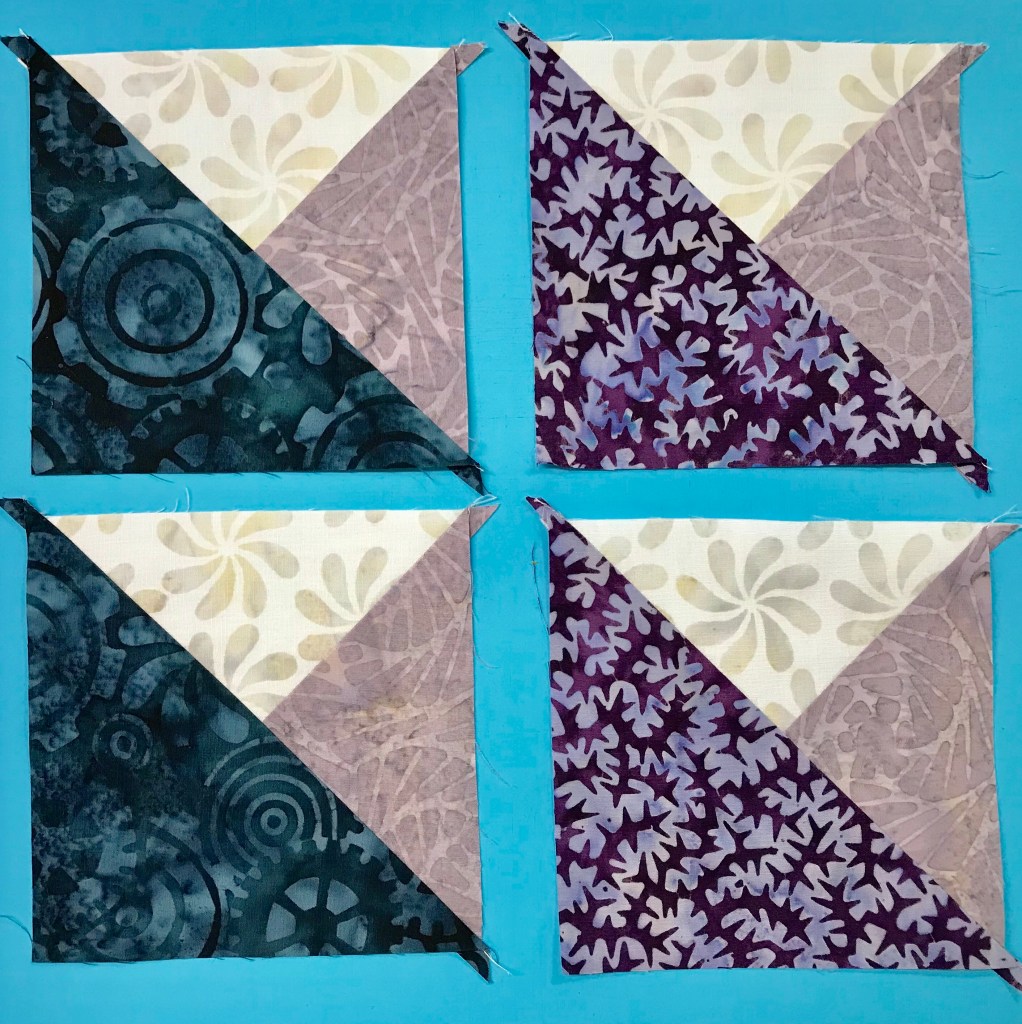
Place background squares right sides together with your color of choice squares, stitch on the lines, cut apart and press toward the dark fabric.

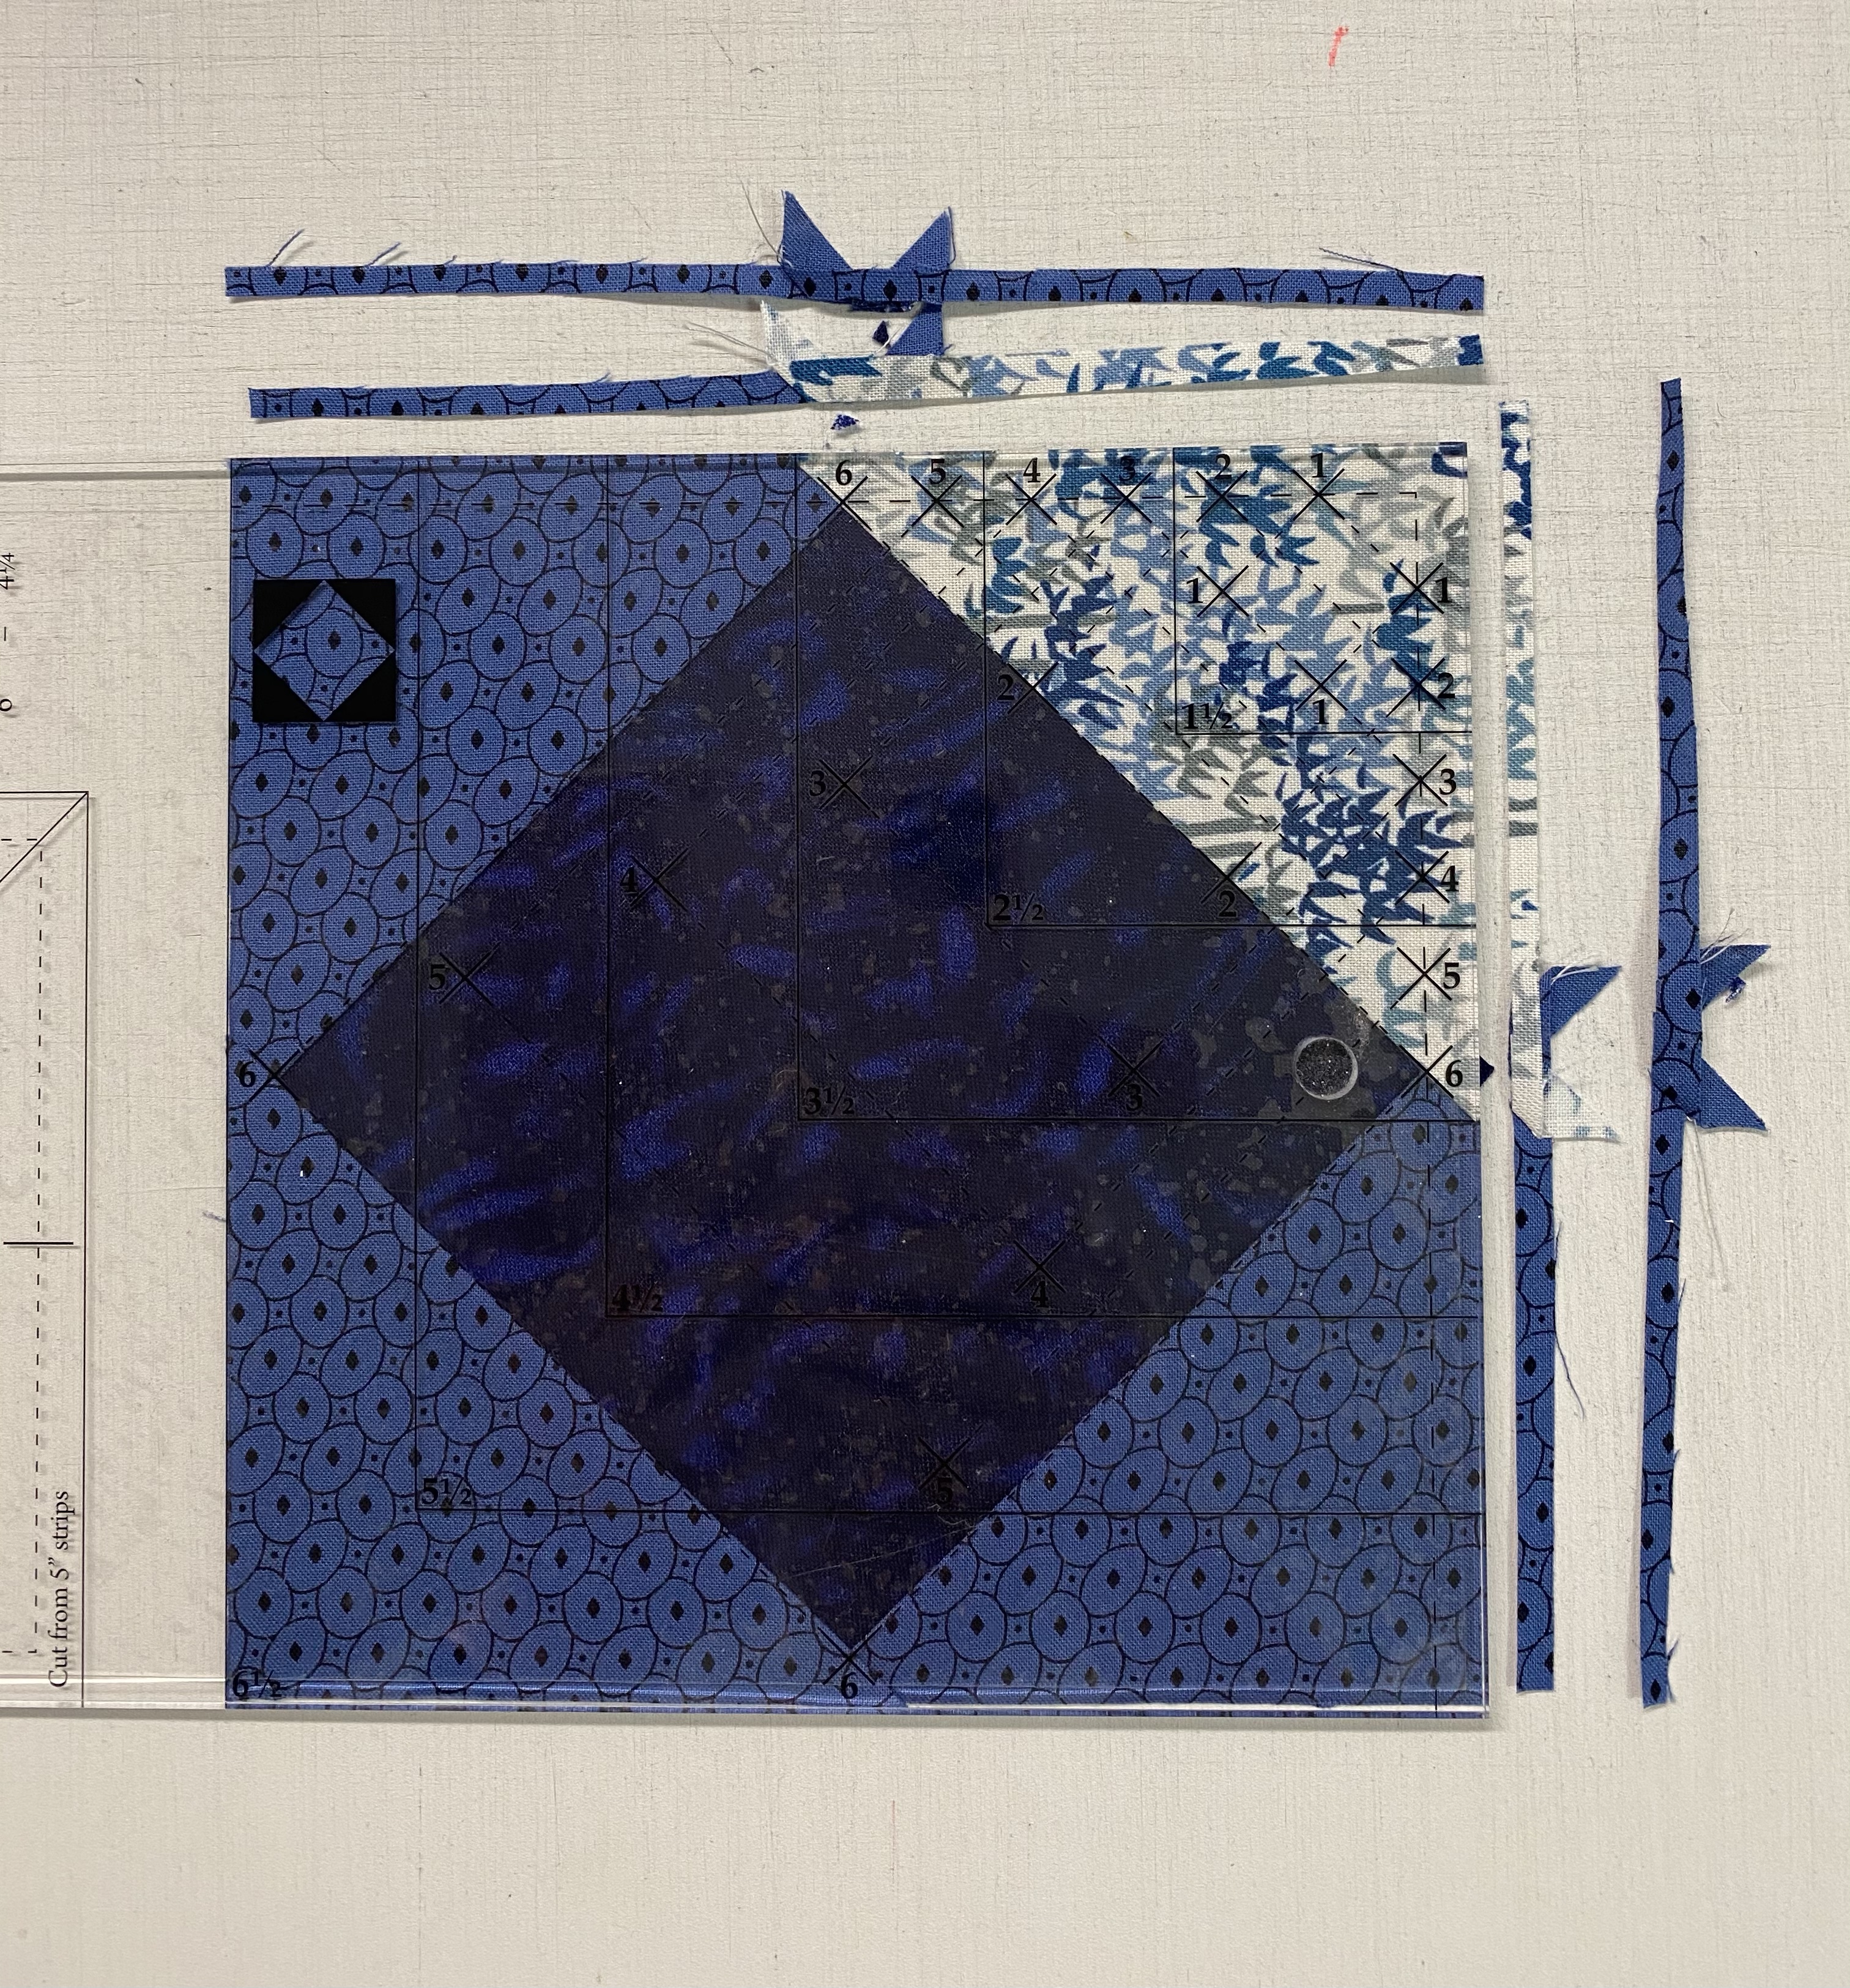
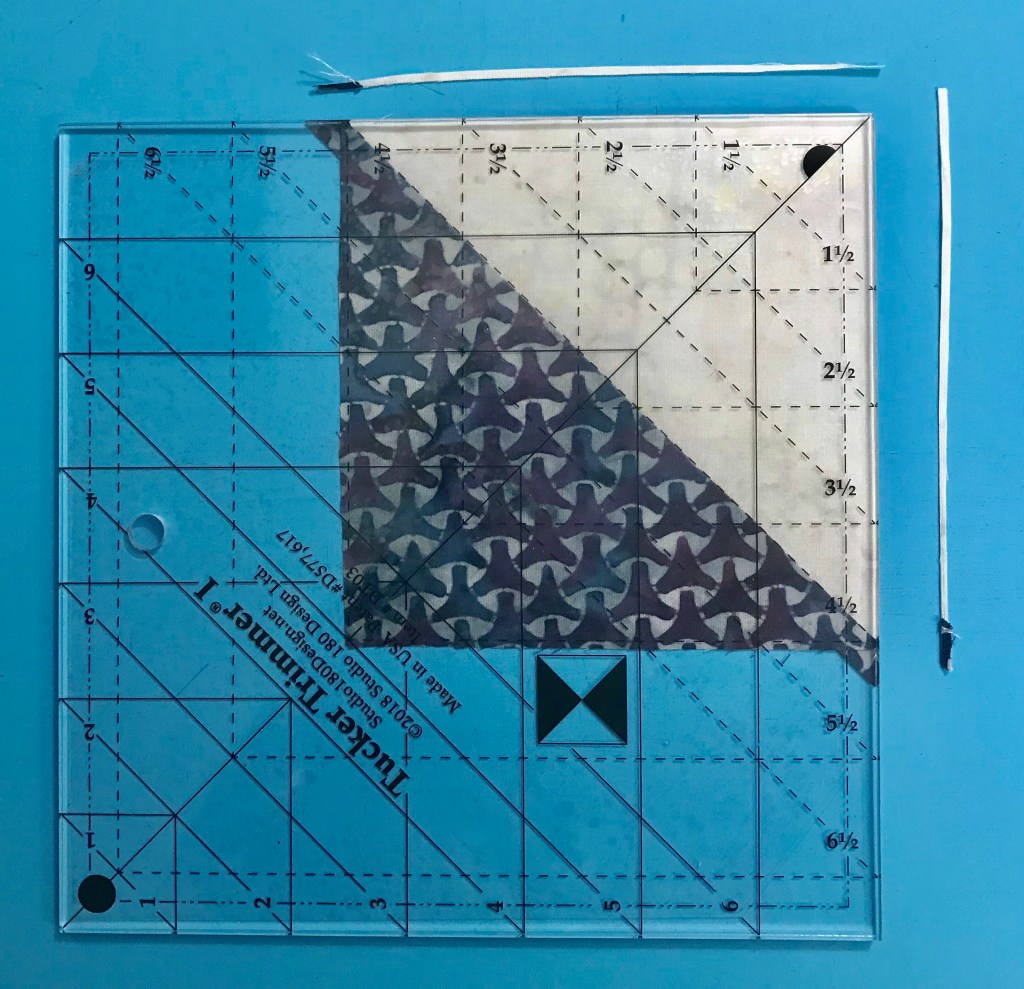
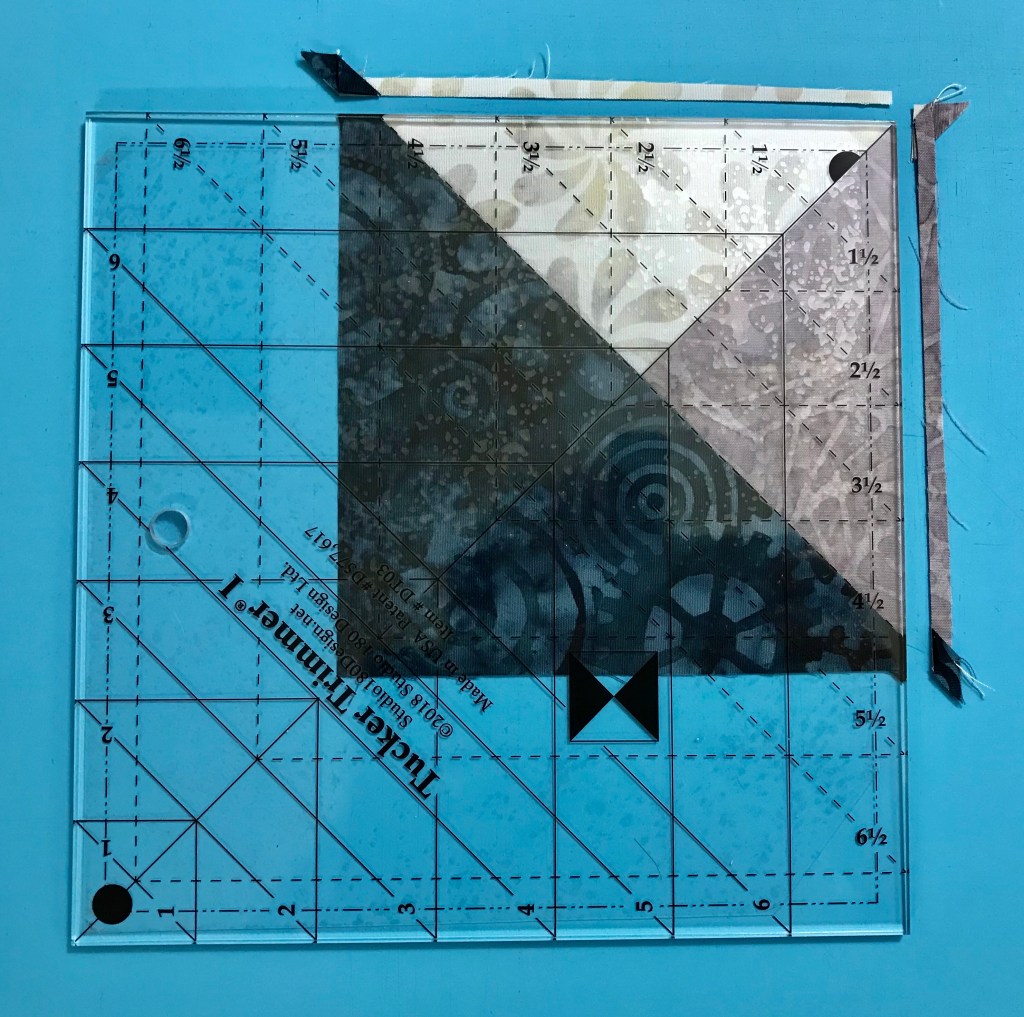
We always trim our units to the cut size.  My HST are 4″ finished and 4 1/2″ cut size.  therefore I look for the half circle in the corner of my tool and position the Tucker Trimmer over the unit with the half circle in the upper right hand corner, carefully aligning the solid diagonal line with the stitched seam as shown above.  Trim up the right side and across the top.  If you are left handed, you would position your tool with half circles in the lower left hand corner of the unit.  

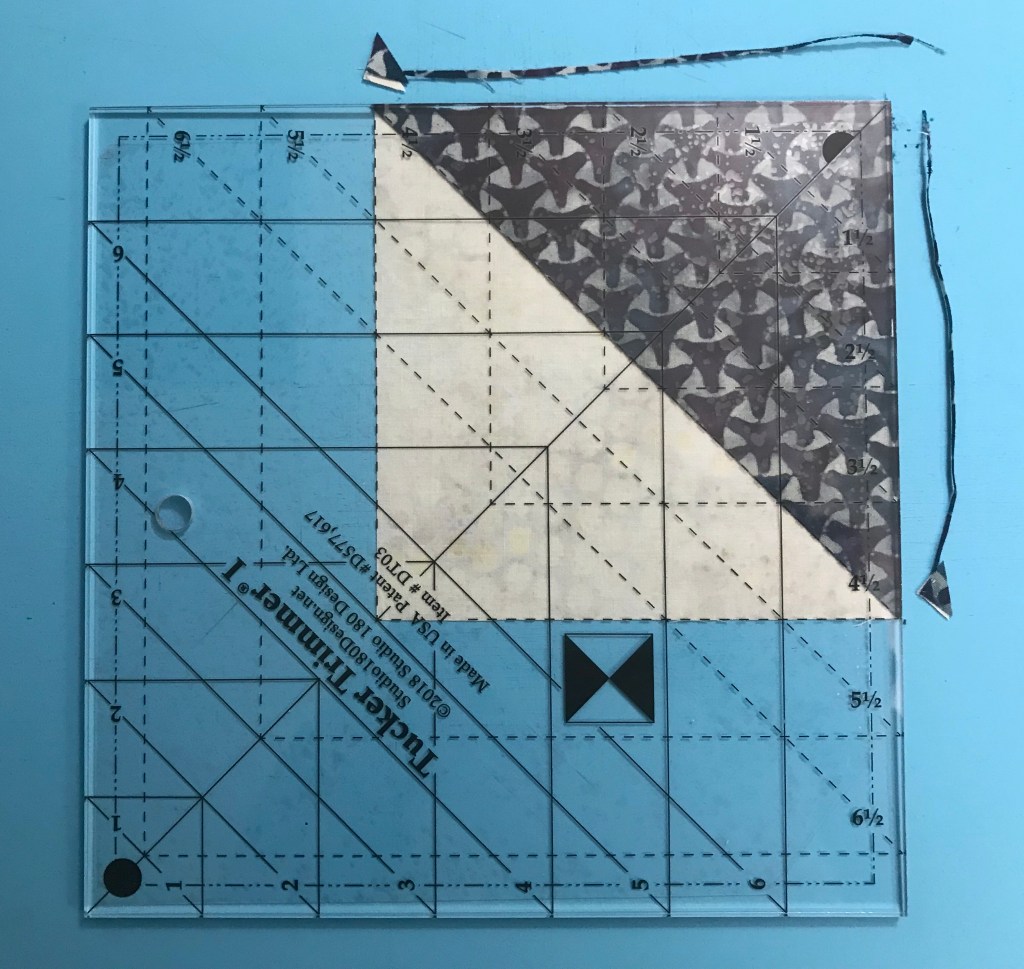
Rotate your unit and line up the trimmed edges with the corresponding cut size of your unit, and carefully aligning the solid diagonal line with the stitched seam as shown above.  Trim up the right side and across the top.

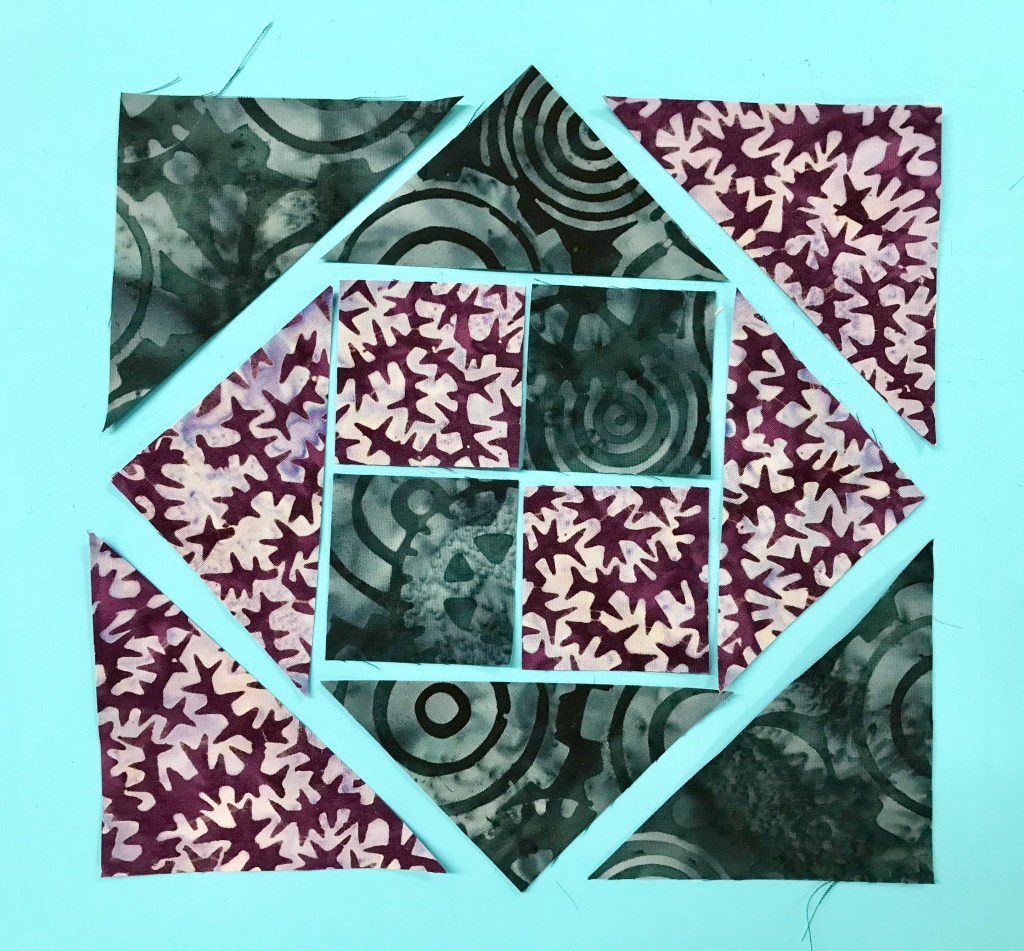
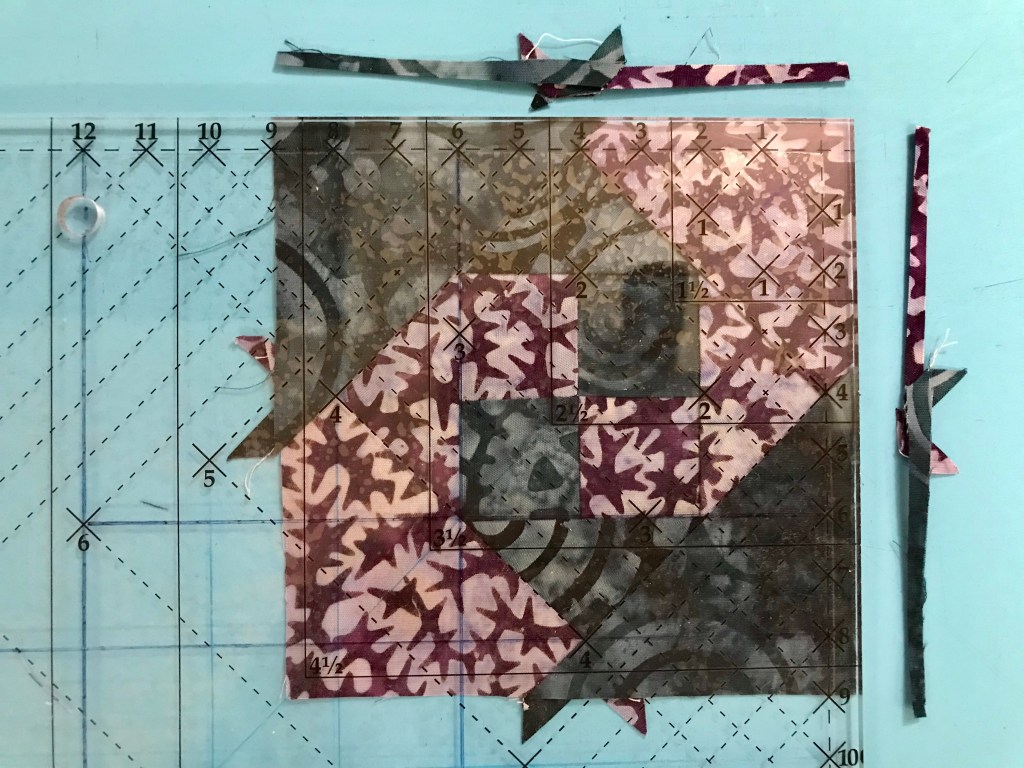
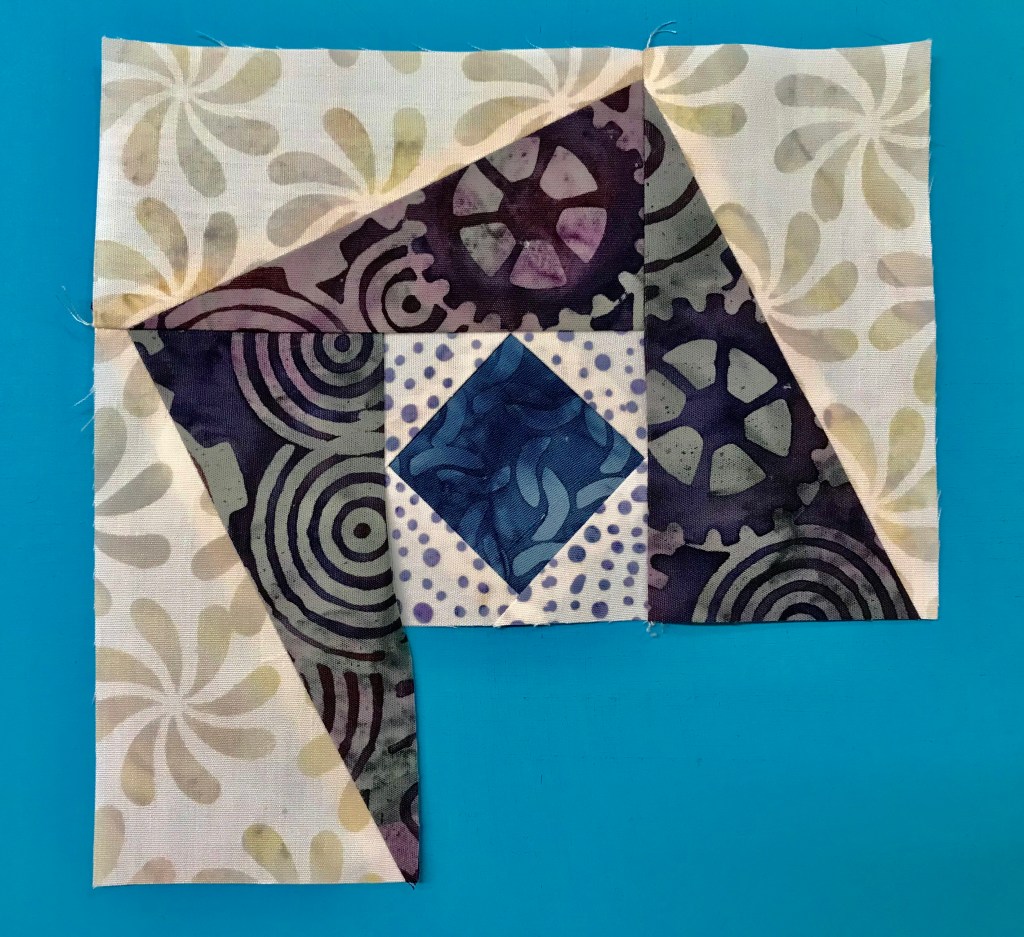
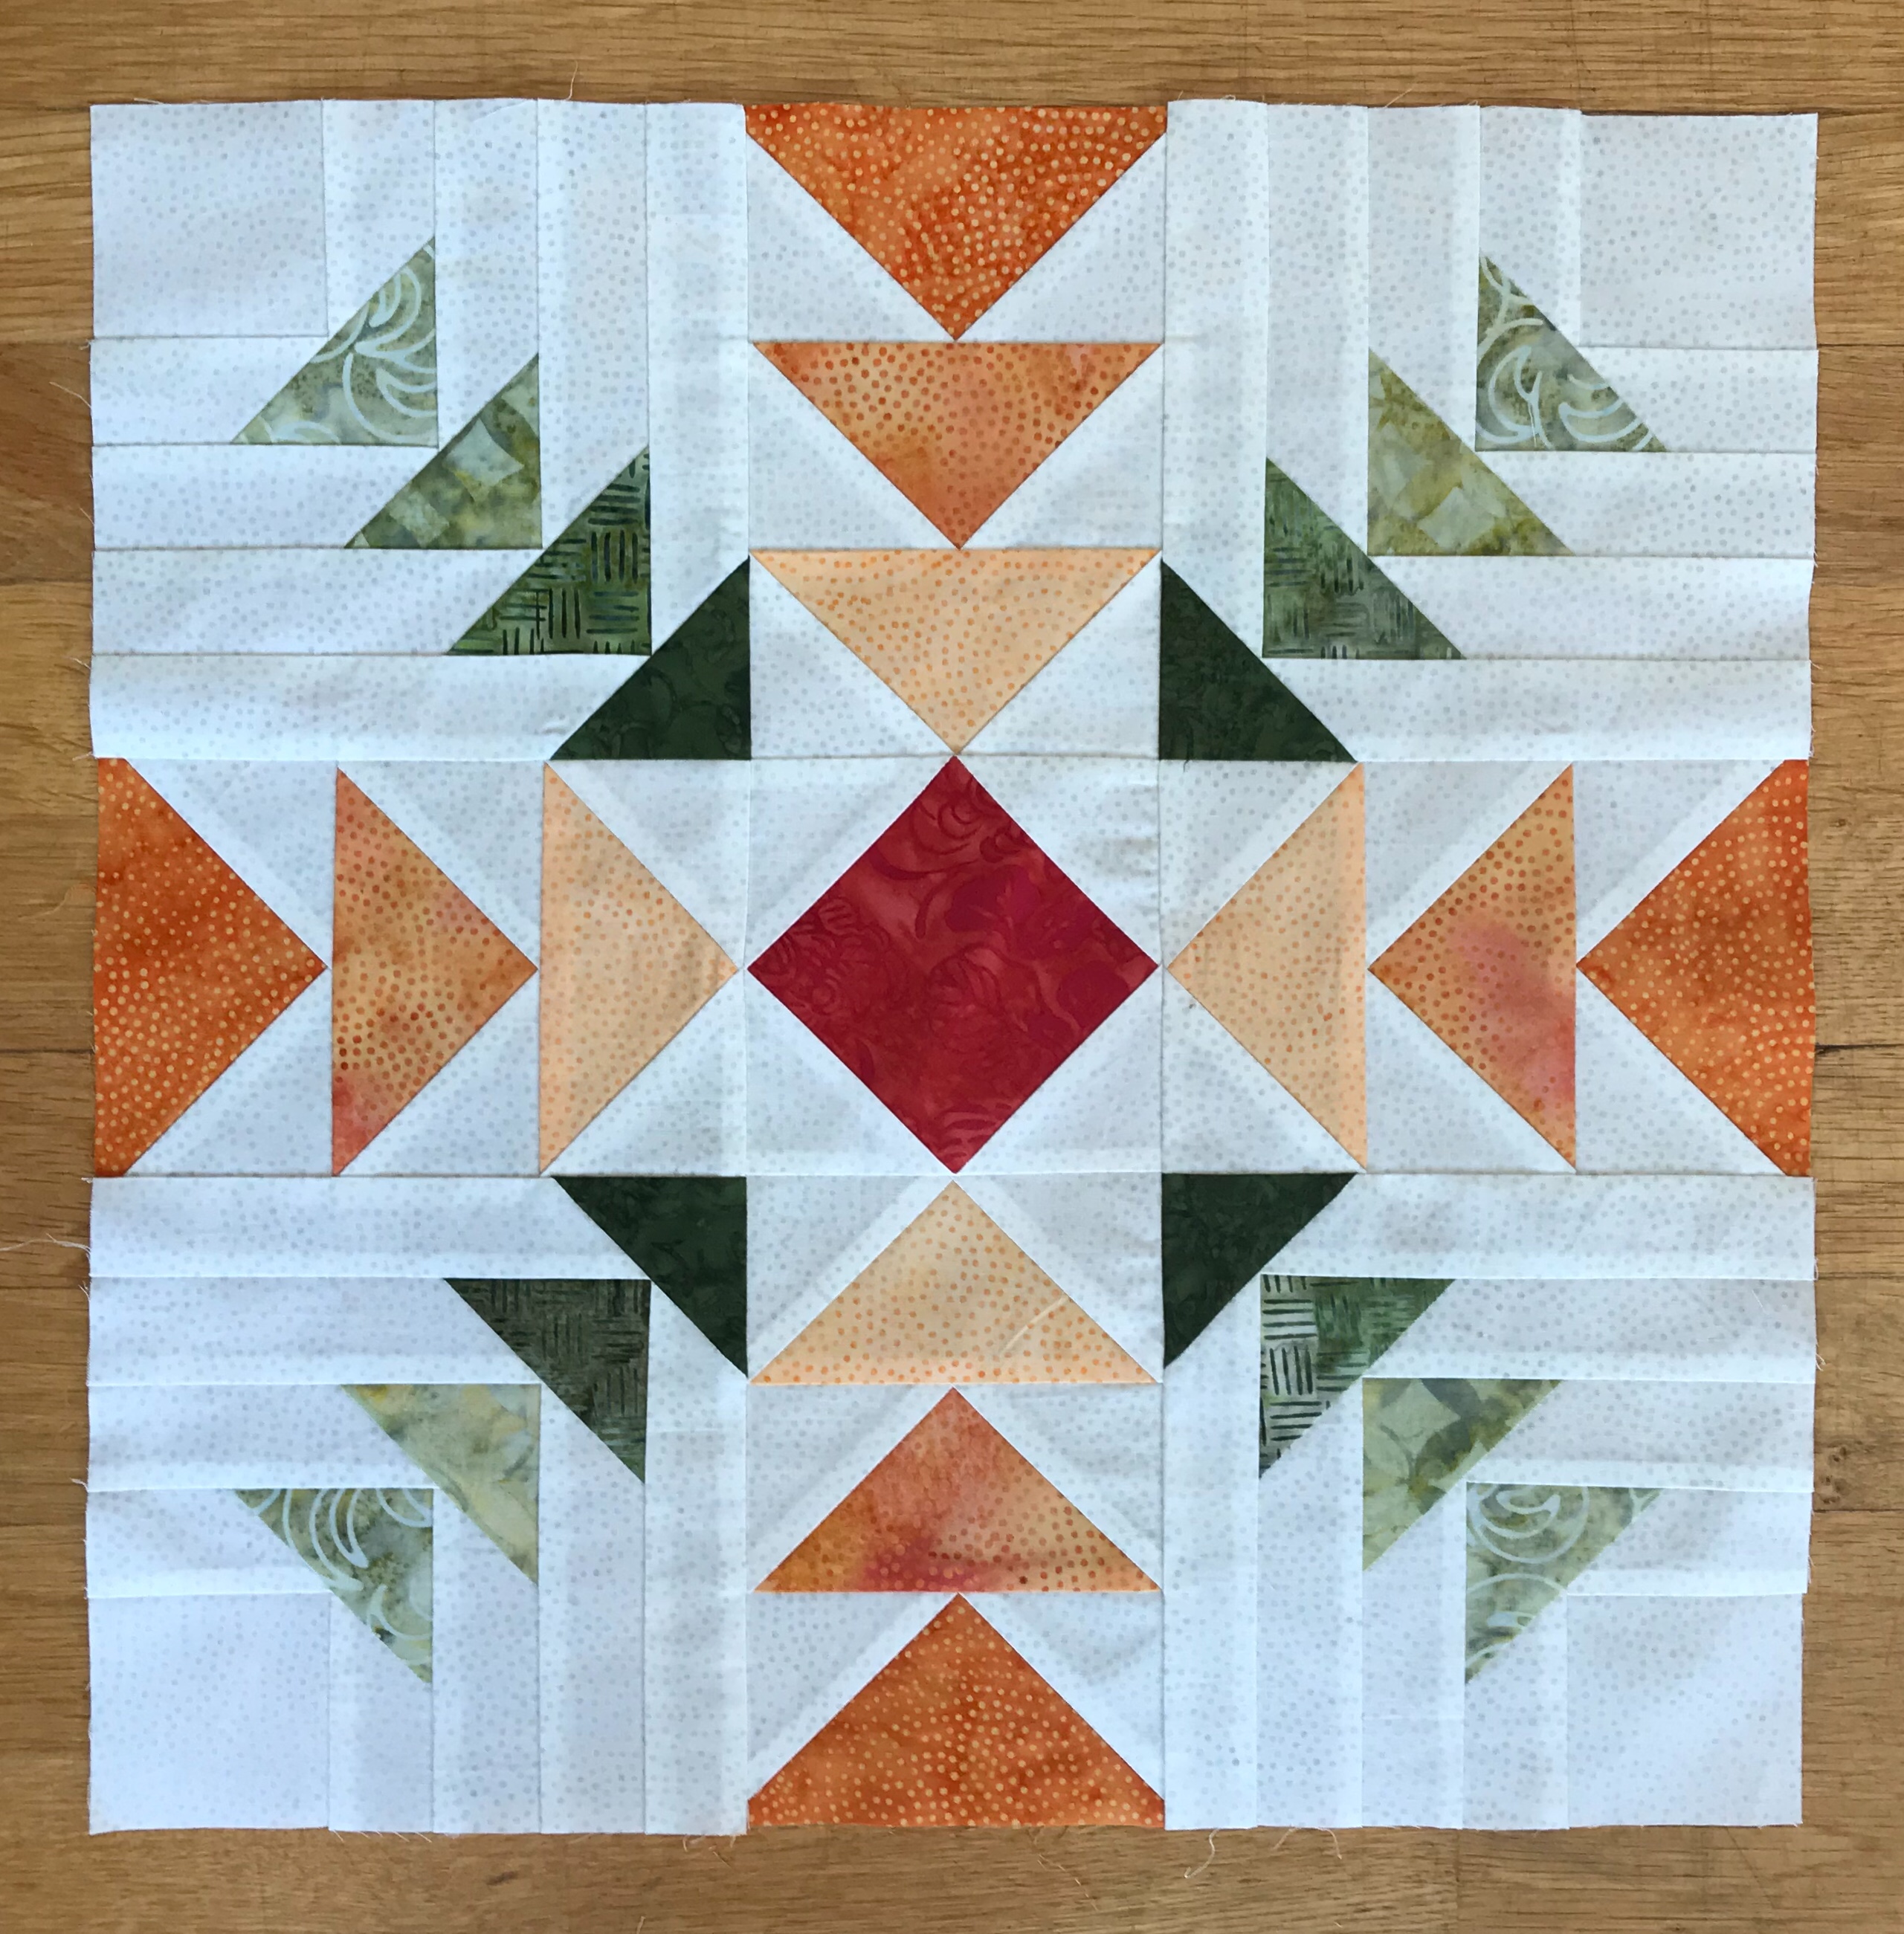
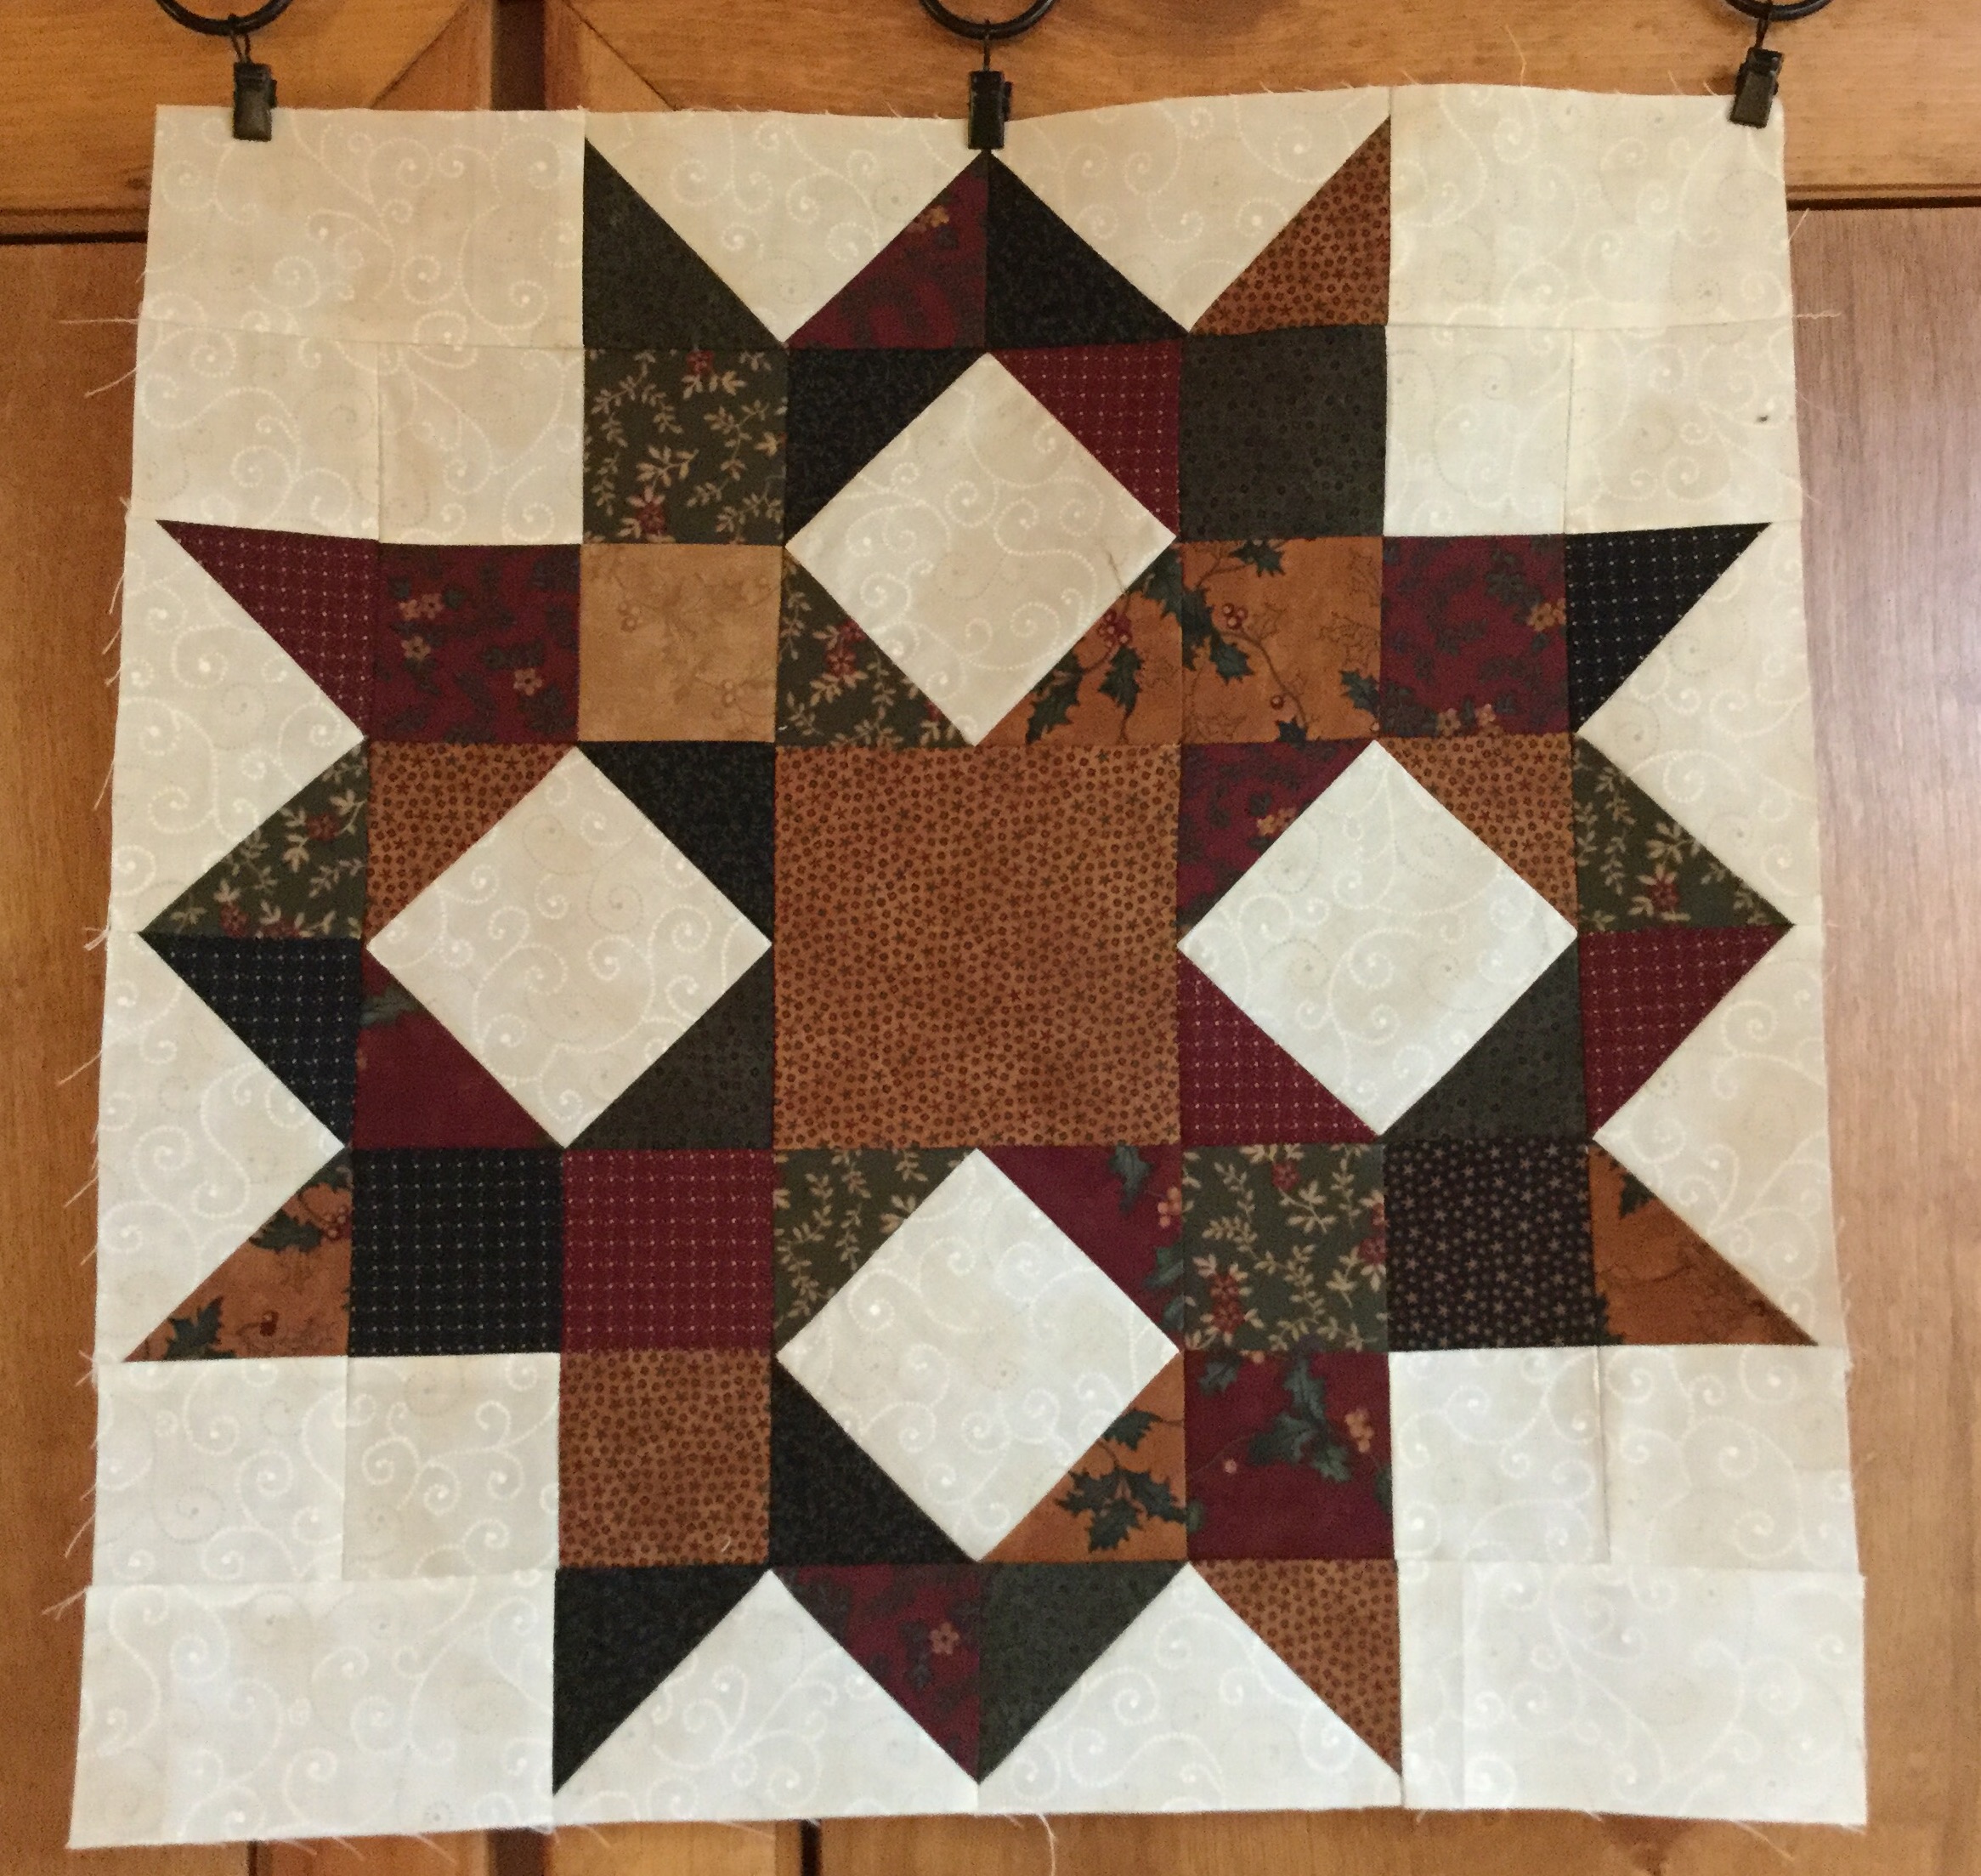
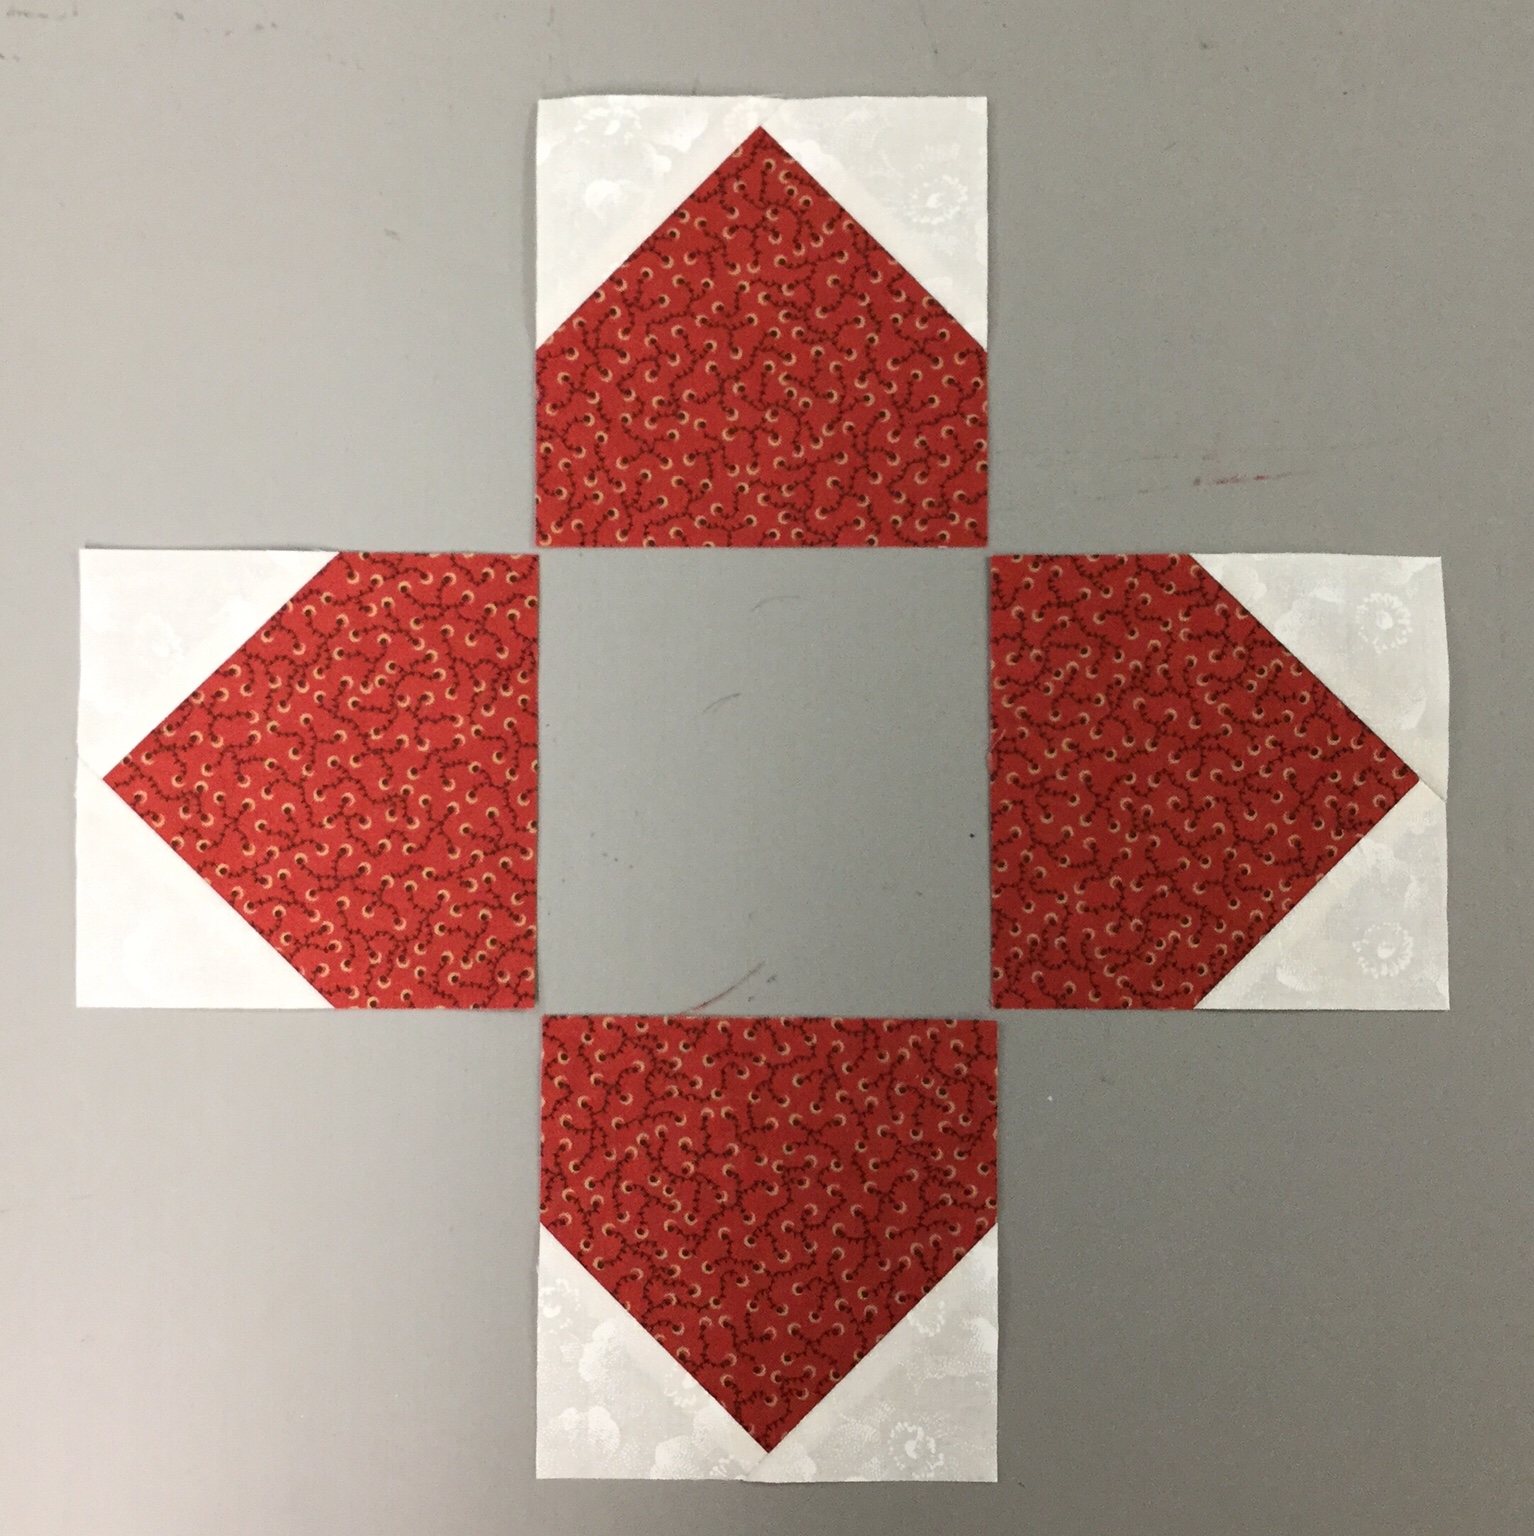
Lay out your completed units.  Sew into rows.

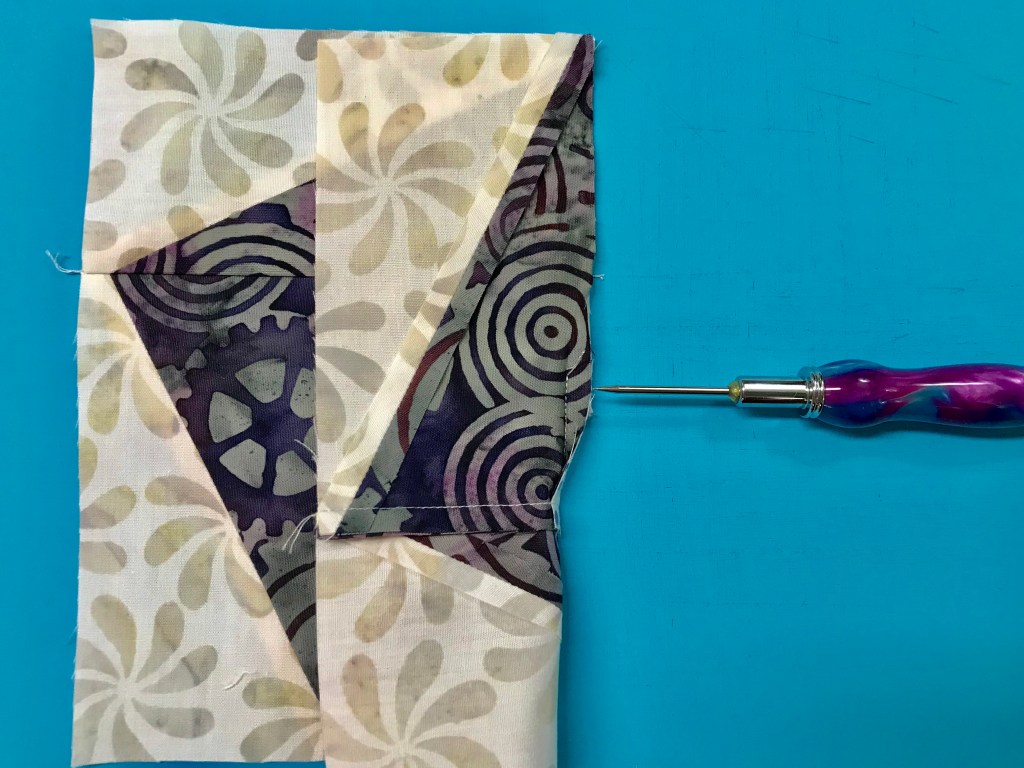
This is the back of the block showing how I pressed  the seams.

img_5626

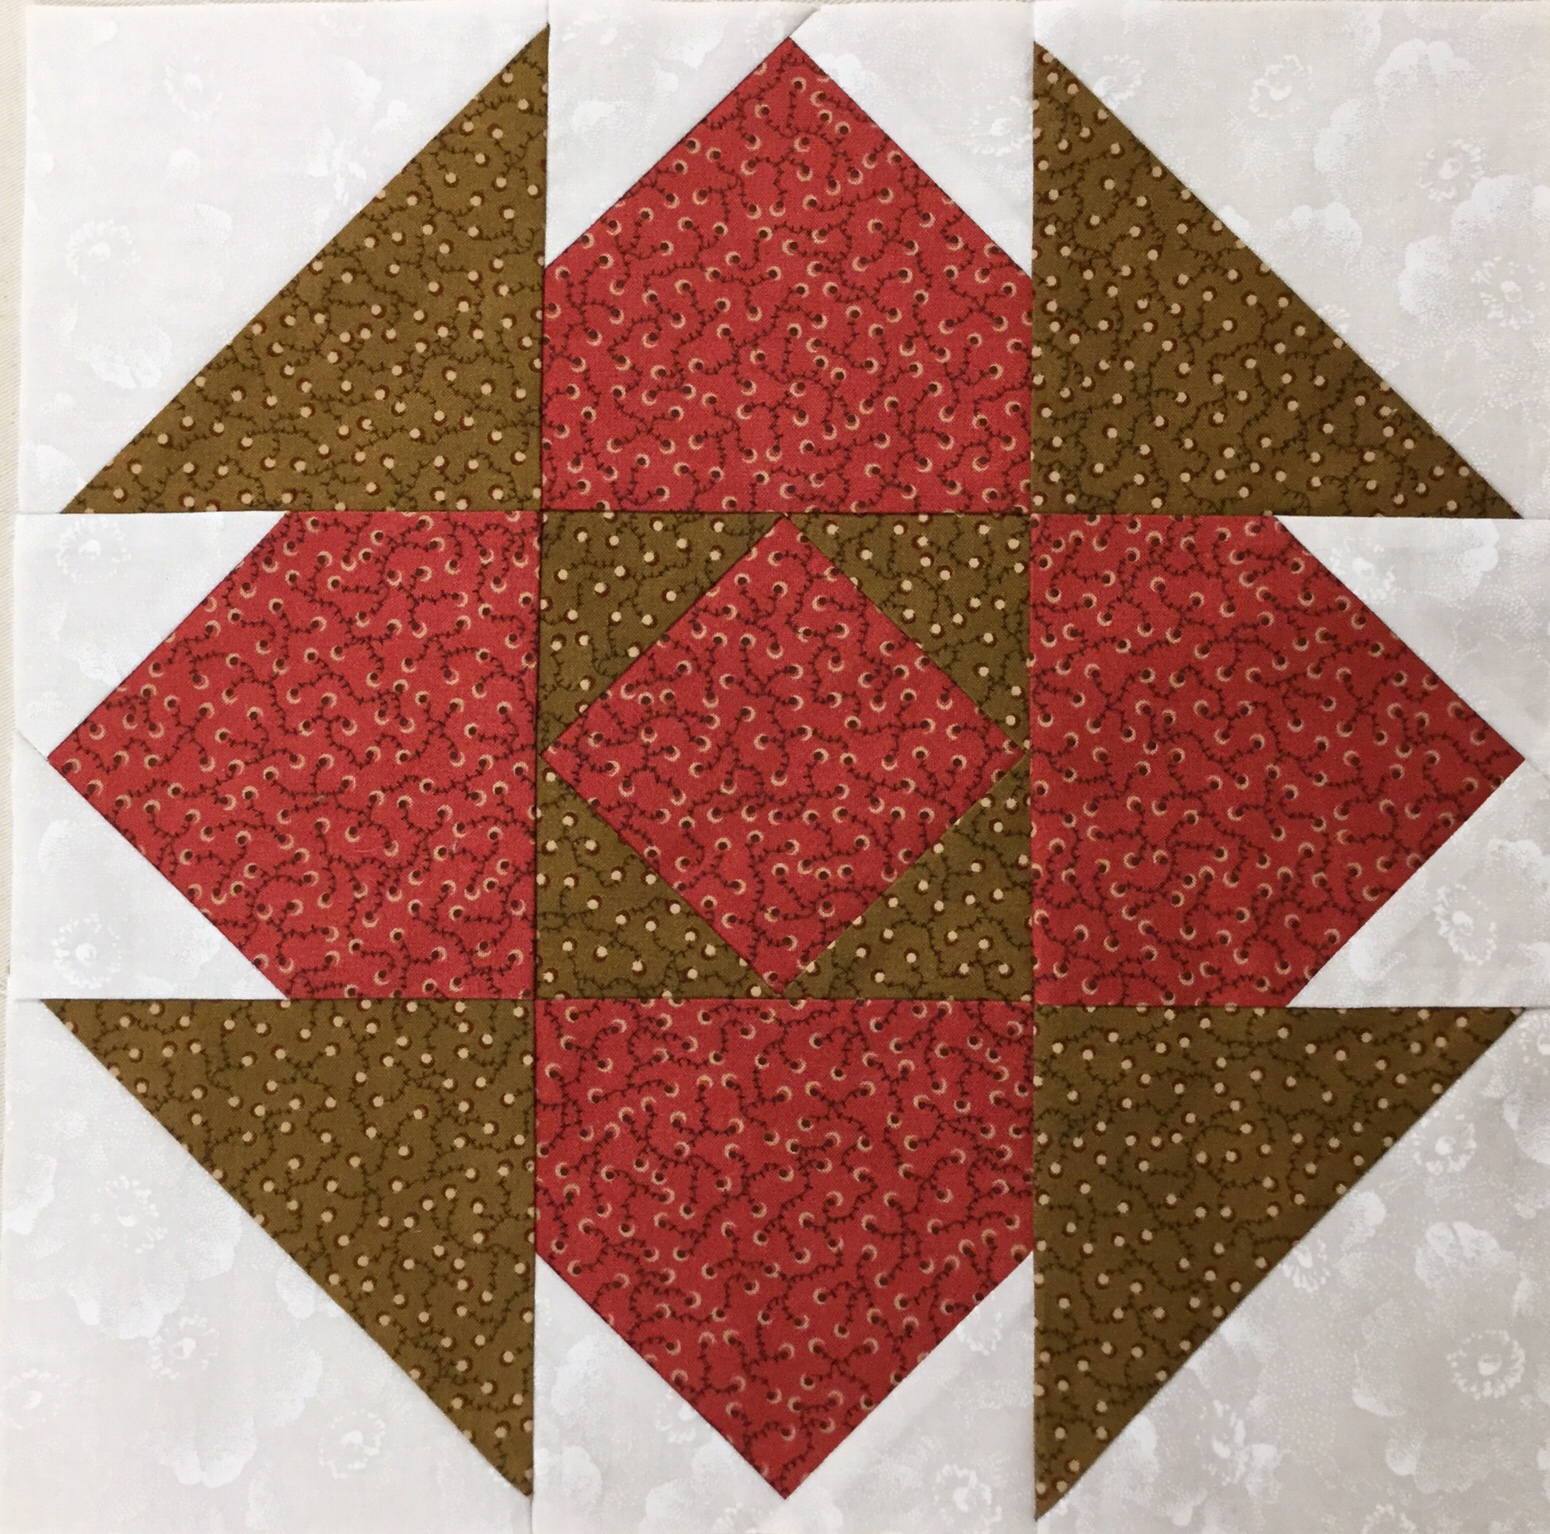
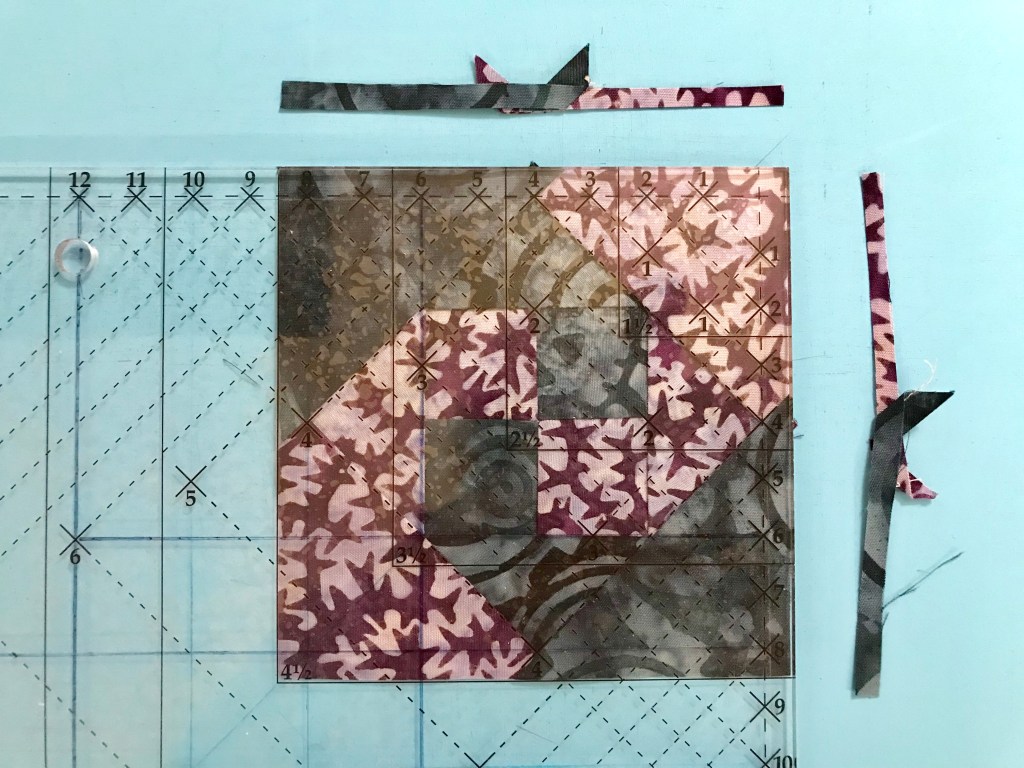
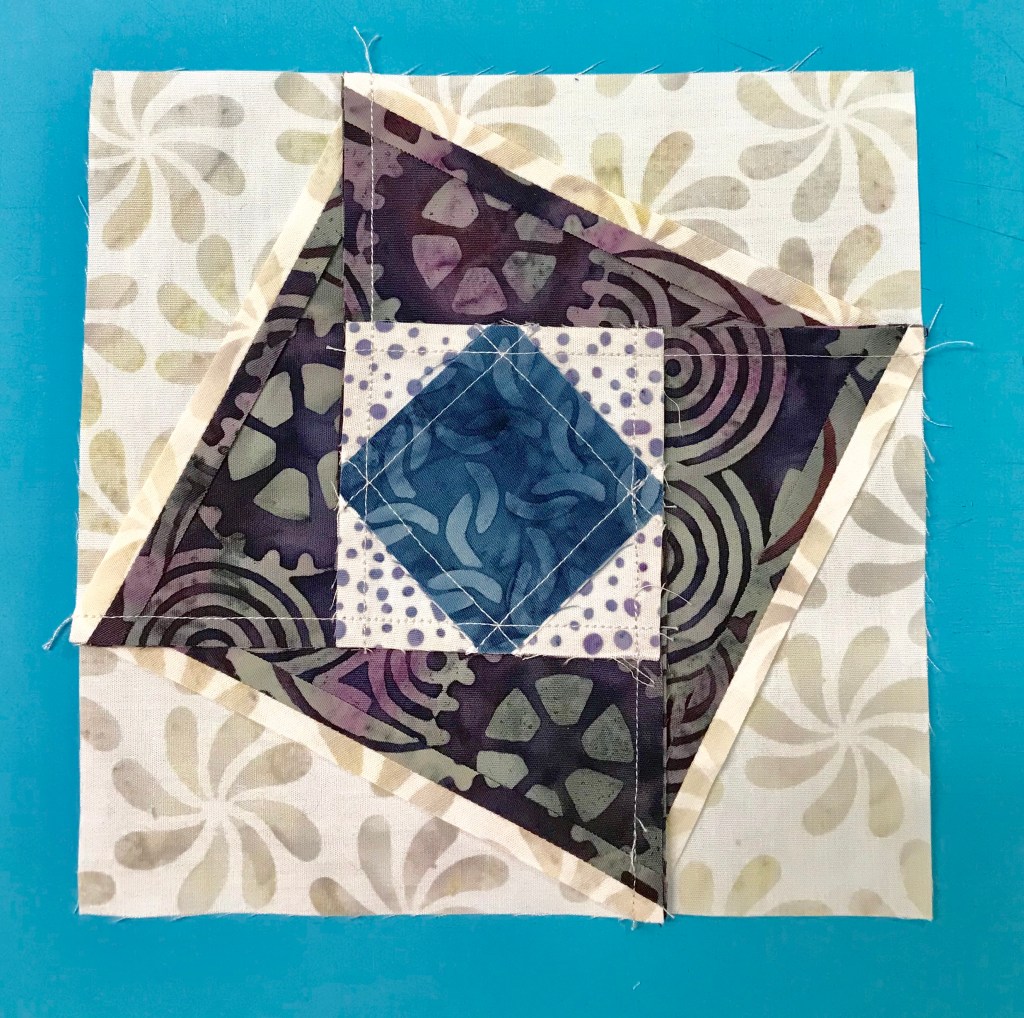
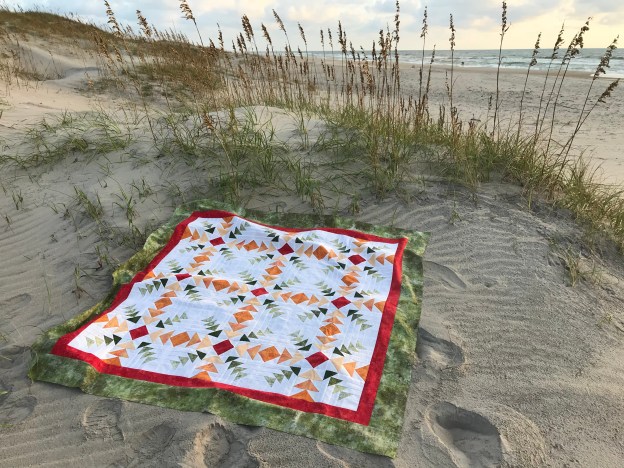
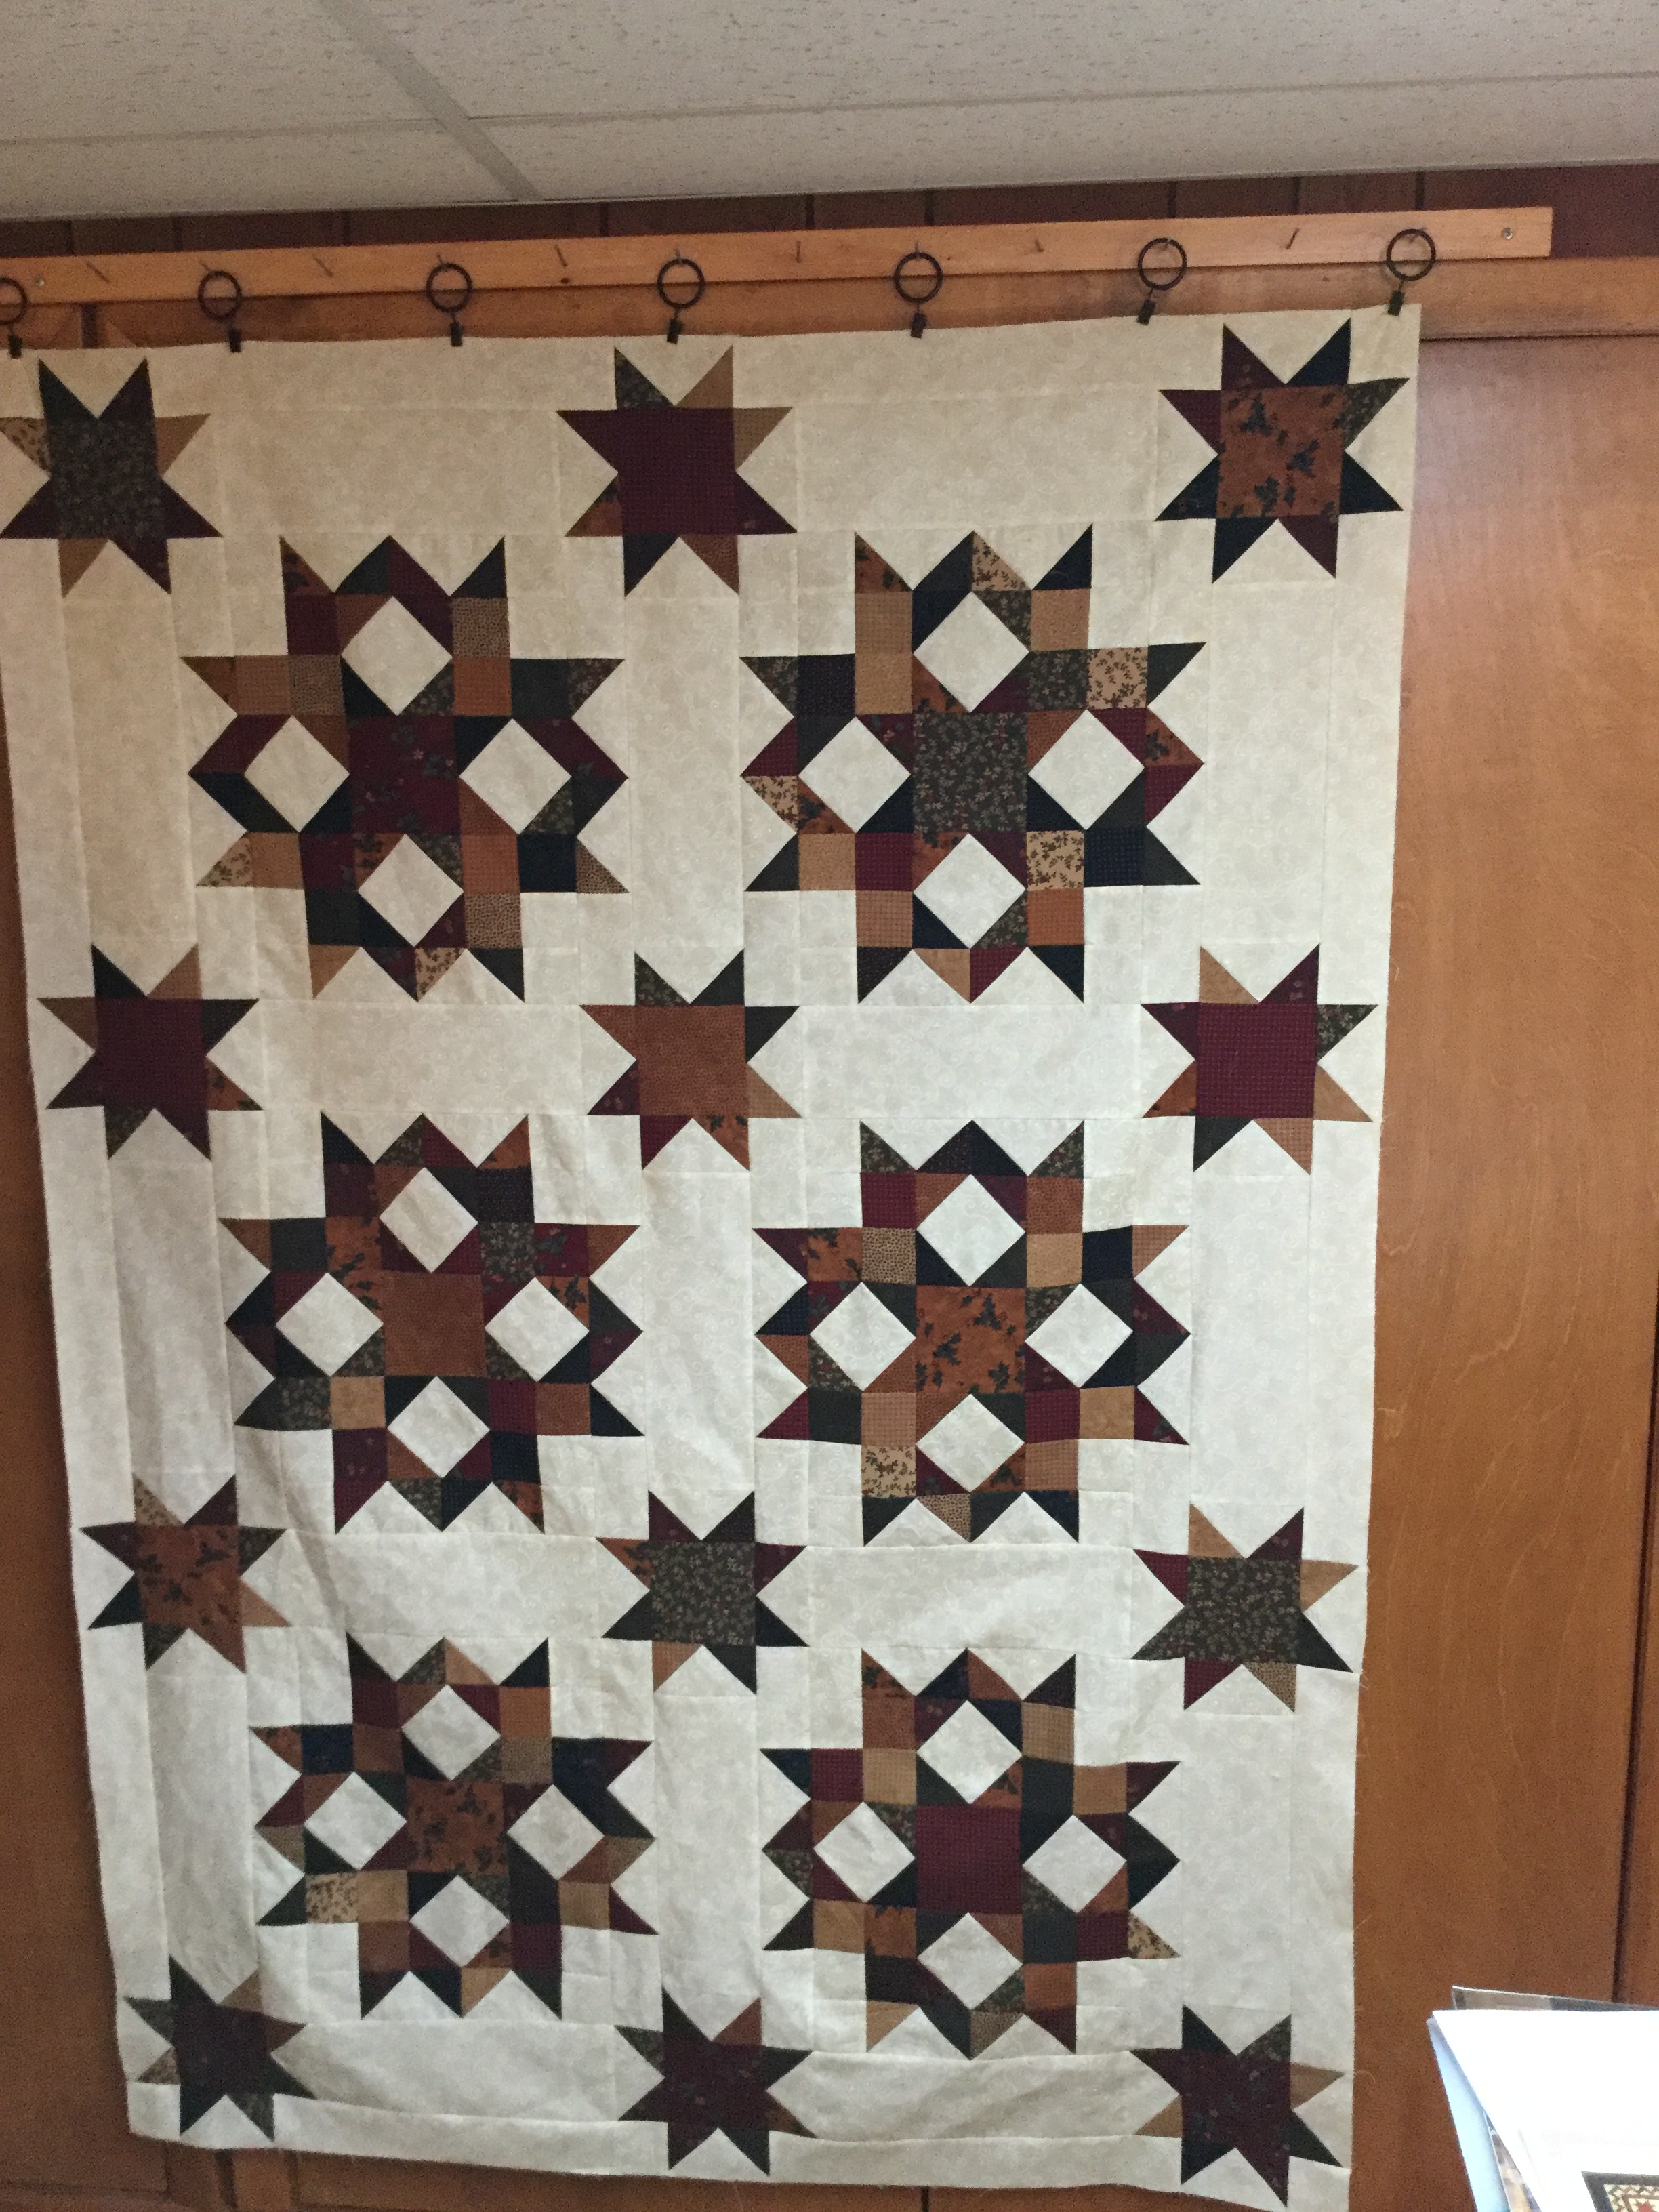
I love the completed Whimsy Turndash and I hope you will too.  This is a great block to practice these easy techniques with.


Jackie’s Folly, AKA Country Fair

Has this ever happened to you?  Deb Tucker’s pattern Country Fair was just featured in Fon’s & Porter Love of Quilting Nov/Dec issue.  I have been wanting to make this quilt for quite awhile, so I thought “this is the time”.

image image

image

I make my Square Squared and Flying Geese units (using my Wing Clipper 1 & Square 2 tools of course really makes the process fly).

image

I get one block done. I feel real good, love the block.

image

I get the blocks done and begin making the sashings.  Oops I have them facing the wrong way, out comes the seam ripper.

image

I get the center of the quilt together and begin working on the borders.

OLYMPUS DIGITAL CAMERA

Borders on, feeling accomplished so I post a picture on Facebook…Drat, I put the blocks together wrong and didn’t even notice.  Apparently I’ve had this pattern awhile and did not check to see if there were any corrections.  Deb Tucker always posts any pattern corrections on their website http://www.studio180design.net.

OLYMPUS DIGITAL CAMERA

But I decide to finish it anyway and I’m sure glad I did.  I call it Jackie’s Folly.  I still love it.  This is a great pattern no matter how you finish it.  The quilt measures 72″ by 92″.