Welcome, Welcome, Welcome to Stitchin Heaven’s Journey’s BOM – Month 12! This has been a spectacular year. You all have worked so hard. Thank you to Deb Luttrell, Founder of Stitchin Heaven, Deb Tucker, Creative Kingpin of Studio 180 Design, Marie Bostwick New York Times best selling author and Jason Yenter Fabric Designer & President of In the Beginning Fabrics for making this all possible. Now to assemble your quilts!
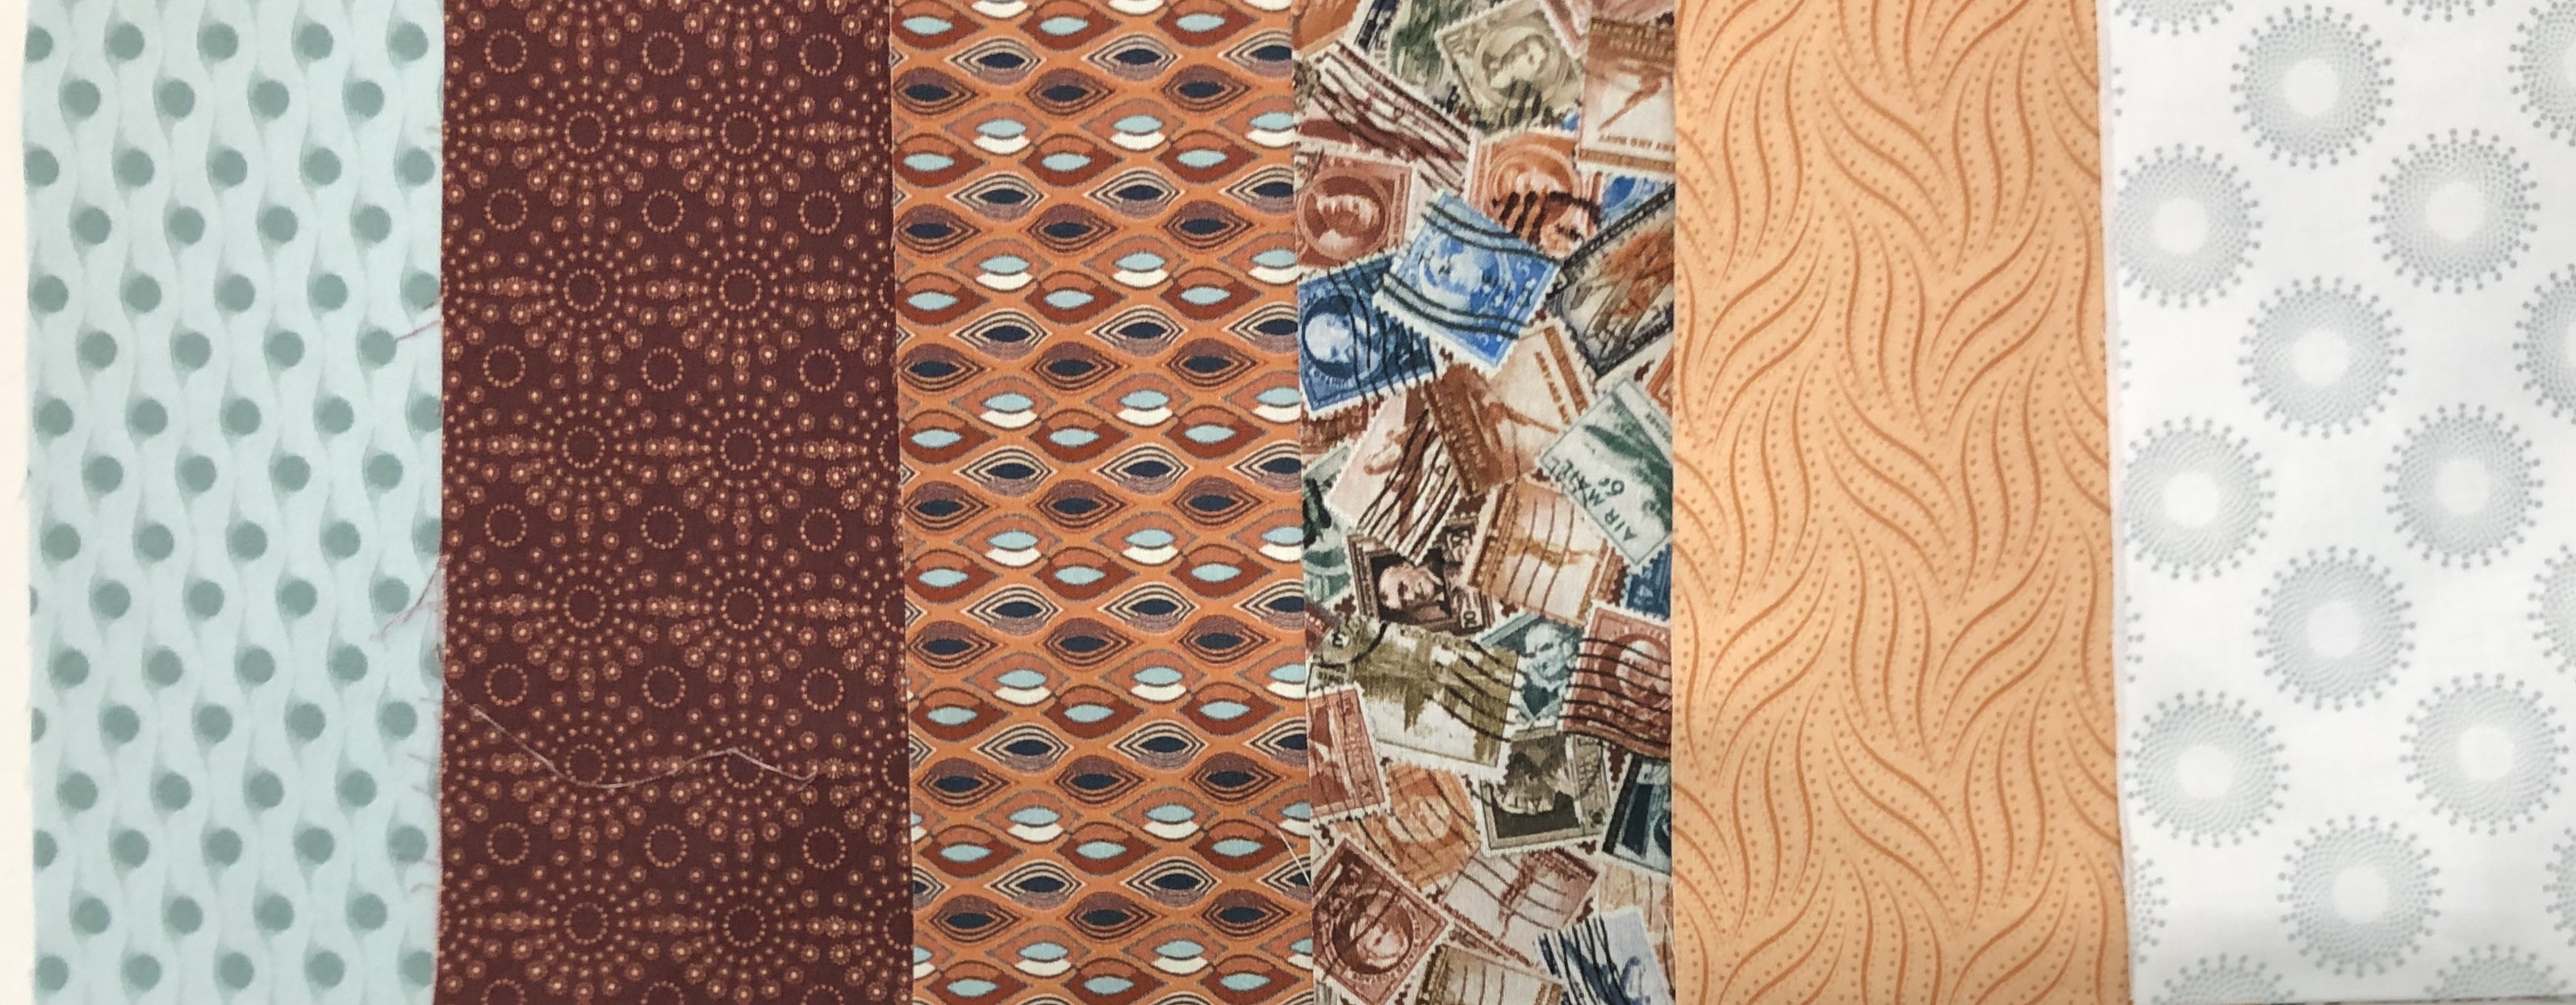
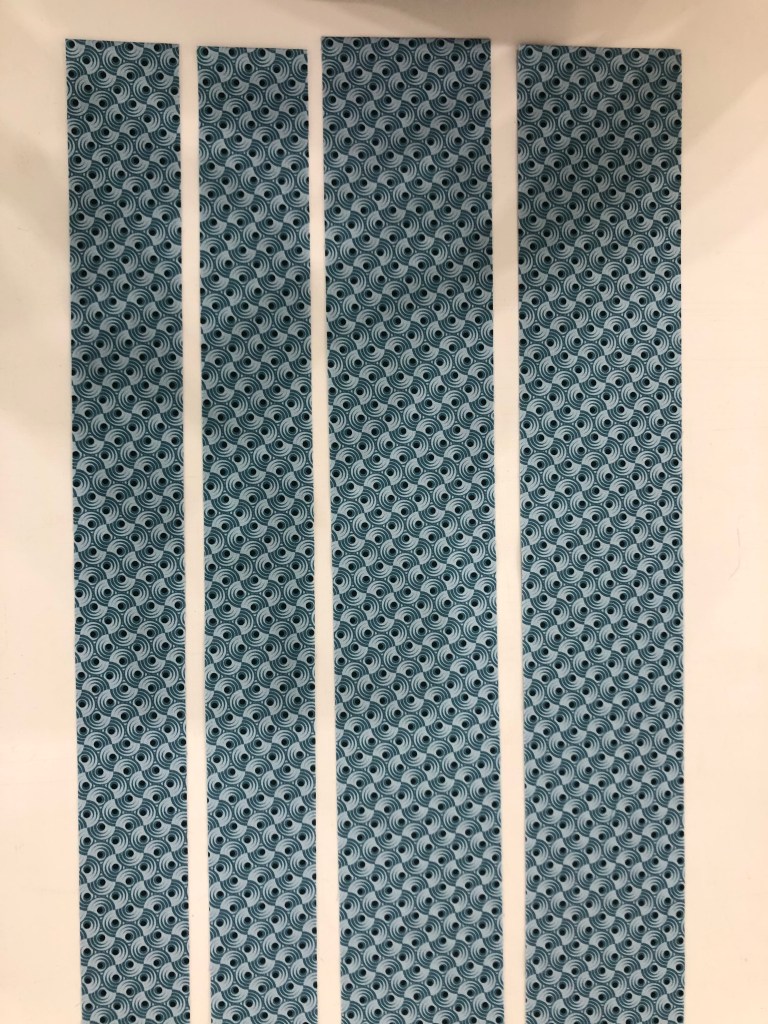
Print 4
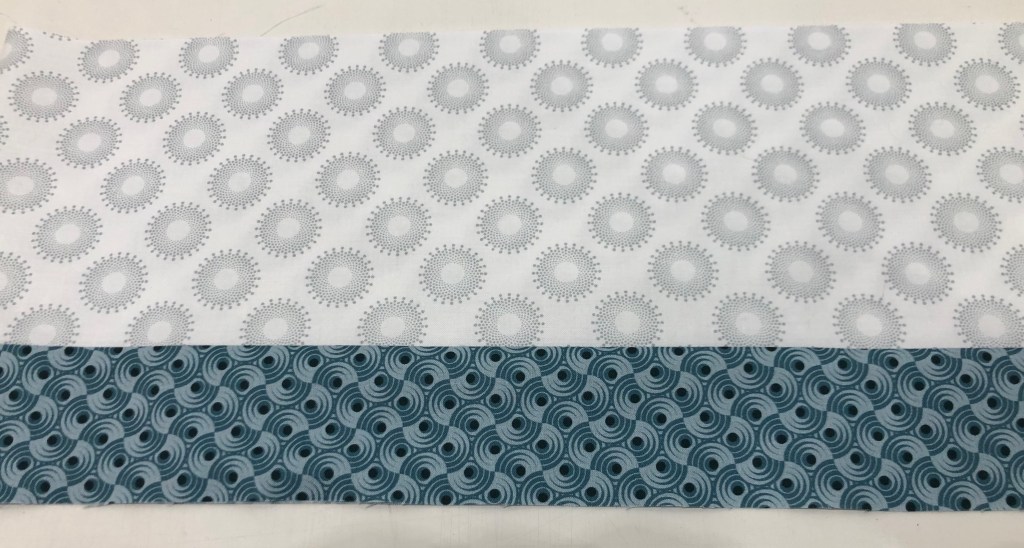
Print 6
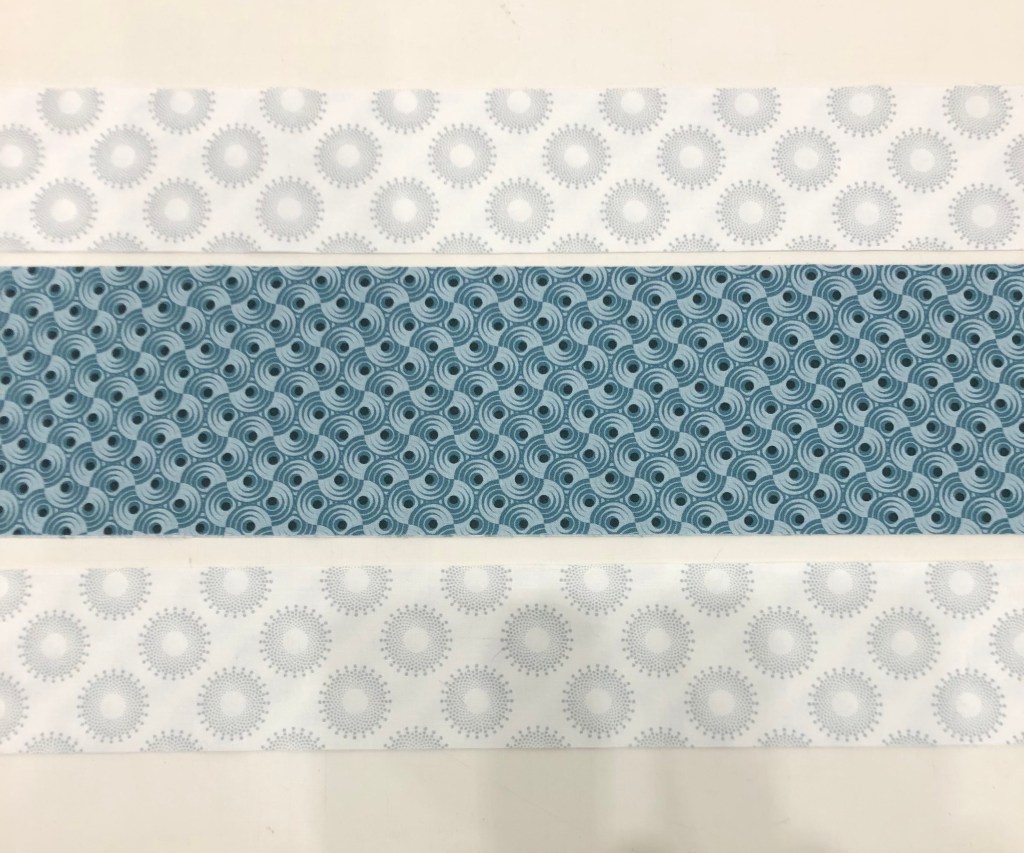
Print 11
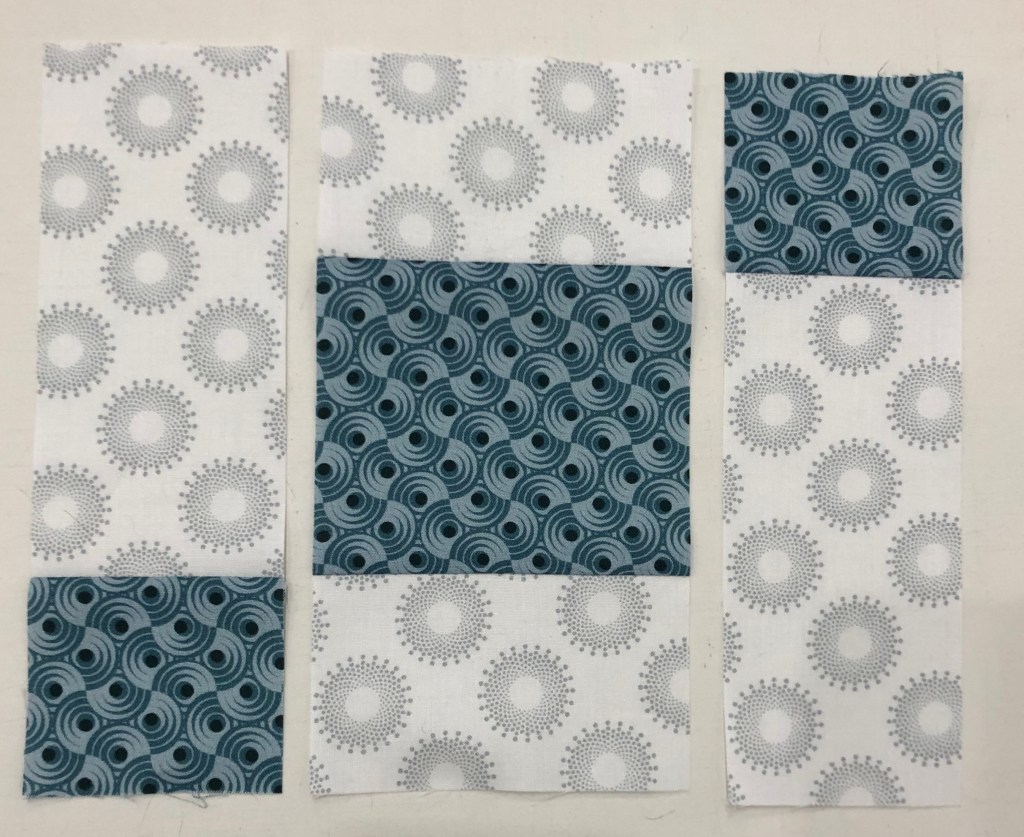
Print 12
Note: WOF stands for width of fabric. This month you will assemble your quilt top and add the borders.
Gather the following pieces:
4 Corner Sections from Month 6
Block K from Month 7
4 Middle Edge Sections from Month 9
4 Pieced Border sections from Month 11
Finishing Instructions
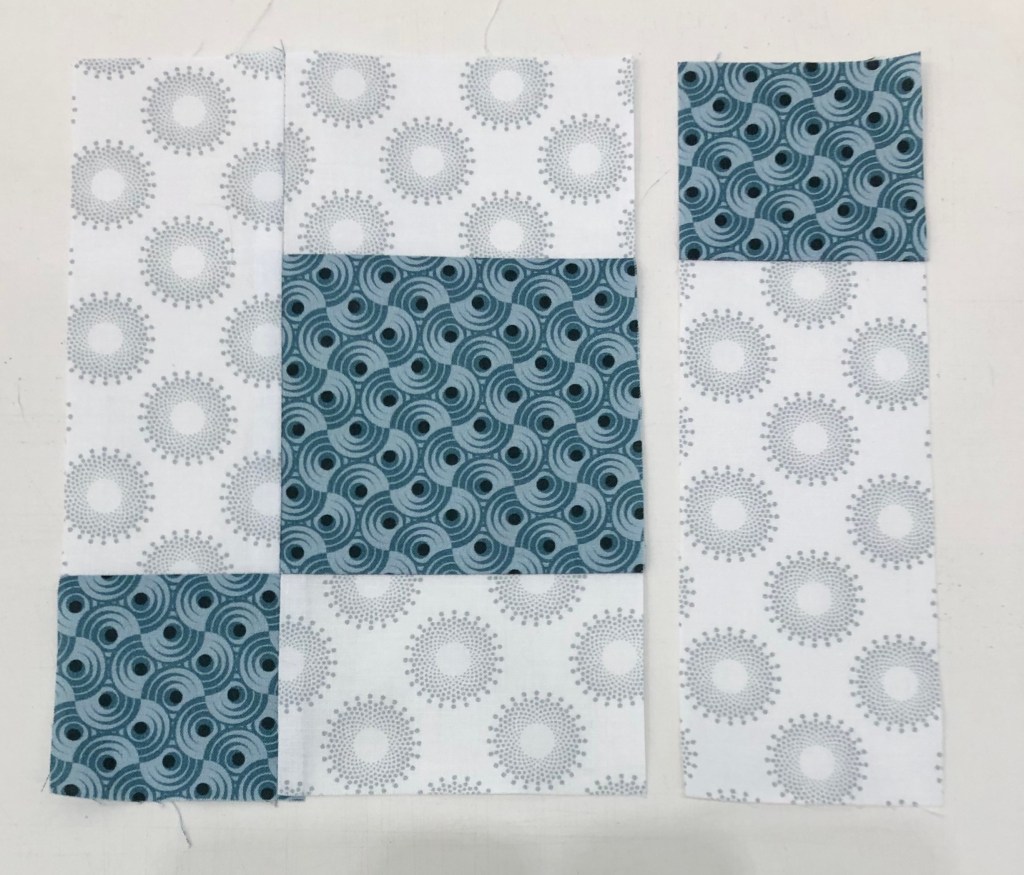
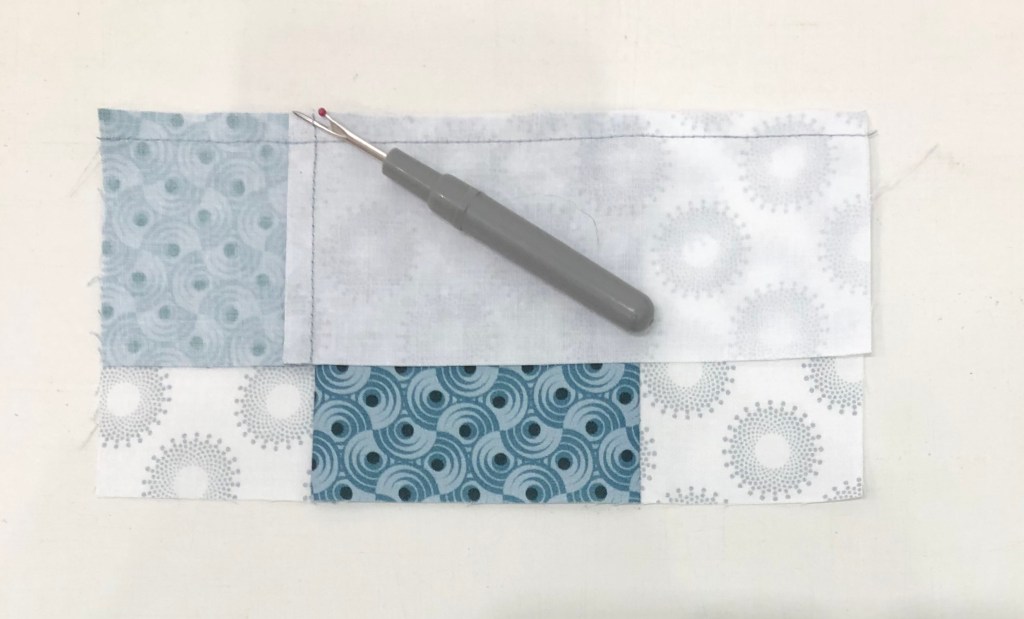
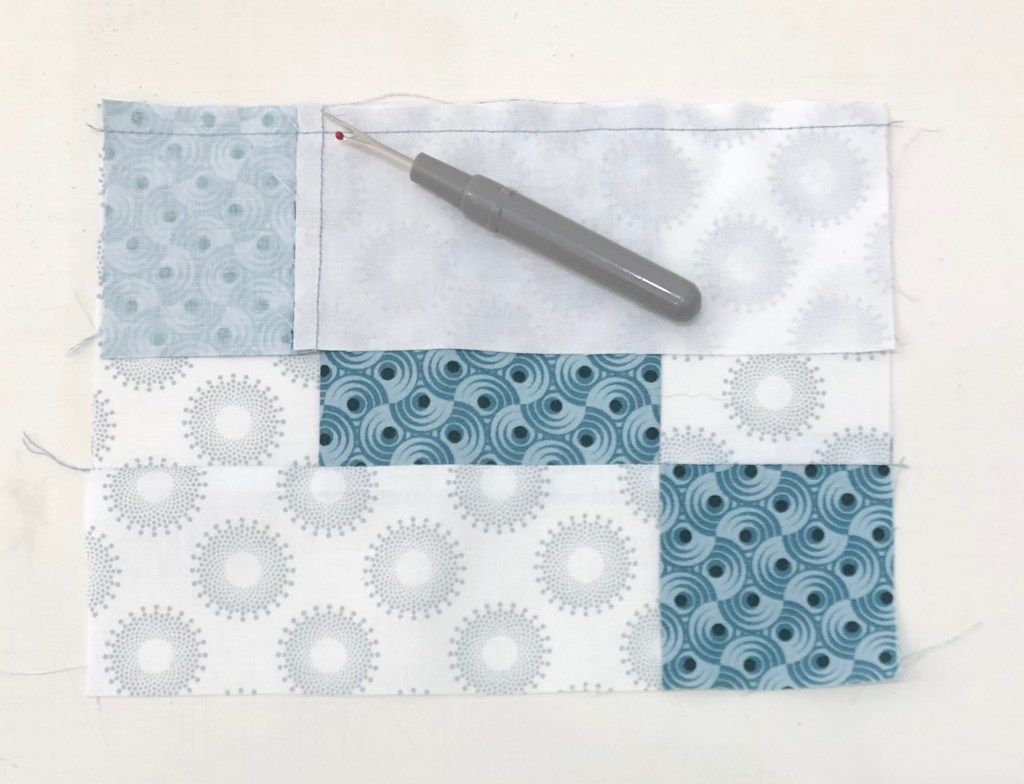
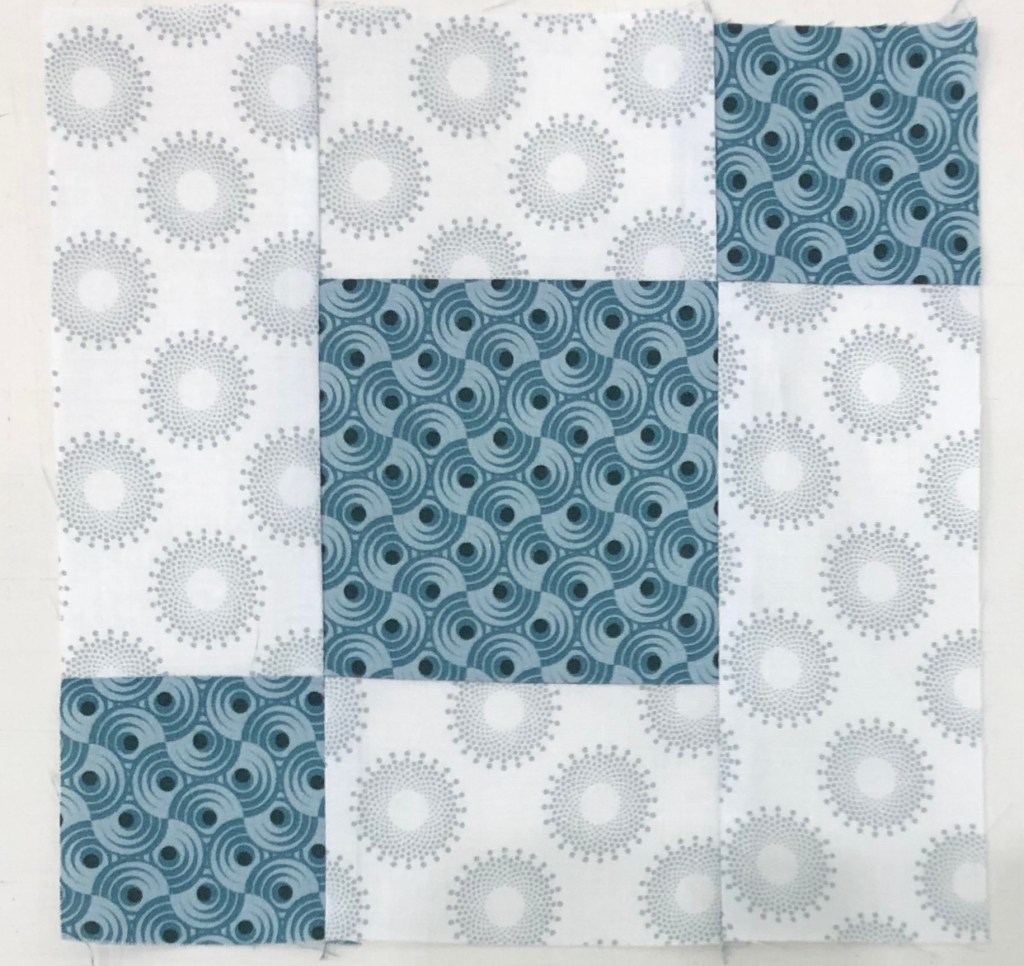
Step 1 – Lay out the Corner Sections, Middle Edge Sections, and Block K as shown in the diagram on page 35.
Step 2 – Stitch the sections together into rows, press the seams open. Stitch the rows together to create the quilt center.
Step 3 – Attach the 72½” Print 11 inner border strips. Find the center of the quilt and the center of the 72½” border strip. Match the center points with right sides together, pin. Match both ends of the strip with the ends of the quilt and pin in place. Ease the quilt top to match the border strip and add more pins between the others to hold the border in place as you stitch. Attach the other 72½” border to the opposite side in the same manner and press toward the inner border strip.
Step 4 – Repeat step 3 for the 75½” Print 11 border strips.
Step 5 – Attach the 75½” Print 6 middle border strips. Using two of the border strips, stitch them to the quilt in the same manner as in step 3. Press toward Print 6.
Step 6 – Stitch a Print 4 middle border corner stone to each end of the remining 2”x 75½” Print 6 borders. Press toward the middle border.
Step 7 – Attach the remining two middle border strips to the quilt as described in step 3. Make sure to nest the seams. Press toward the middle border.
Step 8 – Add the pieced borders. Start with the borders that do not have the N Units on the ends. Orient the pieced borders so that the Corner Pops are against the middle border and the points of the V Blocks are pointing away from the quilt center. Refer to the diagram. Find the center of the quilt top and the center of the pieced border. Match the centers and pin. Match each end and pin. Ease the border to match the quilt top and add more pins between the others to hold the border in place as you stitch. Stitch in place. Press toward the middle border.
Step 9 – Repeat step 8 for the other pieced borders with the N Units attached to the ends. After you have matched the centers and the ends, make sure that you nest the Corner Beam seam with the seam attaching the pieced border.
Note: We recommend that you wait to cut your outer borders to length until you can measure your quilt top. To determine your specific border length, measure the longest side of your quilt in three different places. If those measurements are different, add the three measurements together and divide by three. That will be the length that you need to cut your first two borders. Once the first two borders are attached to the quilt repeat the process for the remaining two sides.
Step 10 – Add the outer borders. Find the center of the quilt and the center of the 90½” outer border strip. Match the center points with right sides together, pin, match either end of the strip with the ends of the quilt, and pin in place. Add more pins between the others, about every 4”, to hold the border in place as you stitch. Attach the other 90½” border to the opposite side in the same manner and press toward the outer border strip.
Step 11 – Repeat step 10 for the 102½” outer border strips.
Step 12 – Finish with Batting, Backing, Quilting, and Binding! Layer quilt top with batting and backing. Baste and quilt. Bind and Enjoy!
Journeys
Thank you all so much for joining us on this Journey! Congratulations on a job well done!
Welcome to Stitchin Heaven’s Journeys BOM Month 4 – Winged Nine Patch. My helper for Month 4 is Diane Marvin, Certified Instructor for Studio 180 Design. This month you are going to learn to make Four Patches with Frames using prints 5, 6, 7 & 9, Center Square with print 8 and Chevrons using prints 5, 6 & 11. Required tools are the Four Patch Square Up and Corner Pop.
Prints 5, 6, 7, 8, 9 and 11
Carefully follow your cutting instructions for each print using your best cutting and measuring skills.
Jackie’s Note: To keep organized when cutting the same print for multiple units I labeled 3 plates for Print 5: one for “Four Patches Strip sets A & B. One for Four Patch Frames Strip Set C. One for Replacement Triangles.
Piecing Instructions
Step 1 – Use the diagram on page 9 to make your strip sets. Position two strips right sides together and align the long edges. Stitch with your best ¼” seam. Press the seam toward Print 5 in all strip sets.
Strip Set A – Prints 5 & 6Strip Set B – Prints 5 & 7
Step 2 – Layer Strip Set A on top of Strip Set B, right sides together, making sure that the Print 5 fabrics are positioned as shown in the diagram. Nest the seams well. Sub-cut along the strip at 2¼” increments until you have 16 sub-cut pieces.
Step 2 – Layer and Sub-Cut at 2 1/4″ increments
Step 3 – Sub-cut Strip Set C. Do not layer it with anything, just make cuts every 2” until you have 16 pieces.
Step 4 – Stitch down the long side of the layered A/B pairs. Consistently feed Print 5 under the machine first. This will make for a nicer alignment in the center.
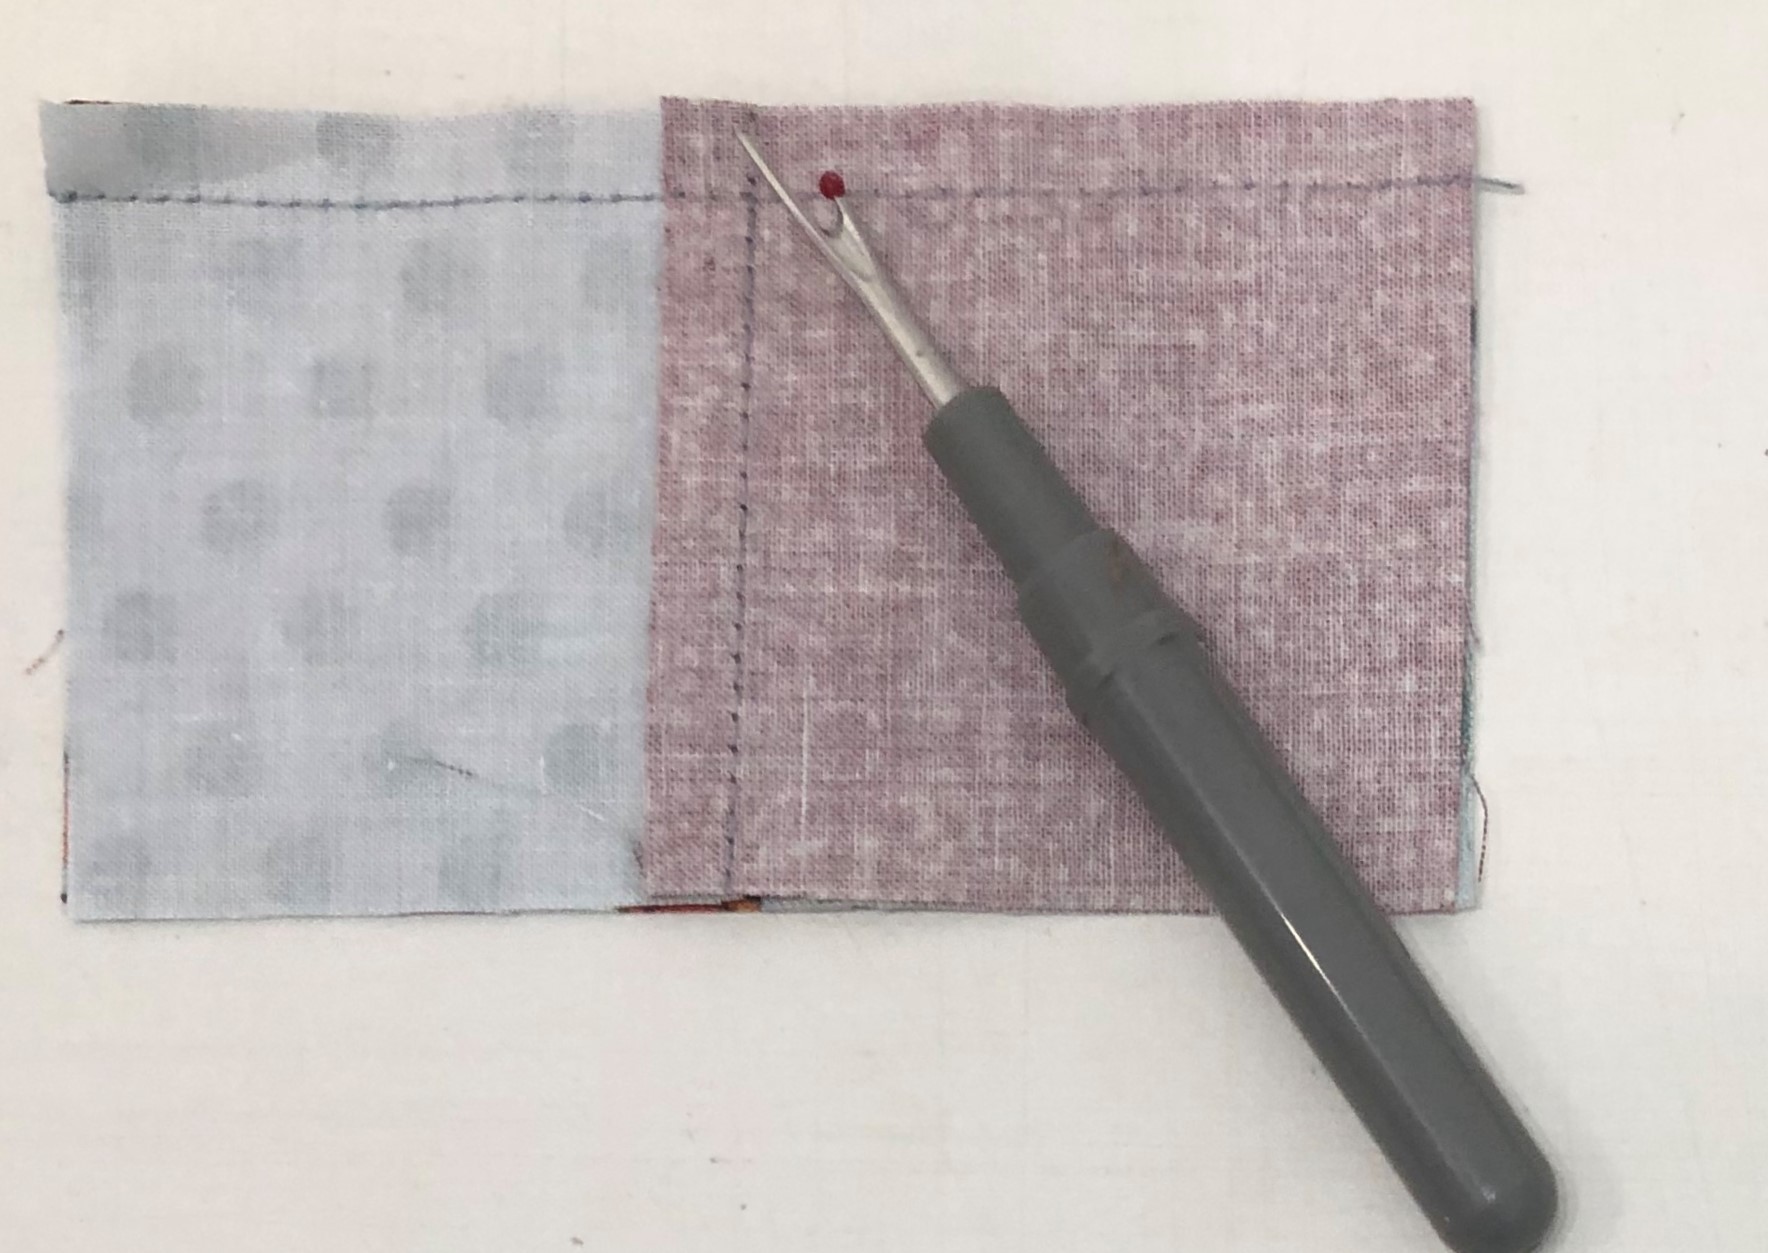
Remove 2 or 3 striches
Step 5 – Press the unit so that the seams spin. To spin the seam, lay the sewn seam east to west on the mat, remove the stitches in the seams on both sides that run north to south. Press so that all seams go in the same direction.
Swirl and press.
Step 6 – Trim. Locate the circle for the 3” finished size on your Four Patch Square Up® tool and position the circle over the sewn seam intersection in the center of your four patch unit, and the dashed lines with your seams. Trim the first two sides.
Right Handed Trimming
Step 7 – Rotate the unit 180 degrees . Realign the 3” Finished Size circle with the center and the dashed lines with your seams. Also make sure that the outside trimmed edge of the unit is aligned with the 3½” cleanup lines. Trim the final two sides. Repeat steps 6 and 7 for the remaining units.
Second Trim
Step 8 – Stitch a 2”x 3½” Print 5 rectangle to the side of each four patch as shown. Press toward the Print 5 rectangle.
Step 8
Step 9 – Stitch a Strip Set C piece onto the pieced unit as shown. Press toward the C piece.
Step 9
Chevrons
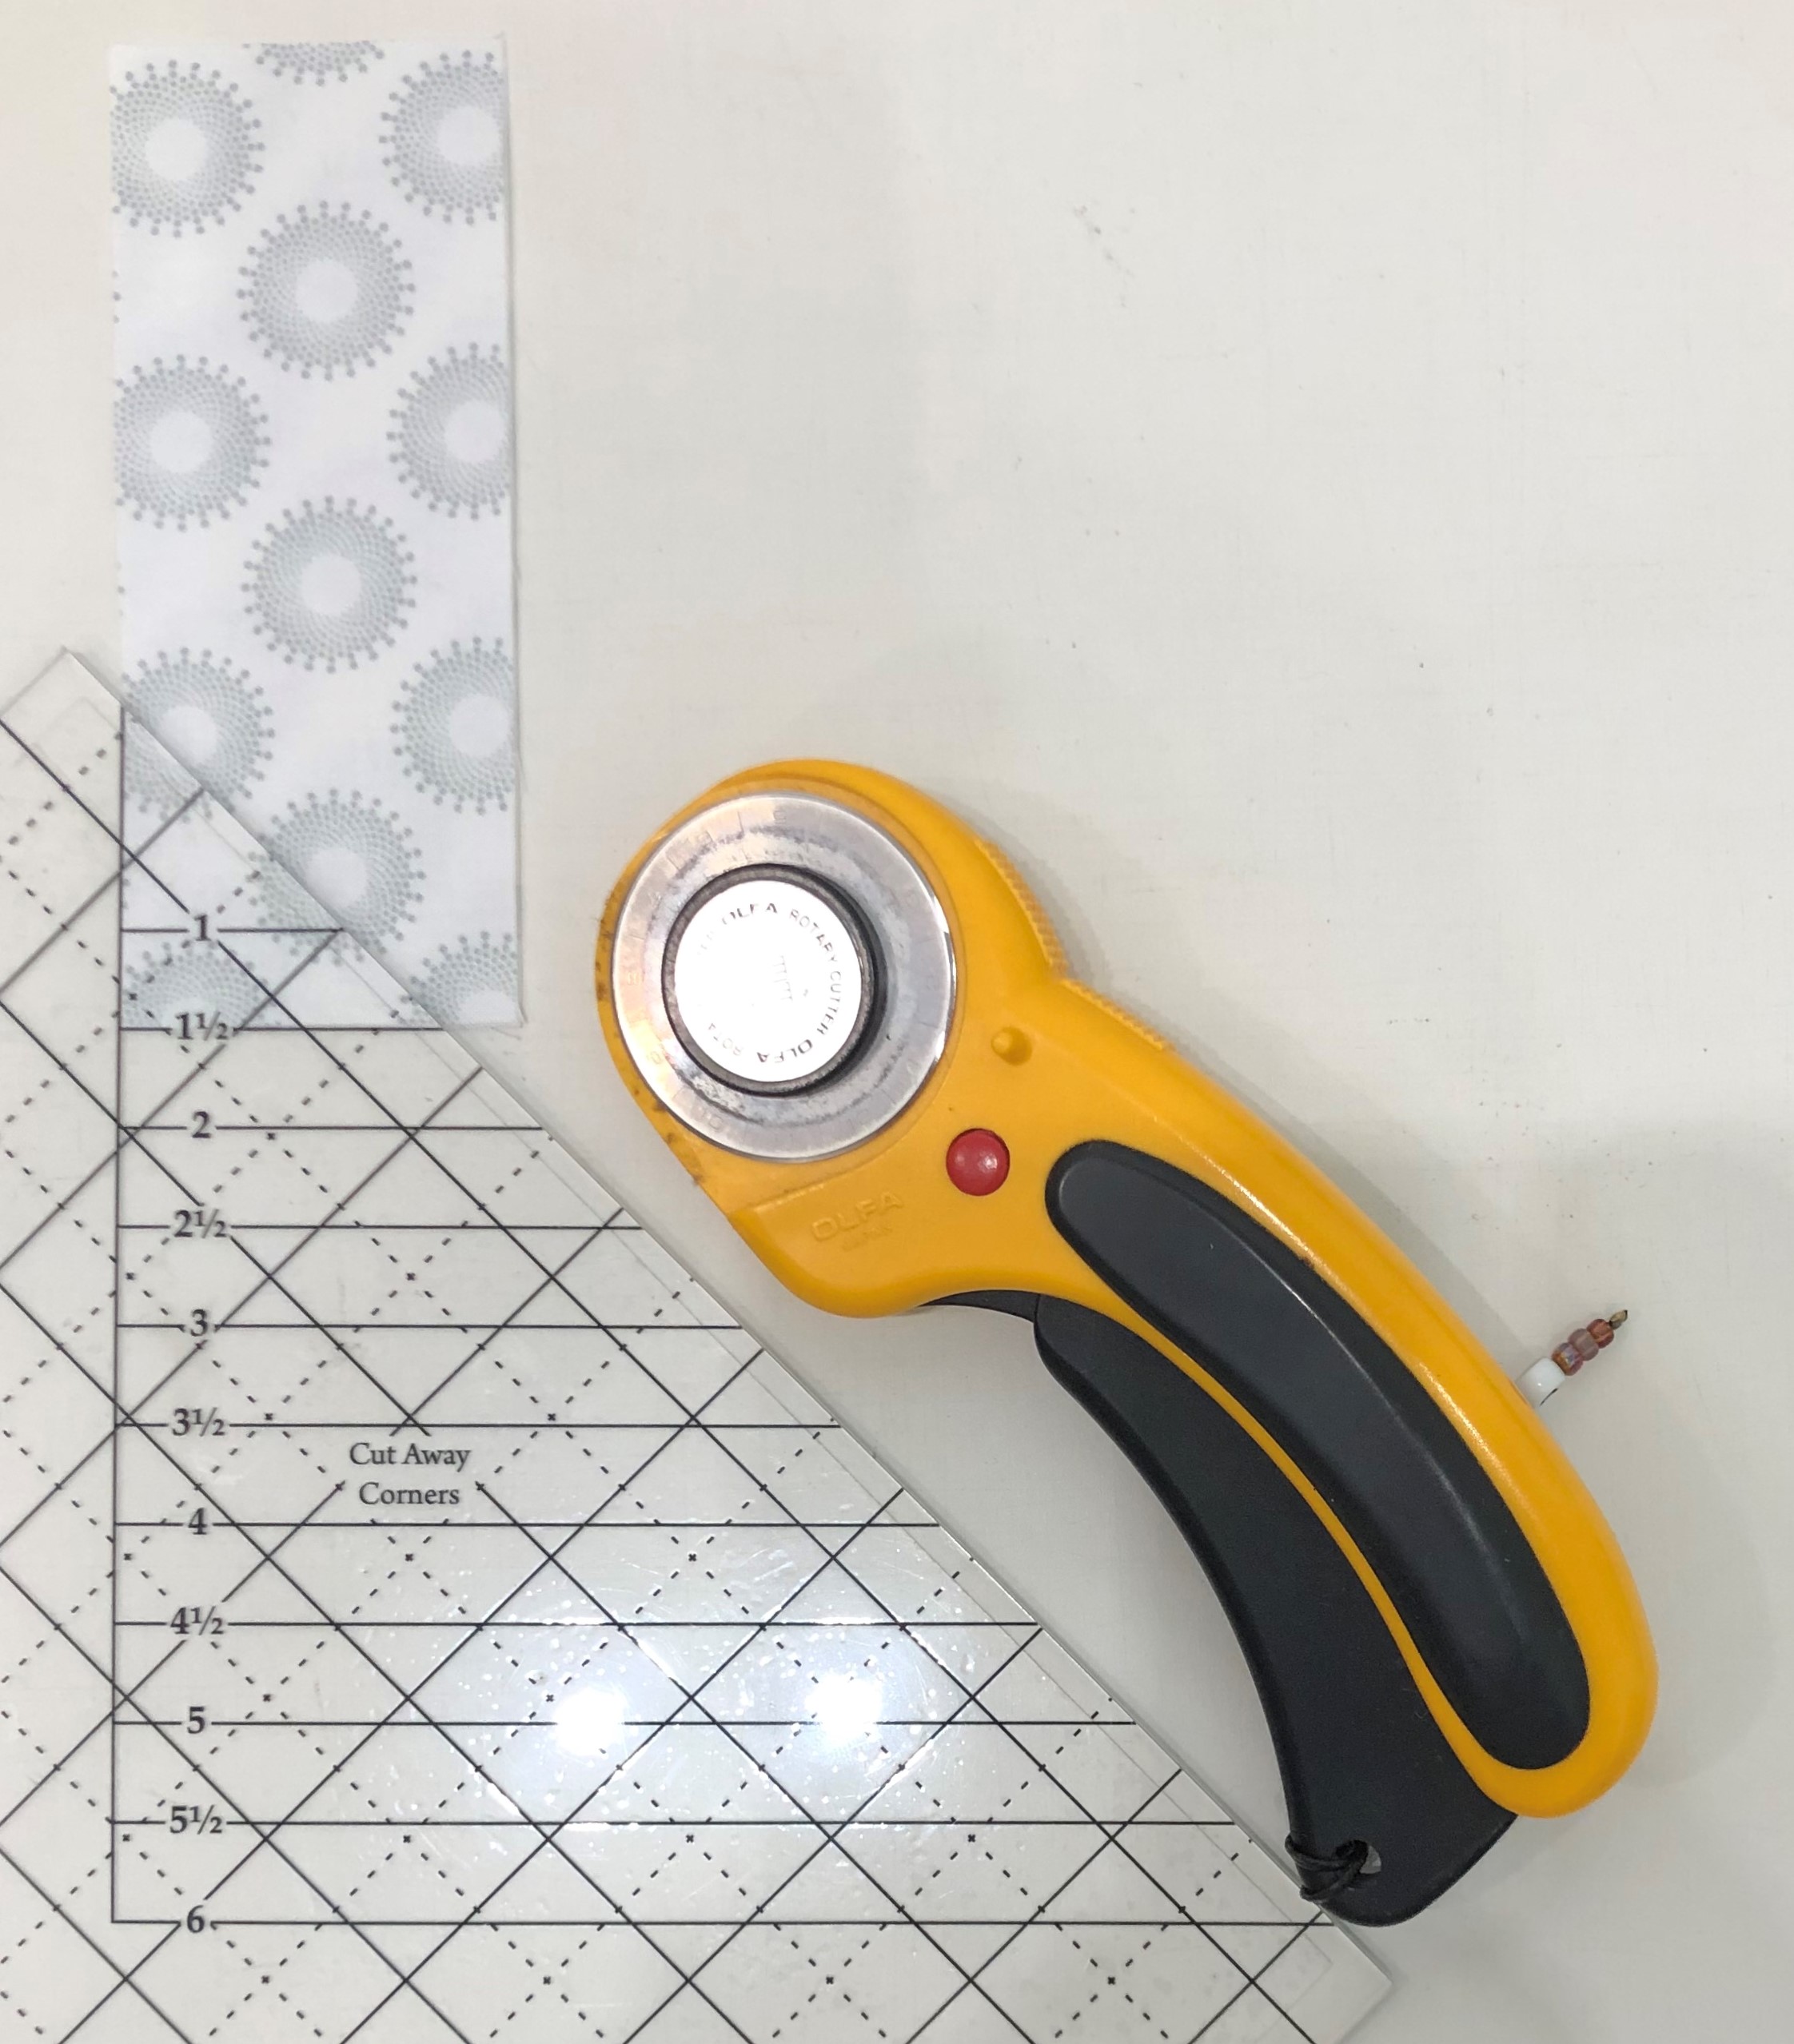
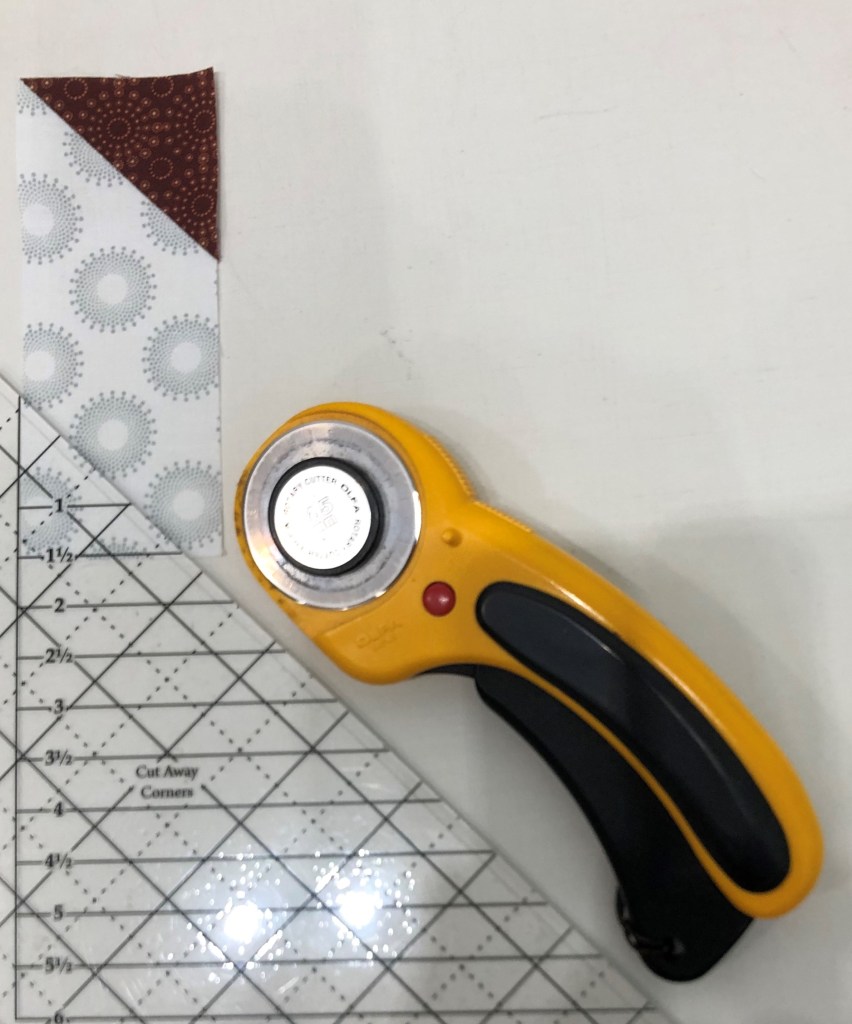
Step 10 – Layer two 2”x 5” Print 11 rectangles wrong sides together. Carefully align the edges. On your Corner Pop® tool, find the 1½” Cut Away Corners line. Position the 1½” Cut Away lines of the tool over the corner of the rectangles as shown. Trim. Repeat for the remaining rectangles.
Step 10
Step 11 – Center the long edge of one 2¾” Print 6 replacement triangle on the trimmed corner of each rectangle.
Step 11, part 1
Step 11 Cont.: Stitch with the rectangle on top using an accurate ¼” seam. Separate the rectangles into two piles as shown in the diagram. Press the seams of the pile on the left toward the triangle and the seams of the right pile toward the rectangle.
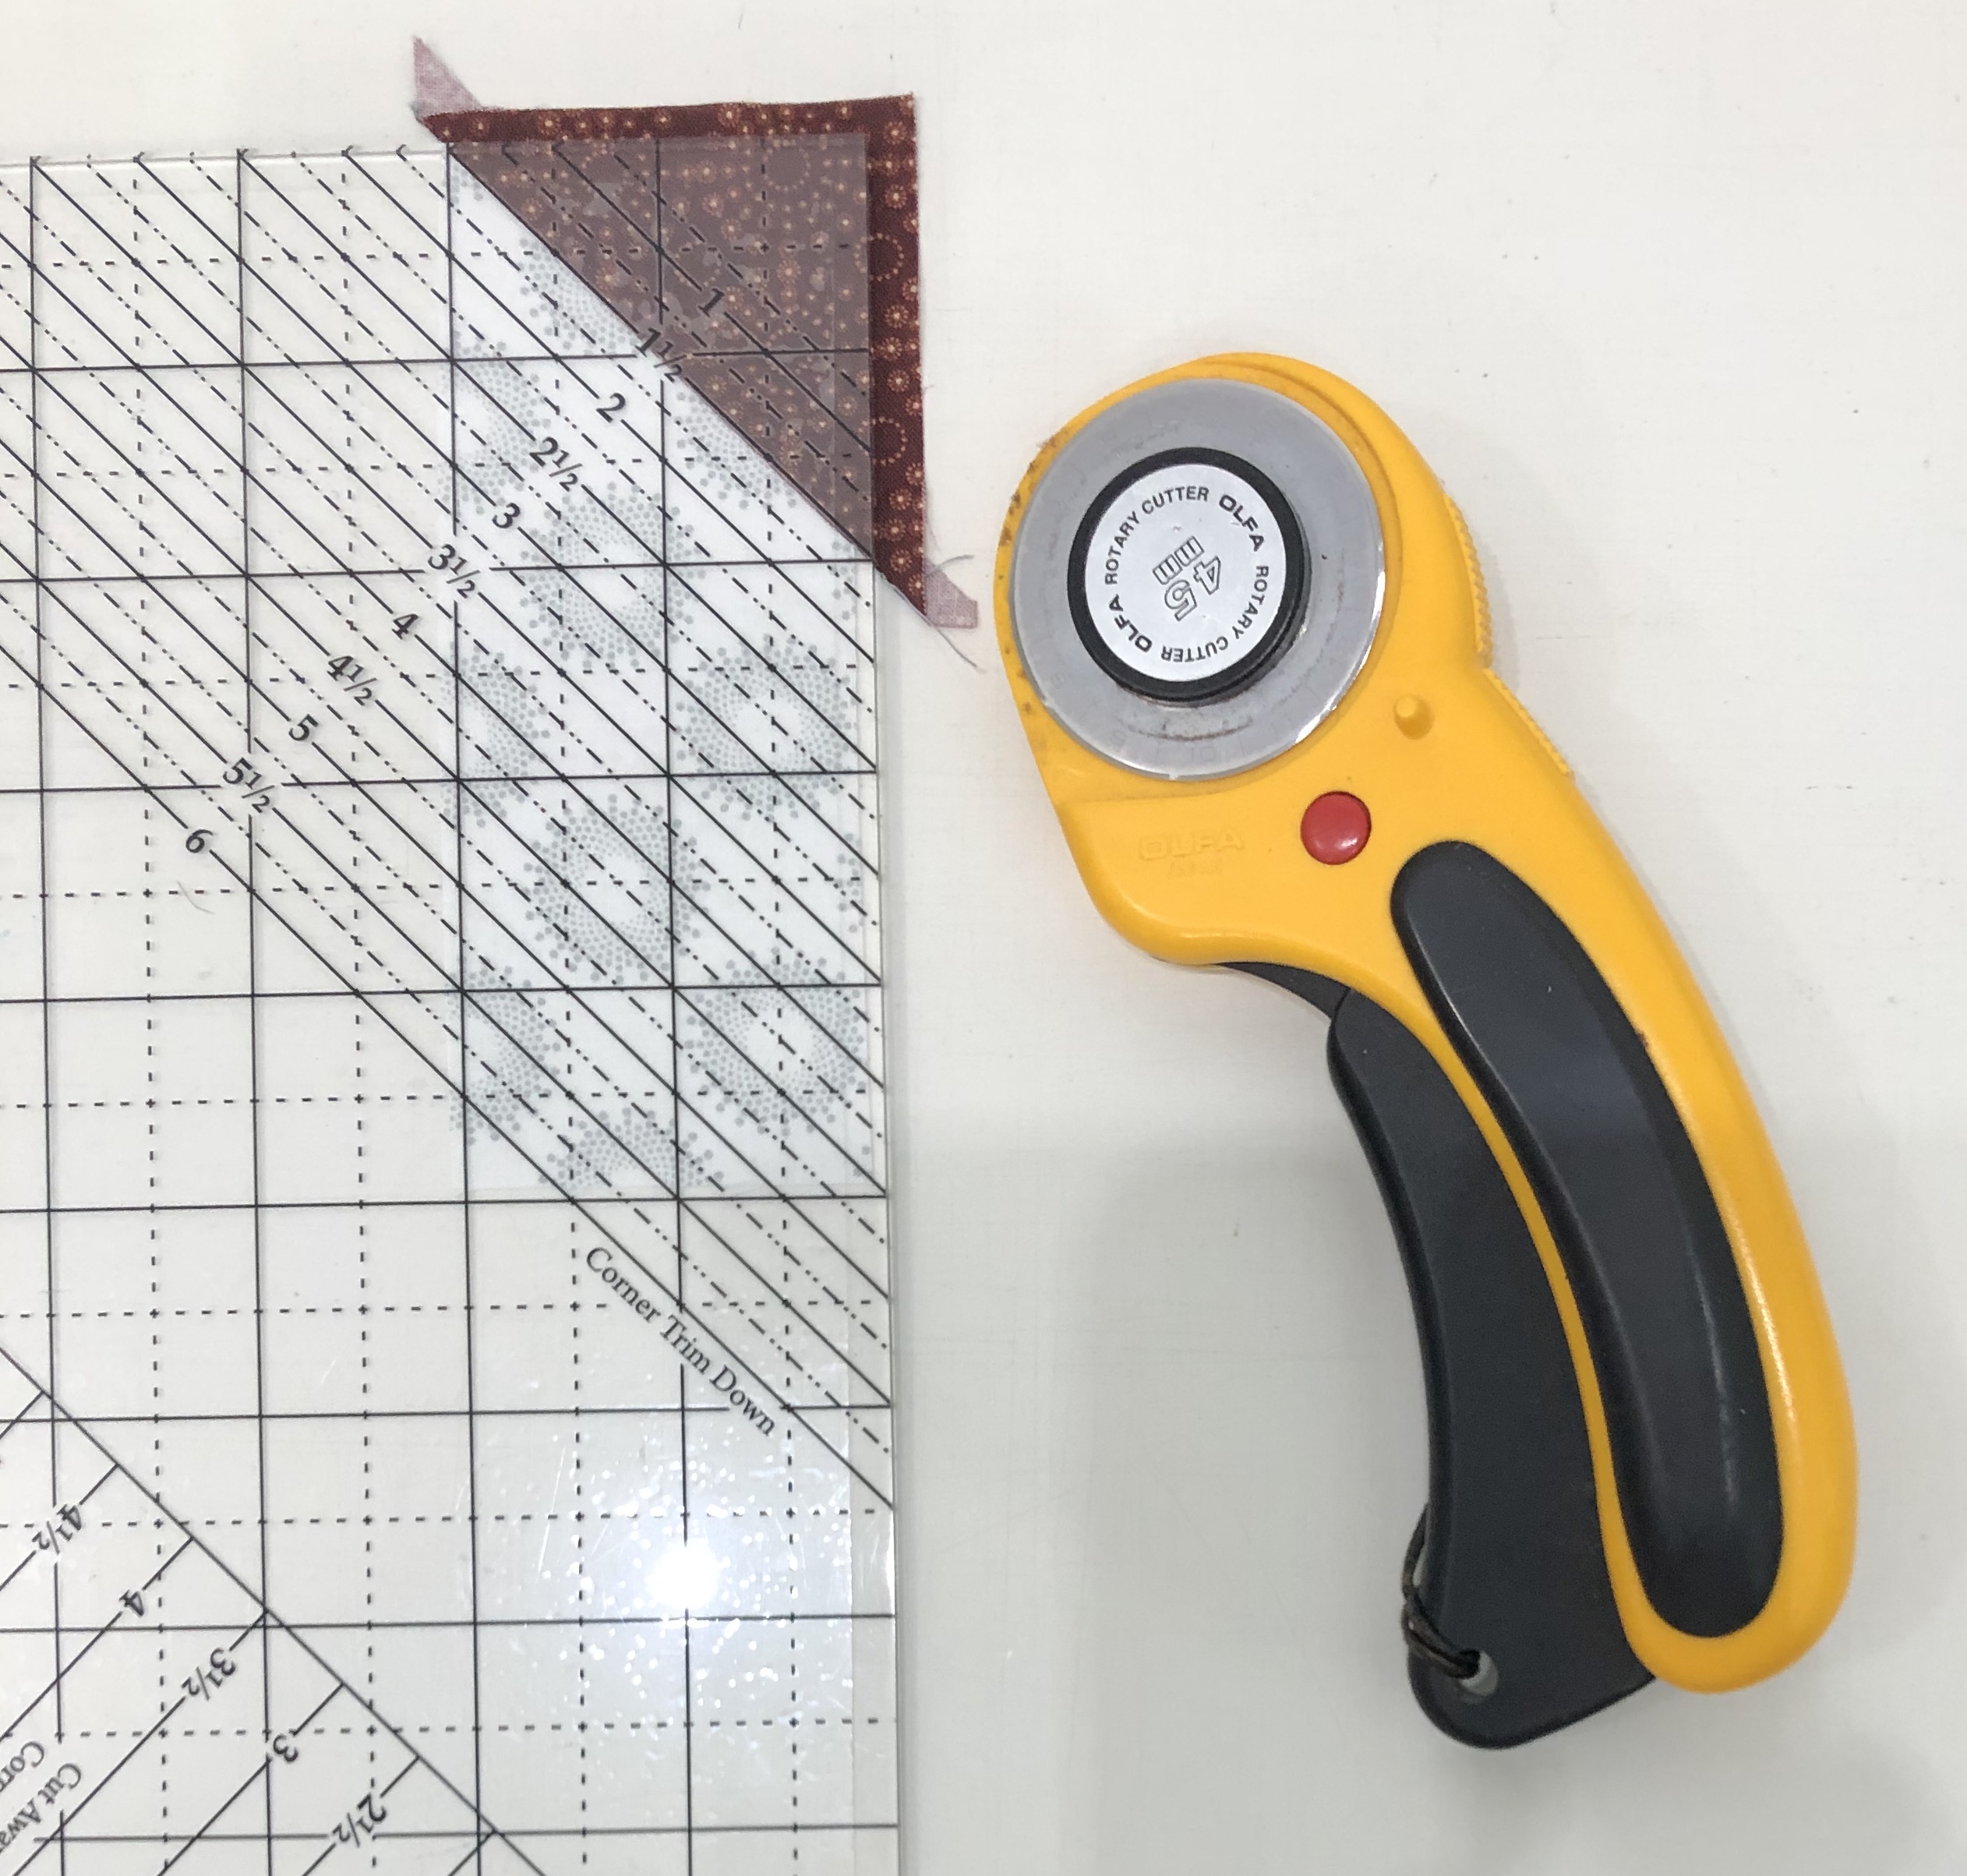
Step 12 – Position the 1½” Corner Trim Down line of the tool over the sewn seam. Align the diagonal guideline with the seam and the edges of the unit with the edge and lines on the tool. Trim the corner. Repeat for all the rectangles.
Step 12
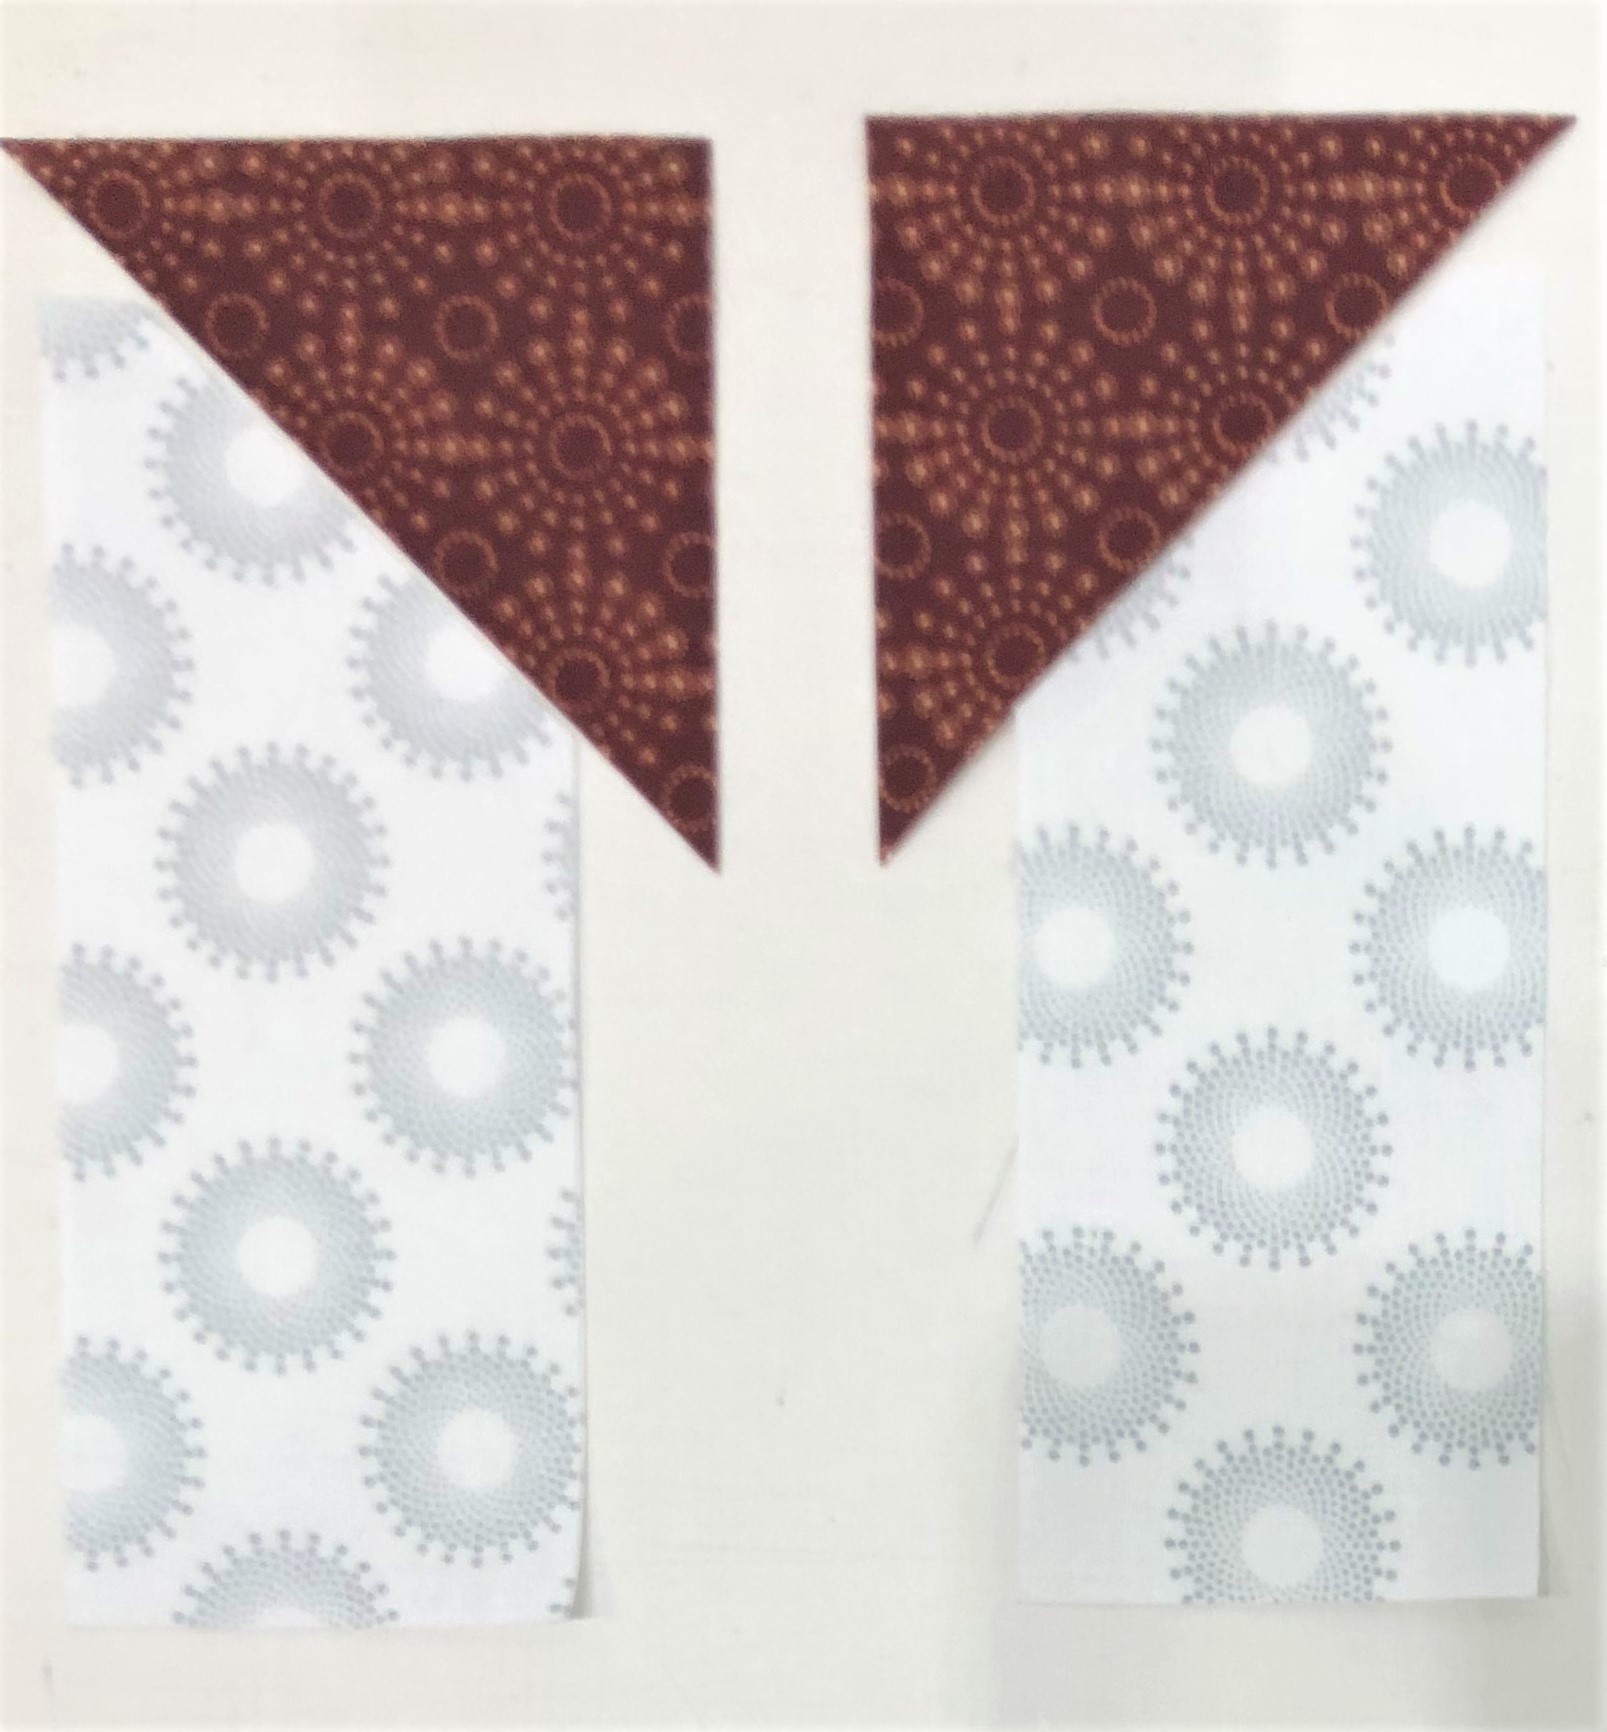
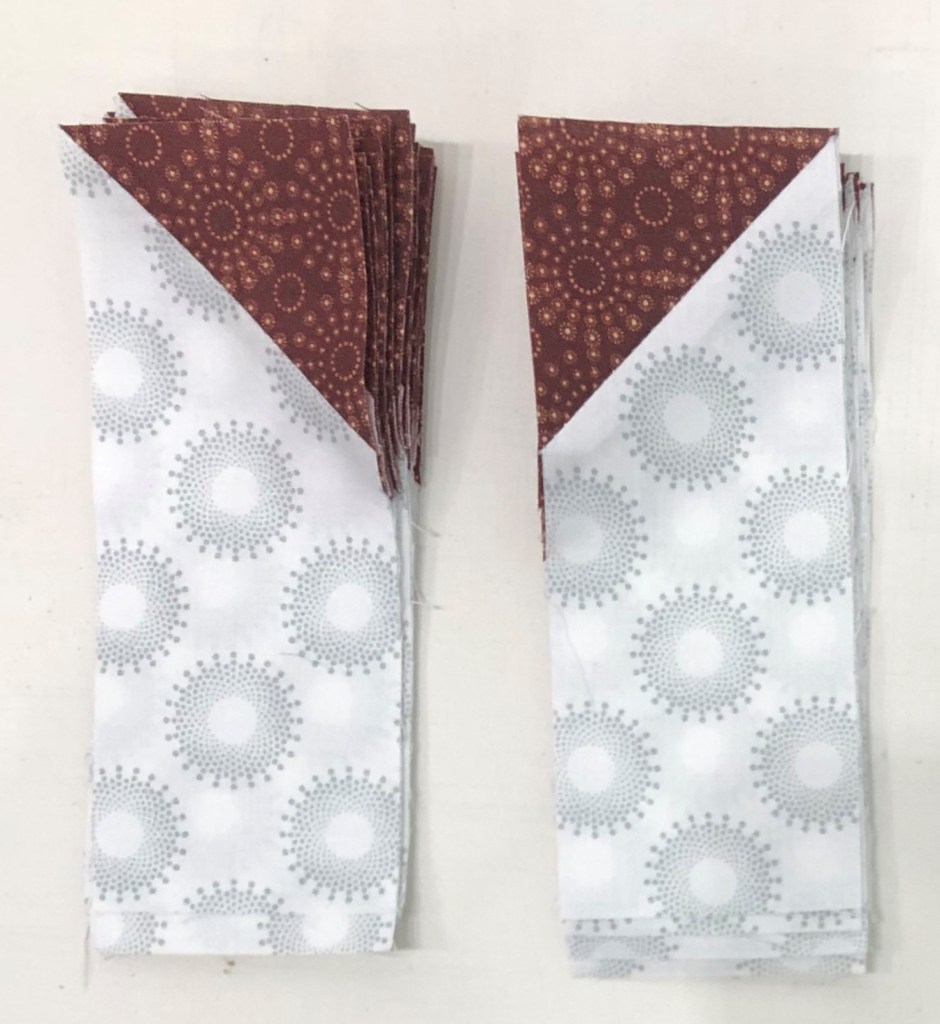
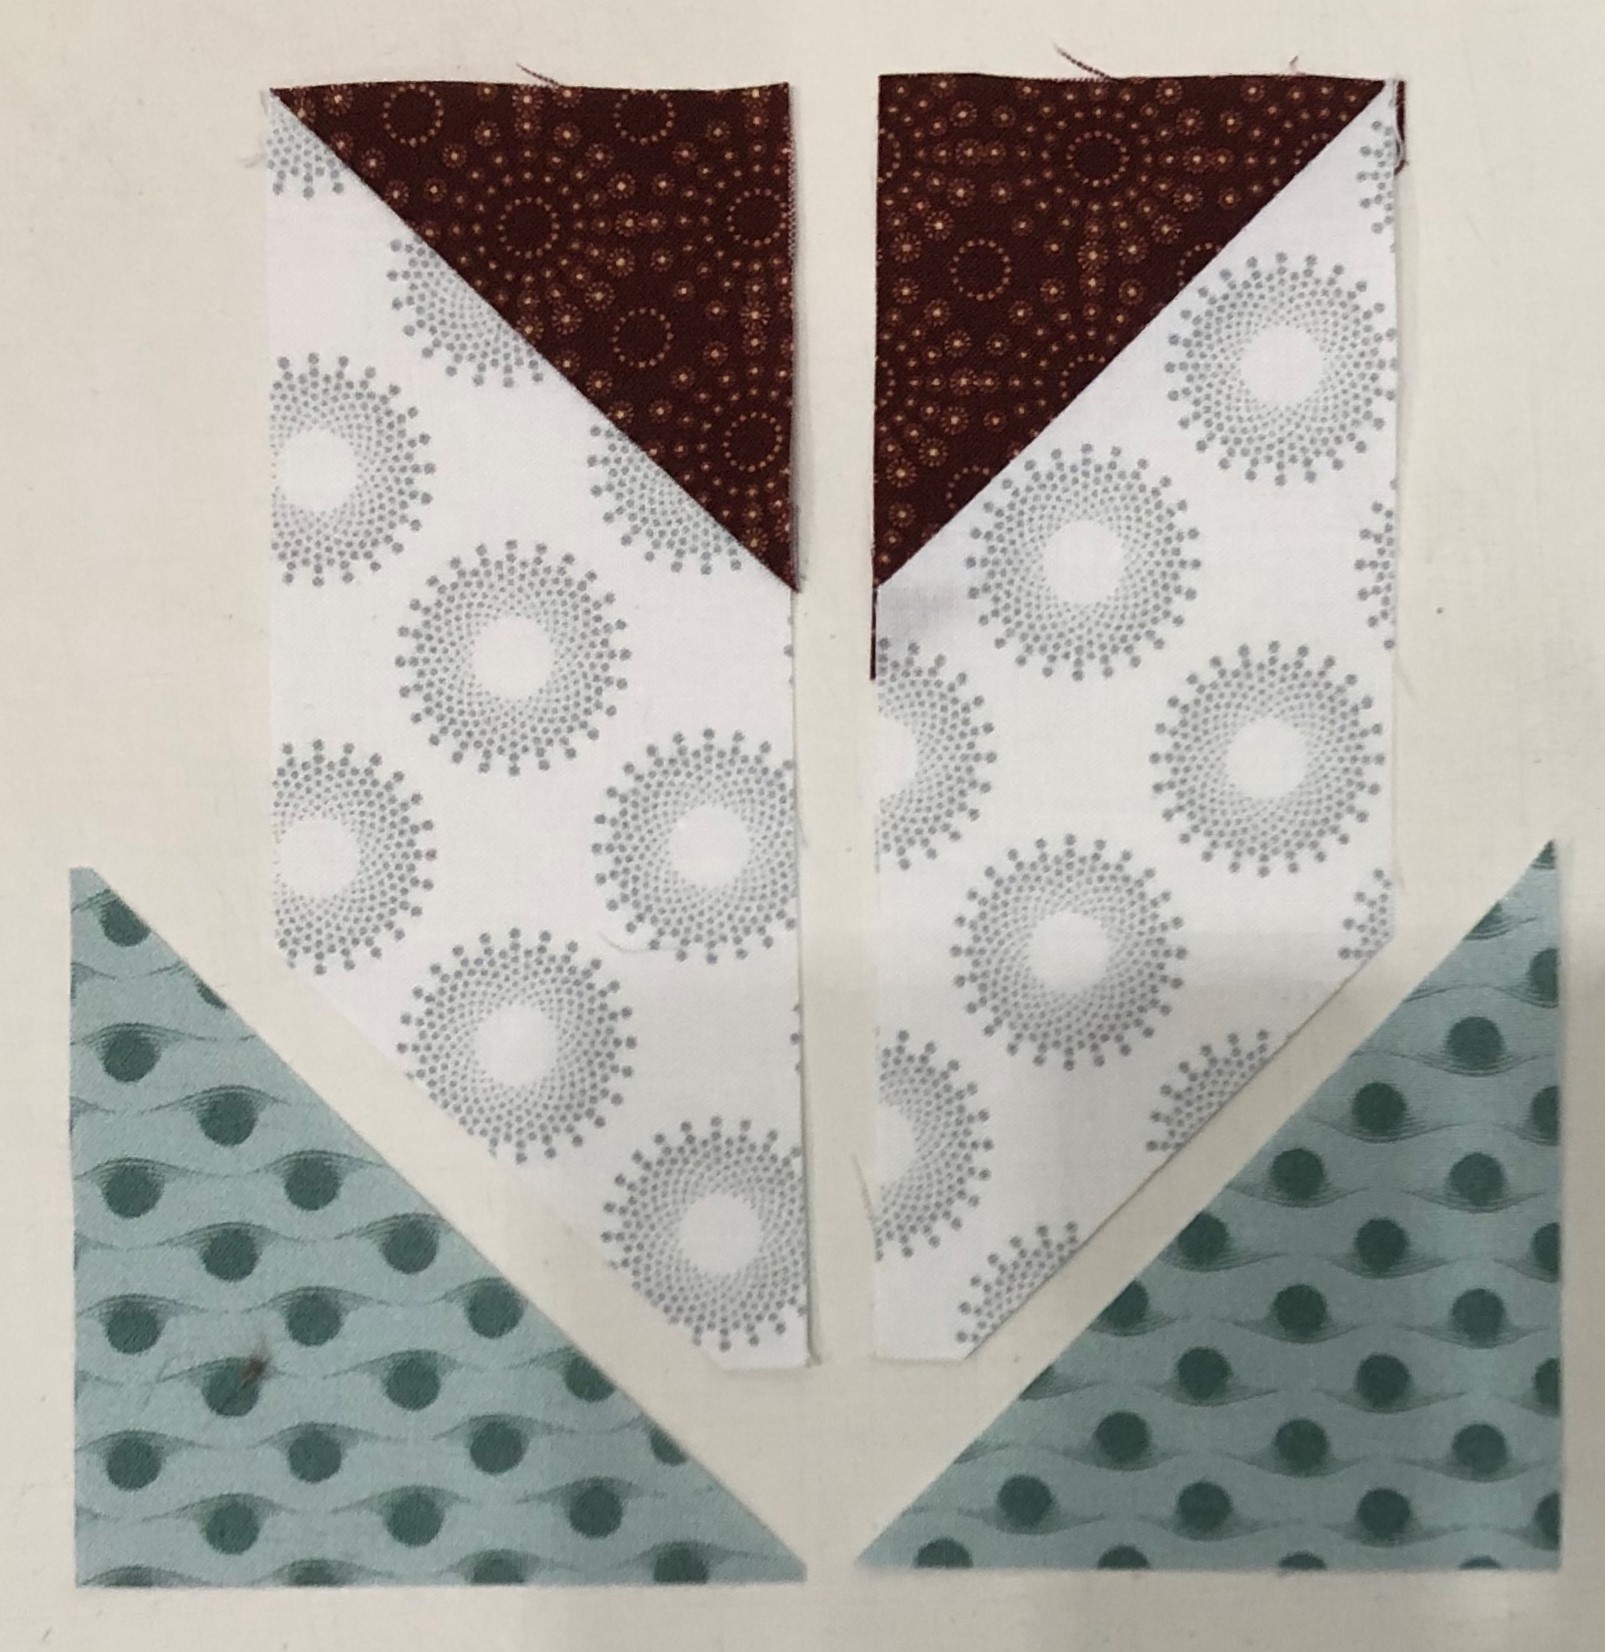
Step 13 – Separate the rectangles into two piles as shown. Turn the right pile (with the replacement triangle slanting from upper right to lower left) wrong side up.
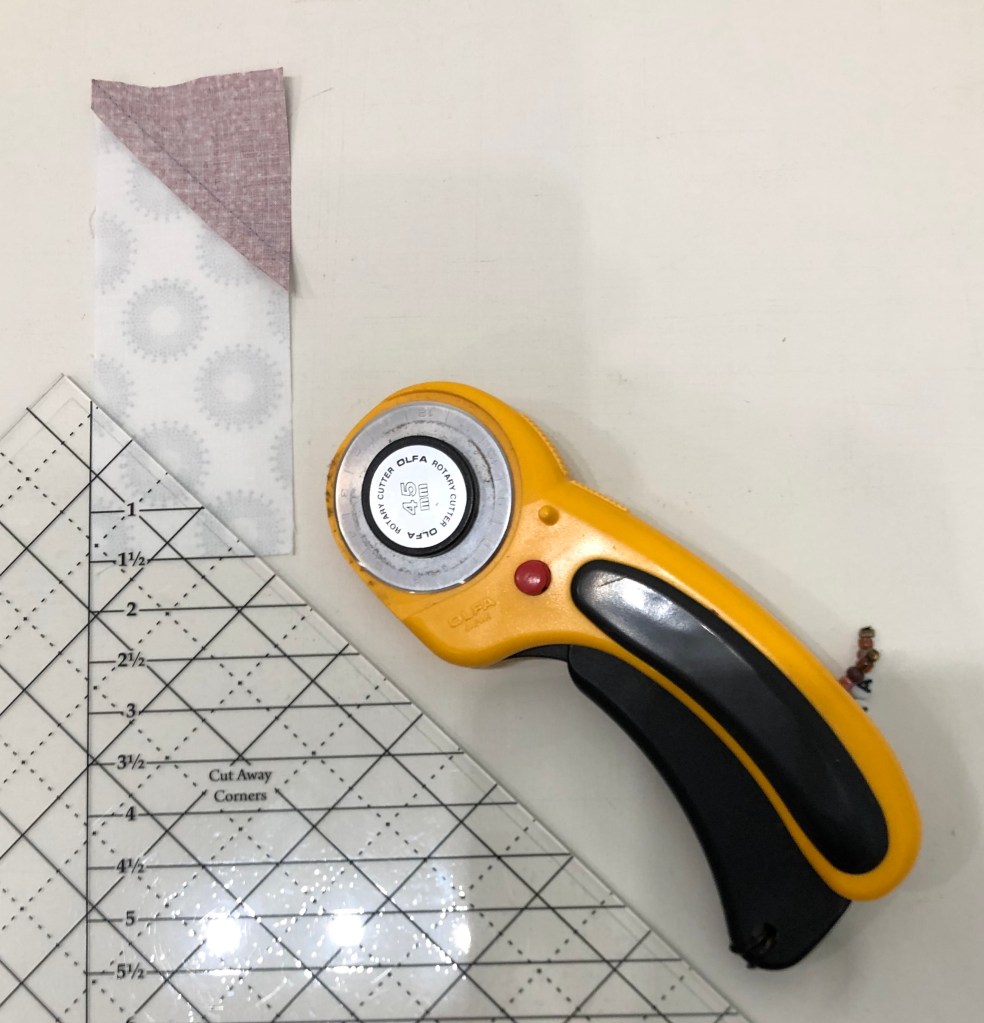
Step 14 – Cut. Use the Corner Pop® tool and the 1½” Cut Away Corners line and cut away the corner opposite Print 6. Make sure that you have the piece positioned how it is in the diagram so that you are cutting off the correct corner to make the chevron. You will cut with 16 units right side up and 16 units right side down. Cut the corner off once you have confirmed that you are cutting in the correct spot.
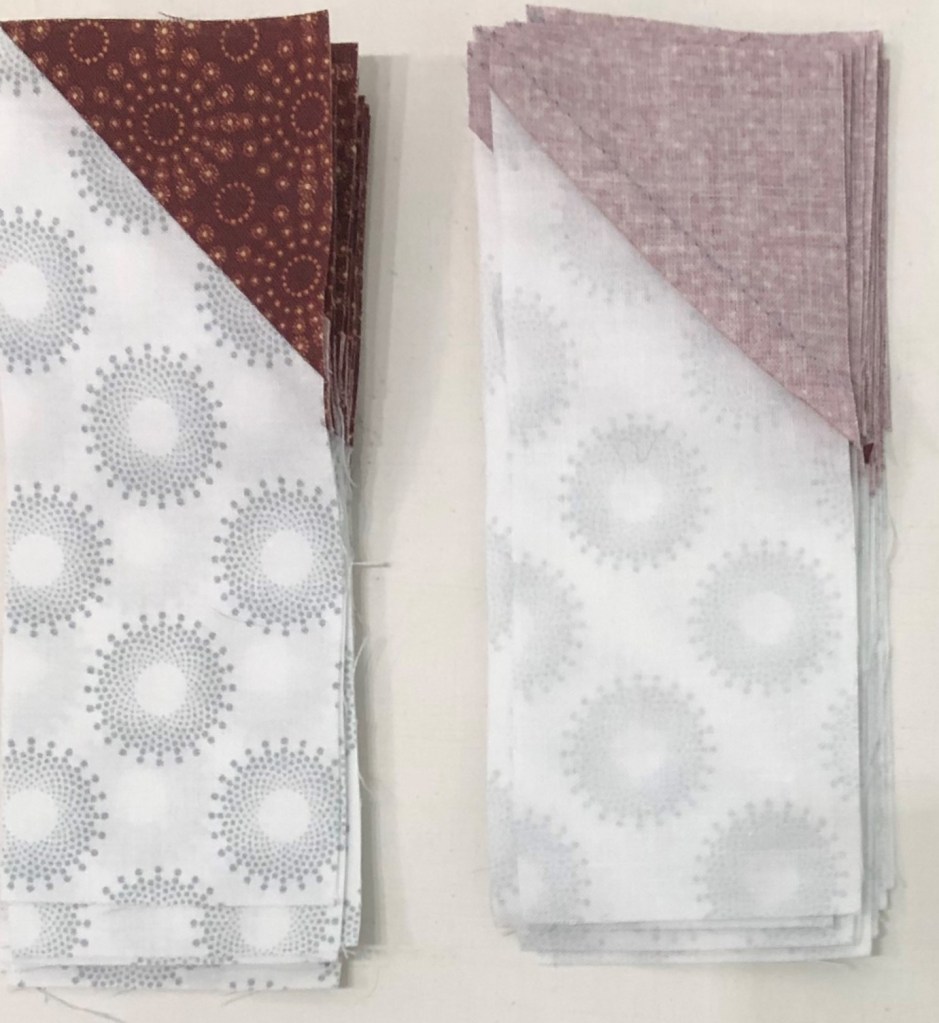
Step 15 – Repeat steps 11 &12 for the cut away corner using the Print 5 replacement triangles.
Step 15
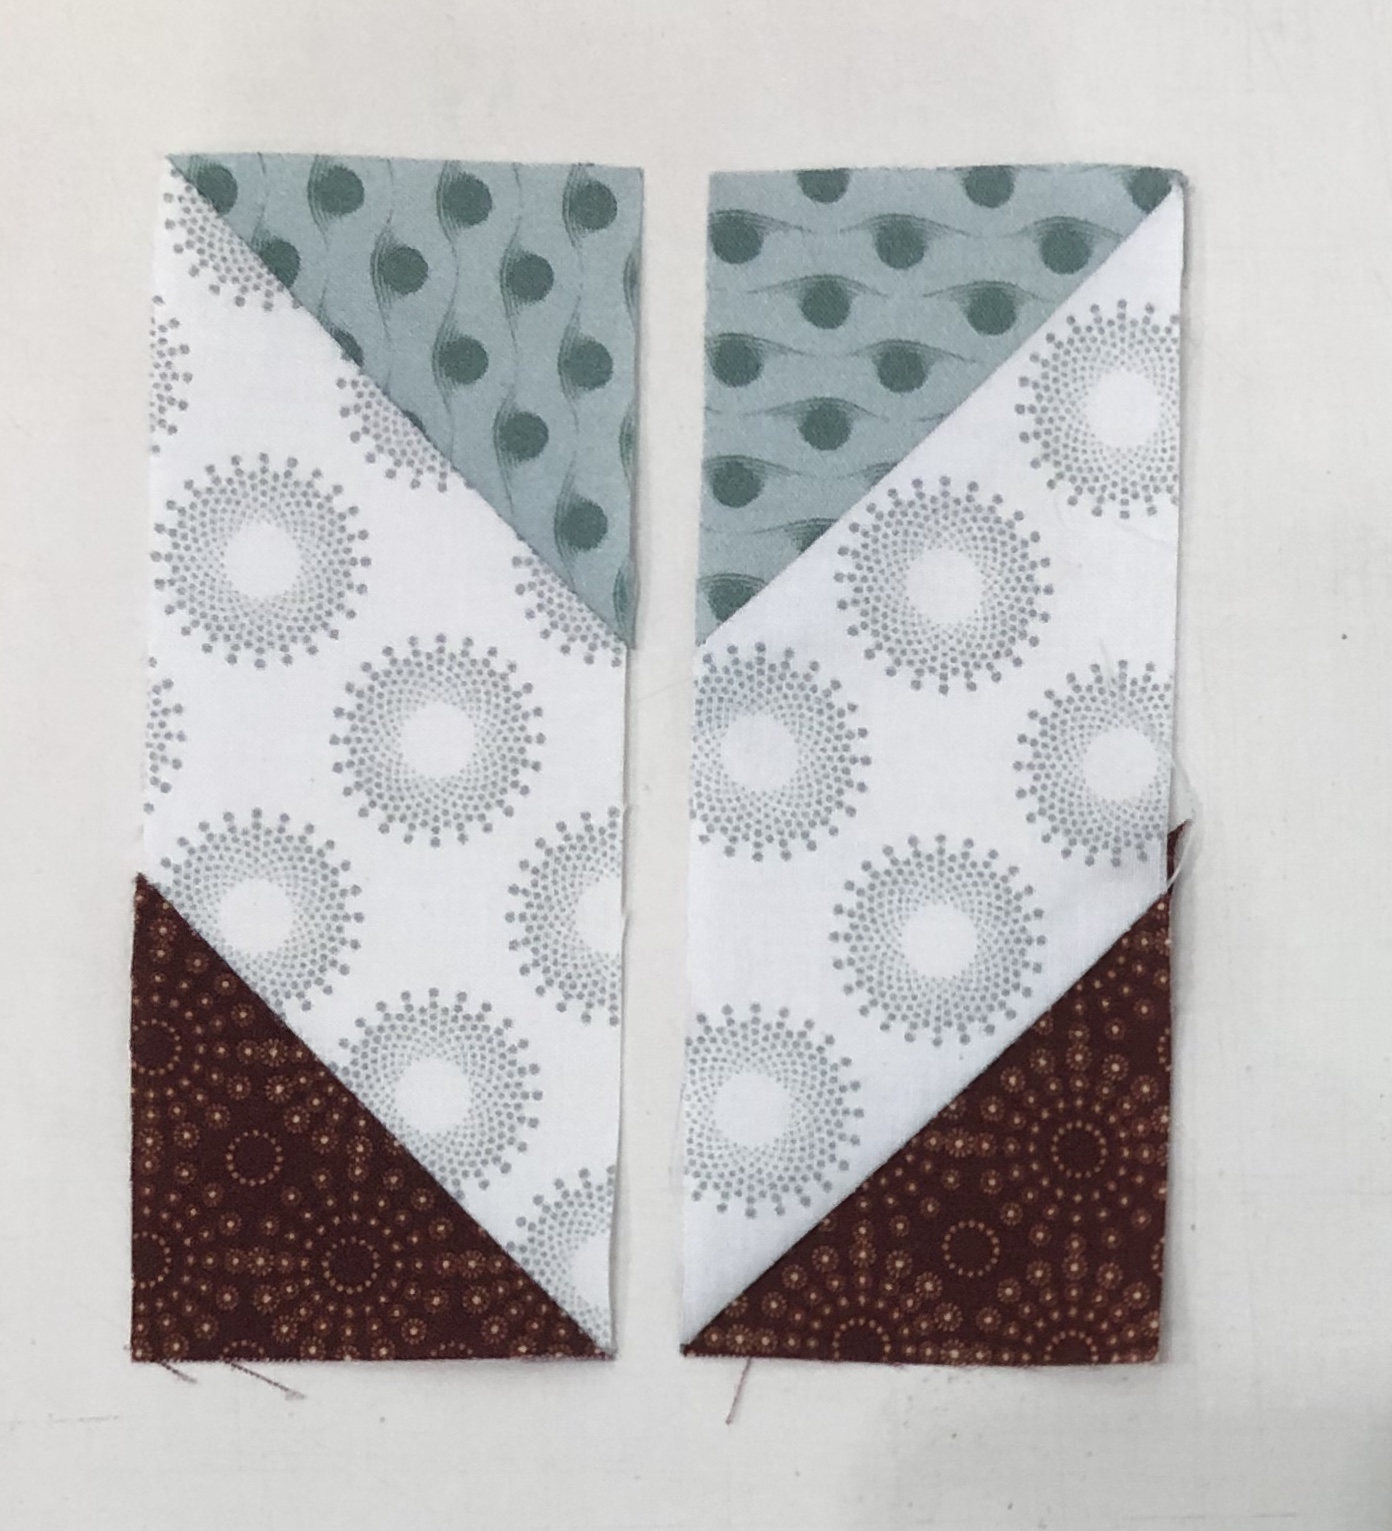
Step 16 – Lay out the pieced rectangles as shown. Position two of them right sides together leaving them in the same orientation and stitch down the long side. Press the seam open.
Step 16
Block Construction
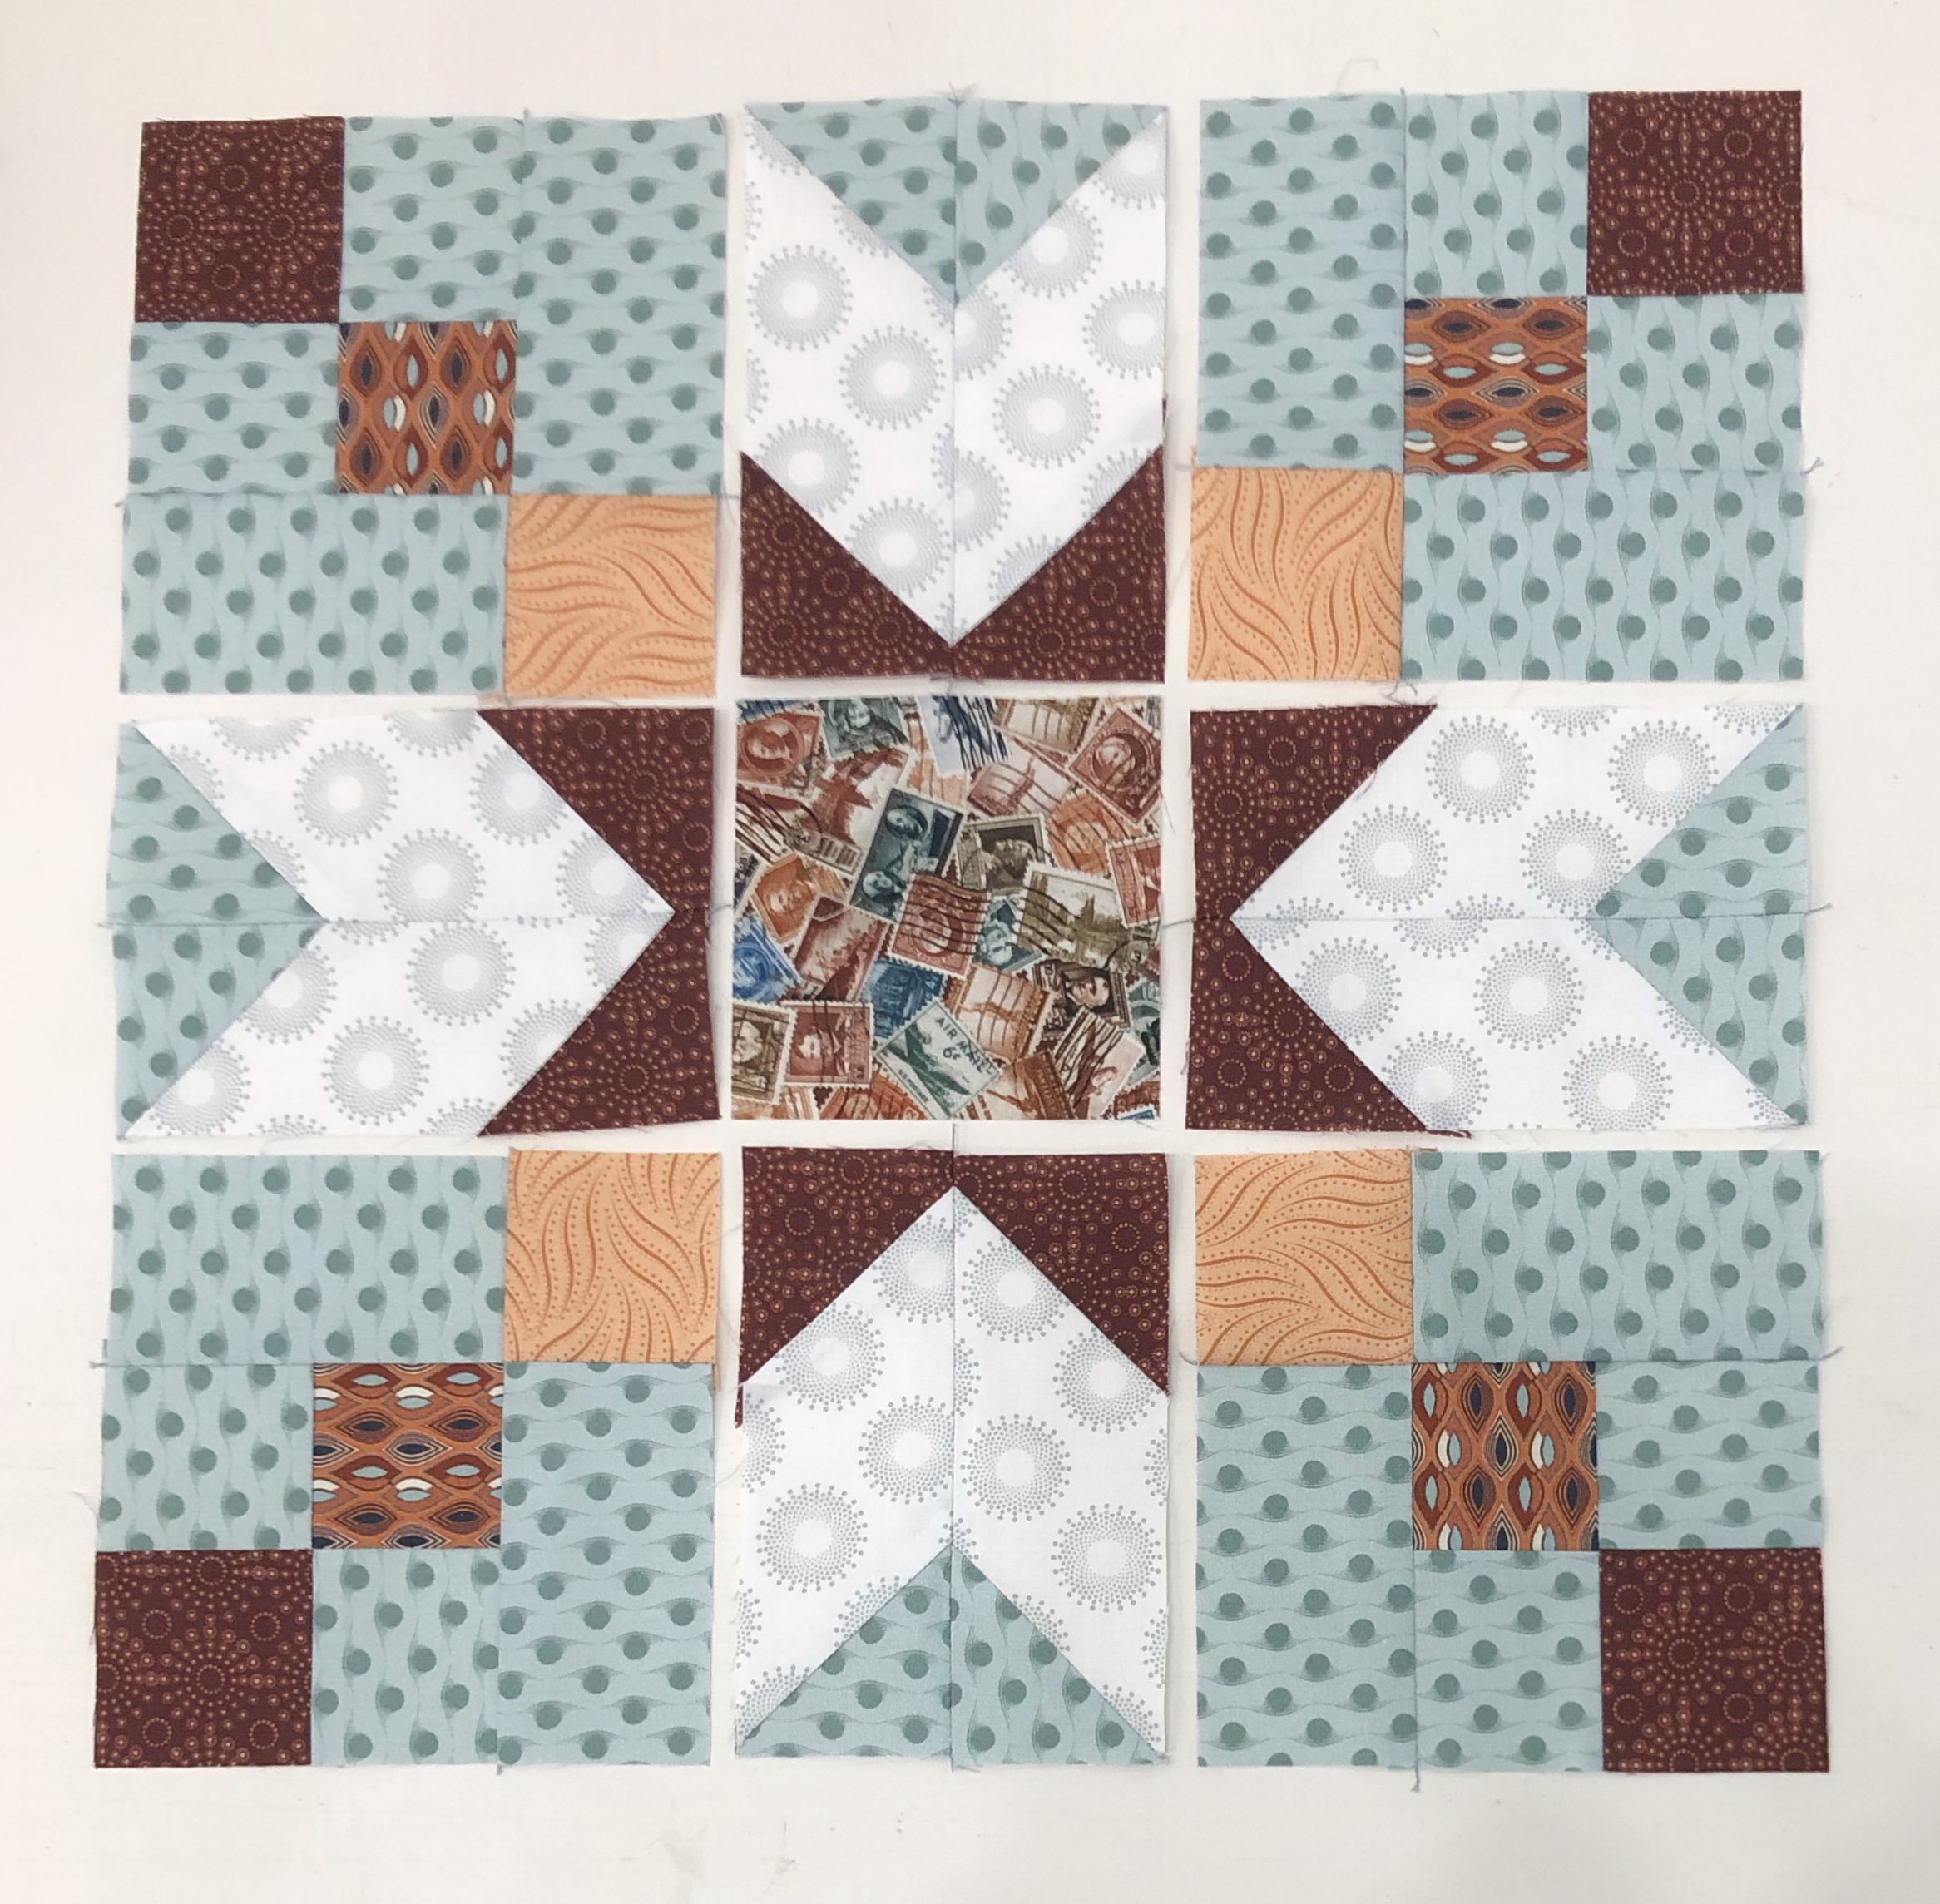
Step 17 – Lay out the framed four patches, chevrons, and center square so that it looks like the diagram.
Step 17
Step 18 – Stitch the units together into rows and then stitch the rows together to create the block. Press as shown in the diagram. You will have 4 blocks when you are done. Label them Block G.
Block G Winged Nine Patch
Congratulations, not only did you expand your knowledge of the Four Patch Square Up tool by making Four Patches with Frames, you also learned to use the Corner Pop tool by making Chevron units!
Hi everyone and welcome to Stitchin Heaven’s “Journeys” Block of the Month (BOM). I will be here to guide you through each month’s process, but not without some help from my friends. I was asked to participate in this BOM back in May. I had already tested the pattern design by Deb Tucker. In June I was diagnosed with breast cancer. I am so blessed to have friends that are helping me. They are each taking a month and creating the units and taking photo’s as they go. They are sending the photo’s to me so I can give you guidance here at “If These Threads Could Talk”.
Remember that there are video tutorials on our website (Studio180Design.net) for each tool.
Label, label, label! We cannot say it enough; you will want to be sure you label your completed units each month so that everything is easily identified.
Be sure to save the fabric left over from each month so that you have it in case you make a mistake.
In your pattern instructions, on the back of “General In formation”, you will find two fabric keys. One will identify the print number above a grayscale swatch. This swatch is what you will see throughout the pattern to identify the fabric when it is being used.
By now you have received your first month of Journeys from Stitchin Heaven. Uneven Chains is a great unit that is easily made using Studio 180 Design’s Four Patch Square Up tool. This month my special helper was Diane Marvin, a good friend and fellow Studio 180 Design Certified Instructor.
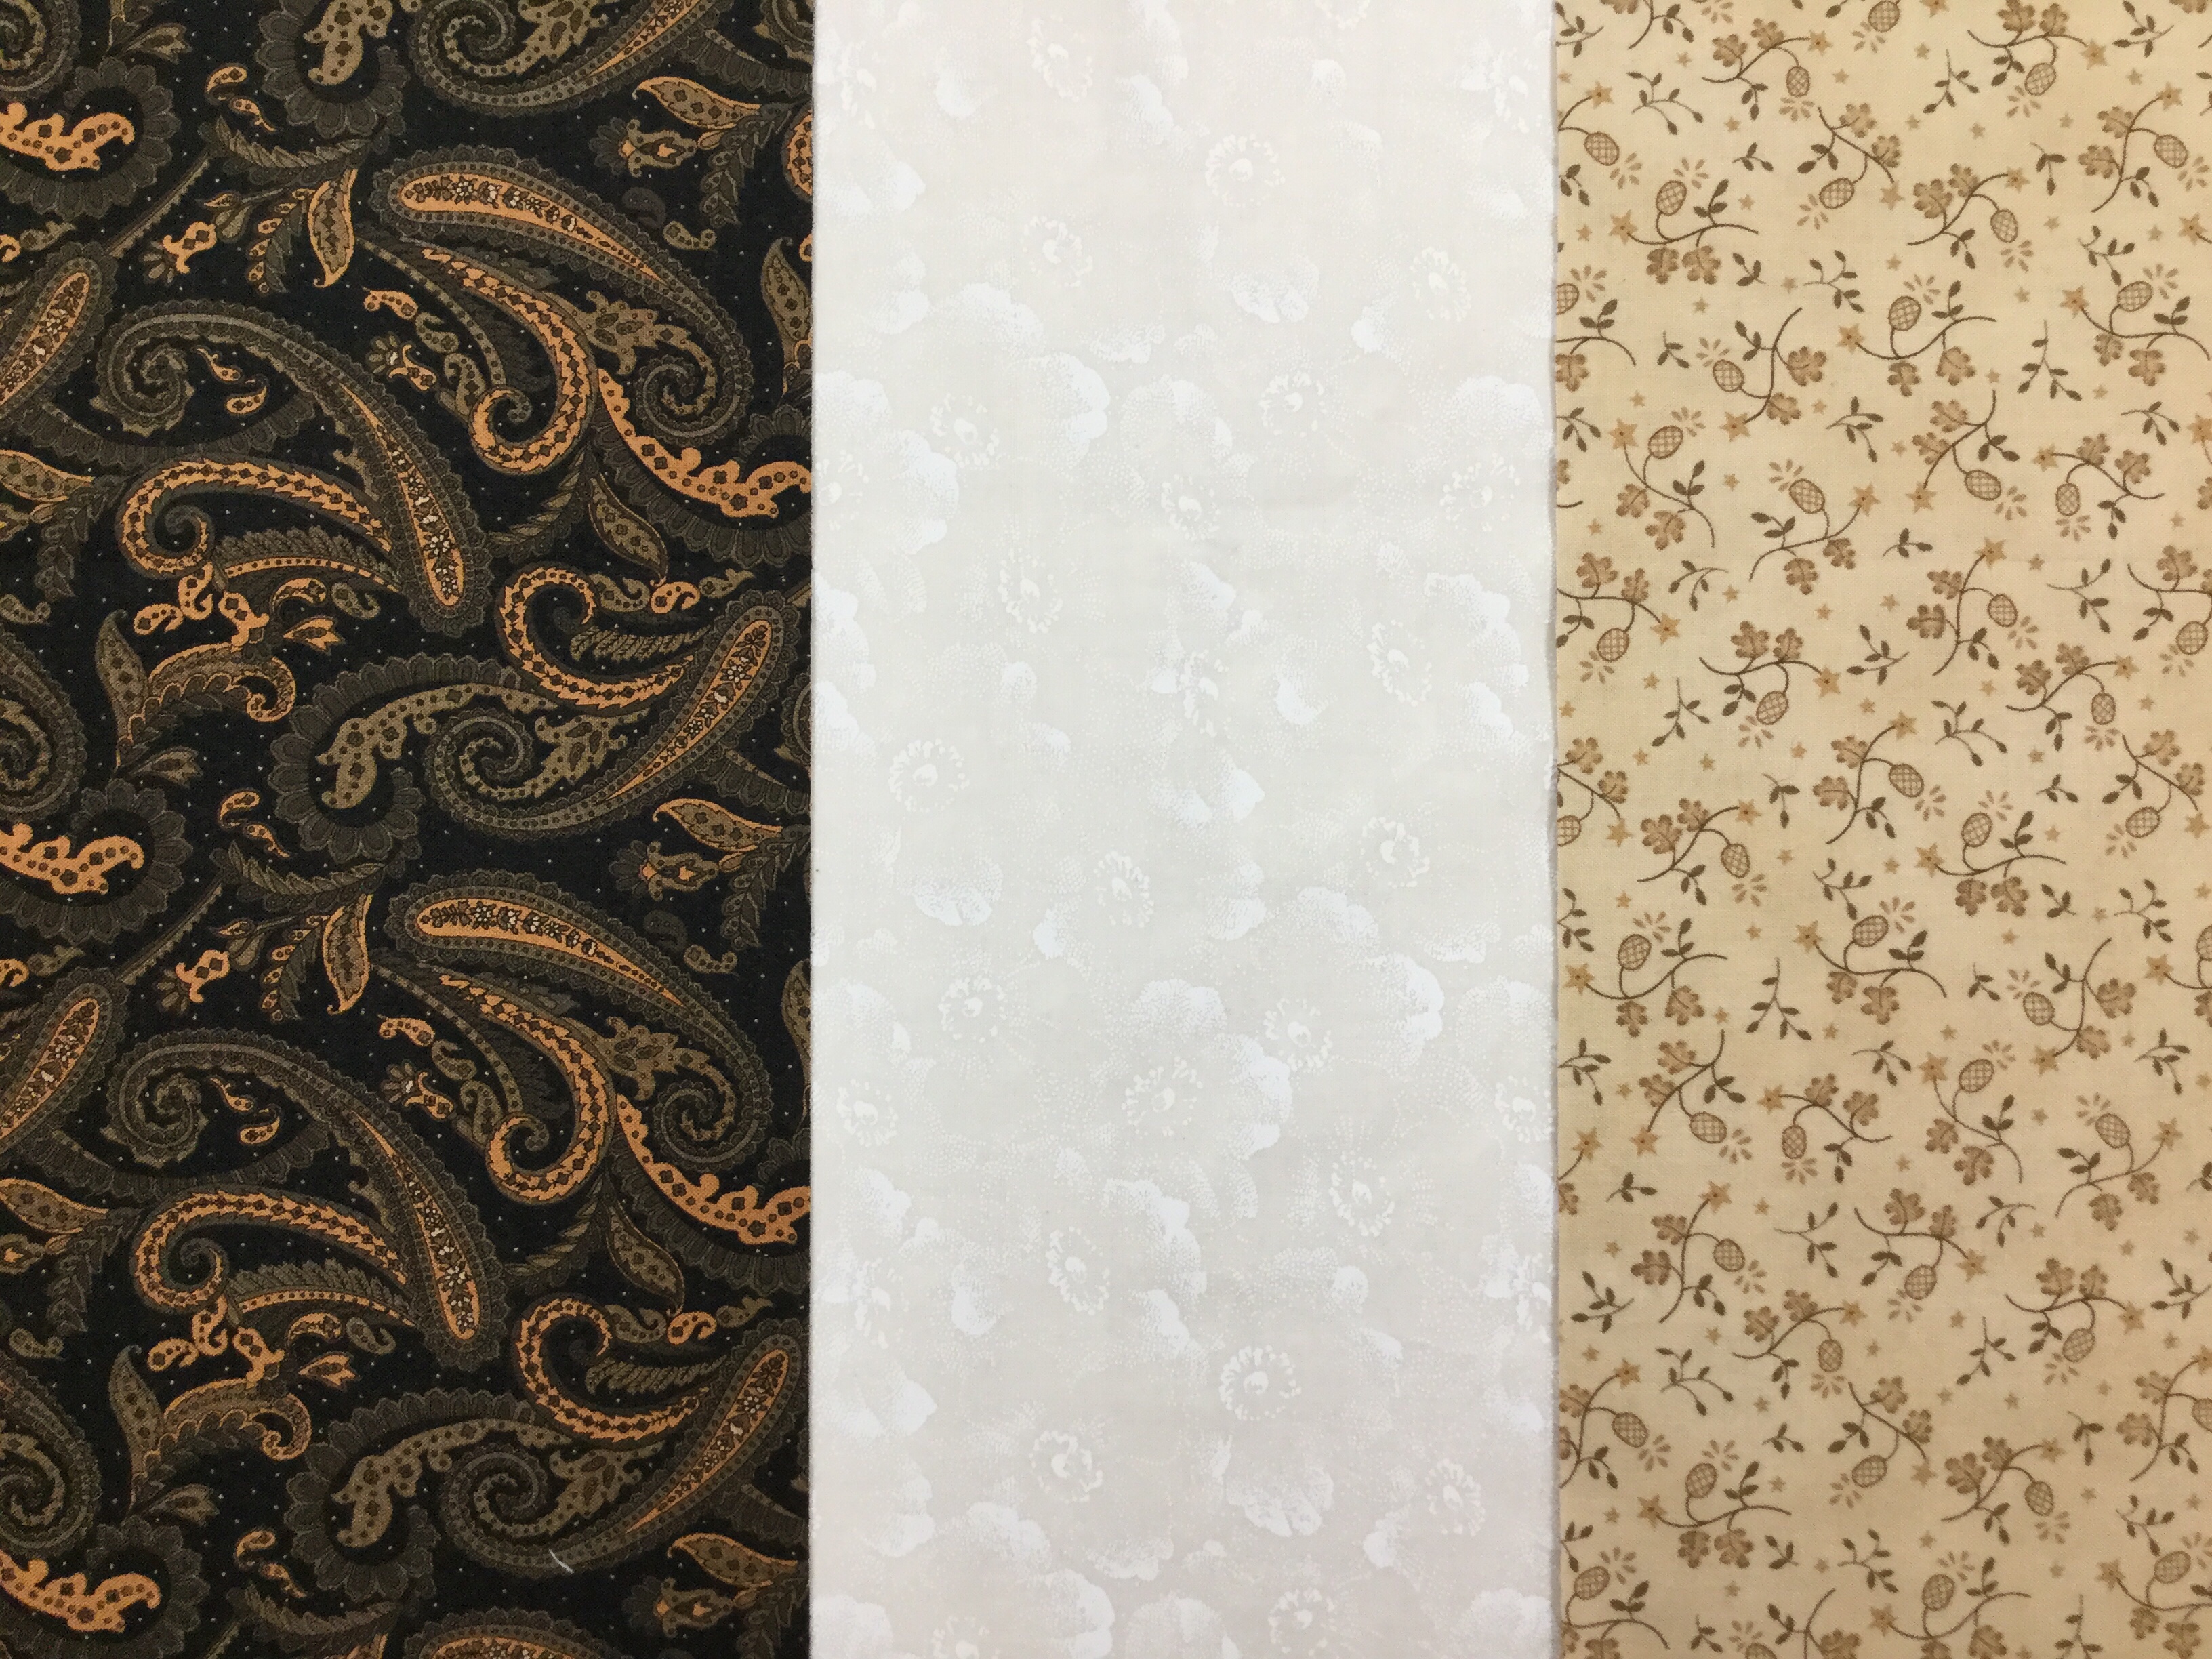
For these Uneven Chains units you will be using Print 3 and Print 11. You will be cutting strip sets from each fabric. Following the cutting instructions and organize your strips into sets “A” and “B”.
Piecing Instructions
Step 1 – Stitch your strips together into Strip Sets A and Strip Sets B. Position two strips right sides together and align the long edges. Stitch with your best ¼” seam.
Above is Strip Set A and Strip Set B.
Step 2 – Press your strip sets. In all strip sets, press the seams toward Print 3. A helpful pressing tip: whatever you are pressing toward goes on top.
Step 3 – Sub-cut the strip sets. Make sure to use the correct sub-cut size for the strip set you are working with. Strip Set A is sub-cut at 2¼” increments and Strip Set B is sub-cut at 3½” increments.
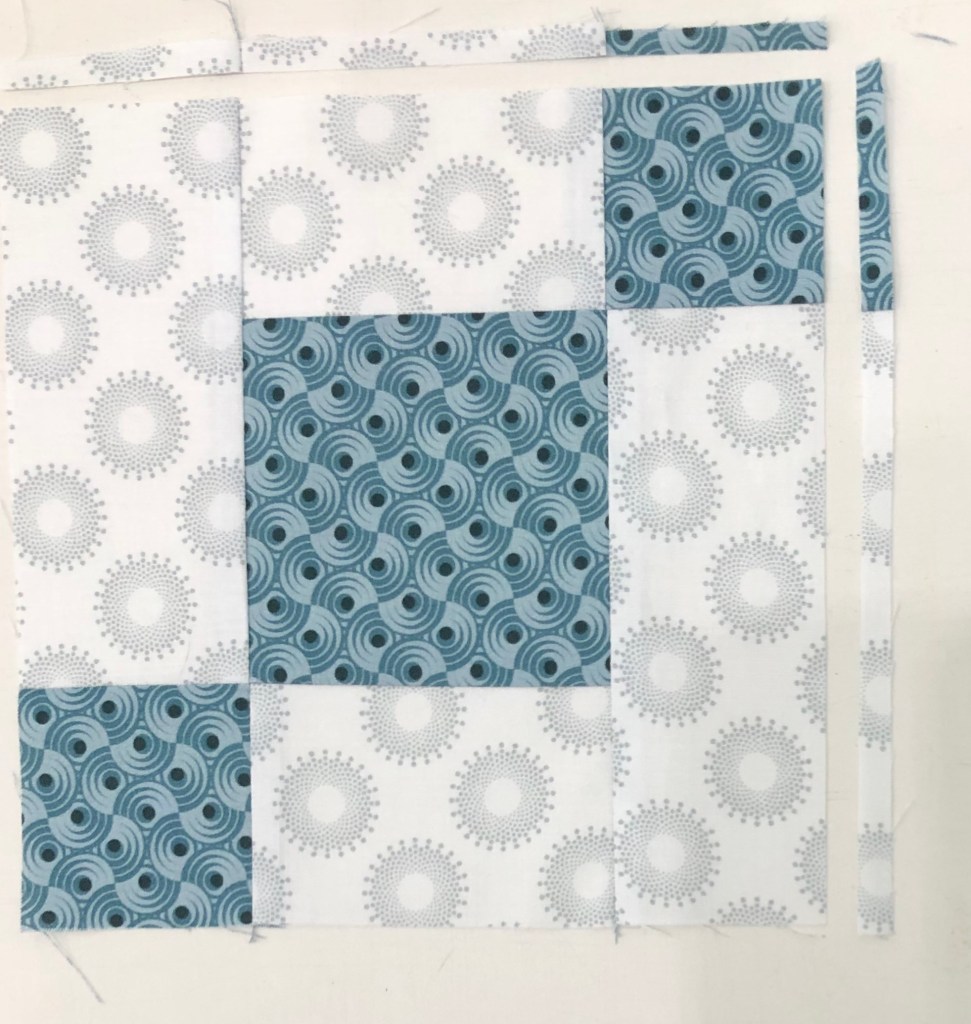
Step 4 – Lay out the pieces from Strip Set A and Strip Set B as shown in the diagram. Stitch an A sub-cut to each side of a B sub-cut.
Save time by chain stitching Strip Set A’s to one side of Strip Set B.
Now add the second Strip Set A to the Strip Set B unit.
Remove 2 or 3 threads.
Step 5 – Press the units so that the seams spin. To spin the seams, lay the last sewn seam east to west on the mat, remove the two or three threads in the center on both sides that run north to south, and press so all the seams go in the same direction.
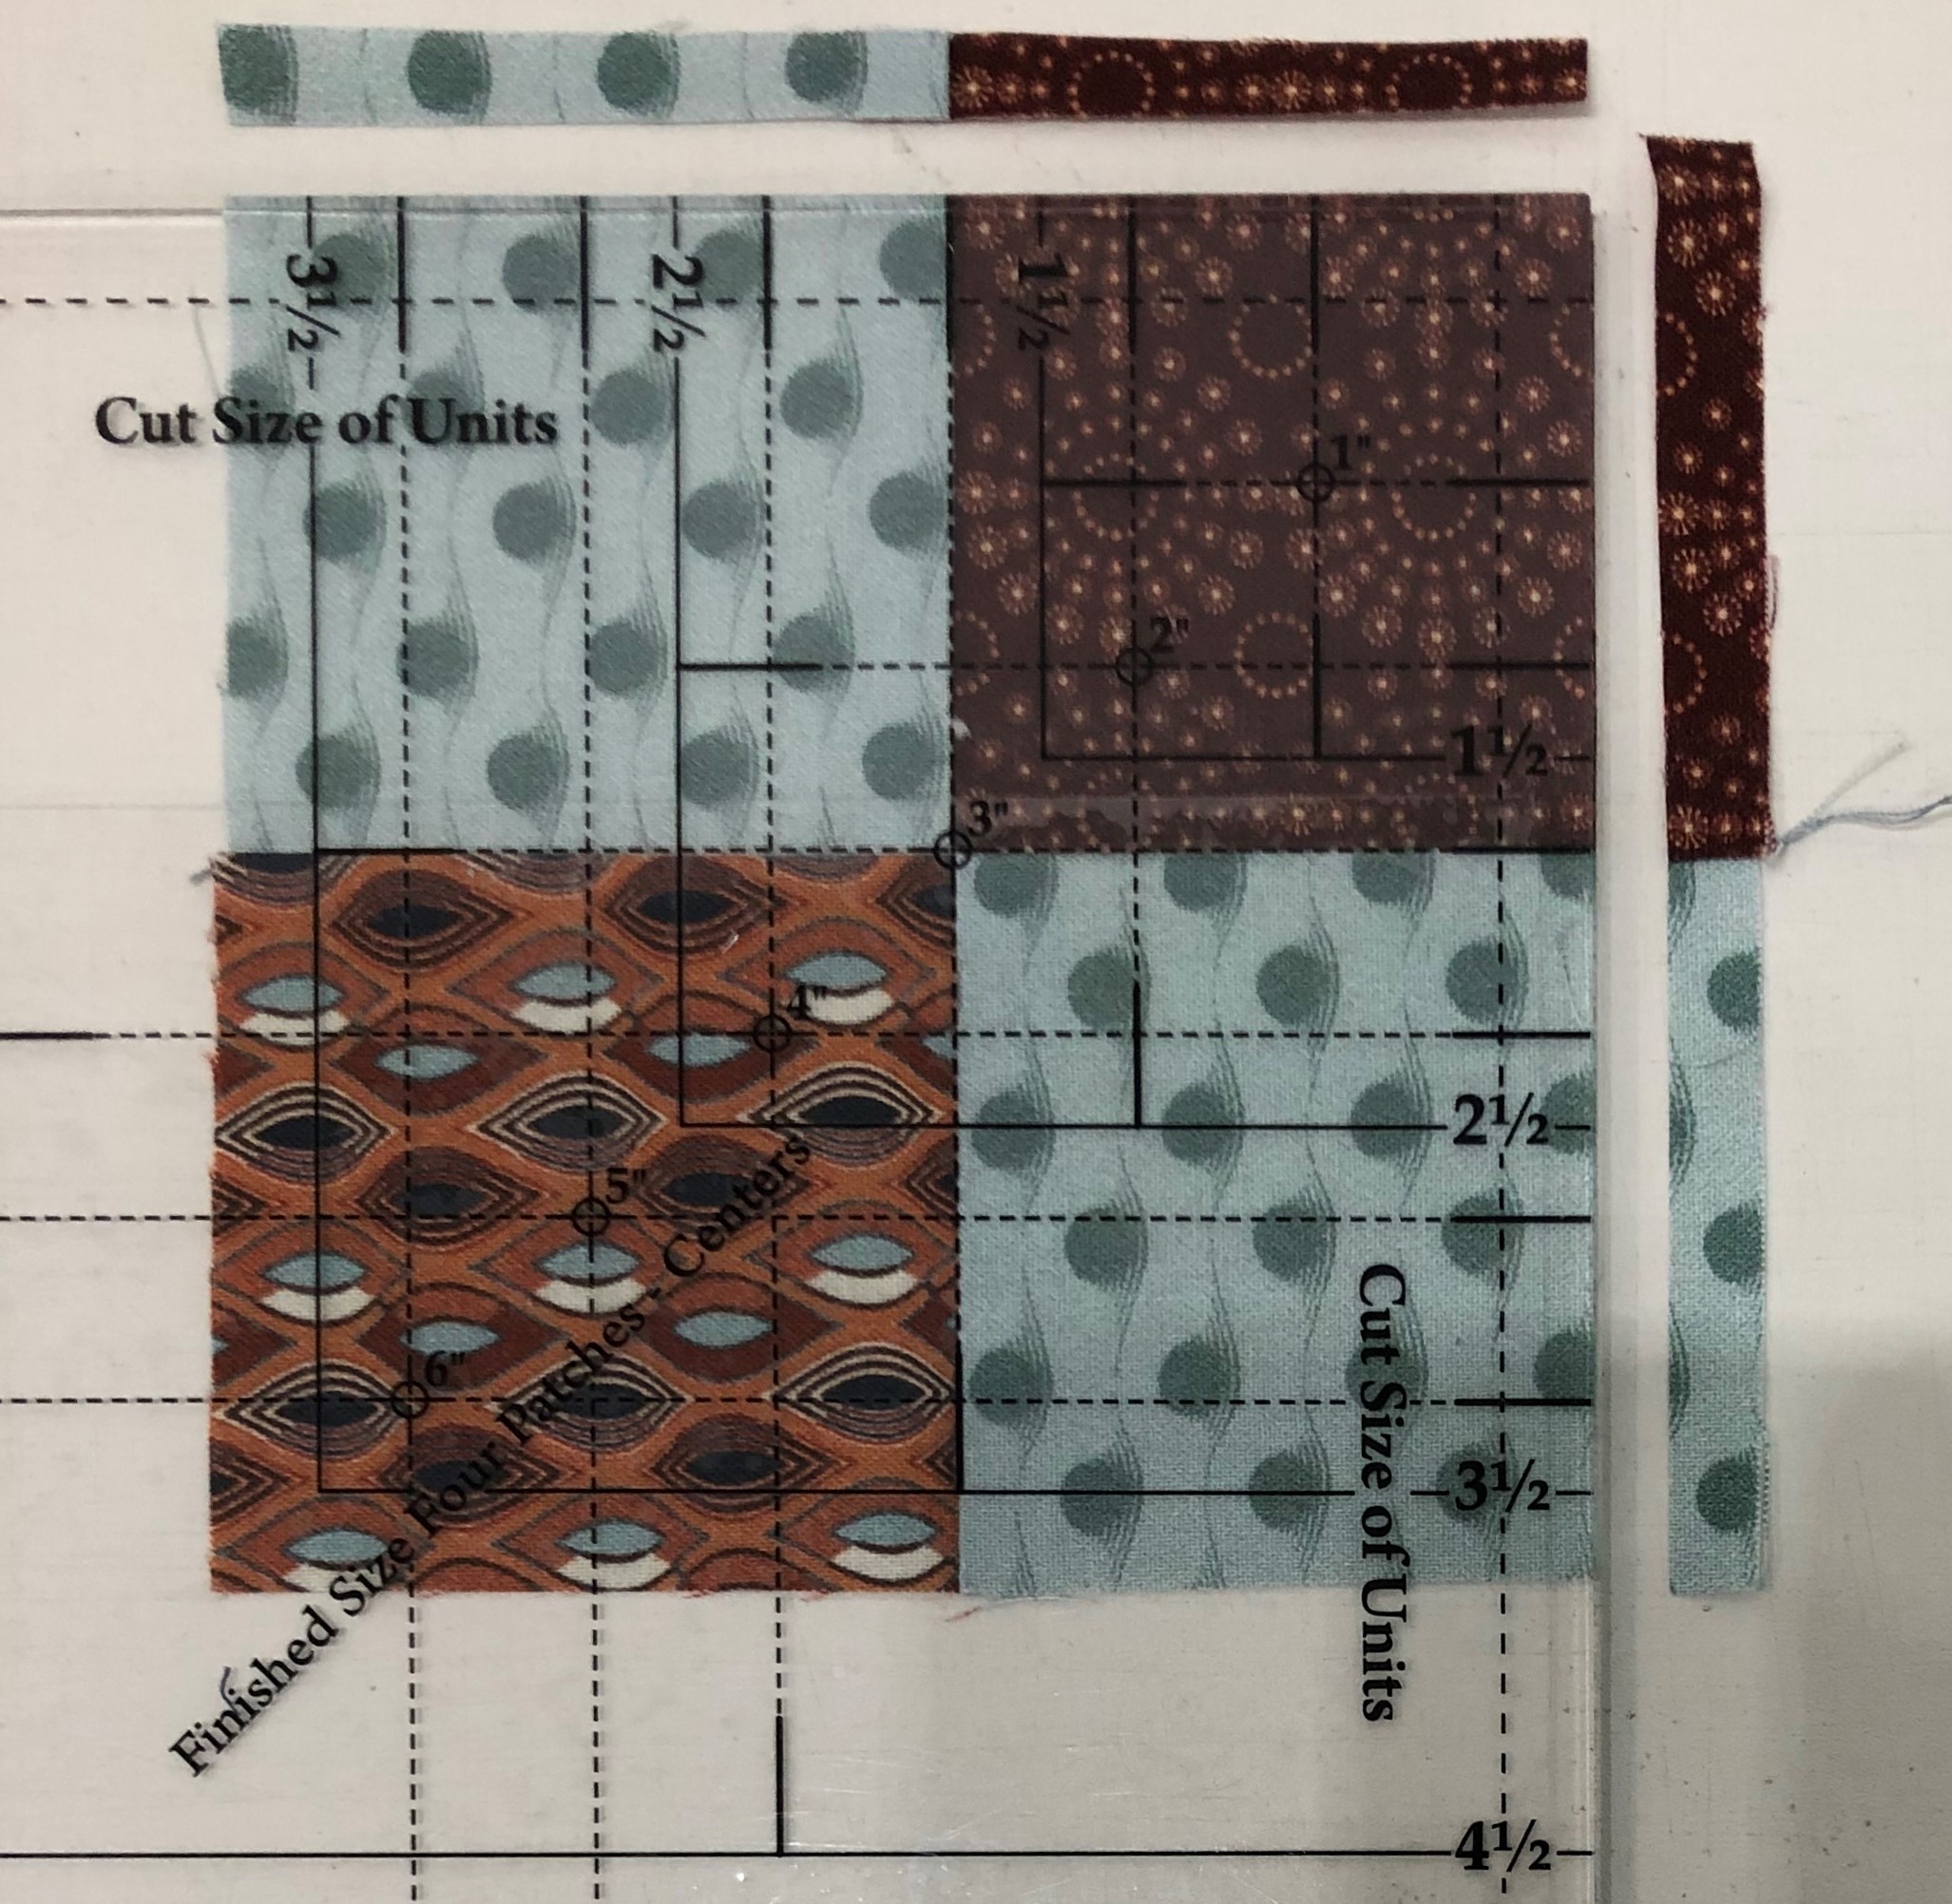
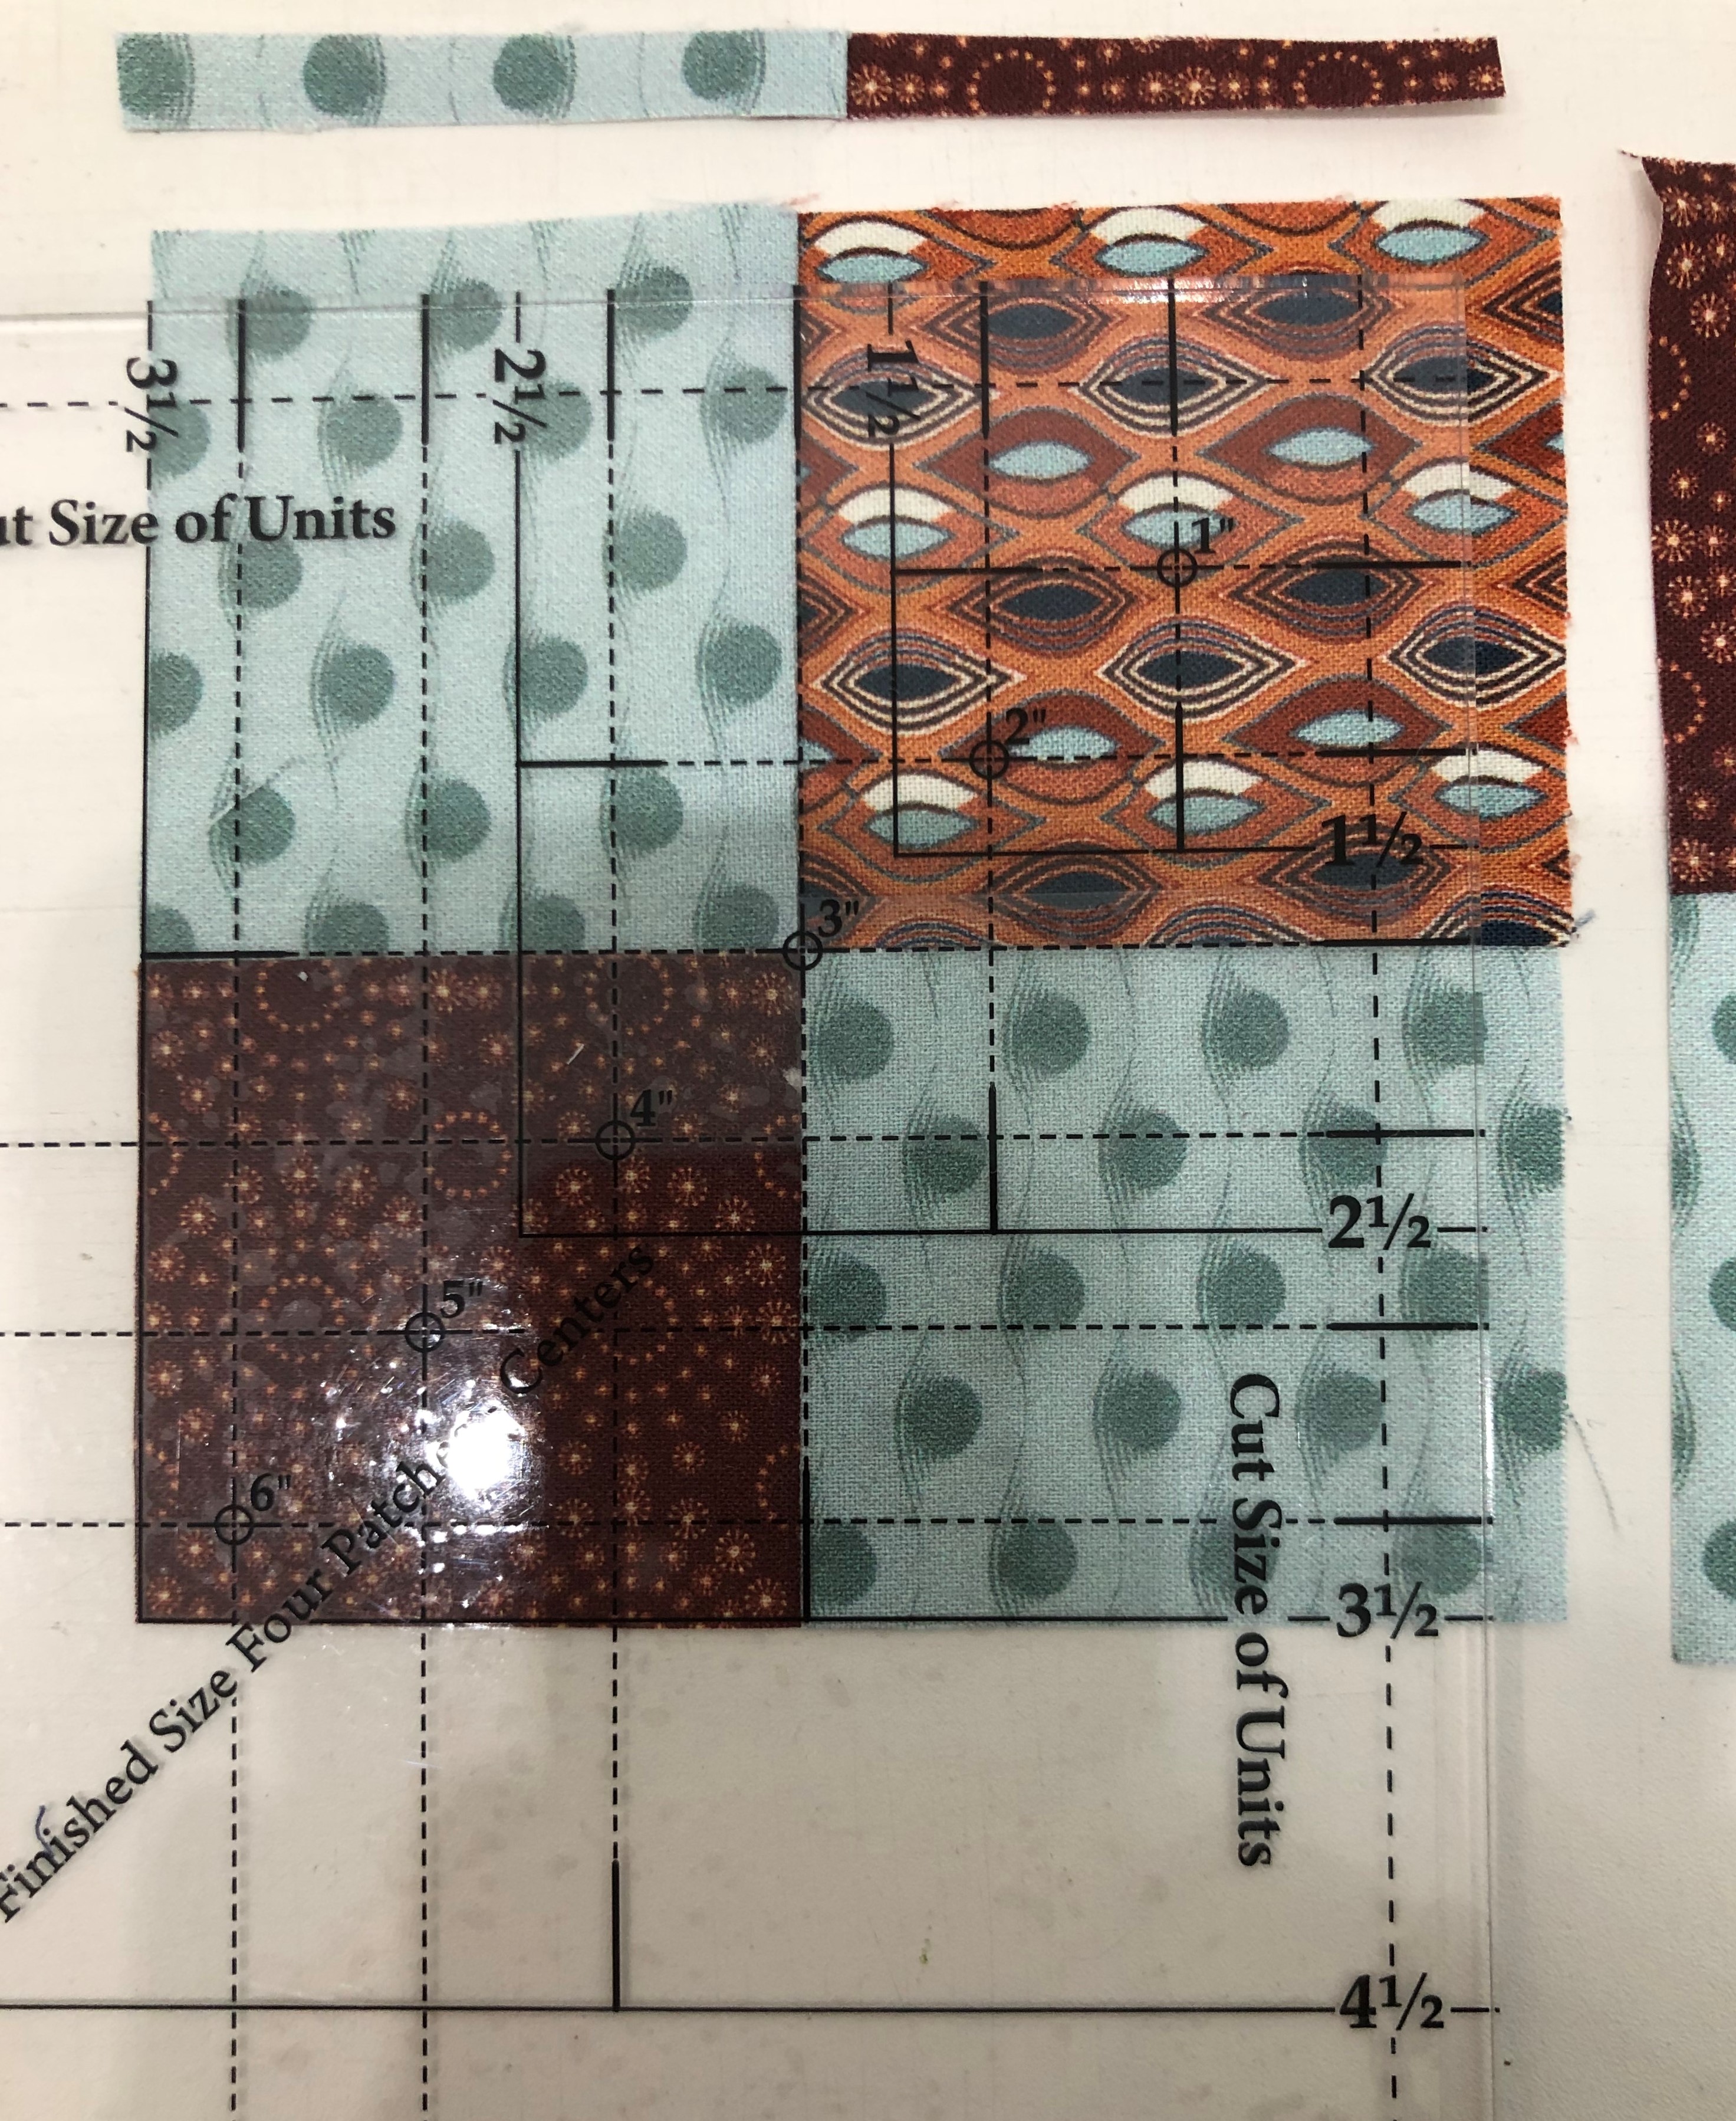
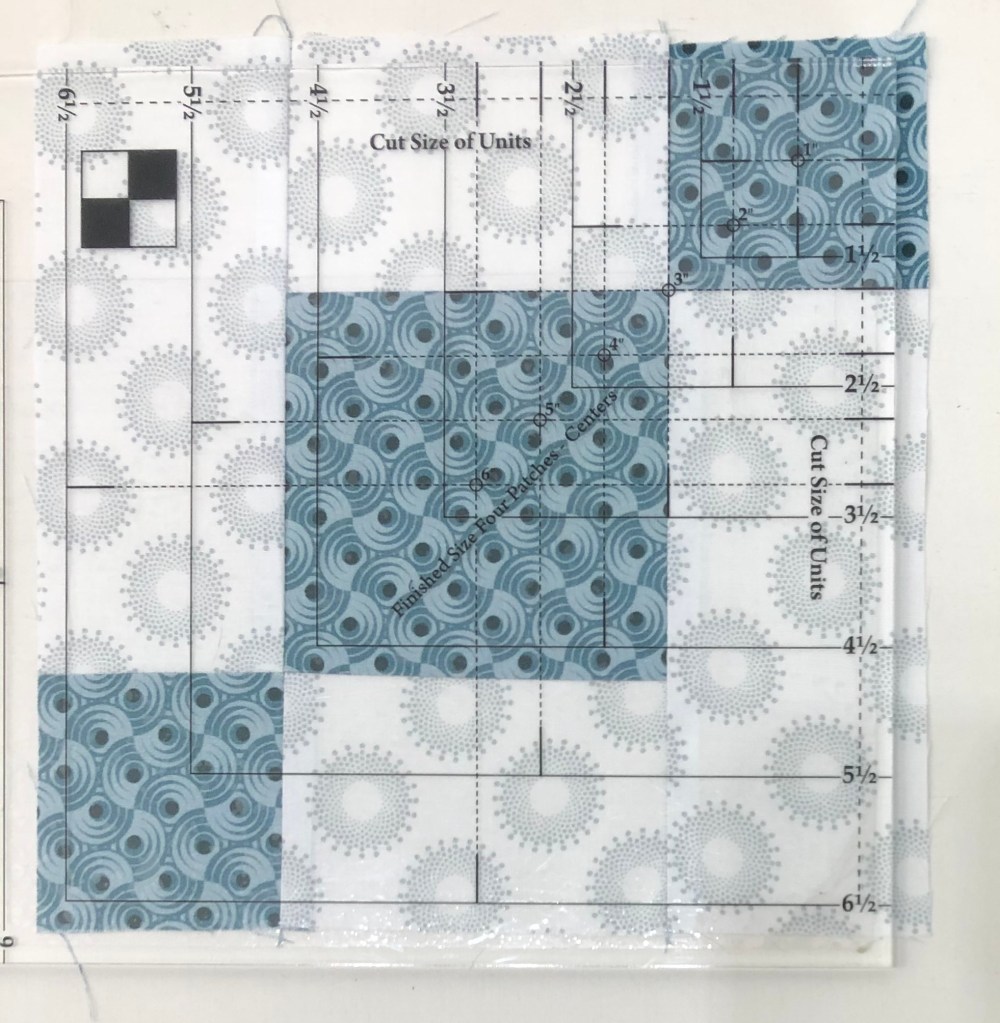
Step 6 – Trim the units to size. Position the unit as shown on your cutting mat and locate the circle for the 3” finished size on your Four Patch Square Up® tool. The finished sizes are located above the words Finished Size Four Patches – Center. Position the circle over the seam intersection between a small square and the large square as shown. Make sure that the dashed lines radiating from the circle align with your seams. Trim the first two sides of the unit.
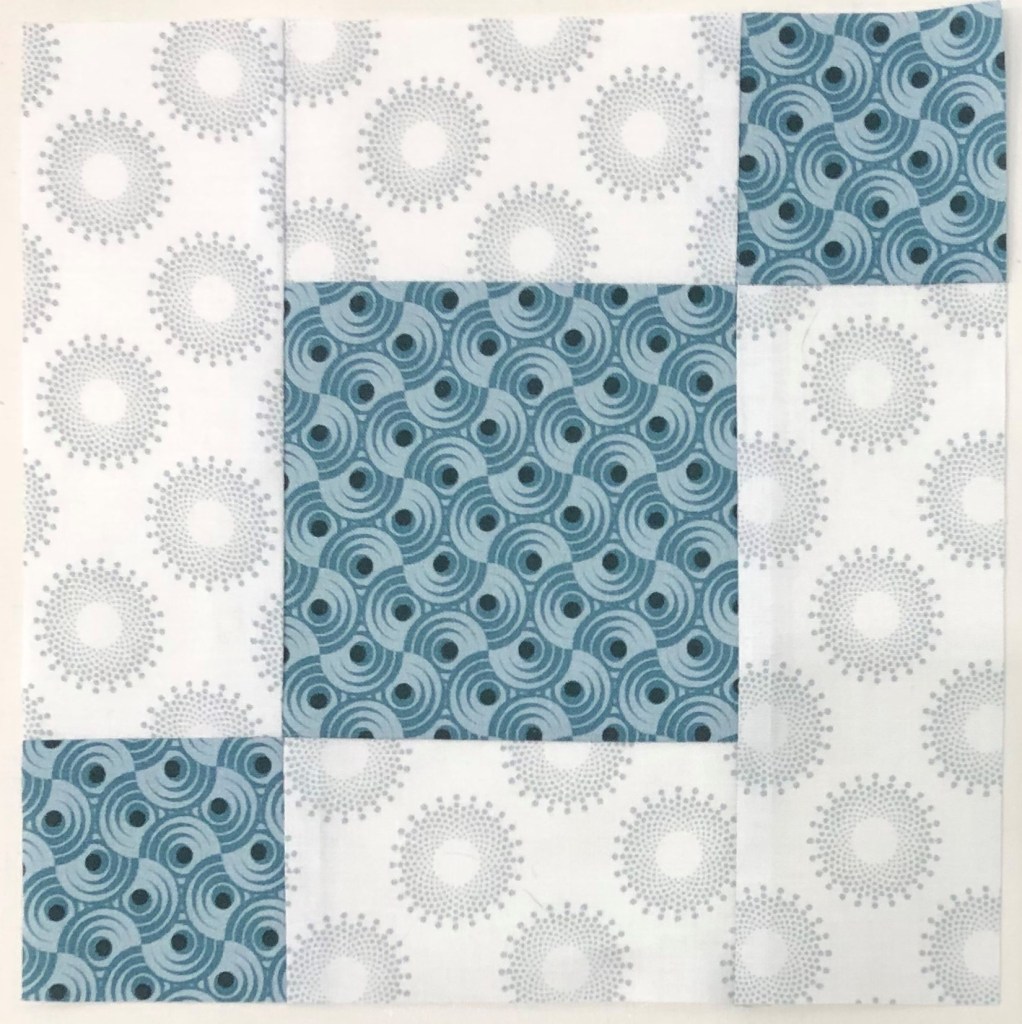
Step 7 – Rotate the unit 180 . Align the 3” finished size circle over the intersection of the remaining small square and the large square as shown. Make sure that the dashed lines align with your seams. Also align the 6½” clean up lines on the previously trimmed edges. Trim the remaining two sides. Once all the units are made, label them Unit A.
Once you have completed and trimmed 16 Uneven Chain units, label a paper plate “Unit A” Uneven Chains and set aside. Congratulations, month is done and you have learned to use the Four Patch Square Up tool.
And now, a special surprise for those of you who have read all the way through….
This message from Deb Tucker and Studio 180 Design:
Hi, Everyone!
I hope you’re all excited about your journey with Journeys! I’ve had such a thrill designing this pattern for you and working with Marie Bostwick to coordinate the quilt and the novella, and with Jason Yenter on the fabric. And many thanks to Deb Luttrell for coming up with the great idea for all of us to work together!
We are thrilled that Stitchin Heaven chose Jackie O’Brien to help you with your journey. Jackie was part of our first class of Certified Instructors 7 years ago, so we’ve worked together for a while. We wanted to do something extra to thank her for her participation in this and also to thank her for all of her contributions to Studio 180 through the years.
And we wanted to do something for you for your enthusiastic support for our first block of the month.
Here’s what we’re going to do. As many of you know, Studio 180 is all about education and skill development, so we’re going to give each of you the chance to get additional practice with your tools. Each month we will offer special pricing on two downloadable patterns that go with that month’s tool or other tools you have used in the BOM. We will post a link and a code each month in the Journeys FB group that gives you exclusive $9.00 pricing per pattern (over 20% discount). Jackie will receive 100% of the proceeds from your purchases as our thanks for a job well done. This is also a way for you to say thank you to Jackie for her help. We hope you find something in our offerings each month that excites you to use your tool on another project.
I just finished my quilt containing Deb Tucker’s BlockBuster patterns #1 through #9! Scrapodopolis seems like a pretty good name.
I used the Tucker trimmer 1, Wing Clipper 1, Square/Squared, V Block & Four Patch Square up tools from Studio 180 Design. I was encouraged by fellow Certified Instructor Sarah Furrer to try a block layout a little outside the box, and I totally did!
This is the layout I chose. I did change it up a little.
My blocks are 12″ when finished. that indicated that my Square/Squared units would finish at 6″. I Needed 16 square/squared units and decided the center squares would be cut from 16 different fabric pulled from the blocks & the side triangles would be the same background fabric used in the blocks. The 3″ rectangles on either side of the square/squared units would match the border fabric. The outer borders would finish at 6″ also. I added a 3″ border outer border to enhance the four square/squared units in the border.
Don’t do what I did. I started in the center and stitched the outer square/squared units to the center blocks, (they had to be un-sewed and sewn to the borders pieces). In each of the corners, I stitched a 12″ block to a square/squared unit & stitched a square/squared unit to a 6.5″ square and then stitched it to the block. The two blocks on either side of the center were stitched to a square/squared unit
This is much better. Now there are 3 rows of blocks in the center ready to be stitched together & the border square/squared units are pieced to the border strips.
Once all the pieces were stitched together I decided I needed to add a 3″ outer border so all the units appear to be floating.
I am so pleased with how it came out! My finished quilt measures 67″ x 67″.
I can’t wait to start the next quilt with BlockBuster #10!
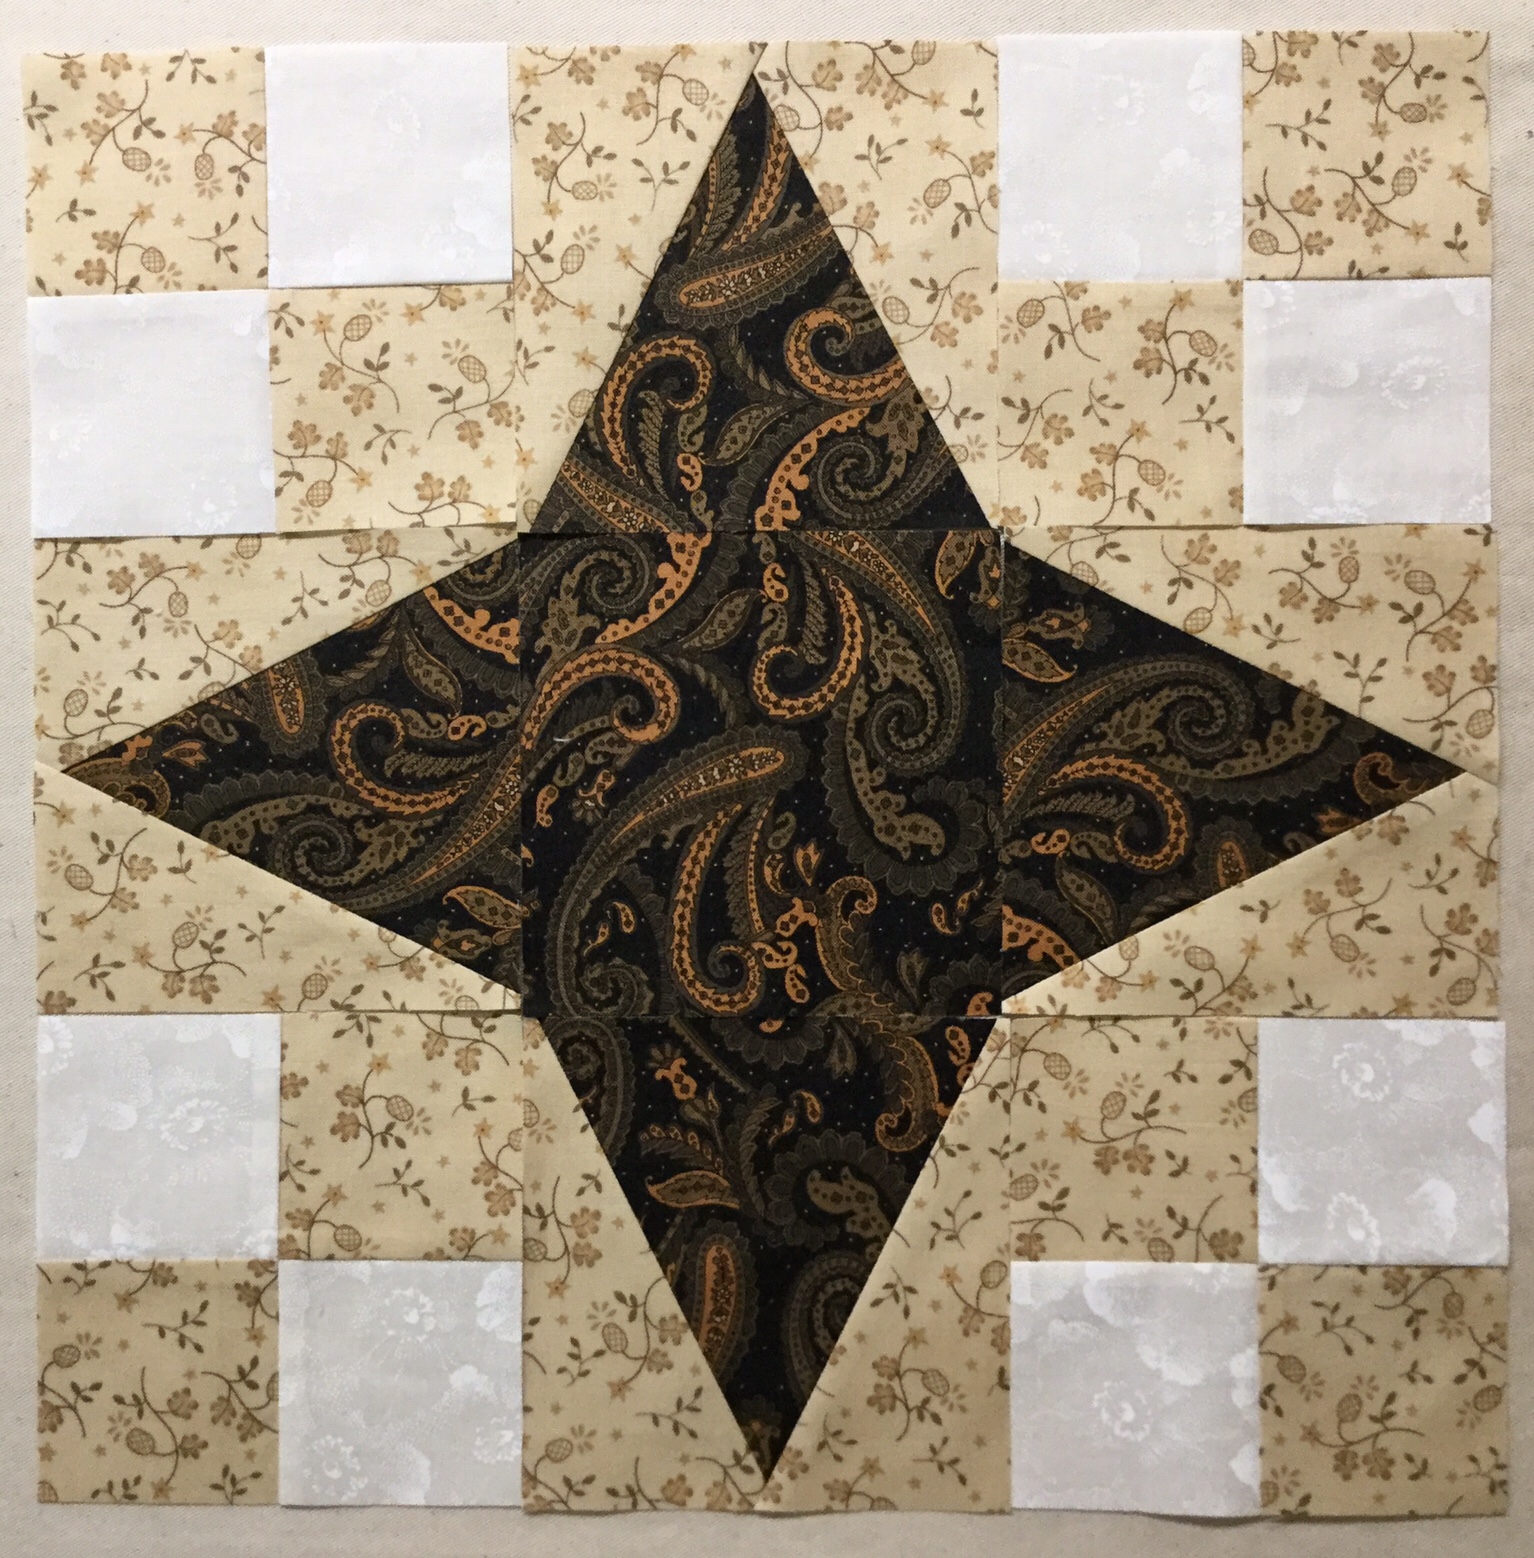
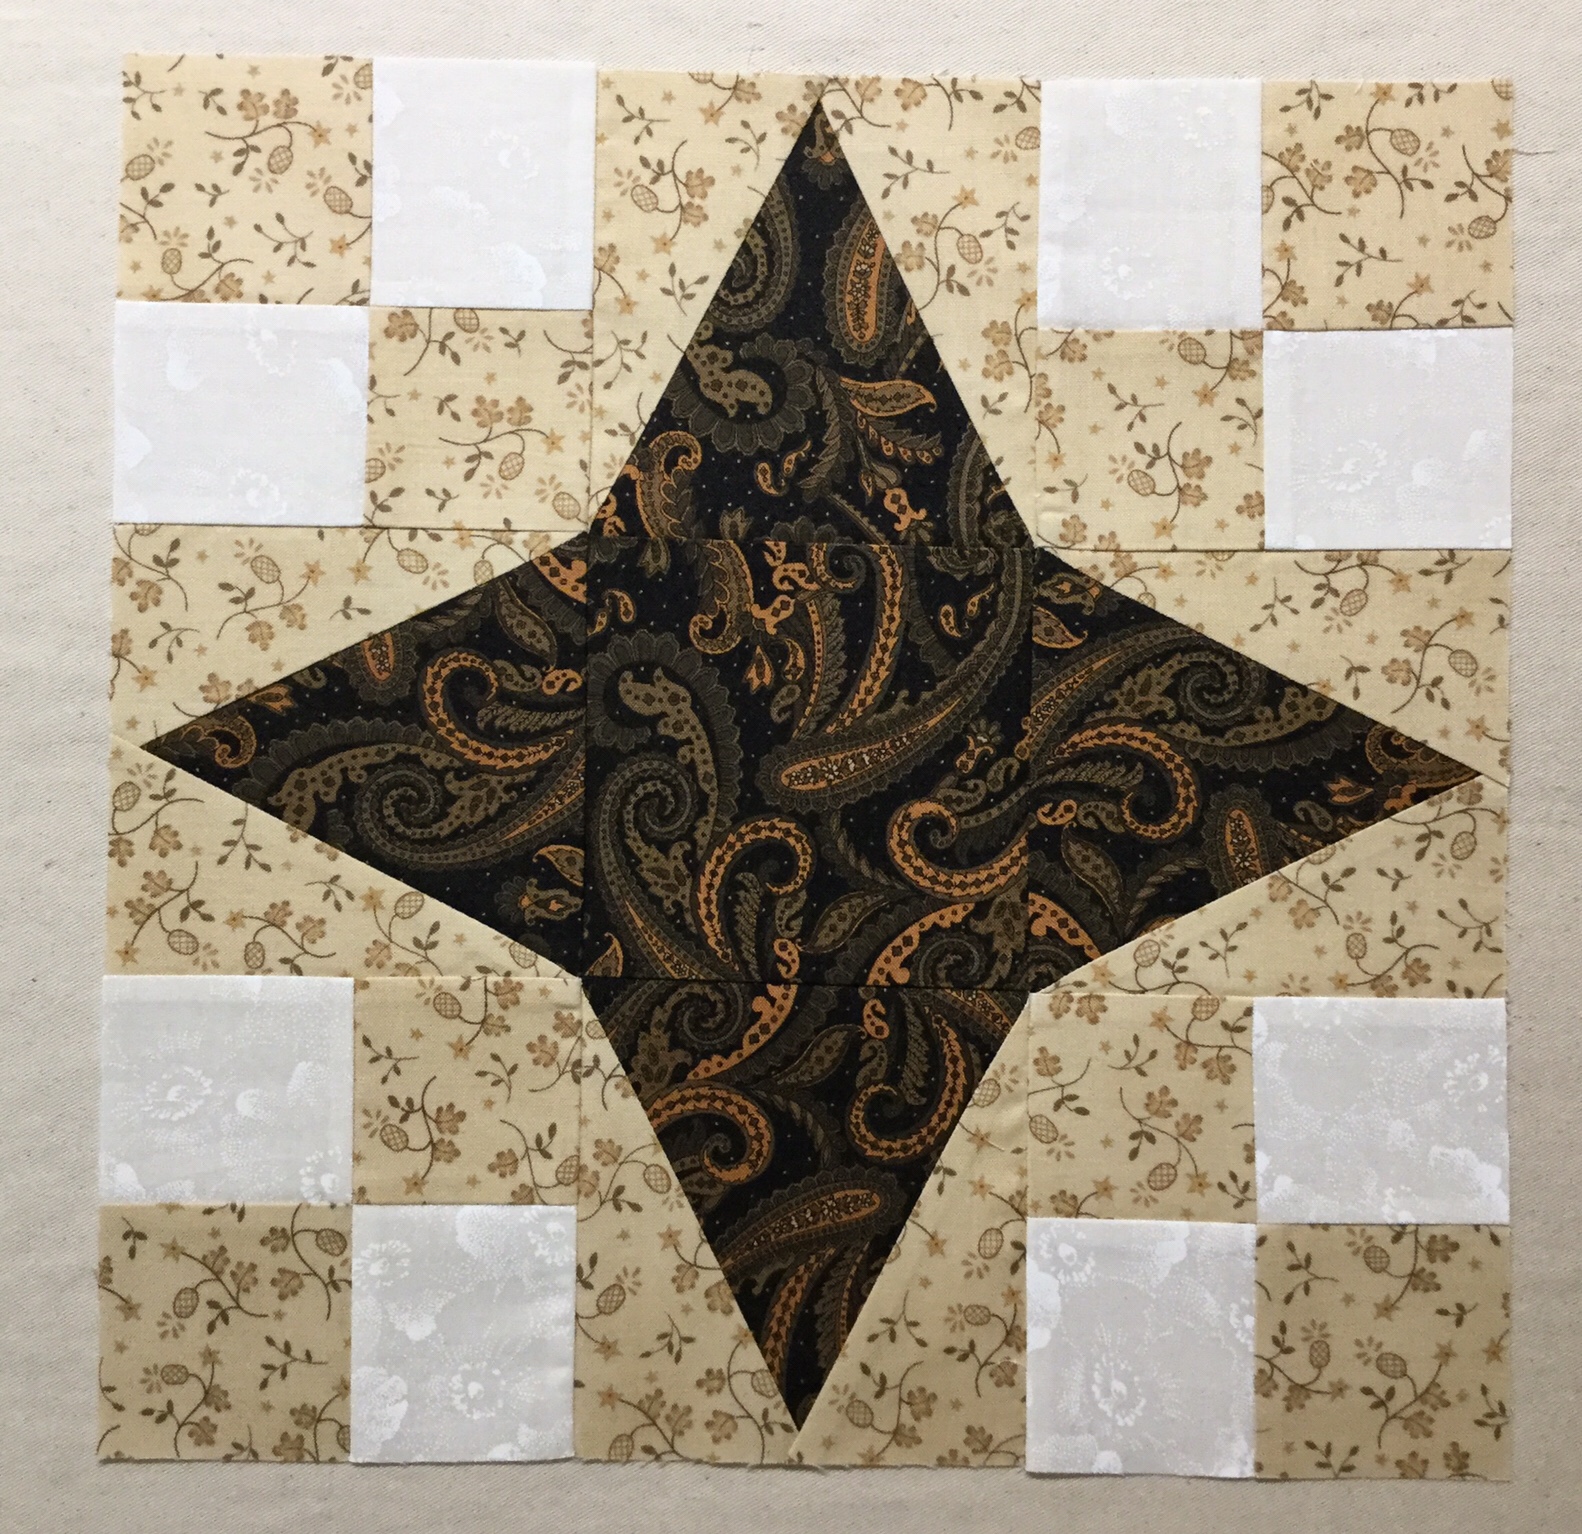
BlockBuster # 08 54 – 40 or Fight is a fun & easy block. It requires Deb Tucker’s V Block tool. This block also has four patch units, which you can make by cutting individual squares. I made my four patch units by using Deb’s Tucker’s new Four Patch Square Up tool. The cutting chart gives you options for making a 6″, 9″ or 12″ block. I made a 12″ block.
I chose the 3 fabric colors shown above.
V Block Units
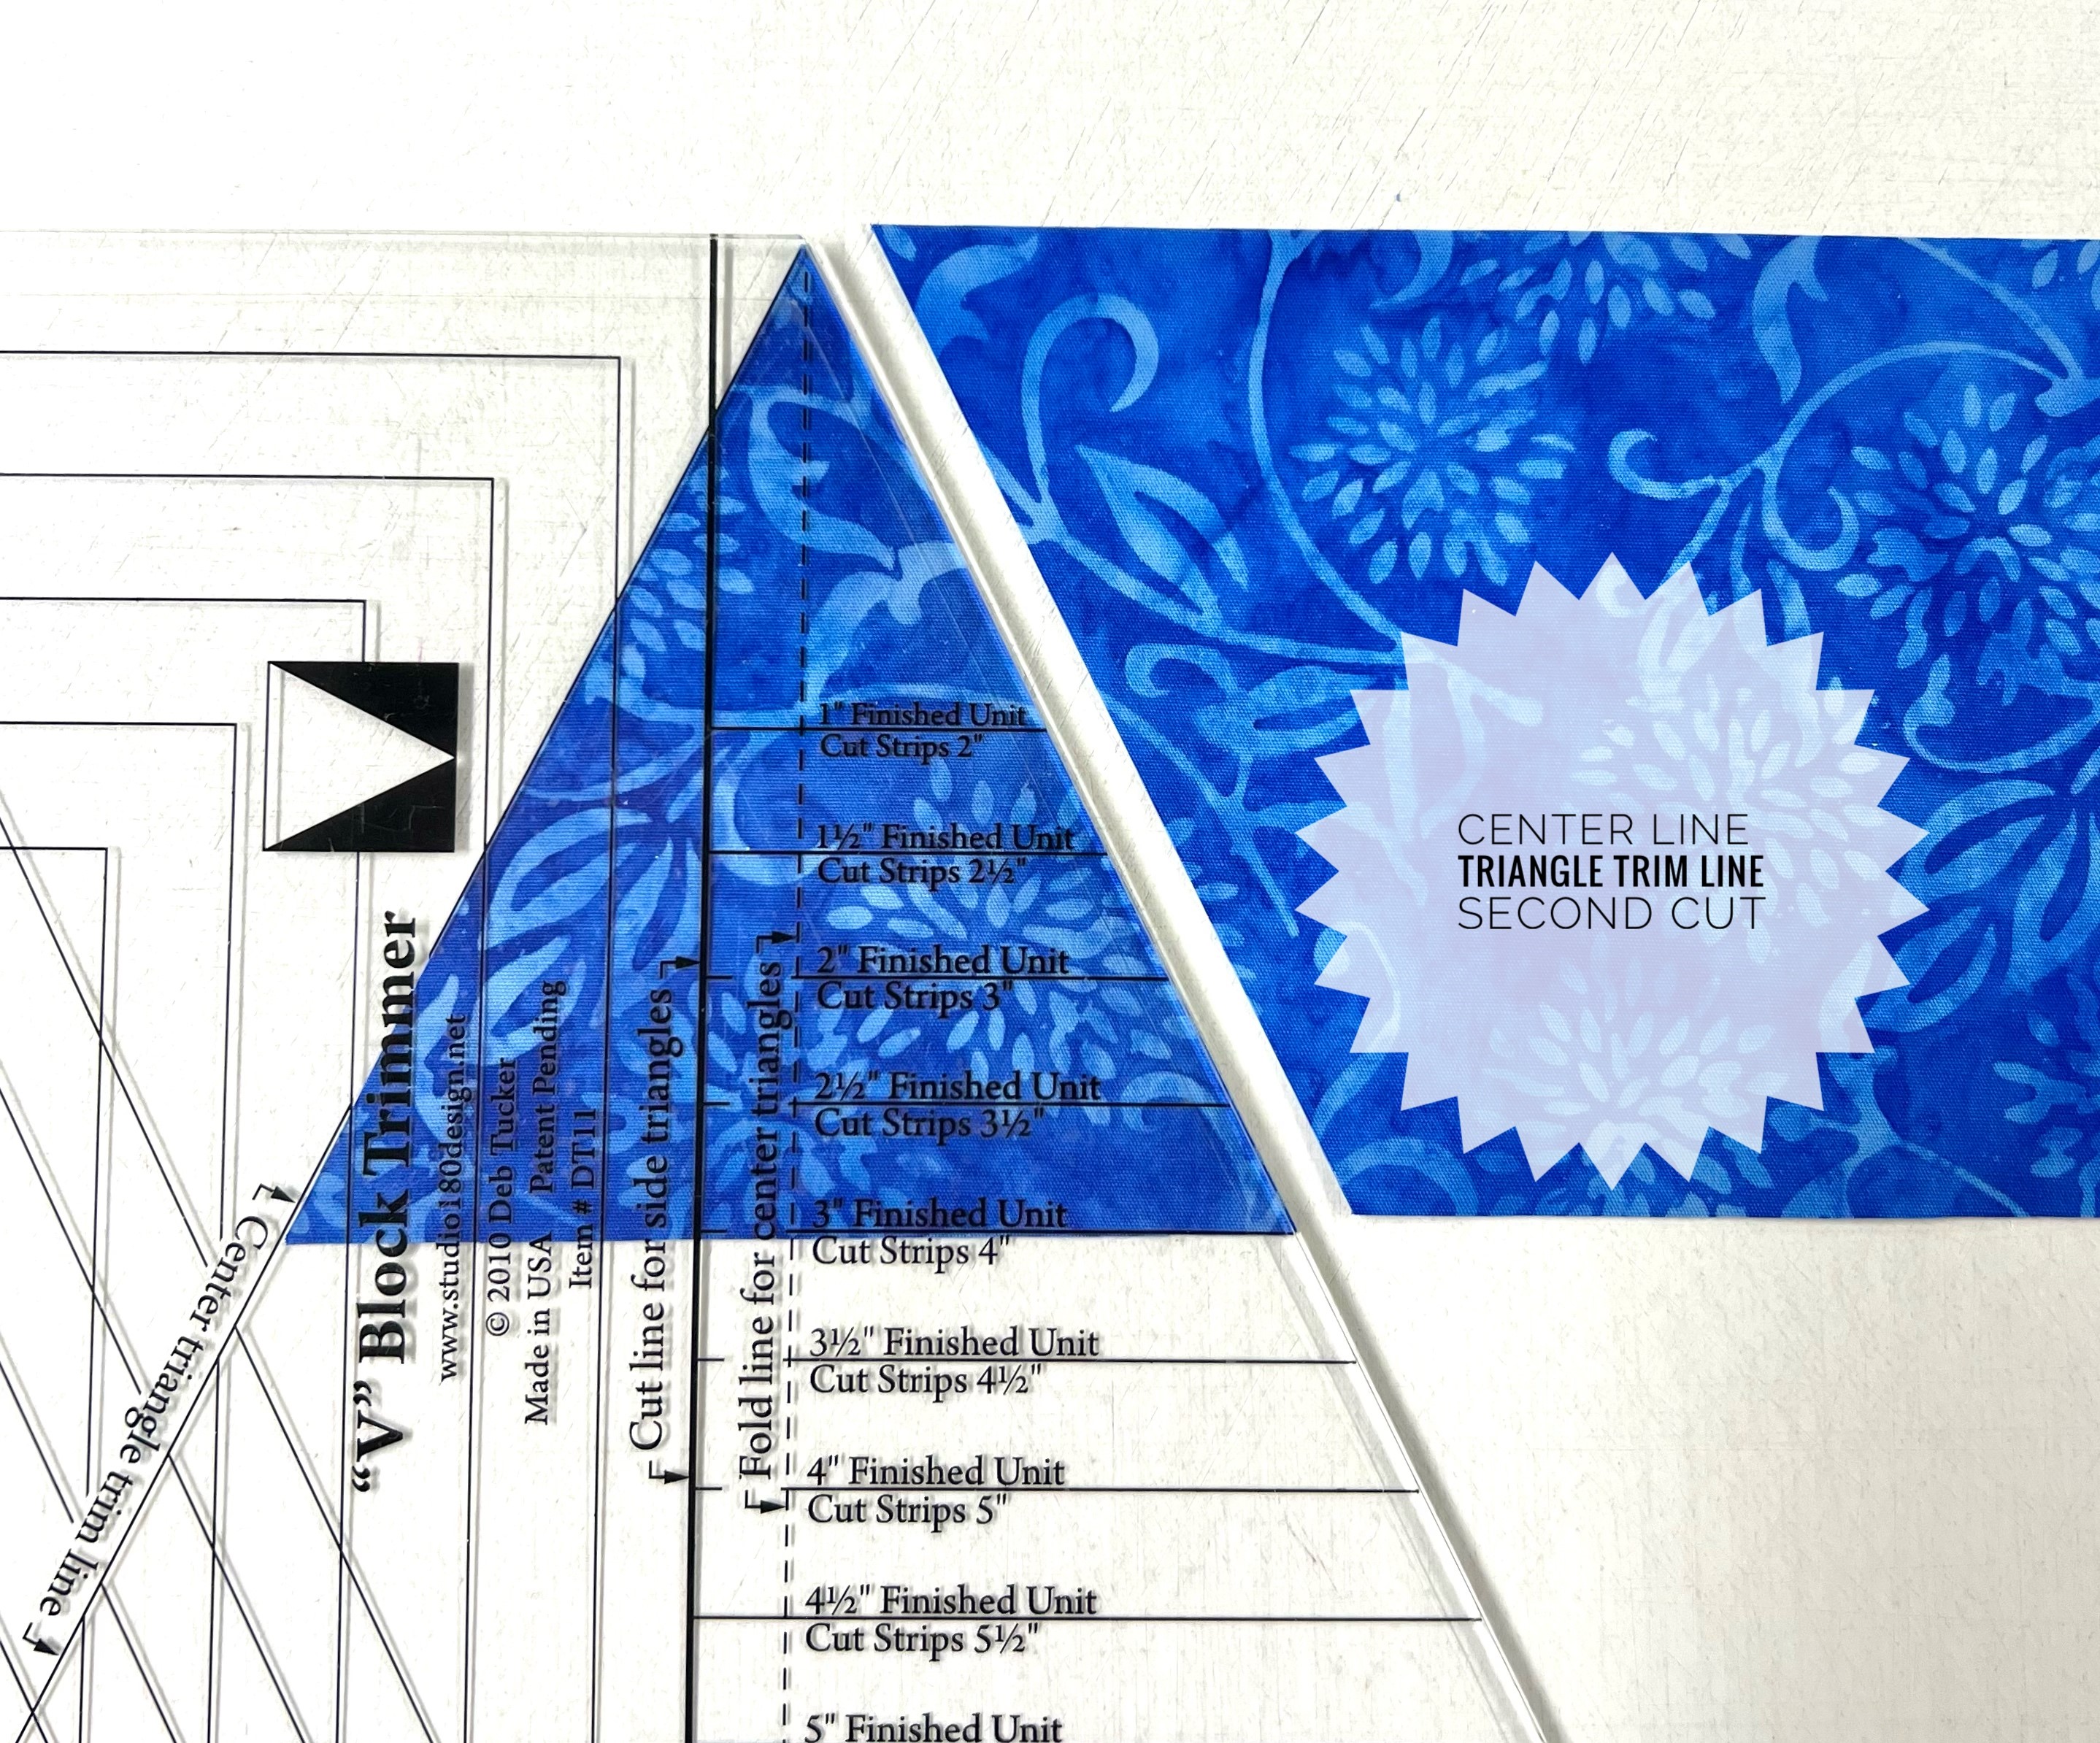
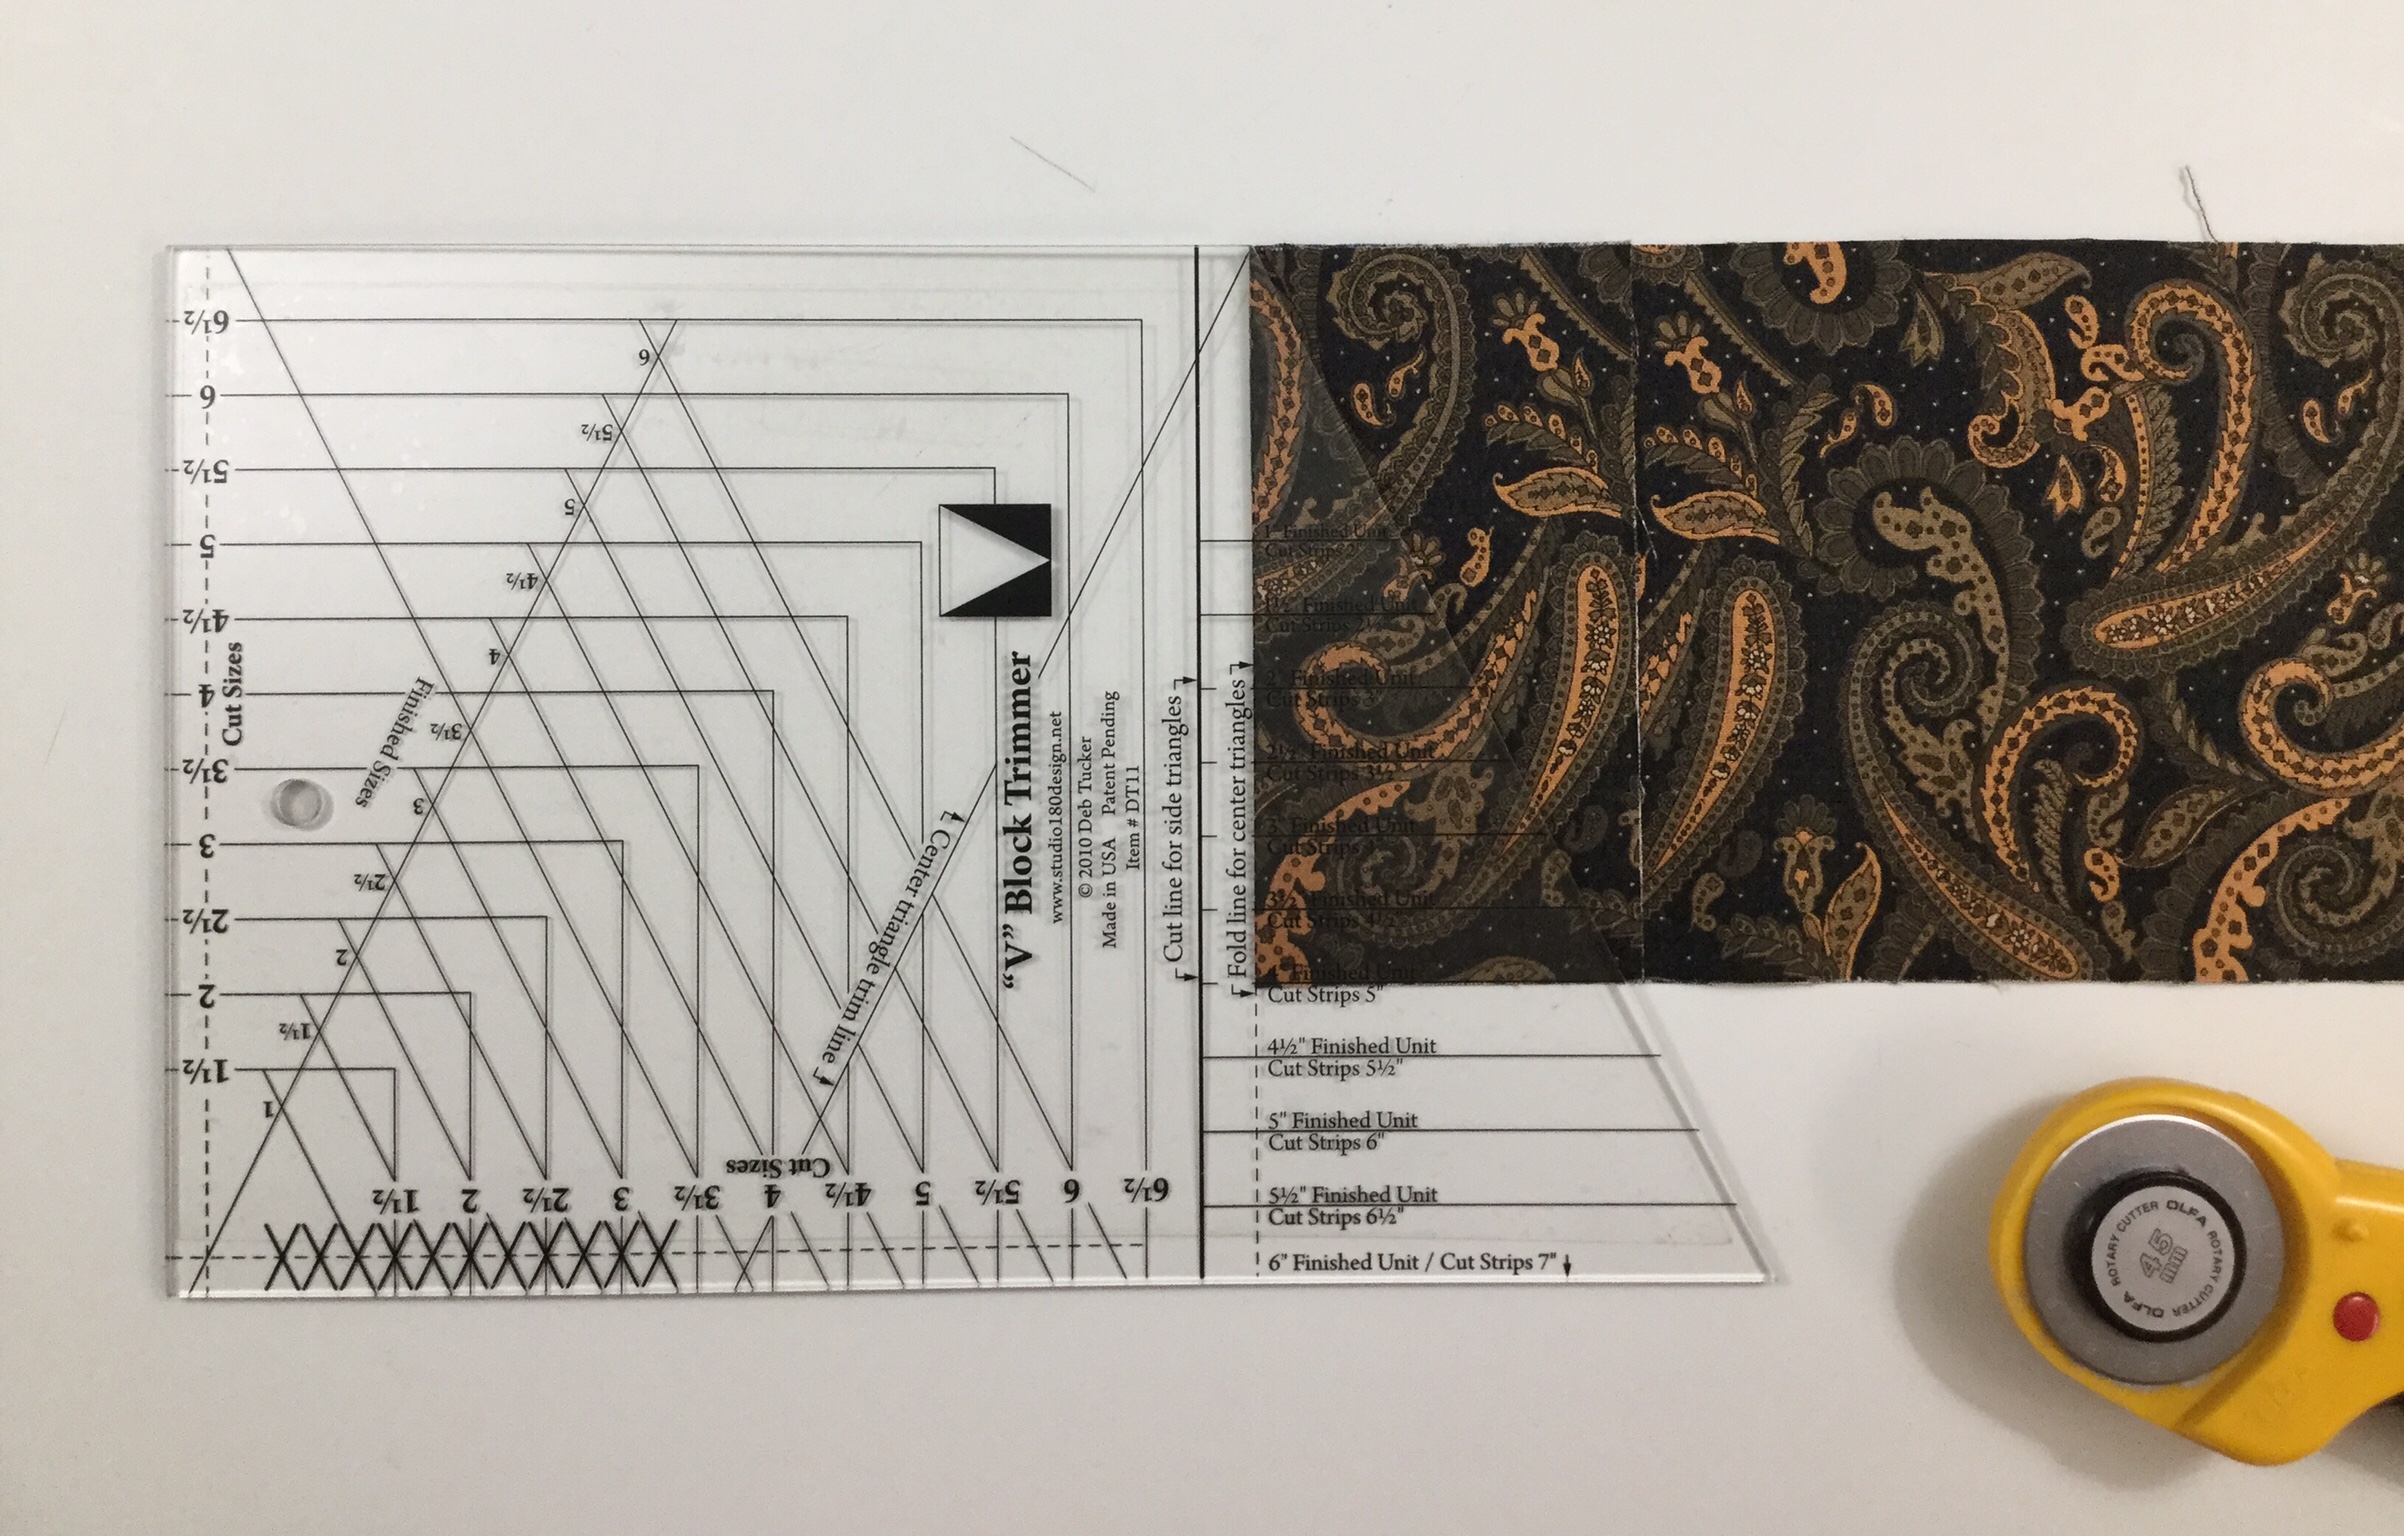
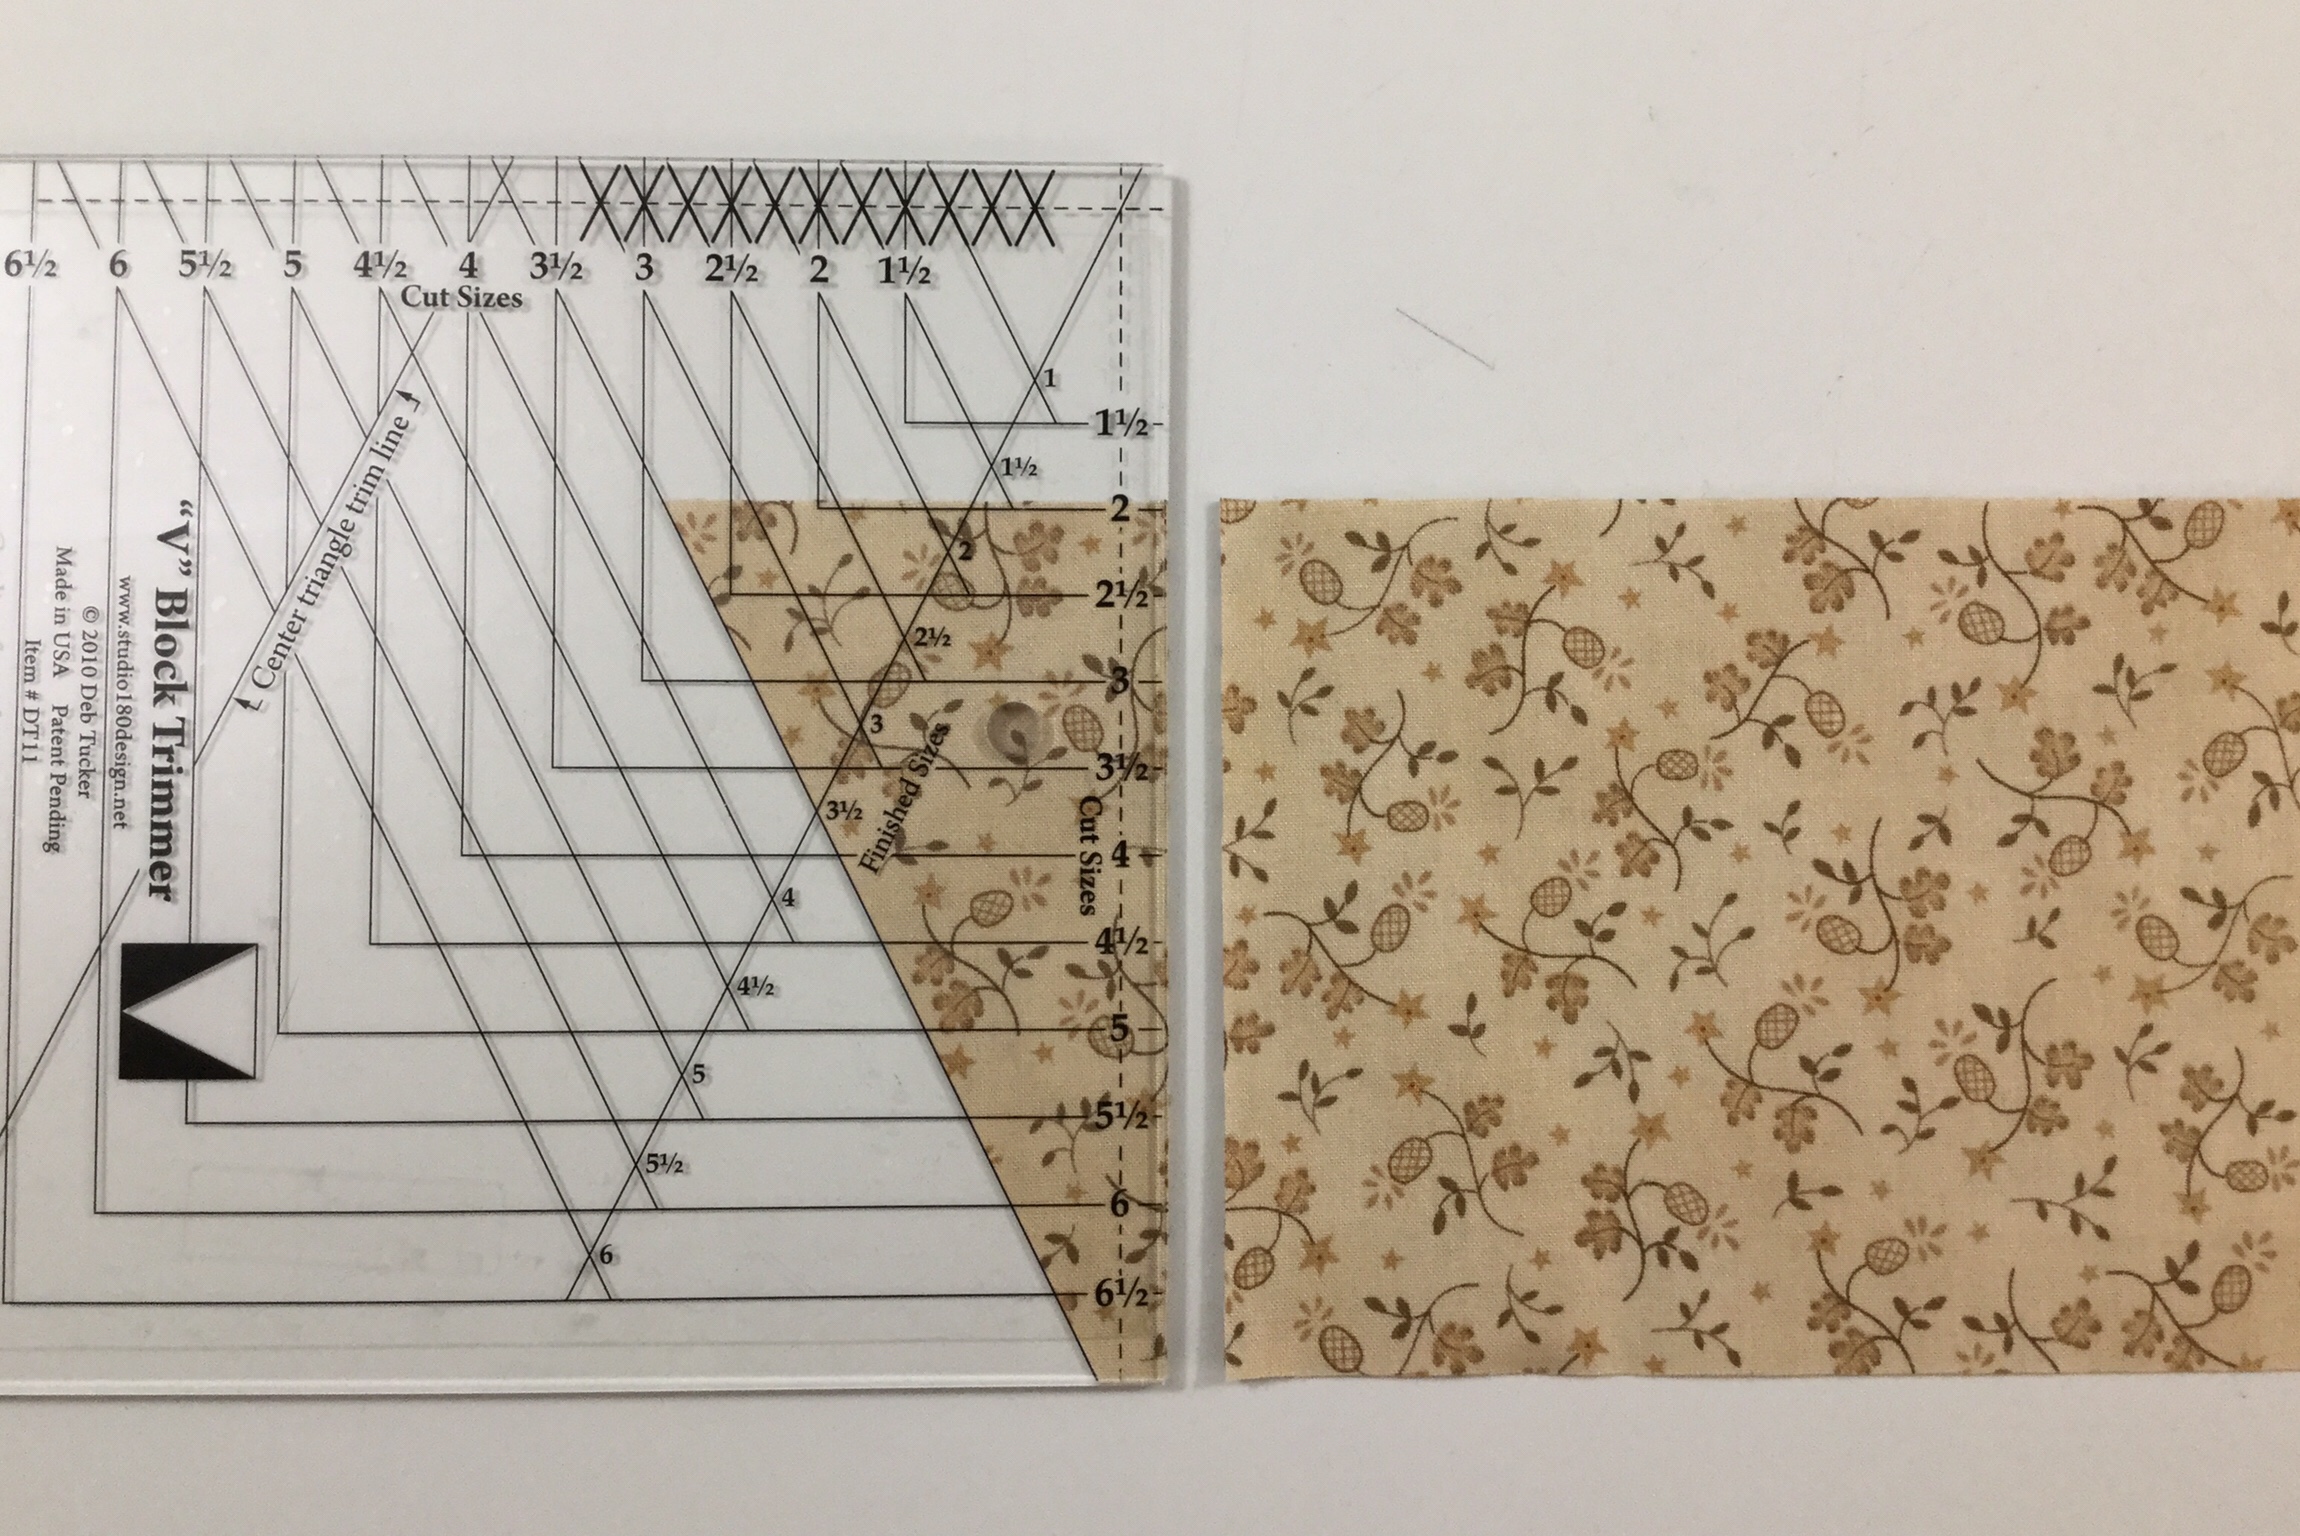
Everything you need to know for making V Block’s is in the tool instructions. I’m starting with the V Block center triangles, I chose a dark fabric for my star. For a 12″ block the cut size of my units will be 4 1/2″. The Size chart and/or the tool itself tells me that for a 4″ finished unit, I need to cut a 5″ strip. To cut the center triangles, layer no more than two layers deep. Fold the ends deep enough to accommodate the slanted cut for a 4″ finished unit and finger press it.
Position the tool on the strip so that the dashed line labeled “Fold Line for Center Triangle” is aligned with the fold and the correct size line of the tool is against the bottom edge of the strip.
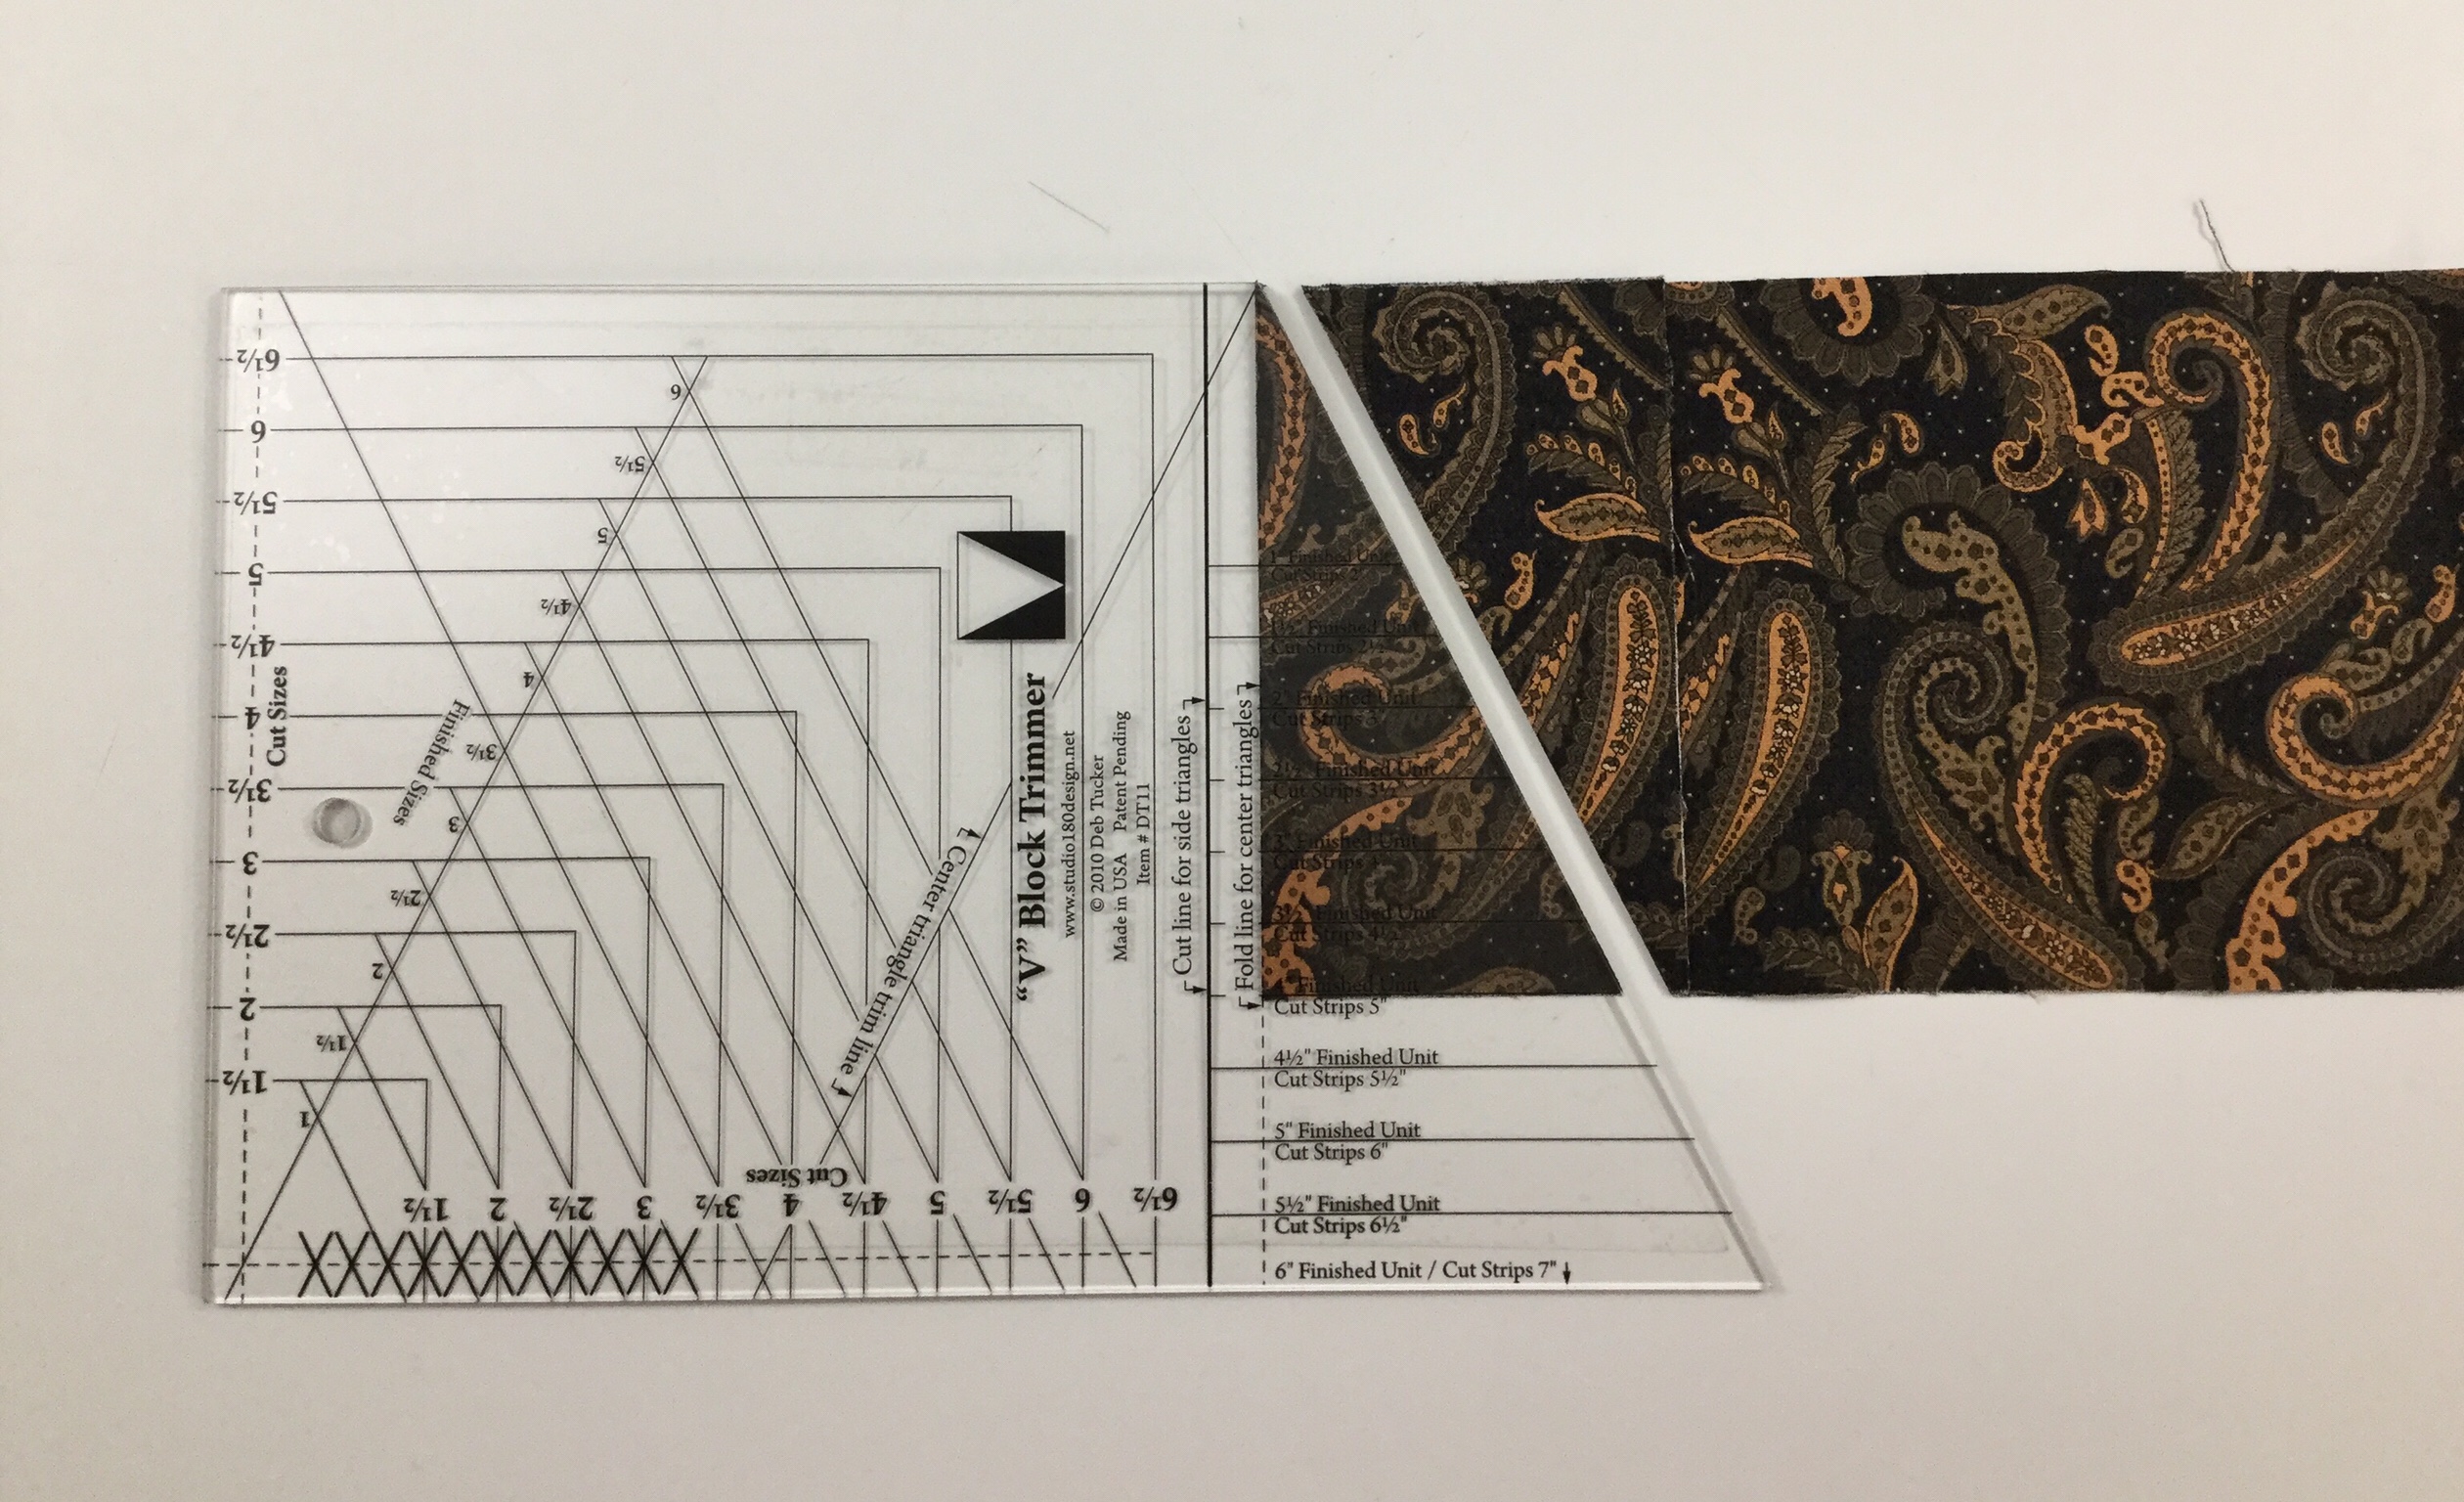
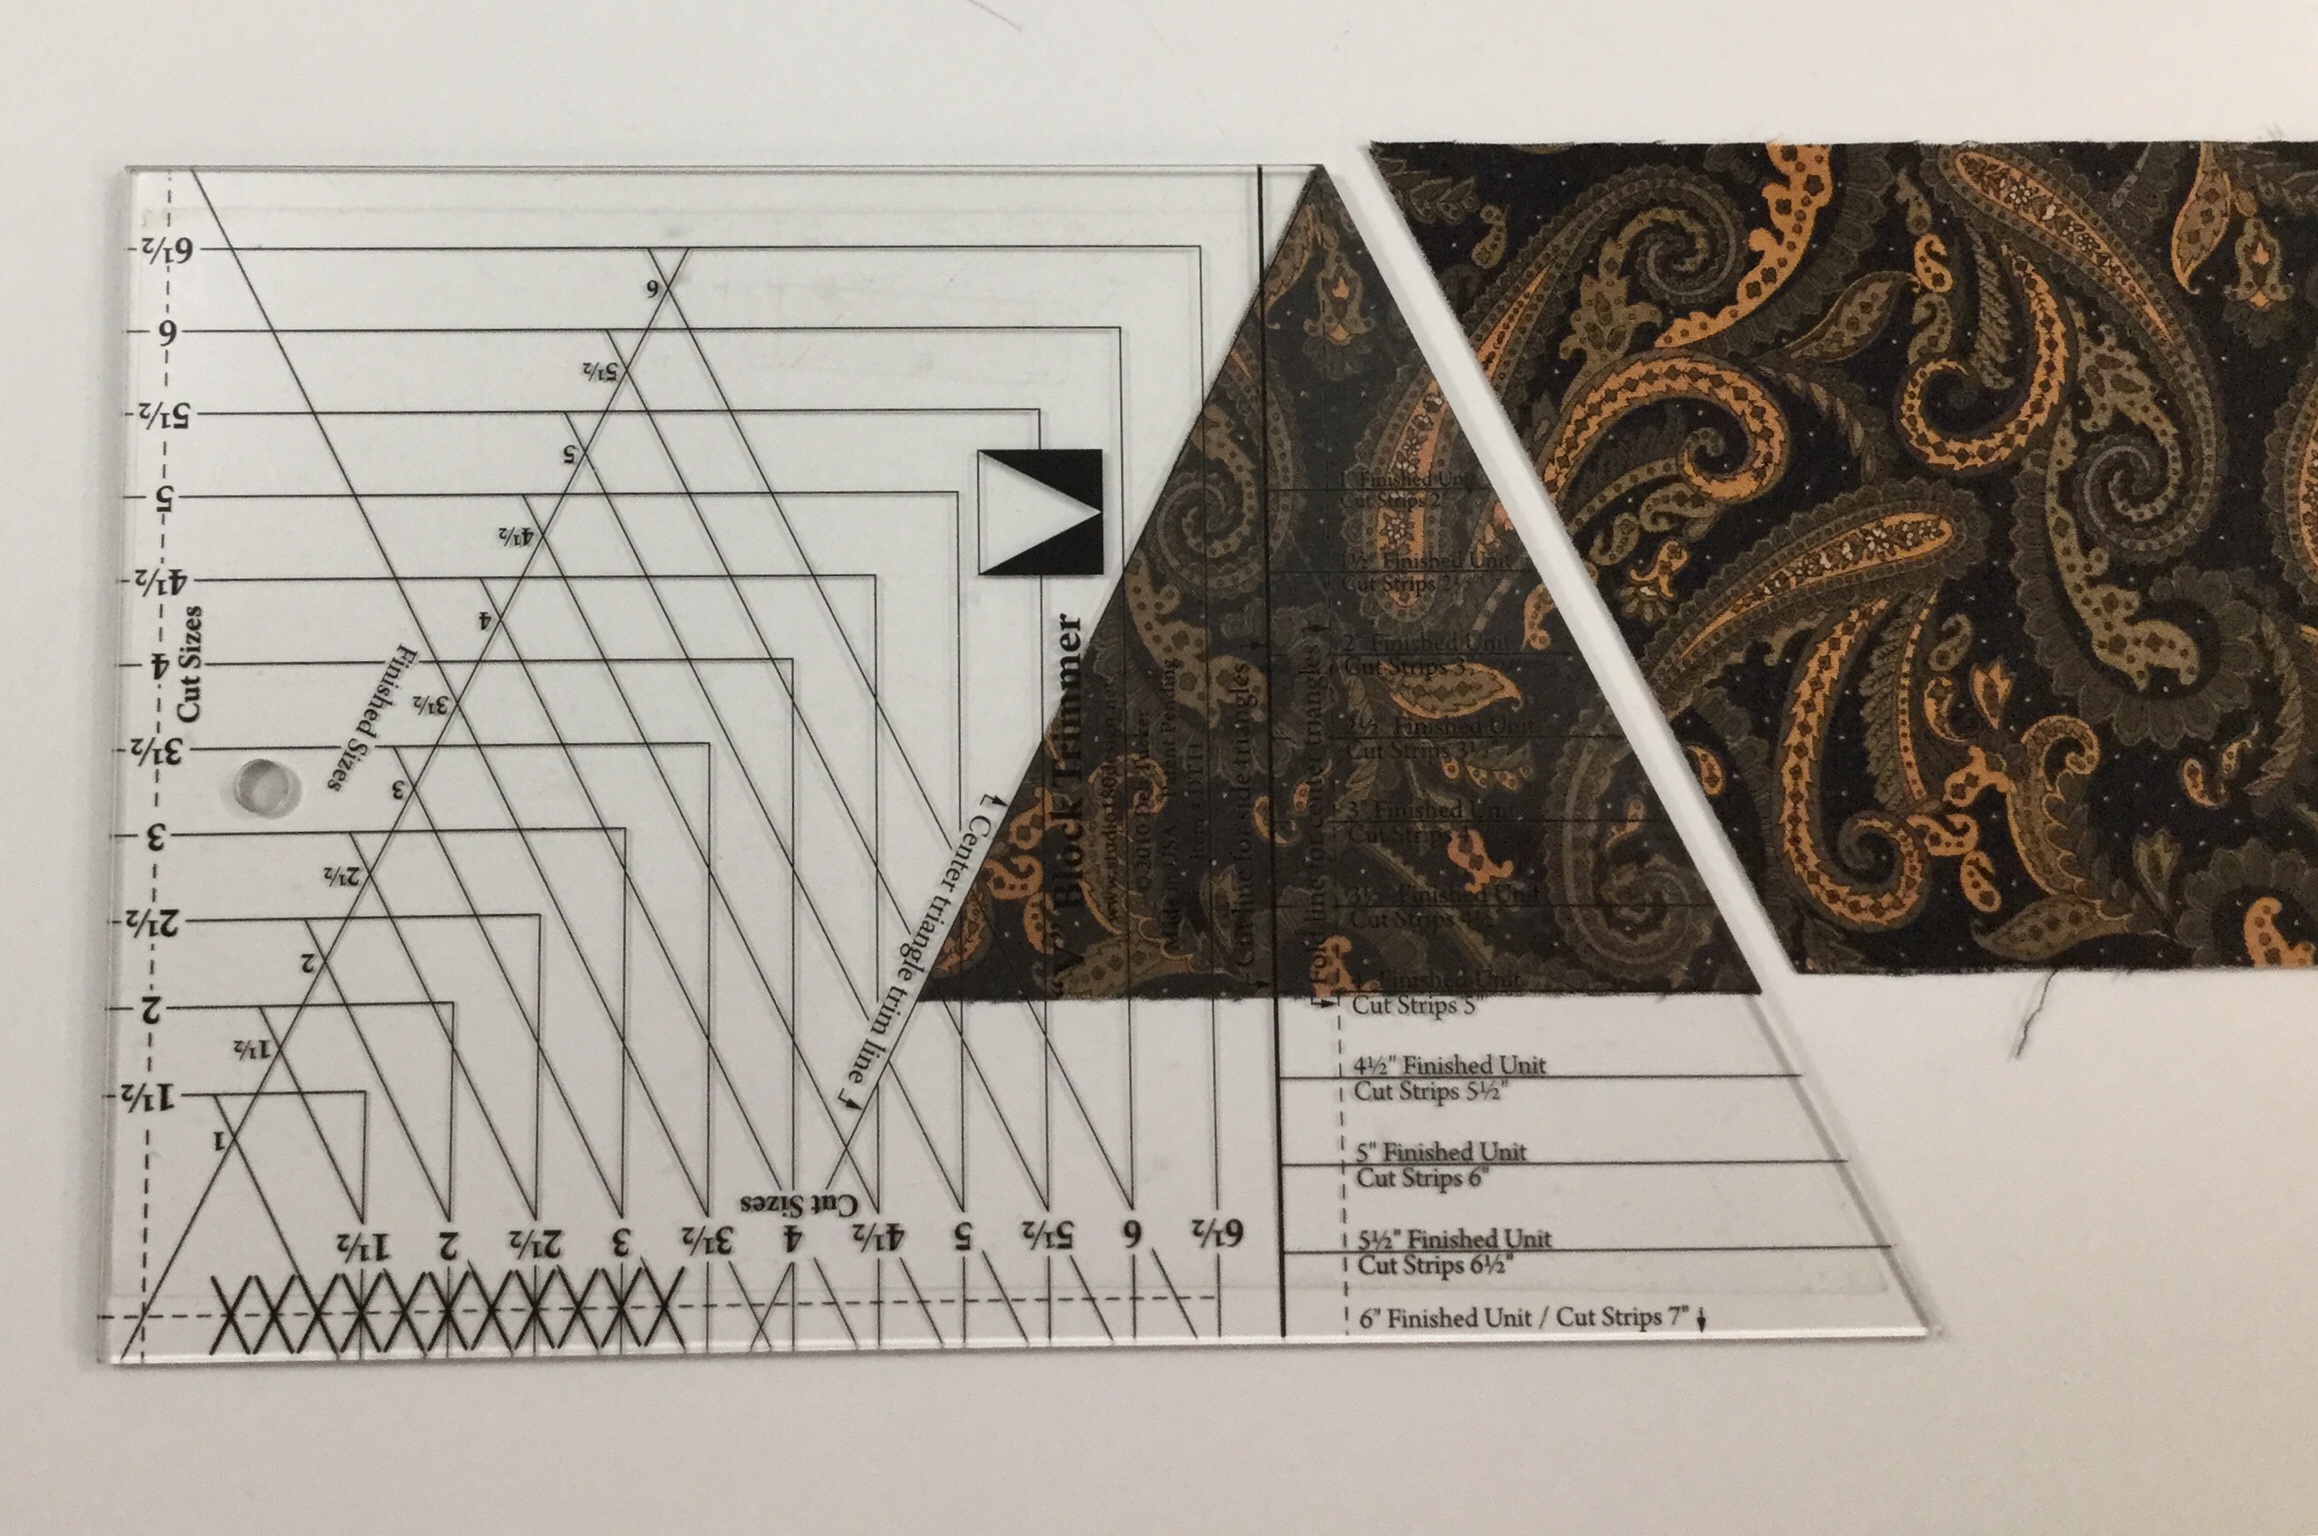
Trim along the slanted edge of the tool and unfold to reveal the center triangle pieces.
Move the cut triangles to the side and flip the strip over from top to bottom. Align the center triangle trim line with the previously trimmed edge and cut your next pair of center triangles. For this block you need four center triangles.
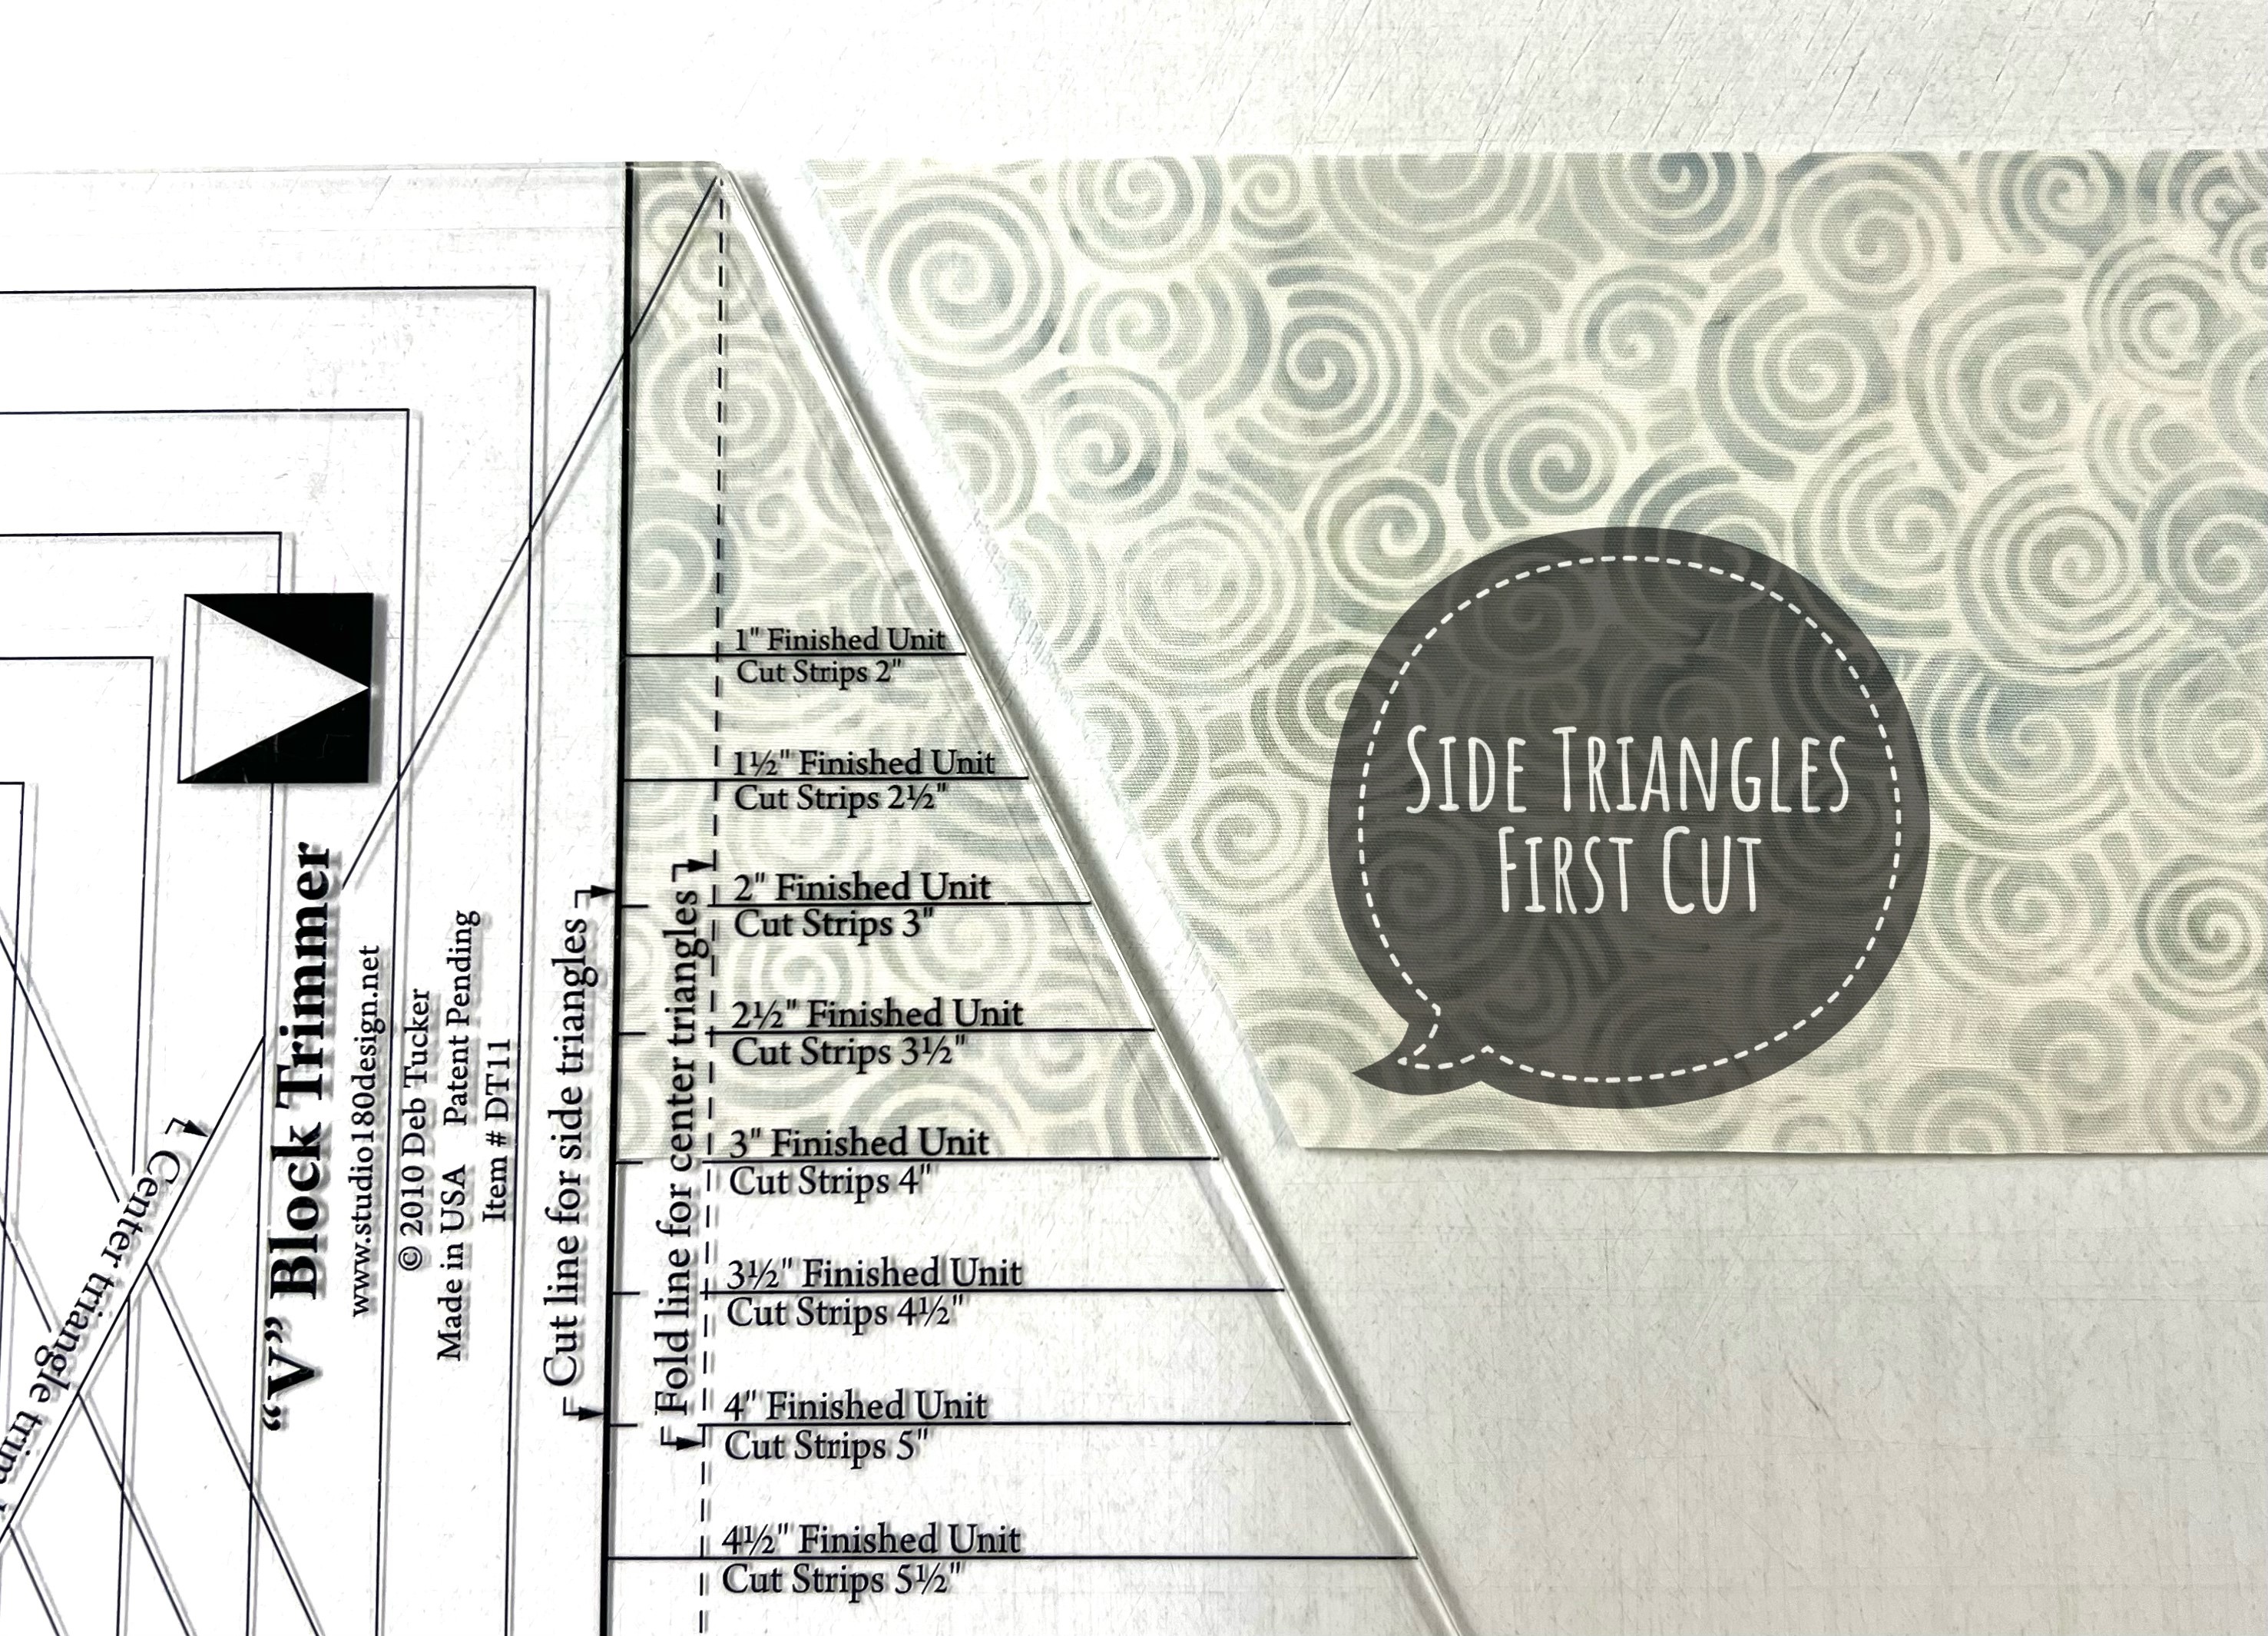
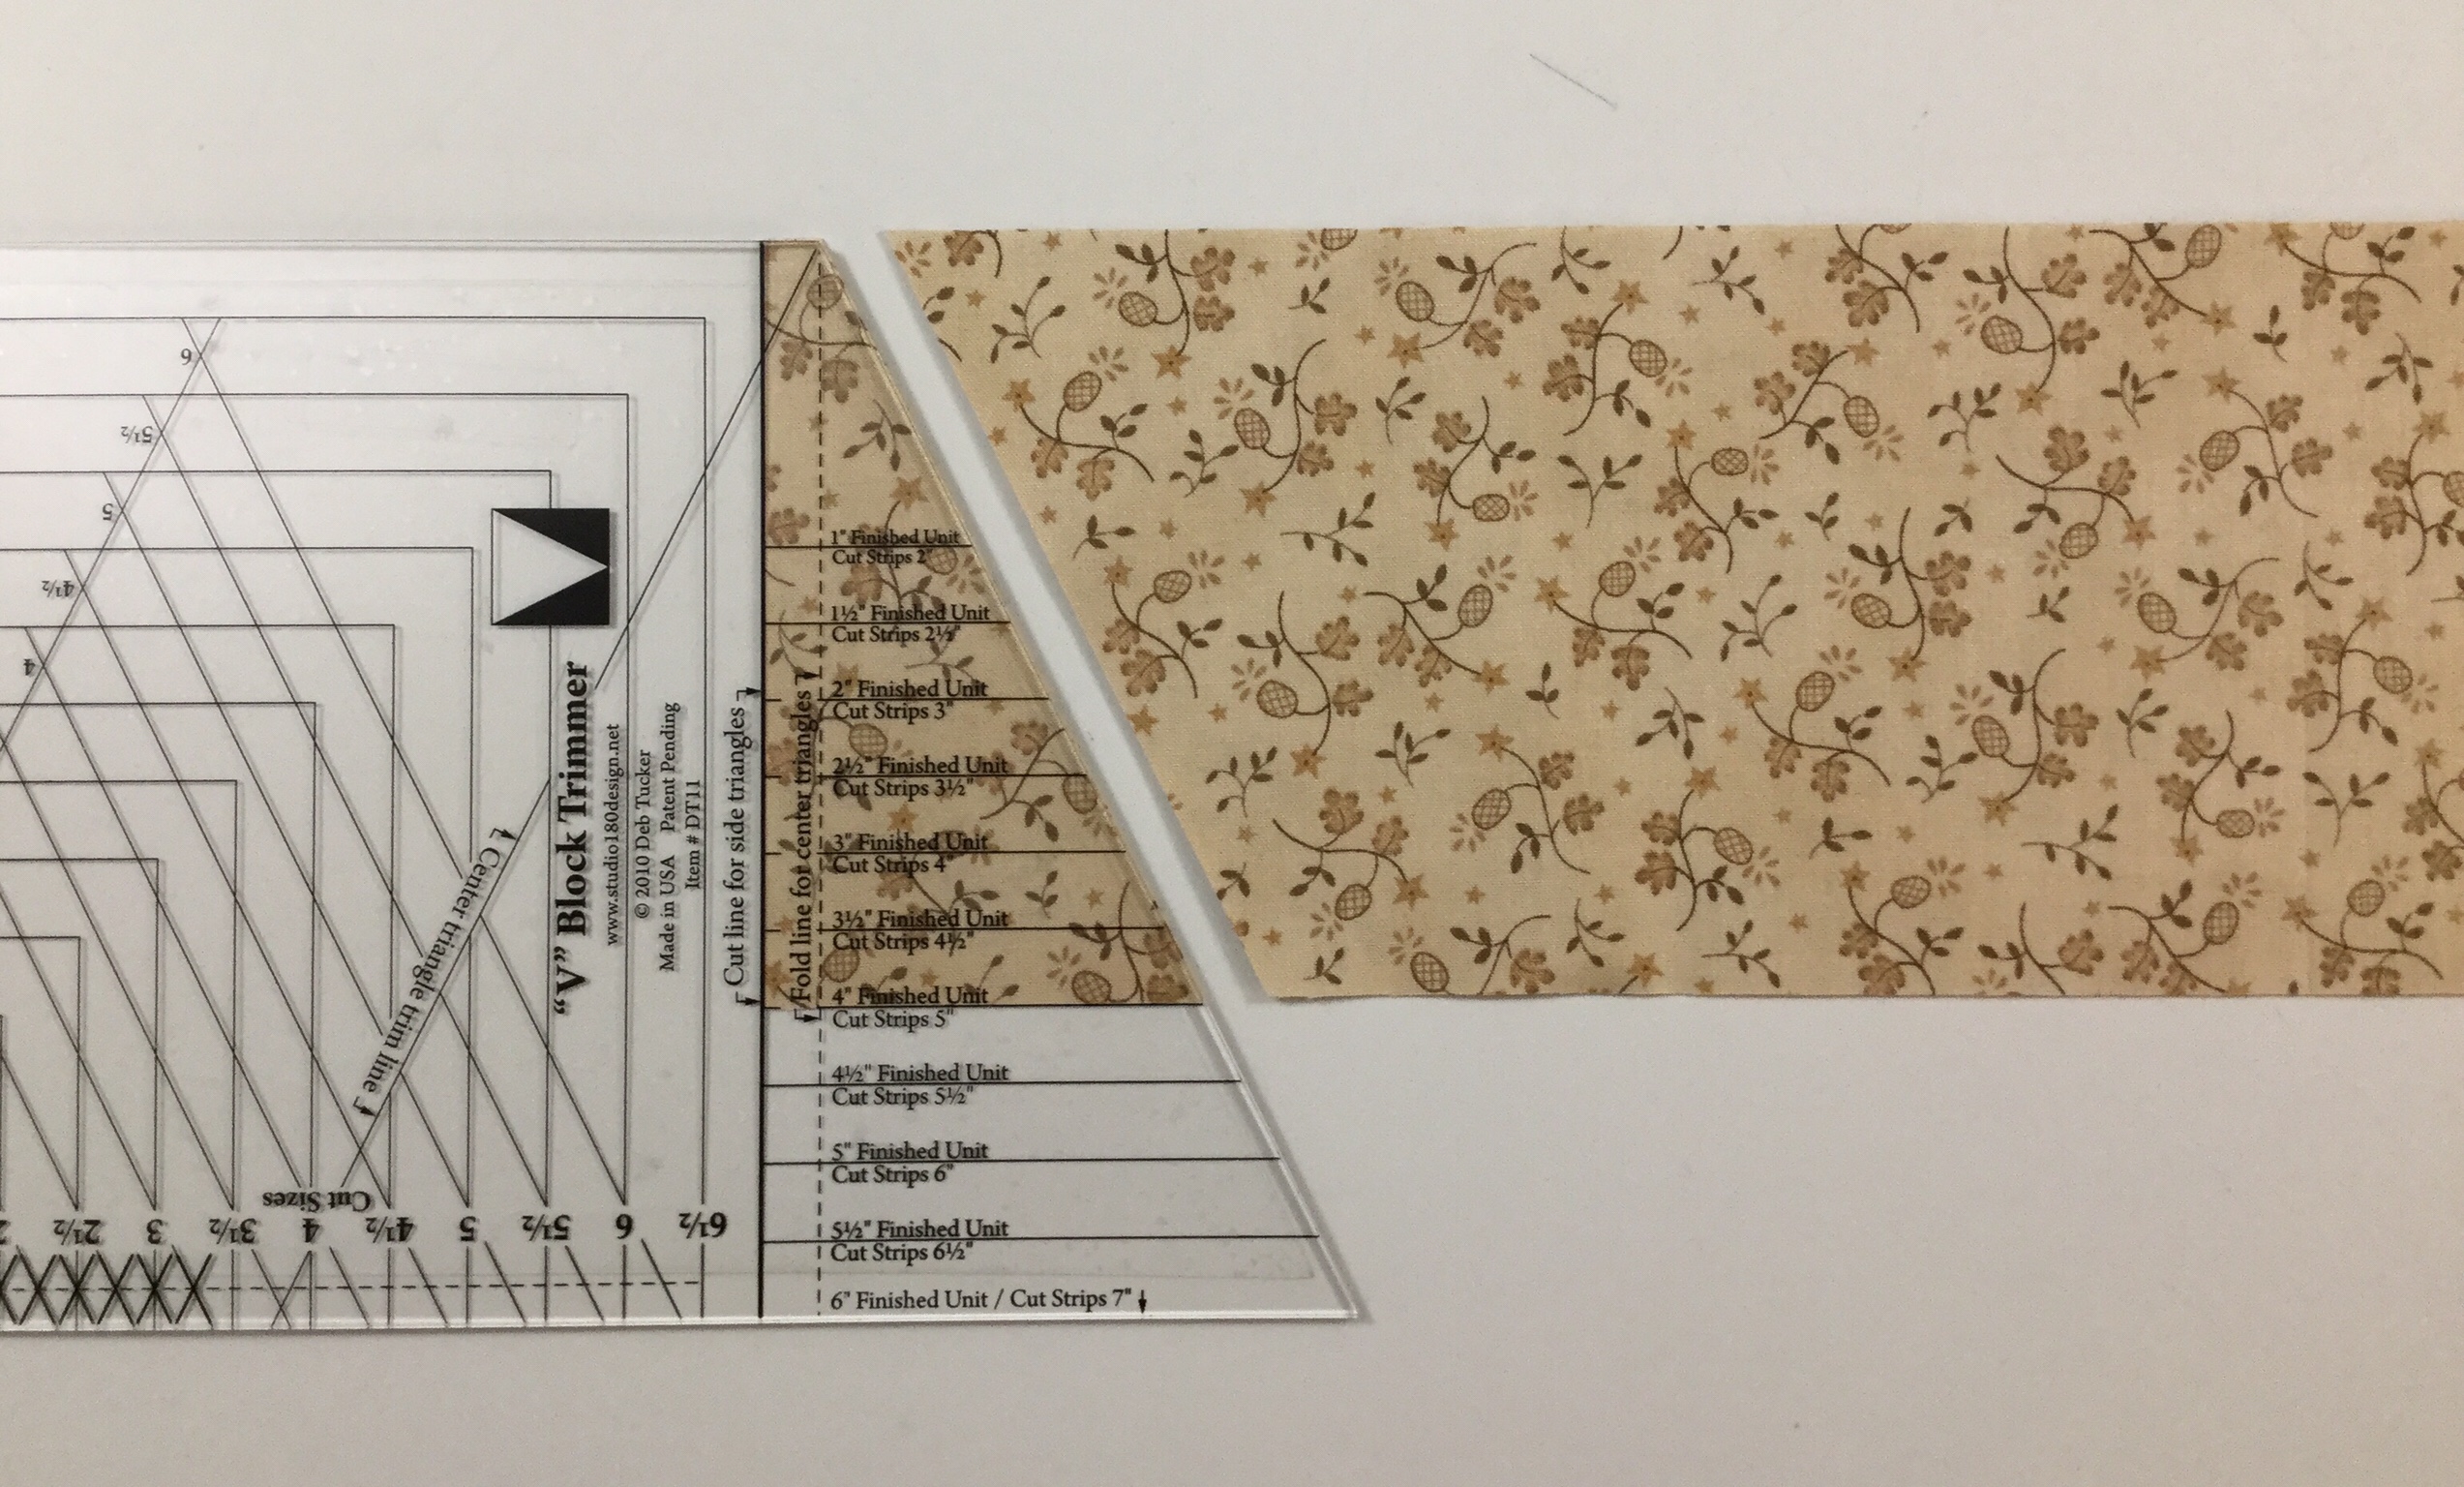
Place the strips facing each other, either right sides or wrong side together on the cutting mat. Locate the bold solid line on the tool that reads “Cut Line for Side Triangles”. Position that line against the trimmed end of the strip and the proper size line against the bottom of the strip. Trim along the slanted edge of the tool.
To make the next cut, keep the fabric in the same position on the mat and rotate the tool as shown above and cut. Rotate the tool back to the first position and cut again. You will need four mirror image sets of side triangles for this block.
Lay out the V Block units, making sure you are lining up the long edge of the side triangles with the edges of the center triangle. To sew position pieces right sides together lining up the slanted cut edges “tip to tip” and chain stitch one side triangle to each unit.
Press all seams toward the side triangles.
Position the second side triangles and stitch onto each unit as before.
Have you ever tried to sew with a Chihuahua on your lap? I don’t recommend it.
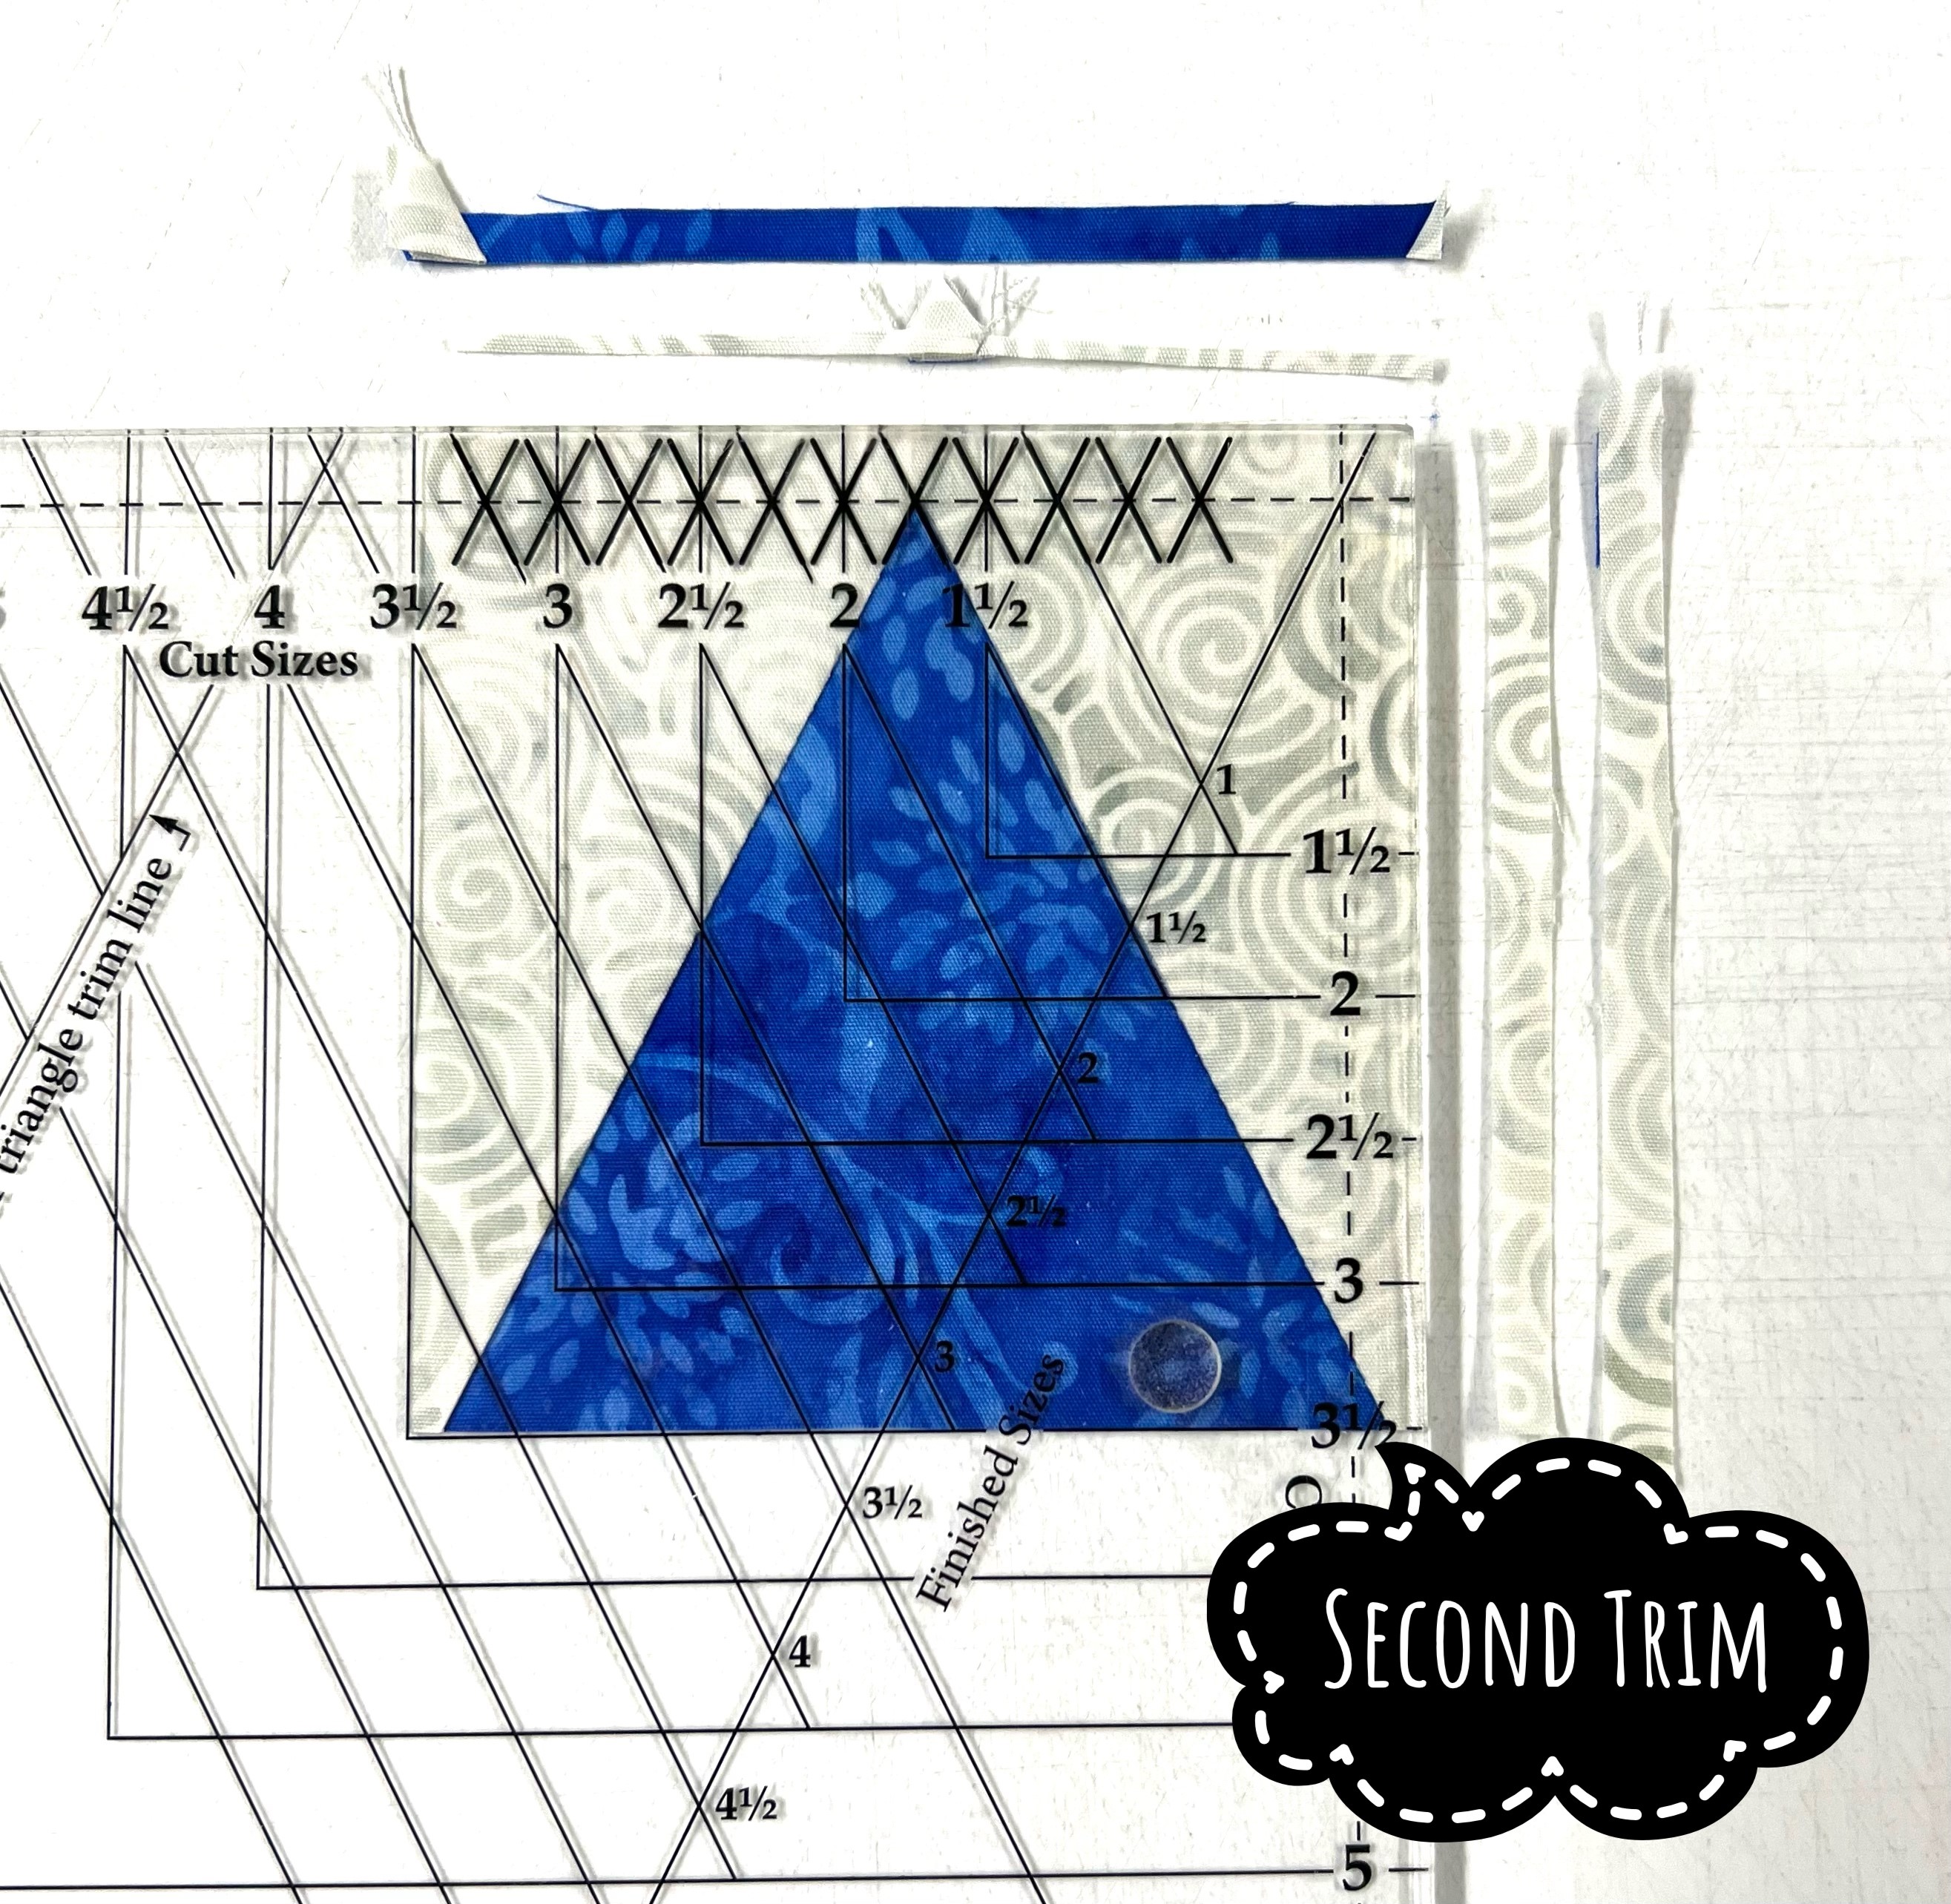
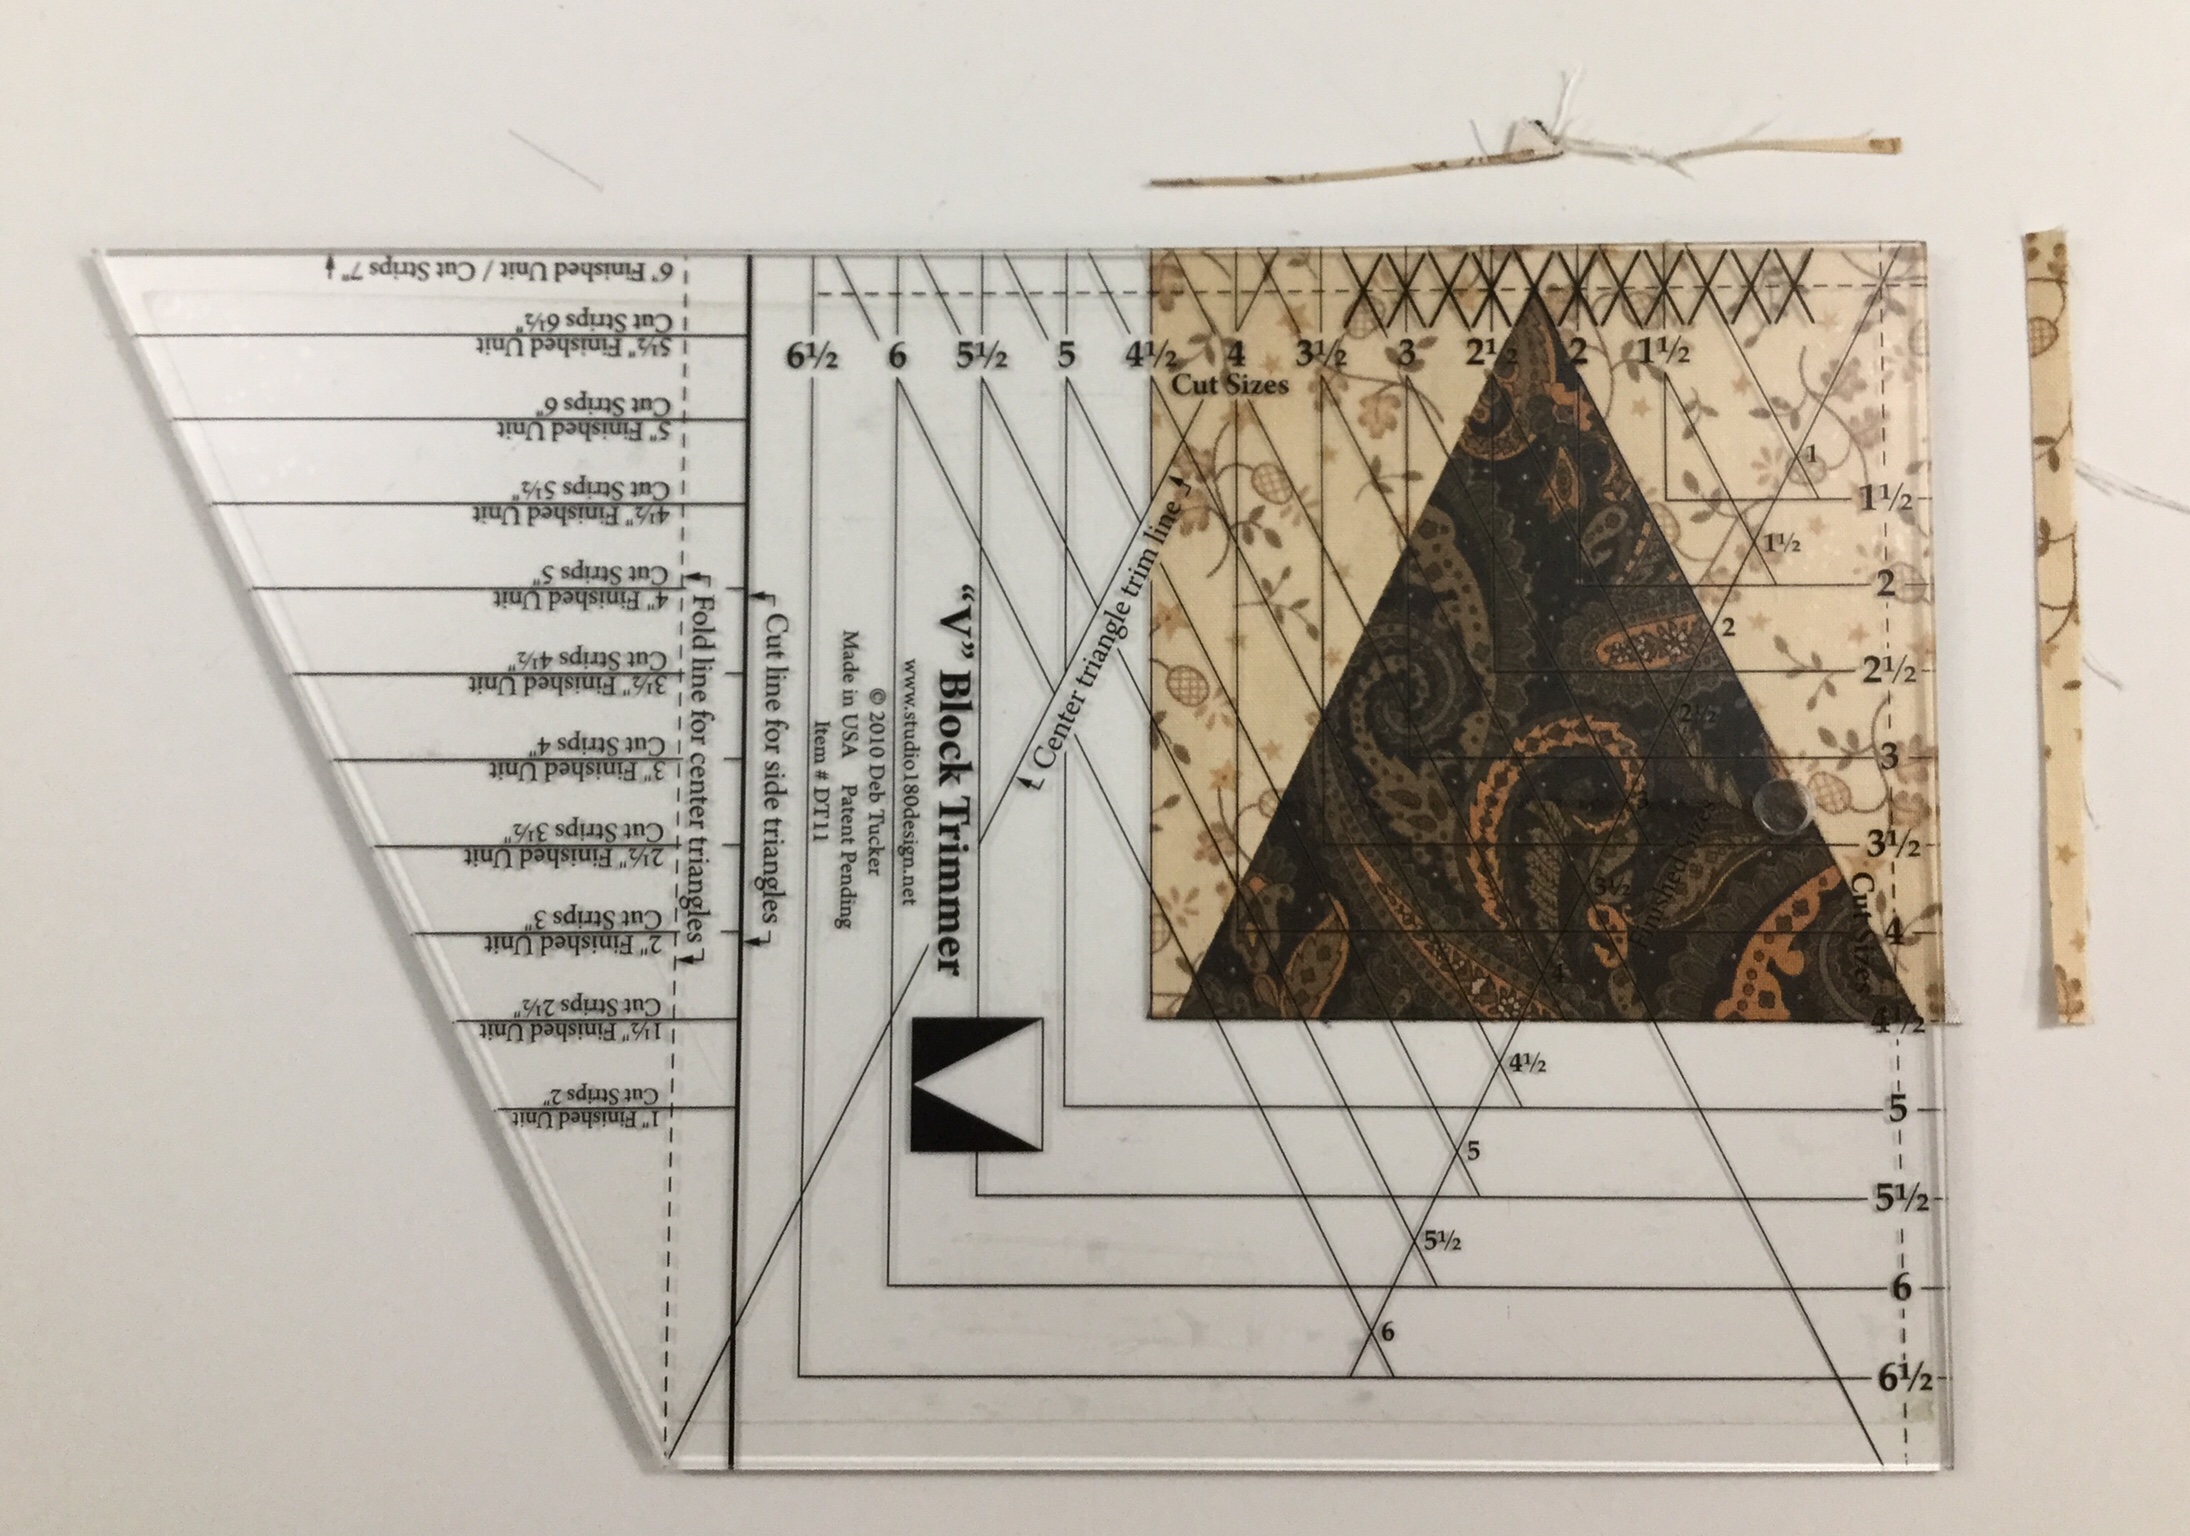
Press toward the side triangle. Lay the V Block unit on the cutting mat with “V” pointing toward you. Lay the tool on the unit aligning the “Finished Size” measurement with the seam lines. Trim up the right side and across the top. (For left hand cutting directions see tool instructions.)
Lift the tool and rotate the unit. Reposition the tool on top aligning the correct “Cut Size” measurements with the previously trimmed corner and “X” with the sewn seam intersection. Trim up the right side across the top.
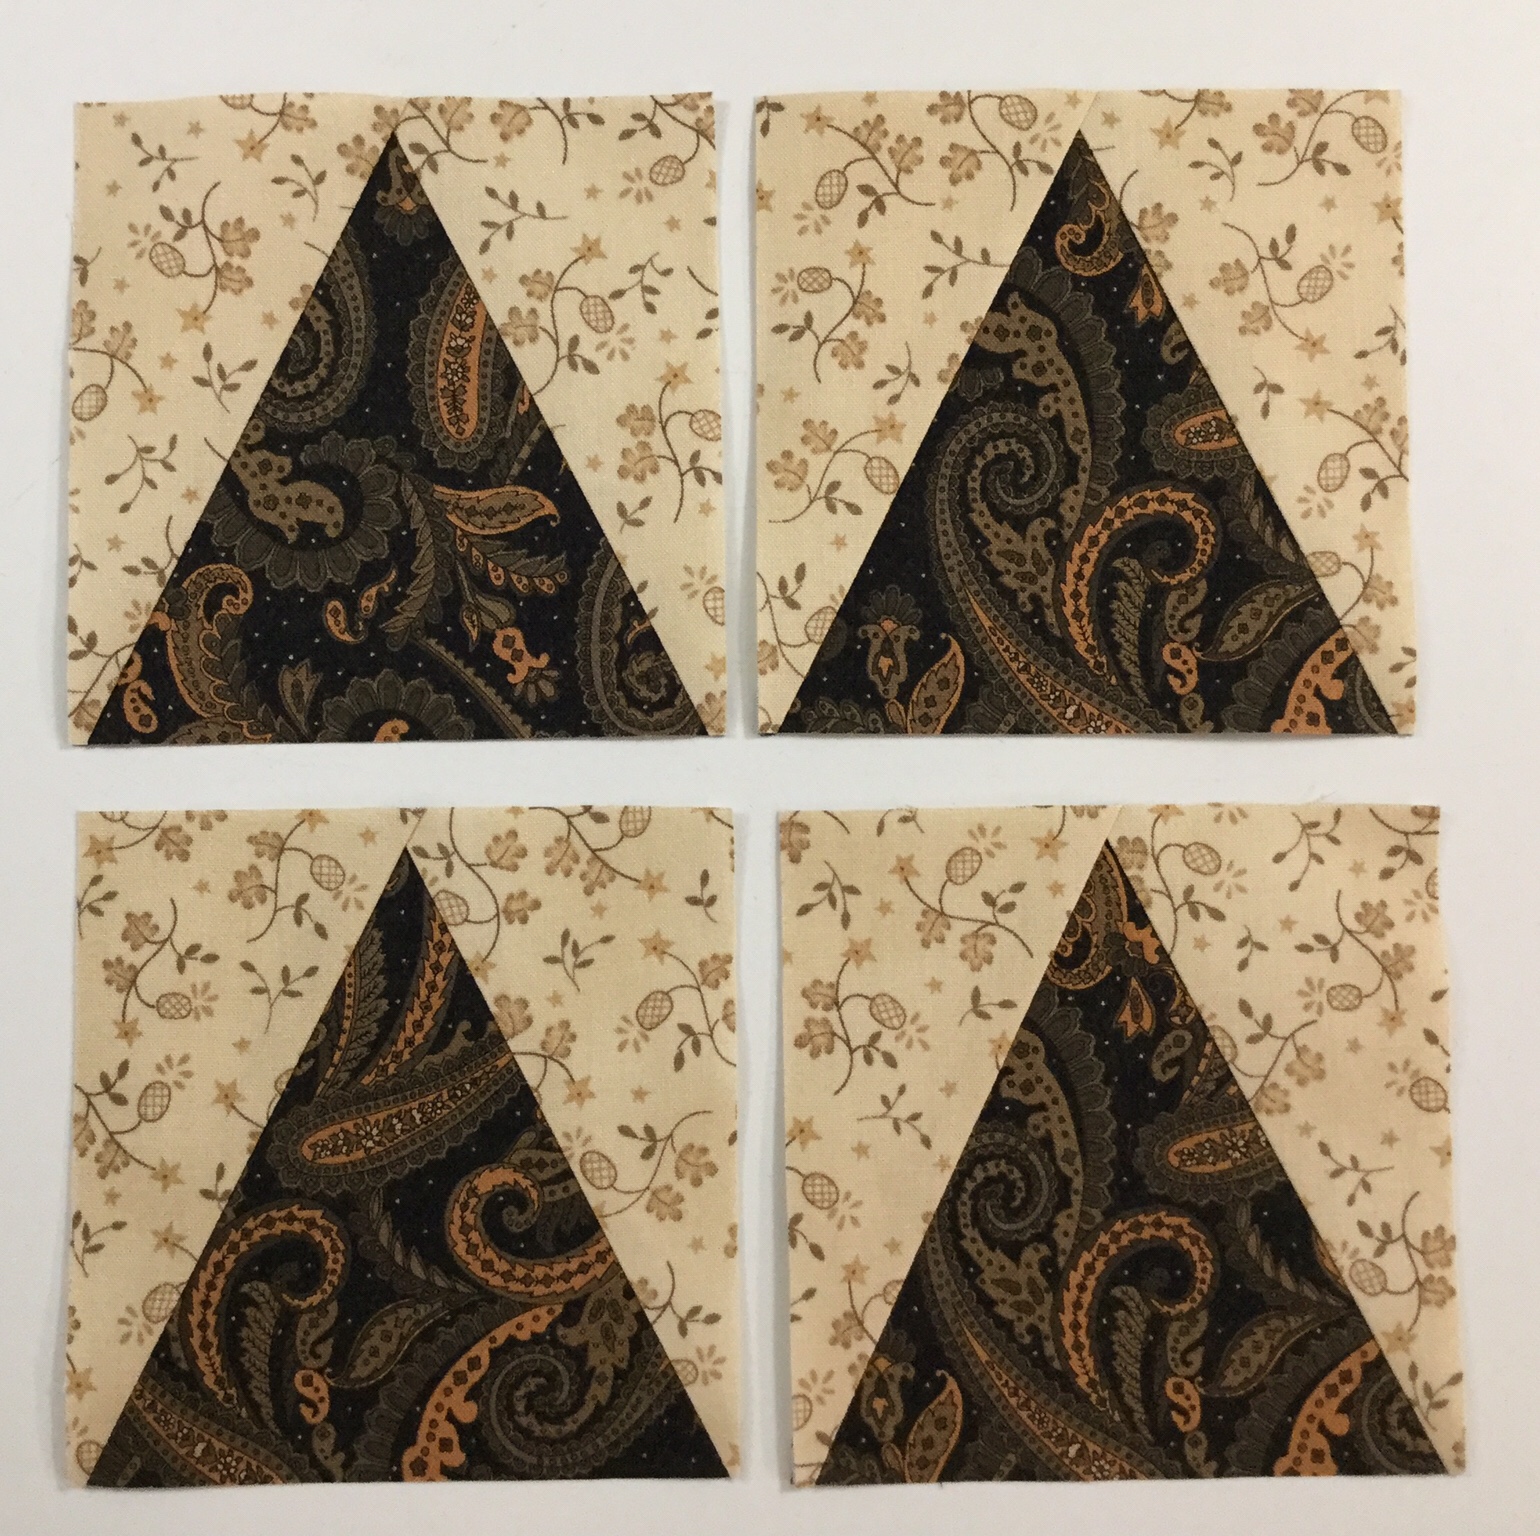
Trim all four V Block units. Remember for more help, there are free video’s for each of Deb’s tools at Studio 180 Design.
Four Patch Units
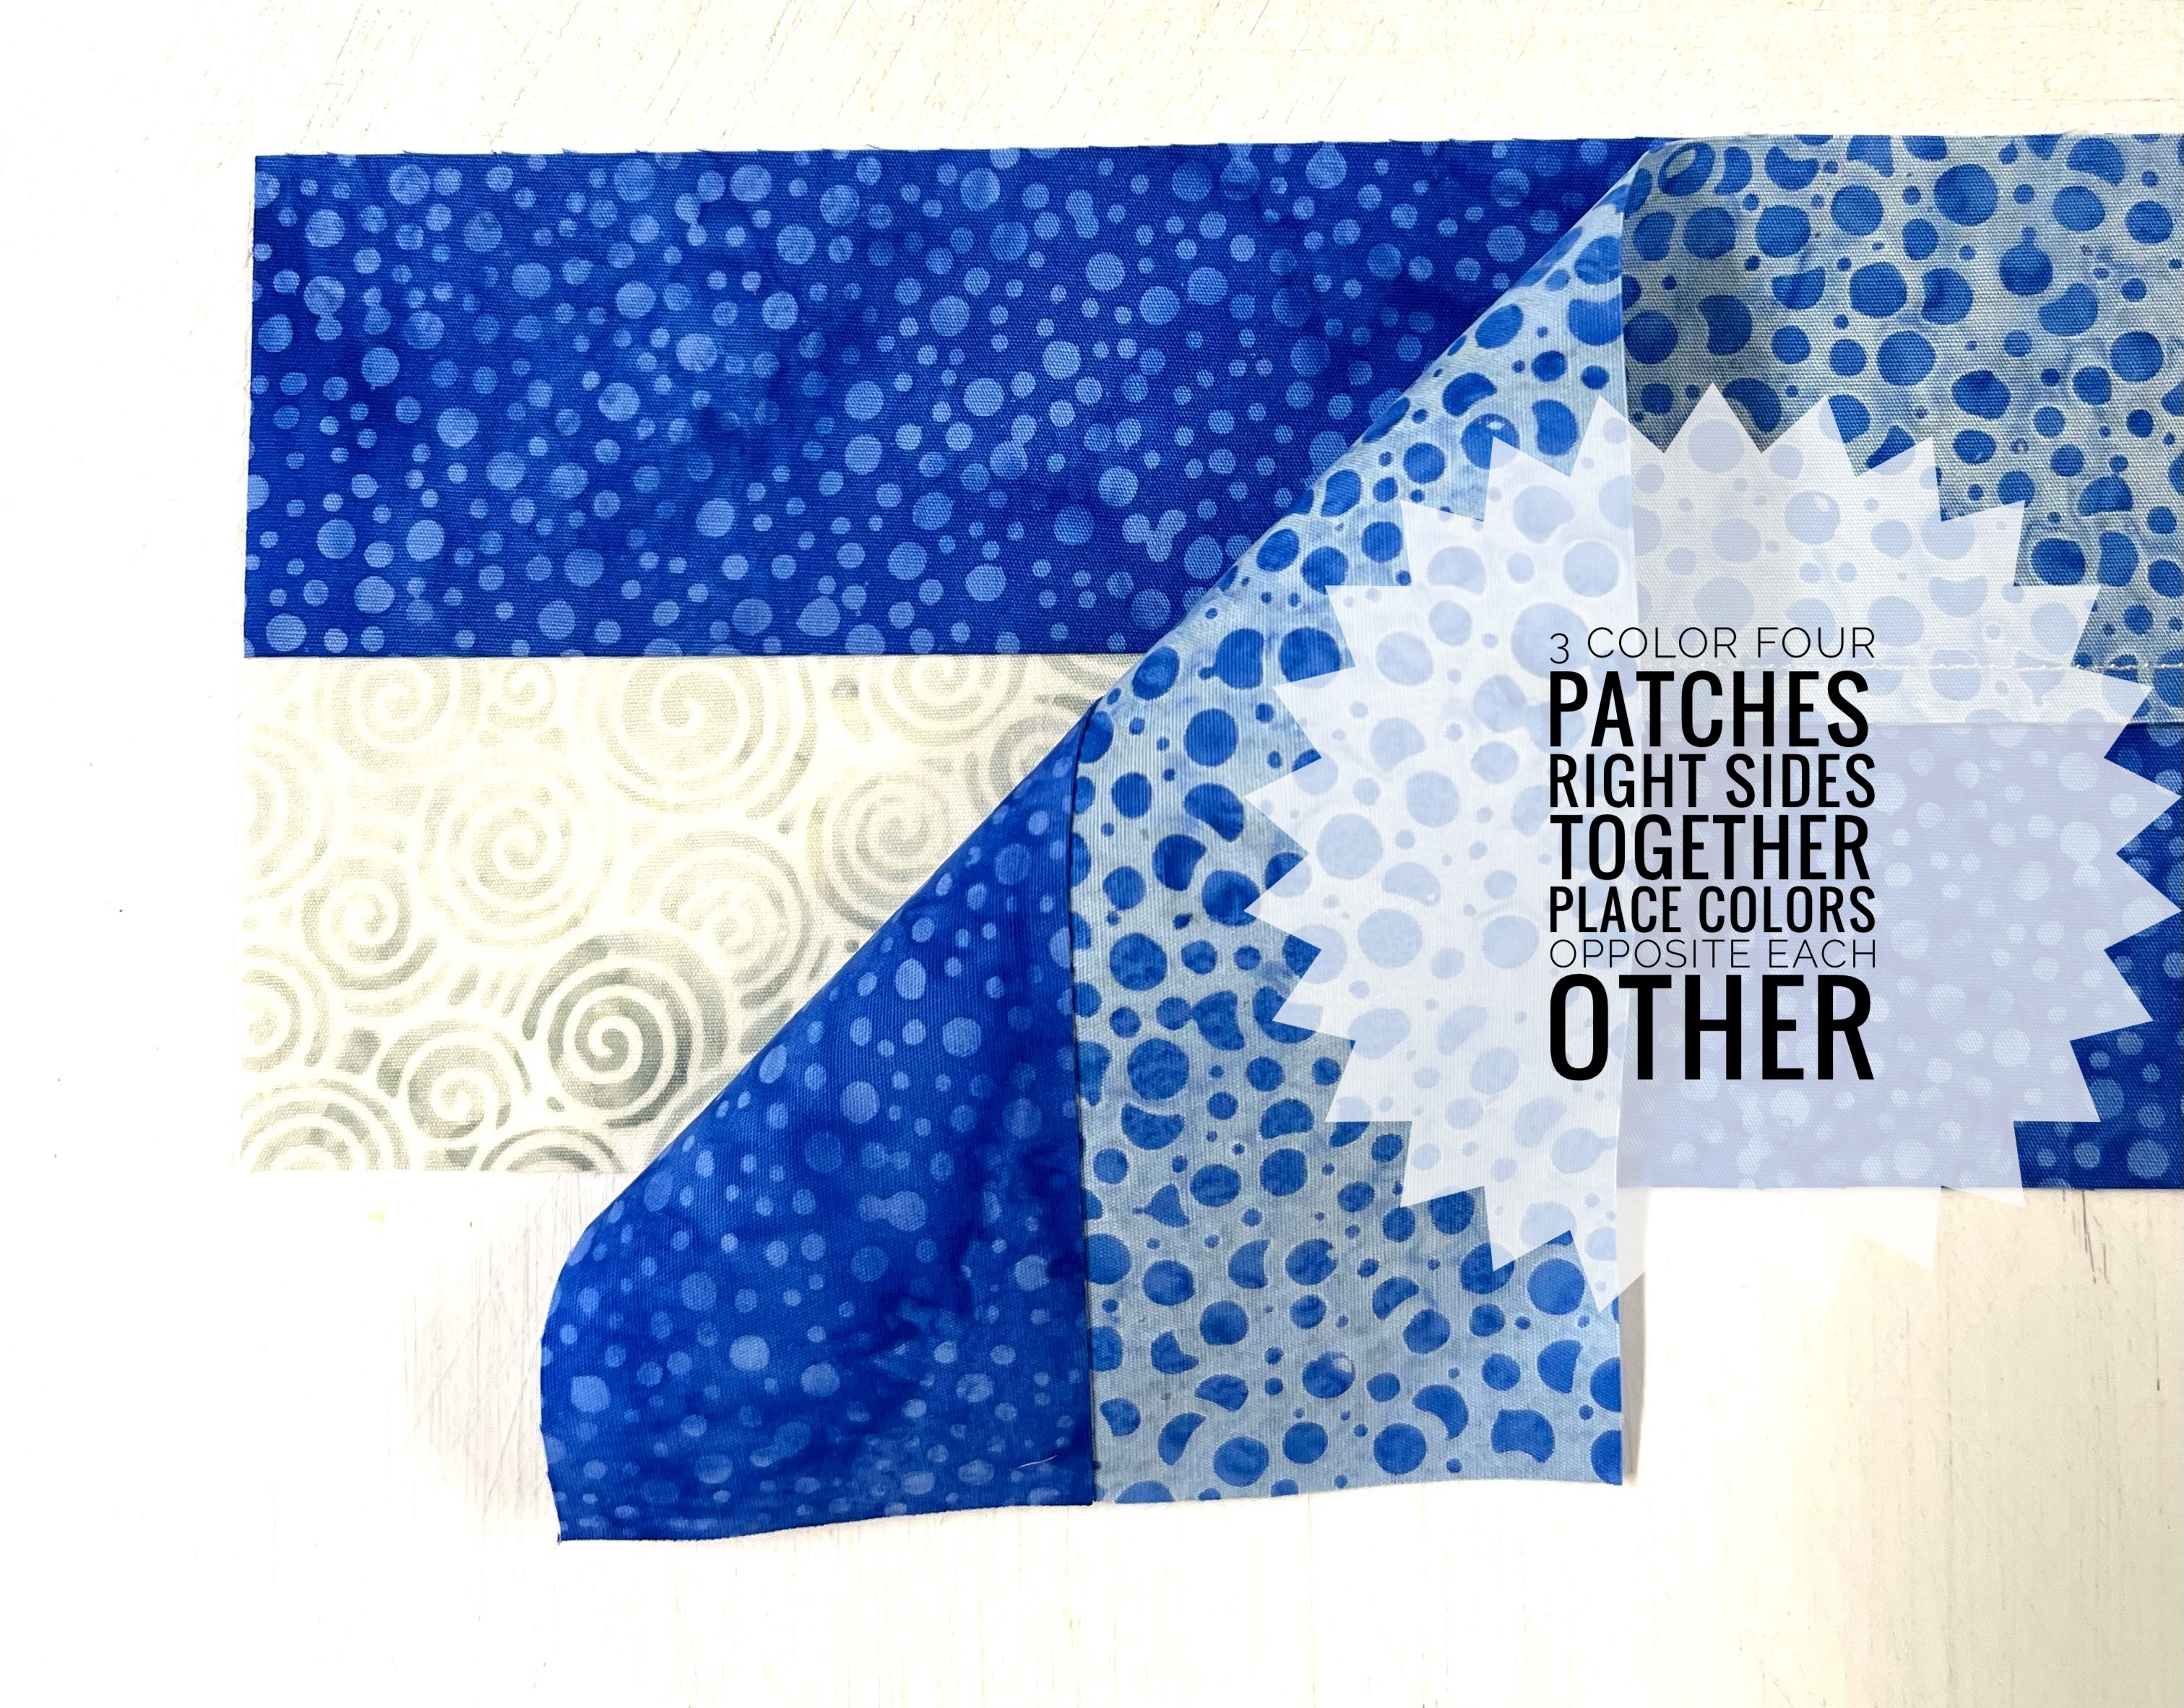
I love Deb Tucker’s new Four Patch Square Up tool, because four patch units are easy to make, so I save them for last. By then I’m tired and my brains have fallen on the floor somewhere. I know for this block I need four 4″ finished four patch units. I simply go to the size cutting chart that came with the tool. I cut one WOF 2 3/4″ strip from each of my two color choices. Position the strips right sides together and stitch them together along the long edge. Cut the sewn strips in half crosswise and press toward the darker fabric. Reverse one half of the strip over the other so each color is opposite the other color. Nest the seams well.
Sub-cut into units the same size as the width that you cut the strips. In this case my strips were 2 3/4″ wide. Chain stitch down the long side of the layered pair.
Swirl the centers and press.
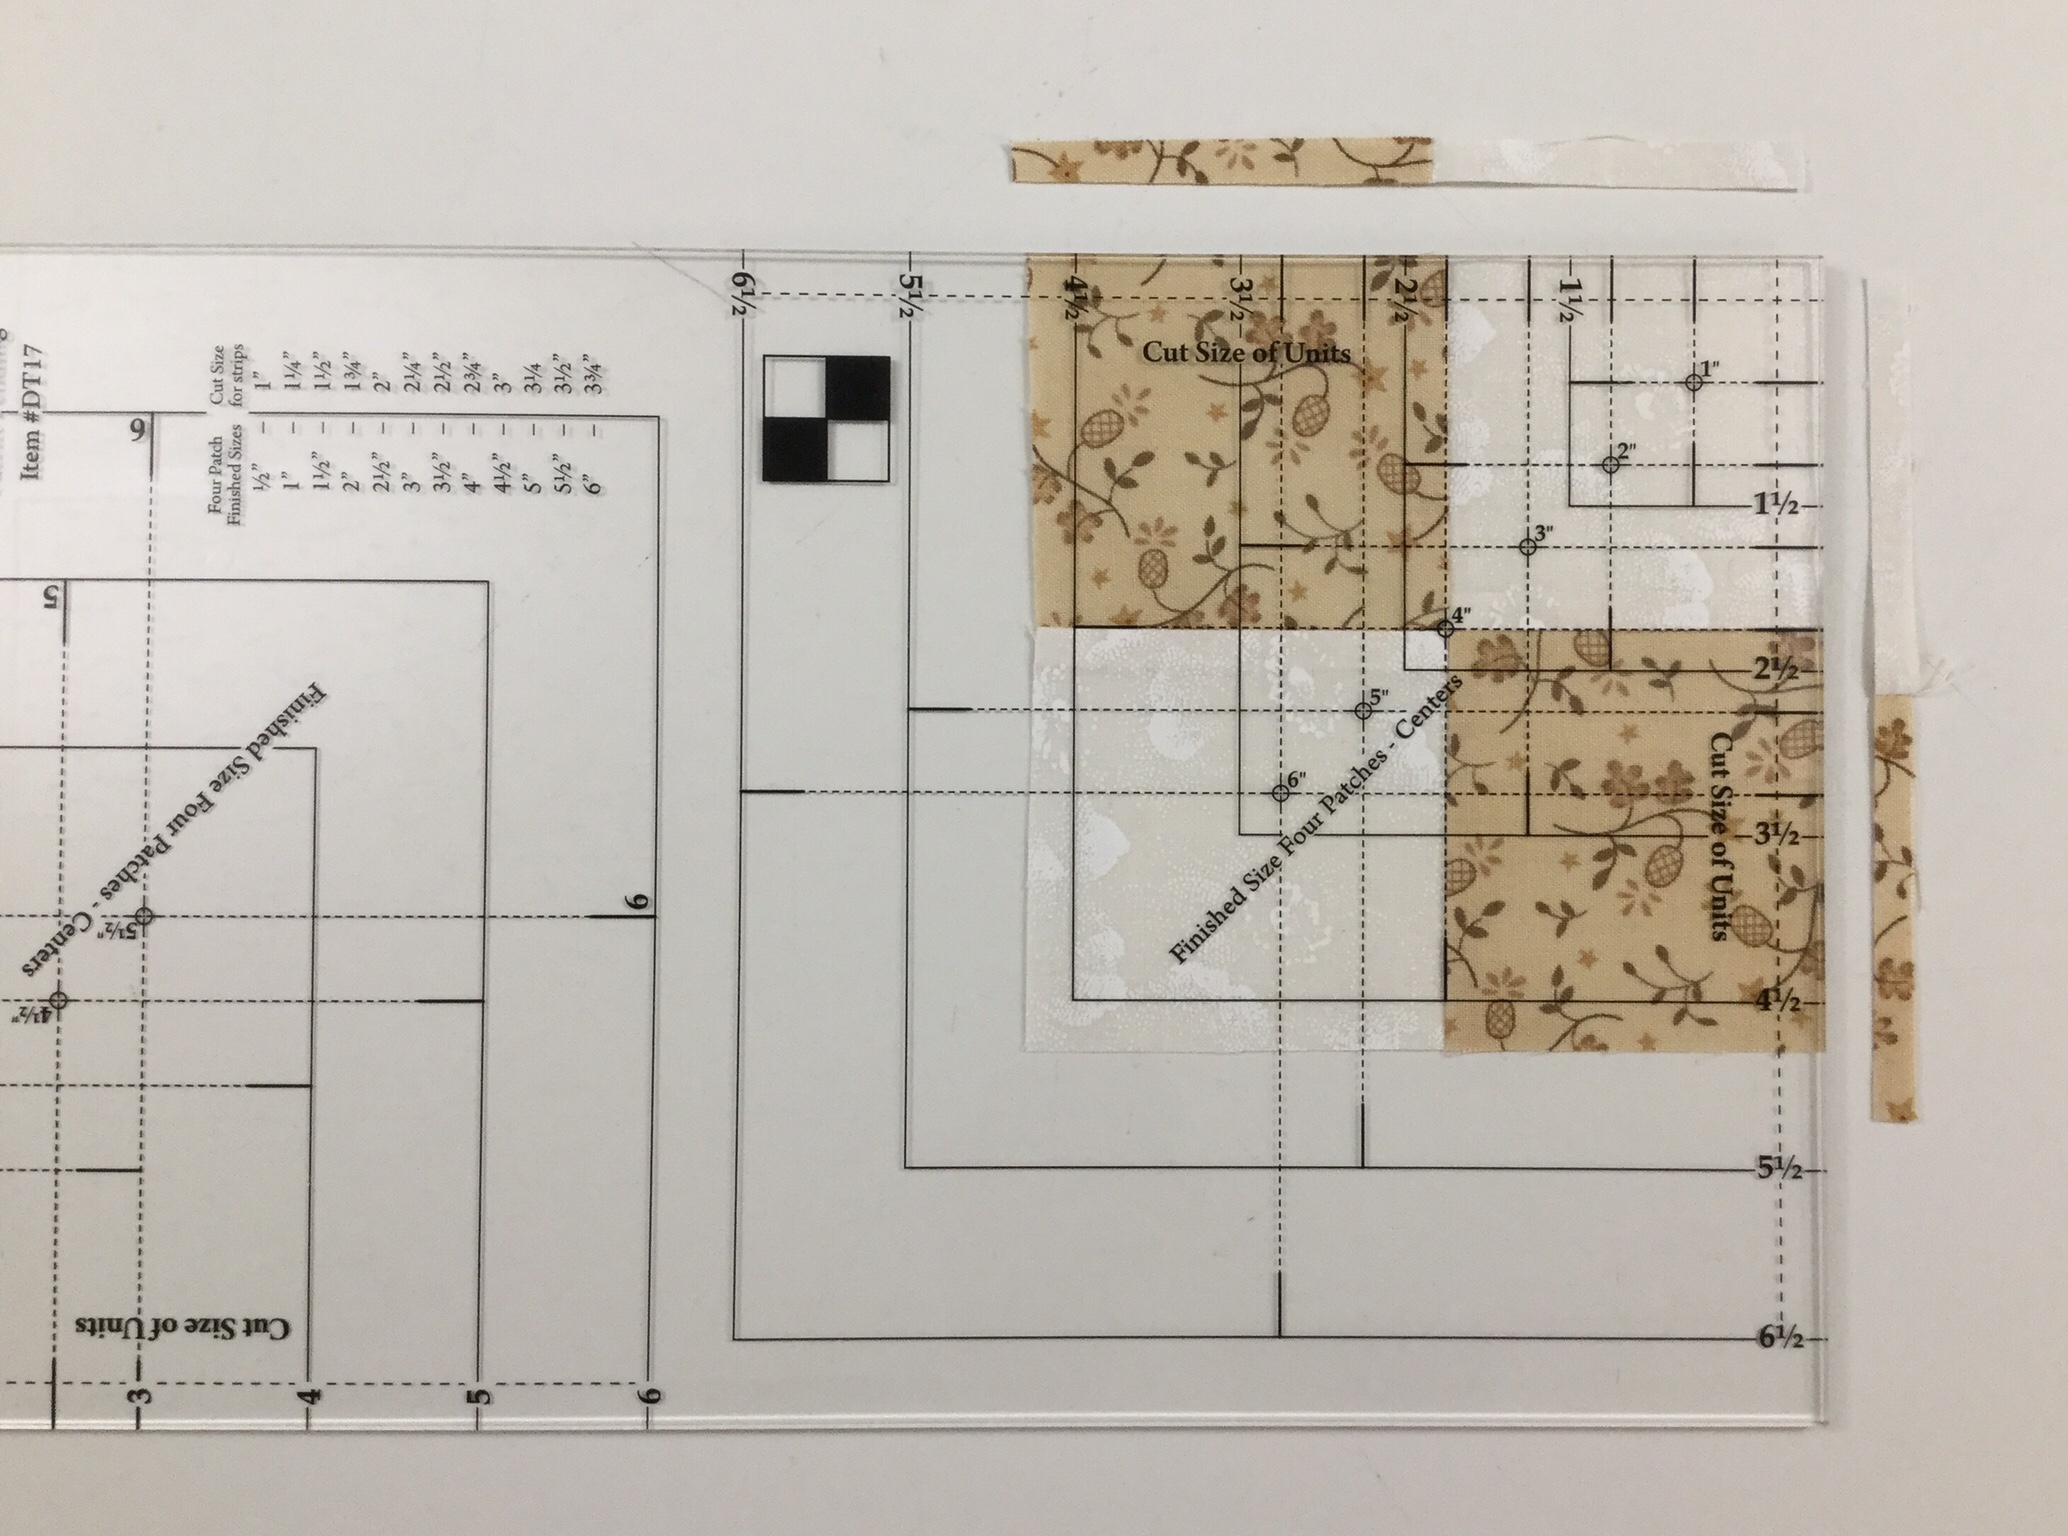
Locate the desired Finished Size circle on your Four Patch Square Up tool and position this circle over the seam intersection of your four patch unit. Line up the dashed lines radiating from the center with your seams. Trim up the right side and across the top.
Lift the tool and rotate the unit. Realign the finished size circle with the center and the dashed lines with the seams. Also make sure the outside trimmed edges of the unit are aligned with the solid cut size clean up lines. Trim up the right side and across the top, and presto you have a beautiful perfectly square Four Patch unit!
Cut a 4 1/2″ center square that matches your star points. Lay out your V Block and four patch units.
Sew the units into rows and press as shown. Join the rows, stitch and press away from the center.
Check out the other color options on the supply list. One more BlockBuster block and I will put together my sampler quilt.
I had a really busy Fall teaching schedule this year. I am so looking forward to 2018. I got a jump start by making a quilt for Granddaughter Bailey’s 19th birthday. She absolutely loves New York City. We have visited there several times and walked from one end of the city to the other. I had this fabric from Timeless Treasures for several years. It just occurred to me that I must have been saving it for Bailey.
It is about 9 degrees in Central NY today. This is my 62nd One Block Wonder.
The back also has a New York City themed fabric. Happy Birthday Bailey!
Deb Tucker had a busy year also, Studio 180 has many new patterns out. I’m working on one now called Whirling Dervish that is so fun. I will be posting about it soon. There are also new Studio 180 Design Technique Sheets to expand our skills.
“Stacked Squares” is a technique that will allow you to make the “Economy” block perfectly every time without using paper foundation piecing. Like all Studio 180 Design processes, you’ll be constructing oversized units and then trimming them down. Above I made a block using the “Stacked Squares” technique sheet and the required Large Square/Squared Tool to make a square in a square, in a square in a square, in a square in a square, in a square in a square, in a square in a square, in a square in a square, in a square! Whew!
You have heard of the “Shaded Four Patch”, well here is a sample of what you can do with the “Shaded Nine Patch” units. The Shaded Nine Patch is an amazing unit that has endless possibilities all by itself or it can be combined with other fundamental units to create even more designs. With the Shaded Nine Patch Technique Sheet you can make this unit in 7 sizes.
I made this block using the Bird of Paradise Technique Sheet. This techniques requires the Large Square/Squared tool, it is so very cool. You can make this unit in 6 sizes from 1″x 2″ to 6″ x 12″.
I love this new “Eight at Once” technique sheet! With the Tucker Trimmer I you can make Half Square Triangles (HST) 2 at a time. With this technique you can make 8 HST’s at a time in 11 different sizes! Wowza!
Deb also gave us a new tool, the Four Patch Square Up. Four Patches are basic units that seem so simple to make. Just stitch 4 squares together and you’re good to go. But anyone who attempted these units knows they are notoriously difficult to make. The Four Patch Square Up tool is the solution. The tool’s perfectly engineered lines are designed to quickly locate and align with the unit center and sewn seams, allowing for easy trimming on all four sides. You will be able to make Four Patch Units in 12 sizes!
I played with the Four Patch Square up using Deb Tucker’s BlockBuster #24 Compounding Four block pattern. I love the design it makes when you put 4 blocks together.
I wish you all a Happy & Healthy New Year! Let’s go quilt something!