Yellow Brick Road With a Twist, #57

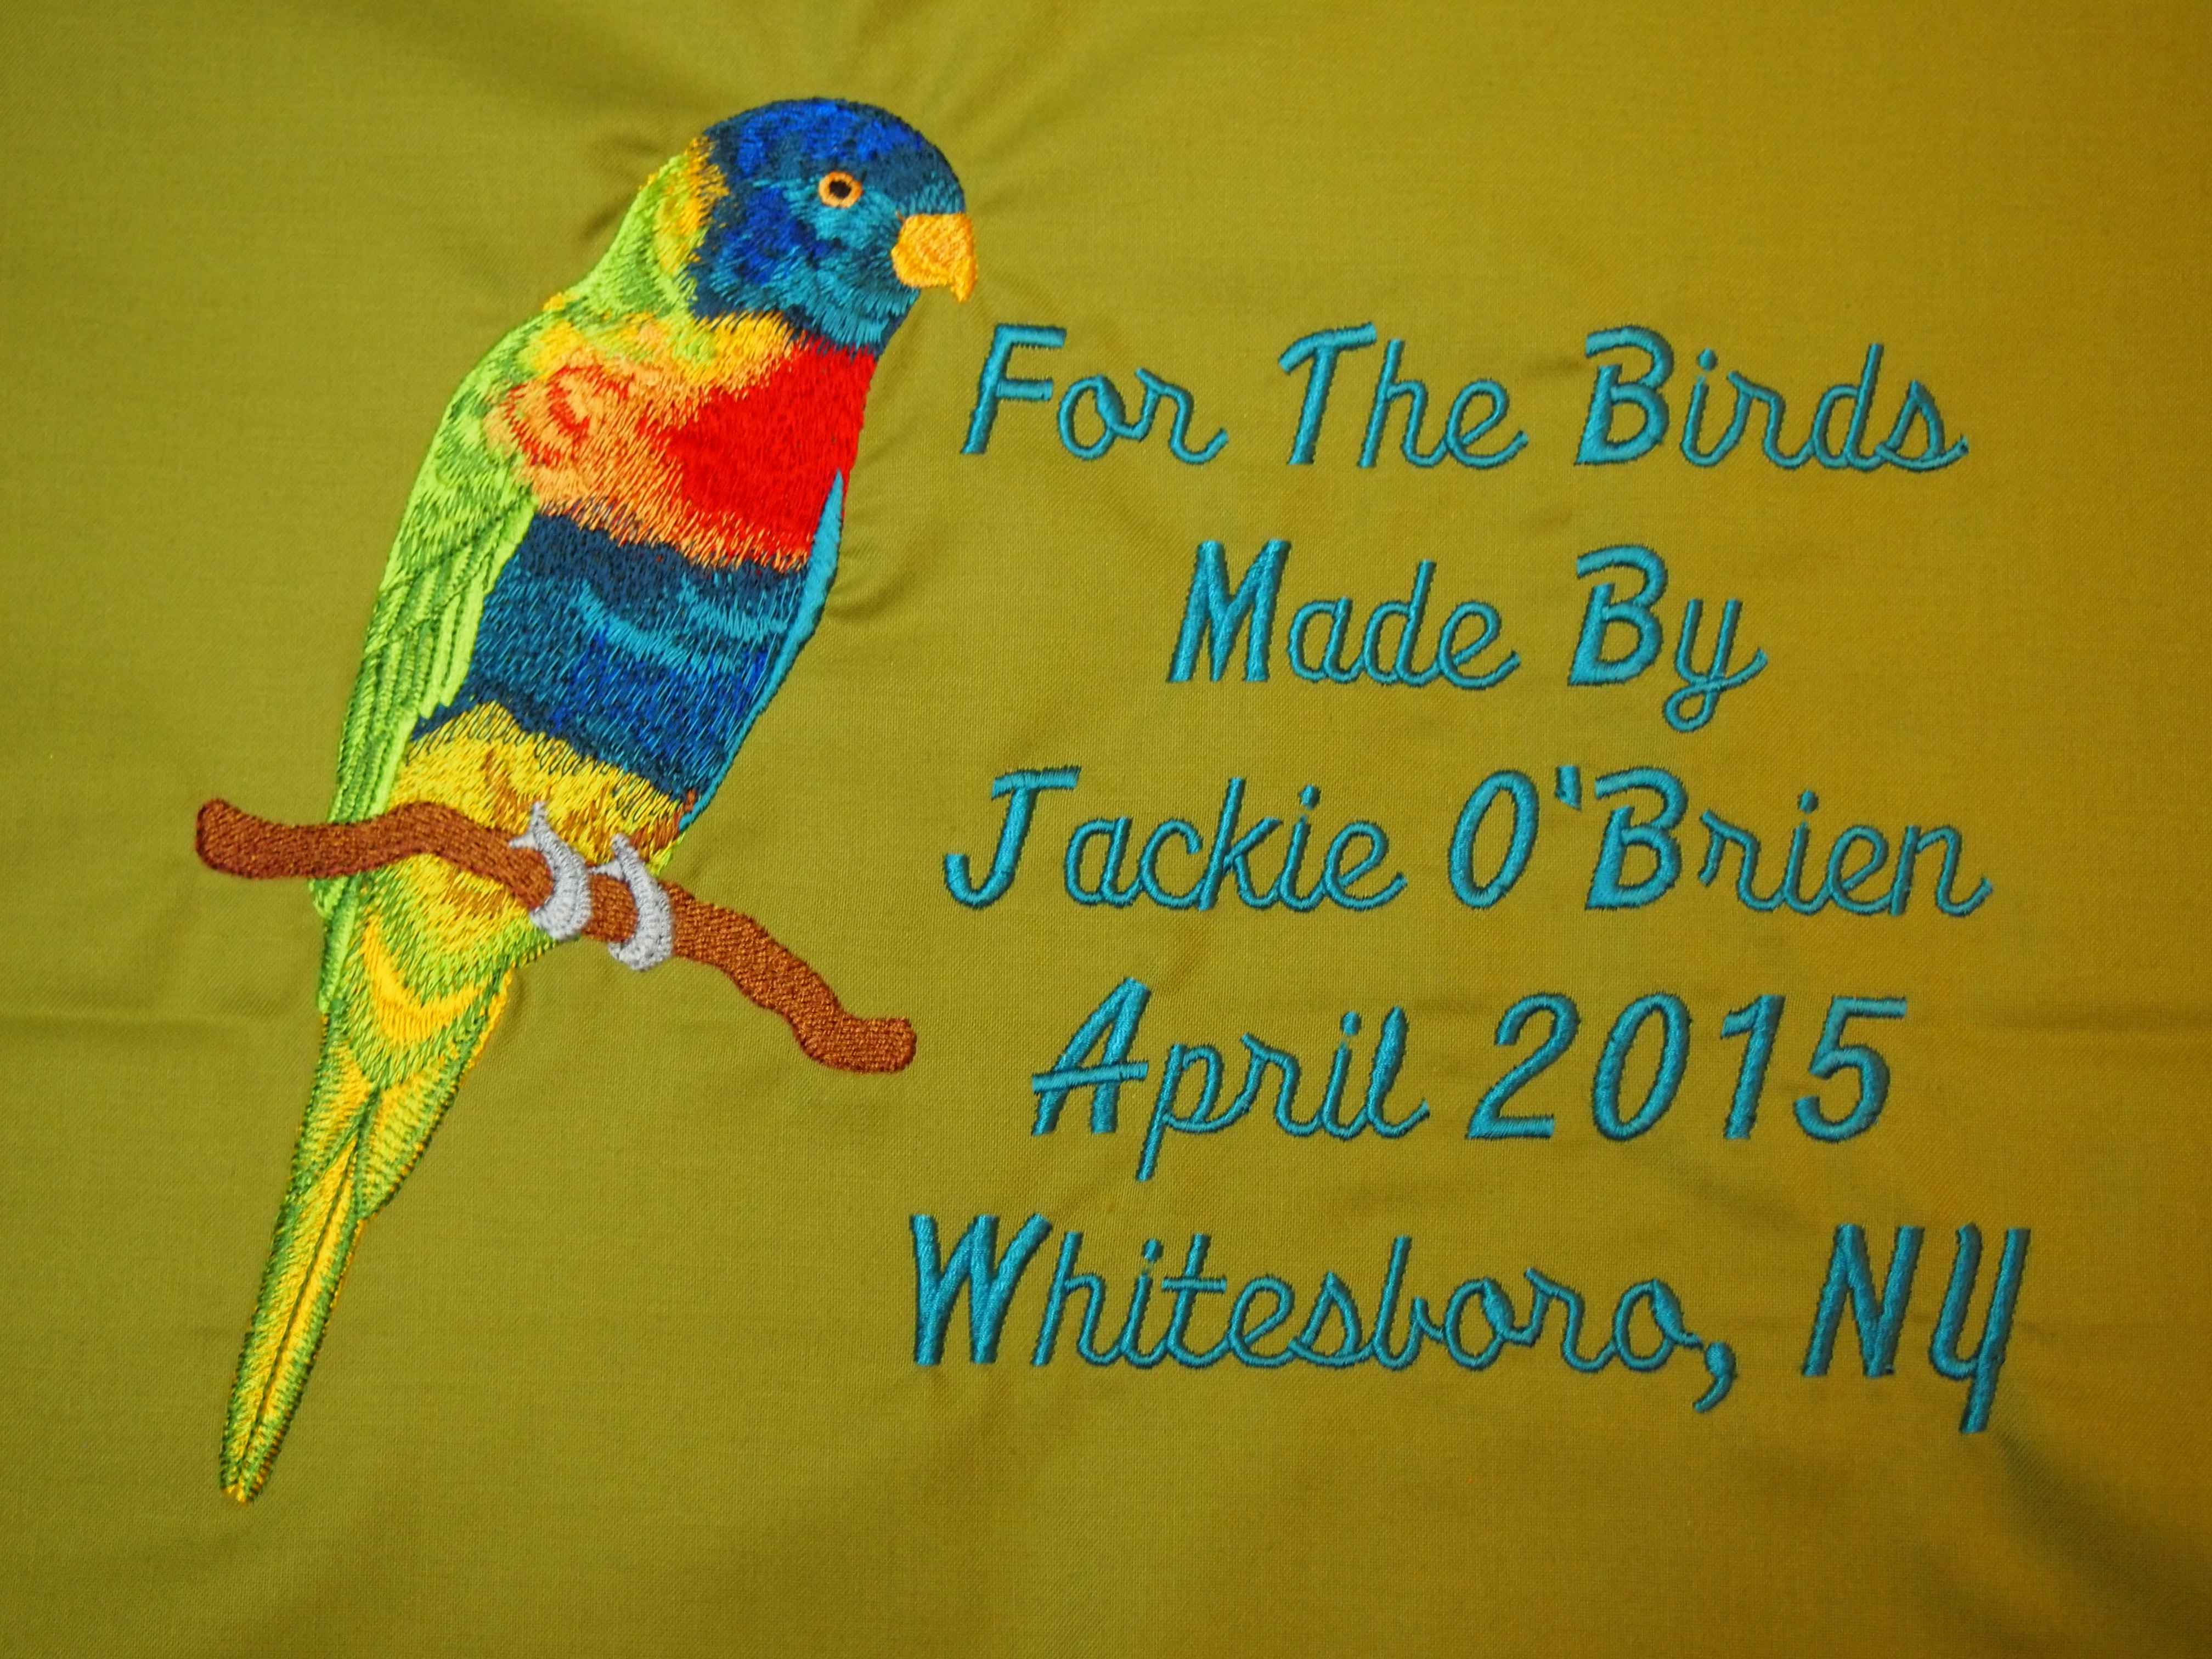
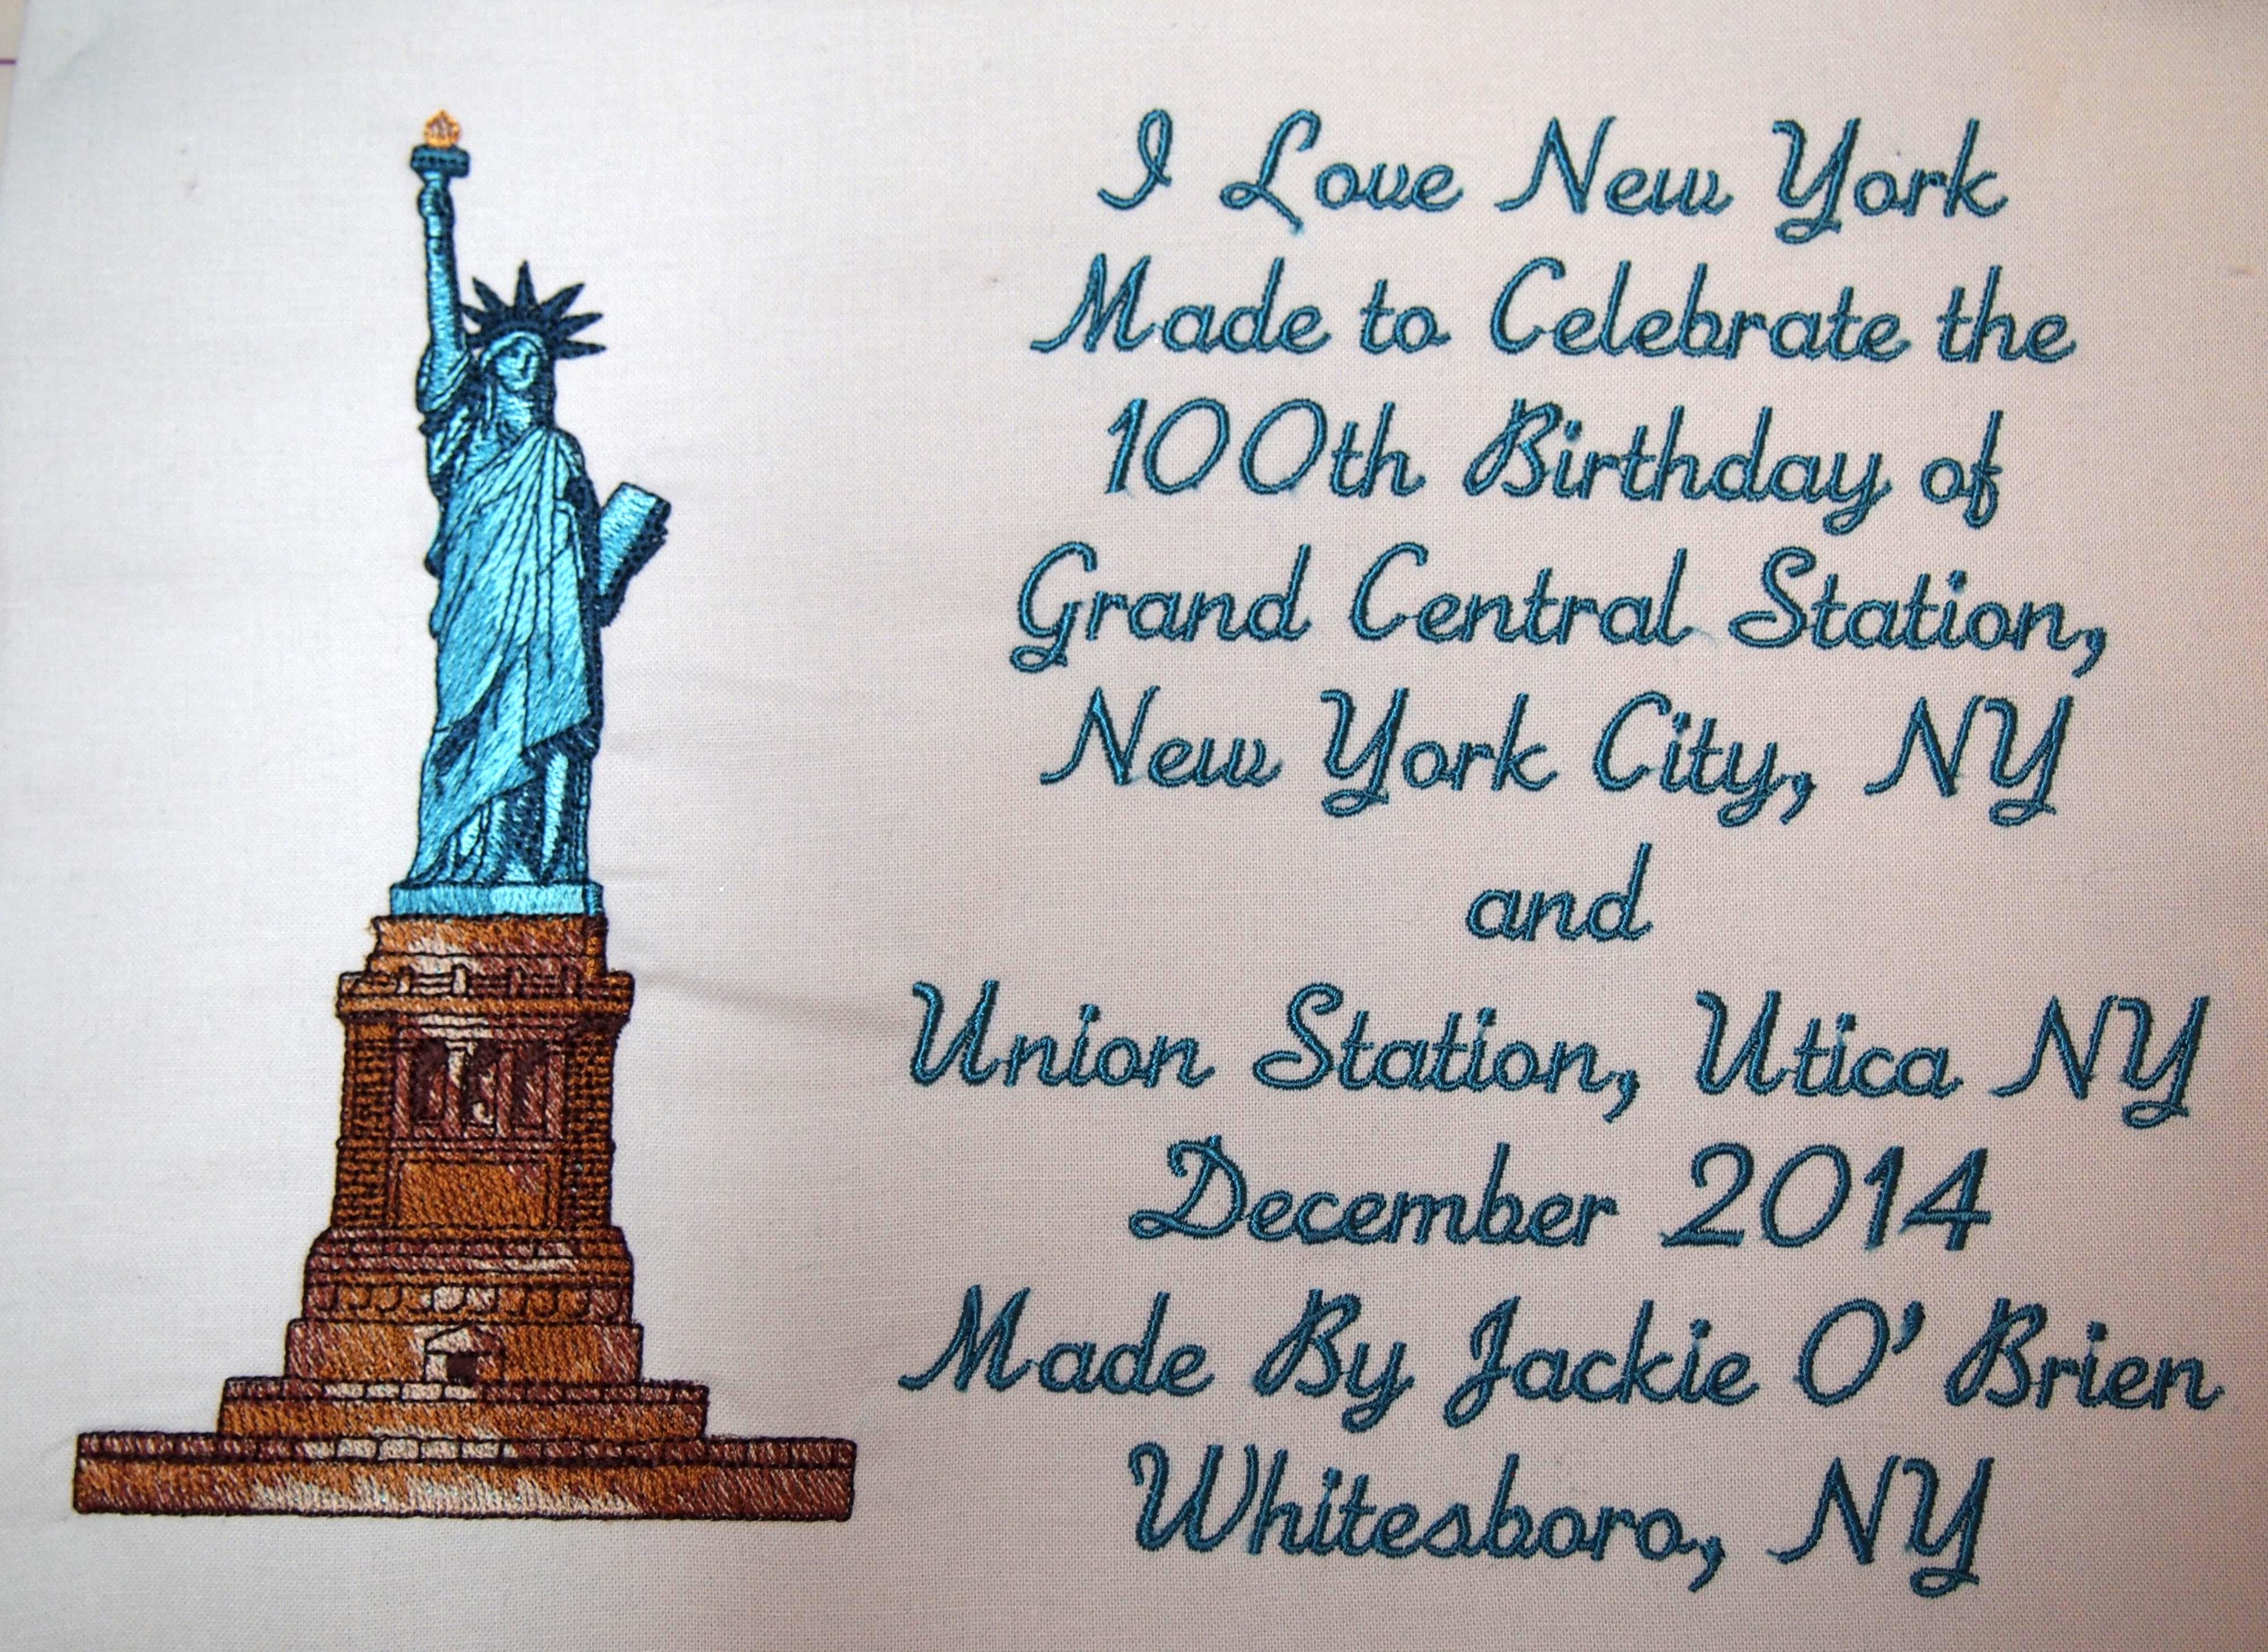
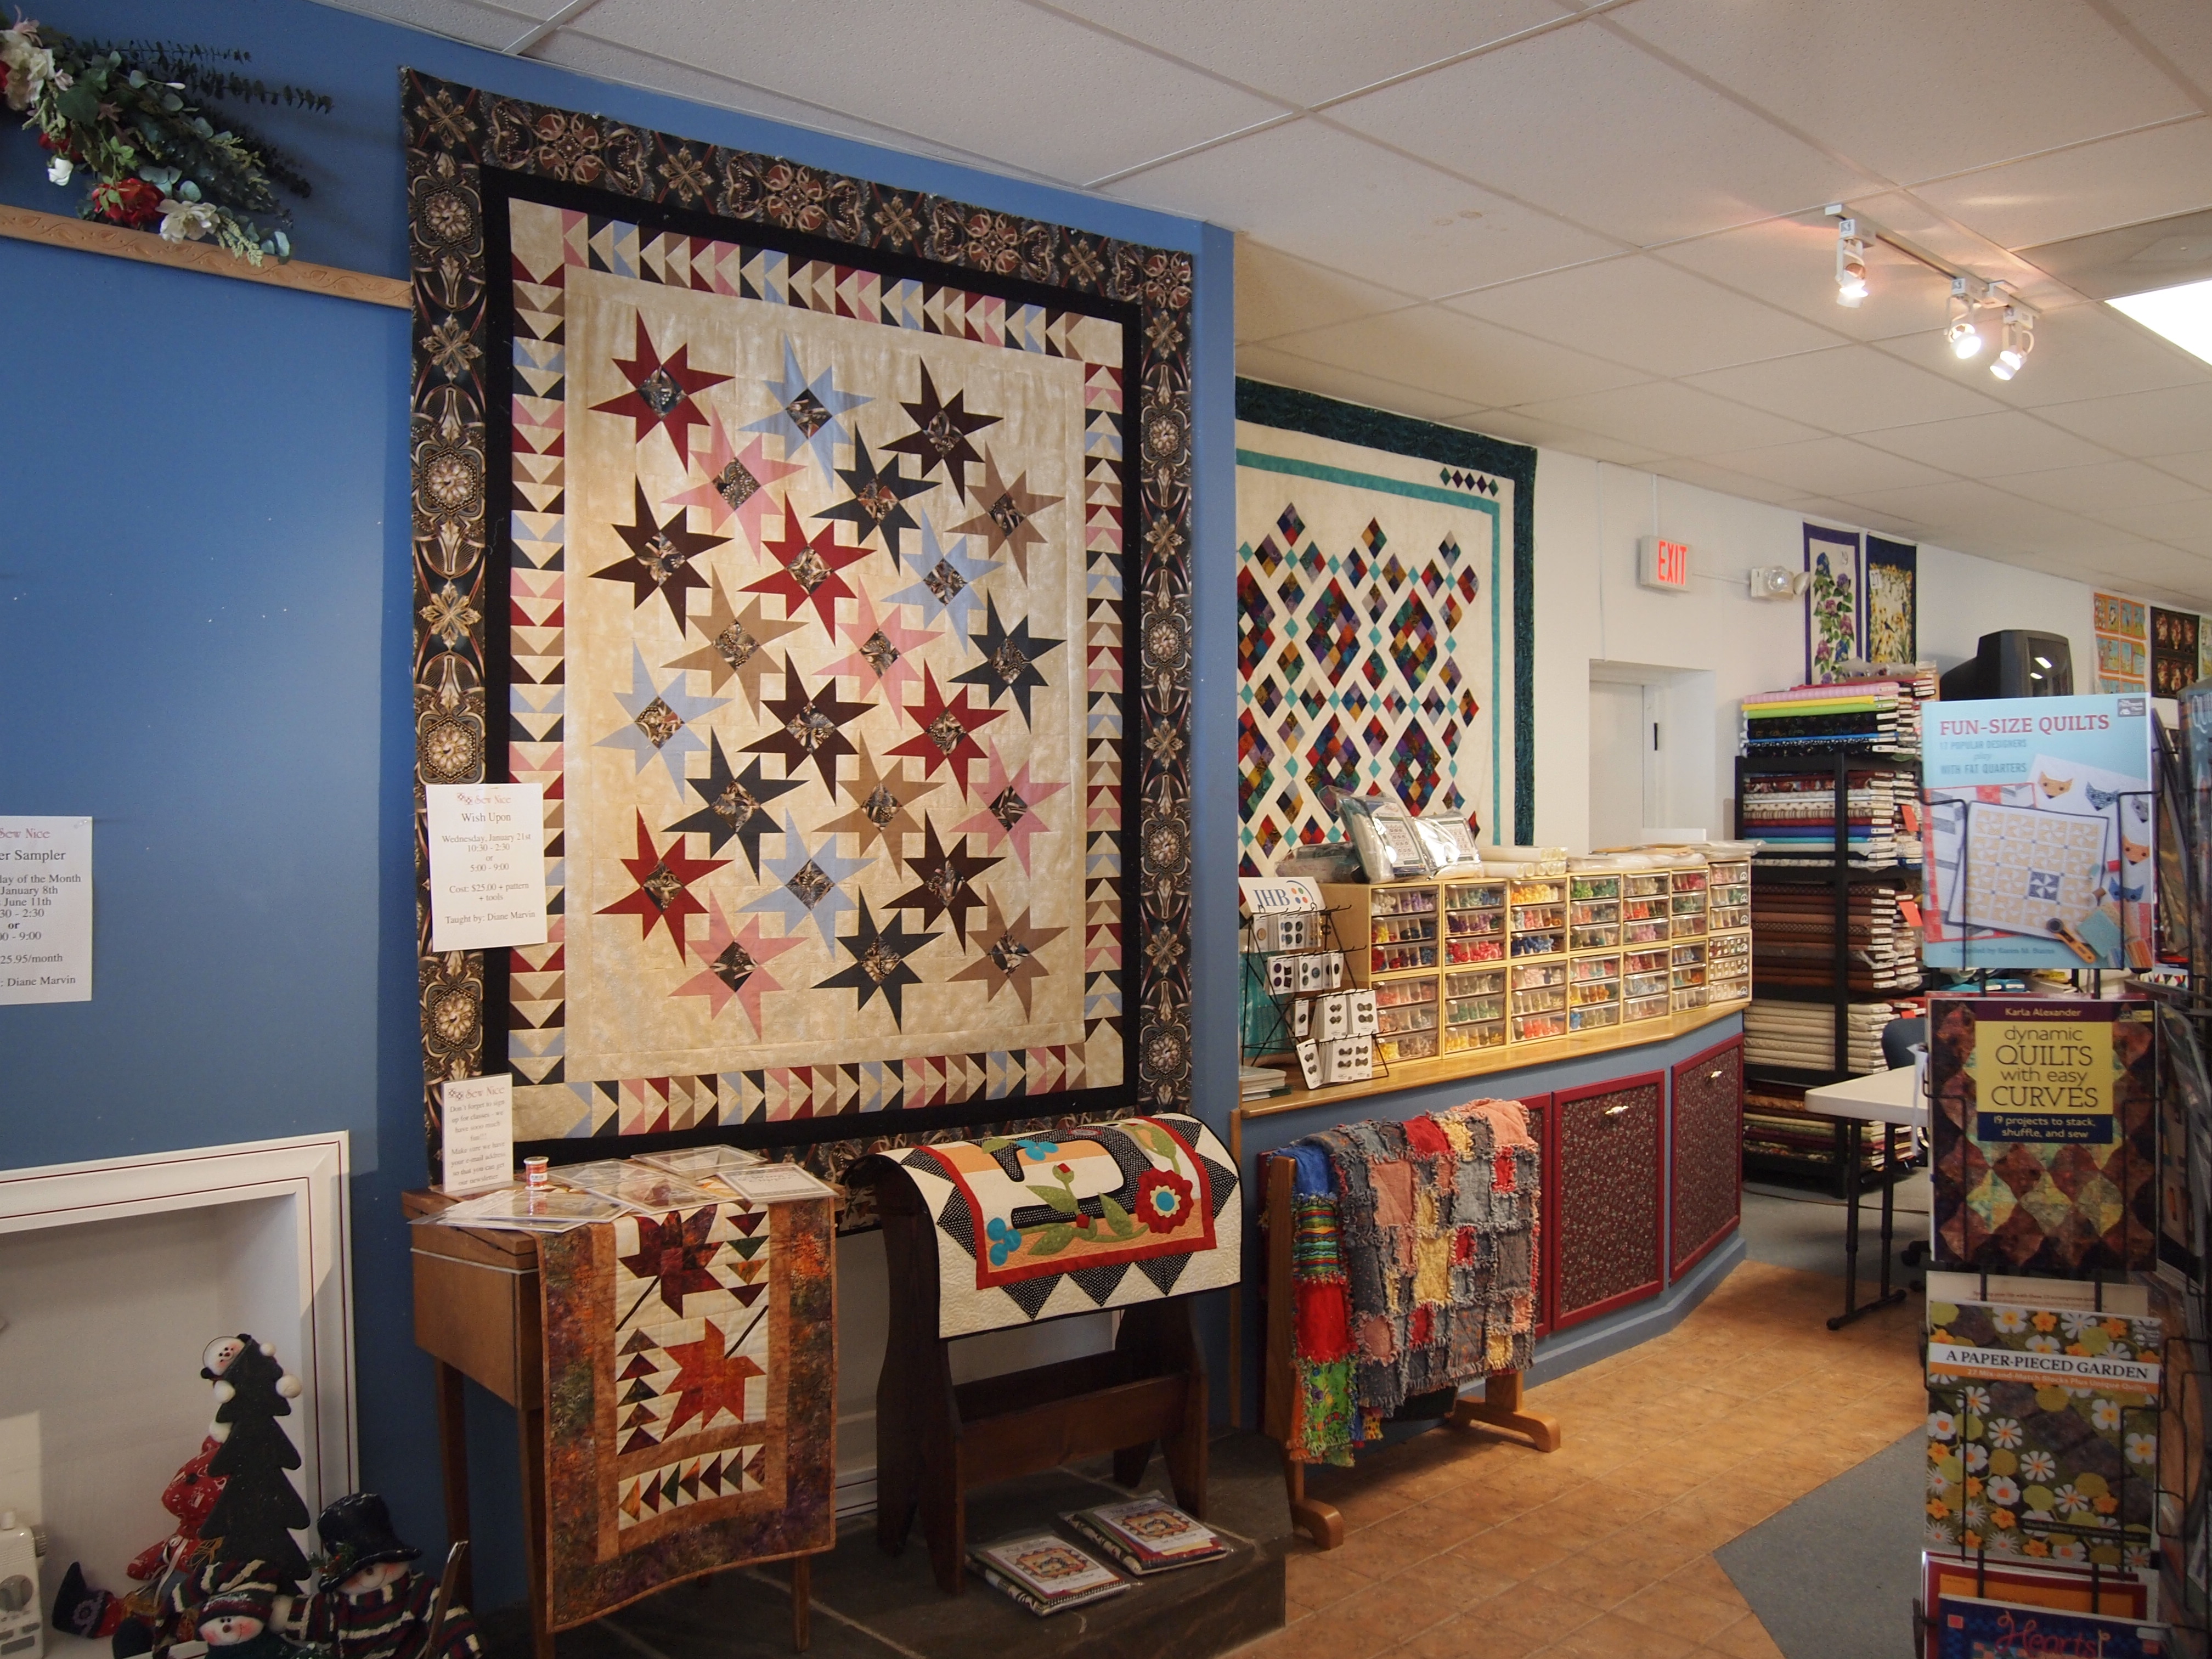
I’m making a fund raiser quilt for The Landmarks Society of Greater Utica whose mission is to promote the preservation and restoration of historically and architecturally significant buildings and sites. Through projects, community education, advocacy, marketing and planned activities, the Society engages its’ members, partners and the community in preserving the past and protecting the future.

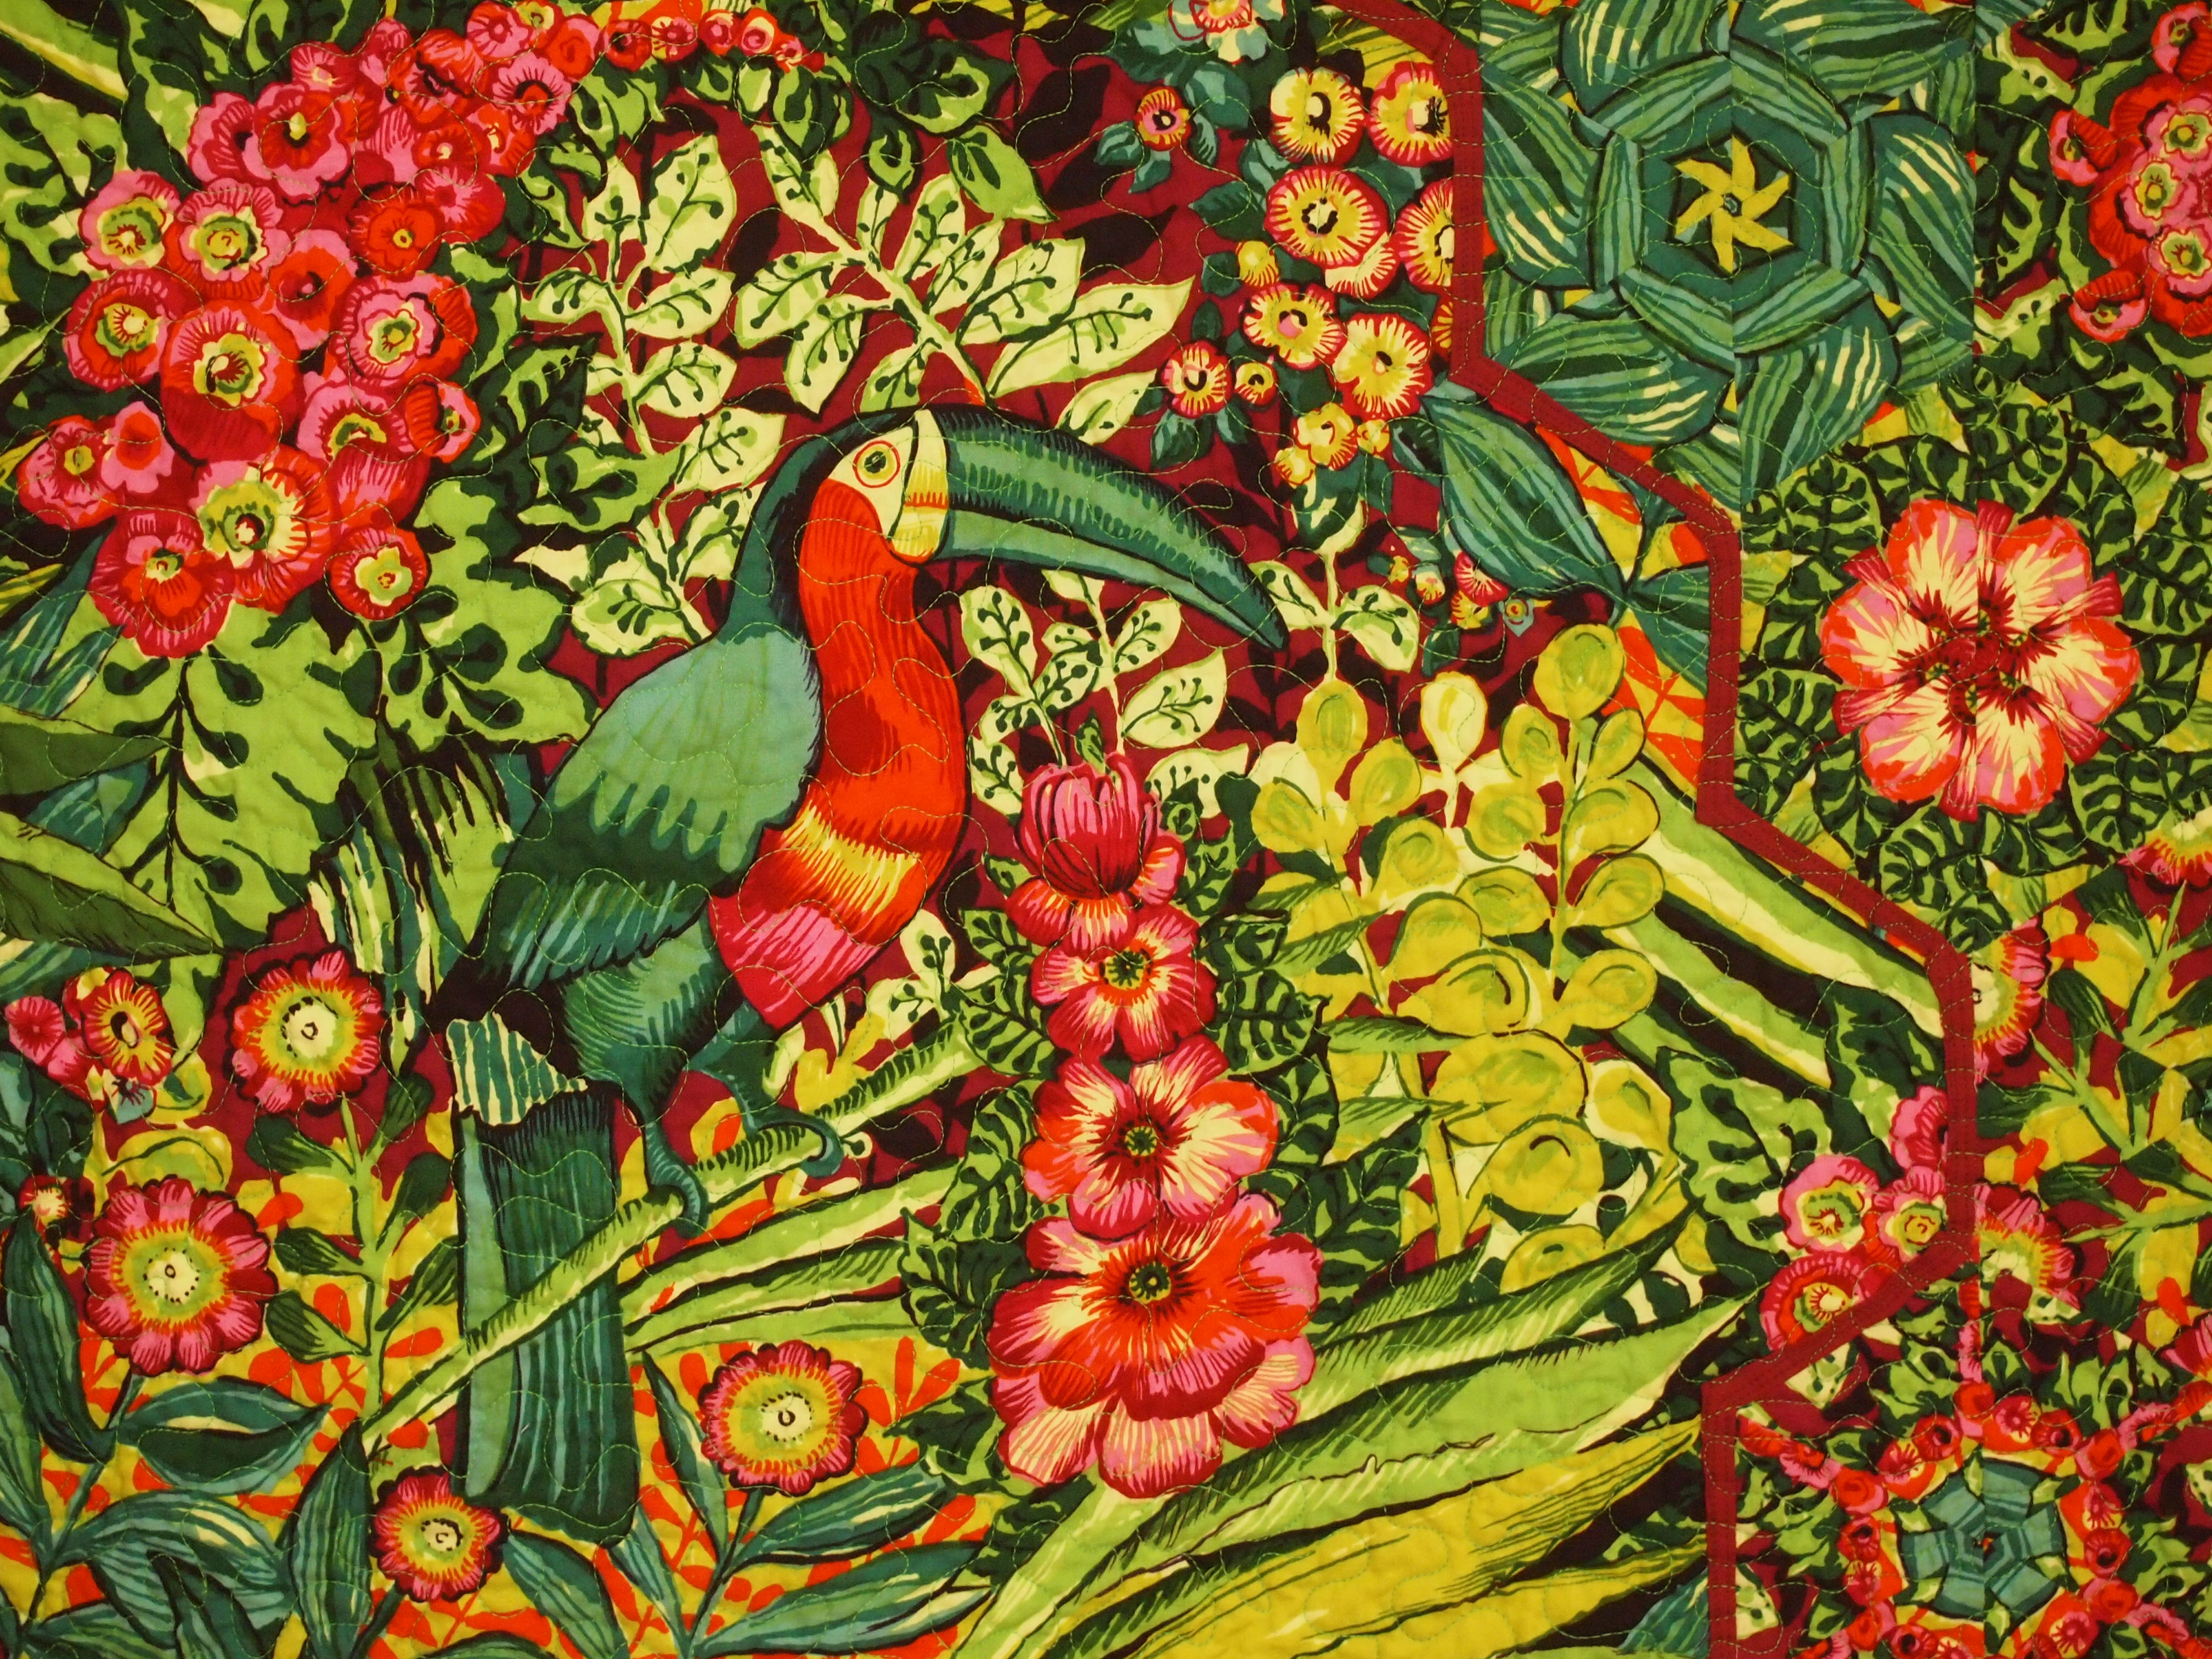
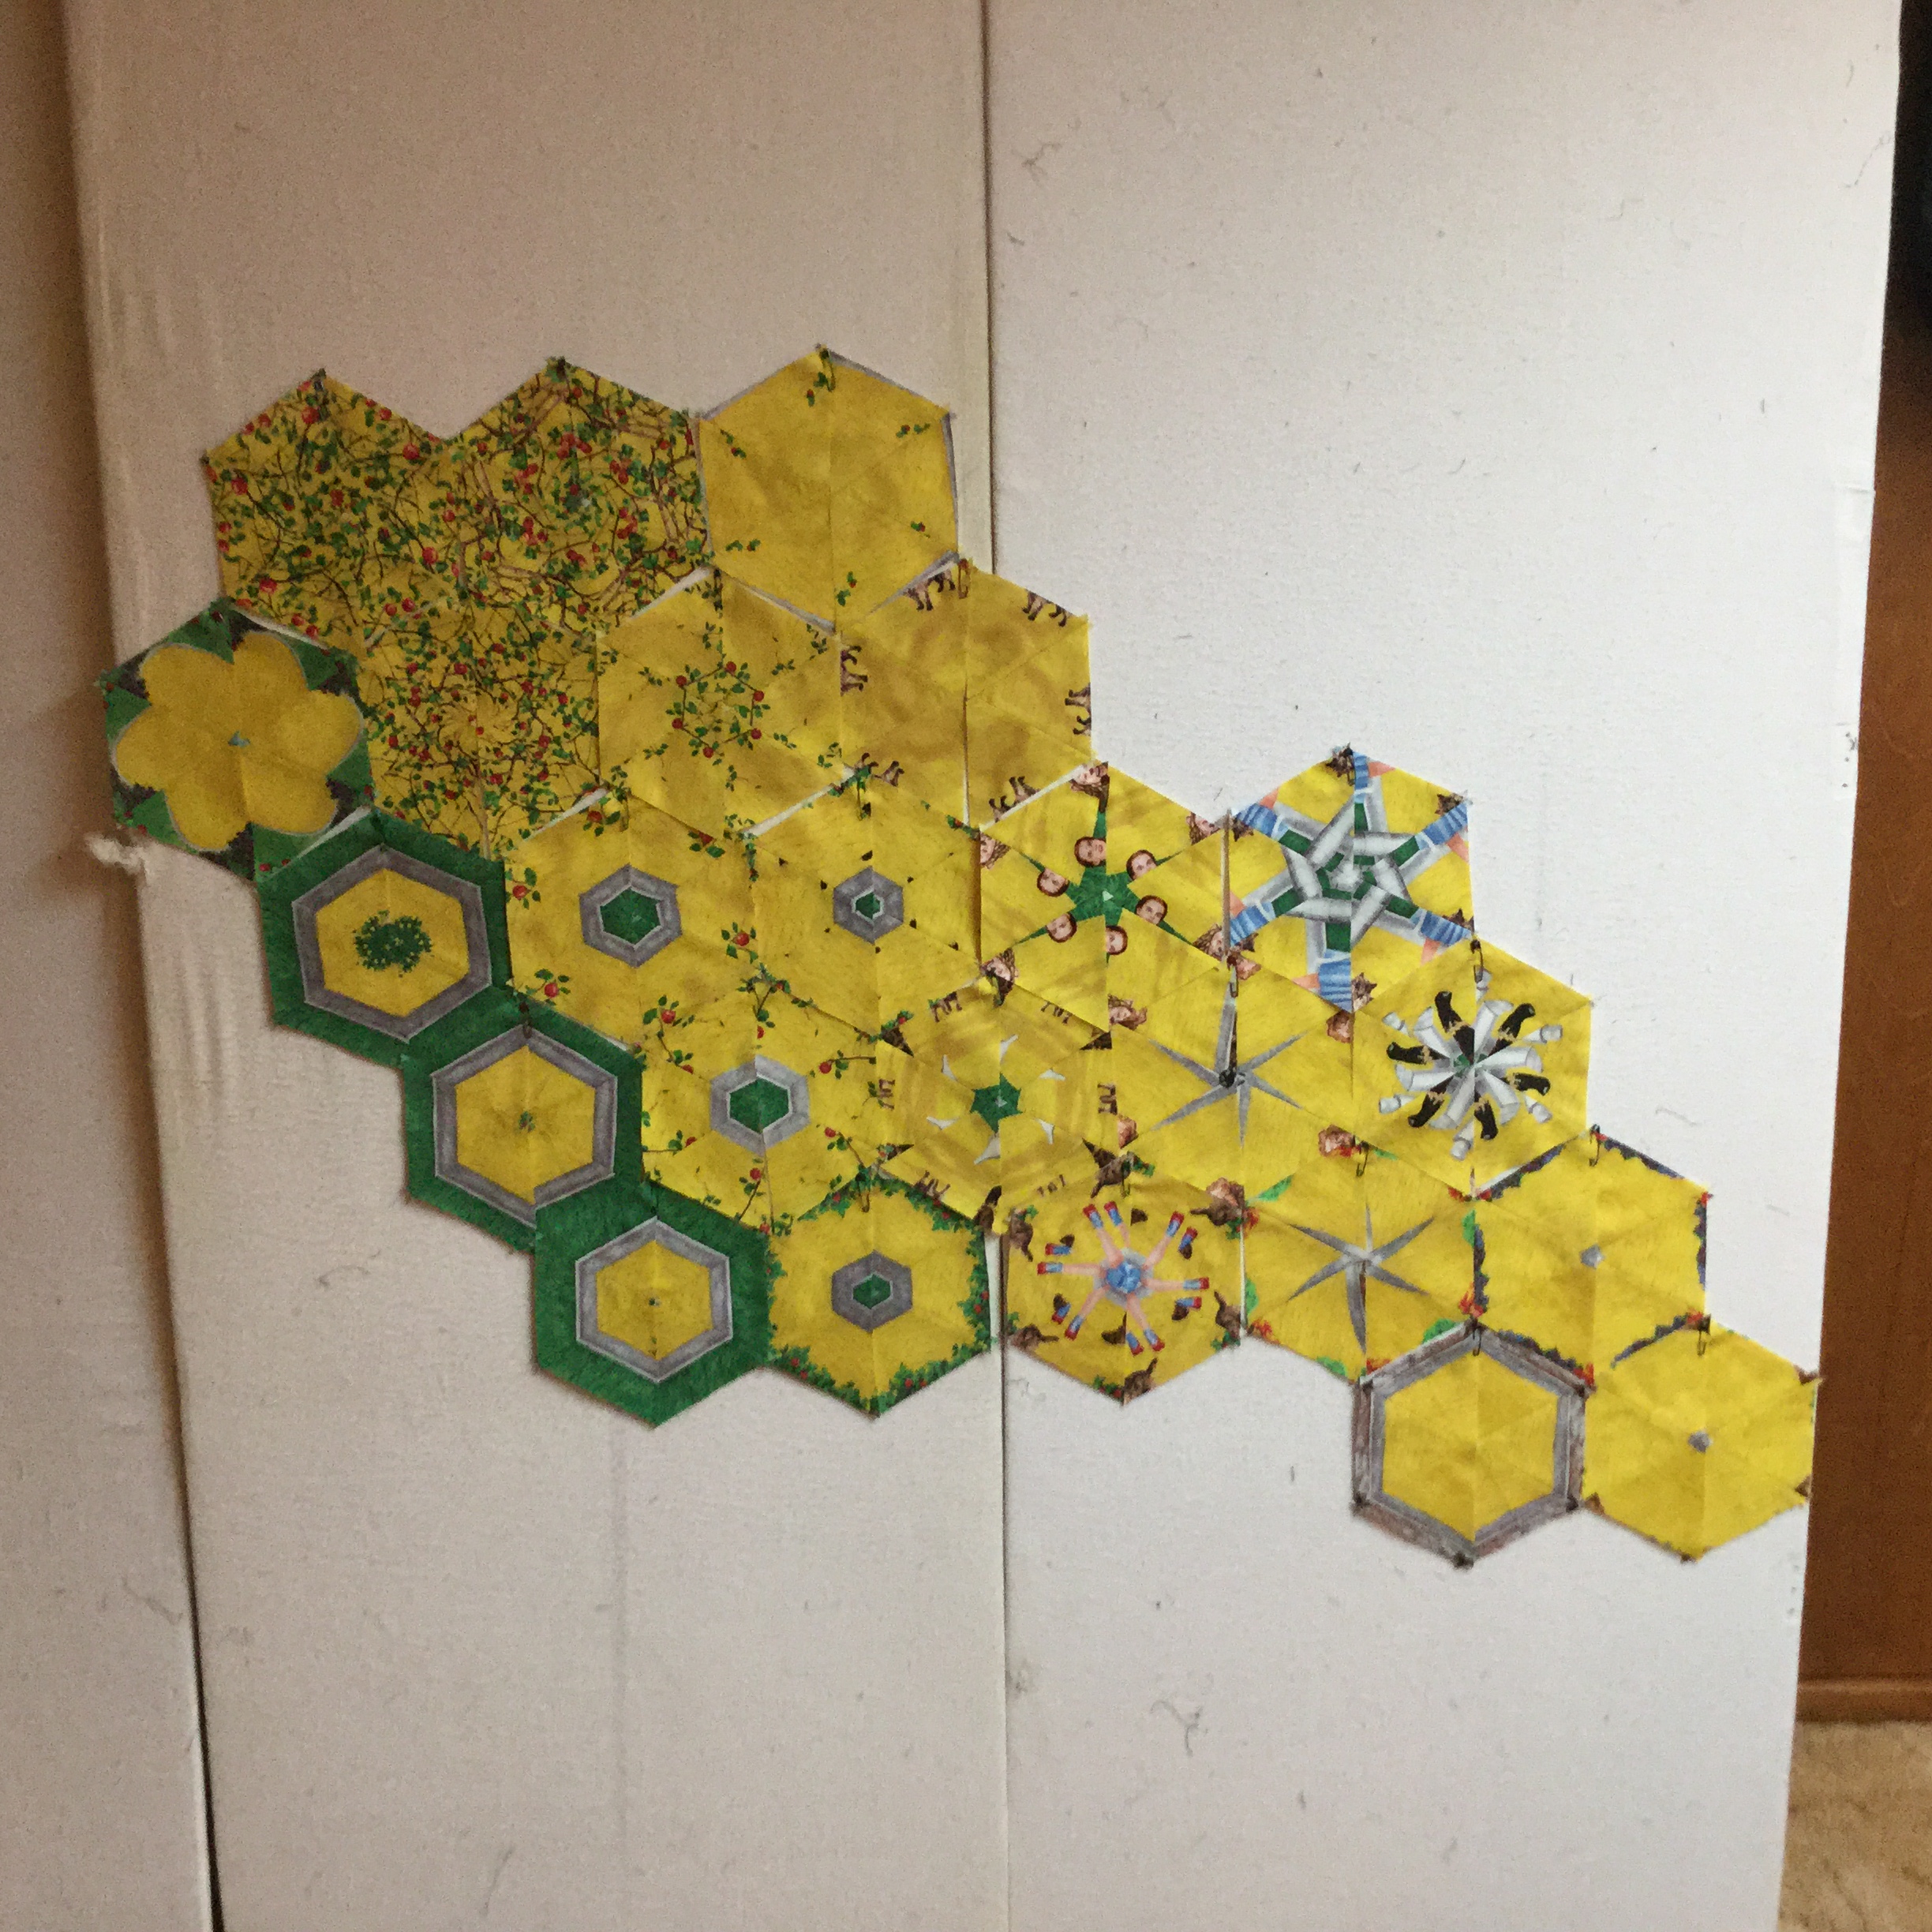
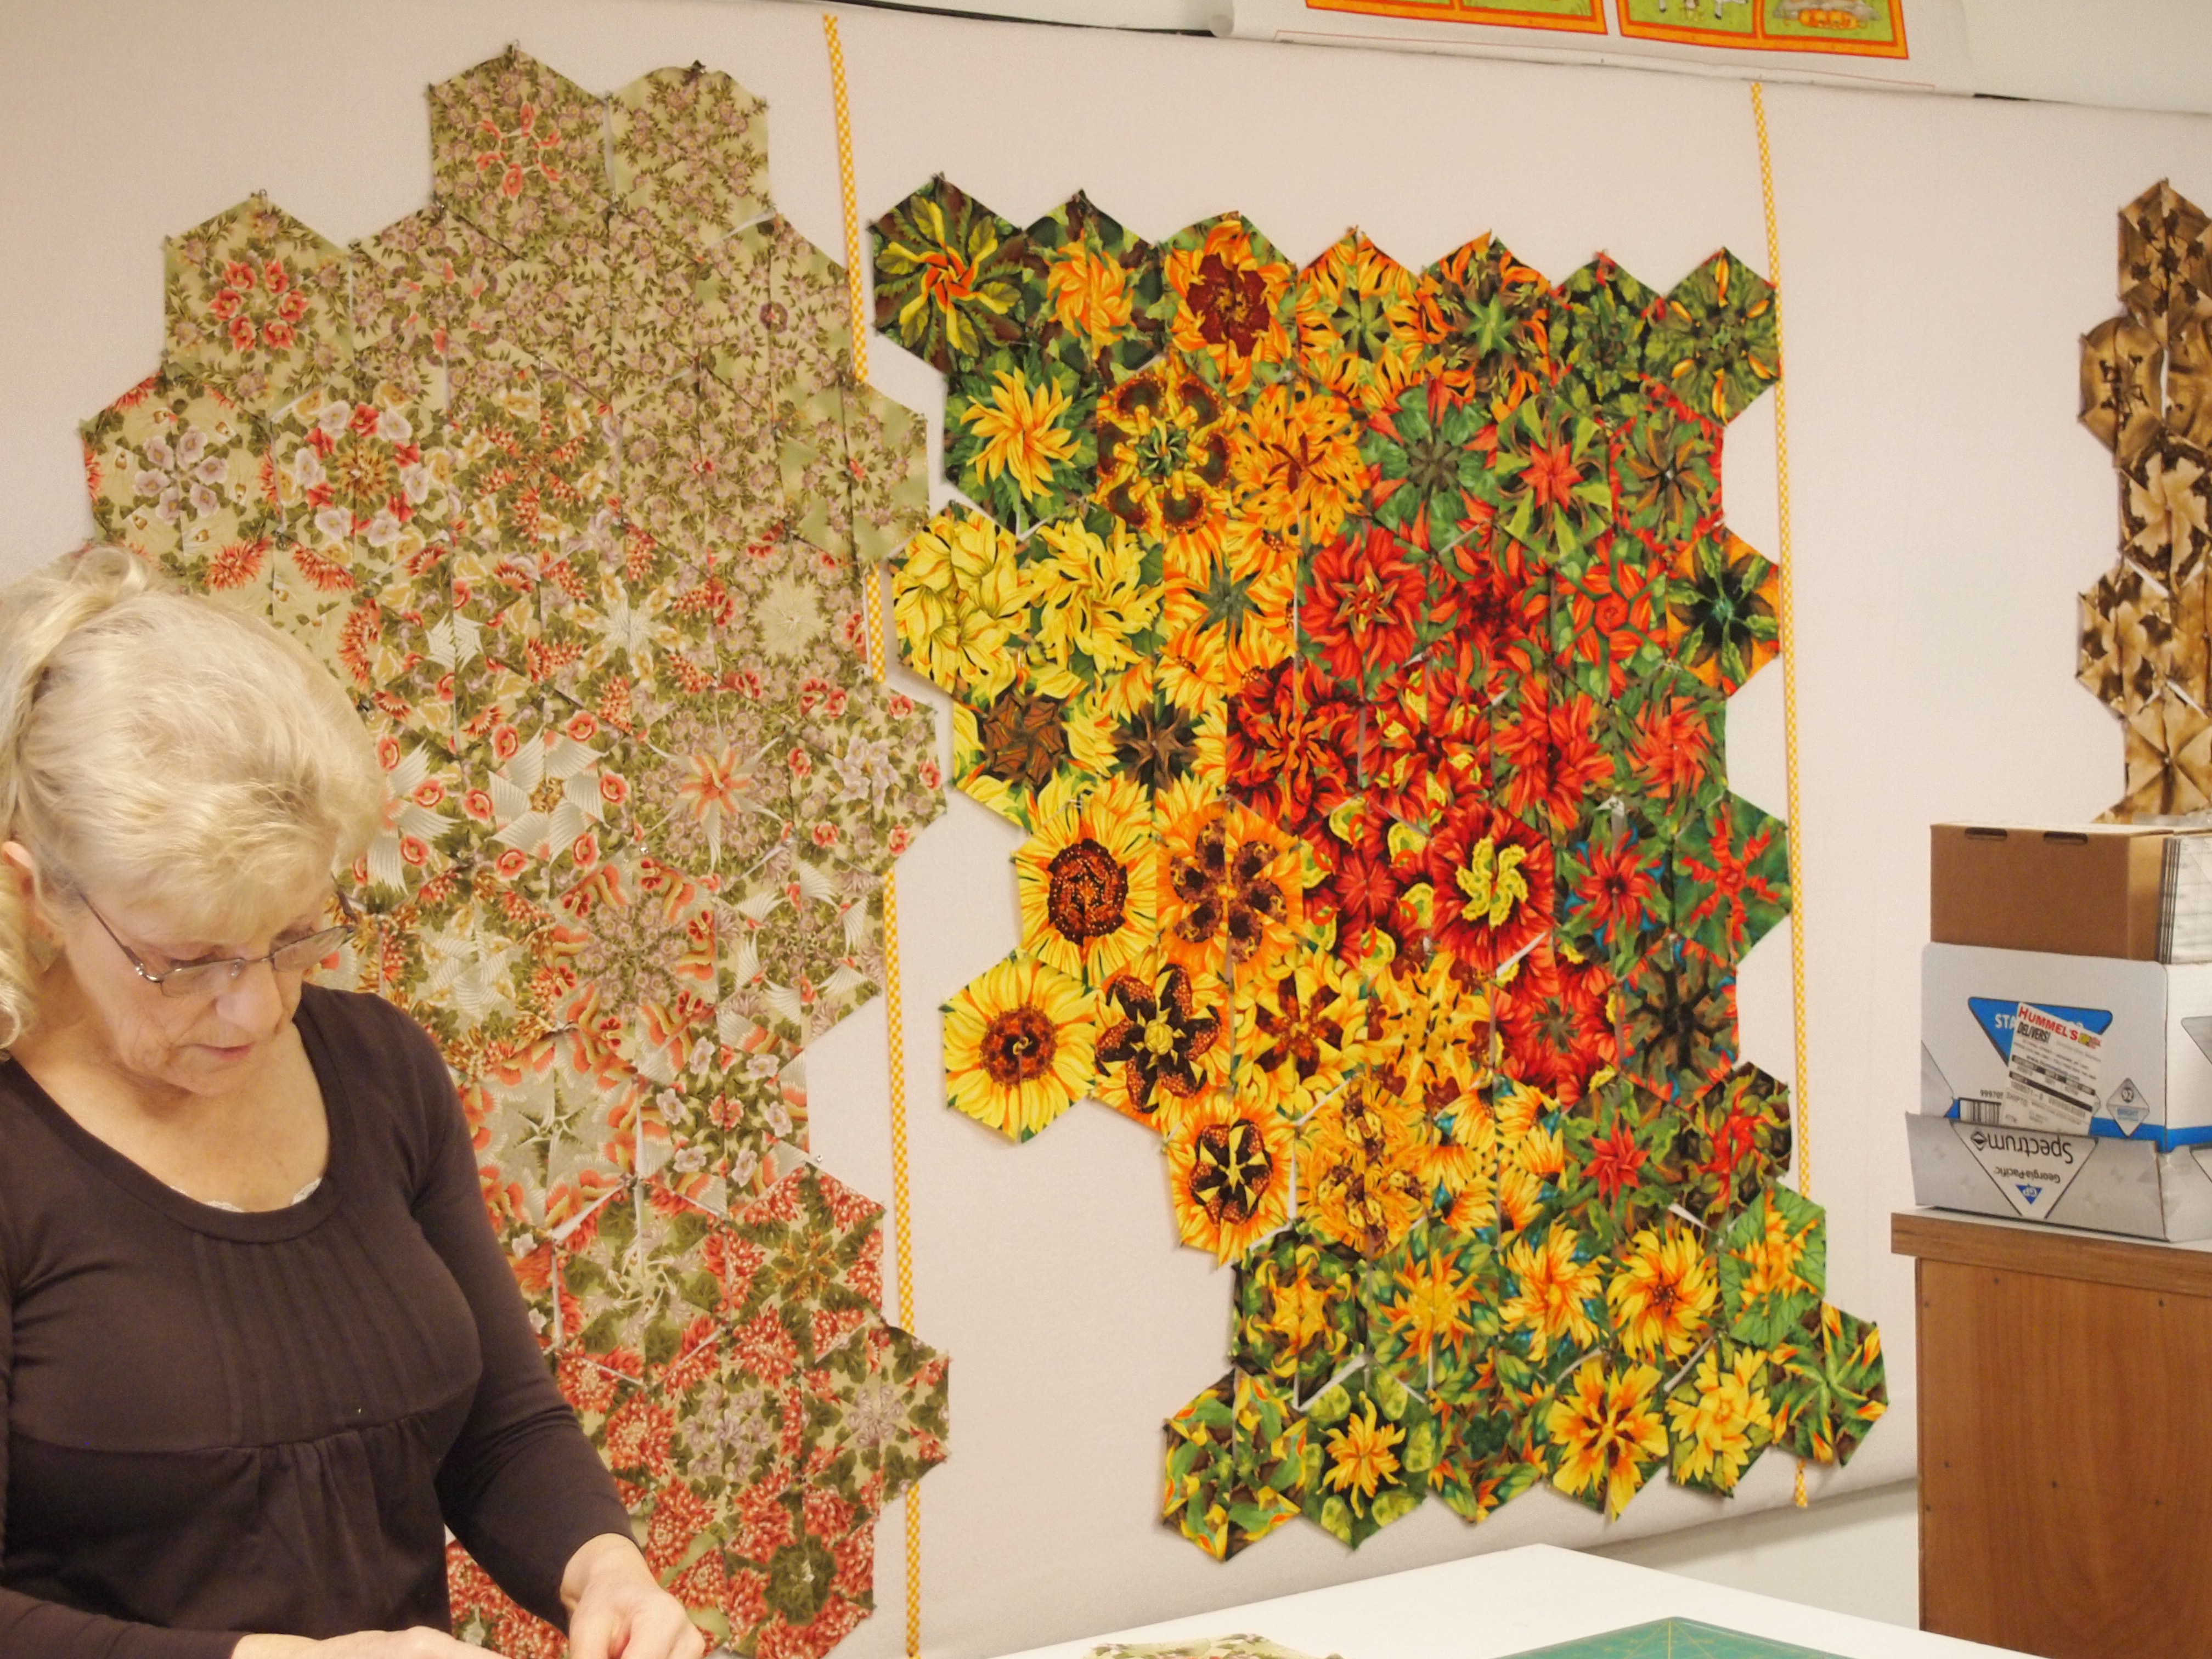
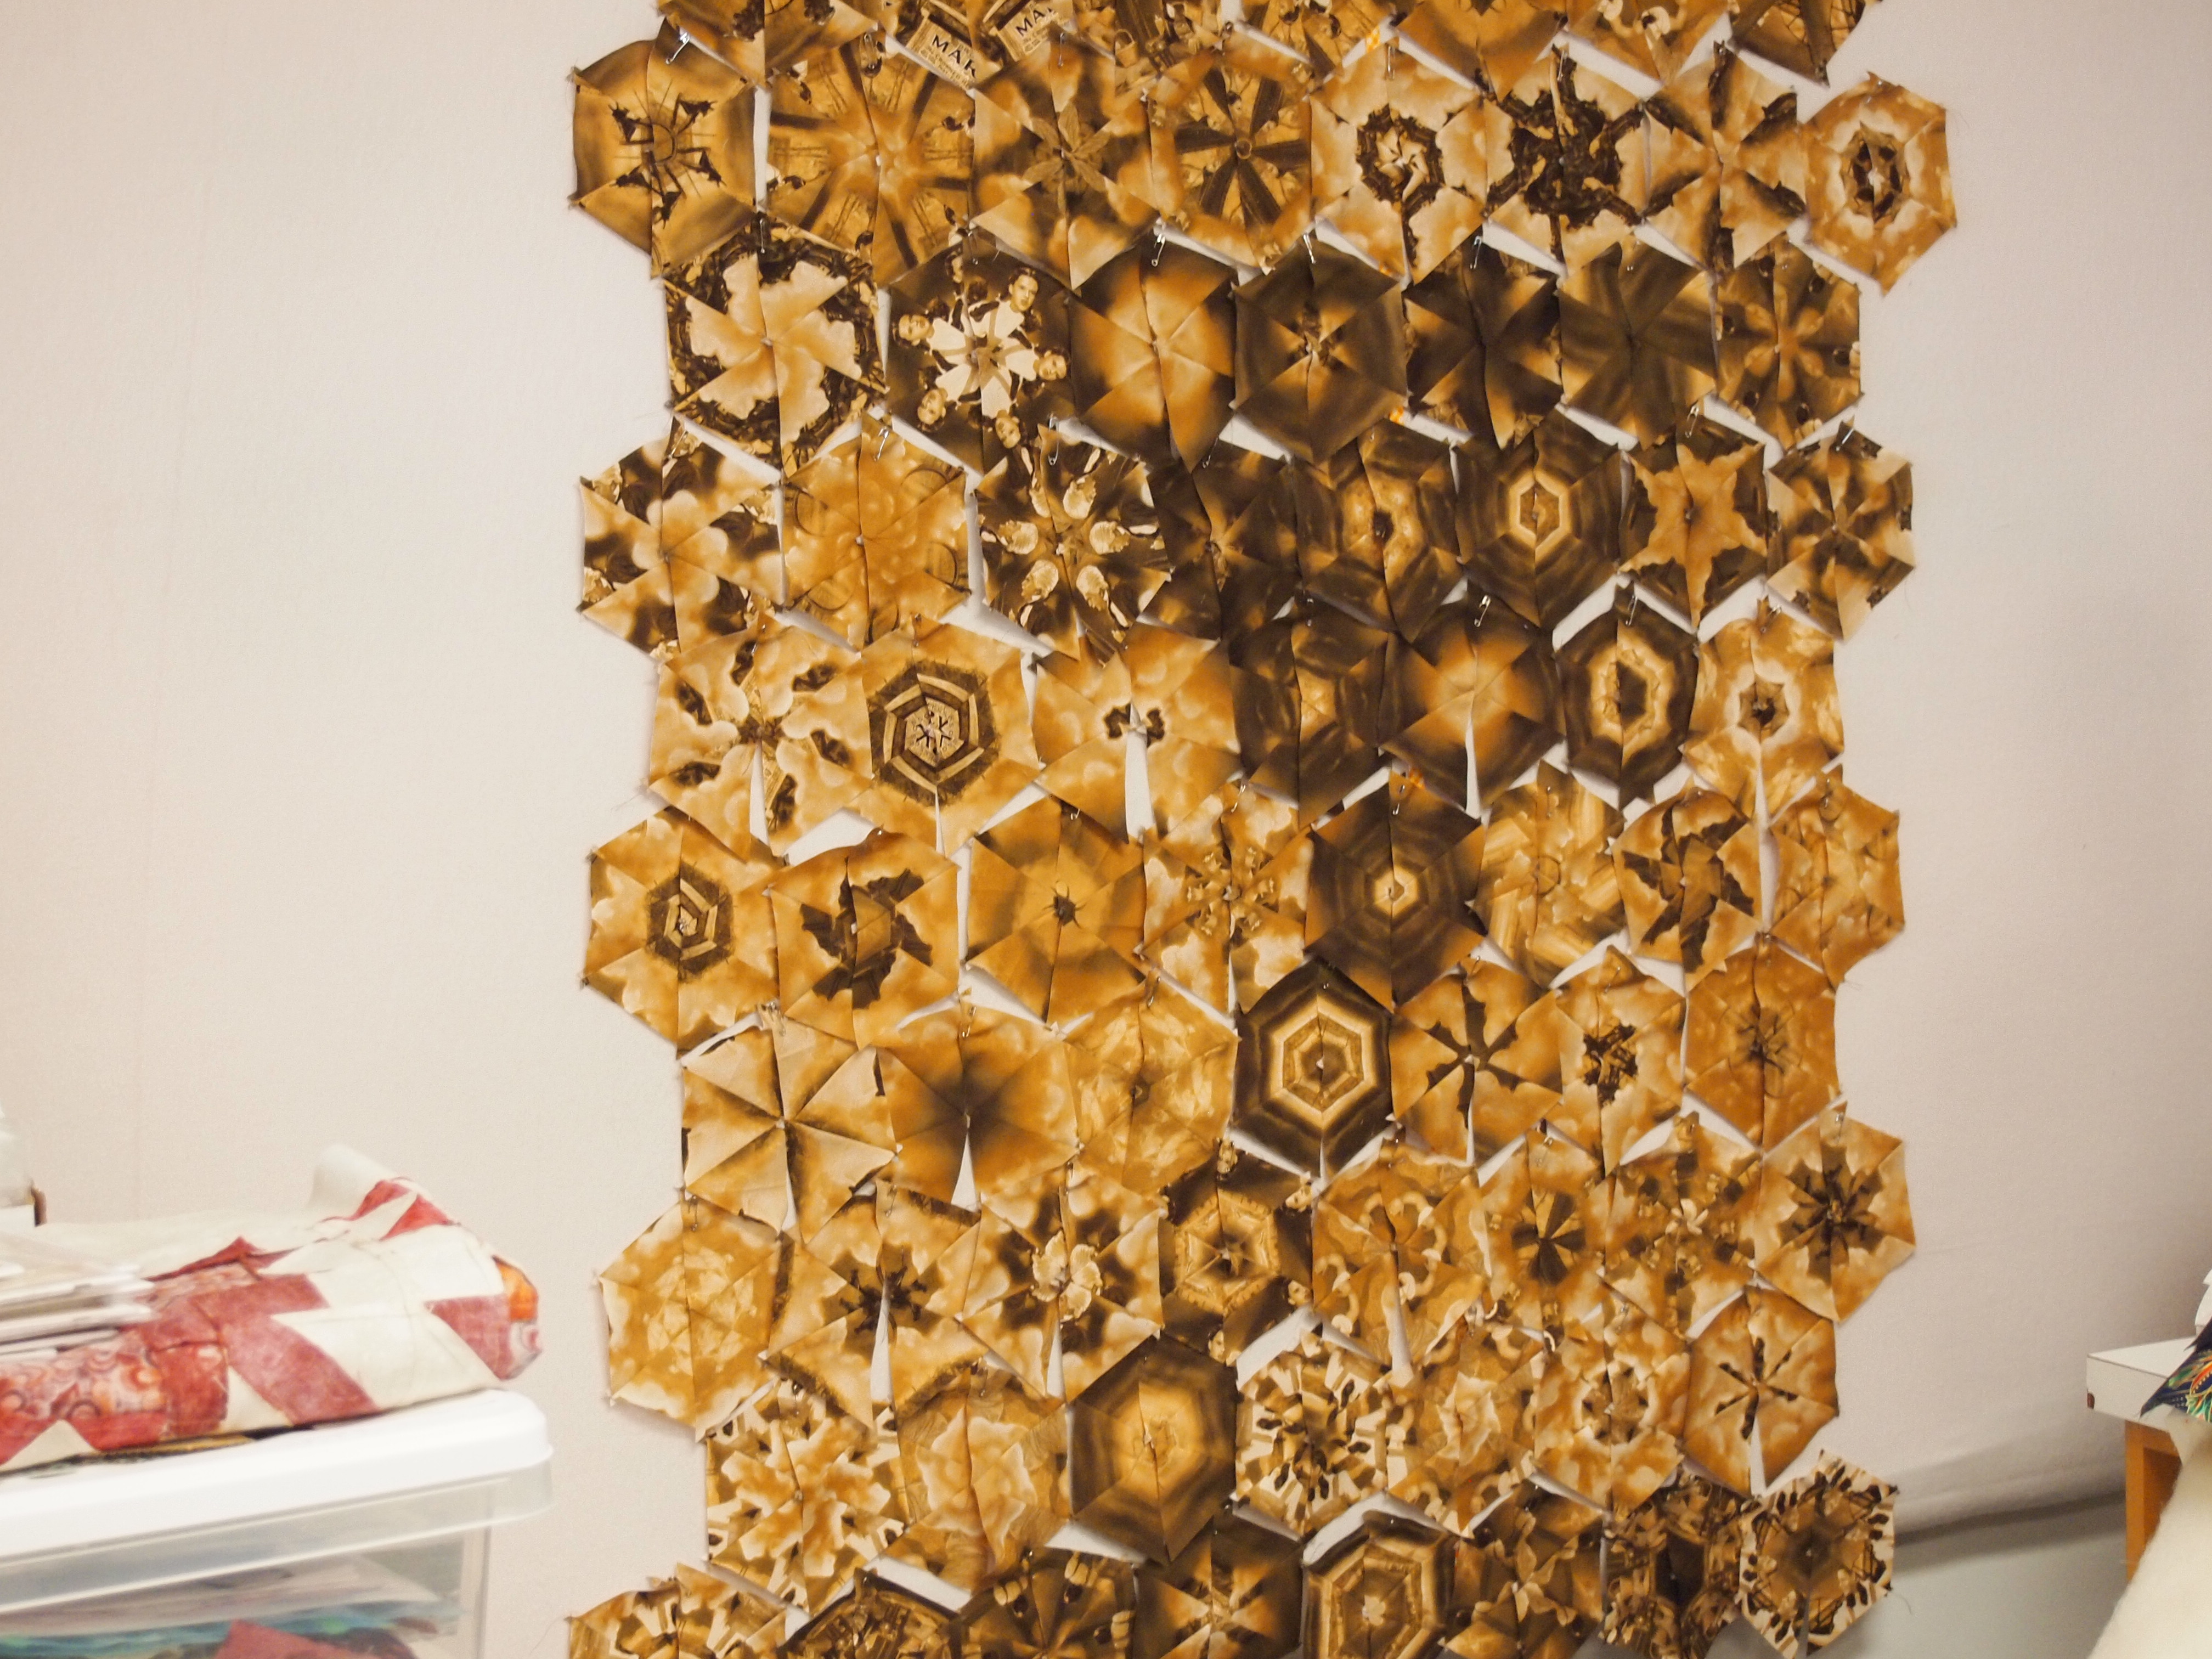
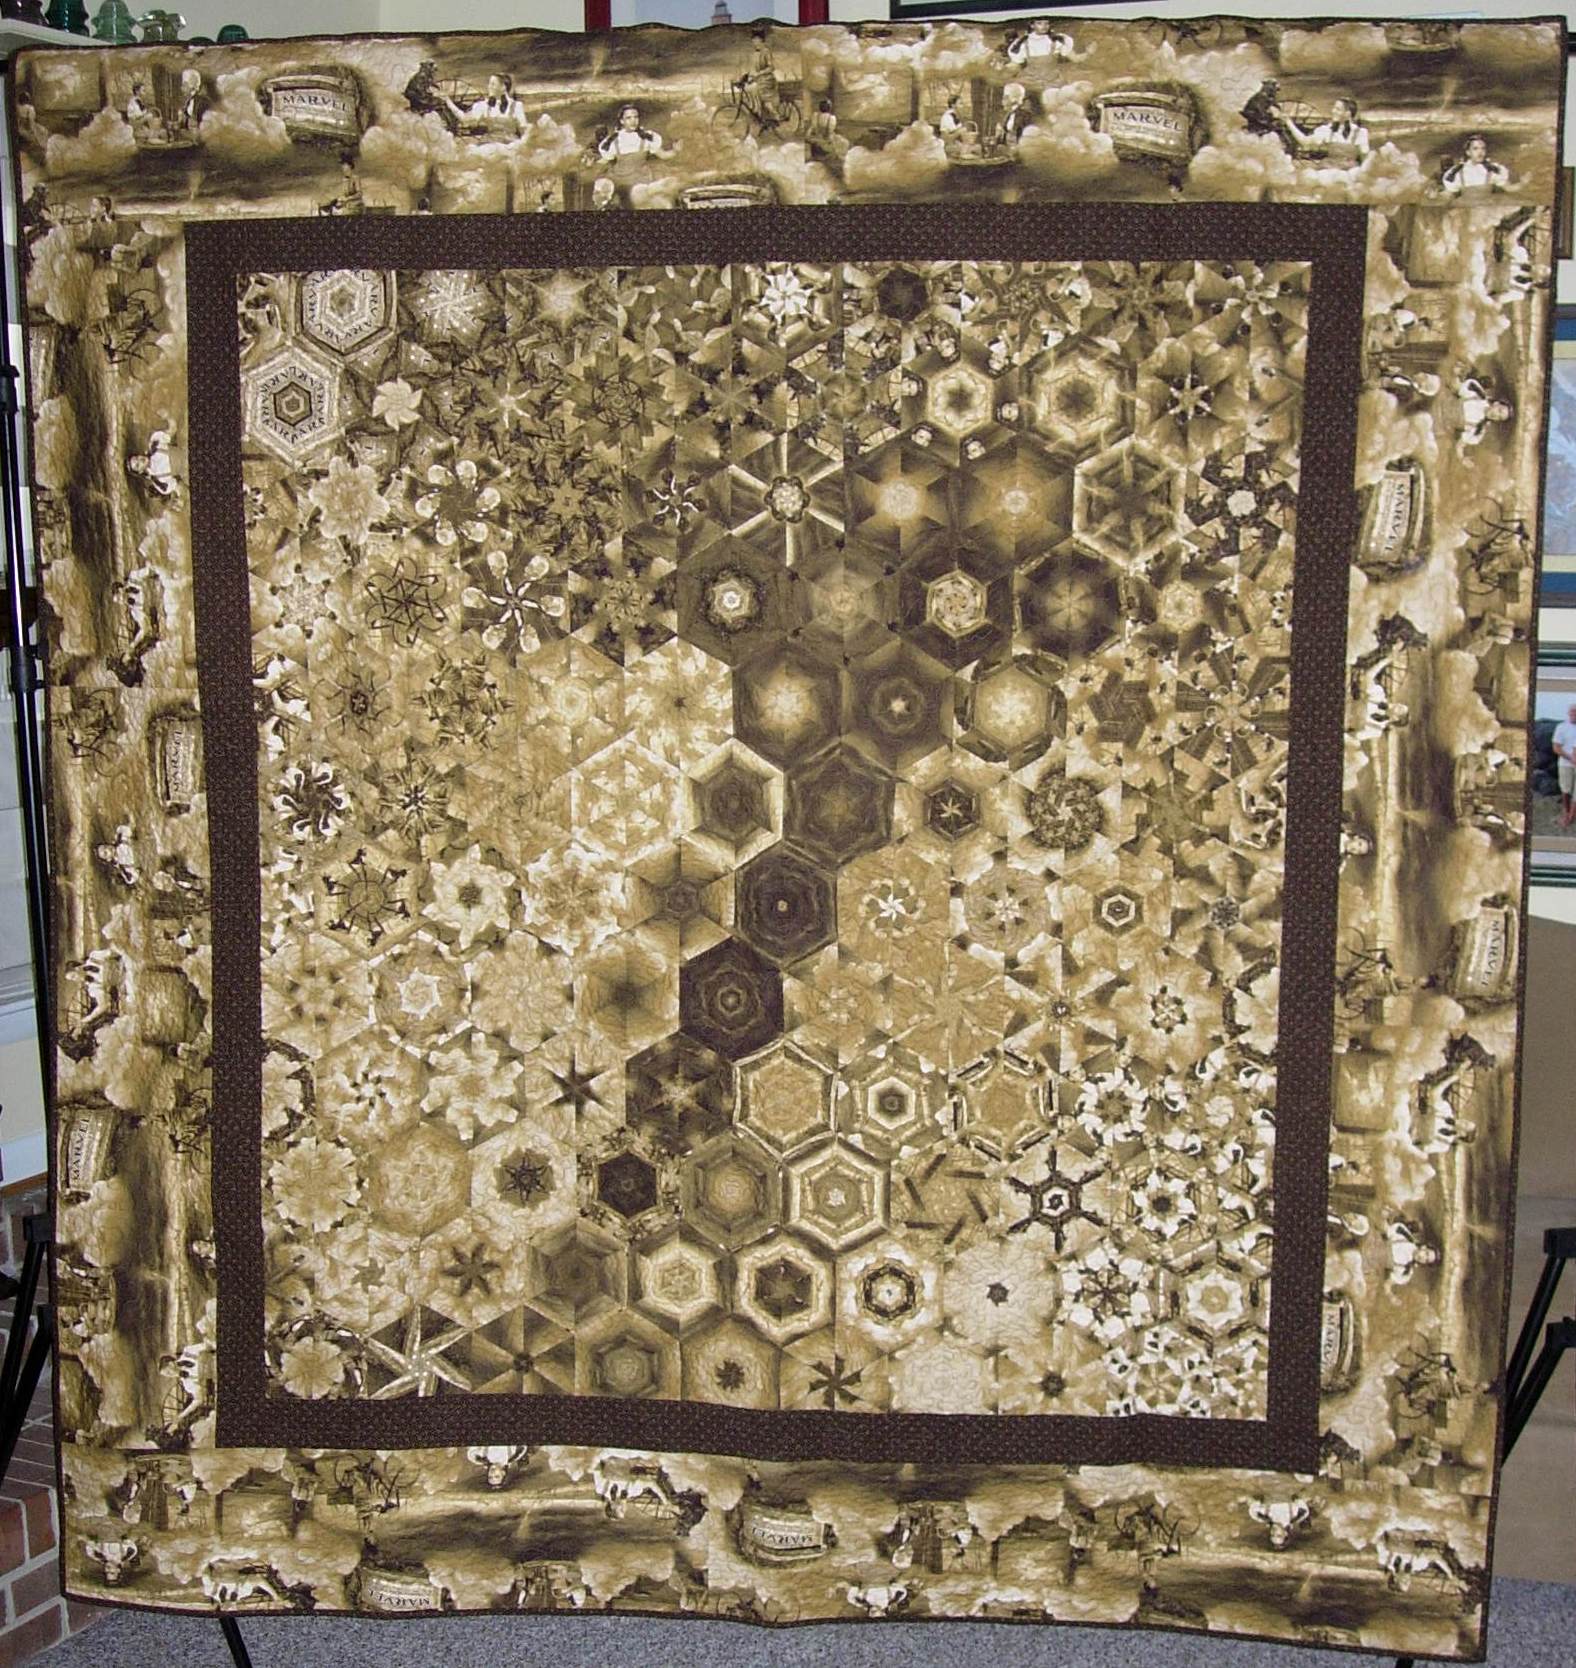
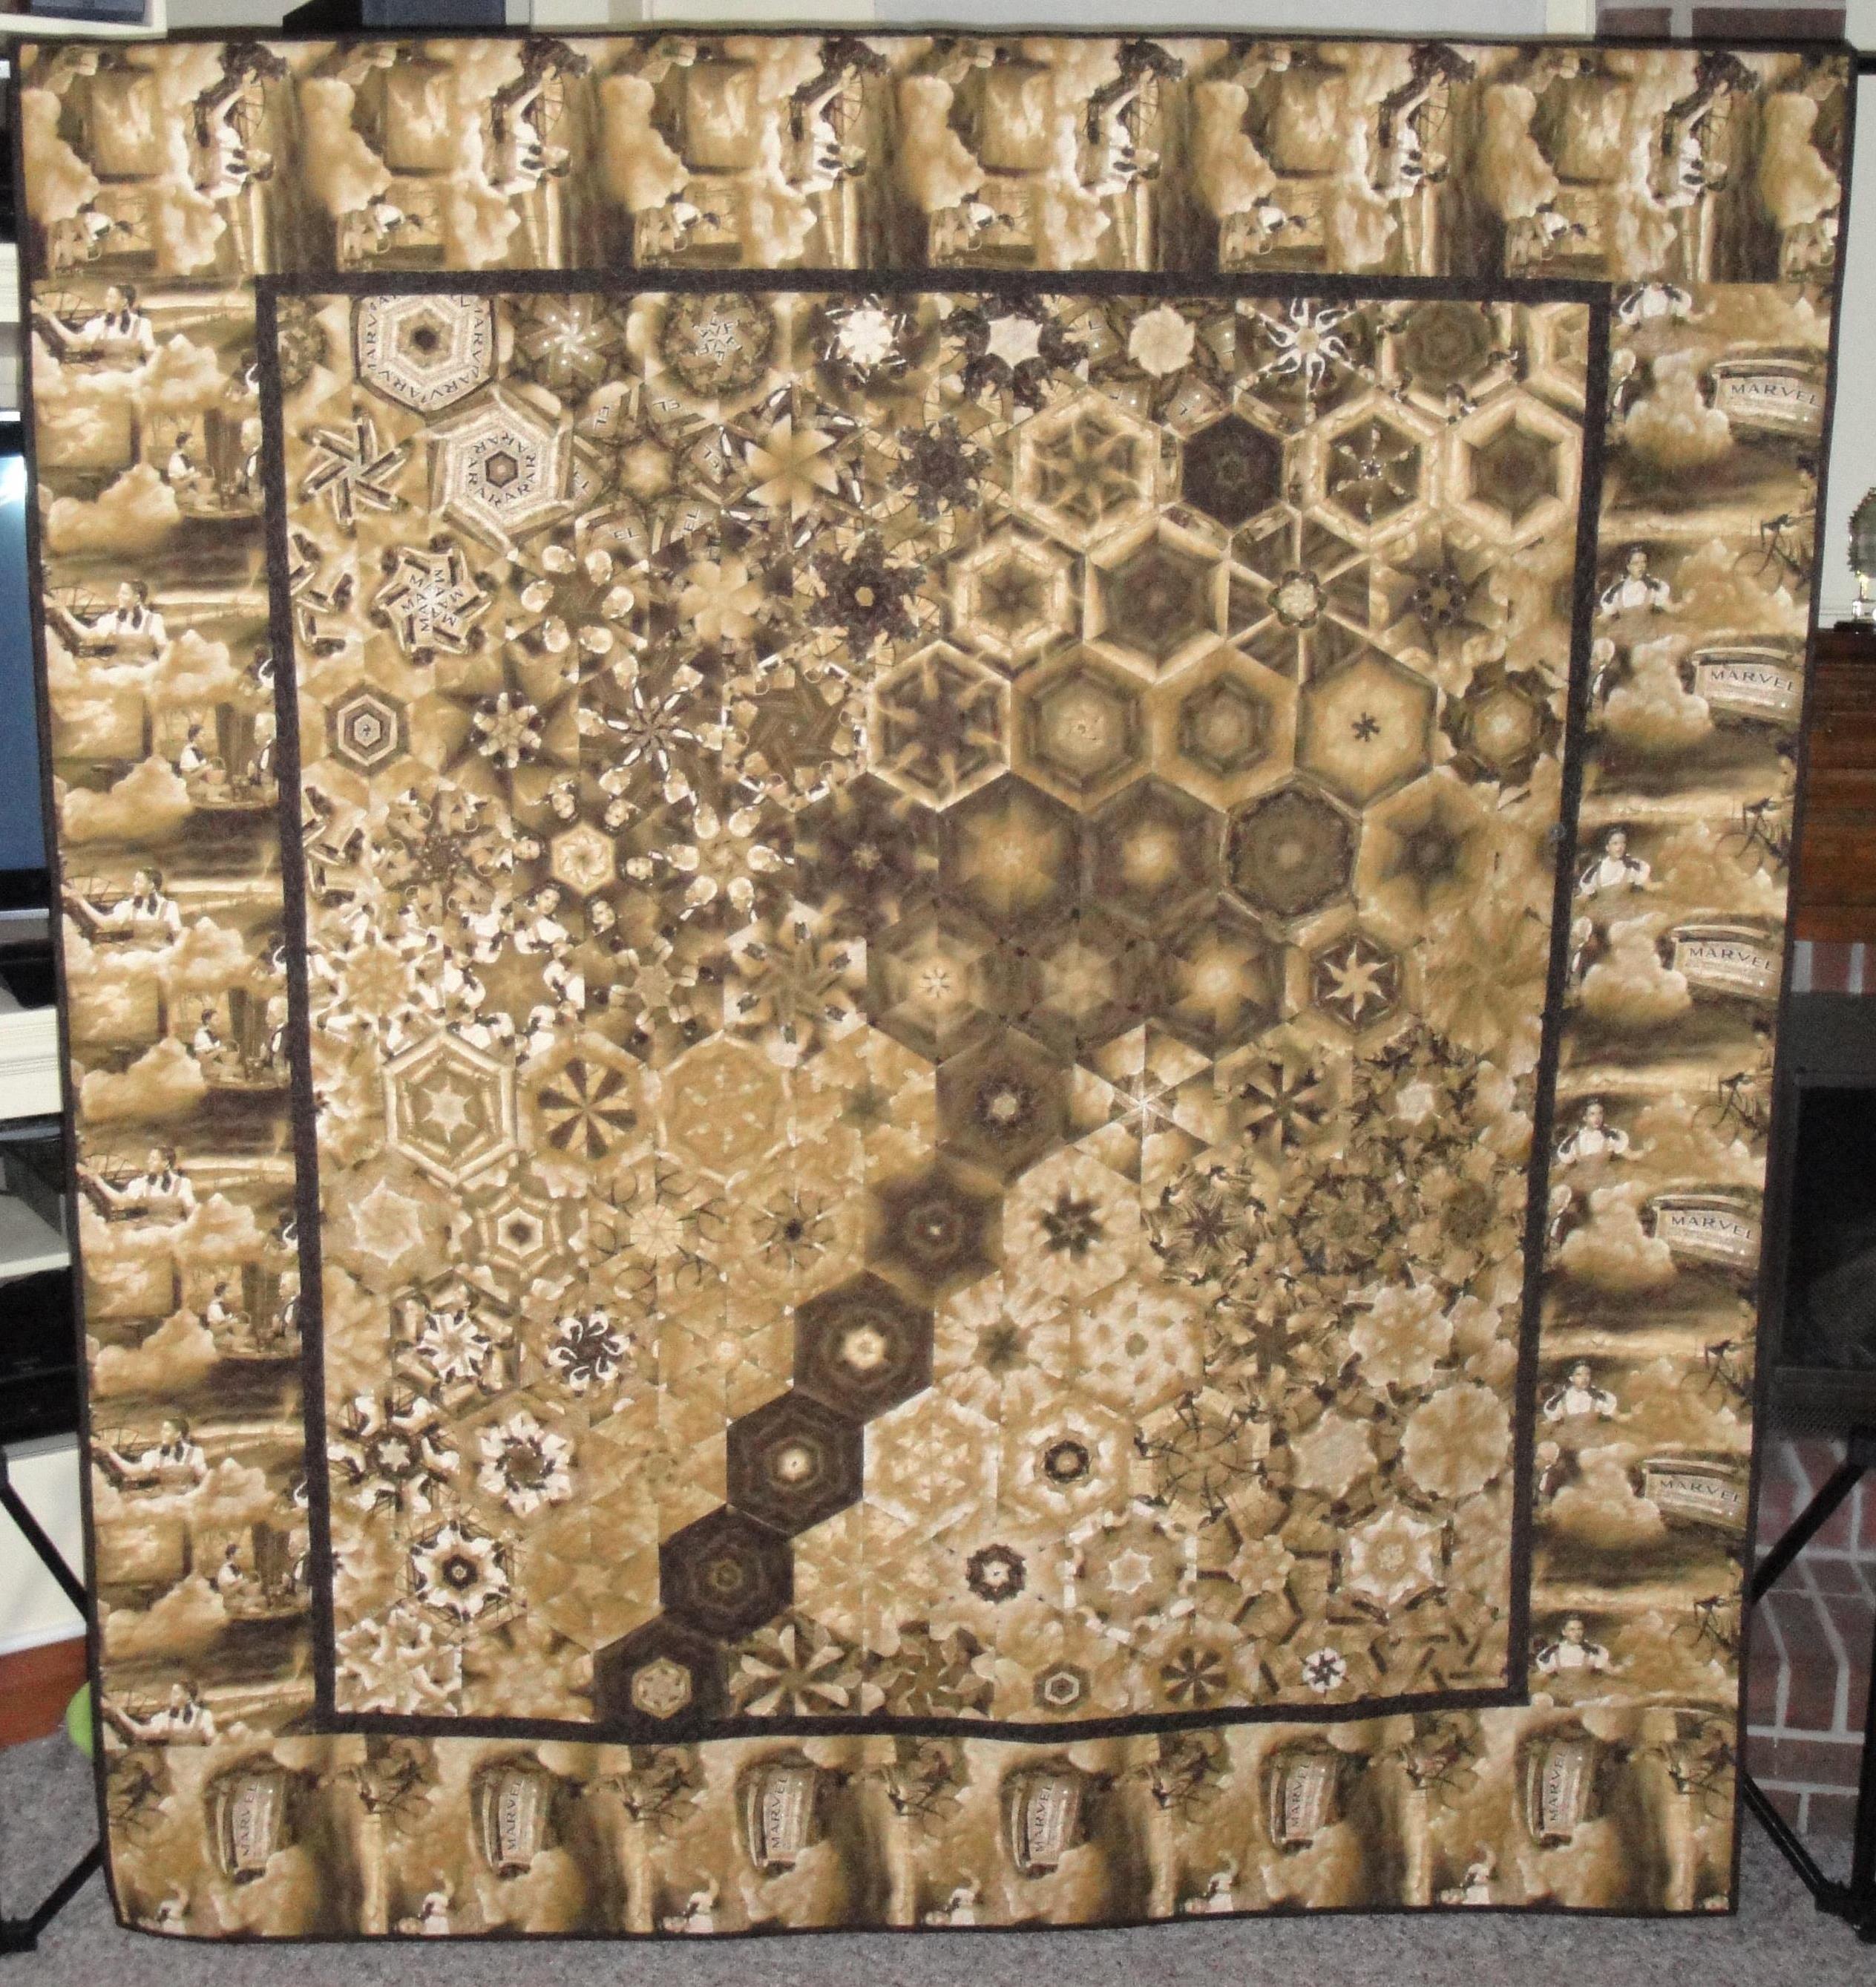
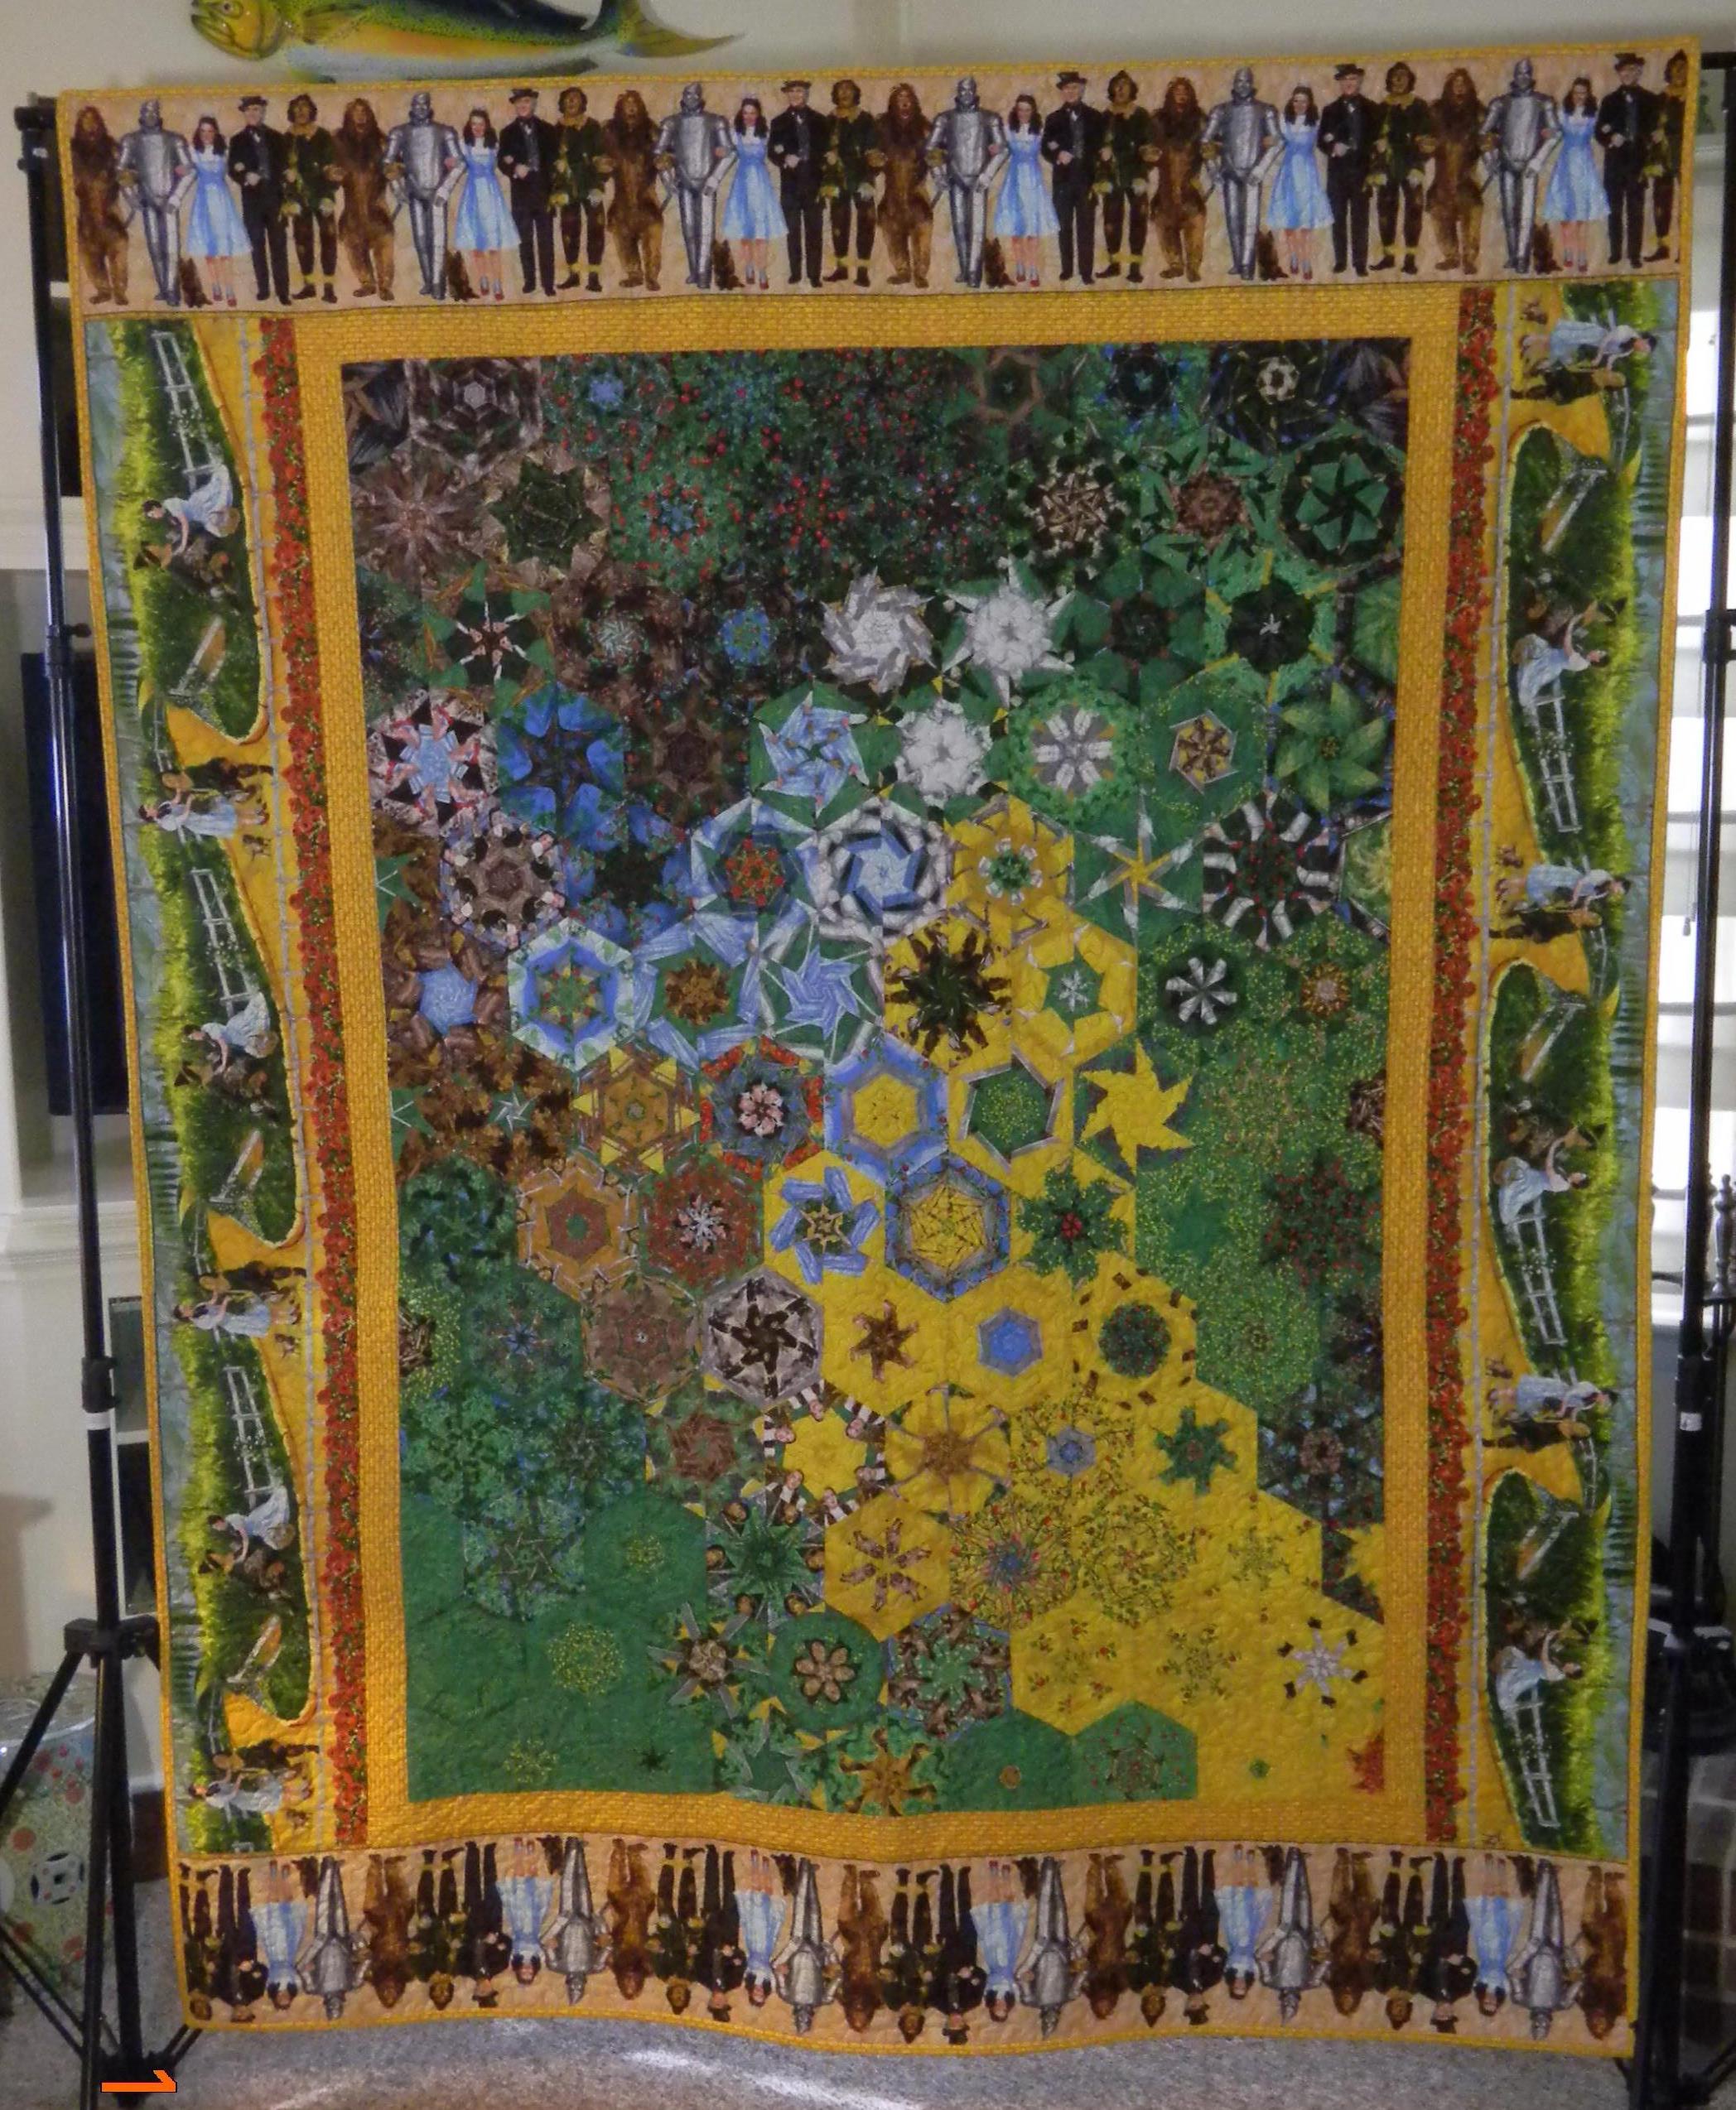
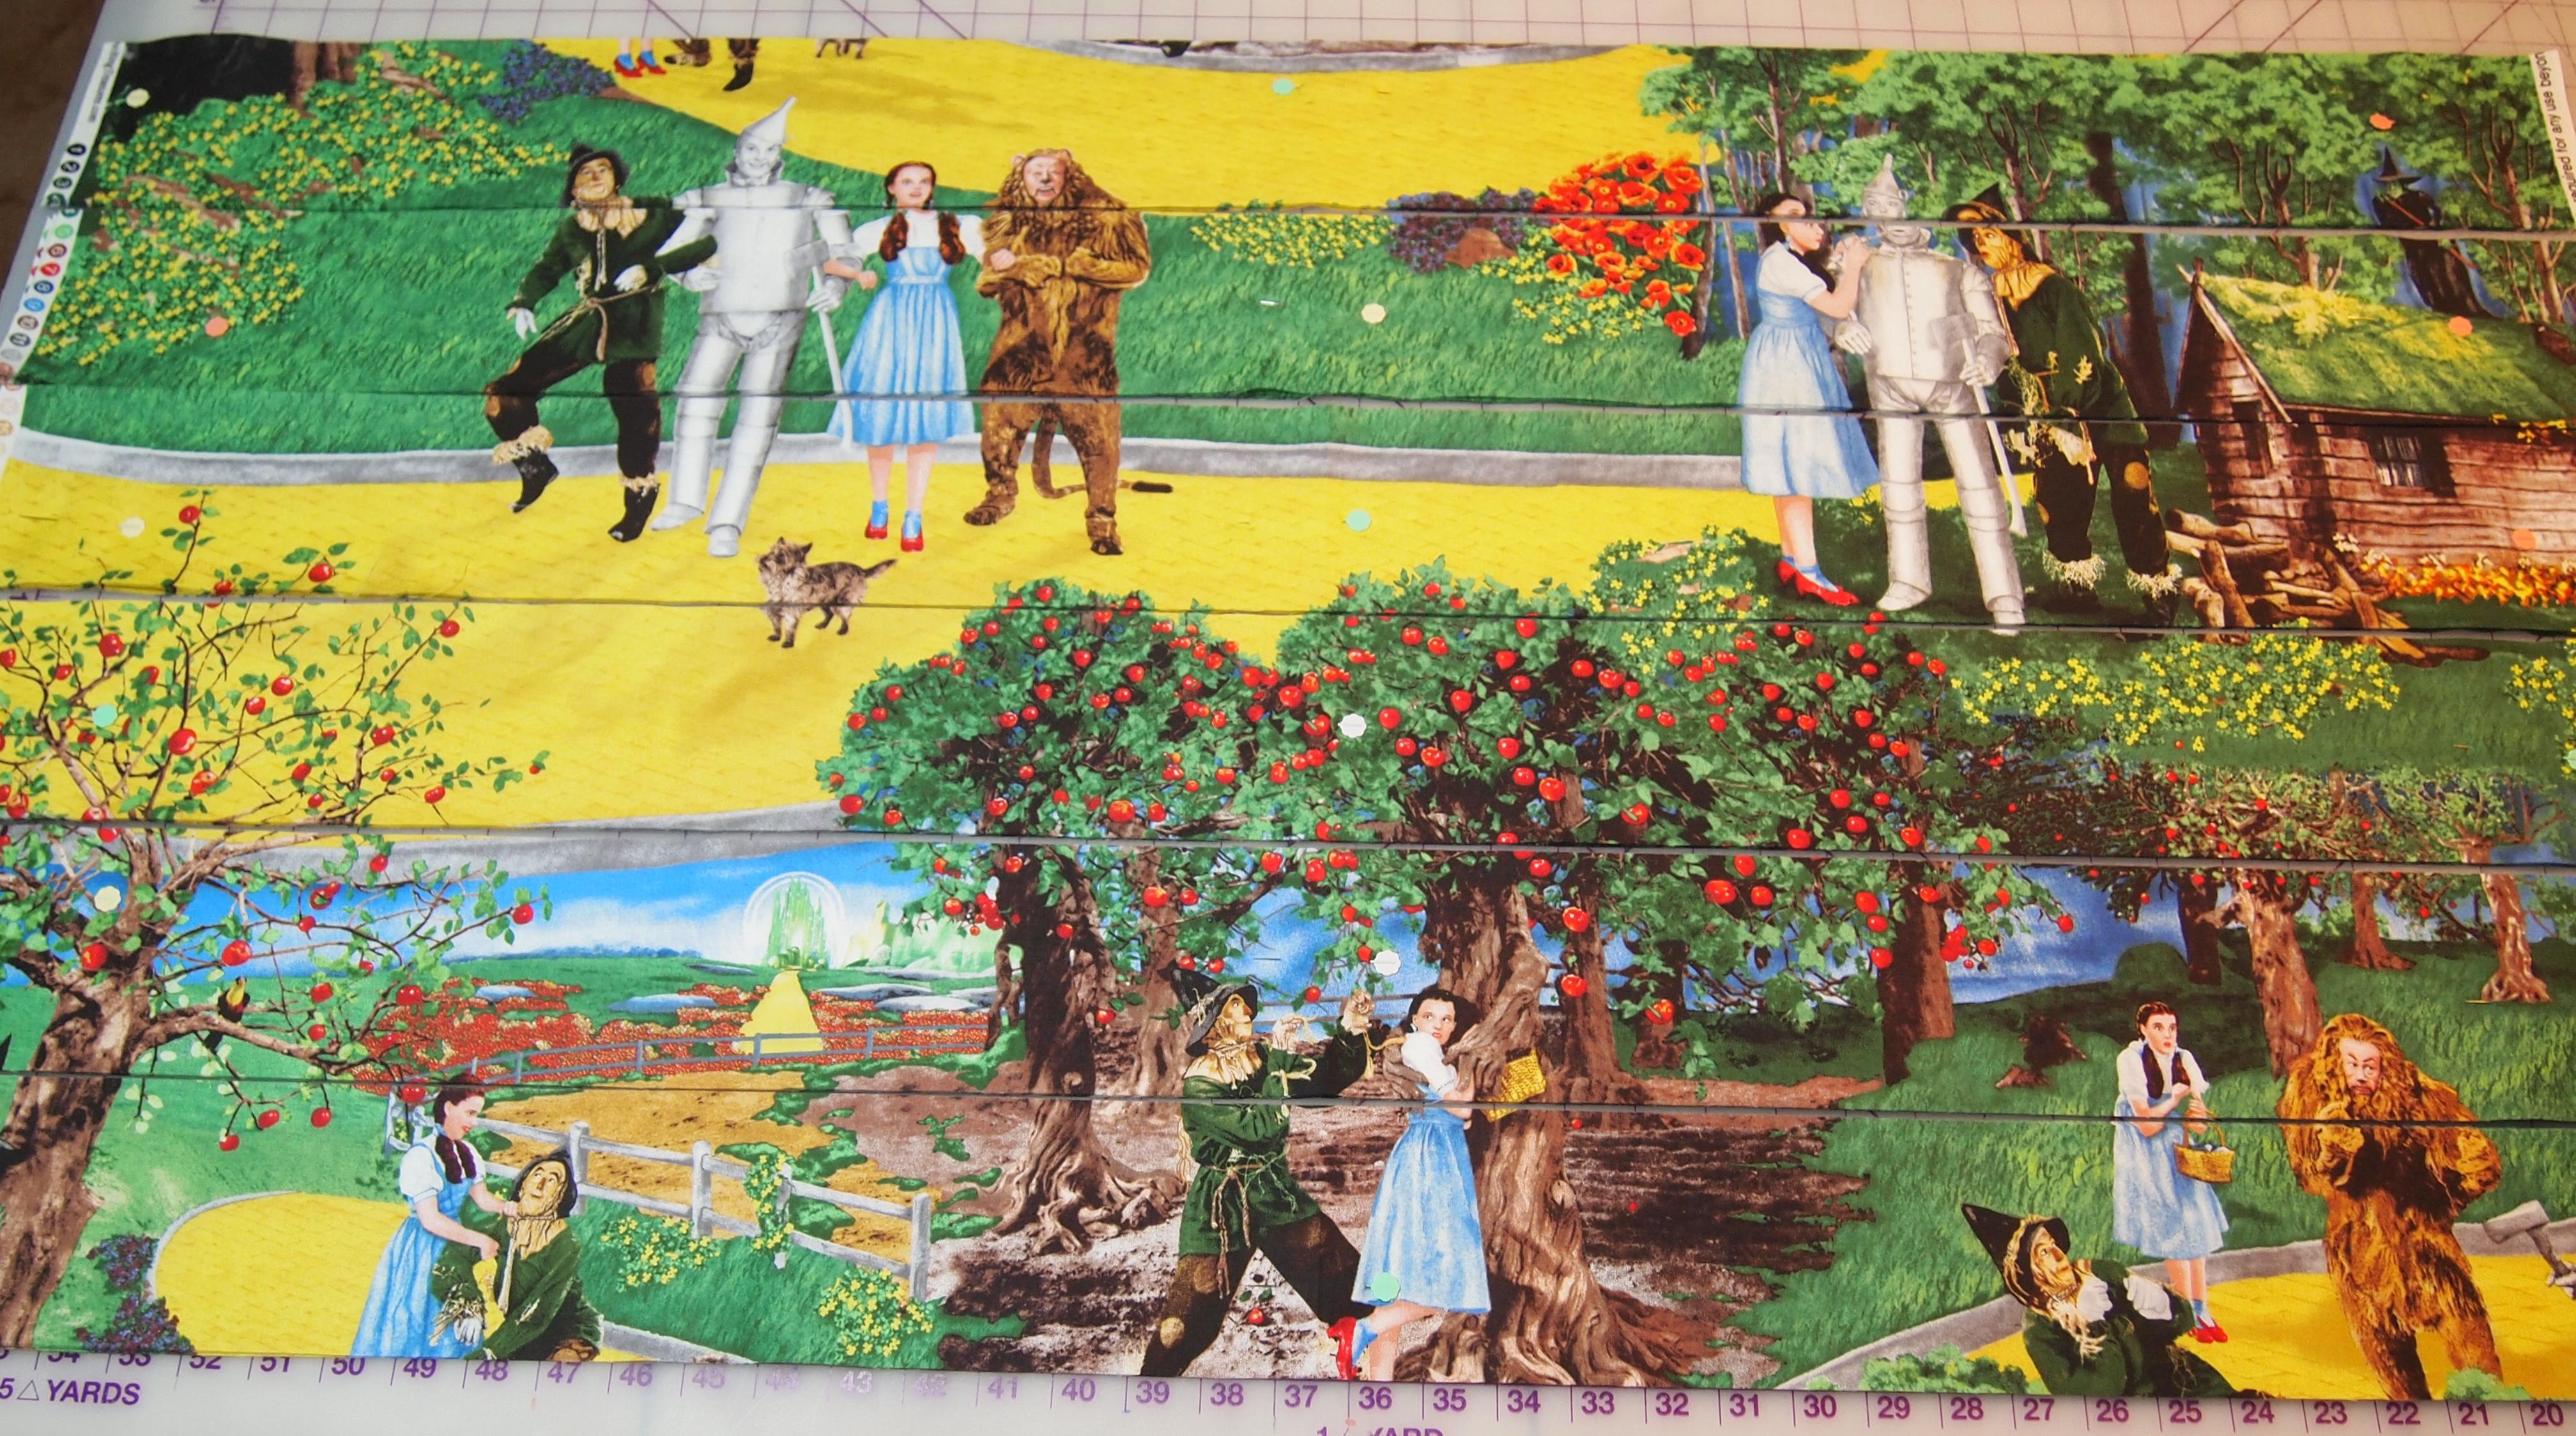
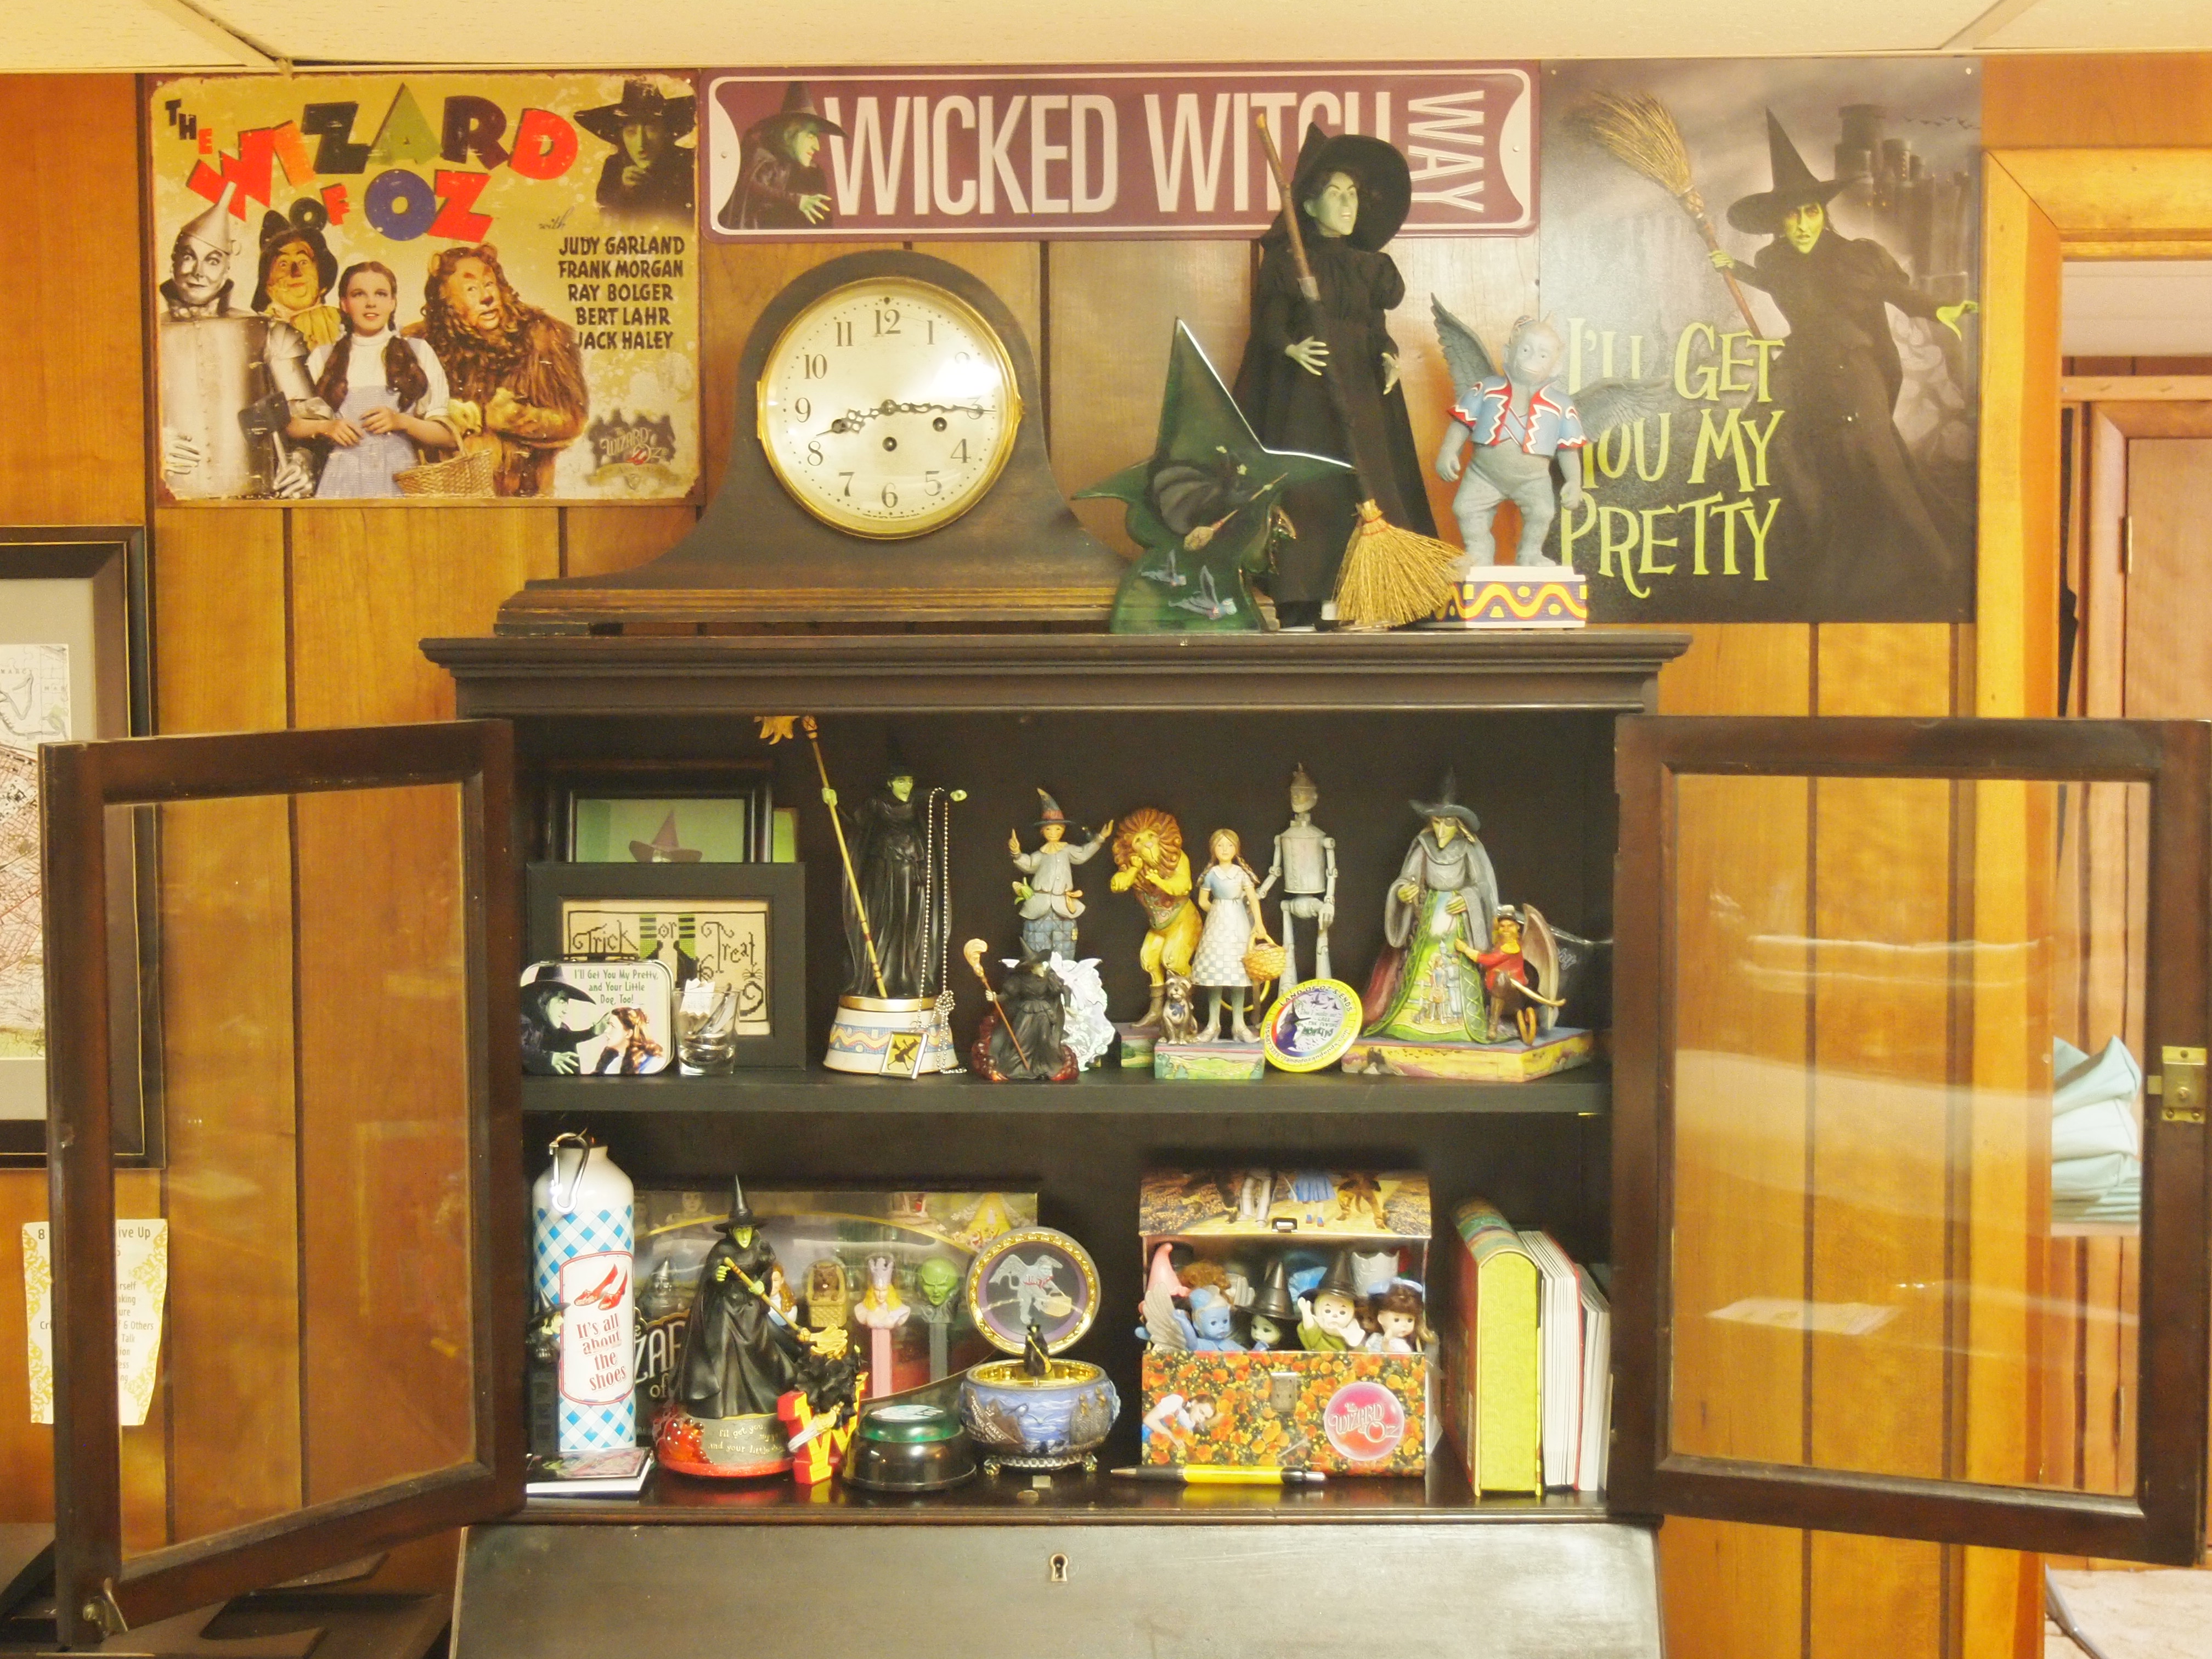
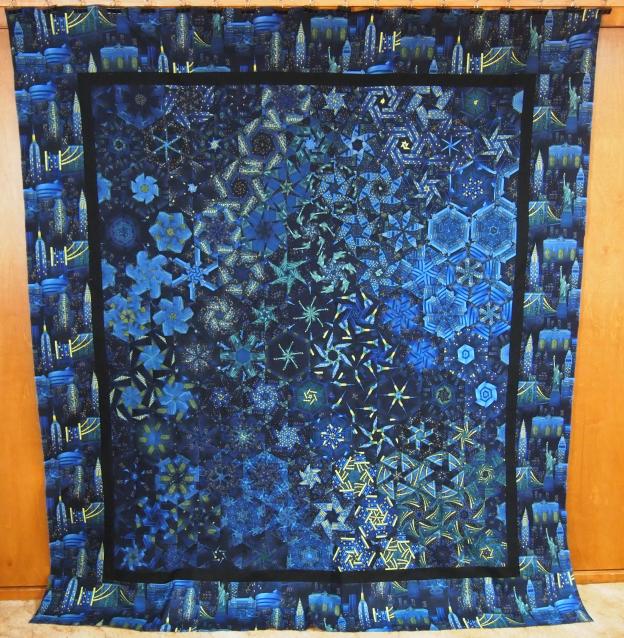
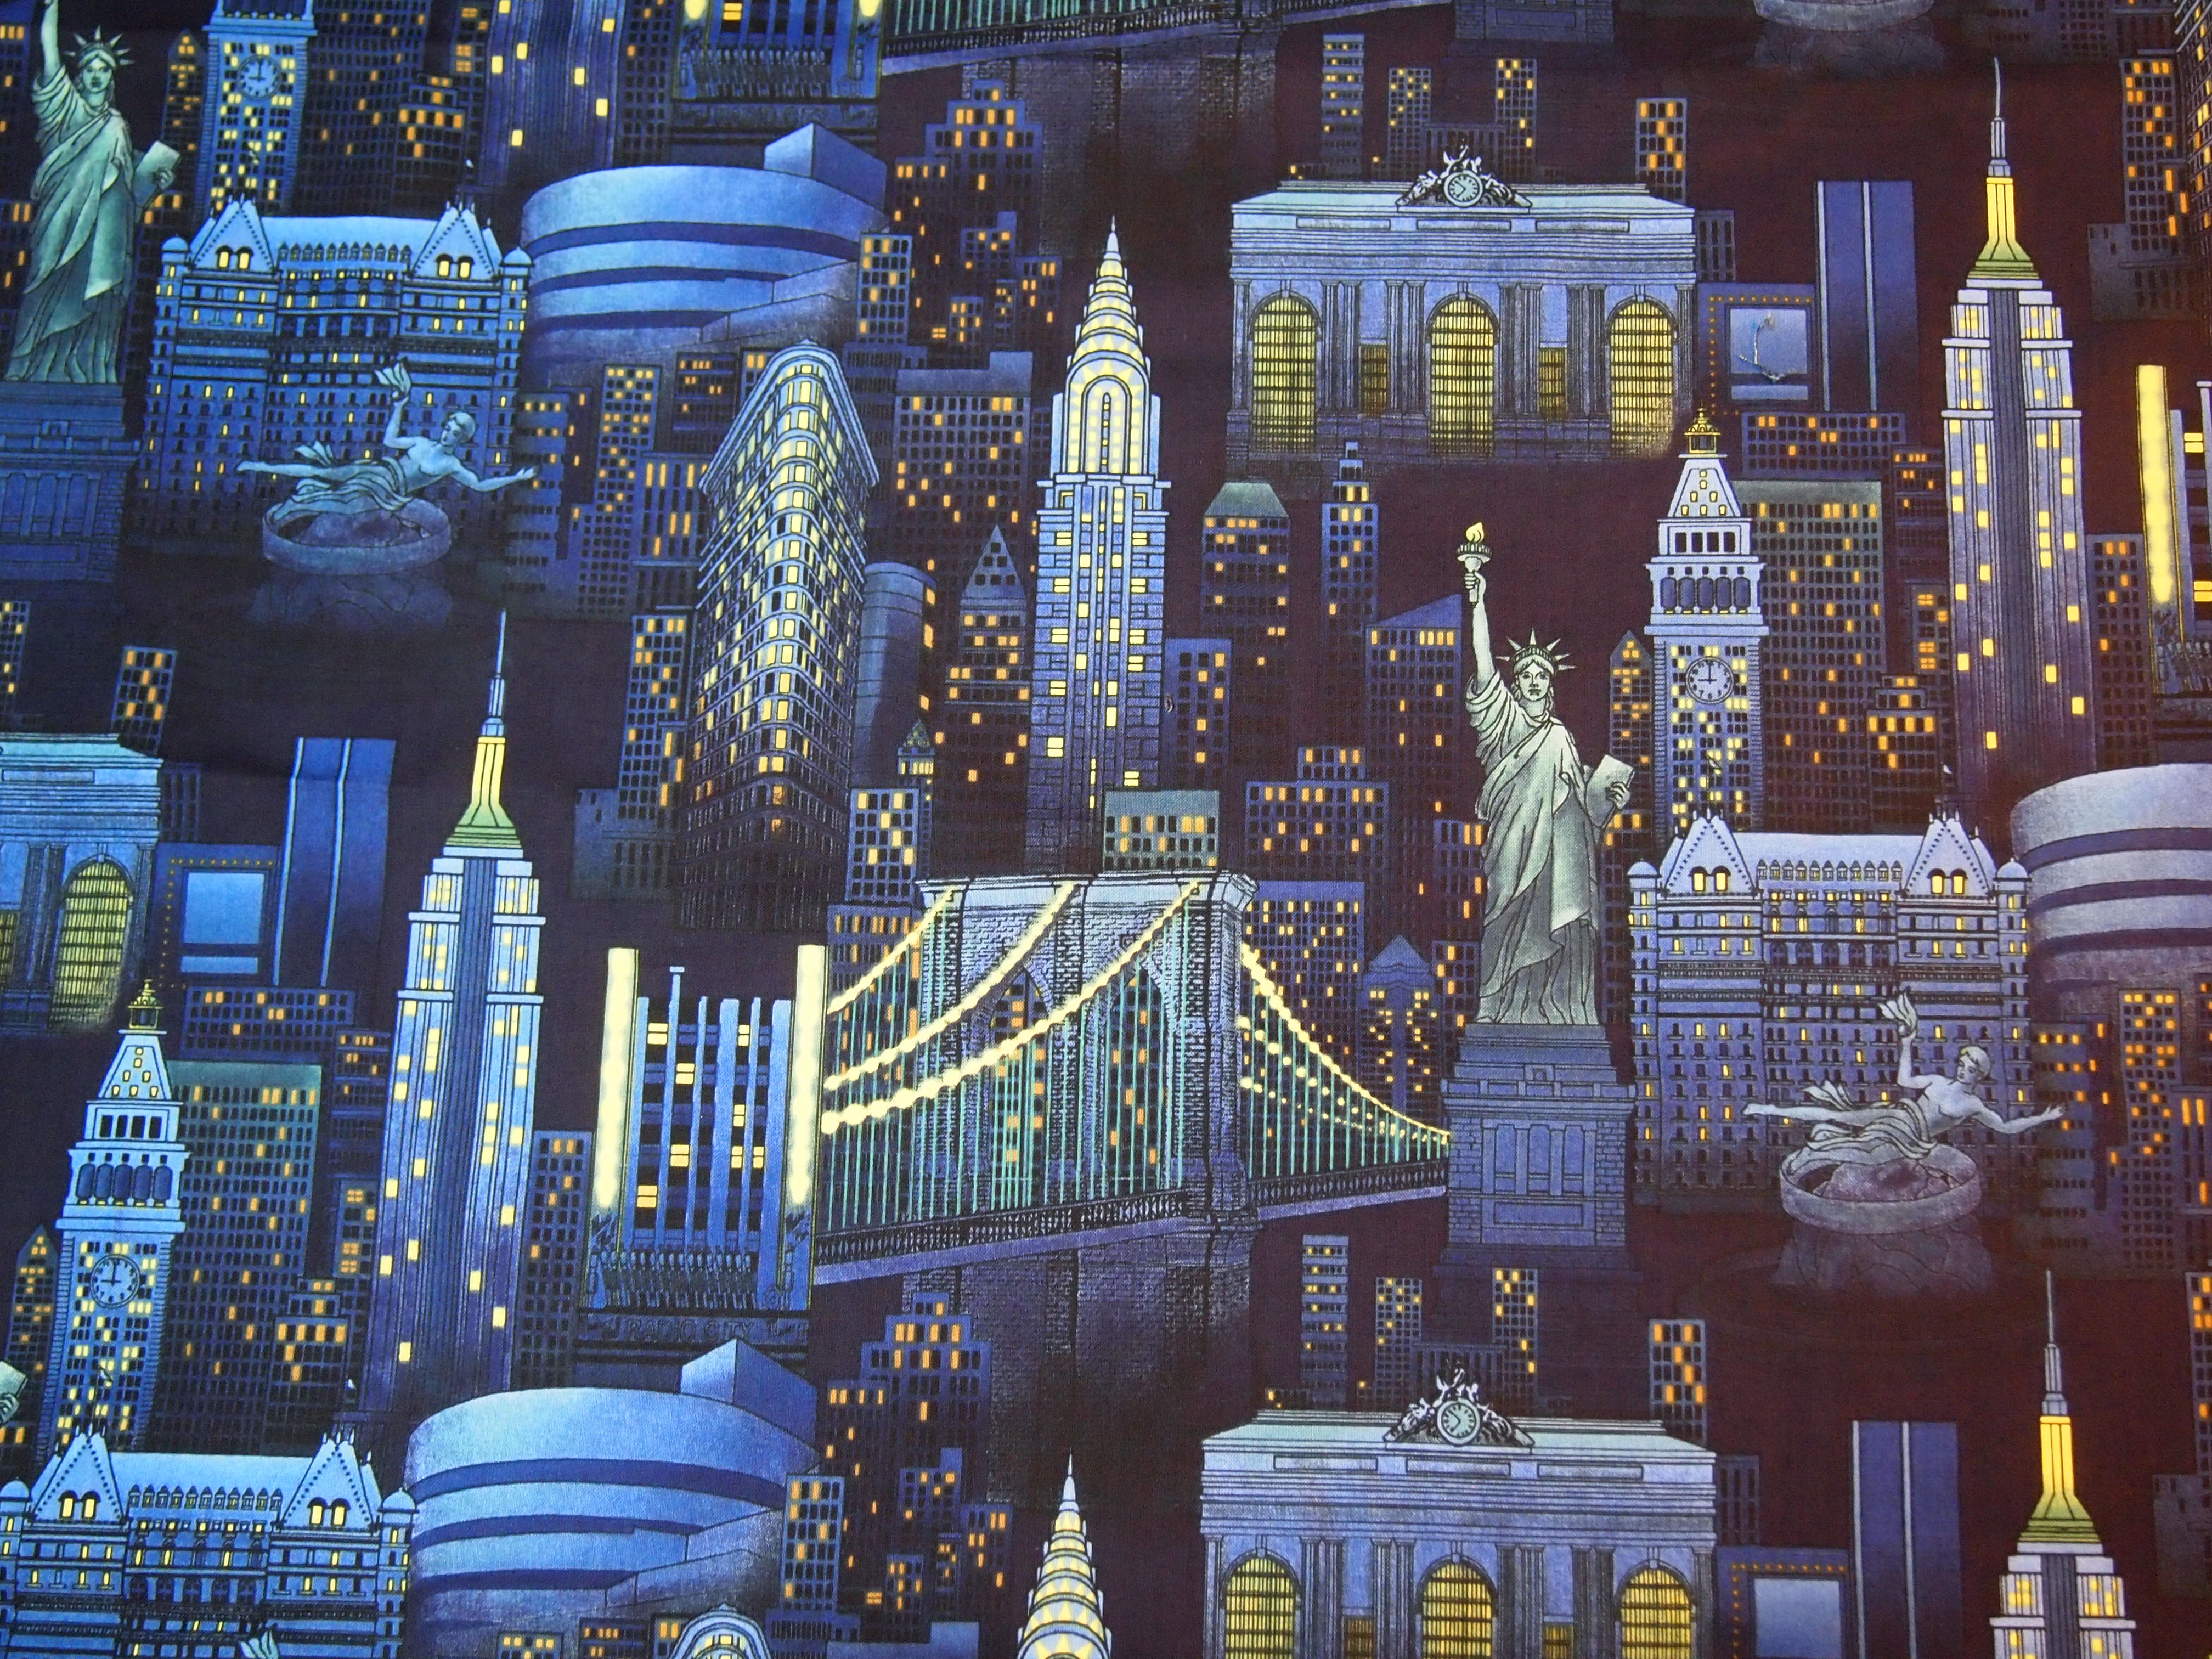
I decided on a One Block Wonder because they are so much fun and visually interesting.  As I’ve said before I’m a self proclaimed Wizard of Oz freak, plus L. Frank Baum was born in Chittenango, NY in 1856 not far from Utica.  So I went to my Oz stash and chose my fabric.  It all starts with 6 repeats of fabric.  I decided to put one repeat on the back of the quilt because it was too large to use in the borders.

One Repeat

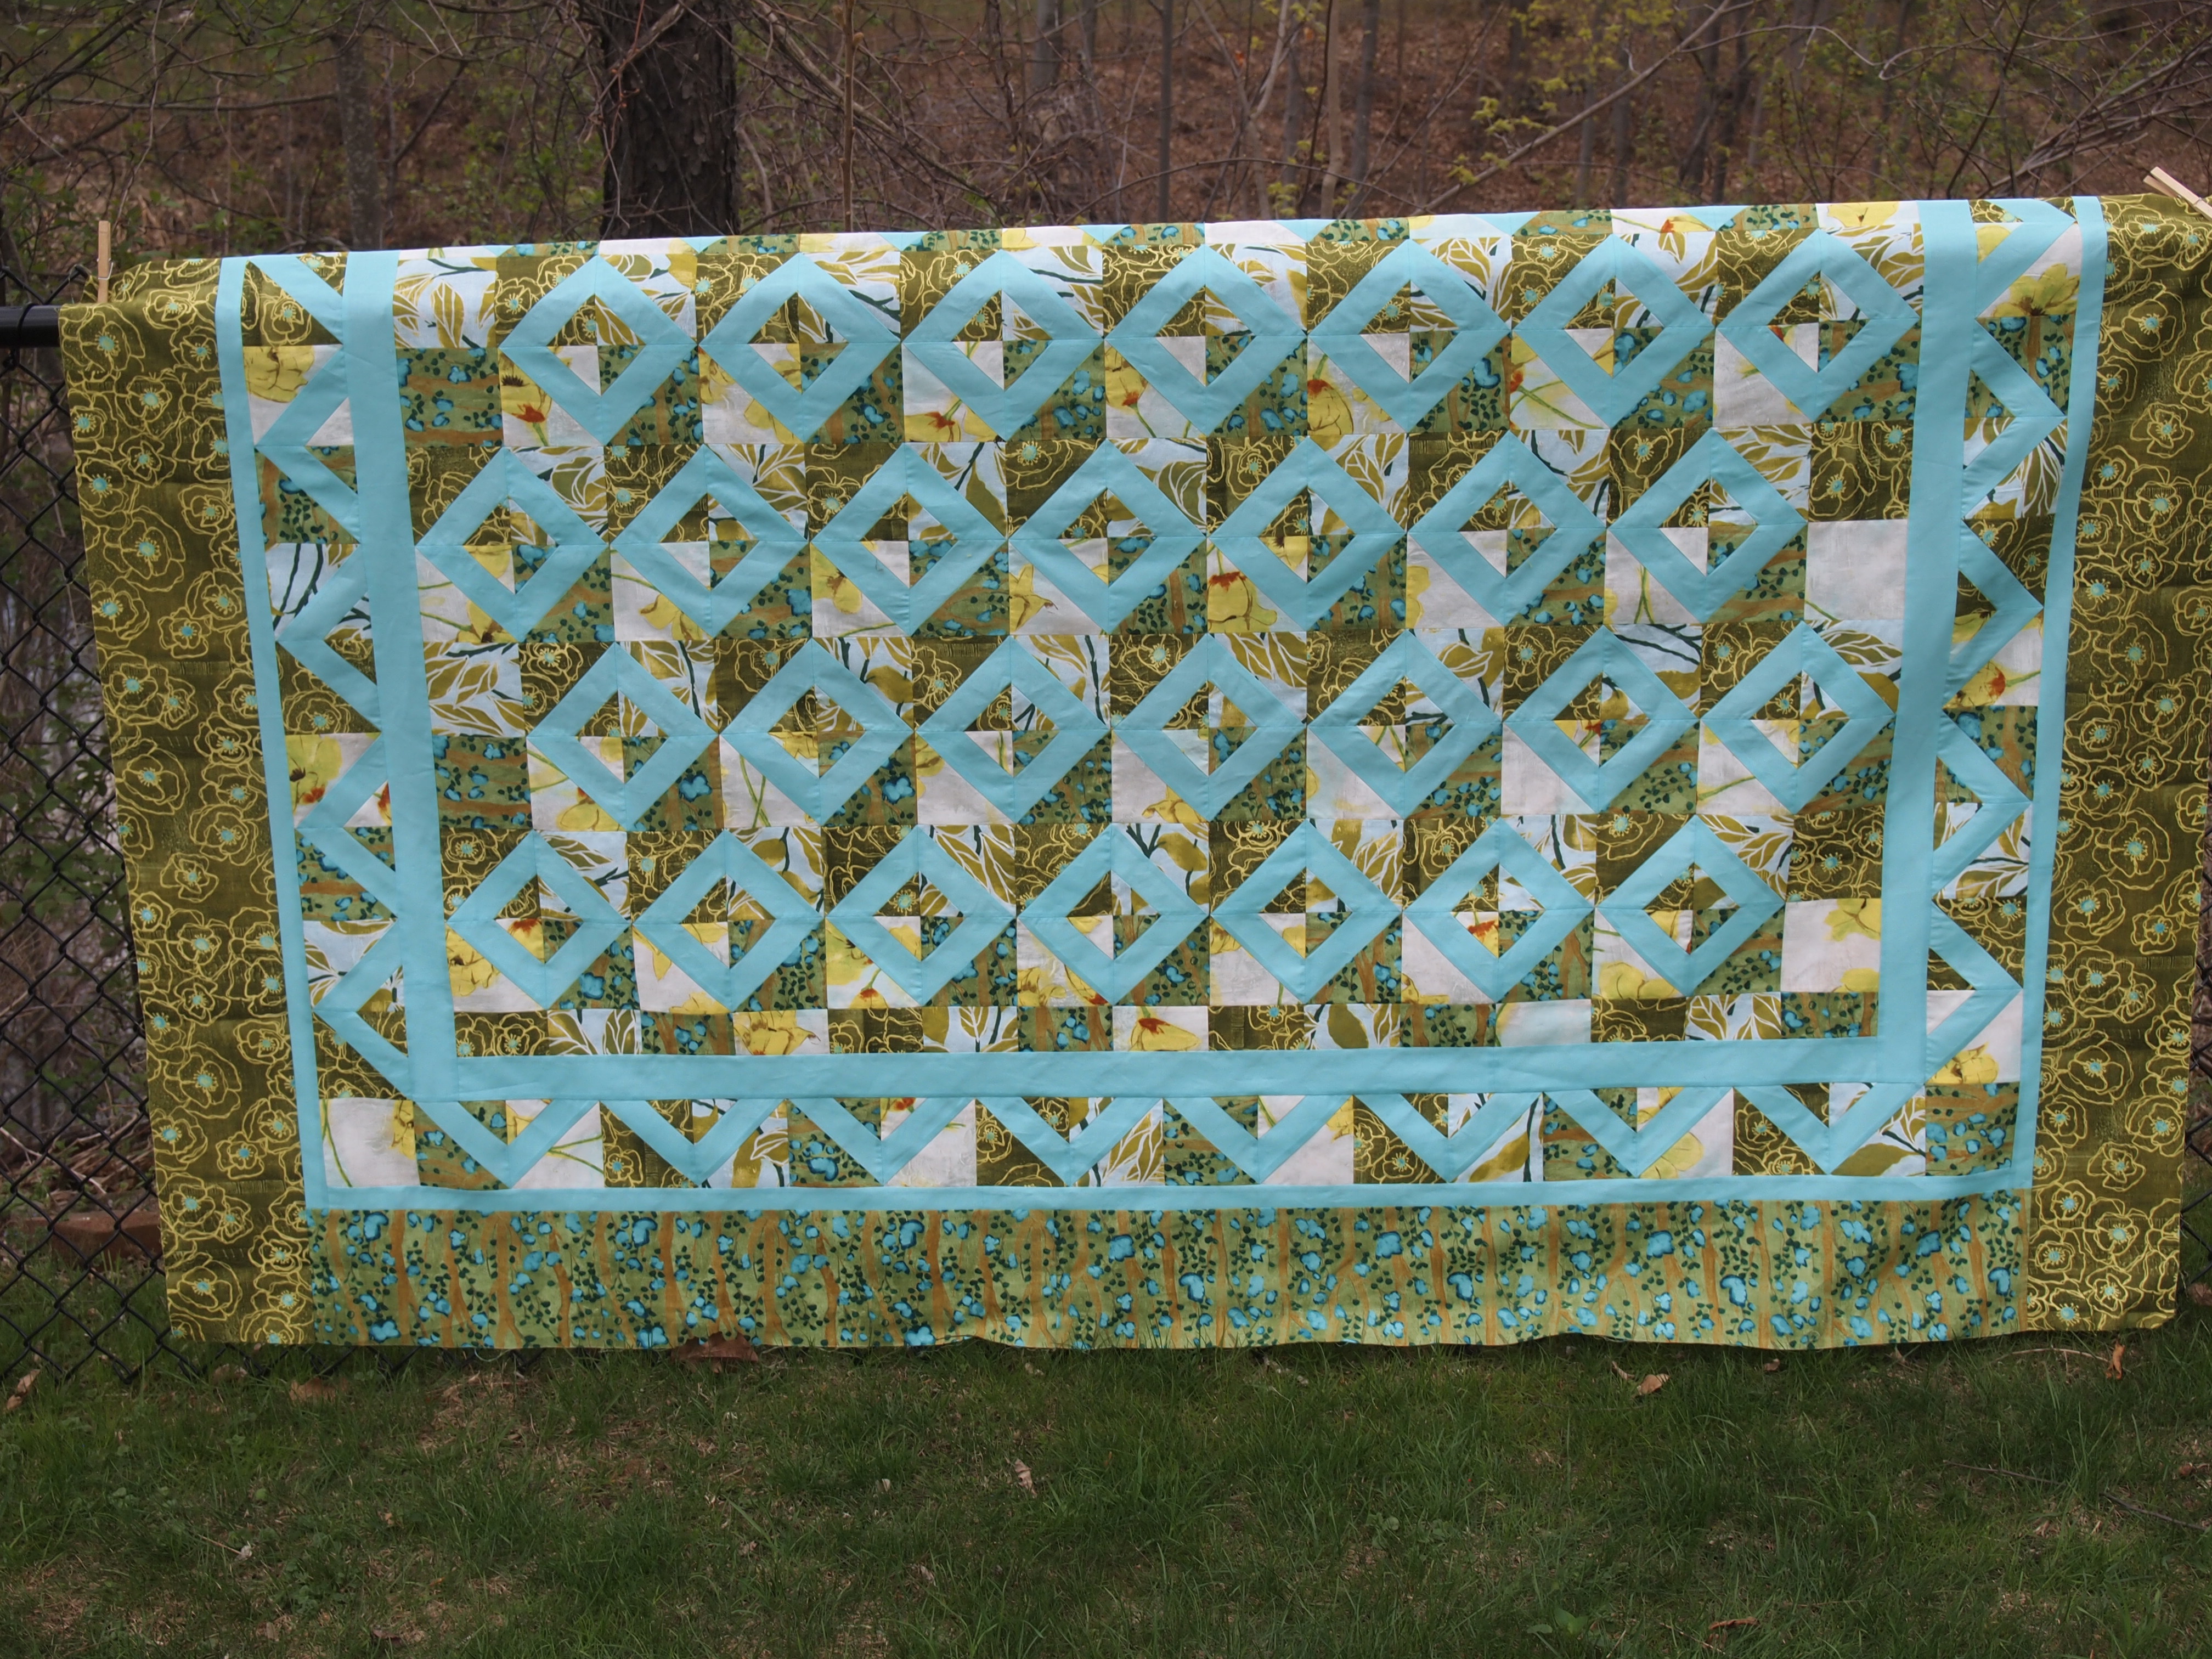
I cut my 6 repeats, aligned the fabric, cut my strips, cut my equilateral triangles and decided to start with a Yellow Brick Road.

First step

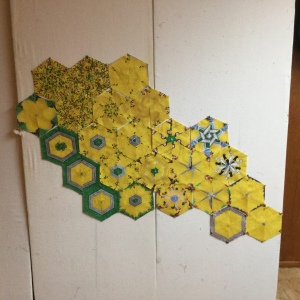
I began by using the yellow blocks to start the path.

Designed

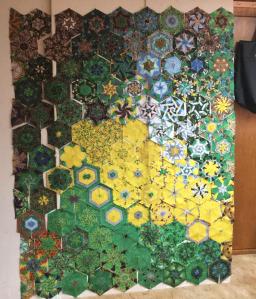
I was pleased with the design except for one block.

OLYMPUS DIGITAL CAMERA

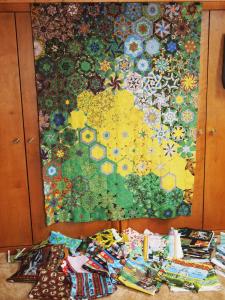
As I said earlier, the original fabric design was too large to use in the borders so I needed to pull from my Oz stash for the outer borders.  I had already sewn the rows together when I noticed one block in the lower left of the quilt that kept catching my eye.  I decided to embroider something in the block to tone it down.

OLYMPUS DIGITAL CAMERA

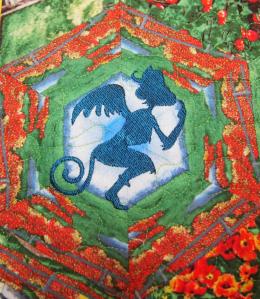
Monkey in the Moonlight, I love it!

OLYMPUS DIGITAL CAMERA

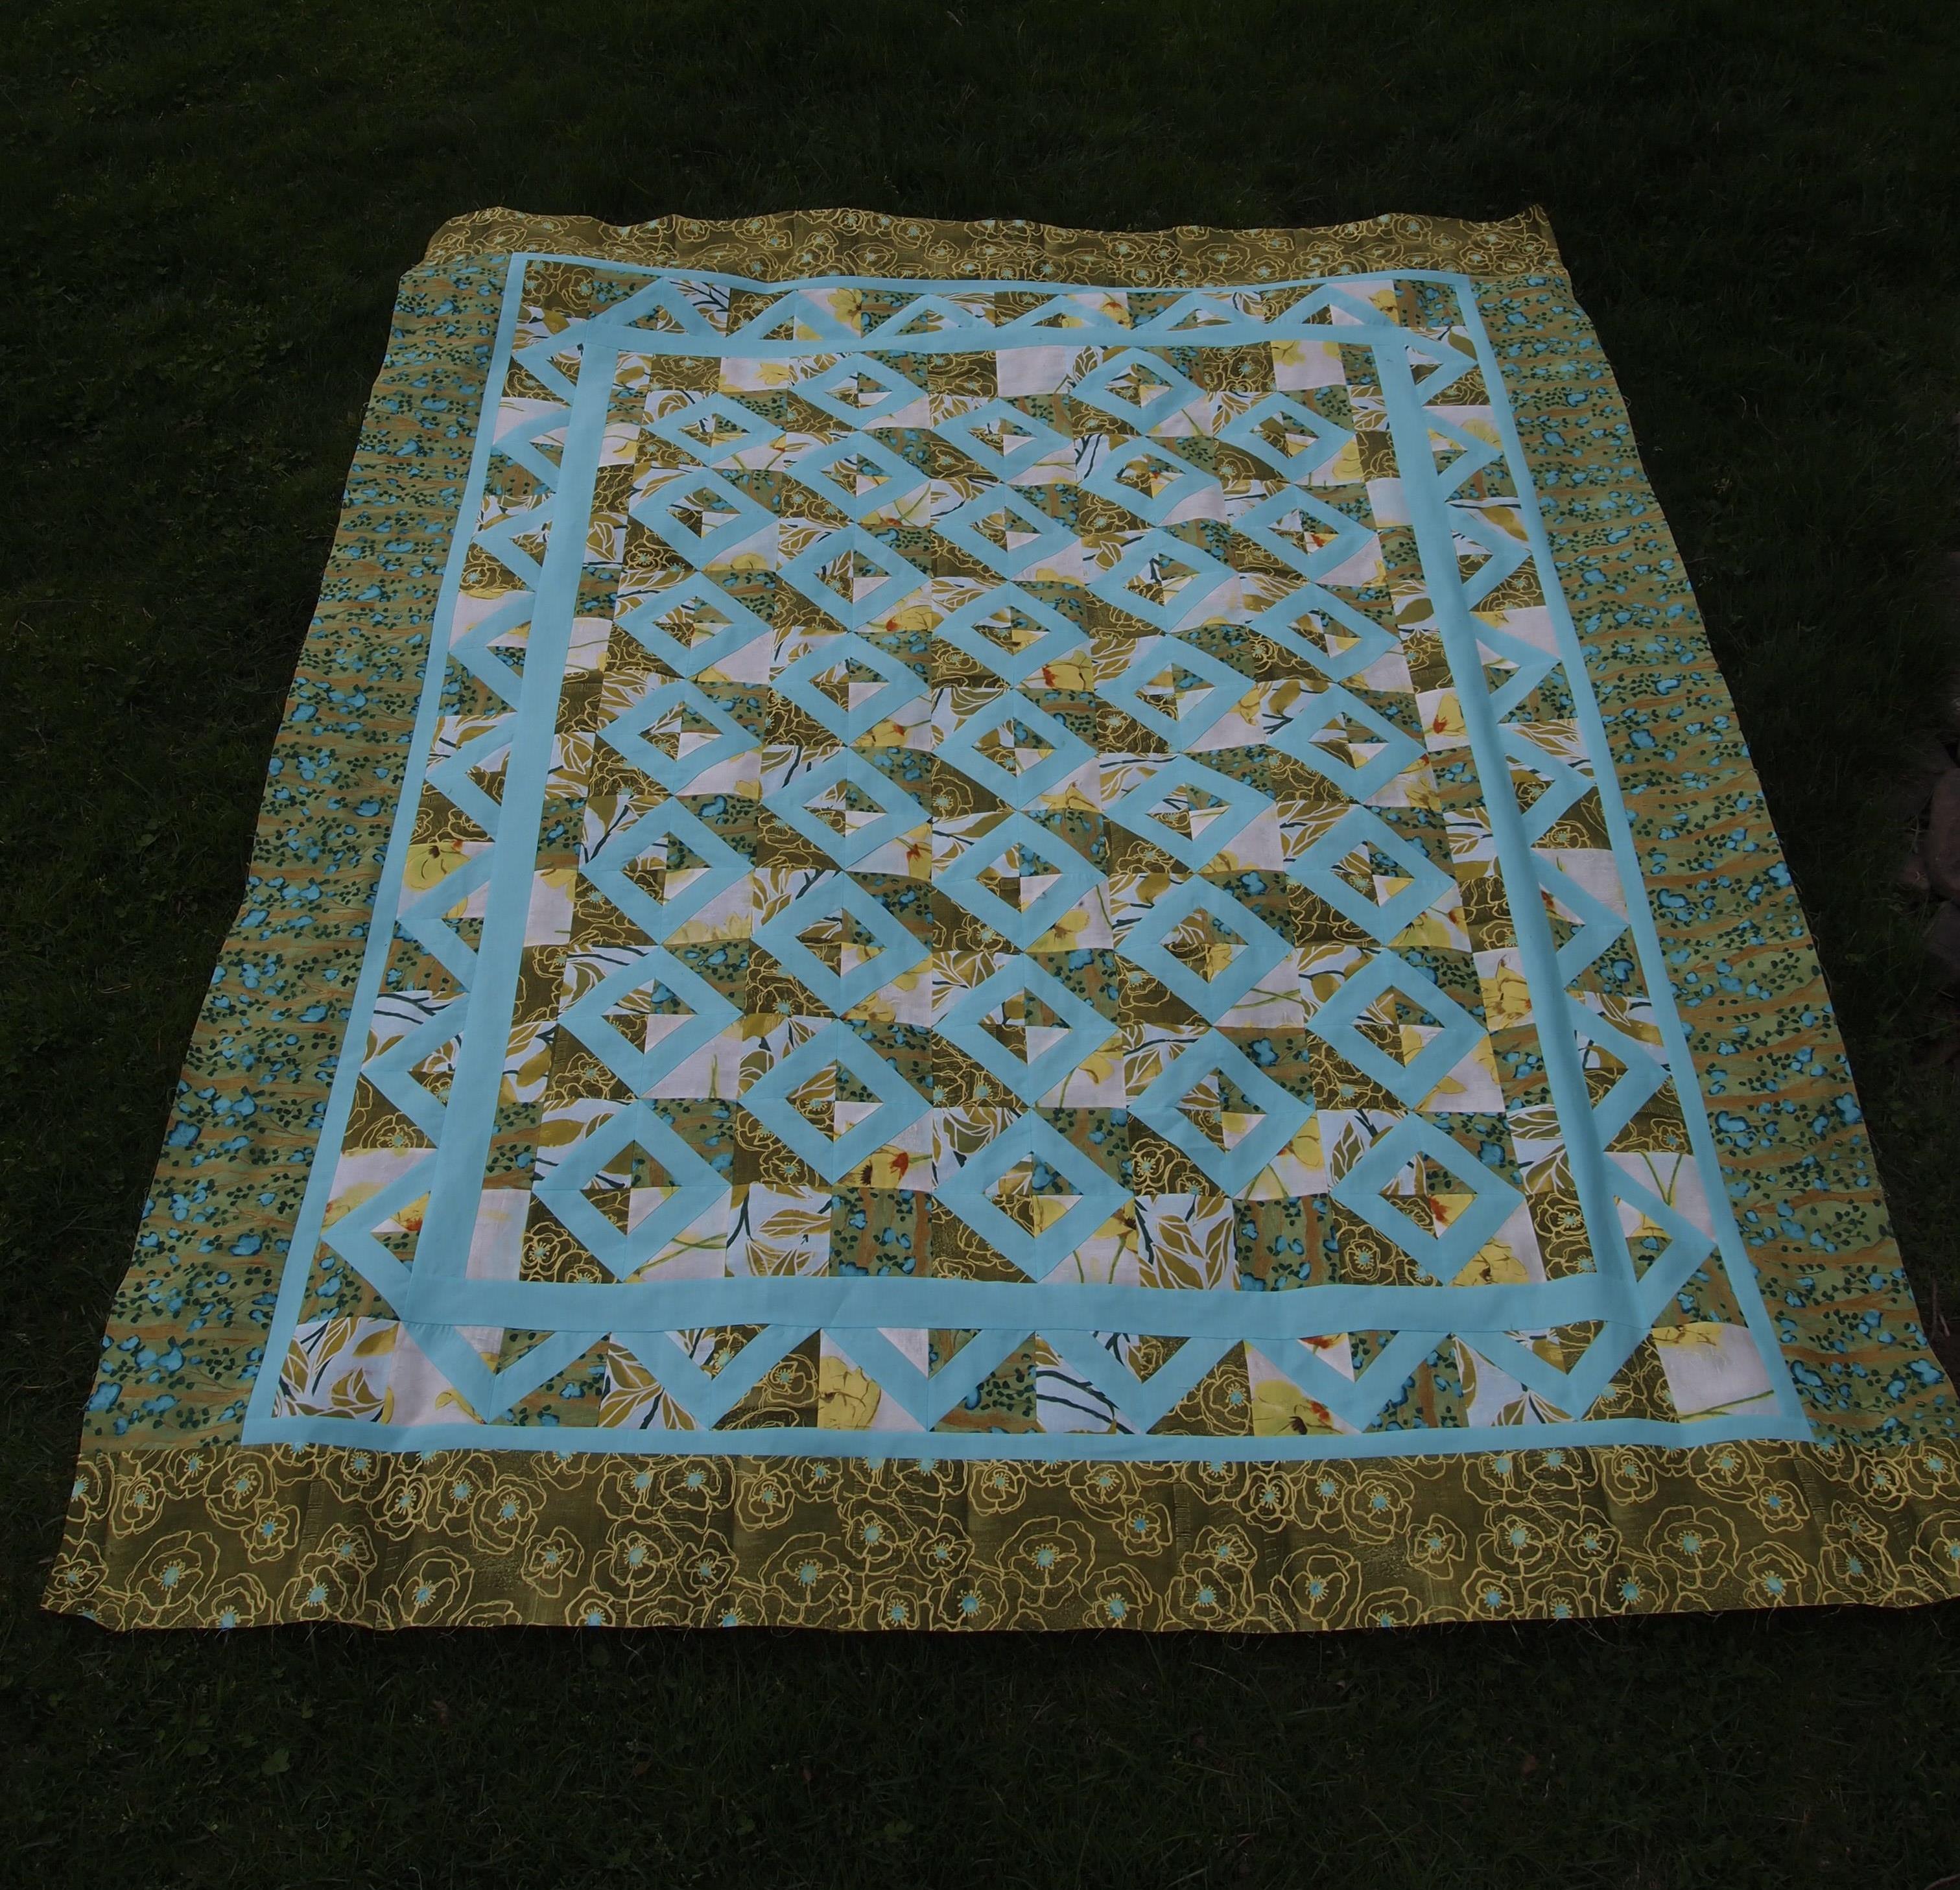
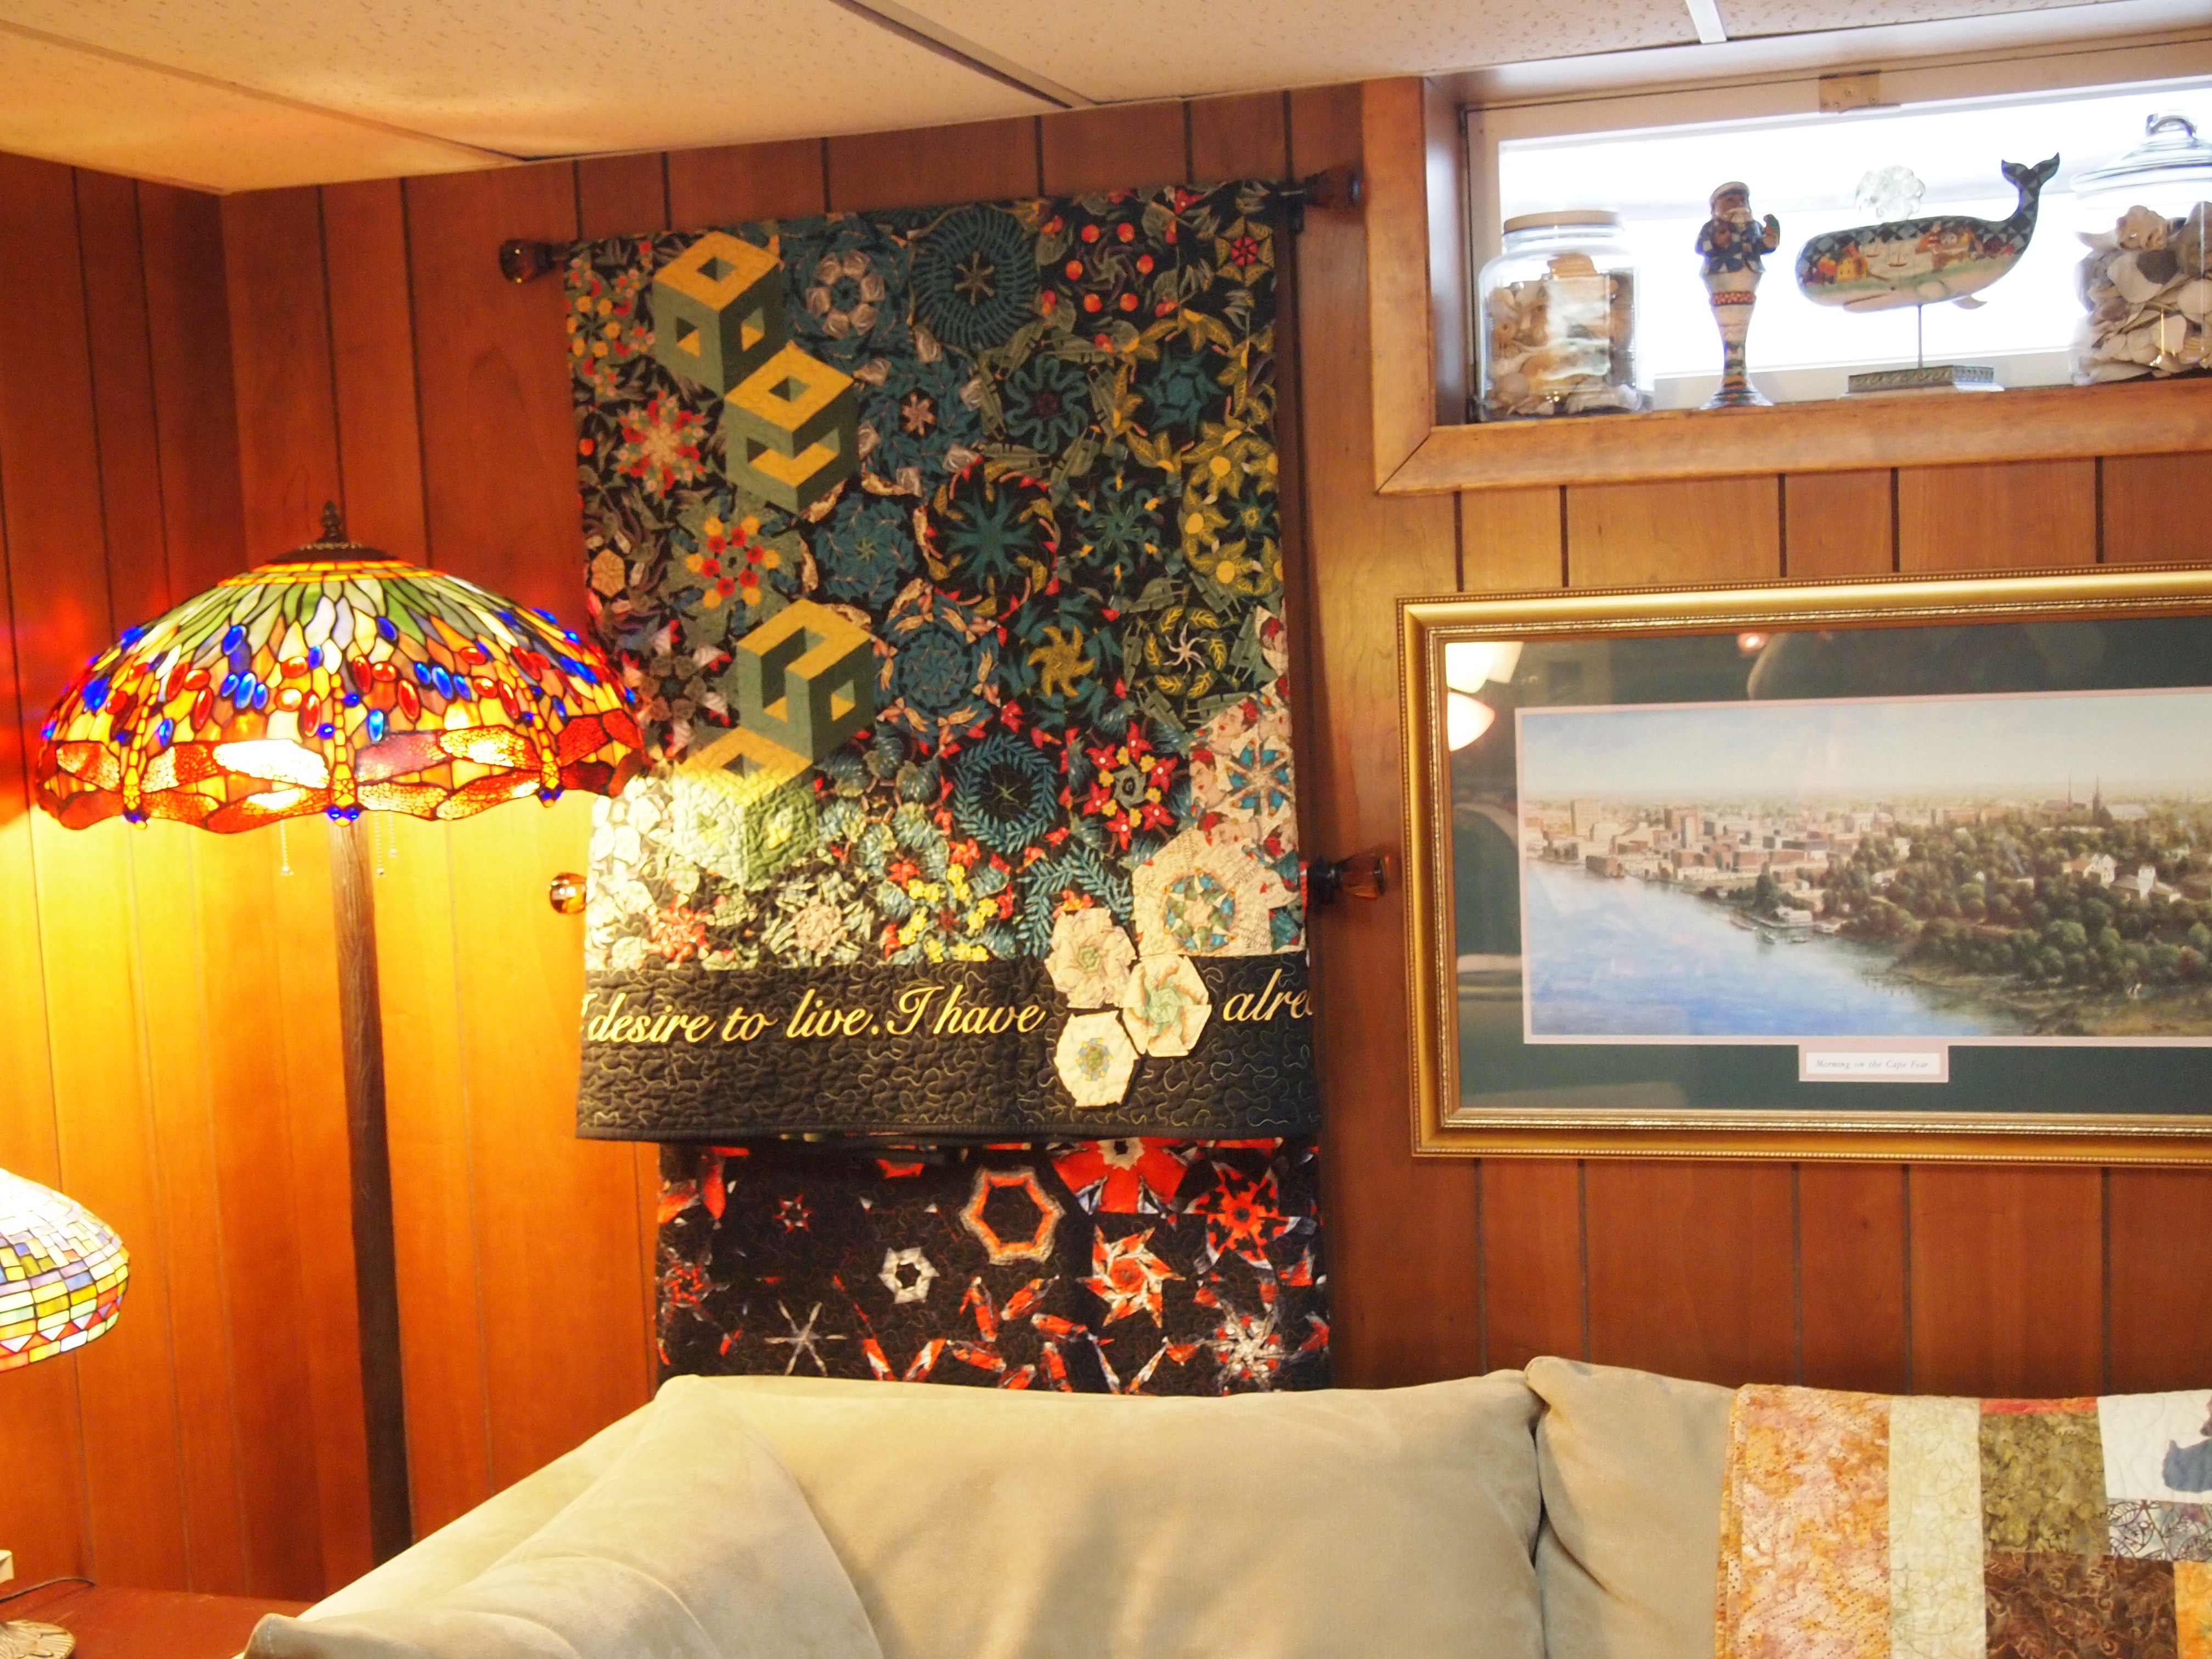
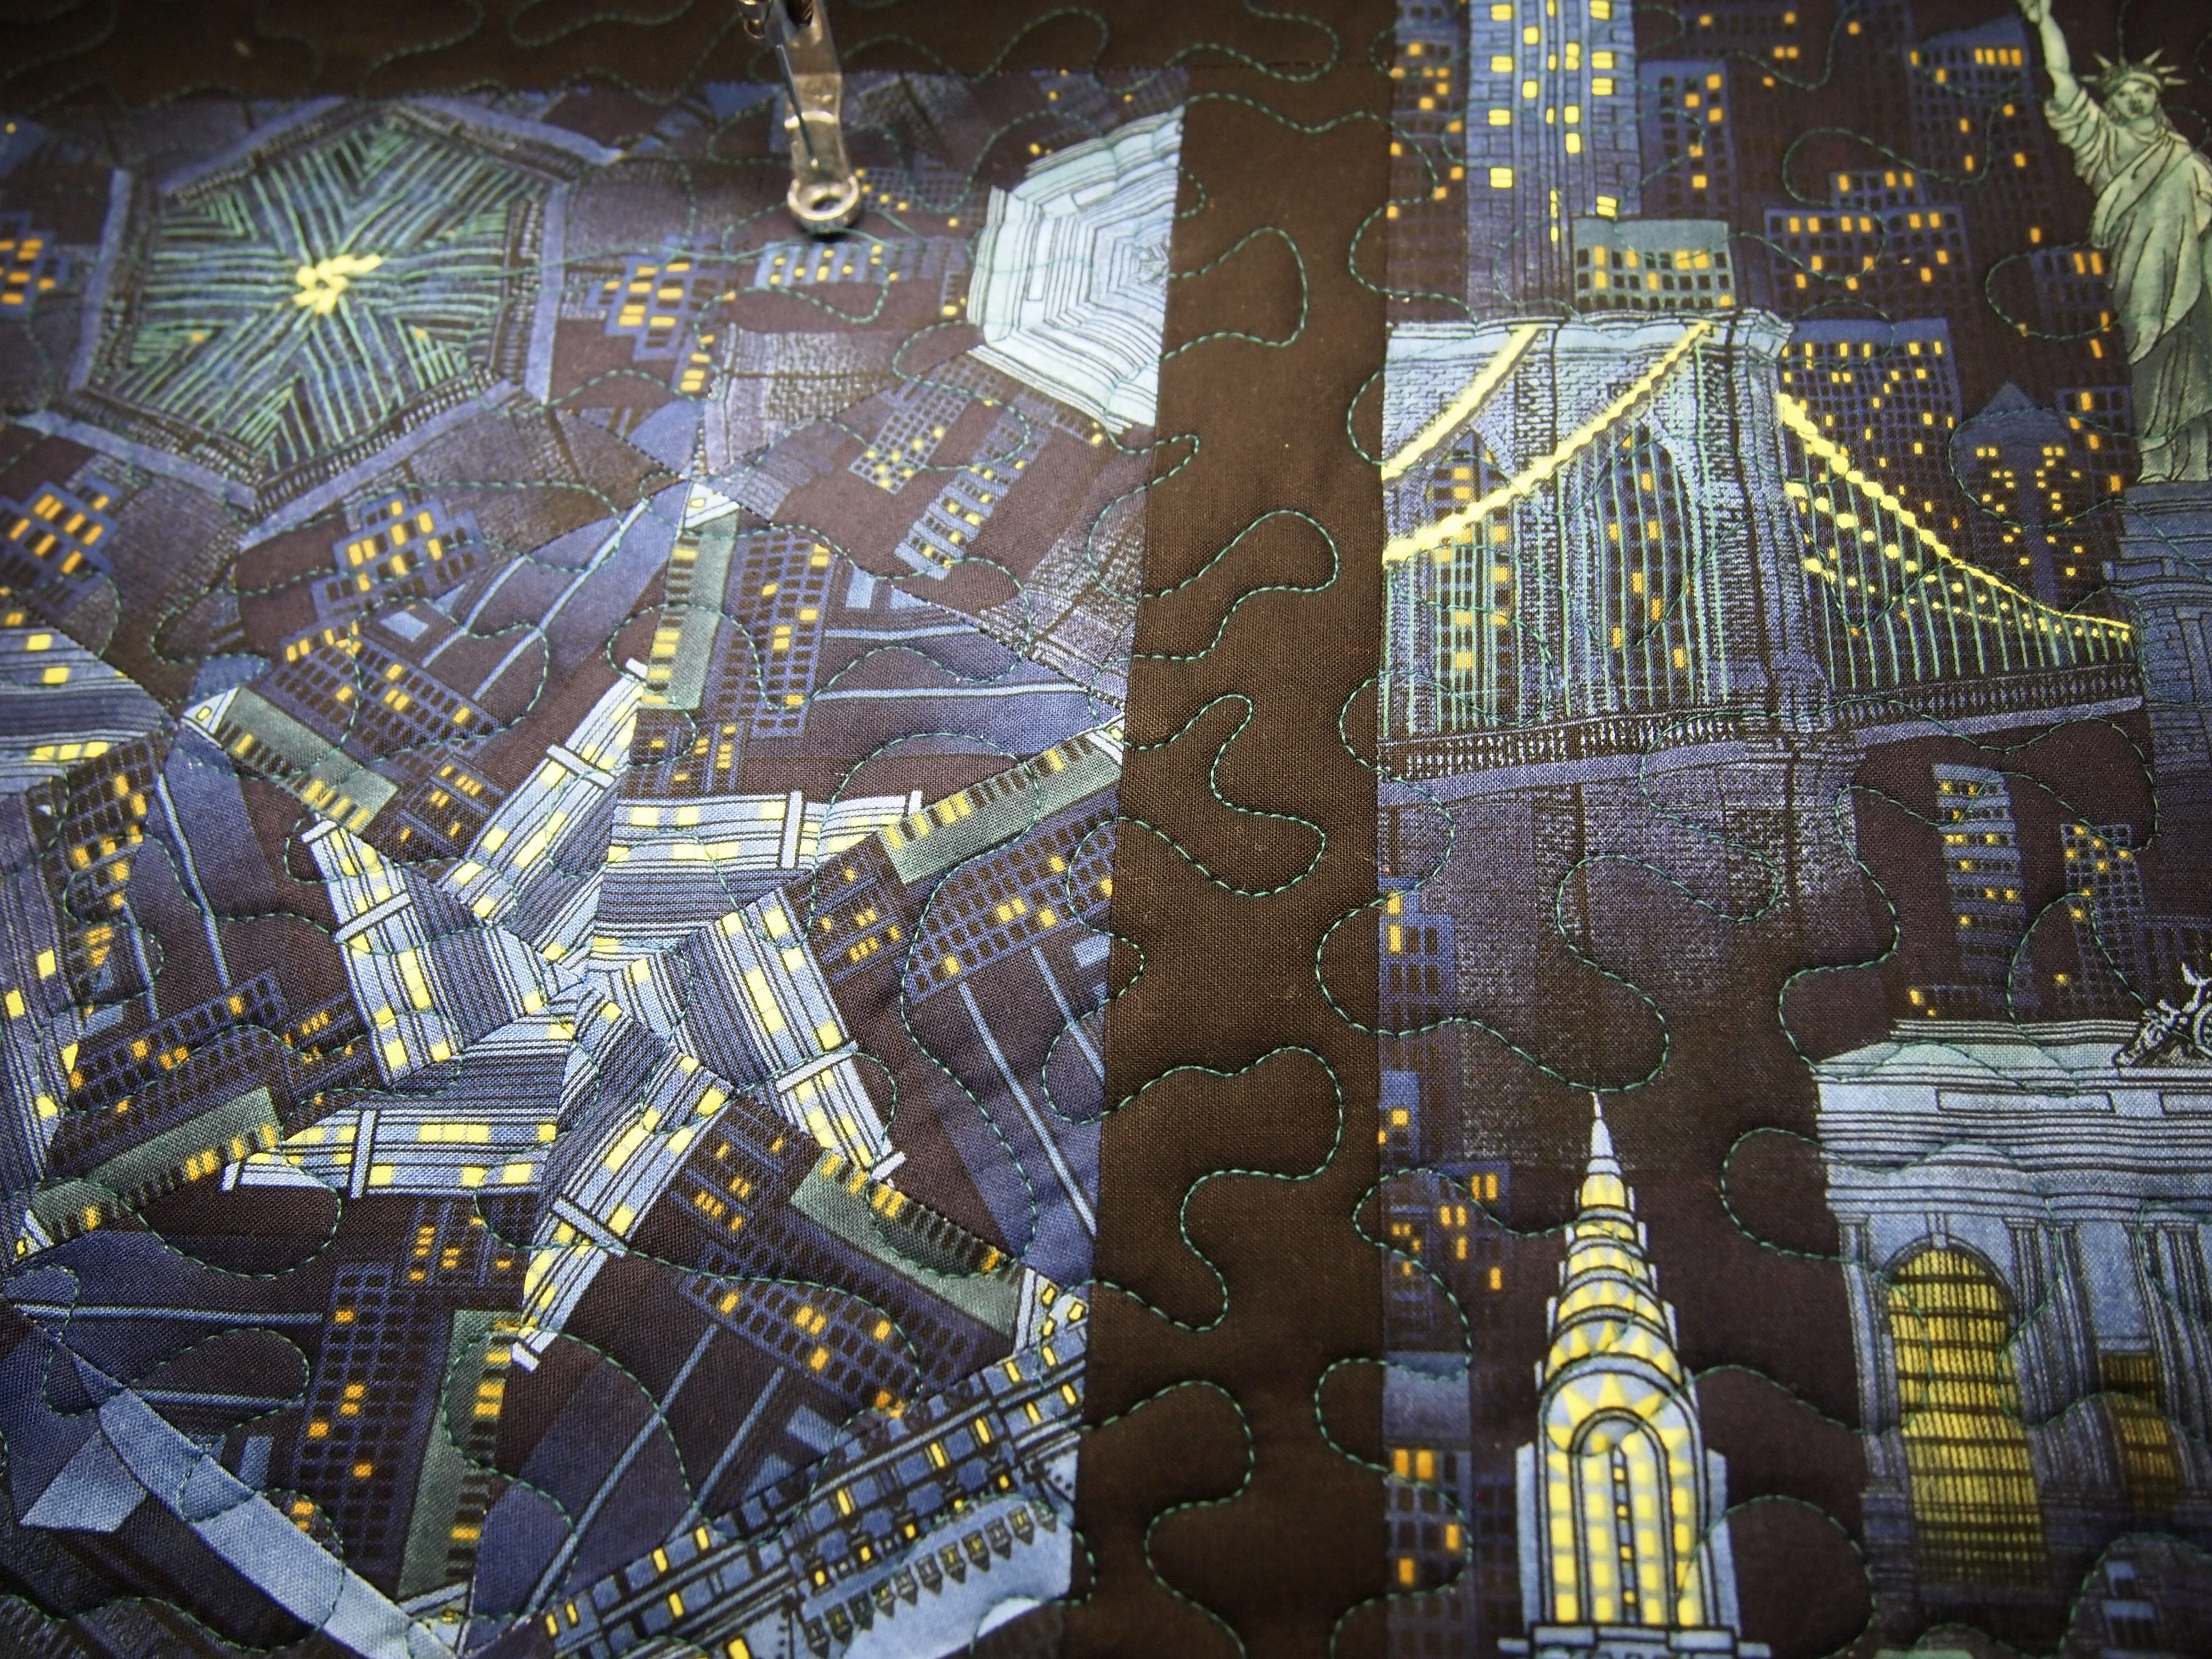
Borders on, now to quilt it.

OLYMPUS DIGITAL CAMERA

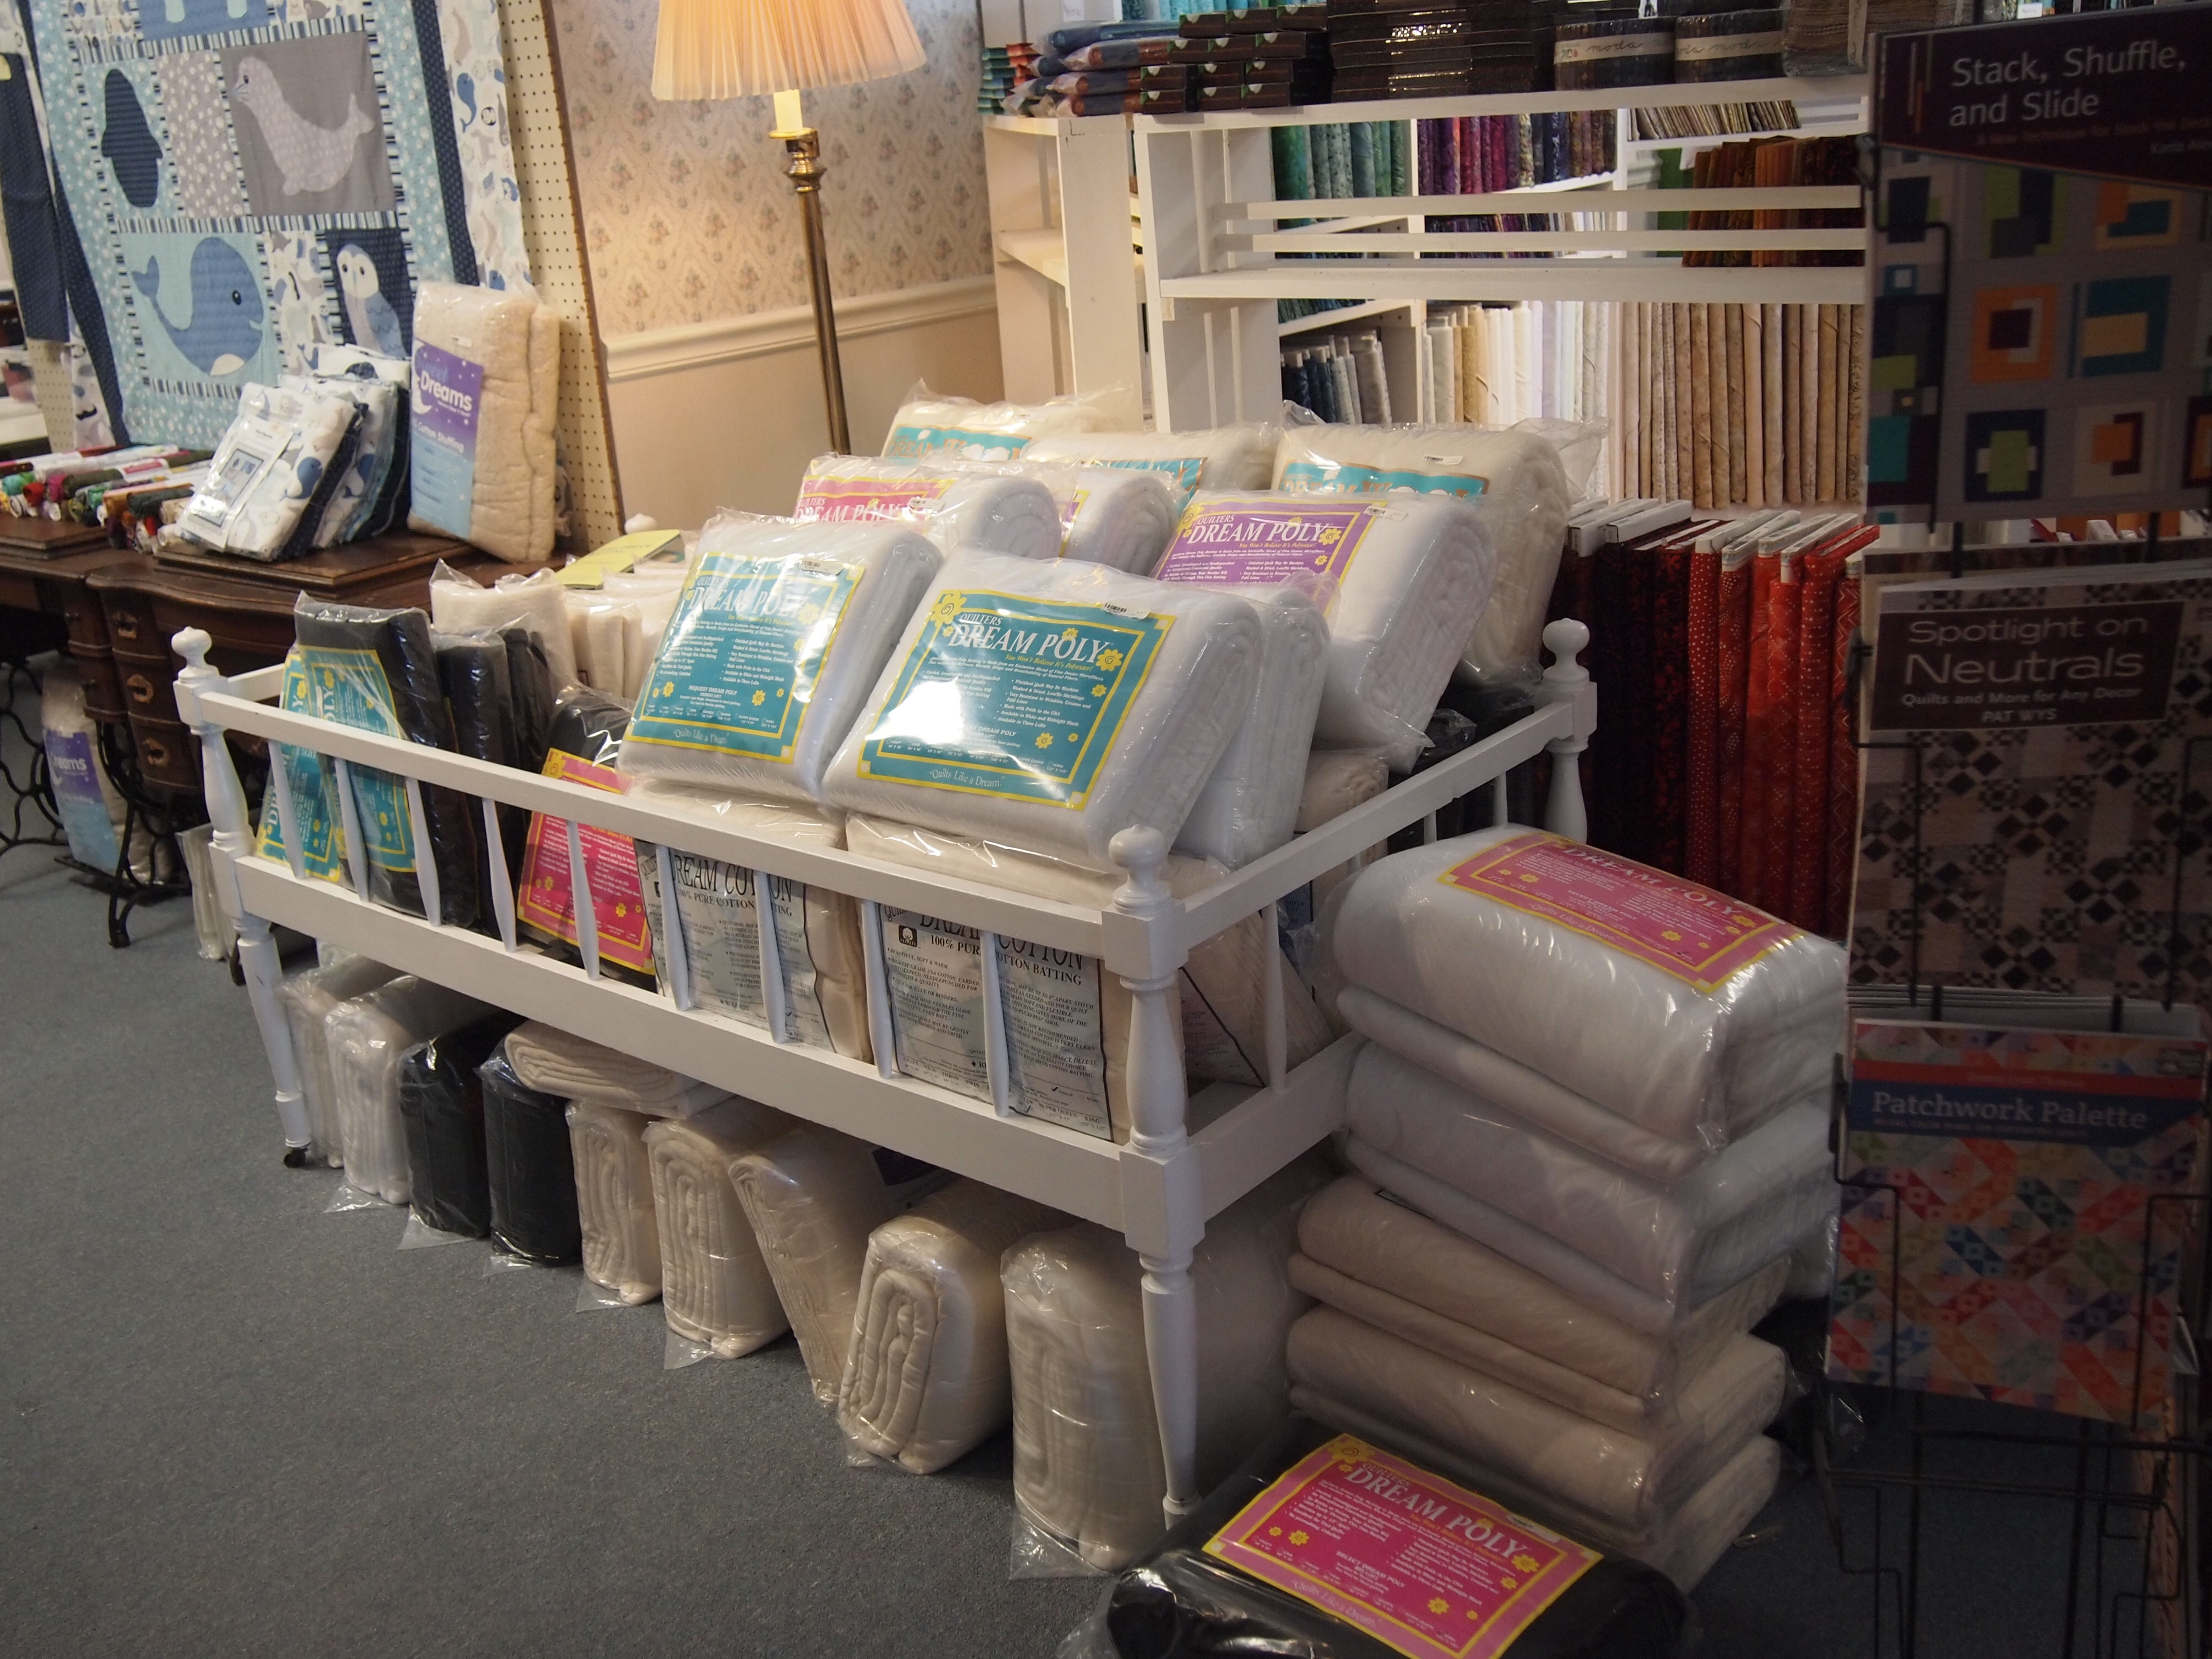
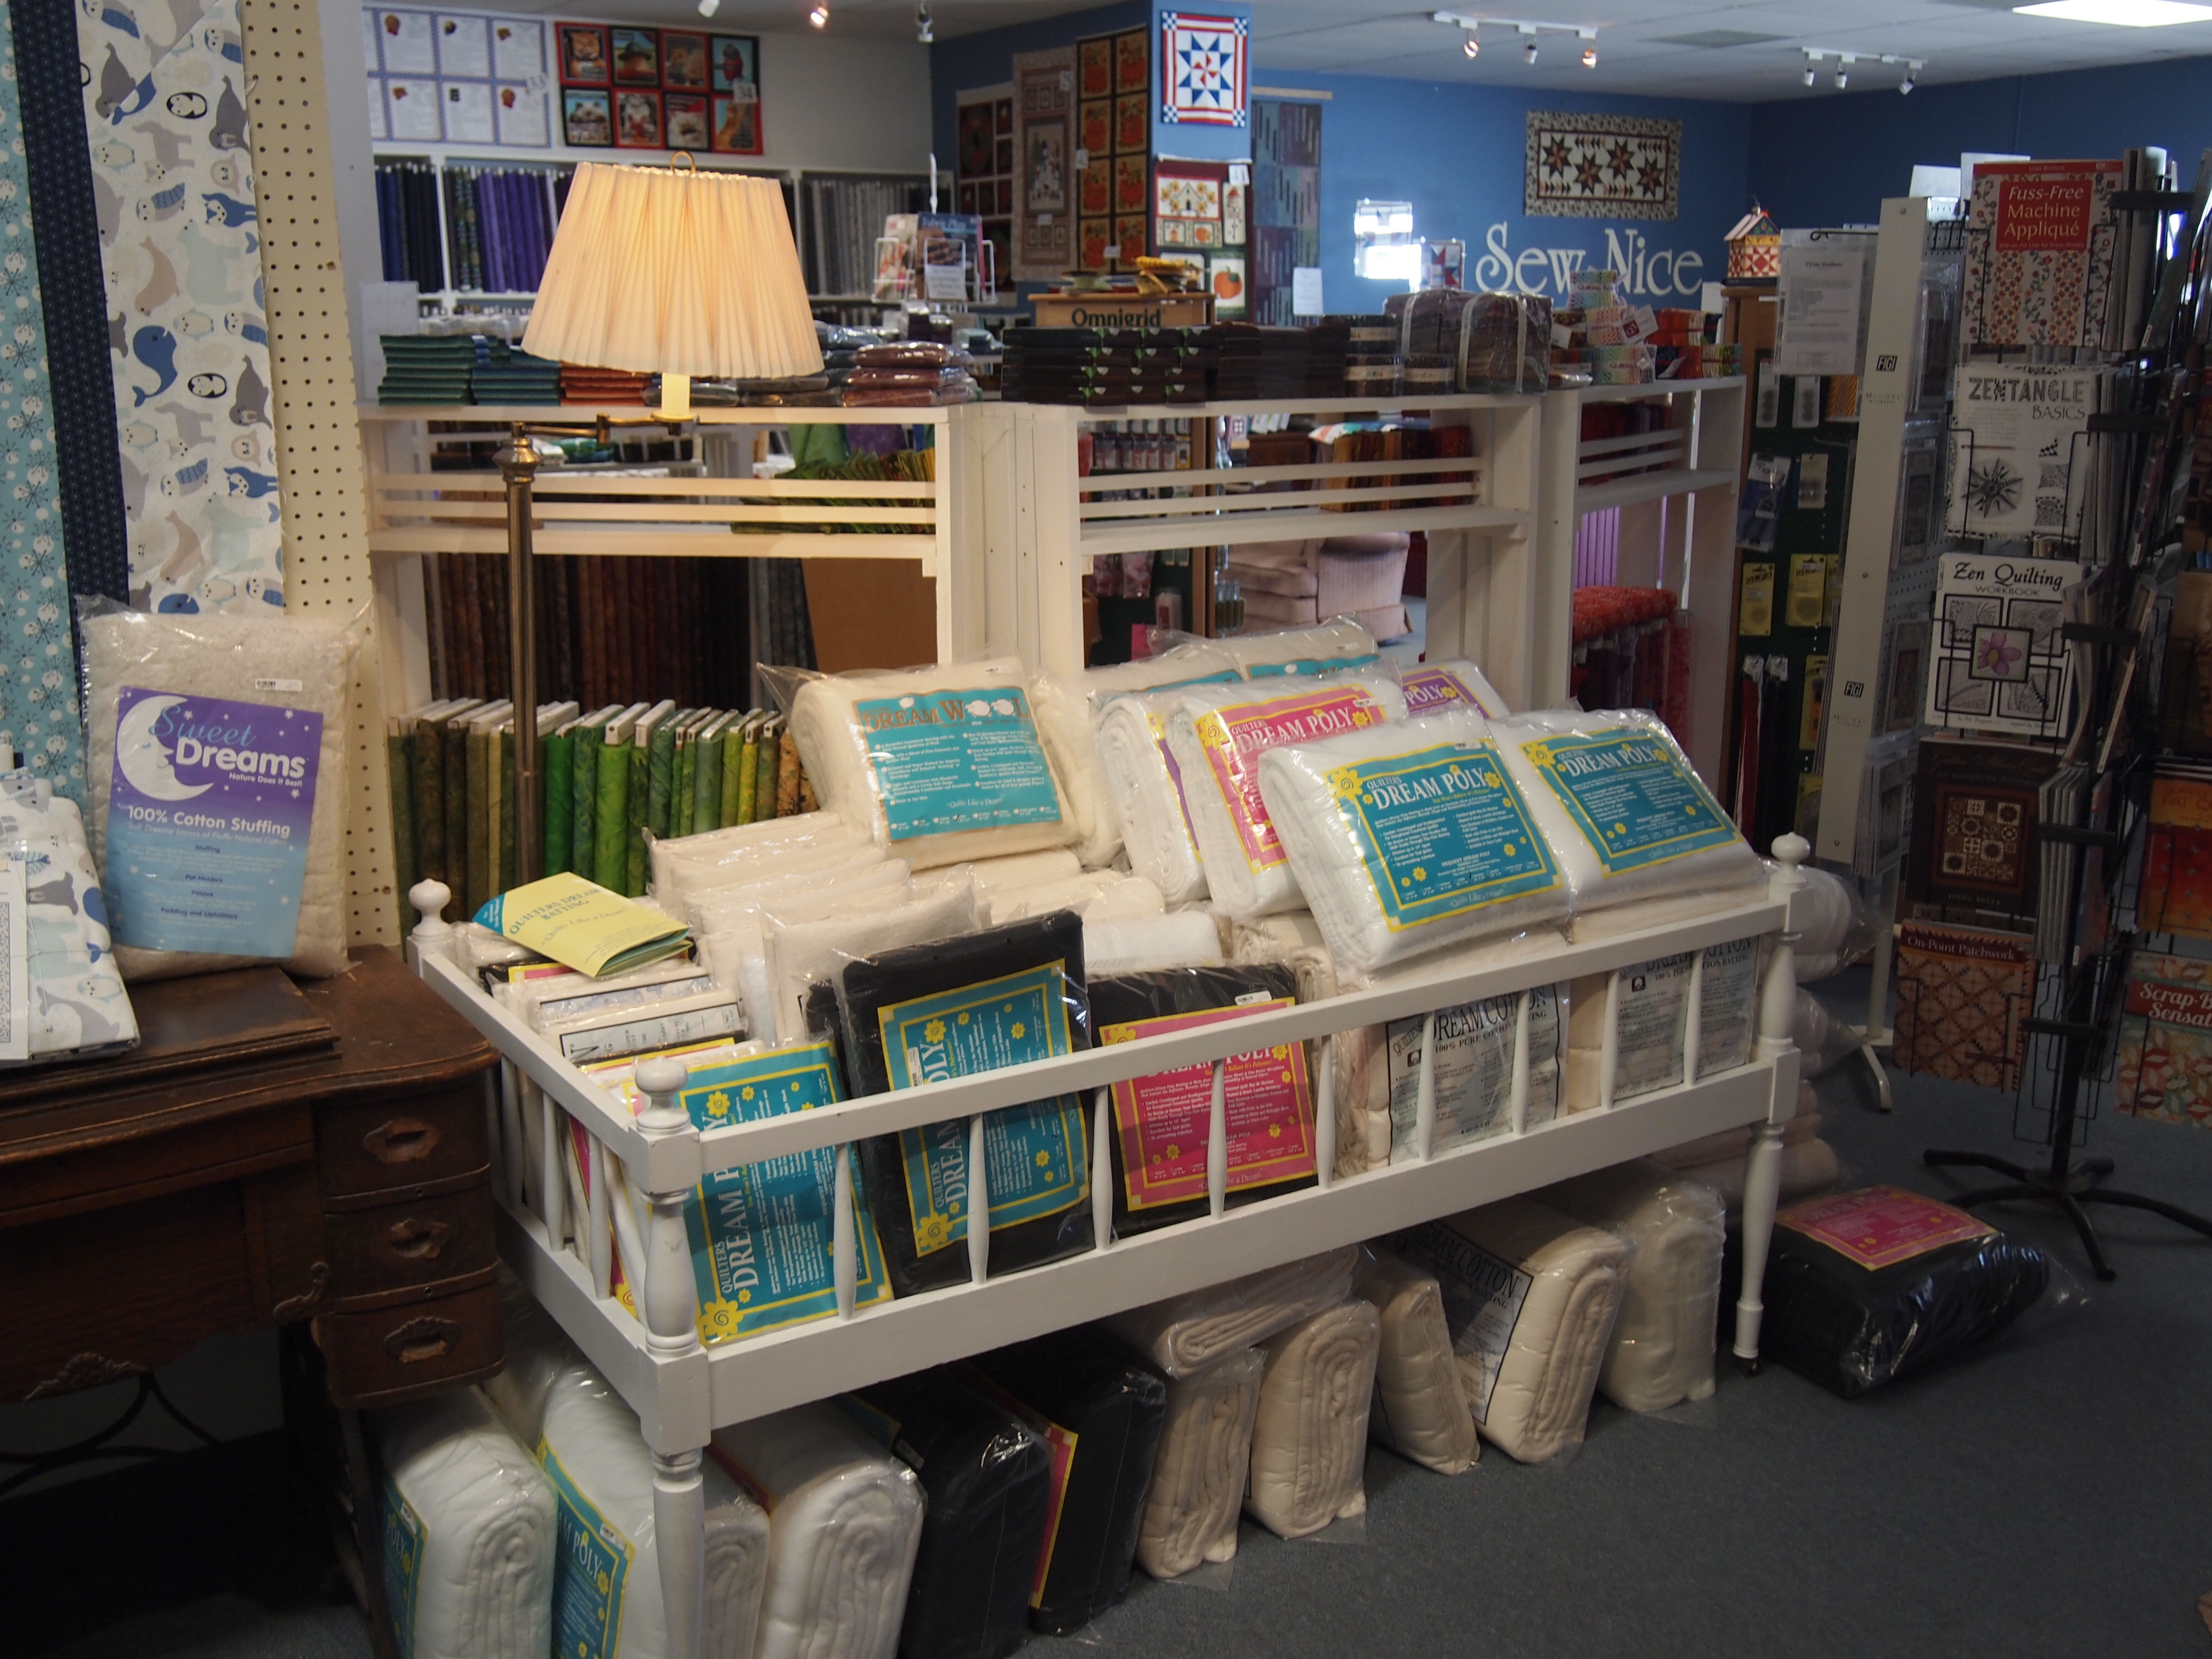
Locked and loaded.  I’m using Quilters Dream Orient Batting made from an exotic blend of bamboo, luscious silk and very soft cotton!  After washing, when I took it out the dryer it just draped in my arms.

OLYMPUS DIGITAL CAMERA

The shadows were in the way a little, but at least the sun is out on this beautiful April day in Central NY.

OLYMPUS DIGITAL CAMERA

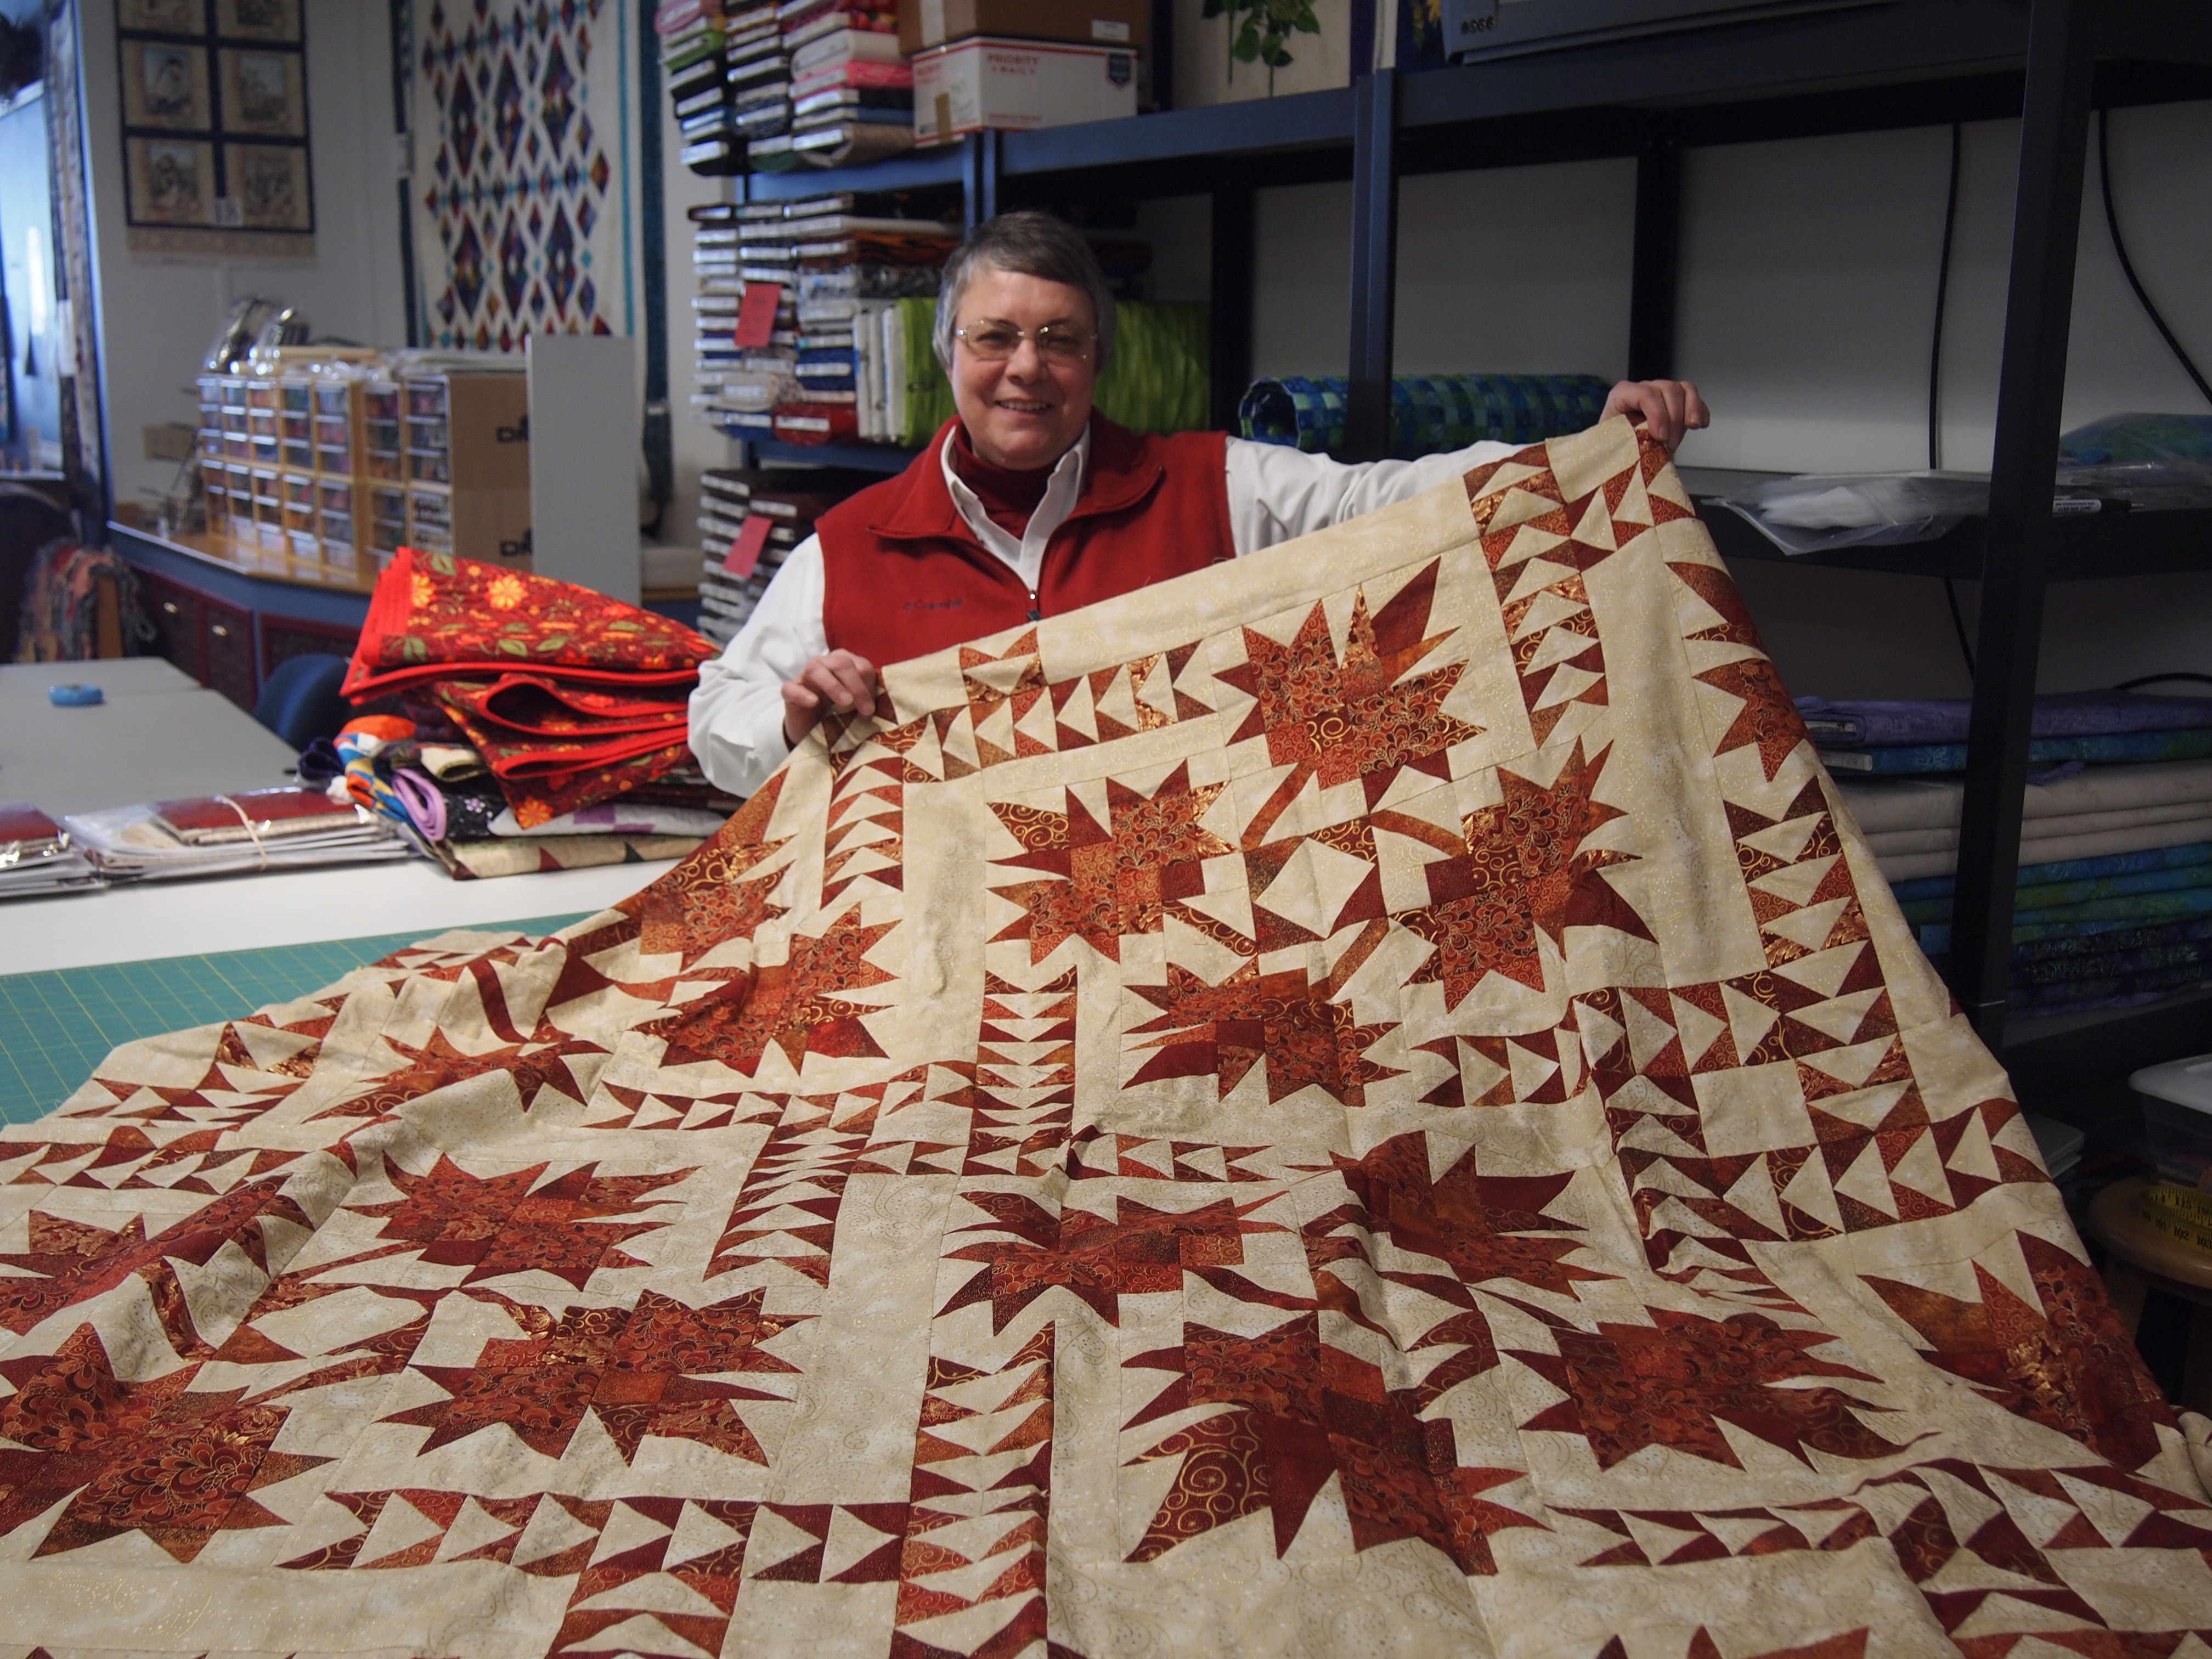
This is the 57th One Block Wonder that I have made.

Just Hanging Around

I was searching Pinterest for different ways to store, show or hang quilts. If you haven’t checked out Pinterest for quilt storage you should, they have some wonderful ideas.  The ones I really liked required carpentry, ain’t nobody got time for that!  So I bought some curtain rods and went to work.

OLYMPUS DIGITAL CAMERA

I had enough room for a 60″ rod and if I folded the quilts just right I could fit 3 on a rod and I had room for a 2nd tier. I showed this picture to a Facebook group call “One Block Wonder Quilt Forum” and they loved it so I thought I would share it you too!

OLYMPUS DIGITAL CAMERA

Then I had to go buy 2 more smaller curtain rods to hang two more quilts.

OLYMPUS DIGITAL CAMERA

I couldn’t forget about the back of the couch.

OLYMPUS DIGITAL CAMERA

Of course I have my “Remember Me” obituary quilt on another wall. I guess this means I might not need to paint down here now!

OLYMPUS DIGITAL CAMERA

Upon entering the Quilt Zone I have Grandma Bessie keeping an eye on me.  How do you hang or show off your quilts?

One Block Wonders at Sew Nice

I finished up the design portion of a One Block Wonder class I taught at Sew Nice in Norwich, NY.  It was a great class with 11 wonderful creative women.  We had loads of fun!OLYMPUS DIGITAL CAMERA

I just want to dive into these blocks, looks like water to me.

OLYMPUS DIGITAL CAMERA

Barb had fun with her Cowboy Hat fabric.

OLYMPUS DIGITAL CAMERA

04 Barb 2

I Love how Bernie’s came out.

OLYMPUS DIGITAL CAMERA

06 Bernice 3

This does look like a big garden. Can you see the path?

OLYMPUS DIGITAL CAMERA

Alice  had a beautiful Asian fabric.

OLYMPUS DIGITAL CAMERA

Next to Alice is are gorgeous blocks from a sunflower fabric.

OLYMPUS DIGITAL CAMERA

Judy didn’t have all her blocks ready to design, but she had enough done to play.

OLYMPUS DIGITAL CAMERA

I absolutely loved Krissy’s fabric. I love grey and this came out so beautiful.

OLYMPUS DIGITAL CAMERA

OLYMPUS DIGITAL CAMERA

OLYMPUS DIGITAL CAMERA

Rebecca was not pleased with her fabric selection. I thought it was beautiful.

OLYMPUS DIGITAL CAMERA

Tara was making this OBW for her brother. I’m sure he will love it. Her blocks were so much fun!

OLYMPUS DIGITAL CAMERA

OLYMPUS DIGITAL CAMERA

Do you see the twister?

OLYMPUS DIGITAL CAMERA

I Love New York…. & Sew Much More

I’m getting excited. Next week I head south to the Mid Atlantic Quilt Festival in Hampton Virginia.  I will be helping out Deb Tucker at the Studio 180 Design Booth, so please, if you are there stop by and say hello.  I’m sorry I will have to miss my local guild “The Mohawk Valley Quilt Club’s” 35th Anniversary celebration.  Congratulation to a great group of quilters.

I’m test driving my new Nolting quilt frame. It is pretty spectacular.  Having a commercial frame makes my mid-arm work better.  I have dreams of improving my quilt skills immensely.  I bought the frame from Delightful Quilting & Sewing. Joyce and Ron Blowers are Nolting Dealers and drove 3 hours to my house in a snow event and set it up for me. I really liked them a lot!  I need to take some lessons from Joyce.

OLYMPUS DIGITAL CAMERA

I usually finish my quilts in the order they are pieced, (just a little OCD) but I wanted to finish “I Love New York” to celebrate the mountains of snow we have, with more on the way.  There is a group on Facebook called “One Block Wonder Quilt Forum”.  Someone asked me how I quilted my hexagon quilts.  I meander mine, not just because that’s all I know how to do, but by going over every seam and center they lay nice and flat.

OLYMPUS DIGITAL CAMERA

I was trying to be arty and photograph my quilt out in the snow, but there is so much snow (close to 3 feet in parts of my yard) I had a very difficult time getting a good angle.

OLYMPUS DIGITAL CAMERA OLYMPUS DIGITAL CAMERA

So I gave up, scraped off mounds of snow and came inside.

OLYMPUS DIGITAL CAMERAOLYMPUS DIGITAL CAMERA

I Don’t Think We are in Kansas Anymore Toto

I am a self proclaimed over the top Wizard of Oz fan and One Block Wonder quilts. I made my first hexagon quilt in 2006.

In 2008 I made “Inside the Twister I” from Wizard of Oz fabric by Quilting Treasures.

01 Inside the Twister 1 2008

In 2010 I made “Inside the Twister II” as a raffle fund raiser for the New York Mills, NY Historical Society.

02 Inside the Twister 2 2010

In 2012 I made “Inside the Twister III” as a raffle quilt for the Virginia Quilt Museum.

OLYMPUS DIGITAL CAMERA

I made the “Yellow Brick Road with a Twist”  for my Granddaughter Pepper.

04 Yellow Brick Road with a Twist 2010

I have decided to make another one, I have cut the repeats into strips as you can see below.  I wonder if it will come out the same or be completely different?

OLYMPUS DIGITAL CAMERA

The blocks are looking very interesting.

OLYMPUS DIGITAL CAMERA

Below are some of my Wizard of Oz collection:

OLYMPUS DIGITAL CAMERA OLYMPUS DIGITAL CAMERA

It’s “Sew Nice” in Norwich, NY

02 logo

Located in Norwich, NY, sits a fabulous quilt shop owned by Diane Marvin which she opened in June 2005. I stopped by Sew Nice to visit and ask Diane a few questions. Diane’s career was in education. Her mother was a career woman that made her own stylish suits to wear to work.  Diane had no interest in sewing until she made her first quilt around 2000 – it was love at first stitch!

OLYMPUS DIGITAL CAMERA

Diane holding up her almost finished quilt top “Northern Neighbors”.

Diane is a Studio 180 Design certified Instructor as is Donna Hanley who also teaches there. Sew Nice is a “Certified Bernina Classroom Shop”. They carry fabric lines from Moda, P&B, Marcus, Benartex, Timeless treasures, Kona, the list goes on. I love that they have a whole isles devoted to polka dot fabric.

OLYMPUS DIGITAL CAMERA

OLYMPUS DIGITAL CAMERA

The quilters that gather at Sew Nice refer to it as their “Quilting Playhouse” and as a “Cheers” for quilters. Quilters lovingly refer to Diane as “The Pusher”, (quilt pusher that is). You go to see Diane at Sew Nice to get your quilt fix!  Diane gently pushes you to always keep learning and try new quilting techniques.

OLYMPUS DIGITAL CAMERA

OLYMPUS DIGITAL CAMERA

OLYMPUS DIGITAL CAMERA

OLYMPUS DIGITAL CAMERA

Sew Nice offers a 24 seat classroom. And if that is not enough, they also offer general sewing machine repair and maintenance.

OLYMPUS DIGITAL CAMERA

OLYMPUS DIGITAL CAMERA

Sew Nice only sells Quilters Dream Batting (QDB). When I asked why Diane said:

  1. It’s made in the USA
  2. NO other batting can compare with QDB quality.
  3. There is no minimum order.
  4. And last but not least “QDB Customer Service”! Diane could not praise the QDB Customer Service enough. She feels QDB is one of the best companies she has dealt with.
  5. Diane’s favorite is Dream Wool!

 OLYMPUS DIGITAL CAMERA

OLYMPUS DIGITAL CAMERA

If you live in the area and are looking for a quilt home you will be so welcomed at “Sew Nice” because they are so nice!

Sew Nice – 6142 State Hwy 12 – Norwich, NY 13815 – (607) 334-2477 – www.sewnicenorwich.com


Is Your Past Haunting You?

Mine is!  I have 7 quilt tops from 2014 that have not been quilted yet and “Northern Neighbors” pattern with only 1 block finished.

OLYMPUS DIGITAL CAMERA

Moving out of state put a real crimp in my quilting.  I am a compulsive finisher, so having a pile of unfinished quilts is driving me crazy.   I have a Nolting fun Quilter, it is a mid-arm with a 17″ throat.  I also have a larger studio now so I have room for a 12′ quilt frame.  One has been ordered and should be here by the end of January.  I’m hoping my new Nolting frame will help me be a better, more creative quilter.

Needless to say, my resolutions for 2015 are all about finishing my tops and getting back to healthy diet again.

#56 Kaleidocally Hexed or OBW

Before you reach for your dictionary, I made that word (kaleidocally) up!  These Kaleidoscope/hexagon quilts are fun and addictive as you can tell by the fact I have now made 56 of them!  This year Grand Central Station in New York City and Union Station in Utica New York celebrated their 100th birthday.  I had wanted to make a quilt to celebrate this fact but was overcome by events.  The year 2014 has been challenging for me to say the least.  Needless to say I found my self facing the last week in 2014 and my goal was to get this quilt top done, and I did – in 4 days.  It is News Years Eve, and I feel a great sense of accomplishment.

I wanted to show you some interior pictures of Union Station in Utica NY. I love this train station.  When I was 12 I left from Union Station and went all the way to Las Vegas, Nevada.  It was a thrill for me and I have loved trains ever since.
01 Union Station 1

Isn’t the marble gorgeous?

02 Union Station 2

I absolutely love the oak seats.  This is a very active train station.

03 Union Station 3

Below is a fabric from Timeless treasures I chose for this kaleidocally hexed quilt.  It is a city scape of landmarks in New York City.  I will have to make another quilt that represents the rest of New York (which is stunningly beautiful)!

OLYMPUS DIGITAL CAMERA

Below is the top I finished in 4 days aptly named “New York – Kaleidocally Hexed”.  I recorded my self making this top and shared the video’s on this blog.

OLYMPUS DIGITAL CAMERA

I so look forward to 2015 and pushing on with other quilt projects like Studio 180 Design’s “Northern Neighbors”!  Happy New year everyone and God Bless!

06 Northern Neighbors

No Pattern??? No Problem !

Did you ever see a picture of quilt that you really wanted to make but couldn’t find the pattern? If you can identify the units that make up the block, you don’t really need the pattern. Last year I blogged about being a “Block Detective”.  I saw this quilt in a book By Doreen Speckmann.  I loved it and wanted to make it, but not with the paper templates that the author suggested.

OLYMPUS DIGITAL CAMERA

So, being a Certified Deb Tucker “Block Detective” I decided to try it out by making a block with 2″ finished units.  I loved the bright colors against black & white backgrounds.

OLYMPUS DIGITAL CAMERA

Now the search was on for fabric to make a whole quilt this time.  I found the outer border fabric first and then pulled the colors for the block from that.  I decided to make six 20″ finished blocks containing twenty-five 4″ finished units.

I initially chose yellow, orange, red and green fabric but later added a blue fabric .   I also needed 6 different black & white prints for the block background.

OLYMPUS DIGITAL CAMERA

The tools required were Studio 180 Design V Block, Squared 2 & Corner Beam Rulers and the Technique Sheet for making Sidekicks and High/Low units and don’t forget your Magic Wand!

OLYMPUS DIGITAL CAMERA

Each Block contains 4 V Blocks with black & white side triangles,

OLYMPUS DIGITAL CAMERA

and 4 V Blocks with black & white center triangles.

OLYMPUS DIGITAL CAMERA

Each Block contains 4 Corner Beam Units with yellow center beams,

OLYMPUS DIGITAL CAMERA

and 4  orange and red Corner Beam units.

OLYMPUS DIGITAL CAMERA

The center of each block contains 1 Squared 2 unit.

OLYMPUS DIGITAL CAMERA

There are 2 High/Low Left & 2 High/Low Right Units in each block.

OLYMPUS DIGITAL CAMERA

I cut all my pieces first then laid them out one block at a time.  I constructed the corner flowers as shown below.

OLYMPUS DIGITAL CAMERA

I press the seams as instructed for each of the units, but when I joined the units into the block I pressed my seams open.

OLYMPUS DIGITAL CAMERA

Join the units into rows.

OLYMPUS DIGITAL CAMERA

Then join the rows to form the block.

OLYMPUS DIGITAL CAMERA

OLYMPUS DIGITAL CAMERA

These are some wild colors.  This quilt was fun to make.  So next time you want to play “Block Detective” get out your graph paper and Studio 180 Design tools and discover what you can do!  If you have any questions don’t hesitate to contact me.

OLYMPUS DIGITAL CAMERA

Someone Dropped a House On My Sister

The tune “Back in the Saddle Again” is playing in my head as I stare into the Shultz & Dooley mirror hanging over my sewing machine.

OLYMPUS DIGITAL CAMERA

I’m getting ready to work on the Wicked Witch Panel below. I’m a Wizard of Oz fan!  This is my first project in the new house.  The panel measures 34″x42″.  I decided to add Lemoyne Star cornerstones and stripped borders.  I pulled the colors from the panel, Kona Black, Midnight Blue and Grass green to match the Witch’s Skin.

OLYMPUS DIGITAL CAMERA

I know I have blogged about the Rapid Fire Lemoyne Star Ruler before but thought I would reiterate some tips.

Below I have cut 2 background strips and two star strips. I know these are dark colors but I like the way they work with the panel.  I have marked my background strips A and B and 2 additional  marks down from the top of the strips on the adjacent, inside edges the same distance as the strip is wide.  What that means is; I chose to make an 8″ finished Lemoyne star so I cut my background strip 3 3/4″ wide by width of fabric (WOF).   So I marked the inside edges down 3 3/4″.  With right sides together I place the star strips on the marks as shown.

OLYMPUS DIGITAL CAMERA

Stitch the strips as shown.

OLYMPUS DIGITAL CAMERA

Quilting is a Pressing Matter!!!  What I love about Studio 180 Design Tools is the care Deb Tucker takes in telling you how to press your seams.  I did not know this until I was Studio 180 Design Teacher Certification Training, “Whatever You Are Pressing Toward – Goes On Top”! Genius!

When pressing strip A, the seam gets pressed toward the background strip. I then place the strip on the ironing board with background side on top and press.  Strip B seam is pressed toward the star strip, so then the I place the strip with star strip on top.  We now have mirror images.

OLYMPUS DIGITAL CAMERA

Place Strip B right up on the table, then place strip A on top, right sides together. I start by just matching up the edges.  Then using my fingers feel along the seams to determine if the seams are nesting properly.  I always gently peel back each end to see if the seams are nesting.  If we pressed the seams correctly it will nest nicely.

OLYMPUS DIGITAL CAMERA

Now we are going to establish a 45 degree angle by placing the edge of the Rapid Fire Lemoyne Star ruler on the stitched seam line and then bump up another cutting ruler against the angled edge.

OLYMPUS DIGITAL CAMERA

Make the first cut.

OLYMPUS DIGITAL CAMERA

Place the cutting ruler on that beautiful 45 degree angle and cut strips the width of your star strip.  For an 8″ Lemoyne Star I cut 2 1/5″ strips. So I make a 2 1/2″ cut.

OLYMPUS DIGITAL CAMERA

You can go ahead and make all your 2 1/2″ cuts, but I prefer to make the  first cut and then make the second cut by going vertically south to north and position the ruler edge at the tip of the star point and trim straight up.

OLYMPUS DIGITAL CAMERA

These triangles will be the side pieces for your unit.

OLYMPUS DIGITAL CAMERA

Once all your units are cut, open your units with A on the right and B on the left as shown below.

OLYMPUS DIGITAL CAMERA

This is a great tip from fellow teacher Jane Godshall:  Take two paper plates, label one A and one B.  Open your units as shown above place all the A units on one plate and B units on the other.  This will save you from confusing them.

OLYMPUS DIGITAL CAMERA

Take plate “A” to the sewing machine, center and stitch one side triangle to each unit.

OLYMPUS DIGITAL CAMERA

Chain stitch all the “A” Units.

OLYMPUS DIGITAL CAMERA

Take the chain to the ironing board.  “A” pieces will be pressed toward the star point fabric so lay the chain with the star point fabric on top.

By chain stitching the “A” units together and pressing, it keeps your brains from falling out trying to keep straight what unit you are working on.

OLYMPUS DIGITAL CAMERA

Now chain stitch the side triangles to the “B” units with the side triangles on top.

OLYMPUS DIGITAL CAMERA

Press.

OLYMPUS DIGITAL CAMERA

Our “A” and “B” units are ready to trim.

OLYMPUS DIGITAL CAMERA

Sorry for the glare, I’m having lighting issues.  I don’t care for most ruler gripping products but I love InvisiGrip.  This product helps keep your ruler from sliding with bunching up your fabric when you are positioning the ruler.  You will definitely want to use some on your Rapid Fire Lemoyne Star Ruler.  As you put pressure on the ruler toward the point it will keep it from moving.

Sorry my fabric is so dark.  Place your unit with the star point facing towards 2 o’clock, this helps with trimming both sides without repositioning the unit.  I am making 8″ Lemoyne stars so I align the desired block size lines with the sewn seam lines.  You really want a sharp blade in your rotary cutter for this trim!

OLYMPUS DIGITAL CAMERA

Trim all your units before sewing the “A” and “B” together.

OLYMPUS DIGITAL CAMERA

OLYMPUS DIGITAL CAMERA

Once the “A” and “B” units are sewn together, trim the dog ears from the star points. Sew 4 units to make a block.

OLYMPUS DIGITAL CAMERA

Square up using your Tucker Trimmer 3.

OLYMPUS DIGITAL CAMERA

I think it came out pretty good.  it measures 52″x60″.

OLYMPUS DIGITAL CAMERA