Join me for a Converging Geese Zoom class September 15th at 11:00 AM. Sign up and download the supply list here (pattern is included with the class fee):
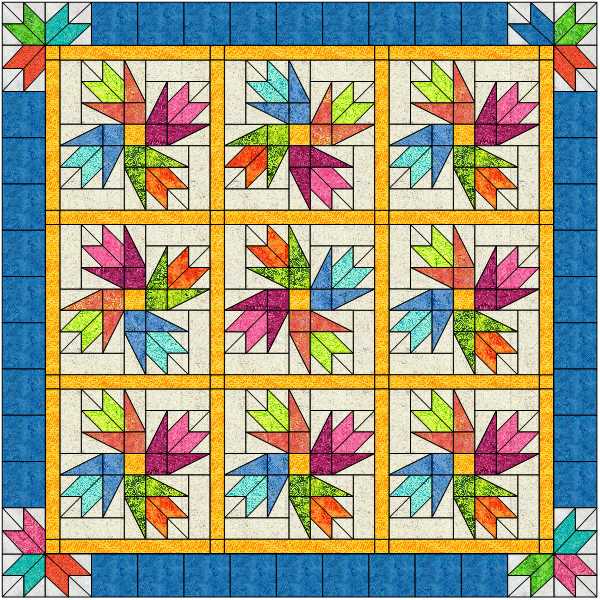
I created this pattern November 2018 for an Island Batik Log Cabin Challenge. It has been a popular pattern in my Etsy Shop ever since. This is a variation on the Log Cabin block and is a fun way to use your Square/Squared, Tucker Trimmer I & Wing Clipper I tools.
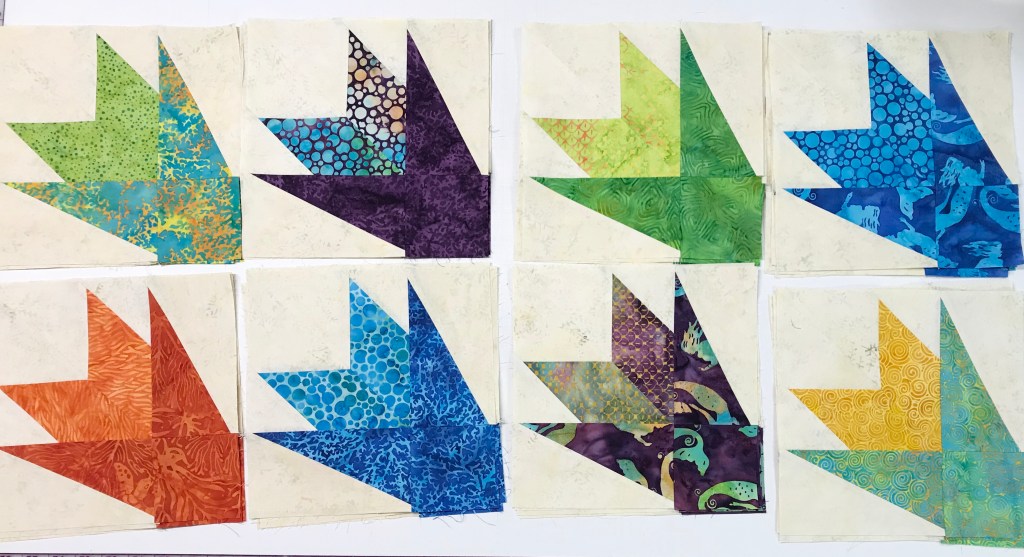
I named my original design “Converging Geese” because each block has Flying Geese & Geese on the Edge units, along with Square/Squared units.
Each 16″ block contains 12 – 2″ x 4″ finished flying geese, 4 – 6″ finished geese on the edge & 1 square/squared unit.
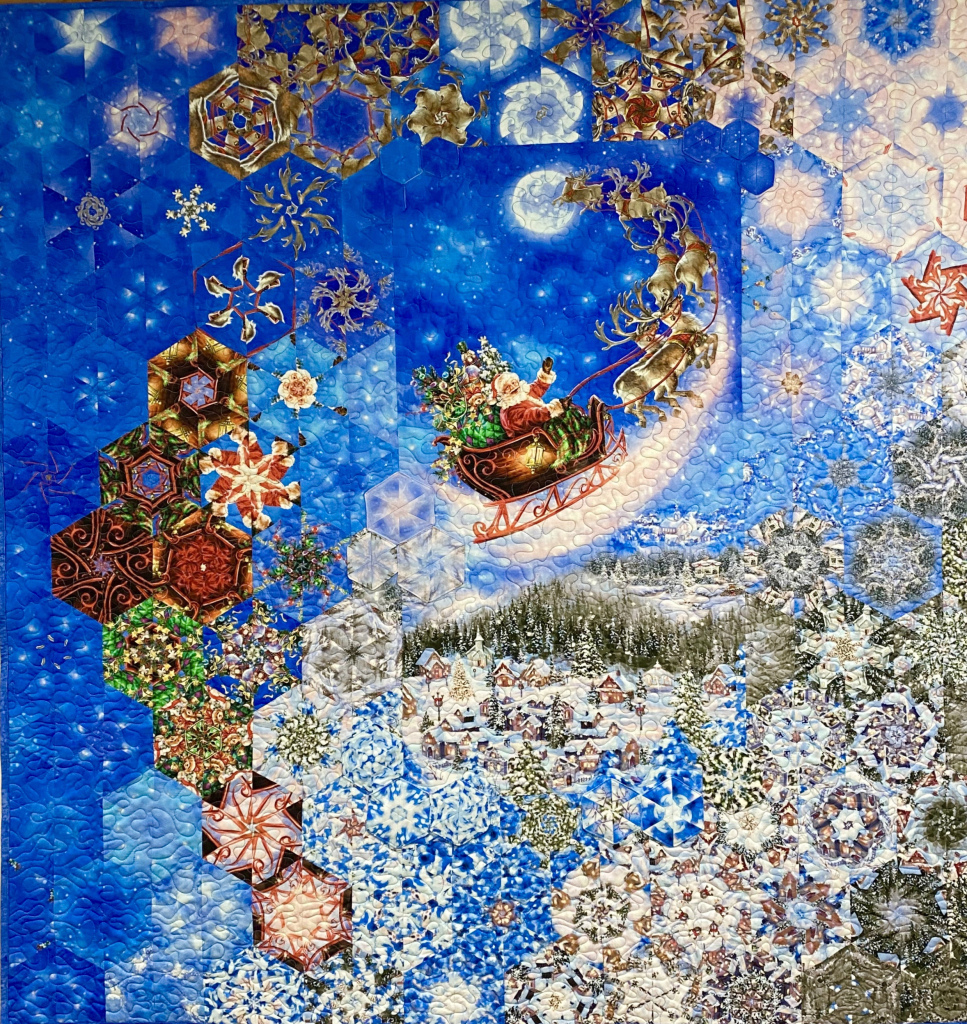
I knew I was busy this year, but I didn’t realize how much I accomplished until I took a look back over 2019! It’s almost New Year’s Eve, in less than a week I’m off to Lake Havasu Arizona to teach a One Block Wonder Workshop for Havasu Stitcher’s – Quilting By the Lake. I will also be teaching Studio 180 Design Doves of Hope at Copper Canyon Quilt Shop. Last, but not least, I will be meeting a sister for the first time, I can’t wait Marti!
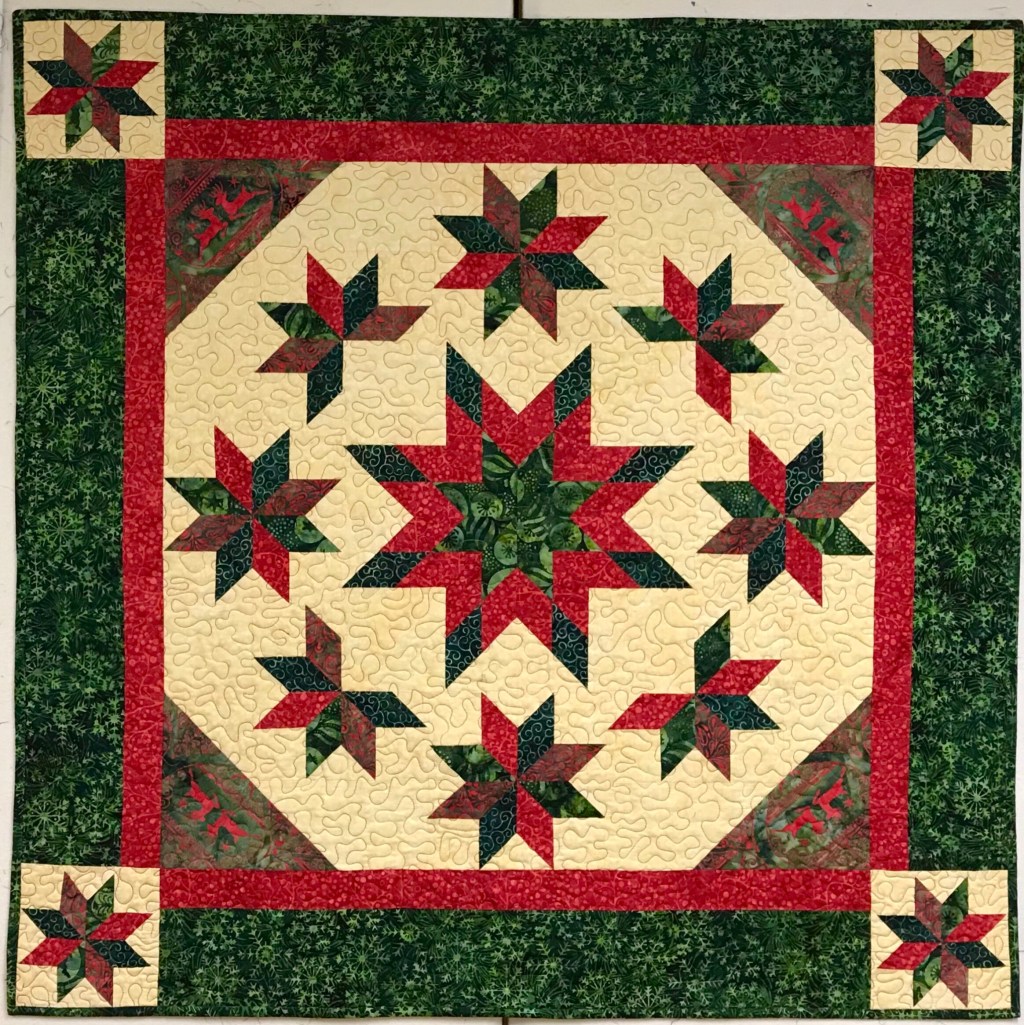
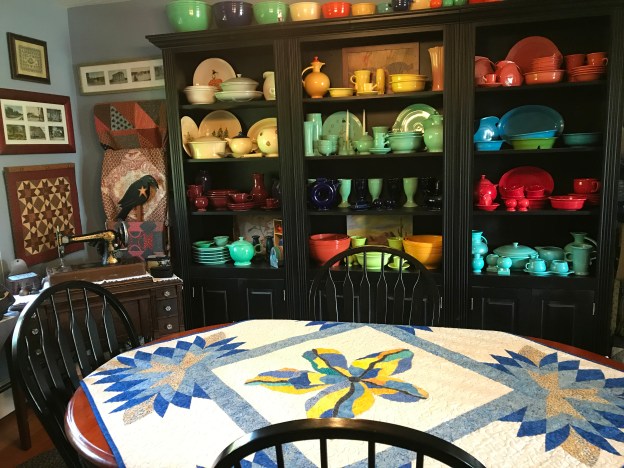
Here is a gallery of projects I completed in 2019:
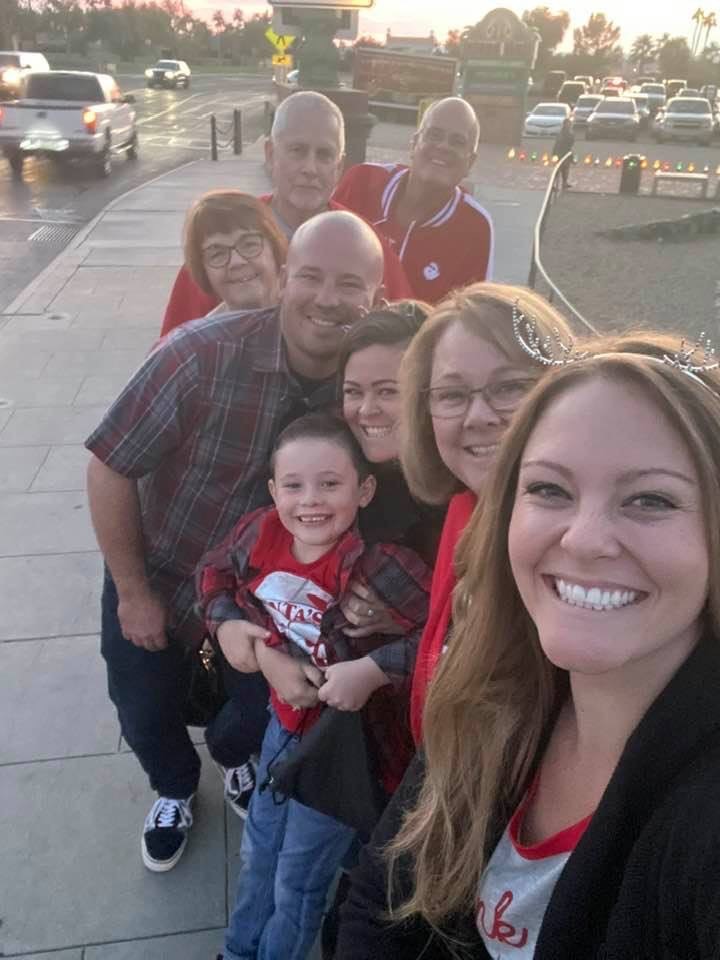
Below is my sister Marti and her wonderful family, I cant wait to give you a hug!
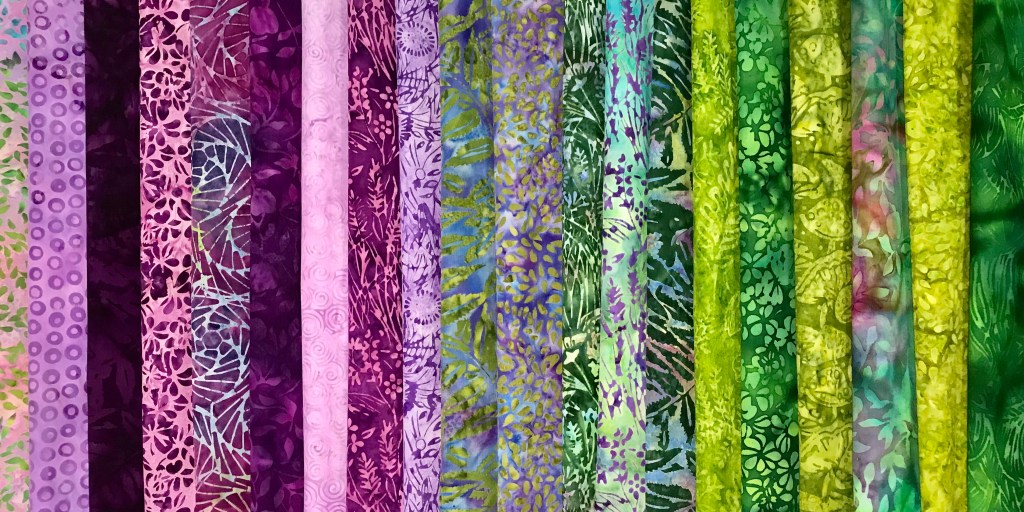
The fabrics shown in this post were given to me by Island Batik.
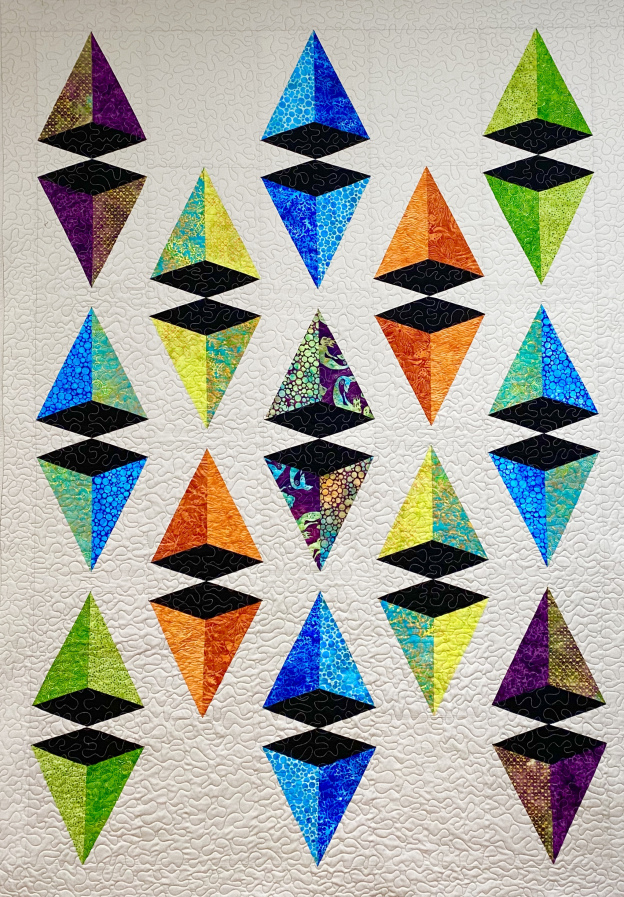
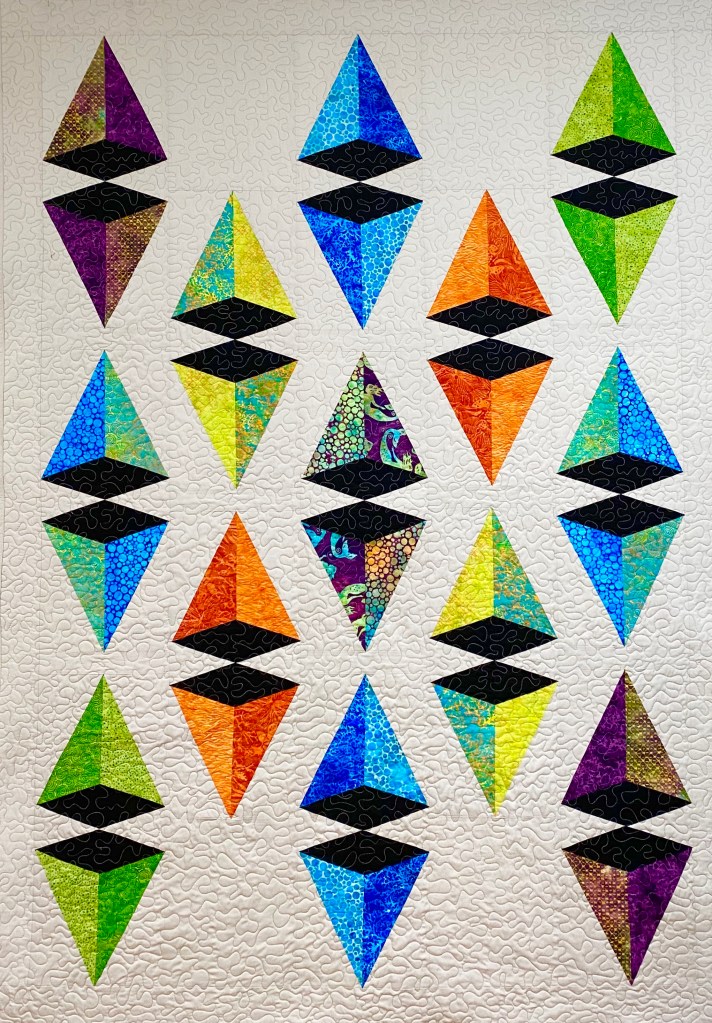
December’s challenge is to explore the world of 3D by using optical illusions, textures, trapunto or whatever else will make your quilt pop into life! I chose to make Pyramid Power, a pattern by Running with Scissors & Studio 180 Design. I think the design looks like perfectly folded boxes that must contain wonderful chocolates inside.
It is a bright sunny day here in Central NY and a balmy 11 degrees outside!
This pattern uses Studio 180 Design Corner Pop II & Corner Pop III. These tools give you perfectly popped corners with little waste. The Corner Pop II pops corners with a 2 to 1 ratio while the Corner Pop II gives a 3 to 1 ratio.
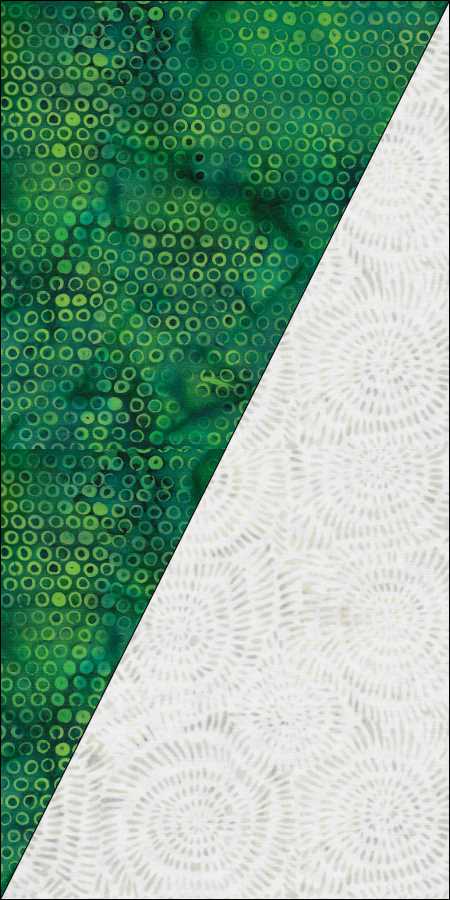
I used Island Batik’s Tropical Escape line due out in January.
The key is to stay organized. I chose 7 light & 7 dark scraps Fat Eighths. I paired each dark fabric with a light fabric of the same color.
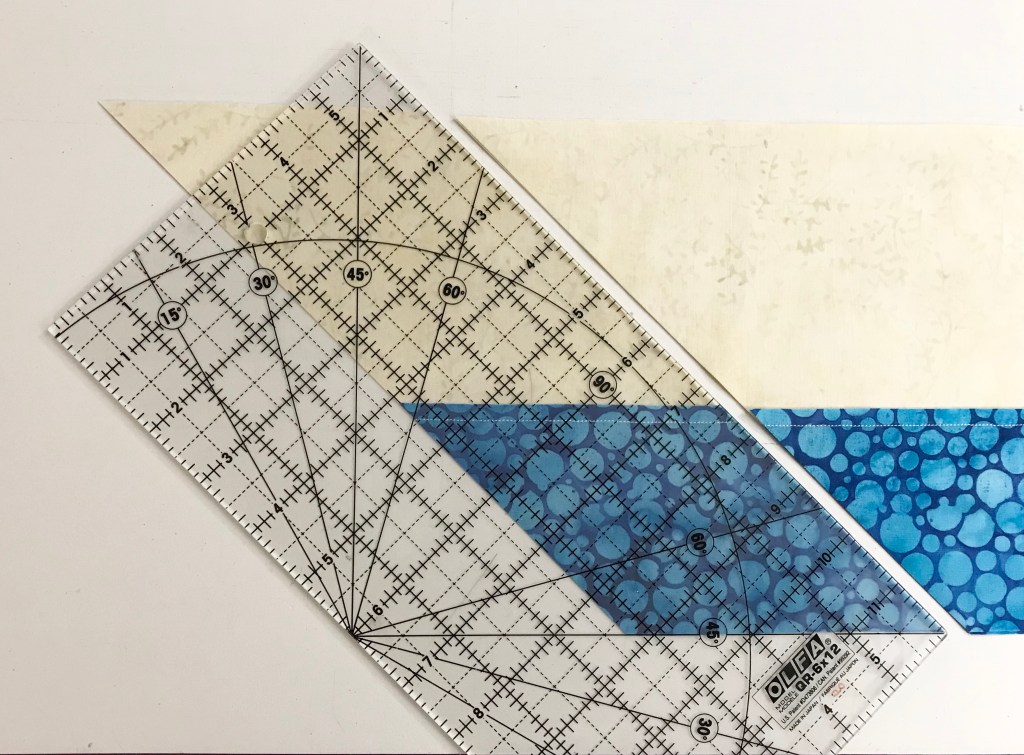
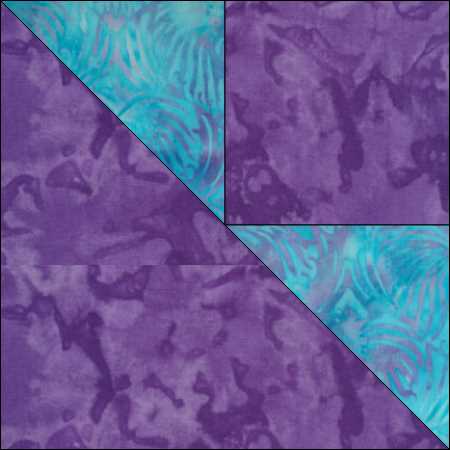
We will be making Type 1 and Type 2 Triangle Units.
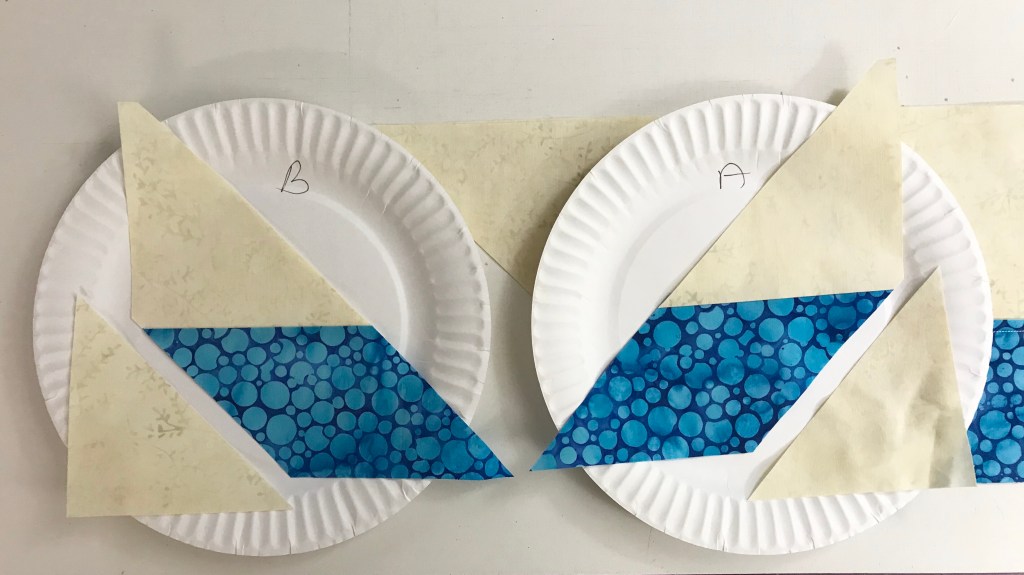
I use paper plates to keep me organized. As I cut the triangles with the Corner Pop II, I placed Type 1 on the right plate and Type 2 on the left plate. Do the same thing for the Background Triangles.
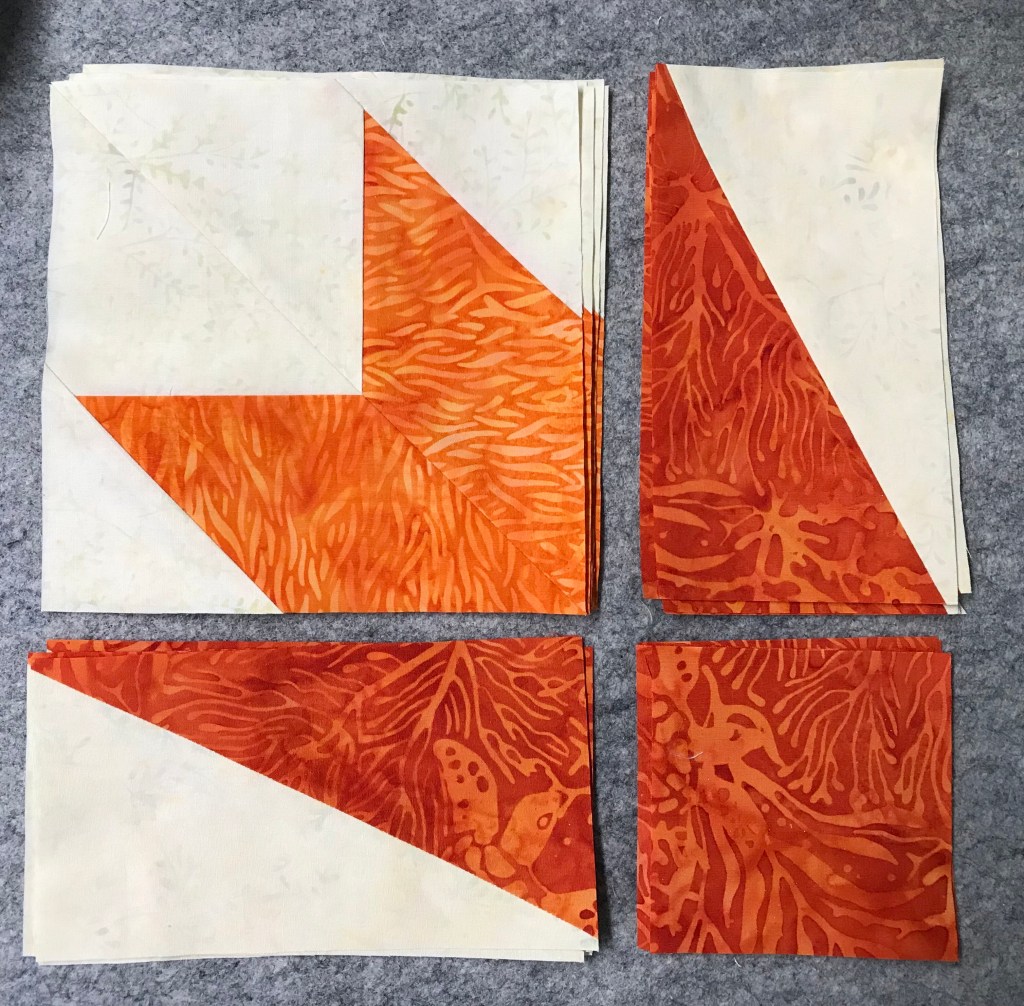
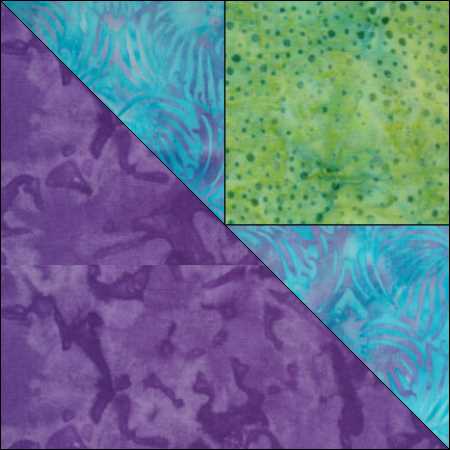
Once you have constructed your Triangle Units it’s time to pop off the corner with the Corner Pop III.
Cut your replacement triangles with the Corner Pop III and get ready to stitch them to the triangle units.
Center the triangle unit over the replacement triangle and stitch.
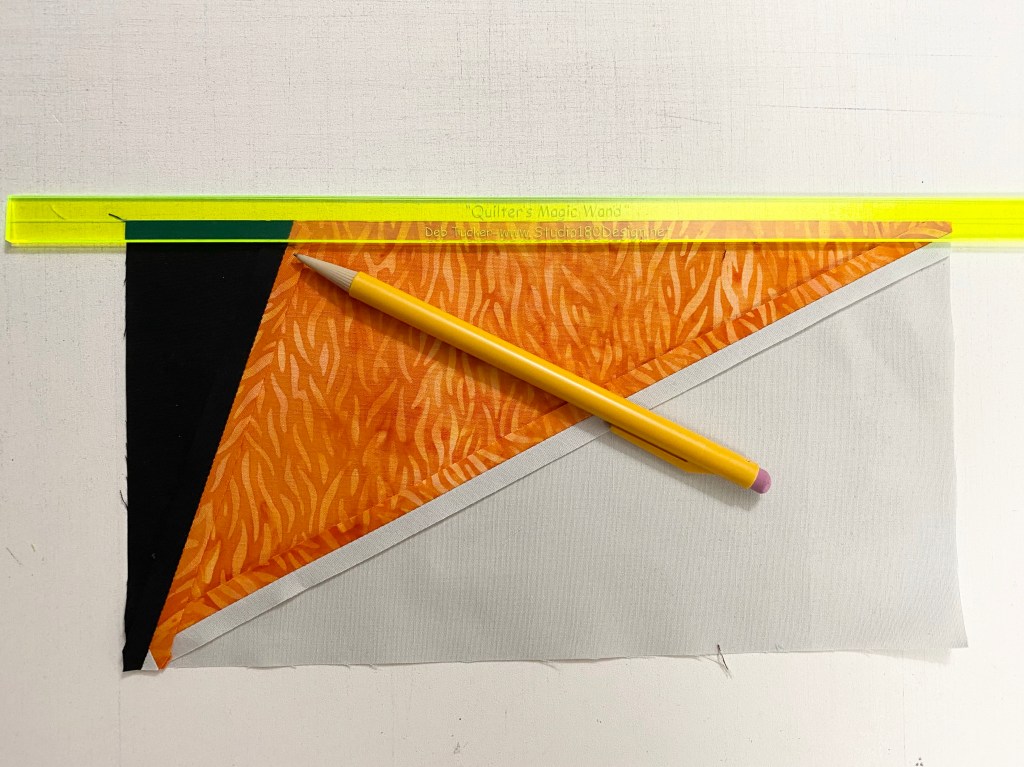
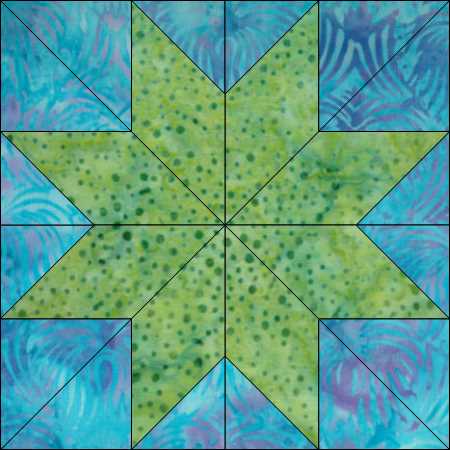
Trim the unit using Corner Pop III.
I used my Magic Wand to mark the 1/4″ seam to help line up and carefully pin to stitch one Type 1 unit to a Type 2 Unit.
Pyramid Power Twin Size measures 51″ x 72″. Pieced with Aurifil thread and finished with Hobbs Cotton Batting.
It has been my great joy to be an Island Batik Ambassador for 2018 & 2019. I was so honored to included in a this group of widely talented & creative quilter’s. I will not be returning for 2020, I will miss you all so much. But I am excited to see what Ambassadors with be sharing next year!
The fabrics shown in this post were given to me by Island Batik.
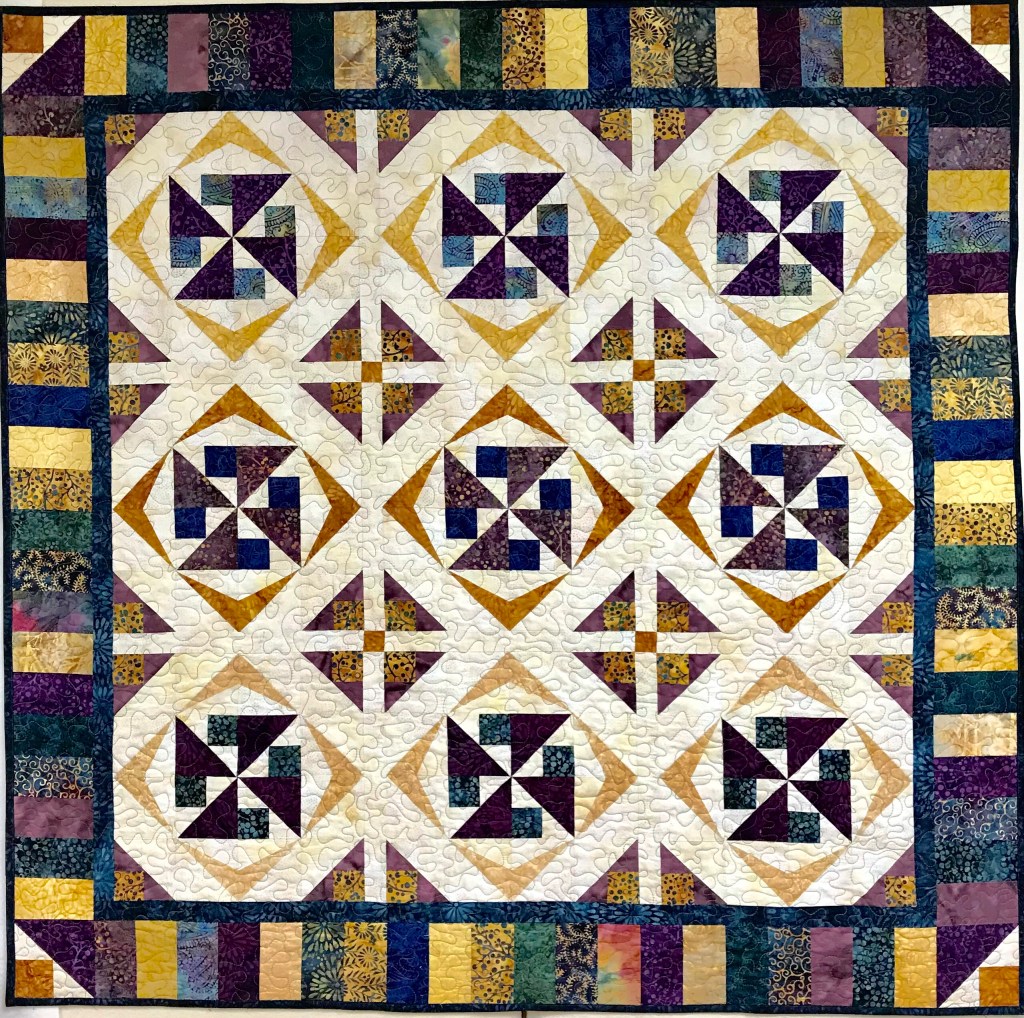
Tropical Escape
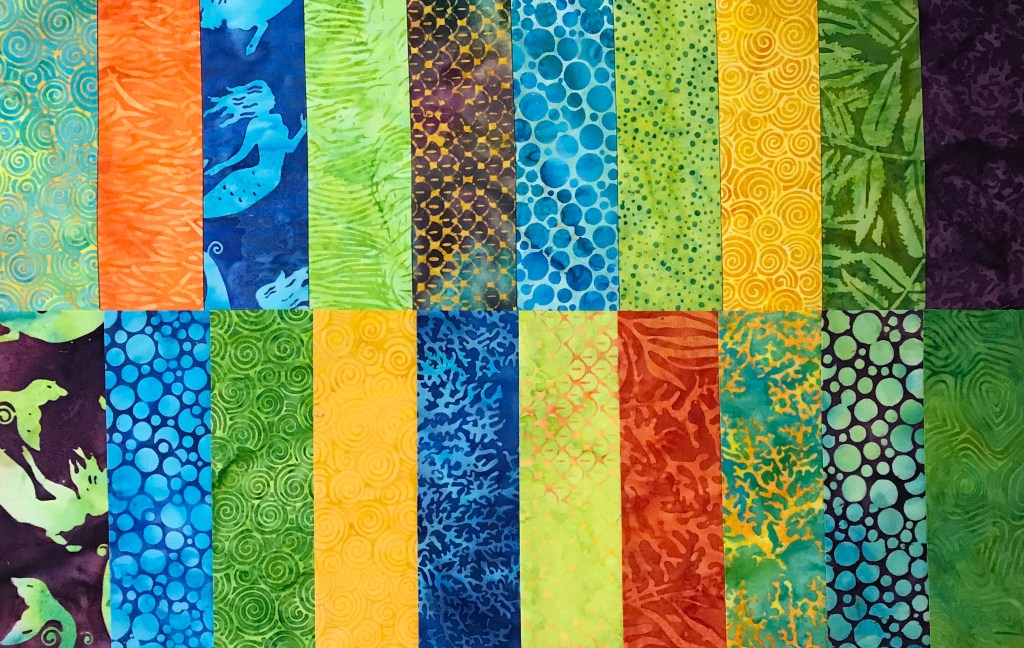
Last January Island Batik gave me a secret bundle to hold onto till November, it was Tropical Escape shown above. I sat and looking at the bundle of gorgeous fabrics, waiting for them to talk to me. The goal is for me to introduce the Tropical Escape fabric line by making a quilt showcasing as many of the 20 fabrics as possible.
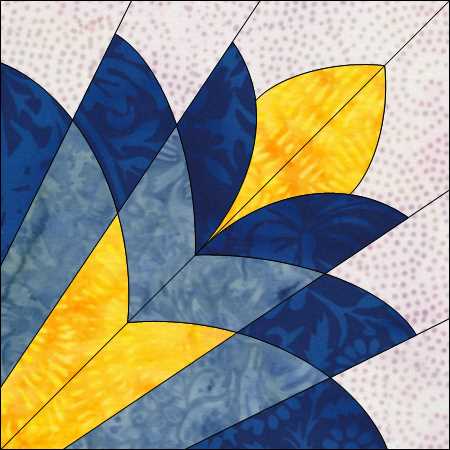
I decided to use Studio 180 Design’s BlockBuster pattern #29 Pointsettia. This block requires the Rapid Fire Lemoyne Star, Split Rects and Tucker Trimmer I tools. You can download the BlockBuster pattern below:
I loved that the Poinsettia block could be made in 7″, 14″ or 21″ finished blocks. I chose the 21″ blocks.
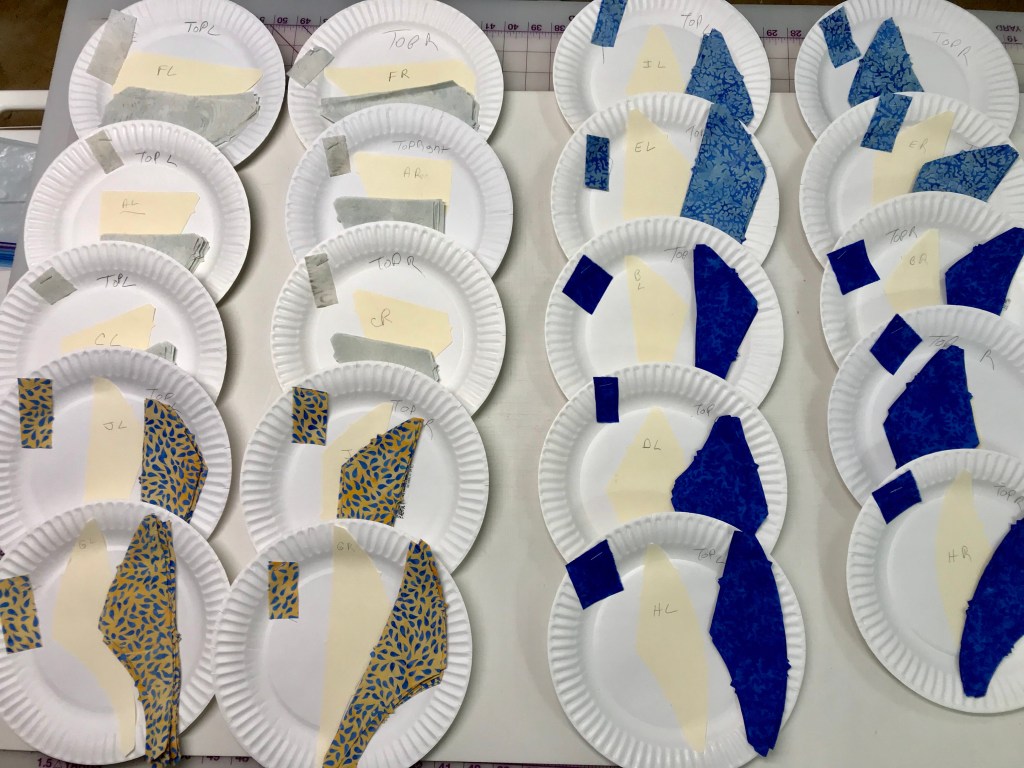
Time to break out the paper plates. I sorted my fabrics by color and value, pairing a light/medium value with a darker value. This would allow me to use 16 different fabrics to form the flowers. I would use the lighter value fabric for the Lemoyne star quarters and the darker value fabrics for the split rects units.
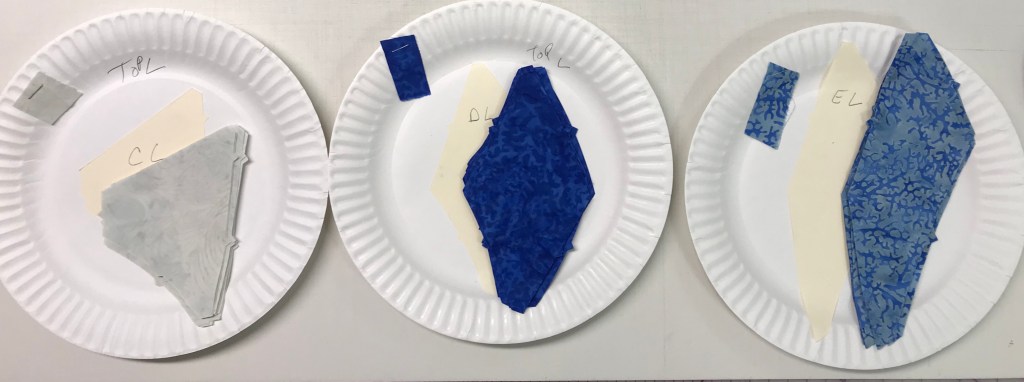
My tip for staying organized while making Lemoyne stars is to label two paper plates, one “A” & one “B”. Follow the Lemoyne star tool instructions. When you come to Step 7, make one 45 degree cut – then imediateley reposition your ruler to cut the side triangles as you go.
If you are right handed the “B” strip was on the bottom & the “A” strip was on top. Place the “A” unit on the plate marked “A” and the “B” unit on the plate marked “B”, place one triangle on each plate also. (If you are left handed the “A” strip would be on the bottom and the “B” strip would be on top). Continue cutting your units, placing each unit on their assigned plate. Construct the Lemoyne units as instructed. Throughout the process you will always know which units are “A” and which are “B”. This is important for knowing which way to press your seams. Another tip for pressing the lemoyne star units is to “remember, the Lemoyne star point should always be pointed to the left”. To make Lemoyne star quarters you will square them up using your Tucker Trimmer 1 before stitching them to the split rects units.
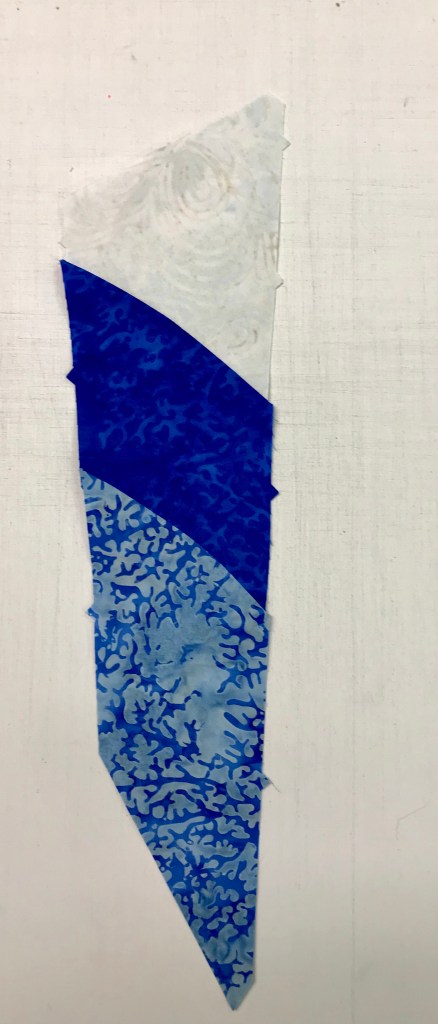
Layout your Lemoyne quarters with your mirror image split rects units and stitch together.
Press seams as shown above.
Continue making your Lemoyne star quarters/split rects units. They are all constructed the same way.
Stitch a background rectangle with each Lemoyne quarter/split rects unit as shown. Follow block assembly instruction in the BlockBuster #29 pattern.
At first I decided to make 6 – 21″ blocks measuring 60″ x 83″.
But I discovered I had enough units to make 9 blocks with left over Lemoyne quarters for the use in the outer border. Quilt measures 83″ x 83″.
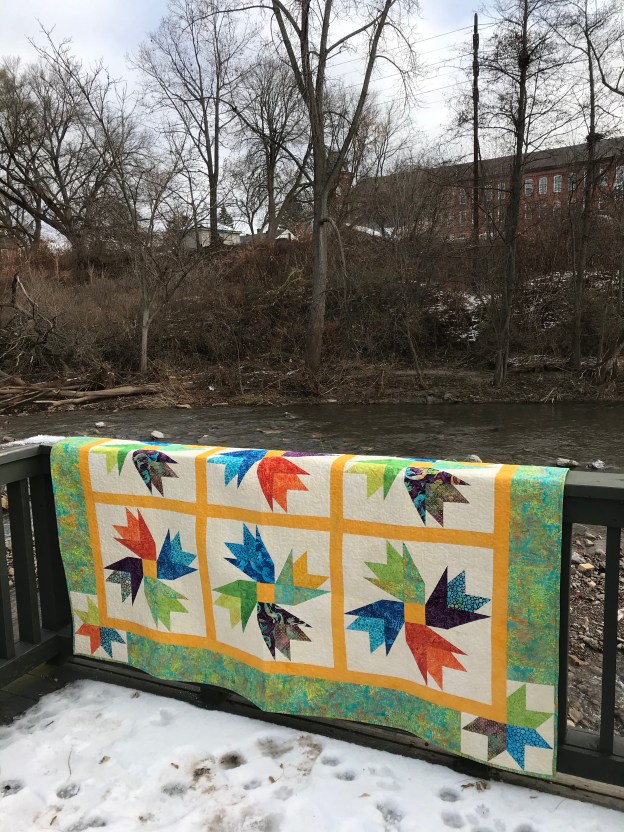
It’s funny how this quilt came about. It stared with Island Batik’s fabric line: Tropical Escape; BlockBuster’s Pointsettia block (a Christmas flower); and it is named after a canyon in Arizona. I named this quilt Copper Canyon Blooms as I think they look like desert blooms! In the supply list below I’ve given you fabric requirements for both the 6 block top and the 9 block top.
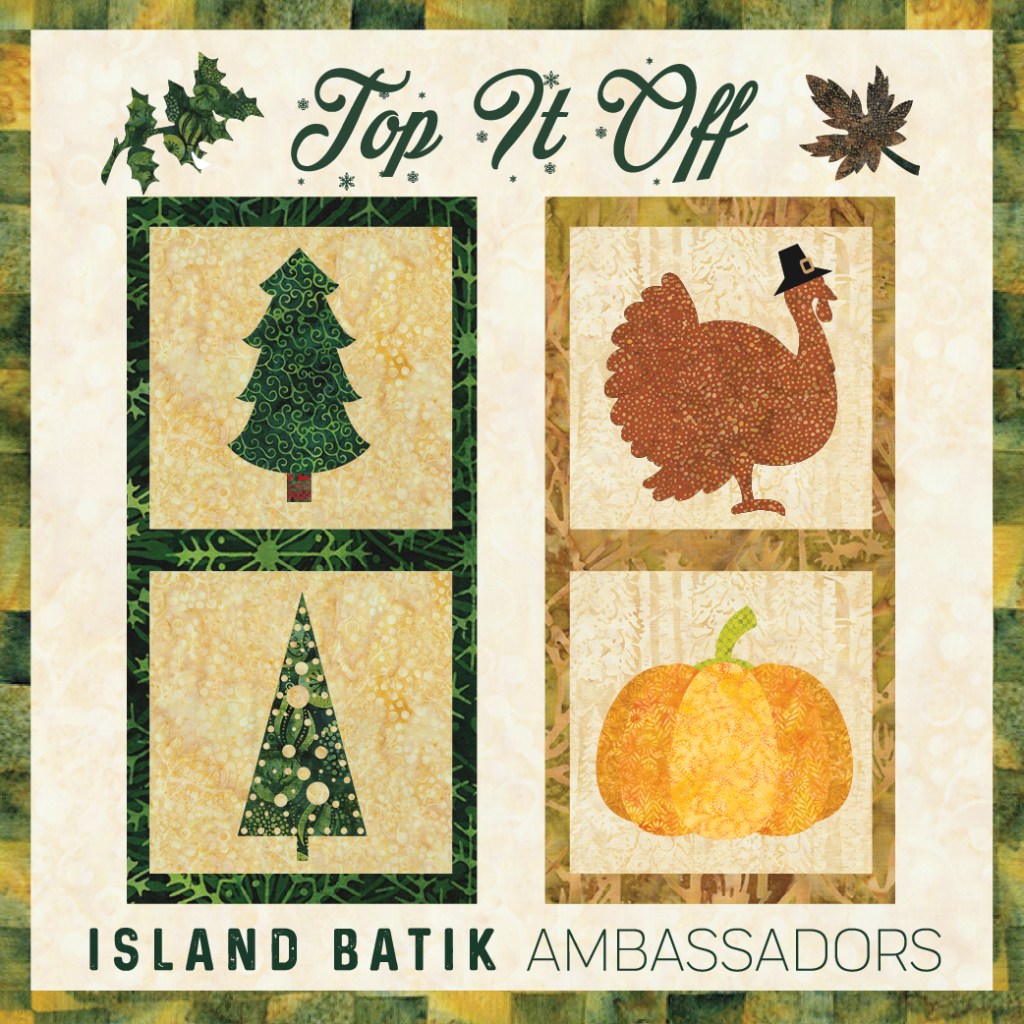
The fabrics shown in this post were given to me by Island Batik. It’s Island Batik Ambassador Challenge time Again! October is “Top it Off” month.
I was charged with making a table topper any size, any holiday, but must include “applique techniques”. Last month I made a child inspired quilt, I was supposed to use my “BOB” (Block on Board) die from AccuQuilt. My BOB was Cleopatra’s Fan. Somehow I messed up and did not use my Cleopatra’s fan die in my design. So, I decided to combine it with my October challenge in an effort to redeem myself.
I love EQ8 (Electric Quilt 8), I always start by designing first. This is the Cleopatra’s Fan Block.
I loved how positioning the blocks made a great frame for the applique center.
I broke out my paper plates and got organized. This die uses mirror image block pieces. To keep my brains from falling out I used the die to cut out paper samples for the left and right pieces and taped them on a paper plate, this really helped me when stitching my blocks together. I was surprised how easy the block pieces went together. The curves were easy as they gave you notches to match up.
Now for the applique portion (not my best technique). I love Barb Olson’s art quilts, she is amazing, if you are not familiar with her check out the link. I decided I would try her pattern “Wild Child”.
This is Barb Olson’s Wild Child. What was I thinking. My version is not as…….I’m at a loss for words.
My Cleopatra’s Wild Child measures 58″ x 58″. It is more like the table topper that ate Central NY! I have discovered I’m not that good at machine applique. Although, the Aurifil thread I used to applique with preformed beautifully, and the Hobbs Cotton Batting was wonderful as usual. I’m not sure what I think of my Spring table topper, but I’m definitely not ready for my closeup Mr. Demille!
The beautiful fabrics featured in this post were given to me by Island Batik.
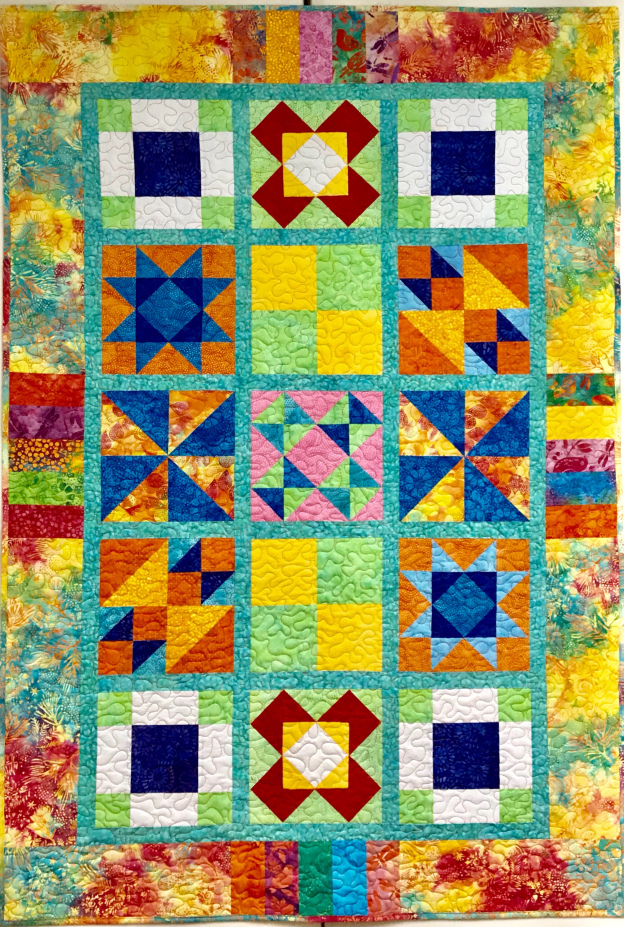
The Island Batik Ambassadors assignment for September is “Childs Play”, make a quilt inspired/designed for a child.
Included in Island Batik Ambassador’s Box 2, I was given a gorgeous fat quarter bundle from the Enchanted Forest line. These fabrics are so beautiful and the name “Enchanted Forest” reminds me of being a child at my grandparents house. My sister Mary and I would go through the backyard, past the little league field, playground and into the woods. For my sister and I, those woods were magical. We imagined we could find a fairy floating by around every tree & magical creatures of all sorts living in our Enchanted Forest along the Saquoit Creek. The many shades of green in the variety of trees and moss were amazing. In the Spring, we couldn’t wait to go hunting for violets, and would come home with beautiful bouquets for our Grandma Bessie.
I pin orphan blocks to the ceiling in my quilt studio. As I was contemplating what to make I spotted a favorite block. For me the creative process usually begins with EQ8, so off I went to see what I would come up with.
I love the flower affect that is created by using Shaded Four Patch & Split Rects units. I decided on a 10″ finished block using 4″ finished Shaded Four Patch units & 2″ X 4″ finished Split Rects Units.
I used all the fabulous fabrics in the fat quarter bundle and made each flower unique. Vivi’s Flowers was constructed with Aurifil Thread and completed with Hobbs Tuscany Silk Blend Batting. This quilt was made for my friend Cher Green’s beautiful Granddaughter Vivi. I named this quilt “Vivi’s Flowers”. It measures 46″ X 58″. If you would like a supply list for this quilt you may download it here:
The fabrics shown in this post were given to me by Island Batik. This quilt was pieced with my favorite thread by Aurifil and completed with Hobbs 100% cotton Batting
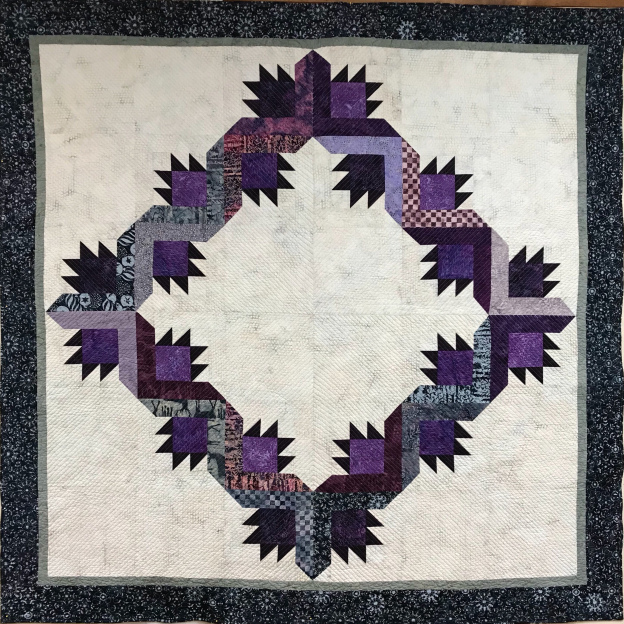
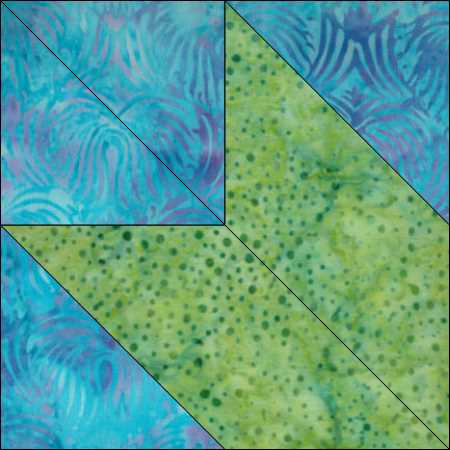
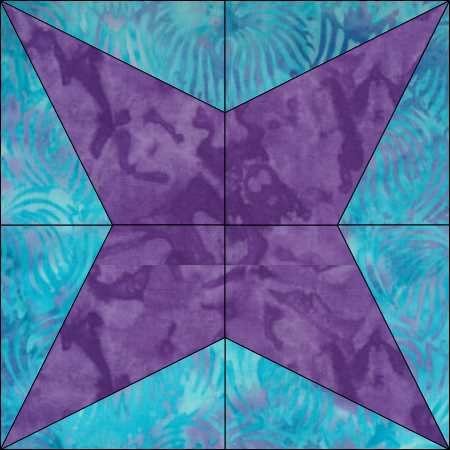
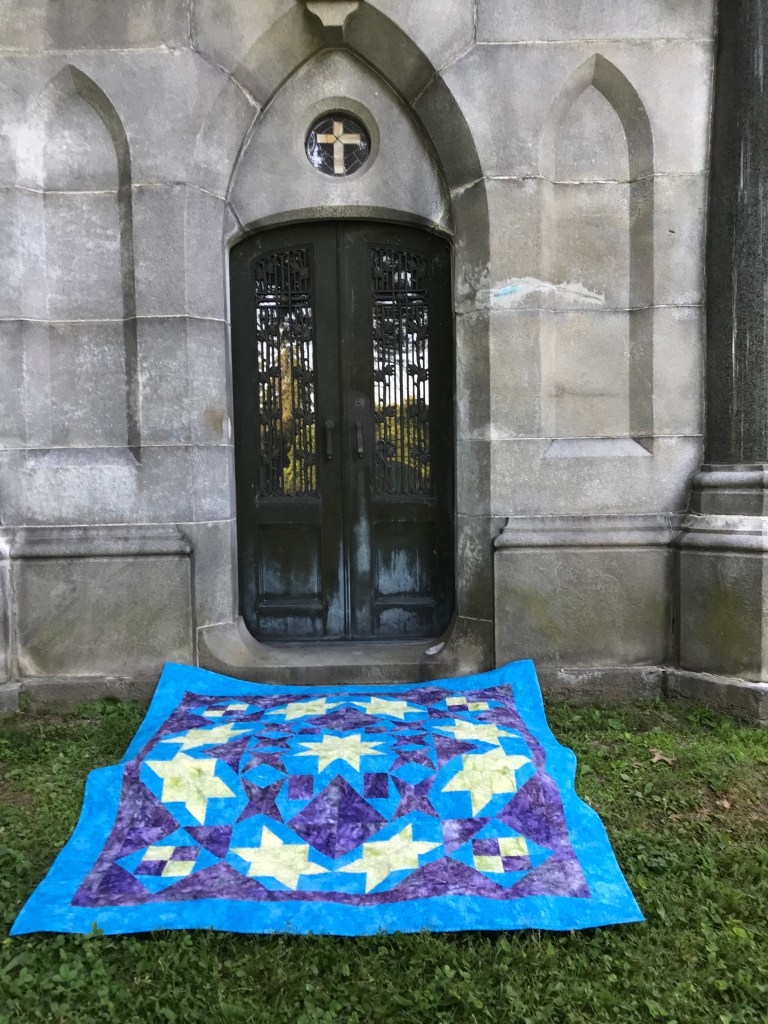
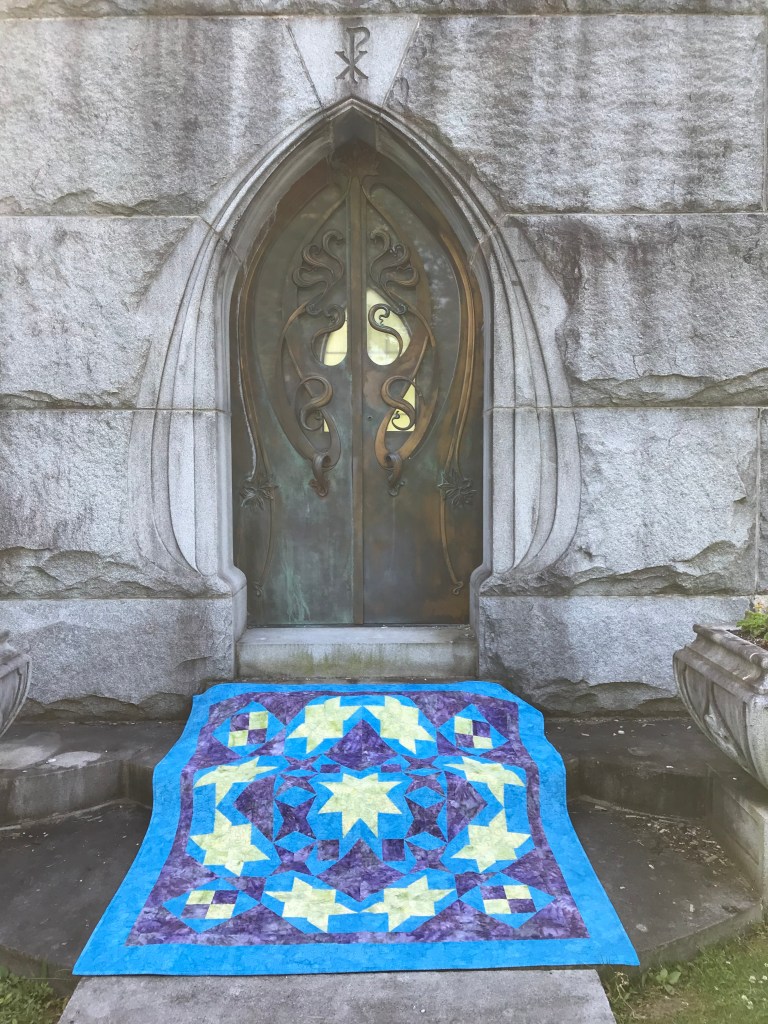
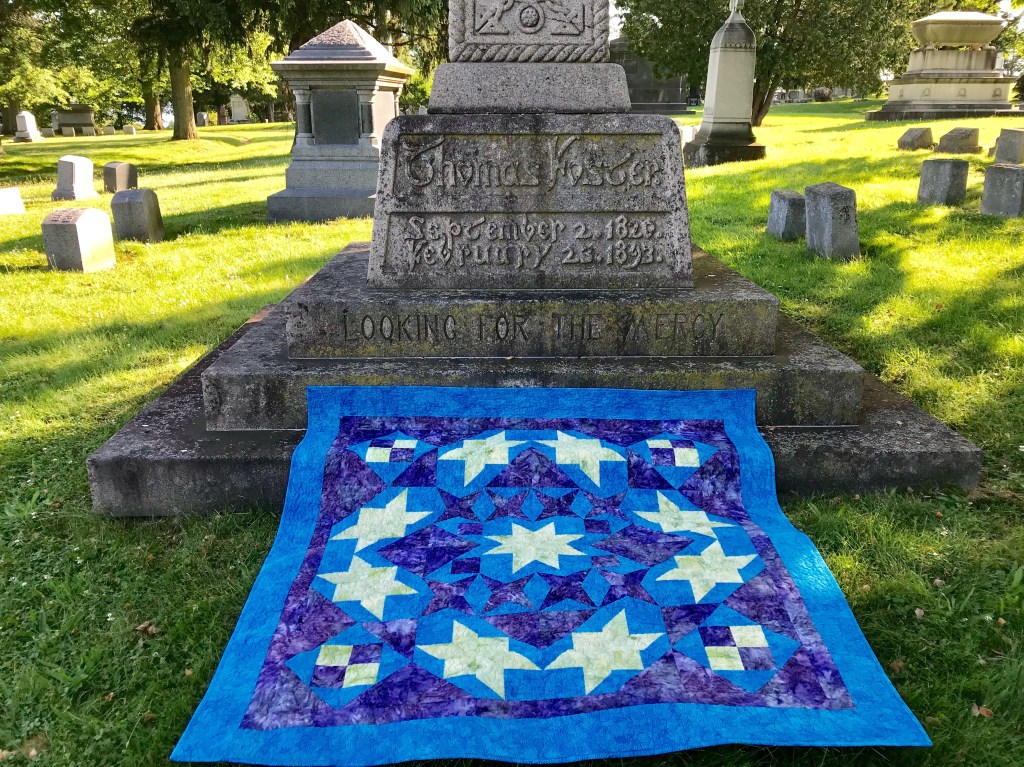
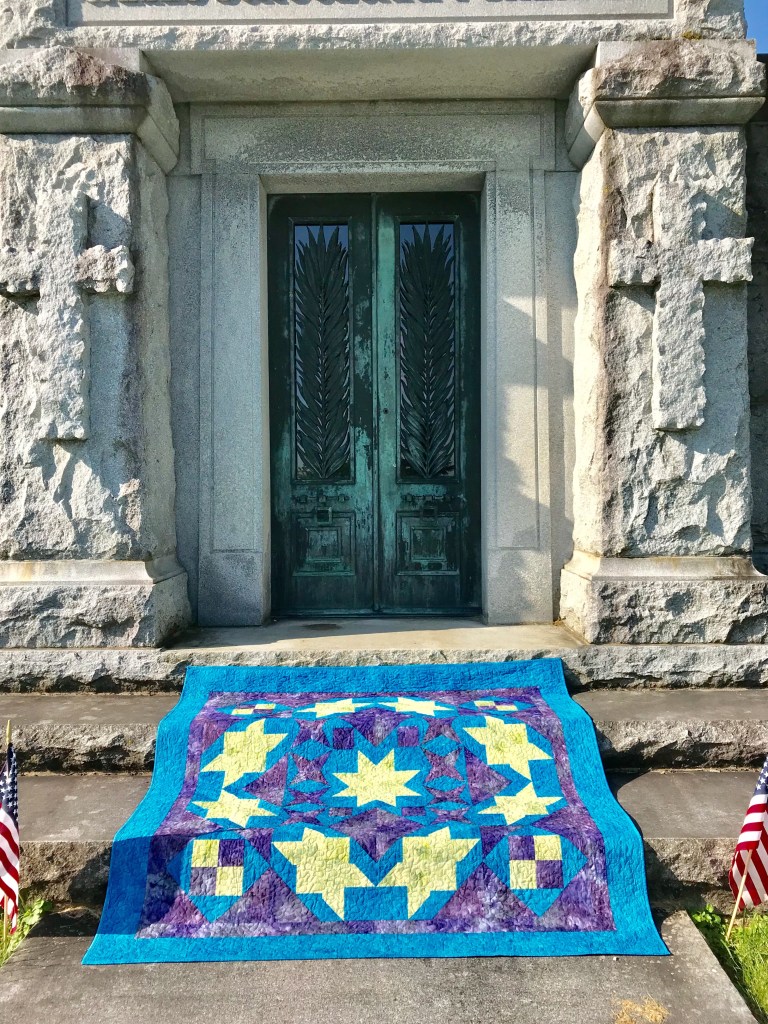
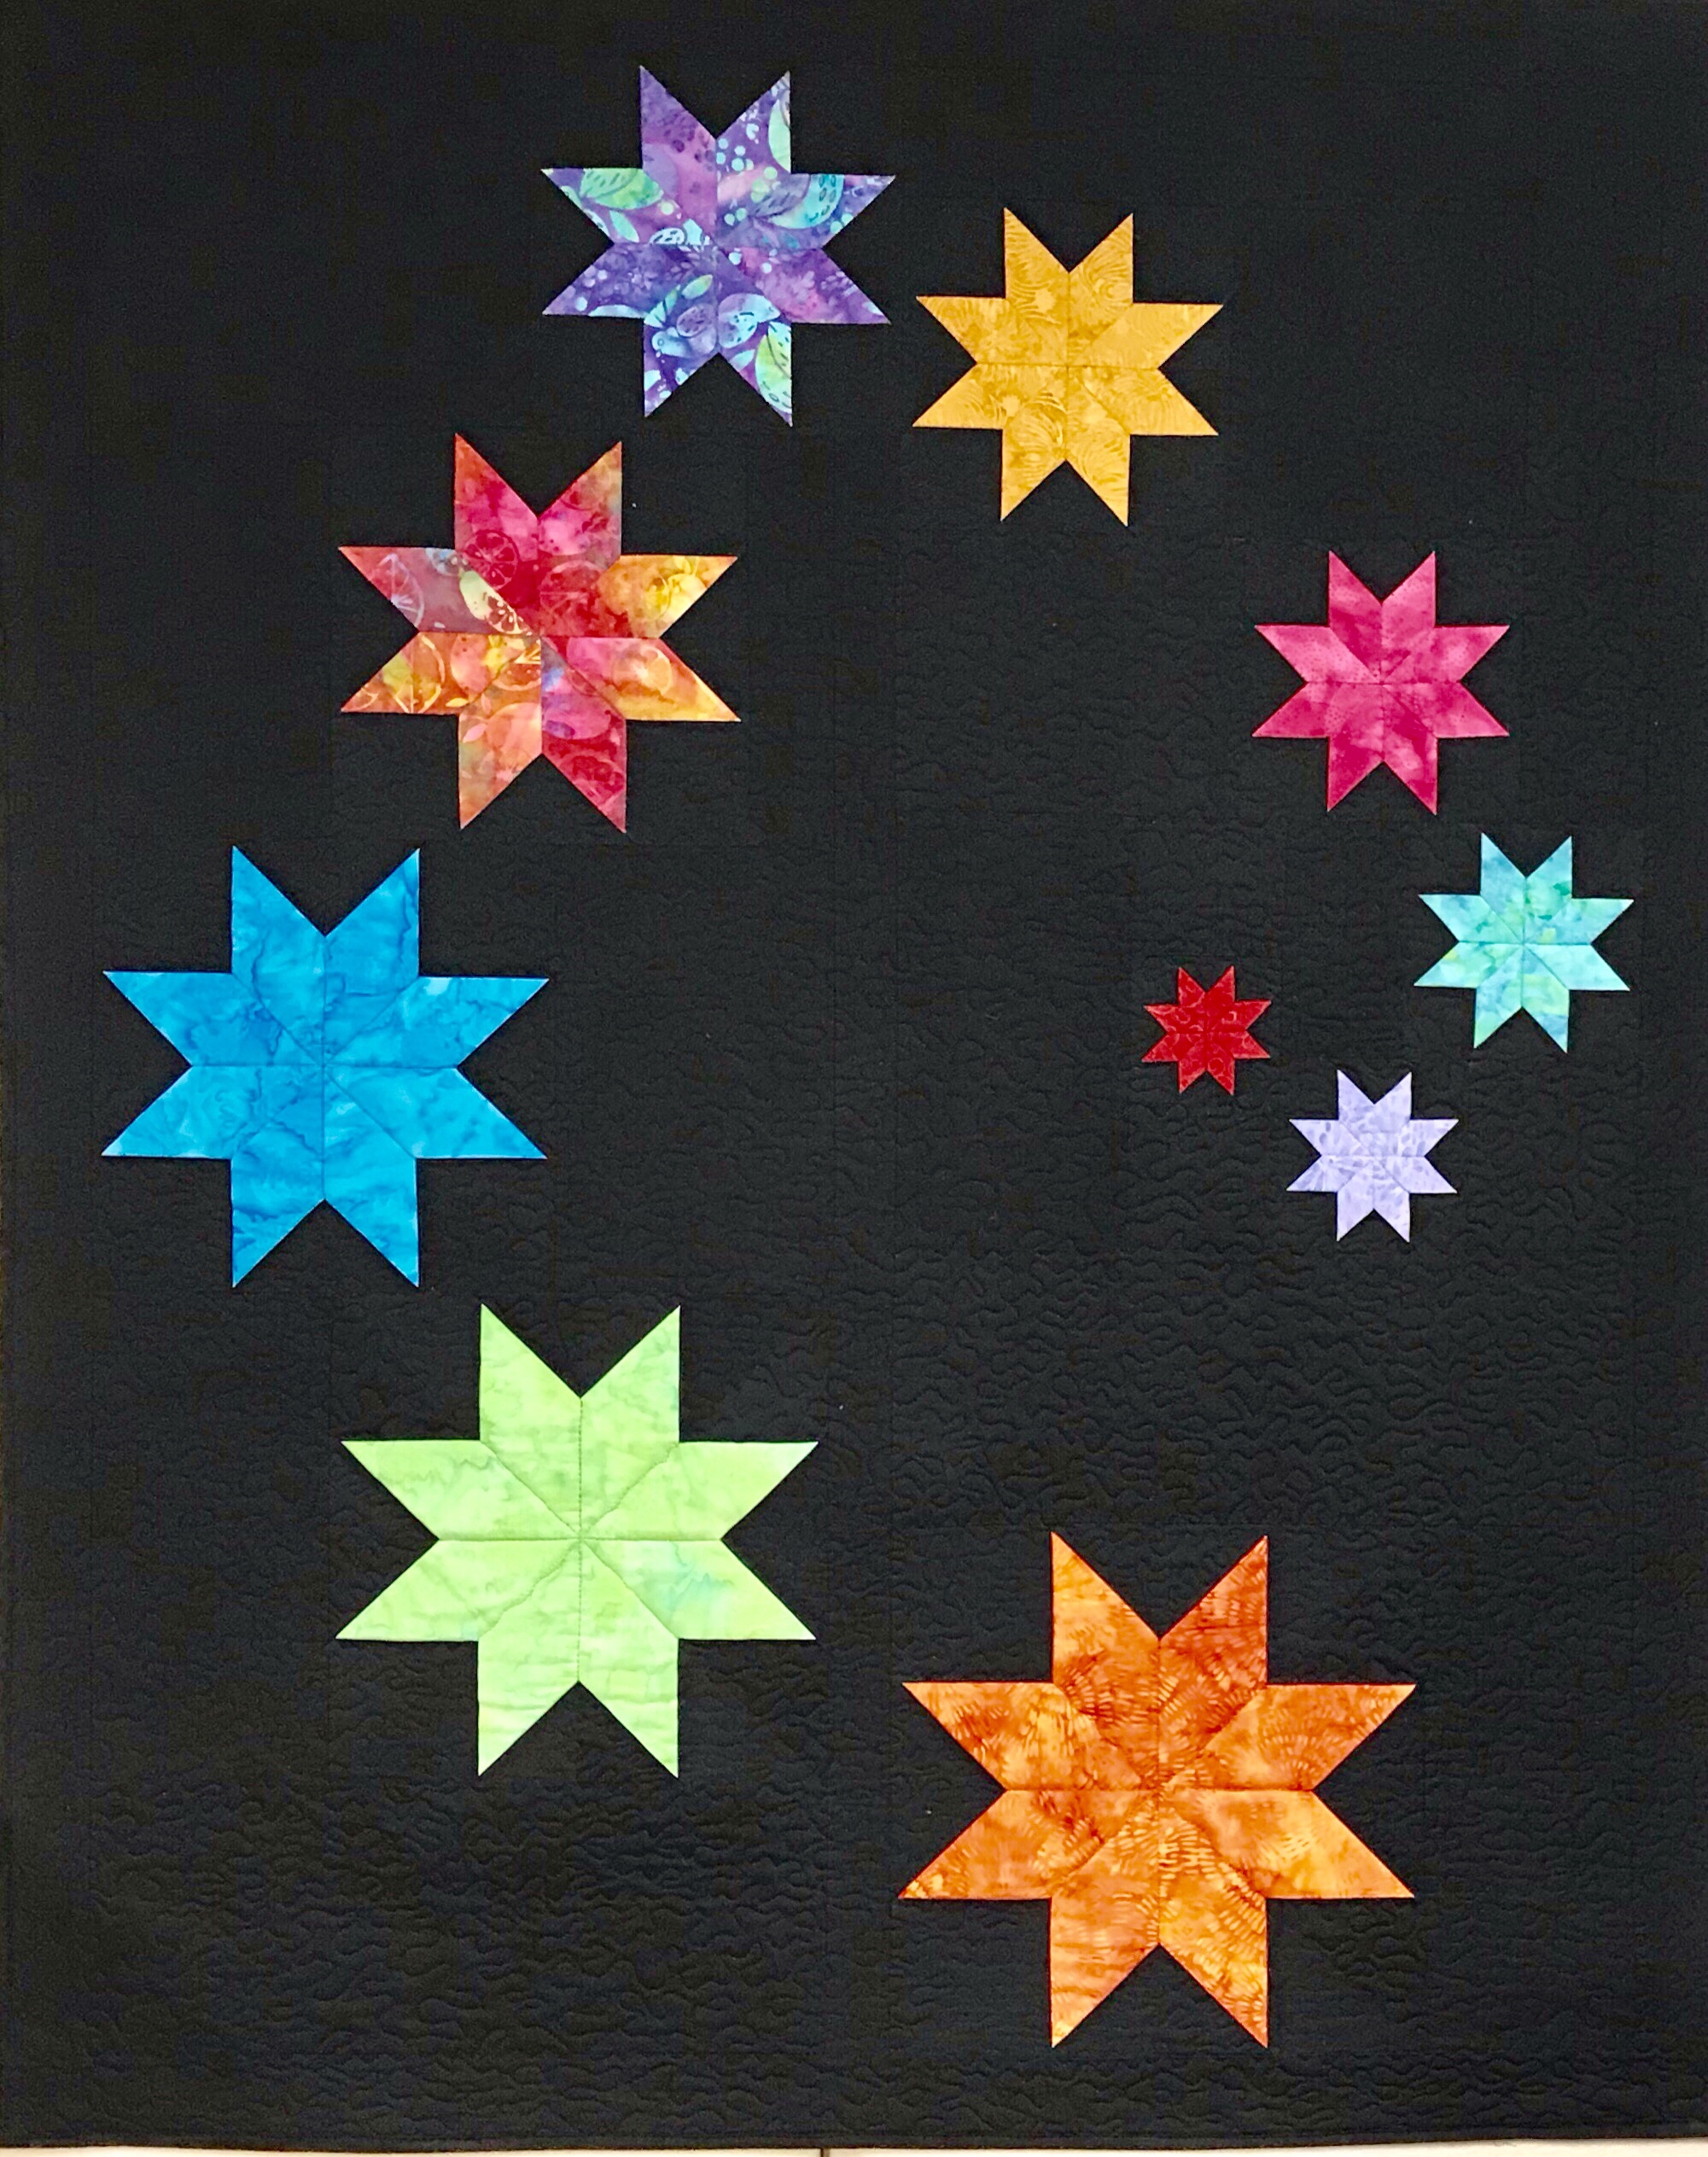
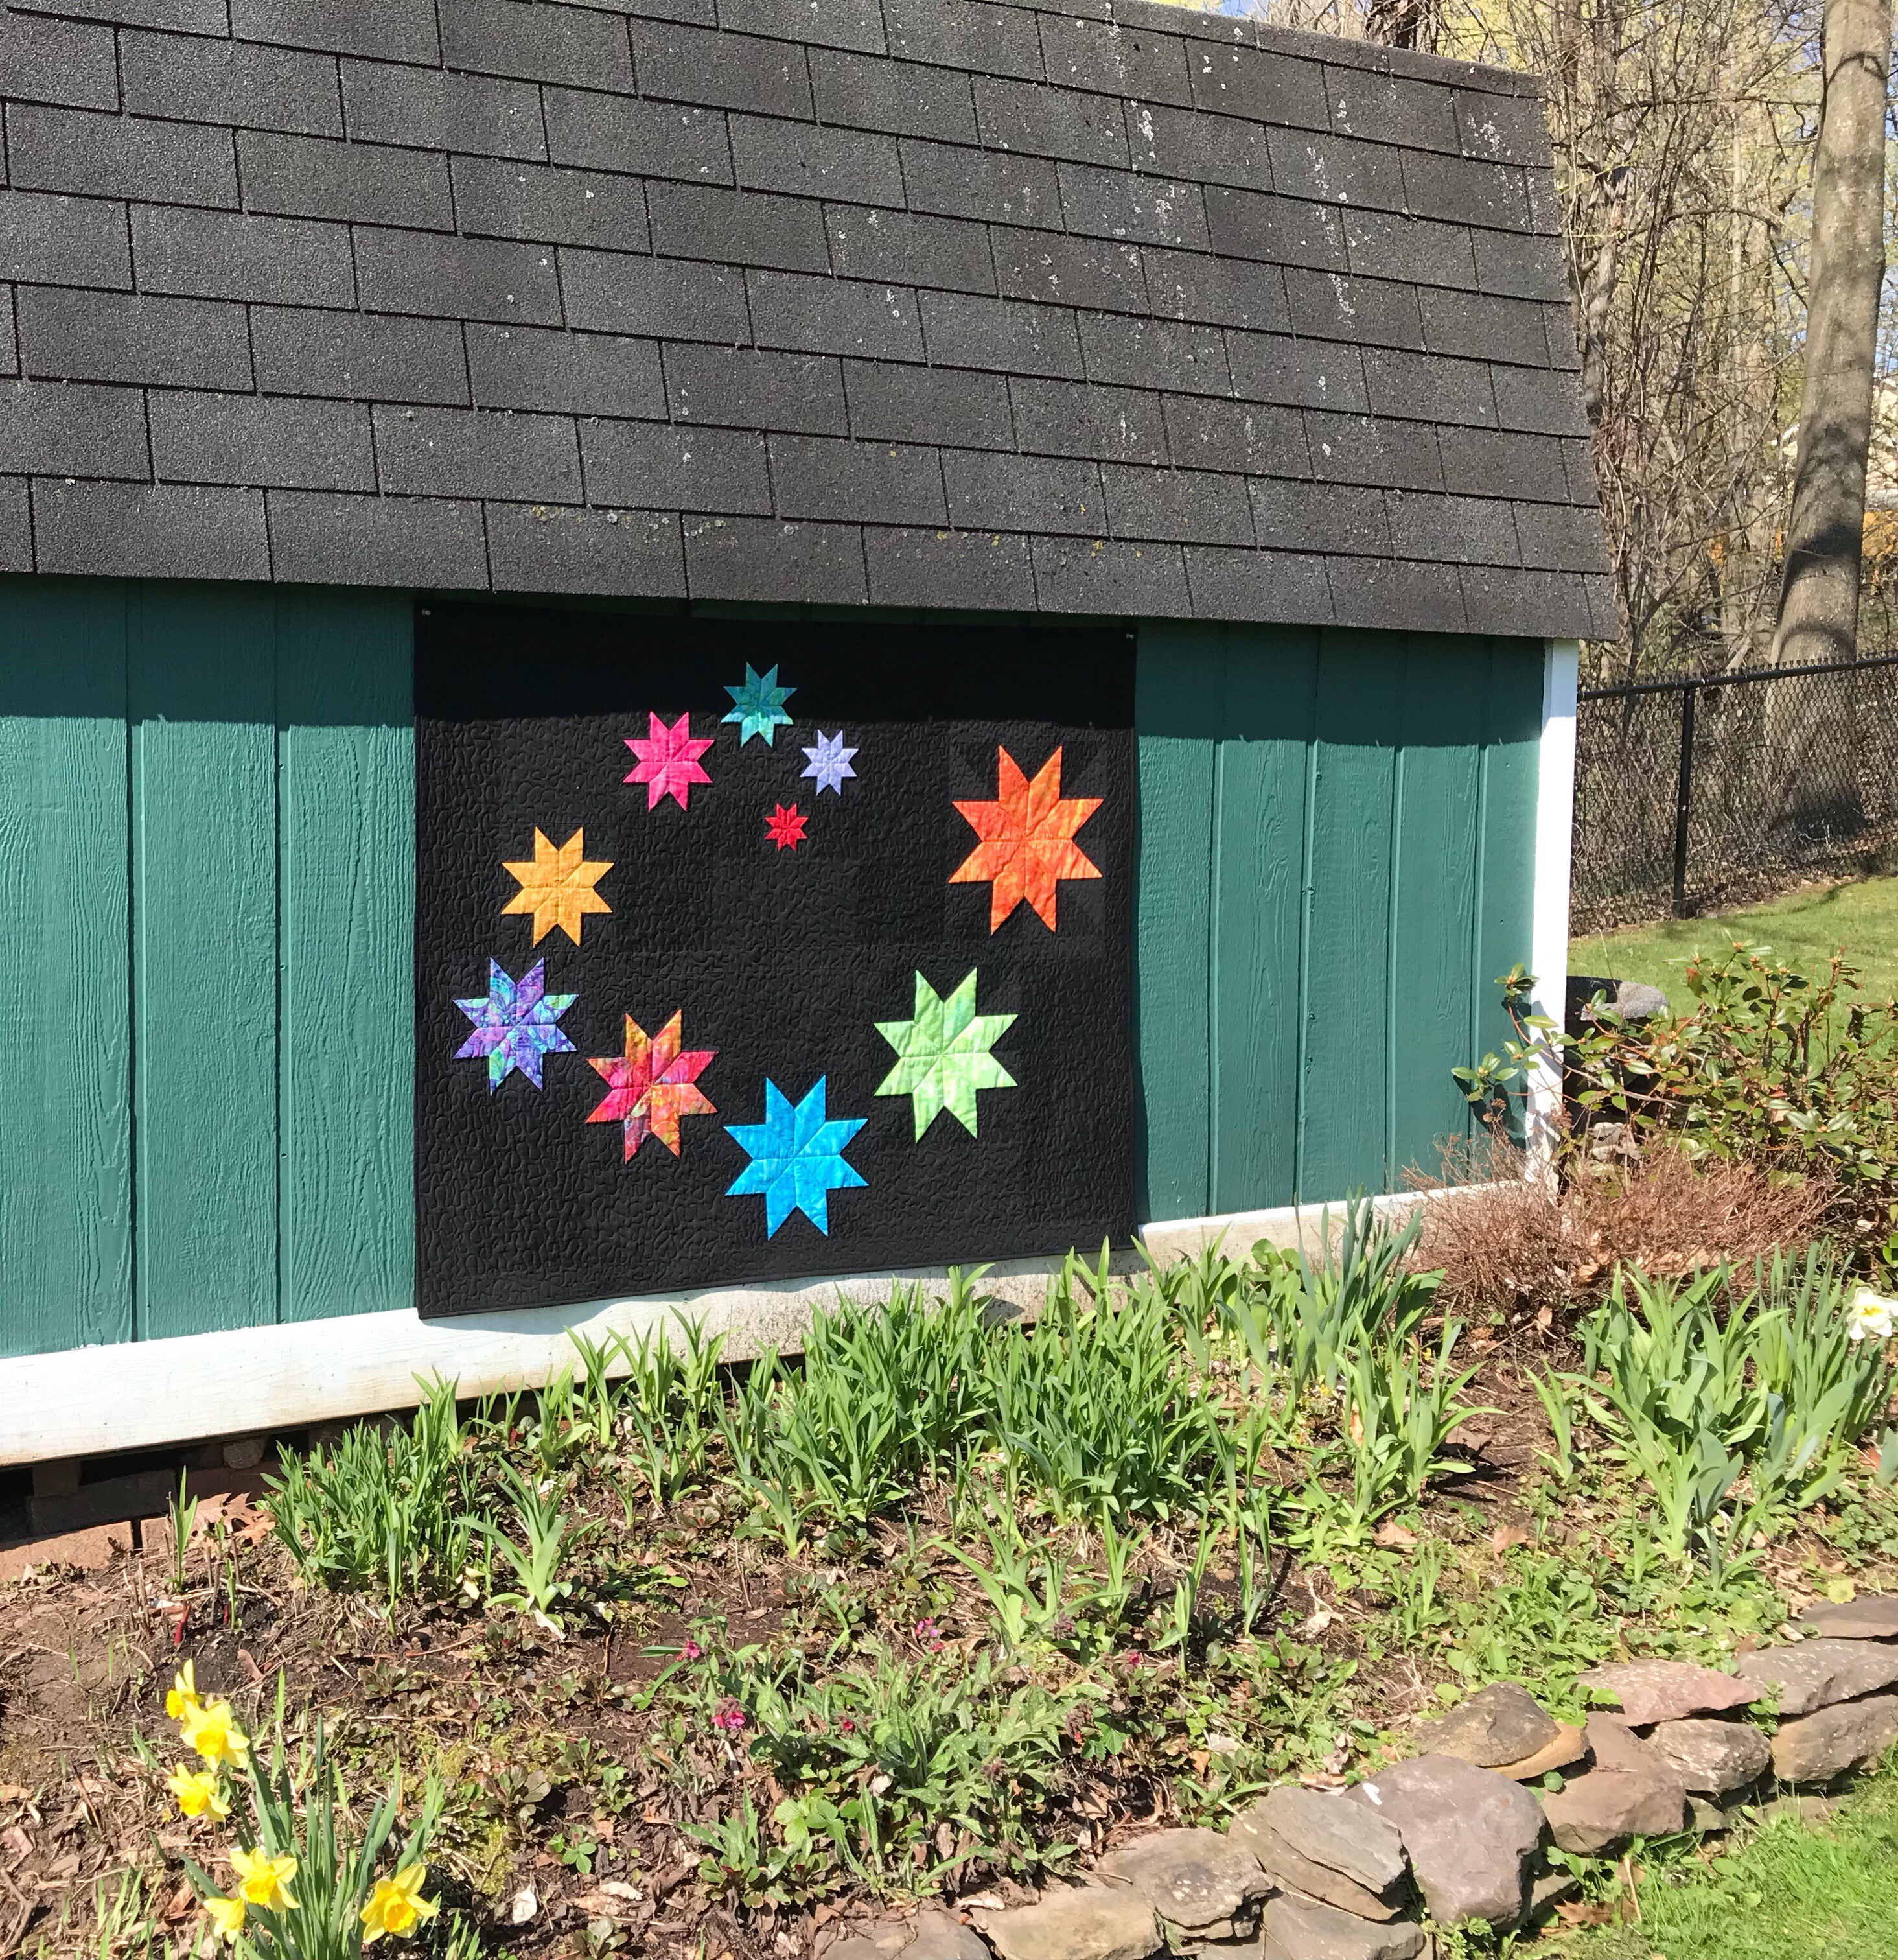
The August Challenge for the Island Batik Ambassadors is to create a quilt featuring Stars. I chose a design I created in EQ8. I love the way the Lemoyne quarters combines with shaded four patch units creates a shooting star effect.
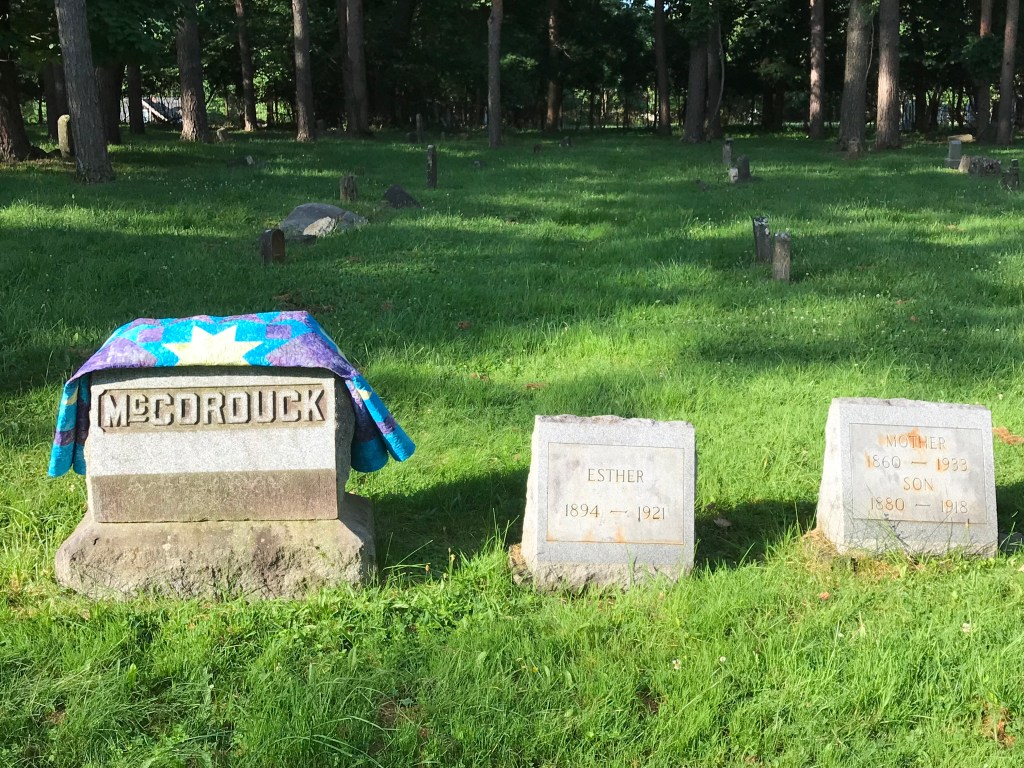
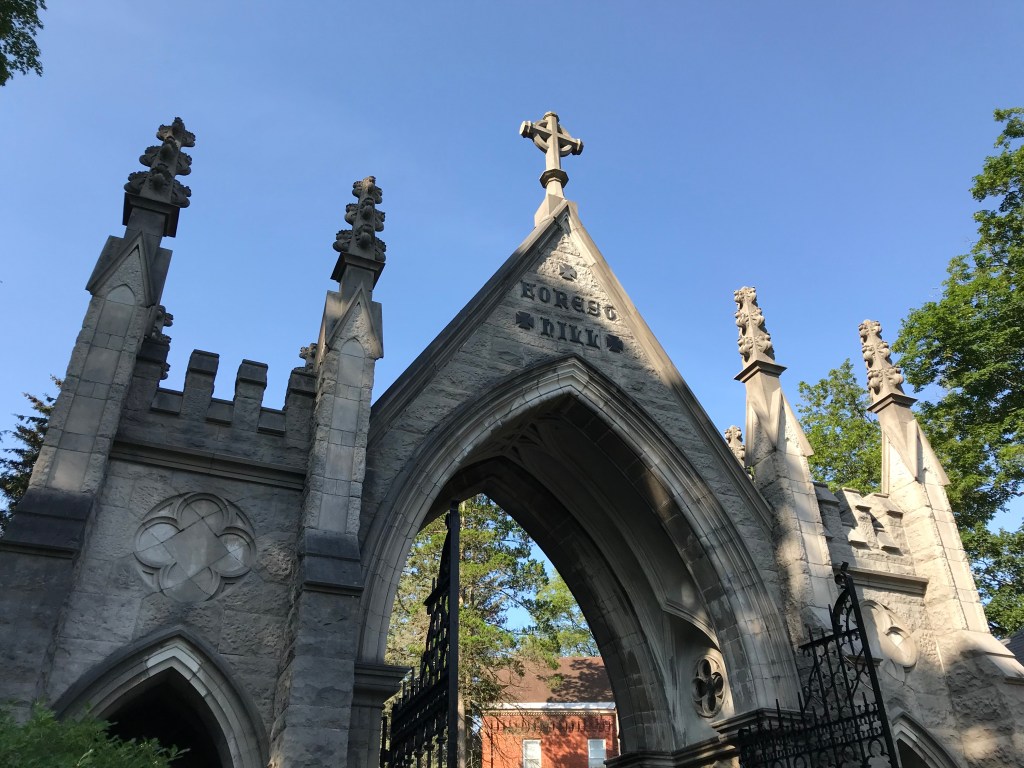
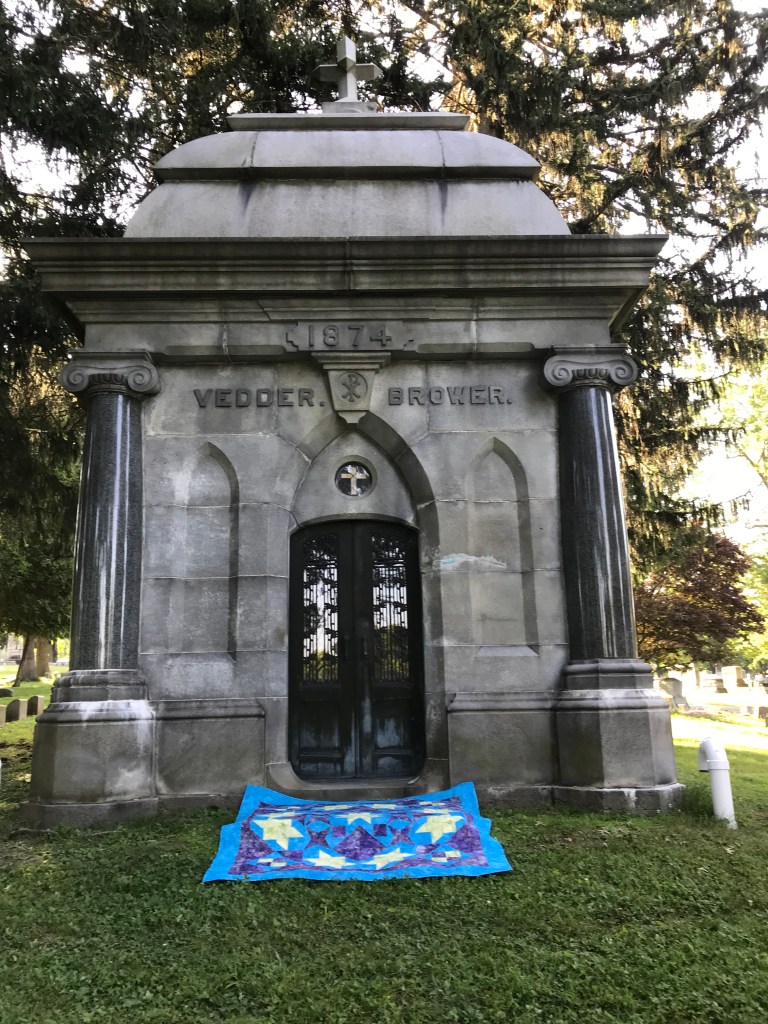
Quilts and mausoleums……what? Who goes on a “Walk & Talk” tour of Forest Hills Cemetery (founded 1848) in my home town of Utica, NY and gets the idea to photograph quilts there? My mind works in mysterious ways. We have family in Forest Hills and visit there often so that is where I began.
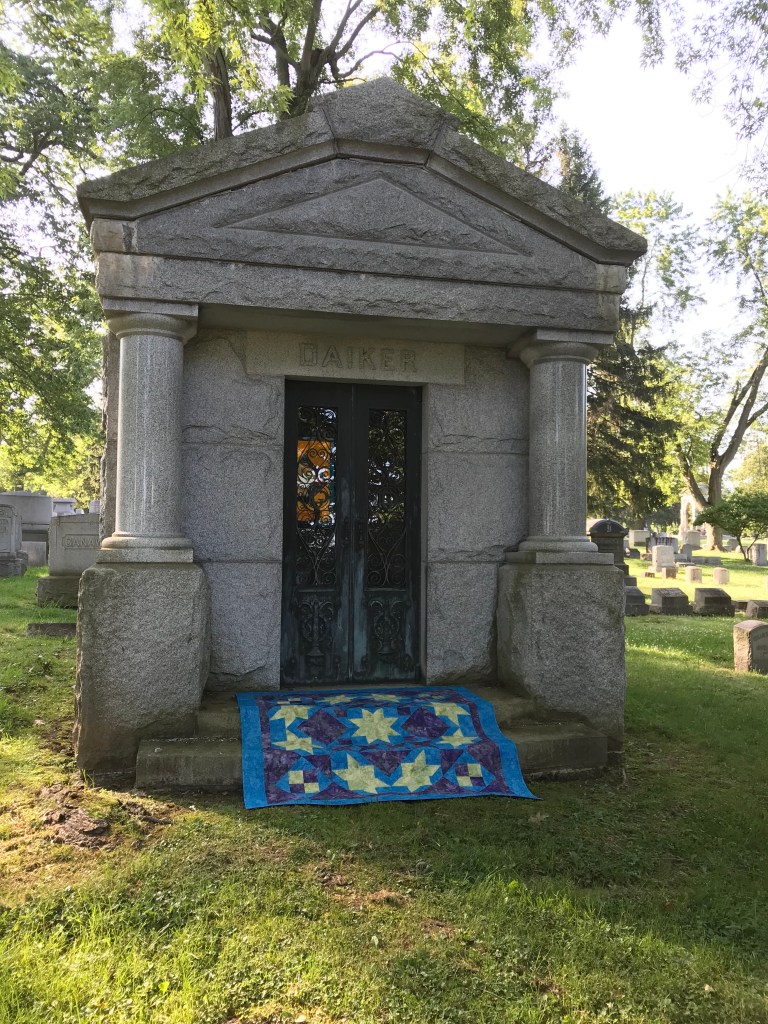
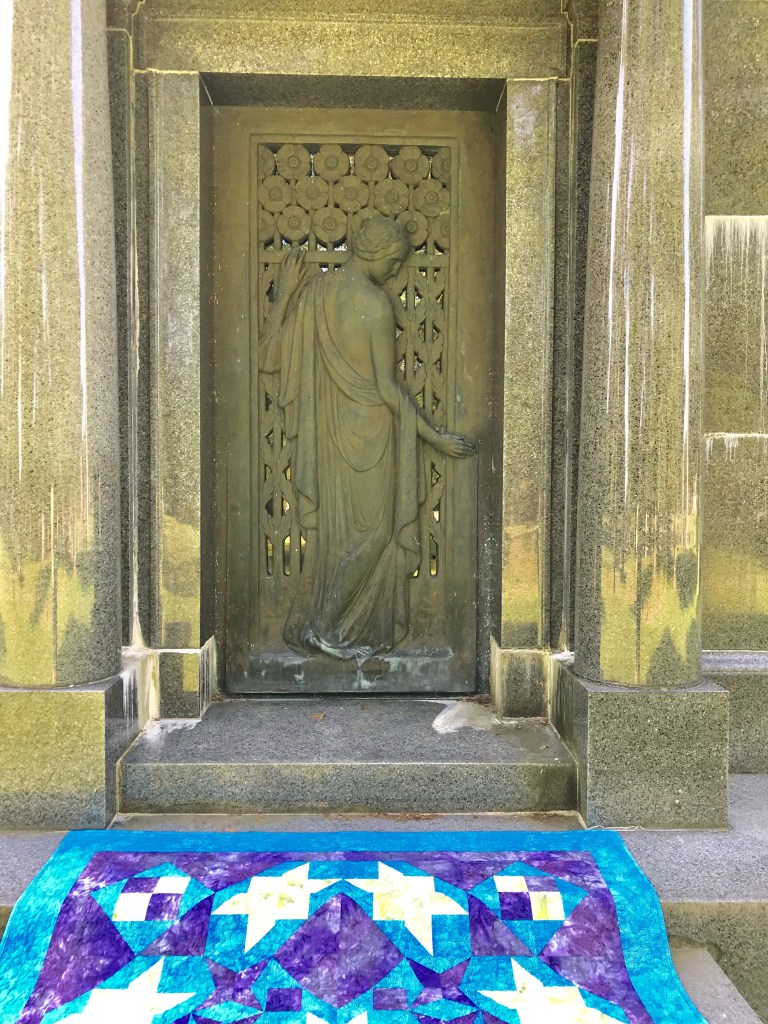
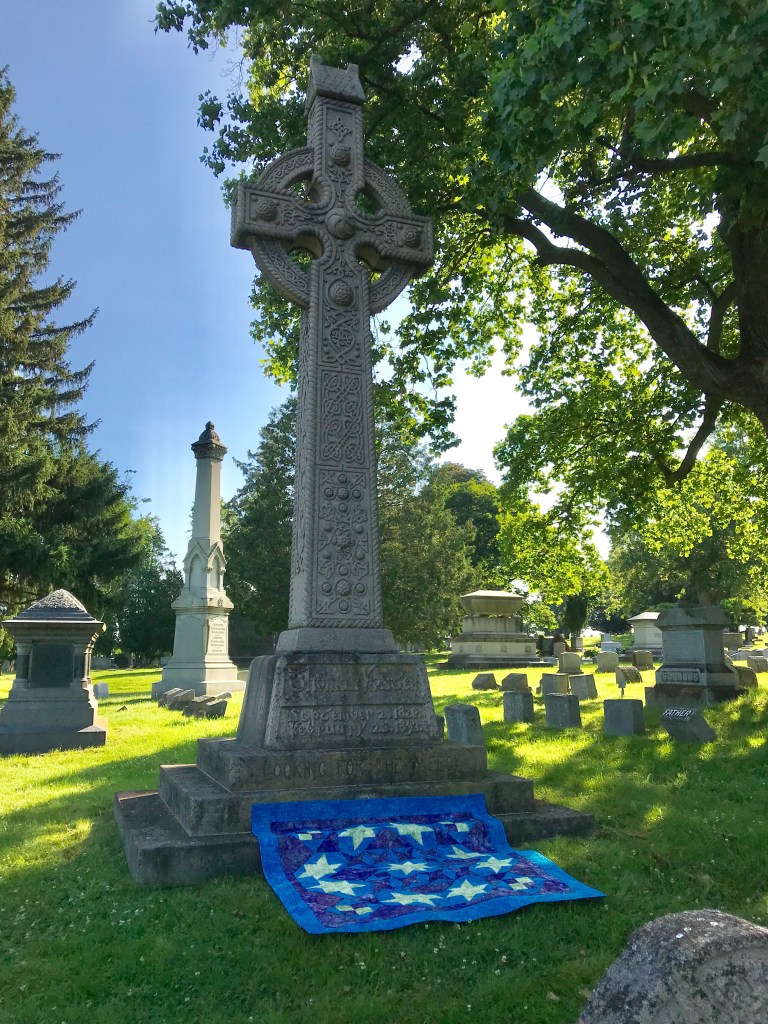
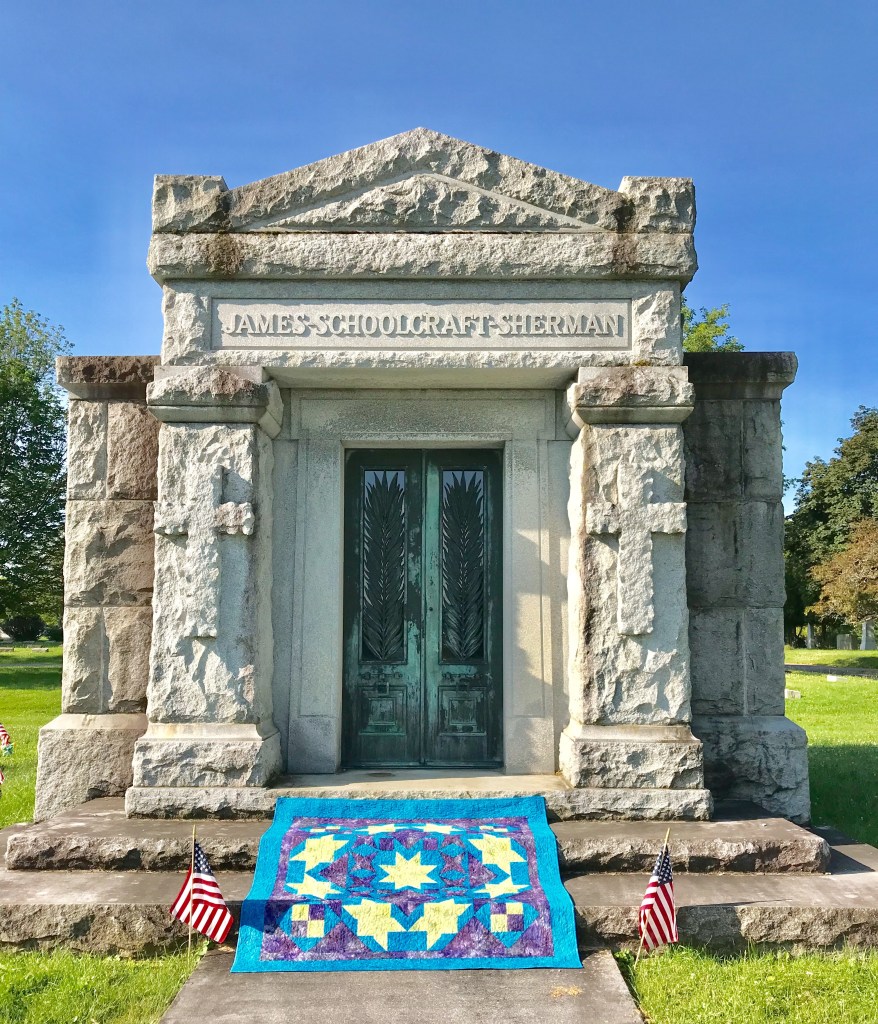
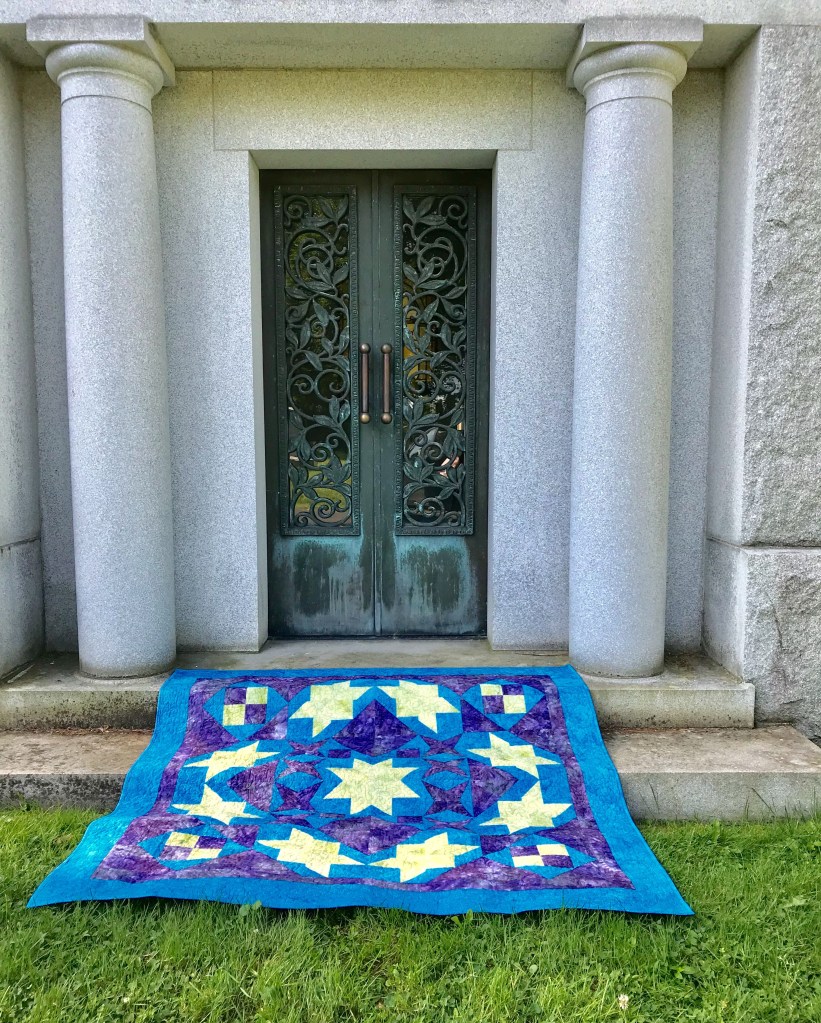
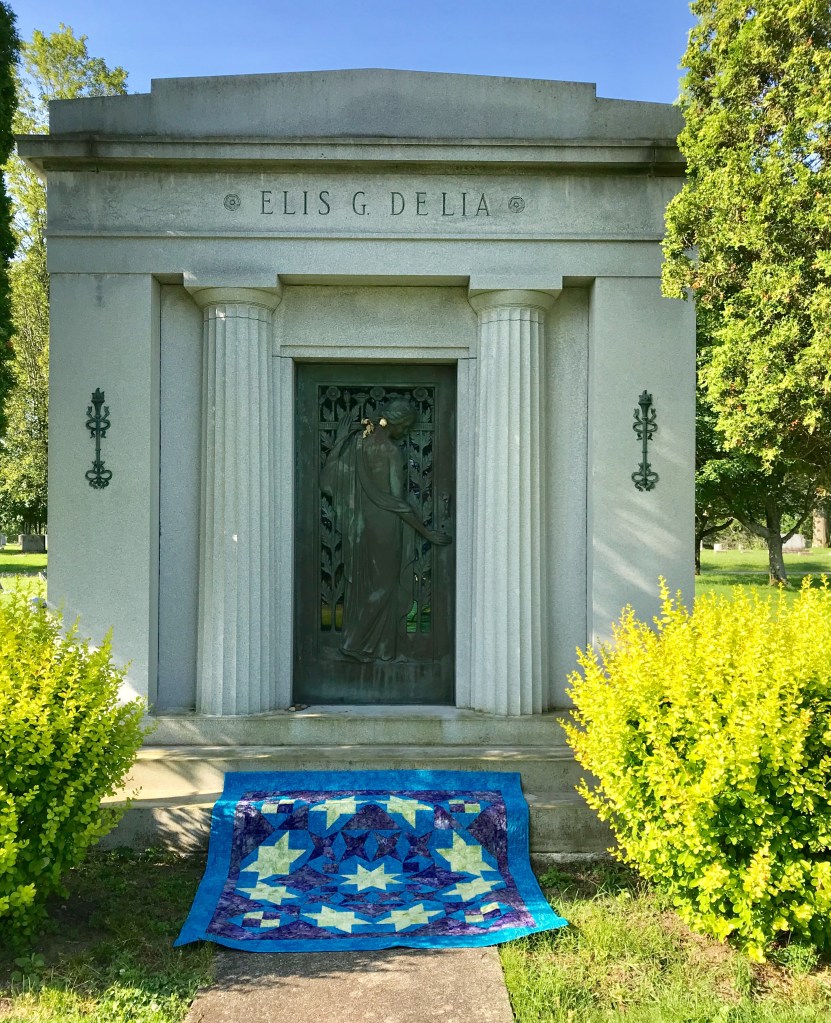
There are so many beautiful mausoleums in Forest Hills. I decided to take photo’s of Shooting Stars in front of them. That may sound weird but I love all the history found in cemeteries. There were so many beautiful doors.
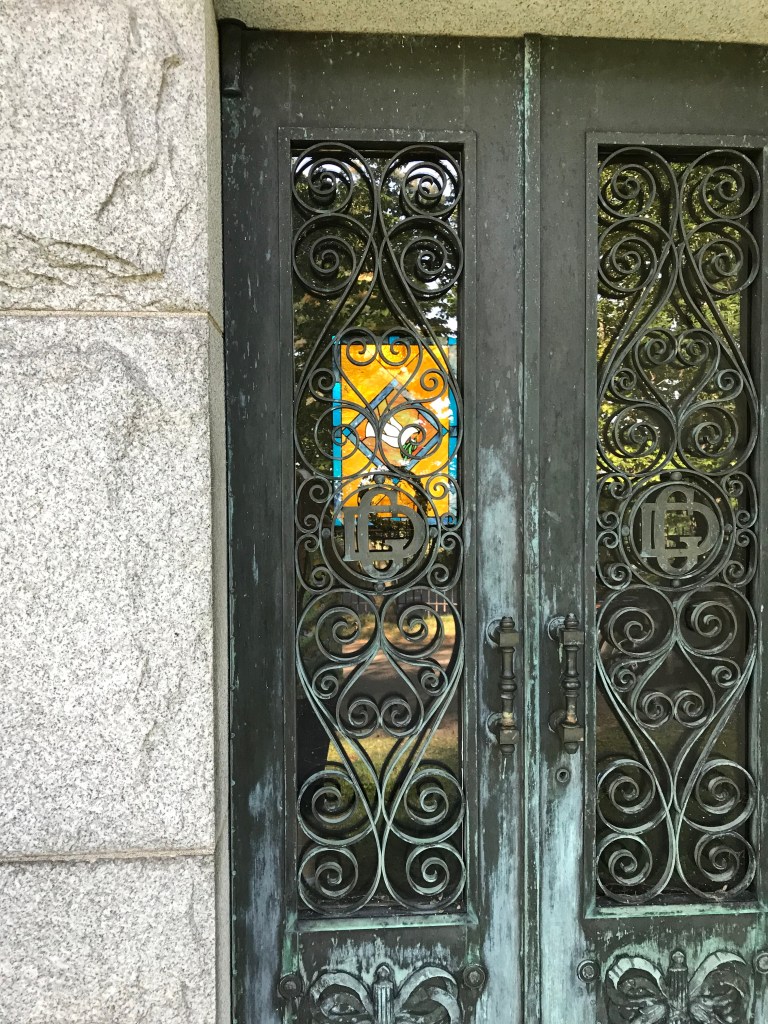
The morning sun was shining through the stained glass.
These beautiful brass doors are what gave me the idea to photograph Shooting Stars there.
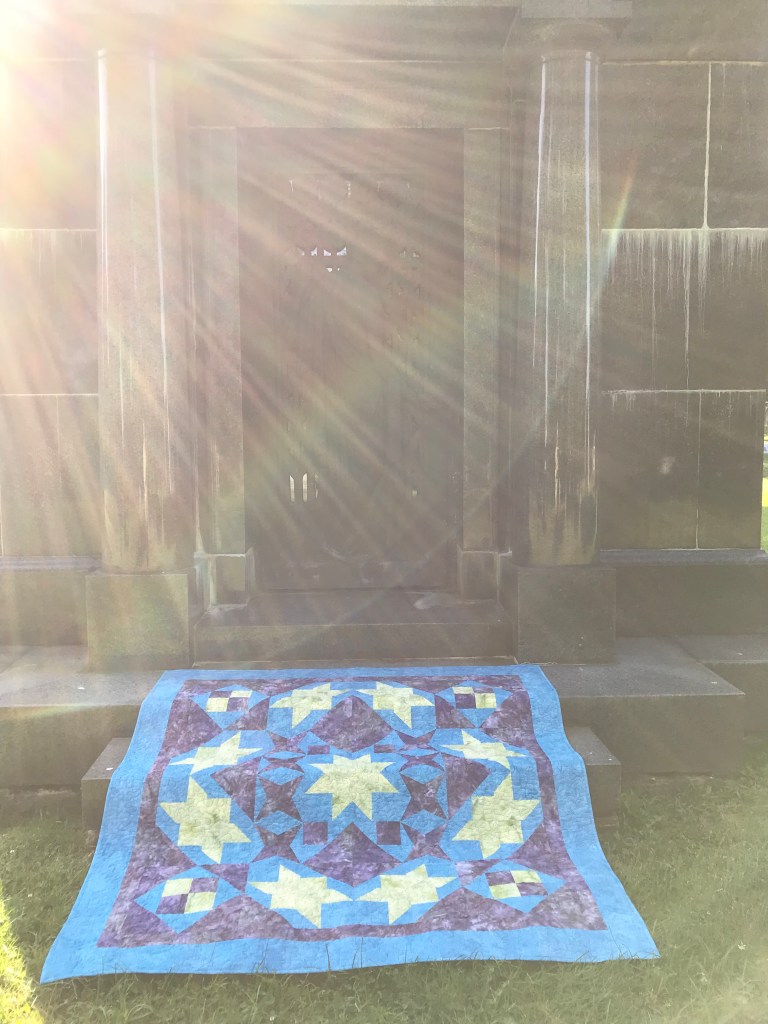
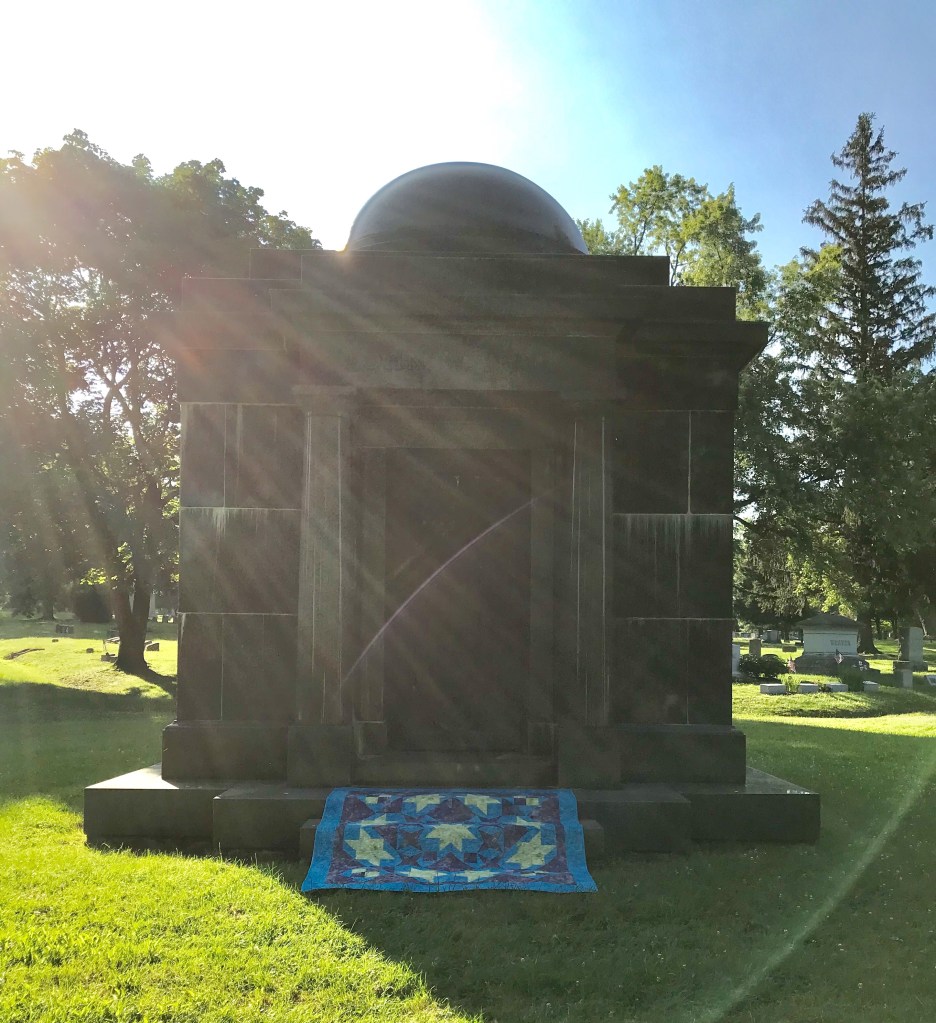
I love the way sun rays were streaming or maybe someone was visiting!
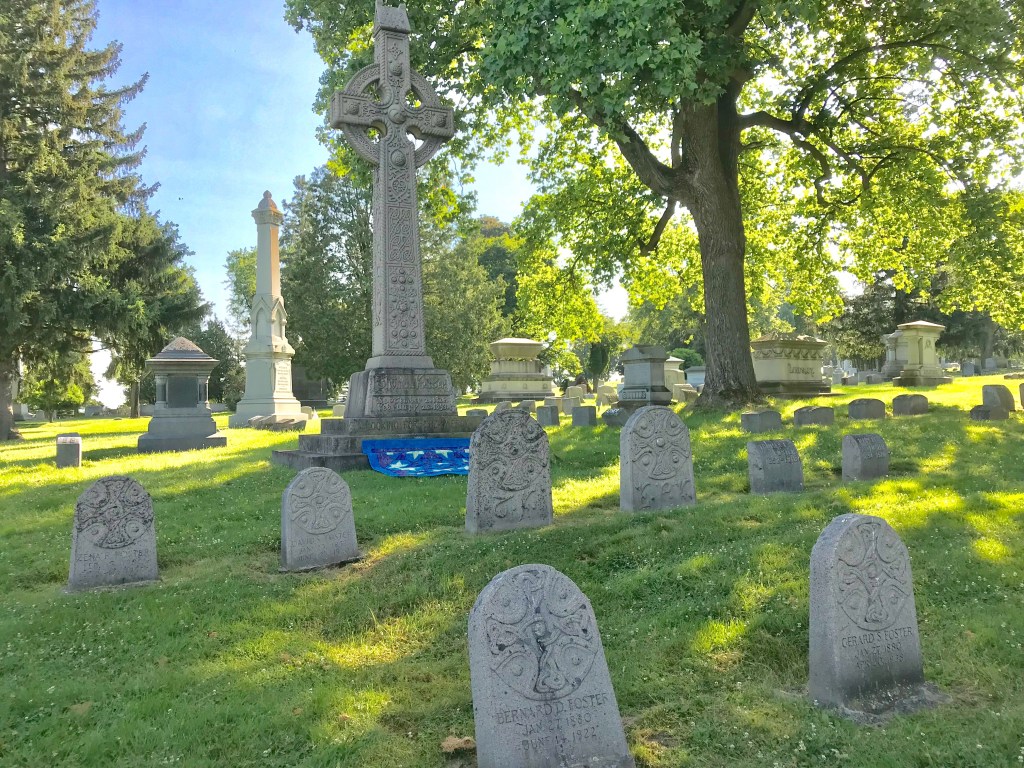
These Celtic Crosses are awesome!
We even have a past Vice President.
I love walking through a cemetery and reading the tributes. If you would like a supply list for Shooting Stars download here.
The fabrics in this post were given to me by Island Batik.
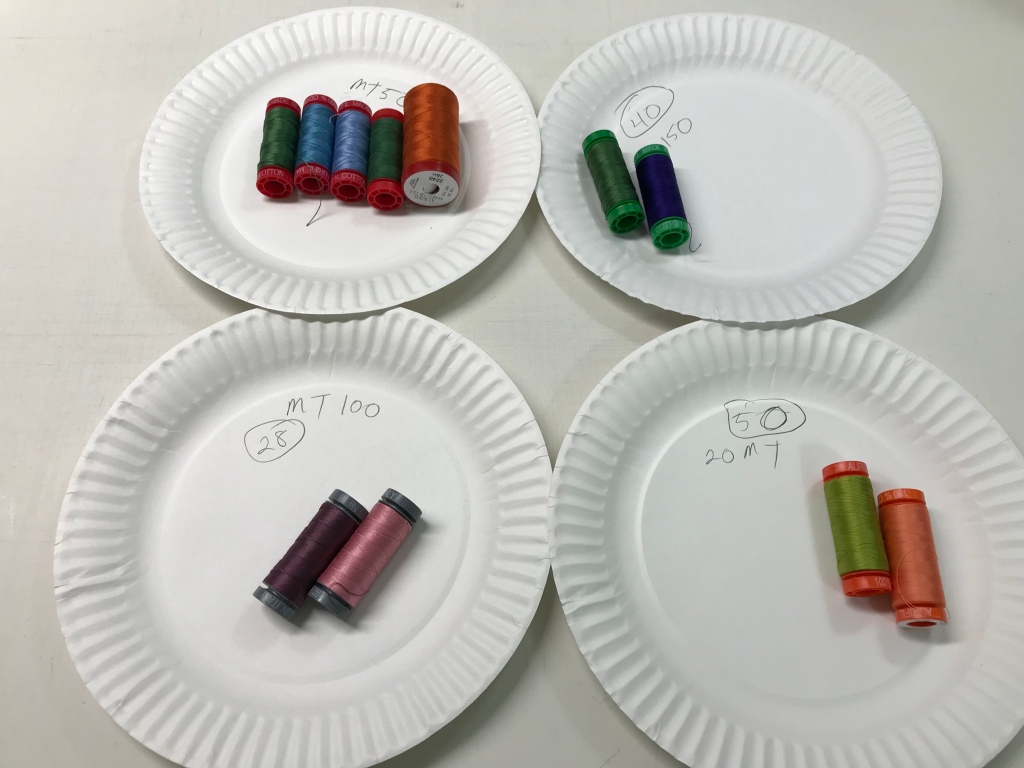
The mission: Use any fabric art/non-traditional quilting/sewing/thread painting technique using 3 Aurifil thread weights. In my infinite wisdom, I chose thread painting (sigh).
About 10 years ago I took a thread painting class from Nancy Prince. She is a wonderful quilt artist.
As usual I get organized with paper plates!
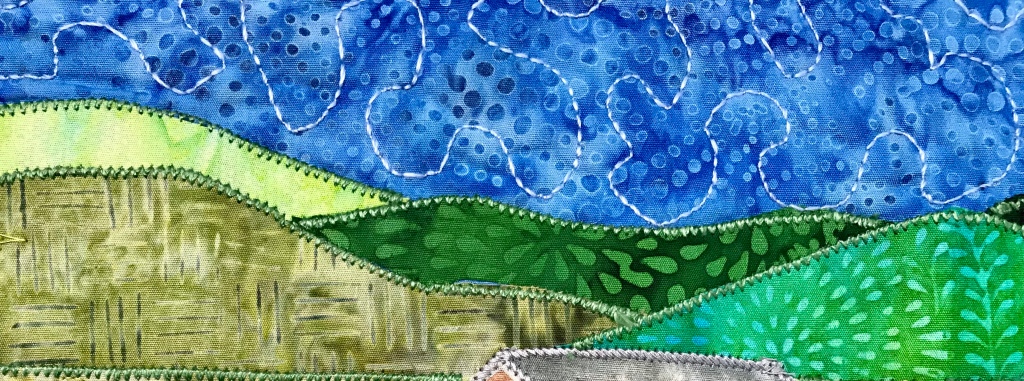
I started by creating my background of land and sky and pinning it to a light weight stabilizer. I traced mountains onto Steam A Seam II to add to the country scene.
I outlined the mountains with Aurifil 12 weight.
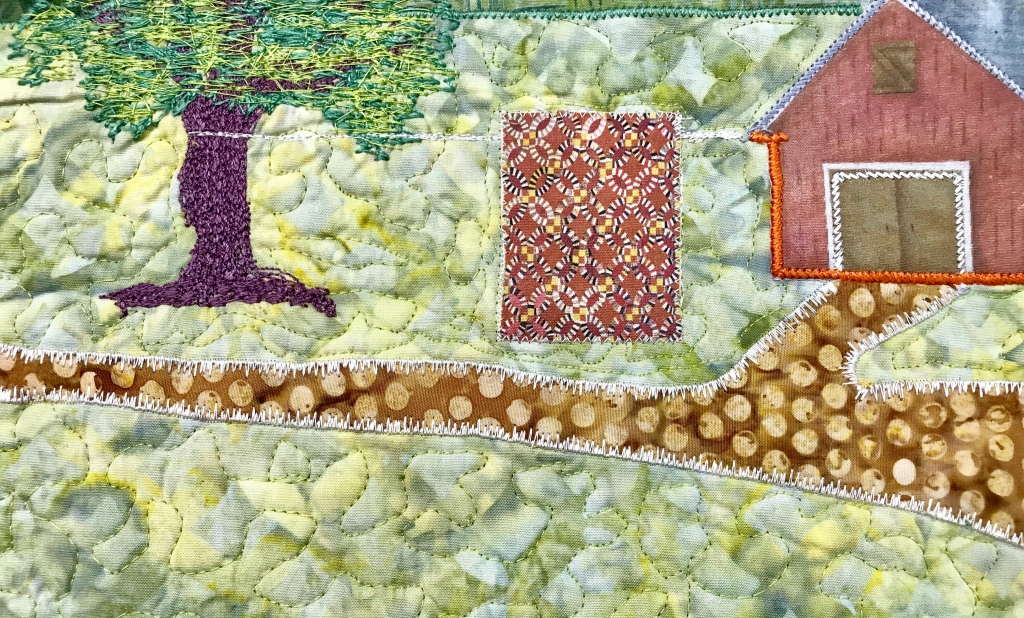
I added a path and stitched the edges with Aurifil 30 weight.
I traced my tree onto a water soluble stabilizer, positioned and pinned it to the quilt top. I used Aurifil 28 weight, lowered the feed dogs, adjusted the upper tension, attached the open toed quilting foot and began thread painting the tree trunk until it was filled in. I changed thread to a dark green Aurifil 12 weight and outlined the tree and lightly filled it in. I changed the thread to a lighter green Aurifil 50 weight and finished thread painting the tree.
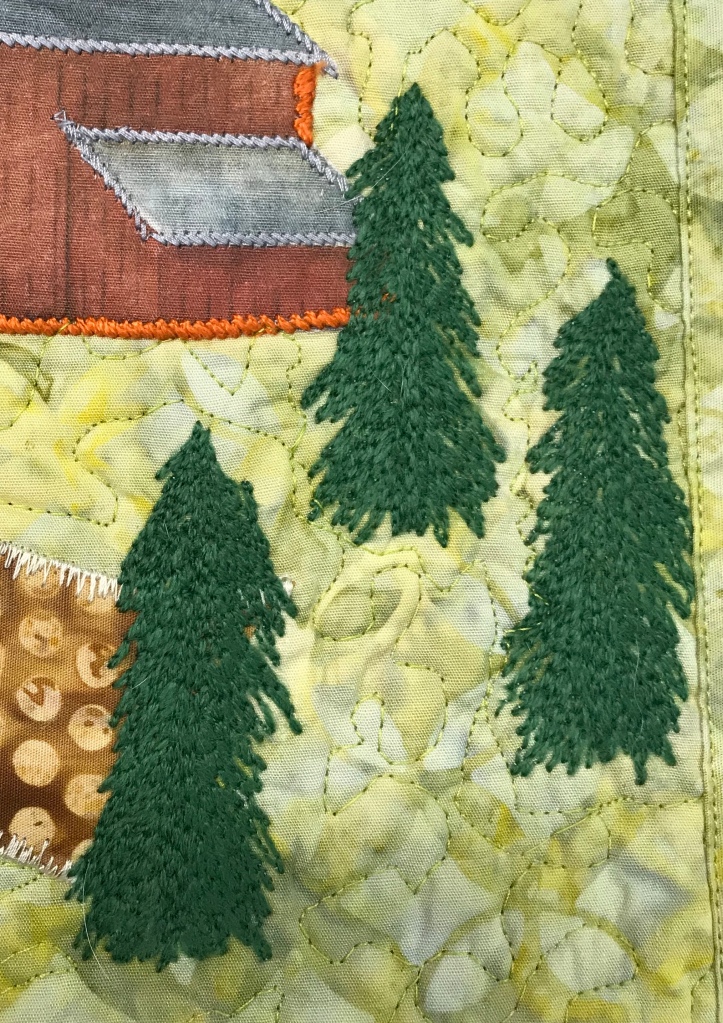
I traced the pine trees onto water soluble stabilizer, changed the thread to a dark green Aurifil 12 weight and thread painted my pine trees.
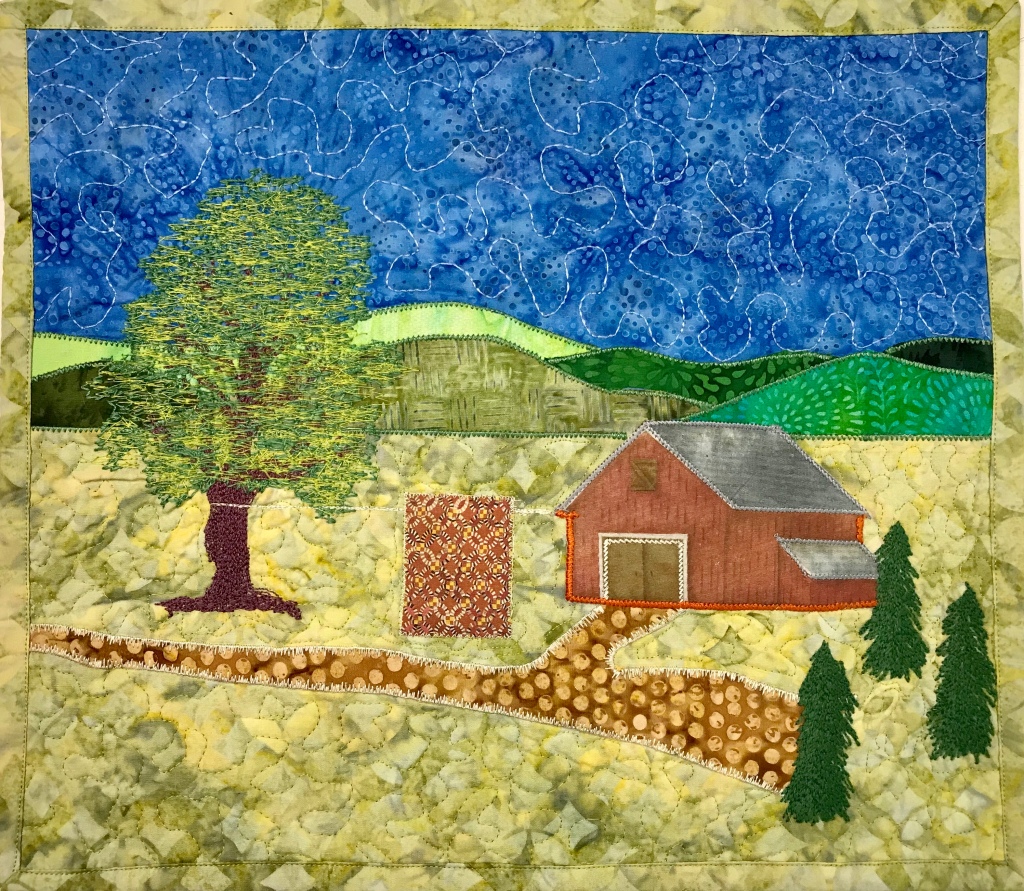
I used Hobbs Thermore batting for the quilt sandwich and attempted to quilt the sky with Aurifil 12 weight. Of course I had to add a little quilt to my country scene. My skills as a thread painter may be questionable, but Aurifil thread performed absolutely beautifully. It was strong, no breakage and hardly any lint. My project measure 13″ x 15″.
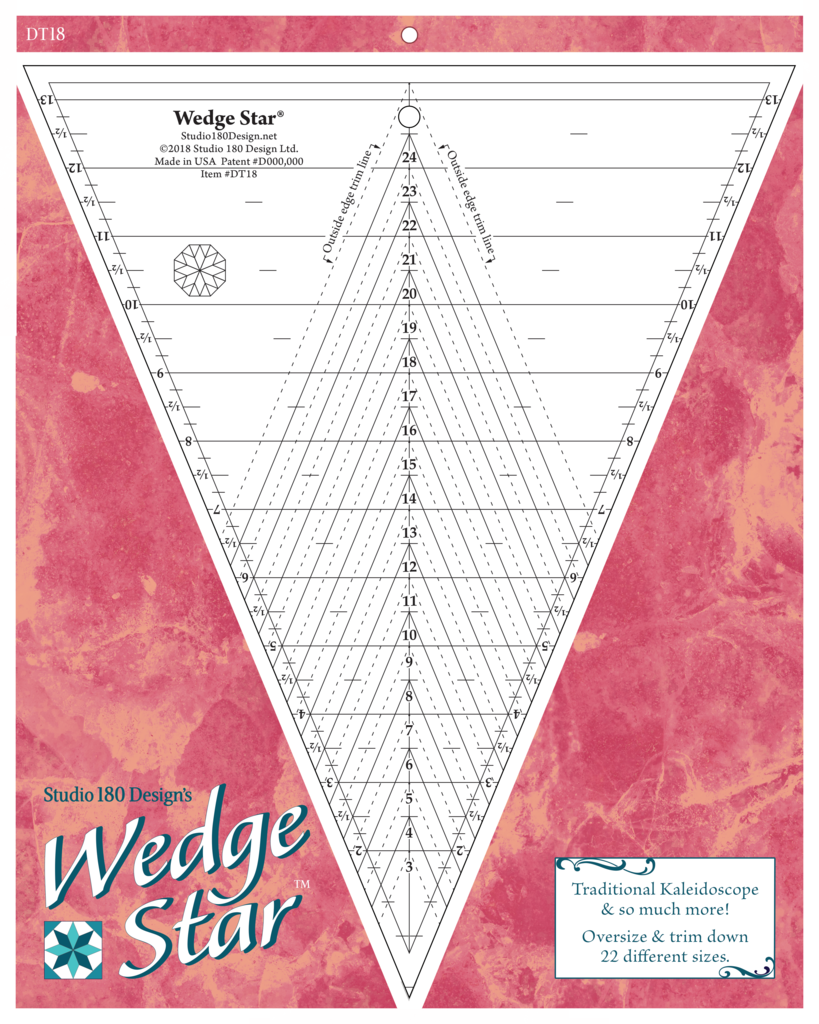
The Island Batik Ambassador’s June Challenge is “Try a New Technique”! Have you tried Studio 180 Design’s new Wedge Star Tool?
The Wedge Star tool is designed to make a variety of different blocks based on 45 degree sub-units.
They range from Wedge Star Blocks, Wedge Blocks & Mixed Blocks. There are 22 different size options ranging from 3″ to 24″ finished blocks!
Diamond units are constructed and trimmed down.
Units are stitched together in quarters and half’s, then joined into blocks with corners added to complete it.
The new Wedge Star tool is for “Intermediate Skilled” quilters. You must use your best 1/4″ seam allowance, NO scant seams here! As always use your best measuring, cutting, stitching & pressing skills.
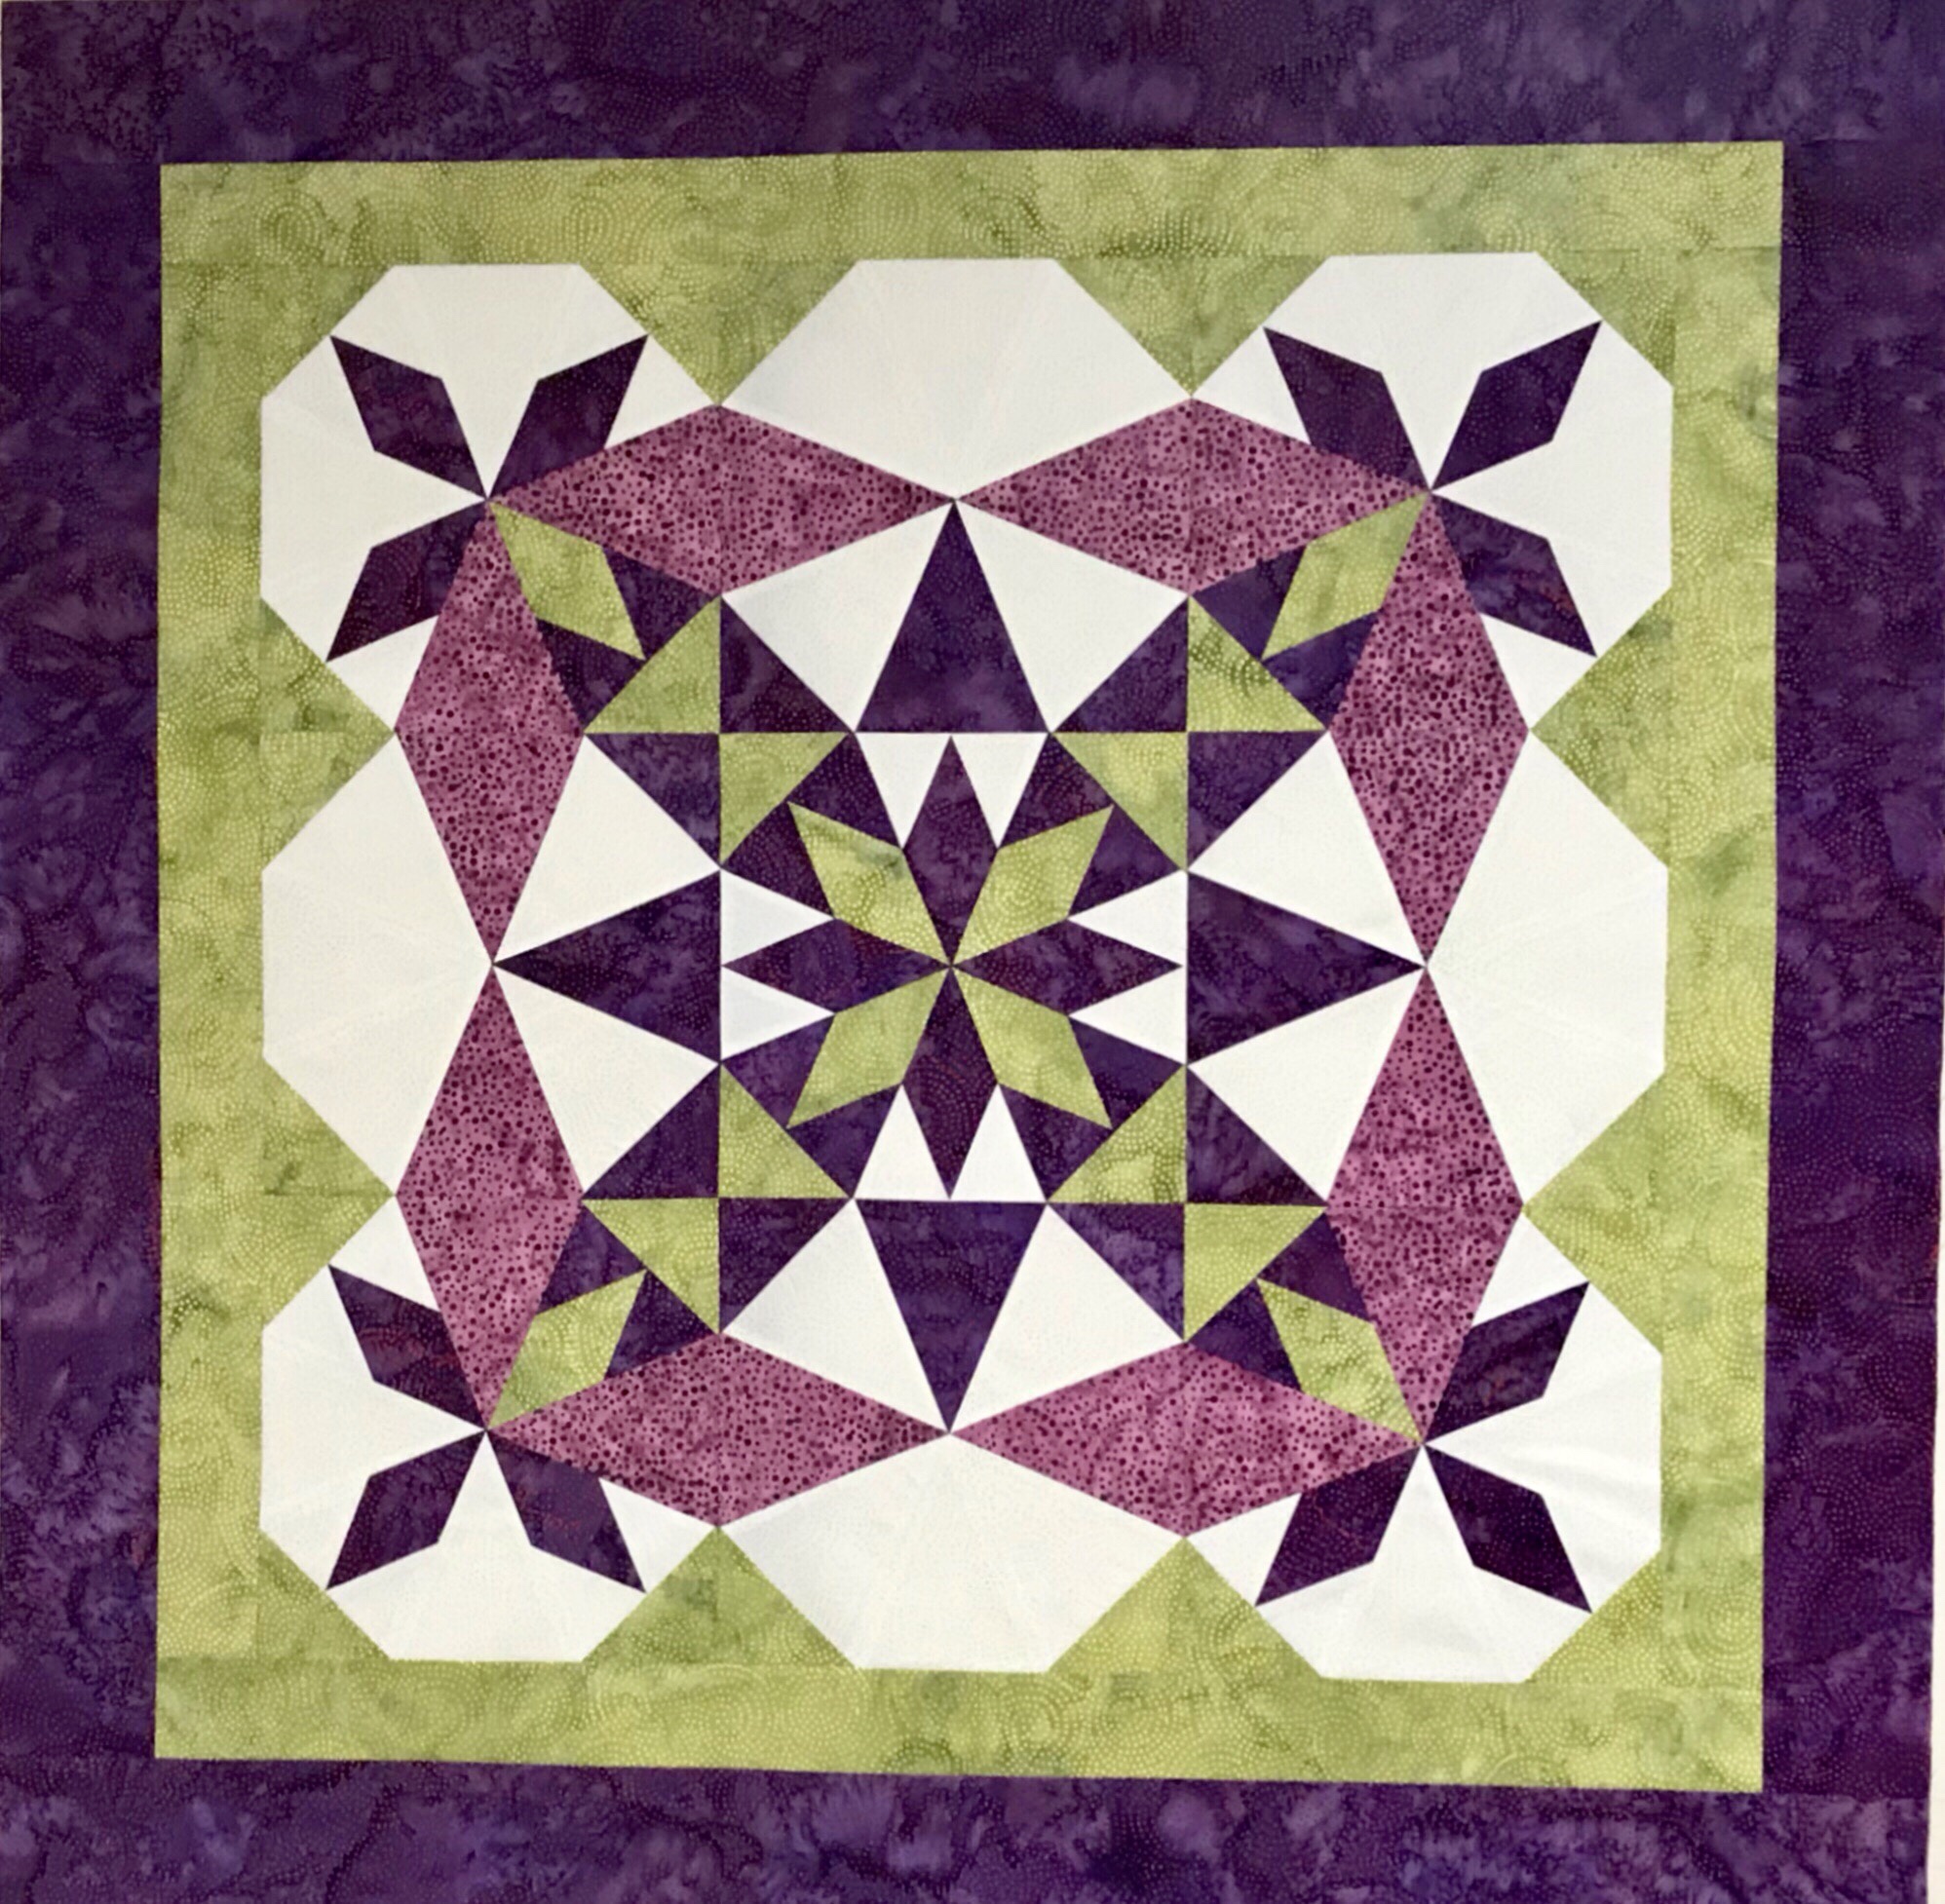
Included in the Wedge Star tool instructions is a bonus Wedge Star Pattern – Freelancer.
My beautiful Freelancer quilt was made using Island Batik’s Paisley Dot Swirl fabric and Aurifil thread.
I just got home from Studio 180 Design Certified Instructor Reunion 2019. We all worked on learning the new Wedge Star Tool. Here are some gorgeous Freelancer Quilts.
Wowza!
Here are some of the CI’s from Class of 2013. There were 5 classes represented this year. It was wonderful to see everyone and make new friends.
The products and fabrics shown in this post were given to me by Island Batik.
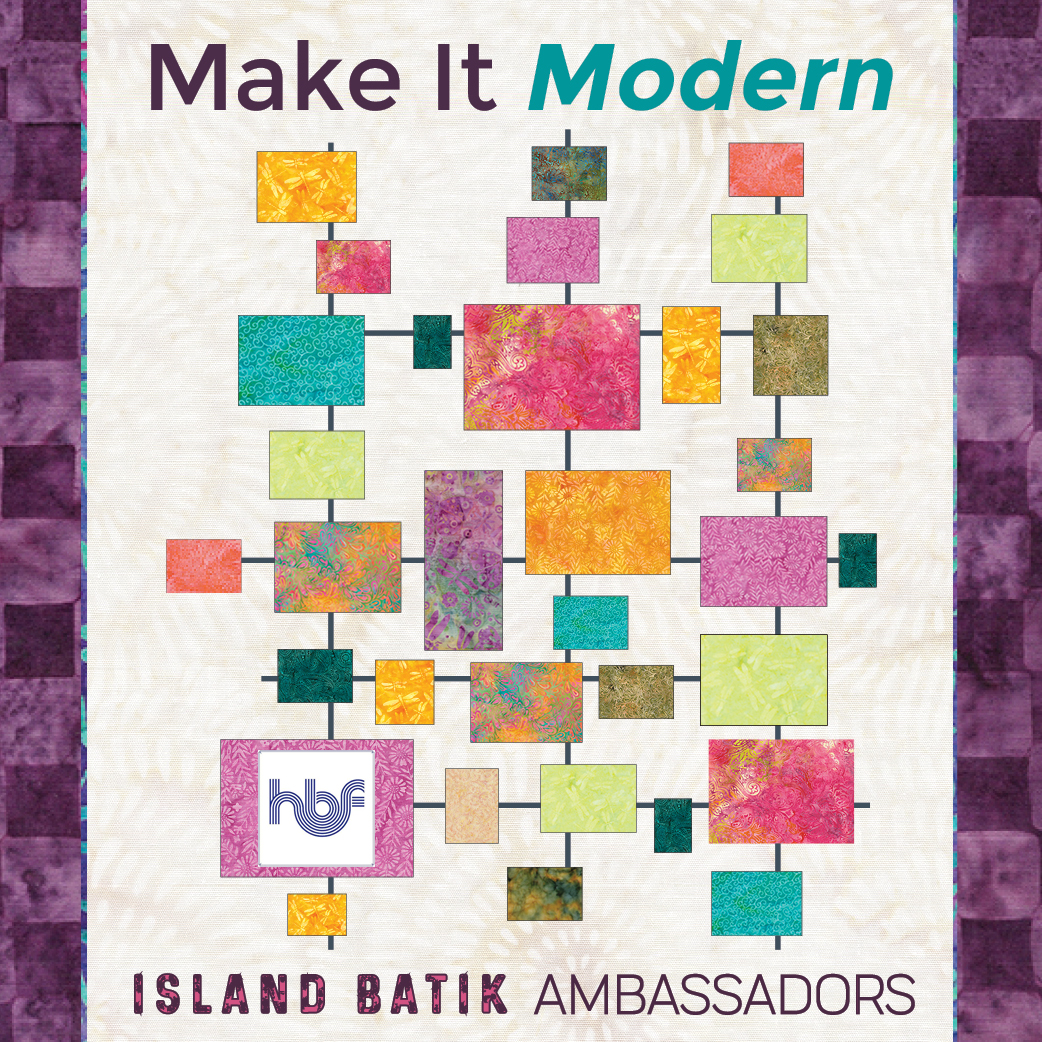
The Island Batik Ambassador’s challenge for May is to “Make It Modern”! The Modern Quilt Guild defines ‘modern” as use of bold colors and prints, high contrast and graphic areas of solid color, improvisational piecing, minimalism, expansive negative space and alternative grid work. I think I did pretty good.
I decided to make Lemoyne Stars. Deb Tucker’s Rapid Fire Lemoyne Star tool was the very first Studio 180 Design tool I used and is one of my favorites! This tool makes Lemoyne stars in 10 sizes from 3″ to 12″ blocks.
I went to my EQ8 and began to design. The drawing above on the left shows the layout for the Lemoyne stars. The drawing on the right with blue indicates the background I had to fill in. I chose to use the “Add a Plain Block” option. This allows me make a block the same size as the quilt center, color it, and move it to the back, behind the stars to fill in the blank spaces. I also could have used the “Paintbrush” option to color in the background. However, this does not give me the fabric sizes to cut.
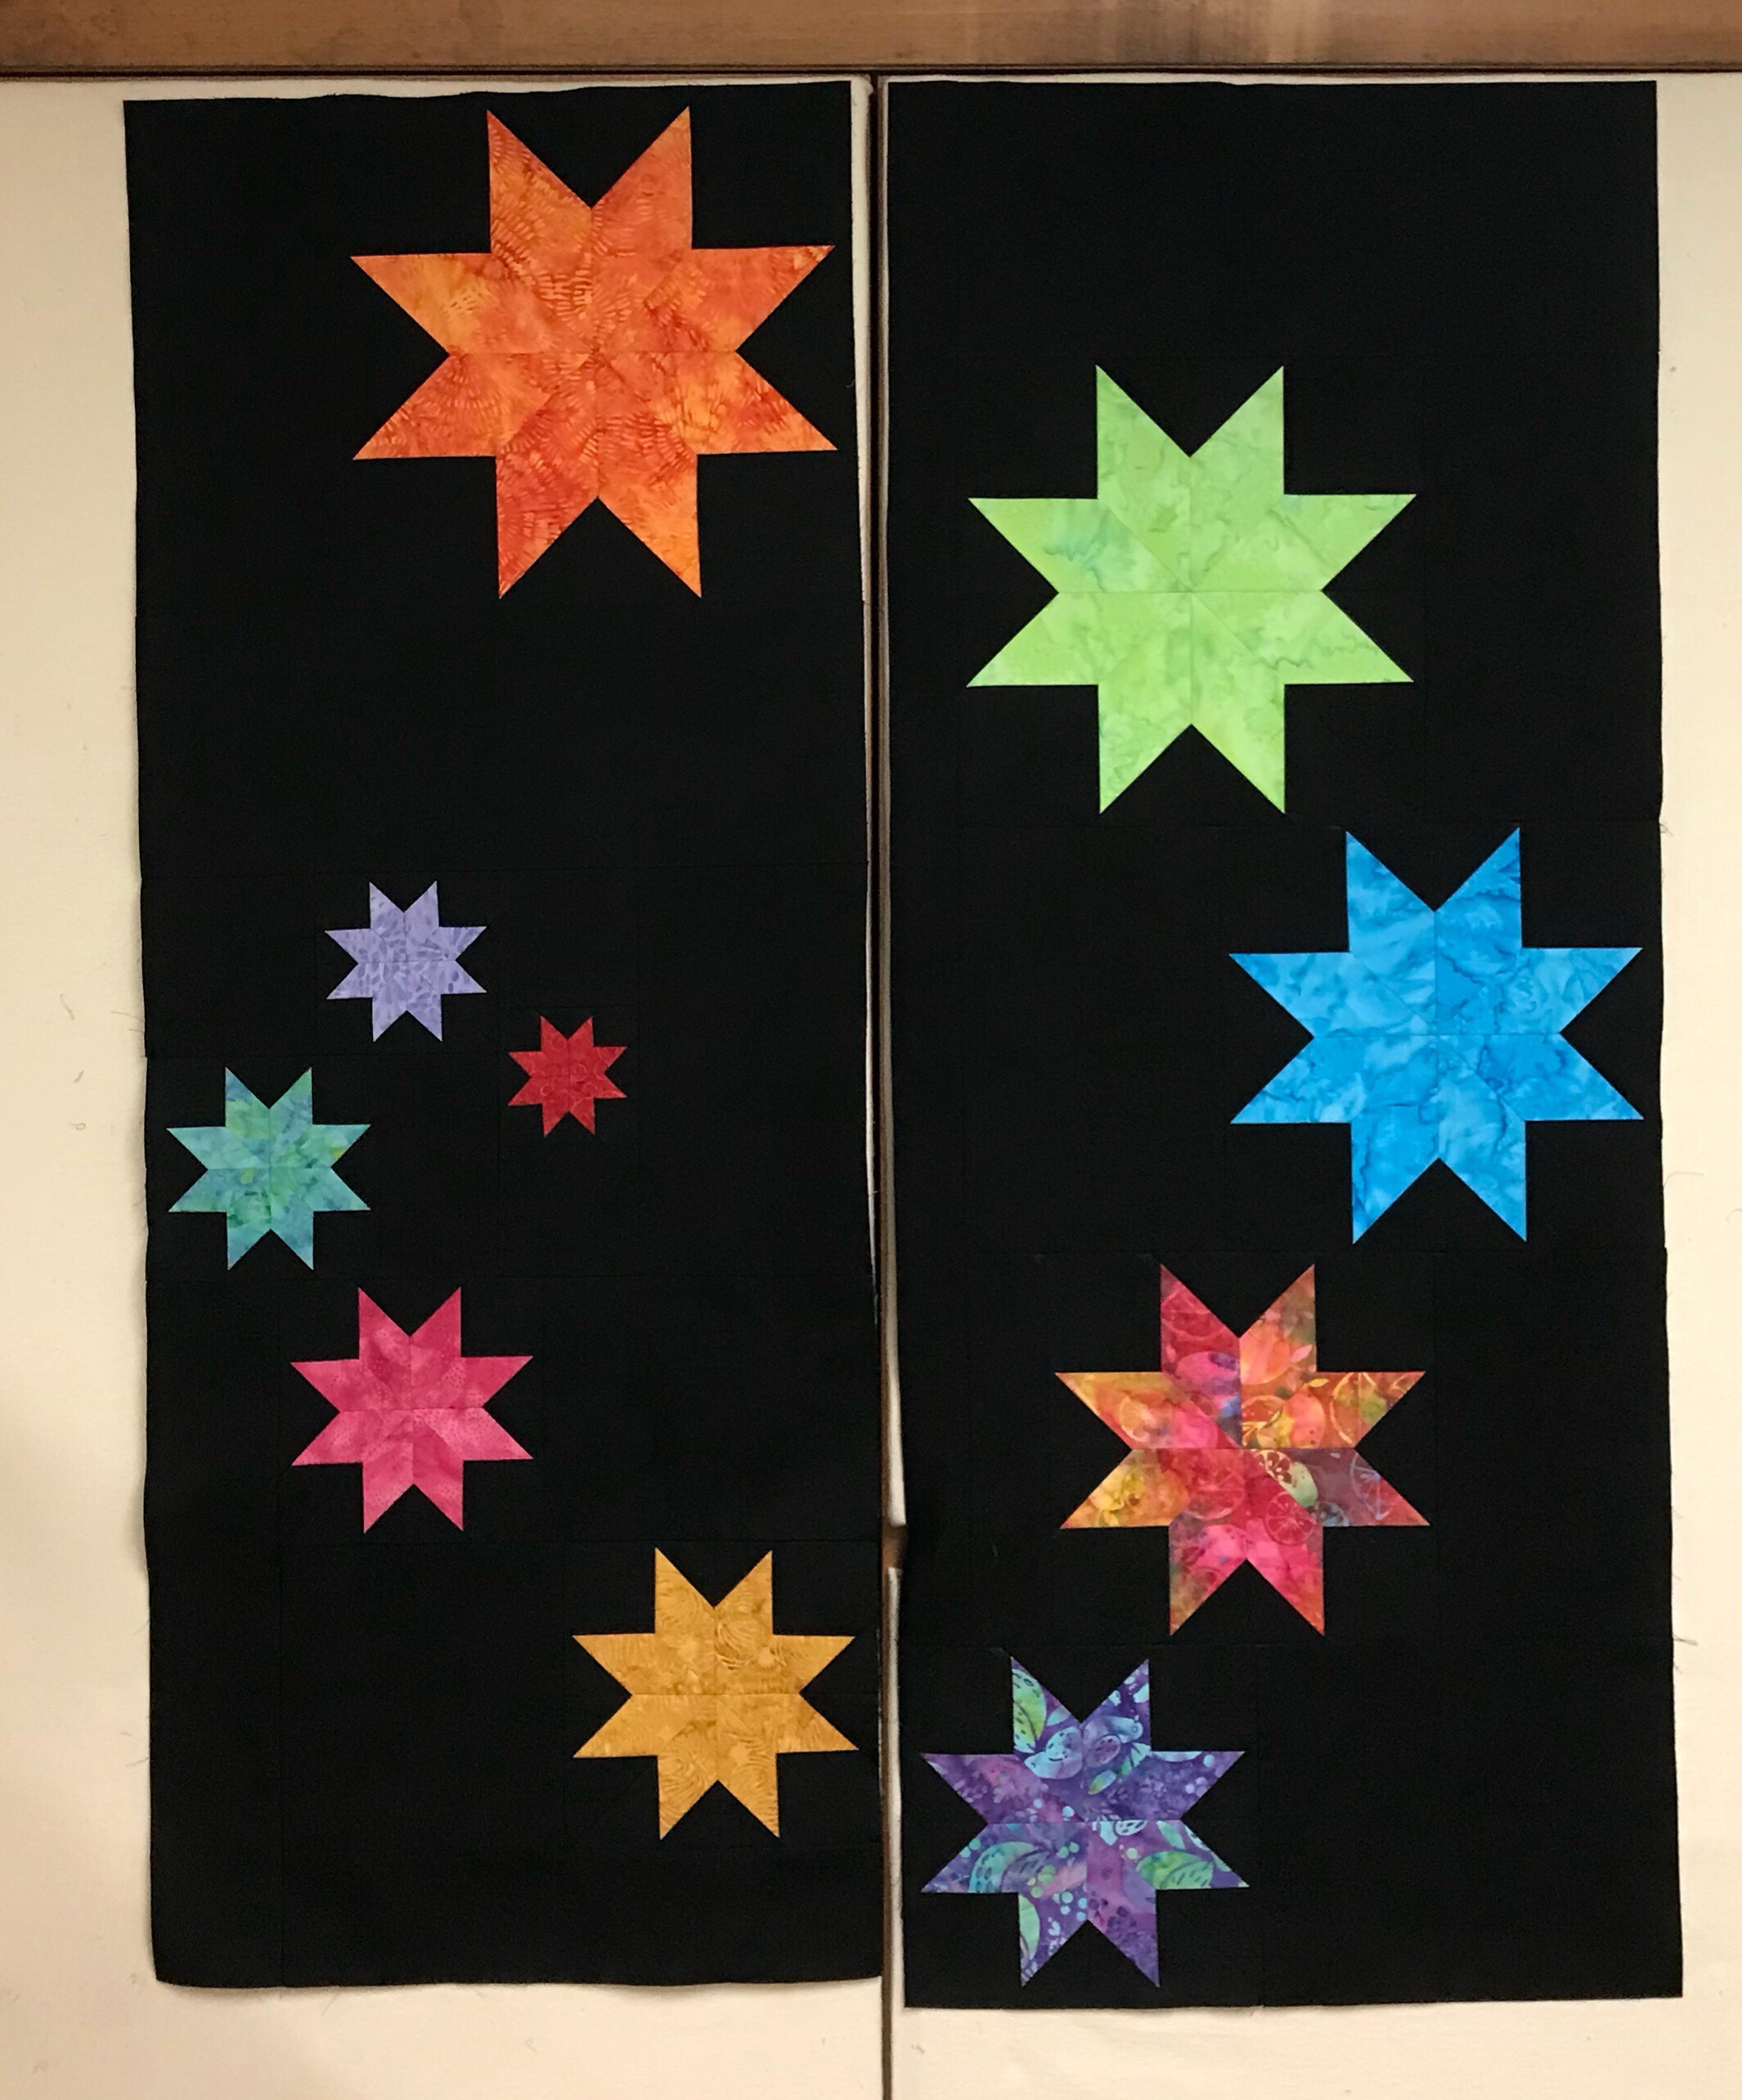
I made my 10 different lemoyne stars and went to the design wall. I worked on the right side first. I measured and added a background rectangle to the left and above the green 11″ star. I then added a rectangle to the blue 10″ star so it was the width as the 11″ star above it.
I continued on, adjusting and measuring, adding background fabric, piecing, tying it all together.
Somehow I couldn’t quite maintain the smooth circle.
I guess my stars are ricocheting instead of swirling!
I decided to quilt using a tight meander around the stars and then stitch in the ditch through the seams of the stars so they have a 3D effect. I used the Hobbs Tuscany Cotton Wool Blend to give the stitches great definition.
AND then I liked it better turned upside down, so I flipped it! Lemoynes Lost in Space measures 40″ x 50″.
The background of my quilt is a black batik from Island Batik, it really makes the colors pop!
Happy Spring! As always my quilts are pieced with Aurifil thread. If you want your stars to shine use Island Batik fabrics and your quilt colors will sing!