Join me for a Converging Geese Zoom class September 15th at 11:00 AM. Sign up and download the supply list here (pattern is included with the class fee):
I created this pattern November 2018 for an Island Batik Log Cabin Challenge. It has been a popular pattern in my Etsy Shop ever since. This is a variation on the Log Cabin block and is a fun way to use your Square/Squared, Tucker Trimmer I & Wing Clipper I tools.
I named my original design “Converging Geese” because each block has Flying Geese & Geese on the Edge units, along with Square/Squared units.
Each 16″ block contains 12 – 2″ x 4″ finished flying geese, 4 – 6″ finished geese on the edge & 1 square/squared unit.
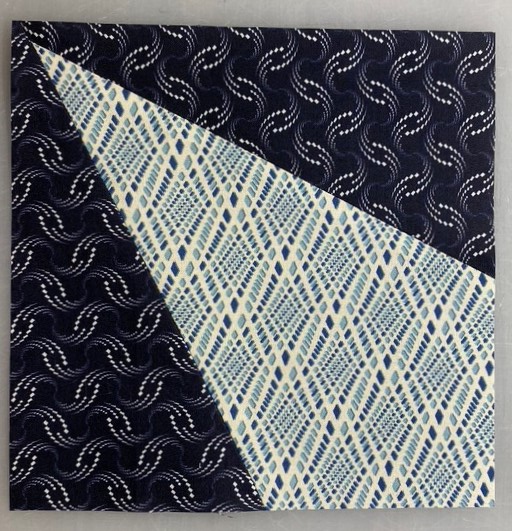
Welcome to Stitchin Heaven‘s Journeys BOM Month 9. You all have worked so hard. This month you will learn to use your Corner Beam tool. Sue Tucker & Naz are my helpers for Month 9.
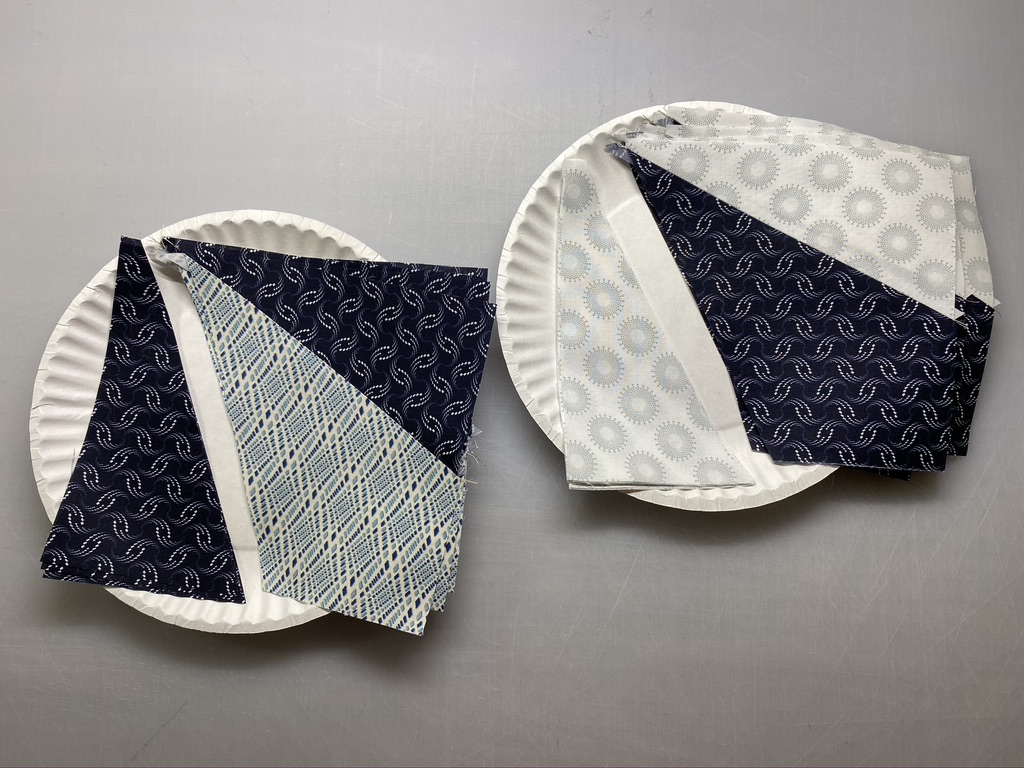
Print 1
Print 4
Print 11
You will be working with Print 1, 4 and 11 this month.
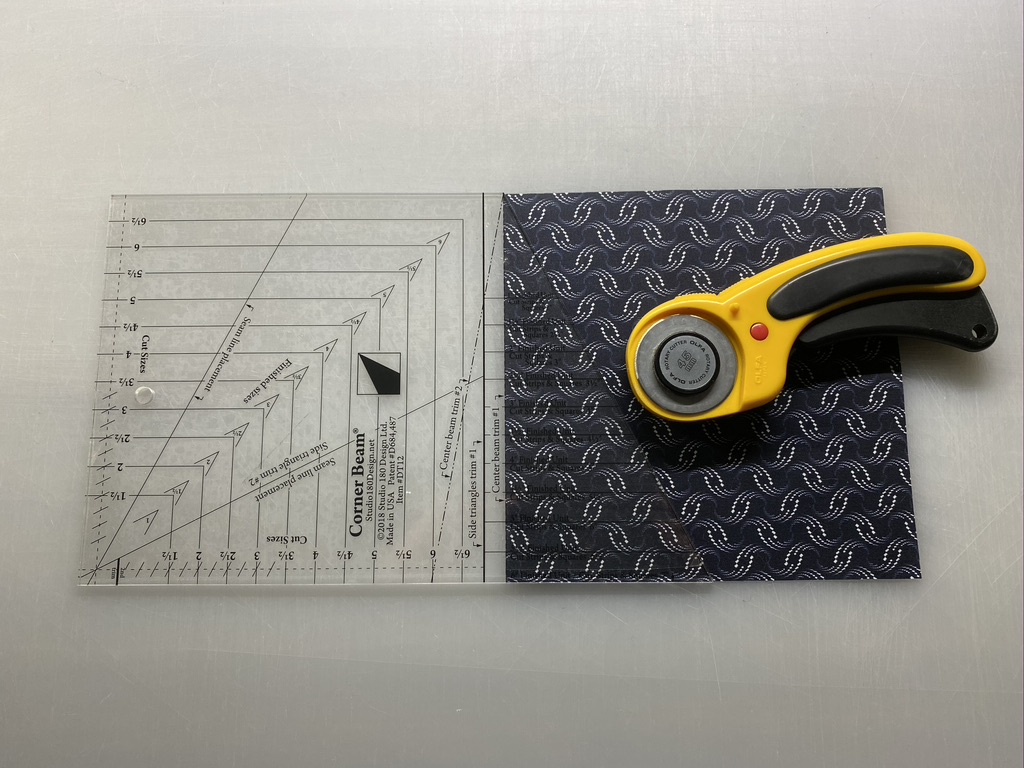
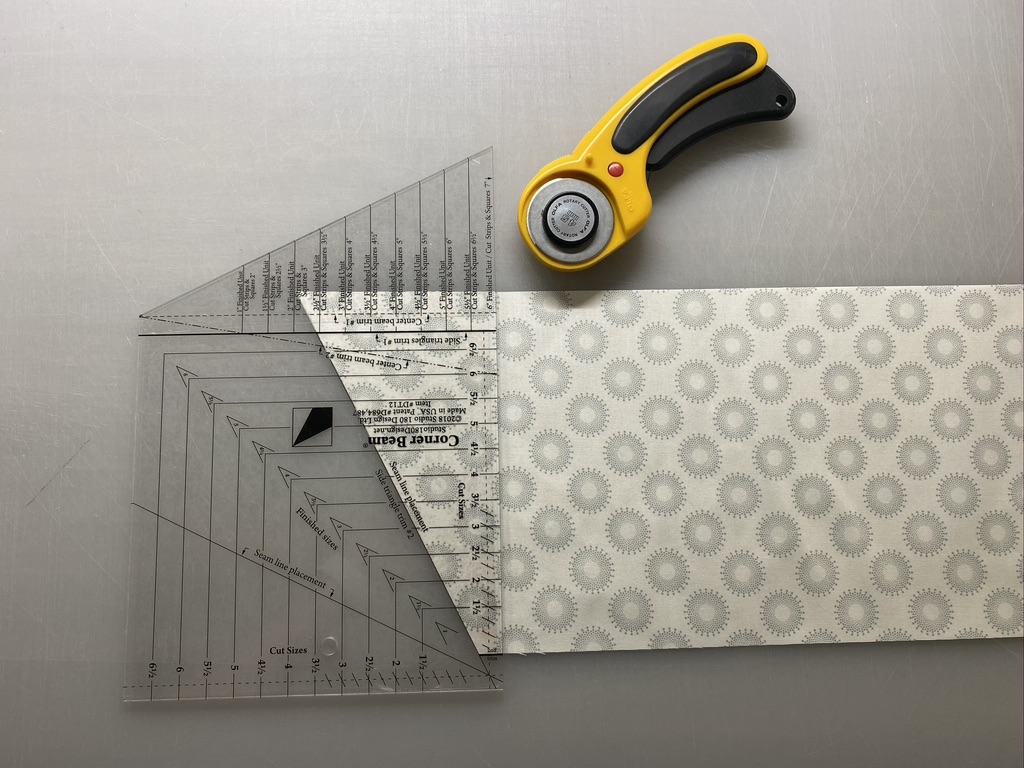
Cutting the Center Beams
Step 1 – Stack the 7” center beam squares up to 4 layers deep. Align the Center Beam Trim #1 line on your Corner Beam® tool and the 6” finished unit line (bottom edge of tool) with the raw edges of your stack of squares. Cut along the angled edge.
Step 1
Step 1
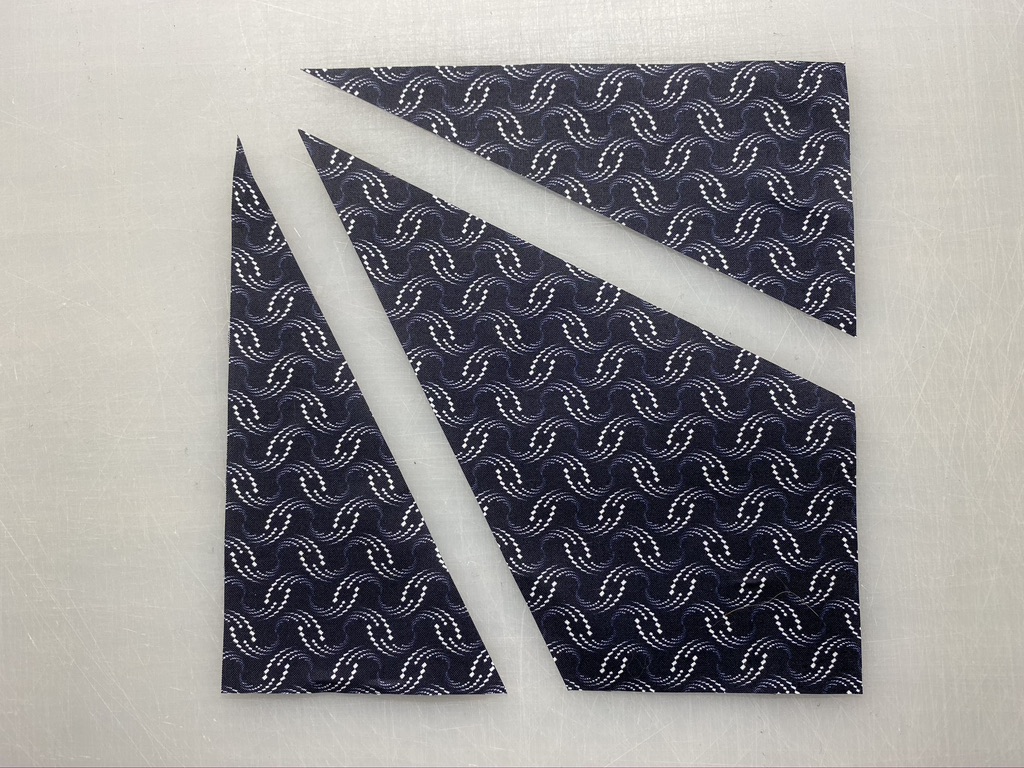
Step 2 – Rotate and cut again. Lift and reposition the Corner Beam® tool, aligning the dashed line labeled Center Beam Trim #2 with the previously trimmed angled edge. Cut again. Do this for all your center beam squares.
Step 2
Step 2
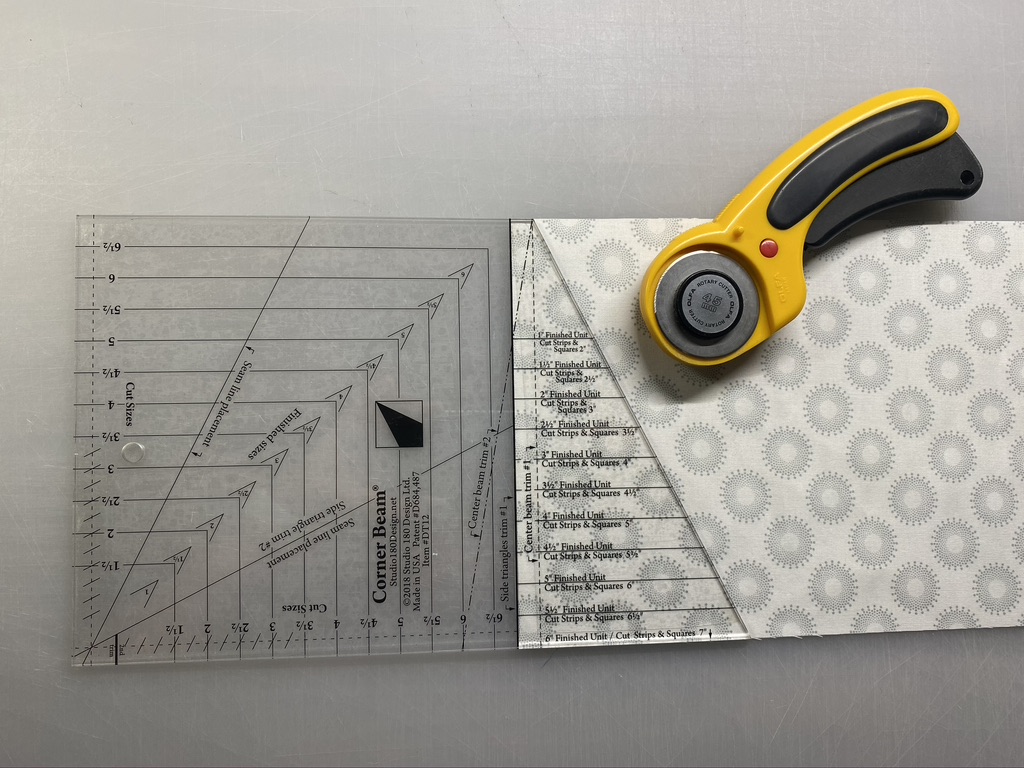
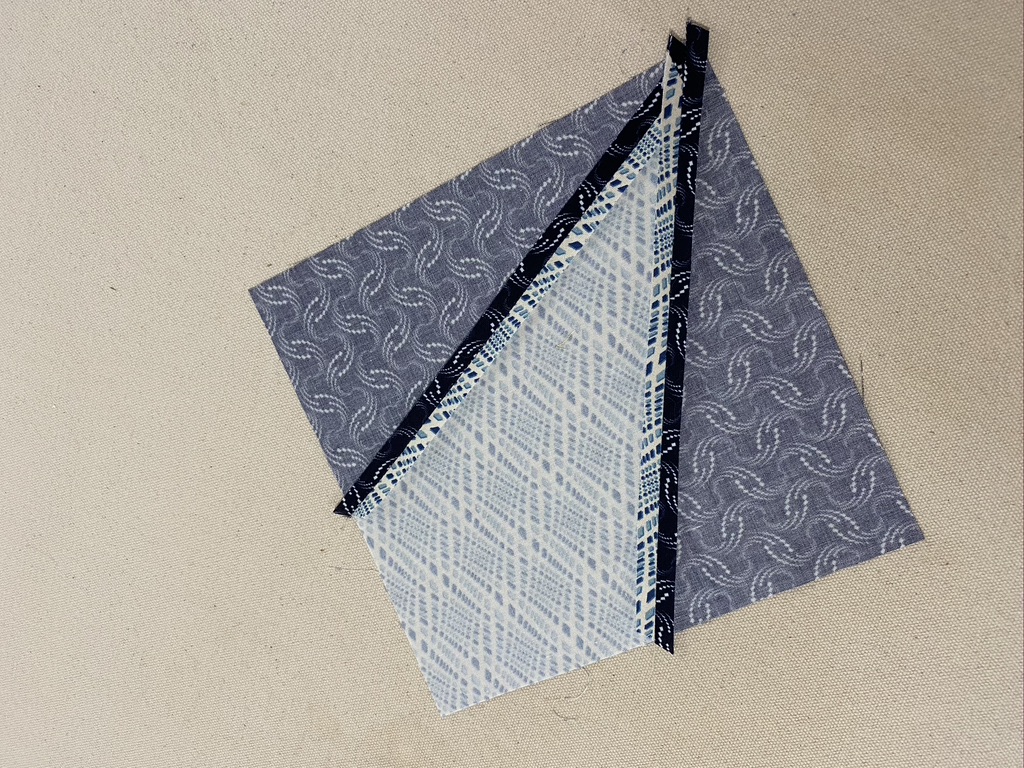
Cutting the Side Triangles
Step 3 – Fold the side triangle strip right or wrong sides together in order to yield mirror images. Trim the selvages and position the Side Triangles Trim #1 line on your strips, lining up the 6” finished unit line (bottom of the tool) with the bottom raw edge of the strip. Cut along the angled edge.
Step 3
Step 4 – Rotatethe Corner Beam® tool and position the Side Triangles Trim #2 line on the edge of the strip you just cut, making sure the bottom of your strip is lined up along the second trim line. Cut along the edge. Continue cutting until you have 8 pairs of side triangles from Print 11 and 4 pairs of side triangles from Print 1.
Step 4
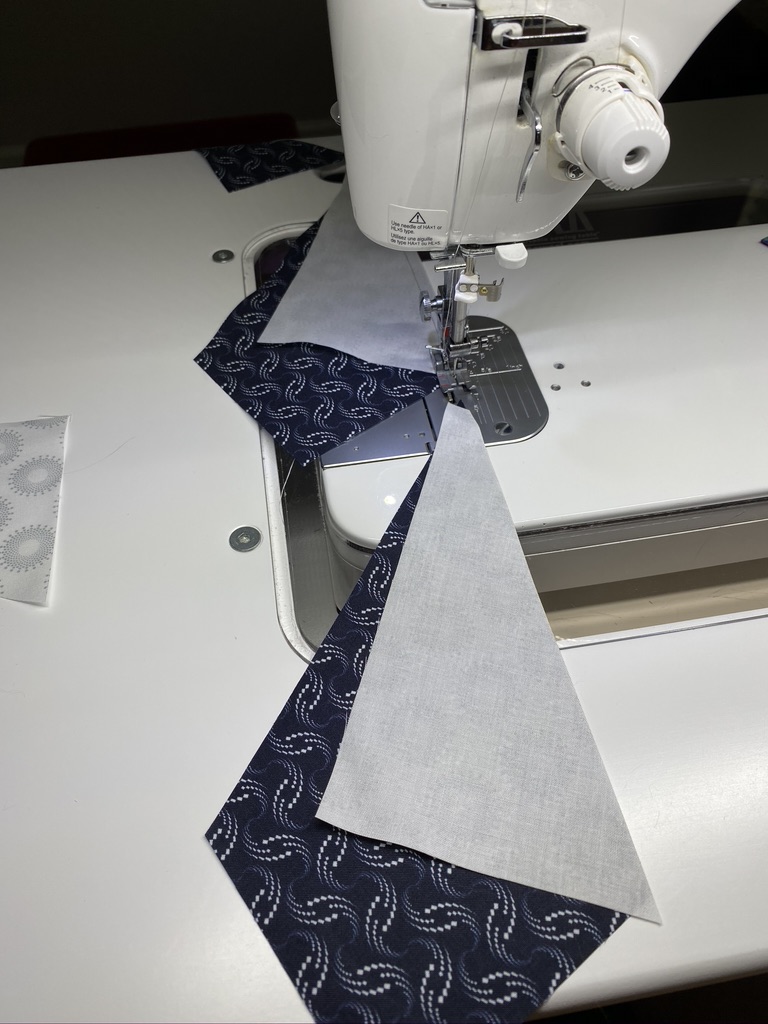
Step 5 – Lay out and organize your pieces into the correct positions as shown to ensure you sew the proper sides together.
Step 6 – Stitch the first side triangle to each center beam, making sure you sew the correct triangle edge to the center beam. Press the seams open.
Press seams open
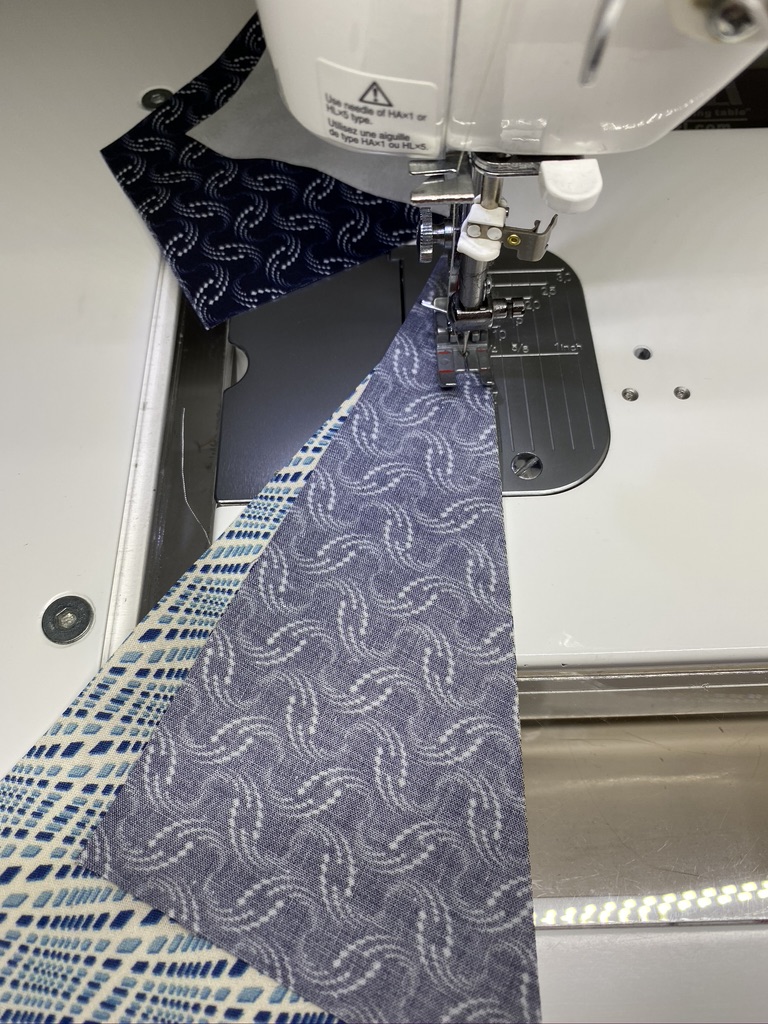
Step 7 – Stitch the second side triangle to the other side of each center beam. Press each seam open
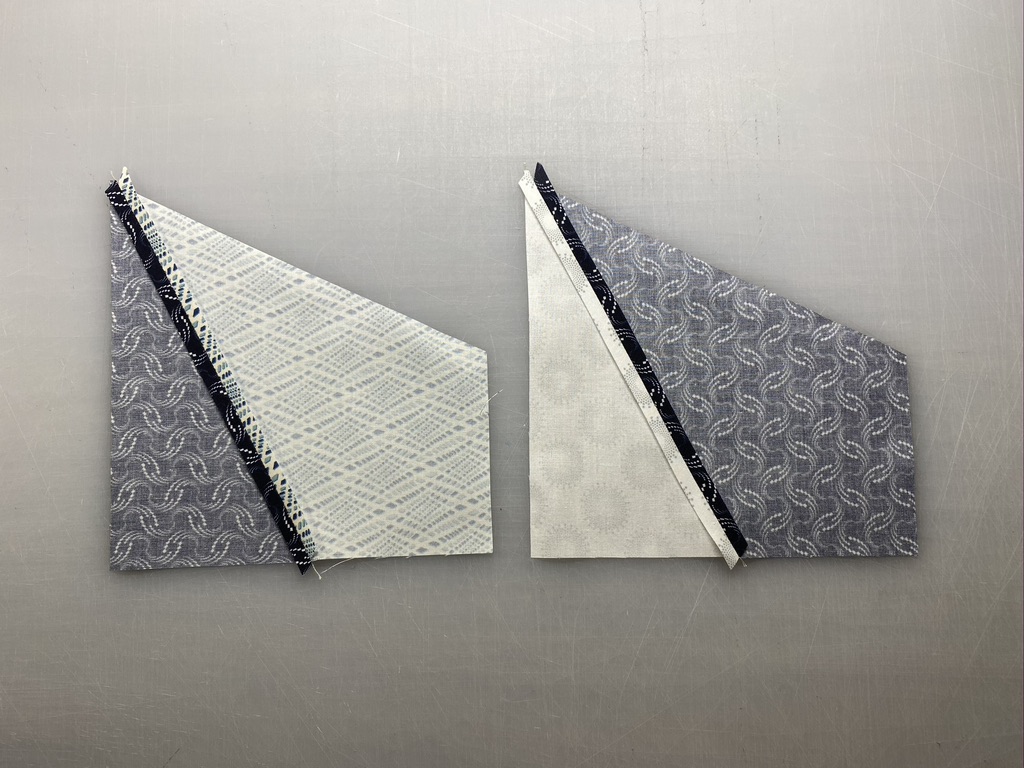
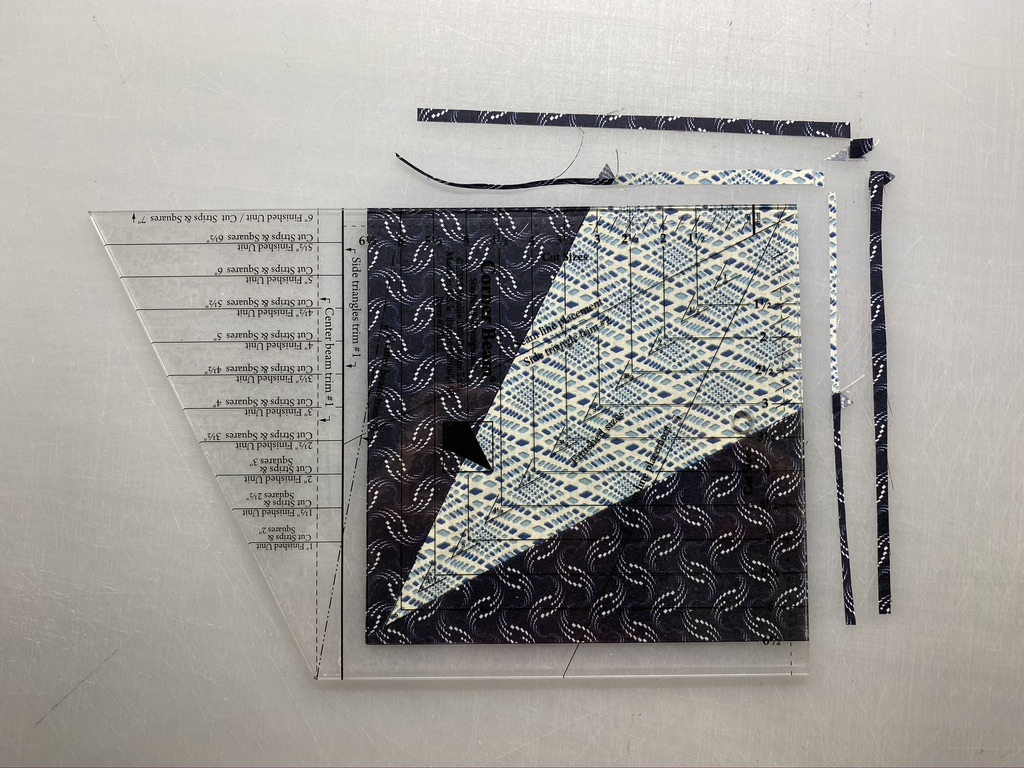
Step 8 – Position the trim down area of your Corner Beam® tool on your unit. Carefully line up the diagonal seam guidelines on the Corner Beam® tool with the diagonal seams of your unit. Trim.
Step 8
Step 9 – Rotate your unit. Align the cleanup lines for the 6½” cut size with the cut edges, the V shaped guideline with the seam intersection, and the tick marks with the seams at the wide end of the beam. Trim. Repeat for all units. Label as indicated in the Unit Summary.
Step 9
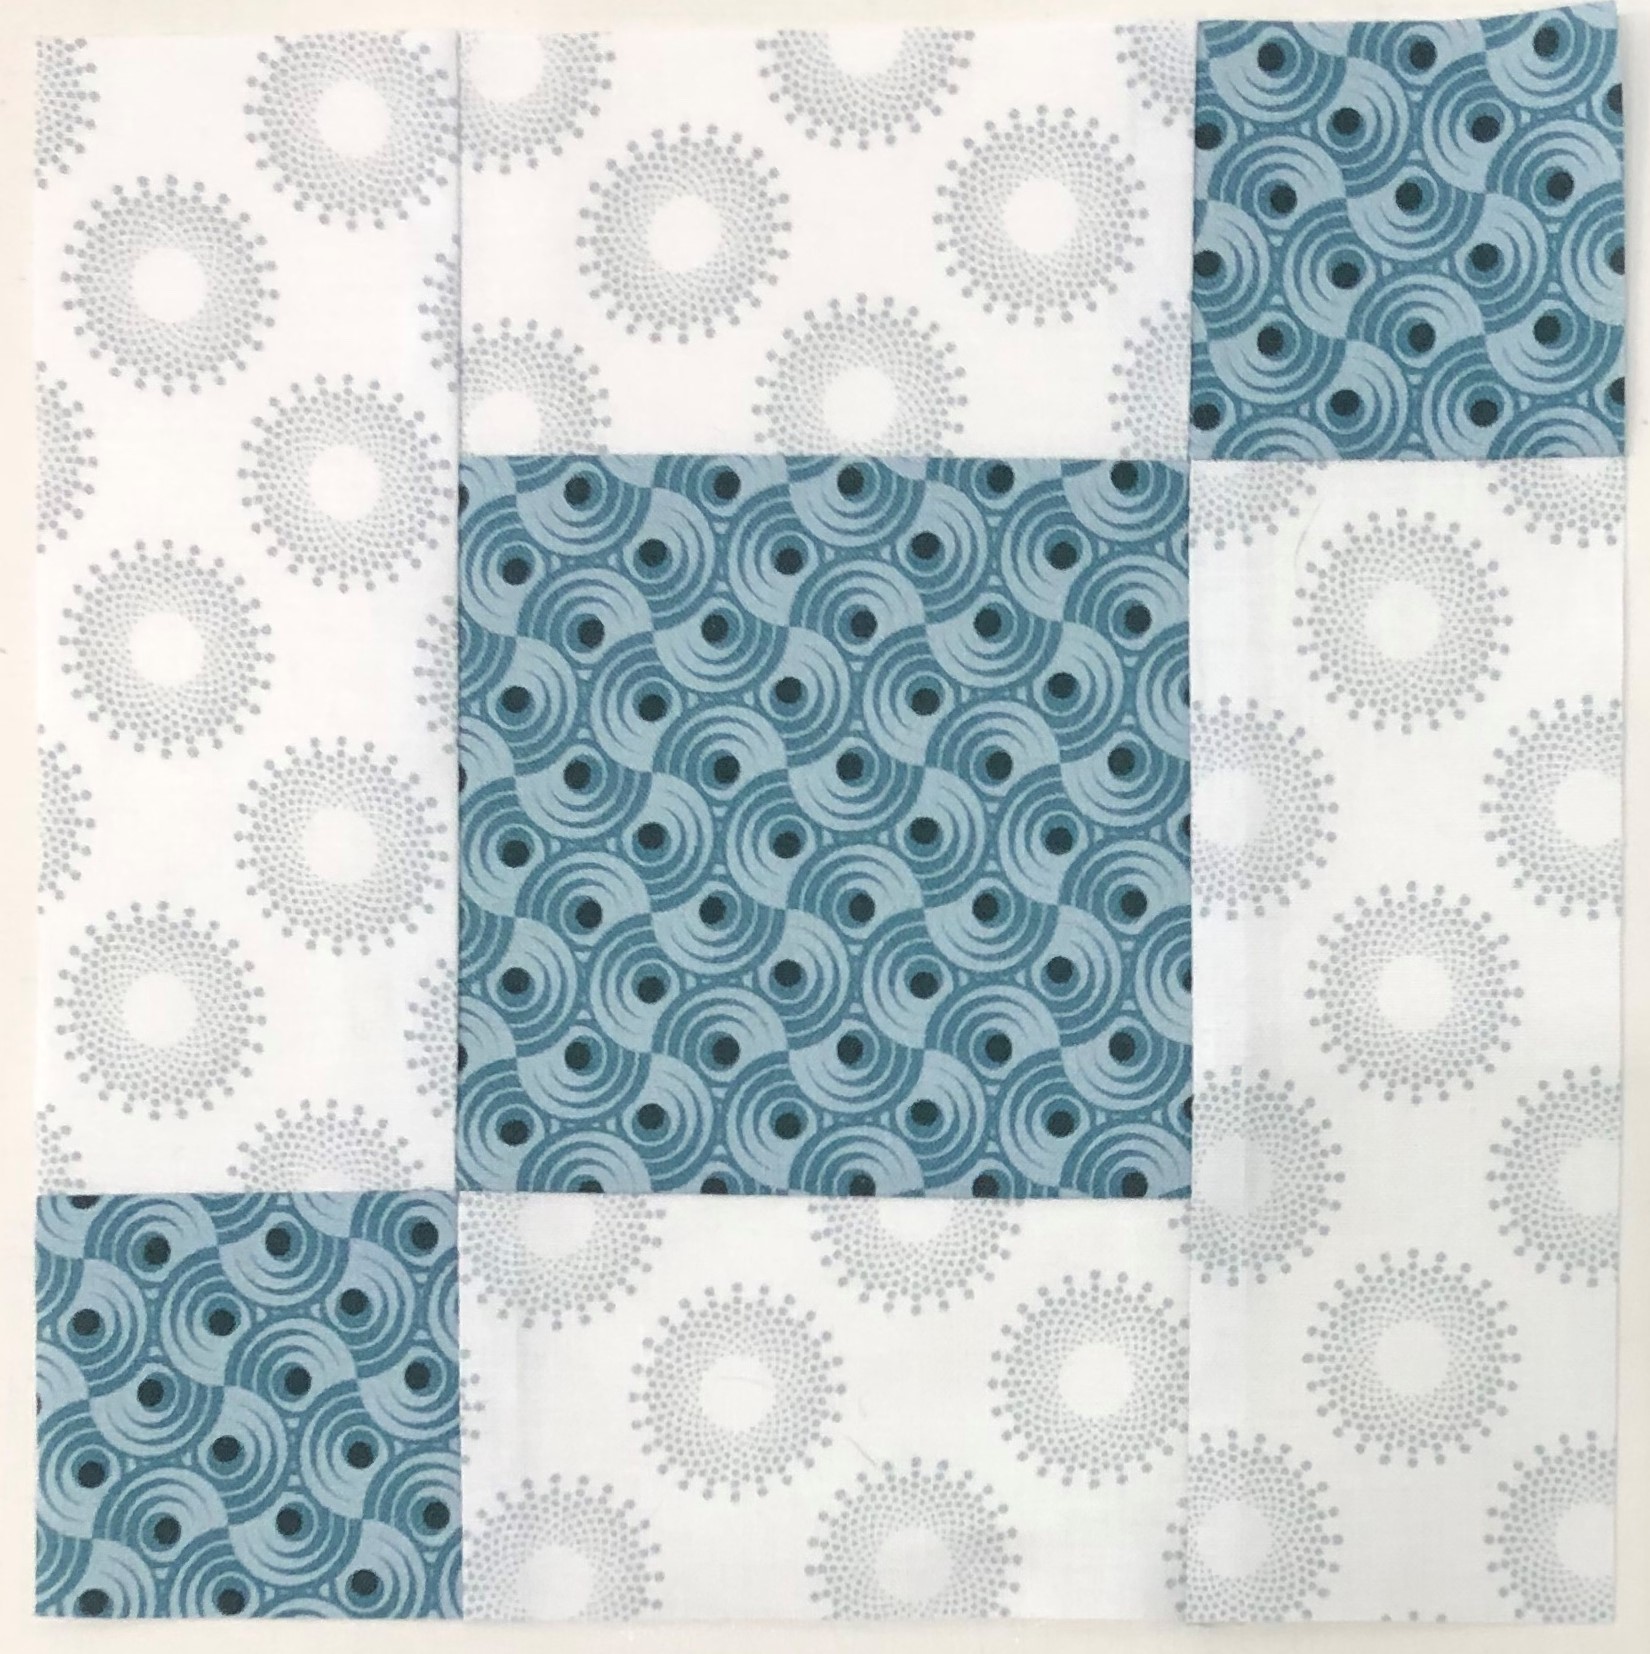
Assemble 4 Middle Edge Sections
It is time to assemble the four Middle Edge Sections of your quilt. To do this you will need the following:
8 Units A from Month 18 Units B from Month 28 Units D from Month 216 Units H from Month 516 Units L from Month 88 Units M from Month 9
Step 10 – Lay out the units as shown to create the Middle Edge Section.
Step 11 – Stitch the units together into rows. Press the seams open between the units.
Step 12 – Stitch the rows together into the Middle Edge Section. Press the seams open between rows.
Step 13 – Repeat steps 10-12 to make a total of 4 Middle Edge Sections.
Steps 10 – 12
Naz carefully supervised Journey’s Month 9
Make 4 Middle Edge Sections. Congratulations on work well done!
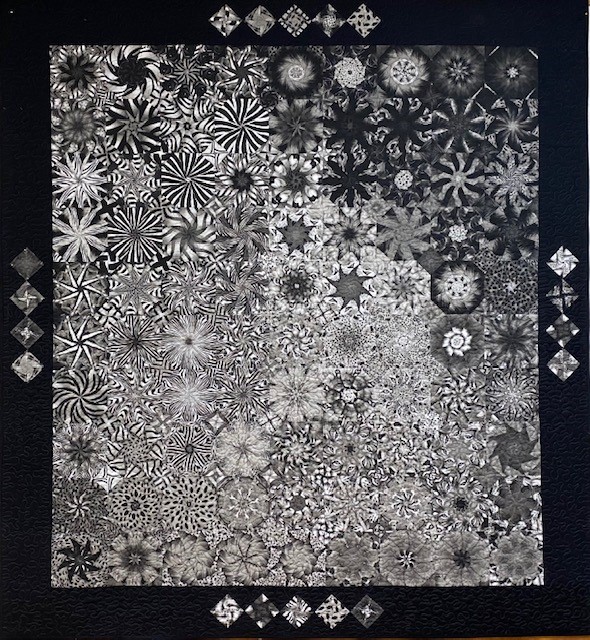
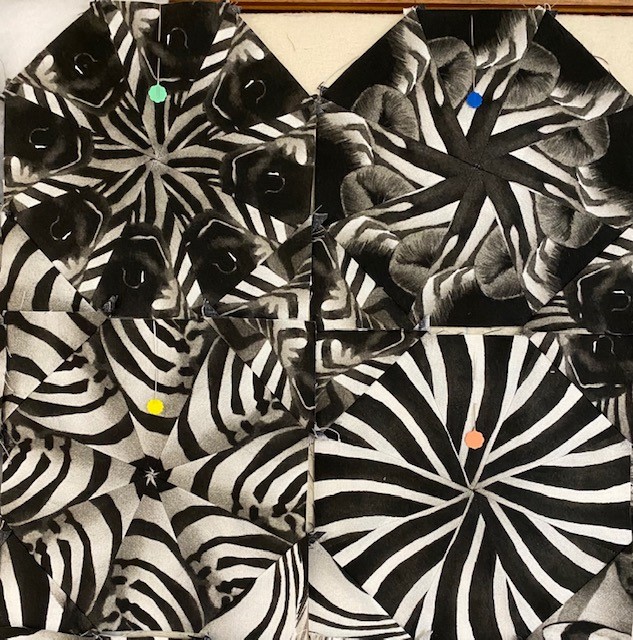
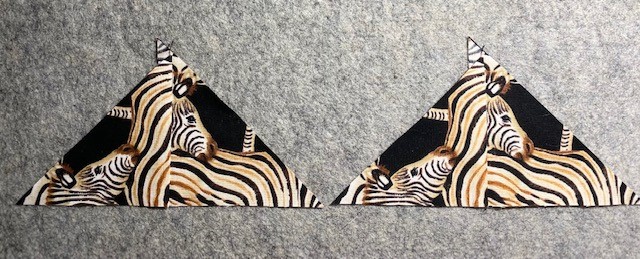
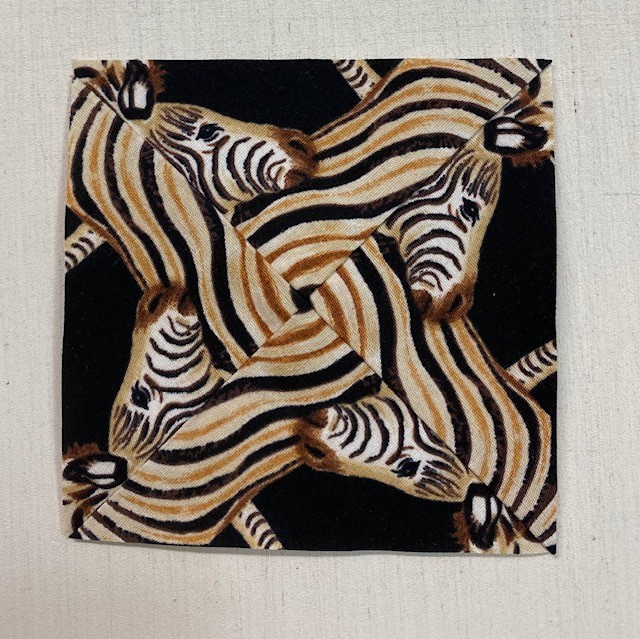
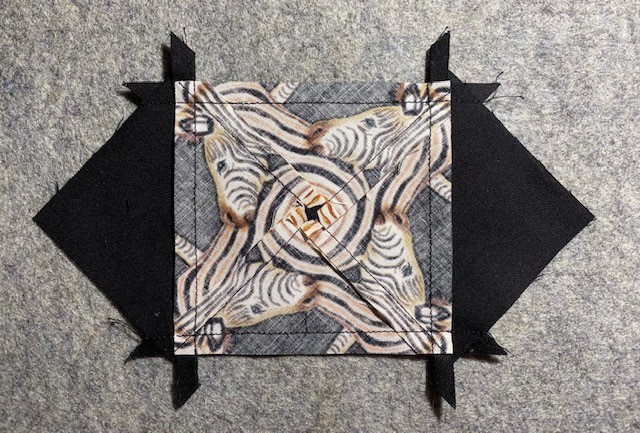
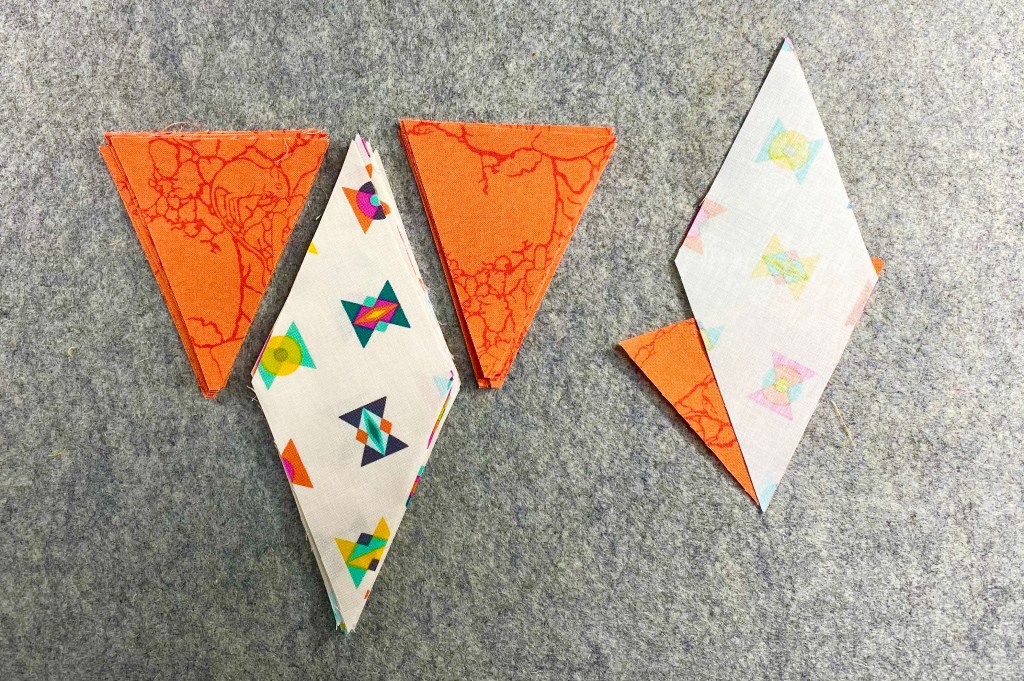
I just finished quilting “Lion Eyes” Octagonal One Block Wonder. I had 18 Sensational Squares sets left over.
Remember, Sensational Squares are the triangles that fill the space between the octagons.
I wanted to add the left over Sensational Squares to the borders of the quilt.
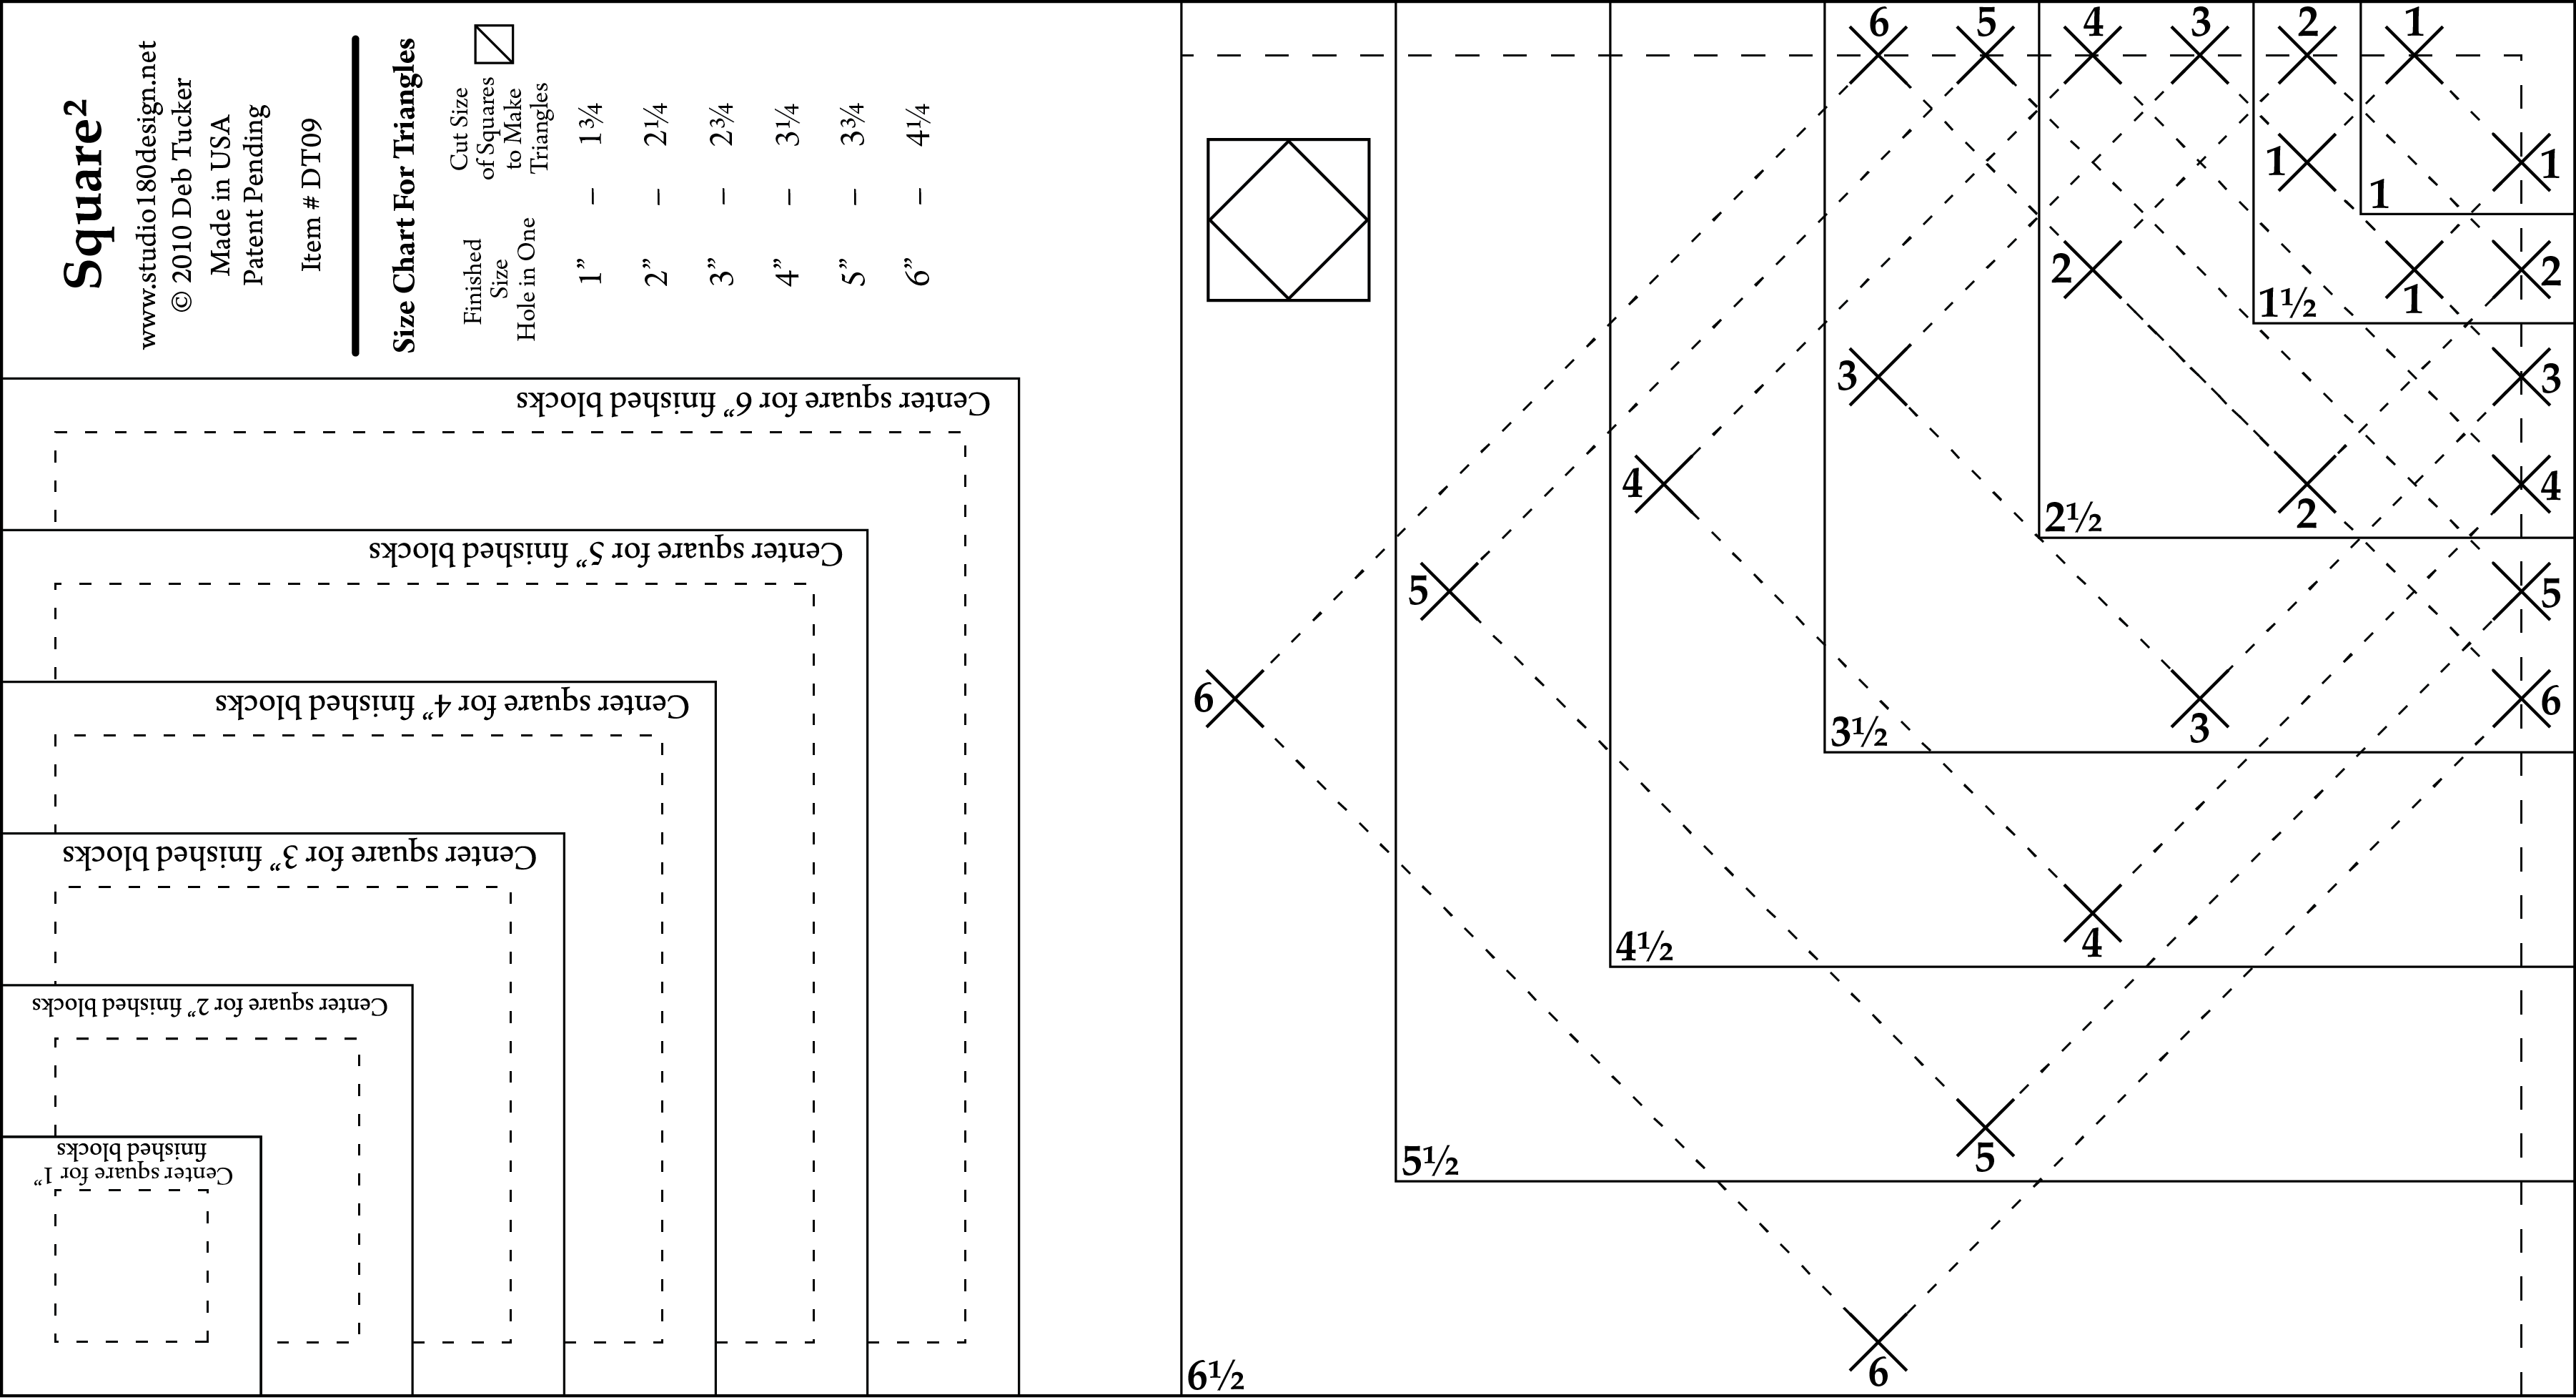
I made my Sensational Squares into Square/Squared units using my Studio 180 Design Square/Squared tool.
There are 3 parts to this tool.
TheCenter Square Section, which gives you a series of squares that are precisely drafted so that their diagonal measurement is exactly the finished size of the Square²™ unit.
The Trim Down Section gives you guide lines to align with the seams of the pieced Square²™ unit so you can trim each to a precise size with a proper ¼” seam allowance on all sides.
The Size Chart for Triangles gives the recommended size squares to cut that when cut in half diagonally will yield two slightly oversized triangles for constructing the unit.
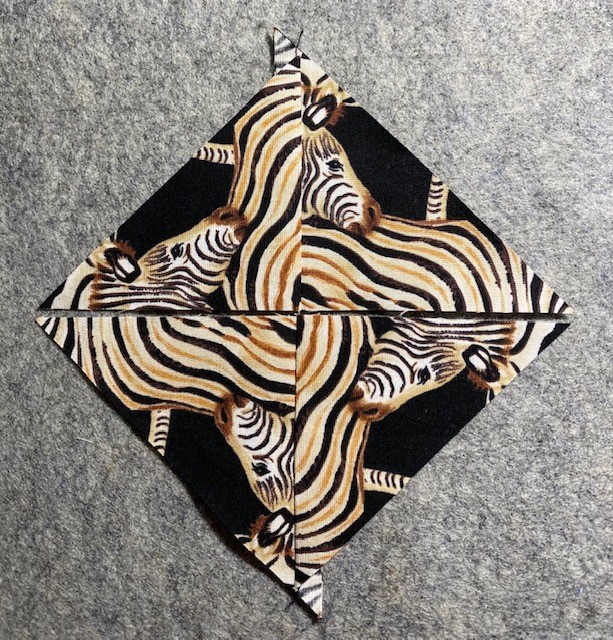
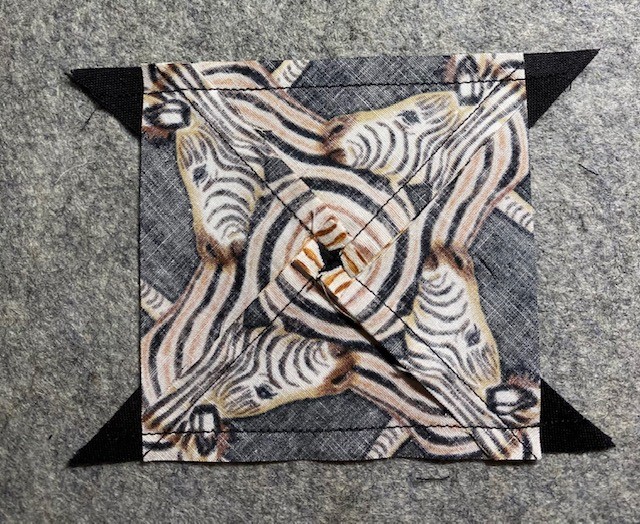
Note: The fabric in the photo is different from the Lion Eyes.
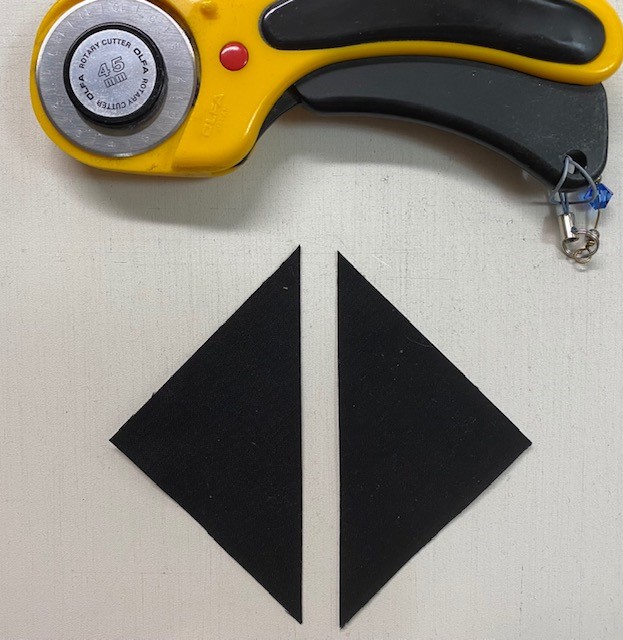
Per my Wedge Star Instructions I had cut my Large Wedges from 4″ strips and my Corner Squares from 3″ strips (you must have at least 4 aligned repeats). Cut 3″ square sets.
Cut your square sets once diagonally.
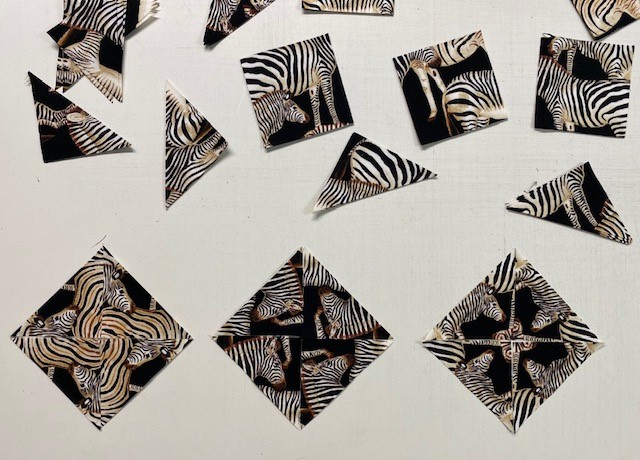
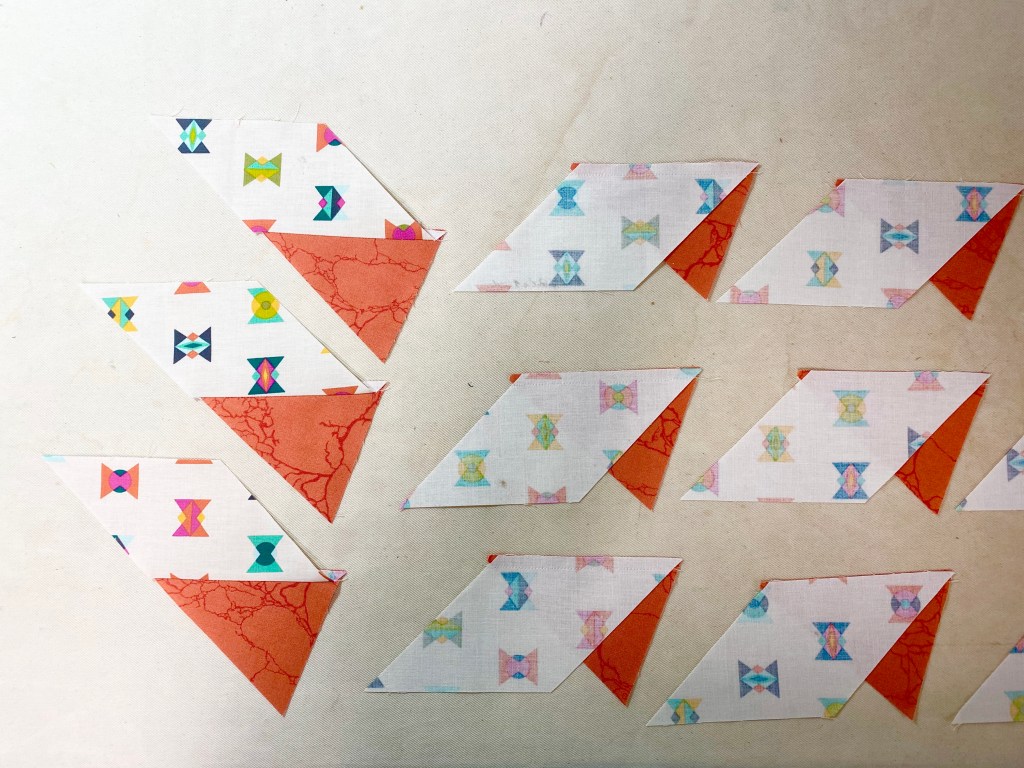
Each stack of 4 half square triangles will give you one 4 Patch Posie.
Stitch 2 triangles together and press the seams the same way on both halves.
The seams will nest when stitching the halves together.
Swirl the seams and press.
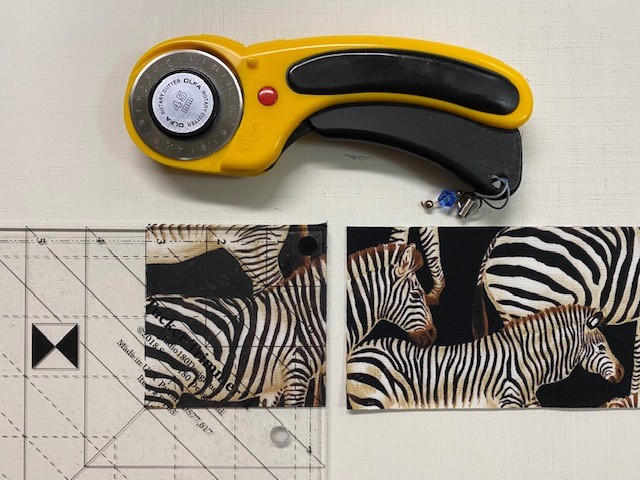
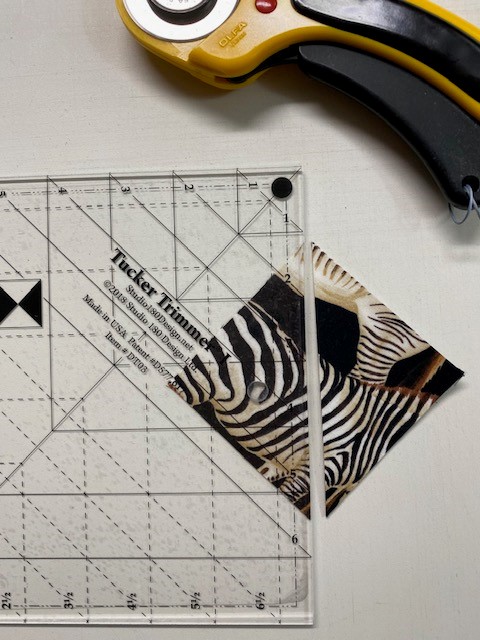
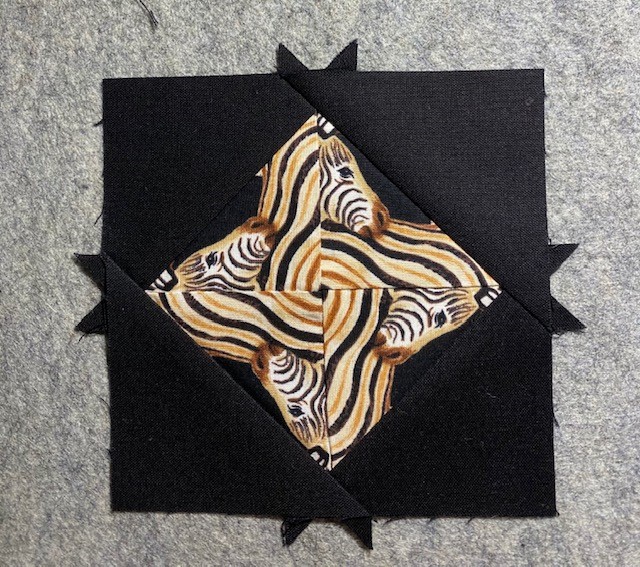
Use your Square²™ ruler to precision cut your center squares from your 4 Patch Posie. I lined up the diagonal line on the tool with the diagonal seam centering the lines for a 4″ finished square making sure I had fabric to trim on all 4 sides. Trim up the side and across the top. Rotate the unit lining up the just trimmed sides with the size lines and the diagonal line with the diagonal seam and trim up the side and across the top. The Square²™ unit looks great with a fussy cut square in the center or simply cut chosen fabric as usual. Just remember that this square will be diagonal in the pieced unit.
The 4 Patch Posie is now trimmed and ready for oversized triangles.
Check the chart on the Square/Squared Tool for strip size to cut squares for side triangles. I’m making 4″ finished units so I cut my strips from a folded strip 3 1/4″ wide.
Cut once diagonally.
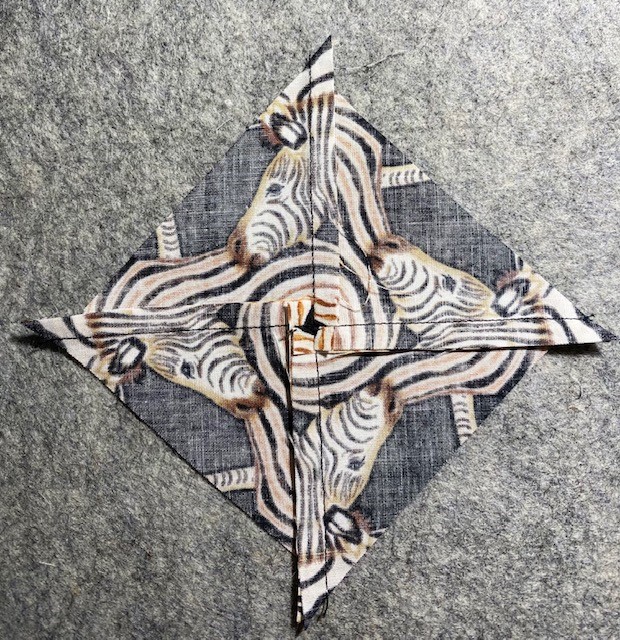
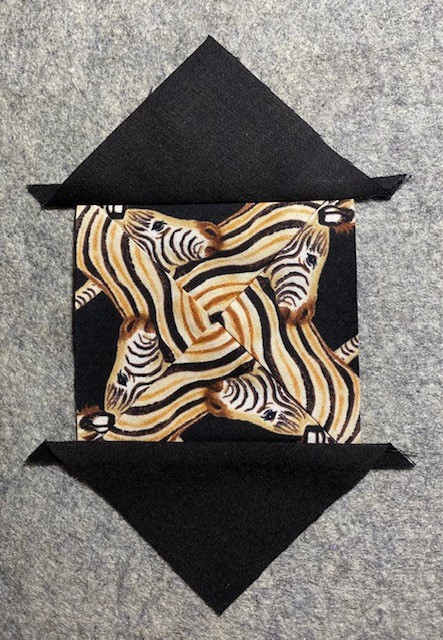
Position two triangles on opposite sides of the center square. No need to fuss with matching the middles as the triangles are larger than they need to be. Just basically center them and try to keep the raw edges aligned.
Press seams away from the center square.
Position remaining two triangles on the remaining two sides of the center square. Again, don’t fuss too much with aligning the centers, just get them close. Stitch and press the triangles away from the center square.
Ready for the trim.
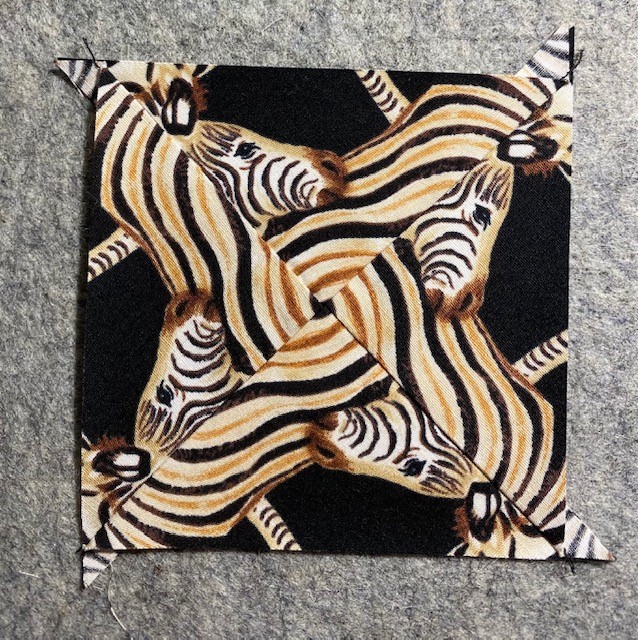
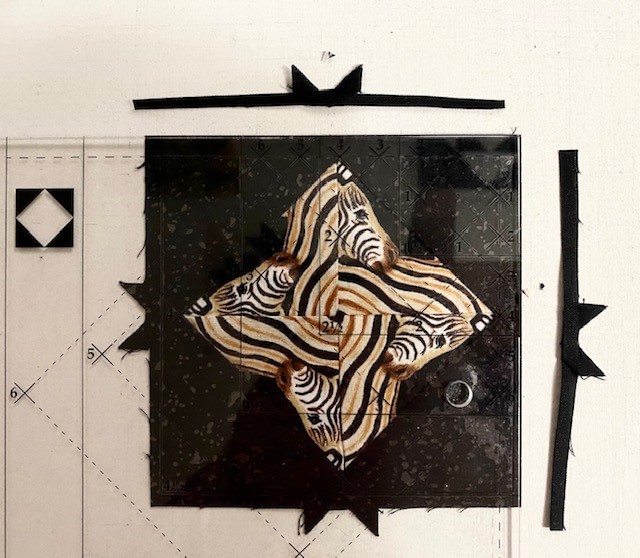
Position the Trim Down Section of the Square²™ ruler over the pieced unit. Focus on aligning the “X’s” for your particular finished size unit over the sewn seams. If they do not line up exactly, simply center the ruler over the area by finding the middle ground of all four marks. Trim up the side and across the top. For the second cut, rotate the unit, position the ruler on top of unit again lining up the “X’s”, and also lining up the cleanup lines on the ruler with the edges previously trimmed.
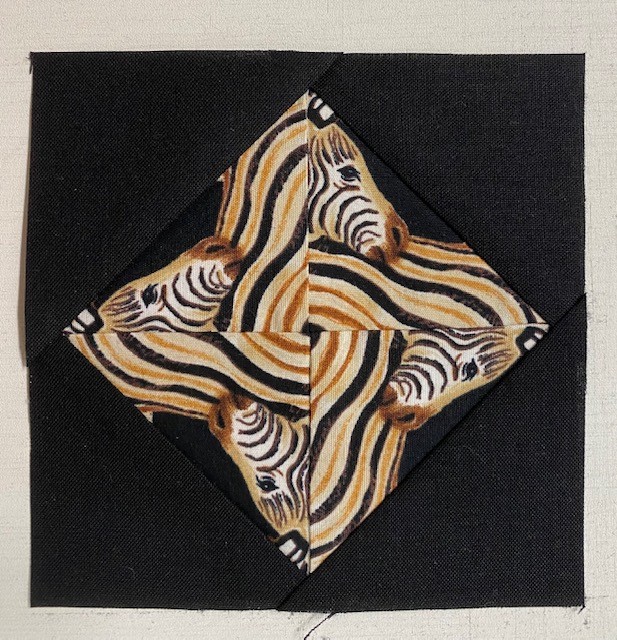
This ensures that you end up with a square that has proper ¼” seams on all sides and is exactly the correct size to use in your quilt project. I added 1″ strips to two sides of the units to make the units measure 4 1/2″ by 6 1/2″. I did this so when I add the binding I won’t lose the points on my square/squared unit. Measuring the correct lengths I cut the 6 1/2″ strips to add to my border additions.
The Square/Squared tool makes finished diamond in square units in six sizes from 1″ to 6″. If you require mores sizes you can purchase the Large Square/Squared Tool which can make them in sizes from 1″ to 12″.
I love Christmas & I love Christmas Tree Quilts! Over the years I have made several and decided to share some with you. Studio 180 Design tools gives you several ways to easily make Christmas Trees.
I Believe
I made this 7 years ago for my Granddaughter Samantha. I Believe uses the V Block tool. Below is the supply list:
Brittany & Jonathon, this is for you in celebration & “anticipation” of the arrival of your daughter!
This is a Hunter Star Quilt from Deb Tucker’s Book “Hidden Treasures”.
Hidden Treasures offers over 30 projects to choose from. Finished quilts are a generous lap size. All the projects in this book are made using the Rapid Fire Hunter Star Petite tool. This book is intended to be a design play book. All the quilts are made using the 7” block size option, and the simplest two color variation where half the pieces are dark value and half are light value pieces. Each project requires 8 light & 8 dark fat quarters, plus border fabric.
Anticipation and the quilt shown above are from the layout called Curveball on page 30. I made the version above using a 5″ block to make a smaller version.
I have now made 3 layouts from Hidden Treasures. I would like to make them all! On the right is Autumn Twilight, page 66. On the left is Painted Desert on page 80.
As quilter’s, we all have an angle. Deb Tucker has a new angle and it is 60 degrees! Studio 180 Design will soon be releasing a new Star 60 tool.
Hextravaganza, free pattern included in the Star 60 tool instructions
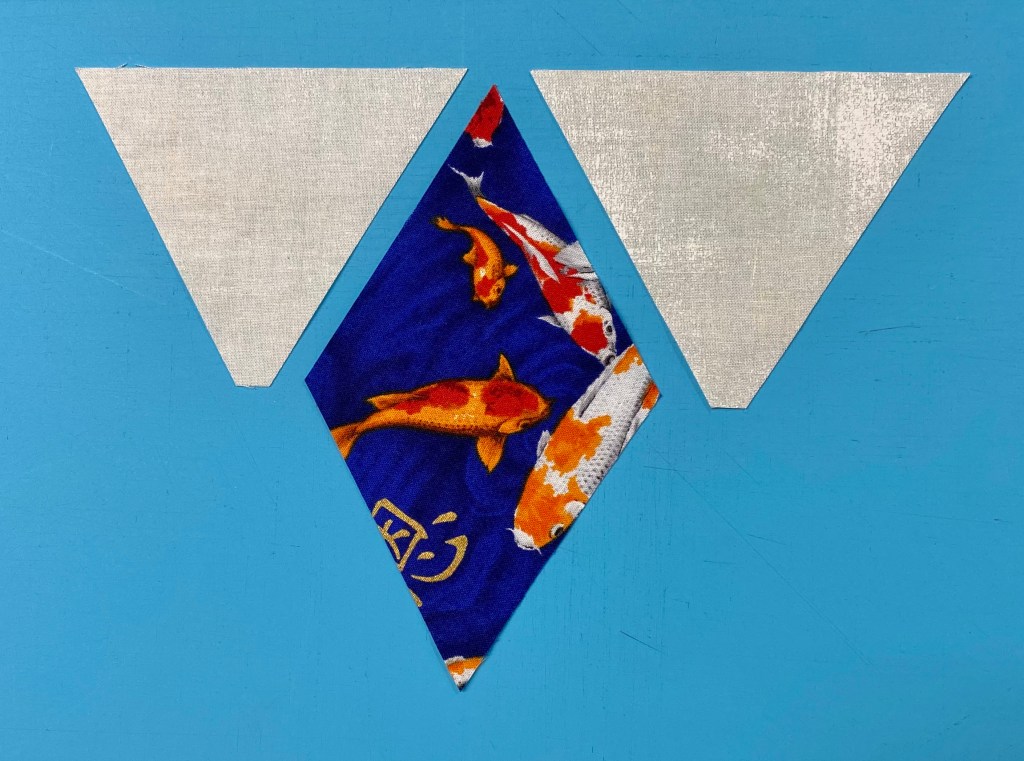
You all know that I have made many, many One Block Wonders (75). One Block Wonder’s are made by constructing equilateral triangles. An equilateral triangle is created by cutting fabric strips at a 60 degree angle.
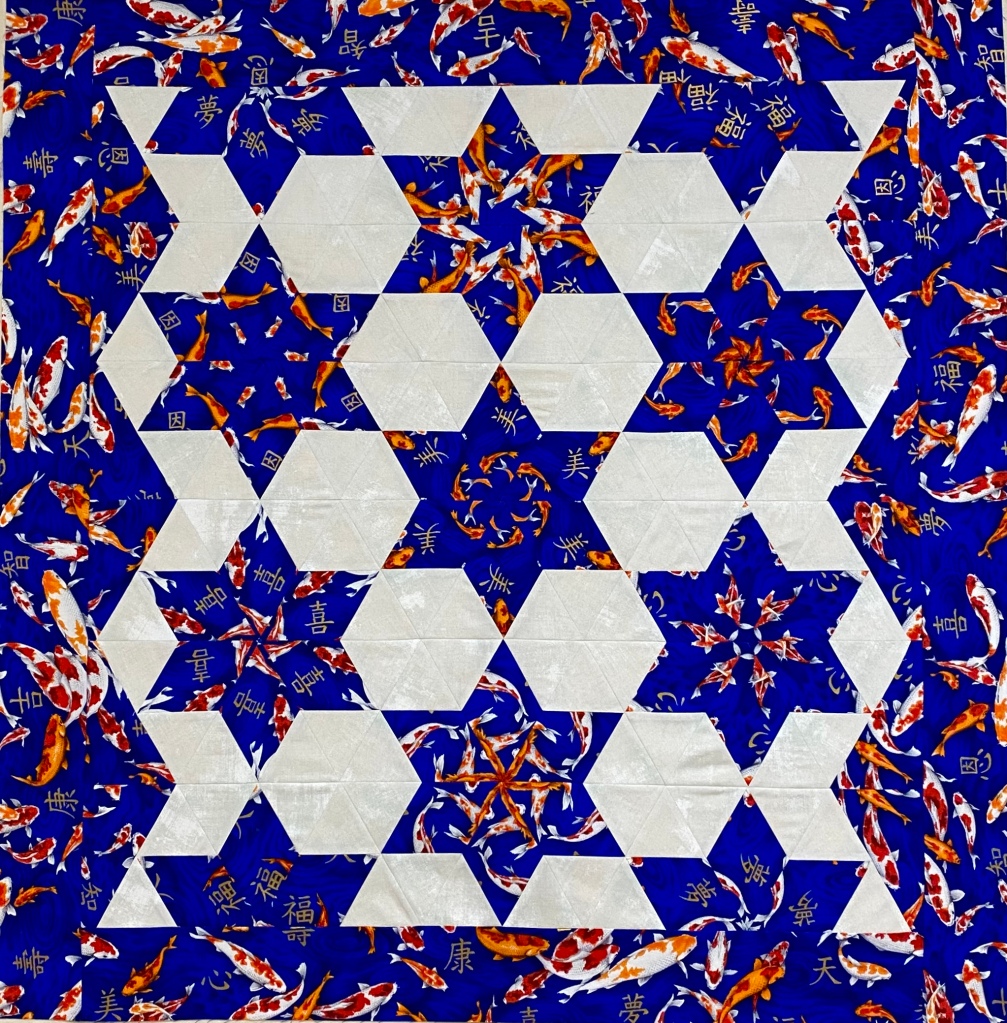
Memories of China, by Luana Rubin for Robert Kauffman
I just finished making “Up Up & Away” OBW yesterday and wanted to play with the Star 60 tool. I’ve had this fabric for at least 14 years. It has a medium size design and a 12″ repeat. I HAD to make a kaleidoscope Star 60 Block. I cut my 6 repeats, aligned them and chose to make 5″ finished units. Following the tool instructions, I cut my strips sets 3 1/4″ wide.
First Cut
This strip set has 6 fabric layers. I put a new blade in rotary cutter and it cut through all 6 layers like butter!
Second Cut
Using the Star 60 tool, I cut the first entire 60 degree diamond. Continue cutting till the end of the strip. I got 10 blocks out of one WOF strip.
OBW 60 Degree Cut
Above, I said “I cut the entire 60 degree diamond”, when cutting for a OBW, we cut triangles. By the way you can use the Star 60 tool to cut equilateral triangles for OBW’s. Just be sure that the tool point is on the edge of the fabric strip. We love dog ears for aligning.
On the left is a block from equilateral triangles. On the right are 60 degree diamonds. Both were cut from 6 repeats of aligned fabric.
For the diamonds we need to add side triangles.
As with a OBW, I did not stitch the center seams. Anyone who has taken a OBW class from me knows I think “Y” seam are of the Devil”! “Y” seams are not required to make these blocks.
Measures 36″ x 36.5″
This was fun. I Love the Star 60 tool. The instructions are wonderful, clear and complete. You will have no trouble creating beautiful & unique 60 degree blocks!
Just look at some of the possibilities! If you are not getting the Deb Tucker Studio 180 Design Newsletter sign up www.studio180design.net so you never miss new pattern or tool releases.
I was entertaining my self with Facebook when I saw a post by my friend and fellow Studio 180 Design Certified Instructor, Karen Overton The Quilt Rambler. Here is some of what she wrote: “The idea began with a talented quilter named Jessica of Jessica Quilter also known on Instagram as @Jessicaquilter. Seems the good folks at Just Wanna Quilt picked up on her inspiration and ran with it! More details can be found here on the JWQ website. Jessica had an idea to use a little bit of her favorite fabrics from her “inventory” and the rest they say is history”. Karen was chosen as a Featured Designer, you can read the rest of The Quilt Rambler’s blog Inventory Quilt Project here.
I was inspired to check my “Inventory”
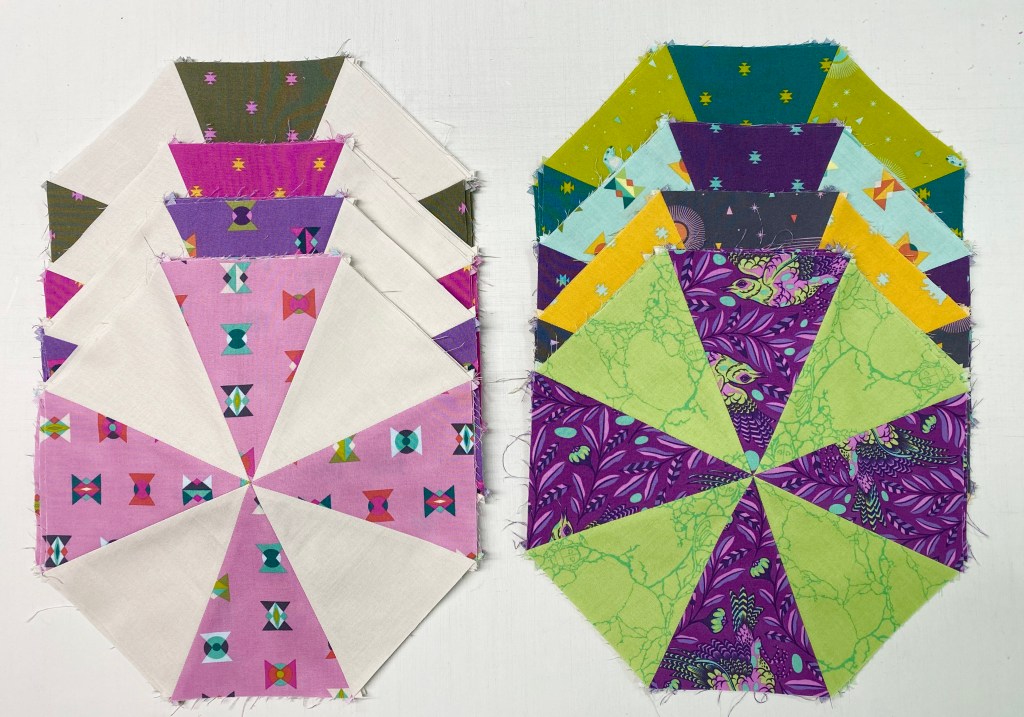
I had this wonderful collection by Tula Pink called Spirit Animal. I have had this fabric in my “Inventor” for over two years.
I decided to make Hallucination by Deb Tucker. This is a great pattern to get yourself acquainted with the Wedge Tool. You will also need a Tucker Trimmer III. To accomplish a scrappy Hallucination I had to put on my Rose colored glasses. I needed light, medium and dark fabrics. Whenever I have trouble sorting fabrics by value I use red lenses to help.
I began cutting my large wedges for Block “A” which consisted of medium and dark wedges.
Once the wedges are cut position a dark wedge with a medium wedge aligning the raw edges, being sure to always put the dark wedge on top. This will assure you will alternate between dark and medium wedges in your block. Stitch into pairs using your best 1/4″ seam allowance.
Remove the “dog ears” and “sliver trim” the wedge pair by aligning the common diagonal line on your Tucker Trimmer with the seam and trim the dog ears, and true up the 90 degree angle. Note there may be just a few whiskers trimmed here.
Continue for all the “A” Blocks and the “B” Blocks.
You need to make a halfway registration mark on all 8 wedges of all “A” & “B” Blocks. You can do this by placing the center line of the wedge tool on the seam and mark on the right side of the fabric with a removable marker. My thin chalk pen broke so I folded the wedges in half matching the seams and then pressed with my iron to give a centerfold line.
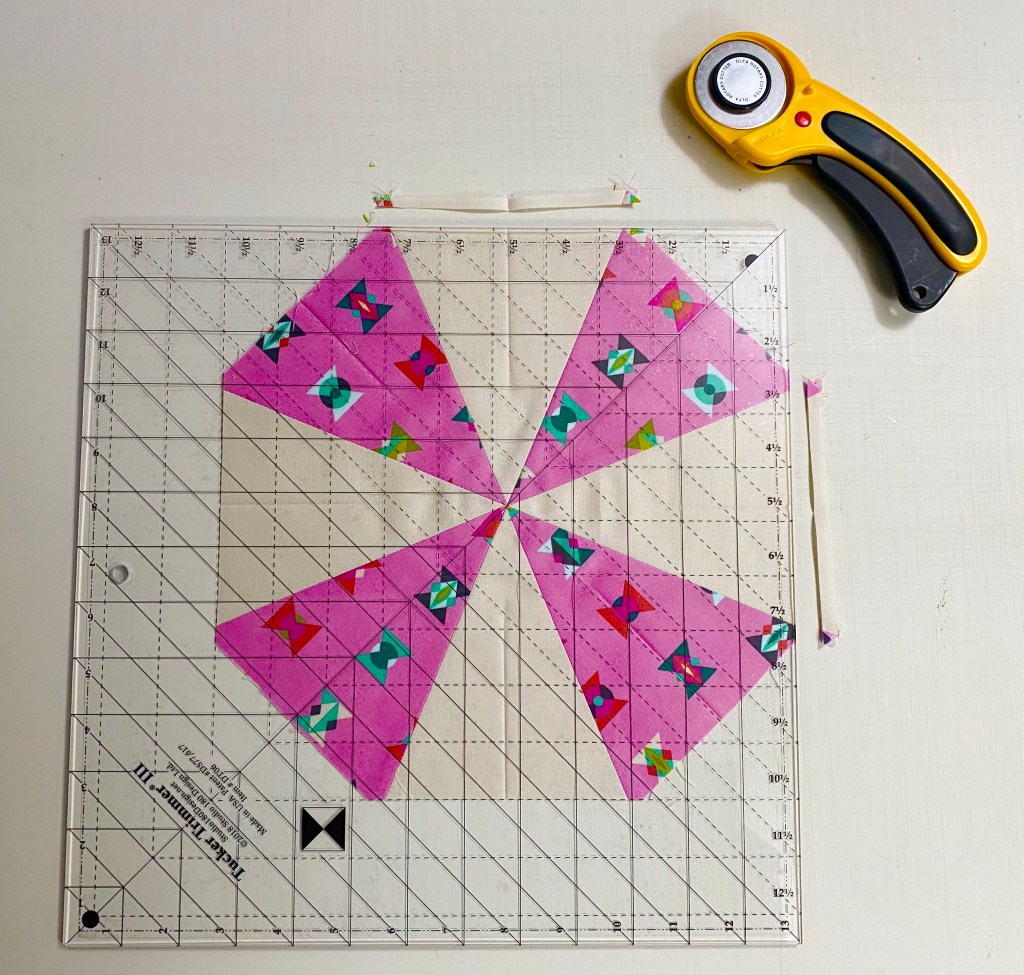
Block A: Position the dark wedges north, south, east and west on your cutting mat. Align the 10 1/2″ sizing line and the common diagonal line with the registration marks and the intersection of the lines with the center of the block. Trim up the side and across the top. Rotate realign and trim again. The dark wedges are trimmed so we can add corners to the block. The medium wedges will be trimmed after the corners are added.
Center the oversized corner triangles over the just trimmed dark wedges and stitch. Press toward the corner triangles.
Using your Tucker Trimmer III, align the common diagonal and the 10 1/2″ sizing line with the registration marks and lines intersecting over the center of the block, trim up the side and across the top. Rotate the block and trim again.
Block B: Position the light wedges north, south, east and west on your cutting mat. Align the 10 1/2″ sizing line and the common diagonal line with the registration marks and the intersection of the lines with the center of the block. Trim up the side and across the top. Rotate realign and trim again. The light wedges are trimmed so we can add corners to the block. The medium wedges will be trimmed after the corners are added.
Center the oversized corner triangles over the just trimmed light wedges and stitch. Press toward the corner triangles.
Using your Tucker Trimmer III, align the common diagonal and the 10 1/2″ sizing line with the registration marks and lines intersecting over the center of the block, trim up the side and across the top. Rotate the block and trim again.
Block C:
Cutting the Diamonds for Block C: Lay your strip horizontally on the cutting mat. Using your wedge tool align the edge of the Wedge Star tool with raw edge of the strip close to end of the strip. Using another ruler with a 45 degree line, bump it up to slanted edge of the Wedge Star tool, this helps to establish the 45 degree angle. Cut, keep cutting till you have the desired number of diamonds.
Lay out your small wedges and diamond units as shown. Position a small wedge from the right hand side of the top of the diamond. Match the point of the diamond with the corner of the wedge and align the raw edges.
Stitch with the diamond on top.
Press toward the diamond. Remember “whatever you are pressing toward, goes on top”!
Trim off the dog ear. Position a remaining small wedge to the other side of the diamond point. Align the raw edges and center the shapes right sides together. Press toward the small wedge. Trim the each diamond wedge using the 10″ line in the Diamond Trim Down Section on the Wedge Star tool.
Lay out the Diamond Wedges and the dark Large Wedges for the C Block.
Consistently place a diamond Wedge on top of a dark Large Wedge right sides together.
Stitch the point end first. Press seams open. Trim the dark wedges as before and add the triangle corners. Trim the block with your Tucker Trimmer III.
In fact be sure you press all seams open during block construction. I find the Strips Stick very helpful!
Lay out your finished A, B & C blocks, stitch into rows. Add your inner and outer Borders.
I’m loving this scrappy version of Hallucination!
This project was Tucker approved with Aurifil Thread, Quilters Dream Batting, my Reliable Iron, and the Strip Stick. Not to mention my wonderful Studio 180 Design Tools.
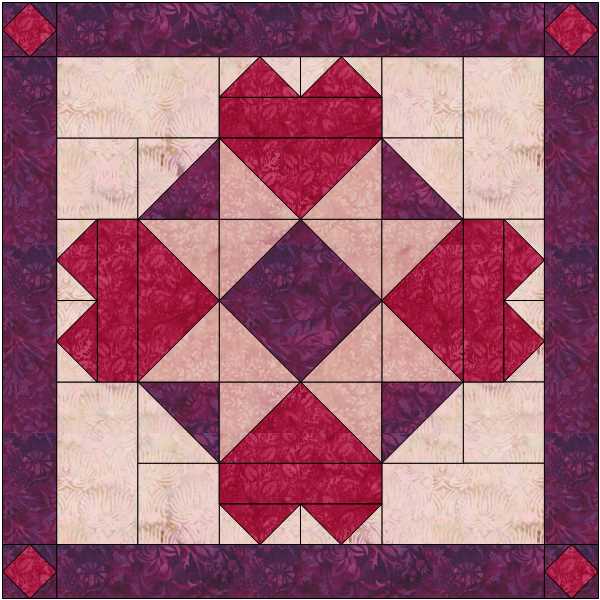
Last Valentines day I posted my Hearts Abound Wall Hanging for Island Batik. Today I taught this class and posted the photo of the wall hanging again. Everyone wants the supply list, So I am posting it here. Remember I’m a Dyed in Wool, Drank the Kool Aid Studio 180 Design Certified Instructor and this Supply List is based on Studio 180 Design Tools: Square Squared, Wing Clipper I, Tucker Trimmer I & Magic Wand. Enjoy
I love Christmas Tree Quilts. I’m always looking for quilt blocks that look like Christmas Trees.
With this block and the Deck the Halls fabric that Northcott gave me to make this quilt, I have a winner.
What can be easier than Half Square Triangles made with Studio 180 Design’s Tucker Trimmer I & Flying Geese made with the Wing Clipper I!
I love designing with EQ8. Having the option of auditioning the actual fabric I will be using is awesome!
Perfect for cuddling up under in front of a warm fire. You can make this quilt using your Studio 180 Design Tucker Trimmer I & Wing Clipper I tool instructions and these fabric requirements:
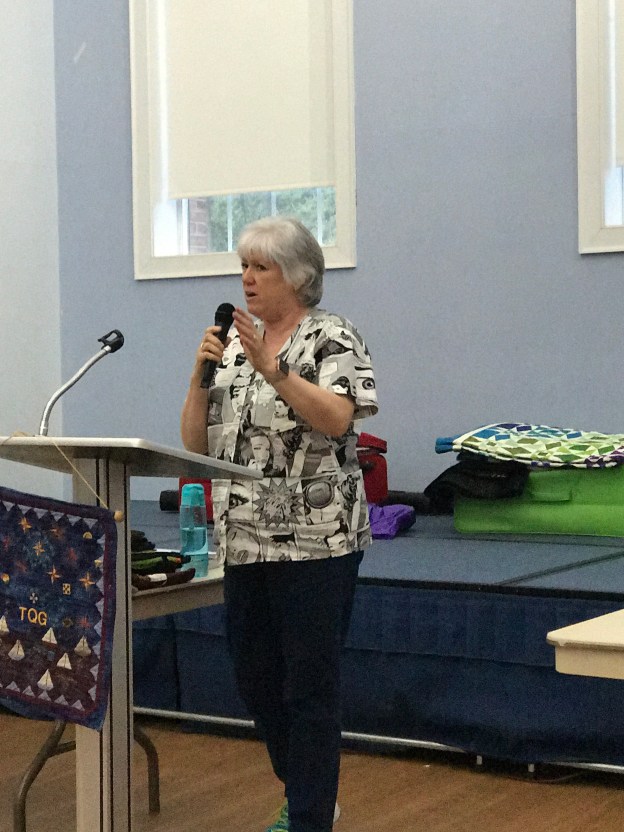
Last night I had a great time sharing quilts with the Tidewater Quilter’s Guild (TQG) in Virginia Beach, Virginia. I lived in Virginia Beach for over 10 years. I always say that TQG birthed me! They were my first quilting guild and they are a wonderful friendly group of quilters.
Whirling Dervish & Cross Street Pasture
My pattern Converging Geese & Studio 180 Design Evening Elegance.