Garden Gnomes symbolize good luck, protection, and prosperity stemming from European folklore where they were believed to be earth-dwelling spirits guarding treasure and helping plants grow at night, bringing fortune and warding off evil spirits.
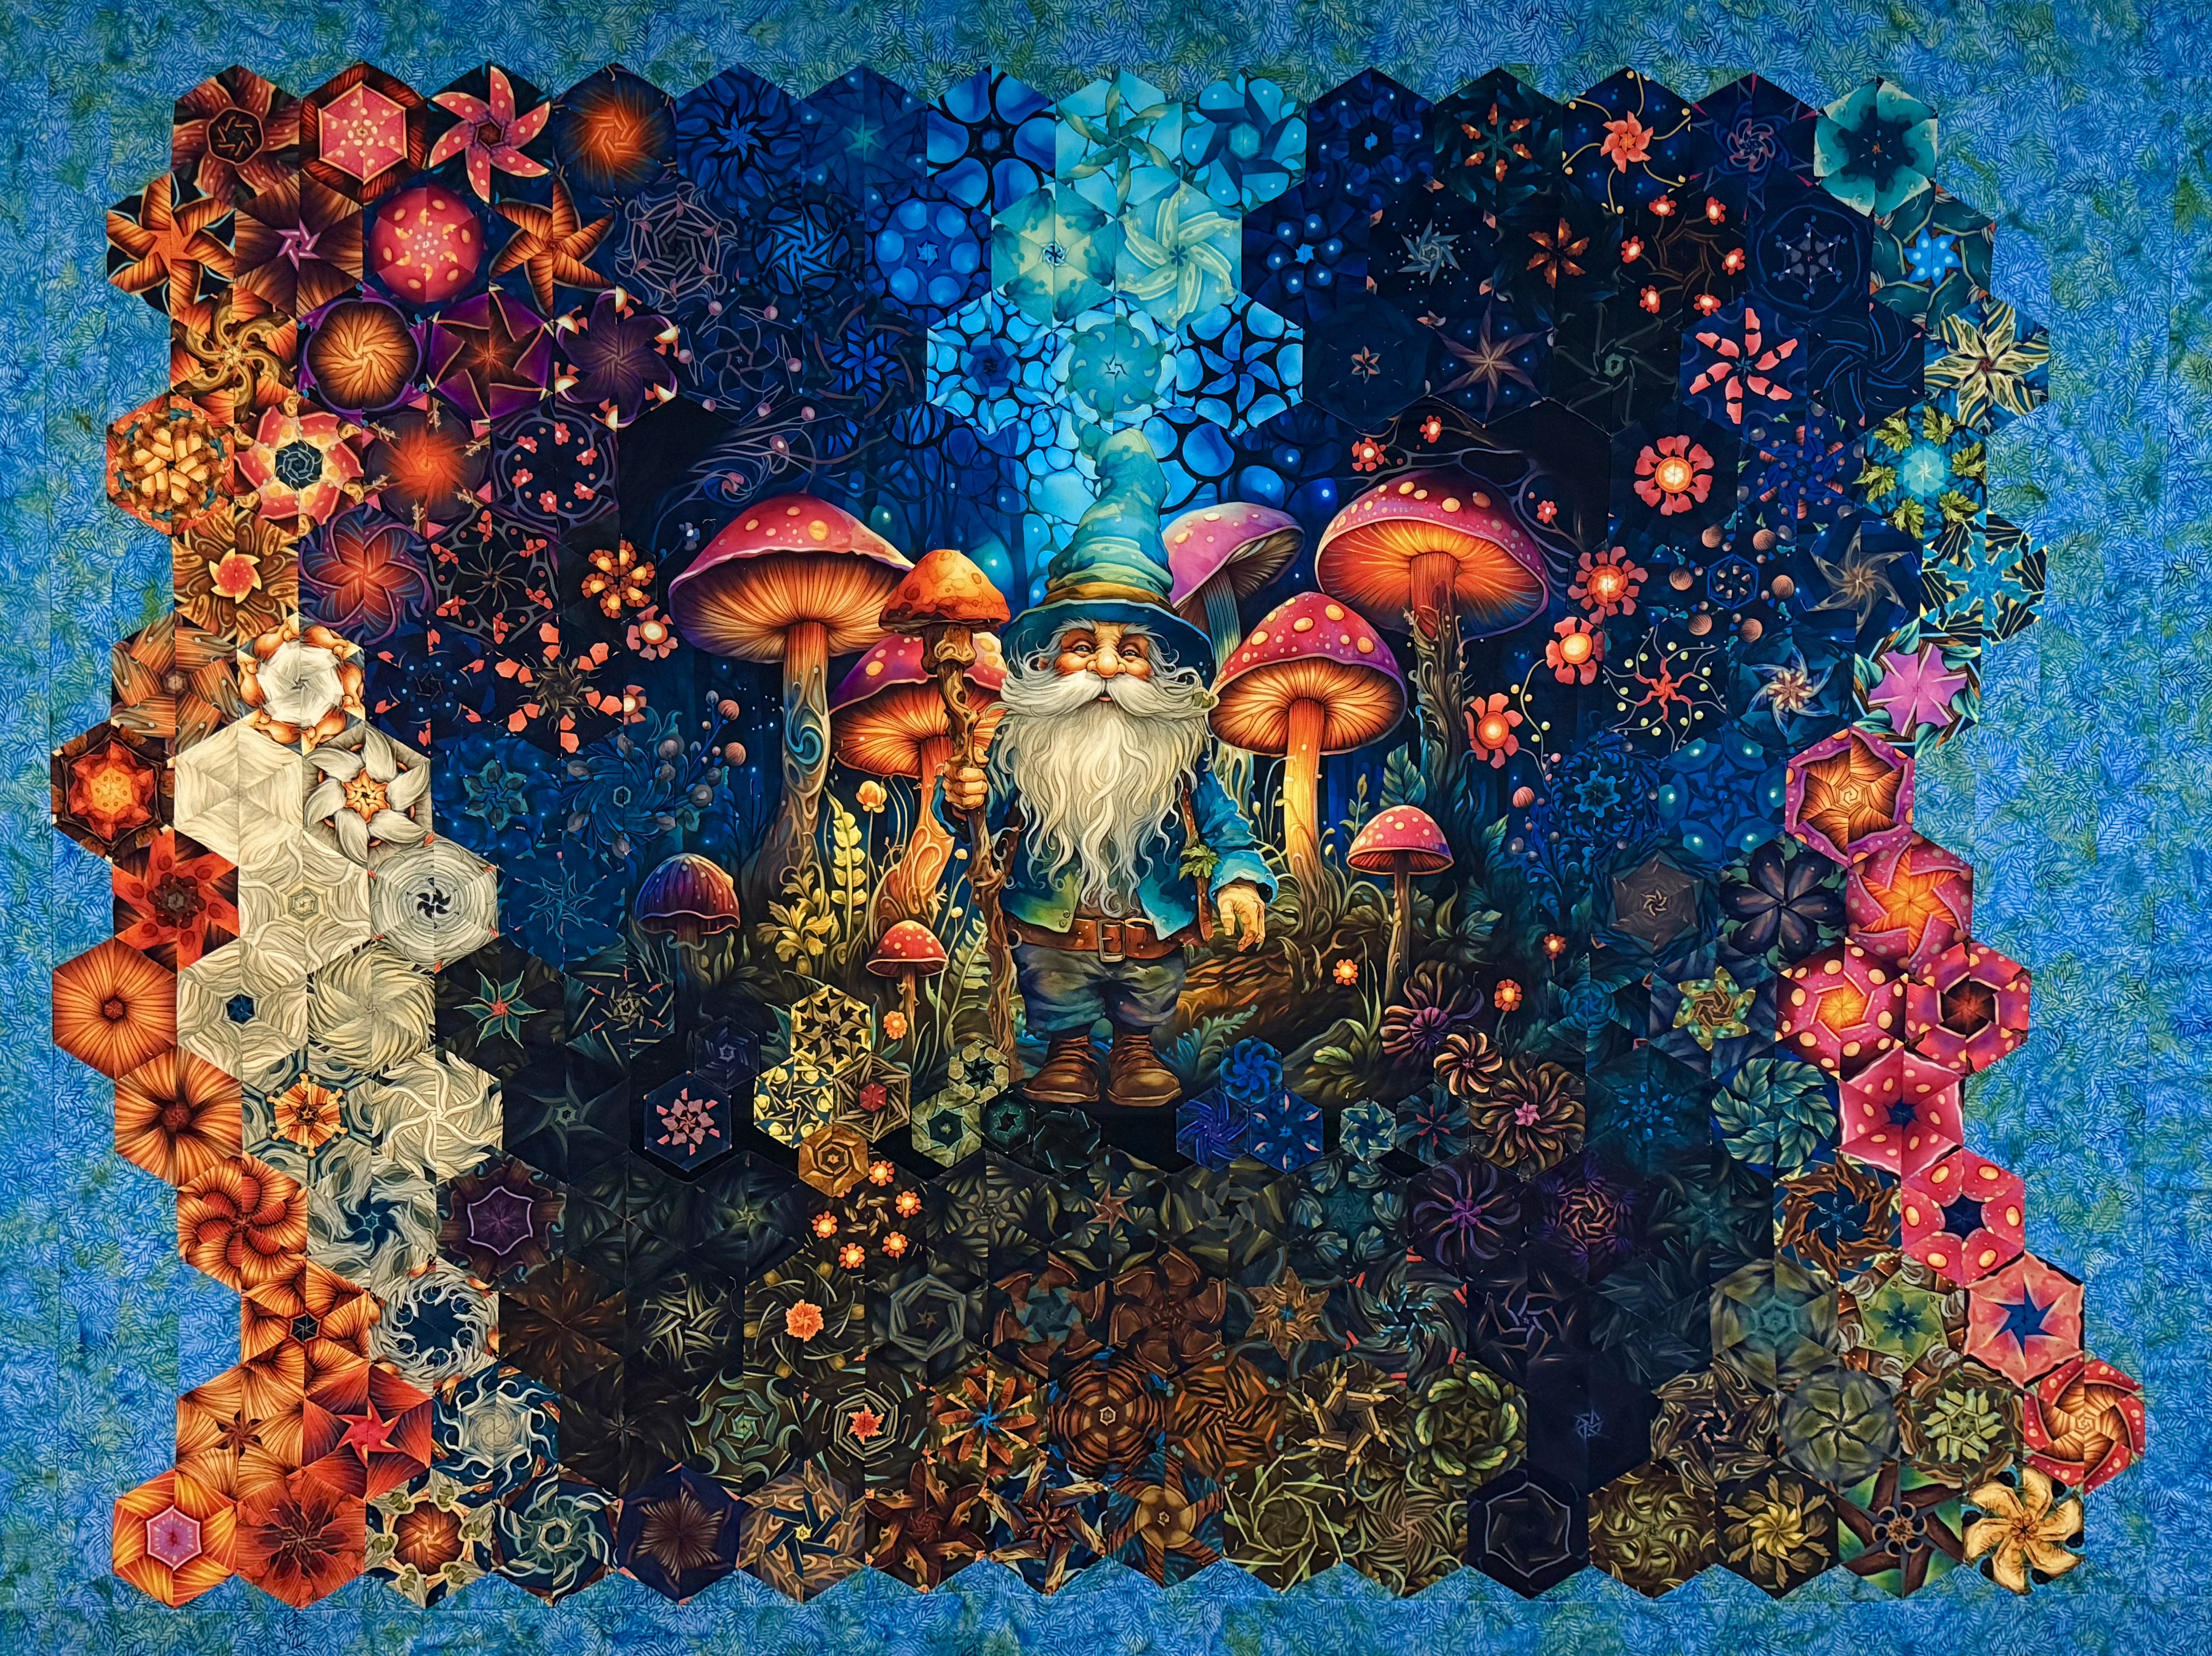
Mushroom Man
This panel is by Rubin Design Studio exclusively for eQuilter.com. This panel measures 30″ x 44″. I love this panel. I call it The Mushroom Man. I cut my strips 3.25″ to yield 5″ finished hexes. I cut my equilateral triangles with my First Choice Rulers.
I’m in love with this quilt. Many times while designing, I subconsciously create a butterfly effect in the background. Can you see it? The magical Mushroom Man has been awakened by the Winter Solstice and has begun to get ready for Spring. Spring is coming!!!
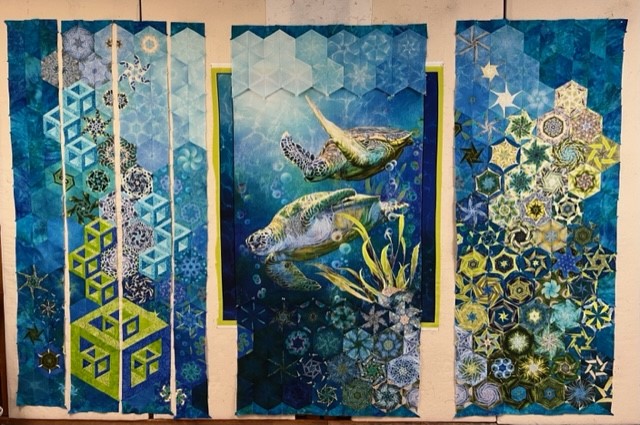
I love creating un-even organic edges on the sides of my OBW’s. When I can, I use Island Batiks for the borders. I fill in the edges by cutting Half Hexagons with my Star 60 Tool. I also added Half Triangle Rectangles to the top and bottom of my columns to give the effect that the top is floating on the border fabric. My Mushroom Man measures 93″ x 70″ un-quilted.
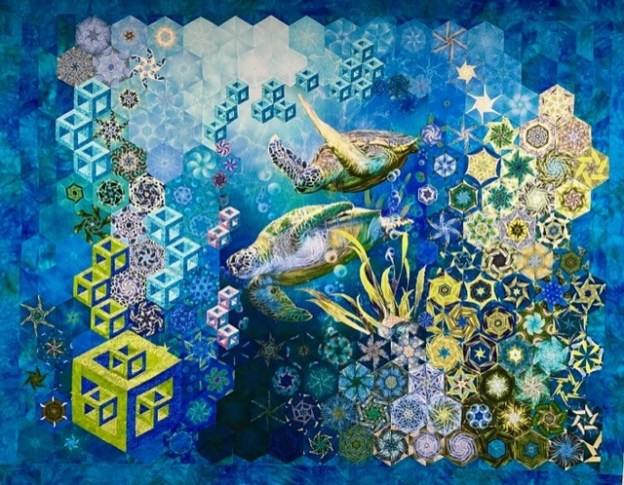
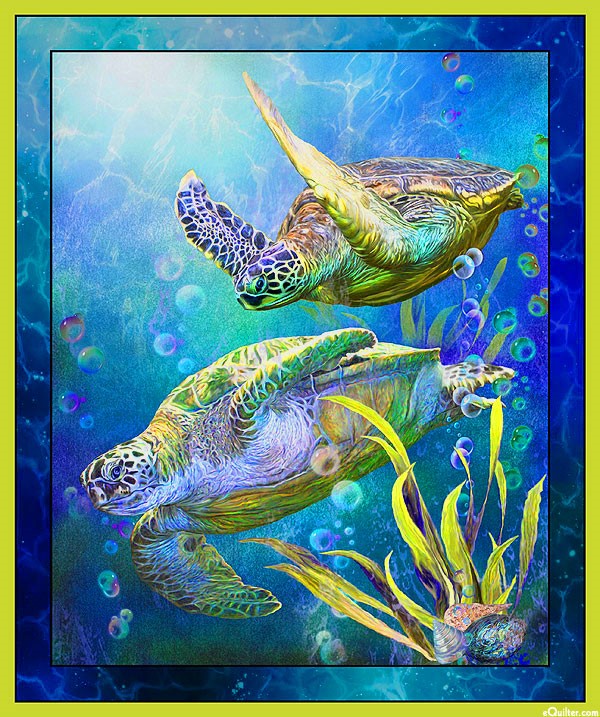
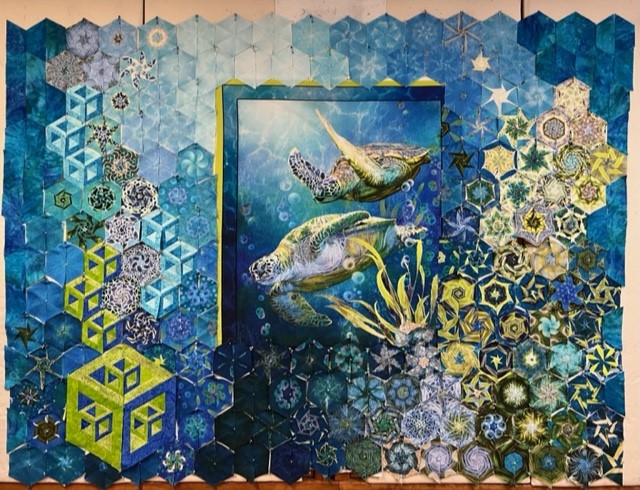
I fell in love with the colors in this panel by Carol Cavalaris and QT Fabrics.
I did not want to include the panel borders in my One Block Wonder (OBW), so I measured the inside as 30.75″ x 36.75″. I cut my strips 3.25″ to yield 5″ finished hexies. As there was little design in corners, I aligned around the turtles and plants in 12 different places. I cut my strips on the shorter 30″ side as opposed to the length of the panel. I had 165 hexies to design with.
I started designing on the bottom right of the panel going across the bottom and up the right side. I added a 15″ Hollow cube that had 3 – 5″ hollow cubes inside it. My cubes are made using Deb Tucker’s Star 60 ruler and the Hollow Cube 60 Technique Sheet.
I added half hexegons made using the Star 60 ruler and a darker Island Batik fabric to fill in around the hexies from the panel.
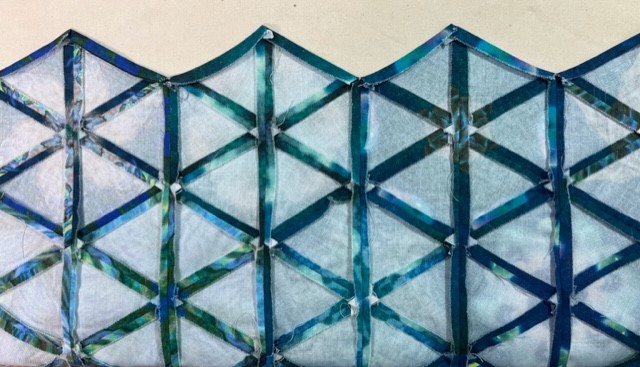
My rows are numbered and ready to be stitched together into sections .
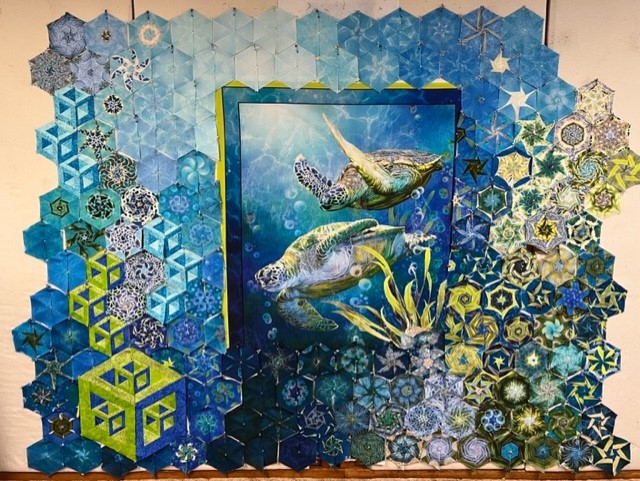
The photo above show how the 15″ cube is incorporated into the 5″ hexies. I don’t trim the panel till I’m ready to stitch the sides to it.
All four sections are stitched together and ready to add to the panel.
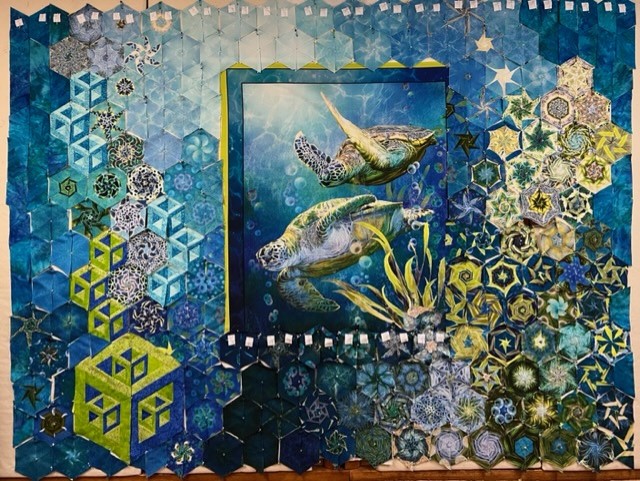
I add the bottom section to the panel first. I did not want to trim the points, so I took out few stitches in the valley’s and pressed under about 1/4″. After the bottom is stitched to the panel, I add the right side and stitch, ending about 8″ from the top of the of the panel. This shows me where to attached the top section to the panel. Once the top is attached I can finish the seam of the right section to the panel. Now the left side can be easily added.
Once all the sections are attached to the panel, I can begin to tweak and soften the edges around the panel.
I made 3″ finished Hollow Cube 60’s to applique on the left side and on the top to hide where the panel border was showing. I use Island Batik fabrics to create my Hollow Cube 60’s. Heading to the Turtle Boudoir is now ready to be quiulted. This quilt won a 4th Place Ribbon at the New York State Fair, 2023.
I love Deb Tucker’s Star 60 ruler! It can be used to cut out equilateral triangles for a One Block Wonder (OBW), and has 8 accompaning technique sheets for stars and cubes that can be added to a OBW or any quilt.
Traditional Lone Star’s are made using a 45 degree angle. I wanted to make a Lone Star quilt using the Star 60 ruler.
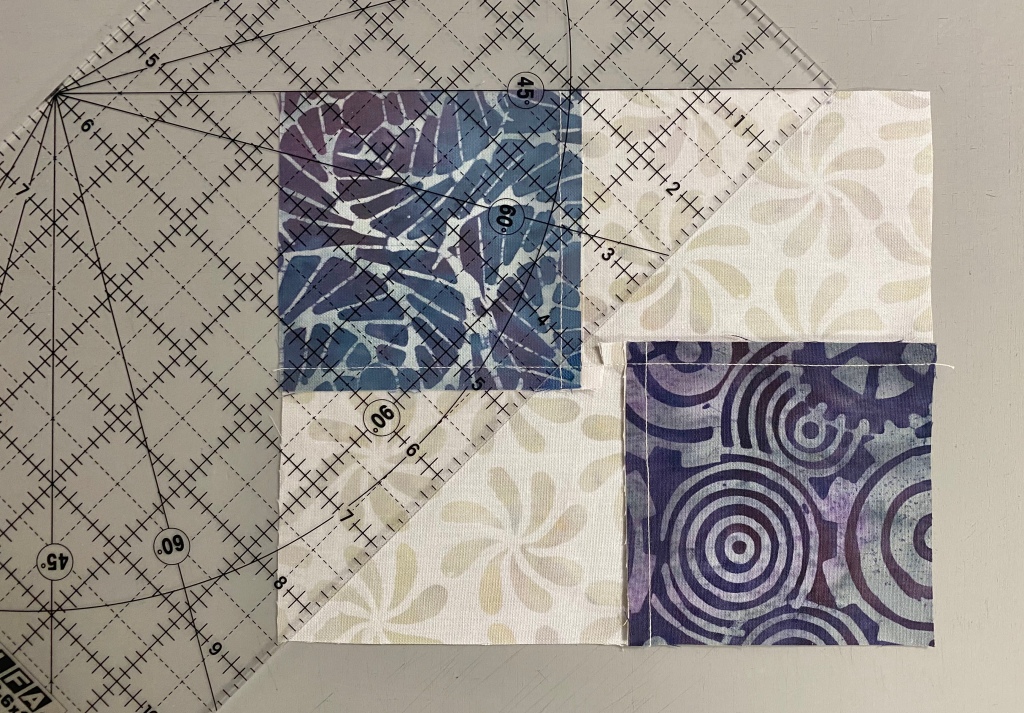
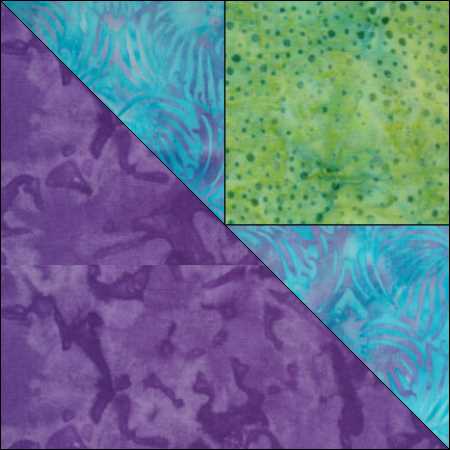
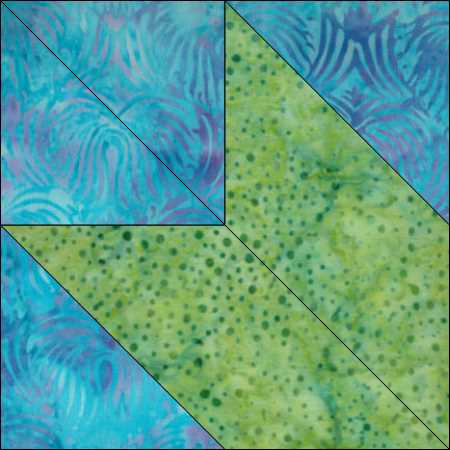
I chose 7 fabrics and a background fabric from Island Batik. I used the Checkerboard Technique Sheet and made 6″ finished Checkerboard units and 6″ diamond units.
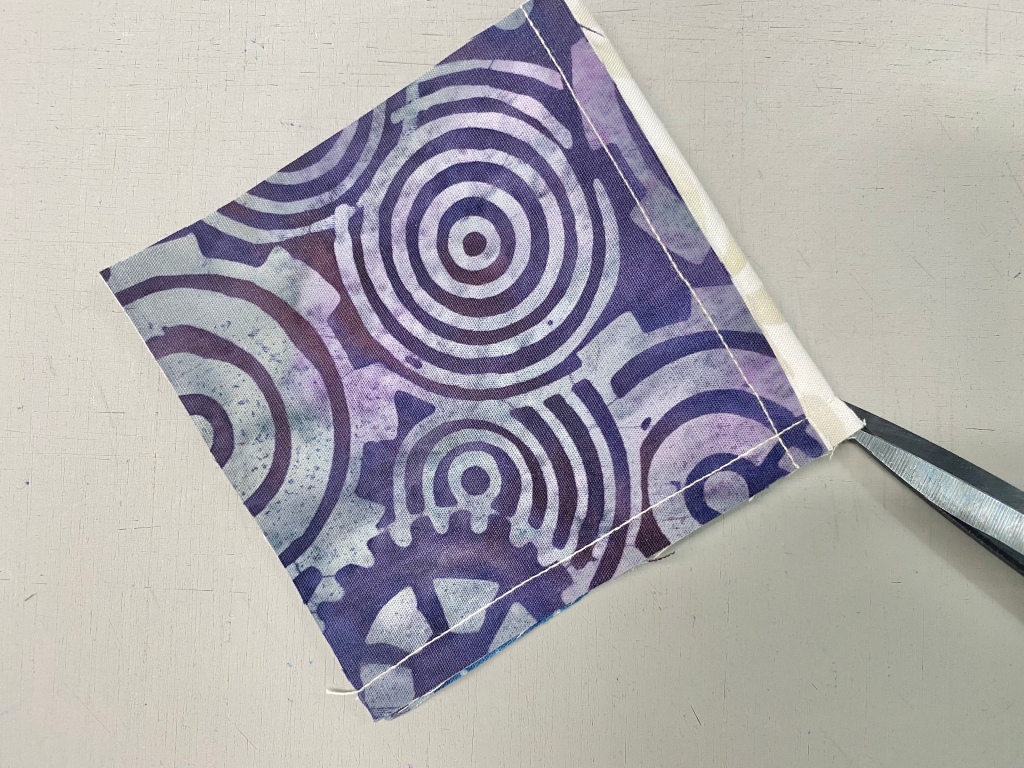
The trick with creating multiple pieced diamonds is to only trim the side of the diamonds that are being stitched together at that time. To help with this I created a chart So I always know which sides are trimmed. This combination makes a 12″ finished diamond.
I made 6 of the pink and green diamonds, 6 of the blue and orange diamonds and 12 of the blue and green diamonds.
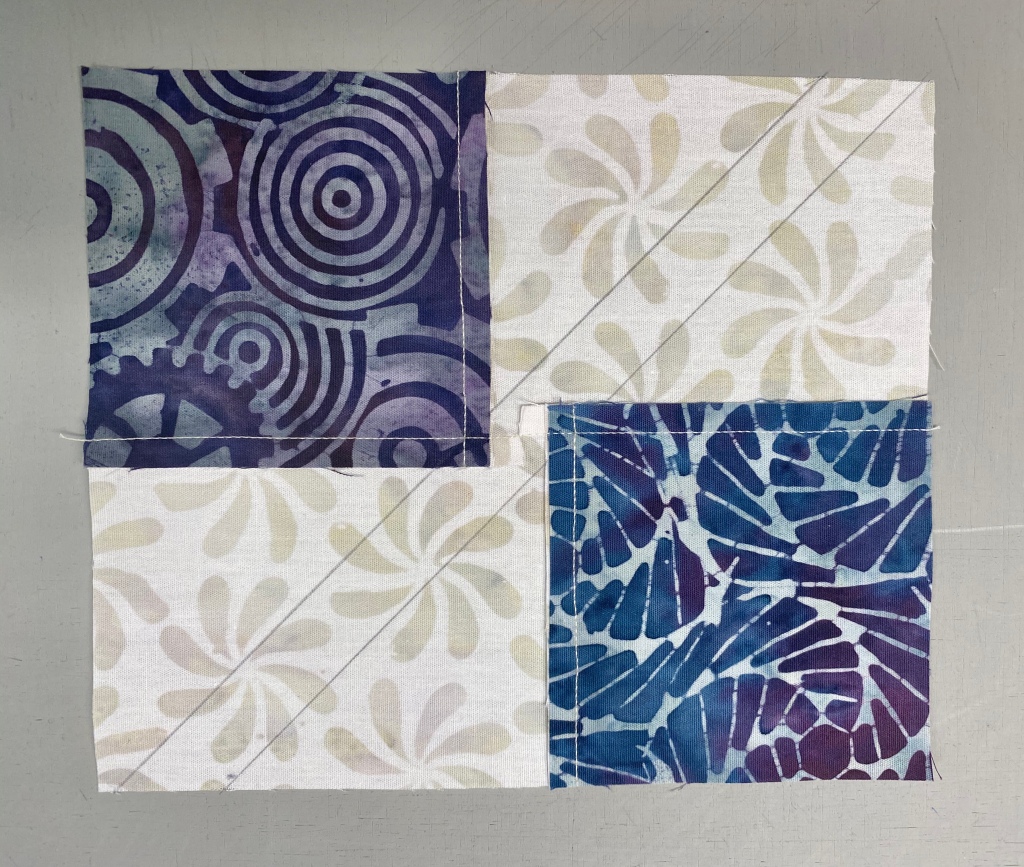
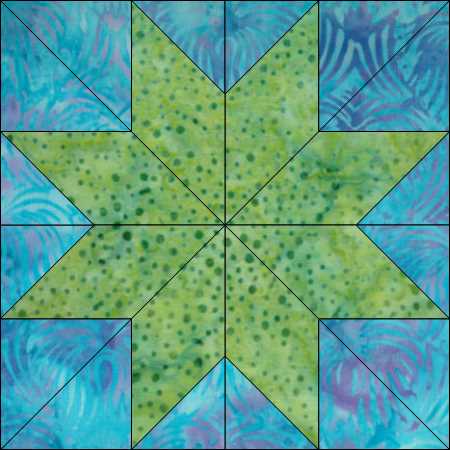
This shows the layout and how the four diamonds fit together.
Once trimmed, stitch the halves together to create a 24″ diamond.
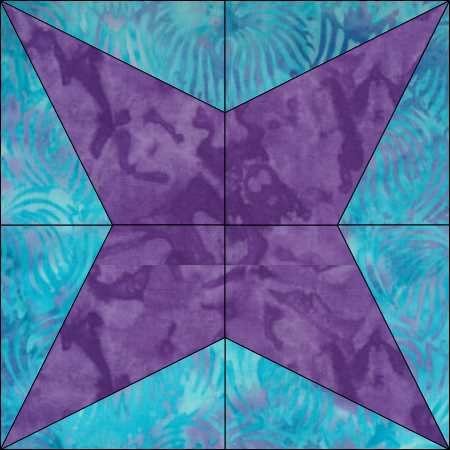
I cut 13″ WOF strips and used my Star 60 ruler and my 6″ x 24″ Olfa ruler to establish the 60 degree line and continued to cut side triangles for my 24″ diamonds
Layout the side triangles on the left and right sides of the diamond.
Stitch the right side triangle first, press toward the diamond. Stitch the left side triangle, press toward the side triangle.
Rotate the unit so that the untrimmed edge is either by your right hand for trimming if you are right handed or by your left hand if left handed. Locate the Flat Edge trim line on the Star 60™ Tool. Align the Flat Edge trim lines with the seams of the Diamond. Bump up a 24″ long ruler next to the Star 60 ruler and trim, leaving a 1/4″ seam allowance.
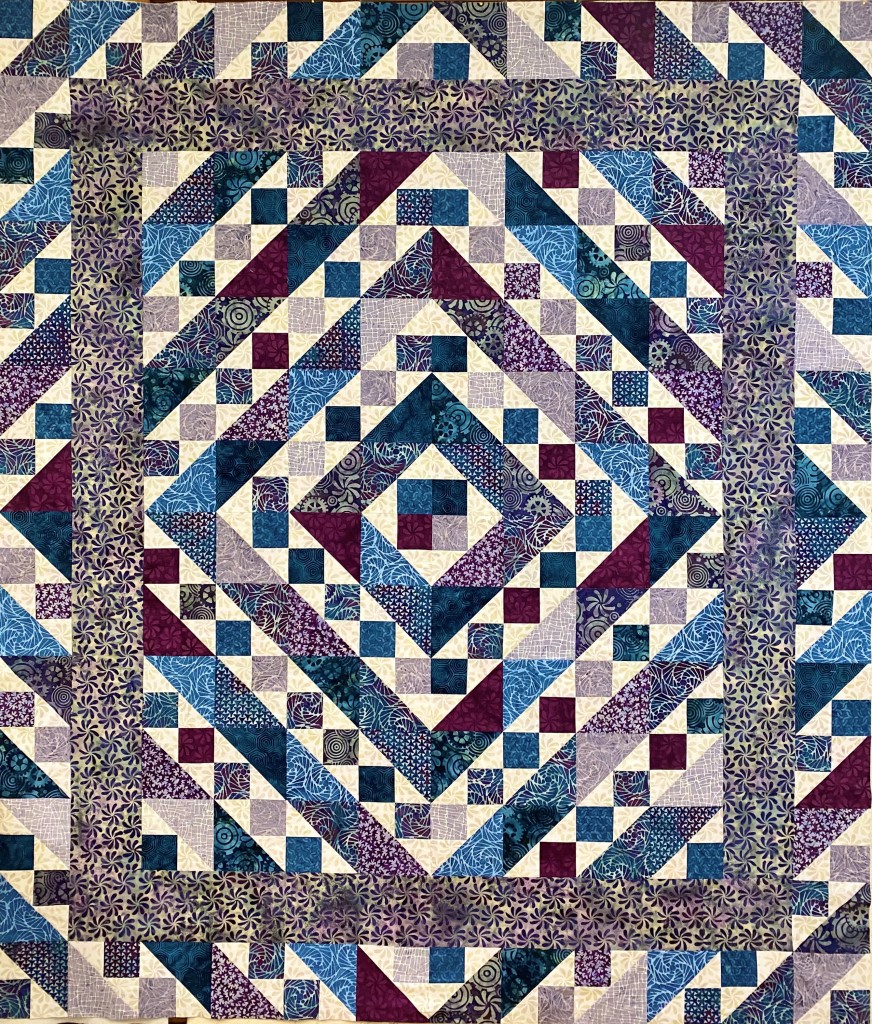
Stitch triangles together in groups of 3, creating half hexagons, press seams open. This is a 48″ star.
Create Half Triangle Rectangles by cutting a 25″ WOF strip, trim to 16″ x 25″, make sure they are right or wrong sides together, align the ½” line on the tool with the top edge and the center line with the edge of the rectangle, place a regular ruler next to the Star 60 tool. Move the Star 60 tool out of the way and cut along the edge of your long ruler.
The Half Triangle rectangles (HTR) turn the hexagon into a rectangle. Once the HTR’s are stitched to the half hexies I added 4.5″ strips to the side to make it a square.
My Star 60 Lone Star top measures 65″ x 65″, and was made Island Batik fabrics.
Join me for a Converging Geese Zoom class September 15th at 11:00 AM. Sign up and download the supply list here (pattern is included with the class fee):
I created this pattern November 2018 for an Island Batik Log Cabin Challenge. It has been a popular pattern in my Etsy Shop ever since. This is a variation on the Log Cabin block and is a fun way to use your Square/Squared, Tucker Trimmer I & Wing Clipper I tools.
I named my original design “Converging Geese” because each block has Flying Geese & Geese on the Edge units, along with Square/Squared units.
Each 16″ block contains 12 – 2″ x 4″ finished flying geese, 4 – 6″ finished geese on the edge & 1 square/squared unit.
Got some fat quarters? Deb Tucker has many free patterns for you and this one is called Twilight Paths. It uses 14 fat quarters and a background with the Tucker Trimmer I. Twilight paths uses 5″ finished Shaded Four Patch units (5.5″ unfinished). The Shaded Four Patch Technique Sheet shows you haw to make this unit in 21 sizes! This whole quilt is made with Shaded Four Patches!
This is Twilight Paths using Deb Tucker’s Twilight Chic fabric line from Island Batik!
Download your pattern and let’s go!
Group 1
Group 2
To get a great scrappy quilt, Deb suggests that you split your fat quarters into two groups. Group 1 along the 22″ side, cut two 3 1/4″ strips and one 6″ strip, sub-cutting into 3 – 6″ x 7″ rectangles. Group 2 along the 22″ side, cut one 3 1/4″ strip and two 6″ strips, sub-cutting each into 3 – 6″ x 7″ rectangles. Cut one more 3 1/3″ strip from leftover from Group 1.
From your assorted dark fat quarters you will need 22 – 3 1/4″ strips, and 64 – 6″ x 7″ rectangles. From your background you will need 22 – 4 1/4″ strips.
Step 1 – Position each 3 1/4″ strip right sides together with a 4 1/4″ wide background strip and stitch lengthwise. Press seams toward the wider strip.
Step 2 – Pair two of the pieced strips right sides together with the narrow strips on opposite sides, so that each narrow strip faces a wide background strip. Sub-cut the strip sets every 3 1/4″ units until you have 128 rectangles.
128 – 3 1/4″ units Pick up each unit the same way when stitching one side.
Step 3 – Keep the two rectangles paired; stitch each pair of cut pieces together along one long side. Note the seams are not supposed to nest.
Snip
Snip the seam allowance at the half way mark between the two squares all the way to the seam.
Press each half of the seam allowance away from the square as shown above.
Step 4– Mark stitching lines. Select a ruler with a 45 degree angle marked on it. Draw a 45 degree sewing line from top to bottom, through the corner of the square where the stitching lines meet. Draw a 2nd line through the corner of the other square.
Step 5 – Center each marked, pieced rectangles right sides together with a 6″ x 7″ rectangle.
Stitch on both lines.
Trim seams 1/4″ from the stitching lines.
Press all seams toward the large triangles.
Step 6 – Trim the 128 oversized units with your Tucker Trimmer I to 5 1.2″ x 5 1/2″. Align the 5 1/2″ Sizing Diagonal with the diagonal seam of the unit. Position the common diagonal so it passes through the center of the unit. Trim the two sides.
Step 7 – Rotate the unit and line up the 5 1/2″ cut size lines on the tool with the previously trimmed edges, align the sizing diagonal and the common diagonal as before and trim the other two edges.
Step 8 – Layout 80 units according to the diagram on page 5 to create the quilt center.
Stitch the units into rows and then stitch the rows together. Press all seams open.
Step 9 – Attach the Inner Border. Stitch the inner border strips to the quilt center.
Step 10 – Assemble the Outer Border. Stitch the remaining units together into 4 border strips containing 12 units each. Make sure you orient the units as shown in the pattern. Press all seams open. Finish as indicated.
My top is not yet quilted. I used Deb Tucker s Steam Engine fabric line by Island Batik in my quilt top. So I guess I will call mine Steam Engine on the Tracks!
The fabrics shown in this post were given to me by Island Batik.
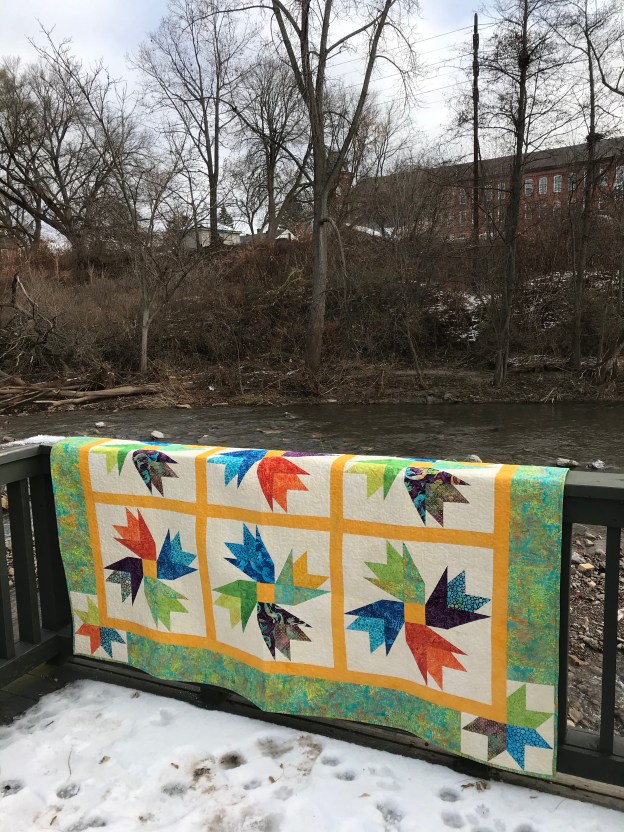
Tropical Escape
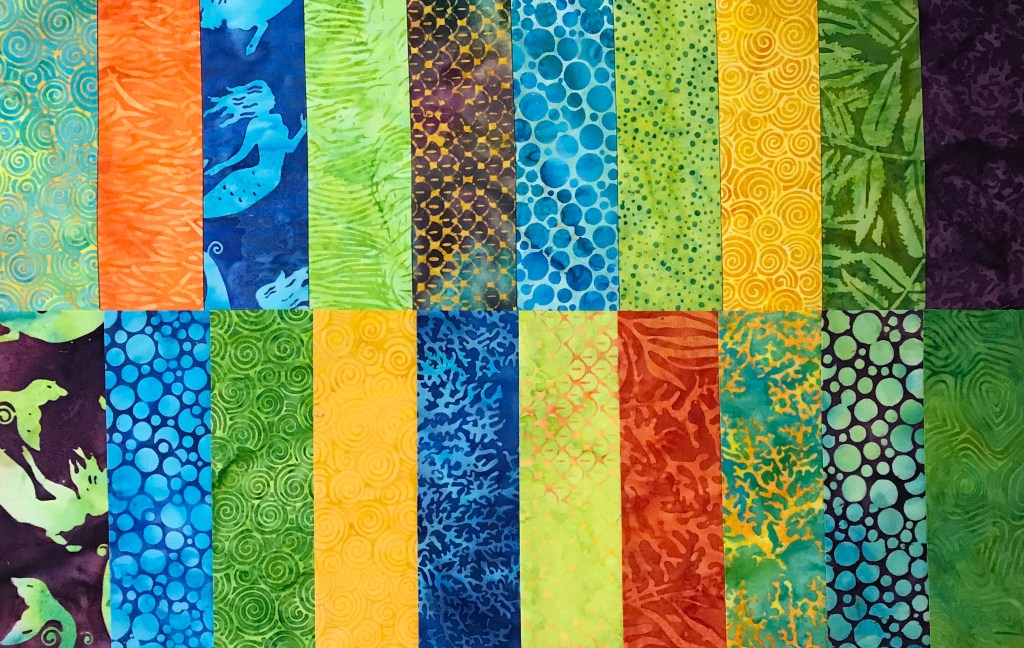
Last January Island Batik gave me a secret bundle to hold onto till November, it was Tropical Escape shown above. I sat and looking at the bundle of gorgeous fabrics, waiting for them to talk to me. The goal is for me to introduce the Tropical Escape fabric line by making a quilt showcasing as many of the 20 fabrics as possible.
I decided to use Studio 180 Design’s BlockBuster pattern #29 Pointsettia. This block requires the Rapid Fire Lemoyne Star, Split Rects and Tucker Trimmer I tools. You can download the BlockBuster pattern below:
I loved that the Poinsettia block could be made in 7″, 14″ or 21″ finished blocks. I chose the 21″ blocks.
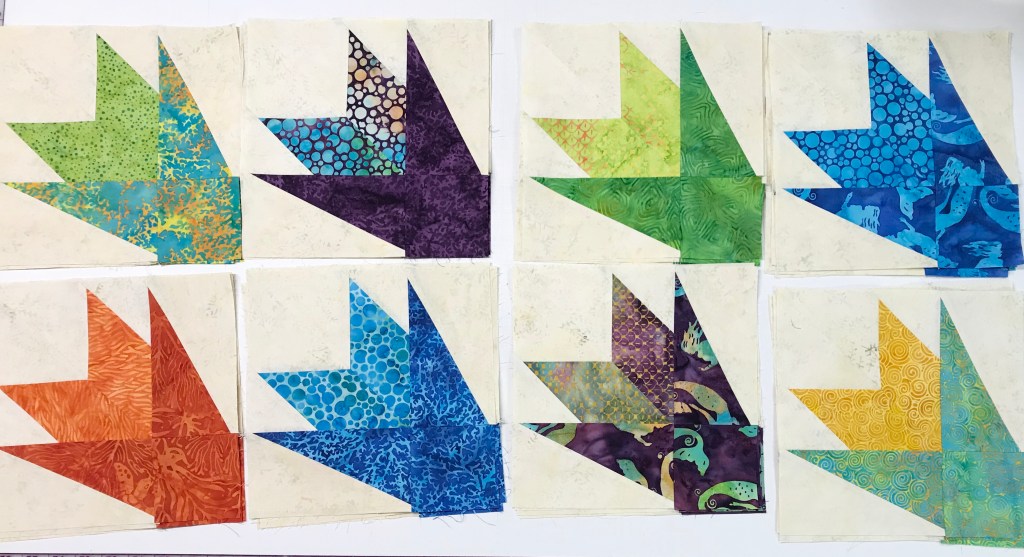
Time to break out the paper plates. I sorted my fabrics by color and value, pairing a light/medium value with a darker value. This would allow me to use 16 different fabrics to form the flowers. I would use the lighter value fabric for the Lemoyne star quarters and the darker value fabrics for the split rects units.
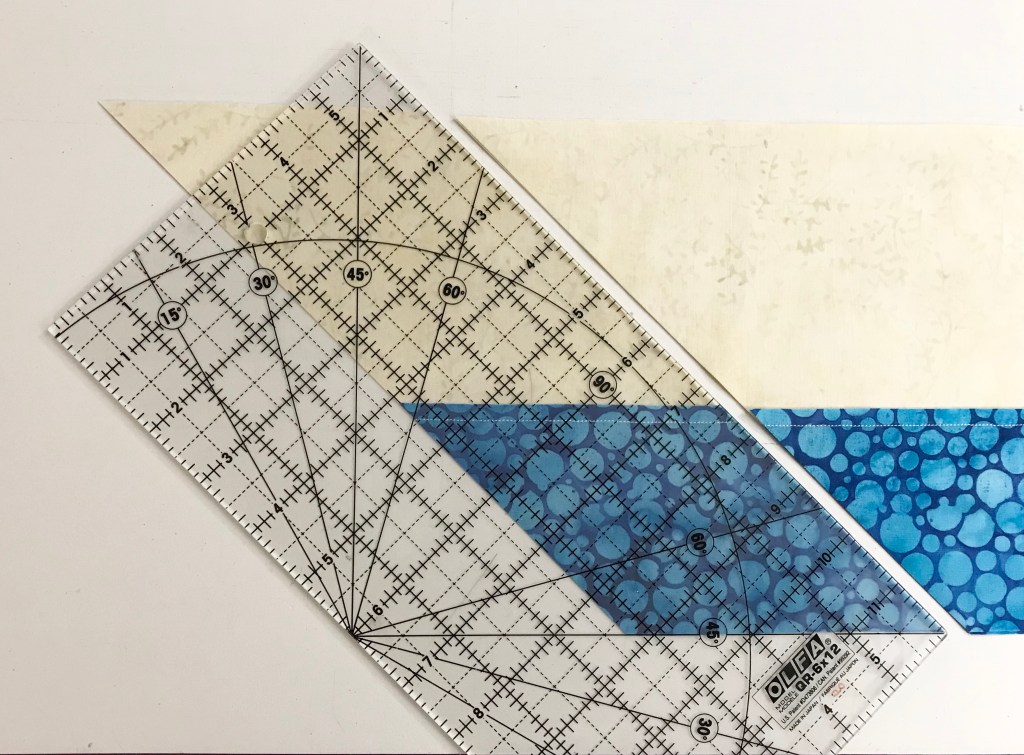
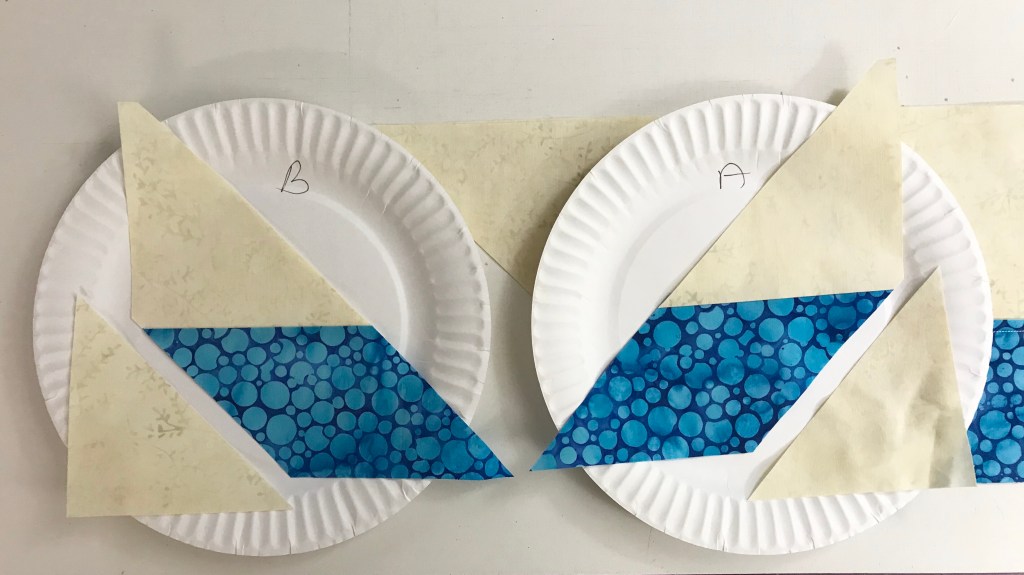
My tip for staying organized while making Lemoyne stars is to label two paper plates, one “A” & one “B”. Follow the Lemoyne star tool instructions. When you come to Step 7, make one 45 degree cut – then imediateley reposition your ruler to cut the side triangles as you go.
If you are right handed the “B” strip was on the bottom & the “A” strip was on top. Place the “A” unit on the plate marked “A” and the “B” unit on the plate marked “B”, place one triangle on each plate also. (If you are left handed the “A” strip would be on the bottom and the “B” strip would be on top). Continue cutting your units, placing each unit on their assigned plate. Construct the Lemoyne units as instructed. Throughout the process you will always know which units are “A” and which are “B”. This is important for knowing which way to press your seams. Another tip for pressing the lemoyne star units is to “remember, the Lemoyne star point should always be pointed to the left”. To make Lemoyne star quarters you will square them up using your Tucker Trimmer 1 before stitching them to the split rects units.
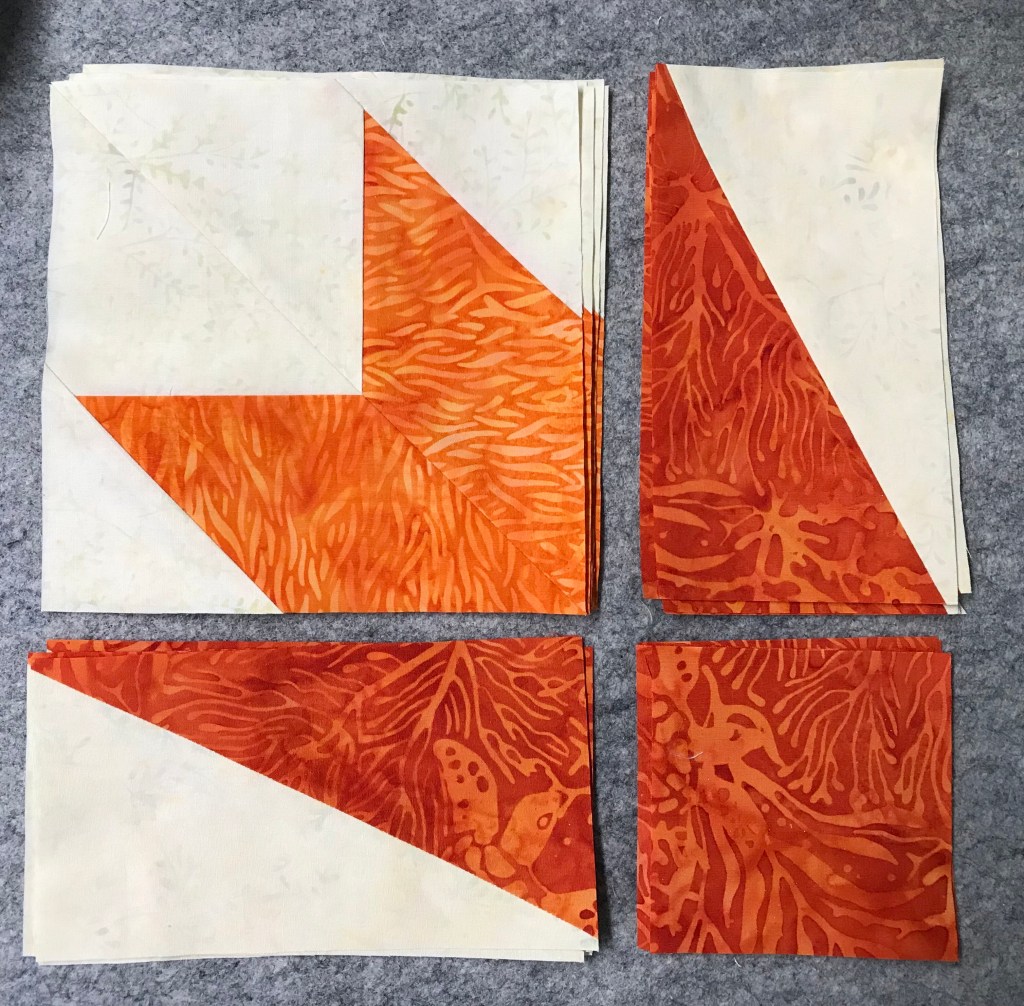
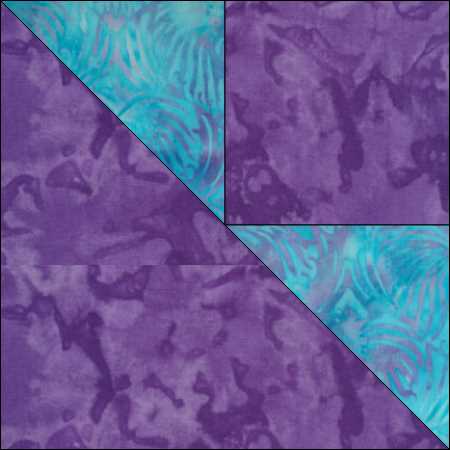
Layout your Lemoyne quarters with your mirror image split rects units and stitch together.
Press seams as shown above.
Continue making your Lemoyne star quarters/split rects units. They are all constructed the same way.
Stitch a background rectangle with each Lemoyne quarter/split rects unit as shown. Follow block assembly instruction in the BlockBuster #29 pattern.
At first I decided to make 6 – 21″ blocks measuring 60″ x 83″.
But I discovered I had enough units to make 9 blocks with left over Lemoyne quarters for the use in the outer border. Quilt measures 83″ x 83″.
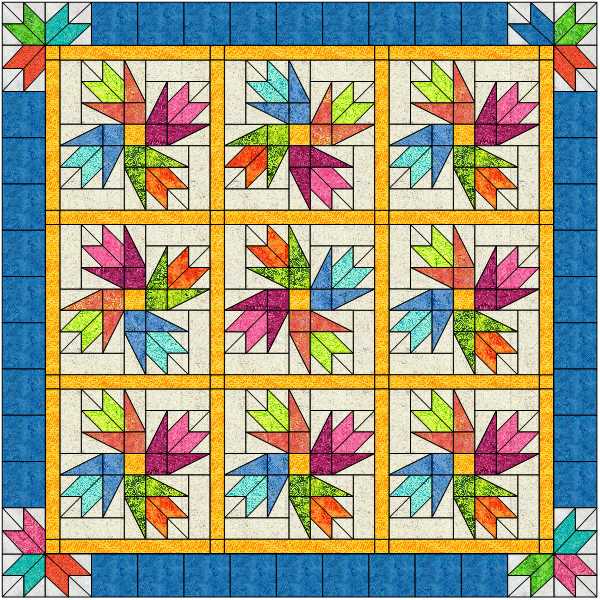
It’s funny how this quilt came about. It stared with Island Batik’s fabric line: Tropical Escape; BlockBuster’s Pointsettia block (a Christmas flower); and it is named after a canyon in Arizona. I named this quilt Copper Canyon Blooms as I think they look like desert blooms! In the supply list below I’ve given you fabric requirements for both the 6 block top and the 9 block top.
I just finished my “Doves of Hope” quilt and wanted to share it with you.
Deb Tucker designed this quilt for Marie Bostwick’s book “Hope on the Inside”. Deb’s pattern Doves of Hope is a twist on a traditional block titled Dove in the Window. She actually nestled a small dove block inside a large dove block to create a quarter section for each 19½” .
I will be teaching Doves of Hope in January 2020 at Copper Canyon Quilting in Lake Havasu, AZ.
I absolutely love how it came out. I pulled out my Island Batik scraps for this project, it is mostly made with Enchanted Forest fabrics. You will need your Tucker Trimmer I to complete this beautiful quilt and can make it in Lap, twin or King sizes.
The fabrics shown in this post were given to me by Island Batik. This quilt was pieced with my favorite thread by Aurifil and completed with Hobbs 100% cotton Batting
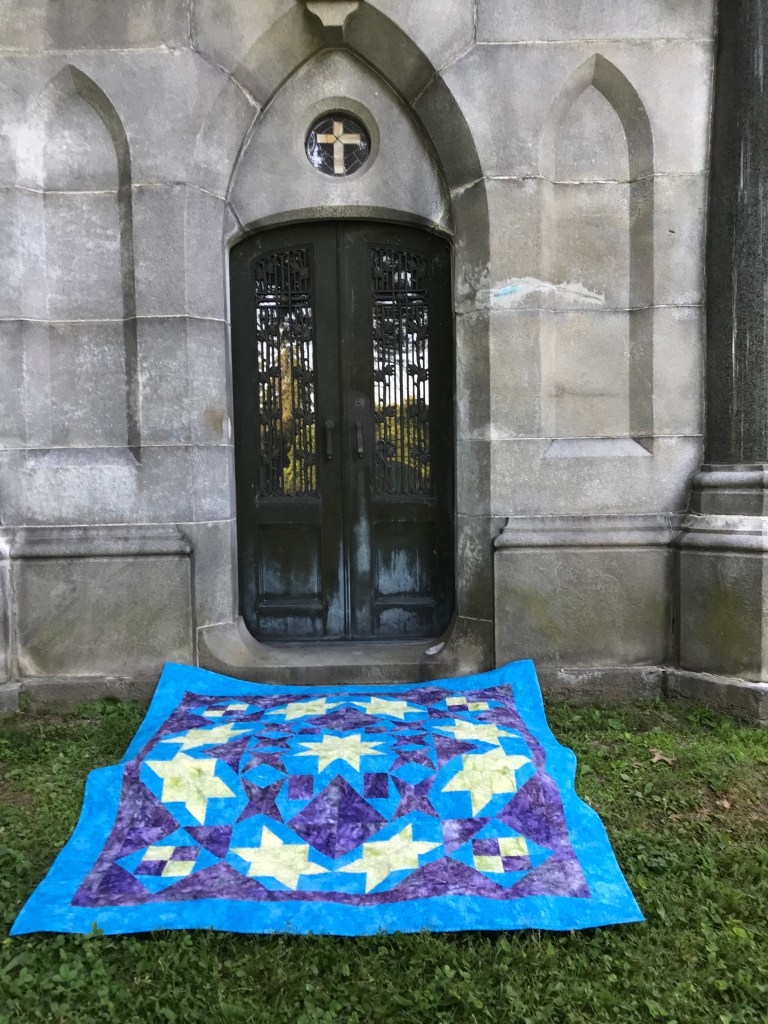
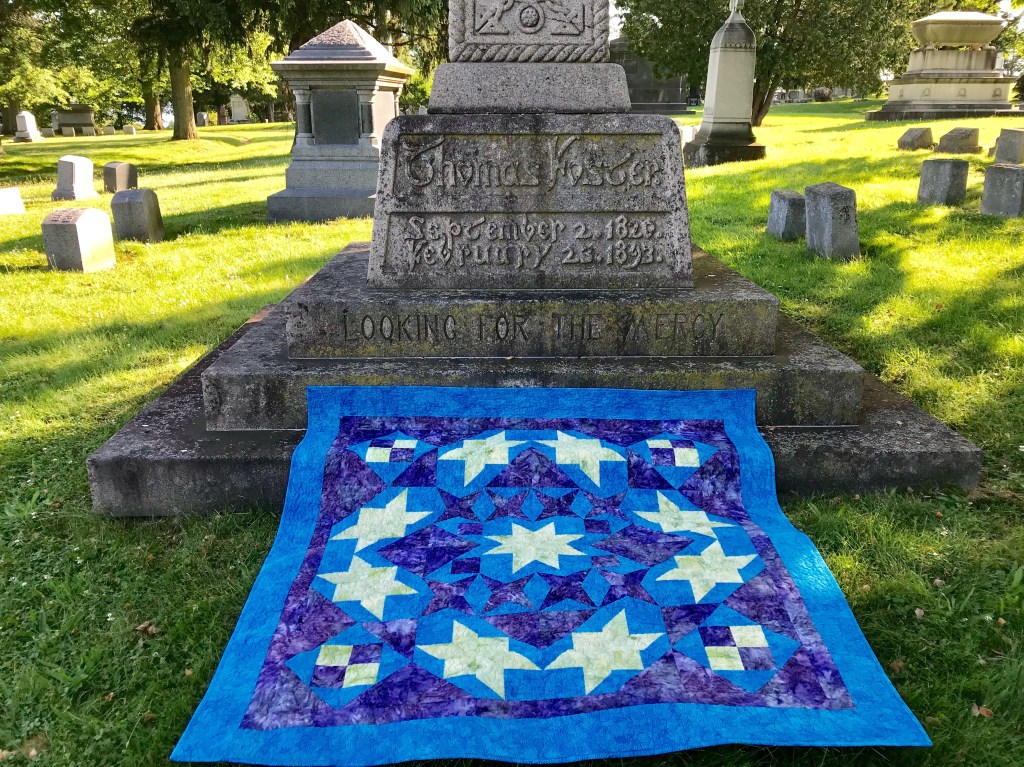
The August Challenge for the Island Batik Ambassadors is to create a quilt featuring Stars. I chose a design I created in EQ8. I love the way the Lemoyne quarters combines with shaded four patch units creates a shooting star effect.
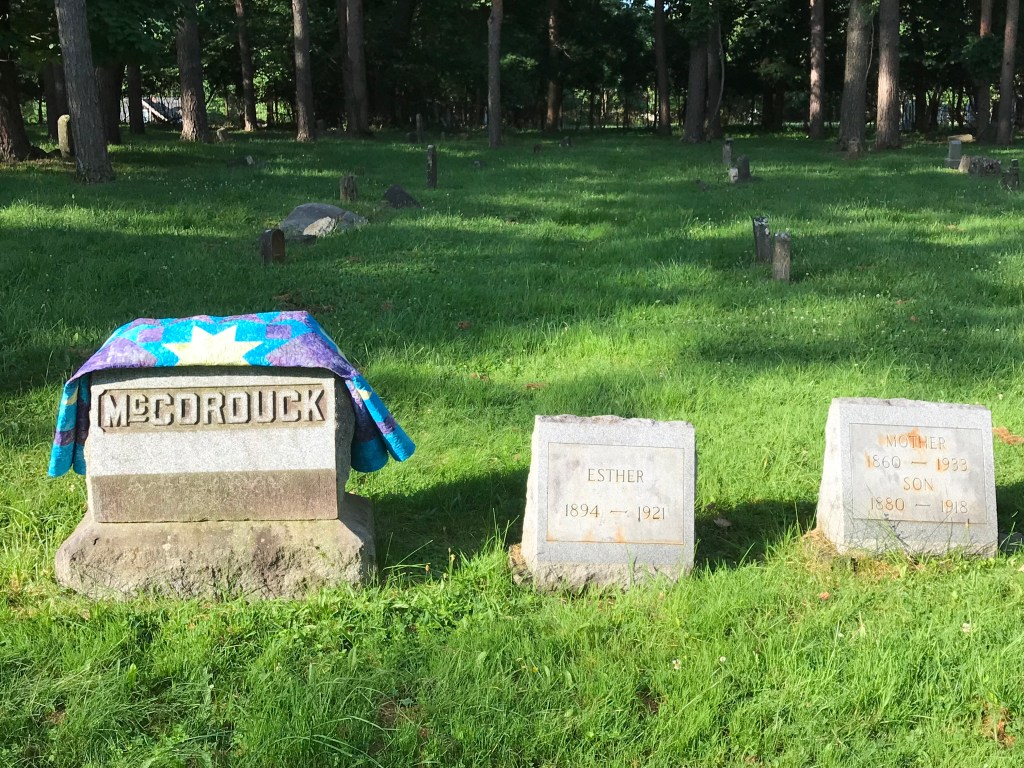
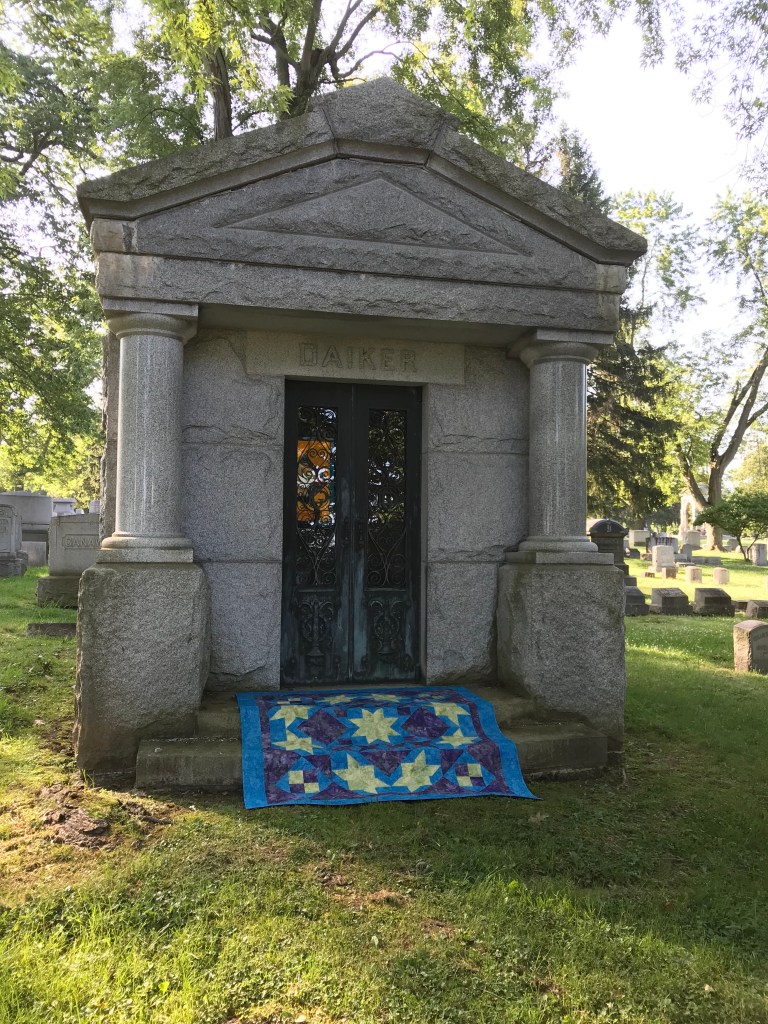
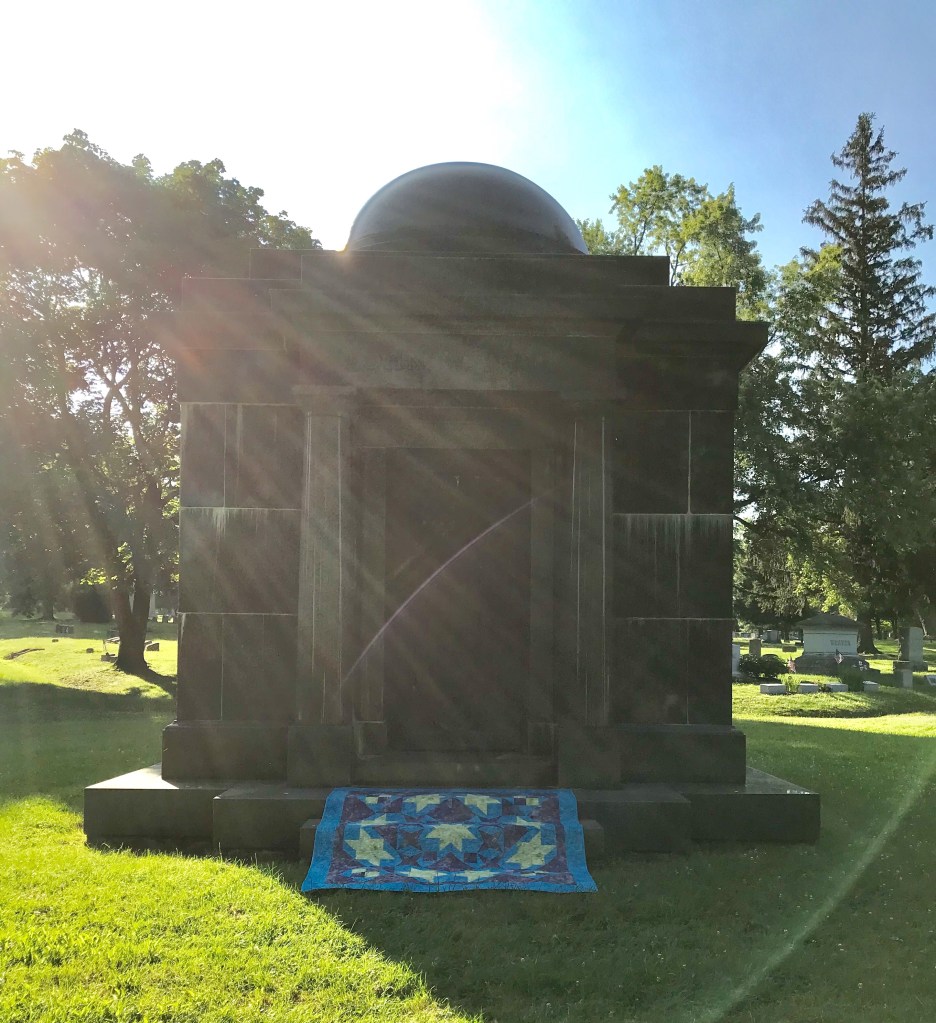
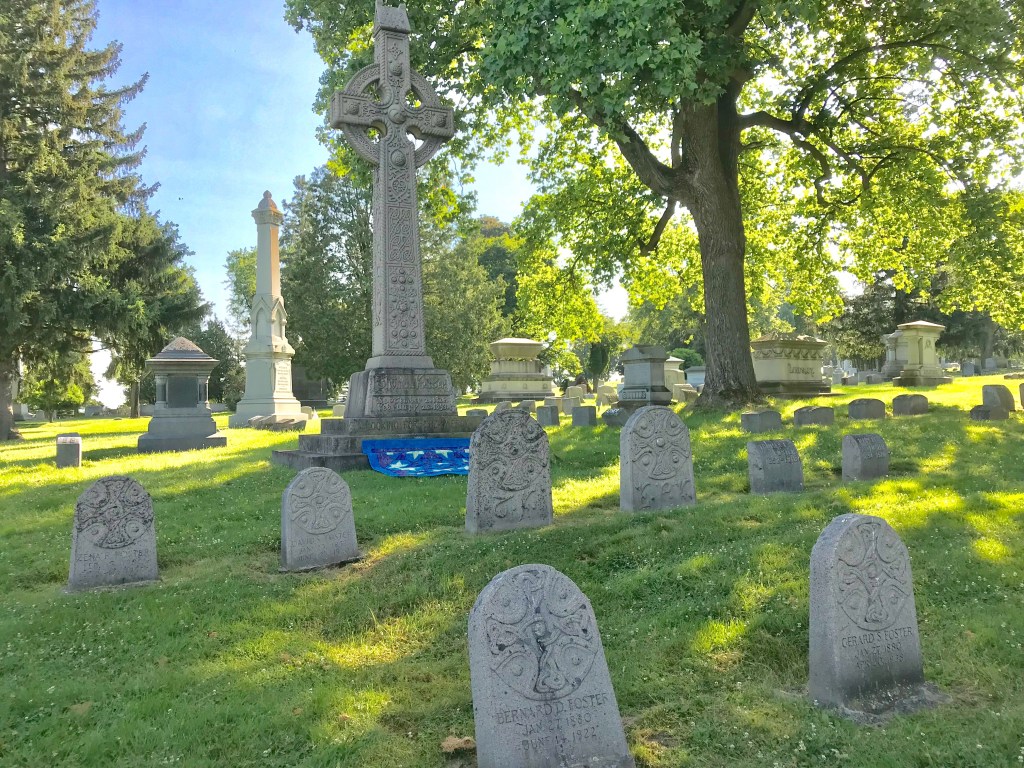
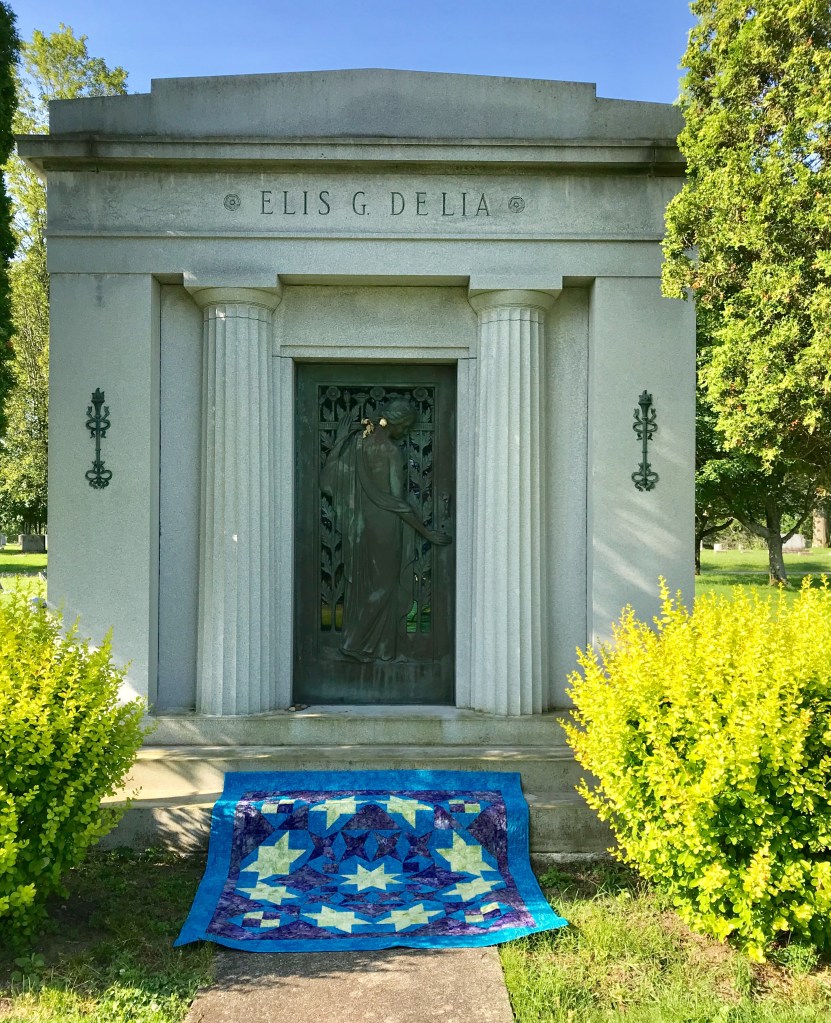
Quilts and mausoleums……what? Who goes on a “Walk & Talk” tour of Forest Hills Cemetery (founded 1848) in my home town of Utica, NY and gets the idea to photograph quilts there? My mind works in mysterious ways. We have family in Forest Hills and visit there often so that is where I began.
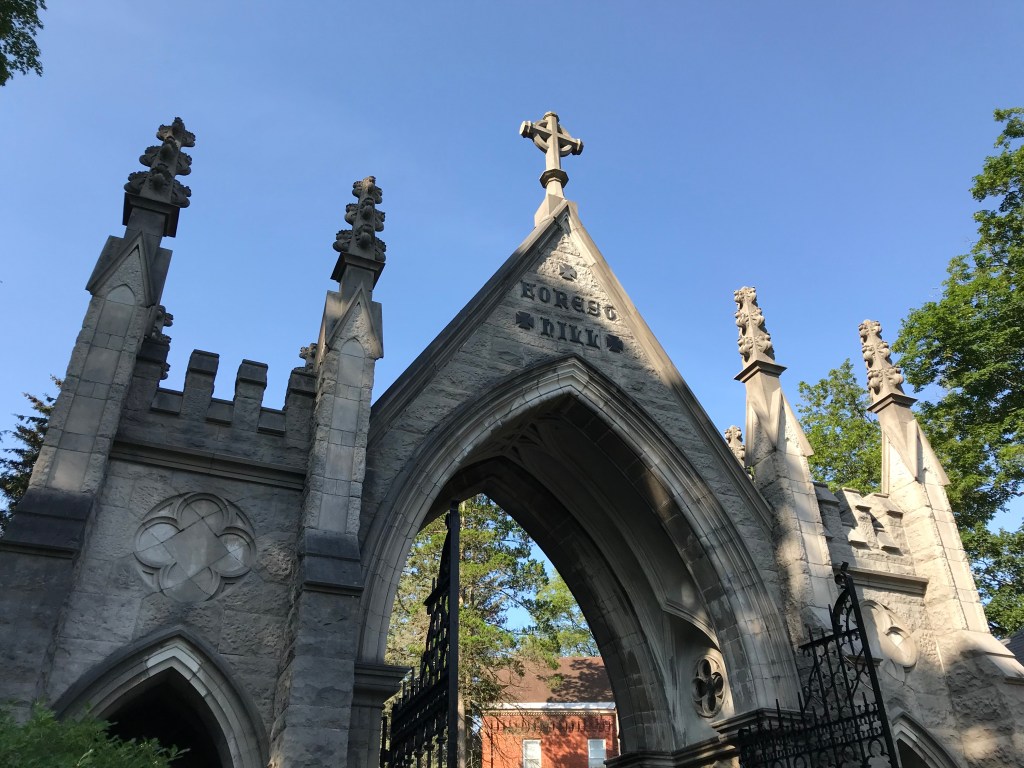
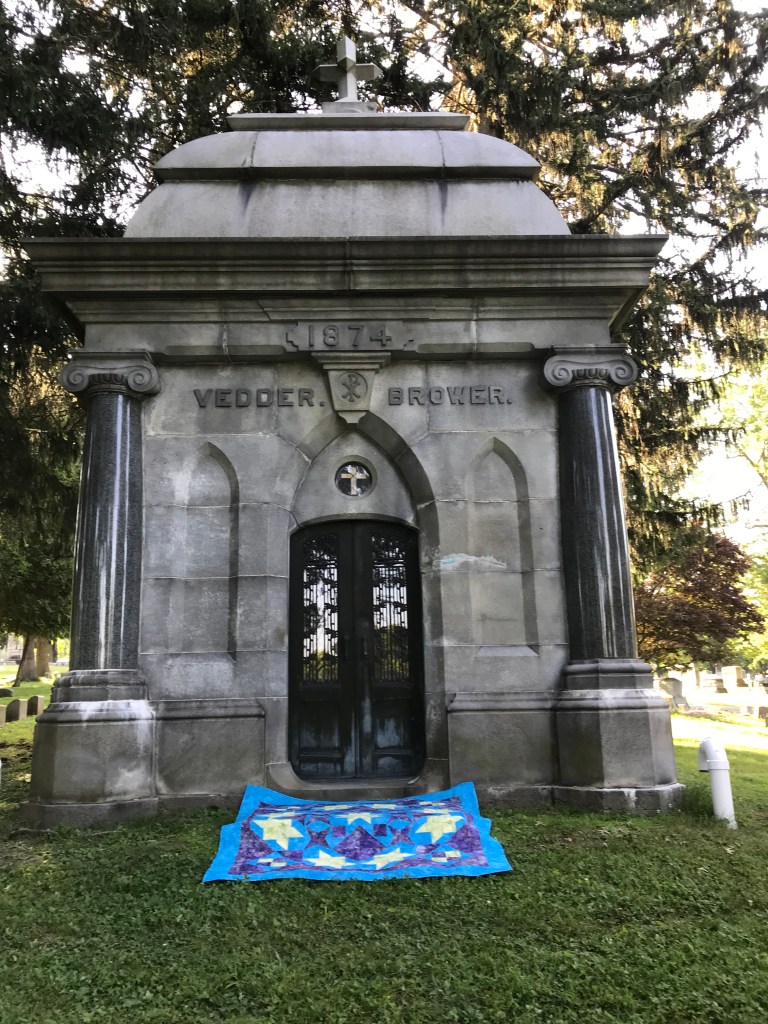
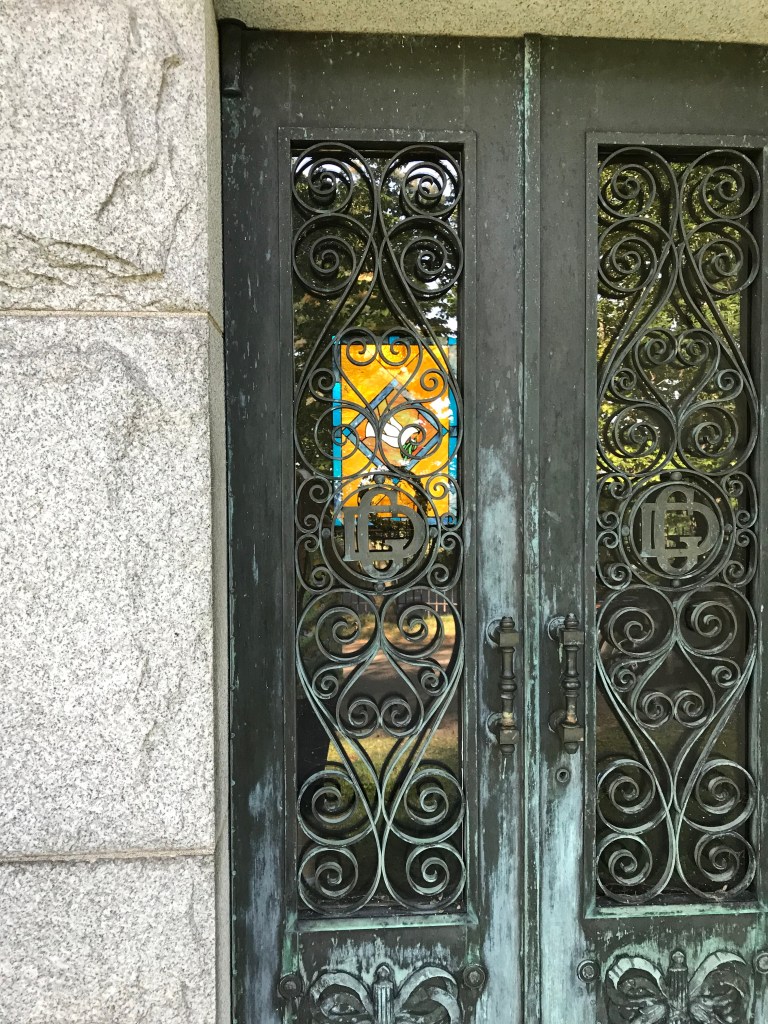
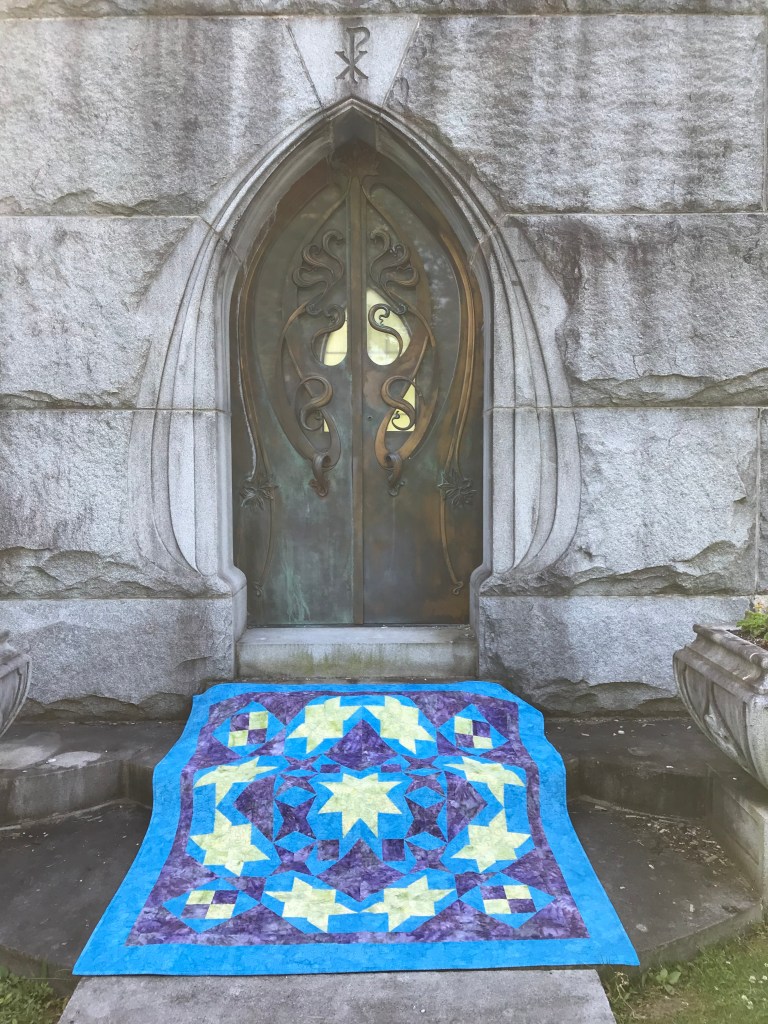
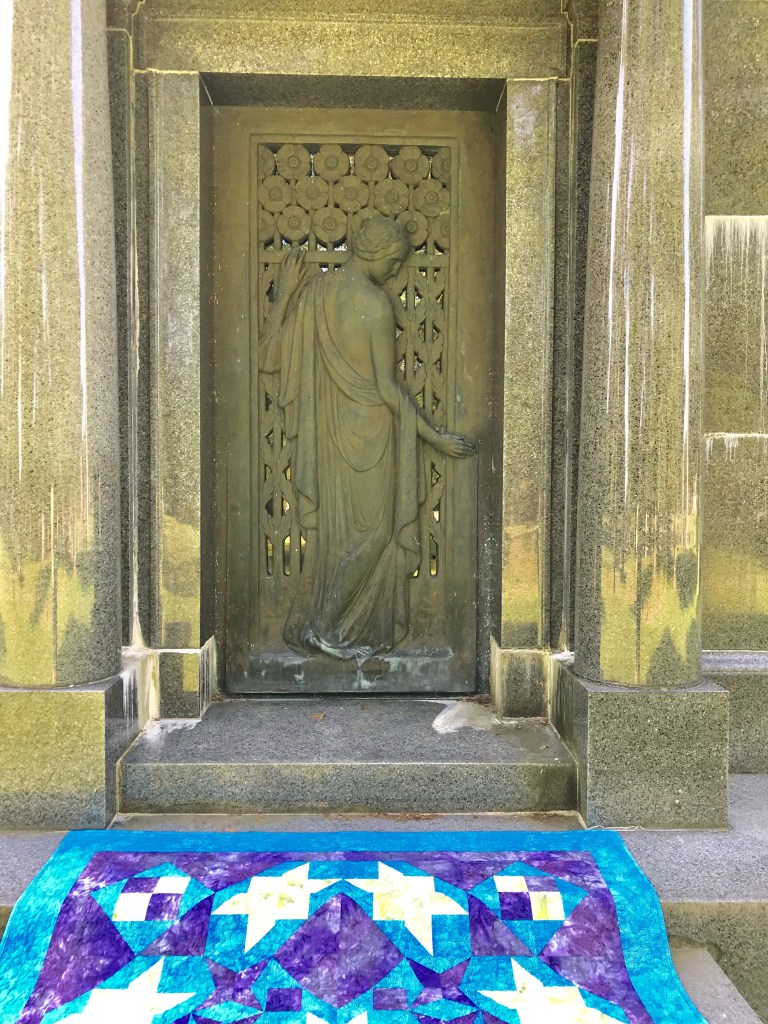
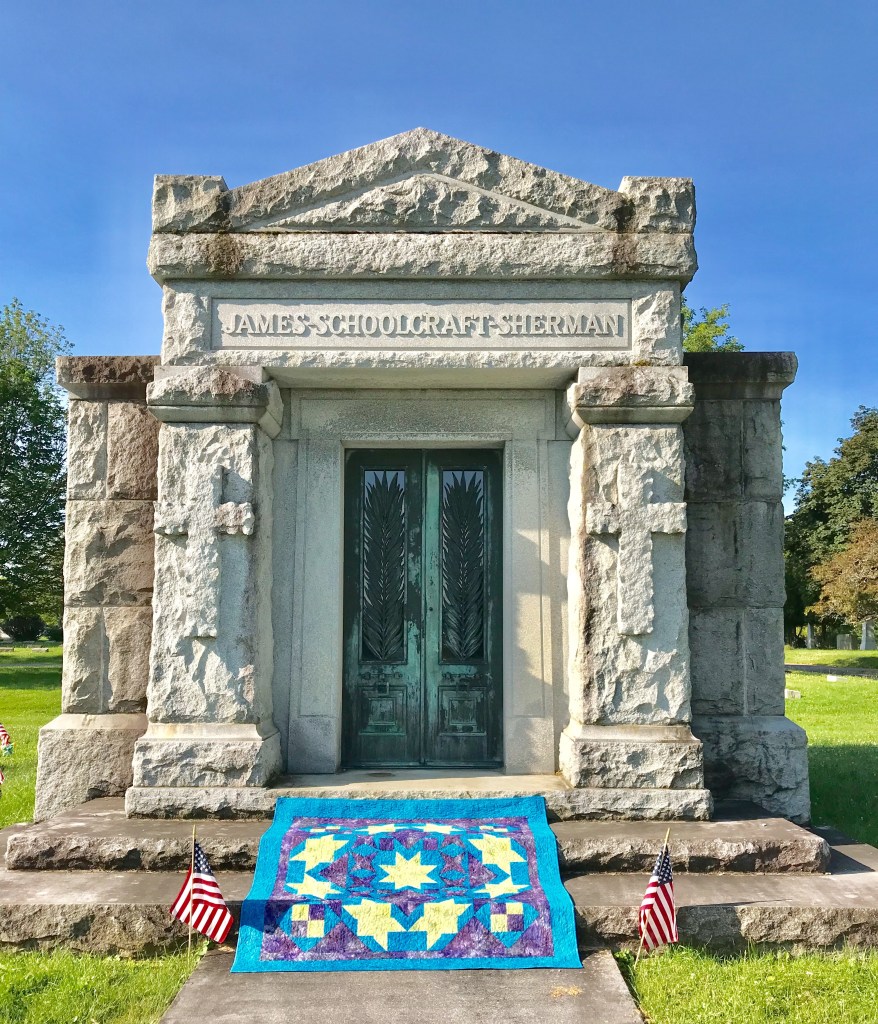
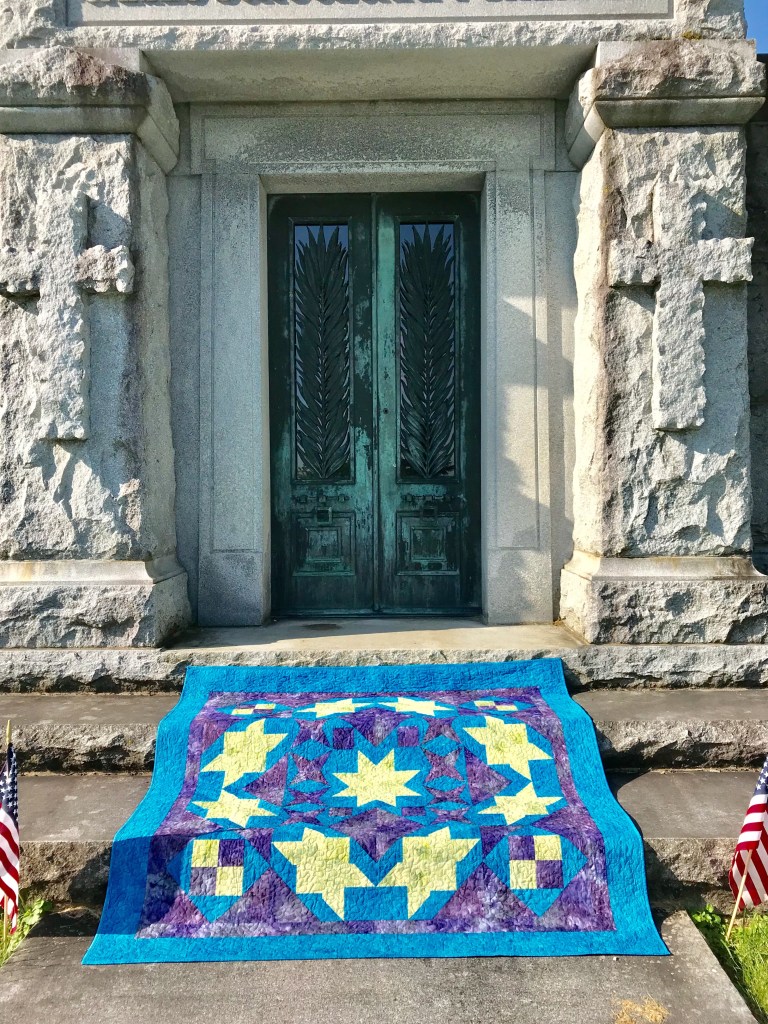
There are so many beautiful mausoleums in Forest Hills. I decided to take photo’s of Shooting Stars in front of them. That may sound weird but I love all the history found in cemeteries. There were so many beautiful doors.
The morning sun was shining through the stained glass.
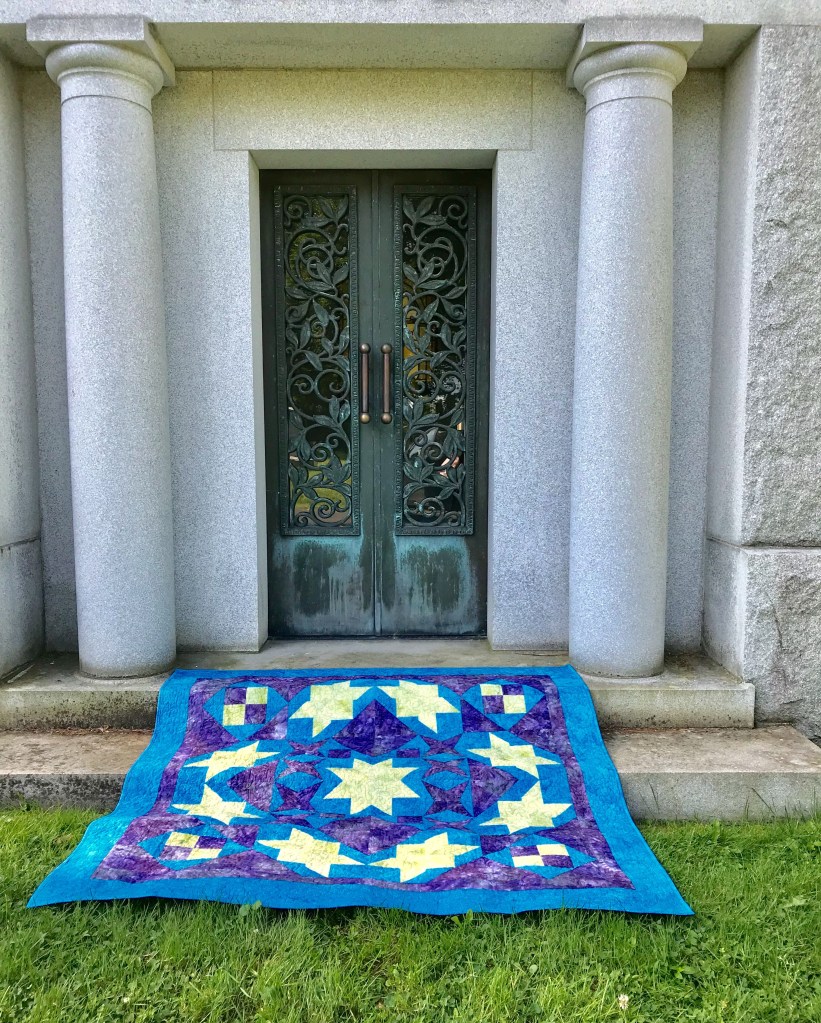
These beautiful brass doors are what gave me the idea to photograph Shooting Stars there.
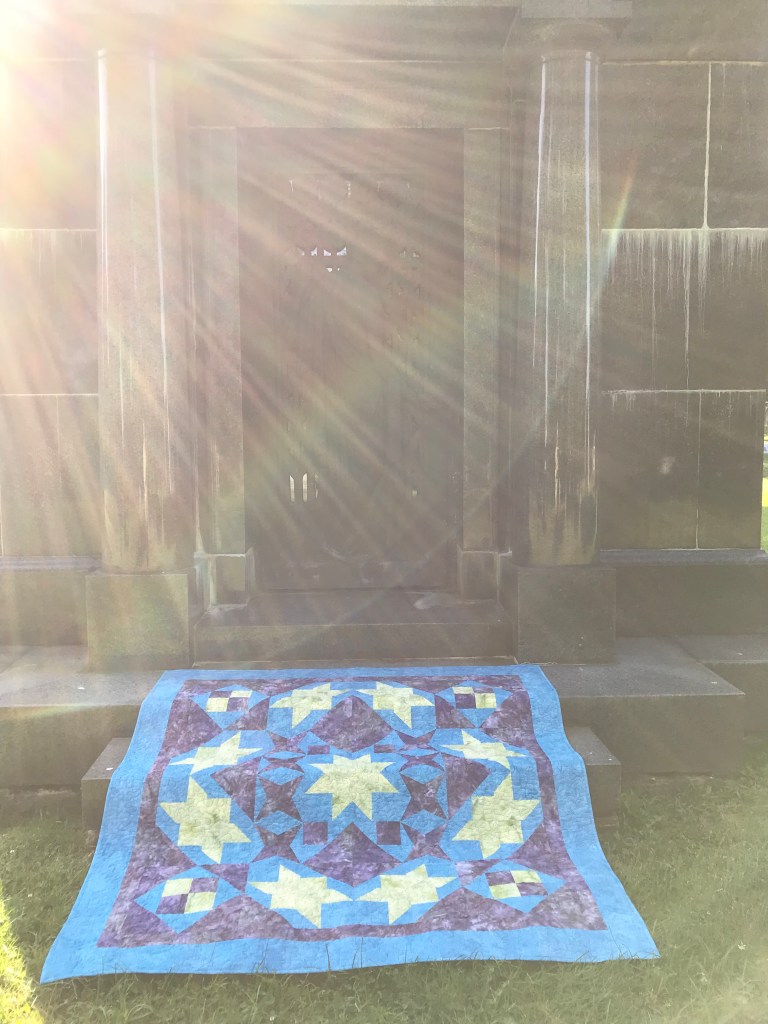
I love the way sun rays were streaming or maybe someone was visiting!
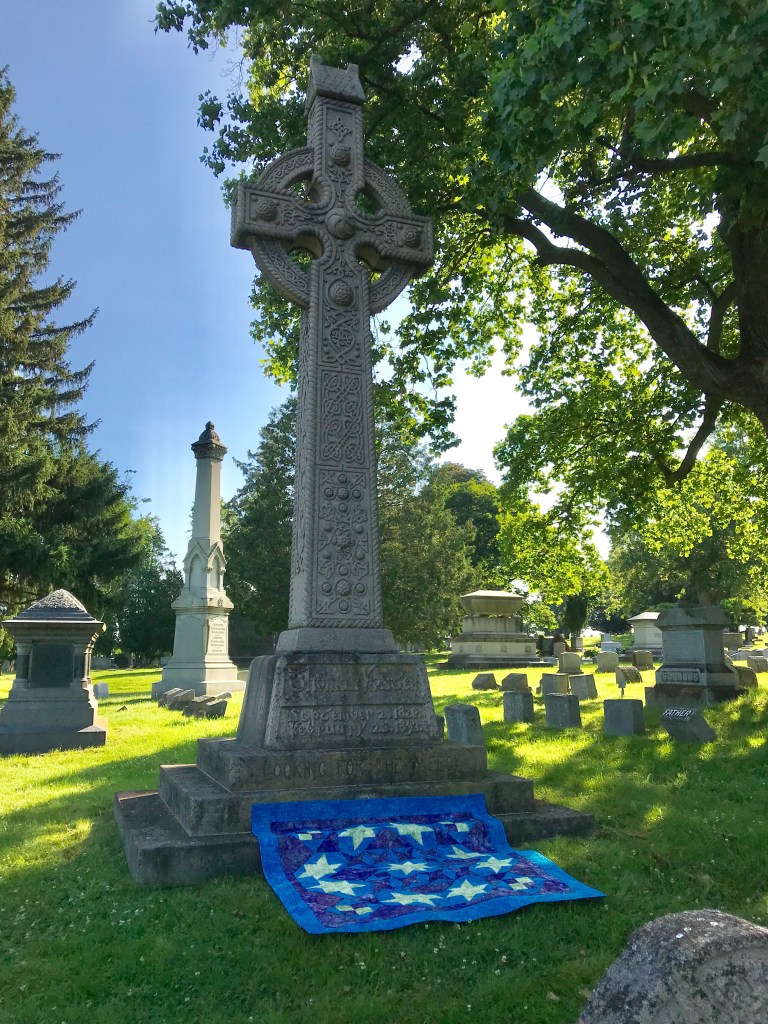
These Celtic Crosses are awesome!
We even have a past Vice President.
I love walking through a cemetery and reading the tributes. If you would like a supply list for Shooting Stars download here.
The fabrics in this post were given to me by Island Batik.
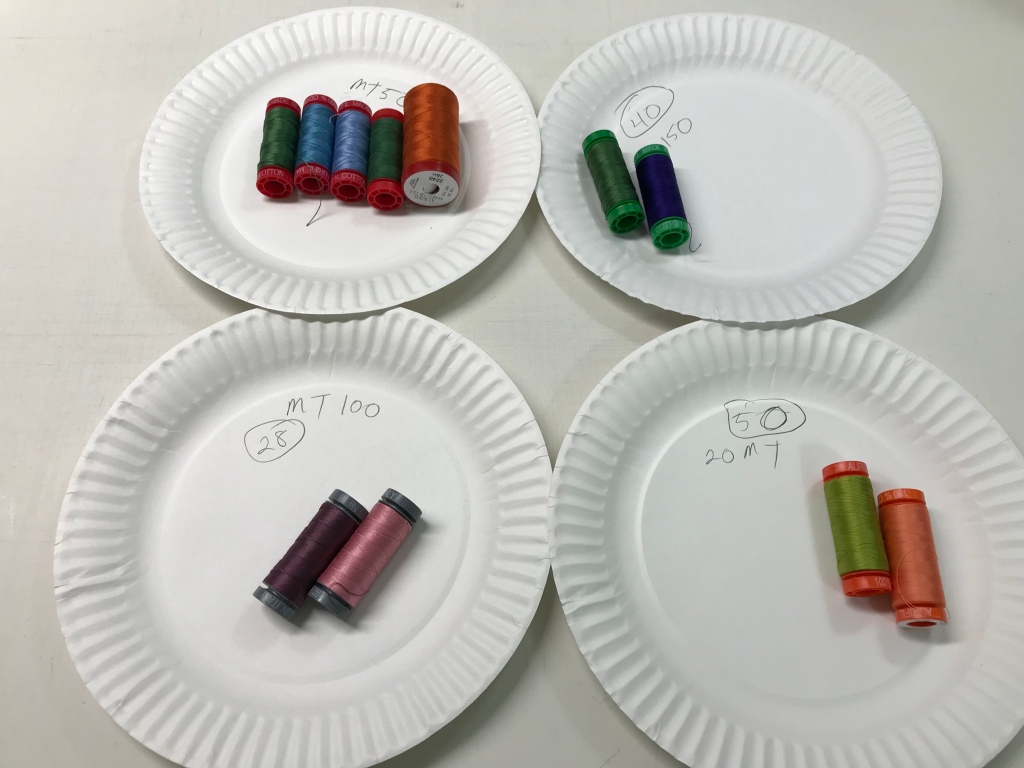
The mission: Use any fabric art/non-traditional quilting/sewing/thread painting technique using 3 Aurifil thread weights. In my infinite wisdom, I chose thread painting (sigh).
About 10 years ago I took a thread painting class from Nancy Prince. She is a wonderful quilt artist.
As usual I get organized with paper plates!
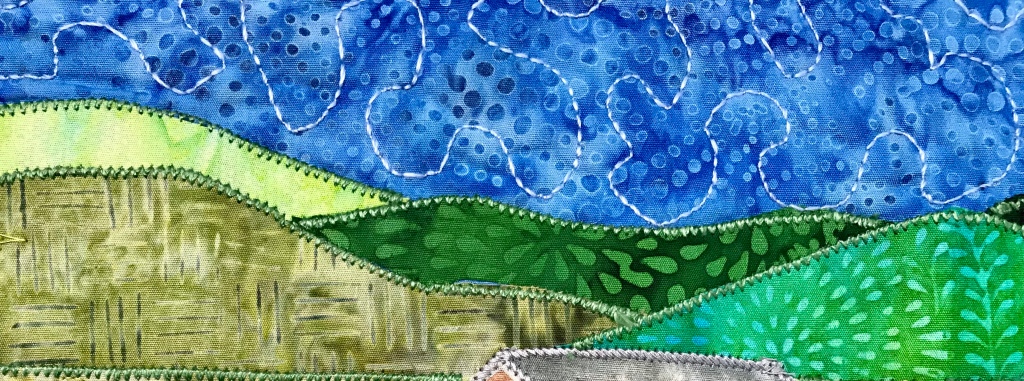
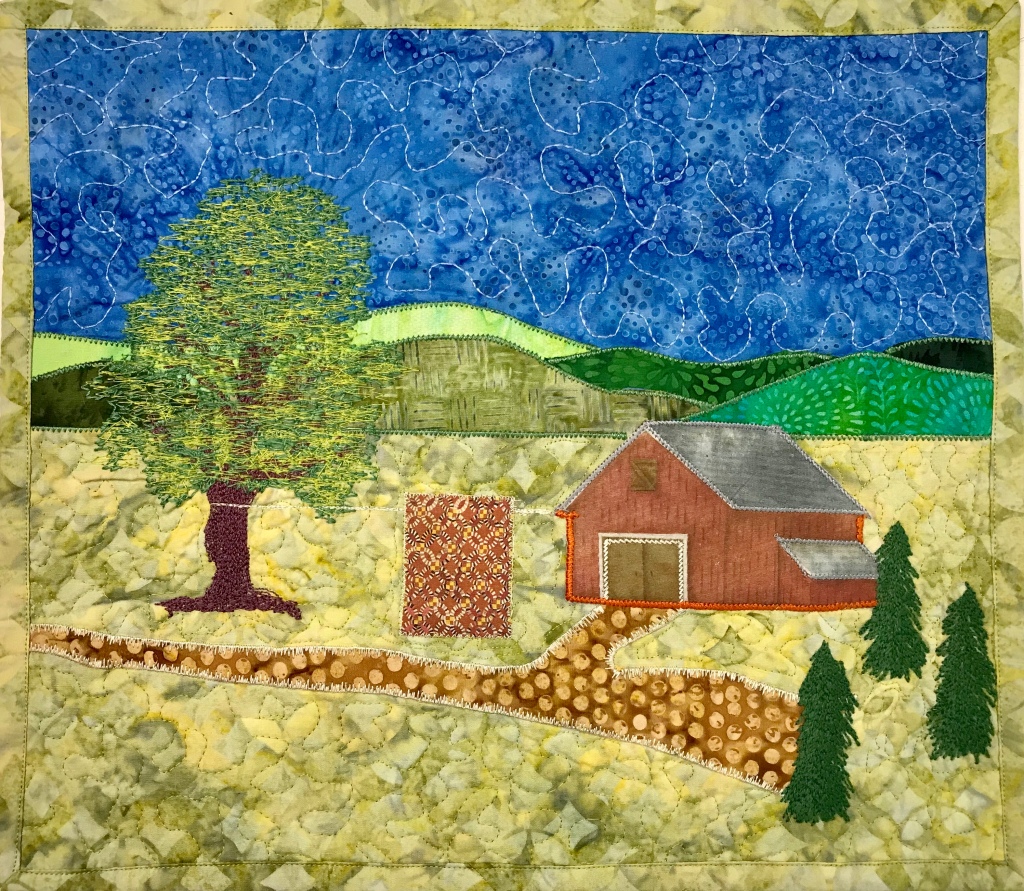
I started by creating my background of land and sky and pinning it to a light weight stabilizer. I traced mountains onto Steam A Seam II to add to the country scene.
I outlined the mountains with Aurifil 12 weight.
I added a path and stitched the edges with Aurifil 30 weight.
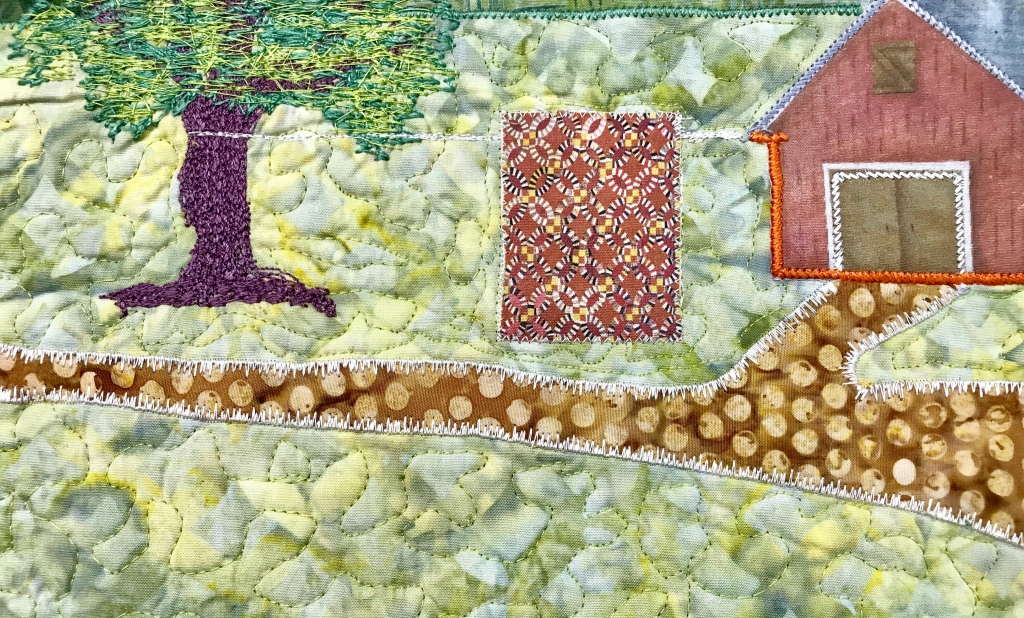
I traced my tree onto a water soluble stabilizer, positioned and pinned it to the quilt top. I used Aurifil 28 weight, lowered the feed dogs, adjusted the upper tension, attached the open toed quilting foot and began thread painting the tree trunk until it was filled in. I changed thread to a dark green Aurifil 12 weight and outlined the tree and lightly filled it in. I changed the thread to a lighter green Aurifil 50 weight and finished thread painting the tree.
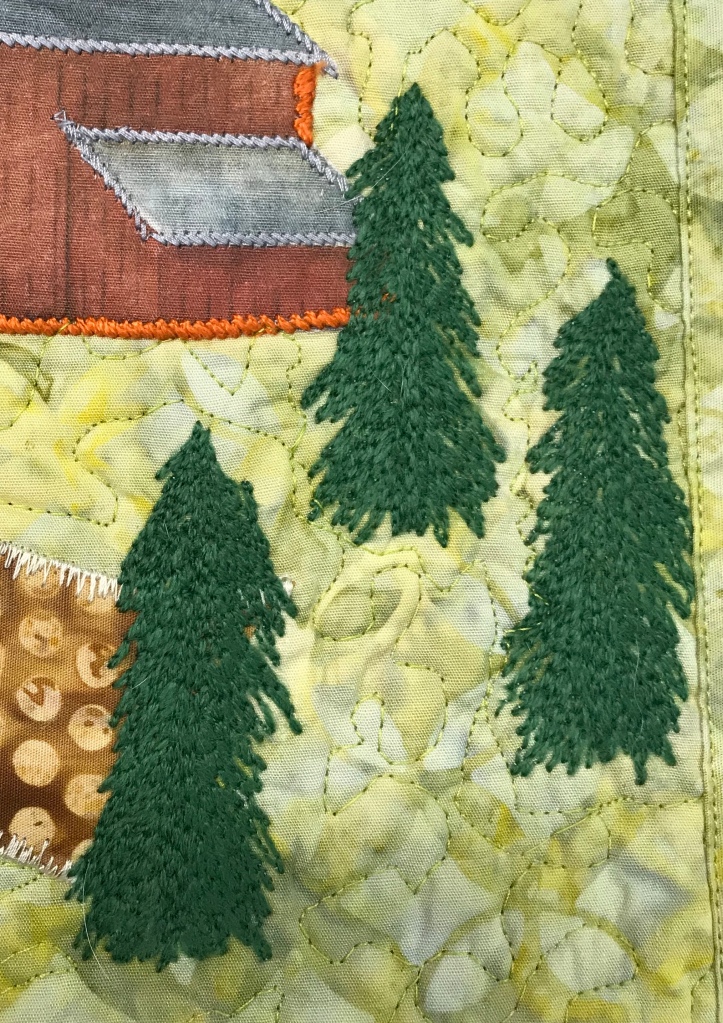
I traced the pine trees onto water soluble stabilizer, changed the thread to a dark green Aurifil 12 weight and thread painted my pine trees.
I used Hobbs Thermore batting for the quilt sandwich and attempted to quilt the sky with Aurifil 12 weight. Of course I had to add a little quilt to my country scene. My skills as a thread painter may be questionable, but Aurifil thread performed absolutely beautifully. It was strong, no breakage and hardly any lint. My project measure 13″ x 15″.
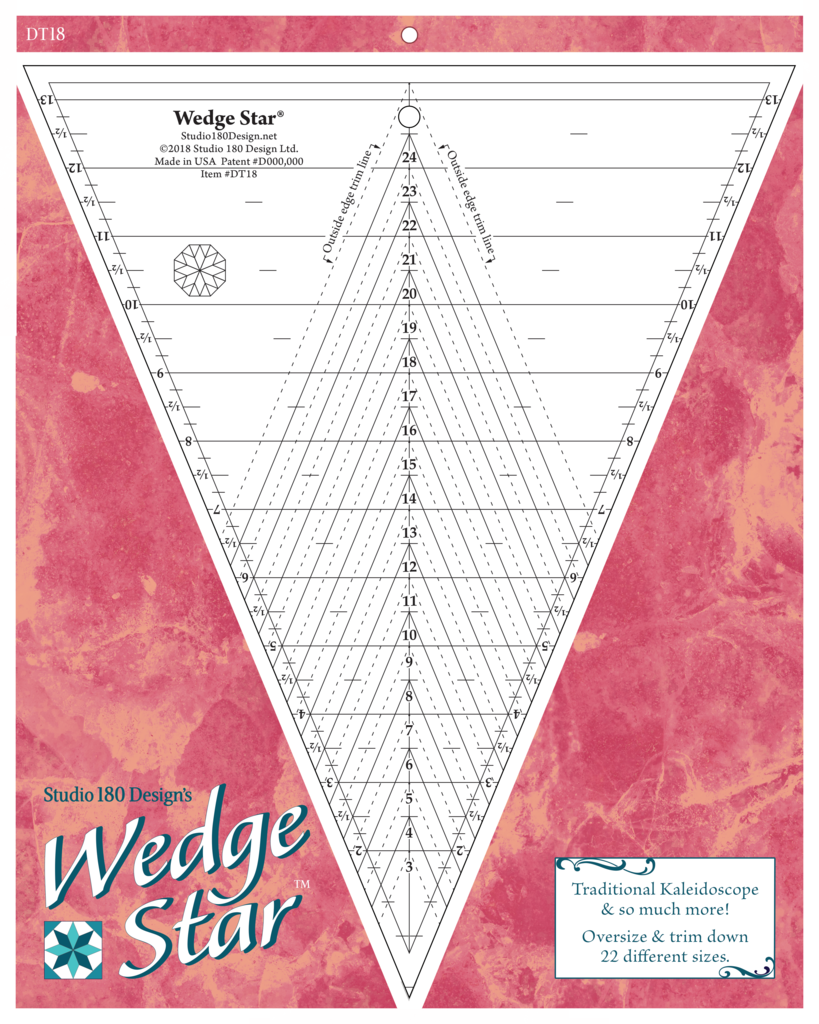
The Island Batik Ambassador’s June Challenge is “Try a New Technique”! Have you tried Studio 180 Design’s new Wedge Star Tool?
The Wedge Star tool is designed to make a variety of different blocks based on 45 degree sub-units.
They range from Wedge Star Blocks, Wedge Blocks & Mixed Blocks. There are 22 different size options ranging from 3″ to 24″ finished blocks!
Diamond units are constructed and trimmed down.
Units are stitched together in quarters and half’s, then joined into blocks with corners added to complete it.
The new Wedge Star tool is for “Intermediate Skilled” quilters. You must use your best 1/4″ seam allowance, NO scant seams here! As always use your best measuring, cutting, stitching & pressing skills.
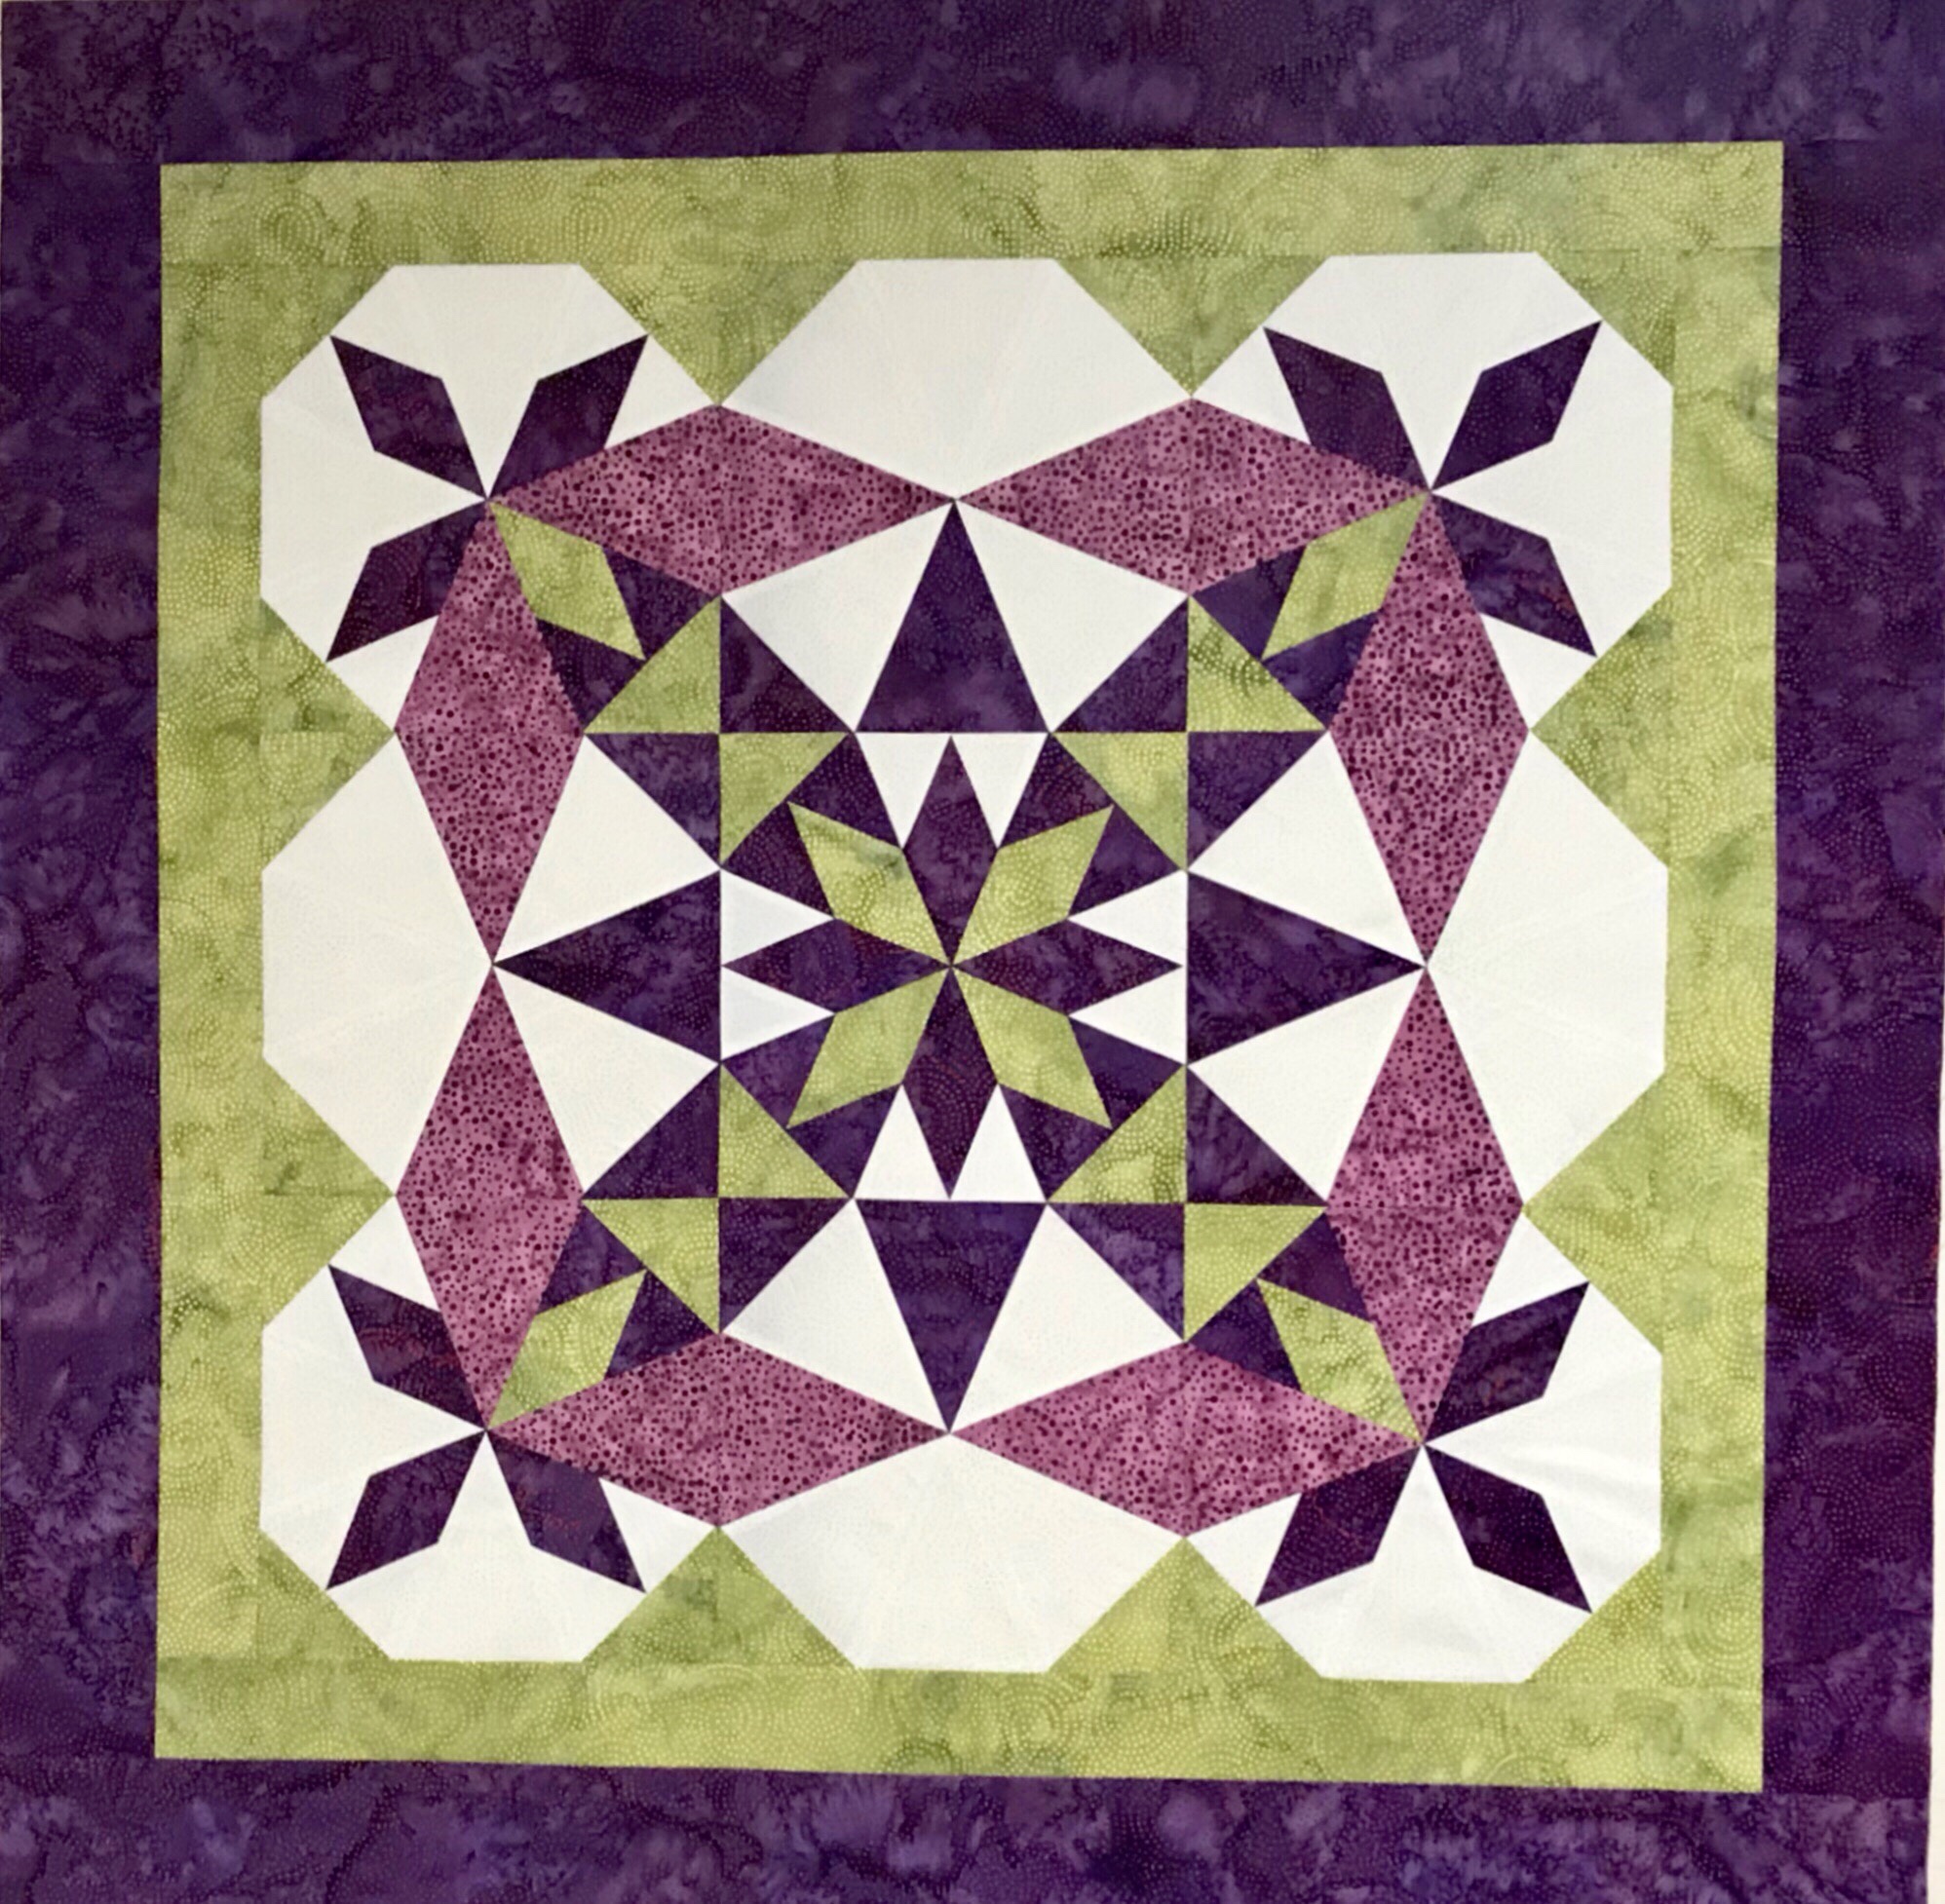
Included in the Wedge Star tool instructions is a bonus Wedge Star Pattern – Freelancer.
My beautiful Freelancer quilt was made using Island Batik’s Paisley Dot Swirl fabric and Aurifil thread.
I just got home from Studio 180 Design Certified Instructor Reunion 2019. We all worked on learning the new Wedge Star Tool. Here are some gorgeous Freelancer Quilts.
Wowza!
Here are some of the CI’s from Class of 2013. There were 5 classes represented this year. It was wonderful to see everyone and make new friends.