Tag Archives: Studio 180 Design

I Love a Pieced Border

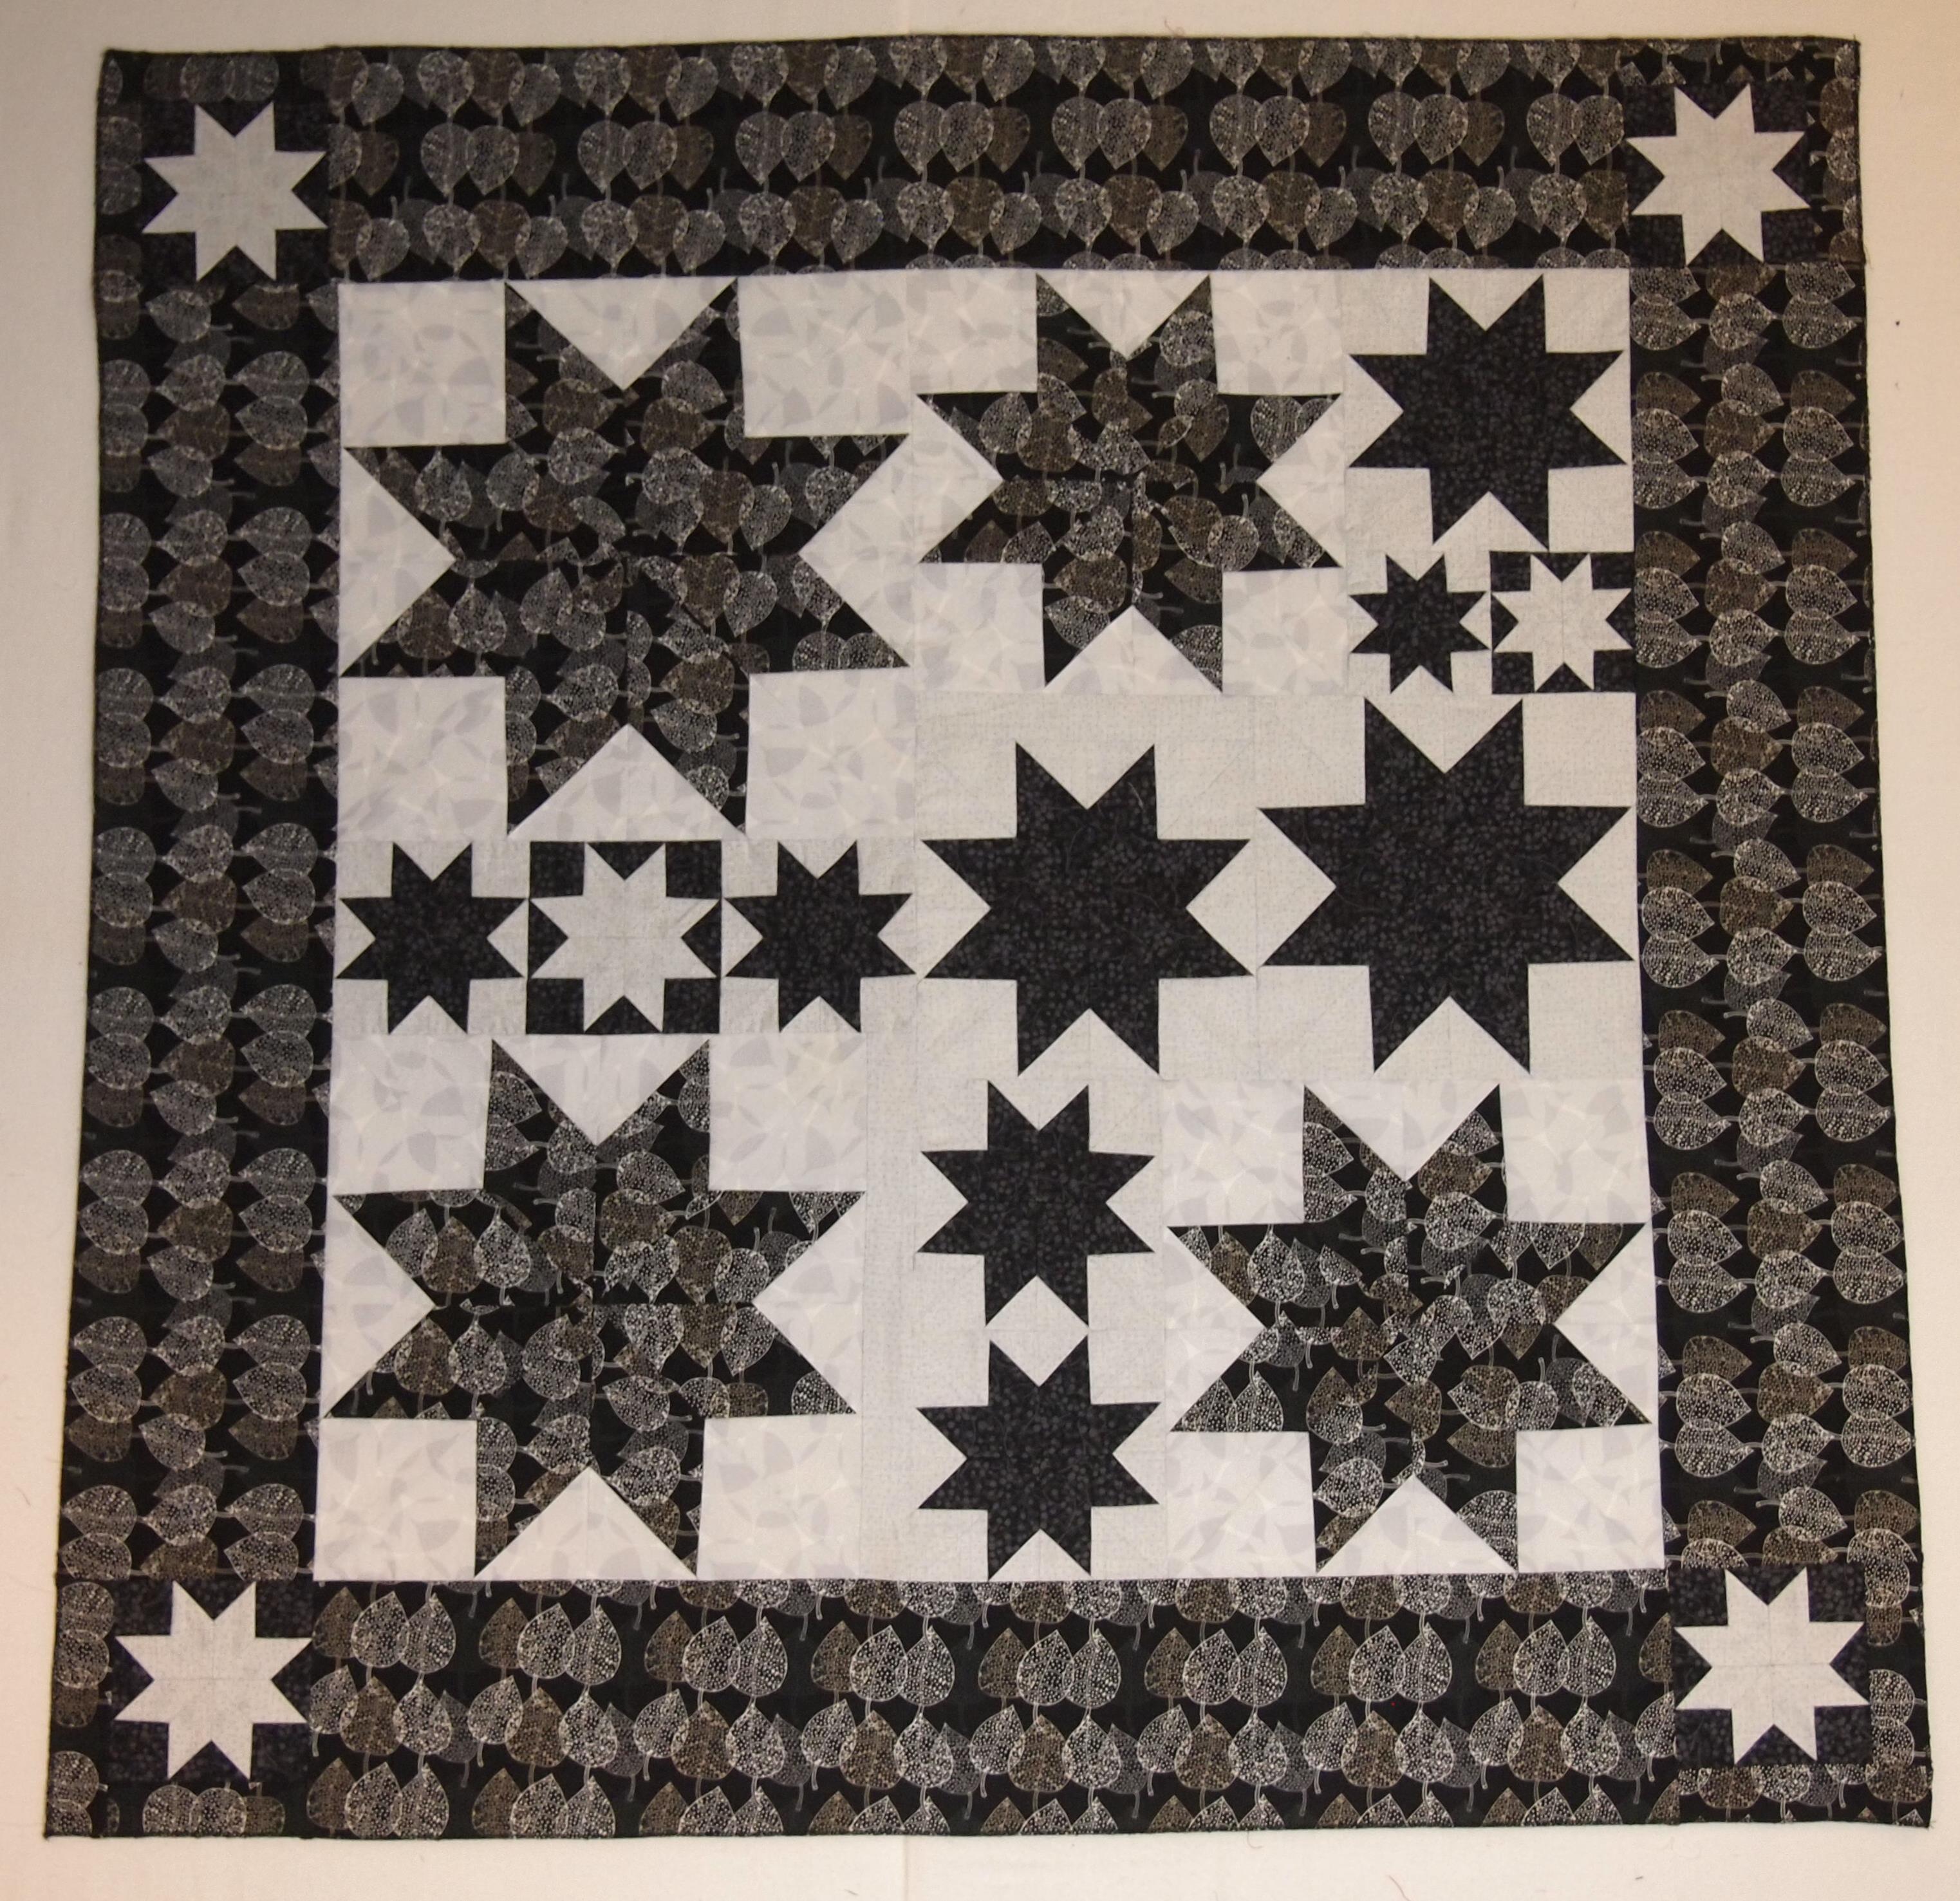
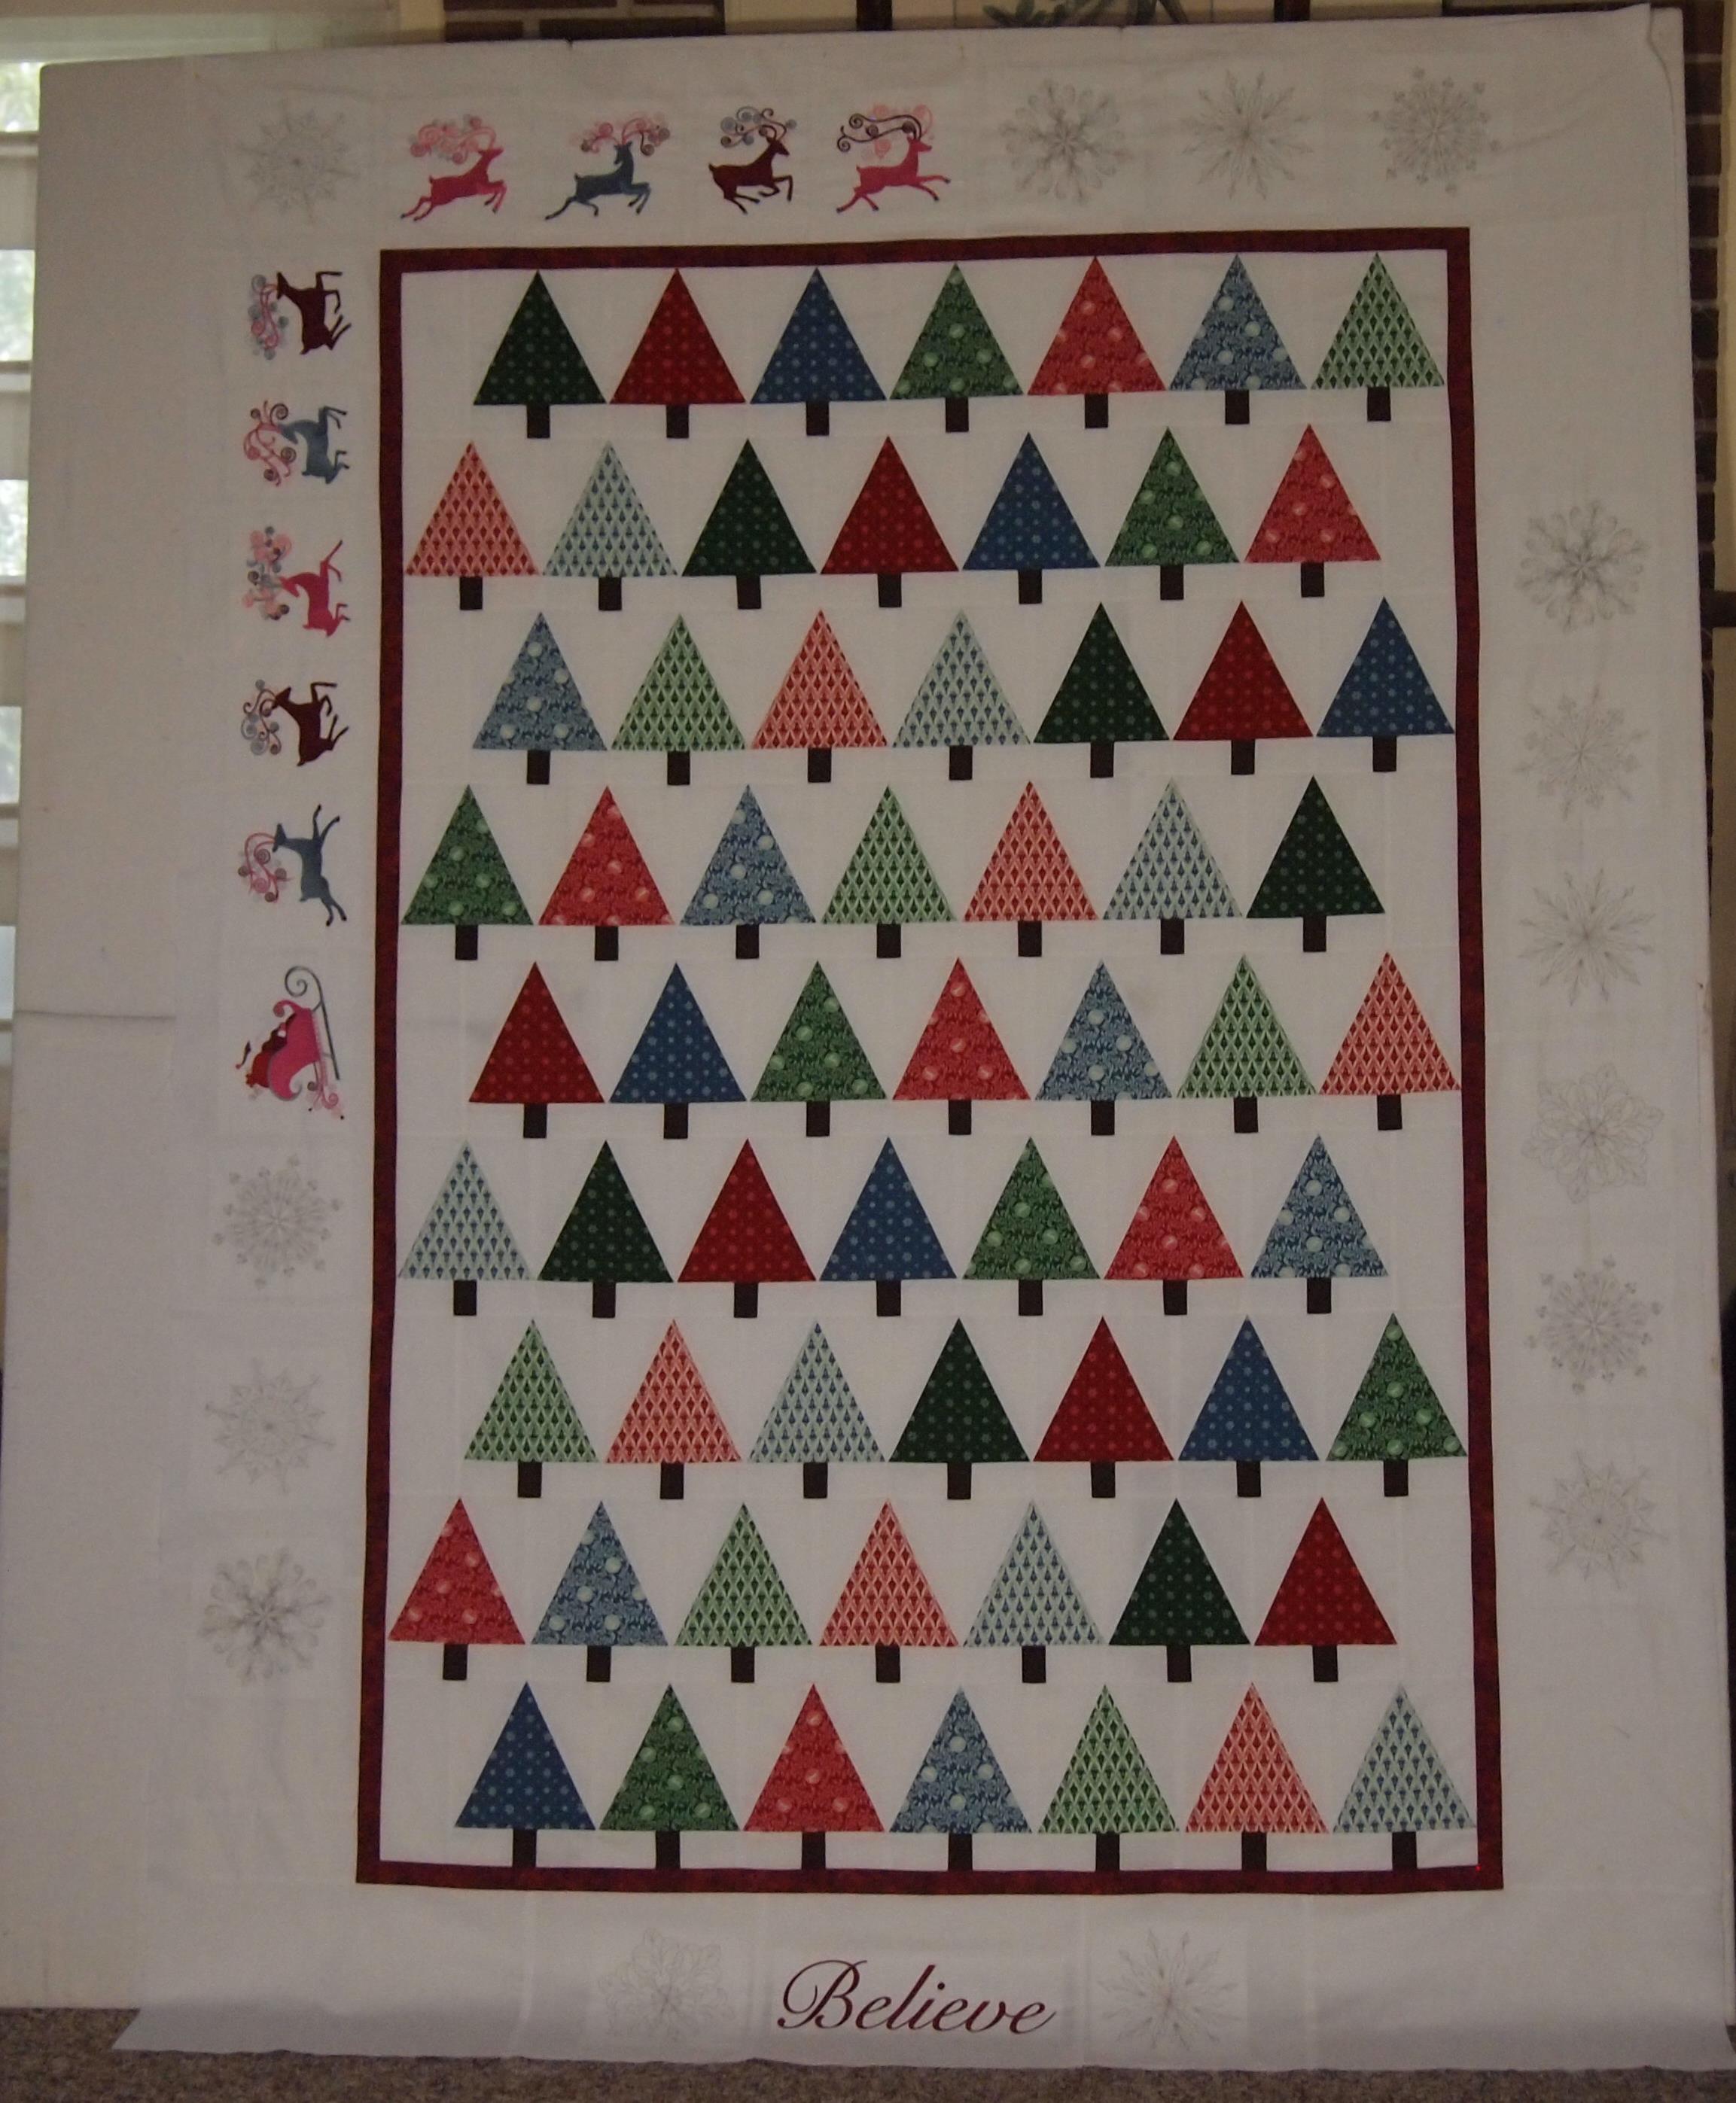
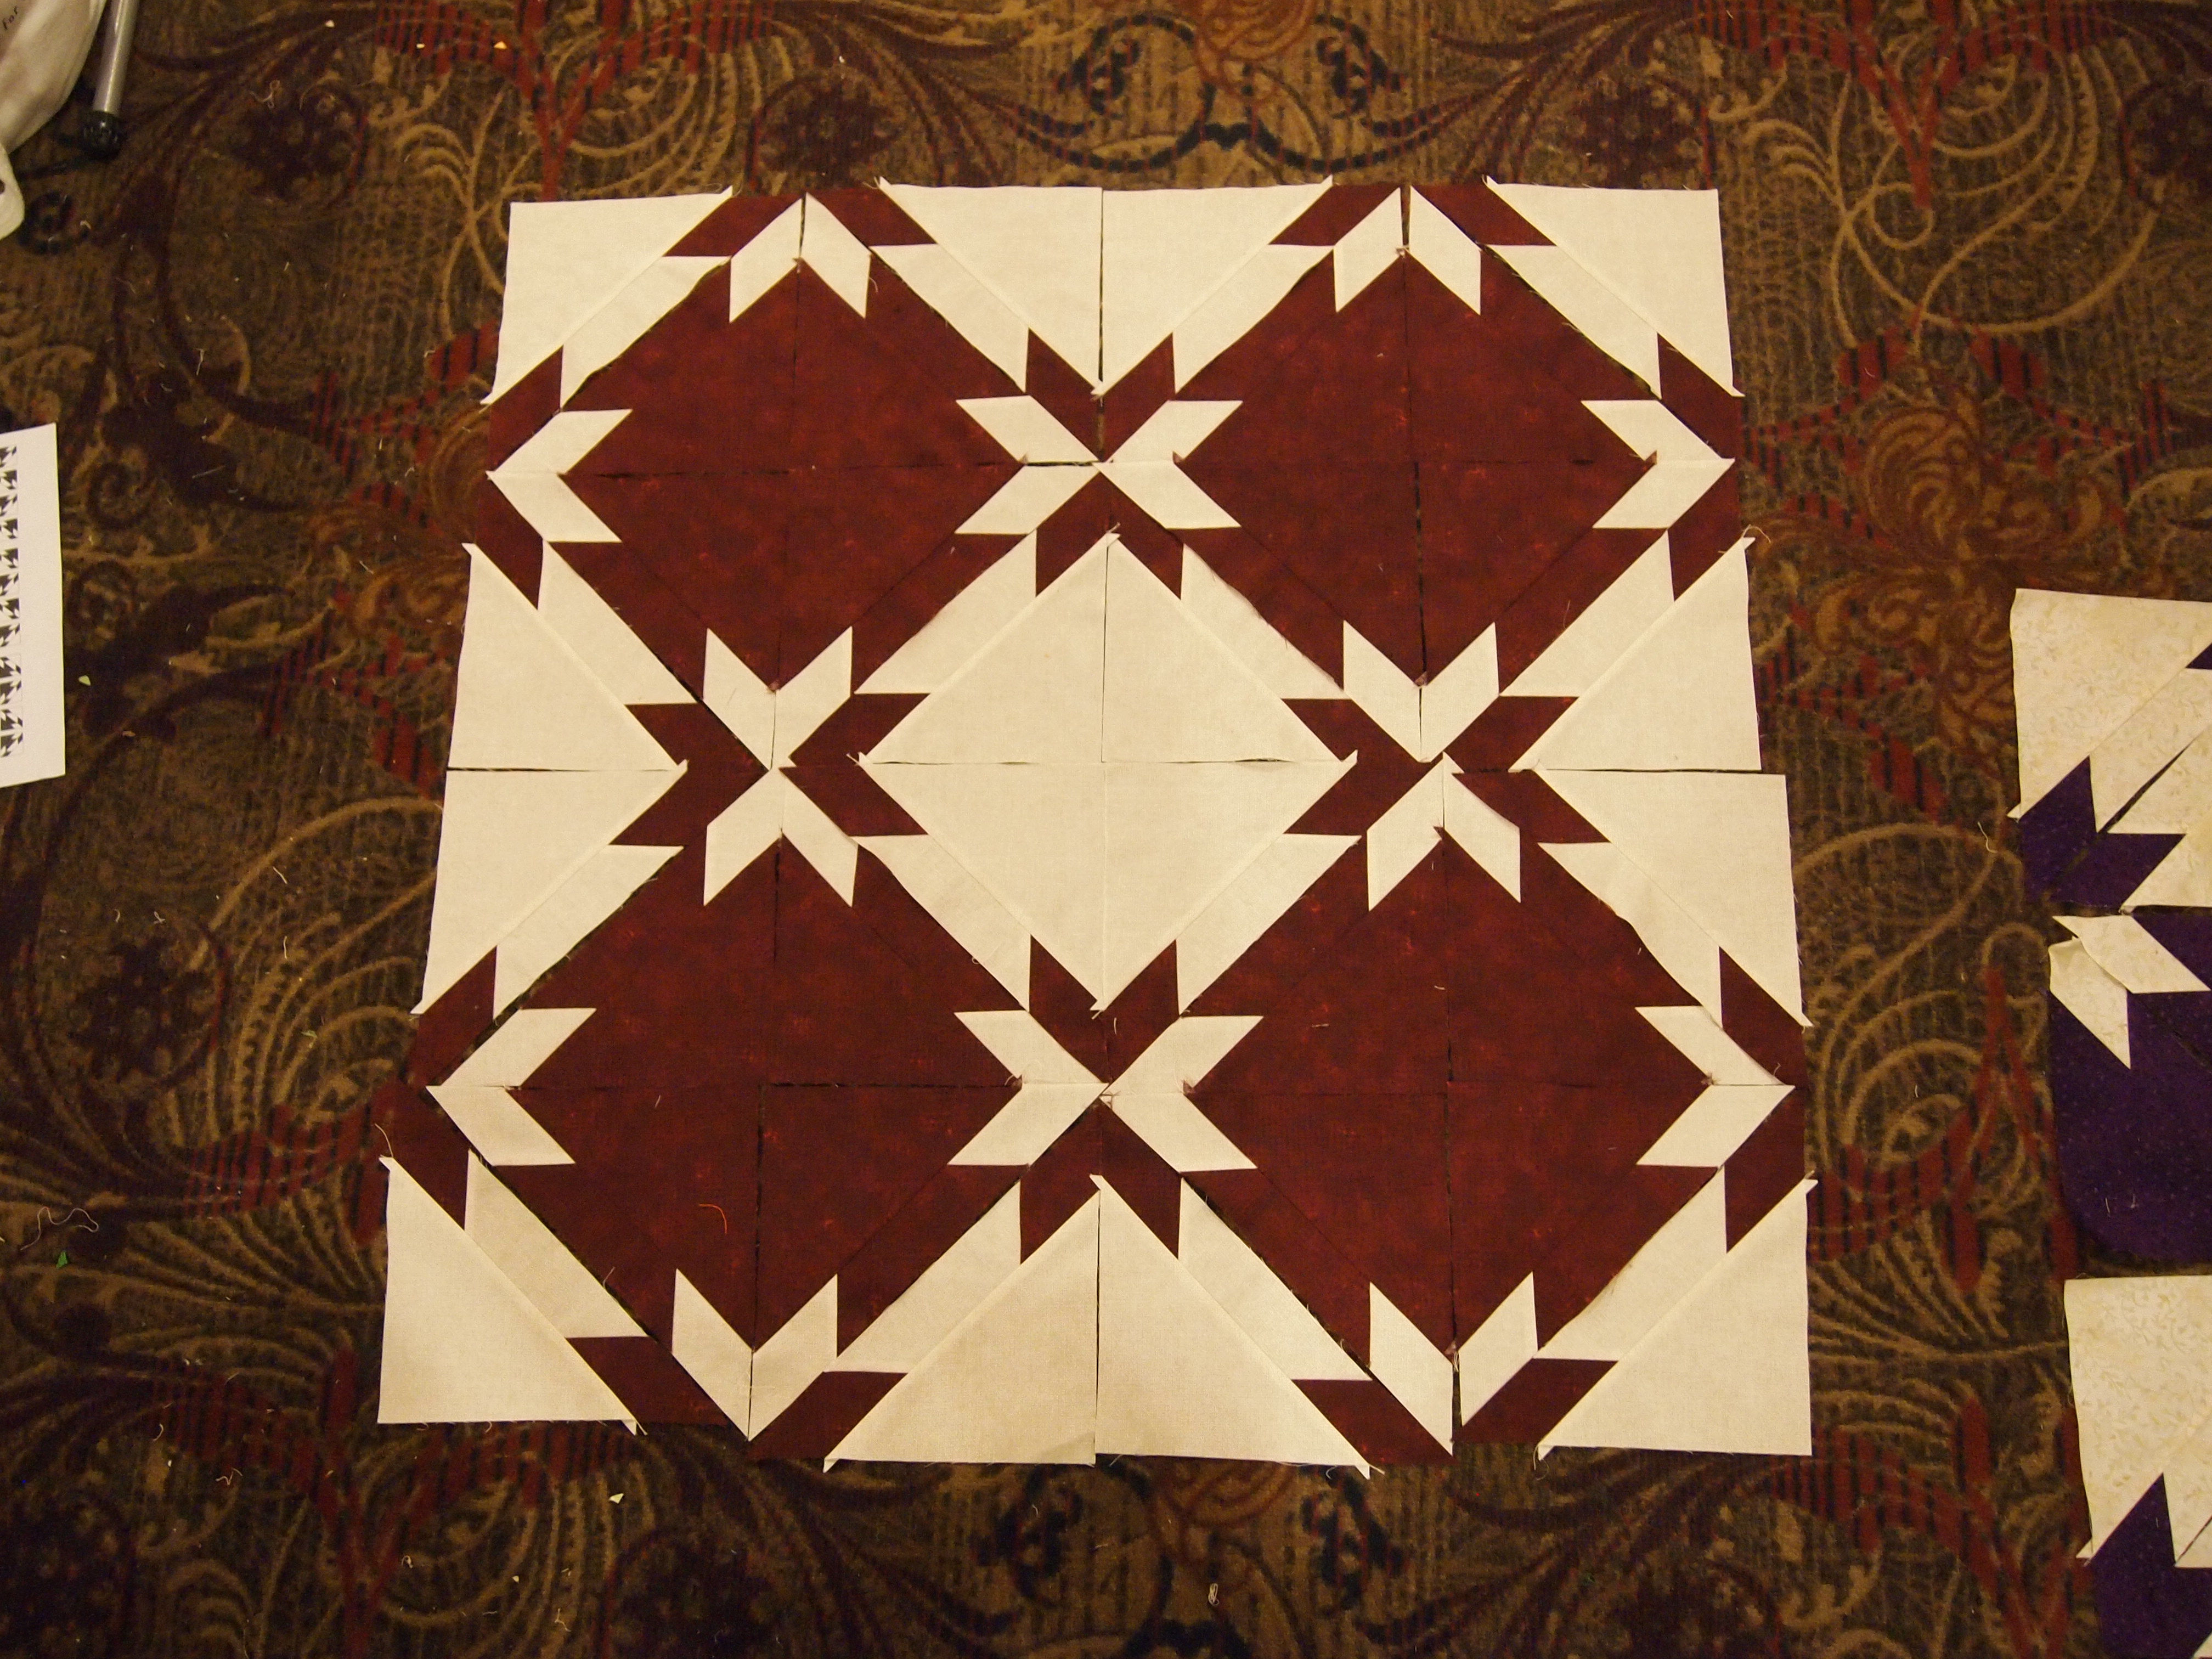
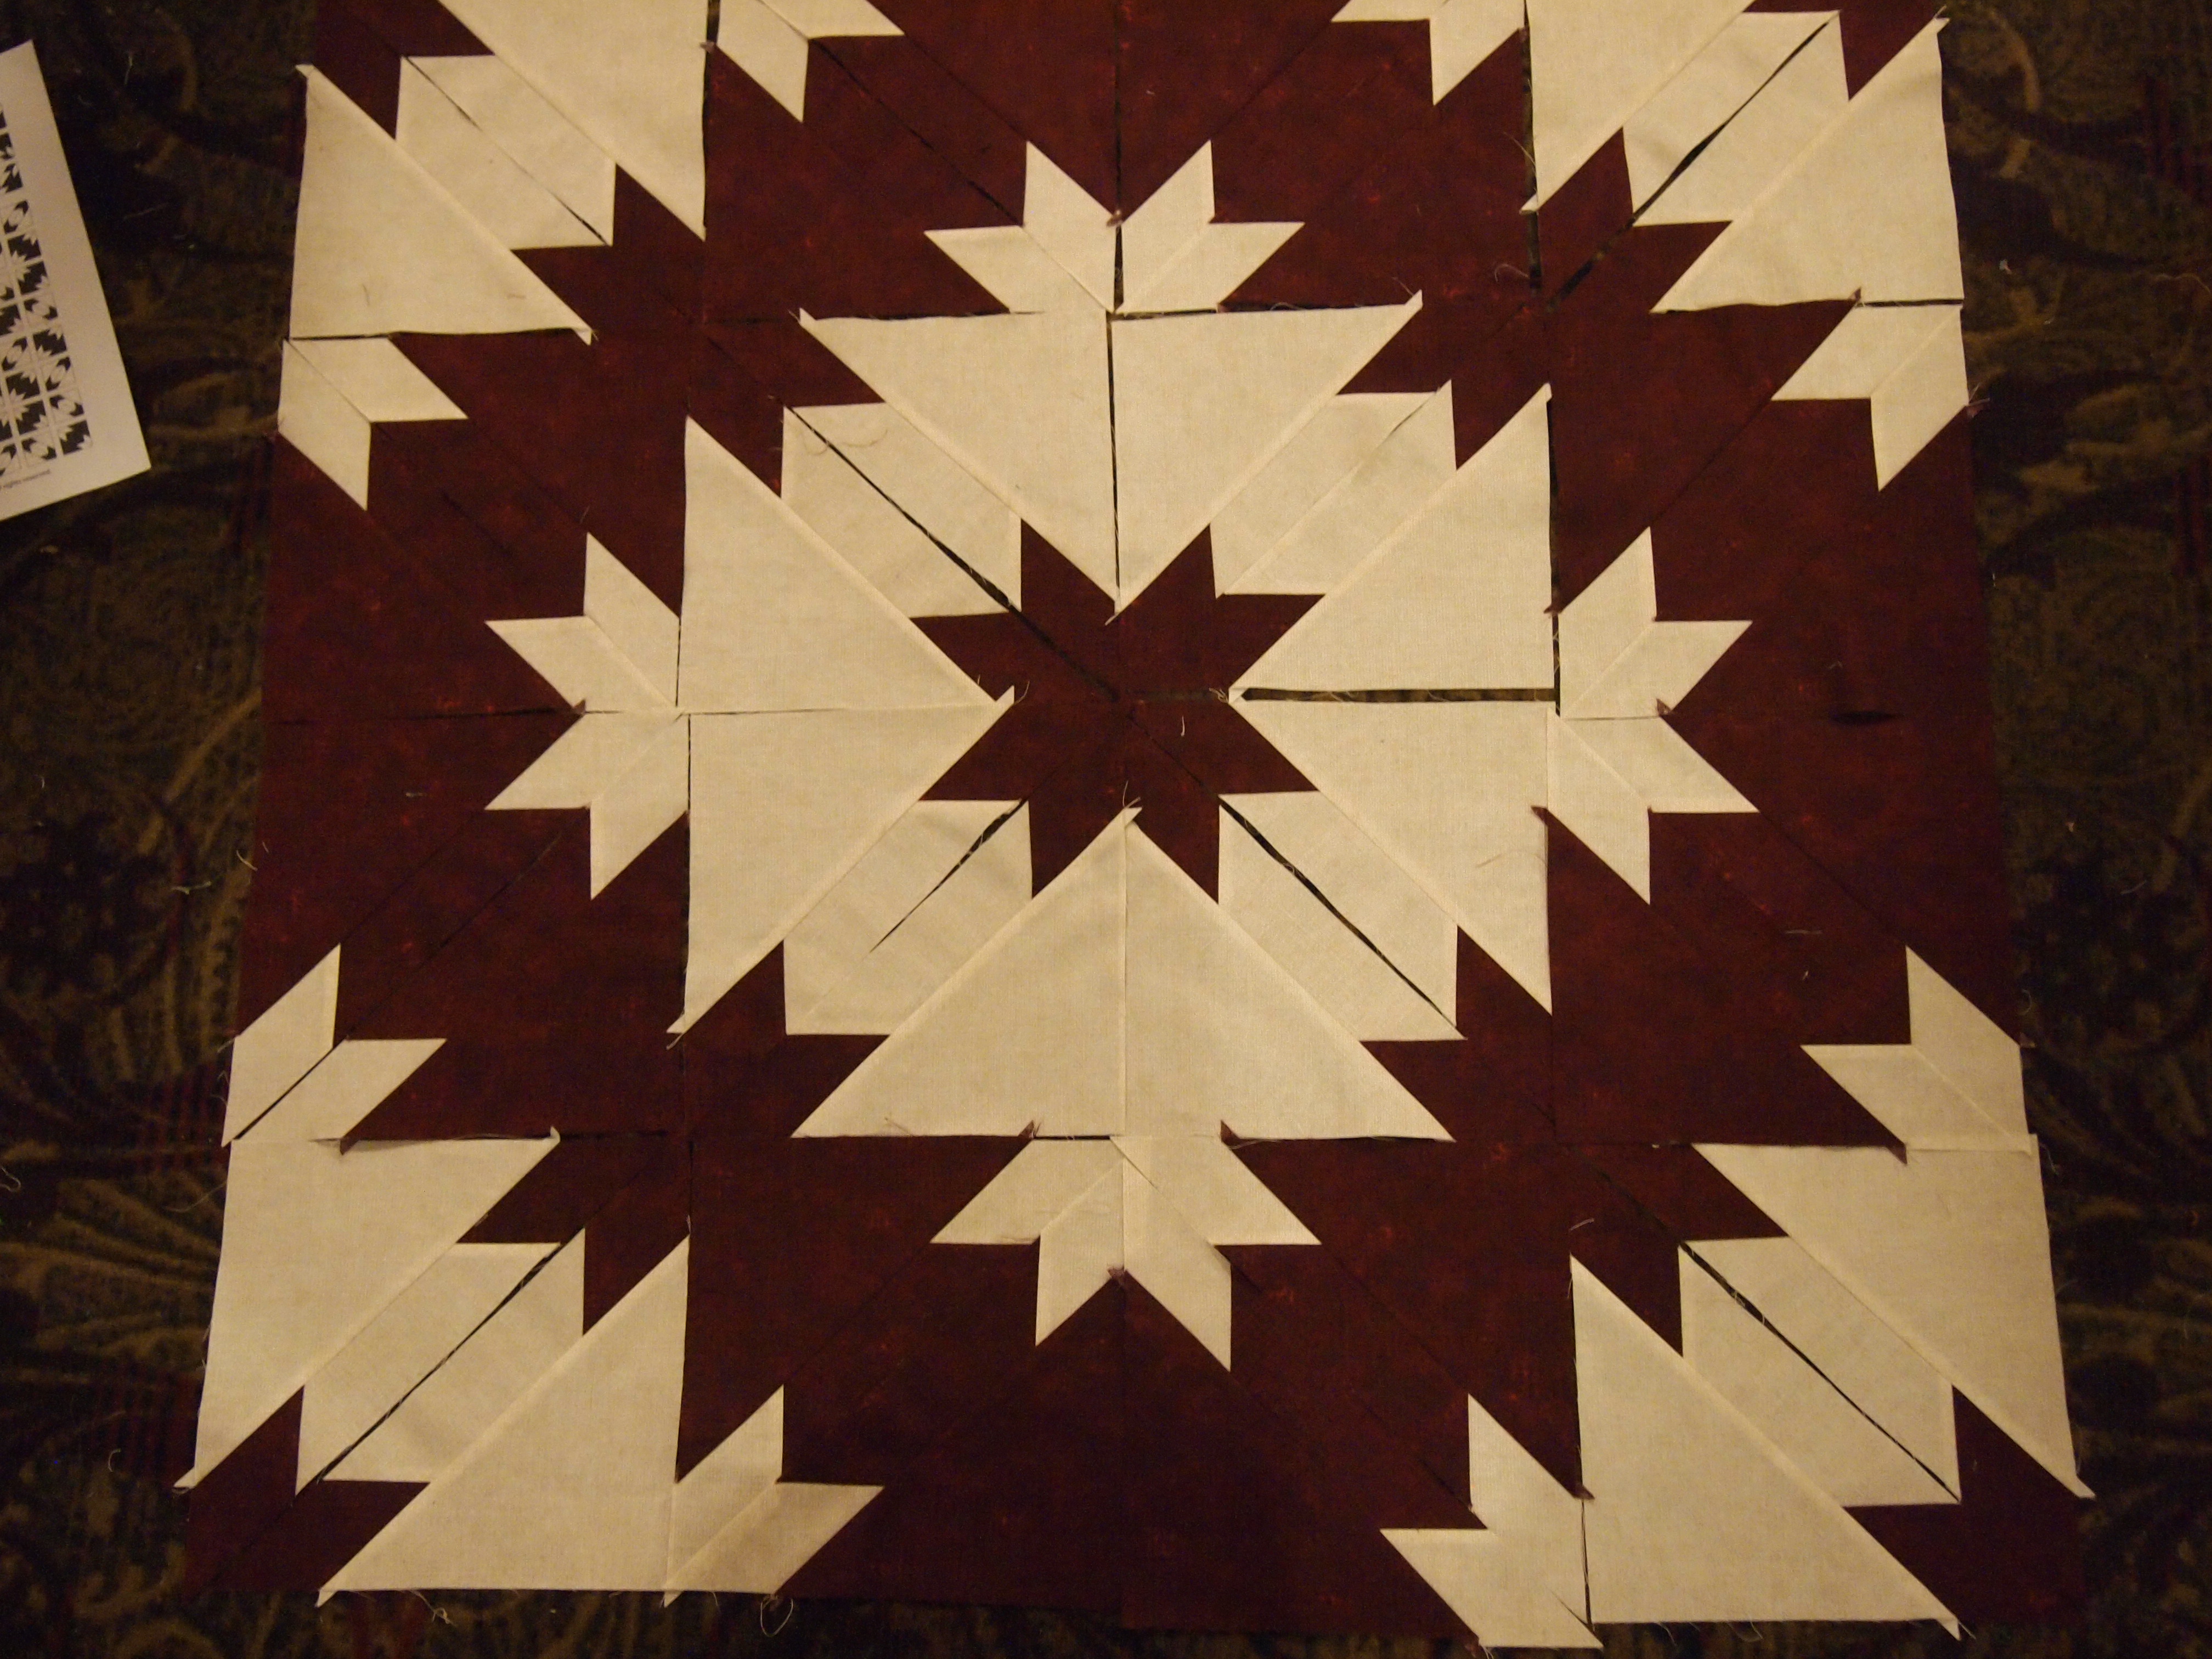
I have been dying to make this quilt pattern.  It is called Twister by Deb Tucker from Studio 180 Design.  It is a companion pattern for the Tucker Trimmer Tool.  I chose a focus fabric by Allison Glass called Lucky Penny from Andover Fabrics.  My Twister is not yet quilted and measures 76″ by 96″.

Twister Block  OLYMPUS DIGITAL CAMERA

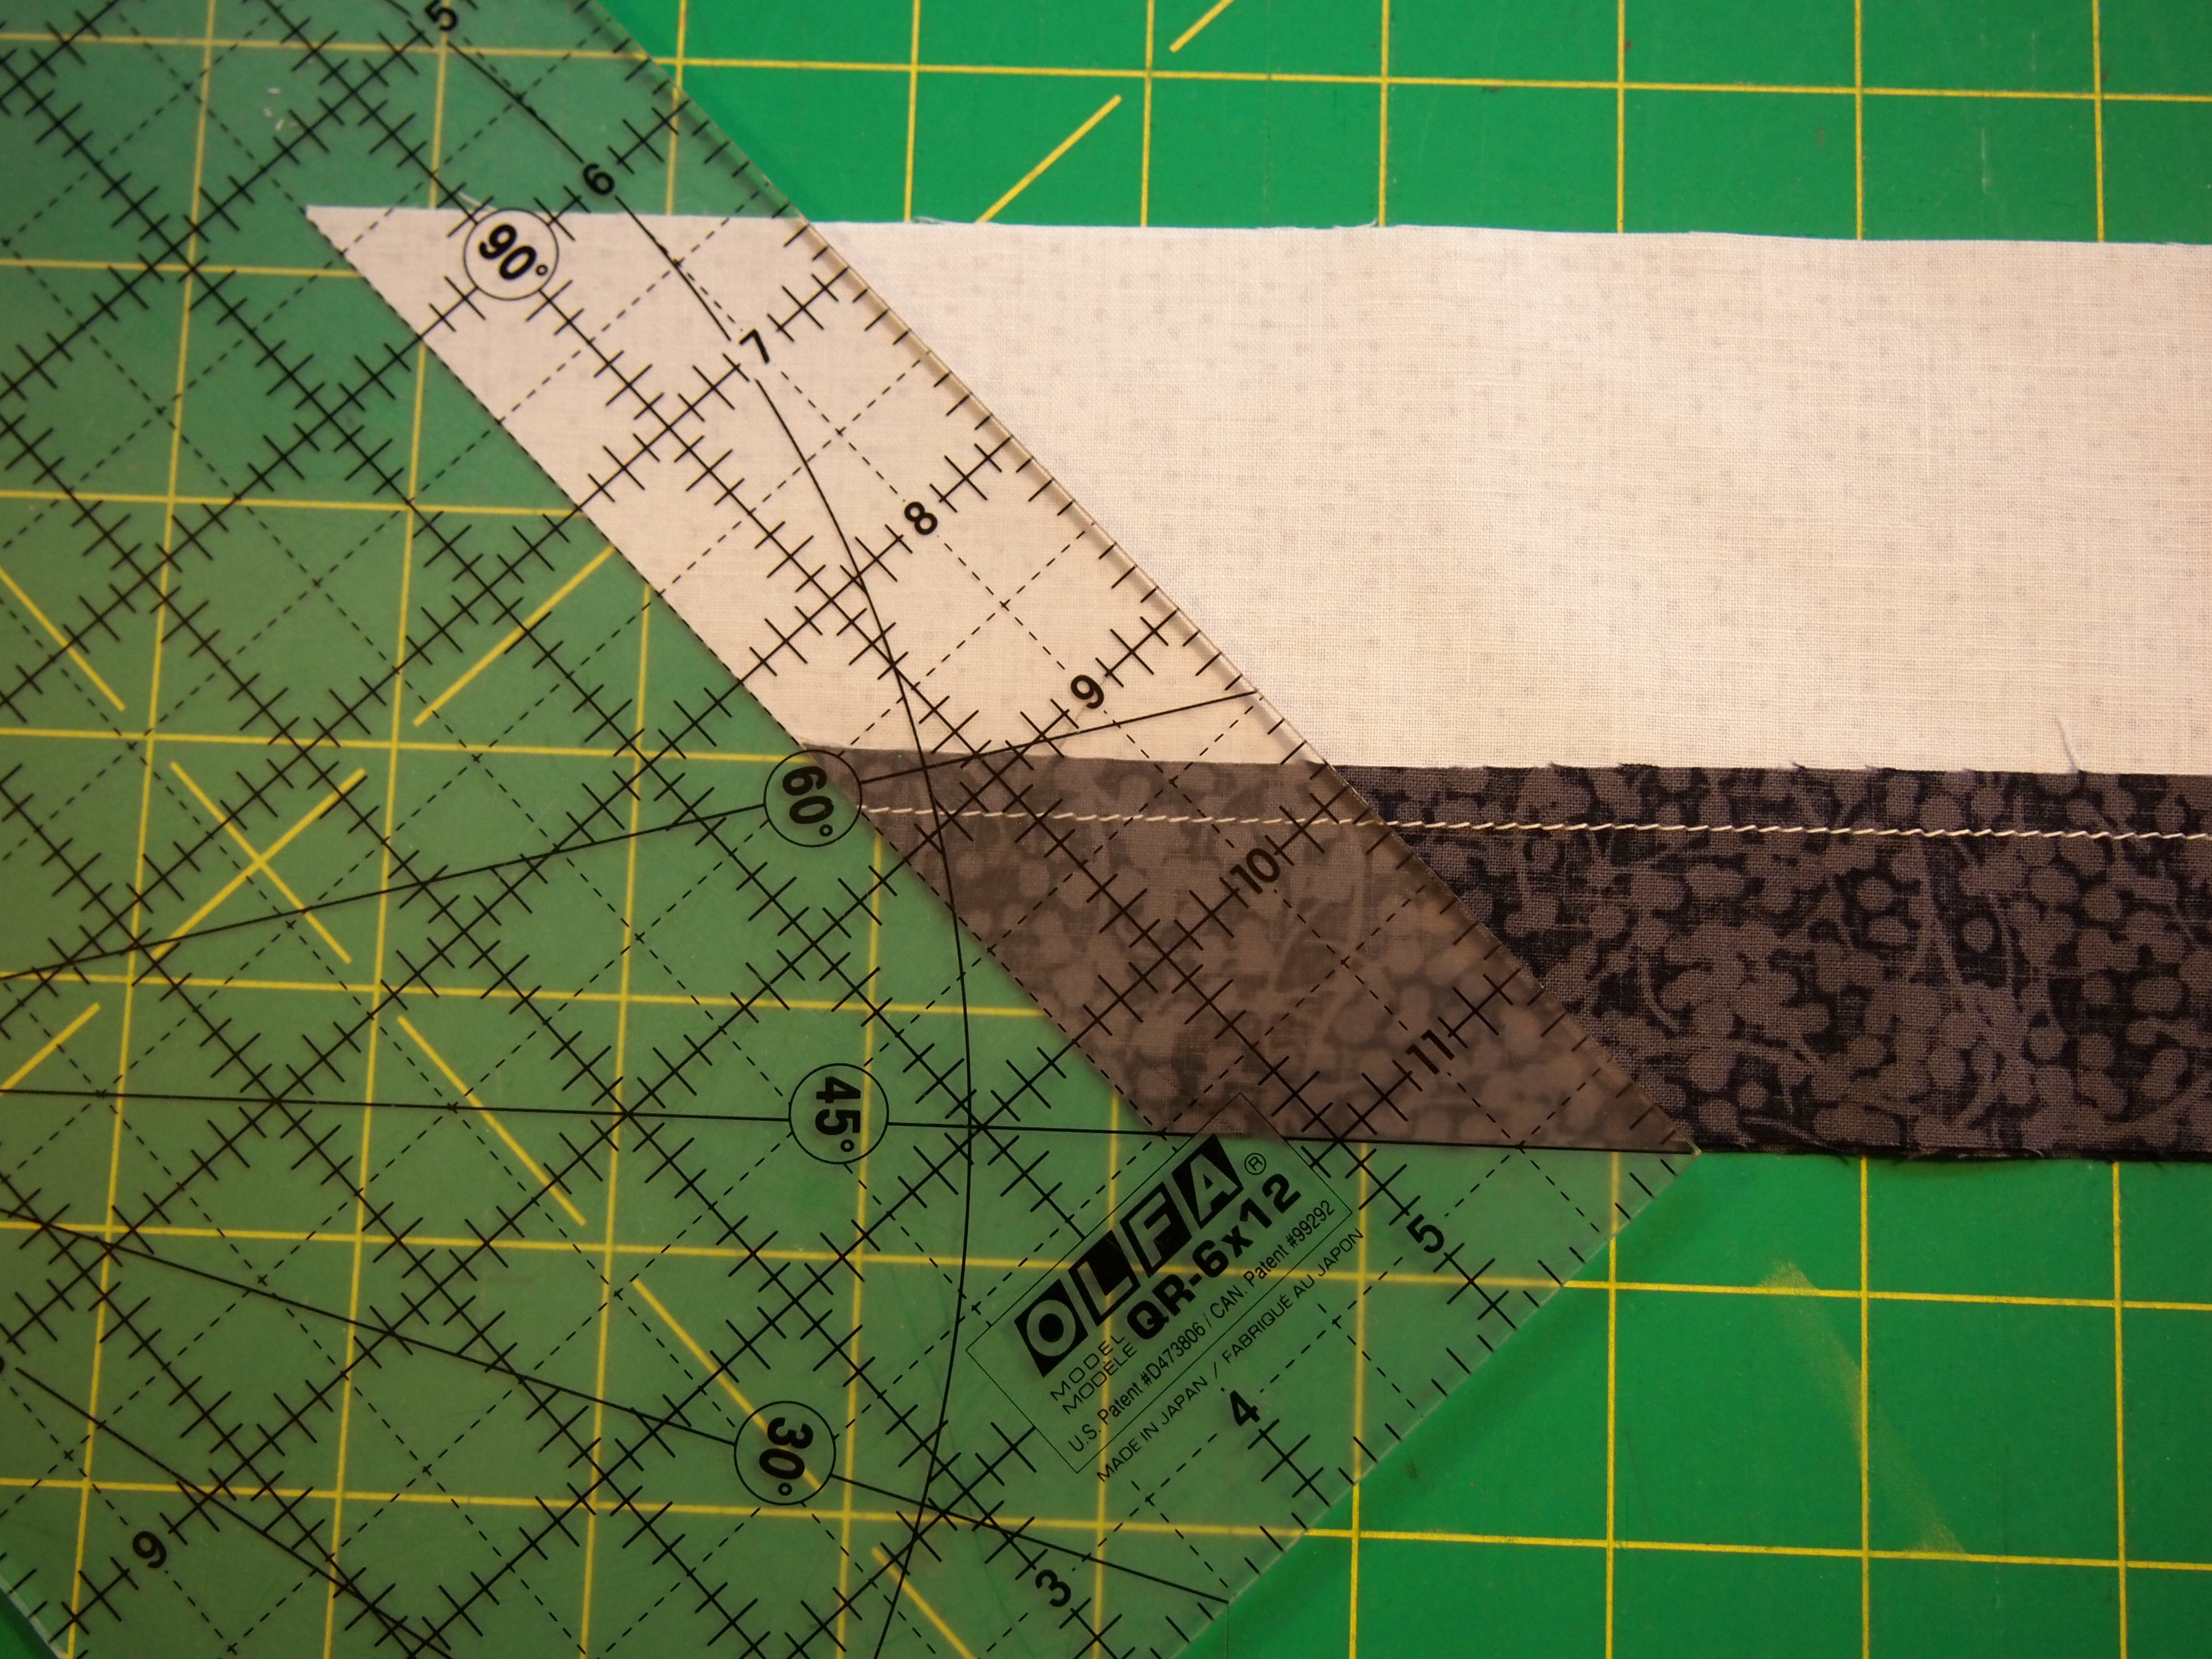
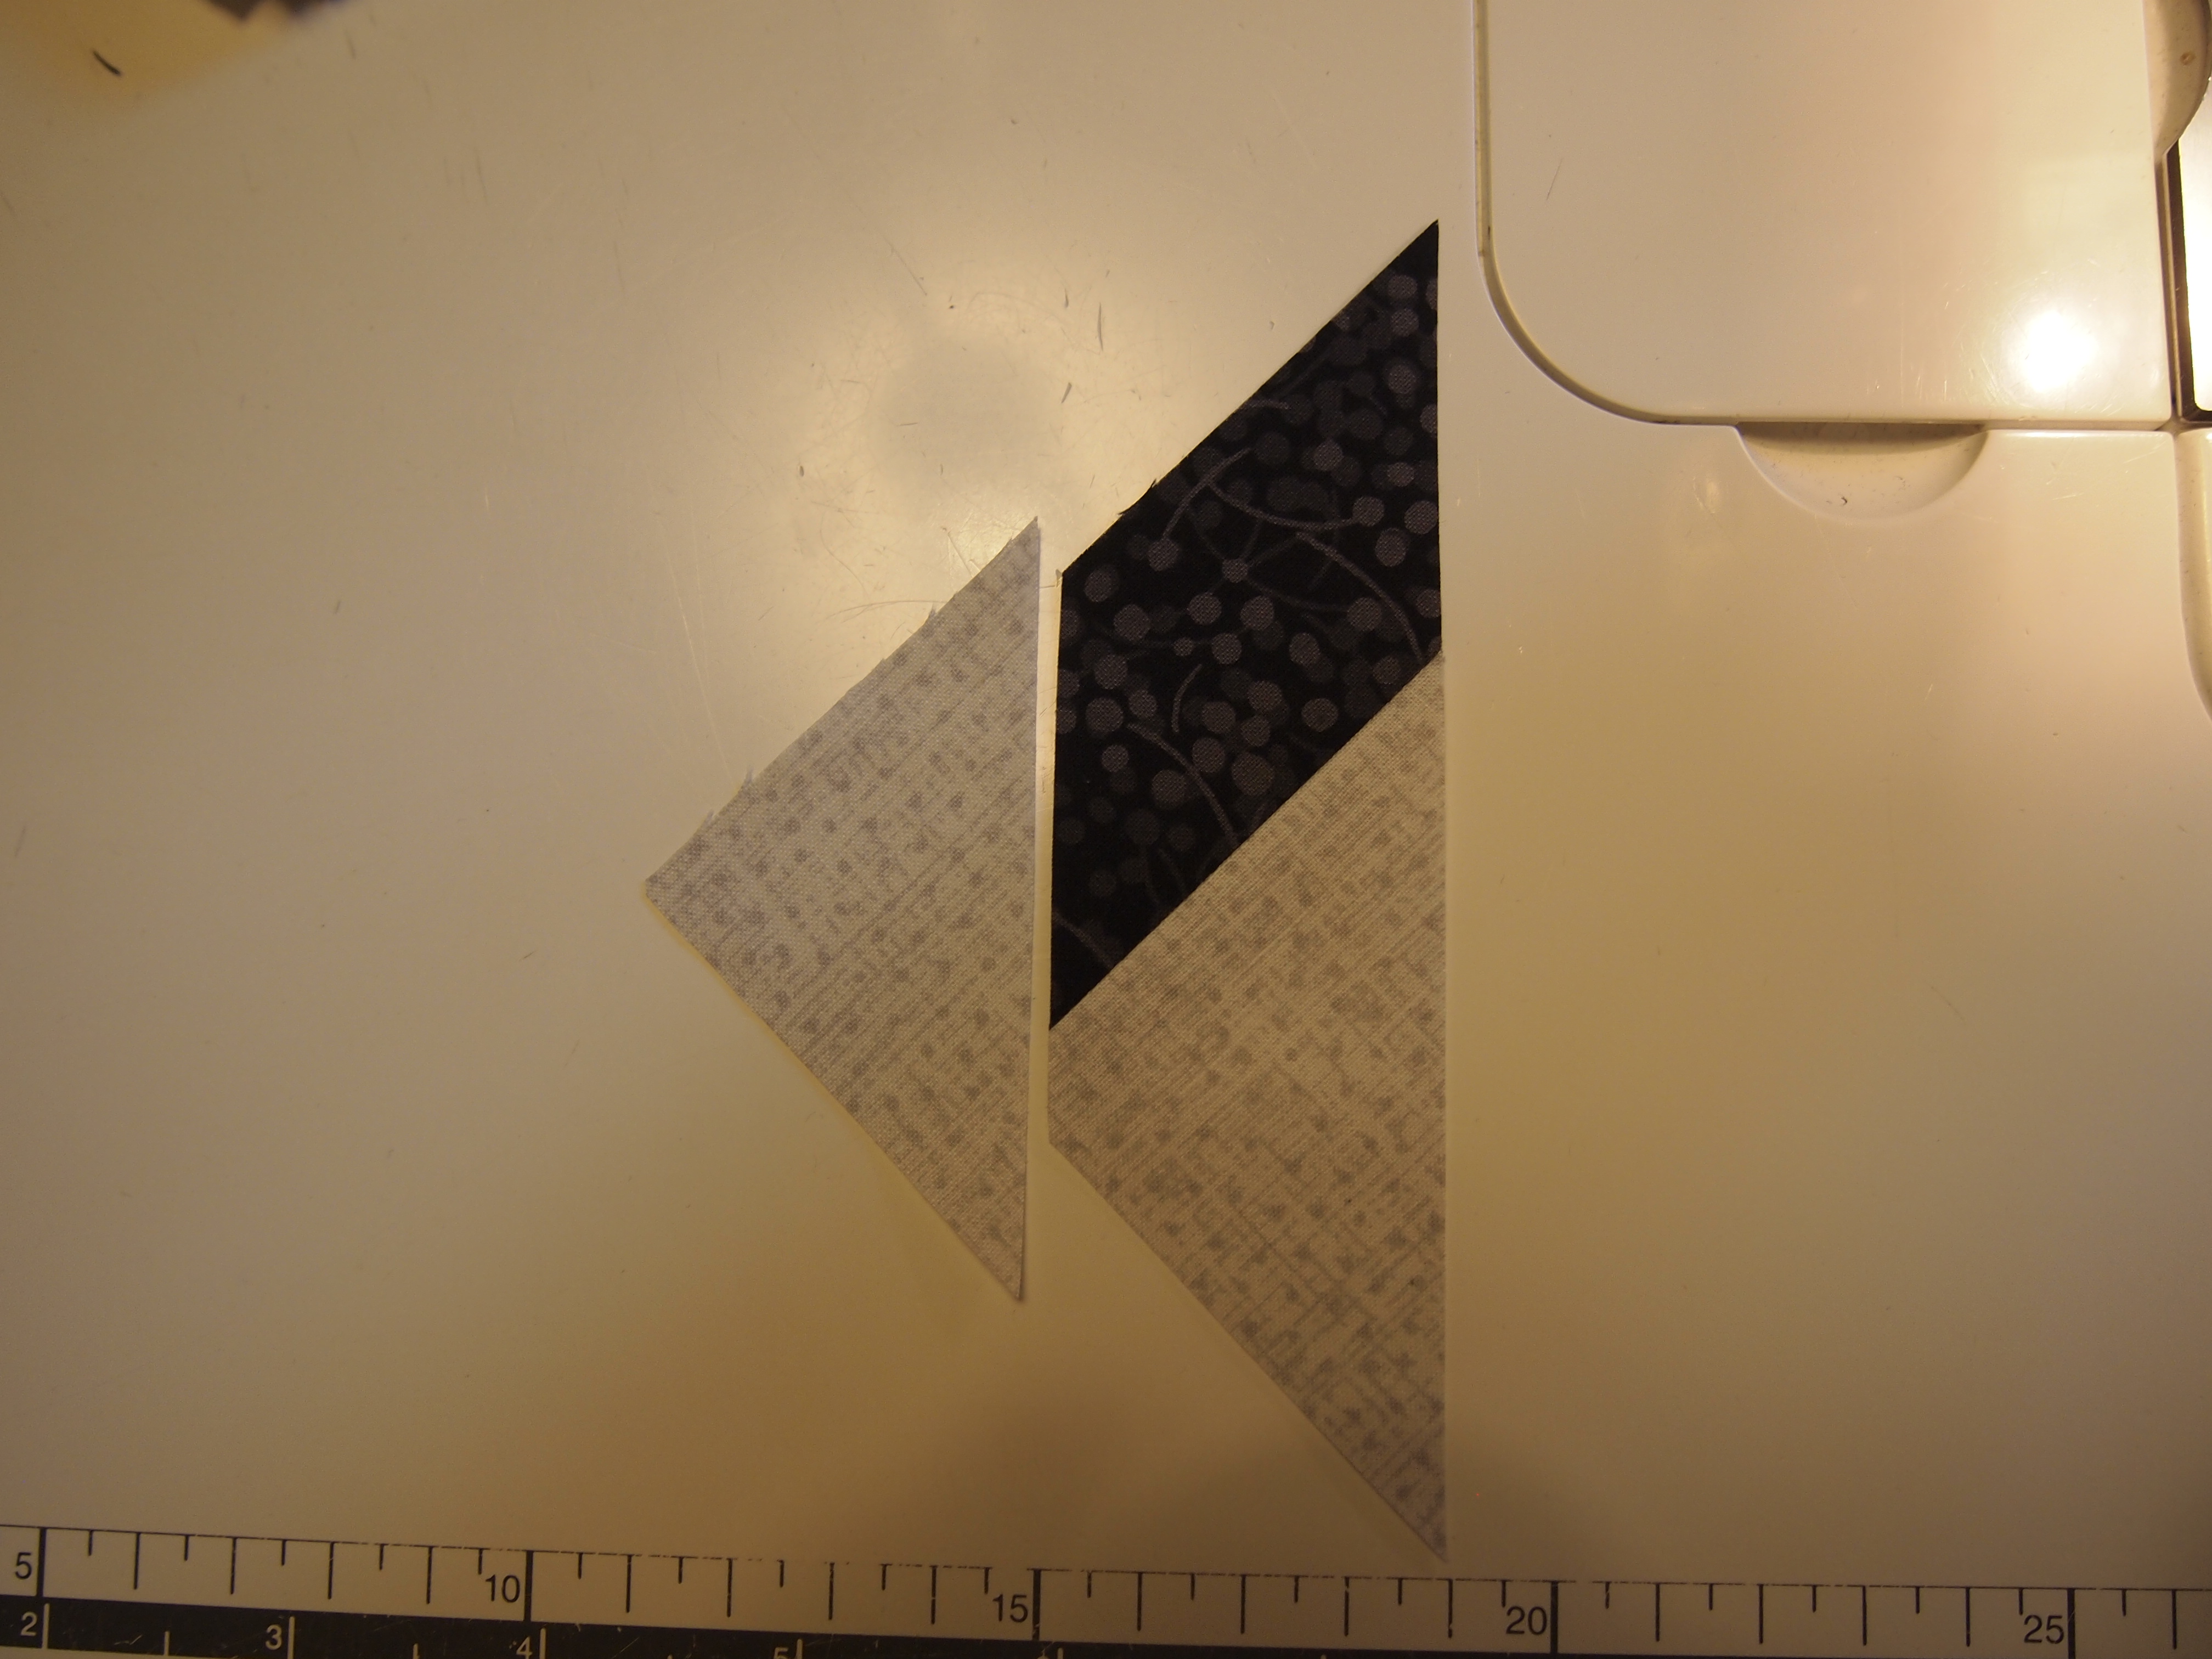
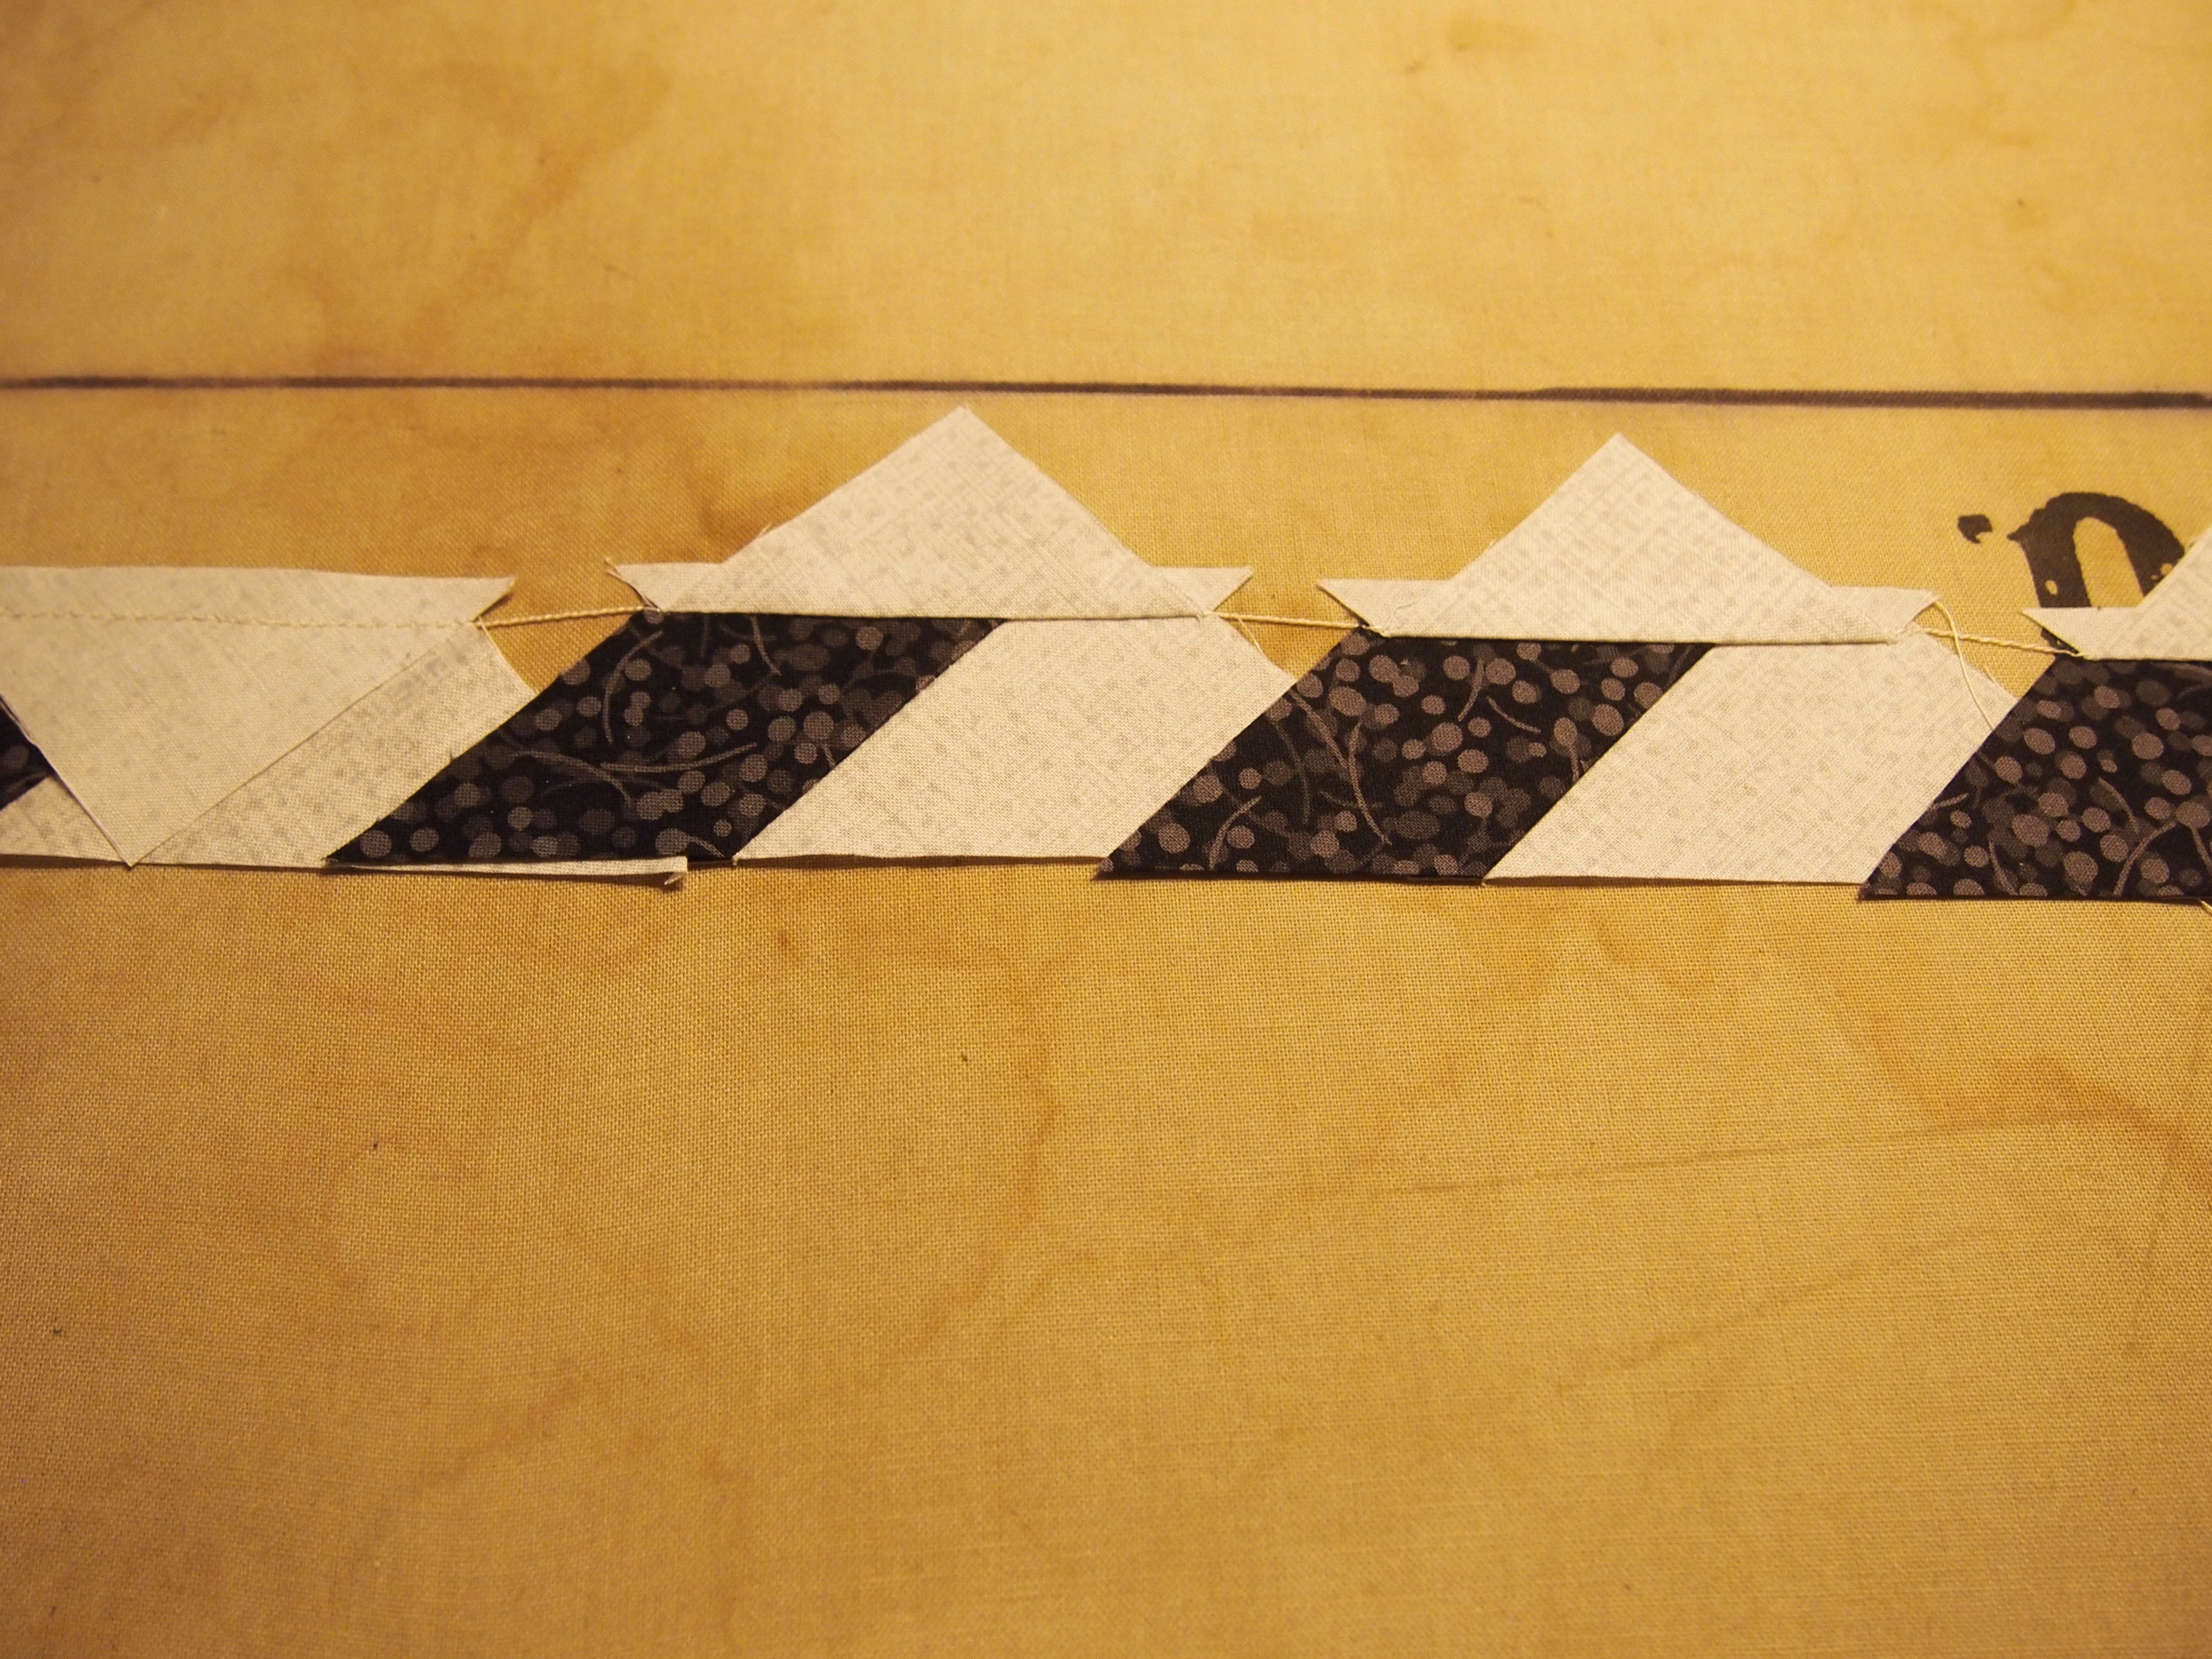
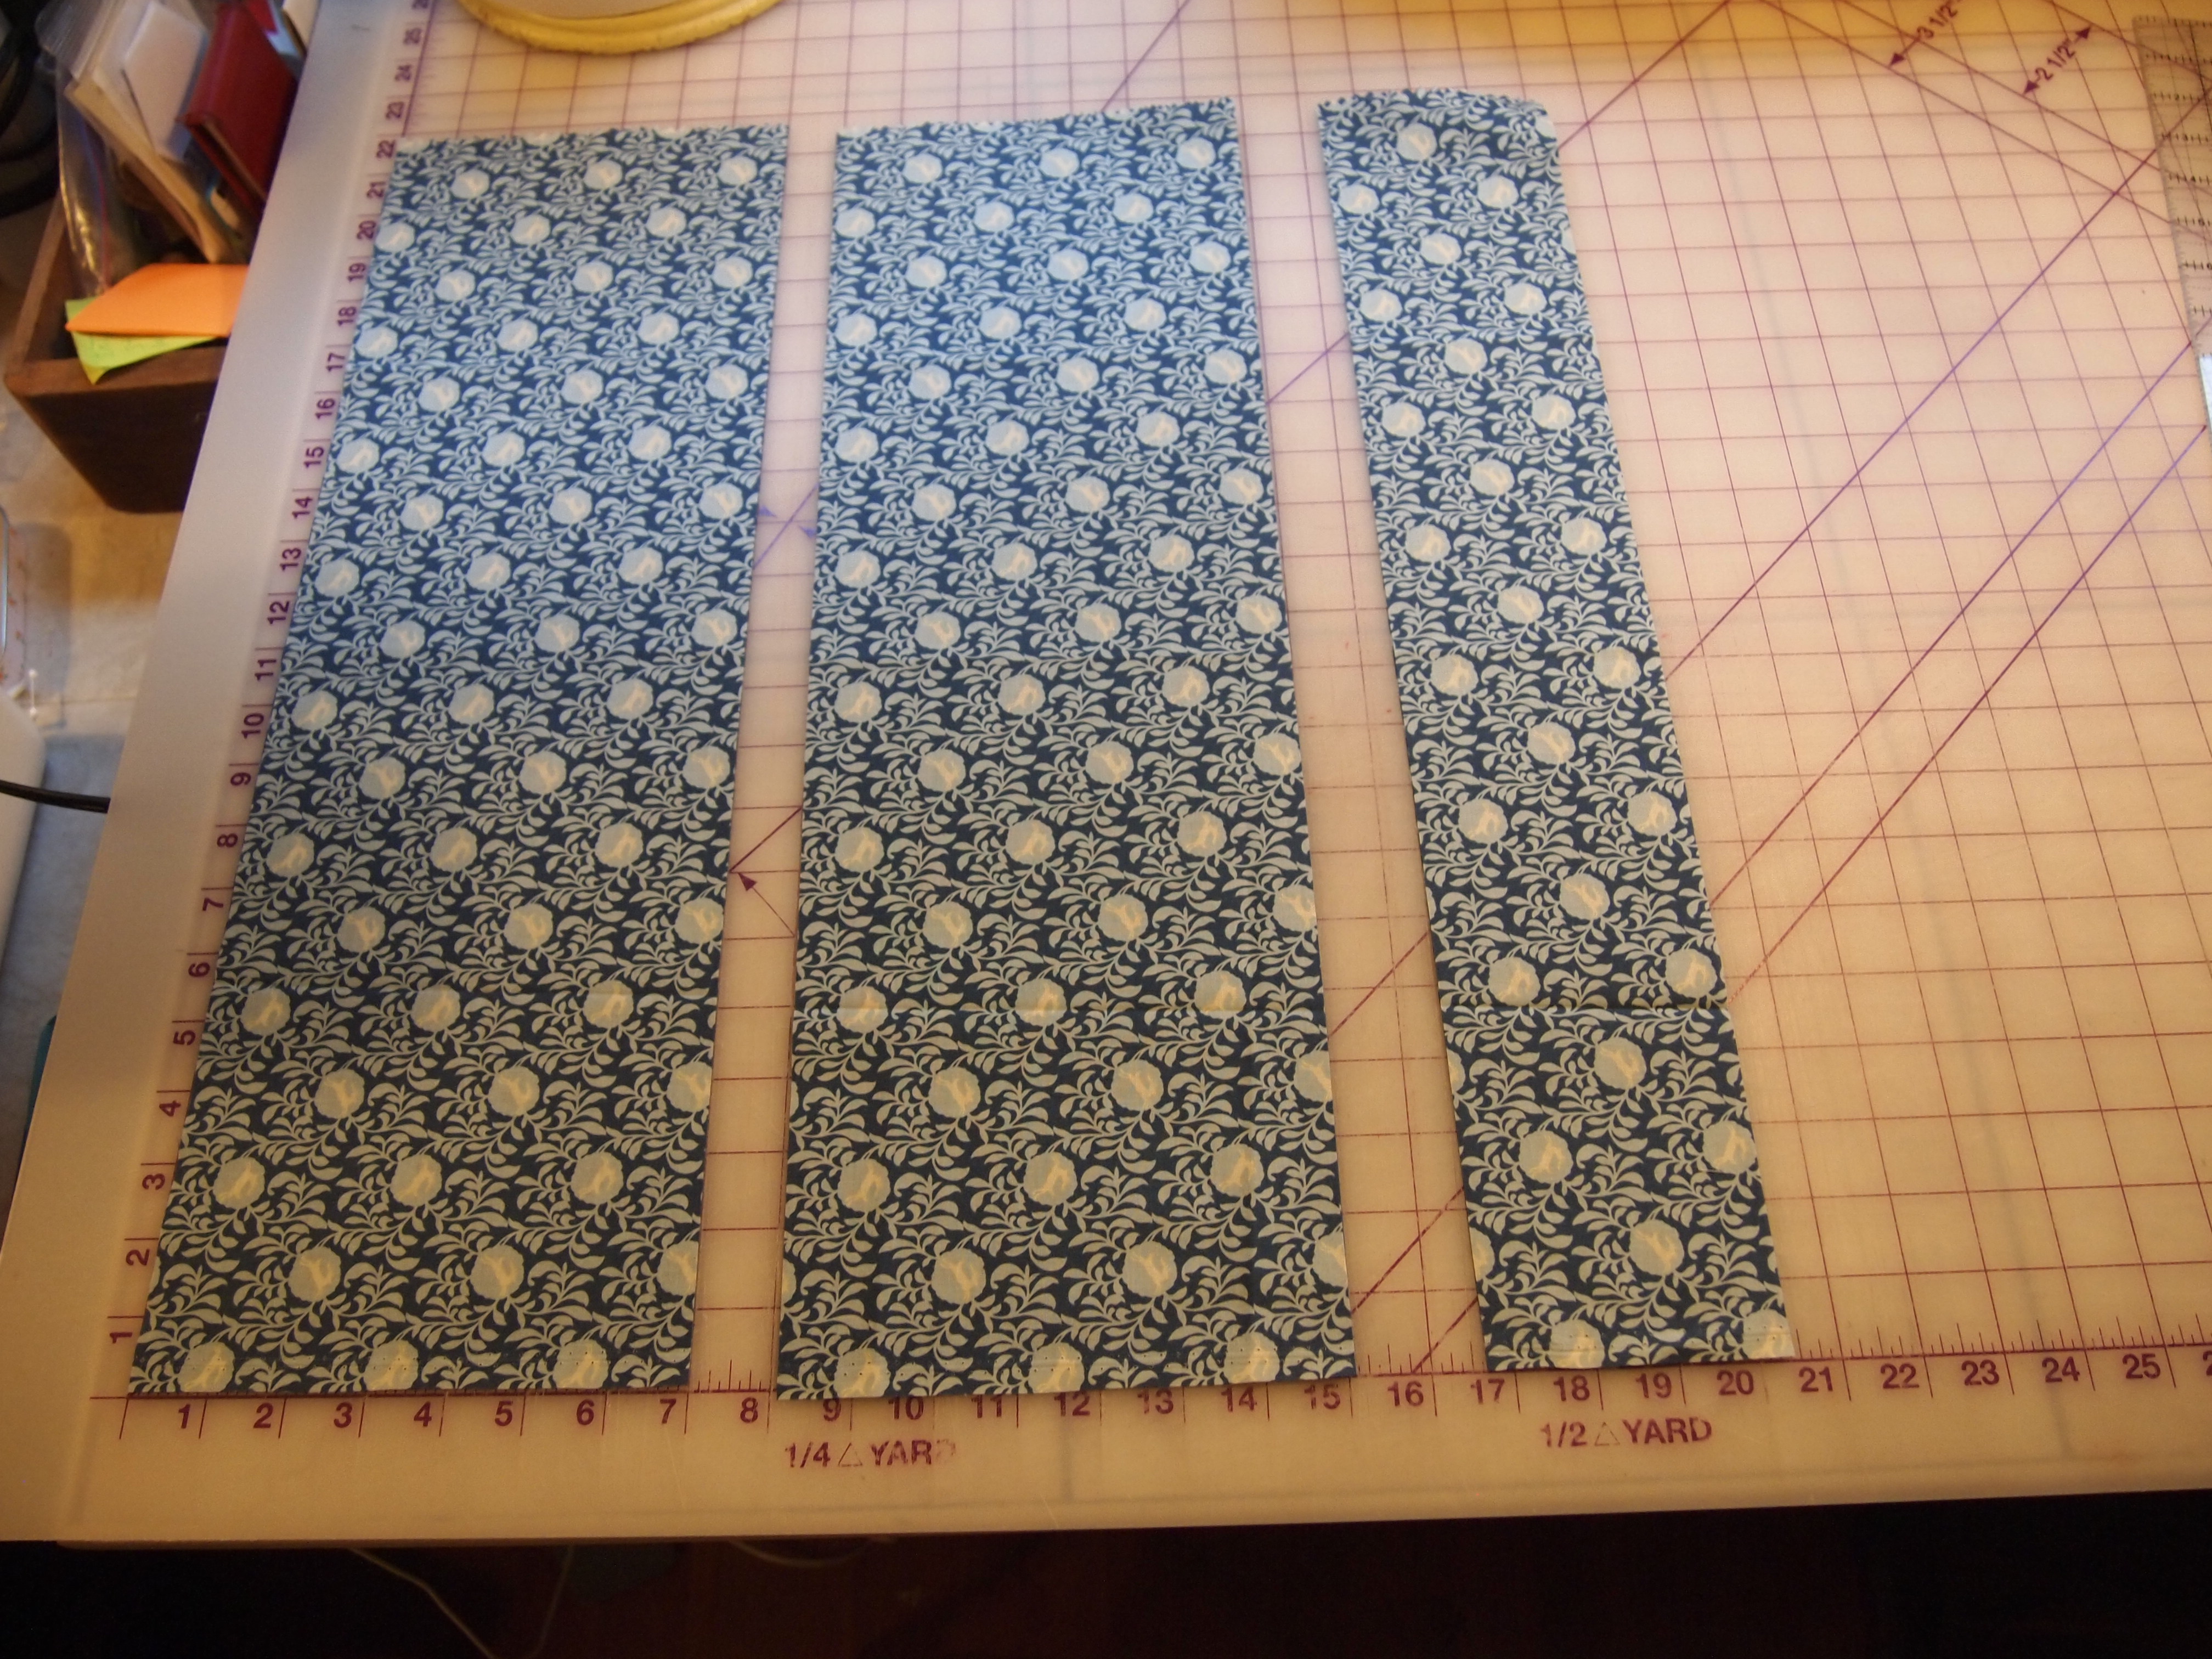
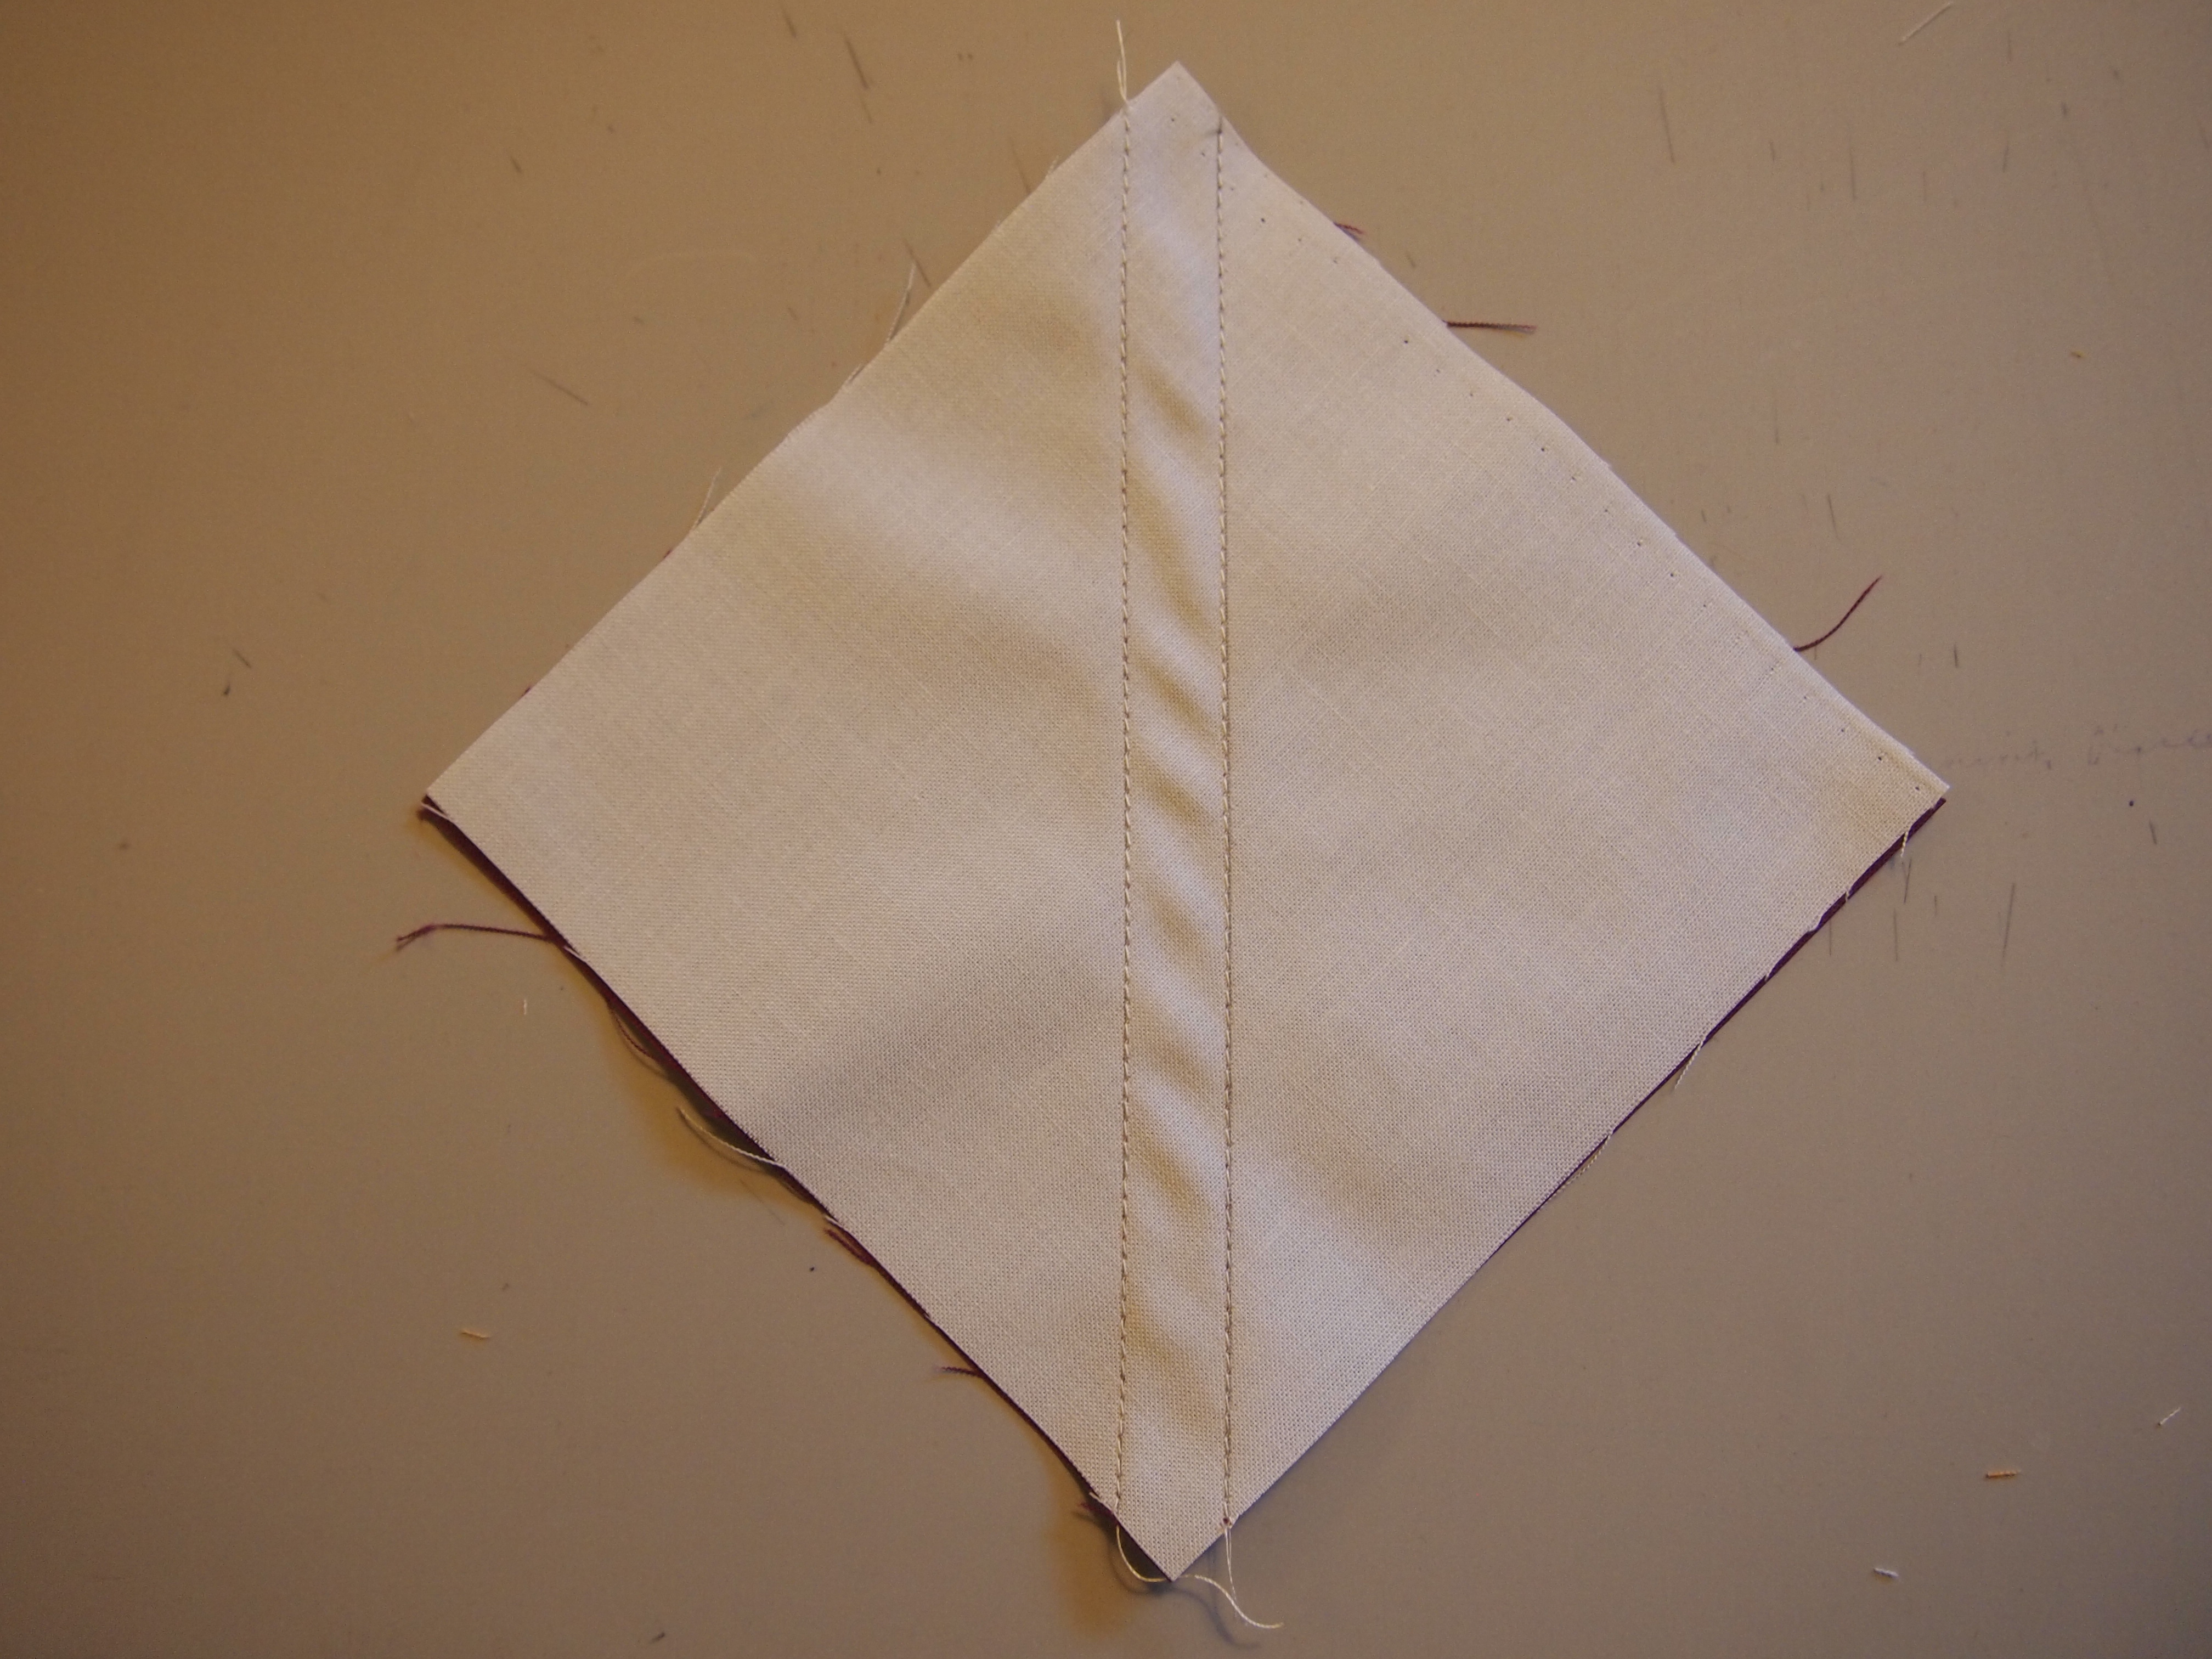
The twister block and the pieced border consist of combination units.  Following the detailed instructions I cut my fabrics. I positioned two fabrics, marked the stitch lines and sewed on the lines.

OLYMPUS DIGITAL CAMERA OLYMPUS DIGITAL CAMERA

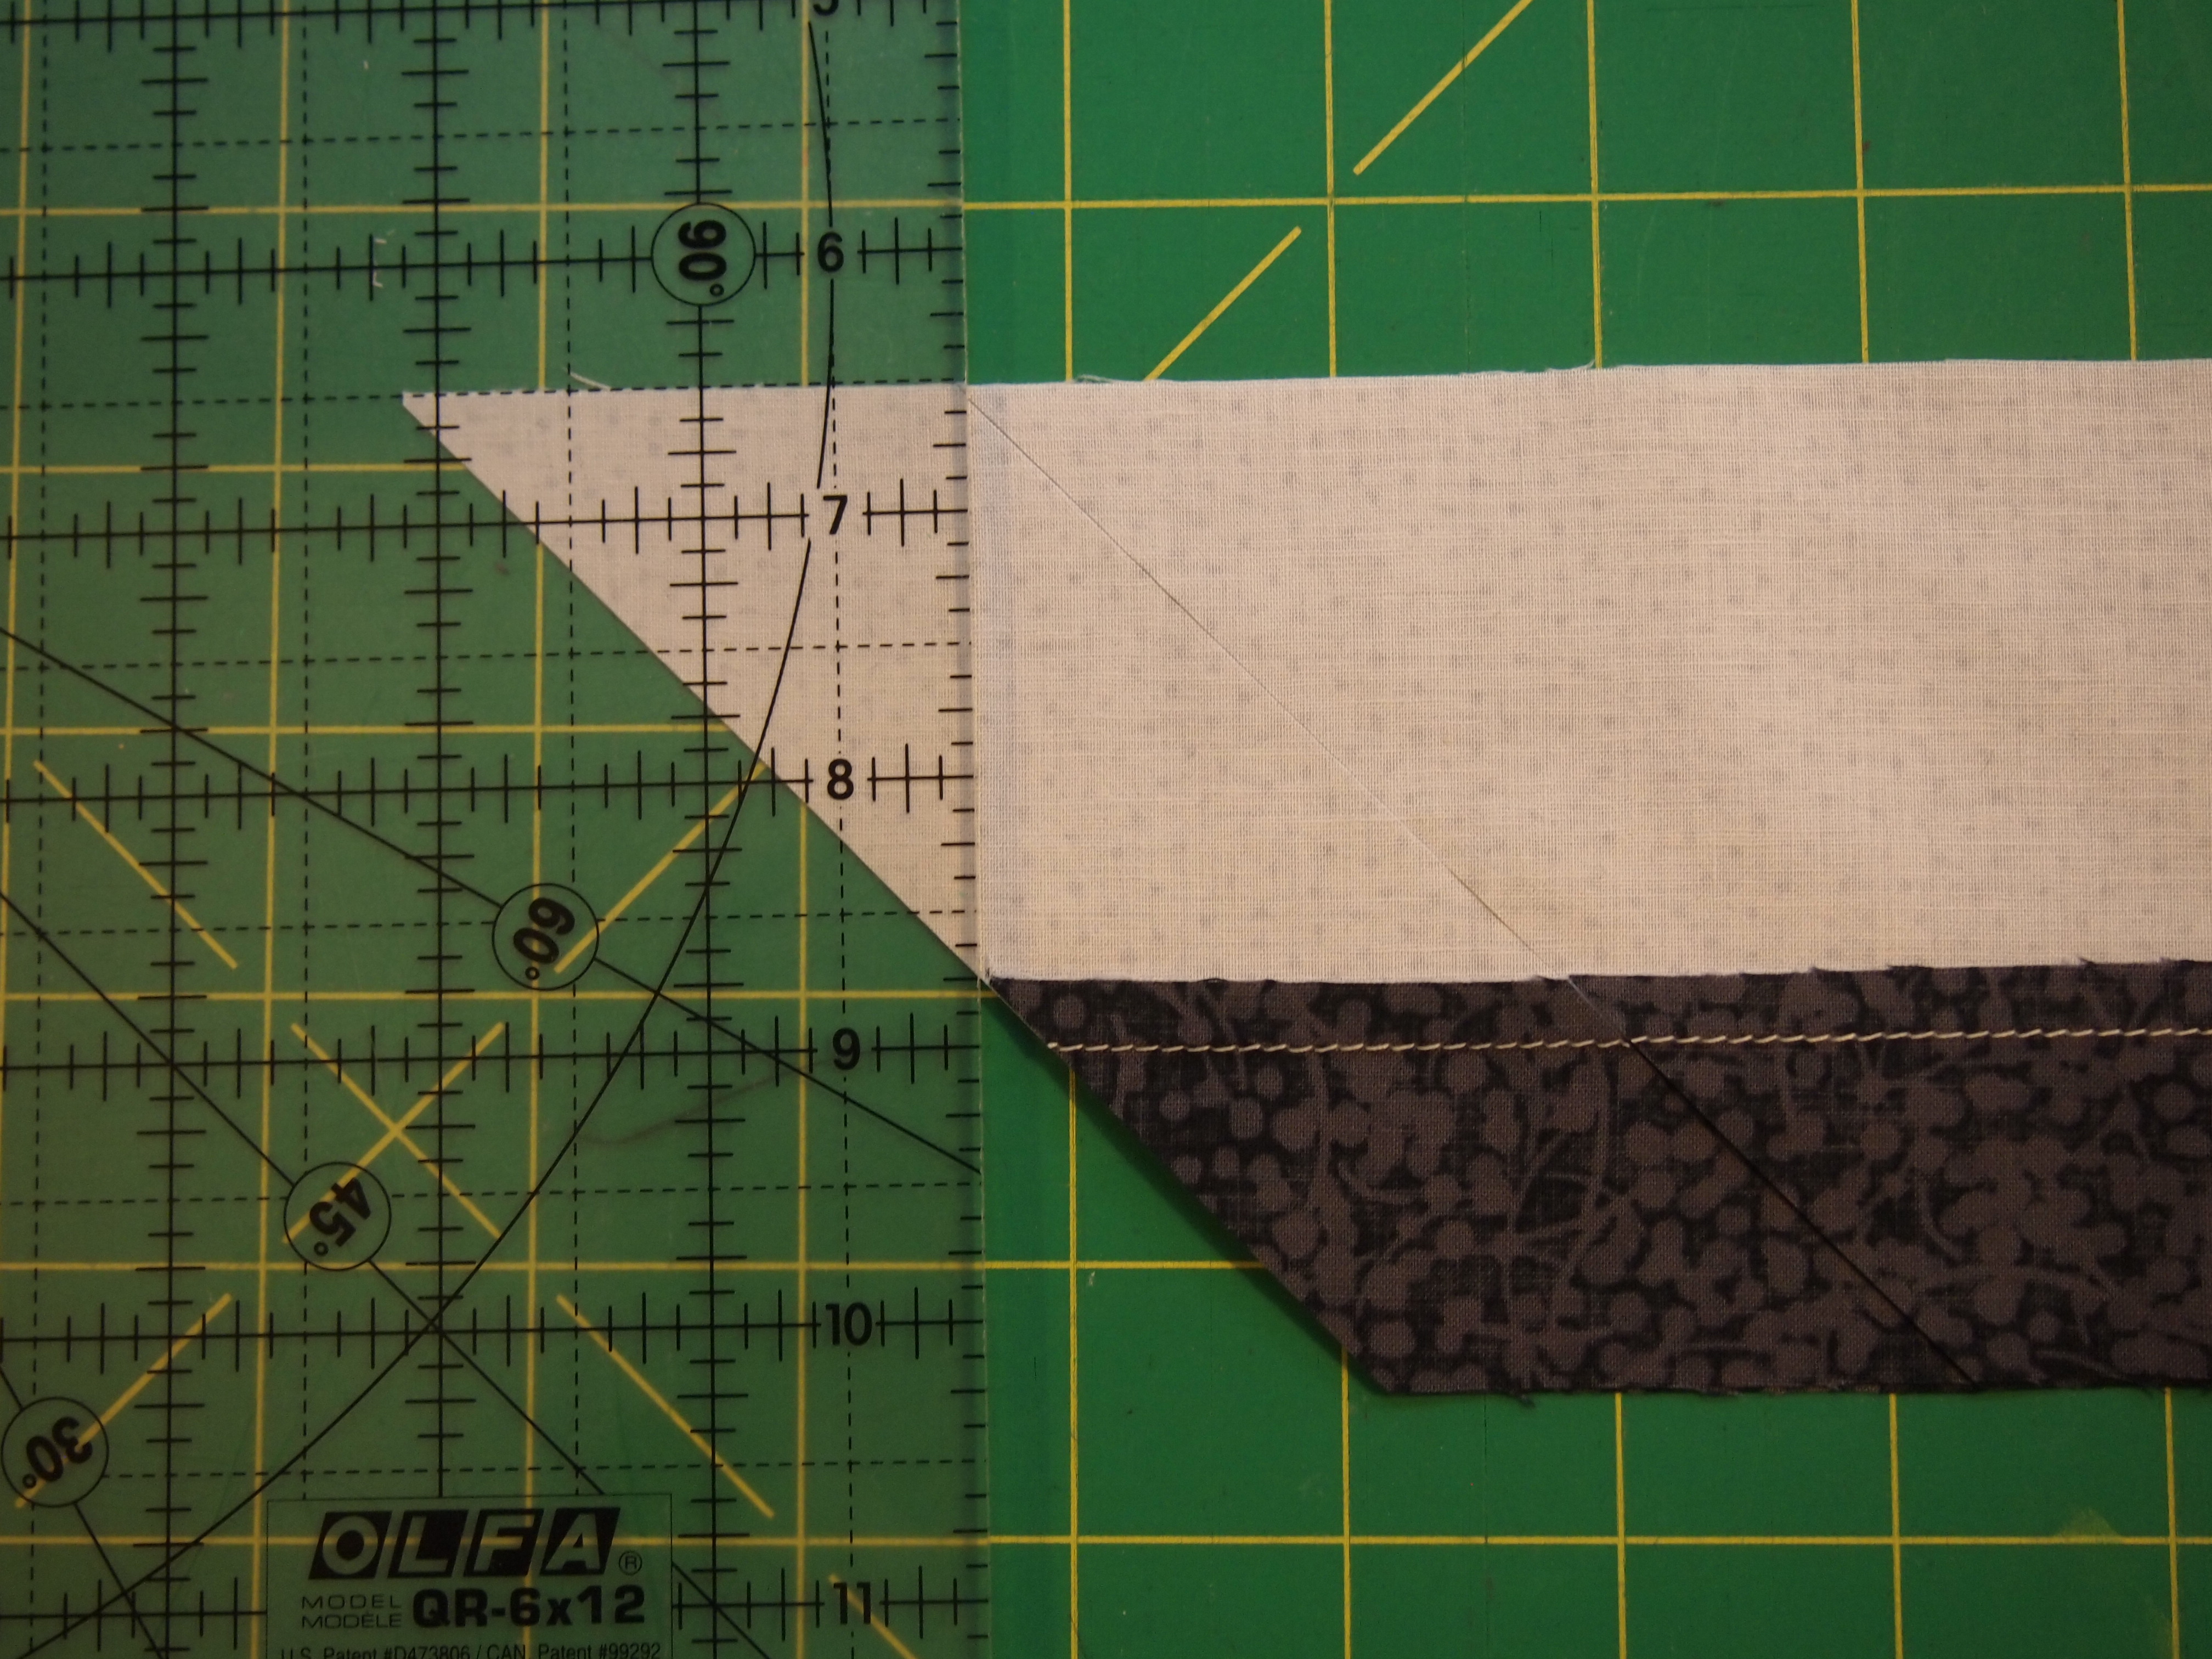
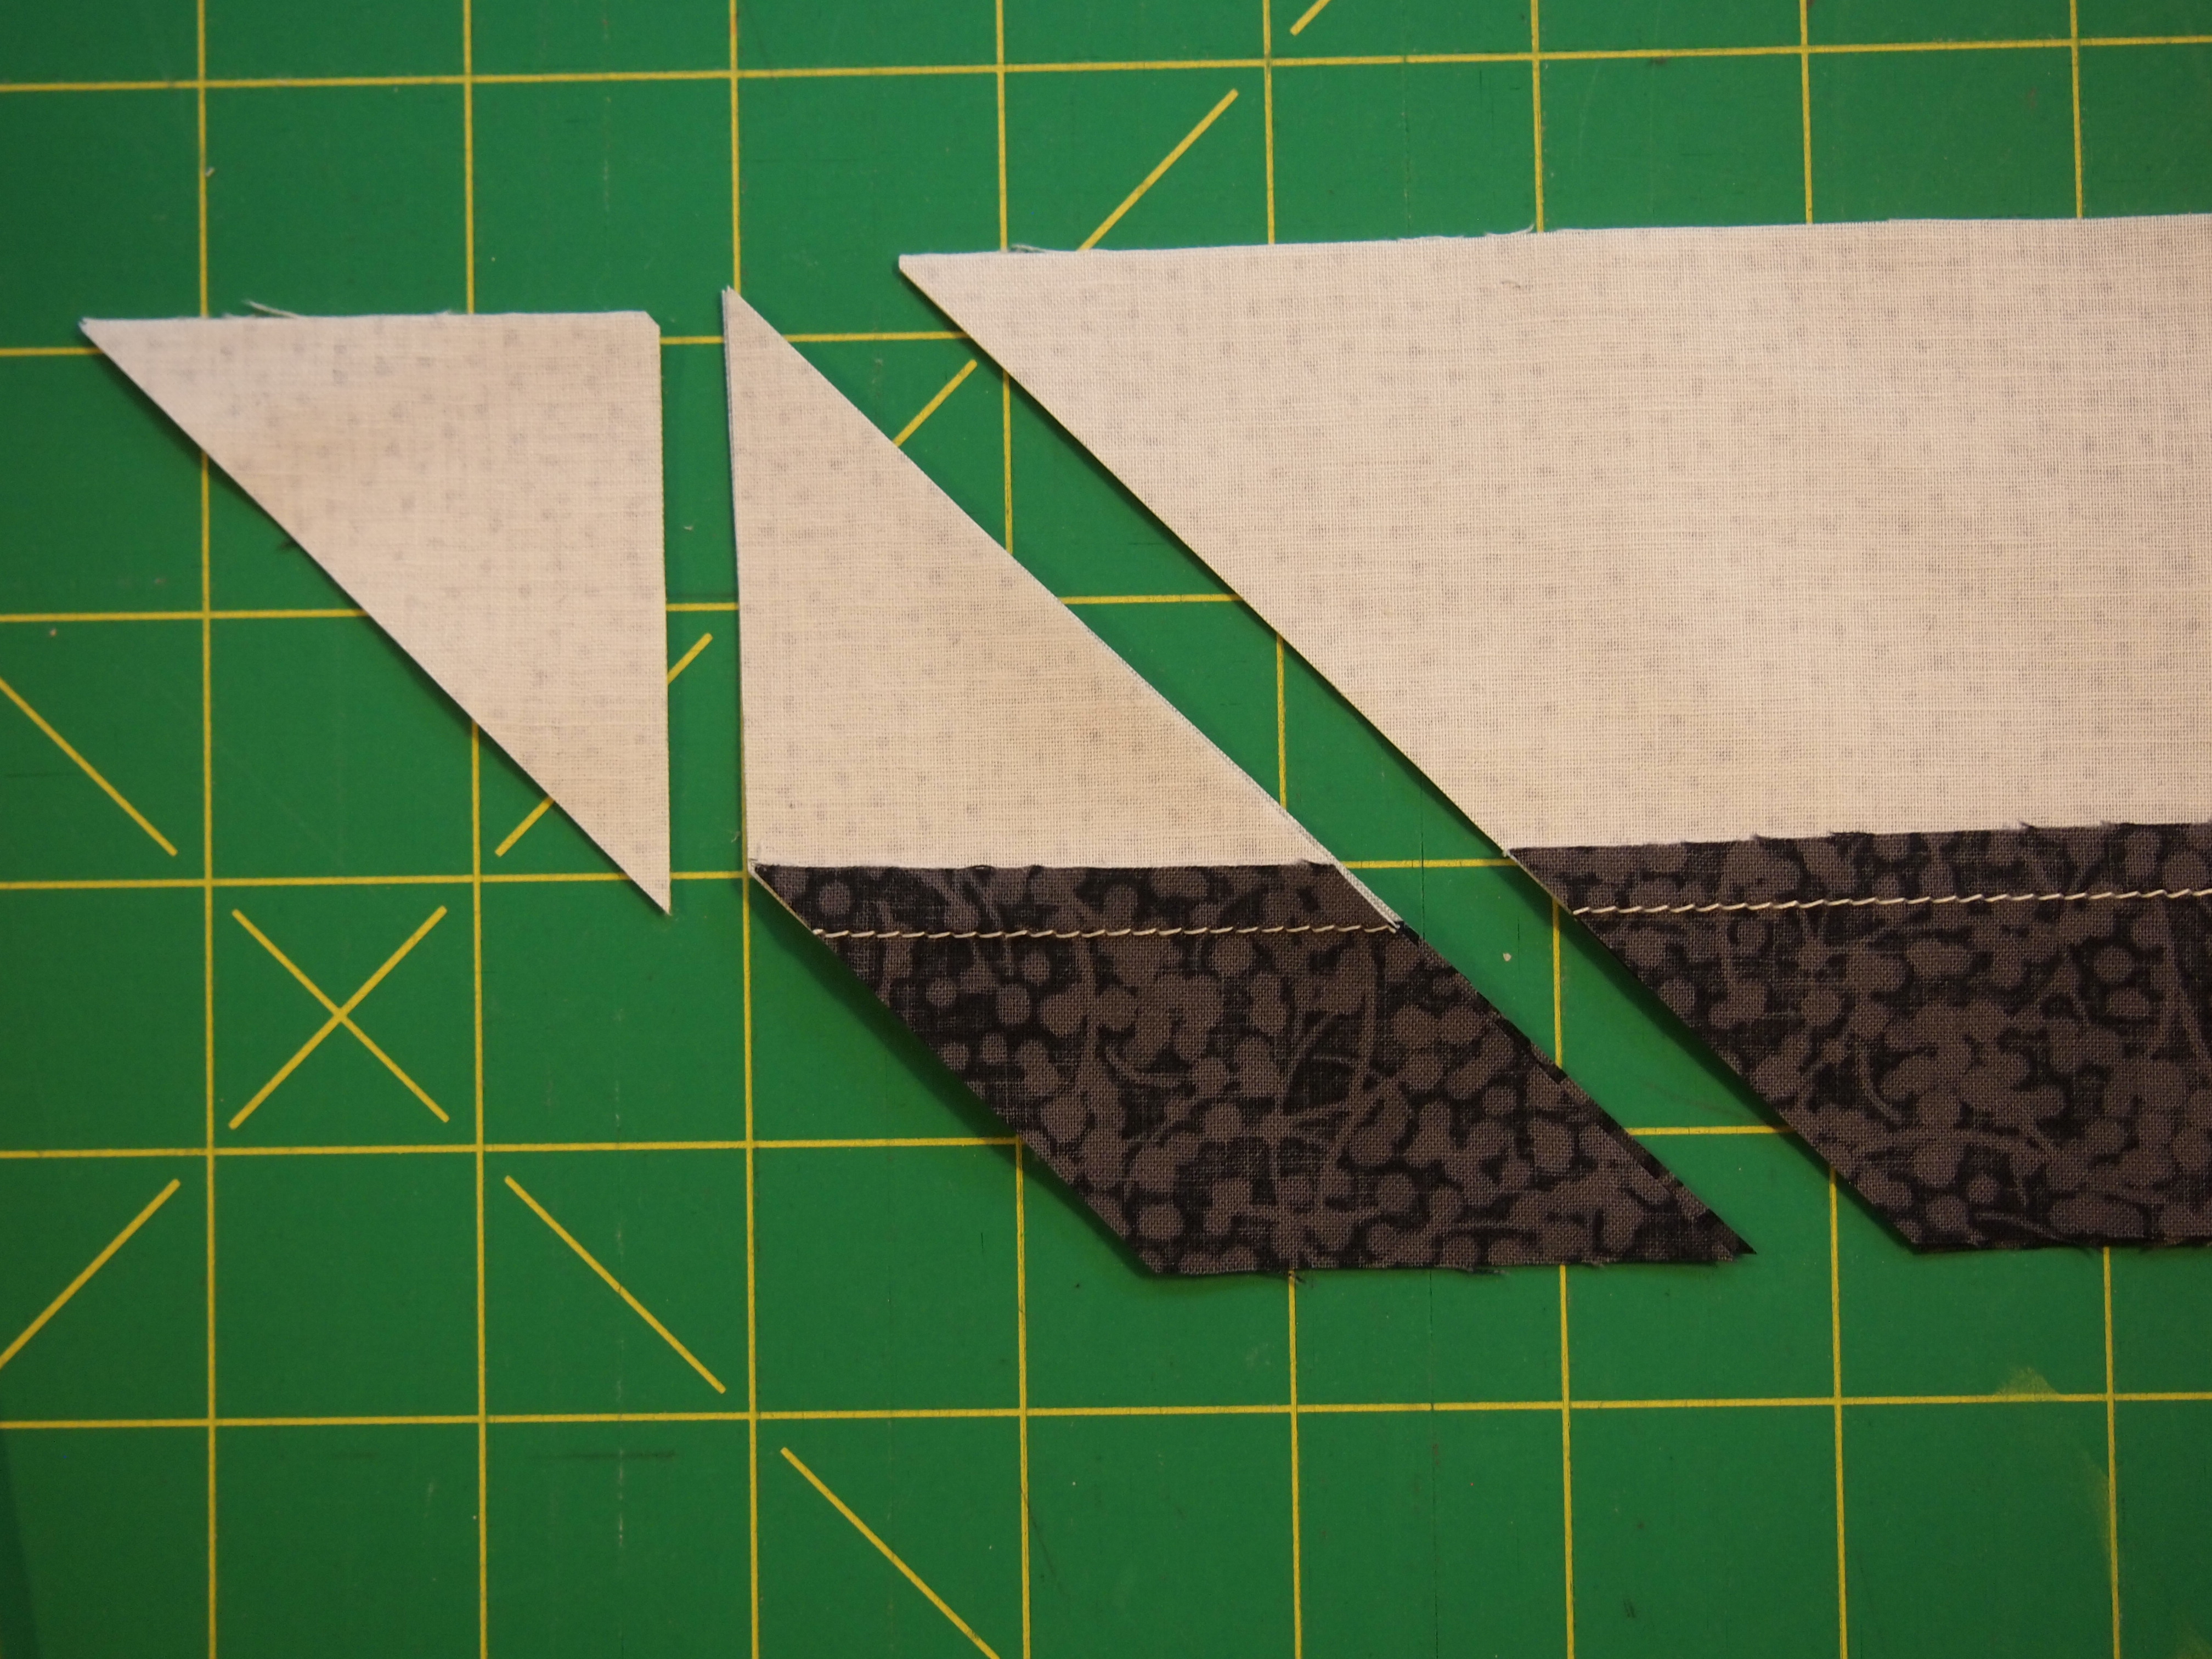
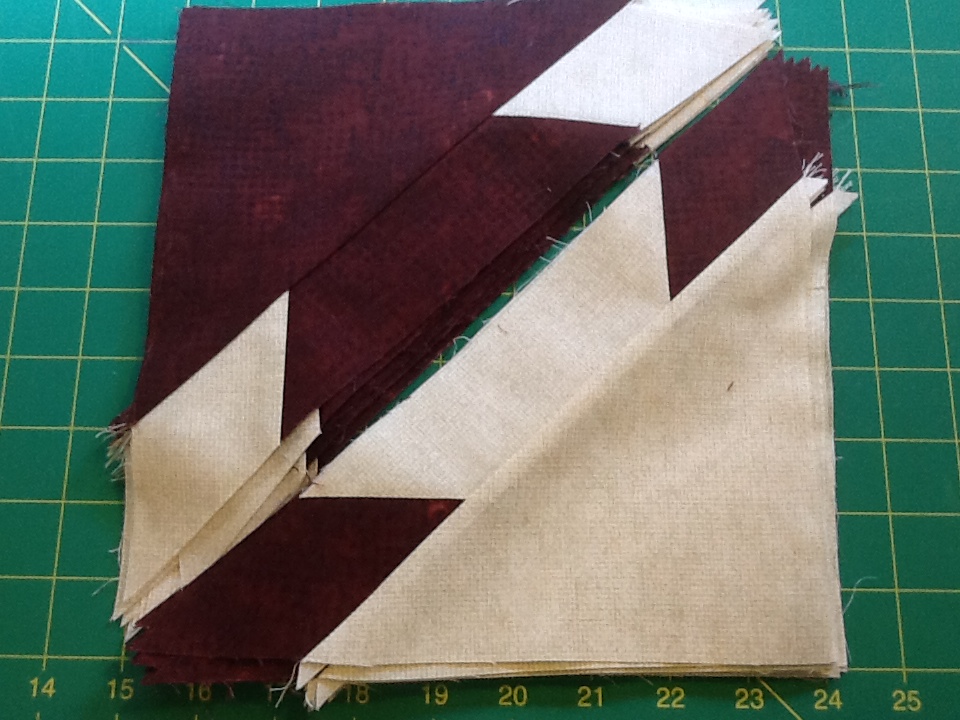
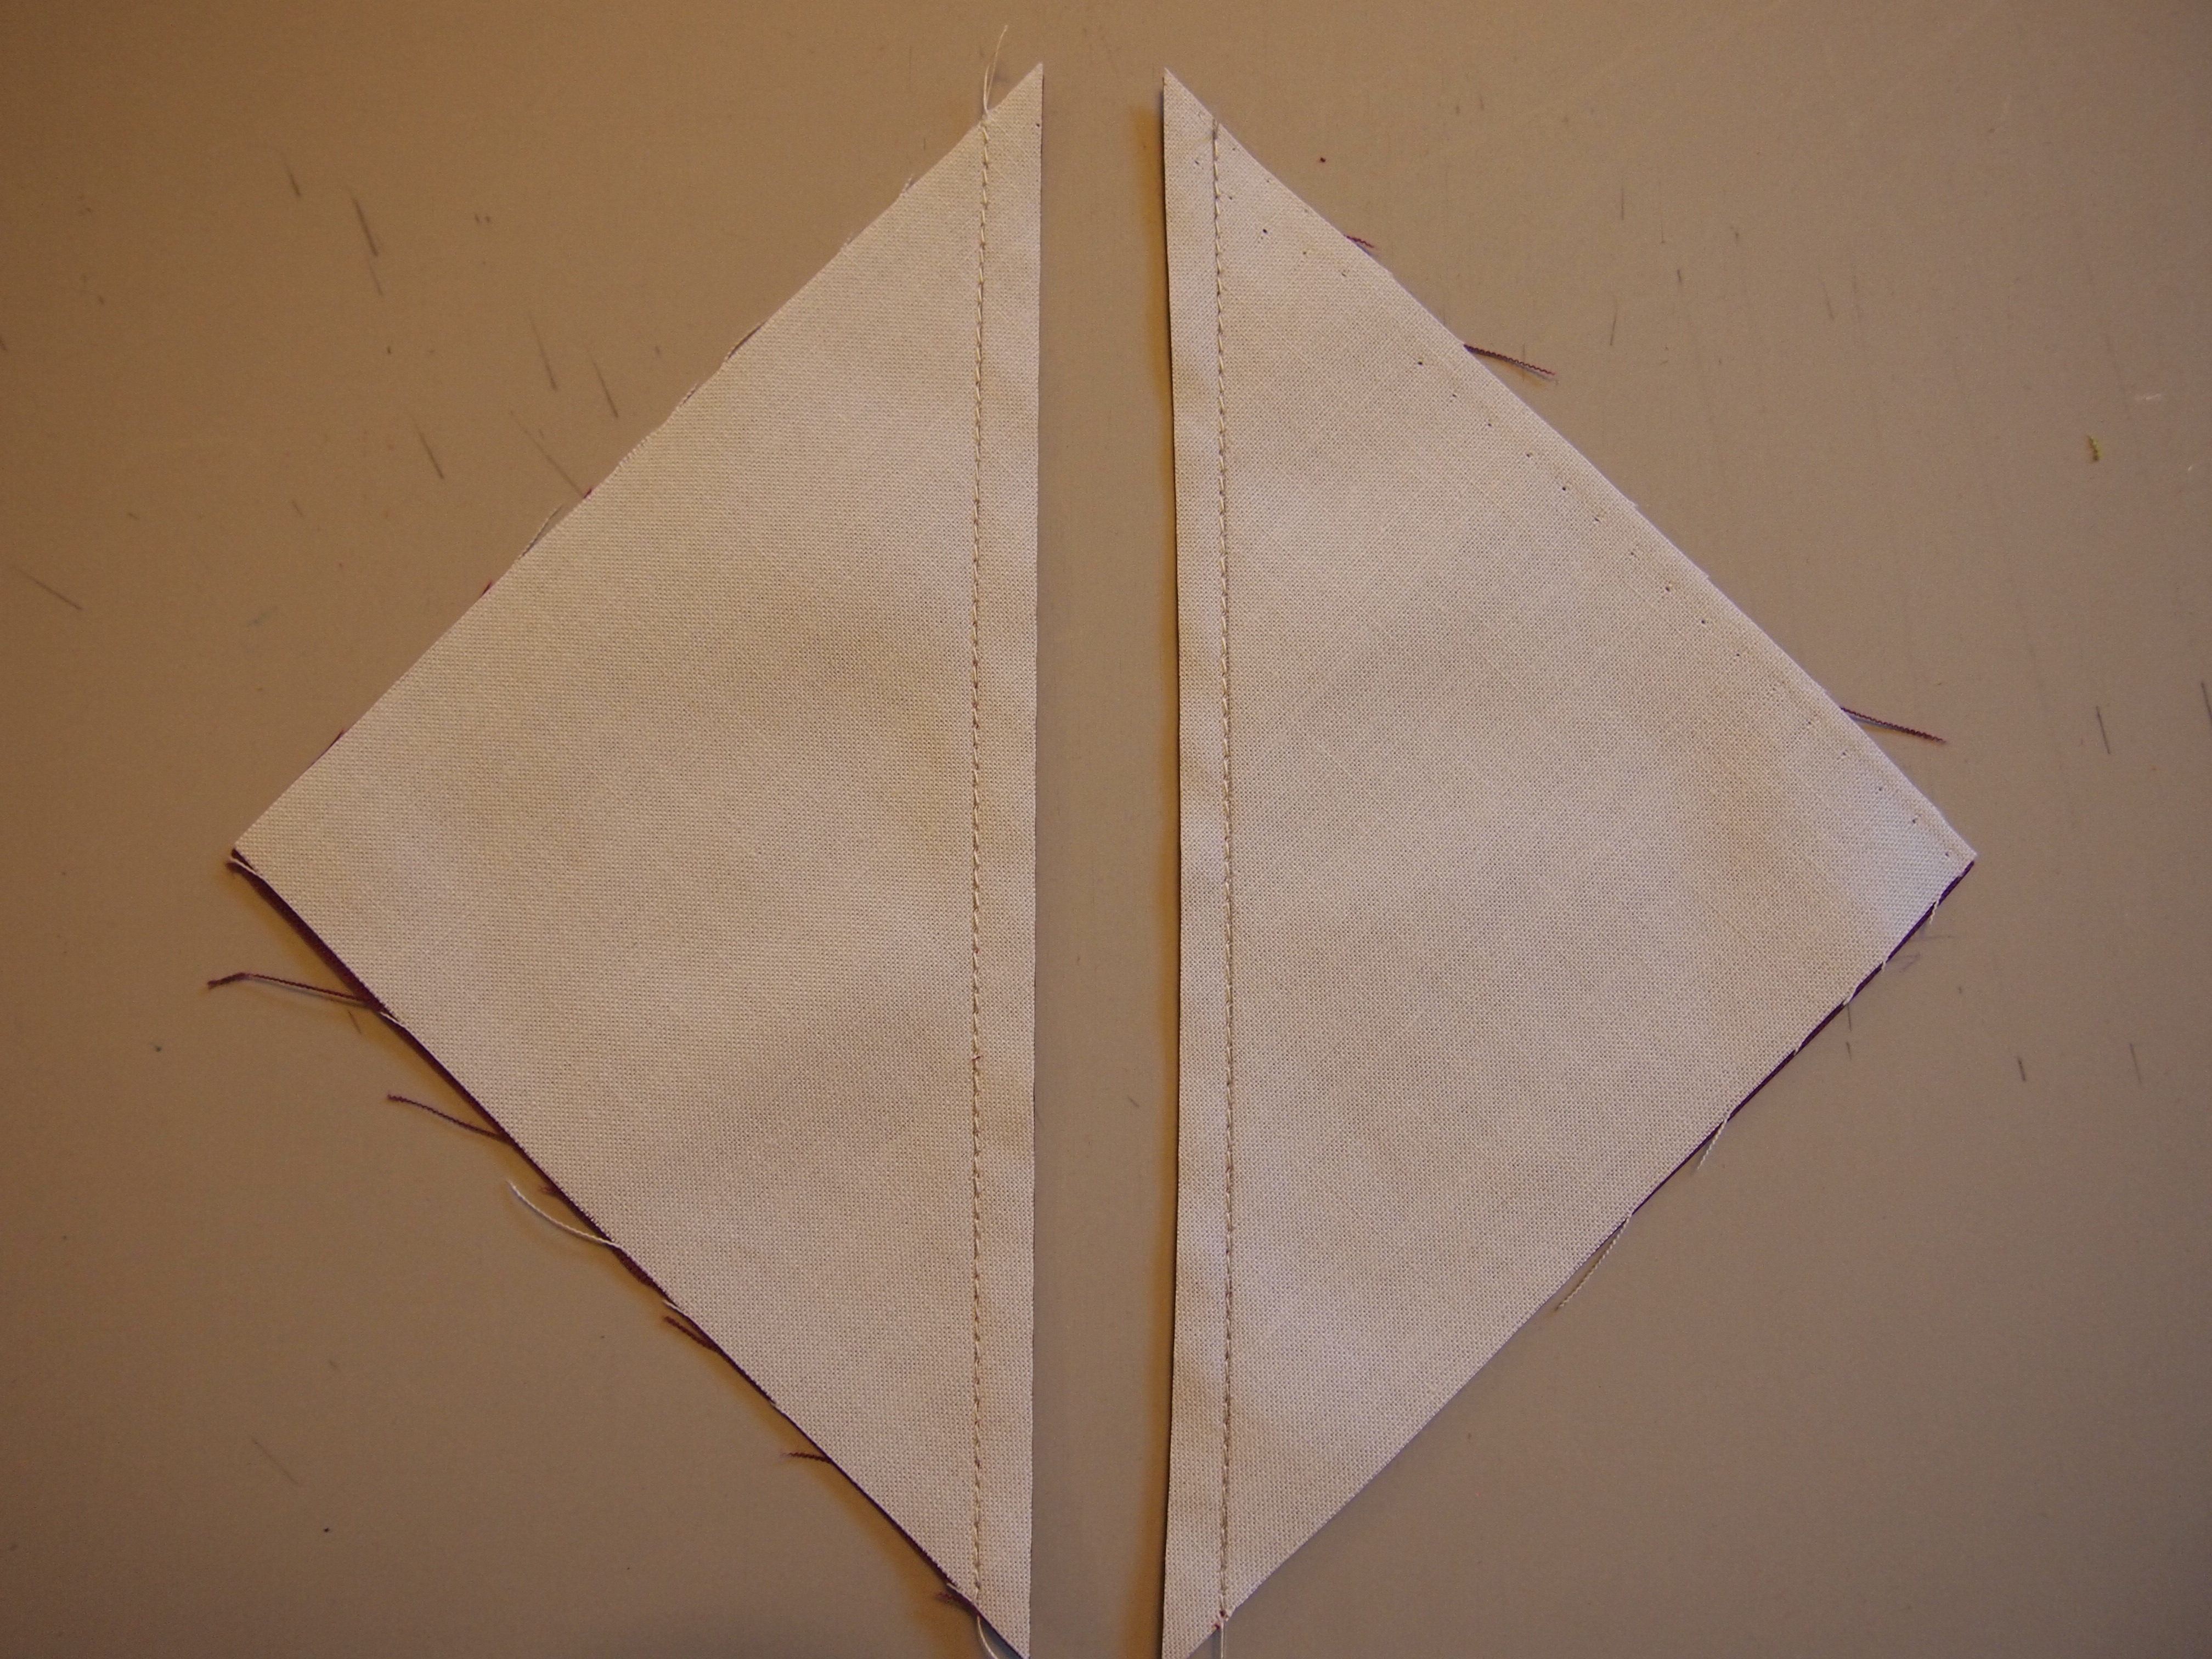
Cut apart  and press to the dark.

OLYMPUS DIGITAL CAMERA OLYMPUS DIGITAL CAMERA

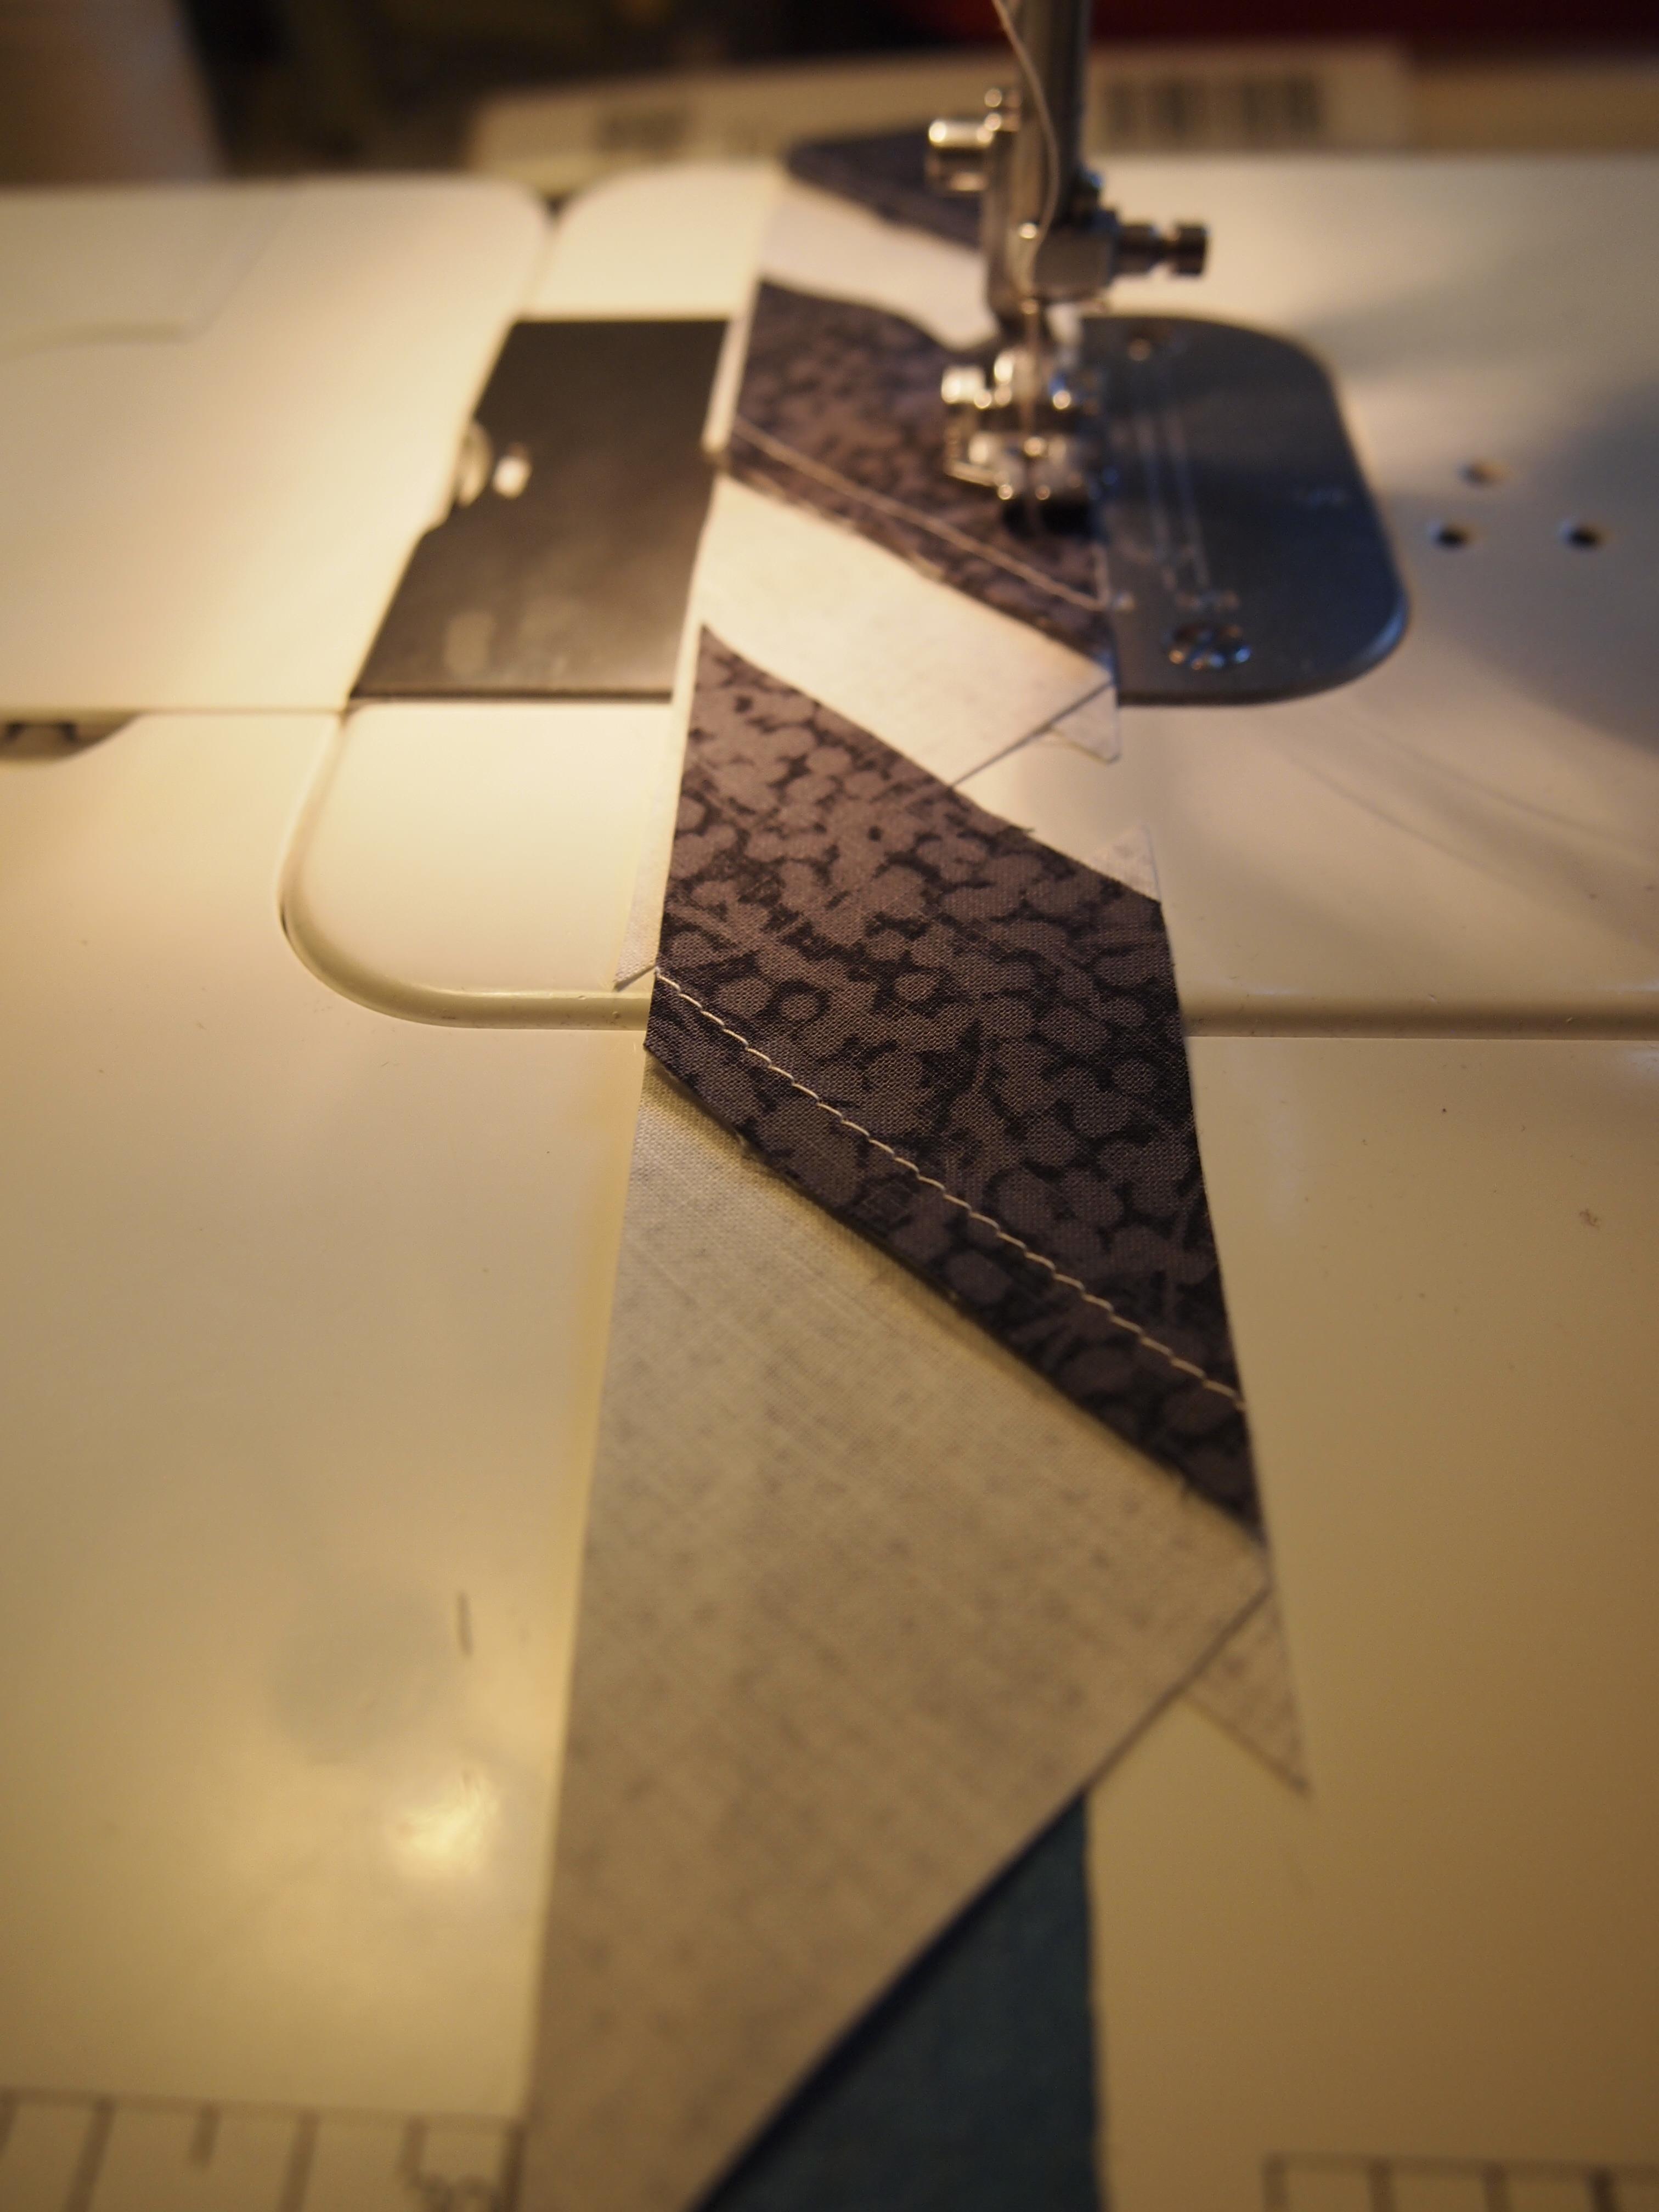
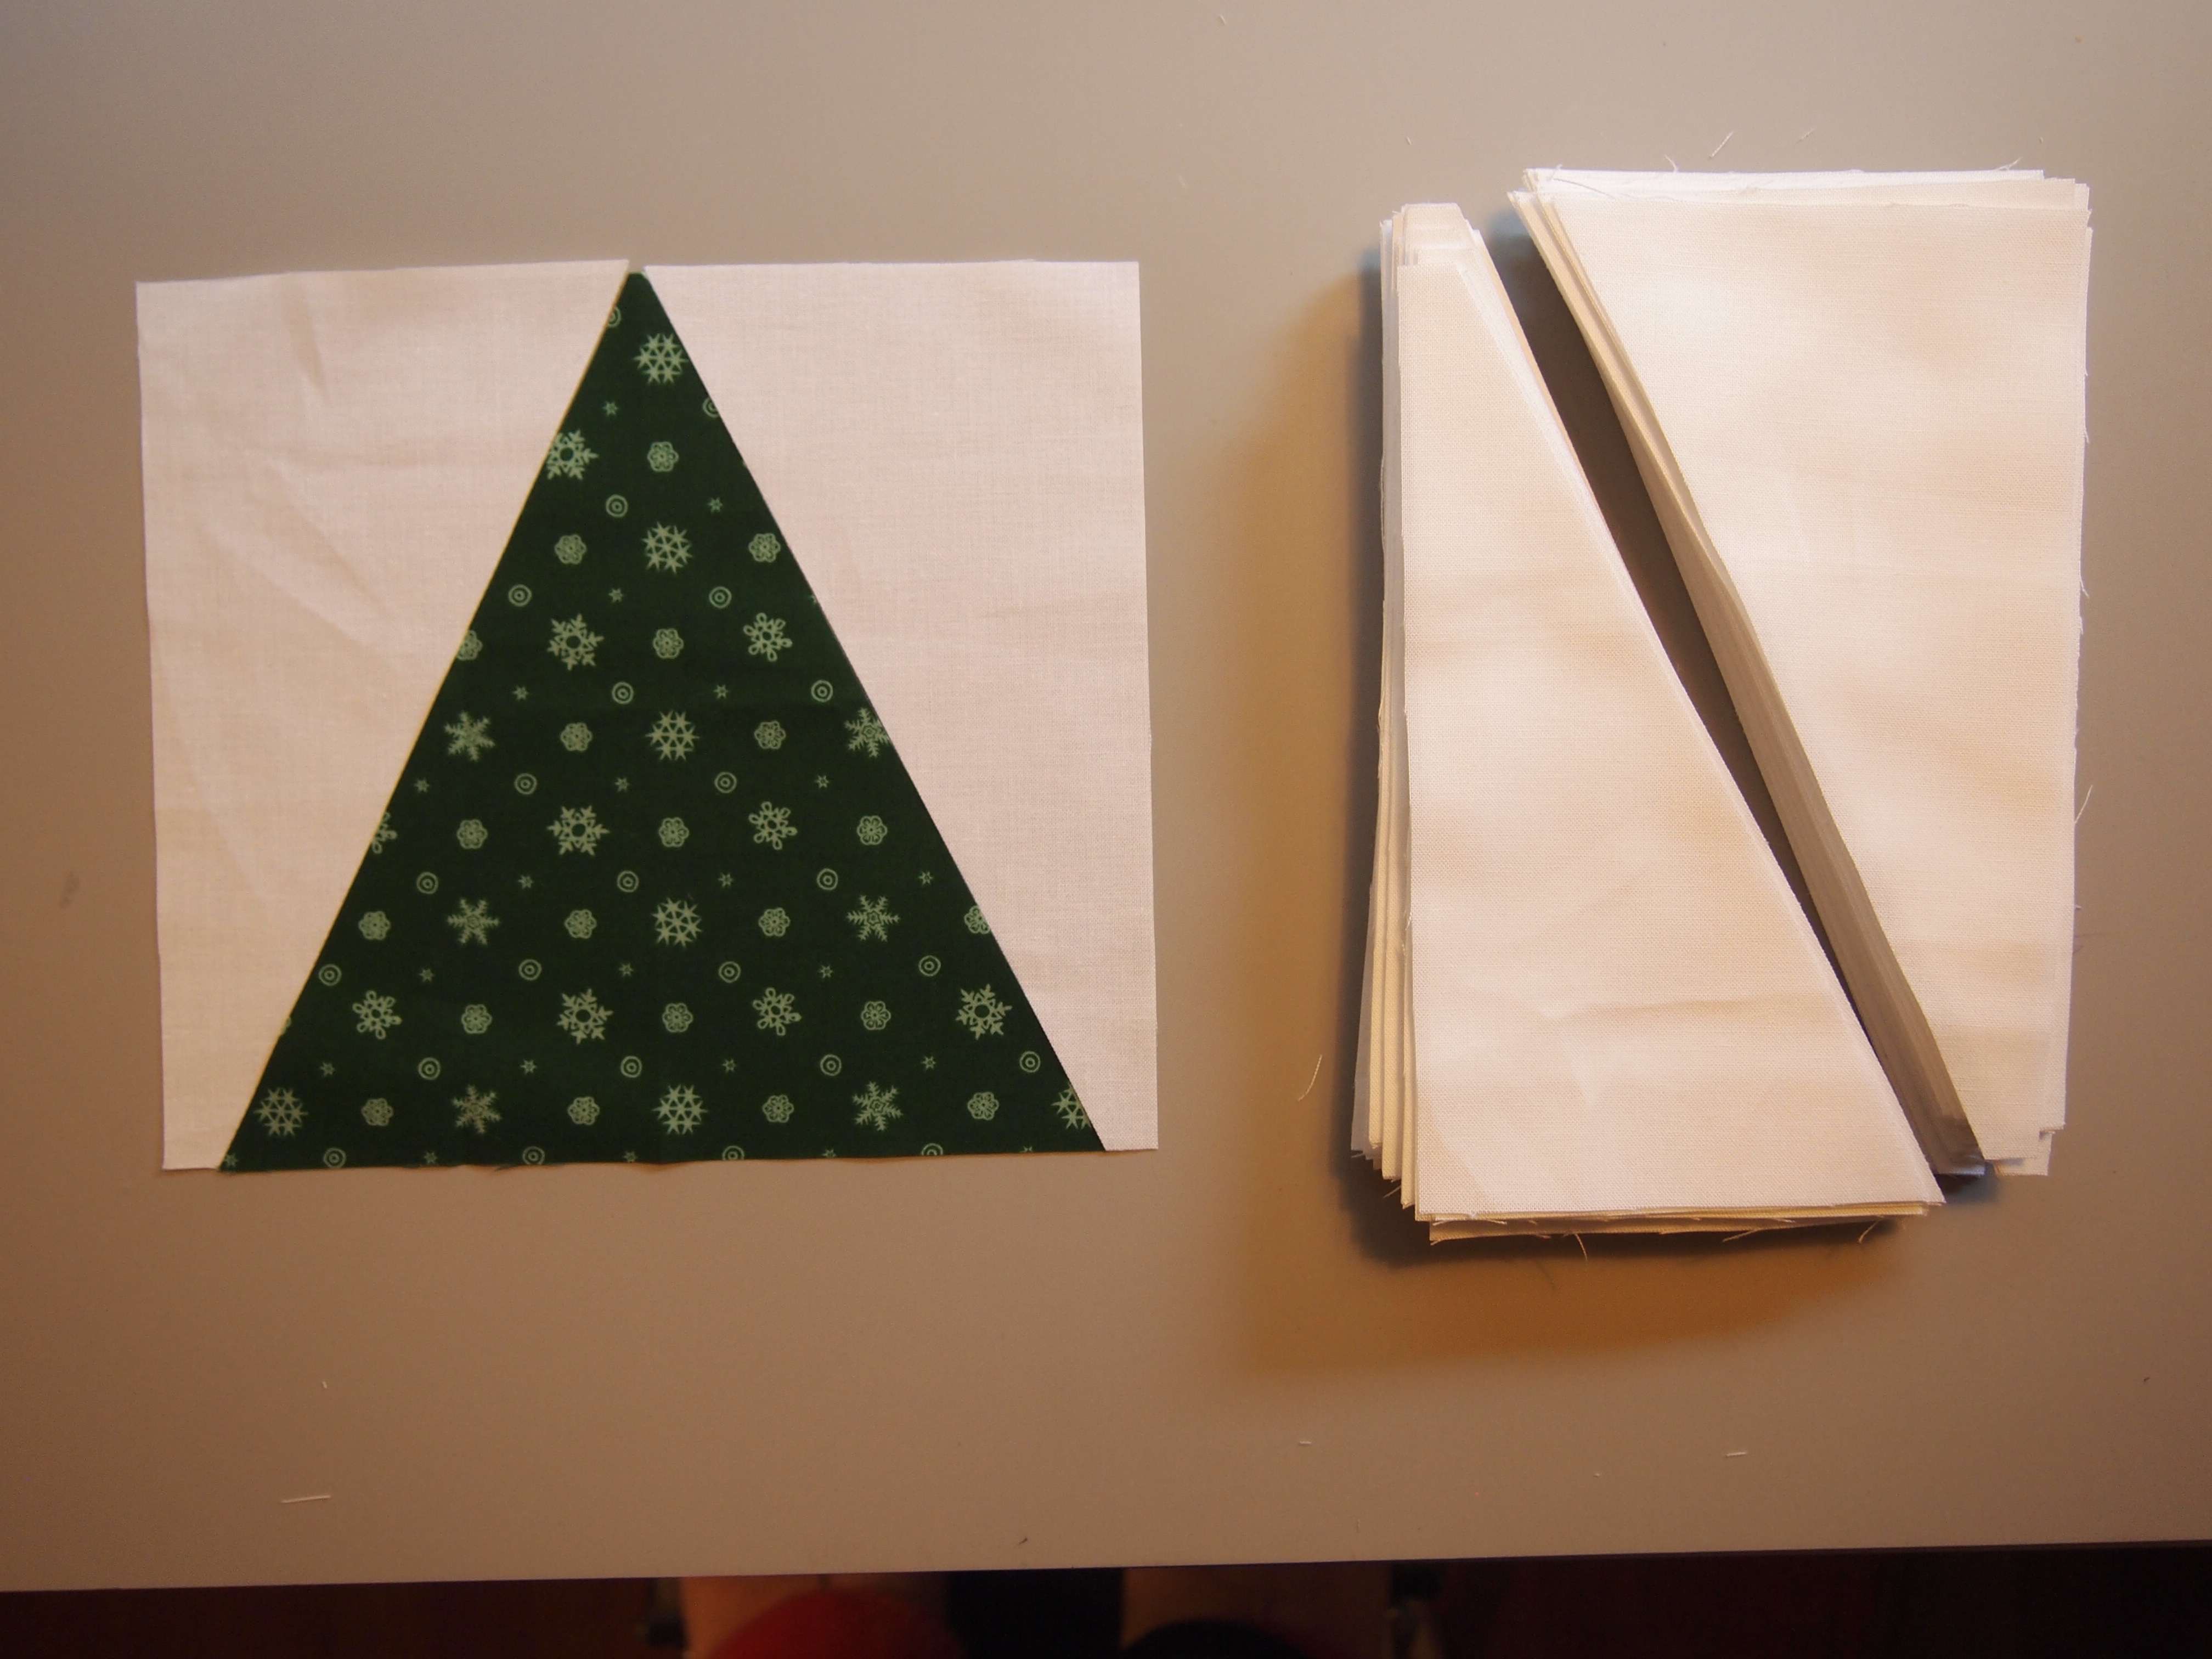
Position the half square triangles on another square, mark the stitch lines.

OLYMPUS DIGITAL CAMERA OLYMPUS DIGITAL CAMERA

Sew on the stitch lines and cut apart.

OLYMPUS DIGITAL CAMERA OLYMPUS DIGITAL CAMERA

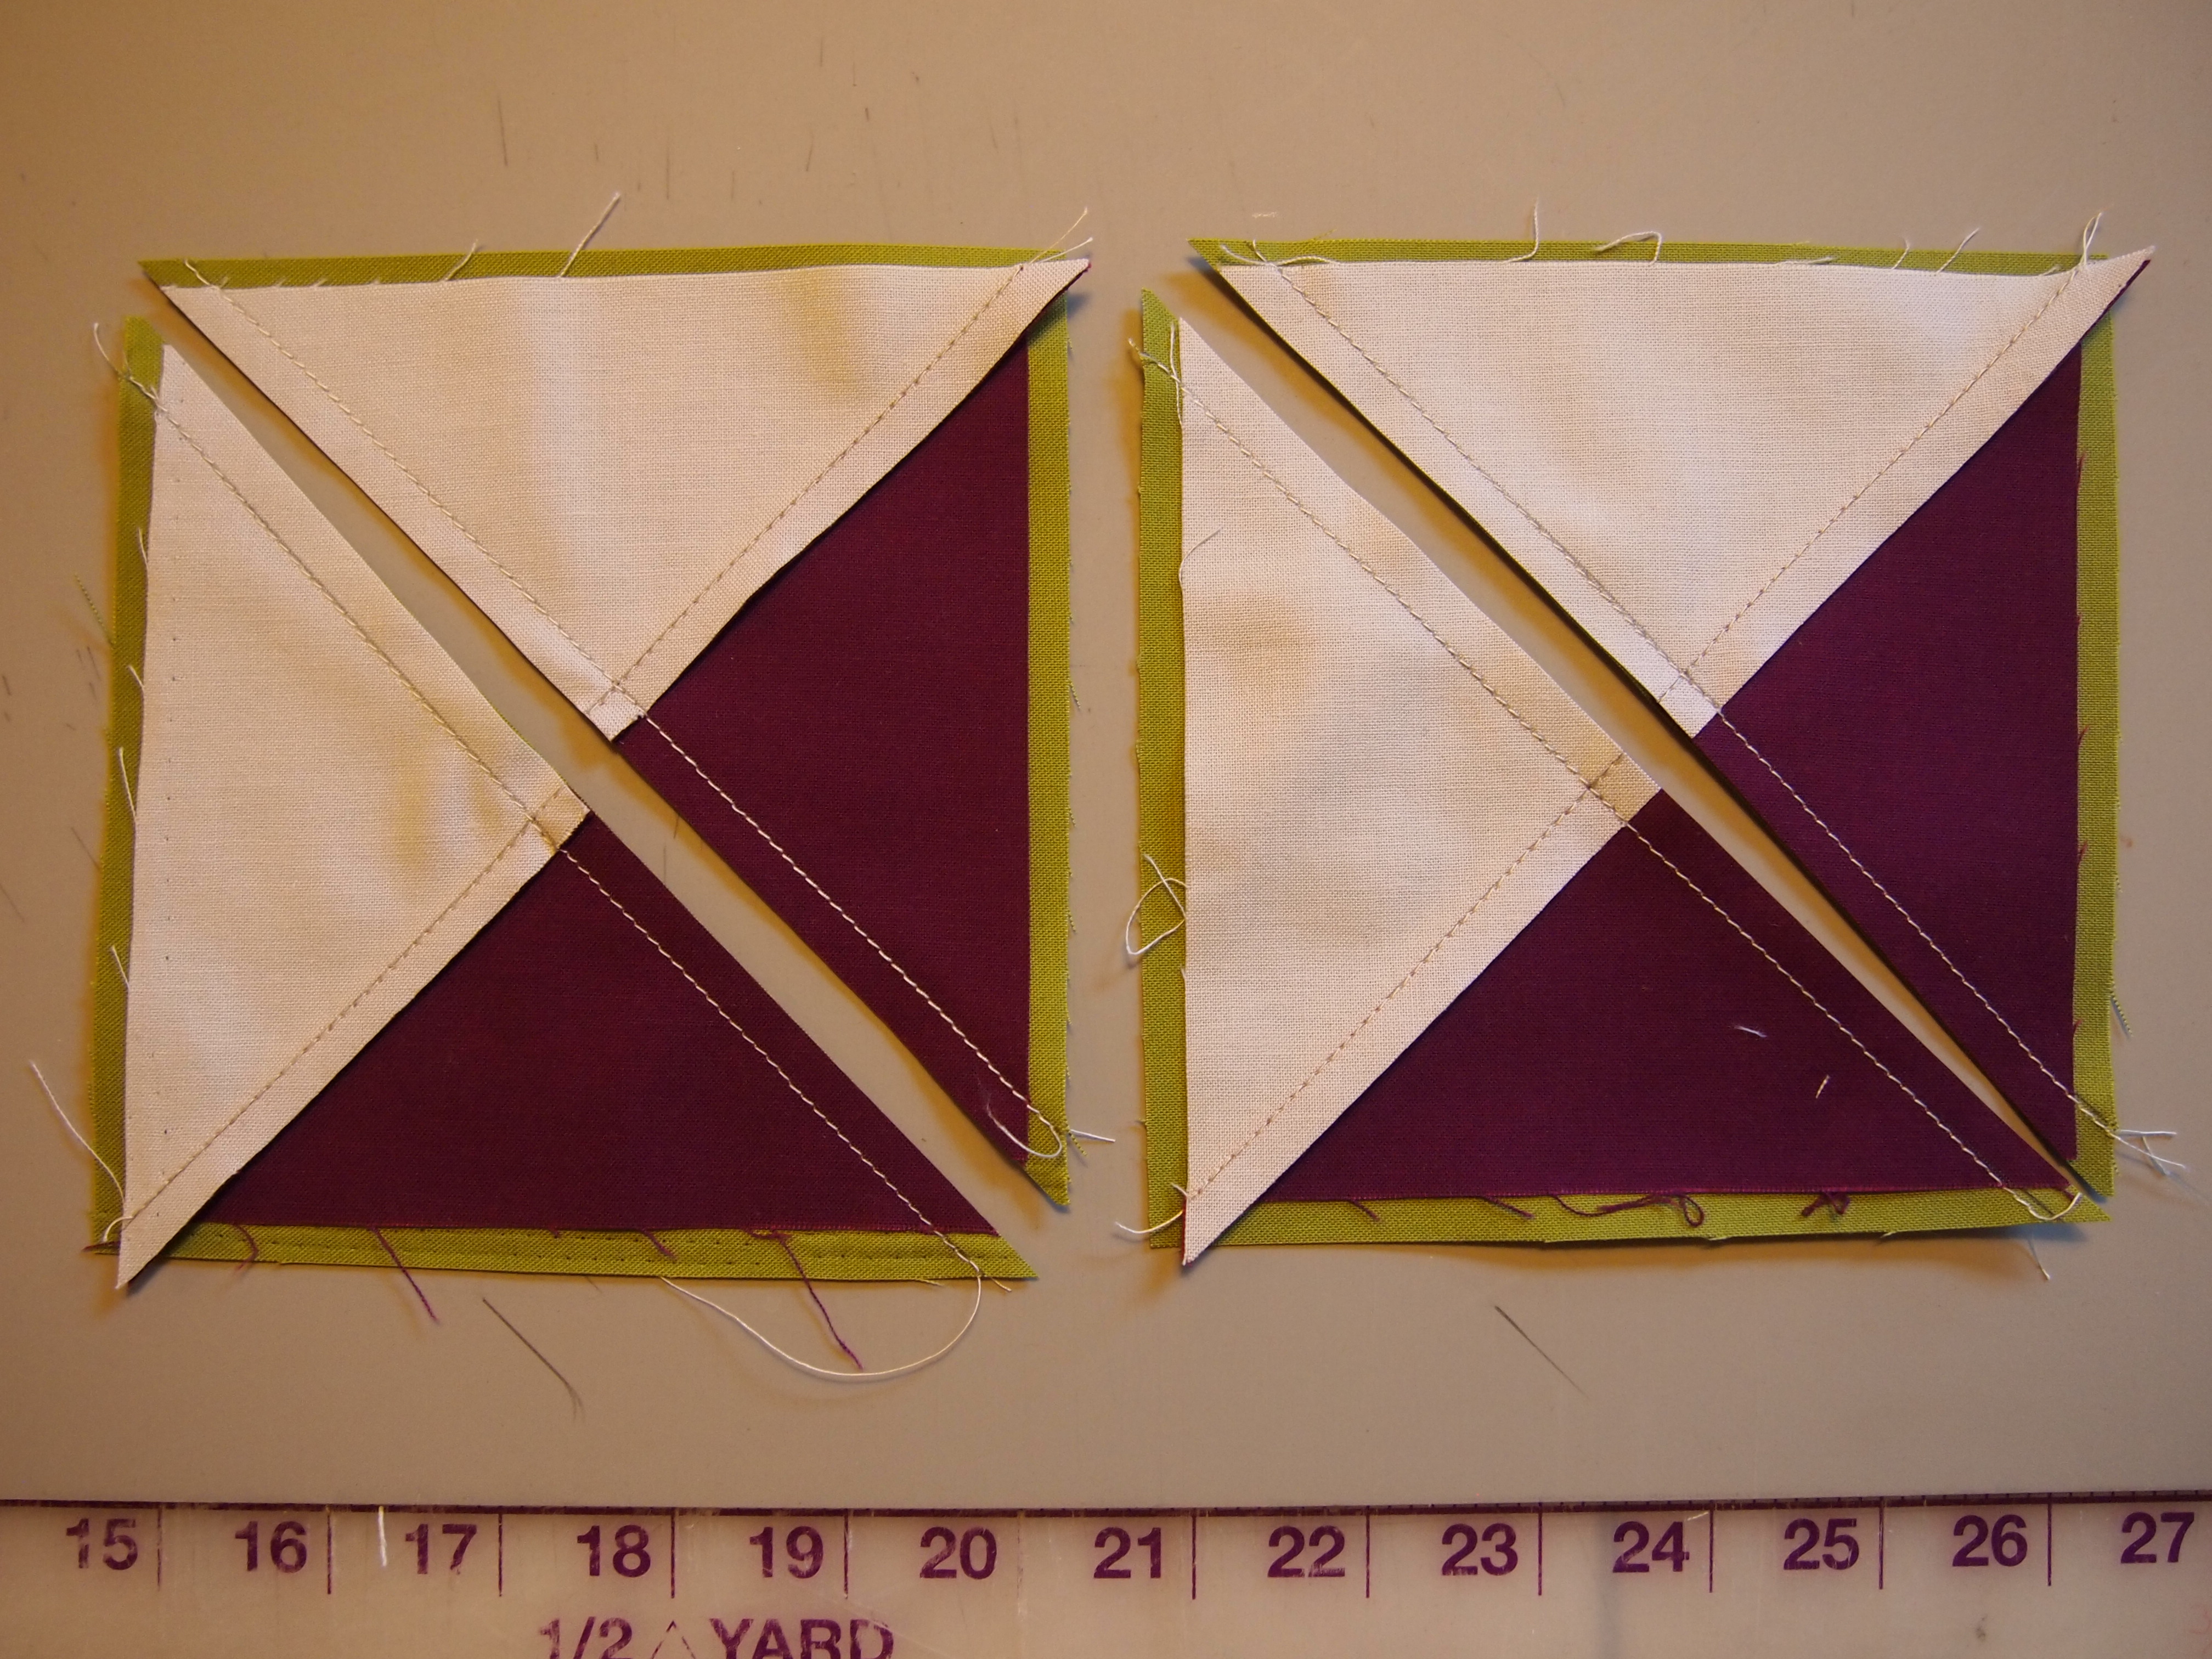
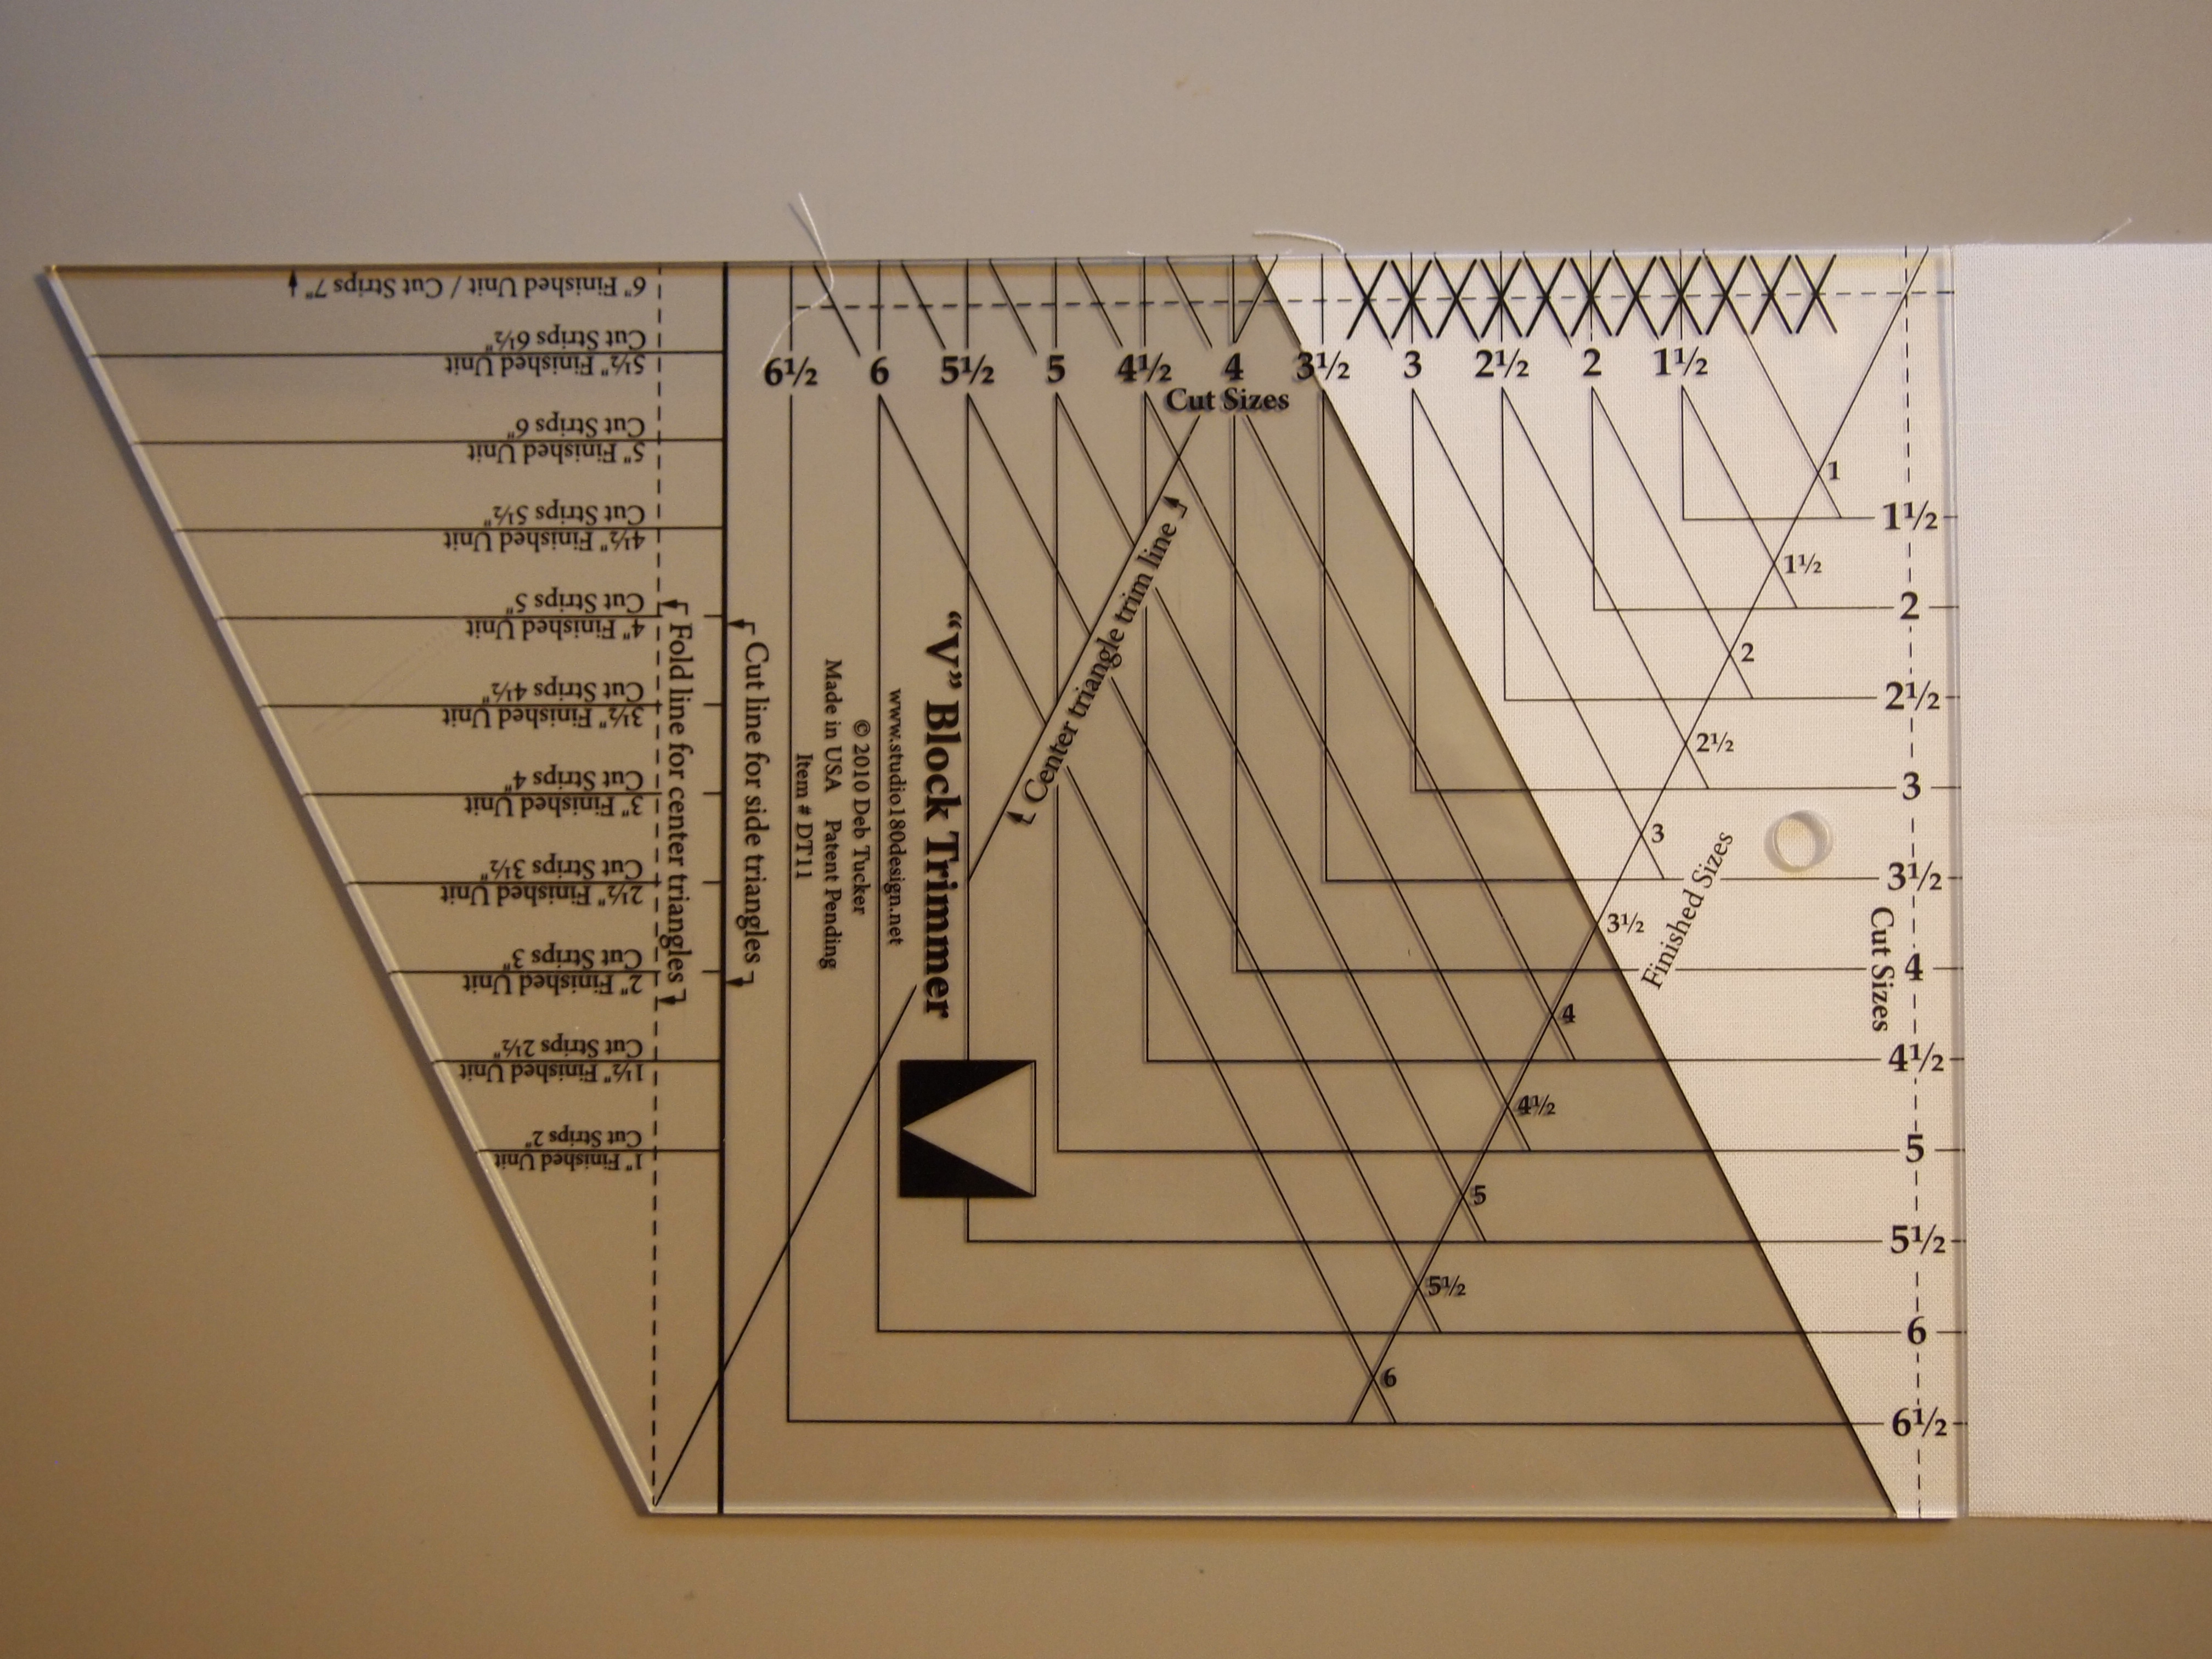
Press toward the larger triangle and square up to 4 1/2″ using your Tucker Trimmer I.

OLYMPUS DIGITAL CAMERA OLYMPUS DIGITAL CAMERA

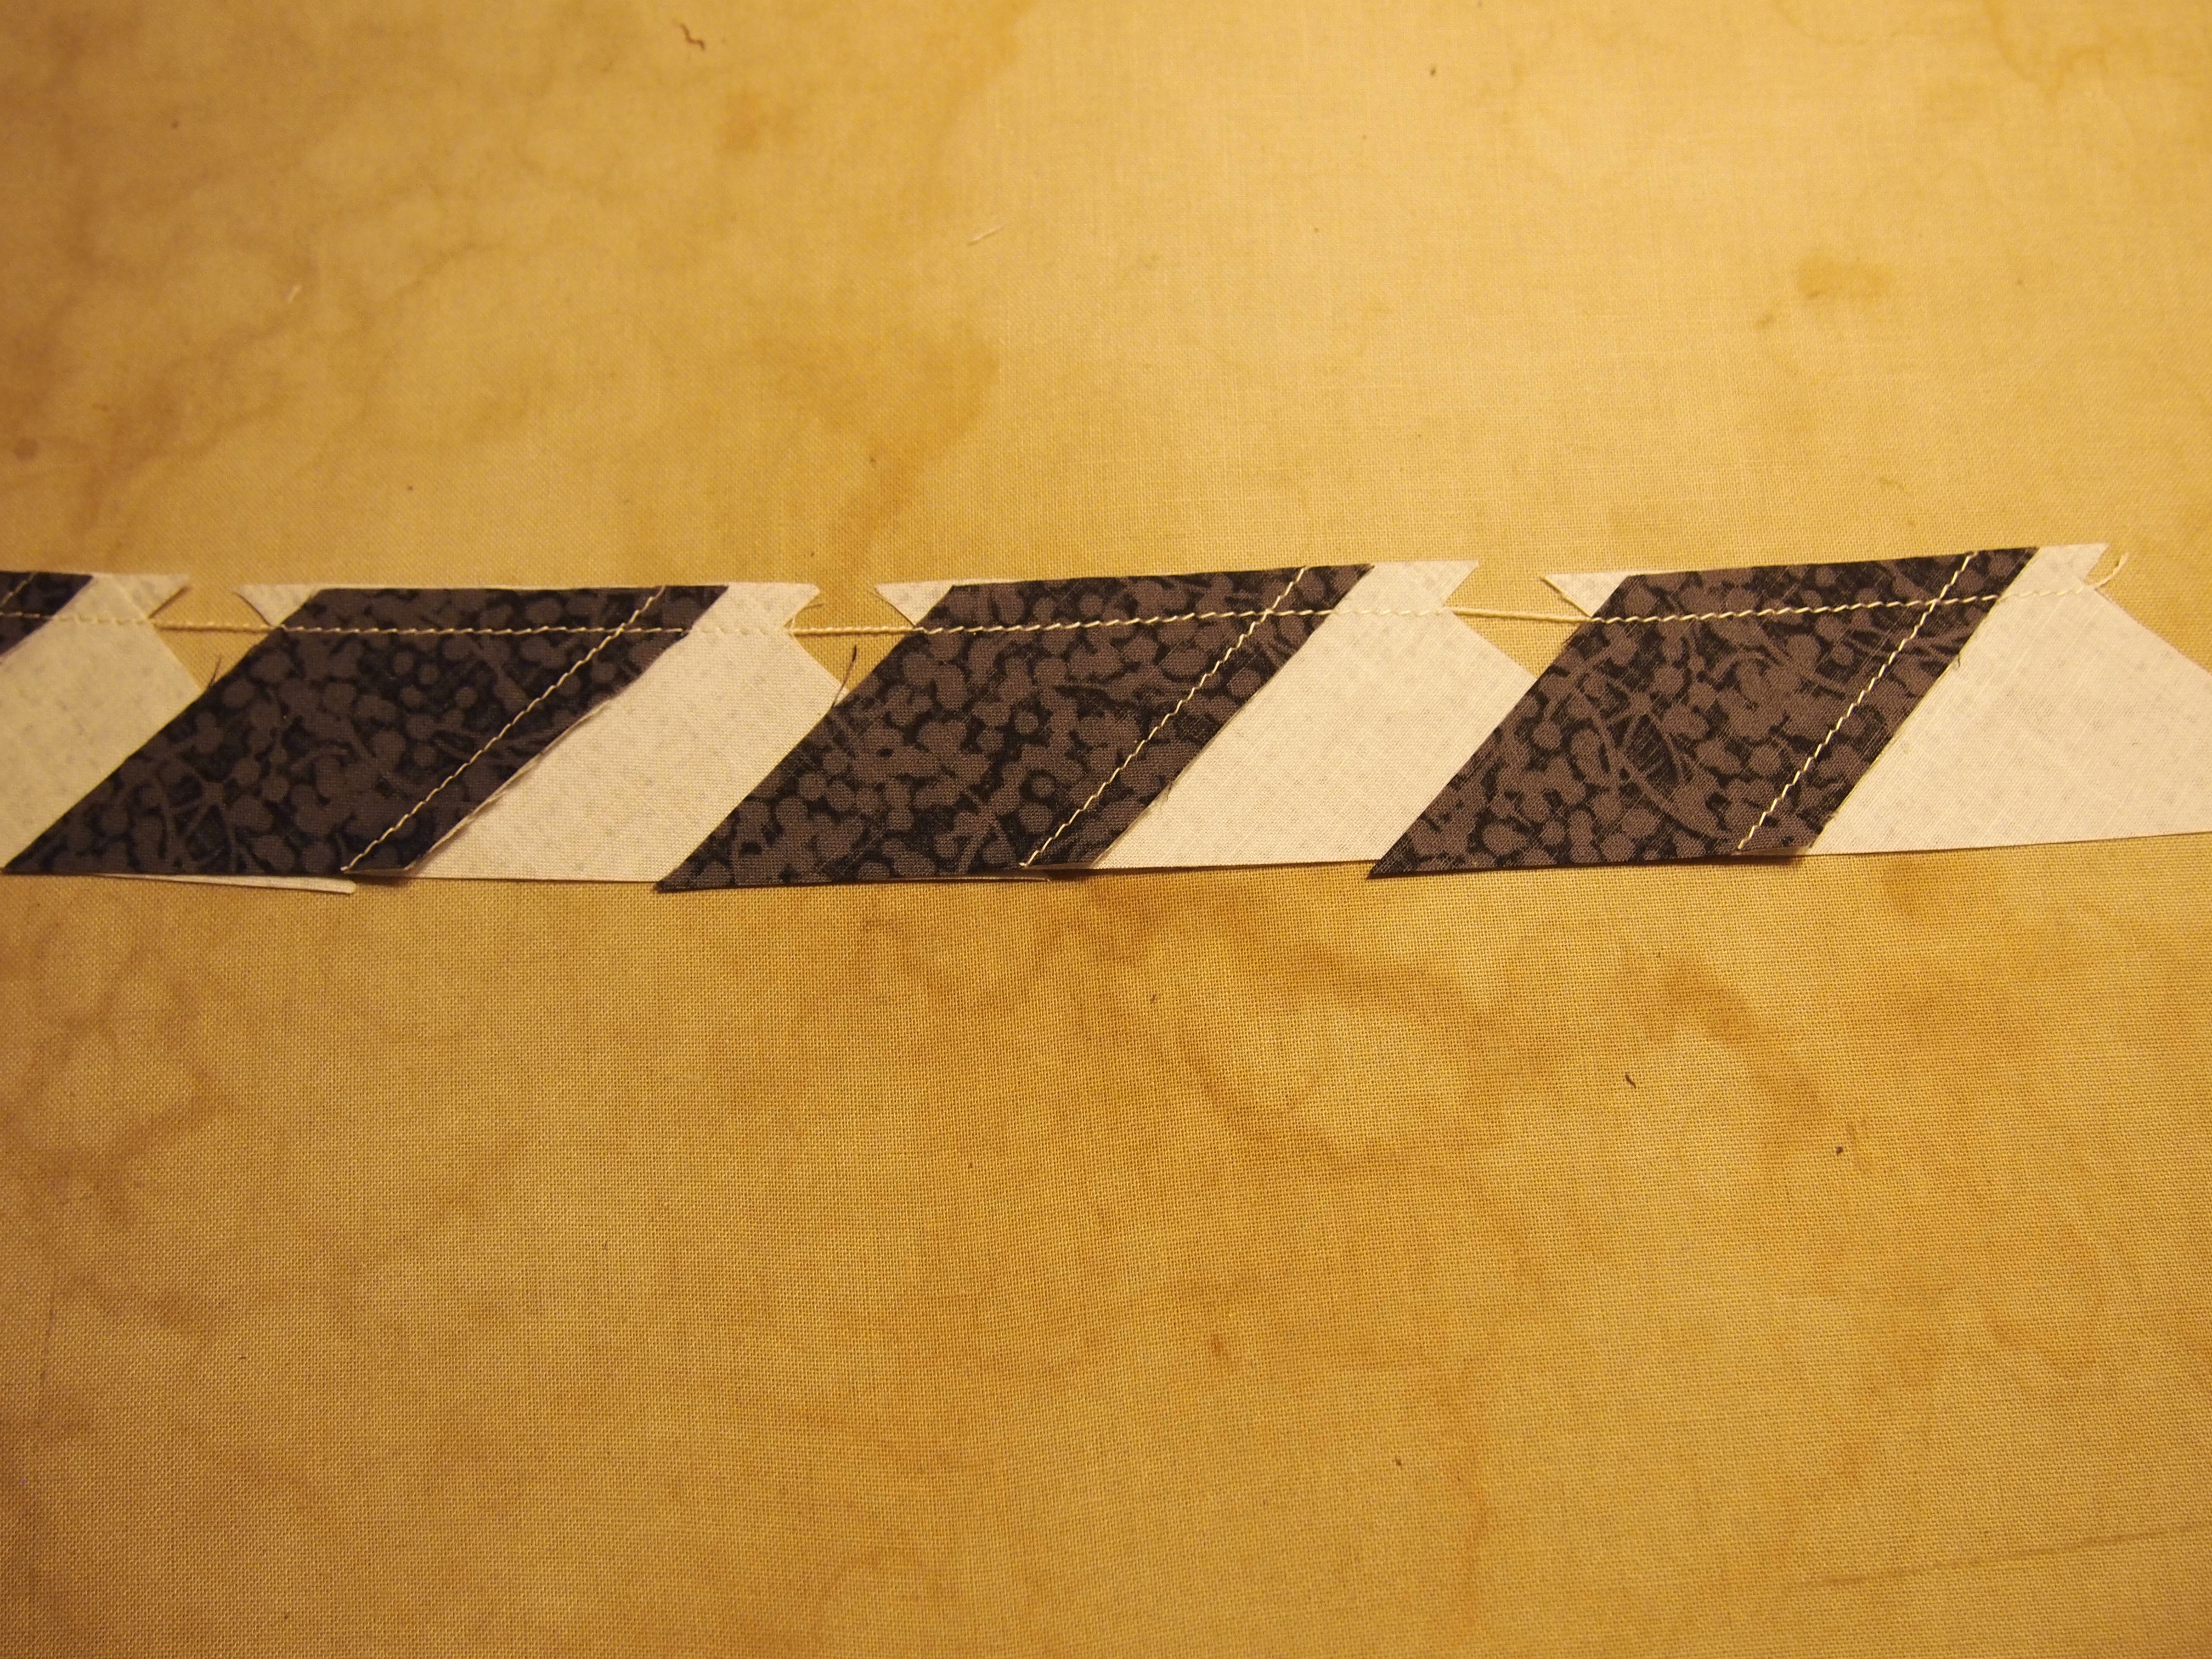
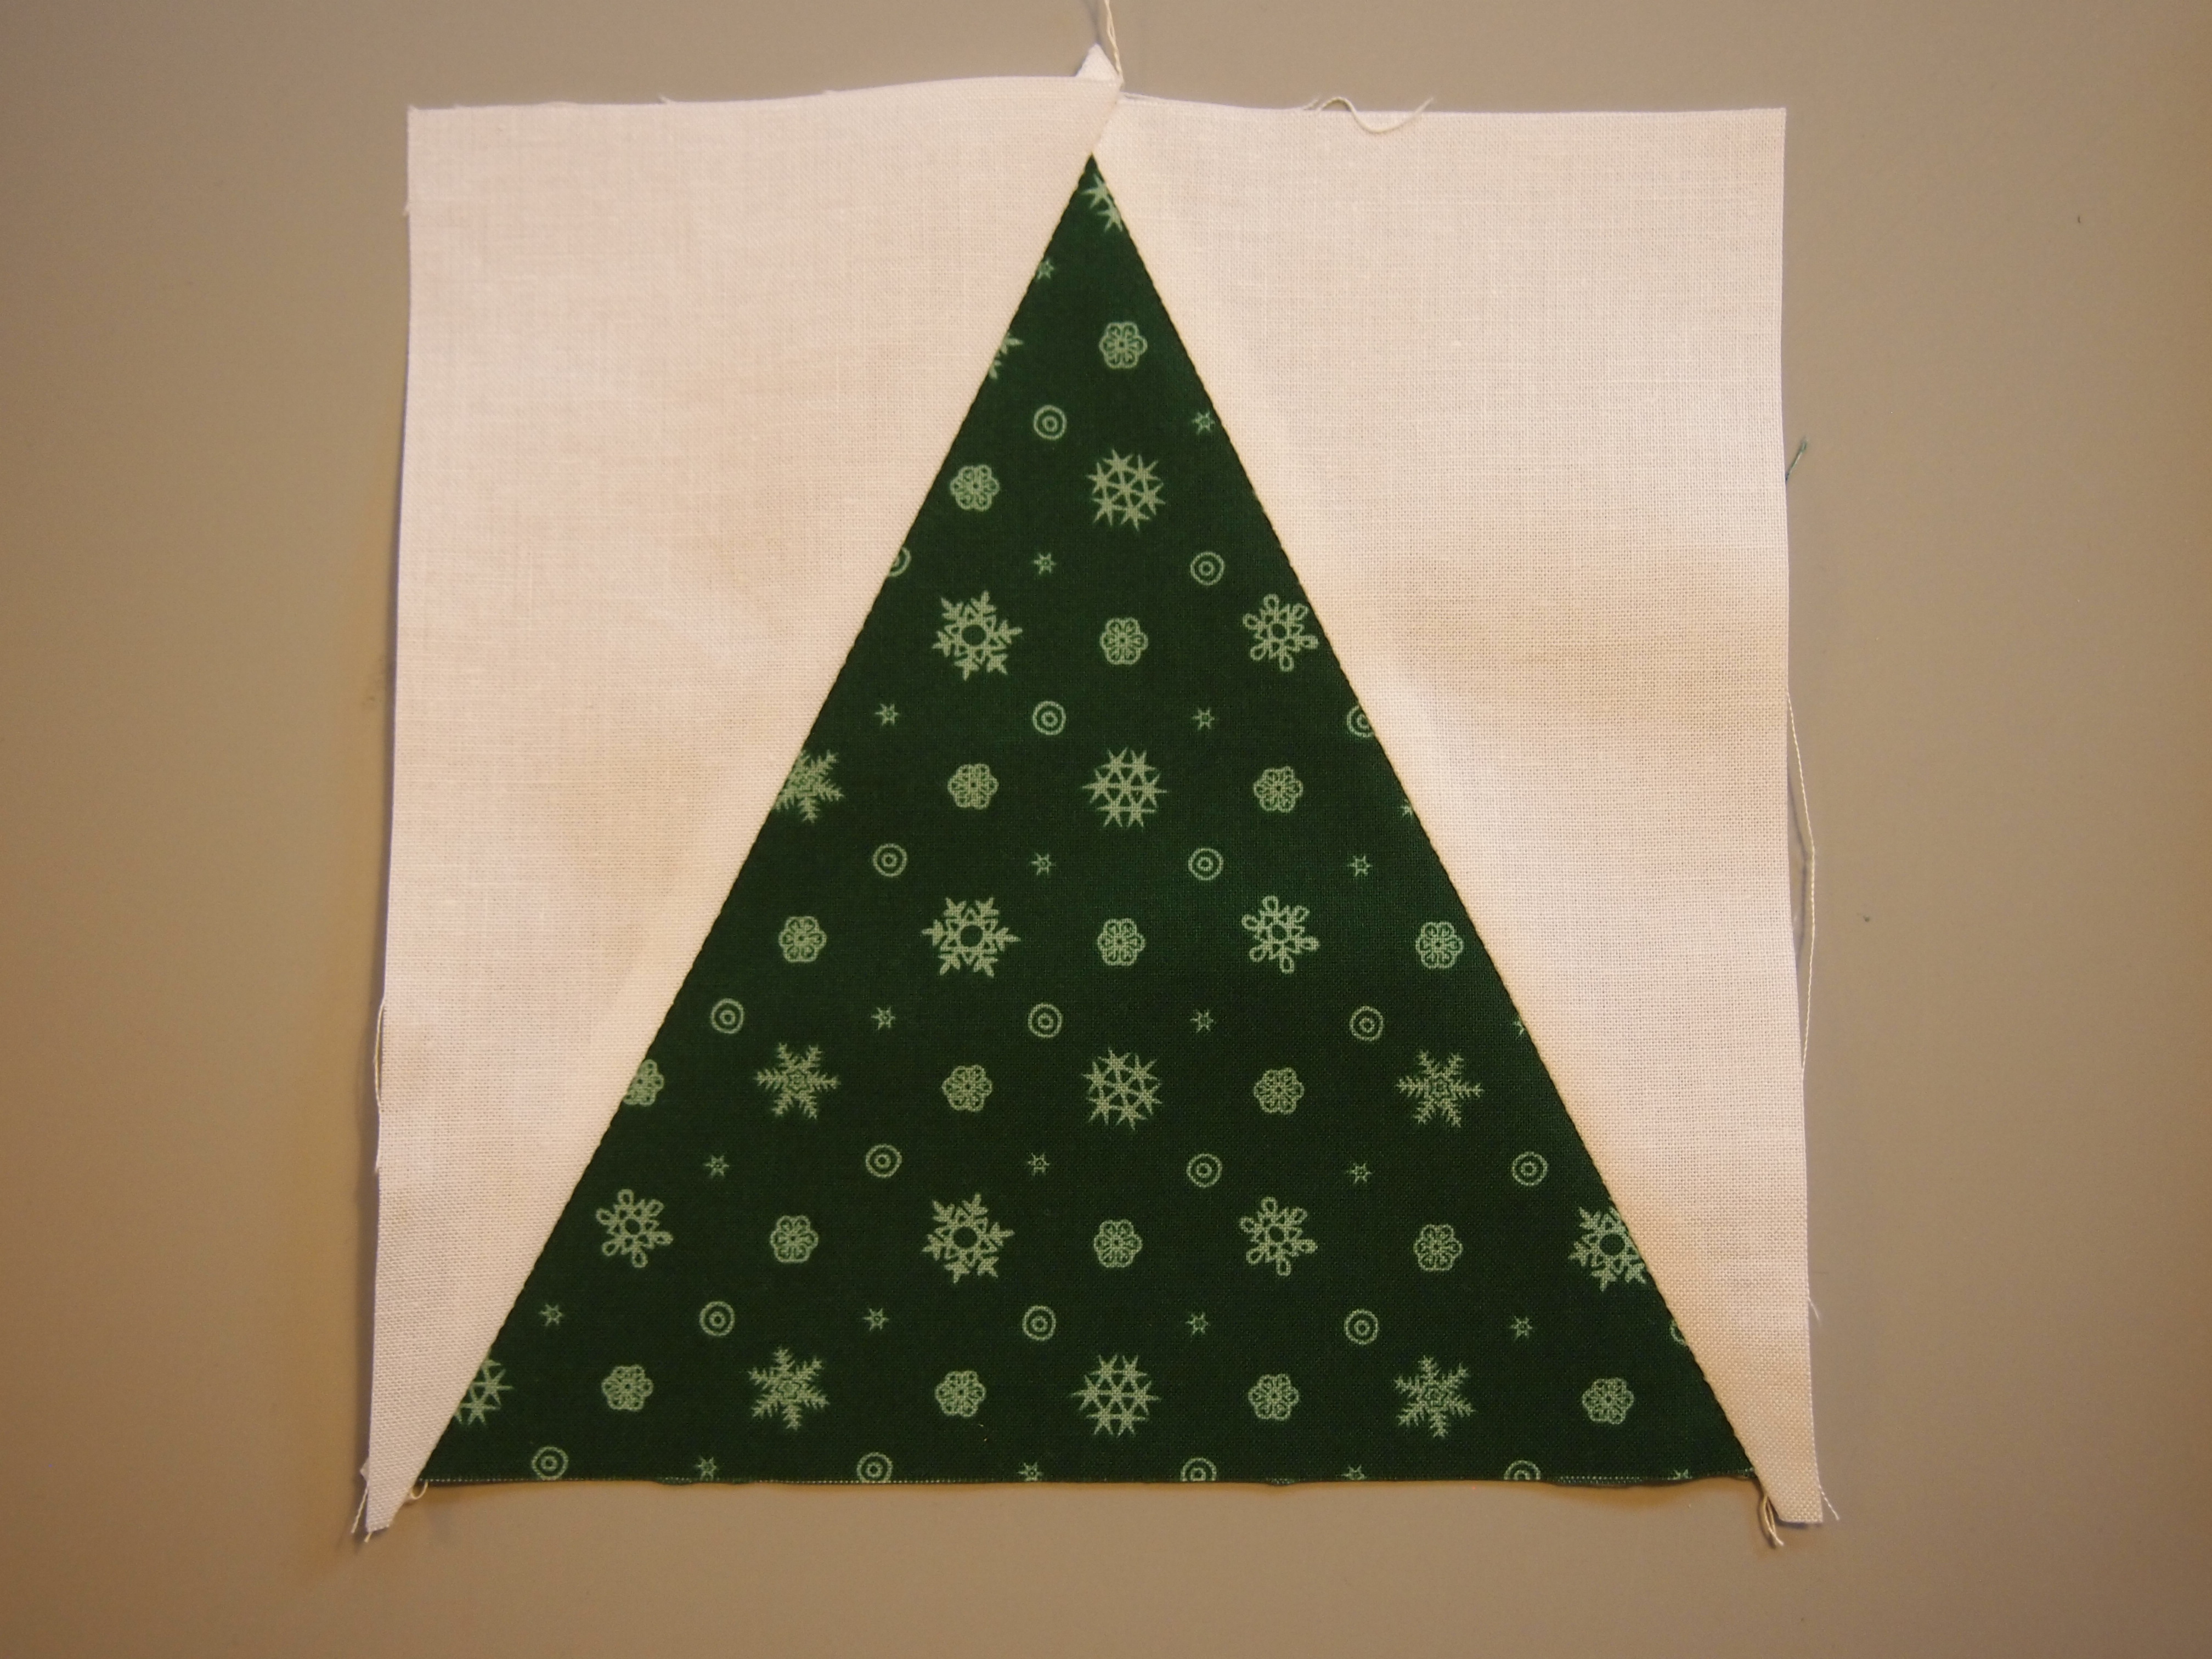
Position a small square, mark it and sew on the line.

OLYMPUS DIGITAL CAMERA OLYMPUS DIGITAL CAMERA

Trim and press.

OLYMPUS DIGITAL CAMERA OLYMPUS DIGITAL CAMERA

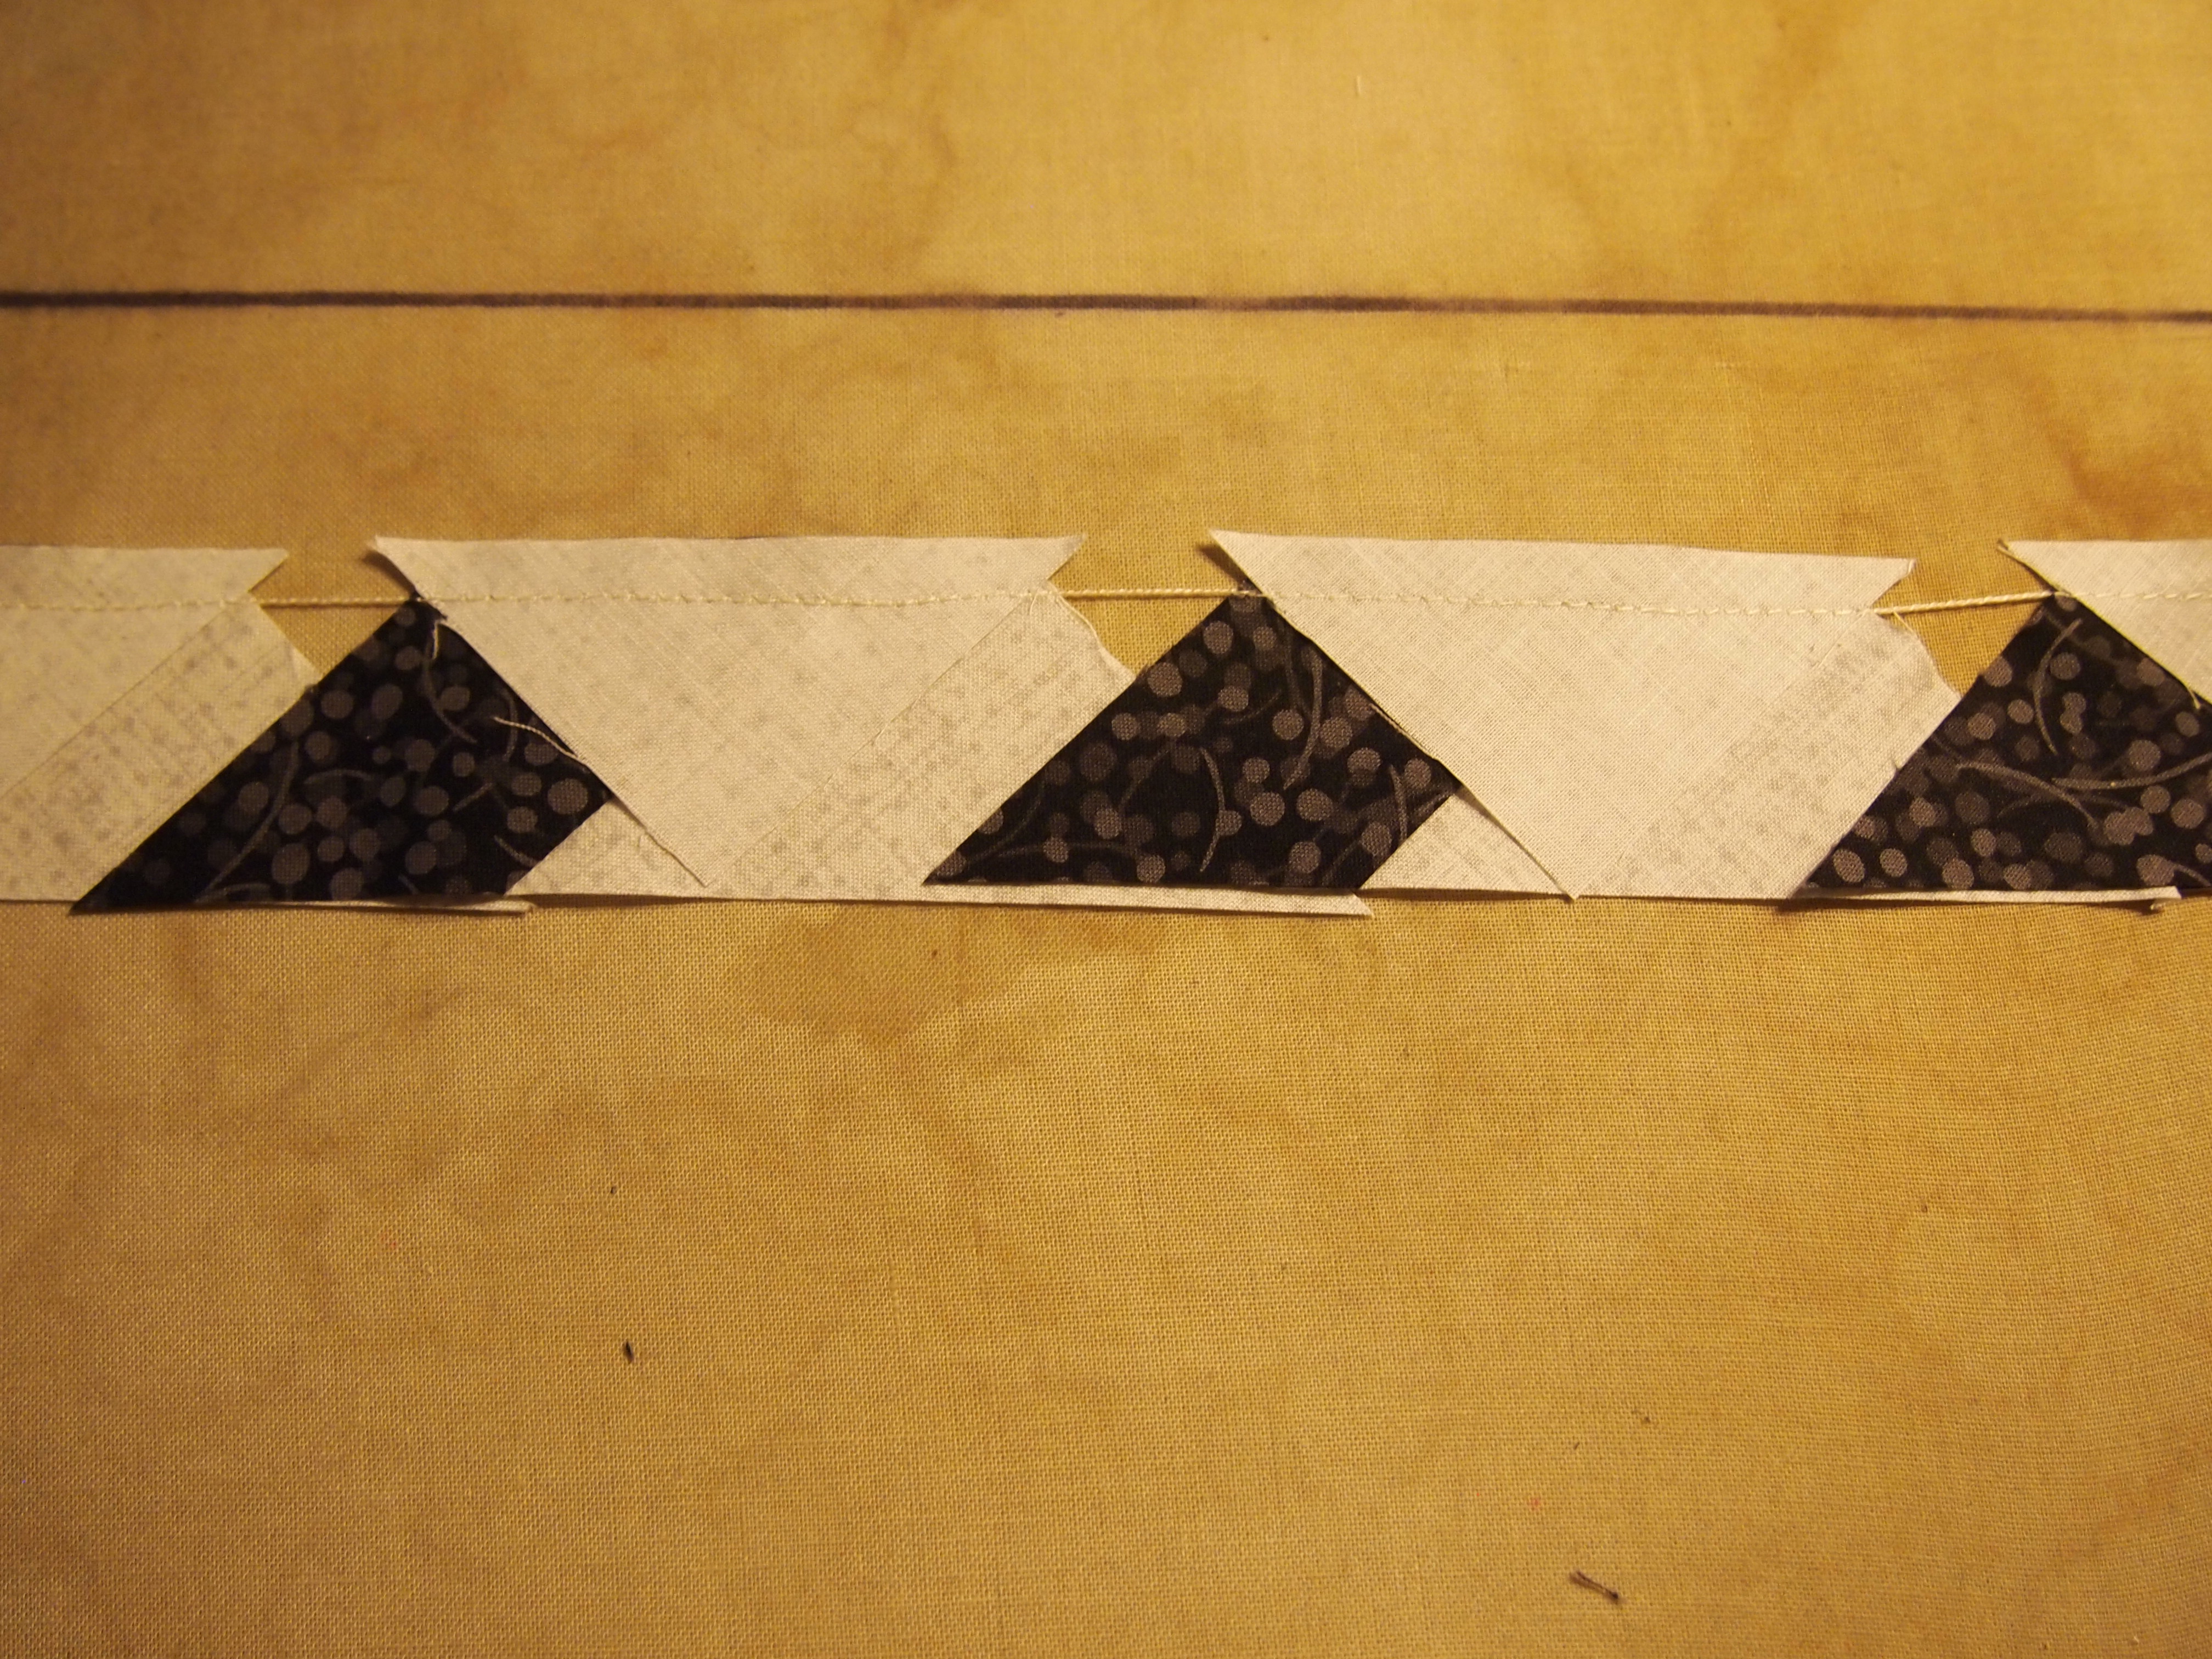
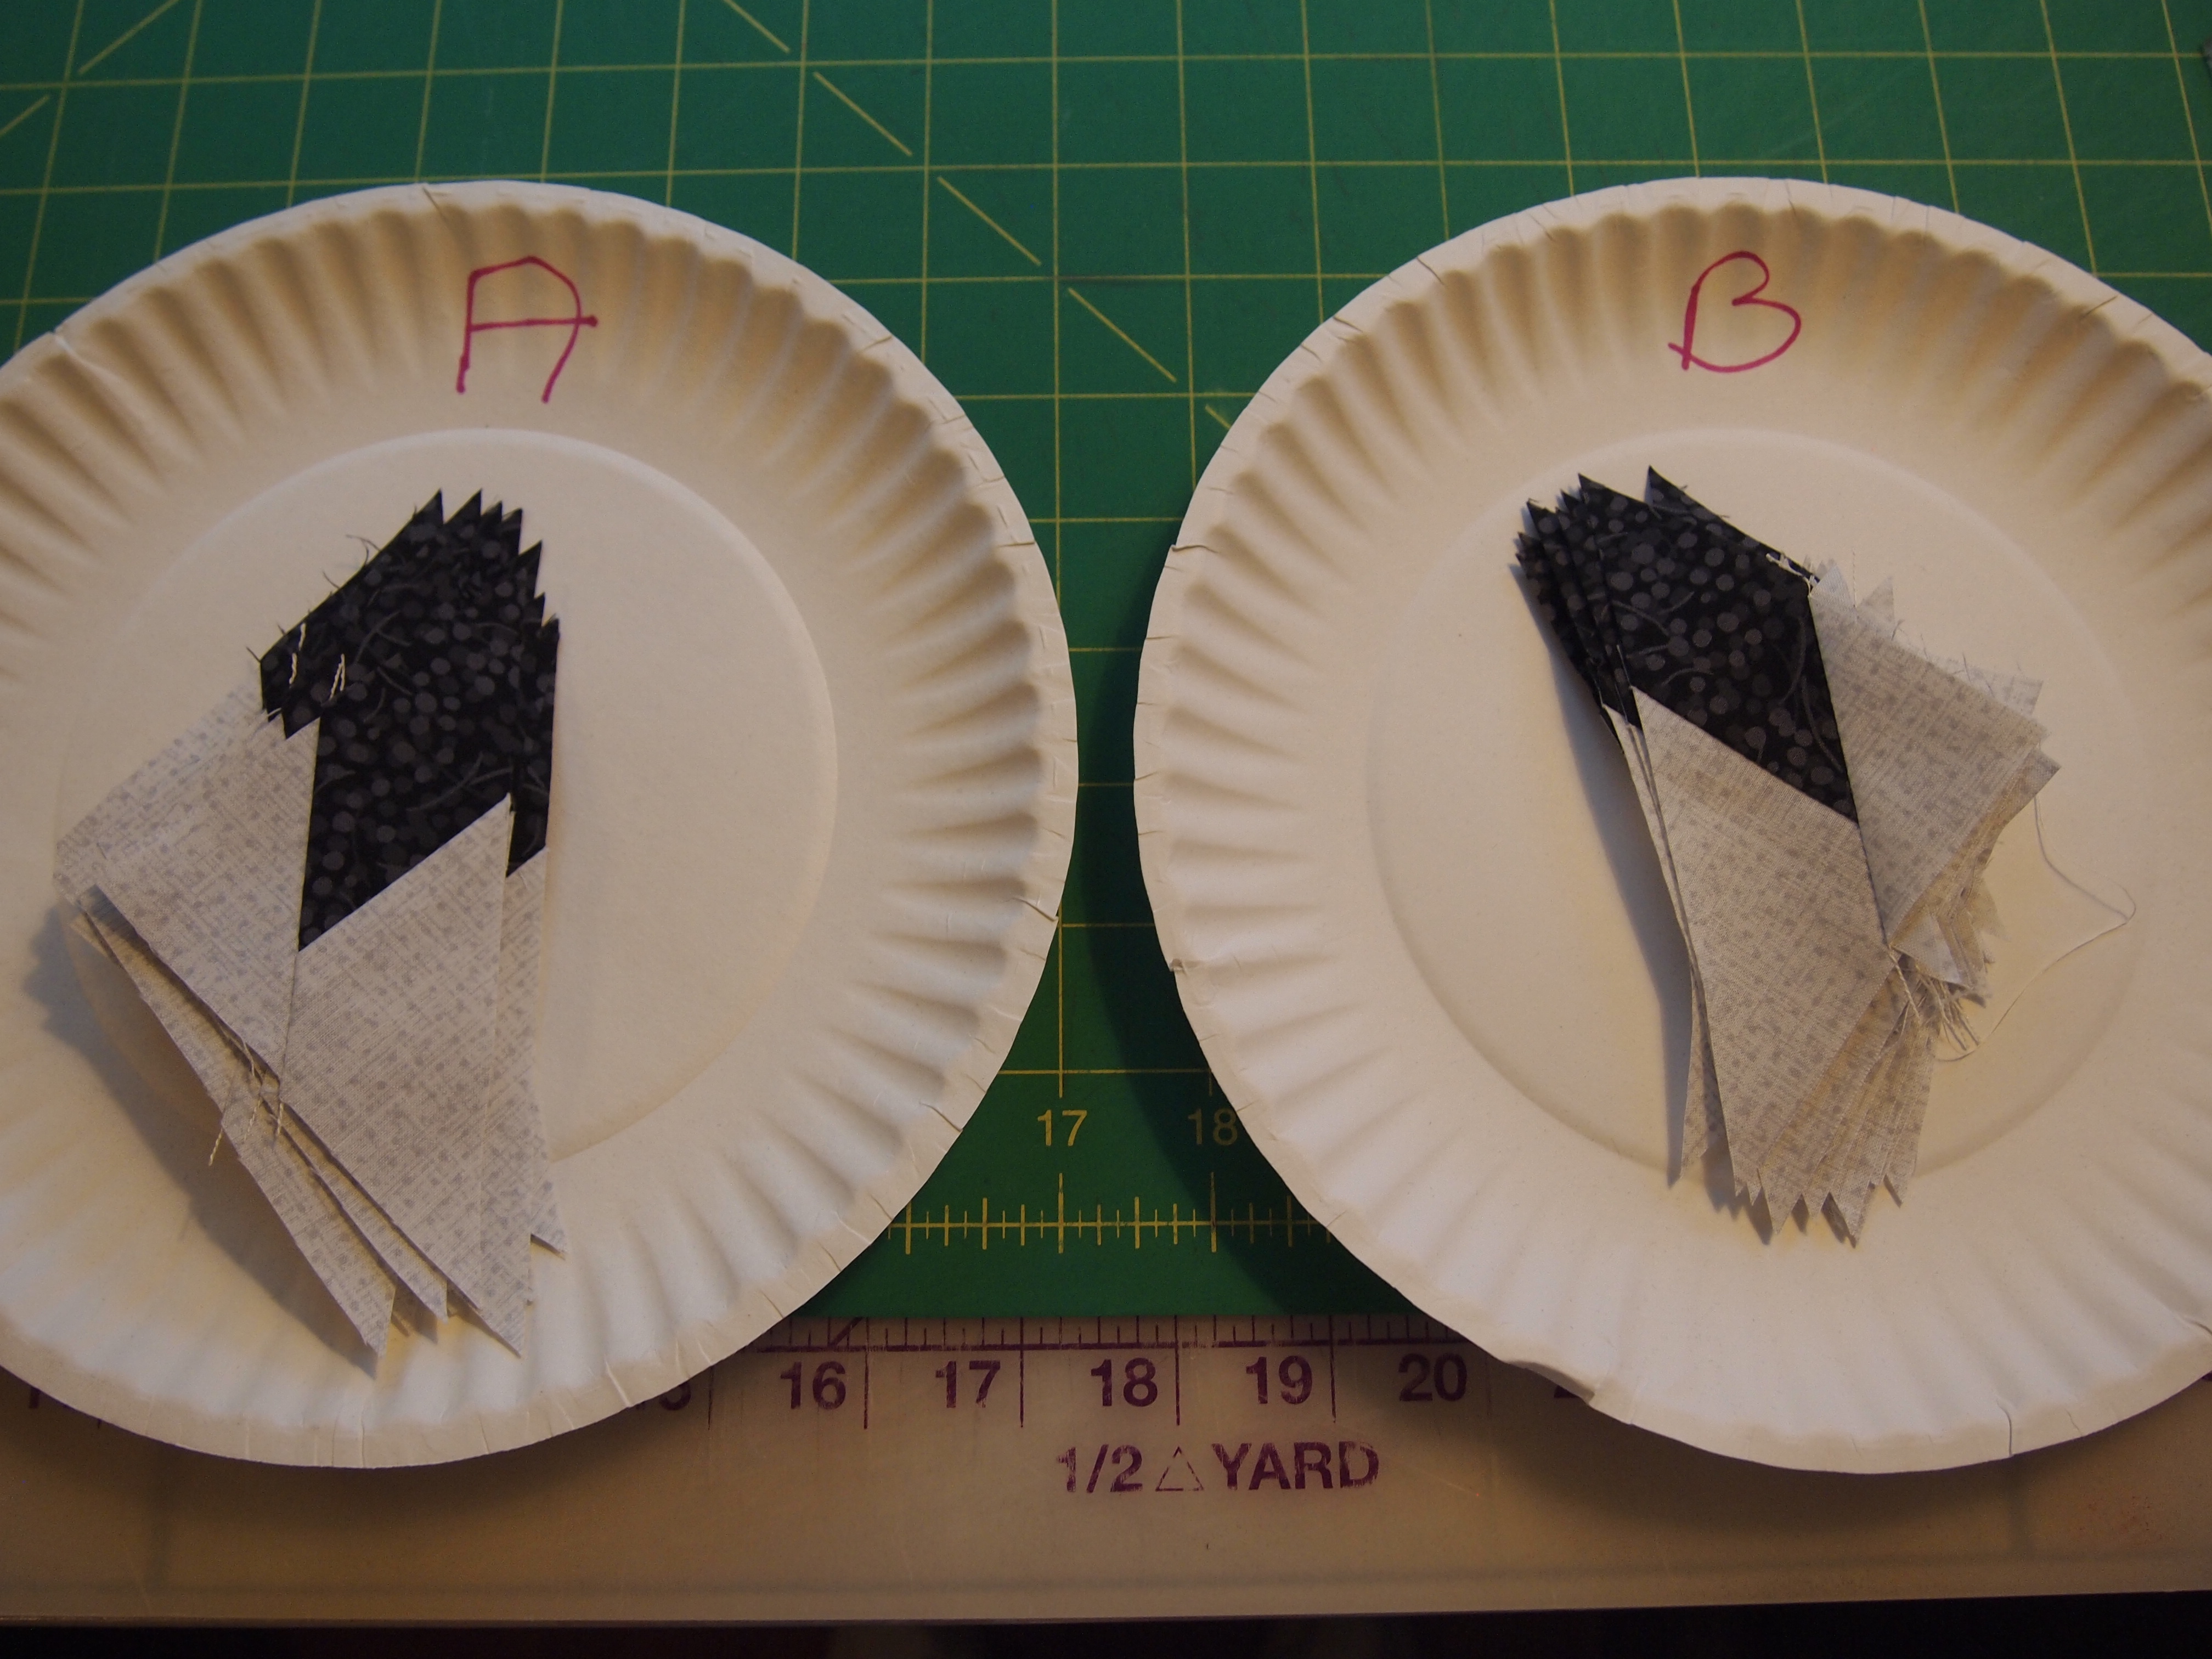
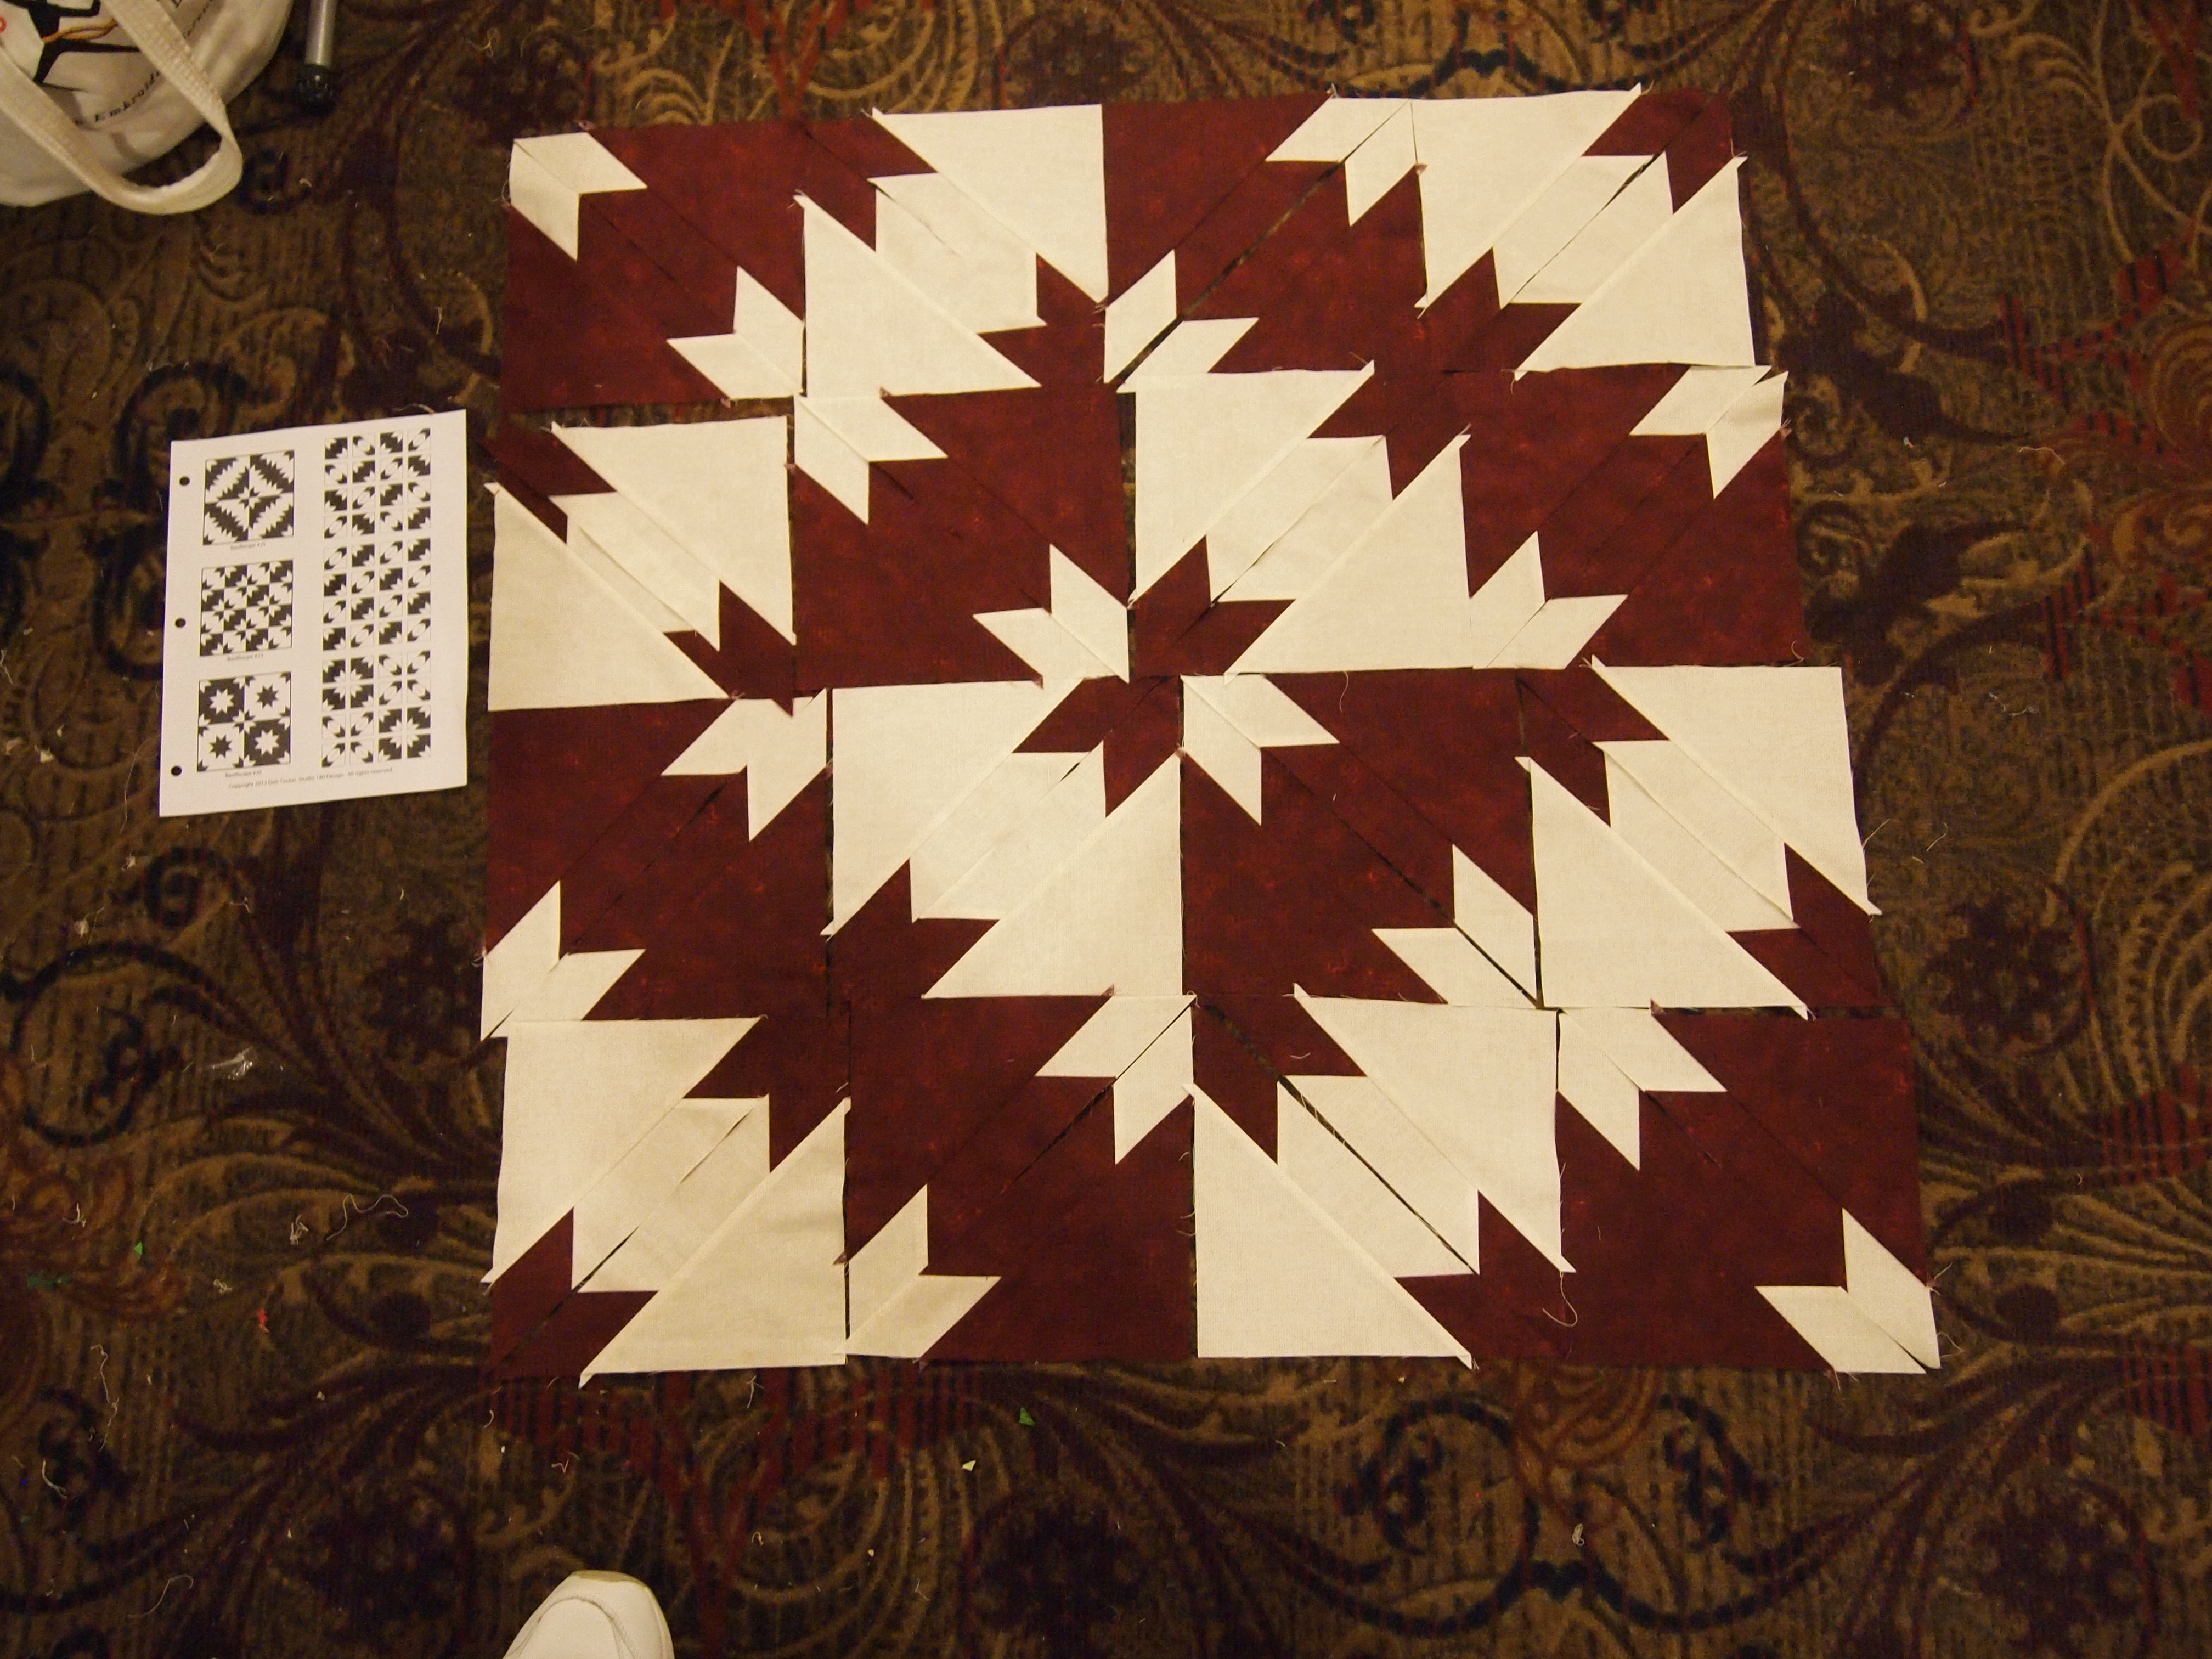
This pattern requires 136 combination units.  Sort the mirror image combination units into two groups.  Group 1 will be used for the Borders and group 2 will be used for the blocks.  I know it sounds like a lot of combination units but it goes very fast.  The pieced border went together beautifully!  The instructions are detailed and very easy to understand.  I will be teaching it this spring.

OLYMPUS DIGITAL CAMERA OLYMPUS DIGITAL CAMERA

Quilting is a Pressing Matter

Constellation
I am getting ready for a Rapid Fire Lemoyne star class using the pattern that comes with the ruler. It is called “Constellation”, you end up making every size Lemoyne star from 3″ to 12″.
OLYMPUS DIGITAL CAMERA
I wanted to share some organizational tips for making this block. Good pressing skills will make this block a breeze. (For complete details check your ruler instructions) We begin by making our 45 degree cuts.
OLYMPUS DIGITAL CAMERA
After the first cut, move the ruler to cut the side triangle .
OLYMPUS DIGITAL CAMERA
This shows the complete cut.
OLYMPUS DIGITAL CAMERA
This is what I find very helpful. I take 2 paper plates and mark one “A” and one “B”. If you are right handed then the top strip was “A” and the bottom strip was “B”. Place the “A” units on the plate marked “A” and the “B” units on the plate marked “B”. Continue cutting your pieces and placing them in the appropriately named plate. Stack up the side triangles to be added later.
OLYMPUS DIGITAL CAMERA
This is where we sew on the side triangles.
OLYMPUS DIGITAL CAMERA
The best way to accomplish this is to take the “A” units and strip piece the side triangles one after the other.
OLYMPUS DIGITAL CAMERA
When you are done take the strip pieced units to the ironing board. (I know mine needs to be washed). When pressing, “what you are pressing toward always goes on top”! So, for the “A” units I placed the star point side on top, and set the seams.
OLYMPUS DIGITAL CAMERA
Then begin to flip back and press. By strip piecing and taking all the units to the iron you avoid the confusion of what way to press the seams.
OLYMPUS DIGITAL CAMERA
Take the “B” units to the ironing board and set the seams.
OLYMPUS DIGITAL CAMERA
For the “B” units we are press toward the side triangle so that goes on top.
OLYMPUS DIGITAL CAMERA
We are now ready to trim the units to size.

Believe is Quilted

Believe is Quilted
All done and ready to mailed!
OLYMPUS DIGITAL CAMERA

I Believe

I love Christmas Tree quilts. I wanted to try making one with the Studio 180 Design V Block Tool. It was pretty easy.
I Believe Christmas quilt
I started with 9 Christmas fat quarters, 3 green, 3 red and 3 blue. I decided to make 6” blocks, so per the directions on the V Block tool I layered 3 fat quarters and cuts 7” strips.
OLYMPUS DIGITAL CAMERA
I used the V Block Tool and placed the line for the cutting the center triangles on the folded fabric.
OLYMPUS DIGITAL CAMERA
Second cut for center triangles. Keep going until you have used up the strip.
OLYMPUS DIGITAL CAMERA
The 9 fat quarters yielded 72 center triangles.
OLYMPUS DIGITAL CAMERA
I used white Kona Cotton for the side triangles. It took about 1 ½ yards. Per the directions on the tool I cut 7” strips for the side triangles also. There is a line on the tool for cutting the side triangles
OLYMPUS DIGITAL CAMERA
Rotate the tool for the second cut for side triangles, keep going until you have two side triangles for each center triangle.
OLYMPUS DIGITAL CAMERA
Sew on the first side triangle.
OLYMPUS DIGITAL CAMERA
Press toward the side triangle.
OLYMPUS DIGITAL CAMERA
Add the second triangle.
OLYMPUS DIGITAL CAMERA
Press toward the side triangle.
OLYMPUS DIGITAL CAMERA
Square up the V Blocks by pointing it toward you, square up two sides.
OLYMPUS DIGITAL CAMERA
Rotate the block and square up the. other two sides.
OLYMPUS DIGITAL CAMERA
For each tree block I cut two 2″ x 3″ white rectangles and one 1 1/2″ x 2″ brown rectangles for the tree trunk.
OLYMPUS DIGITAL CAMERA
Sew these sashings to the bottom of each block.
OLYMPUS DIGITAL CAMERA
I cut nine 3 1/2″ x 8″ rectangles to be used to stagger the tree blocks. I sewed one rectangle to row 1,3, 5, 7, and 9. And one rectangle to the end of row 2, 4, 6, and 8.

I cut 1 1/2″ red inner borders (1/2 yard). The white outer borders took about 2 yards white Kona cotton. I cut 9″ borders and machine embroidered Santa and his reindeer in reds, blues and pinks. And randomly scattered machine embroidered silver snowflakes around the border. In the center of the bottom of the quilt I embroidered “Believe”. The quilt measures 65″ x 87″ un-quilted. I purchased my embroidery designs from Embroidery LibraryOLYMPUS DIGITAL CAMERA
OLYMPUS DIGITAL CAMERA

You’ve Got to Love Pink!

While I was at Studio 180 Design Teacher Certification, as I was just trying to keep up two other students; Phyllis Fay and Sarah Furrer were busy creating. Below is what they whipped up.
Phyllis and Sarah
What I love about this top other than great technique, is all the different tools they used to create a quilt without using a pattern. When I am giving a presentation on all the Studio 180 Design tools I always show this picture. I am crazy about the outer border. I love the way they used the Split Rects tool. It looks just like they paper pieced it but it was accomplished with a ruler!

You start in the middle of the quilt with the Lemoyne Star and work your way out with each new border. I have also listed the pre-finished sizes or trimmed sizes.

• One 12 ½” Lemoyne Star
• Four 3 ½” shaded 4-patch
• Sixteen 3 ½” little houses
• Eight 3 ½” squares of background fabric
• Fifty-six 3 1/2” combo blocks (which means you have to make 28 Half Square Triangles (HST) blocks first; remembering that they yield a double number of blocks)
• Four 3 ½ “Square/Squared blocks
• Twenty 3 ½ ” X 6″ ½ ” Diamond Rects
• 2 ½ ” border of the background fabric
• Four 4 ½ ” V Blocks
• Four 4 ½ ” Corner Beams
• Eighty 2 ½ ” x 4 ½ ” Split Rects (which means you have to make 40 by using the rights sides together method)

Studio 180 Design Tools Required:
• Rapid Fire Lemoyne Star
• Tucker Trimmer I & III
• Diamond Rects
• V-Block
• Corner Beam
• Split Rects

Studio 180 Design Technique Sheets:
• Shaded 4-Patch
• Little Houses

Thanks Phyllis & Sarah for sharing.

Quilt Block Detective

During the Studio 180 Design Teacher certification we participated in a skill building exercise, “Quilt Block Detective”. Various quilt blocks were displayed and we had to identify the units that made up the blocks. It was great fun and very educational. There are many fundamental units that are used to make a variety of quilt blocks. In the book “Pattern Play” by Doreen Speckmann, she introduces us to those basic units.
Quilt Block Detective
I wanted to practice, so I thumbed through the book. It contains fabulous quilts. I chose to investigate “Cross Street Pasture” below.
OLYMPUS DIGITAL CAMERA
Doreen uses templates. Studio 180 Design tools can make the same units without templates. I identified Square/Squared, V Block, High/Low Left, High/Low Right, and the Corner Beam.
OLYMPUS DIGITAL CAMERA
I decided to make 2″ finished units making it a 10″ finished block. This block could be made bigger by making the units bigger.
OLYMPUS DIGITAL CAMERA
I really liked this block.

Hunter Star Pattern Play

When I was getting ready for the Studio 180 Design Teacher Certification retreat we had to have a sample made from every tool. I had not used the Hunter Star tool yet, so I chose to make the companion pattern “Star Cross love” designed by Deb Tucker for Marie Bostwick. It only required 25 fat quarters for the blocks and made a 74″ by 92″ quilt. I had a fat quarter bundle of reproduction fabrics I used for mine. I named it “Adirondack Nights”.
Hunter star pattern play
We were also asked to bring to class 16 light hunter square triangles and 16 dark hunter square triangles.
Hunter Star Triangles
By not sewing the triangles together before we go to the design wall we were able to have some pattern play! If you go the Studio 180 Design website (there is a link on my home page). Un der the Gallery tab there is a link to “Basic Recipe Razzle Dazzle”. There you will find many options for 2, 3 and 4 color pattern play. This is so much fun!
OLYMPUS DIGITAL CAMERA
The possibilities are almost limitless.
OLYMPUS DIGITAL CAMERA

OLYMPUS DIGITAL CAMERA