Tag Archives: V-Block

How Many Geese in that Formation?

I’m getting ready for some upcoming trunk shows and decided to make some Studio 180 Design Tool samples.  There are 8 Fundamental Tools (not counting Tucker Trimmer 2 & Wing Clipper 2).  The Tucker Trimmer 1 makes Half Square Triangles, Quarter Square Triangles & Combination Units in 11 sizes from 1 inch to 6 inches.

OLYMPUS DIGITAL CAMERA

Above are Quarter Square Triangles in 11 sizes.

OLYMPUS DIGITAL CAMERA

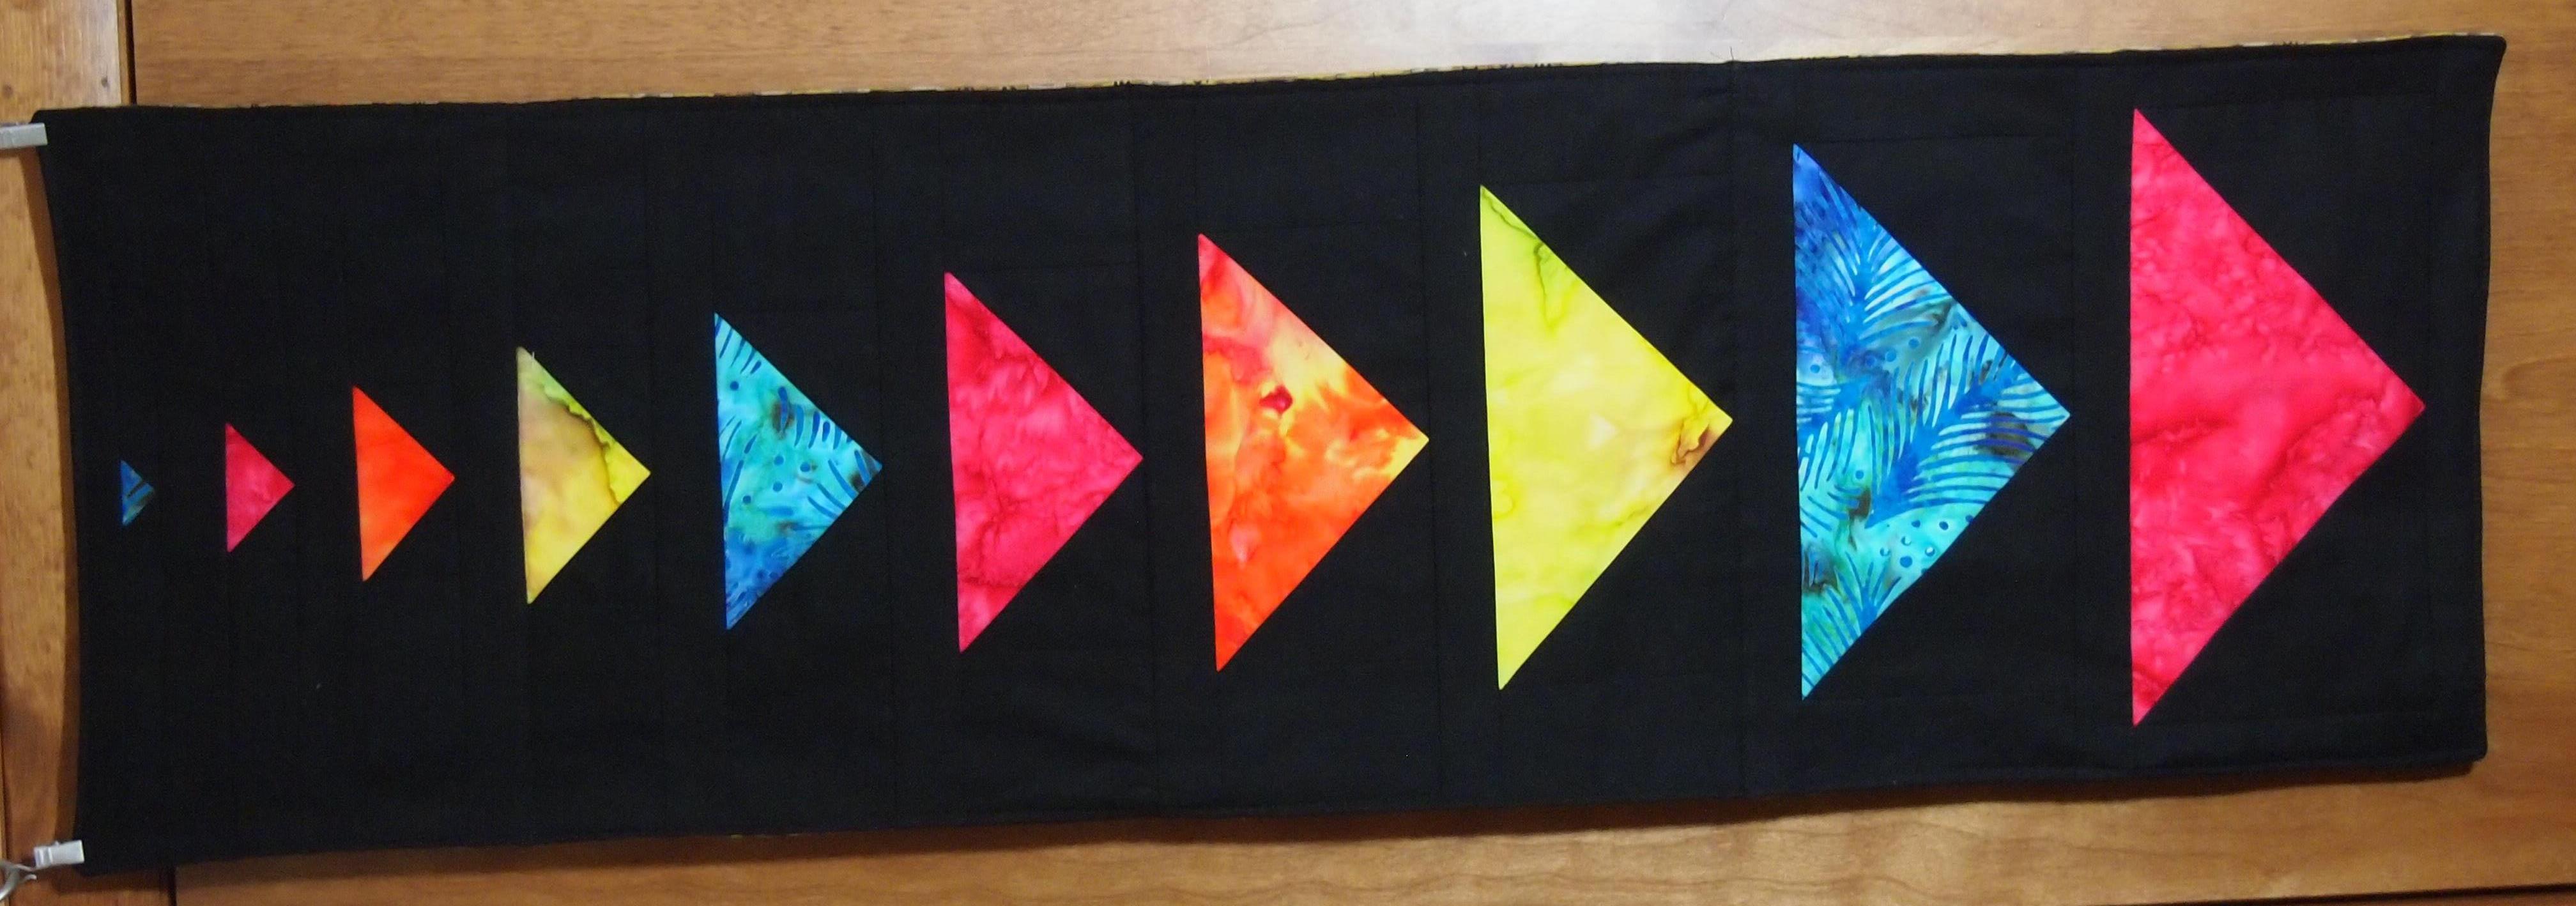
The Wing Clipper 1 makes Flying Geese in 10 sizes from 1 inch to 10 inches.

OLYMPUS DIGITAL CAMERA

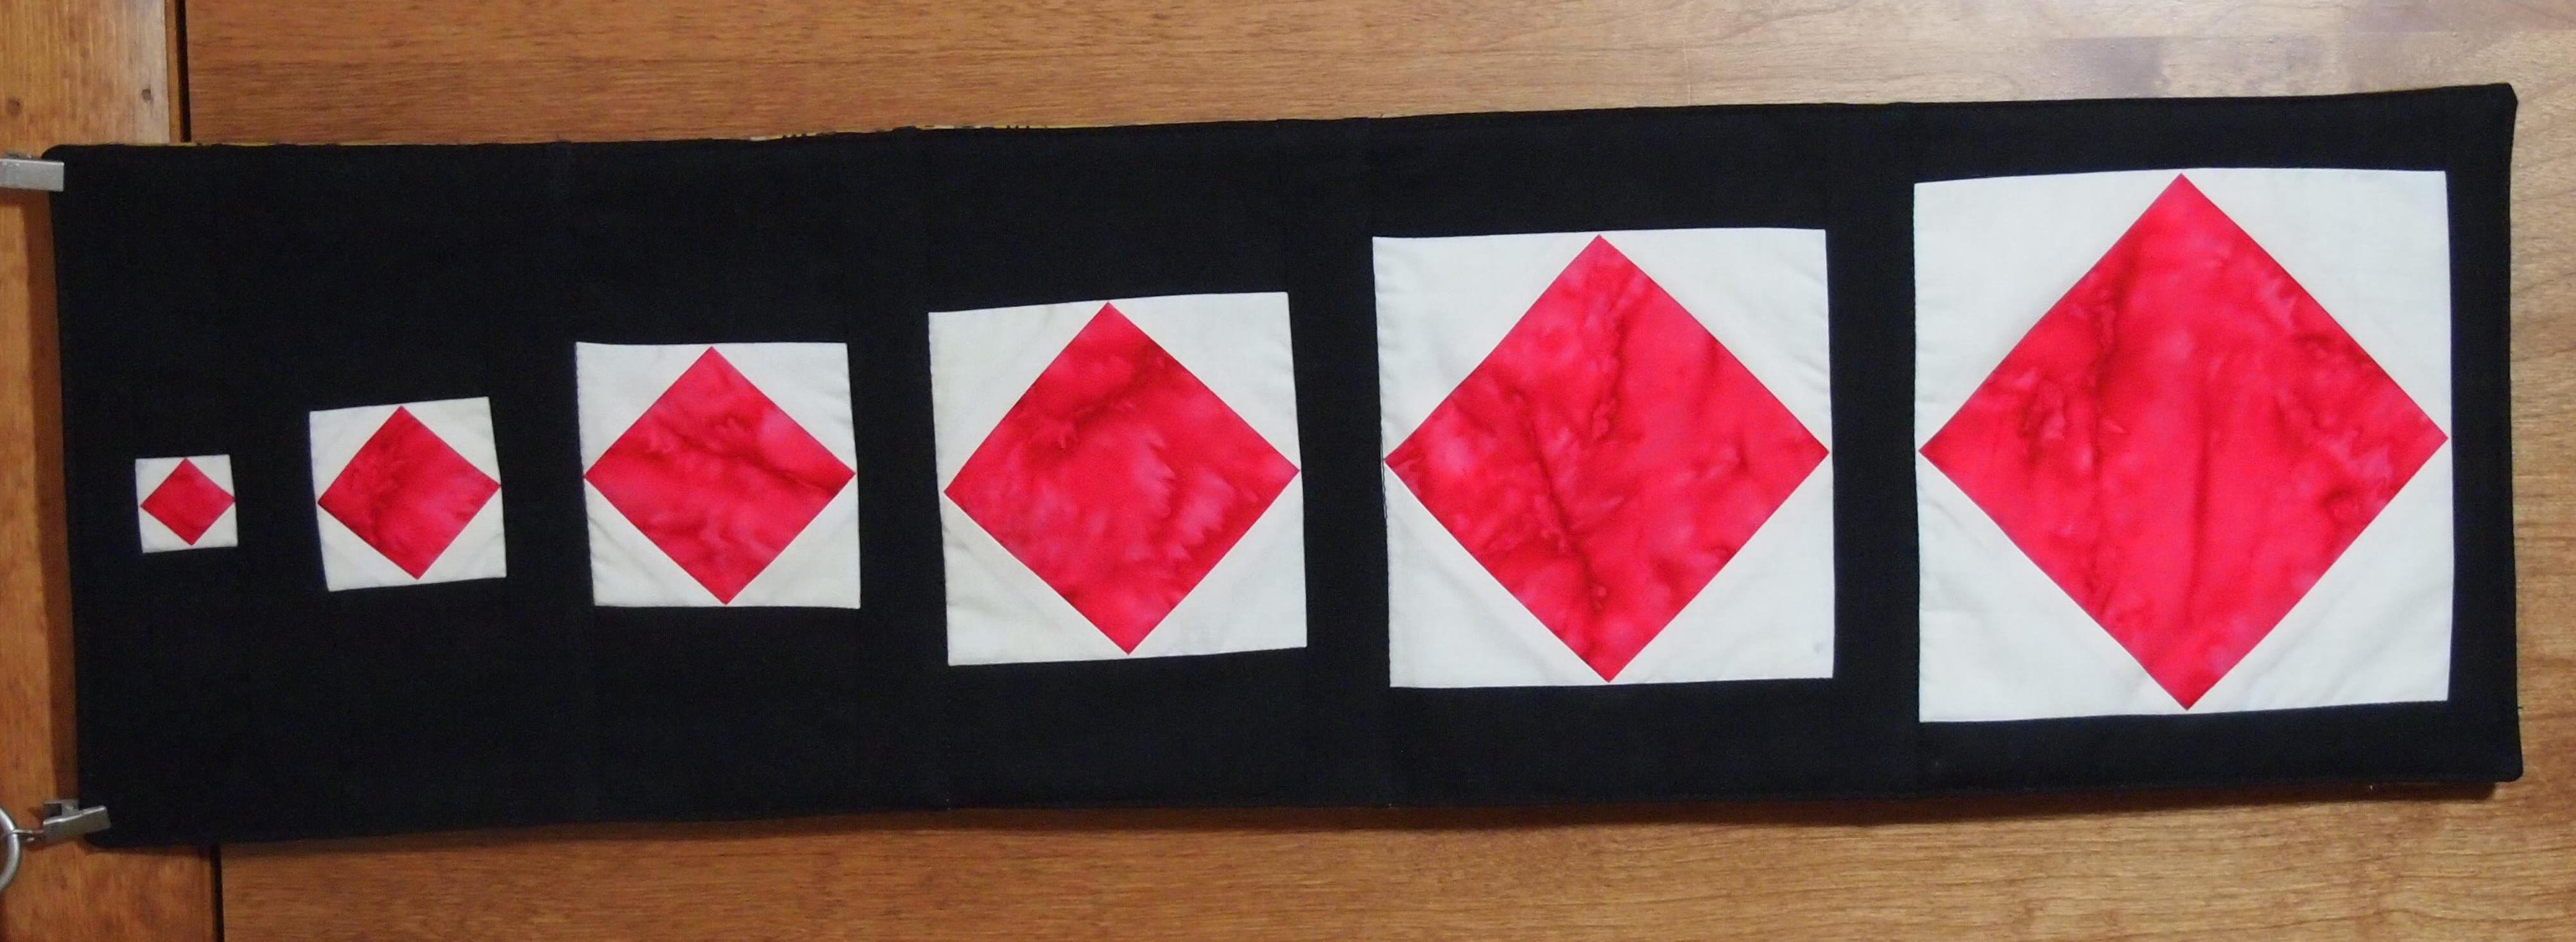
The Square Squared Tool makes 6 sizes from 1 inch to 6 inches.

OLYMPUS DIGITAL CAMERA

The Corner Beam Tool makes 11 sizes from 1 1/2 inches to 6 1/2 inches

OLYMPUS DIGITAL CAMERA

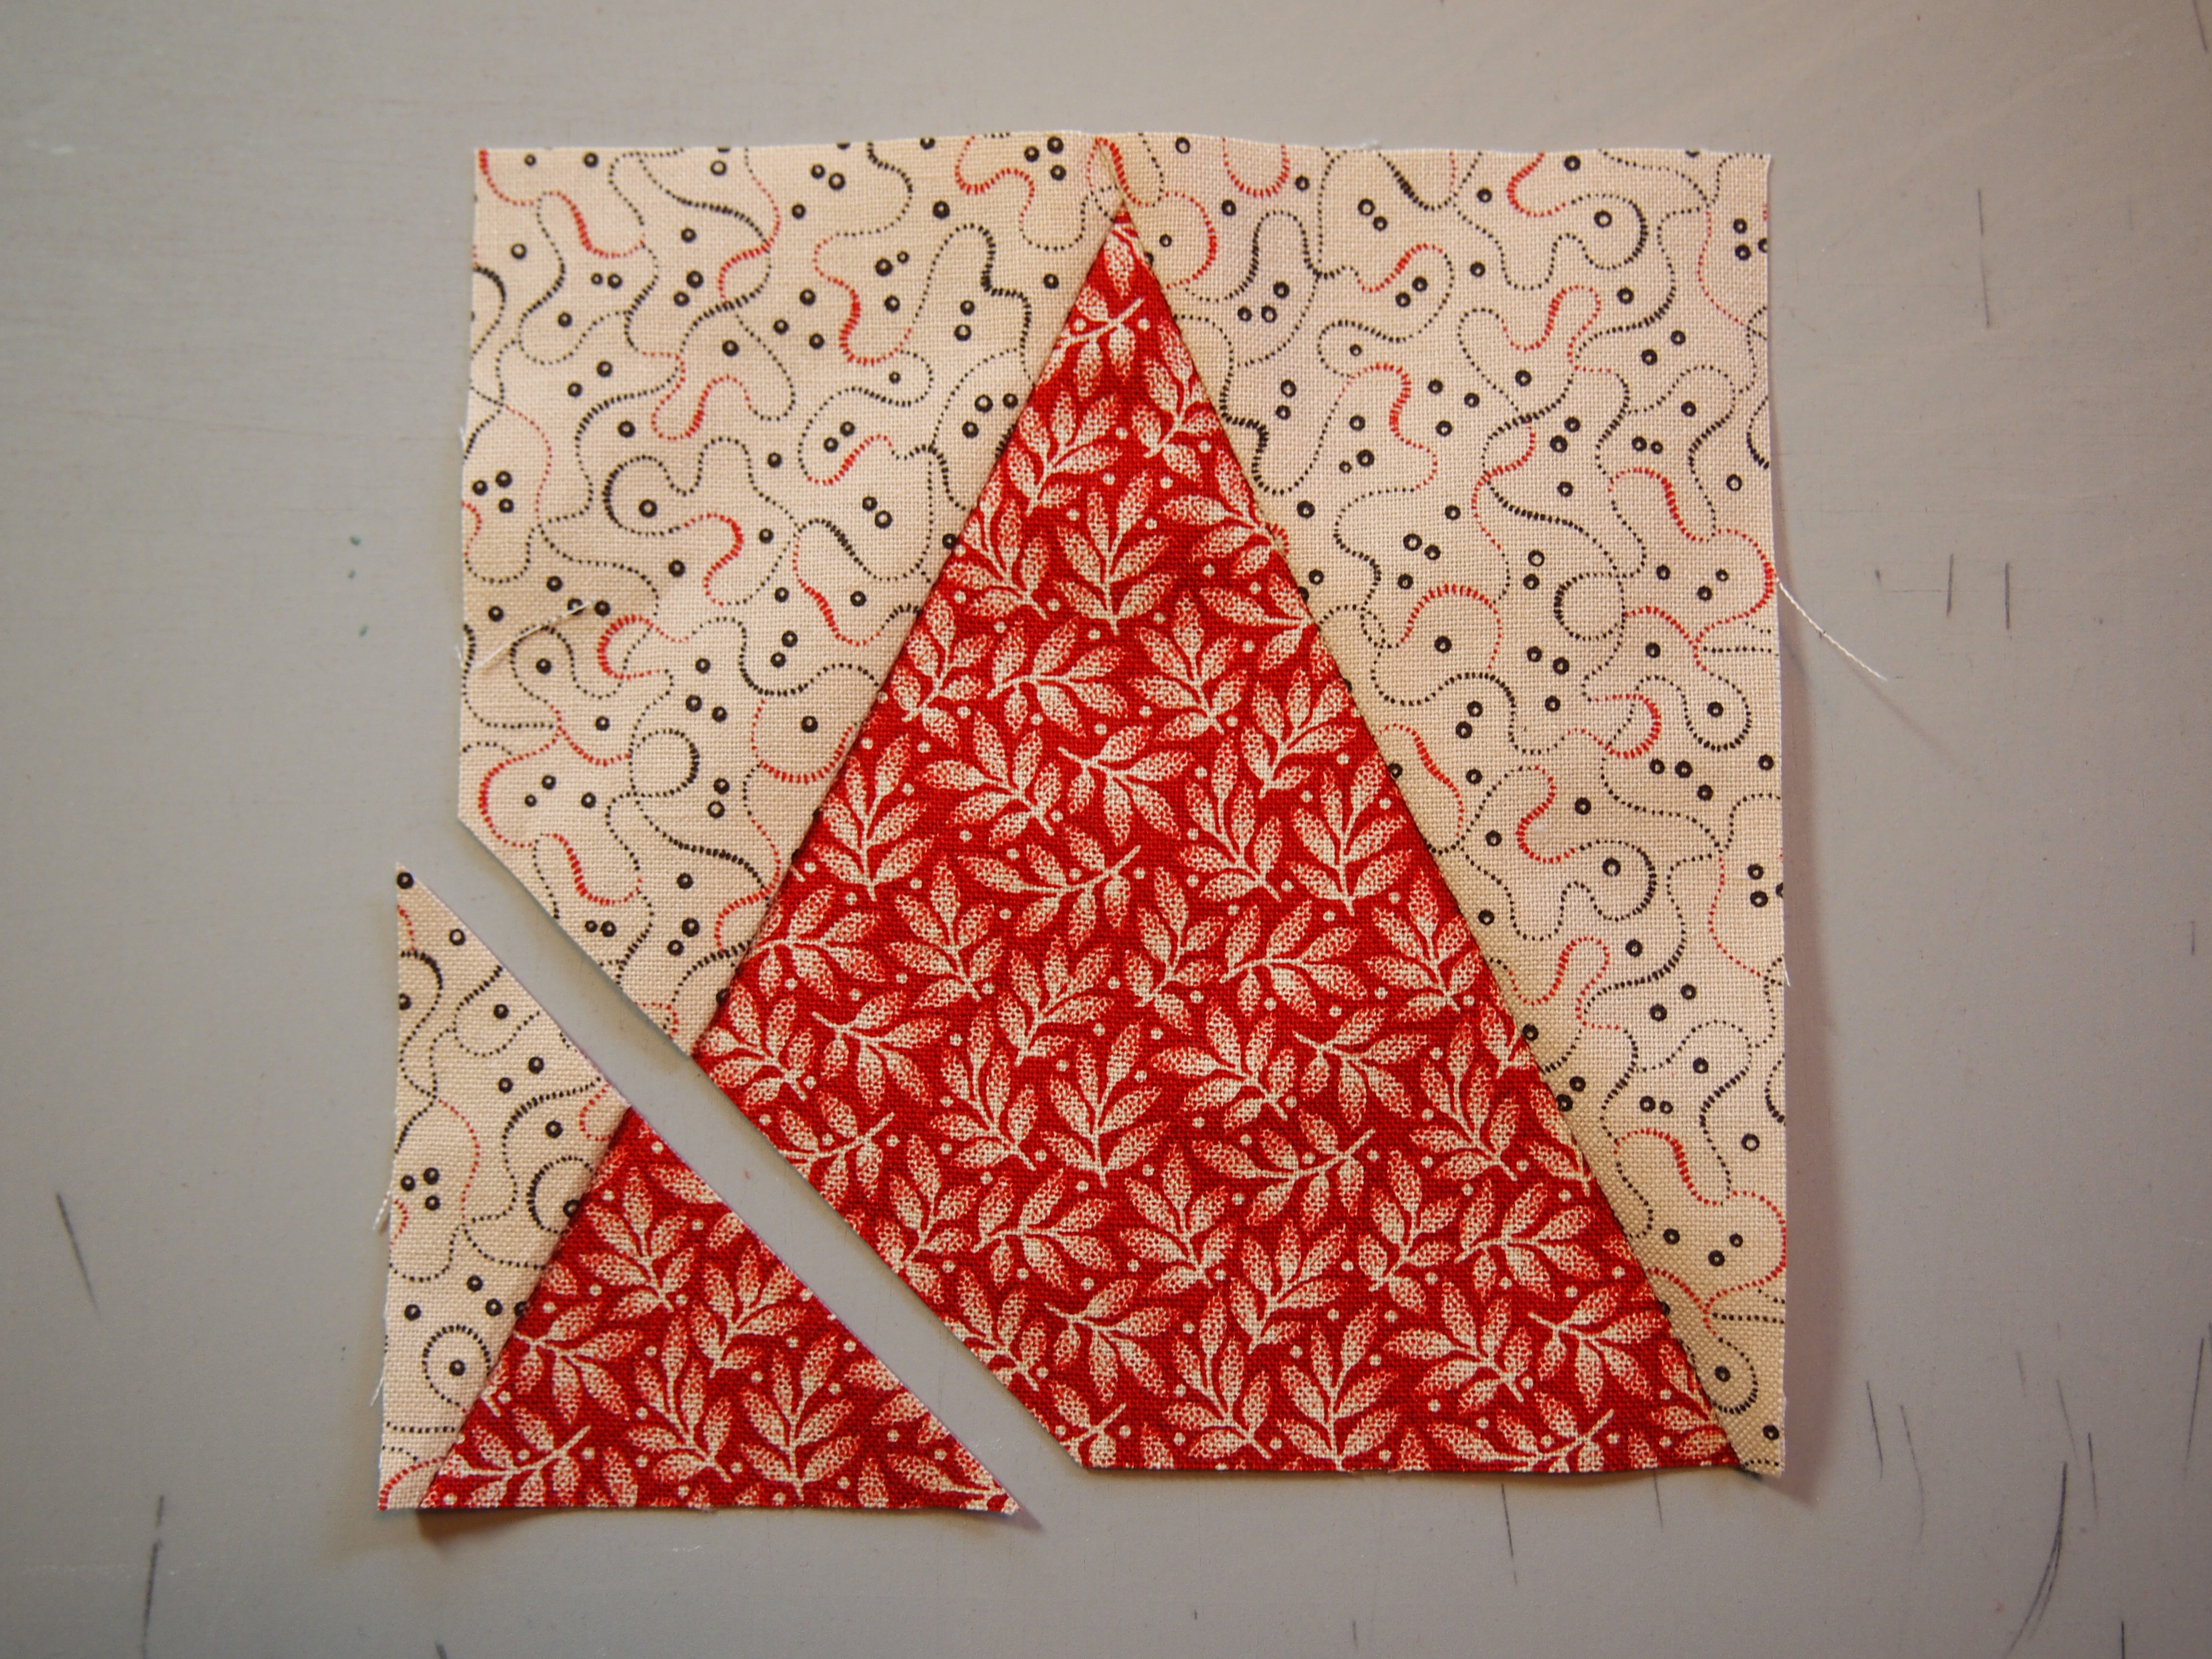
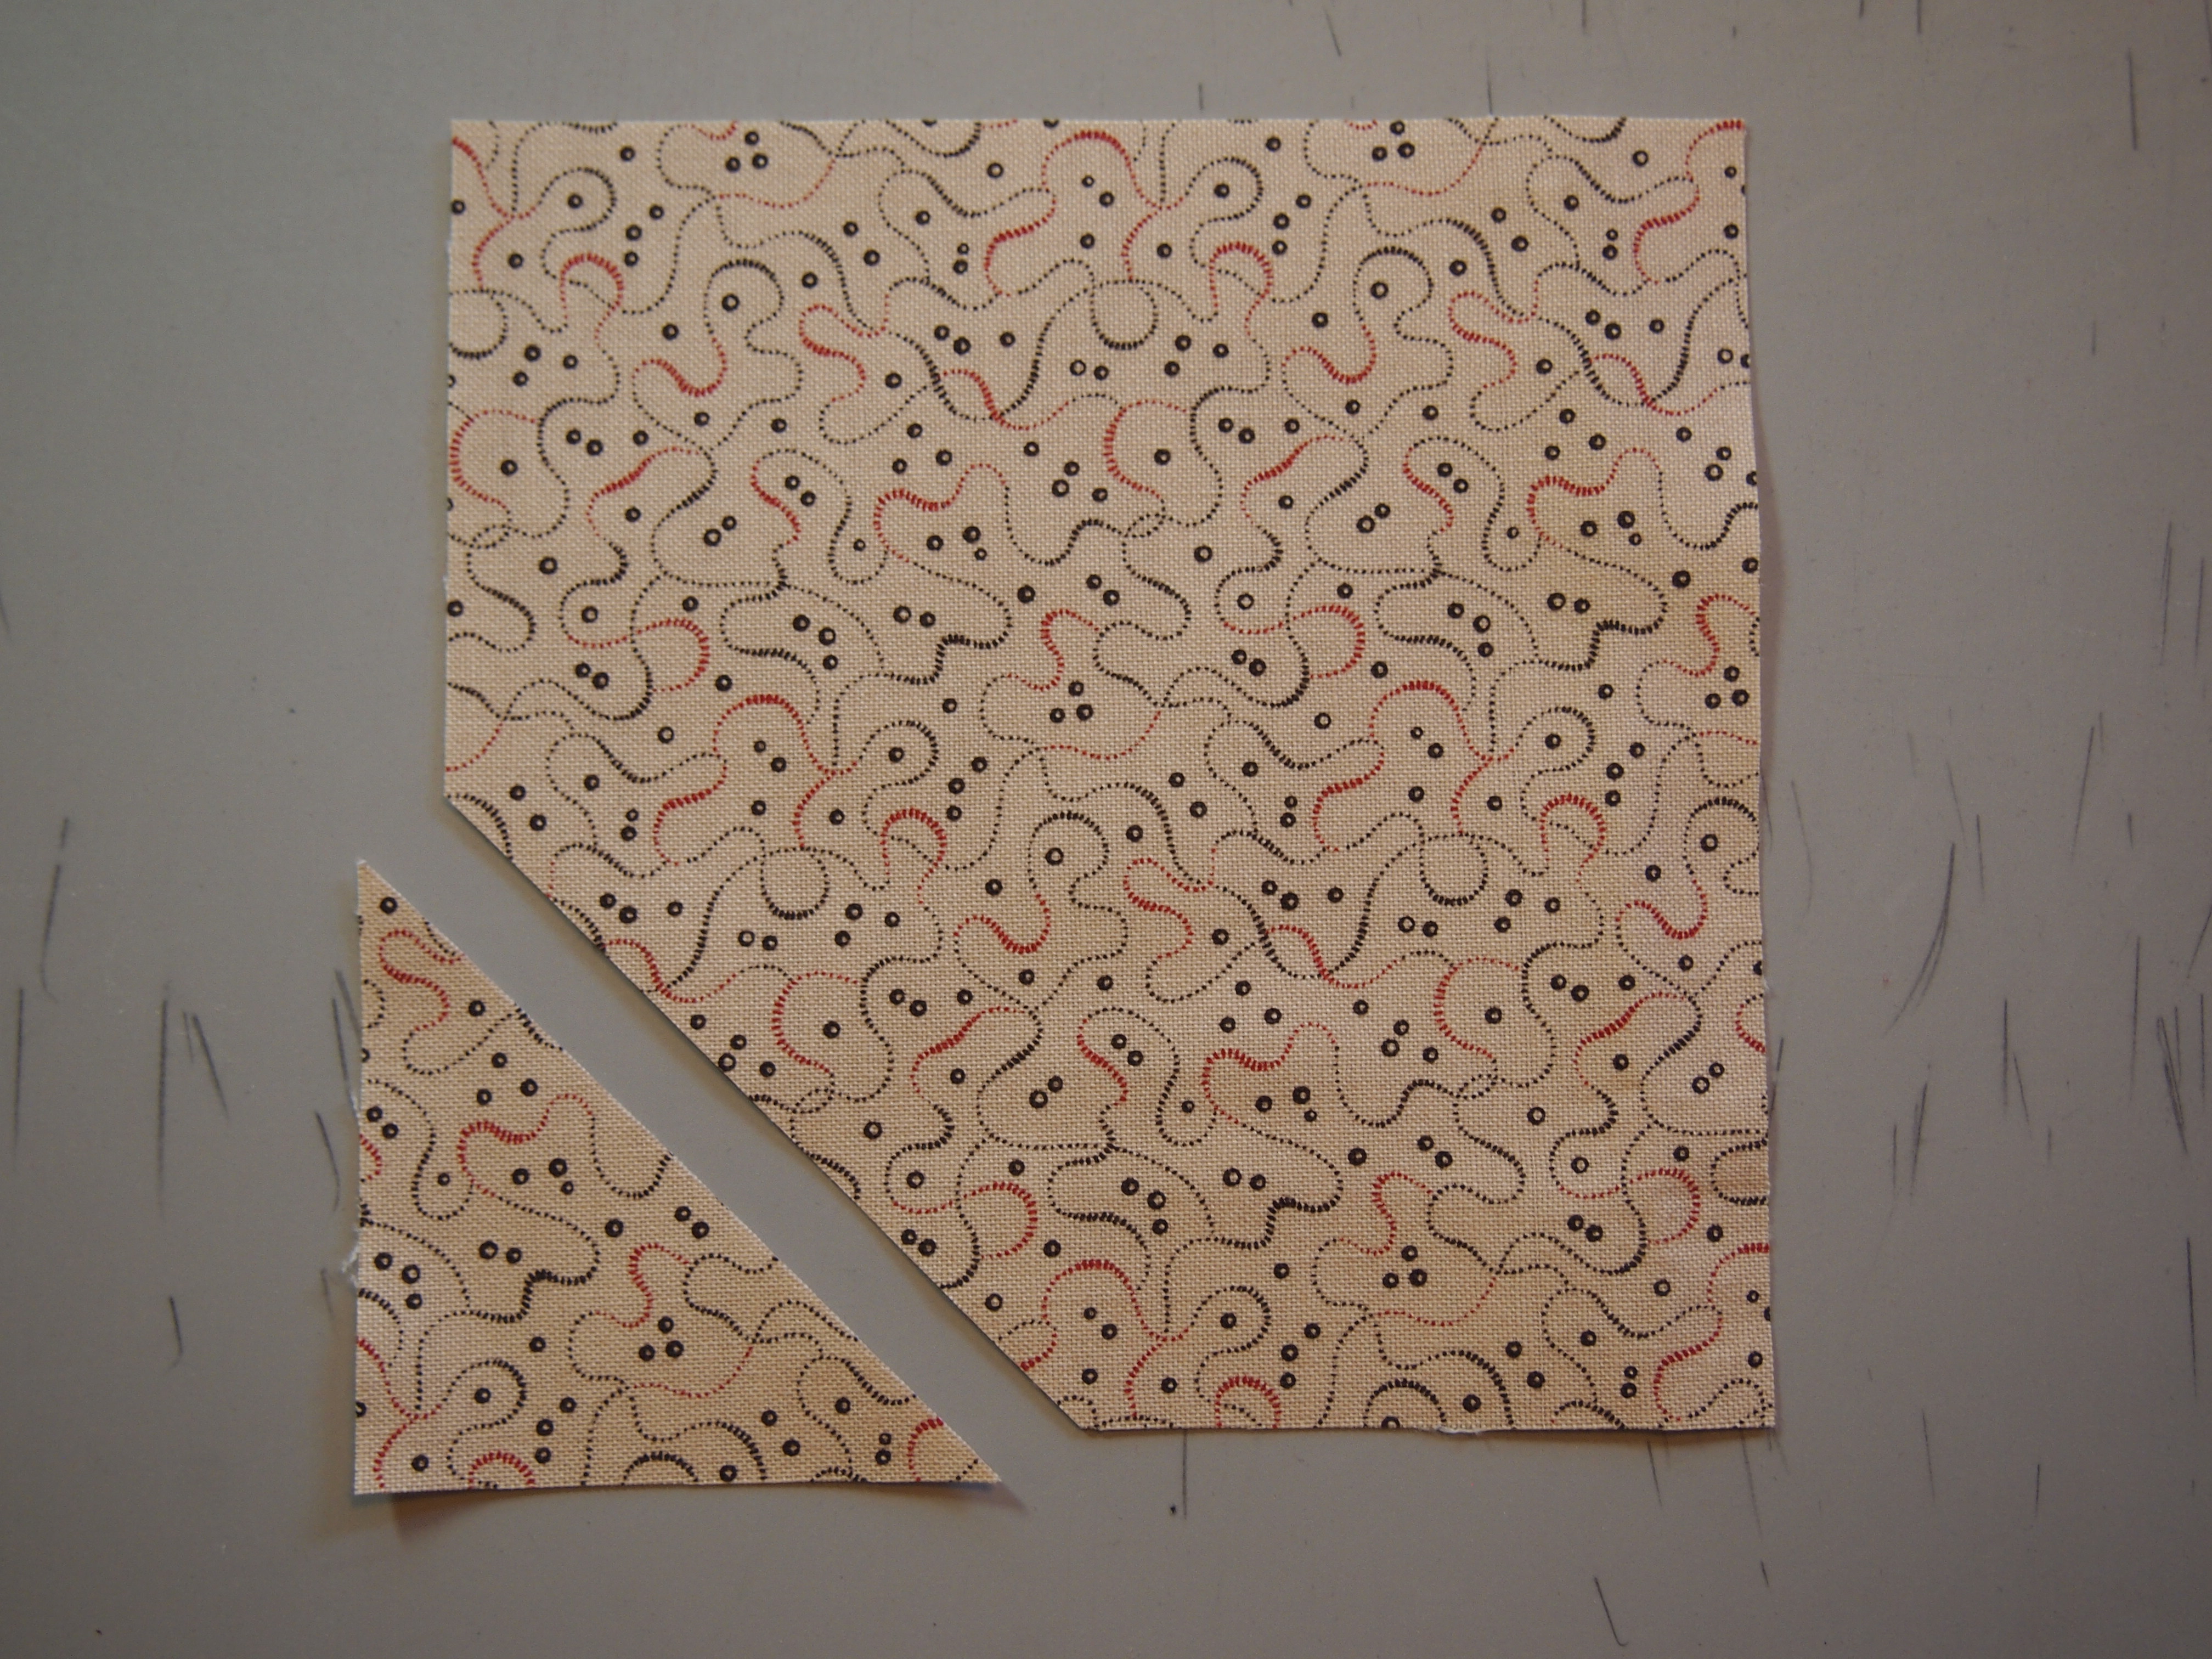
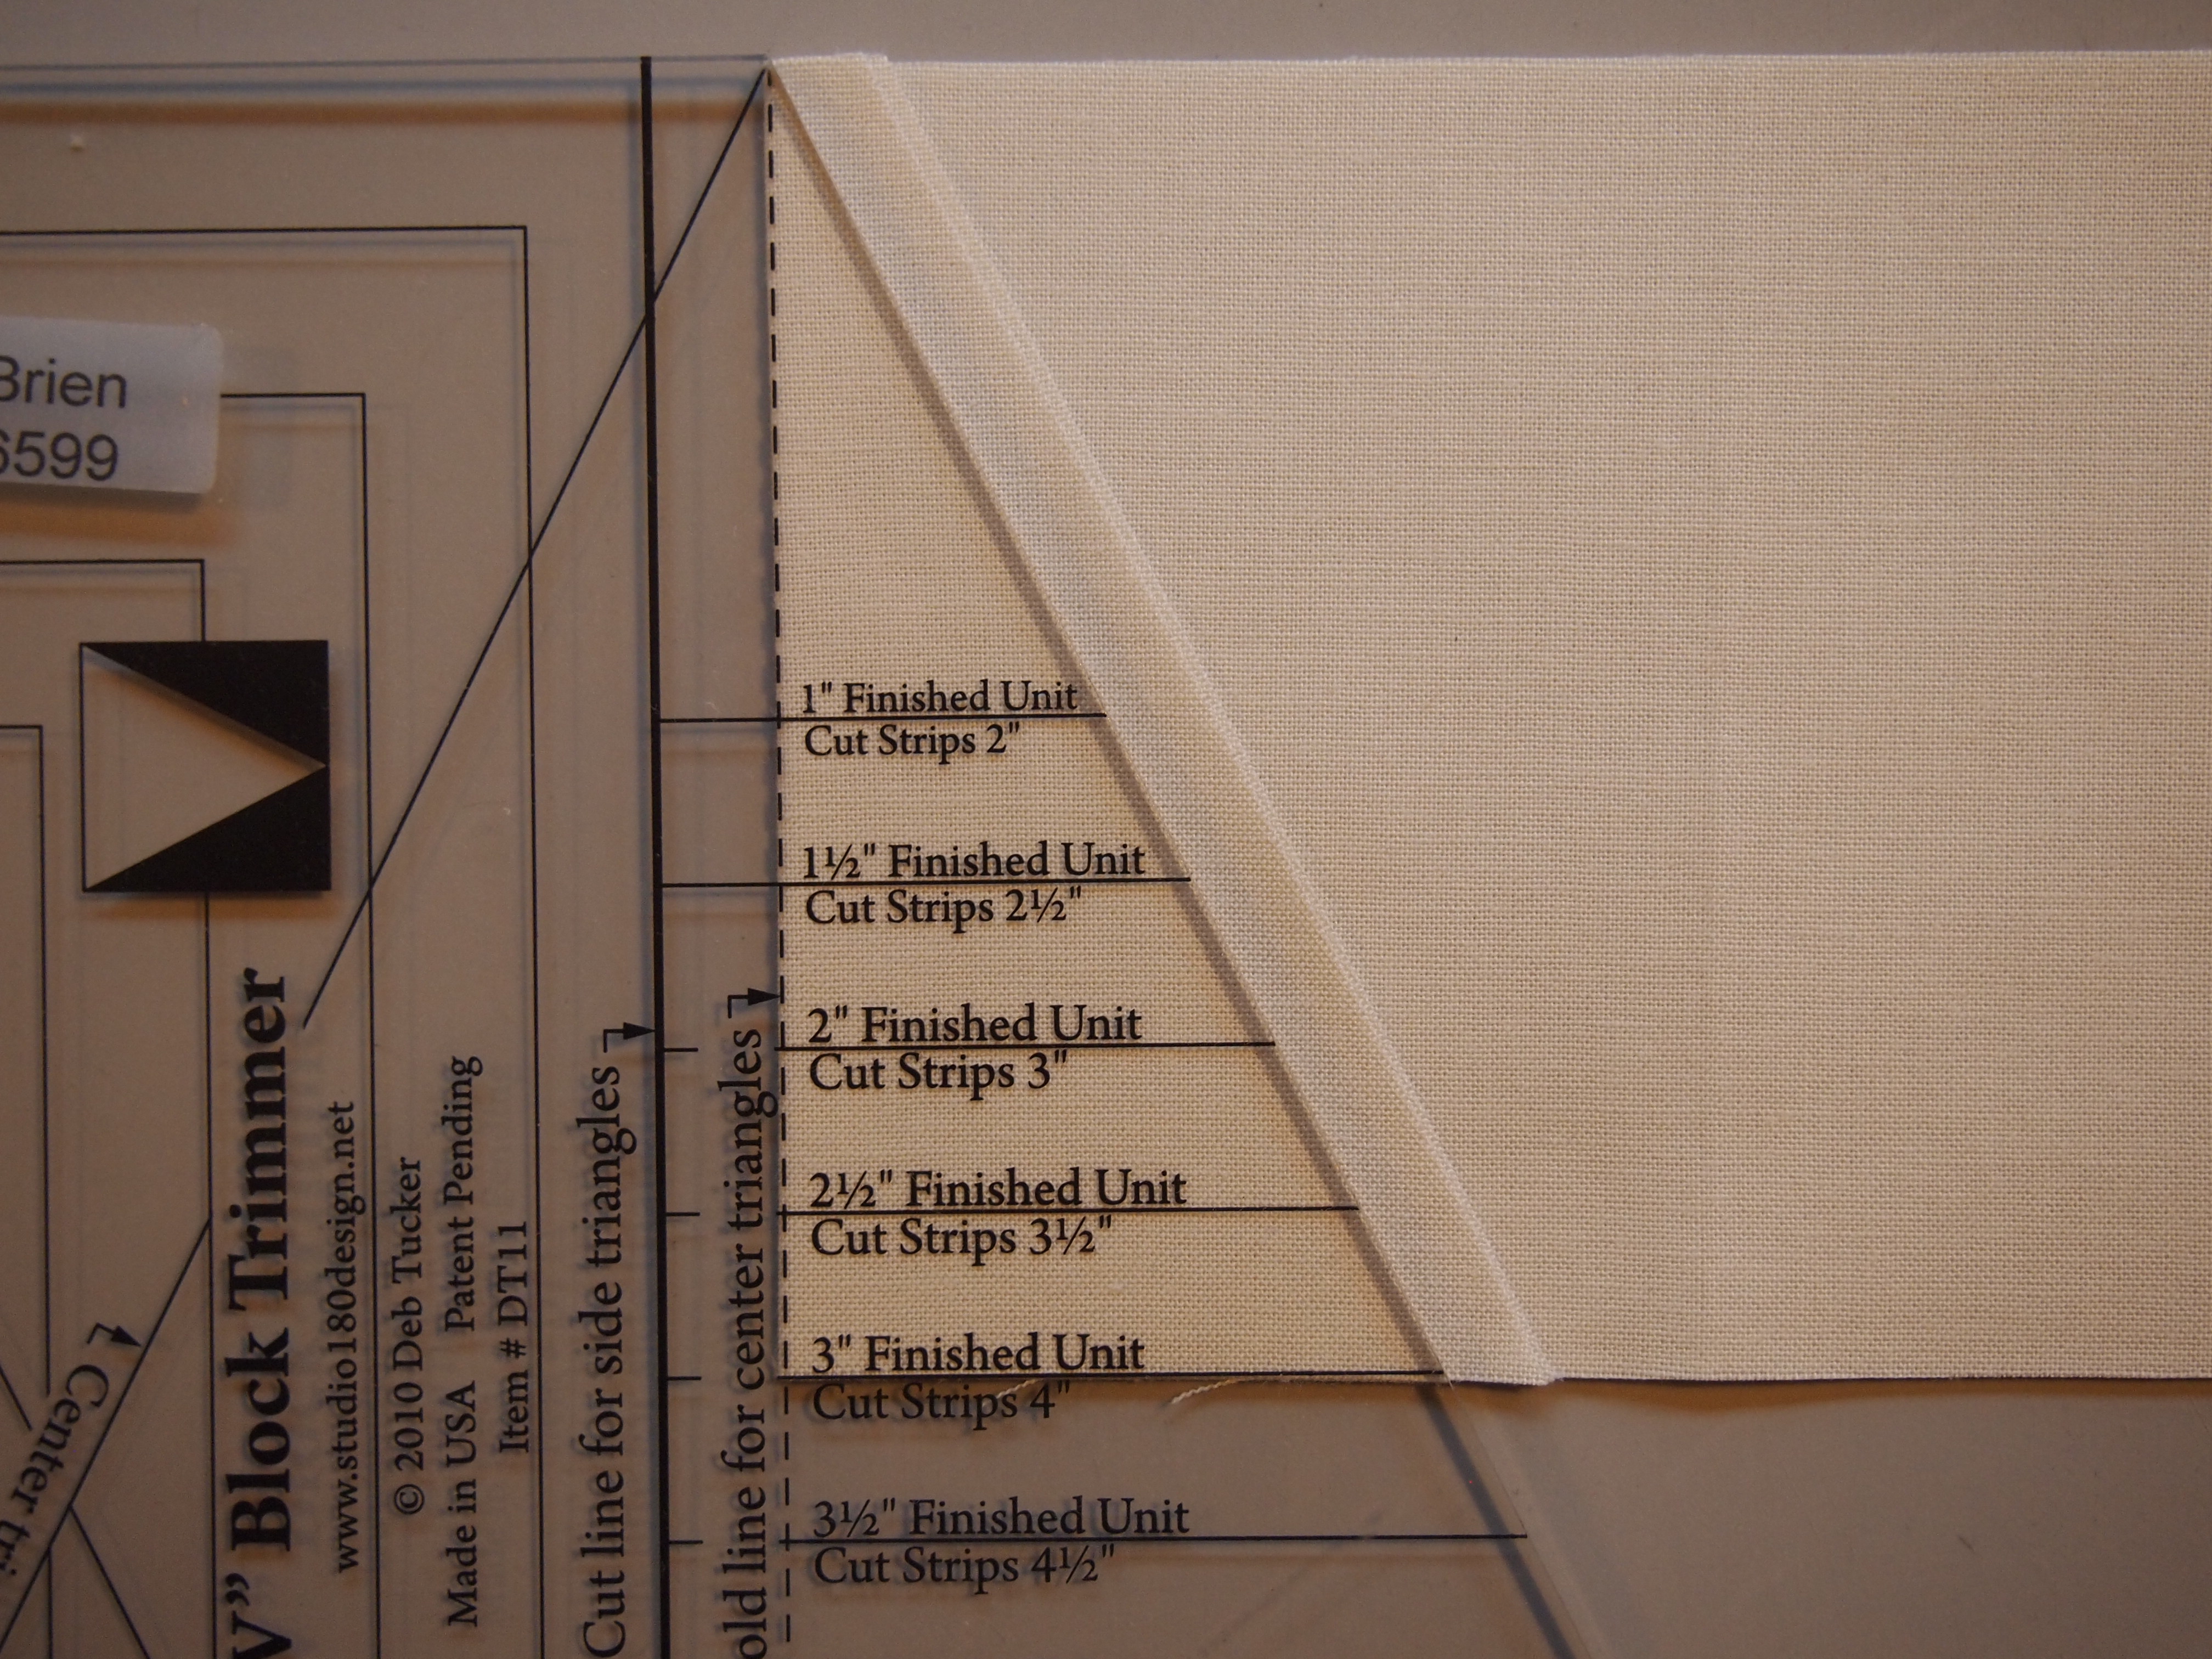
The V Block Tool makes 11 sizes from 1 1/2 inches to 6 1/2 inches

OLYMPUS DIGITAL CAMERA

The Split Rects Tool makes 8 sizes from 1 inch to 8 inches.

OLYMPUS DIGITAL CAMERA

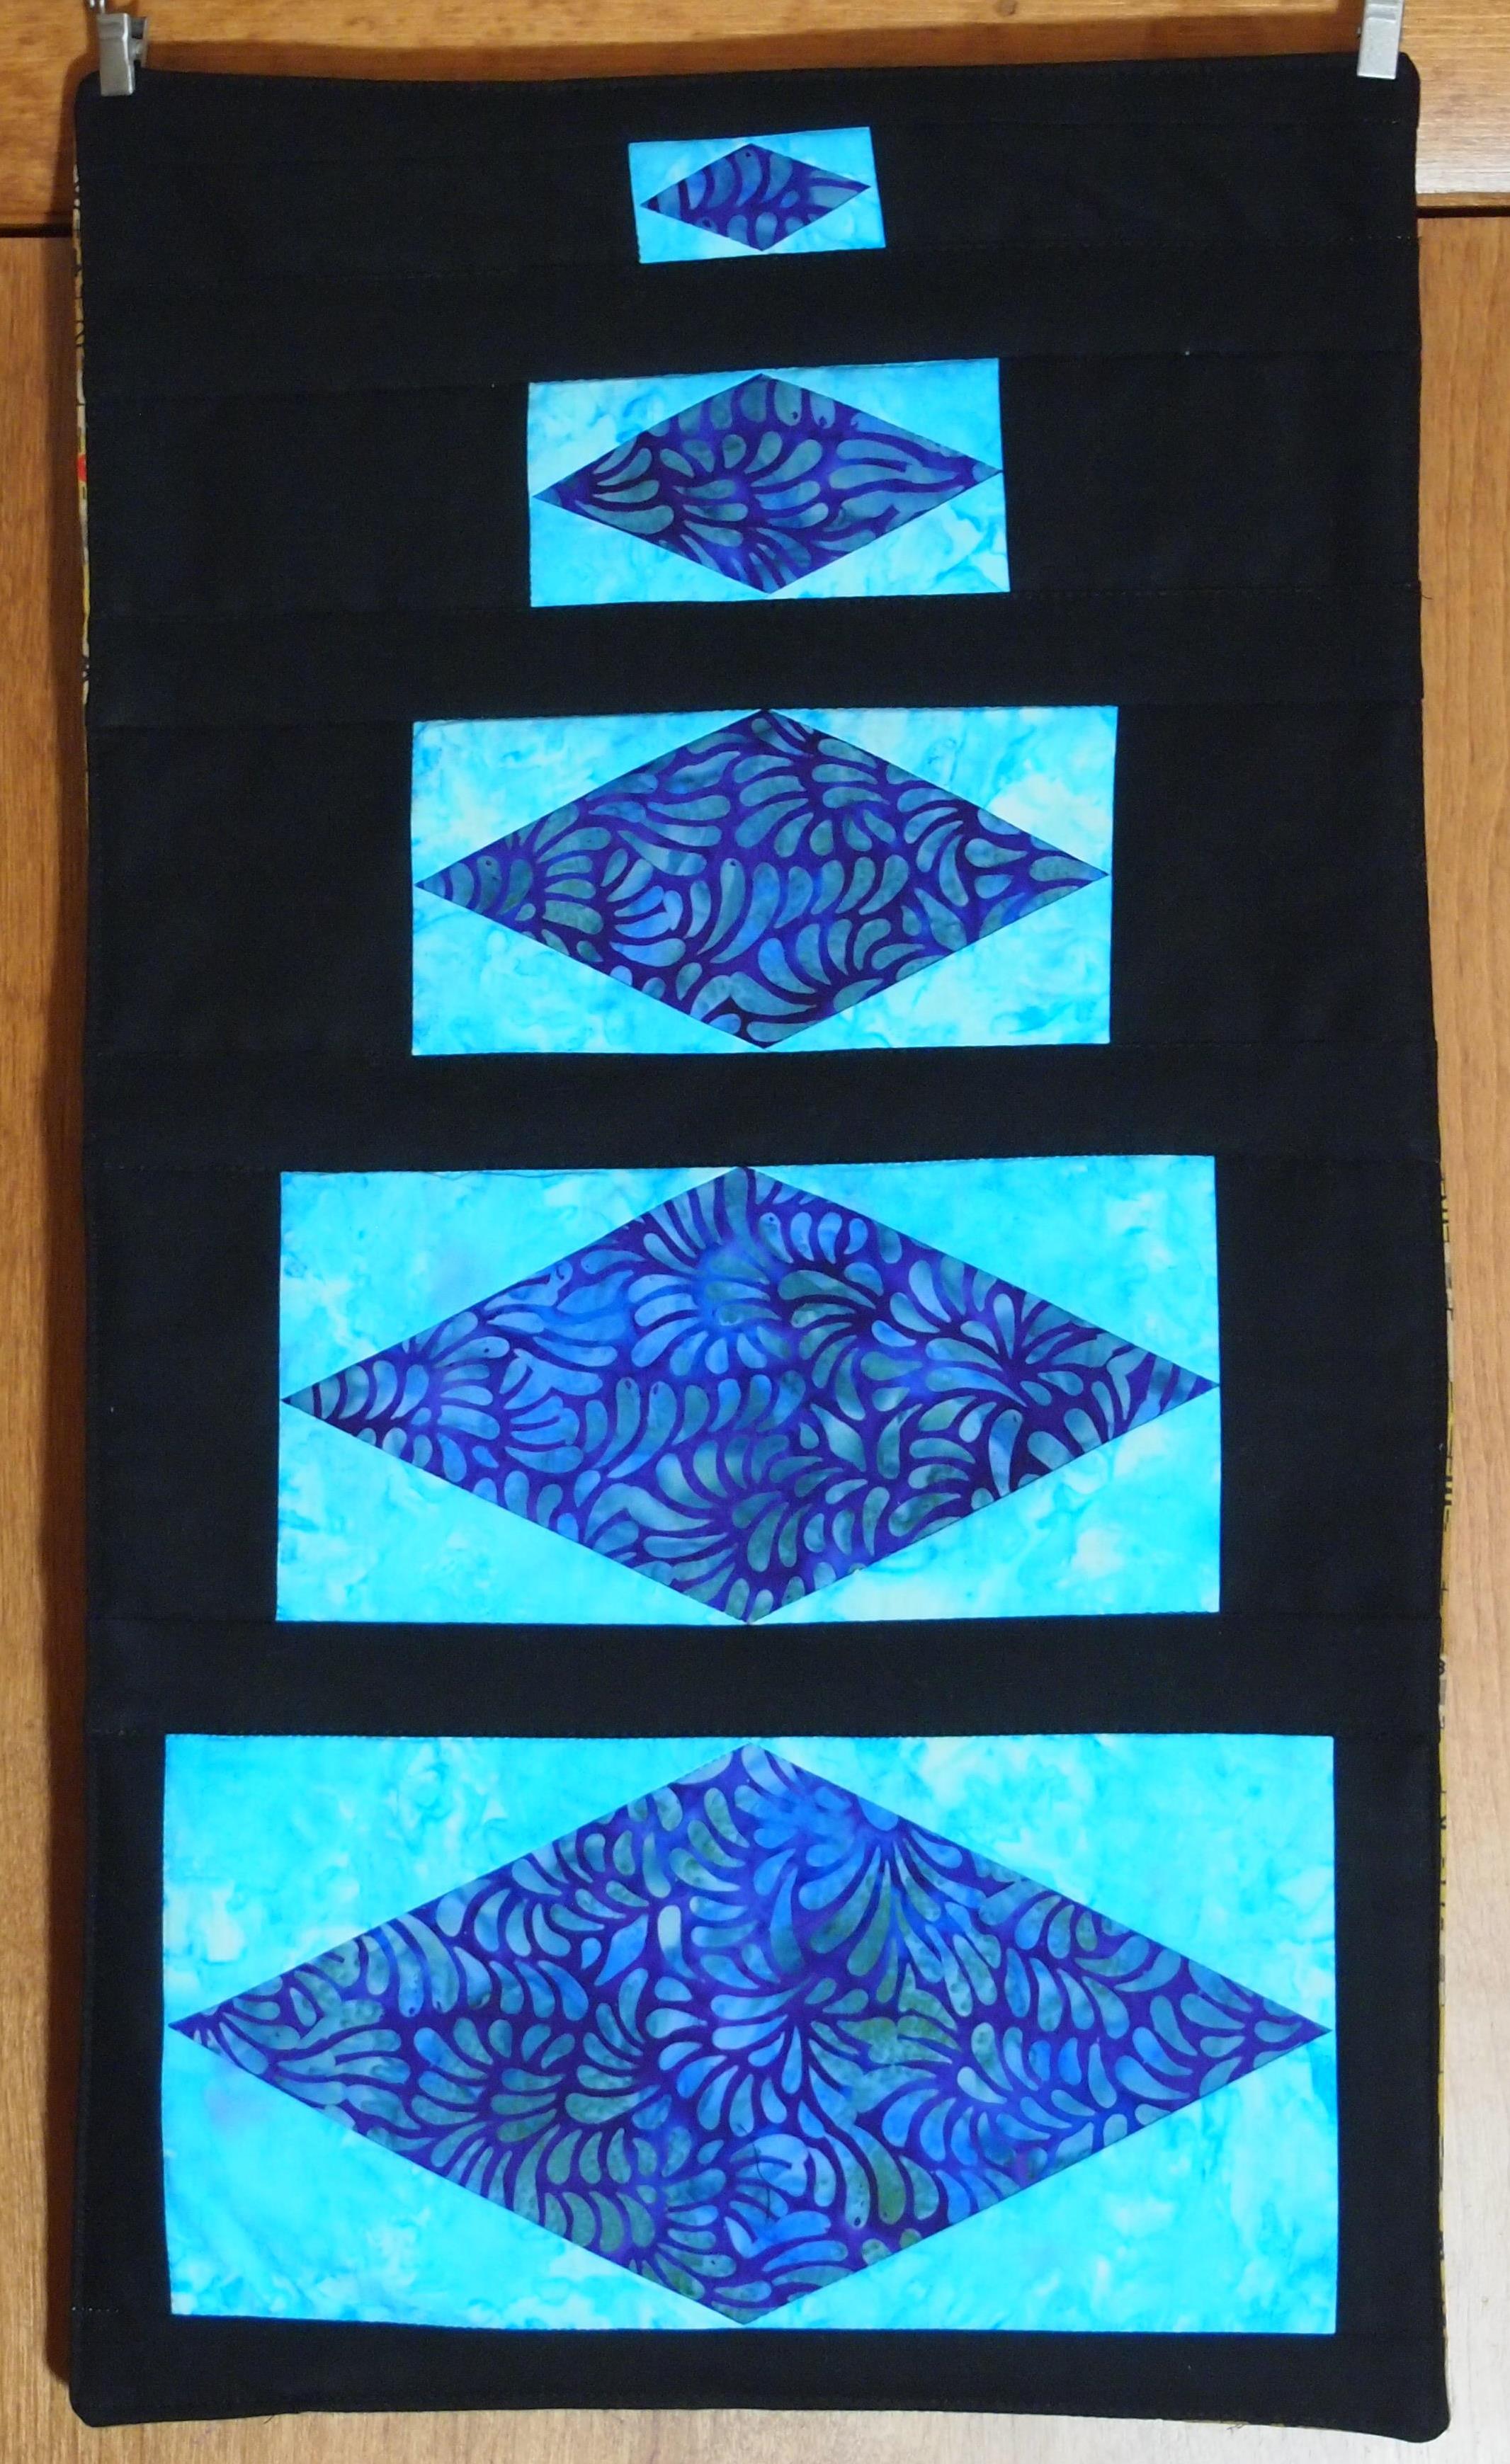
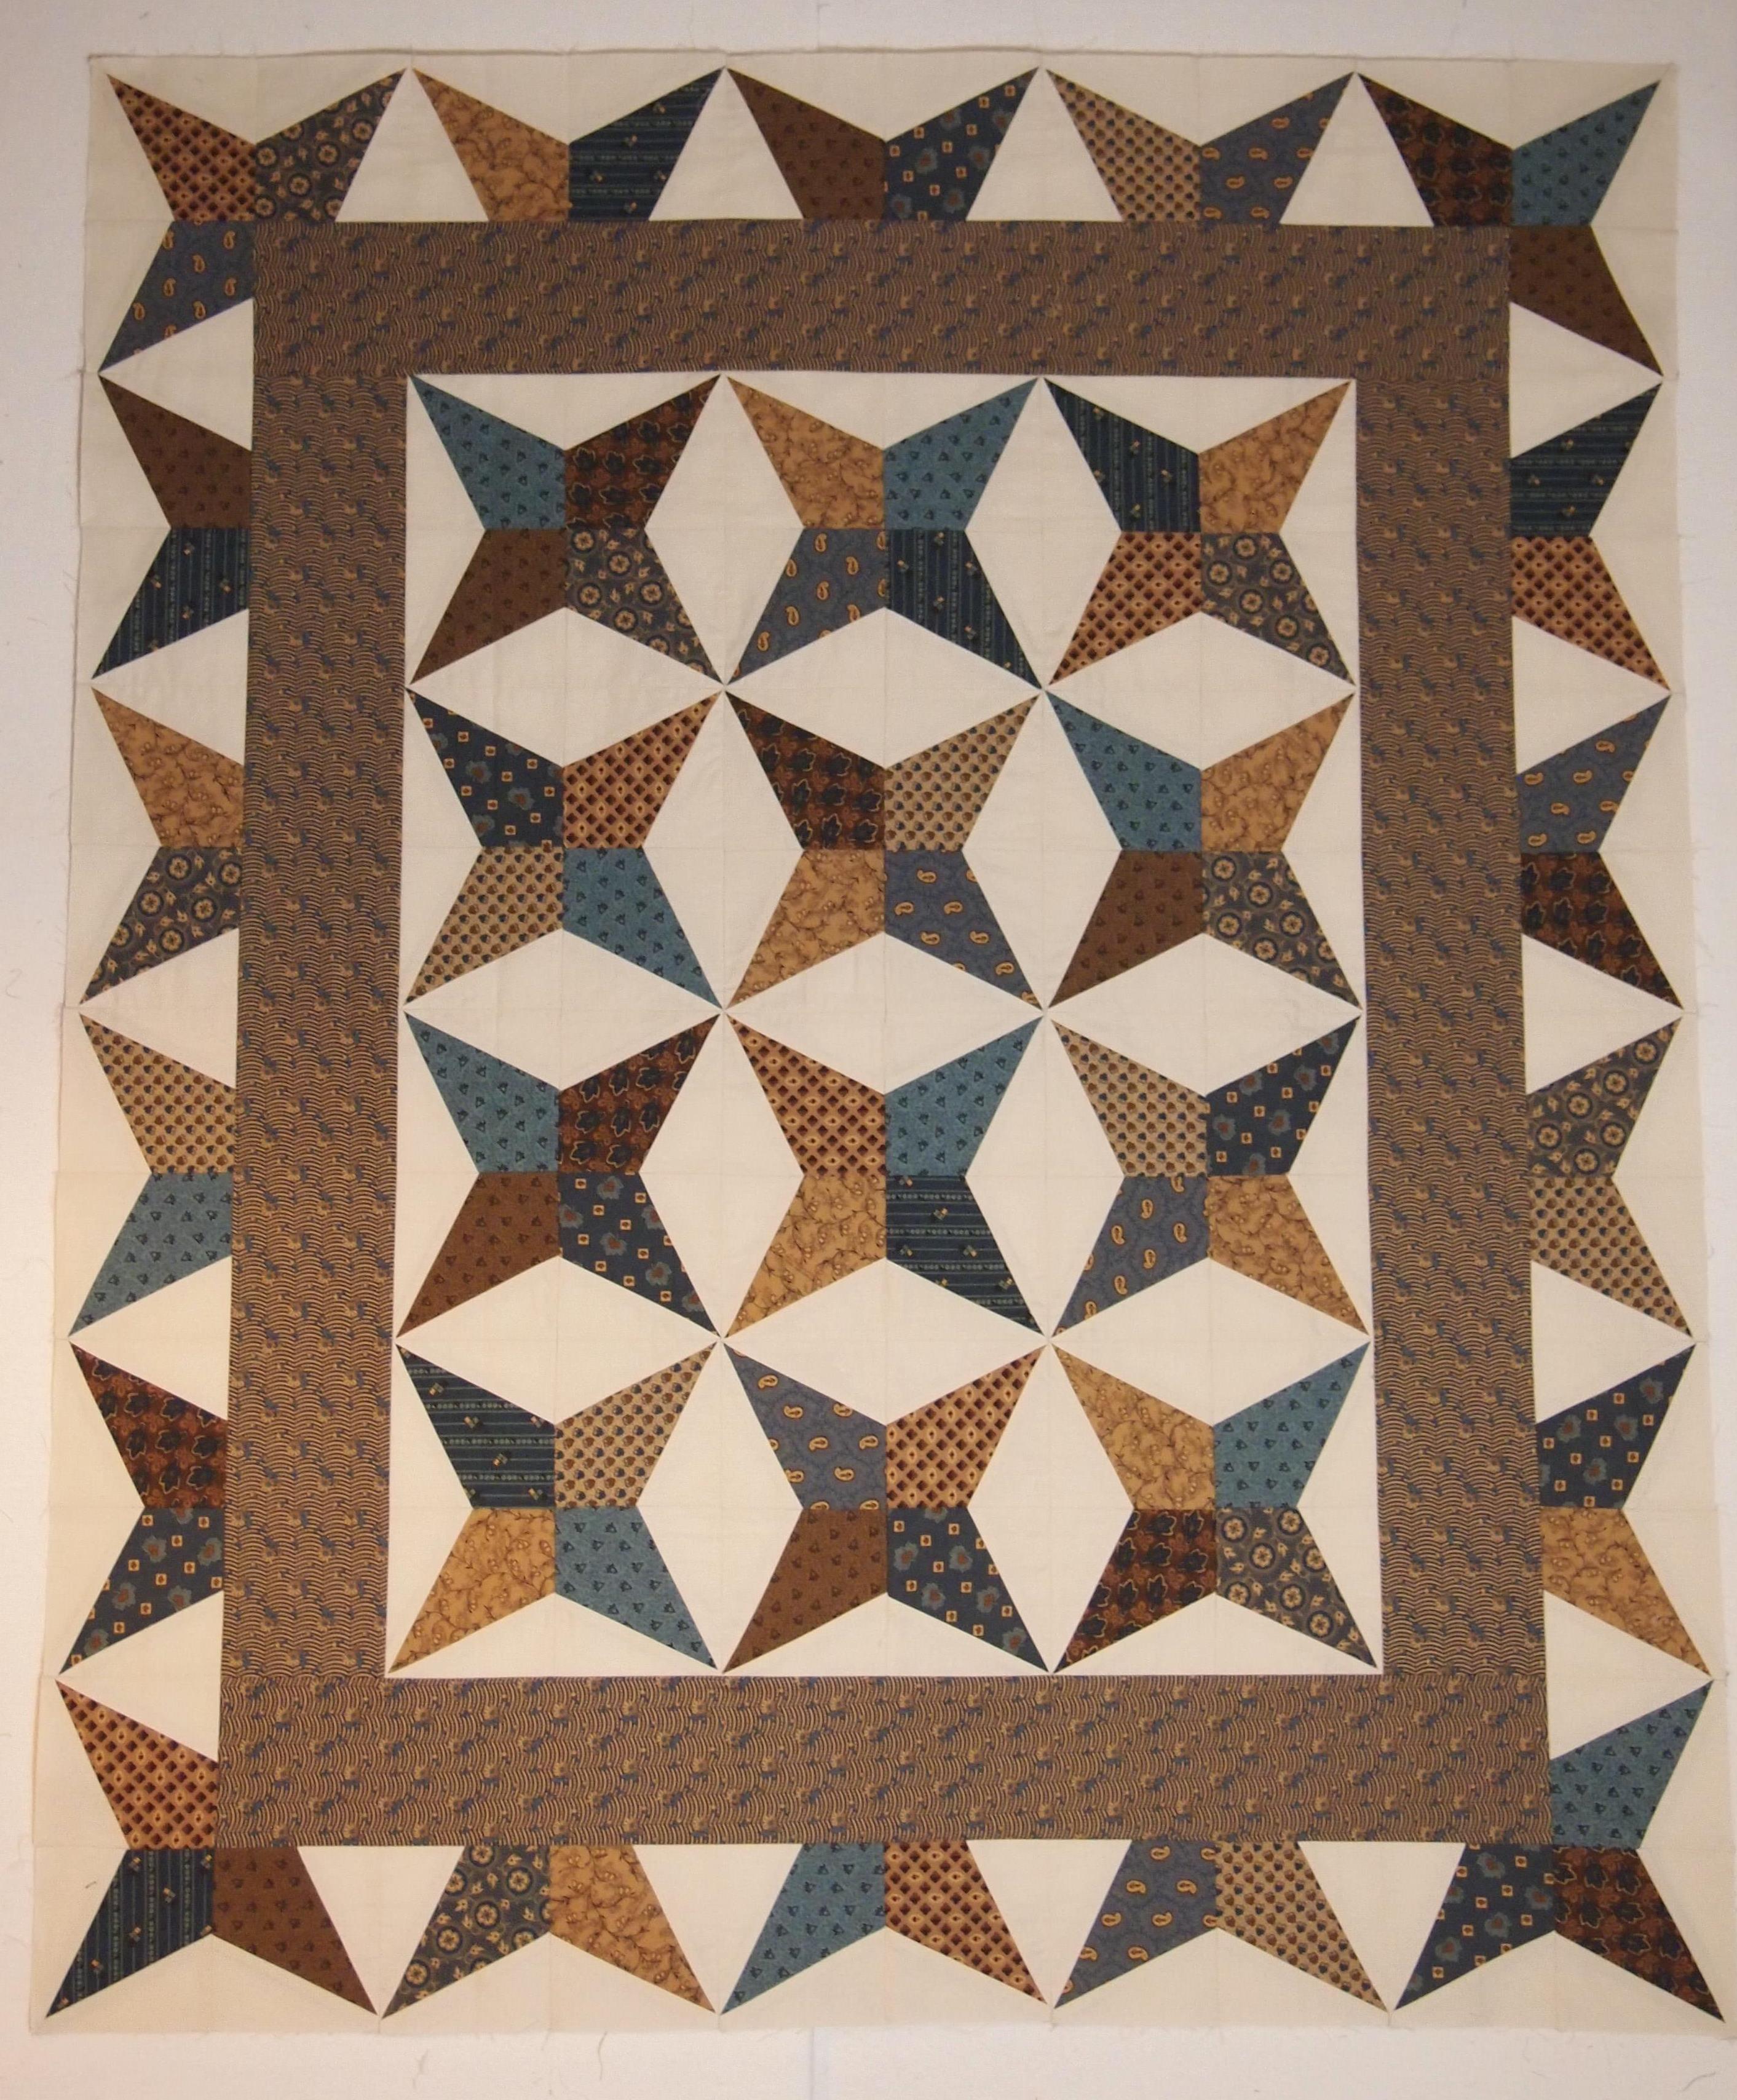
The Diamond Rects Tool makes 5 sizes from 2 1/2 inches wide to 10 1/2 inches wide.

With the Corner Pop Tool you can choose from any of the 22 size options and remove a corner from a base shape such as a square, rectangle, pieced unit or block and leave the necessary 1/4″ seam allowance in tact.

OLYMPUS DIGITAL CAMERA

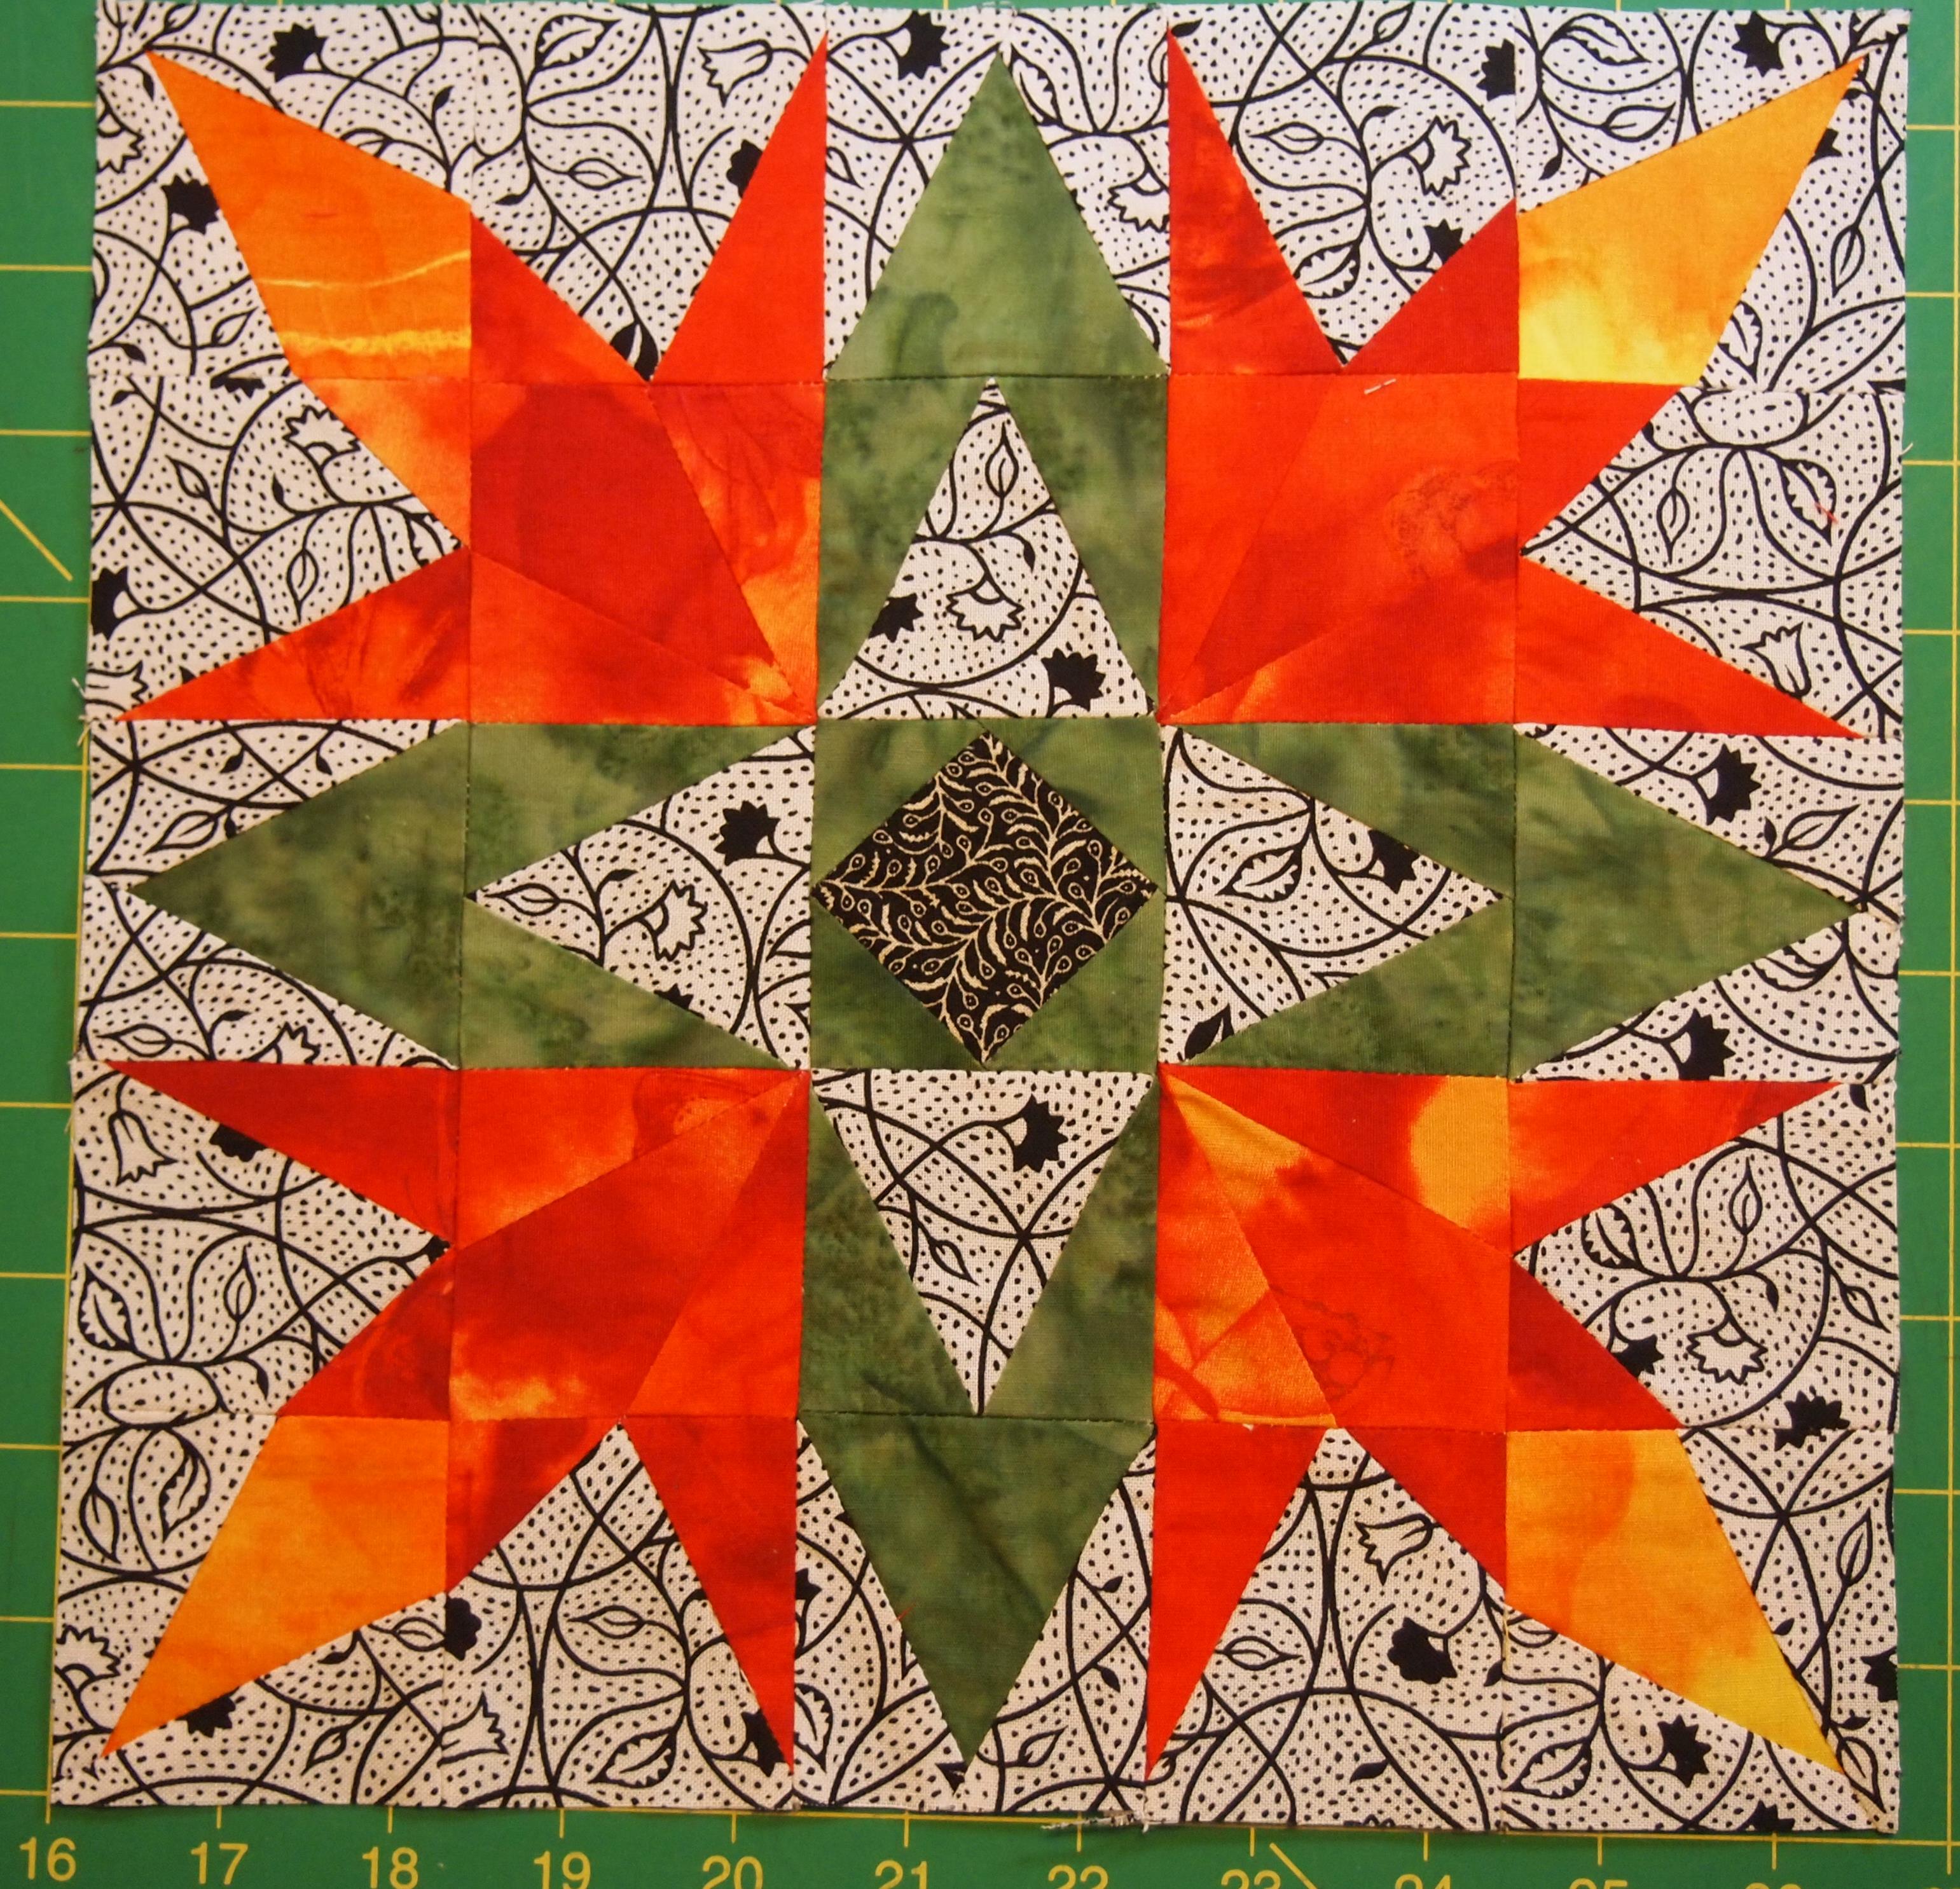
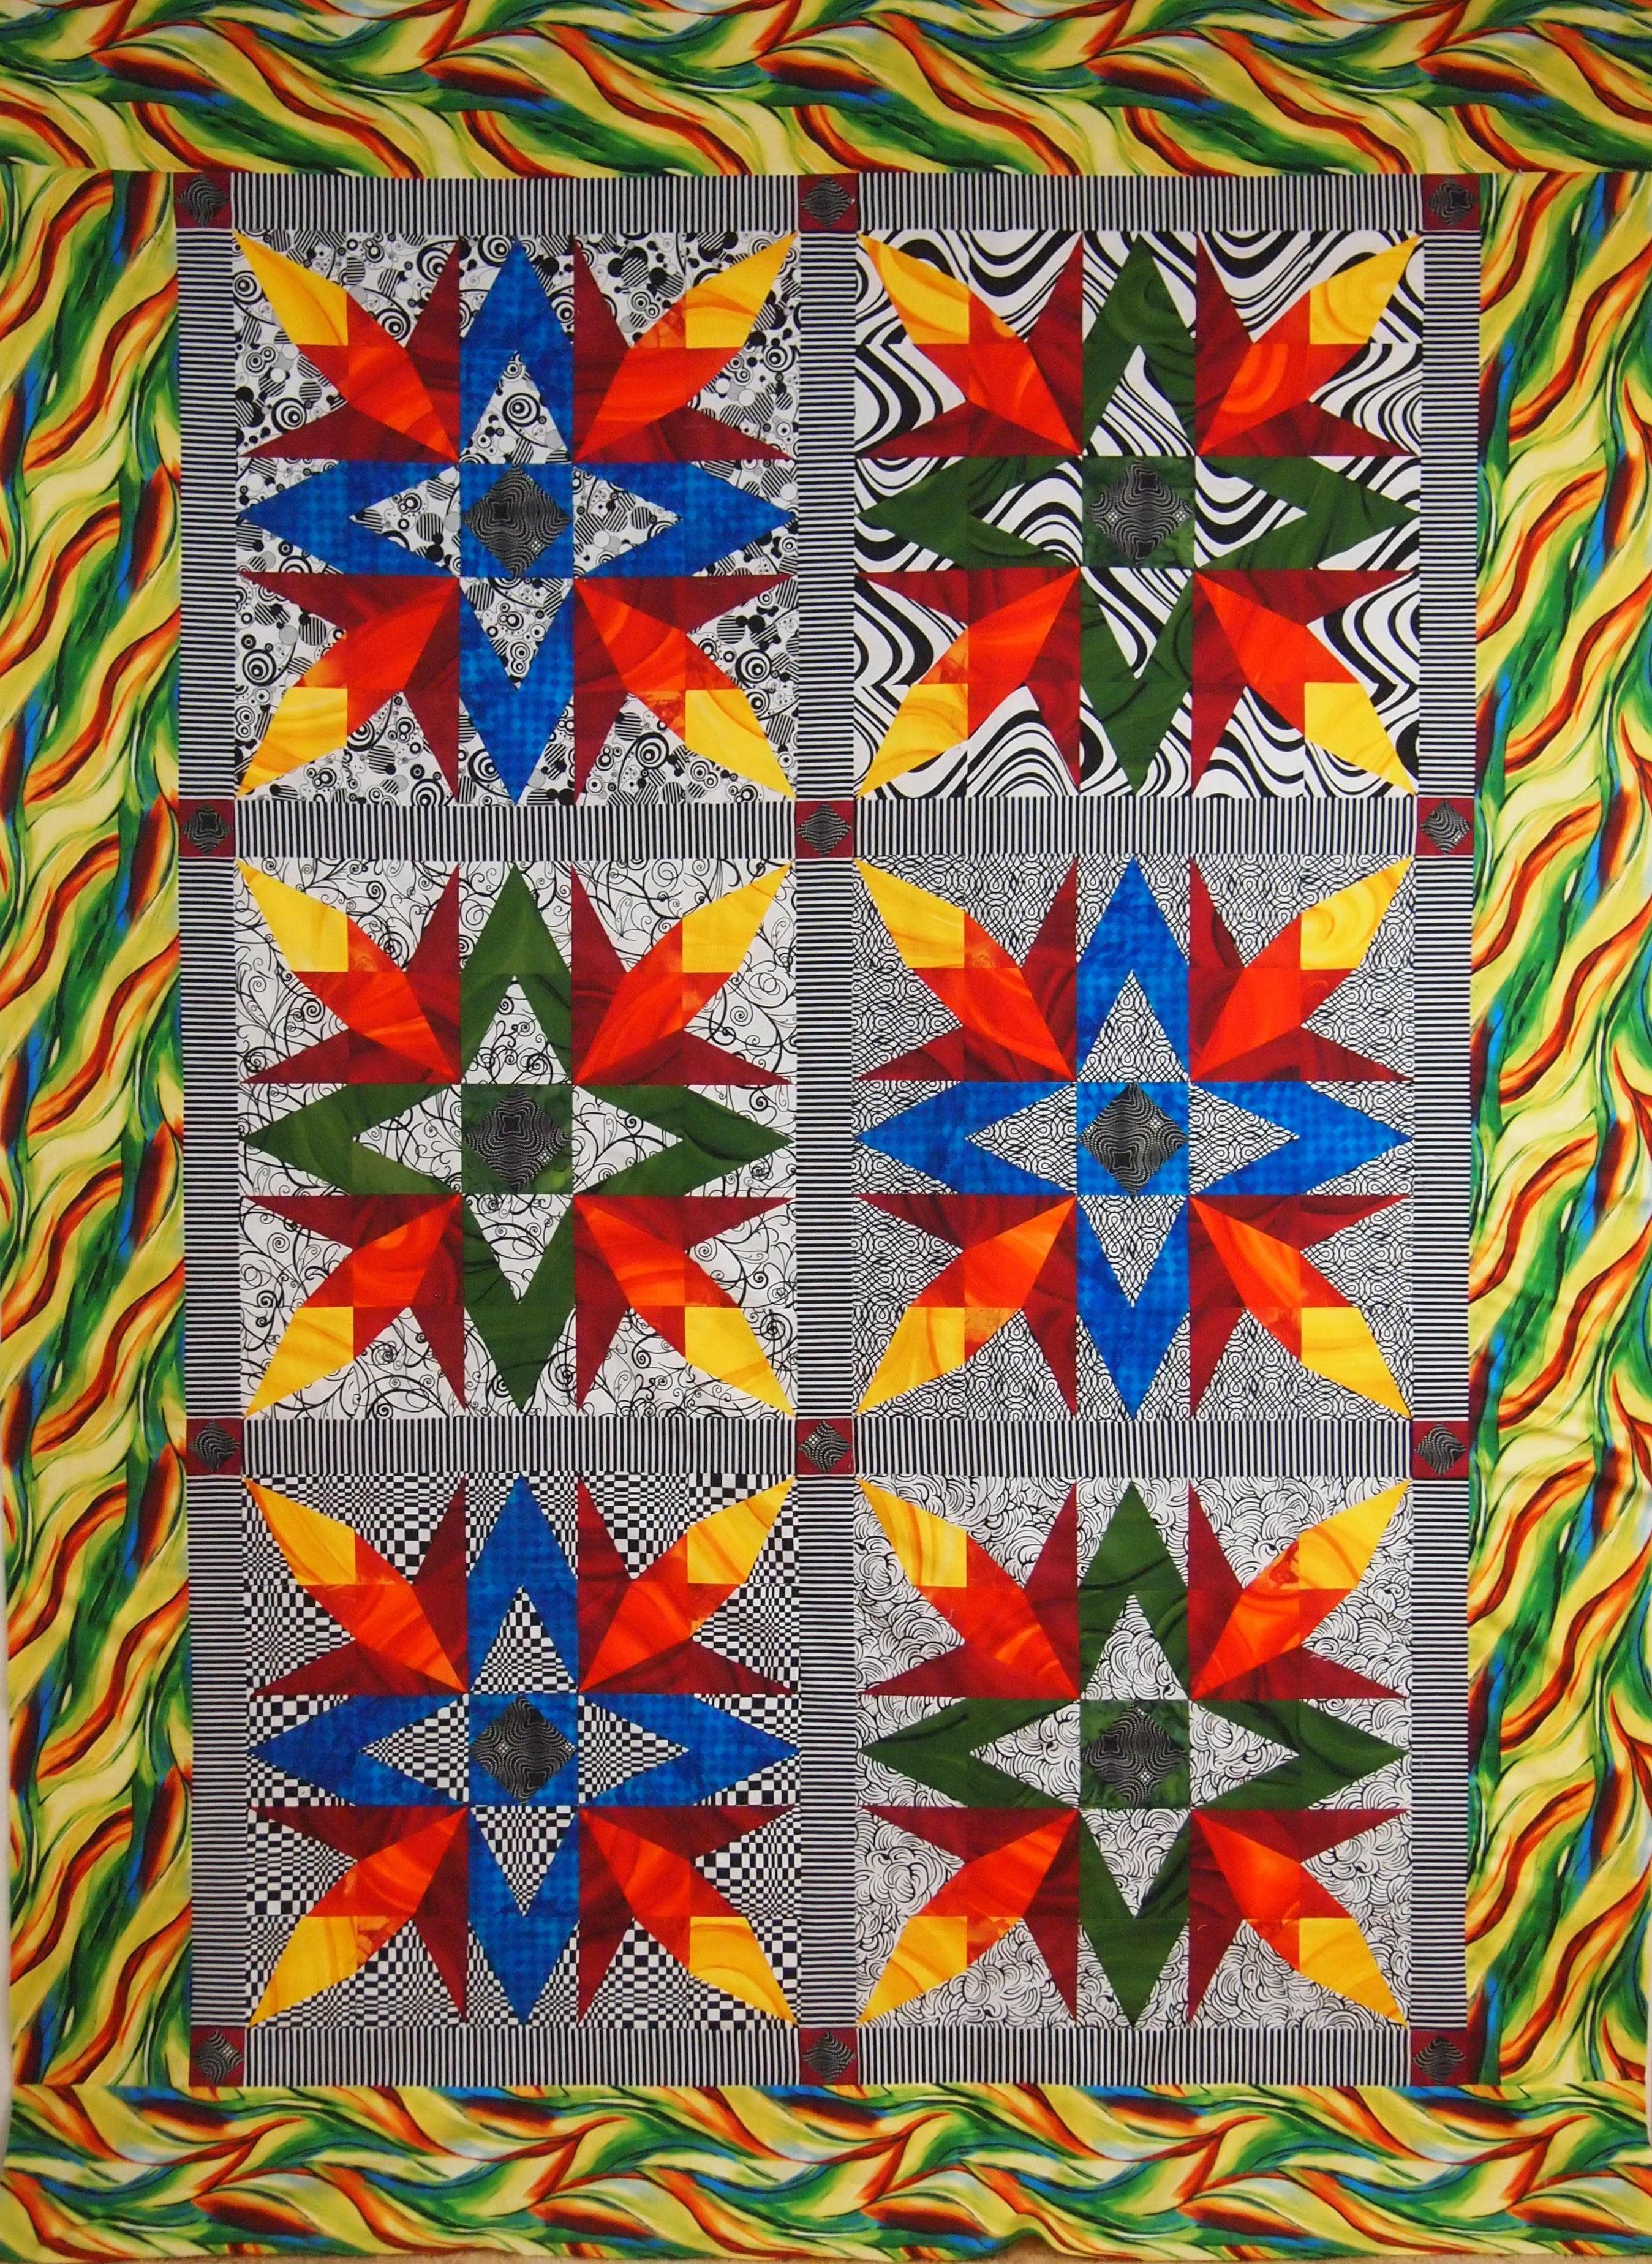
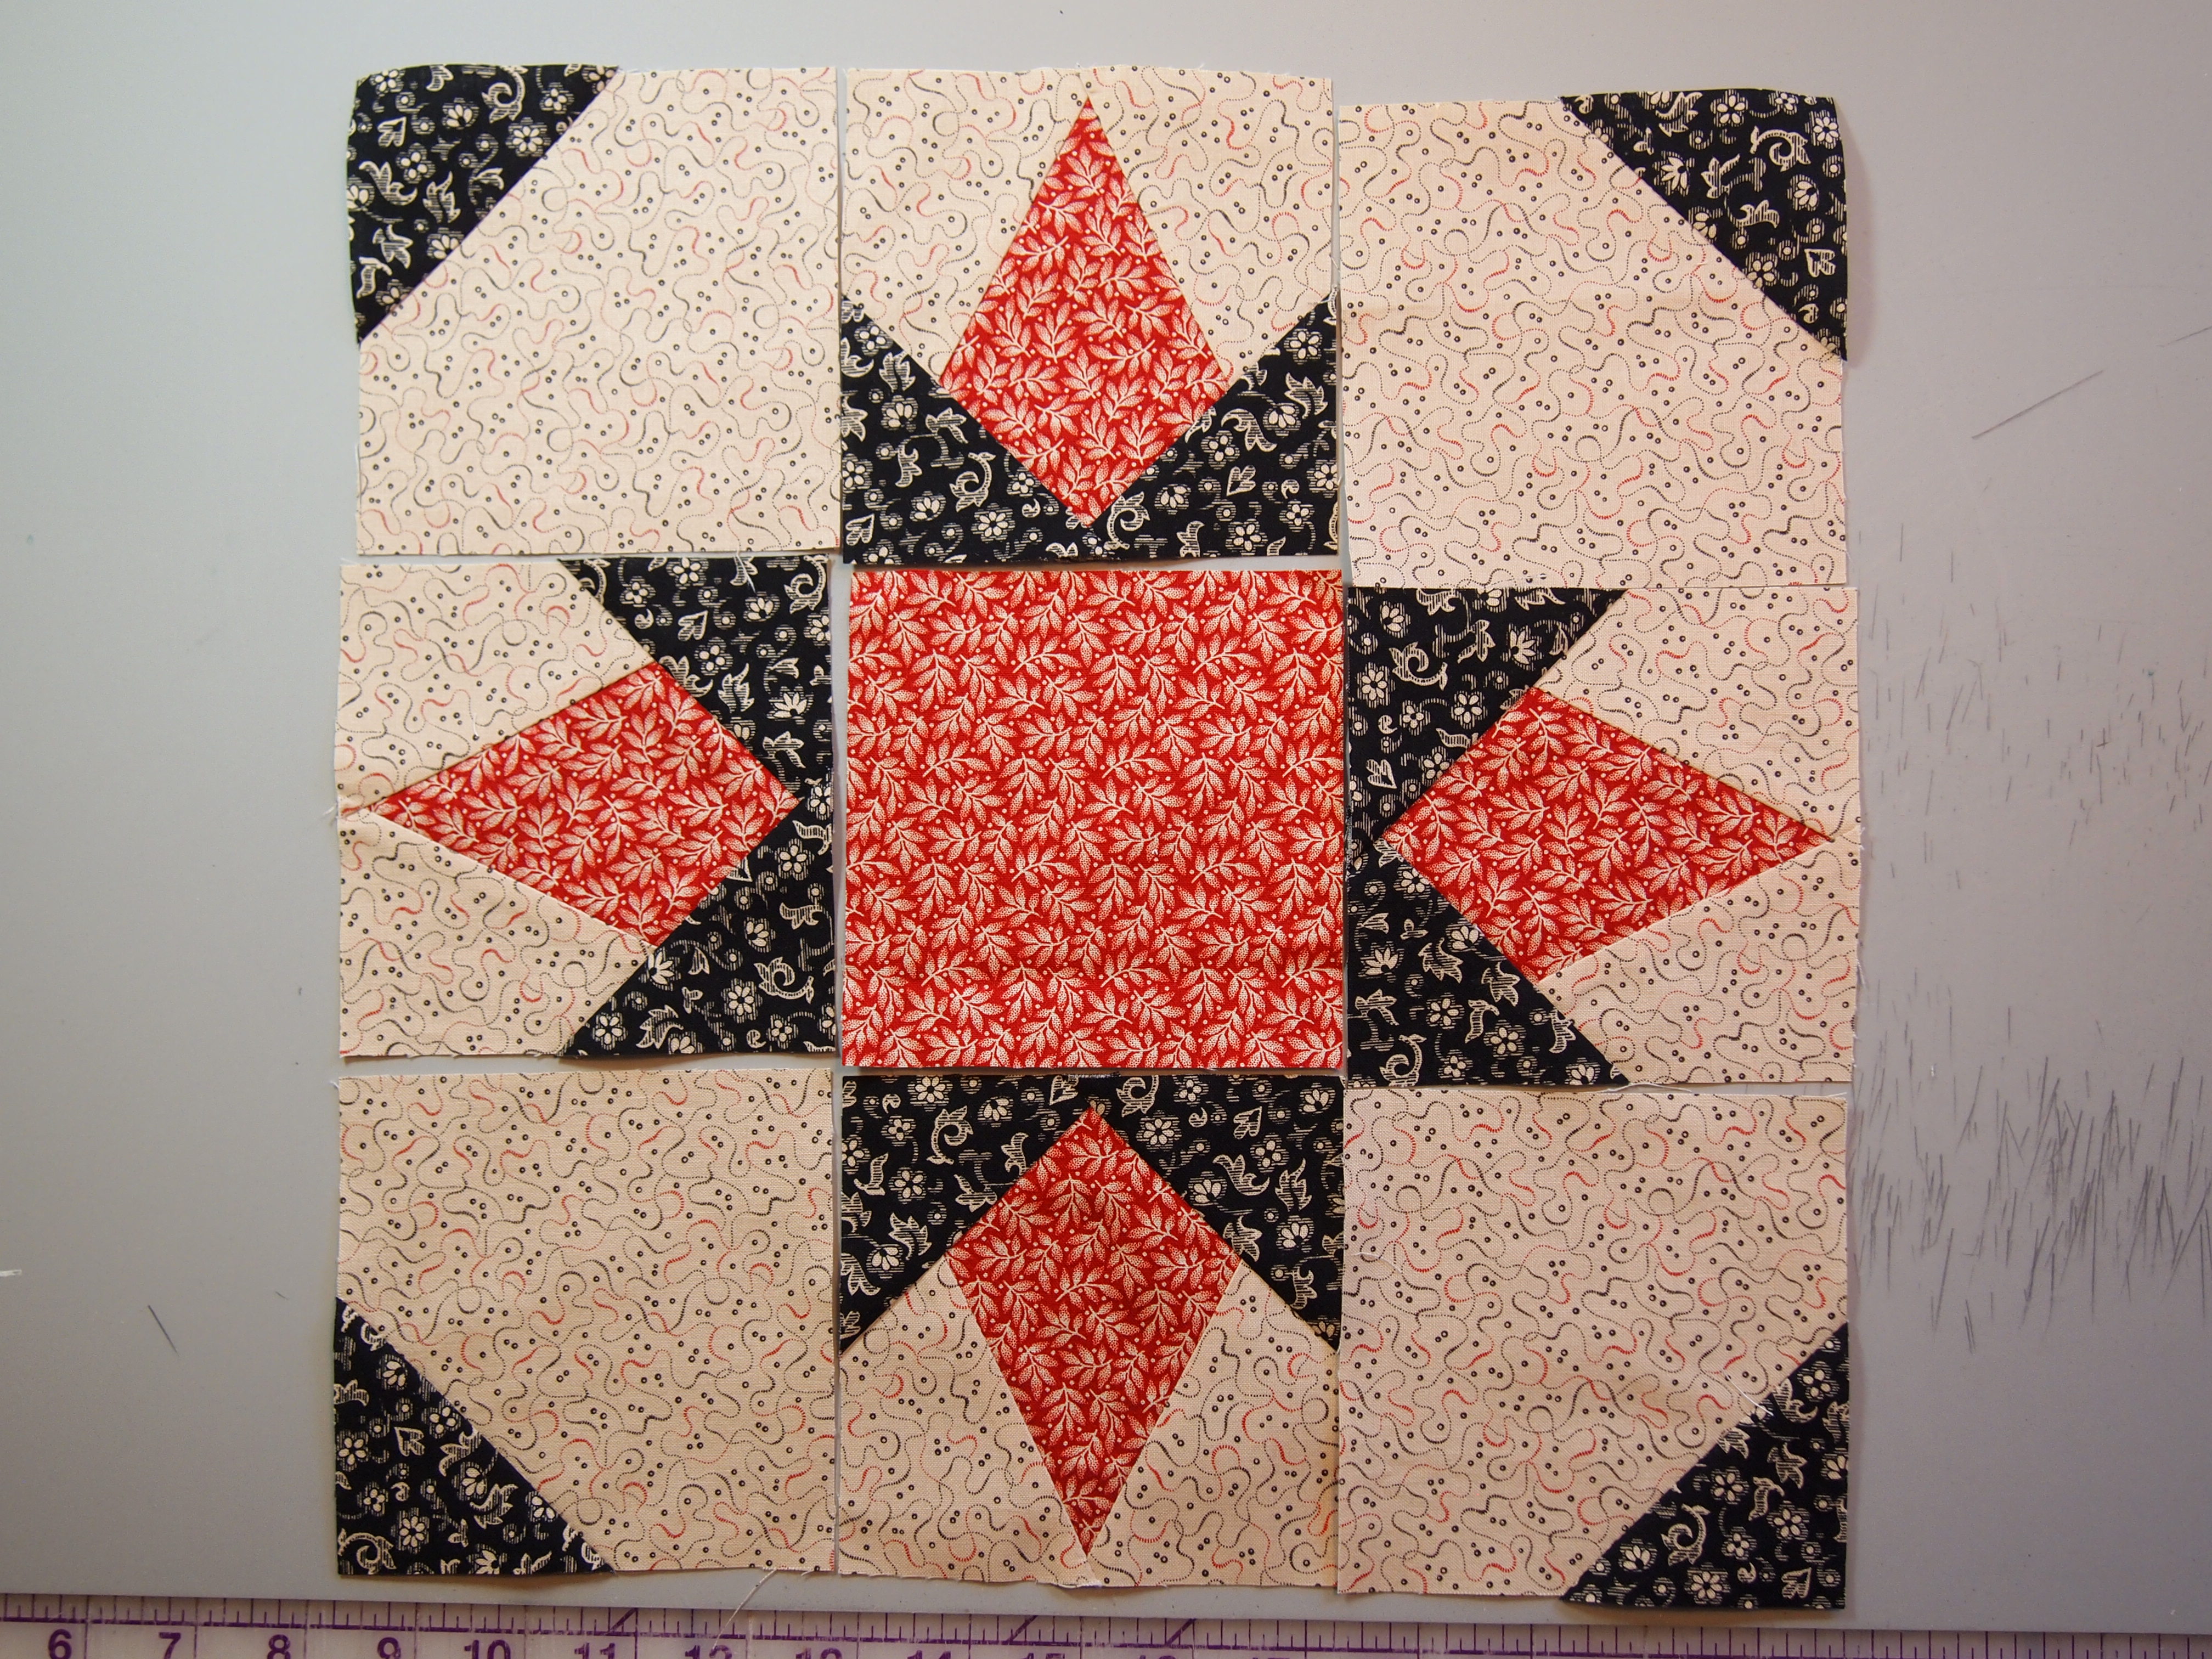
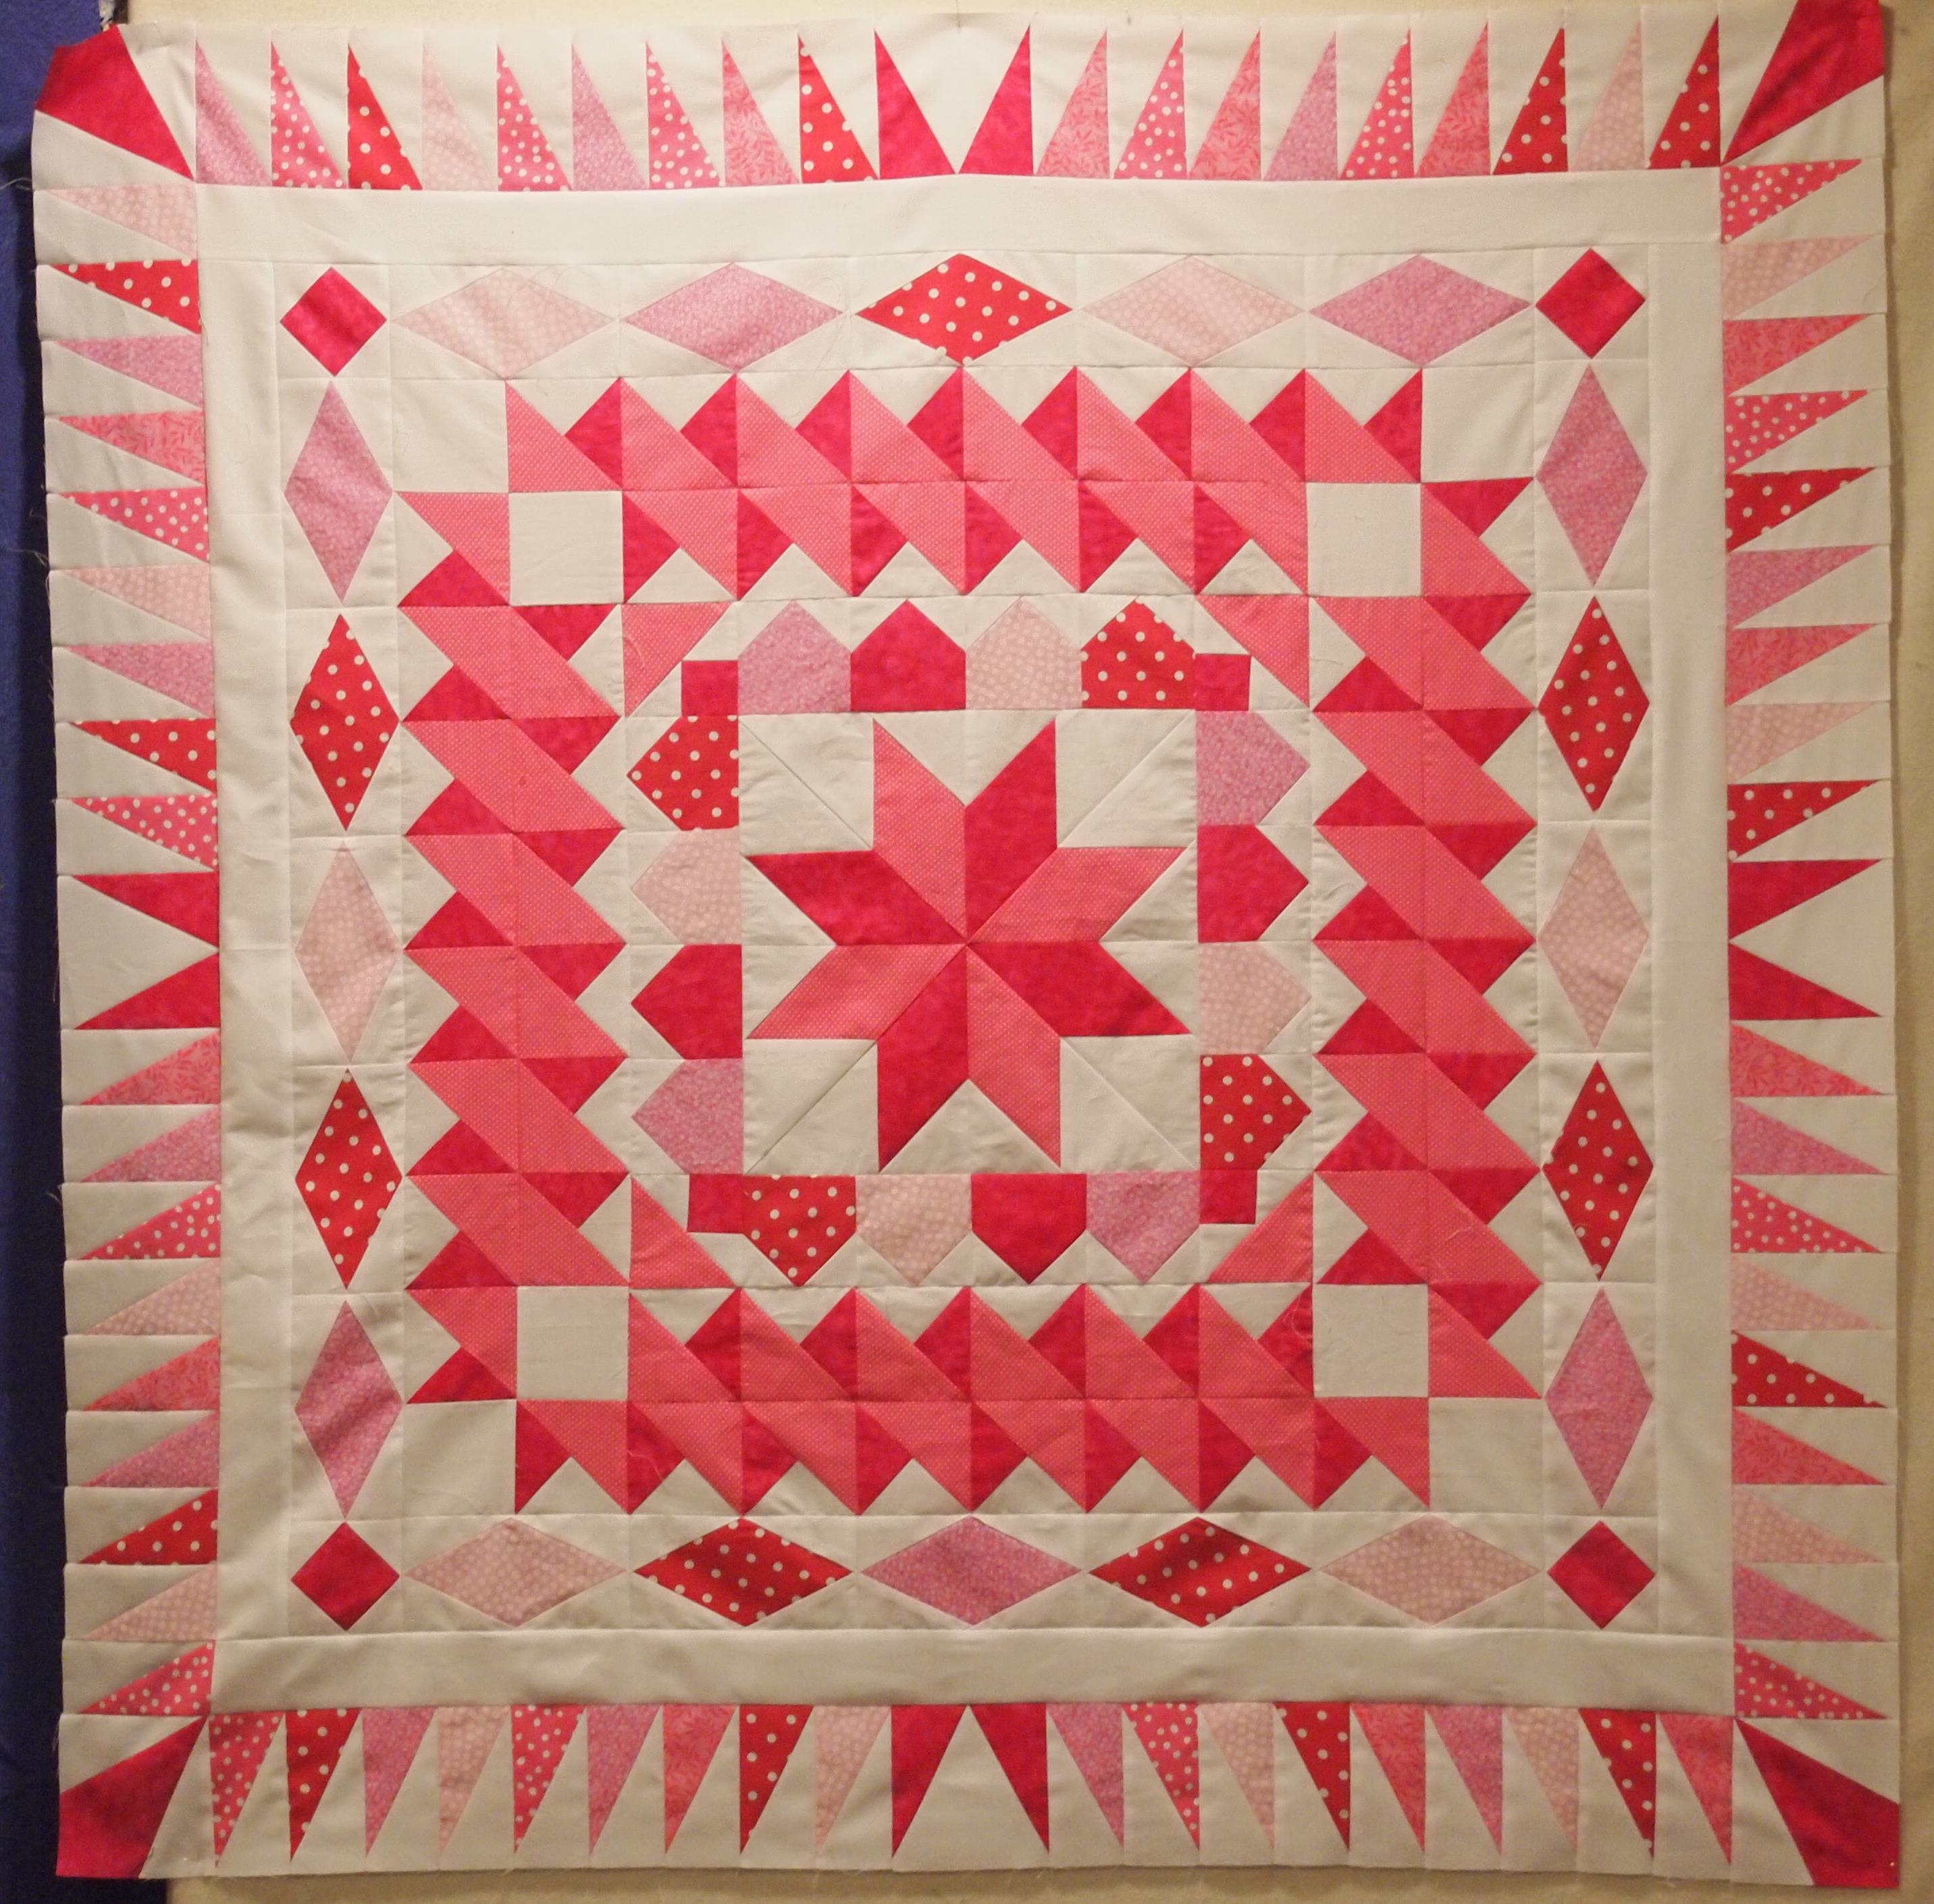
The block above is made from V Block and Corner Beam Units.

OLYMPUS DIGITAL CAMERA

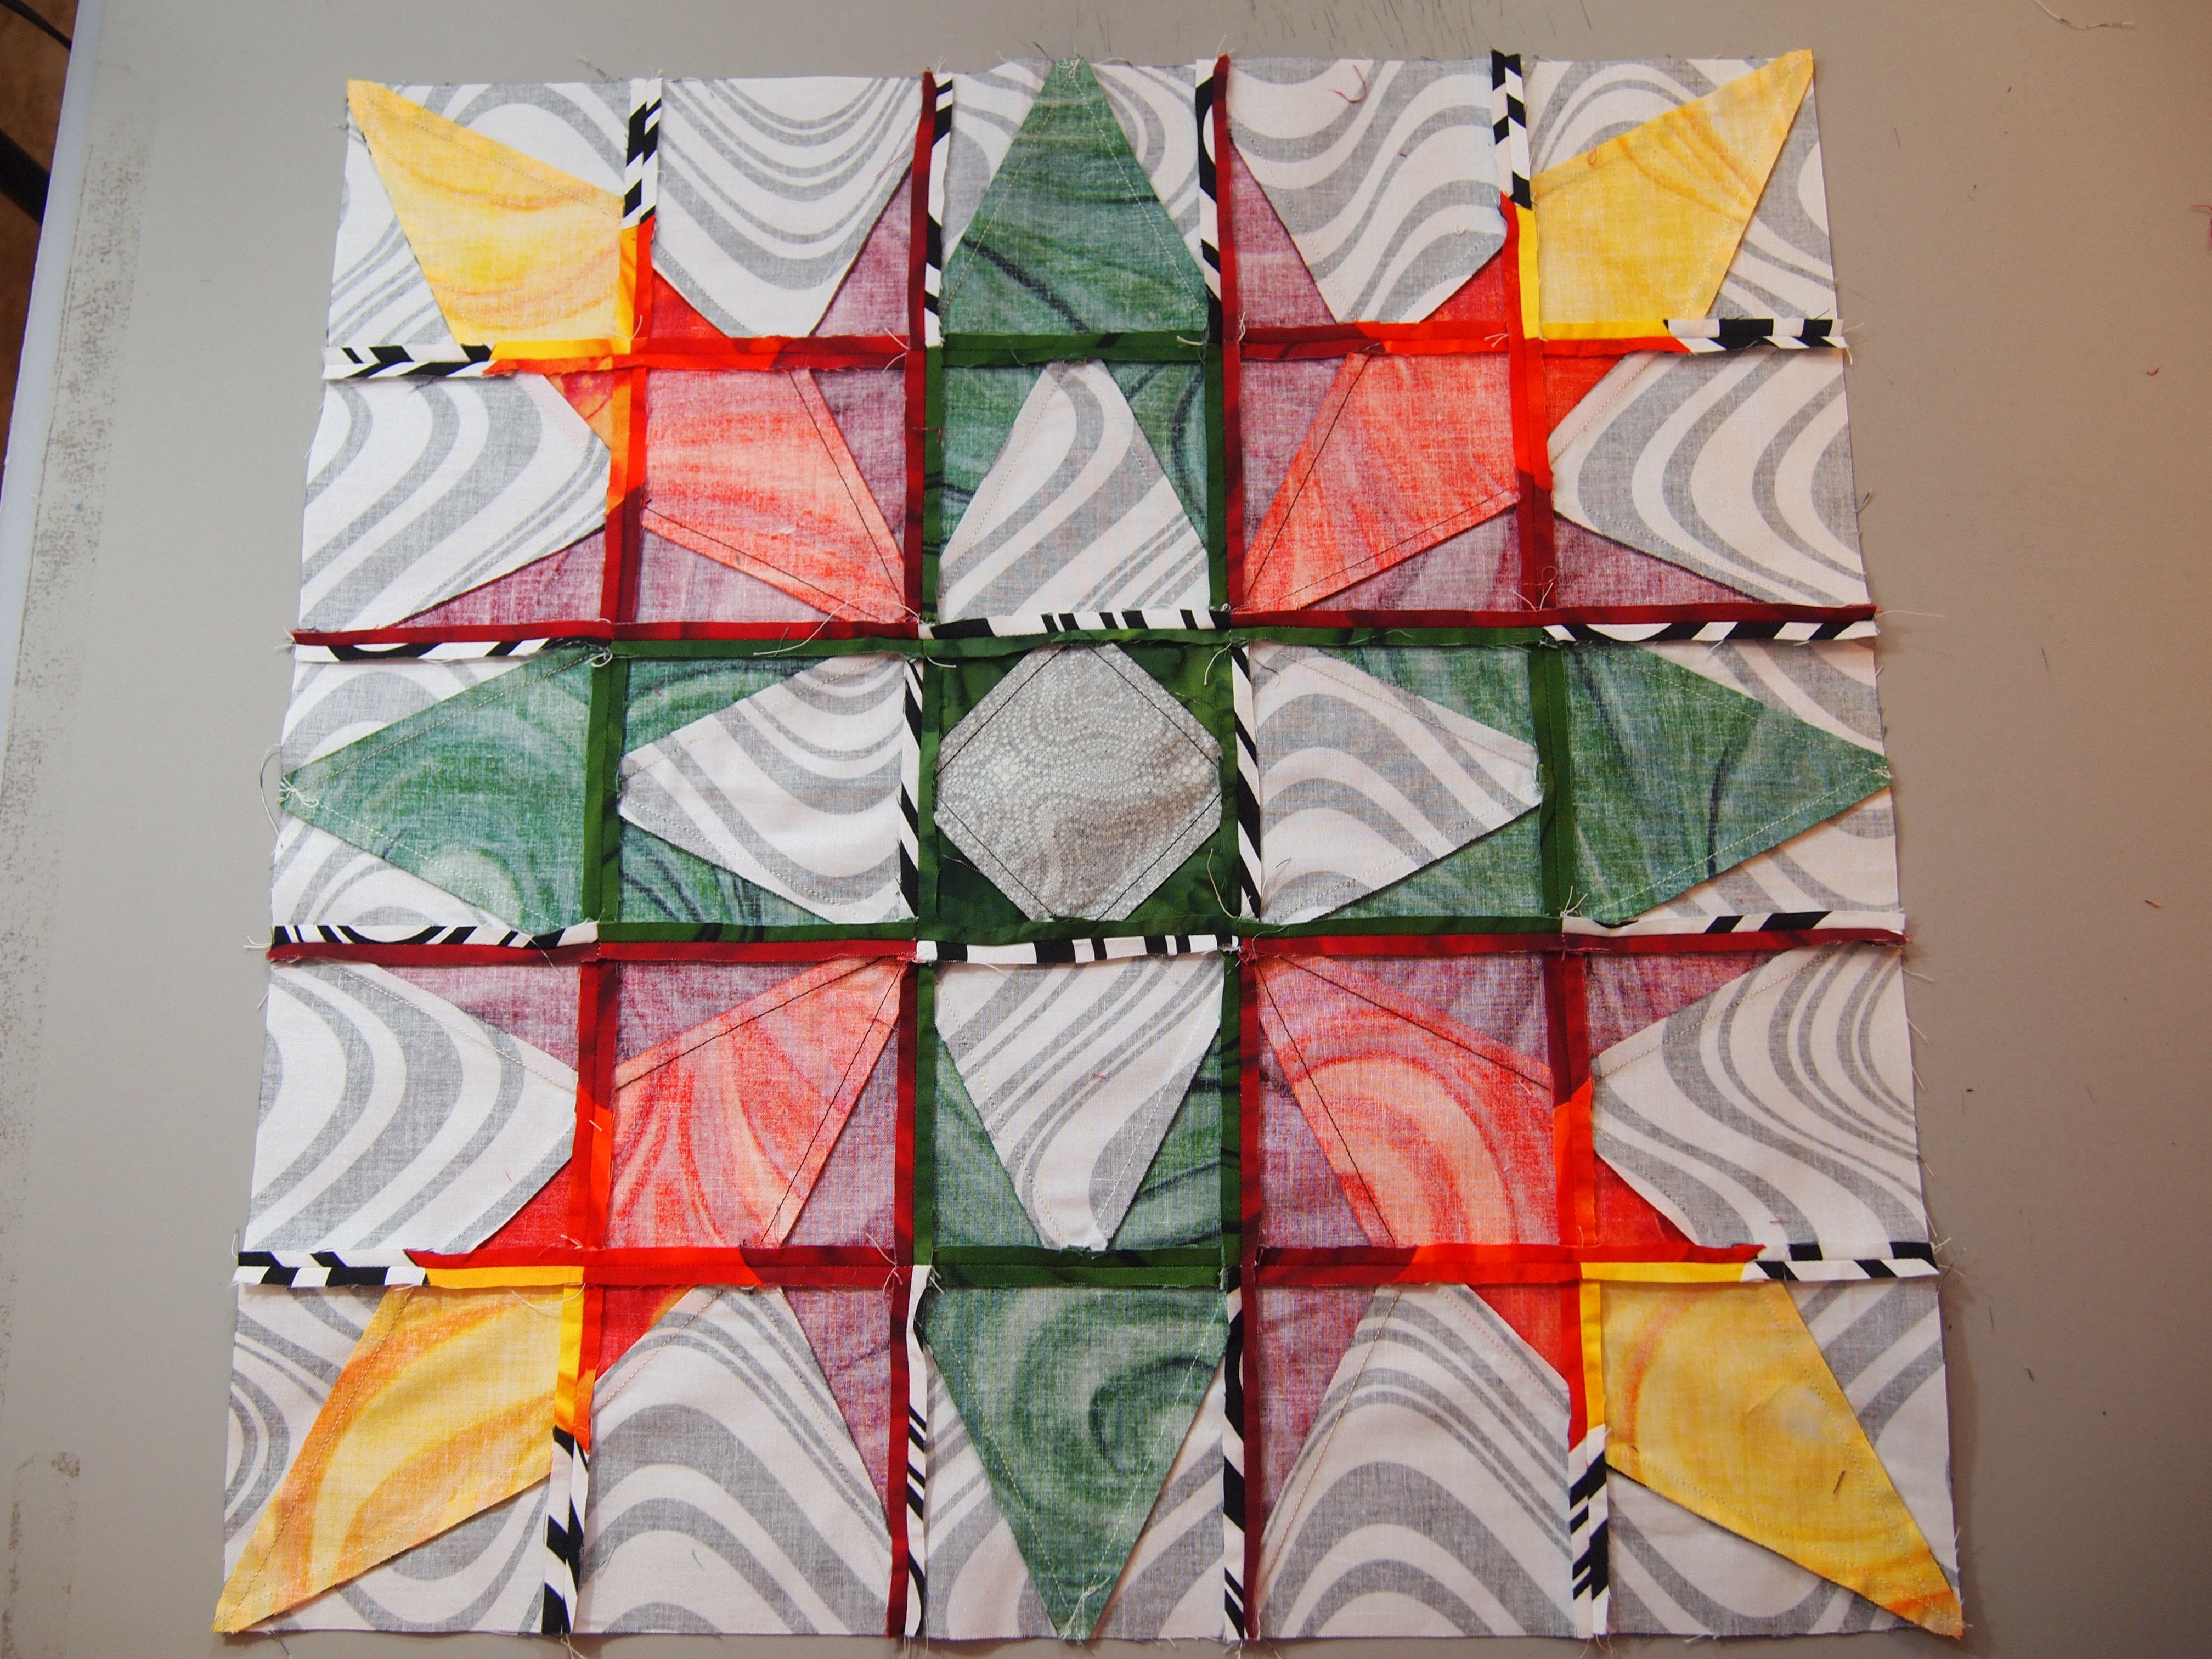
I made 4 of the blocks but this time I popped of corners of the V Block & Corner Beam units before I put the blocks together, making this very interesting wall hanging.

Next I need to make samples for the Rapid Fire Hunters Stars and Lemoyne Star Tools.  Happy quilting!

OLYMPUS DIGITAL CAMERA

No Pattern??? No Problem !

Did you ever see a picture of quilt that you really wanted to make but couldn’t find the pattern? If you can identify the units that make up the block, you don’t really need the pattern. Last year I blogged about being a “Block Detective”.  I saw this quilt in a book By Doreen Speckmann.  I loved it and wanted to make it, but not with the paper templates that the author suggested.

OLYMPUS DIGITAL CAMERA

So, being a Certified Deb Tucker “Block Detective” I decided to try it out by making a block with 2″ finished units.  I loved the bright colors against black & white backgrounds.

OLYMPUS DIGITAL CAMERA

Now the search was on for fabric to make a whole quilt this time.  I found the outer border fabric first and then pulled the colors for the block from that.  I decided to make six 20″ finished blocks containing twenty-five 4″ finished units.

I initially chose yellow, orange, red and green fabric but later added a blue fabric .   I also needed 6 different black & white prints for the block background.

OLYMPUS DIGITAL CAMERA

The tools required were Studio 180 Design V Block, Squared 2 & Corner Beam Rulers and the Technique Sheet for making Sidekicks and High/Low units and don’t forget your Magic Wand!

OLYMPUS DIGITAL CAMERA

Each Block contains 4 V Blocks with black & white side triangles,

OLYMPUS DIGITAL CAMERA

and 4 V Blocks with black & white center triangles.

OLYMPUS DIGITAL CAMERA

Each Block contains 4 Corner Beam Units with yellow center beams,

OLYMPUS DIGITAL CAMERA

and 4  orange and red Corner Beam units.

OLYMPUS DIGITAL CAMERA

The center of each block contains 1 Squared 2 unit.

OLYMPUS DIGITAL CAMERA

There are 2 High/Low Left & 2 High/Low Right Units in each block.

OLYMPUS DIGITAL CAMERA

I cut all my pieces first then laid them out one block at a time.  I constructed the corner flowers as shown below.

OLYMPUS DIGITAL CAMERA

I press the seams as instructed for each of the units, but when I joined the units into the block I pressed my seams open.

OLYMPUS DIGITAL CAMERA

Join the units into rows.

OLYMPUS DIGITAL CAMERA

Then join the rows to form the block.

OLYMPUS DIGITAL CAMERA

OLYMPUS DIGITAL CAMERA

These are some wild colors.  This quilt was fun to make.  So next time you want to play “Block Detective” get out your graph paper and Studio 180 Design tools and discover what you can do!  If you have any questions don’t hesitate to contact me.

OLYMPUS DIGITAL CAMERA

My last Quilt Class in Virginia

Today I taught my last quilt class in Virginia. In about 6 weeks I will be moving to Upstate NY, Utica to be exact, my hometown. Today we finished up our Doubly Charmed class where we first made the Corner Beam quilt.

Doubly Charmed

We saved our side triangles to use in our V Block quilt.

OLYMPUS DIGITAL CAMERA

I want to thank Nancy, Denise, Carol and Karen for a great last class!
image image  imageimage

image image

Jennifer Griffin will be taking over the Studio 180 Design Tool Demo classes in Virginia Beach.  She is happily holding up the Diamonds Rects tool.  In her first demo class she will teach you to make a simple Storm at Sea using the Studio 180 Design Diamond Rects and Squared2 rulers.  I know she will do a great job!  Look out NY, get ready for One Block Wonders and Deb Tucker’s spectacular rulers and quilt patterns.

image

Victorious

I just finished quilting and binding my Studio 180 design pattern “Victorious”  I’m on my quest to branch out and try other battings.  Of course my preference is any batting by Quilters Dream.  This time I used the “Blend”, 70% cotton & 30% polyester, needle punched onto an ultra light scrim base.  It was created especially for machine quilters.

Victorious

It was very nice to work with.  It didn’t stretch out of shape at all.  It stitched beautifully.  It held its shape throughout the washing and drying process.

OLYMPUS DIGITAL CAMERA

Victorious is a beautiful traditional quilt pattern that uses the Deb Tucker V Block tool and the Squared2 tool for units in four corners of the border.  The V Block tool was also used to create the diamond shapes in the border.  Although, now Deb has created the Diamond Rects tool that could also be used to create the border units.

Do You Ever Pop Off?

….Corners that is. Deb Tucker is at it again, and is about to release a new Studio 180 Design Tool. At the certified teacher reunion we were given the chance to play with the “Corner Pop”. We were given permission to blog about it but I can’t show a picture of the ruler until it is released, hopefully by Spring Market in May.

Corner Pop

Above are blocks made using the Corner Pop ruler, made by Deb Tucker.  This ruler makes it so easy to pop off a corner without having to draw any lines.
02 Corner pop student samples

Above are blocks made using the Corner Pop ruler by the certified instructors.
03 Corner pop 2 jacks

I made the block above using the V Block, Corner Beam and Corner Pop rulers.
04 Michelle H block

Above is a Hunter Star with the corners popped off and a strip added before sewing the popped off corner back on.  This was made by Michelle Hiatt of “Sew on the Go“.  I love what she did.

Below I will describe how to use the Corner Pop ruler:
OLYMPUS DIGITAL CAMERA

To begin, I made four 4.5″ unfinished V Blocks.
OLYMPUS DIGITAL CAMERA

The Corner Pop ruler has measurements for popping off the corner in 1/2″  increments from 1″ to 6″, and 1/2″ increments from 3/4″ to 5 3/4″.  It is also used for trimming down.  To determine how much to pop off divide the “Finished” size of your unit in half.  My V Blocks will finish at 4″, so I place the 2″ line placement on my unit and popped off the corner.
OLYMPUS DIGITAL CAMERA

I then flip the V Block unit over and pop off the second corner.
OLYMPUS DIGITAL CAMERA

What ever size you pop off add 1  1/4″ to that.  I popped off 2″ so 2 + 1  1/4″= 3 1/4″.  I cut four 3 1/4″ squares.
OLYMPUS DIGITAL CAMERA

Cut each square in half diagonally.
OLYMPUS DIGITAL CAMERA

Center a triangle on one side of the Corner Popped  V block and stitch.
OLYMPUS DIGITAL CAMERA

Press toward the triangle.
OLYMPUS DIGITAL CAMERA

Center the 2nd triangle on the other side and stitch.
OLYMPUS DIGITAL CAMERA

Press toward the triangle and trim down using the measurements on the Corner Pop Ruler.
OLYMPUS DIGITAL CAMERA

I cut four 4 1/2″ squares and popped off the corner to make snowball units.
OLYMPUS DIGITAL CAMERA

I cut four more 3 1/4″ squares and cut in half diagonally, and stitched the triangle on the popped off side.
OLYMPUS DIGITAL CAMERA

Press toward the triangle and trim down.
OLYMPUS DIGITAL CAMERA

I cut a 4 1/2″ center block and laid out my units.
OLYMPUS DIGITAL CAMERA

Above is the finished block with the corners popped off the V Blocks and Snowball units WITHOUT DRAWING ANY LINES!

This tool can open up very creative ways to make intricate blocks easily.  Woo Hoo!

Doubly Charmed

Doubly Charmed
Above is Charmed Corner Beam (40″ x 48″).  I Love this pattern. It’s from Studio 180 Design and is called “Doubly Charmed”! You use the same set of 5″ squares for two quilts. You cut the center beams from the squares for the first quilt and then use the cutaway triangles for the side triangles in the second quilt. Two beautiful quilts from one set of squares. Below is Charmed V Block (47″ x 59″).
OLYMPUS DIGITAL CAMERA

OLYMPUS DIGITAL CAMERA

Above shows the first cut using the Corner Beam ruler.  Position the dashed line against the raw edge of your stacked squares, trim.
OLYMPUS DIGITAL CAMERA

Lift and position the ruler and locate the line labeled “Center Beam Trim #2”, trim.
OLYMPUS DIGITAL CAMERA

Save the side triangles for the Charmed V Block Quilt.
OLYMPUS DIGITAL CAMERA

V Block Center triangle first cut.  Fold the fabric strip deep enough to accommodate the slanted cut for the chosen size unit, trim.
OLYMPUS DIGITAL CAMERA

2nd cut.  Move the cut triangles off to the side and flip the strip over and fold the fabric strip deep enough to accommodate the slanted cut, trim.
OLYMPUS DIGITAL CAMERA

Per the instructions in the pattern, trim down the side triangles saved from the corner beam quilt and construct your units.  This is a companion pattern for the V Block, Corner Beam, and Squared2 Tools from Studio 180 Design.
OLYMPUS DIGITAL CAMERA

You’ve Got to Love Pink!

While I was at Studio 180 Design Teacher Certification, as I was just trying to keep up two other students; Phyllis Fay and Sarah Furrer were busy creating. Below is what they whipped up.
Phyllis and Sarah
What I love about this top other than great technique, is all the different tools they used to create a quilt without using a pattern. When I am giving a presentation on all the Studio 180 Design tools I always show this picture. I am crazy about the outer border. I love the way they used the Split Rects tool. It looks just like they paper pieced it but it was accomplished with a ruler!

You start in the middle of the quilt with the Lemoyne Star and work your way out with each new border. I have also listed the pre-finished sizes or trimmed sizes.

• One 12 ½” Lemoyne Star
• Four 3 ½” shaded 4-patch
• Sixteen 3 ½” little houses
• Eight 3 ½” squares of background fabric
• Fifty-six 3 1/2” combo blocks (which means you have to make 28 Half Square Triangles (HST) blocks first; remembering that they yield a double number of blocks)
• Four 3 ½ “Square/Squared blocks
• Twenty 3 ½ ” X 6″ ½ ” Diamond Rects
• 2 ½ ” border of the background fabric
• Four 4 ½ ” V Blocks
• Four 4 ½ ” Corner Beams
• Eighty 2 ½ ” x 4 ½ ” Split Rects (which means you have to make 40 by using the rights sides together method)

Studio 180 Design Tools Required:
• Rapid Fire Lemoyne Star
• Tucker Trimmer I & III
• Diamond Rects
• V-Block
• Corner Beam
• Split Rects

Studio 180 Design Technique Sheets:
• Shaded 4-Patch
• Little Houses

Thanks Phyllis & Sarah for sharing.