This is a very cool block, but be sure to use your best pressing, measuring and cutting skills as this is a 3 out of 4 stars for difficulty. All the instructions to make this block can be found in the instructions that came with your Wing Clipper I, Tucker Trimmer I and on the Pickets & Quickets technique sheet.
This is a tricky block; you will need to pay attention to your fabric placement and the orientation of your quicket and picket units. To help you out here is link to the Whirligig Black Line Layout you can print this sheet and use your colored pencils to help choose your fabrics and placement.

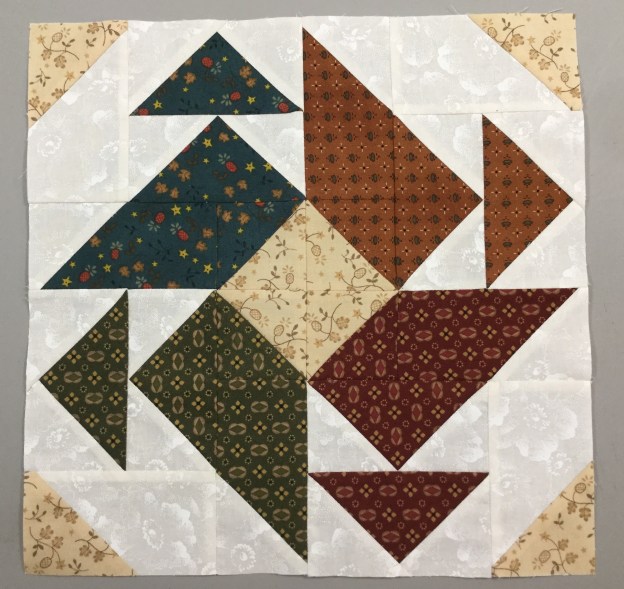
I chose five colors and a background fabric to make 4 different color units, each containing 2 flying geese, a Picket, a Quicket and a half square triangle.
The 05 Whirligig block can be made in 3 sizes: 6″, 9″ and 12″. I chose the 12″ block. Check the Cutting Chart, and choose the size block you want to make. We will start with the Flying Geese Unit. The cutting chart gives you the finished and the cut sizes of the units. Check your Wing Clipper instructions to see what size starter squares you need to cut. As you know when using the Wing Clipper you start with one large square and 4 small squares.

Following the instructions use your Magic Wand and draw two diagonal lines on the back of your small squares.

Position 2 of the small squares right sides together in diagonally opposite corners of the large square, nudging them in toward the center by just a few threads
Stitch on both drawn lines, them trim between the lines on the center diagonal.

Press the seams toward the smaller triangles. One of these units will make 2 flying geese, the other will be saved to make a left slanted Quicket.
Position one of the smaller squares in the corner of the previously pieced unit. Nudge the square in like you did before. Stitch on the drawn lines and trim between the lines as before.
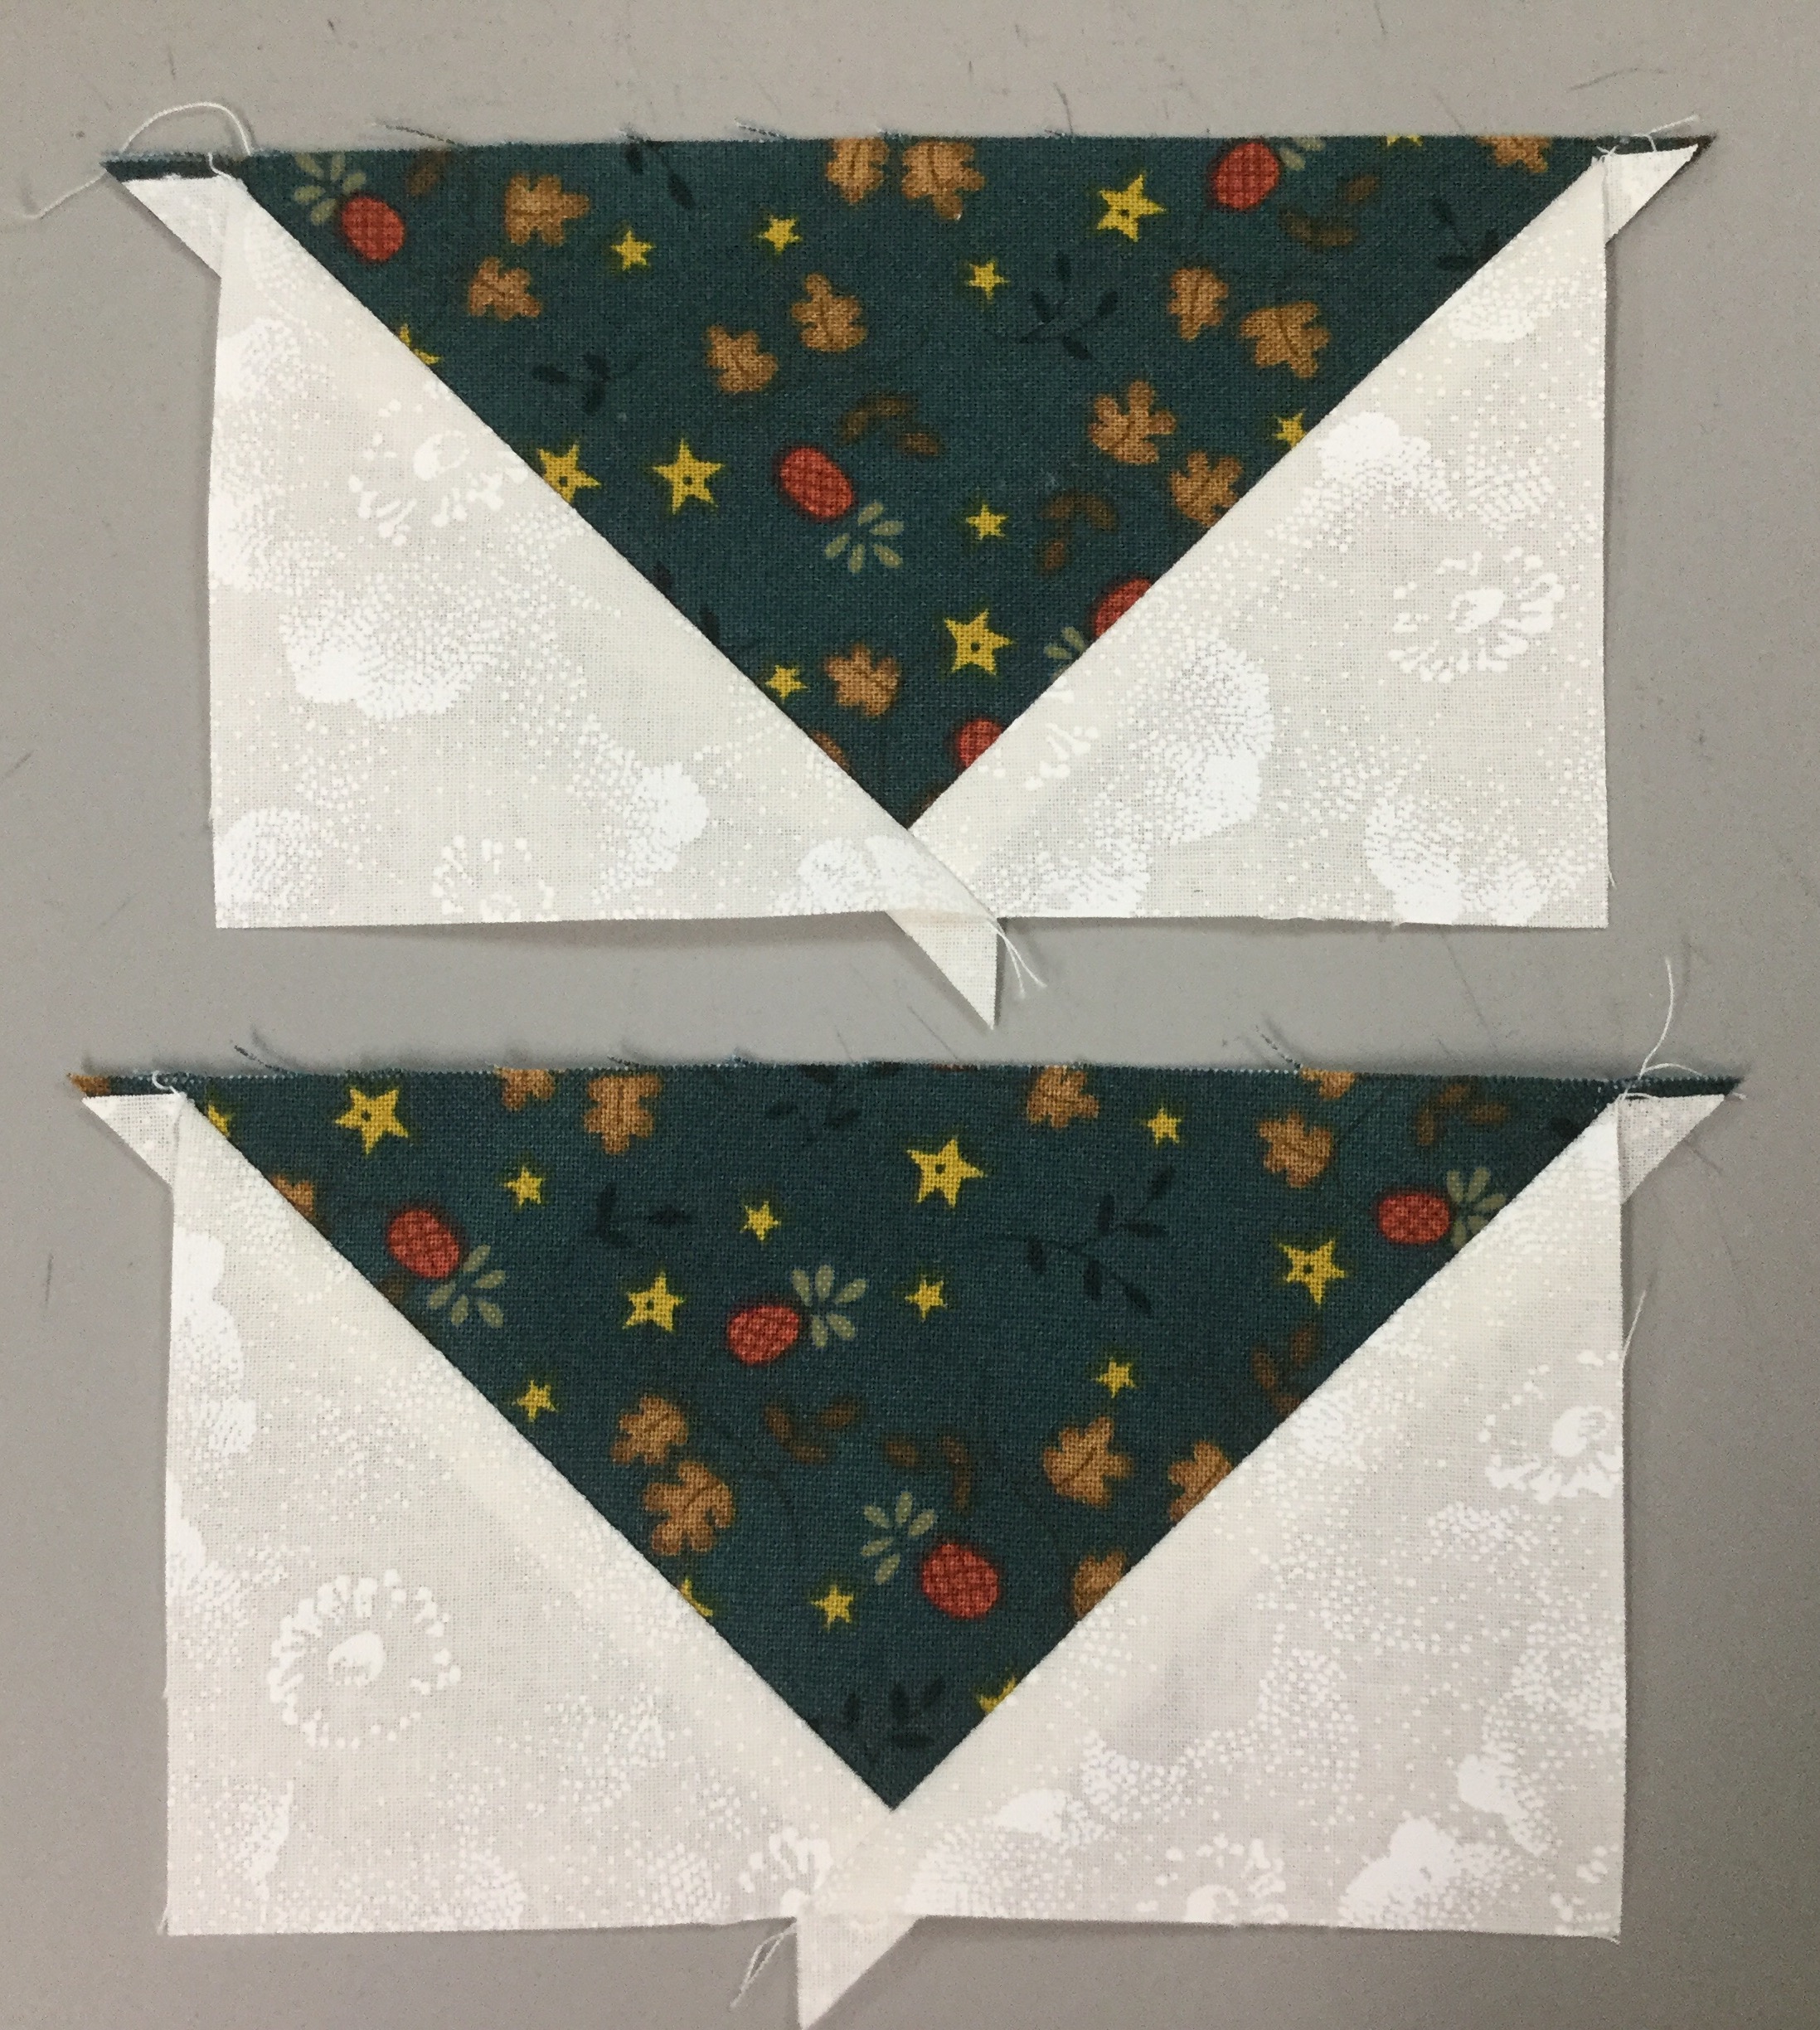
Press the seams toward the smaller triangles.
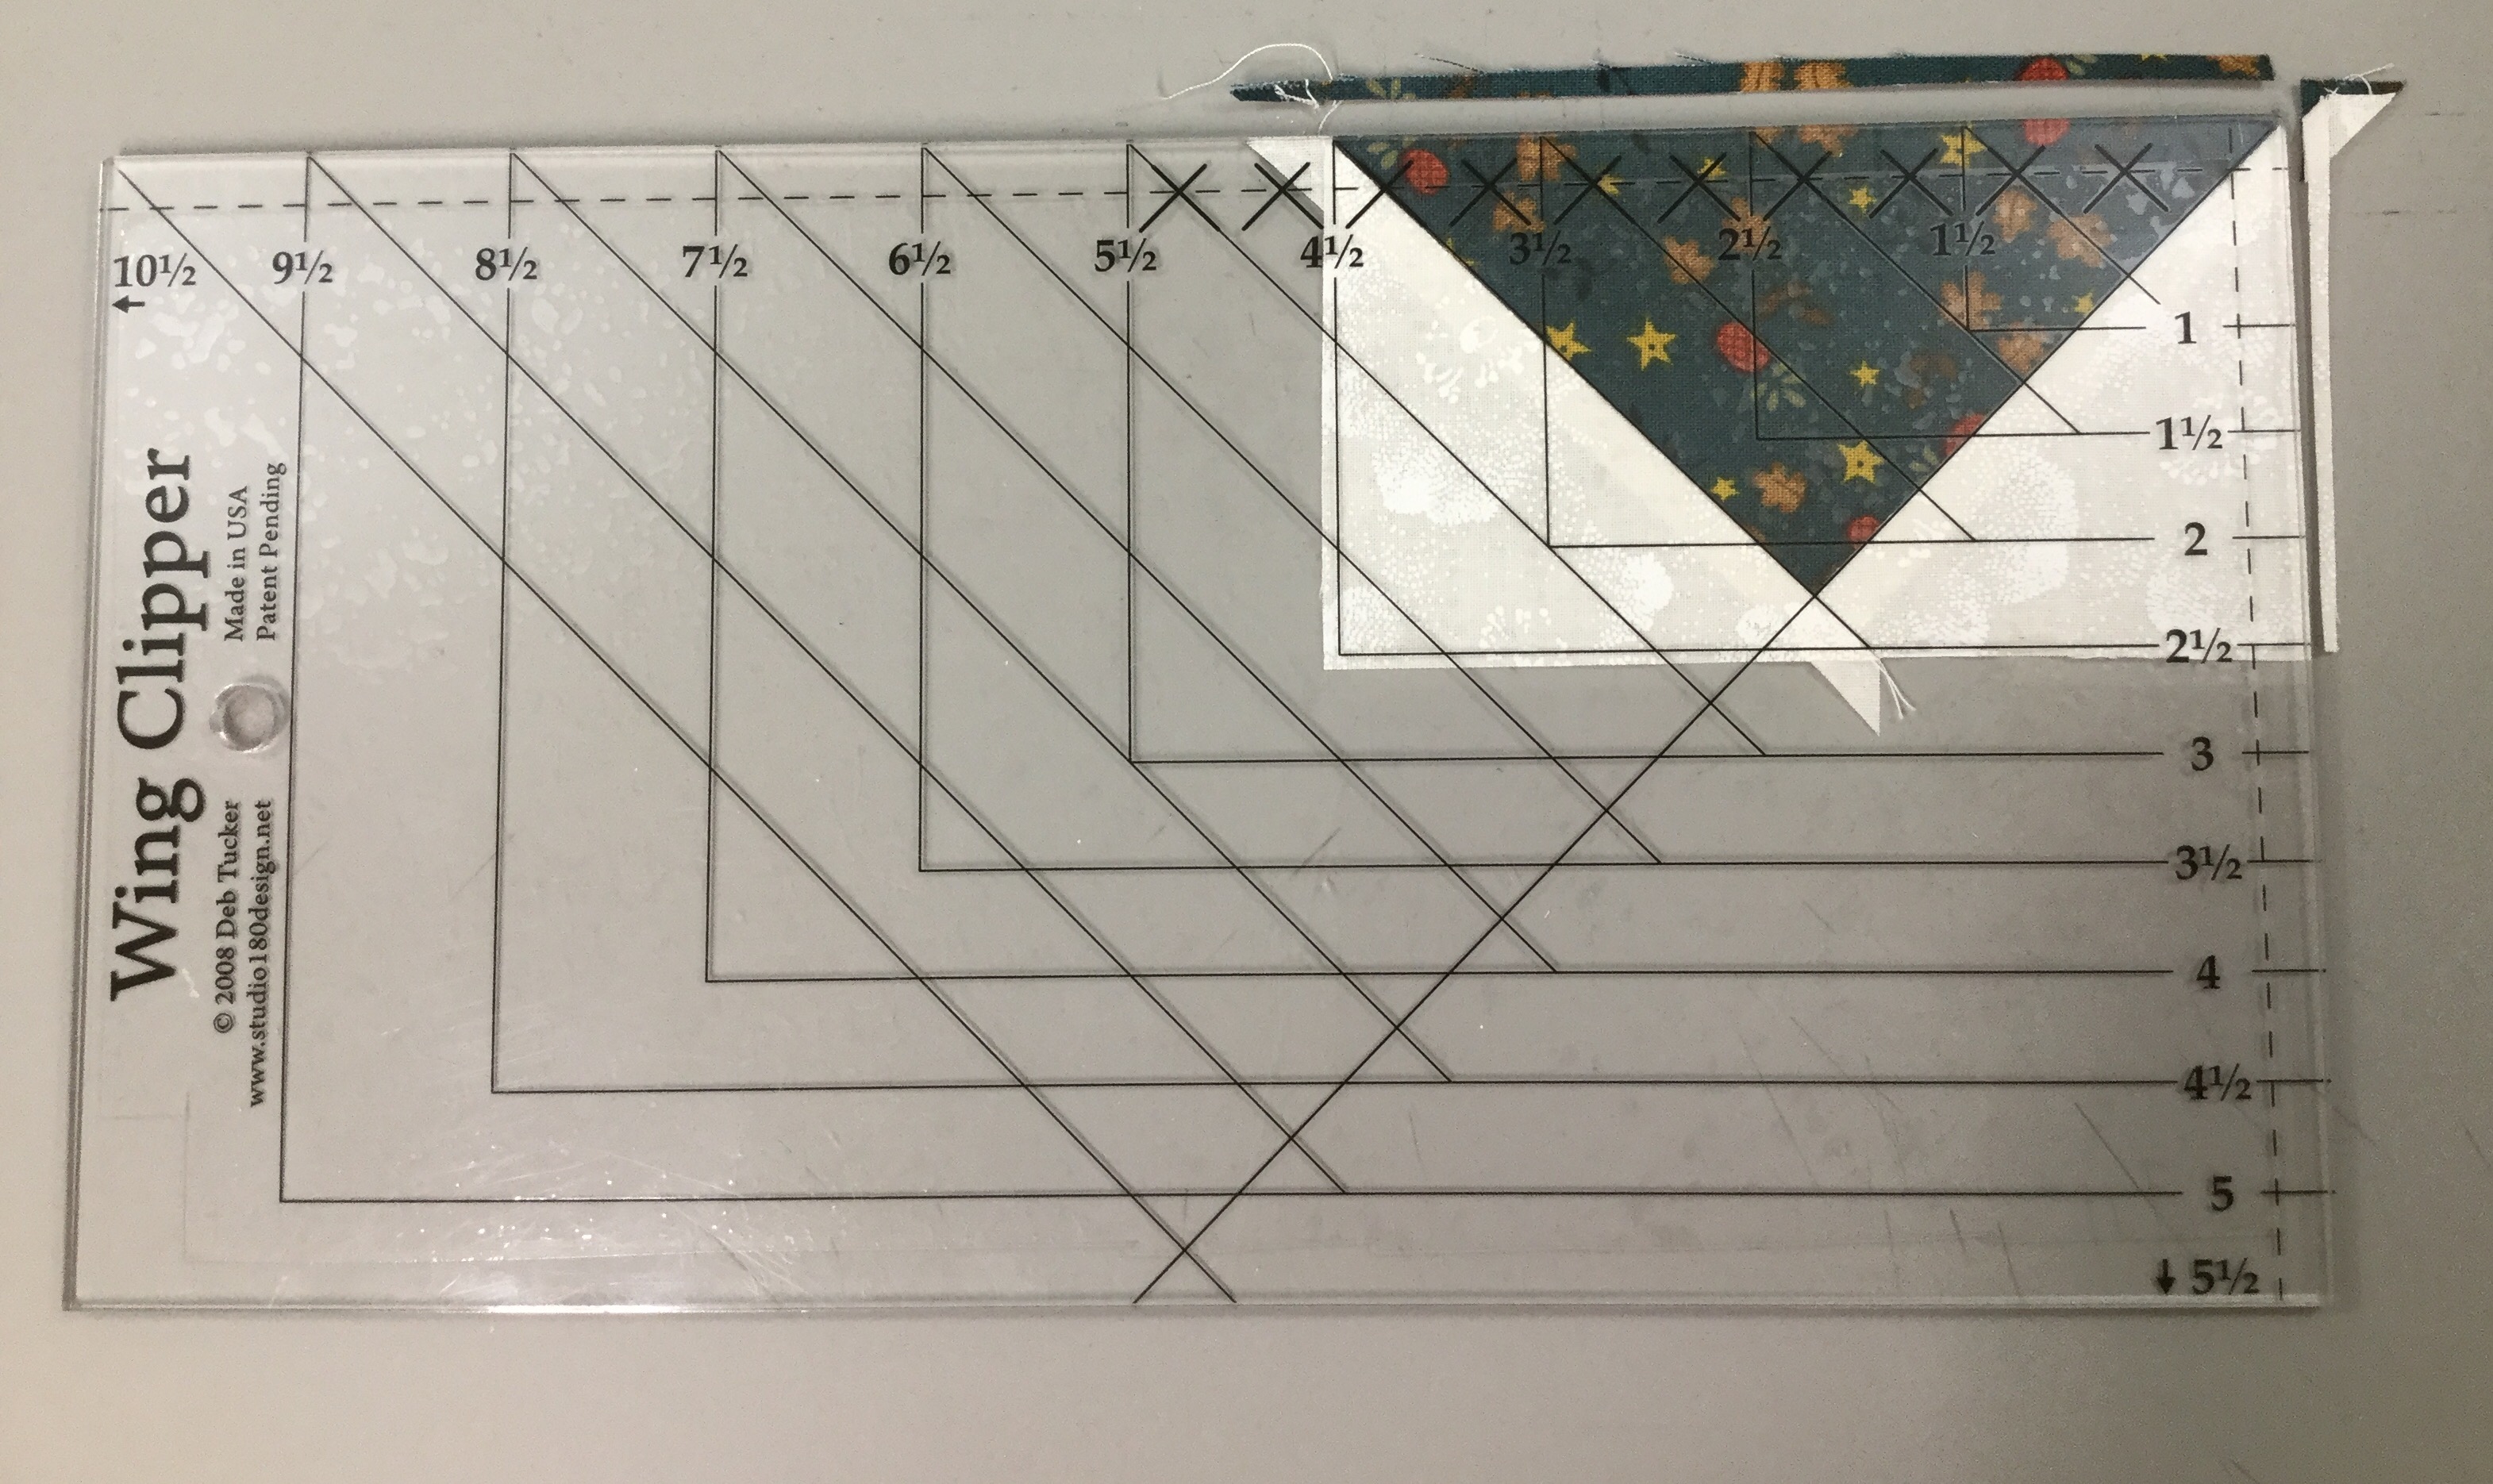
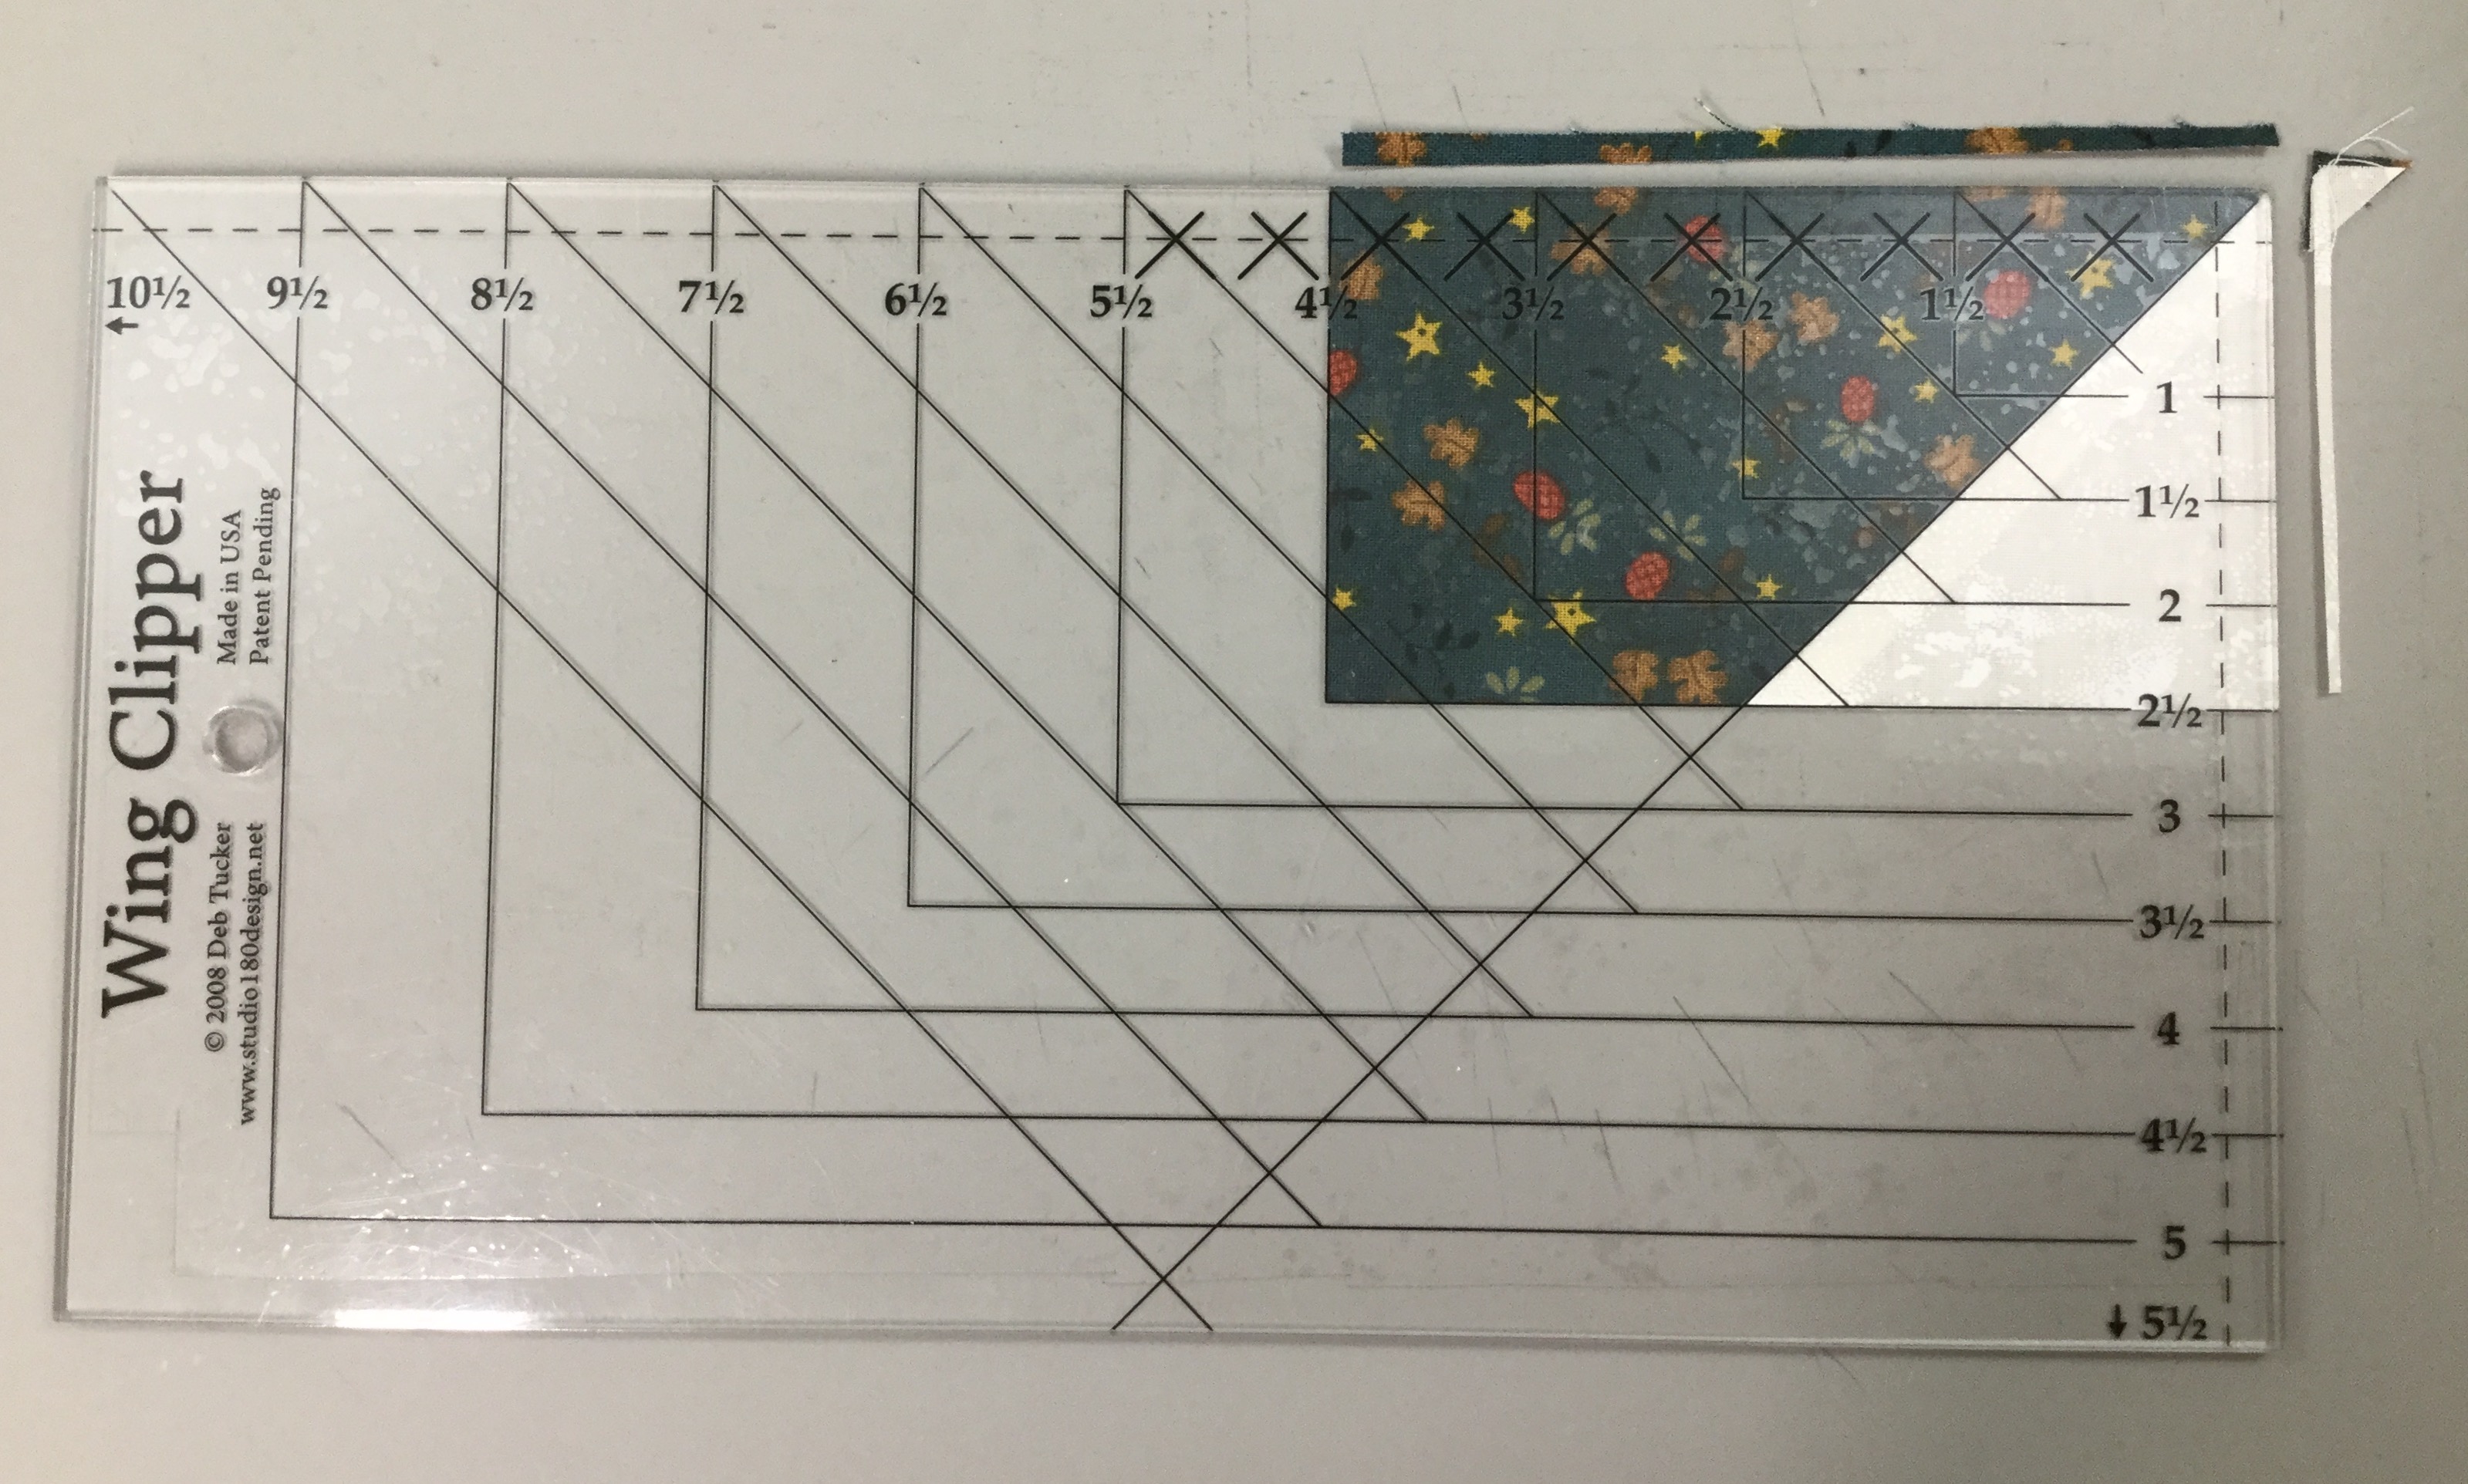
Position your oversized unit horizontally on your cutting mat with the goose pointing toward you. Align the diagonal guide lines of the Wing Clipper with the sewn seams of the flying geese unit. Trim up the right side and across the top. (See the Wing Clipper Instructions for left hand cutting.)
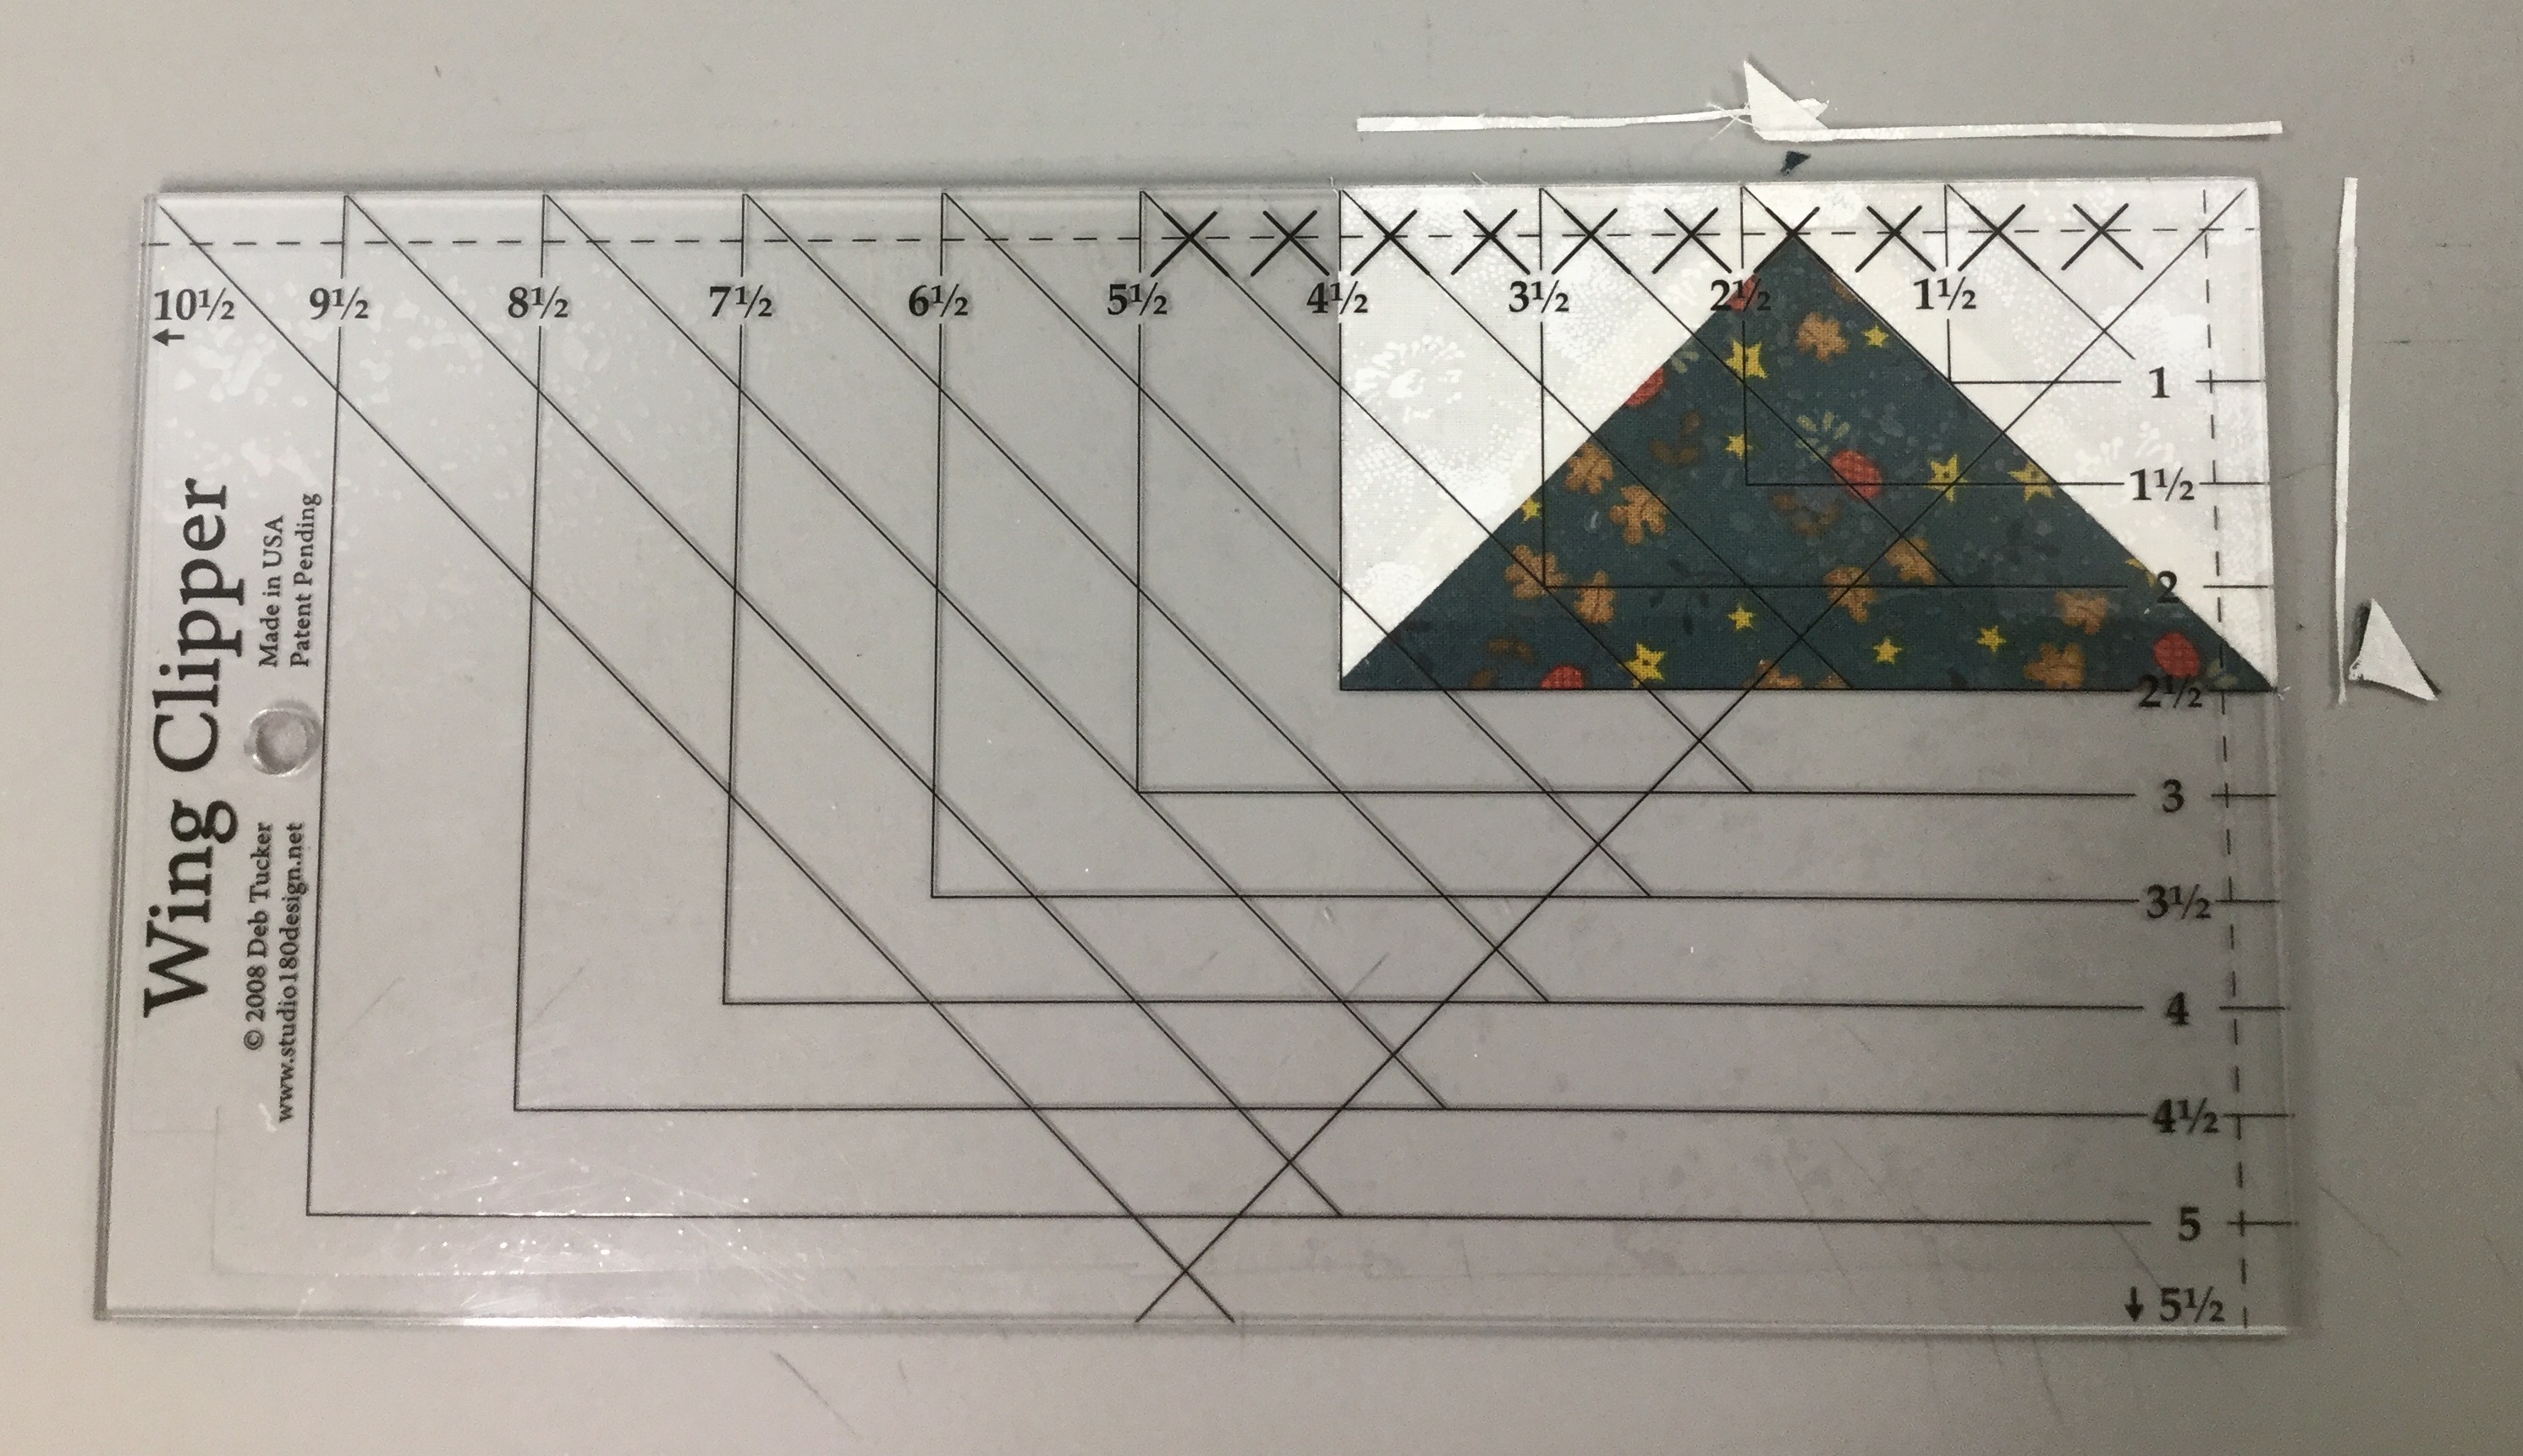
Lift your Wing Clipper and rotate your flying geese unit 180 degrees. Reposition your Wing Clipper to align cleanup guidelines with the previously trimmed raw edges and the “X” at the top with the intersection of the seams. Trim up the right side and across the top.

Remember we only used one of the heart shaped units for the flying geese. We will use the other to make our left slanted Quicket. Lay the unit on your cutting mat as shown above. Position your Wing Clipper tool over the unit, the “X” on the tool should align with diagonal seam. I am making a Quicket with a cut size of 4 1/2″ by 2 1/2″, so I positioned my tool to ensure I can trim all four sides.
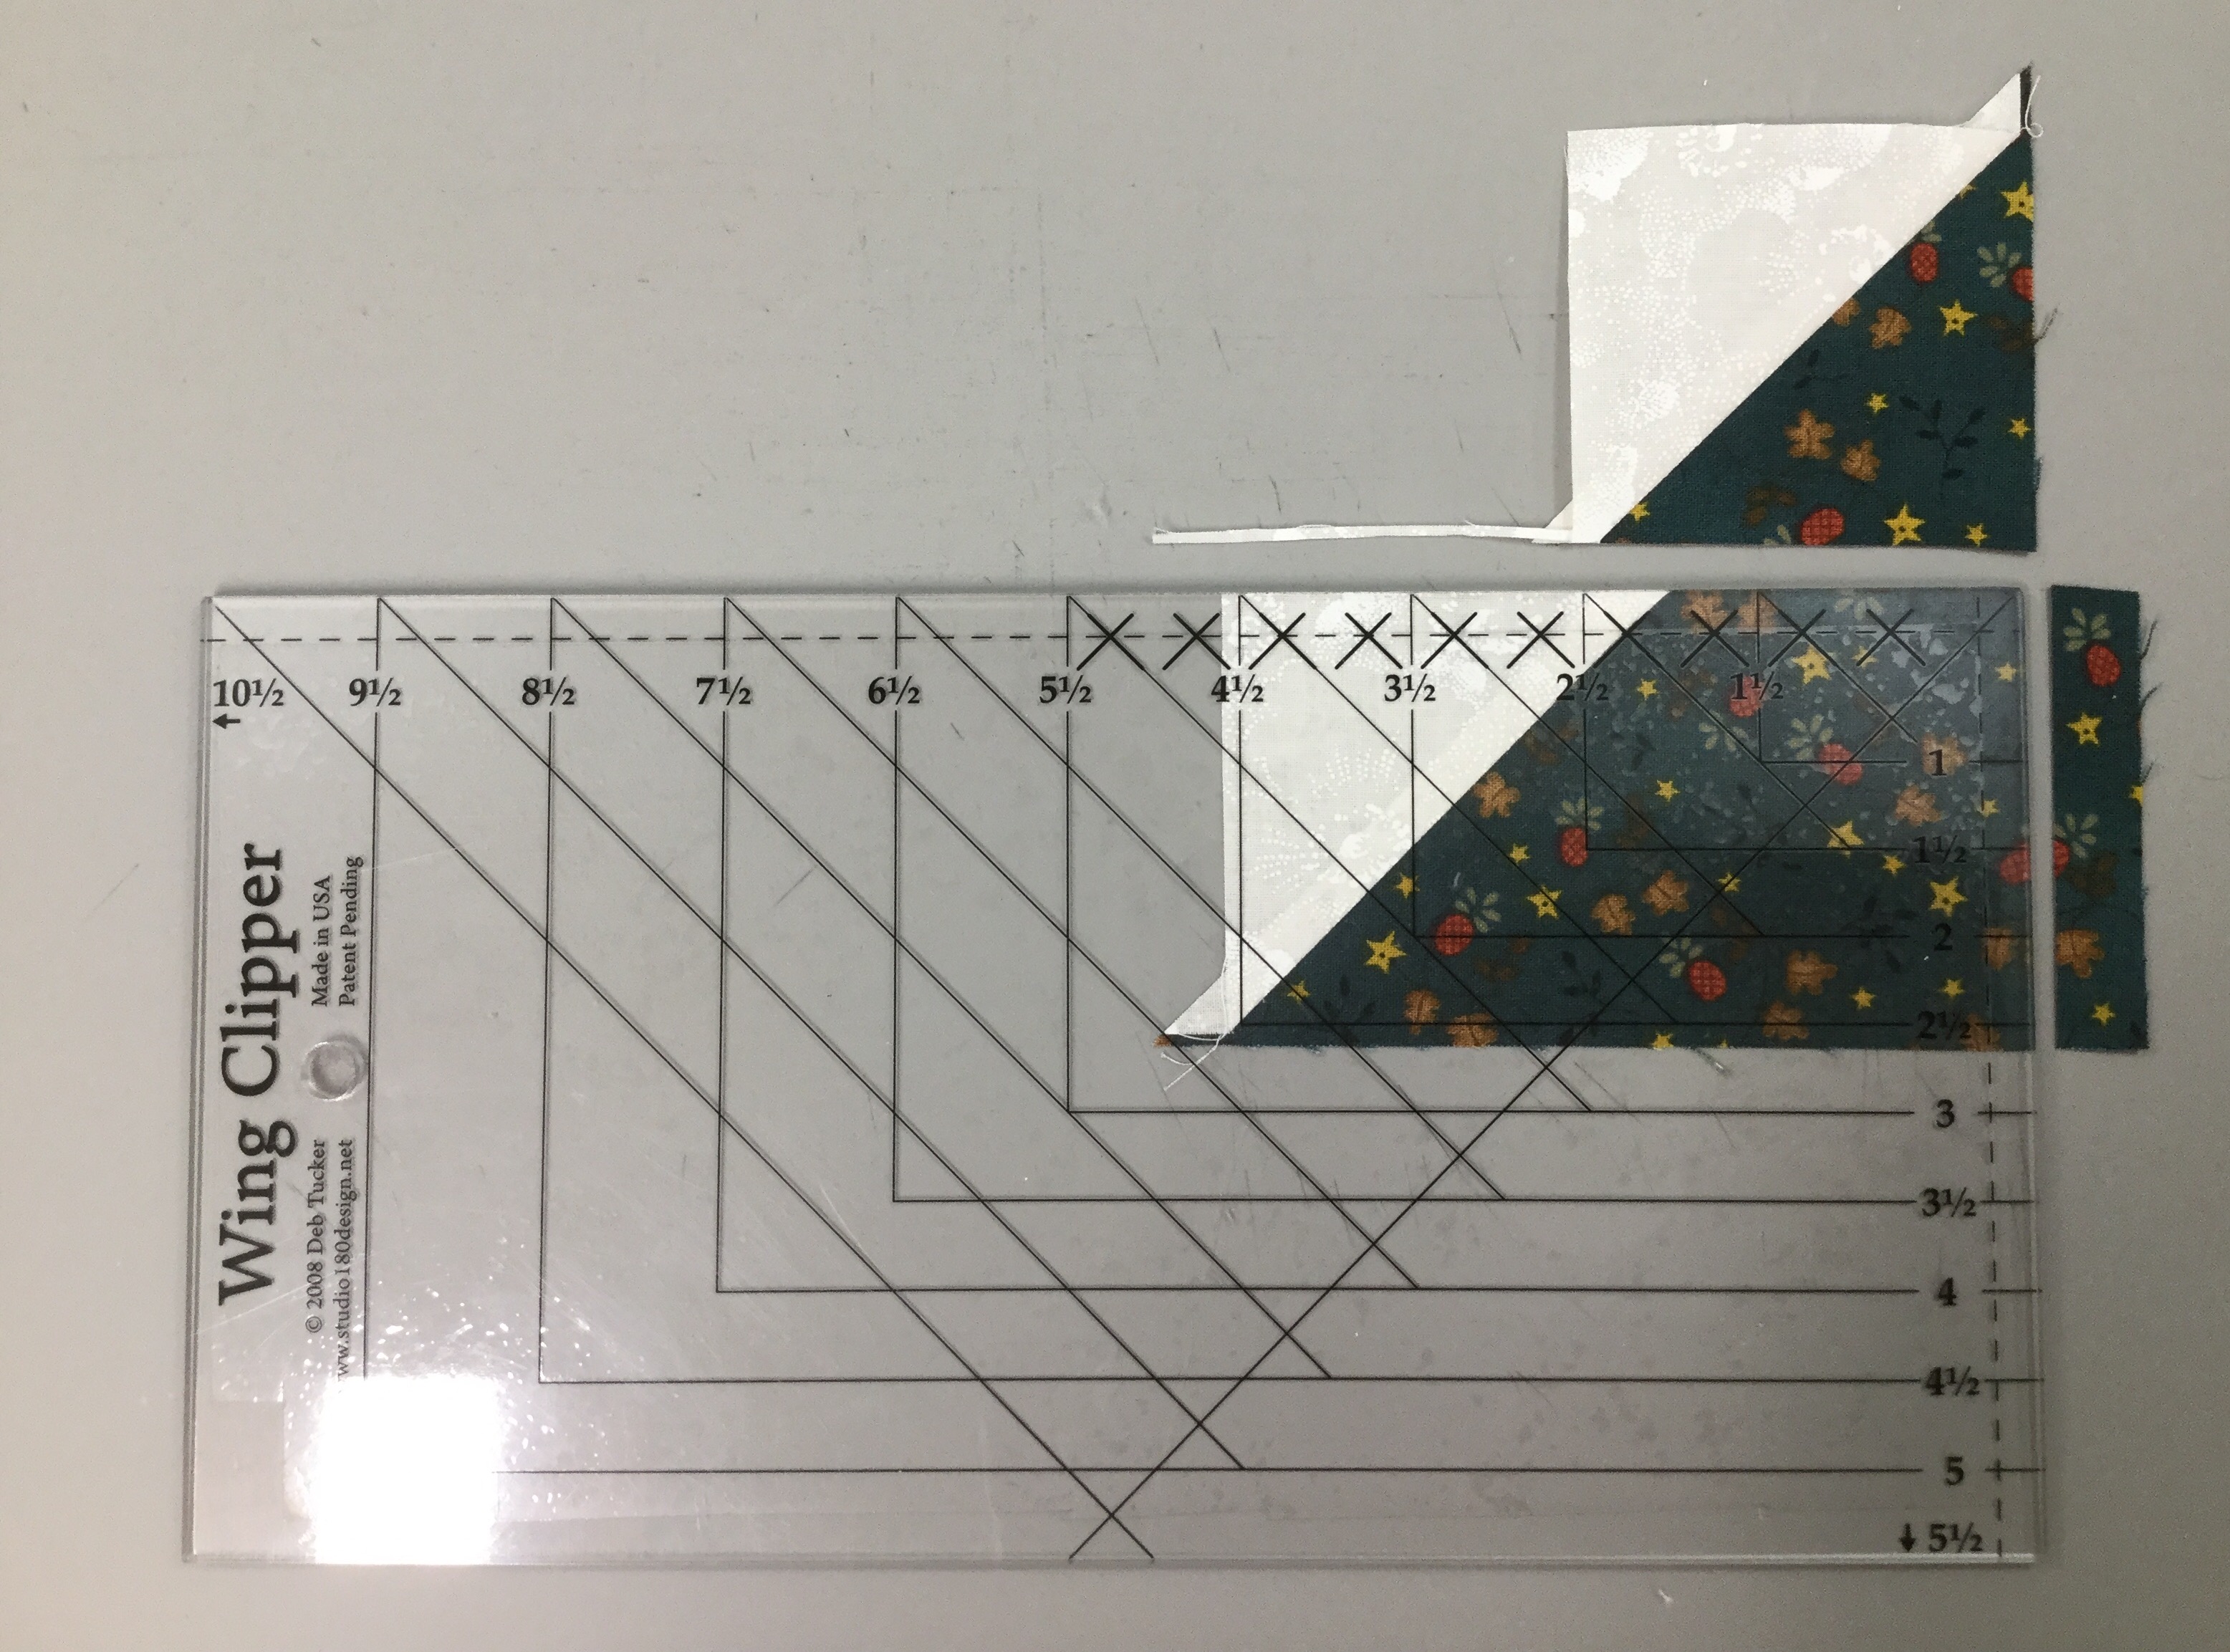
Trim up the right side then across the top.
Lift your Wing Clipper tool and rotate your unit 180 degrees. Align the trim down lines with the just trimmed raw edges and aligning the long diagonal line on the tool with the single diagonal seam. Trim up the right side and across the top.

The cut size of my right slanted Picket is 2 1/2″ by 4 1/2″. Following the instructions on my Pickets & Quickets Technique Sheet, I bump up the size by 1/4″. My rectangle is 4 3/4″ by 2 3/4″. My small square is 2 3/4″. Draw a diagonal line from corner to corner on the small square.
Position the small square right sides together with the rectangle and align the raw edges. Stitch on the line and trim the excess. Press toward the small triangle.

Position your Wing Clipper tool over the unit, the “X” on the tool should align with diagonal seam. Trim up the right side and across the top.

Lift your Wing Clipper tool and rotate your unit 180 degrees. Align the trim down lines with the just trimmed raw edges and aligning the long diagonal line on the tool with the single diagonal seam. Trim up the right side and across the top.
Follow the instructions that came with your Tucker Trimmer I for making Half Square Triangles (HST) in the size you chose. Using your Magic Wand draw two diagonal lines on the back of one of your starter squares. Place your starter squares right sides together. Stitch on lines and trim down the center. I pressed toward the dark fabric.
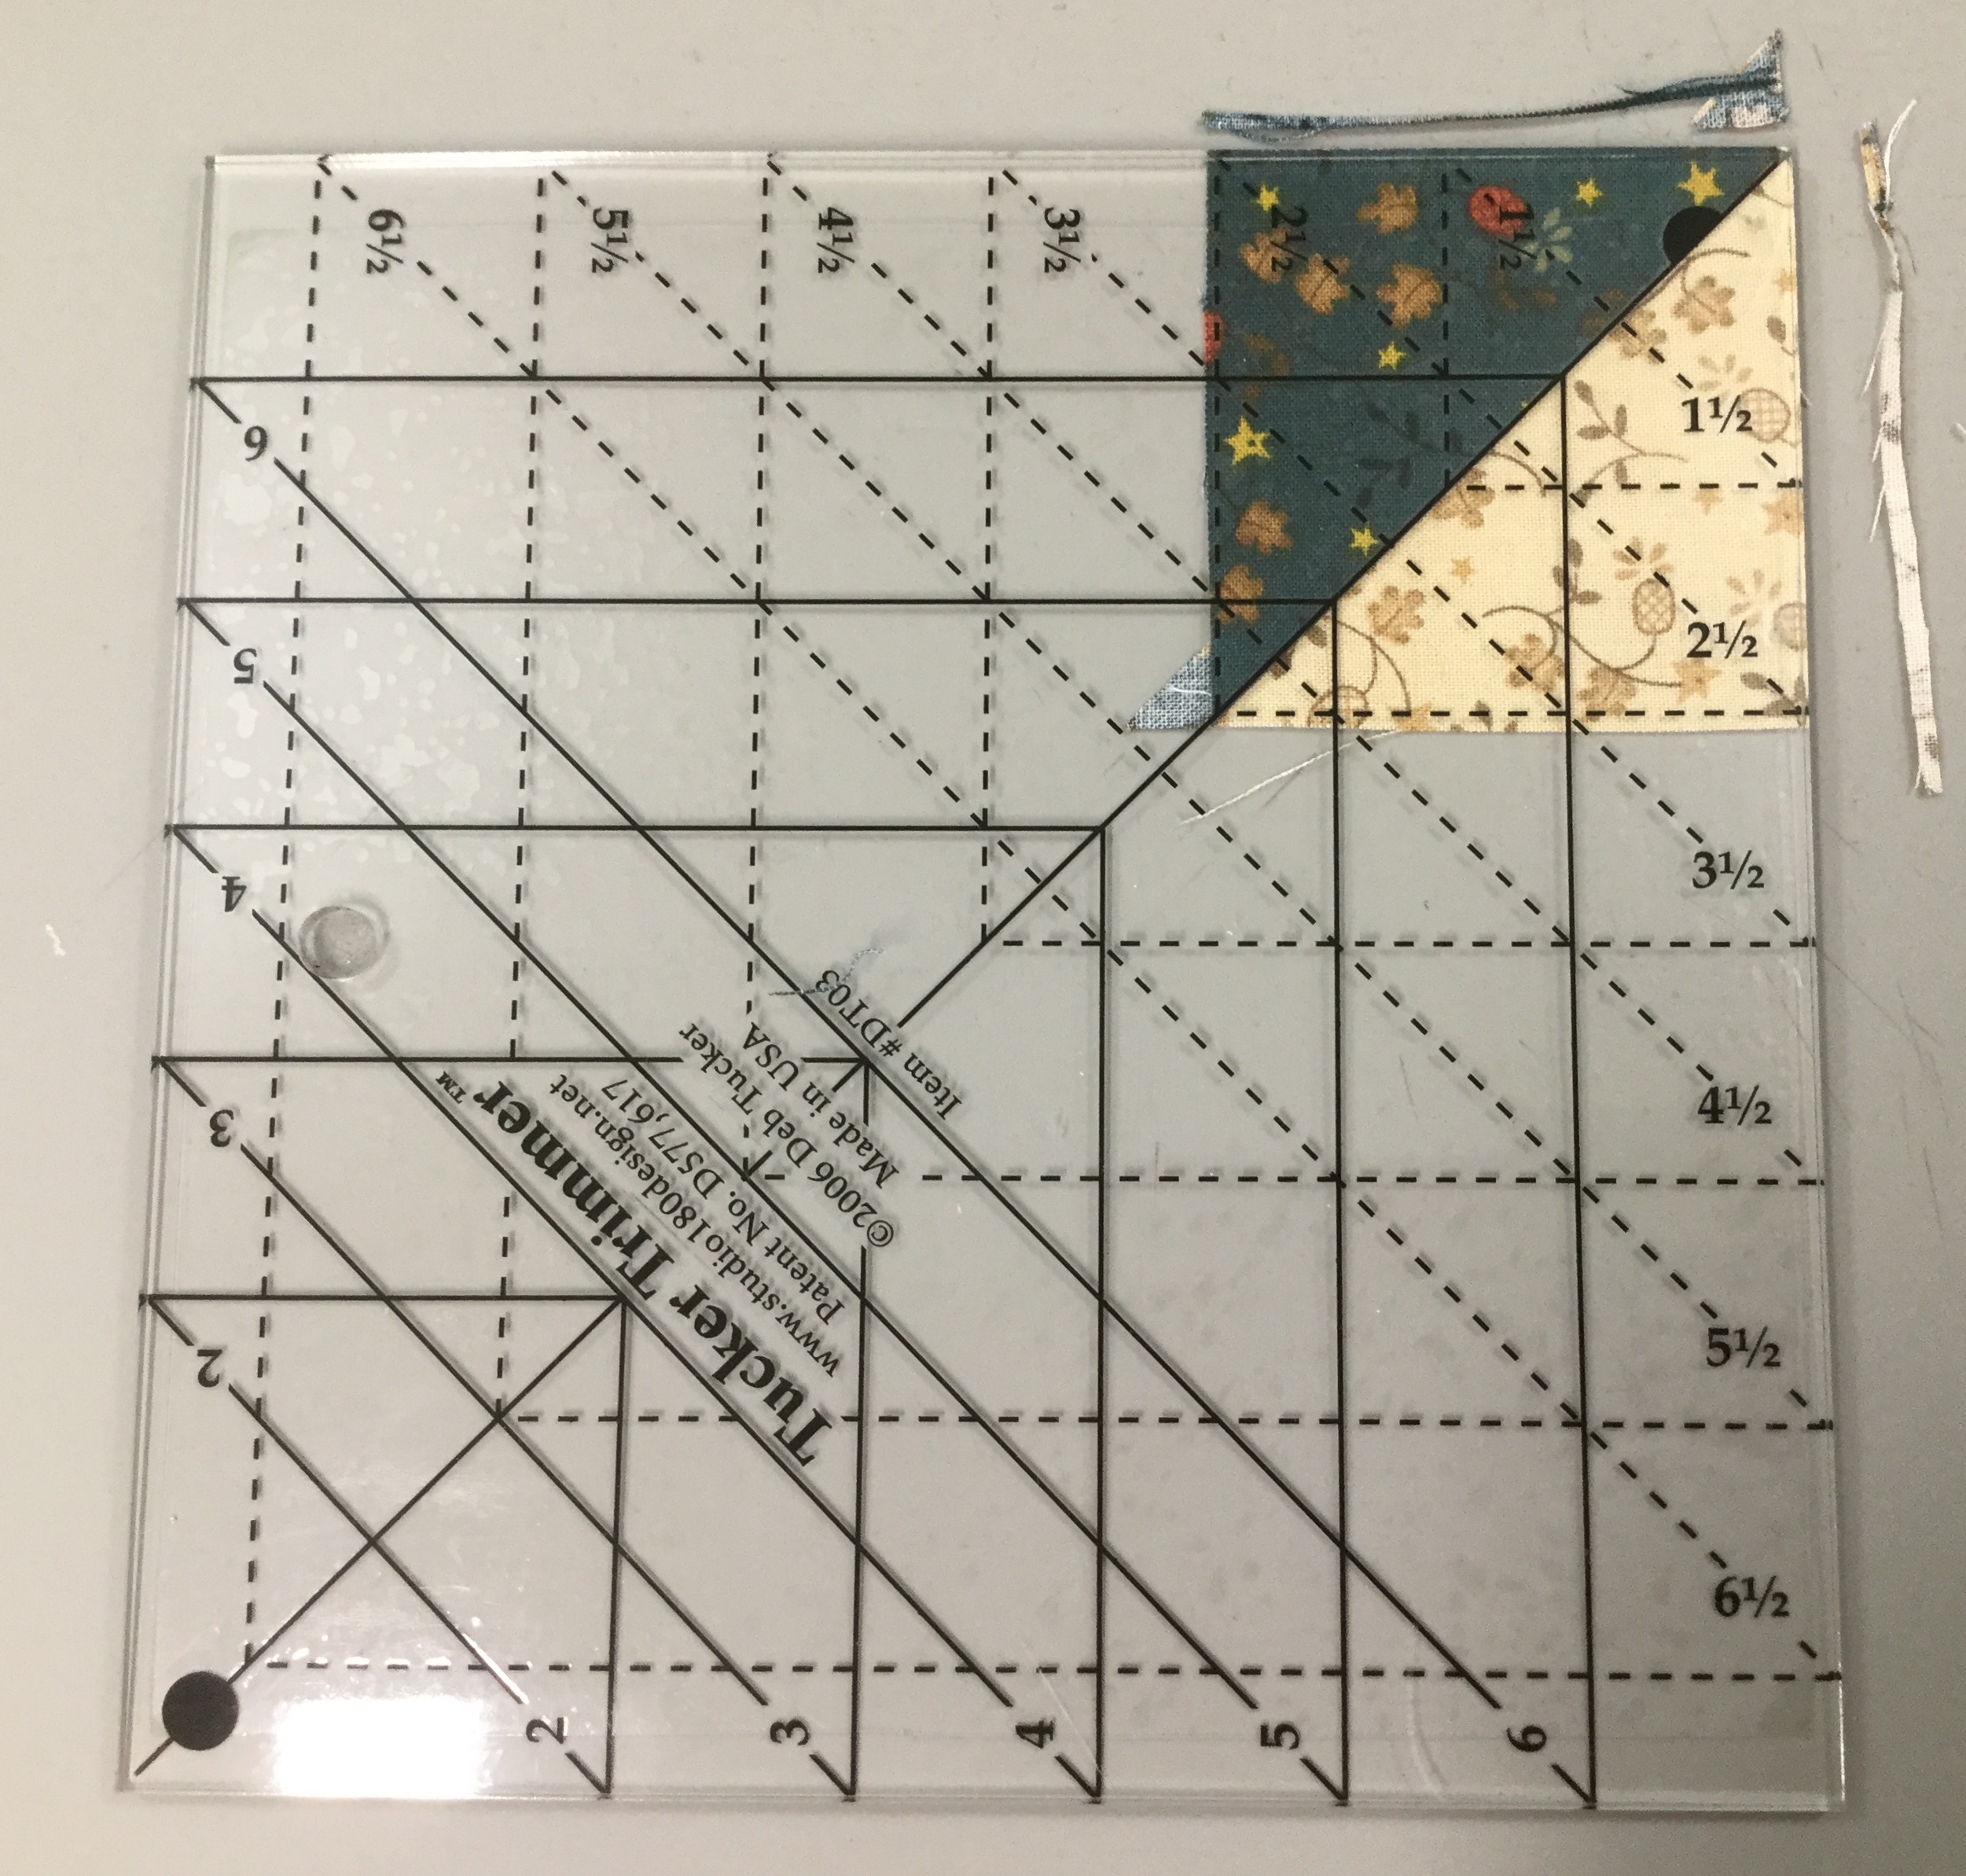
Trim the oversized HST to the desired cut size. Mine are 2 1/2″. (See the Tucker Trimmer Instructions for left hand cutting.)
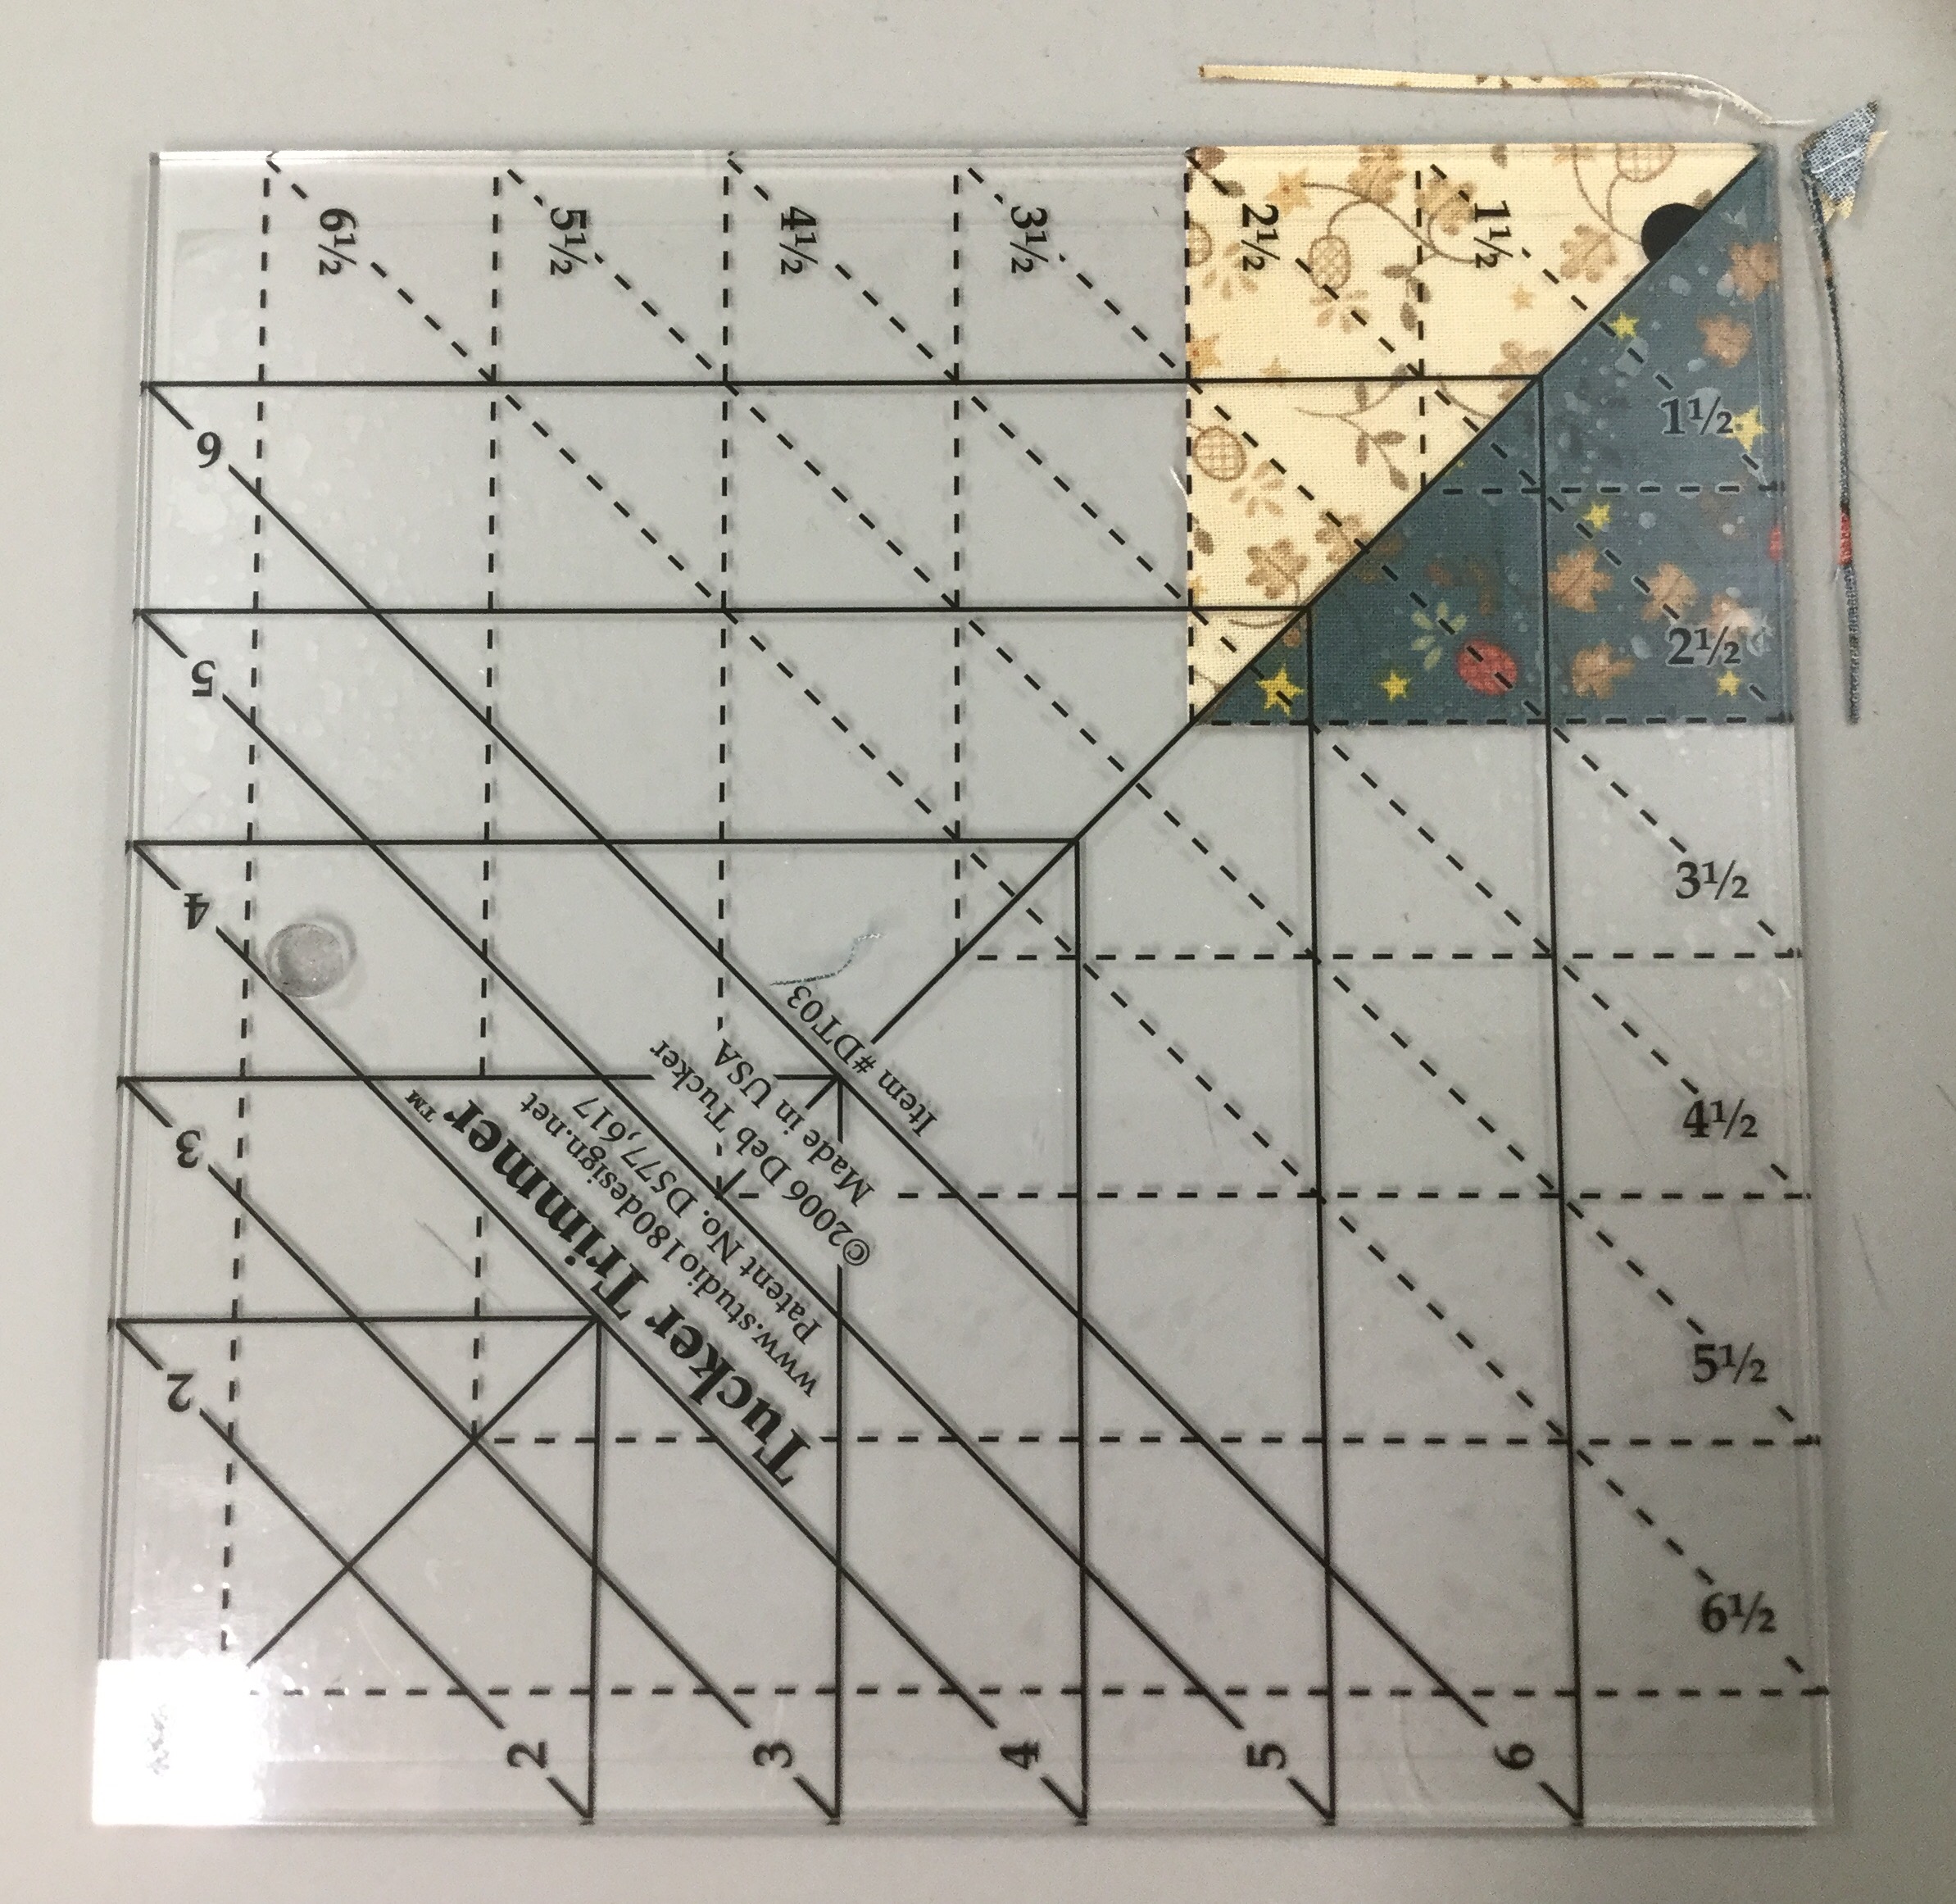
Lift your Tucker Trimmer and rotate the HST 180 degrees position the diagonal line and the outline of the square to the measurement desired and trim up the right side and across the top.

We are now ready to sew this unit together. Layout the 2 flying geese, 1 left slanted Quicket, 1 right slanted Picket and 1 half square triangle as shown above..
First stitch the 2 flying geese together, press in the direct the geese are flying. Then stitch the geese to the right slanted Picket. Press toward the Picket.
Stitch the HST to the left slanted Quicket, pressing toward the Quicket.

Stitch the two sections together.

Repeat the process for each of the other 3 sections. If all of your geese are the same color you can make all your flying geese in sets of four, then make the Pickets & Quickets using the method in the technique sheet. When I stitched the four sections togehter I pressed the seams open to avoid bulk.

As I said in the beginning, “very cool block”!