Tag Archives: Shaded Four Patch

Two of a Kind

I’m sitting here in Tuckerville, watching TV, looking at my ceiling. I pin orphan blocks on my drop ceiling.

Two of a Kind

These two blocks are made from the same fabric and units. They both have a Square Squared for the block center, 4 V Block units for the star points and 4 Shaded Four Patch Units (with the Tucker Trimmer I) in the block corners. The top block has the Shaded Four Patch unit small square facing out, while the bottom block has the Shaded Four Patch unit small square facing in. Two very different looks from the same block.

As I stared at these blocks on the ceiling I wondered what the secondary design would be if I put them in a quilt. Time to break out EQ8!

I used shades of purple and lavender because I thought my sister may like it. This is pretty cool. EQ8 is fun to use and brings quilt designs to life. Time to break out my Studio 180 Design tools get busy!

Next Up – Shaded Four Patch

Got some fat quarters? Deb Tucker has many free patterns for you and this one is called Twilight Paths. It uses 14 fat quarters and a background with the Tucker Trimmer I. Twilight paths uses 5″ finished Shaded Four Patch units (5.5″ unfinished). The Shaded Four Patch Technique Sheet shows you haw to make this unit in 21 sizes! This whole quilt is made with Shaded Four Patches!

This is Twilight Paths using Deb Tucker’s Twilight Chic fabric line from Island Batik!

Download your pattern and let’s go!

To get a great scrappy quilt, Deb suggests that you split your fat quarters into two groups. Group 1 along the 22″ side, cut two 3 1/4″ strips and one 6″ strip, sub-cutting into 3 – 6″ x 7″ rectangles. Group 2 along the 22″ side, cut one 3 1/4″ strip and two 6″ strips, sub-cutting each into 3 – 6″ x 7″ rectangles. Cut one more 3 1/3″ strip from leftover from Group 1.

From your assorted dark fat quarters you will need 22 – 3 1/4″ strips, and 64 – 6″ x 7″ rectangles. From your background you will need 22 – 4 1/4″ strips.

Step 1 – Position each 3 1/4″ strip right sides together with a 4 1/4″ wide background strip and stitch lengthwise. Press seams toward the wider strip.

Step 2 – Pair two of the pieced strips right sides together with the narrow strips on opposite sides, so that each narrow strip faces a wide background strip.   Sub-cut the strip sets every 3 1/4″ units until you have 128 rectangles.

128 – 3 1/4″ units
Pick up each unit the same way when stitching one side.

Step 3 – Keep the two rectangles paired; stitch each pair of cut pieces together along one long side. Note the seams are not supposed to nest.

Snip

Snip the seam allowance at the half way mark between the two squares all the way to the seam. 

Press each half of the seam allowance away from the square as shown above.

Step 4 – Mark stitching lines. Select a ruler with a 45 degree angle marked on it.  Draw a 45 degree sewing line from top to bottom, through the corner of the square where the stitching lines meet.  Draw a 2nd line through the corner of the other square.

Step 5 – Center each marked, pieced rectangles right sides together with a 6″ x 7″ rectangle.

Stitch on both lines.

Trim seams 1/4″ from the stitching lines.

Press all seams toward the large triangles.

Step 6 – Trim the 128 oversized units with your Tucker Trimmer I to 5 1.2″ x 5 1/2″. Align the 5 1/2″ Sizing Diagonal with the diagonal seam of the unit. Position the common diagonal so it passes through the center of the unit. Trim the two sides.

Step 7 – Rotate the unit and line up the 5 1/2″ cut size lines on the tool with the previously trimmed edges, align the sizing diagonal and the common diagonal as before and trim the other two edges.

Step 8 – Layout 80 units according to the diagram on page 5 to create the quilt center.

Stitch the units into rows and then stitch the rows together. Press all seams open.

Step 9 – Attach the Inner Border. Stitch the inner border strips to the quilt center.

Step 10 – Assemble the Outer Border. Stitch the remaining units together into 4 border strips containing 12 units each. Make sure you orient the units as shown in the pattern. Press all seams open. Finish as indicated.

My top is not yet quilted. I used Deb Tucker s Steam Engine fabric line by Island Batik in my quilt top. So I guess I will call mine Steam Engine on the Tracks!

This project was supervised by Tucker!

#debtucker #studio180design #IslandBatik #steamengine #aurifilthread #bernina740 #olfa

Island Batik Getaway Blog Hop

The fabrics shown in this post were given to me by Island Batik
Deb Tucker’s Twilight Chic by Island Batik

Well, if you can’t getaway, go to the library for a good book! The Utica, NY Public Library opened in 1904. I love the inside of this Library.

Shaded Chic

The upper floors of the Utica Library are made of thick glass. I used to love coming here as a child.

In every box of fabric we Island Batik Ambassador’s receive, there is a secret bundle of the newly released batiks. I was lucky enough to be assigned Twilight Chic by Deb Tucker for Studio 180 Design. This is my third quilt from the Twilight Chic line.

Shaded Chic is based on BlockBuster # 35 Hidden Blossoms.

Shaded four & Mirror Image Sliver Units

Each block has 8 Shaded Four Patch units and 8 Sliver units.

This block is made using Studio 180 Design’s Tucker Trimmer I & Corner Beam tools with the Shaded Four Patch & Sliver Technique Sheets.

Shaded Chic Block
Shaded Chic

Shaded Chic consists of nine 12″ blocks and measures 50″ x 50″.

Be sure to visit Island Batik to enter their give away of 20 fat quarter bundle. 


Here is the list of all the ambassadors for this month-long hop!

WEEK 1

Monday, January 7 – Crystal Ball

Maryellen McAuliffeMary Mack’s Blog

Sandra Walker- mmm! quilts

Tuesday, January 8  – Ditty

Stephanie JacobsonSteph Jacobson Designs

Michelle RobertsCreative Blonde

Wednesday, January 9 – Elk Lodge

Connie CampbellFree Motion by the River

Anna BranchArk Angel Creations

Thursday, January 10 – Feline Fine

Bea LeeBea Quilter

Sharon ParcelYellow Cat Designs

Friday, January 11 – Flea Market

Geraldine WilkinsLiving Water Quilter

Jessica CaldwellDesert Bloom Quilting

WEEK 2

Monday, January 14 – Fortune Teller

Sarah GoerSarah Goer Quilts

Sherry ShishPowered by Quilting

Jennifer FultonThe Inquiring Quilter

Tuesday, January 15  – Gypsy Rose

Jen StrauserDizzy Quilter

Janet YamamotoWhispers of Yore

Wednesday, January 16 – Paisley Park

Dione Gardner-StephenClever Chameleon

Nancy ScottMasterpiece Quilting

Thursday, January 17 – Soul Song

Carole Lyles ShawCarol Lyles Shaw

Toby LischkoGateway Quilts & Stuff  

Friday, January 18 – Twilight Chic

Jackie OBrienIf These Threads Could Talk

Tina DillardQuilting Affection

WEEK 3

Monday, January 21 – Winter Park

Jennifer ThomasCurlicue Creations

Anita SkjellangerQuilt In a Not Shell

Tuesday, January 22  – Bazaar

Karen OvertonThe Quilt Rambler

Alison VermilyaLittle Bunny Quilts

Turid BakkenDen syende Himmel

Wednesday, January 23 – Blossom

Karen NearySew Karen-ly Created

Leanne ParsonsDevoted Quilter

Thursday, January 24 – Boho

Laura PilandSlice of Pi Quilts

Suzy WebsterAdventurous Applique and Quilting

Myra BarnesBusy Hands Quilts

Friday, January 25 – Brookview

Vicki SchlimmerVicki’s Crafts and Quilting

Amy WarnerSew Incredibly Crazy

WEEK 4

Monday, January 28 – French Blue

Pamela BoatrightPamelaQuilts

Joyce MullisHearts Creations

Tuesday, January 29  – Midsummer Night

Kathleen McCormickKathleen McMusing

Connie KauffmanKauffman Designs

Wednesday, January 30 – Oh Deer

Jen ShafferPatterns by Jen

Jeanette JonesInchworm Fabrics

Thursday, January 31 – Snow Berry  

Sally MannkeSally Manke Fiber Artist

Joan KawanoMoosestash Quilting

Friday, February 1-  Candy Cane Lane and Icicle

Terri Vanden Bosch Icicle – Meanderings along Lizard Creek

Anne Wiens- Icicle – Sweetgrass Creative Designs

Mania Hatziioannidi Candy Cane Lane- Mania For Quilts

Barbara Gaddy – Candy Cane Lane  –Bejeweled Quilts by Barb

# Islandbatikgetawaybloghop  #islandbatik #twilightchic #debtucker #studio180design #bestofbali

BlockBuster 2 – Crowning Glory

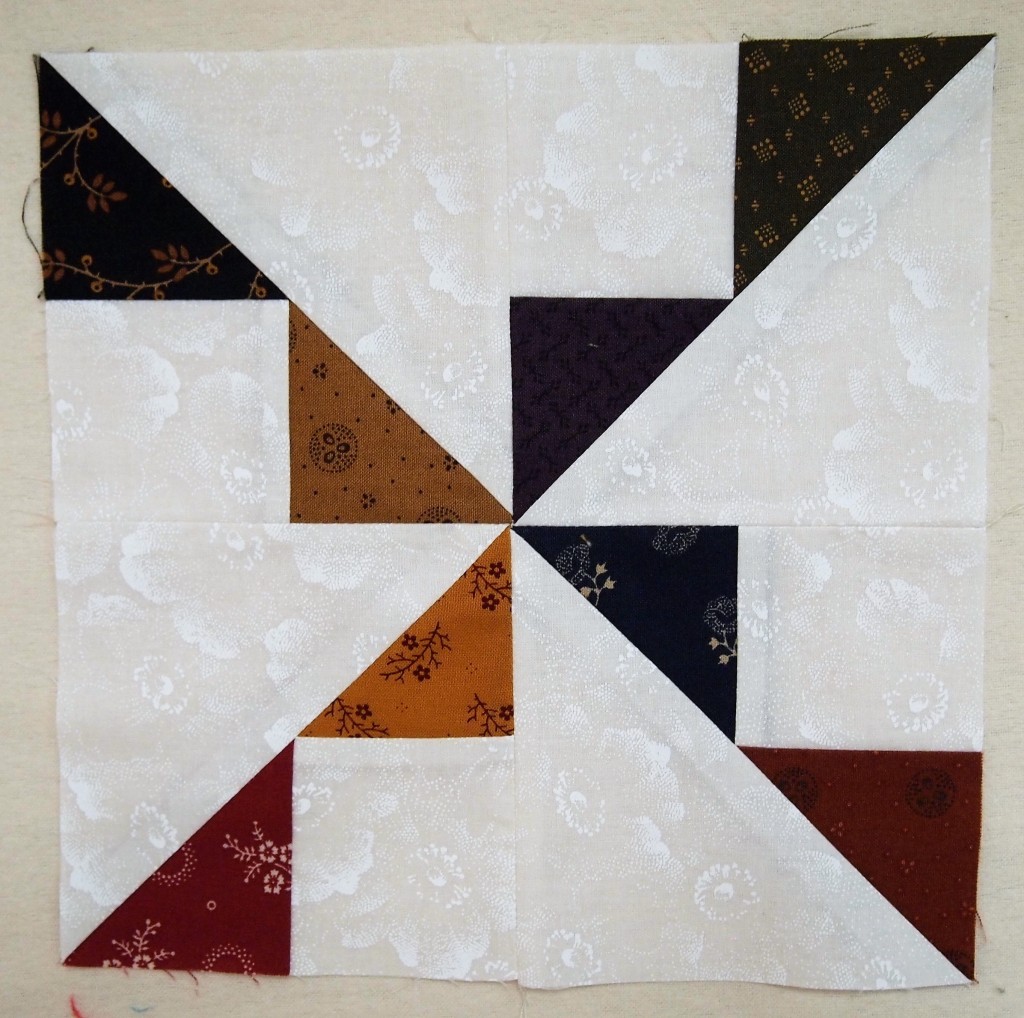
The BlockBuster 2 – Crowning Glory block is very much like the Ohio Star Variation.  Both use the Tucker Trimmer I, but the corner units are swapped out for the Shaded Four Patch units.  All the instructions you need for this block can be found in the instructions that came with your Tucker Trimmer I tool and on the Shaded Four Patch Technique Sheet.

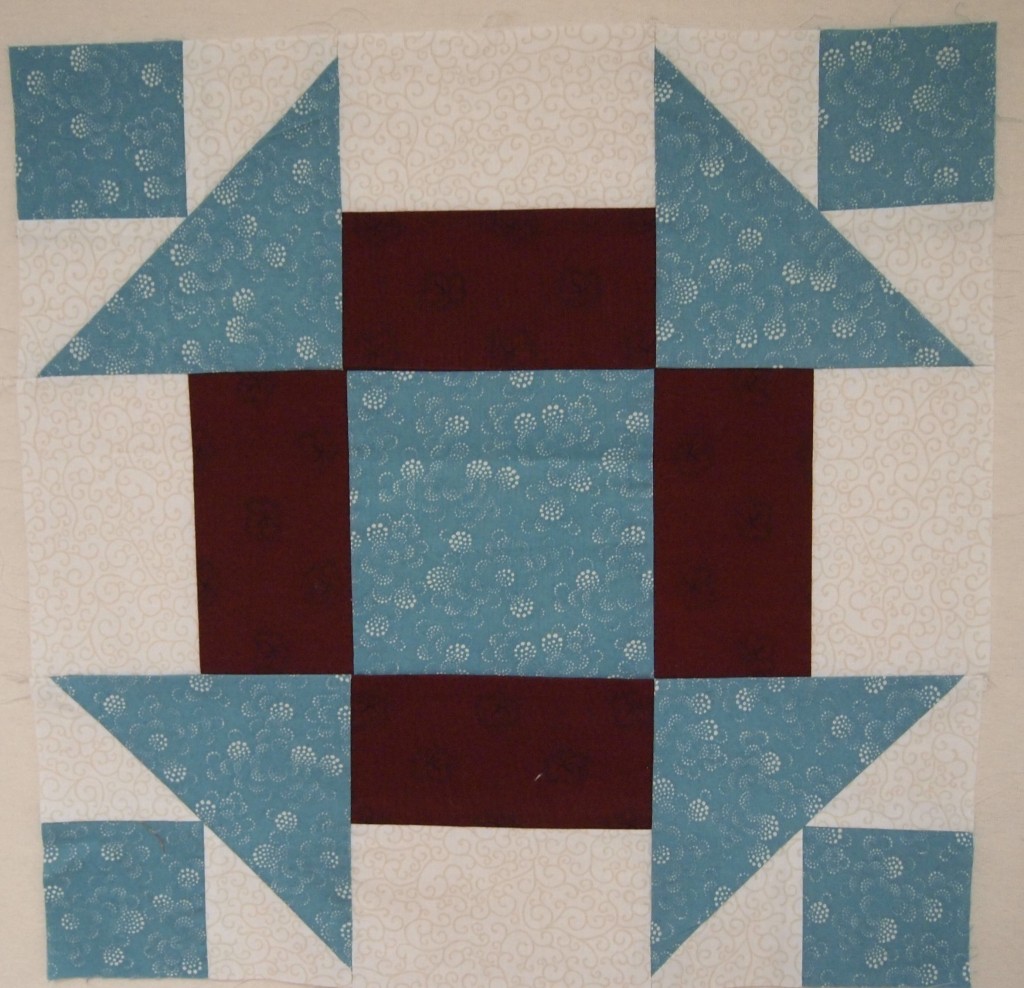
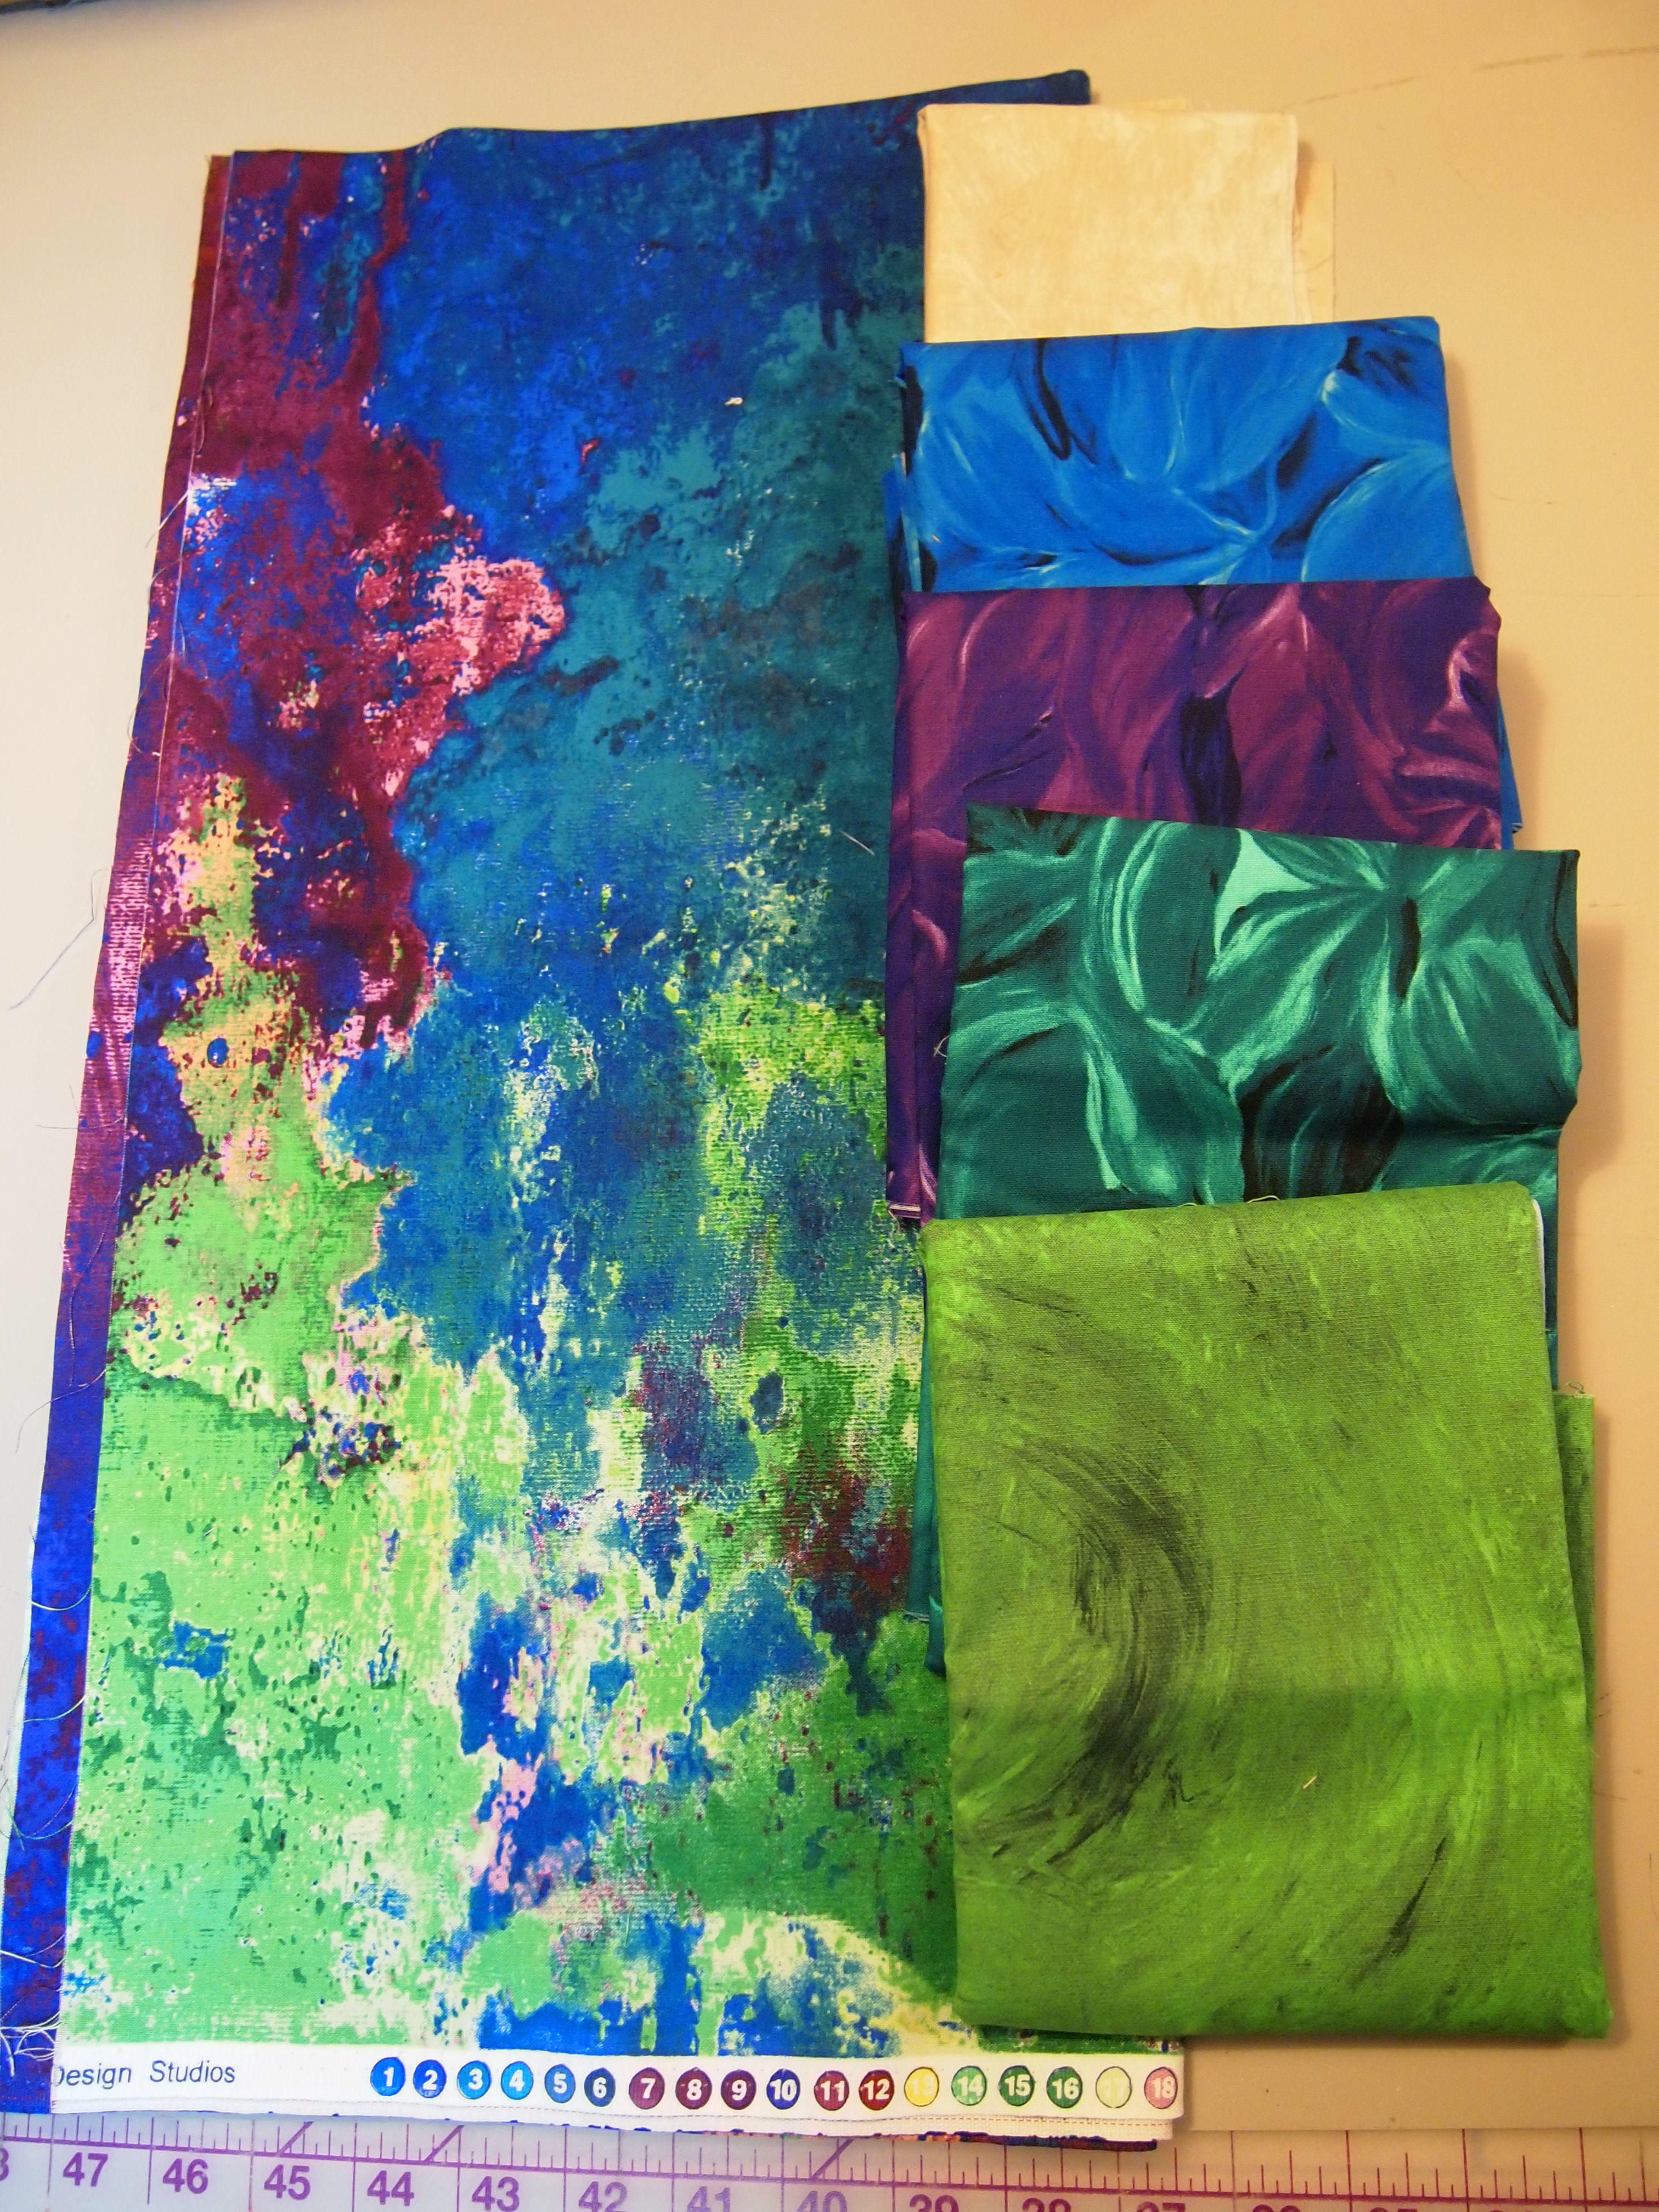
Click here for the 02 Crowning Glory supply list.  When making your shaded four patches, remember that the narrow strip is your small square and the wide strip becomes your little triangles, and the rectangle is the large triangle.  I chose to make the middle block layout using 5 fabrics for a 12″ finished block.

IMG_4746

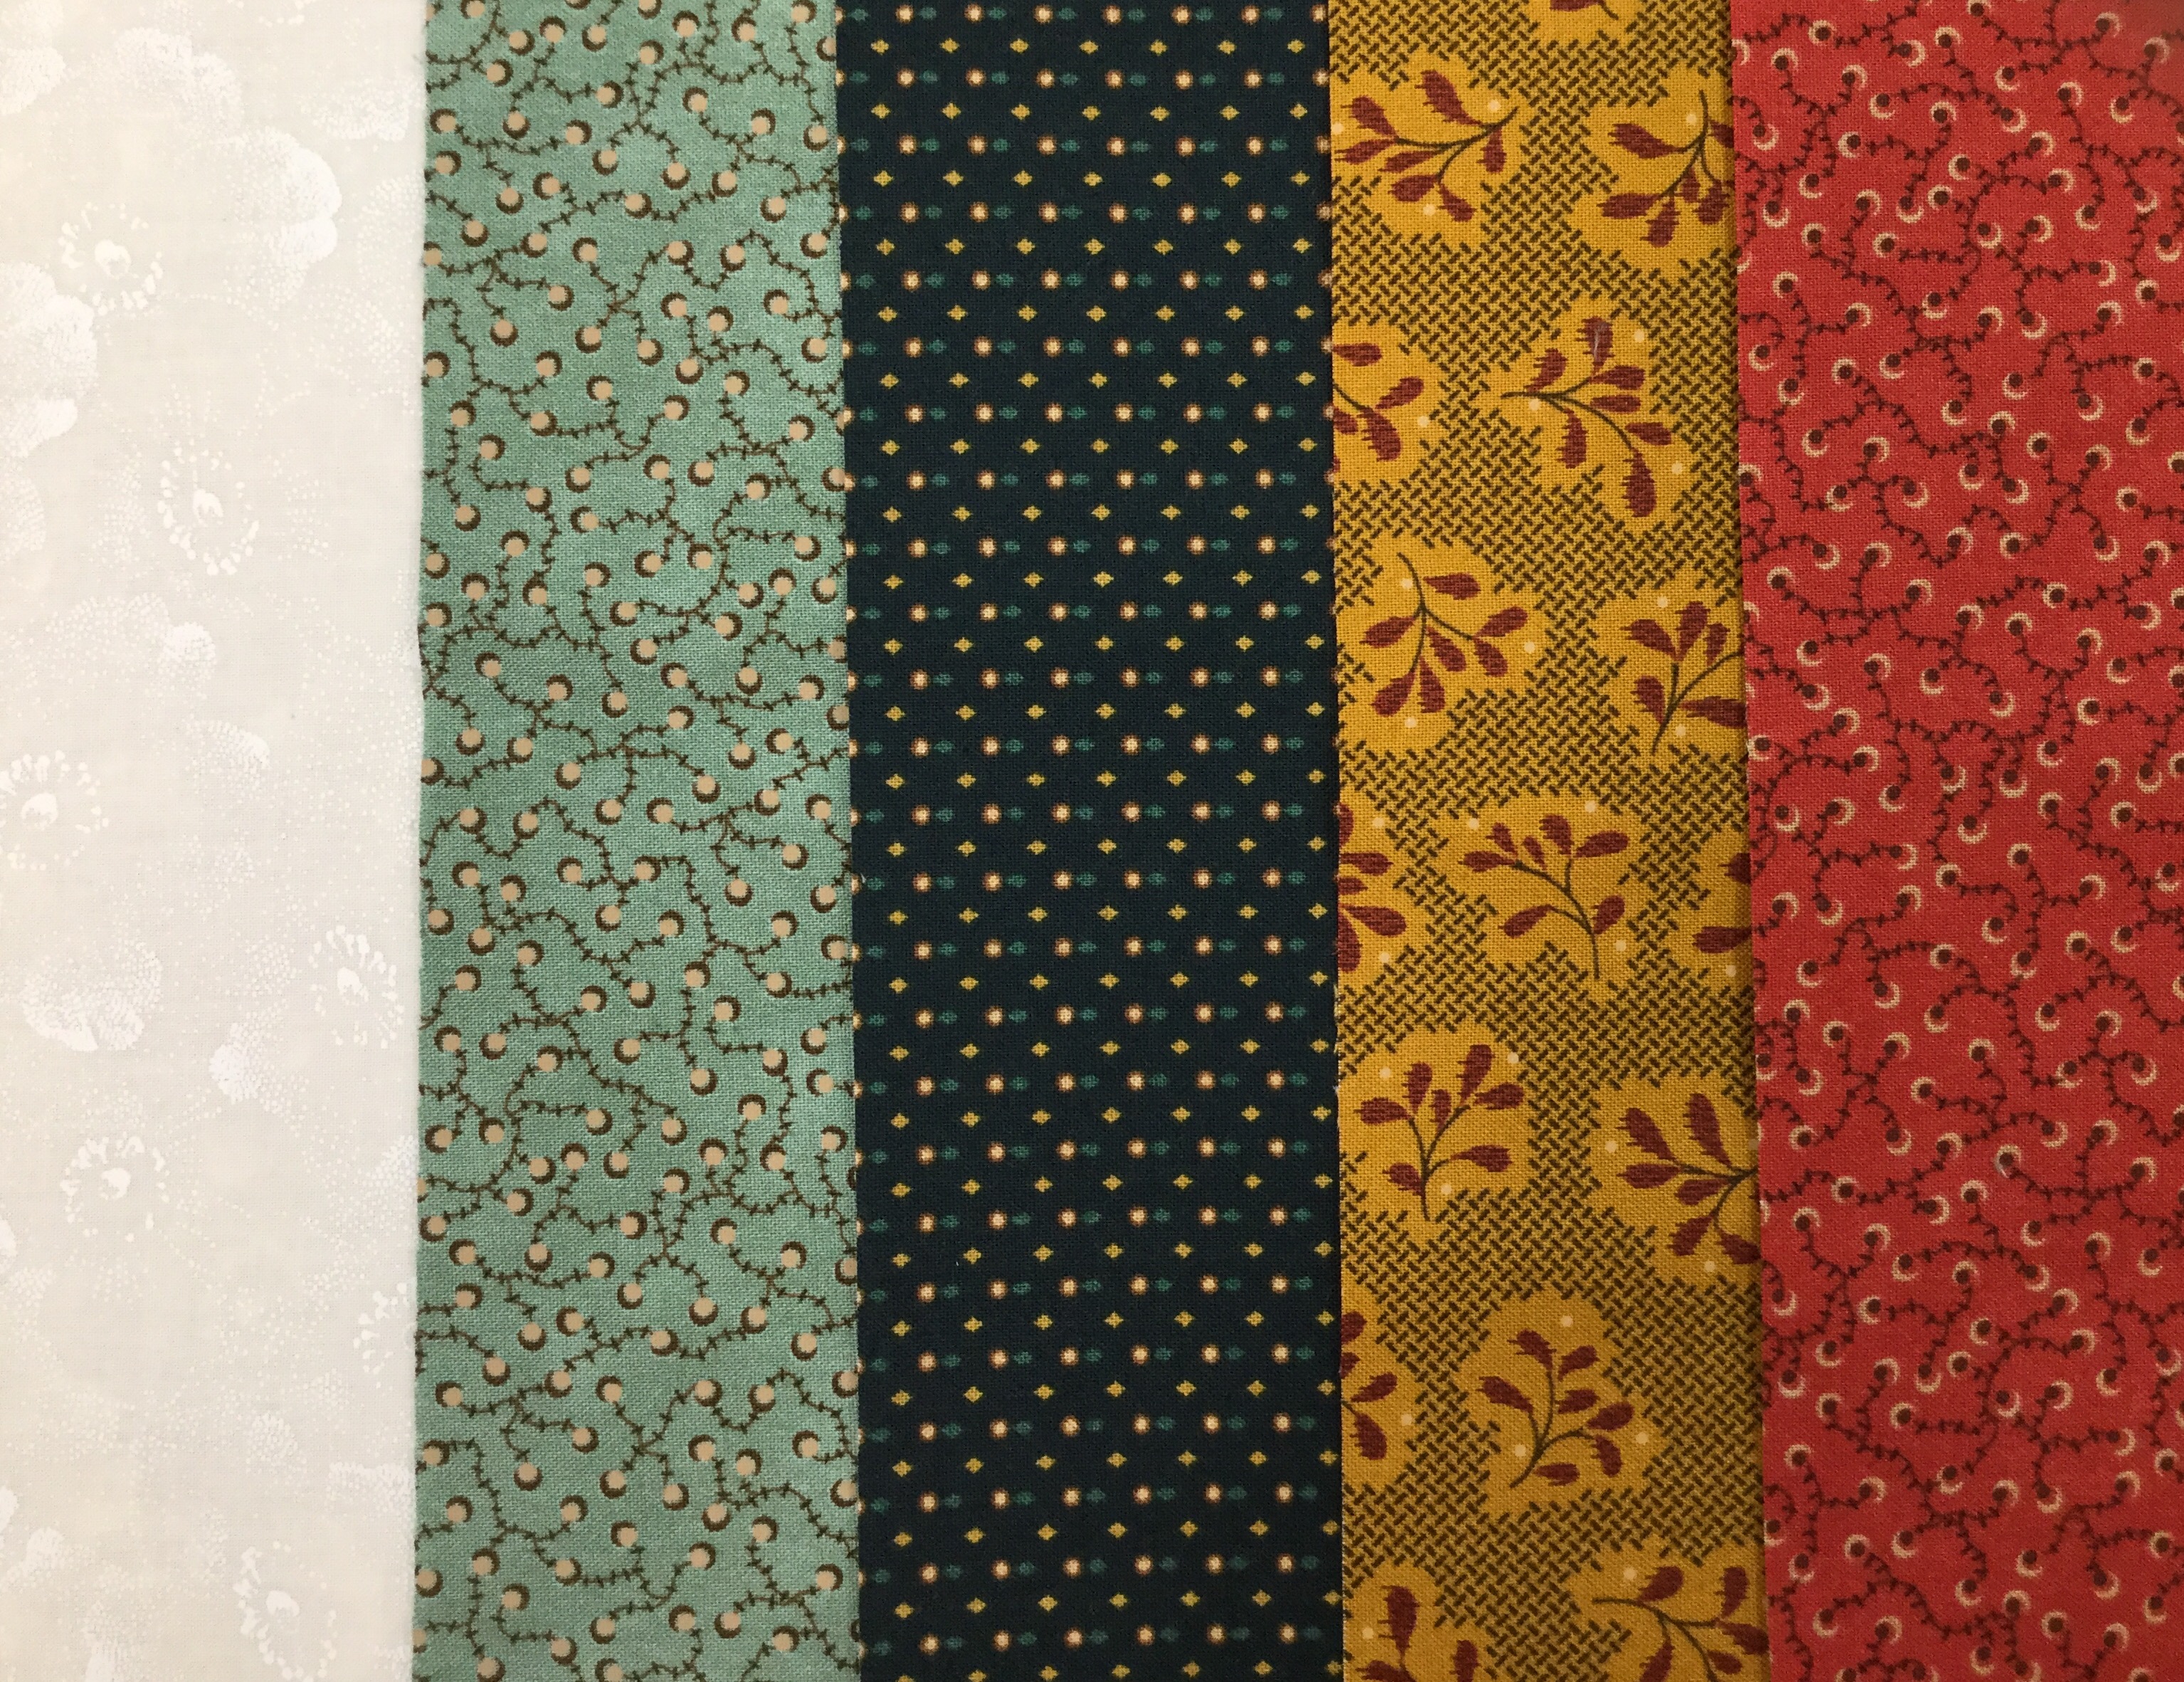
Color 1 – Background, cut 2 – 5″ x 6″ rectangles.

Color 2 – Light Teal, wide strip, cut 1 – 3 3/4″ strip WOF ( if using a fat quarter, cut 2 strips). Cut 1 – 5 1/2″ square.

Color 3 – Dark Teal, narrow strip, cut 1 – 2 3/4″ strip WOF ( if using a fat quarter, cut 2 strips). Cut 2 – 5 1/2″ squares.

Color 4 – Gold, cut 1 – 5 1/2″ square.

Color 5 – Red center square, cut 1 – 4 1/2″ square.

Beginning with the shaded four patch units, cut 2 – 5″ x 6″ rectangles from Color 1 – Background.  Cut 1 – 3 3/4″ strip from Color 2 – Light Teal.   Cut 1 – 2 3/4″ strip from Color 3 – Dark Teal.

IMG_4715

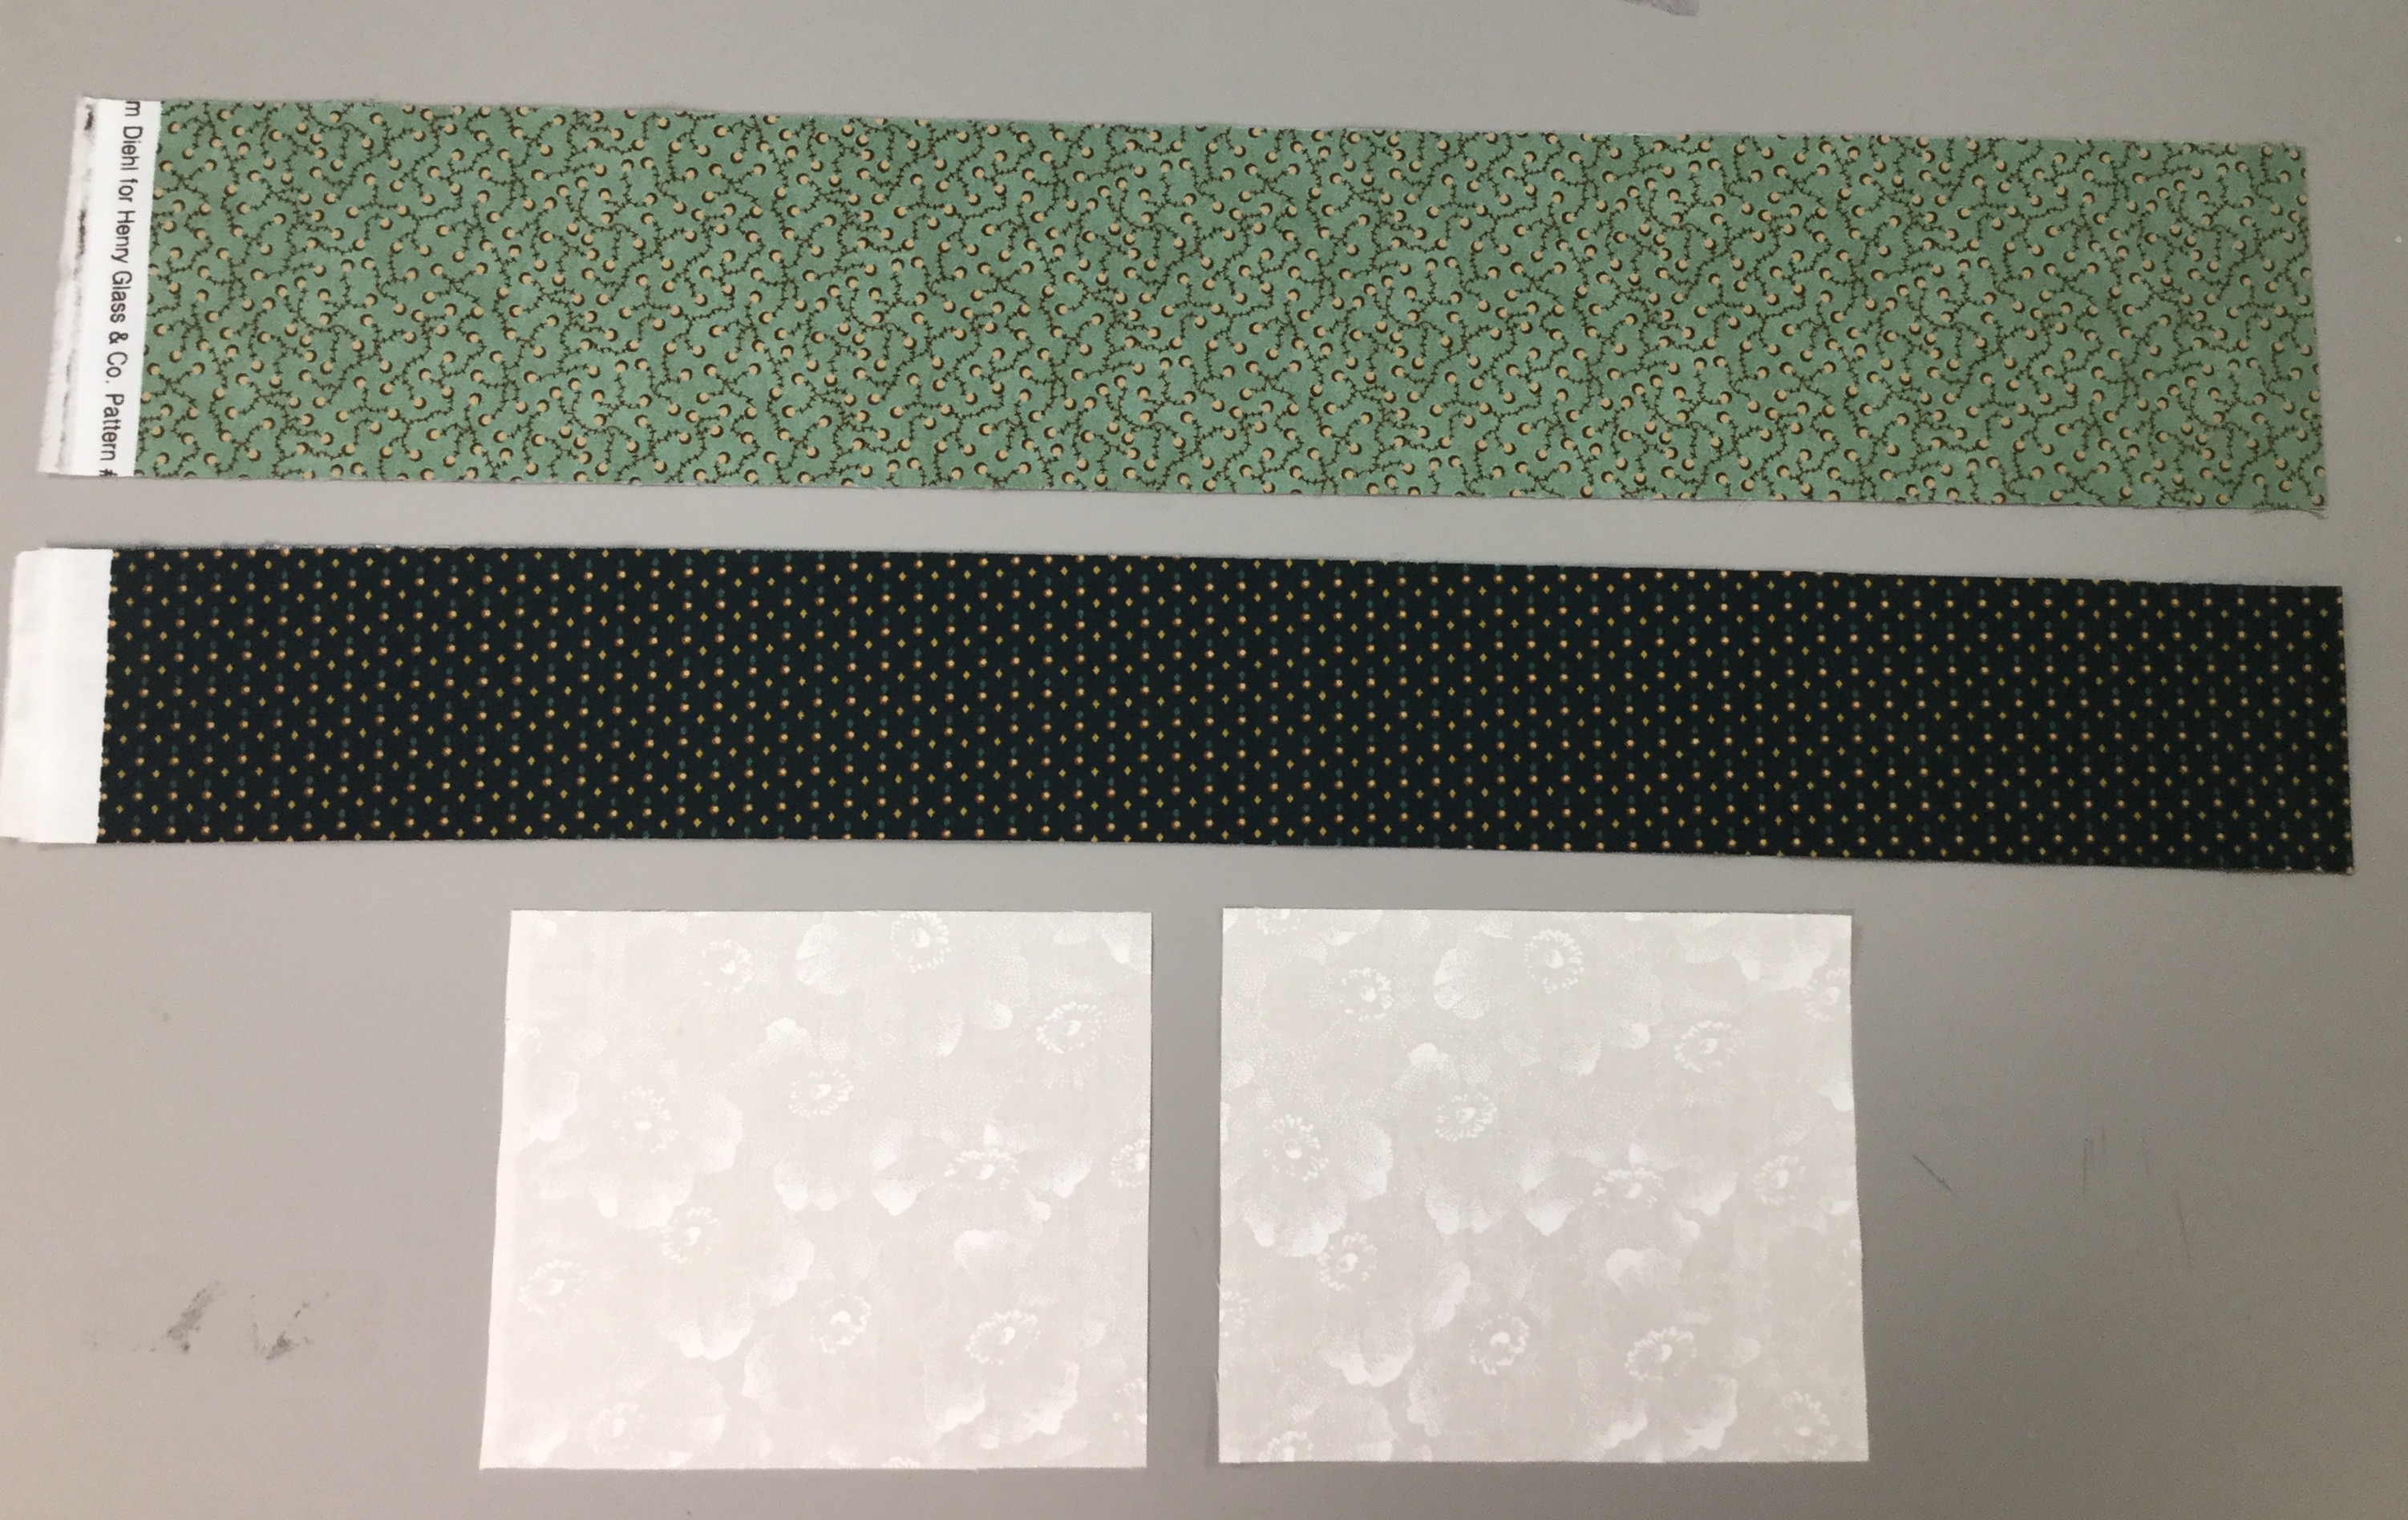
Cut the wide & the narrow strips in half if you cut from WOF.

IMG_4716

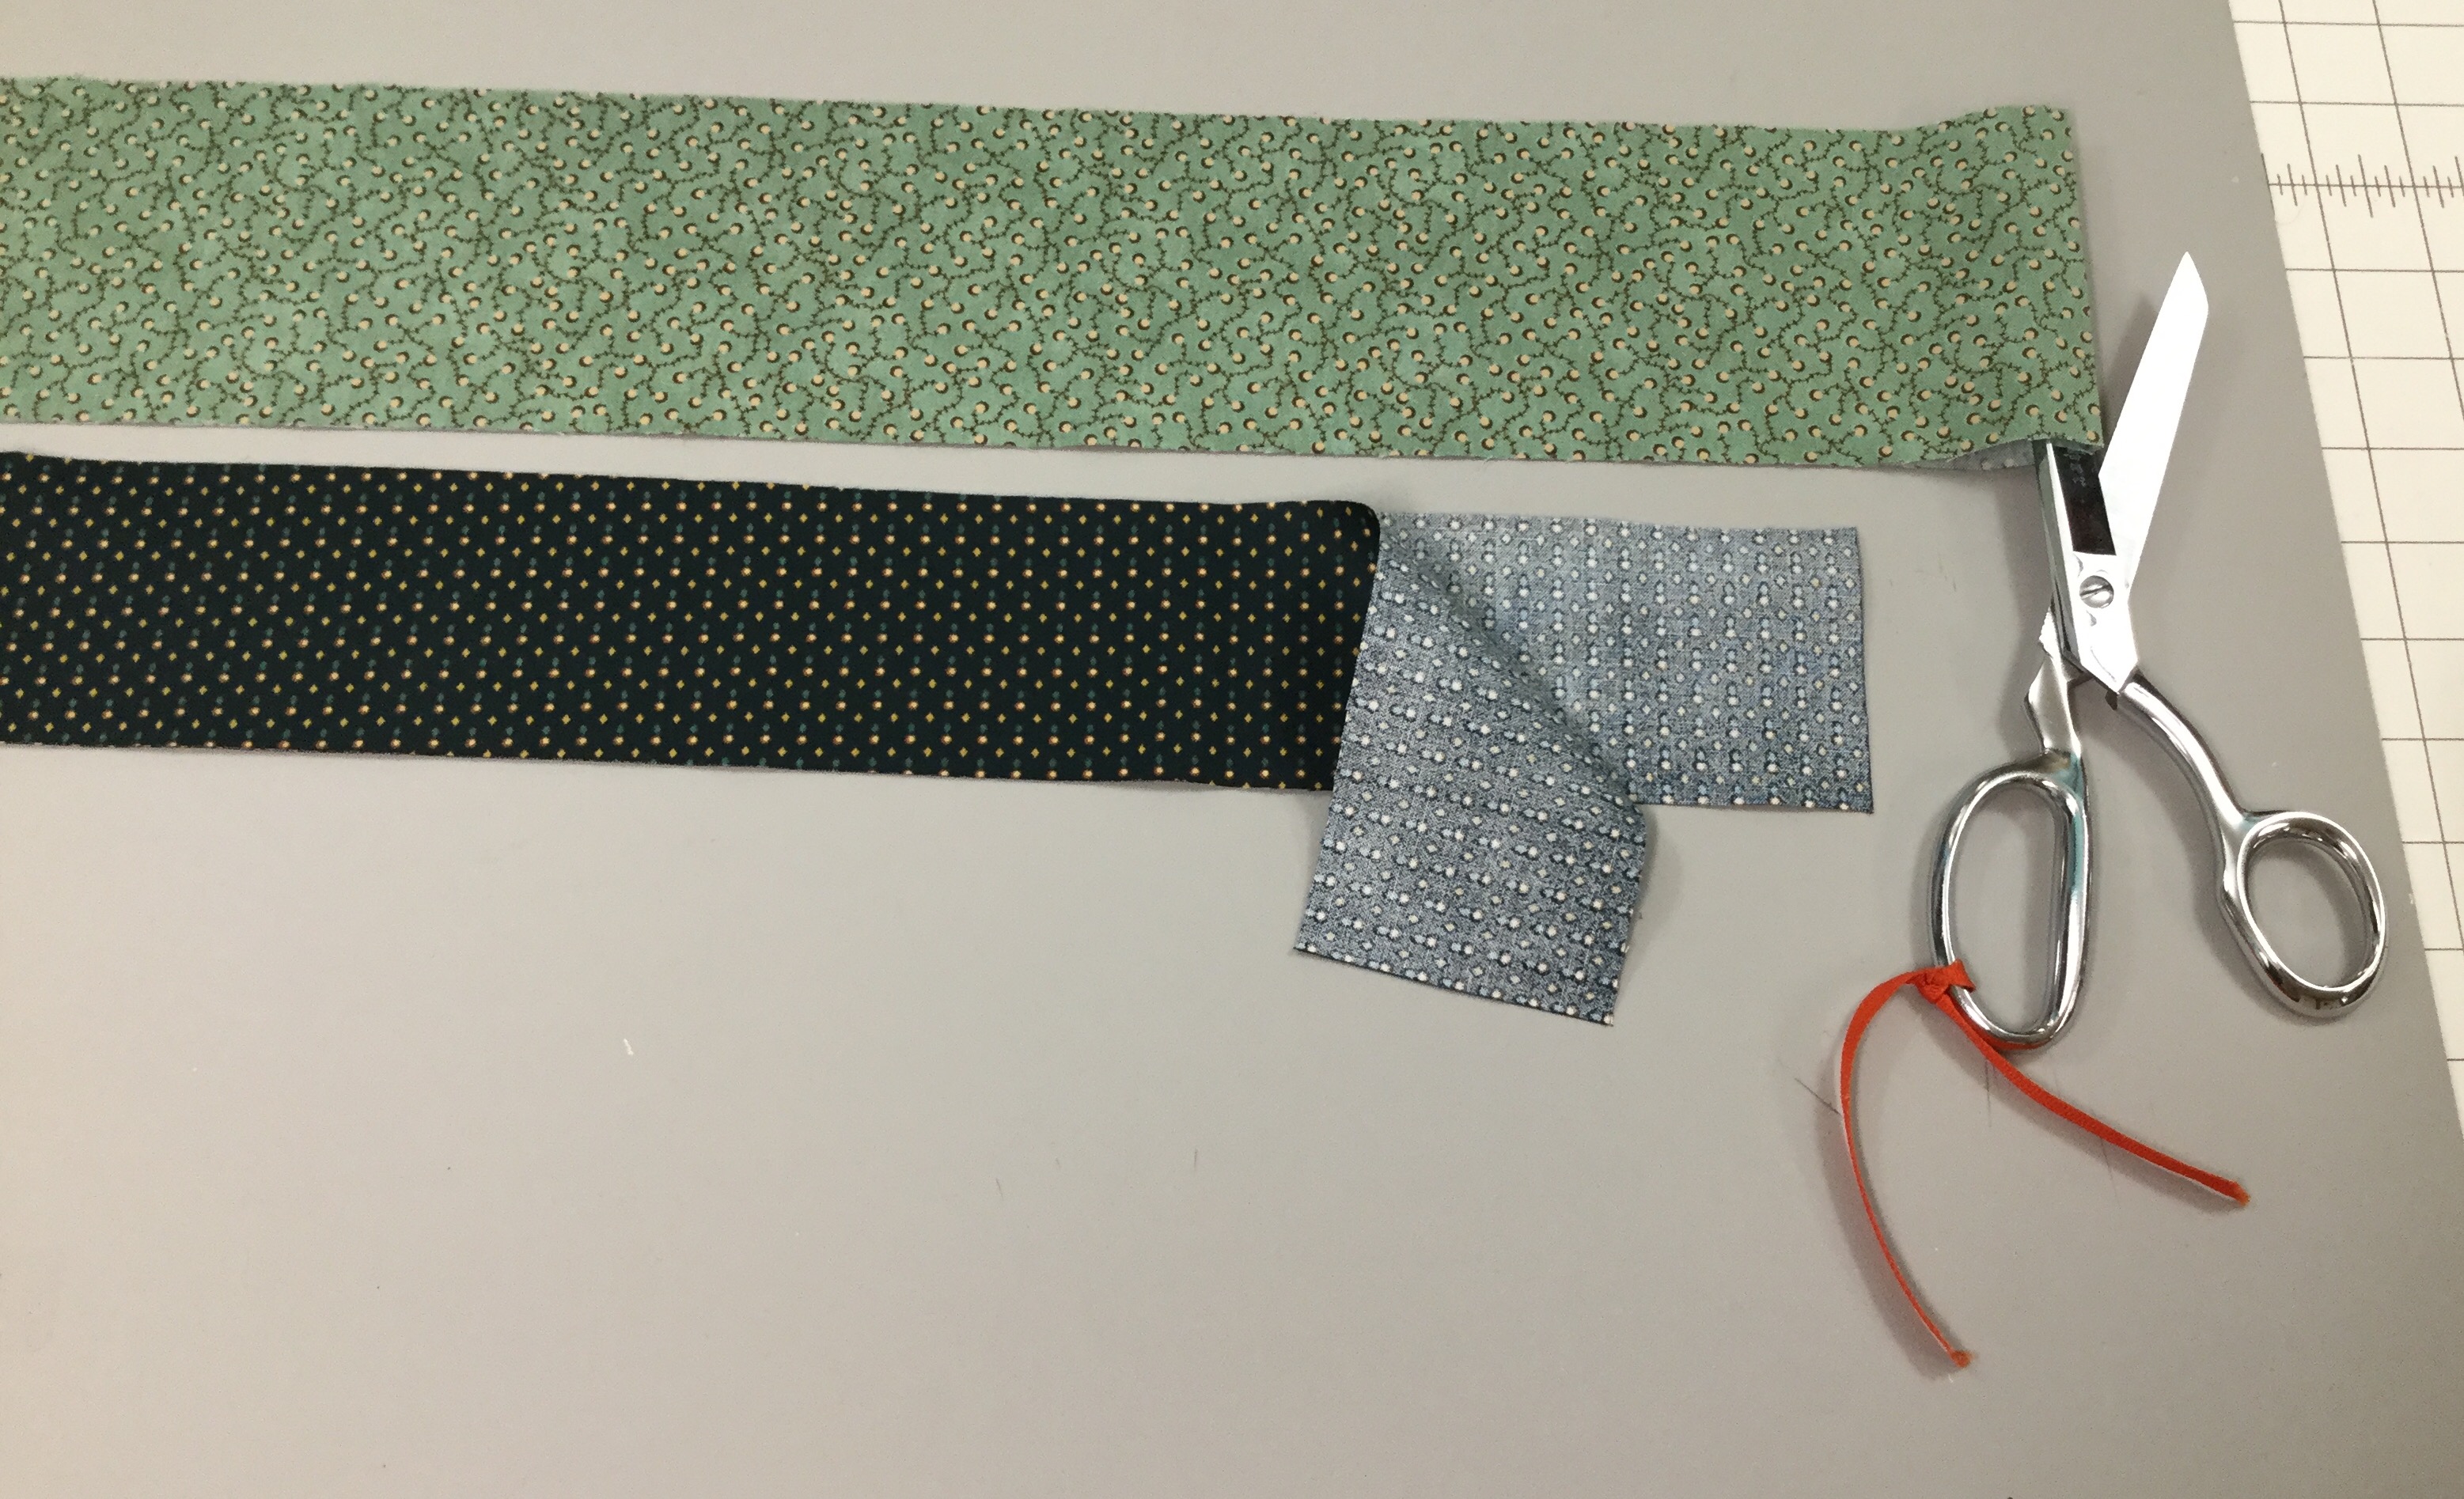
Take one narrow strip and one wide strip and with right sides together, sew along one long side. Repeat with the other 2 strips.  Press towards the wide strip.

IMG_4717

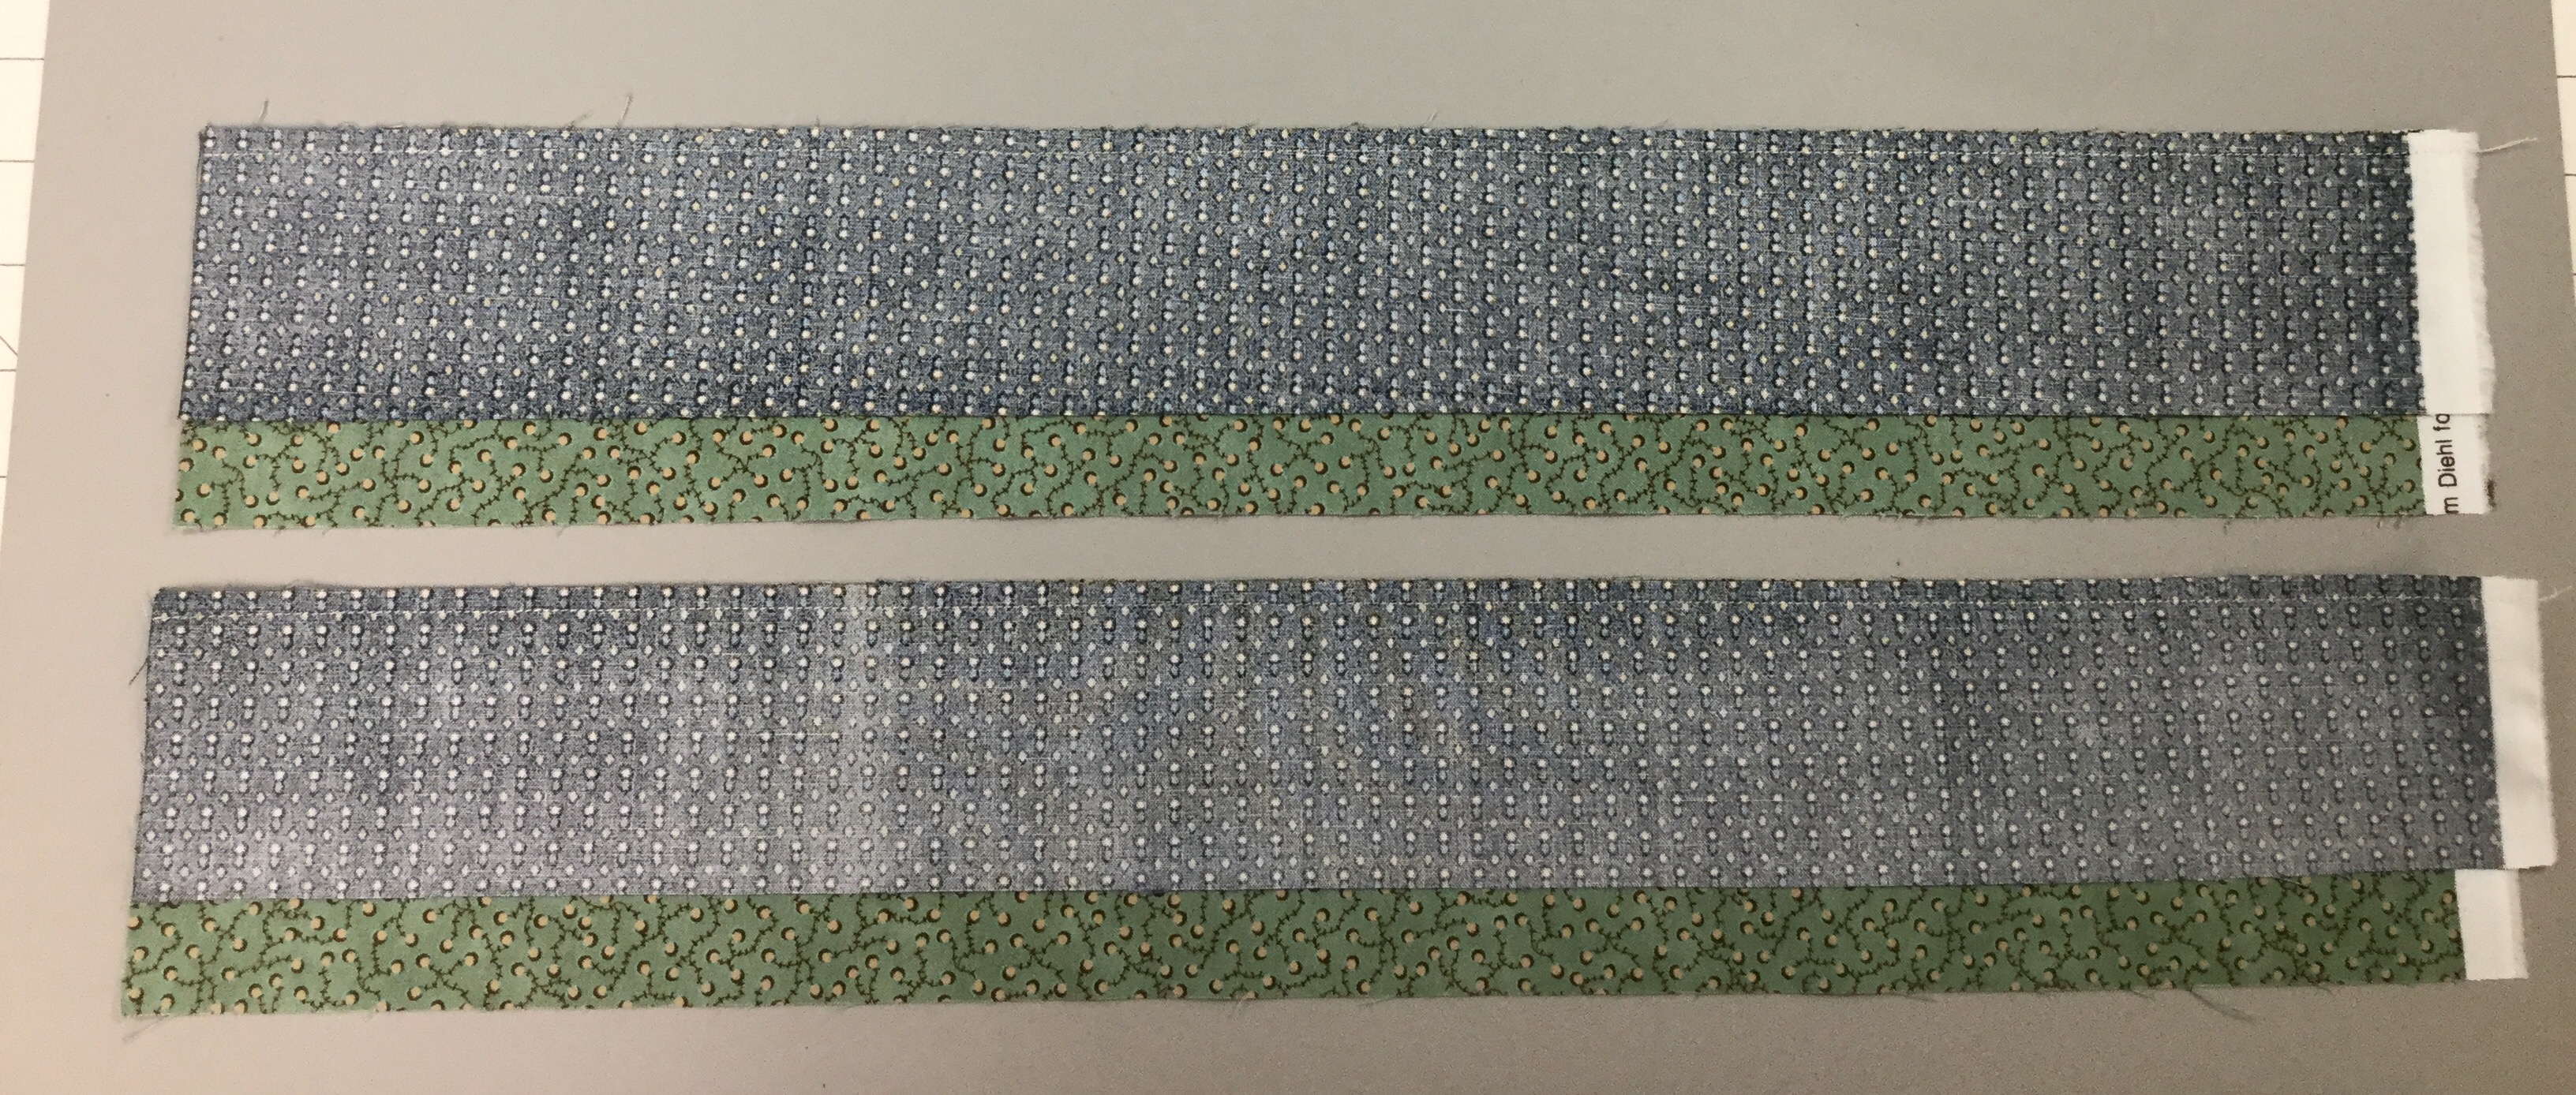
Pair two of the pieced strips, right sides together with the narrow strips on opposite sides as show below:

IMG_4718

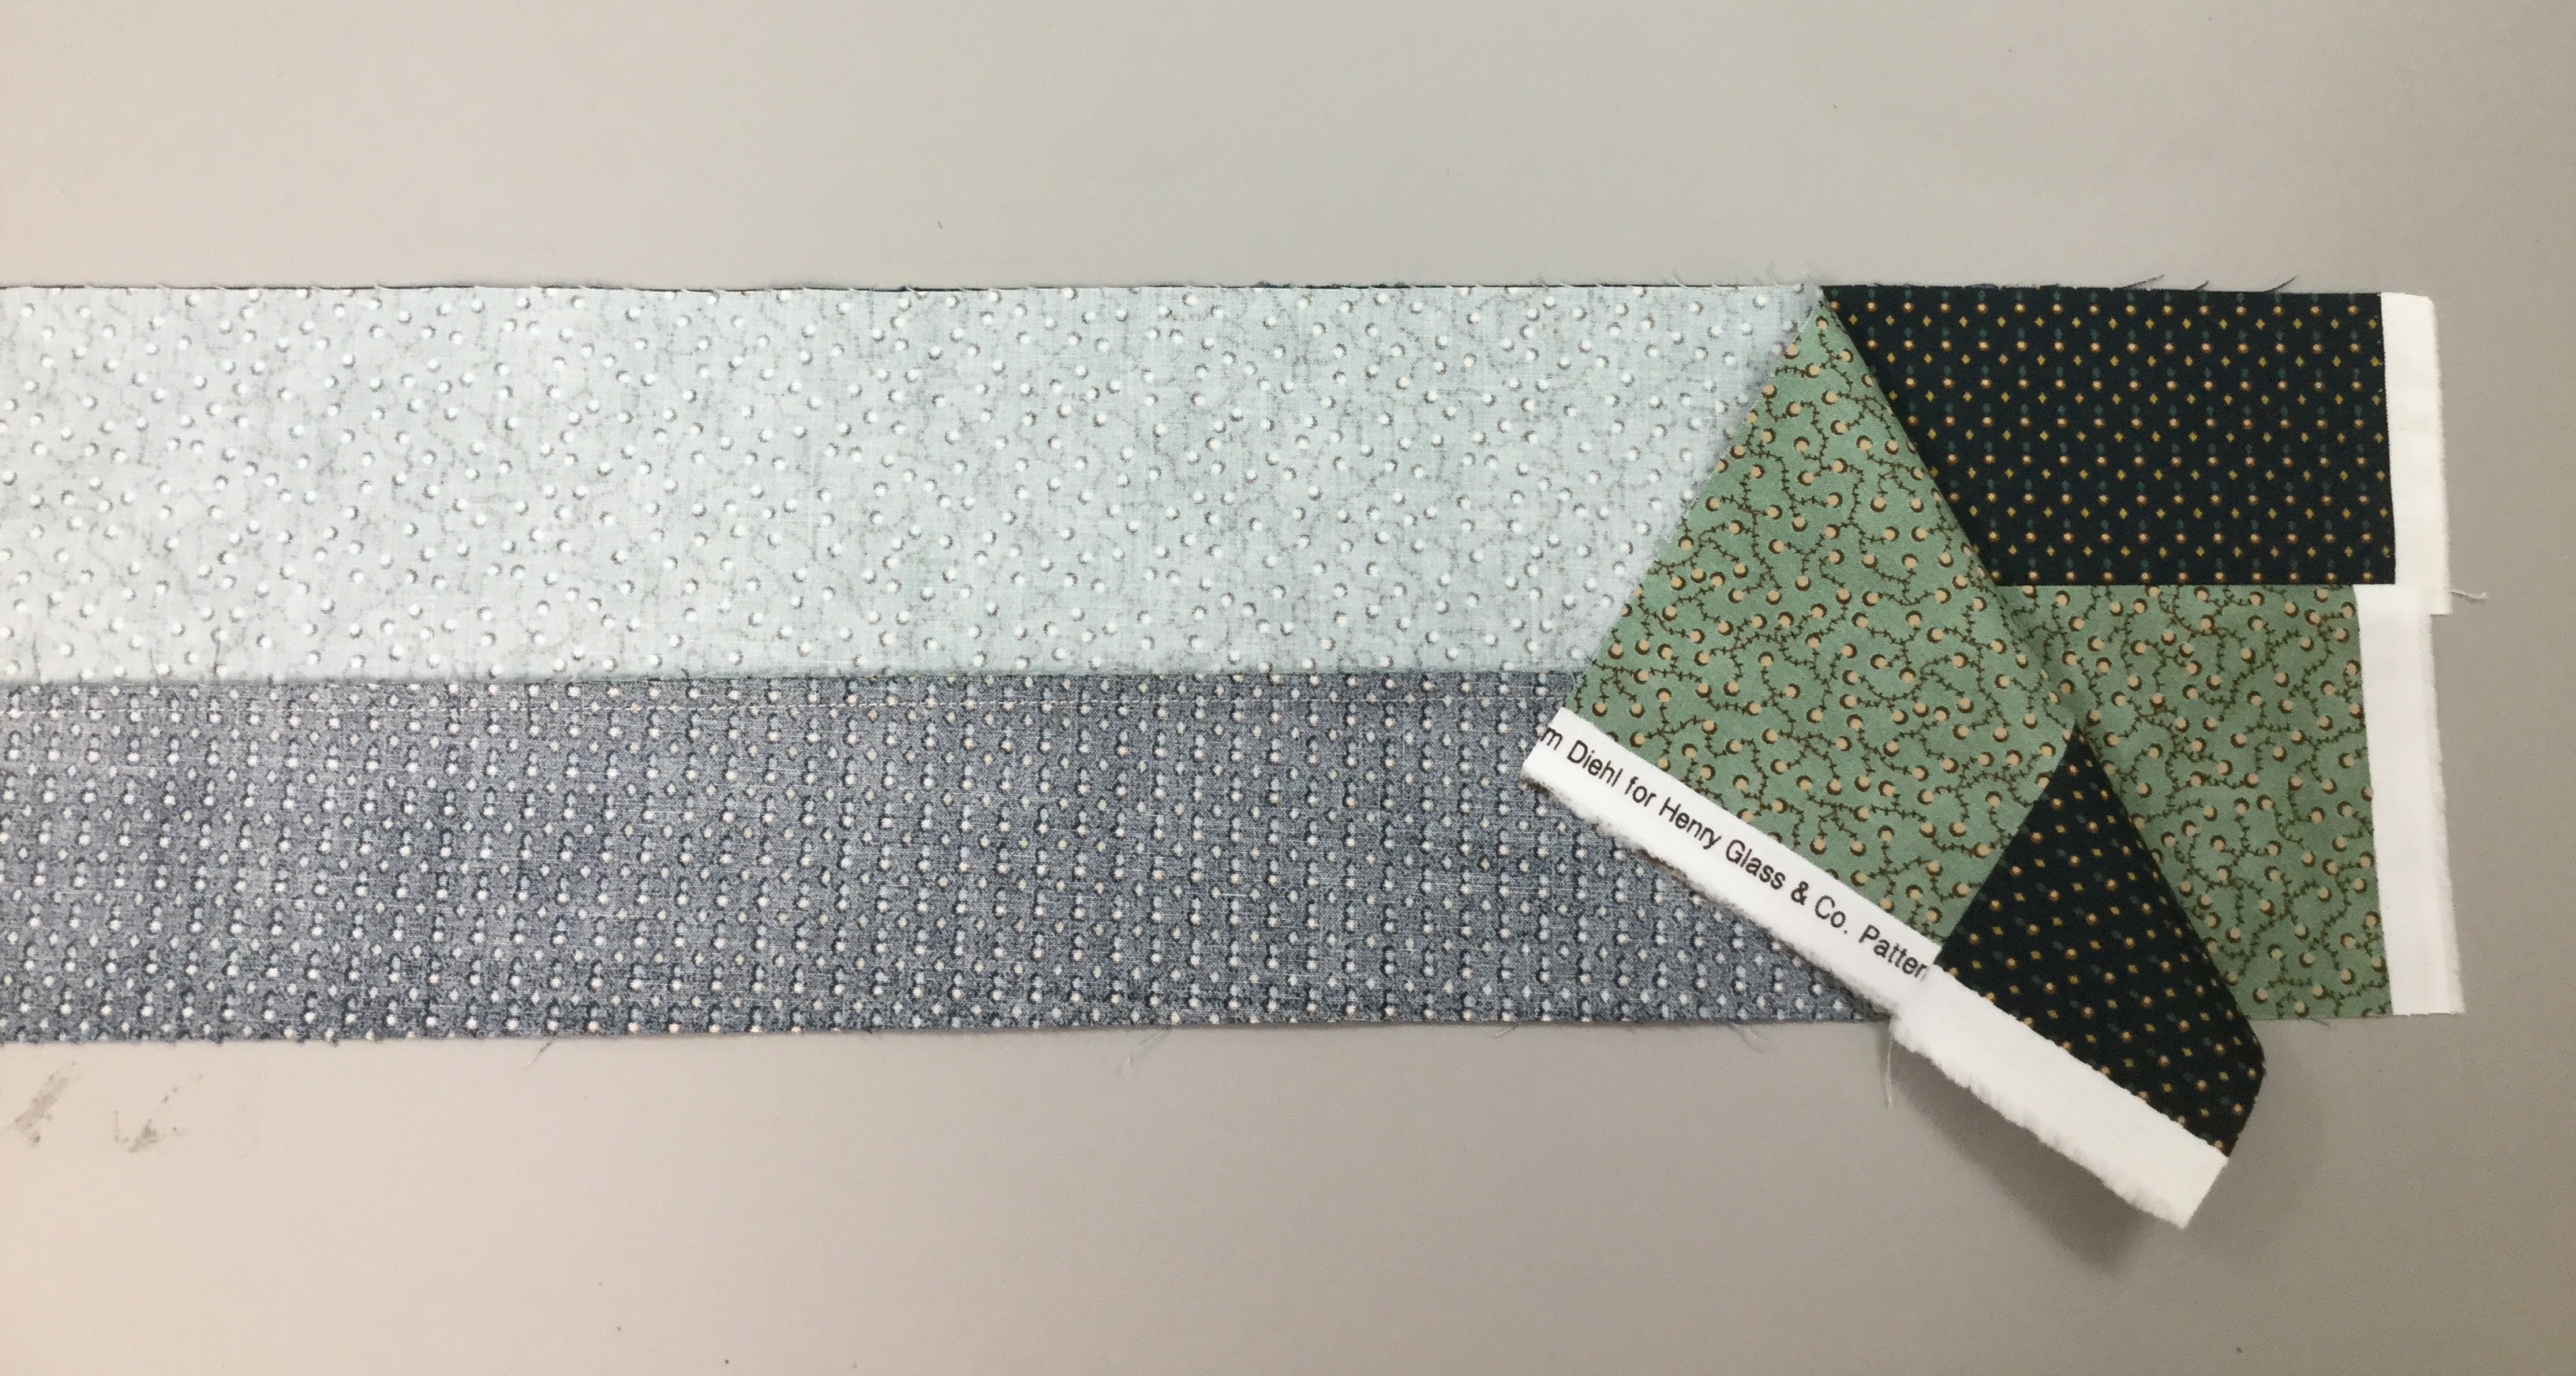
Trim the end and sub-cut into units the same width as the narrow strip, which is 2 3/4″.  Because we only need 4 shaded four patch units, we only need to cut 2 pairs.

IMG_4719

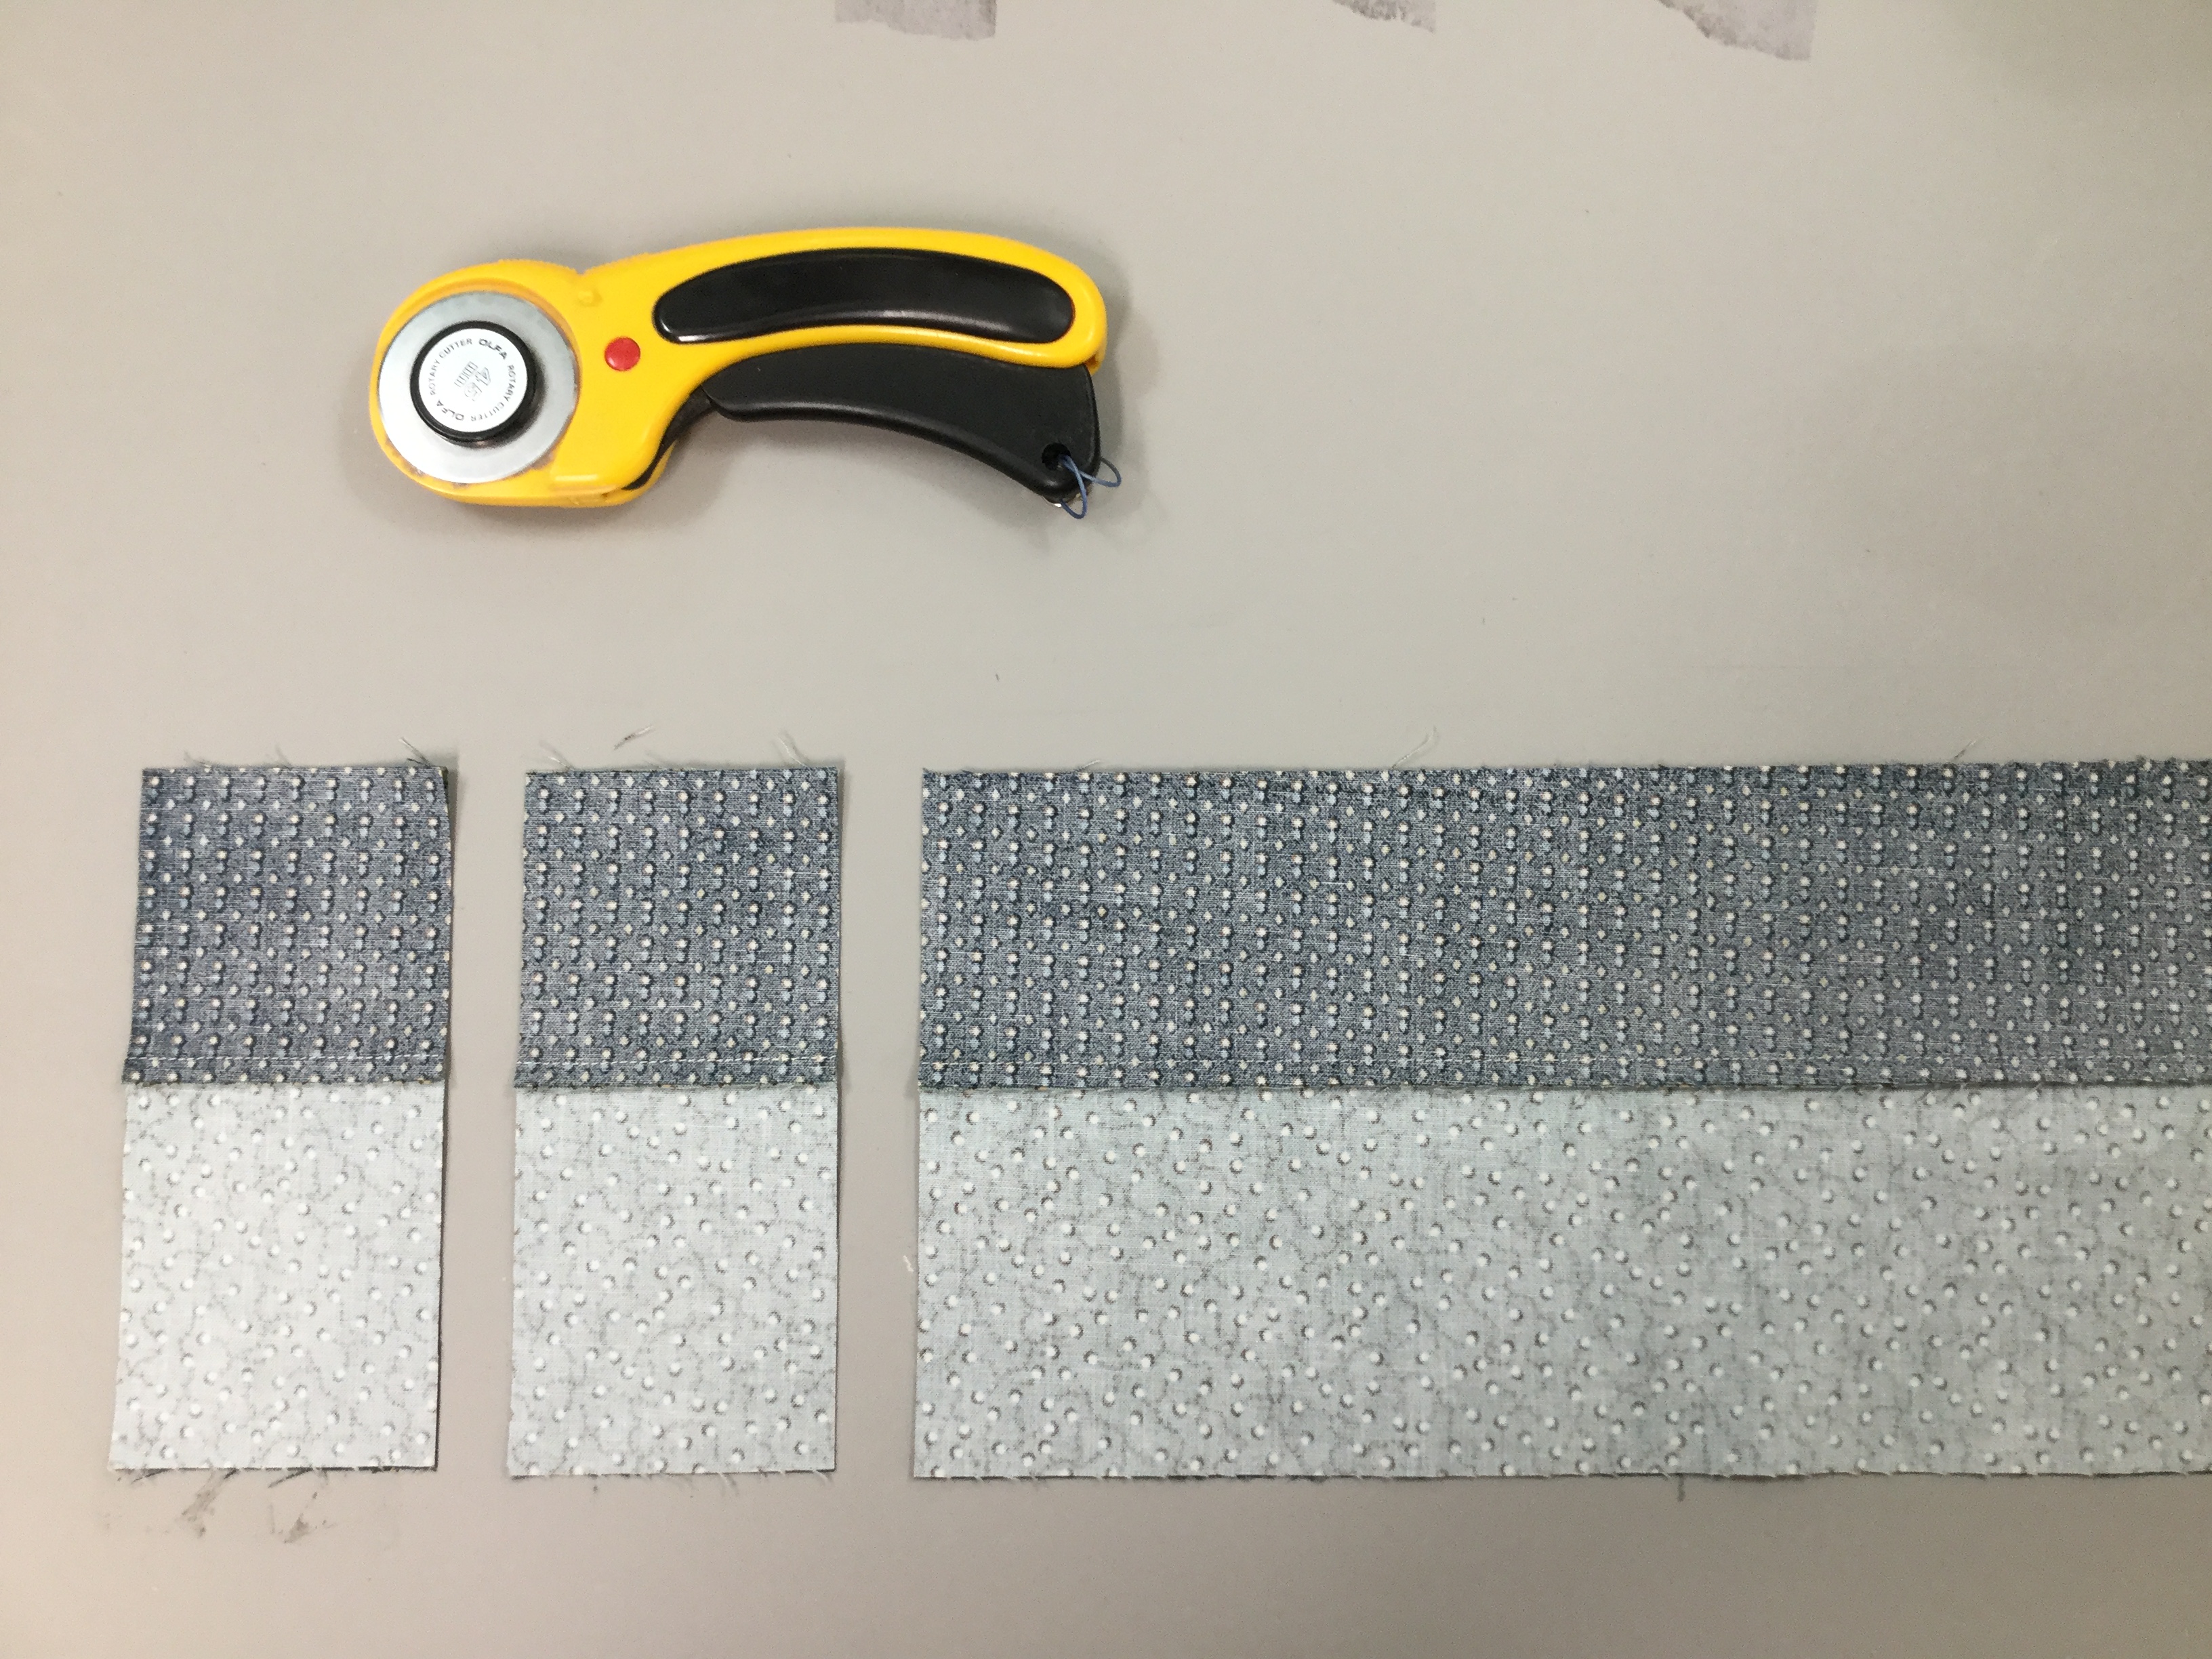
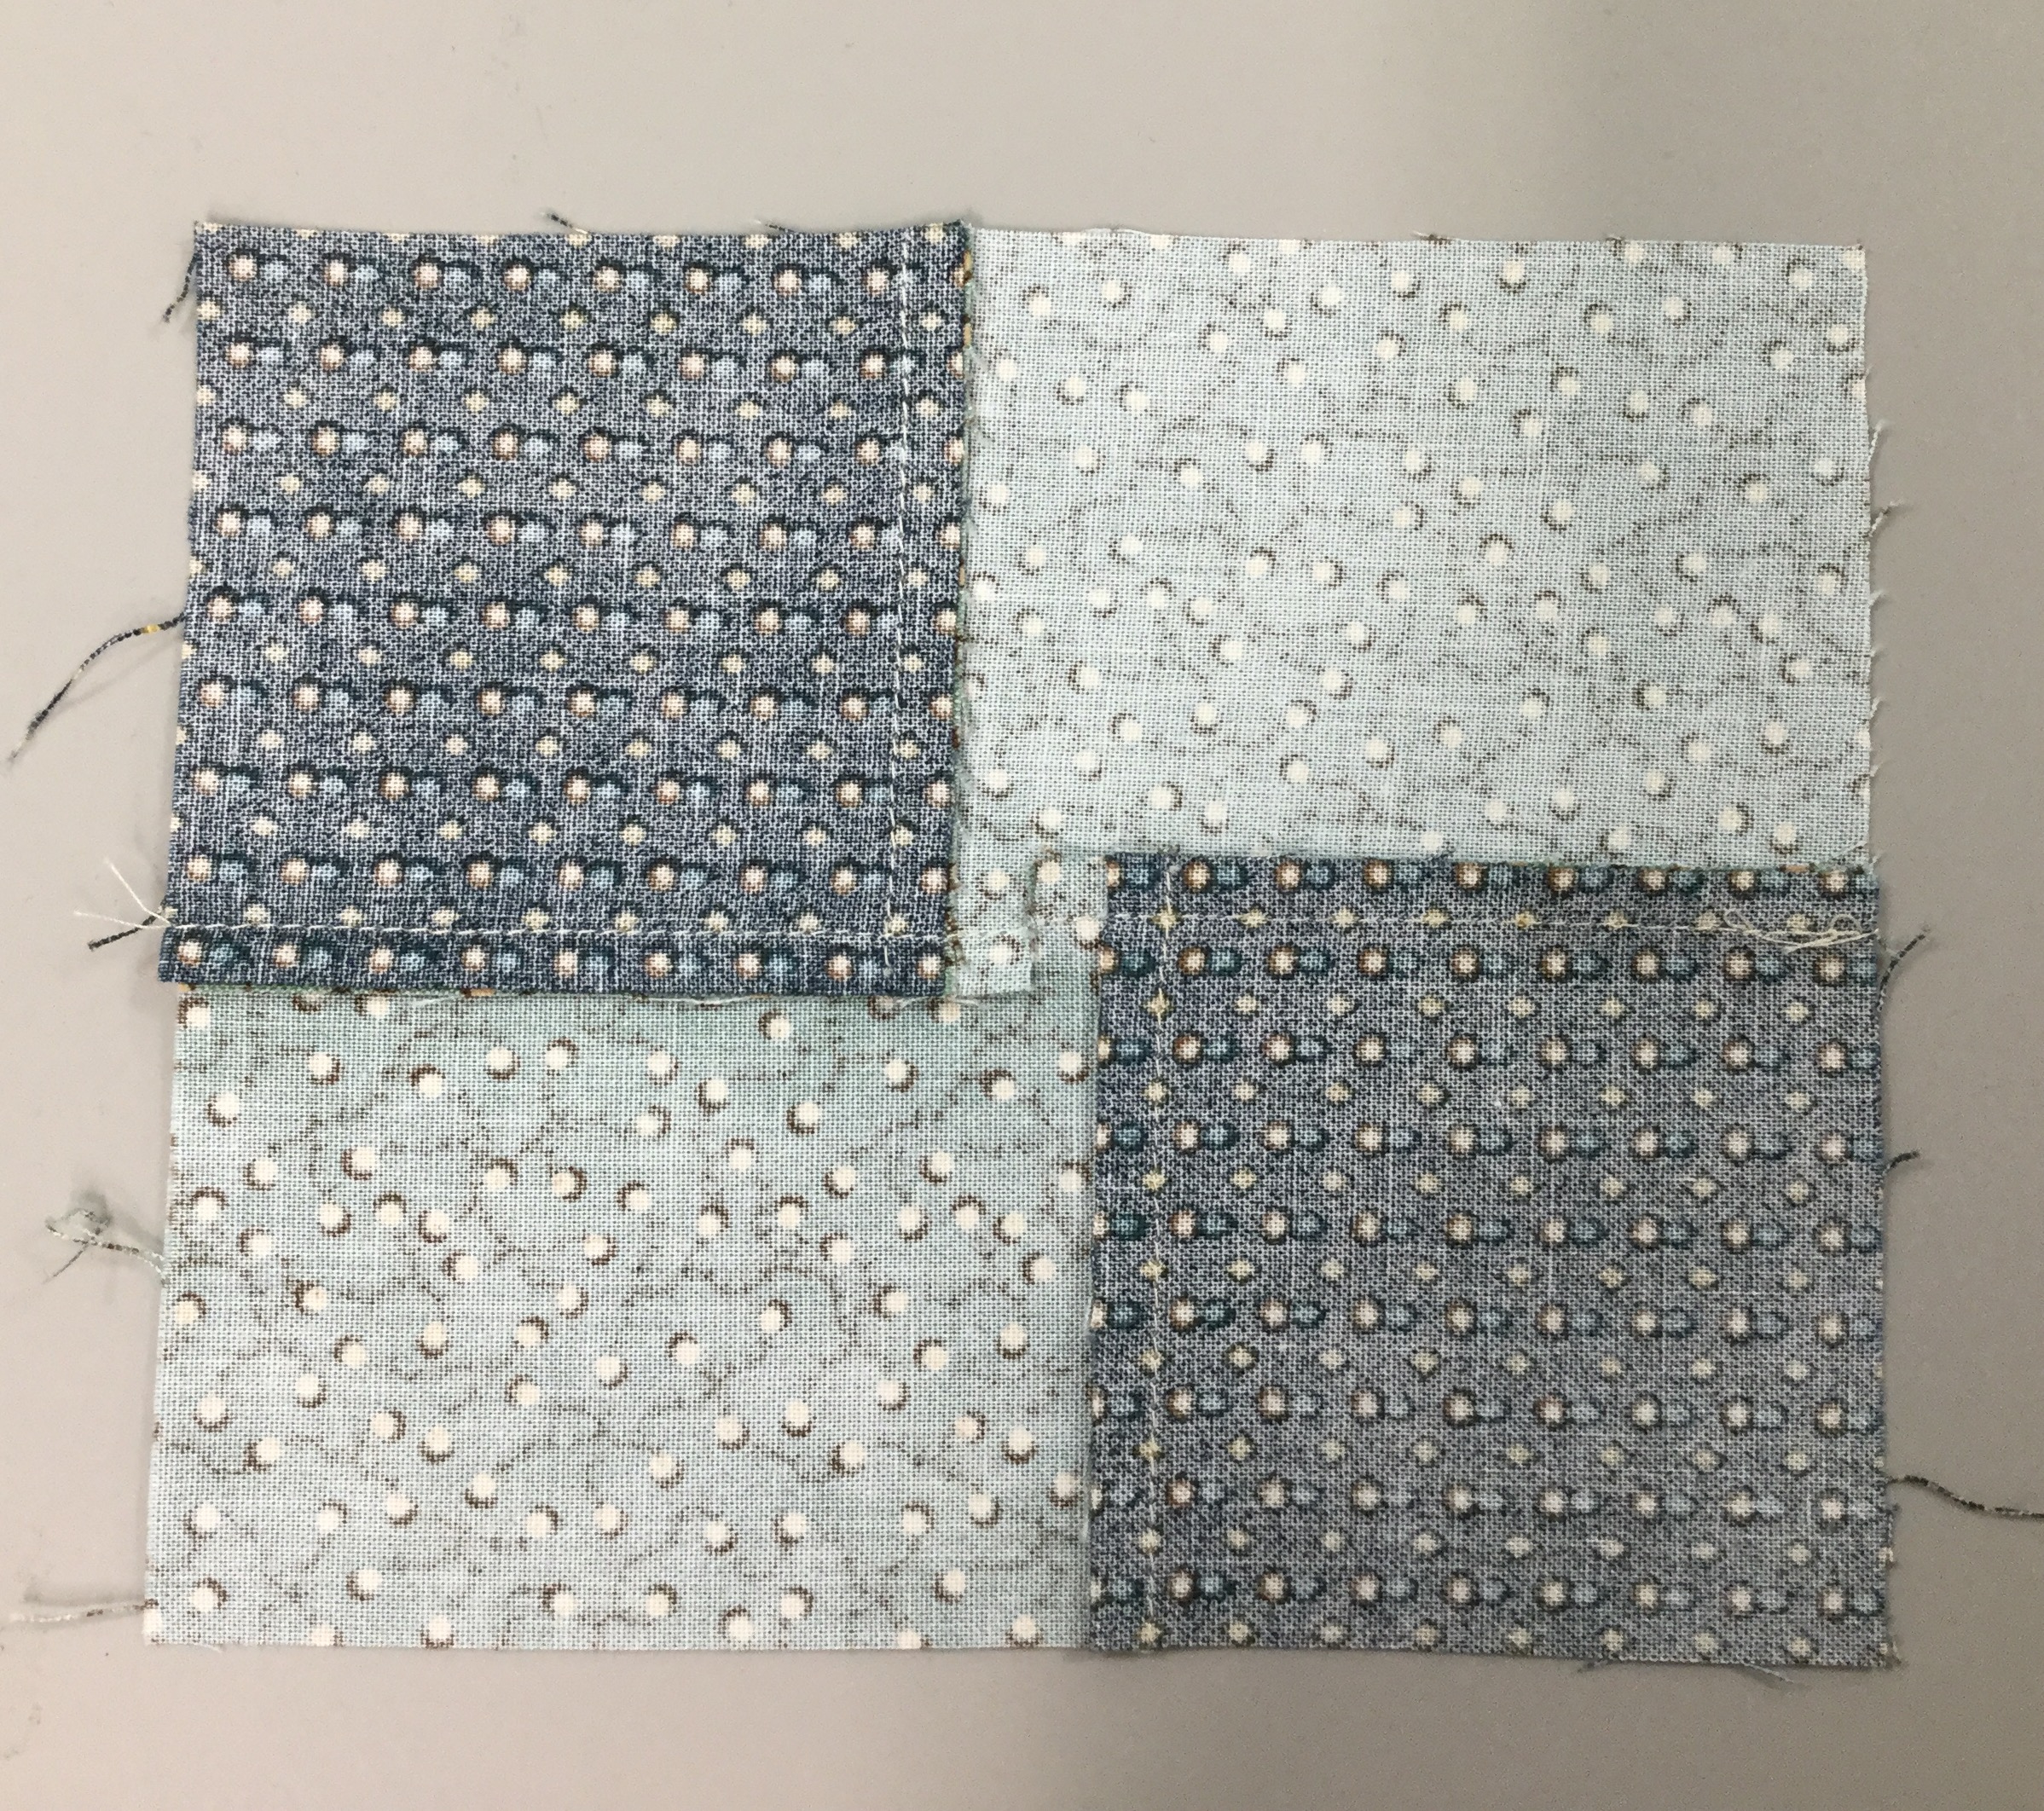
Stitch each pair of cut pieces along one long side. Fold in half to find the center and snip to the seam line to aid in pressing.

IMG_4720

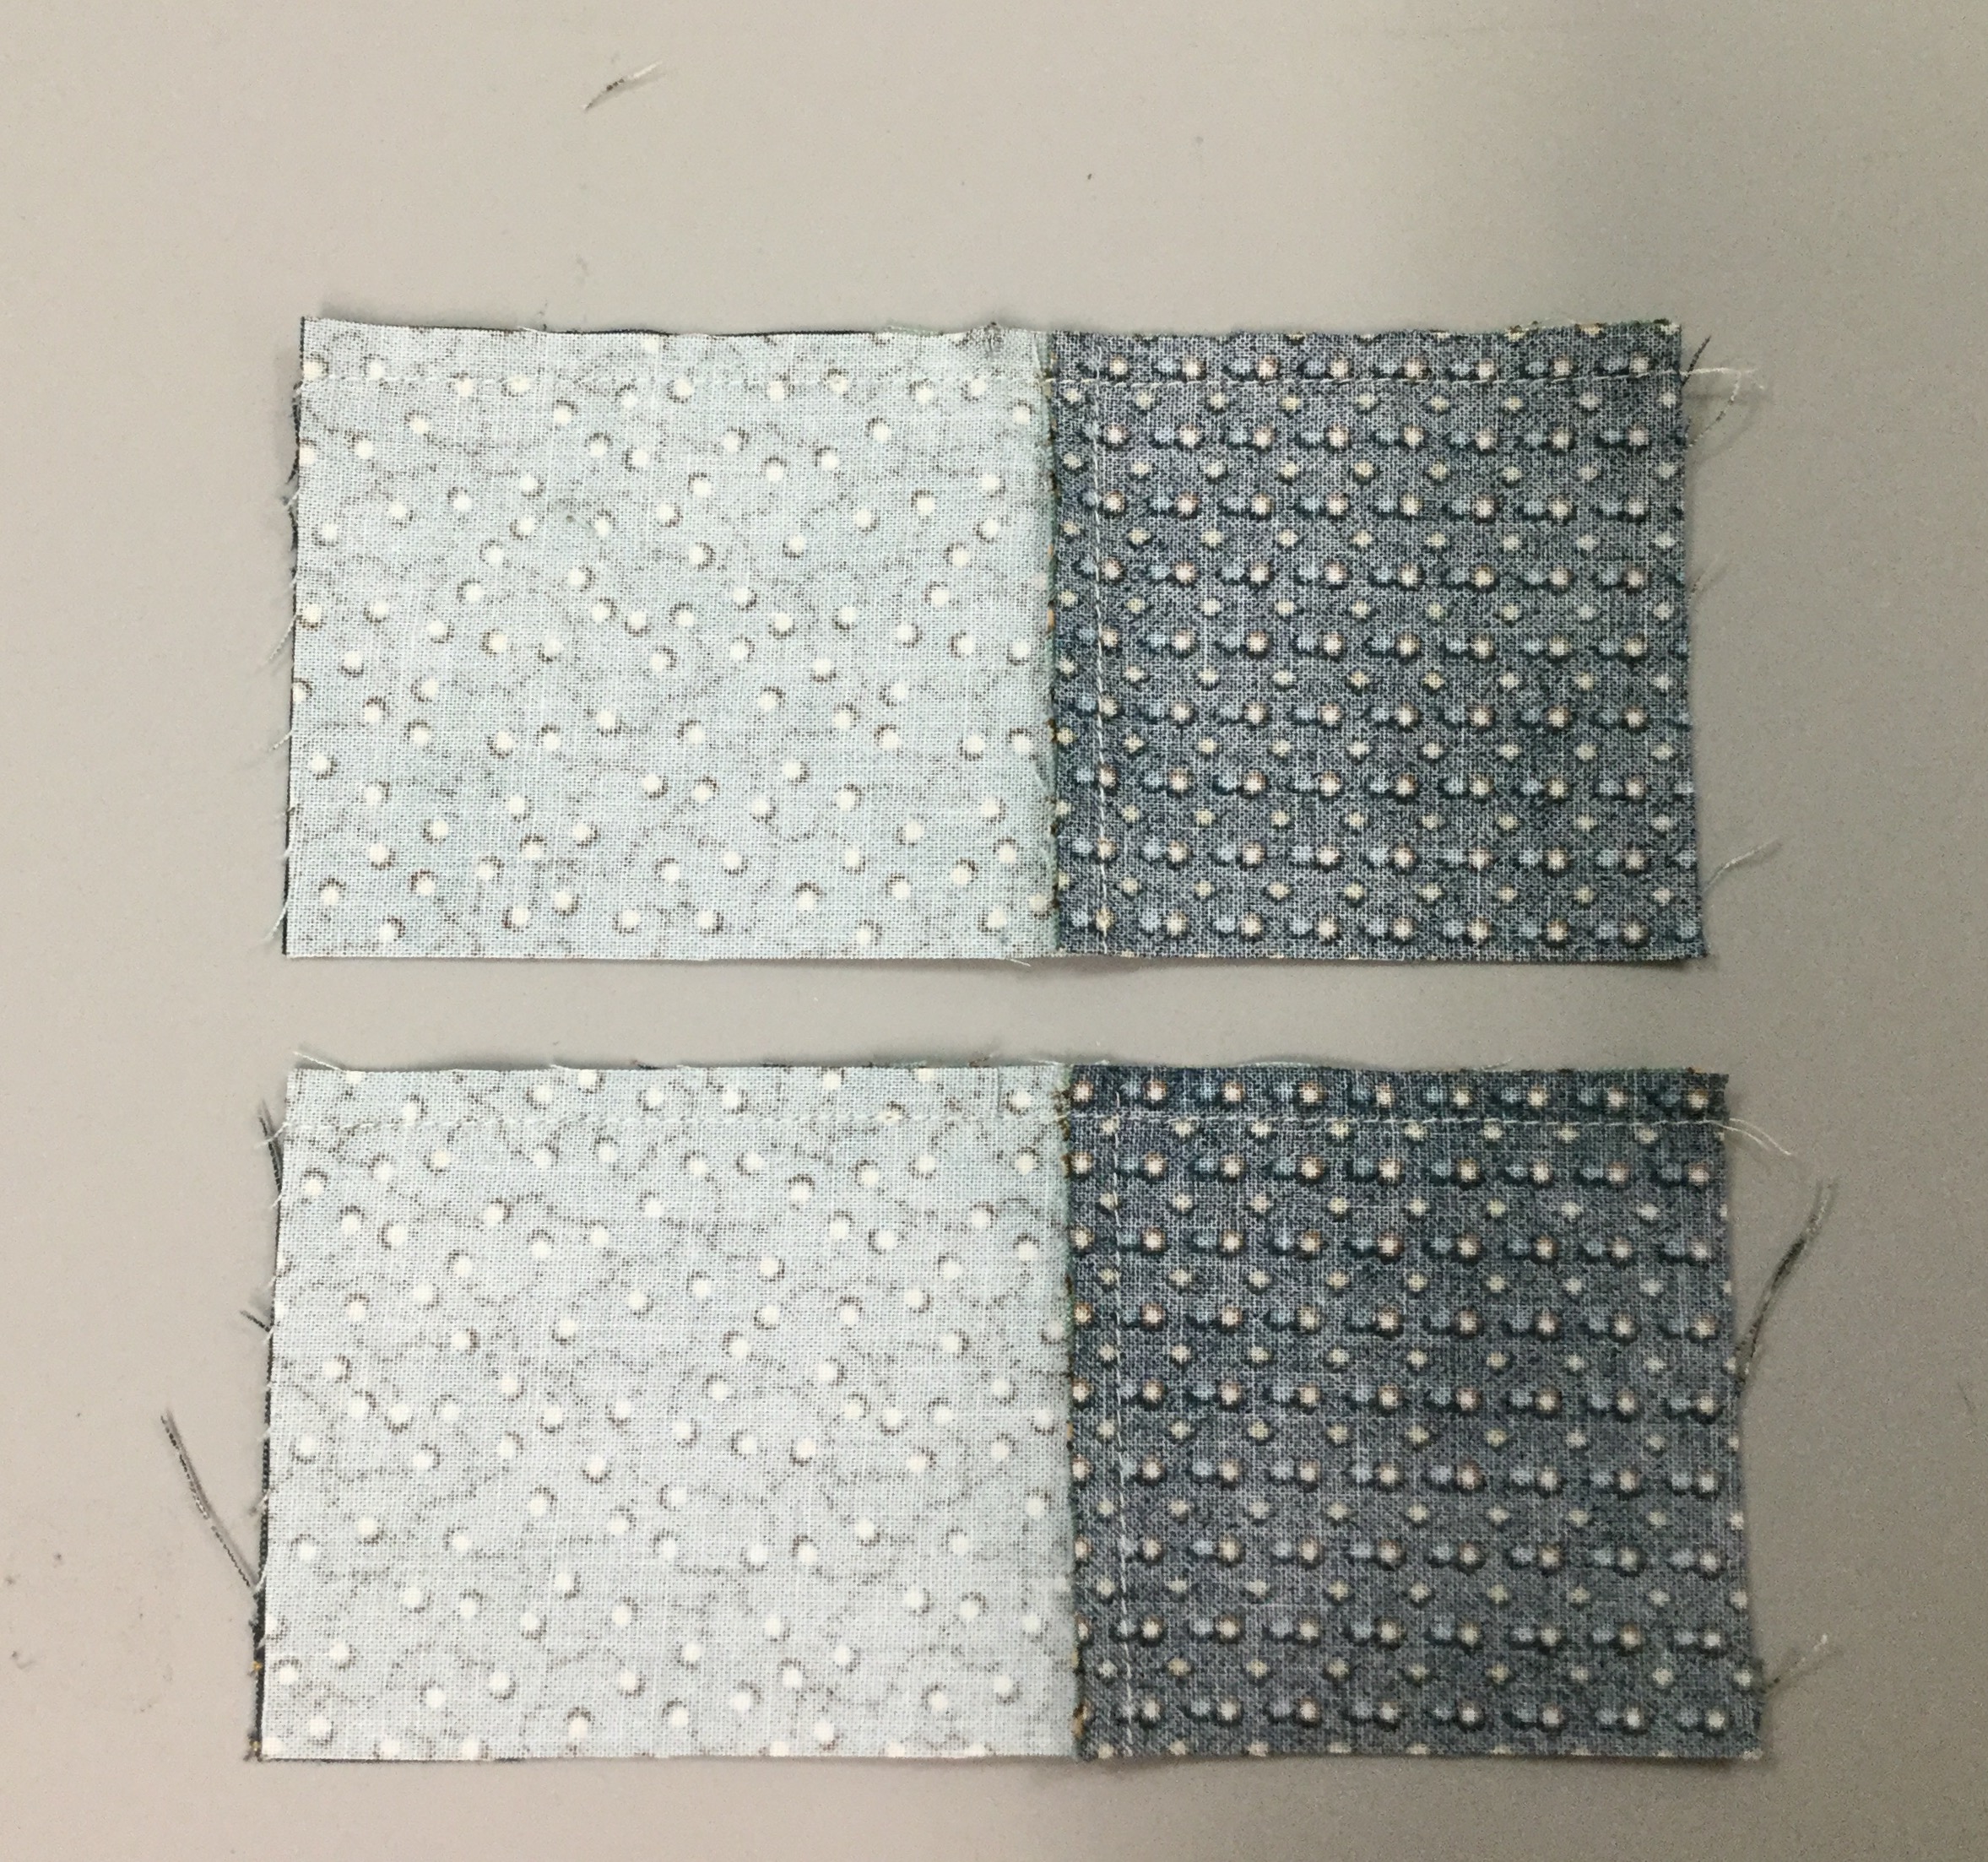
Press each unit as shown below:

IMG_4721

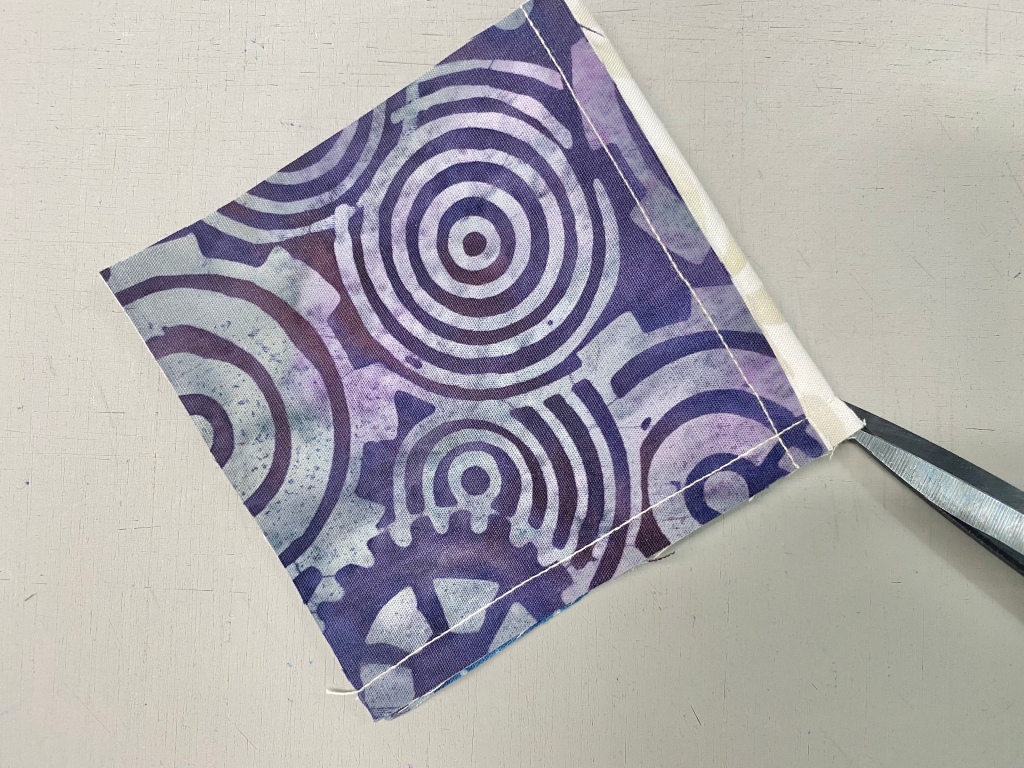
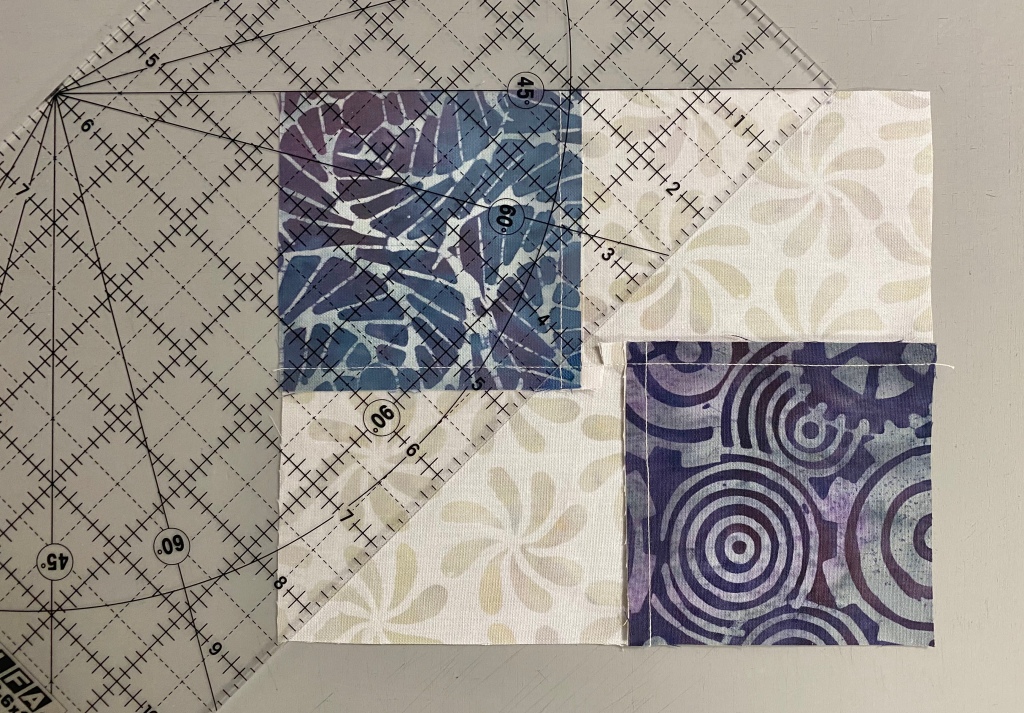
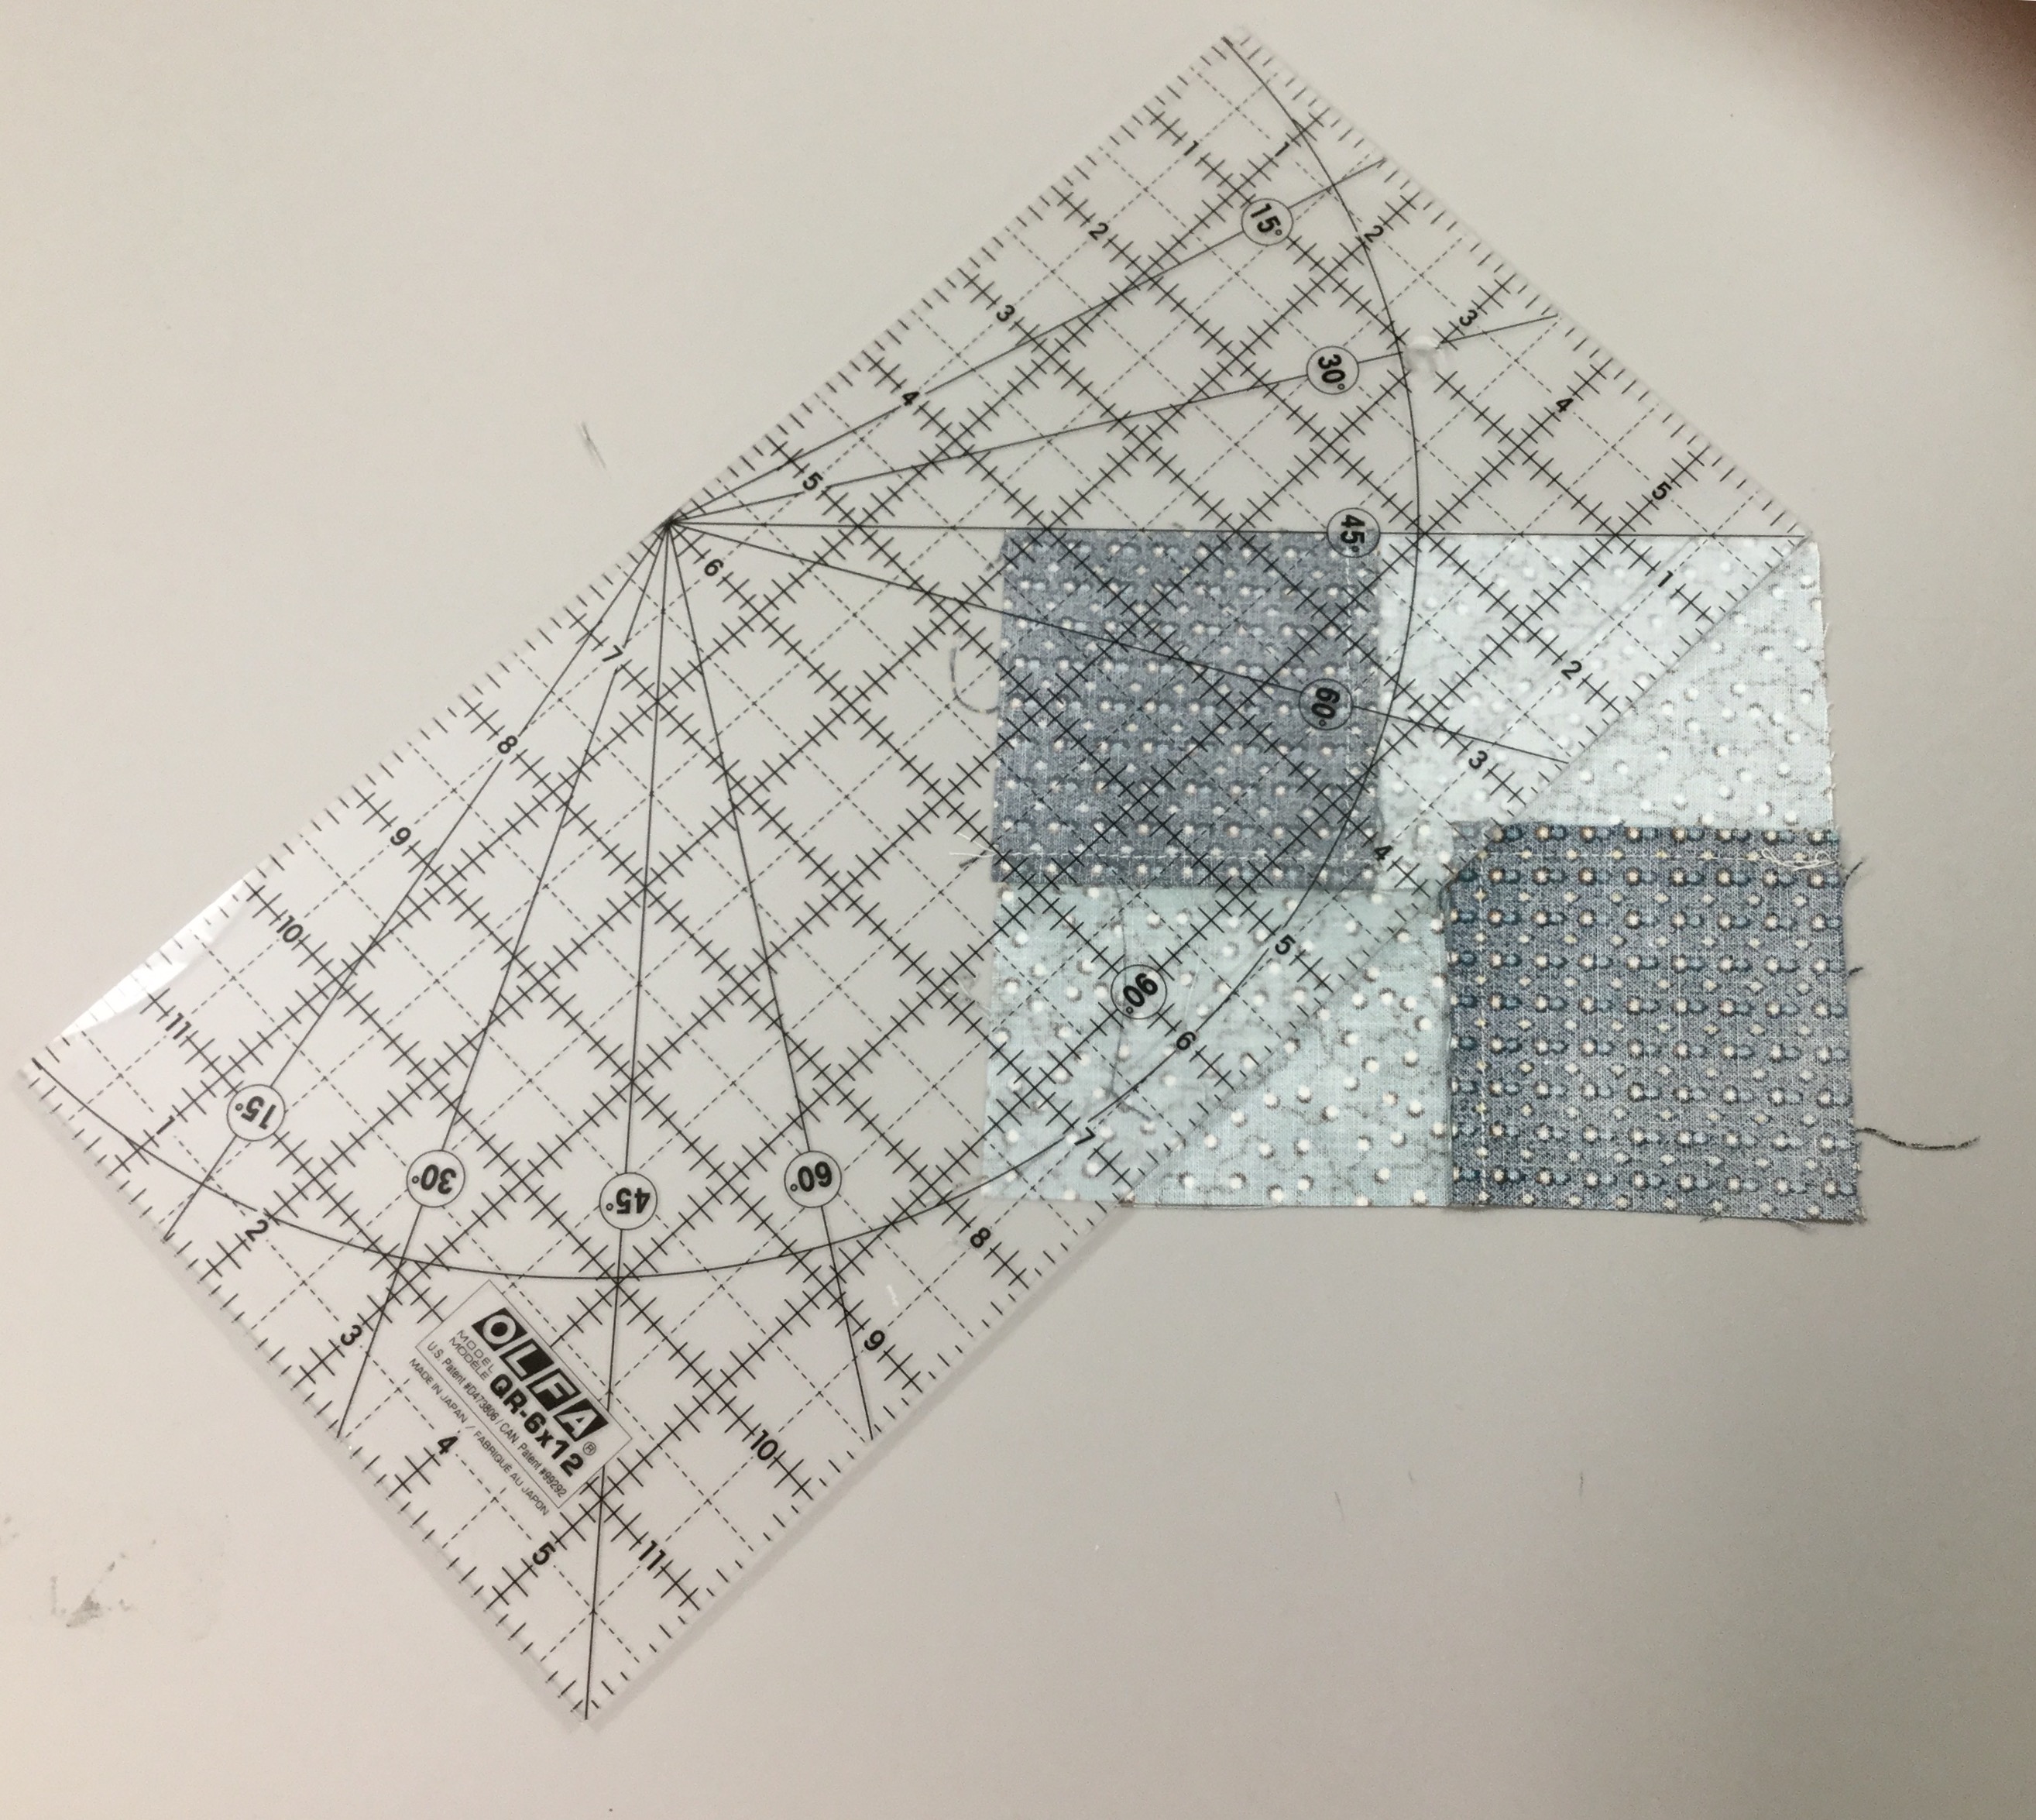
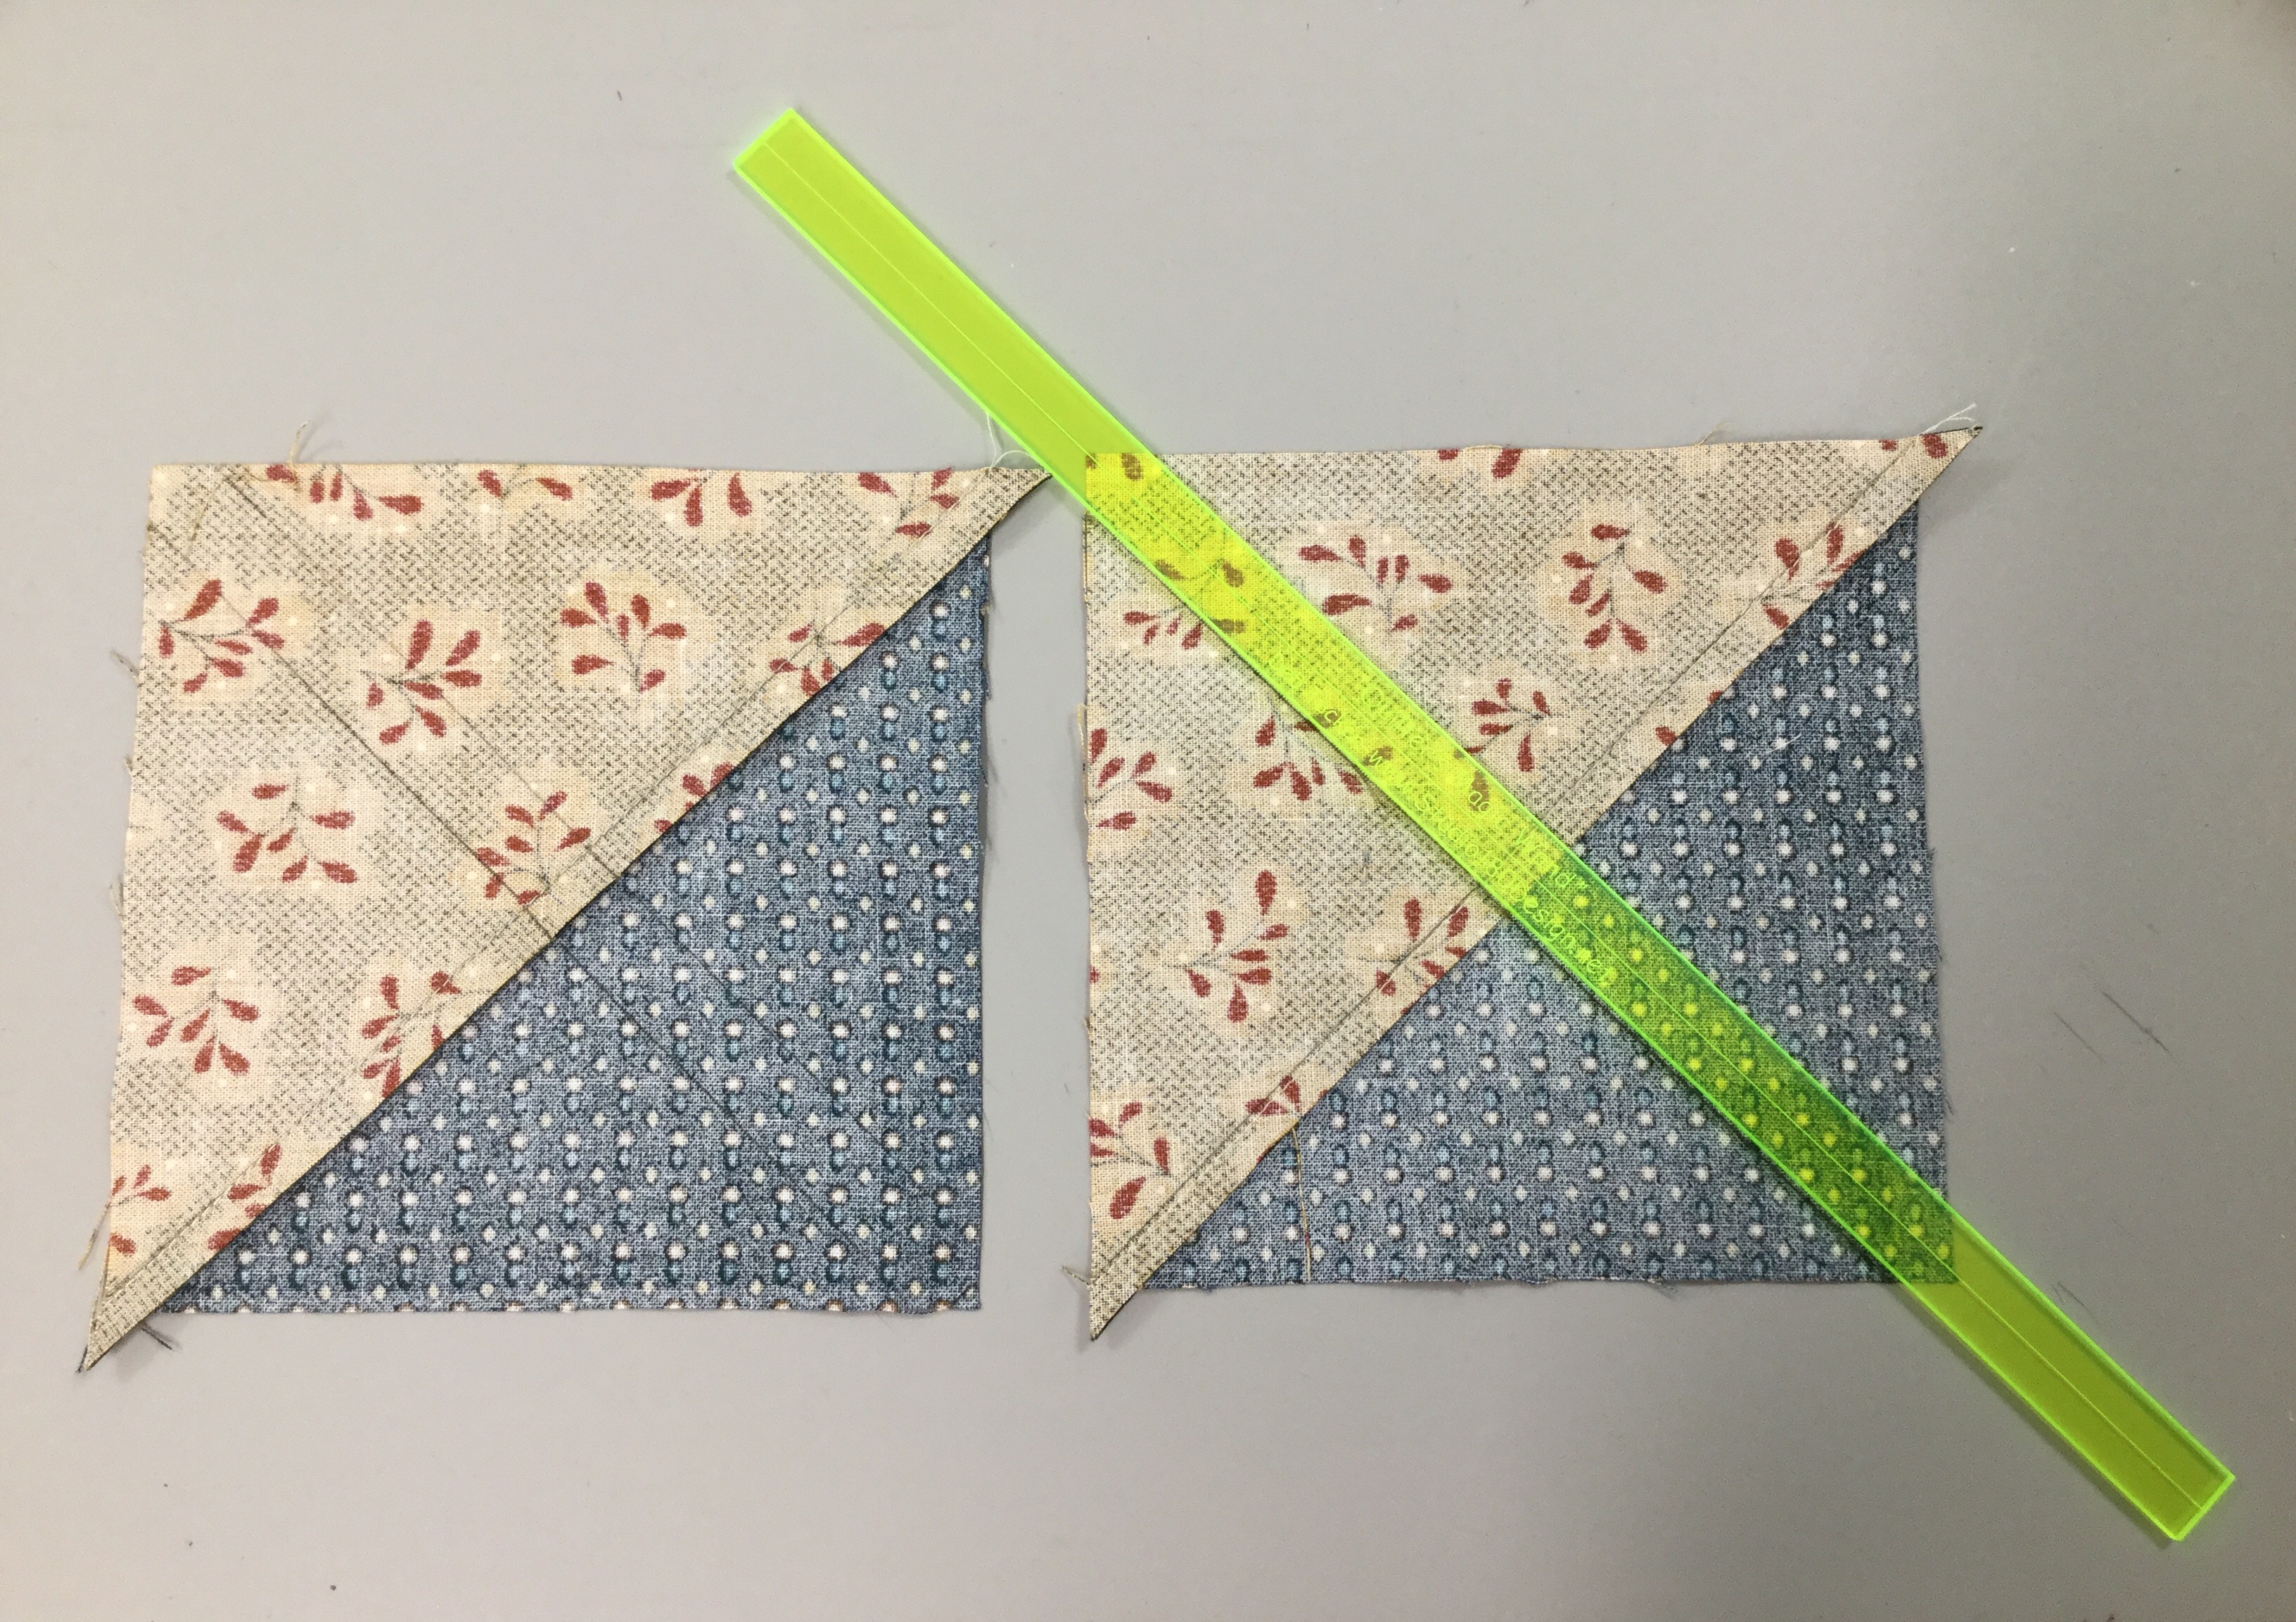
Position a ruler with a 45 degree angle on your unit as shown below. Draw a 45 degree sewing line from the top to bottom, through the corner of the square where the stitching lines meet.

IMG_4722

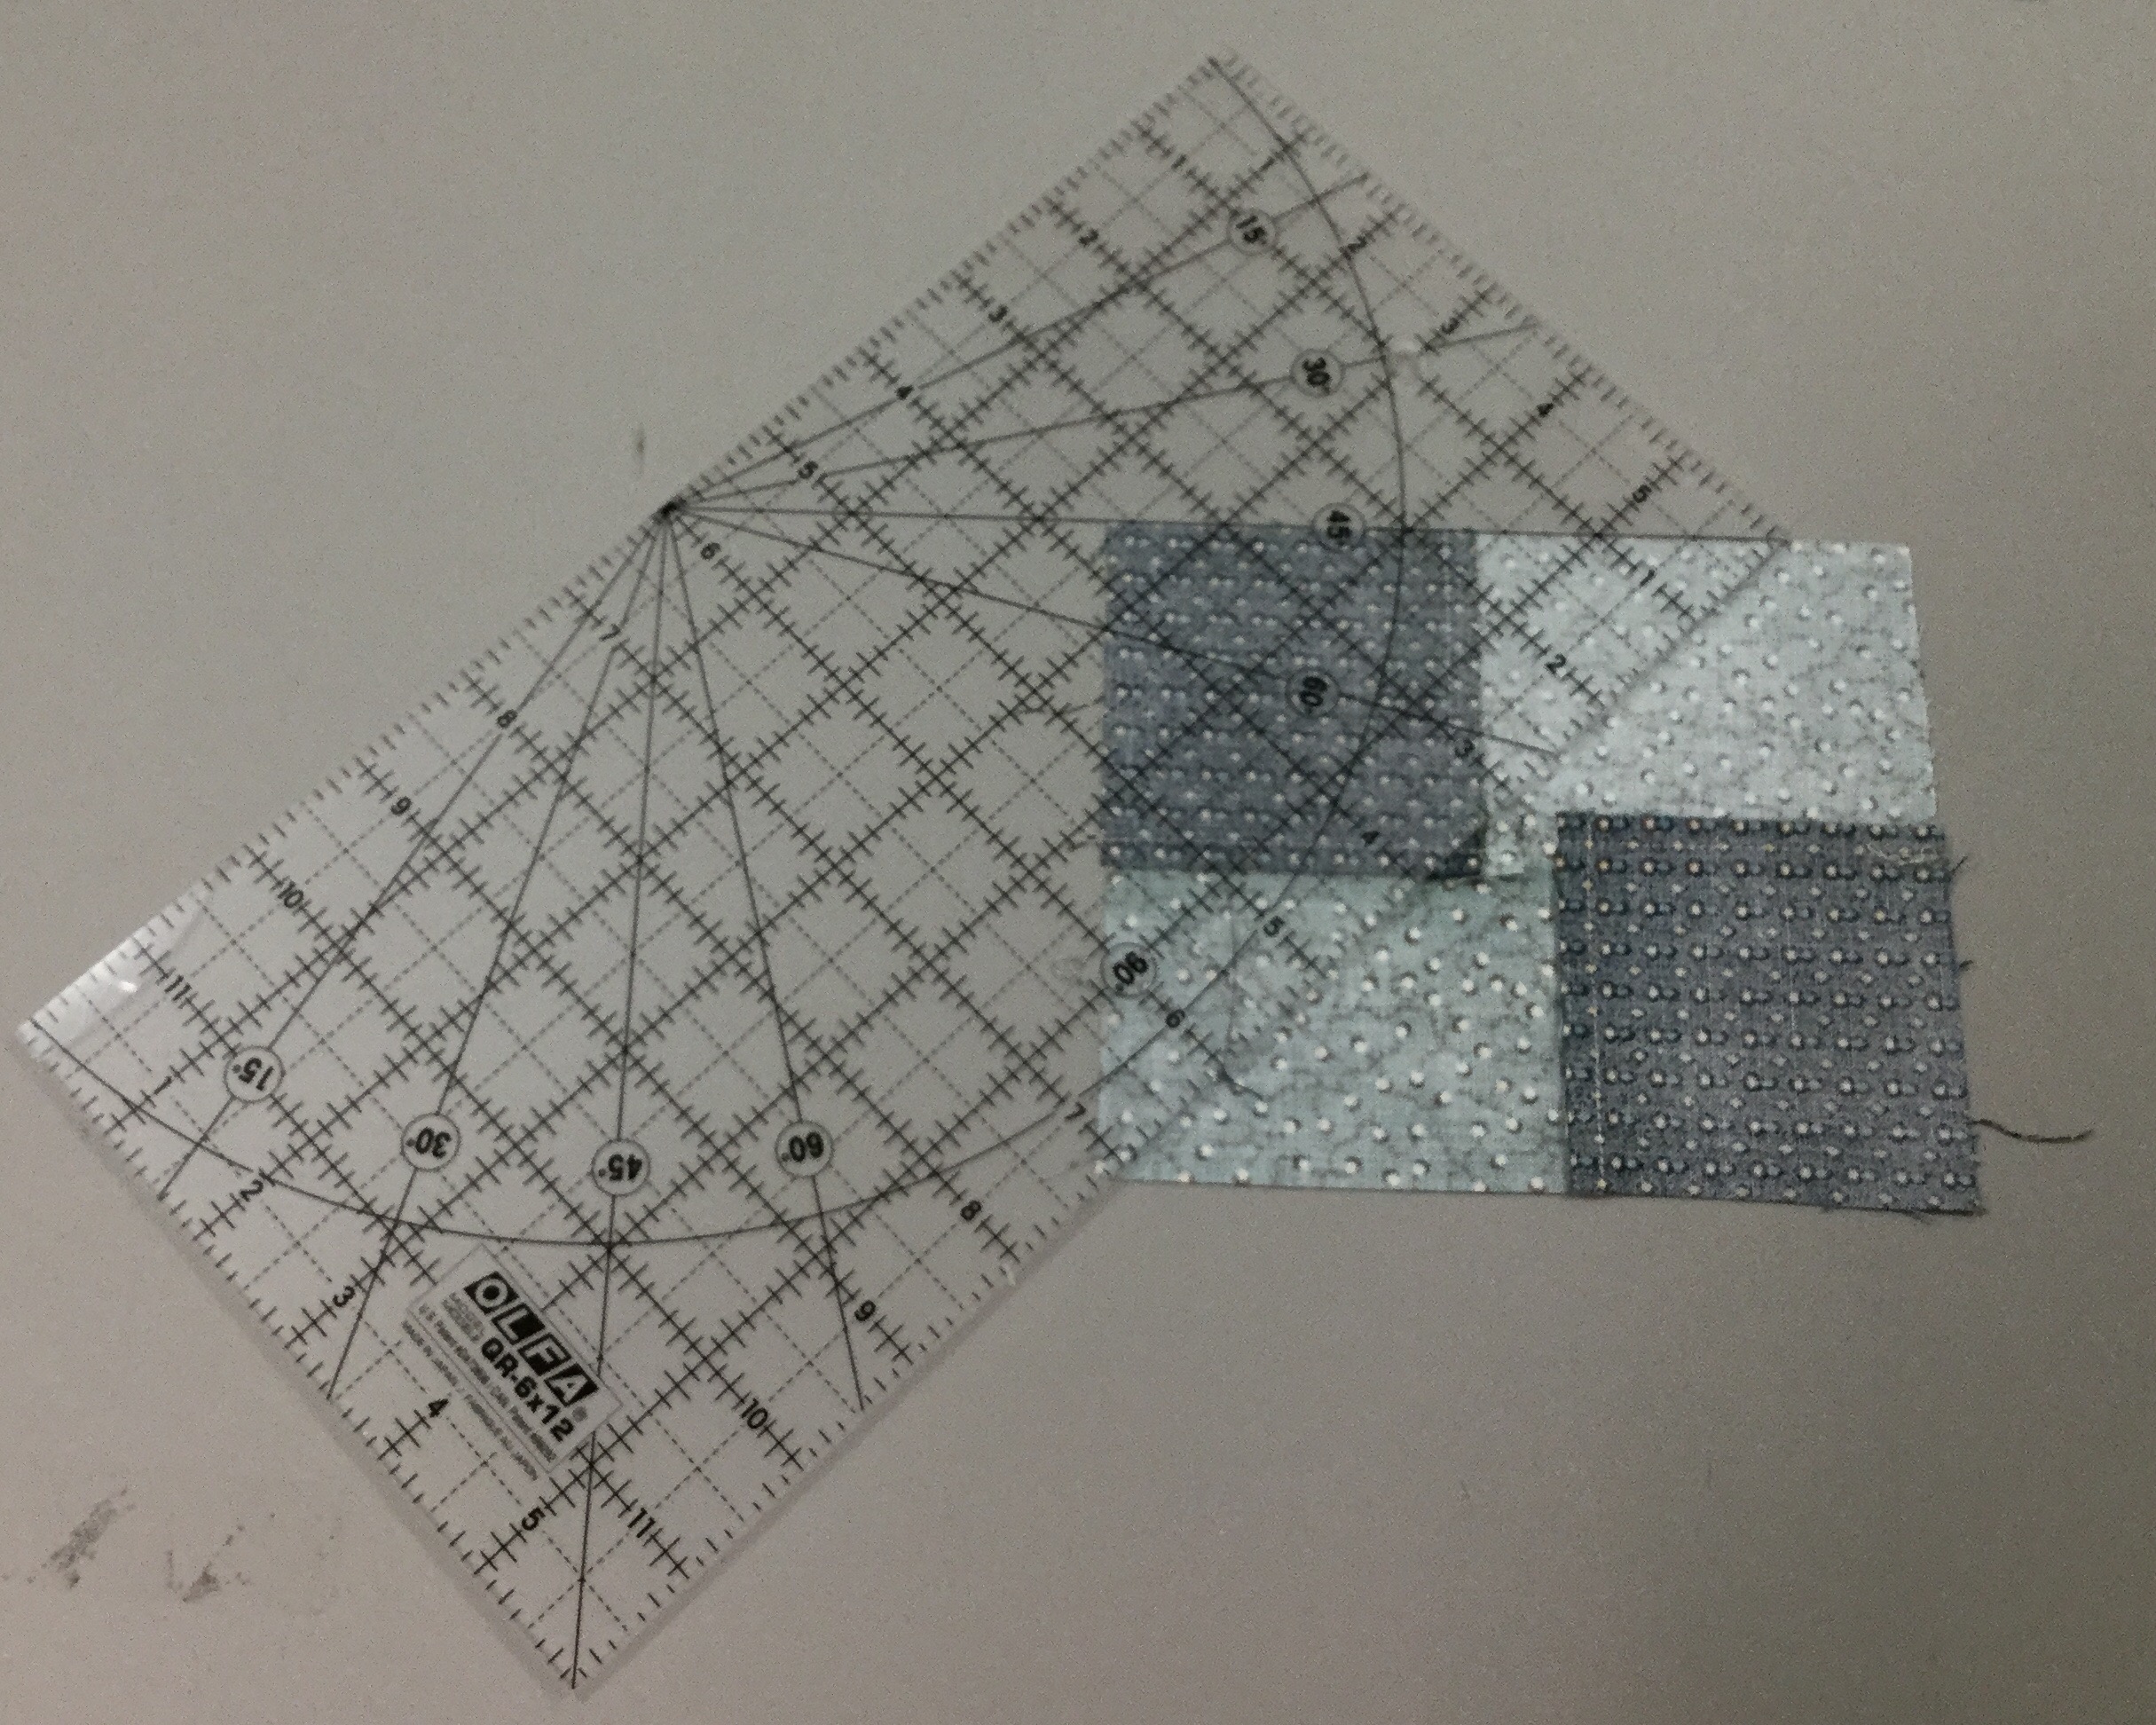
Draw a second 45 degree sewing line through the other corner as shown below:

IMG_4723

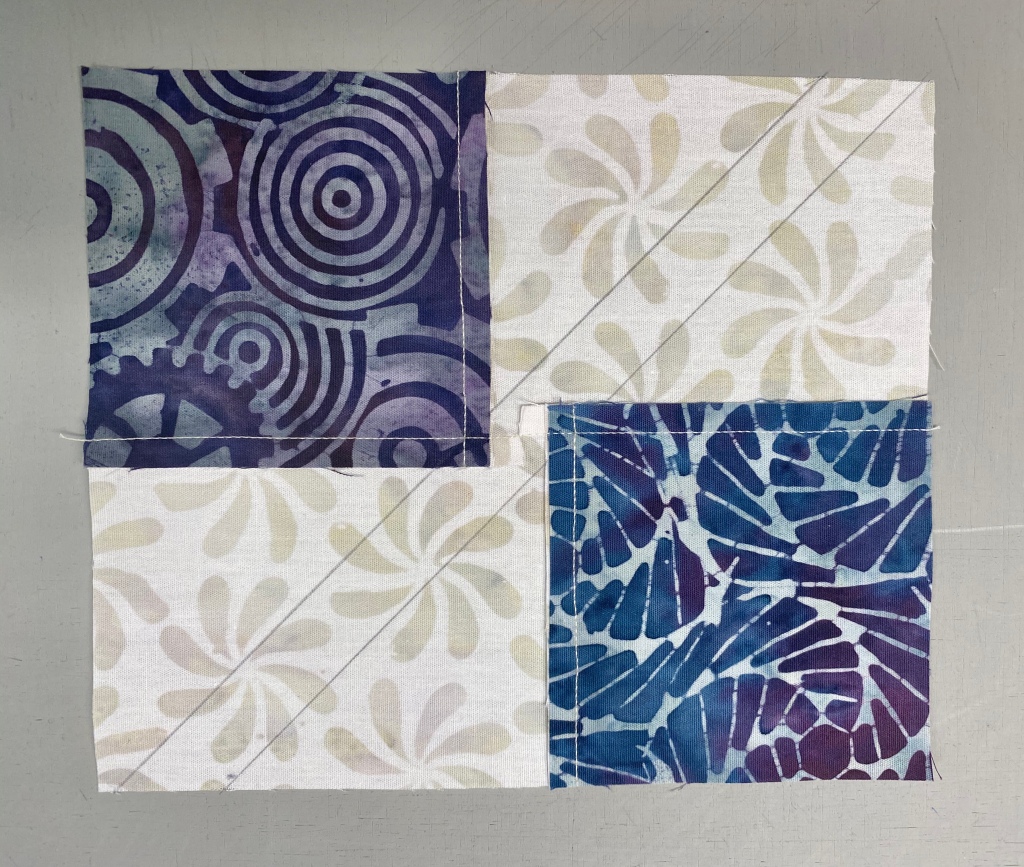
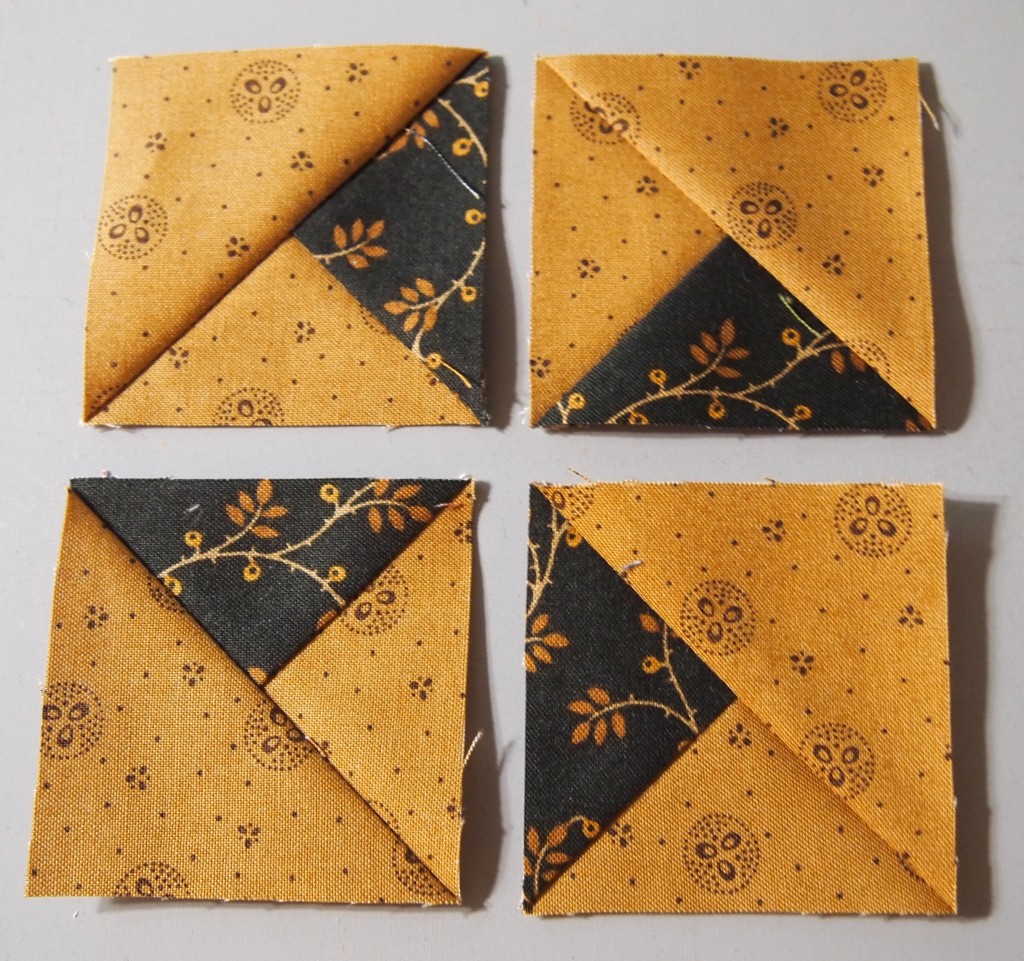
Center each marked unit over the rectangle. Sew on the lines, Cut apart and press toward the large triangle.

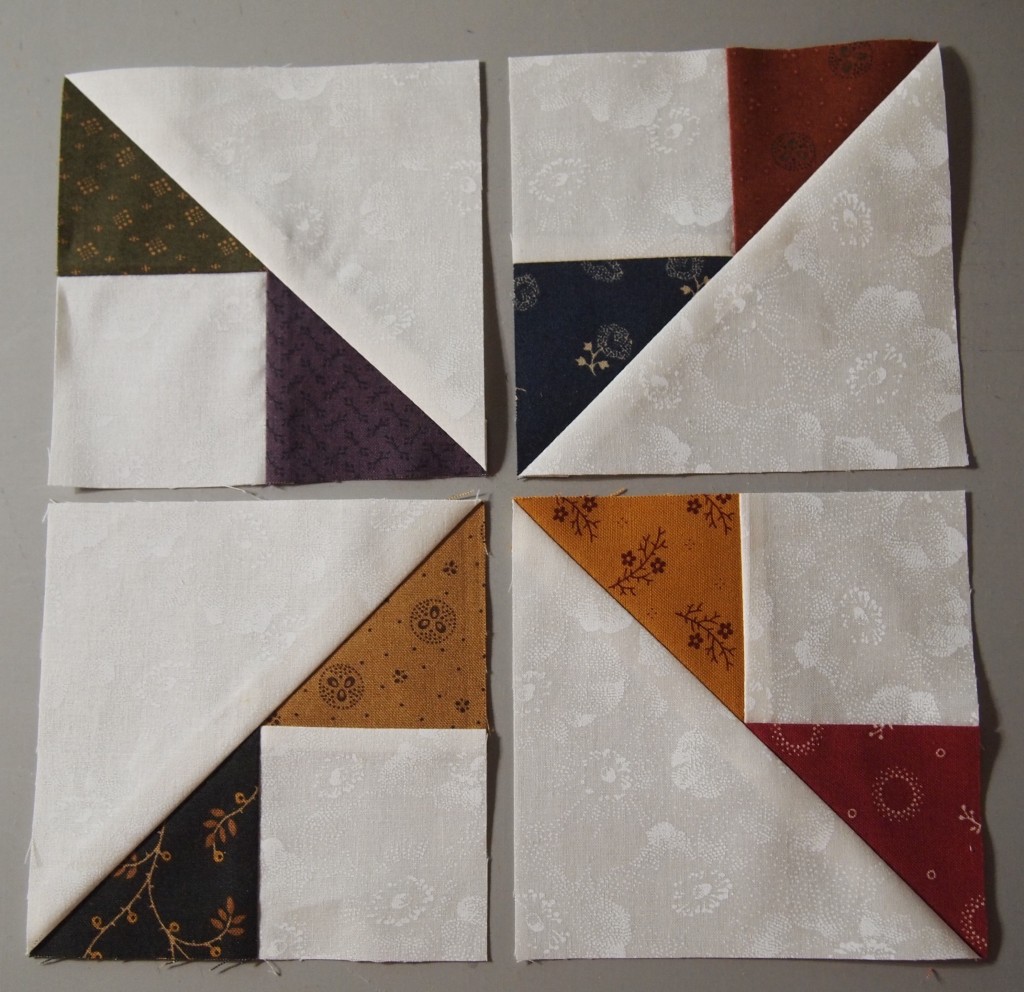
Using your Tucker Trimmer I, trim to the cut size of 4 1/2″.  Rotate the unit and trim again.  You now have 4 shaded four patch units.

As with the Ohio Star Variation we will be making 3 color quarter square triangles.  I chose the dark teal as my star points.  Following the instructions for my Tucker Trimmer  for 4″ finished units, I cut 2 – 5 1/2″ starter squares of my color 3 dark teal, 1 – 5 1/2″ starter square of color 2 light teal. And 1 – 5 1/2″ starter square of color 4 gold.

IMG_4729

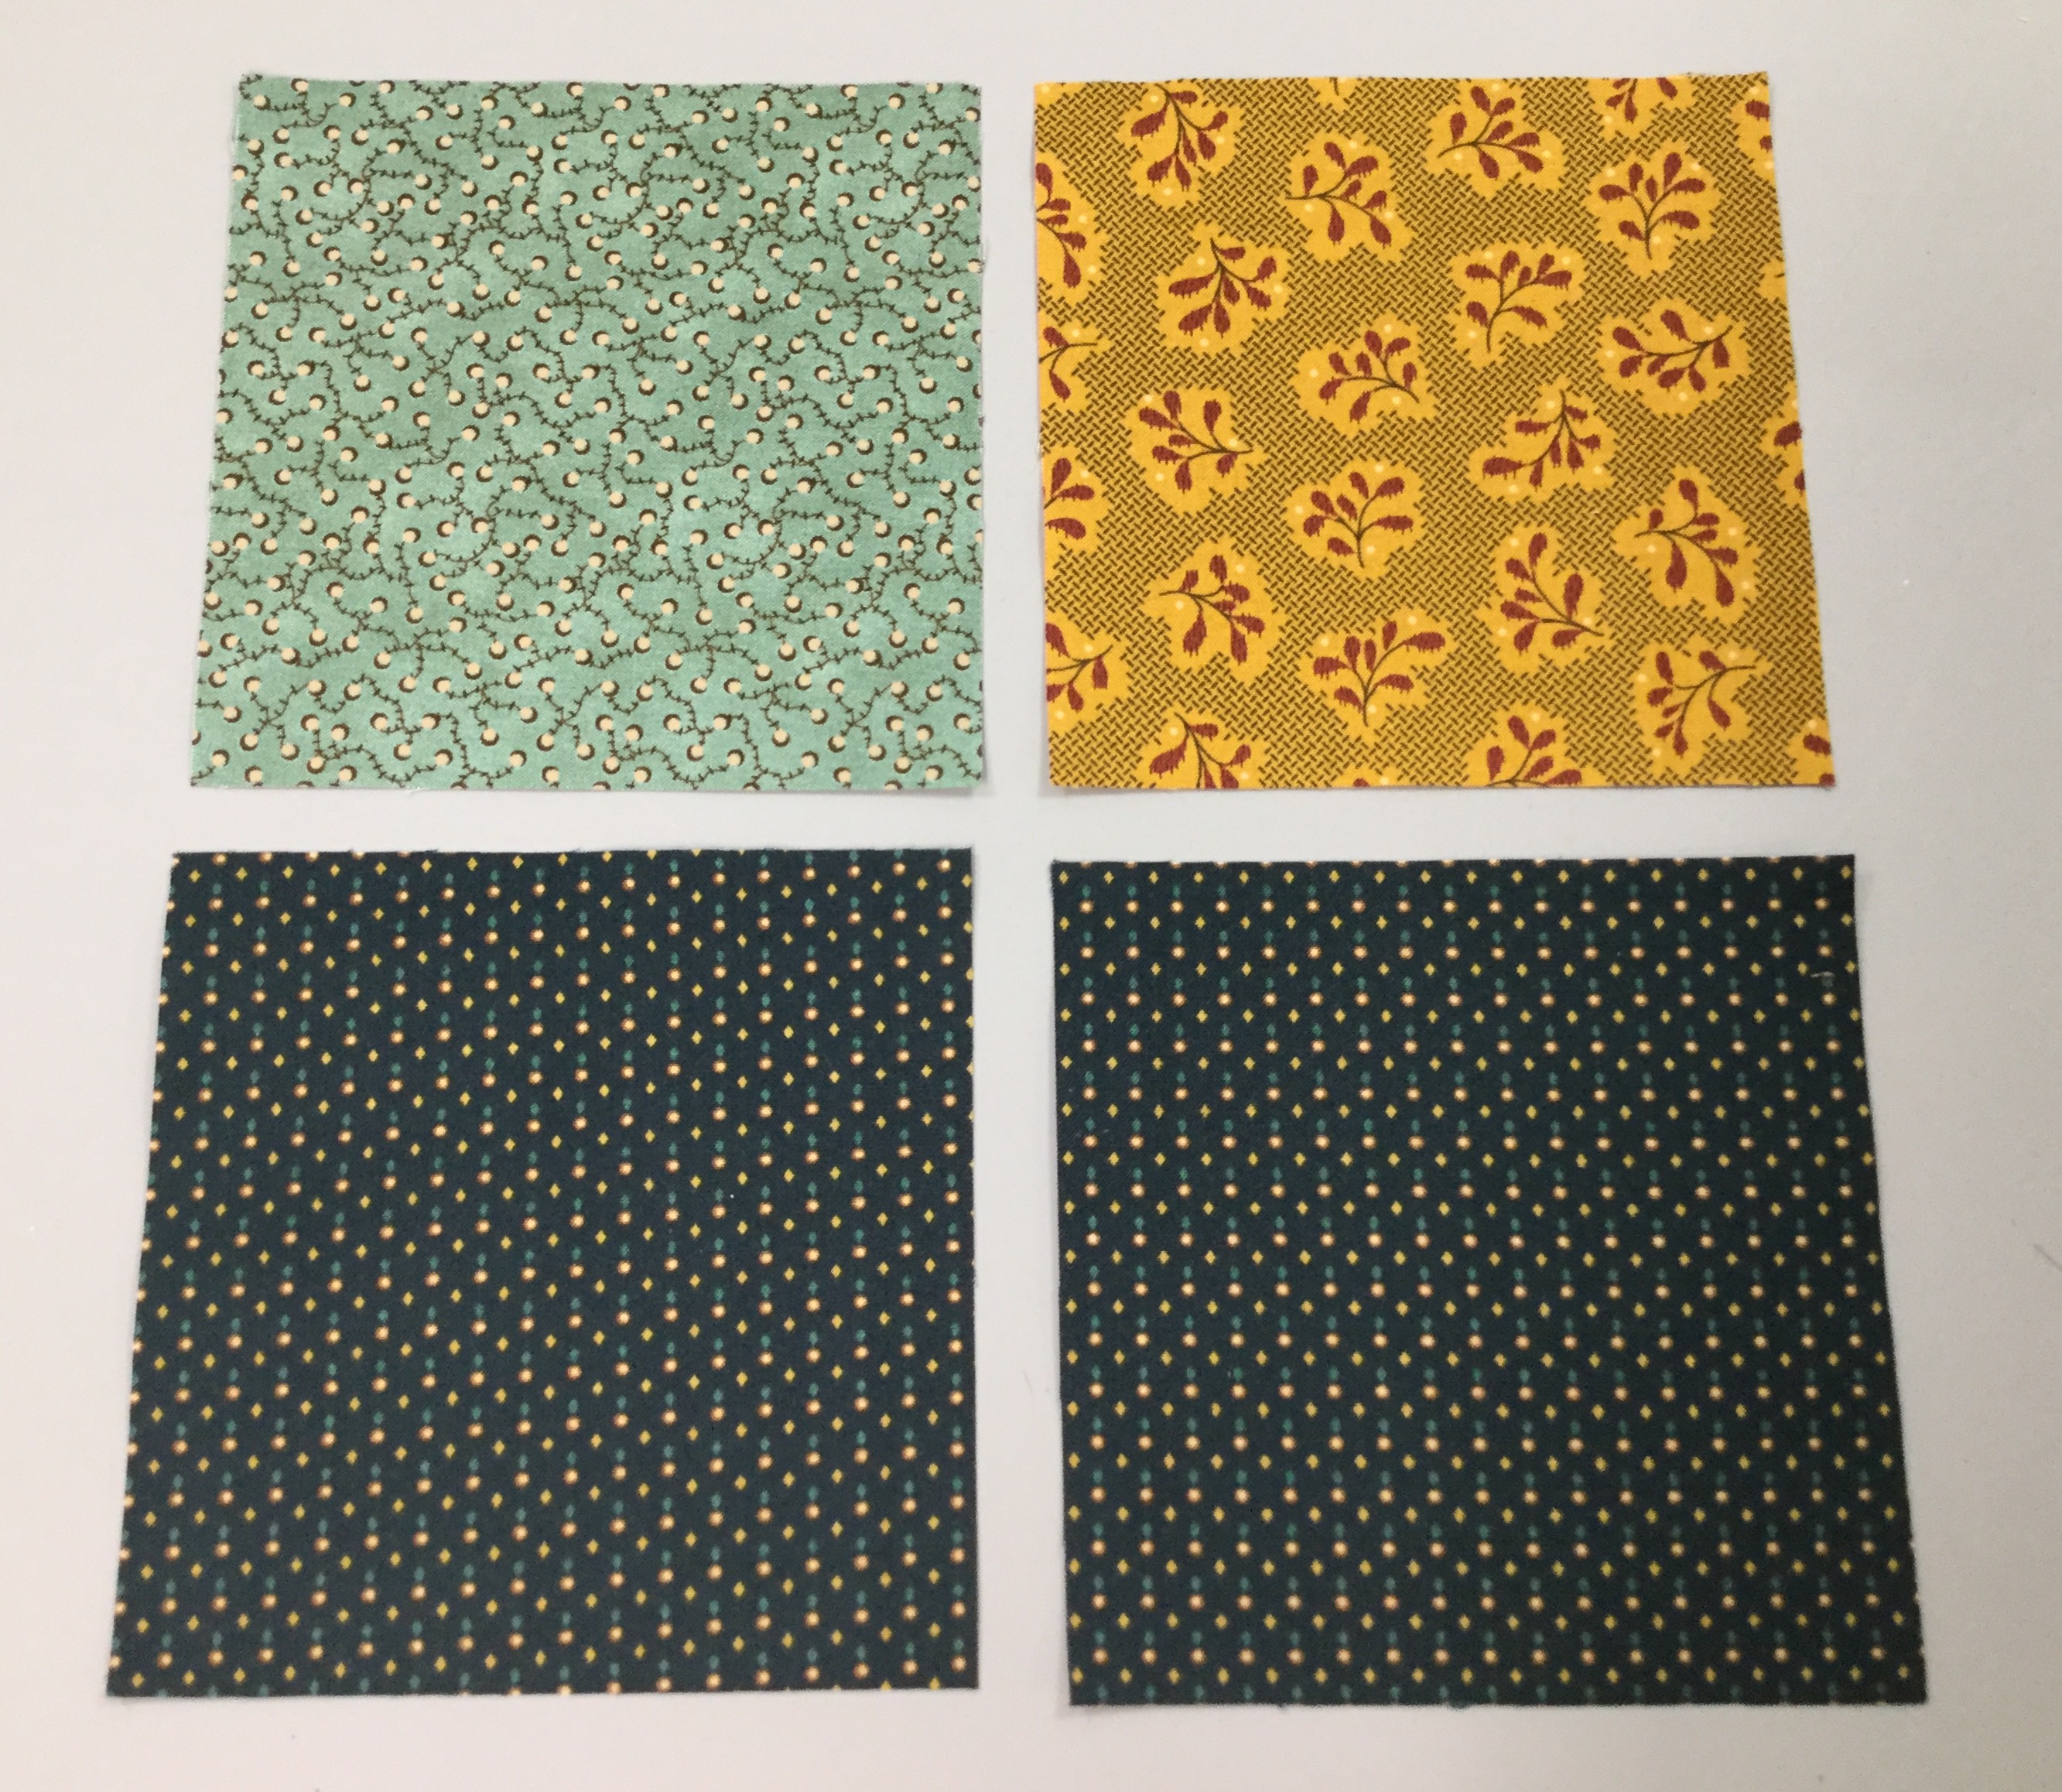
We start by making half square triangles.  Using your Magic Wand, draw diagonal lines on the back of 2 of the starter squares.  Position a color 2 light teal square over a color 3 dark teal square, and a color 4 gold square over the other color 3 dark teal square.

Sew on the lines and cut apart.  Press toward the dark triangle.

Again, Using your Magic Wand draw diagonal sewing lines on the back of two half square triangles.

IMG_4734

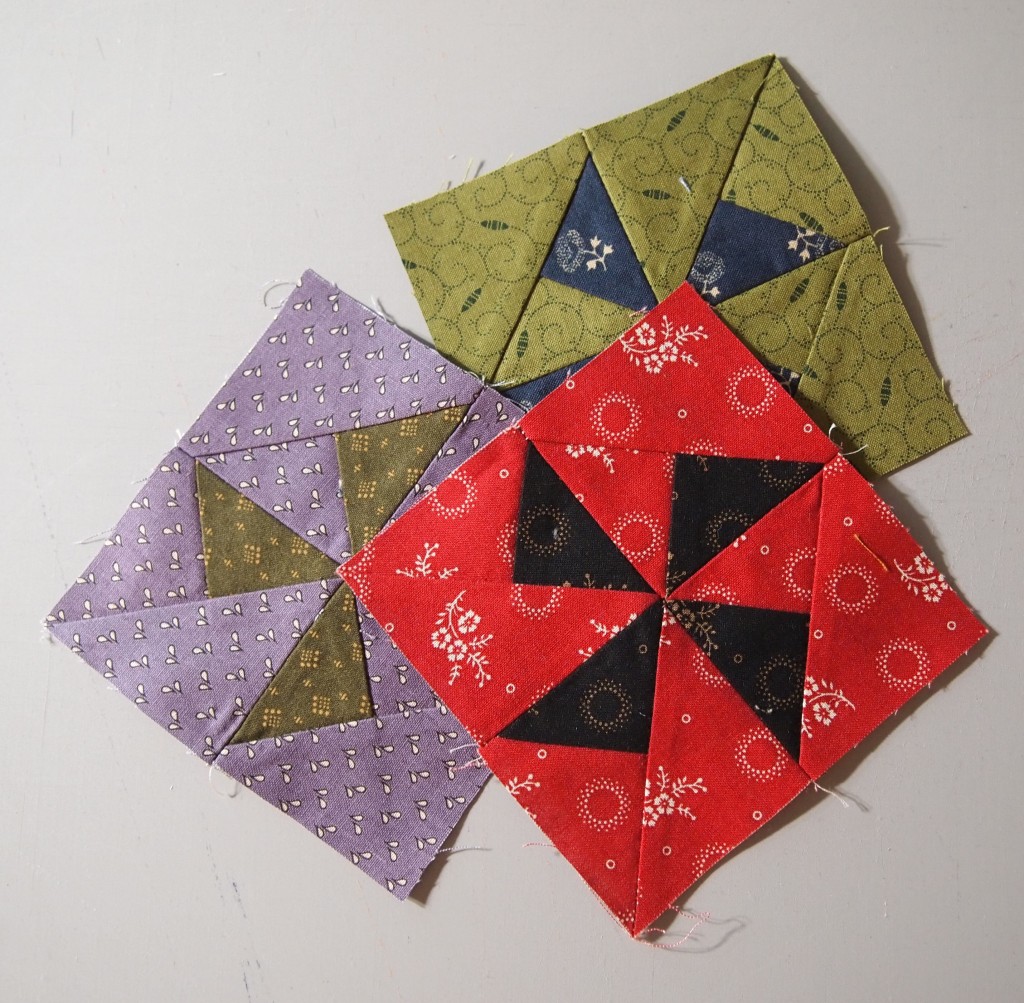
Position one gold and dark teal half square triangle over one light teal and dark teal half square triangle making sure the dark teal is on opposite sides. Nest the seams carefully.  Sew on the lines, cut apart, swirl the centers and press well.  Repeat with the other two half square triangles.

Trim to the cut size of 4 1/2″ using your Tucker Trimmer I. Rotate and trim Again.  You now have 4 – 3 color quarter square triangles.

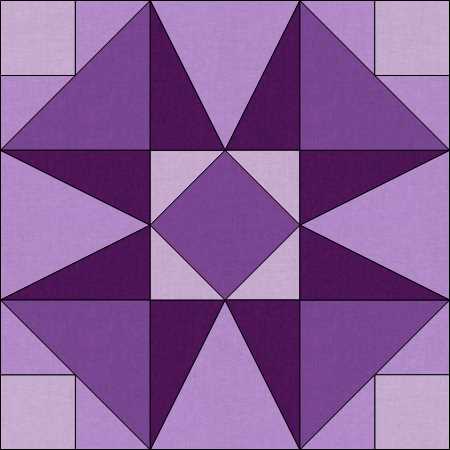
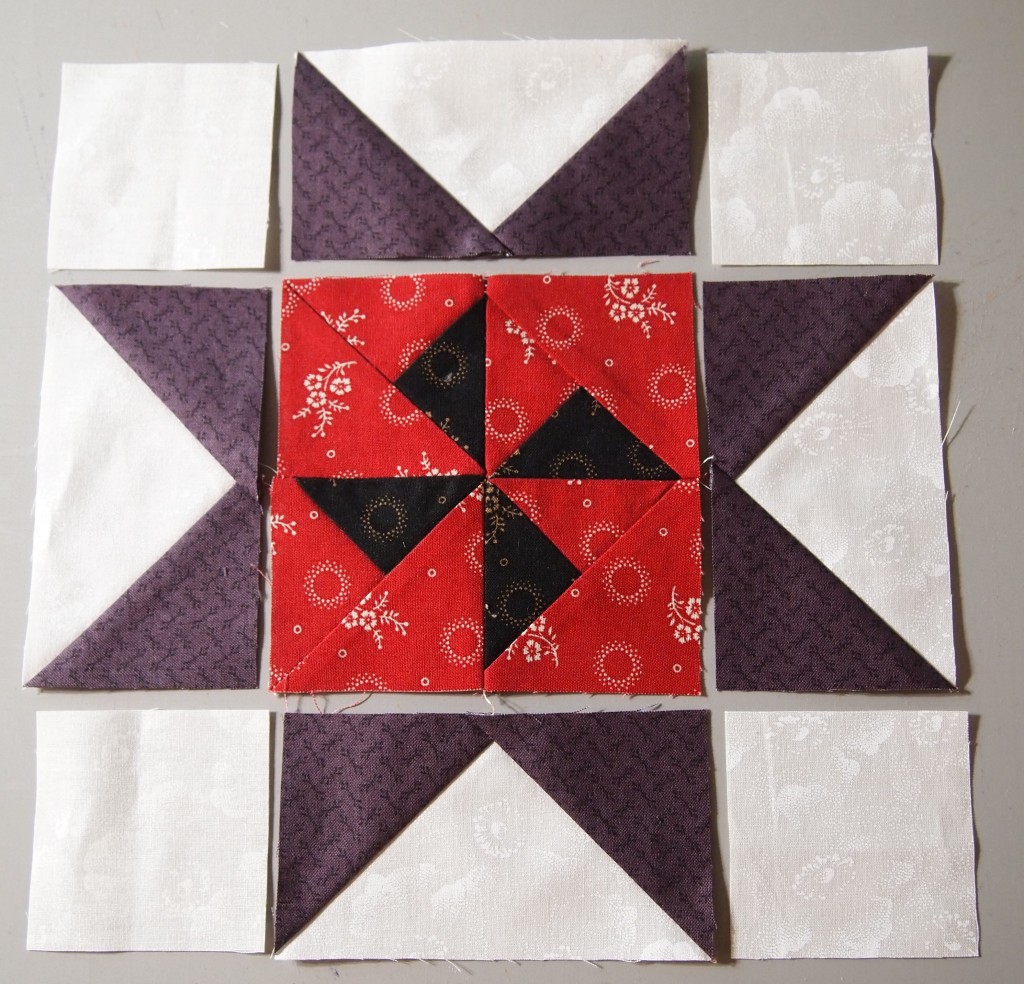
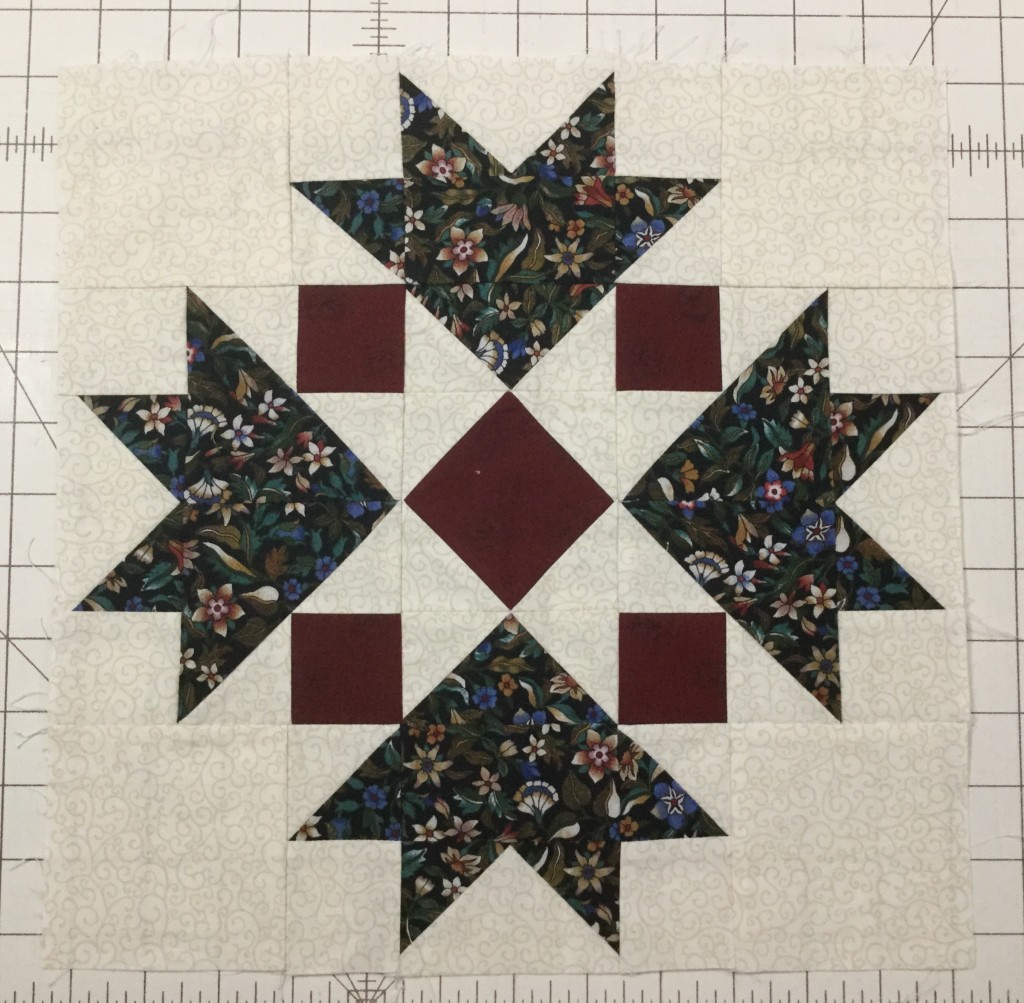
Cut 1 – 4 1/2″ square from color 5 for the block center.  Layout your units as shown below:

IMG_4741

Sew the 3 units on the right and press toward the shaded four patch units.  Sew the center 3 units and press toward the center square.  sew the 3 units on the left and press toward the shaded four patch units.  Join the 3 sections, carefully nesting the seams and press.
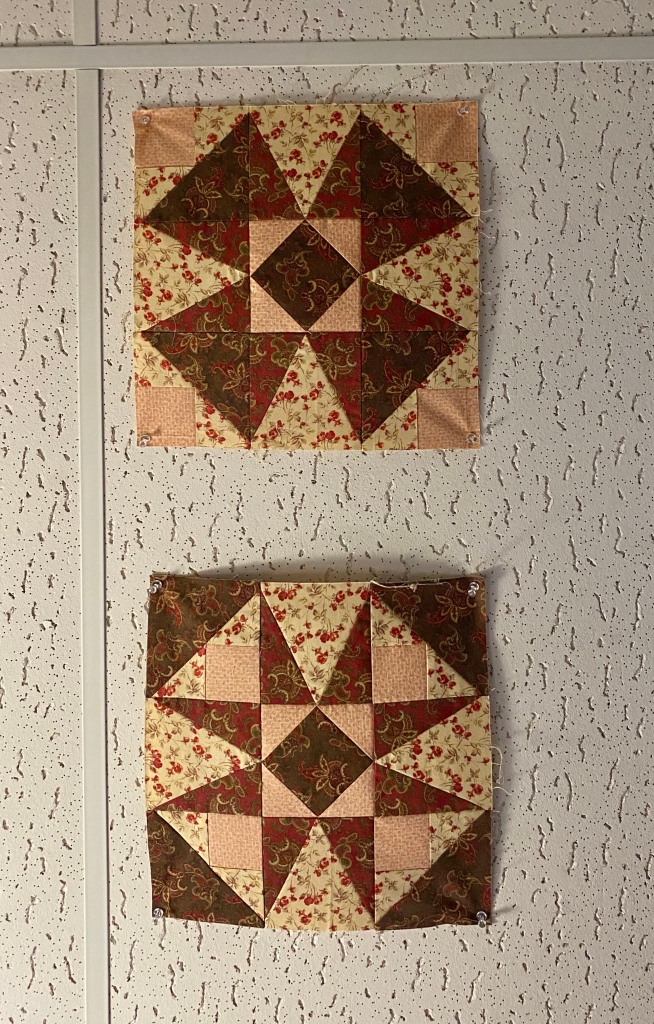
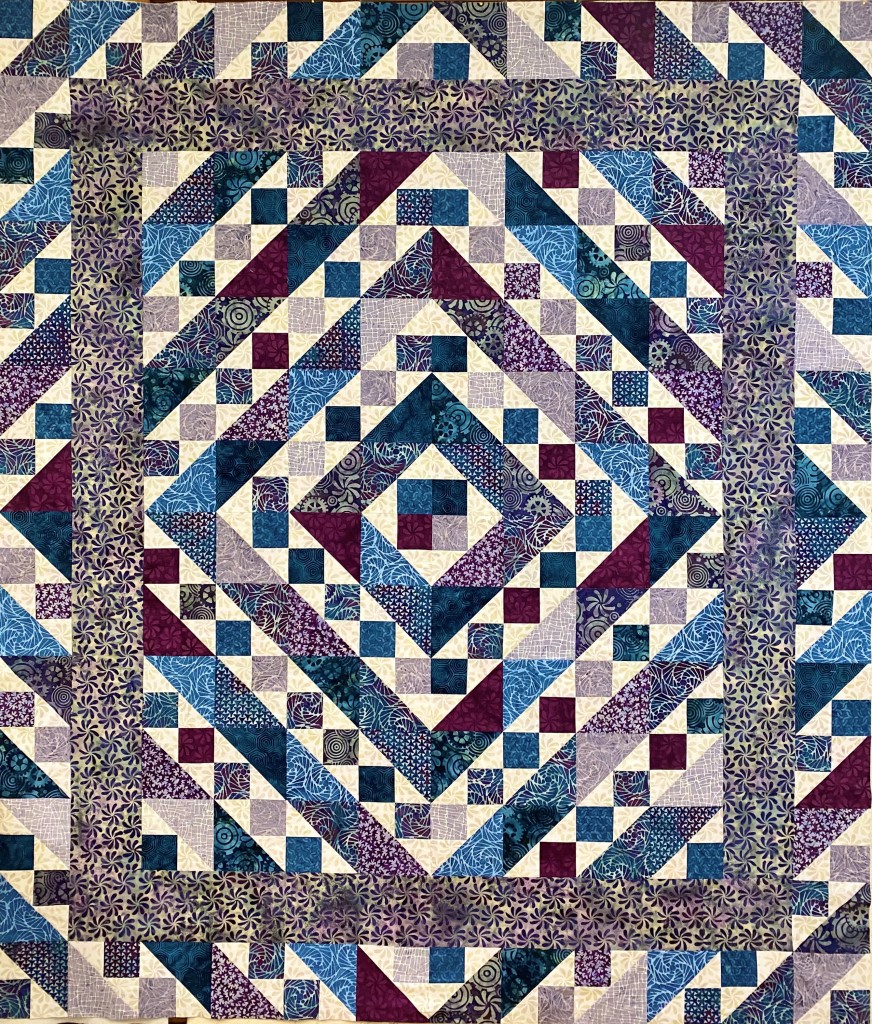
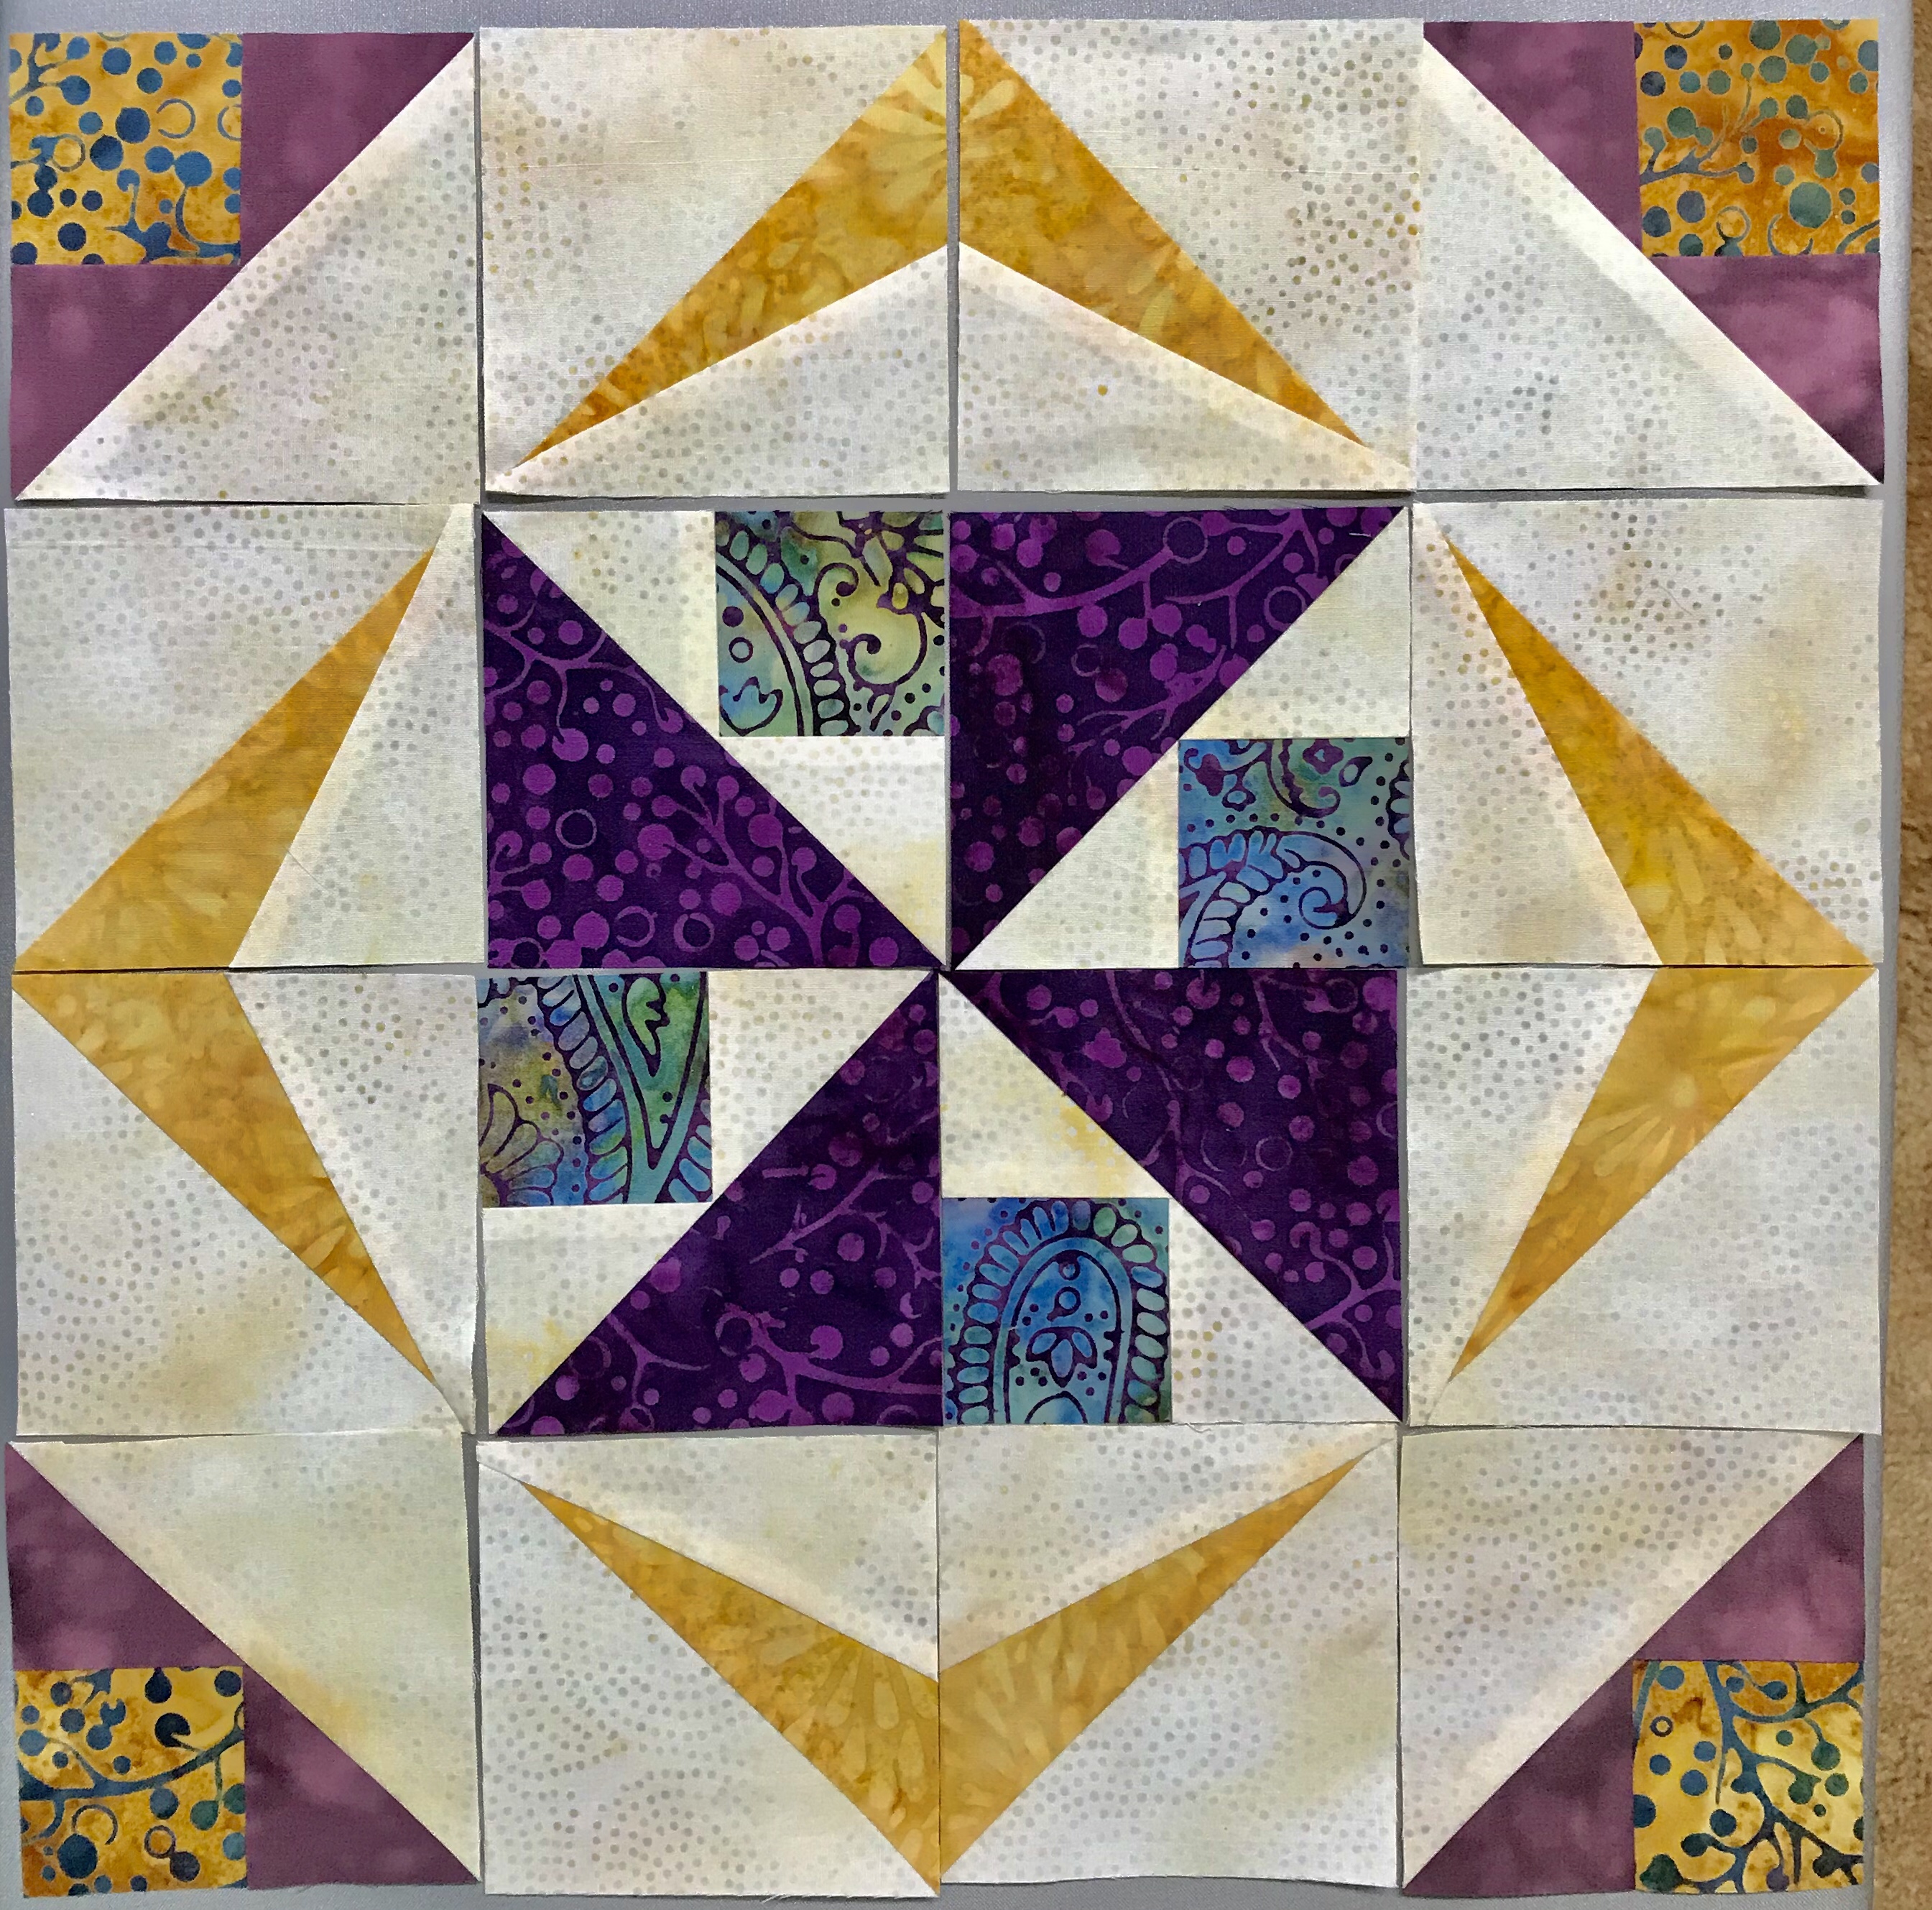
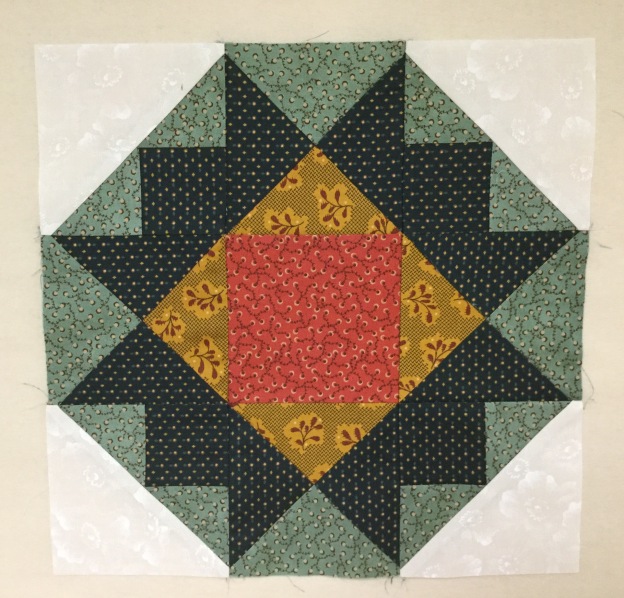
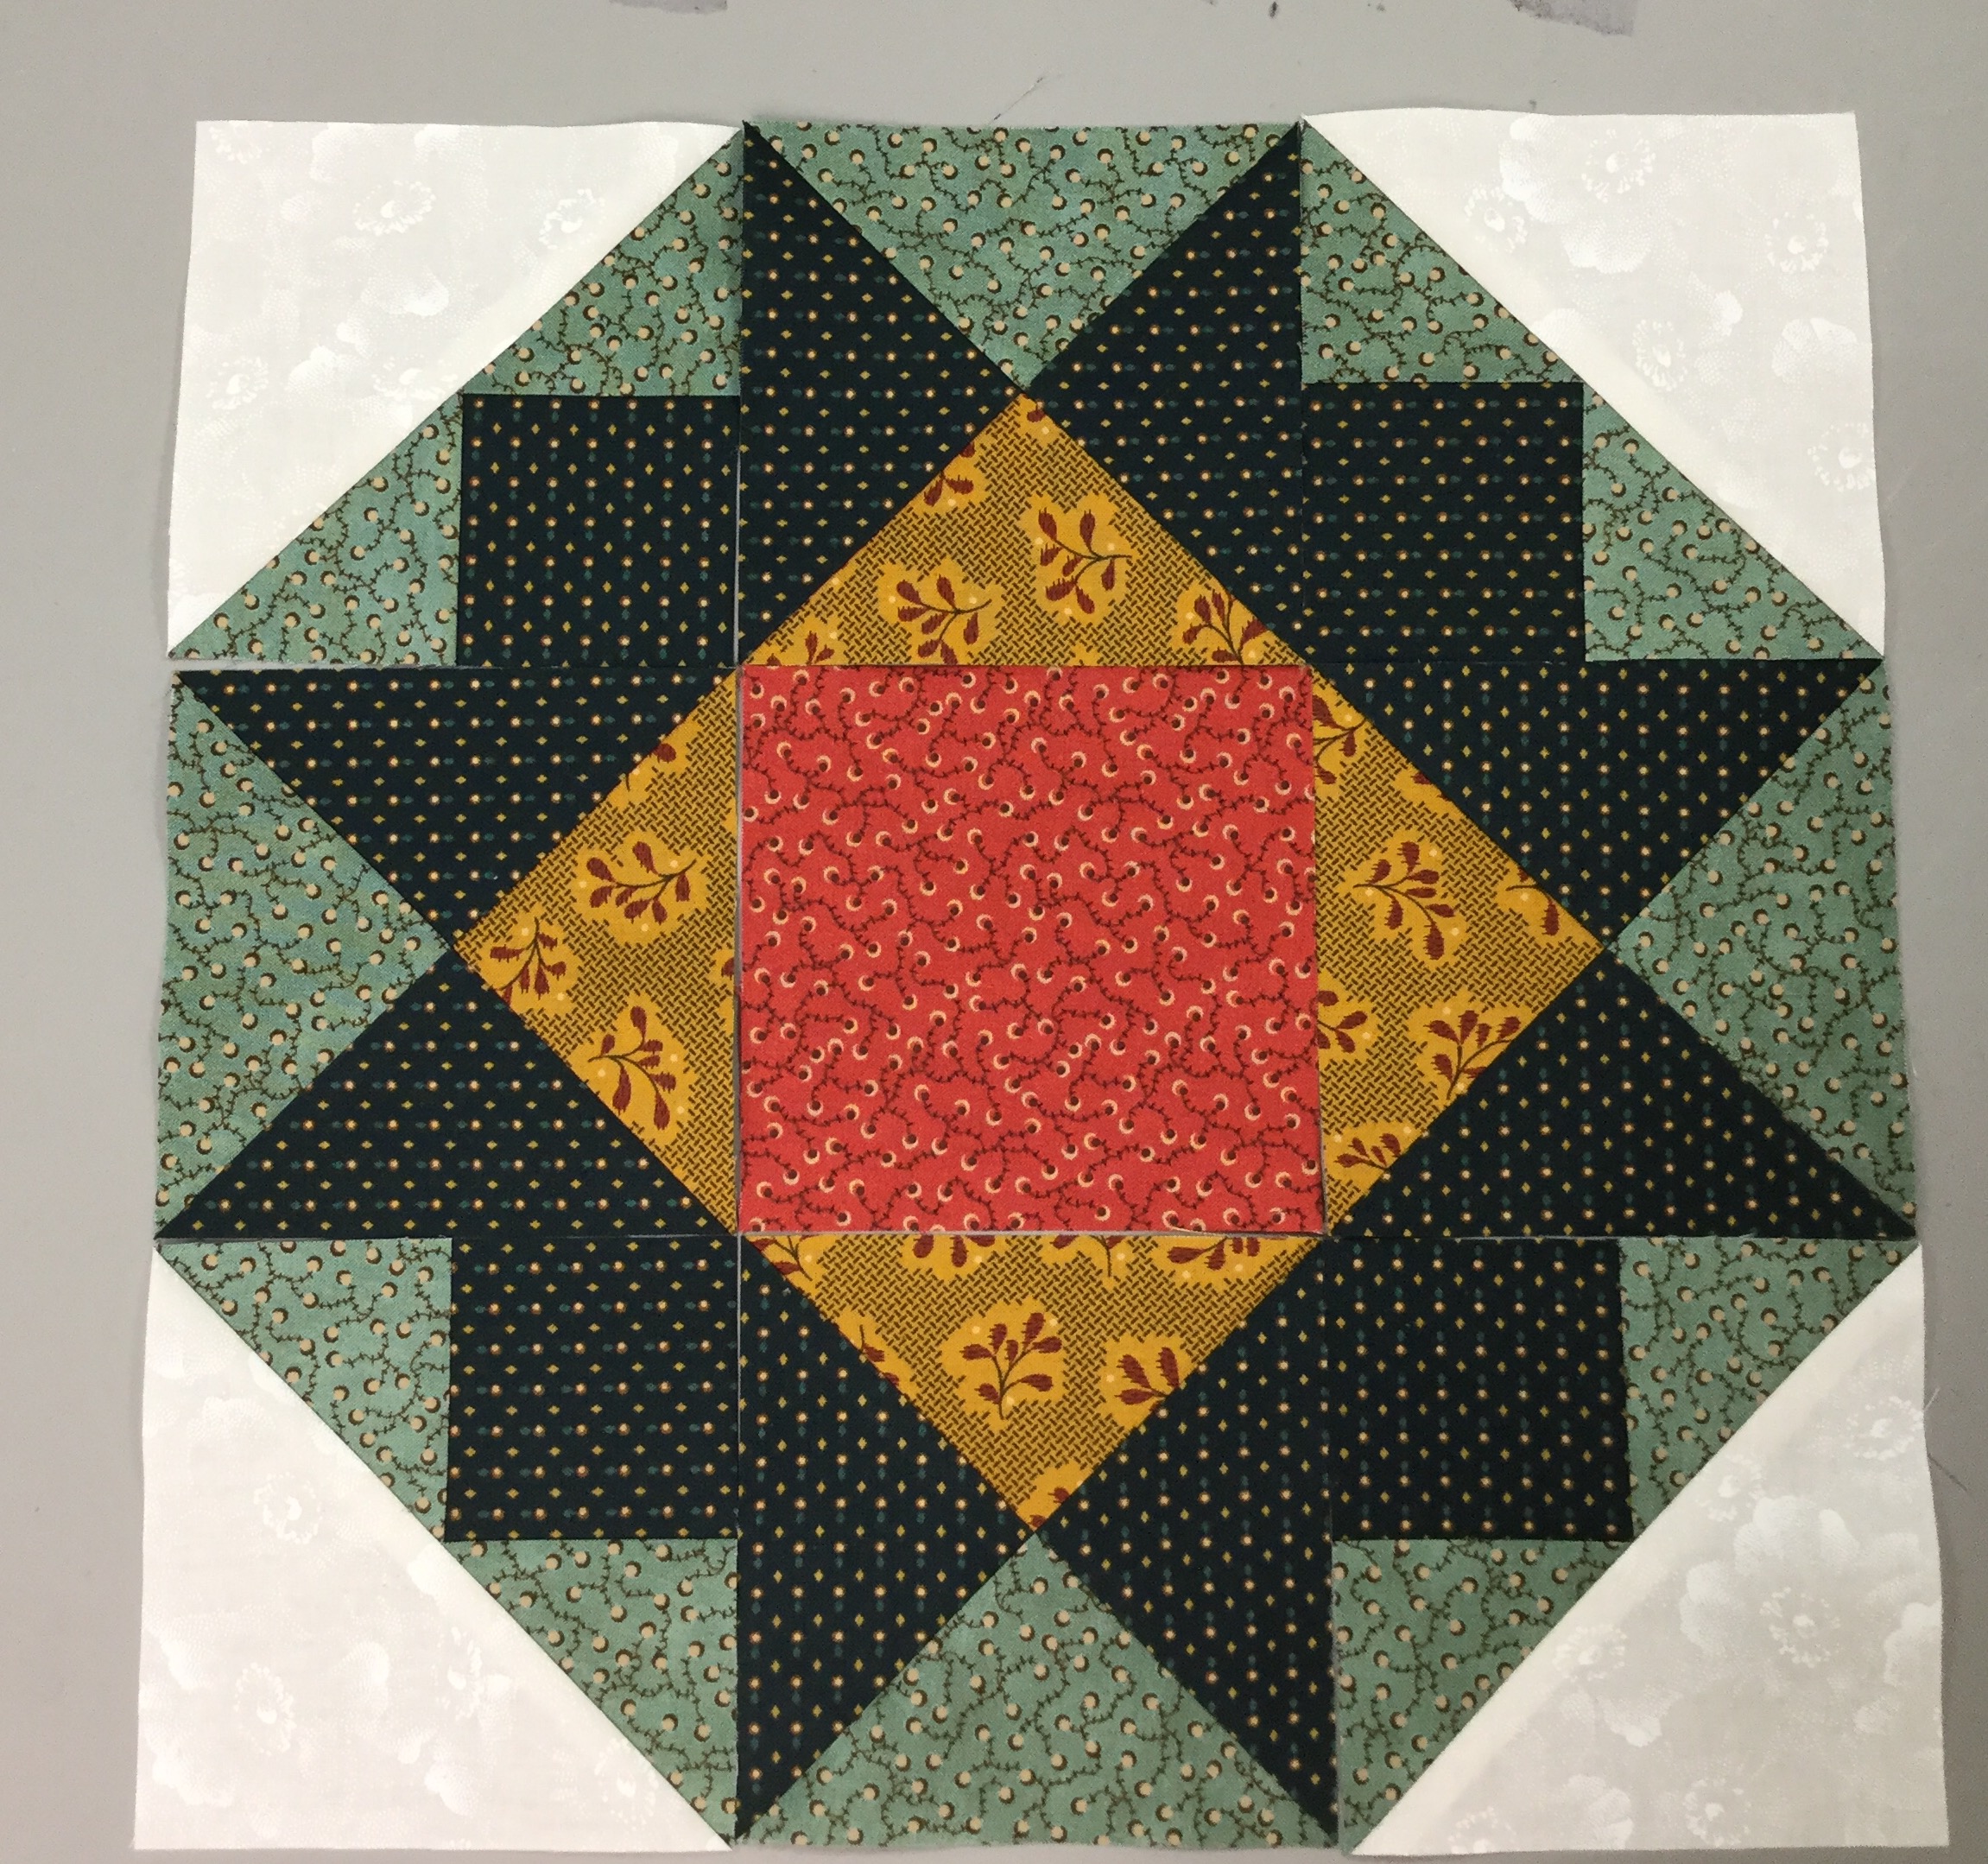
The finished block:

IMG_4745

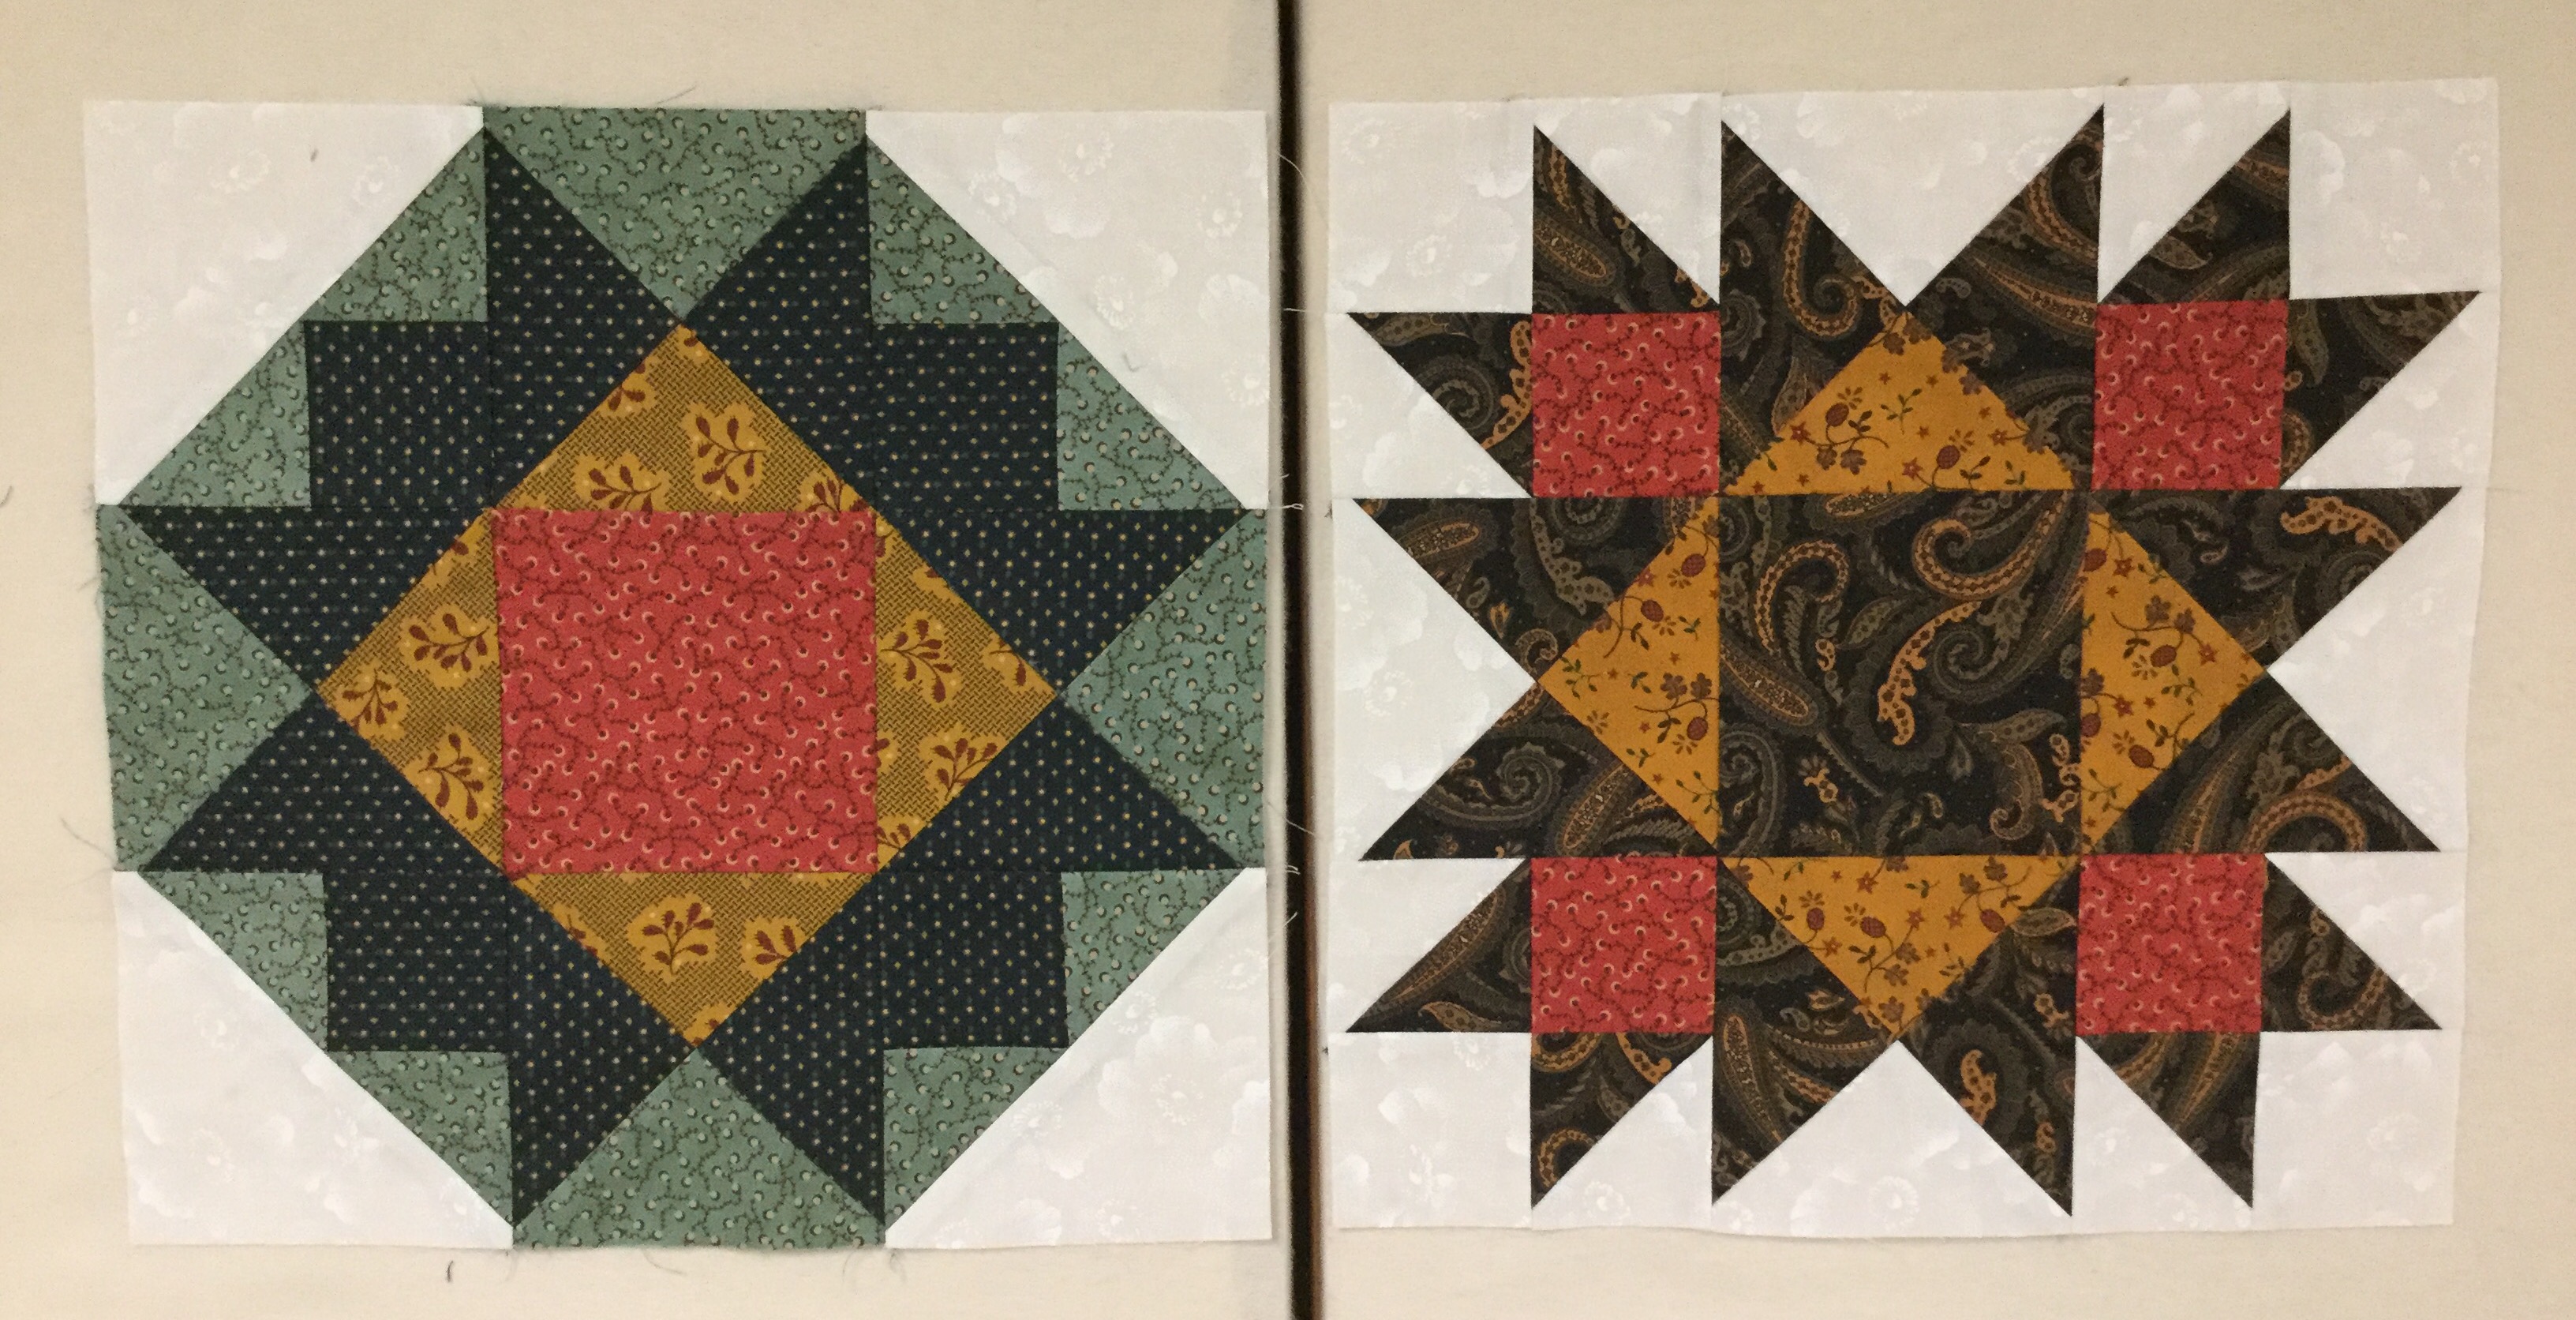
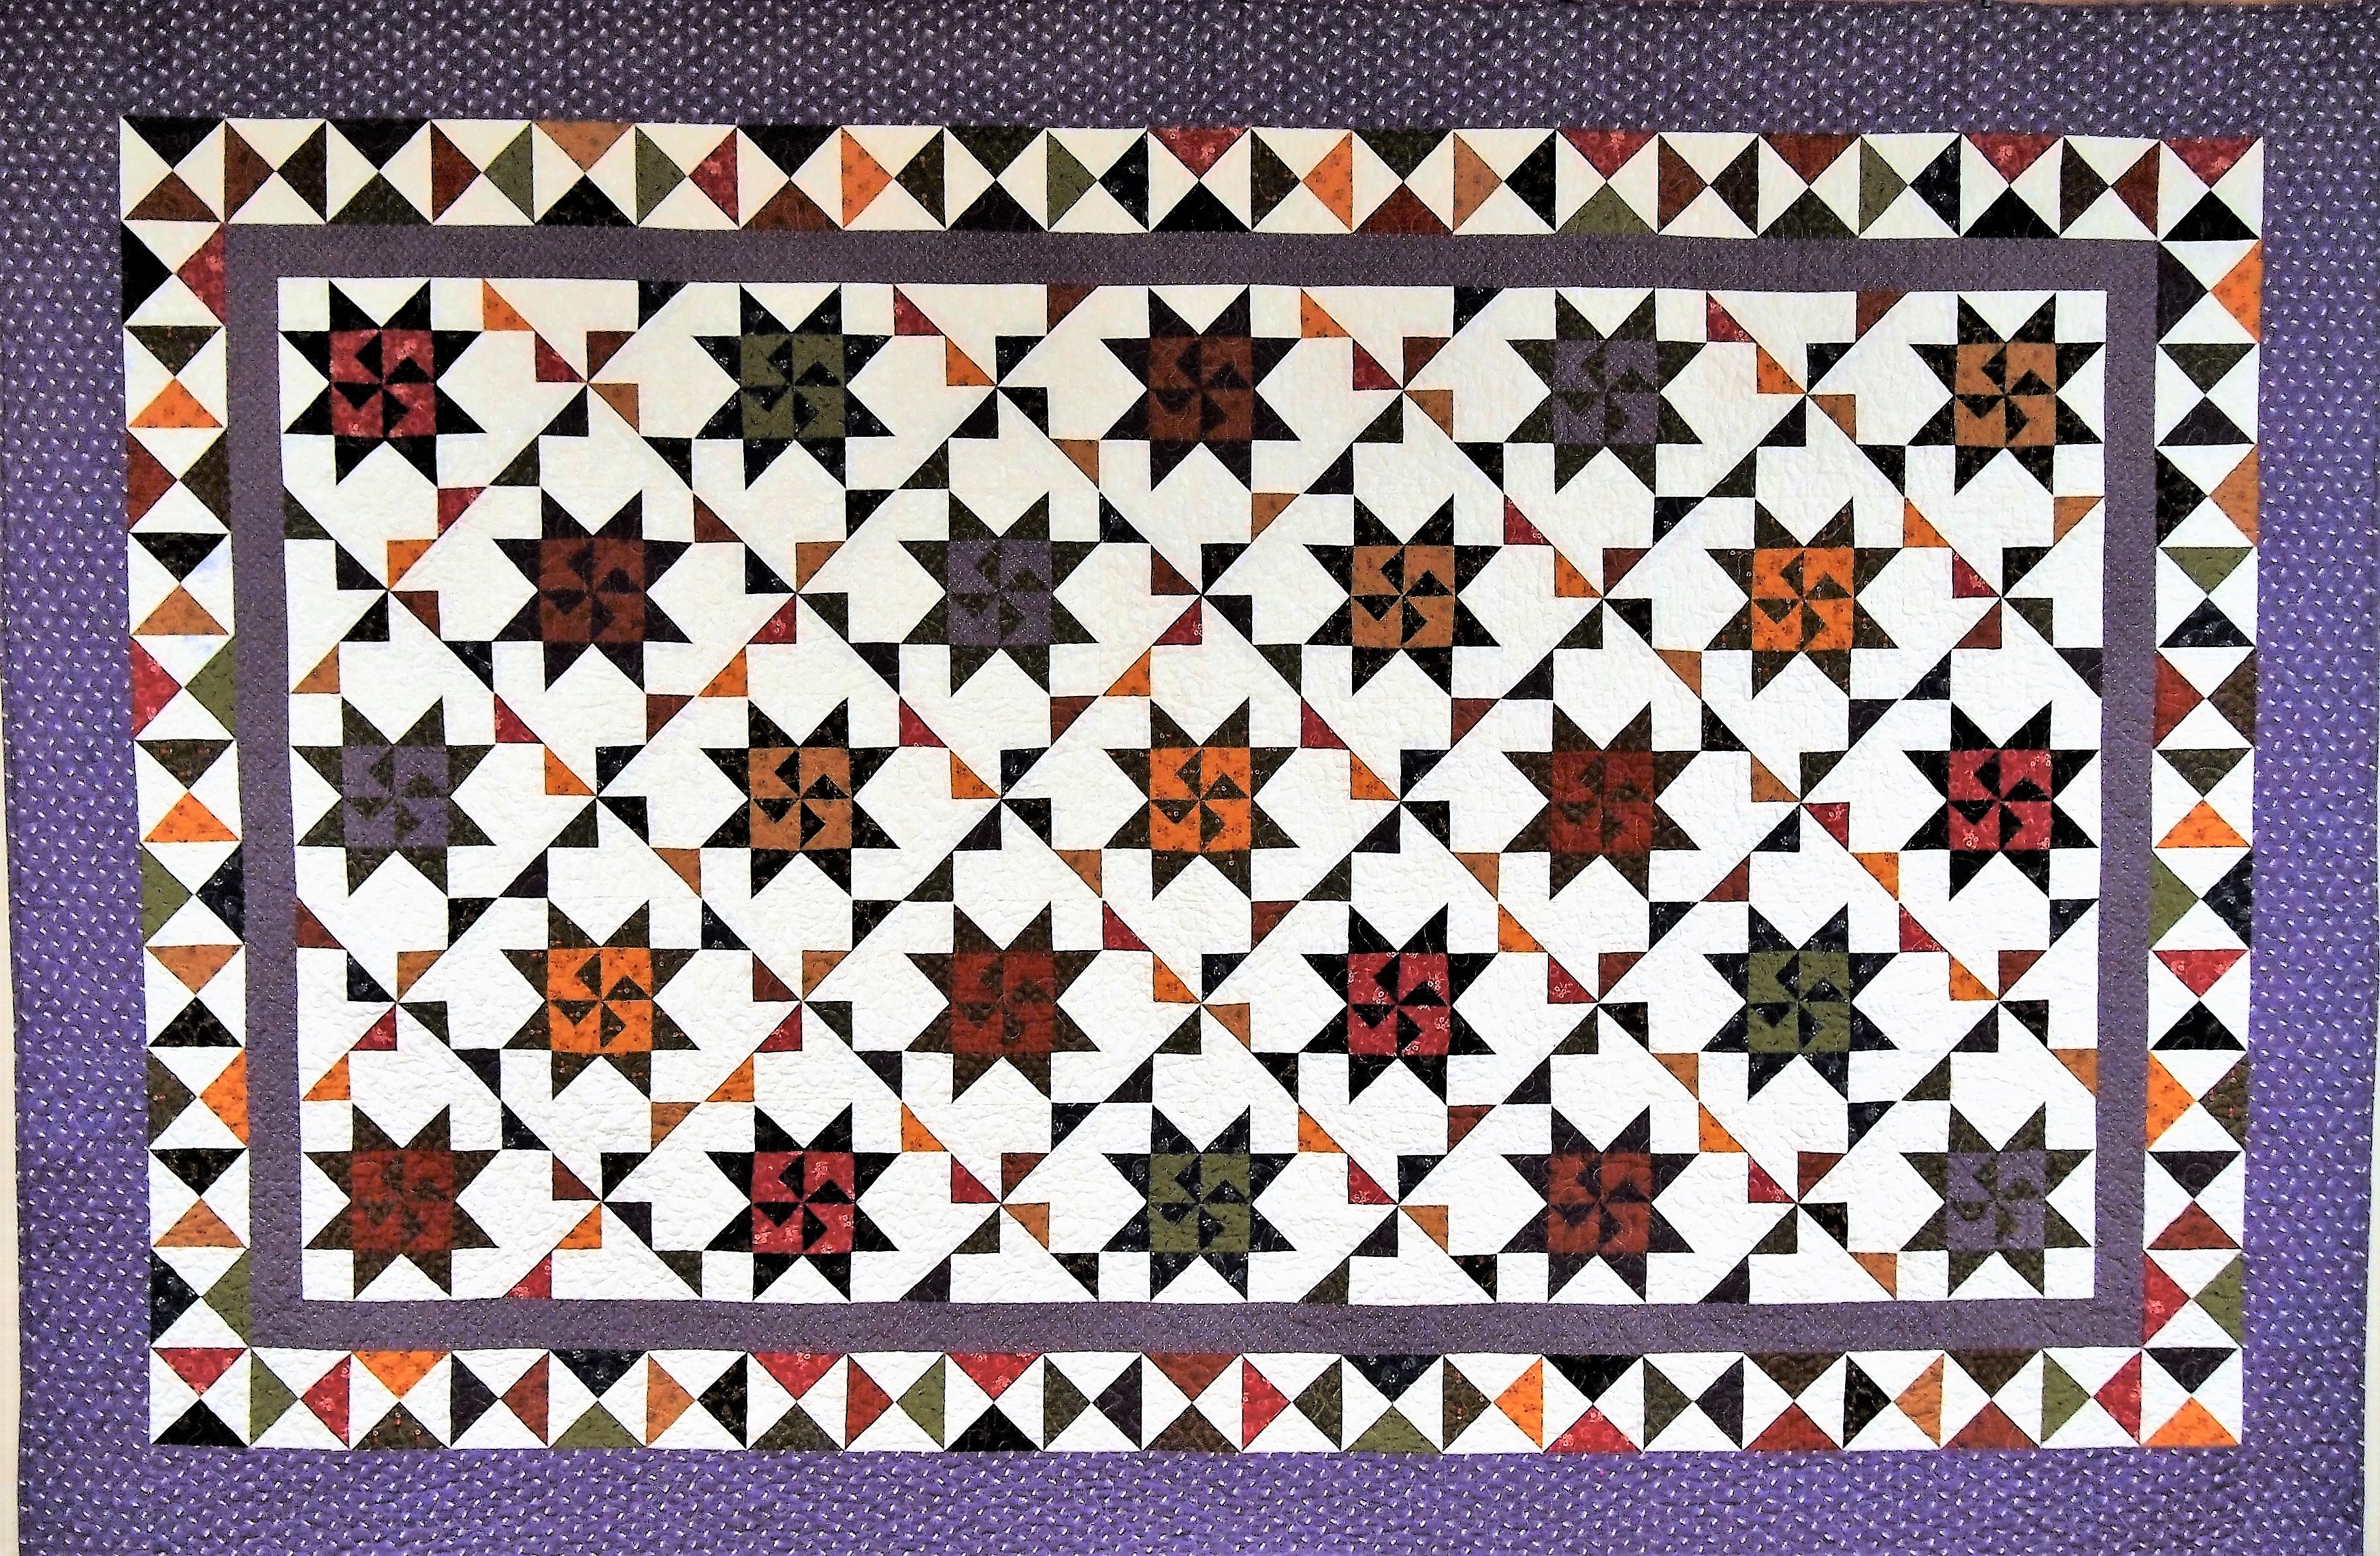
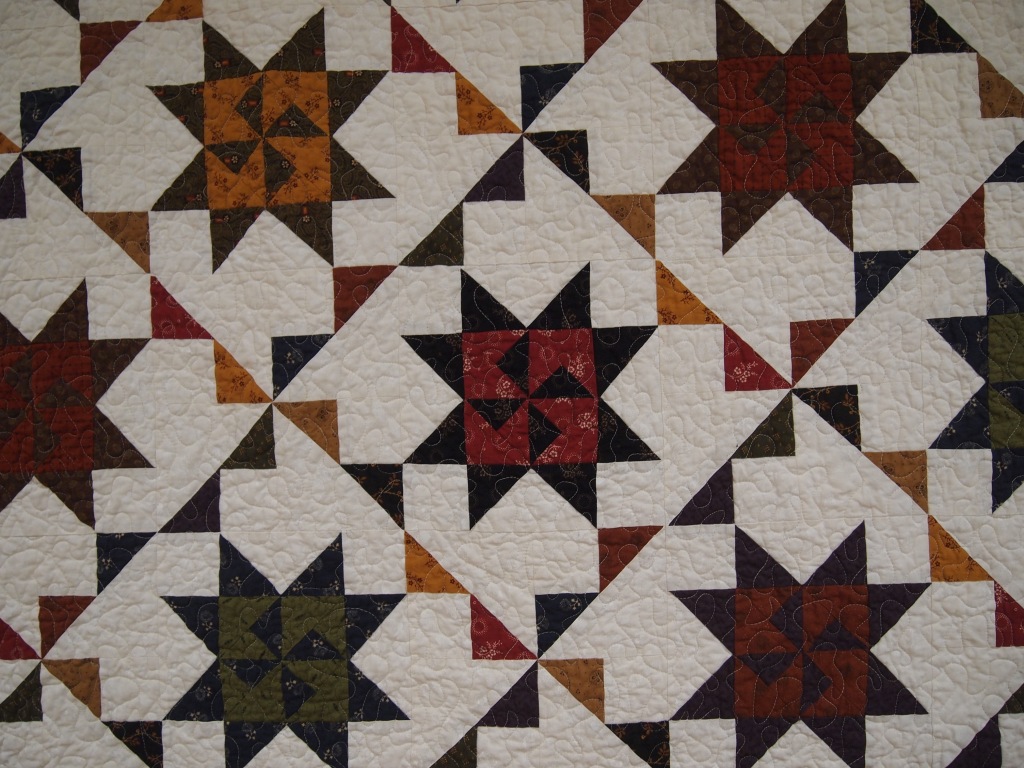
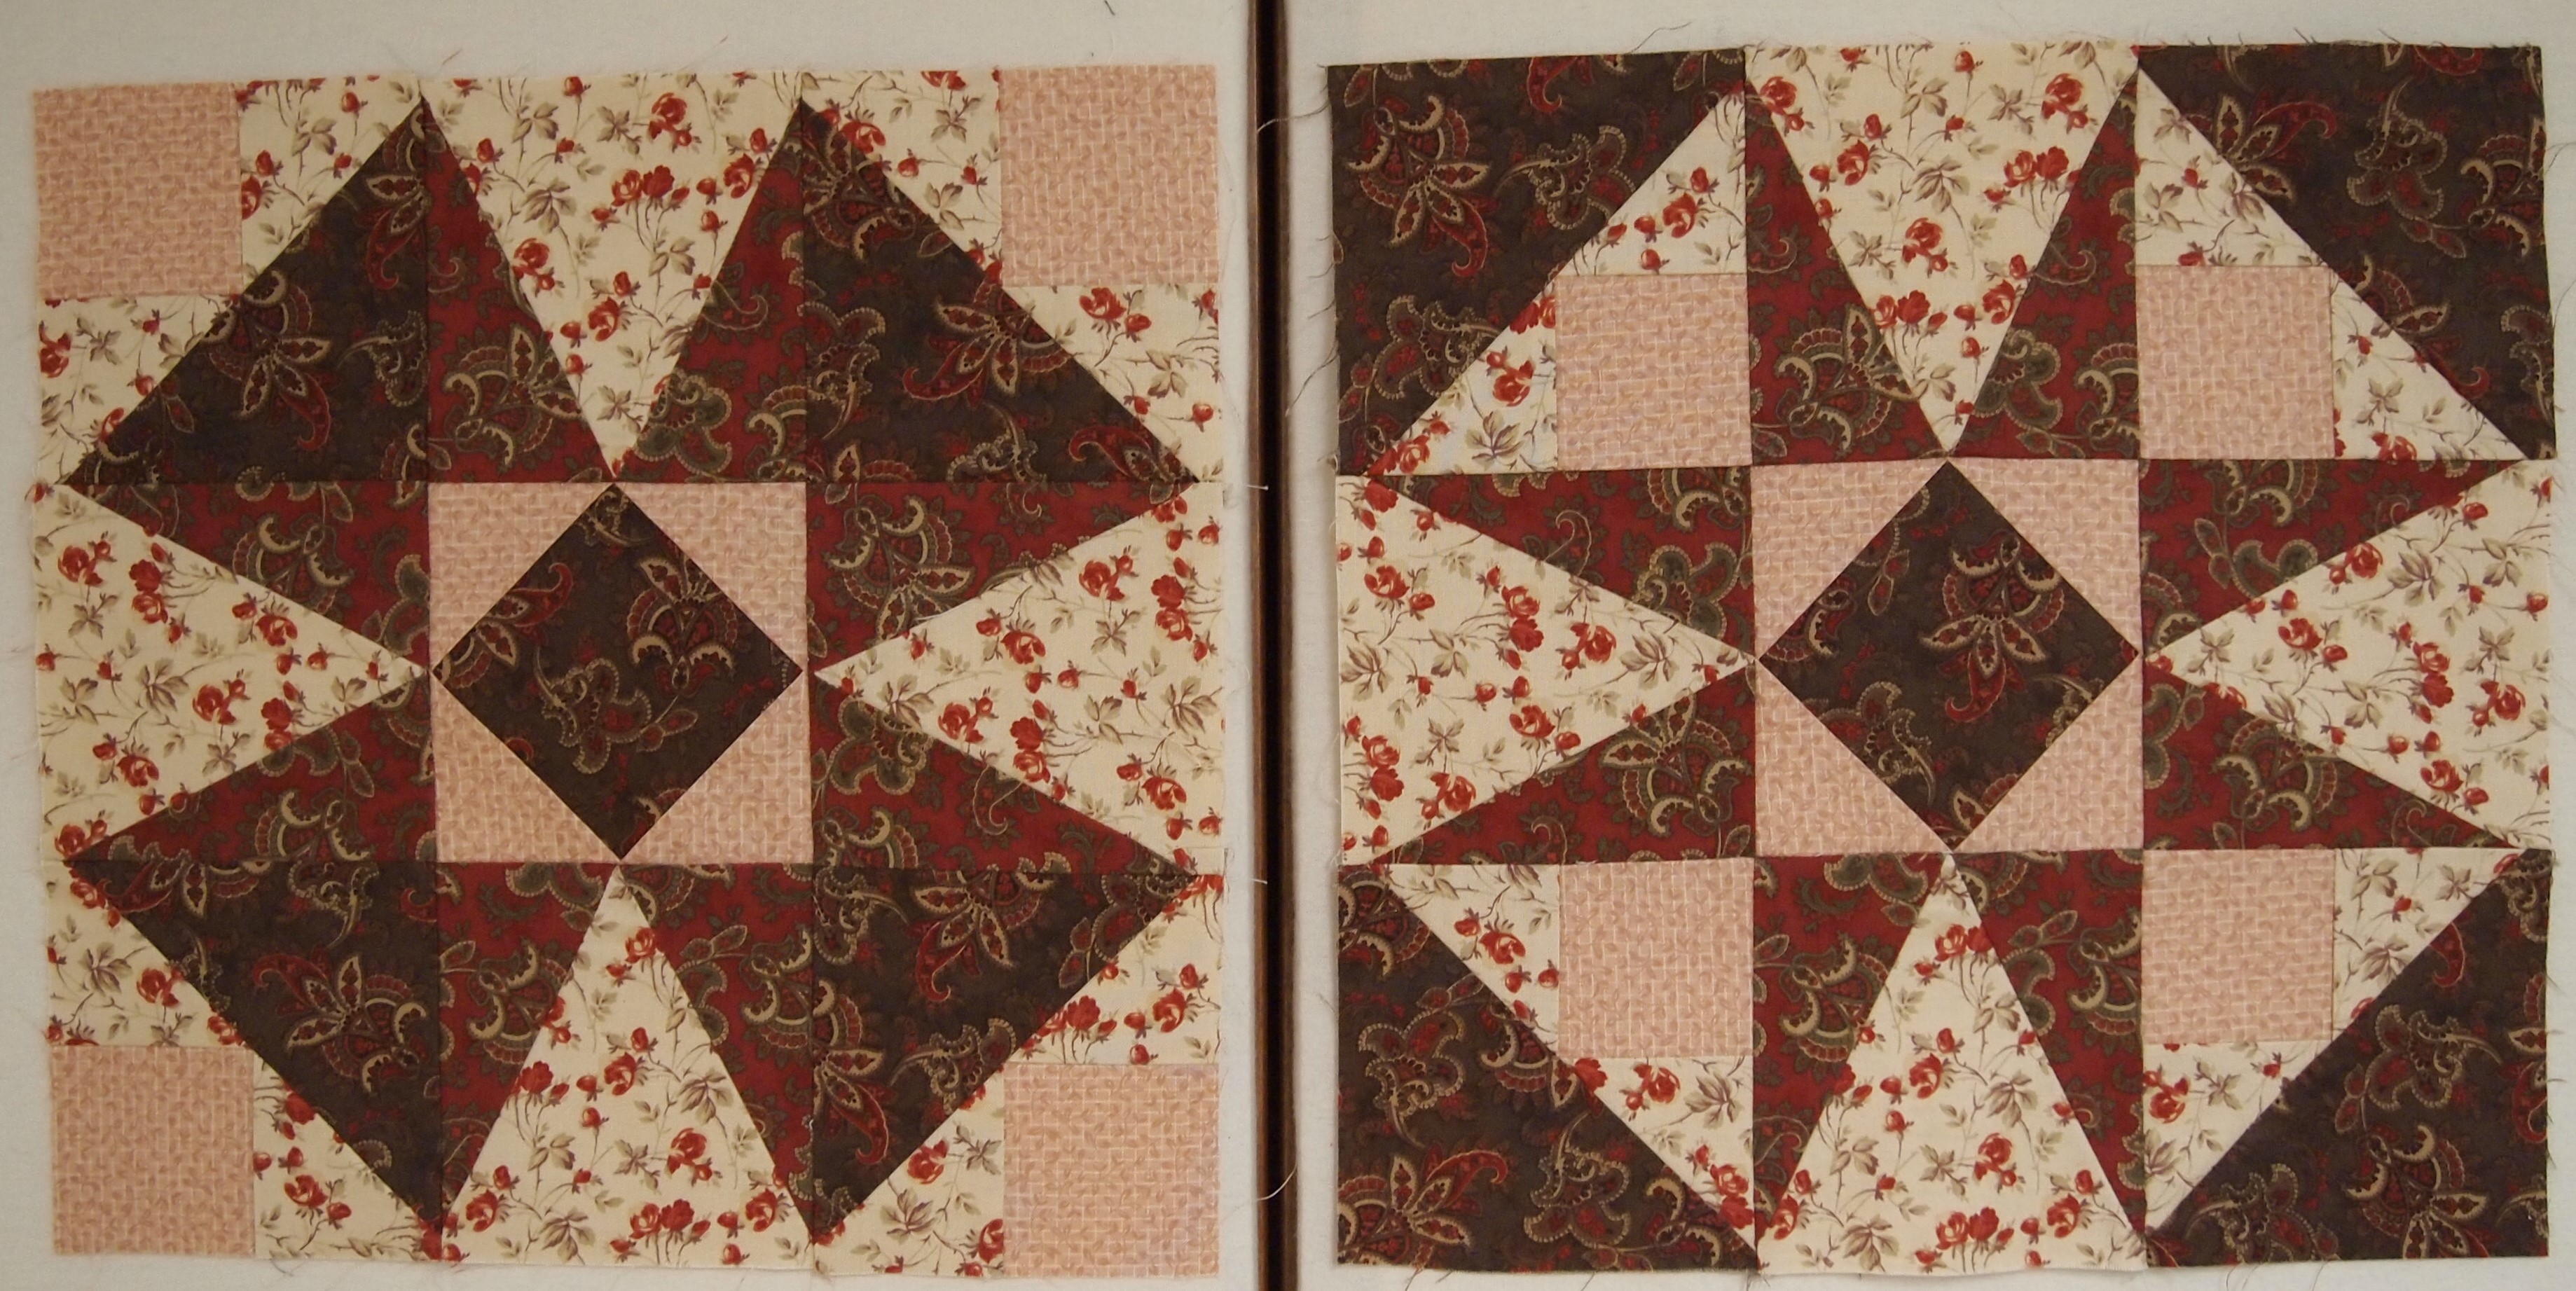
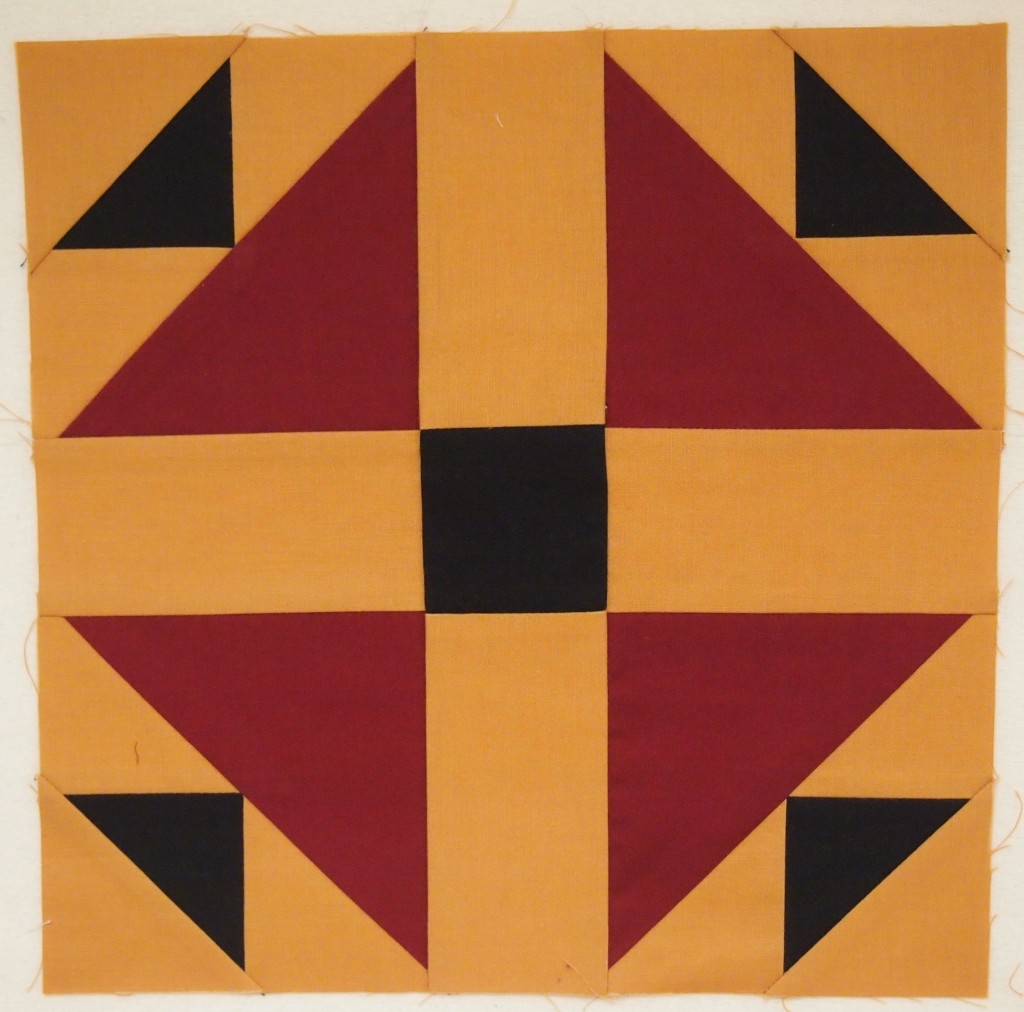
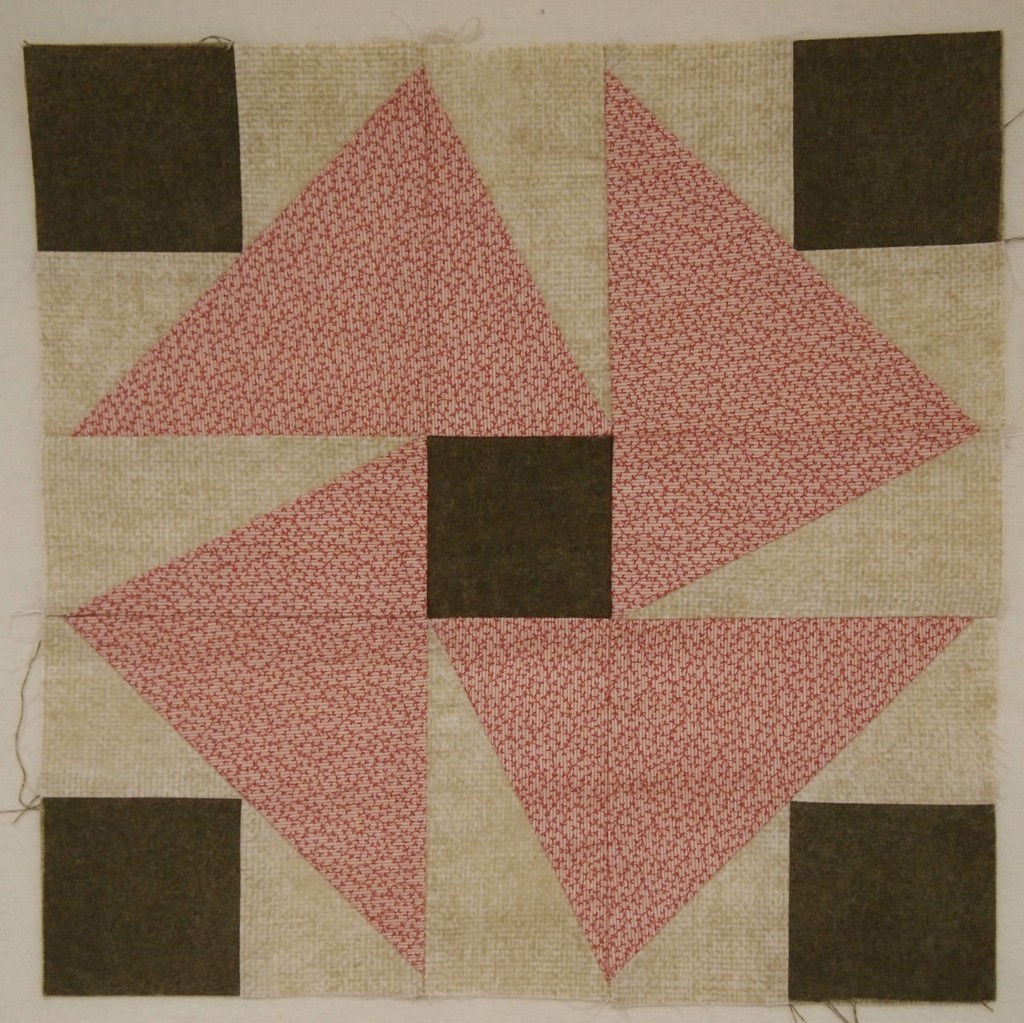
Below are Crowning Glory and the Ohio Star Variation side by side .  They look so different for being so similar.

IMG_4747

Tuckerization

Tuckerization, to Tuckerize. V.  The process of taking traditional quilt block instructions and applying process improvement techniques with Deb Tucker’s Studio 180 Tools!

I taught a Shaded Four Patch workshop last month and have been slightly obsessed with them ever since.  I keep looking for them everywhere.  I was at a quilt retreat with some fellow Certified Instructors and one them showed me a book by Sally Schneider called “Scrap Quilts Fit for a Queen, or a King, Twin, or Lap”.  There are some beautiful quilts in this book with layouts for King, Queen, Twin or Lap size (hence the title of the book). There are several quilts that contained the Shaded Four Patch Unit.  I decided to make “Happy Days”.  I love her layouts but there are better ways to construct the units for the blocks.

OLYMPUS DIGITAL CAMERA
Happy Days

Can you see the Shaded Four Patch Units in the quilt above?

Above is a deconstructed block using four Shaded Four Patch units.  I absolutely love how using the background fabric for the narrow strip and the rectangle  give you this pennant effect.

By using Studio 180 Design’s Shaded Four Patch Technique Sheet and the Tucker Trimmer I  was able to make oversized units and square them up perfectly.

These little beauties are Combination Units made with my Tucker Trimmer I.  When you put 4 units together it makes this great looking pin wheel for the center of the block.  These are 2″ finished units. You can make these in 11 sizes with your Tucker Trimmer.

Above is the deconstructed block consisting of the combination units center and 4 Flying Geese made with my Wing Clipper I.  You can make flying geese in 10 sizes from 1″ to 10″ with the Wing Clipper

OLYMPUS DIGITAL CAMERA

The inner border was made using Quarter Square Triangles, which I made using my Tucker Trimmer.  I Tuckerized the heck out of this quilt!

OLYMPUS DIGITAL CAMERA

Below are more blocks containing the Shaded Four Unit.

OLYMPUS DIGITAL CAMERA

These two blocks are made exactly the same, with the same fabric.  The only difference is that the shaded Four Patch units in the corners are turned different ways.

These blocks all contain Shaded Four Patch Units.

OLYMPUS DIGITAL CAMERA

The quilt on the cover of “Love of Quilting” for Jan/Feb 2017 contains Shaded Four Patch Units and can be Tuckerized  with your Trimmer I and Square/Squared tools.  I would say Studio 180 Design Tools give you Quilting Clarity!


Lucky Lemoynes

I love Lemoyne stars, especially when there are no “Y” seams!  I have wanted to make this pattern “Lucky Lemoynes” by Deb Tucker since it was released.   When you learn Deb Tucker’s process using the Rapid Fire Lemoyne Star Tool you will be able to make a Lemoyne star in 10 sizes from 3″ to 12″ blocks all by strip piecing and NO “Y” seams!

image

I bought the fabric for it from Delve MIY (Make It Yourself) last August at the AQS show in Syracuse.  The fabric is gorgeous.  I chose their Plaster of Paris, Zuzu’s Petals & Daydreams IV – Love Blossoms lines.

OLYMPUS DIGITAL CAMERA

Fabric by Frond Design Studios

Lucky lemoynes is made with 7″ lemoyne star blocks and Shaded Four Patch units.

image

Can you identify how the block is put together?  Rapid Fire Lemoyne Star and Tucker Trimmer III tools are required fort this project.

OLYMPUS DIGITAL CAMERA

Lucky Lemoynes measures 56″ x 70″

I wish I could get outside and get a better picture but the weather is not cooperating today.  Carry on and quilt something!