Tag Archives: Quilts

Great Outdoor Blog Hop Week 3

I love Island Batik fabrics, Studio 180 Design Tools & EQ8!  So I wanted to share some of my Sunday morning creativity.

I started with BlockBuster 19 Exploding Lemoynes (you can find all the BlockBuster patterns on http://www.ifthesethreadscouldtalk.com).  There are 3 different color versions of this block.  These blocks require the Rapid Fire Lemoyne Star tool.

BB19 Version 1 block

This is Exploding Lemoynes version 1

BB19 version 1 quilt

This is what happens when you put 4 version 1 blocks together.

BB19 version 2 block

Exploding Lemoynes version 2 block.

BB19 Version 2 quilt

Exploding Lemoynes Version 2 with 4 blocks.

BB19 Version 3 block

Exploding Lemoynes version 3 block.

BB19 version 3 quilt

Exploding Lemoynes version 3 with 4 blocks put together.  These are so cool and easy to make with the Rapid Fire Lemoyne Star tool that makes Lemoyne stars in 10 sizes from 3″ to 12″ blocks!

I want to share links to Island Batik’s Great Outdoor Blog Hop for week 3:

Monday, August 20 – Ocean Odyssey
Toby Lischko, Karen Overton

Tuesday, August 21 – British Rose
Busy Hands Quilts, Mania for Quilts

Wednesday, August 22 – Dear William
The Inquiring Quilter, MMM Quilts, Living Water Quilter

Thursday, August 23 – Dragonfly Dreams
Inchworm Fabrics, BeaQuilter

Friday, August 24 – Fur-ocious Friends
Quilting Affection Designs, Dizzy Quilter

Be sure to visit all the links and enter to win “Give Aways”.

#iheartislandbatik #islandbatikfabrics  #studio180design #debtucker #EQ8 #electricquilt

The Great Outdoors Blog Hop

The products in this post were given to me by Island Batik.

img_6392

Back in February when I received my Island Batik Ambassador Box 1 it contained a secret bundle that could not be shared until now!  Through out the month of August “The great Outdoors Blog Hop” is featuring Island Batik Ambassador’s creations using fabrics that were introduced at the 2018 Spring Market.  Go to Island Batik for links to all the Ambassador Blog Sites.

I was given fabric from the “Spring Blossom” line:

This slideshow requires JavaScript.

I managed to use 20 different fabrics from this gorgeous line in my quilt as shown above.

img_1343

I named my quilt “Firefly”.  It is my original design, and uses Studio 180 Design Split Rects & Corner Beam tools.  It measures 66″ x 78″.  It is designed using one 6″ finished block.

img_6373

Each block contains 1 – 4″ finished Corner Beam unit, 2 mirror image 2″ x 4″ finished  Split Rects units & a 2″ finished square.

img_6367img_6368

I chose 7 different fabrics for the Split rects units and 10 more fabrics for the Corner Beam units and squares.

img_1378

I got one star block by place the corner beam units in the center and a 2nd star block by placing the 2″ squares in the center which created the “Firefly” in the center, how cool is this?  I had so much fun making this quilt.

This slideshow requires JavaScript.

To celebrate the great out door places in Utica, NY, my sister Mary & I went all over taking pictures of my travelling quilt.  We went to the historical Utica Train Station, Forest Hills Cemetery (the tree was up the hill from John Quincy Adams granddaughter’s grave), Rutger Park 1 & 3, Franklin Square, Liberty Bell Corner, Bagg Square & Utica Bread (fabulous bakery) and then upstairs to Jay Groah Realtor Group (his office has the coolest 70″s vibe), we finished up at the Eagle with a beautiful view of Utica.

GIVEAWAY:  Please leave a comment about this post and I will choose a winner to receive this Island Batik Spoolin Around Charm Pack!  (Giveaway is US Only and ends September 5, 2018.  Please leave your email in the comment.)

#greatoutdoorsbloghop #islandbatik #islandbatikambassador

Great Outdoors Blog Hop Week 1

Just in case you missed the links to the Island Batik’s Great Outdoors Blog Hop, you can see our creations and get in on free give aways here are the links:

Monday, August 6 – All A Flutter
Yellow Cat Quilts, Creative Blonde

Tuesday, August 7 – Birds N’ Bees
Ark Angel Creations, Patterns by Jen

Wednesday, August 8 – Canterbury Manor
Sally Manke, Powered by Quilting

Thursday, August 9 – Eclectic Garden
Desert Bloom Quilting, Sew Karen-ly Created

Friday, August 10 – Vintage Morris
MooseStash Quilting, Devoted Quilter

I will be up next week, so enjoy this weeks links.


Modern Batik Challenge Recap

Fellow Island Batik Ambassador Joan Kawano of Moose Stash Quilting grouped our submissions for the June Island Batik Modern Batik Challenge & I wanted to share them with you.

mod-1_resize

mod-2_resize

mod-3_resize

mod-4_resize

mod-5_resize

mod-6_resize

mod-7_resize

mod-8_resize

mod-9_resize

Mod-10_resize

Coming up in August we have a “Great Outdoors Blog Hop Event scheduled.  Below are links to all the participants.  You will have to wait till their assigned day to see their creations:

Monday, August 6 – All A FlutterYellow Cat Quilt Designs, Creative Blonde
Tuesday, August 7 – Birds N’ BeesArk Angel Creations, Patterns By Jen
Wednesday, August 8 – Canterbury Manor Sally Manke, Powered By Quilting
Thursday, August 9 – Eclectic GardenDesert Bloom Quilting, Sew Karen-ly Created
Friday, August 10 – Vintage MorrisMooseStash Quilting, Devoted Quilter
Monday, August 13 – SafariSew Incredibly Crazy, SweetGrass Designs
Tuesday, August 14 – Spring BlossomsMary Mack Made Mine, If These Threads Could Talk
Wednesday, August 15 – Victoria and Albert Bejeweled Quilts, Clever Chameleon
Thursday, August 16 – Wild ThingsFreemotion By The River, Kauffman Designs
Friday, August 17 – Petting ZooDen Syende Himmel, Sarah Goer Quilts
Monday, August 20 – Ocean OdysseyGateway Quilts, The Quilt Rambler
Tuesday, August 21 – British RoseBusy Hands Quilts, Mania for Quilts
Wednesday, August 22 – Dear WilliamThe Inquiring Quilter, MMM Quilts, Living Water Quilter
Thursday, August 23 – Dragonfly DreamsInchworm Fabrics, BeaQuilter
Friday, August 24 – Fur-ocious FriendsQuilting Affection Designs, Dizzy Quilter
Monday, August 27 – Globetrotter Pamela Quilts, Curliecue Creations
Tuesday, August 28 – Jungle CruiseVicki’s Crafts and Quilting, Little Bunny Quilts
Wednesday, August 29 – LavendulaCarole Lyles Shaw, Masterpiece Quilting
Thursday, August 30 – London CallingQuilt in a Not-Shell, Lizard Creek Quilting
Friday, August 31 – Spirit Rhythm Steph Jacobson, Whispers of Yore
Monday, September 3 – Sweet Tweets Kathleen McMusing, Adventurous Applique and Quilting
Tuesday, September 4 – Whatnot – heARTS Creations, Slice of Pi Quilts

Paris – One Block Wonder #64

I had this fabric for quite awhile.  It is called Paris by Timeless Treasures.  I really loved it and wanted to make a One Block Wonder (OBW) with it.  While I was making it I wasn’t sure if I liked it for a OBW.  Up until today I didn’t care for it.  I was sure it would end up gifted.  But after finally getting finished and photographed – I love it!

img_1452

It had a 24″ repeat and the print wasn’t too small.  Sometimes you have to wait till the quilt is put together to decide if the fabric worked or not.

img_1456

I put it on the daybed in Tuckerville, (Tuckerville is my quilt studio) This is where Tucker (the Mayor of Tuckerville) keeps an eye on me.

img_1454

It is fun to look at how the hexies came together.

Tucker approved!

This slideshow requires JavaScript.

It took me awhile to get a design I liked!  Now onto the next project!

The Reveal of Island Batik Box 2

I received my 2018 Box 2 from Island Batik and decided to video the reveal to share with you.  Thank You Island Batik, Aurifil & Hobbs for your generosity.

#islandbatik #islandbatikambassador  #Aurifil #hobbsbatting

A Field of Popped ‘V’s”

Secondary-Pattern-Graphic

The Island Batik Ambassador’s Challenge for July is “Pattern Play, Secondary Pattern”.  I chose a simple design using BlockBuster  18 A Popped V  pattern from Deb Tucker which uses Studio 180 Design V Block & Corner Pop tool and the Side Kick High/Low technique sheet.

img_5382-1

Last year I made four Popped V blocks and loved the secondary pattern that came from putting together the blocks.  Notice the nice sharp points?

img_1261

I love my bright orange & green Island Batik fabrics.  But, this time my blocks looked a little different…there’s a story there!  I don’t know about you, but when I’m at a quilting retreat with my quilting buddies I’m usually  talking way too much and that’s how mistakes are made!  My in-attention to detail led me down the primrose path of error!

img_1262

I was organizing my fabrics, I decided to make twelve 12″ blocks.  When making a quilt block, we refer to Finished & Cut size units.  The Finished size is the what the unit measures after it is sewn into the block,  the Cut Size measurement is the size of the unit before it is sewn into the block.  The Cut Size is what size you trim the unit to before sewing it into the block. 

img_6315

Checking the size chart in my V block instructions, I needed to cut 5″ strips to make 4″ finished V Block units.  So far no problem.  I pop off the corners of my V Block units with my Corner Pop tool and replace the corners with my beautiful orange Island Batik.  I popped off the corners of the center squares and continue on.

Here was my downfall, I had not cut the starter strips for the Sidekick units.  Instead of checking the technique sheet, I grabbed the Blockbuster pattern and looked at the “Cut Size” of 4 1/2″!  Drat!!!!  I cut all the background squares smaller than they needed to be.  I continued to trim the squares for the replacement side triangles.  I stitched the side triangles to squares, thinking “this doesn’t look right”, but I still kept yapping away, going down the primrose path of error.

img_1297

Needless to say my sidekicks lost their points!  That makes me “Pointless”, something I try to avoid at all costs!  I did not have enough fabric to make new sidekick units.  My secondary design has dull points, but it is a lesson learned to pay attention!

img_1272

The moral of this story is, when you find yourself wandering through “A Field of Popped V’s”, don’t end up pointless!

These beautiful fabrics are all from Island Batik and stitched with Aurifil thread.  Quilt measures 45″ x 57″.

#islandbatik #aurifilthread #Debtucker #studio180design #VBlocks #CornerPop #Quiltersdreambatting

Crossfire

The fabrics in the post were generously given to me by Northcott Fabrics.

img_6250

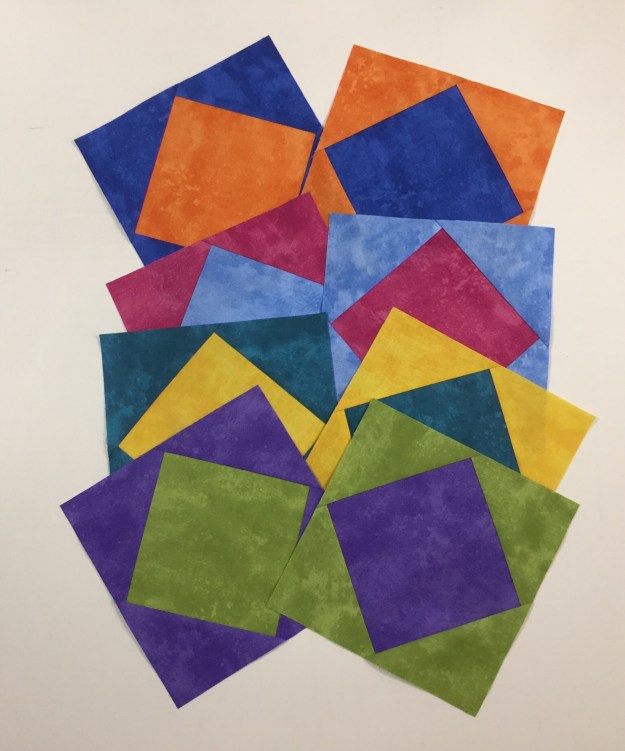
I chose Northcott fabrics from the Sew Musical Row by Row Palette 2018.  When I choose my fabrics from Northcott, I get so excited when they are delivered.  As soon as I touch the fabric, I feel the quality.  These colors are luscious with just enough texture to give depth and interest.

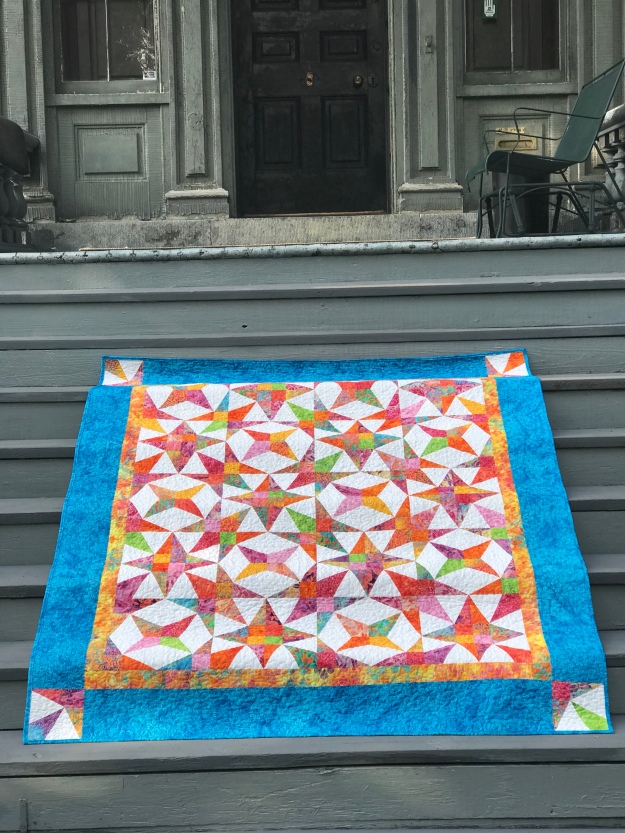
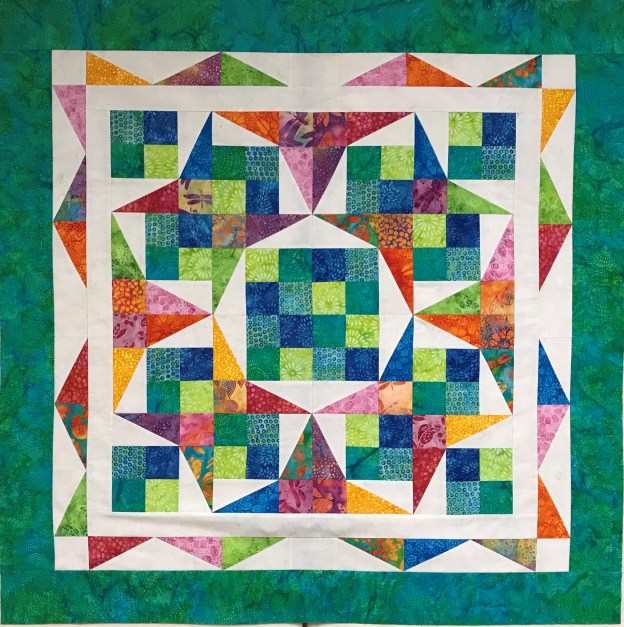
Crossfire is a Studio 180 Design pattern designed by talented Certified Instructor Sarah Furrer.  It is a companion pattern for the Large Square/Squared tool.

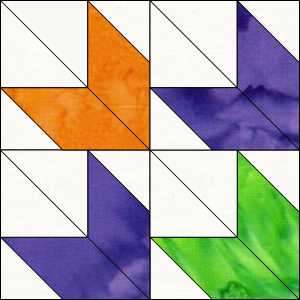
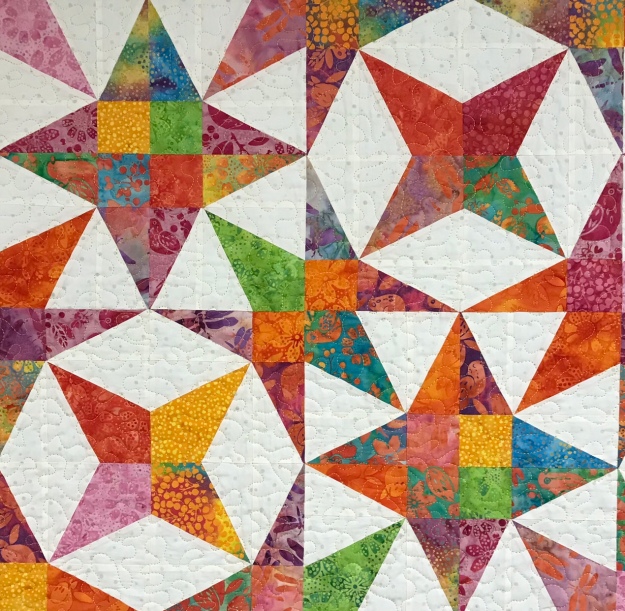
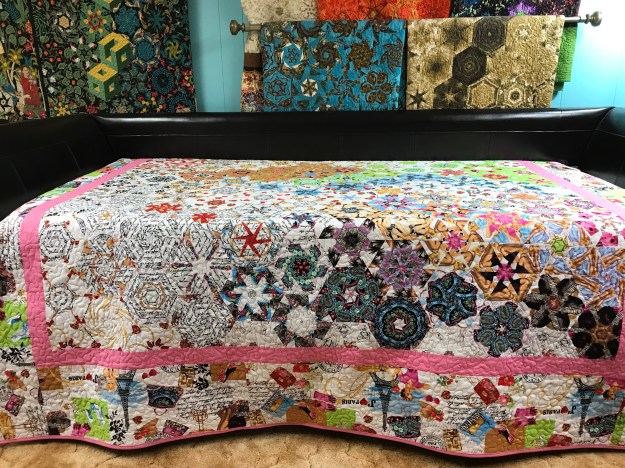
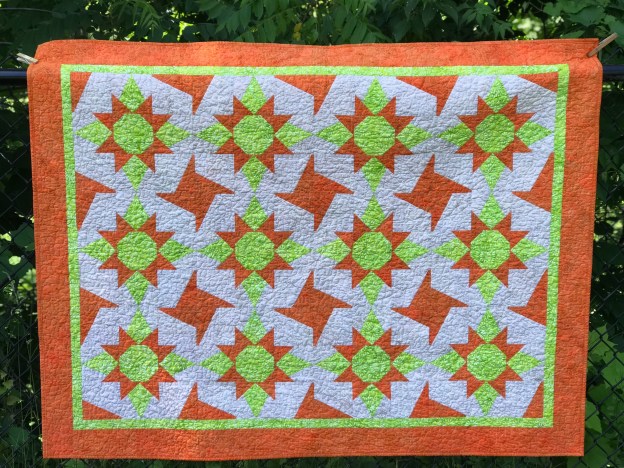
The block featured in this quilt is called “Bird of Paradise”.  The pattern describes this quilt as “whirling stars with accents and chains of black and grey.  A new fun variation of a Flying Goose makes for a star with loads more sparkle”, and it does.

This slideshow requires JavaScript.

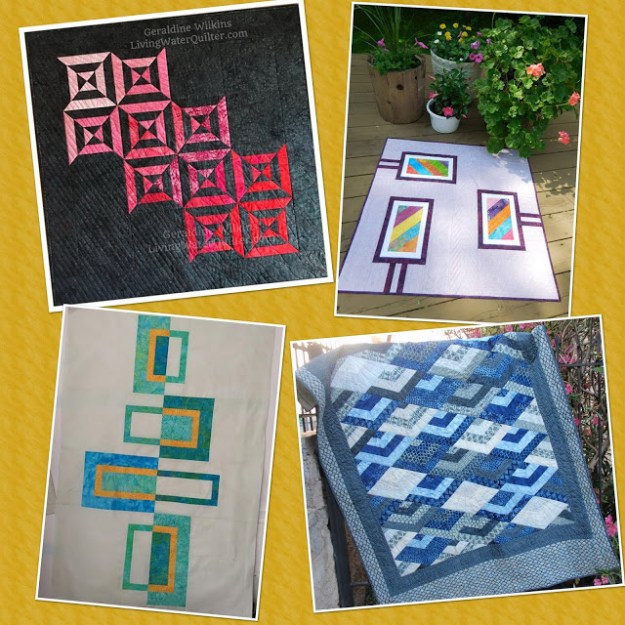
If you follow me, you know I love to organize my quilt making process by labeling paper plates for my block pieces as I cut them out.  I never get lost or forget what the pieces are for.  All my block pieces are cut and ready to put together.

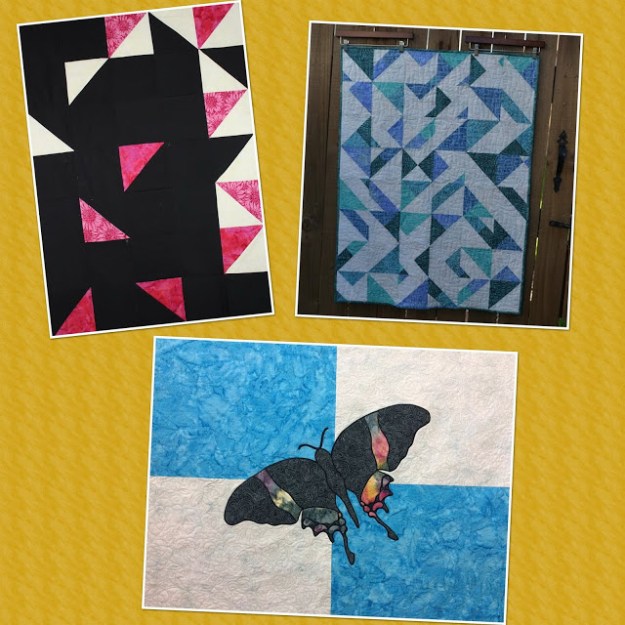
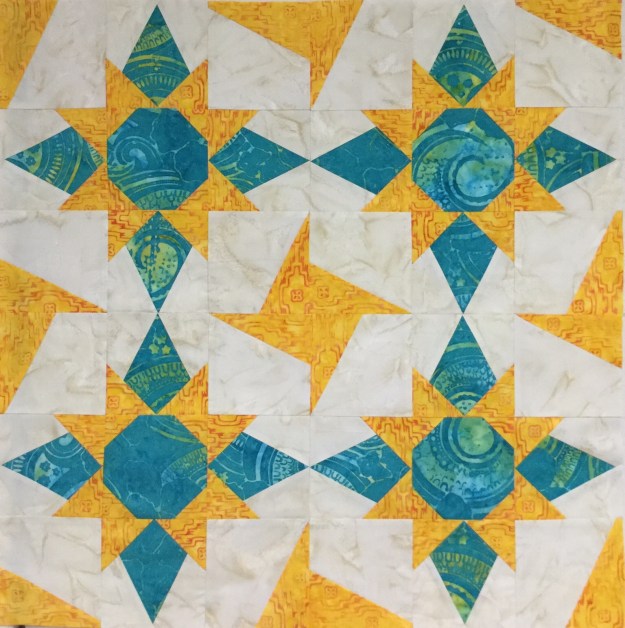
Star Blocks:  You will be making 8 star blocks, they will be made in pairs.  Each pair will contain the same colors, but their arrangements will give you two different looking blocks.  Label one of the colors in each pair as Color 1 & Color 2.  If you follow the instructions in the pattern you wont have any trouble.  After construction the diamond square units are trimmed to the cut size of 6.5″ x 6.5″

img_6288

Beautiful, perfectly trimmed units leaving a 1/4″ seam allowance, so I will not lose my points.  After all…no one wants to be pointless!

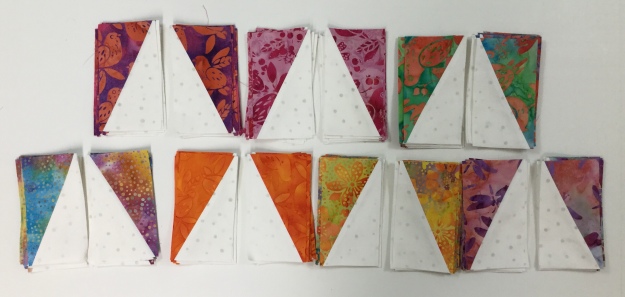
Next, we make half square triangles and perfectly trim them using our Large Square/Squared tool.

Lay out your trimmed half square triangles and the and two white triangles as shown.  Work with one triangle at a time, stitch & carefully press toward the white triangle as not to distort the shape.

img_6301

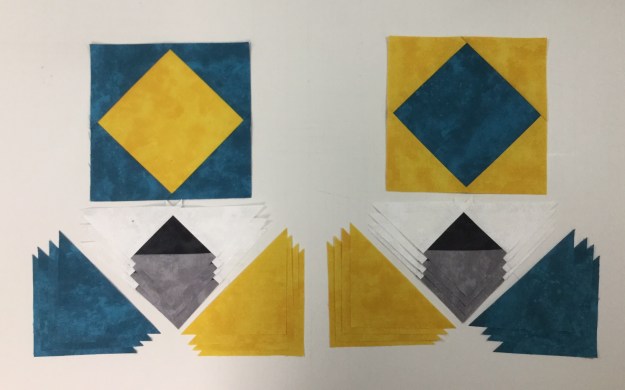
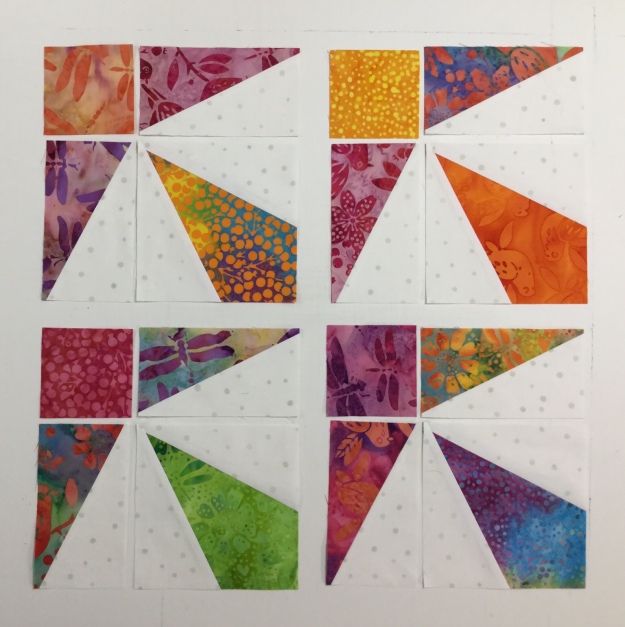
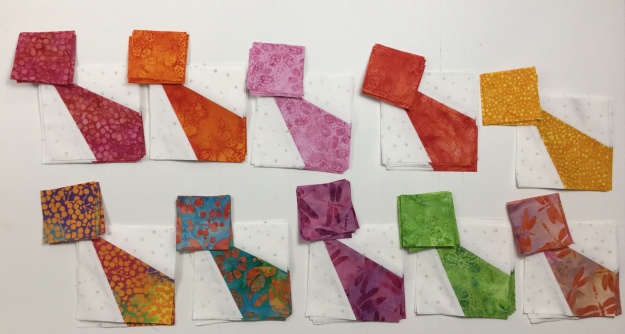
Laying Out the Blocks:   Pay close attention to Step 10.  Split your pieced geese into two piles of four.  Lay out your side triangles so that on one pile you have four Color 1 side triangles on the right side & four Color 2 side triangles on the left side.  The other pile will have four Color 2 side triangles on the right side & four Color 1 side triangles on the left side.  If you lay them as I did above for every color combination, you will be fine.

It is very important to pay attention to Step 11:  Position the right side triangle so that Color 1 shows a bit beyond the white along the top edge.  Stitch and press toward the side triangle.  Trim the units according to pattern instructions and put your blocks together.

img_6348

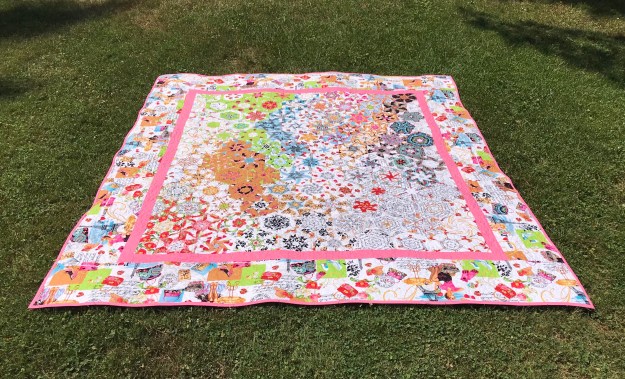
Crossfire is a fun, skill expanding pattern.  Finished quilt measures 60″ x 84″.

This slideshow requires JavaScript.

Blast From The Past

The fabrics featured in this post were given to me by Island Batik. 

Modern Batik Challenge 39

The Island Batik Ambassador’s challenge for June is “Modern Batik”.  Lord have mercy!  I had no idea what to do.  I love all types of quilts.  For some reason I wondered……what colors were popular in 1953?  A search on Pinterest revealed an O’Brien Paints Color Card from 1953!  It must be a sign!

I racked my brain.  I had these really cool precut rolls of 5″ WOF strips I’d received in my box “O” fabric from Island Batik.

Last year I was constantly looking for quilt blocks containing Shaded Four Patch units. This year it seems to be Split Rects units that have my mind whirling.

2 TU SR Unit Types

3 TU SR 5 thru 8

5 TU SR 12 thru 16

The above photo’s are my teaching step outs that explain the process of making Spilt Rects Units in case you weren’t sure what I was talking about.

img_6178

I chose 8 – 5″ WOF strips of color & cut 8 – 5″ strips of neutral.  Each strip yielded 12 pair mirror image elongated triangles for a total of 192 – 2″ x 4″ finished Split Rects Units that I will put together to make a multi-faceted Diamond unit.

I Combined the Split Rects units to make multifaceted diamonds.

img_1210

img_6180

I was very closely supervised during this part.

I had an idea of what I wanted, but wasn’t sure how to get there.  I had 48 diamond units but needed to add something more.  I decided on Rapid Fire Lemoyne Stars.

img_6193

I went to Island Batik stash and used 2 1/2″ strips from Spoolin’ Around.  These beautiful pieces of batik have been hand dyed by skilled fabric artists in the garden village of Sanur, Bali.

img_6210

This is what I came up with.  Is it modern?  The challenge description was “must incorporate ONE of the characteristics of modern quilts as defined by the Modern Quilt Guild:  the use of bold colors & prints, high contrast & graphic areas of solid color, improvisational piecing, minimalism, expansive negative space, alternate grid work”.

I may have hit one or two points!  But if you look to the past for inspiration what can you expect!  “Blast From The Past” measures 42′ x 62″.

img_6206

img_6211

As always, my quilts are lovingly pieced with Aurifil thread!

#islandbatik #debtucker #studio180design #aurifilthread

The Heron

The Artisan Spirit, Water Garden fabric in this post was given to me by Northcott Fabrics for the Creators Club.

This is my 63rd One Block Wonder, and I love it!  It came out better than I had anticipated.  This OBW started as a 28″ x 42″ panel.

When choosing fabric for a One Block Wonder (OBW)  I look  for a large repeat and a large design in colors that I like.  OBW’s require 6 repeats of fabric plus more if you want to put the original fabric in the border.  With a panel, the repeat is pre-determined.  I bought 7 panels, one to integrate into the top of the quilt and 6 for the blocks.

img_6213

The process starts with aligning your repeats, evening up one end and cutting them into 3 3/4″ WOF strips.  With a 24″ repeat I get 6 strips, but this had a 28″ repeat. Bonus, I got 7 WOF strips.  I was able to cut equilateral triangles for  127 .hexagon blocks

img_6214

There are several 60 degree rulers out there.  I prefer to cut my triangles using a 6″ x 12″ Olfa ruler with a 60 line.

img_6216

Each stack of six triangles is a kaleidoscope giving you 3 choices on how to stitch your block together.  I have free, detailed video tutorials available here on my site and on YouTube that guide you through the process of making a One Block Wonder.  Plus you should check out Maxine Rosenthal’s books, One Block Wonder’s, One Block Wonders Encore, One Block Wonders Cubed and One Block Wonders of the World (2 of my OBW’s are included in that book).

img_6226

Usually I wait till all my blocks are sewn before going to the design wall.  I was so excited that every few blocks I had to start designing.  When constructing OBW blocks, you stitch 3 triangles together, pressing all seams open and then sew the other 3  triangles together.  DO NOT sew the center seam.  Simply overlap the halves at the center and pin it.  My goal with this panel was to design it so it seemed the colors were swirling right off the panel.

img_6234

Once you have a design you like it’s time to sew the blocks into rows.

img_6236

Un-pin the blocks one row at a time and sew into rows, press all seams open.  I love my pressing stick.  It makes it much easier to press all the seams open without disturbing what was previously pressed.

img_6235

Stitch your rows together.  I love my Clover Fork Pins.  They are thin and grip and hold the fabric in place.

img_6237

Did I tell you to press all seams open?  That pressing stick really helps.

img_6240

Putting together a One Block Wonder made using a panel in the quilt top is a little trickier than with just stitched rows.  I divided rows into four sections to attach them to the panel.  It is like making a log cabin block.  I wanted the rows to attach in certain places so color seemed as though it continued right off the panel.  I began by trimming the bottom section first and attaching it to the panel.

img_6242


I could now attach the rows to the right to the panel, using a partial seam and leaving room to adjust the top section of triangles and then add the rows to left of the panel.

img_6243

I trimmed the edges of the quilt to square it up.  I love it, but still wanted to soften the panel edges.

img_6244

I did not use all the blocks in the quilt top design.  I sewed the left over blocks together and trimmed them to make smaller hexagons.  I randomly placed them along the edges of the panel and appliqued them down.

img_6248

The finished quilt measures 60″ x 68″.  I did not feel it needed a border.  Thank you to Northcott Fabrics and Water Garden designer Ira Kennedy. I really love this quilt.

For OBW inspiration check out the Facebook page “One Block Wonder Quilt Forum”.  I am available to teach One Block Wonder Workshops. 

#northcottfabrics # Northcottcreatorsclub #oneblockwonders #OBW #Watergarden