Tag Archives: Studio 180 Design

Evening Elegance Blog Hop

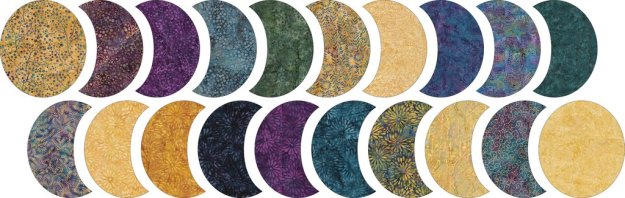
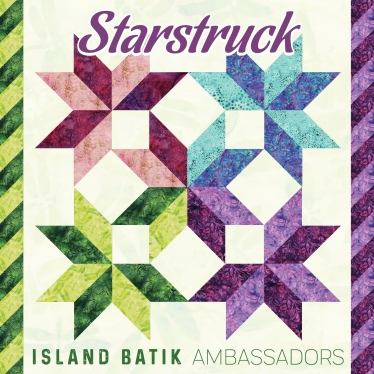
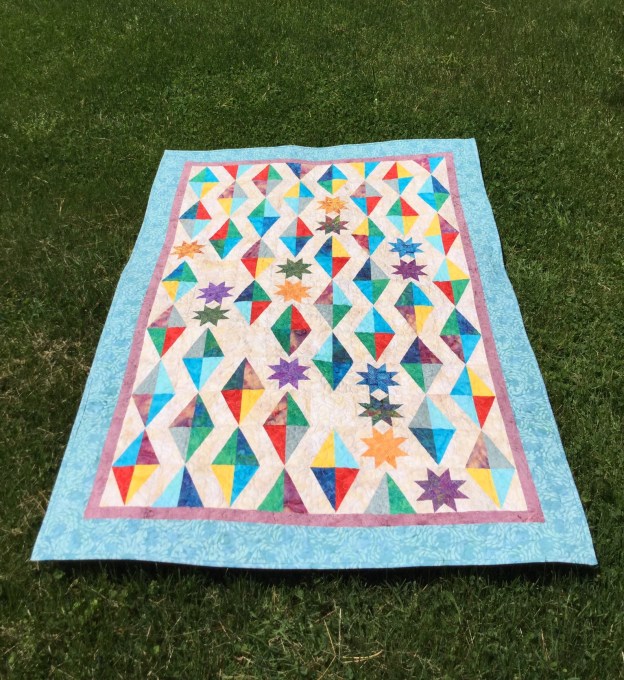
This is day 3 of Studio 180 Design’s Evening Elegance Blog Hop.  Deb Tucker has launched her own fabulous signature fabric collection, Twilight Chic, with Island Batik and fabric designer Kathy Engle.

Twilight_Chic_Swatches_1024x1024

Below are the links to everyone participating in the blog hop:

Monday November 5th – Karen Overton – The Quilt Rambler” https://thequiltrambler.com/blog/

Tuesday November 6th – Tammy Silvers – Tamarinis – http://www.tamarinis.typepad.com/

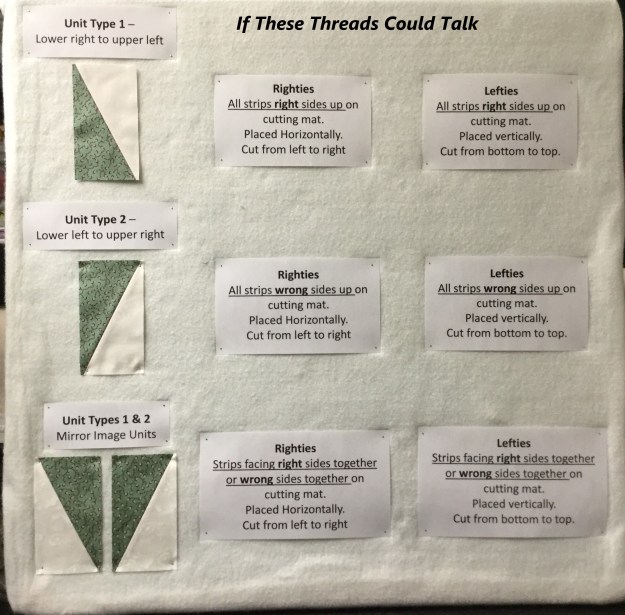
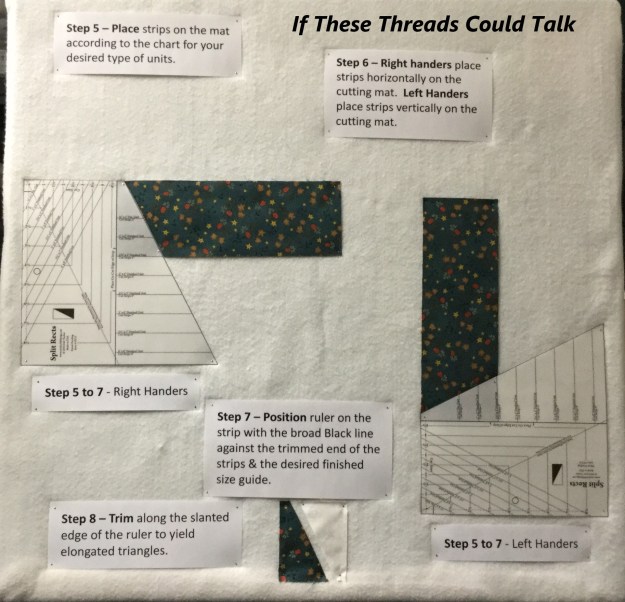
Wednesday November 7th – Jackie OBrien – If These Threads Could Talk – https://ifthesethreadscouldtalk.com/blog-posts/

Thursday November 8th – Tina Dillard – Quilting Affection Designs – http://quiltingaffection.blogspot.com/

Friday November 9th – Studio 180 Design – https://deb-tuckers-studio-180-design.myshopify.com/blogs/news

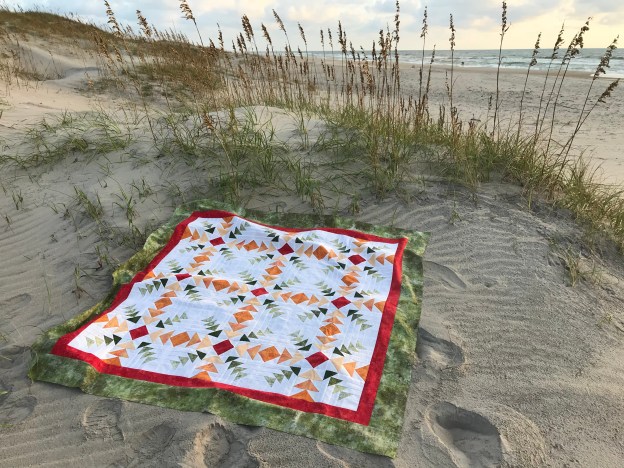
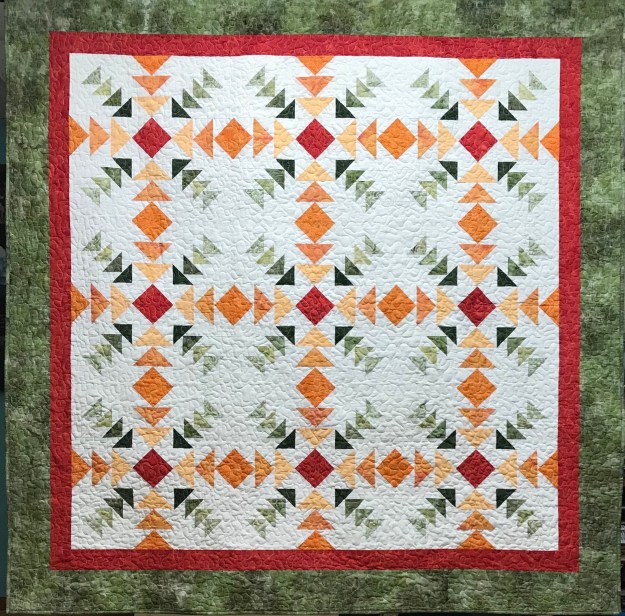
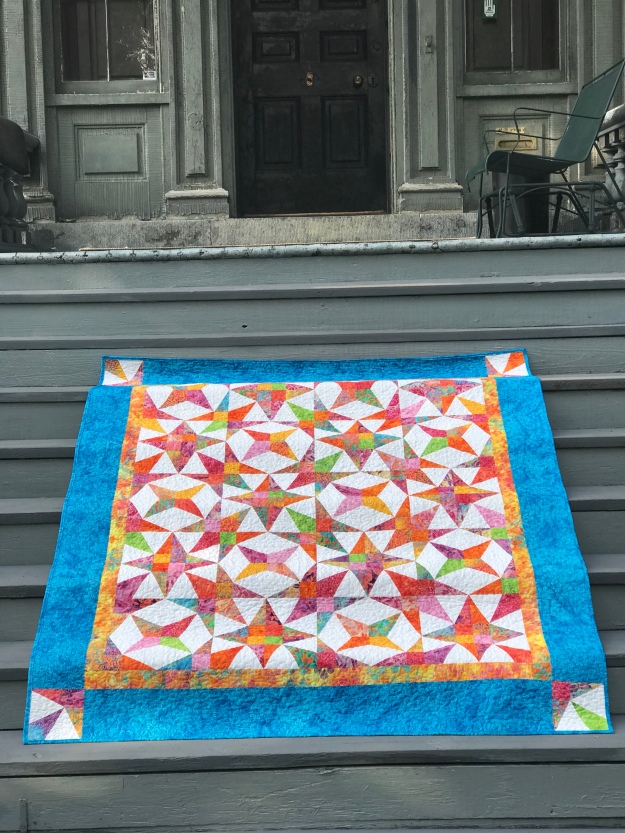
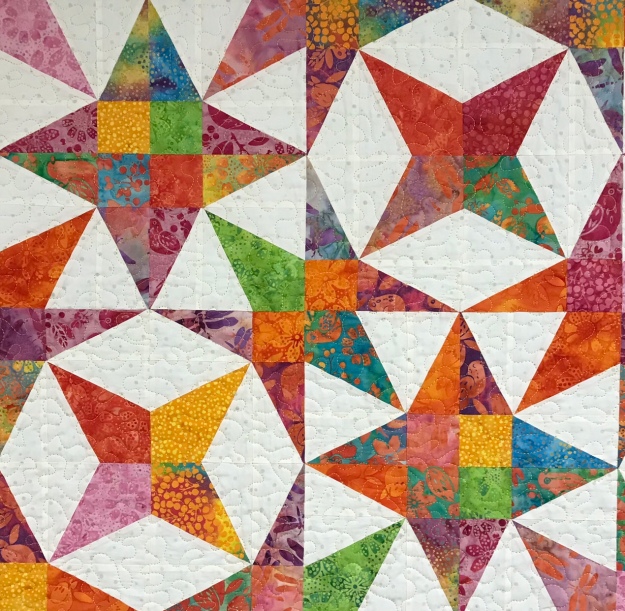
Check back on Friday to see one version of the  Evening Elegance quilt completed.  The quilt was designed using BlockBuster Patterns:   1 Ohio Star, 7 Whimsy Turndash, 9 Three in One, 16 Peaks & Valleys, 20 Stellar Collision, 21 Around the Block, 22 Square Dance, 26 Cactus Blossom and  34 Evening Shadow.

img_1936

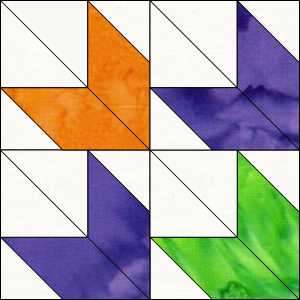
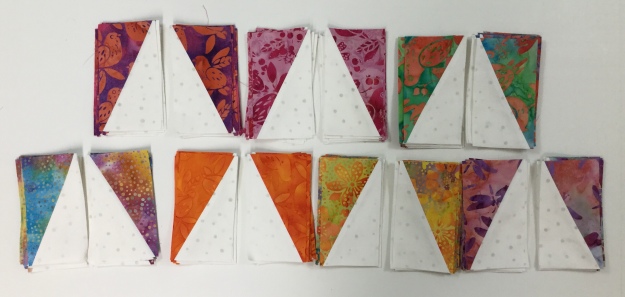
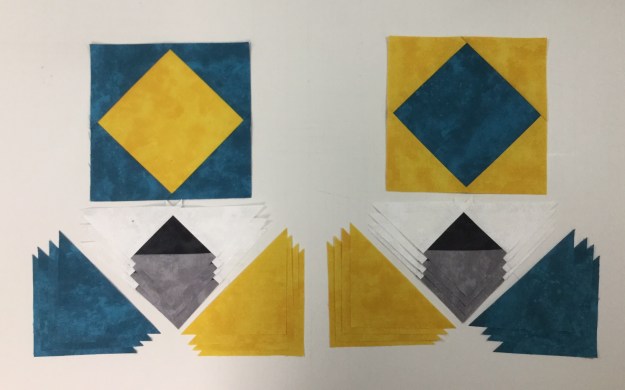
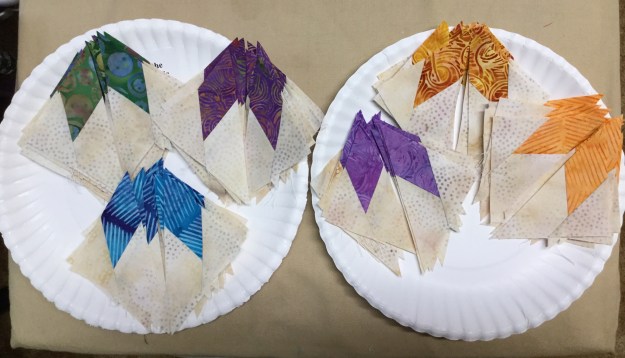
I was assigned BlockBuster 9 – Three in One, using the V Block and Tucker Trimmer I tools.

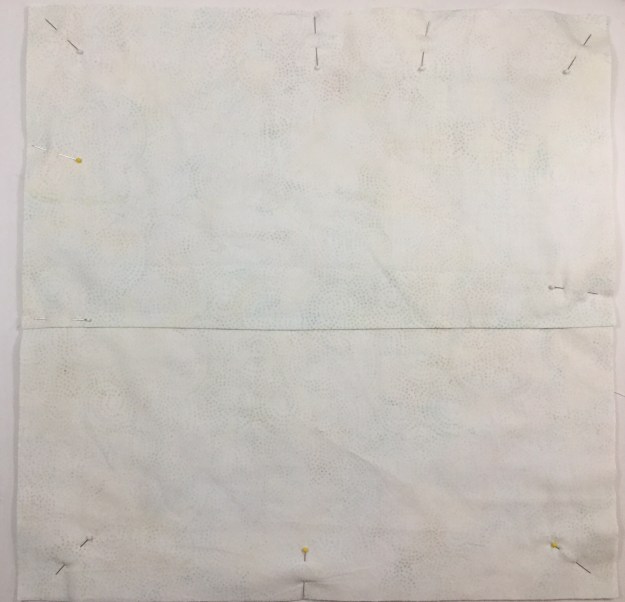
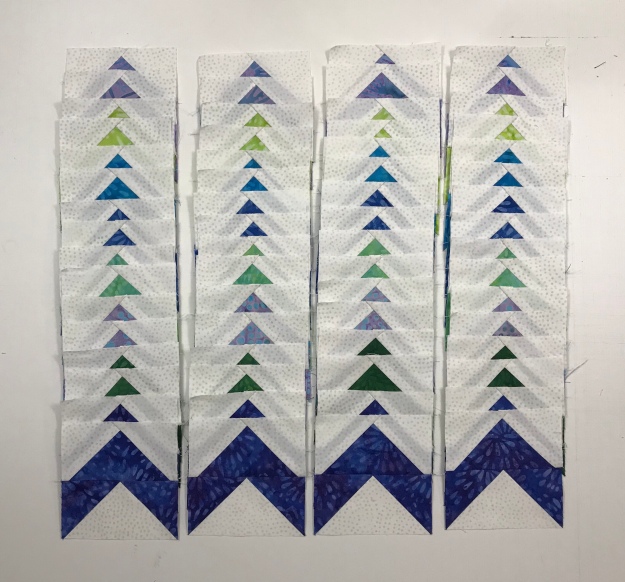
Unit A. V Blocks:  Make 4 V Blocks.

Unit C. Quarter Square Triangle:  Make a Quarter Square Triangle with the fabrics that match the V Blocks, remember to swirl the center.

Unit B. Combination Units:  Combination units begin by making half squares triangles (HSTs). The fabric for the HSTs must match the side triangles in the v blocks, so I began by laying out the starter squares next to the V Blocks and then making them into the combination units.

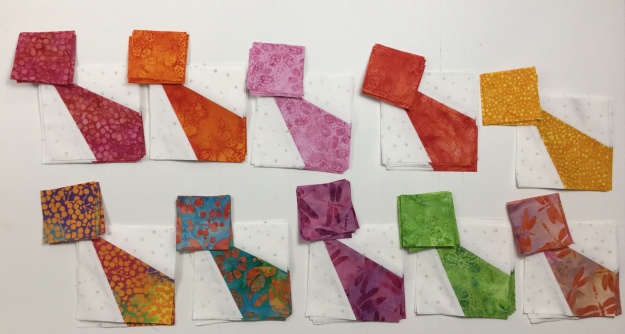
When making Combination units, you are making two at a time, a left & a right.  Choose the units that will match the side triangles in the V Blocks as shown above.

Sew the units into rows then join the rows into the block.

img_1903

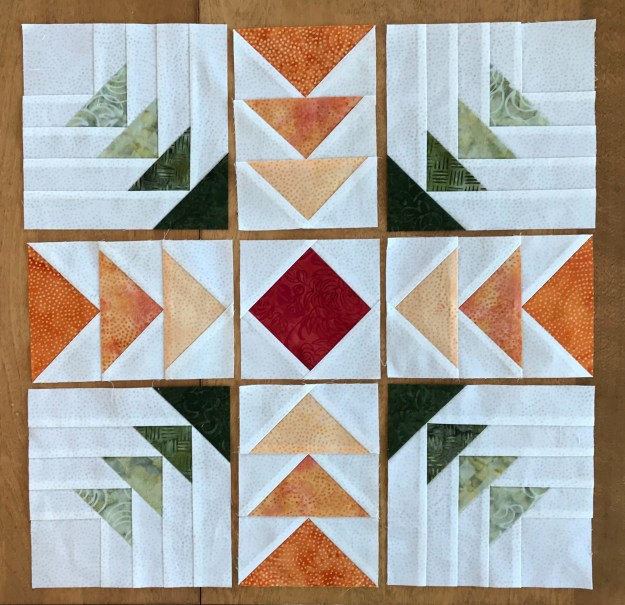
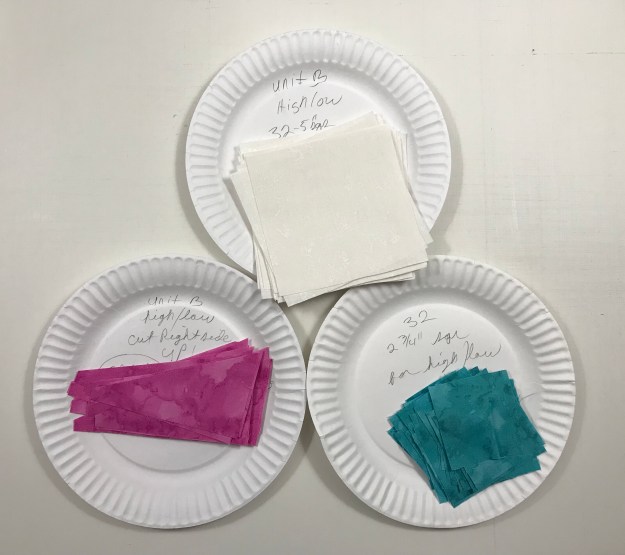
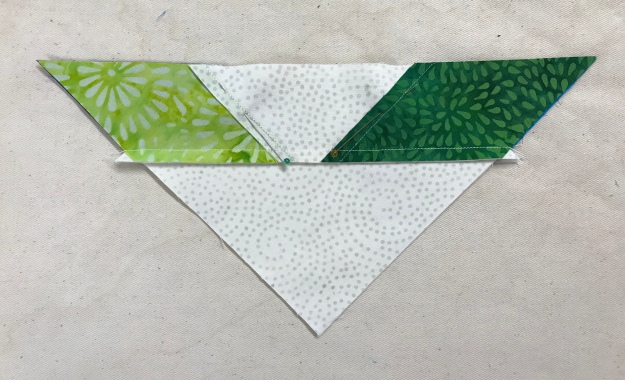
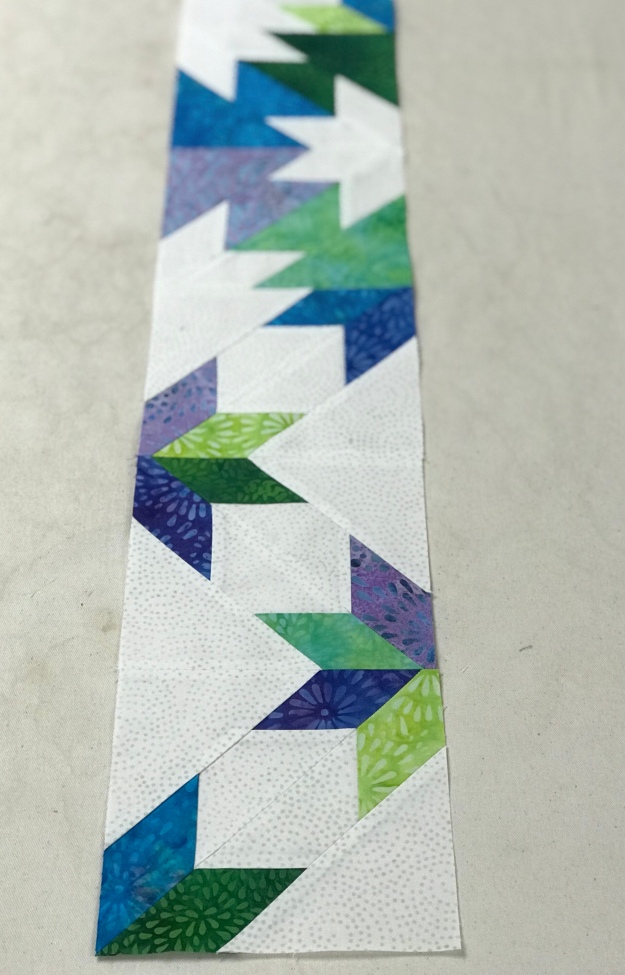
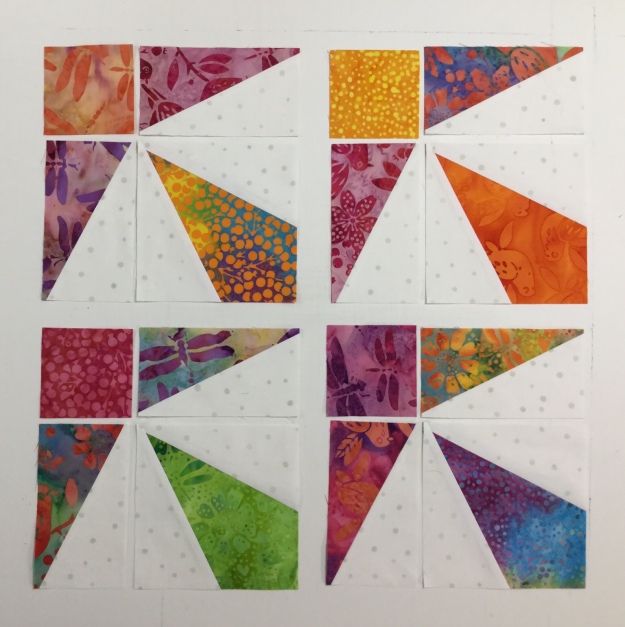
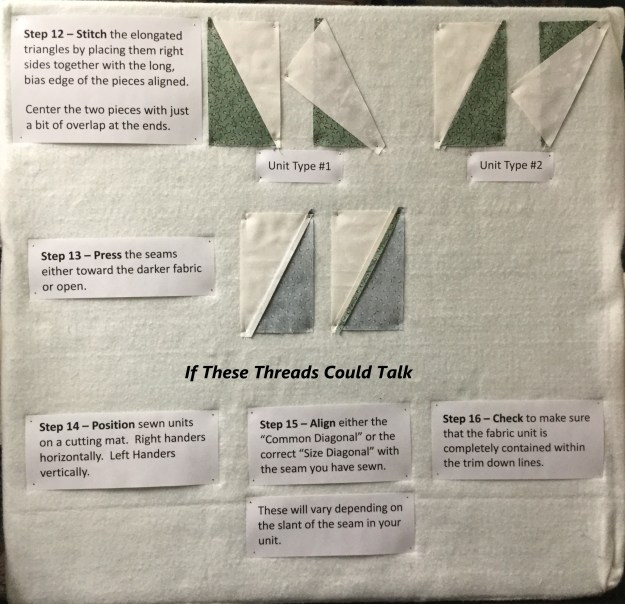
My second BlockBuster was 16 Peaks & Valleys using the Diamonds Rects Tool and V Block Tool & the  Sidekick, High Low Technique Sheet.

Unit A. Diamond Rects:  Cut your precision diamonds & side triangles per the Diamonds Rects instructions.  Stitch opposite side triangles, press toward the side triangles.  Stitch the other opposites side triangles.

Make 4 diamond rects units and trim.

Stitch using a partial seam to the center square.  Stitch the second diamond rects unit and so on to finish the block center.

Unit B. High Low Left:  Following the instruction the in technique sheet cut your squares and trim, add the replacement side triangle.  Mark and stitch the square for the low point and trim.

img_1888

Make four High Low Left Units.

img_1871.jpg

Unit C Sidekick Right:  When making a Sidekick Right, position fabrics face down for cutting.  Cut and stitch replacement side triangles.

img_1892

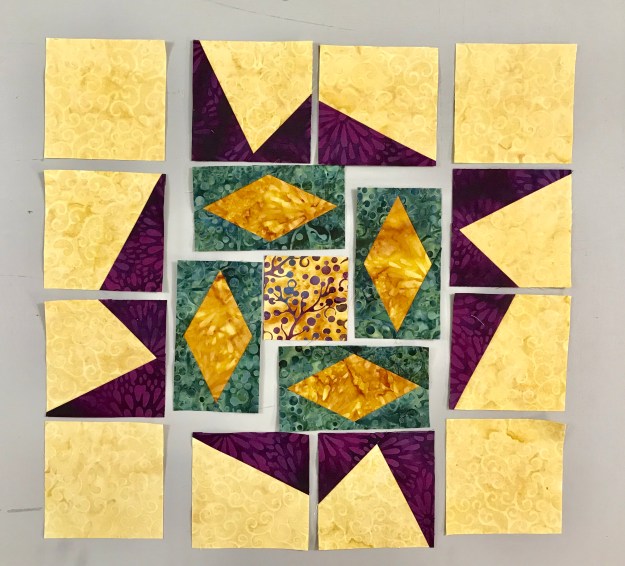
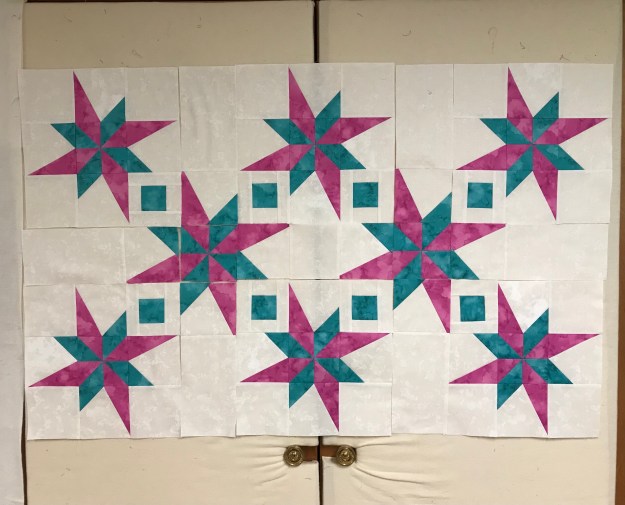
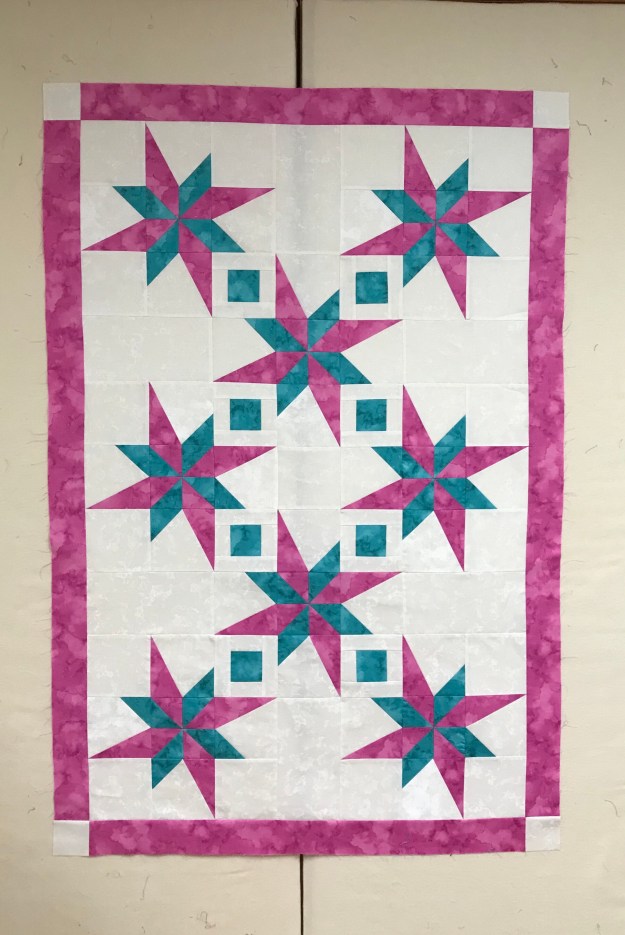
Peaks & Valleys block unit layout.

img_1900

Stitch units into rows.

img_1903

Join the rows to complete the block.

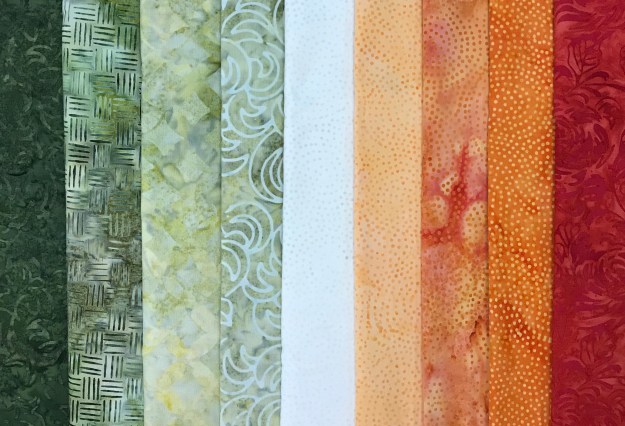
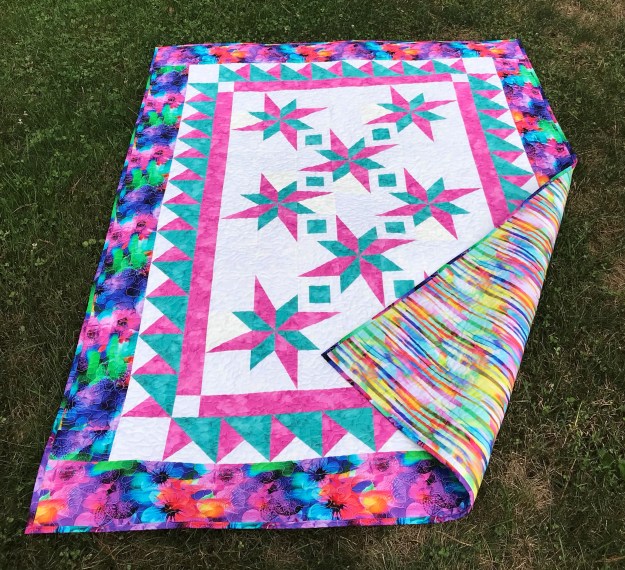
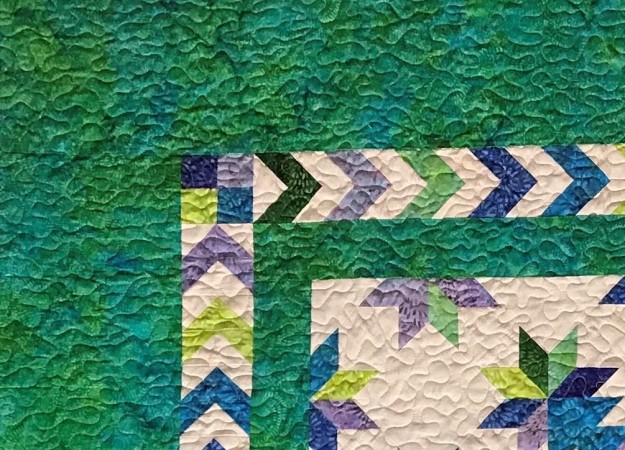
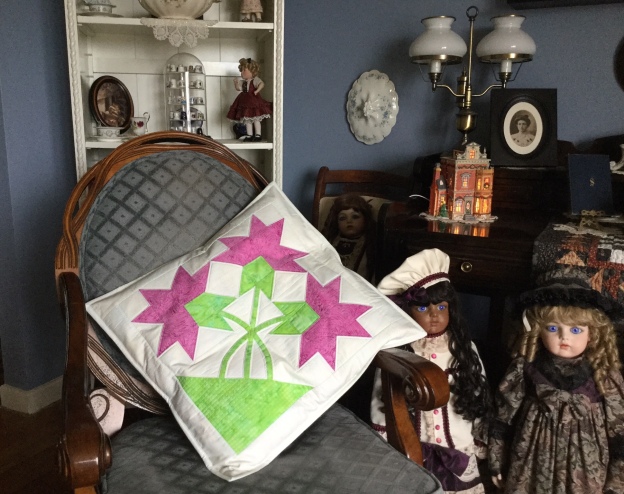
I love the Twilight Chic fabrics from Island Batik and I can’t wait to show you one of the finished quilts!

#islandbatik #debtucker #twilightchic #studio180design #blockbusters

Log Cabin Challenge

2a8528e9-15bc-499d-9f48-f0125510a612

The Island Batik challenge for November is to incorporate a log cabin block or variation into my project.  I decided to use Studio 180 Design’s Geese on the Edge Technique Sheet.  This is a variation on the Log Cabin block and is a fun way to use your Square/Squared tool, Tucker Trimmer I & Wing Clipper I.

img_1664

My beautiful Island Batik fabrics from left to right:  Mr. T Blocks: Arc Pine Needle, Dash-Grasshopper, Seed Circle Custard, Arc Waves Grasshopper, & Sprinkles Playful Pachyderm, & Paisley Dot: Apricot, Candy Corn, Nasturtium, & Item number 121412189.

I have named my original design “Converging Geese” because each block has Flying Geese & Geese on the Edge units, along with Square/Squared units.

img_1725

Each 16″ block contains 12 – 2″ x 4″ finished flying geese, 4 – 6″ finished geese on the edge & 1 square/squared unit.  These Geese on the Edge units are soooo much fun to make!  The technique sheet gives instruction for making geese on the edge in 10 sizes from 3″ to 12″!

You begin with starter squares, add logs by chain stitching, square up two sides with your Tucker Trimmer.

Trim apart.

Using your Wing Clipper trim the corner leaving a 1/4″ seam allowance.

Add a replacement triangle and press toward the triangle.

Trim after every addition of a replacement triangle.  Add more logs.

The final trim down is performed when I have four rounds of logs for a  6″ finished geese on the edge unit.

img_1667

Stitch the flying geese units into sets containing 3 each.

img_1708

Block layout.

img_1815

I have created a down loadable pattern for Converging Geese (measures 60″ x 60″) that can be purchased on my If Threads Could Talk Etsy Shop.

#islandbatik #bestofbali #studio180design #debtucker #geeseontheedge

New Years Star

The fabrics featured in this post were given to me by Northcott  Fabrics.

This fabulous pattern, “New Year’s Star” by Deb Tucker is fun to make using your V Block & Tucker Trimmer I tools.  It can be made in 3 sizes: 50″ x 66″, 66 x 82″ & 82 x 102″.  I love pink and aqua & retro fans.  I guess you can say the photo above shows my fan club (HAHAHAHA).

img_1481

I chose 4 fabrics from Northcott’s “Strokes of Brilliance” collection.  The colors are so deep and rich.

img_1489

Pinwheels:  Making the pinwheels begins by  making half square triangles using the 3″ dark & medium squares.  Trim to 2 1/2″ with your Tucker Trimmer.  Arrange the trimmed squares into pinwheels.

img_1490.jpg

Use Care Here!.  The blocks should spin exactly as shown in the pattern instructions.

V Block High/Low:

img_1503

I have cut my background squares and side triangles for unit construction.

Following my pattern instructions I trimmed the background square and stitch a side triangle to it.

img_1506

Press toward the side triangle,  add the square to make the second low side triangle and trim.

Trim using the V Bock tool as shown above.  Rotate and trim again.

img_1521

By placing the high/low units around the pinwheels we get a great looking wonky star!

Framed Squares:

img_1549

Make 8 of these easy framed squares.

Combination Units:

Using the Magic Wand draw 2 diagonal lines on the back of the 5 1/2″ the background squares and align with the medium squares, stitch on lines.

Cut apart and press toward the darker fabric.

Using the Magic wand draw 2 diagonal lines on the back of the half square triangles (HST).  Center the HST’s on a dark 5 1/2″ square, stitch on the lines, cut apart & press toward the large triangle.

Trim using your Tucker Trimmer, rotate and trim again.

img_1520

Each set makes mirror image combination units.  Both are used in the pieced inner border.  It is a good idea to keep the units organized into left and right groups.  You’ll be glad you did.

img_1525

Lay out your units.

img_1526

Stitch into rows.

img_1527

Add your inner borders.

img_1545

Add your pieced inner borders and your final outer border.

img_1544.jpg

I love the backing too.  This quilt was completed with Quilters dream Batting!  Thank you Northcott for letting me create with your beautiful fabrics.  The description I’ve shared in this post does not answer every question you may have.  Please feel free to contact me with questions.

#northcottfabrics #strokesofbrilliance #debtucker #studio180design  #tuckertimmer #vblock #newyearsstar

Starstruck, in a SueNami Kind of Way!

Starstruck

The Island Batik Ambassador’s challenge for September is “Starstruck”.  We must incorporate “stars” into our project.  I chose the Hunter Star block and Sue Tuckers award winning quilt pattern “SueNami“.  This really fun quilt was made with 5” blocks using Deb Tucker’s Rapid Fire Hunter Star Petite tool and measures 68″ x 68″.

img_1480

This fat quarter friendly quilt requires 8 dark & 8 light fat quarters.  I used yardage for light background instead of fat quarters.  Of course, all my fabrics are from Island Batik.

img_1396

Every hunter star block consists of 2 trapezoids, 2 triangles, 4 star points.  I made 64 blocks – 32 blocks with dark trapezoids and triangles & 32 blocks with light trapezoids and triangles.

The first layout is with un-trimmed triangles. Take care when laying out the triangles that when ever dark star points come together that none are the same so when the stars are formed, every star point is a different color.

img_1390

Having a design wall is very helpful.

img_1392

Once you are satisfied with the balance of color, stitch blocks together, press seam open and trim using your Hunter Star tool.  Full instructions are included with the pattern & hunter star tool.

img_1395

Once your blocks are trimmed, stitch them together into rows.

Join the rows together to complete the quilt center.

img_1439

The inner border was made with flying geese using Deb Tucker’s Wing Clipper I tool.  A flying goose with a large light triangle always follows a flying goose with a large dark triangle. This fools the eye into seeing chevrons.

img_1440

Stitch the geese into pairs, you will then have 8 chevrons from each color fabric. Divide the chevrons into four piles containing 2 chevrons from each color. Decide how you want the colors of your geese to flow, and organize each pile of 16 chevrons, we will use 15 per side. Each strip of stitched chevrons will end up in the same order, with 4 chevrons left over.

Cropped corner


The pattern calls for quarter Square triangles as the cornerstones.  I decided to use four patches, (there’s a story there).  Using Deb Tucker’s Four Patch Square Up tool for the four patches is so quick and easy.

This quilt comes alive with color because of the Island Batik fabrics I used.

#islandbatikambassador  #islandbatik #iheartislandbatik

Great Outdoor Blog Hop Week 4

Wow, the last week in August gets so busy!  Have you visited Island Batik for week 4’s project reveals?  There are two more days to go next week then it is over.  Here are links to this weeks reveals:

Monday, August 27 – Globetrotter
Pamela Quilts, Curliecue Creations

Tuesday, August 28 – Jungle Cruise
Vicki’s Crafts and Quilting, Little Bunny Quilts

Wednesday, August 29 – Lavendula
Carole Lyles Shaw, Masterpiece Quilting

Thursday, August 30 – London Calling
Quilt in a Not-Shell, Lizard Creek Quilting

Friday, August 31 – Spirit Rhythm
Steph Jacobson, Whispers of Yore

If you follow my blog you know I have a female chihuahua named “Tucker”.  Tucker is definitely in charge!img_1598

Tucker keeps a close eye on everything I’m doing.  All that supervision makes her sleepy.  She will climb on my head to get me to go to bed by 7:30 at the latest.  I’m not ready to sleep that early, so I am usually on my laptop.  Last night I was playing with EQ8. I was drawing the BlockBuster patterns by Deb Tucker.  It is so much fun seeing what the blocks will look in quilt.

BB10 Twisted Pinwheel Blue Background

One of the blocks I was playing with last night BlockBuster 10 Twisted Pinwheel.  This block has a 4 patch in the center, High/Low units & Sidekick units made with the V Block tool and Sidekick High\Low Technique Sheet.  I was able to load fabric scans of Island Batik fabrics into the EQ8 software.

BB10 Twisted Pinwheel Quilt

I decided to design the quilt with 12″ finished blocks, on point, adding sashing with 6″ Twisted Pinwheels as cornerstones and Piano key outer borders.  What a nice way to end summer!  Have a great weekend everyone!

#greatoutdoorbloghop #islandbatik #Iheartislandbatik #DebTucker #Studio180Design #EQ8 #BlockBusters

Great Outdoor Blog Hop Week 3

I love Island Batik fabrics, Studio 180 Design Tools & EQ8!  So I wanted to share some of my Sunday morning creativity.

I started with BlockBuster 19 Exploding Lemoynes (you can find all the BlockBuster patterns on http://www.ifthesethreadscouldtalk.com).  There are 3 different color versions of this block.  These blocks require the Rapid Fire Lemoyne Star tool.

BB19 Version 1 block

This is Exploding Lemoynes version 1

BB19 version 1 quilt

This is what happens when you put 4 version 1 blocks together.

BB19 version 2 block

Exploding Lemoynes version 2 block.

BB19 Version 2 quilt

Exploding Lemoynes Version 2 with 4 blocks.

BB19 Version 3 block

Exploding Lemoynes version 3 block.

BB19 version 3 quilt

Exploding Lemoynes version 3 with 4 blocks put together.  These are so cool and easy to make with the Rapid Fire Lemoyne Star tool that makes Lemoyne stars in 10 sizes from 3″ to 12″ blocks!

I want to share links to Island Batik’s Great Outdoor Blog Hop for week 3:

Monday, August 20 – Ocean Odyssey
Toby Lischko, Karen Overton

Tuesday, August 21 – British Rose
Busy Hands Quilts, Mania for Quilts

Wednesday, August 22 – Dear William
The Inquiring Quilter, MMM Quilts, Living Water Quilter

Thursday, August 23 – Dragonfly Dreams
Inchworm Fabrics, BeaQuilter

Friday, August 24 – Fur-ocious Friends
Quilting Affection Designs, Dizzy Quilter

Be sure to visit all the links and enter to win “Give Aways”.

#iheartislandbatik #islandbatikfabrics  #studio180design #debtucker #EQ8 #electricquilt

The Great Outdoors Blog Hop

The products in this post were given to me by Island Batik.

img_6392

Back in February when I received my Island Batik Ambassador Box 1 it contained a secret bundle that could not be shared until now!  Through out the month of August “The great Outdoors Blog Hop” is featuring Island Batik Ambassador’s creations using fabrics that were introduced at the 2018 Spring Market.  Go to Island Batik for links to all the Ambassador Blog Sites.

I was given fabric from the “Spring Blossom” line:

This slideshow requires JavaScript.

I managed to use 20 different fabrics from this gorgeous line in my quilt as shown above.

img_1343

I named my quilt “Firefly”.  It is my original design, and uses Studio 180 Design Split Rects & Corner Beam tools.  It measures 66″ x 78″.  It is designed using one 6″ finished block.

img_6373

Each block contains 1 – 4″ finished Corner Beam unit, 2 mirror image 2″ x 4″ finished  Split Rects units & a 2″ finished square.

img_6367img_6368

I chose 7 different fabrics for the Split rects units and 10 more fabrics for the Corner Beam units and squares.

img_1378

I got one star block by place the corner beam units in the center and a 2nd star block by placing the 2″ squares in the center which created the “Firefly” in the center, how cool is this?  I had so much fun making this quilt.

This slideshow requires JavaScript.

To celebrate the great out door places in Utica, NY, my sister Mary & I went all over taking pictures of my travelling quilt.  We went to the historical Utica Train Station, Forest Hills Cemetery (the tree was up the hill from John Quincy Adams granddaughter’s grave), Rutger Park 1 & 3, Franklin Square, Liberty Bell Corner, Bagg Square & Utica Bread (fabulous bakery) and then upstairs to Jay Groah Realtor Group (his office has the coolest 70″s vibe), we finished up at the Eagle with a beautiful view of Utica.

GIVEAWAY:  Please leave a comment about this post and I will choose a winner to receive this Island Batik Spoolin Around Charm Pack!  (Giveaway is US Only and ends September 5, 2018.  Please leave your email in the comment.)

#greatoutdoorsbloghop #islandbatik #islandbatikambassador

Crossfire

The fabrics in the post were generously given to me by Northcott Fabrics.

img_6250

I chose Northcott fabrics from the Sew Musical Row by Row Palette 2018.  When I choose my fabrics from Northcott, I get so excited when they are delivered.  As soon as I touch the fabric, I feel the quality.  These colors are luscious with just enough texture to give depth and interest.

Crossfire is a Studio 180 Design pattern designed by talented Certified Instructor Sarah Furrer.  It is a companion pattern for the Large Square/Squared tool.

The block featured in this quilt is called “Bird of Paradise”.  The pattern describes this quilt as “whirling stars with accents and chains of black and grey.  A new fun variation of a Flying Goose makes for a star with loads more sparkle”, and it does.

This slideshow requires JavaScript.

If you follow me, you know I love to organize my quilt making process by labeling paper plates for my block pieces as I cut them out.  I never get lost or forget what the pieces are for.  All my block pieces are cut and ready to put together.

Star Blocks:  You will be making 8 star blocks, they will be made in pairs.  Each pair will contain the same colors, but their arrangements will give you two different looking blocks.  Label one of the colors in each pair as Color 1 & Color 2.  If you follow the instructions in the pattern you wont have any trouble.  After construction the diamond square units are trimmed to the cut size of 6.5″ x 6.5″

img_6288

Beautiful, perfectly trimmed units leaving a 1/4″ seam allowance, so I will not lose my points.  After all…no one wants to be pointless!

Next, we make half square triangles and perfectly trim them using our Large Square/Squared tool.

Lay out your trimmed half square triangles and the and two white triangles as shown.  Work with one triangle at a time, stitch & carefully press toward the white triangle as not to distort the shape.

img_6301

Laying Out the Blocks:   Pay close attention to Step 10.  Split your pieced geese into two piles of four.  Lay out your side triangles so that on one pile you have four Color 1 side triangles on the right side & four Color 2 side triangles on the left side.  The other pile will have four Color 2 side triangles on the right side & four Color 1 side triangles on the left side.  If you lay them as I did above for every color combination, you will be fine.

It is very important to pay attention to Step 11:  Position the right side triangle so that Color 1 shows a bit beyond the white along the top edge.  Stitch and press toward the side triangle.  Trim the units according to pattern instructions and put your blocks together.

img_6348

Crossfire is a fun, skill expanding pattern.  Finished quilt measures 60″ x 84″.

This slideshow requires JavaScript.

Blast From The Past

The fabrics featured in this post were given to me by Island Batik. 

Modern Batik Challenge 39

The Island Batik Ambassador’s challenge for June is “Modern Batik”.  Lord have mercy!  I had no idea what to do.  I love all types of quilts.  For some reason I wondered……what colors were popular in 1953?  A search on Pinterest revealed an O’Brien Paints Color Card from 1953!  It must be a sign!

I racked my brain.  I had these really cool precut rolls of 5″ WOF strips I’d received in my box “O” fabric from Island Batik.

Last year I was constantly looking for quilt blocks containing Shaded Four Patch units. This year it seems to be Split Rects units that have my mind whirling.

2 TU SR Unit Types

3 TU SR 5 thru 8

5 TU SR 12 thru 16

The above photo’s are my teaching step outs that explain the process of making Spilt Rects Units in case you weren’t sure what I was talking about.

img_6178

I chose 8 – 5″ WOF strips of color & cut 8 – 5″ strips of neutral.  Each strip yielded 12 pair mirror image elongated triangles for a total of 192 – 2″ x 4″ finished Split Rects Units that I will put together to make a multi-faceted Diamond unit.

I Combined the Split Rects units to make multifaceted diamonds.

img_1210

img_6180

I was very closely supervised during this part.

I had an idea of what I wanted, but wasn’t sure how to get there.  I had 48 diamond units but needed to add something more.  I decided on Rapid Fire Lemoyne Stars.

img_6193

I went to Island Batik stash and used 2 1/2″ strips from Spoolin’ Around.  These beautiful pieces of batik have been hand dyed by skilled fabric artists in the garden village of Sanur, Bali.

img_6210

This is what I came up with.  Is it modern?  The challenge description was “must incorporate ONE of the characteristics of modern quilts as defined by the Modern Quilt Guild:  the use of bold colors & prints, high contrast & graphic areas of solid color, improvisational piecing, minimalism, expansive negative space, alternate grid work”.

I may have hit one or two points!  But if you look to the past for inspiration what can you expect!  “Blast From The Past” measures 42′ x 62″.

img_6206

img_6211

As always, my quilts are lovingly pieced with Aurifil thread!

#islandbatik #debtucker #studio180design #aurifilthread

Pillow Possibilities

The products featured in this post were given to my by Island Batik.

Playful Pillows

The Island Batik challenge for May is “Playful Pillows”.  As I was thinking about what pillow design I would choose, it occurred to me I had a wealth of ideas at my fingertips.  So many of my favorite quilt patterns have blocks large enough for a pillow.  I decided I would make the center block from Deb Tucker’s “Carolina Lily: One Block” wall quilt pattern.

DTP005_-_No_Y_Carolina_Lily_-_One_Block_1024x1024Carolina Lily is a companion pattern for the Wing Clipper I.

My fabrics from Island Batik & threads from Aurifil.

img_6145

For each of the 3 flower blocks you will need 4 flying geese units.  Two of the flying geese units will have one pink point & one green point as shown above.  Deb Tucker’s method for constructing flying geese requires one large square and 4 small squares.  The large square is my background fabric. Three of the small squares are my pink fabric, and one is the green fabric.  Using your Magic Wand draw two diagonal lines on the back of your small squares.

To make a flying geese units position one green square and one pink square right sides together in diagonally opposite corners of the one large square.  Do Not align the raw edges, instead nudge them in toward the center just a few threads & overlapping the two small squares.  Stitch on the lines and cut apart.

img_6148

Press the seams toward the smaller triangles.

Position the remaining pink squares in the corner of the previously pieced units.  Nudge the squares as you did before.  Stitch on the lines and cut apart as before.

img_6151

You now have four flying geese units, two with pink points and two with one green & one pink point.  For Right handed cutting position your geese unit horizontally on the cutting mat so it points toward you.  Align the diagonal guide lines of the Wing Clipper with the sewn seams of the flying geese unit.  Trim up the side and across the top.  (See your tool instructions for left handed cutting.)

img_6152

Rotate the unit and reposition the Wing Clipper to align cleanup guidelines with the previously trimmed raw edges and the “X” at the top with the intersection of the seams.  Trim up the side and across the top.  Do this for all your geese units.

img_6153

Construct your lily block according to pattern instructions.  The lily block measures about  a 16 1/2″, I added 2 1/2″ borders all around it.  I like the inside of the pillow to be neat with no raw edges showing.  I want to quilt this block so I cut a backing and batting larger than my block and pin basted it.

I used my walking foot and cross hatched the basket portion of the block.

I was carefully supervised during this process.

img_6159

Once I finished with the basket, I outlined the flower parts and squared up the pillow top.

img_6161

My pillow top now measures 20 1/2″.  I cut two pieces of fabric 12″ x 20 1/2″.  On each piece, along one of the 20 1/2″ edges fold it over about 1/4″, press it & fold it over again and press it.  Stitch on the pressed over edges for a nice finish.  Position these two pieces on the pillow with WRONG sides together aligning the raw edges so the finished edges overlap in the middle.  Pin in place and stitch around the outside edges of the pillow using a 1/4″ seam allowance.

img_6162

Now you have a pillow with raw edges around the outside edge.  I like to add a binding just like it was a quilt.  That way the inside of the pillow is completely finished with no unfinished edges, which is nice for washing the pillow case.

img_6166

I made this pillow for my sister Mary, but I think Tucker & Zoey are claiming it!

#islandbatik #Aurifilthread #islandbatikambassador #debtucker #studio180design