The fabrics featured in this post were given to me by Northcott Fabrics.
A Storm at Sea quilt has been on my “need to make list” for a long time. I especially love the kind that use graduating colors. Lucky for me, fellow Studio 180 Design Certified Instructor Michelle Hiatt created her pattern “Calm Seas“. This fabulous pattern offers you a choice of 3 sizes; Throw, Double or King. I chose to make the Throw size (62″ x 72”). Calm Seas is a companion pattern for Studio 180 Design’s Large Square/Squared, Diamond Rects & V Block Tools.
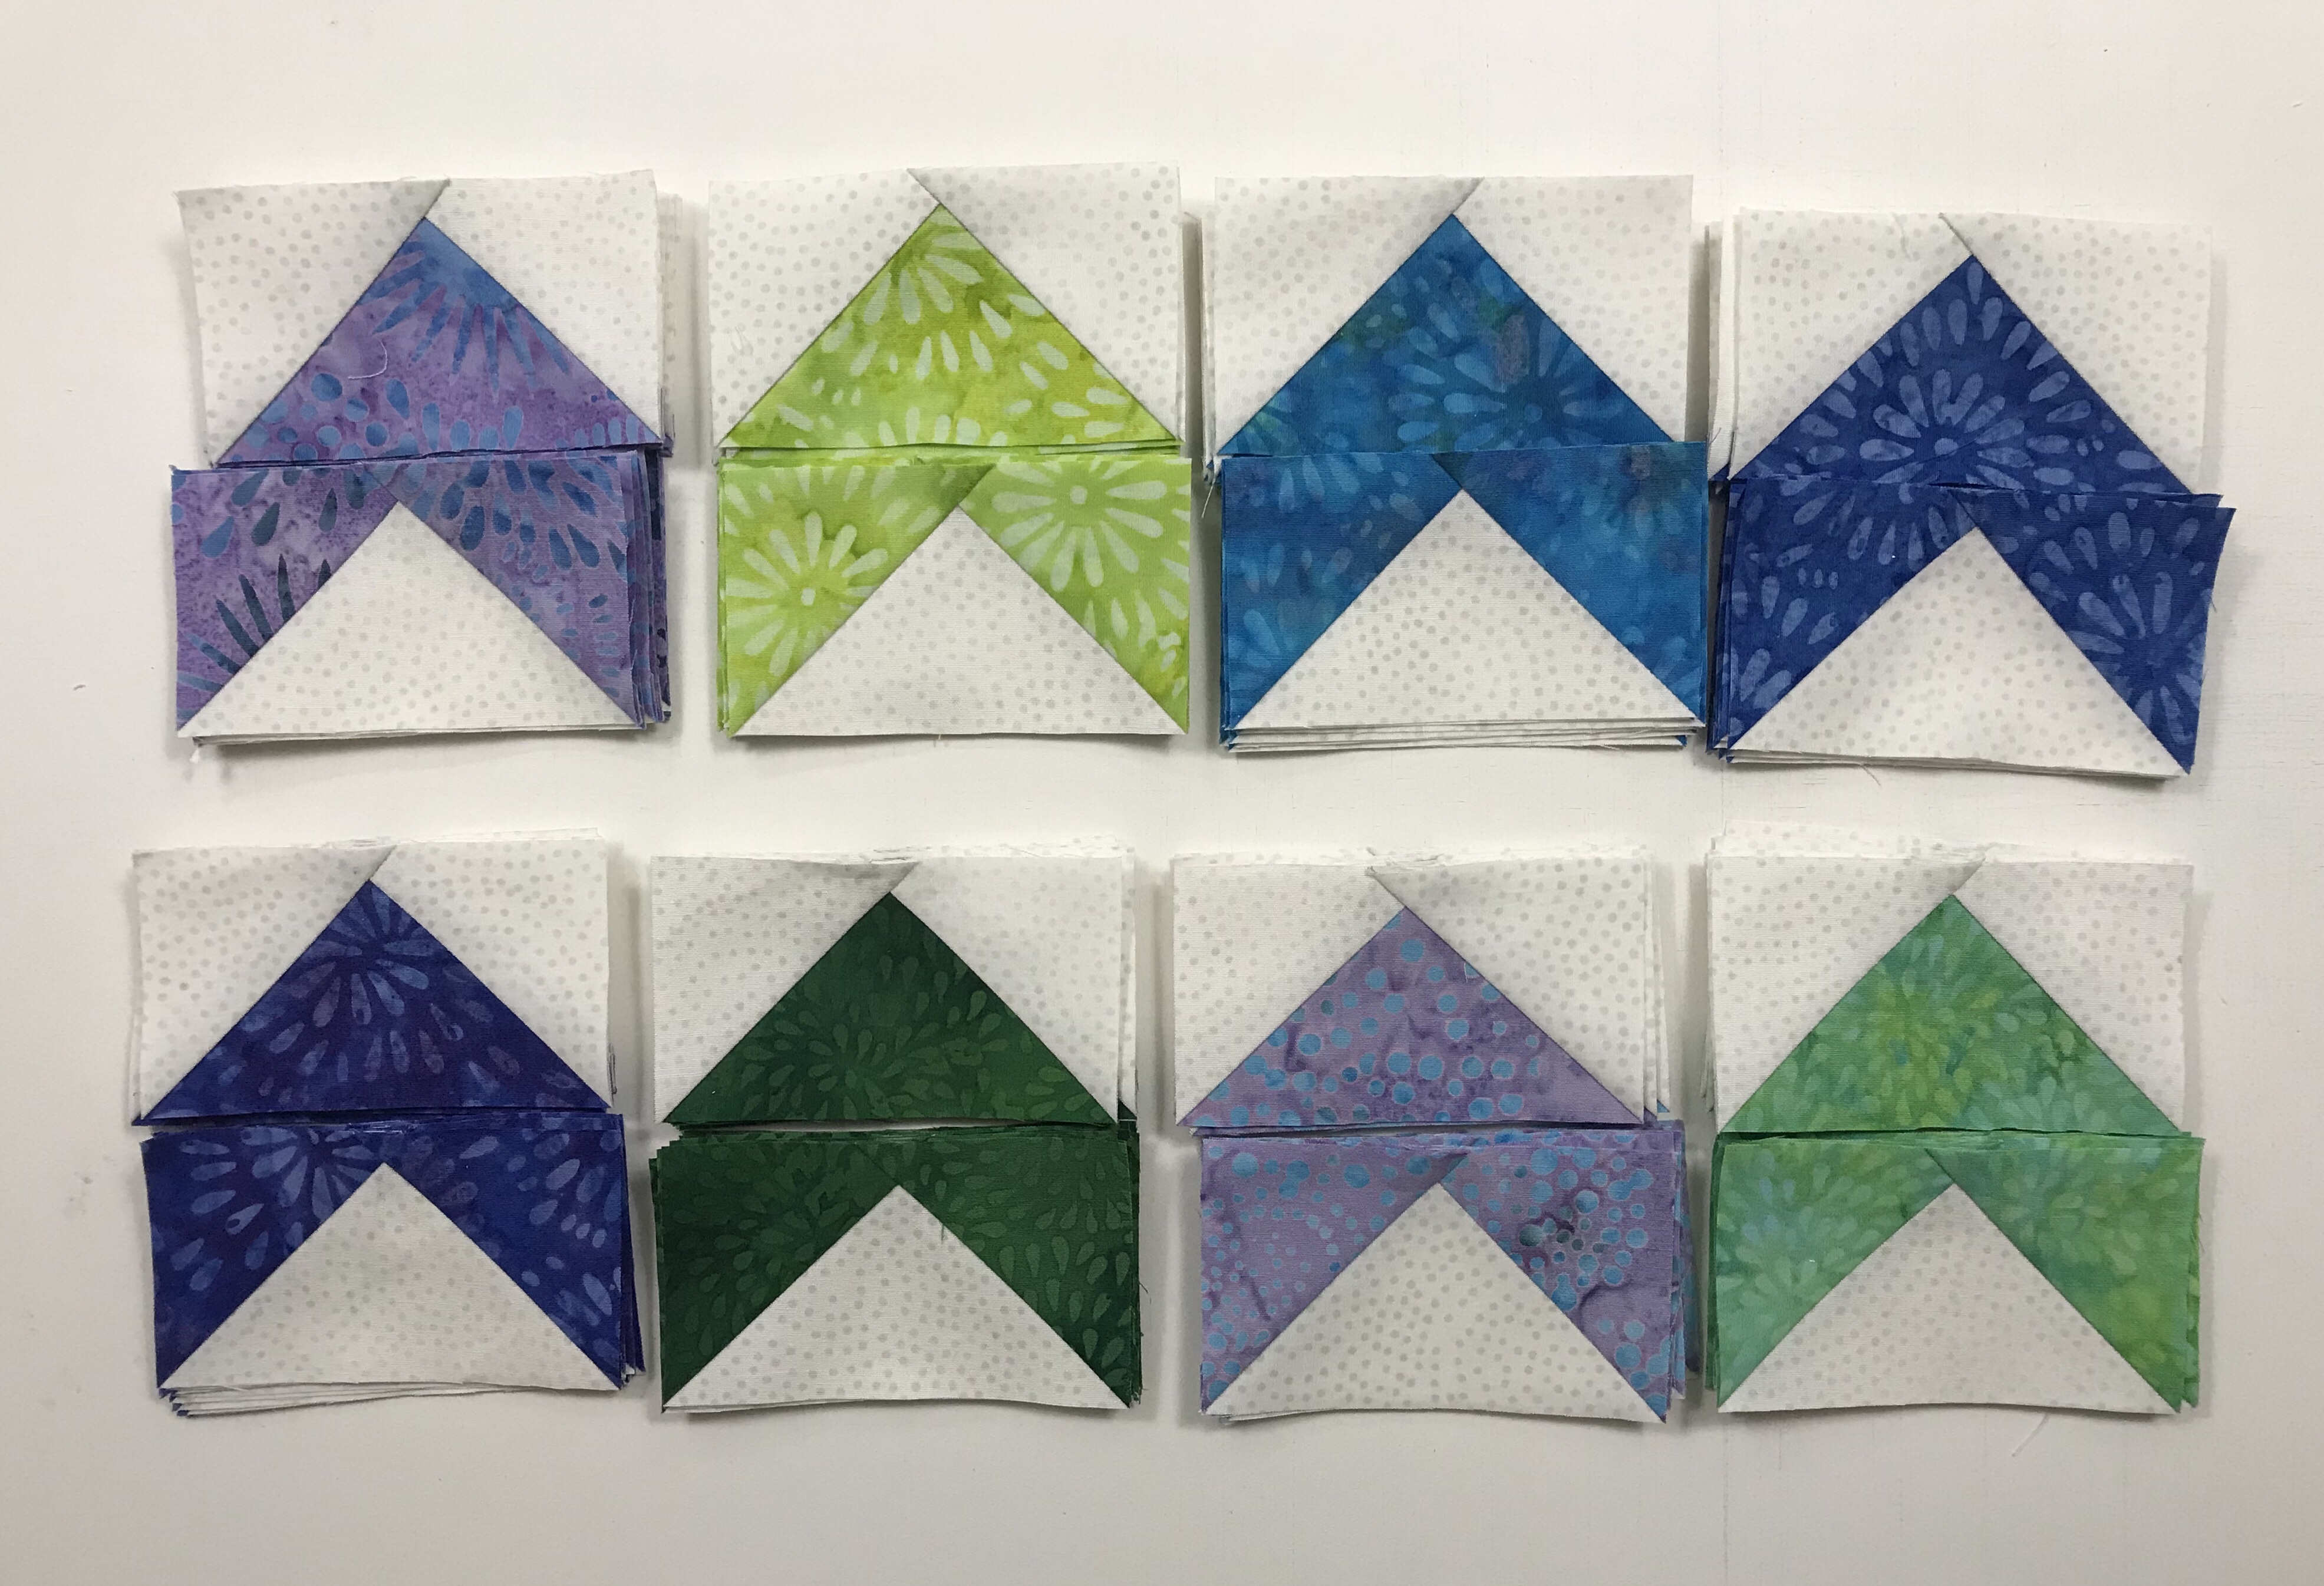
I chose to use the fabulous fabrics from Northcott’s Canvas line. I needed 12 graduating colors in 2 different values each. Canvas is richly textured and has a depth of color that is gorgeous!
Definitely use your best organizational skills when making this pattern. Michelle has made it much easier for us to conquer a storm at sea.
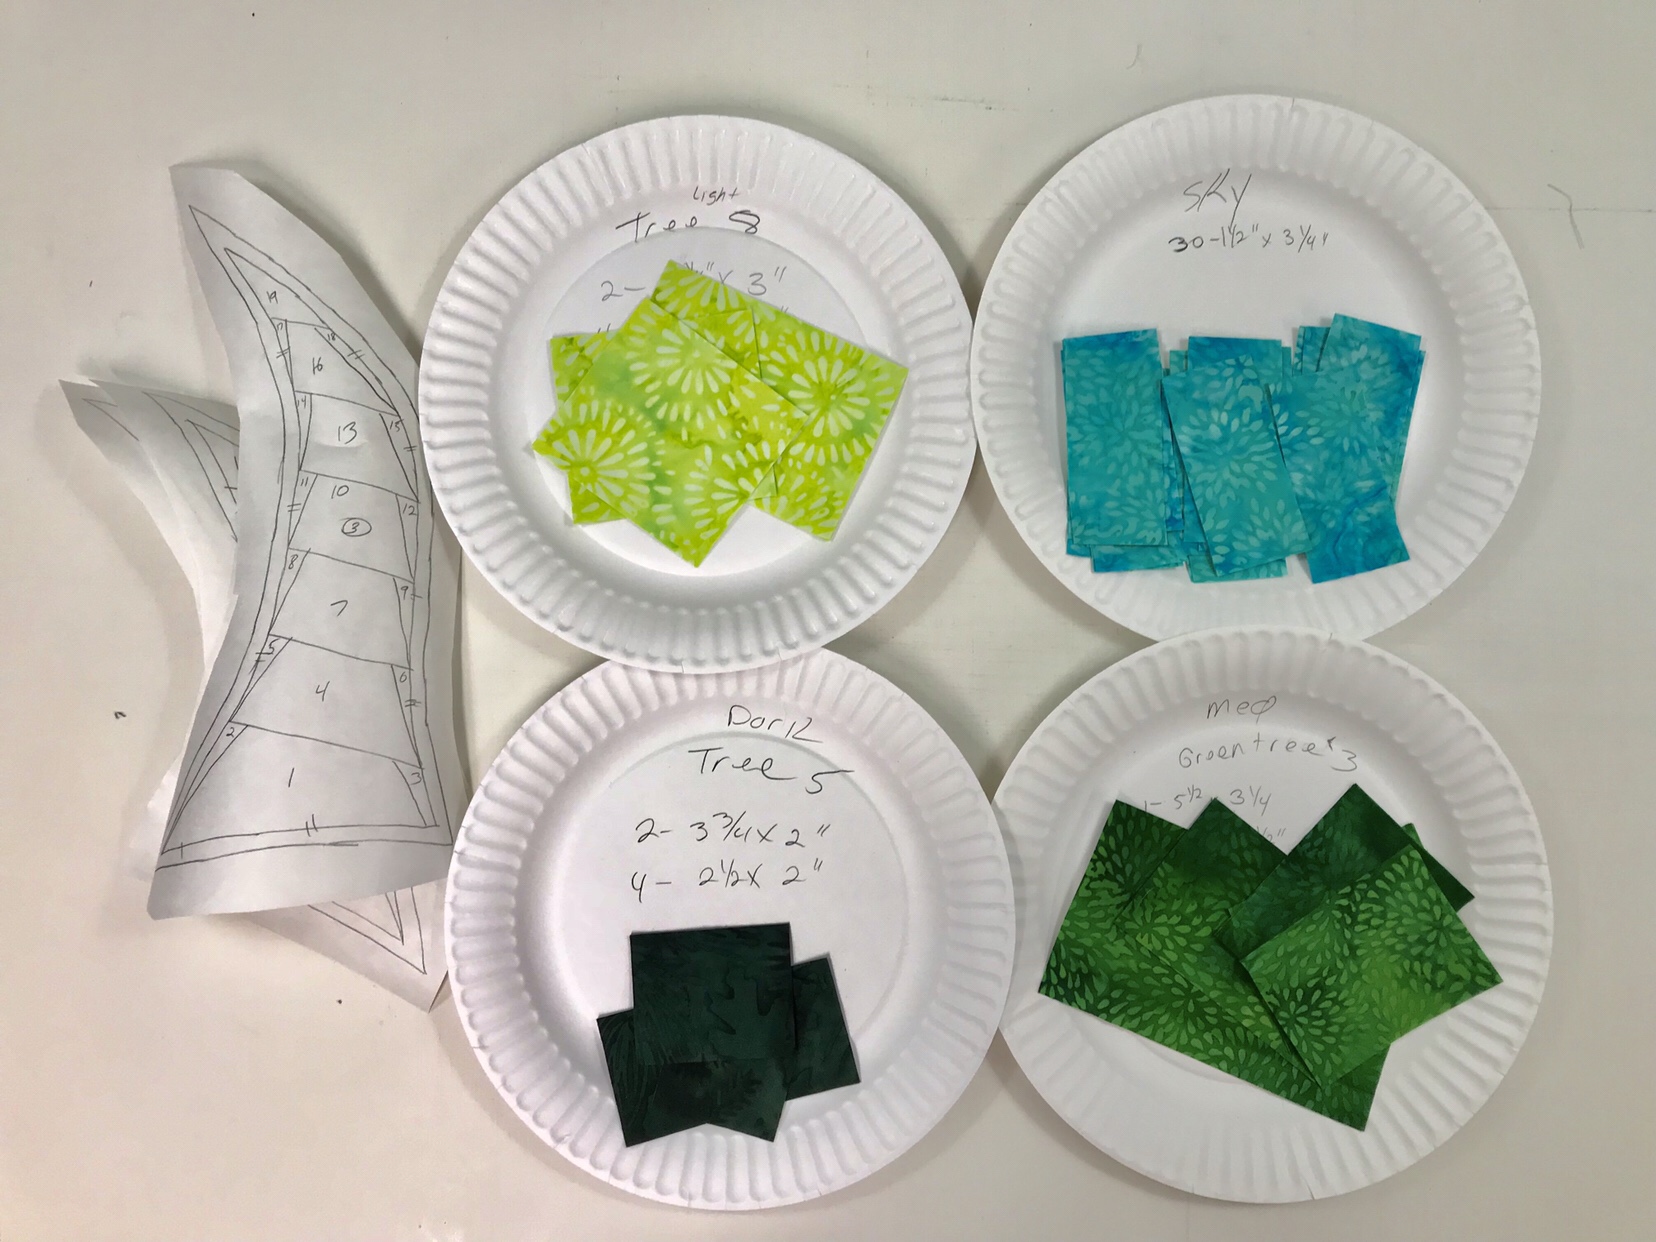
If you know me…you know I use paper plates to keep myself organized. I snipped a piece of each fabric and pasted it to the paper plate, writing down all pertinent info to keep my brains from falling out.
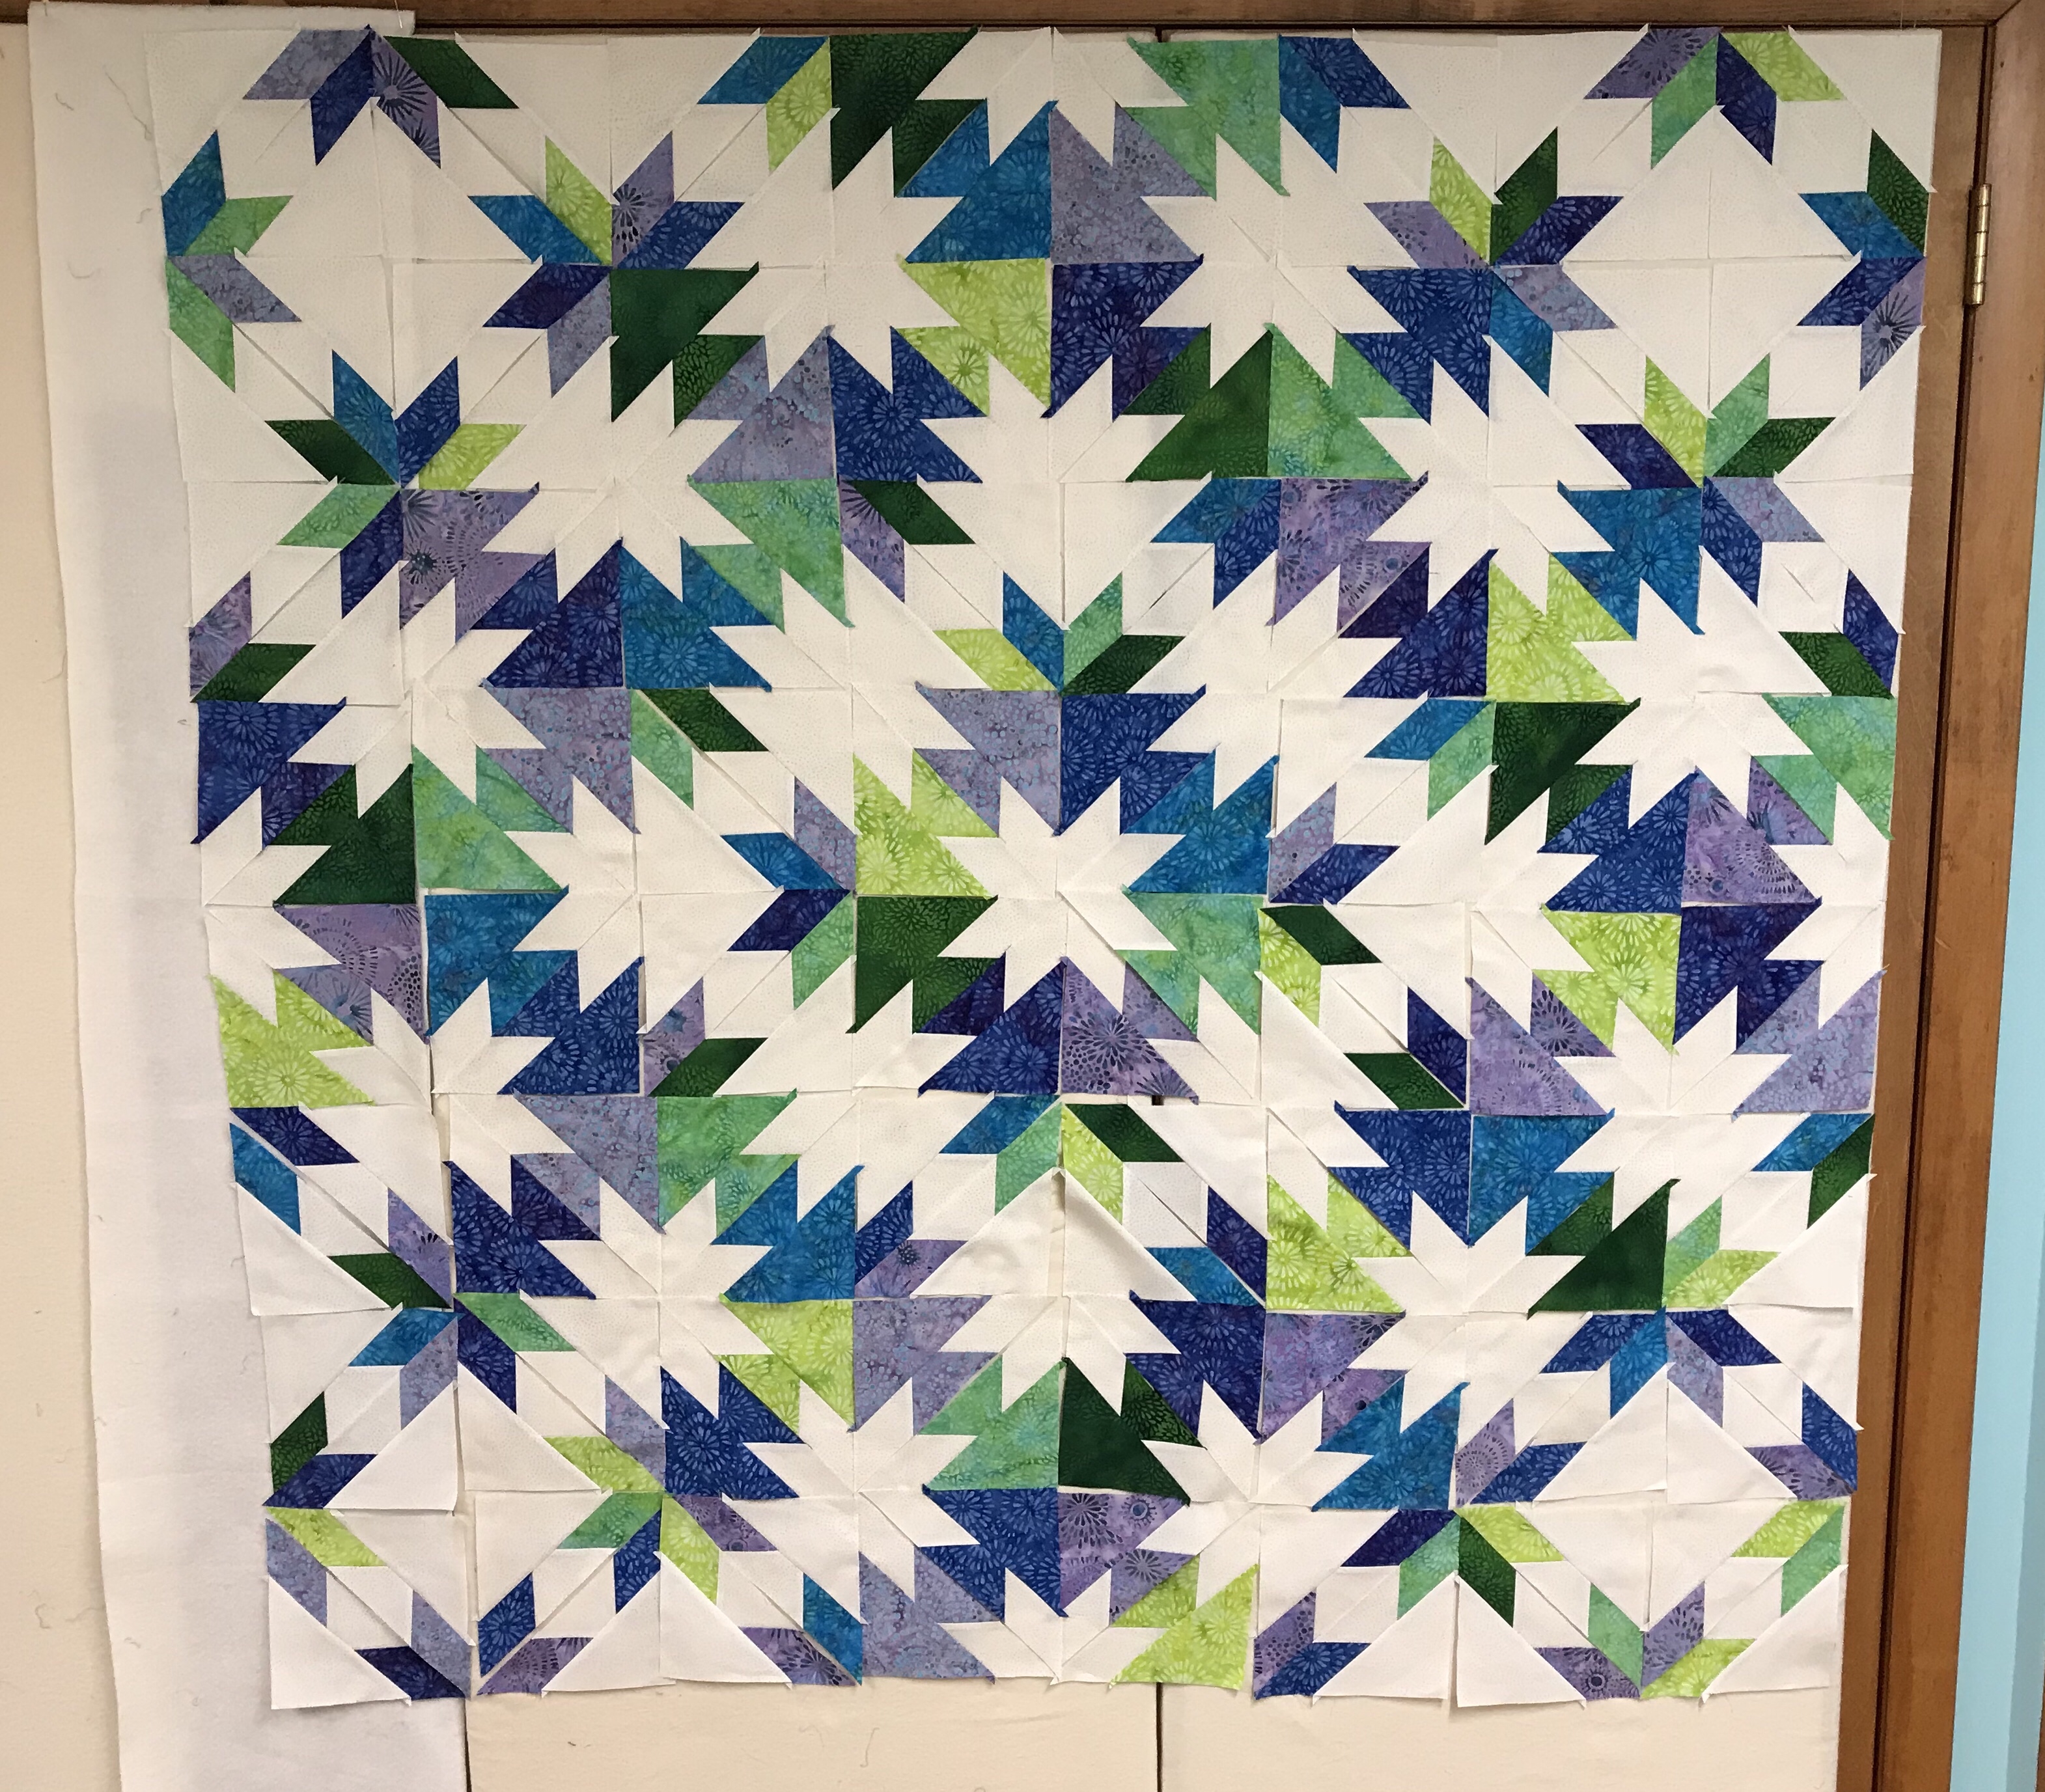
I was very fortunate to spend a few days at Bridle Creek Bed & Breakfast for an annual mini quilt retreat with friends. I managed to get all my diamond rects, large square/squared and small square/squared units done!
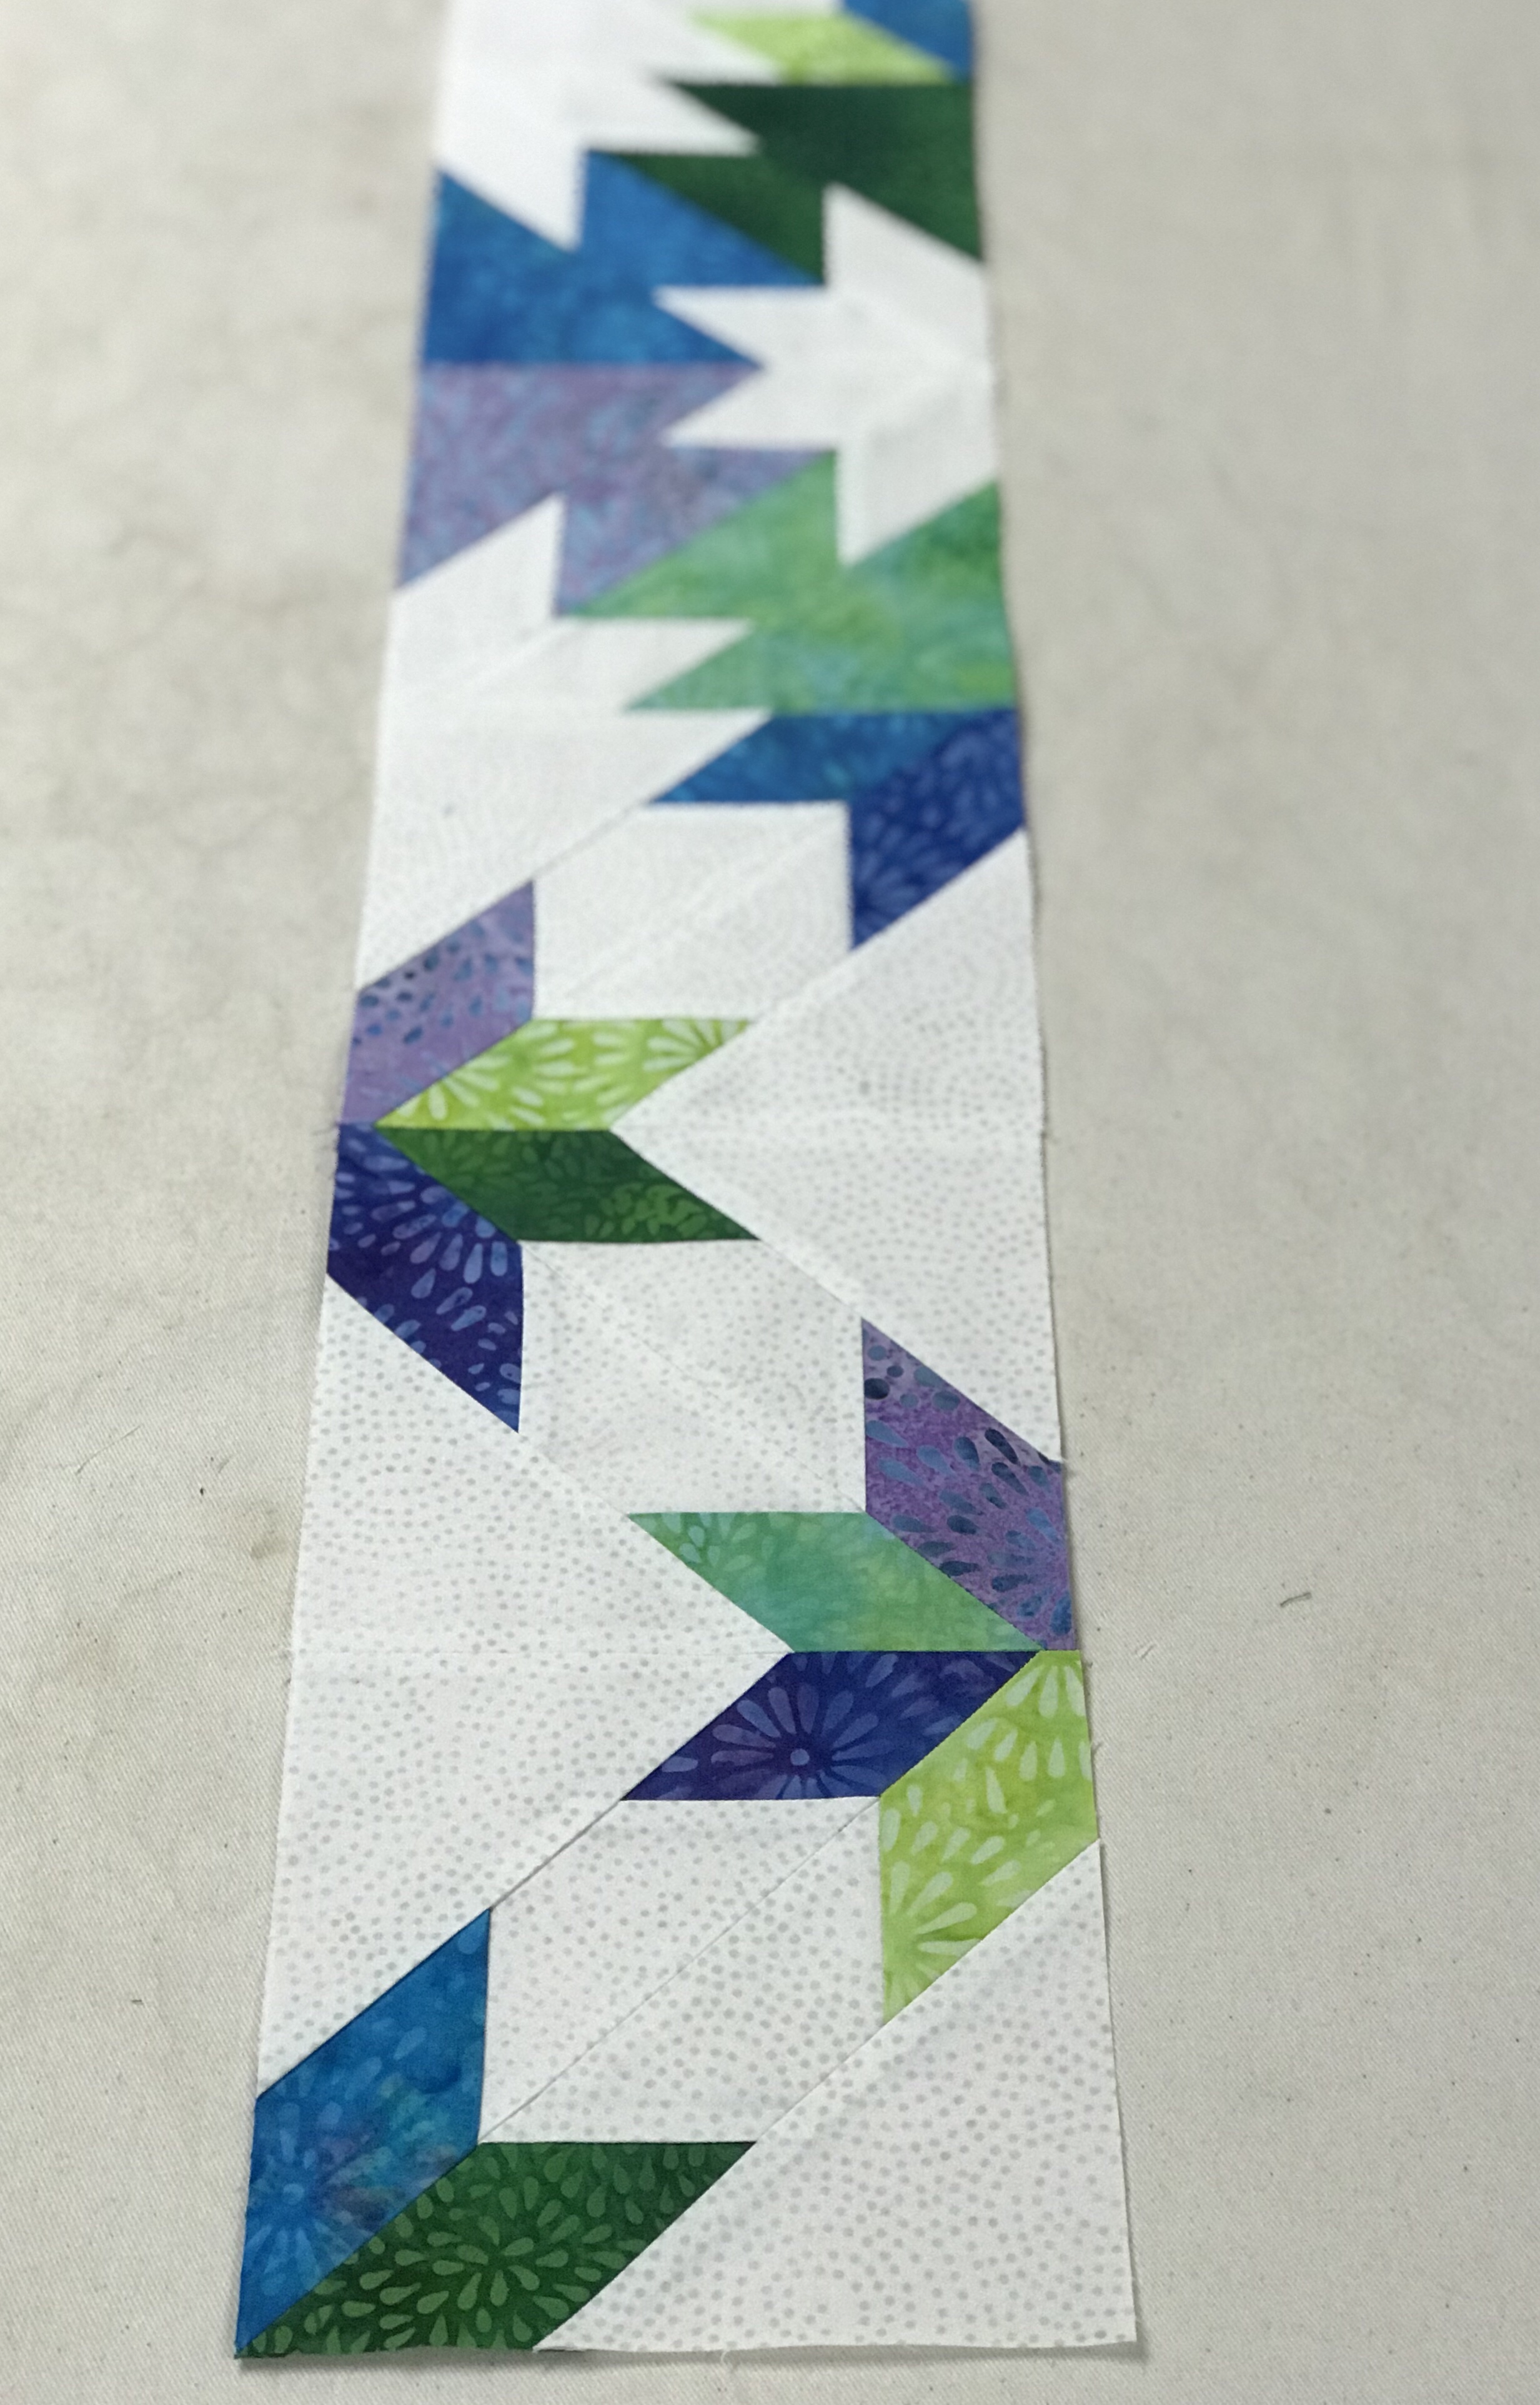
Following the pattern instructions, I laid out my units in the proper color order to achieve this beautiful flow.
I numbered my rows and pinned them together to begin stitching them together,
A little precision pinning goes a long way when it comes to nice crisp points.
After four days of hard work I finished the top. Thanks to Michelle’s pattern Calm Seas & Deb Tucker’s Studio 180 Design tools I have checked another awesome quilt off my bucket list!
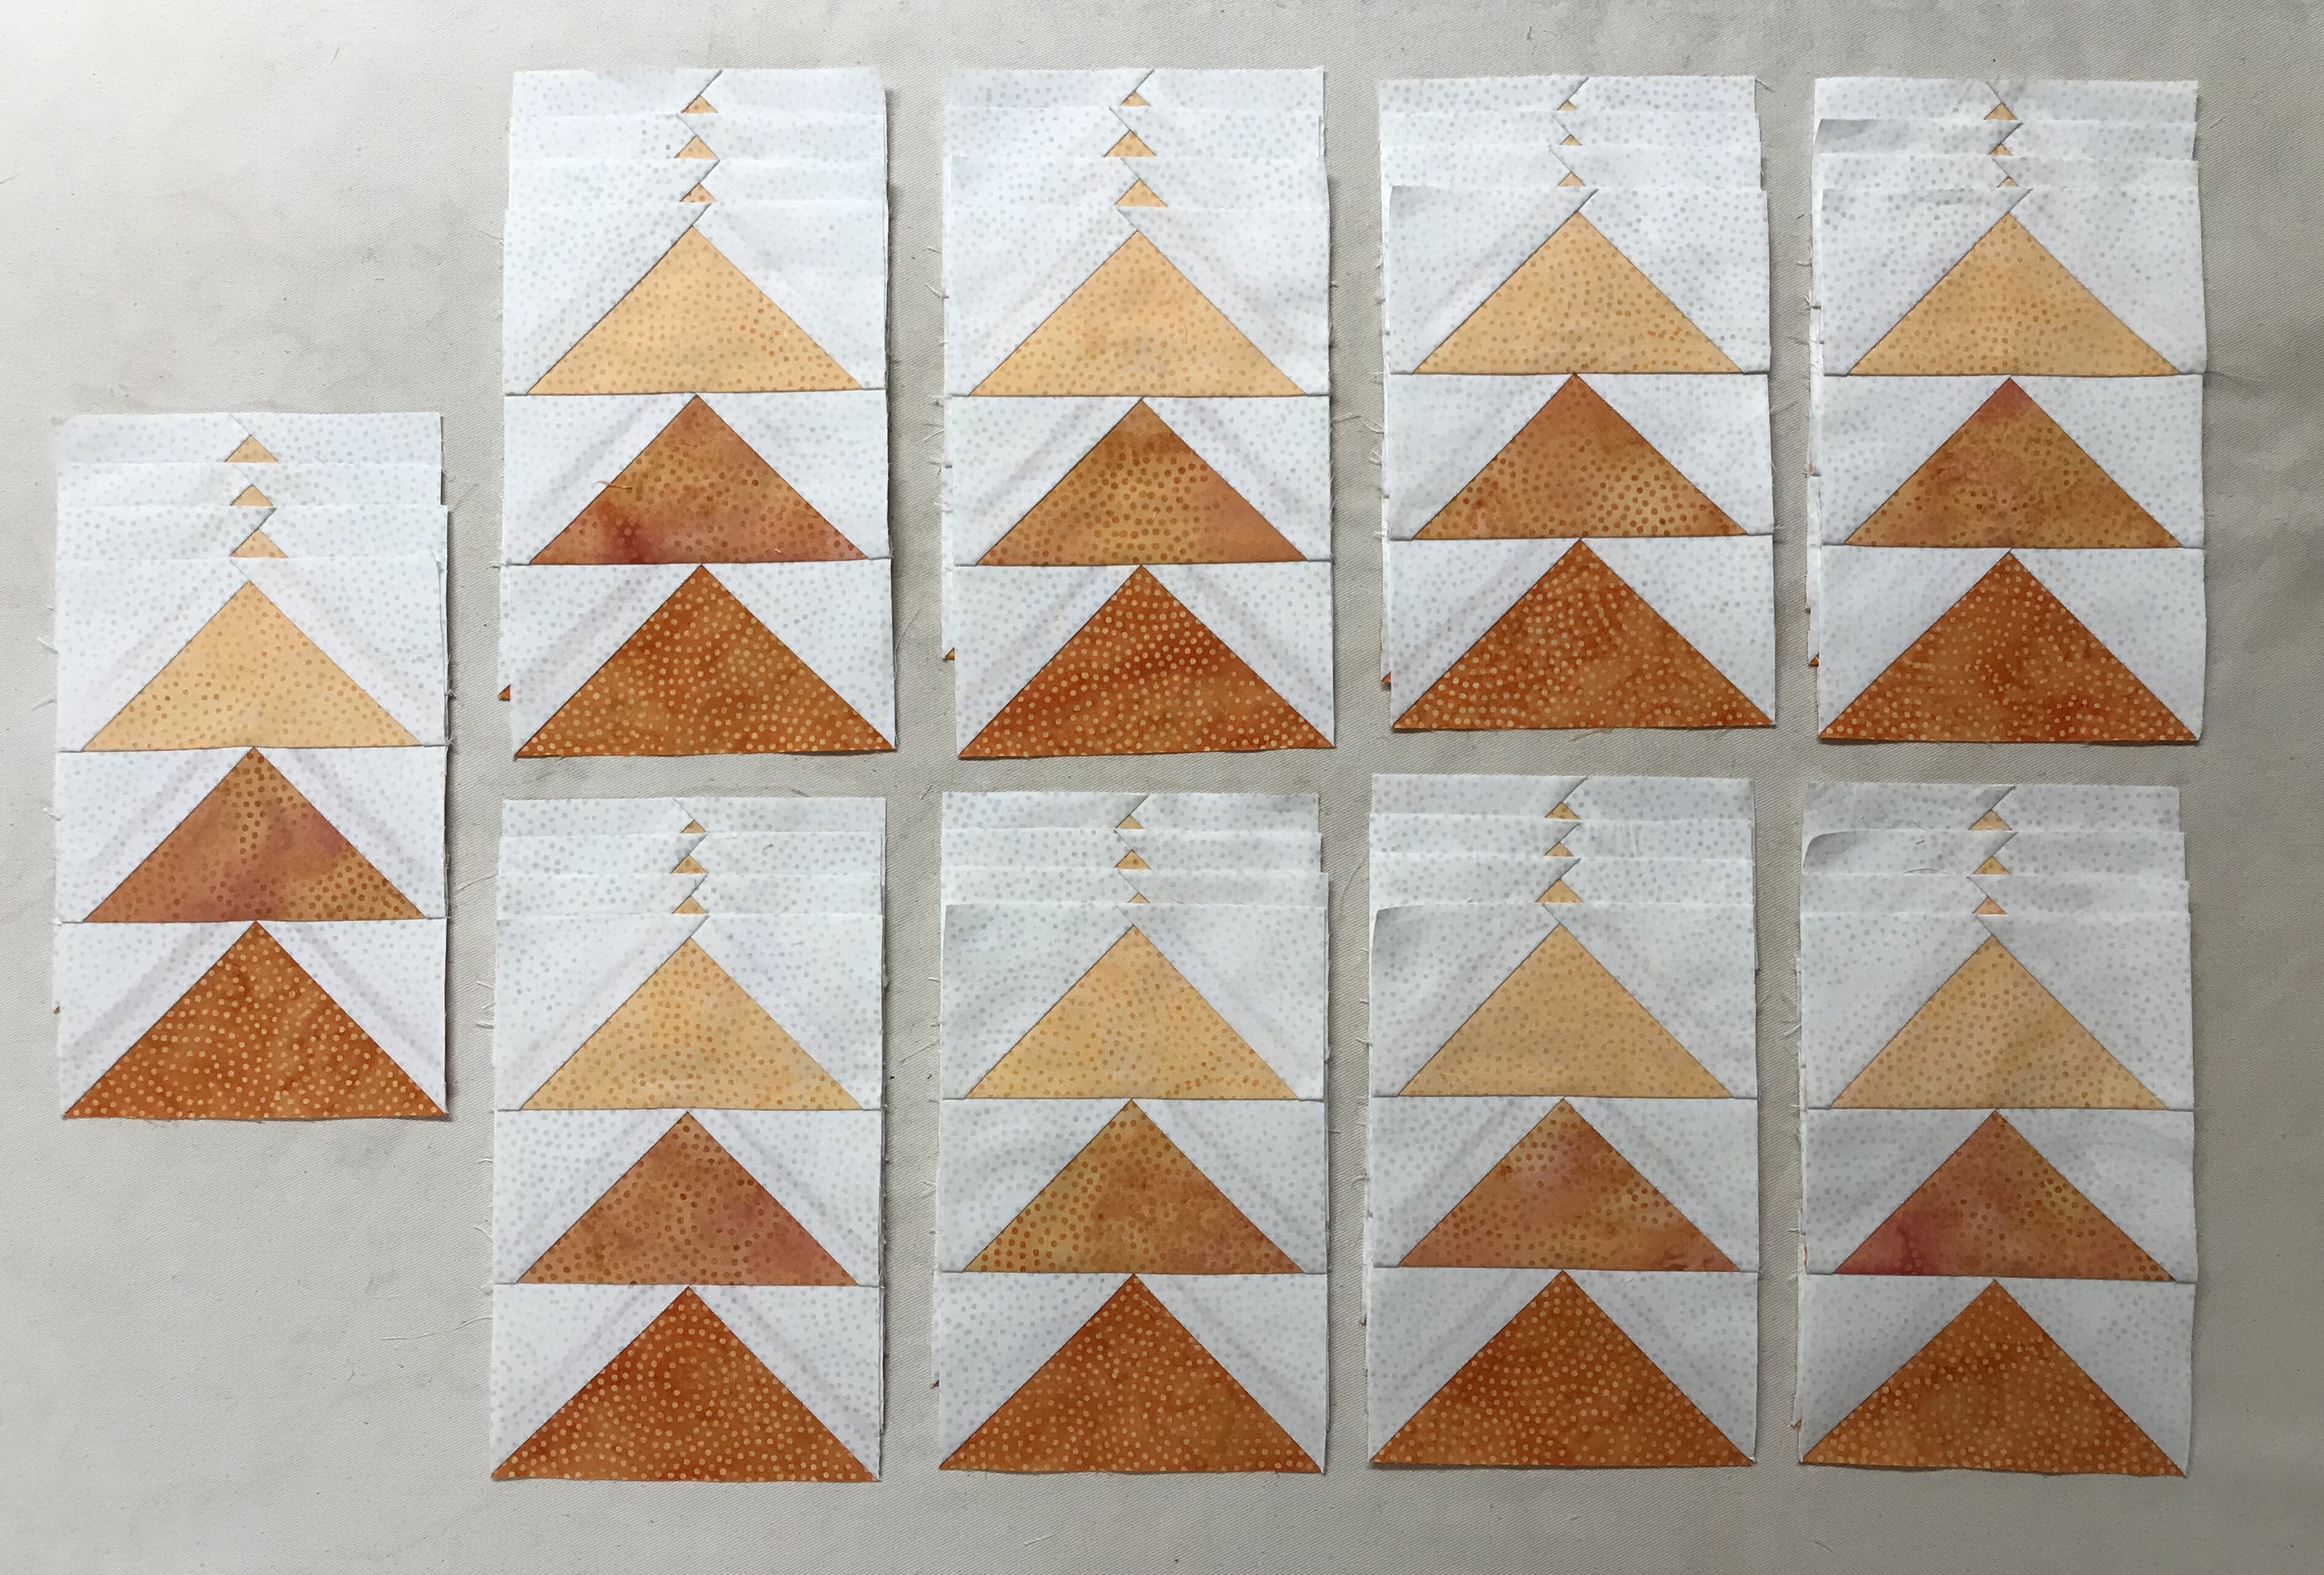
The Island Batik Ambassador’s December challenge was to create a project that is Whimsical & Wonky”. Well, I settled on Tipsy! My Holiday Tipsy Tree is based on BlockBuster pattern # 27 Roll the Dice . This year I have made many quilt projects using Split Rects Units so it is only fitting I end the year with Split Rects.
Cut your elongated triangles according to the Split Rects tool instructions.
Cut your background side triangles the same way.
Lay out your split rects, align and center the two pieces with just a bit of overlap at the ends. Stitch and press seams open. I love using my “Stick Strip” for pressing seams open.
Following the tool instructions trim, rotate & trim again.
Make the 9 Square/Squared units following the Square Squared tool instructions. I chose 9 different unit centers but you could make them all one color if you like. Each side of the square/squared unit will be different to match the fabric used for the split rects units.
Lay out your units as they will be stitched. Choose a square/squared unit for the center, rotating the square/squared unit so the side triangle matches the same fabric used in the split rects unit.
This block is constructed using a partial seam. Place the square/squared unit right sides together with one of the split rects units being sure to match the fabrics and stitch half way down the square/squared unit.
This gives you the next complete edge to stitch another split rects to, again matching the square/squared unit fabric with the split rects fabric.
When stitching the split rects to the square/squared unit, always place the precision cut square/squared unit on top be careful to stitch using the unit center as a guide.
Continue stitching the split rects units and complete the partial seam, pressing toward the split rects units. Make the other 8 blocks the same way.
Tree Trunk: Make one set of 2″ x 4″ finished flying geese using the Wing Clipper I tool instructions. Only 3 flying geese units will be needed.
Tree Star: Make the 6″ finished lemoyne star using the Lemoyne Star tool instructions.
Lay out your quilt blocks and construct the quilt center. Once the borders are added the finished quilt measures 38″ x 38″.
This is day 3 of Studio 180 Design’s Evening Elegance Blog Hop. Deb Tucker has launched her own fabulous signature fabric collection, Twilight Chic, with Island Batik and fabric designer Kathy Engle.
Below are the links to everyone participating in the blog hop:
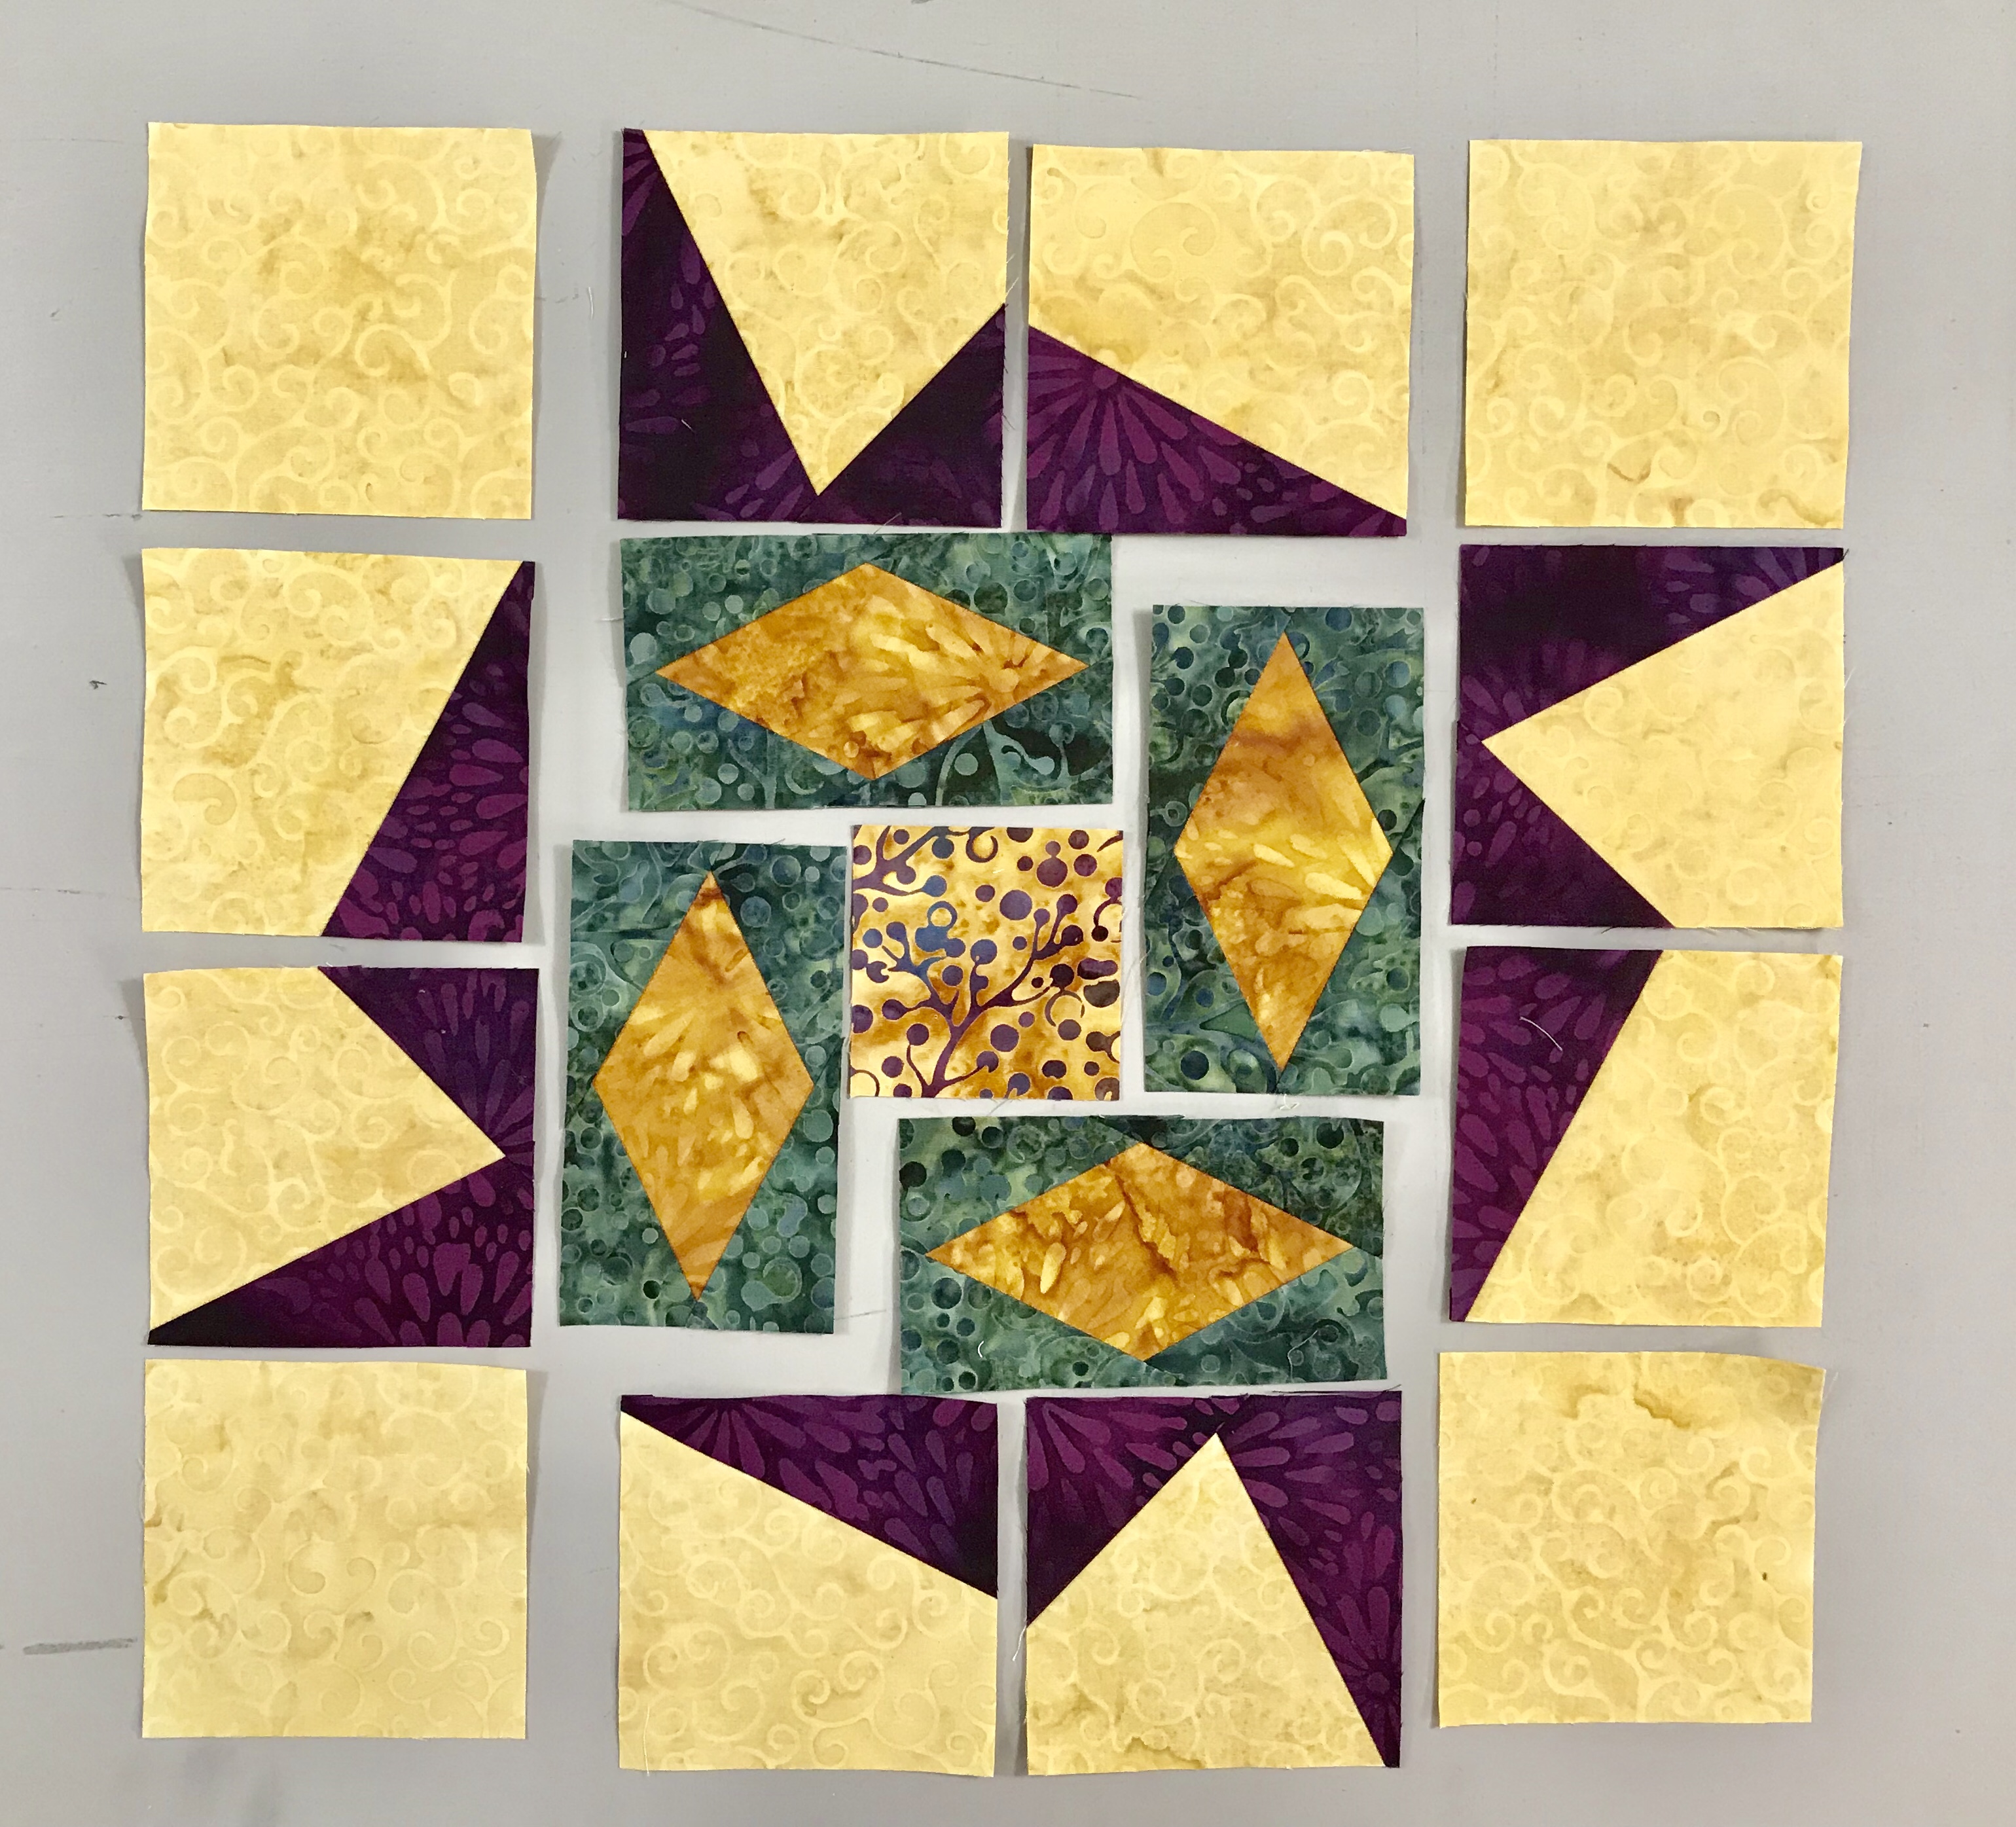
Unit C. Quarter Square Triangle: Make a Quarter Square Triangle with the fabrics that match the V Blocks, remember to swirl the center.
Unit B. Combination Units: Combination units begin by making half squares triangles (HSTs). The fabric for the HSTs must match the side triangles in the v blocks, so I began by laying out the starter squares next to the V Blocks and then making them into the combination units.
When making Combination units, you are making two at a time, a left & a right. Choose the units that will match the side triangles in the V Blocks as shown above.
Sew the units into rows then join the rows into the block.
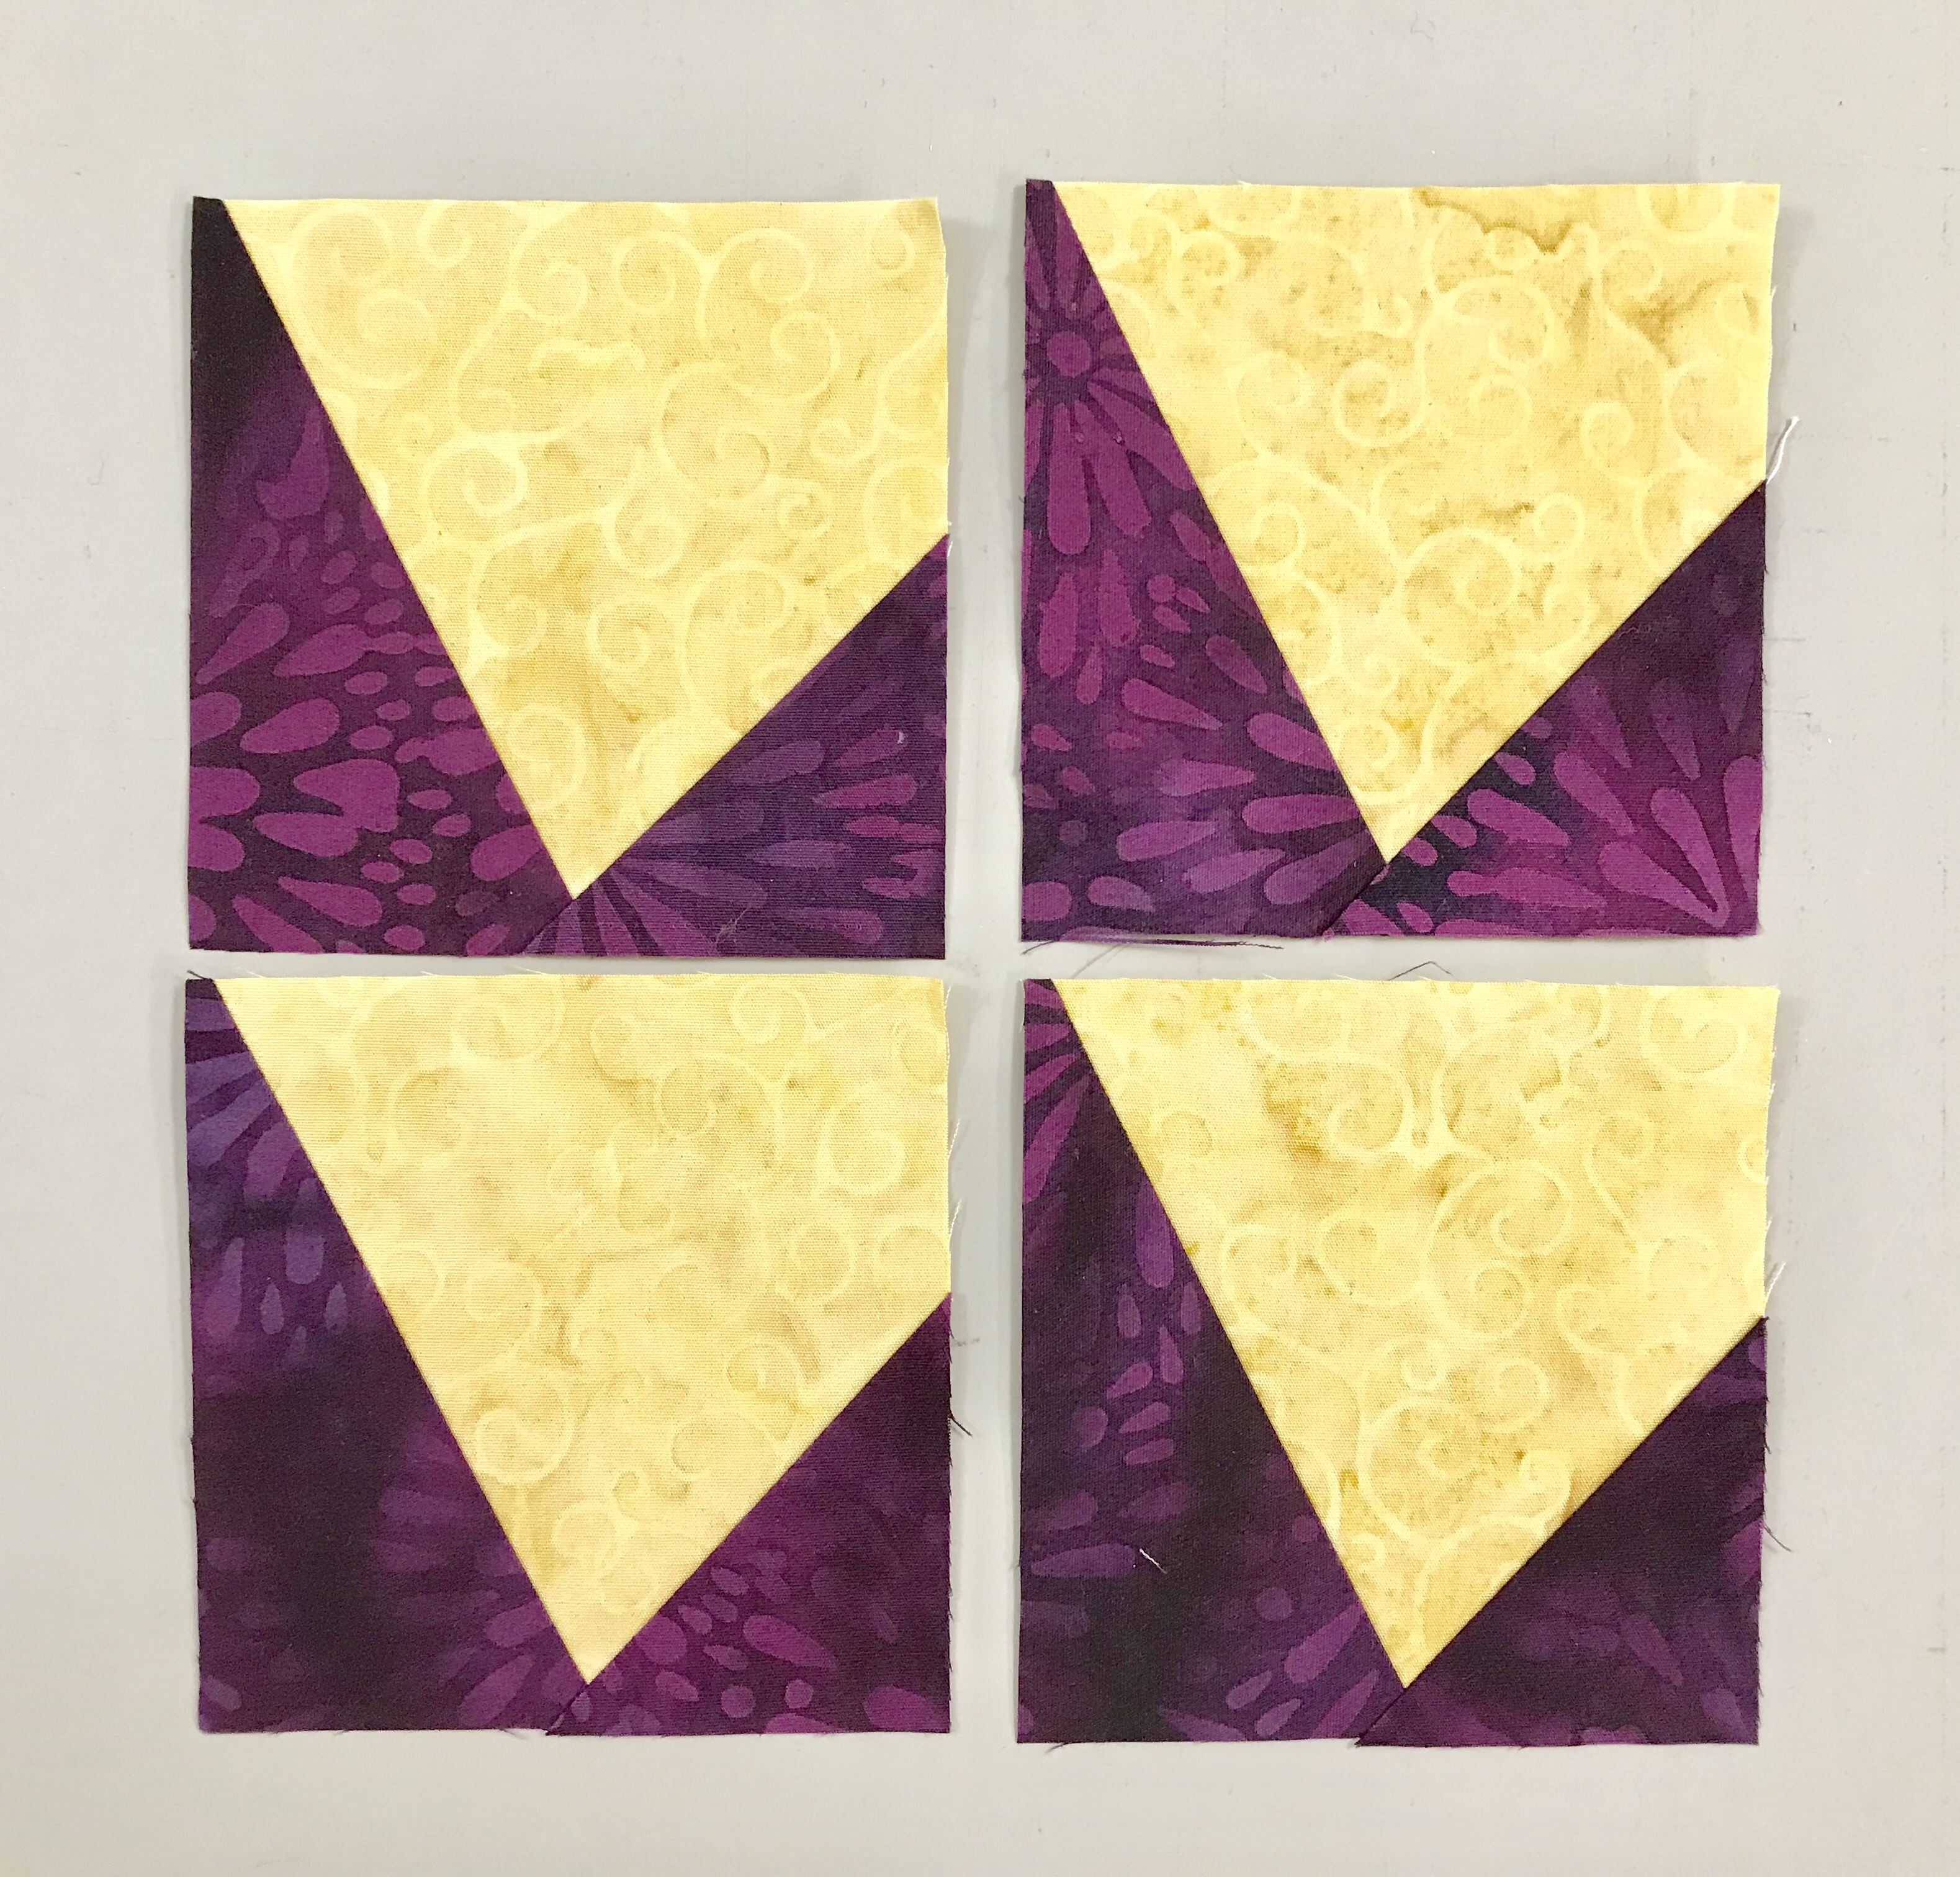
Unit A. Diamond Rects: Cut your precision diamonds & side triangles per the Diamonds Rects instructions. Stitch opposite side triangles, press toward the side triangles. Stitch the other opposites side triangles.
Make 4 diamond rects units and trim.
Stitch using a partial seam to the center square. Stitch the second diamond rects unit and so on to finish the block center.
Unit B. High Low Left: Following the instruction the in technique sheet cut your squares and trim, add the replacement side triangle. Mark and stitch the square for the low point and trim.
Make four High Low Left Units.
Unit C Sidekick Right: When making a Sidekick Right, position fabrics face down for cutting. Cut and stitch replacement side triangles.
Peaks & Valleys block unit layout.
Stitch units into rows.
Join the rows to complete the block.
I love the Twilight Chic fabrics from Island Batik and I can’t wait to show you one of the finished quilts!
My beautiful Island Batik fabrics from left to right: Mr. T Blocks: Arc Pine Needle, Dash-Grasshopper, Seed Circle Custard, Arc Waves Grasshopper, & Sprinkles Playful Pachyderm, & Paisley Dot: Apricot, Candy Corn, Nasturtium, & Item number 121412189.
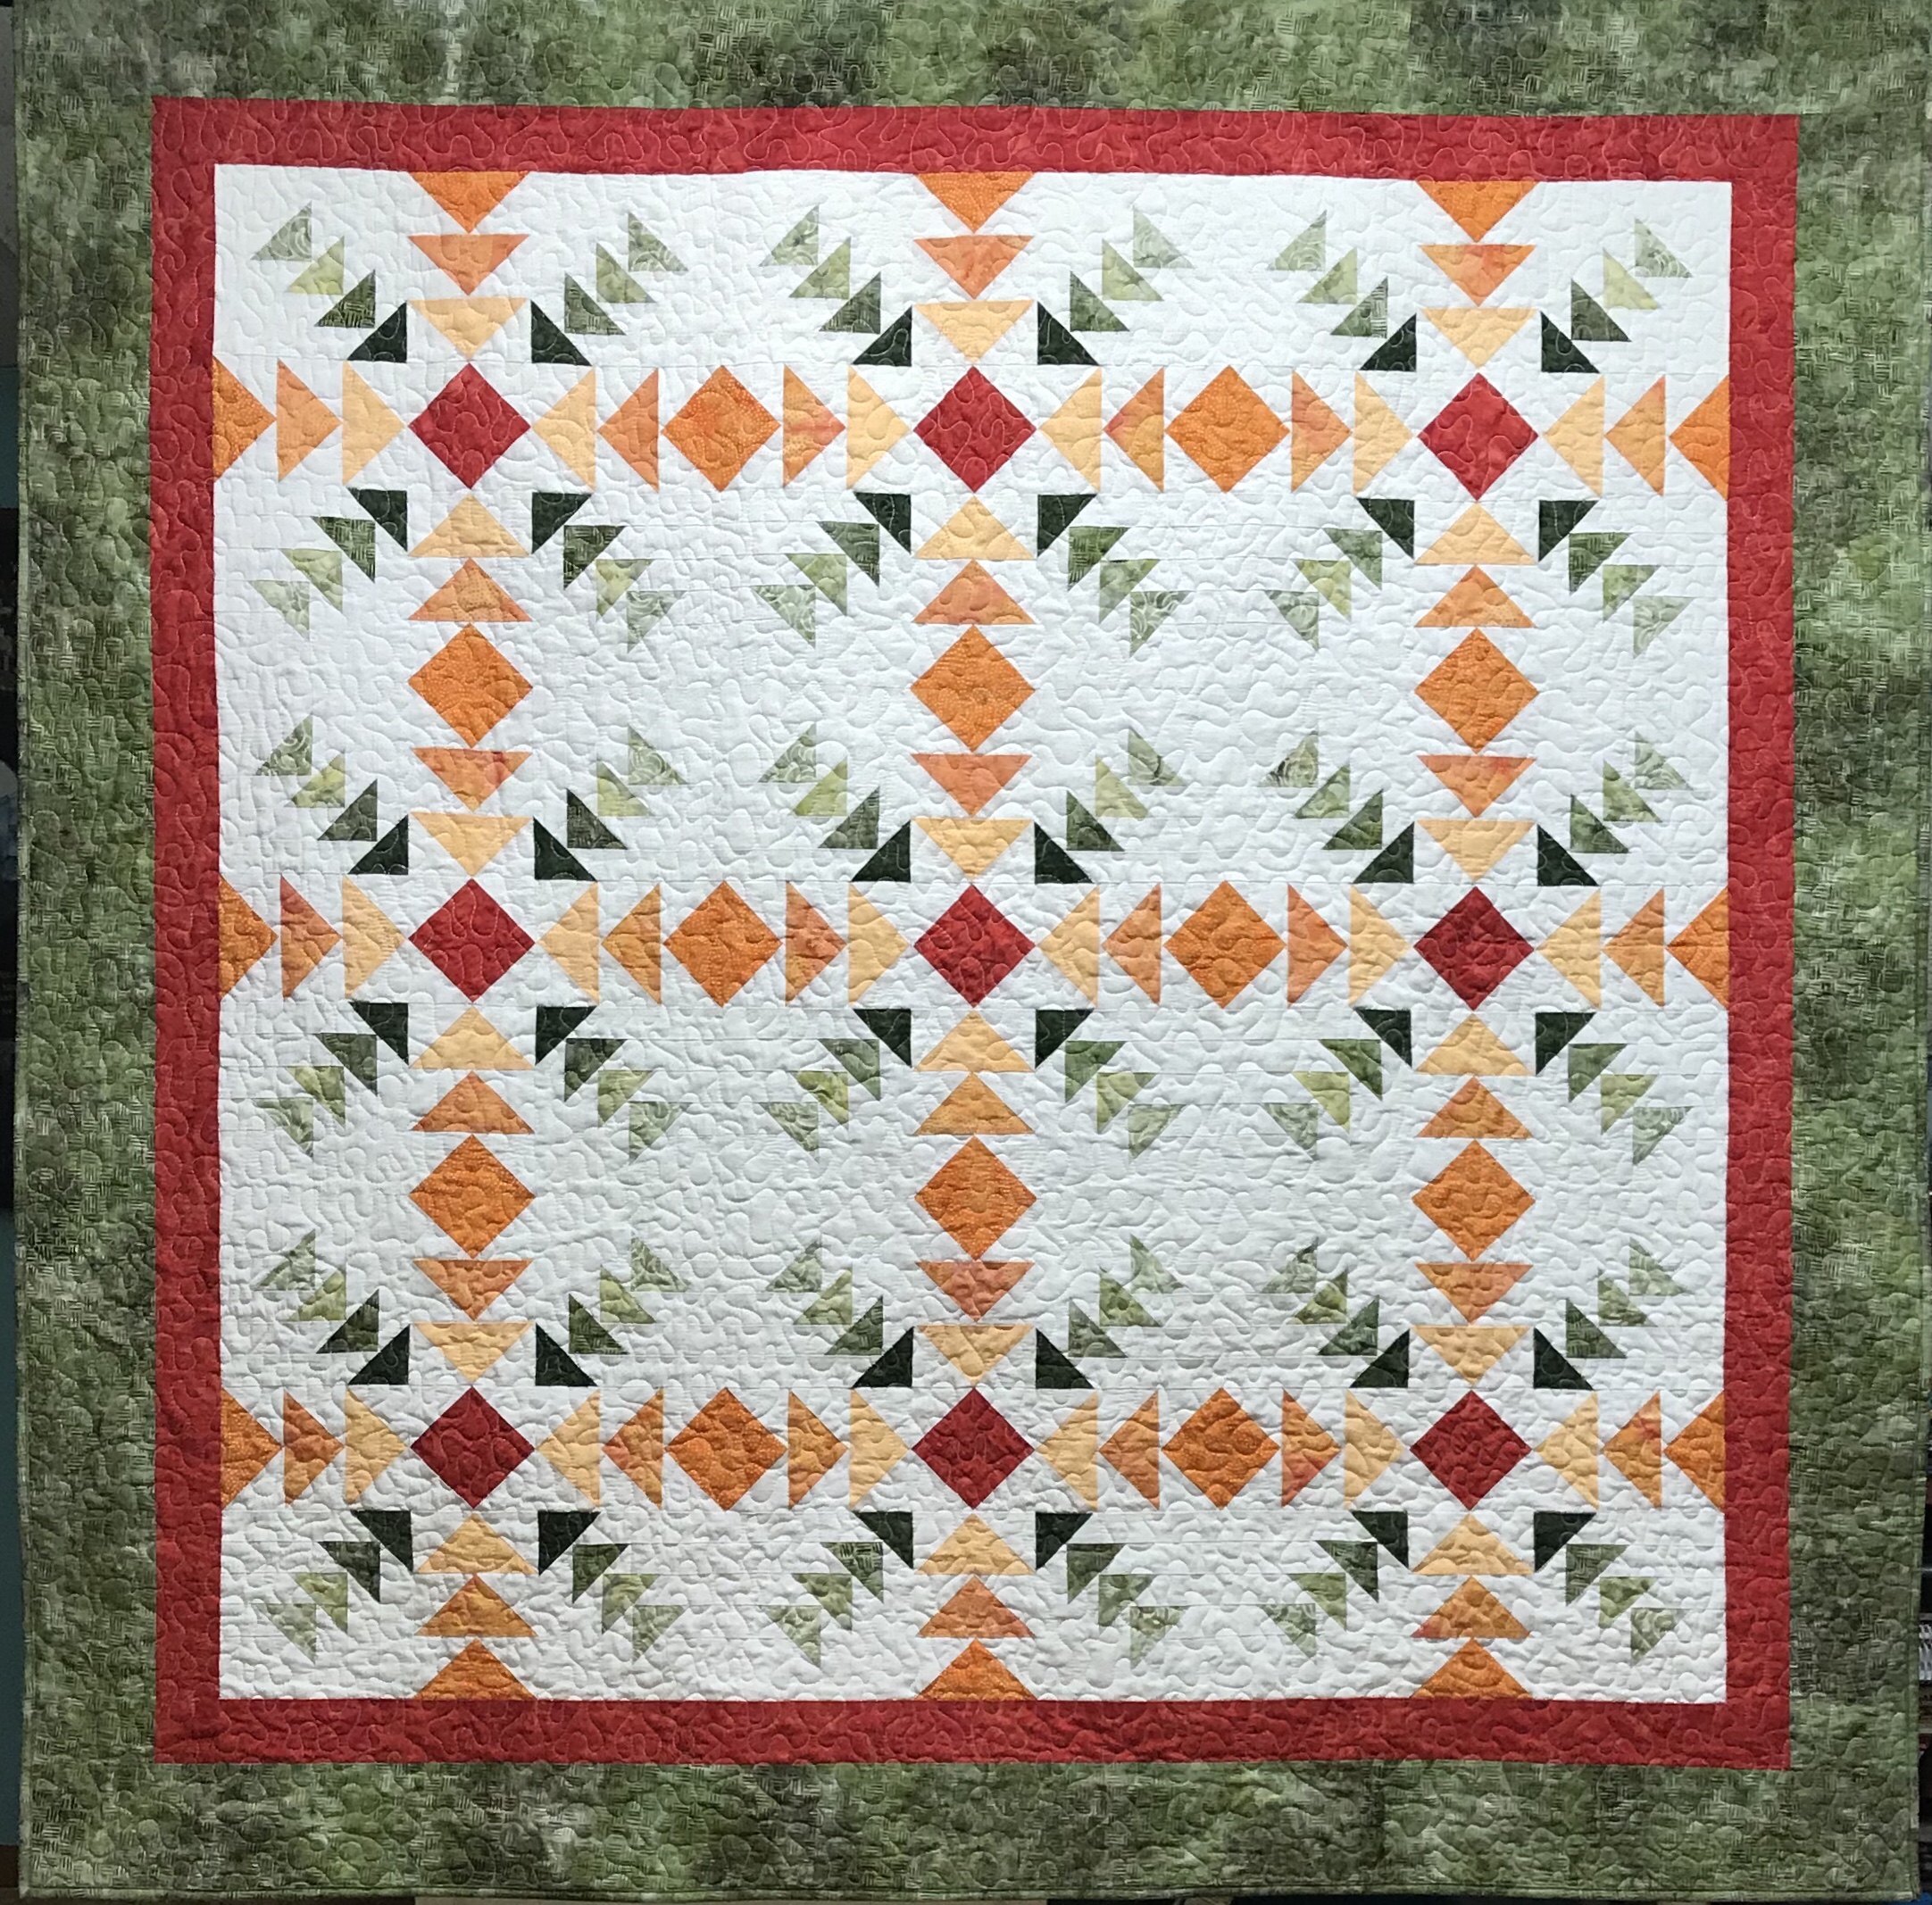
I have named my original design “Converging Geese” because each block has Flying Geese & Geese on the Edge units, along with Square/Squared units.
Each 16″ block contains 12 – 2″ x 4″ finished flying geese, 4 – 6″ finished geese on the edge & 1 square/squared unit. These Geese on the Edge units are soooo much fun to make! The technique sheet gives instruction for making geese on the edge in 10 sizes from 3″ to 12″!
You begin with starter squares, add logs by chain stitching, square up two sides with your Tucker Trimmer.
Trim apart.
Using your Wing Clipper trim the corner leaving a 1/4″ seam allowance.
Add a replacement triangle and press toward the triangle.
Trim after every addition of a replacement triangle. Add more logs.
The final trim down is performed when I have four rounds of logs for a 6″ finished geese on the edge unit.
Stitch the flying geese units into sets containing 3 each.
Block layout.
I have created a down loadable pattern for Converging Geese (measures 60″ x 60″) that can be purchased on my If Threads Could Talk Etsy Shop.
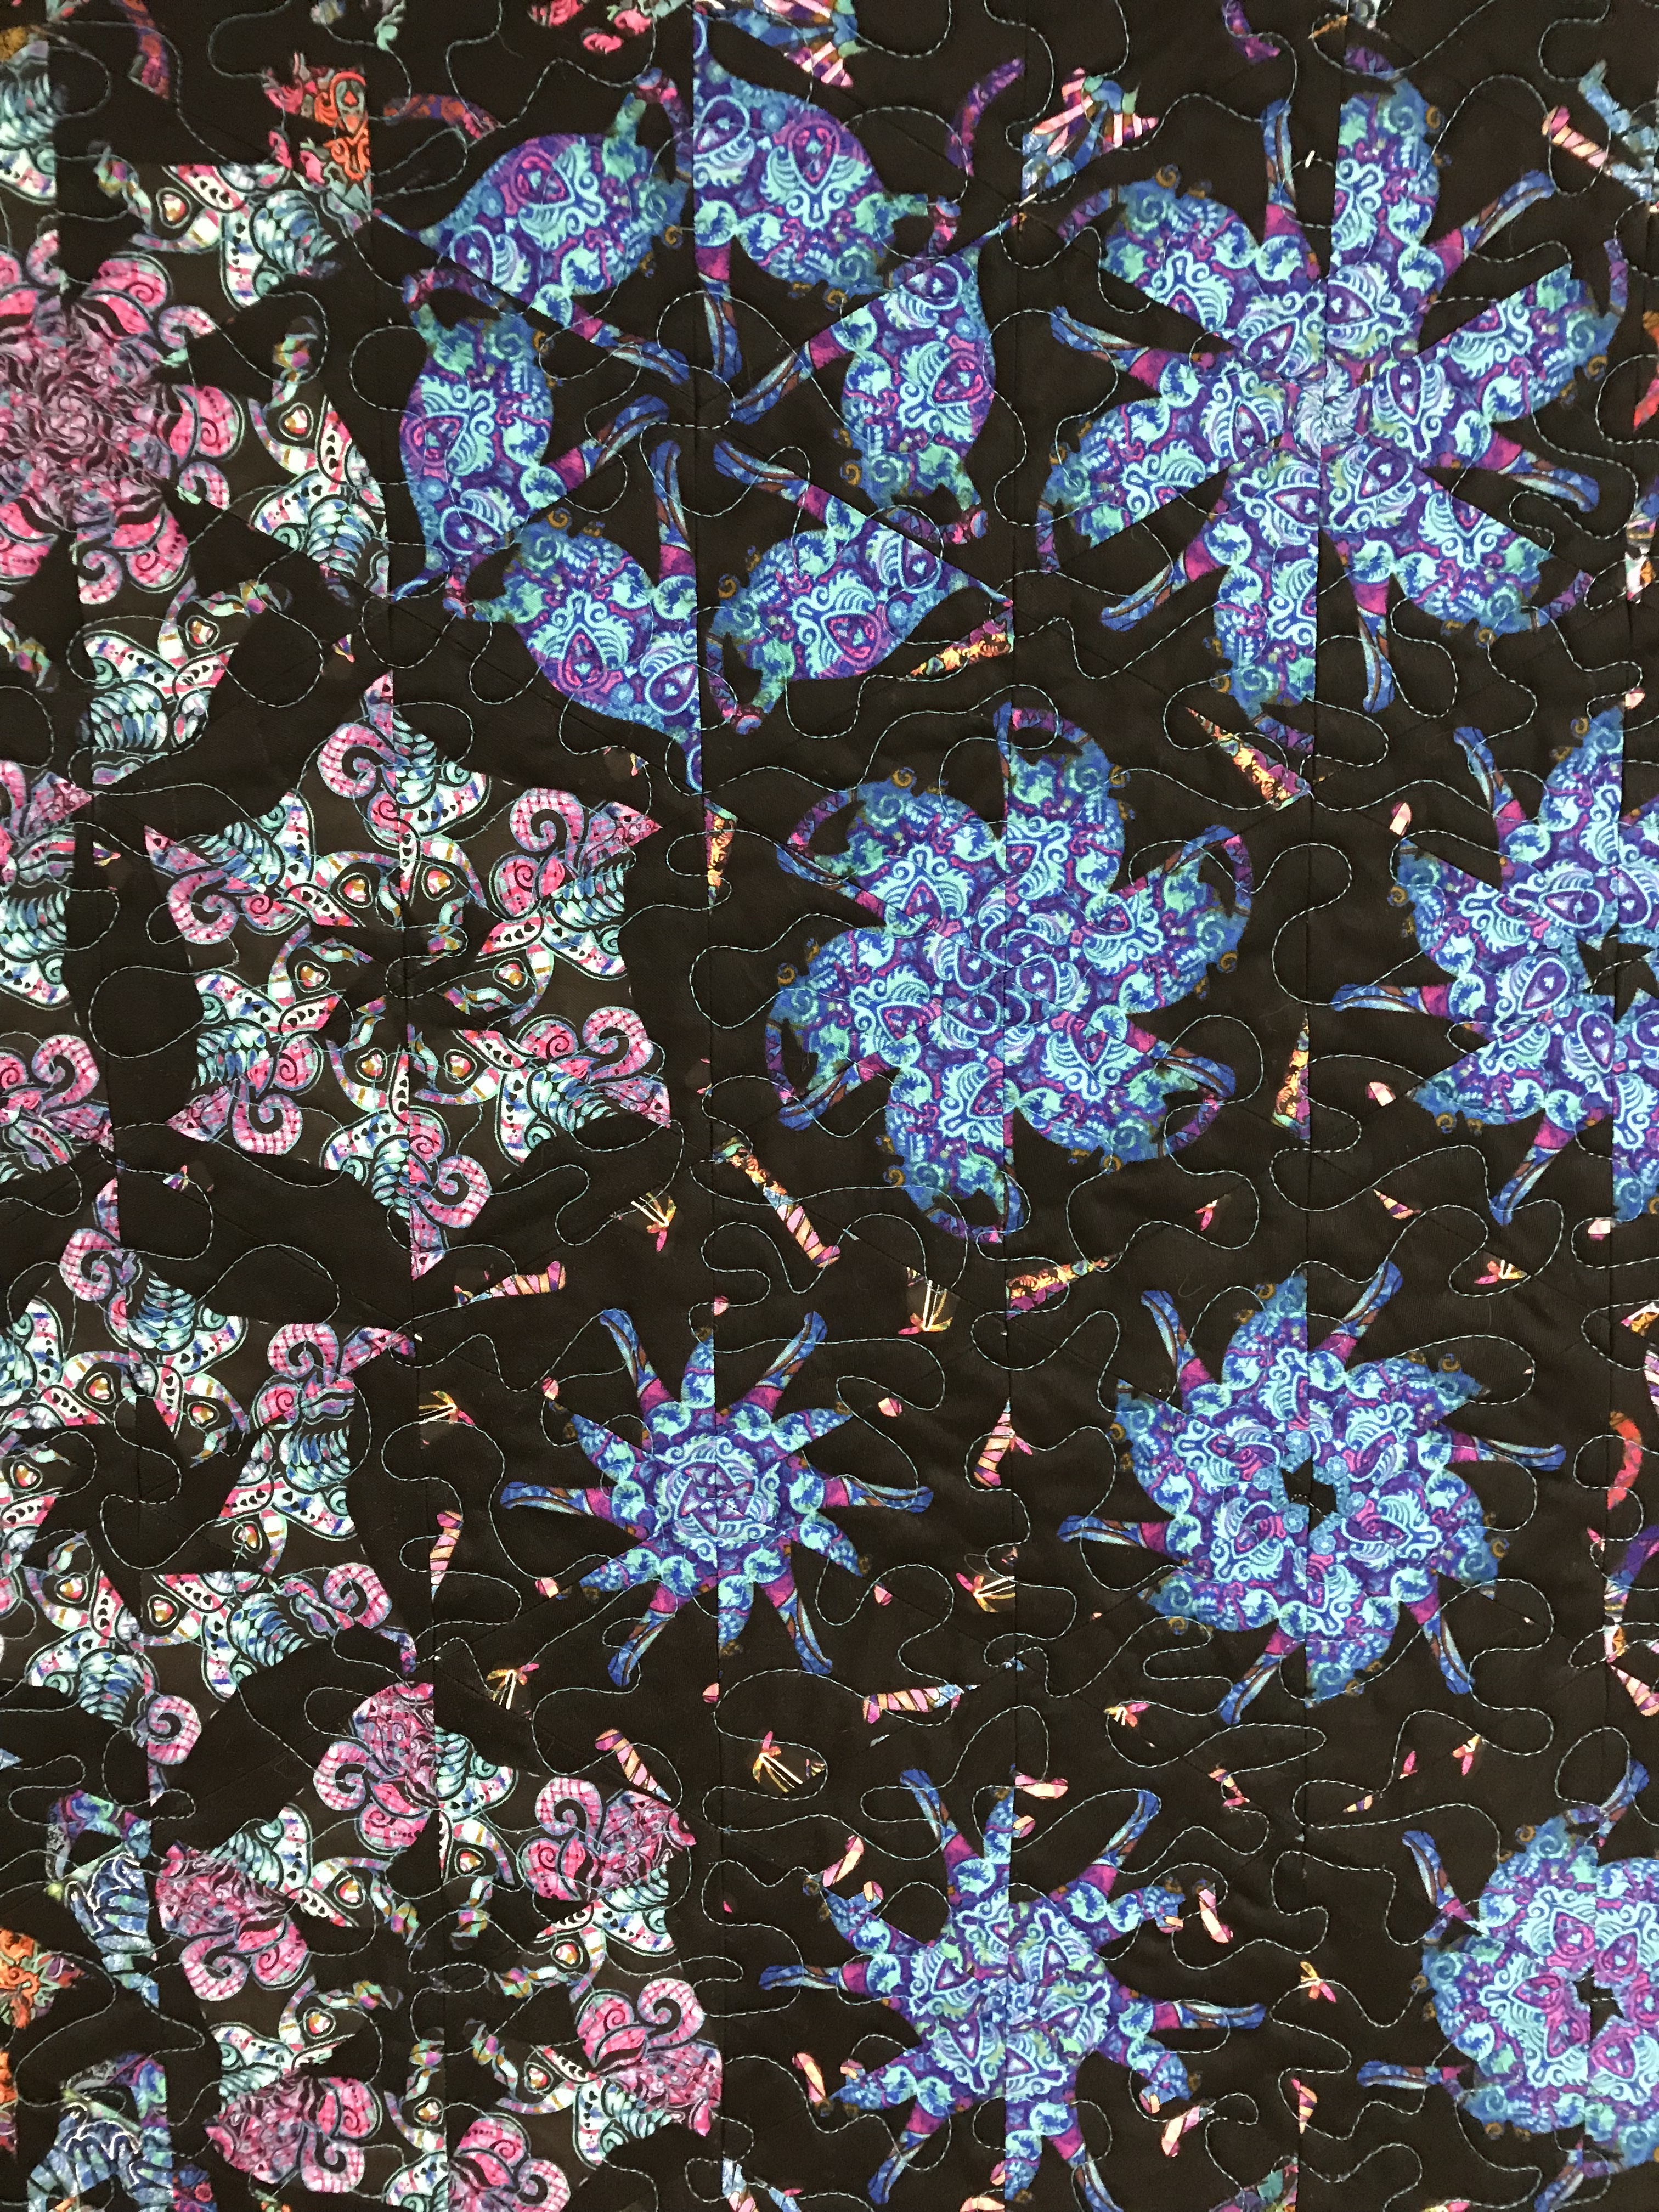
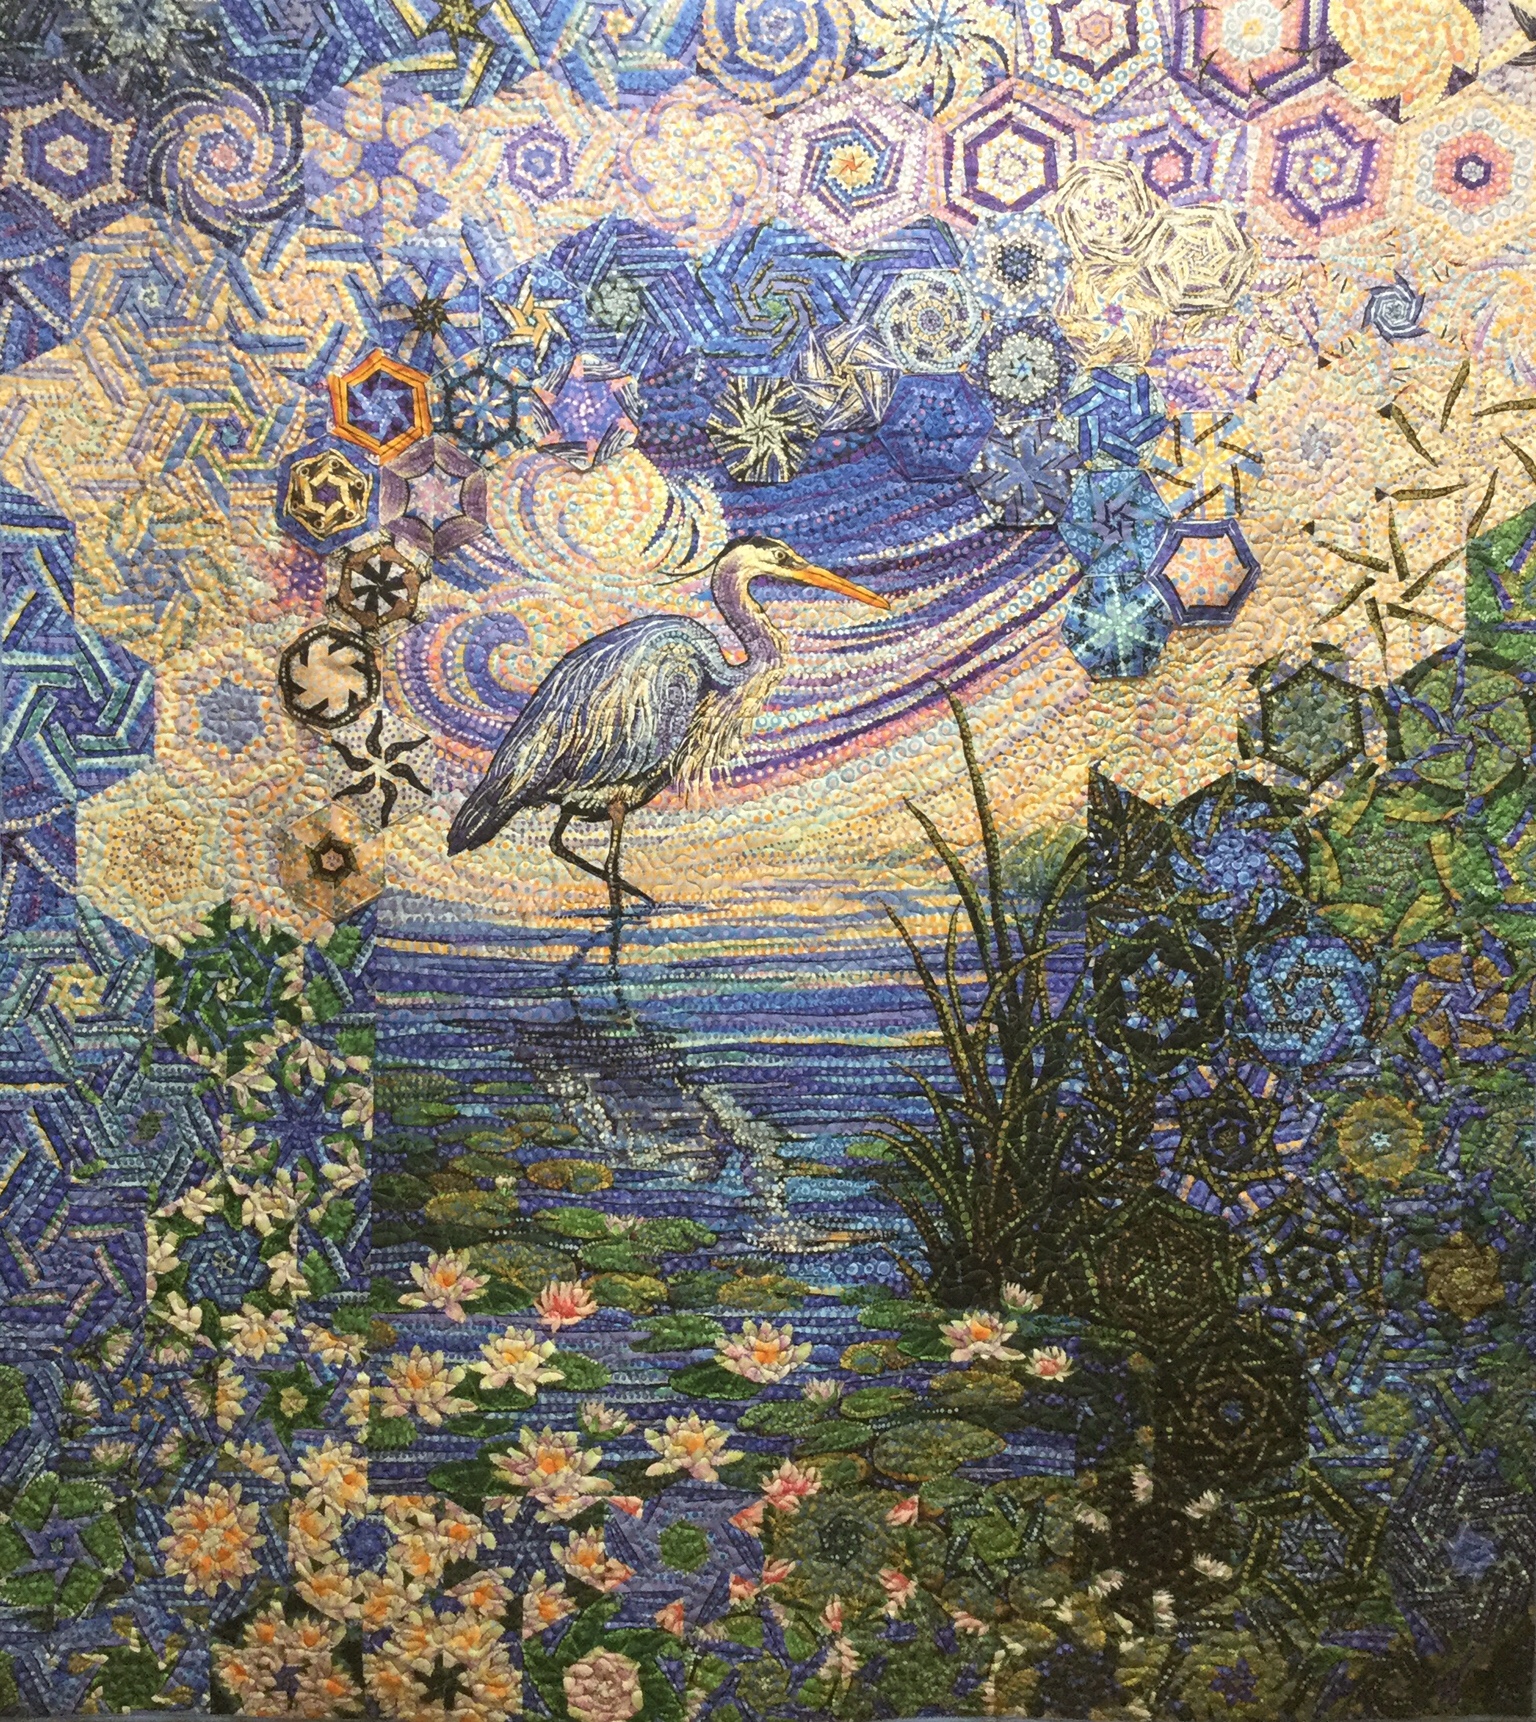
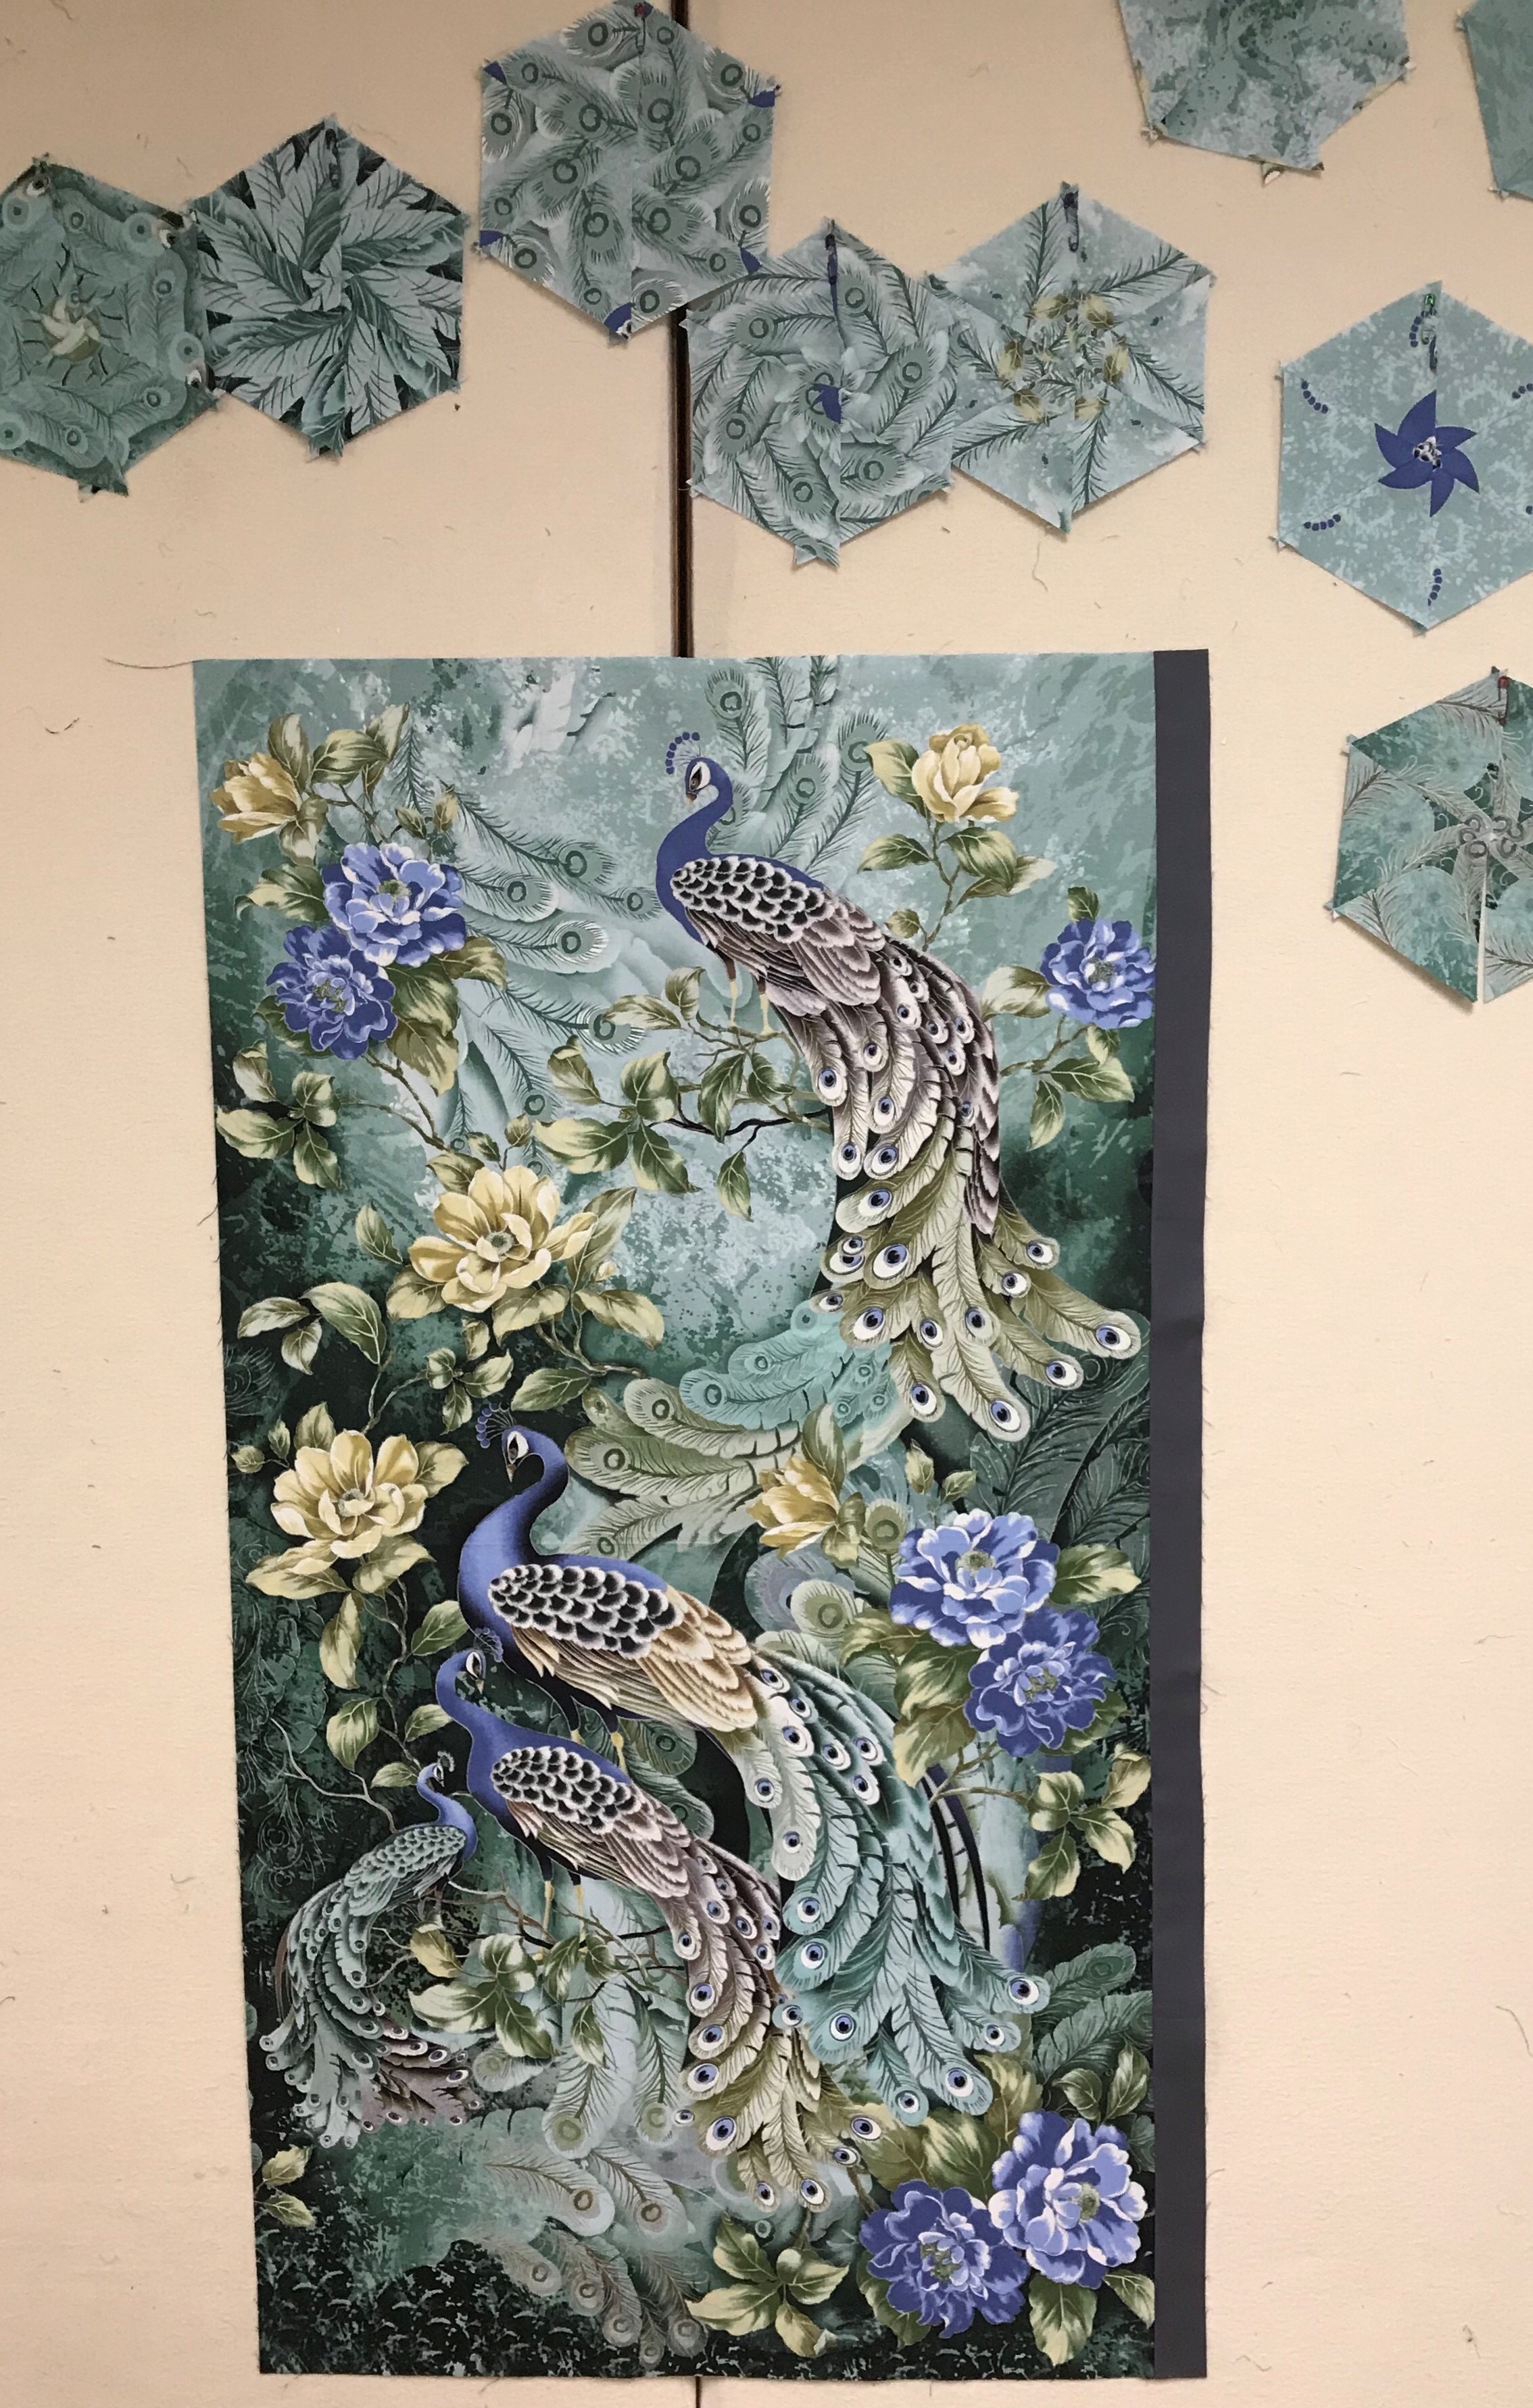
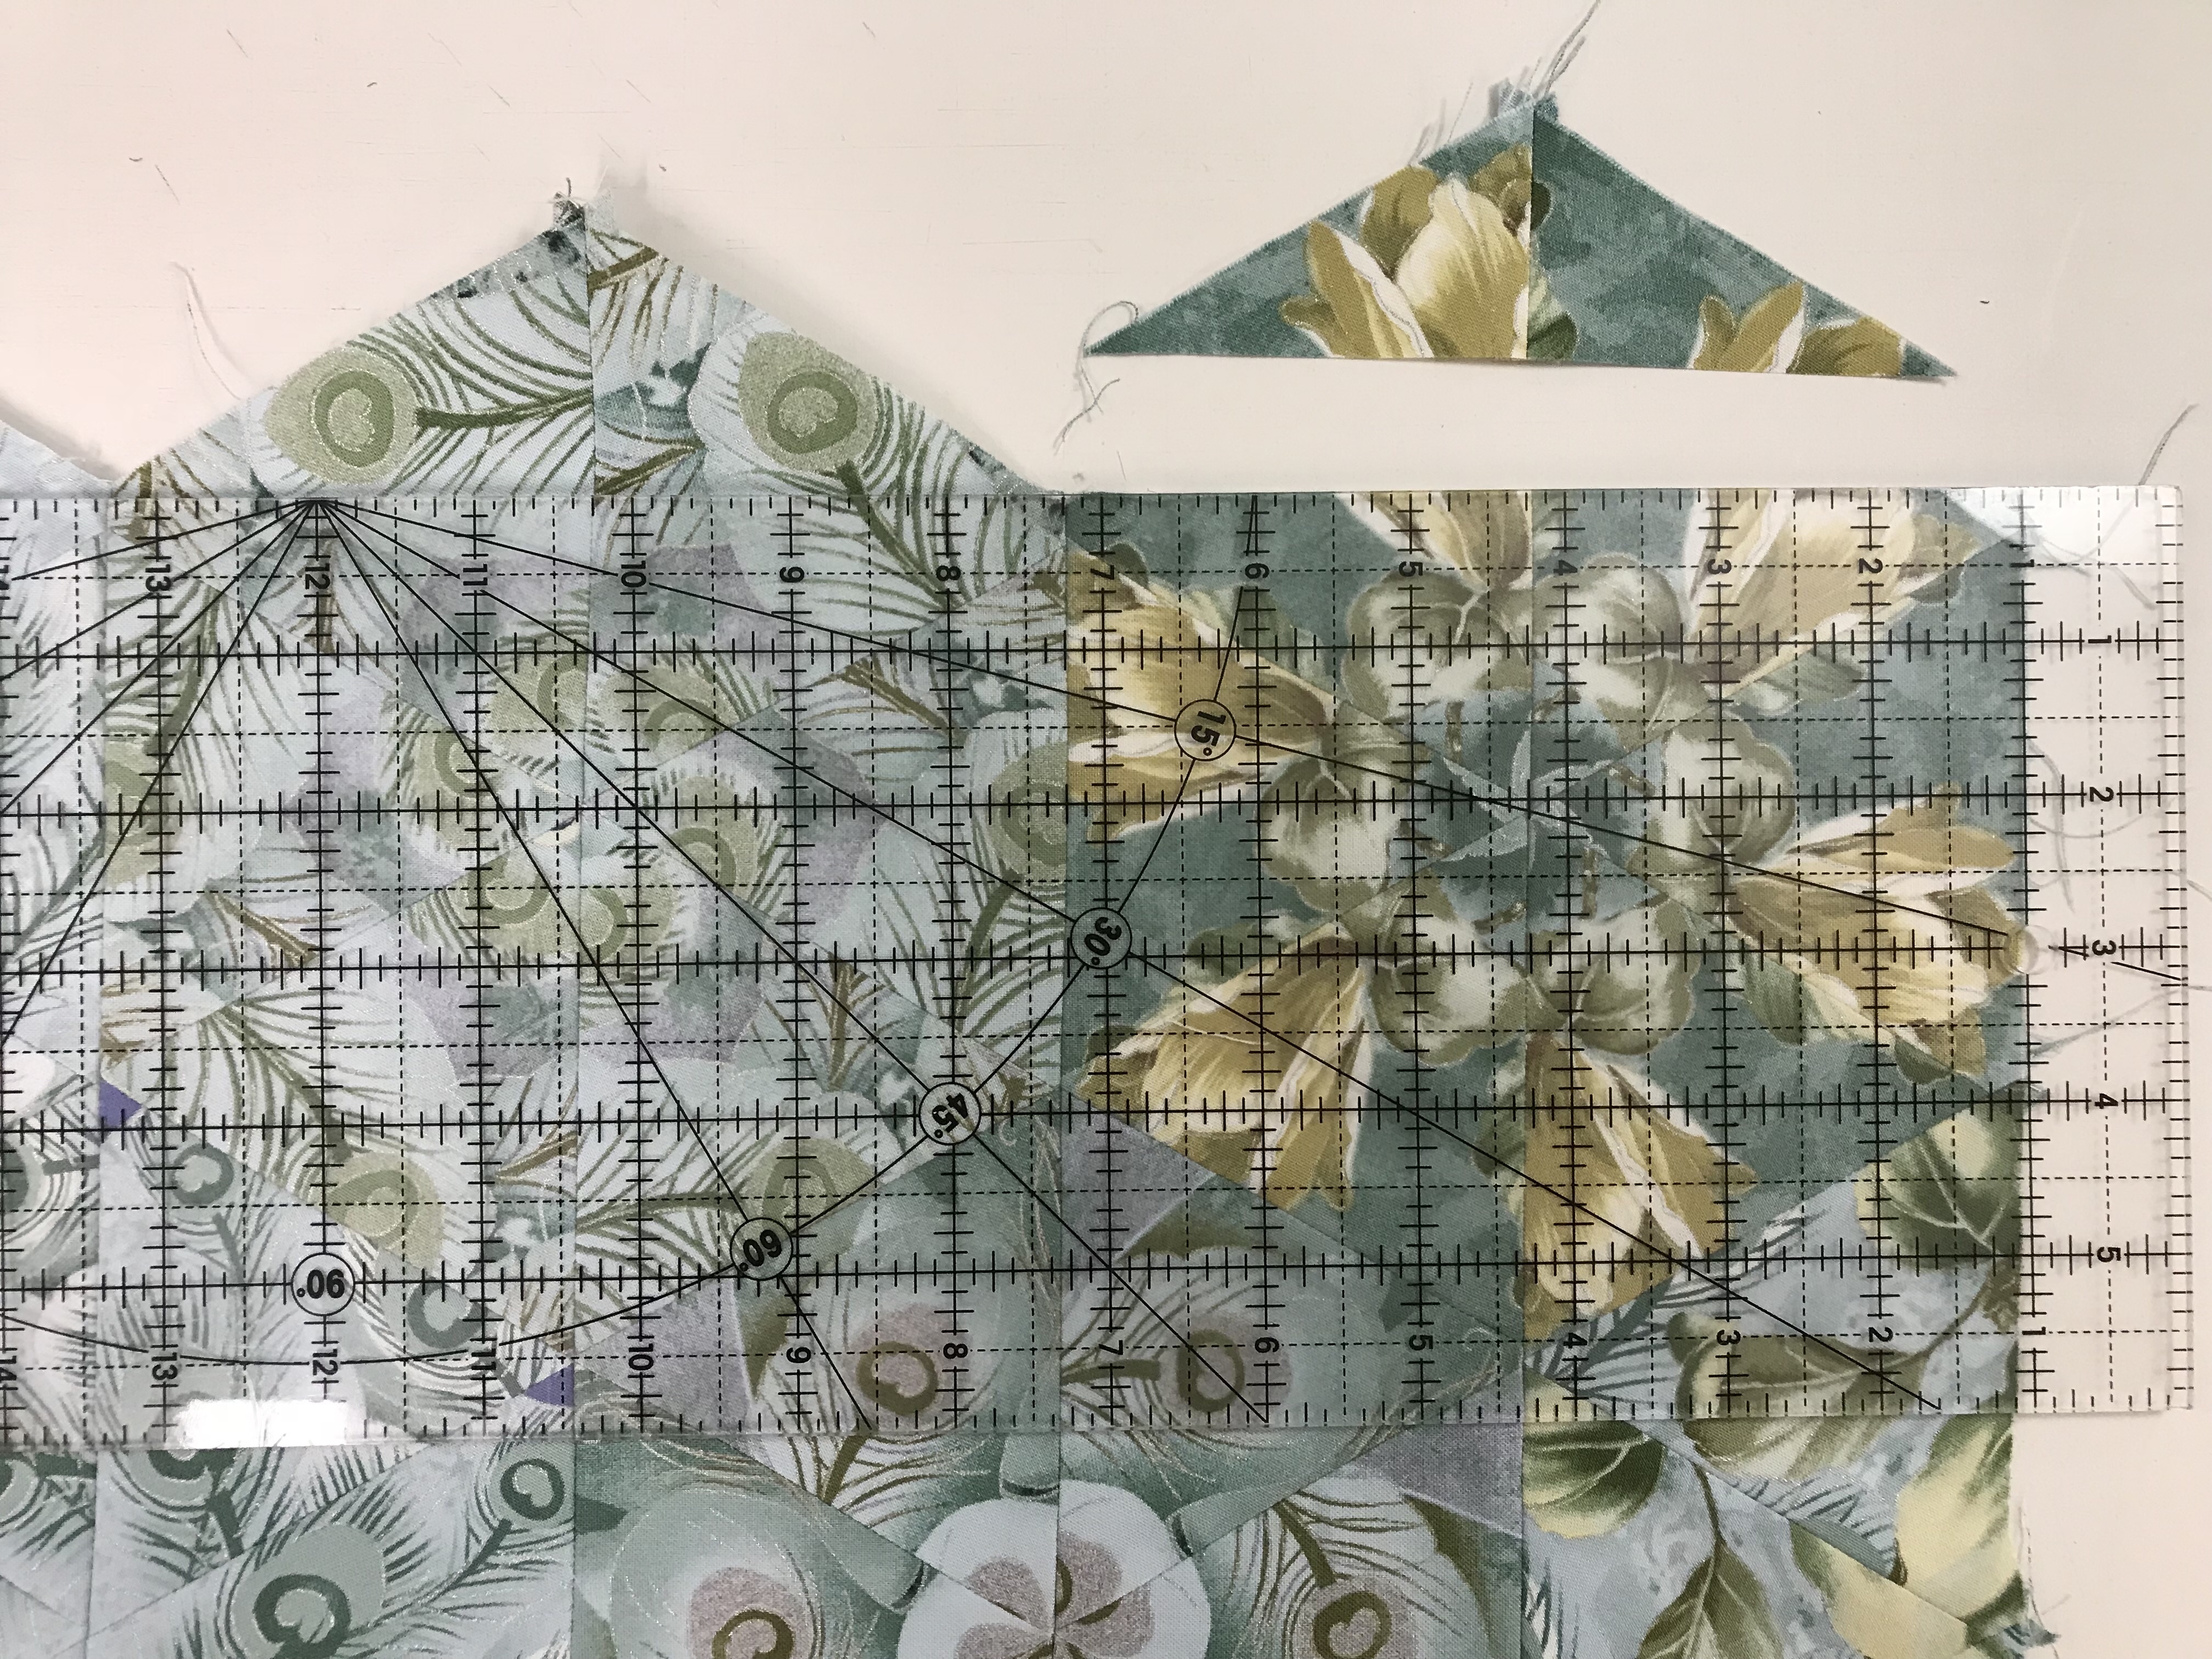
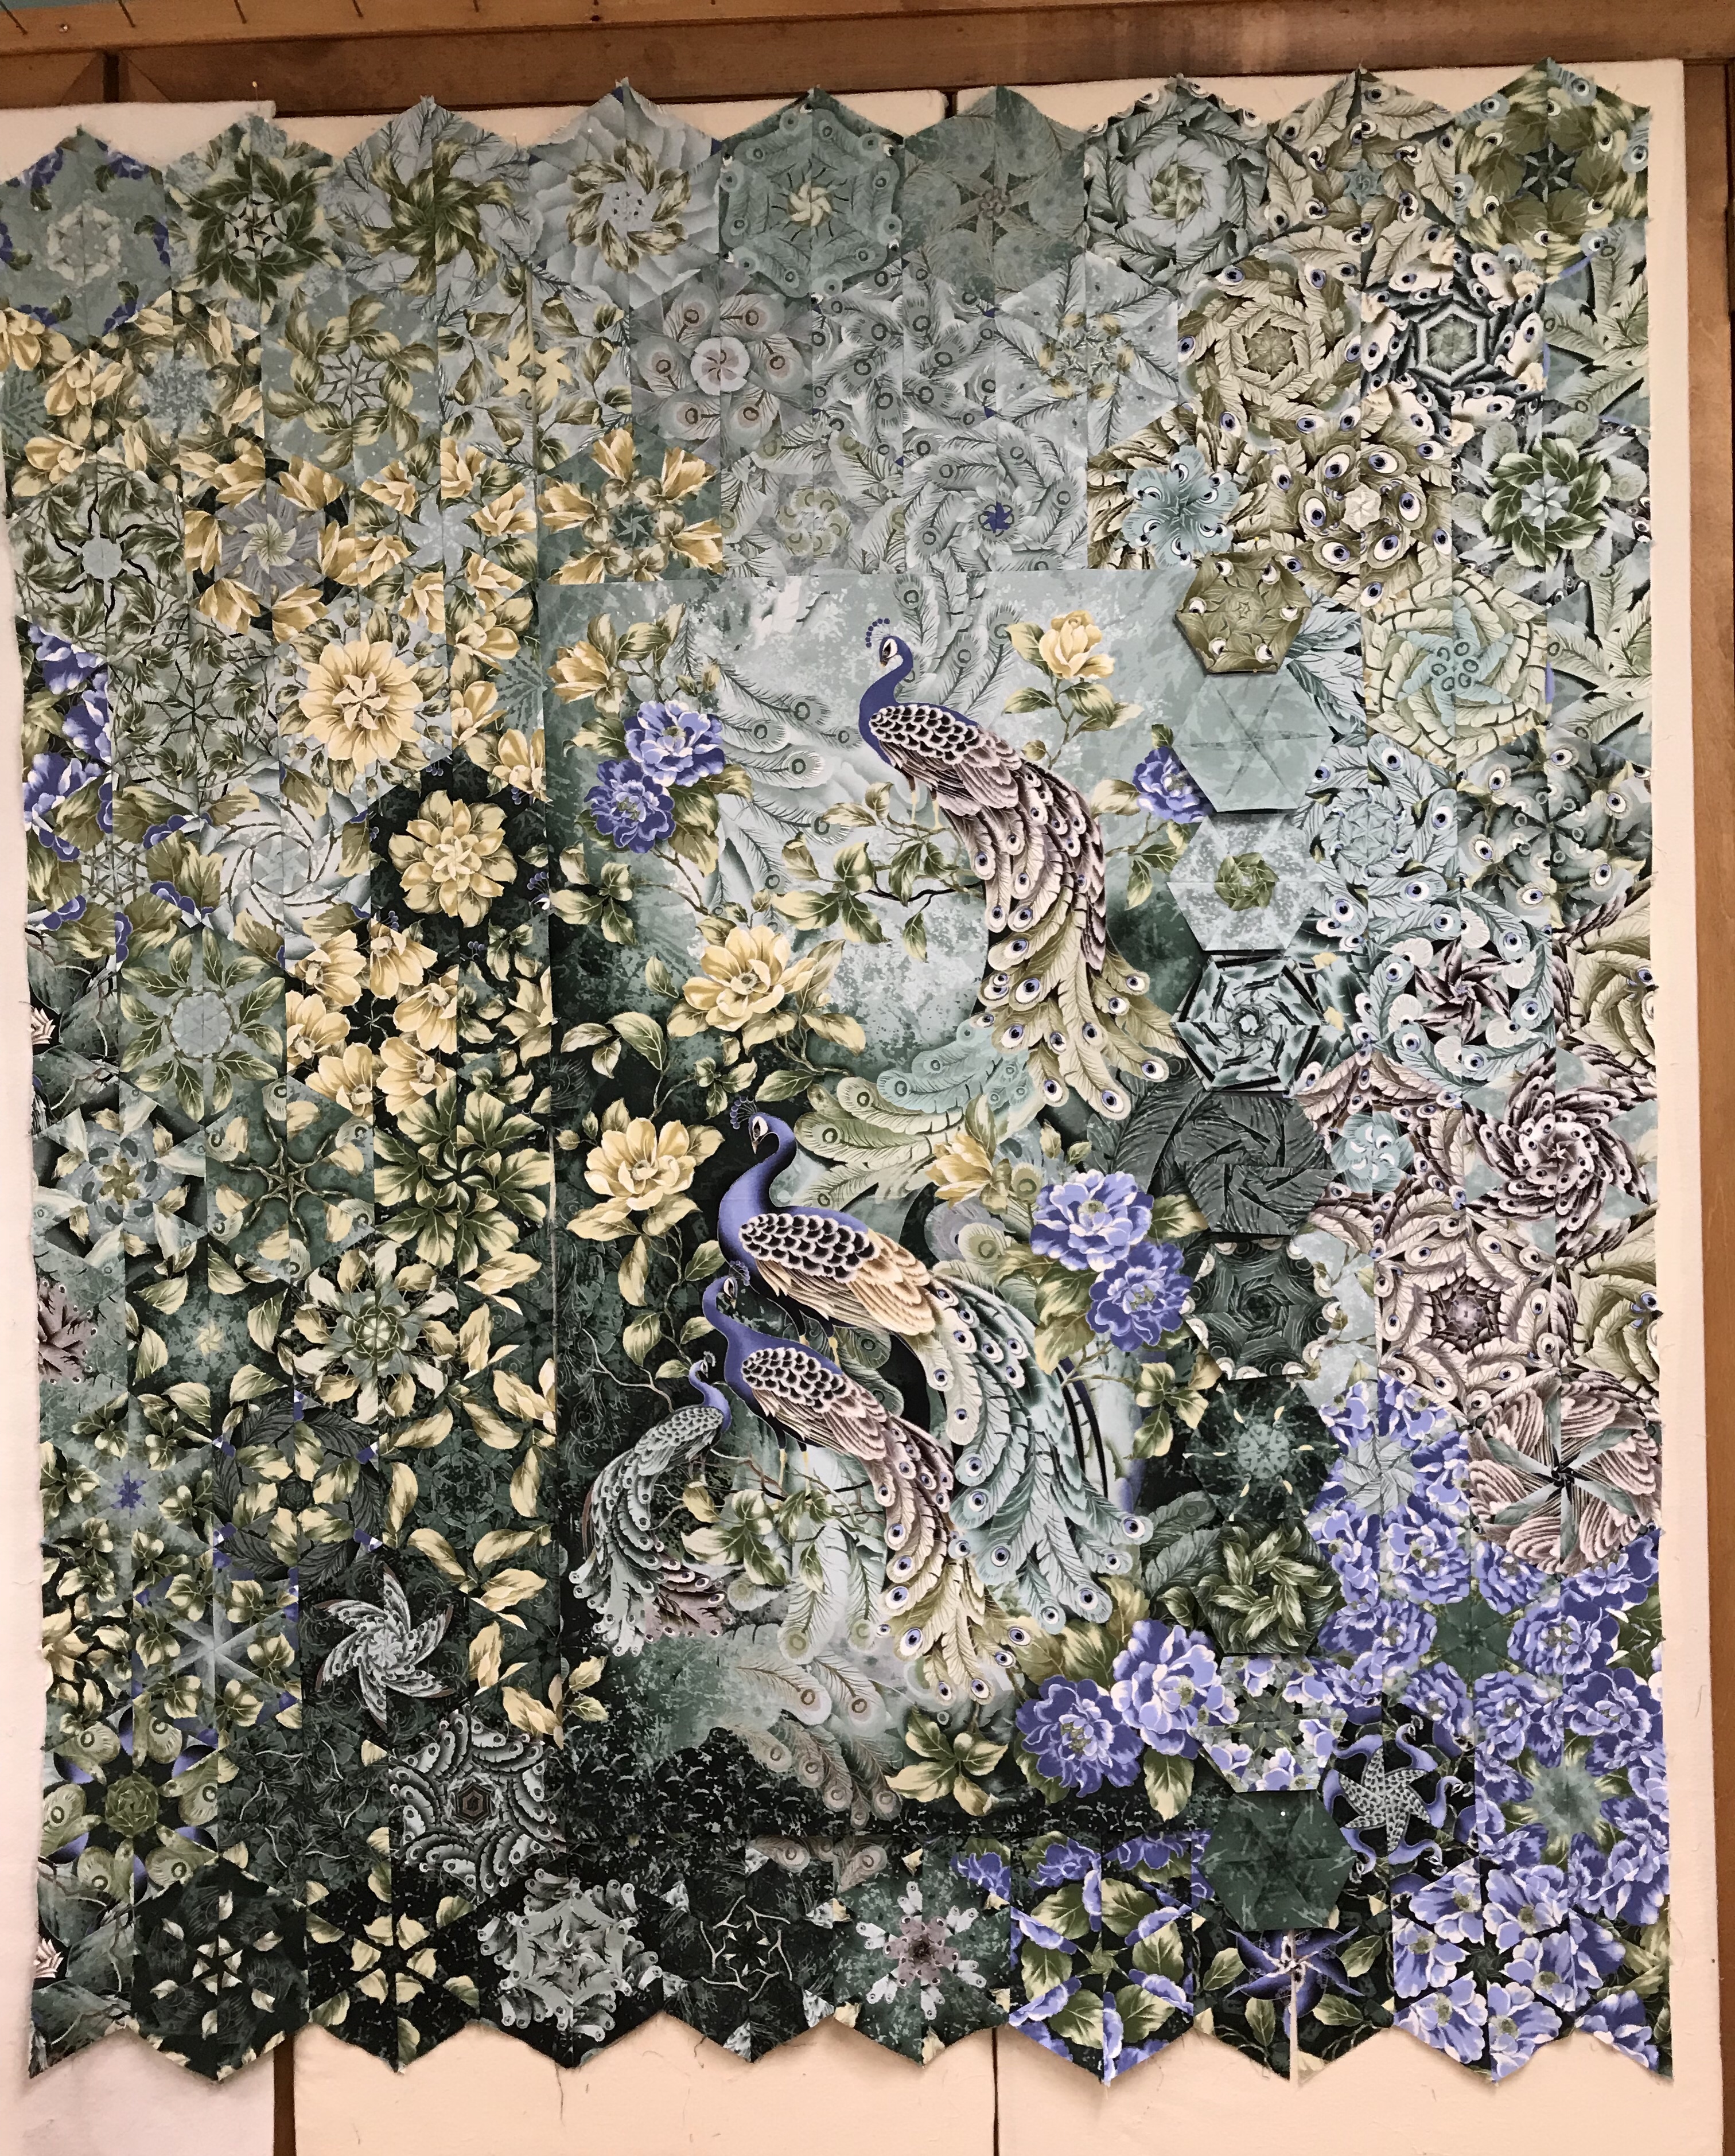
Have you seen some of the wonderfully creative One Block Wonders (OBW) made using precut panels? If you haven’t you should join the Facebook group “One Block Wonder Quilt Forum”! This is my third OBW using panels and I wanted to share how I put them together.
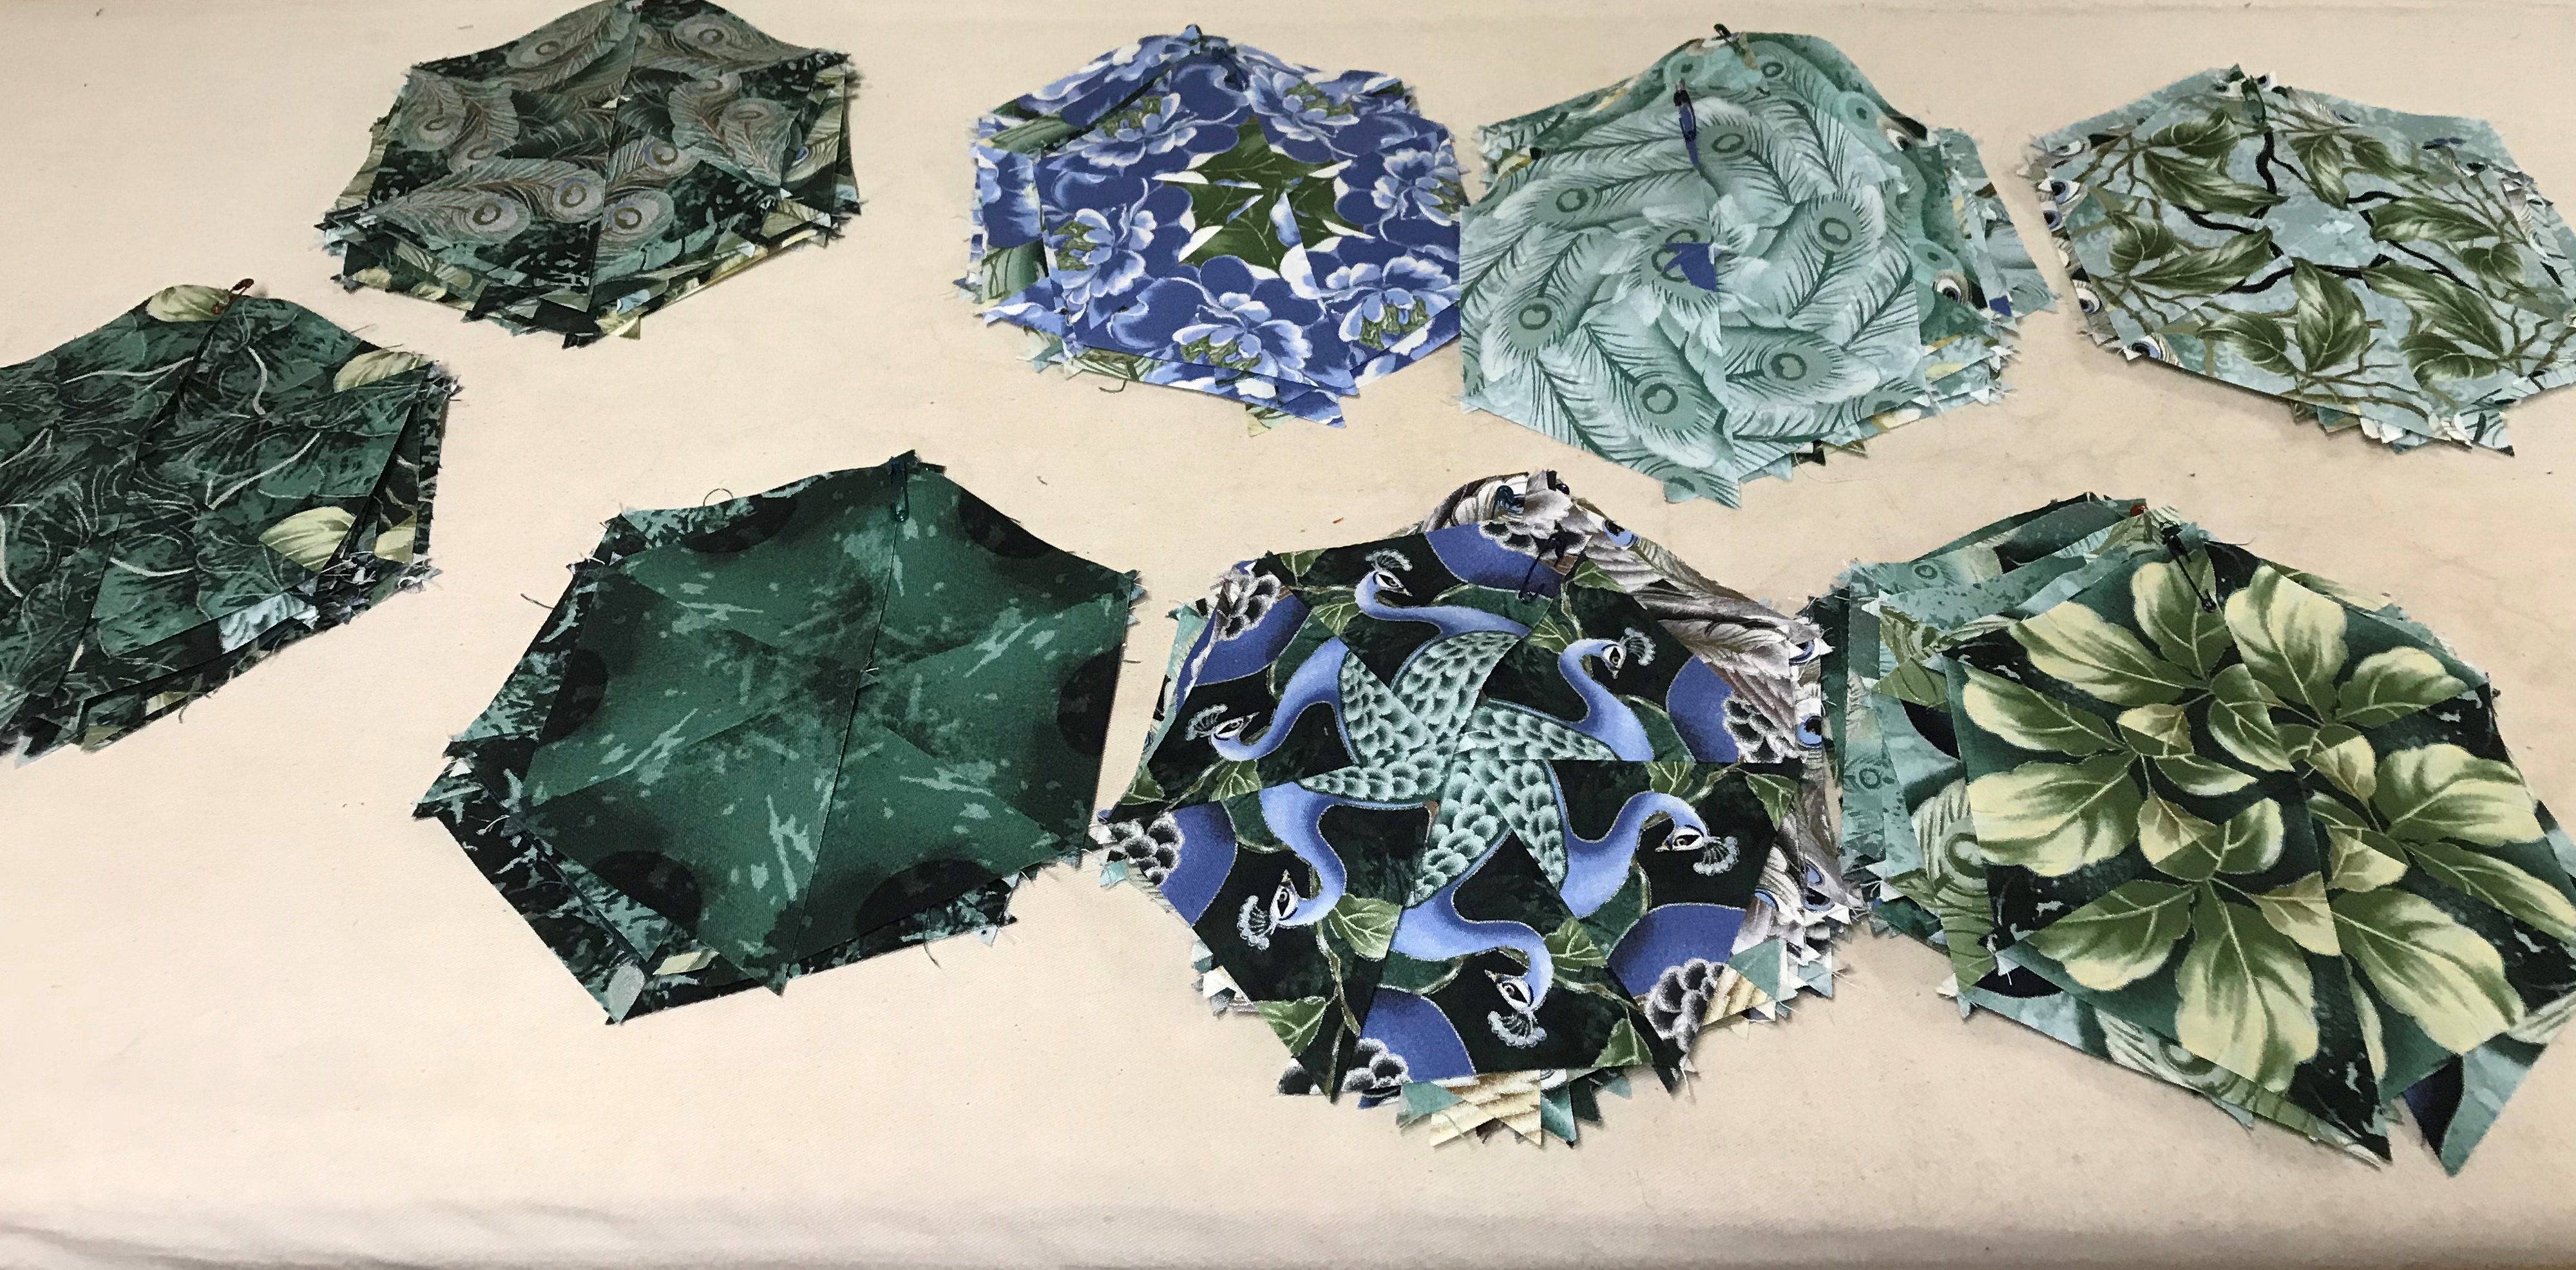
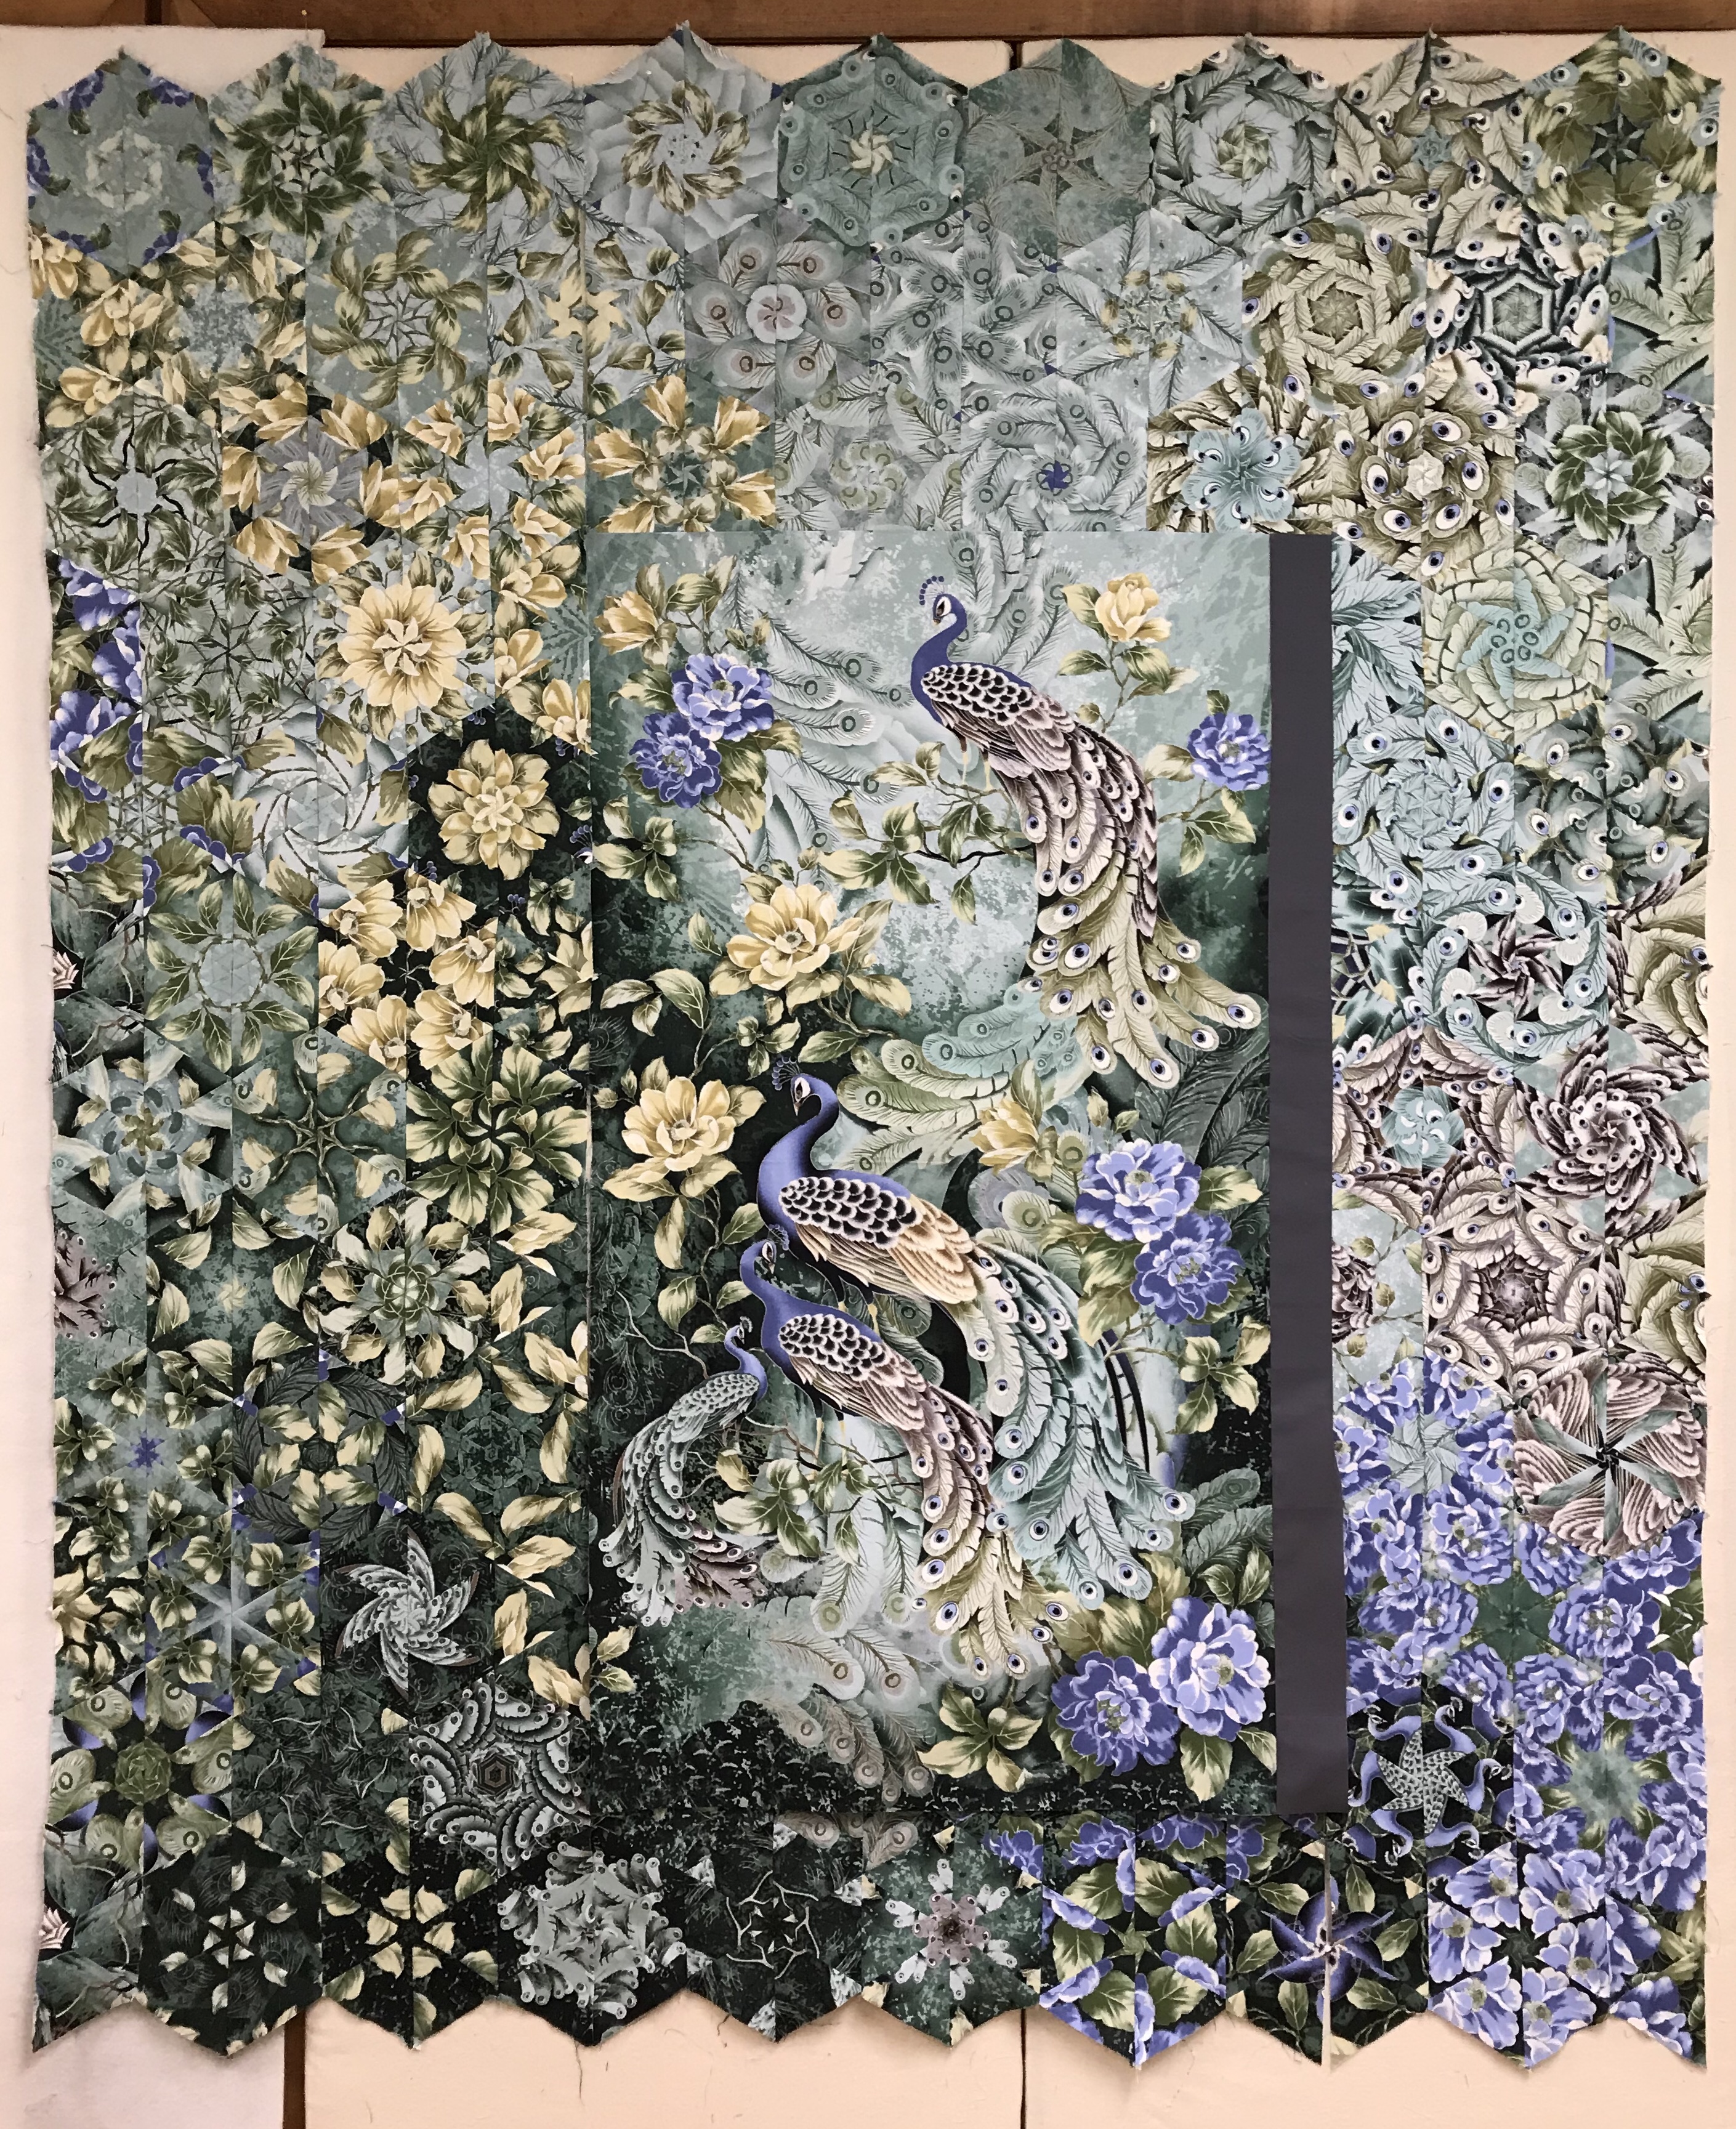
My last OBW using panels “The Heron”, was so much fun I couldn’t wait to make the next one. Start by purchasing 7 Panels. One to be incorporated into the top and 6 to be aligned for making the hexagon blocks.
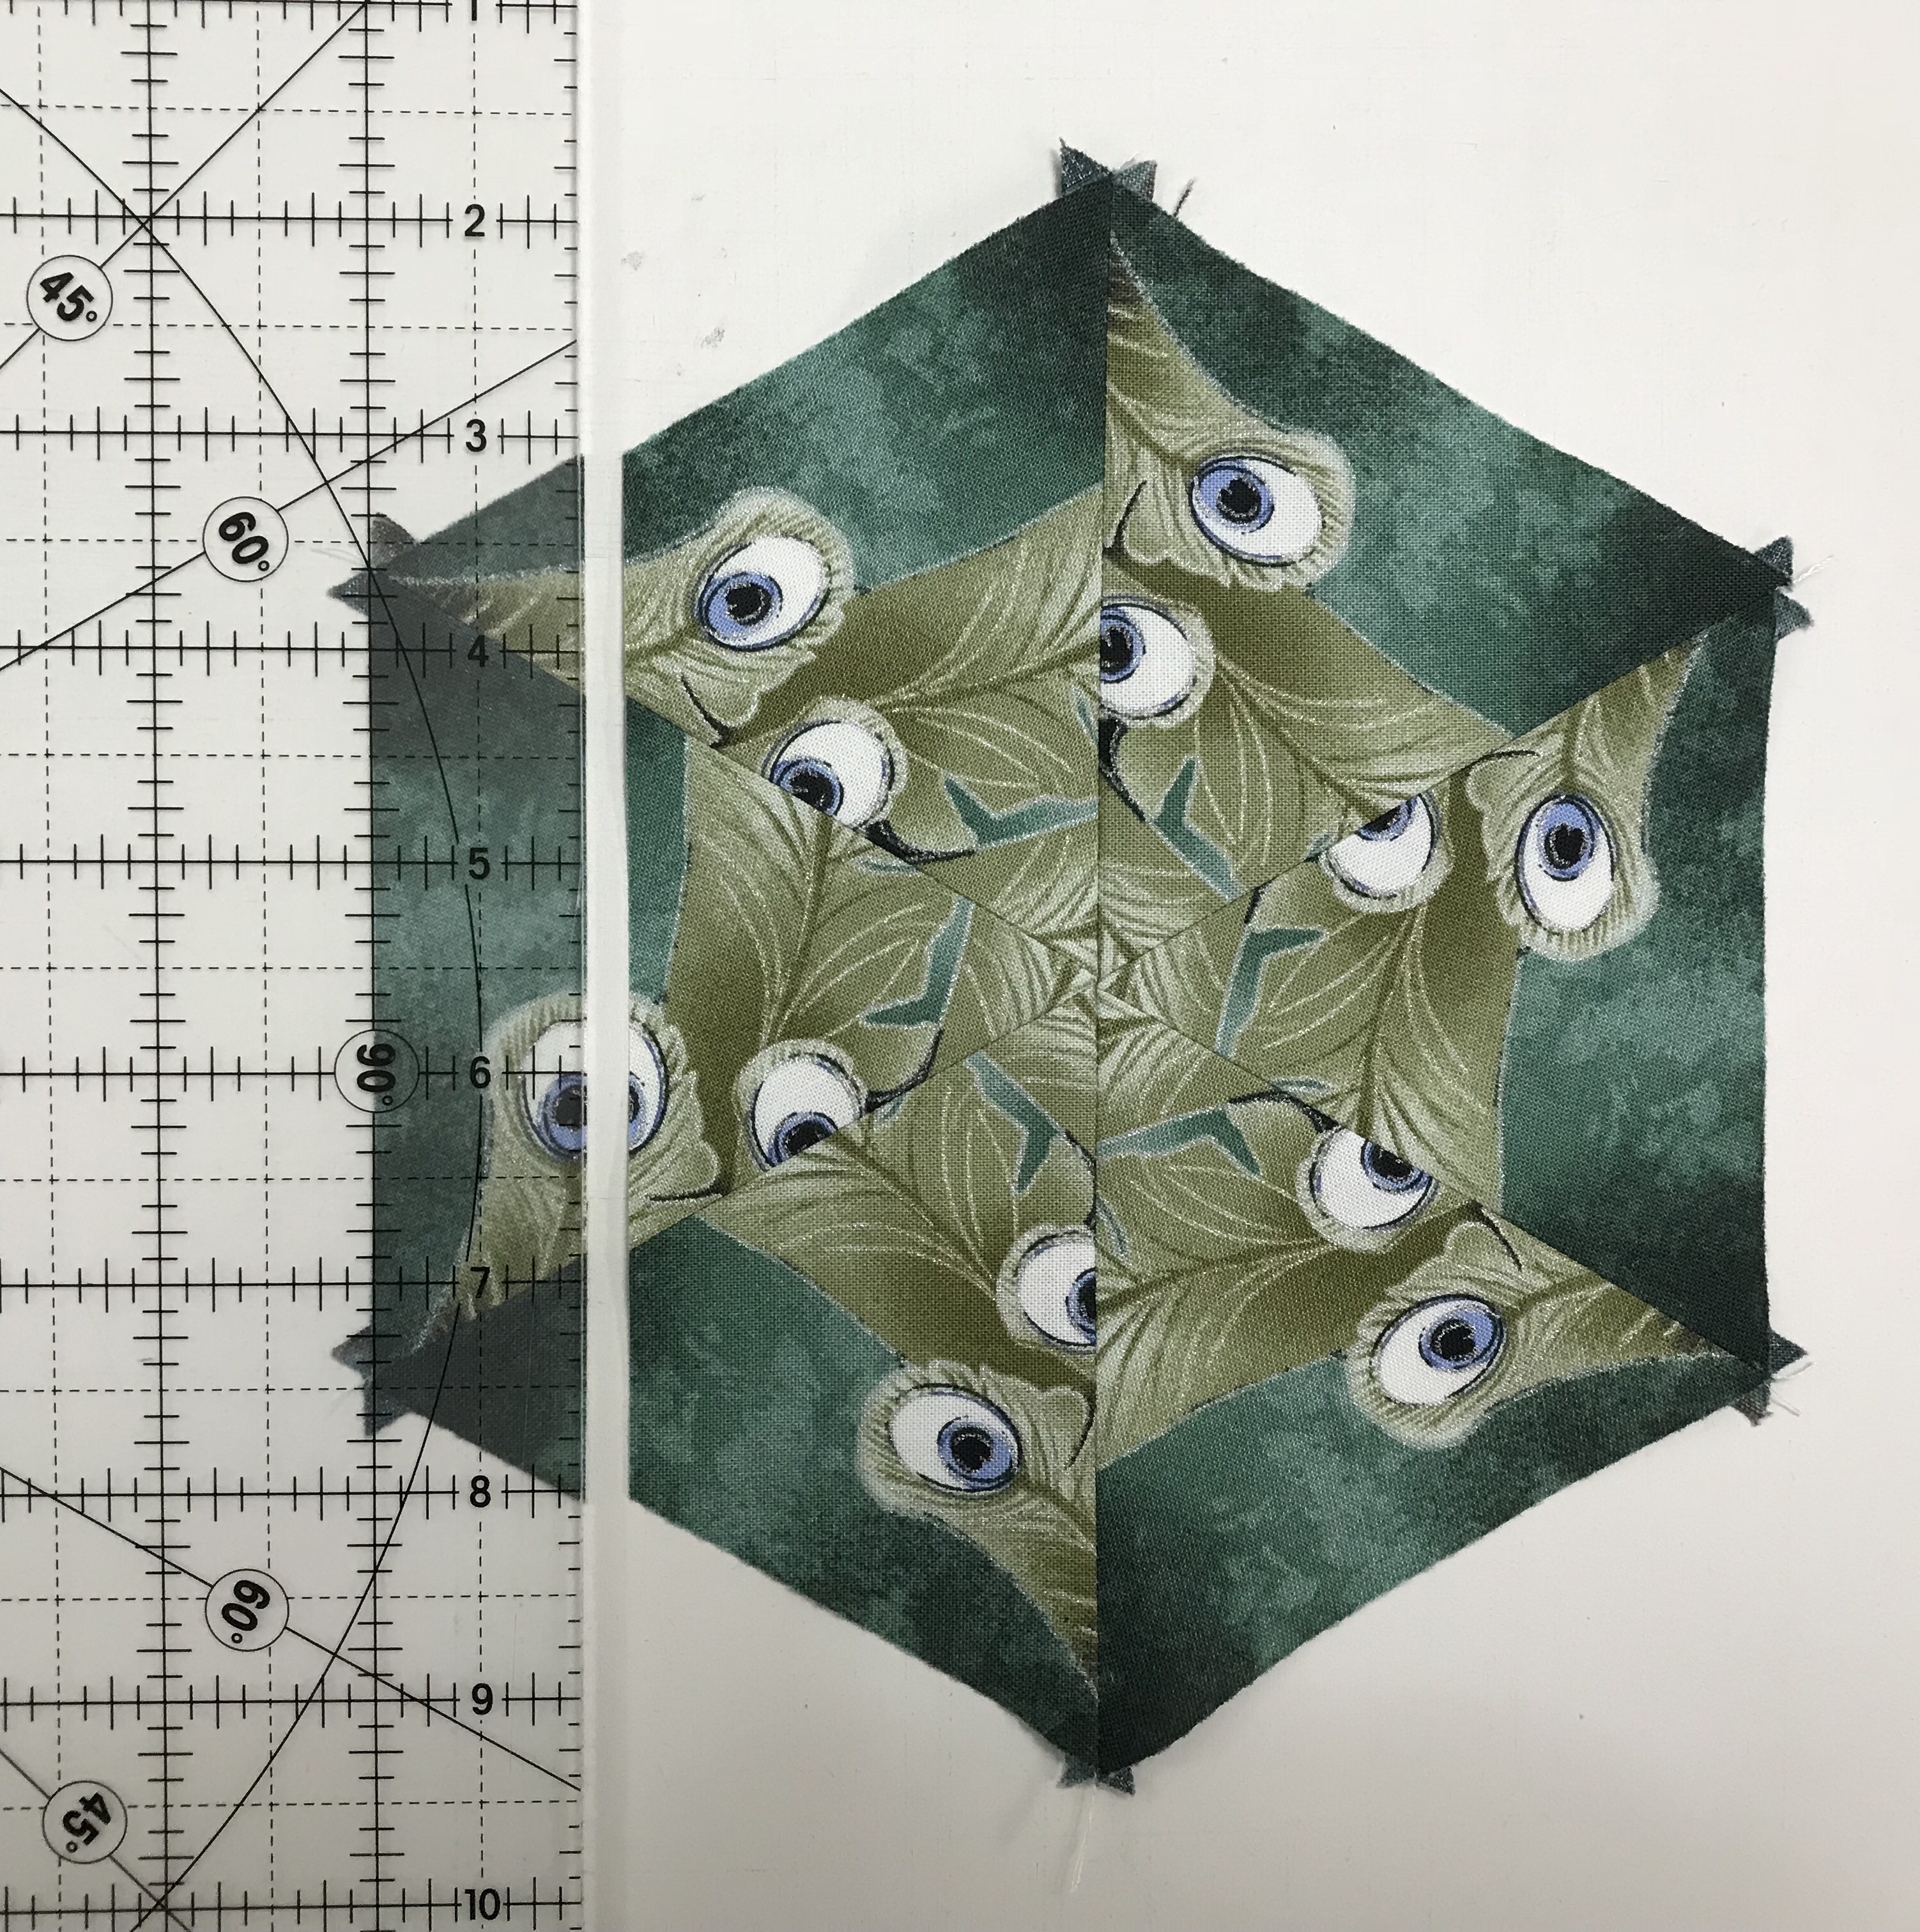
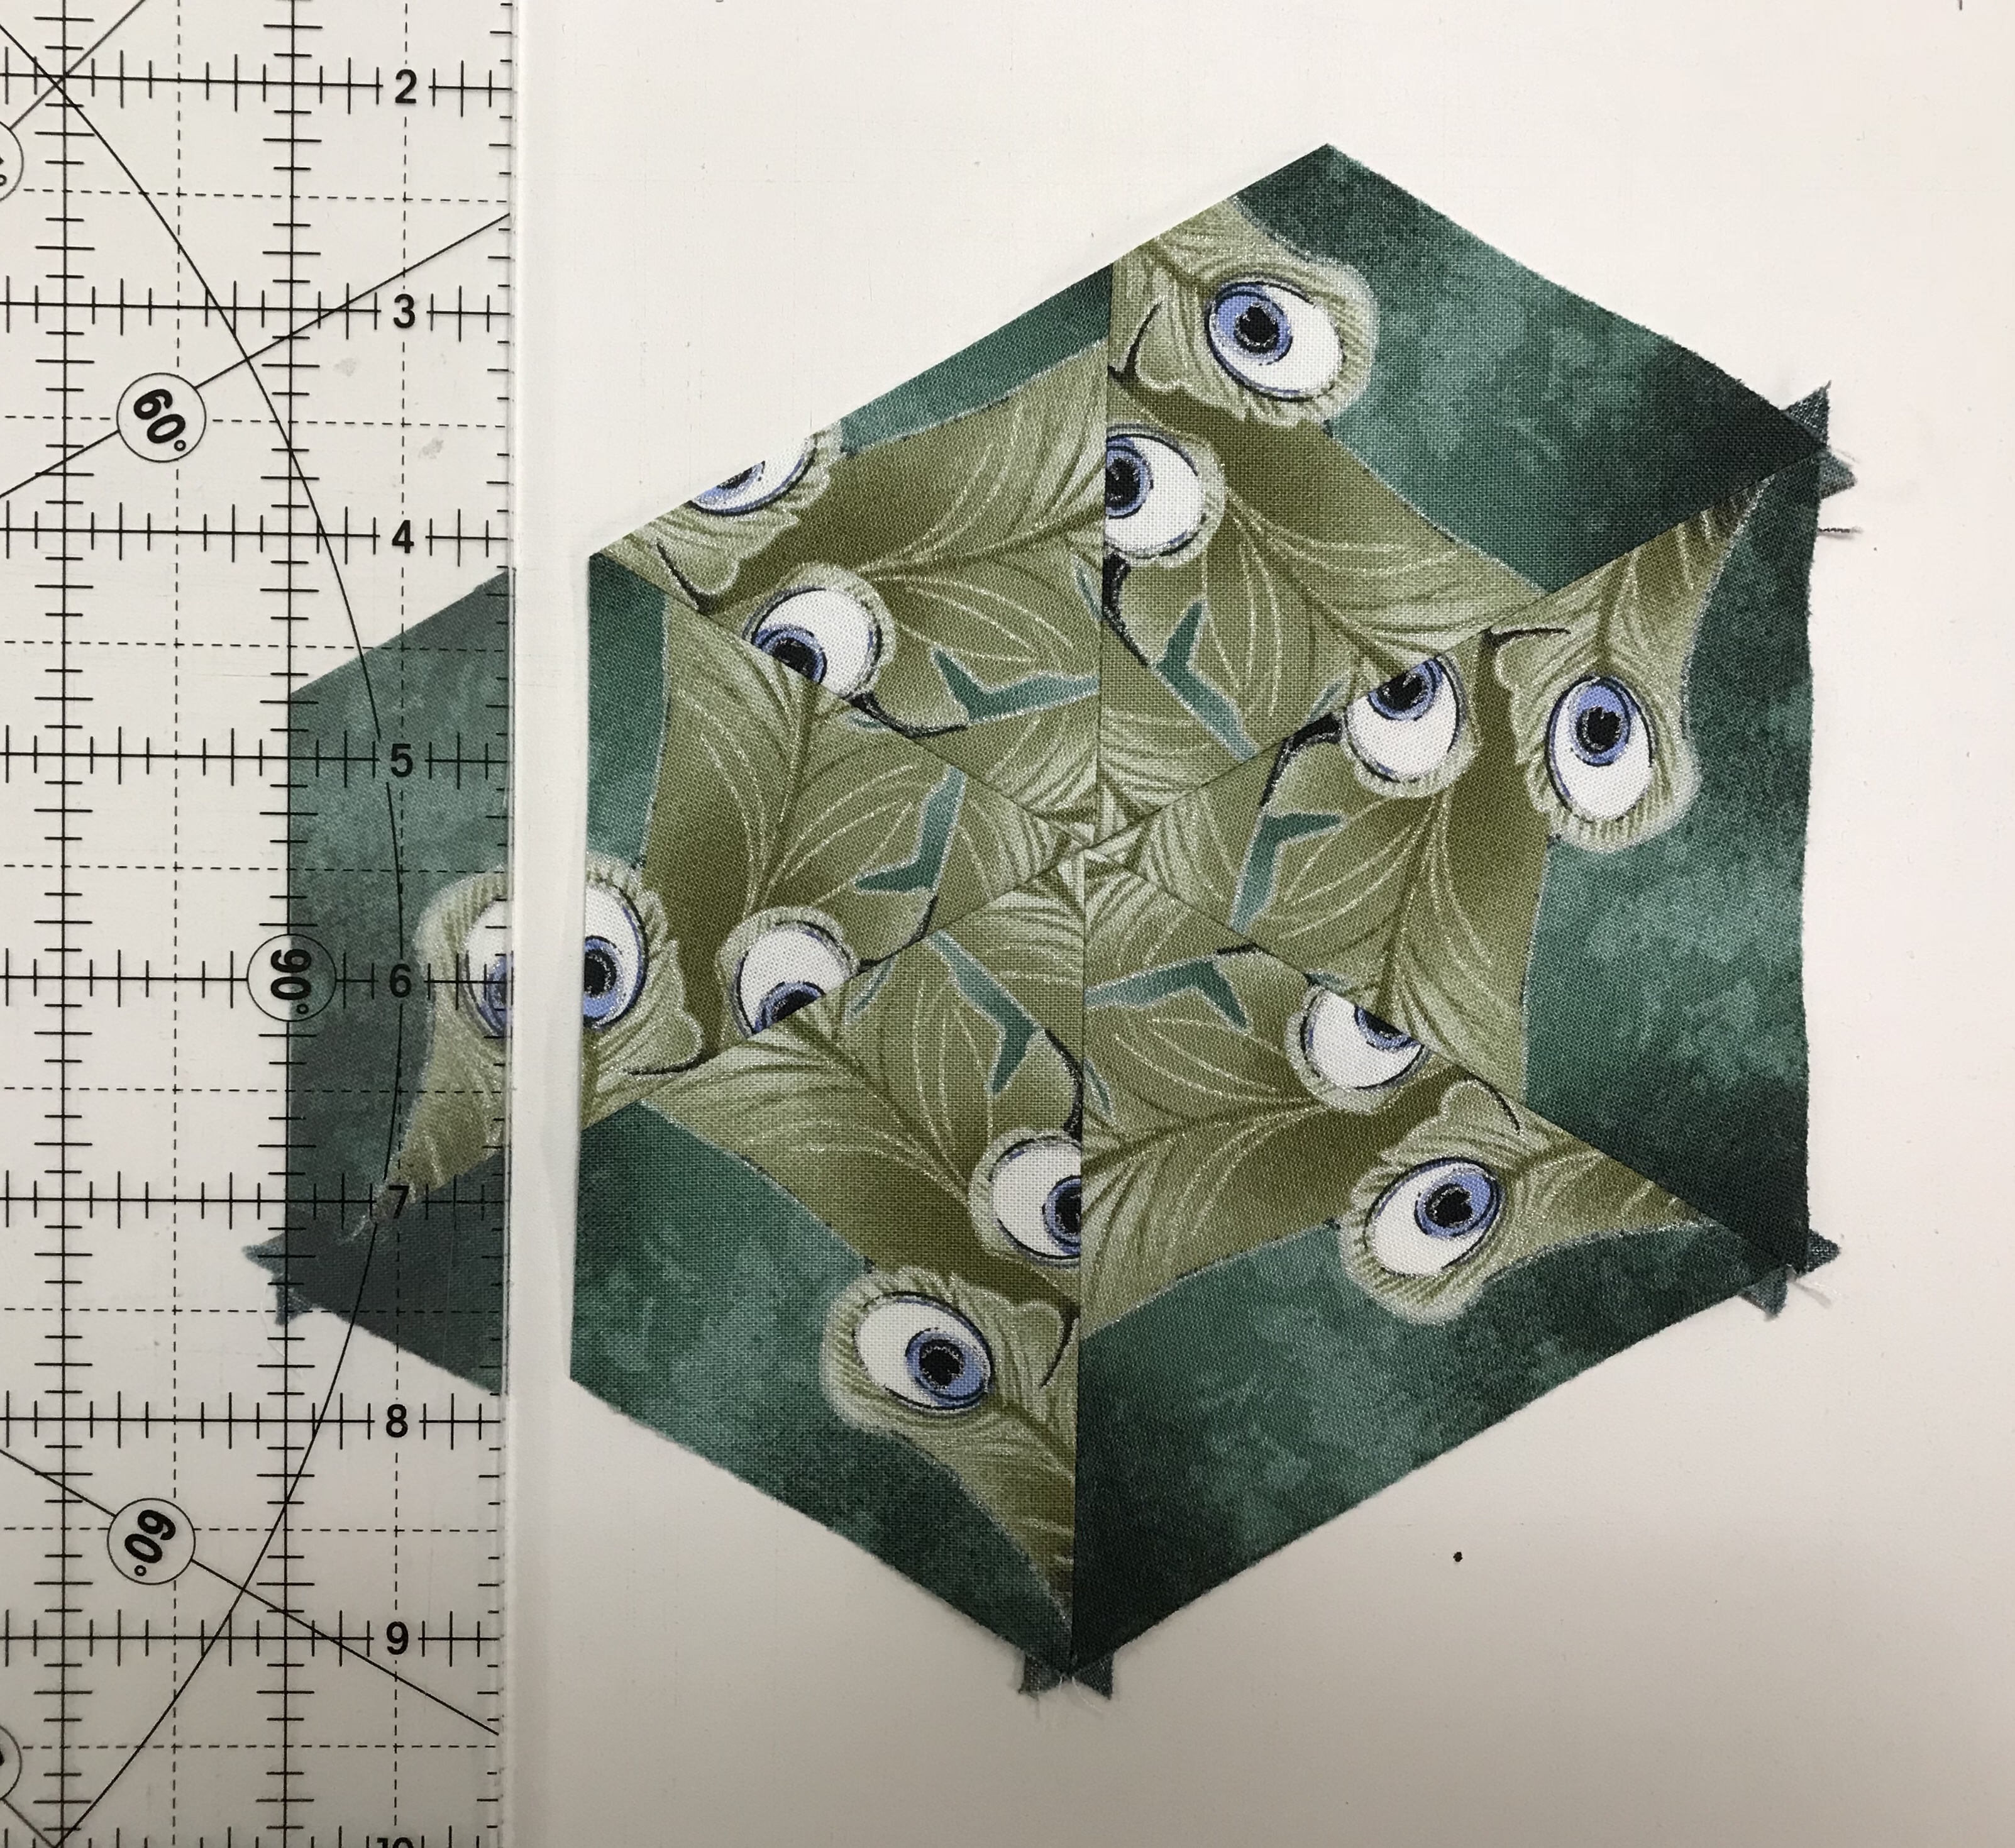
The process is same whether you are using yardage or panels. The only difference is the repeats are already cut for you. I don’t trim the panels, I just press them and layer them assuring they are all going in the direction. Align them as directed in Maxine Rosenthal’s book One Block Wonders or One Block Wonder Encore.
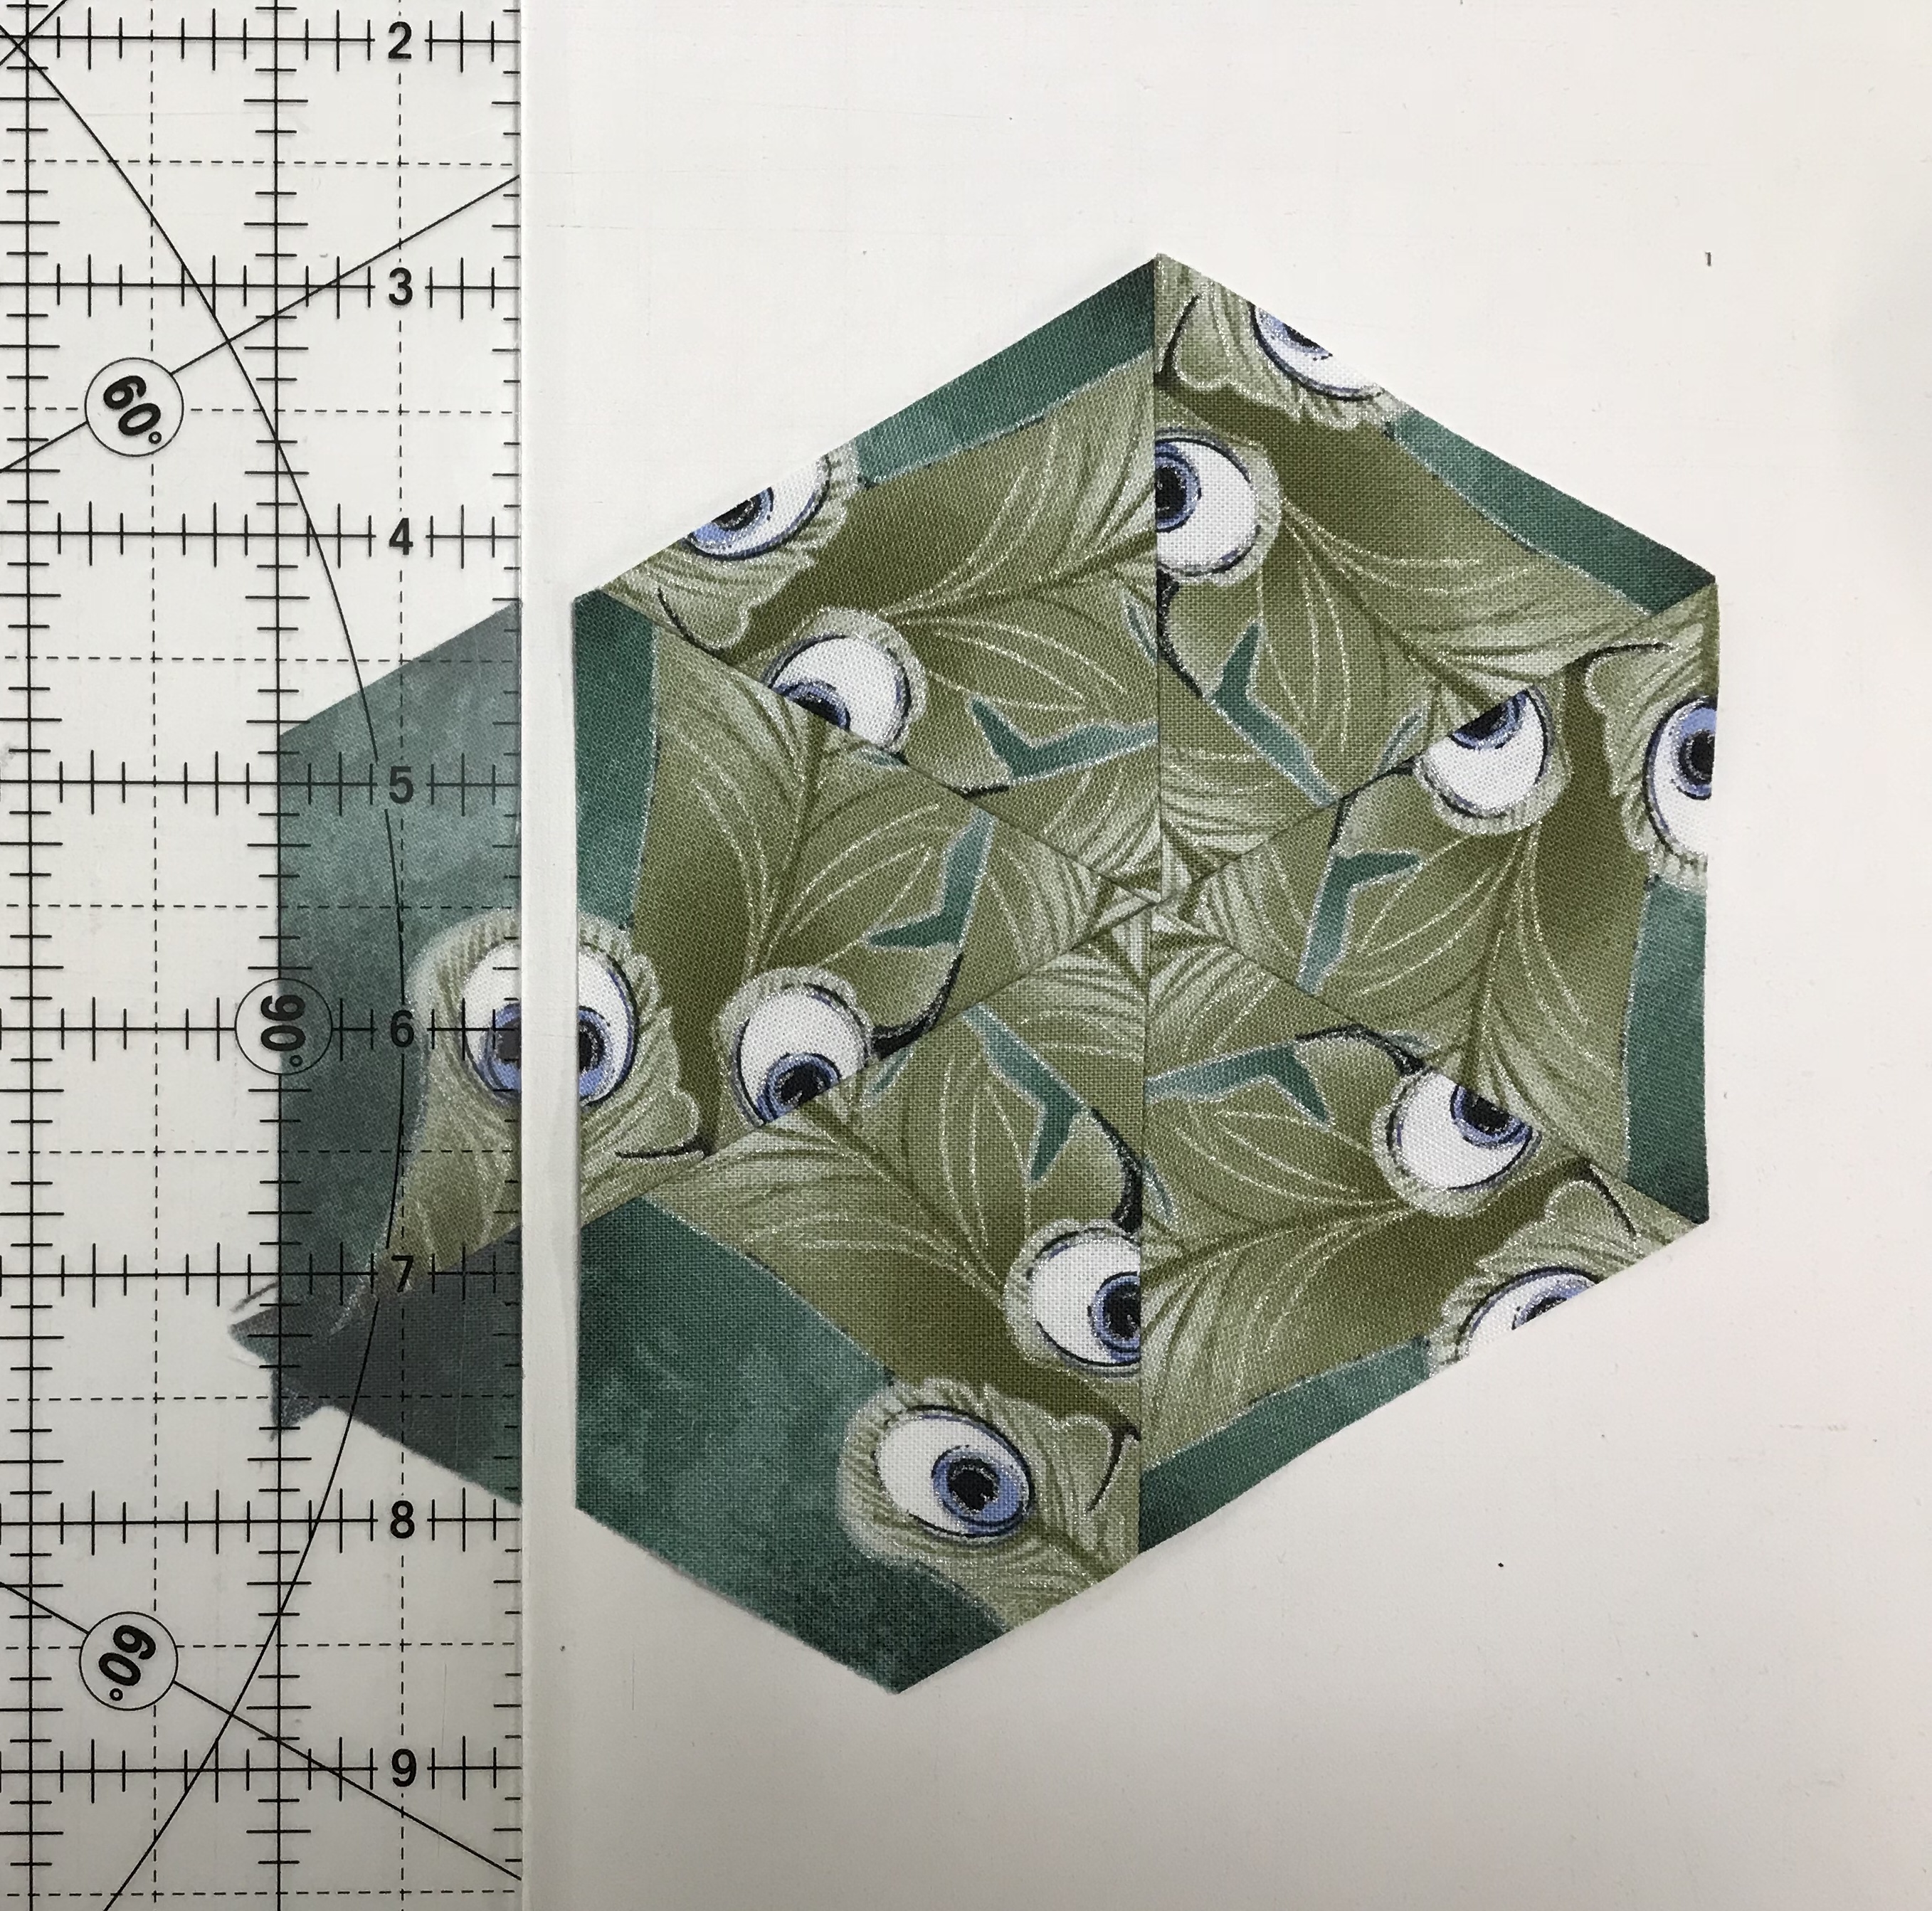
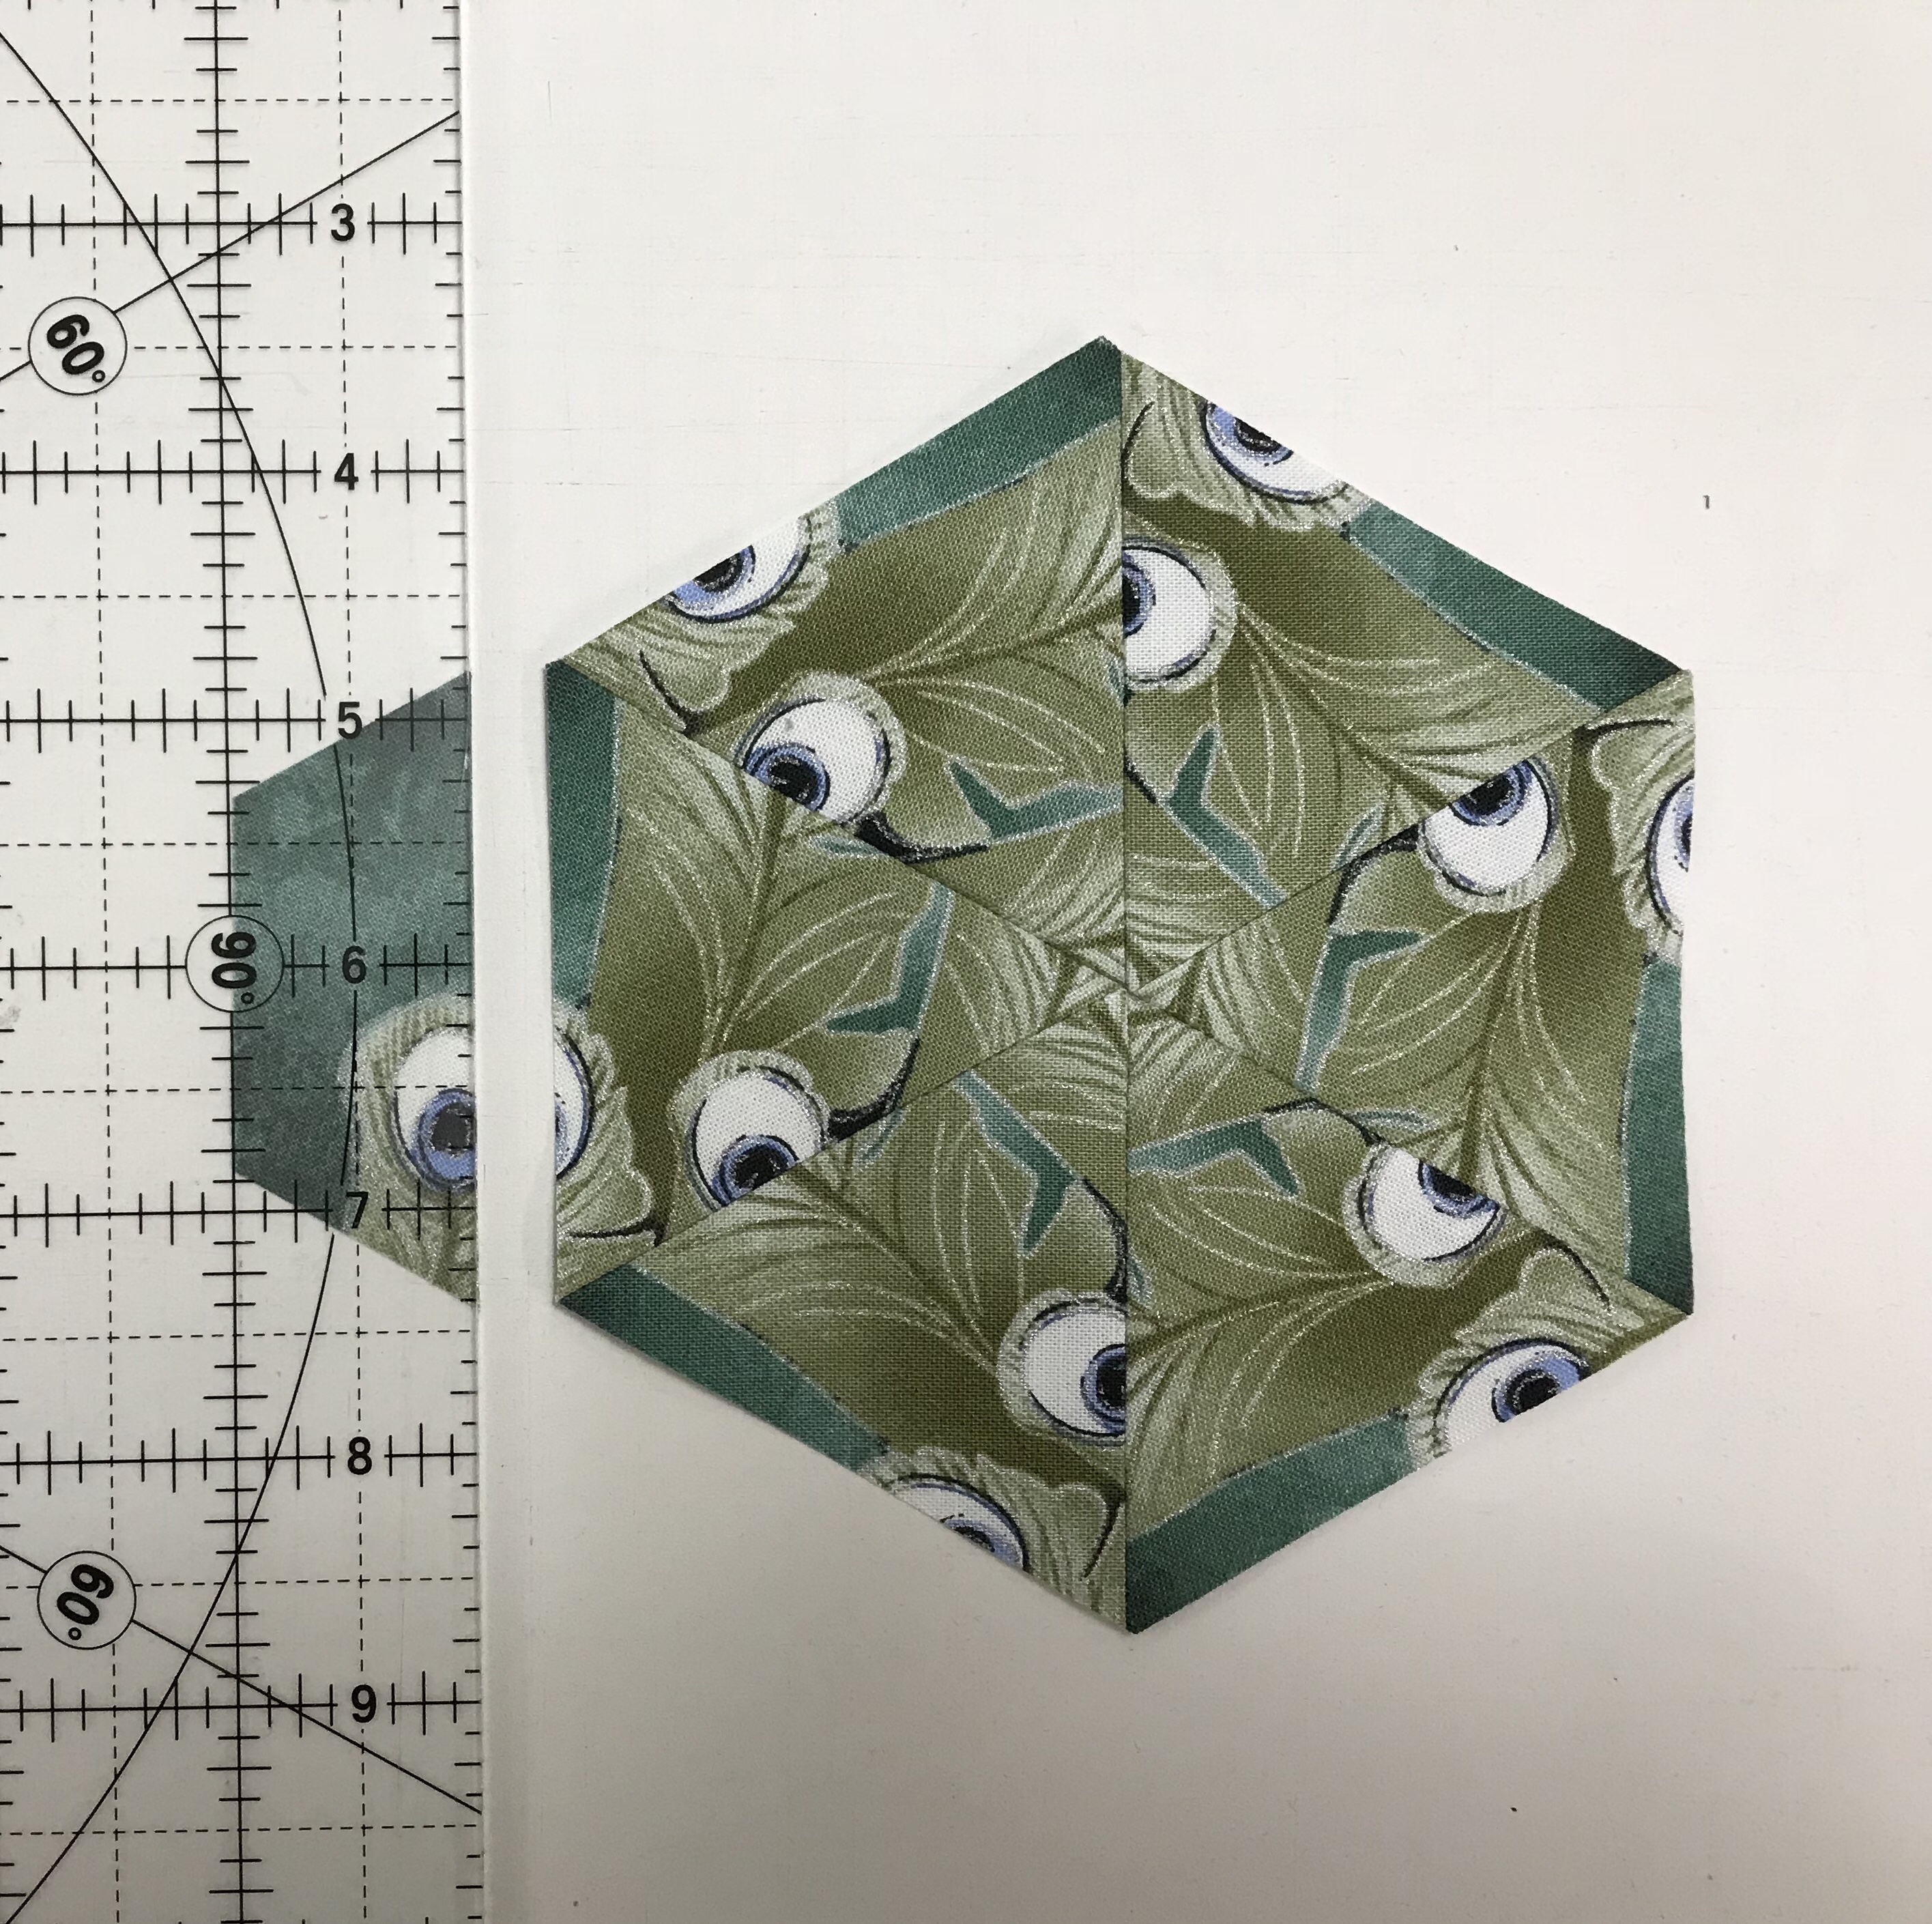
Once the repeats/panels are aligned, trim one long edge so all the layers are ending in the same place. This panel has a good size design, so I cut my strips 3 3/4″ wide by Width of Fabric (WOF). Then using my ruler with a 60 degree line I cut my equilateral triangles and made my blocks. Once the blocks are sorted by predominate color it is time to design.
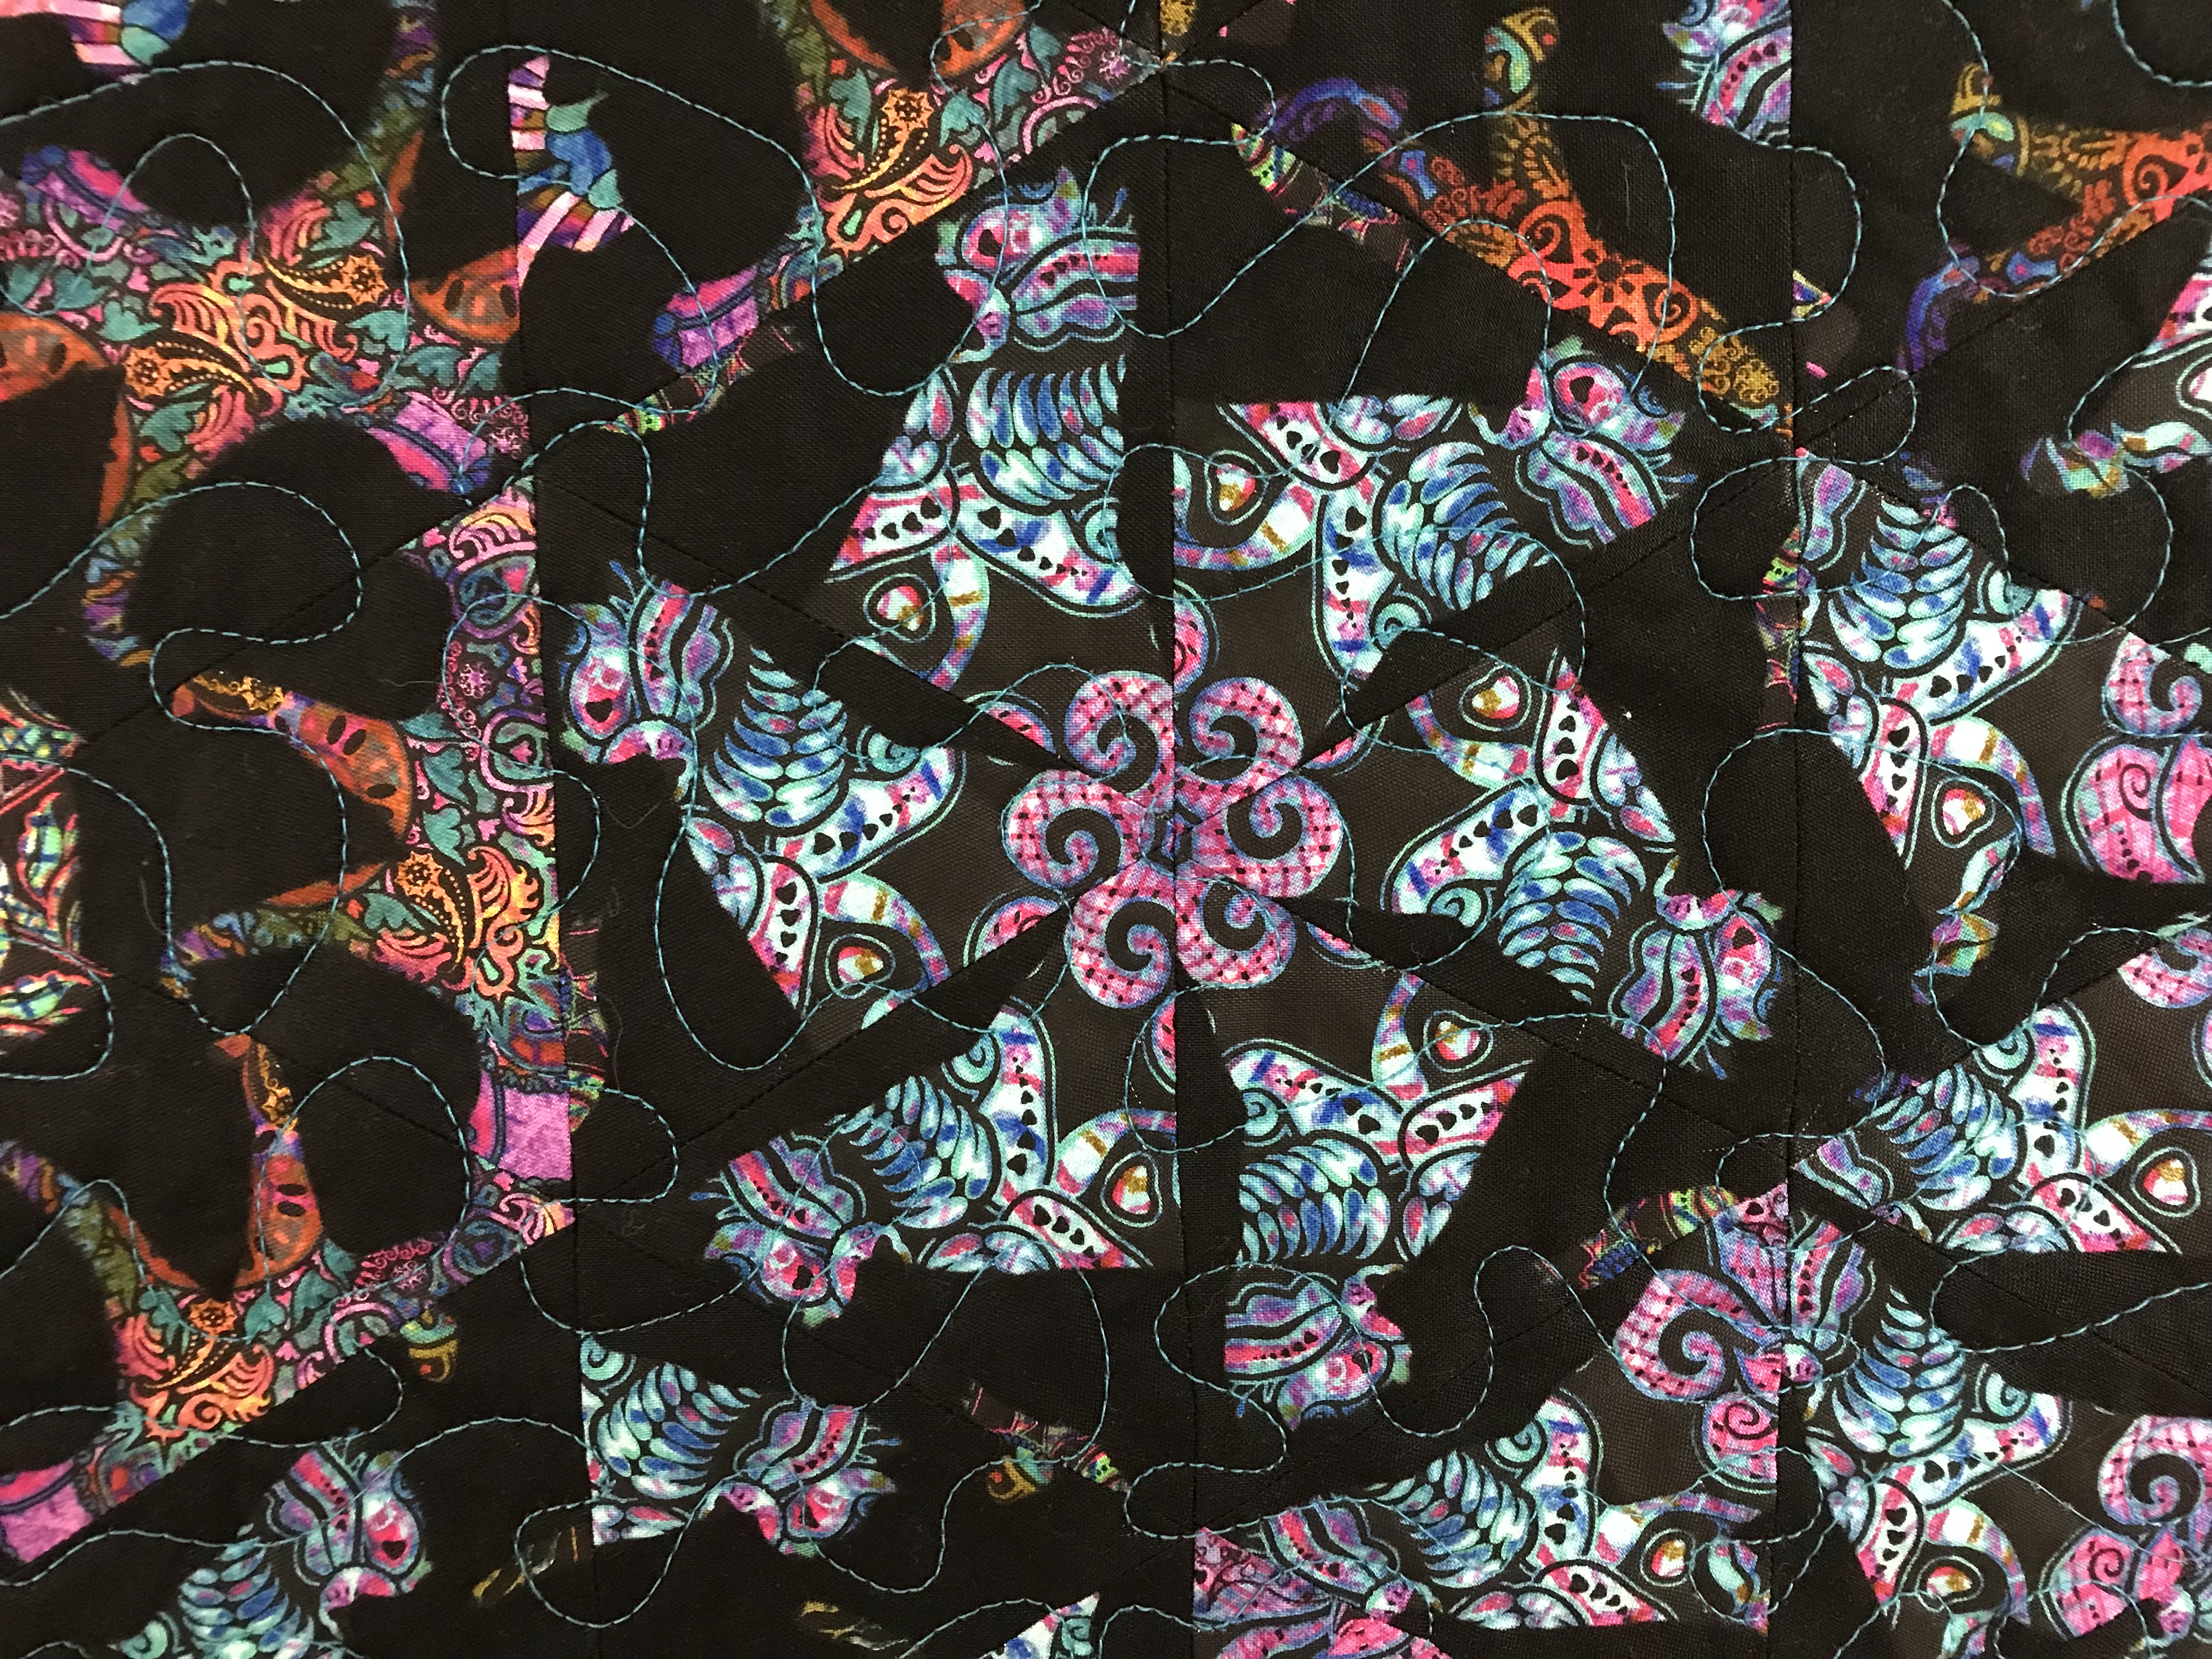
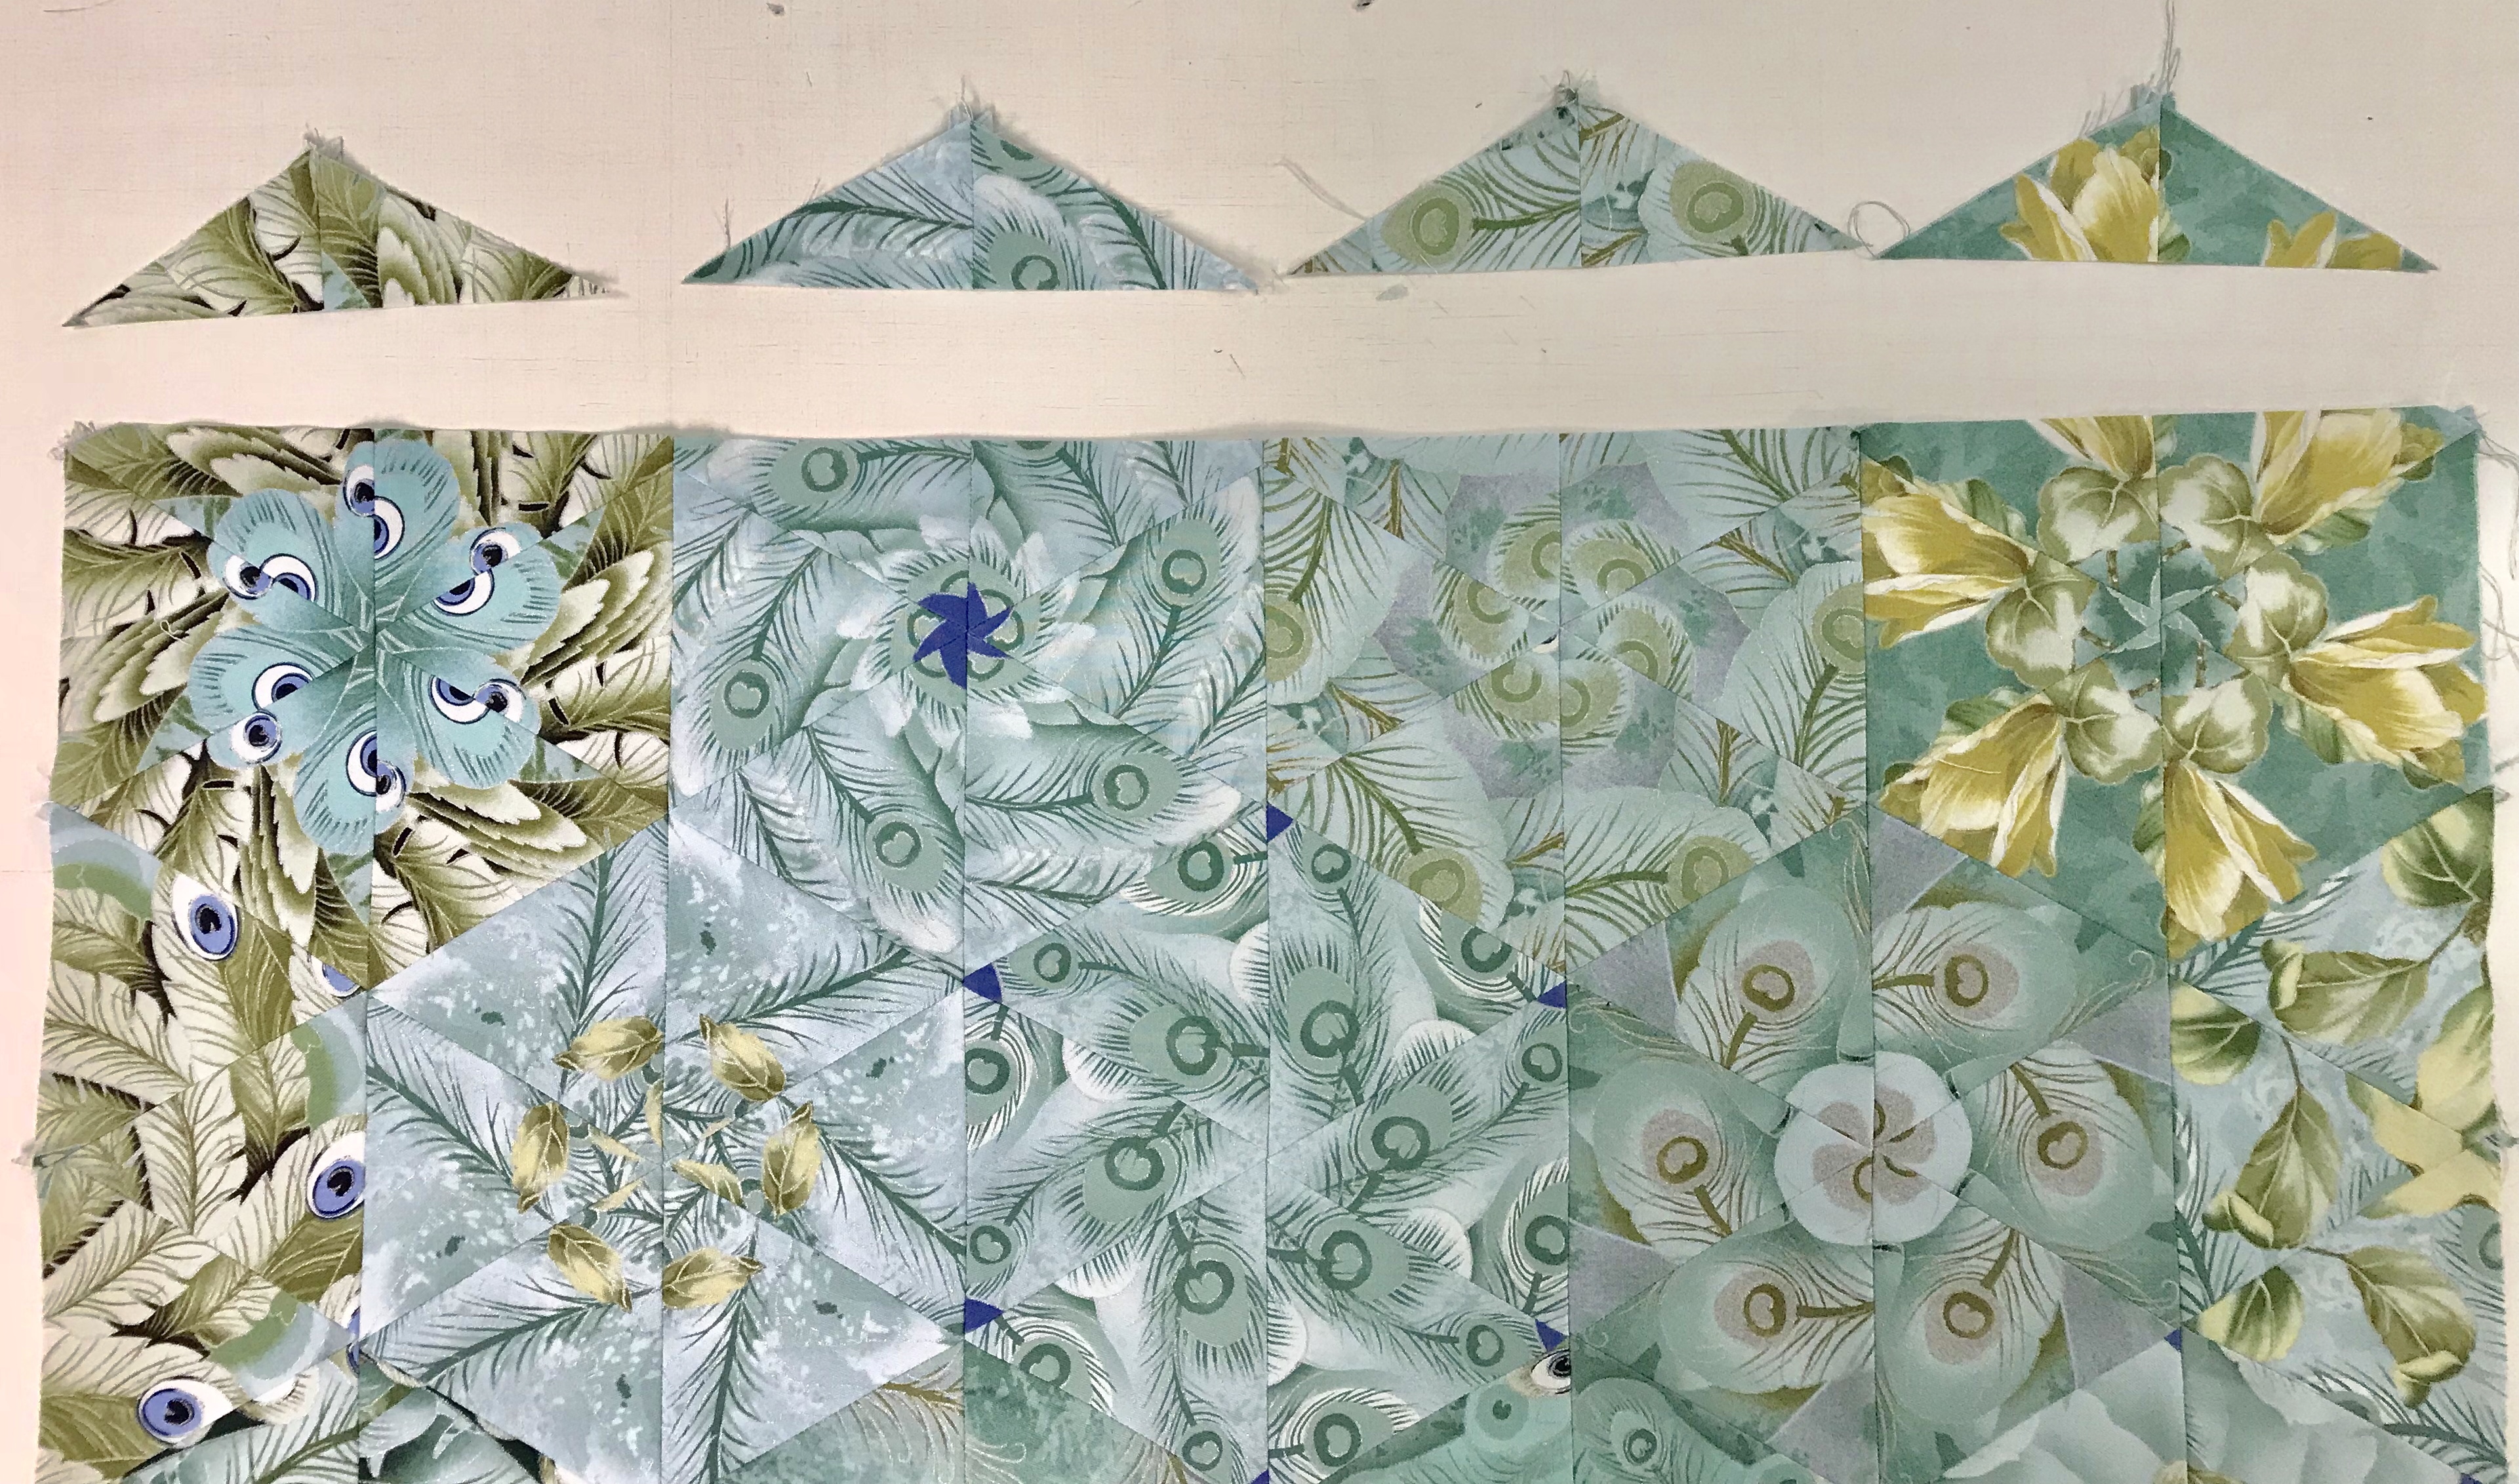
I know that when I cut my strips 3 3/4″ wide, my finished hexagon block will measure 6″ wide. I squared up the panel and measured the width. This panel after squaring up was 23″ wide. This means 3 finished hexagon blocks would measure 18″ and 4 finished hexagon blocks would measure 24″ wide. At this point I had two choices, trim the panel to 18″ wide or add fabric to make the panel 24″ wide. I decided to add fabric that I will hide later. You can decide to center your panel or offset it in any way.
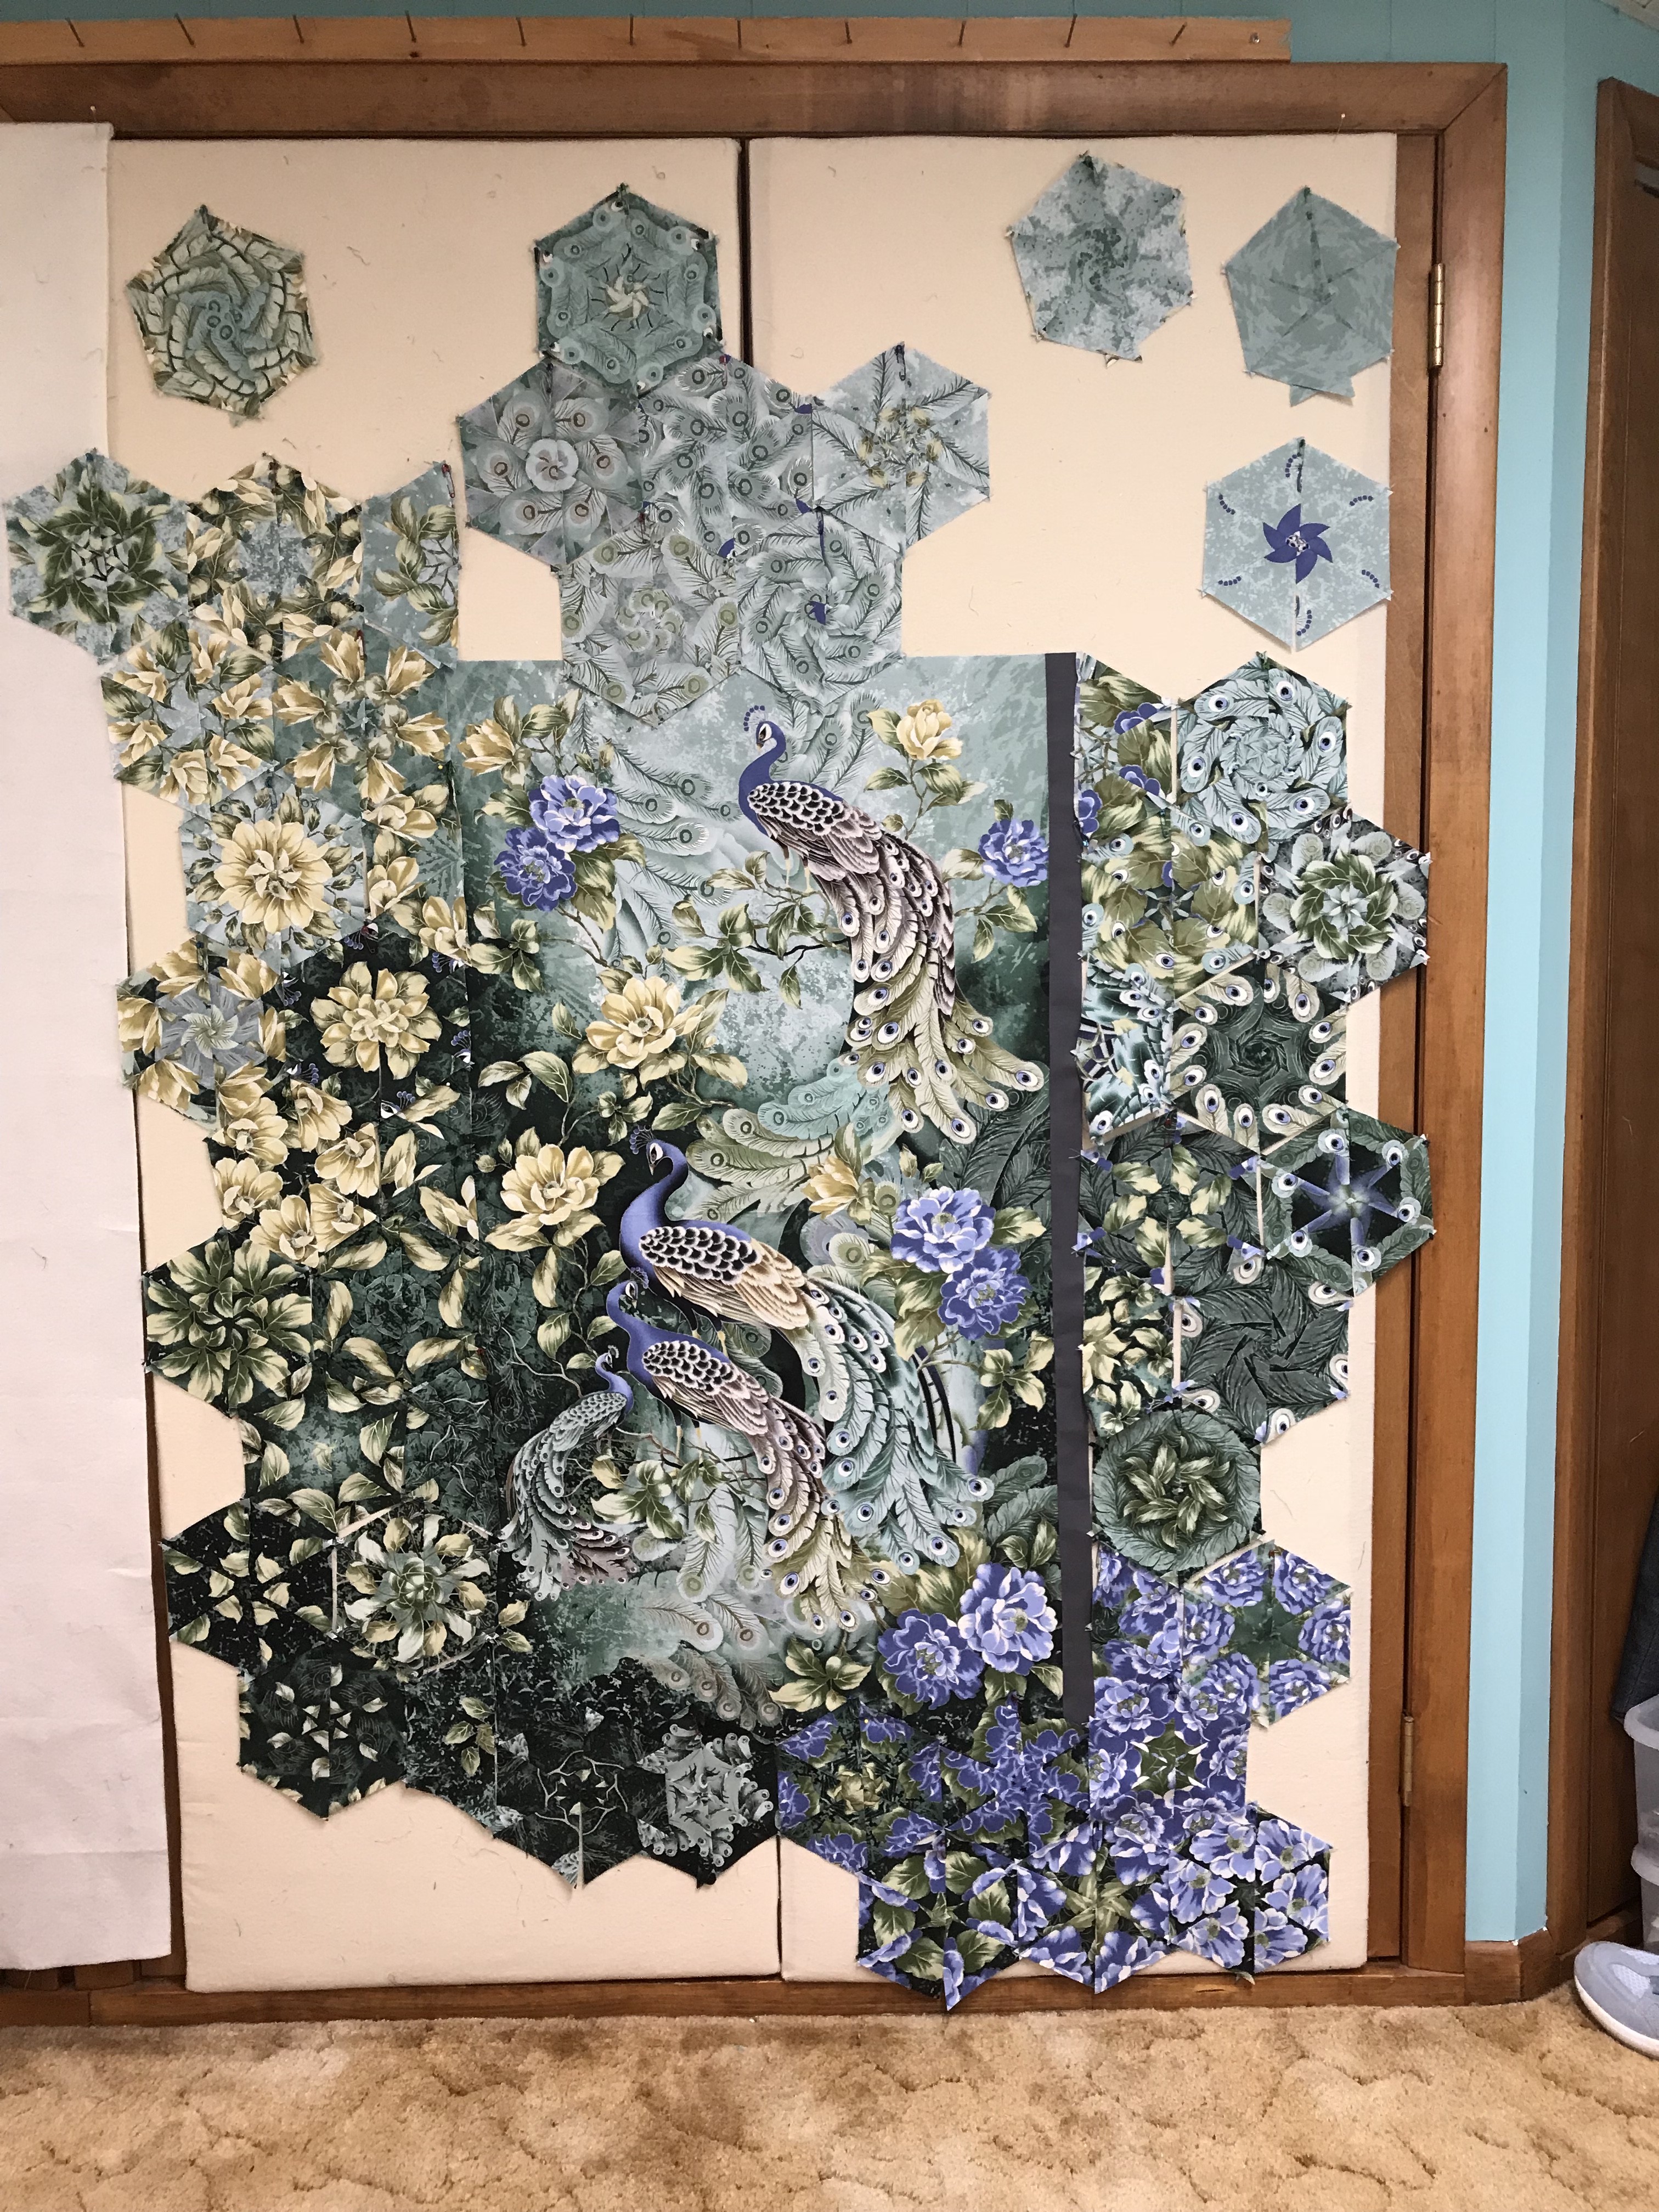
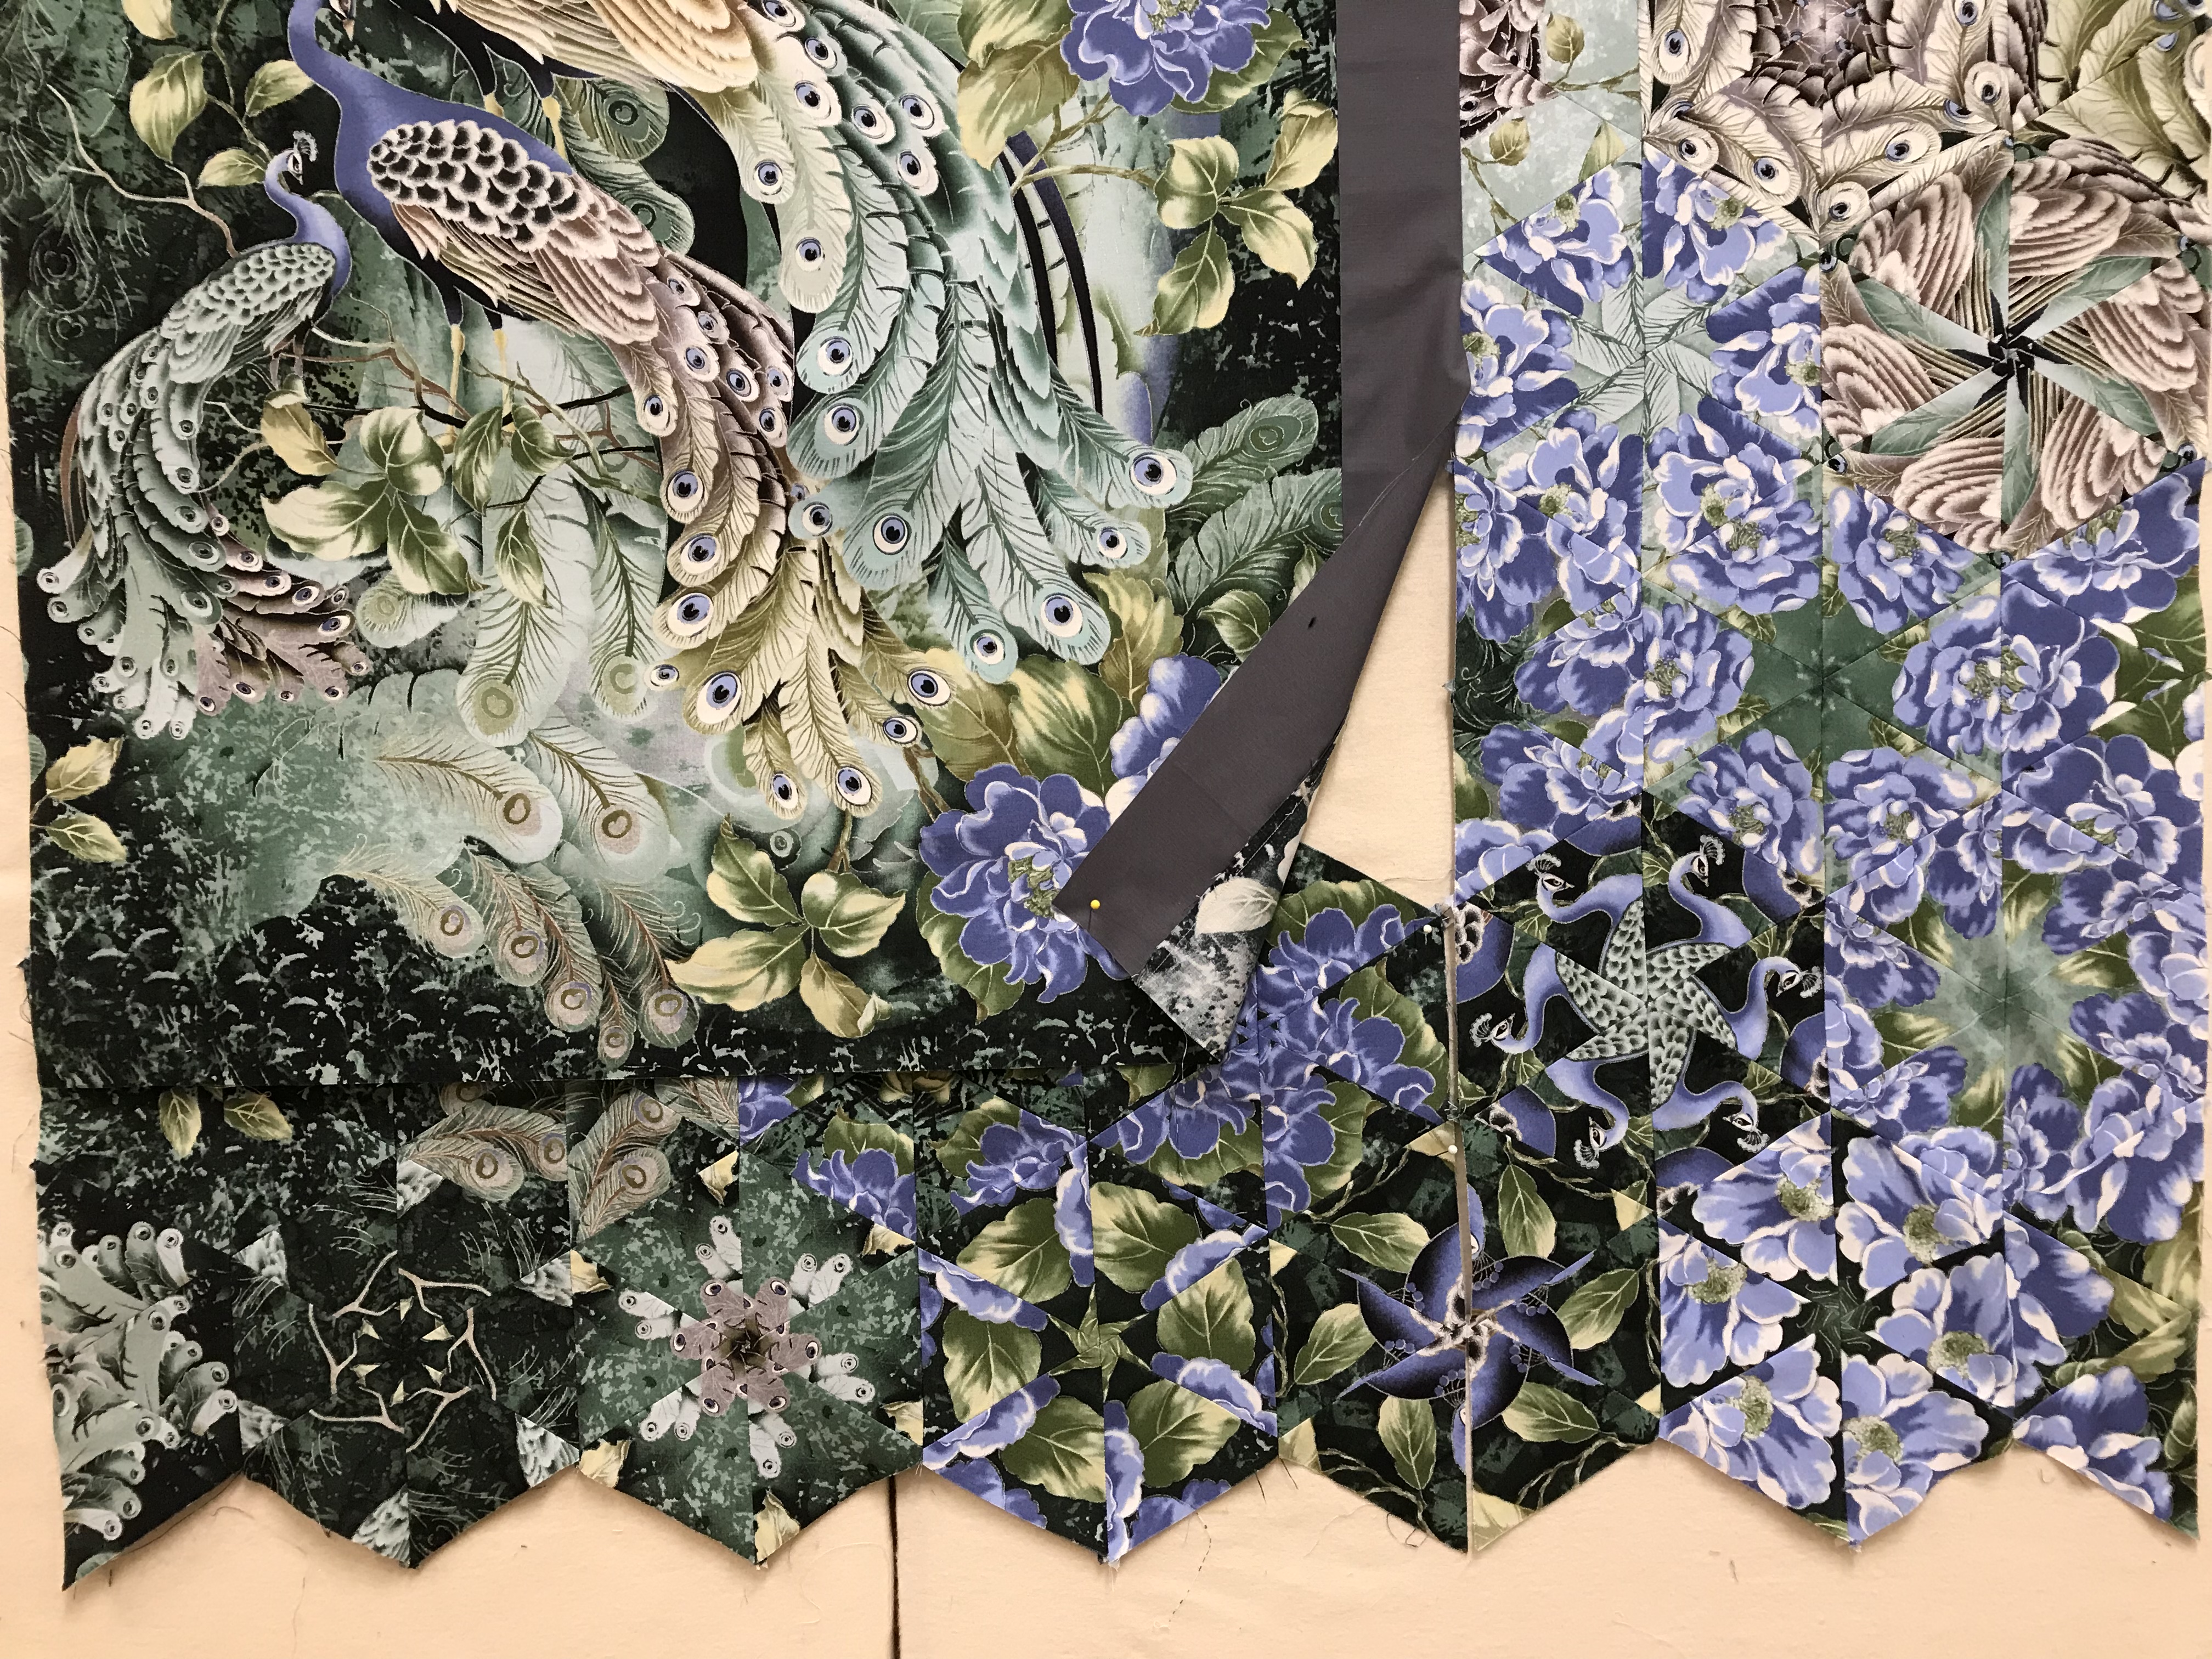
I place the panel on my design wall and start the designing process. I always place my blocks on the design wall so the opening is north and south.
I have established that I will need four blocks wide across the top and the bottom. How deep it goes depends on me. I chose 4 blocks wide and 3 blocks deep on the top, and 4 blocks wide and 2 blocks deep on the bottom.
When placing the blocks on the side of the panel, every other block remains whole, while everything other is a half of a block. I don’t remove the half until I’m sure the block will remain there, I just fold it in half.
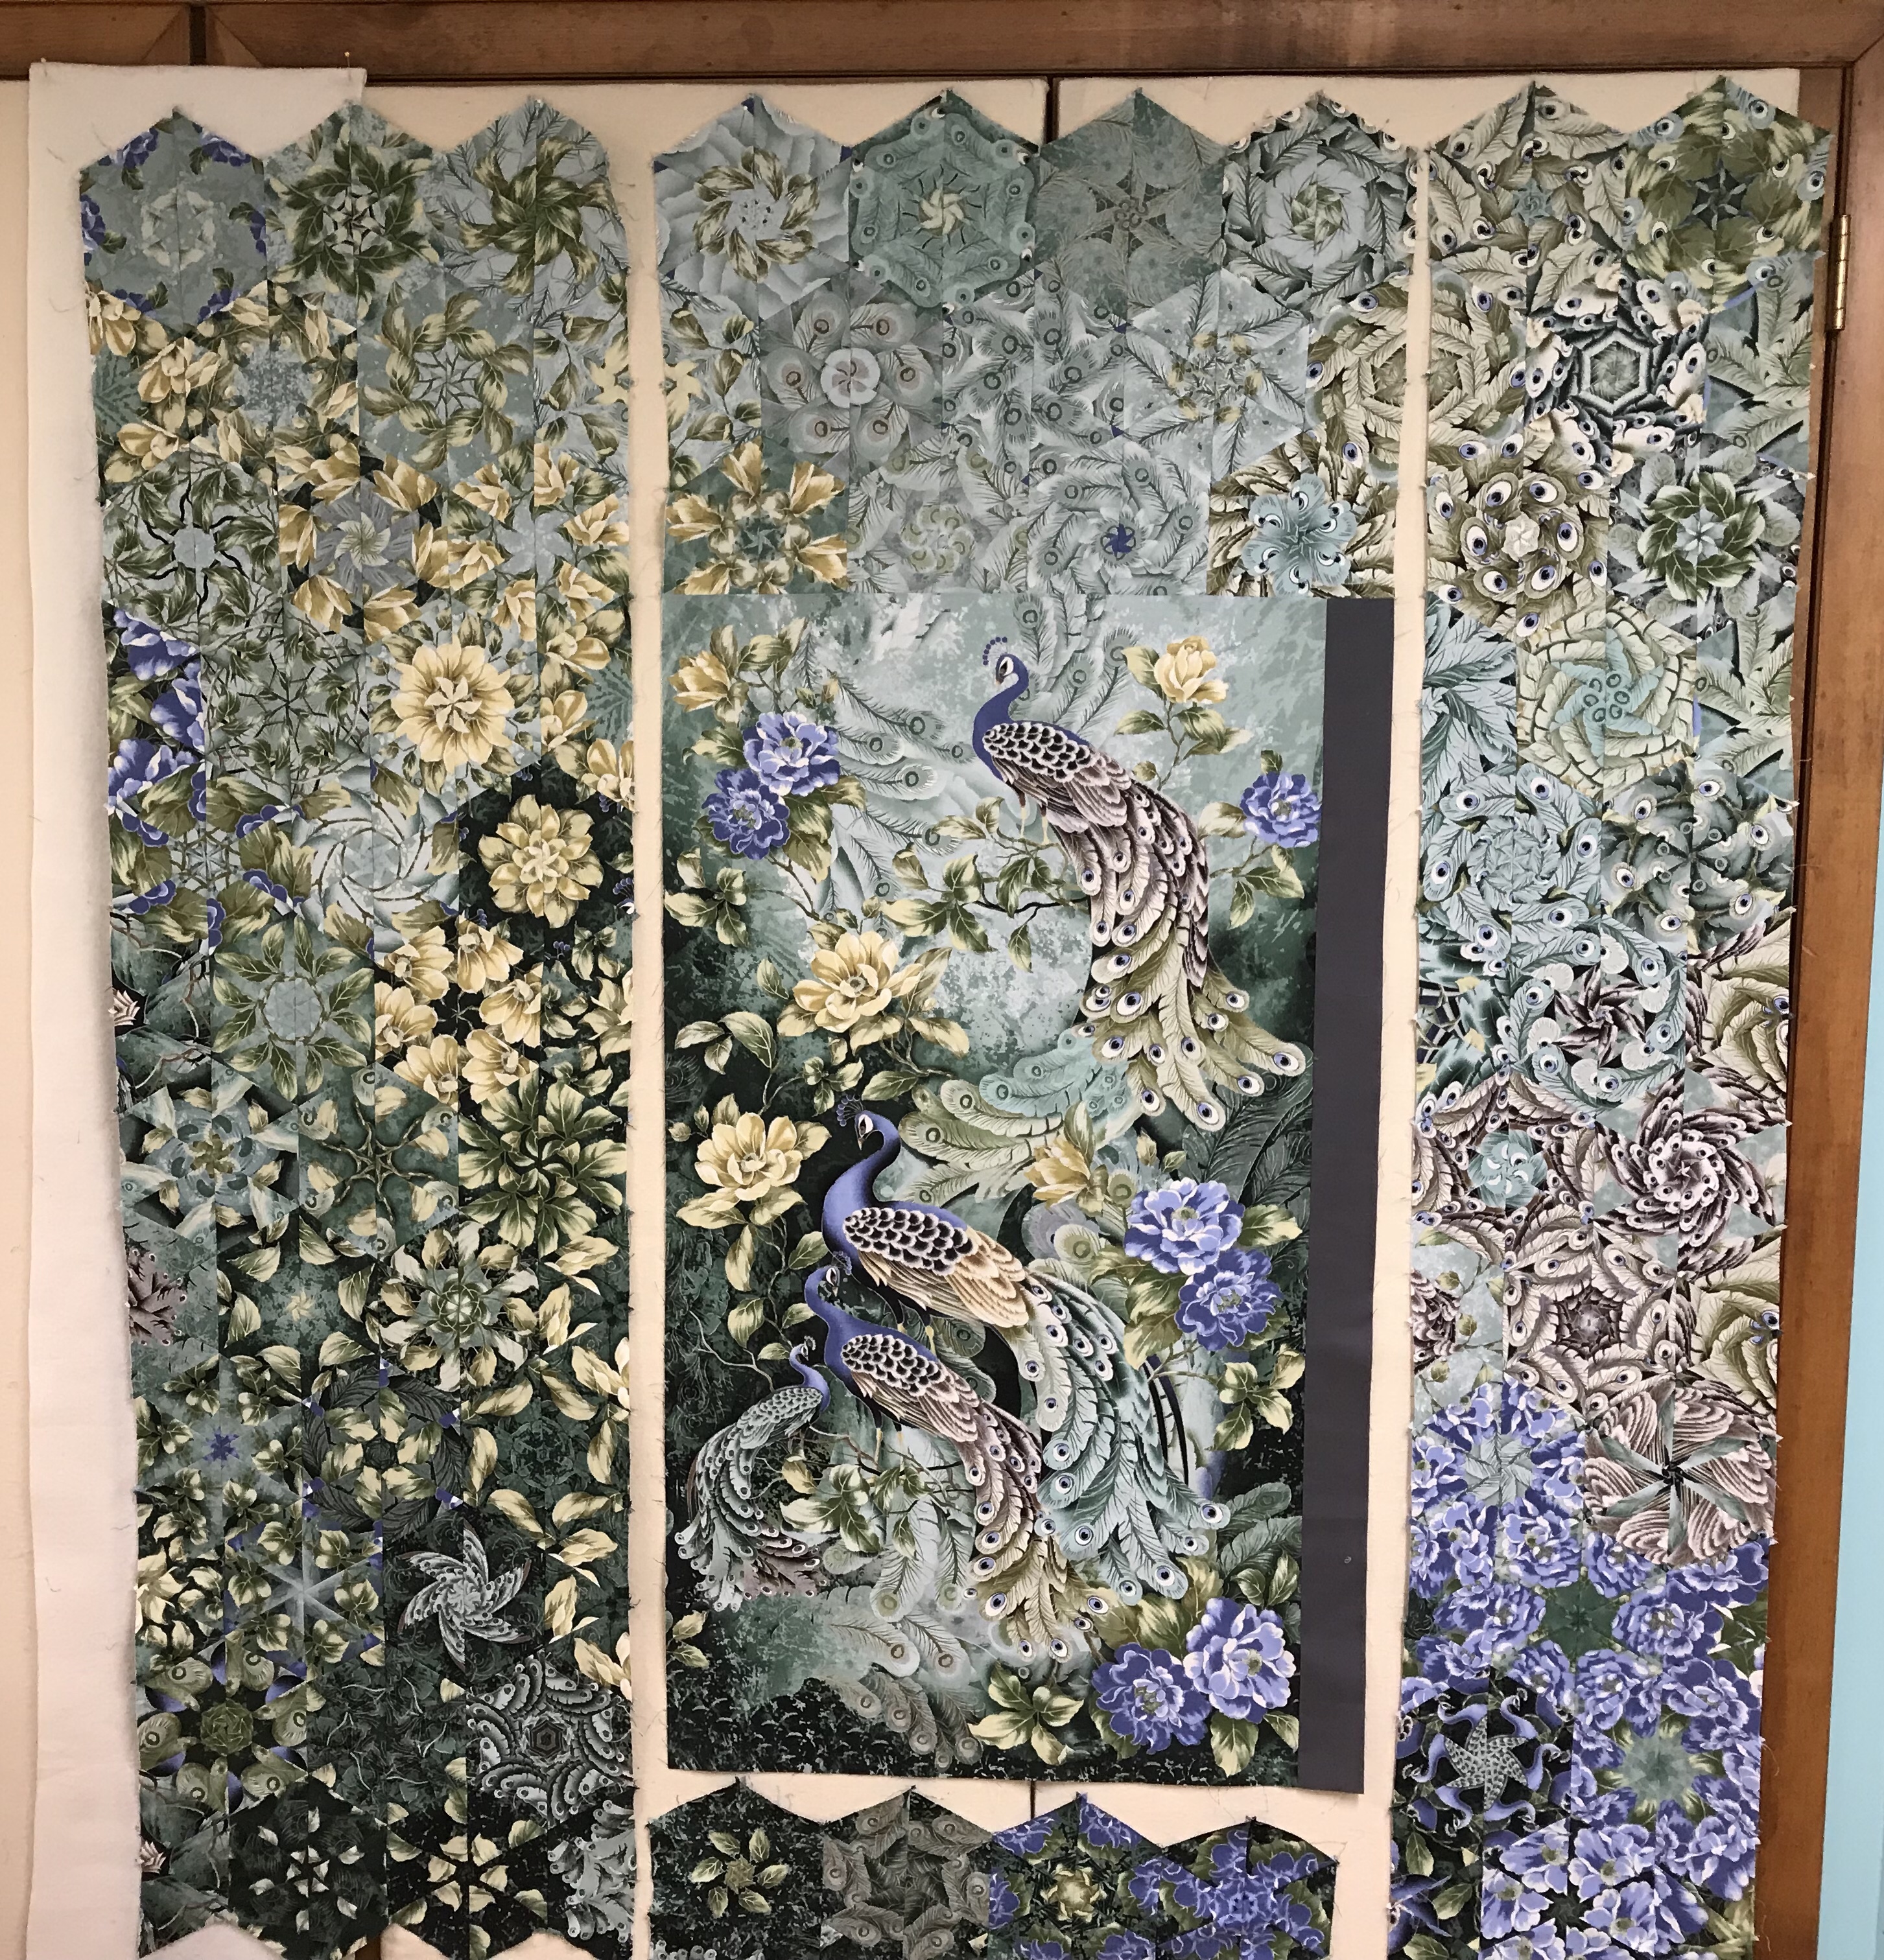
When I am satisfied with the design I number the rows as always and stitch the rows together in four groups: the top, bottom, right side & left side. I think of this as a giant block that has a rectangle in the center and will be constructed using a partial seam.
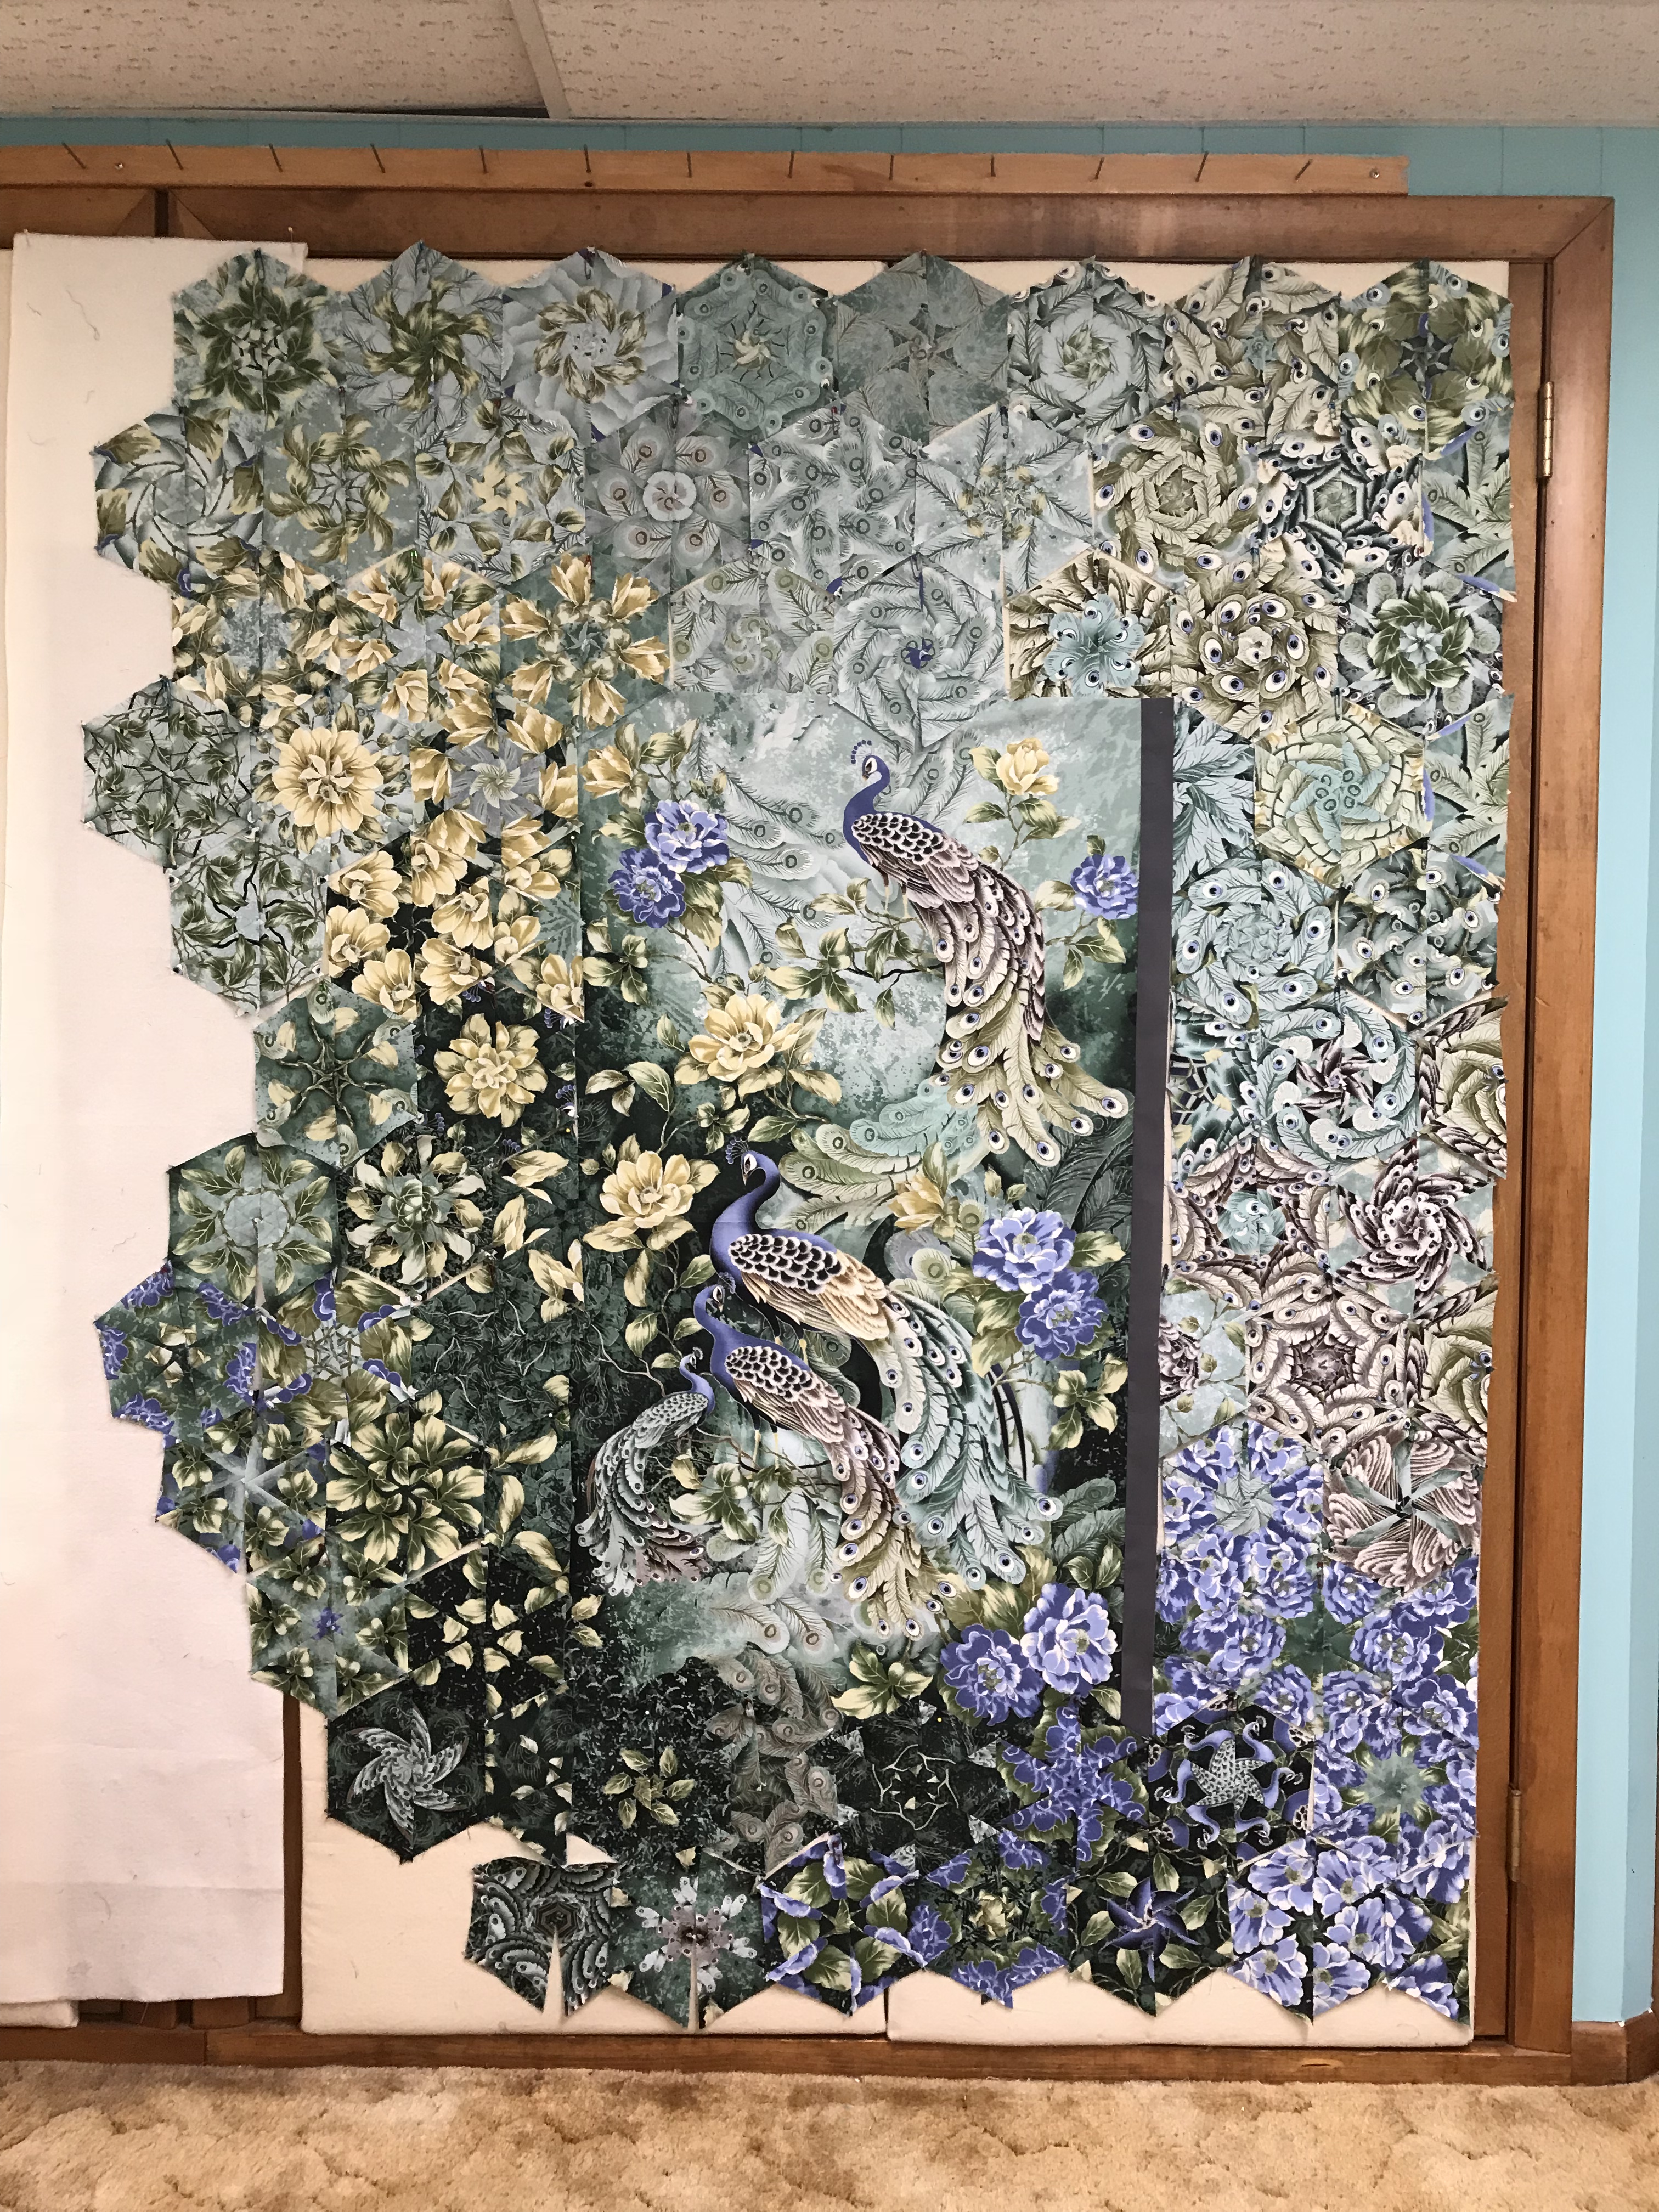
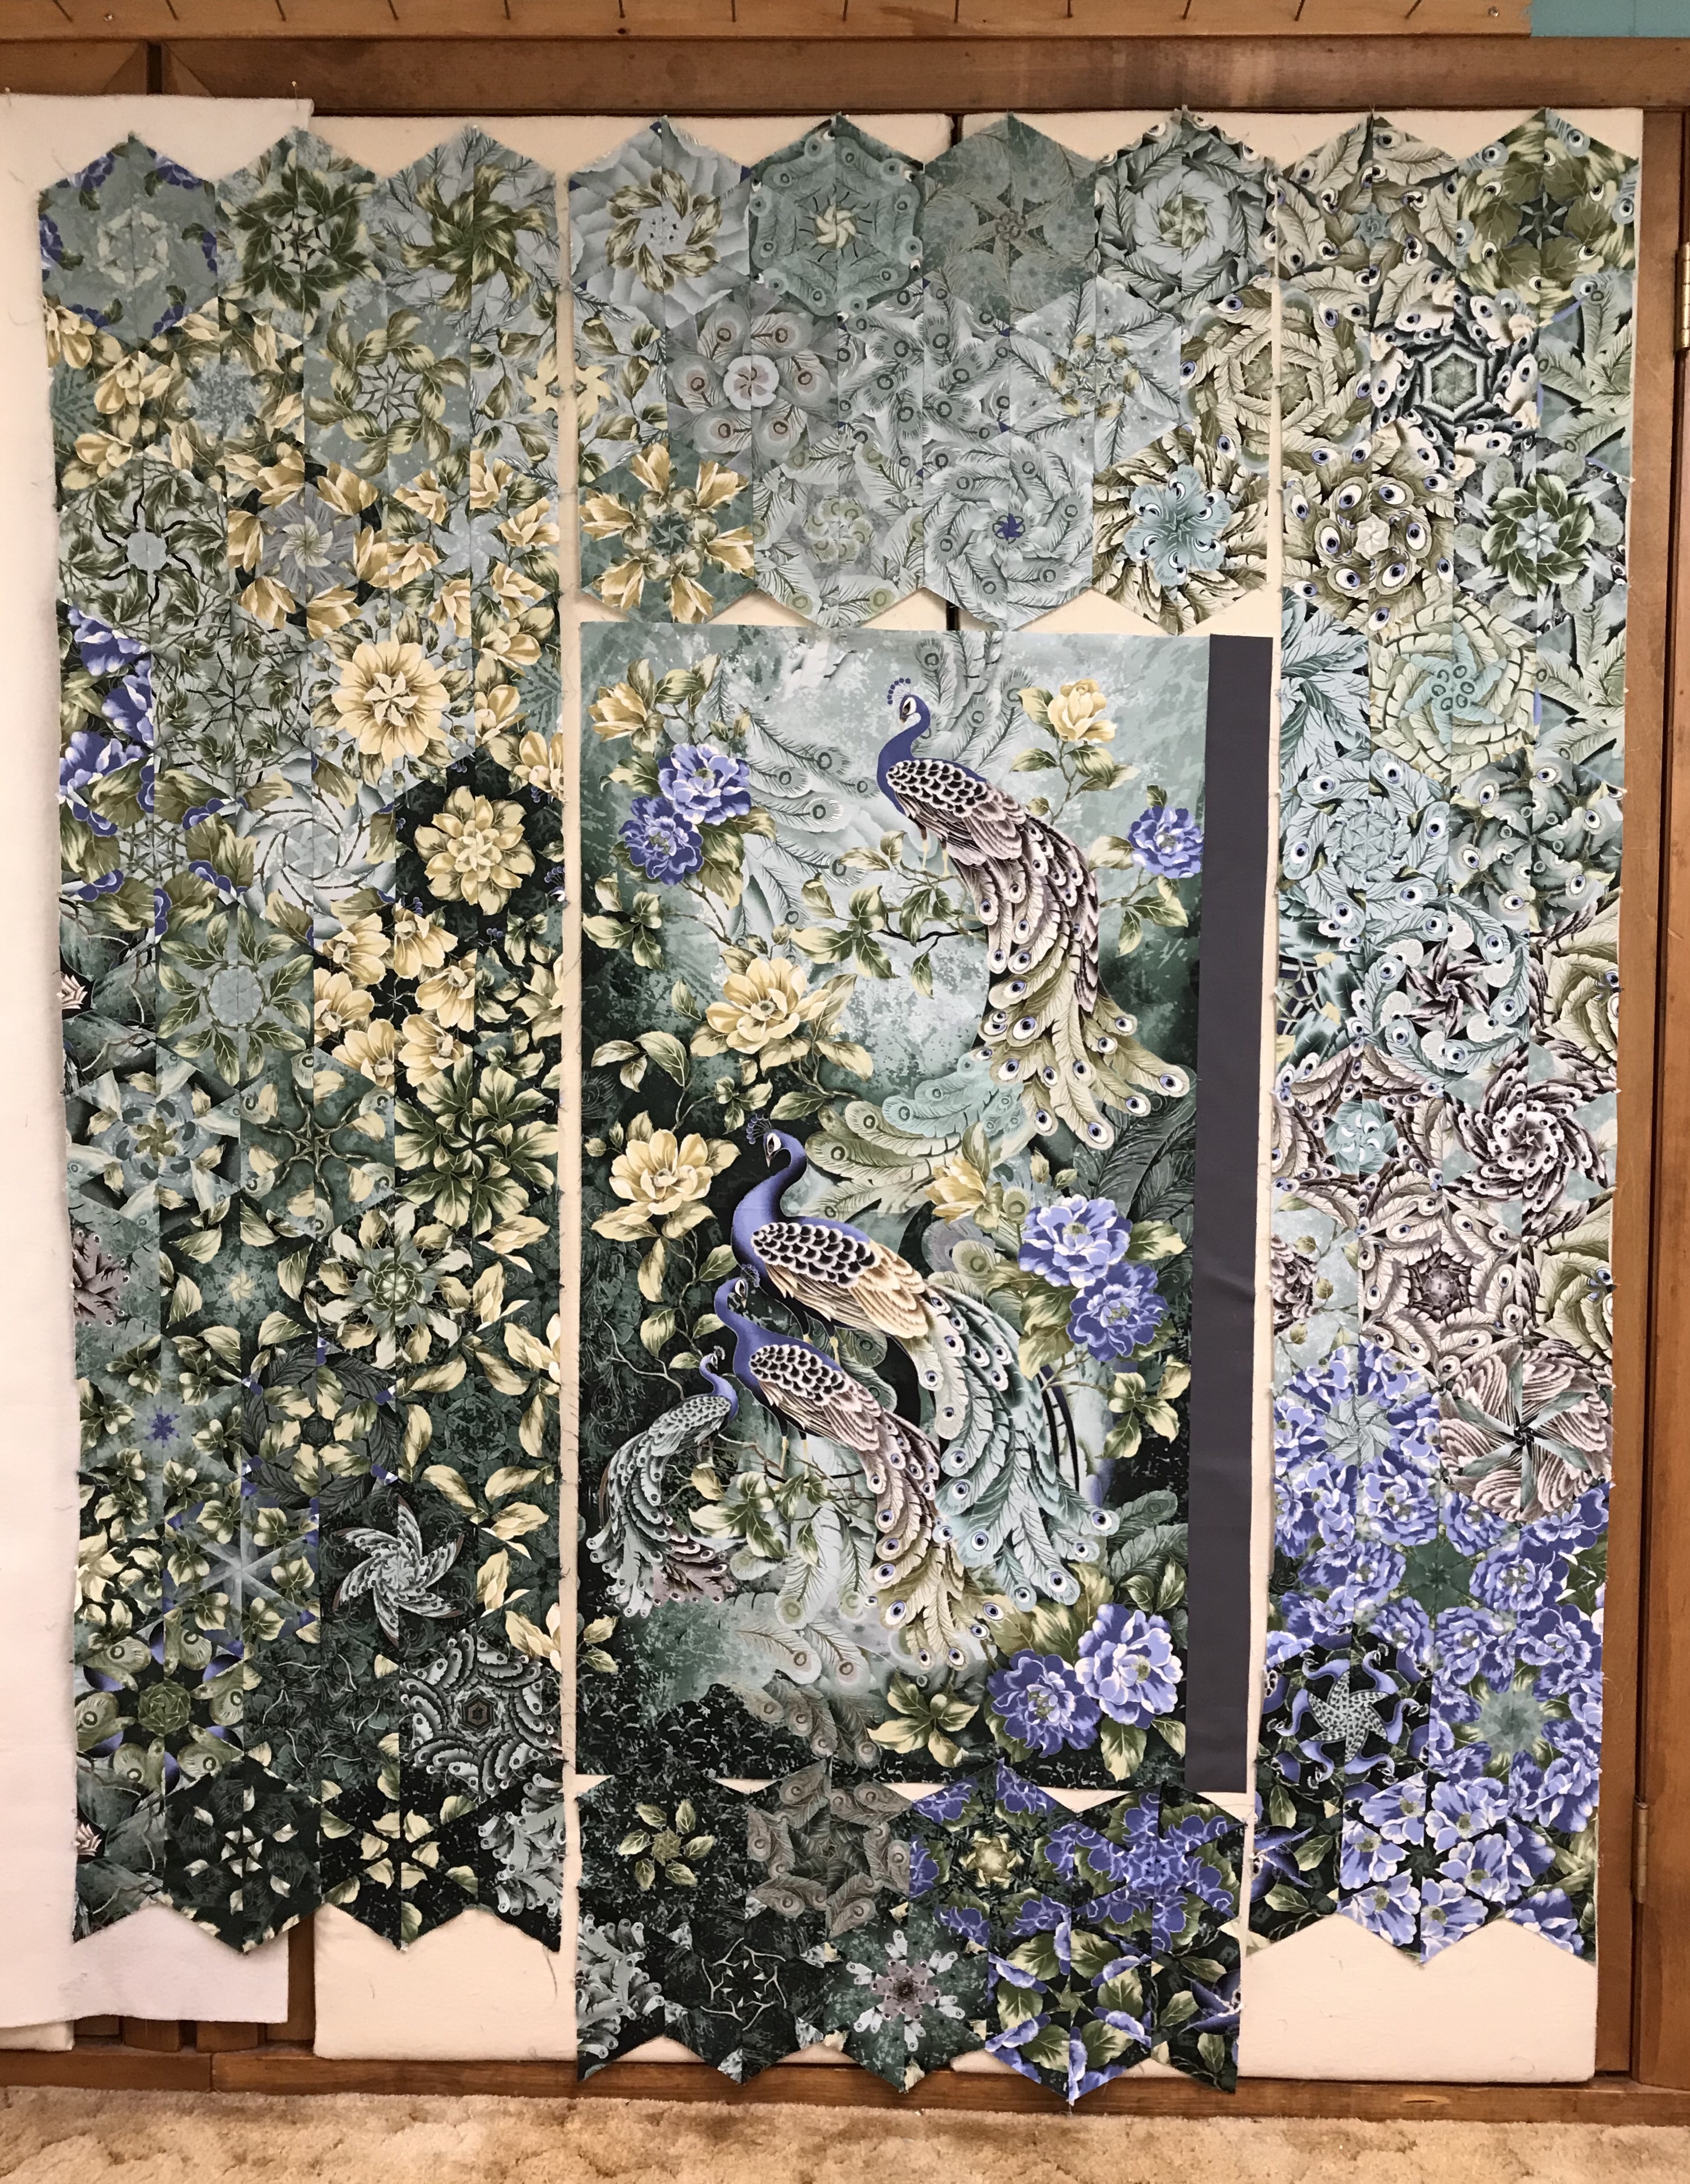
Decide whether to attach the top or bottom first. I am going to attach the top rows first by trimming the points that will be stitched to the panel, leaving a 1/4″ seam allowance.
Once I have stitched the top rows to the panel I need to choose which side to attach next, matching up dog ears as you would when joining the rows and stitch three quarters of the way down (partial seam).
By using a partial seam, it allows you to match up the dog ears of the bottom of the side rows. I will them mark where the panel hits the bottom rows, add a 1/4″ seam allowance and stitch to the bottom and then finish the partial seam.
It is now easy to stitch the remaining side rows to the panel matching the dog ears at the top and bottom. I have not finished this top yet as I’m teaching several classes soon and wanted to have a good visual example to show the class.
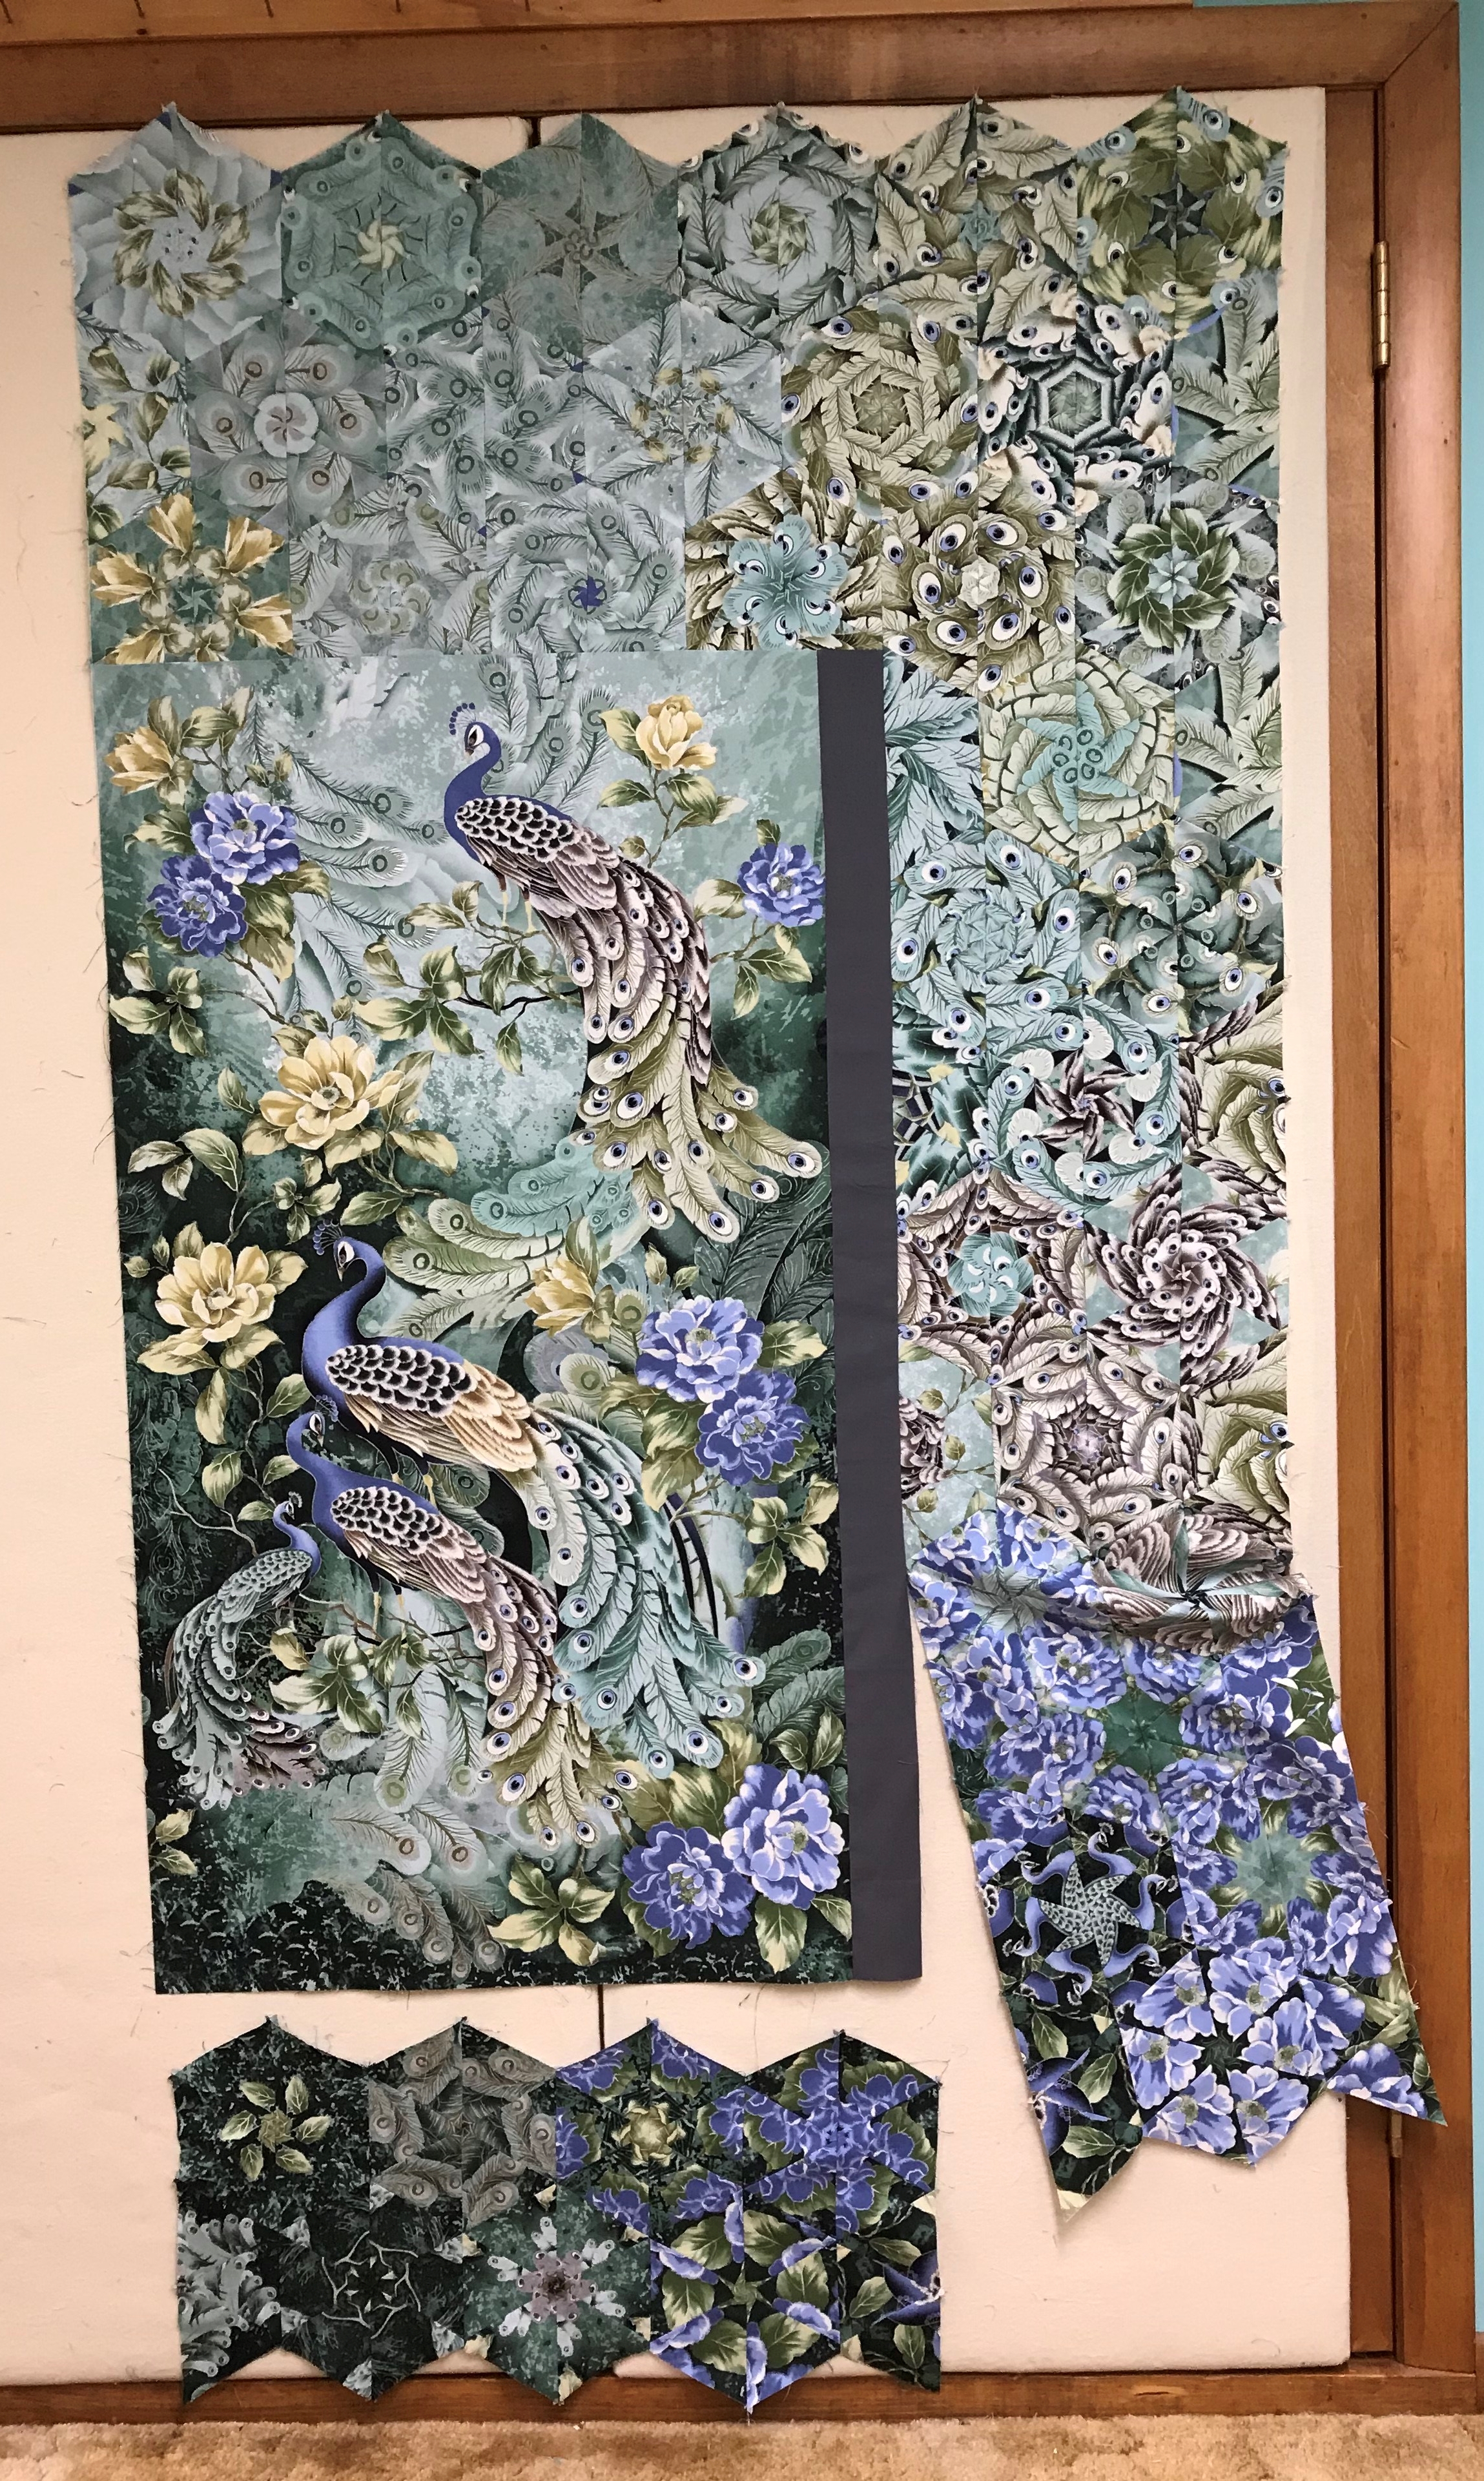
Now to hide my added fabric.
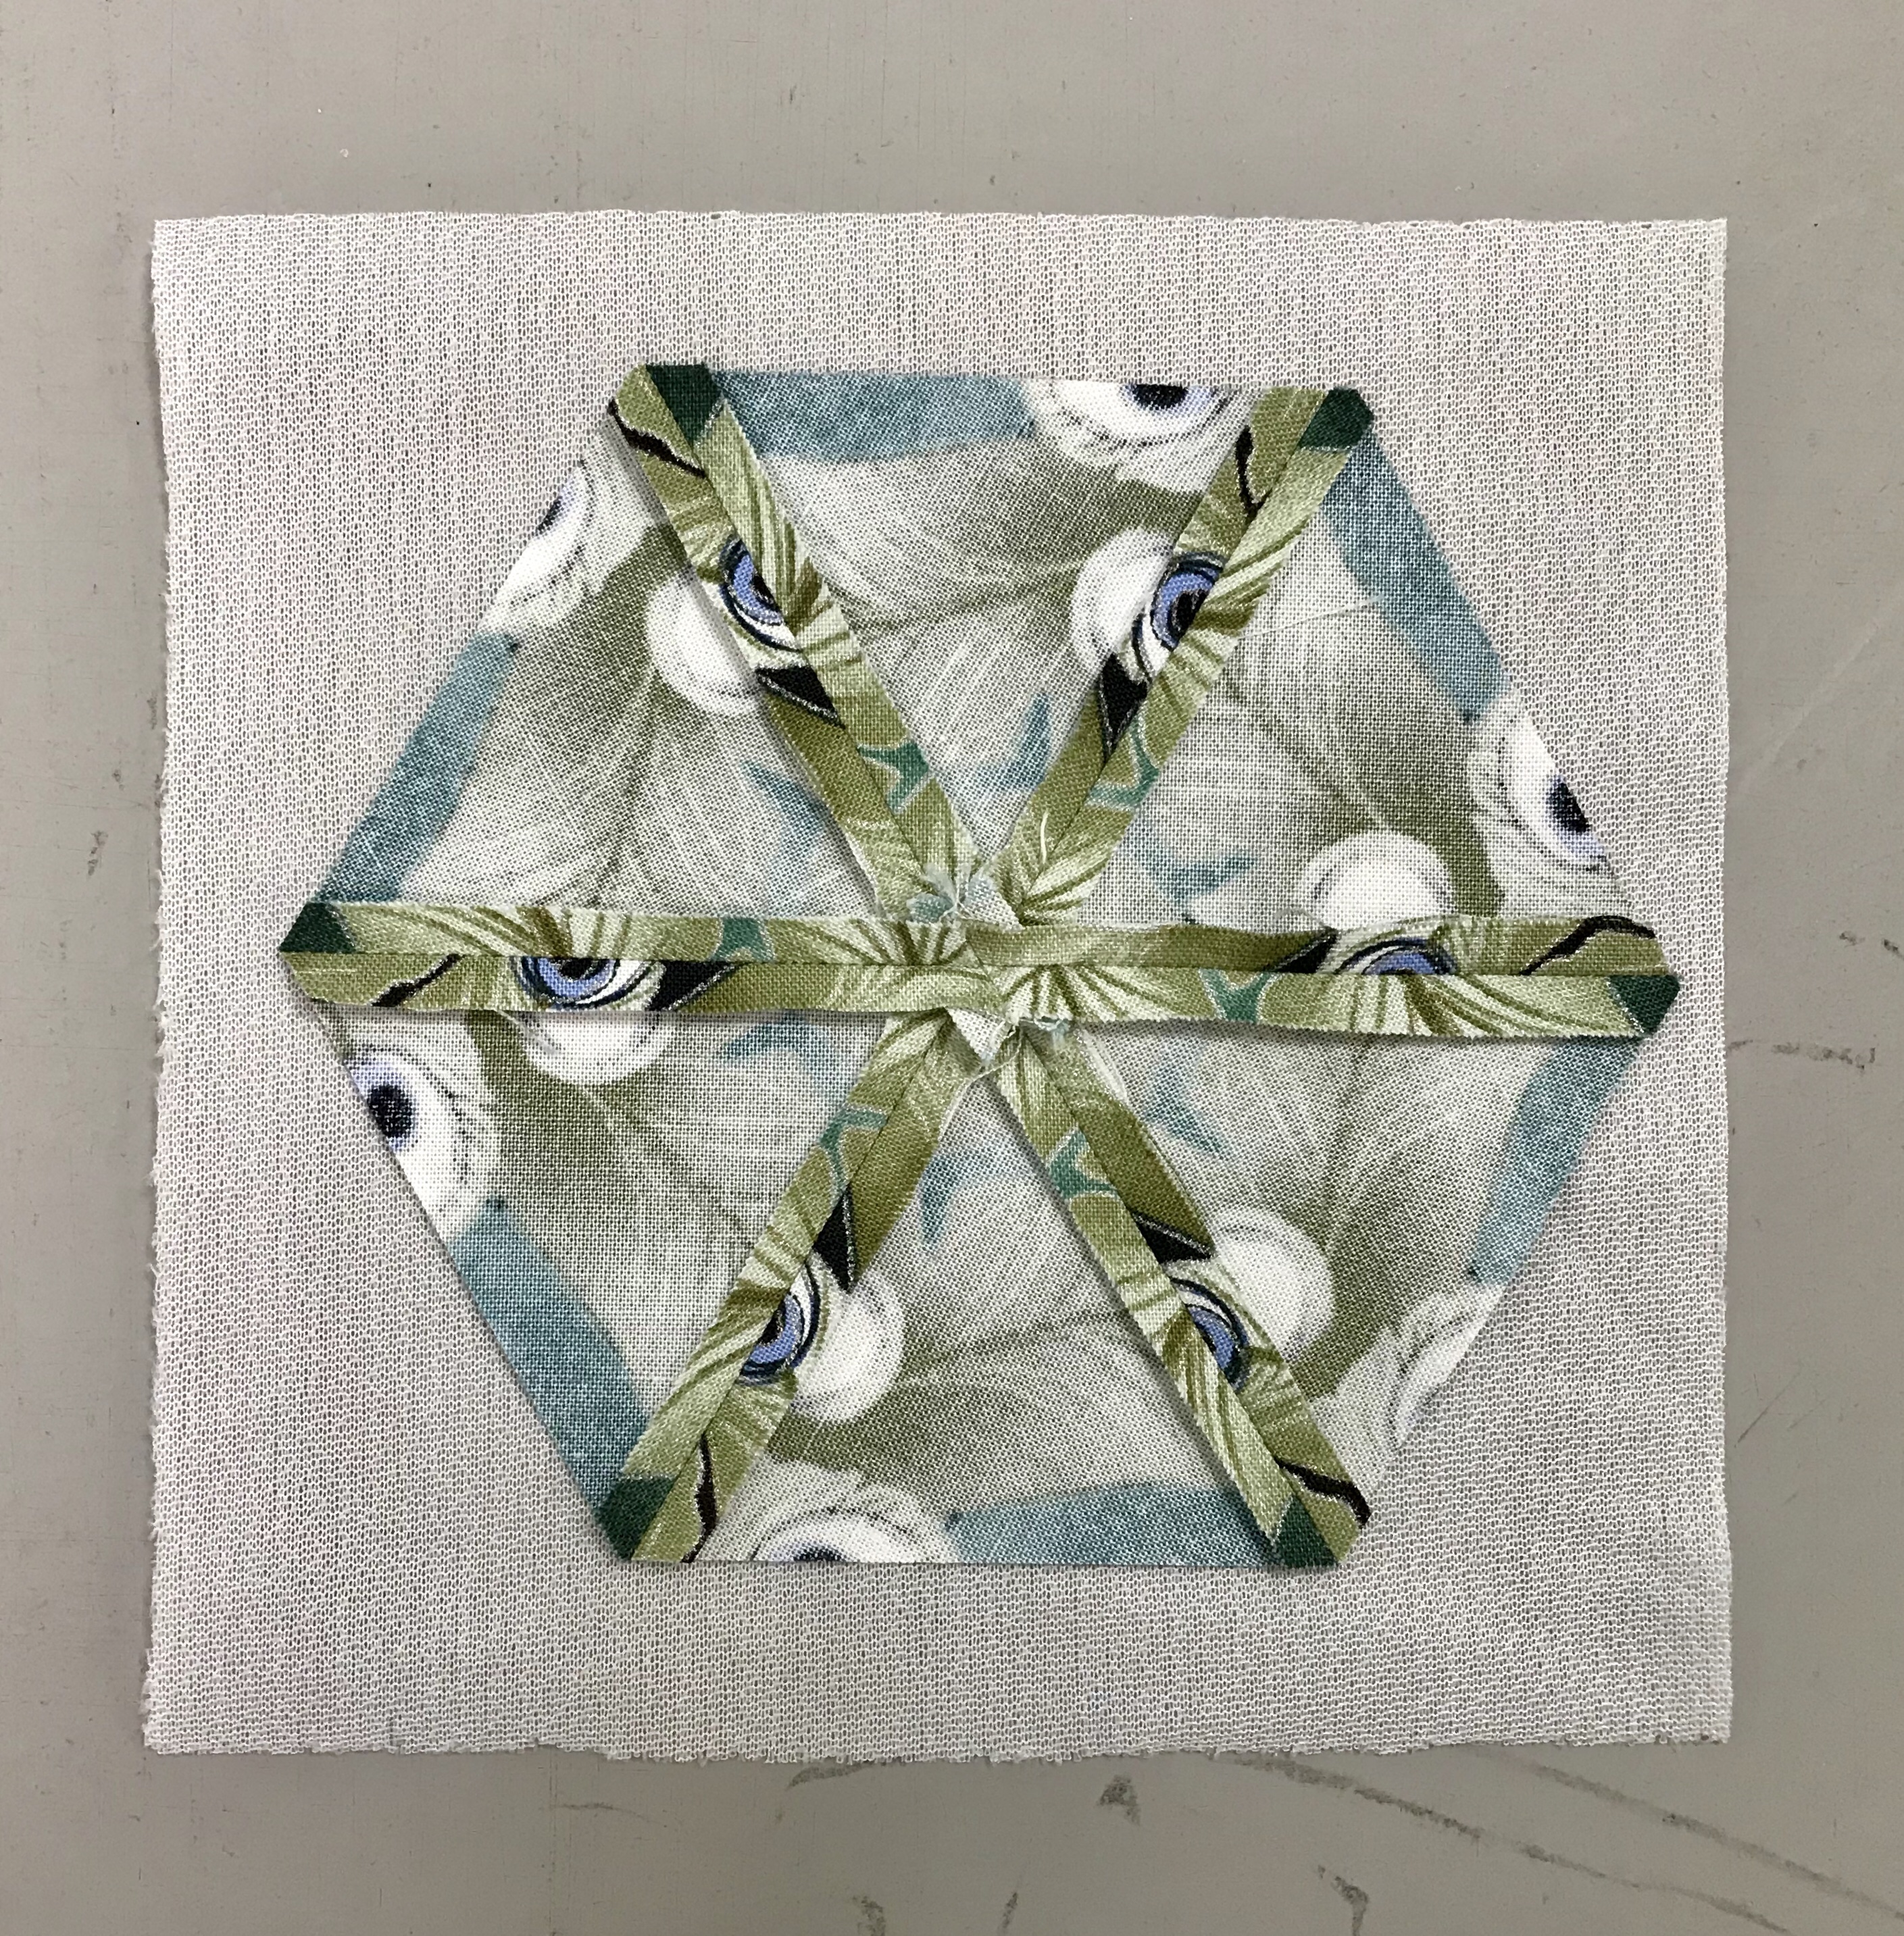
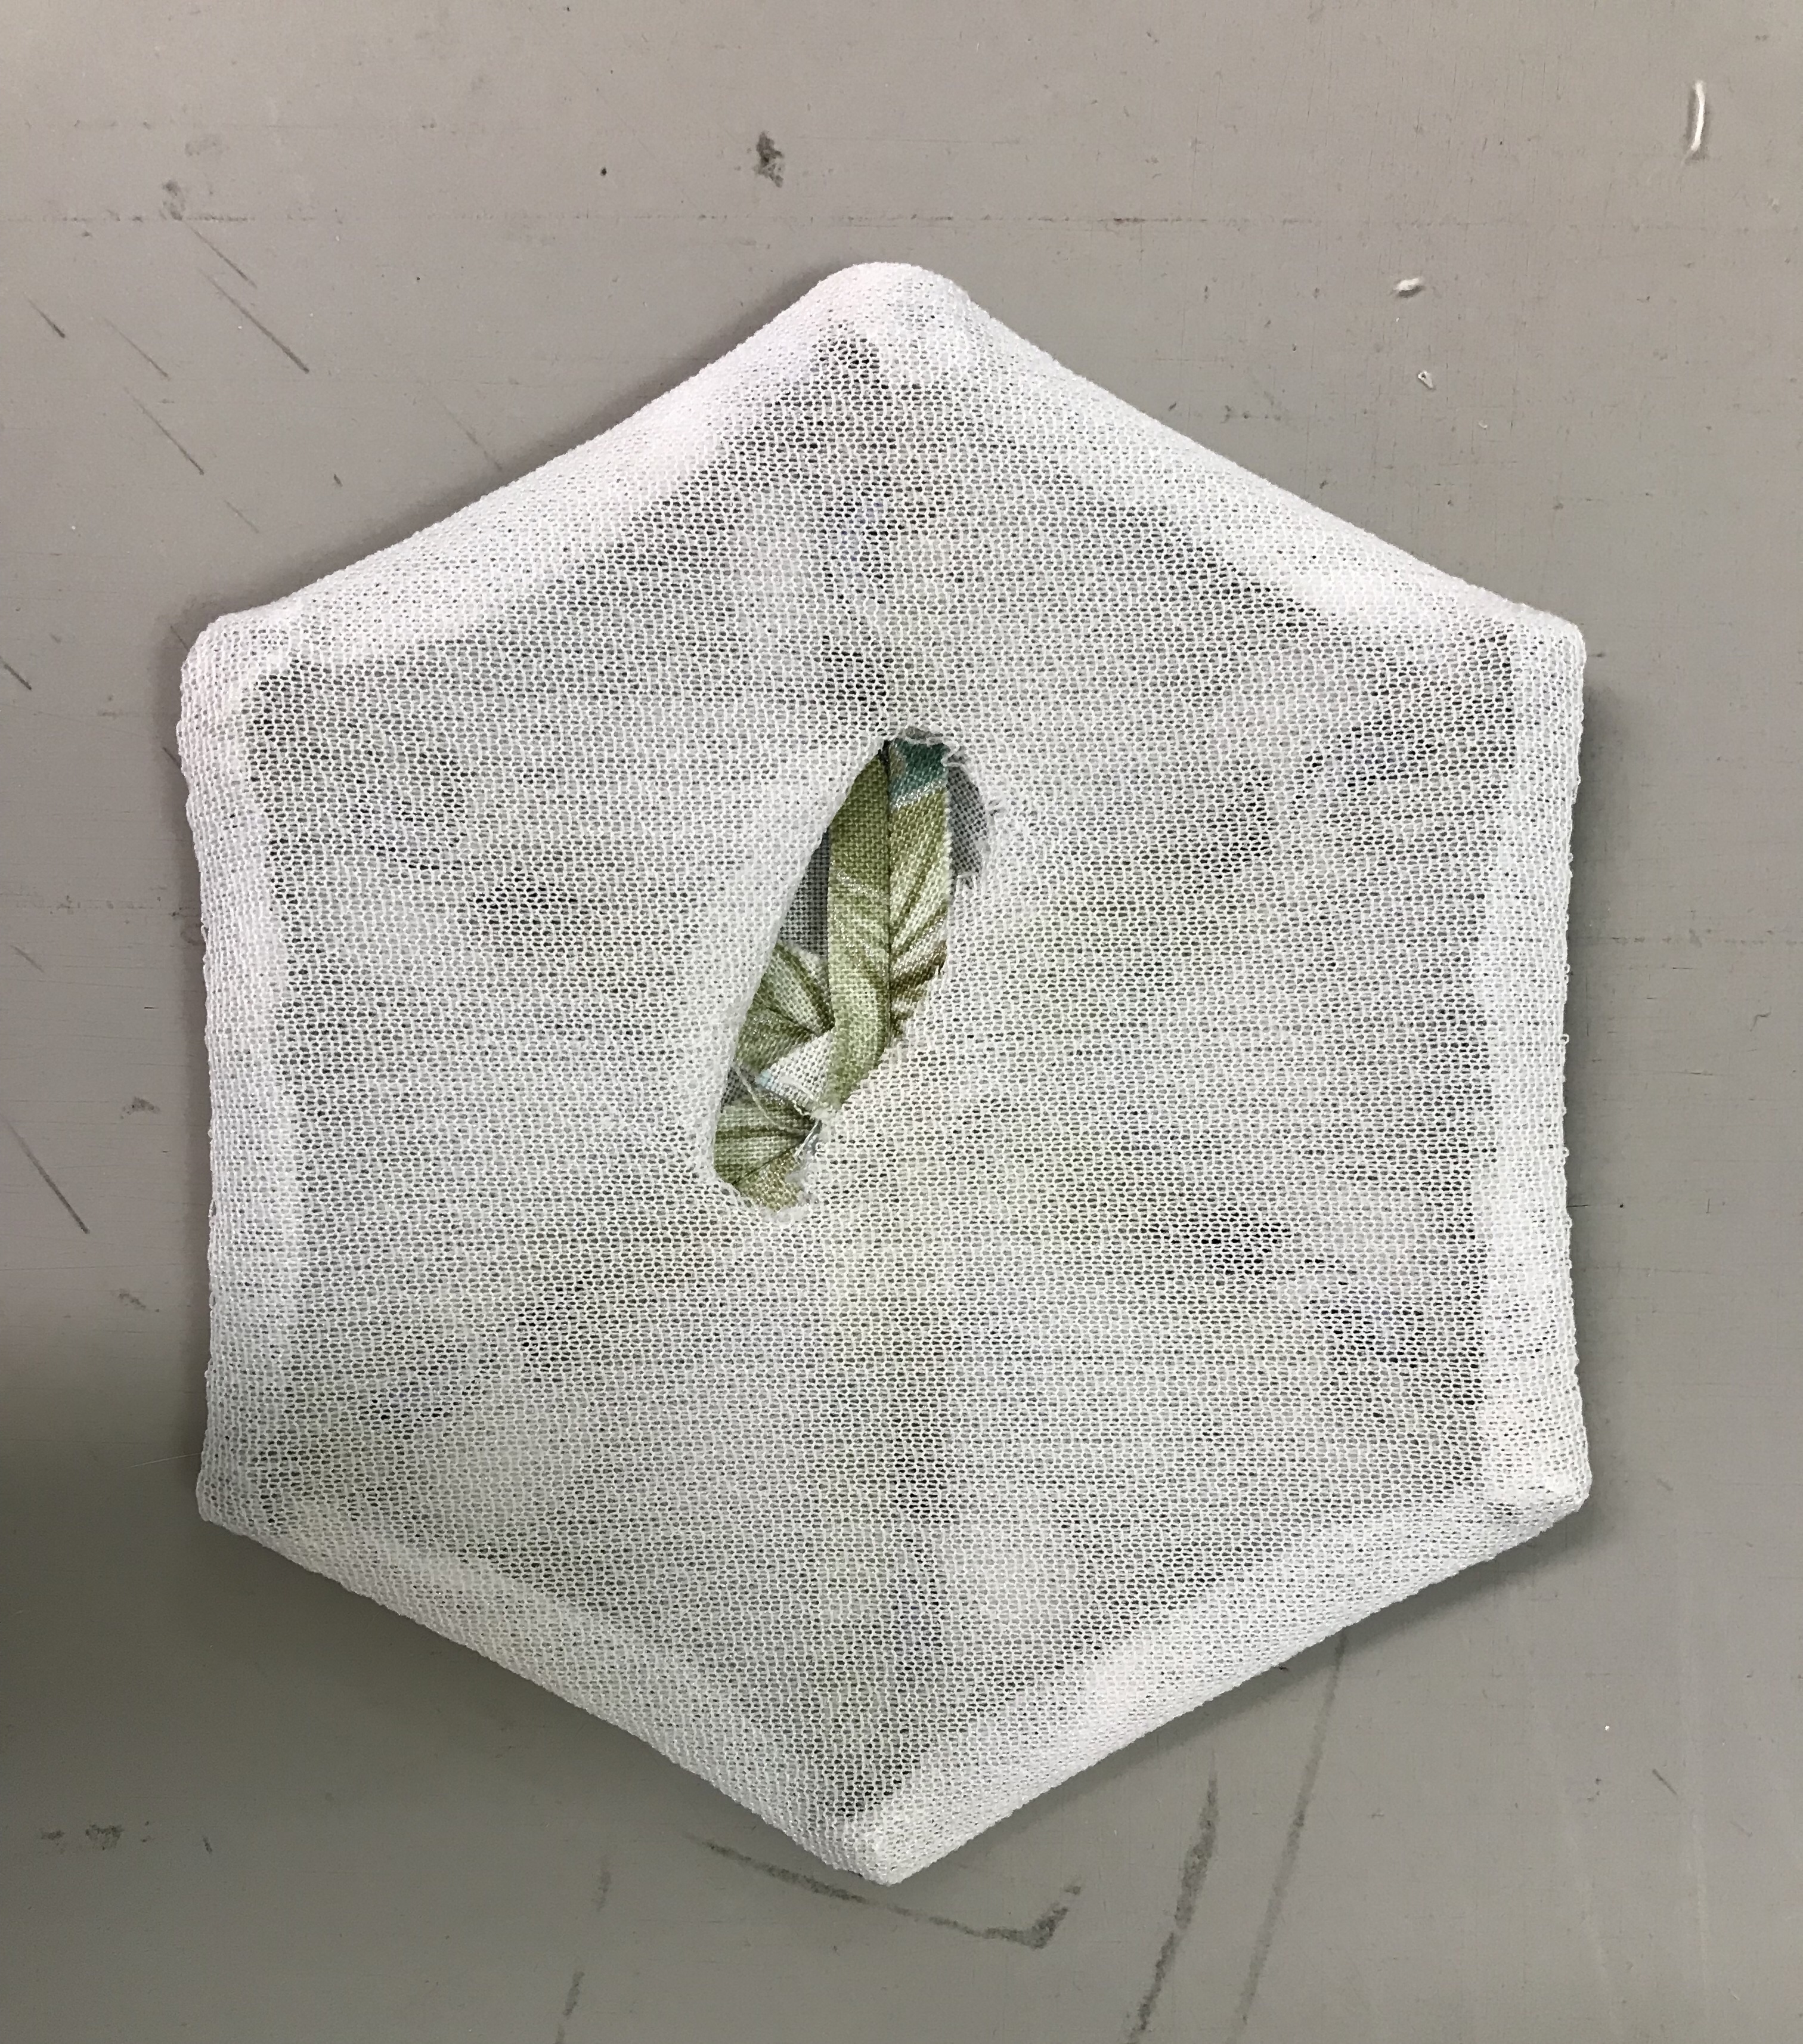
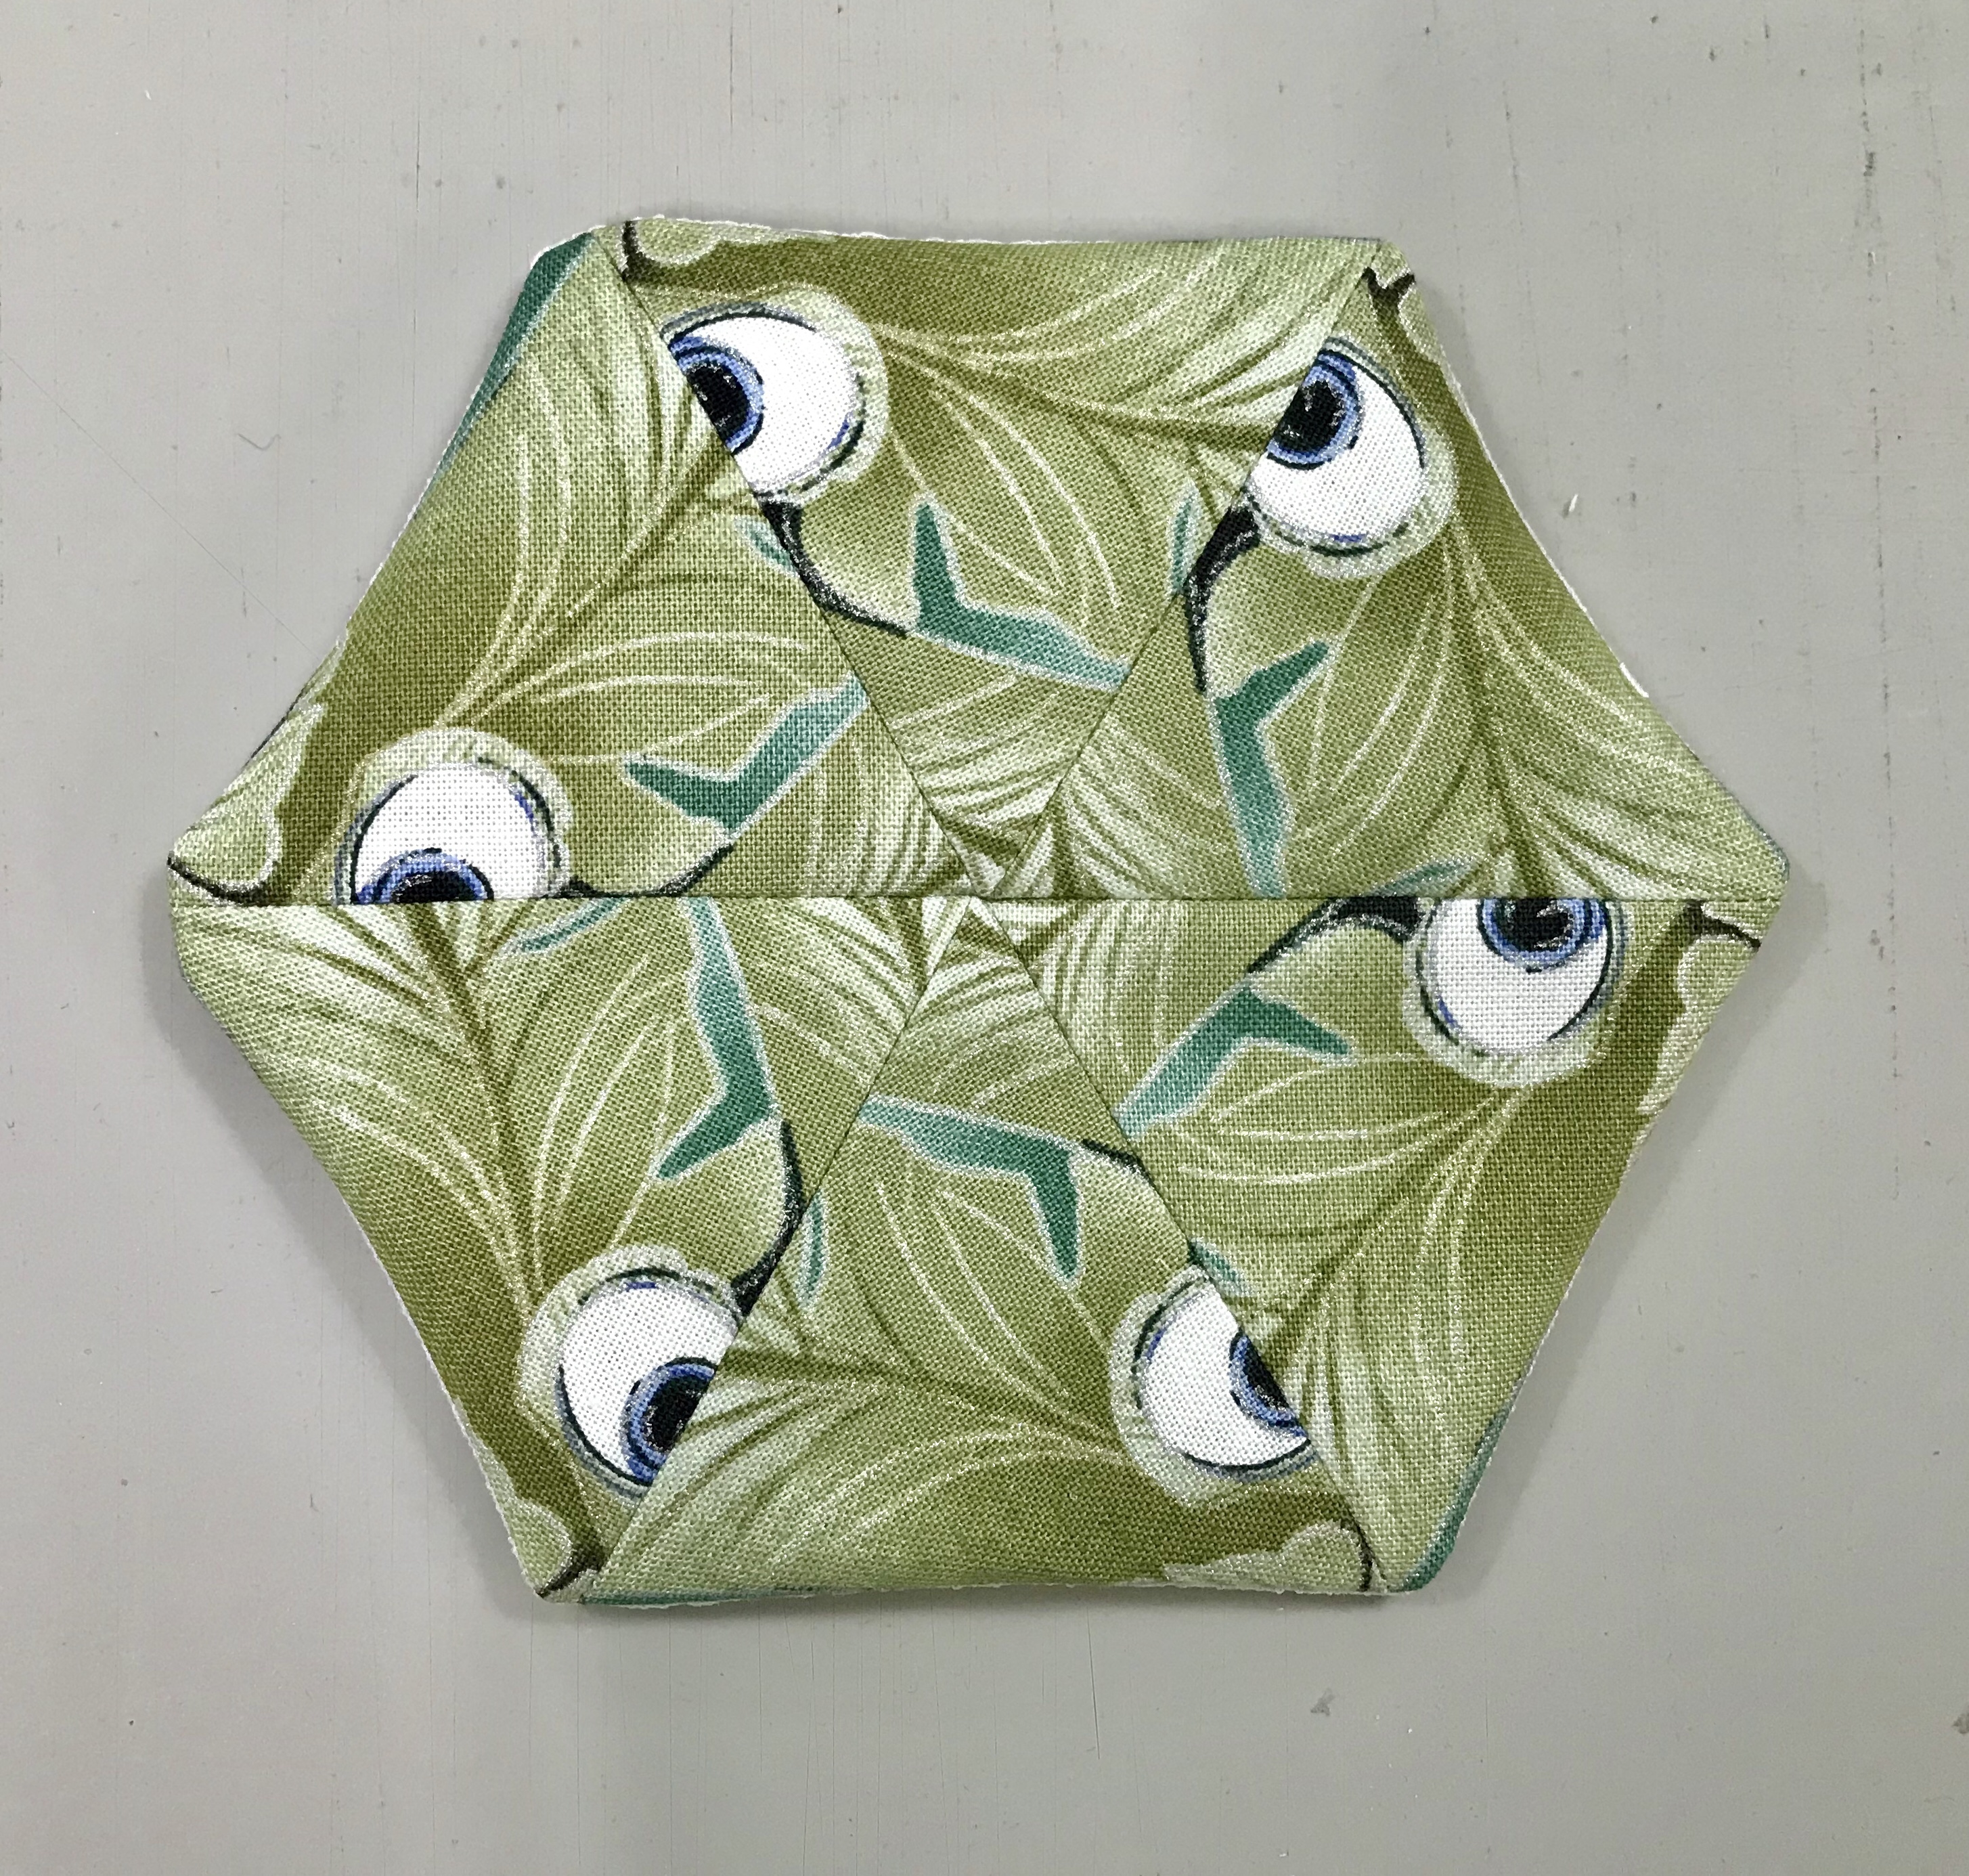
I made sure I had several left over blocks. I stitched the two halves together, pressed the seam open and using my ruler, trimmed 1″ off every side. This reduces my hexagon to about 4″ wide.
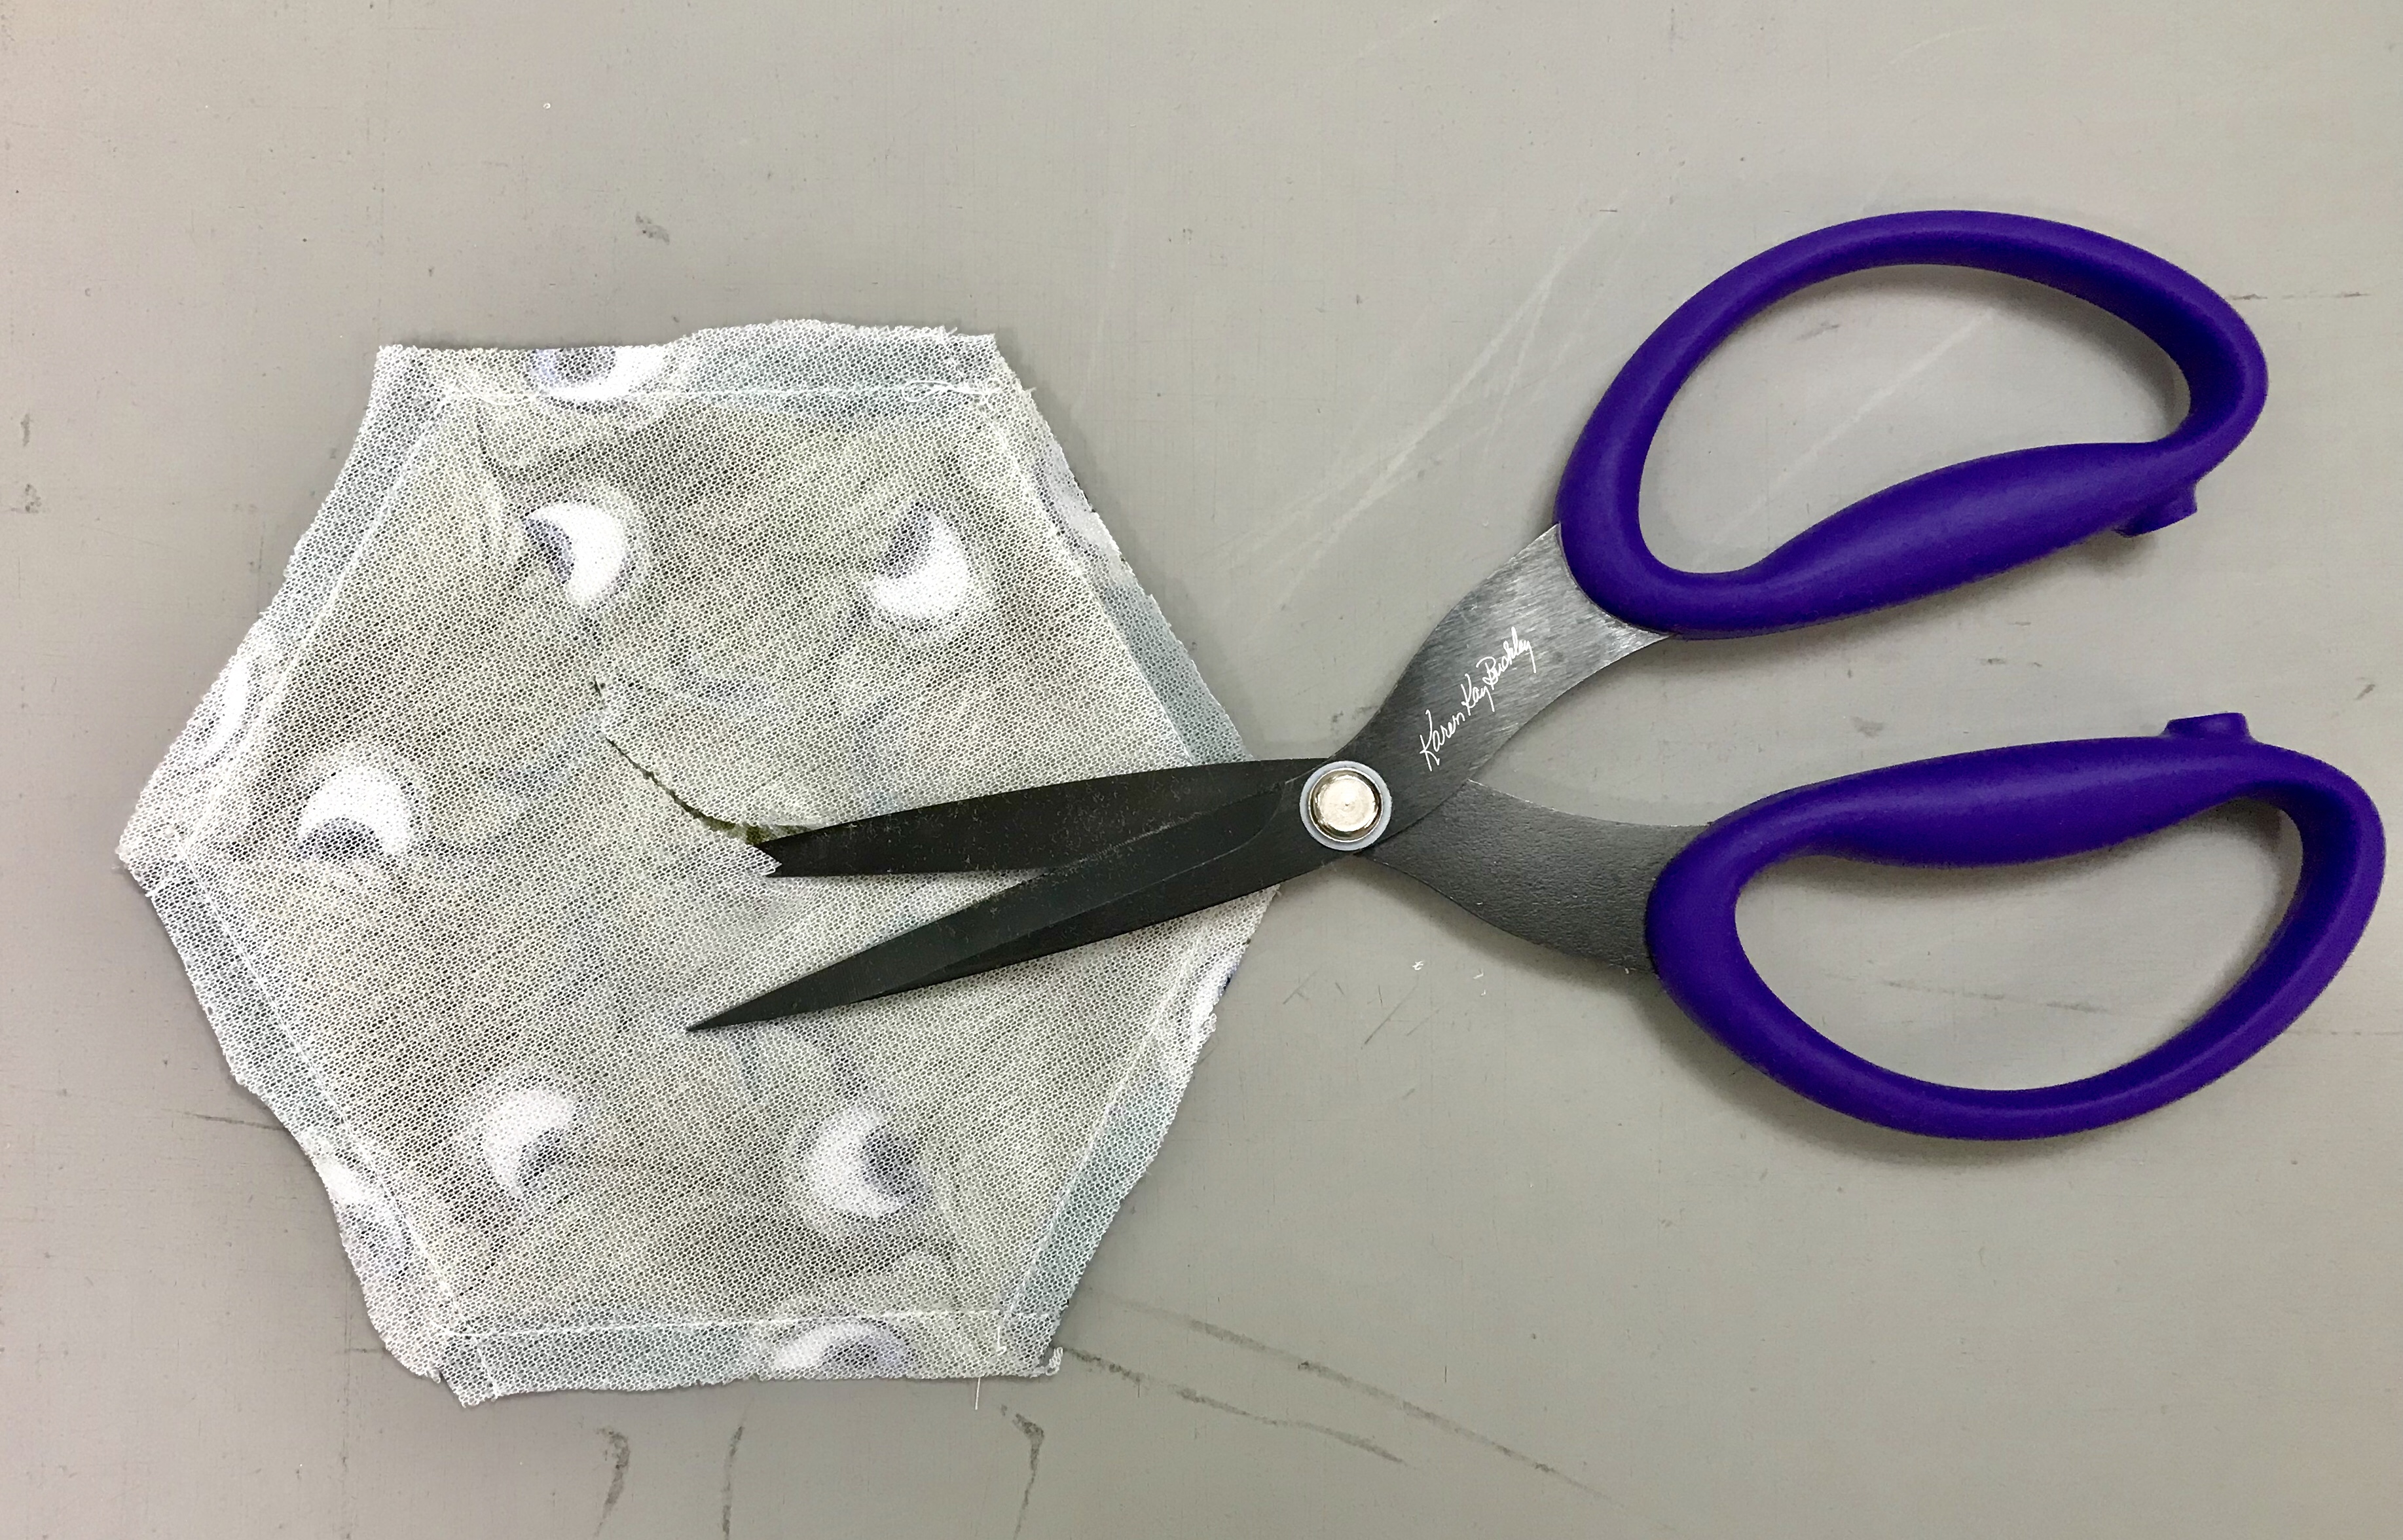
I use a Fusible Knit Interfacing, cut a square slightly larger than the hexagon. Place the bumpy side of the interfacing with the right side of the hexagon. Stitch around the hexagon using a 1/4″ seam allowance. Trim off the excess interfacing and snip a hole about 1″ wide.
Turn the hexagon right side out. Now the fusible ‘bumpy side is on the outside. Finger press the edges to flatten it out. This is a great way to get a perfect finished edge. Once I have decided where to place my smaller hexagons, I can use my iron and press them in place and finish them by stitching them down.
See how well the small hexagons hide my added fabric? I will post this OBW once I finished it.
I was closely supervised while making this OBW by my quilting buddy Tucker!
The fabrics used in this post were given to me by Island Batik.
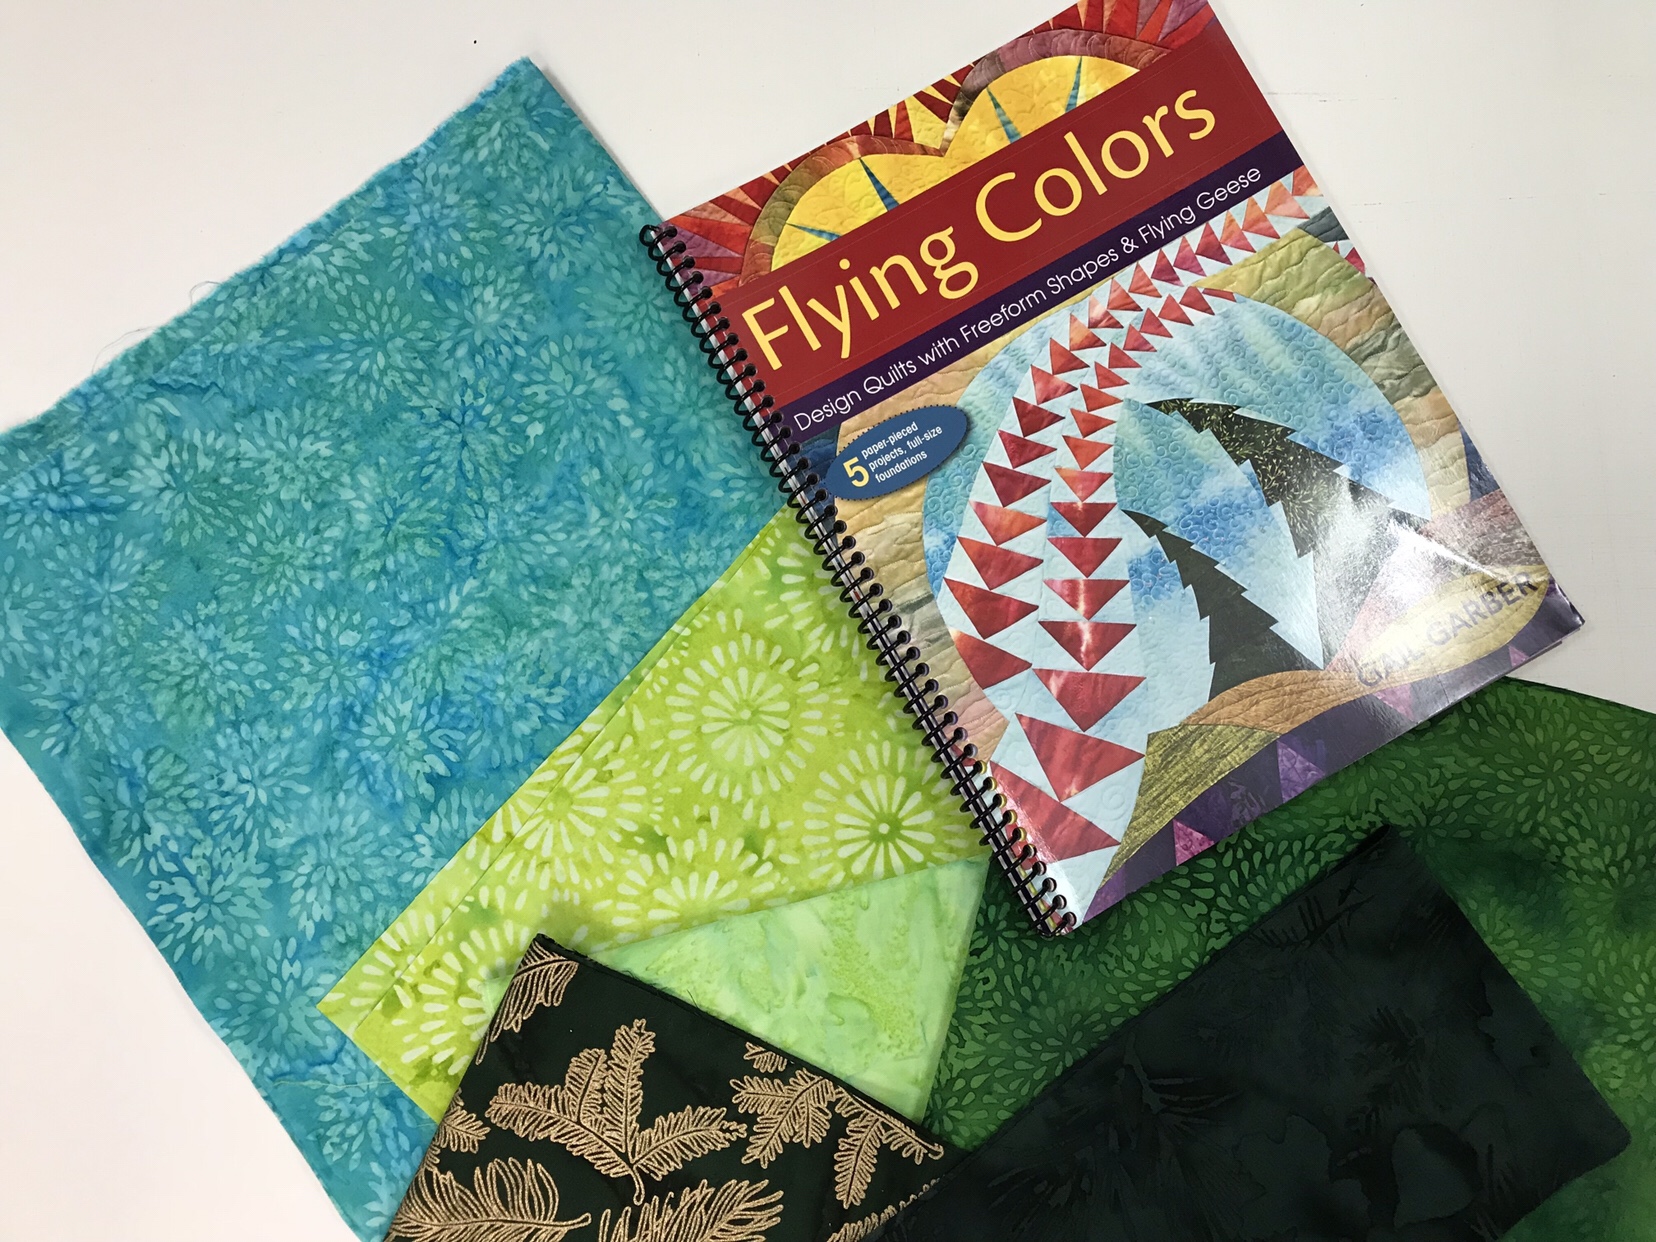
October’s Island Batik Ambassador’s Challenge was to use any paper piecing technique.
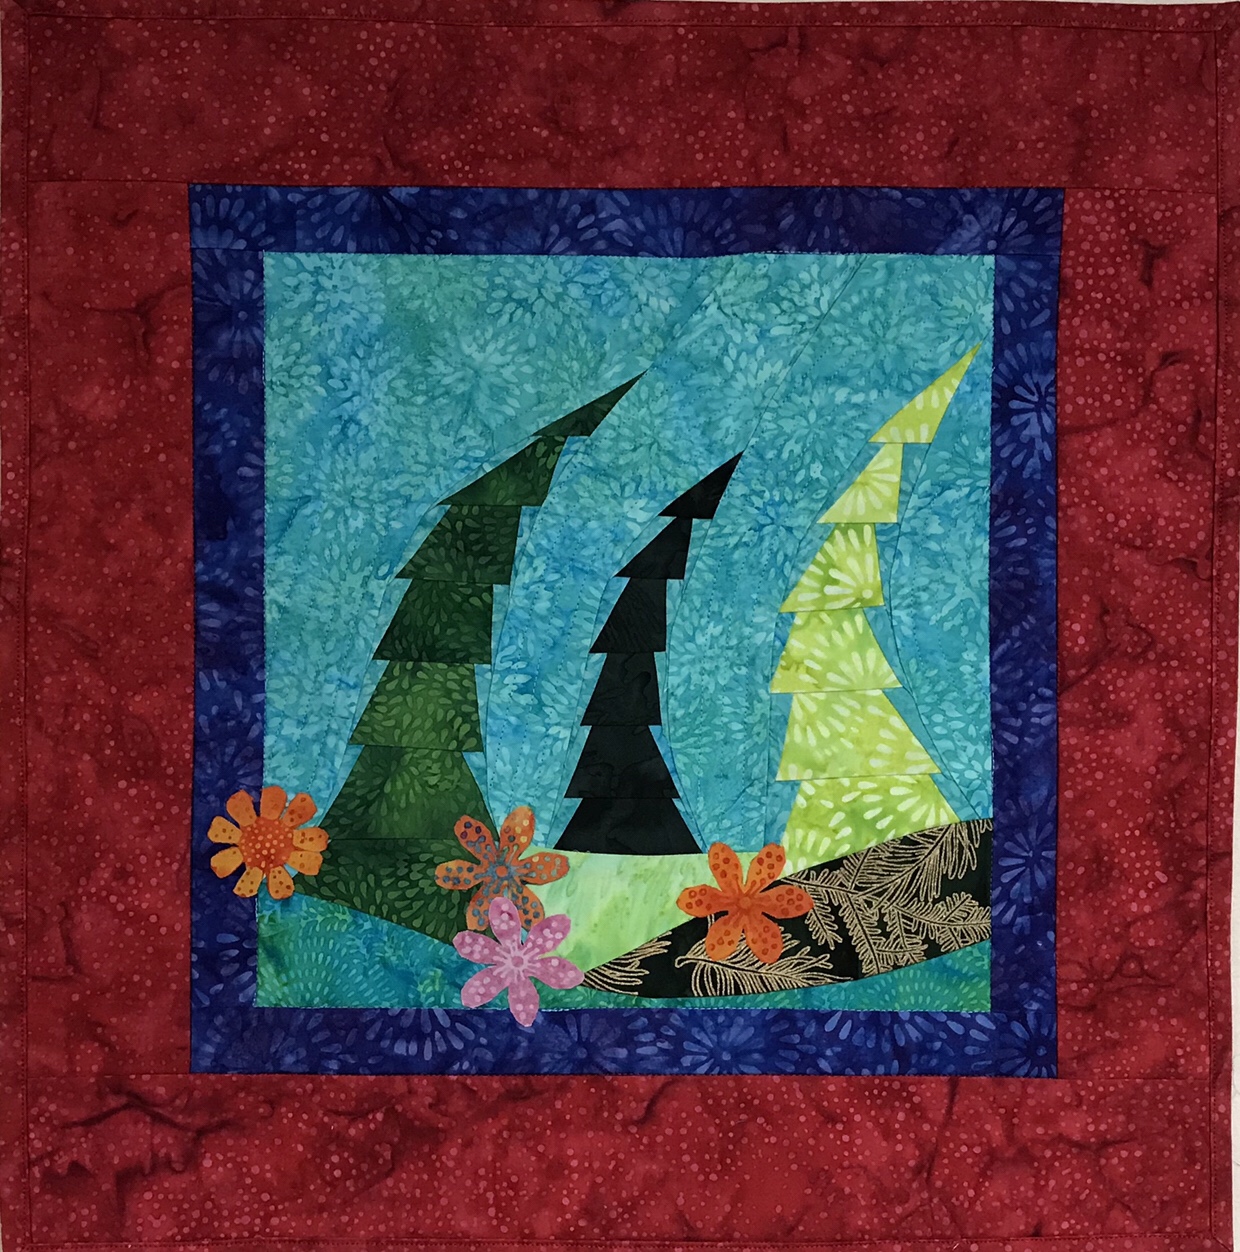
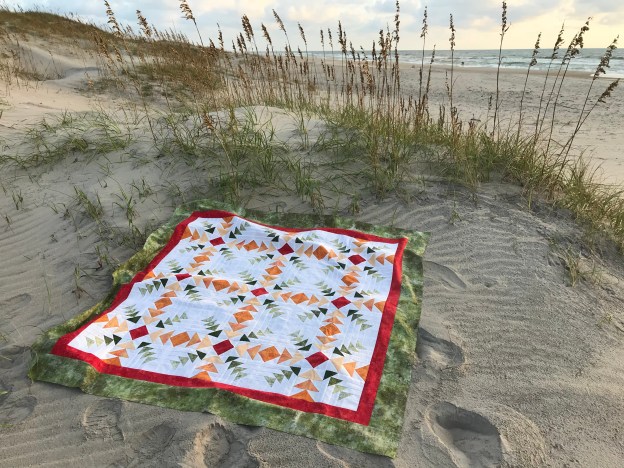
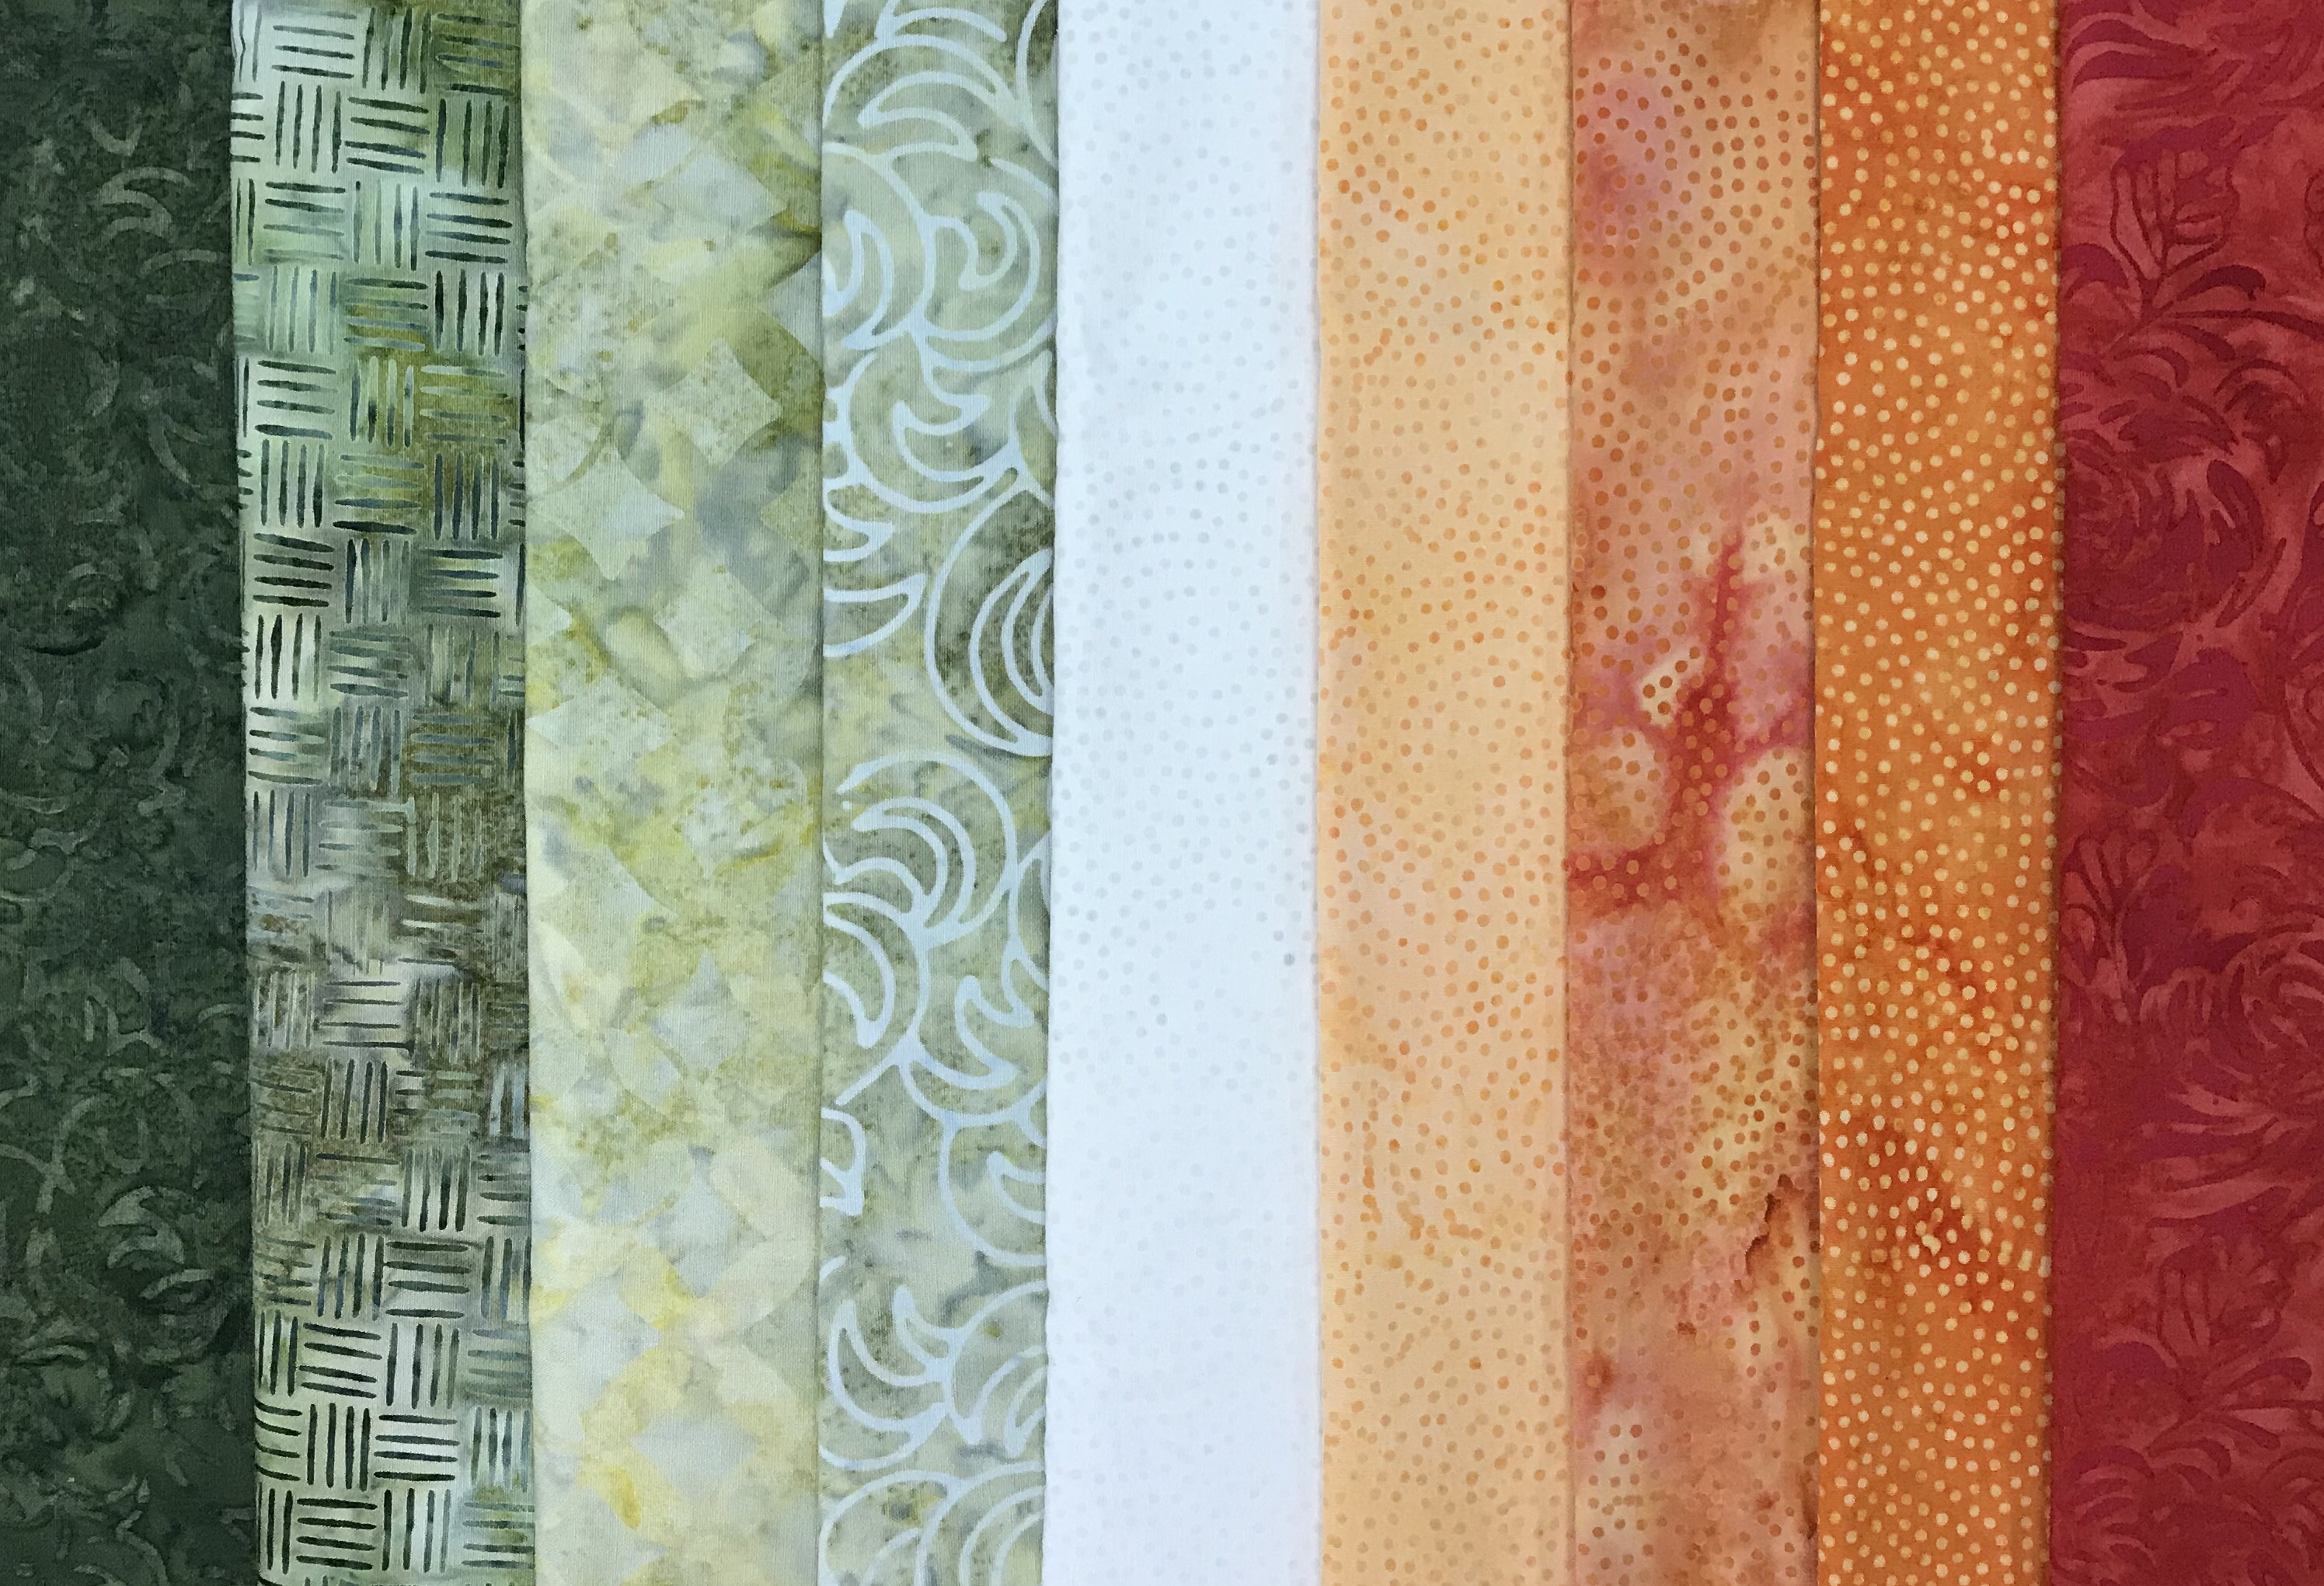
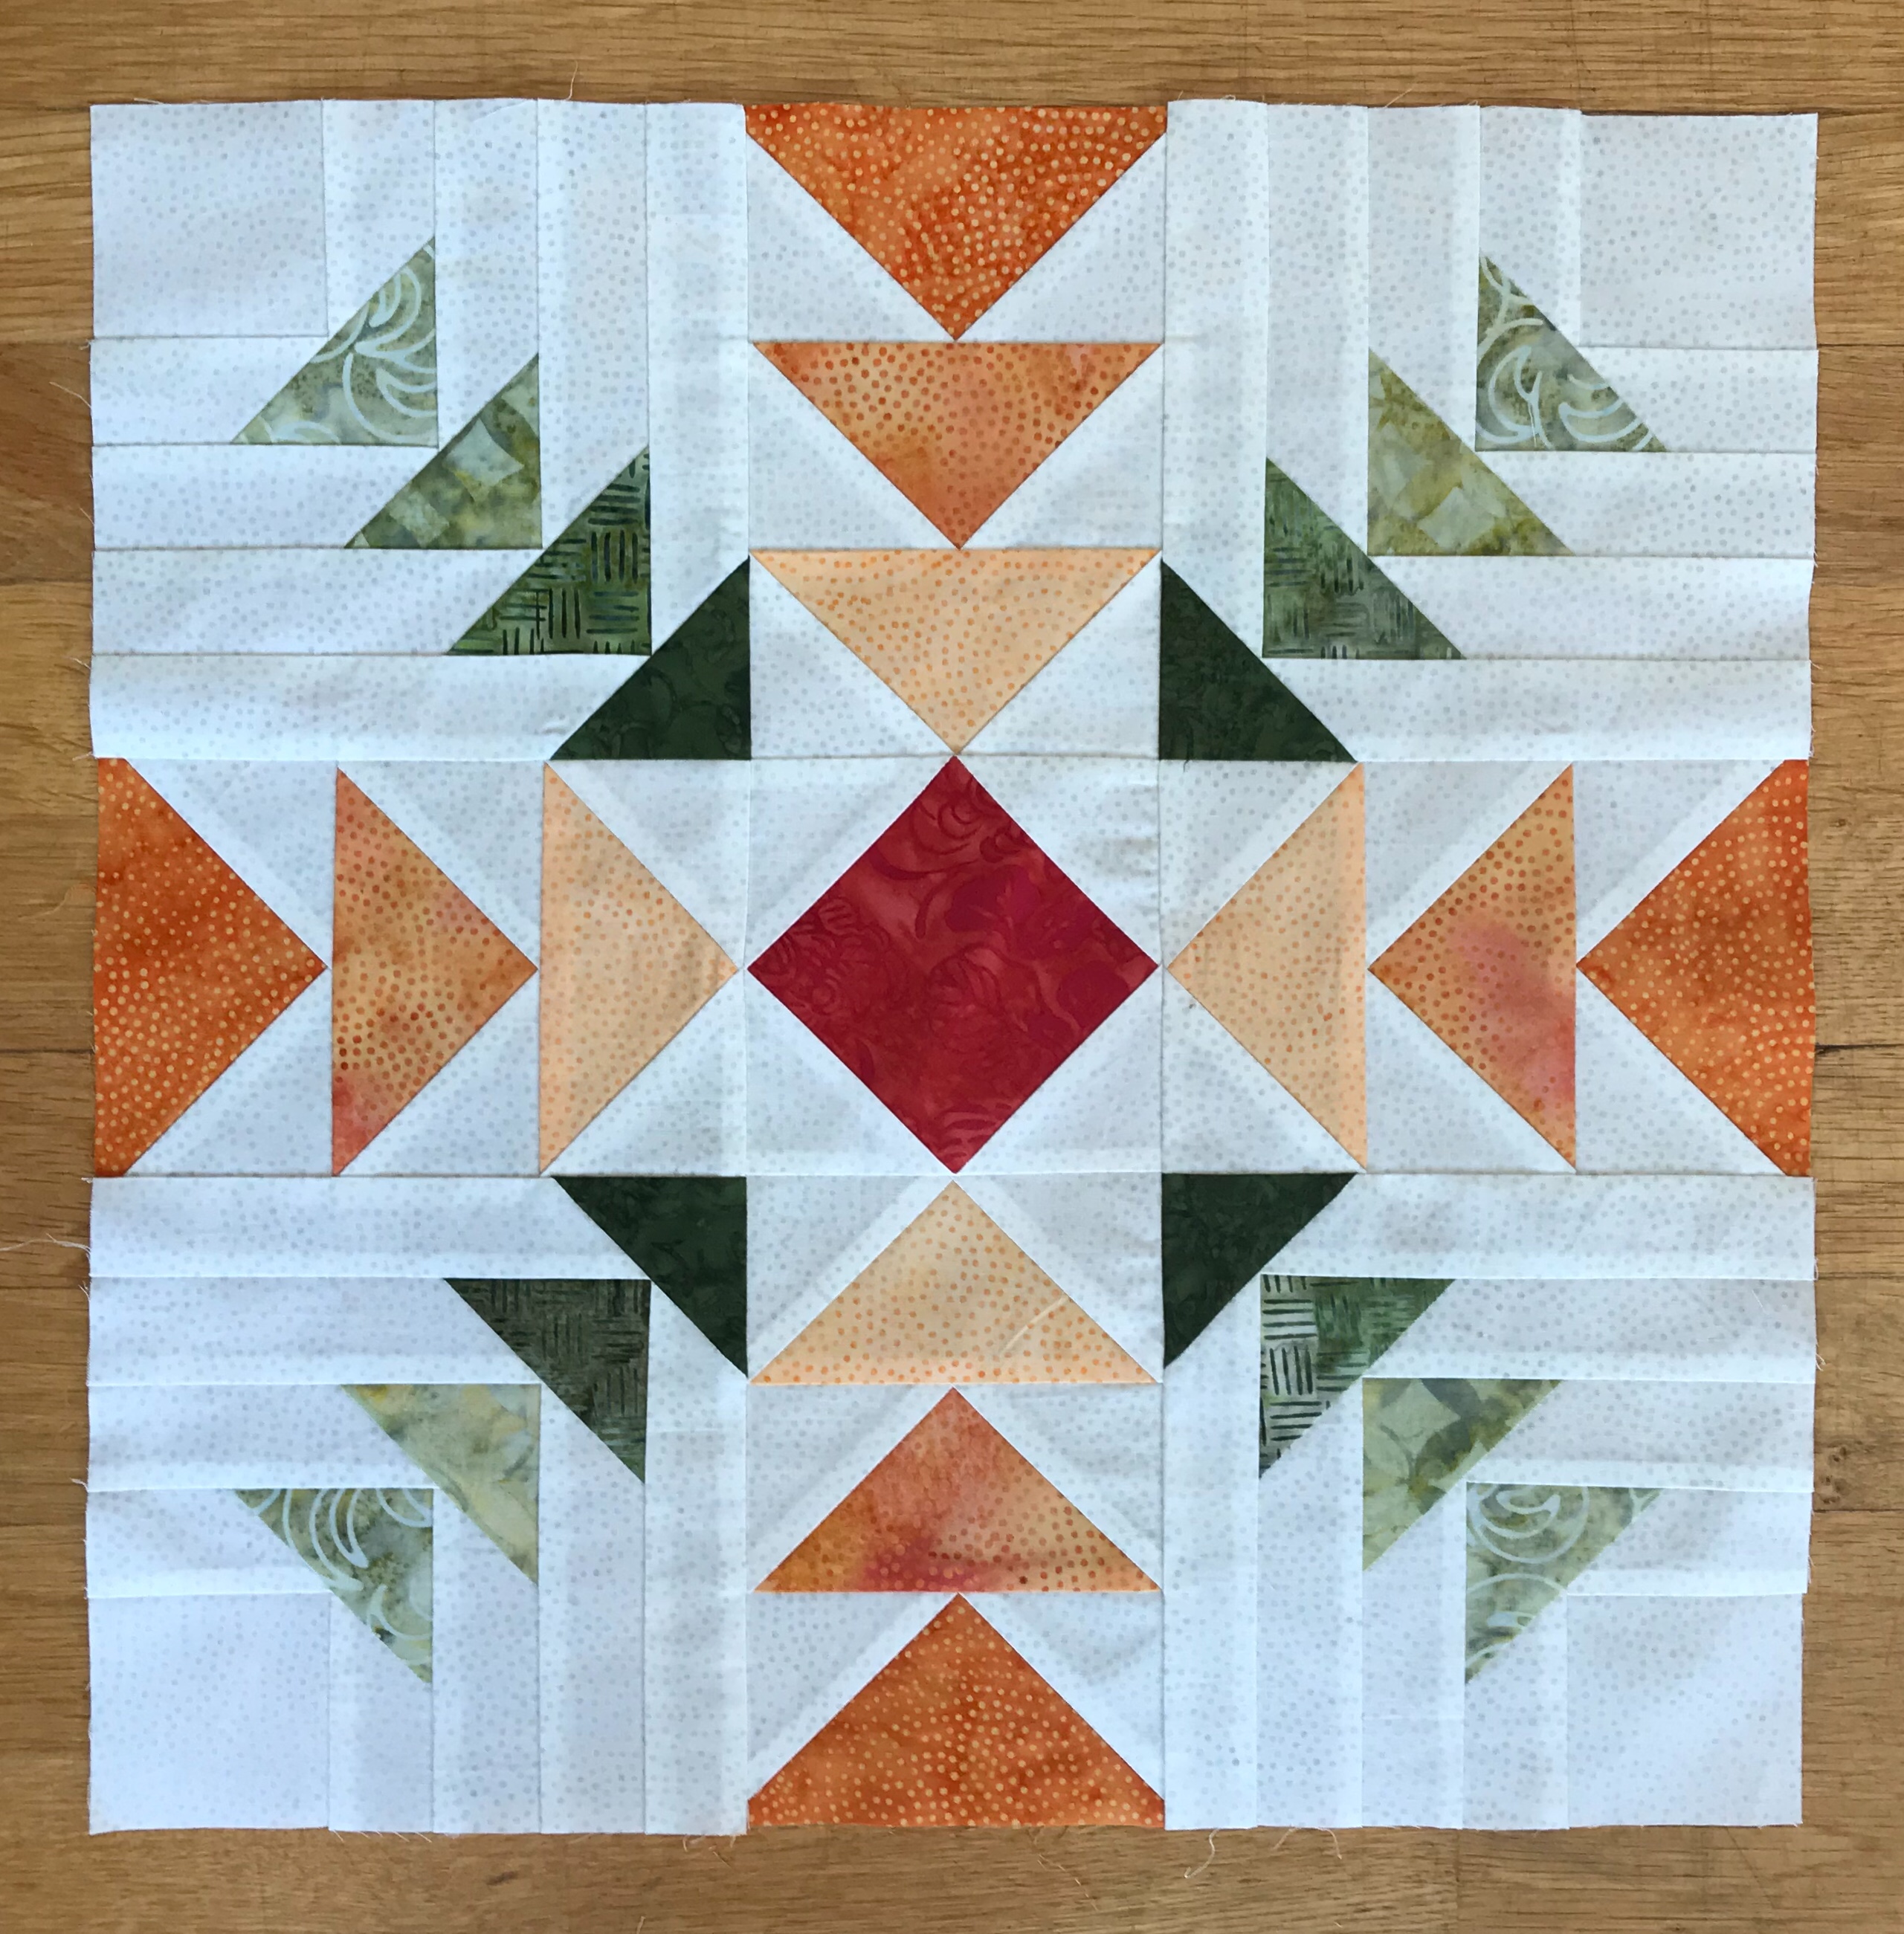
I love Gail Garber and her book Flying Colors. Gail’s projects are awesome and inspiring. She encourages you to create your own design and gives you the tools to do it. I created free form flying geese with this book, but this time I used Gail’s pattern for Tiny Trees. The Tiny Trees block measures 12′ x 12″, with borders it project measures 19″ x 19″.
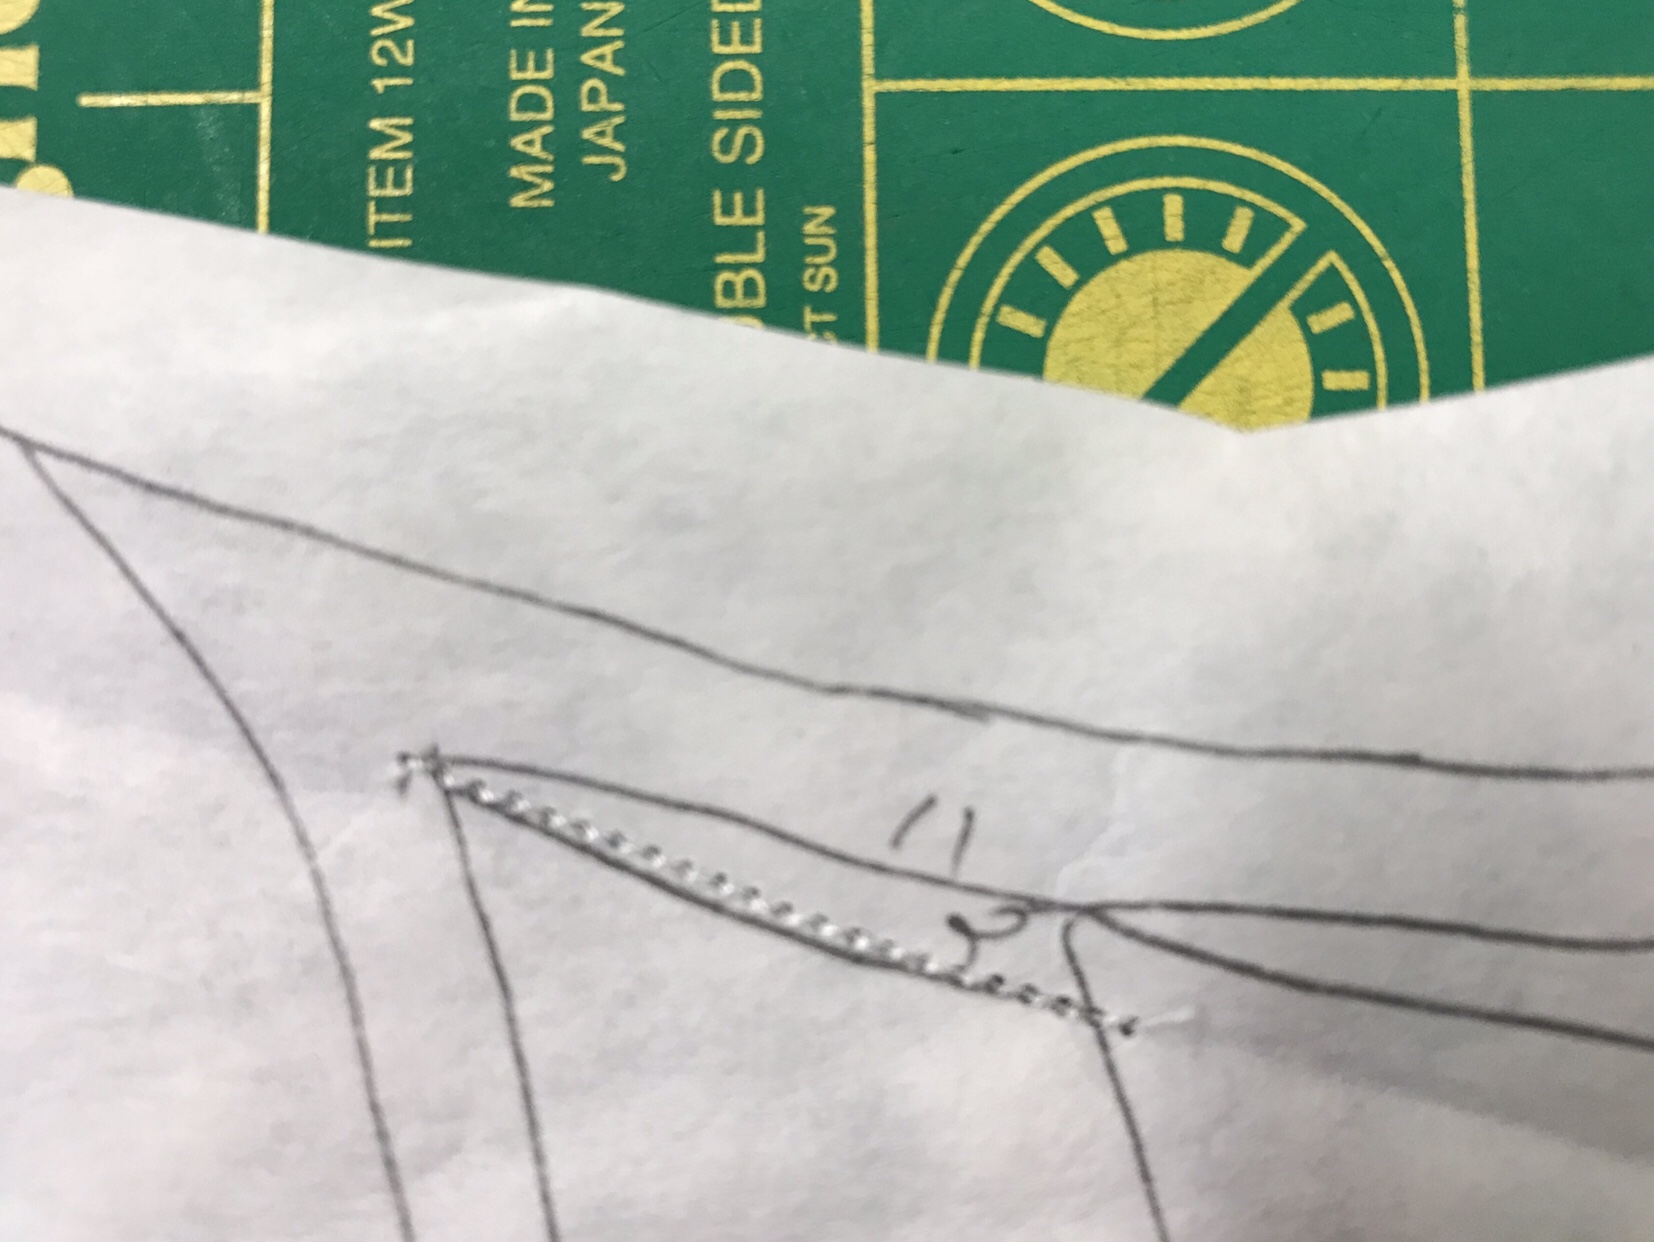
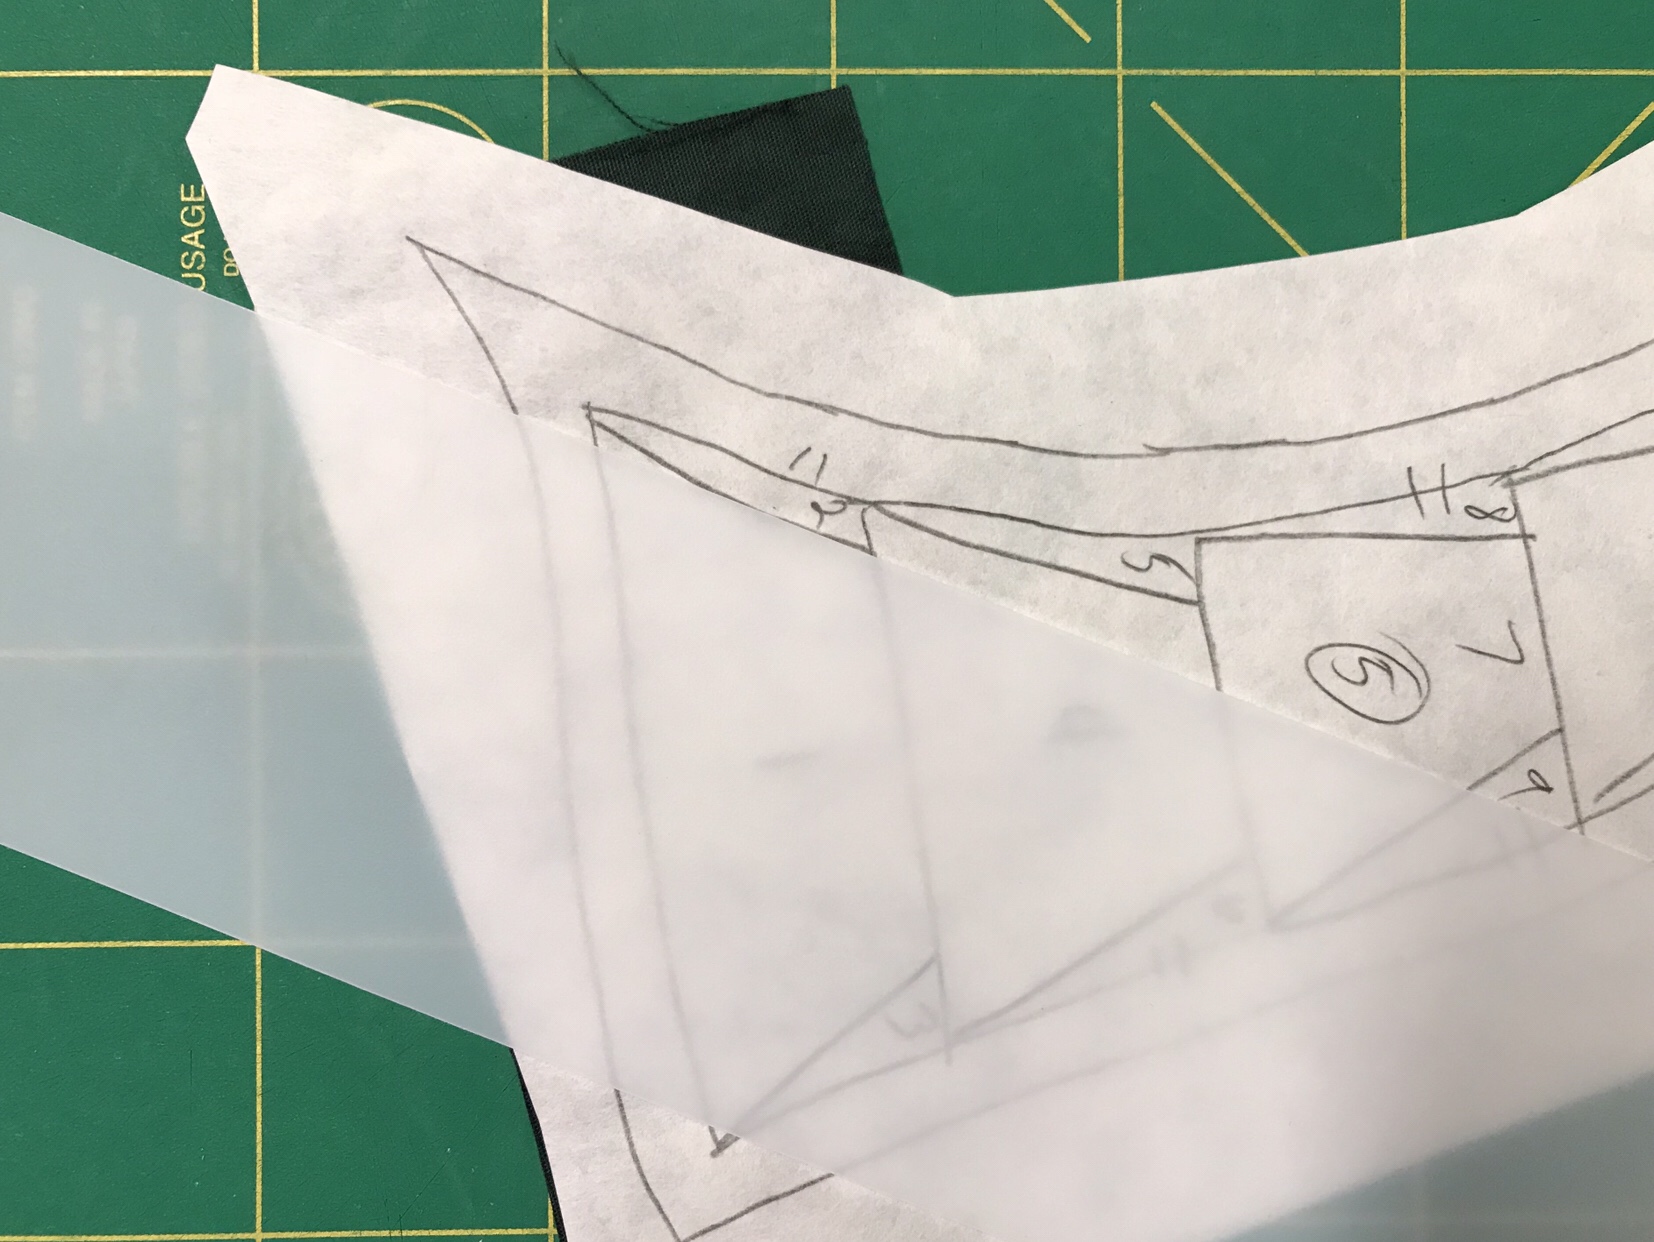
All the components parts are numbered. I began by tracing all the elements in the pattern onto freezer paper, including their assigned number, grainlines and registration marks.
Cut out the pattern pieces adding a generous seam allowance. Press them onto the wrong side of your chosen fabric and cut them out.
Above shows the tree foundations and fabrics to make them.
Add A Quarter ruler is absolutely recommended. I use a piece of plastic template material. You can also use a post card.
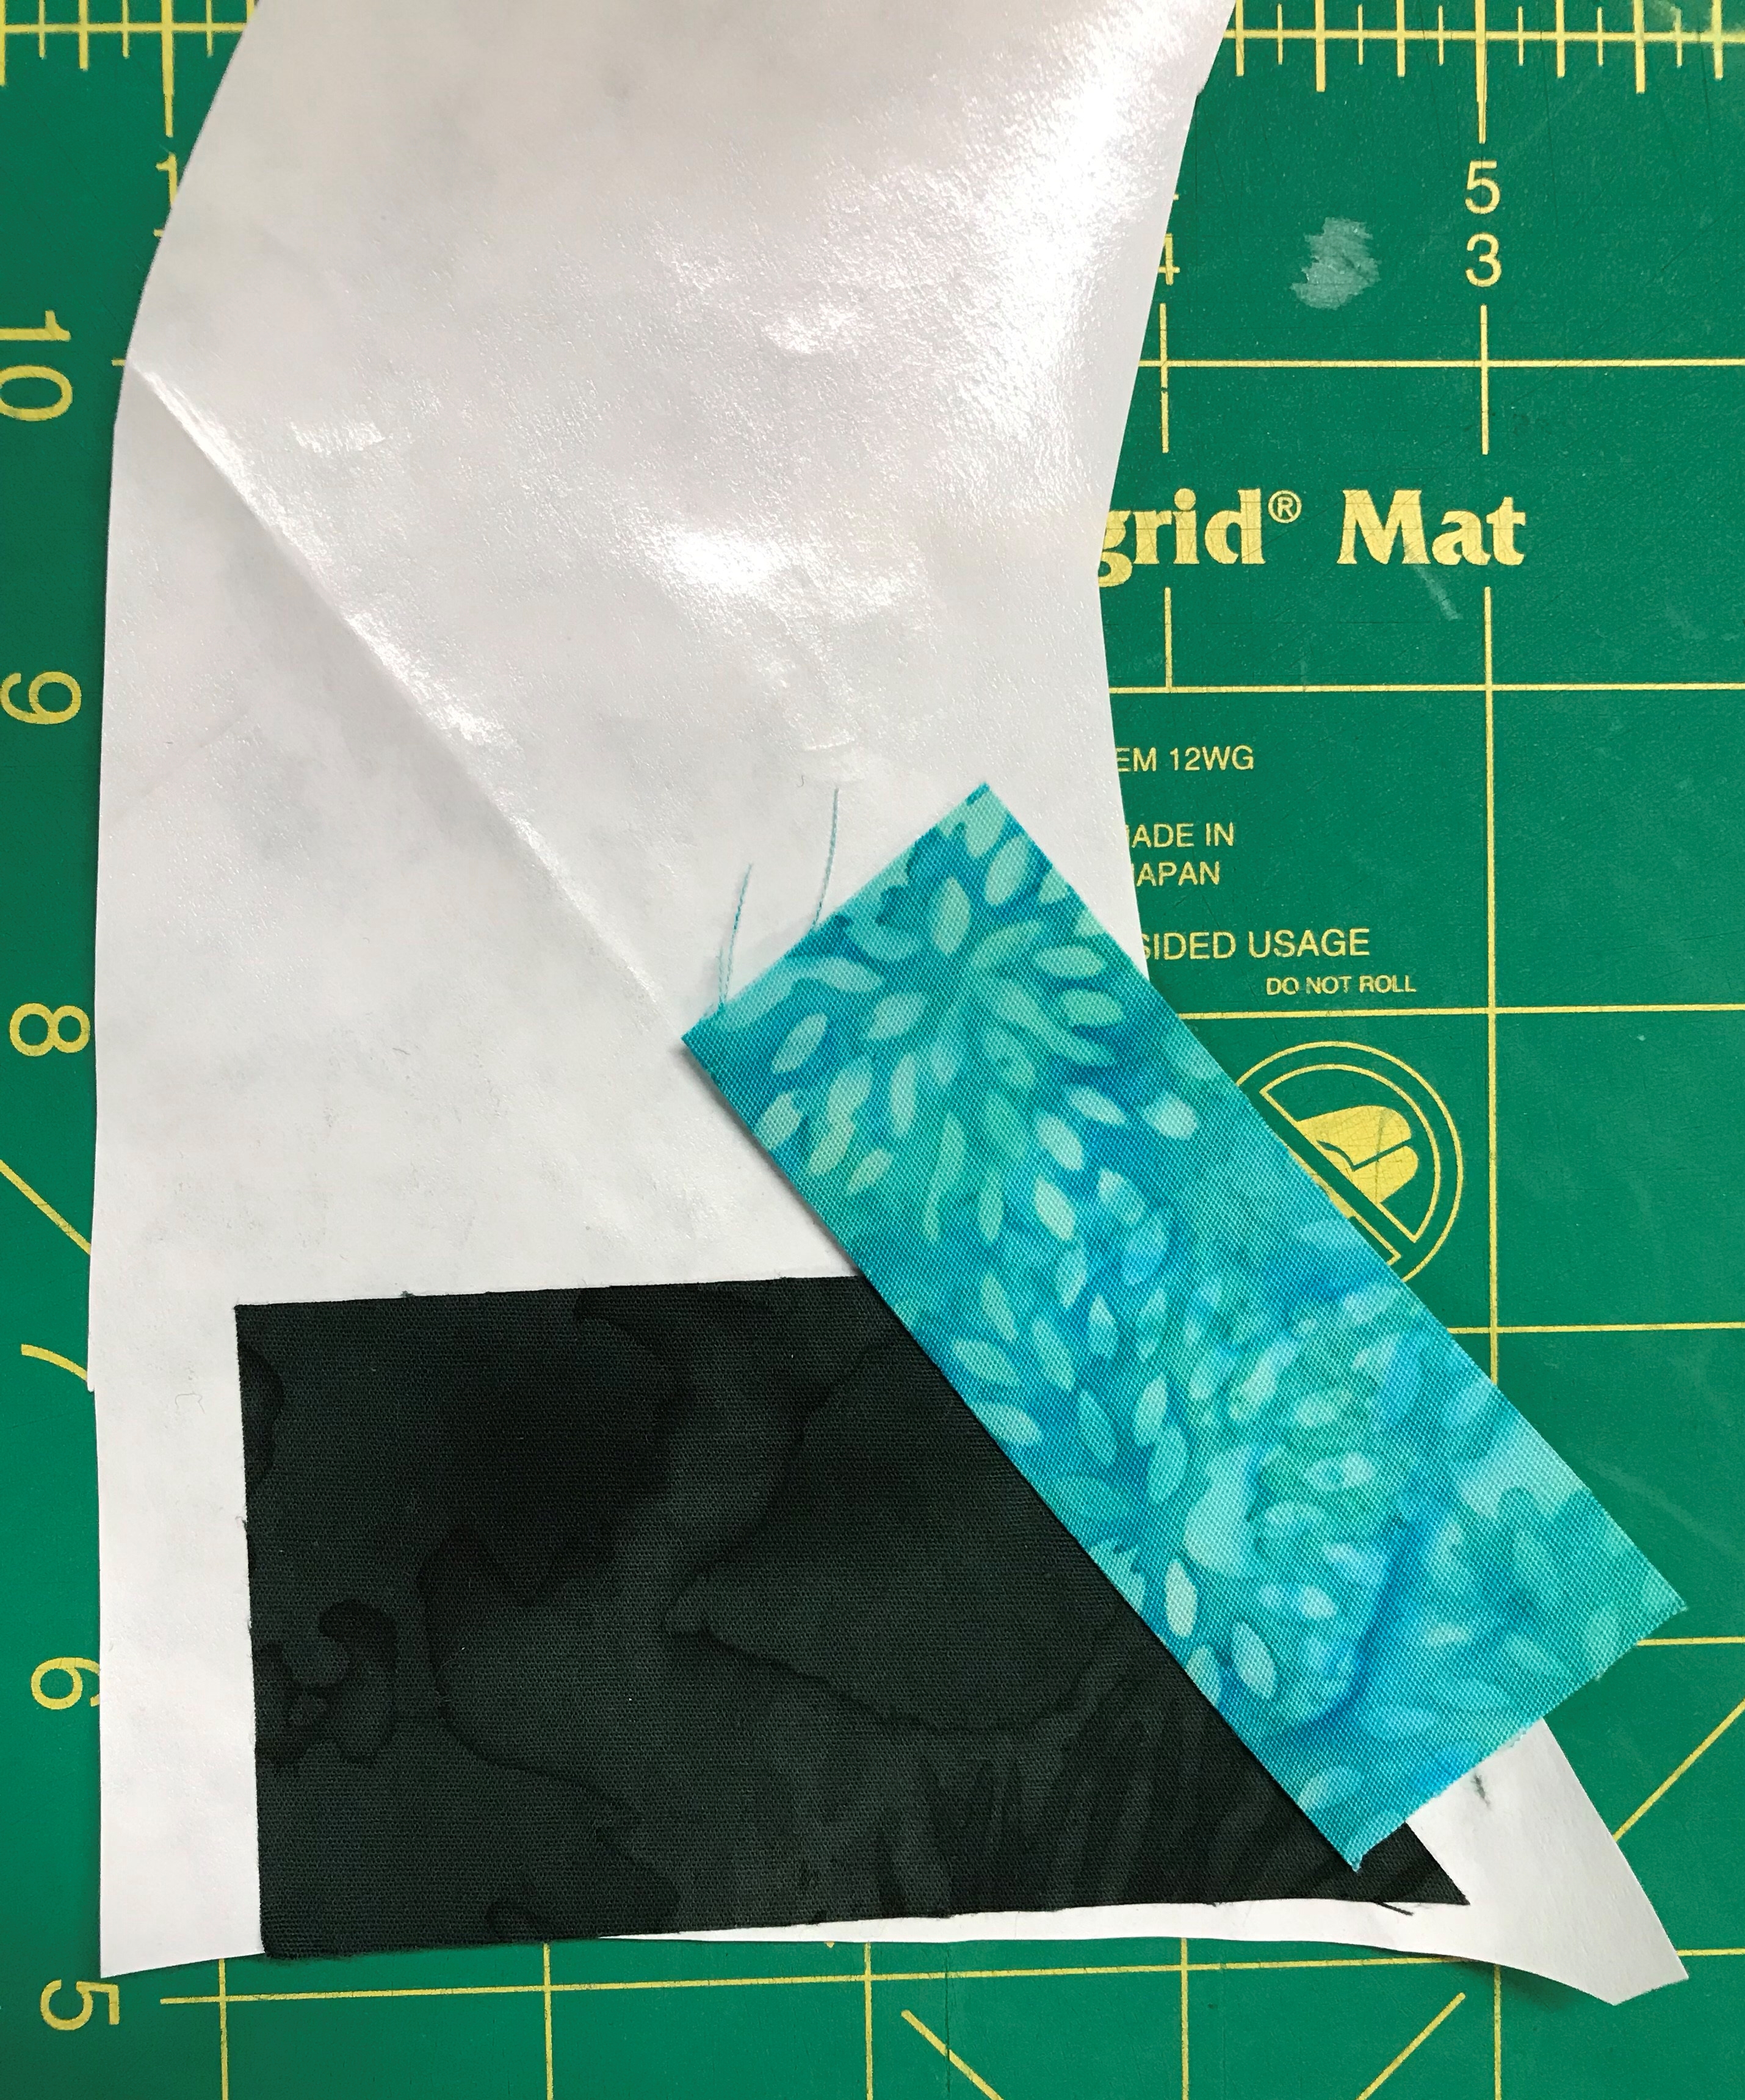
Begin by positioning the wrong side of the fabric to the waxy side of the freezer paper against the portion numbered “1”. Press this in place making sure the fabric has covered the number 1 section. Place the strip, fabric side down on a cutting mat. Align the template material with the line that separates pieces 1 & 2.
Fold the paper over the edge of the plastic and position the “Add A Quarter” ruler against the plastic edge and trim. You have now trimmed the fabric leaving a 1/4″ seam allowance.
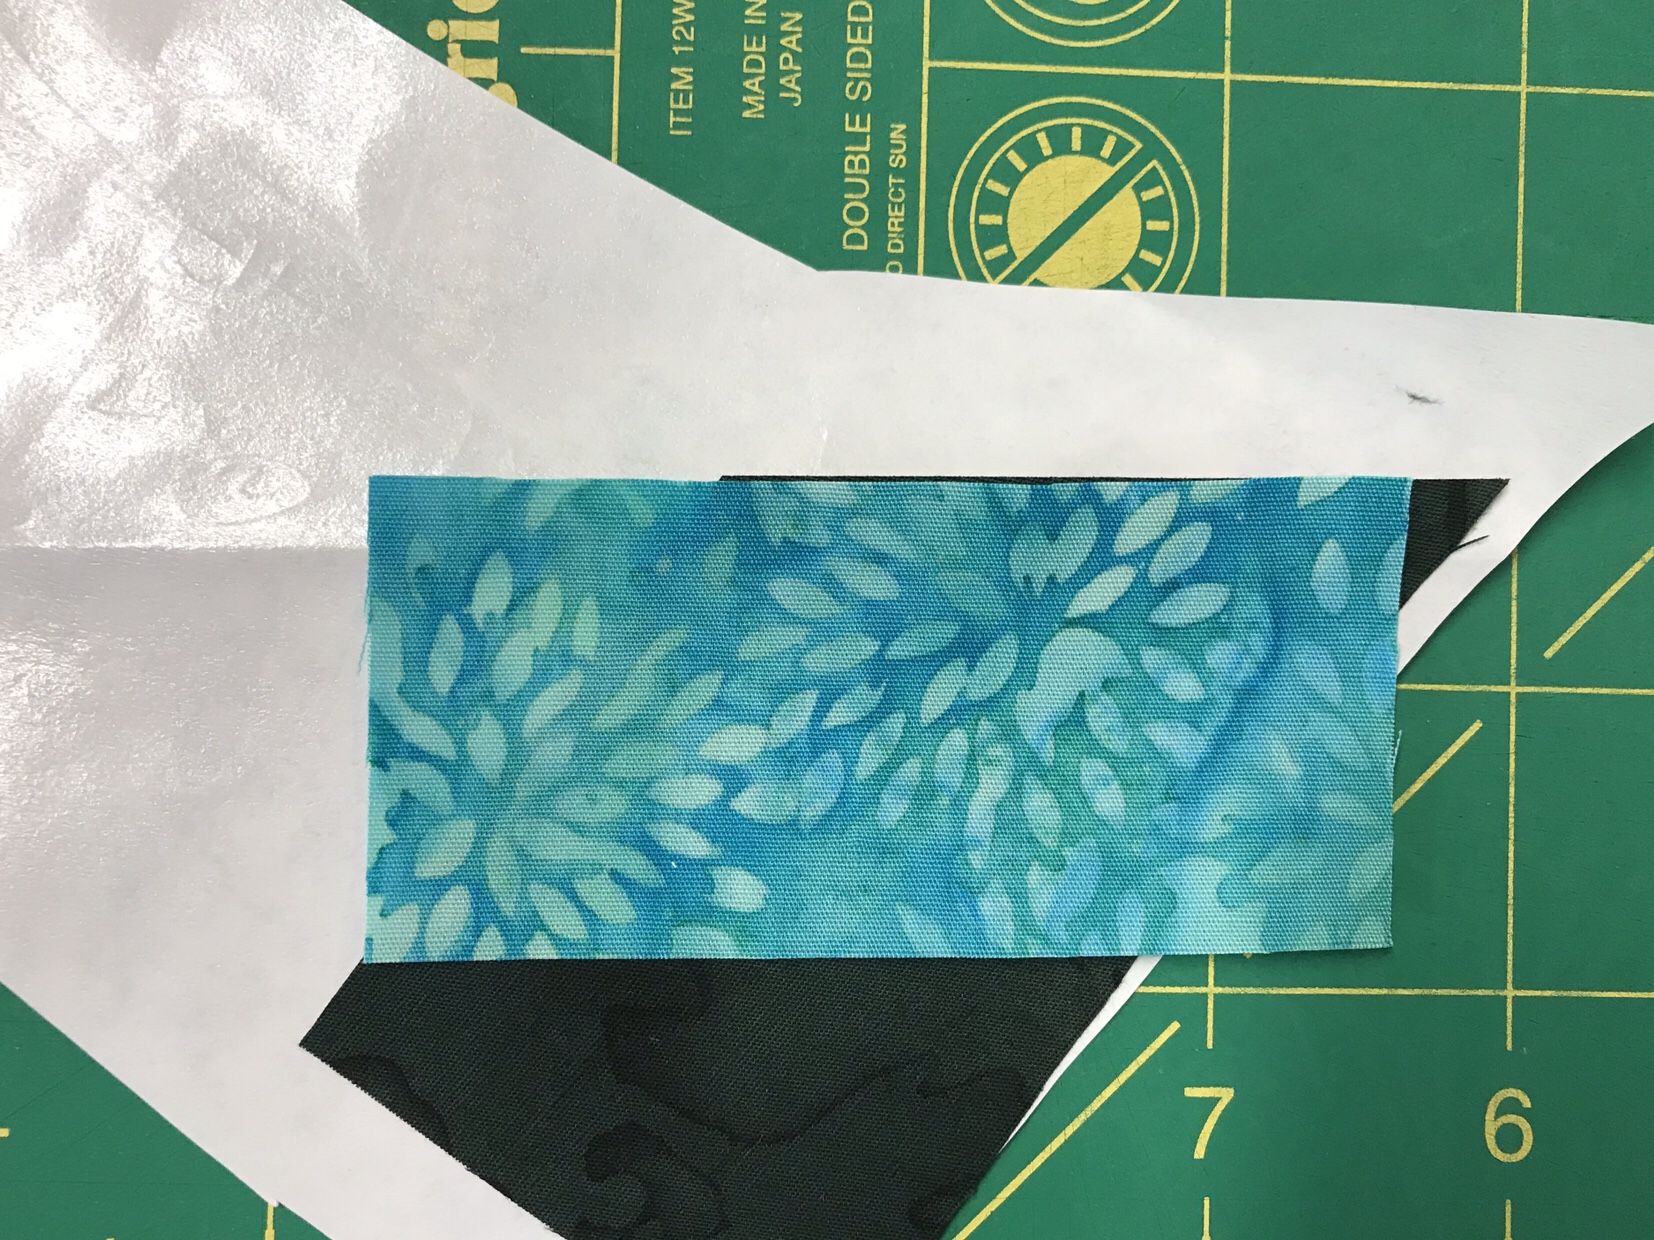
Align fabric piece 2 to the raw edge that has just been trimmed, placing the fabrics right side together.
Turn the foundation over so the paper is on top. Stitch using a 1.5 stitch length along the seamline, stitching a couple of stitches beyond the end of the line. A smaller stitch length aids in removing the paper later.
Press.
Prep for piece 3, add fabric, stitch.
Press and trim as before leaving a 1/4″ seam allowance.
Continue up the tree until all pieces are stitched down. I trimmed the excess fabric from the side of mine with very sharp scissors.
After all the trees, sky and foreground are completed, begin piecing them together in the order they are numbered.
I added a 1″ inner border and 3″ outer border. I quilted the sky following the movement of the trees, and stitched in the ditch around the inner border.
The fabrics featured in this post were given to me by Northcott Fabrics.
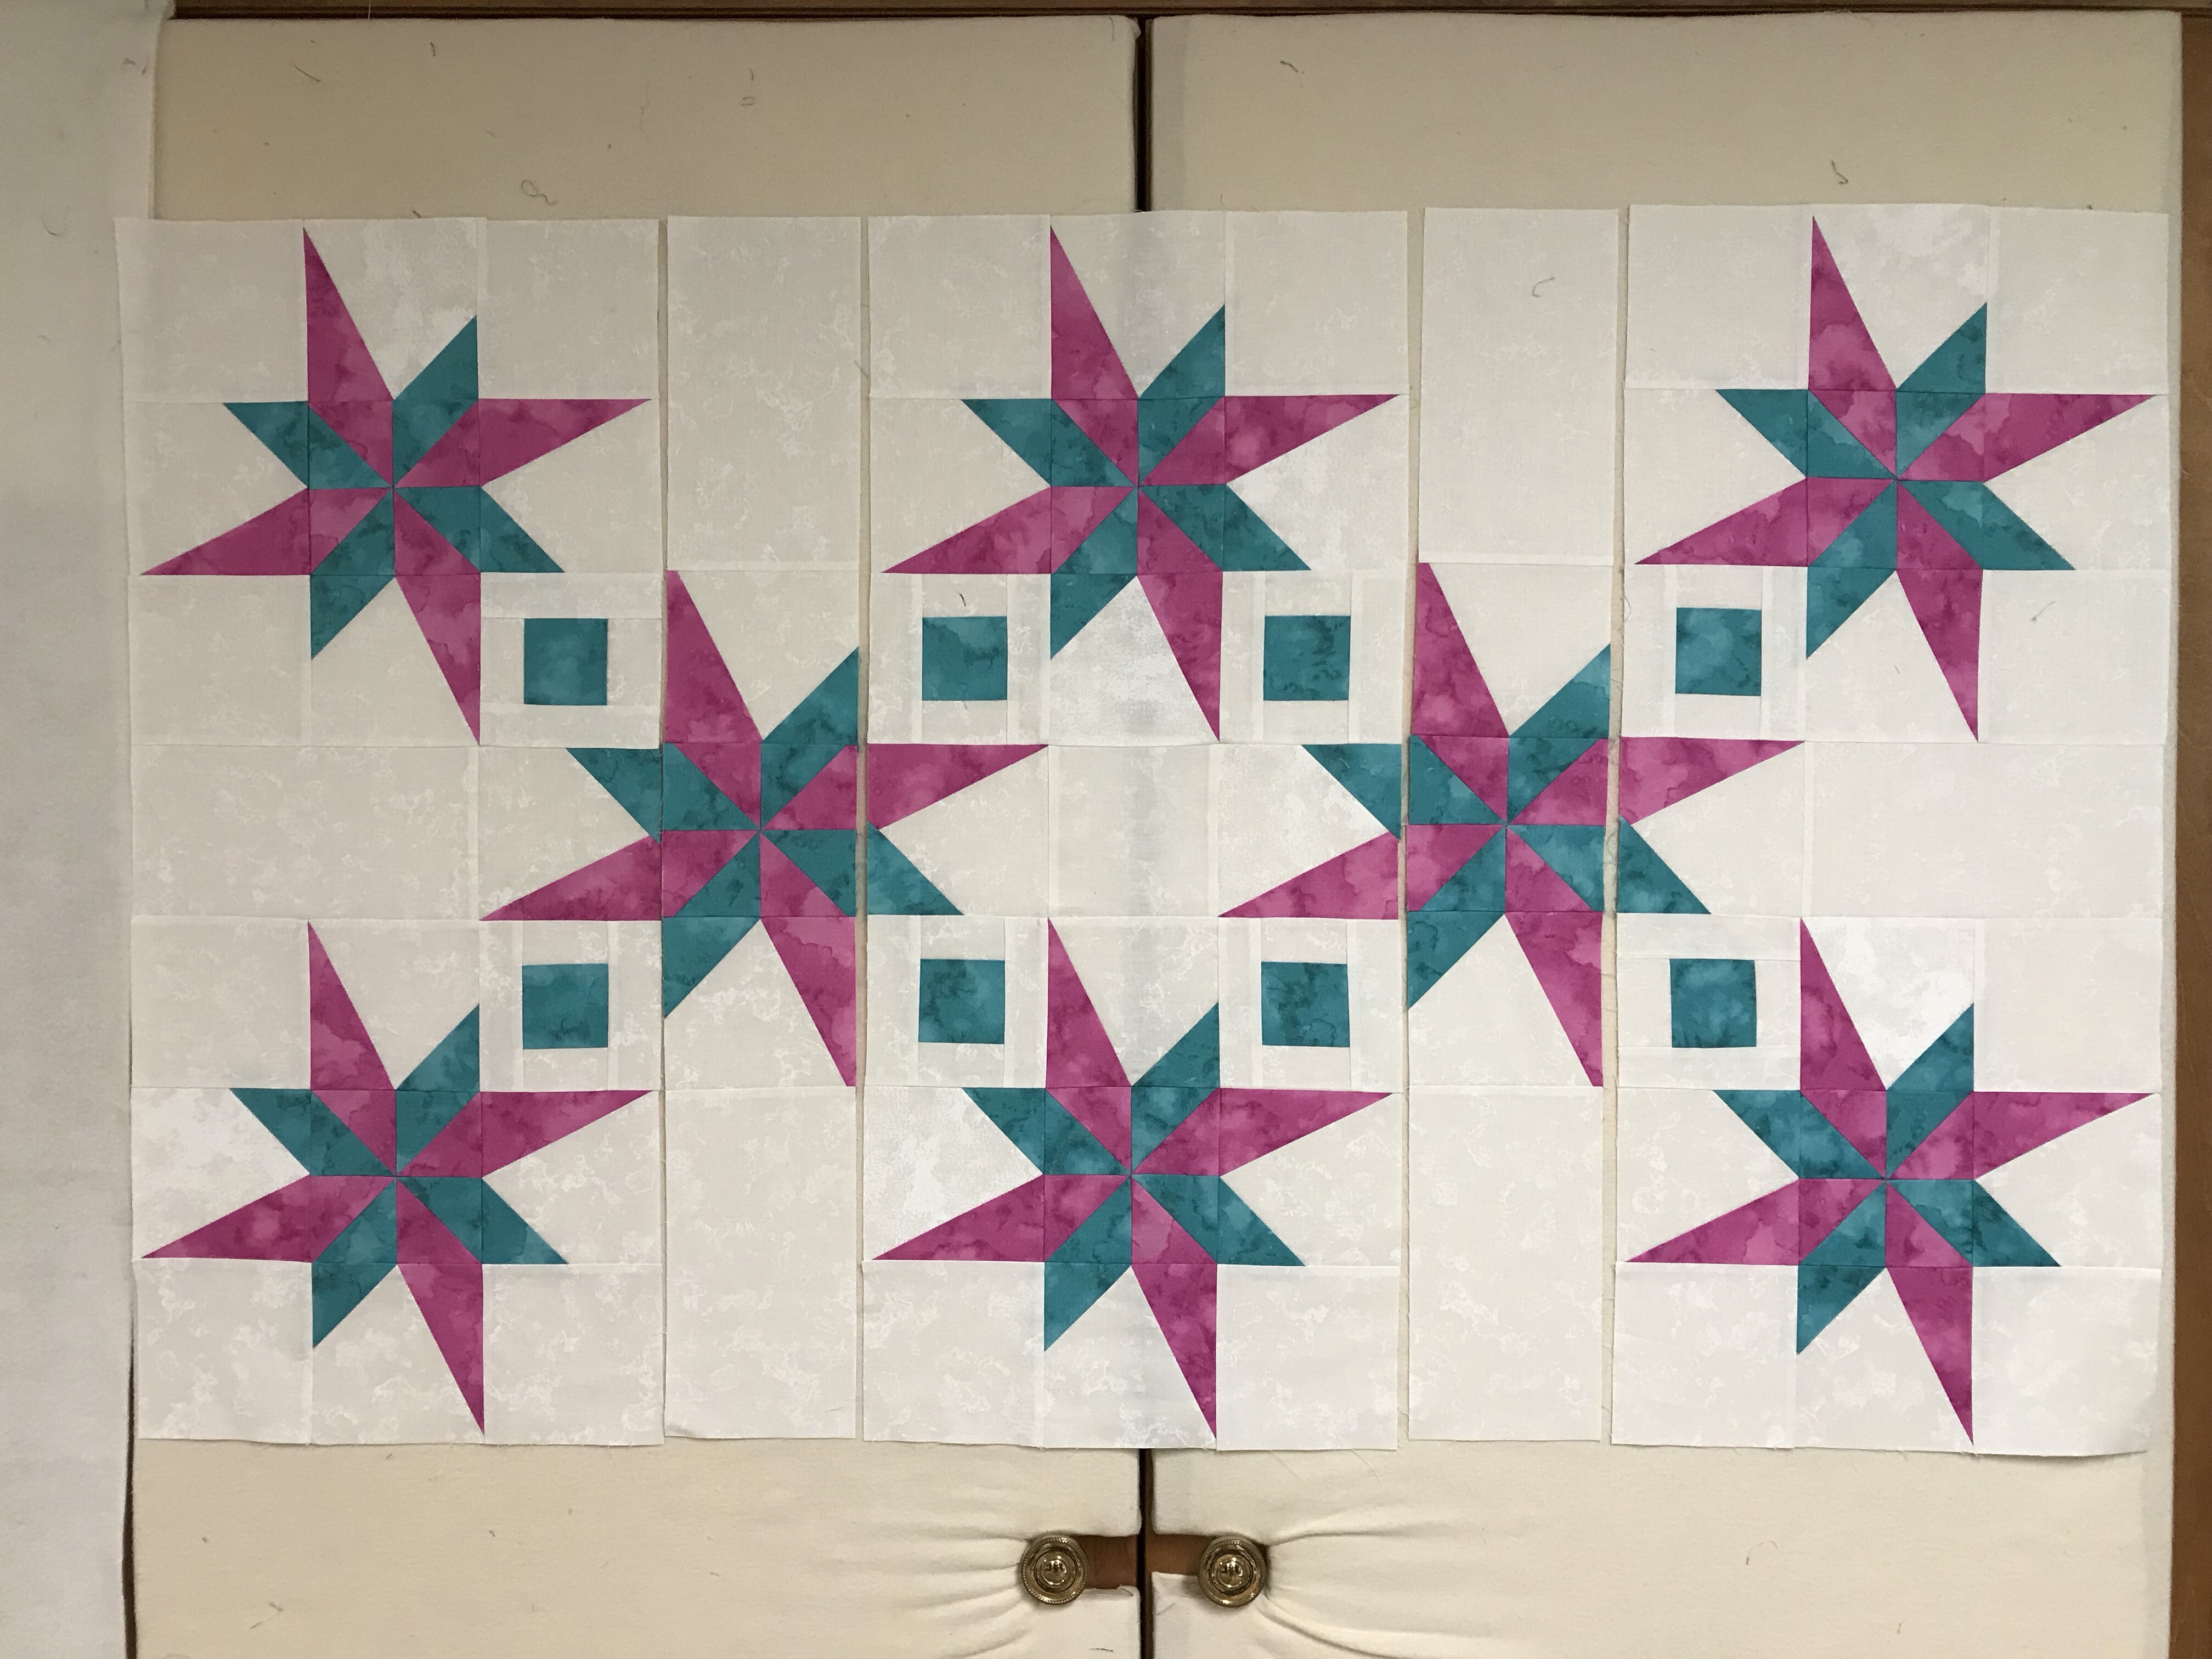
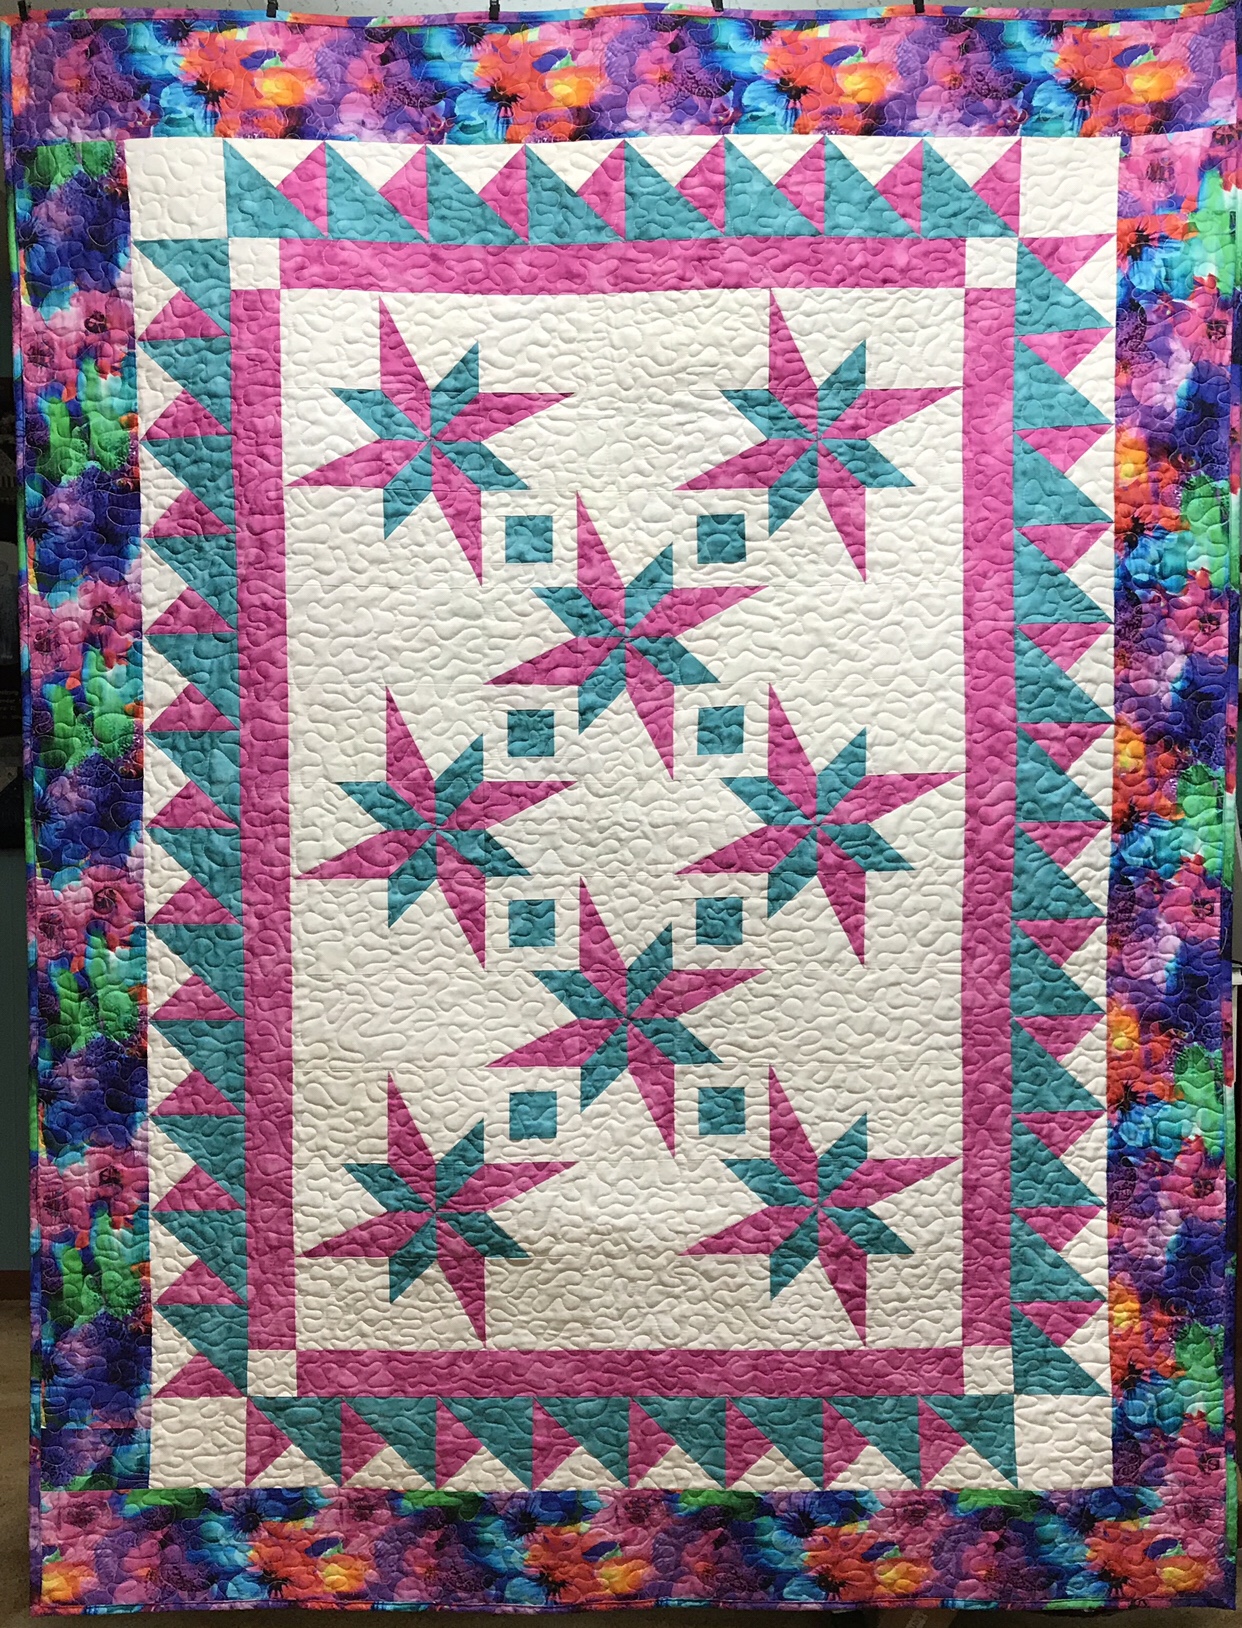
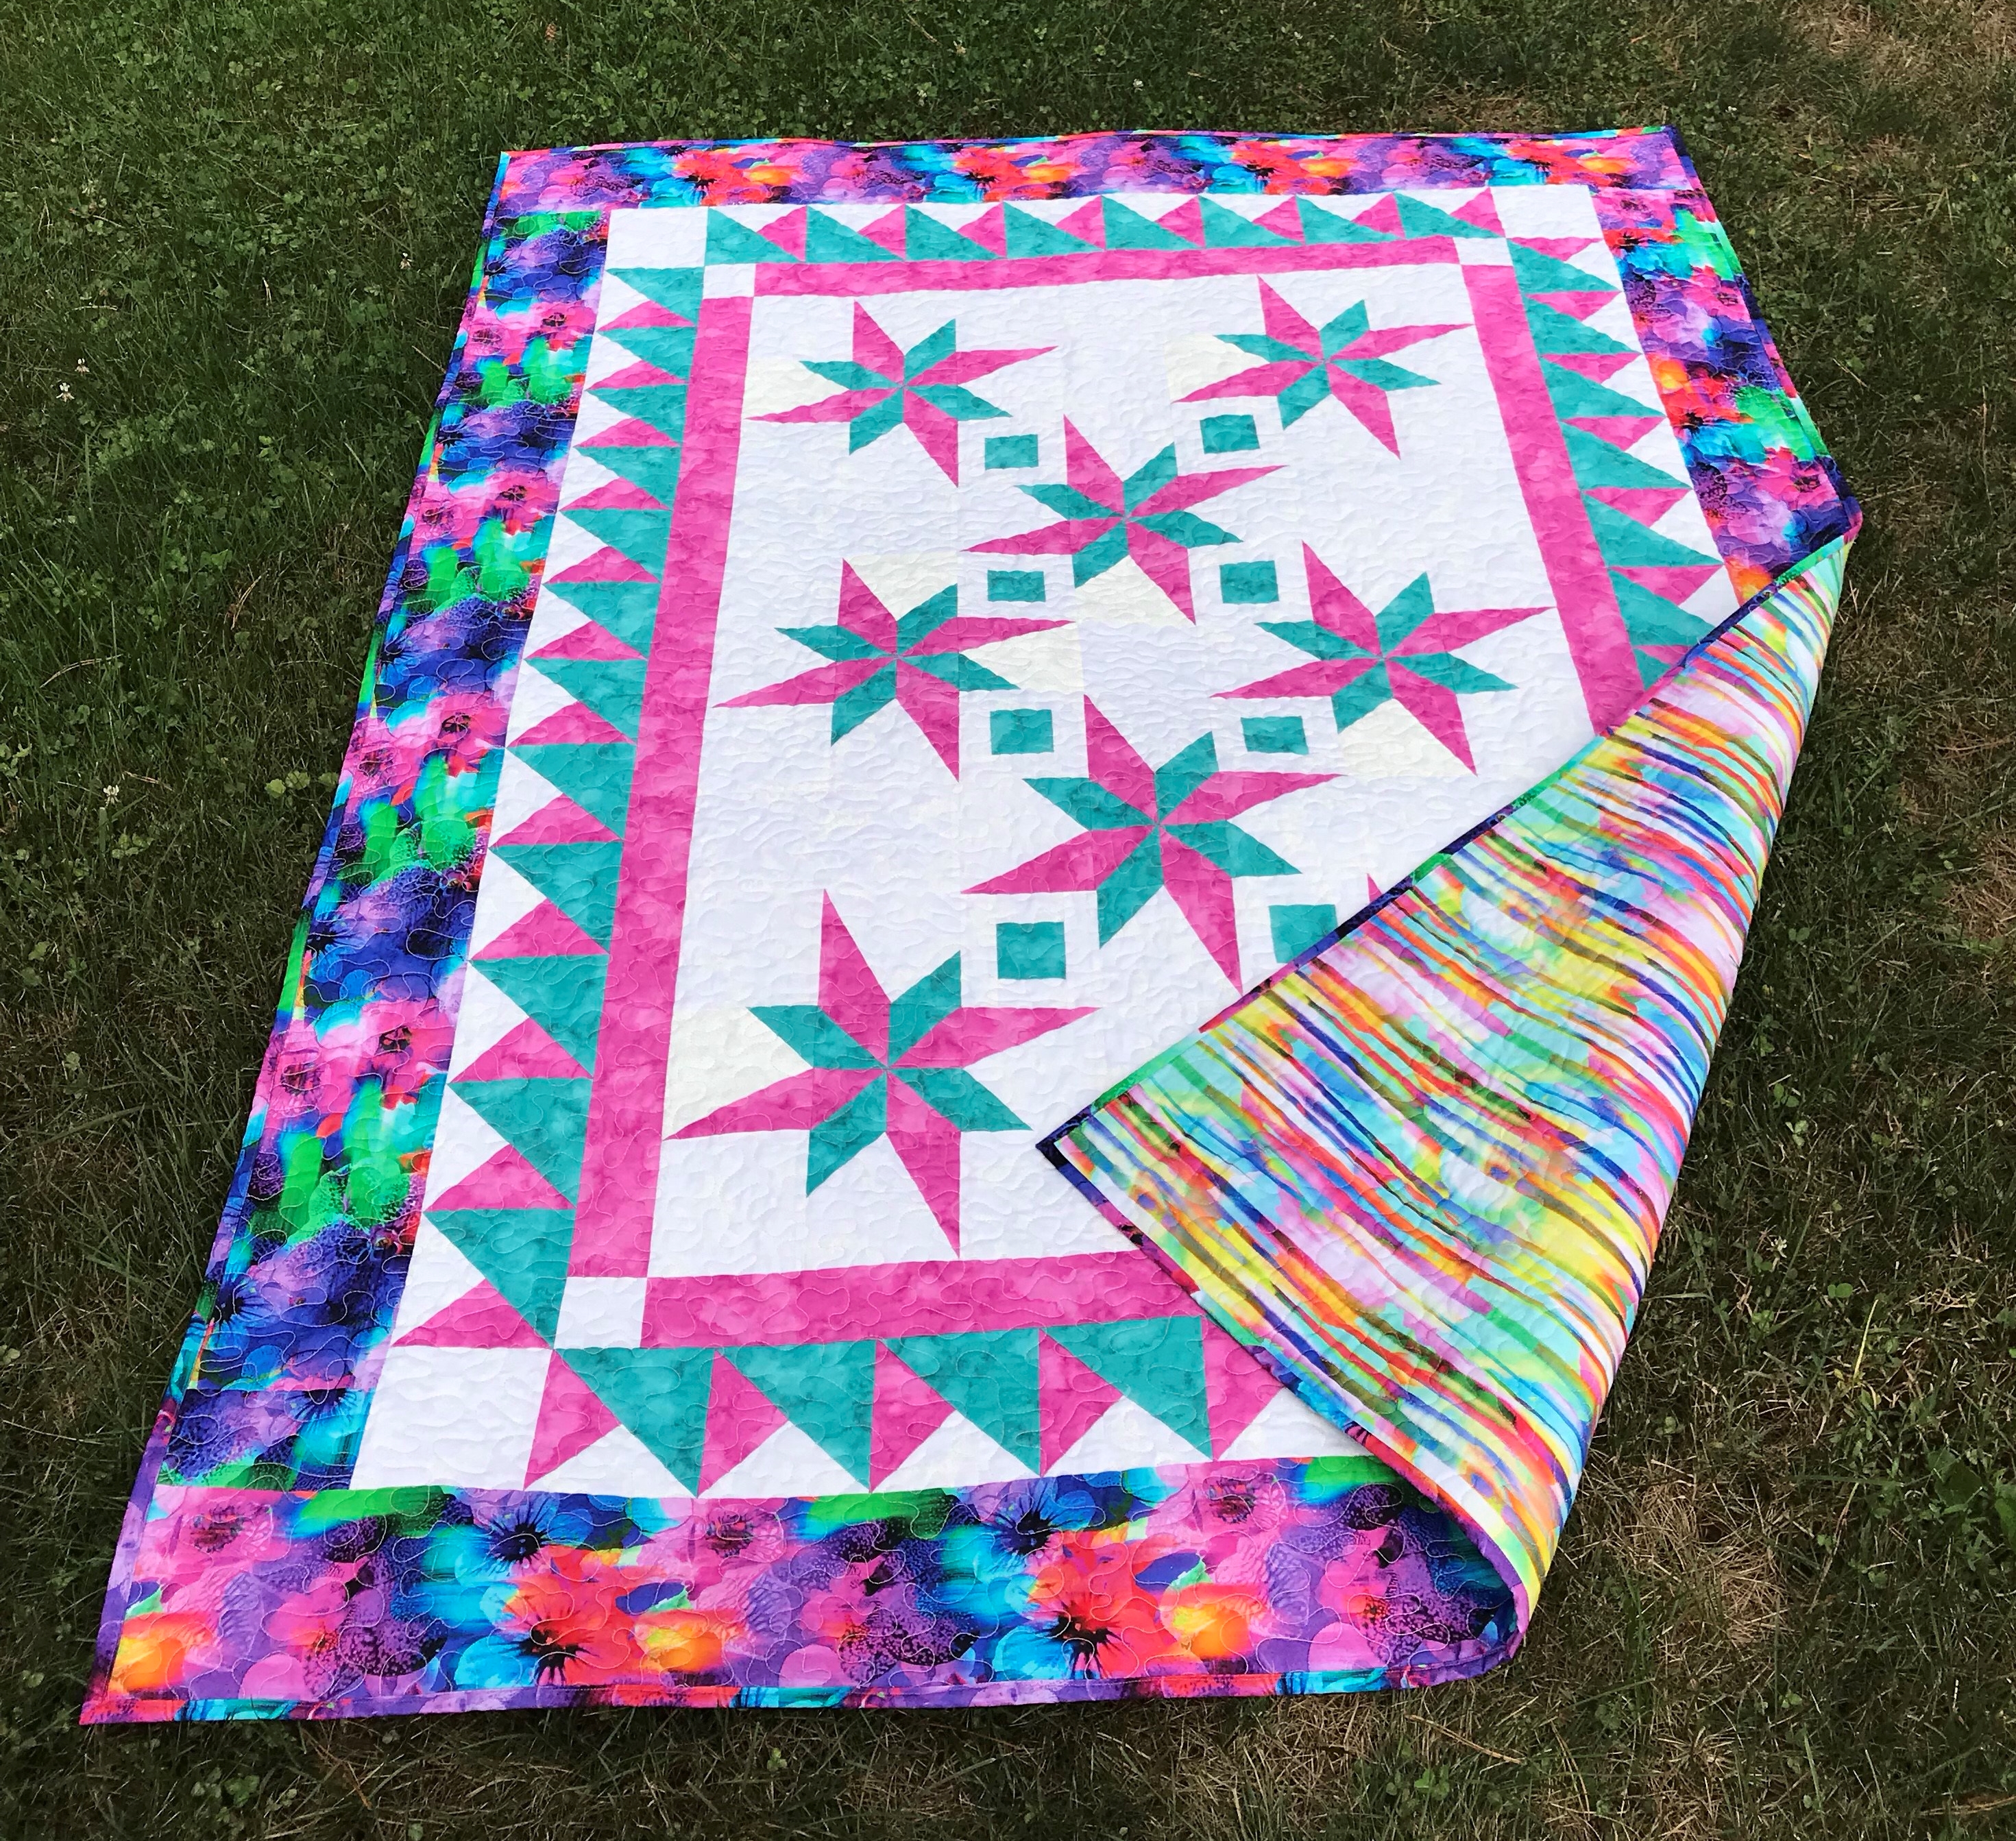
This fabulous pattern, “New Year’s Star” by Deb Tucker is fun to make using your V Block & Tucker Trimmer I tools. It can be made in 3 sizes: 50″ x 66″, 66 x 82″ & 82 x 102″. I love pink and aqua & retro fans. I guess you can say the photo above shows my fan club (HAHAHAHA).
I chose 4 fabrics from Northcott’s “Strokes of Brilliance” collection. The colors are so deep and rich.
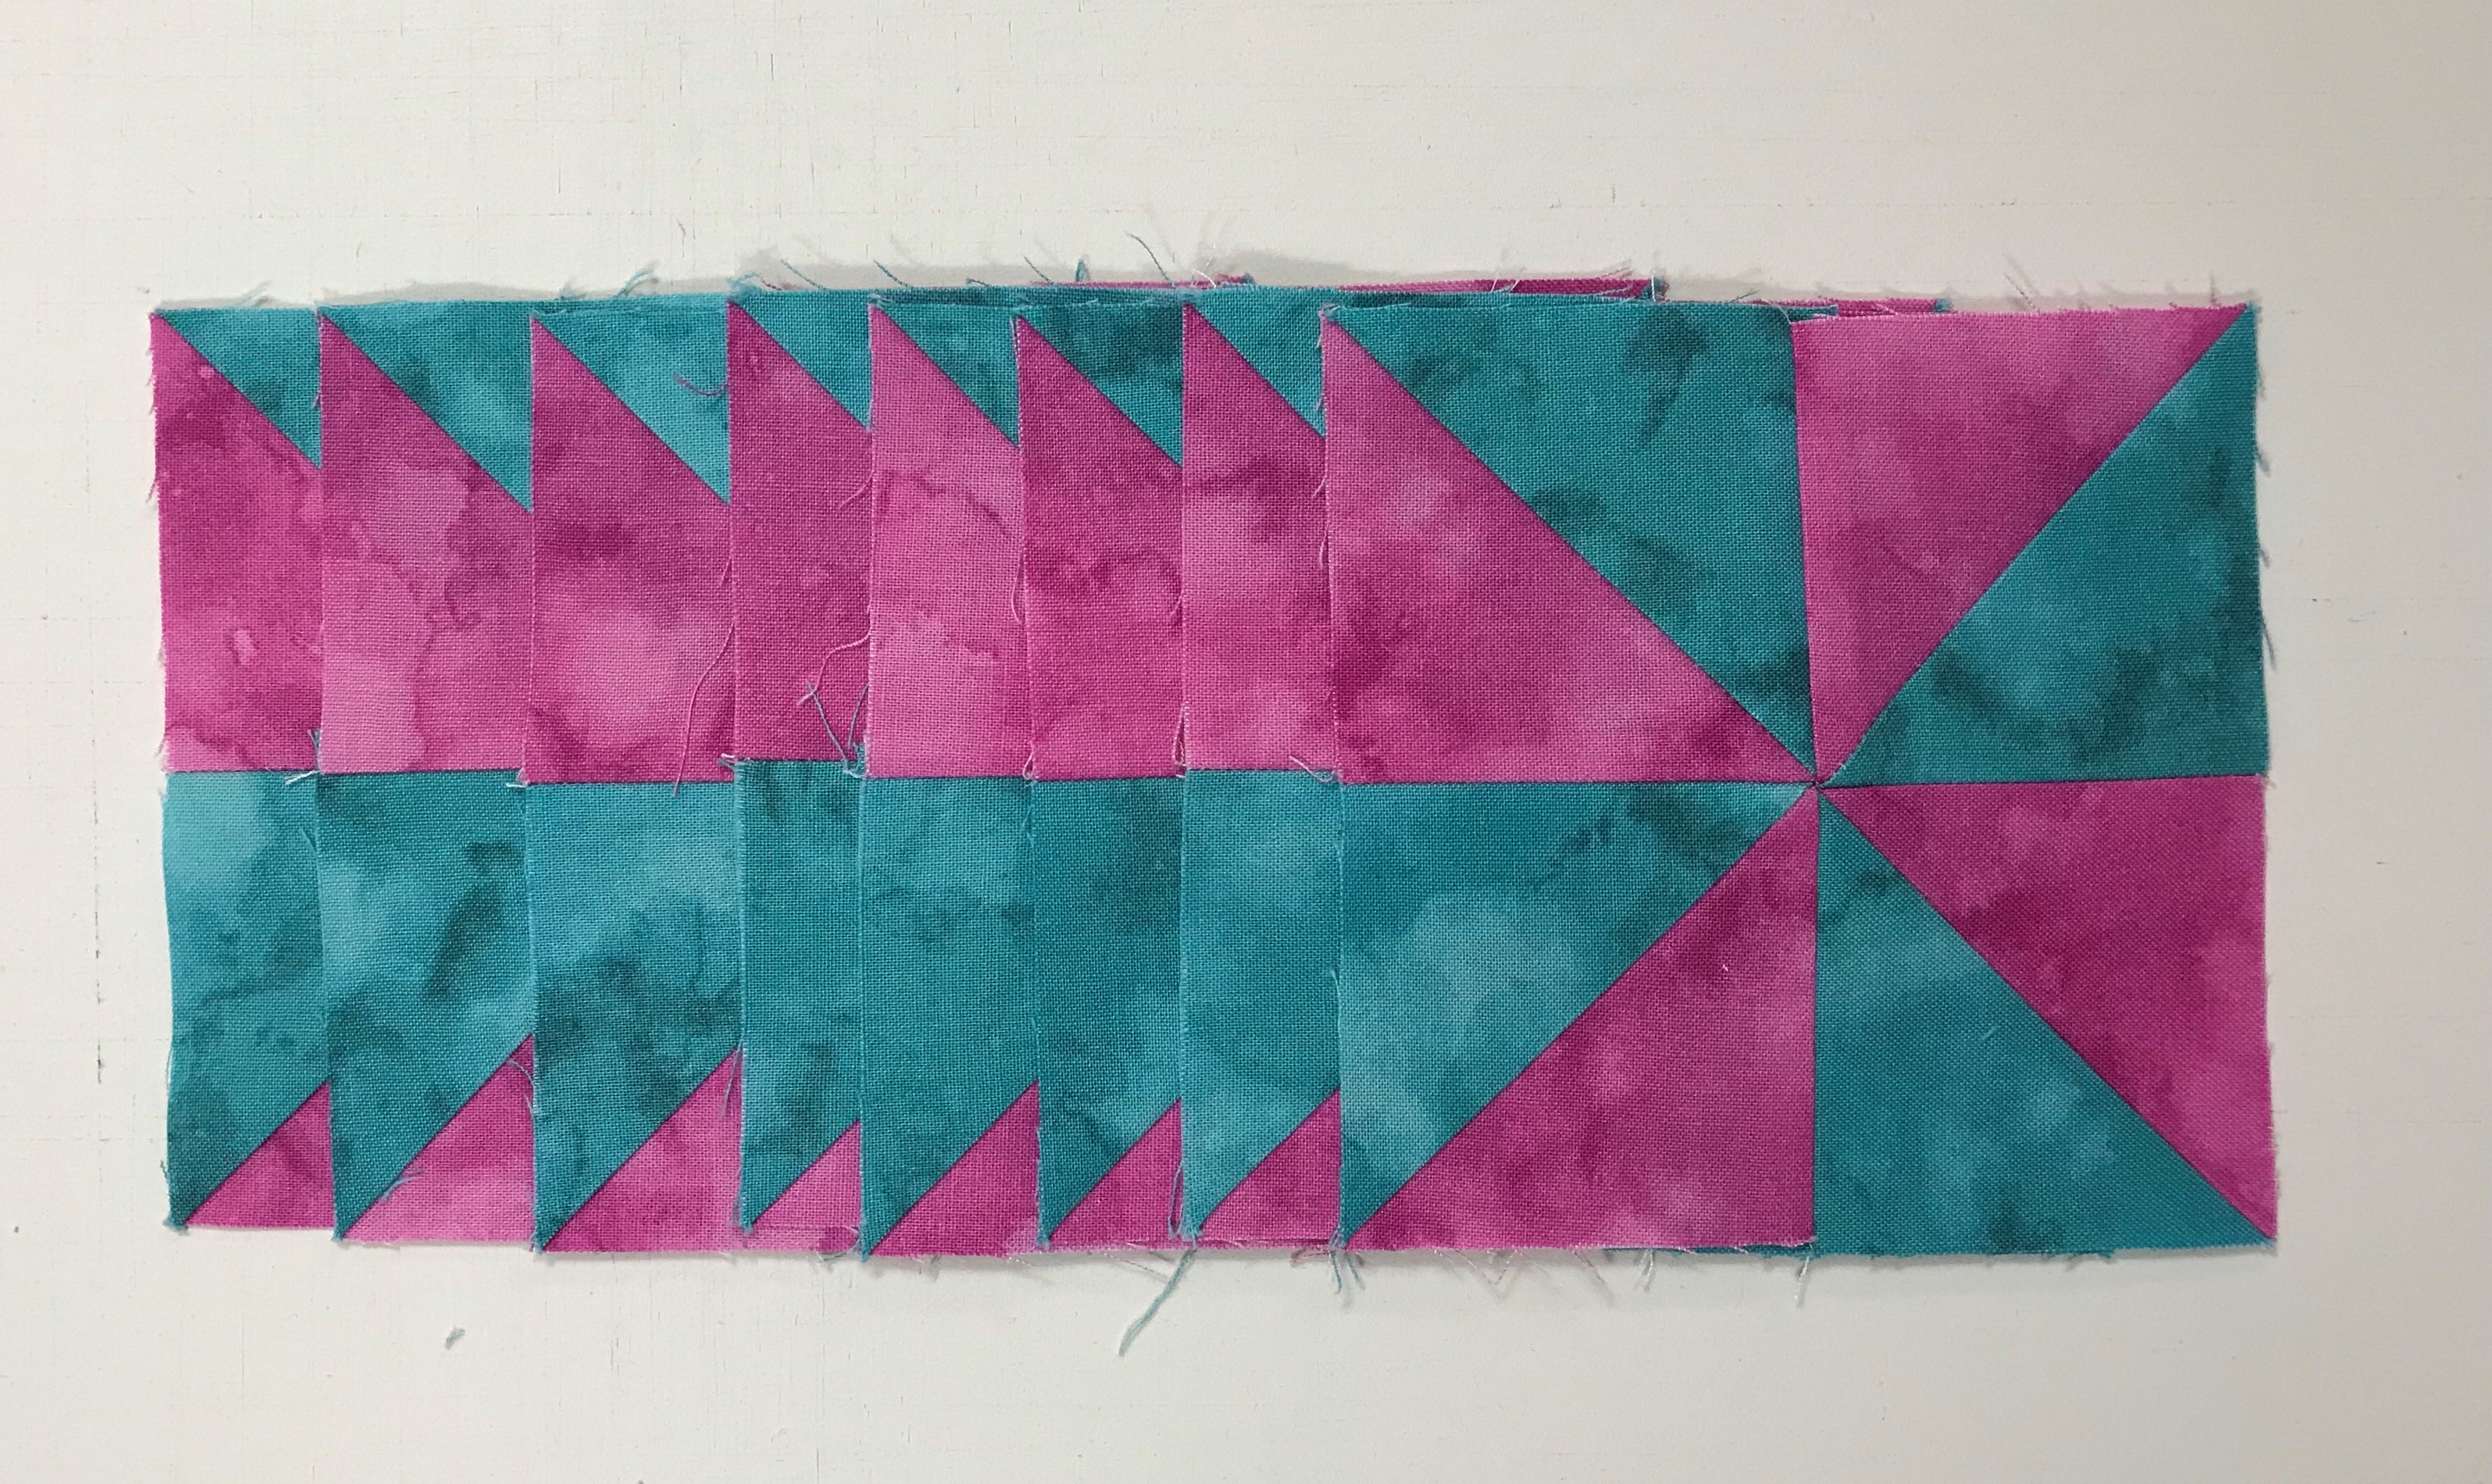
Pinwheels:Making the pinwheels begins by making half square triangles using the 3″ dark & medium squares. Trim to 2 1/2″ with your Tucker Trimmer. Arrange the trimmed squares into pinwheels.
Use Care Here!. The blocks should spin exactly as shown in the pattern instructions.
V Block High/Low:
I have cut my background squares and side triangles for unit construction.
Following my pattern instructions I trimmed the background square and stitch a side triangle to it.
Press toward the side triangle, add the square to make the second low side triangle and trim.
Trim using the V Bock tool as shown above. Rotate and trim again.
By placing the high/low units around the pinwheels we get a great looking wonky star!
Framed Squares:
Make 8 of these easy framed squares.
Combination Units:
Using the Magic Wand draw 2 diagonal lines on the back of the 5 1/2″ the background squares and align with the medium squares, stitch on lines.
Cut apart and press toward the darker fabric.
Using the Magic wand draw 2 diagonal lines on the back of the half square triangles (HST). Center the HST’s on a dark 5 1/2″ square, stitch on the lines, cut apart & press toward the large triangle.
Trim using your Tucker Trimmer, rotate and trim again.
Each set makes mirror image combination units. Both are used in the pieced inner border. It is a good idea to keep the units organized into left and right groups. You’ll be glad you did.
Lay out your units.
Stitch into rows.
Add your inner borders.
Add your pieced inner borders and your final outer border.
I love the backing too. This quilt was completed with Quilters dream Batting! Thank you Northcott for letting me create with your beautiful fabrics. The description I’ve shared in this post does not answer every question you may have. Please feel free to contact me with questions.
The Island Batik Ambassador’s challenge for September is “Starstruck”. We must incorporate “stars” into our project. I chose the Hunter Star block and Sue Tuckers award winning quilt pattern “SueNami“. This really fun quilt was made with 5” blocks using Deb Tucker’s Rapid Fire Hunter Star Petite tool and measures 68″ x 68″.
This fat quarter friendly quilt requires 8 dark & 8 light fat quarters. I used yardage for light background instead of fat quarters. Of course, all my fabrics are from Island Batik.
Every hunter star block consists of 2 trapezoids, 2 triangles, 4 star points. I made 64 blocks – 32 blocks with dark trapezoids and triangles & 32 blocks with light trapezoids and triangles.
The first layout is with un-trimmed triangles. Take care when laying out the triangles that when ever dark star points come together that none are the same so when the stars are formed, every star point is a different color.
Having a design wall is very helpful.
Once you are satisfied with the balance of color, stitch blocks together, press seam open and trim using your Hunter Star tool. Full instructions are included with the pattern & hunter star tool.
Once your blocks are trimmed, stitch them together into rows.
Join the rows together to complete the quilt center.
The inner border was made with flying geese using Deb Tucker’s Wing Clipper I tool. A flying goose with a large light triangle always follows a flying goose with a large dark triangle. This fools the eye into seeing chevrons.
Stitch the geese into pairs, you will then have 8 chevrons from each color fabric. Divide the chevrons into four piles containing 2 chevrons from each color. Decide how you want the colors of your geese to flow, and organize each pile of 16 chevrons, we will use 15 per side. Each strip of stitched chevrons will end up in the same order, with 4 chevrons left over.
The pattern calls for quarter Square triangles as the cornerstones. I decided to use four patches, (there’s a story there). Using Deb Tucker’s Four Patch Square Up tool for the four patches is so quick and easy.
This quilt comes alive with color because of the Island Batik fabrics I used.


 Align fabric piece 2 to the raw edge that has just been trimmed, placing the fabrics right side together.