Welcome to Stitchin Heaven‘s Journeys BOM Month 9. You all have worked so hard. This month you will learn to use your Corner Beam tool. Sue Tucker & Naz are my helpers for Month 9.
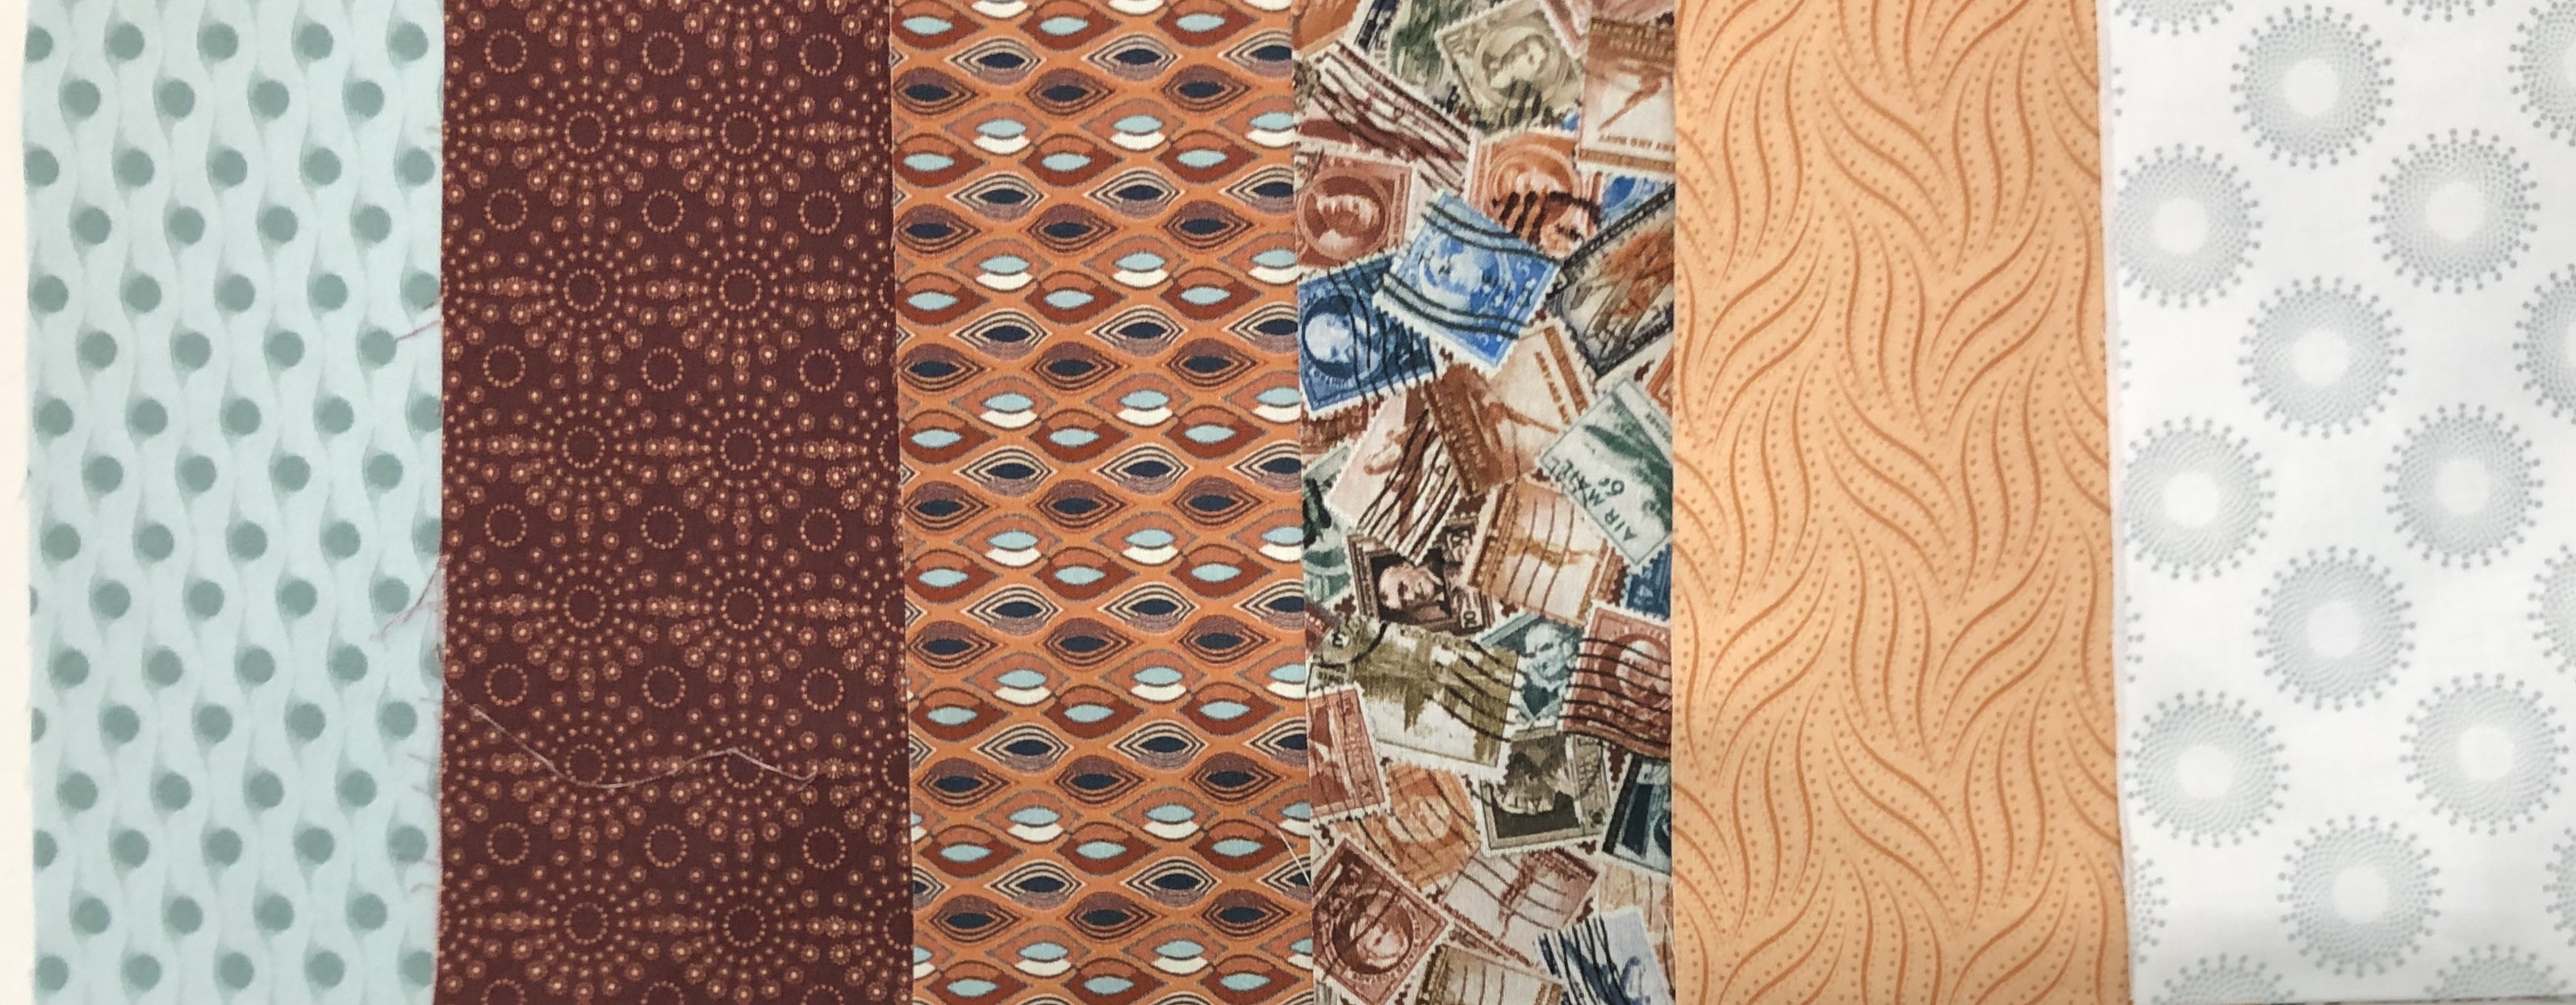
Print 1
Print 4
Print 11
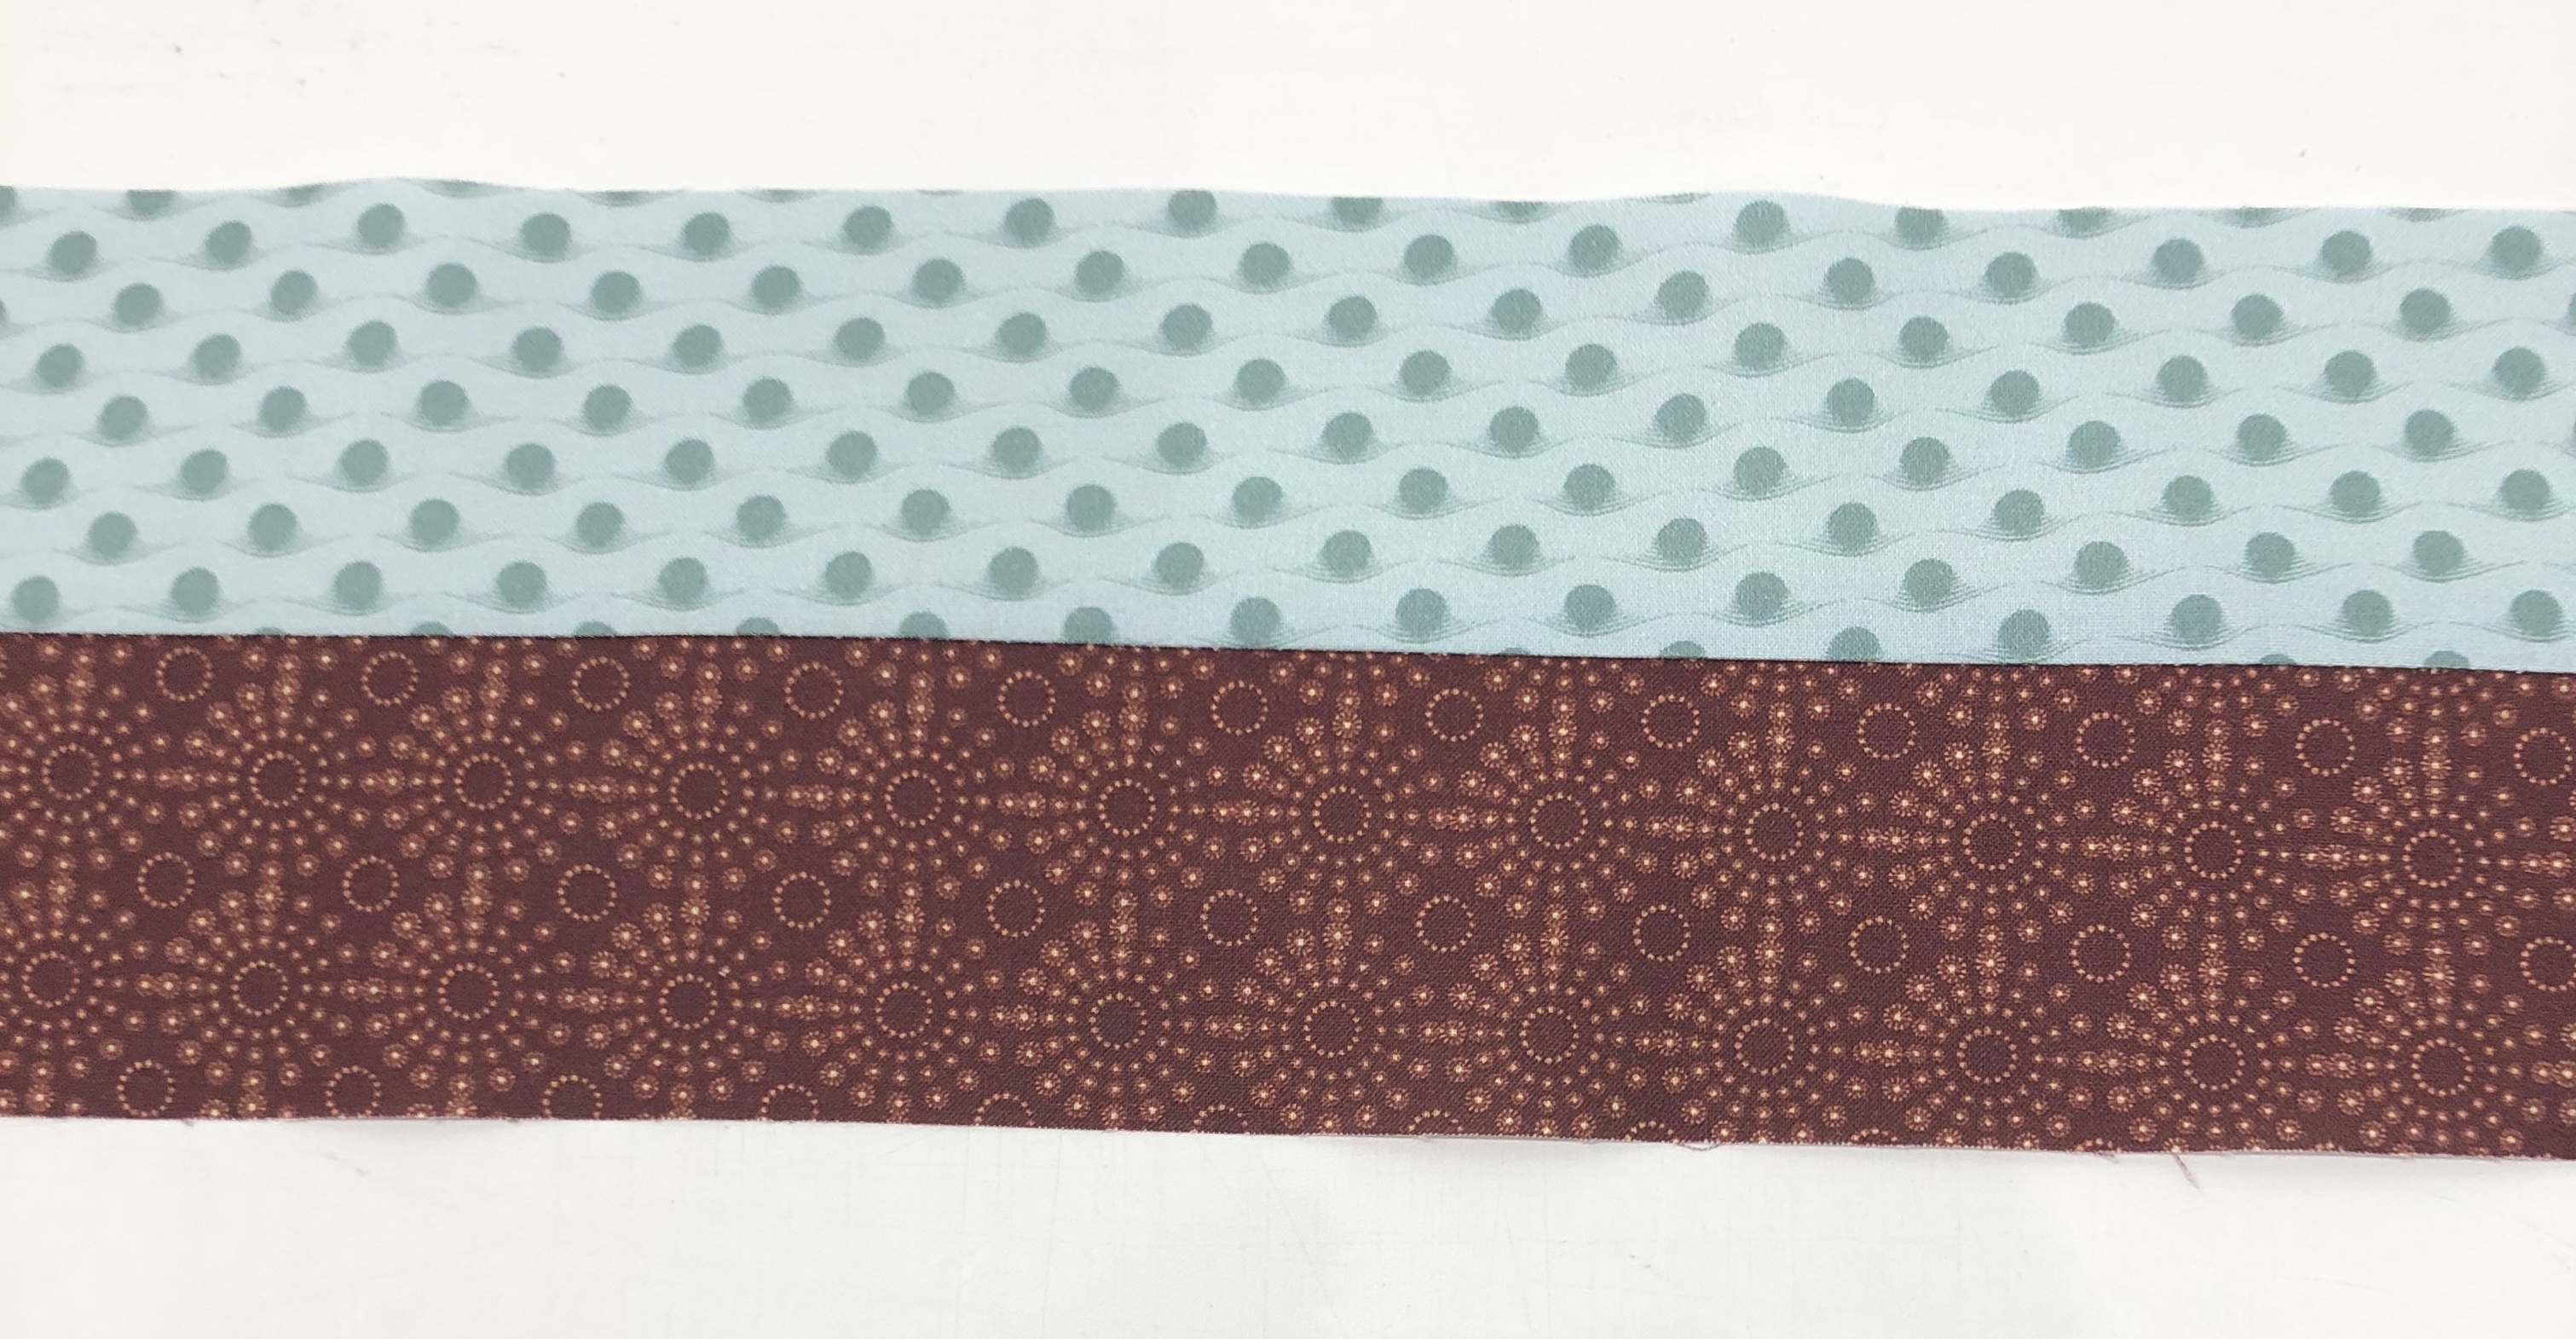
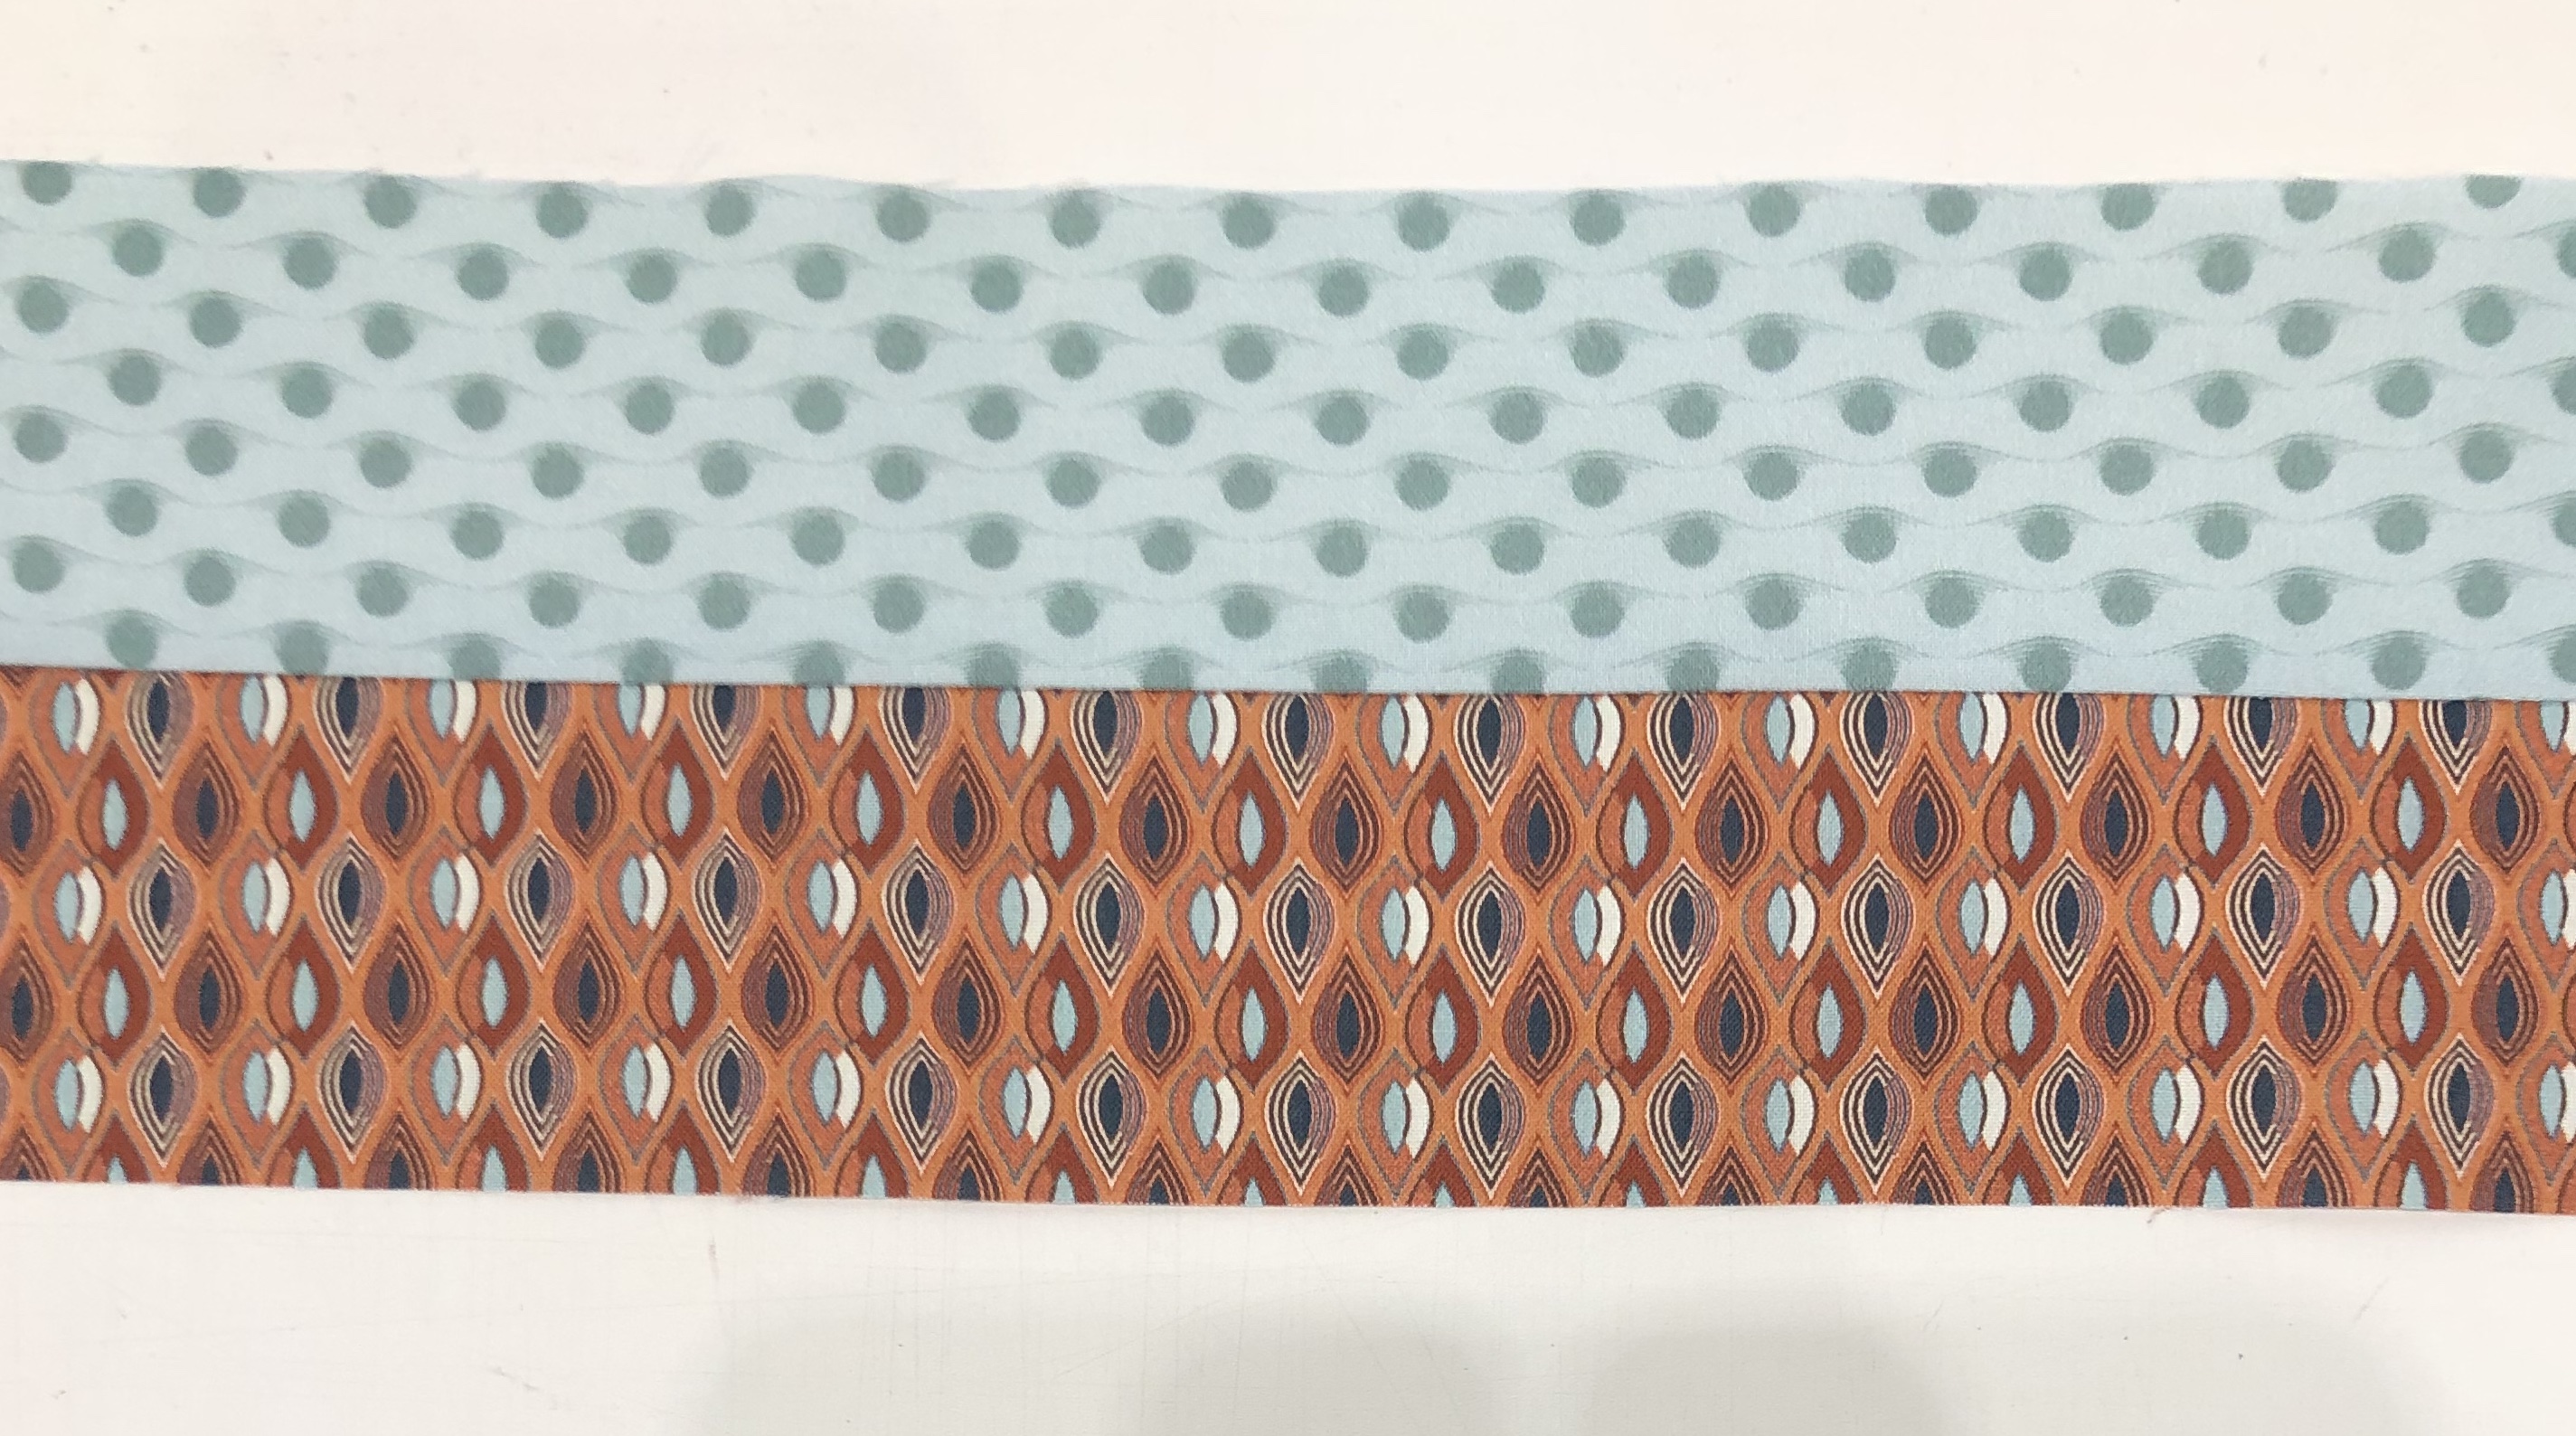
You will be working with Print 1, 4 and 11 this month.
Cutting the Center Beams
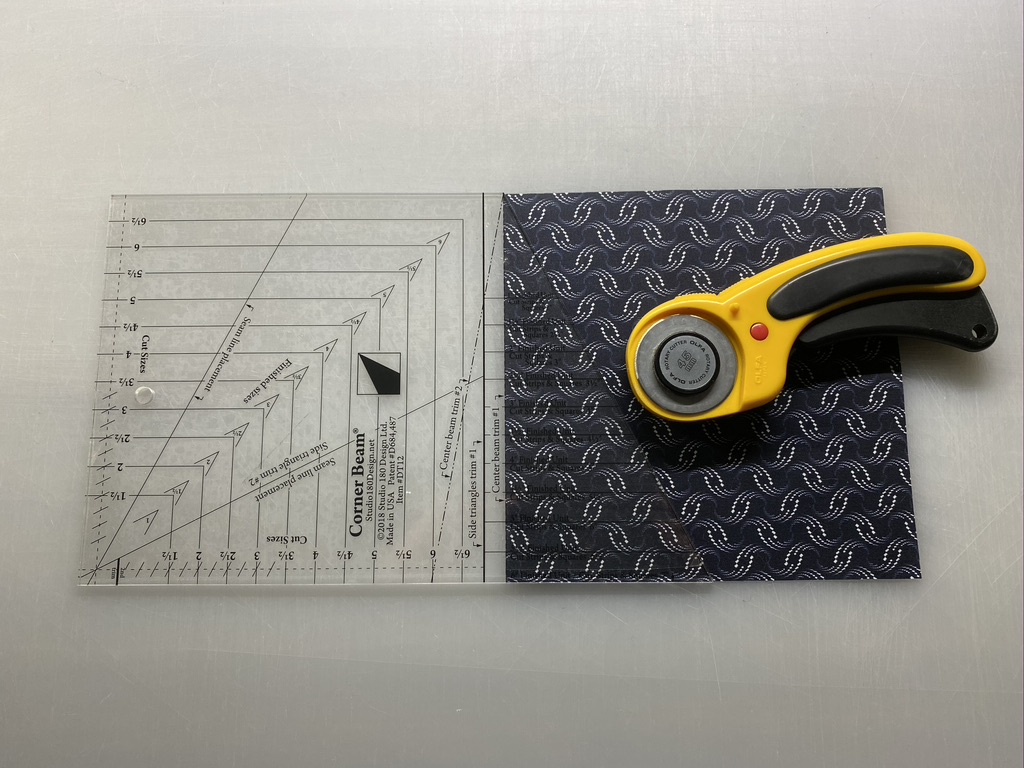
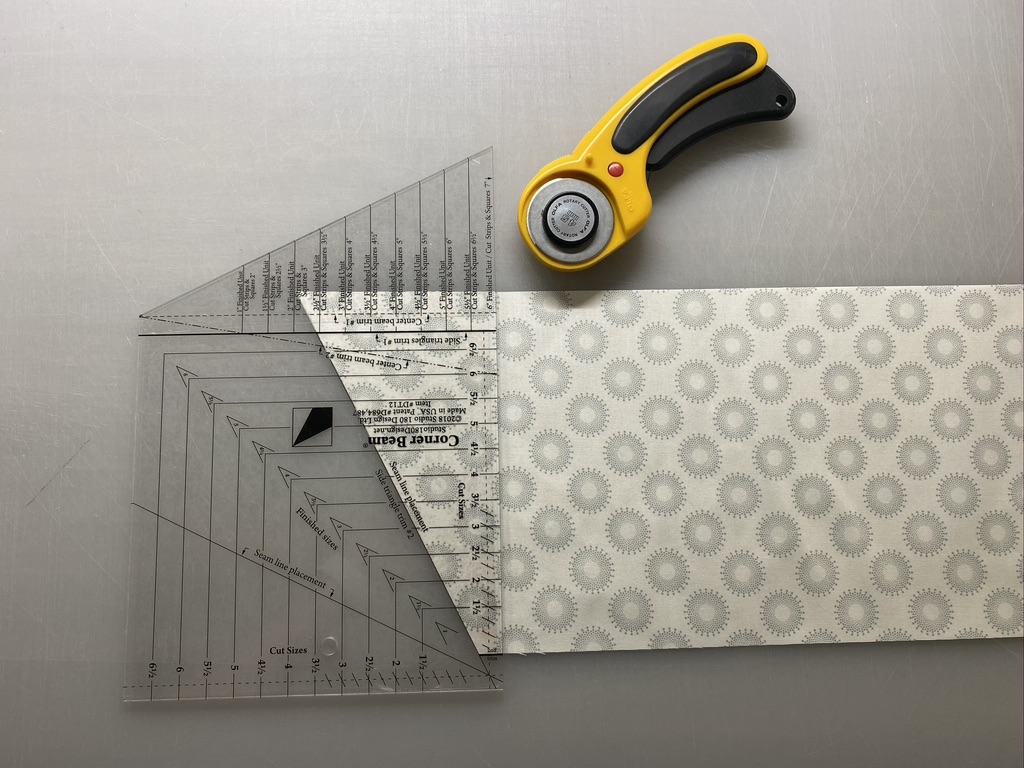
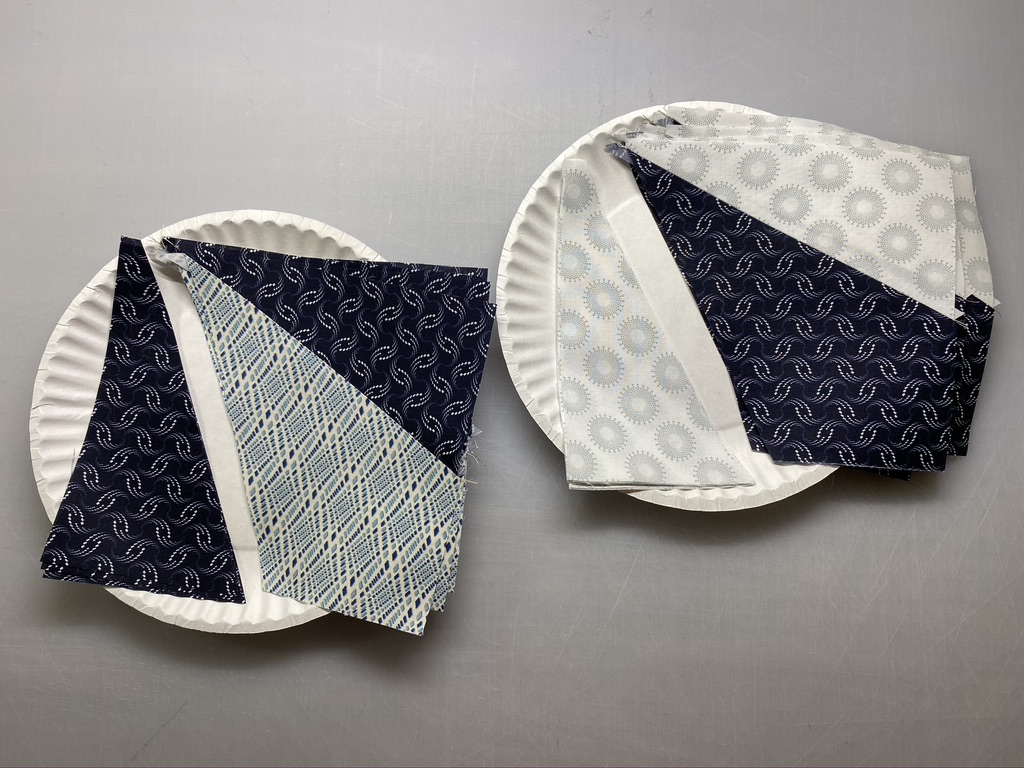
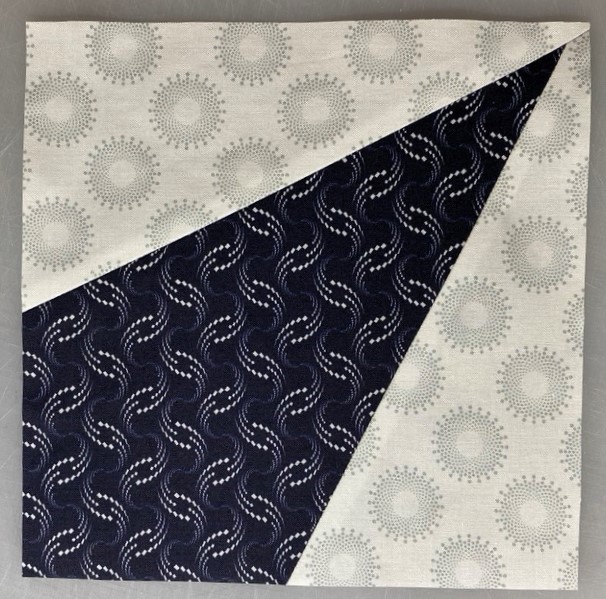
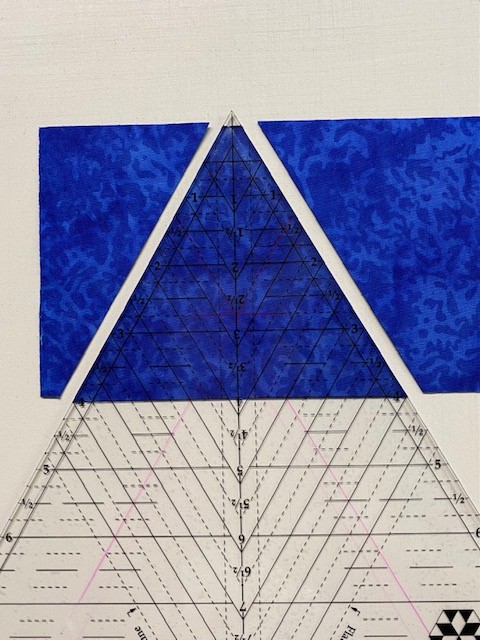
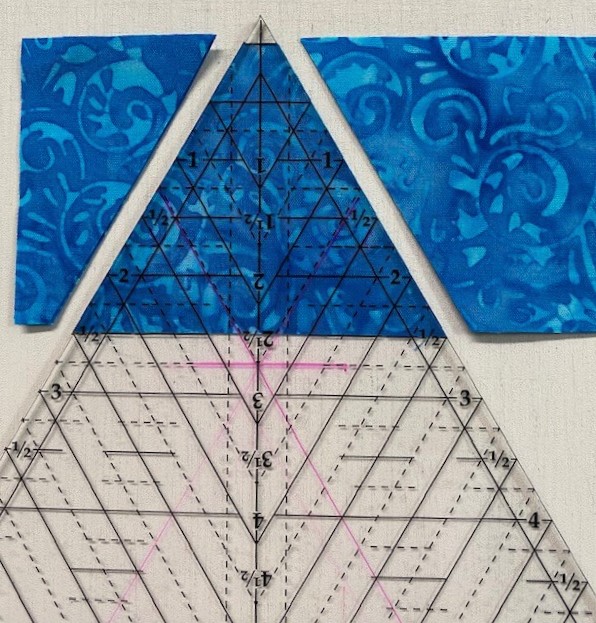
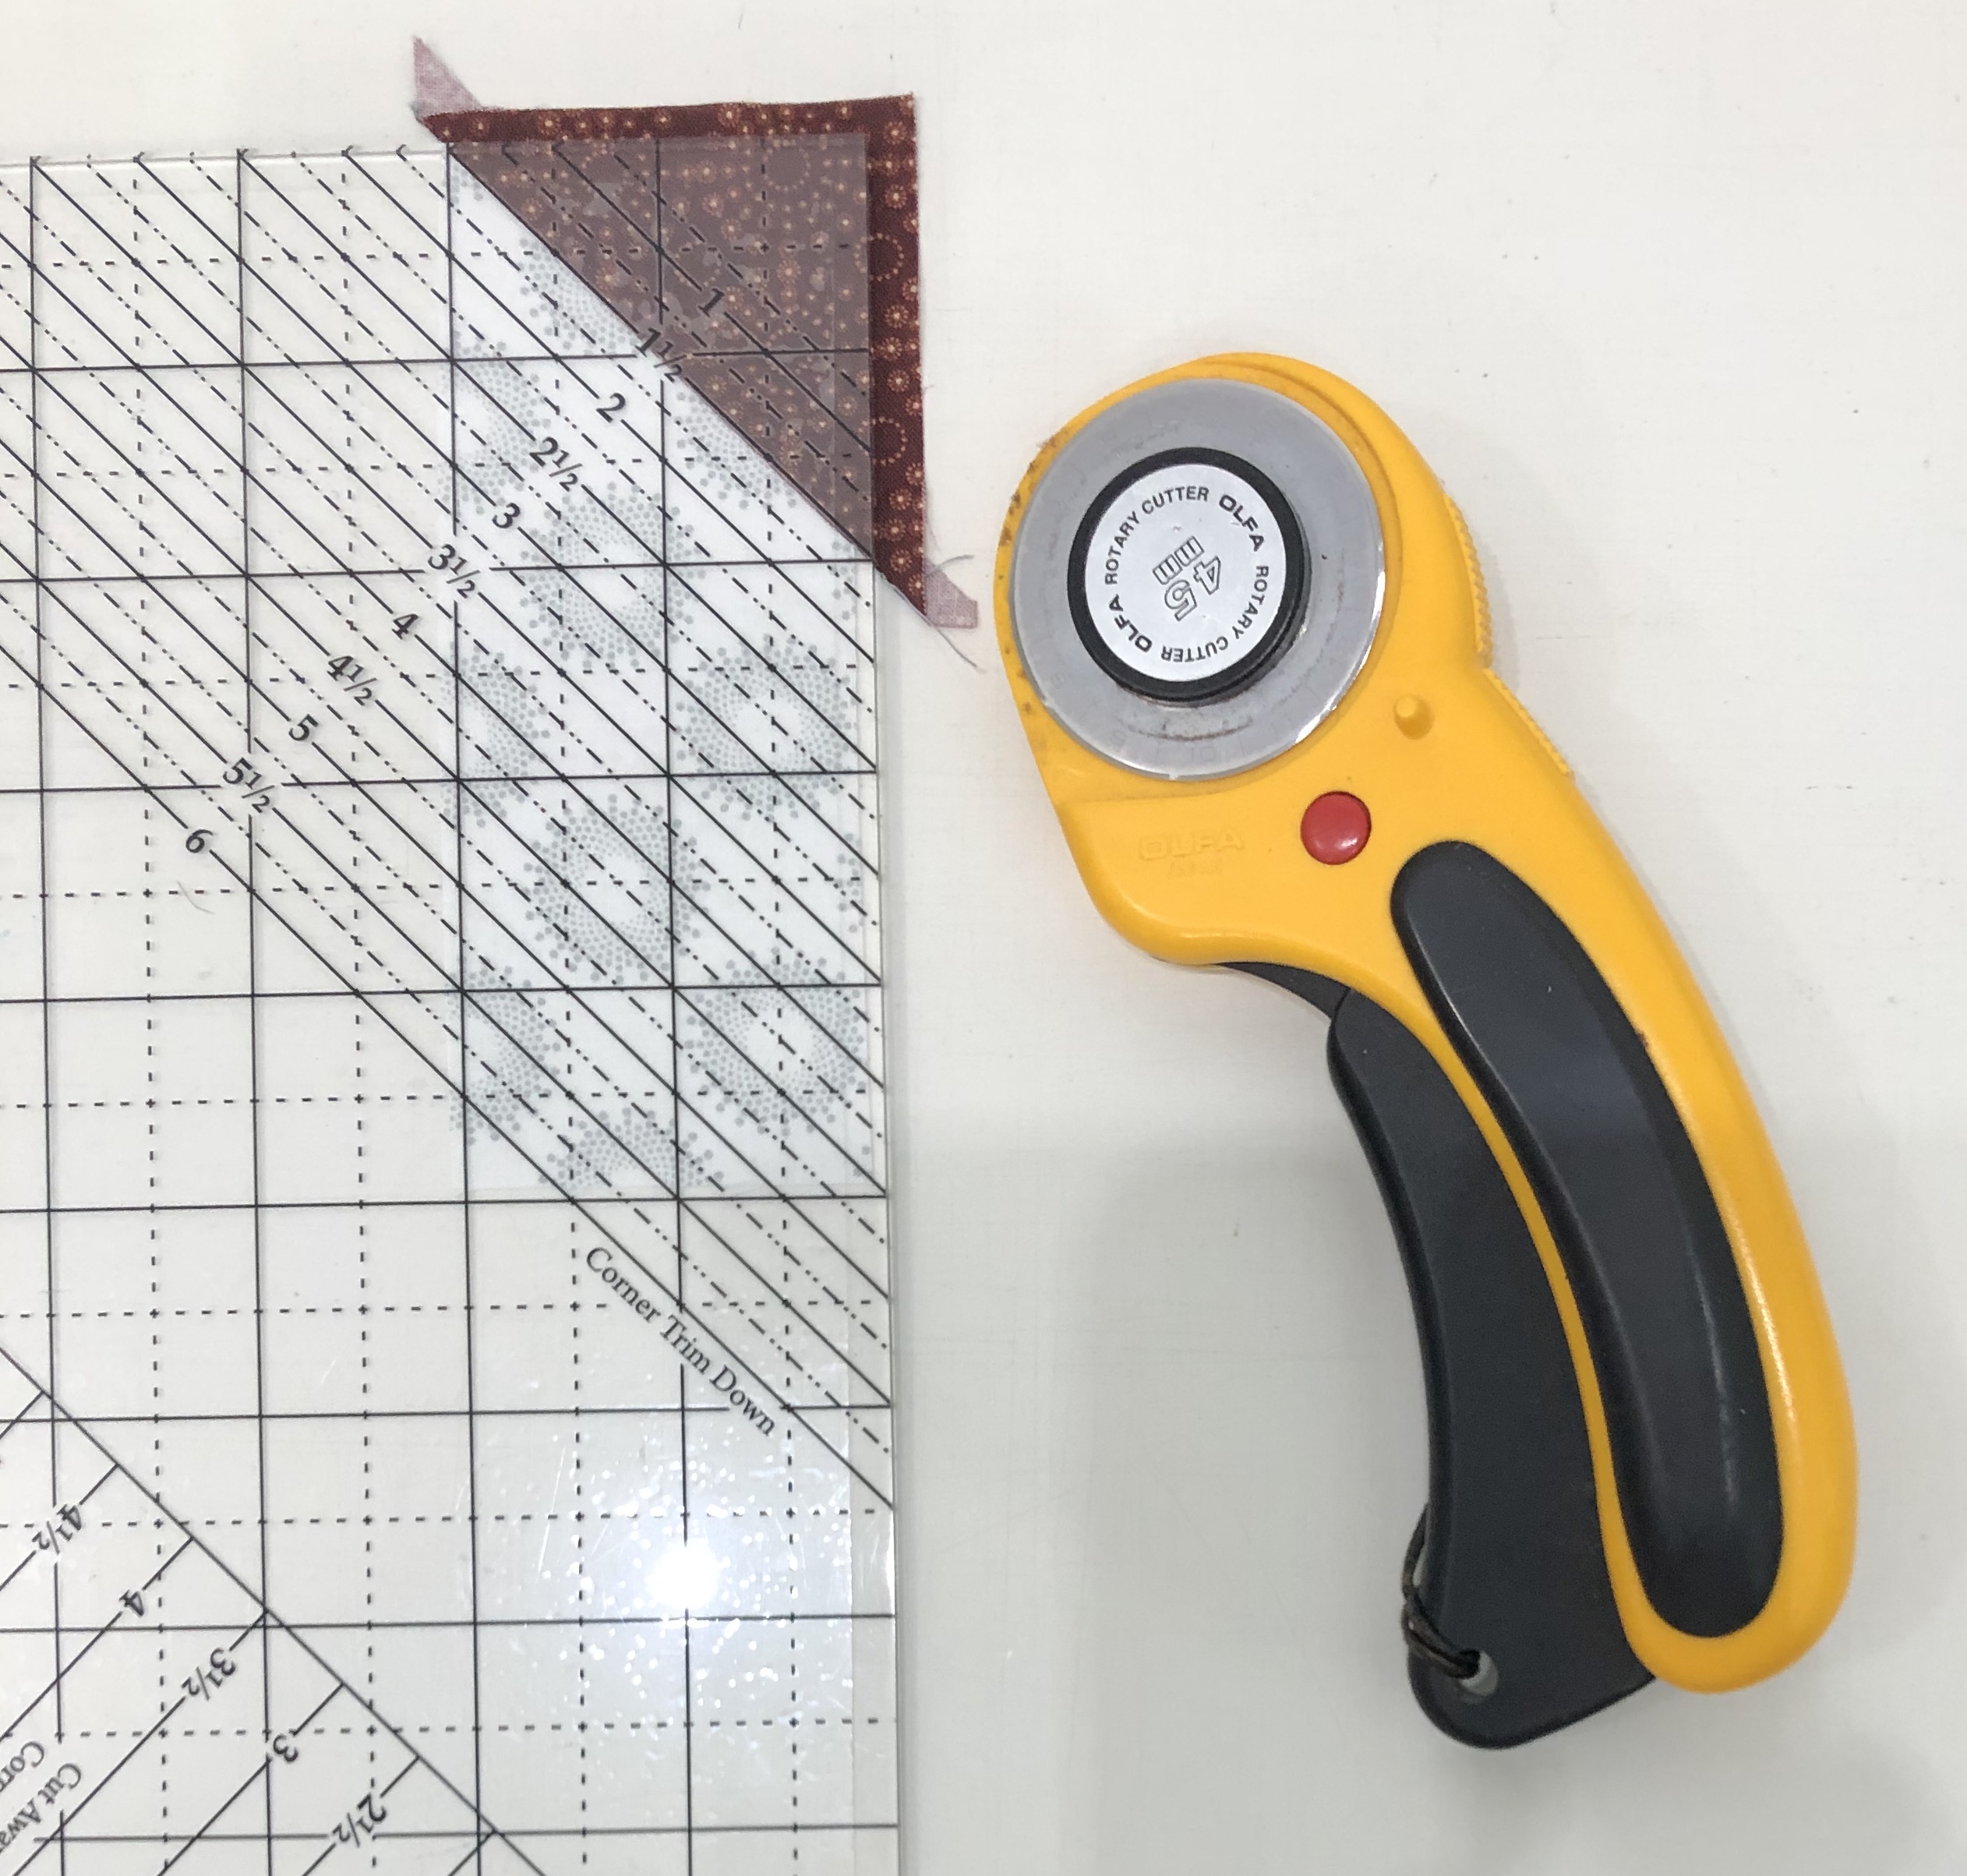
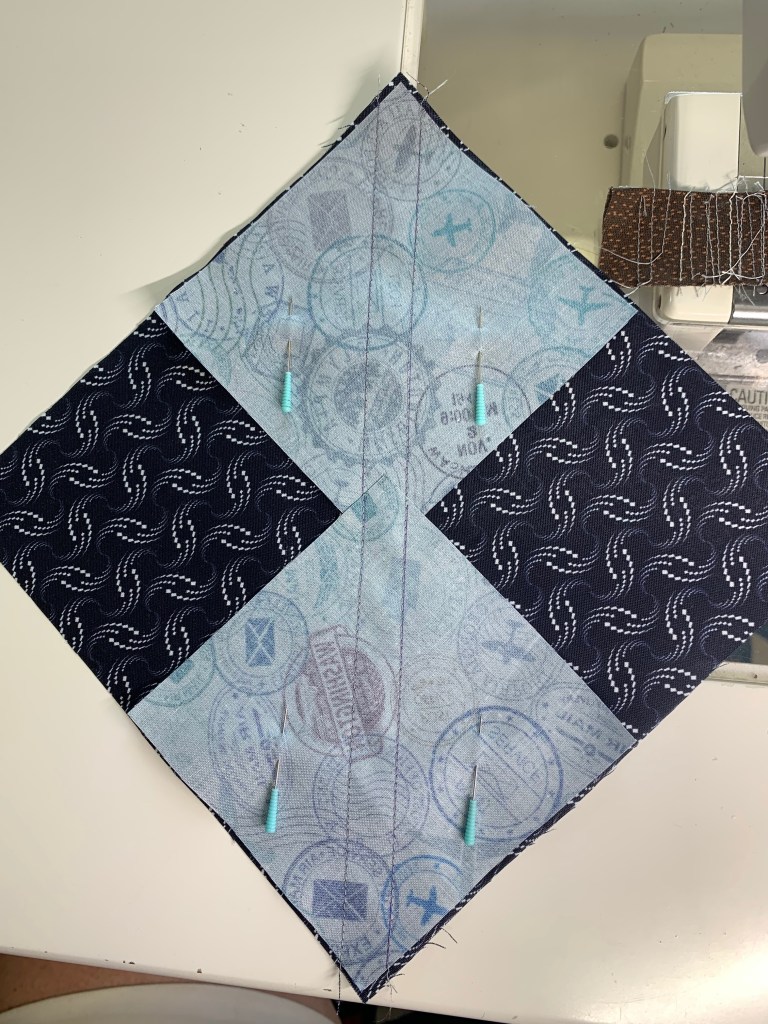
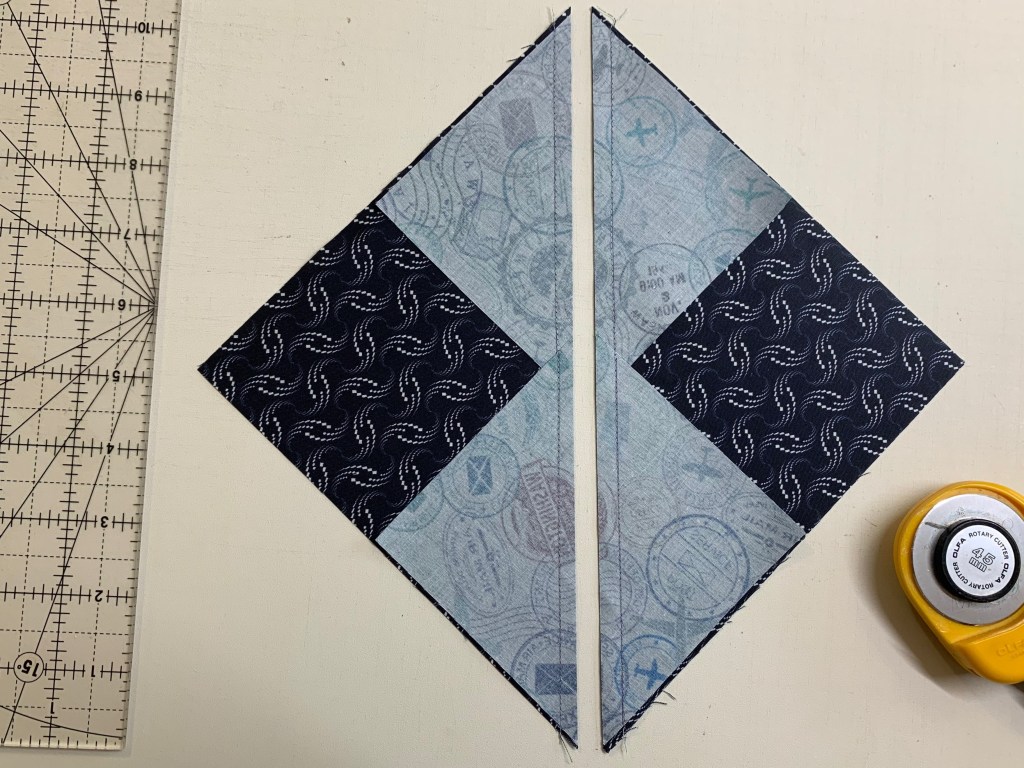
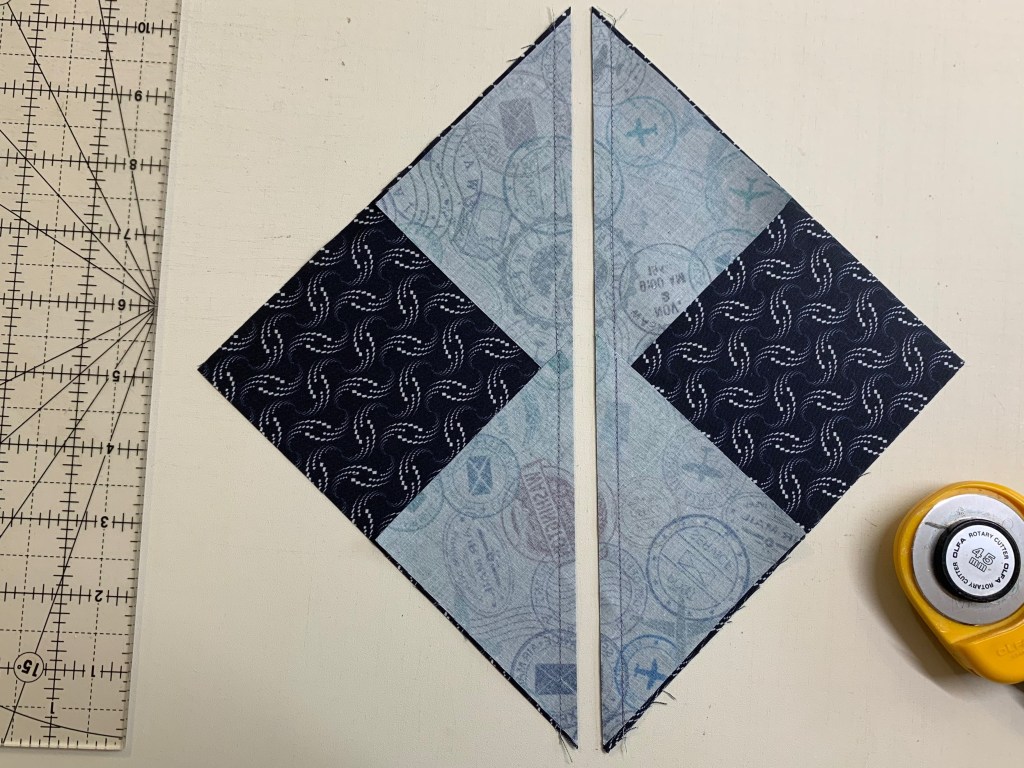
Step 1 – Stack the 7” center beam squares up to 4 layers deep. Align the Center Beam Trim #1 line on your Corner Beam® tool and the 6” finished unit line (bottom edge of tool) with the raw edges of your stack of squares. Cut along the angled edge.
Step 1
Step 1
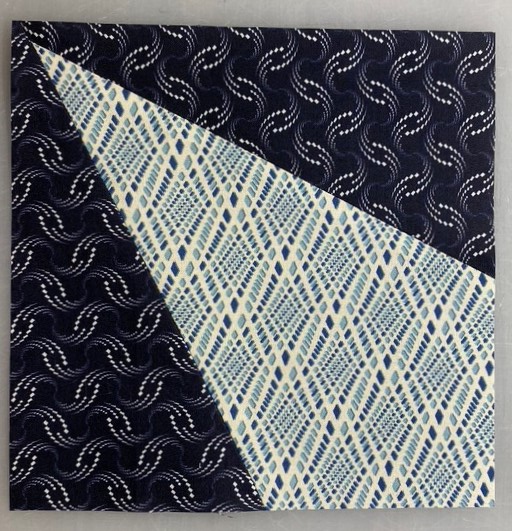
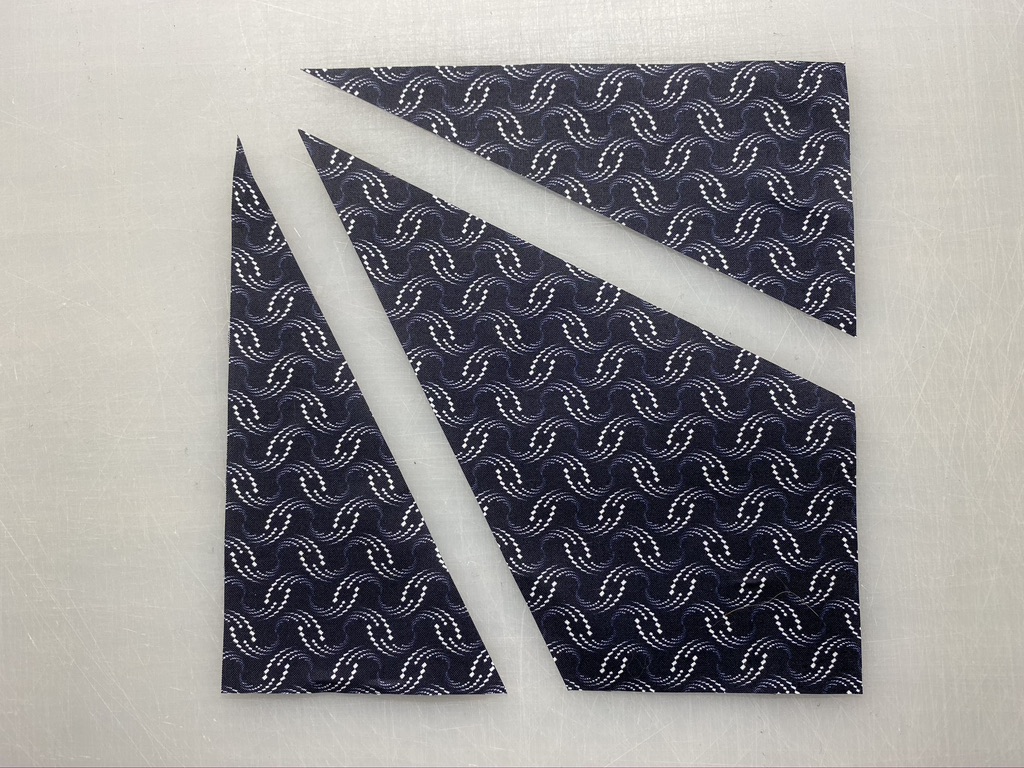
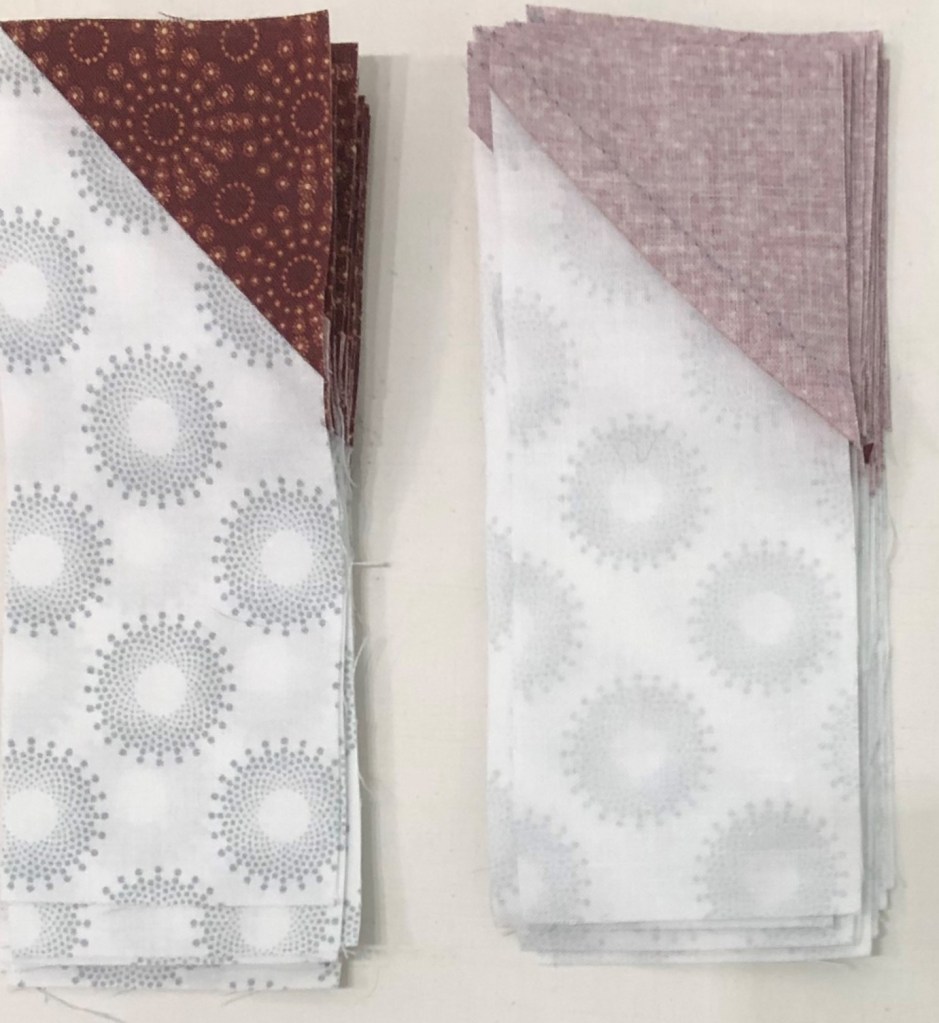
Step 2 – Rotate and cut again. Lift and reposition the Corner Beam® tool, aligning the dashed line labeled Center Beam Trim #2 with the previously trimmed angled edge. Cut again. Do this for all your center beam squares.
Step 2
Step 2
Cutting the Side Triangles
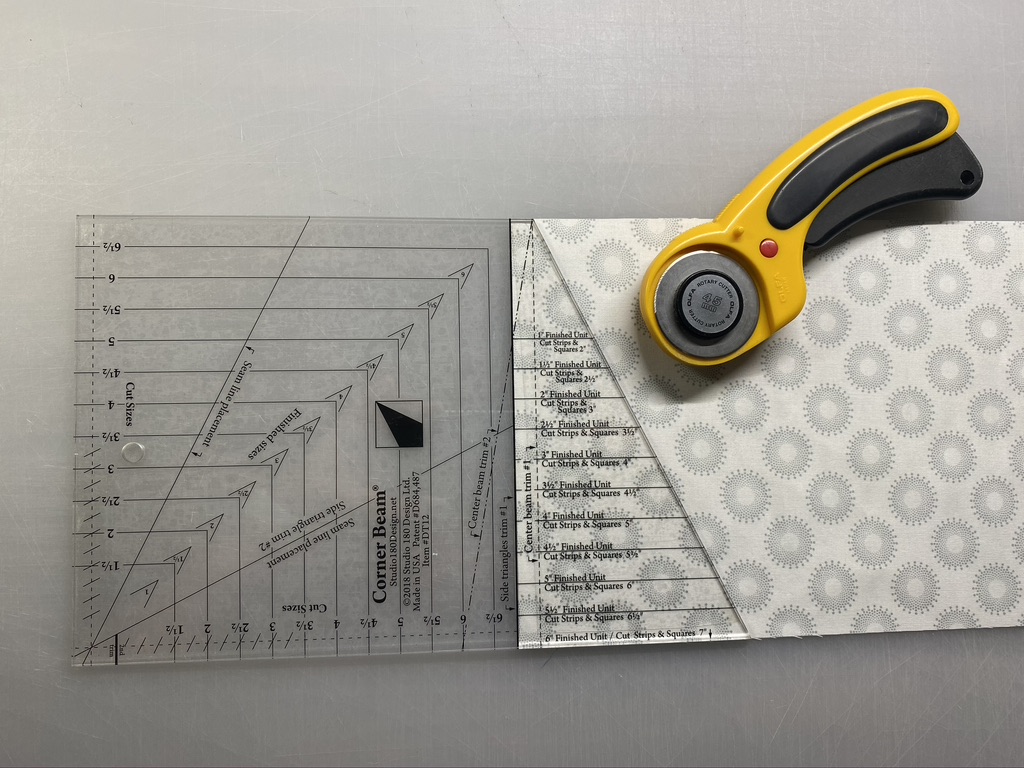
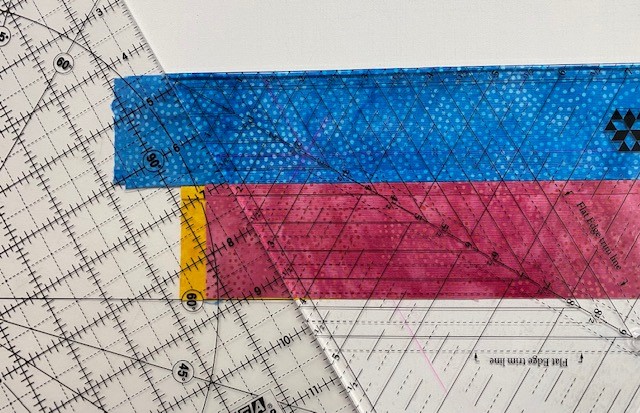
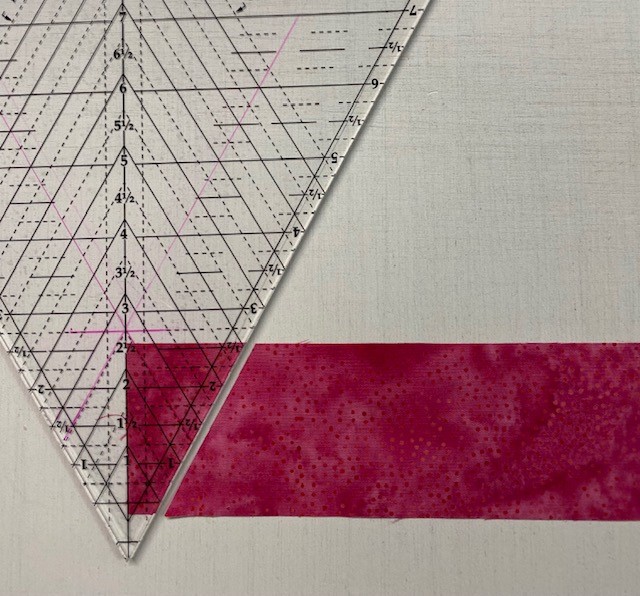
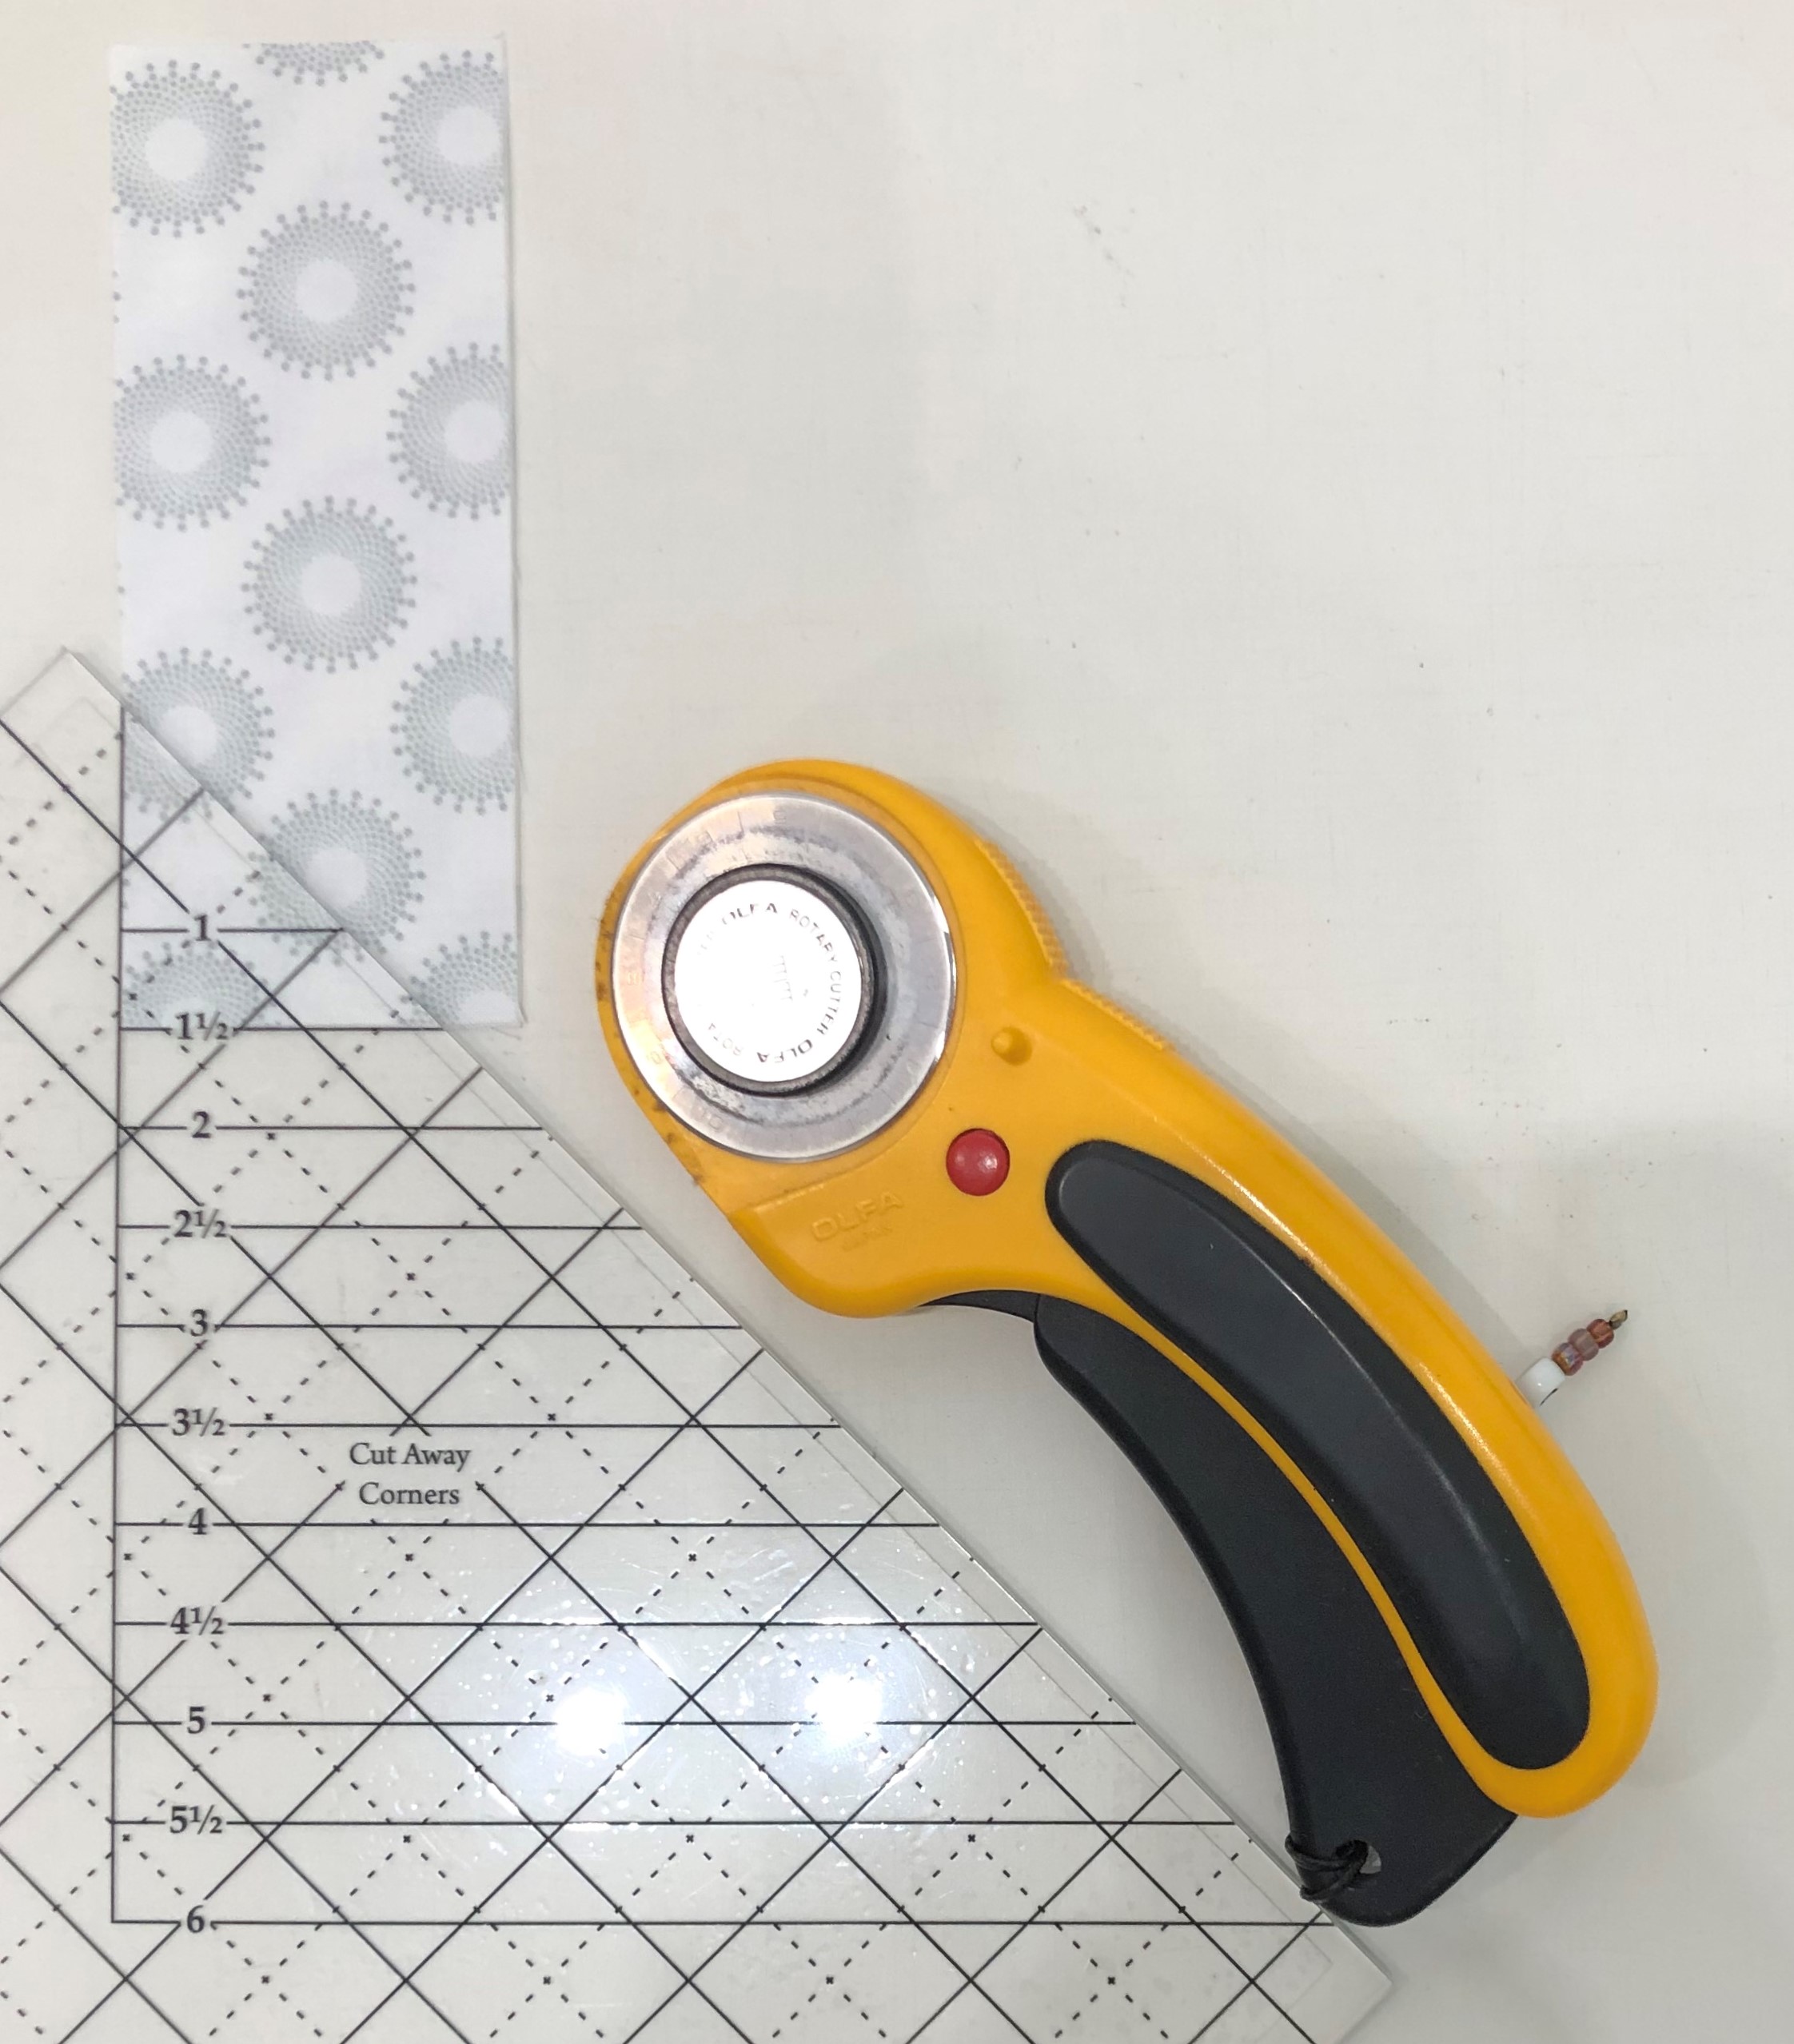
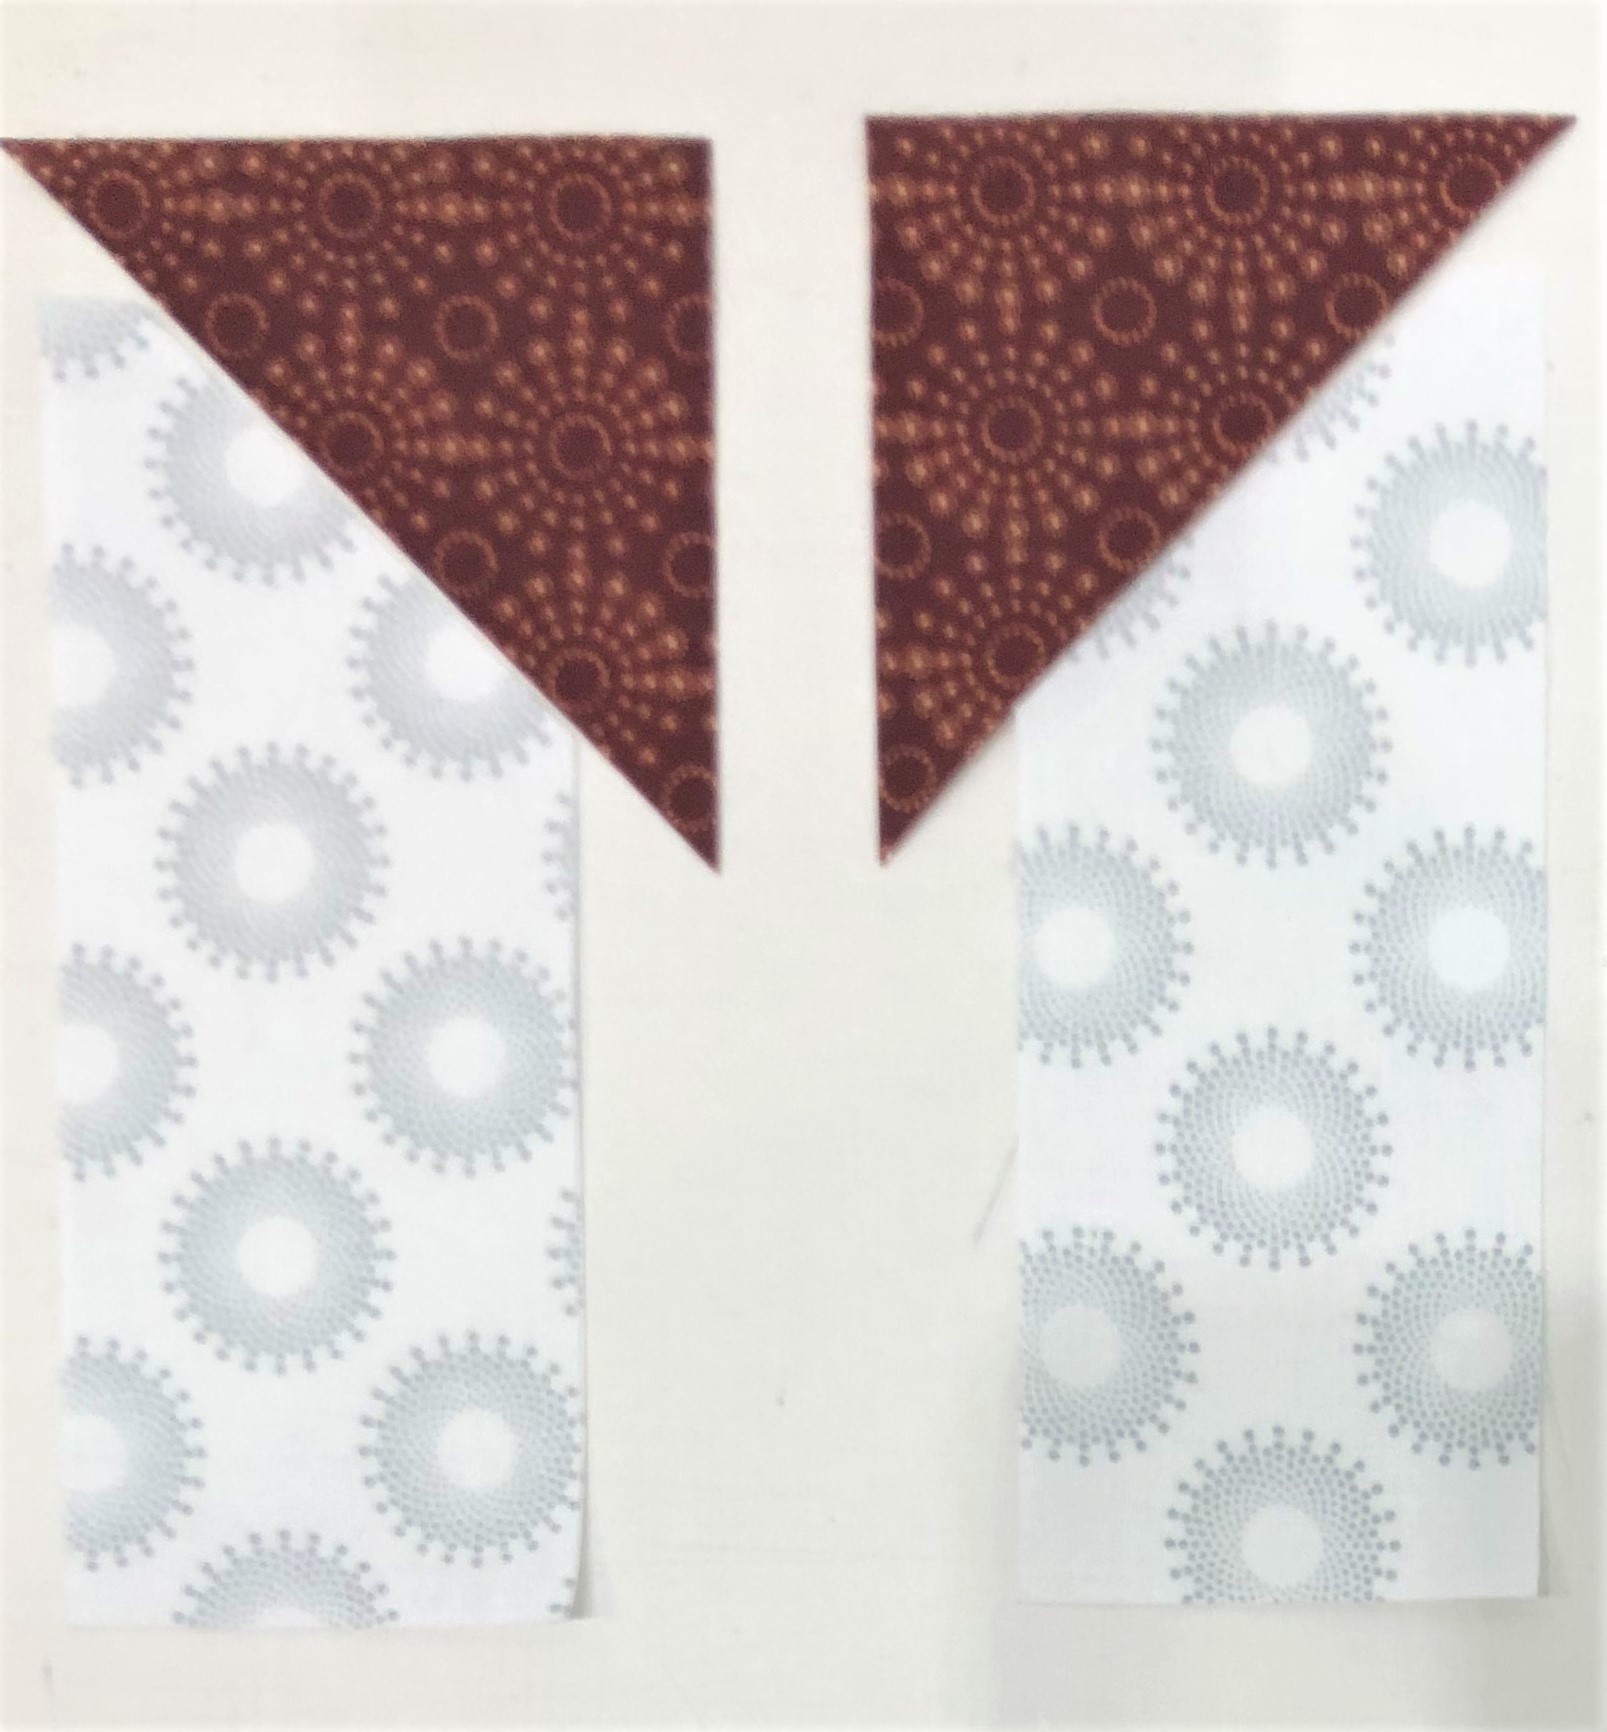
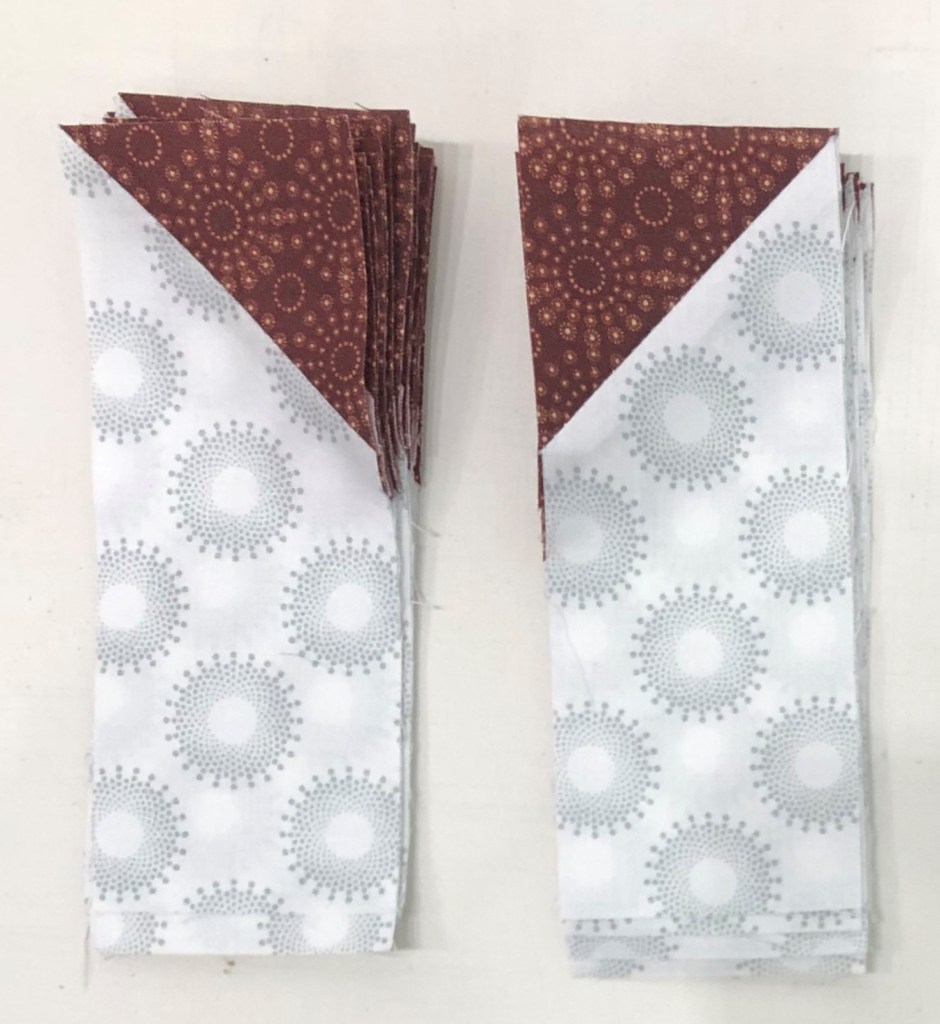
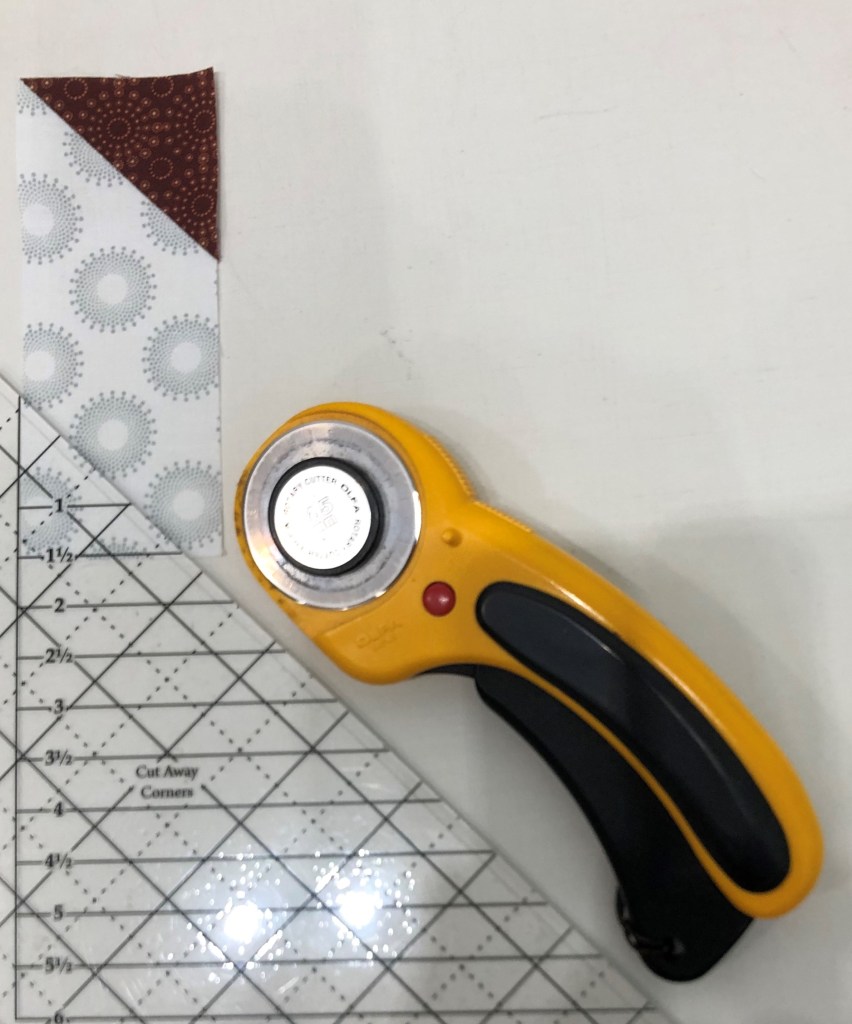
Step 3 – Fold the side triangle strip right or wrong sides together in order to yield mirror images. Trim the selvages and position the Side Triangles Trim #1 line on your strips, lining up the 6” finished unit line (bottom of the tool) with the bottom raw edge of the strip. Cut along the angled edge.
Step 3
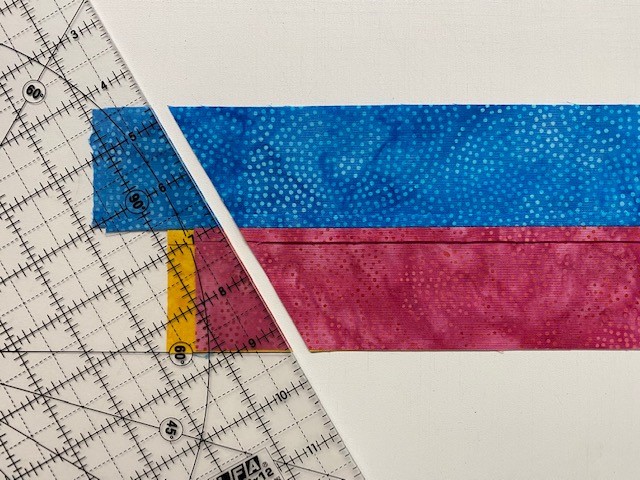
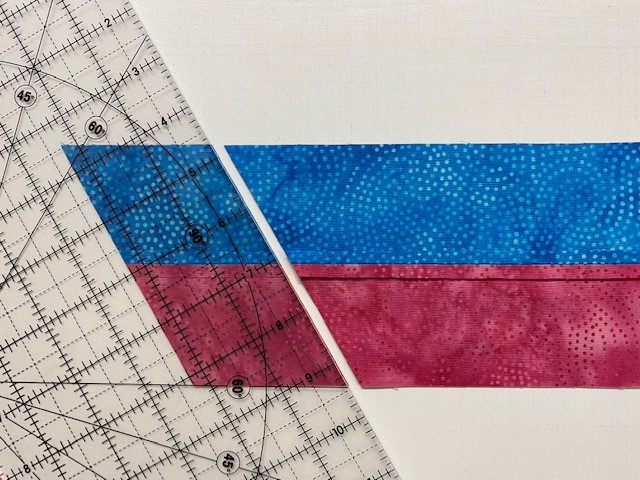
Step 4 – Rotatethe Corner Beam® tool and position the Side Triangles Trim #2 line on the edge of the strip you just cut, making sure the bottom of your strip is lined up along the second trim line. Cut along the edge. Continue cutting until you have 8 pairs of side triangles from Print 11 and 4 pairs of side triangles from Print 1.
Step 4
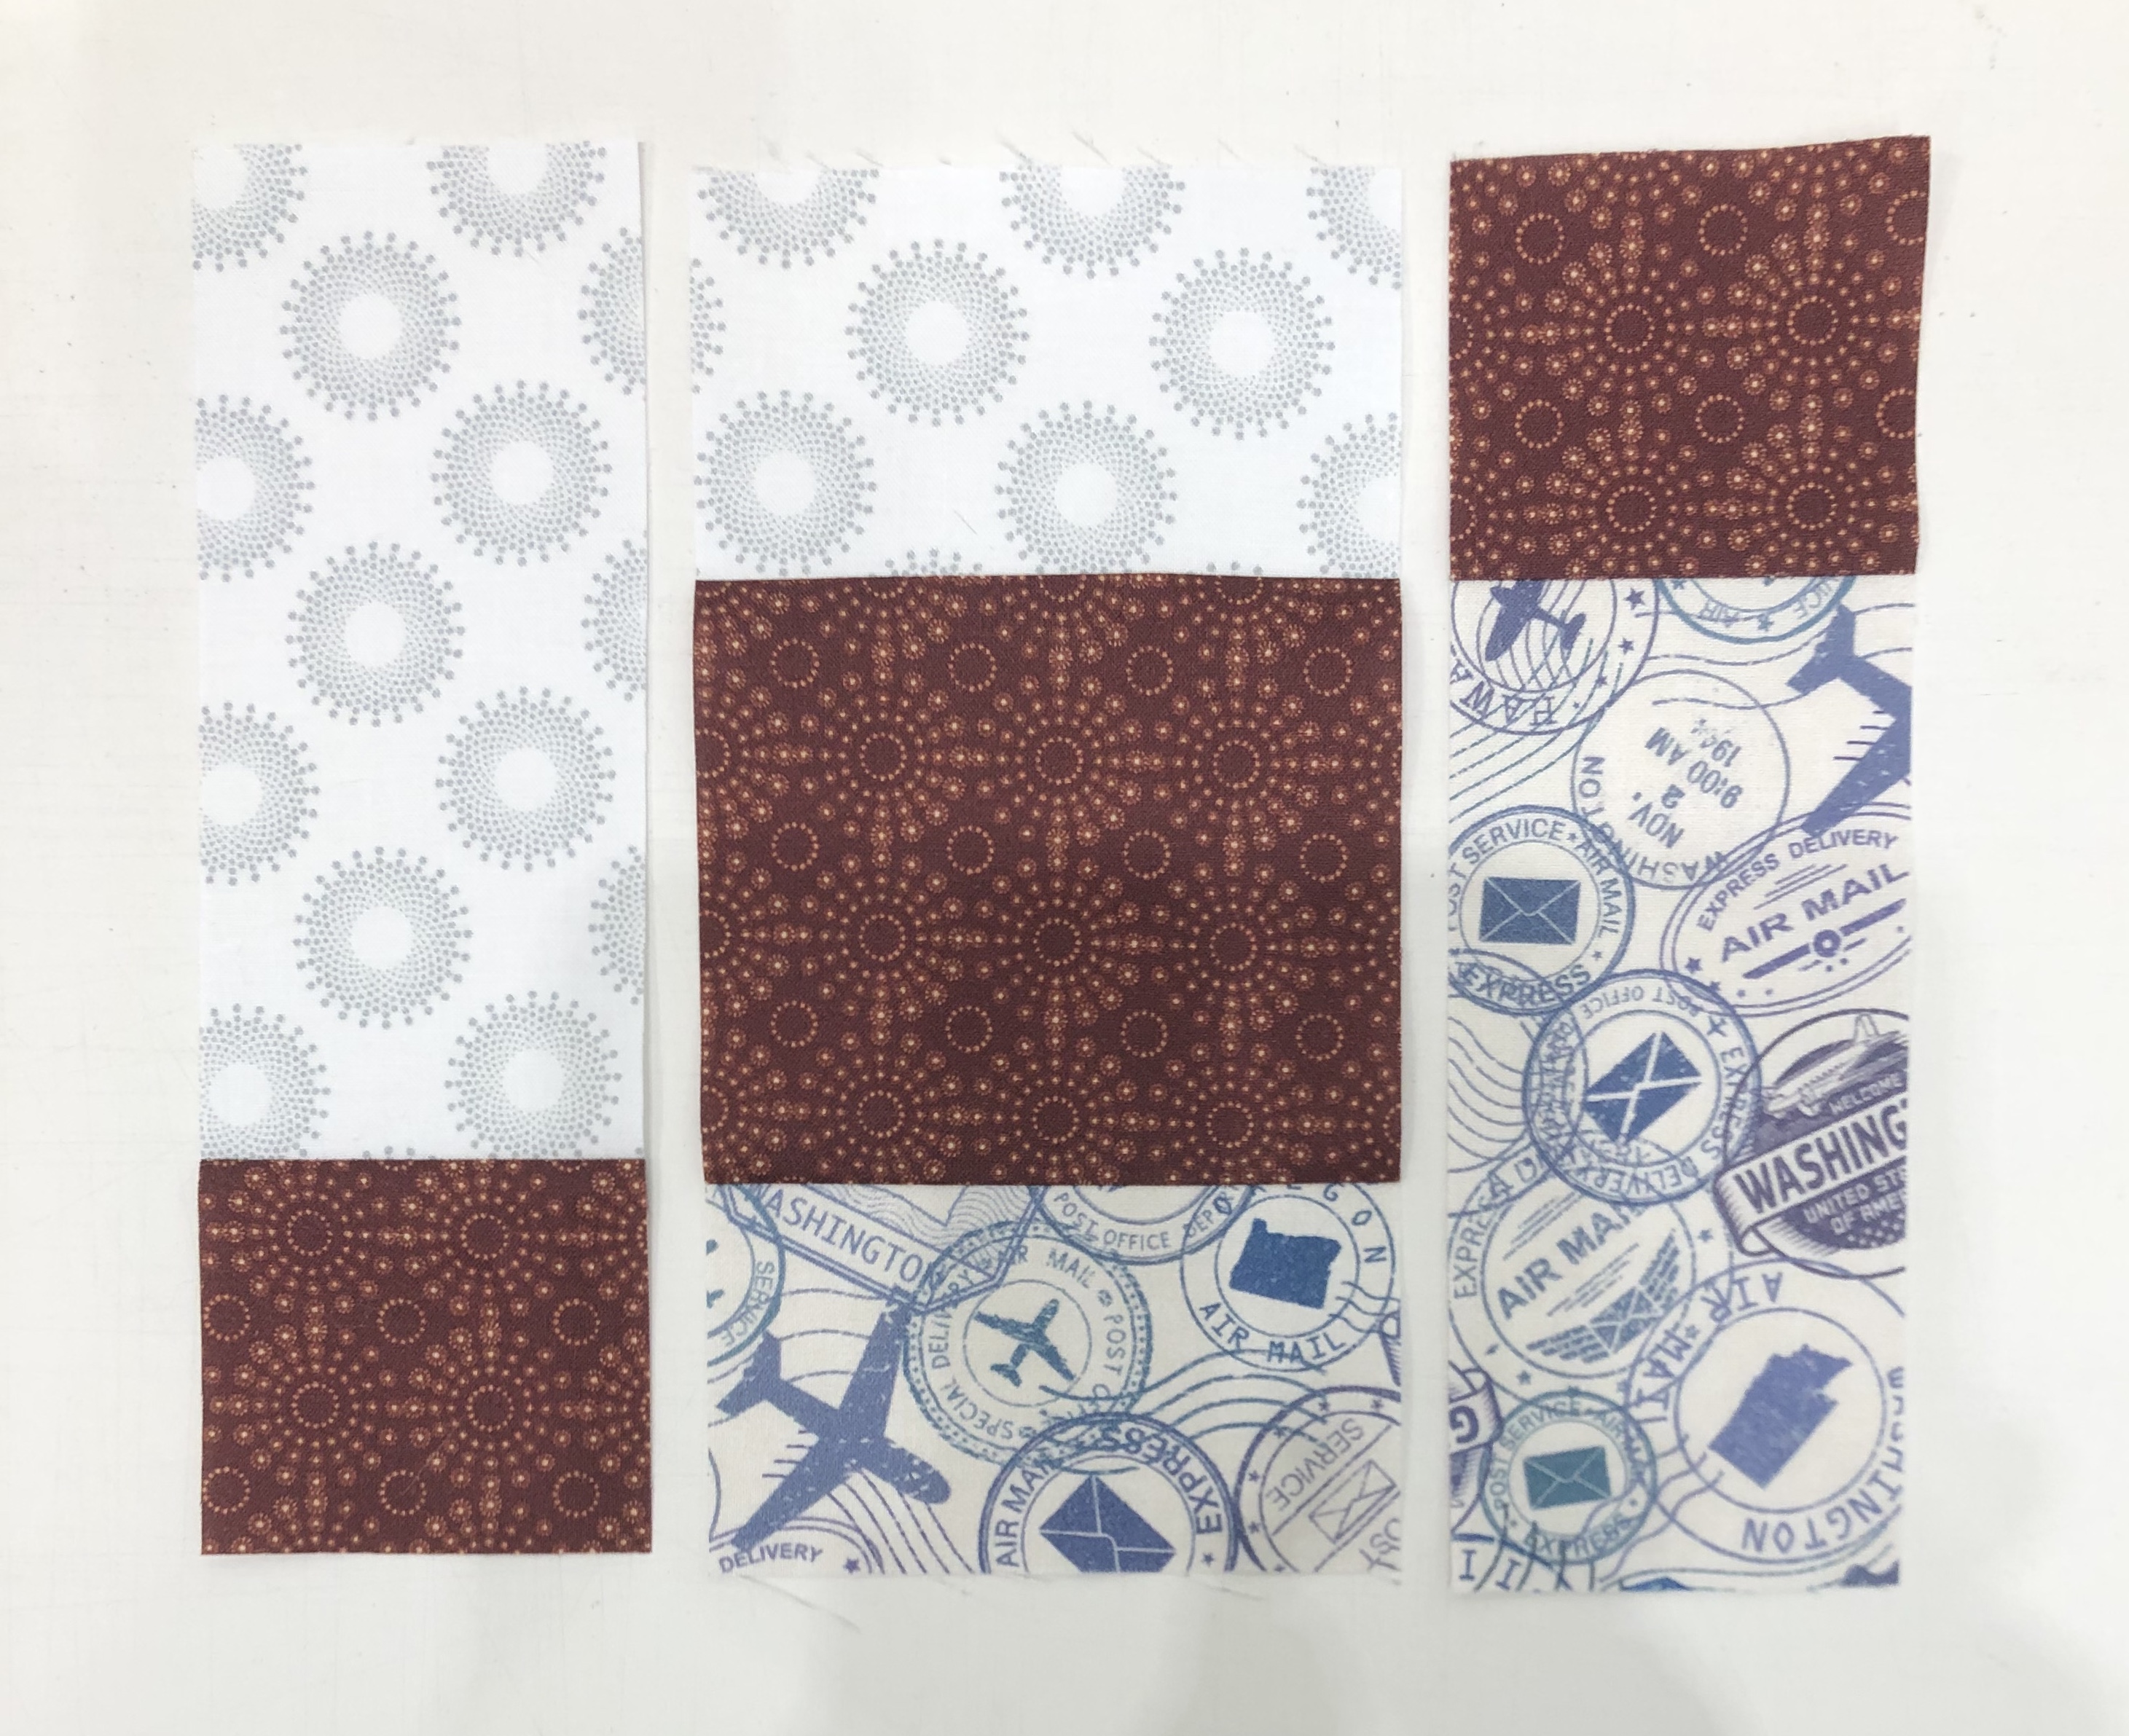
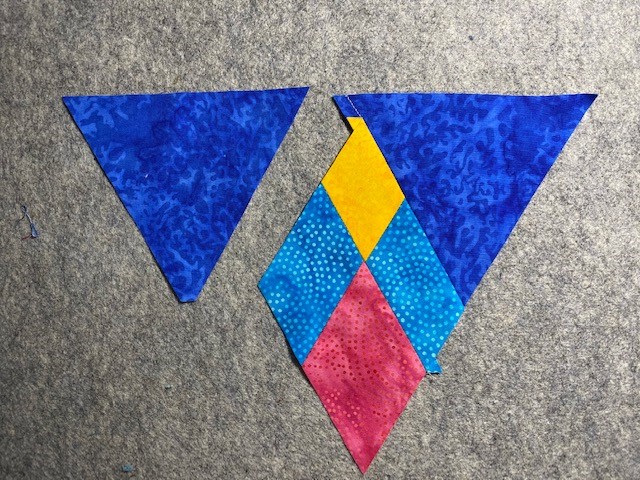
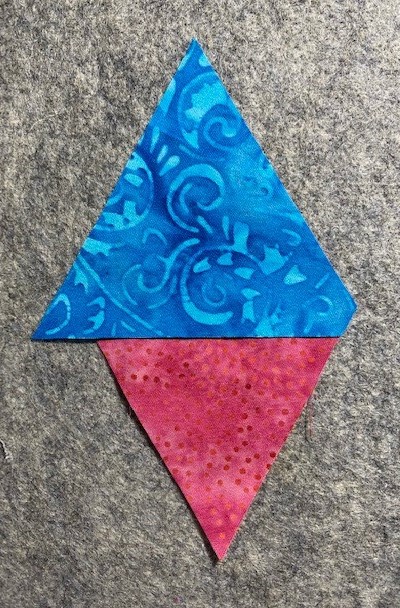
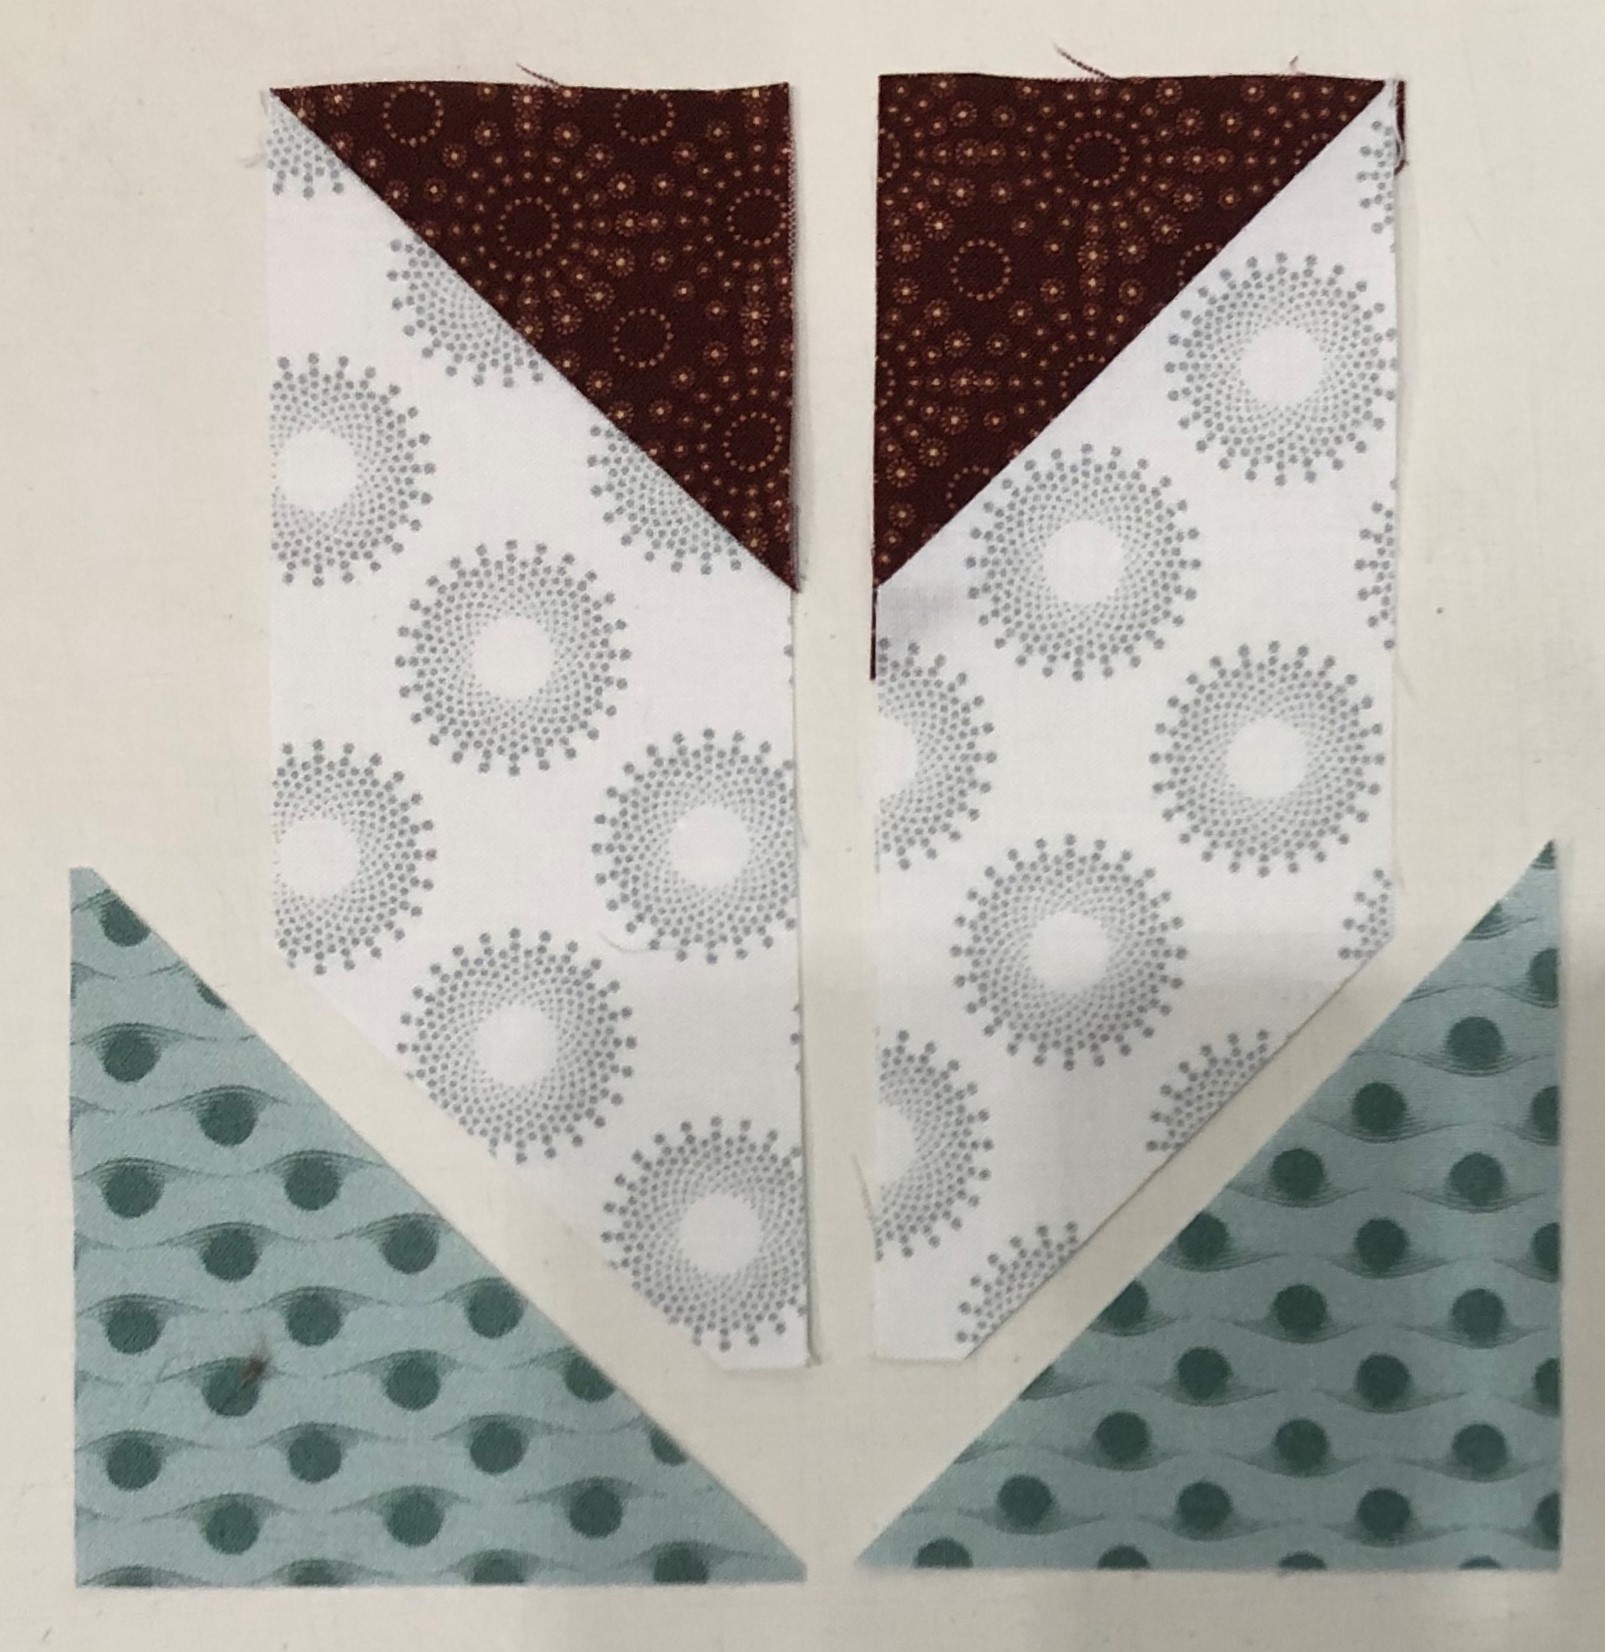
Step 5 – Lay out and organize your pieces into the correct positions as shown to ensure you sew the proper sides together.
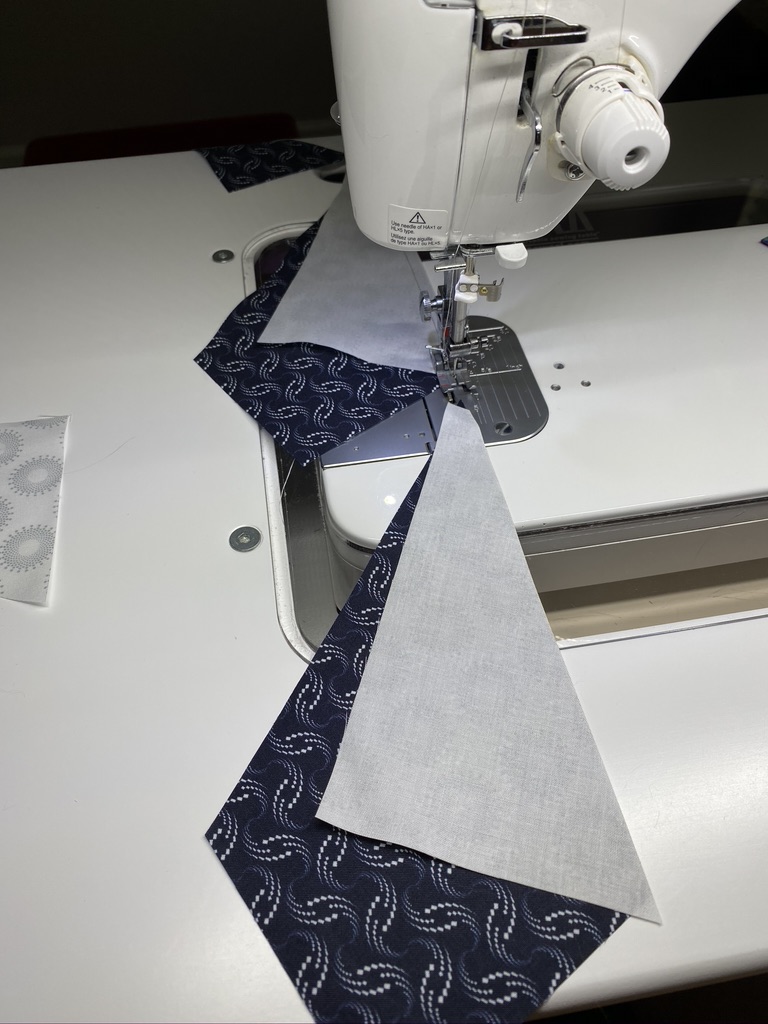
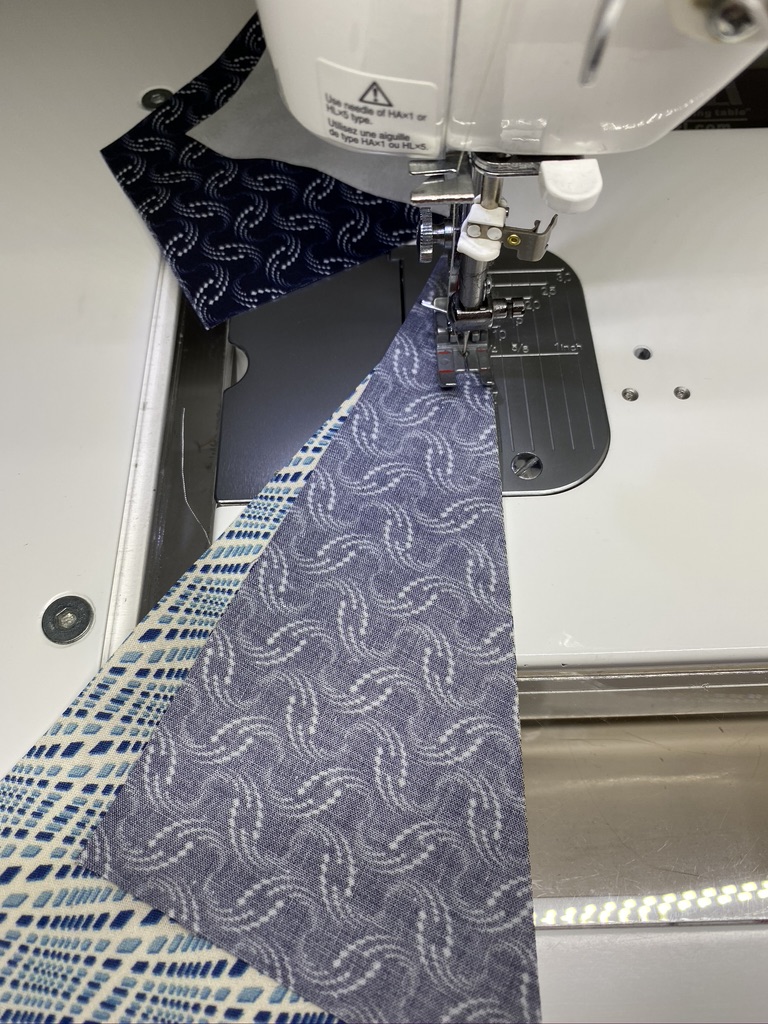
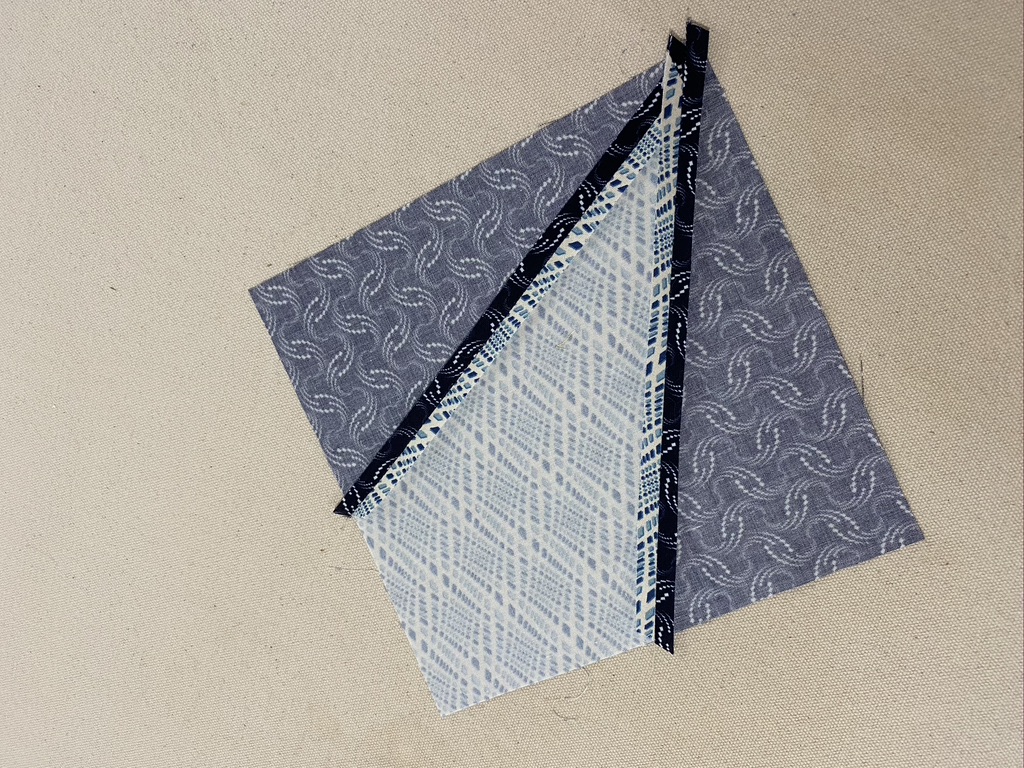
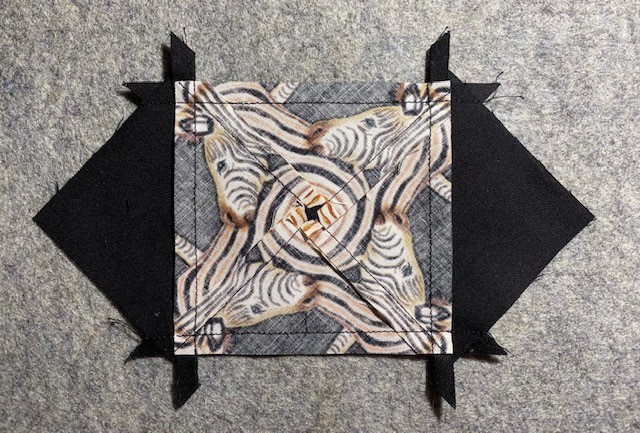
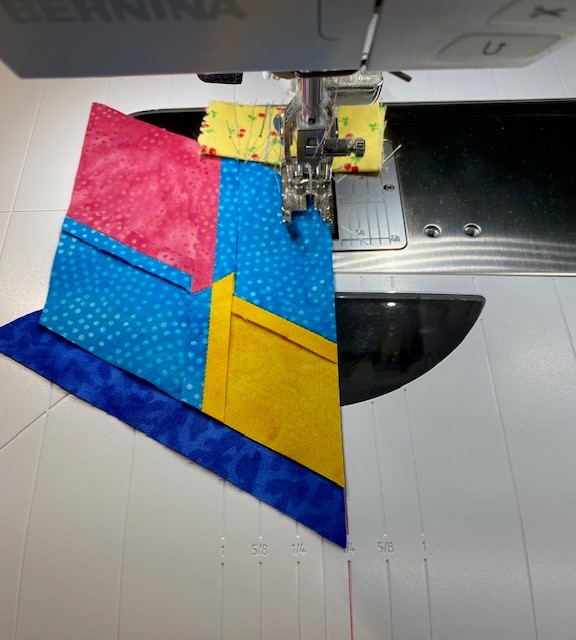
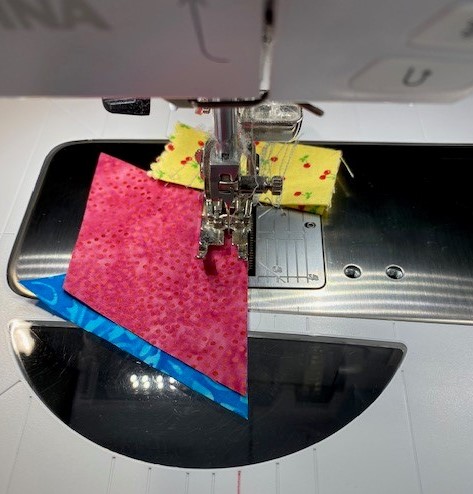
Step 6 – Stitch the first side triangle to each center beam, making sure you sew the correct triangle edge to the center beam. Press the seams open.
Press seams open
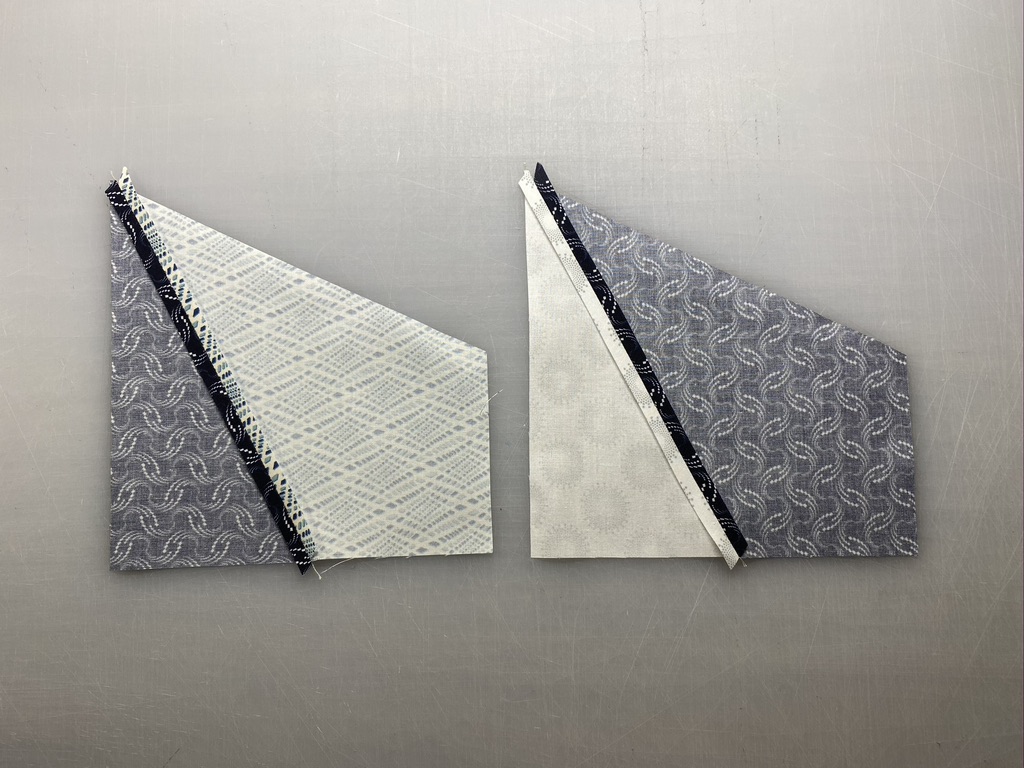
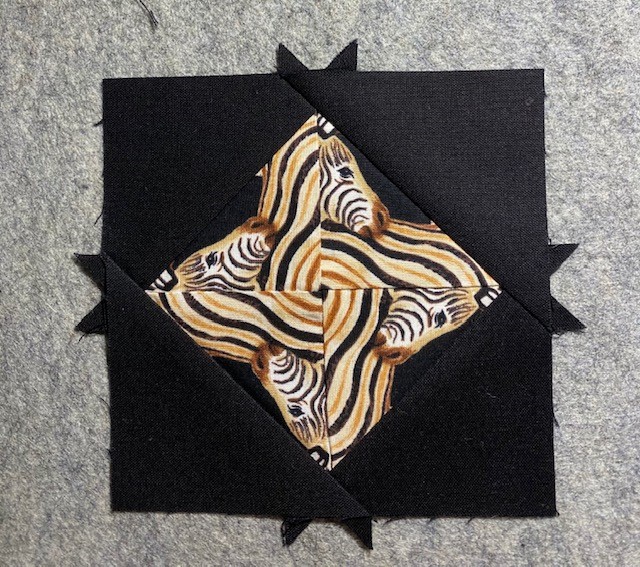
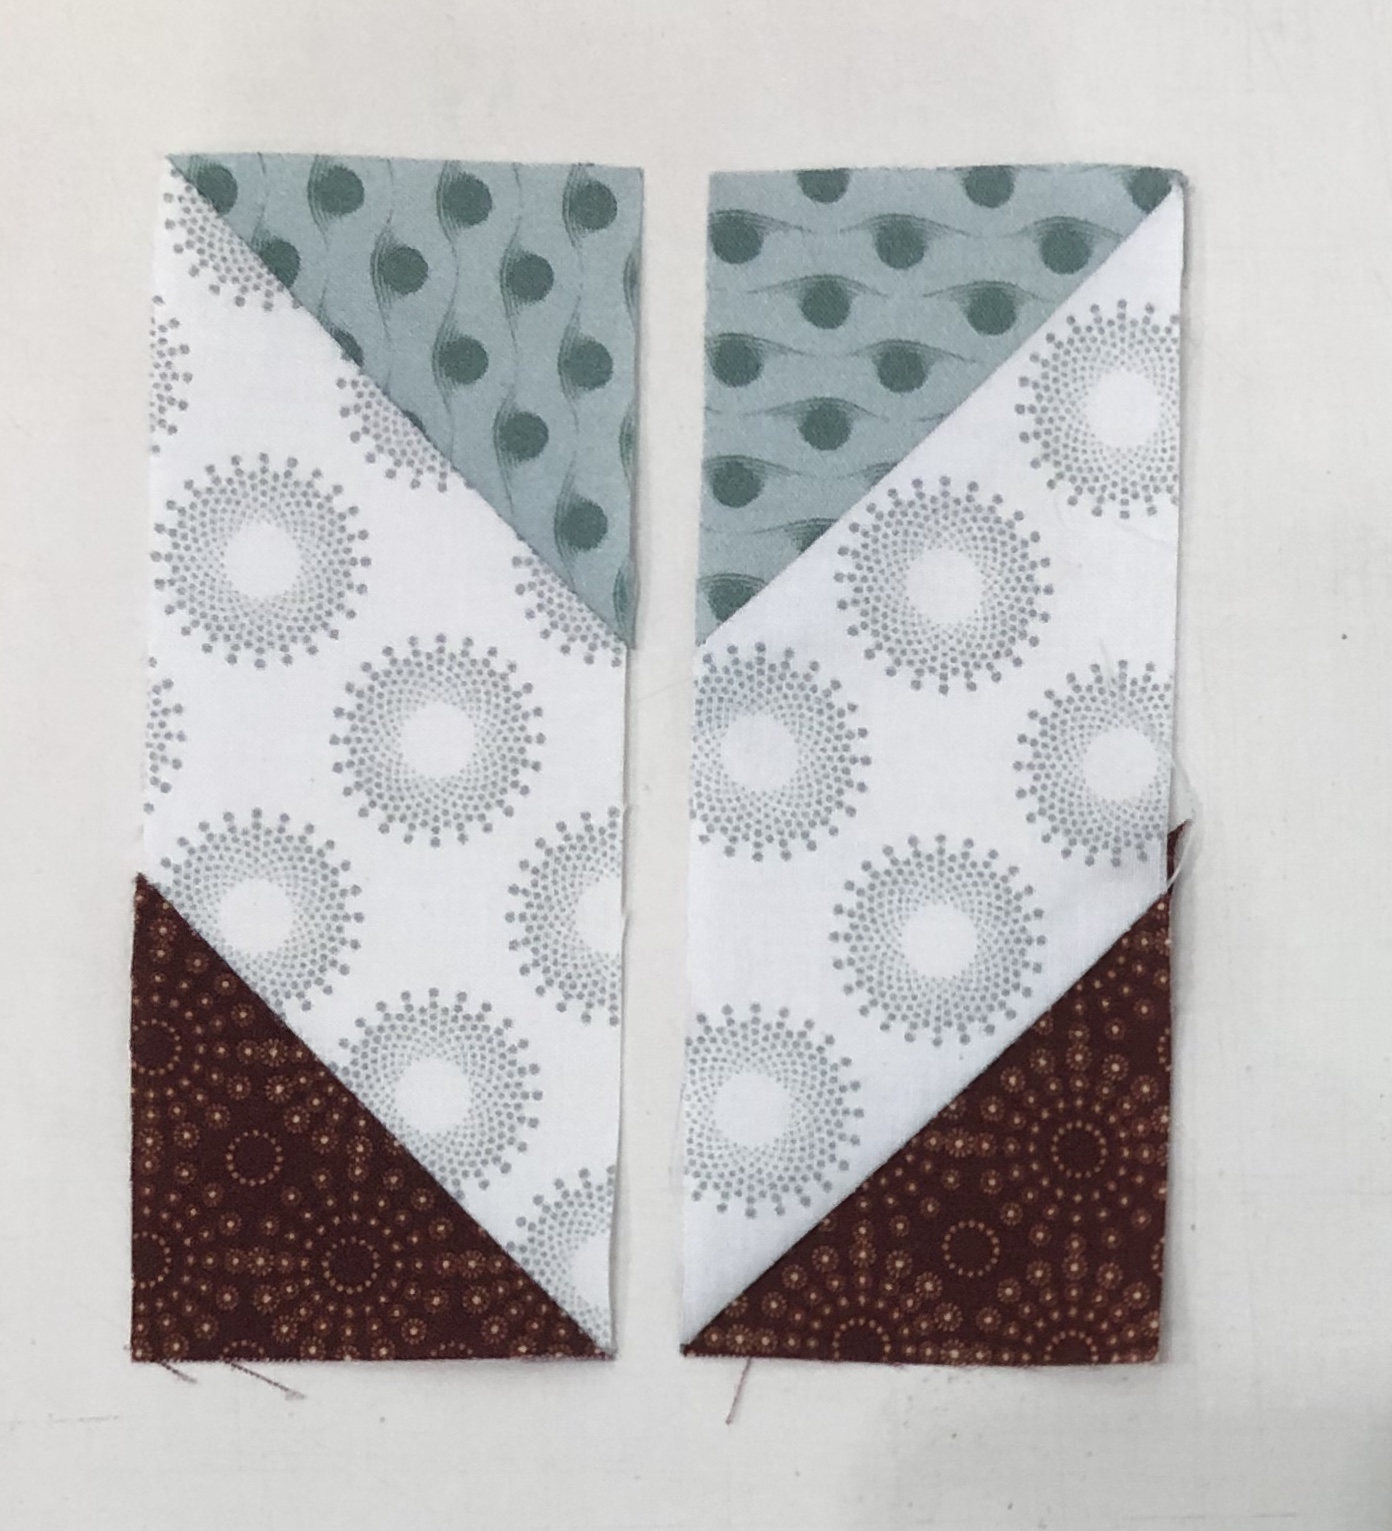
Step 7 – Stitch the second side triangle to the other side of each center beam. Press each seam open
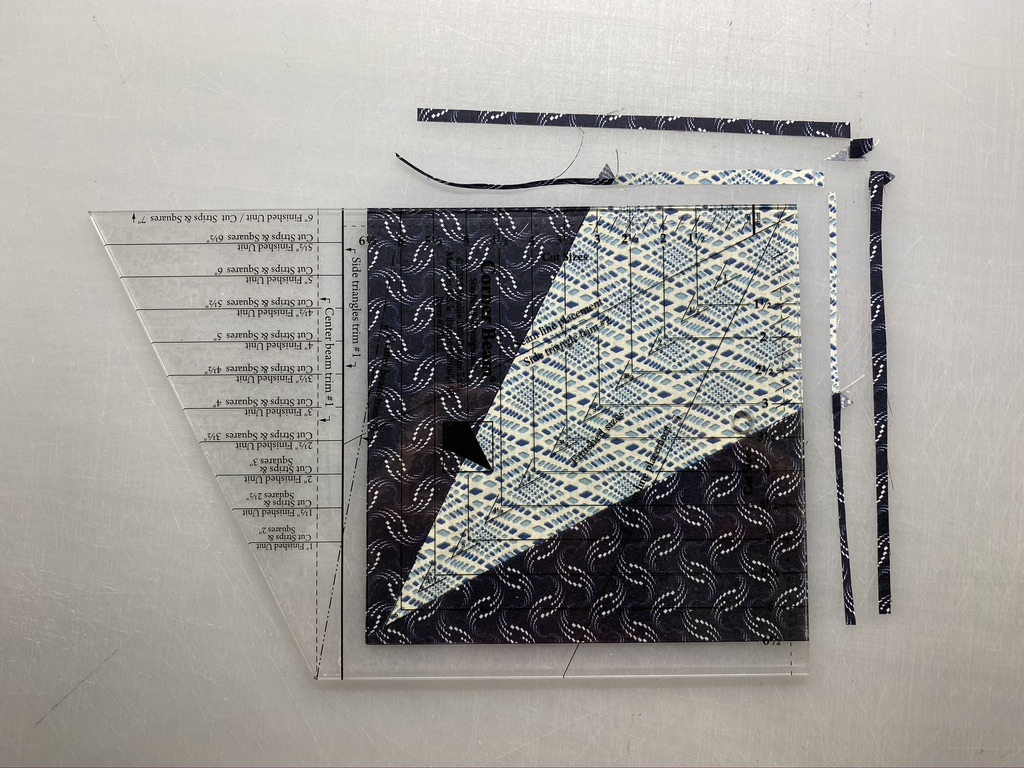
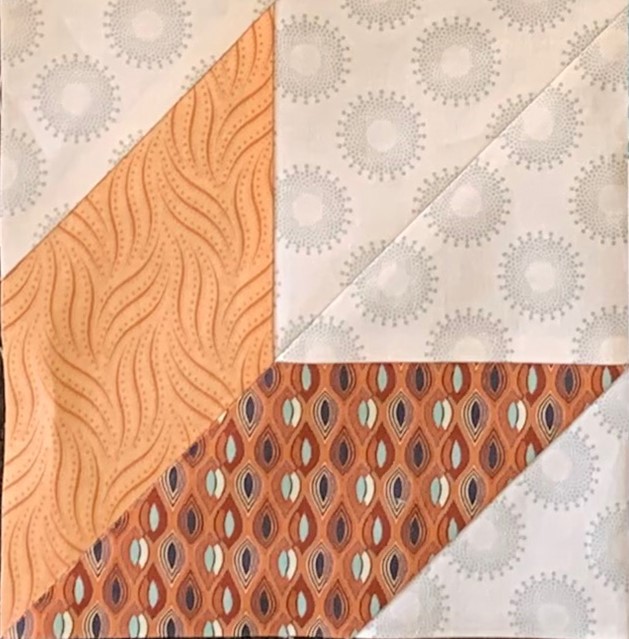
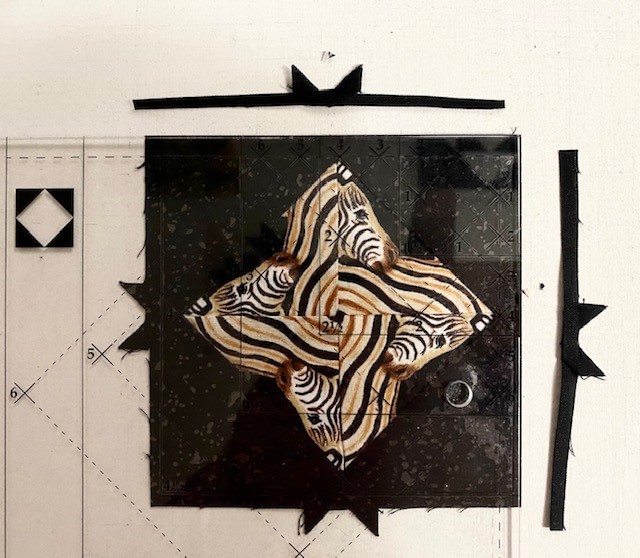
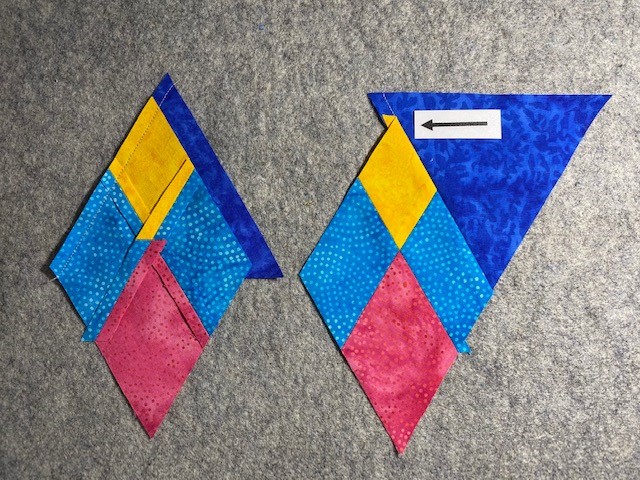
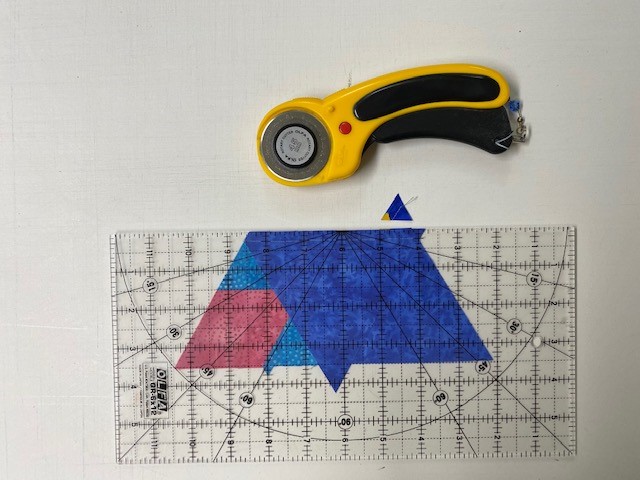
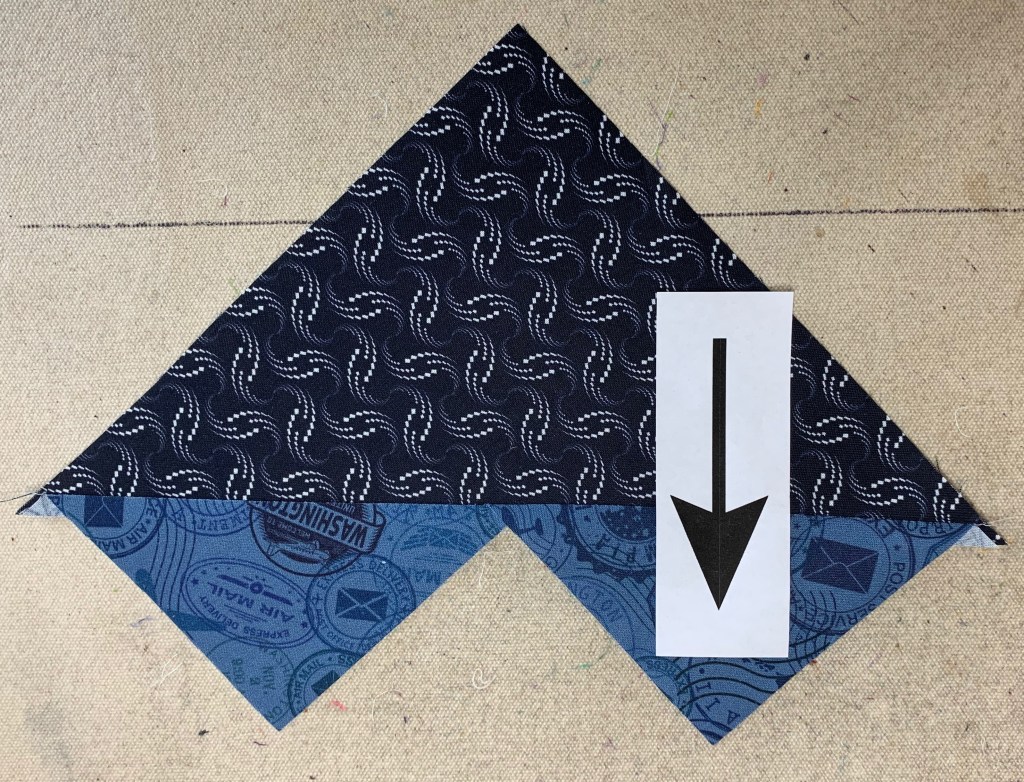
Step 8 – Position the trim down area of your Corner Beam® tool on your unit. Carefully line up the diagonal seam guidelines on the Corner Beam® tool with the diagonal seams of your unit. Trim.
Step 8
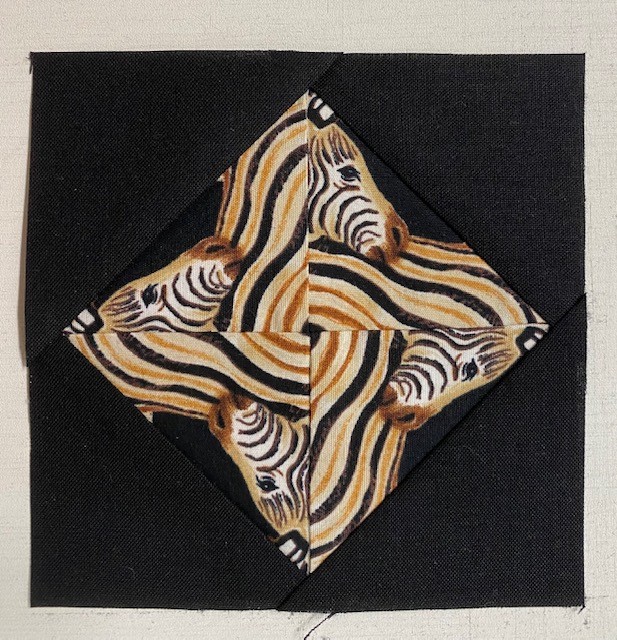
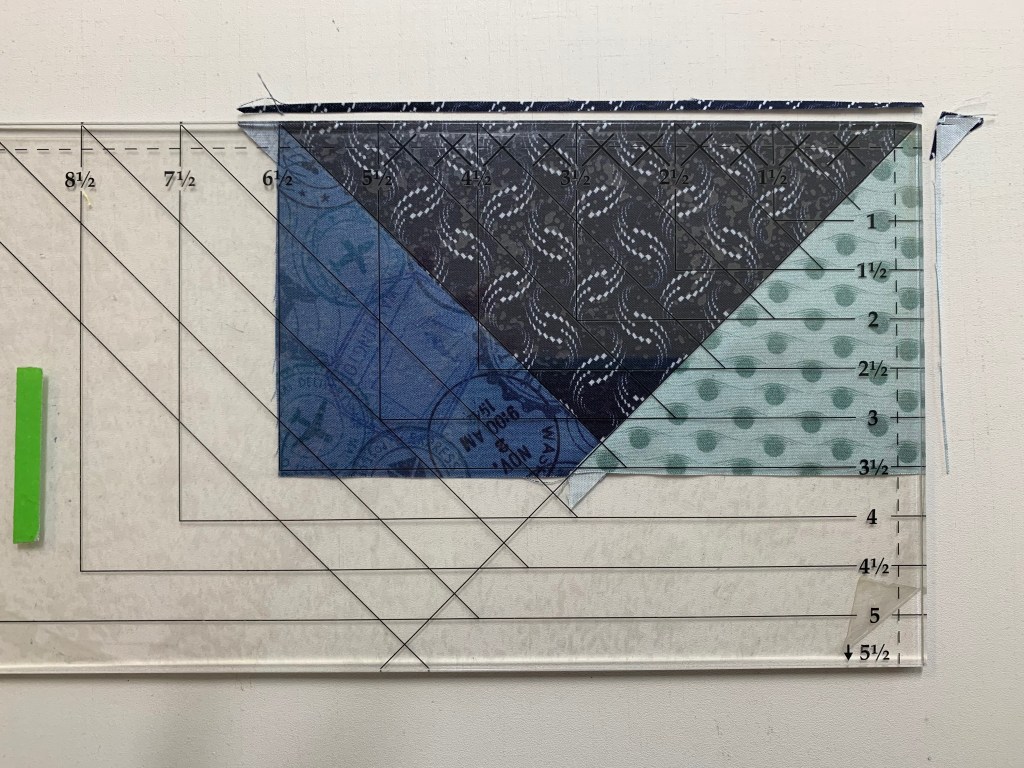
Step 9 – Rotate your unit. Align the cleanup lines for the 6½” cut size with the cut edges, the V shaped guideline with the seam intersection, and the tick marks with the seams at the wide end of the beam. Trim. Repeat for all units. Label as indicated in the Unit Summary.
Step 9
Assemble 4 Middle Edge Sections
It is time to assemble the four Middle Edge Sections of your quilt. To do this you will need the following:
8 Units A from Month 18 Units B from Month 28 Units D from Month 216 Units H from Month 516 Units L from Month 88 Units M from Month 9
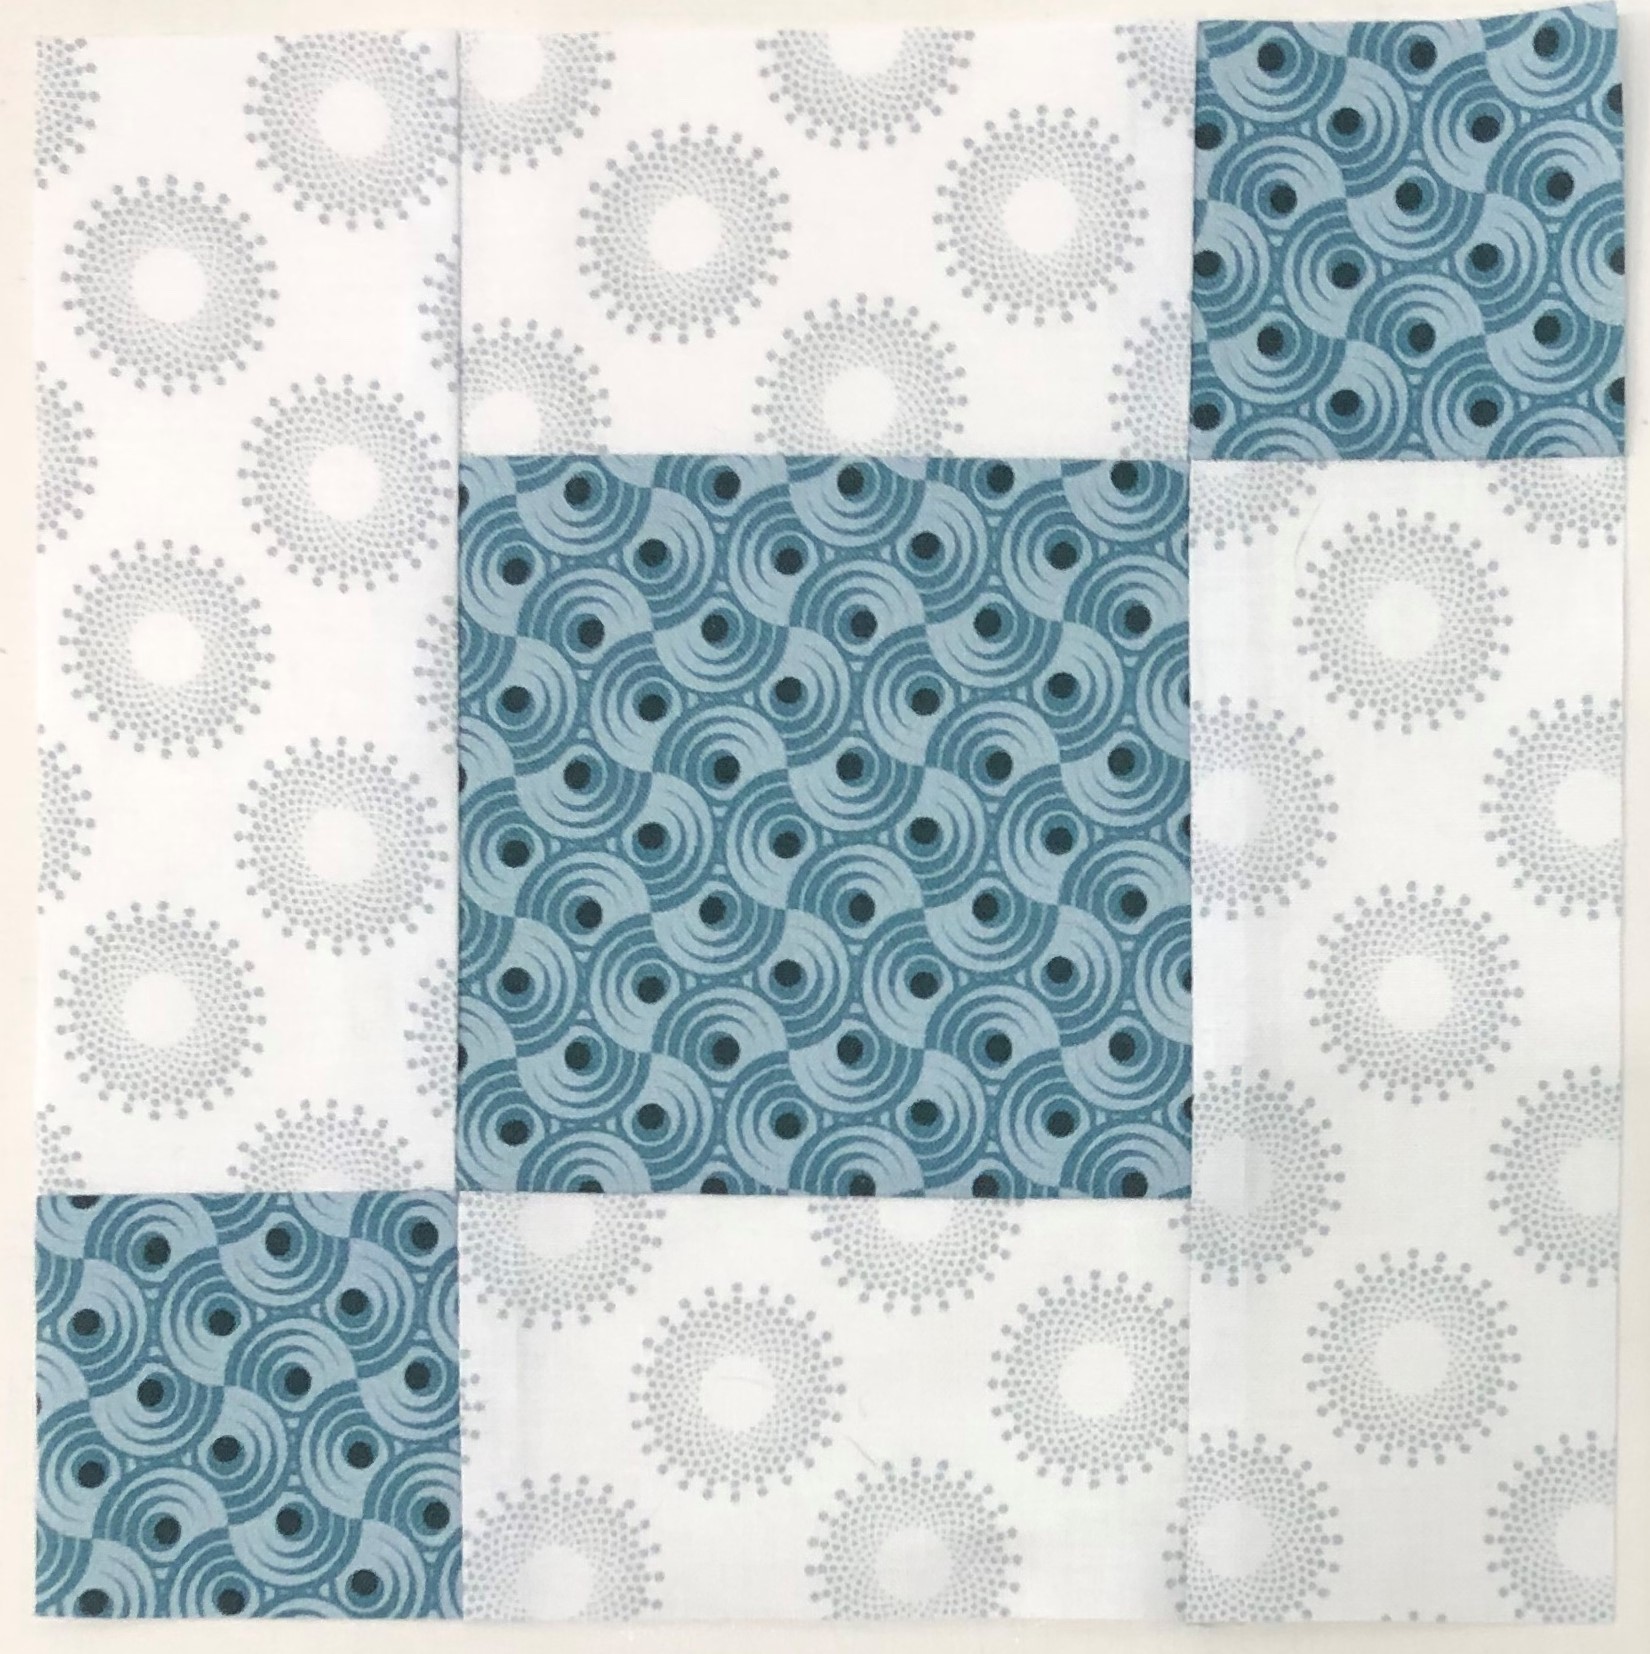
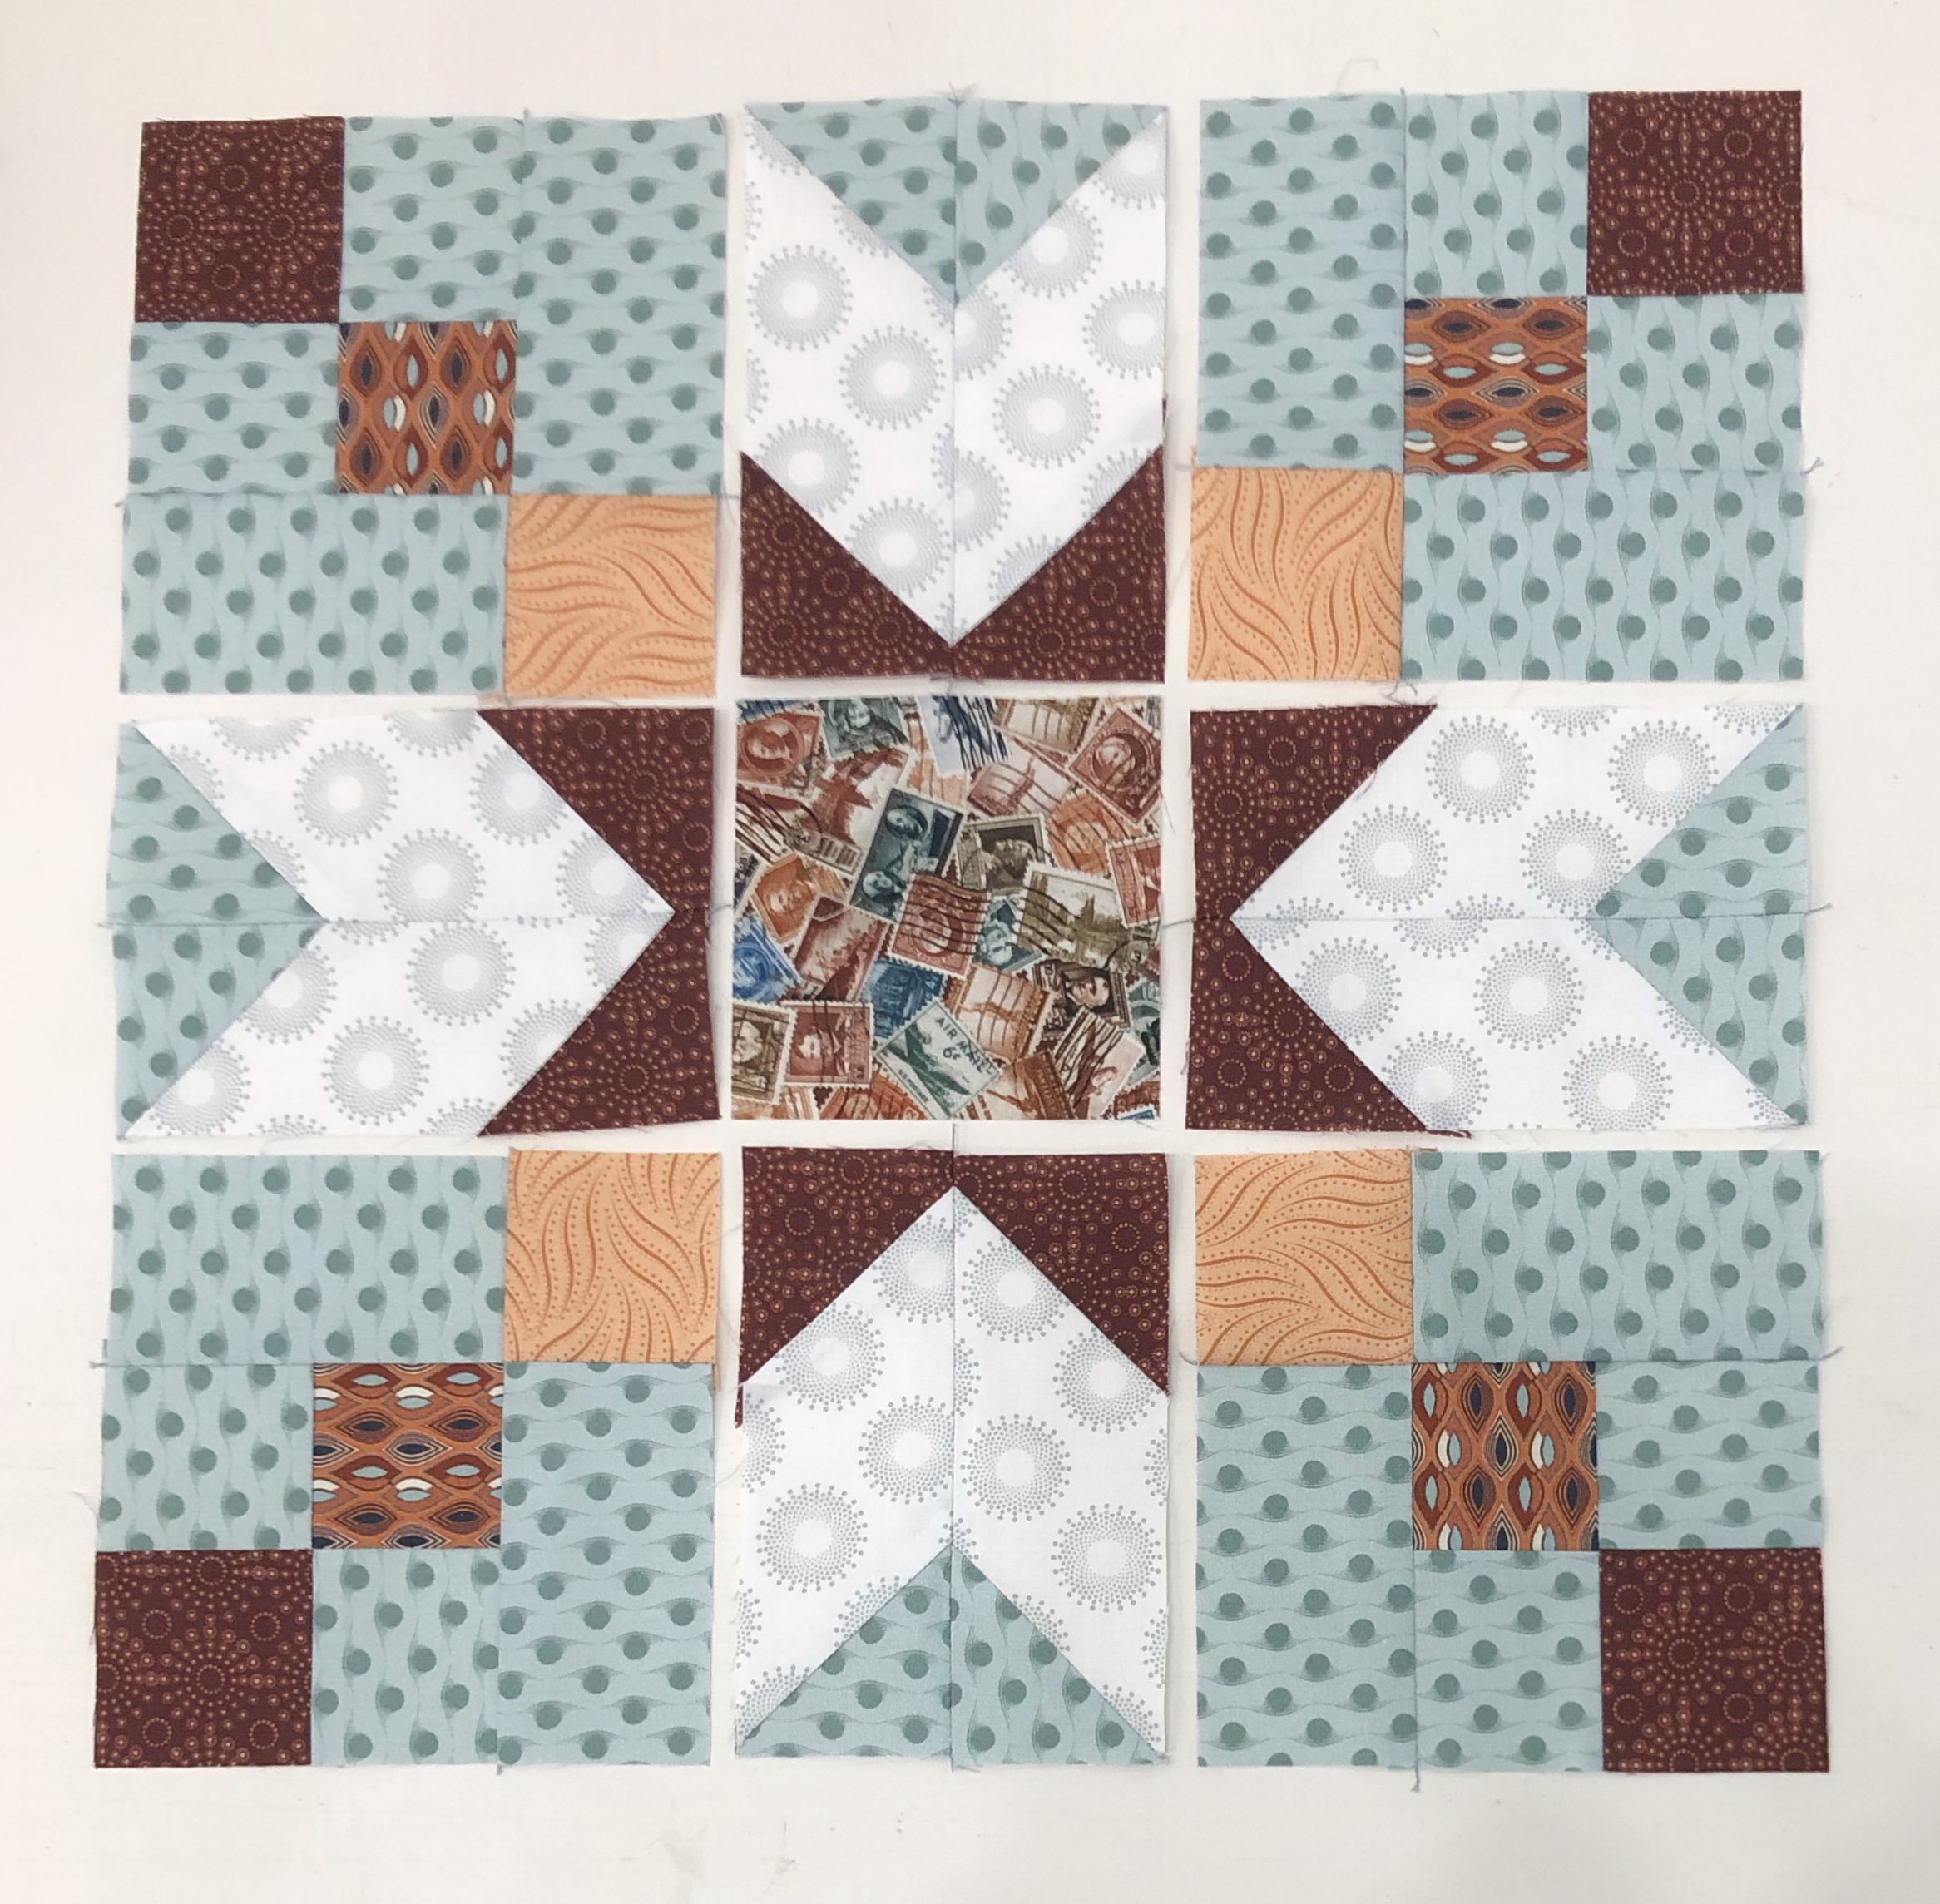
Step 10 – Lay out the units as shown to create the Middle Edge Section.
Step 11 – Stitch the units together into rows. Press the seams open between the units.
Step 12 – Stitch the rows together into the Middle Edge Section. Press the seams open between rows.
Step 13 – Repeat steps 10-12 to make a total of 4 Middle Edge Sections.
Steps 10 – 12
Naz carefully supervised Journey’s Month 9
Make 4 Middle Edge Sections. Congratulations on work well done!
Welcome to Stitchin Heaven’s Journeys Block of the Month 8 – Uneven Chains 2. I know you all worked so hard last month on your Liberty Stars. You learned how to make Uneven Chains in month 1, so this month should be a breeze. We will again be using the Four Patch Square Up tool.
Print 6
Print 10
Print 11
This month we will be using prints 6, 10 & 11
Piecing Instructions
Step 1 – Stitch your strips together into Strip Set A, Strip Set B, and Strip Sets C. Position two strips right sides together and align the long edges. Stitch with your best ¼” seam.
Step 2 – Press your strip sets. In all strip sets, press toward Print 6. A helpful pressing tip: whatever you are pressing toward goes on top.
Strip Set AStrip Set A make 1 – 2 1/4″ sub-cuts, 16 sub-cuts required.Strip Set BStrip Set B make 1 – 2 1/4″ sub-cuts, 16 sub-cuts required.Strip Set C (stitch strips together)Strip Set C make 2 – 3 1/2″ sub-cuts, 16 sub-cuts required.
Step 3 – Sub-cut the strip sets using the information in the diagrams above. Make sure to use the correct sub-cut size for the strip set you are working with and cut the correct number of pieces needed.
Step 4 – Lay out the pieces from Strip Set A, Strip Set B, and Strip Sets C as shown. Stitch an A piece to one side of the C piece and Stitch a B piece to the other side. Make sure you sew the correct piece on each side so that it looks like the diagram.
Step 4 – Lay out and stitch
Step 5 – Press the unit so that the seams spin. To spin the seam, lay the last sewn seam east to west on the mat, remove the two or three threads in the center on both sides that run north to south, and press so all the seams go in the same direction.
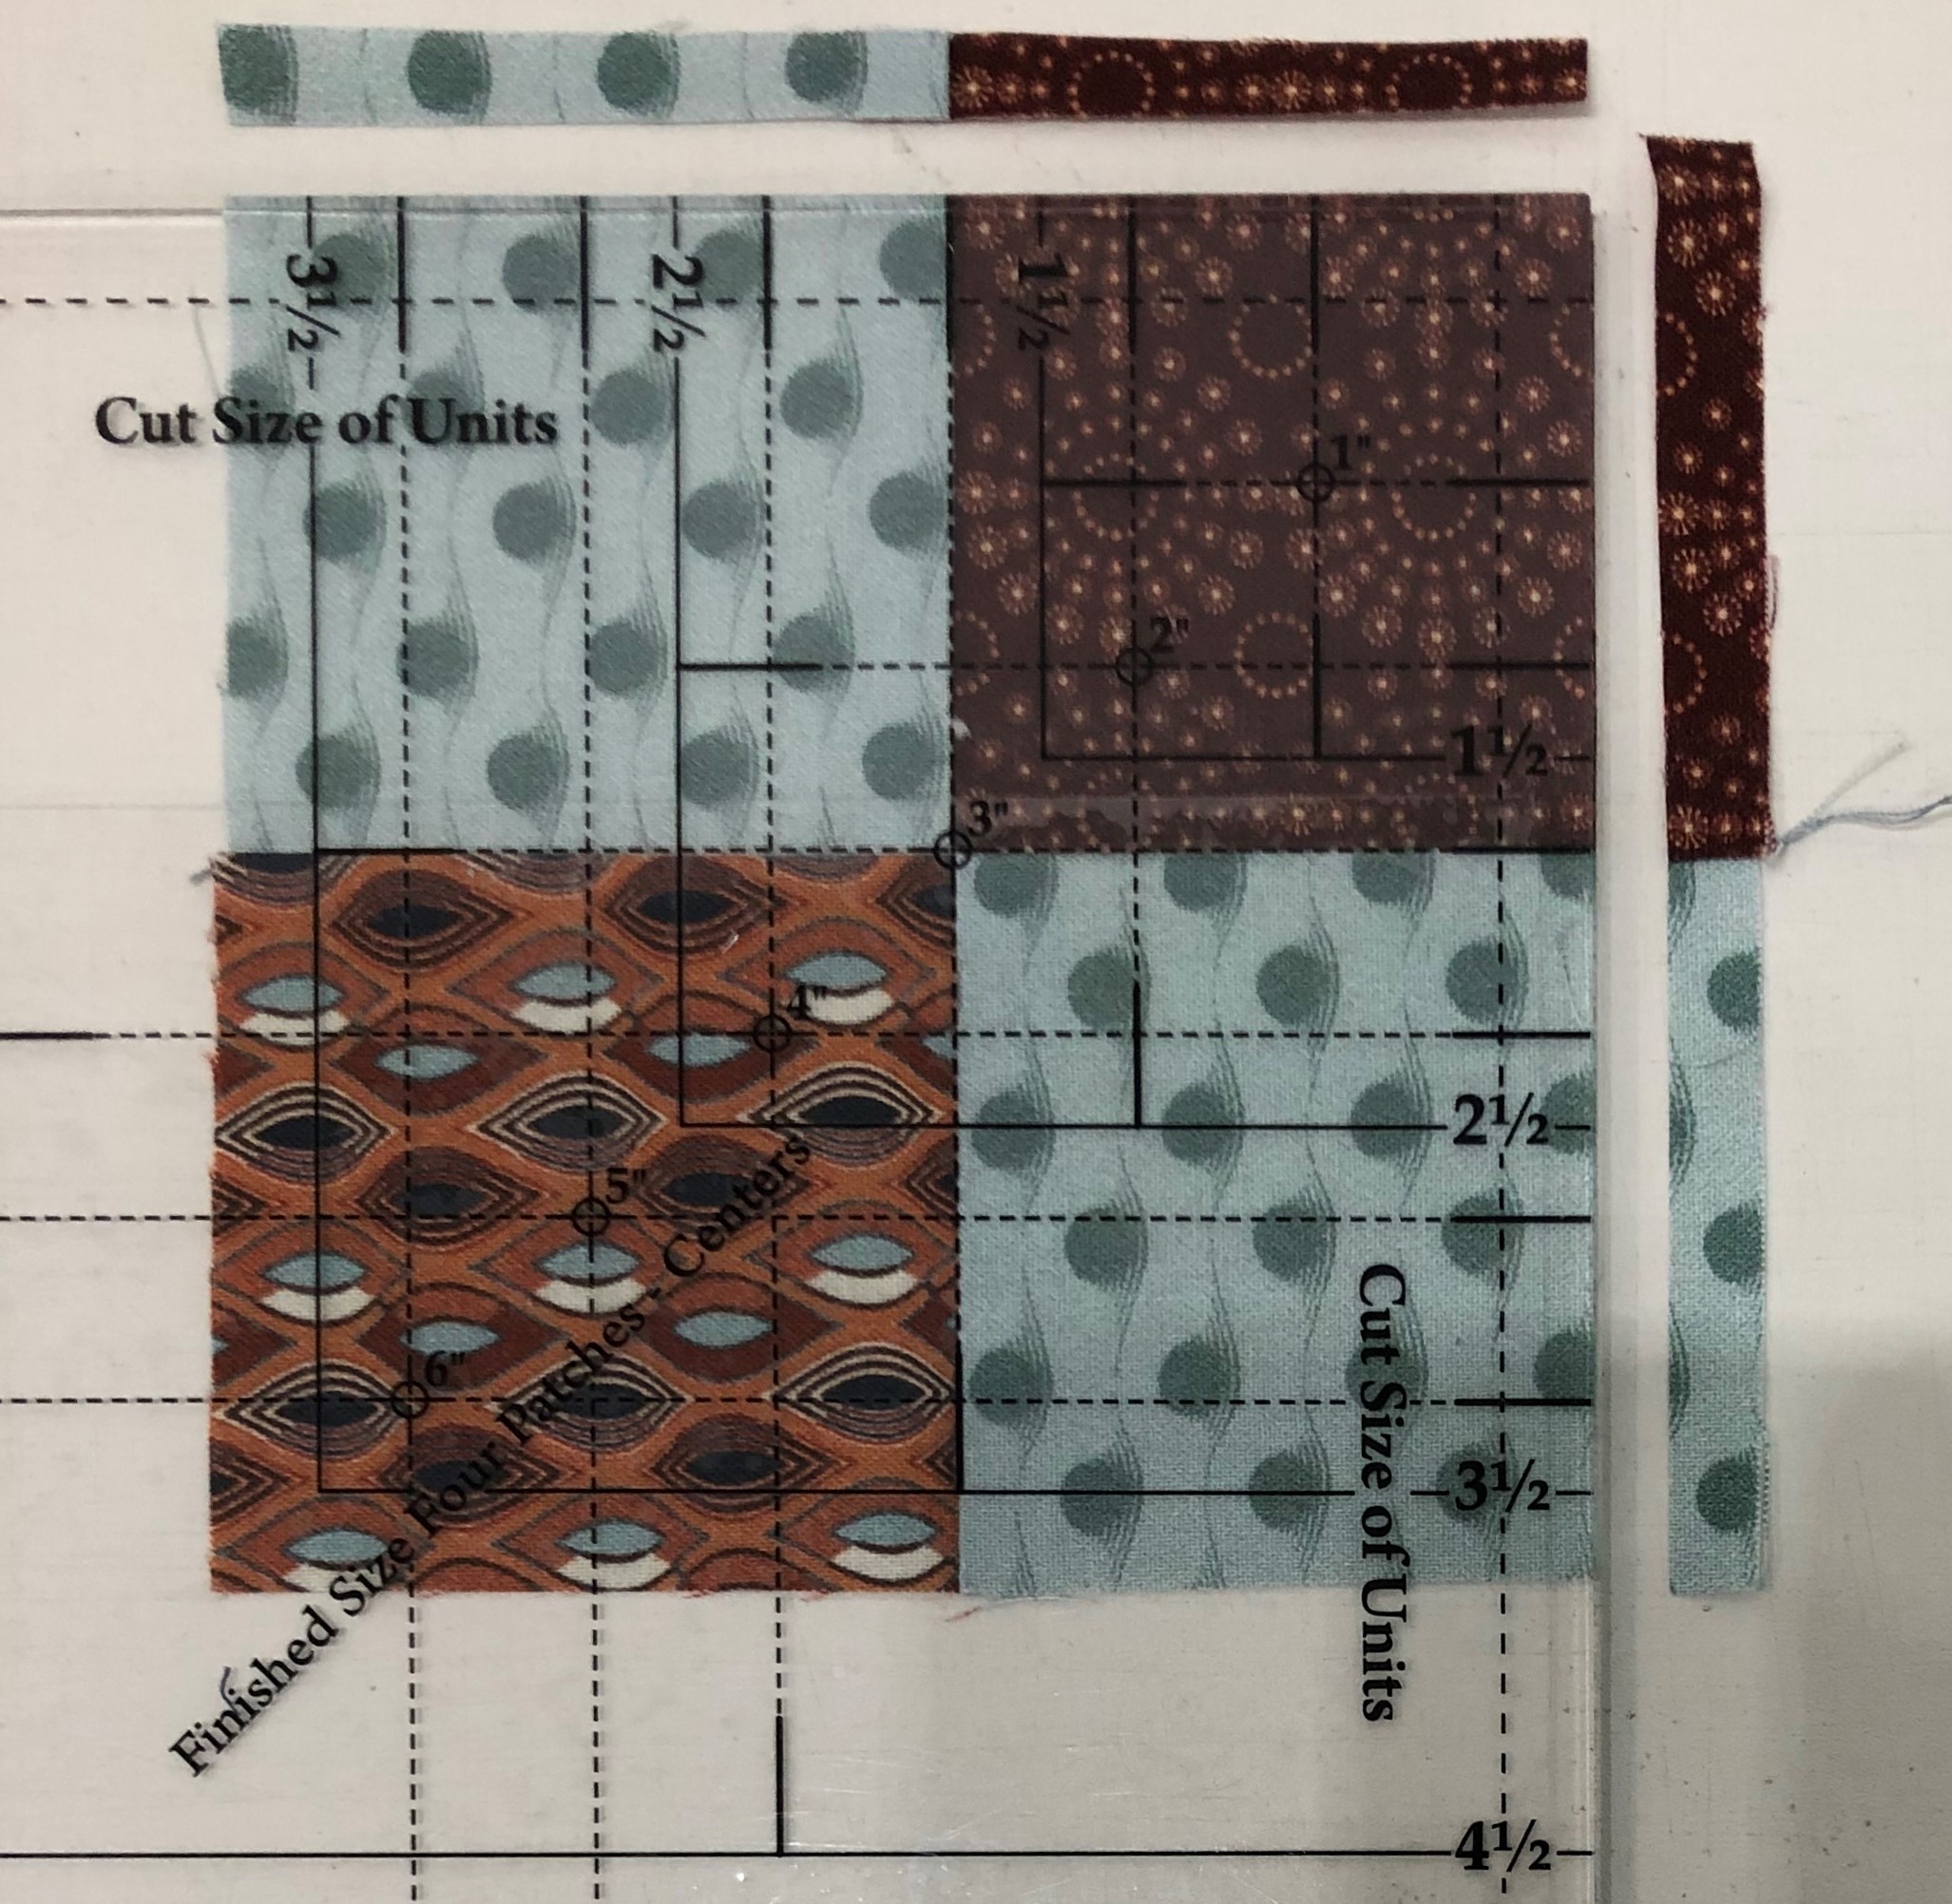
Step 6 – Trim the unit to size. Position the unit as shown on your cutting mat and locate the circle for the 3” finished size on your Four Patch Square up® tool. The finished sizes are located above the words Finished Size Four Patches – Center. Position the circle over the seam intersection between the small and large square as shown. Make sure that the dashed lines radiating from the circle align with your seams.
Trim the first two sides of the unit.
Step 7 – Rotate the unit 180 degrees. Align the 3” finished size circle over the other intersection of the small square and the large square as shown. Make sure that the dashed lines align with your seams and that the 6½” cut size clean up lines align with the outside trimmed edges. Trim the remaining two sides. Once all 16 units are made, label them Unit L.
Congratulations, you’ve completed month 8 and I’ll bet you are even more comfortable using the Four Patch Square Up tool.
Remember, you can go back and search for any of the Journey’s posts, they are never deleted and I’m always available for questions.
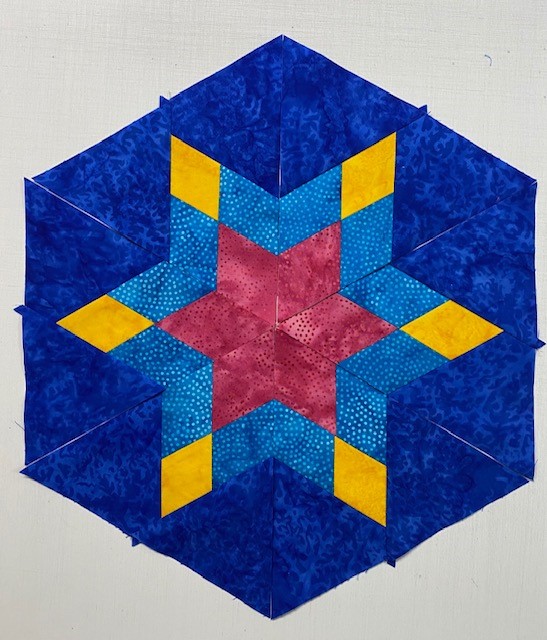
Continuing my journey to create interesting embellishments for my hexagon and octagon One Block Wonders (OBW’s). I created fabulous stars using Studio 180 Design’s Diamond Four Patch Wedge Technique Sheet and the Wedge Star Tool.
Flowers of the Sun by South Sea Imports
Once again I went to my OBW stash, I’ve had this beautiful large large print for at least 10 years. When I showed it to my friend Sue Tucker she immediately suggested Aqua stars be added.
Groovy Seam Rippers are my favorite
I went to my Joen Wolfrom Color Wheel. To find a complimentary color look directly opposite. For Orange/Red it is Aqua/Blue. Groovy Seam Rippers are my favorite.
I could have chosen several values of aqua, but I decided to use two.
I was lucky to find Kona Cotton Paprika for my star side triangles. The Diamond Four Patch Wedge Technique Sheet gives you instructions for making this block in 22 sizes from 6″ to 48″ finished blocks. I decided that I wanted several size stars in my OBW. My octagons are 6″ finished blocks. Therefore, I would choose size variations in multiples of 6″. I made a 24″, 18″ 12″ and three 6″ finished blocks.
Step 1 – Make strip sets. I chose to make my Inner Diamond & Outer Diamonds the same color. See the Diamond Four Patch Technique Sheet for making strip sets A & B.
Step 2 – Layer the strips sets one on top of the other. Make sure both sets are right sides down. Use the Wedge Star tool to get the 45 degree angle.
Make the first cut.
From the first cut, cut angled sections the same width as the cut size of the diamond strip.
You’ll need 8 angles “A” & 8 angles “B” sections for each star.
Pair a section “A” with a section “B”Mark seam intersection
Step 3 – Pair each “A” section with a “B” section. Make sure that the inner and outer points are oriented correctly. On the edges you will be stitching together, mark the 1/4″ seam allowance across the seams.
Position the pieces so that the intersections of the marked lines and the seams match. Pin and stitch.
StitchPress your seams open.
Step 4 – Trim the outer points using the Wedge Star tool. Consult the chart for the line needed, and position the line on the seam of the outer point only, trim each side.
Step 5 – Add the small wedges to the out points that you just trimmed. See the Wedge Star tool instructions, page 3 for “Cutting the Small Wedges”.
Layout the small wedges and the Diamond Four Patches.
Stitch the right wedges first. For complete instruction on “Piecing the Diamond Wedges” see the Wedge Star tool instructions, page 4.
Diamond Four Patch Wedge18″ Diamond Star Wedge
Step 6 – Trim the pieced wedges using the Wedge Star tool. For finished stars up to 24″, align the desired finished block size line with the outer point.
Step 7 – Assemble and trim the block according to steps 1.12 through 1.18 in the Wedge Star tool Instructions.
As before, I marked the 1/4″ seam allowance across the seams and pinned before stitching. Stitch 2 Diamond Four Patch Wedge together. Remove the dog ears and sliver trim the Wedge pair by placing on the mat Righties orient the pair so the 90 degree corner is in the upper right, lefties position it so the 90 degree corner is in the upper left. Align the common diagonal on your Tucker Trimmer with the seam to trim the dog ears and true up the 90 degree angle.
Welcome to Stitchin Heaven’s Journeys Month 6 – Corner Section. My helper for Month 6 is Sue Tucker, of Studio 180 Design. This month you are going to learn to make the Square/Squared unit using the Square/Squared tool. You will be using Prints 1, 2 & 5. Label your fabrics and use your best cutting skills when cutting your starter squares.
Prints 1, 2 & 5
Piecing Instructions
Diamond Squares
Step 1 – Lay your Print 1 strip on the mat and clean up the short edge. Locate the Center Square window template for a 6” finished unit. Place the solid lines of the window template on the raw edges of the strip end. Cut up the side and across the top to trim each square to a precision size. Cut 4 center squares.
Step 2 – Stitch two Print 2 side triangles to opposite sides of the center square. Stitch with the center square on top. Press the seams toward the side triangles.
Step 3 – Stitch one Print 2 side triangle to one remaining side of the center square and a Print 5 triangle to the other side. Press the seams toward the side triangles.
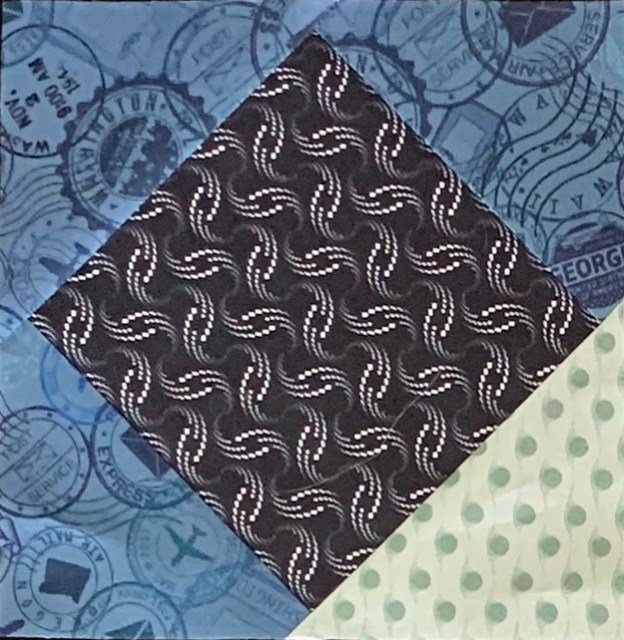
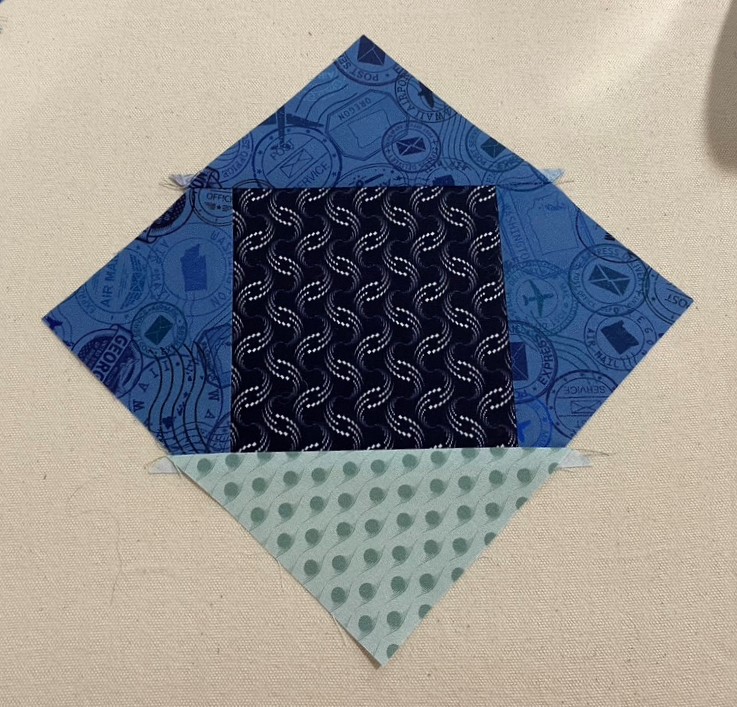
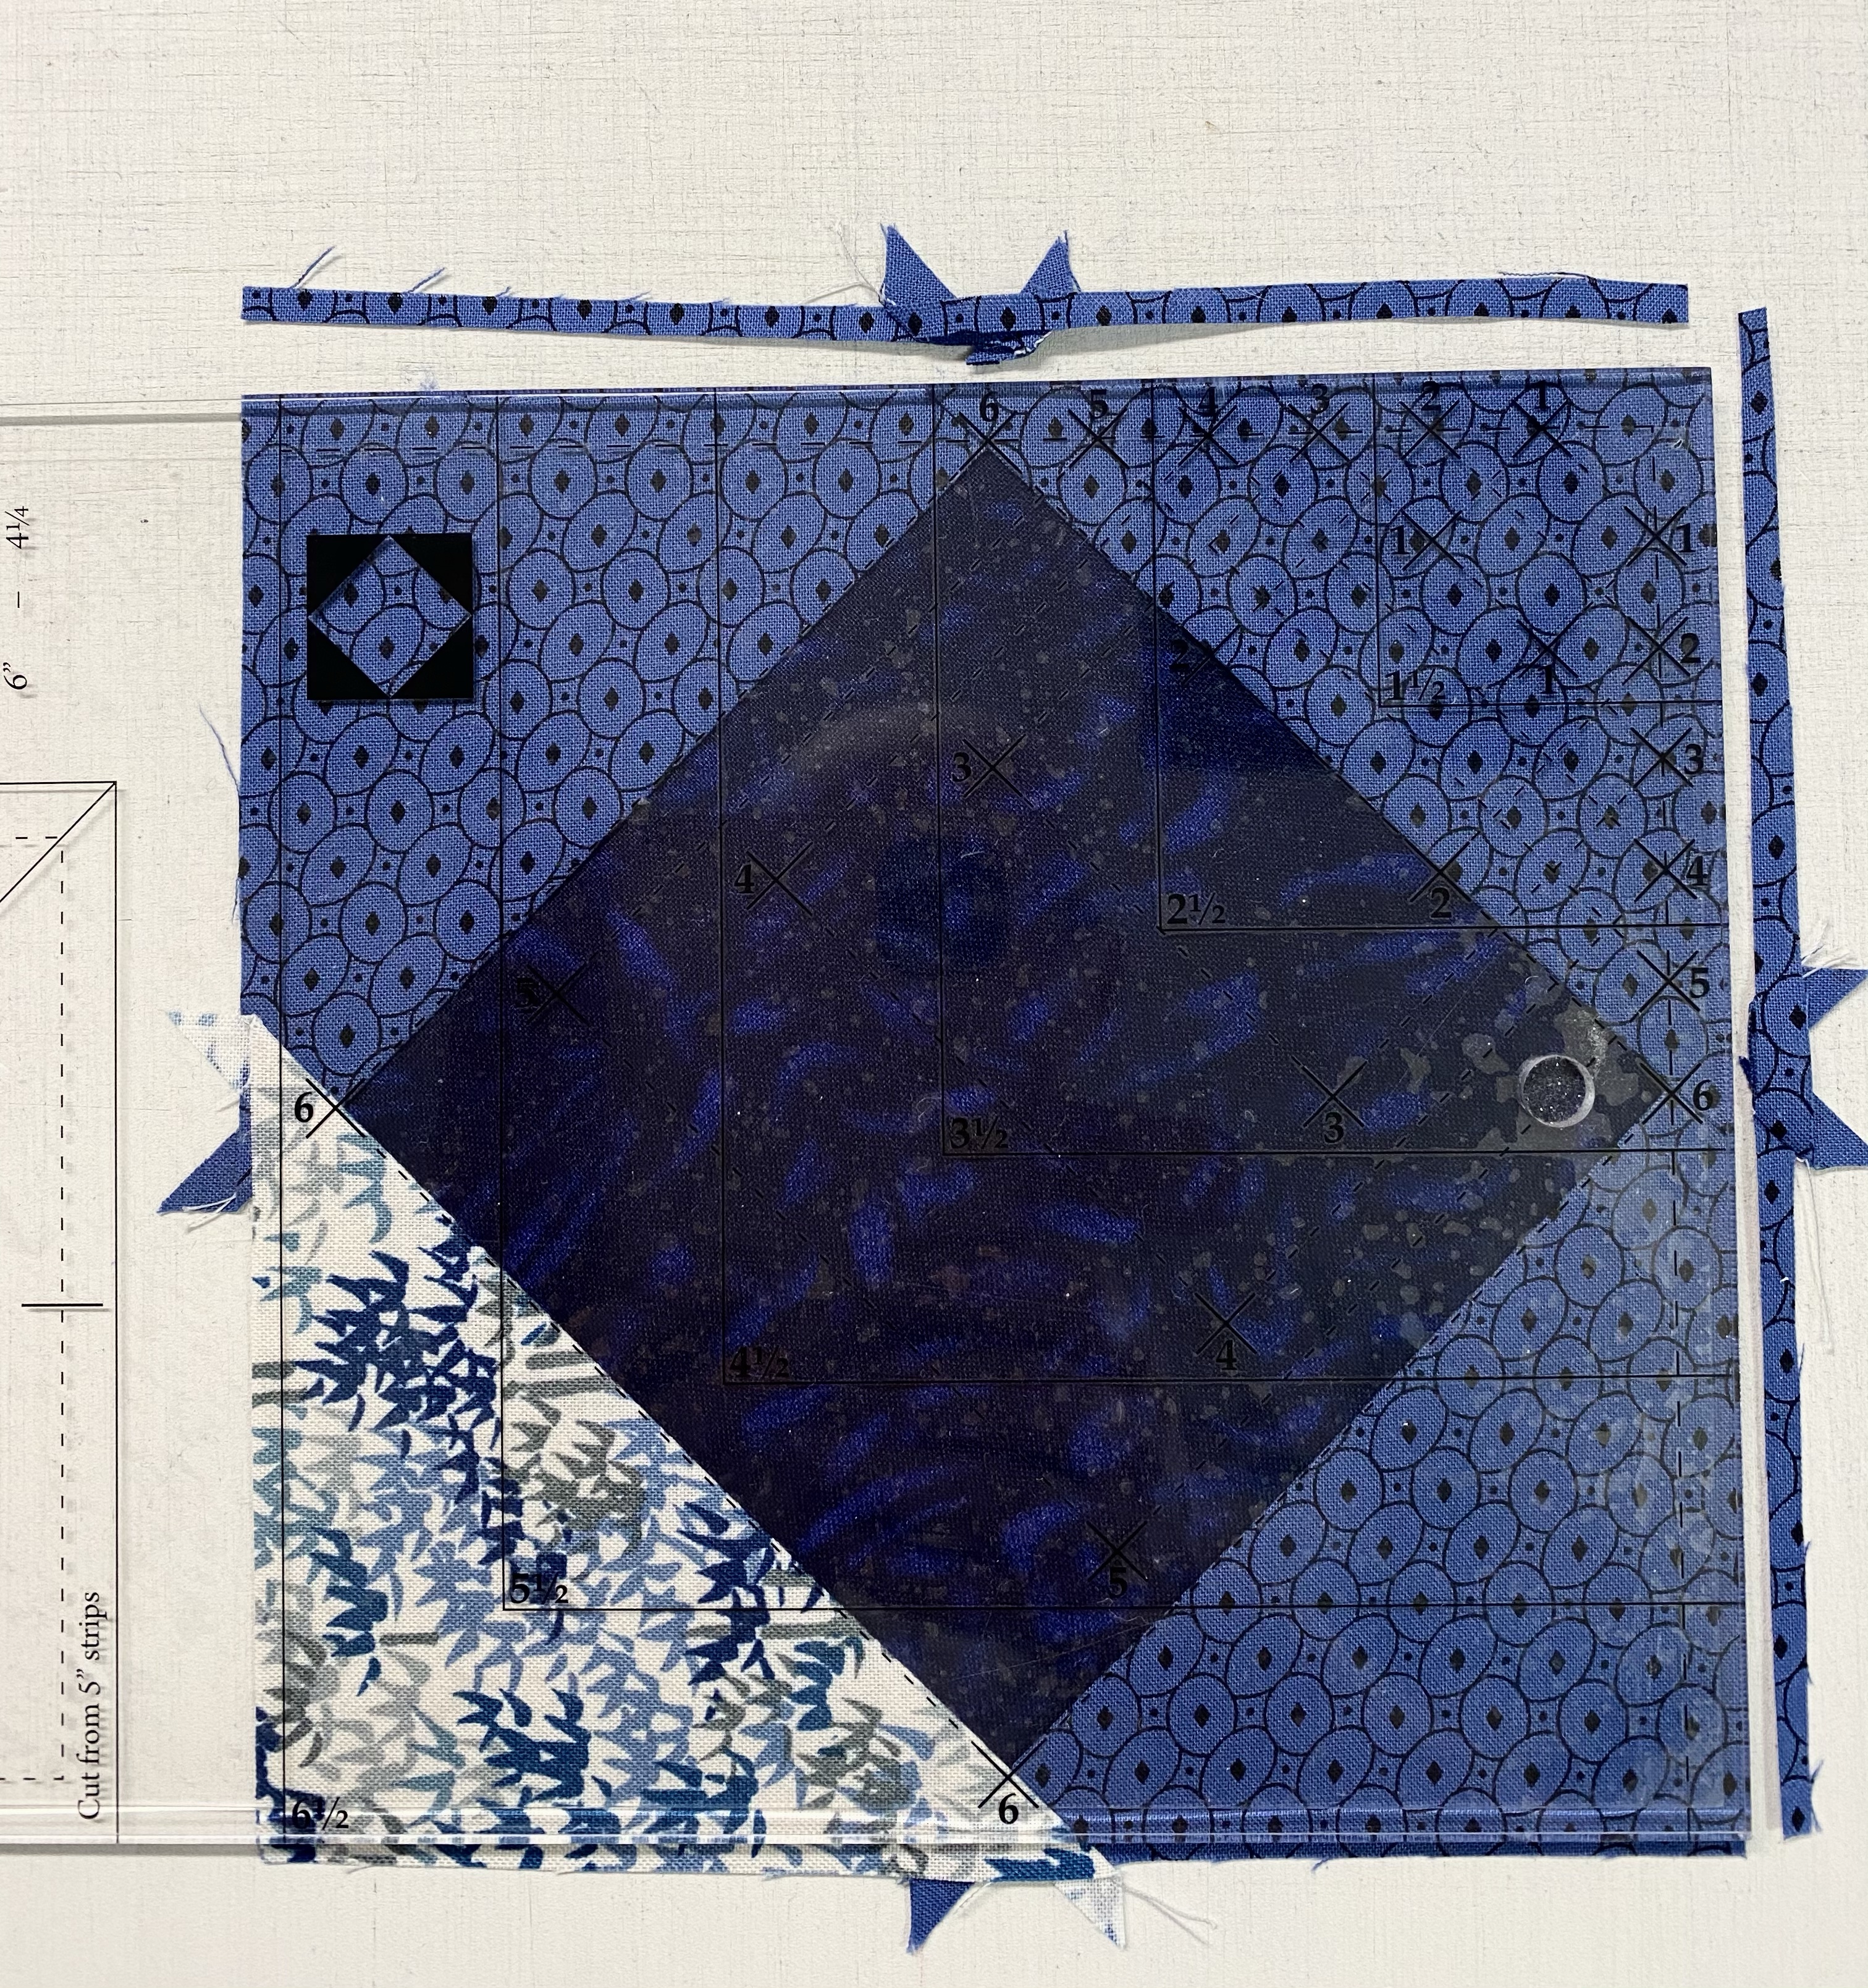
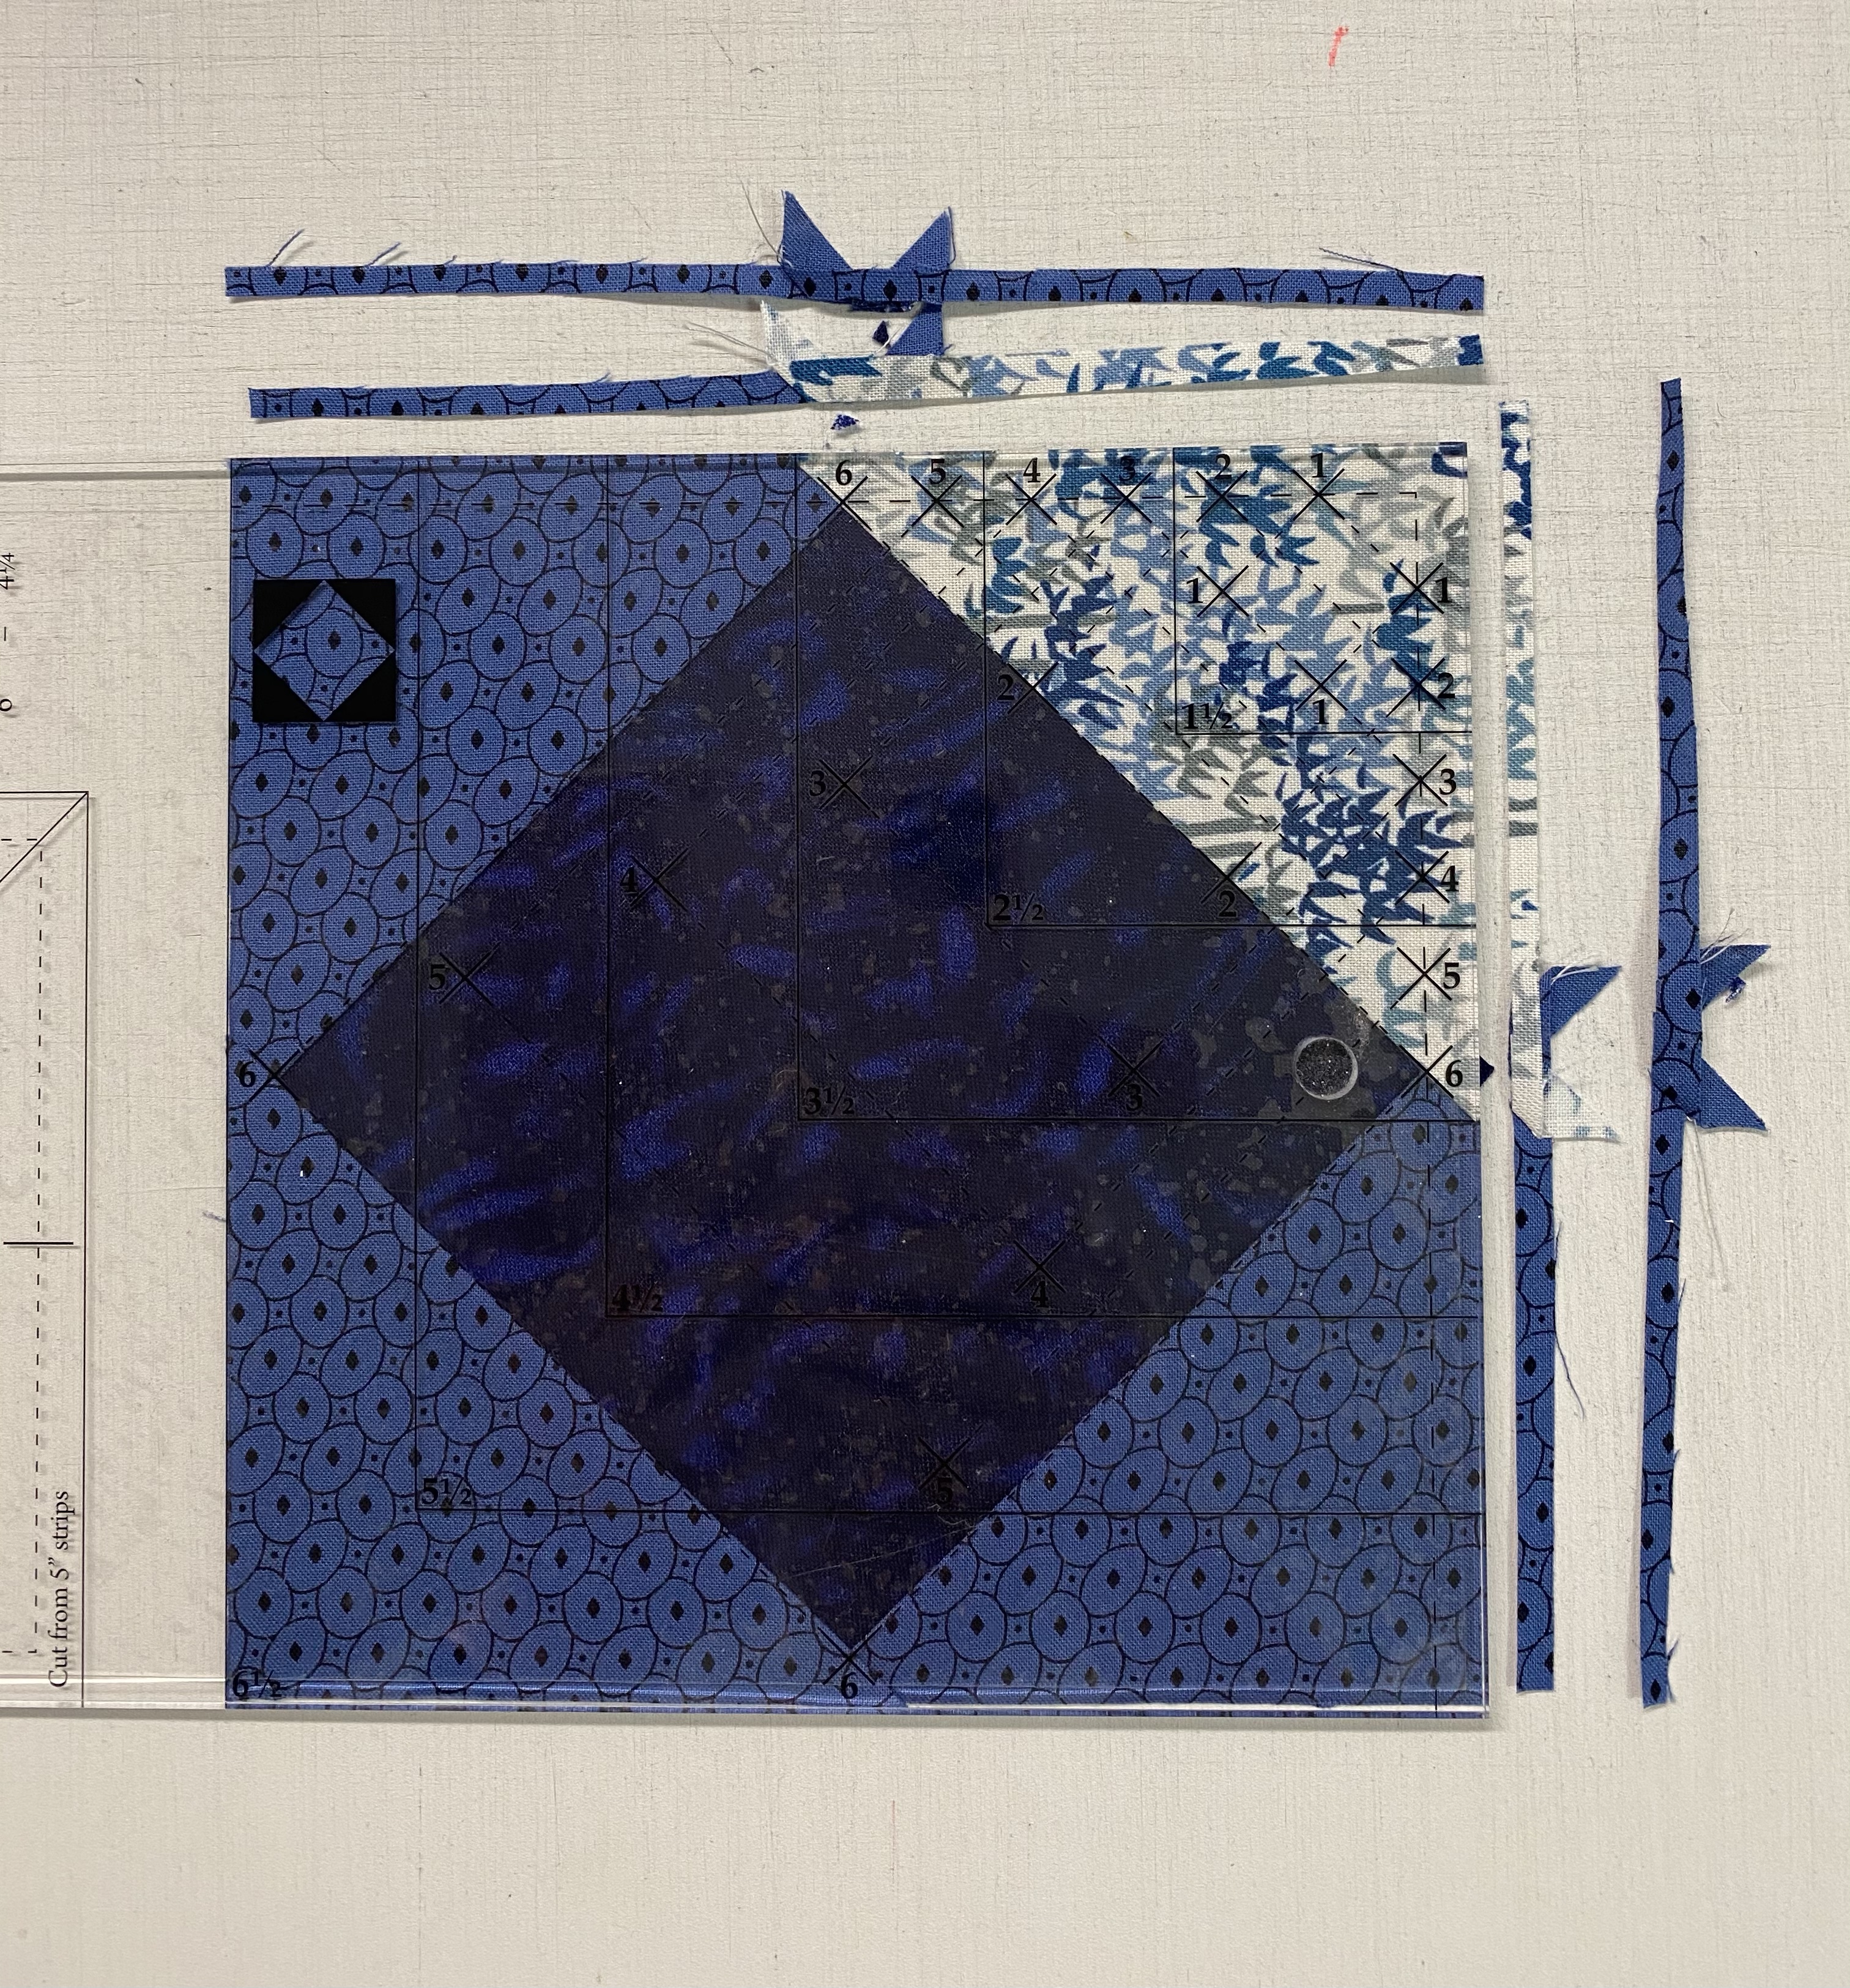
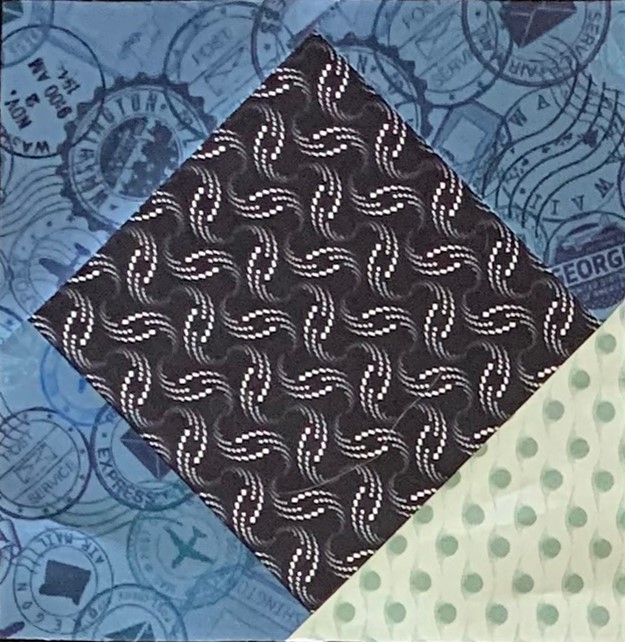
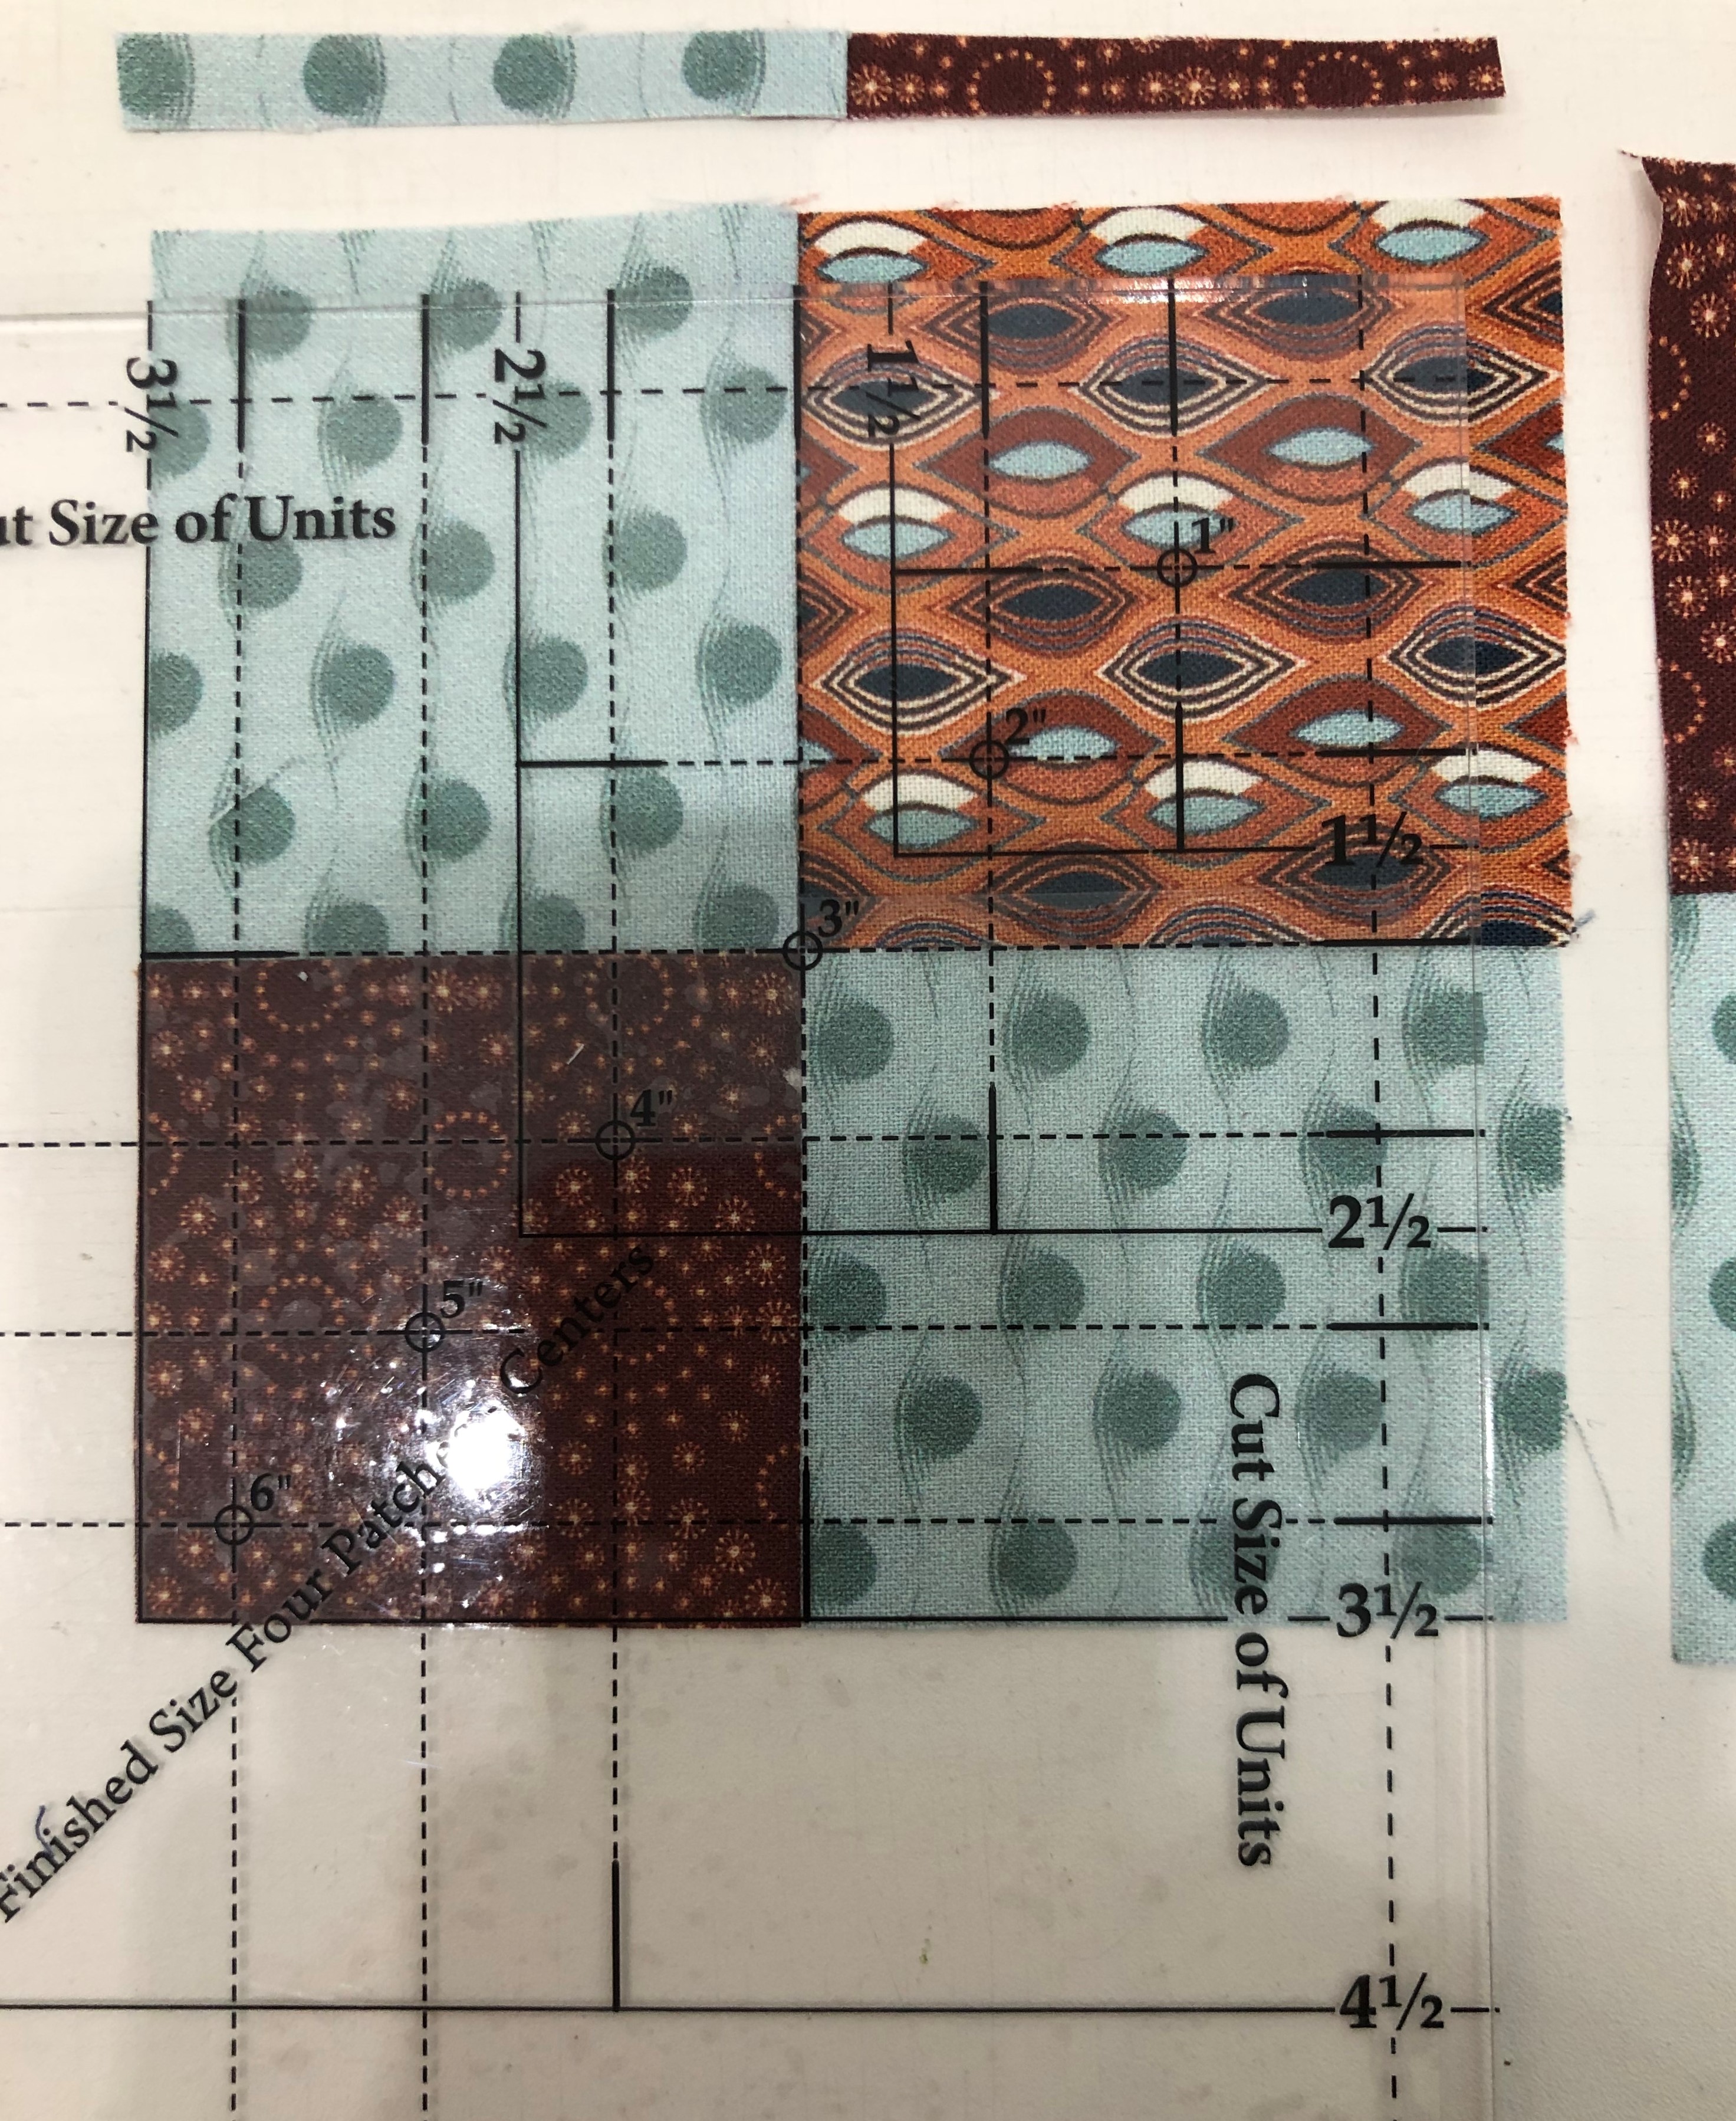
Step 4 – Trim to 6½” with your Square Squared® tool. Align the X’s labeled 6 with the seam intersections and the dashed lines with the seams. Trim. Rotate the unit 180o and align the seam intersections with the X’s labeled 6. Also align the cut edges with the 6½” clean up lines. Trim again. Repeat steps 1-4 to make a total of 4 Diamond Square units. Label the finished Units J.
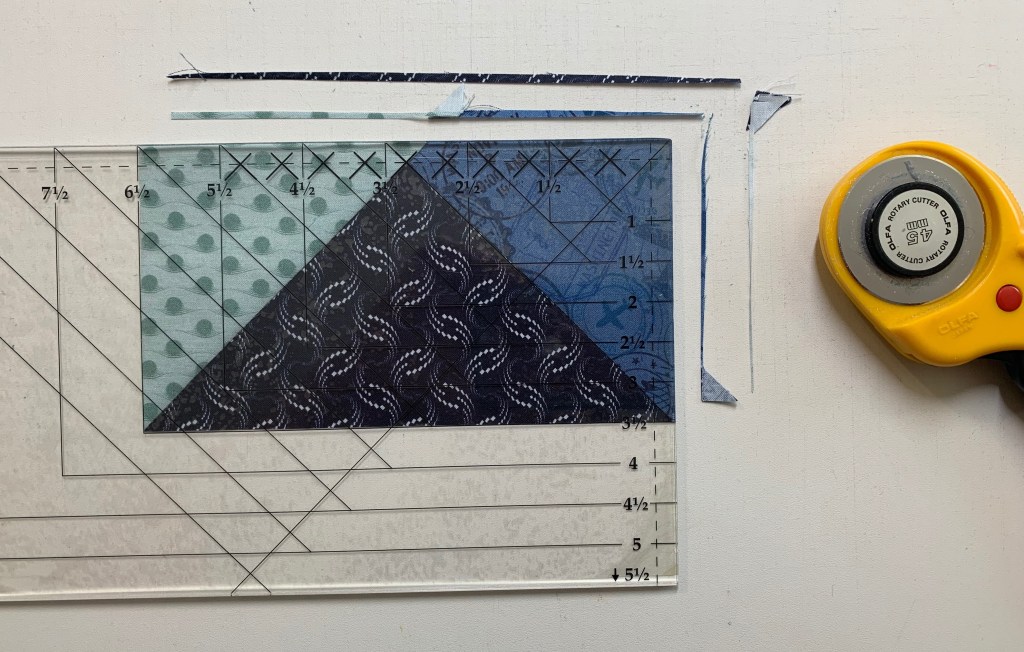
Below is a correction. The original photo for the second trim showed the Left Hand Trim for Trim 2. I do not have the original fabric so I remade the Square/Squared unit from stash fabric.
Trim 1Trim 2Make 4 Unit J
Assemble Four Corner Sections
It is time to assemble the four corner sections of your quilt. To do this you will need the following:
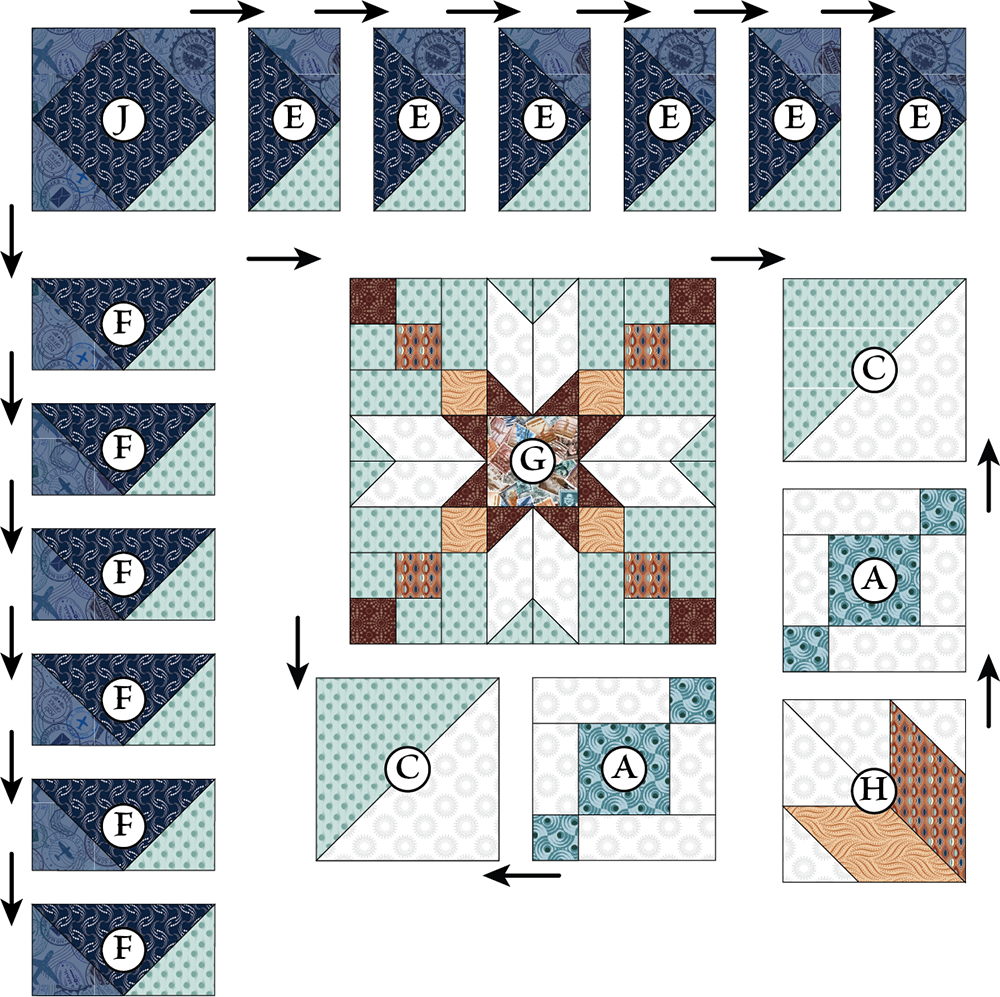
8 Unit A’s from Month 1. 8 Unit C’s from Month 2. 24 Unit E’s and 24 Unit F’s from Month 3. 4 – G Blocks from Month 4. 4 Unit H’s from Month 5. 4 Unit J’s from Month 6.
Step 5 – Lay out the gathered units as shown to create one corner section.
Step 6 – Stitch the Unit F Flying Geese together to create the rows of geese. Press the seam away from the point of the goose. Attach Unit J to the end of the Unit E Geese as shown in the diagram.
Step 7 – Sew together Unit C, Unit A, and unit H as shown to create two sections and press as indicated.
Step 8 – Sew Block G, together with the two sections you just created as shown and press as indicated.
Step 9 – Sew the Flying Geese rows to the block and press as shown.
Step 10 – Repeat steps 5-9 to make a total of 4 Corner Sections.
Congratulations! You have learned to use the Square/Squared tool, not mention you are half way through your Journeys Quilt.
I just finished quilting “Lion Eyes” Octagonal One Block Wonder. I had 18 Sensational Squares sets left over.
Remember, Sensational Squares are the triangles that fill the space between the octagons.
I wanted to add the left over Sensational Squares to the borders of the quilt.
I made my Sensational Squares into Square/Squared units using my Studio 180 Design Square/Squared tool.
There are 3 parts to this tool.
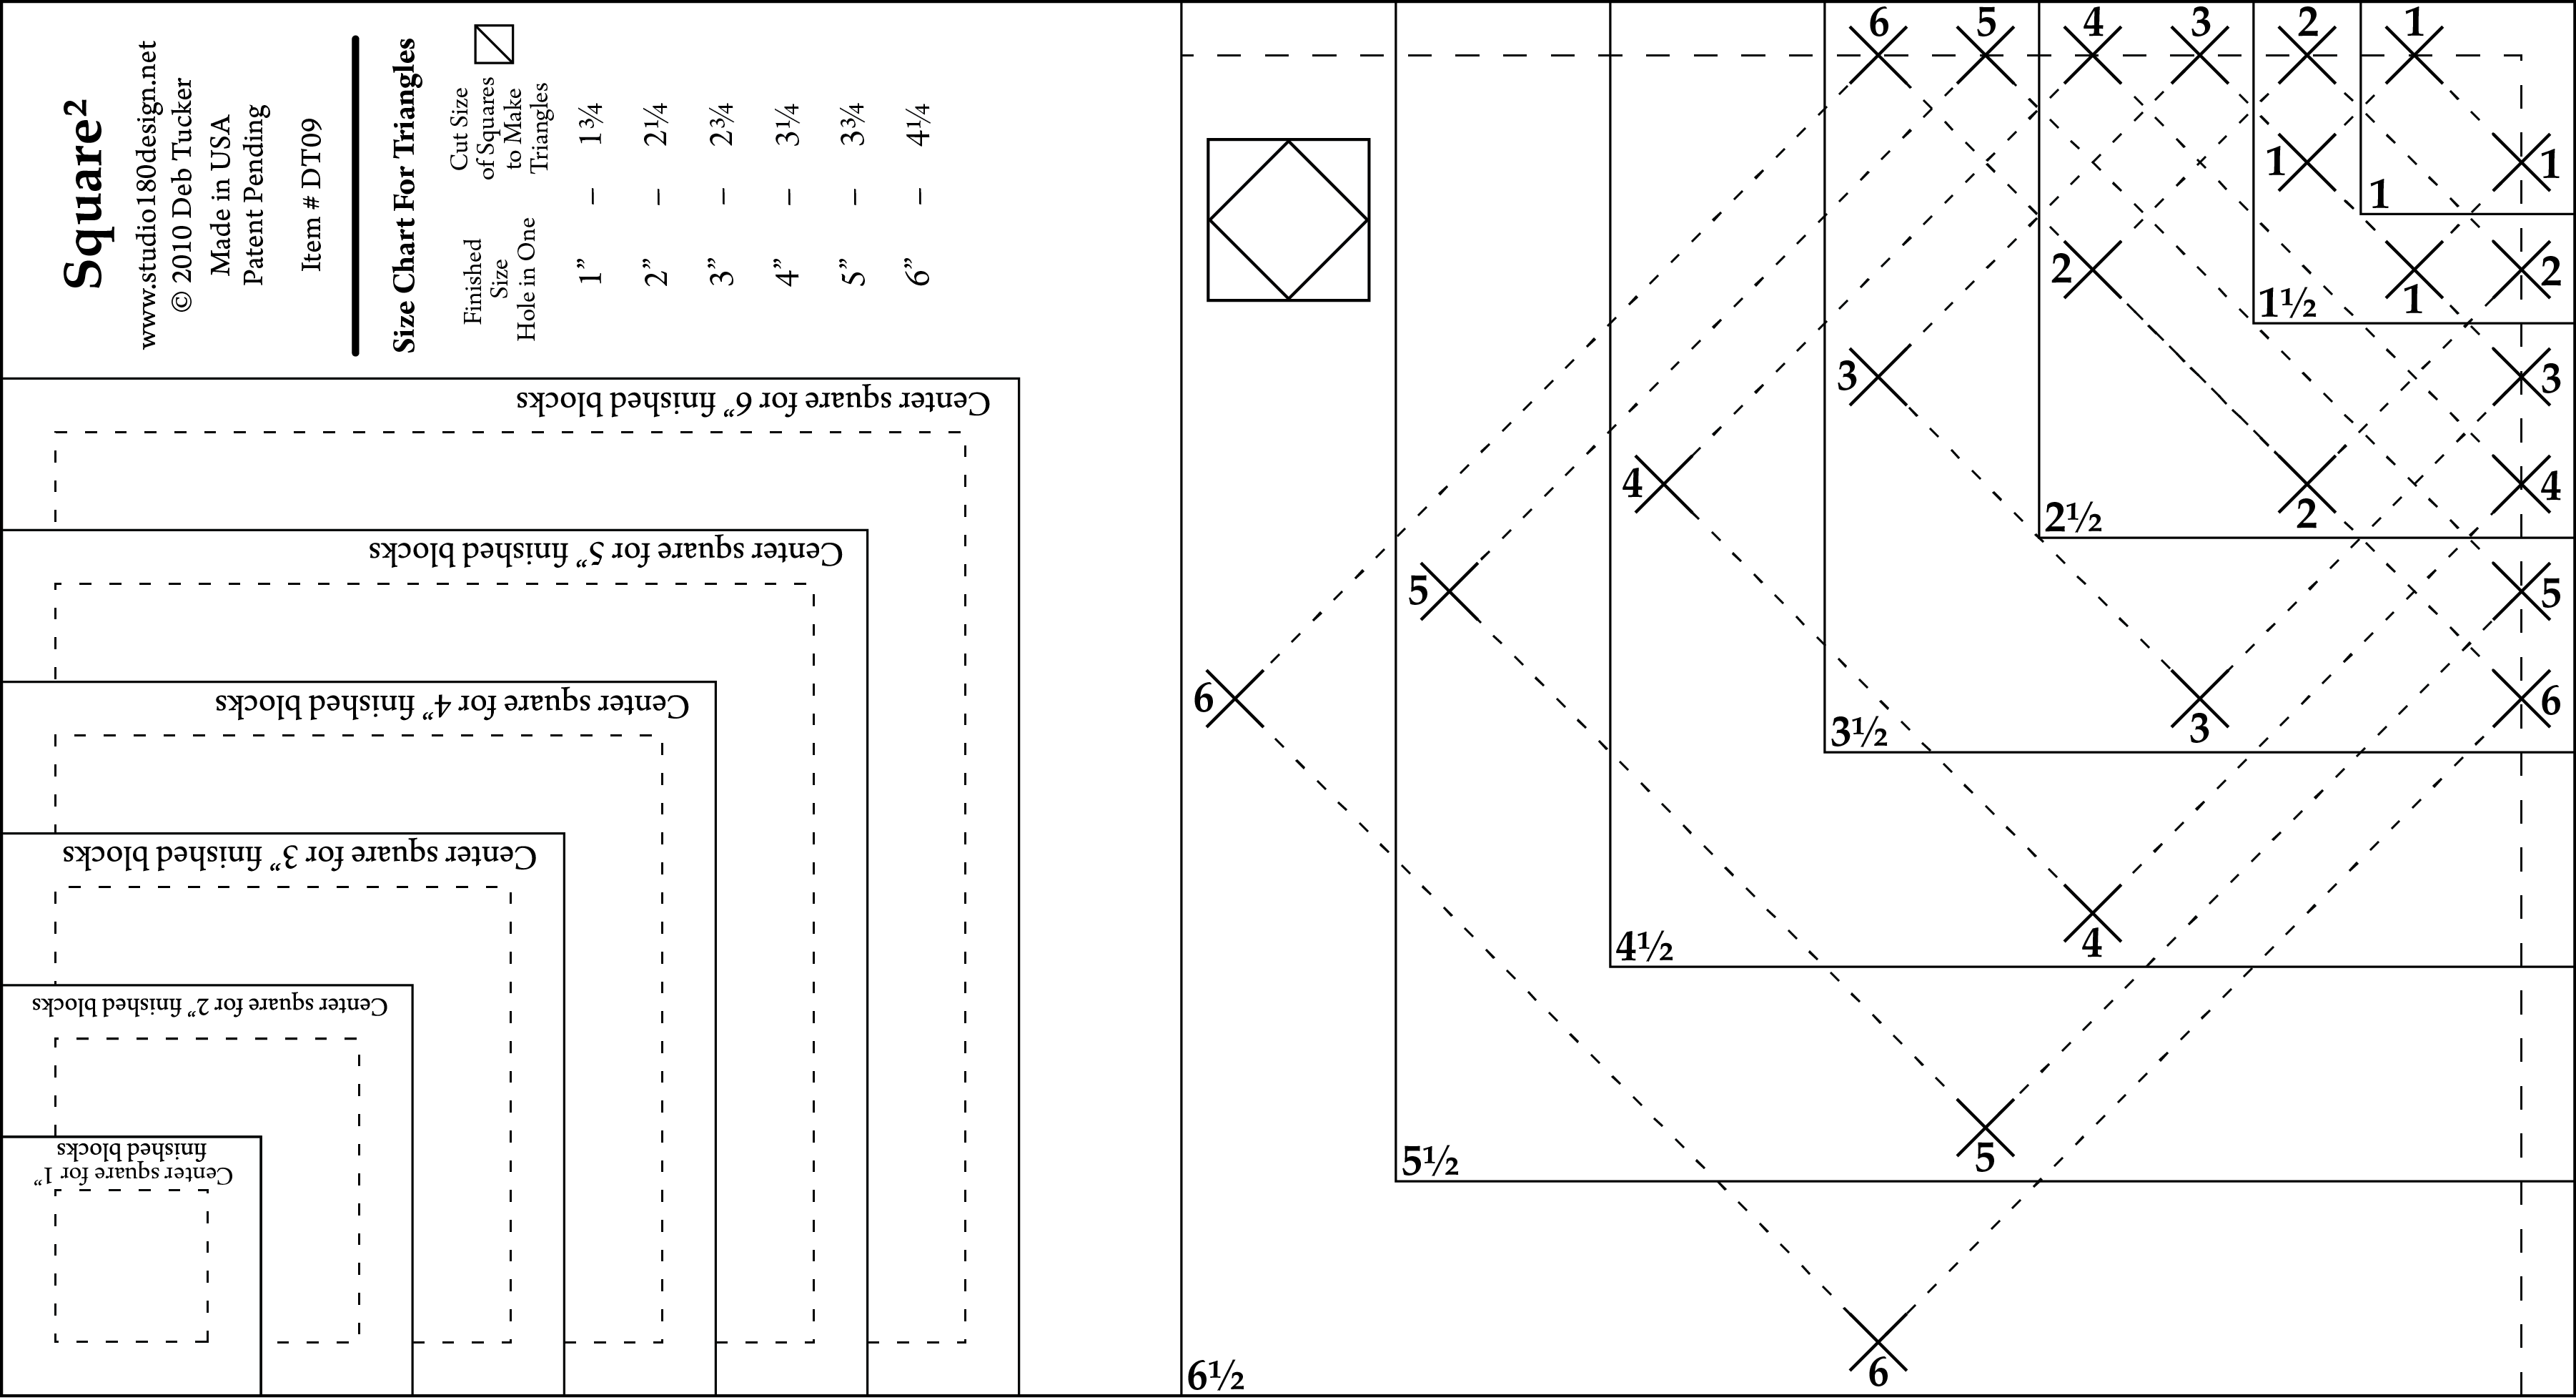
TheCenter Square Section, which gives you a series of squares that are precisely drafted so that their diagonal measurement is exactly the finished size of the Square²™ unit.
The Trim Down Section gives you guide lines to align with the seams of the pieced Square²™ unit so you can trim each to a precise size with a proper ¼” seam allowance on all sides.
The Size Chart for Triangles gives the recommended size squares to cut that when cut in half diagonally will yield two slightly oversized triangles for constructing the unit.
Note: The fabric in the photo is different from the Lion Eyes.
Per my Wedge Star Instructions I had cut my Large Wedges from 4″ strips and my Corner Squares from 3″ strips (you must have at least 4 aligned repeats). Cut 3″ square sets.
Cut your square sets once diagonally.
Each stack of 4 half square triangles will give you one 4 Patch Posie.
Stitch 2 triangles together and press the seams the same way on both halves.
The seams will nest when stitching the halves together.
Swirl the seams and press.
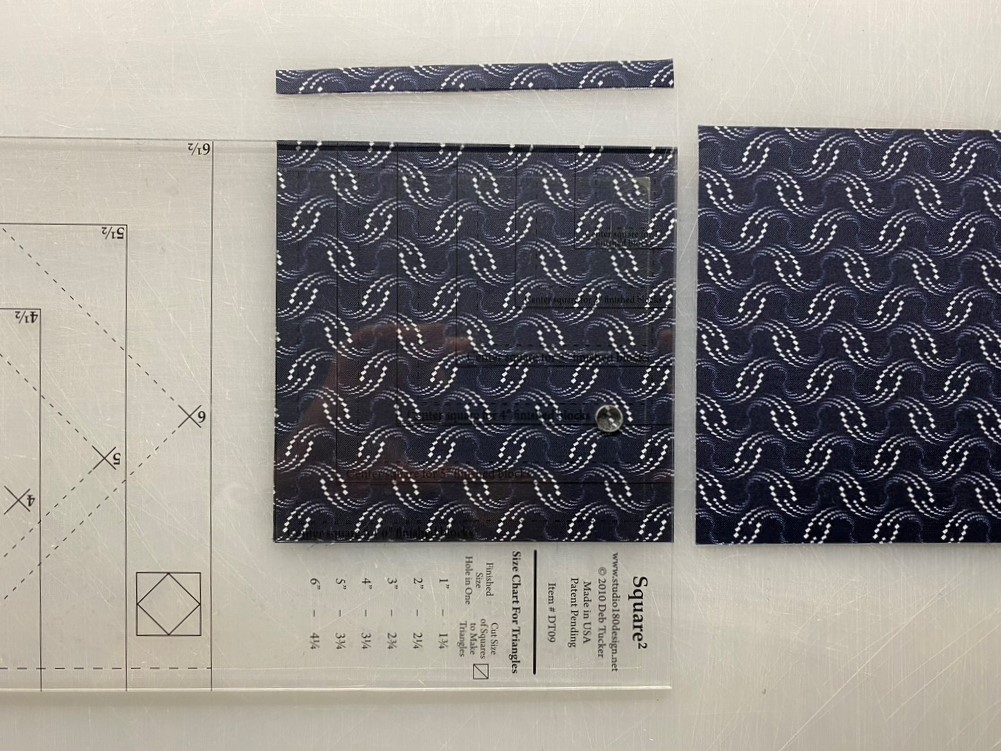
Use your Square²™ ruler to precision cut your center squares from your 4 Patch Posie. I lined up the diagonal line on the tool with the diagonal seam centering the lines for a 4″ finished square making sure I had fabric to trim on all 4 sides. Trim up the side and across the top. Rotate the unit lining up the just trimmed sides with the size lines and the diagonal line with the diagonal seam and trim up the side and across the top. The Square²™ unit looks great with a fussy cut square in the center or simply cut chosen fabric as usual. Just remember that this square will be diagonal in the pieced unit.
The 4 Patch Posie is now trimmed and ready for oversized triangles.
Check the chart on the Square/Squared Tool for strip size to cut squares for side triangles. I’m making 4″ finished units so I cut my strips from a folded strip 3 1/4″ wide.
Cut once diagonally.
Position two triangles on opposite sides of the center square. No need to fuss with matching the middles as the triangles are larger than they need to be. Just basically center them and try to keep the raw edges aligned.
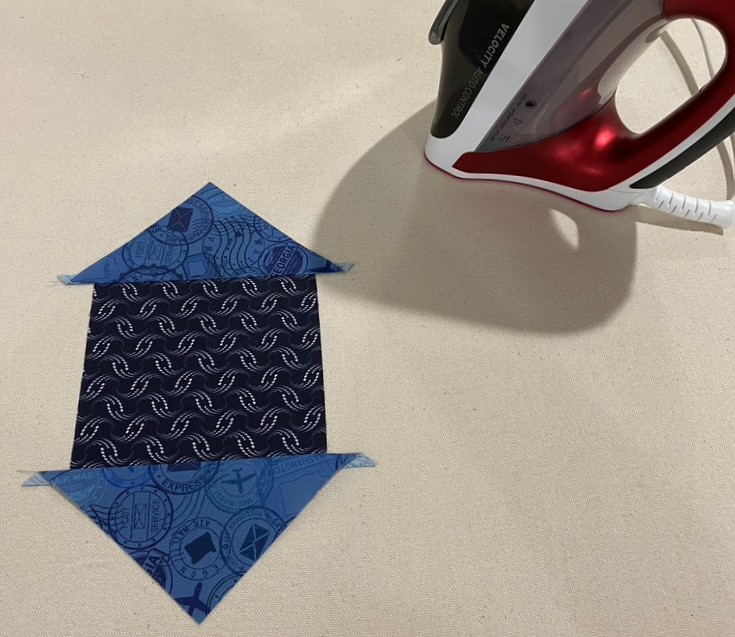
Press seams away from the center square.
Position remaining two triangles on the remaining two sides of the center square. Again, don’t fuss too much with aligning the centers, just get them close. Stitch and press the triangles away from the center square.
Ready for the trim.
Position the Trim Down Section of the Square²™ ruler over the pieced unit. Focus on aligning the “X’s” for your particular finished size unit over the sewn seams. If they do not line up exactly, simply center the ruler over the area by finding the middle ground of all four marks. Trim up the side and across the top. For the second cut, rotate the unit, position the ruler on top of unit again lining up the “X’s”, and also lining up the cleanup lines on the ruler with the edges previously trimmed.
This ensures that you end up with a square that has proper ¼” seams on all sides and is exactly the correct size to use in your quilt project. I added 1″ strips to two sides of the units to make the units measure 4 1/2″ by 6 1/2″. I did this so when I add the binding I won’t lose the points on my square/squared unit. Measuring the correct lengths I cut the 6 1/2″ strips to add to my border additions.
The Square/Squared tool makes finished diamond in square units in six sizes from 1″ to 6″. If you require mores sizes you can purchase the Large Square/Squared Tool which can make them in sizes from 1″ to 12″.
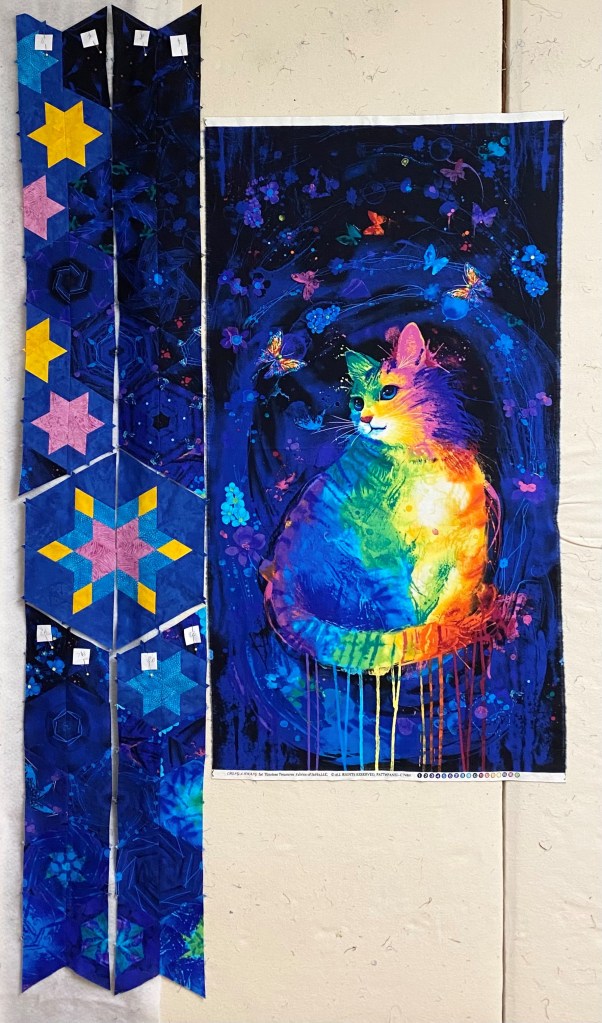
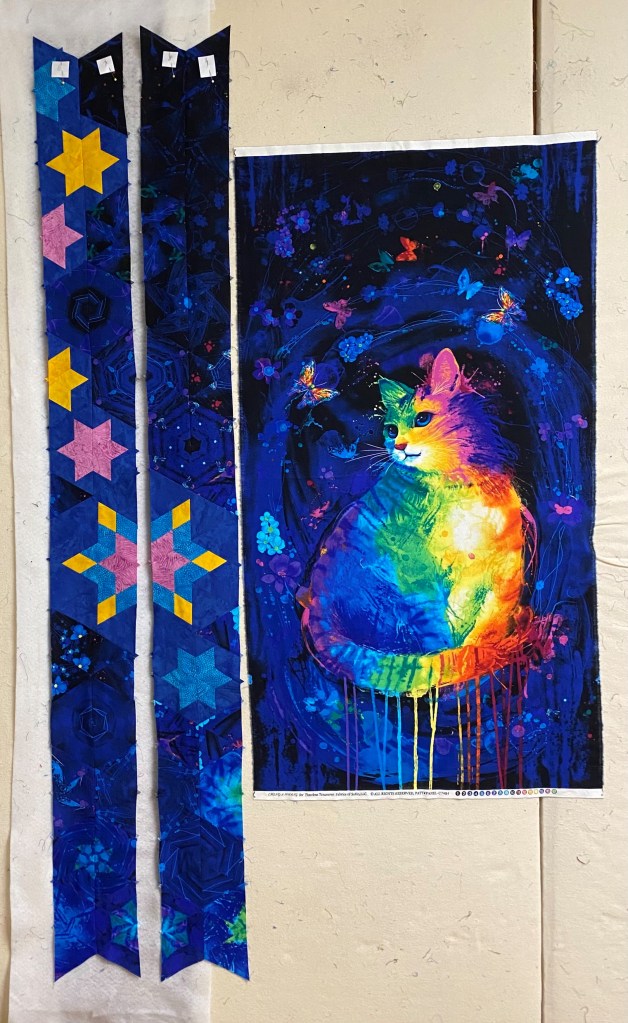
The official name for this quilt is Samantha’s Rainbow Kitty. This quilt was made with love for my Granddaughter Sam. It was supposed to be finished for Christmas but it is in time for my special Valentine.
Panel by Chong-A-Hwang for Timeless Treasures
Why did I choose 5.5″ Finished Hexagons?
This panel measured 23 inches wide. I chose 5.5″ (Cut my strips 3.5″) finished hexies because 4 X 5.5 = 22″. Now I only have trim 1/2″ from both sides and my hexies will fit along the bottom and the top of the panel.
I began by deciding on what size to make my star. I wanted it twice as big as my 5.5″ finished hexies, hmmm, that means an 11″ finished star. The Checkerboard Technique sheet makes beautiful stars in 17 sizes from 2″ up to 18″ in 1″ increments. I needed to make 5.5″ Finished units. I followed technique sheet instructions for a 6″ Finished Units and will trim them so they would finish at 5.5″ units.
Step 1 – Make two strip sets.
Step 2 – Layer the strips sets one on top of the other right sides down. Using the Star 60 tool and a regular ruler establish the 60 degree angle.
From the first cut, cut additional angled sections the same width as the as the cut size of the diamond strips.
Step 3 – Pair each “A” section with a “B” section. Make sure the inner and outer diamonds are oriented correctly. The pink diamonds will be the inner part of my star. The outer diamonds are yellow.
Mark 1/4″ seam allowance using the Magic Wand.
On the edges you will be stitching together, mark the 1/4″ seam allowance across the seams on the wrong side.
Pin section A & B
Stitch your section “A” with Section “B” units.
Press the seams open.
Step 4 – Trim the outer diamond using the Star 60 tool. I trimmed using the Outer Diamond Trim Guidelines for a 5″ finished unit.
First cut.
Continue cutting side triangles.
Step 5 – Add the side triangles.
Layout the right side triangles.
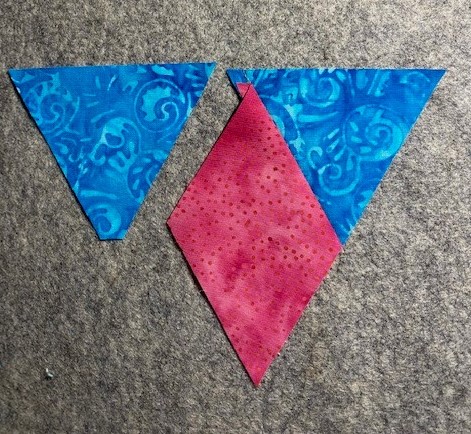
Position the side triangle on top of the diamond, matching the flat corner to the edge of the diamond.
Stitch with the diamond on top.
Press toward the diamond. (Whatever you are pressing toward, goes on top.)
Layout the left side triangle.
Position the the remaining side triangle on the other side of the diamond point. Align the flat corner of the triangle with the edge of the diamond, aligning the raw edges as before.
After it is stitched, but before you press, trim the unit as shown above to remove bulk.
Press toward the side triangle.
Step 6 – Trim the pieced Star 60 unit suing the Star 60 tool. I trimmed using the 5″ finished unit guidelines.
Step 7 – Describes the trimming the final edge. I did not complete this trim. Remember, I need an 11″ finished star, which means I need 5.5″ finished units. I accomplished this by trimming the diamonds per the 5″ guidelines. I created an 11″ finished star by NOT trimming the outer edges of the star.
Layout your diamond units.
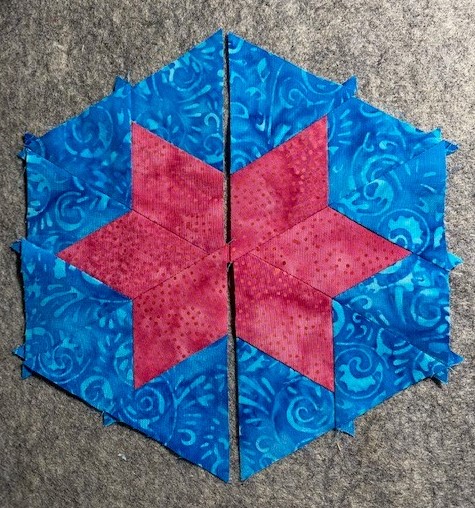
Stitch your diamond units together creating two halves.
Making Star 60’s – To make 5.5″ finished Stars, I am following the cutting instructions for 3″ Finished Units. Remember, the chart refers to UNITS not to Finished Stars! To use the chart, first determine the desired finished size of your unit, then follow the row across for the strip size for the shape you want to cut.
Cutting the Diamonds – I followed the cutting instructions for 3″ finished units. Trim one short edge at a 60 degree angle as shown above. Locate the Diamond Sub-Cut Guideline in the chart which for 3″ finished units is 4″. Align those guidelines with the raw edges of the strip and the angled cut just made as shown in the diagram. Cut along the leading edge of the tool to create oversized diamond shapes.
Cut your side triangles. For 3″ finished units the side triangle strips are 2 1/2″.
Layout the right side triangle.
Position the side triangle on top of the diamond, matching the flat corner to the edge of the diamond.
Stitch with the diamond on top.
Press toward the Diamond. Layout the remaining side triangle.
Position the the remaining side triangle on the other side of the diamond point. Align the flat corner of the triangle with the edge of the diamond, aligning the raw edges as before.
Trim the bulk as shown above.
Press toward the side triangle.
I followed the cutting instructions for 3″ finished units, BUT I’m making 5.5″ finished stars, so I’m trimming the Diamond Point using the 2 1/2″ guidelines. I do not trim the outer edges of the unit to obtain a 5.5″ finished star.
Star 60 Units
Stitch units into two halves.
Designing With the Hexagons
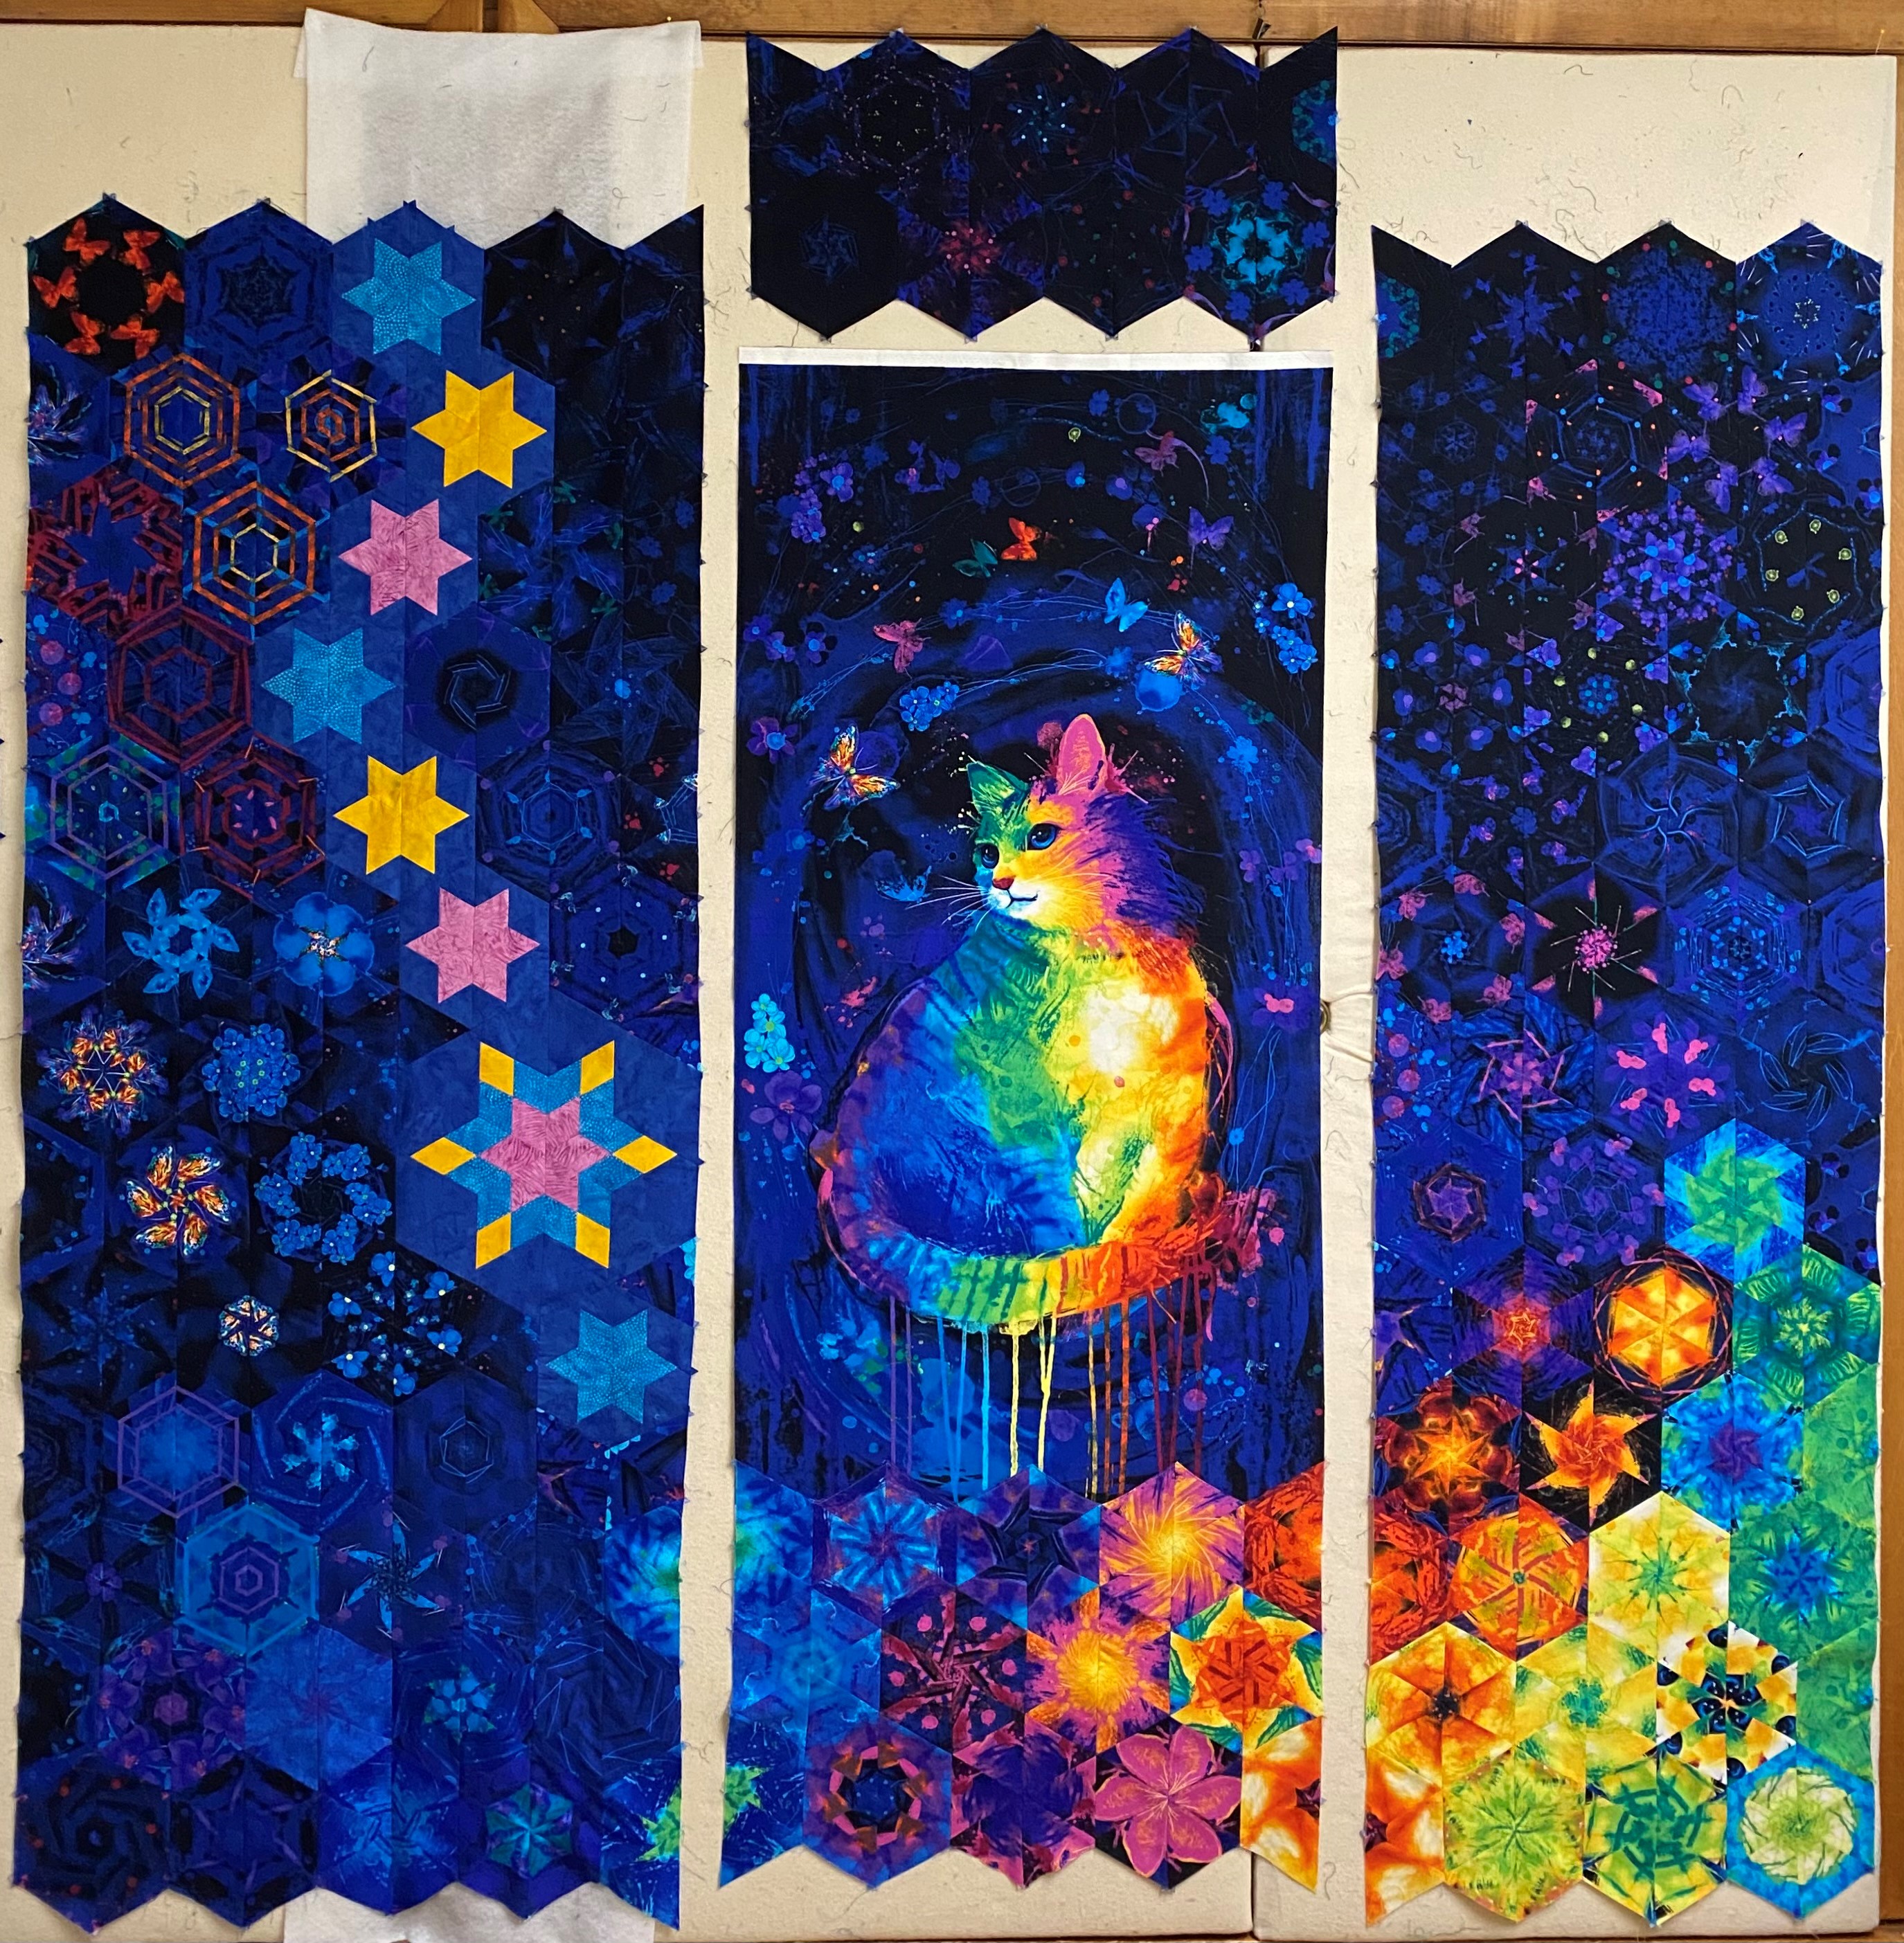
The final layout
After I numbered my rows, I stitched the four rows above the checkerboard star into two rows, and the same with the four rows under the checkerboard star as shown in photo 1. Photo 2 shows stitching the top and bottom row to the checkerboard star halves. Photo 3 shows the two rows joined together.
Continue to stitch rows into 4 sections, Left, Right, Top & Bottom.
I placed the bottom section right sides together to verify how much I need to trim off the sides of the panel so it will be the same width as the top and bottom hexies. In this case I trimmed 1/2″ off both sides.
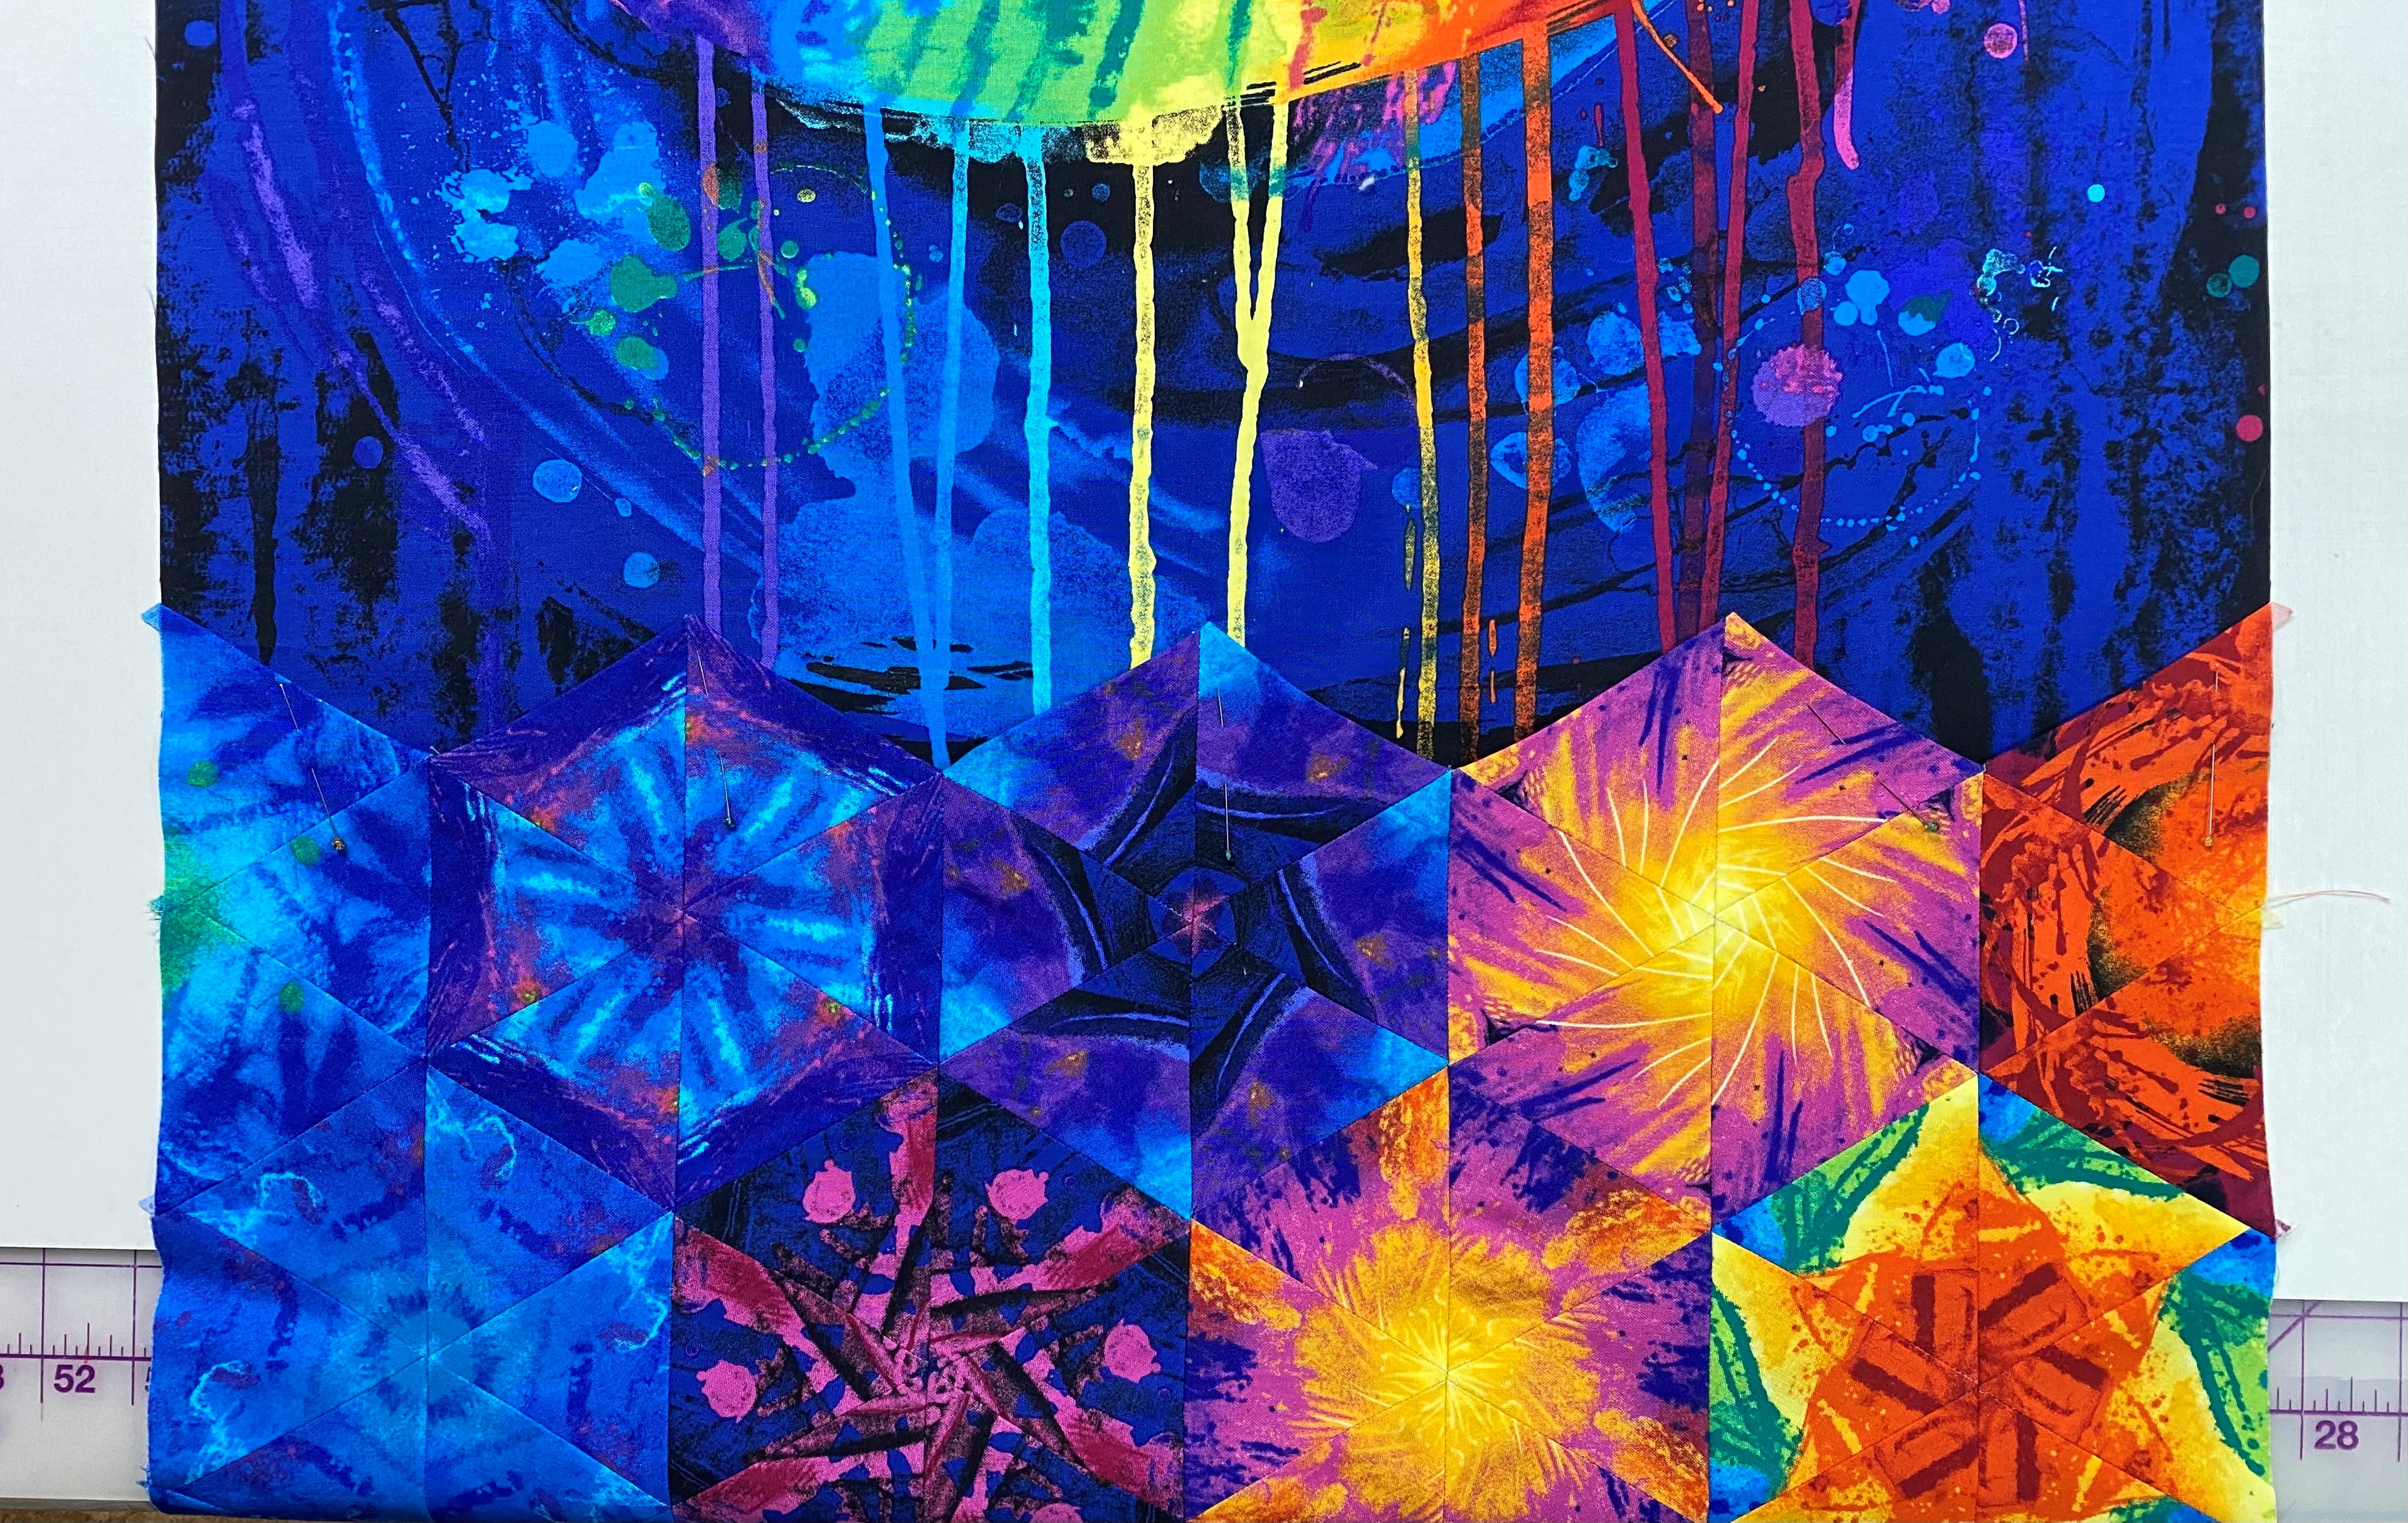
You can choose to attach either the top or bottom hexies first. I chose the bottom because I wanted to control where the hexies attached to the bottom of the panel. After the hexies are laid out and stitched together we loose 1/4″ between them. I felt I could safely loose a couple of inches off the top of the panel without affecting the design. But I did not want to loose inches off the panel bottom.
I pressed the bottom hexies under 1/4″ and top stitched them to the panel.
Match up the hexies/dog ears of the left side with hexies/dog ears on the bottom. Stitch leaving about 12″ from the top of the panel.
Place the panel and partially stitched left side on a table and place the top hexies on top of the panel matching up the dog ears to establish where the top hexies will be stitched to the panel.
Pin top to the panel being sure the dog ears match up to the left side hexies.
Top Stitch the top hexies to the panel. Finish stitching the left side to the panel and top hexies.
Match up the dog ears of the right side and stitch.
Samantha’s Rainbow Kitty, measures 75″ X 70″. I will quilt it as soon as the backing arrives.
Welcome to Stitchin Heaven’s Journeys Month 5. My helper for Month 5 is Deb Tucker, of Studio 180 Design. This month you are going to learn to make Lemoyne Star Quarters using the Rapid Fire Lemoyne Star and Tucker Trimmer I tools. You will be using Prints 7, 9 & 11. Label your fabrics and use your best cutting skills when cutting your starter squares.
Prints 7, 9 & 11
Piecing Instructions
Step 1 – Organize Strips. Place Print 9 and Print 7 into two separate piles. Use Print 7 to make the A Strip Set and Print 9 to make the B Strip Set.
Step 2 – Make Strip Sets A and Strip Sets B in the same manner as described in the Rapid Fire® Lemoyne Star basic instructions. Position each diamond strip 4¾” down from the top of the background strip. Sew the strips lengthwise and press as indicated in the diagram below. Pay close attention to proper strip alignment and pressing to ensure success.
Step 3 – First Cuts. Layer Strip Set A and Strip Set B right sides together as illustrated. Trim the ends of the strips at a 45° angle, then continue making 45° angle cuts every 3¼” across the length of the strips. You will get 8 cuts from a paired strip set. Cut the remaining strip sets in this manner until you have 20 pairs.
Step 4 – Make Second Cuts going vertically south to north, as shown. Position the ruler edge at the tip of the star strip and trim straight up. These triangles will be added to the pieced unit.
Jackie’s Tip for staying organized is to label two paper plates A & B. For Right handers, Strip “A” is on top & Strip “B” is on the bottom. Cut one unit at a time, place the “A” unit on plate marked “A” & the “B” unit on plate marked “B”. You will always know which units are A & B for pressing.
Step 5 – Arrange, position and stitch the cut pieces together into pieced triangle units. Press as shown in the diagram to yield future nesting seams.
You can chain stitch your “A” and “B” units for easier pressingPress “A” units toward the Star PointPress “B” units toward the side triangle
Tip: Remember “whatever you are pressing toward – goes on top”!
Step 6 – Trim down all pieced triangle units using the 12” line on the Rapid Fire® Lemoyne Star tool as shown in the diagram.
Step 7 – Assemble quarters. Arrange the sewn and trimmed A and B sections into quarter blocks. Stitch the sections together and press the seams open to best distribute bulk. You should have 20 quarter blocks total.
You can choose to press your seams open or…You can choose to press the seams so they are all going in the same direction.
Step 8 – Trim the quarters to 6½” x 6½” with your Tucker Trimmer® I tool. Clean up the dog ears and true up the first corner as shown (this should just be a few threads at most), then rotate the unit 180o to trim the opposite corner. Align the Common Diagonal with the seam and the 6½” clean up lines with the trimmed edges to trim the remaining two sides. Repeat for all 20 quarters. Label the finished quarters Unit H.
First TrimSecond Trim
Recap: Make 20 Unit H – Homeward Bound Units.
Homeward Bound, Unit H
Congratulations, you have learned to use your Rapid Fire Lemoyne Star tool!
Welcome to Stitchin Heaven’s Journeys BOM Month 4 – Winged Nine Patch. My helper for Month 4 is Diane Marvin, Certified Instructor for Studio 180 Design. This month you are going to learn to make Four Patches with Frames using prints 5, 6, 7 & 9, Center Square with print 8 and Chevrons using prints 5, 6 & 11. Required tools are the Four Patch Square Up and Corner Pop.
Prints 5, 6, 7, 8, 9 and 11
Carefully follow your cutting instructions for each print using your best cutting and measuring skills.
Jackie’s Note: To keep organized when cutting the same print for multiple units I labeled 3 plates for Print 5: one for “Four Patches Strip sets A & B. One for Four Patch Frames Strip Set C. One for Replacement Triangles.
Piecing Instructions
Step 1 – Use the diagram on page 9 to make your strip sets. Position two strips right sides together and align the long edges. Stitch with your best ¼” seam. Press the seam toward Print 5 in all strip sets.
Strip Set A – Prints 5 & 6Strip Set B – Prints 5 & 7
Step 2 – Layer Strip Set A on top of Strip Set B, right sides together, making sure that the Print 5 fabrics are positioned as shown in the diagram. Nest the seams well. Sub-cut along the strip at 2¼” increments until you have 16 sub-cut pieces.
Step 2 – Layer and Sub-Cut at 2 1/4″ increments
Step 3 – Sub-cut Strip Set C. Do not layer it with anything, just make cuts every 2” until you have 16 pieces.
Step 4 – Stitch down the long side of the layered A/B pairs. Consistently feed Print 5 under the machine first. This will make for a nicer alignment in the center.
Remove 2 or 3 striches
Step 5 – Press the unit so that the seams spin. To spin the seam, lay the sewn seam east to west on the mat, remove the stitches in the seams on both sides that run north to south. Press so that all seams go in the same direction.
Swirl and press.
Step 6 – Trim. Locate the circle for the 3” finished size on your Four Patch Square Up® tool and position the circle over the sewn seam intersection in the center of your four patch unit, and the dashed lines with your seams. Trim the first two sides.
Right Handed Trimming
Step 7 – Rotate the unit 180 degrees . Realign the 3” Finished Size circle with the center and the dashed lines with your seams. Also make sure that the outside trimmed edge of the unit is aligned with the 3½” cleanup lines. Trim the final two sides. Repeat steps 6 and 7 for the remaining units.
Second Trim
Step 8 – Stitch a 2”x 3½” Print 5 rectangle to the side of each four patch as shown. Press toward the Print 5 rectangle.
Step 8
Step 9 – Stitch a Strip Set C piece onto the pieced unit as shown. Press toward the C piece.
Step 9
Chevrons
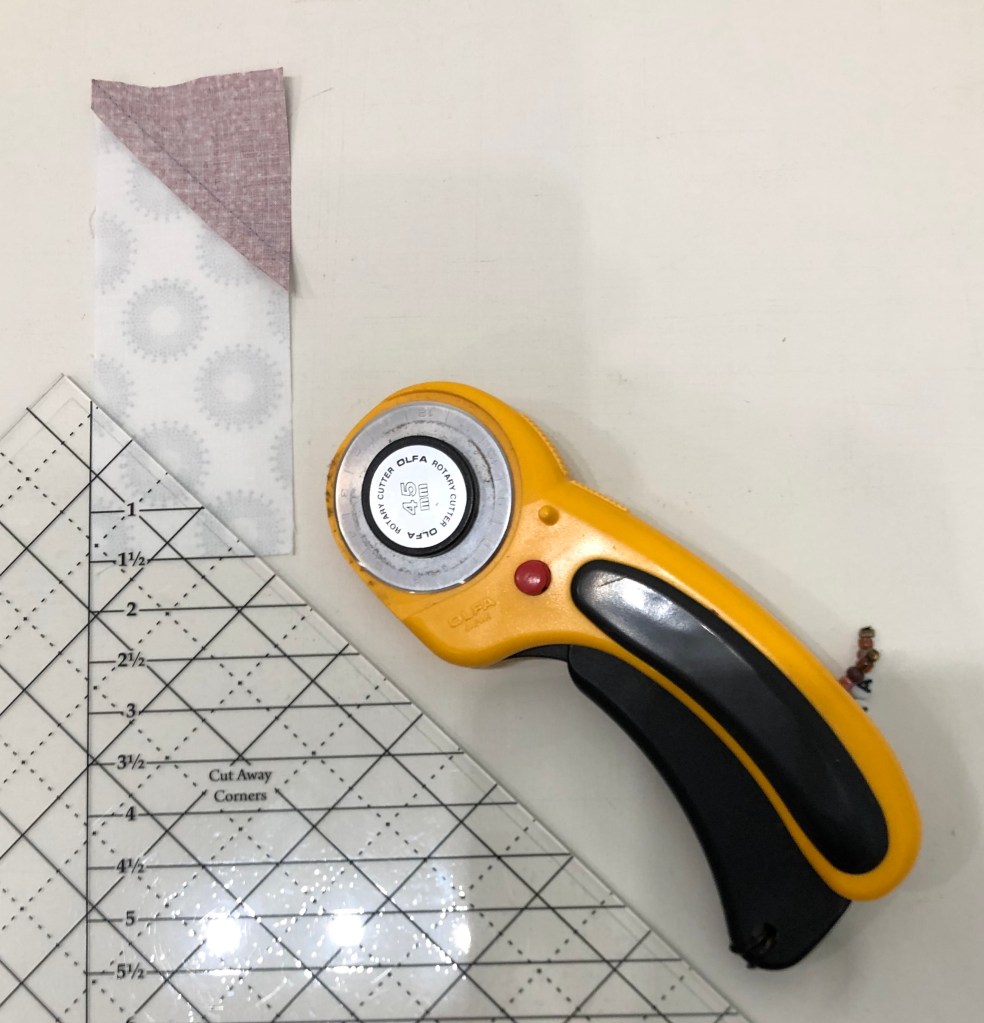
Step 10 – Layer two 2”x 5” Print 11 rectangles wrong sides together. Carefully align the edges. On your Corner Pop® tool, find the 1½” Cut Away Corners line. Position the 1½” Cut Away lines of the tool over the corner of the rectangles as shown. Trim. Repeat for the remaining rectangles.
Step 10
Step 11 – Center the long edge of one 2¾” Print 6 replacement triangle on the trimmed corner of each rectangle.
Step 11, part 1
Step 11 Cont.: Stitch with the rectangle on top using an accurate ¼” seam. Separate the rectangles into two piles as shown in the diagram. Press the seams of the pile on the left toward the triangle and the seams of the right pile toward the rectangle.
Step 12 – Position the 1½” Corner Trim Down line of the tool over the sewn seam. Align the diagonal guideline with the seam and the edges of the unit with the edge and lines on the tool. Trim the corner. Repeat for all the rectangles.
Step 12
Step 13 – Separate the rectangles into two piles as shown. Turn the right pile (with the replacement triangle slanting from upper right to lower left) wrong side up.
Step 14 – Cut. Use the Corner Pop® tool and the 1½” Cut Away Corners line and cut away the corner opposite Print 6. Make sure that you have the piece positioned how it is in the diagram so that you are cutting off the correct corner to make the chevron. You will cut with 16 units right side up and 16 units right side down. Cut the corner off once you have confirmed that you are cutting in the correct spot.
Step 15 – Repeat steps 11 &12 for the cut away corner using the Print 5 replacement triangles.
Step 15
Step 16 – Lay out the pieced rectangles as shown. Position two of them right sides together leaving them in the same orientation and stitch down the long side. Press the seam open.
Step 16
Block Construction
Step 17 – Lay out the framed four patches, chevrons, and center square so that it looks like the diagram.
Step 17
Step 18 – Stitch the units together into rows and then stitch the rows together to create the block. Press as shown in the diagram. You will have 4 blocks when you are done. Label them Block G.
Block G Winged Nine Patch
Congratulations, not only did you expand your knowledge of the Four Patch Square Up tool by making Four Patches with Frames, you also learned to use the Corner Pop tool by making Chevron units!
What is a One Block Wonder (OBW)? I bought Maxine Rosenthal’s book “One Block Wonders” in 2006 and was totally awestruck! So much so, that I have made 79 hexagon OBW’s since. Whether you are making hexagons or octagons your are creating kaleidoscope blocks – each one unique by using one fabric, one shape for one of kind quilts! With hexagon OBW’s you cut 6 identical repeats and with octagon OBW’s you cut 8 identical repeats.
Octagons are used in the cover photo.
In 2007 I bought Alexander Henry’s fabulous fabric “Lion Eyes”. I always buy at least 6 yards. This time I had 12 yards in my stash.
I made my 27th hexagon OBW and named it “Just Lion Around” It was included in Maxine Rosenthal’s 4th book One Block Wonders of World.
Just Lion Around 2007, OBW #27
I made my first OBW in 2006. That year I made 16 OBW’s. It only took me 14 years to finally make my first octagon One Block Wonder!
Cutting the Repeats: I cut my 8 identical repeats and aligned them just as I would for a hexagon OBW. Now it is time to cut octagon and corner triangle strips. You can make octagon OBW’s in any size. Following Maxine’s suggestion I cut my octagon strips 4″ wide. Maxine said to cut the strips for the corner triangles 2 3/4″ wide. I am a Studio 180 Design Certified Instructor. You may be able to take the girl out of the studio…but you will never take the studio (180) out of the girl!
Instead of 2 3/4″ strips, I cut my corner triangle strips 3″ wide, that would give me a little more to trim off the completed octagon blocks. After I aligned and trimmed one long edge of the repeats, I re-measure the width of my repeat to verify how may strips I can cut. My trimmed, aligned repeat measured 23″. For every two strips used to make octagons, cut one strip for the “Sensational Squares” (corner triangles). If I cut four 4″ strips and two 3″ strips it equals 22″. Now I know I have enough fabric in my repeat without cutting myself short.
First cut
As I said earlier: You may be able to take the girl out of the studio…but you will never take the studio (180) out of the girl! I am using Studio 180 Design’s Wedge Star Tool to cut my wedges for the octagon blocks.
The beauty of the Wedge Star tool is you can make octagons in sizes 3″ to 24″.
I found it easier to cut both left and right wedges by placing the octagon strip vertically on my cutting table and pull the strip toward me as I cut. The Wedge Star tool instructions show how to cut the units horizontally also:
Continue cutting your wedge units. I got 23 wedges per strip.
From the 3″ strips cut your 3″ squares using your Tucker Trimmer I.
Cut you squares diagonally once and set aside.
Because hexagons are made with equilateral triangles you have 3 choices as how to design your block. With Octagons you only have one choice, the narrow end of the wedge is always the center.
Align two wedges and chain stitch the four pair.
As with hexagons, press all seams open. I love my Strip Sticks for that.
Remove “dog ear” and sliver trim the wedge pair. Righties orient the wedge pair so the 90 degree corner is in the upper right (lefties orient the wedge pair so the 90 degree corner is in the upper left). Align the common diagonal line on the Tucker Trimmer with the seam and slide it toward the corner just until the sides of the tool touch the very edge of the wedge pair and trim. Note there may be just a few whiskers trimmed here. This is called Trueing up your 90 degree angles and will create a much more square unit.
Match up two wedge pairs, stitch them together and press seams open.
Find the center of the two wedge halves by placing a pin where the two seams meet in both units and align the halves. Pin close to both sides of the first pin, then remove the pin in the center. This will help to center you octagon wedge halves.
Stitch your wedge halves together.
Press your seams open.
I placed my octagons on the design wall as I made them. This helped me to see what I had.
Here I am looking at life through rose colored glasses. again Time to sort the octagons. Looking at the octagons through red plastic helps me to sort the octagons by value. If you didn’t know, I have been battling breast cancer. I am responding well to treatment, but as my hair grows back, I’m noting a resemblance to the Old Man Dancing for the Six Flags commercials.
Sorting the octagons by predominate color or value was more difficult than I thought it would be. I think because the octagons don’t nest with each other as the hexagons do, you don’t get the same flow and movement. I’m saying this because after I added the corner triangles i wasn’t as happy with the design. Take your designing!
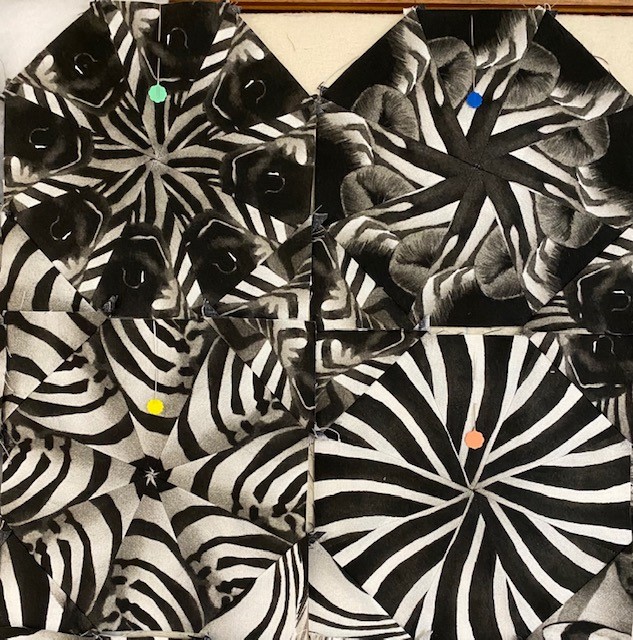
Tip: This is most important tip! Place a flower pin in the top wedge of each octagon! By doing this you will be able to easily orient the octagons as you remove and place them back on the design wall. It will keep your brains from falling out!
Adding the “Sensational Squares” (corner triangles).
One set of corner triangles is laid out as shown above making a kaleidoscope square.
Those squares will fit into the space between 4 octagons.
When you step back from the design wall, the square will appear to be gone as the 4 octagons blend together.
I worked with one row at time, deciding which set of corners to add. Remove one octagon at a time and stitch the triangle to the appropriate octagon wedge. In affect, you will be adding corners that effect two rows at a time. In the end, each octagon will have a different triangle on each corner.
Center the octagon wedge over the corner triangle and stitch. Press toward the corner triangle. Remember Deb Tucker’s tip when pressing: “whatever you are pressing toward, always goes on top”!
Above shows the corner triangles added to the inner octagons.
Once the inner octagons have the corners added, continue adding the final corner triangles to the outside edges of the octagons.
Trimming the Octagon Blocks: The octagon units need to be squared up to 6 1/2″.
If you don’t know the beauty of using the Tucker Trimmer you will love this. The Tucker Trimmer is marked with a “Common Diagonal line and Size Lines to help you perfectly center each unit or block for trimming. For righties the Common diagonal line is placed on the center seam going from the bottom left to the upper right. The 6 1/2″ size line is positioned from the upper left to the lower right going through the center of the block. The size line and common diagonal line should intersect in the center of the block centering it perfectly for squaring up. Trim up the right side and across the top. Rotate the block place the 6” clean up lines of the Tucker Trimmer on just trimmed lines of the block. Trim up the right side and across the top.
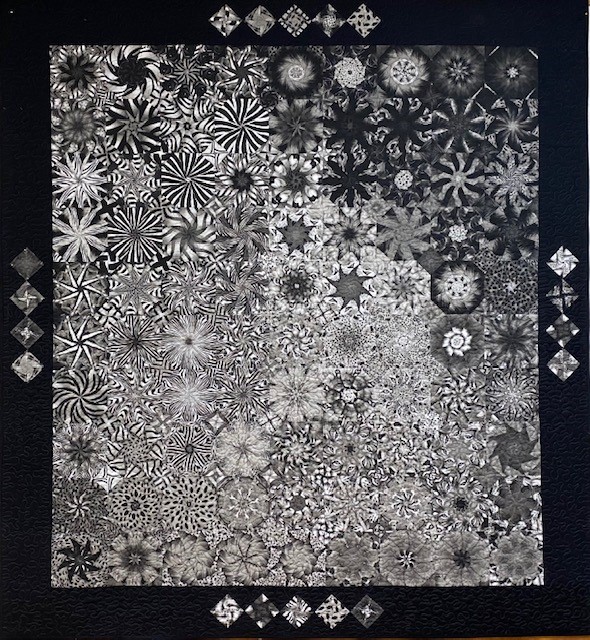
When all the octagons are trimmed it’s time to stitch your blocks into rows and then join your rows to complete your quilt. My layout was 9 X 10 = 90 – 6″ finished blocks measuring 57″ X 63″ unquilted. I learned a lot in this process. I think my layout would have been more satisfying if I had left it more random. I was trying to create an oval shape with the lighter blocks in the center. But there wasn’t enough contrast between the medium and light blocks. I’ve always been a little contrast challenged.
Welcome to Stitchin Heaven’s Journeys BOM Month 3. This month you will be learning to make flying geese the Deb Tucker way, using your Wing Clipper I. My helper this month is Deb Tucker herself! As always use your best cutting, stitching and pressing skills. We will be using prints 1, 2 & 5. Carefully cut your starter squares and let’s go!
Prints 1, 2 & 5
Piecing Instructions Flying Geese Construction
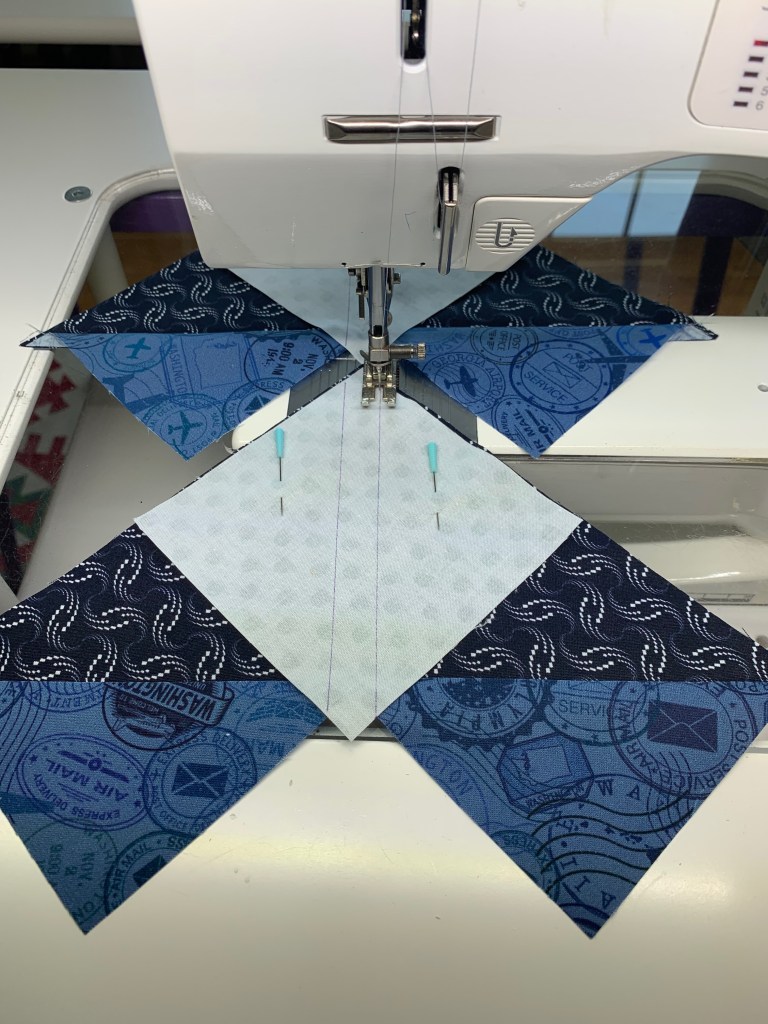
Step 1 – Mark Squares. Begin with one large Print 1 square and two Print 2 and two Print 5 small squares. On the wrong side of each small square, mark two stitching lines ¼” on either side of the center diagonal. I like to use my Quilter’s Magic Wand™ for this task.
Step 1
Step 2 – Position the two Print 2 small squares in opposite diagonal corners of the large square, right sides together. Nudge the small squares in toward the center a few threads from the edge of the large square and align the drawn lines.
Nudge the small squares toward the center of the large square.Step 2
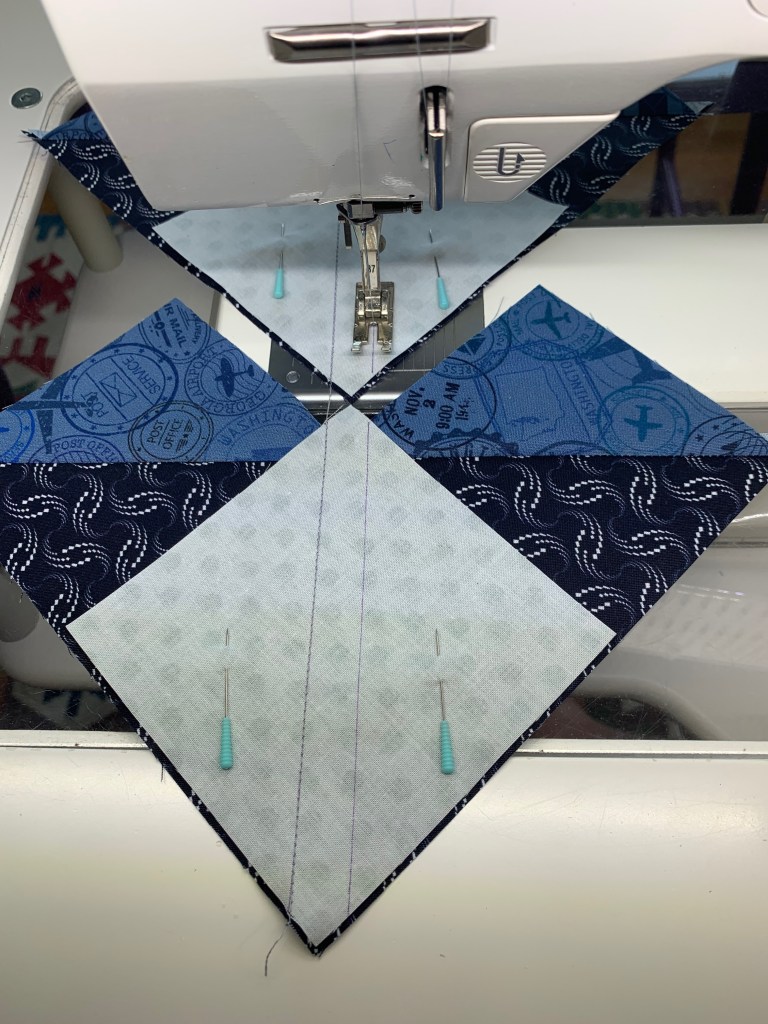
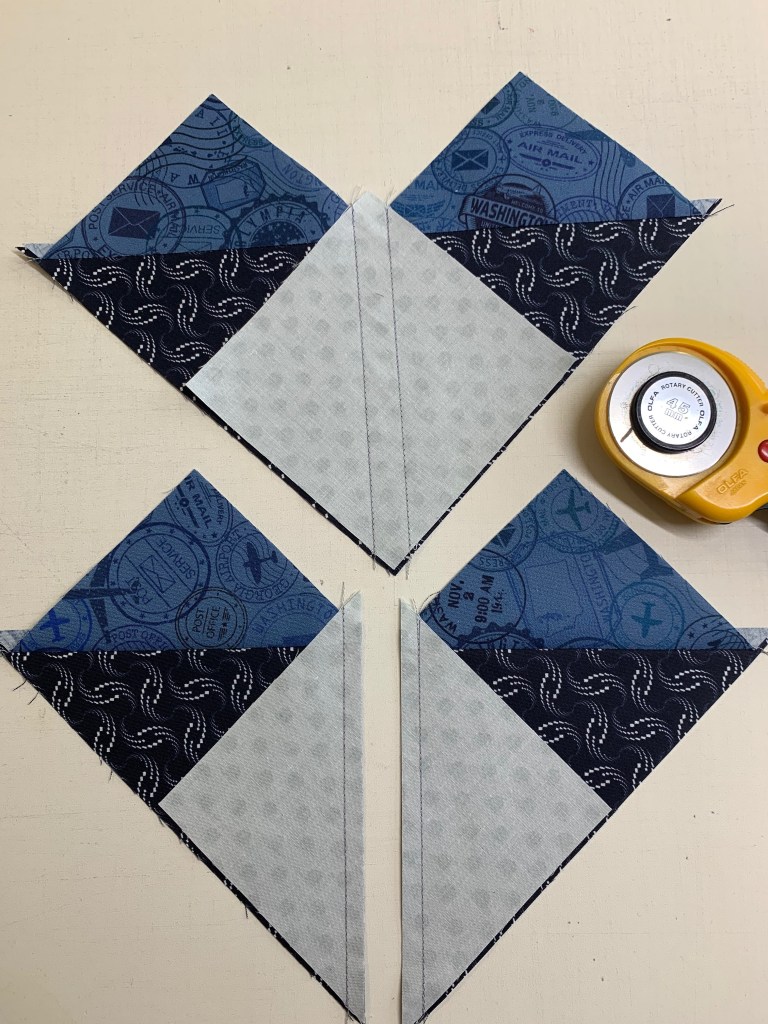
Step 3 – Stitch on the two marked lines, then cut between the stitching lines along the center diagonal of the squares. Press your seams toward the small triangles.
Tip: Stitch just inside of the drawn lines. This will give you more to trim later.Step 3 Step 3 Cont.
Step 4 – Position two Print 5 small squares, one in each corner of your heart shaped units. Nudge these squares a few threads in from the edge of the large triangle.
Step 4
Step 5 – Stitch along the two marked lines.
Step 5
Step 6 – Cut between the stitched lines along the center diagonal of the small squares and press toward the small triangle.
Step 6Step 6
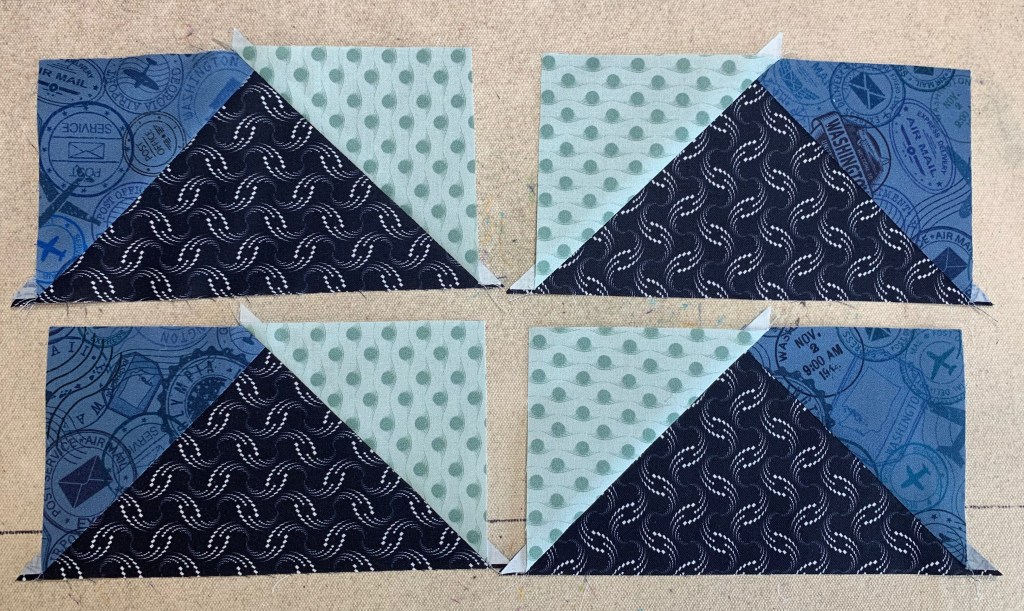
Step 7 – Position your Wing Clipper® I tool over your unit, aligning the correct diagonal guidelines of the ruler with the seams of your unit and trim two sides. Rotate the unit 180° and align the 3½”x 6½” horizontal and vertical guide lines with the edges of the unit. Align the “X” on the Wing Clipper® I with the seam intersection of your unit and trim again. Repeat for the remaining units. You will end up with 24 geese that have print 2 on the left, label these as Unit E, and 24 geese that have print 2 on the right, label these as Unit F.
First TrimSecond Trim4 Flying Geese
Congratulations! You have now learned to make flying geese using the Wing Clipper I.



























































 If These Threads Could Talk